


June 14, 2018
Scupper 49
Thursday
Throughout any project, I continually re-evaluate and re-prioritize my work list, taking into account the timeframes of work underway and completed, and upcoming schedule requirements to help adjust the work flow accordingly. I set up this job in phases, taking advantage of space in the shop schedule to work in various bursts and with specific goals each time, and fitting in with the owner’s schedule and requirements. With an agreed completion date well in the future, and other projects on the docket for the upcoming fall, I’d always intended Phase 1 to be focused on the major exterior repairs and surface preparation, with the ultimate goal of finishing the exterior surface prep with high-build primer before new boats arrived at the shop for work in the fall, at which point I’d need to temporarily move Scupper to outdoor storage till the next intensive work phase later in the winter.
The whole inside of the boat–lockers, bilges, and interior spaces–required substantial surface preparation (i.e sanding), and all along I had hoped to complete this work during the current phase. I felt on track with my overall schedule and plan, but with vacation time coming up through the prime summer months, and the exterior virtually ready for the primer, I chose now to refocus my efforts on completing any final tasks that needed to be done before I could spray the primer (which I considered part of the basic surface prep rather than part of the painting process). Once I finished with the high-build, I could spend the rest of the time during this phase working on the interior prep.
To this end, I ordered a new deck hatch to replace the original wooden hatch in the forward cabin. I needed this hardware now so I could cut the enlarged opening, and build the coaming required to support the hatch and have it all glassed and faired in before the primer. The hatch would arrive in a day, and I could then get to work as needed. I chose a Vetus Magnus offshore escape hatch, a product I’d installed with good results in the past.

The rearrangement of my immediate goals left me temporarily unprepared for the work I now needed to do. I could have and would have spent the day sanding on the interior of the hull–something I looked forward to completing for various reasons–but my air compressor, which I used frequently during sanding work as a blow-down tool for the boat and myself, had inexplicably died during my last break, and I was reluctant to do the filthy sanding work inside the boat without it. I’d ordered a new one as soon as I discovered the problem upon my return earlier in the week, and in fact it arrived in mid-afternoon as expected, but before then I needed something to move the project forward in some way.
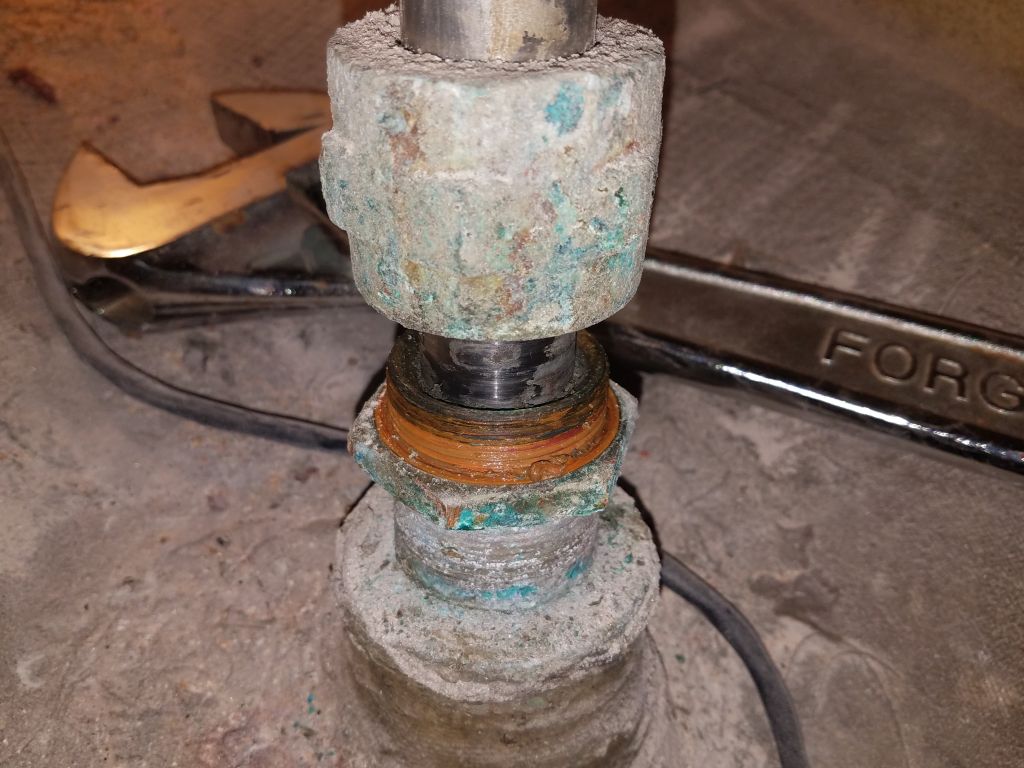
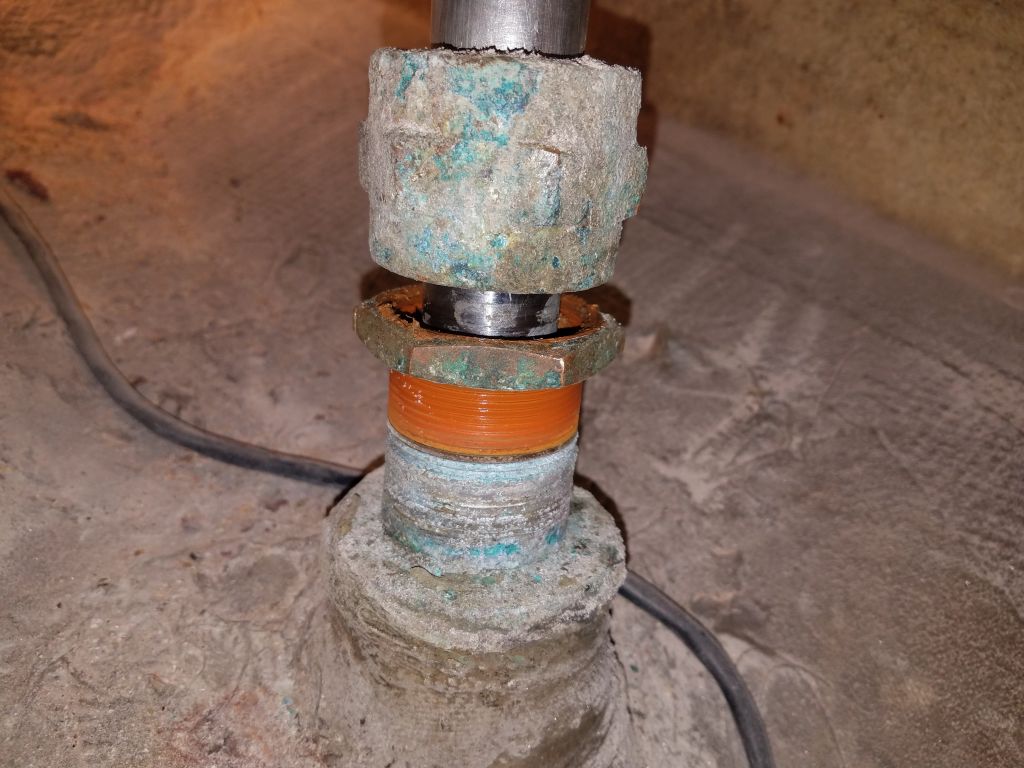
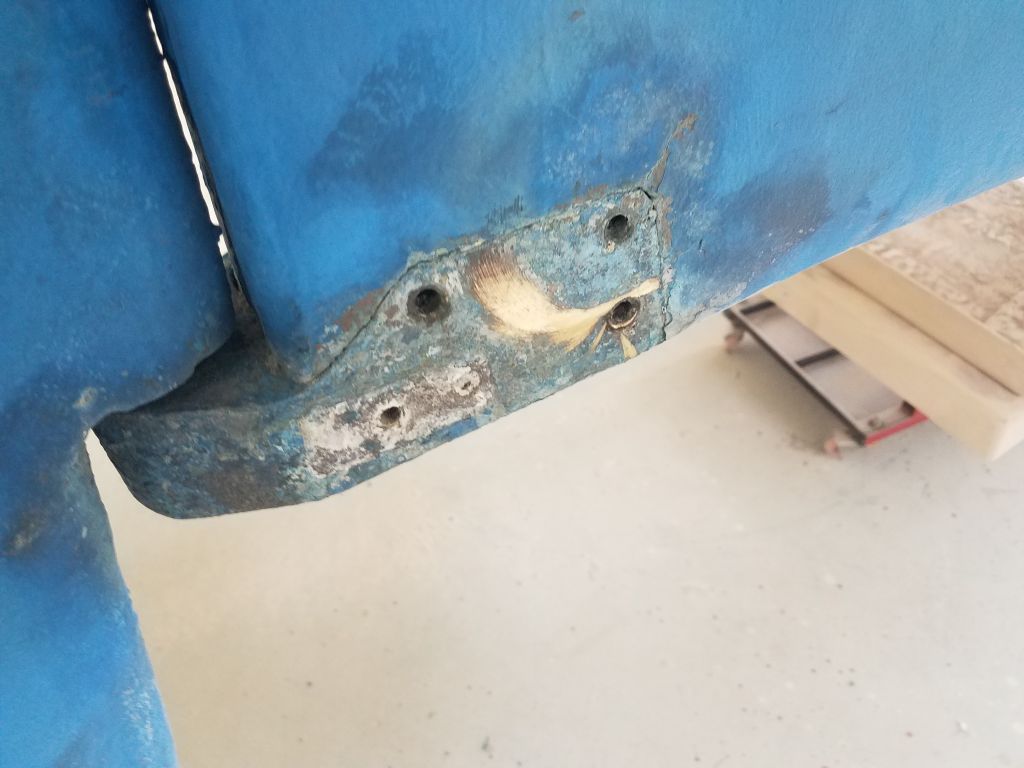
I decided to tackle the rudder shaft packing nuts, which I’d so far not been able to loosen. I needed to remove these so I could eventually drop the rudder and repair it. The rudder blade featured a number of issues, from a crack along the leading edge to the damage at the top edge caused where the rudder had been turned too far and contacted the hull. The only thing really holding the rudder in the boat was a bronze shoe and pin at the base of the skeg, as well as (somewhat) the packing box itself.


Although I couldn’t drop the rudder while the boat was in her current position–the shaft was too long to allow the rudder to drop straight out, so I’d need the boat either raised higher, or dig a hole beneath the rudder, something I couldn’t do on concrete–I could at least take care of all the initial removal steps so that the final removal would be as straightforward as possible. I planned to remove the rudder later, whenever I moved the boat outdoors: at that time, I could either raise the boat high enough on the trailer (possibly), or else hang the aft end over an embankment I have near the shop. But now was the time to do all the initial work required to drop the rudder later.
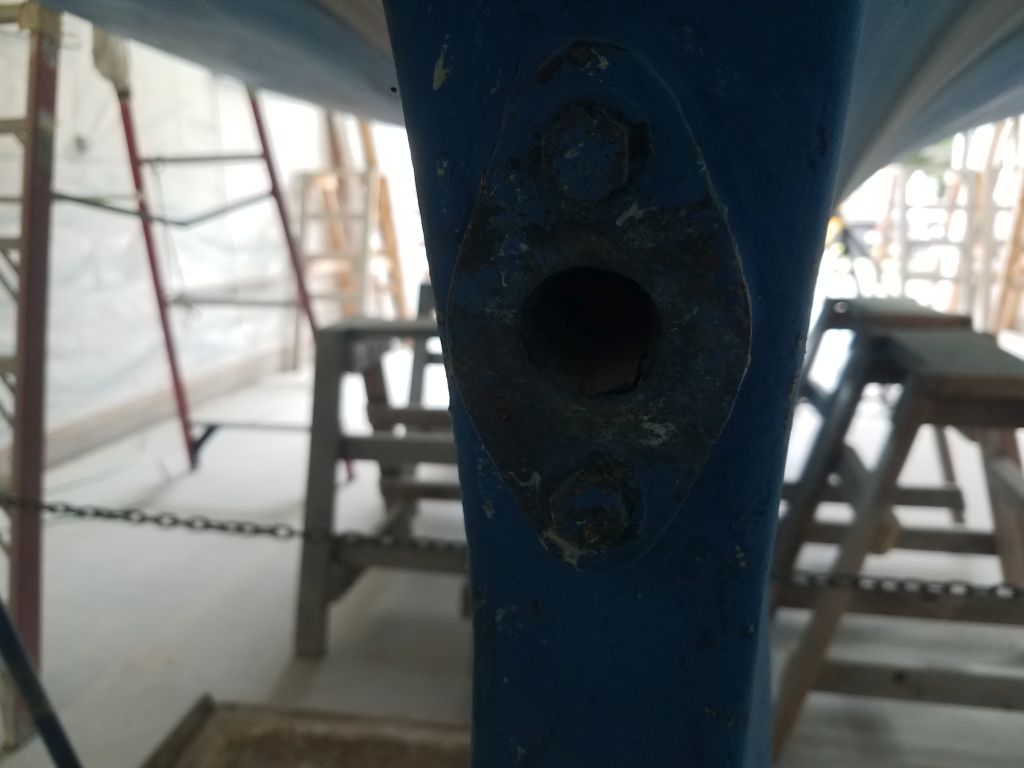
Armed with a big wrench, I tried working on the packing nut from one of the cockpit lockers, but the angles were all wrong, and I couldn’t get any leverage. Instead, I crawled through the now-empty engine room to reach the nuts from that side, and this worked a treat: with no trouble at all I released the main packing nut and backed it off. I also broke free the locknut, and backed it up to the top of the threaded stern tube to prevent any damage to the threads when they were exposed.
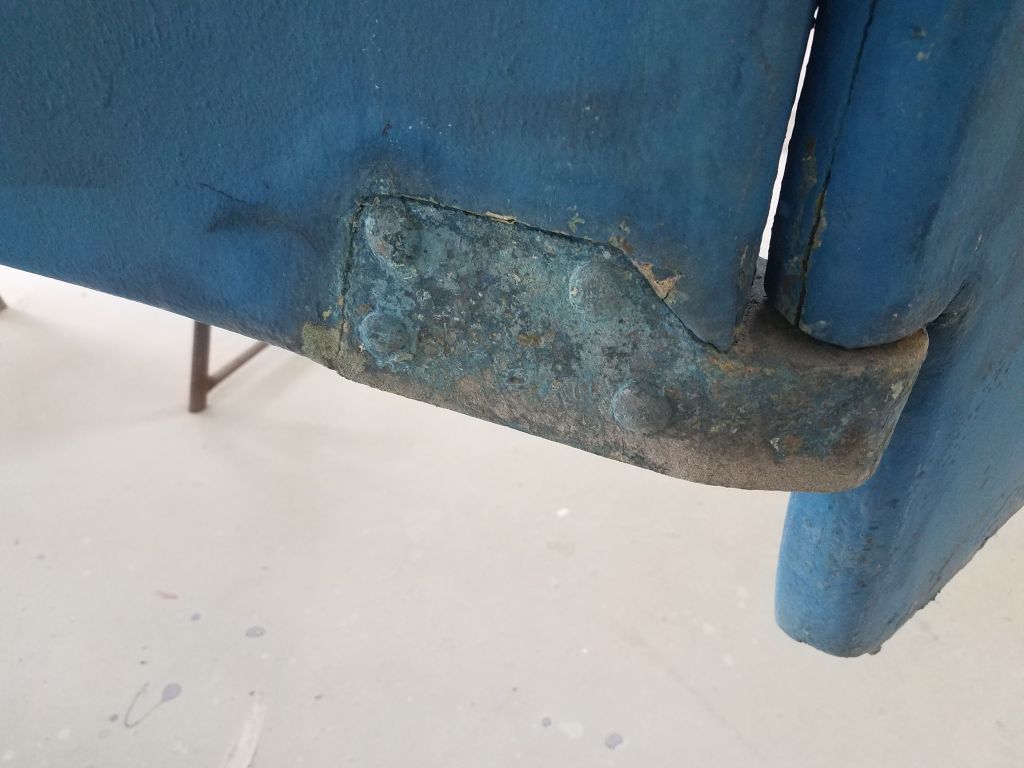
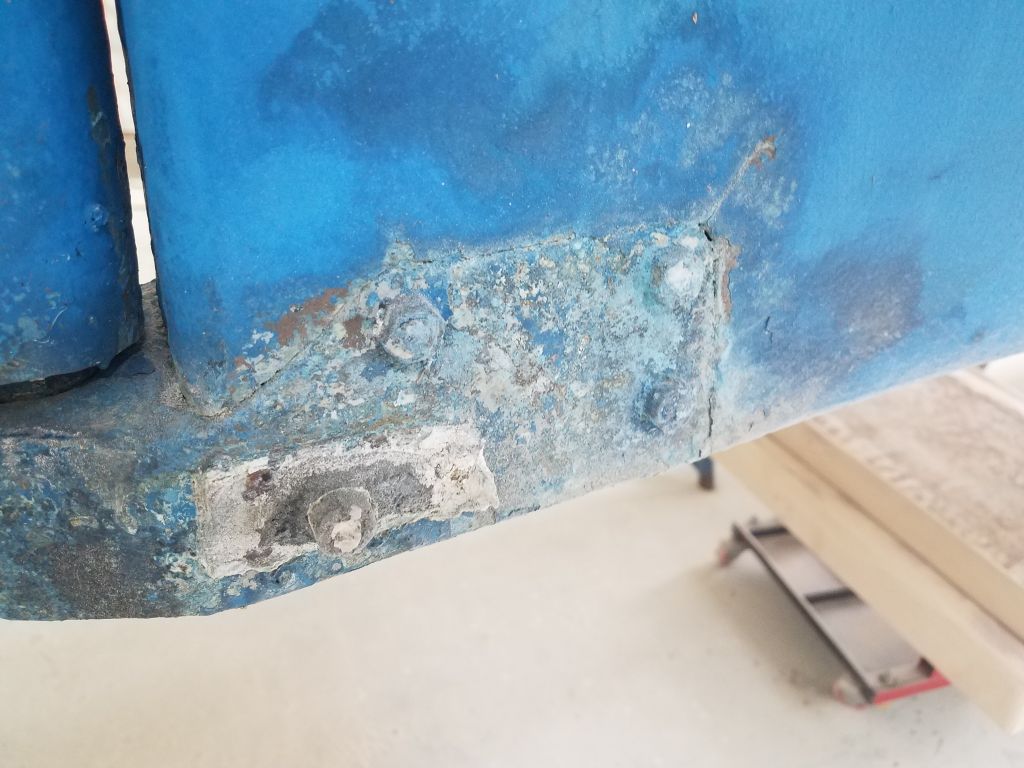
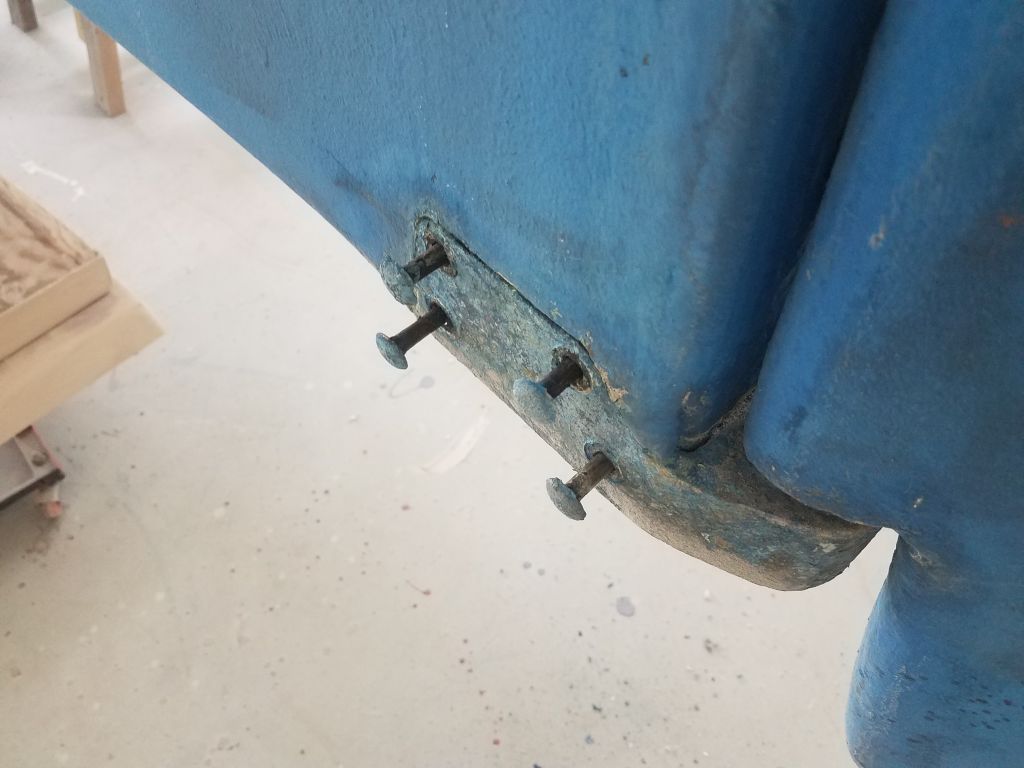
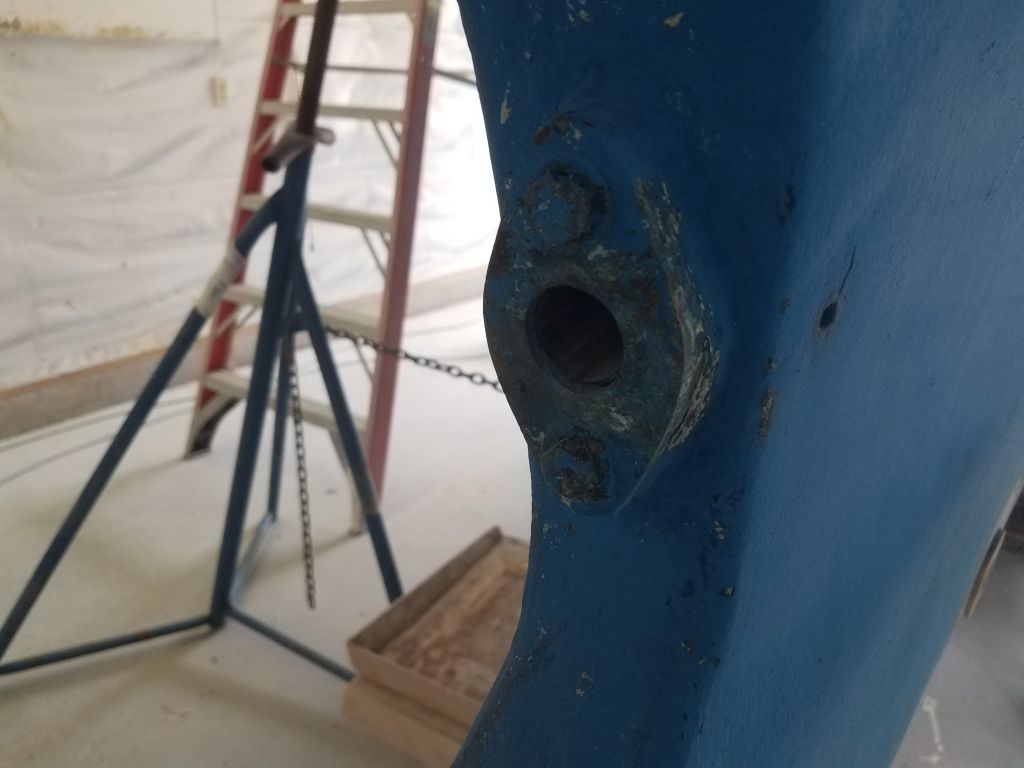
Back outside, I turned to the bronze rudder shoe, which was secured to the skeg with four carriage bolts and nuts. Three of the four nuts came free without issue, but the last one spun the head of the carriage bolt, so I had no choice but to cut off the nut with a grinder. I loosened the bolt studs, but left them in place to hold the shoe on till I was ready to actually remove the rudder. I was able to easily lift the rudder just off the shoe, so it looked like removal wouldn’t pose too much problem when I was ready. Rudder repair would be a good thing to take care of in the shop while the boat was stored outdoors, and in any event the rudder prevented good access to the aperture and for shaft/propeller installation later, so it might as well be out of the way for much of the remainder of the project.
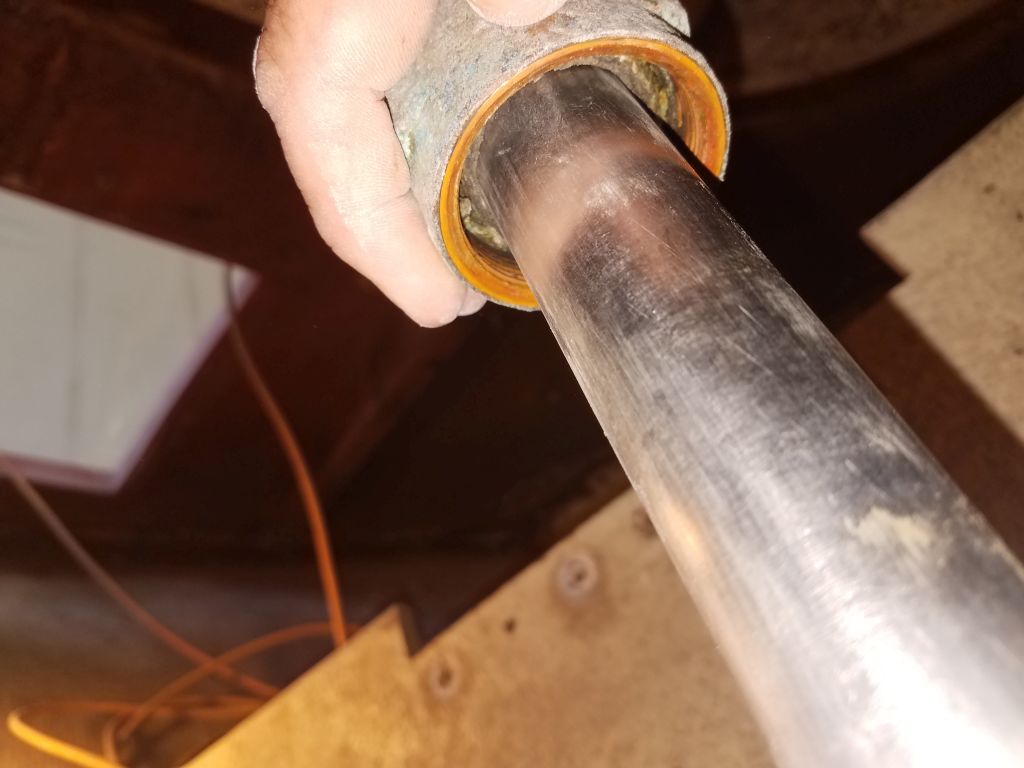
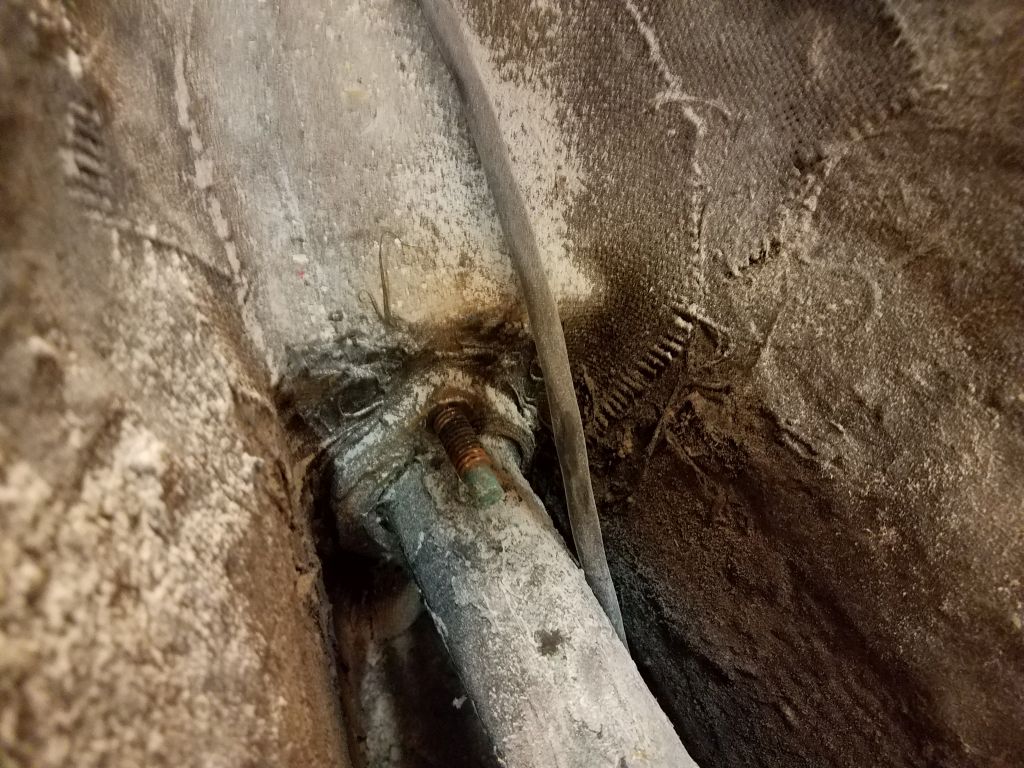
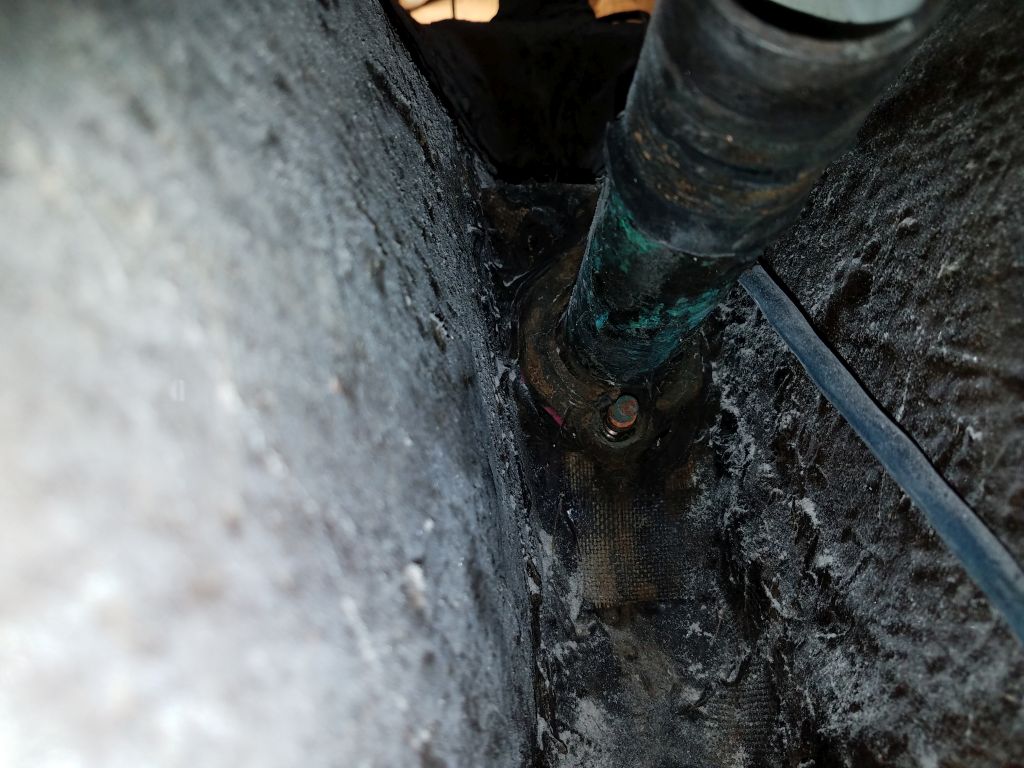
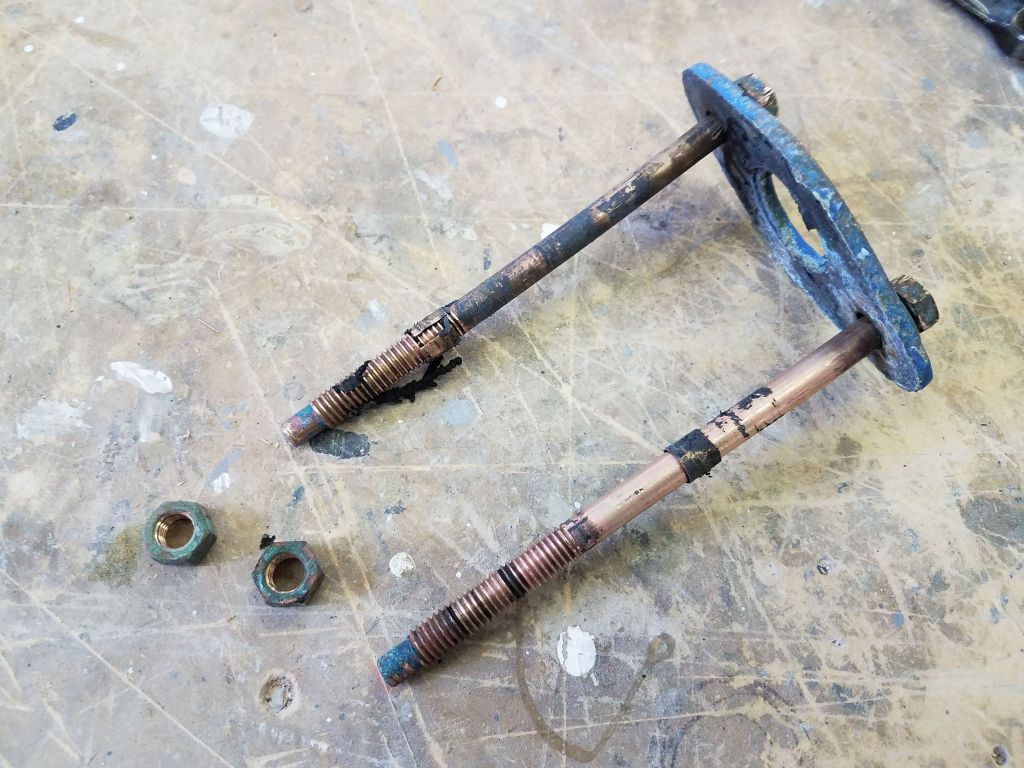
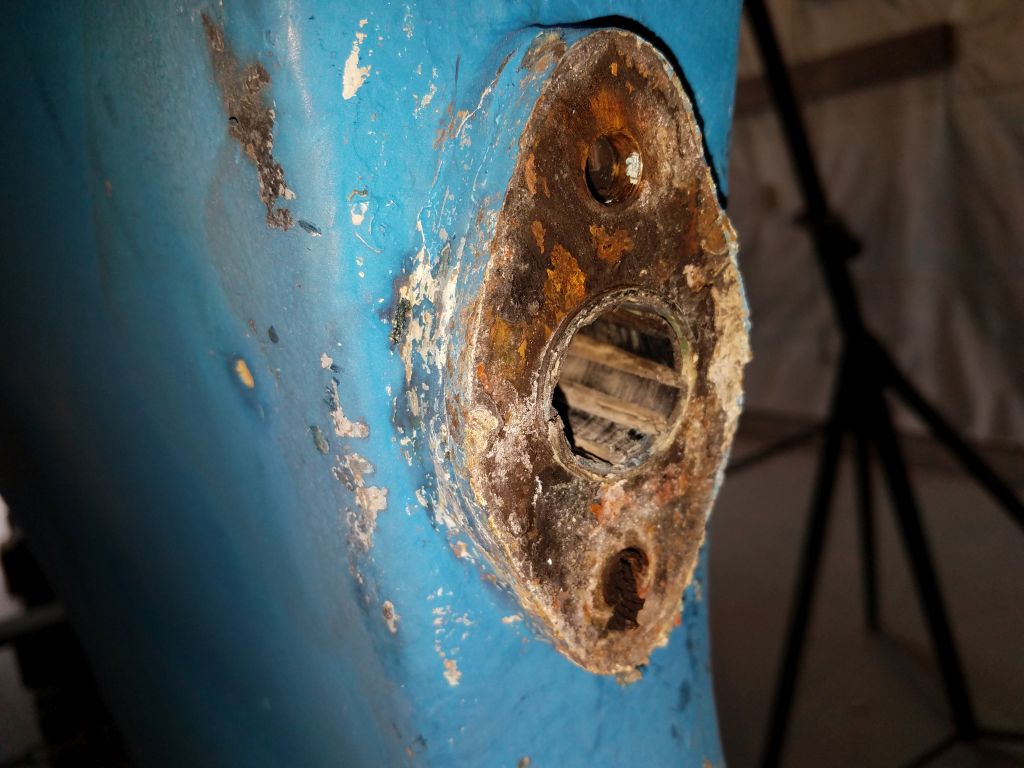
While I was working in the area, I decided to remove part of the propeller shaft stern tube assembly in order to access the old Cutless bearing, which would require replacement. The bearing was held in place in a bronze housing by a bronze casting that was bolted through the deadwood; inside the boat, the nuts at the ends of the two bolts were accessible on either side of the bronze stern tube.

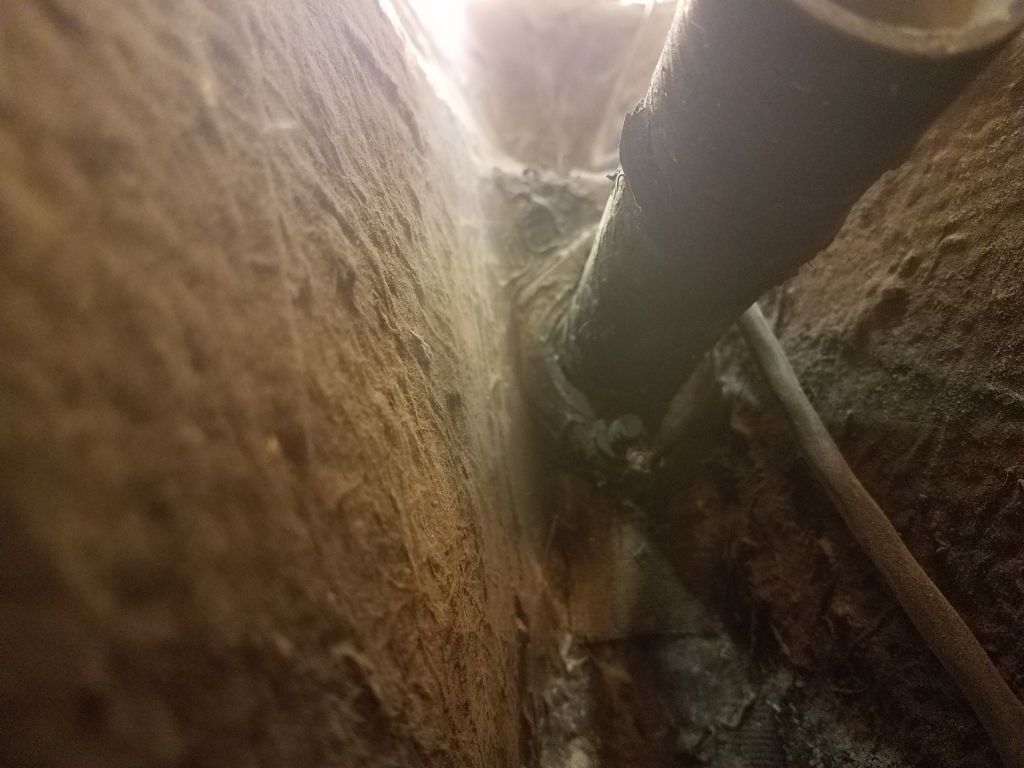
Removal posed no particular problems, though I had to unwind the long bolts completely from outside, thanks to the sealant within that prevented me from otherwise pulling them free. This exposed the end of the bearing, but pulling that free would be a chore for another time, as there wasn’t an immediately easy way to remove it since it was flush with the housing. Now fully exposed, the bearing was clearly in poor shape, and I’d continue removal efforts in due course.


It hadn’t been the day I’d necessarily planned, but in any event I had my priorities realigned and was ready to move forward effectively from here.
Total time billed on this job today: 3 hours
0600 Weather Observation: 65°, overcast. Forecast for the day: Mostly cloudy, temperature steady around 70°