


April 5, 2018
Scupper 20
Thursday
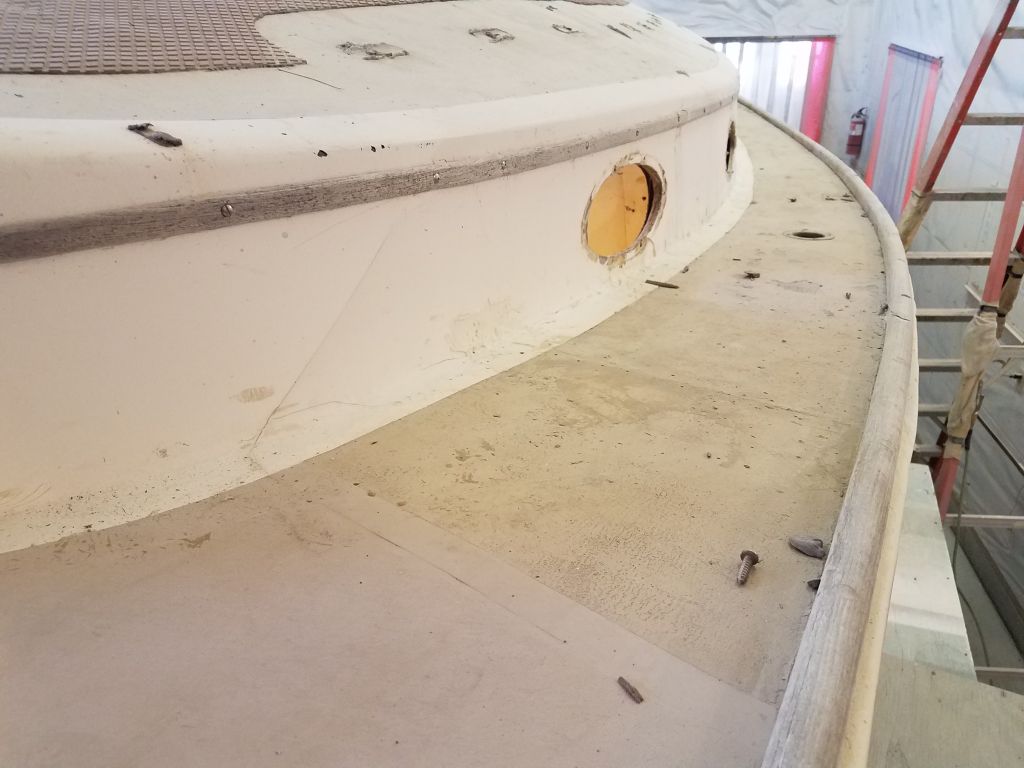
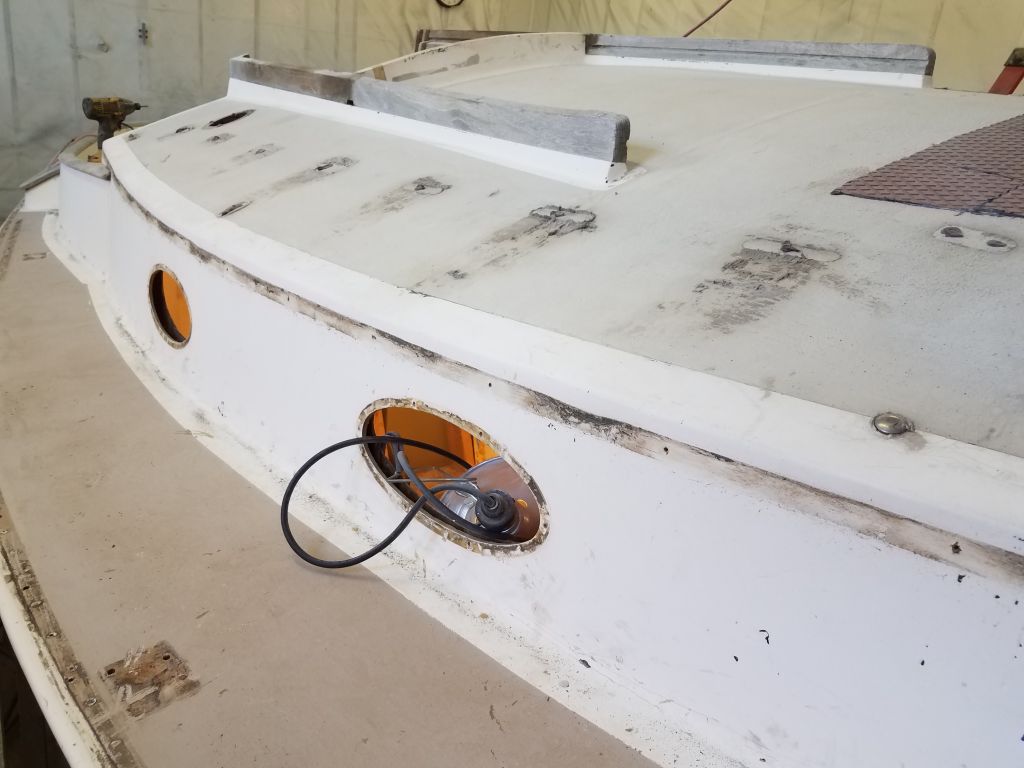
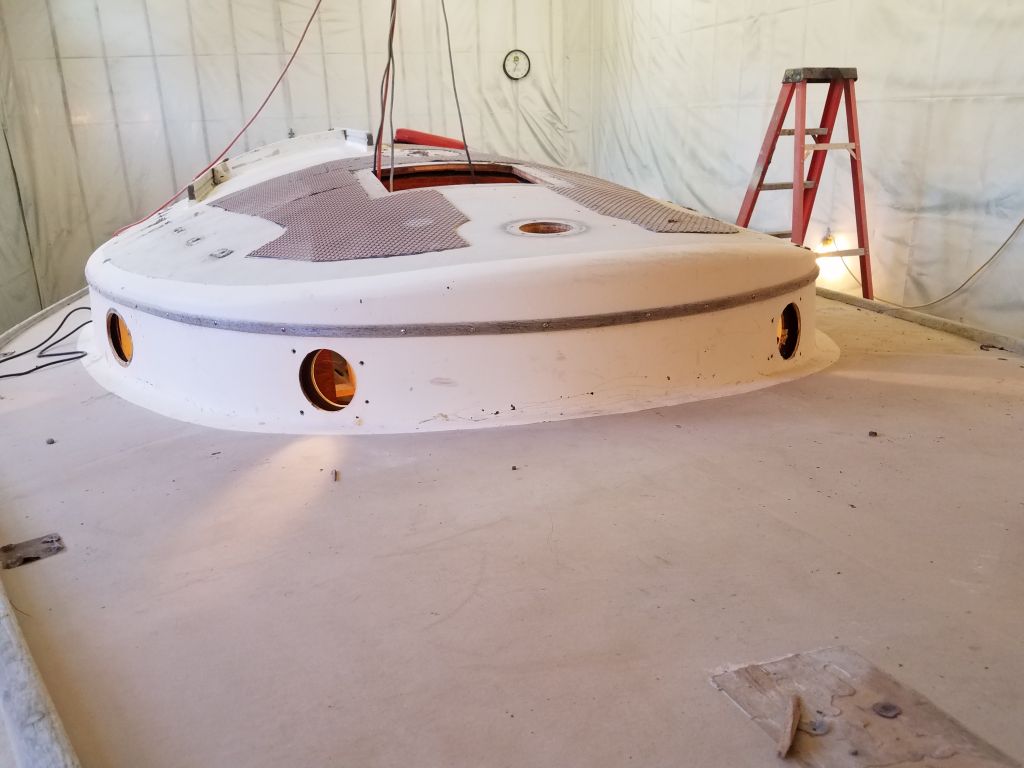
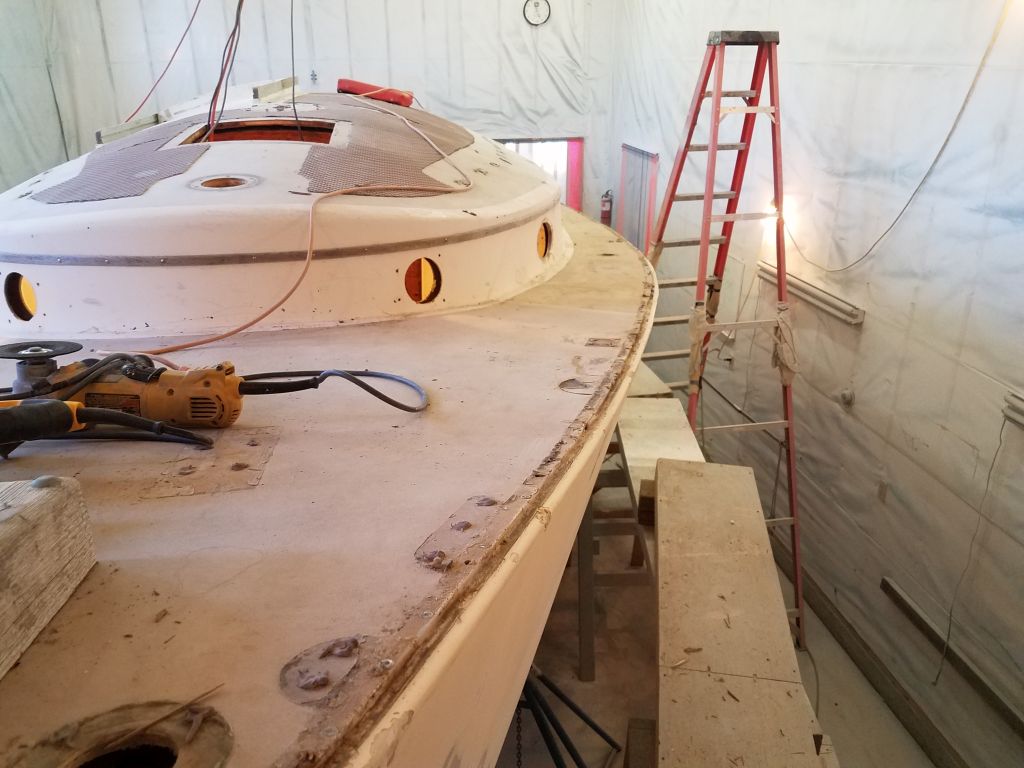
After a morning appointment, I got to work on the decks, where I expected to spend a lot of my time in the coming weeks. I began with an overall visual assessment of the deck, something I’d done over and over every day as I worked on other parts of the boat, but now it was time to really dig in. Whatever incident (s) had traumatized the poor port side of this boat might never be known to us, but clearly there’d been a lot of work here in the past, both on the hull and on the decks. The port sidedeck was a terrible looking thing, with too many horrors to document properly. Would it end up being sound despite it all?


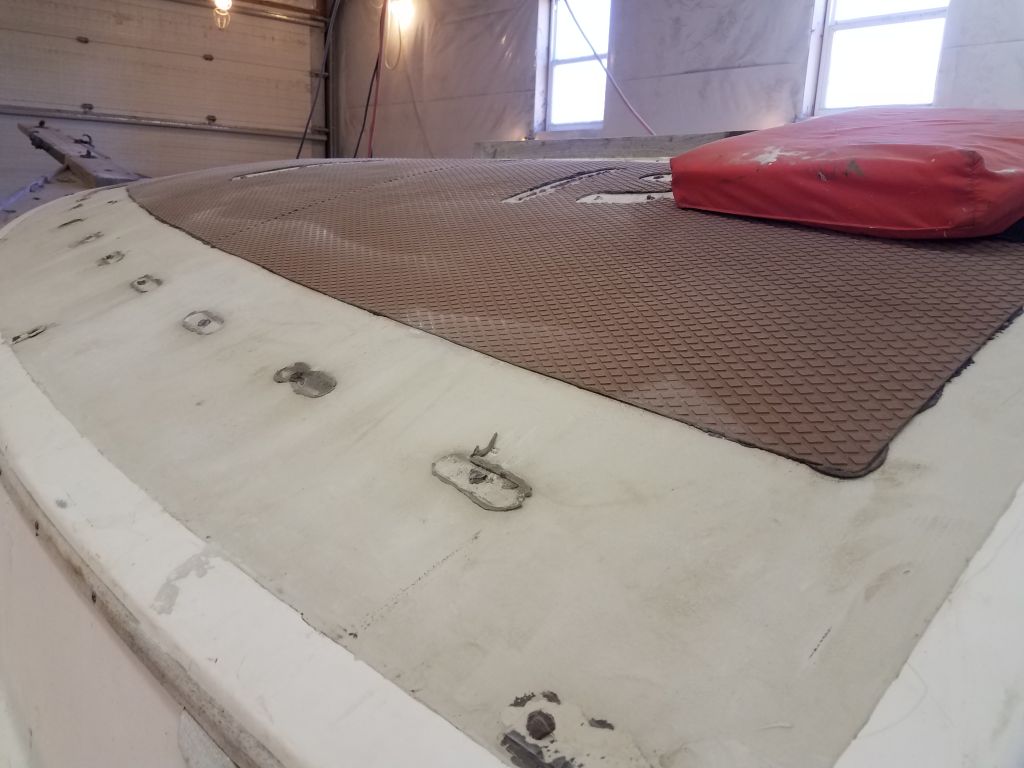
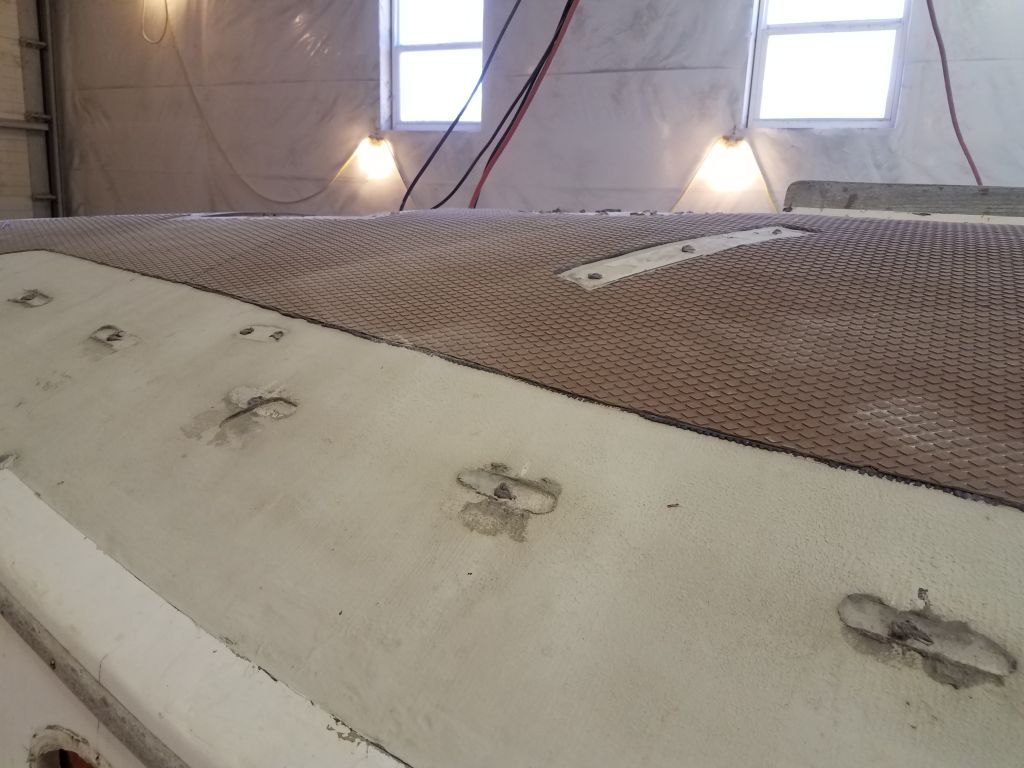
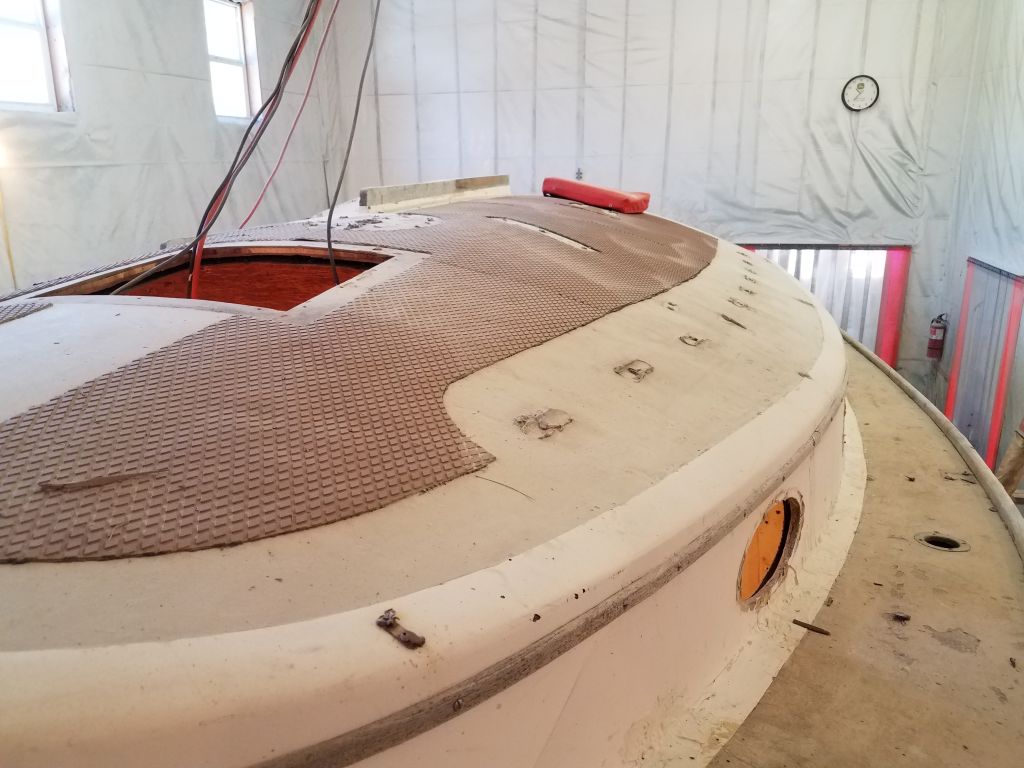
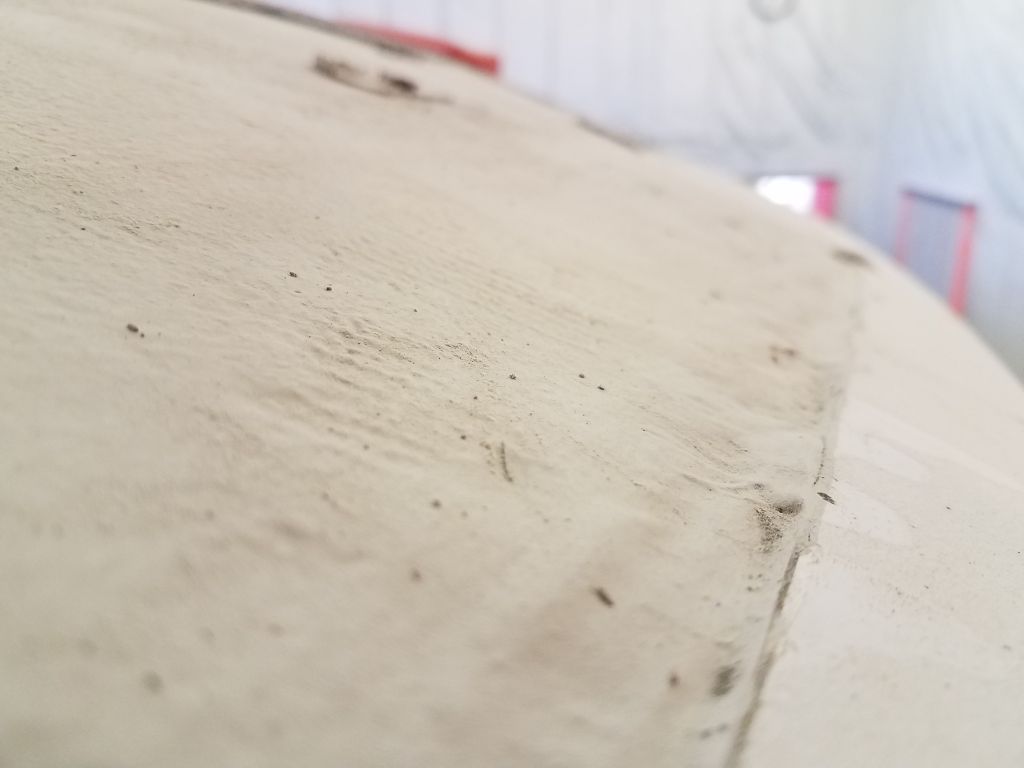
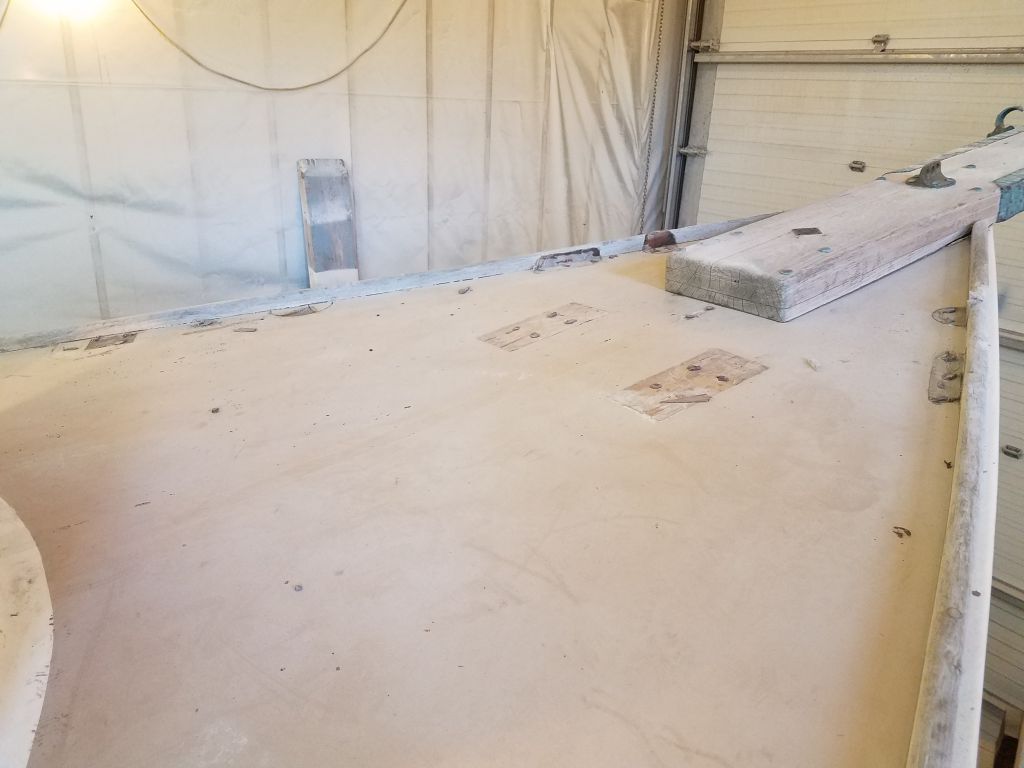
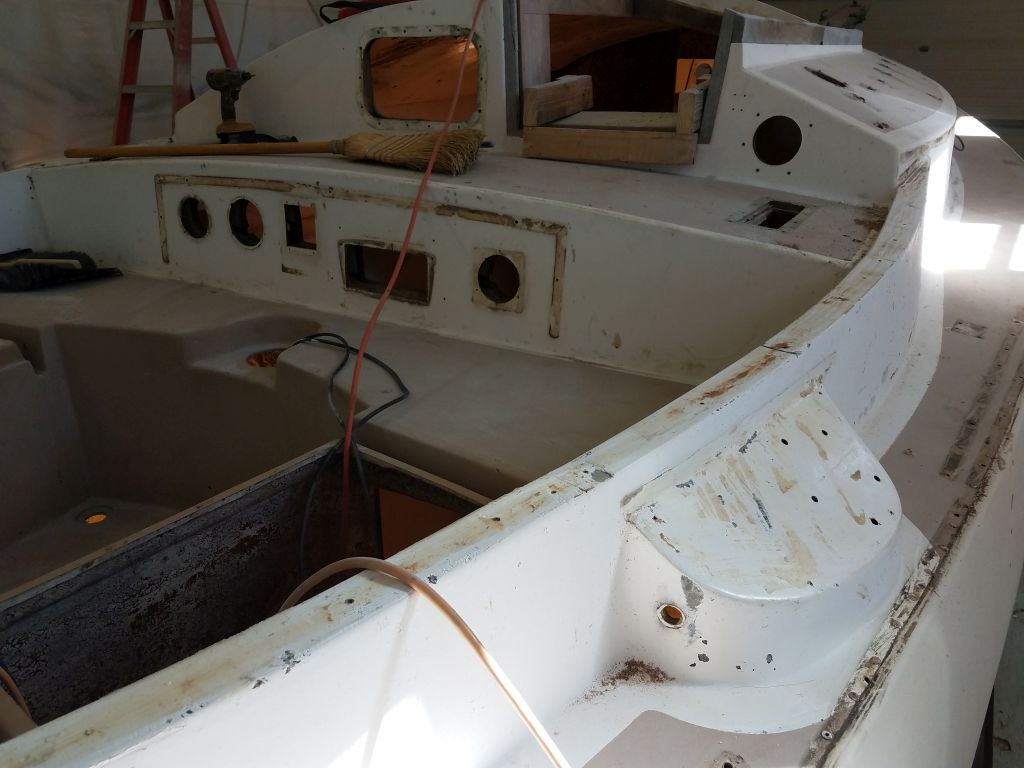
The sharply cambered coachroof looked to have had repairs in the past, probably core replacement. Much of the surface was covered with Treadmaster applique, hiding the true condition for now, but from various angles it was clear that the previous repaired had felt that fairing was for fools. There was ample fiberglass weave still showing in the non-Treadmastered areas, and a rough edge near the corner of the cabin trunk. At a minimum, this area would need a lot of coatings removal and refairing; time would tell how successful the previous core repair had been. I’d remove the Treadmaster as well.
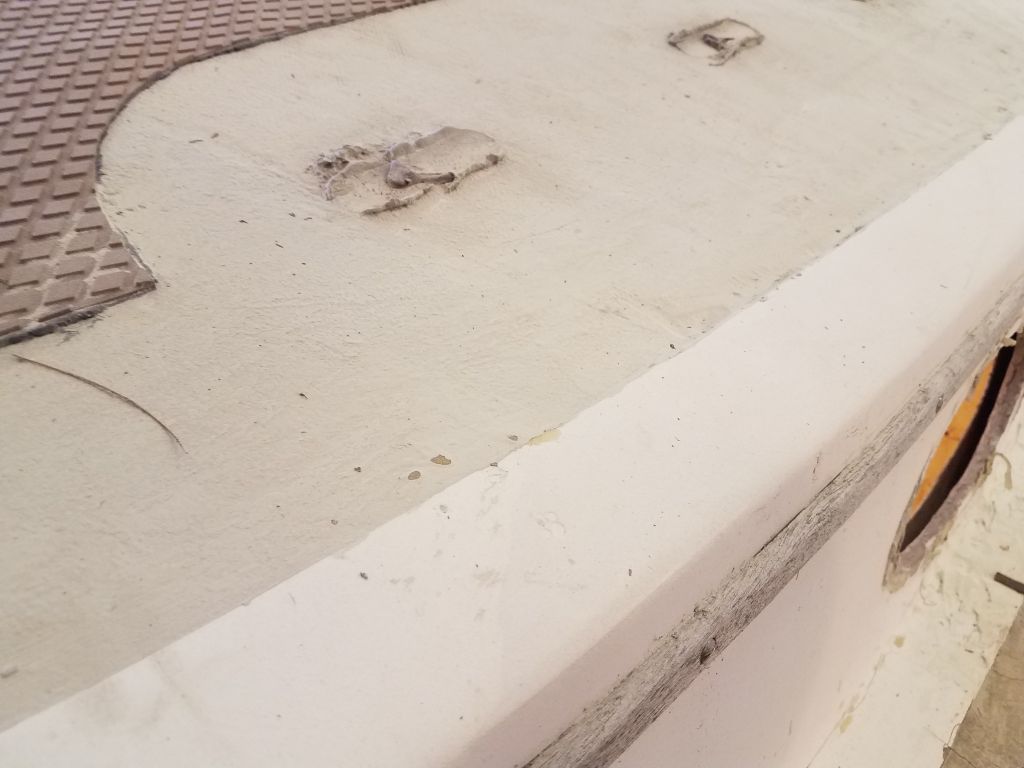
The forward portion of the starboard side of the coachroof had been worked on at the same time, judging from the basic appearance, but the narrower strip leading aft outboard of the companionway appeared original, and while I’d not yet done a detailed deck inspection and core sounding, earlier while working on something else I’d noticed some softness here.

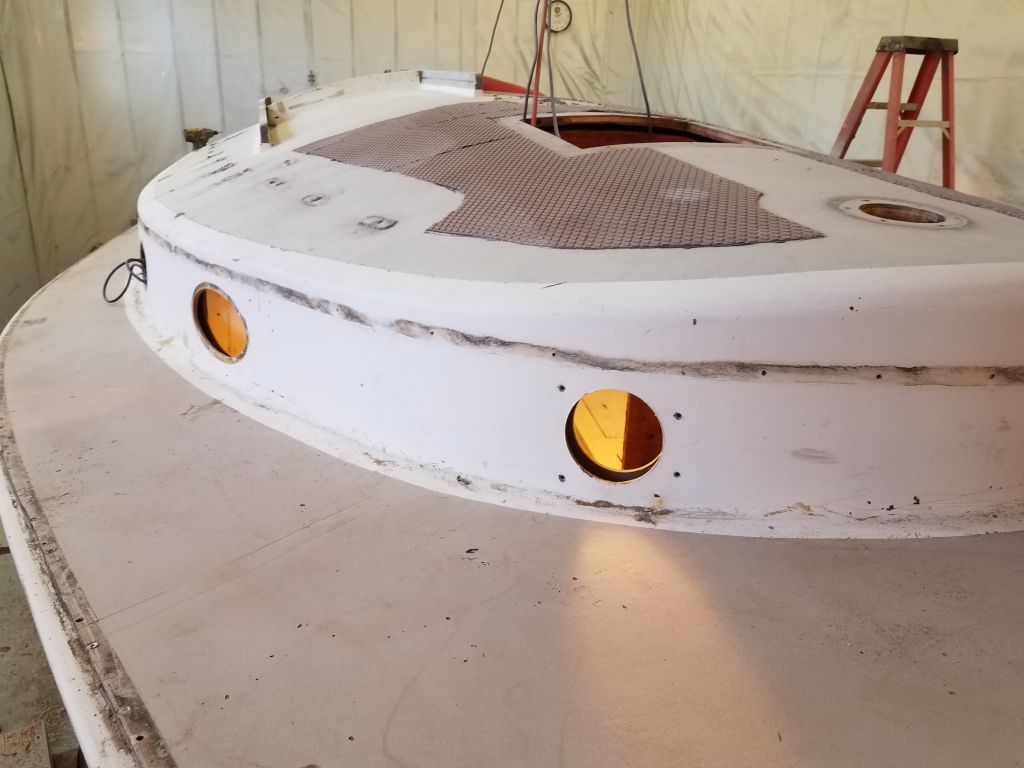

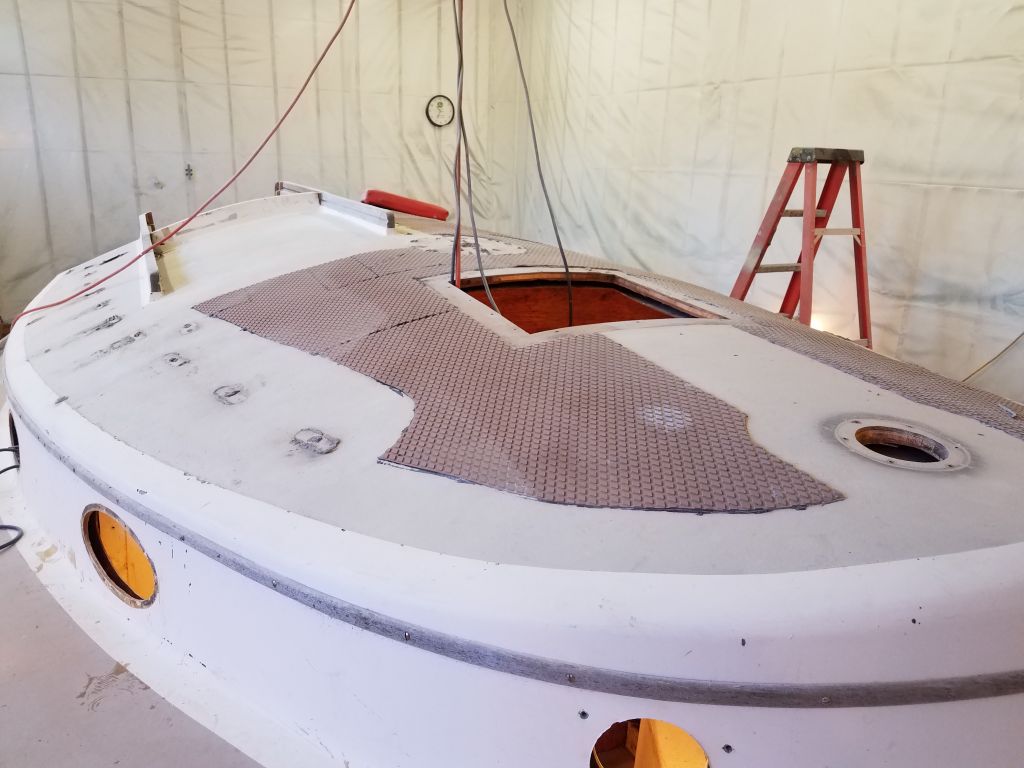
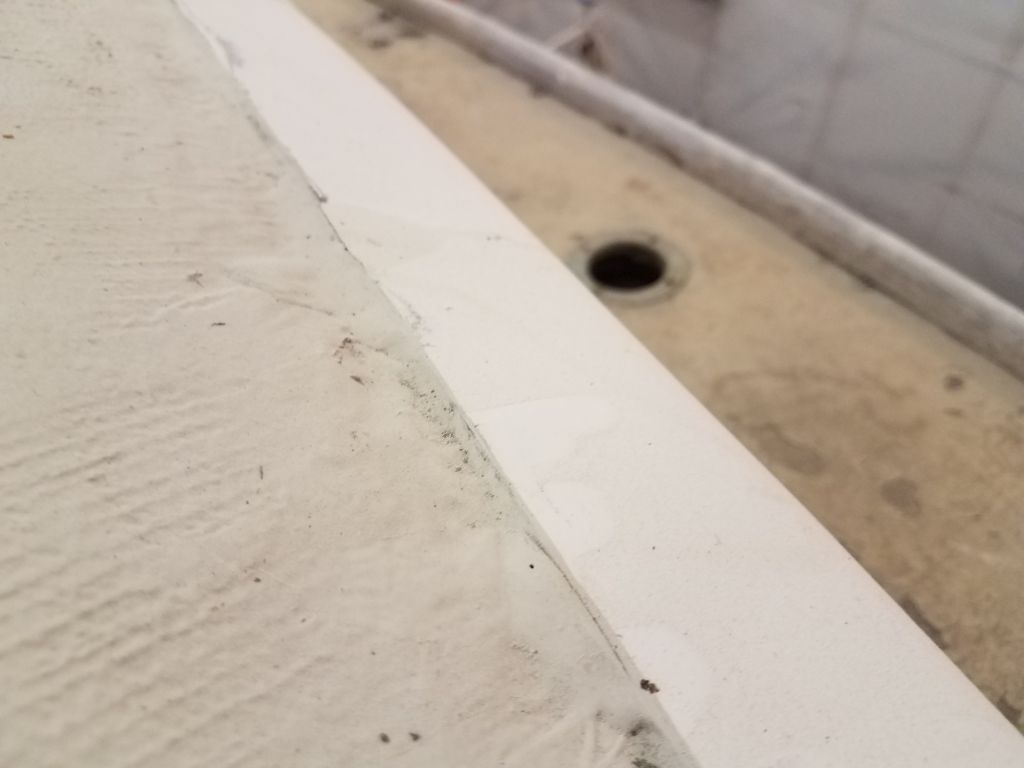
The starboard sidedeck and most of the foredeck appeared to be original, which was probably a better state of things in this instance.

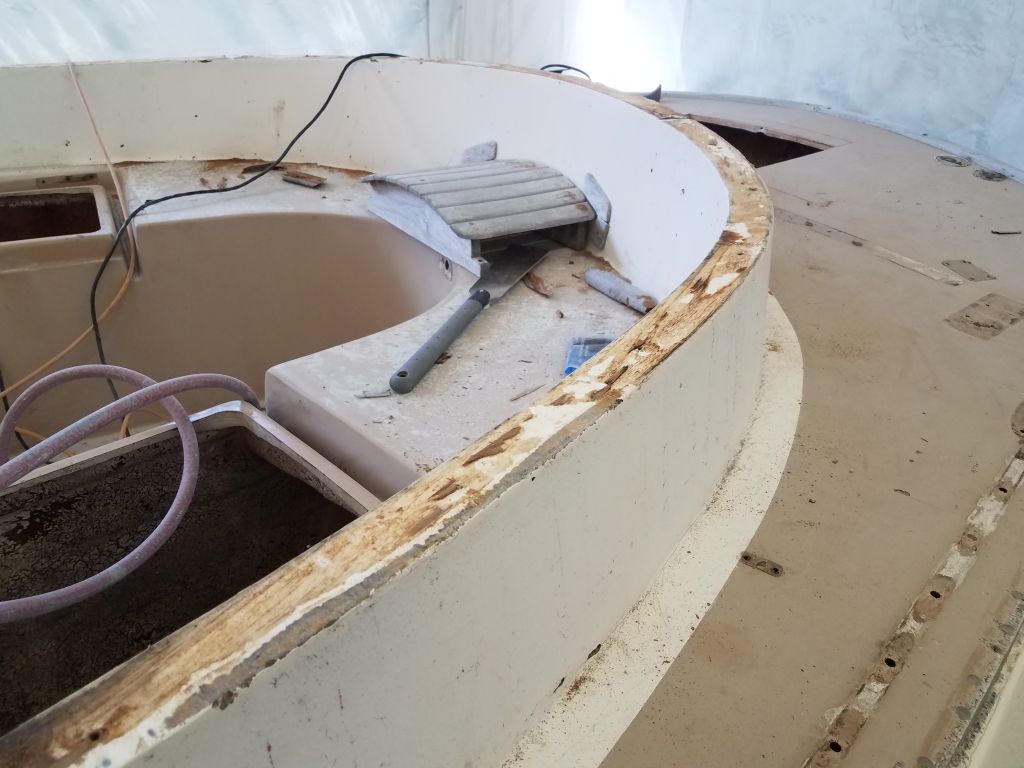
The cockpit well, in original form, seemed generally sound so far, though there was some top-skin delamination here and there (just like on the poop deck around the new hatch opening). After many trips back and forth across it over the past weeks, I already knew that the core in the large bridgedeck was completely ruined and would require replacement.
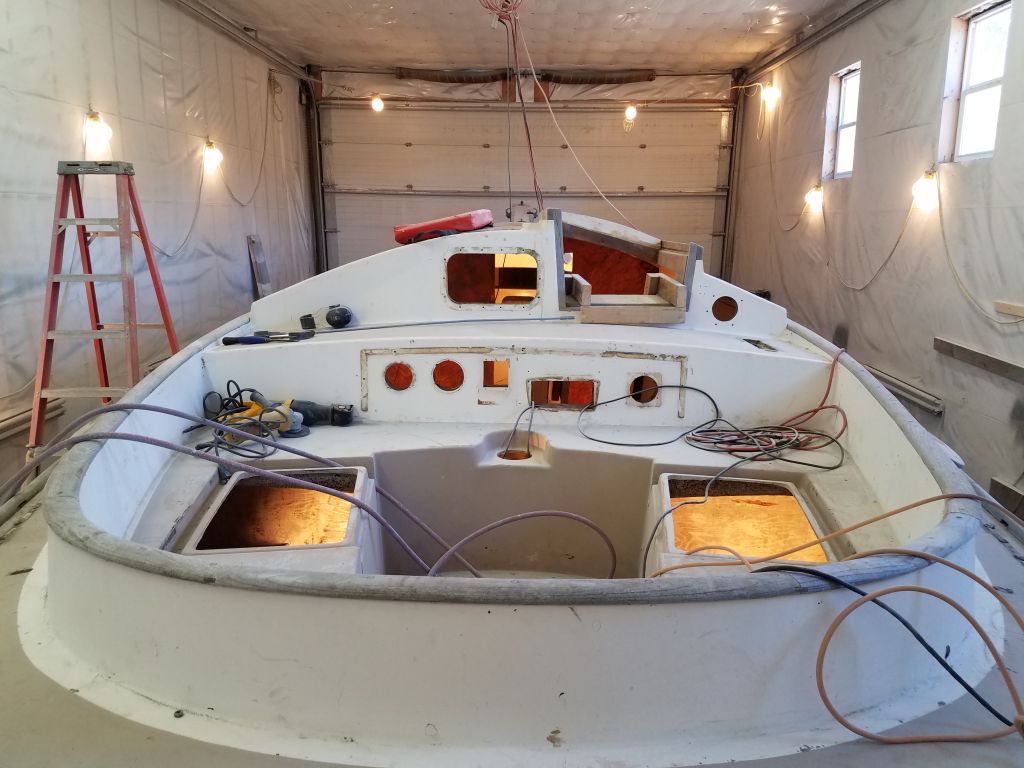
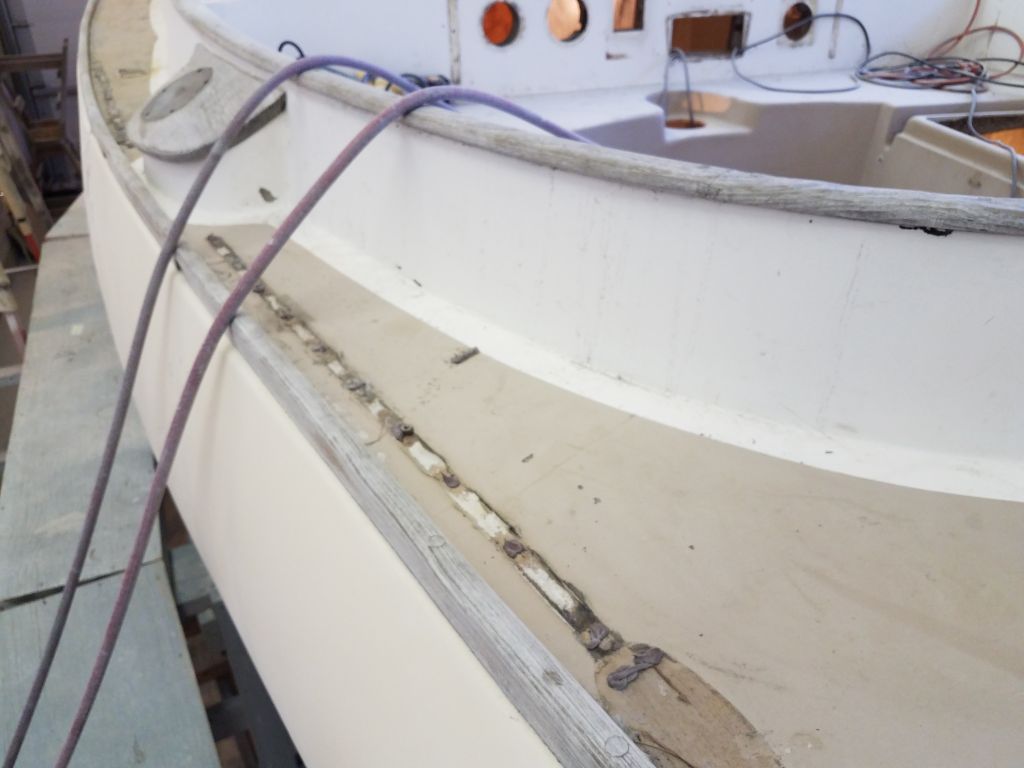
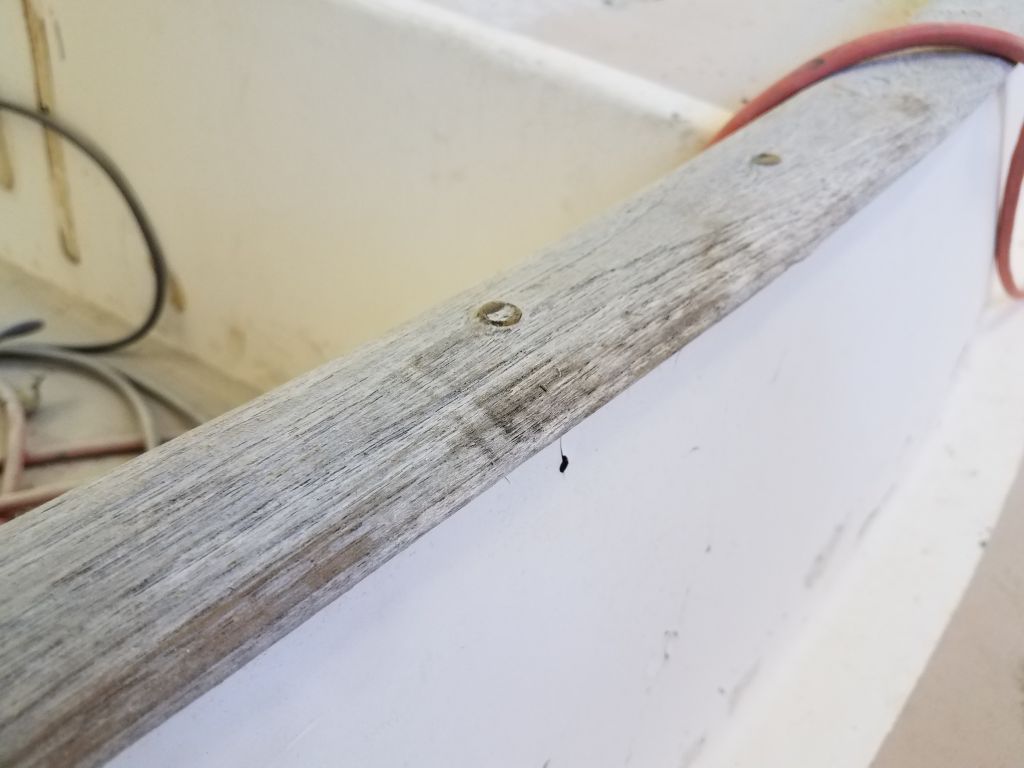
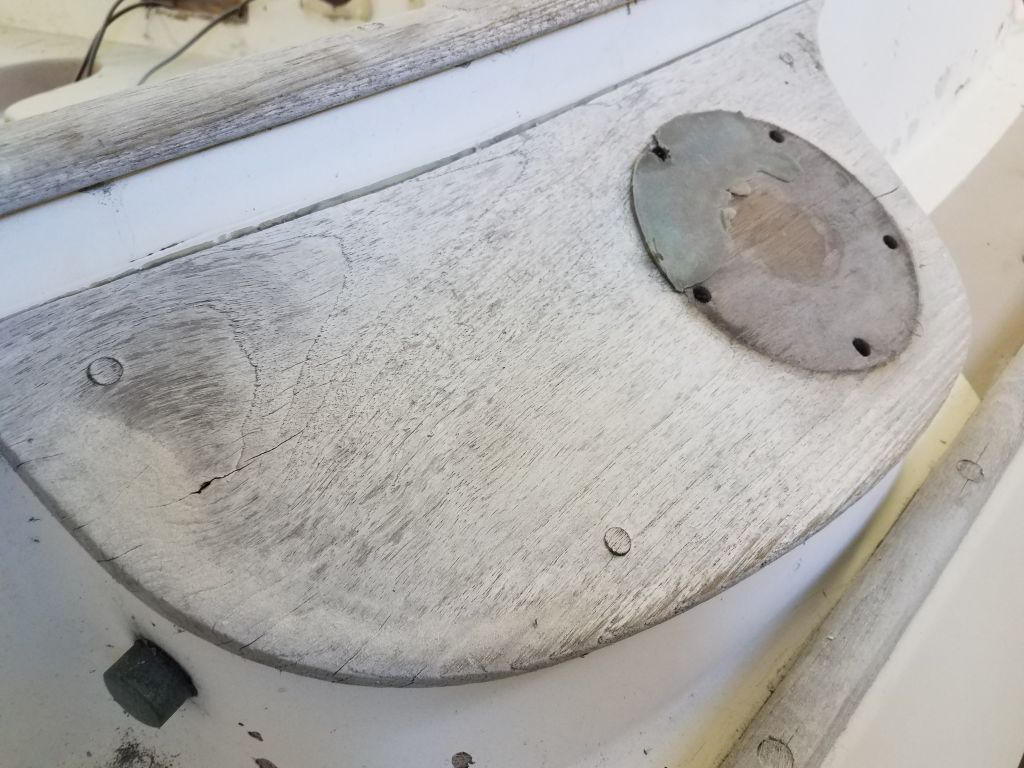
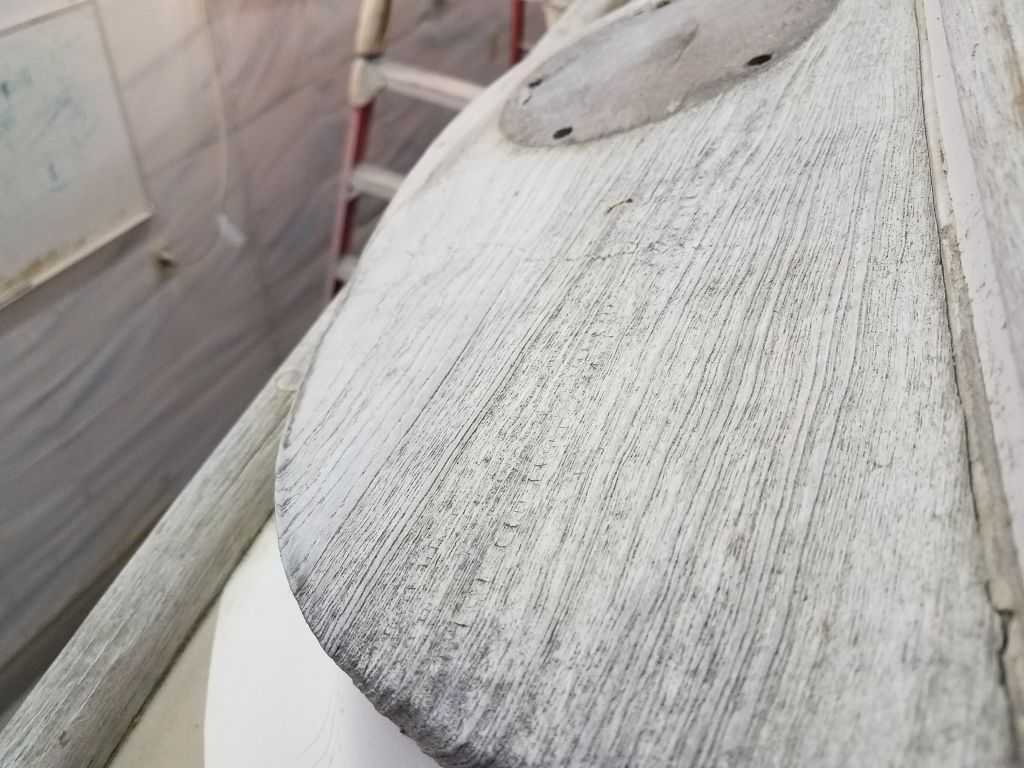
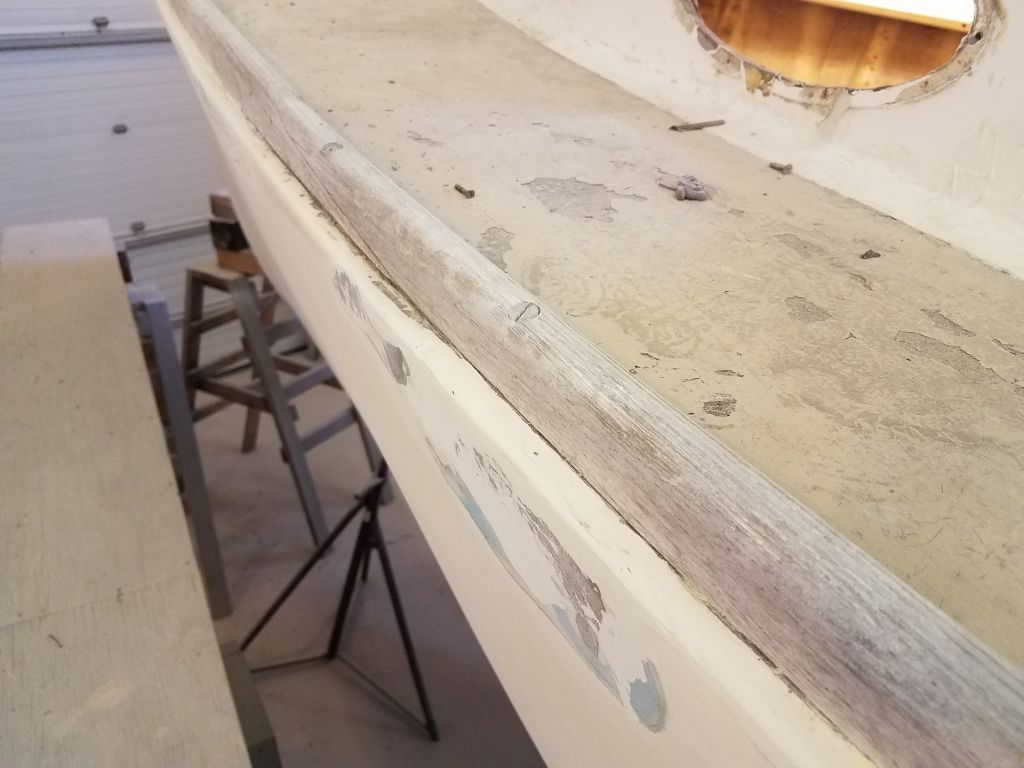
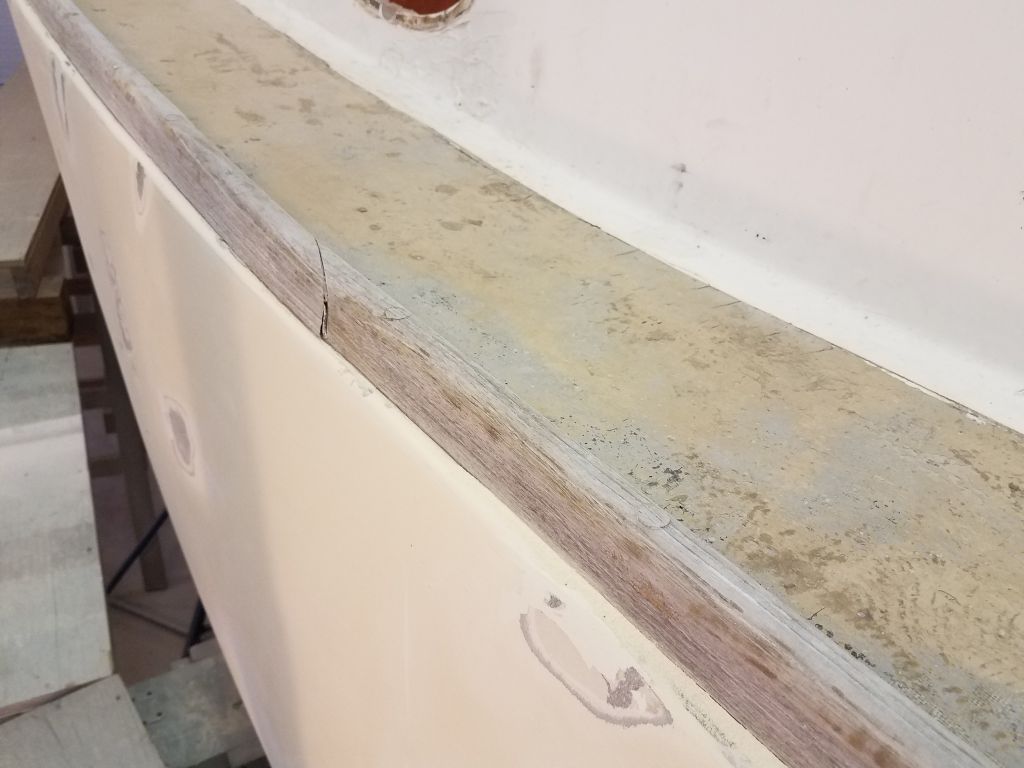
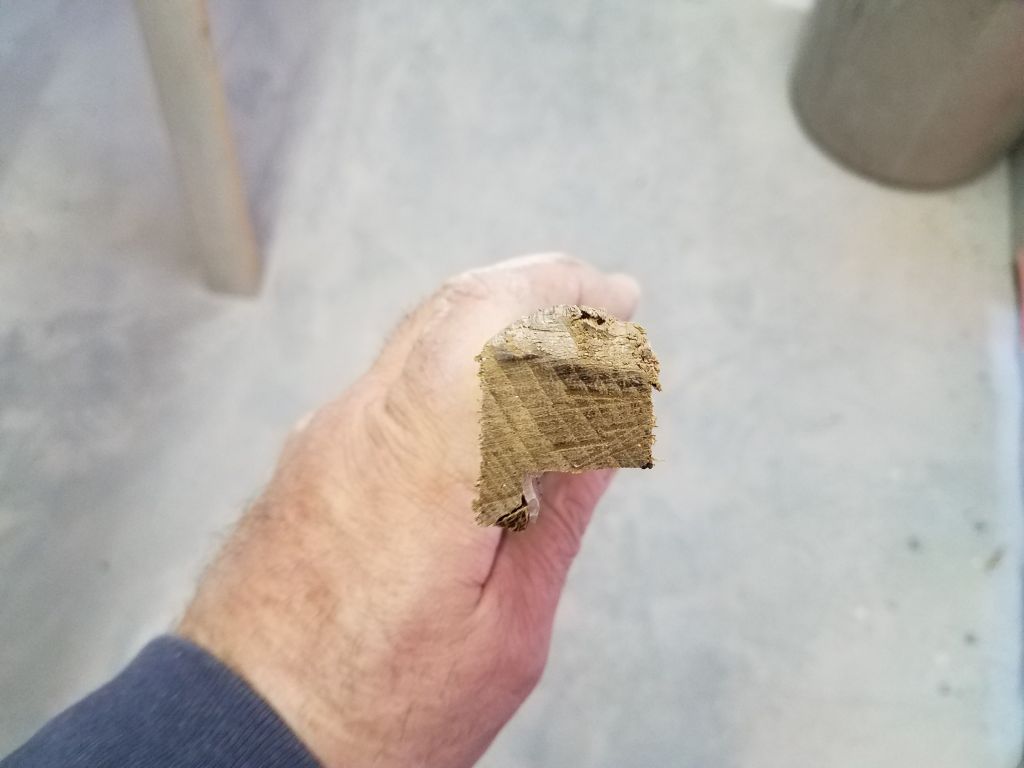
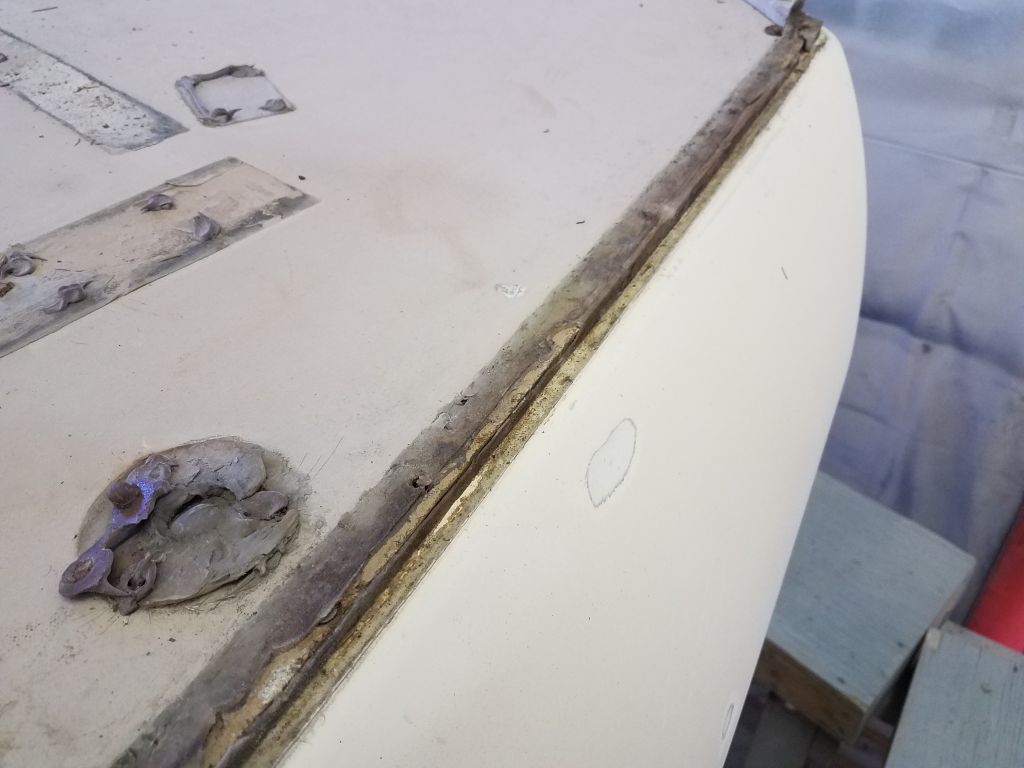
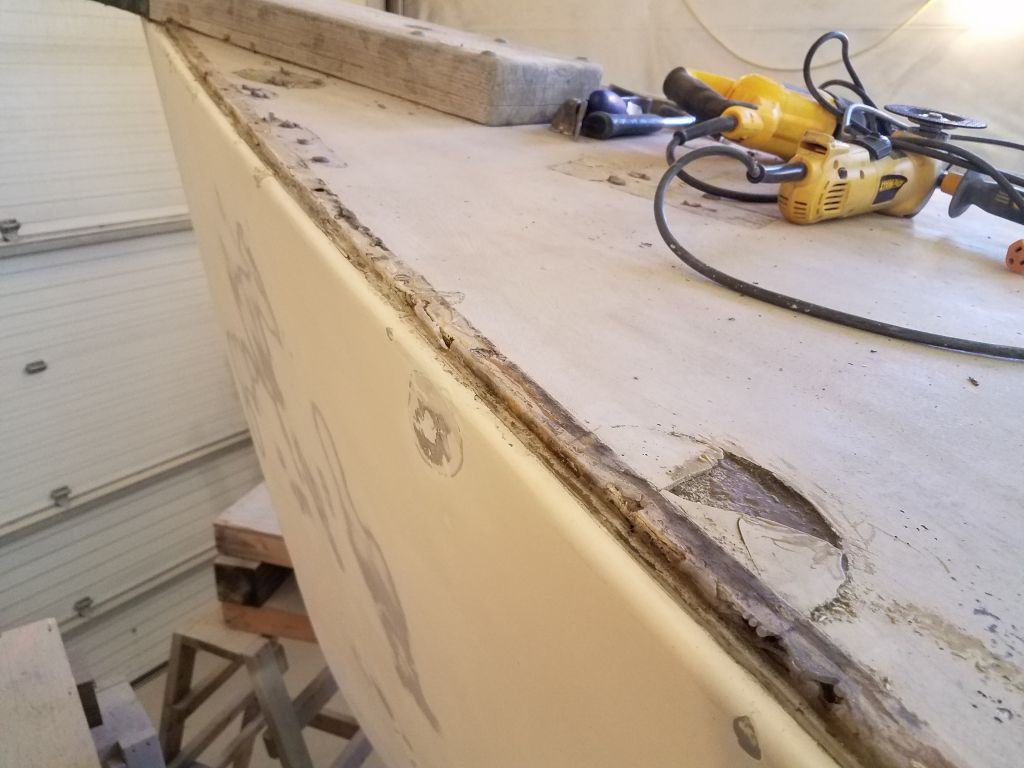
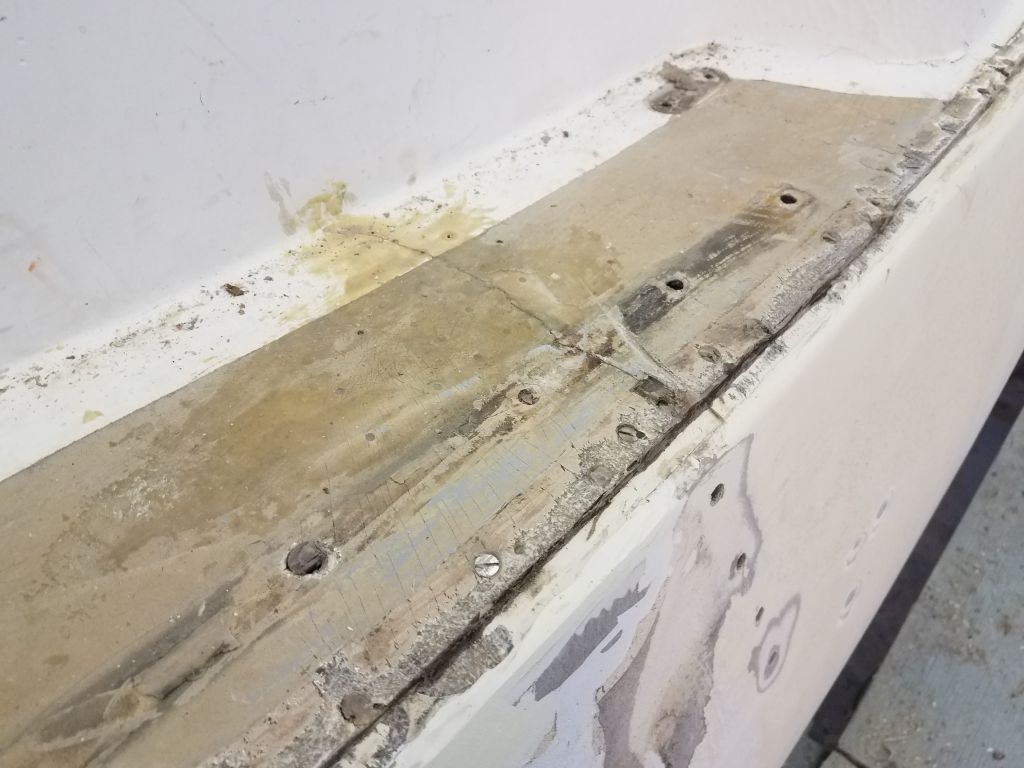
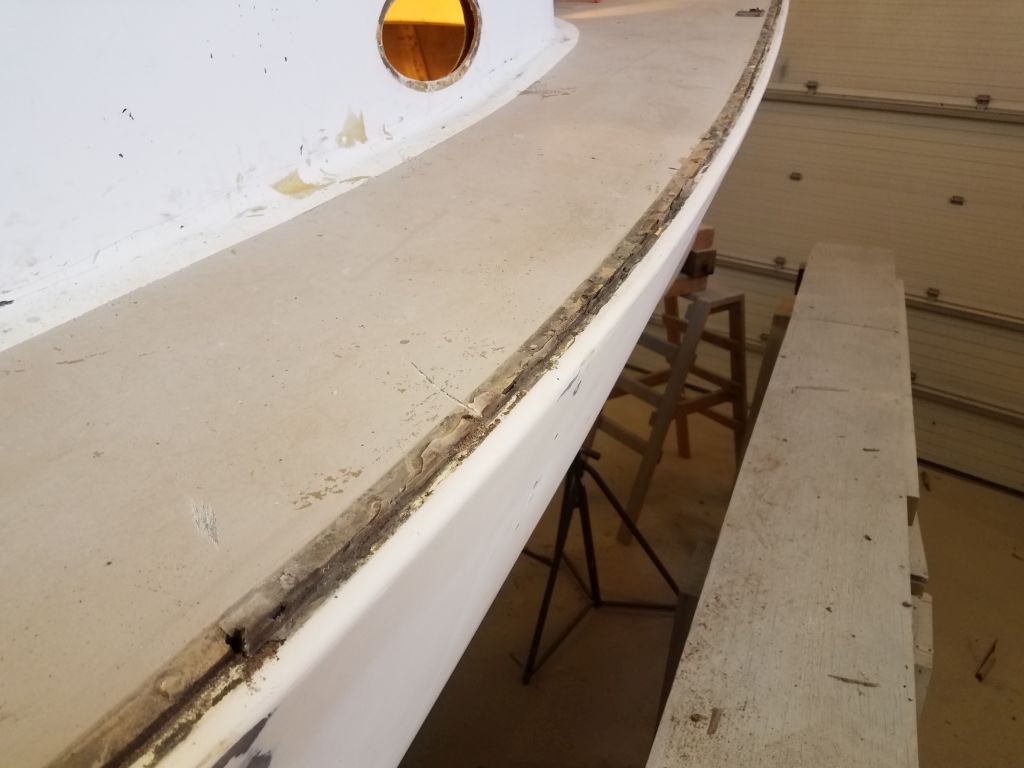
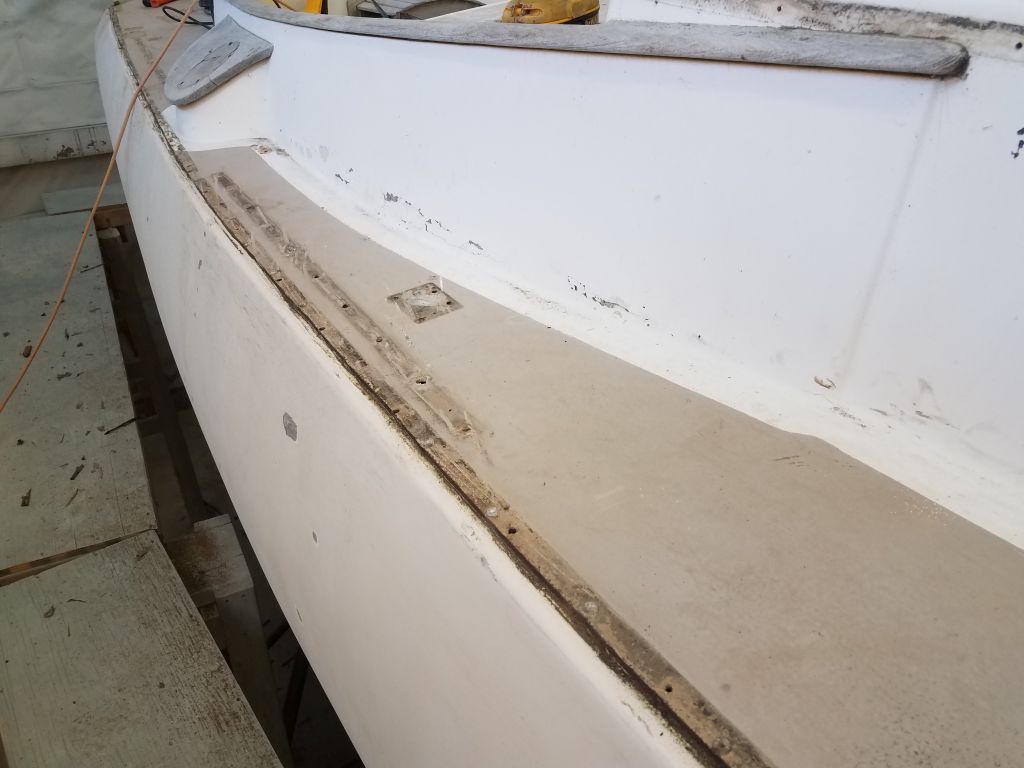
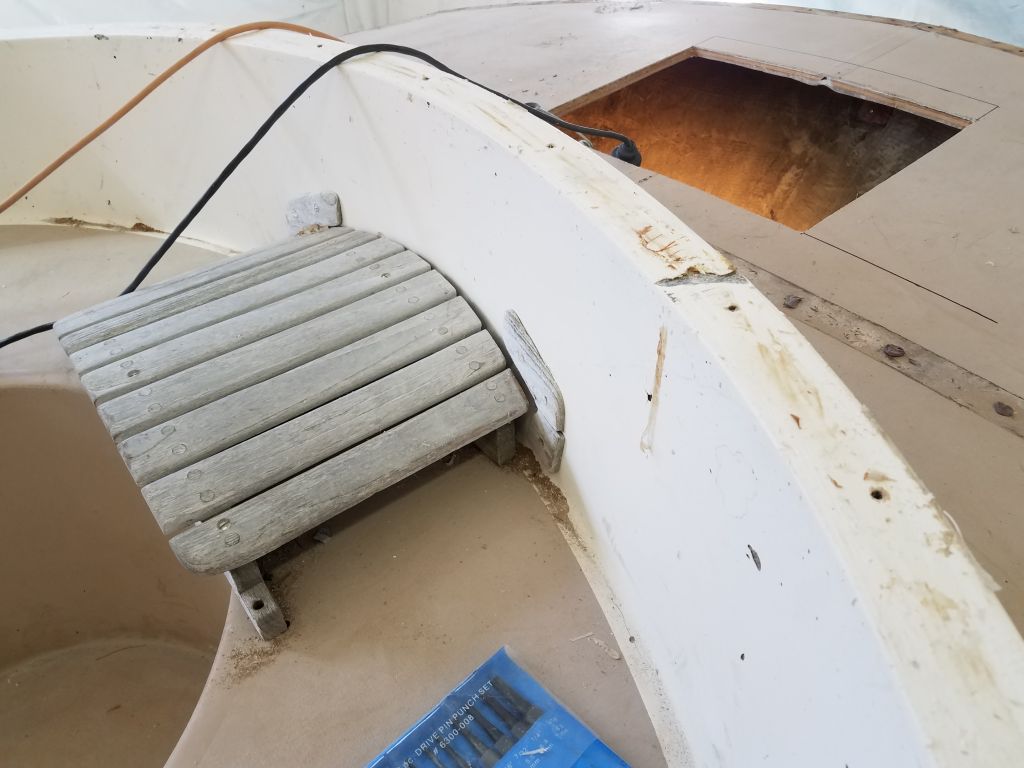
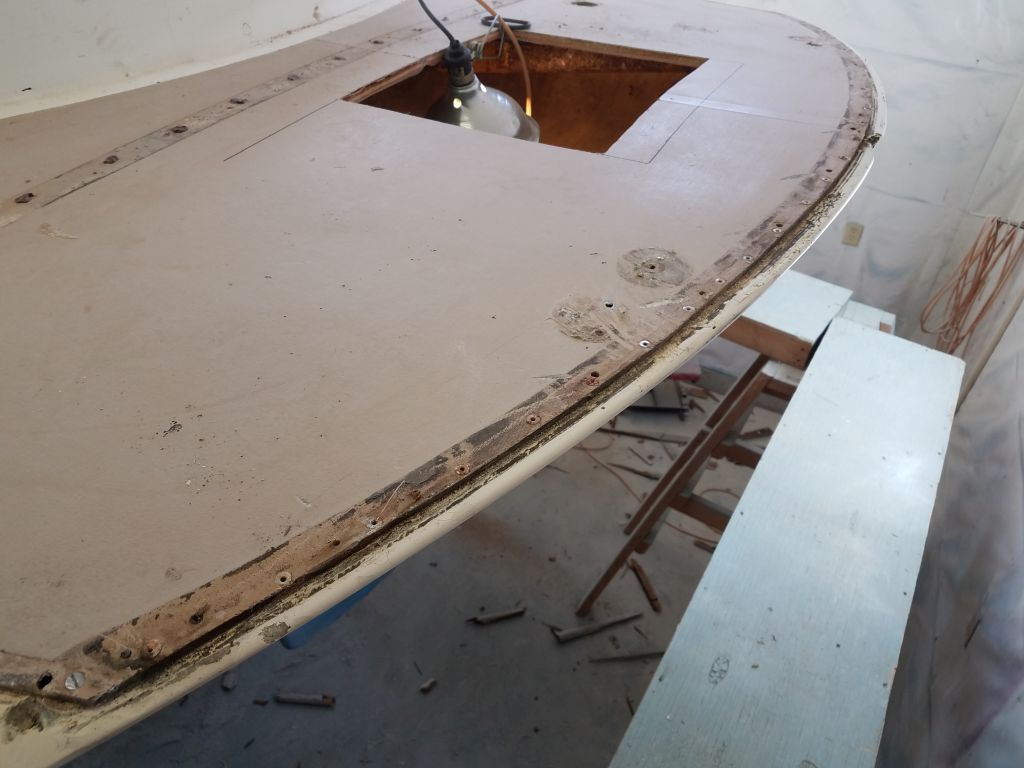
Now I got to work on the toerails and other deck woodwork. Since the beginning of the project, I’d considered whether or not to remove all this wood, or whether it could be salvaged as is. In the final analysis, though, I knew all along that it would all have to be removed, partly to ensure proper access to all areas of the deck in order to properly complete the substantial list of repairs and cosmetic improvements. Plus, the woodwork itself was just marginal at best: heavily weathered, with some splits and checking (port toerail), missing bungs and exposed fasteners, and just a lot of hard, protruding grain that would never be restorable satisfactorily. Things that seem OK at the onset of a project always fade quickly into unacceptability once the adjacent areas get spiffed up.
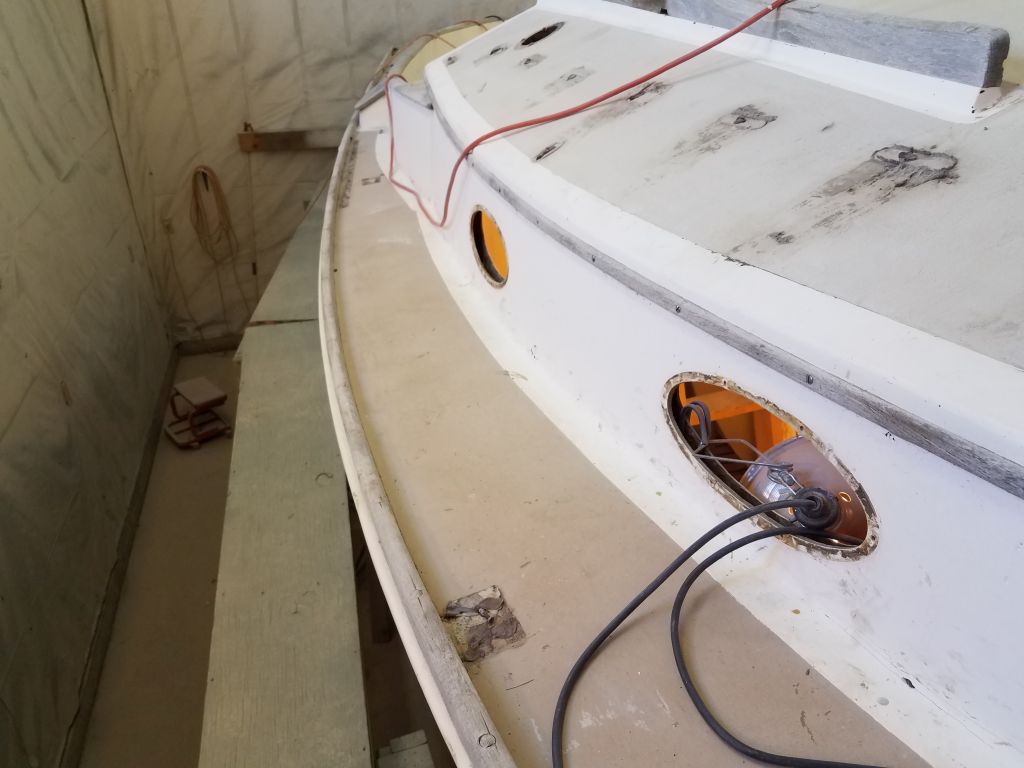
Then, even if the existing woodwork had been OK as is for other reasons, there was the fact that the toerails, at least, were clearly leaking through the fasteners in many areas, as evidenced by staining on the hull in regular intervals in exposed areas inside. Never mind that some of the repair work and upgrades might require removal of the wood in their own right, particularly since I wanted to ensure the integrity of the hull/deck joint on the port side. Off it would come!

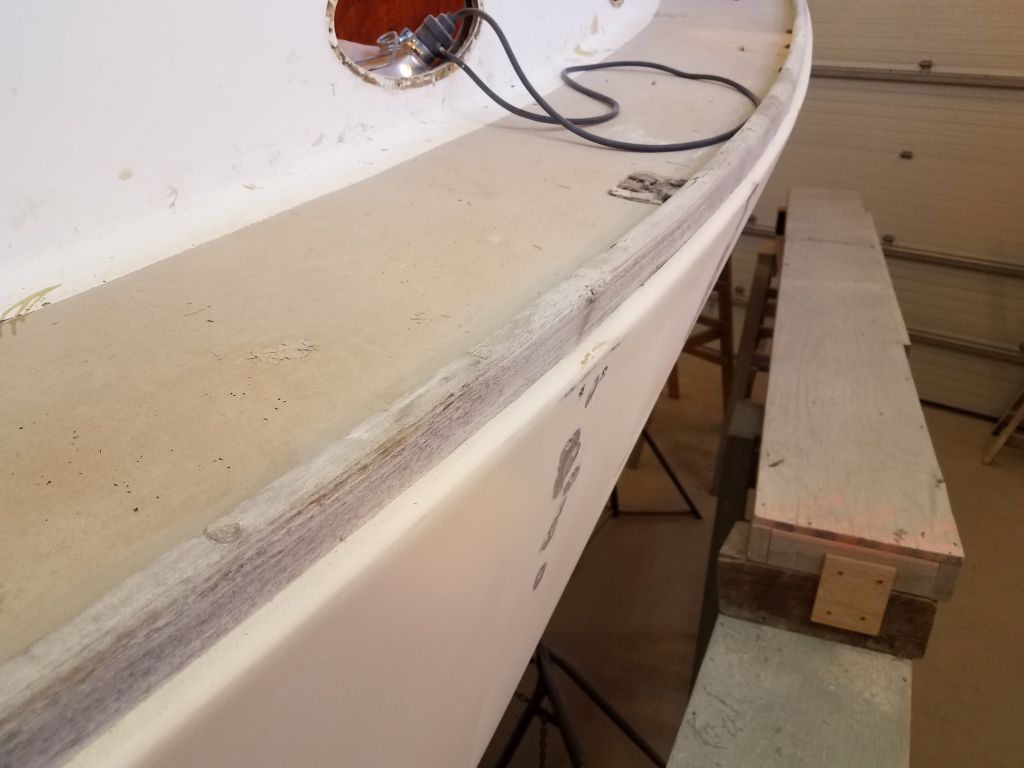


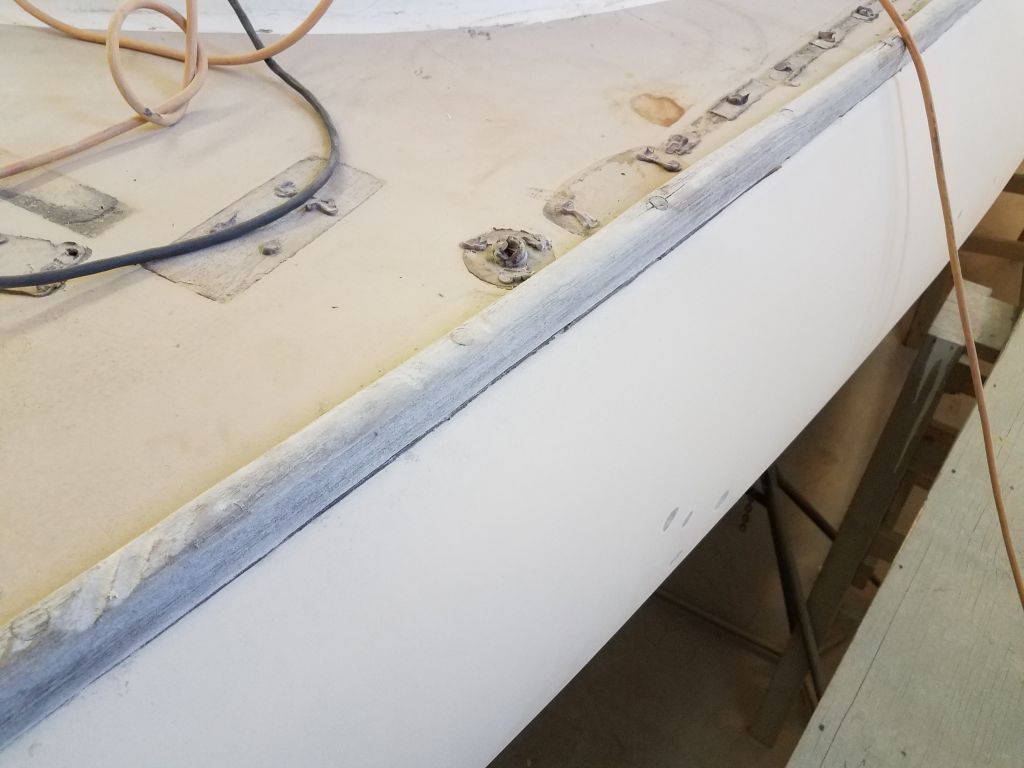
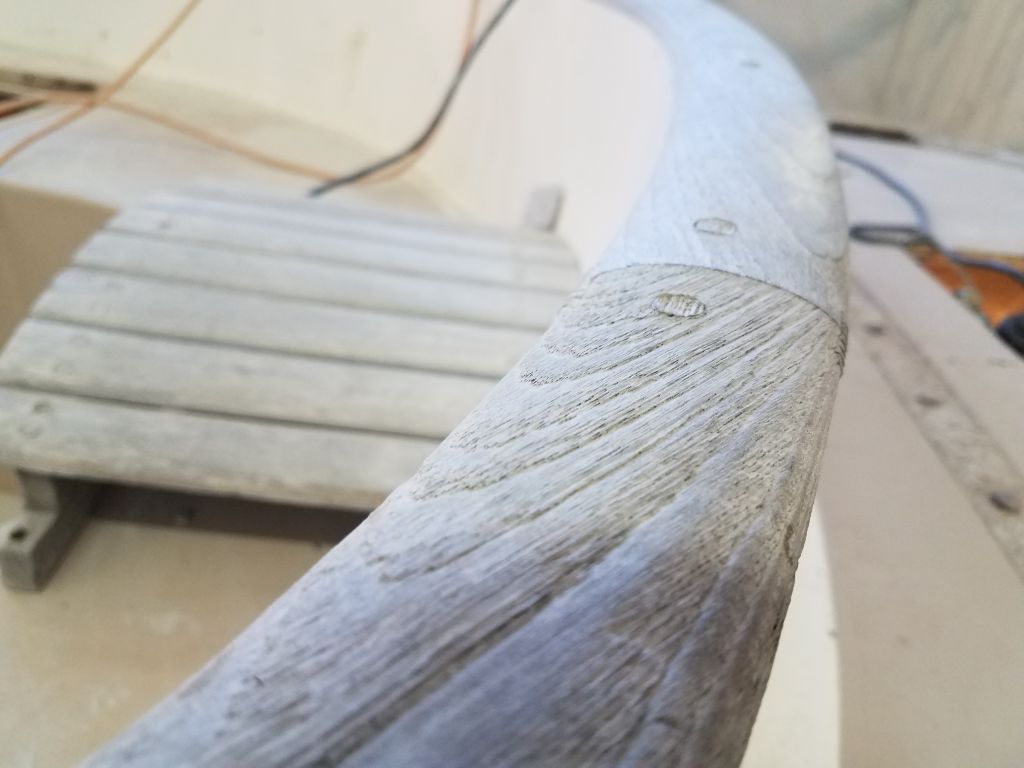


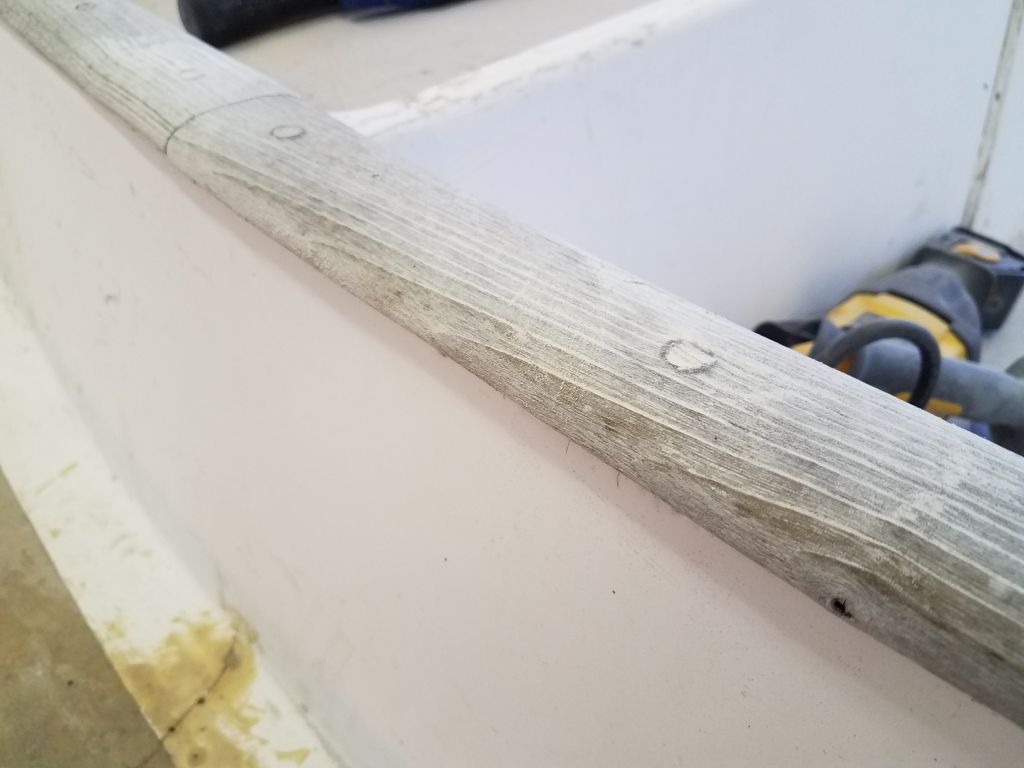
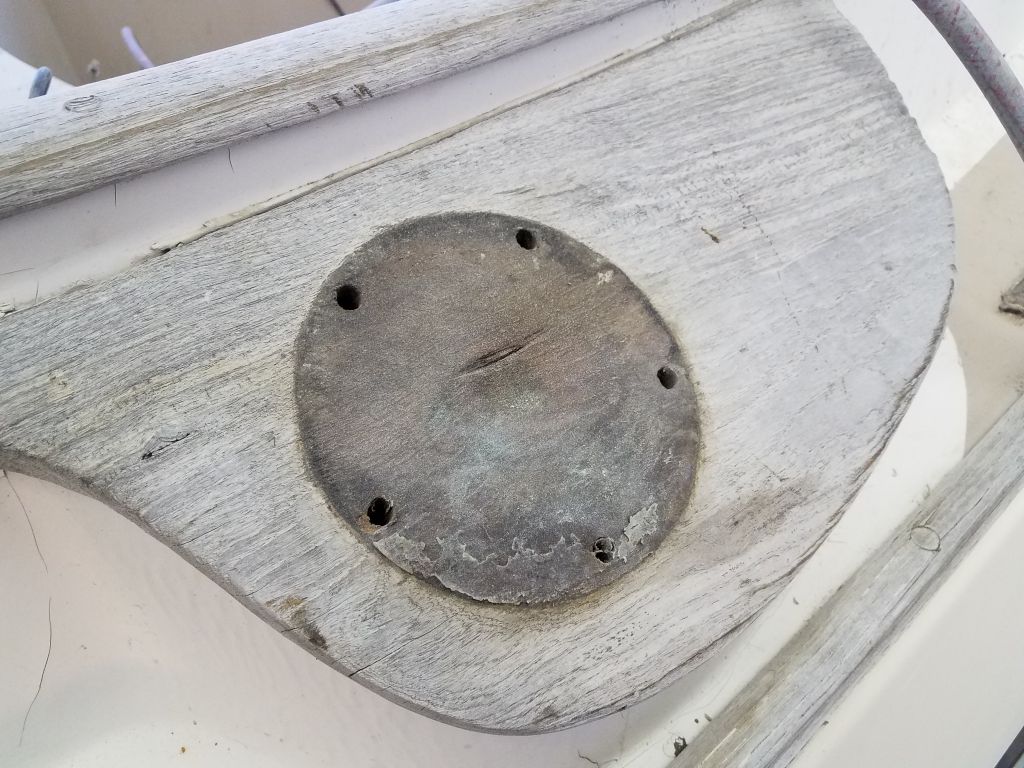
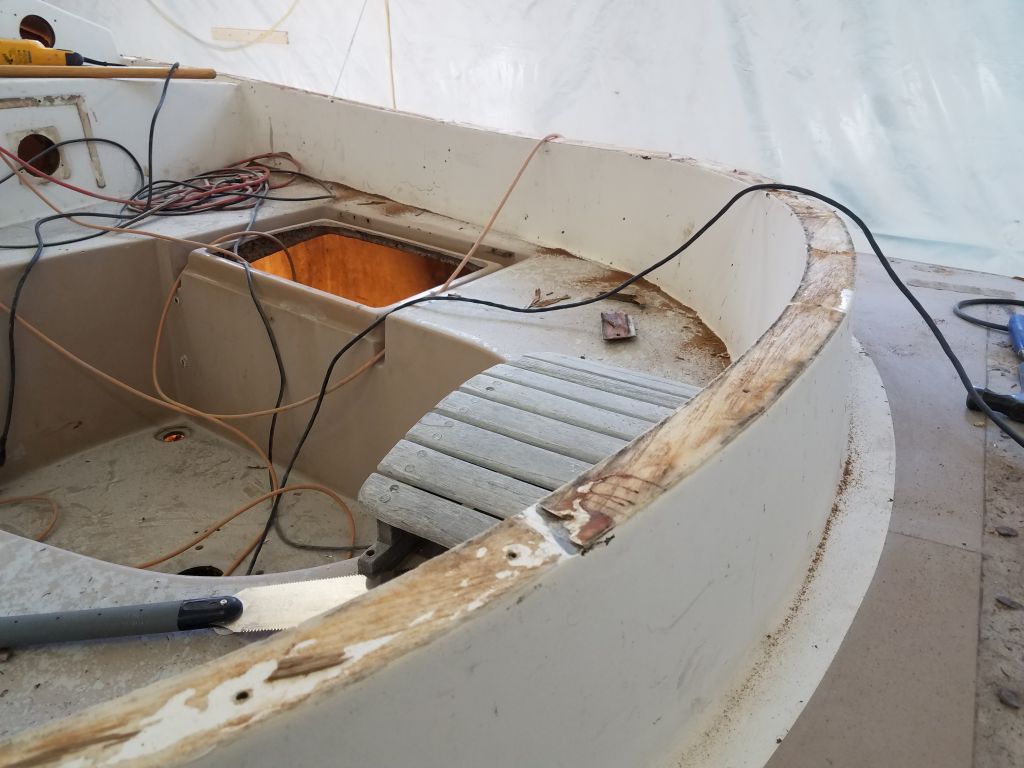
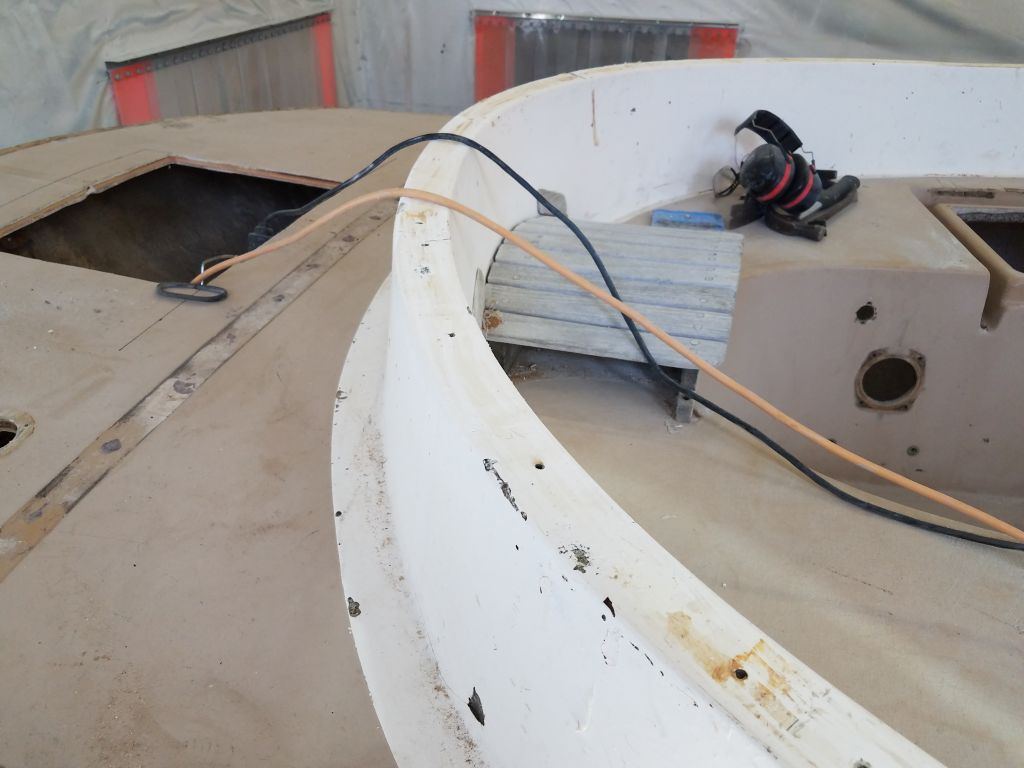
The toerails were installed with stainless bolts through the deck. I never even considered trying to carefully undo these bolts, which would have taken me days to complete. I started with the port side. With no need to save the rails, I used a saw to cut through the rail at each fastener location, sawing off the fastener head so I could easily (relatively speaking) pull the rail up and off in most cases. The rails were heavily bedded in silicone, which might not have done a great job actually preventing water from entering, but at least it was difficult to remove. I saved a few pieces of the existing rail for future reference. I pushed the fastener studs through into the interior for later removal.
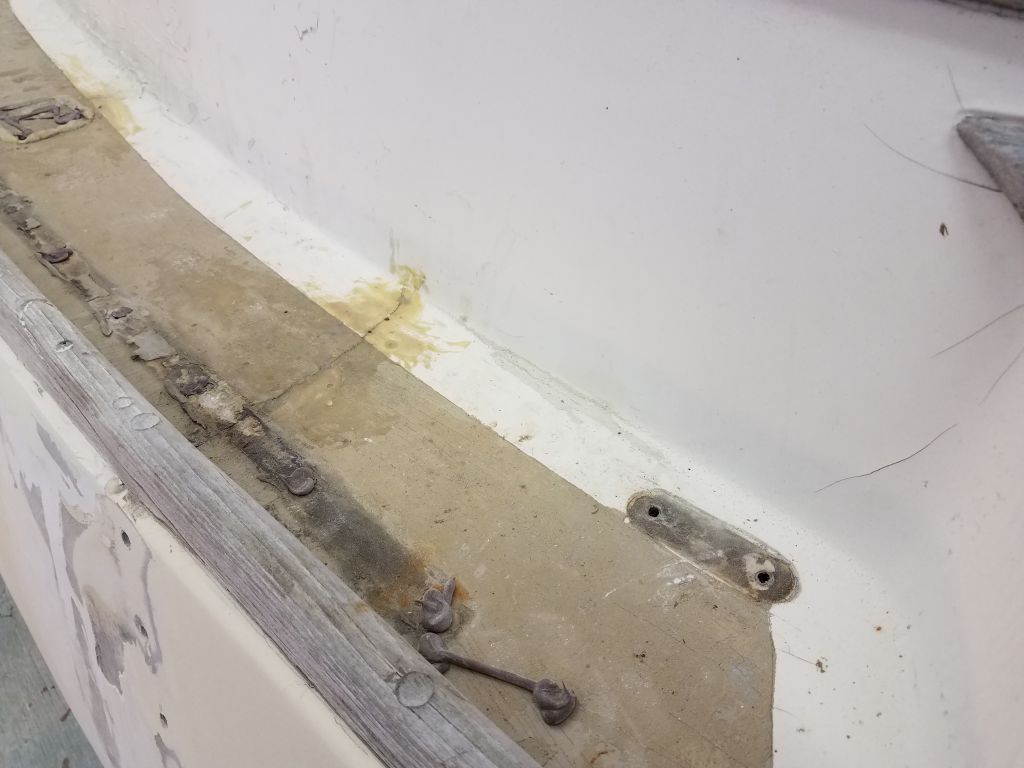
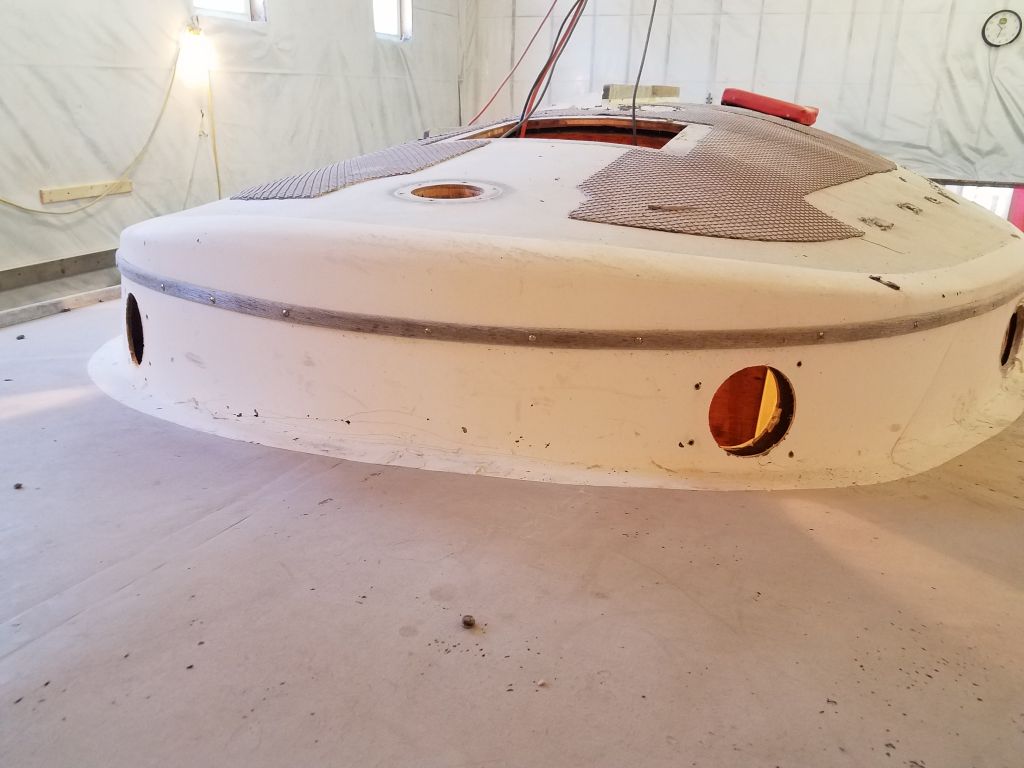
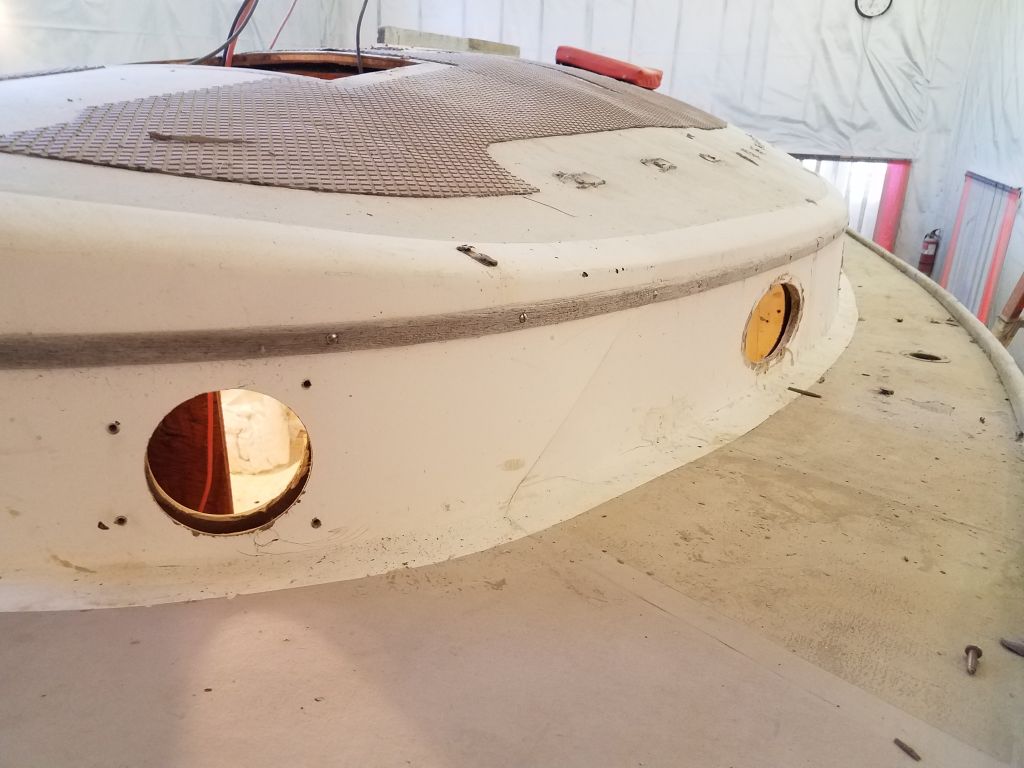
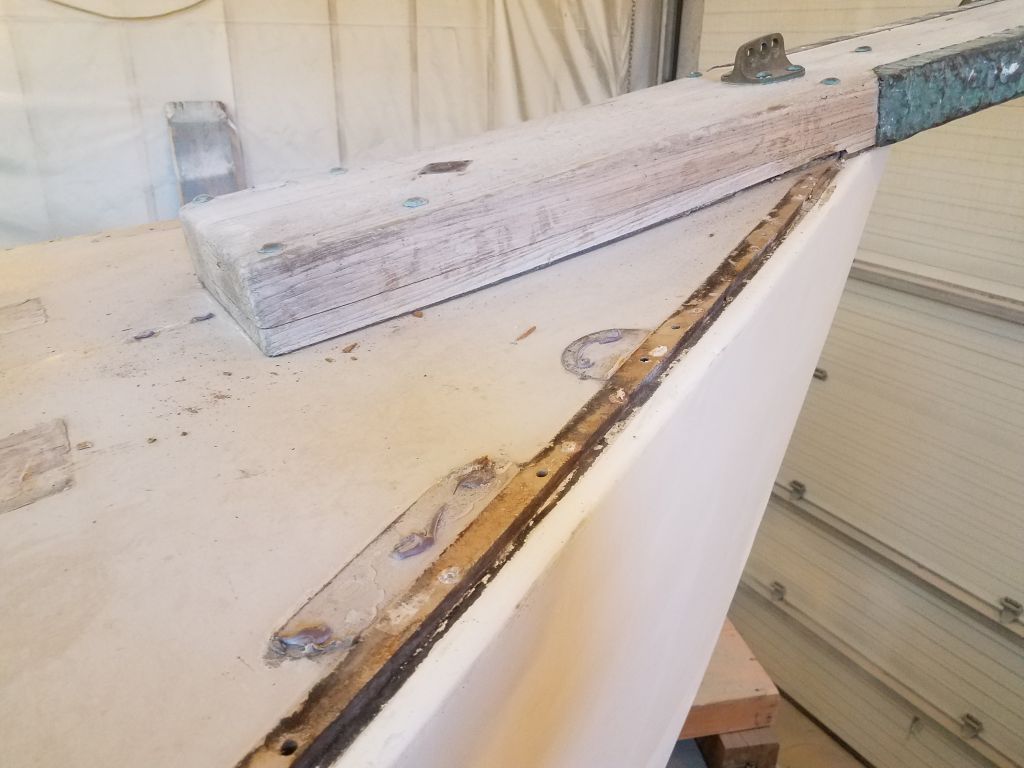
As expected, the deck molding rested atop an inward hull flange, creating a small edge there. The rails had been notched to fit over the lip and hide it. The deck was secured with rivets and some sort of sealant, and while the toerail bolts had gone through the flange, they weren’t alone responsible for holding the boat together.


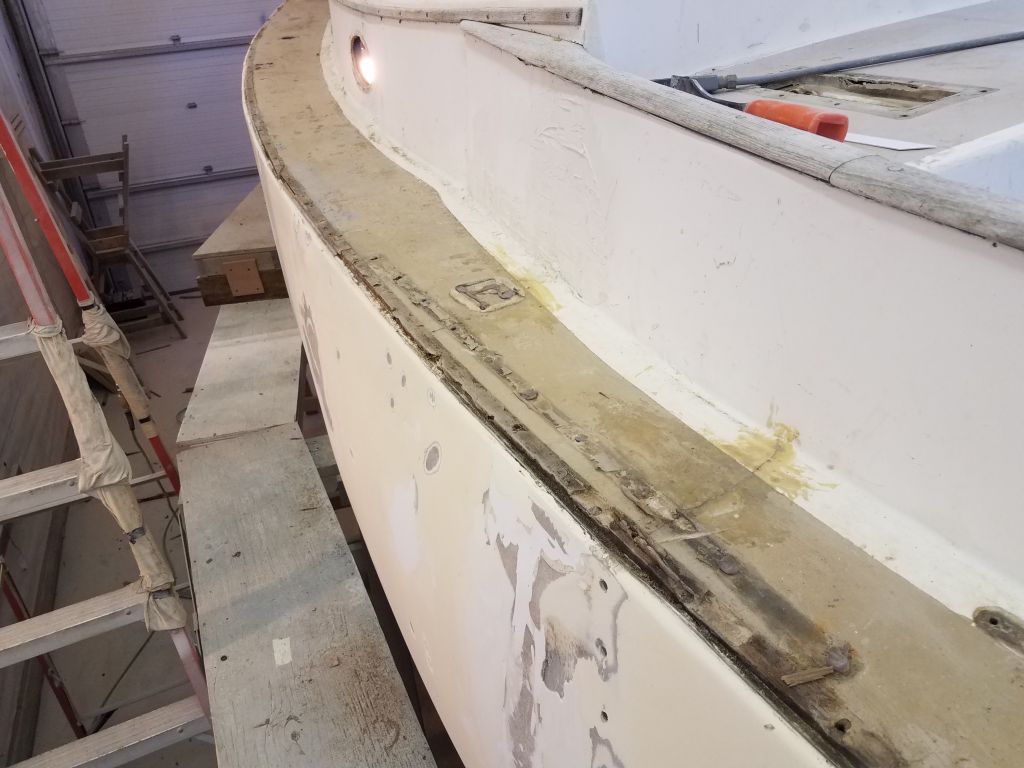
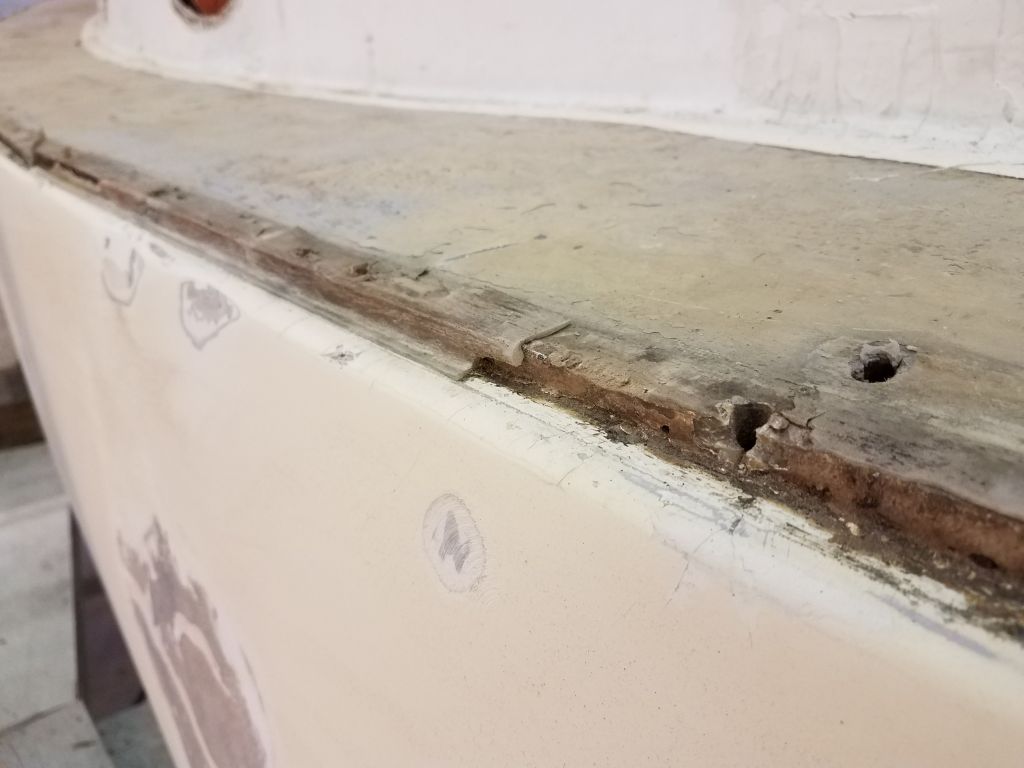
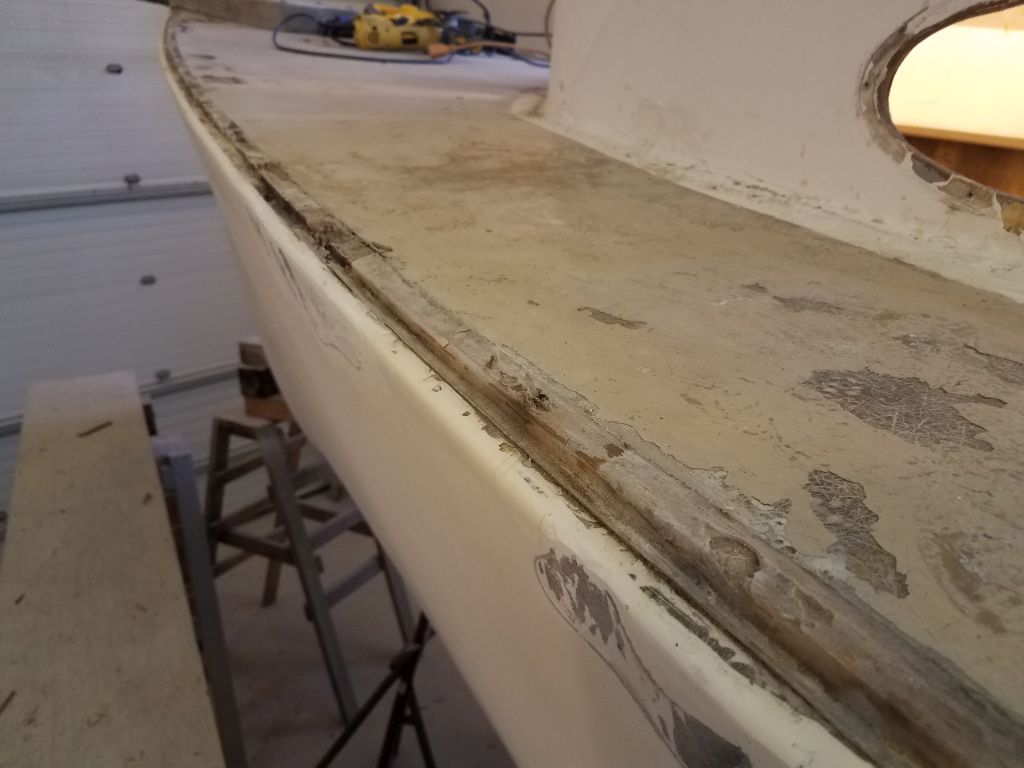
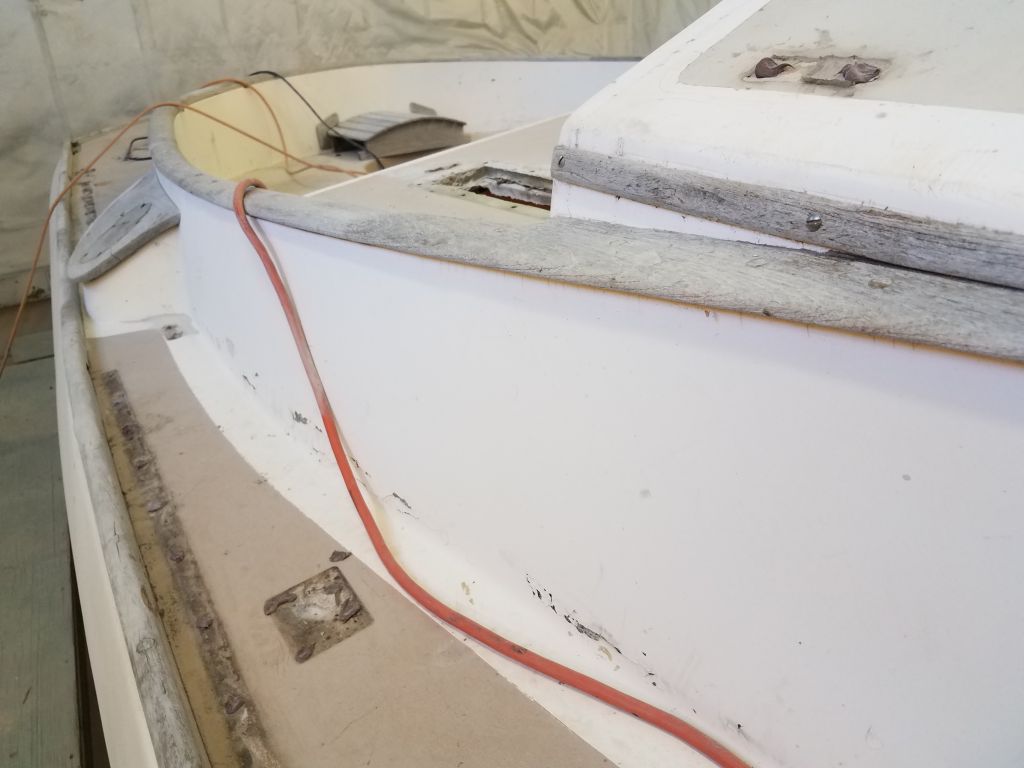
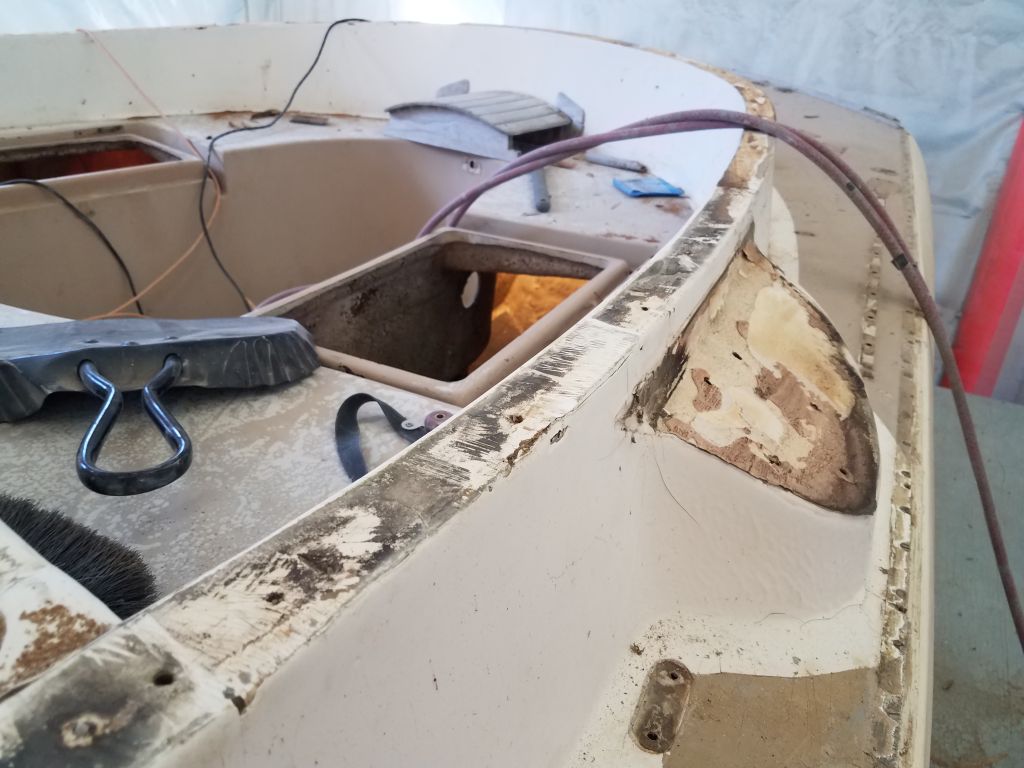
Once I’d removed all the wood, I scraped away the worst of the old silicone from the edge of the deck. While some of the newer work over the amidships portion was a bit rough, it didn’t appear there were any horrible structural findings yet either.
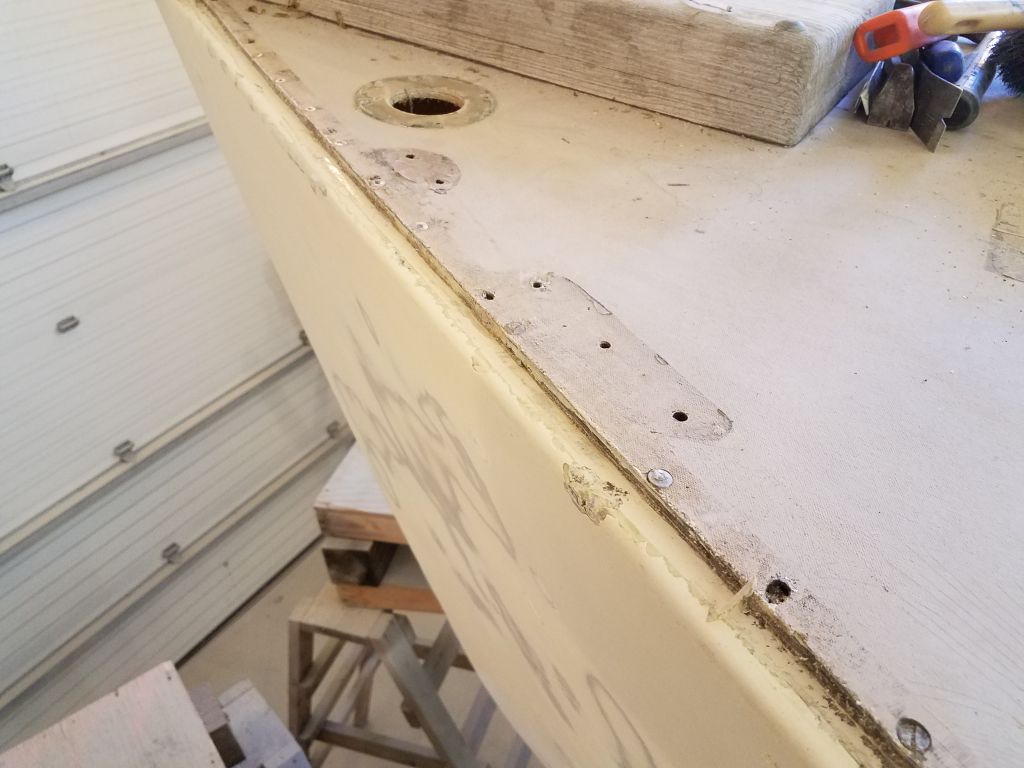
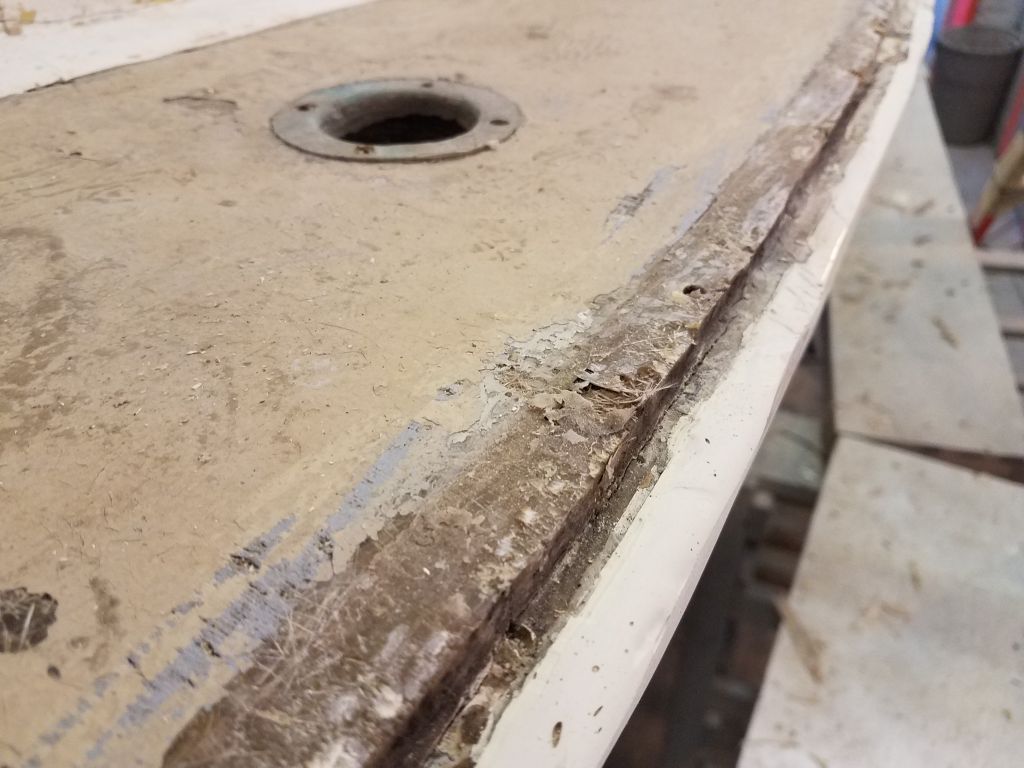


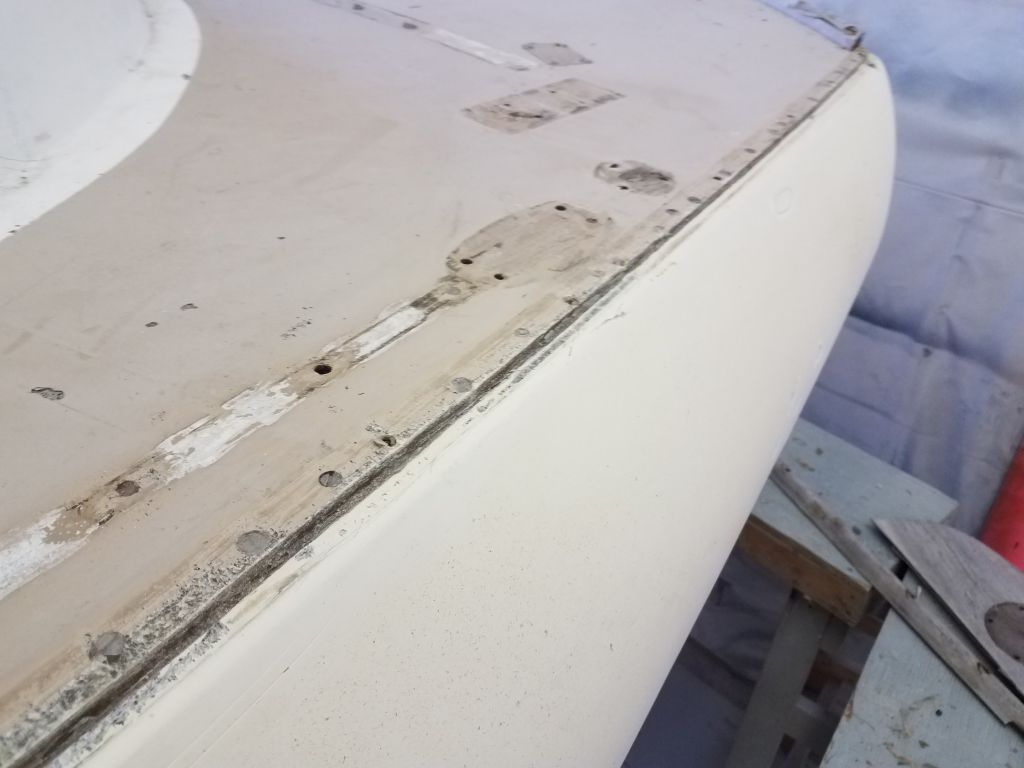
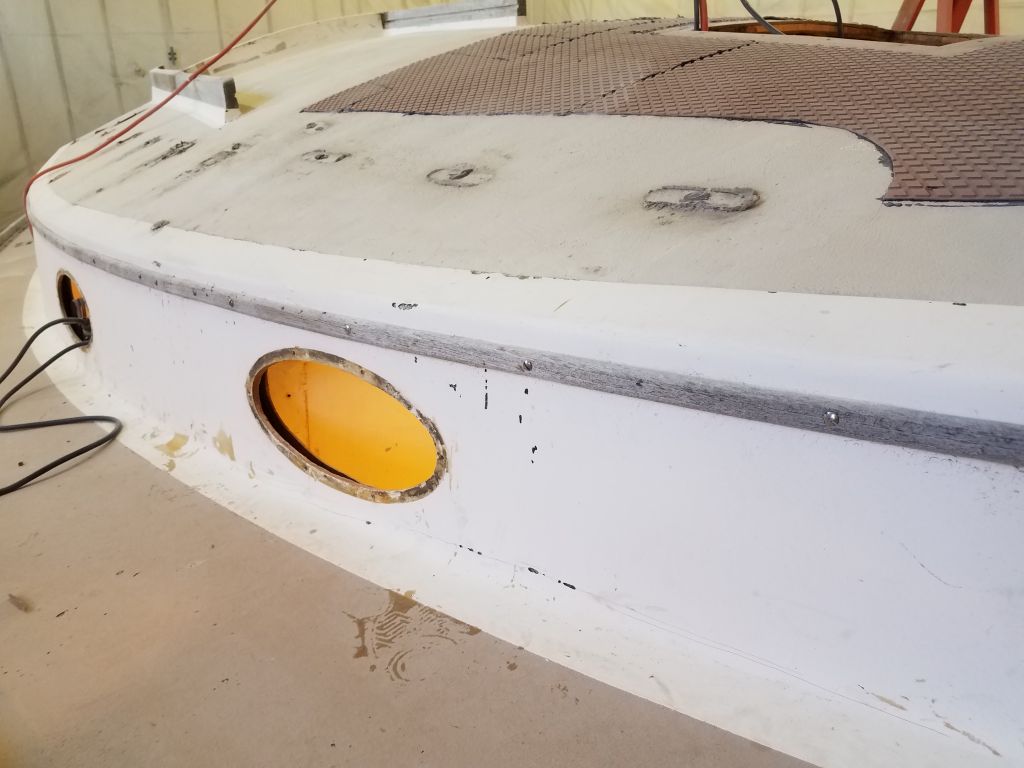
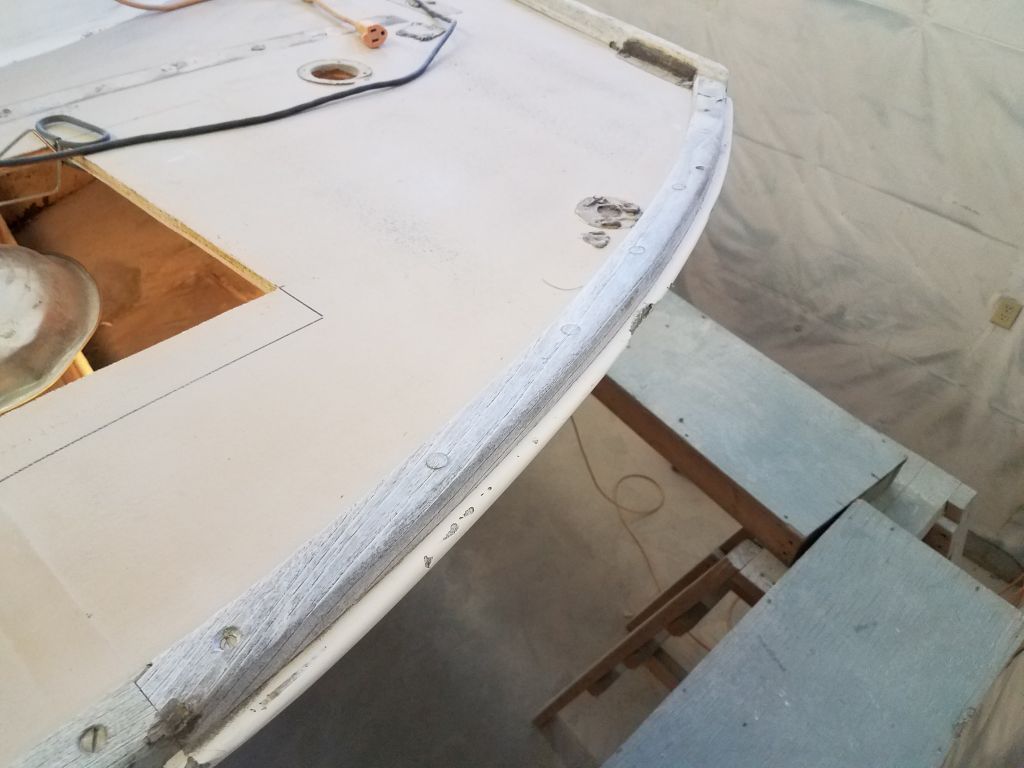
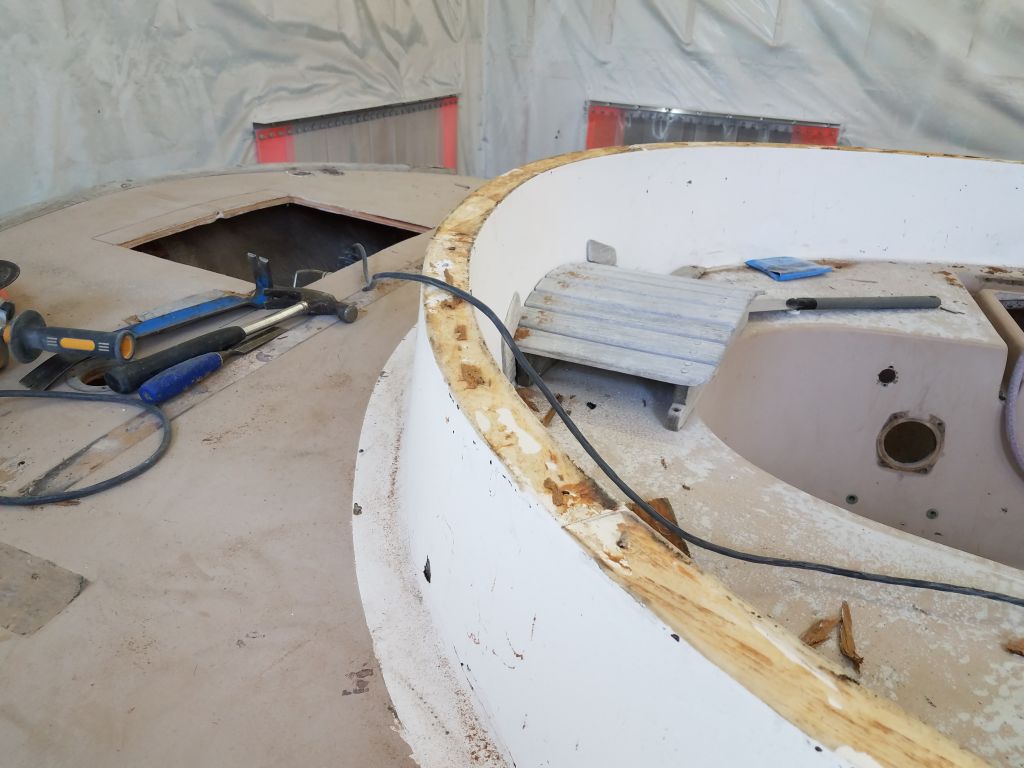
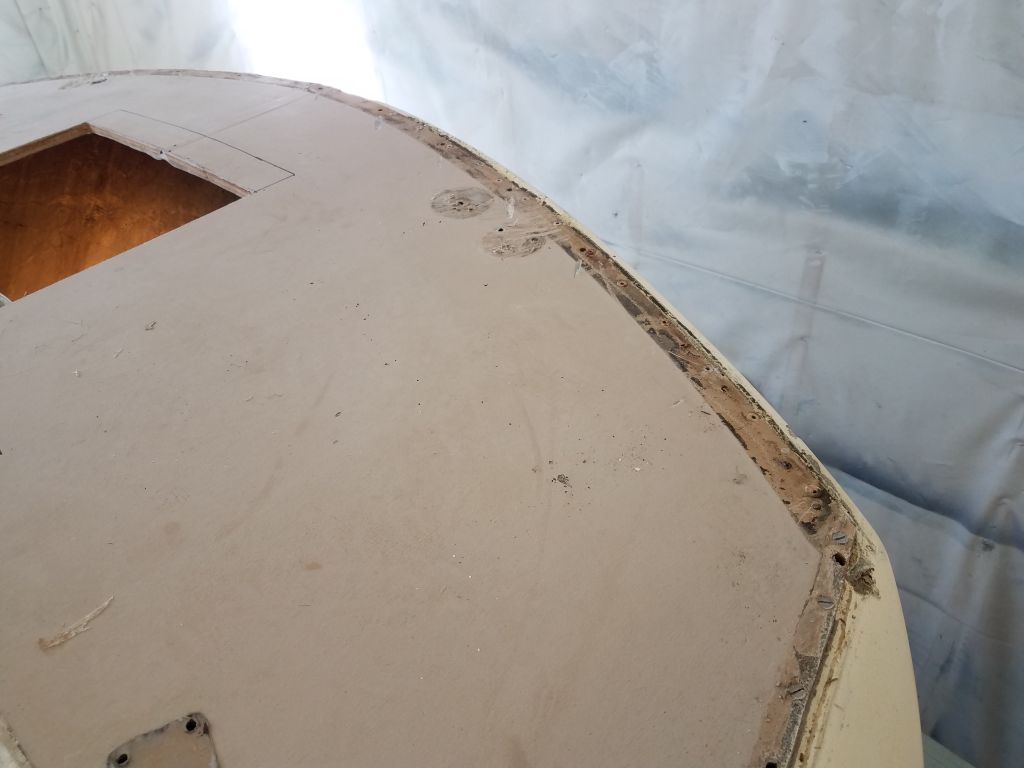
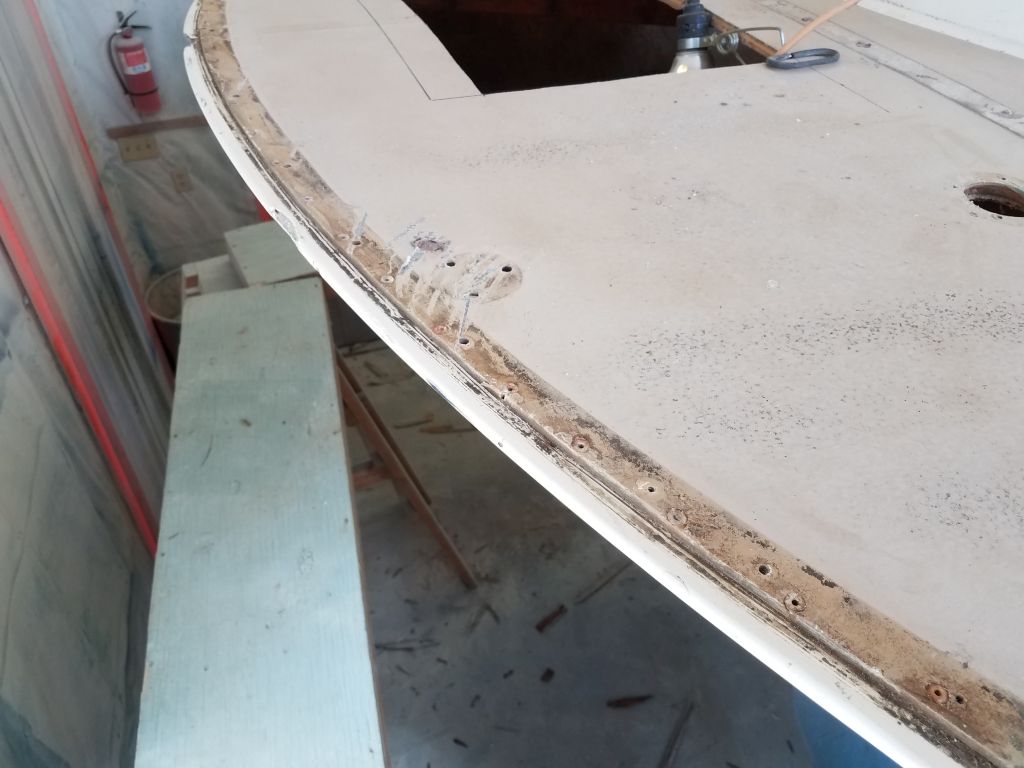
I repeated the process on the starboard side, which appeared to be a completely original installation and featured less silicone than its counterpart to port.
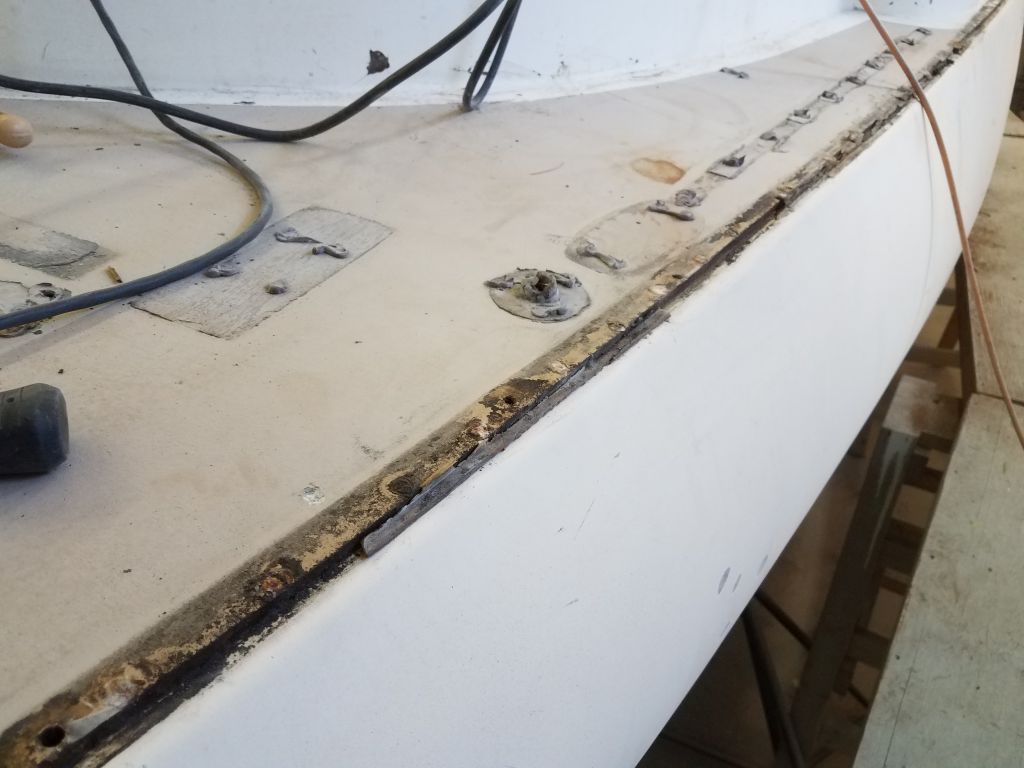
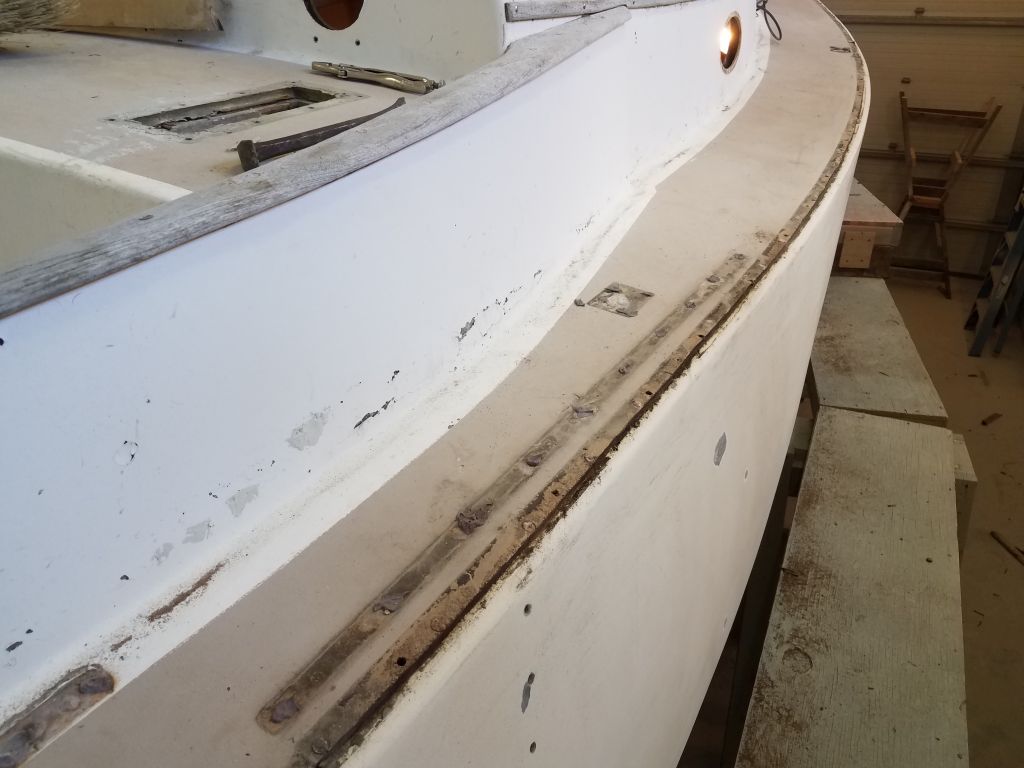

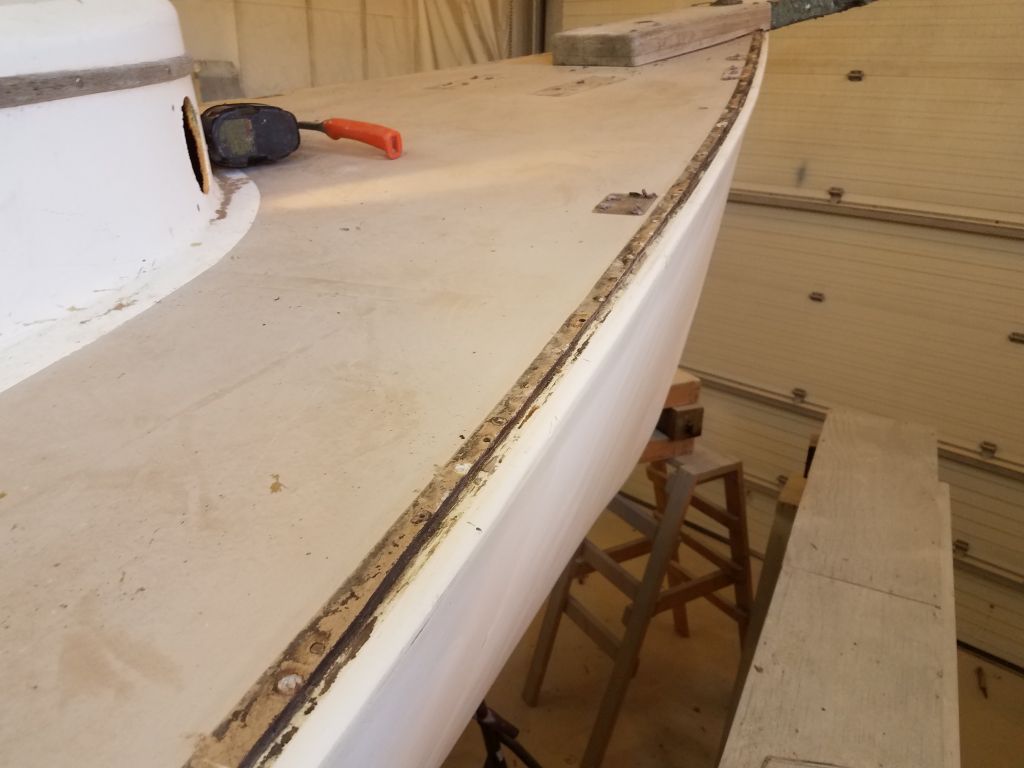
As before, I scraped off the excess silicone from the hull/deck edge.

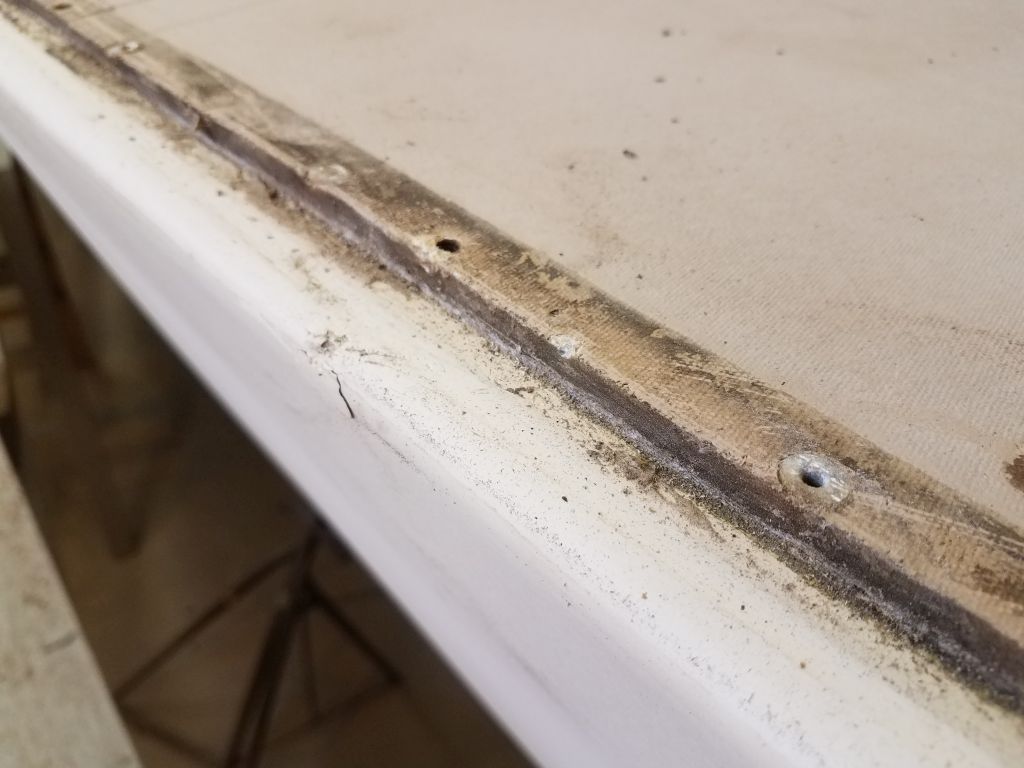


My initial thought was that it would be beneficial to prepare and glass over this hull/deck seam on both sides, to enhance the watertight integrity, reinforce the joint substantially with the need for fewer fasteners, and to open up options for the replacement toerail.
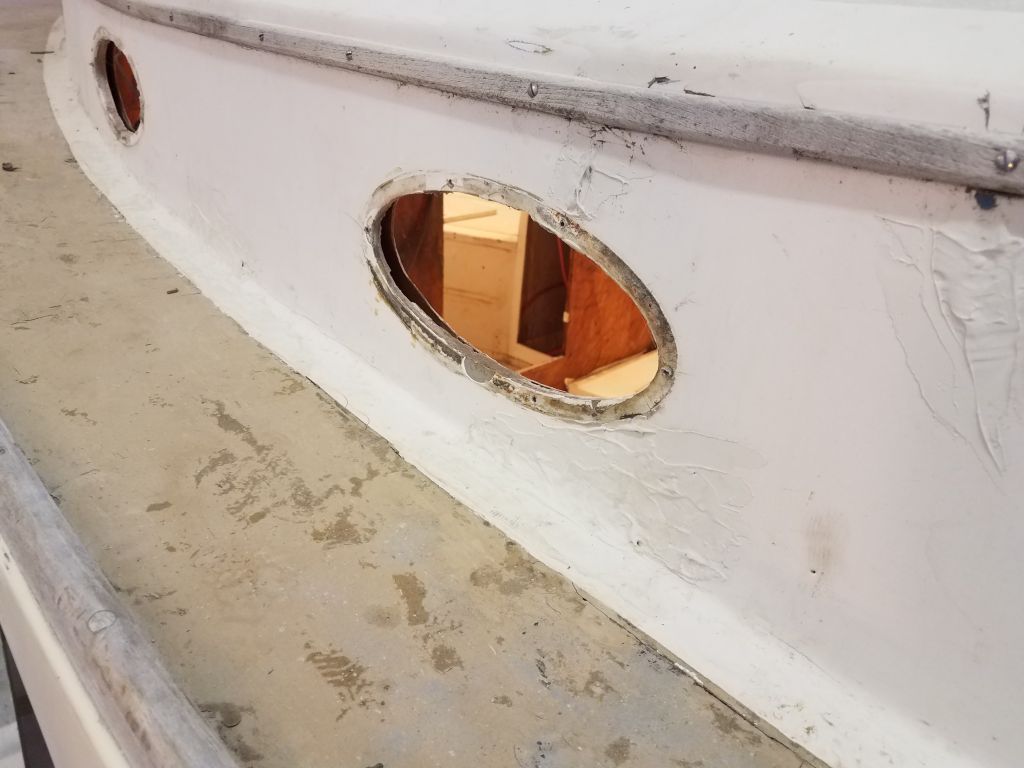
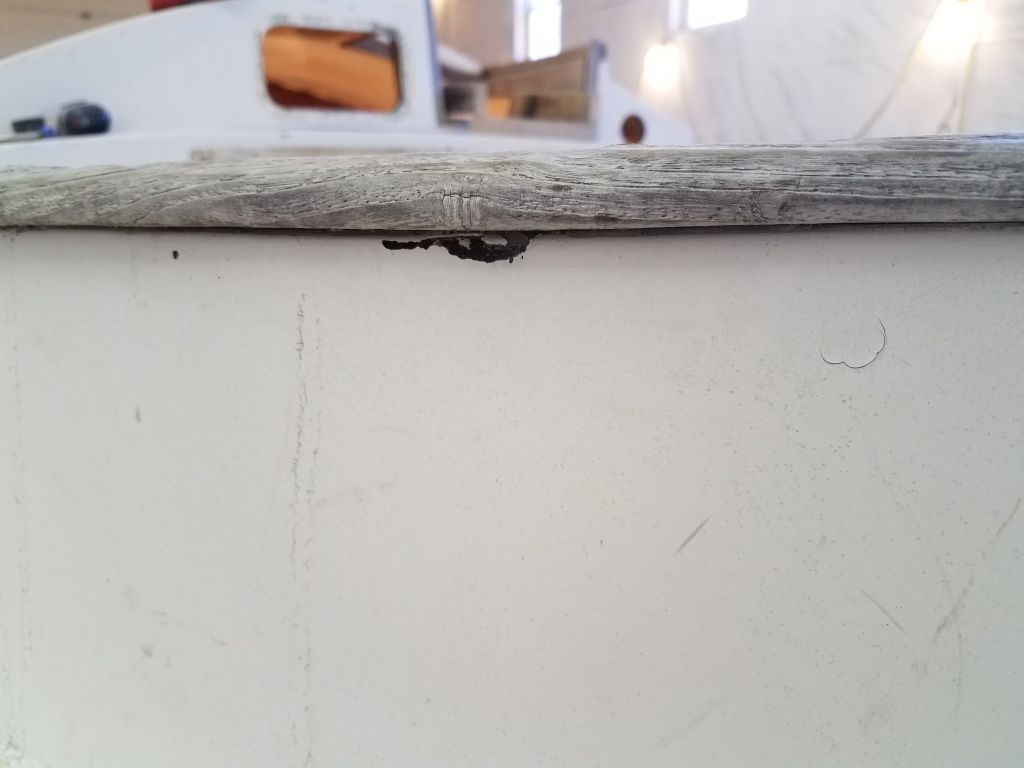
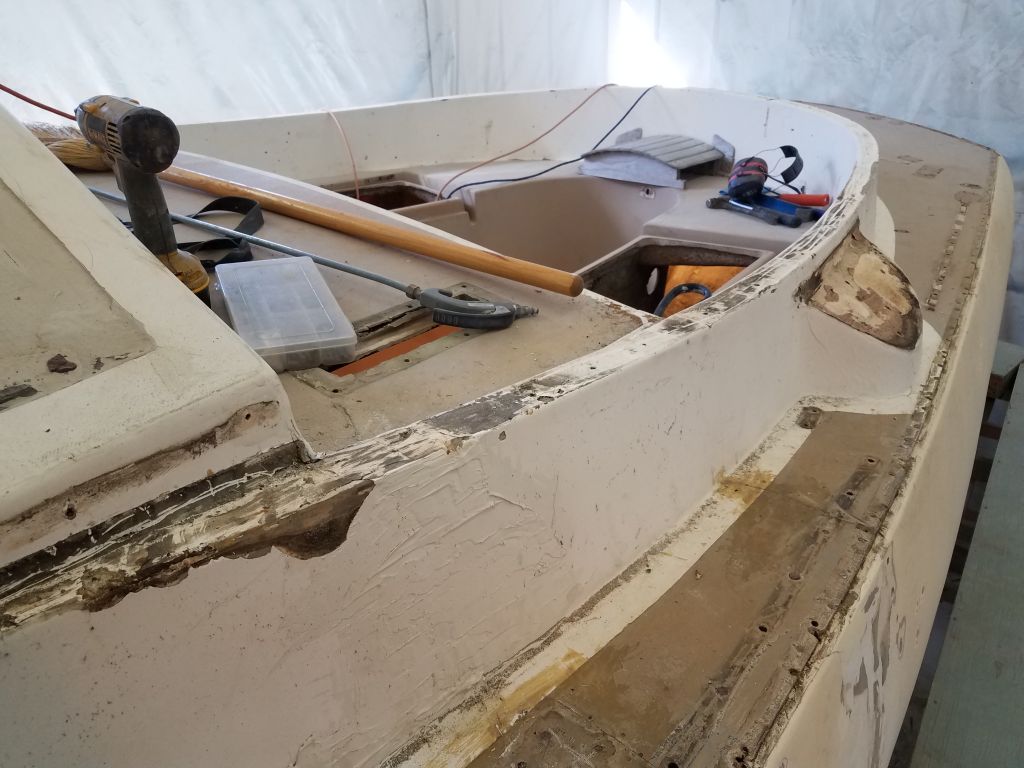
The slim eyebrow trim was secured with exposed screws and came off without any trouble; there didn’t appear to be any sealant beneath the trim. I forgot to get pictures of the port side, but it looked just like this in reverse.
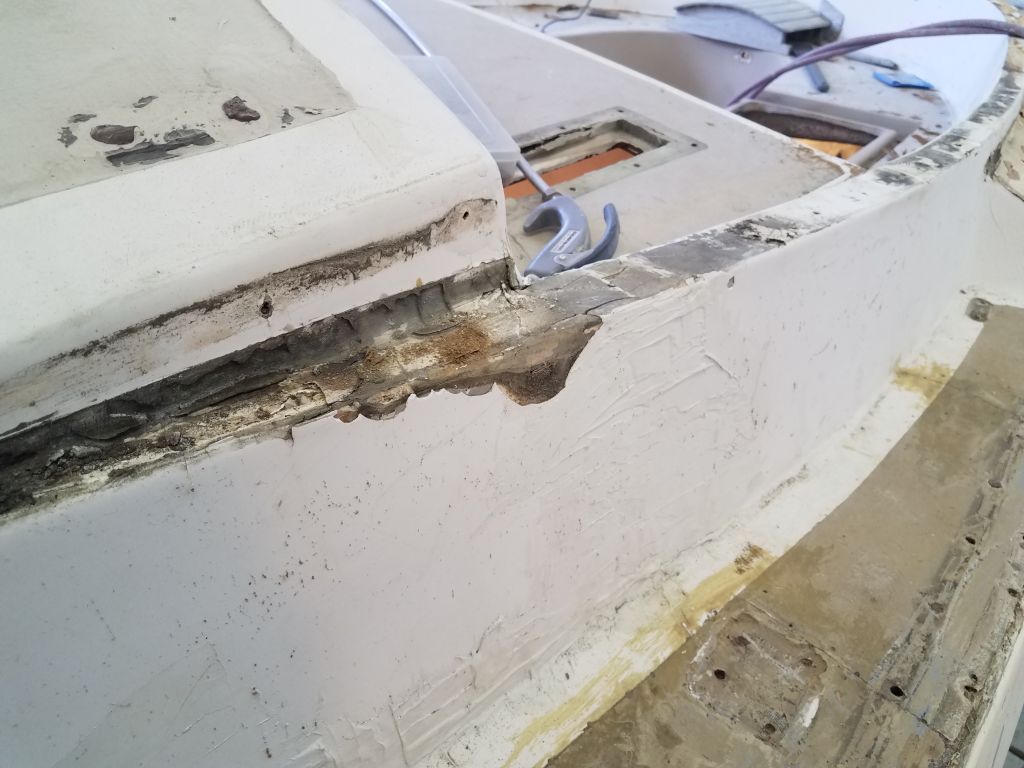
Next, I turned to the cockpit coaming cap, a nicely-shaped and attractive half oval. I’d noticed earlier that portions of this trim were standing proud of the coaming itself, with light visible beneath, and this called into question whether the trim was properly sealed against water ingress. While the trim was also rough and weathered, it might have been salvageable and cleaned up with quite a bit of effort, but earlier the owner and I had decided that it would be best to remove it given the concerns about water. And the wood would probably look increasingly worse as time went on and as the adjacent areas got spruced up. Away!
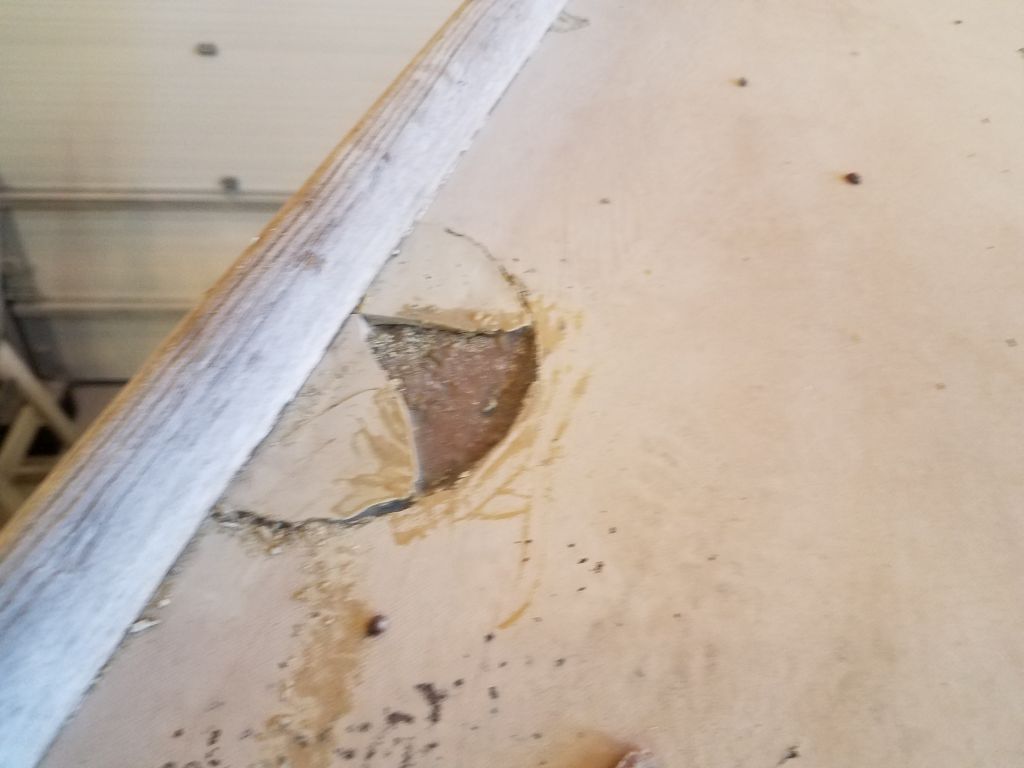
The original installers on this boat certainly loved their silicone sealant: the trim installations were rife with the horrible stuff, and this little coaming cap might have been the strongest thing I’d tried to remove so far, given the rubbery resistance silicone offers to clean removal. I call this sort of installation the Inverse Structure Theory, something I’d often seen on older boats where the silliest things seem the most sturdily installed while seemingly important structures can be haphazard at best. Never mind tabbing the bulkheads–but make sure that 2″ coaming cap can be used to lift the whole boat even if the fasteners fail.
In any event, I removed the cap, at times with difficulty, and scraped away the jiggly 3/16″ thick layer of silicone from the top of the fiberglass coaming with even more difficulty.

Finally, I removed the taffrail, which was uneventful. I cleaned up the day’s detritus, along with the bulk of the sanding dust on the floor from the hull, and got ready for a thorough deck and core inspection next time.


Total time billed on this job today: 5.25 hours
0600 Weather Observation: 22°, clear. Forecast for the day: Sunny, low 30s