


May 16, 2018
Scupper 42
Wednesday
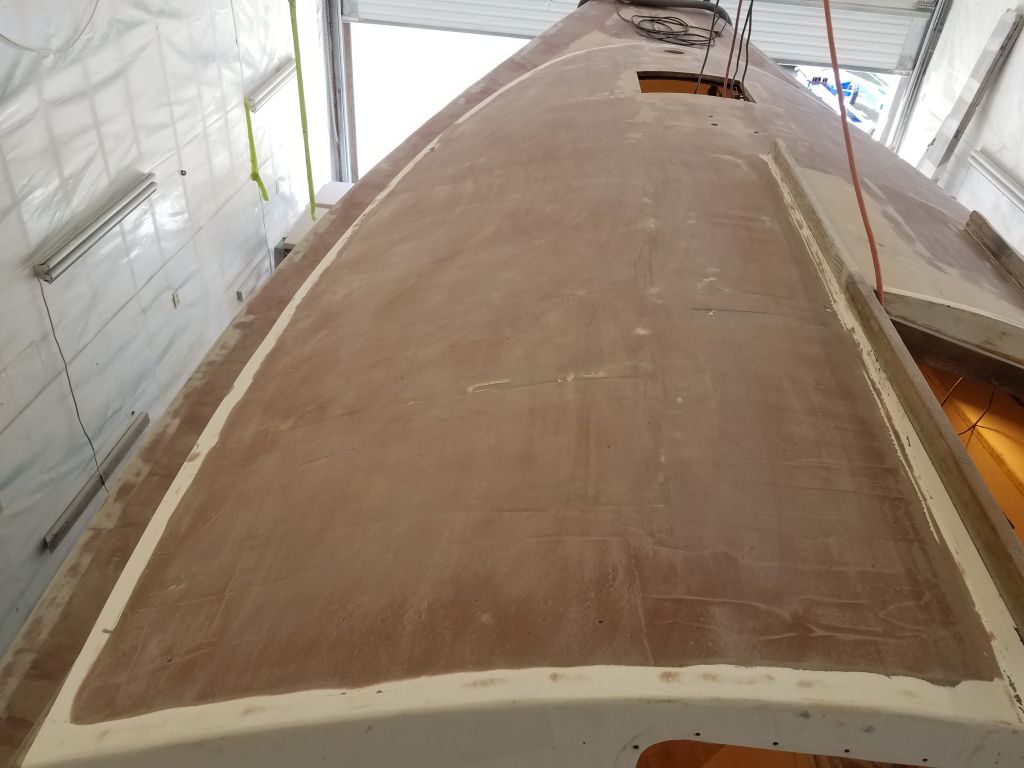
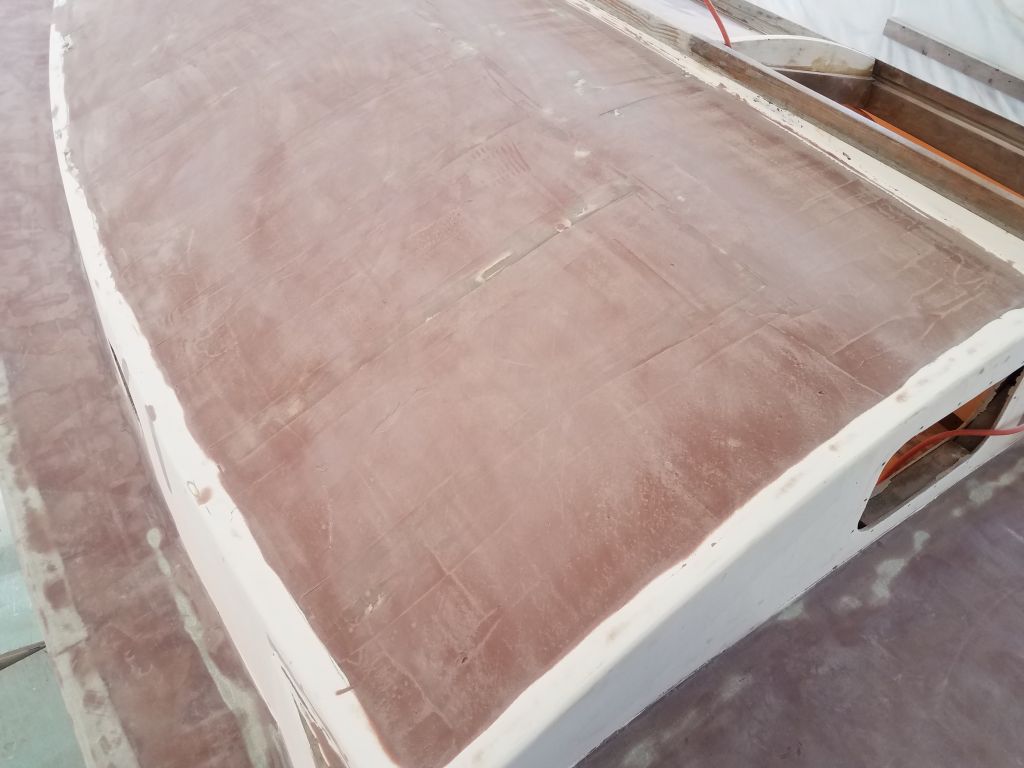
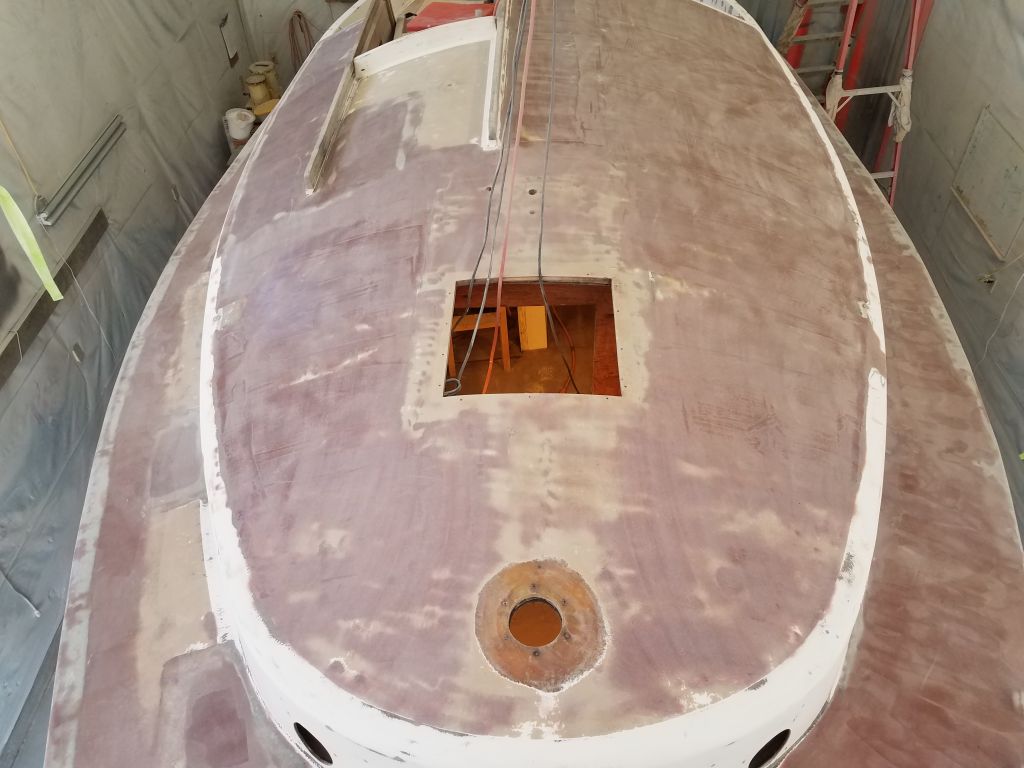
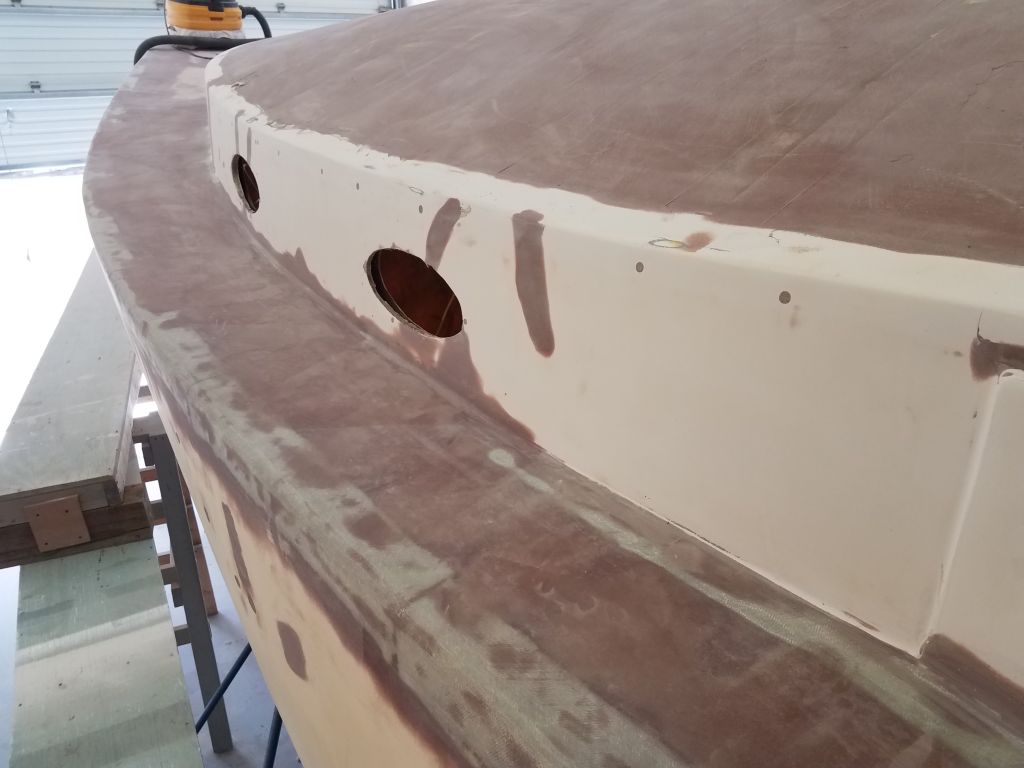
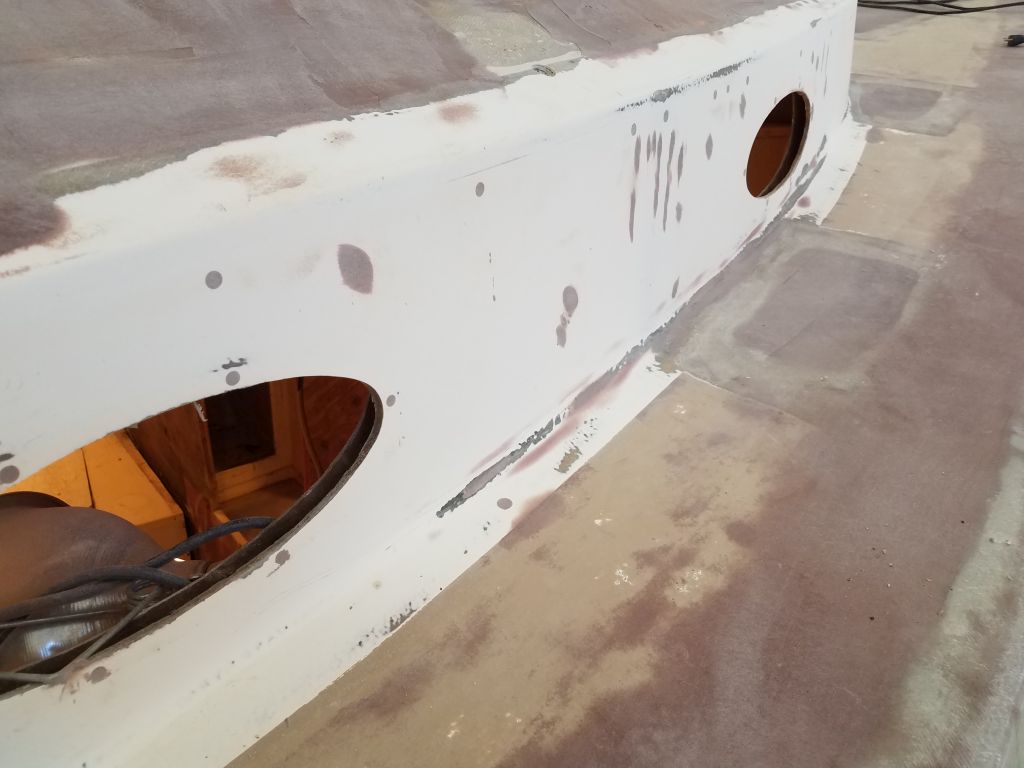
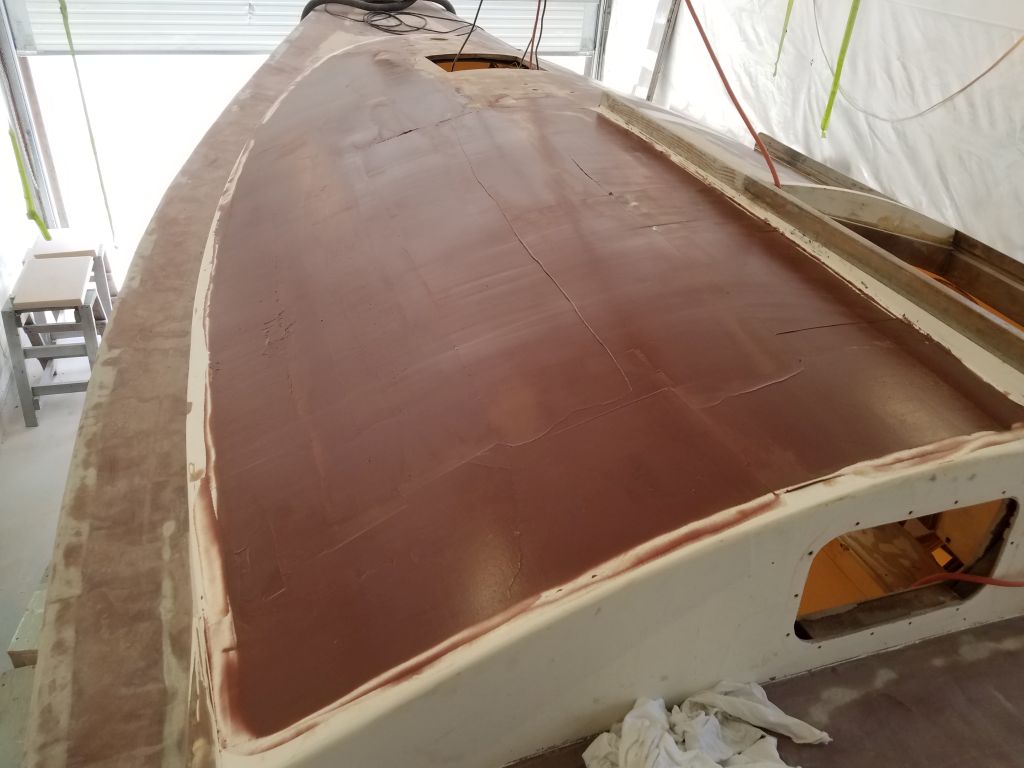
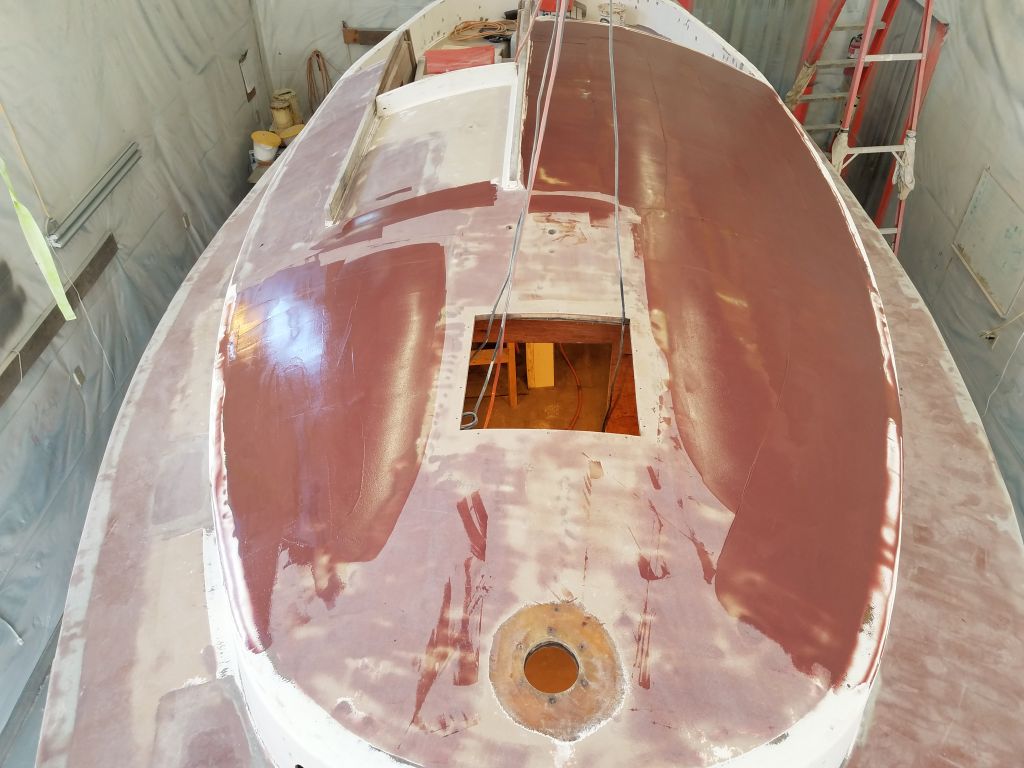
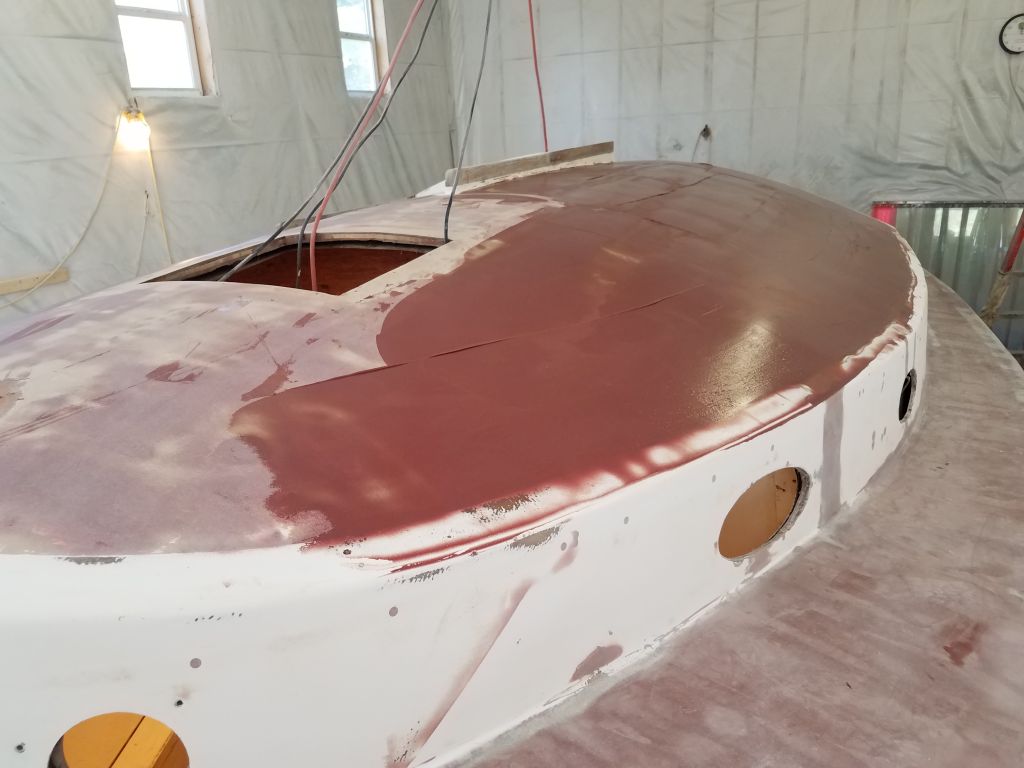
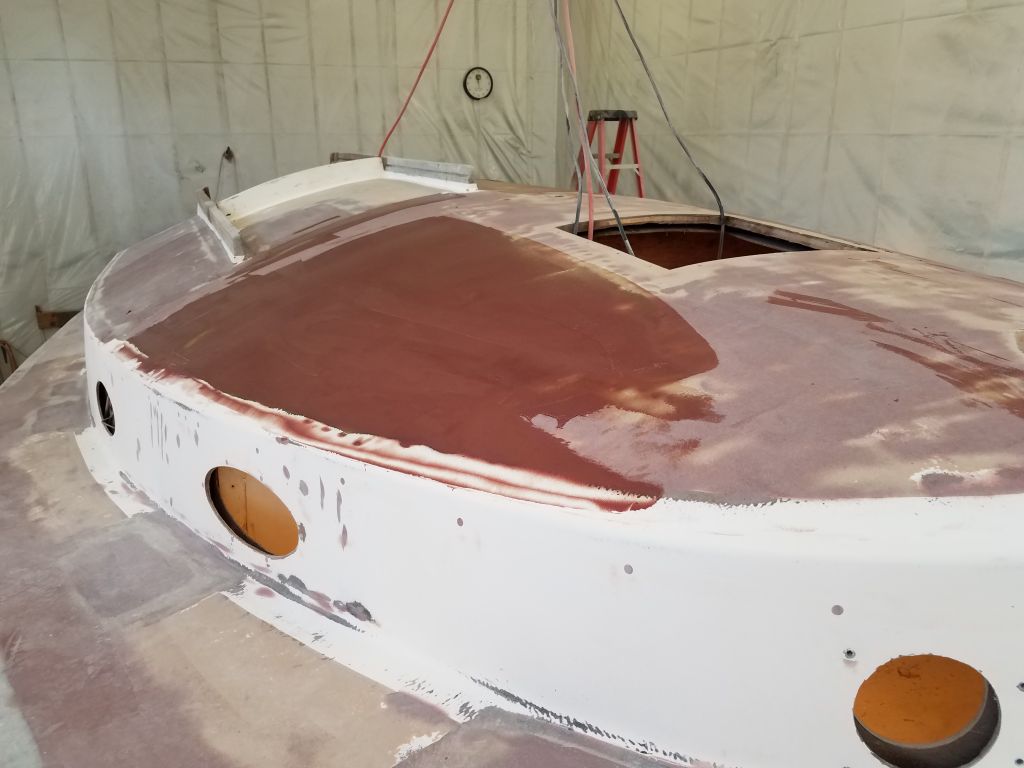
No one likes the long board, but the huge coachroof, which had started out substantially unfair as a remnant of some previous repair effort, simply required it in order to highlight the basic contour of the deck and the low spots that I needed to fill between the various highs that would ultimately form the basis for the new shape. Fortunately, at least at this early stage I didn’t need to use the laborious tool for long: just enough to scratch up the surface and show me where to focus on the next fairing coat. Since most of the surface was actually low, I knew I’d be filling again, probably several more times, and now I just needed to knock off any rough spots and high areas to prepare for the next round, most of which I could do with normal sanding tools once I’d as sense of things from the hand scratching.


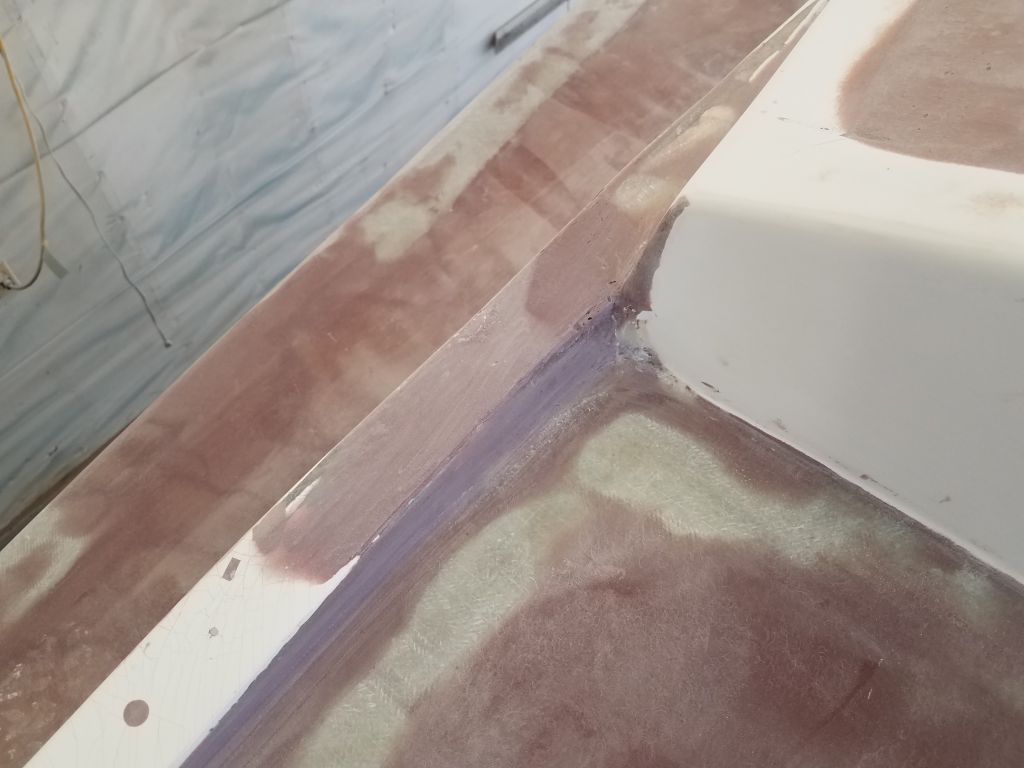
There were a few other small detail areas that had fairing compound requiring sanding at this point as well, including some fillets along the deck edges and cockpit repairs, plus the port coaming repair and port cockpit locker area. There’d be more detail work ahead as I continued the increasingly minor and light fairing and overall surface preparation work on the decks now that most of the major repair work was complete,
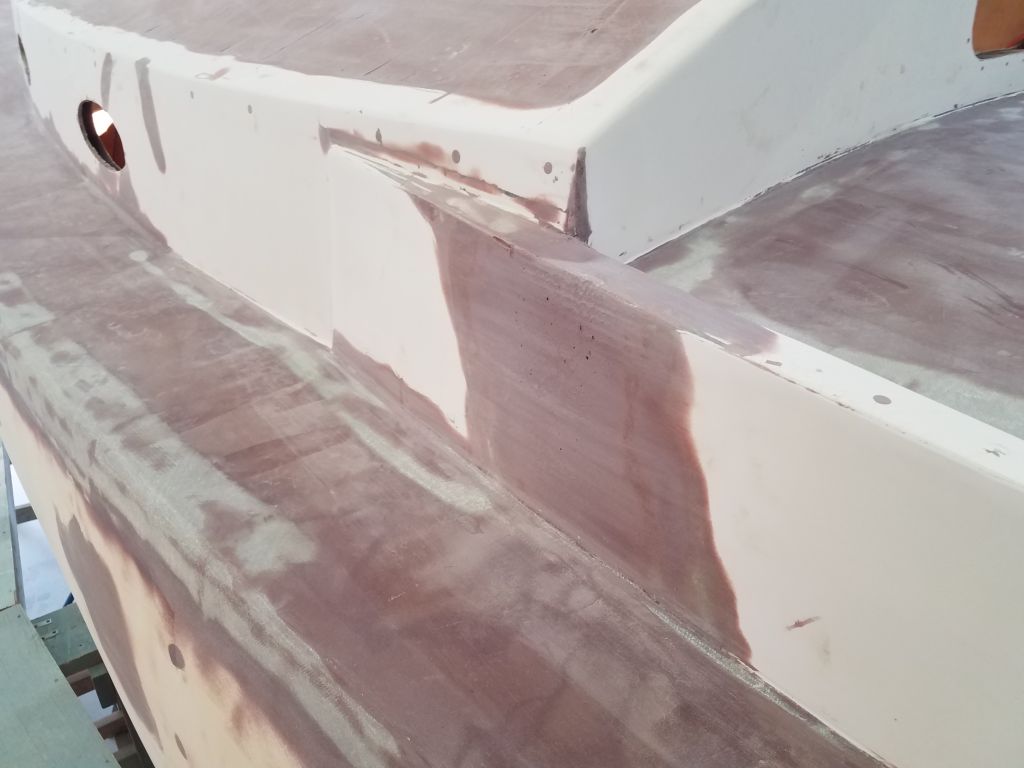


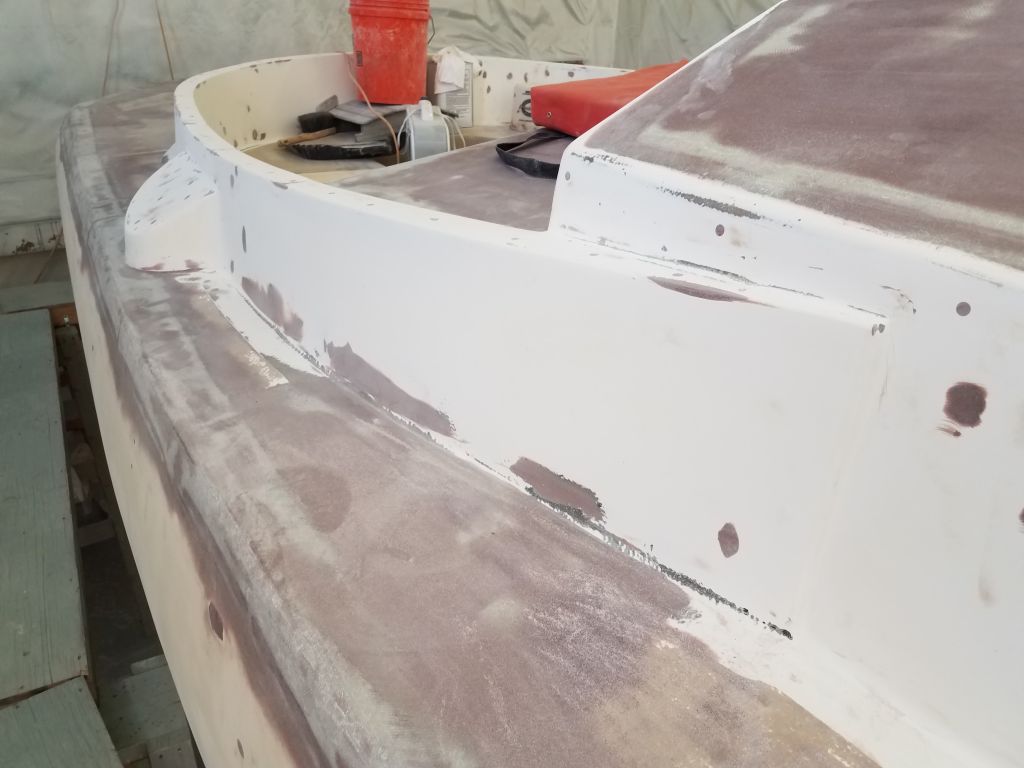
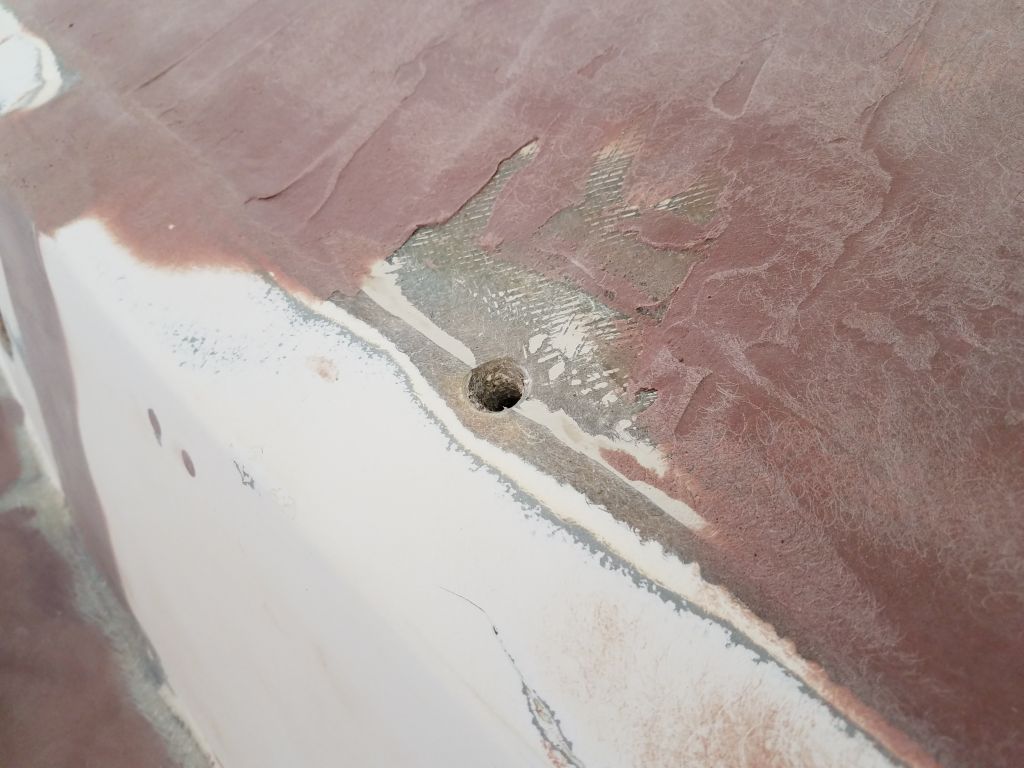
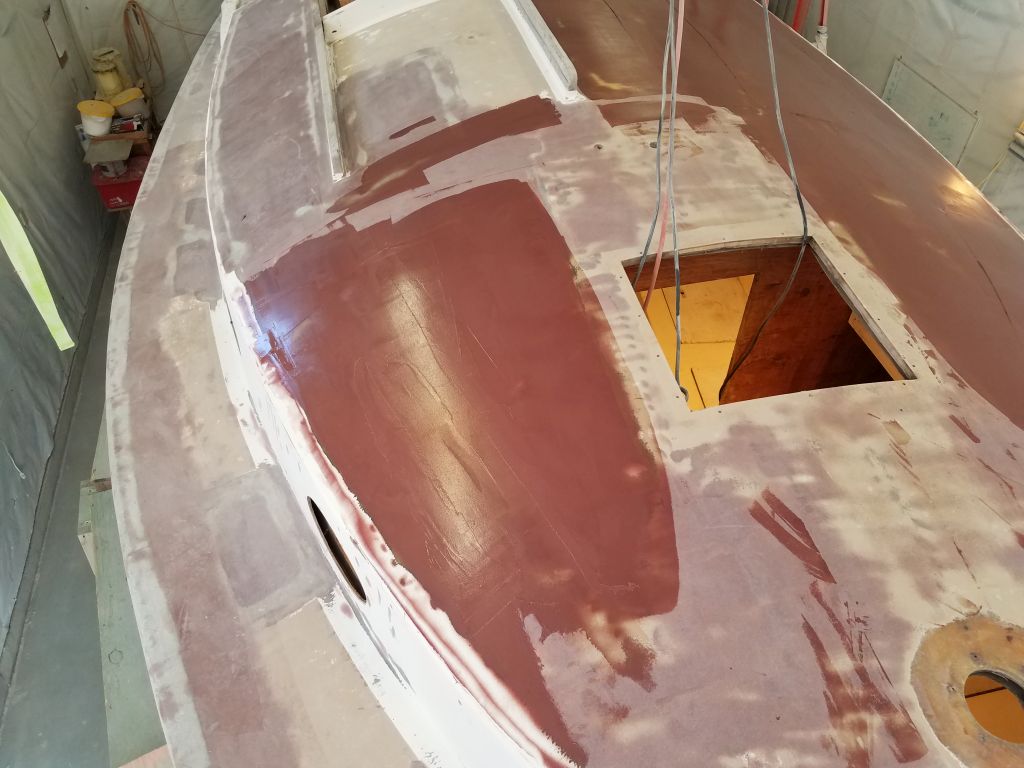
The main bulkhead was sort of pinned in place at the top outside corners (most of the top edge wasn’t secured at all) with wooden blocks, which were throughbolted to the bulkhead and then secured through the coachroof with carriage bolts from above and barrel nuts from below. These were in the way of the new fairing work–I’d just worked around them for the first coat–and needed to be removed, since they were not what I saw as a permanent solution to the bulkhead, so from belowdecks I removed the nuts (easily, fortunately) and then pried up the bolts from above, leaving holes that I reamed out and prepared for filling in my usual way.


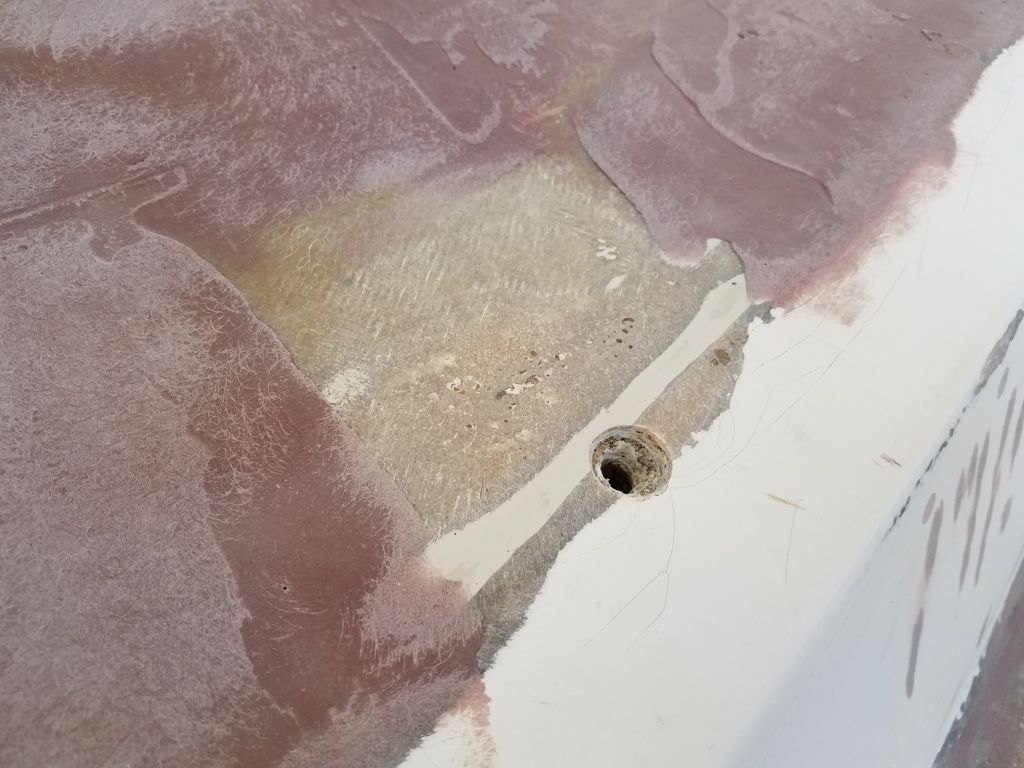
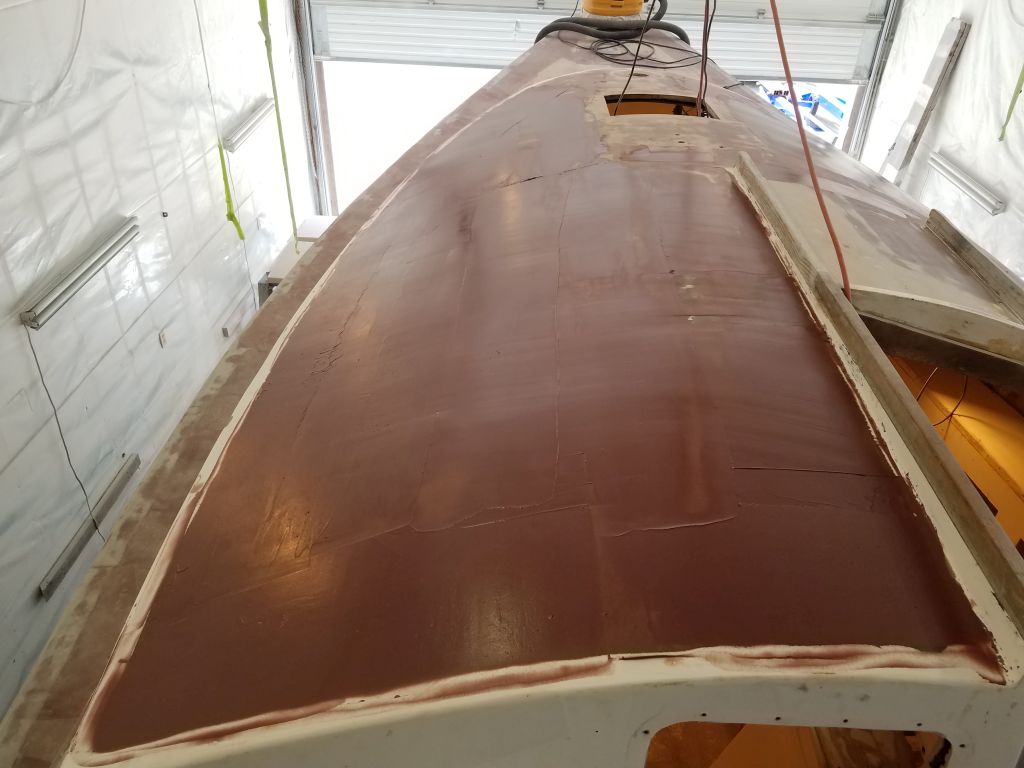
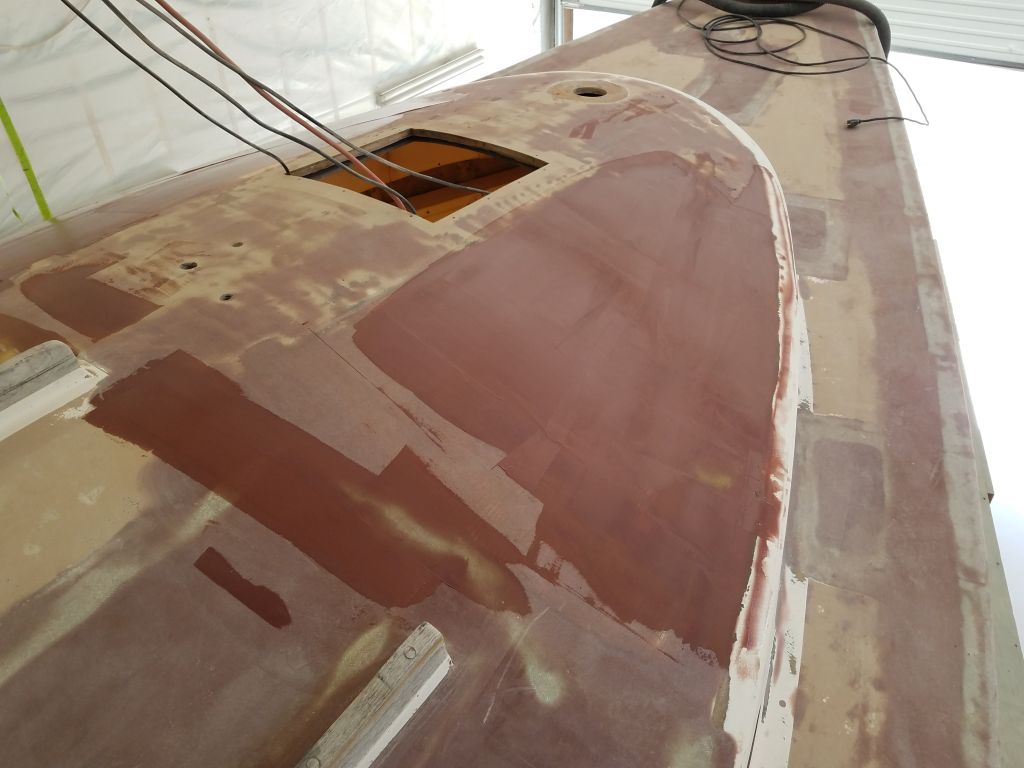
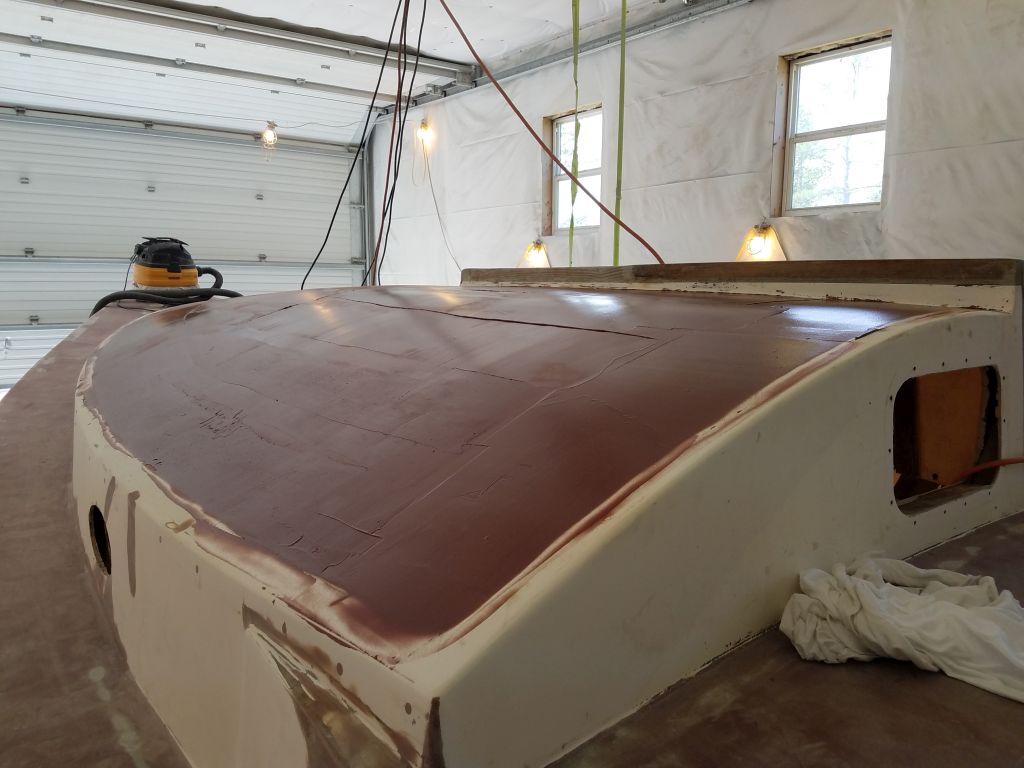
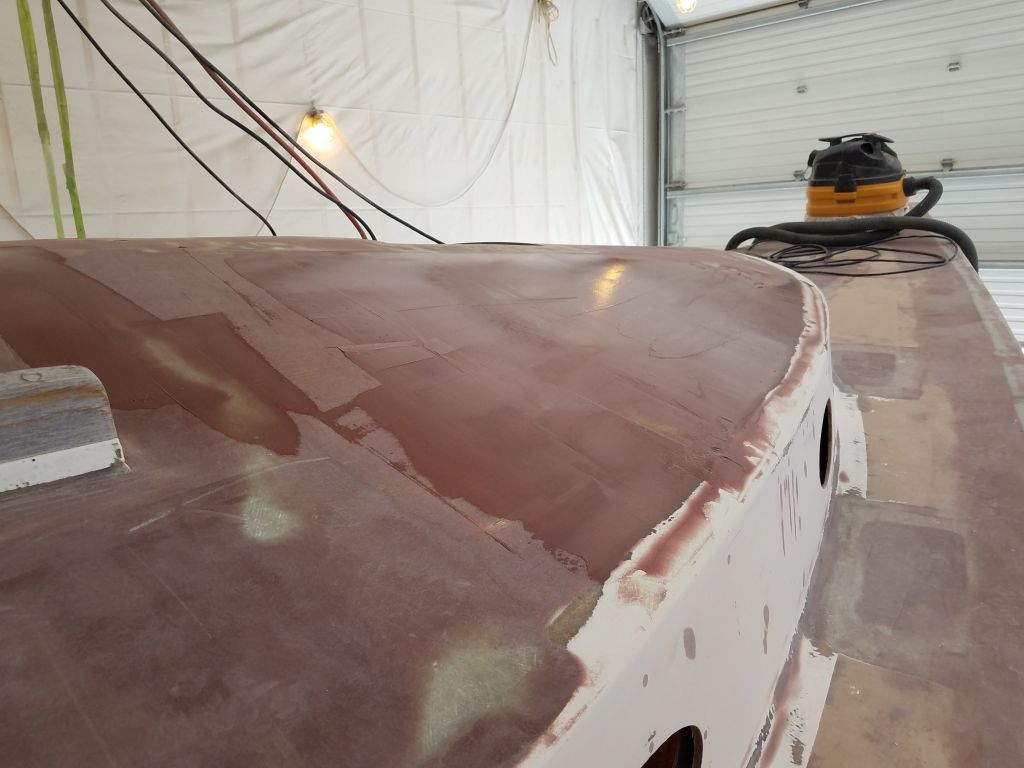
After cleanup and final preparations, including filling the now-empty boltholes, I applied a second coat of fairing compound to the coachroof, troweling longitudinally this time, which was perpendicular to how I’d applied the first coat to help fill the trowel marks and other low spots left after the first application. This was starting to look better and smoother, but there were still obvious low “swales” in the reconstructed laminate beneath, and I knew there’d be several more rounds of fairing before I could approach a reasonable shape on the coachroof. With such a huge area, I didn’t even try (OK, I tried, but didn’t fret) to avoid ridges or trowel marks between application rows, but each application would be that much better and already the massive port side was looking an order of magnitude better than its original shape. Rome wasn’t built in a day.
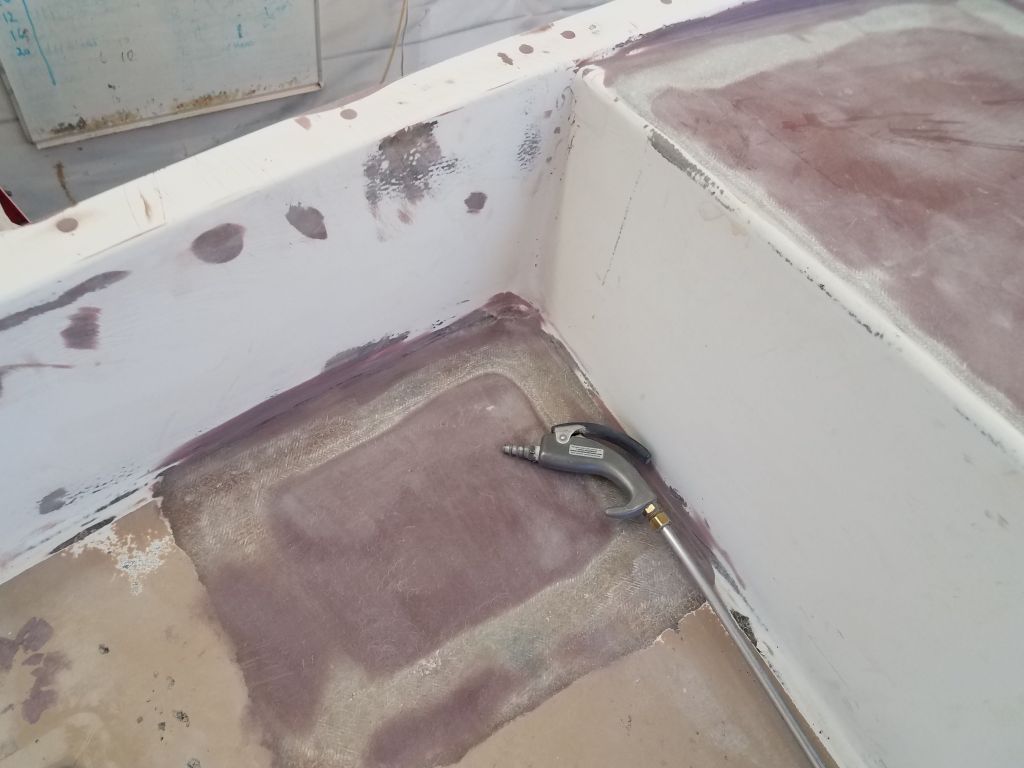
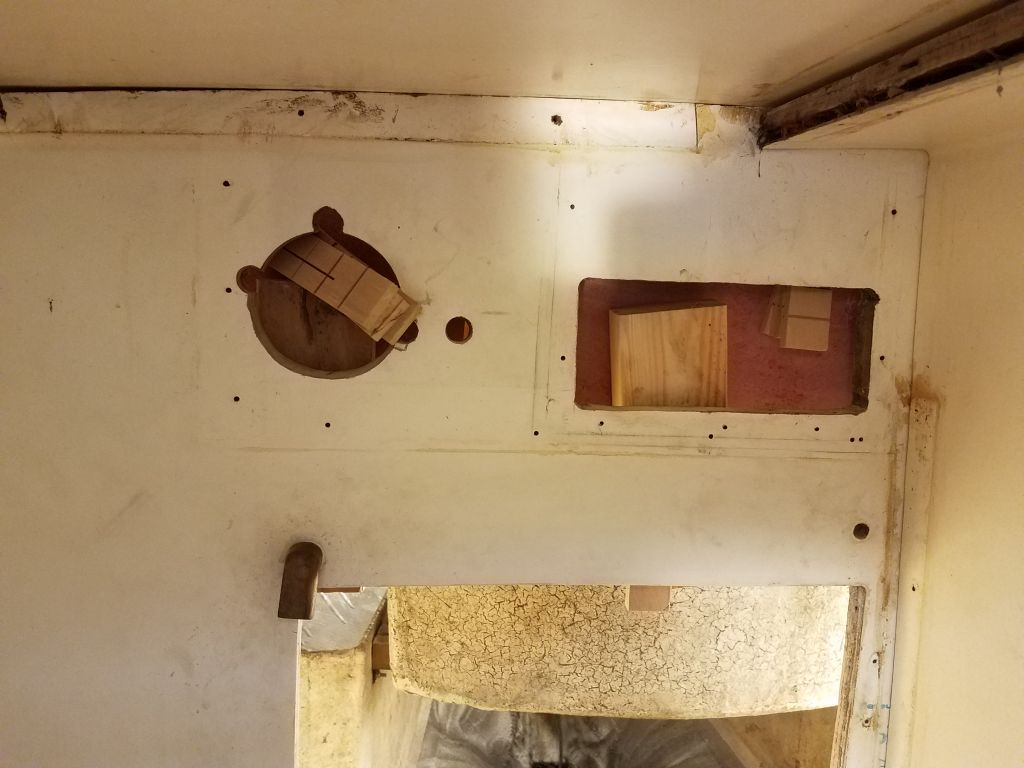
There were still several old hardware and instrument holes in the cockpit that required patching, most notably the myriad openings in the base of the bridgedeck. With no direct access to the back side of this area, other than a narrow slot accessible from inside the engine room, I decided my best approach would be to apply a permanent prefabricated panel behind the holes, over which I could fiberglass the patches from the inside. To this end, I’d ordered a sheet of 1/8″ thick fiberglass, which I sanded to prepare for bonding. To the extent possible, I prepared and cleaned up the surface behind the instruments, then wedged the fiberglass panel in place from behind, holding it securely with some wooden wedges.
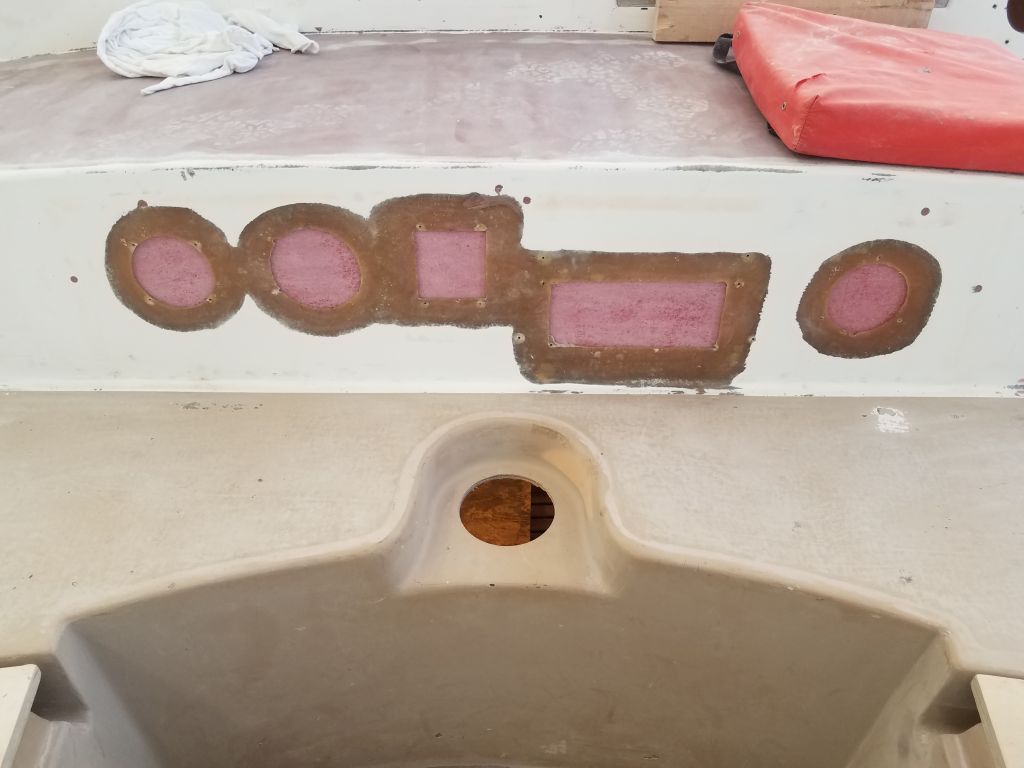

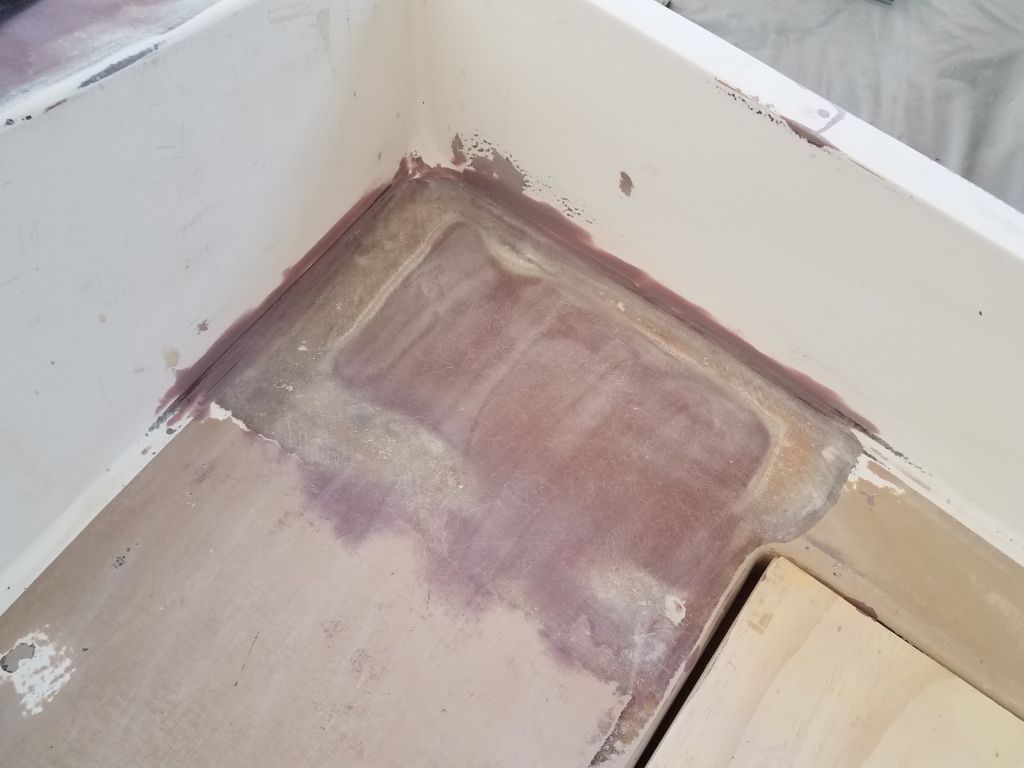
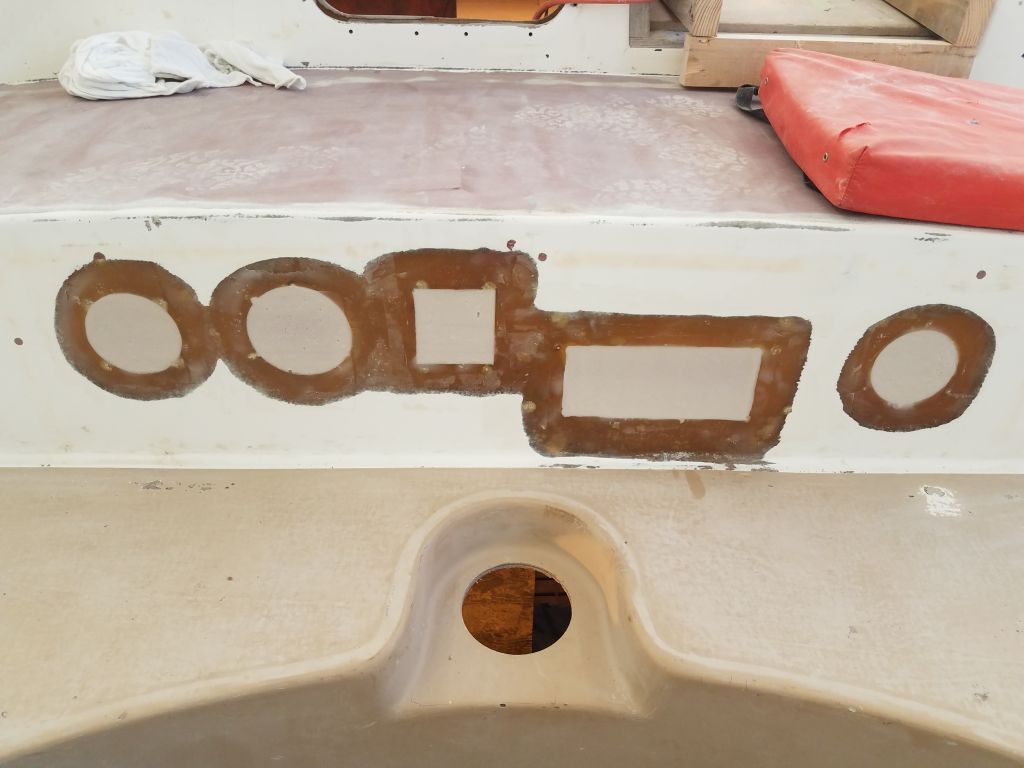
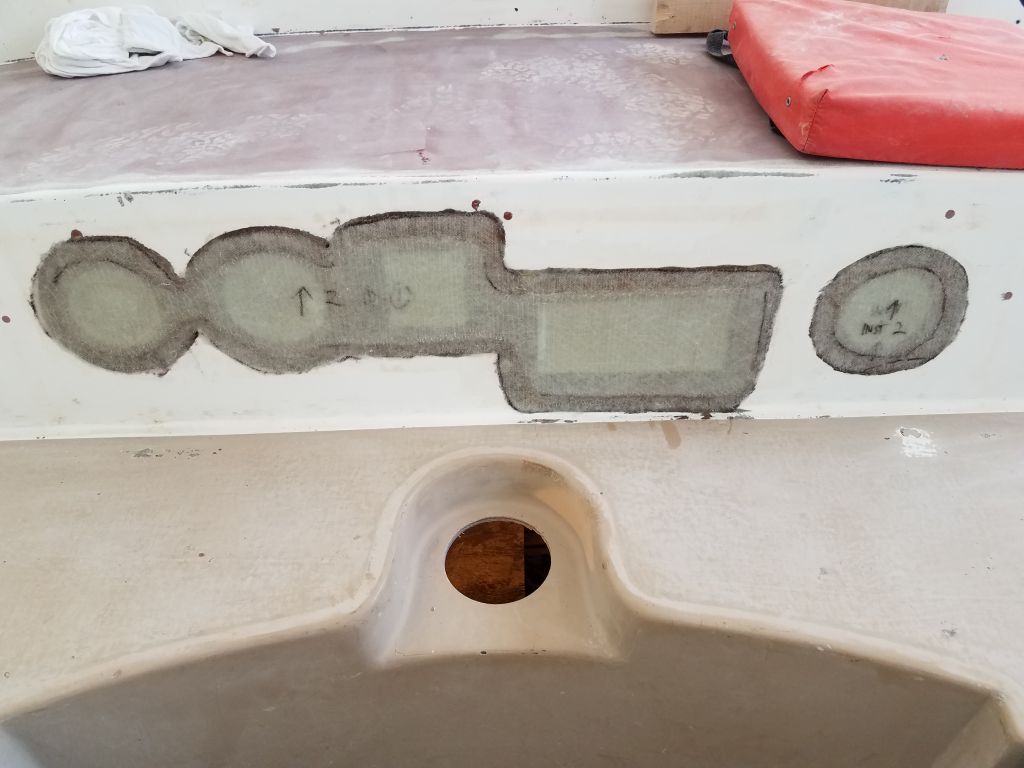
From outside, I applied a thickened structural epoxy mixture to smooth in the old cutout edges with the surrounding area, which also would ultimately well adhere the backing to the boat and new repair work. While I let this cure for a time, I prepared two layers of fiberglass for the patch, cut to fit as needed, and later installed there new fiberglass in epoxy resin. Meanwhile, in the cockpit well I installed new fiberglass over several existing holes that I’d previously repaired and filled with thickened epoxy during an earlier work session.
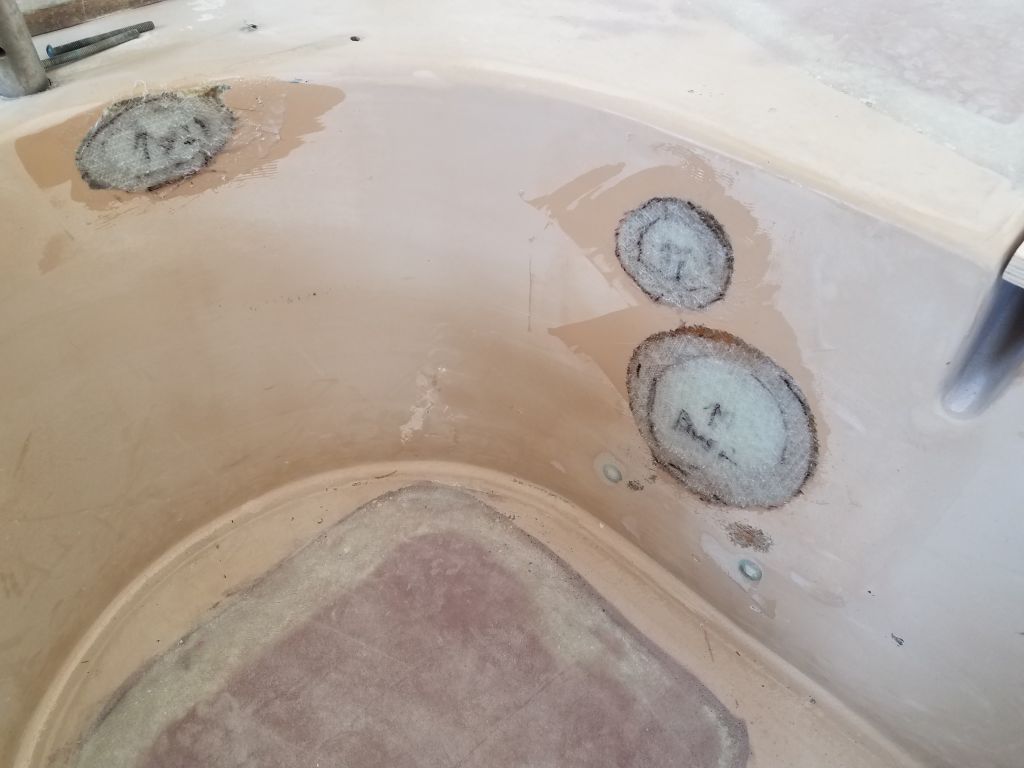
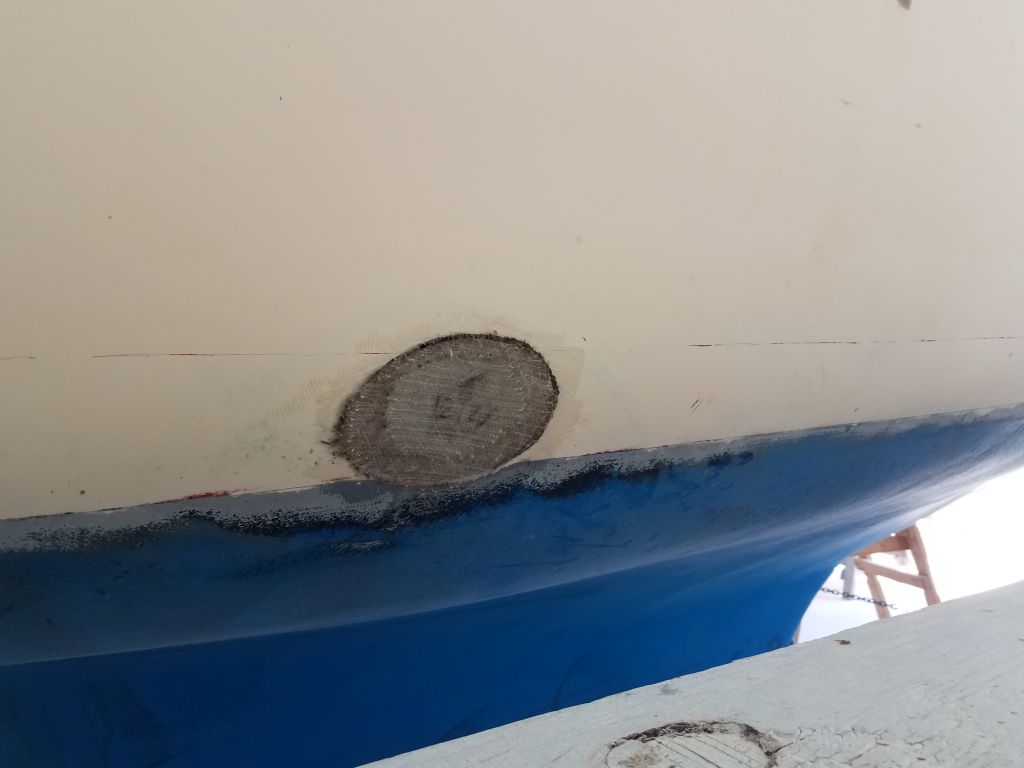
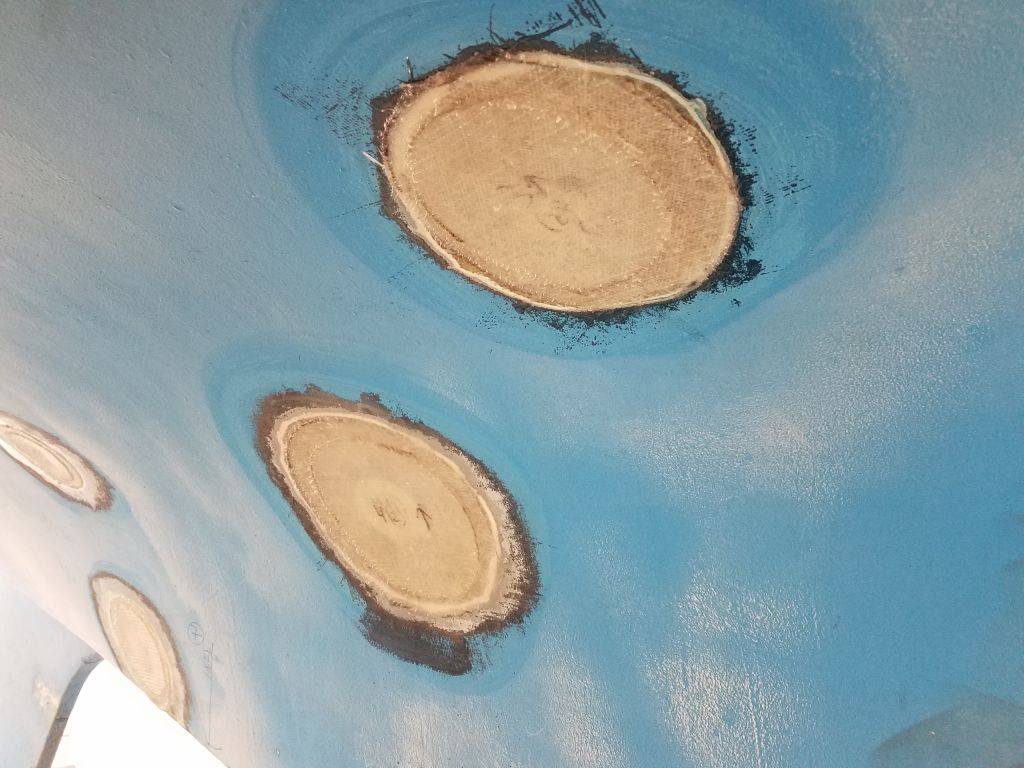
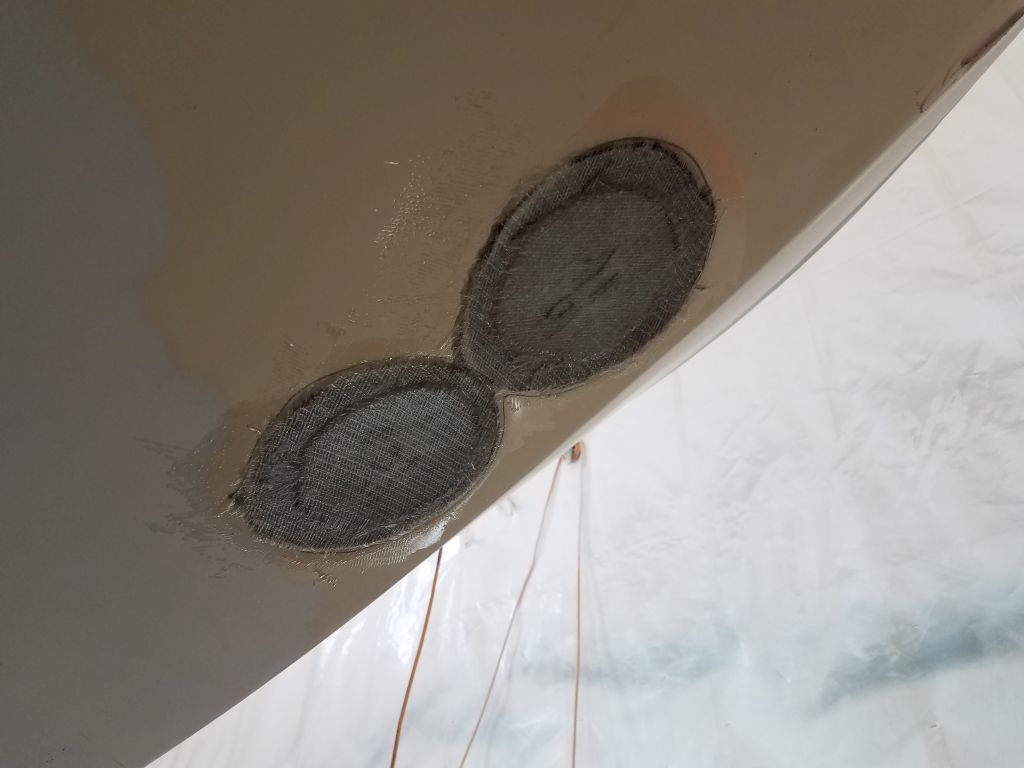
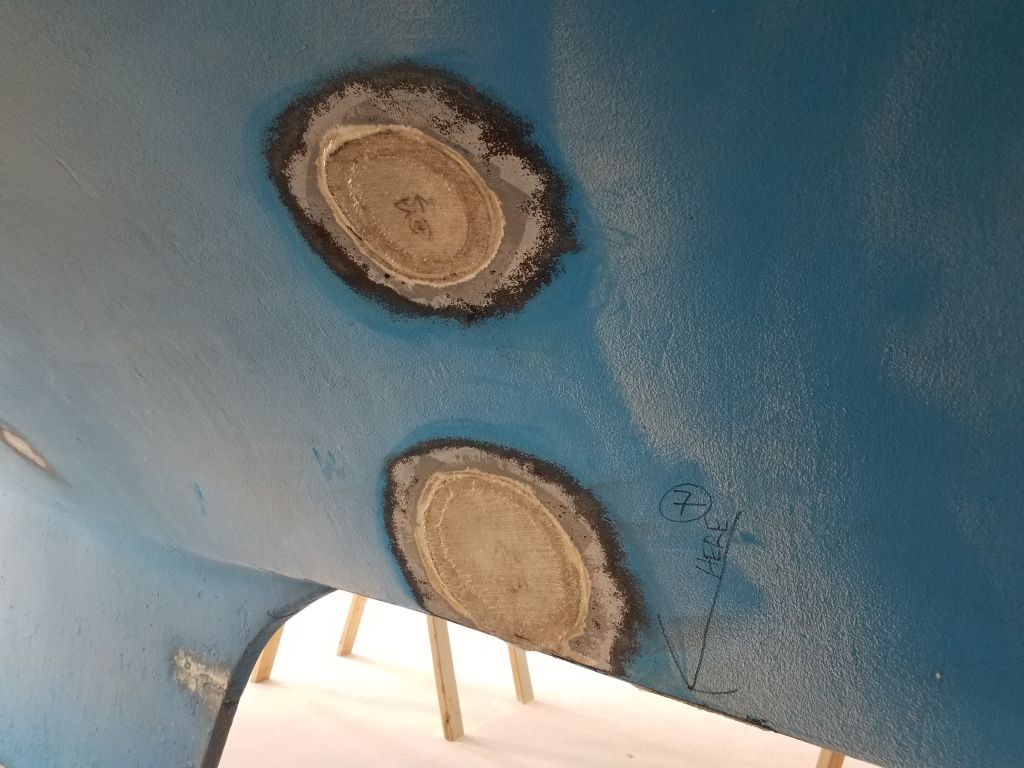
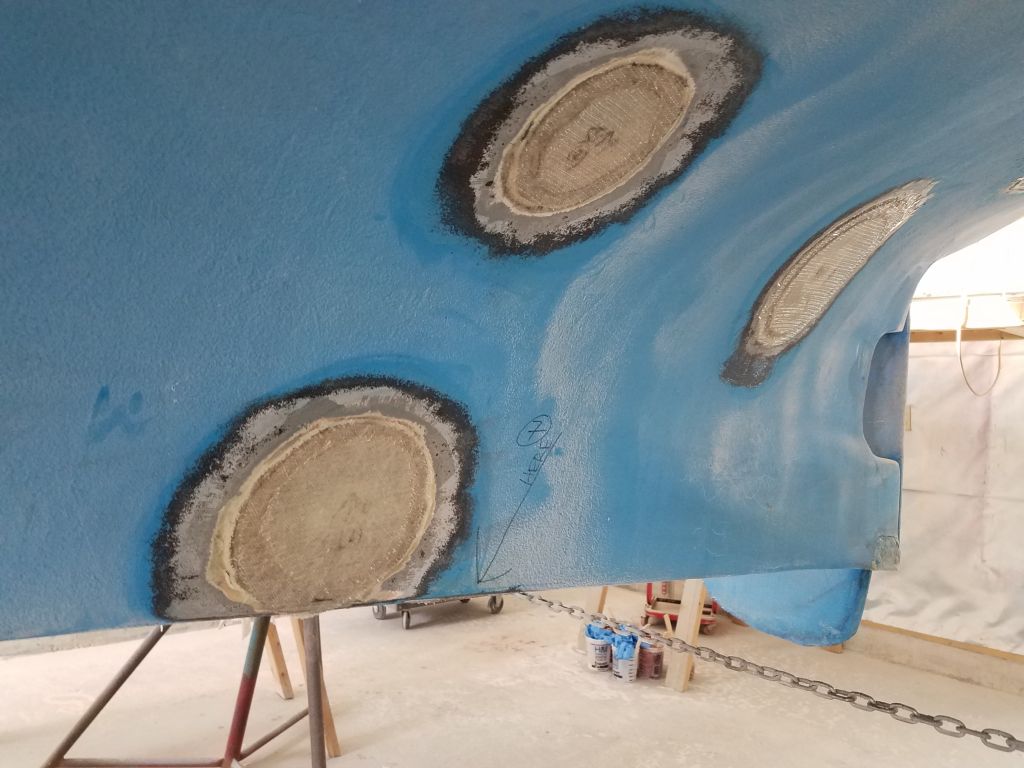
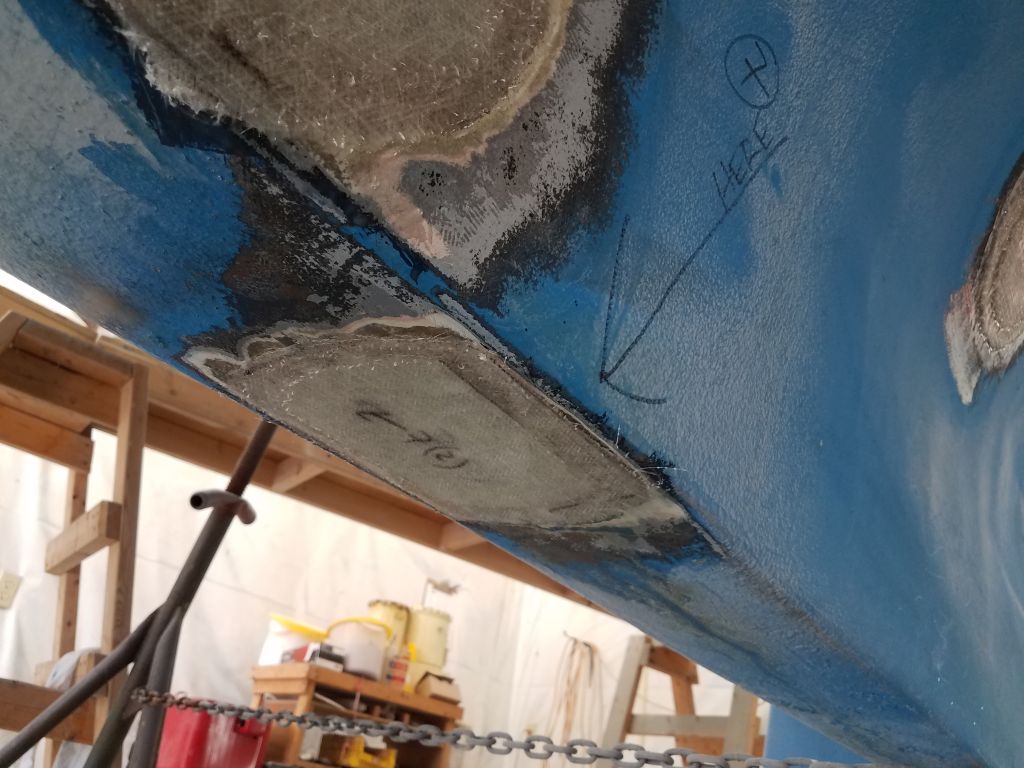
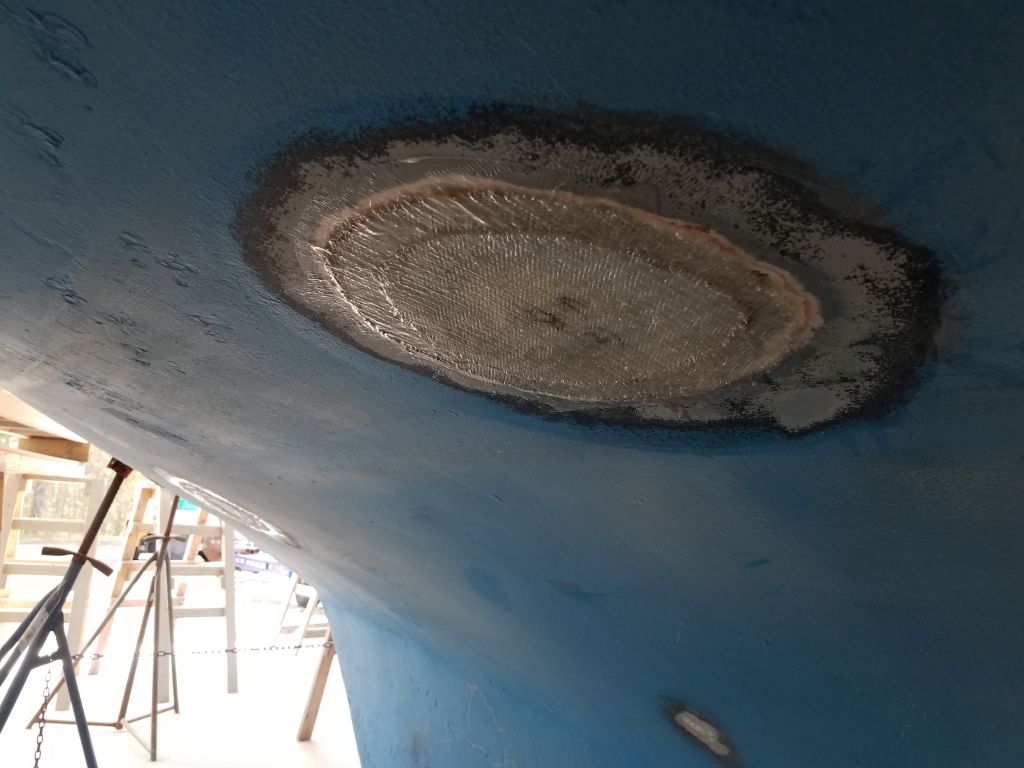
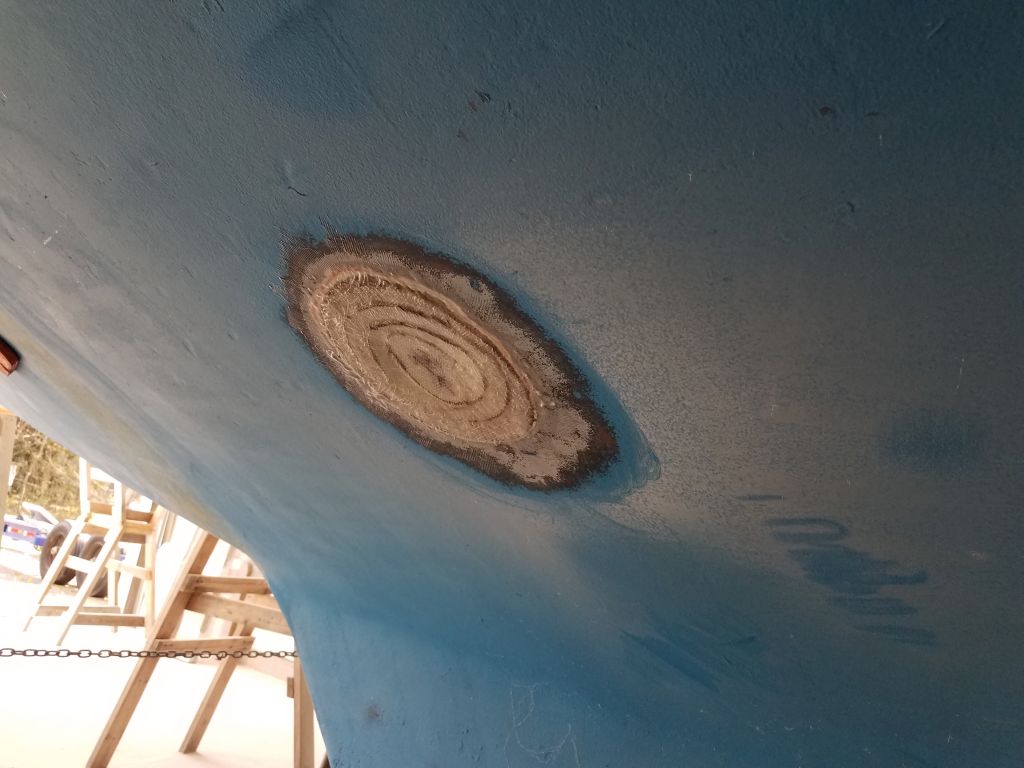
During the remainder of the day, I patterned and cut fiberglass for the 12 through hull patches required on the bottom and, in a few cases, on the topsides.
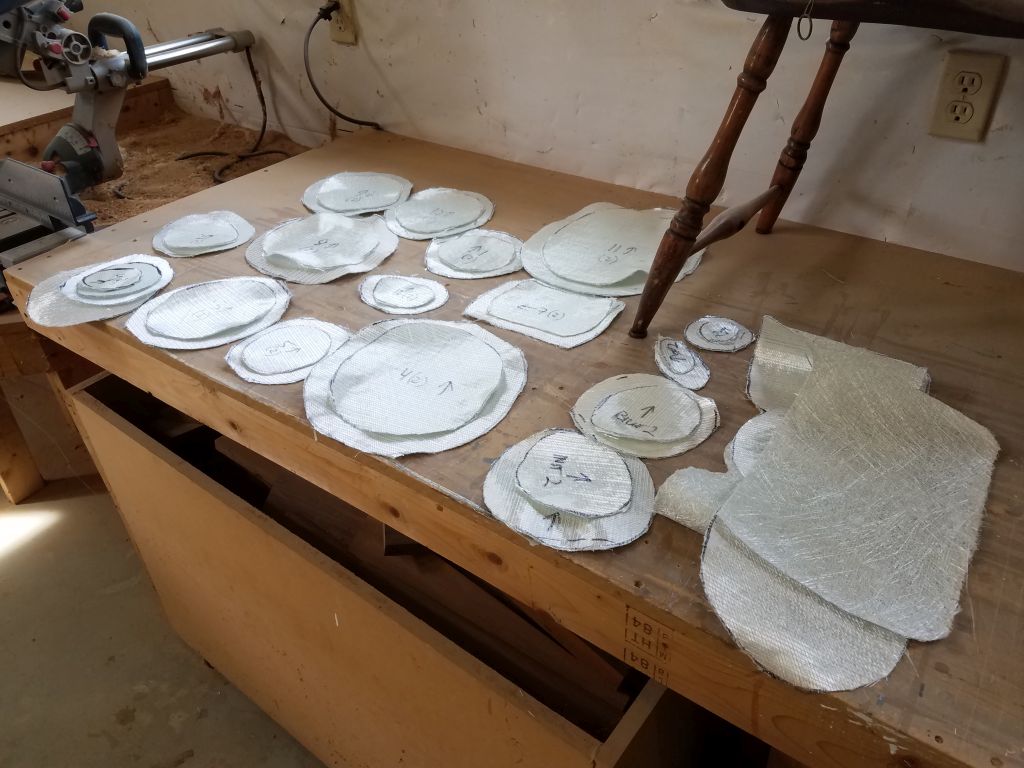
I’d long ago prepared all these old openings for the patch work by grinding out around the holes to accept the new fiberglass from outside, and in another work session I’d filled the round holes with my usual epoxy mixture from within, so all areas were ready for the new work after the usual solvent wash, epoxy application, and minor fine filling to better accept the fiberglass over the existing plugs. With all the new fiberglass cut to shape, I wet out each patch and installed it in the usual way.

Total time billed on this job today: 8.25 hours
0600 Weather Observation: 45°, clear. Forecast for the day: Sunny, 50s