


February 12, 2024
Calliope Girl 63
Monday
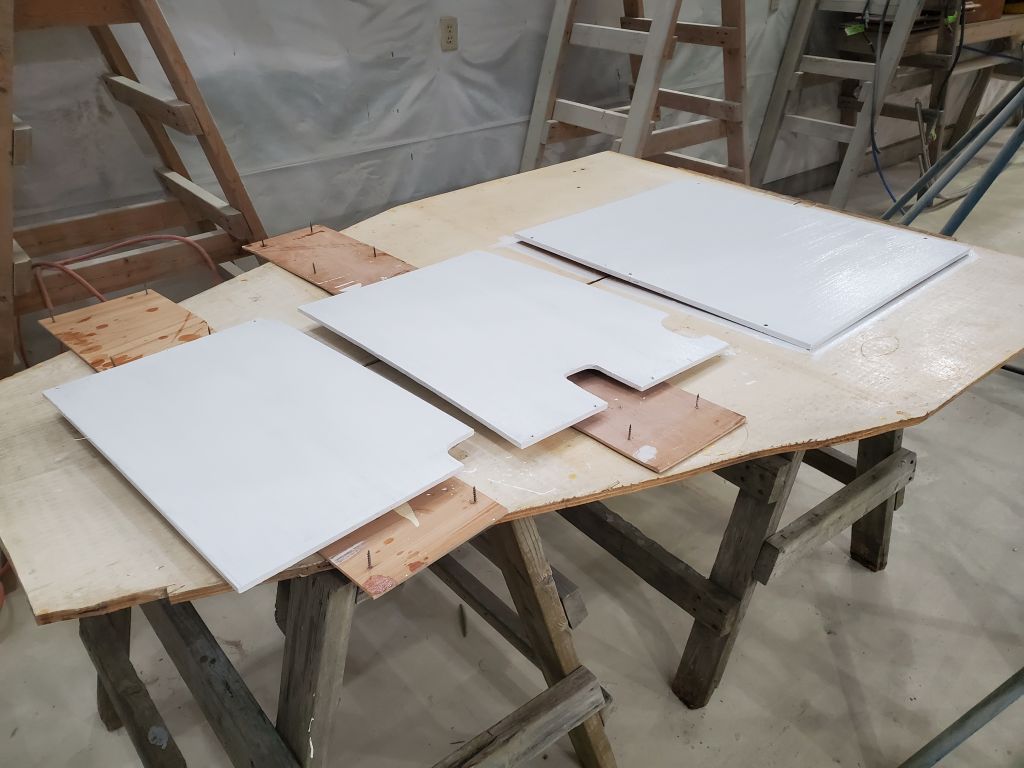
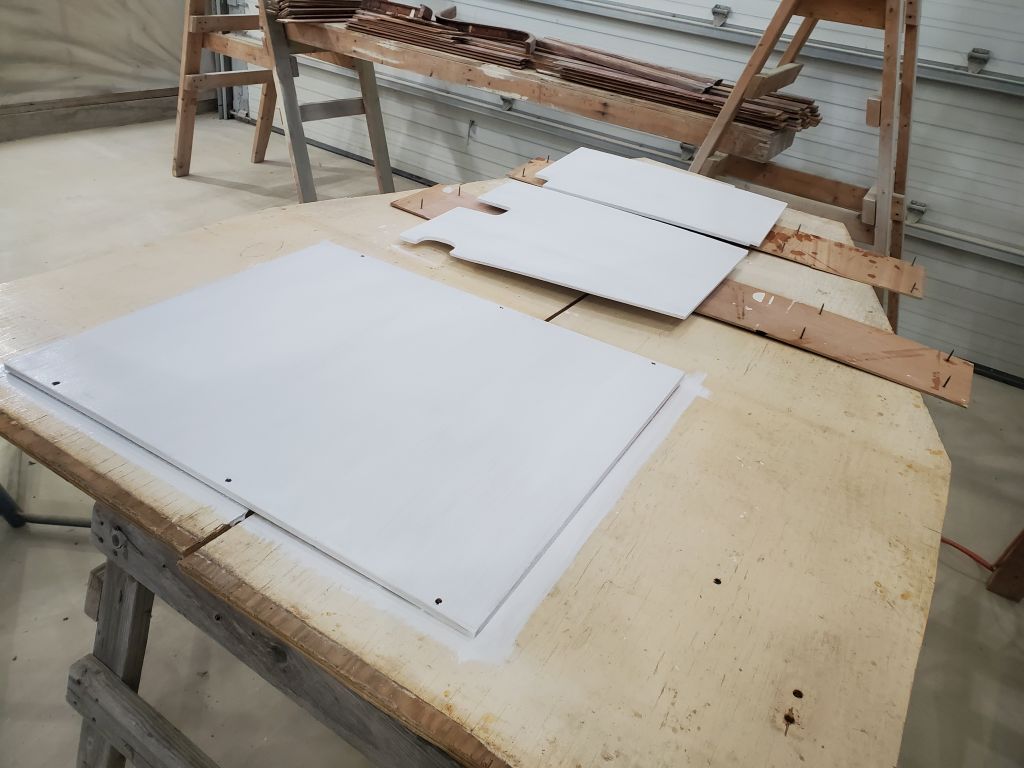
To begin the week, I set up a work station in the shop and laid out the loose plywood panels I had so far–the two removable panels from the engine room, and the engine room front panel–then prepped and primed them, the first of three anticipated coats of paint.
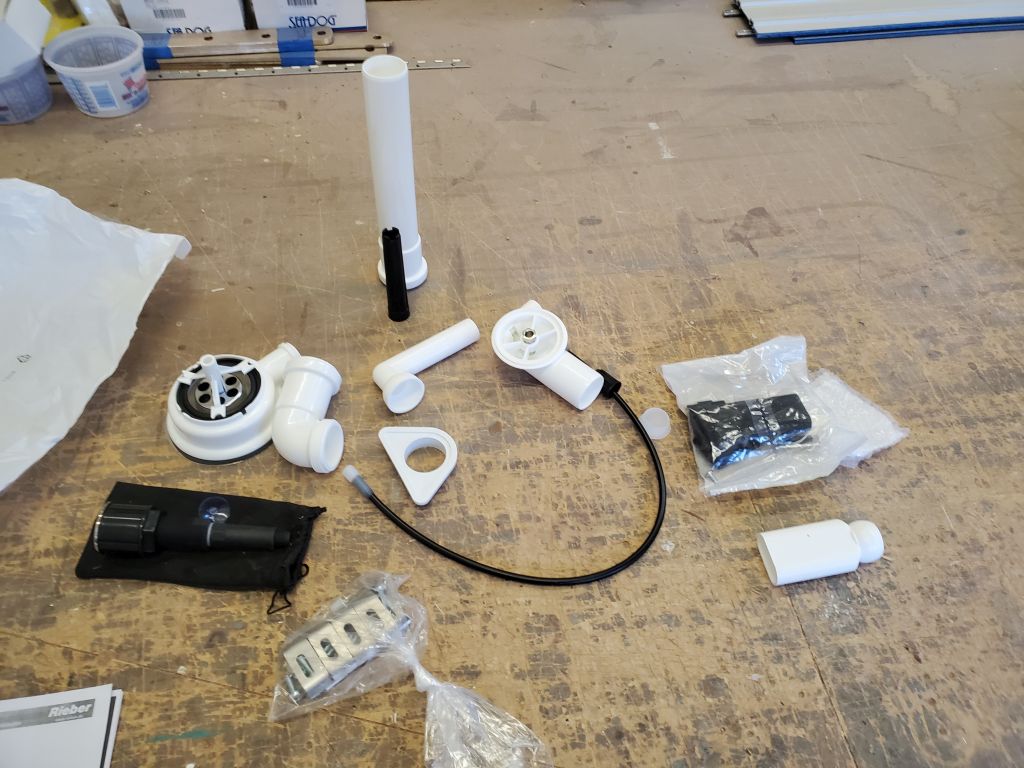
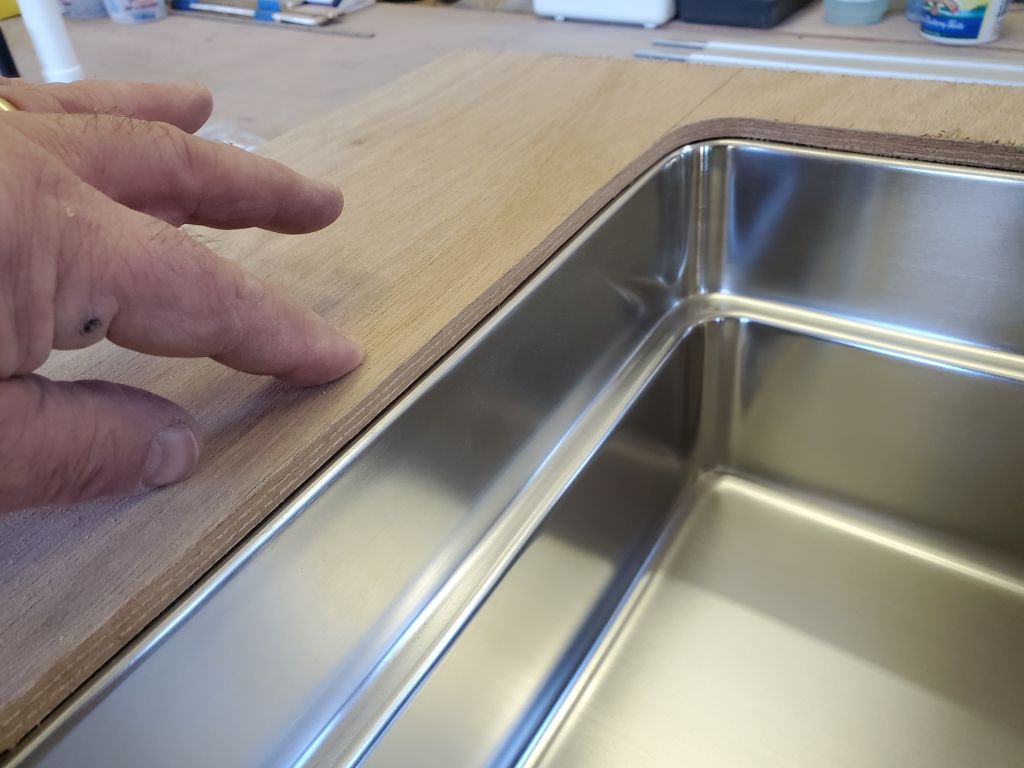
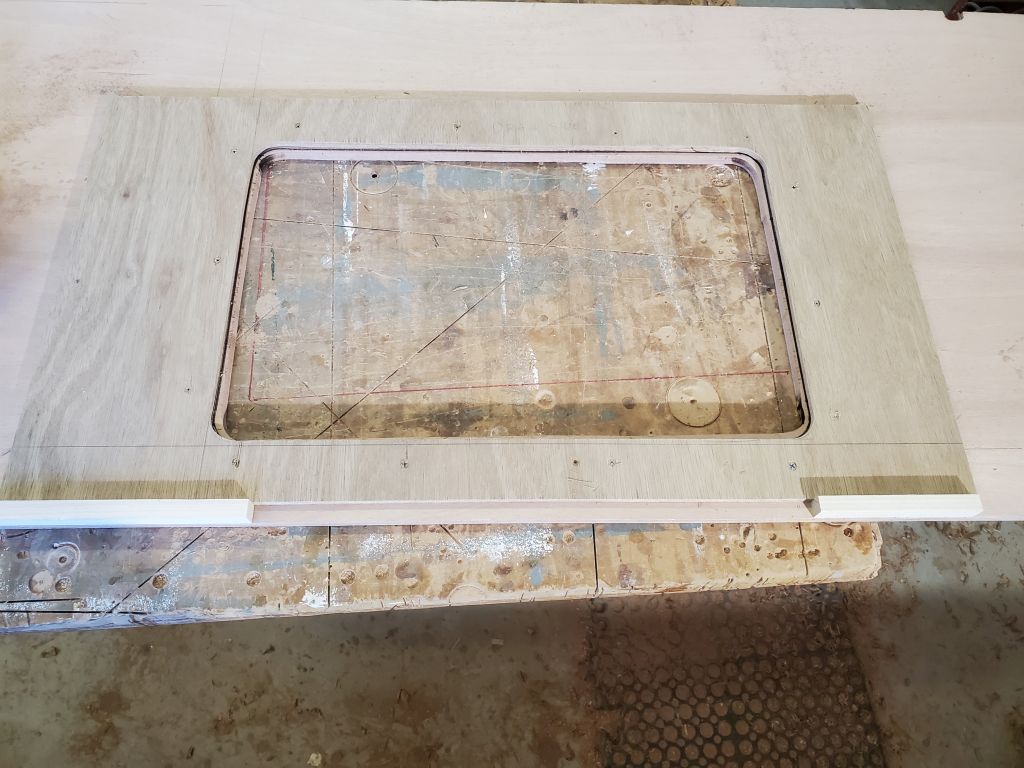
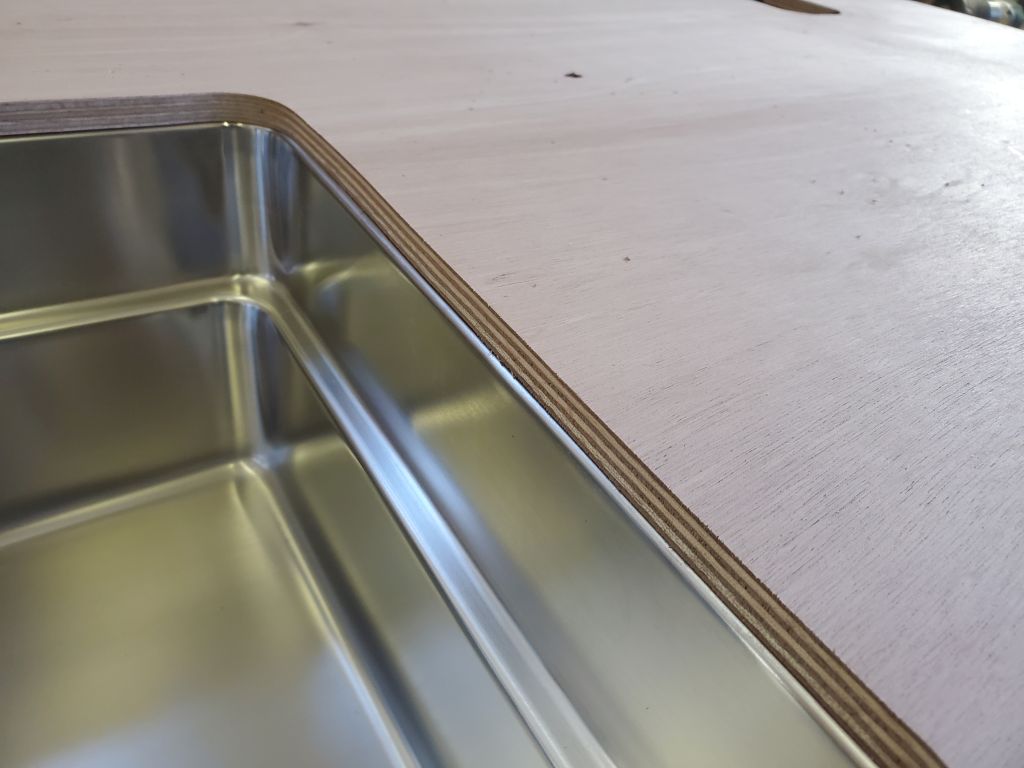
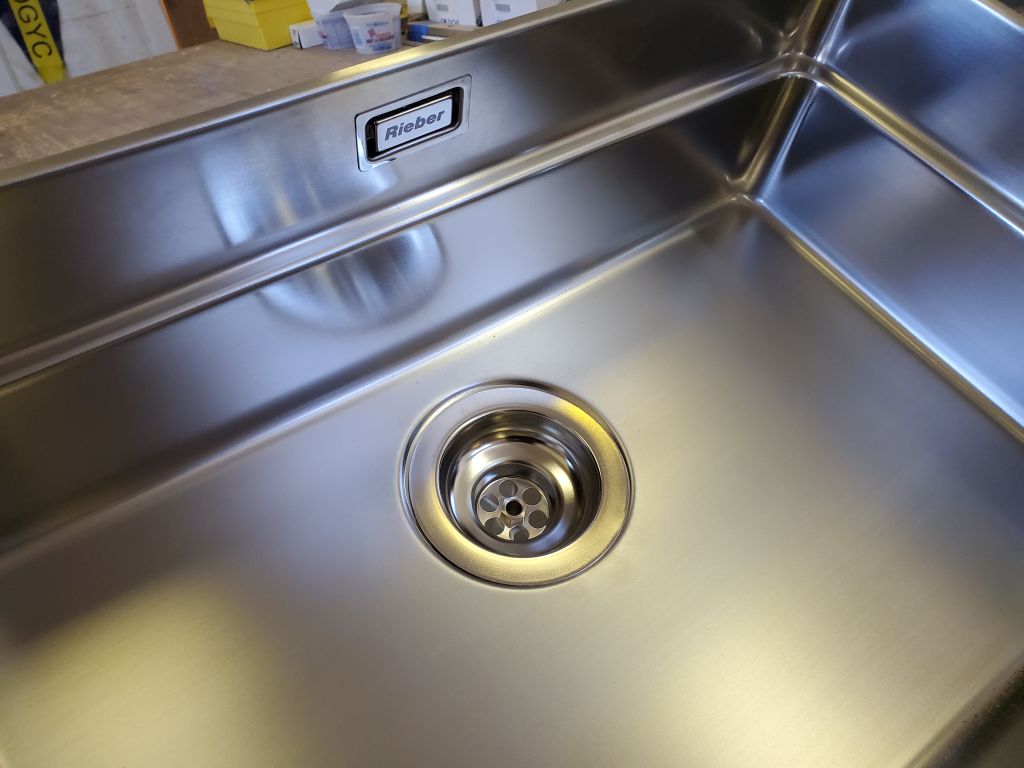
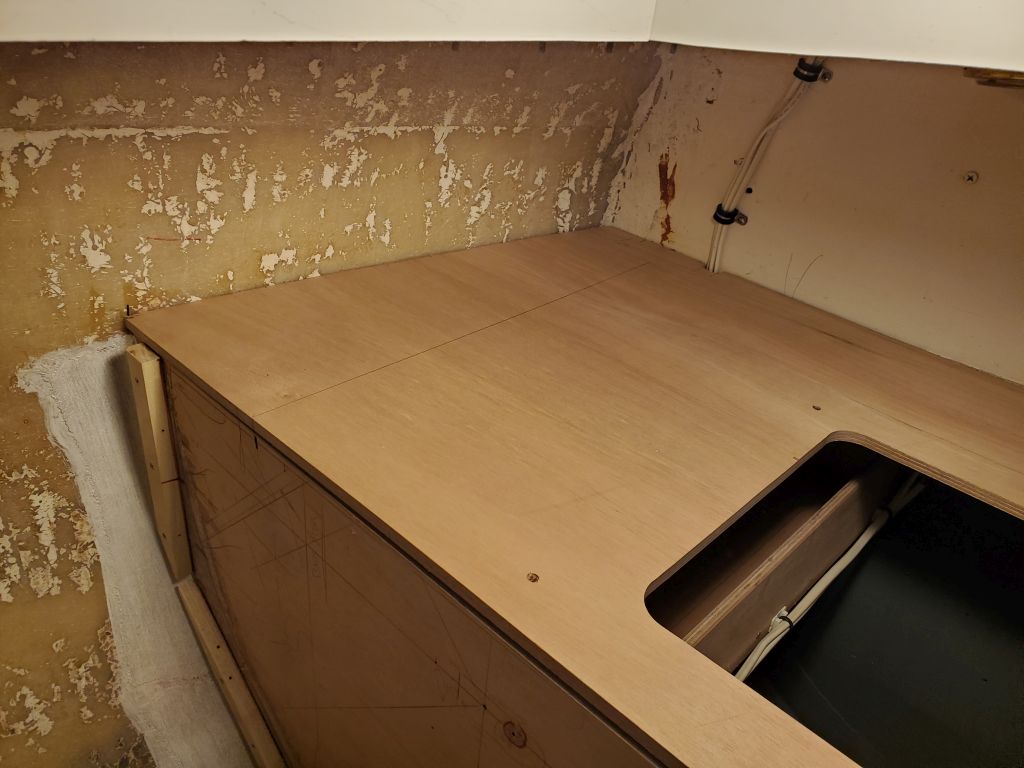
Much of the remaining detail and construction of the galley countertop and surrounds depended on the position of the sink, so next I made moves in this direction. I’d had the sink out of its packaging a few days earlier so I could roughly determine its placement and how it would interact with structural members either already in place or being installed, but this was the first time I’d really looked at it in terms of final installation. It was clear from the sink’s construction and the pictograph instructions that the sink was intended for under-mounting, with a narrow top flange meant to be pressed tightly to the underside of the counter with installation brackets from beneath. I also unpacked all the related and included components of the drain system, mainly so I could figure out the overflow drain configuration. I’d been planning a self-rimming (from the top) installation in the traditional way, and I might have continued in that direction even with the narrow support flange, but it was clear that the overflow drain would be in the way of sink installation from the top, and there was no way I was going to consider its installation and connection with the sink in place and the difficult access thereunto.
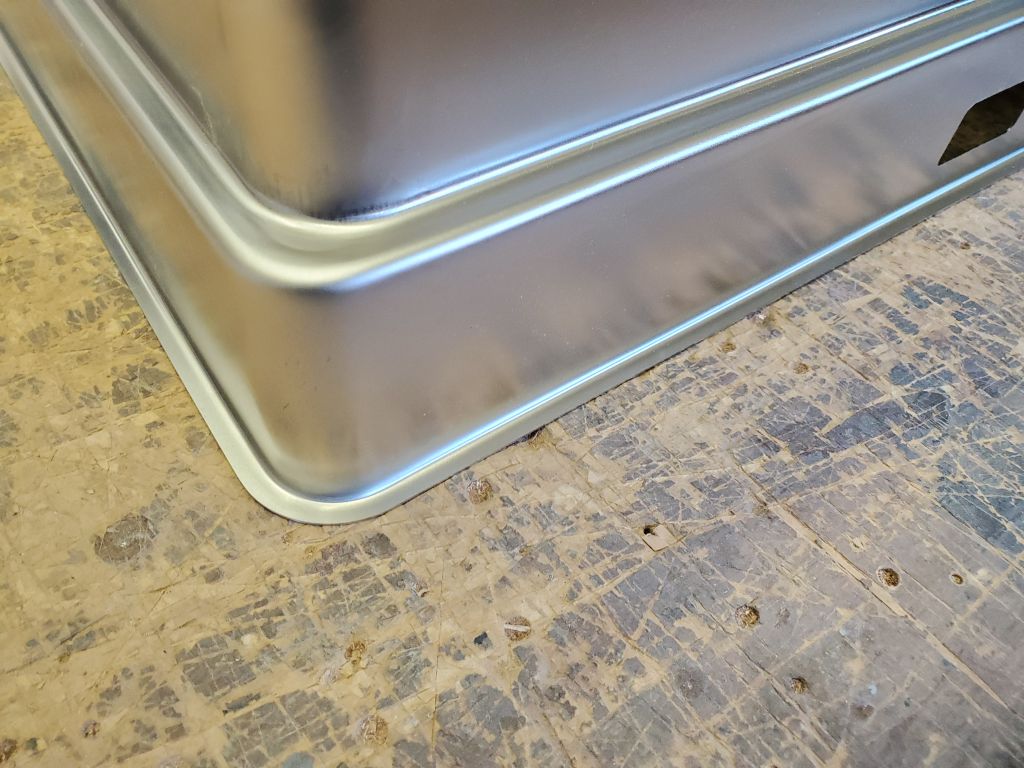
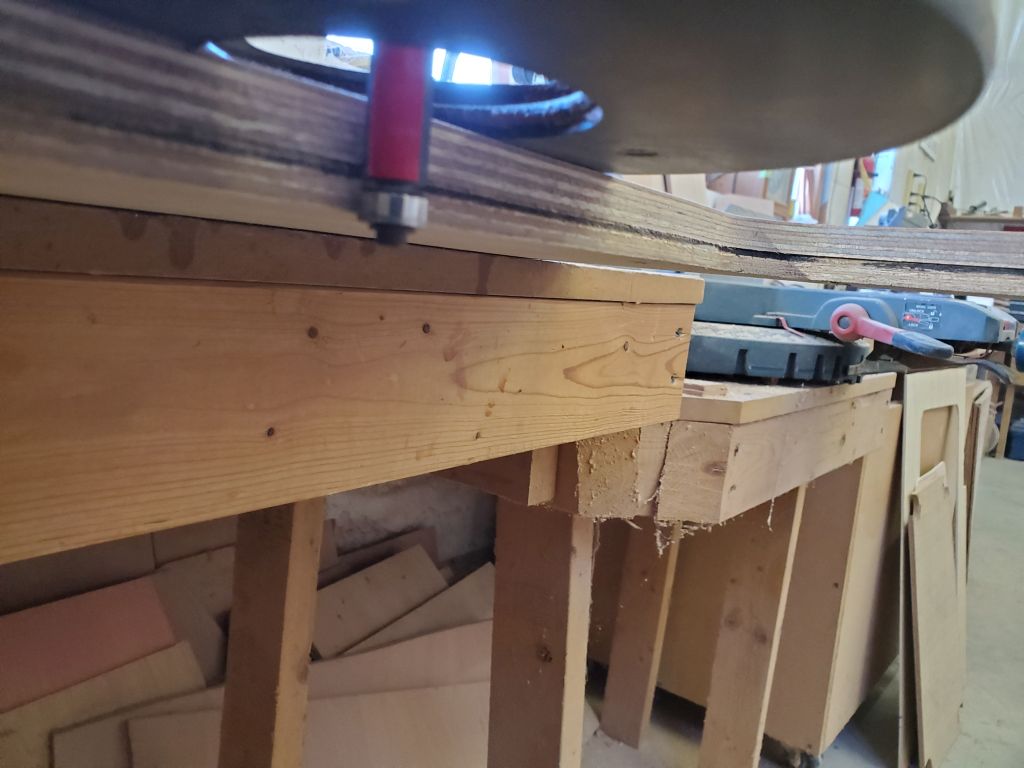
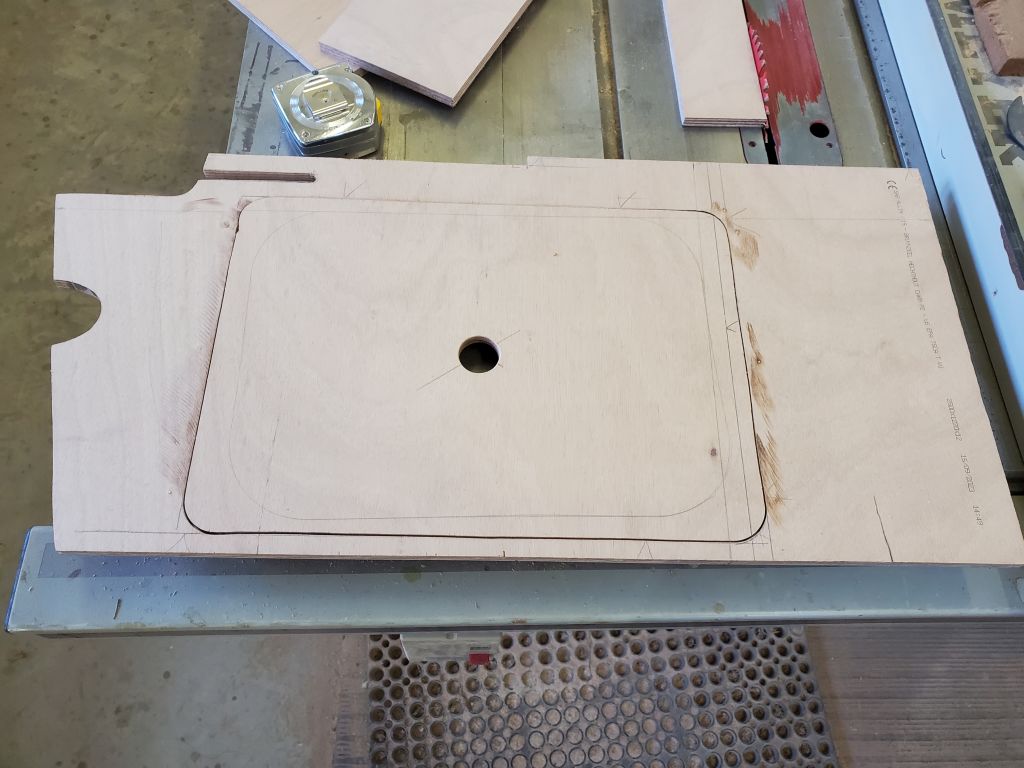
To undermount the sink meant that I required a highly accurate template, so I began by tracing the overall outline of the sink (i.e. the edge of the outward flange) onto some pattern plywood, which opening I then cut out carefully and fine-tuned till it was clean, fair, and accurate. Then, I traced along the inside of the pattern but at a 1/4″ offset, which I’d determined would give the final opening the correct reveal at the top edge of the sink. With the initial template held flat on a piece of 9mm plywood I planned to use for the final template, I traced the opening with a pencil inside a small washer (5/16″ ID), which gave me a nice line with the proper offset (or inset, if you will).
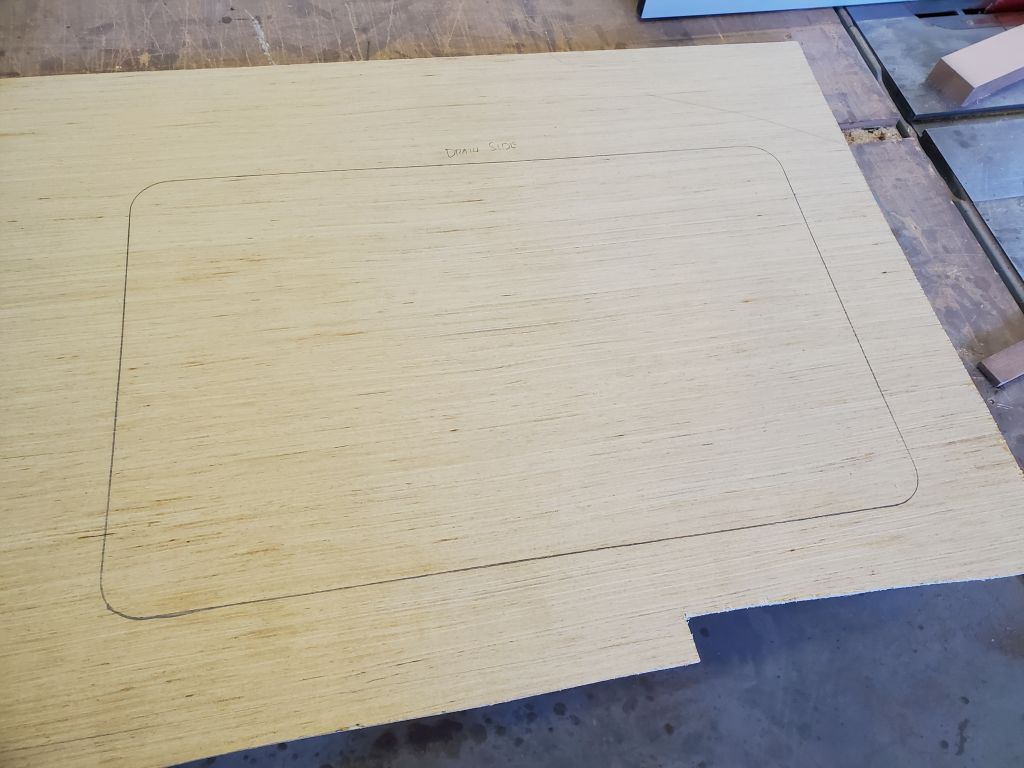
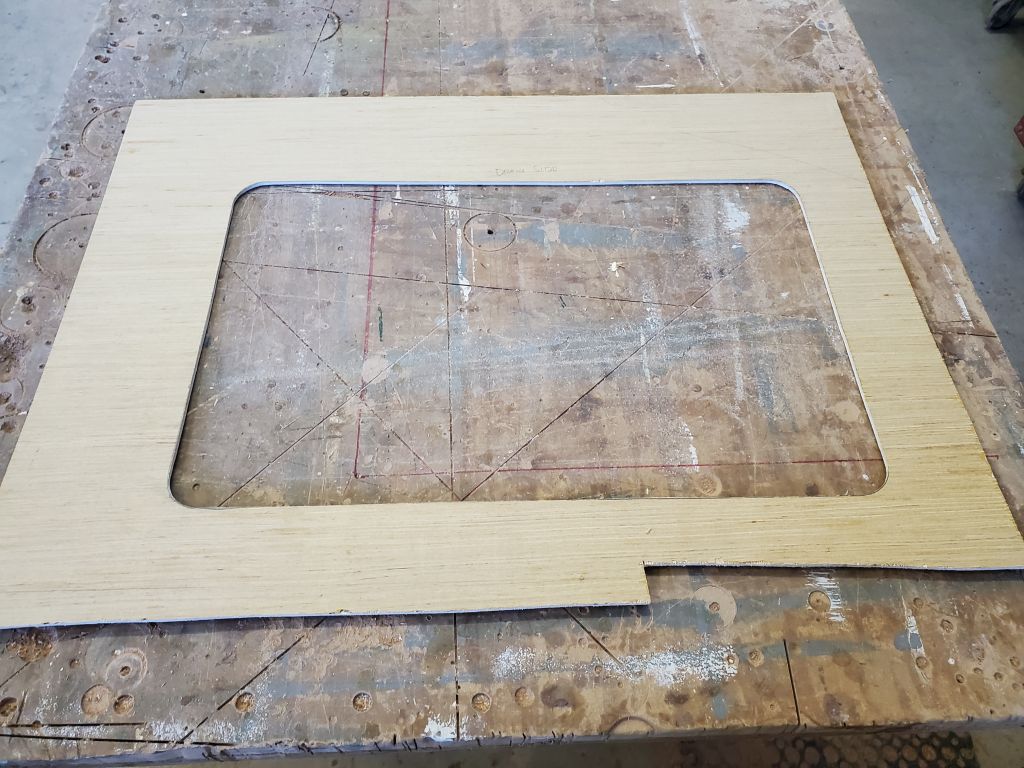
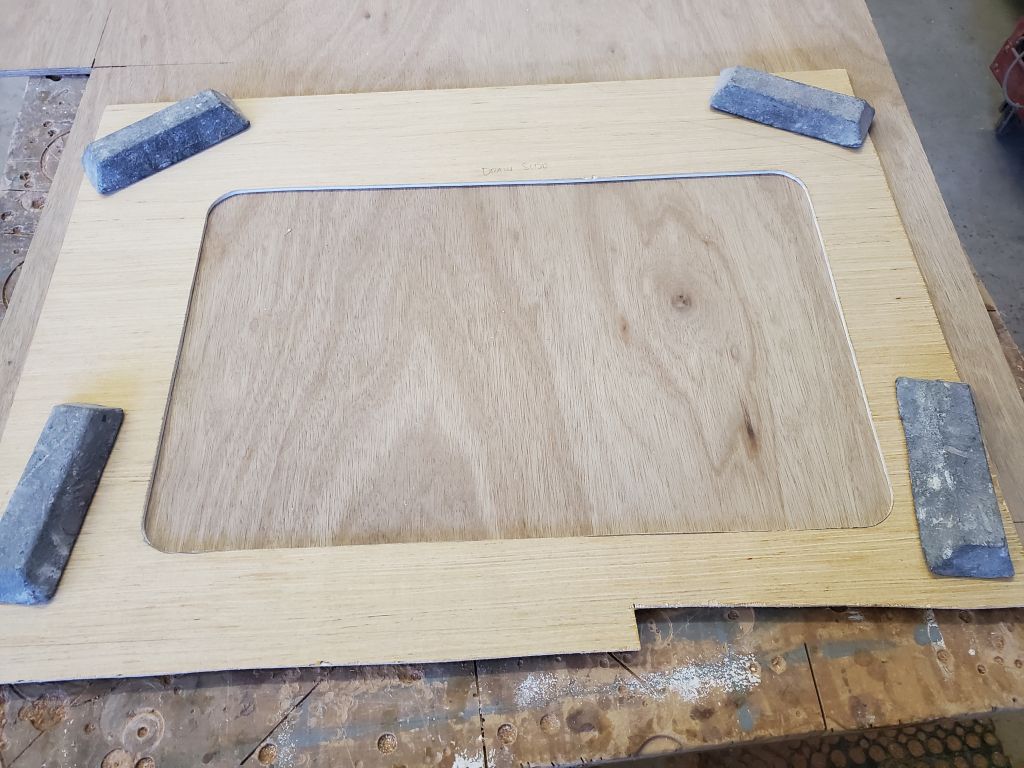
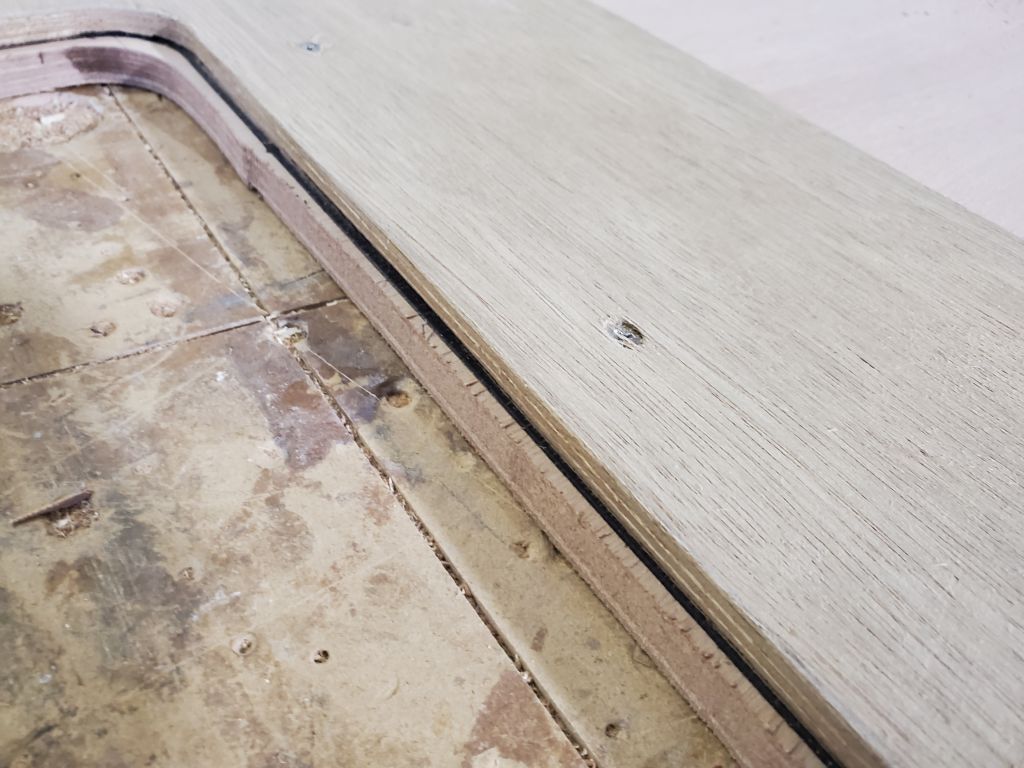
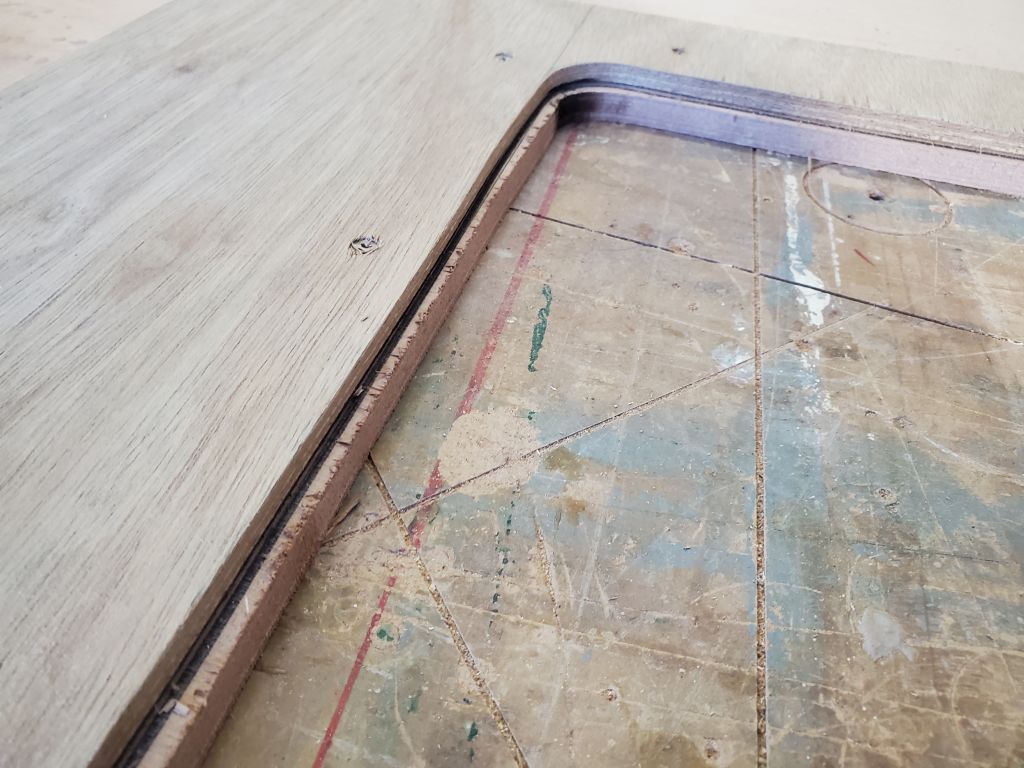
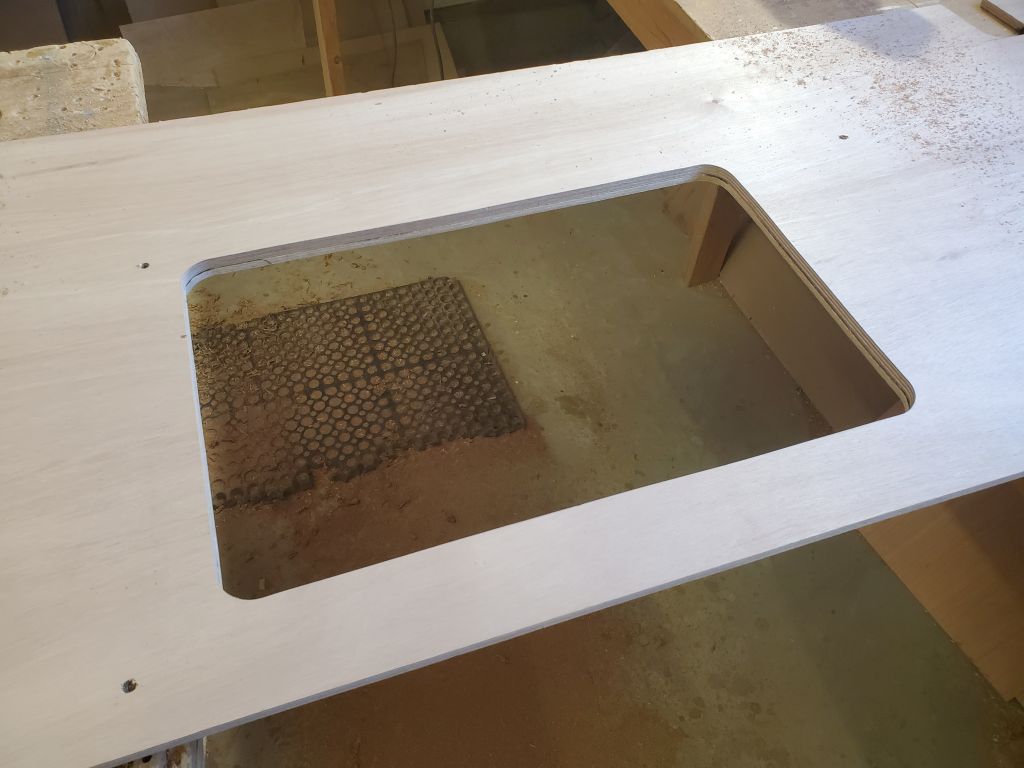
Next, I cut the new opening in the 9mm plywood, starting with large holes at the corners to create the proper radius, then connecting them with saw cuts. After some fine-tuning and minor fairing, this created a template of the actual opening size I’d need to cut in the countertop, and which template I could use with a router to follow the pattern and make an exact cut. The template opening sat just outside of the upper radius on the sink, as intended and as aesthetically and functionally required.
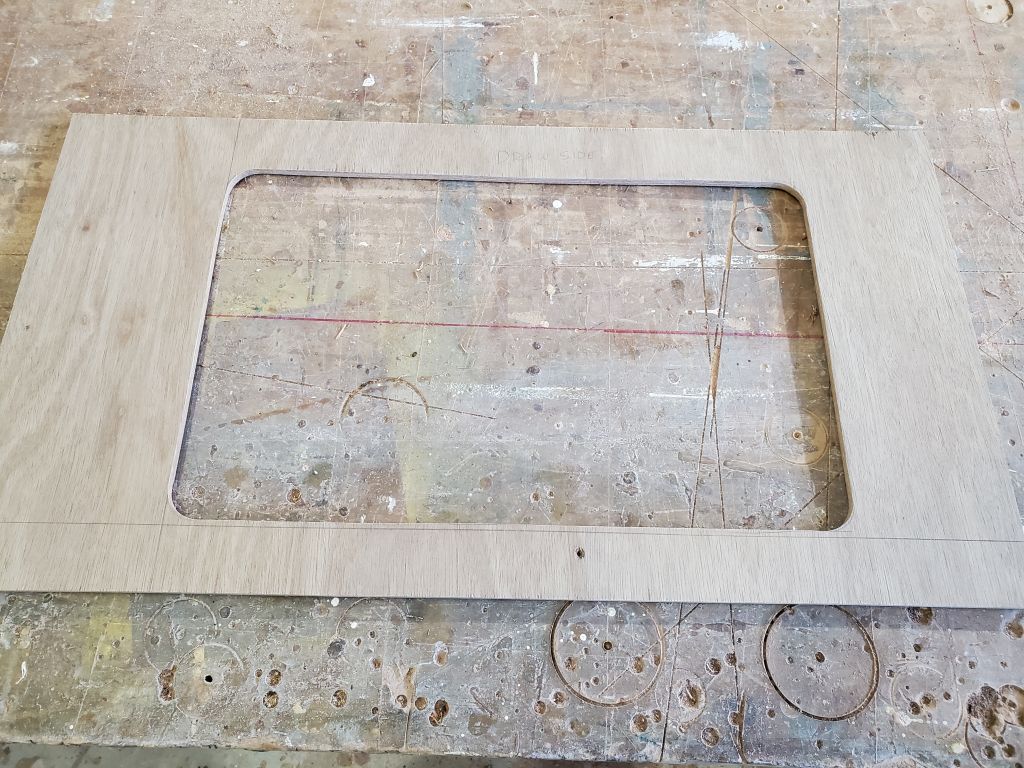
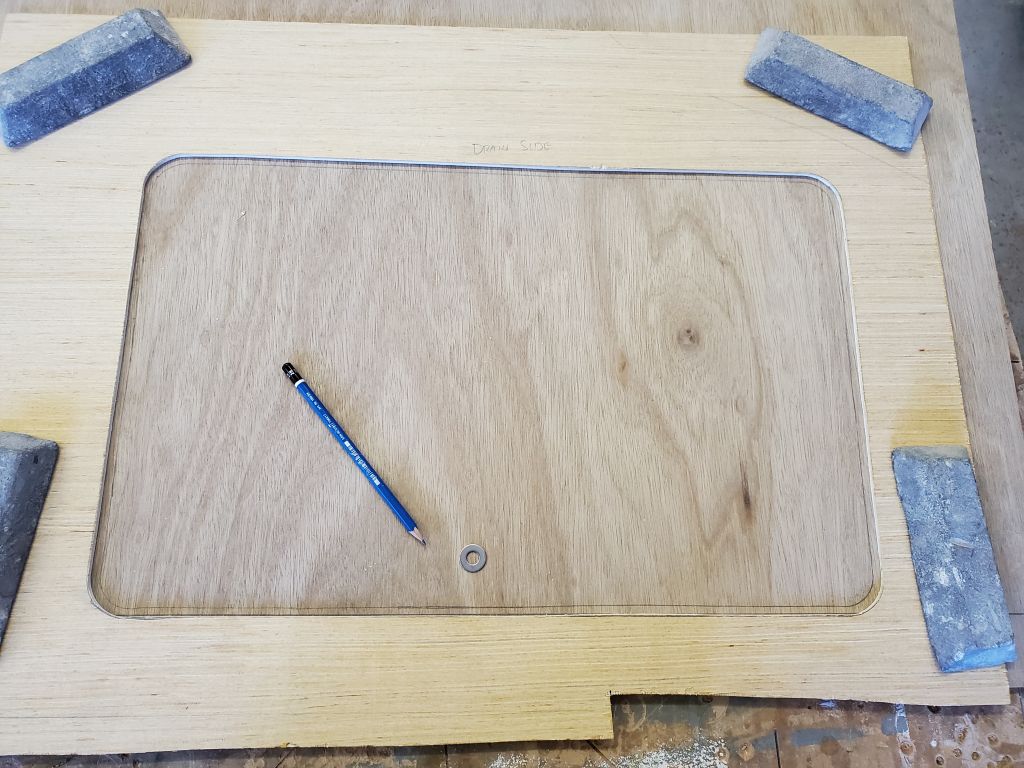
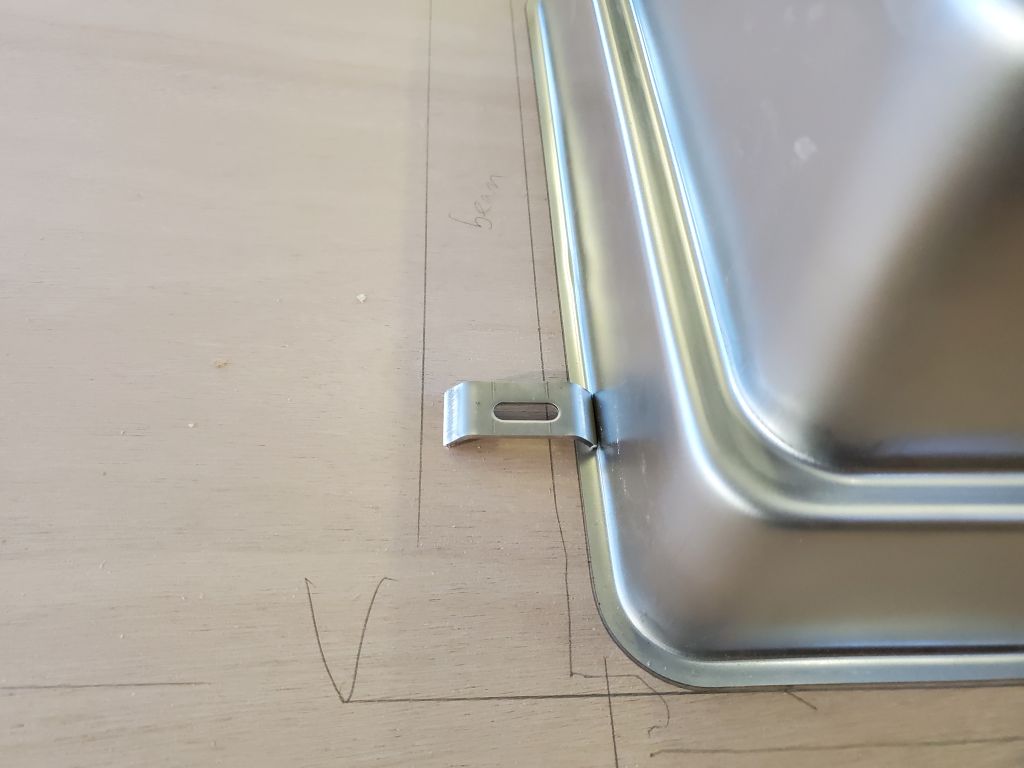
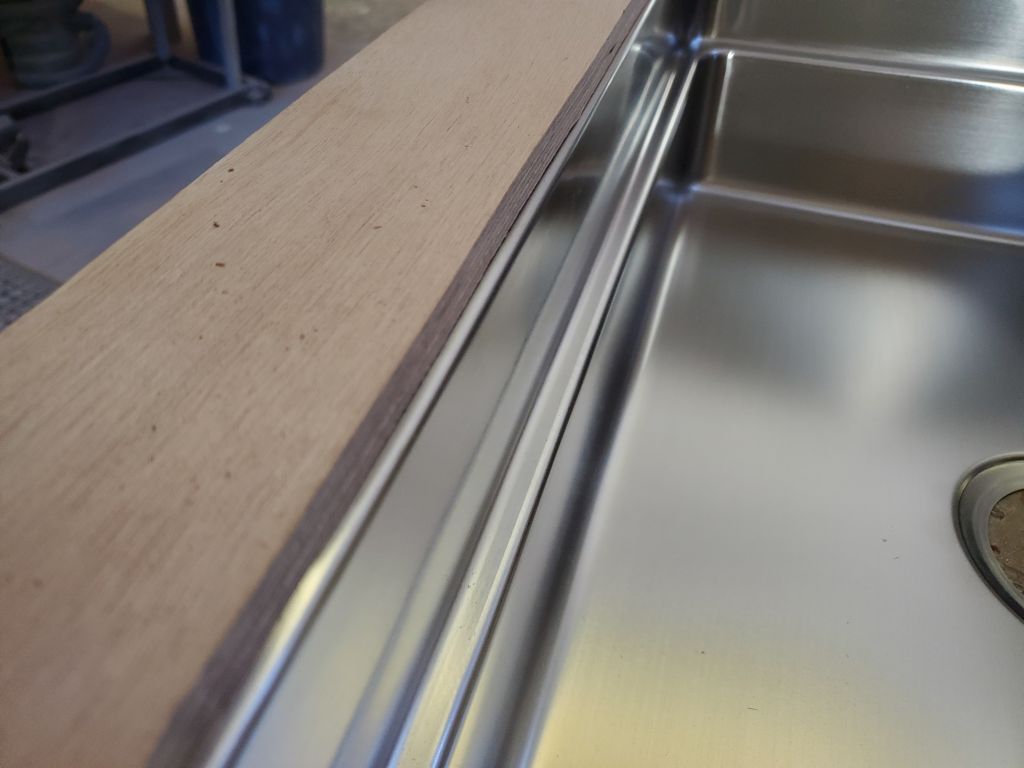
With the sink positioned upside down on the underside of the countertop, I determined its final position so I could lay out the template and make the cut. I made sure there’d be room for the installation brackets, which would pin the sink tightly to the underside of the counter; I’d have to make a relief cut or two in the galley support beam to leave room for these clips in the final installation, but that posed no issue. Once I’d finalized the position of the sink taking all necessary factors into consideration, I traced the outline of the pattern so I could cut out the bulk of the opening with a jigsaw.


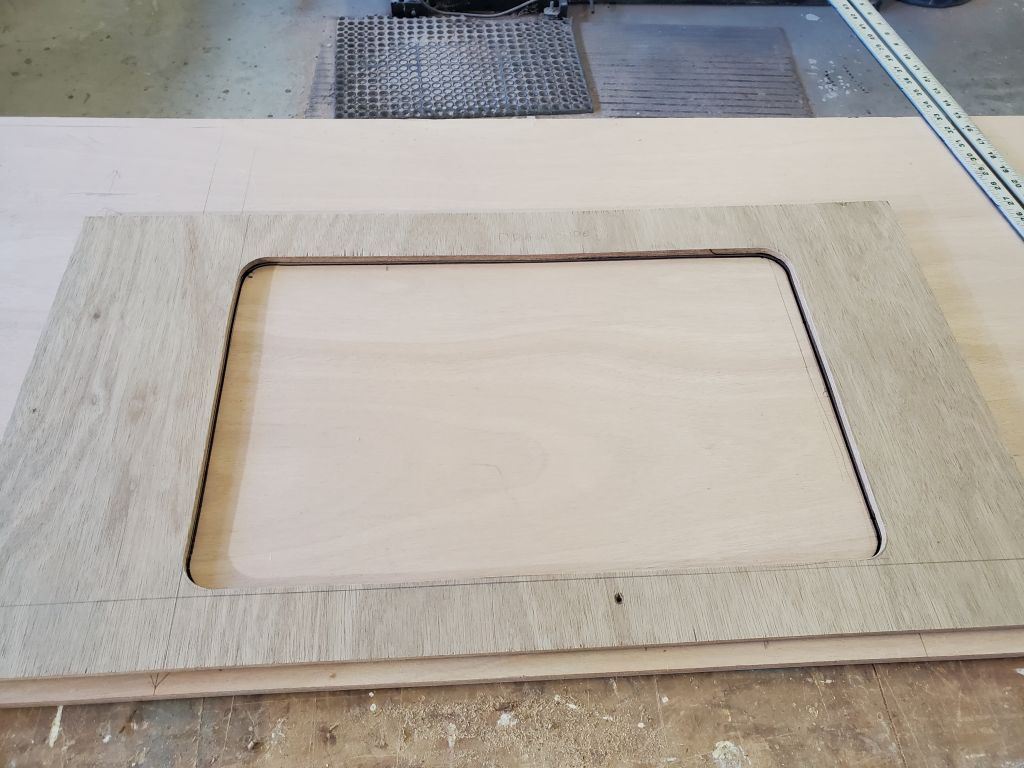
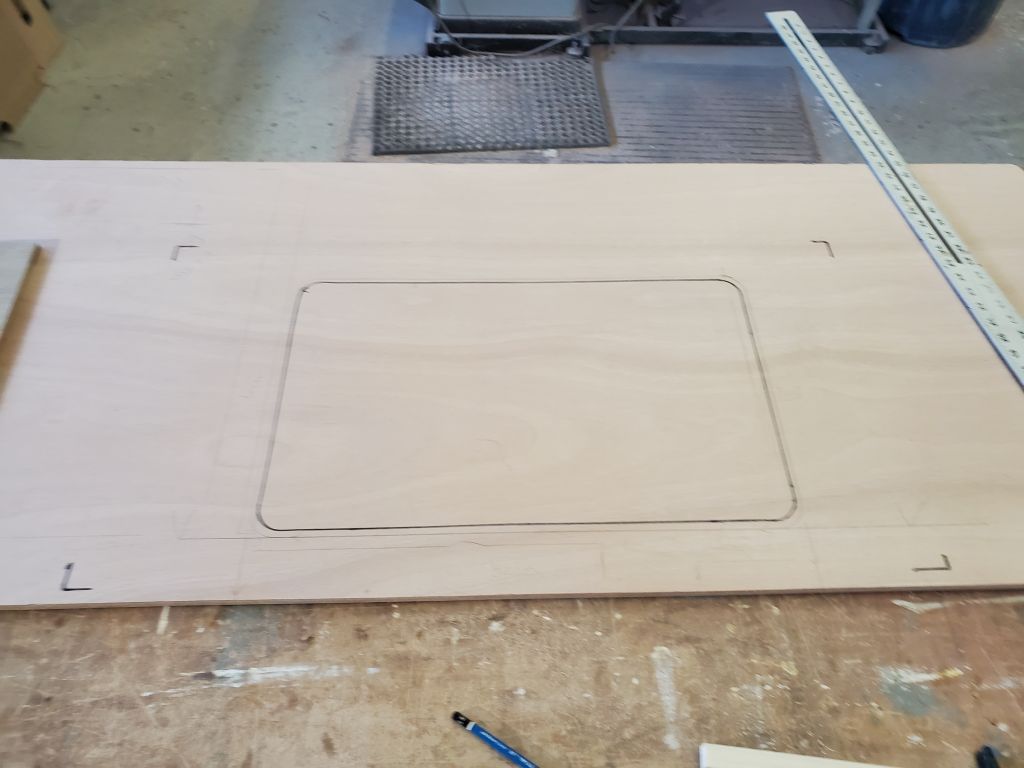
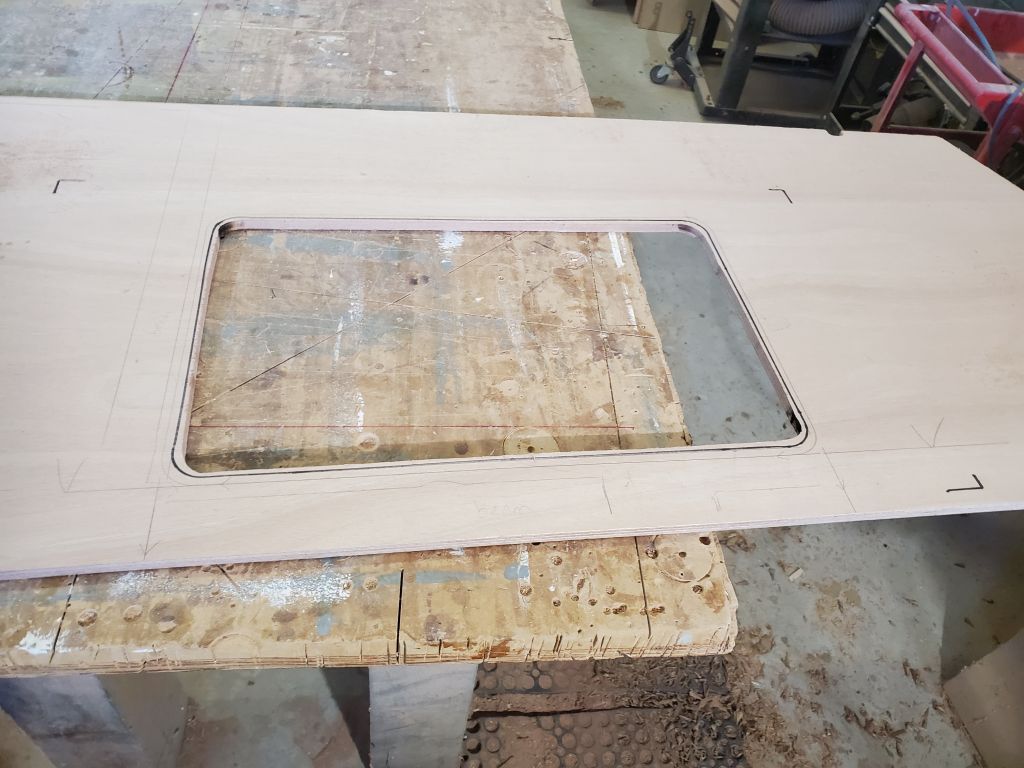
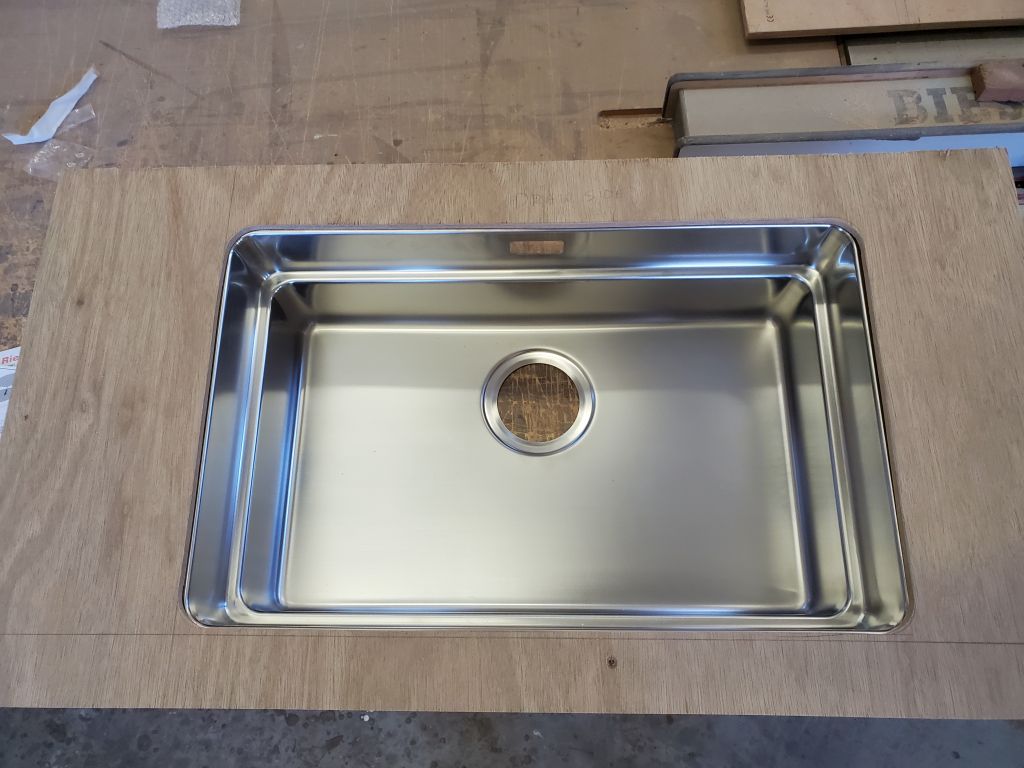
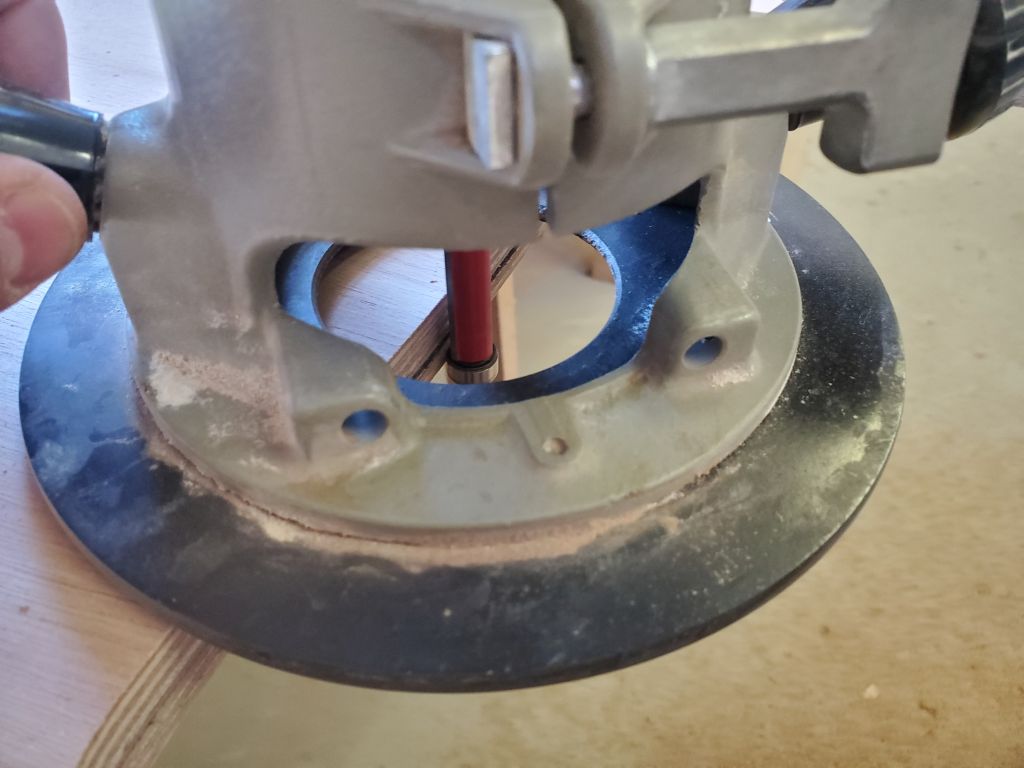
I reinstalled the pattern in the correct position, securing it with screws all around, then used a router and a pattern bit to make the final cut and replicate exactly the template.
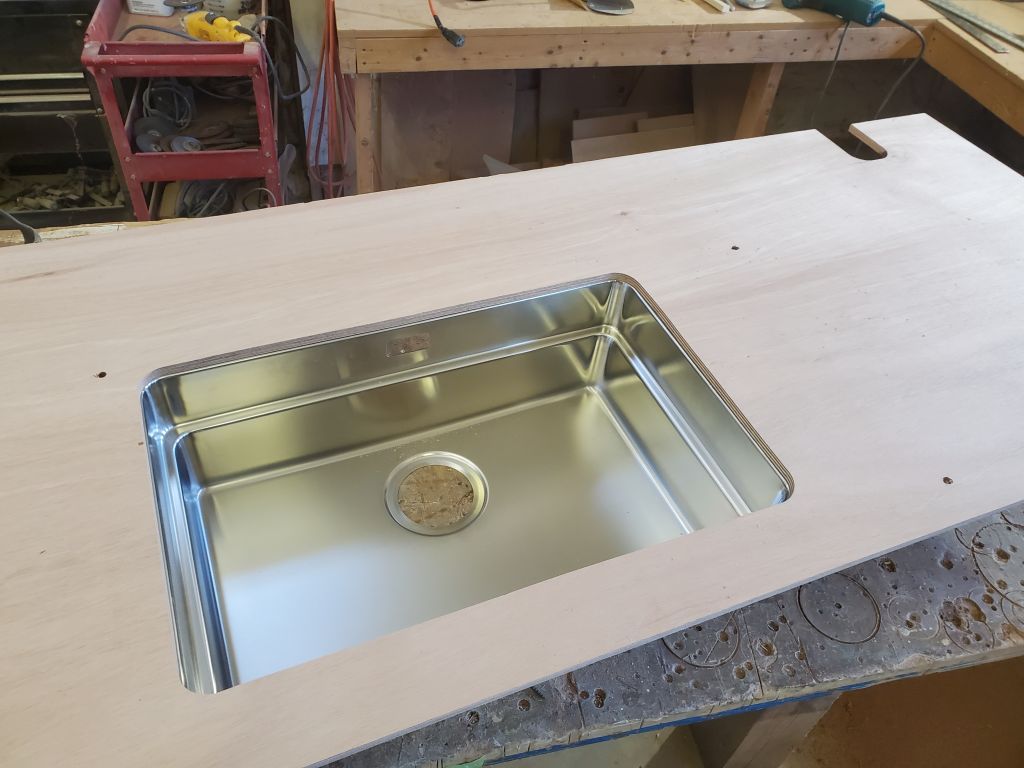
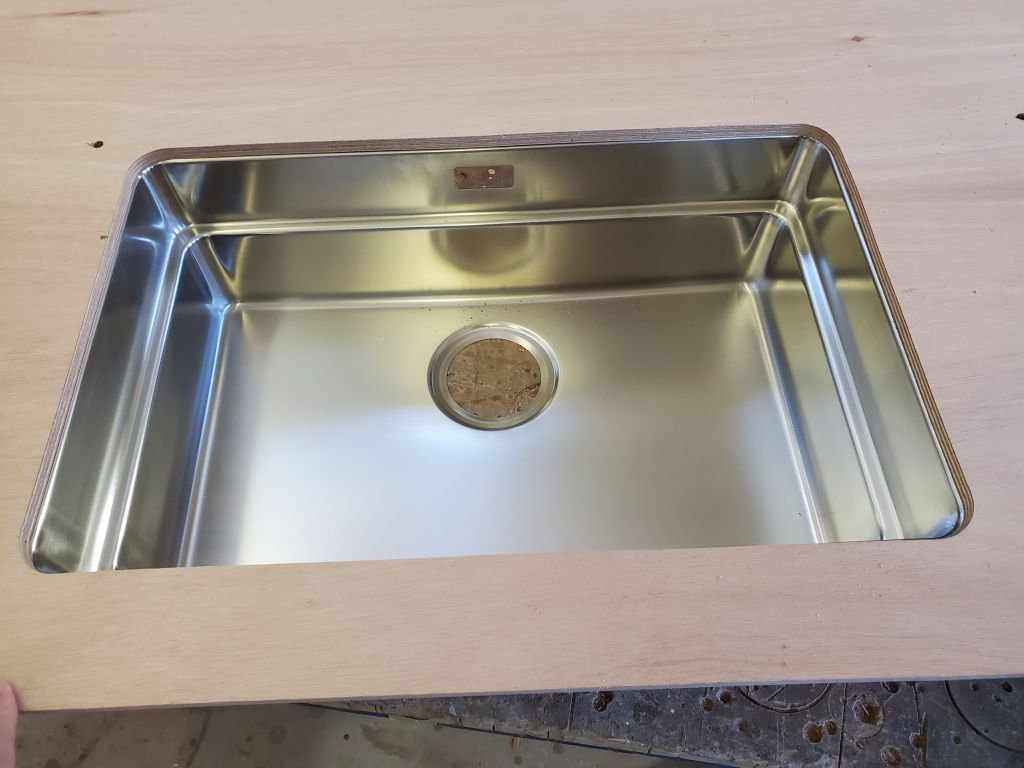
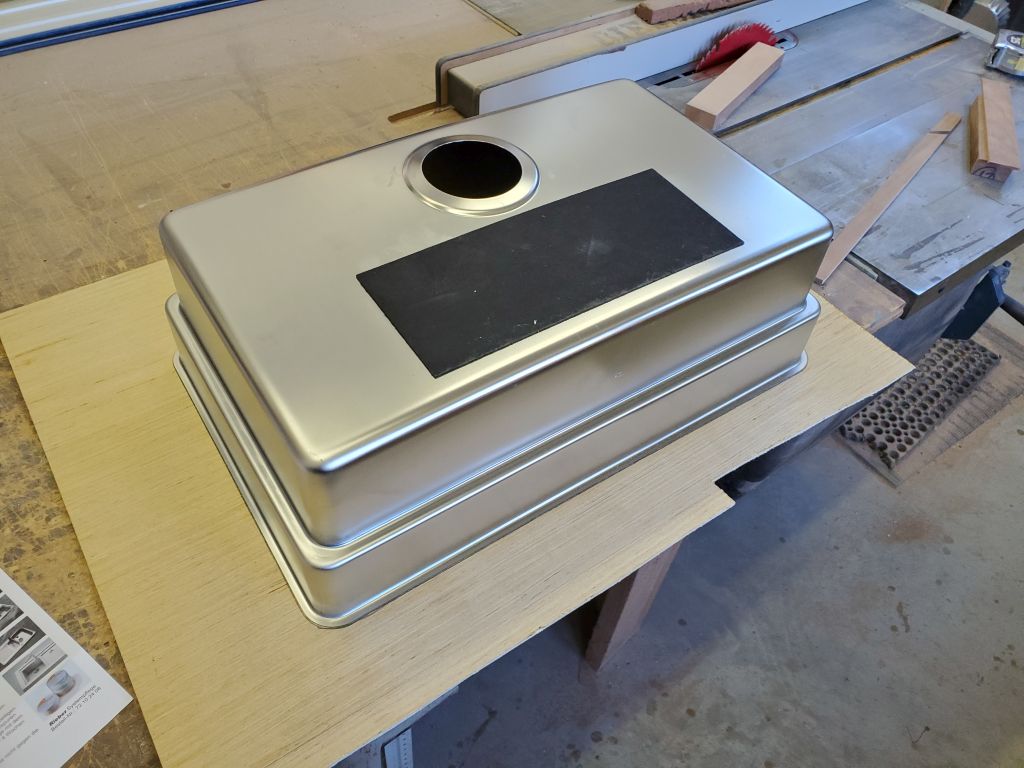
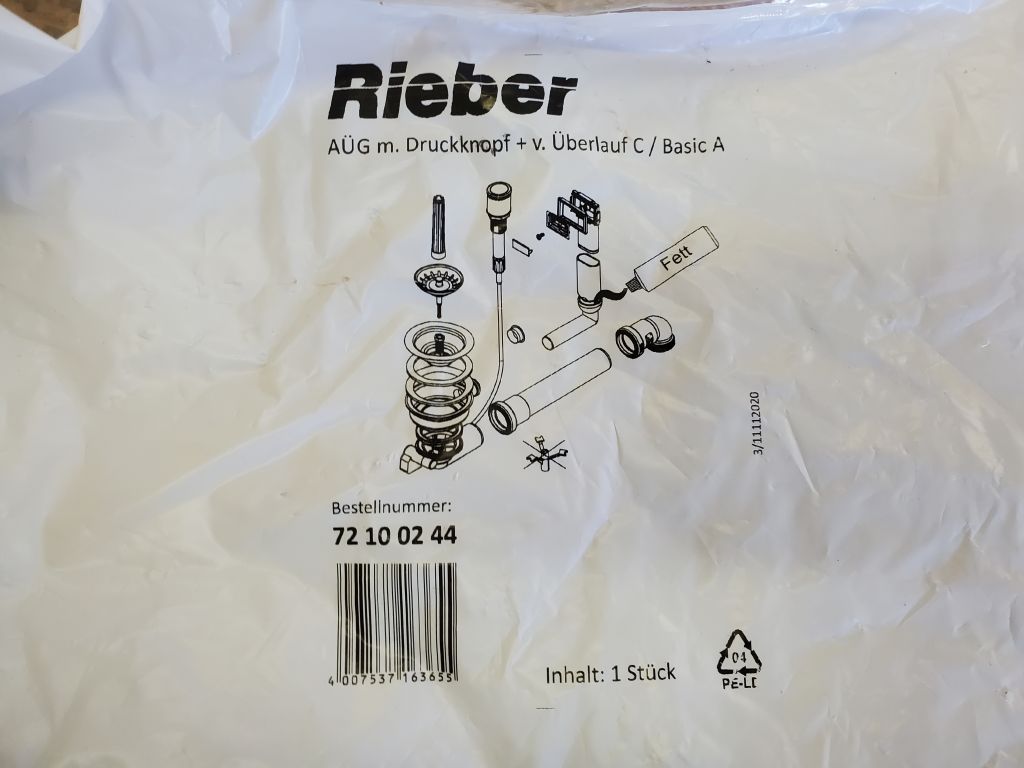
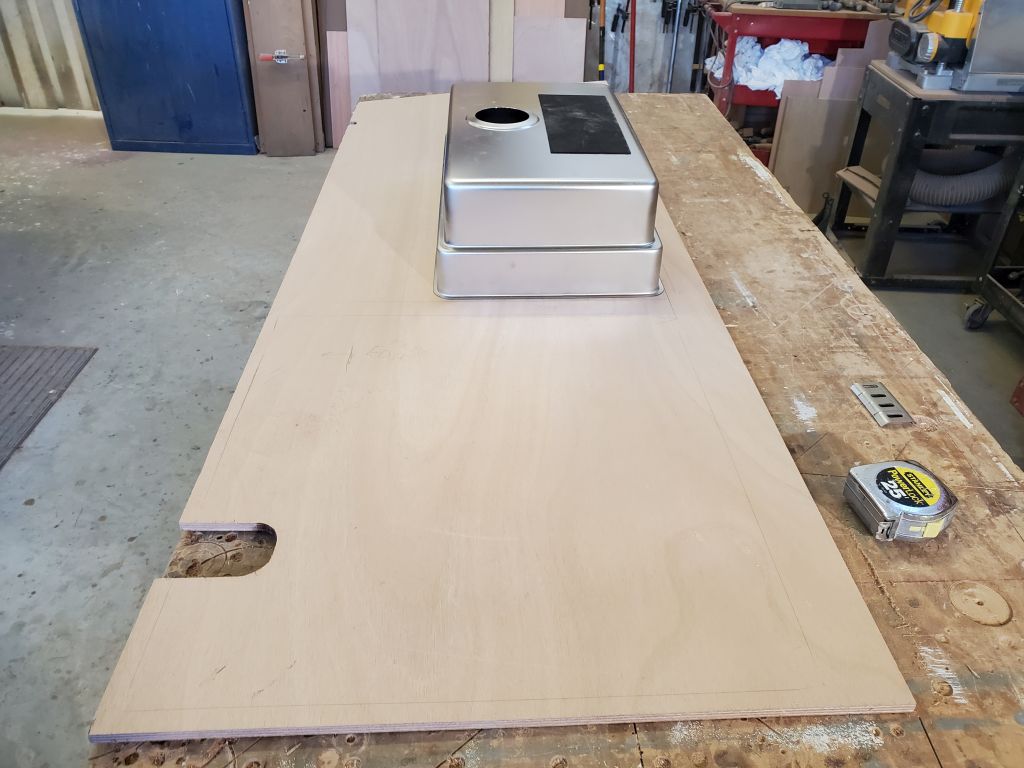
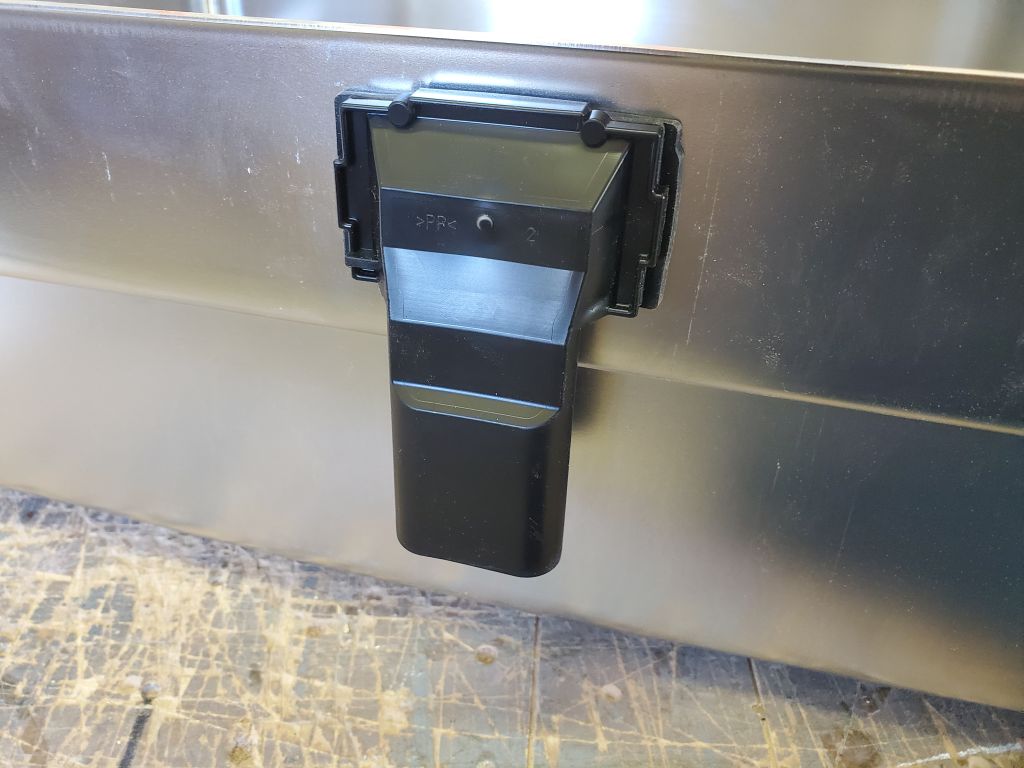
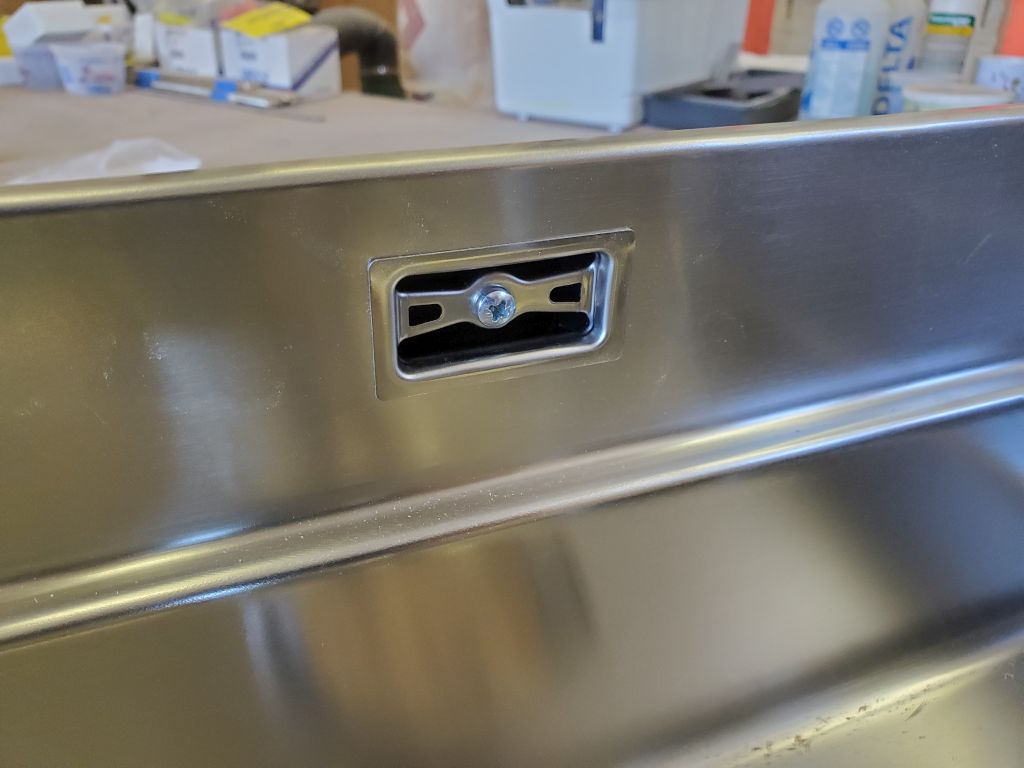
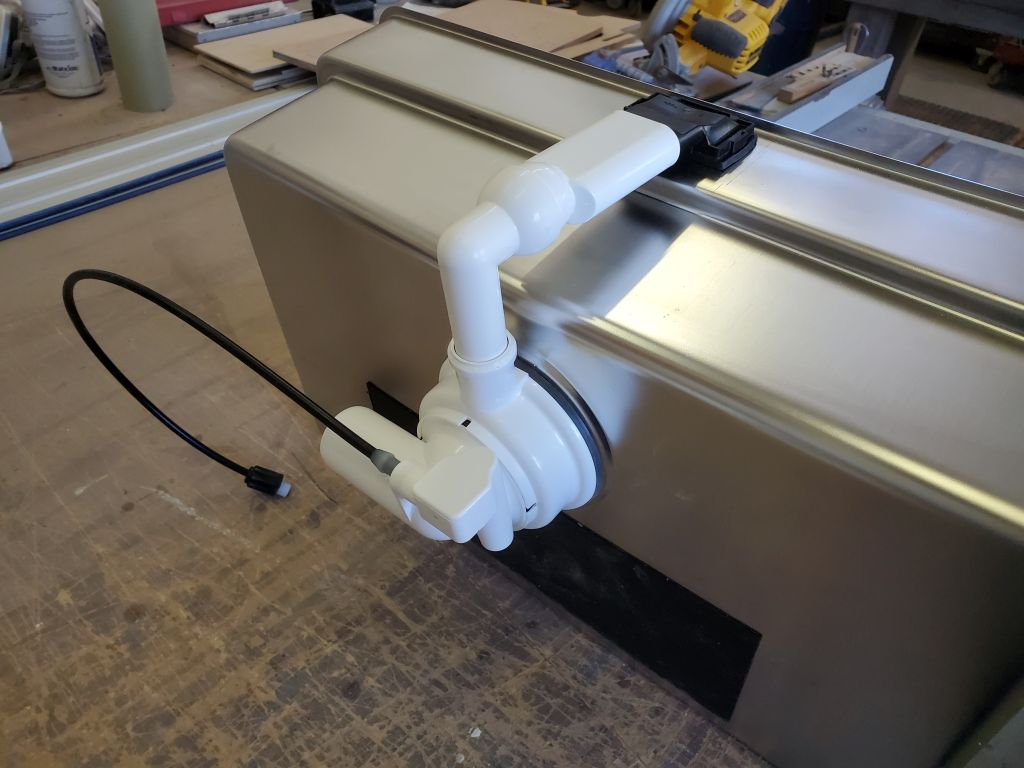
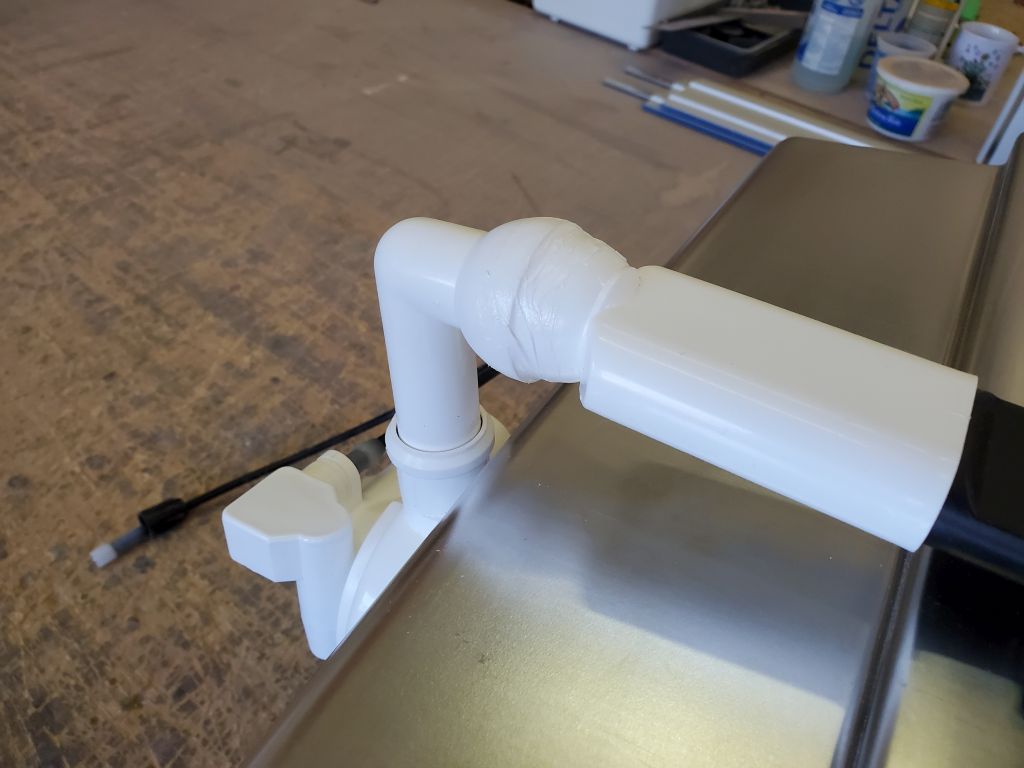
Now I had the required opening, finally, and while I had all the sink paraphernalia spread out I decided I might as well install the drain so the sink would be ready for final installation whenever I needed it. It took a little while to puzzle out the drain components included with the sink, but once I did the final installation was pretty straightforward. The drain system included a remote-activated push-button device (to be set flush in the countertop) for operating the (I think) drain/stopper system, and I might have avoided using this but it was integrally required with the whole setup. The overflow drain included a sort of universal ball joint for its joint with the elbow leading to the main drain assembly, allowing leeway in final positioning, and once I had that figured out and the elbow cut to the appropriate length, it made final assembly of the disparate parts as straightforward as possible. Per the instructions, I added sealant to the ball during final assembly.


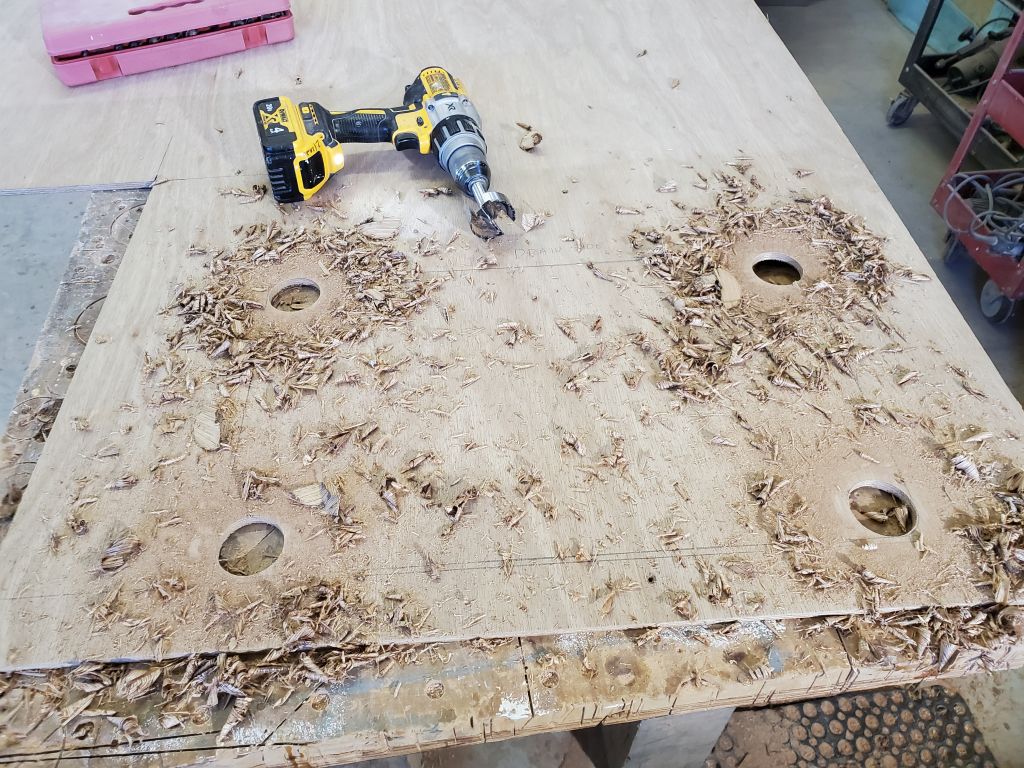
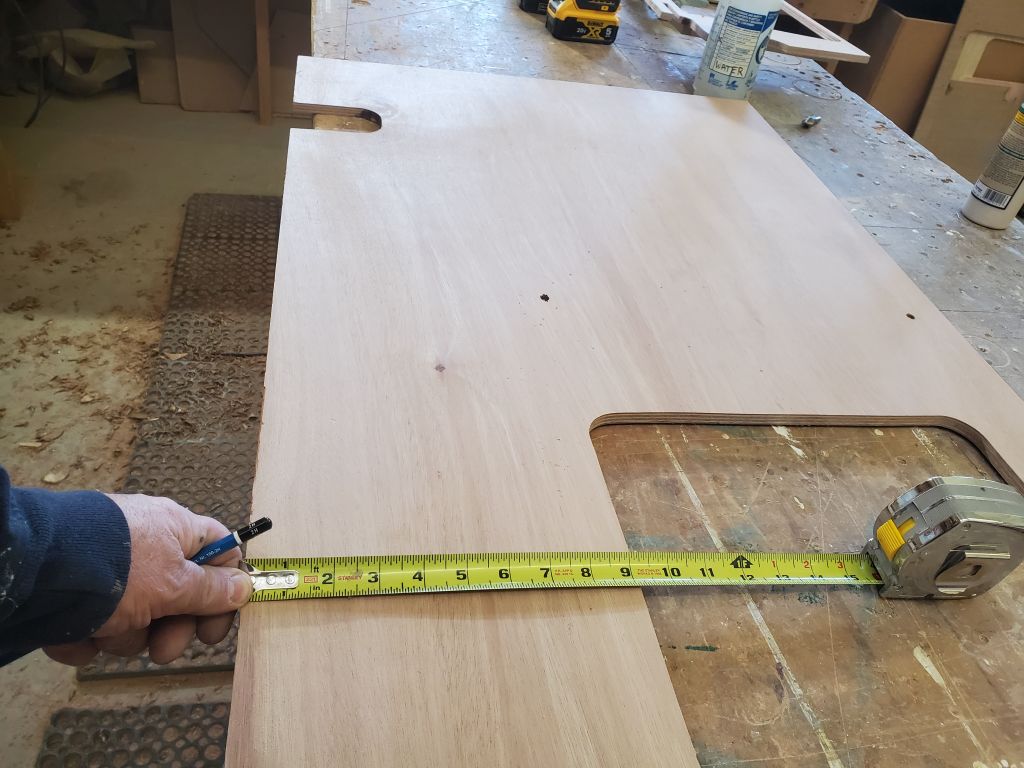
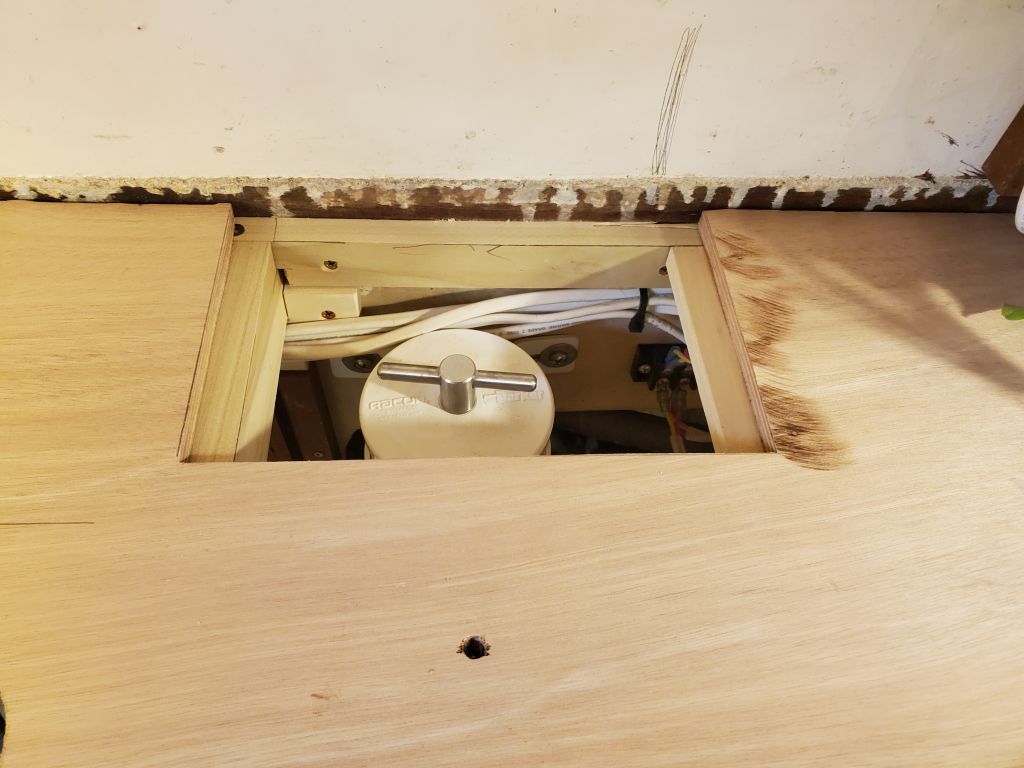
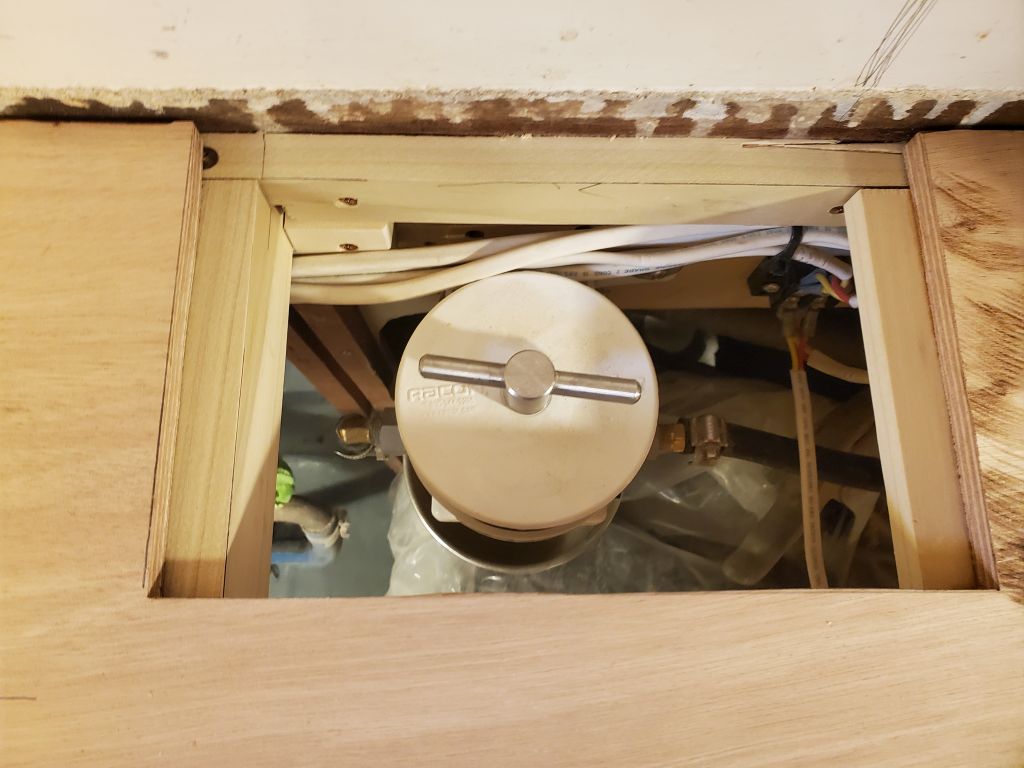
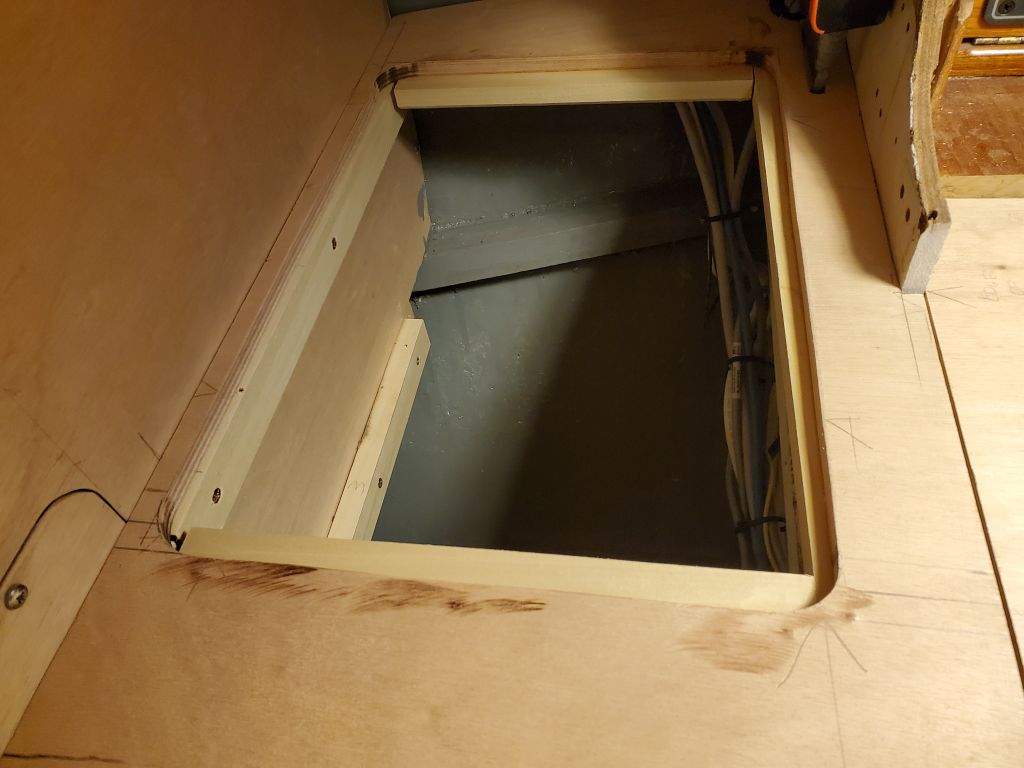
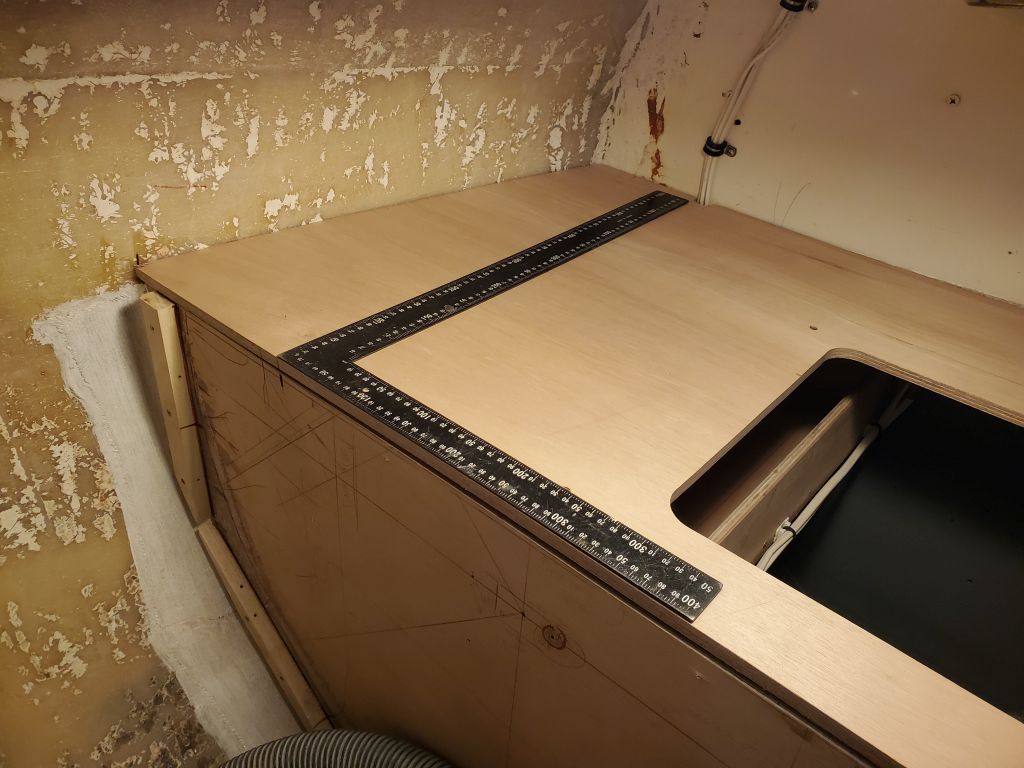
That whole exercise took up most of the morning, but now I’d accomplished the initial goal of having the sink position finalized. This left about 9″ on the aft side of the counter behind the sink, giving me a guideline for the upper cabinets still to come, and some other considerations like the access hatch over the fuel filter, which I’d planned all along to provide the requisite–and easy–access for replacing the filter element. Leaving a couple inches’ clearance behind the sink for faucet installation would give me as much as 7″ depth for the upper cabinets (to the inboard face), more than ample for them to be useful and also to hide the filter access hatch when all was said and done. With some measurements and reference marks I’d made when the countertop was in place earlier, now I cut a 6″ x 9″ opening over the filter, large enough so that the longitudinal countertop beam on the starboard side could form one cleat to support the cover, and plenty of room on the other side for a support cleat without impeding filter access.
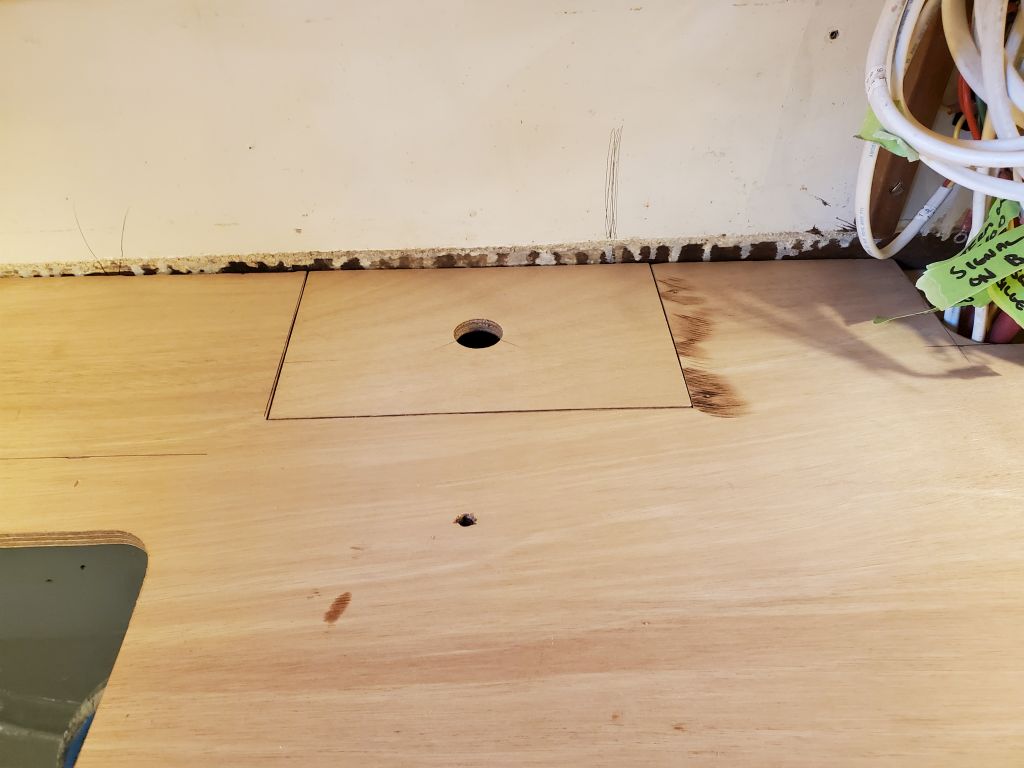
On the port side, I added support cleats as needed around the trash can opening (note that the countertop opening inside the cleats is sized to allow passage of the entire can through the top), and test-fit the panel back in place again.
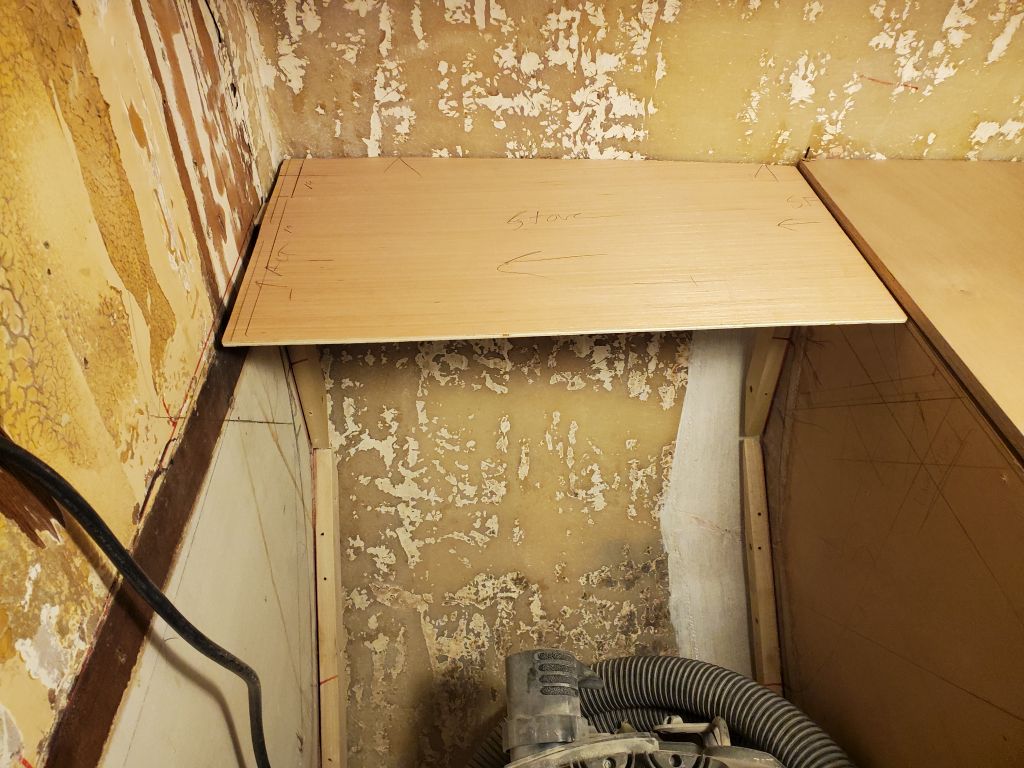
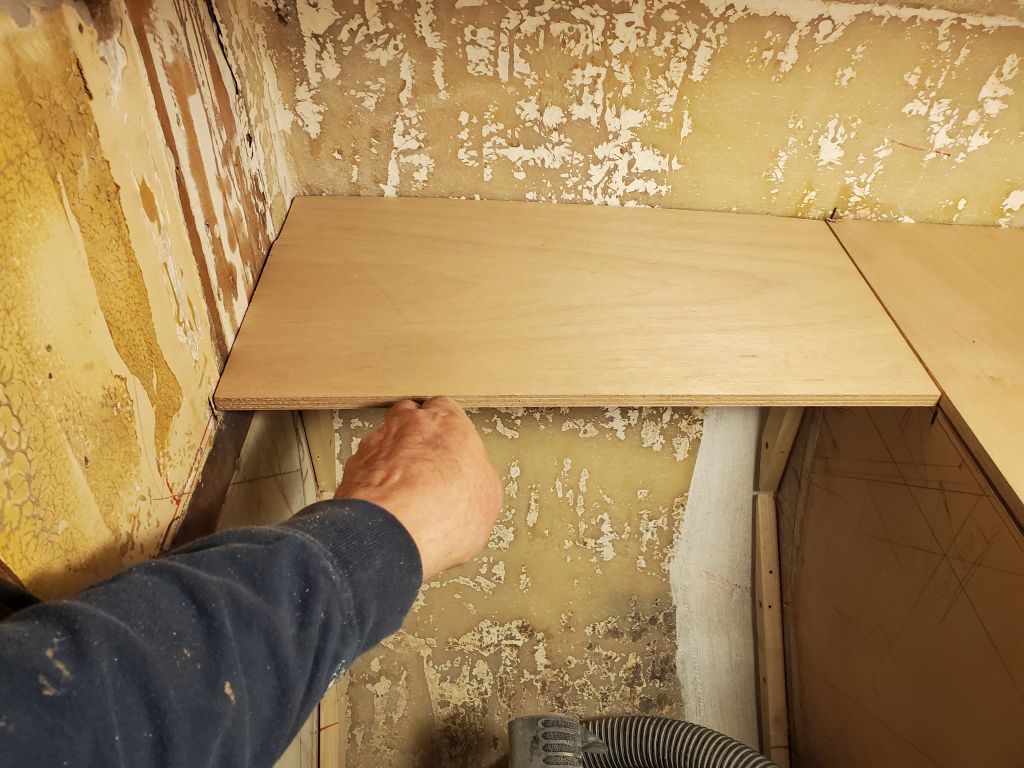
I also needed to plan an access hatch outboard of the sink to starboard, so that the large shelf I’d built beneath could be used. Before I could determine its size and placement, I first had to work out one small remaining piece of countertop across the outboard side of the stove enclosure. There was room here, outboard of the farthest swing reach of the stove itself, for a continuation of the counter, mainly to provide additional over-counter storage lockers in this side. So with the swing extent marked on the bulkheads as a guide, I started with a basic cheap plywood template cut and scribed to fit, then transferred the shape to the final material, which for the moment I could only temporarily hold in place as it require additional support cleats. But this gave me a reference to use as a maximum position for the upper cabinet to come, which in turn, along with the corresponding mark parallel to the aft bulkhead, gave me the open field area left to be available for under-counter locker access. I’d lay out, cut, and finish that opening soon.
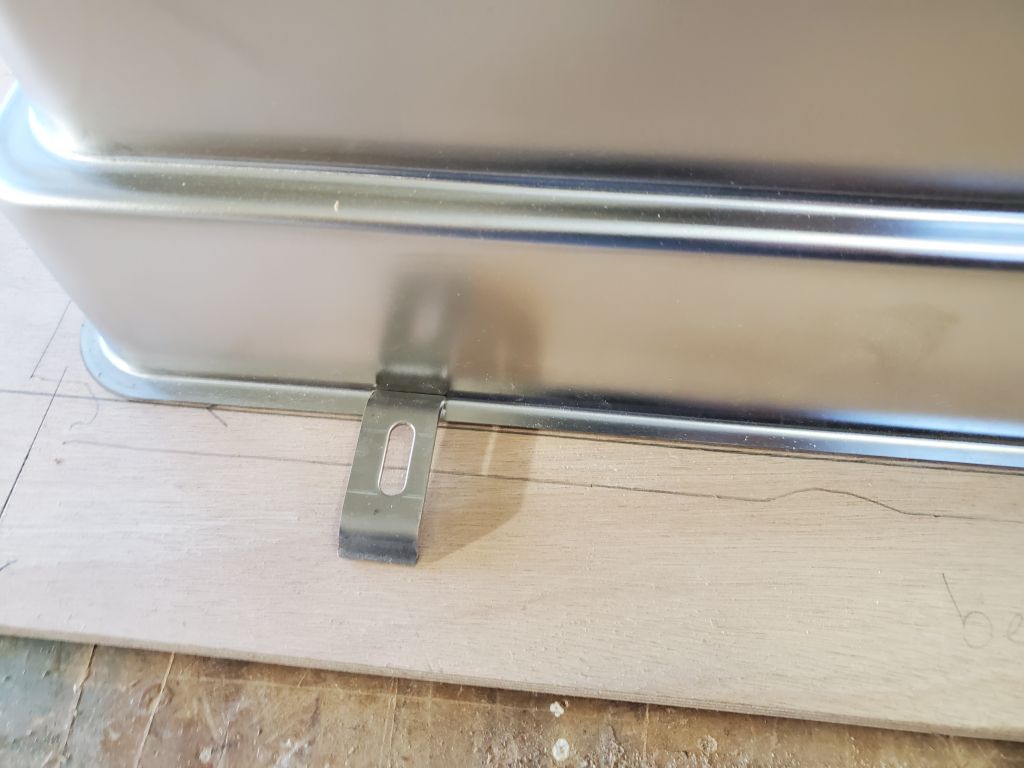
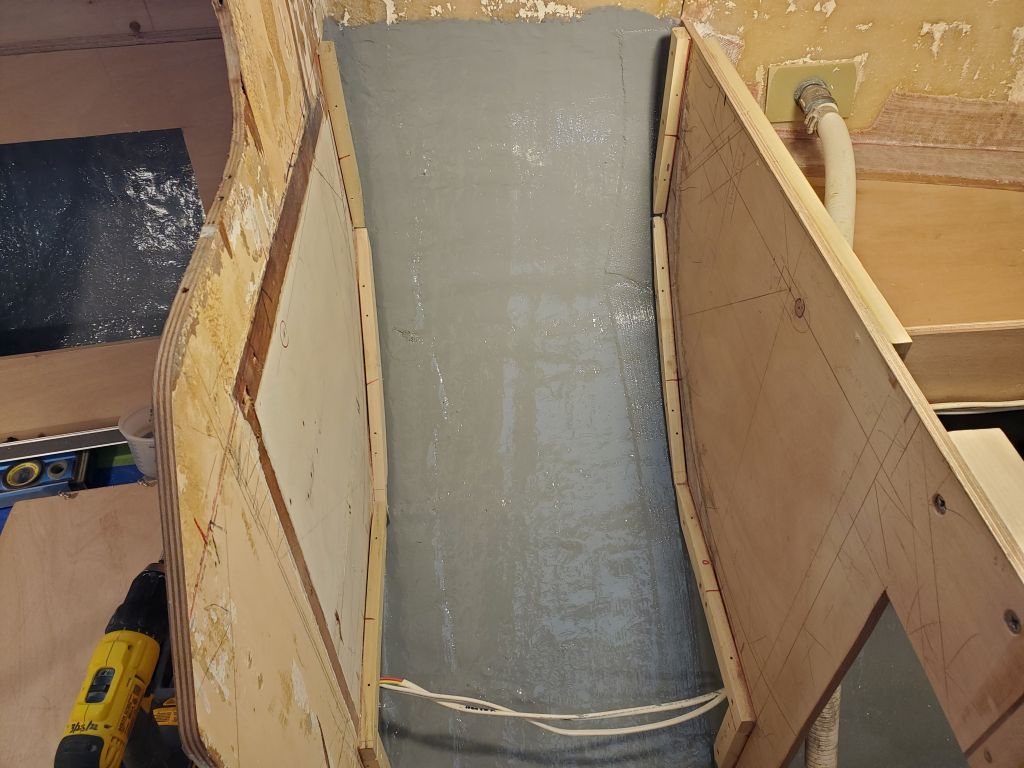
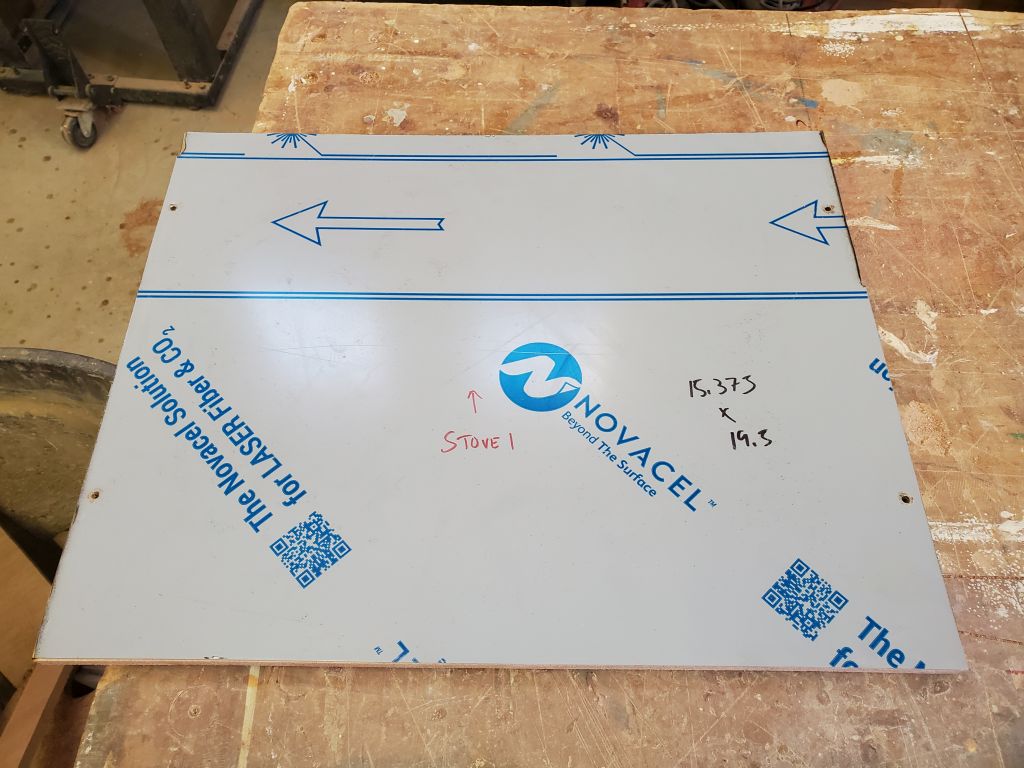
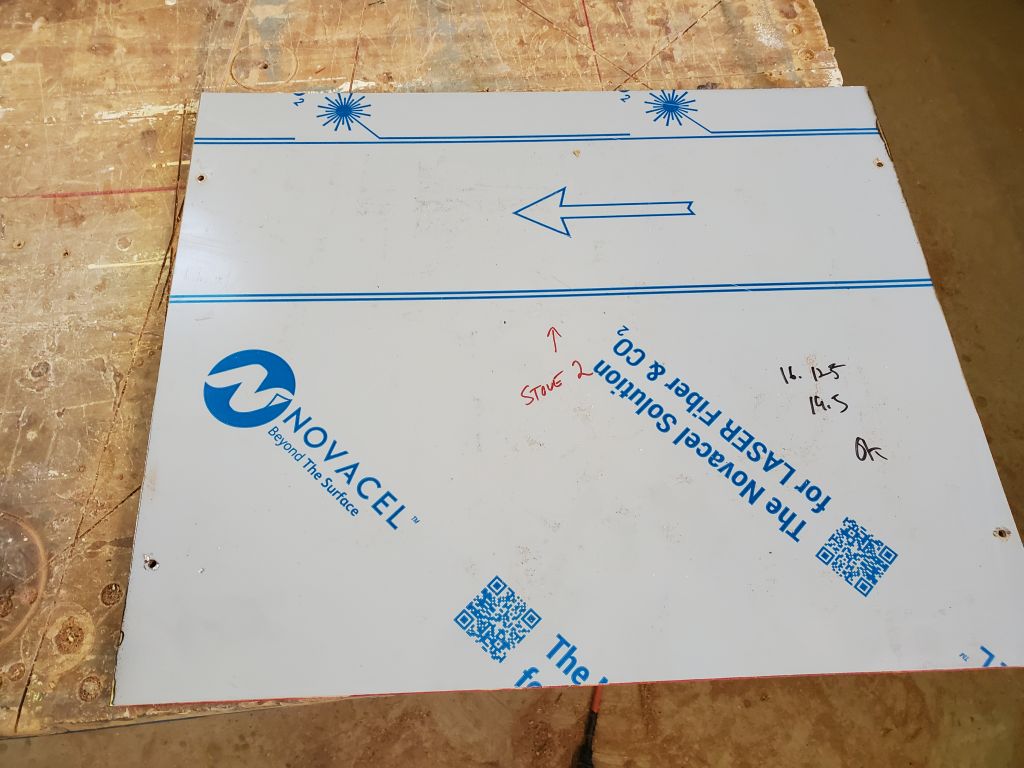
Now I couldn’t install the support cleats required for that final section of countertop, behind the stove, till I had installed the stainless steel sheeting I’d purchased to line the surround. So to that end, I worked to finish off the opening so I could install the three faceted pieces between the bulkheads, after which I could template and cut the sheeting for the fore and aft bulkheads to shape and install it. Only then could I finish up the support cleats above. After cleaning up, I applied a coat of gray bilge paint to the hull inside the space, then spent the remainder of the afternoon preparing the sheeting to fit the three pieces forming the bottom and back of the enclosure. I’d ordered the sheeting cut to the overall dimensions of each piece, but there was some minor shaping and fitting required so the stainless would fit correctly, and I had to drill for the four mounting screws that would hold the panels–and the sheeting–in place. Once all these pieces were done and installed, and the vertical bulkheads similarly covered, I’d finish off the various corner seams with some trim, and then the space would be ready for the stove whenever it was time. This would all make more sense once the pieces were installed.
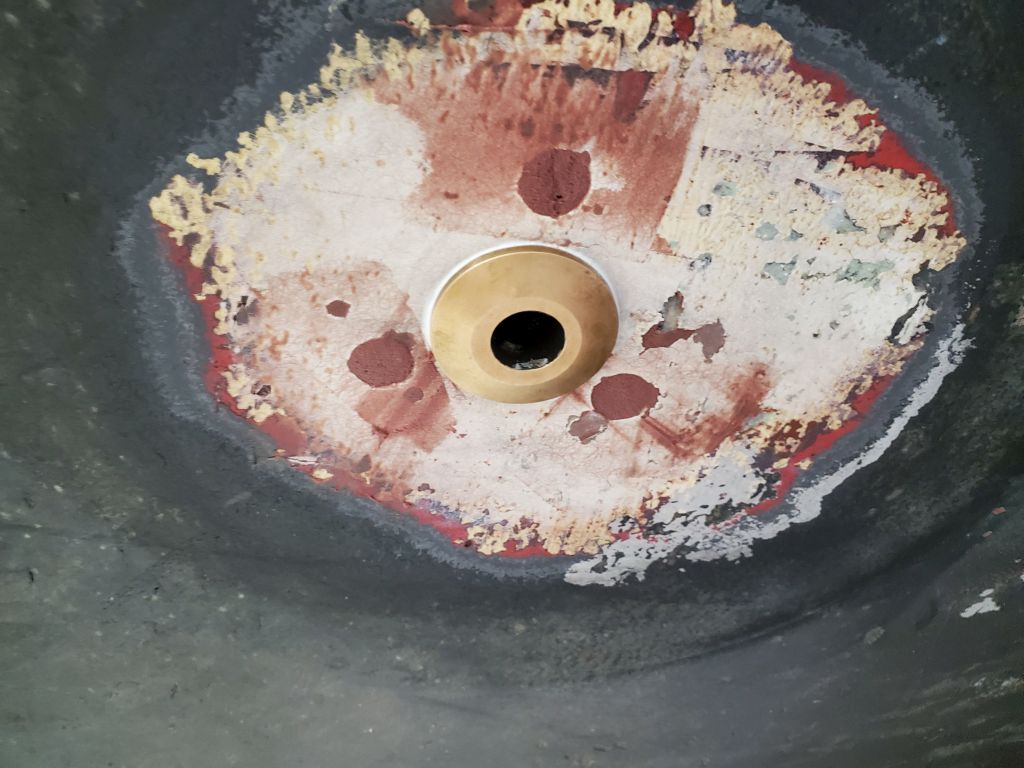
With a few seconds left in the day, I knocked another small item off my list and applied some fairing filler to the three bolt holes of the new through hull I’d installed earlier.
Total time billed on this job today: 7.75 hours
0600 Weather Observation: 30°, clear. Forecast for the day: Sunny, 40°