


December 21, 2023
Calliope Girl 26
Thursday
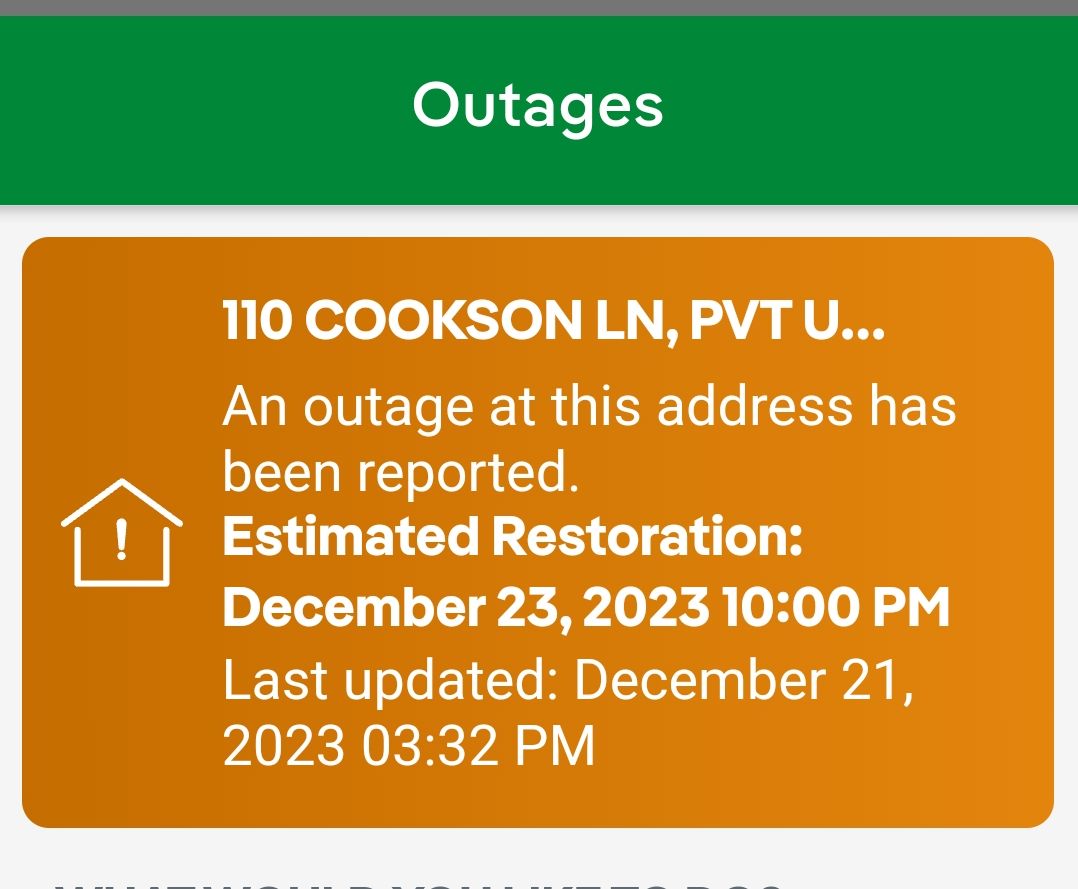
As the 4th frustrating day without power got underway, and with the temperature on the cold side, it was time to hook up a temporary generator so I could run the heat in the shop and maintain the temperature at a reasonable level, and more importantly to circulate water through the in-floor piping. The generator didn’t power the whole shop–just one outlet circuit and one lighting circuit in addition to the oil burner–and the setup wasn’t ever intended as anything other than a fail-safe, but at inception I also never expected that there would be such frequent, long outages as we seem to see now, with at least one (and often two) extended outages statewide per year.
I digress.
In the event, with the generator running the heat for several hours, I also had the opportunity to get at least something done workwise with an extension cord run to one of the powered outlets. I had no lights in the woodshop, but plenty of natural light through the windows for what I wanted to do. While I couldn’t do what I’d planned to do this week, which was to get started on the new settees, as I stewed over the unwanted delay, I’d come up with the idea that I could make some progress under the existing circumstances and sand the various ceiling strips (from the v-berth) and bulkhead staving (from the old nav station and galley) to prepare these pieces, which I intended to re-use, for refinishing and eventual reinstallation. This task was something that had to be done sometime, but was also the sort of job that always seemed less important than many, so this was a good opportunity to knock it off.
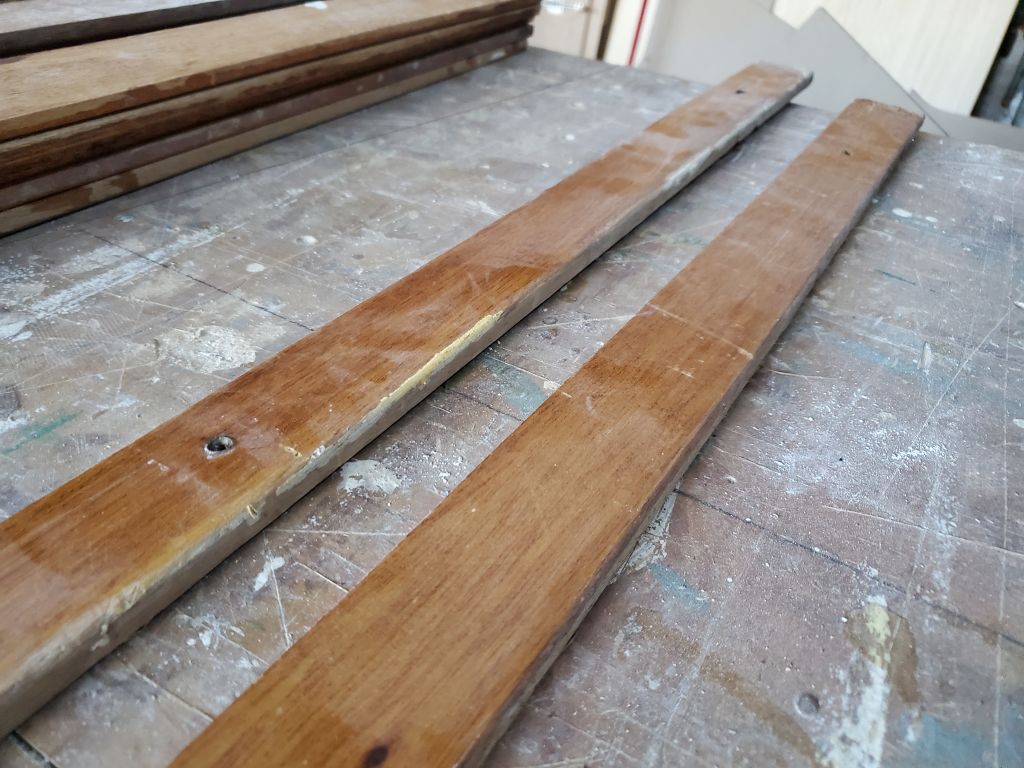
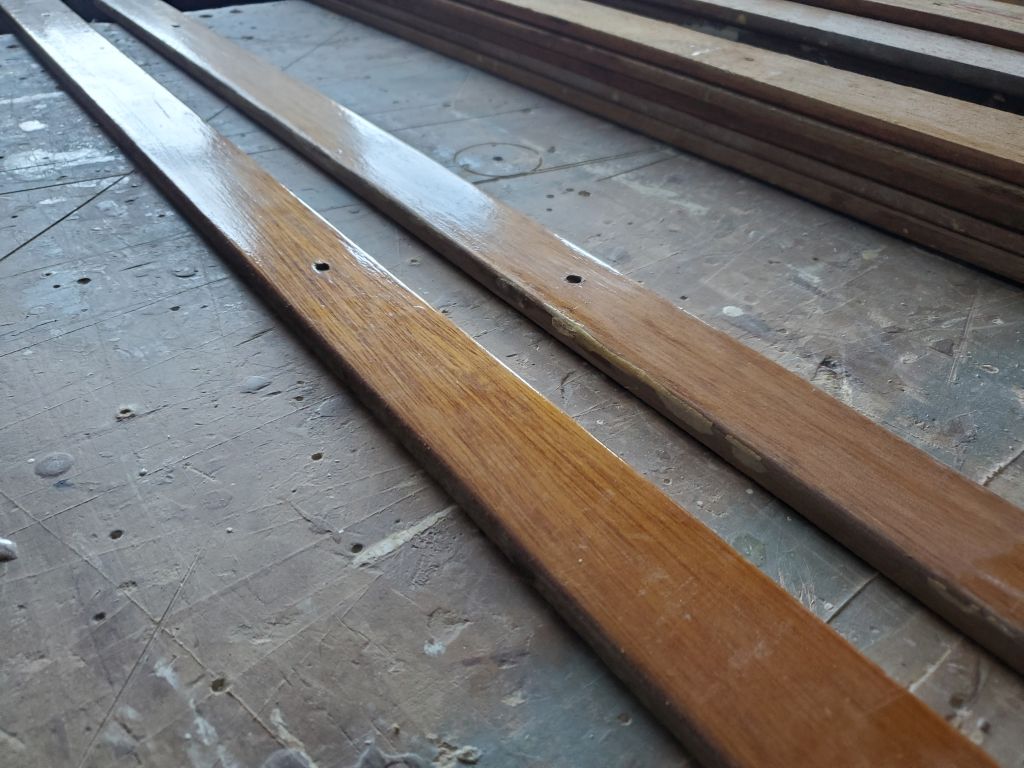
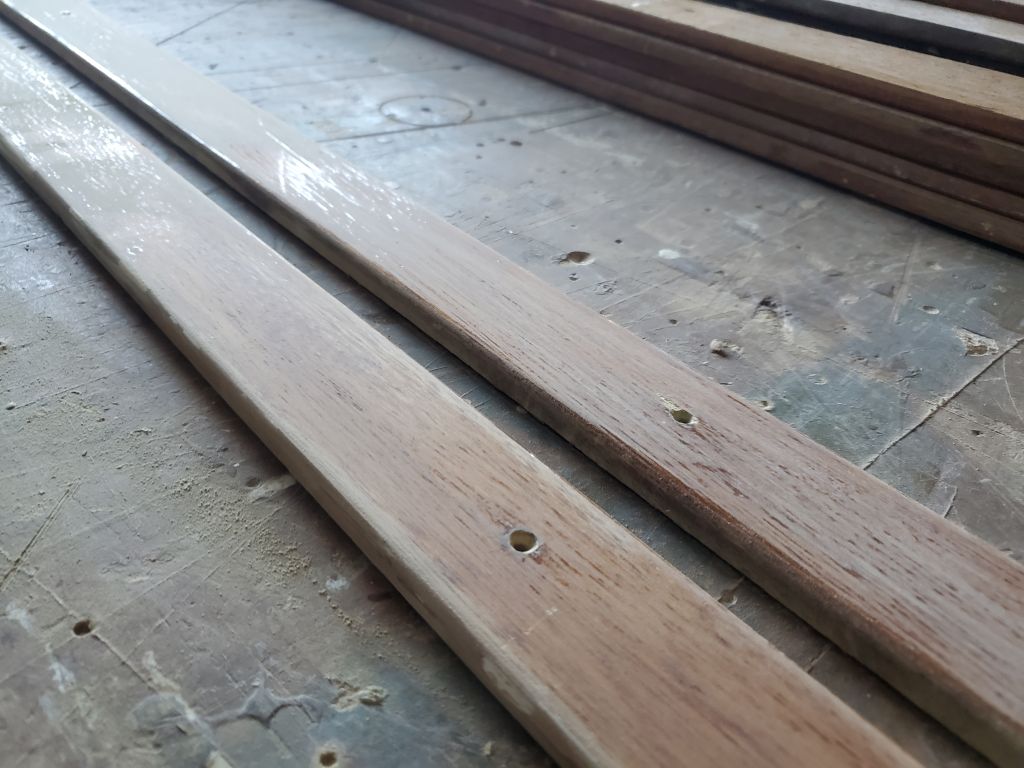
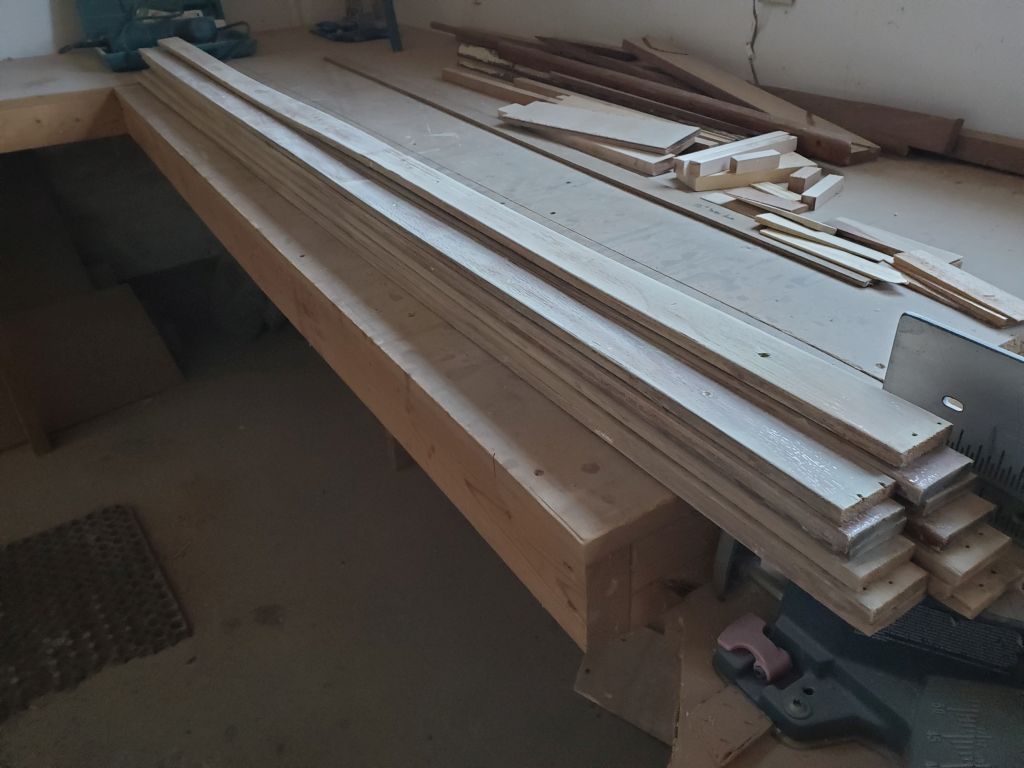
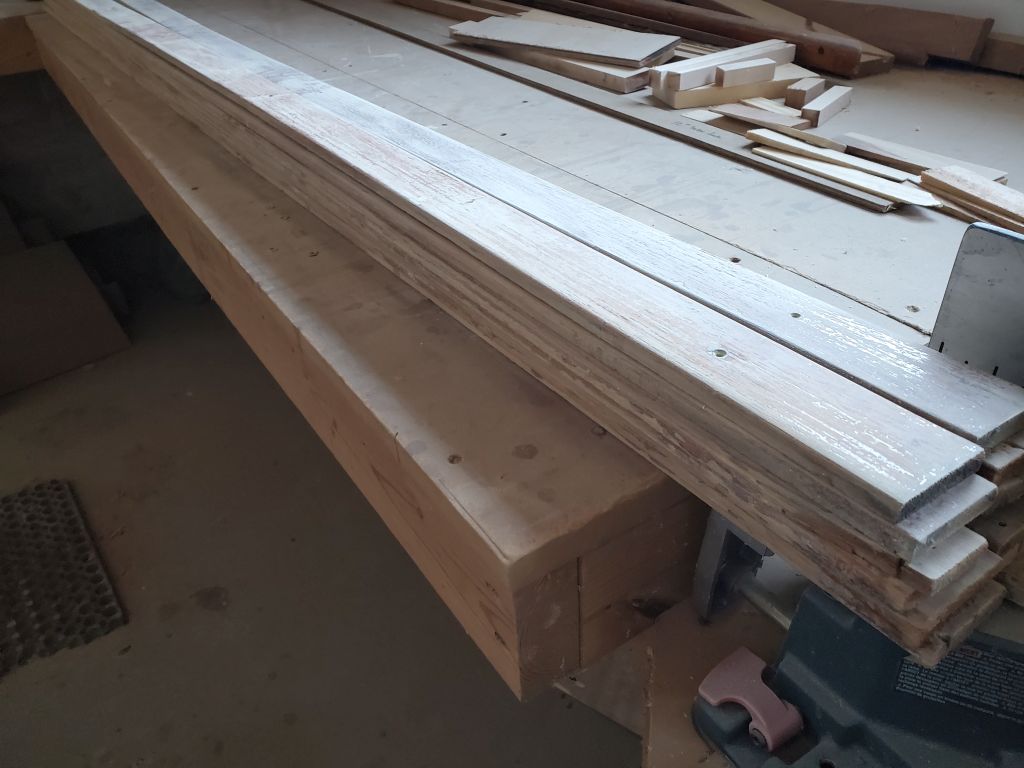
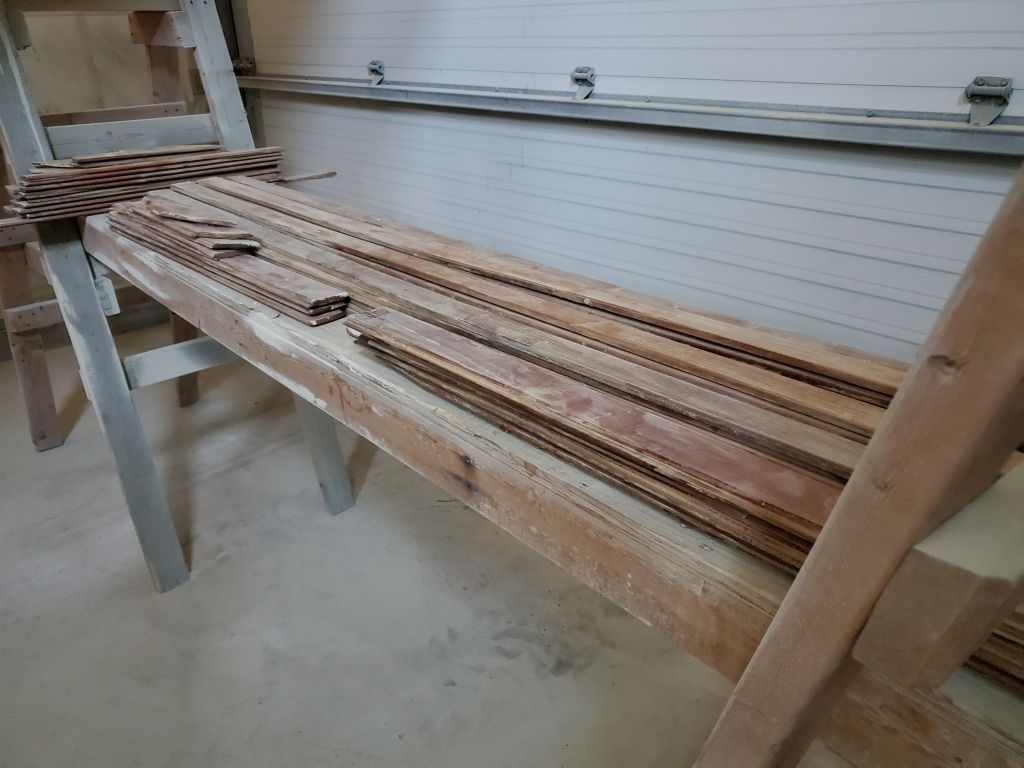
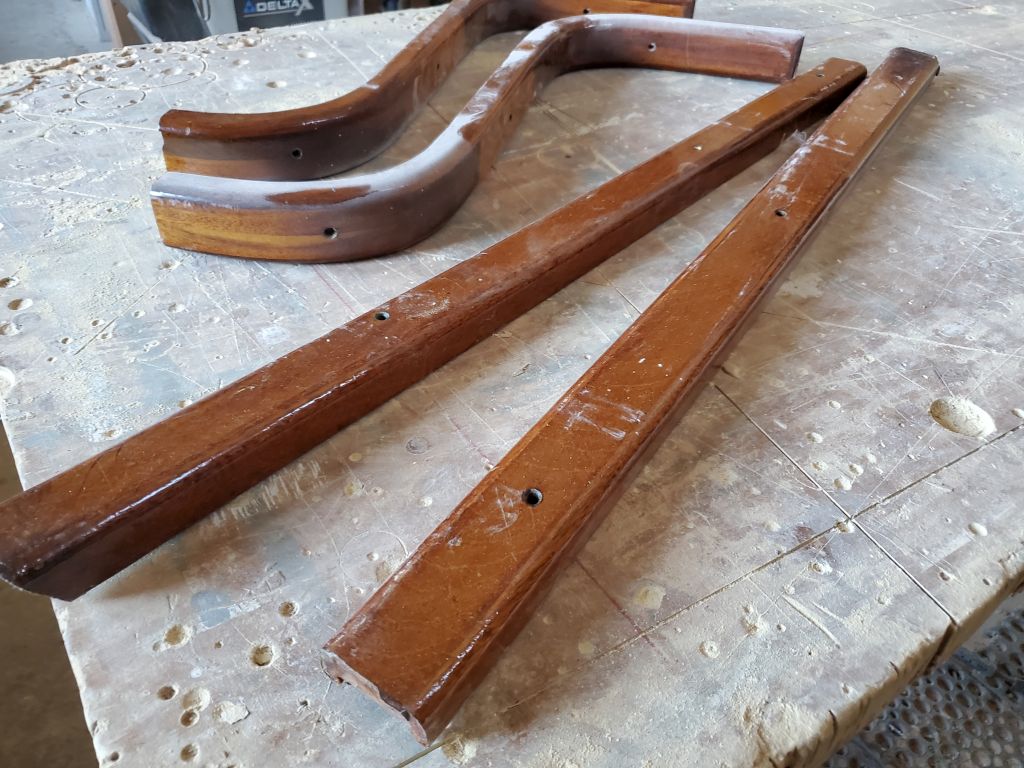
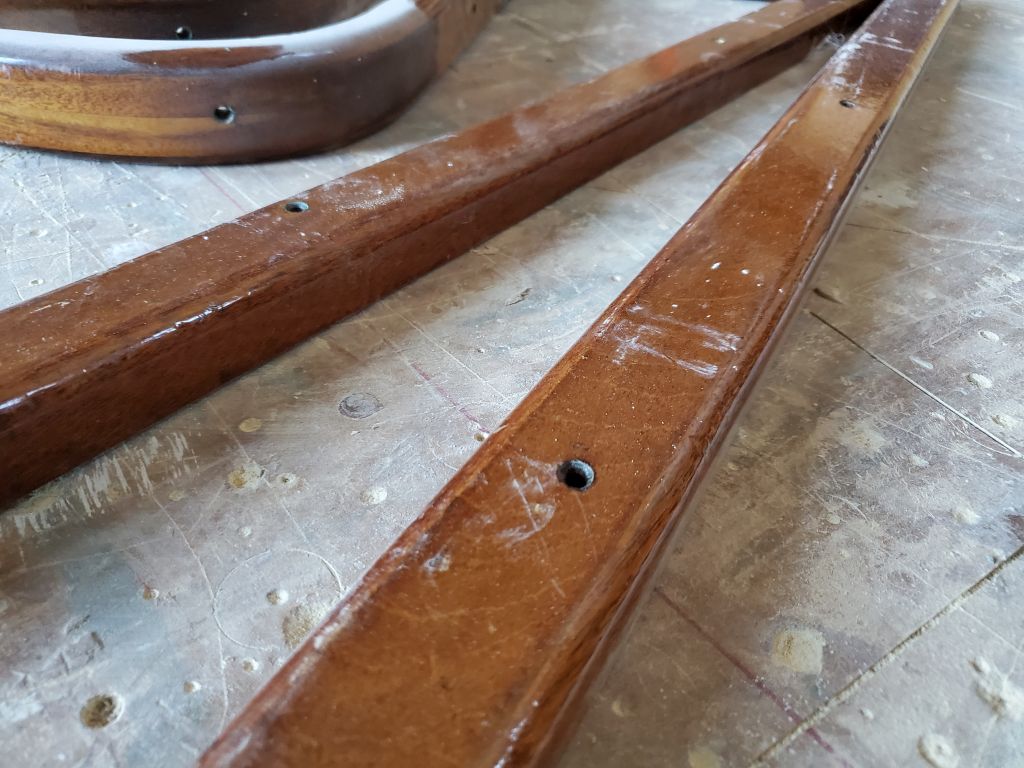
The existing gloss varnish on the ceiling strips was in fair condition, but pretty tired overall, with some scuffs and scratches and a general need for refurbishment. The backs and sides of the rough-cut strips had never been varnished, and didn’t need to be, but after sanding and before installation, I planned to apply a coat or maybe two of gloss varnish as an improved base, and then (at least according to current thoughts) a final coat of rubbed-effect varnish. Some of the edges had some paint that had dripped down from somewhere.
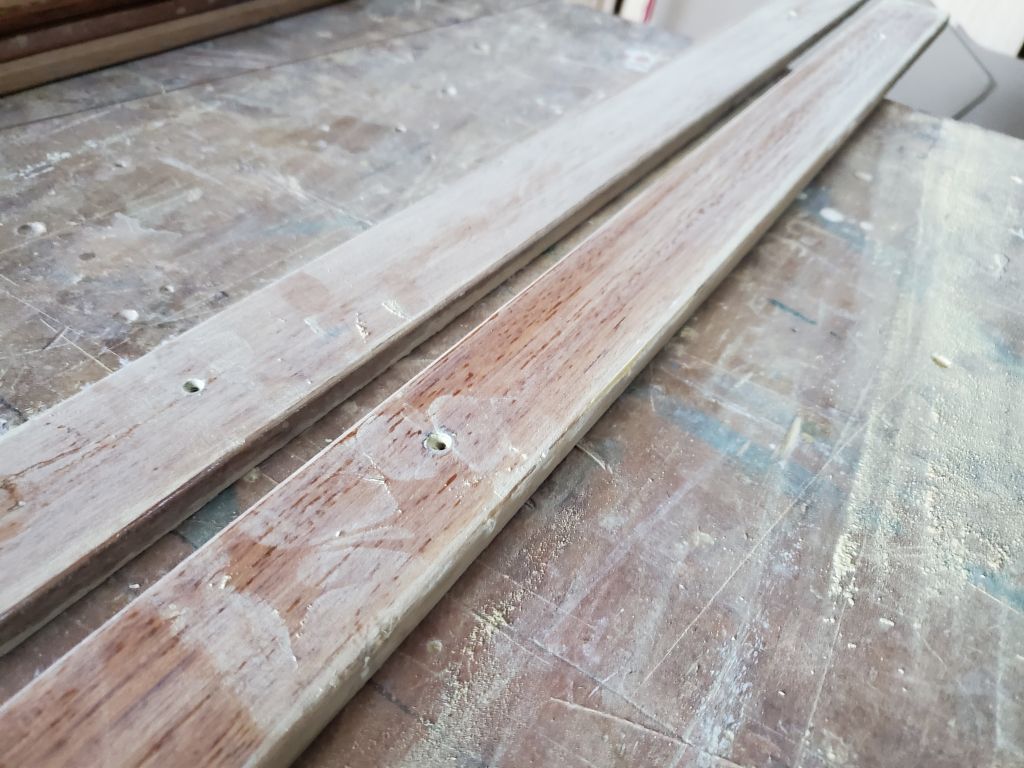
There were 26 strips, each 3/8″ thick, about 2″ wide, and roughly 6′ long, in total, and I sanded them all with 220 grit and a palm sander (and by hand as needed) to clean up the surface and prepare for more varnish. I made no attempts to strip or otherwise completely “fix” all the issues, as these strips wouldn’t be worth that sort of labor versus replacement, but that said there was no need to replace them either when a simple refinishing would make a huge difference in their appearance once reinstalled. As a base, the existing strips were in decent shape, and I cleaned up the edges a bit as I went too. I set all the freshly-sanded strips aside for later attention.
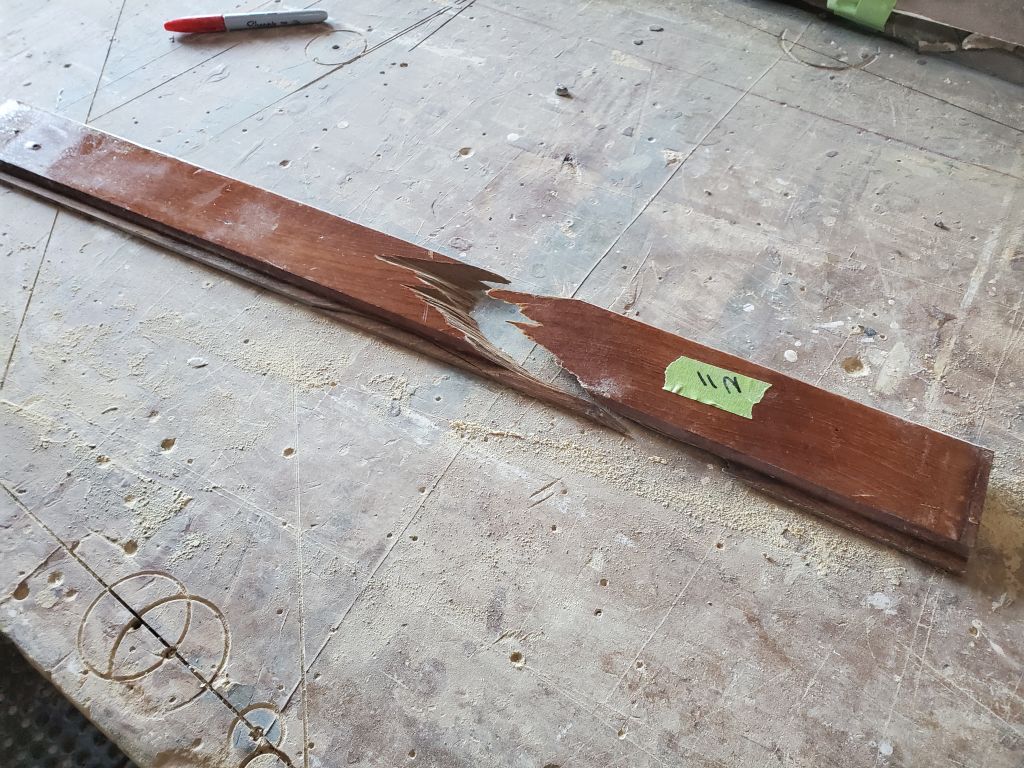
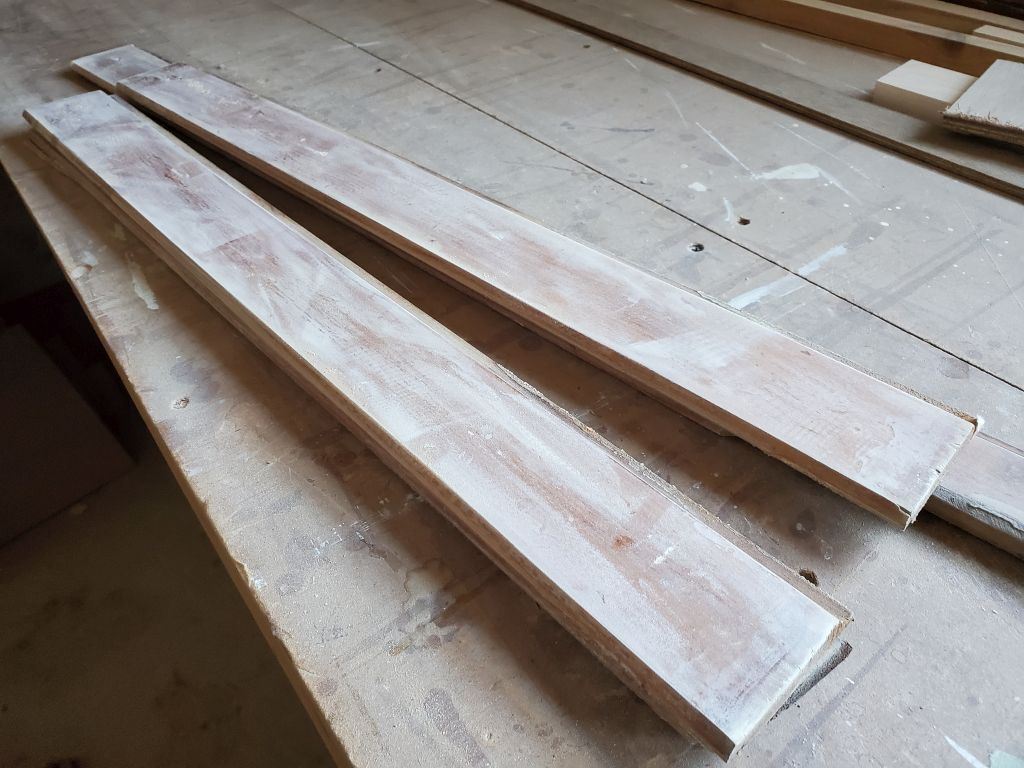
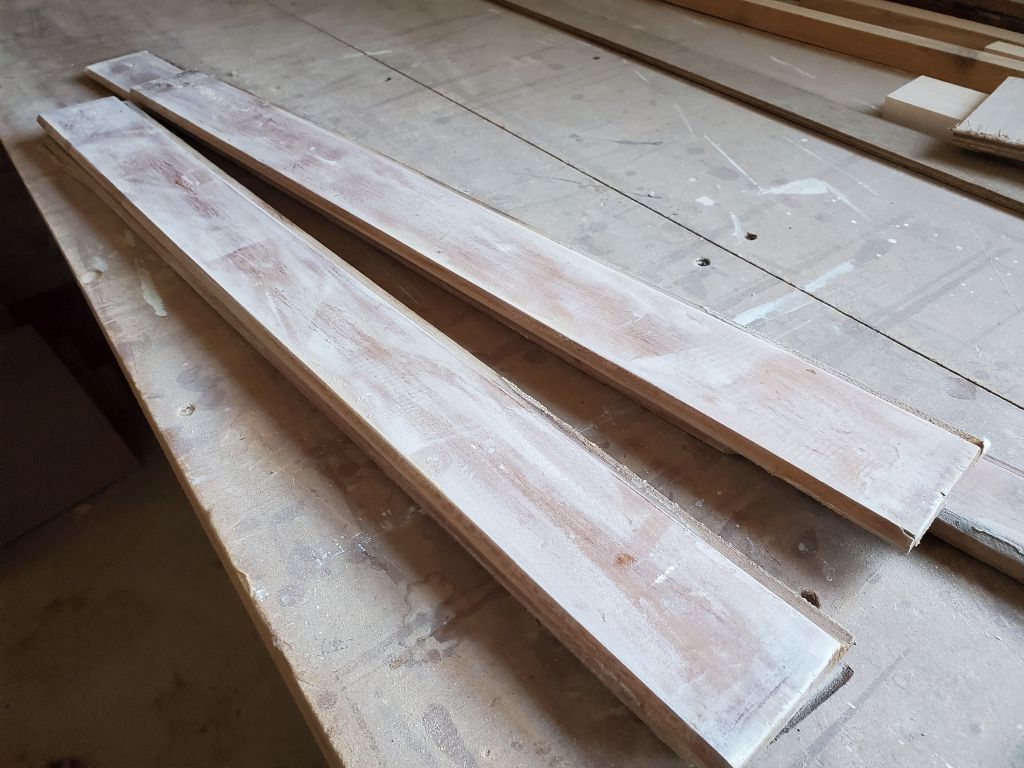
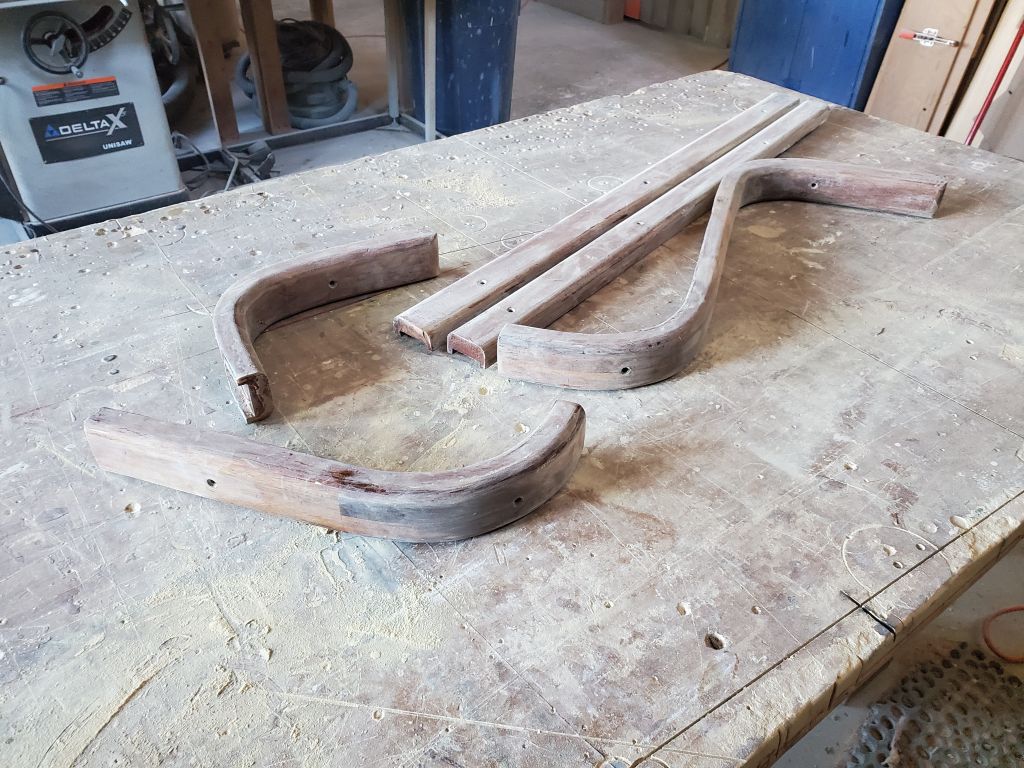
With more time on hand as the generator continued to run, I continued with the bundles of vertical staving from the two after bulkheads in the main cabin (3/8″ thick teak boards cut with a v-match shiplap pattern). I’d been careful removing these from the bulkheads, but inevitably there’d been some damage, mainly to the narrow/thin tongues on one side of the boards, as the staving had been secured with an adhesive of some sort. There were about 30 of these pieces (mostly about 3′ long, a few longer, a few shorter), and only one had broken completely during removal. Fortunately, there were a few extras left from the opposite sides of these bulkheads, places where new staving was unlikely to be installed going forward, so I could replace the broken piece as needed. Sometime later, I’d have to remove the remnants of old adhesive from the back sides.
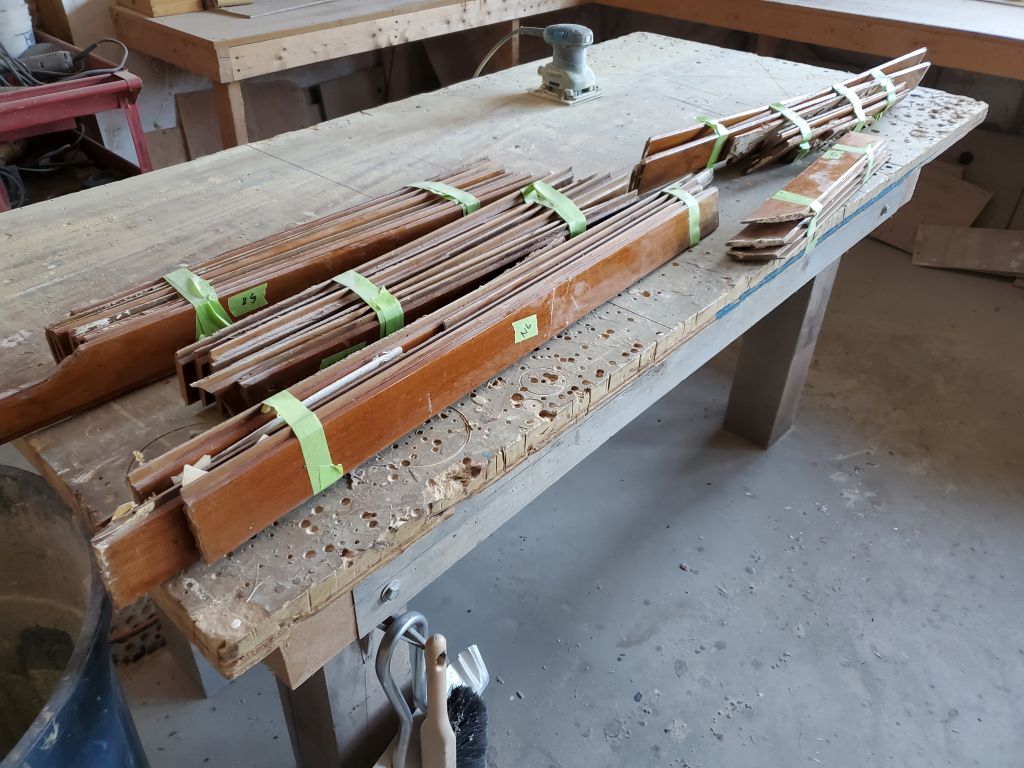

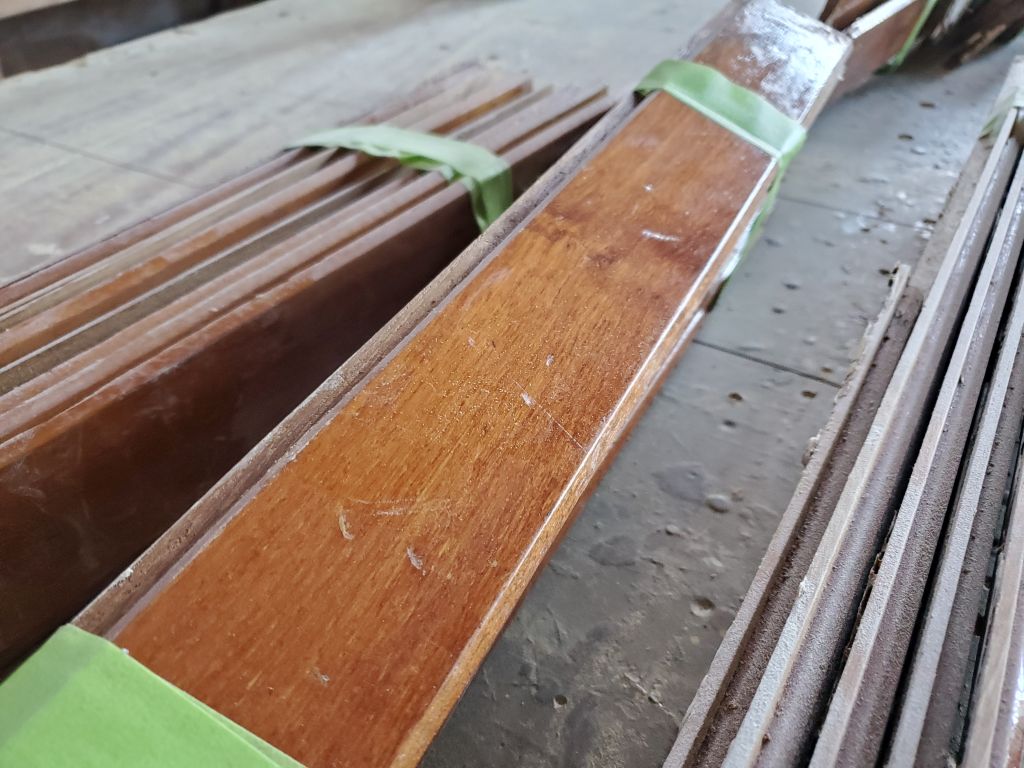

In the same way, I sanded the existing varnish on these staving pieces with 220 grit paper, including the chamfered (corresponding parts of the v-groove) edges, preparing them for new varnish to suit when the time came. I added these to the pile of other wood awaiting varnish.
Finally, I sanded some pieces of trim I’d removed from the edges of these bulkheads, including curved pieces to fit. I wasn’t sure if these would be re-used as is or not, but they were in good shape and I preferred not to re-make the curvy pieces if unnecessary.
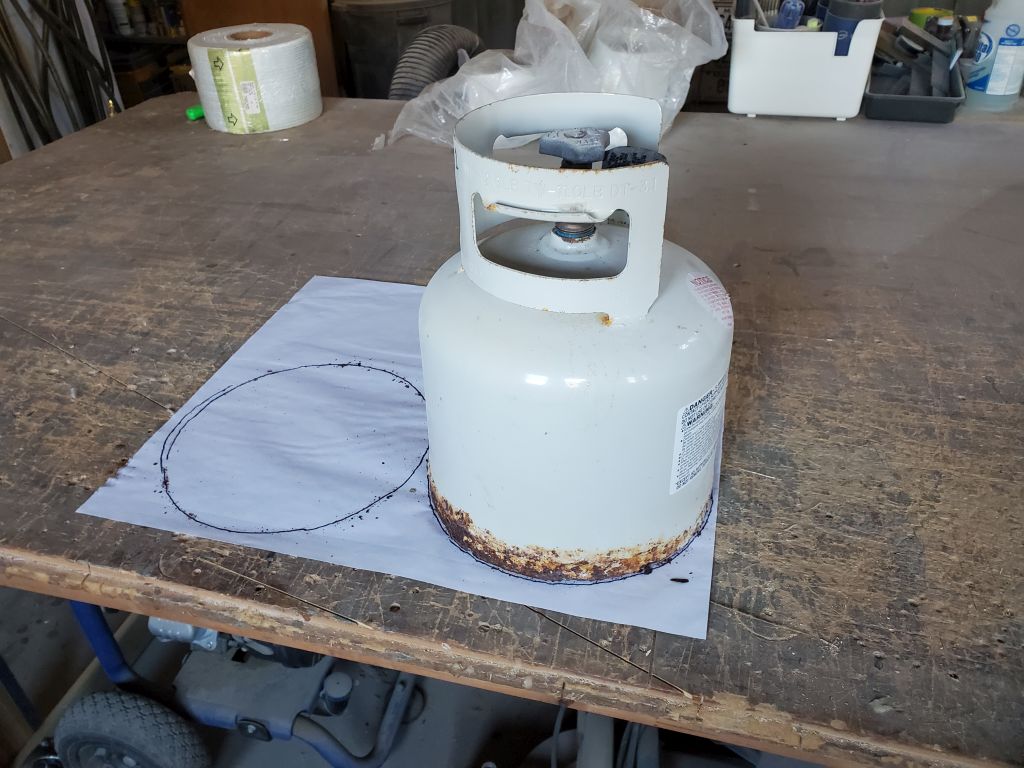
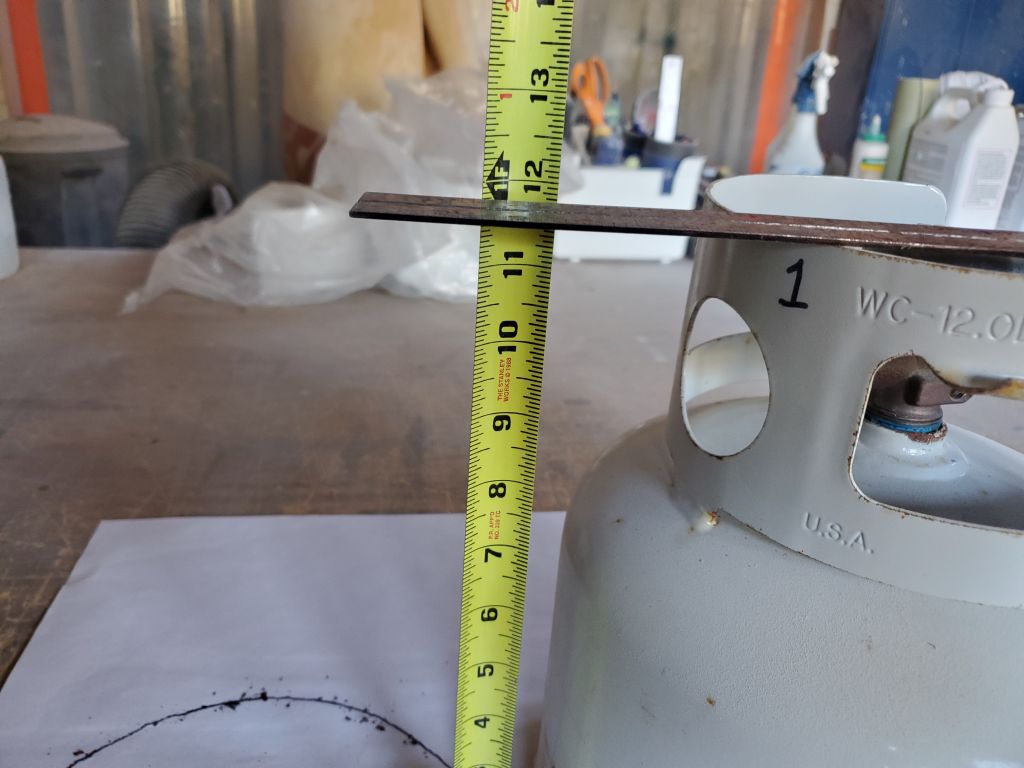
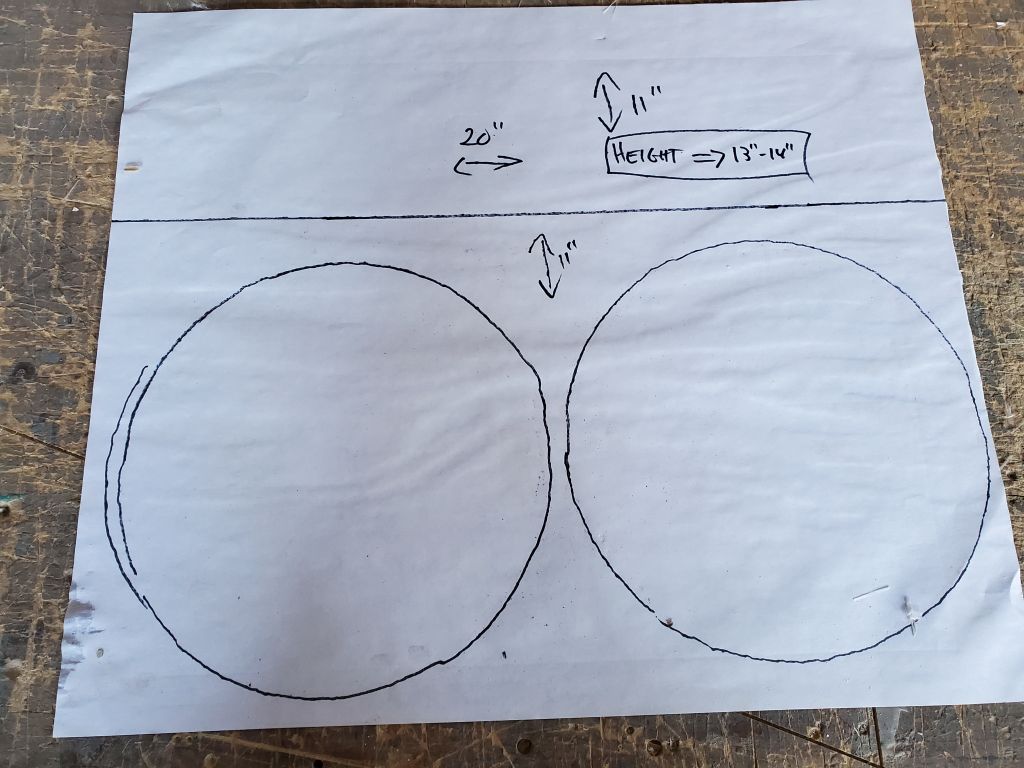
With the immediate sanding work complete, I took a moment to think ahead to the new propane locker that I planned to build into the port cockpit seat. The owner and I had agreed to build this to fit his two existing small steel tanks, which would actually make the new locker fit more easily, avoid the need to purchase an expensive horizontal tank (as originally had been planned), and, with the dual tanks, there’d be plenty of capacity–and the clear indication of usage when one tank ran dry.
With the utility estimating power restoration not until two or three days in the future, I anticipated more “project planning” time ahead, so with that in mind I laid out the two tanks on a sheet of paper to get the basic size requirements so I could figure out how to build the box and what materials I’d need. I planned to build the box from 1/4″ sheets of fiberglass, in a design that would fit down into the locker from above with a flange to secure it on top–making it easier to install and ultimately removable for access as needed. The basic measurements I got from this exercise would allow me to order the raw materials soon and get started on the construction whenever possible.
Total time billed on this job today: 3 hours
0600 Weather Observation: 28°. clear, windy. Forecast for the day: Sunny, windy, 30°