


March 17, 2016
Salty 19
Thursday
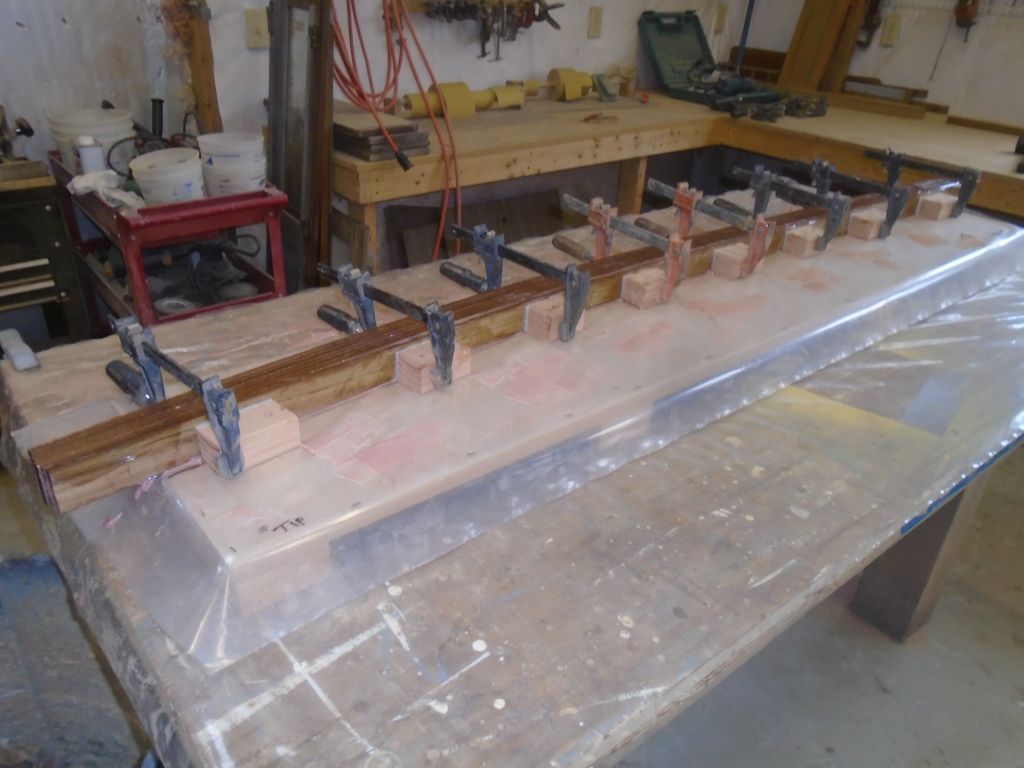
To complete preparations to the laminating jig for the tiller, I installed with dabs of hot glue little sections of plastic on each of the wooden supports, which would prevent the tiller from sticking to the clamping blocks. I covered the bench with plastic, and prepared all the teak laminations by solvent-washing with acetone.

Afterwards, I applied epoxy adhesive to the strips and clamped them securely in the jig, using a mallet to ensure they were flat and even on the jig surface. I scraped off most of the epoxy squeezeout and left the assembly to cure.


Before moving on, I lightly sanded and varnished again the new rudder cheeks.

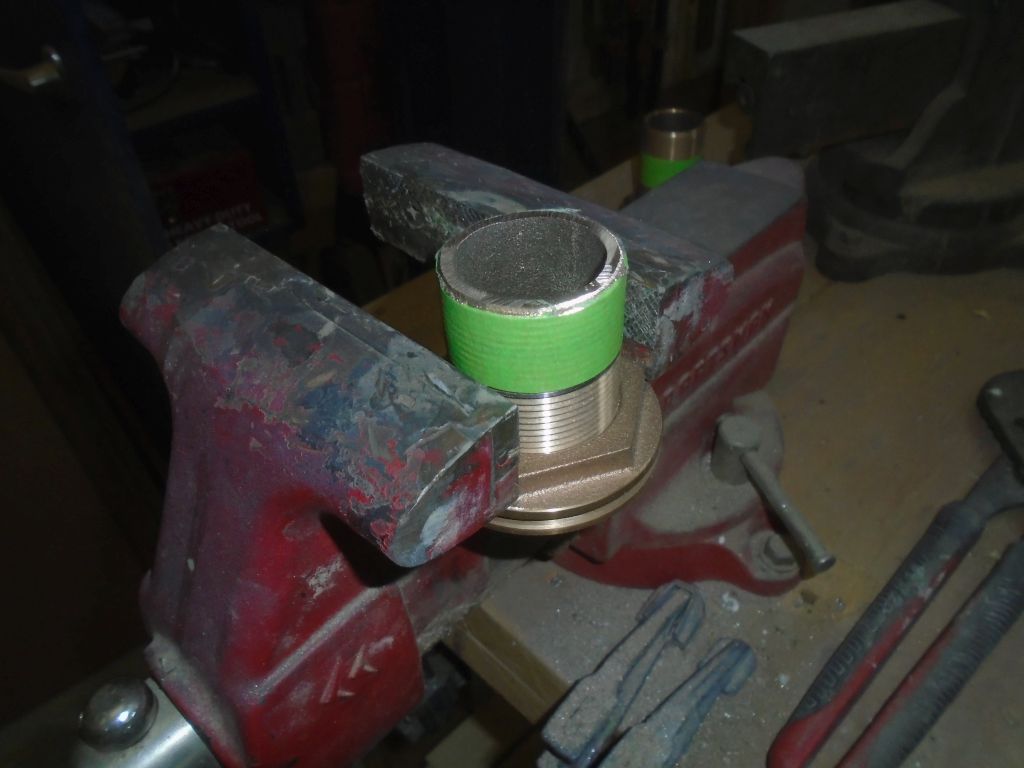
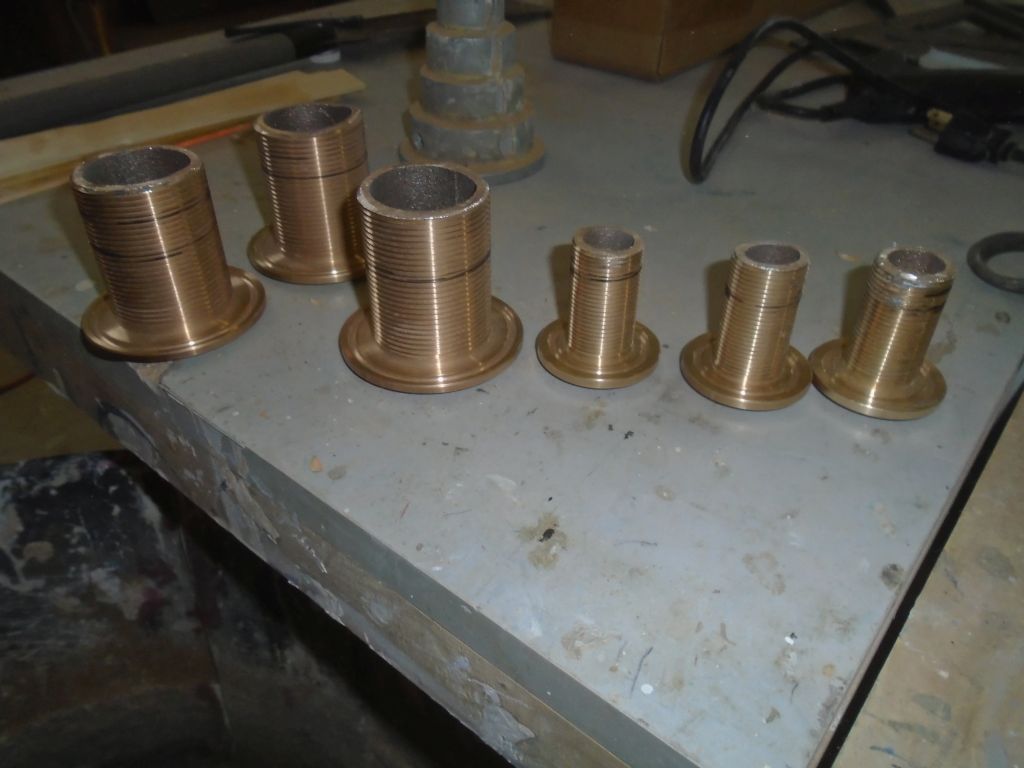
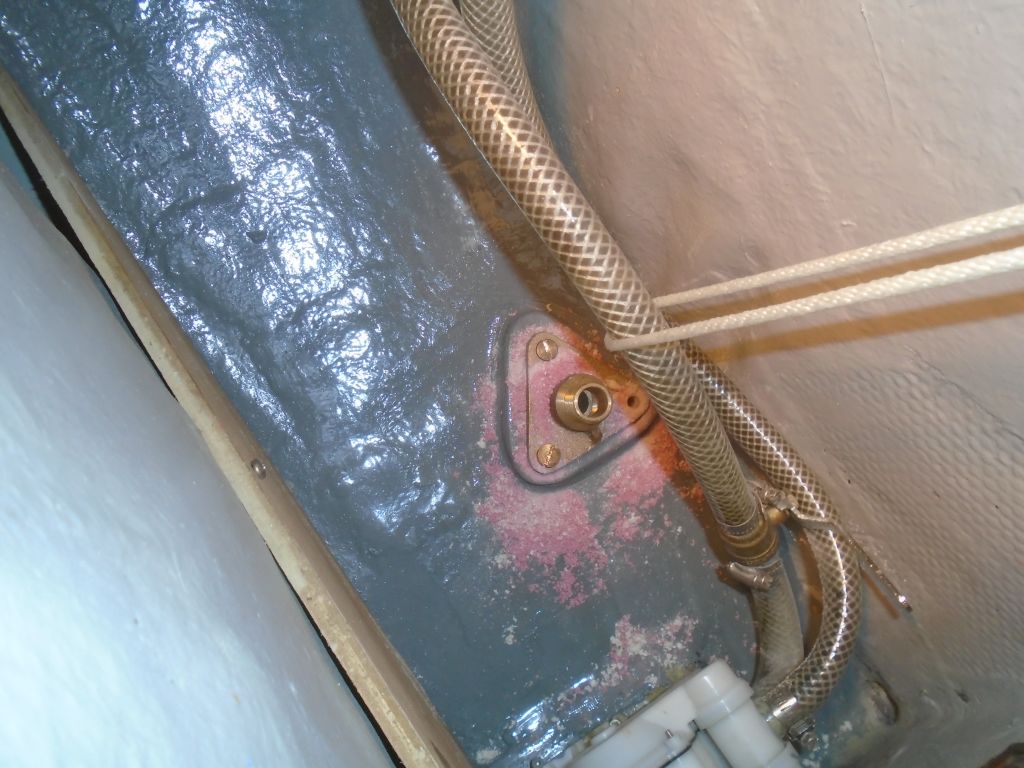
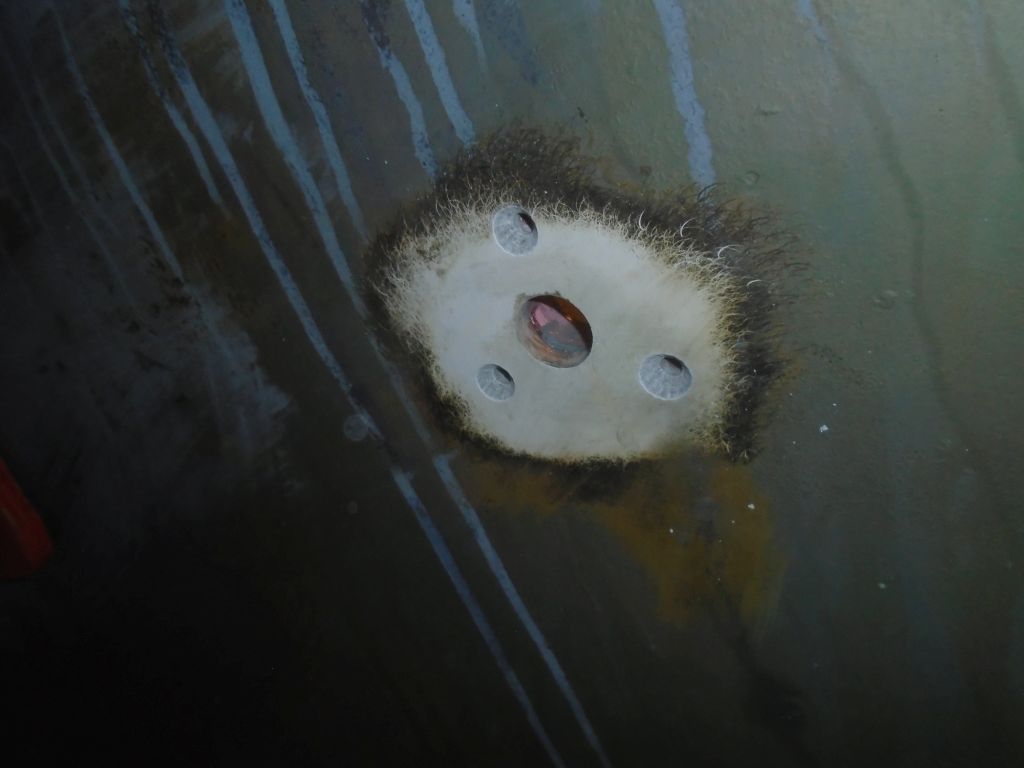
I’d been waiting for a while for two missing and critical parts for the through hull installation–the flange bases for the cockpit scuppers. Eventually, I located two at another supplier and ordered them, as their absence was holding me up. So with these due later in the day, I turned to the through hull preparations, starting with a dry fit of all the bronze through hull fittings so I could cut the stems to the required length in each case. Since I had one of the three 1-1/2″ bases that I needed, I could cut all the stems now. Inserting the through hulls from outside, I taped them in place to hold them while I worked inside.
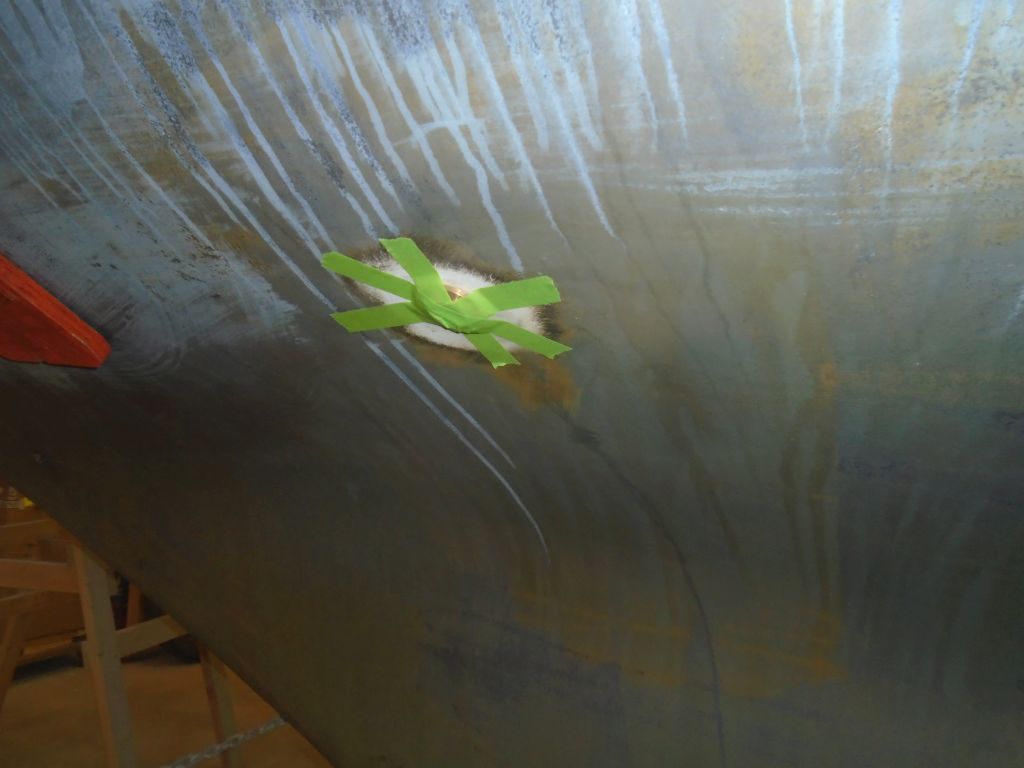
At each fitting, I marked where the stem came through the hull and backing block, then tested how far I could thread on the flange base. Any gap between the two would require that I cut off some excess length in order to tightly thread the assembly together. All of the fittings would require modification, though the three 3/4″ fittings almost might have worked as is, but I wasn’t about to chance it. In this way I marked each through hull in turn. In order to fully thread the stem into the bases, plus a little extra to ensure that I didn’t come close to bottoming out, I needed to remove about 3/4″ on each of the larger through hull stems, and about 1/4″ – 3/8″ on the smaller ones, just to be safe.


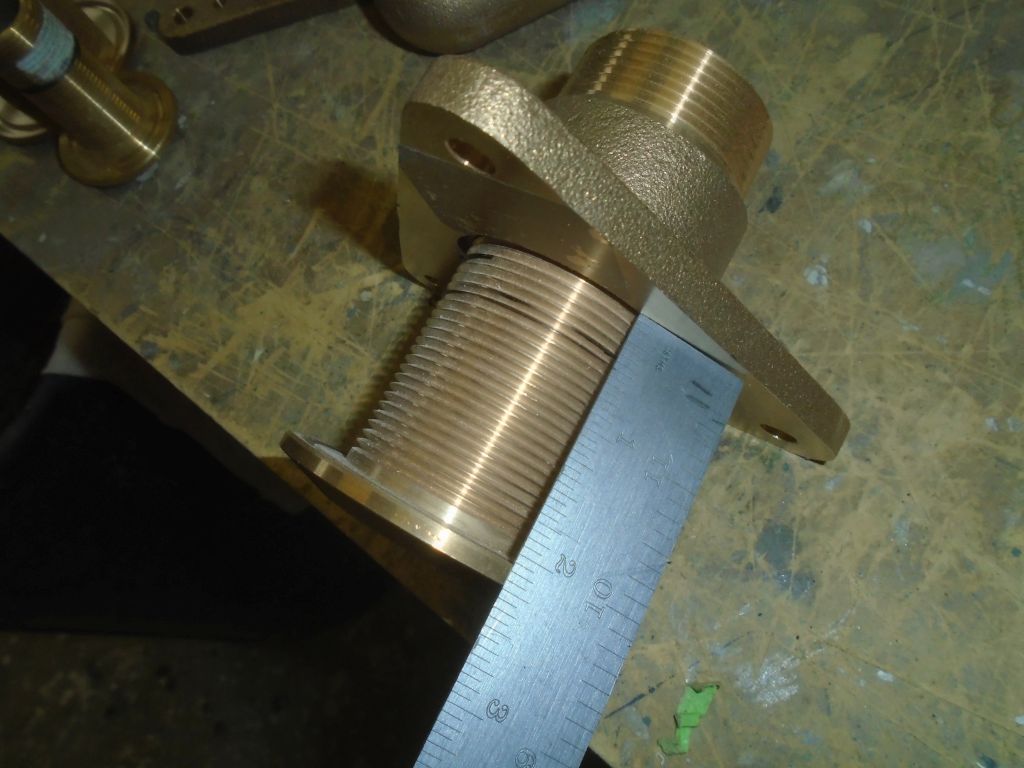
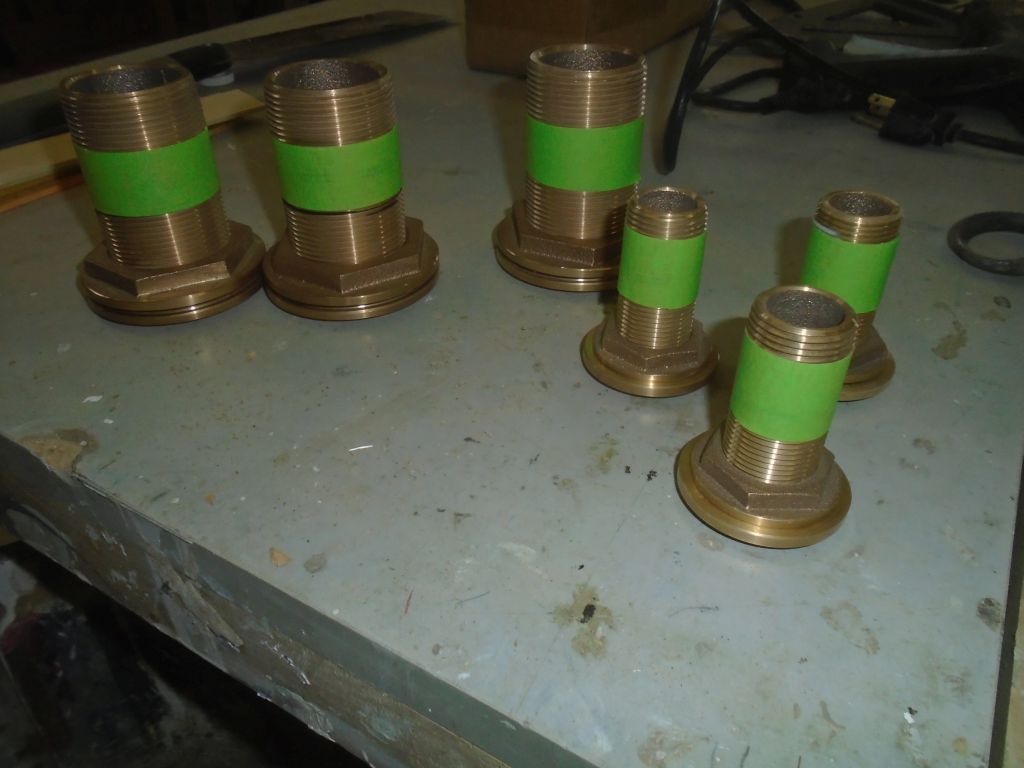
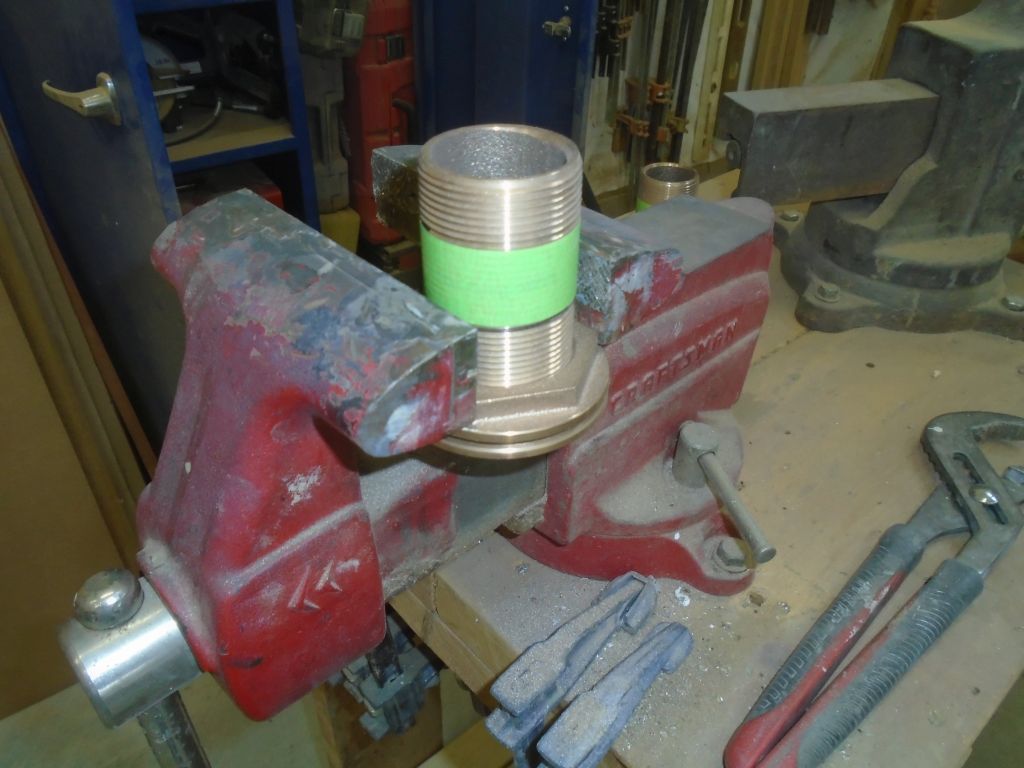
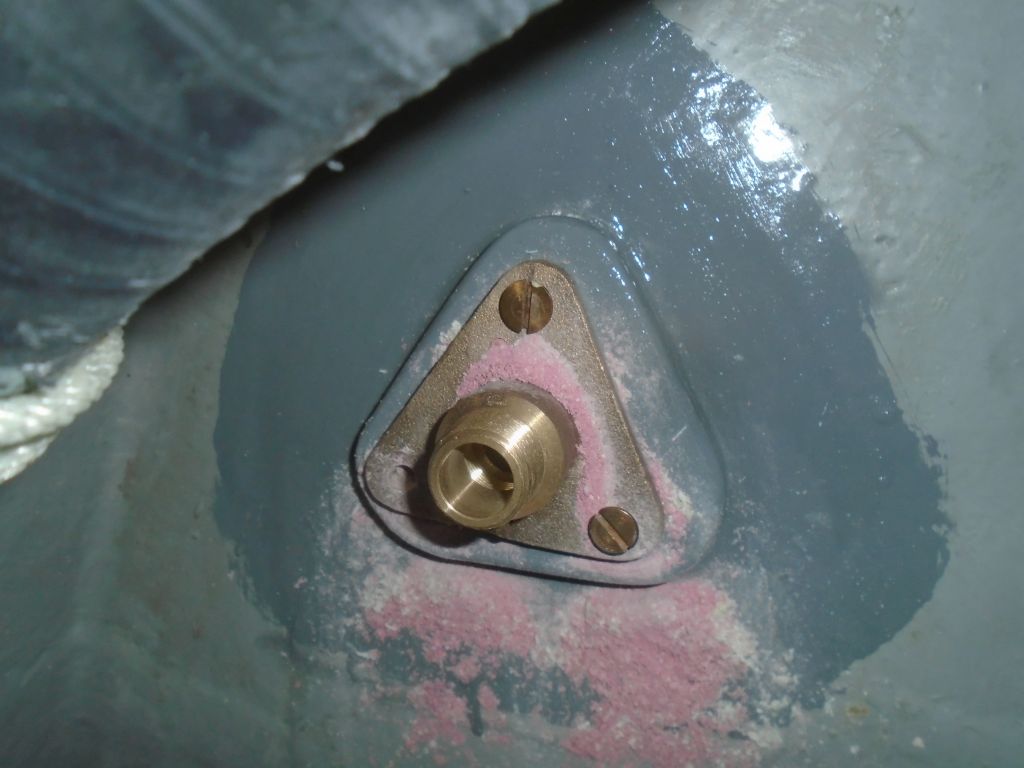
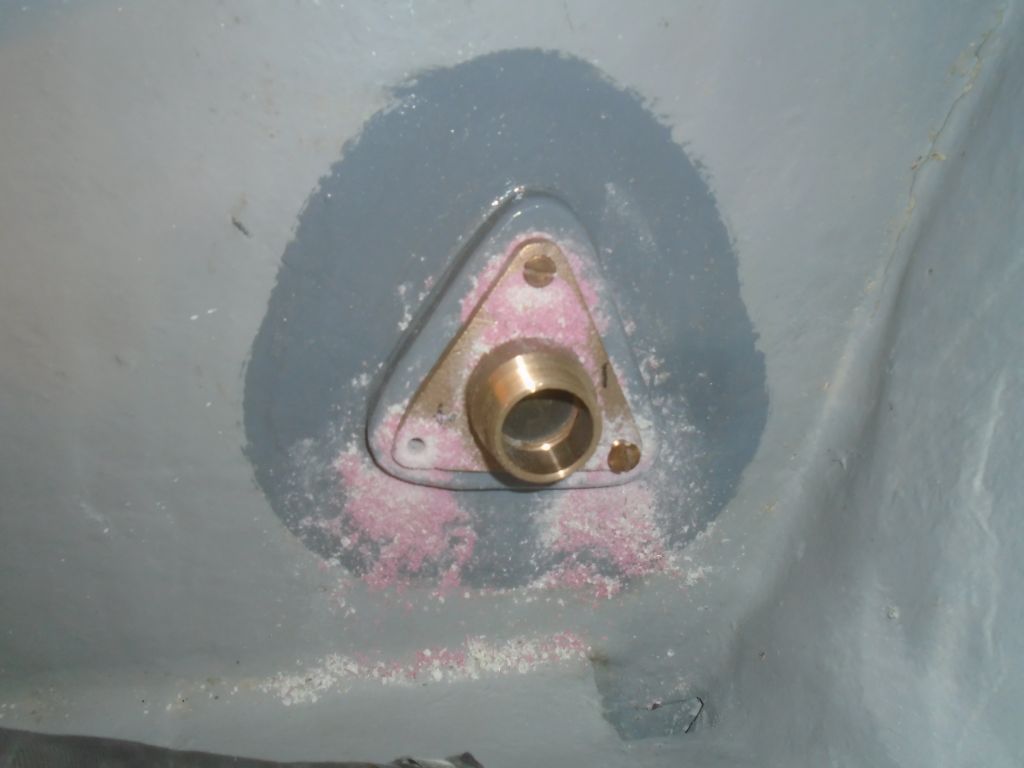
Threading on the through hull nuts, which I’d use to clean up the cut threads, I marked each fitting and cut off the excess with a cutting wheel. I tried to grind a small bevel at the top of the cut, and I cleaned up the threads with the through hull nut and a little sandpaper as needed till I could easily thread on the base, which ensured that it would work as planned when I was actually installing the fittings. I’d already marked each through hull as to its location.
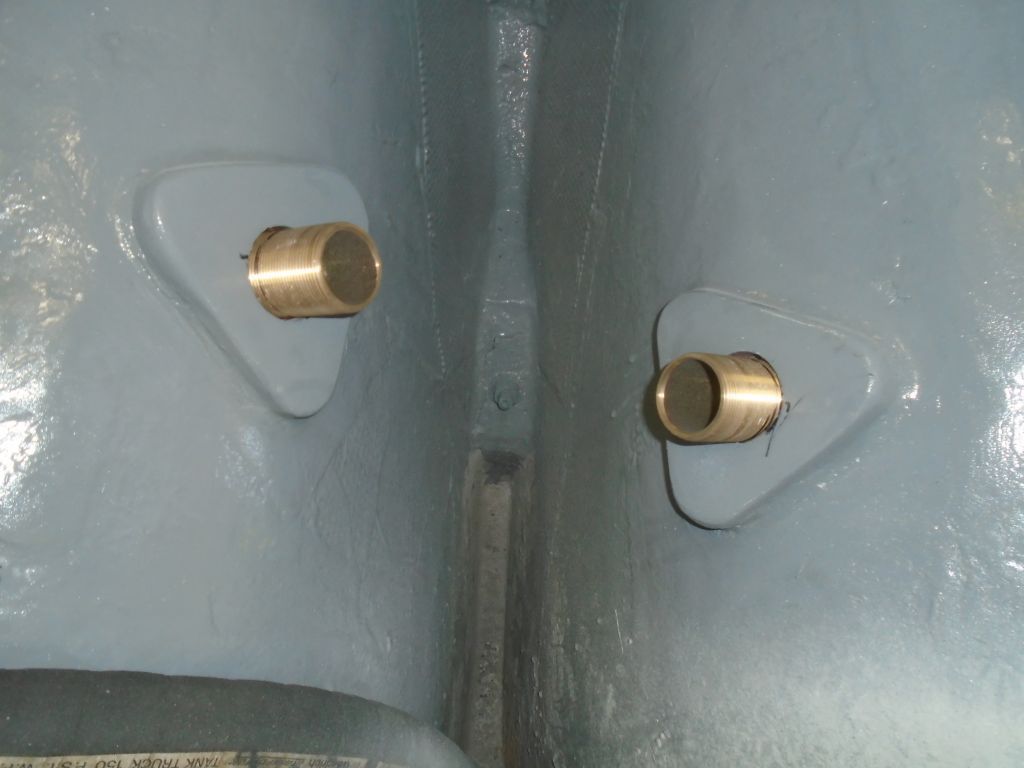
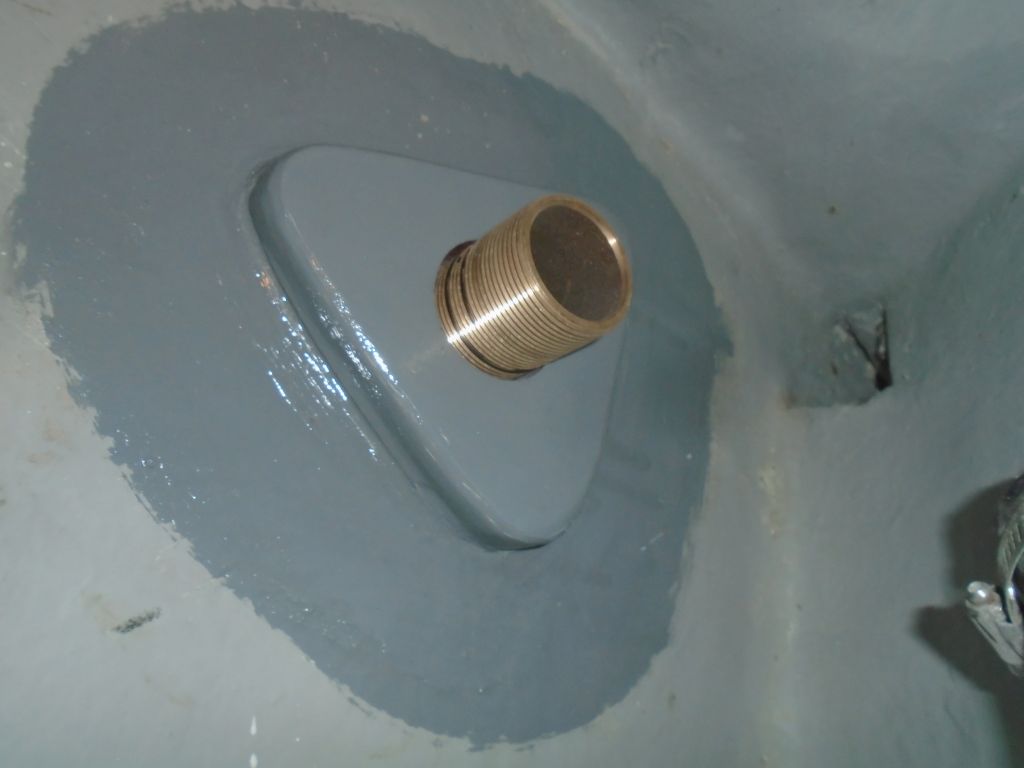
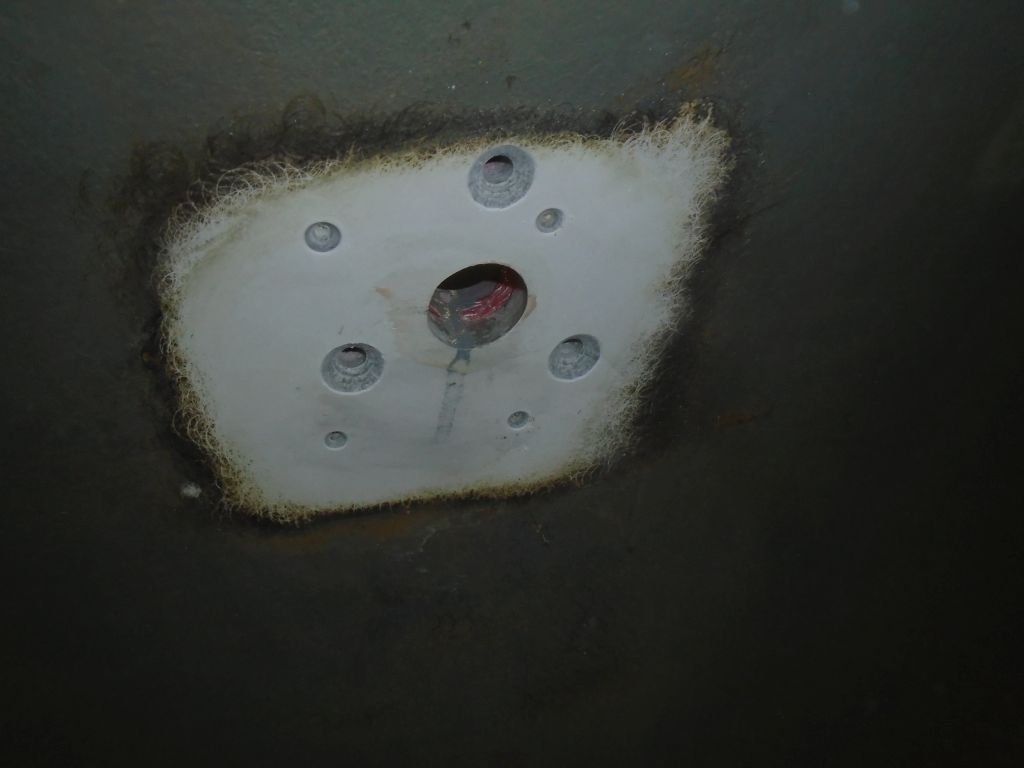
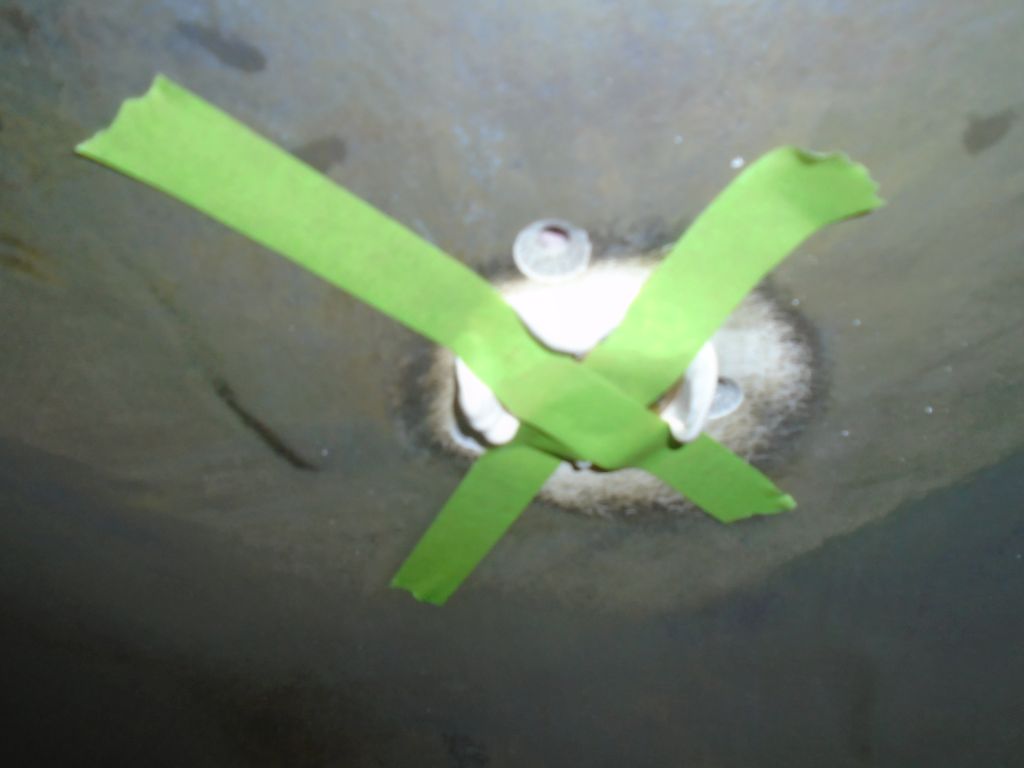
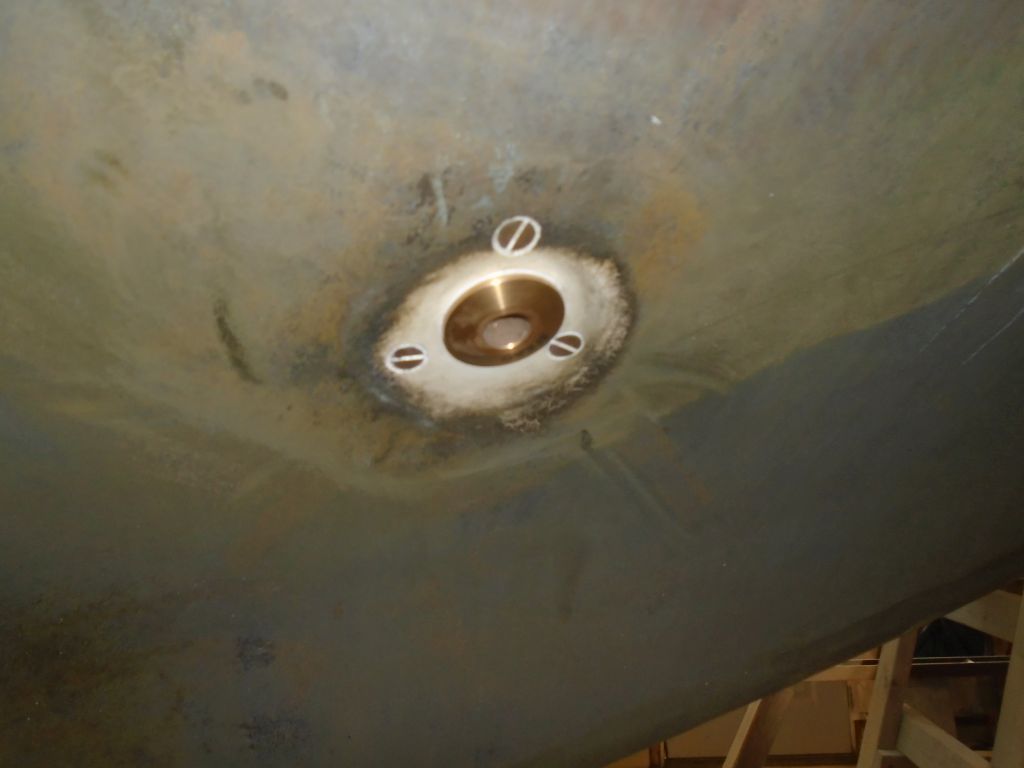
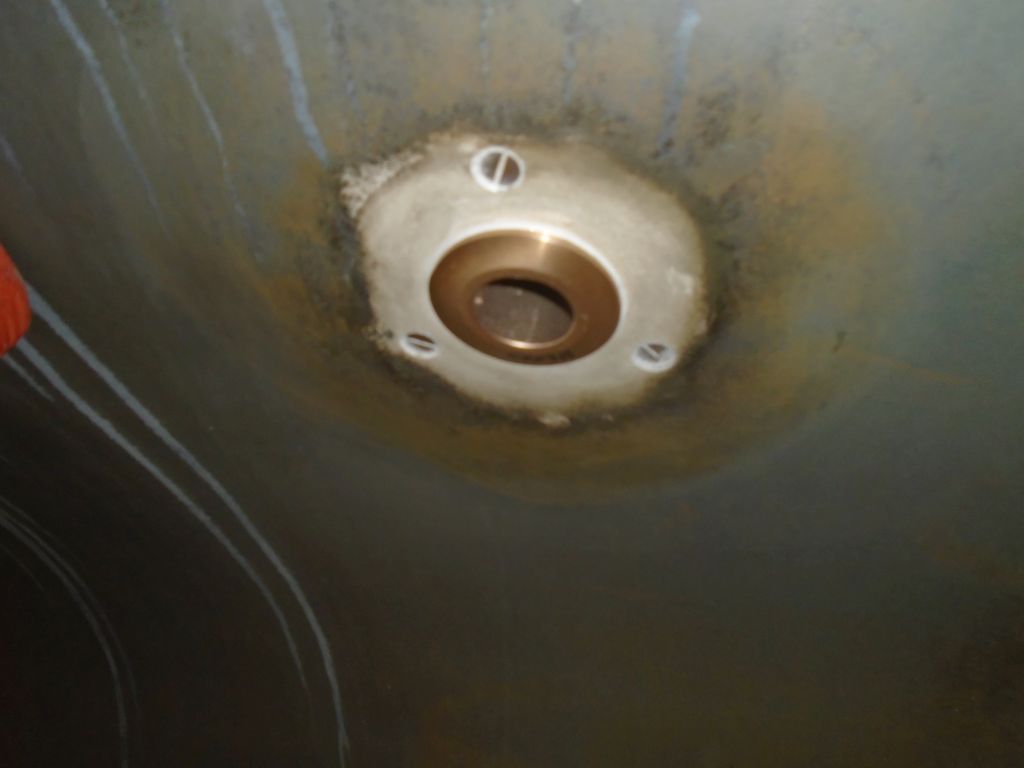
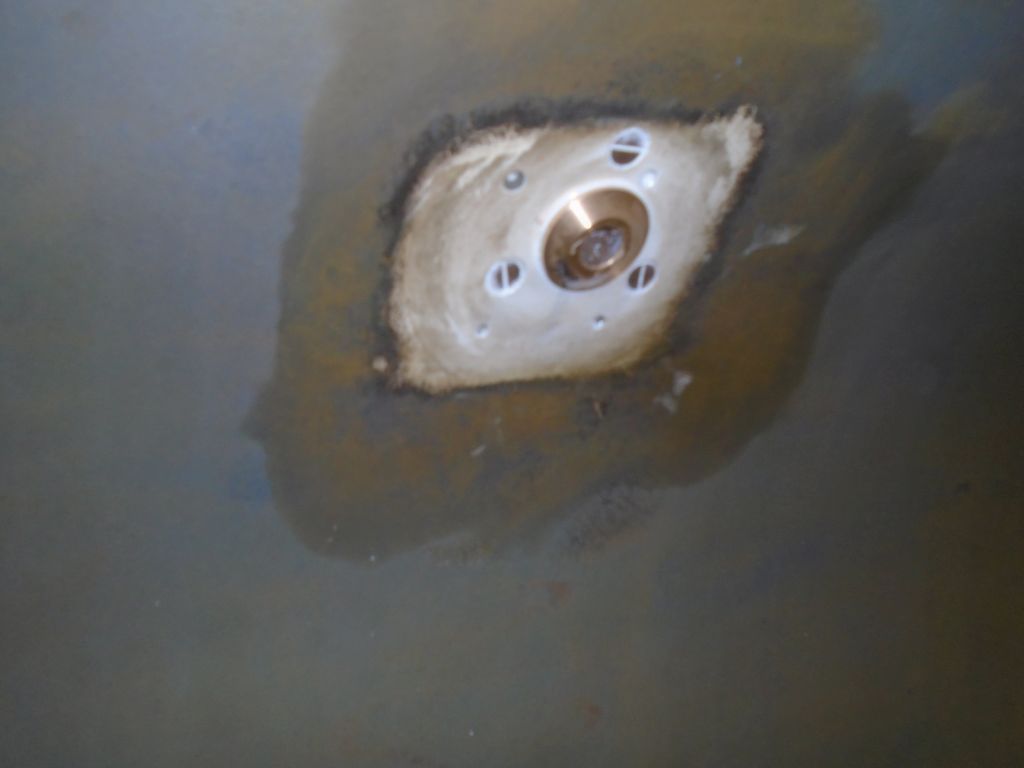
Now I taped the newly-shortened through hulls back in place–this time just on the four that I planned to install right away, while awaiting my final two bases–and, from inside, threaded on the bases tightly enough so I could align the base and drill the bolt holes through the hull. I drilled one hole, inserted a temporary bolt, and then the next, ensuring that the alignment would all work out later: one does not want to find that there’s a slight misalignment once the fitting is gooped up. I did this for each fitting. Then, outside the boat, I milled countersinks at each hole to allow the machine screw head to sit flush with the hull.
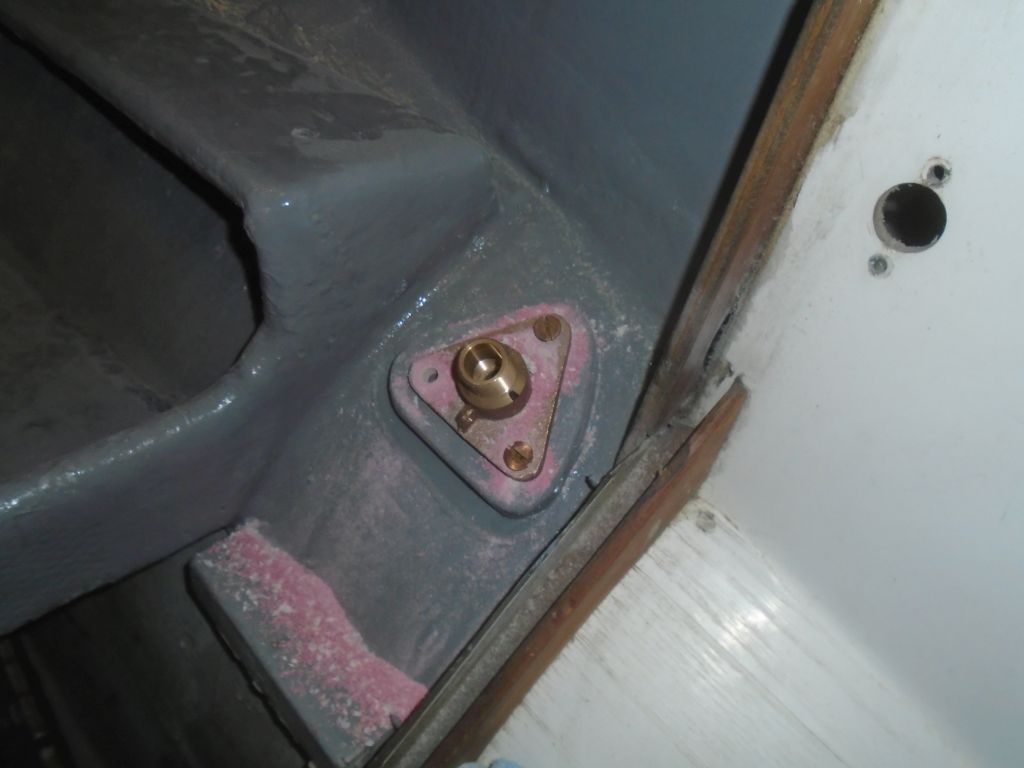
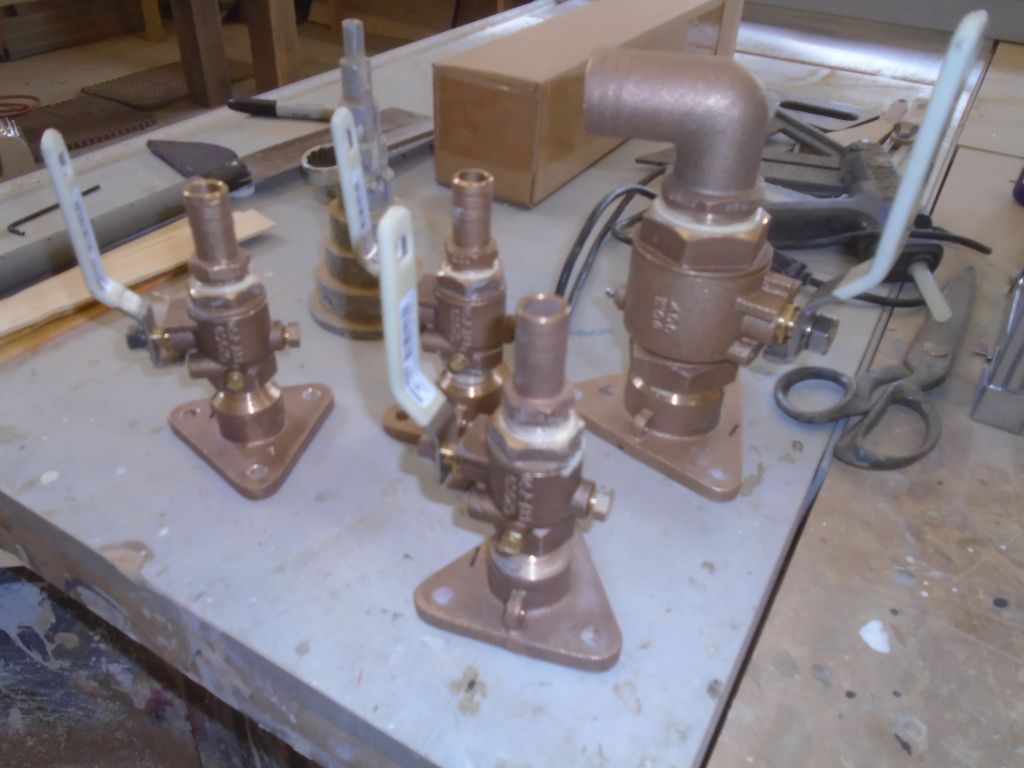
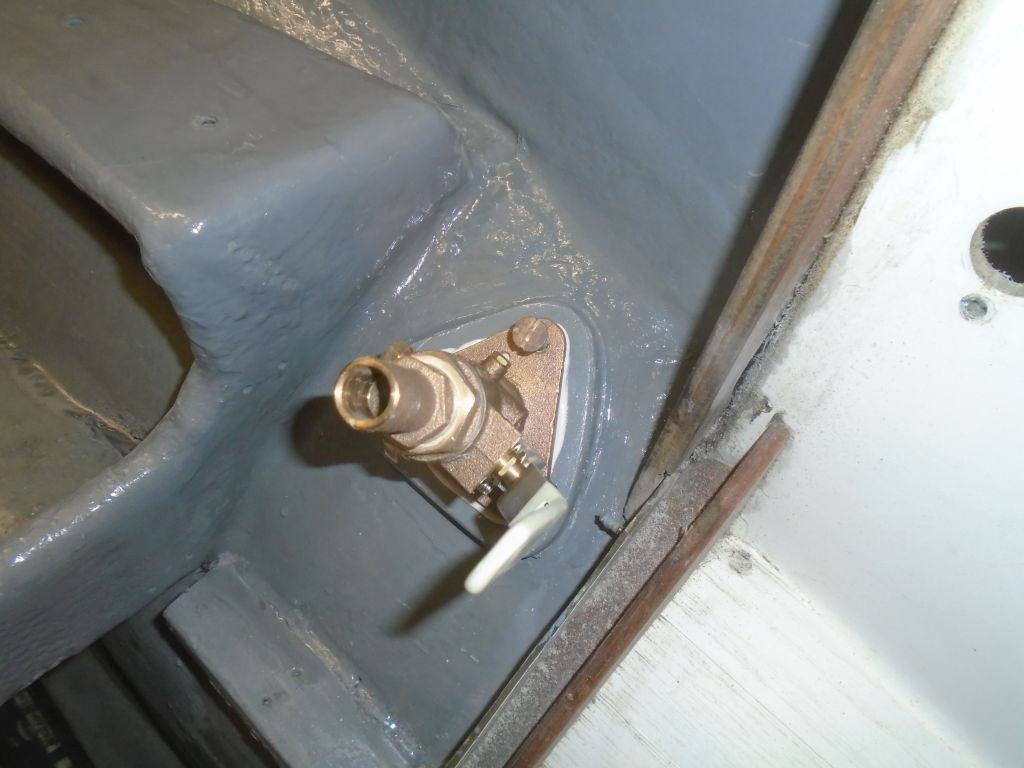
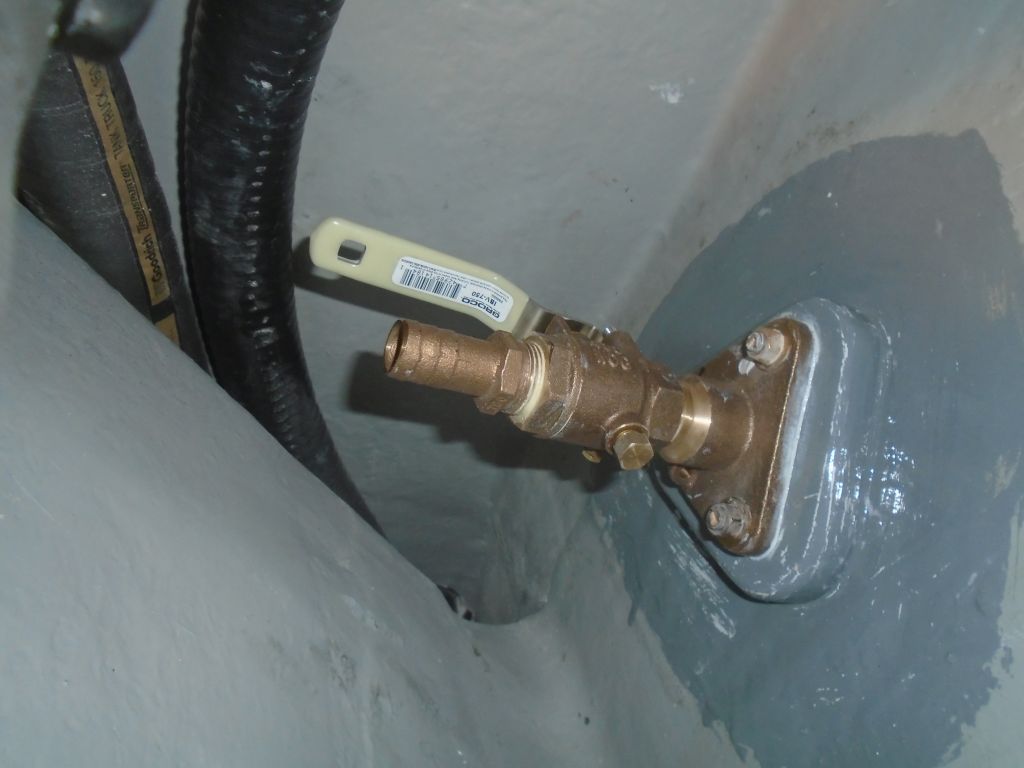
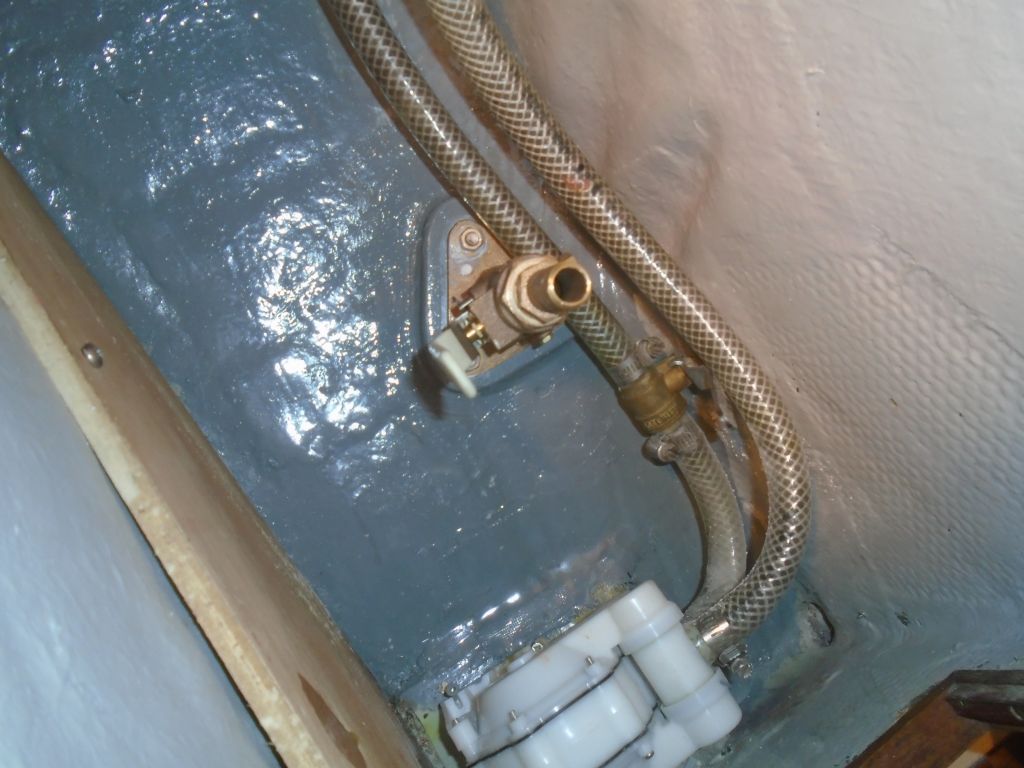
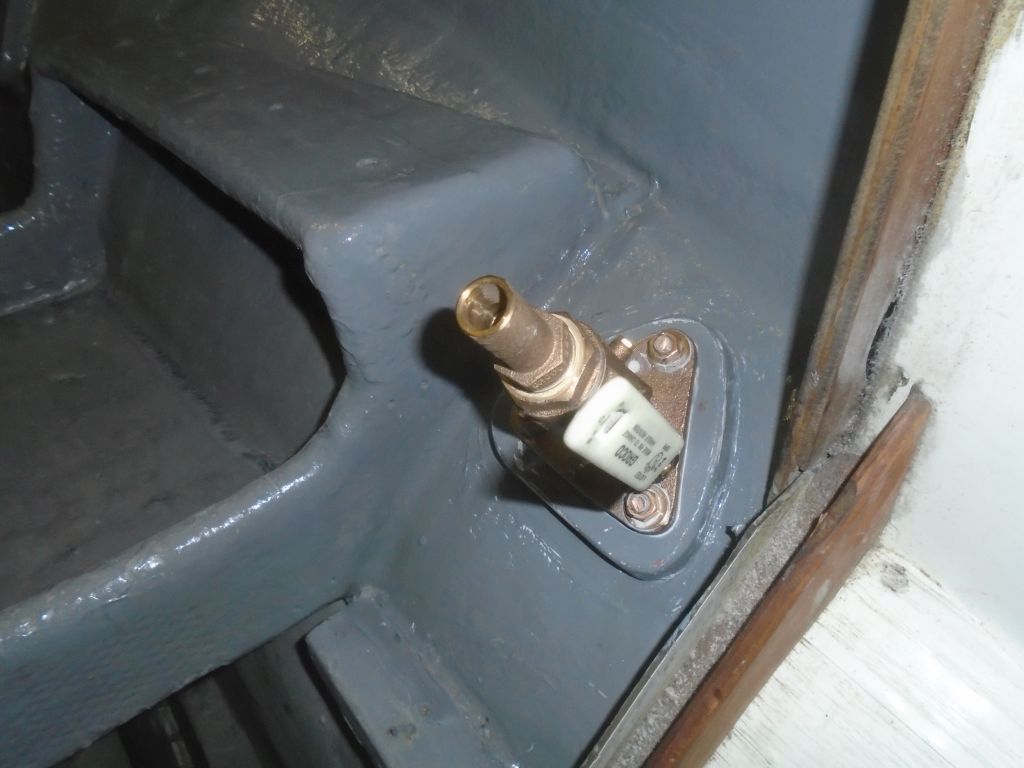
While preparing the bolt holes, I’d noted where I wanted the valve handles to be to allow for access and clearance, so down on the bench I pre-assembled the valves onto the bases for each of these four fittings (head intake and discharge; sink drain; engine intake). Access was tight enough in several of the locations that I didn’t want to have to use unwieldy wrenches to try and spin these valves on tightly and into the correct orientation in place. Only one of the valves required a 90° tailpiece, and I’d noted the correct orientation of this as well so I could pre-install it in the direction it needed to be to match up with its existing hose, for the head discharge.
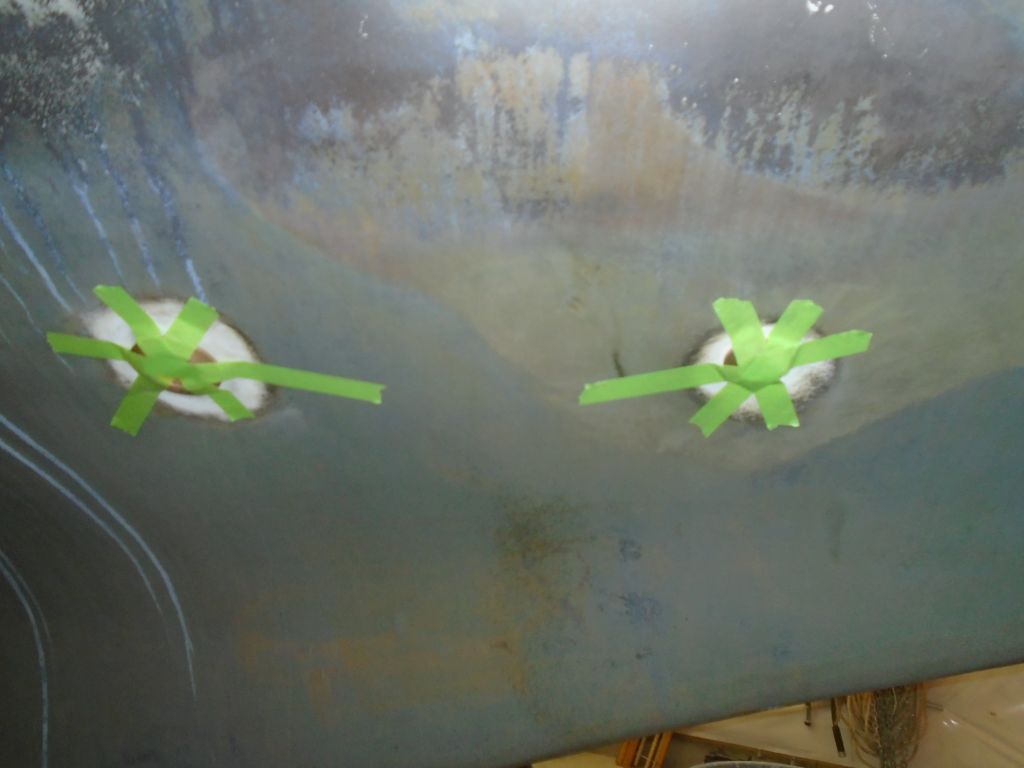
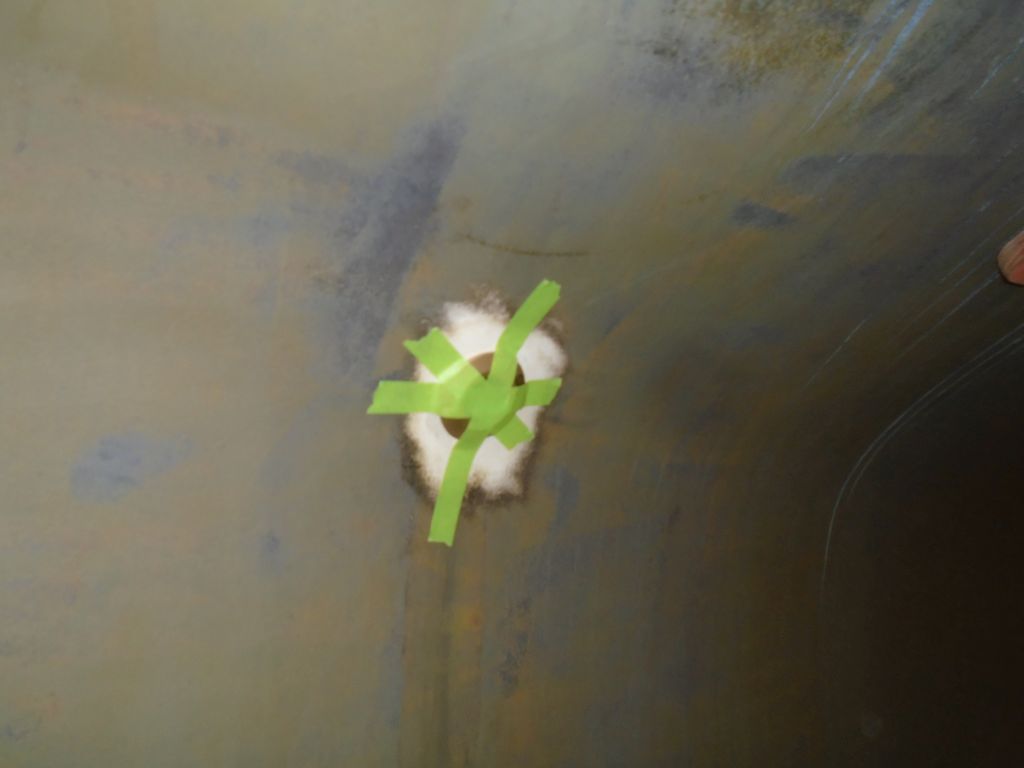
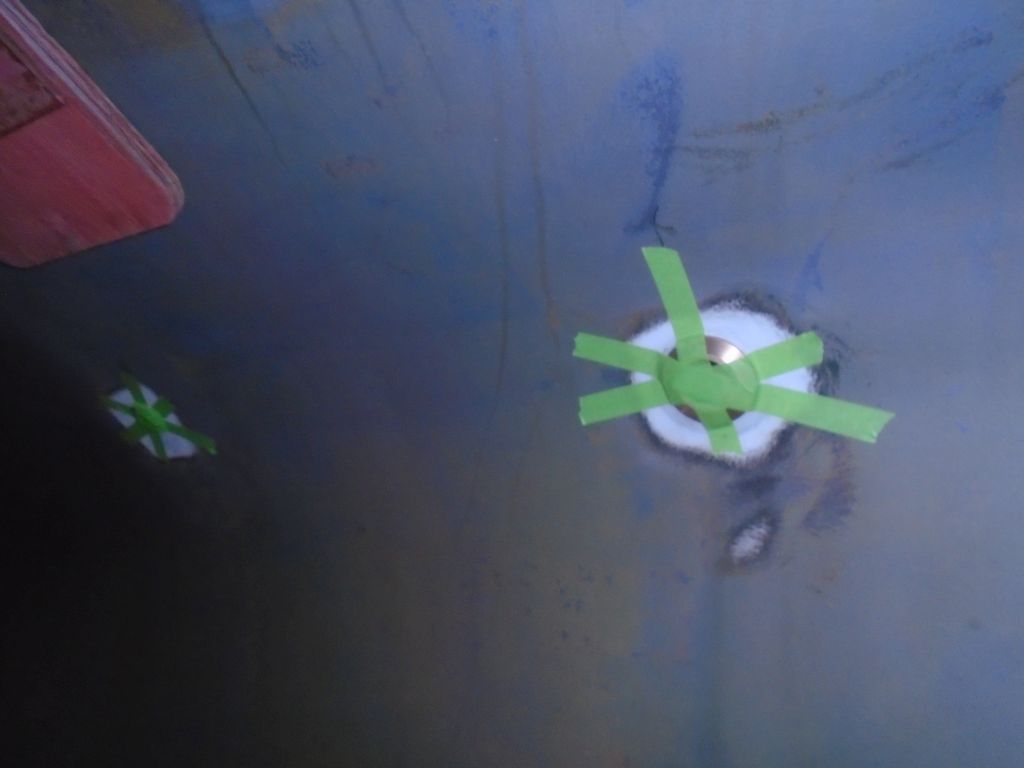
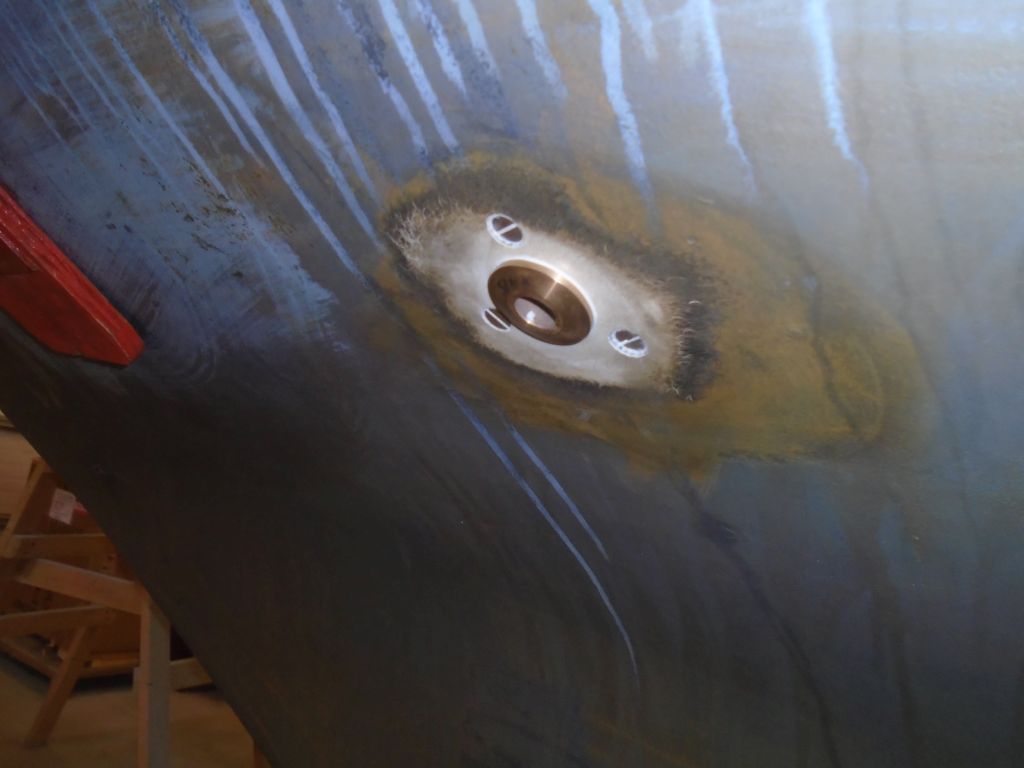
After final preparations and cleanup, I installed the four fittings, following the same procedure for each one, but I didn’t try to document each step on each fitting because the job was time-sensitive and messy. But the photos below show the basic sequence, though they may not all show the same exact fitting.
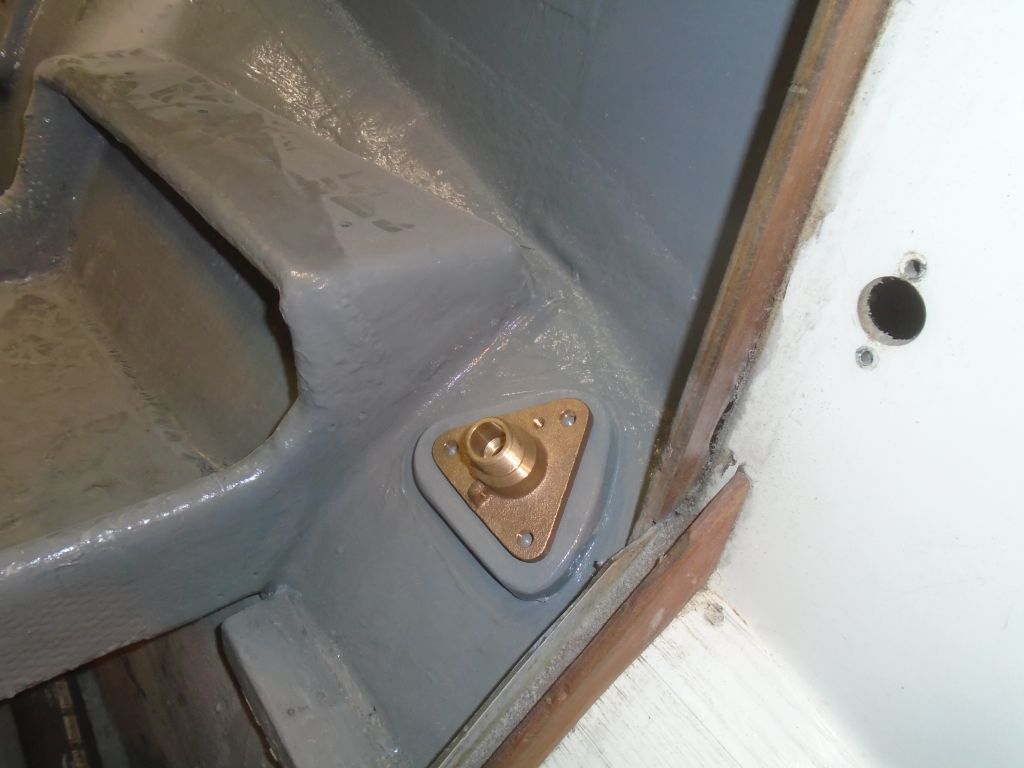
For each fitting, I heavily applied adhesive sealant to the through hull flange and neck, and pressed it into the hole. The sealant was fairly stiff, but still required some tape to ensure the fitting wouldn’t fall out when I started the threads inside. Now, inside the boat, I applied more sealant around the through hull neck and the perimeter of the mounting flange area, including around the bolt holes, and carefully threaded on the flange base (with valves pre-attached in this case). I threaded the base on till it was nearly tight, then aligned it properly with the bolt holes and installed temporary bolts from inside, to hold the alignment.
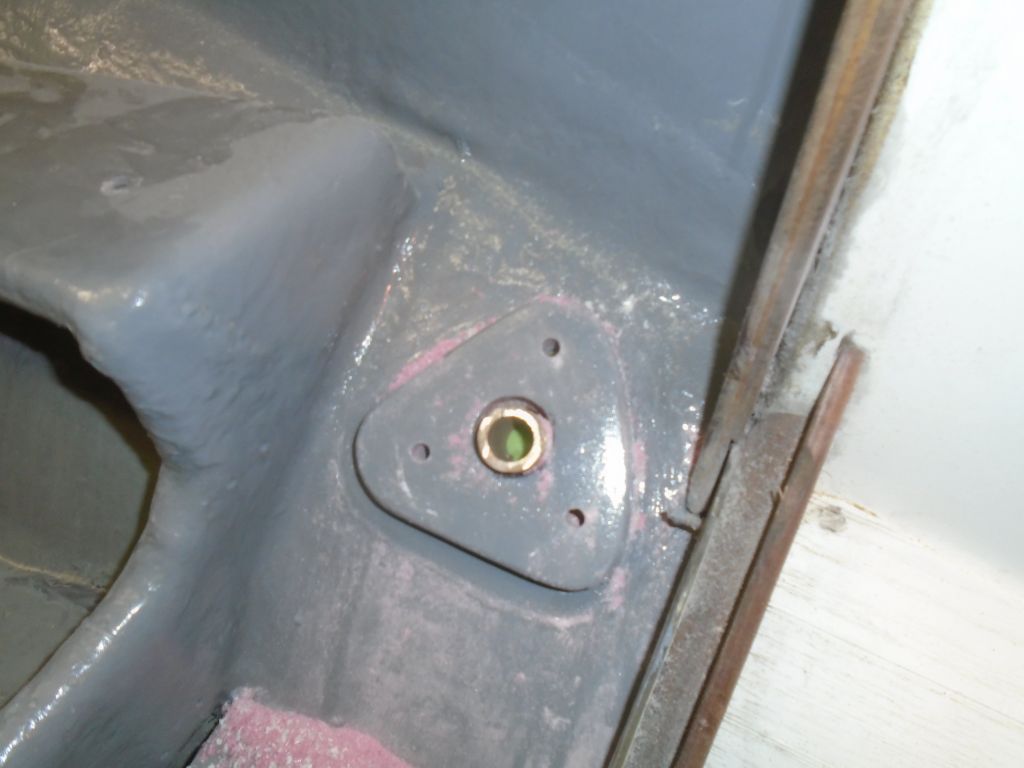
Back outside, I gooped up the necks and heads of the 5/16″ bronze flathead machine screws, and inserted them into the bolt holes, pushing out the temporary bolts on the inside in the process. Once I had all three bolts installed, I used a special tool (not shown here) to tighten the through hull securely into the flange within, and tightly against the hull on the outside.
Scampering back into the boat, I installed washers and nuts on the through bolts, and tightened them before cleaning up excess sealant from around the flange and, finally, continuing back outside where I cleaned up excess sealant there as well.

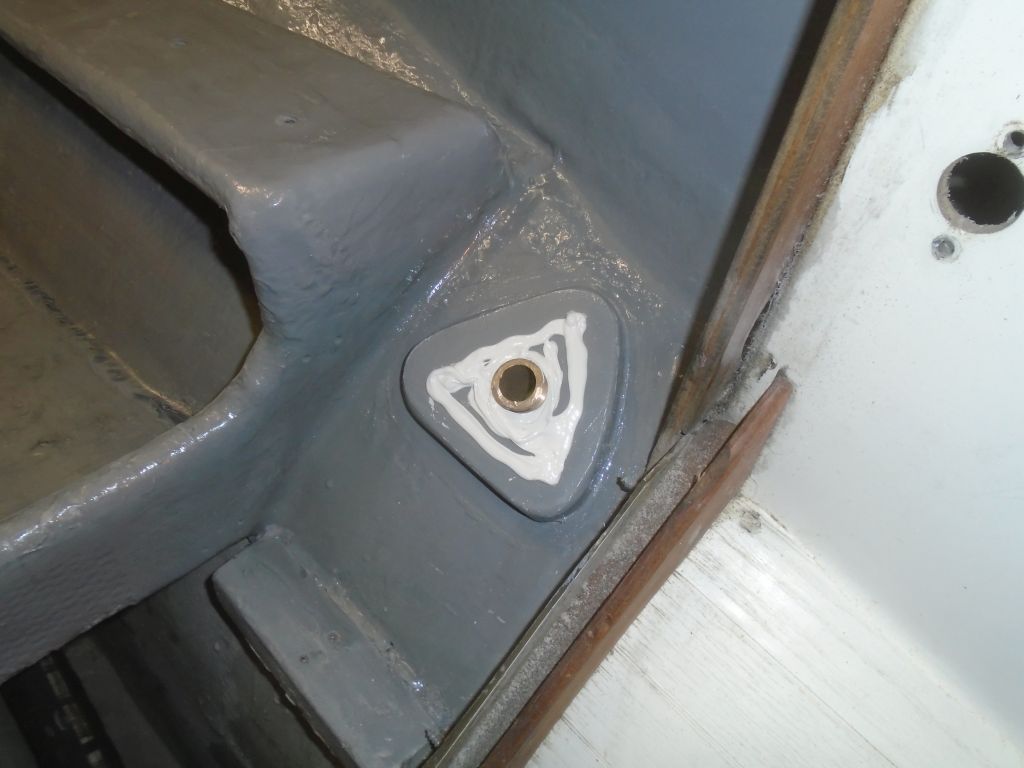


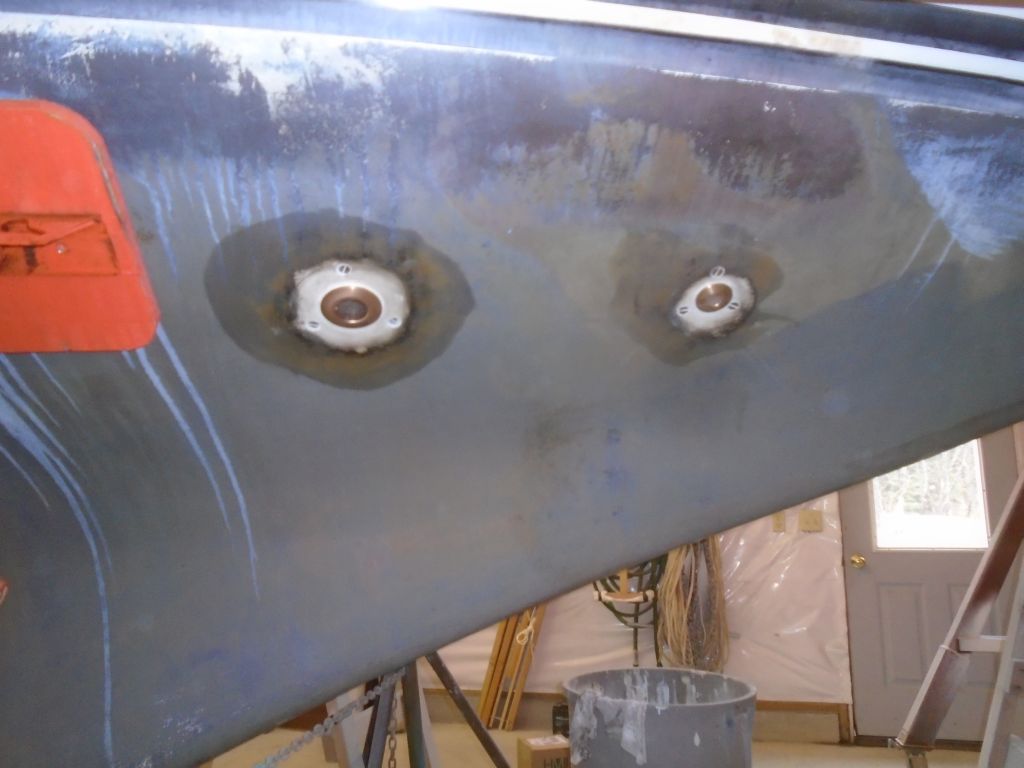
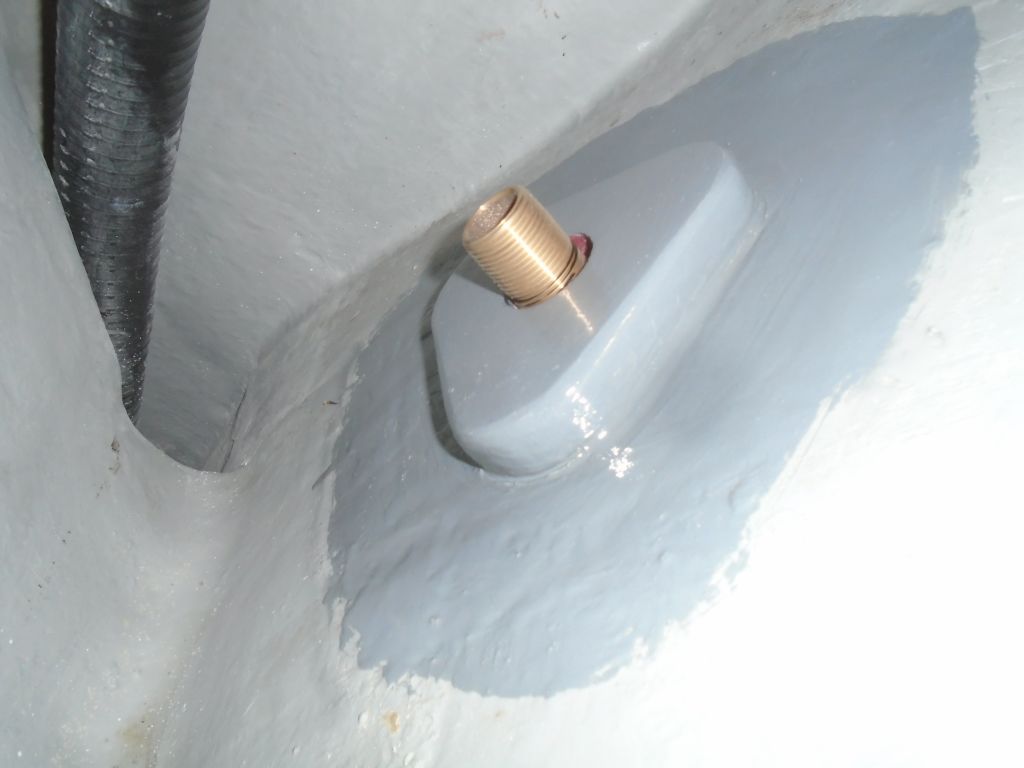
With all four fittings installed (the two new bases arrived, but too late in the day to install), I cut off the excess bolt length inside, and the job was done. The thinner removed a little of the gray paint in a few areas while I was cleaning up sealant, revealing a bit of the white primer beneath, so that’s what the white streaks are.

I’d finish up the two cockpit scupper fittings next time.
Total time billed on this job today: 7.25 hours
0600 Weather Report:
Drizzle and fog, 35°. Forecast for the day: partial clearing, high in the 50s, chance of a thunderstorm