

October 26, 2016
Acadia 24
Wednesday
Awaiting new taps to finish up the engine mount bolt holes, I worked on various final connections to the engine, beginning with the throttle and gear control cables. There’d likely be final adjustments to the cables later when I connected the pedestal end to the controls there.

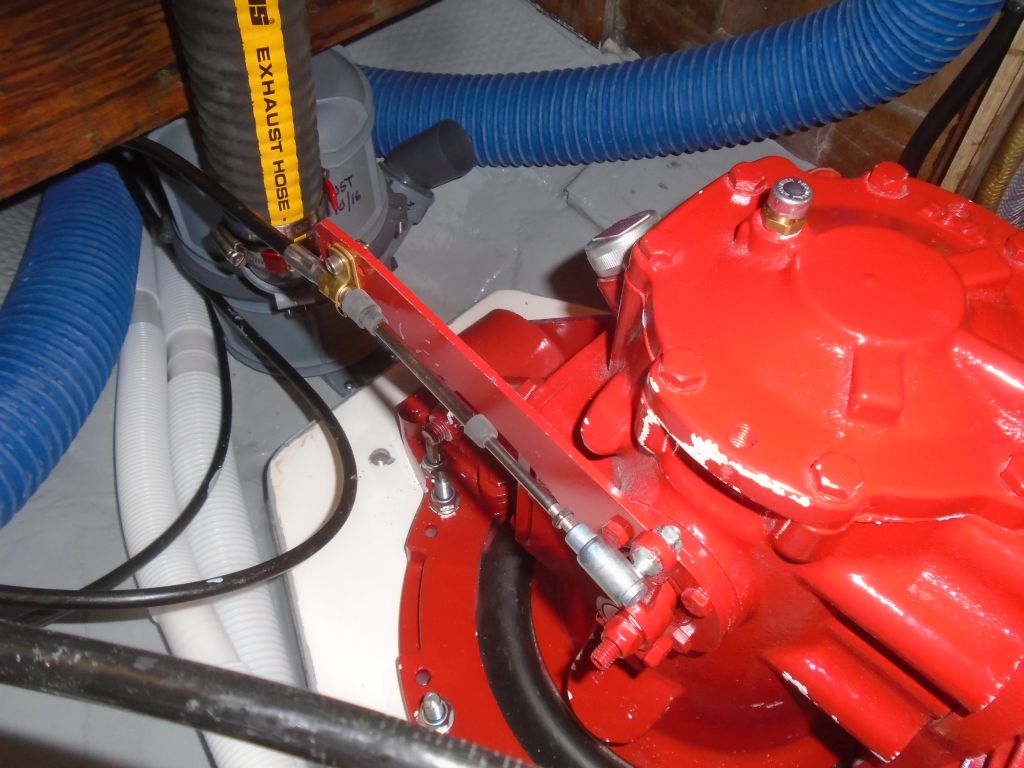
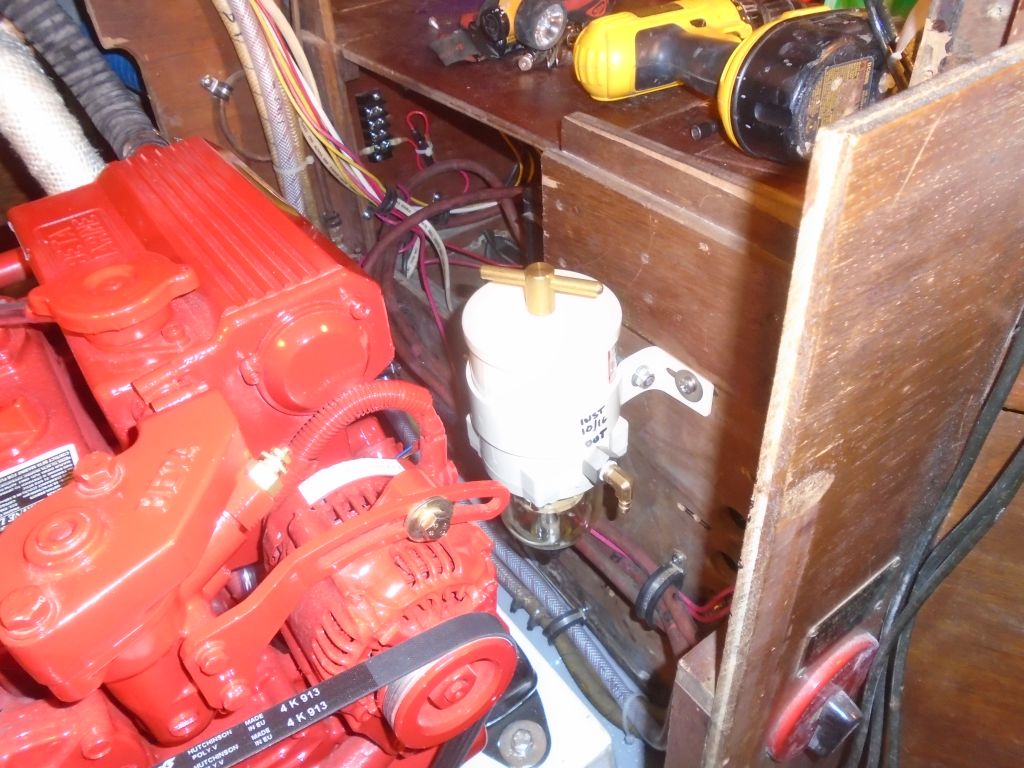
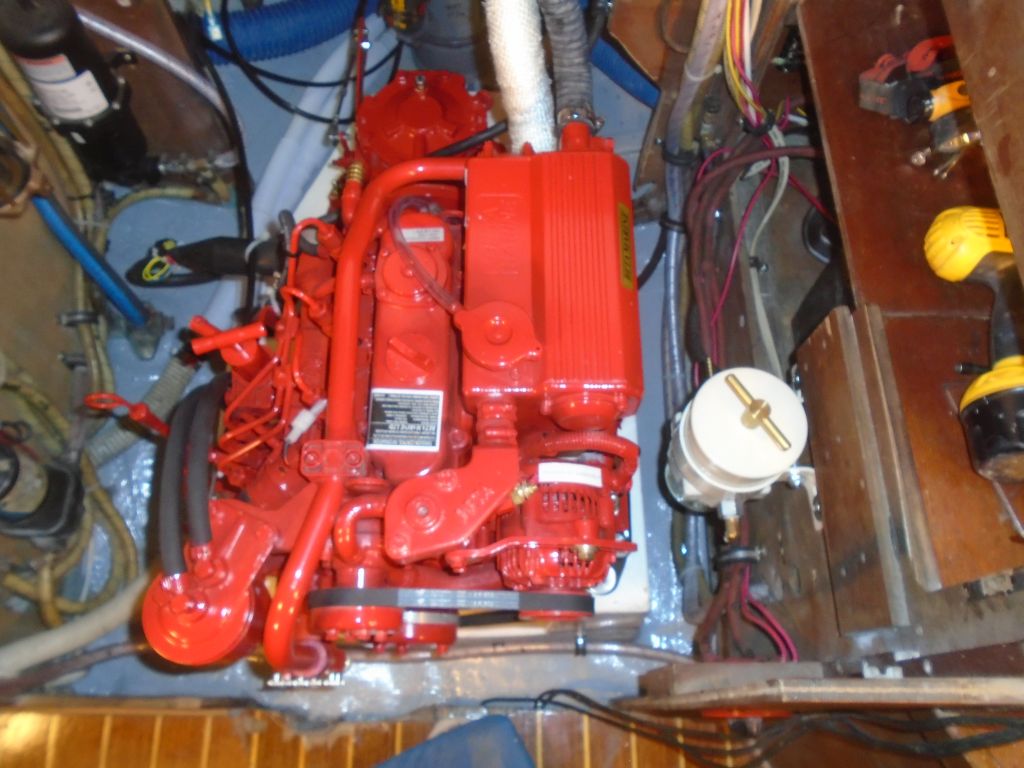
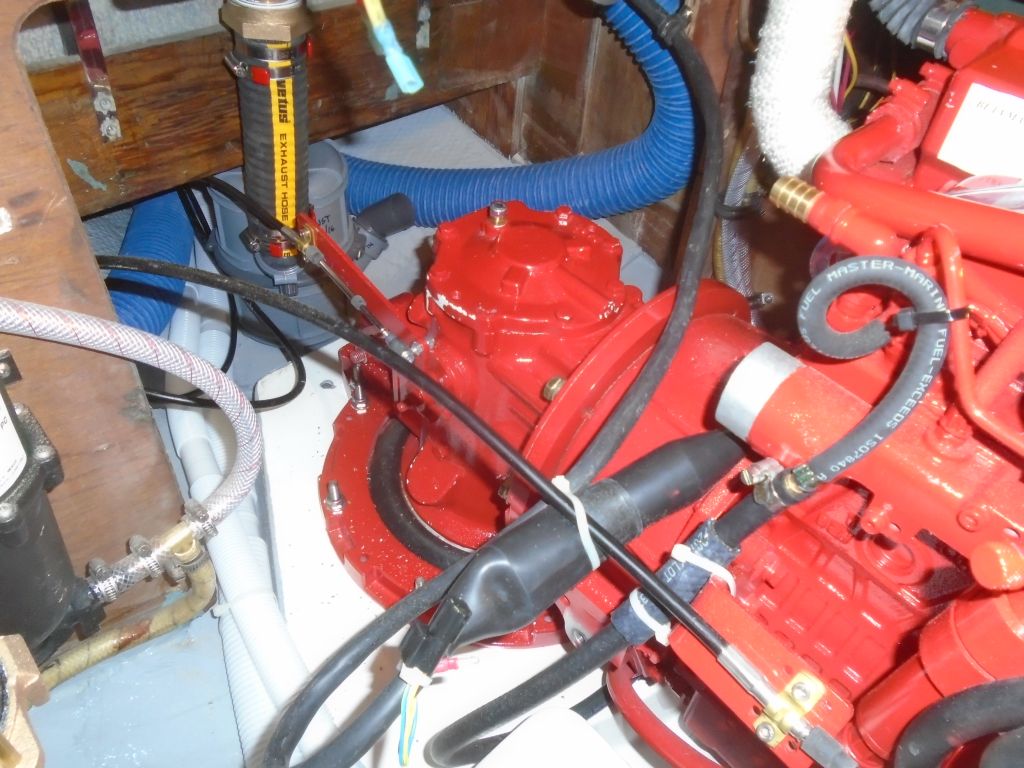
When I pre-arranged some of the fuel lines, for reasons unknown I’d been envisioning the fuel connections on the engine’s port side–I knew better, but perhaps the configuration of the old engine, which had the fuel connections in the aft port corner, was was stuck in my mind. In any event, the fuel supply and return connections were actually to starboard, so I needed to change things around. Fortunately, this was easy, and there was ample hose to make the change. To begin, I led the fuel return line across the aft part of the engine foundation, just forward of the transmission, then up to its connection at the engine, near the aft starboard side. I secured it with cushioned clamps and, on the engine itself, with some chafe gear where I secured it to the nearby control bracket.
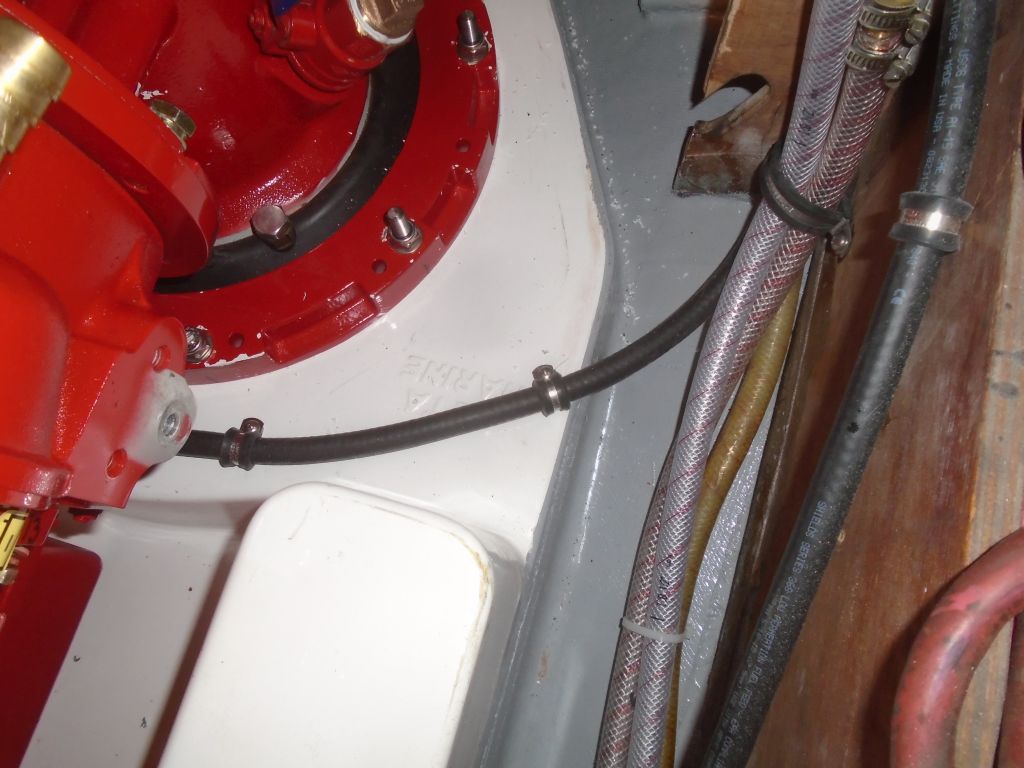

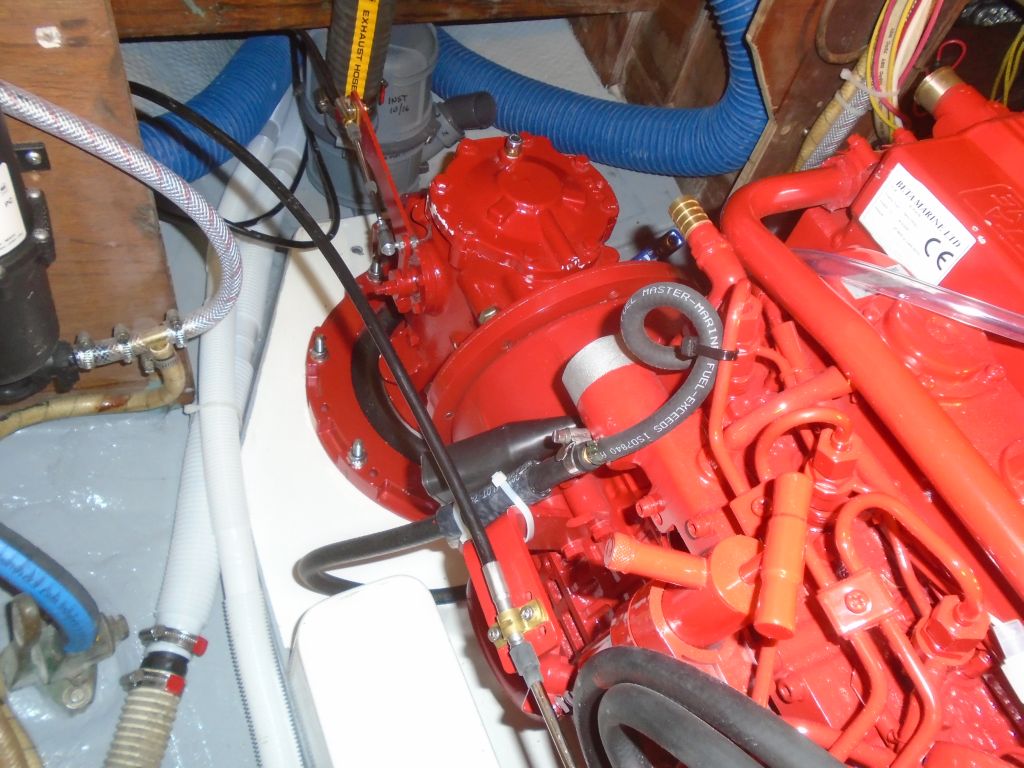
I’d temporarily removed the fuel filter during engine installation to increase space, and now I reinstalled it. I moved it a little higher than I’d originally placed it since I found that the bowl ended up close to the top of the foundation, and access to the drain in that original location would have been awkward. Moving the filter up improved access and kept the filter unit well out of the way of any engine interference. I also spun the filter 180° to reverse the position of inlet and outlet ports to better fit the reality of the eventual hose leads.
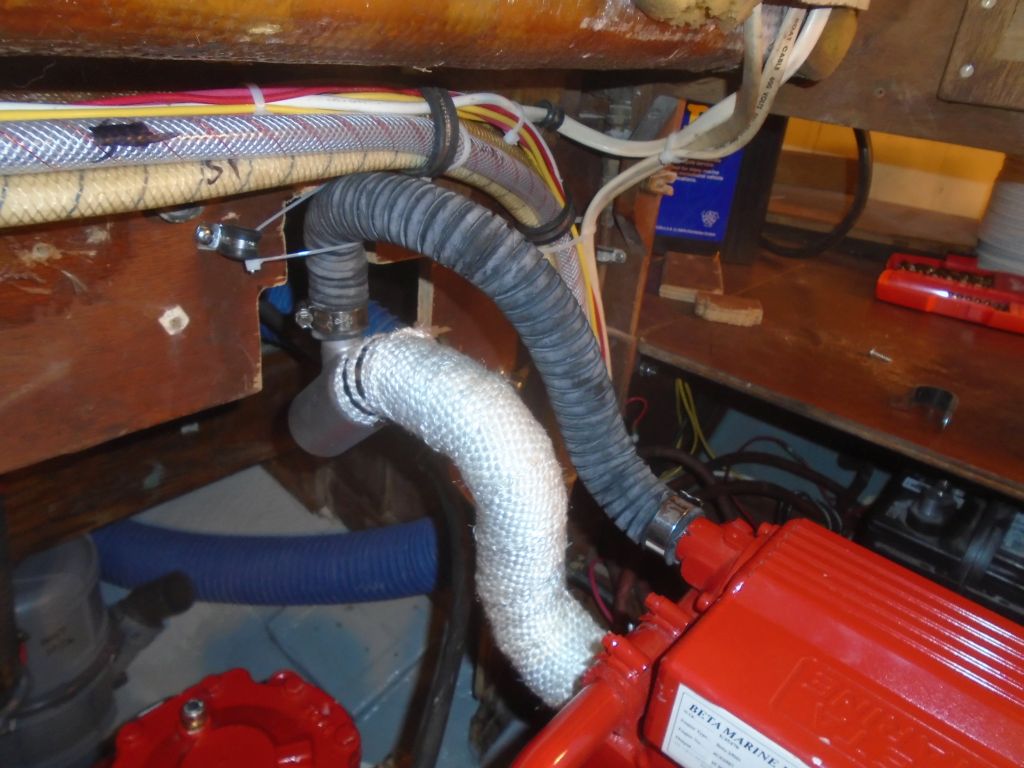
Now I test-fit the engine exhaust elbow, which had been shipped separately from the engine, and I’d left it off during installation. I found that the raw water inlet at the top of the elbow ended up directly in way of the engine room after bulkhead (natch), so I had to mark and cut away the bulkhead in this area to allow the elbow and its hose to fit. This also required me to move up the pre-existing wire and hose bundle that I’d led across the bulkhead earlier, but other than resecuring the clamps this didn’t require any other substantial changes to the bundle. Afterwards, I permanently installed the elbow with its four bolts, and attached the supplied injection hose.
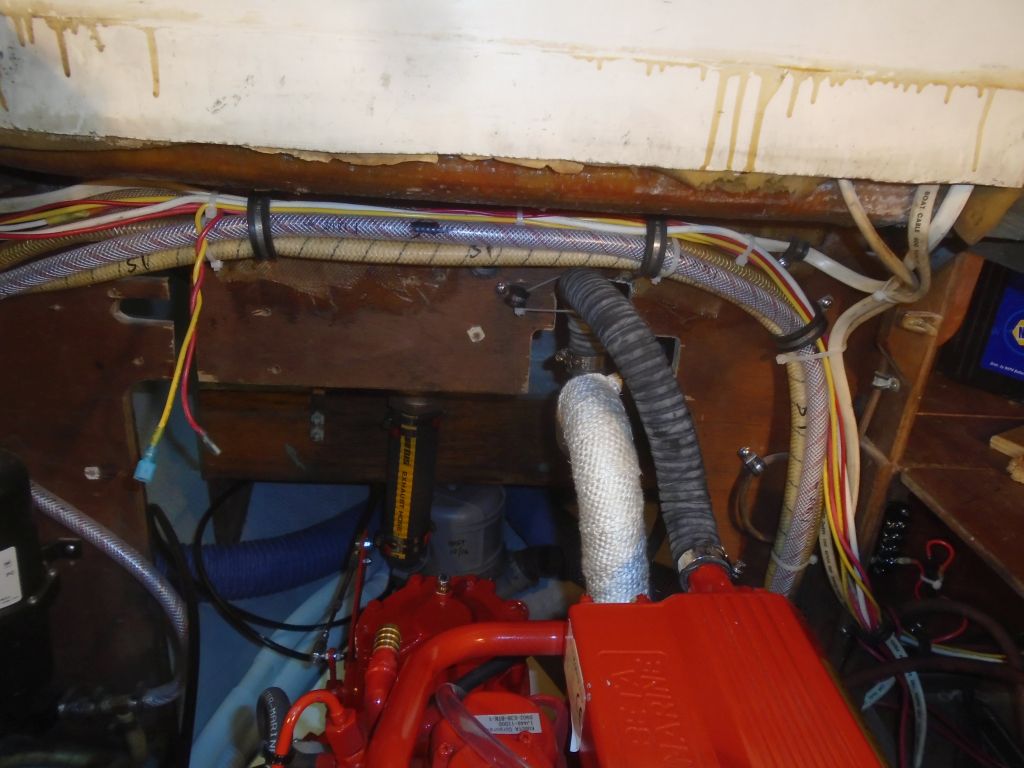
I led the engine wiring harness across the aft end of the engine, securing it as necessary, and made the connection at the engine plug.
In the afternoon, with my new tap on hand, I worked on the remaining bolt holes to secure the engine mounts. Despite the fresh tool, this was still slow going. Progress was incremental, but eventually I finished the forward hole on the port side, and moved on to the port after hole. Access here was awkward, with various obstructions limiting the torque I could put on the tap handle, and completing the threads in this hole was an exercise in frustration, though ultimately successful. As I felt I was getting close to finally threading the hole all the way through, the bad angles conspired against me and I broke off the tap–the very thing I’d tried so hard to avoid all along. To my great relief, I found that not only did the tap break with enough exposed above the hole to grab easily, but the tap was also loose and not bound, so I was able to remove the broken part without difficulty and then finish the hole with another tap–I was right, the first tap was just breaking through the bottom when it broke, so although I knew I was pressing my luck at this point, I finished the third of the four holes, but knew better than to approach the final hole on the other side till next time, as I’d clearly used up the good Karma for the day.


Total time billed on this job today: 4.75 hours
0600 Weather Observation:
34°, Clear. Forecast for the day: becoming cloudy, chance of a shower, high 44