

December 5, 2017
Jasmine 4
Tuesday
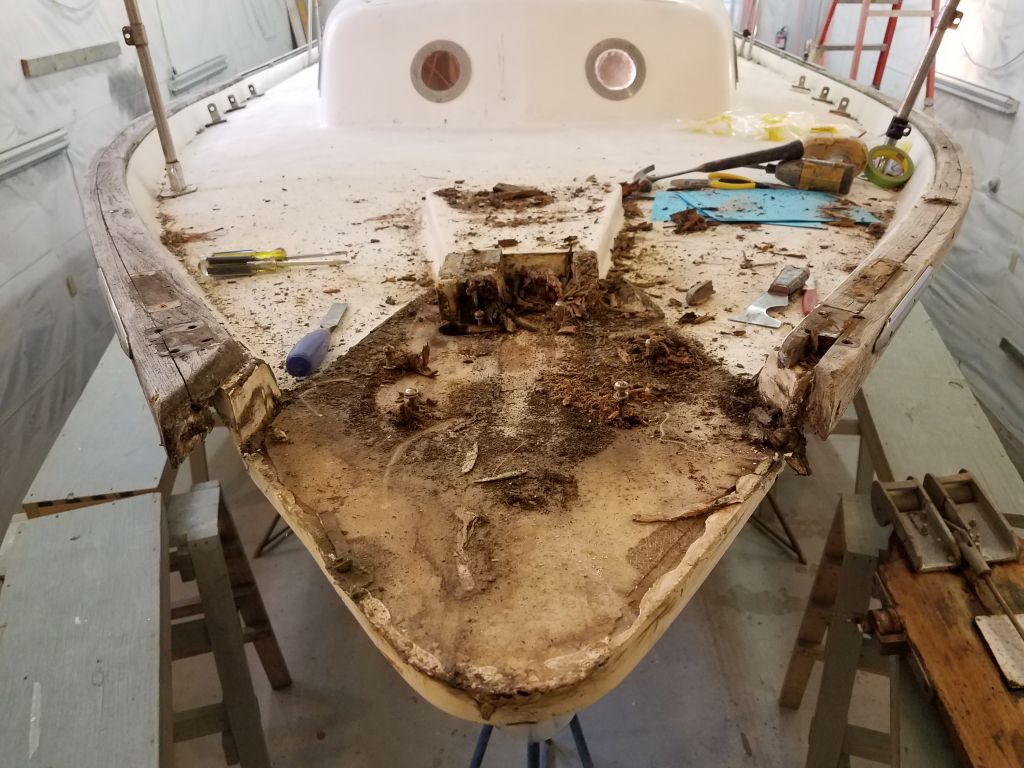
With substantial deck work and eventual refinishing on the way, my first step was to remove deck hardware. I began, as usual, at the stem and worked my way aft. From inside the almost comfortably roomy chainlocker, I removed the nuts from the fasteners securing the manual anchor windlass above, along with those from the bow cleats. Fortunately, these nuts came free without spinning the fasteners, even though the windlass bolts were a couple inches too long with lots of exposed thread.
Back on deck, I removed the windlass and cleats, along with the fasteners. The chain stripper associated with the windlass was nearly completely rusted away. The platform itself was in atrocious condition at the after end.
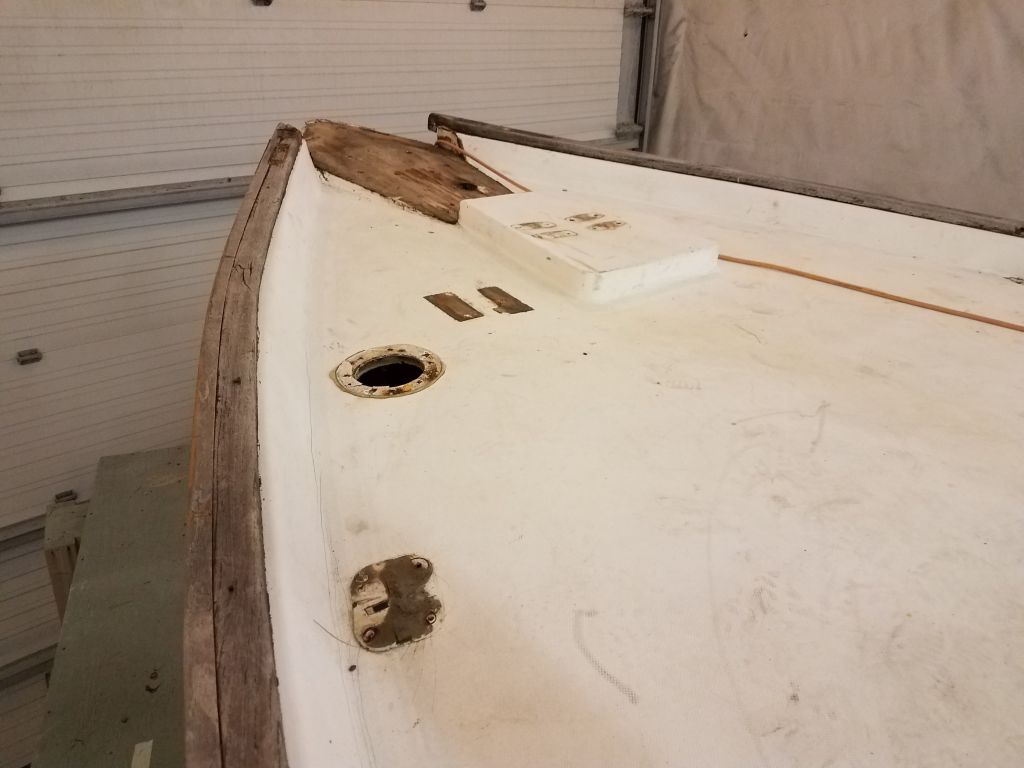
I removed the bow pulpit, which was bolted through the outward flange of the hull/deck joint and toerail, making the fasteners easy to access. The central forward stanchion of the pulpit was secured into the bronze stem fitting at the end of the bow platform with a single bolt, and this was straightforward to remove. I also removed the bow chocks, which I realized belatedly was unnecessary since they were on the rail and not in the way of deck work, along with an anchor hawse and some wooden blocking on the port side.
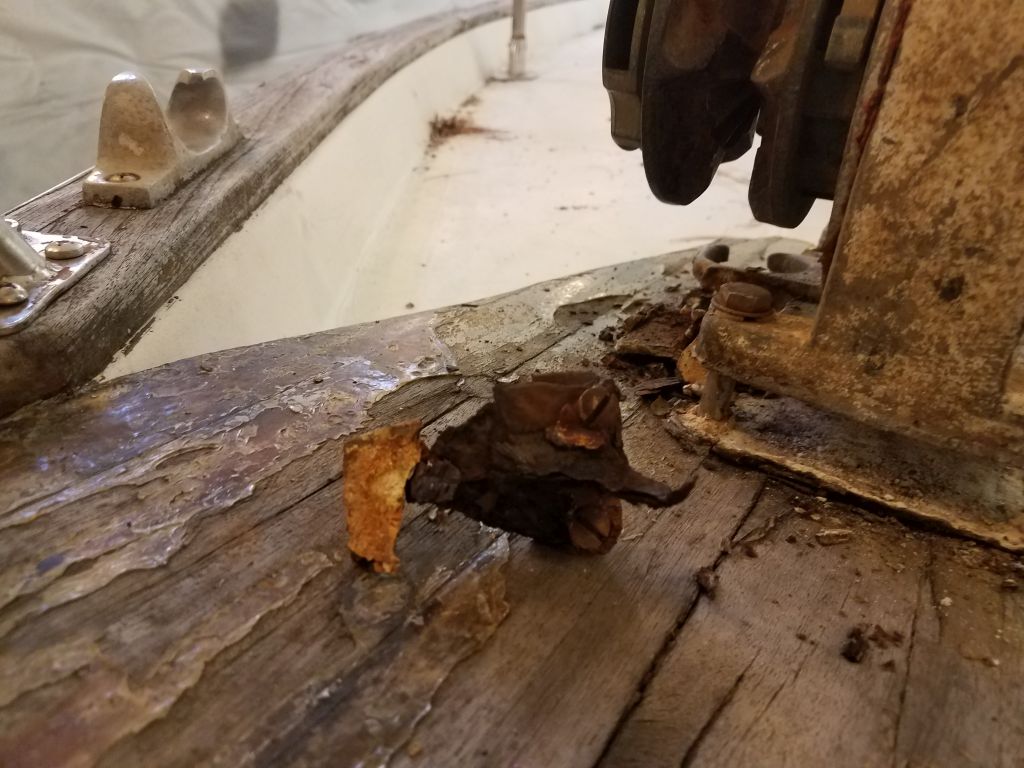

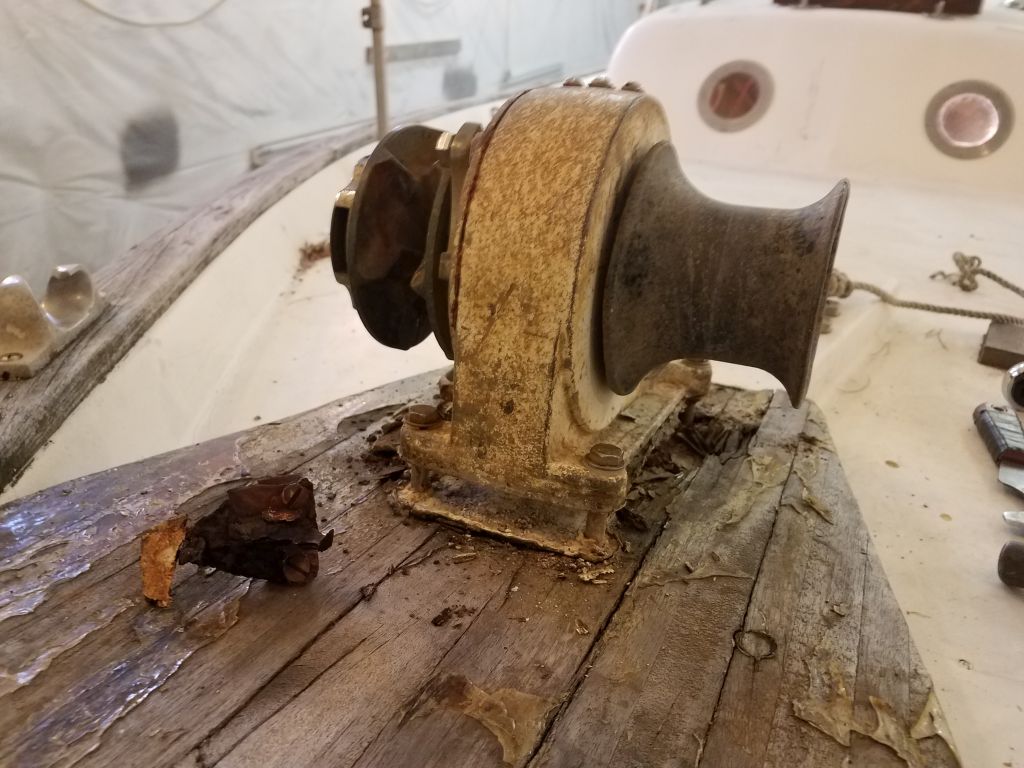
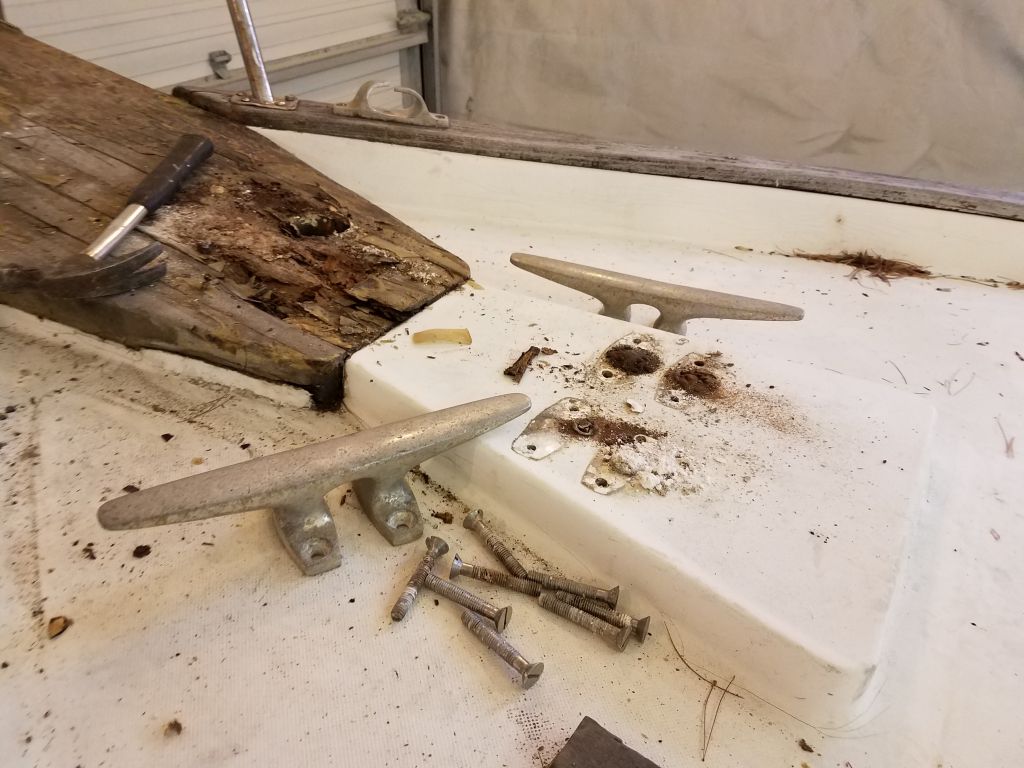

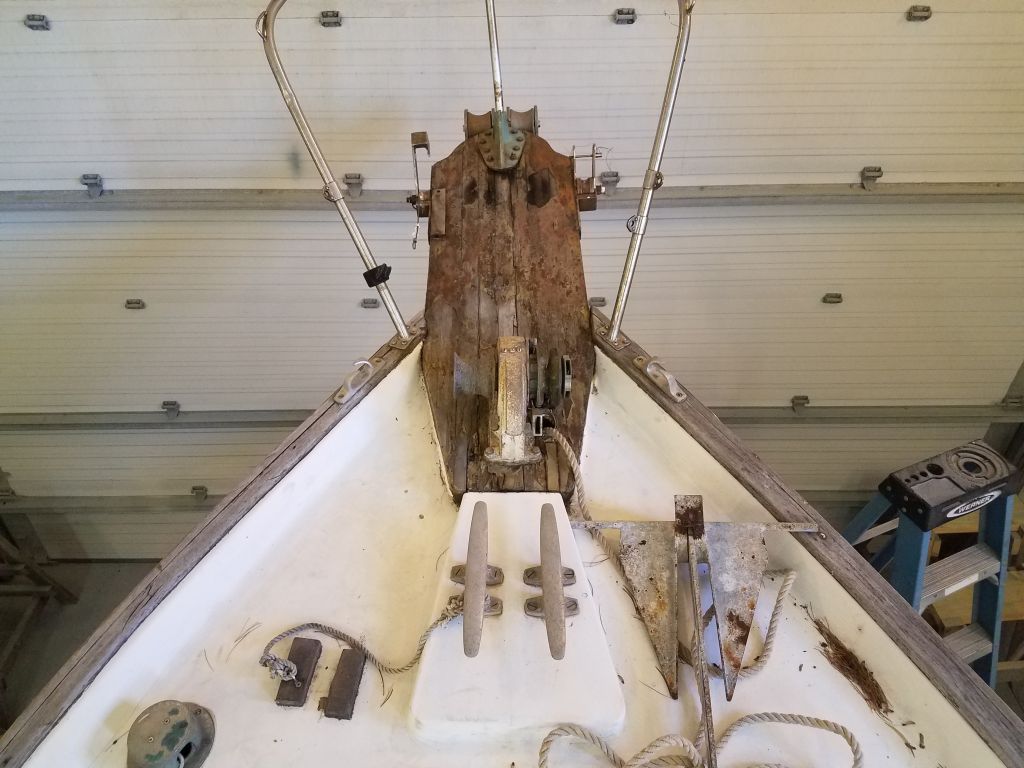
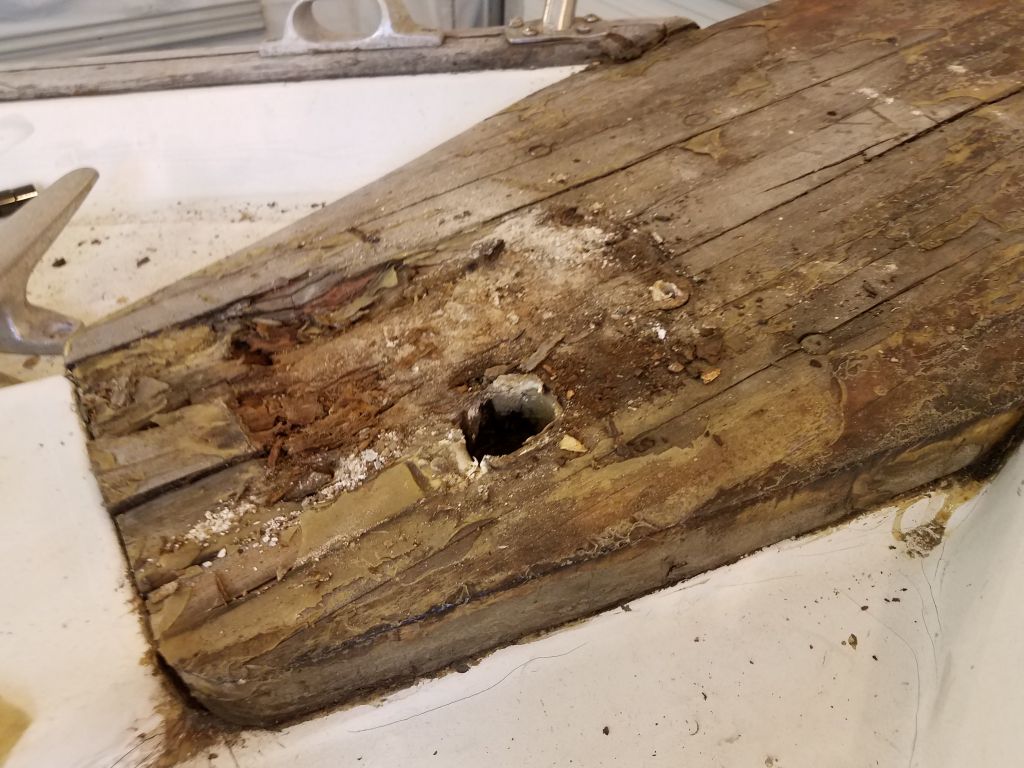
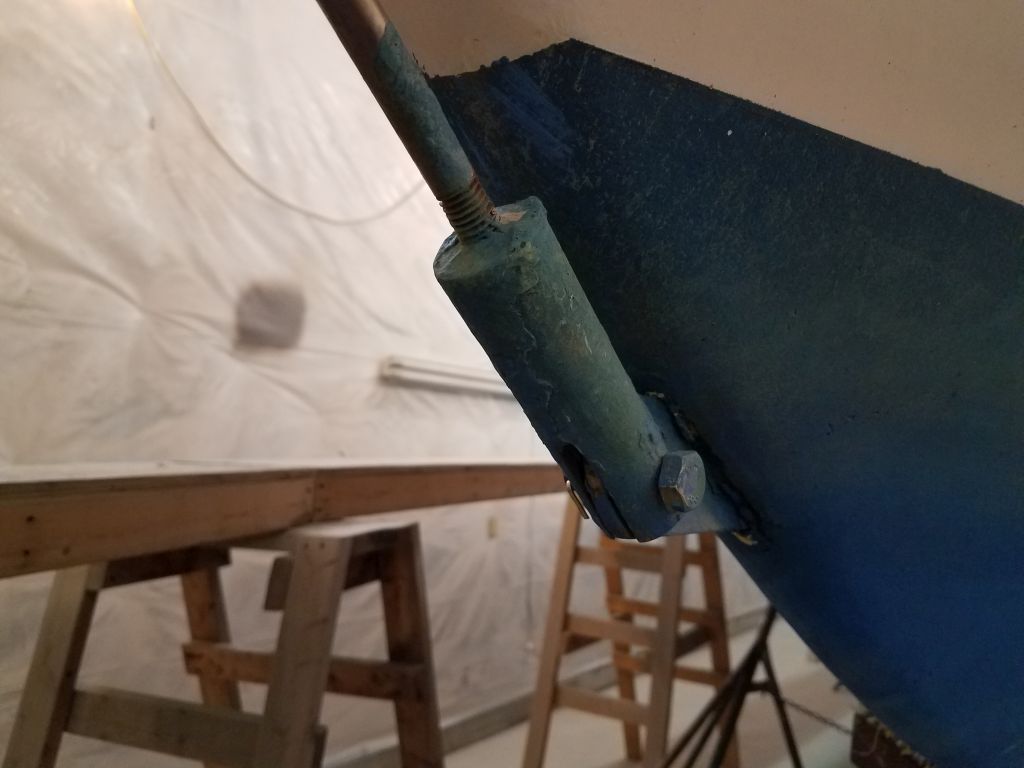
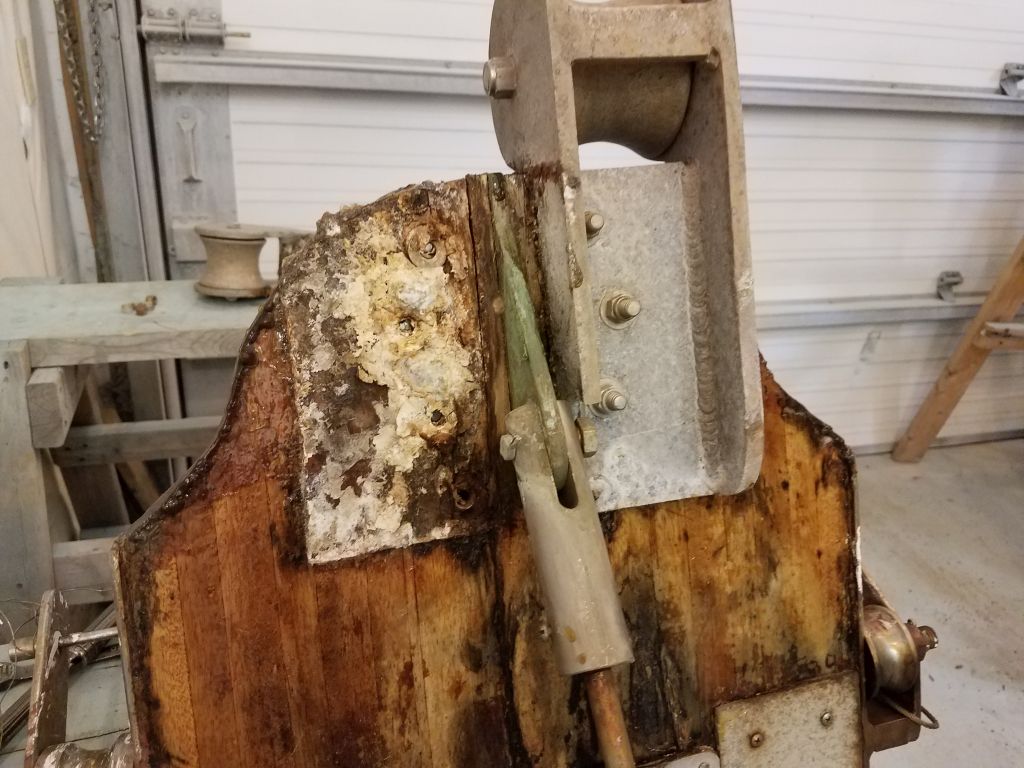
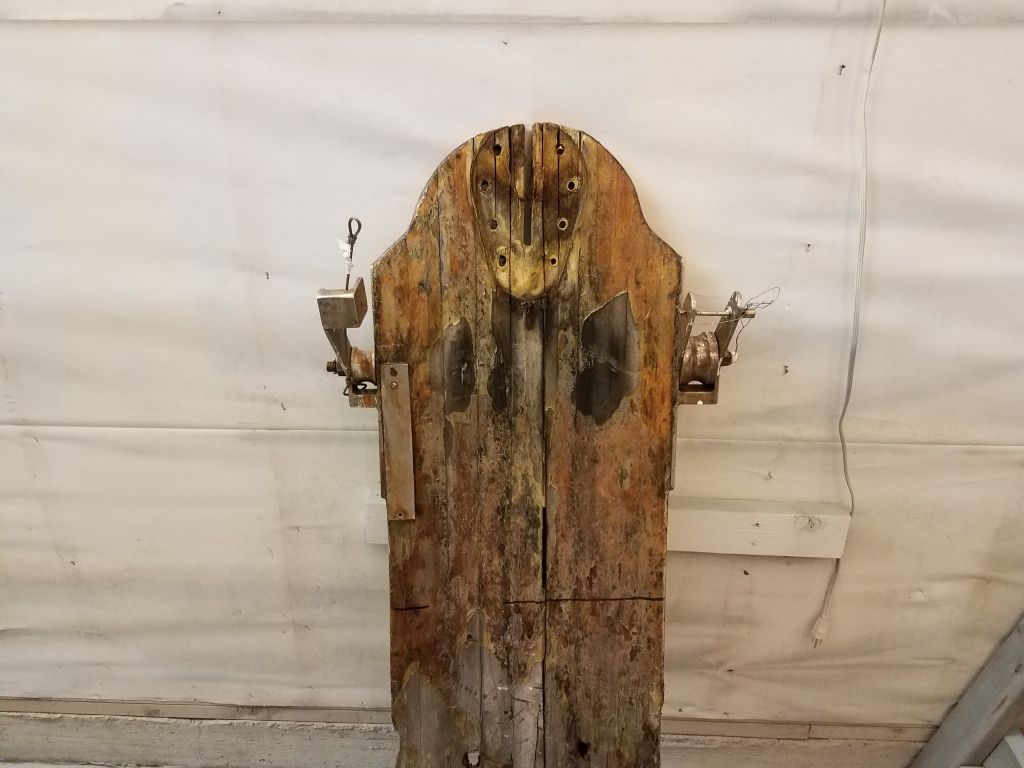
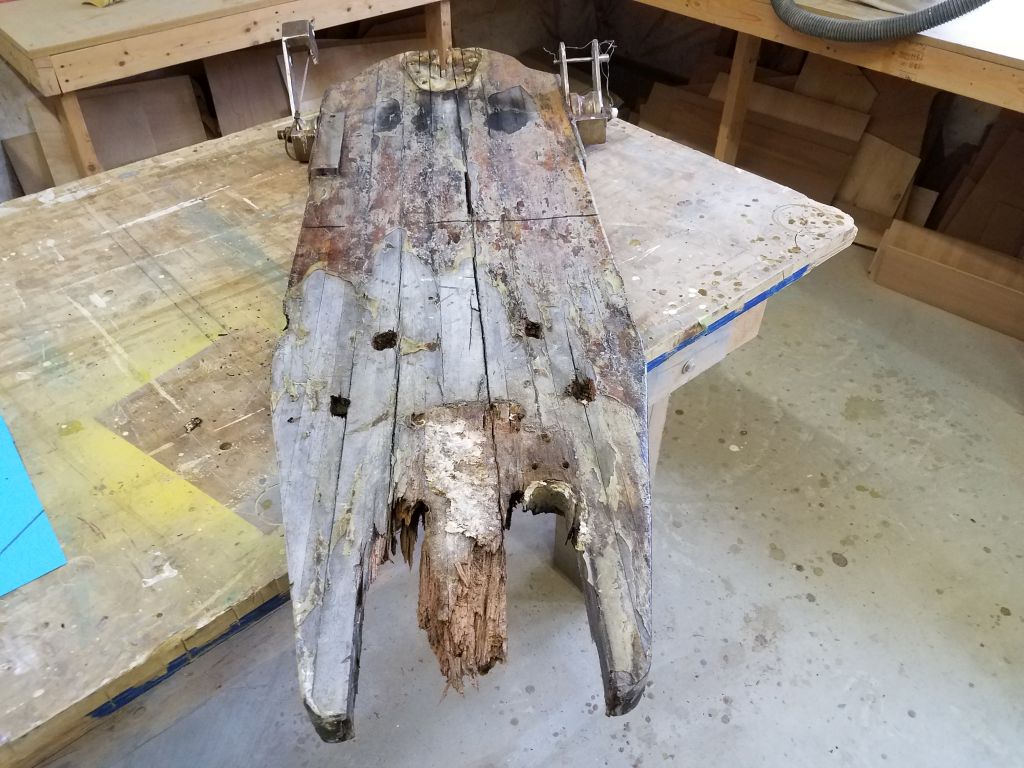
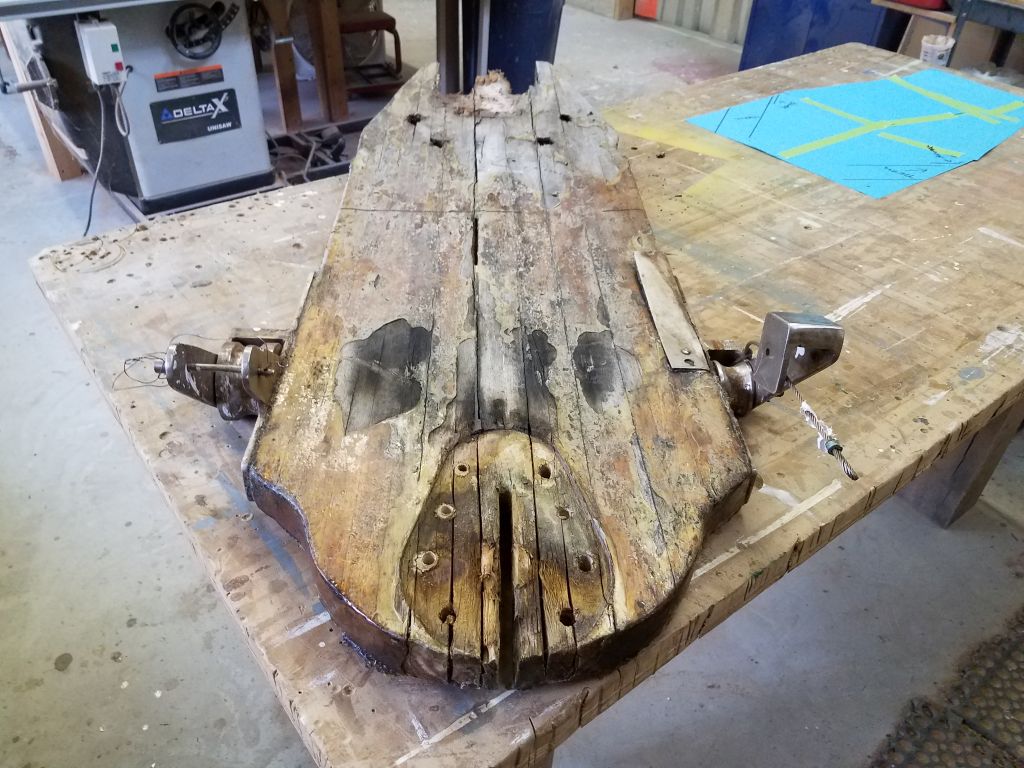
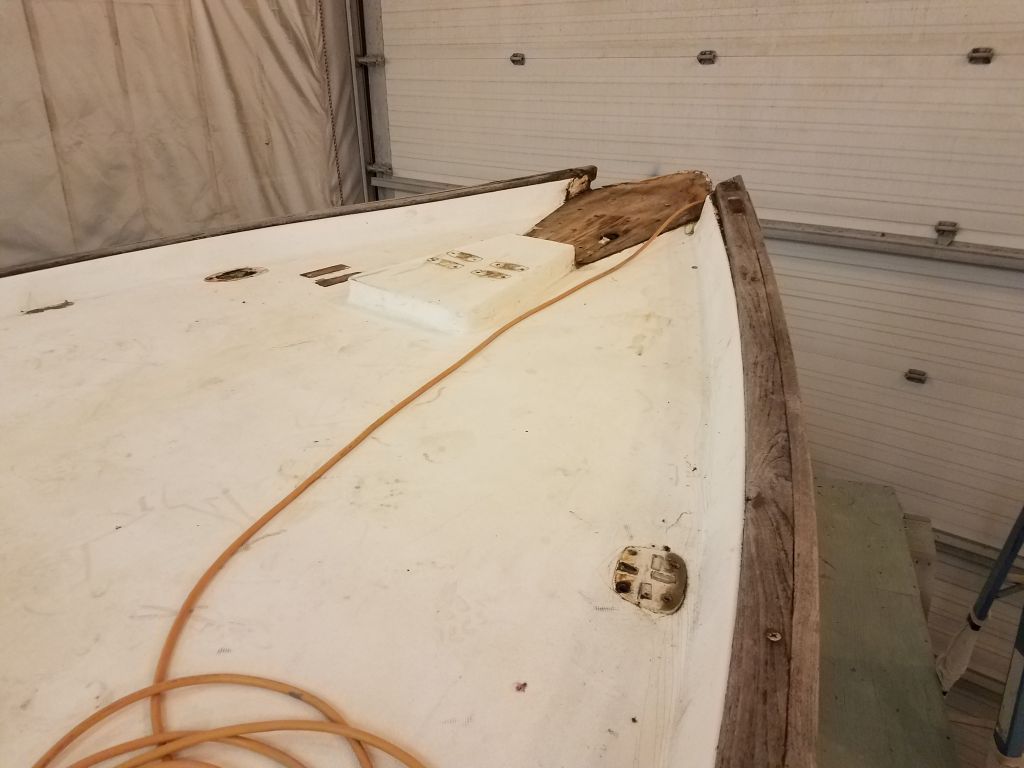
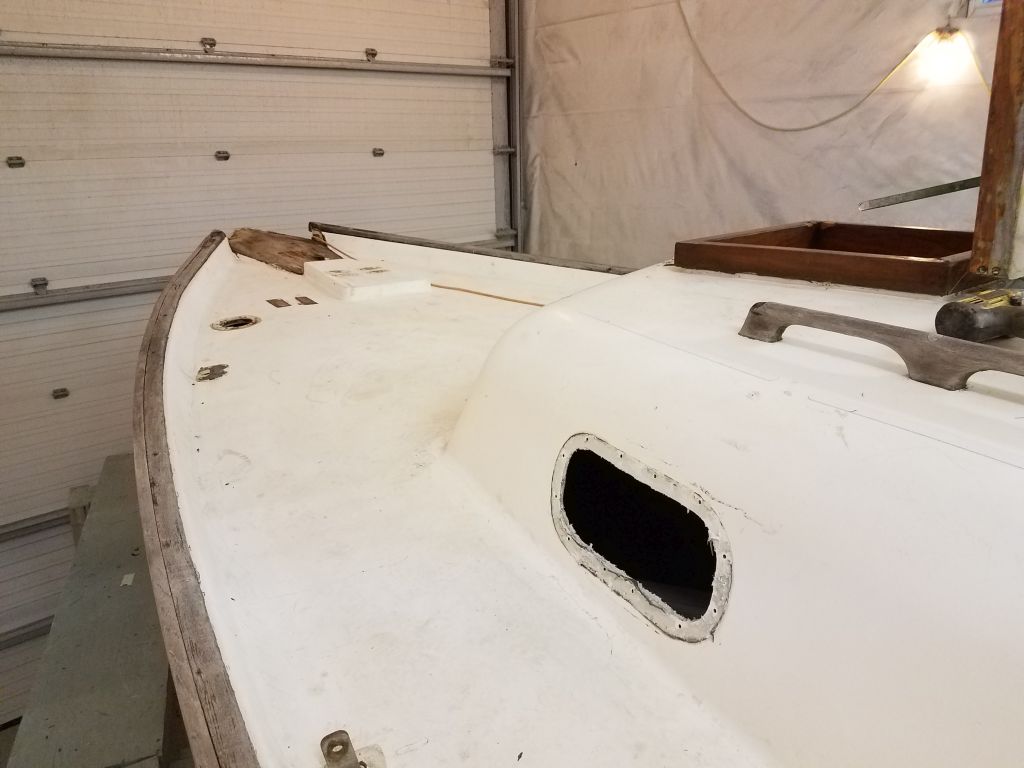
Removing the windlass highlighted the extremely poor condition of the wooden bow platform: the after end was completely rotten and unsound, and compressed and flaked away easily under light (or no) pressure. I’d been aware that the platform’s condition was sketchy, but hadn’t understood quite to what extent. It was abysmal. With the windlass and its bolts removed, I could have easily pulled away most of the after portion of the wood by hand had I so chosen, but I hoped to keep the platform as intact as possible to aid in templating a replacement later.

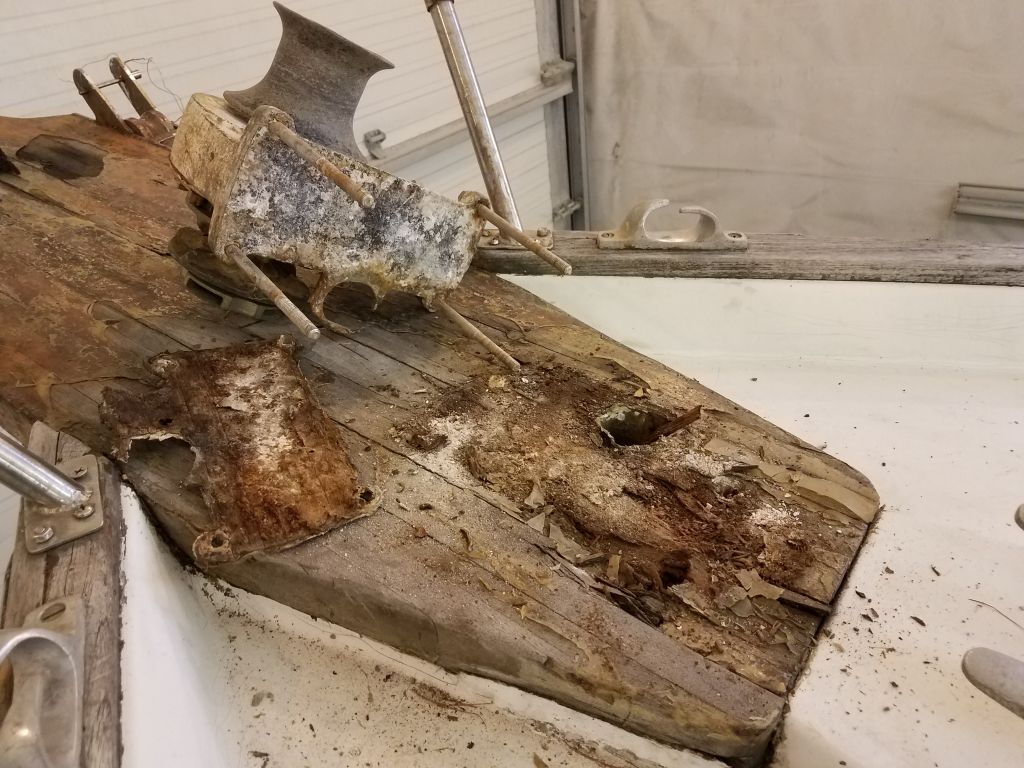
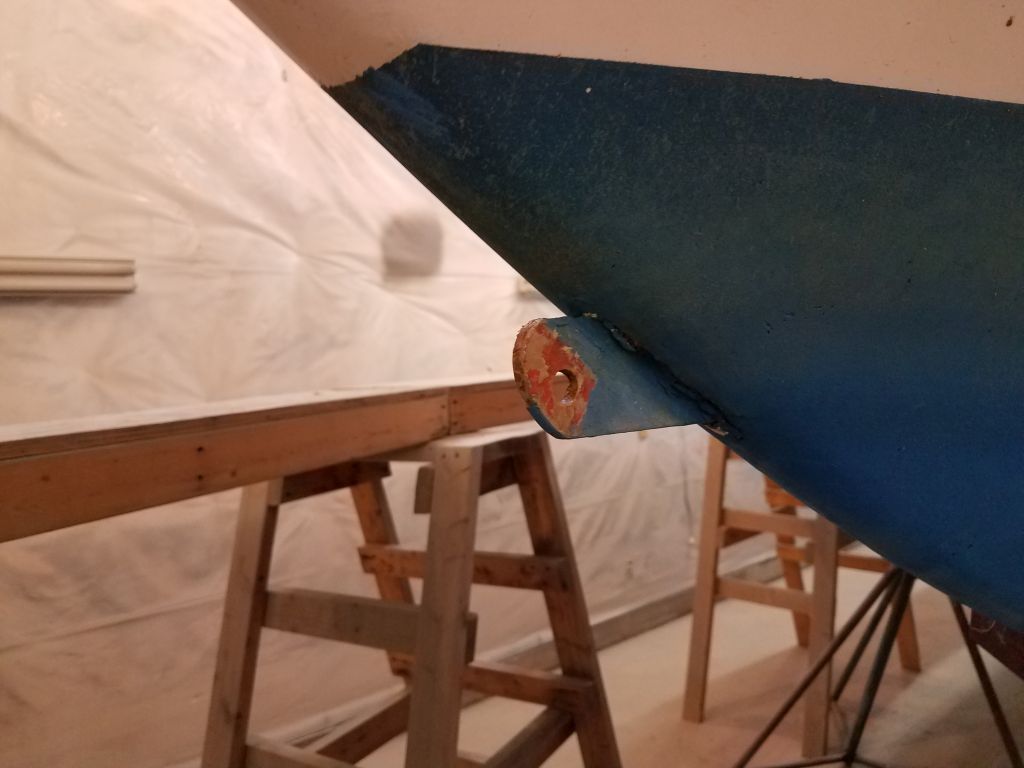
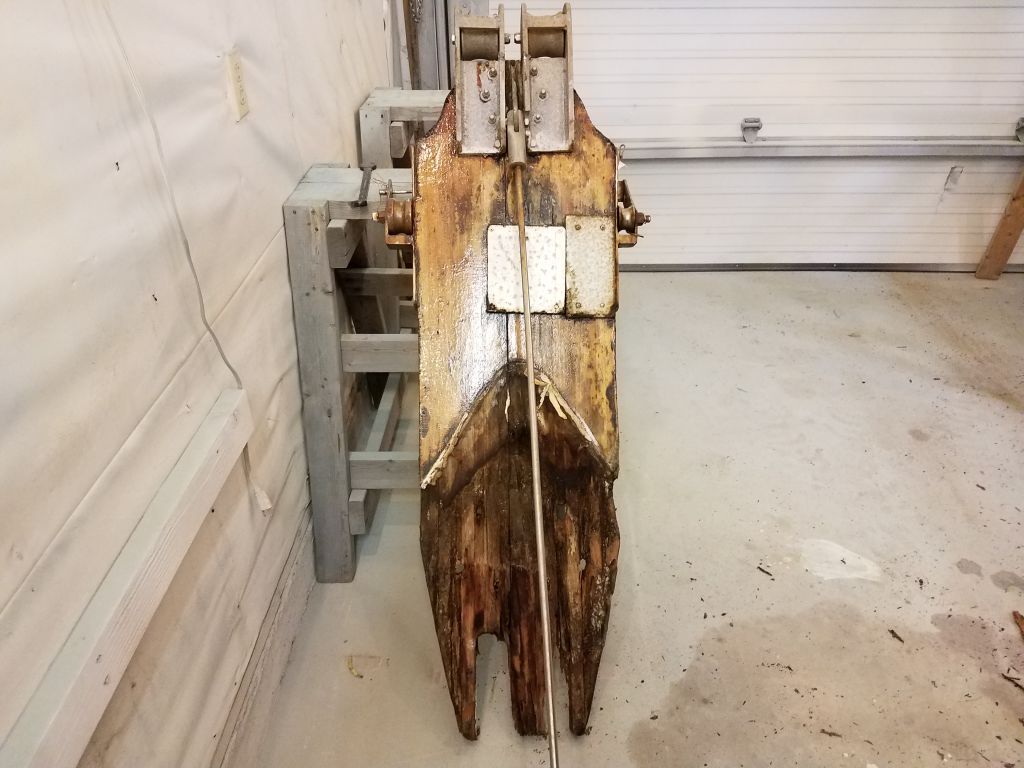
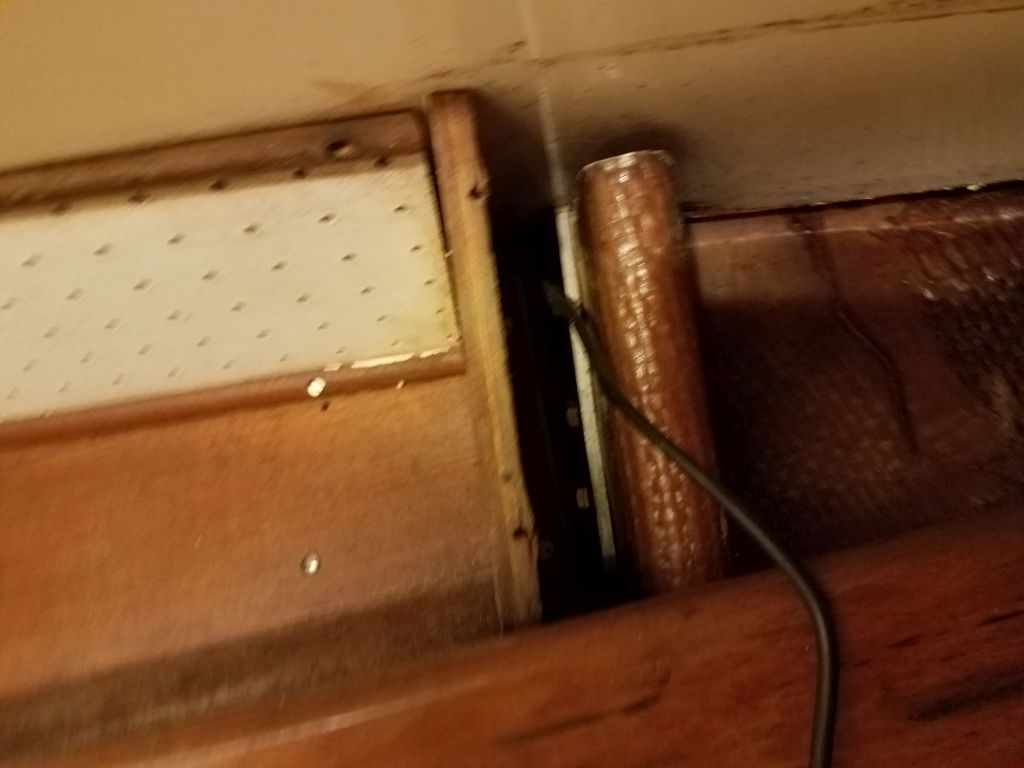
In order to remove the platform, I had to unhook the solid rod bobstay beneath, which opposed the rigging pressures from the headstay when attached to the bronze casting at the far end of the platform. The top fitting was semi buried in a tight space between the two aluminum anchor rollers at the end, and I couldn’t easily access the cotter pin nor spin the clevis to aid in removal. In hindsight I should have just unbolted the pair of anchor rollers to remove them and access the pin, but at the time I preferred the thought of doing this later at my leisure, wanting more to simply get the platform off the boat. So I removed the pins from the lower end of the bobstay, freeing it from the stem and also freeing the platform for removal. The downside to this was that the platform was end-heavy, with all the hardware at the outer end, and the long, heavy, unwieldy bobstay only made things worse. In the end this complicated removal, but didn’t prevent it and didn’t create any undue problems.

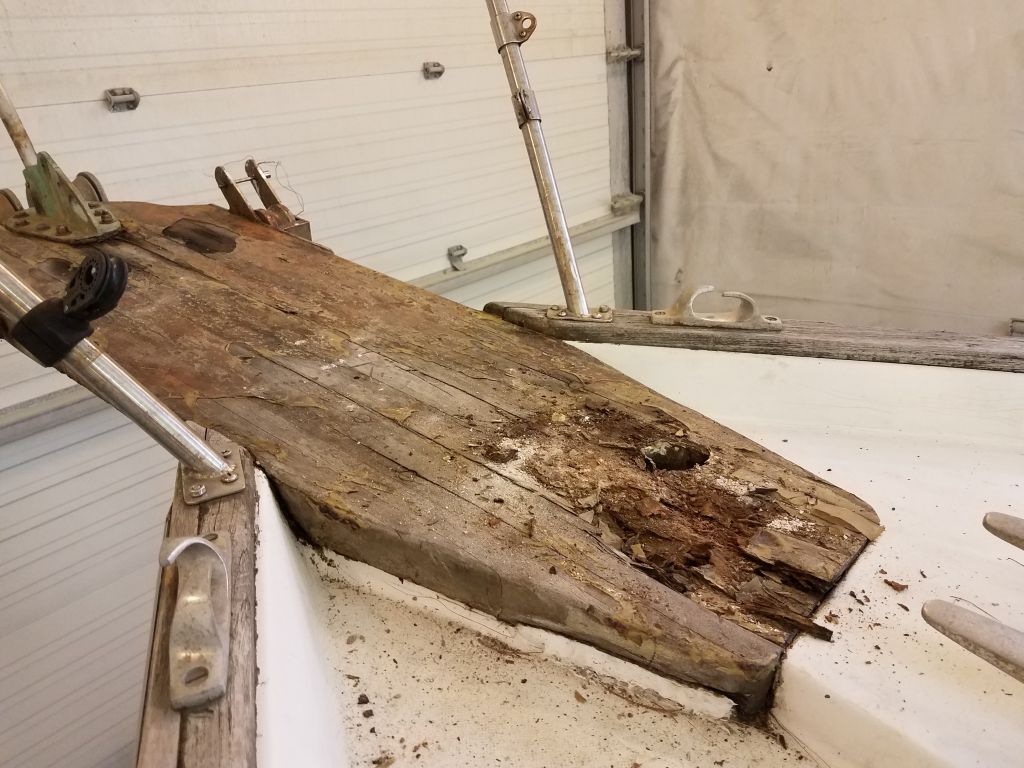
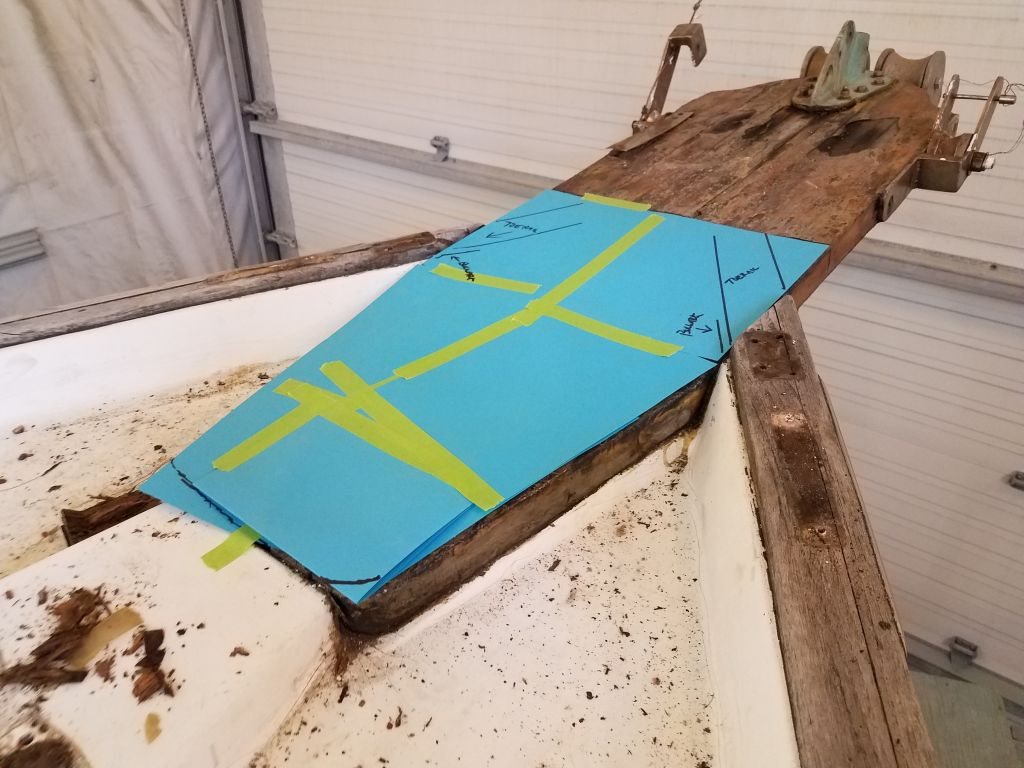
From belowdecks, I attempted briefly to remove the nuts from the platform fasteners, but it was clear the fasteners were all spinning freely in the remnants of rotted wood above, so instead I decided to simply lift the platform off the fasteners–pretty simple given that the wood was so rotted. Before removal, I took a few moments to make a quick template of the shape of the top of the platform, in case the platform disintegrated complely during removal.
It only took a little prying from beneath before I could lift the outer end of the platform and free it completely from the deck. The platform was quite heavy with all the hardware at the end, and the nearly 4′ long rigid bobstay was a pain in the neck, but without real issue I got the platform safely onto the foredeck, where I could regroup before lifting it more effectively and getting it to the staging, then eventually to the shop floor.

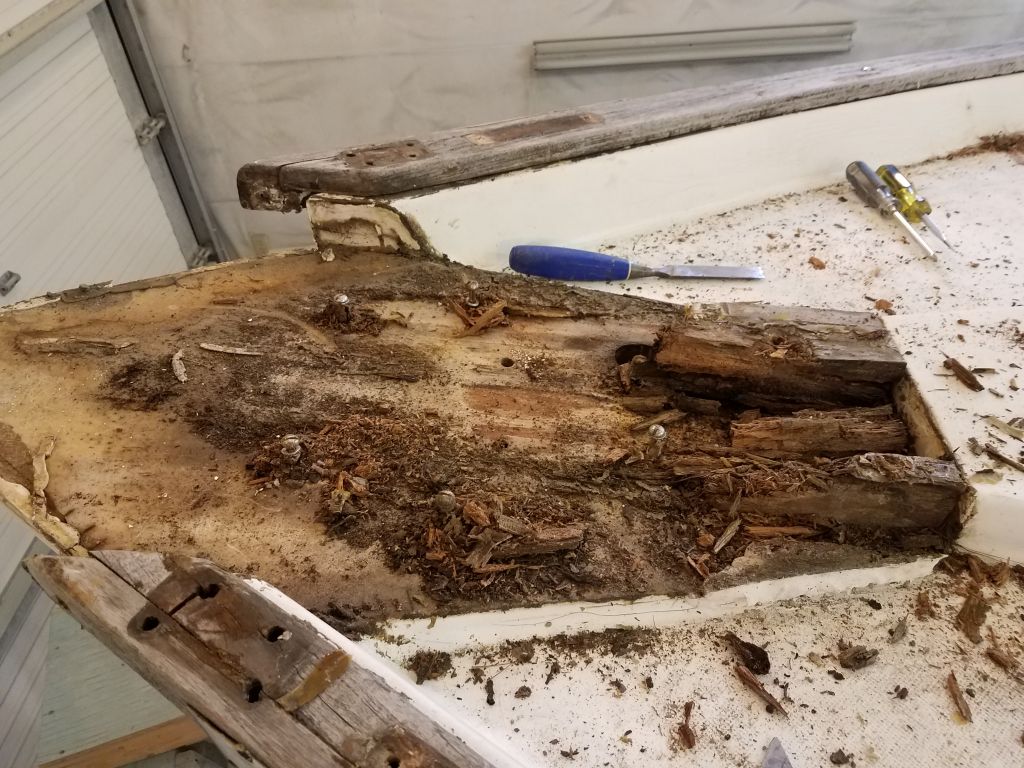
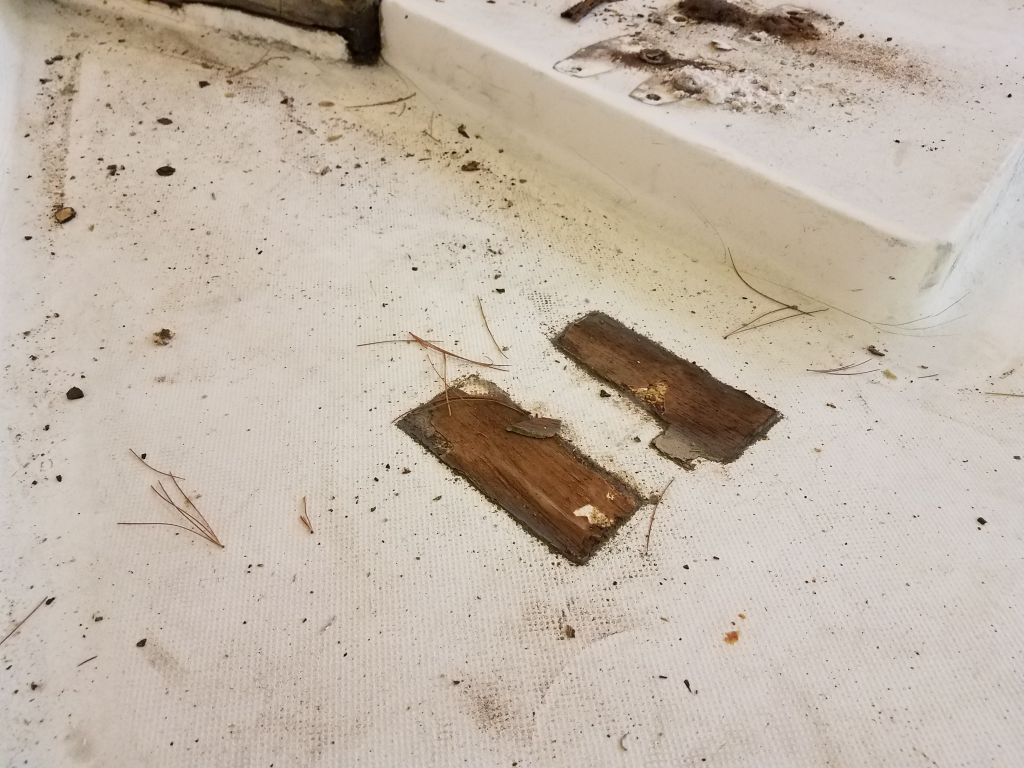
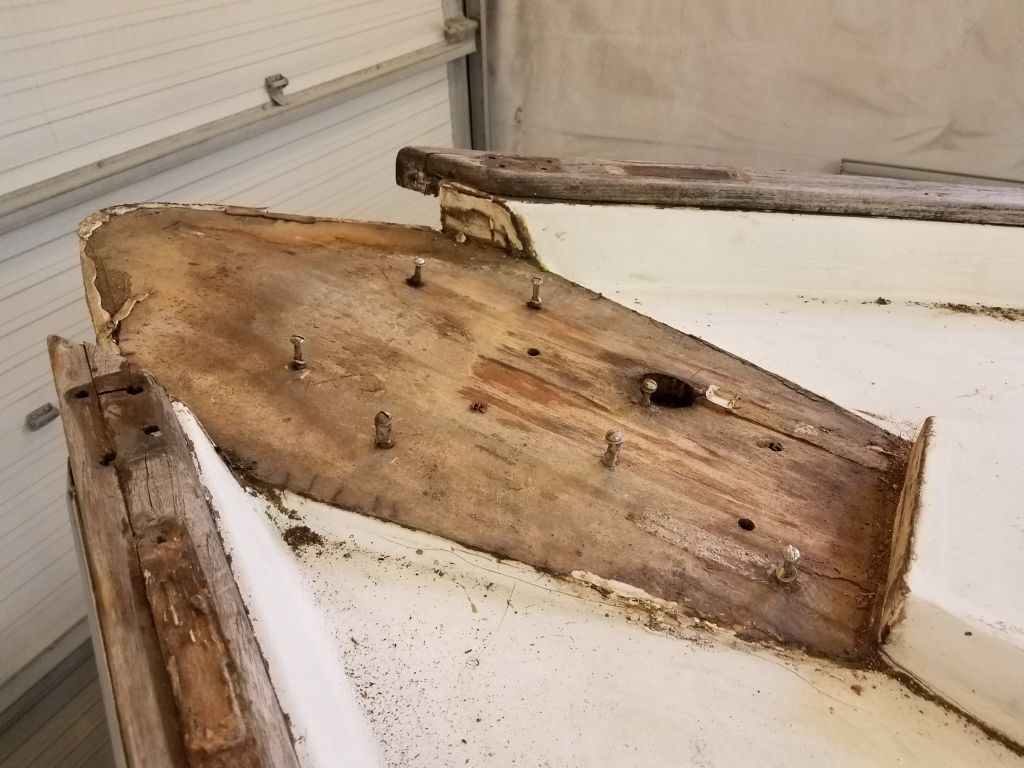
There was a substantial block of epoxy surrounding one of the after fastener holes, indicating that someone had tried to effect a band-aid repair when the platform had begun to deteriorate; there was also a huge blob of sealant at the after port edge, at deck level, where someone had filled in rotting wood with whatever came close to hand. In any event, I removed the detritus and later, after cleaning up the wood scraps and dust, I cut off the bolts above decks and pushed them through the holes.


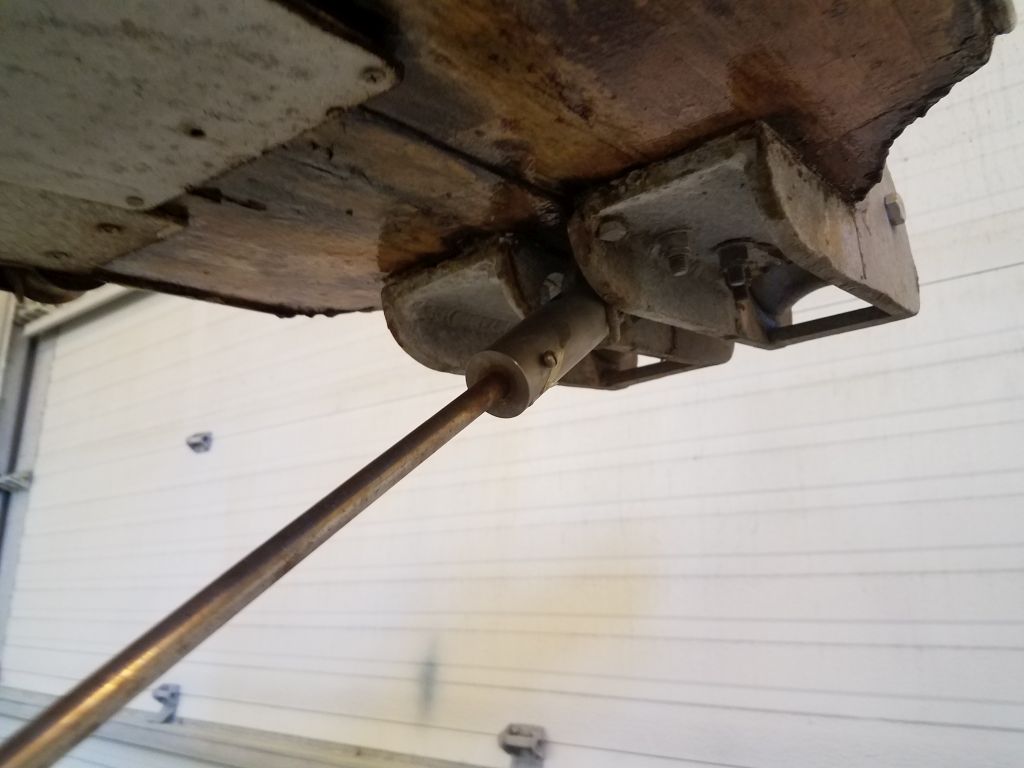
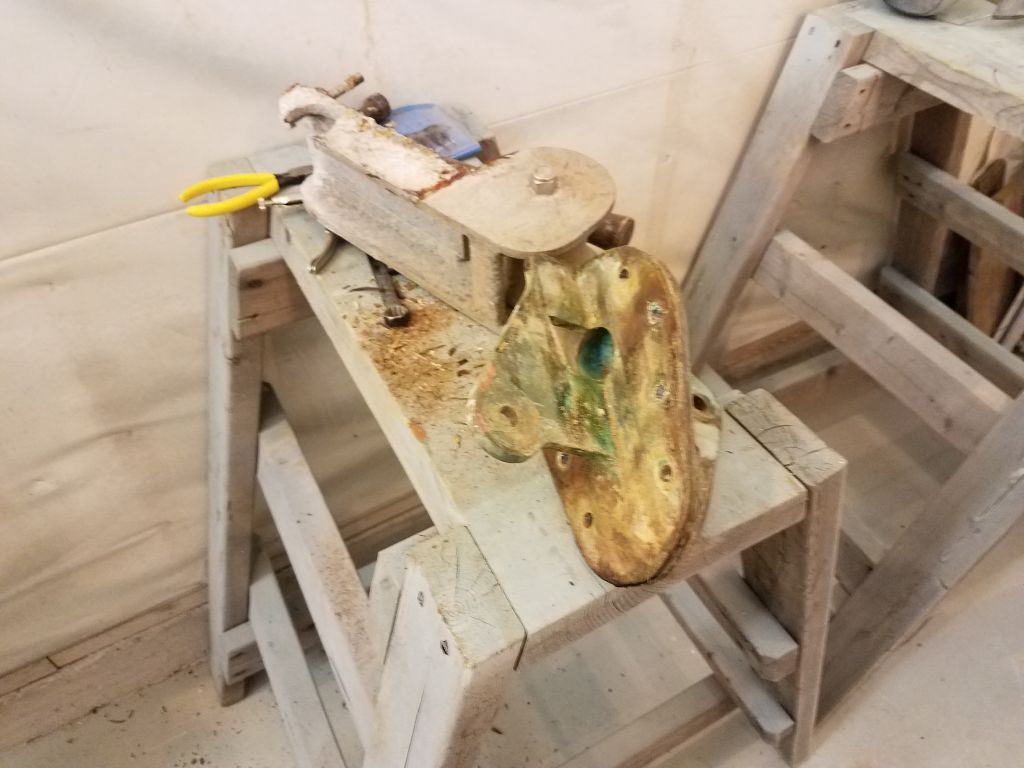
Now, wanting the bobstay out of the way completely, I had to go ahead and remove the anchor rollers from the end of the platform so I could remove the cotter pin and hammer out the extremely tight clevis from the top fitting, finally freeing the bobstay. I set this aside for later inspection, then completed the removal of the bronze stem casting, which would be reused later. The aluminum anchor rollers were in poor condition and had exacerbated (along with the aluminum anchor windlass) the deterioration of the wooden platform. In any event, the owner planned for a new, single roller in the new installation.

Continuing aft, I turned to the first set of lifeline stanchions, a mismatched pair with a non-angled base on the port side, causing the stanchion to lean outwards. Belowdecks, I removed some trim panels from the forward cabin to gain access to the stanchion bolts, which I removed without incident.
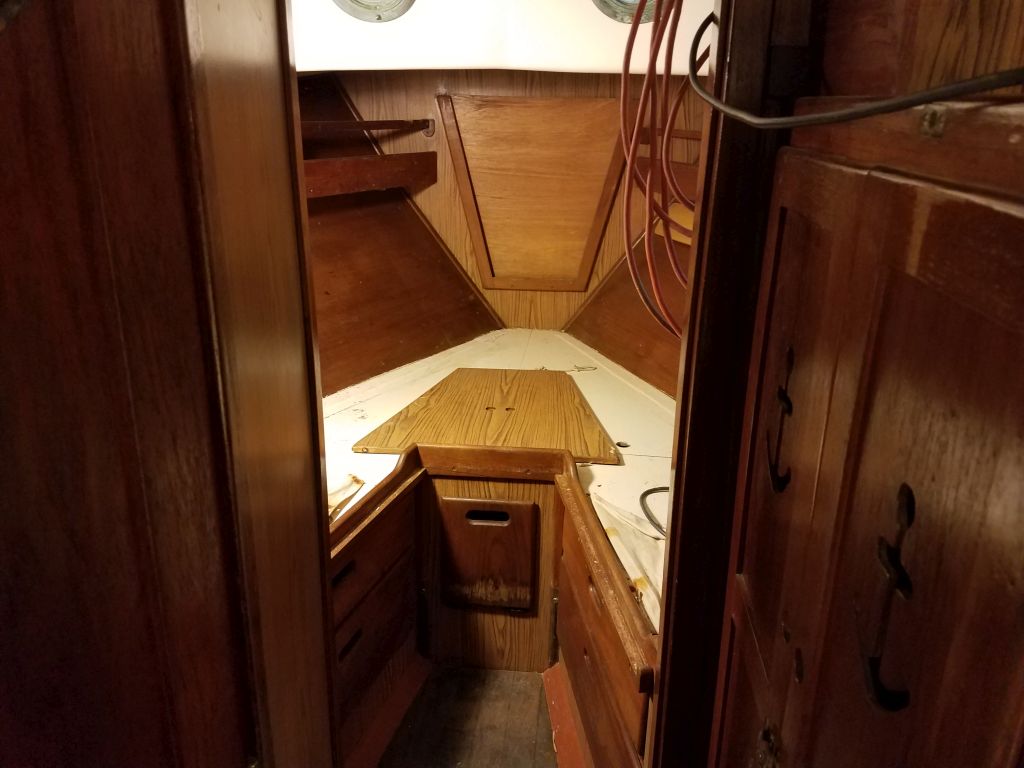


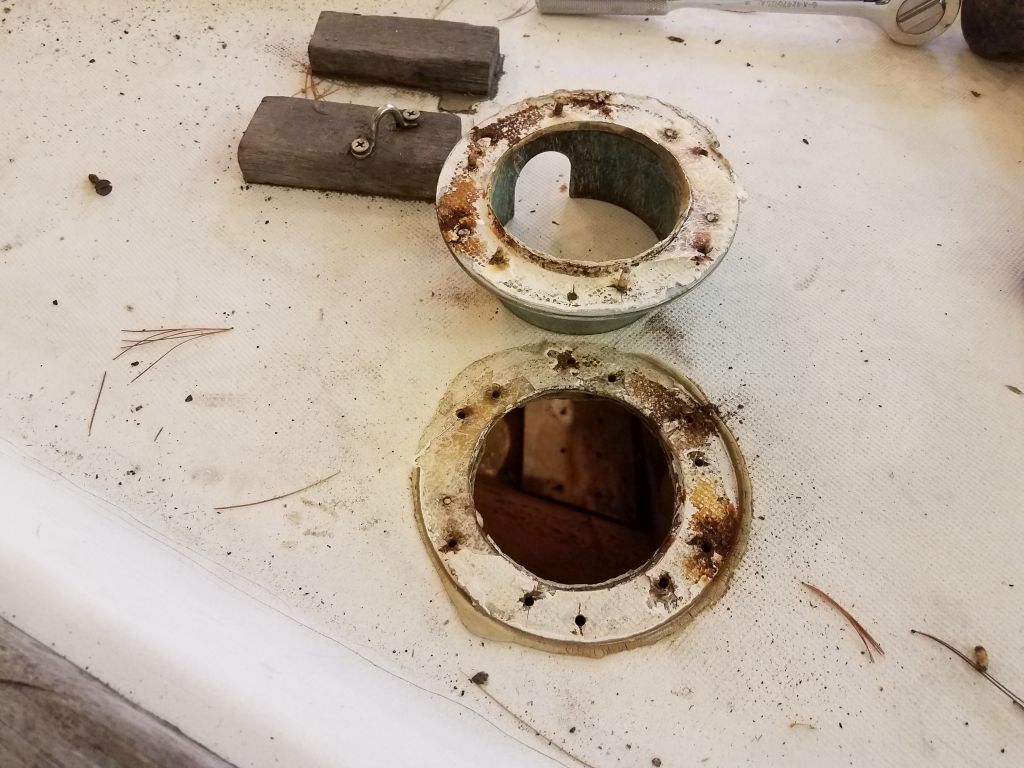
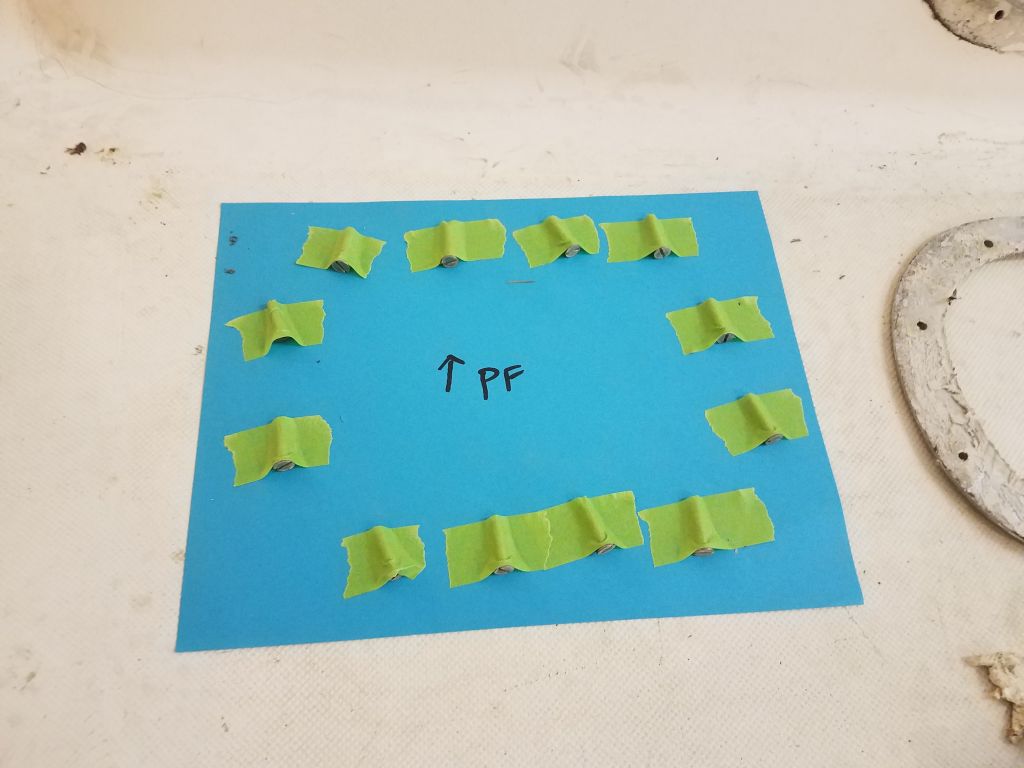
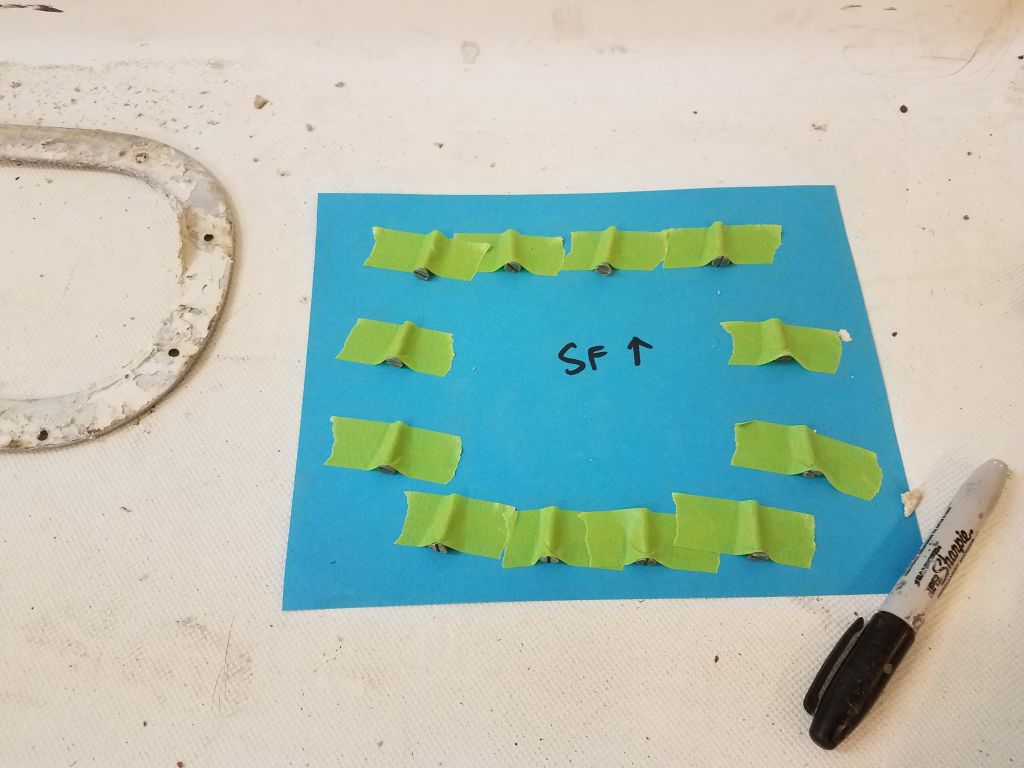
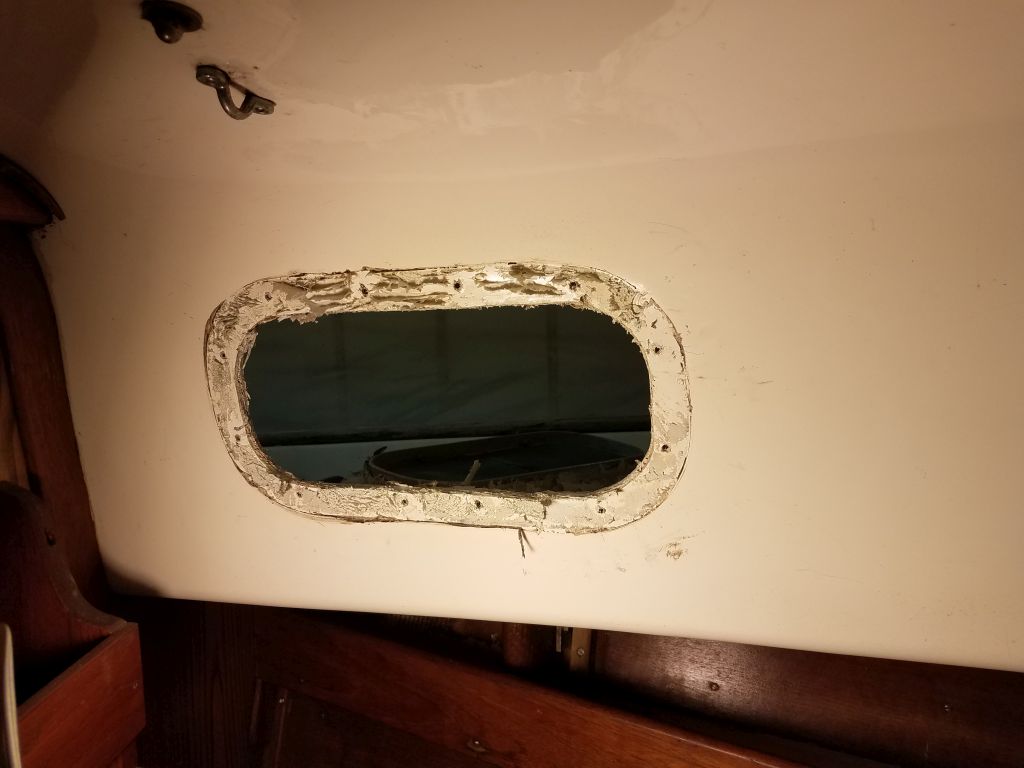
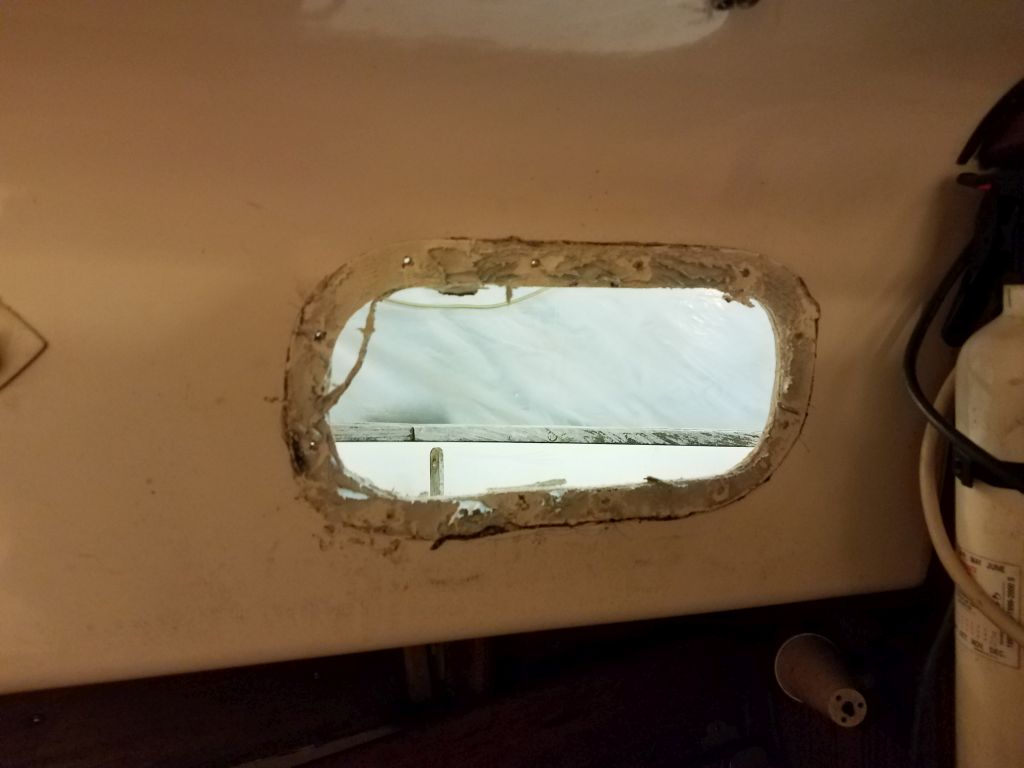
The forward cabin had a set of deadlights facing forward, along with a pair of aluminum opening ports. From inside, I removed cap nuts from the fasteners, then carefully removed the screws from the outside. I always keep track of screw locations when removing ports and deadlights on boats like this, as I’ve found that the fasteners are often different lengths depending on position. Once I’d removed the screws, I carefully pried off the opening port trim rings, which were well-sealed with what was likely the original bedding compound, a soft, oily, flexible material roughly comparable to a mix between window glazing compound, plumbers putty, and butyl. Effective and good stuff, the likes of which I’ve not seen in modern products.
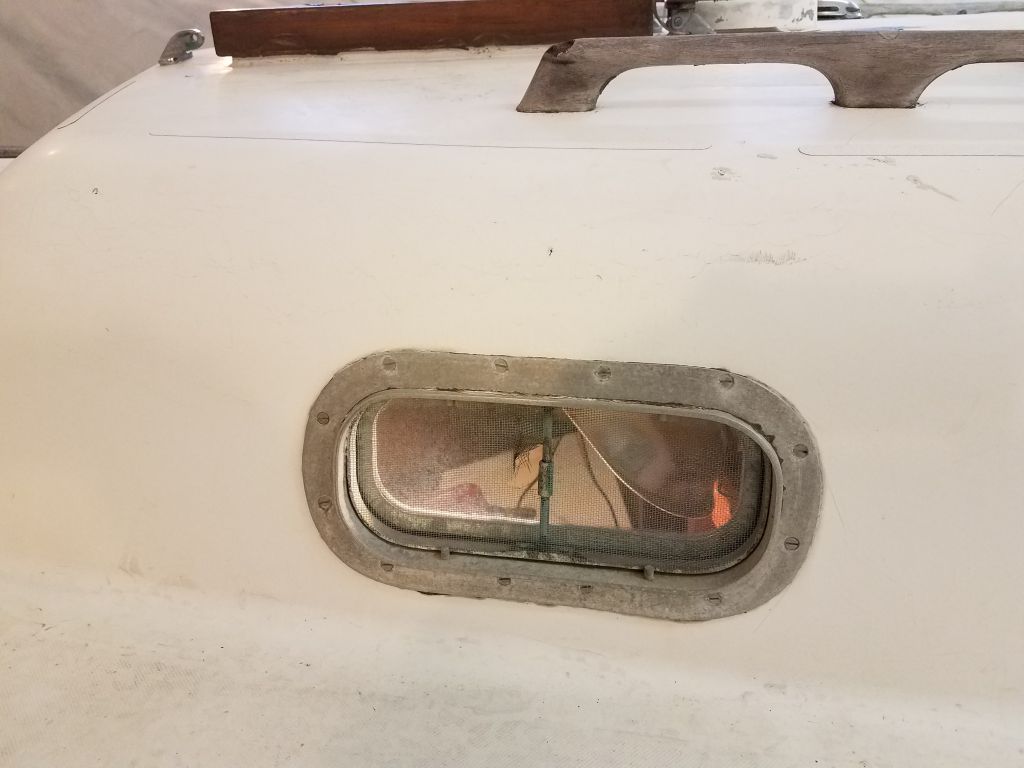

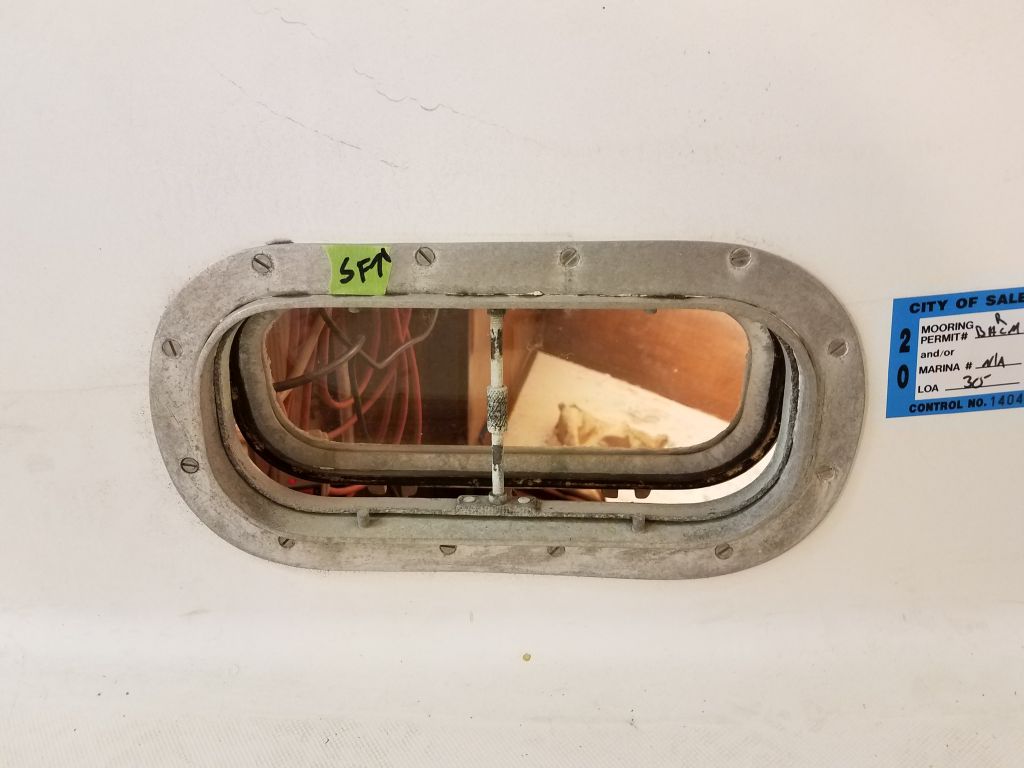
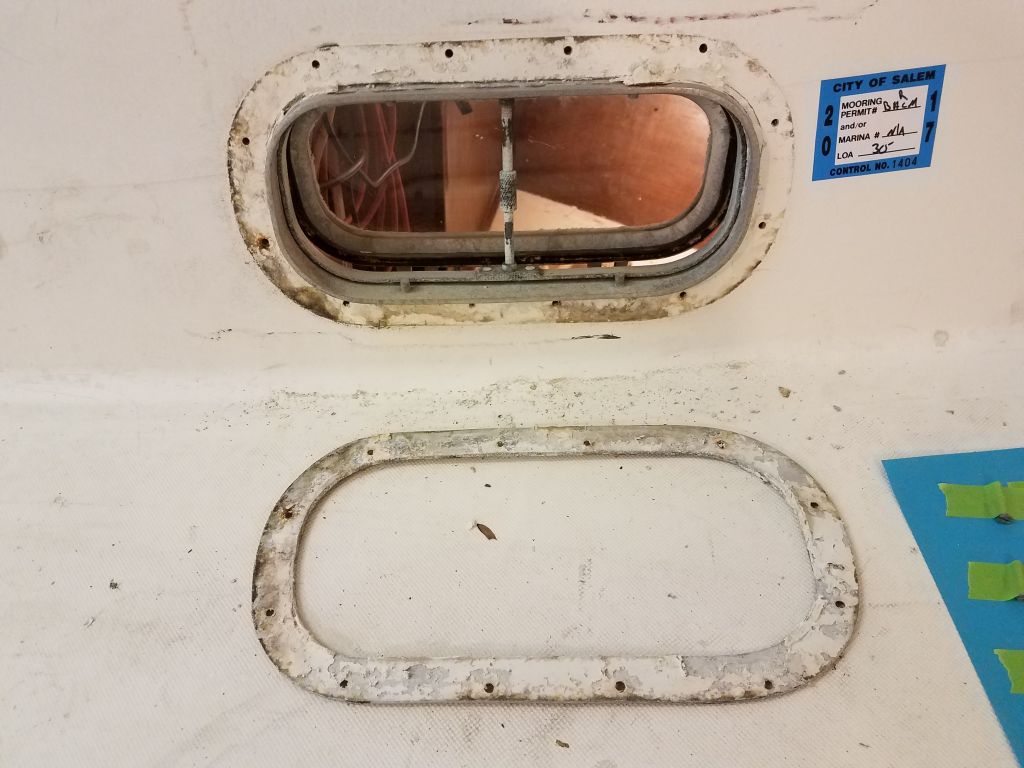
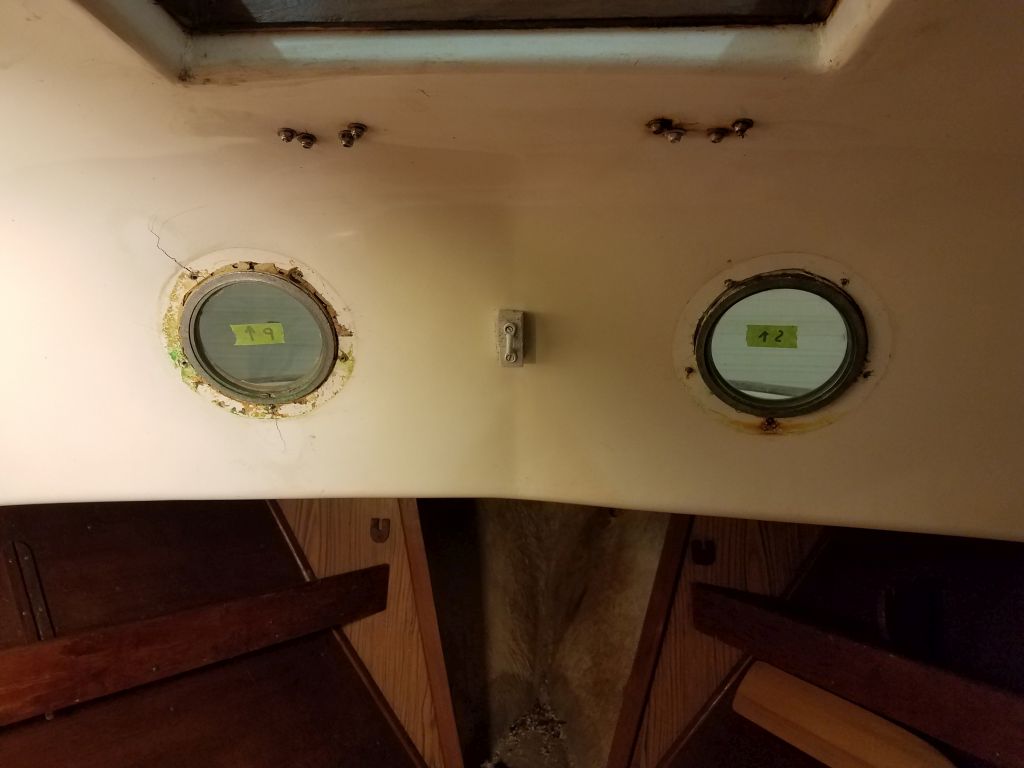
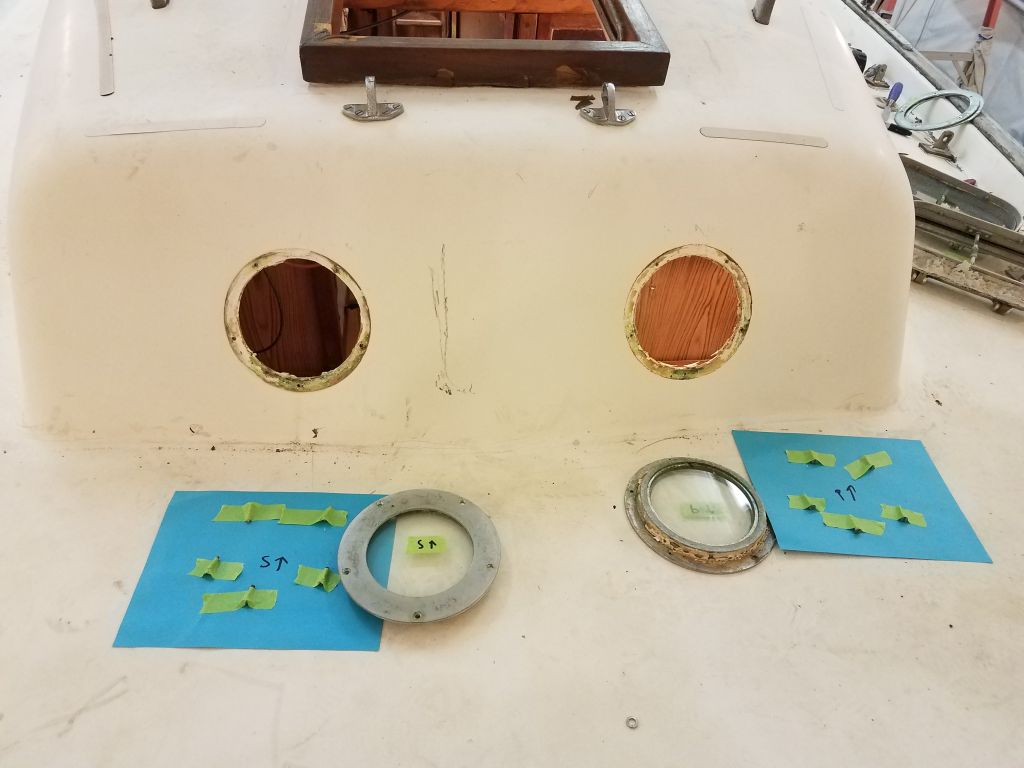
With the trim rings off (the trim rings were inside on the deadlights, which had the glass set in the outer frame), I removed the ports and deadlights from the forward cabin. I’d clean off the excess sealant later.

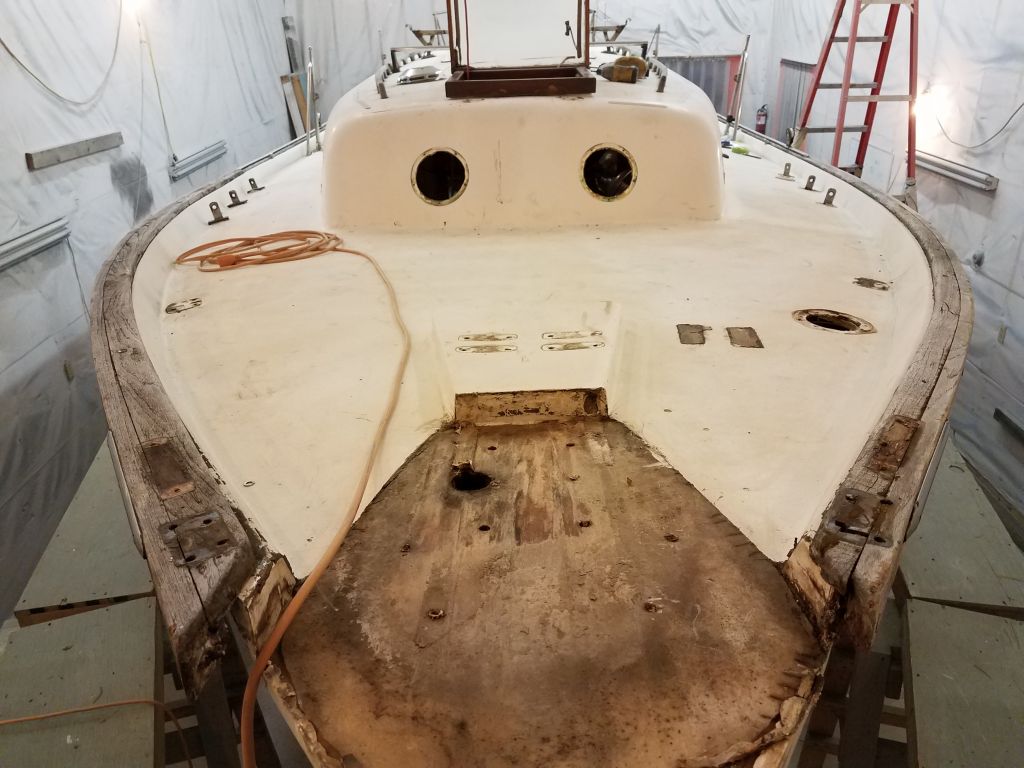

To round out the day, I removed two hatch hinge bases from the forward side of the forward hatch.

Total time billed on this job today: 7.25 hours
0600 Weather Observation: 30°, mostly cloudy. Forecast for the day: Increasing clouds, showers, then rain into and through the overnight, temperatures rising into the 50s