|
|
~MENU~ |
| Home |
| The Concept |
| The Boat |
| Bringing Her Home |
|
Weekly Progress Log |
|
Daysailor Projects |
| The Boat Barn |
| Resources |
| Other Sites |
| Email Tim |
|
|
| Progress Report: 2005 Archives |
|
January February March April May June July August September October November December |
|
Reports from January, 2005 1/2/05 1/9/05 1/16/05 1/23/05 1/30/05 |
|
Log for the Week Ending January 2, 2005 With Christmas behind (and we don't care about the New Year thing), it seemed like I might be able to finally get back into a proper routine. It didn't help that I was still fighting off the year's most ridiculous virus, left over from the week before Christmas; however, life must go on, so I plunged forward and got back to work.
|
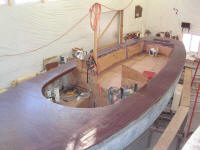 With
the cockpit sides in place and glassed at their top edge, I could begin the
much-anticipated step of fairing the decks. Again, future steps in the
construction process hinged on the completion of this step, so I wanted to get
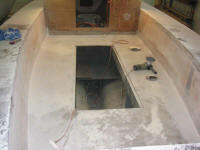
the decks smooth and surfaced as soon as possible. Over a few days, I
applied and sanded several coats of sticky purple fairing compound. This
was a slow process with little visual gain, but key to the overall construction. With
the cockpit sides in place and glassed at their top edge, I could begin the
much-anticipated step of fairing the decks. Again, future steps in the
construction process hinged on the completion of this step, so I wanted to get
the decks smooth and surfaced as soon as possible. Over a few days, I
applied and sanded several coats of sticky purple fairing compound. This
was a slow process with little visual gain, but key to the overall construction. |
|
Log for the Week Ending January 9, 2005 The week got off to a slow start in the shop. Sunday, I managed to finish longboarding the second application of fairing compound on the deck, and applied the needed third coat, which I left to cure. I had errands and other commitments on Monday that kept me away from the shop throughout the day; that was OK, since I was waiting for a shipment of sandpaper before I could continue work on the deck fairing anyway. Tuesday, I was away from the shop again, with previous commitments. |
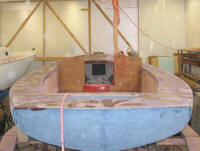 Wednesday,
I finally was back for a full day. Awaiting me was sanding the entire deck
with the longboard again, to smooth the 3rd application of fairing compound that
I had applied way back on Sunday. Leaving the epoxy for so many days after
application was a mistake, one that I thought of while I applied it (knowing
that I might not have time till Wednesday), but that I had ignored for the sake
of efficiency. In any event, sanding was quite difficult and challenging,
and took many hours to complete. By 1500, however, I had the whole deck
sanded and the 4th coat of compound applied--thankfully, this time only in
select areas, as the deck was nearly fair after the 3rd sanding. Thursday,
I was disappointed to find that my shop heater had experienced an error
overnight and needed to be reset (this happens from time to time with Monitors),
so the shop had been cooler overnight than expected. As a result, the 4th
coat of compound had not sufficiently cured to allow sanding, so that had to
wait until Friday, when I finally completed this round of backbreaking work. Wednesday,
I finally was back for a full day. Awaiting me was sanding the entire deck
with the longboard again, to smooth the 3rd application of fairing compound that
I had applied way back on Sunday. Leaving the epoxy for so many days after
application was a mistake, one that I thought of while I applied it (knowing
that I might not have time till Wednesday), but that I had ignored for the sake
of efficiency. In any event, sanding was quite difficult and challenging,
and took many hours to complete. By 1500, however, I had the whole deck
sanded and the 4th coat of compound applied--thankfully, this time only in
select areas, as the deck was nearly fair after the 3rd sanding. Thursday,
I was disappointed to find that my shop heater had experienced an error
overnight and needed to be reset (this happens from time to time with Monitors),
so the shop had been cooler overnight than expected. As a result, the 4th
coat of compound had not sufficiently cured to allow sanding, so that had to
wait until Friday, when I finally completed this round of backbreaking work.Click here for more about the fairing. |
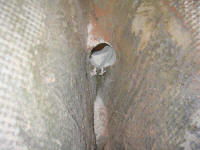 Also
on Friday, after completing the deck sanding, I set to work to remove the old
stern tube for the propeller shaft. The original was in lousy shape, so it
required replacement; plus, installing a new tube would give me a bit more
leeway and adjustment room when it came time to install the new engine and
shafting. Also
on Friday, after completing the deck sanding, I set to work to remove the old
stern tube for the propeller shaft. The original was in lousy shape, so it
required replacement; plus, installing a new tube would give me a bit more
leeway and adjustment room when it came time to install the new engine and
shafting. |
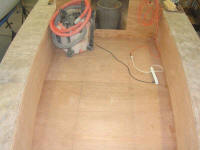
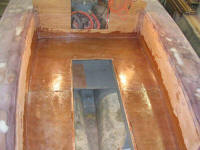 Saturday,
after finishing up the final (for the coarse fairing, at least) sanding on the
decks, I shifted focus to the cockpit, first sanding the fillets around the
edges, and then preparing for and completing the installation of a layer of
fiberglass on the cockpit sole. I was pleased to get this done, as it
meant that I could leave the fiberglass to cure for the remainder of the
weekend, and it would be ready for grinding and further steps on Monday morning. Saturday,
after finishing up the final (for the coarse fairing, at least) sanding on the
decks, I shifted focus to the cockpit, first sanding the fillets around the
edges, and then preparing for and completing the installation of a layer of
fiberglass on the cockpit sole. I was pleased to get this done, as it
meant that I could leave the fiberglass to cure for the remainder of the
weekend, and it would be ready for grinding and further steps on Monday morning. |
|
Log for the Week Ending January 16, 2005
Click here for more detail on the cockpit sole surfacing and finishing. |
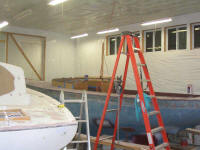 In the afternoon, with uncured fairing compound in the cockpit, I decided to
start a mockup of the cabin trunk, to confirm what its ultimate appearance might
be and to help provide a rough pattern for later on when I recreated the cabin
trunk in mahogany. In the afternoon, with uncured fairing compound in the cockpit, I decided to
start a mockup of the cabin trunk, to confirm what its ultimate appearance might
be and to help provide a rough pattern for later on when I recreated the cabin
trunk in mahogany. |
|
Tuesday morning, after conducting some business off site, I sanded the surfacing compound on the cockpit. The end result was a smooth, fair surface ready for additional steps and final surfacing before final finishing. |
|
When I was done with the cockpit work, which took the rest of the morning and into the afternoon, I continued with the cabin trunk mockup. Today, I added a mockup of the cockpit coaming, and also built a coachroof for the cabin trunk so that I (and you) could better visualize what the finished product might look like, and to double check its physical dimensions and appearance versus my conceptual drawing. |
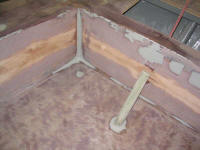 Late in the day, I spot-applied some additional fairing compound to the cockpit
area, mainly to fine-tune the corner fillets and fill a few small low spots. Late in the day, I spot-applied some additional fairing compound to the cockpit
area, mainly to fine-tune the corner fillets and fill a few small low spots.In the morning, I sanded the cured filler, and then went over the whole cockpit area--sides, sole, and deck-cockpit joint--with a palm sander to further smooth the surfaces and create some small roundovers at the transition between deck and cockpit. At this point, the cockpit was ready for final surfacing, which I would do later on. |
|
With snow in the air and uncertainty over when I might have to leave for plowing, my shop day was somewhat truncated. Since the major work on the decks was done for the time being, to fill some of the time, I worked to lower the staging planks outside the hull, lowering them 2' to the lower level of my supports in preparation for some upcoming hull work and fairing. |
|
Bending the curvature into the forward portion of the cabin trunk would, of course, require laminating many thin pieces around a form. Earlier, I had ordered enough stock for this task, but because of the width required, I had no way of resawing the boards in the shop. In preparation for the much-anticipated task of building the curved cabin trunk, I dropped three mahogany boards off at a local sawyer for resawing into 1/4" slabs. I could plane them thinner in the shop if need be. Because of a backlog (no pun intended--though I suppose the forestry industry might actually have been the genesis of this term, now that I think of it...hmm...), it looked like it might be a week or so before I could get the resawn boards back. |
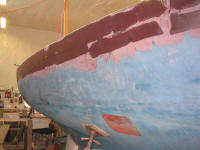
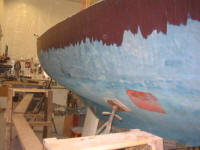 Thursday, I turned my attention to the hull, which had remained virtually
untouched for well over a year, since I originally ground the paint off
before the barn was even built. It was time to start the arduous task of
fairing and surfacing. Thursday, I turned my attention to the hull, which had remained virtually
untouched for well over a year, since I originally ground the paint off
before the barn was even built. It was time to start the arduous task of
fairing and surfacing. |
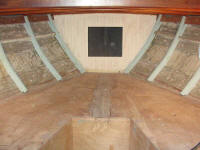 Later in the day, I set to work in the cabin installing the beginnings of
ceiling support strips in the v-berth, one of the final tasks required there. Later in the day, I set to work in the cabin installing the beginnings of
ceiling support strips in the v-berth, one of the final tasks required there. |
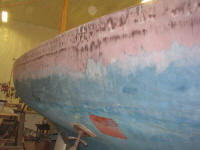 Friday
morning, I sanded the first coat of fairing compound on the hull, which
highlighted the low spots that required additional filling. Because of
some Friday afternoon commitments, and plans to help fiberglass another boat on
Saturday, I didn't apply a second coat of fairing compound just yet. I
hoped to apply that on Sunday, so that I could sand again on Monday morning. Friday
morning, I sanded the first coat of fairing compound on the hull, which
highlighted the low spots that required additional filling. Because of
some Friday afternoon commitments, and plans to help fiberglass another boat on
Saturday, I didn't apply a second coat of fairing compound just yet. I
hoped to apply that on Sunday, so that I could sand again on Monday morning.Look for the results, and more, next week! |
|
Log for the Week Ending January 23, 2005
Click here to go to the hull fairing page for the updates.
|
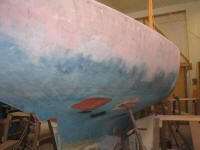 Monday,
I spent a couple hours sanding the second coat of filler, which left a
relatively (coarsely) fair surface. There were a few low spots remaining,
so I applied a third coat of QuikFair to those specific areas. Monday,
I spent a couple hours sanding the second coat of filler, which left a
relatively (coarsely) fair surface. There were a few low spots remaining,
so I applied a third coat of QuikFair to those specific areas. |
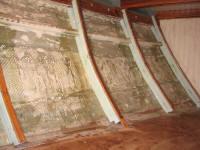 During what remained of Monday, I continued working
on the v-berth ceiling strips. Before the day was over, I completed their
installation, adding wood and fiberglass. During what remained of Monday, I continued working
on the v-berth ceiling strips. Before the day was over, I completed their
installation, adding wood and fiberglass. |
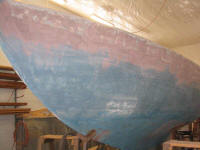 Tuesday,
I sanded the third and final coat of QuikFair filler on the hull, concentrating
on getting the surface as smooth and fair as possible. The overall result
was quite fair even after these initial steps, but more work was needed.
To get a perfectly fair and smooth surface before moving on to high build
primer, I applied a skim coat of AlexSeal fairing filler to the port side of the
hull; I covered only one side because I was worried about my stamina for
longboarding (manually) both sides of the hull in one day--I envisioned
backbreaking work akin to that required for boarding the decks--so I decided to
split the job in half. Tuesday,
I sanded the third and final coat of QuikFair filler on the hull, concentrating
on getting the surface as smooth and fair as possible. The overall result
was quite fair even after these initial steps, but more work was needed.
To get a perfectly fair and smooth surface before moving on to high build
primer, I applied a skim coat of AlexSeal fairing filler to the port side of the
hull; I covered only one side because I was worried about my stamina for
longboarding (manually) both sides of the hull in one day--I envisioned
backbreaking work akin to that required for boarding the decks--so I decided to
split the job in half. |
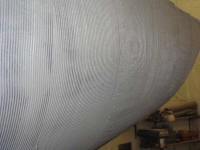 I
had hoped to sand the fairing filler on Wednesday, but unfortunately it had not
cured sufficiently. This left me rather loose-endy during Wednesday, as my
plans for the day had been shot. To fill time time, I skim coated the
starboard side, figuring that it would take until Friday to cure, and then
helped Nathan on Dasein
work on his major deck project for a good part of the afternoon. I
had hoped to sand the fairing filler on Wednesday, but unfortunately it had not
cured sufficiently. This left me rather loose-endy during Wednesday, as my
plans for the day had been shot. To fill time time, I skim coated the
starboard side, figuring that it would take until Friday to cure, and then
helped Nathan on Dasein
work on his major deck project for a good part of the afternoon. |
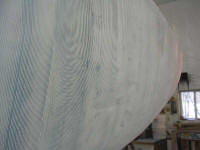 Thursday,
I was up at 0230 to go plowing, but managed to get into the shop by mid-morning,
where I found the port side fairing compound was ready to sand. I was
pleased at the ease with which it sanded, and in a surprisingly short time I had
sanded the whole side (see the detailed description for why it was so easy). Thursday,
I was up at 0230 to go plowing, but managed to get into the shop by mid-morning,
where I found the port side fairing compound was ready to sand. I was
pleased at the ease with which it sanded, and in a surprisingly short time I had
sanded the whole side (see the detailed description for why it was so easy). |
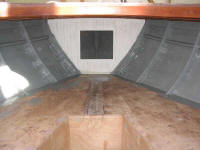 With
the port side sanded, and the starboard side still a bit too soft for sanding
(as anticipated), I filled out some more time by painting the v-berth area
around the new ceiling support strips. With
the port side sanded, and the starboard side still a bit too soft for sanding
(as anticipated), I filled out some more time by painting the v-berth area
around the new ceiling support strips.
Click here to go to the V-berth. With that, I decided to take the afternoon off from shop work, as I'd already had a 12-hour day by that point, and there was little else I could do on the boat in any event. |
|
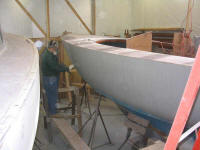
Friday, I longboarded the starboard side of the hull, following the same process described for doing the port side the day before. That was about all I managed to accomplish in the shop that day, as there was heavy-duty grinding occurring on neighboring Dasein, so I couldn't effectively work in the dust. It was a good opportunity for me to attend to a variety of neglected administrative and other tasks, however.
Click here to go back to the fairing page for the description. I posted the log a bit early, on Saturday night, as we were expecting a blizzard overnight and Sunday and I thought I might be busy plowing in the morning. |
|
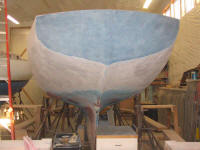
Log for the Week Ending January 30, 2005 The "blizzard", for us anyway, ended up being far less intense than anticipated, with only about 8-9" of snow received. We escaped the feet of snow and high winds experienced by the Boston area, and ended up with a significant snow, but nothing unusual in the least. Monday, with a slightly late start after my usual administrative tasks, I set to work sanding the hull. The fairing compound had had adequate time to set up, with all night Saturday and all day Sunday under its belt, so my task of the day was to sand the hull smooth. |
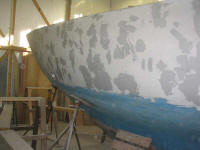 I
was out of the shop all day on Tuesday, but managed in the afternoon to apply a
third coat of filler to the low spots on the hull. The material had to
cure throughout the day Wednesday, but on Thursday I sanded these final spots
smooth, and sanded the entire hull to 120 grit. I
was out of the shop all day on Tuesday, but managed in the afternoon to apply a
third coat of filler to the low spots on the hull. The material had to
cure throughout the day Wednesday, but on Thursday I sanded these final spots
smooth, and sanded the entire hull to 120 grit.Click here for more about the final fairing steps. |
 On
Friday, I coated the remaining exposed plywood in the cockpit (on the vertical
sides) with unthickened epoxy to prepare them for a final smooth sanding and
then high build primer coats. On
Friday, I coated the remaining exposed plywood in the cockpit (on the vertical
sides) with unthickened epoxy to prepare them for a final smooth sanding and
then high build primer coats.With the ongoing hull process, a filthy shop, and a delay in the readiness of the resawn wood I needed to proceed with the cabin trunk, I had difficulty finding many tasks that I could attend to without a major shift in gears. The hull and deck fairing absorbed many weeks, and I had had enough. I looked forward to moving on with other aspects of the construction, and expected to be ready to jump back in with both feet next week. In the meantime, I had the opportunity to take care of a few shop tasks and other things that had been neglected for a few months. Progress in the shop was rather slow this week, but another major step in the overall process was complete, with hull and deck both ready for high build primer and final surfacing. |
|
|
