|
|
~MENU~ |
| Home |
| The Concept |
| The Boat |
| Bringing Her Home |
|
Weekly Progress Log |
|
Daysailor Projects |
| The Boat Barn |
| Resources |
| Other Sites |
| Email Tim |
|
|
|
Systems: Stern Tube and Shafting |
Removing the Original Stern Tube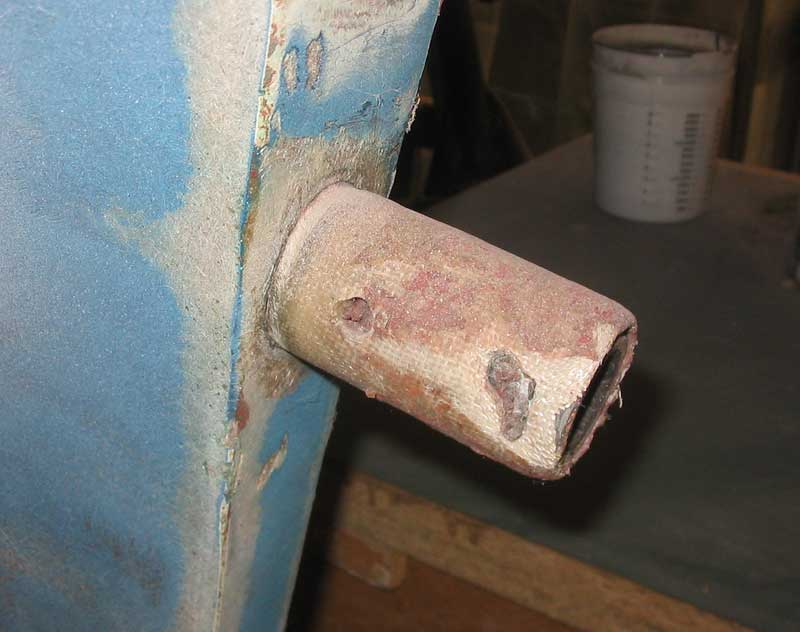 The
stern tube originally installed at the factory in 1960 was in terrible
shape and required replacement. It began outside the hull and
extended through the deadwood and into the bilge aft of the engine room,
with enough protruding for the typical hose connection of a stuffing box.
The portion extending outside the hull was badly delaminating and
checkered with holes from old setscrews for the Cutless bearing. In
any event, I was looking forward to trying out a stern tube replacement
for my own benefit, so the decision to remove and replace the tube was
made. The
stern tube originally installed at the factory in 1960 was in terrible
shape and required replacement. It began outside the hull and
extended through the deadwood and into the bilge aft of the engine room,
with enough protruding for the typical hose connection of a stuffing box.
The portion extending outside the hull was badly delaminating and
checkered with holes from old setscrews for the Cutless bearing. In
any event, I was looking forward to trying out a stern tube replacement
for my own benefit, so the decision to remove and replace the tube was
made. |
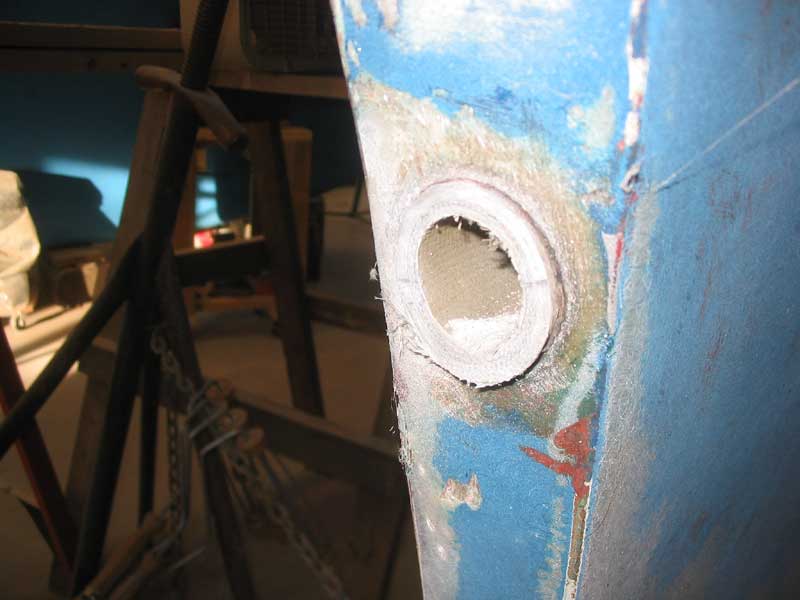 My
first step was to saw off the section of the tube that protruded outside
the boat, into the aperture. I used a reciprocating saw to buzz this
section off flush with the deadwood. My
first step was to saw off the section of the tube that protruded outside
the boat, into the aperture. I used a reciprocating saw to buzz this
section off flush with the deadwood.I planned to use a hole saw, sized to match that of the old tube's outer diameter, to remove the tube cleanly from the boat. In order to do this, however, I needed some means of support in the center of the old tube, to accept the pilot drill bit of the hole saw. |
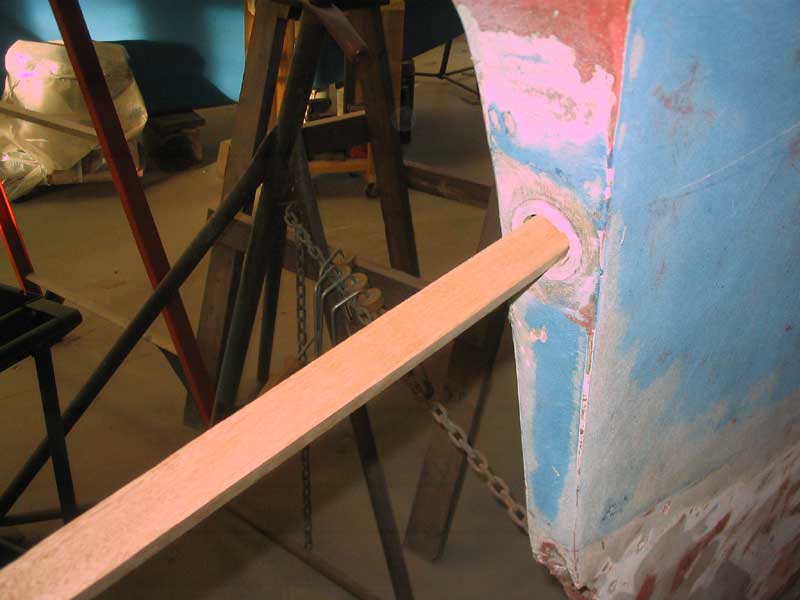
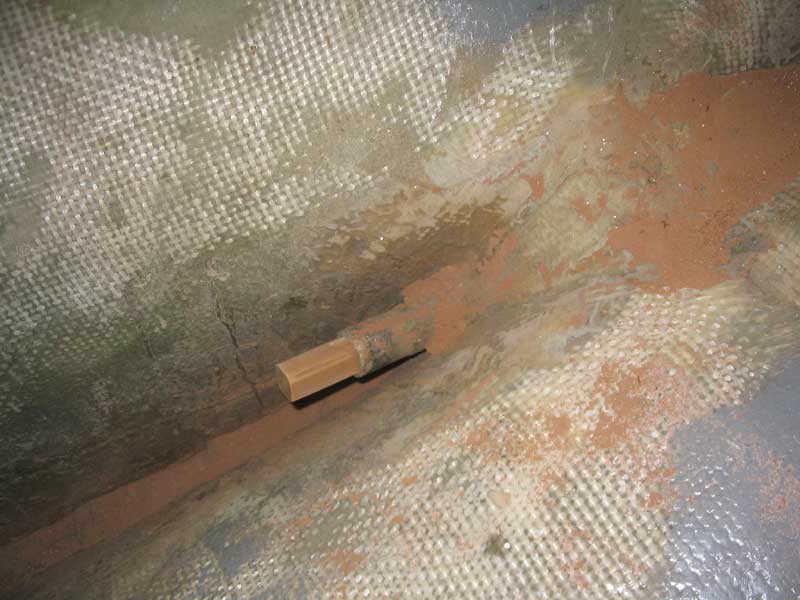 For
this, I located a square scrap of wooden stock in the scrap bin that was
nearly a fit inside the stern tube. To make the square blank fit
tightly, I sanded off the corners with some coarse sandpaper until it just
began to fit. Then, I pounded the piece deeply into the tube with a
mallet, until I was sure it was protruding well into the boat. I cut
off the excess flush on the outside, and was ready to drill; the
wooden block filled the center portion of the tube and gave the pilot bit
something into which to bite. For
this, I located a square scrap of wooden stock in the scrap bin that was
nearly a fit inside the stern tube. To make the square blank fit
tightly, I sanded off the corners with some coarse sandpaper until it just
began to fit. Then, I pounded the piece deeply into the tube with a
mallet, until I was sure it was protruding well into the boat. I cut
off the excess flush on the outside, and was ready to drill; the
wooden block filled the center portion of the tube and gave the pilot bit
something into which to bite. |
|
|
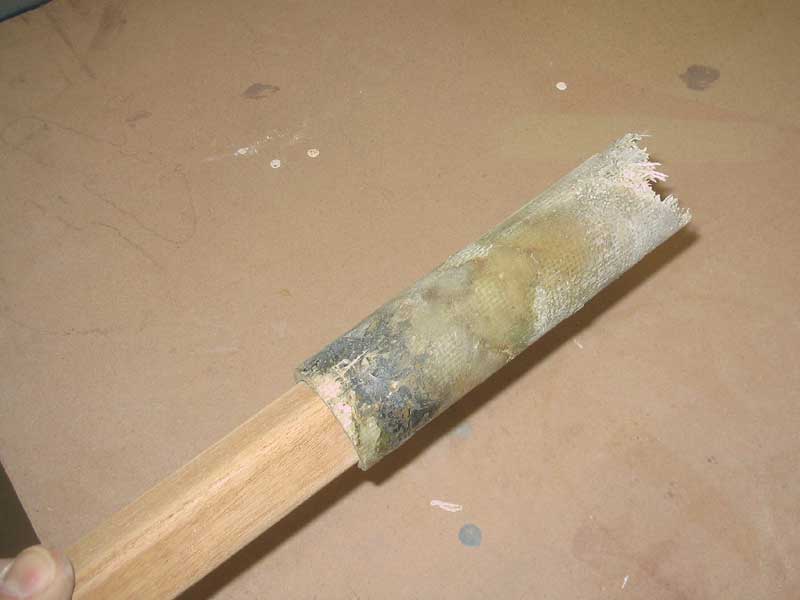
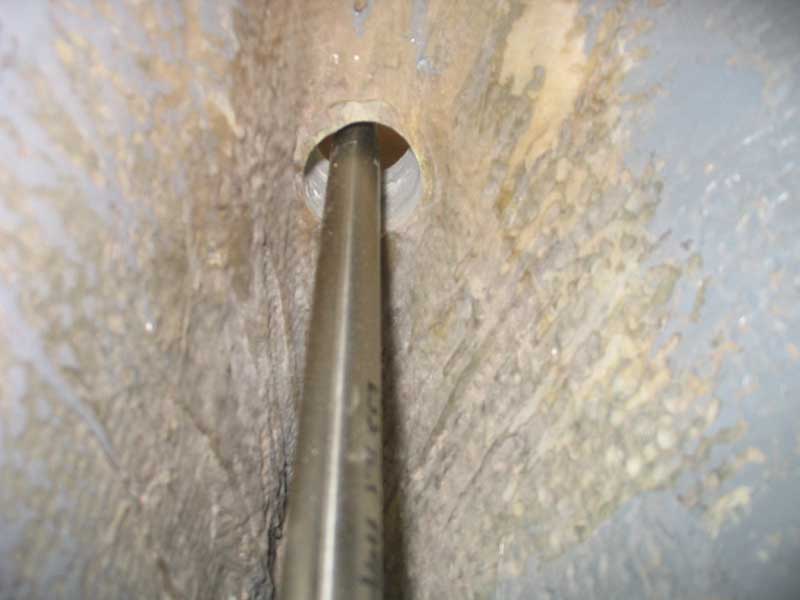
 With
a hole saw chucked into my drill, I carefully centered the pilot bit and
slowly let the saw cut into the old tube. The method worked like a
charm, and it was easy to cut the old tube out cleanly and accurately. With
a hole saw chucked into my drill, I carefully centered the pilot bit and
slowly let the saw cut into the old tube. The method worked like a
charm, and it was easy to cut the old tube out cleanly and accurately. |
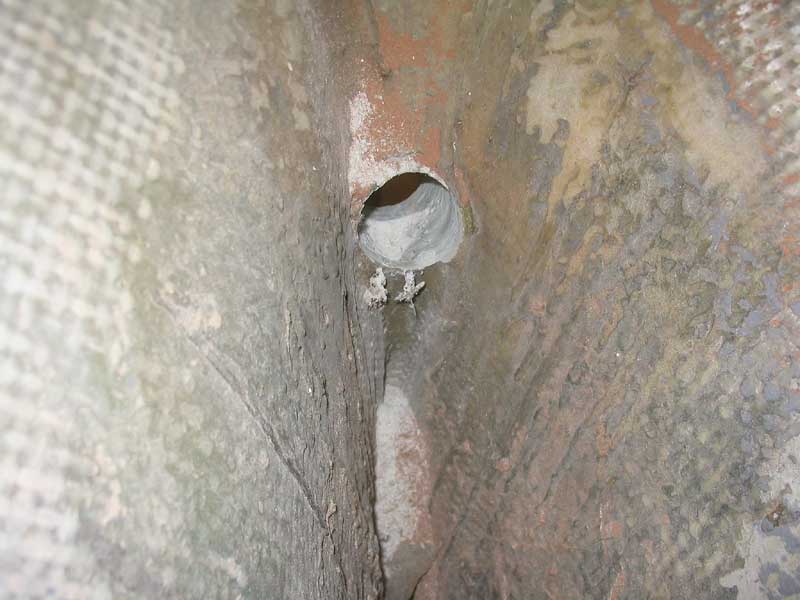
 The
only problem I ran into was that the hull in the deadwood was thick enough
that the hole saw bottomed out before it had penetrated all the way
through the old tube. I got around this by chipping out some of the
spoils at the outer end of the old tube so that the hole saw could bite
deeper into the old tube. Soon enough, the entire tube was removed,
leaving a clean hole ready for the installation of a new tube. The
only problem I ran into was that the hull in the deadwood was thick enough
that the hole saw bottomed out before it had penetrated all the way
through the old tube. I got around this by chipping out some of the
spoils at the outer end of the old tube so that the hole saw could bite
deeper into the old tube. Soon enough, the entire tube was removed,
leaving a clean hole ready for the installation of a new tube. |
|
|
|
Installing the New Stern Tube, Shafting, and Engine Alignment When replacing the stern tube, I had decided to align the new tube to the engine itself, rather than align the engine to an existing stern tube. This gave me a little more "wiggle room", as it were, in the final installation. Once the engine was installed on its mounts and loosely bolted in place, I began the final installation process by measuring for the needed shaft length. Assuming a 3" length of exposed stern tube on the exterior of the boat (as is common in apertures), I determined the basic length and left it to the prop shop to calculate the additional length required for the propeller taper, nut threads, and clearance. |
 Once
I had the new shaft in hand, I prepared for final installation.
After checking to be sure the shaft fit (at first I thought it was too
long, but later realized my error), I pressed the shaft into the
supplied coupling, which I had ordered "fit and faced", indicating that
the coupling was turned and trued to be exactly perpendicular to the
shaft centerline, and secured the setscrews. Then, I bolted the
coupling to the transmission coupling using the supplied bolts.
Securing the four bolts tightly ensured that the shaft was in perfect
alignment with the engine; with no stern tube yet installed, the shaft
could move up or down as needed during the bolt-tightening process. Once
I had the new shaft in hand, I prepared for final installation.
After checking to be sure the shaft fit (at first I thought it was too
long, but later realized my error), I pressed the shaft into the
supplied coupling, which I had ordered "fit and faced", indicating that
the coupling was turned and trued to be exactly perpendicular to the
shaft centerline, and secured the setscrews. Then, I bolted the
coupling to the transmission coupling using the supplied bolts.
Securing the four bolts tightly ensured that the shaft was in perfect
alignment with the engine; with no stern tube yet installed, the shaft
could move up or down as needed during the bolt-tightening process. |
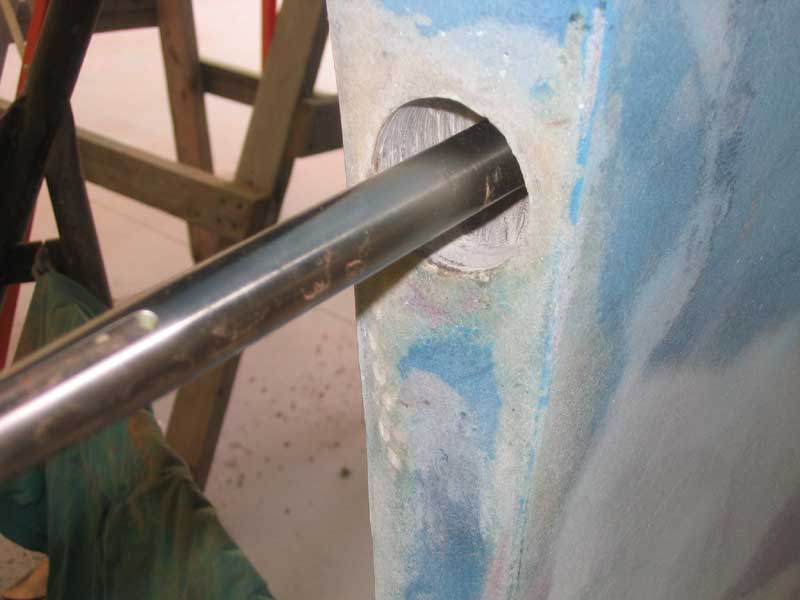
 The
engine as installed forced the shaft a bit off center to starboard, and
a bit higher than center in the enlarged stern tube opening. To
correct this, I lowered the after engine mounts until the shaft
projected through the center of the opening vertically, and also
adjusted the side-to-side alignment of the engine to bring the shaft
more into the horizontal center. The
engine as installed forced the shaft a bit off center to starboard, and
a bit higher than center in the enlarged stern tube opening. To
correct this, I lowered the after engine mounts until the shaft
projected through the center of the opening vertically, and also
adjusted the side-to-side alignment of the engine to bring the shaft
more into the horizontal center. |
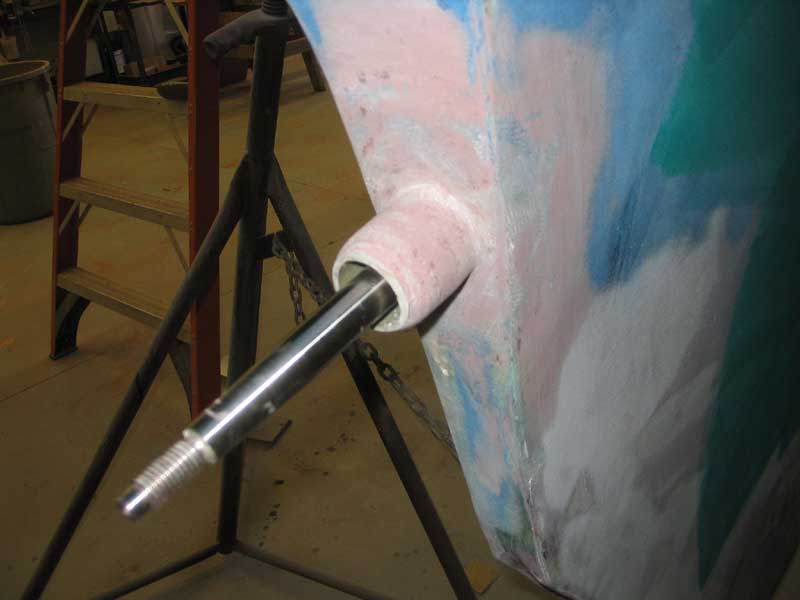
 |
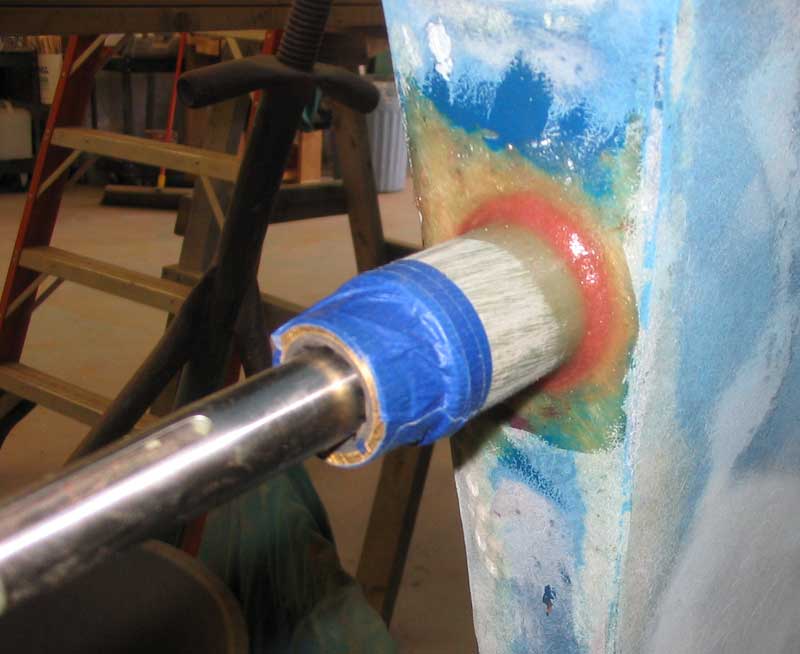
 Next,
I installed the stern tube over the shaft, with the Cutless bearing
taped temporarily in place at the end to hold the shaft properly, and
also slid the new stuffing box assembly (which I had slipped over the
shaft before installing it in the boat) onto the inside of the stern
tube to ensure full alignment. Next,
I installed the stern tube over the shaft, with the Cutless bearing
taped temporarily in place at the end to hold the shaft properly, and
also slid the new stuffing box assembly (which I had slipped over the
shaft before installing it in the boat) onto the inside of the stern
tube to ensure full alignment. |
 When
the new assembly was properly placed, I injected some thickened epoxy
resin into the opening around the new tube, using a small syringe, and
smoothed the excess to create a fillet on the inside and outside of the
tube, tacking it in place. When
the new assembly was properly placed, I injected some thickened epoxy
resin into the opening around the new tube, using a small syringe, and
smoothed the excess to create a fillet on the inside and outside of the
tube, tacking it in place.When the epoxy cured, I sanded it smooth, and prepared for the final glassing. |
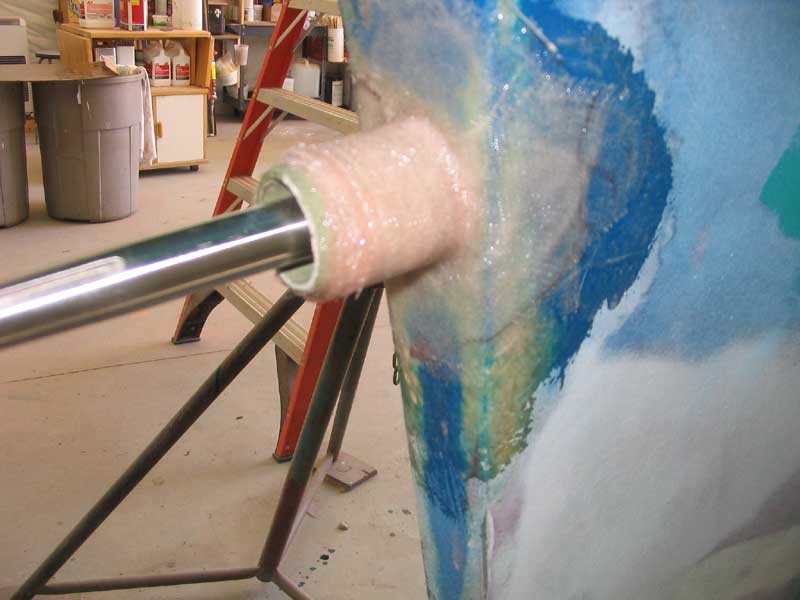 I
cut a number of small strips of 10 oz. fiberglass cloth, and glassed
them to the stern tube, overlapping between the tube and the deadwood
all the way around, and through several overlapping layers. Then,
I wrapped a strip of 17 oz. biax, which I had previously cut to a width
just less than the length of the protruding stern tube, around the
exterior of the tube, capturing the tube ends of all the fiberglass I
had installed previously. Finally, I added one more layer of the
10 oz. cloth around to finish up the reinforcement. I
cut a number of small strips of 10 oz. fiberglass cloth, and glassed
them to the stern tube, overlapping between the tube and the deadwood
all the way around, and through several overlapping layers. Then,
I wrapped a strip of 17 oz. biax, which I had previously cut to a width
just less than the length of the protruding stern tube, around the
exterior of the tube, capturing the tube ends of all the fiberglass I
had installed previously. Finally, I added one more layer of the
10 oz. cloth around to finish up the reinforcement. |
|
Inside the boat, I used additional 10 oz. cloth to glass the seam at the inside of the tube, working around the tube on all sides as best as possible. |
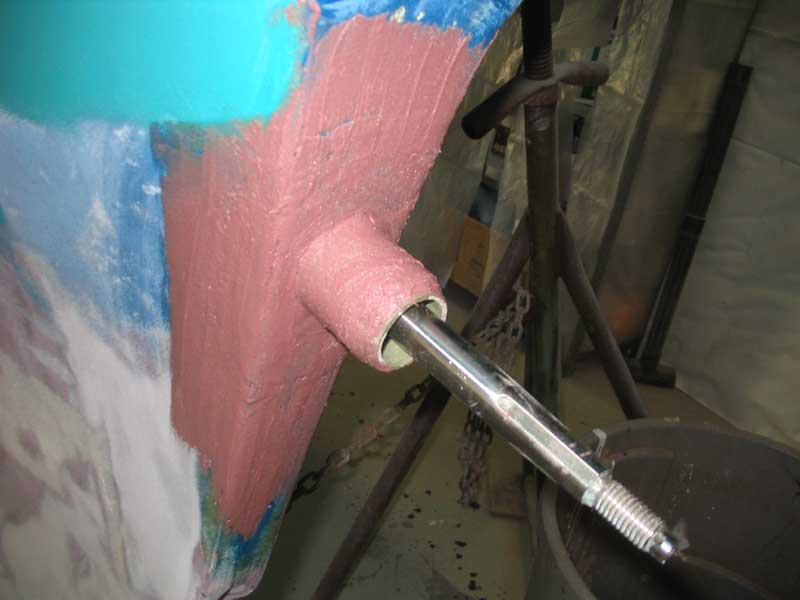 When
the fiberglass cured, I added a layer of fairing compound to fill the
weave of the cloth and make up any slight depressions. The next
day, after curing, I sanded the fairing compound and completed final
shaping, tapering the tube slightly towards the opening at the end. When
the fiberglass cured, I added a layer of fairing compound to fill the
weave of the cloth and make up any slight depressions. The next
day, after curing, I sanded the fairing compound and completed final
shaping, tapering the tube slightly towards the opening at the end. |
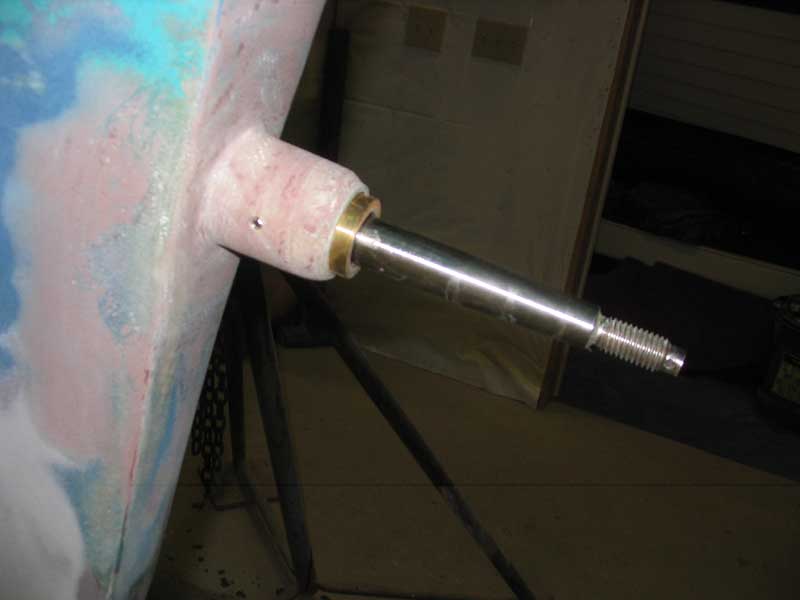
 To
install the Cutless bearing, I drilled two 3/16" holes--one on each
side--in the stern tube, and then tapped them for 1/4-20 threads, which
matched the small set screws I had purchased for the task. Next, I
inserted the Cutless bearing to the depth I wanted--leaving a small
amount exposed at the aft end of the stern tube to allow it to be easily
grabbed for later removal and replacements down the road--and, with a
drill, created very small dimples on the bearing, drilling through the
two holes in the stern tube. To
install the Cutless bearing, I drilled two 3/16" holes--one on each
side--in the stern tube, and then tapped them for 1/4-20 threads, which
matched the small set screws I had purchased for the task. Next, I
inserted the Cutless bearing to the depth I wanted--leaving a small
amount exposed at the aft end of the stern tube to allow it to be easily
grabbed for later removal and replacements down the road--and, with a
drill, created very small dimples on the bearing, drilling through the
two holes in the stern tube. |
 Finally,
I threaded in the set screws until they were tight, which captured the
Cutless bearing and, by driving the points of the set screws into the
slight dimples in the Cutless, prevented it from spinning. This
completed the Cutless bearing installation. Finally,
I threaded in the set screws until they were tight, which captured the
Cutless bearing and, by driving the points of the set screws into the
slight dimples in the Cutless, prevented it from spinning. This
completed the Cutless bearing installation.
|
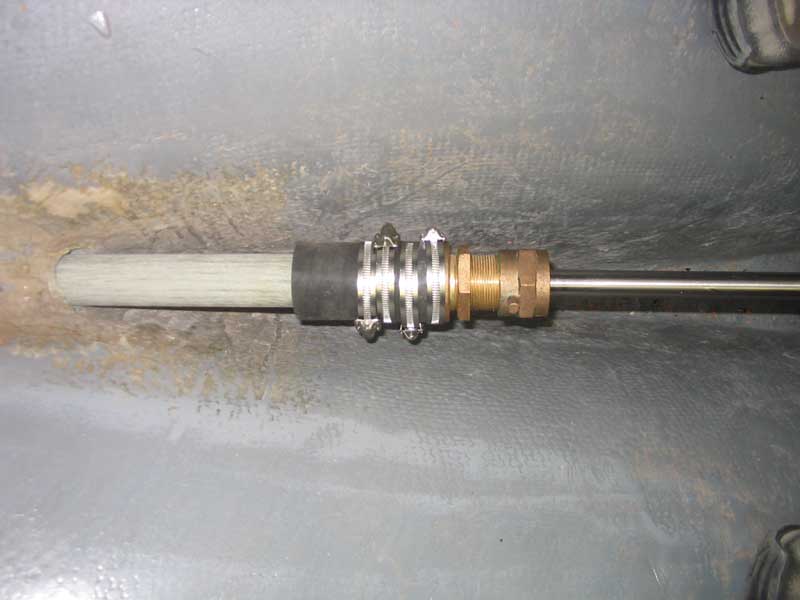
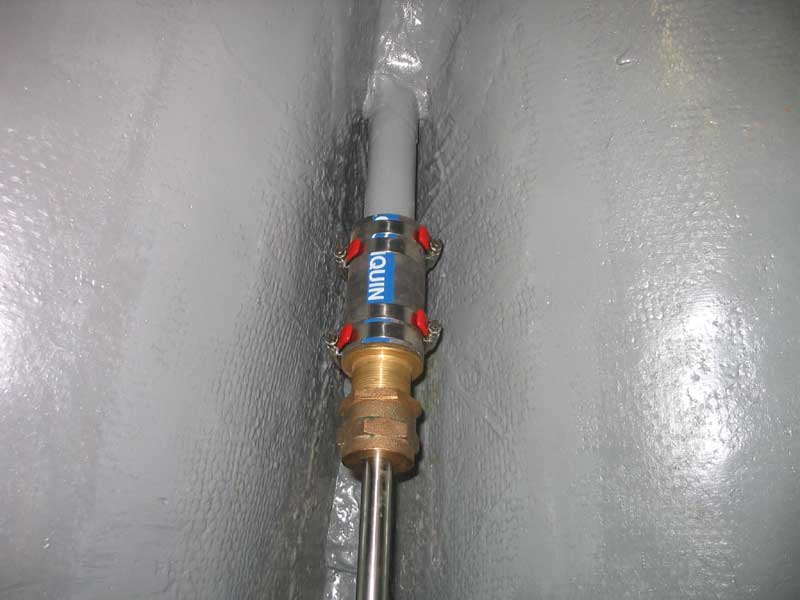 Inside the boat, with
the stern tube complete, I permanently installed the stuffing box and
hose, which I had of course threaded onto the shaft before completing
the shaft installation. At this stage, all that remained was to
clamp the hose in place, both on the end of the stern tube and on the
packing box itself. I used four AWAB 316 SS clamps and secured
them tightly. Inside the boat, with
the stern tube complete, I permanently installed the stuffing box and
hose, which I had of course threaded onto the shaft before completing
the shaft installation. At this stage, all that remained was to
clamp the hose in place, both on the end of the stern tube and on the
packing box itself. I used four AWAB 316 SS clamps and secured
them tightly. |
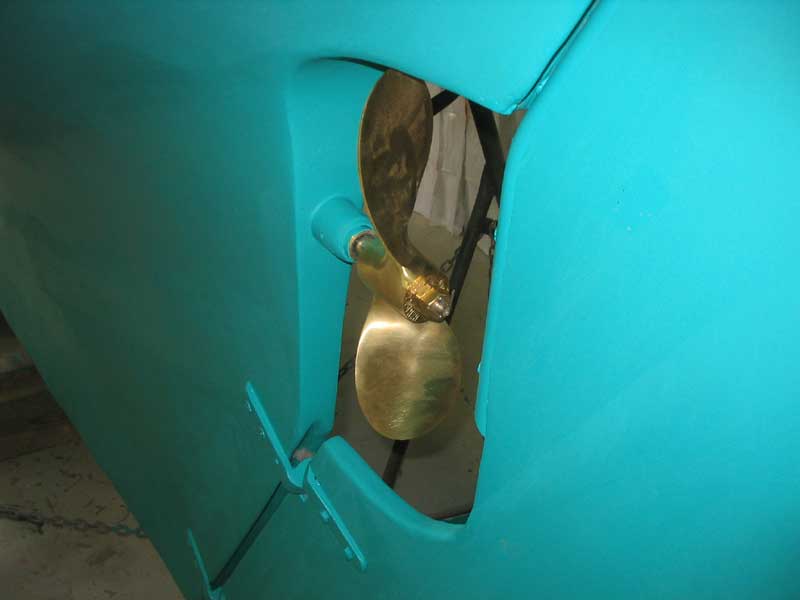
 Finally, I installed the new 2-blade propeller, which the prop shop had
specified based on my engine installation, transmission, and other
factors. The propeller ended up being 14" diameter and 12" pitch;
the diameter was larger than anticipated, but fortunately it did clear
the aperture, though with quite tight clearance at the top edge.
With little choice but to press on, I decided that the prop would be
fine, if perhaps less efficient because of the tight clearance.
Installing the propeller was a simple matter that really bears no
description here. Finally, I installed the new 2-blade propeller, which the prop shop had
specified based on my engine installation, transmission, and other
factors. The propeller ended up being 14" diameter and 12" pitch;
the diameter was larger than anticipated, but fortunately it did clear
the aperture, though with quite tight clearance at the top edge.
With little choice but to press on, I decided that the prop would be
fine, if perhaps less efficient because of the tight clearance.
Installing the propeller was a simple matter that really bears no
description here. |
 |