|
|
~MENU~ |
| Home |
| The Concept |
| The Boat |
| Bringing Her Home |
|
Weekly Progress Log |
|
Daysailor Projects |
| The Boat Barn |
| Resources |
| Other Sites |
| Email Tim |
|
|
|
From a Bare Hull: The Hull (Page 2) |
Fairing and Surfacing (Continued)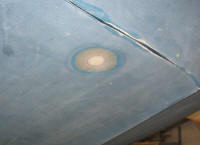 Before
beginning the hull fairing, I had dished out the areas around the old
through hull fittings, which I had filled flush with thickened epoxy many
months before, prior to beginning rebuilding work inside the hull.
In this series of photos, one through hull is represented continually (the
old engine exhaust, in this case); each through hull received the same
treatment. Before
beginning the hull fairing, I had dished out the areas around the old
through hull fittings, which I had filled flush with thickened epoxy many
months before, prior to beginning rebuilding work inside the hull.
In this series of photos, one through hull is represented continually (the
old engine exhaust, in this case); each through hull received the same
treatment. |
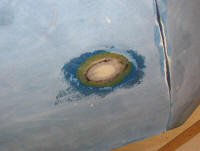 Once
these areas were dished out, I applied a single layer of 24 oz. biaxial
cloth, cut into a circular shape, over the filled portion of the through
hull, and extending out slightly onto the hull. The dishing allowed
the new glass to lay more or less flush with the existing outer surface of
the hull; the new glass wasn't necessarily strictly required, but would
reinforce the filled areas and prevent any cracking or potential failure
later. Once
these areas were dished out, I applied a single layer of 24 oz. biaxial
cloth, cut into a circular shape, over the filled portion of the through
hull, and extending out slightly onto the hull. The dishing allowed
the new glass to lay more or less flush with the existing outer surface of
the hull; the new glass wasn't necessarily strictly required, but would
reinforce the filled areas and prevent any cracking or potential failure
later. |
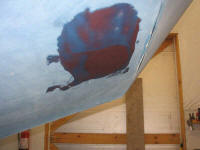 When the new glass was cured, I ground it so that the general area was
flush with the hull. Then, I applied a layer of fairing compound
(left over while I was filling the hull-deck joint above) to the through
hull locations, the first of a few steps required to fair these holes into
the hull. When the new glass was cured, I ground it so that the general area was
flush with the hull. Then, I applied a layer of fairing compound
(left over while I was filling the hull-deck joint above) to the through
hull locations, the first of a few steps required to fair these holes into
the hull. |
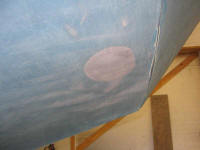 It took two applications of the fairing compound, but in the end the
through hulls were smoothly incorporated into the surrounding hull, with
no high or low spots. It took two applications of the fairing compound, but in the end the
through hulls were smoothly incorporated into the surrounding hull, with
no high or low spots. |
|
With the coarse fairing of the hull-deck joint and the through hulls complete, I moved on to the next, rather significant, step. I planned to skim coat the entire hull with a fine fairing compound, which would give me the base and thickness of product required to perfectly fair the entire hull and rid it of dimples, bumps, and minor flaws. |
|
For this step, I chose a new product. Since I had decided to try out a new line of marine LPU paint for the entire boat--AlexSeal Coatings, I selected the trowelable fairing compound from that line, a 2-part epoxy product designed specifically for fairing boats prior to application of additional products from the same line. For the significant manual longboarding ahead, I wanted an easily-sandable material. |
|
At some point I had read an article about a method for skim coating a hull that would make the job easier. It made sense to me, so I decided to use the procedure. Before beginning, I vacuumed the hull carefully, and then washed the entire hull with Awl-Prep cleaning solvent. (All Awlgrip products are compatible with AlexSeal, and vise-versa.)
|
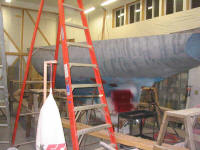
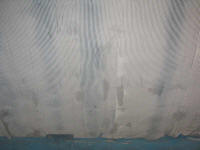
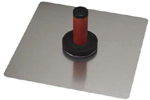 I
used a plasterers' hawk to hold the fairing compound while I applied it; a
hawk is a thin, flat metal plate with a wooden cylindrical handle in the
center beneath the plate. The sharp metal edge is good for scraping
application tools, and the center handle makes holding the load of
material fairly convenient. With the flat side of the trowel, I
applied a relatively even coat of the gray fairing compound to the
hull; then, with the notched side of the trowel, I scraped off the
surface, leaving behind the grooved surface that I intended. In this
manner I worked my way up one side of the hull. I
used a plasterers' hawk to hold the fairing compound while I applied it; a
hawk is a thin, flat metal plate with a wooden cylindrical handle in the
center beneath the plate. The sharp metal edge is good for scraping
application tools, and the center handle makes holding the load of
material fairly convenient. With the flat side of the trowel, I
applied a relatively even coat of the gray fairing compound to the
hull; then, with the notched side of the trowel, I scraped off the
surface, leaving behind the grooved surface that I intended. In this
manner I worked my way up one side of the hull. |
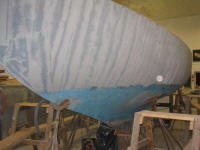 I
began by applying the compound to only one side of the hull, since I
thought it might be challenging to sand both sides of the hull by hand in
one day. Therefore, I chose to split the job into two separate days:
apply to one side, then the next day sand the first side and, when
complete, apply compound to the other side, so that it would be ready for
sanding the day after. I didn't want to apply more than I could sand
in one day, since all epoxy compounds become significantely harder to sand
as the days go by. I
began by applying the compound to only one side of the hull, since I
thought it might be challenging to sand both sides of the hull by hand in
one day. Therefore, I chose to split the job into two separate days:
apply to one side, then the next day sand the first side and, when
complete, apply compound to the other side, so that it would be ready for
sanding the day after. I didn't want to apply more than I could sand
in one day, since all epoxy compounds become significantely harder to sand
as the days go by. |
|
Since the product's ideal cure temperature was 77°, before I left the shop for the night I turned up the heat to about 72°, up from the shop normal of 60°. I wanted to make sure the material cured properly overnight.
|
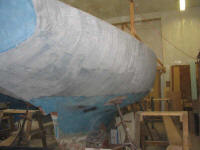
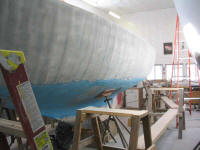 I
found that the ridged application system worked extremely well when it
came time to sand. Armed with my 30" flexible longboard, I easily
sanded one side of the hull with two different grits in only a couple
hours, give or take. By just sanding the narrow tops of the ridges,
the amount of effort was cut significantely. With the longboard, it
was relatively easy to work the hull into a fair, smooth shape; any low
spots were clearly visible, and my earlier work with the coarse fairing
ensured that there were no significant high spots. I coarse-sanded
the ridges with 40 grit paper on the longboard, and then boarded the hull
again using 80 grit to further hone the shape. I
found that the ridged application system worked extremely well when it
came time to sand. Armed with my 30" flexible longboard, I easily
sanded one side of the hull with two different grits in only a couple
hours, give or take. By just sanding the narrow tops of the ridges,
the amount of effort was cut significantely. With the longboard, it
was relatively easy to work the hull into a fair, smooth shape; any low
spots were clearly visible, and my earlier work with the coarse fairing
ensured that there were no significant high spots. I coarse-sanded
the ridges with 40 grit paper on the longboard, and then boarded the hull
again using 80 grit to further hone the shape. |
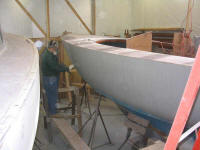 To
continue, I first brushed and vacuumed the dust out from between the
sanded ridges, and solvent-washed the hull to remove the last traces.
Then, I applied a second coat of the filler with plastic squeegees,
pressing it into the grooves between the ridges. I wore a respirator
for most of the job, as I found the fumes from the product to be rather
strong and irritating over time when working closely with the product. To
continue, I first brushed and vacuumed the dust out from between the
sanded ridges, and solvent-washed the hull to remove the last traces.
Then, I applied a second coat of the filler with plastic squeegees,
pressing it into the grooves between the ridges. I wore a respirator
for most of the job, as I found the fumes from the product to be rather
strong and irritating over time when working closely with the product. |
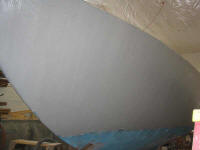 After
squeeging on a section, I then used the tool to scrape off the excess, so
that the grooves ended up flush with the surrounding ridges; the ridges
acted as a natural screed. As straightforward as this process
seemed, I was surprised with how long the job took. I had
expected it to be rather quick, but instead it took nearly 4 hours to fill
the entire hull, port and starboard. After
squeeging on a section, I then used the tool to scrape off the excess, so
that the grooves ended up flush with the surrounding ridges; the ridges
acted as a natural screed. As straightforward as this process
seemed, I was surprised with how long the job took. I had
expected it to be rather quick, but instead it took nearly 4 hours to fill
the entire hull, port and starboard. |
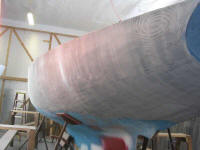
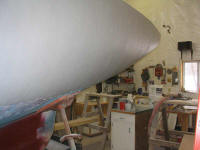
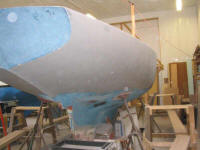
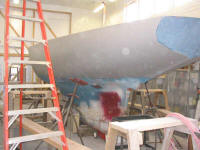
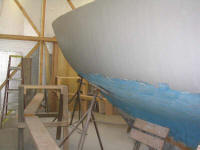
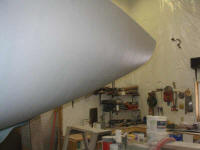 I
was thrilled with how the hull looked when the job was complete, however,
It appeared to be smooth and fair, and had started to really look nice.
Of course, the surface was still slightly uneven here and there, and would
require sanding and some additional spot filling to take care of isolated
low spots, but it was clear that the major fairing operations were a
success, and that the interesting technique using the notched trowel had
worked as advertised. I
was thrilled with how the hull looked when the job was complete, however,
It appeared to be smooth and fair, and had started to really look nice.
Of course, the surface was still slightly uneven here and there, and would
require sanding and some additional spot filling to take care of isolated
low spots, but it was clear that the major fairing operations were a
success, and that the interesting technique using the notched trowel had
worked as advertised. |
|
Please click here to continue> |
