|
|
~MENU~ |
| Home |
| The Concept |
| The Boat |
| Bringing Her Home |
|
Weekly Progress Log |
|
Daysailor Projects |
| The Boat Barn |
| Resources |
| Other Sites |
| Email Tim |
|
|
| Progress Report: 2005 Archives |
|
January February March April May June July August September October November December |
|
Reports from February, 2005 2/6/05 2/13/05 2/20/05 2/27/05 |
|
Log for the Week Ending February 6, 2005 It was a busy start to the week, but not in the shop; I had several other chores and details to attend to, and didn't spend a ton of time in the shop on Monday, though I did sand out the epoxied cockpit areas that I had coated last week. With this step, the hull and deck were truly ready for primer coats. Expect primer sometime next week. There were some frustrating delays with the wood that I had outsourced for resawing into 1/4" thick slabs, which delayed the beginnings of cabin trunk construction. I had hoped to receive this material back last week, but it wasn't ready. Monday, I got in touch with them again, to be told that it would be prepared either late Tuesday or, at the latest, early Wednesday. I knew what that meant: I settled in to wait until Wednesday. |
 On
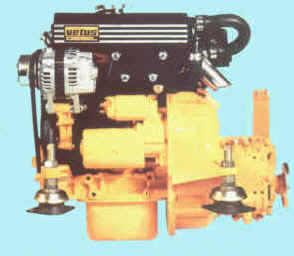
Tuesday, I ordered the diesel engine for the boat. I chose a Vetus M 2.06
16 HP two-cylinder model, a small, lightweight, and relatively inexpensive
diesel that I thought would serve the purpose well. There was a slight
delay in shipping (with free shipping on an engine, one doesn't argue about a
week or two if timing really isn't critical, as in my case), so I expect
that the engine will arrive on February 25. More details on the engine and
its installation will follow after that point. On
Tuesday, I ordered the diesel engine for the boat. I chose a Vetus M 2.06
16 HP two-cylinder model, a small, lightweight, and relatively inexpensive
diesel that I thought would serve the purpose well. There was a slight
delay in shipping (with free shipping on an engine, one doesn't argue about a
week or two if timing really isn't critical, as in my case), so I expect
that the engine will arrive on February 25. More details on the engine and
its installation will follow after that point.Click here to go to the engine installation page.
|
 Tuesday
afternoon, anticipating that my resawn wood might be ready Wednesday morning, I
worked on a laminating form for the cabin trunk, against which I would bend the
wood to laminate the curved piece required. It took most of the afternoon
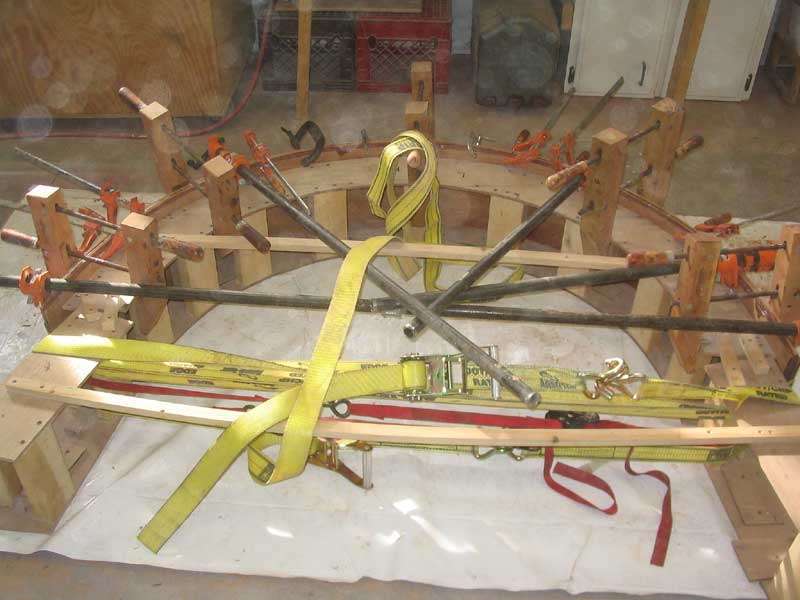
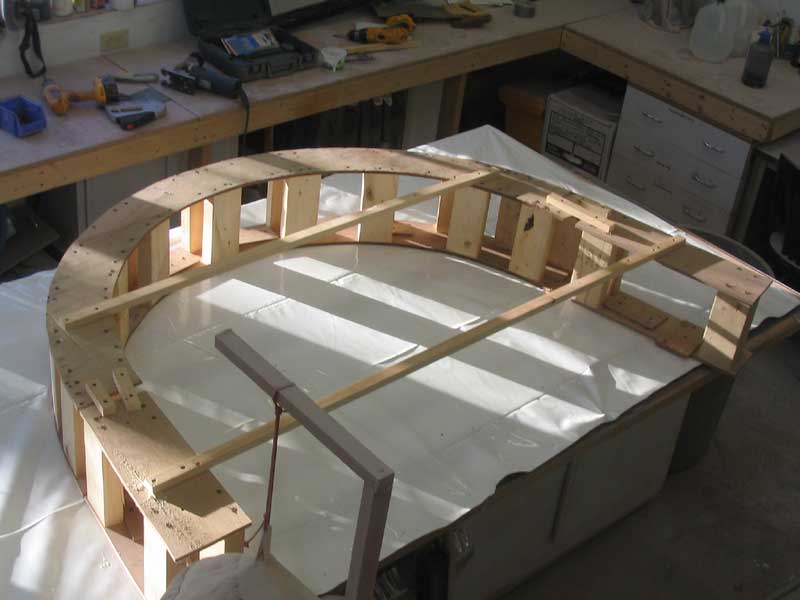
to build. Tuesday
afternoon, anticipating that my resawn wood might be ready Wednesday morning, I
worked on a laminating form for the cabin trunk, against which I would bend the
wood to laminate the curved piece required. It took most of the afternoon
to build.Click here to read about the first stages of building the cabin trunk. |
|
Wednesday morning, frustratingly, the wood was not ready. As I had been counting on the wood, I had little else to get into, so I decided it would be a great time to clean the shop. For weeks, with two boats in the throes of significant fairing and fiberglass work (see www.dasein668.com for the other work that's going on in the shop), the shop had become progressively dirtier, with a nasty, fine dust infiltrating everything. Despite several sweepdowns and straightening up, the dust was getting out of control, and was affecting just the general air quality. It never seemed like it was worth the trouble for a serious cleanup, as the dust would be recreated the next day.
|
 Finally, halfway through Wednesday afternoon, I found a phone message that my
wood was ready, so I headed out to pick it up. The resawn slabs of wood
were rough, and would require a fair bit of additional planing to achieve a
uniform thickness and smoothness, but the hard work was done; I simply could not
have resawn the 10-12" boards in my shop. I looked forward to a full day
on Thursday preparing the wood for laminating. Finally, halfway through Wednesday afternoon, I found a phone message that my
wood was ready, so I headed out to pick it up. The resawn slabs of wood
were rough, and would require a fair bit of additional planing to achieve a
uniform thickness and smoothness, but the hard work was done; I simply could not
have resawn the 10-12" boards in my shop. I looked forward to a full day
on Thursday preparing the wood for laminating. |
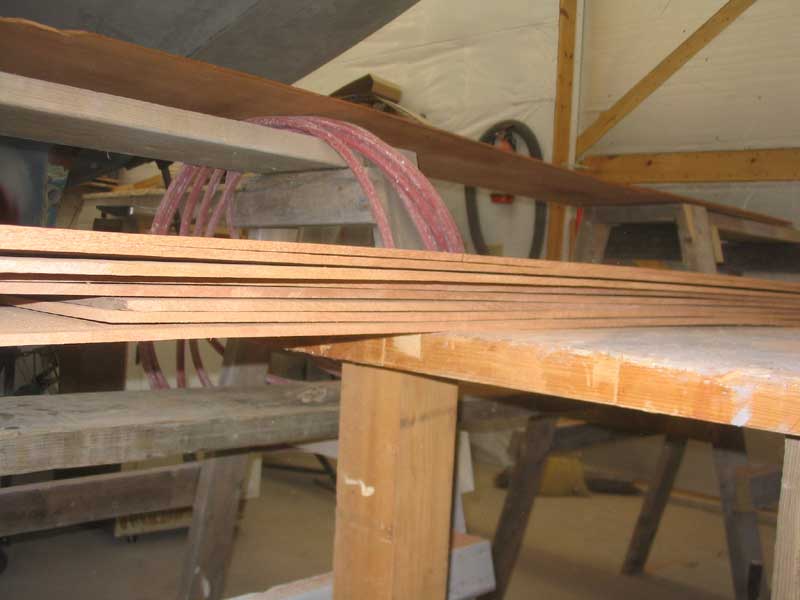 In
the morning, I set up for a long planing session. The thickest of the
slabs was nearly 3/8", at least along one edge, so I set the planer high and ran
all the boards through. I continued in this manner until, two hours later,
all the boards were planed flat and even to about 1/4" in thickness. In
the morning, I set up for a long planing session. The thickest of the
slabs was nearly 3/8", at least along one edge, so I set the planer high and ran
all the boards through. I continued in this manner until, two hours later,
all the boards were planed flat and even to about 1/4" in thickness.After cleaning up the mountains of chips in the shop and putting the tools away, I prepared for the much-anticipated task of bending some of the boards around my mold to glue up the curved cabin trunk portion. |
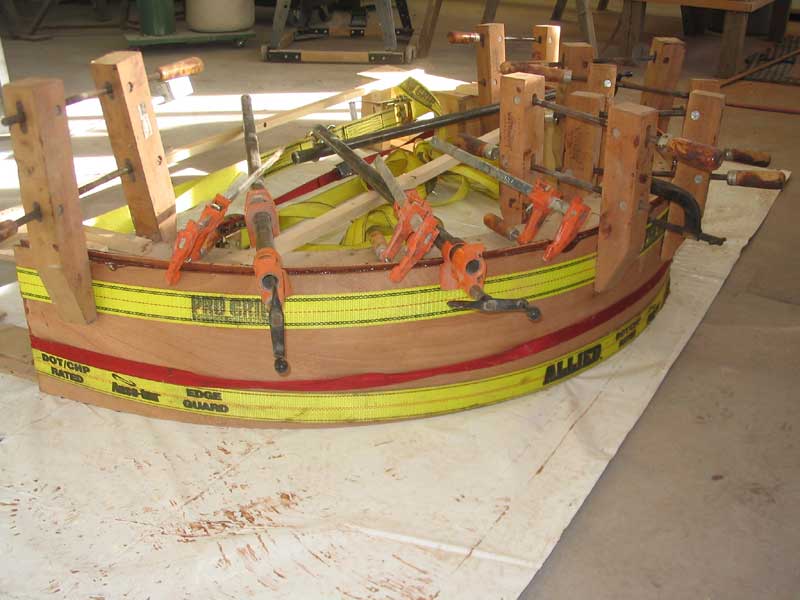 Friday was a day off, which was just as well since I
wanted to leave the laminated pieces in the clamps as long as possible to ensure
a strong bond. Nothing had self-destructed overnight, which I was pleased
to see! Friday was a day off, which was just as well since I
wanted to leave the laminated pieces in the clamps as long as possible to ensure
a strong bond. Nothing had self-destructed overnight, which I was pleased
to see! |
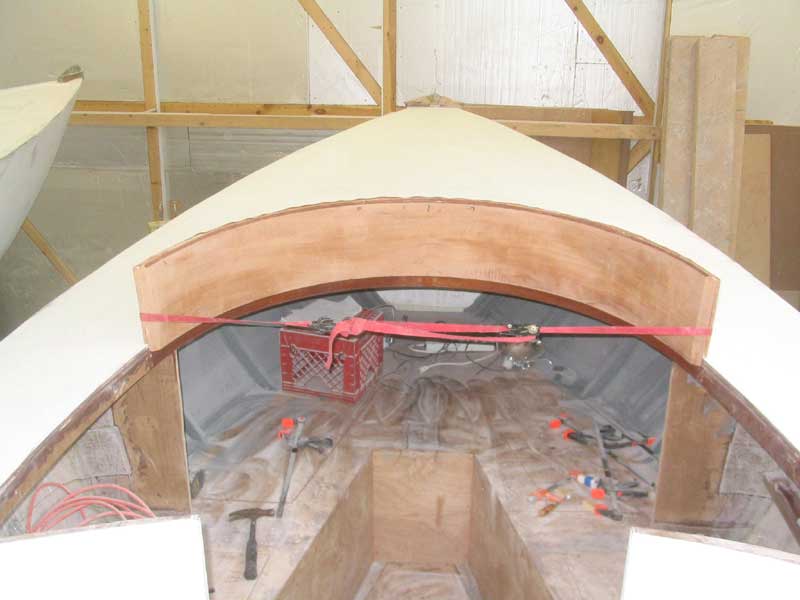
 Saturday
morning, I removed the blank from the clamps and test-fit it up on the boat.
It looked like the blank would be usable, and would in fact work well.
Although I spent a lot of contemplative time studying the blank in place, and
thinking through some of the coming installation and completion steps, little
else of substance happened on Saturday. With spring-like temperatures
around 40, it seemed like a good time to take care of a few outdoor chores. Saturday
morning, I removed the blank from the clamps and test-fit it up on the boat.
It looked like the blank would be usable, and would in fact work well.
Although I spent a lot of contemplative time studying the blank in place, and
thinking through some of the coming installation and completion steps, little
else of substance happened on Saturday. With spring-like temperatures
around 40, it seemed like a good time to take care of a few outdoor chores. |
|
Log for the Week Ending February 13, 2005
|
|
Tuesday was all about cleaning. I planned to spray high-build primer on Friday, and Tuesday had to be cleaning day since the remainder of the week looked uncertain, shop-wise: Wednesday, I had business elsewhere that would take me away from the shop most of the day, and there was a snowstorm predicted for Thursday that looked as if it might keep me occupied. Therefore, I had to get going on cleaning at once to ensure readiness for Friday. Preparing the shop for paint after weeks of dust and fiberglass work took much of the day. Had I been preparing for final topcoats, I would have gone even further, but for initial primer coats, a solid overall cleaning, including vacuuming all surfaces, floors, and storage areas, was sufficient. I also vac'd the hull and deck of the boat in further preparation. |
 Wednesday, I was away from the shop for the day.
Thursday, my work was limited to some final pre-priming preparations, as I
planned to apply high-build primer on Friday. On Thursday morning, I first
solvent washed the hull and deck with Awl-Prep solvent, and then I masked off
the areas that would not be painted and applied plastic to protect as
necessary--mainly covering the openings over the engine hatch, cabin, and
lazarette, as both hull and deck were to receive the high-build. Wednesday, I was away from the shop for the day.
Thursday, my work was limited to some final pre-priming preparations, as I
planned to apply high-build primer on Friday. On Thursday morning, I first
solvent washed the hull and deck with Awl-Prep solvent, and then I masked off
the areas that would not be painted and applied plastic to protect as
necessary--mainly covering the openings over the engine hatch, cabin, and
lazarette, as both hull and deck were to receive the high-build. |
|
A powerful winter storm intervened, keeping me away from the shop Thursday afternoon and then all day Friday, as I plowed and cleaned up from the 2' of show we received from a storm that, a day earlier, was to drop 4-8". It was a beautiful snow that stuck to everything. Unfortunately, this meant that I was unable to prime as hoped, and with weekend plans, it looked like it would probably be next week before I could finally get to the job. I considered whether to try on Sunday, but as of this writing, and not made the decision yet. |
|
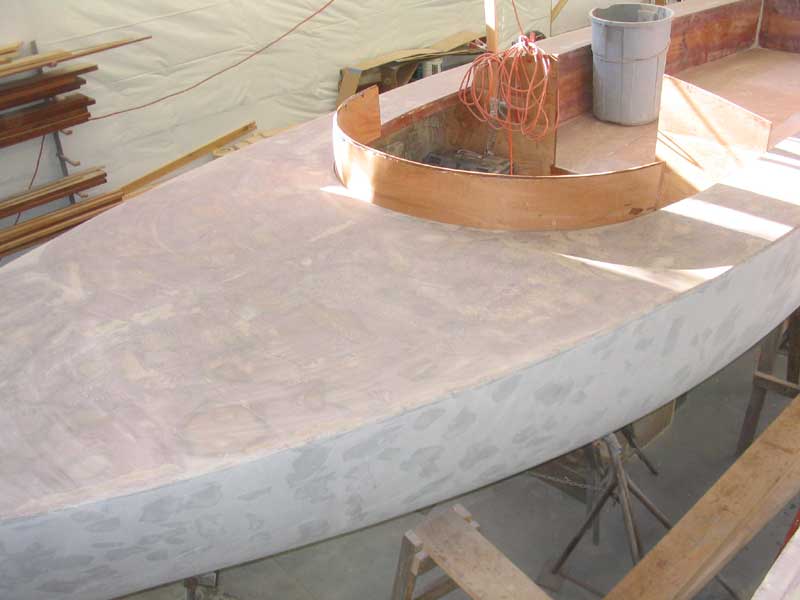
Log for the Week Ending February 20, 2005  After
an unsure start on Sunday, I decided to go ahead and spray the high build primer
on the decks. With cockpit, decks, and hull priming looming ahead, it
seemed the perfect day to get a head start on the process. I don't usually
work on Sundays, but with so many days last week occupied with other things that
kept me away from the shop, I felt I had to get back into the swing of things
and keep the project moving along. After
an unsure start on Sunday, I decided to go ahead and spray the high build primer
on the decks. With cockpit, decks, and hull priming looming ahead, it
seemed the perfect day to get a head start on the process. I don't usually
work on Sundays, but with so many days last week occupied with other things that
kept me away from the shop, I felt I had to get back into the swing of things
and keep the project moving along. |
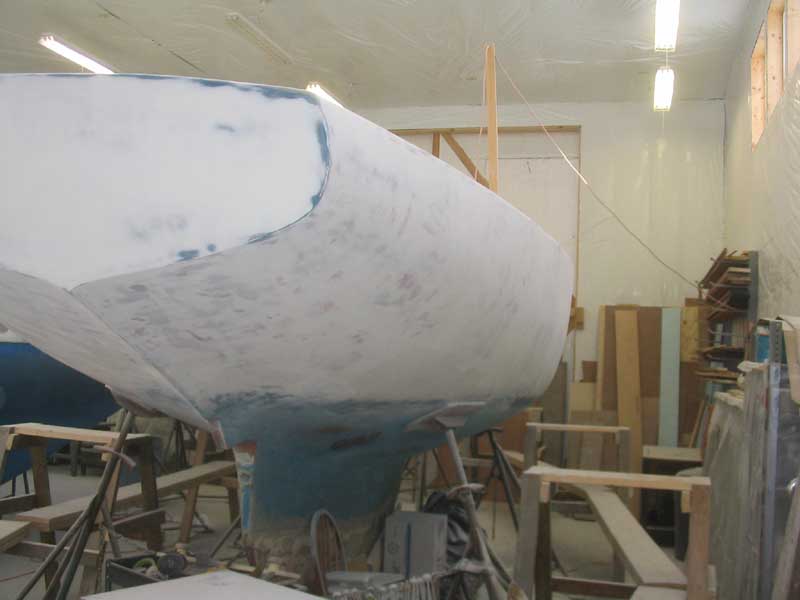
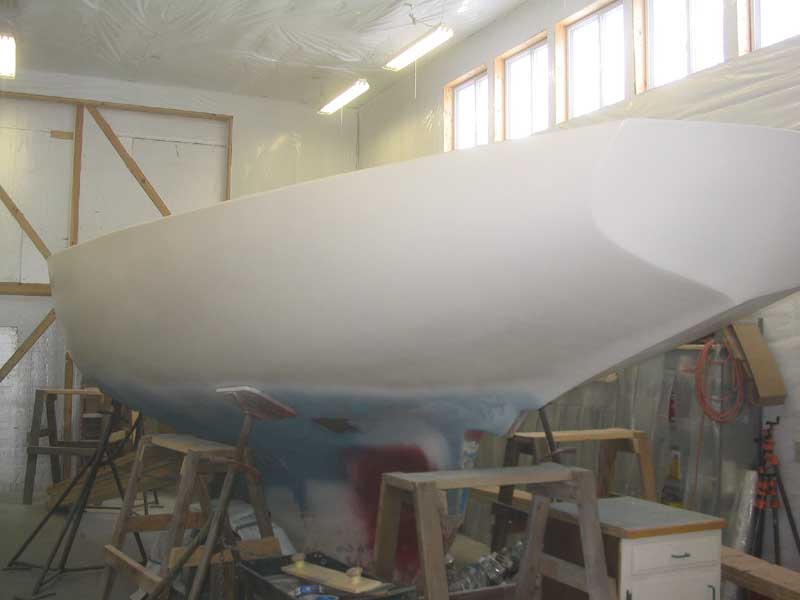 Monday,
I continued with the priming and sprayed three coats of high build primer on the
hull, over the course of several hours' elapsed time. The whole shop
seemed brighter afterwards, as the nearly-white primer completely changed the
way light reflected off things in the shop. Monday,
I continued with the priming and sprayed three coats of high build primer on the
hull, over the course of several hours' elapsed time. The whole shop
seemed brighter afterwards, as the nearly-white primer completely changed the
way light reflected off things in the shop. |
 Tuesday,
I sanded the decks and cockpit, first with 120 grit and then 220 grit on my palm
sander. I was pleased with the end result--the primer sanded nicely, and
came out very smooth in the end, having done a good job of filling the minor
imperfections. Tuesday,
I sanded the decks and cockpit, first with 120 grit and then 220 grit on my palm
sander. I was pleased with the end result--the primer sanded nicely, and
came out very smooth in the end, having done a good job of filling the minor
imperfections.
|
 With
the decks sanded, I continued on Wednesday with the hull. I ran out of
sandpaper and knocked off early, with little choice but to wait for new paper
the next day. Over the course of several hours on Thursday and Friday, I
sanded the entire hull, applied a mist coat to highlight low areas, and sanded
the hull again. Finally, on Friday morning, I applied some spot filler to
take care of minor pinholes and voids that had existed in the fairing compound,
and finished sanding the hull on Saturday morning. With
the decks sanded, I continued on Wednesday with the hull. I ran out of
sandpaper and knocked off early, with little choice but to wait for new paper
the next day. Over the course of several hours on Thursday and Friday, I
sanded the entire hull, applied a mist coat to highlight low areas, and sanded
the hull again. Finally, on Friday morning, I applied some spot filler to
take care of minor pinholes and voids that had existed in the fairing compound,
and finished sanding the hull on Saturday morning.
|
 Also
on Friday, I installed a layer of mahogany veneer on my curved cabin trunk
section. The laminated piece looked pretty good, but I had discovered some
cracks and one large split towards the end that simply prevented the piece from
being up to snuff, so I applied a layer of veneer set in epoxy resin. On
Saturday, I removed the clamps and trimmed off some of the excess veneer in
preparation for installing the curved section in the near future. Also
on Friday, I installed a layer of mahogany veneer on my curved cabin trunk
section. The laminated piece looked pretty good, but I had discovered some
cracks and one large split towards the end that simply prevented the piece from
being up to snuff, so I applied a layer of veneer set in epoxy resin. On
Saturday, I removed the clamps and trimmed off some of the excess veneer in
preparation for installing the curved section in the near future.It was a week that began with instantly gratifying progress--the primer on hull and deck--and then continued with hours upon hours of sanding and final fairing, which was all a necessary part of the overall process, but provided little significant visual progress. Still, by the end of the week, both hull and deck were prepped and ready for final finishing primer and topcoats, and I was ready to clean up the dusty mess in the shop (again) and move on to some serious woodworking. |
|
Log for the Week Ending February 27, 2005 I began the week on a positive and exciting note, as I prepared to plunge deeply back into woodworking with the construction of the cabin trunk and coamings. I began on Sunday, when, with the help of Nathan Sanborn, I planed down the huge mahogany boards that I had purchased for the task. Each board was a rough-sawn monstrosity about 1-1/4" thick, close to 12" wide (I had to trim one of the boards to even fit through the planer), and over 17' in length. We set the planer up about halfway down the long axis of the shop and managed to plane three of these huge boards without incident. This, and some additional milling operations, took up about half the day, which was enough for a Sunday. |
|
Monday, I looked forward to getting to work. I began with the curved section of the cabin trunk, and determined where I needed to cut the ends before final installation. Then, with the piece down on my bench, I sawed the ragged ends off at an angle in preparation for its eventual mating with the cabin trunk and coamings. This took a couple hours, all told, and by the time I was done the snow falling outside had amounted to enough that I had to abandon the shop for the day and prepare for plowing. |
 Tuesday, I got back to work and started preparing one of the 17' long coaming
boards for installation. This is where my week started going downhill.
Nothing was coming together as hoped; all along, I had anticipated this
particular construction being fairly complicated, but I had thought the curved
lamination would be the most challenging. With that more or less
successfully out of the way, I was somewhat unprepared for the events that
today, and subsequent days, would bring. Suffice it to say that by the end
of the day, not only was the new coaming board remotely close to being fitted,
but I had caused damage to the curved laminated piece as well. Tuesday, I got back to work and started preparing one of the 17' long coaming
boards for installation. This is where my week started going downhill.
Nothing was coming together as hoped; all along, I had anticipated this
particular construction being fairly complicated, but I had thought the curved
lamination would be the most challenging. With that more or less
successfully out of the way, I was somewhat unprepared for the events that
today, and subsequent days, would bring. Suffice it to say that by the end
of the day, not only was the new coaming board remotely close to being fitted,
but I had caused damage to the curved laminated piece as well.Click here for more on the ongoing cabin trunk installation. |
|
After my bad day Tuesday, and some regrouping time, I returned Wednesday with some trepidation and a sense of foreboding. The large board was proving to be too difficult to handle in this application, and with some technical errors on my part, I damaged a rabbet I had milled on the board, forcing me to stop and regroup yet again. I thought I could salvage the board, so I glued up the cracked area and left it to cure overnight. |
|
For what remained of Wednesday, I turned my attention to a couple smaller tasks that were pending, including applying a final coat of fairing filler to portions of the cockpit, to fill some of the remaining plywood grain in the cockpit sides, and then began work on the engine hatch area, where I milled and installed the beginnings of a raised lip around the deck opening that would provide the requisite water resistance for the hatch. |
 Thursday morning, I figured I had the cabin trunk problem under control. I
decided that I needed to kerf the back side of the board at the forward end,
where the curve was most extreme, and eventually decided to cut the board into
two pieces to make the entire installation easier. First, however, I
permanently installed the curved forward section, to ensure that it was well
secured during the fittings of the adjacent pieces needed to complete the cabin
trunk. I installed it in a heavy bed of 5200 adhesive using #12x2" bronze
screws. Thursday morning, I figured I had the cabin trunk problem under control. I
decided that I needed to kerf the back side of the board at the forward end,
where the curve was most extreme, and eventually decided to cut the board into
two pieces to make the entire installation easier. First, however, I
permanently installed the curved forward section, to ensure that it was well
secured during the fittings of the adjacent pieces needed to complete the cabin
trunk. I installed it in a heavy bed of 5200 adhesive using #12x2" bronze
screws. |
|
With these important decisions made, I spent most of the day working on the port side of the cabin trunk, fine-tuning the bevel cut at the forward end and working ever closer to its final fitting and installation. Then, in one ill-advised movement (or perhaps it would have happened anyway), I tightened a clamp just wrong, just as I was approaching probably the second-to-last final fitting of the piece, and cracked the board just above the area I had repaired the previous day. By this point in the week, I wasn't even expecting success in my endeavors, and any angst, anger, or irritation I might have felt earlier in the week was long gone. Now, I just shrugged off the latest setback, put the broken board aside for good (I had other suitable boards in the shop), and went back to work on the engine room hatches. |
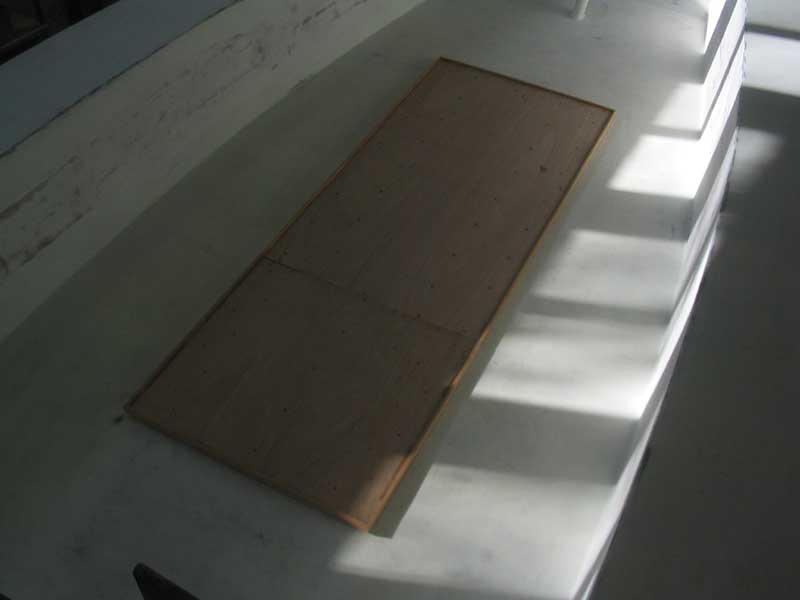 Friday, I ignored the cabin trunk and coaming, and instead worked solely
on the engine hatches, building a low framework on top of the original plywood,
and cutting and installing a sub-level of plywood for their tops. I
planned to install solid wood strips as the final surface above the plywood,
making the hatch stand 3/4" proud of the surrounding cockpit sole; to make an
effectively flush hatch, I also planned to build a 3/4" thick cockpit grating
for the remaining areas. My day's work was truncated by some necessary
errands, as well as an unplanned--but delicious--side trip with Heidi to
Harmon's, a local hamburger place that we like to enjoy every so often. It
was just that kind of a week, after all. Friday, I ignored the cabin trunk and coaming, and instead worked solely
on the engine hatches, building a low framework on top of the original plywood,
and cutting and installing a sub-level of plywood for their tops. I
planned to install solid wood strips as the final surface above the plywood,
making the hatch stand 3/4" proud of the surrounding cockpit sole; to make an
effectively flush hatch, I also planned to build a 3/4" thick cockpit grating
for the remaining areas. My day's work was truncated by some necessary
errands, as well as an unplanned--but delicious--side trip with Heidi to
Harmon's, a local hamburger place that we like to enjoy every so often. It
was just that kind of a week, after all. |
|
For whatever reason, my engine shipment was delayed, and I found out on Thursday that they would be unable to deliver on Friday as planned; we rescheduled for Monday. It had better come then; my good-guy patience points had been exhausted, free shipping or no free shipping. I didn't do much on Saturday, as I had a small gathering of Seabreeze owners coming by for lunch and boat talk. In the morning, though, I wrapped up a couple small details on the engine hatches and temporarily installed them for final adjustments. Better luck next week! |
|
|