|
|
~MENU~ |
| Home |
| The Concept |
| The Boat |
| Bringing Her Home |
|
Weekly Progress Log |
|
Daysailor Projects |
| The Boat Barn |
| Resources |
| Other Sites |
| Email Tim |
|
|
|
From a Bare Hull: The Cockpit (Page 6) |
 After
I applied the high-build primer coats to the
cockpit and sanding the new paint smooth, I continued with a few small
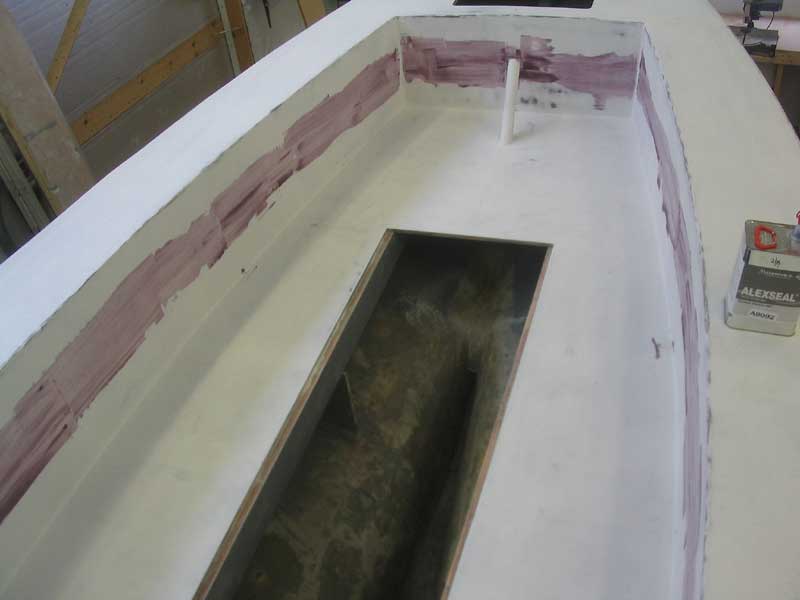
projects in the cockpit. First, I applied a final coat of filler to
the cockpit sides, to fill the grain of the plywood that had not been
filled by the high build primer. It only needed a thin coat, which I
sanded smooth the next day. After
I applied the high-build primer coats to the
cockpit and sanding the new paint smooth, I continued with a few small
projects in the cockpit. First, I applied a final coat of filler to
the cockpit sides, to fill the grain of the plywood that had not been
filled by the high build primer. It only needed a thin coat, which I
sanded smooth the next day. |
|
Next, I turned my attention to the hatch opening I had previously cut in the sole for access to the bilges and engine room beneath. I needed to make these hatches essentially watertight, at least for normal amounts of rain water and spray that might be encountered. My solution wouldn't hold up offshore, but then the boat is not designed for such work. |
|
After considering several solutions, including some complex drain installation possibilities, I decided to stick with the simpler approach and built a slightly raised hatch overlapping an internal lip like a shoebox lid that would prevent water from entering the bilge space. To create a flush cockpit sole in the end, I decided to also build a full grate system that would surround the new hatch at the same height, thereby providing the flush sole desired. |
 I
began by milling a series of 3/8" x 3/4" wide mahogany strips, which I
installed around the edges of the opening to serve as the lip. I
installed the pieces in a bead of 5200 and secured them with bronze
screws. I
began by milling a series of 3/8" x 3/4" wide mahogany strips, which I
installed around the edges of the opening to serve as the lip. I
installed the pieces in a bead of 5200 and secured them with bronze
screws. |
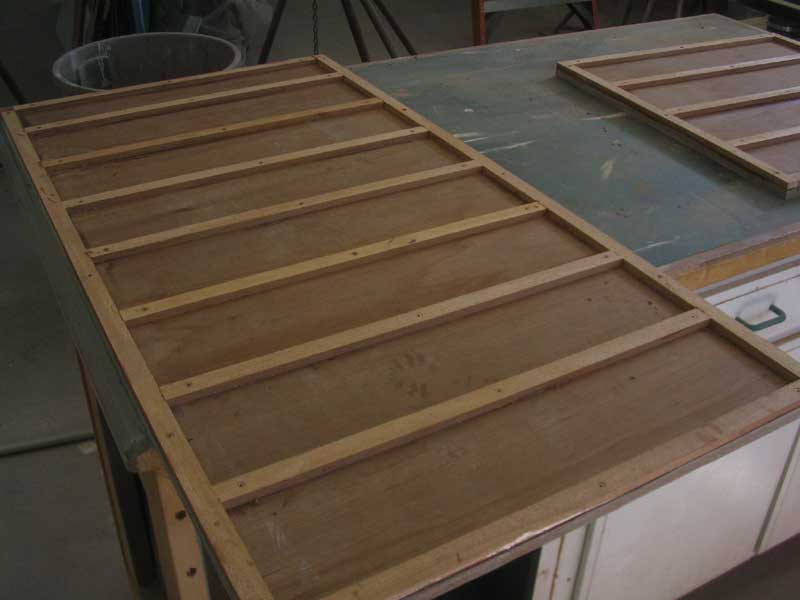 Next,
I began to modify the existing plain plywood hatches. To raise the
surface as needed to overlap the new lip, I installed a framework of 3/8"
strips over the plywood using epoxy and bronze screws. The new
framing was designed to support a piece of 1/4" plywood above, which I cut
to the size needed to overlap the lip as needed. I secured the
plywood to the framing with 5200 and screws. Next,
I began to modify the existing plain plywood hatches. To raise the
surface as needed to overlap the new lip, I installed a framework of 3/8"
strips over the plywood using epoxy and bronze screws. The new
framing was designed to support a piece of 1/4" plywood above, which I cut
to the size needed to overlap the lip as needed. I secured the
plywood to the framing with 5200 and screws. |
 Then,
I milled a final piece out of solid mahogany, which I installed around the
edges. The new piece provided the edge of the "shoebox" lid and hung
down over the lip beneath, and also provided an edge for the plywood top.
To eventually cover the plywood, I planned to install solid wood strips
for a pleasing appearance, but that would come later. The total
thickness of the new hatch, and the distance it stood proud of the cockpit
sole, equaled 3/4", a standard size from which I would later make the
cockpit grating. Then,
I milled a final piece out of solid mahogany, which I installed around the
edges. The new piece provided the edge of the "shoebox" lid and hung
down over the lip beneath, and also provided an edge for the plywood top.
To eventually cover the plywood, I planned to install solid wood strips
for a pleasing appearance, but that would come later. The total
thickness of the new hatch, and the distance it stood proud of the cockpit
sole, equaled 3/4", a standard size from which I would later make the
cockpit grating. |
|
|
|
To cover the plywood hatches, and bring the surface up even with the trim around the edges, I decided to install teak strips on the plywood, using epoxy and filling the seams with black polysulfide. From some larger boards, I milled a number of 1/4" thick strips, about 1-1/2" wide--a width I determined after calculating the approximate seam width and the width of the plywood hatches. |
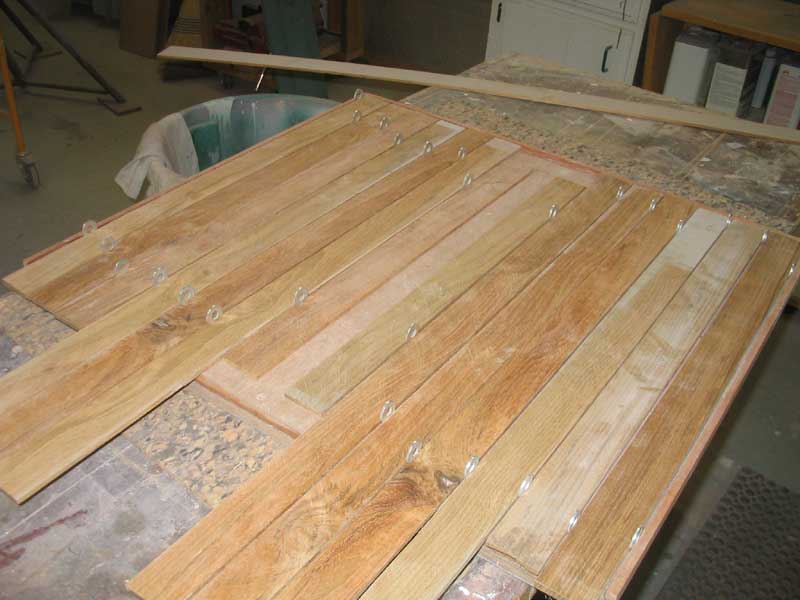 With
the strips dry, I laid out the planking, using two thicknesses of steel
washers as spacers between each strip; this provided open seams of about
1/8" or a little more between the strips. Working from each edge
towards the center, I ended up ripping the final strip slightly narrower
to fit properly in the final gap at the centerline. With
the strips dry, I laid out the planking, using two thicknesses of steel
washers as spacers between each strip; this provided open seams of about
1/8" or a little more between the strips. Working from each edge
towards the center, I ended up ripping the final strip slightly narrower
to fit properly in the final gap at the centerline. |
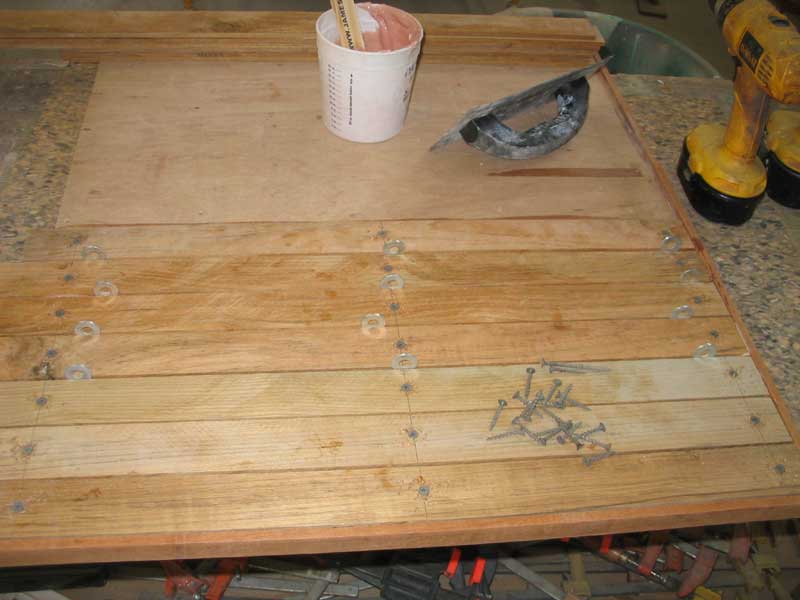 Then,
I used a notched trowel (1/16" notch) to apply a bet of thickened epoxy
to the plywood, and set the strips into the epoxy, using the washers to
space them and securing them temporarily with drywall screws. I
secured the screws along pre-drawn lines to keep the spacing consistent
and the screws in even lines, for the holes resulting from the screw
removal later would be plugged with teak plugs. Then,
I used a notched trowel (1/16" notch) to apply a bet of thickened epoxy
to the plywood, and set the strips into the epoxy, using the washers to
space them and securing them temporarily with drywall screws. I
secured the screws along pre-drawn lines to keep the spacing consistent
and the screws in even lines, for the holes resulting from the screw
removal later would be plugged with teak plugs. |
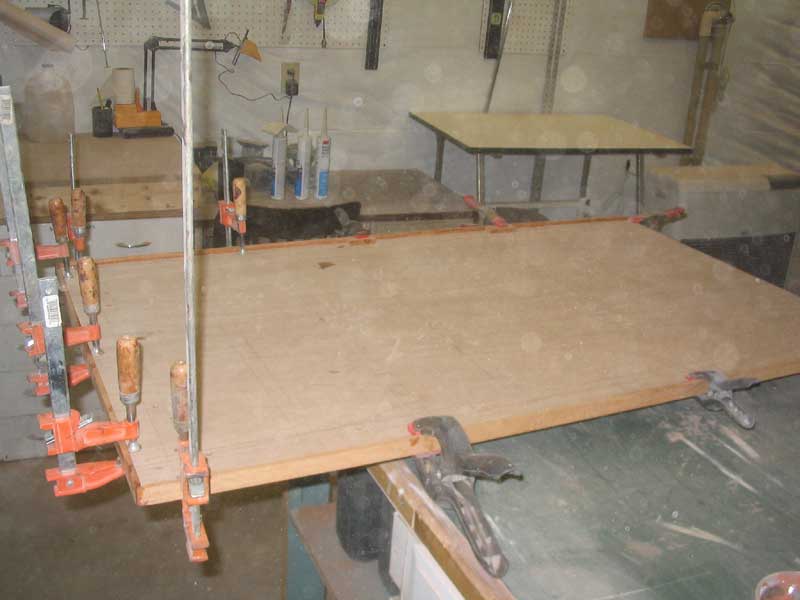
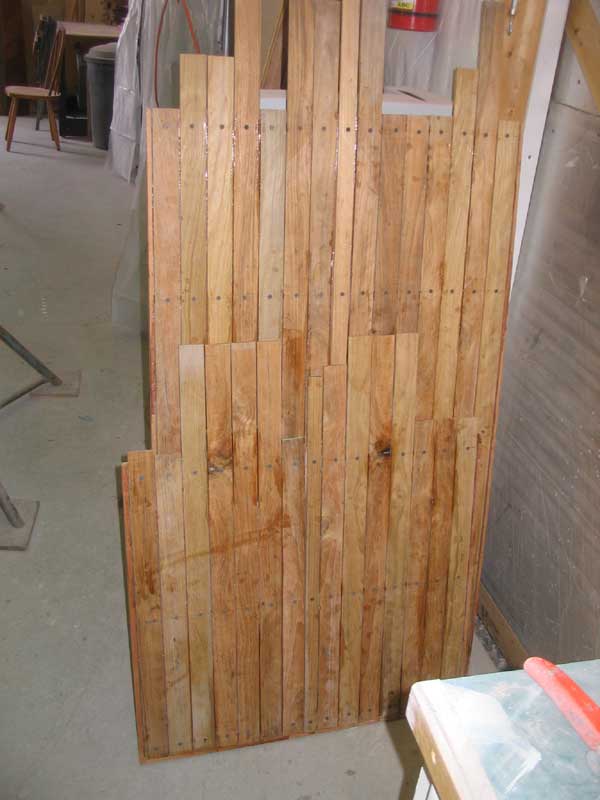 I
repeated this process for each of the two hatches and set them aside to
cure. When the epoxy cured, I removed the screws and left the
hatches for later steps for the moment. I
repeated this process for each of the two hatches and set them aside to
cure. When the epoxy cured, I removed the screws and left the
hatches for later steps for the moment.Later, I trimmed the overhanging teak strips flush with the end, and cleaned out any epoxy squeezeout that might interfere between the strips. |
 To
fill the seams between the strips and complete the traditional look of
the hatches, I chose black polysulfide caulk (one part). I applied
the caulk into the seams with a caulking gun, a time-consuming, slow,
and tedious process. To complete the caulking in the two hatches
at hand--a four-foot hatch and a 2-foot hatch--required about two hours
behind the caulking gun. To
fill the seams between the strips and complete the traditional look of
the hatches, I chose black polysulfide caulk (one part). I applied
the caulk into the seams with a caulking gun, a time-consuming, slow,
and tedious process. To complete the caulking in the two hatches
at hand--a four-foot hatch and a 2-foot hatch--required about two hours
behind the caulking gun. |
 The
process was simple: fill the seams with an overabundance of caulk,
and then use a plastic squeegee to press the caulk more deeply into the
seams, hopefully eliminating air voids. This made a mess of caulk
all over the teak strips, of course, but later steps (sanding) would
take care of that. The polysulfide required several days to cure
to a sandable extent, so I set the hatches aside for the moment. The
process was simple: fill the seams with an overabundance of caulk,
and then use a plastic squeegee to press the caulk more deeply into the
seams, hopefully eliminating air voids. This made a mess of caulk
all over the teak strips, of course, but later steps (sanding) would
take care of that. The polysulfide required several days to cure
to a sandable extent, so I set the hatches aside for the moment. |
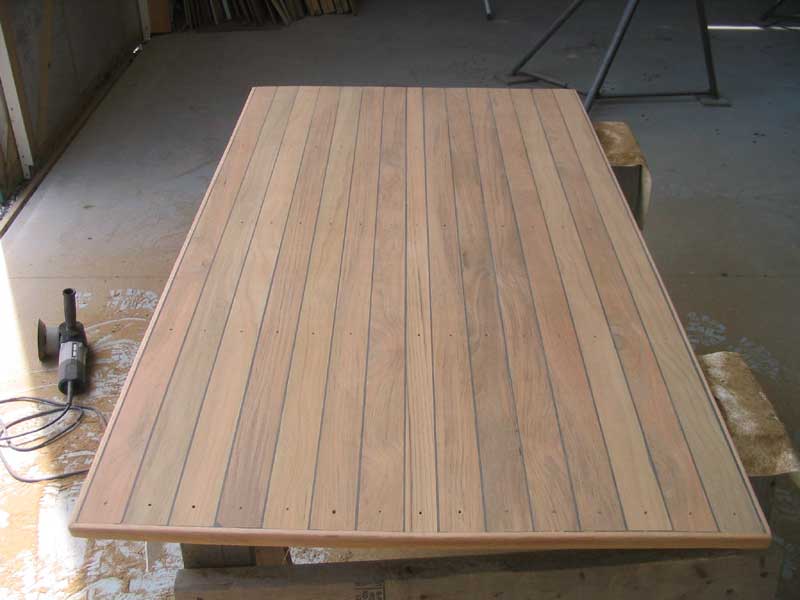
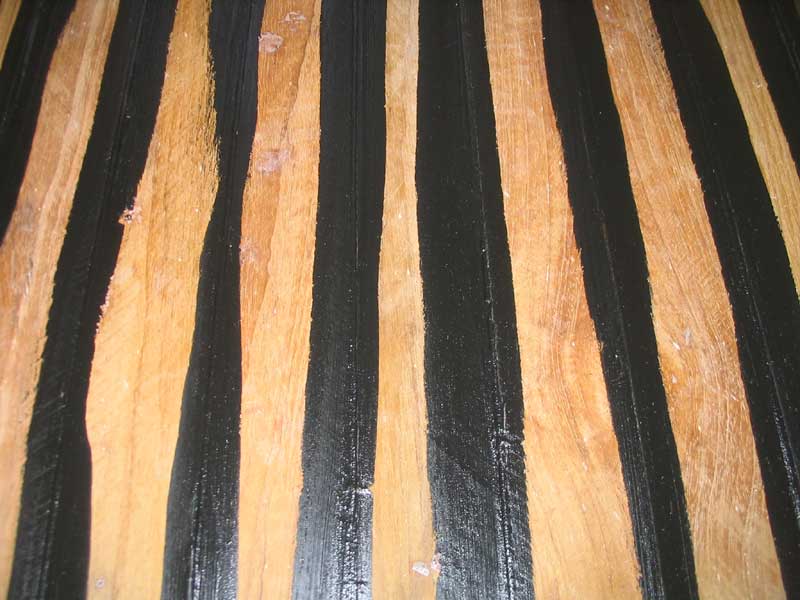
 Later, when the caulk was cured, I sanded the
hatches with 36 grit on a DA sander to remove the excess polysulfide and
smooth out any unevenness between the teak strips. With the bulk
stock removal completed, I continued sanding with 80 and 120, and
finished with 120 grit on a vibrating finish sander. The sanded
hatches looked great; I was pleased. Later, when the caulk was cured, I sanded the
hatches with 36 grit on a DA sander to remove the excess polysulfide and
smooth out any unevenness between the teak strips. With the bulk
stock removal completed, I continued sanding with 80 and 120, and
finished with 120 grit on a vibrating finish sander. The sanded
hatches looked great; I was pleased. |
|
|
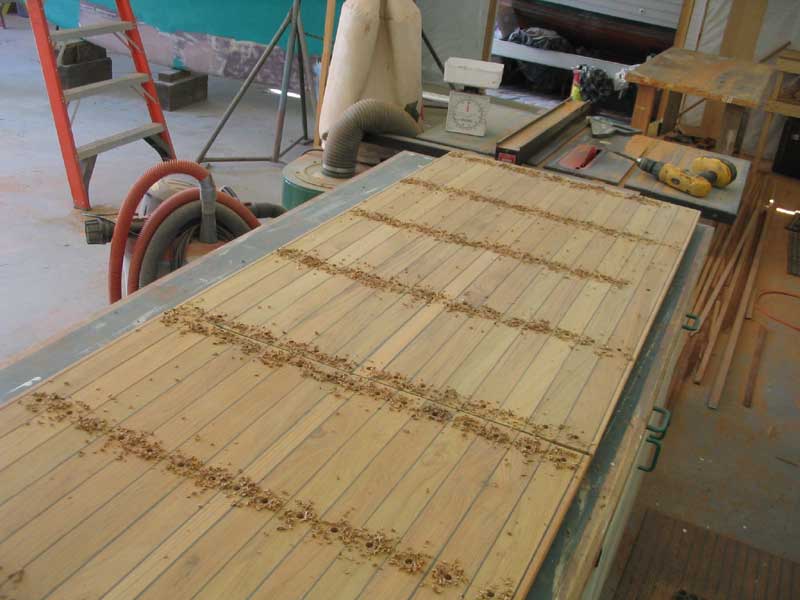 The construction process had left 120 screw holes in the teak, which I
now needed to fill with teak plugs. I enlarged each screw hole
using a 3/8" Forstner bit, and then glued in a teak plug with
resorcinol, tapping each into place. I left these to cure for a
couple days. The construction process had left 120 screw holes in the teak, which I
now needed to fill with teak plugs. I enlarged each screw hole
using a 3/8" Forstner bit, and then glued in a teak plug with
resorcinol, tapping each into place. I left these to cure for a
couple days.
|
 Once
the glue cured, I removed the excess bungs and sanded the surface of
both panels smooth once more. Then, I prepared for the final
details: lifting hardware and some trim on the smaller piece to
cover the seam between the hatches when installed. Once
the glue cured, I removed the excess bungs and sanded the surface of
both panels smooth once more. Then, I prepared for the final
details: lifting hardware and some trim on the smaller piece to
cover the seam between the hatches when installed.
|
 I
ordered three flush bronze lifting rings from Spartan Marine, and now
prepared to install them in the hatches. After some layout to
locate the rings--two on the large hatch, one on the small hatch--I
traced the outline of the hardware on the teak and prepared to chisel
out the material inside as needed. I left some outlines in the
corners for the screw locations, which would need to be chiseled less
deeply. I
ordered three flush bronze lifting rings from Spartan Marine, and now
prepared to install them in the hatches. After some layout to
locate the rings--two on the large hatch, one on the small hatch--I
traced the outline of the hardware on the teak and prepared to chisel
out the material inside as needed. I left some outlines in the
corners for the screw locations, which would need to be chiseled less
deeply. |
 After
scoring the outline with a sharp utility knife, I carefully pared out
the material with some chisels. This took a long time, and
required great care. In the end, I discovered that the teak
overlay was not thick enough to allow the whole depth of the lifting
ring to fit, so this meant that I'd have to extend my cut into the
plywood substructure beneath (the thin 1/4" top layer; see
above to refresh your memory on the hatch
construction). After
scoring the outline with a sharp utility knife, I carefully pared out
the material with some chisels. This took a long time, and
required great care. In the end, I discovered that the teak
overlay was not thick enough to allow the whole depth of the lifting
ring to fit, so this meant that I'd have to extend my cut into the
plywood substructure beneath (the thin 1/4" top layer; see
above to refresh your memory on the hatch
construction). |
|
|
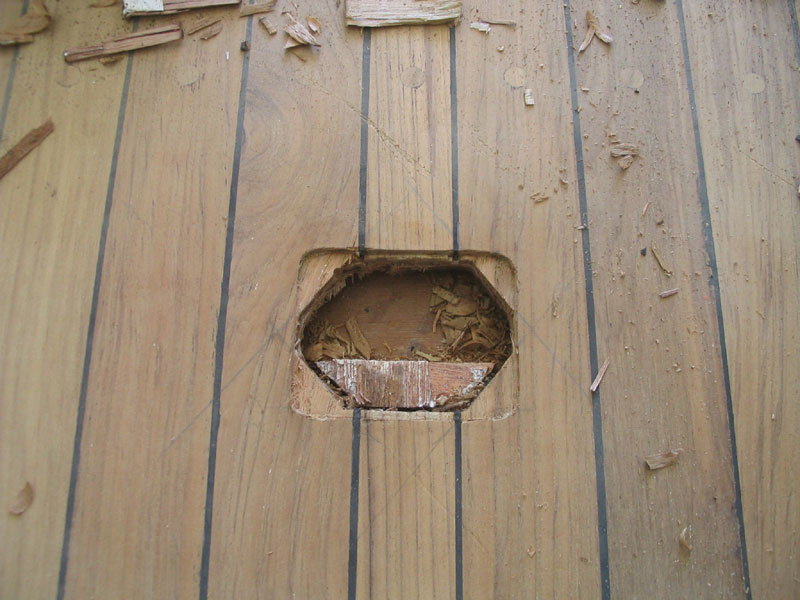 For
this, I turned to my Roto-Zip tool, and cut out the plywood inside the
opening. Now, with some additional chiseling at the corners, I
could make the ring fit flushly, after a few test-fits. For
this, I turned to my Roto-Zip tool, and cut out the plywood inside the
opening. Now, with some additional chiseling at the corners, I
could make the ring fit flushly, after a few test-fits.
Armed with this new information, I attacked the remaining two ring locations with the Roto Zip. After laying out the outlines as before, I simply cut out the center portion with the power tool, saving all the futile chiseling that I had done on the first opening, and then finished off the openings with the chisel on the corners and edges. |
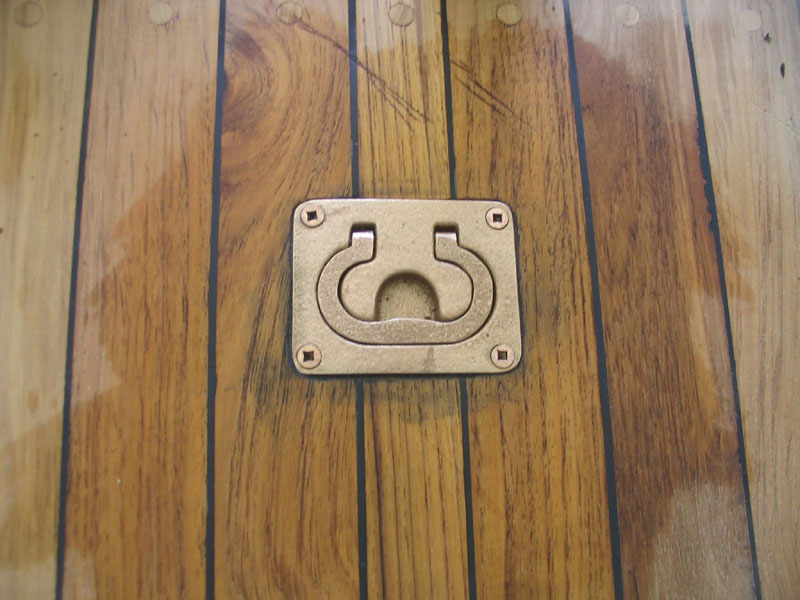 To
install the rings, I first applied lots of black polysulfide caulk to
the inside of the opening, and sealed off the void beneath the top layer
of plywood. I also applied plenty of the caulk beneath the new
fitting itself, to essentially glue it to the bottom of the hatch
inside. With a small bead around the top of the mortise and around
the screw holes, I installed each ring with four bronze screws, and
cleaned up the excess caulk. To
install the rings, I first applied lots of black polysulfide caulk to
the inside of the opening, and sealed off the void beneath the top layer
of plywood. I also applied plenty of the caulk beneath the new
fitting itself, to essentially glue it to the bottom of the hatch
inside. With a small bead around the top of the mortise and around
the screw holes, I installed each ring with four bronze screws, and
cleaned up the excess caulk. |
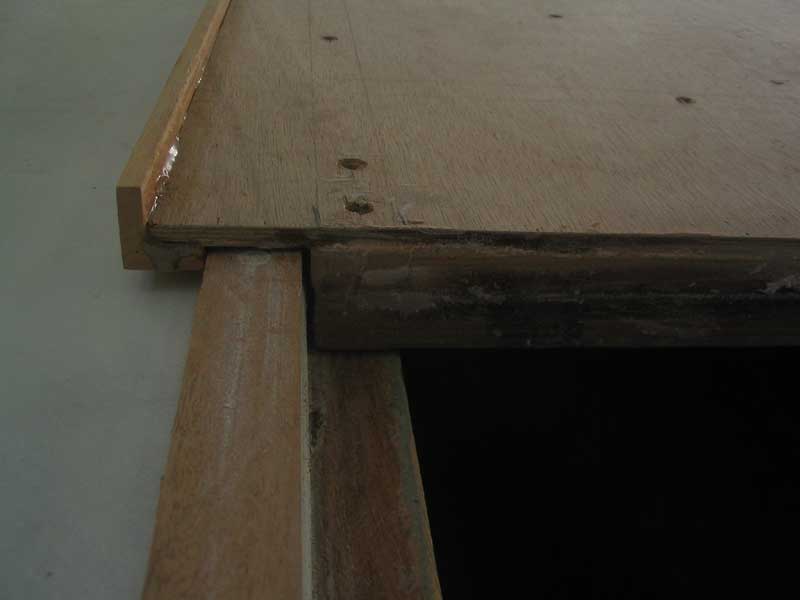
 Finally,
I milled a thin strip of teak, rounded the edges, and epoxied it to the
after edge of the smaller hatch. This trim would overlap the seam
between the hatches and not only improve the looks, but would also help
keep the seam from leaking. Finally,
I milled a thin strip of teak, rounded the edges, and epoxied it to the
after edge of the smaller hatch. This trim would overlap the seam
between the hatches and not only improve the looks, but would also help
keep the seam from leaking.The cockpit hatches were complete! |
|
|