|
|
~MENU~ |
| Home |
| The Concept |
| The Boat |
| Bringing Her Home |
|
Weekly Progress Log |
|
Daysailor Projects |
| The Boat Barn |
| Resources |
| Other Sites |
| Email Tim |
|
|
|
From a Bare Hull: High Build Primer (Hull & Deck) |
 With
both hull and deck faired, longboarded, and otherwise prepared, the first
step in the painting process was to apply a high-build primer, which would
fill small voids and imperfections, and allow me to fine-tune the
smoothness and fairness of the hull and deck surfaces. With
both hull and deck faired, longboarded, and otherwise prepared, the first
step in the painting process was to apply a high-build primer, which would
fill small voids and imperfections, and allow me to fine-tune the
smoothness and fairness of the hull and deck surfaces. |
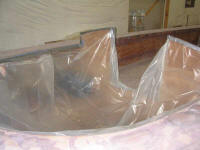
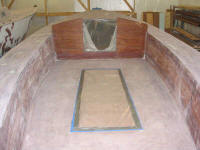 Before
priming, there was minimal masking to perform. I covered the cabin
trunk opening and bulkhead with masking tape and plastic, and also covered
the cockpit engine hatches (which required additional construction steps
and would be painted later), the lazarette hatch opening, and the stem
casting. Before
priming, there was minimal masking to perform. I covered the cabin
trunk opening and bulkhead with masking tape and plastic, and also covered
the cockpit engine hatches (which required additional construction steps
and would be painted later), the lazarette hatch opening, and the stem
casting. |
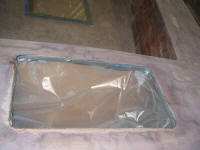 Final
preparations included solvent-washing the surfaces with Awl-Prep, and
then, right before spray application, a final tacking off. Final
preparations included solvent-washing the surfaces with Awl-Prep, and
then, right before spray application, a final tacking off.After some consideration, I decided that I would need to paint the deck in a couple stages. Since multiple coats of the primer could be applied in a short period of time, more or less wet-on-wet (not quite), I realized that I couldn't paint the cockpit one coat and them immediately go on to the sidedecks; doing so would mean that I couldn't get back to the cockpit for all the wet surrounding paint. Therefore, I planned to paint the requisite 2 or 3 coats in the cockpit, and then move on to the decks in a separate operation. With only primer, wet edge maintenance was less important. |
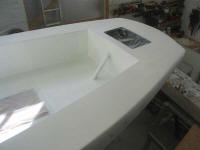 My product of choice for primer was part of
the Alexseal family, a high-build
primer called Super Build 302. I mixed product as required and
began spraying inside the cockpit, using the taped-off engine hatches as a
convenient place to stand and spray. I sprayed two coats in the
cockpit and determined that was enough, as the surfaces had been fairly
smooth to begin with. My product of choice for primer was part of
the Alexseal family, a high-build
primer called Super Build 302. I mixed product as required and
began spraying inside the cockpit, using the taped-off engine hatches as a
convenient place to stand and spray. I sprayed two coats in the
cockpit and determined that was enough, as the surfaces had been fairly
smooth to begin with. |
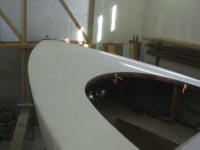
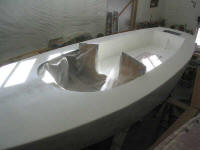 With
the cockpit done, I moved on to the sidedecks and foredeck. Working
from staging around the boat, I could reach all areas of the deck, and
sprayed three coats of the primer over the course of a few hours' time,
waiting 45 minutes or an hour between coats. Once I learned how the
new product would spray, I found the spraying to be easy, though it was
very hard to keep track of where I was spraying each coat. I thought
that it might be an interesting idea to incorporate some basic primer
tints, which the user could add to the product for various coats, just to
change the color of the product enough to make spraying subsequent coats
easier. With
the cockpit done, I moved on to the sidedecks and foredeck. Working
from staging around the boat, I could reach all areas of the deck, and
sprayed three coats of the primer over the course of a few hours' time,
waiting 45 minutes or an hour between coats. Once I learned how the
new product would spray, I found the spraying to be easy, though it was
very hard to keep track of where I was spraying each coat. I thought
that it might be an interesting idea to incorporate some basic primer
tints, which the user could add to the product for various coats, just to
change the color of the product enough to make spraying subsequent coats
easier. |
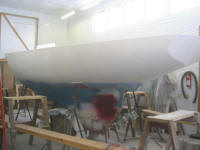 The
next day, I rearranged the staging and continued by spraying three coats
of high build on the hull. Each coat took 30 or so minutes to spray,
followed by 45 minutes or so between coats. Again, I was
pleased with the spray performance of the heavy primer, and there was no
propensity for the product to run on the surface. The
next day, I rearranged the staging and continued by spraying three coats
of high build on the hull. Each coat took 30 or so minutes to spray,
followed by 45 minutes or so between coats. Again, I was
pleased with the spray performance of the heavy primer, and there was no
propensity for the product to run on the surface. |
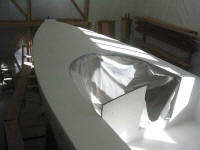
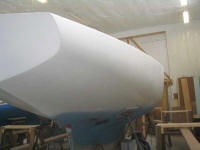
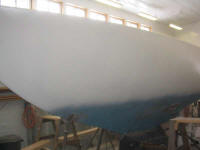 Spraying
the hull radically altered the appearance of the boat; while the primer
was actually a very light gray, it was extremely bright and close to white
in appearance. The boat appeared to be larger, and the whole shop
reflected the light; it actually was hard to work on the boat later on in
the direct sun streaming through the nearby shop windows. Spraying
the hull radically altered the appearance of the boat; while the primer
was actually a very light gray, it was extremely bright and close to white
in appearance. The boat appeared to be larger, and the whole shop
reflected the light; it actually was hard to work on the boat later on in
the direct sun streaming through the nearby shop windows. |
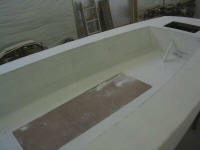 I
continued the next day by sanding the primer on the decks. I might
have been able to sand the hull as well, but because of some other
commitments in the morning I didn't get started till late morning, and had
to first clean up the shop from the previous days' spraying, as well as
reconfigure the staging again. Plus, I was exhausted from the
previous day's spray marathon: in addition to spraying three coats
on my own hull, I also, later in the day, sprayed three coats, in two
separate operations, on neighboring Dasein's decks and cockpit. My
day was a blur or mixing and applying paint. I
continued the next day by sanding the primer on the decks. I might
have been able to sand the hull as well, but because of some other
commitments in the morning I didn't get started till late morning, and had
to first clean up the shop from the previous days' spraying, as well as
reconfigure the staging again. Plus, I was exhausted from the
previous day's spray marathon: in addition to spraying three coats
on my own hull, I also, later in the day, sprayed three coats, in two
separate operations, on neighboring Dasein's decks and cockpit. My
day was a blur or mixing and applying paint. |
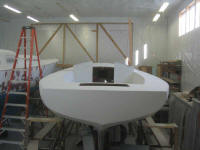 Excuses
aside, I managed to sand the decks and cockpit with 120 and then 220
grit on a palm sander, leaving a very smooth surface behind. The
primer did a good job filling minor voids, pinholes, and sanding scratches
left behind from longboarding the decks, and there were only a few minor
areas that might require additional filling. There was something
very satisfying about sanding the primer and ending up with a lovely
smooth surface at the end; it's always more enjoyable to sand to 220 grit
than when using something like 40 grit. Excuses
aside, I managed to sand the decks and cockpit with 120 and then 220
grit on a palm sander, leaving a very smooth surface behind. The
primer did a good job filling minor voids, pinholes, and sanding scratches
left behind from longboarding the decks, and there were only a few minor
areas that might require additional filling. There was something
very satisfying about sanding the primer and ending up with a lovely
smooth surface at the end; it's always more enjoyable to sand to 220 grit
than when using something like 40 grit. |
