|
|
~MENU~ |
| Home |
| The Concept |
| The Boat |
| Bringing Her Home |
|
Weekly Progress Log |
|
Daysailor Projects |
| The Boat Barn |
| Resources |
| Other Sites |
| Email Tim |
|
|
| Progress Report: 2005 Archives |
|
January February March April May June July August September October November December |
|
Reports from March, 2005 3/6/05 3/13/05 3/20/05 3/27/05 |
|
Log for the Week Ending March 6, 2005 First, I apologize for the poor quality of many of the photos in this week's descriptions and some of last week's. My poor camera, already on its last legs, survived a fall from the boat deck to the concrete floor last week. While it's amazing that it still works at all, it's definitely not happy, and a replacement is on its way. Meantime, the photos are coming out rather dark and sometimes filled with lines or fuzziness.
|
 In
preparation for final work on the coaming boards, I addressed the small matter
of the rabbet in the port coaming board that I had cut earlier. My new
installation plan called for the coaming to be secured entirely inside the
cockpit well, so no rabbet would be required. Since the original rabbet
was on the outside (well, the edge that pressed against the outer wall of the
cockpit), and would be hidden in the final installation, I cut a strip of
mahogany to fit the rabbet and epoxied it in place, just to fill the gap.
This would return the board to full strength. I left the strip to cure,
and then sanded everything smooth again. In
preparation for final work on the coaming boards, I addressed the small matter
of the rabbet in the port coaming board that I had cut earlier. My new
installation plan called for the coaming to be secured entirely inside the
cockpit well, so no rabbet would be required. Since the original rabbet
was on the outside (well, the edge that pressed against the outer wall of the
cockpit), and would be hidden in the final installation, I cut a strip of
mahogany to fit the rabbet and epoxied it in place, just to fill the gap.
This would return the board to full strength. I left the strip to cure,
and then sanded everything smooth again. |
 Monday was soured by the lack of delivery of my engine. All day long, I
kept my cell phone nearby--something I never, ever do, as I loathe the
things--in case the delivery driver needed guidance to get here or if there were
any problems. Phones and email remained mute, but by about 1400 I was
really starting to wonder. Finally, I placed a call to the business from
which I had ordered the engine. Of course, the delivery had been canceled,
ostensibly because of a pending snowstorm. Fair enough: but first of
all, no one called me to let me know (this was, to me, the primary failure of
the company); secondly, the snowstorm, to anyone willing
to take a pair of seconds to check, was arriving slower than anticipated, and
didn't reach southern New England, where they were located, until evening.
Thirdly, they could have easily delivered the engine early and been back well
before even the earlier predictions of the snow. Finally, I had already
waited patiently for three weeks, endured a change in the delivery schedule last
Friday, and had, frankly, used up my nice-guy points. I was a bit unhappy
with them, but nonetheless we eventually settled on Wednesday for engine
delivery here. What else could I do but wait? Monday was soured by the lack of delivery of my engine. All day long, I
kept my cell phone nearby--something I never, ever do, as I loathe the
things--in case the delivery driver needed guidance to get here or if there were
any problems. Phones and email remained mute, but by about 1400 I was
really starting to wonder. Finally, I placed a call to the business from
which I had ordered the engine. Of course, the delivery had been canceled,
ostensibly because of a pending snowstorm. Fair enough: but first of
all, no one called me to let me know (this was, to me, the primary failure of
the company); secondly, the snowstorm, to anyone willing
to take a pair of seconds to check, was arriving slower than anticipated, and
didn't reach southern New England, where they were located, until evening.
Thirdly, they could have easily delivered the engine early and been back well
before even the earlier predictions of the snow. Finally, I had already
waited patiently for three weeks, endured a change in the delivery schedule last
Friday, and had, frankly, used up my nice-guy points. I was a bit unhappy
with them, but nonetheless we eventually settled on Wednesday for engine
delivery here. What else could I do but wait?There was no shop work on Tuesday because of an ongoing snowstorm. Unlike last week, I actually looked forward to getting back into the project on Wednesday. My start in the shop on Wednesday was delayed by another surprise snowstorm overnight, which required plowing again in the morning. |
 When I finally arrived at the shop in the late
morning, I removed the clamps from the coaming repair and those from the cabin
trunk lamination, and continued work on the coamings. The port side
coaming was already cut more or less to the correct size and shape, though I had
to deepen the relief cuts at each end, since the coaming was now to sit about 3"
down beyond the deck edge, about twice the distance I had considered during the
original installation attempts. When I finally arrived at the shop in the late
morning, I removed the clamps from the coaming repair and those from the cabin
trunk lamination, and continued work on the coamings. The port side
coaming was already cut more or less to the correct size and shape, though I had
to deepen the relief cuts at each end, since the coaming was now to sit about 3"
down beyond the deck edge, about twice the distance I had considered during the
original installation attempts.Click here for more about the initial coamings' installation. |
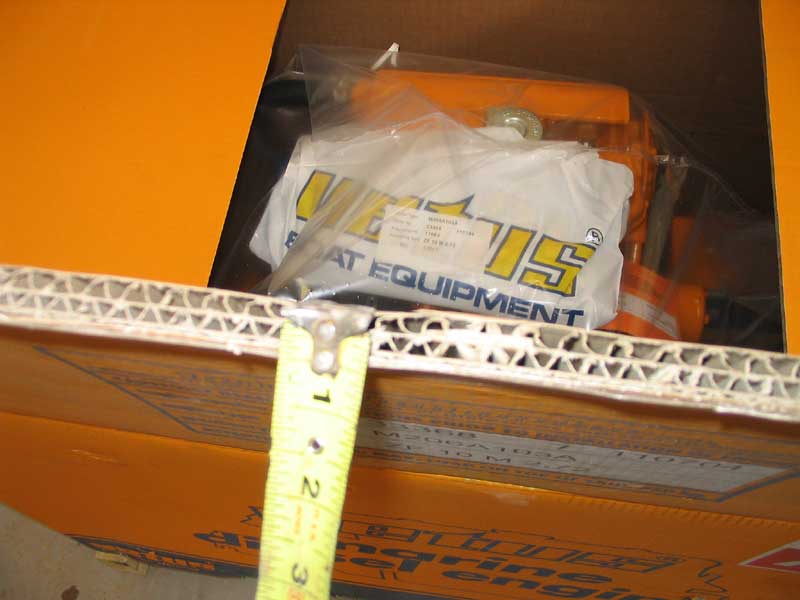
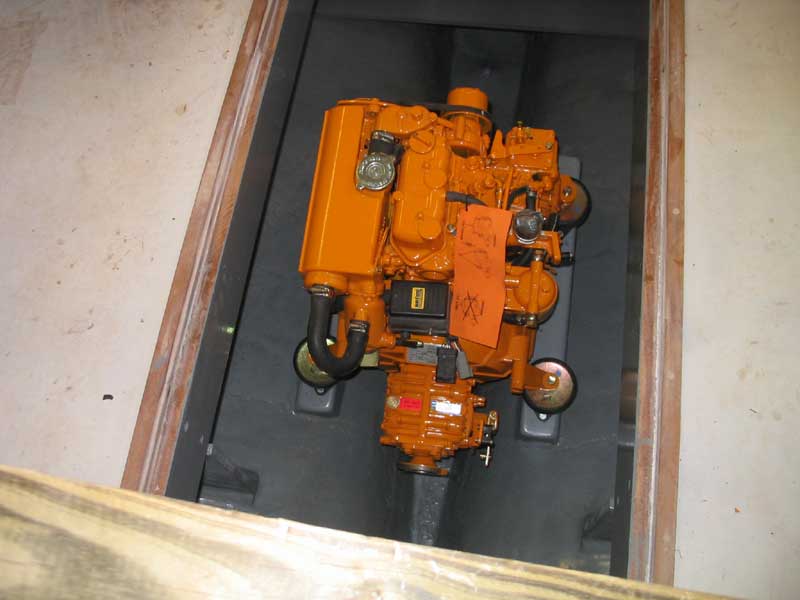
 Late Wednesday morning, my new Vetus diesel engine
arrived, at long last, from the dealer in Massachusetts. (...and
there was much rejoicing...)
The engine came installed on a pallet surrounded
by an enormous orange box, a box of such sturdy construction that I considered
using it to build a strong boat. Late Wednesday morning, my new Vetus diesel engine
arrived, at long last, from the dealer in Massachusetts. (...and
there was much rejoicing...)
The engine came installed on a pallet surrounded
by an enormous orange box, a box of such sturdy construction that I considered
using it to build a strong boat. |
 For the time being, I left the engine safely crated
and covered in its protective plastic, but looked forward to the opportunity to
begin its installation in the near future. For the time being, I left the engine safely crated
and covered in its protective plastic, but looked forward to the opportunity to
begin its installation in the near future. |
|
Thursday I was away from the shop all day with other commitments. It seems the last few weeks have been full of delays, which are starting to bother me.
|
 Before
knocking off on Friday, I made two small glue-ups with some scrap mahogany,
which I planned to use to create some trim pieces the next day. I glued
the pieces together with the standard mix of epoxy resin and cabosil, clamped
them tightly, and left them to cure overnight. Before
knocking off on Friday, I made two small glue-ups with some scrap mahogany,
which I planned to use to create some trim pieces the next day. I glued
the pieces together with the standard mix of epoxy resin and cabosil, clamped
them tightly, and left them to cure overnight.
|
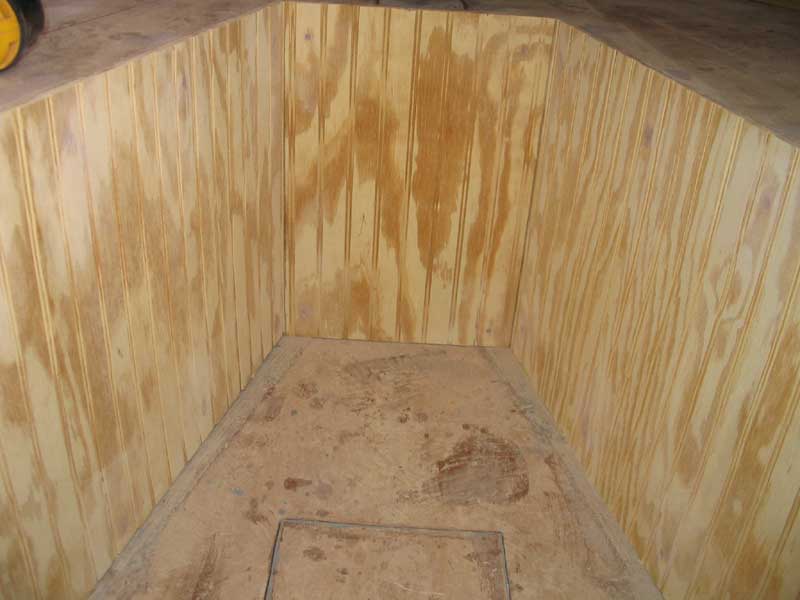
 I
filled the rest of Saturday working on the interior, now that the basis of the
cabin trunk was finally complete. The final stages of interior
construction included installing two small bulkheads (dividers, really) in the
settee backs, and the beginnings of installing some more beadboard that would
cover many of the cabin surfaces. I
filled the rest of Saturday working on the interior, now that the basis of the
cabin trunk was finally complete. The final stages of interior
construction included installing two small bulkheads (dividers, really) in the
settee backs, and the beginnings of installing some more beadboard that would
cover many of the cabin surfaces. |
|
Log for the Week Ending March 13, 2005
|
|
Monday was a busy day. I began by installing the beadboard settee backs, and with that out of the way moved onto cutting, fitting, and installing all the remaining beadboard in the cabin areas: on the lower portions of the settees and on the forward-facing side of the chainplate bulkhead. These areas would all be visible in the final interior, and I planned a white-painted beaded surface with plenty of varnished mahogany trim. |
|
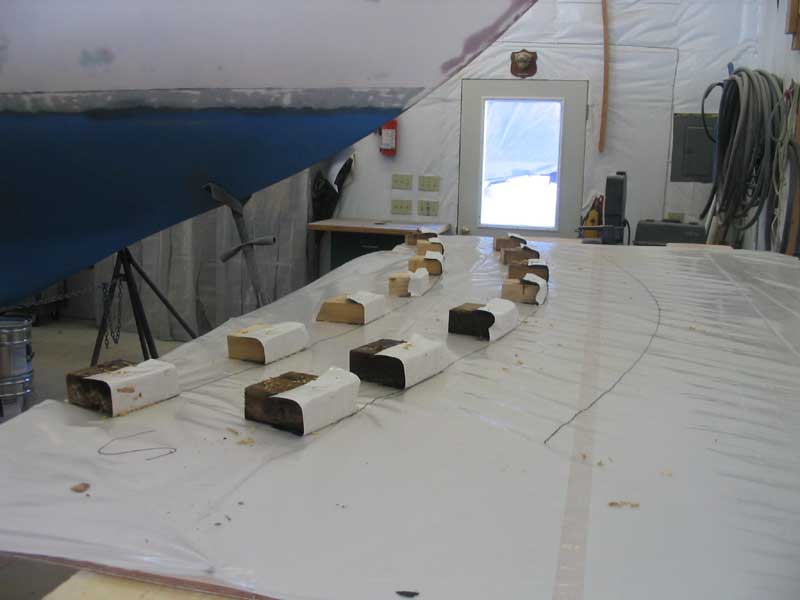
The beadboard jobs took a surprisingly long time and consumed most of the morning. When the installation was complete, I moved on to thinking about my new engine foundations, which I wanted to get built and installed as soon as possible. After some thought, I decided to build the foundations out of a core of Meranti plywood (of which I had abundant supply in the shop) rather than solid wood of one form or another.
|
|
Wednesday ended up being a non-work day, as plowing kept me away from the shop longer than expected and I was simply too tired to work in the late afternoon. Likewise, I had appointments that kept me away on Thursday and Friday, disappointing delays in my schedule but unavoidable.
If you're keeping count, that means that I only had 2-1/2 workdays in the shop this week...disappointing. Tentatively--and I hardly dare say so--it looks as if the next several days might be calm and storm-free. Perhaps I can get done in the shop next week what I had meant to do this week. |
|
Log for the Week Ending March 20, 2005
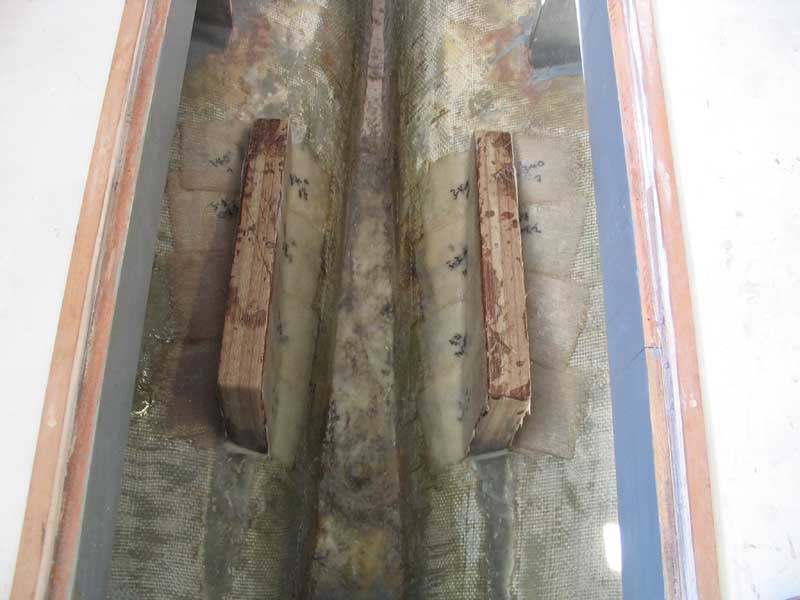
Click here for the details on fiberglassing the foundations. |
 After the 4-hour (elapsed) chore of preparing, cutting, and installing the
fiberglass, I continued by taking care of a small, yet important, project:
filling the holes left by the screws that I used to temporarily secure the
interior beadboard while the adhesive cured. This was one of those
irritating projects, but one that needed to get done so that I could move on to
begin the priming and painting process. After the 4-hour (elapsed) chore of preparing, cutting, and installing the
fiberglass, I continued by taking care of a small, yet important, project:
filling the holes left by the screws that I used to temporarily secure the
interior beadboard while the adhesive cured. This was one of those
irritating projects, but one that needed to get done so that I could move on to
begin the priming and painting process. |
|
Next, I continued by beginning work on the laminated cabin trunk overhead beams. I needed 5 or 6 of these beams to frame and support the overhead and thus complete the cabin trunk construction. Since I had delayed the ordering of my new mast so that I could get an accurate measurement from the new keel step to the mast partners (which would, of course, be defined by the actual coachroof position), it was time--past time, really--to get this project underway.
|
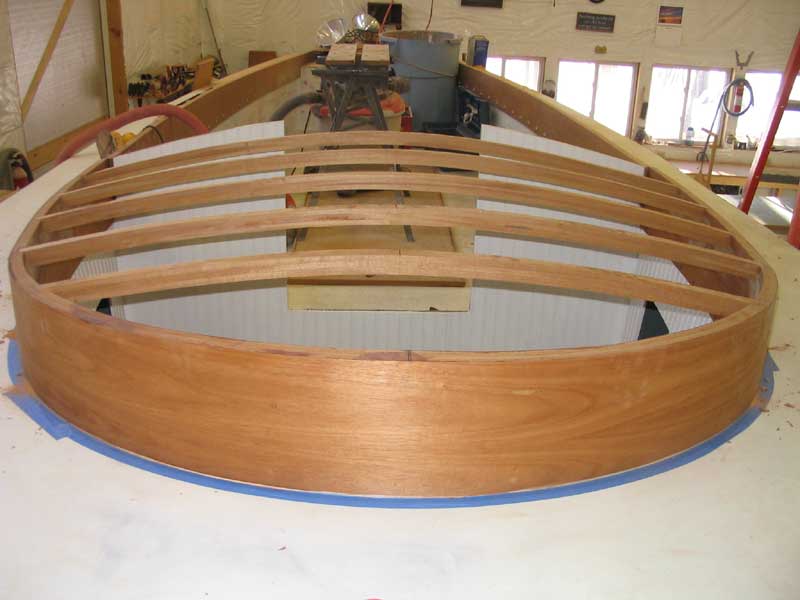 Over
the next three days--Tuesday, Wednesday, and Thursday-- I laminated the
remaining beams till I had six total. Each morning, I glued up two beams
and left them to cure till the next day. On Friday morning, the beams were
complete, so I spent some time at the planer cleaning up the beams and achieving
a consistent thickness through all six beams. Now, they were ready for
final fitting and installation, which I worked on Saturday. Over
the next three days--Tuesday, Wednesday, and Thursday-- I laminated the
remaining beams till I had six total. Each morning, I glued up two beams
and left them to cure till the next day. On Friday morning, the beams were
complete, so I spent some time at the planer cleaning up the beams and achieving
a consistent thickness through all six beams. Now, they were ready for
final fitting and installation, which I worked on Saturday.Click here to see more about cutting and fitting the cabin trunk beams. |
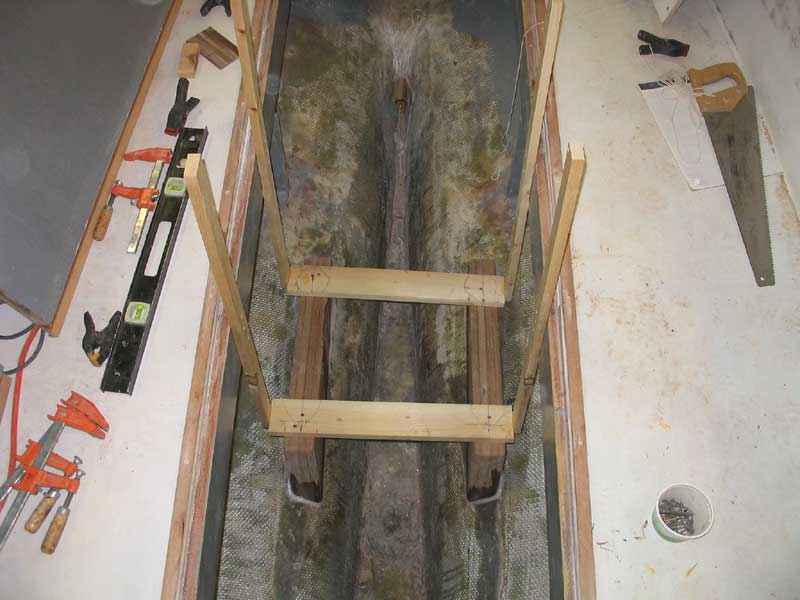
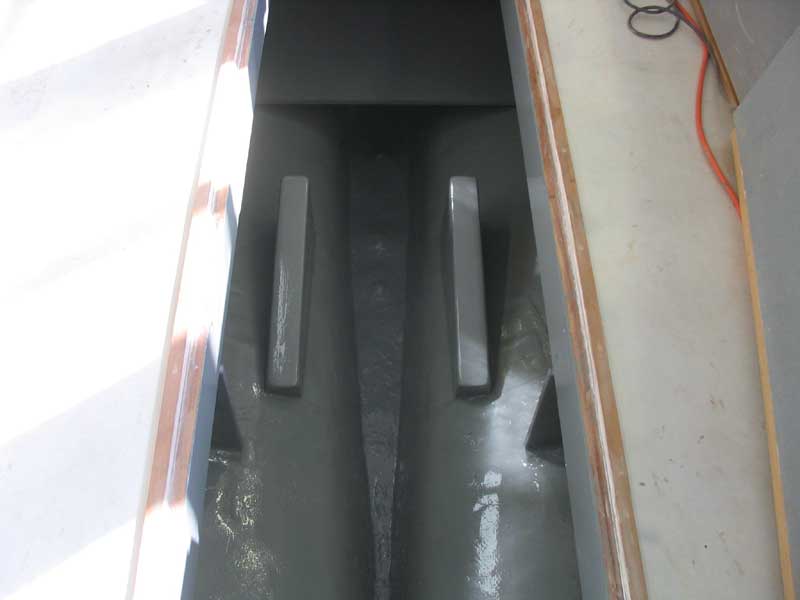 With
the engine foundations all tabbed securely in place, it was finally time to
paint out the remaining bilge areas with more gray Bilgekote. I took care of
this first thing on Friday morning, then covered the open area with the engine
hatches to keep dust out while I worked on other projects. With
the engine foundations all tabbed securely in place, it was finally time to
paint out the remaining bilge areas with more gray Bilgekote. I took care of
this first thing on Friday morning, then covered the open area with the engine
hatches to keep dust out while I worked on other projects. |
 Also
on Friday, I sanded all the primed beadboard to prepare it for subsequent coats
of white paint, and also sanded the inside and outside of the cabin trunk to
prepare for the initial coats of varnish. By the end of the day Friday, I
was ready to apply the white paint and varnish, a pleasing way to end the day.
I also added a coat of white paint to beadboard on the chainlocker bulkhead,
which had been in primer for some months now awaiting its companions in the main
cabin to be installed. Also
on Friday, I sanded all the primed beadboard to prepare it for subsequent coats
of white paint, and also sanded the inside and outside of the cabin trunk to
prepare for the initial coats of varnish. By the end of the day Friday, I
was ready to apply the white paint and varnish, a pleasing way to end the day.
I also added a coat of white paint to beadboard on the chainlocker bulkhead,
which had been in primer for some months now awaiting its companions in the main
cabin to be installed.Click here for more on the beadboard and cabin. It was a great pleasure to have a full week with no snowstorms, and no real interruptions to the construction progress, though I was out of the shop all day on Thursday. I hoped that the trend would continue in the coming few weeks, as I anticipated significant progress and passing several more milestones during that time. Stay tuned! |
|
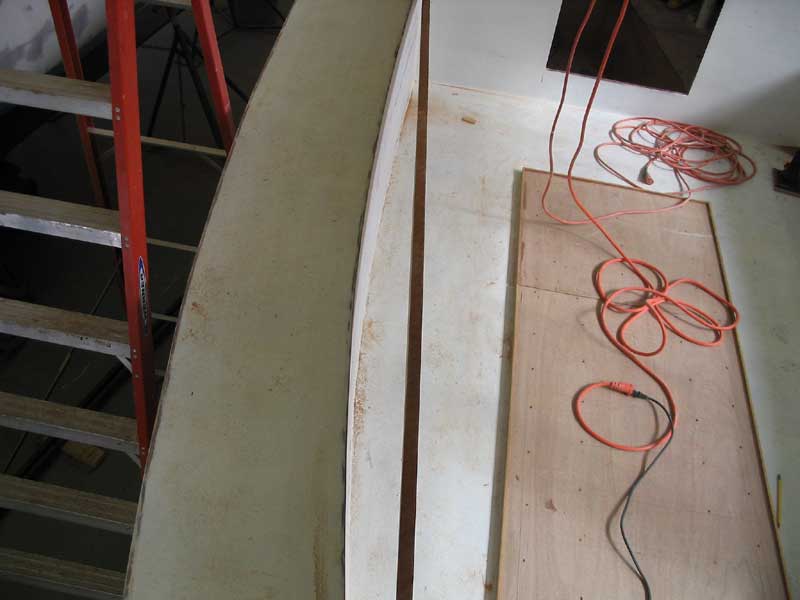
Log for the Week Ending March 27, 2005 Anxious to keep cabin trunk construction moving along, I began on Sunday morning by working on the new cabin trunk beams, which I had cut and fit roughly in place the day before (last week's update). With that work out of the way, I prepared the beams for final installation by routing a chamfer detail on the lower edges, and then sanding the beams through 220 grit. When the beams were all prepared, I installed them permanently in the slots in the cabin trunk. Click here to read more about the cabin trunk beams' installation. |
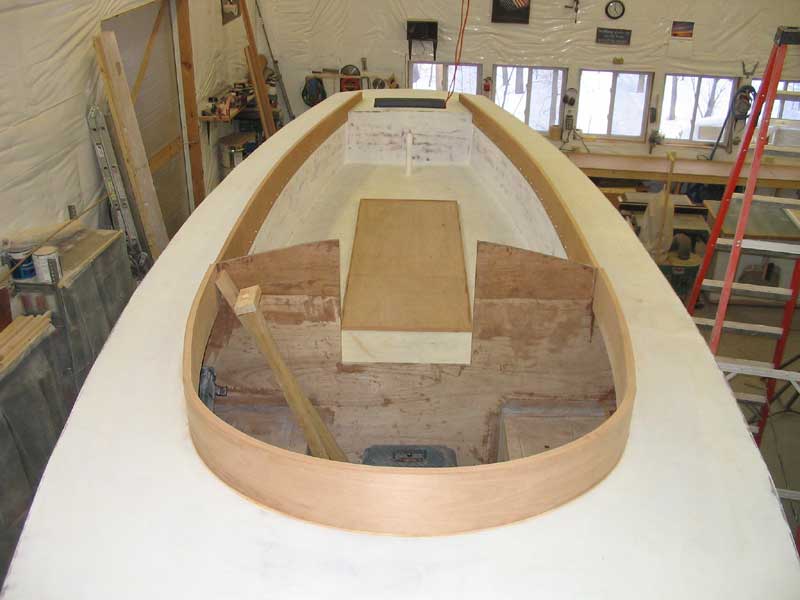
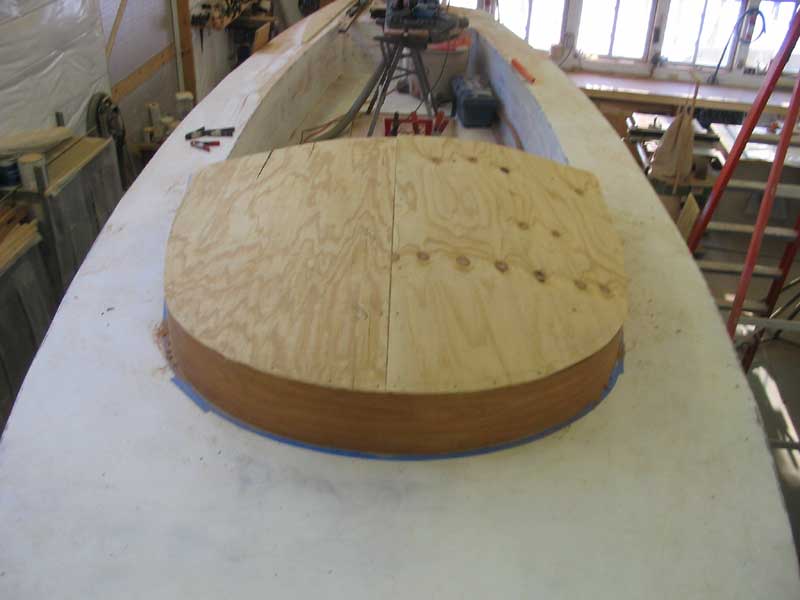 Monday
morning, I headed off to pick up two extra sheets of beaded plywood, which I
planned to use for the down-facing layer of the new coachroof. With the
two sheets in hand, I prepared the two pieces needed to cover the cabin trunk
beams; one side at a time, I temporarily installed a sheet of plywood and marked
the outline of the cabin trunk, then cut out the piece as needed. Monday
morning, I headed off to pick up two extra sheets of beaded plywood, which I
planned to use for the down-facing layer of the new coachroof. With the
two sheets in hand, I prepared the two pieces needed to cover the cabin trunk
beams; one side at a time, I temporarily installed a sheet of plywood and marked
the outline of the cabin trunk, then cut out the piece as needed. |
 It
seemed that the remainder of the week was lacking in major headlines, or
significant projects I could point to, but it was a very busy week in the shop
nonetheless. With plans indelibly set in place that included spraying
finish primer in the next week, both on the Daysailor and also on the Sanborn's
Dasein next door, I used the week to take care of many smaller aspects of
the project, including application of several coats of white paint on the
various beadboard pieces in the cabin and cabin trunk overhead, varnish
application on the cabin trunk, and several other small chores. I also had
several smaller, unrelated projects going on in the shop that I worked on, which
took quite a bit of my time. It
seemed that the remainder of the week was lacking in major headlines, or
significant projects I could point to, but it was a very busy week in the shop
nonetheless. With plans indelibly set in place that included spraying
finish primer in the next week, both on the Daysailor and also on the Sanborn's
Dasein next door, I used the week to take care of many smaller aspects of
the project, including application of several coats of white paint on the
various beadboard pieces in the cabin and cabin trunk overhead, varnish
application on the cabin trunk, and several other small chores. I also had
several smaller, unrelated projects going on in the shop that I worked on, which
took quite a bit of my time. |
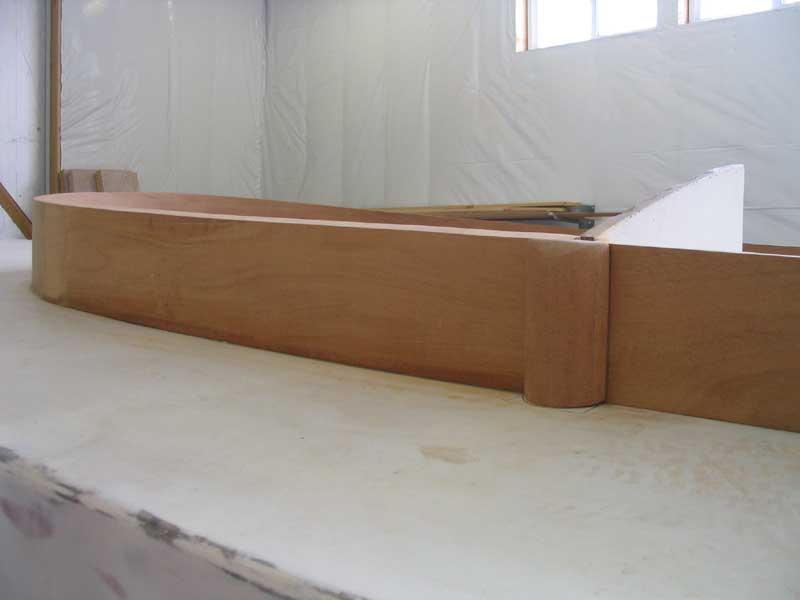
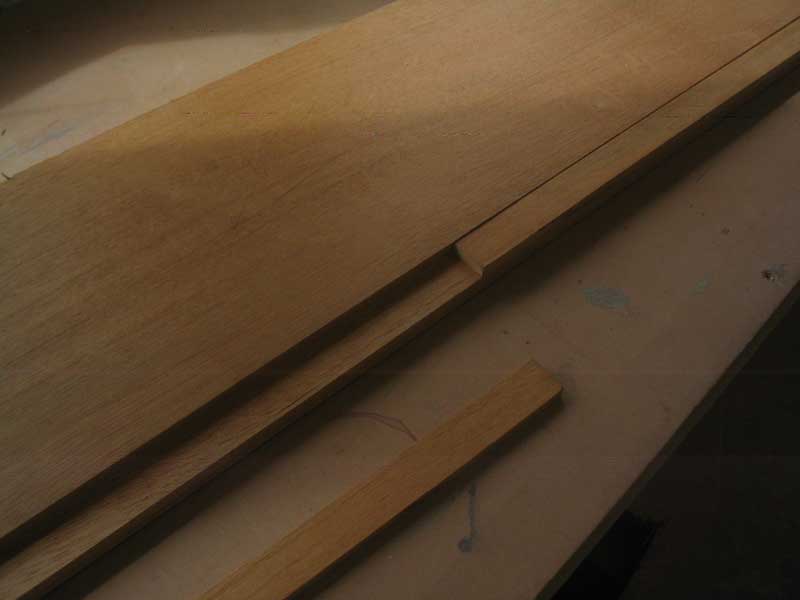
 Later
in the week, in preparation for final installation of the coachroof, I worked on
a couple trim pieces, which I fashioned as sort of structural knees running
between the inside edges of the cabin trunk and the overhead beam in way of the
mast partners. The main purpose of these two trim pieces was to cover the
inside seam where the pieces forming the cabin trunk met, but in reality they
would also help secure the whole structure together as well. This photo
shows the knees after shaping and application of one coat of varnish; I'll post
more about them next week. Later
in the week, in preparation for final installation of the coachroof, I worked on
a couple trim pieces, which I fashioned as sort of structural knees running
between the inside edges of the cabin trunk and the overhead beam in way of the
mast partners. The main purpose of these two trim pieces was to cover the
inside seam where the pieces forming the cabin trunk met, but in reality they
would also help secure the whole structure together as well. This photo
shows the knees after shaping and application of one coat of varnish; I'll post
more about them next week. |
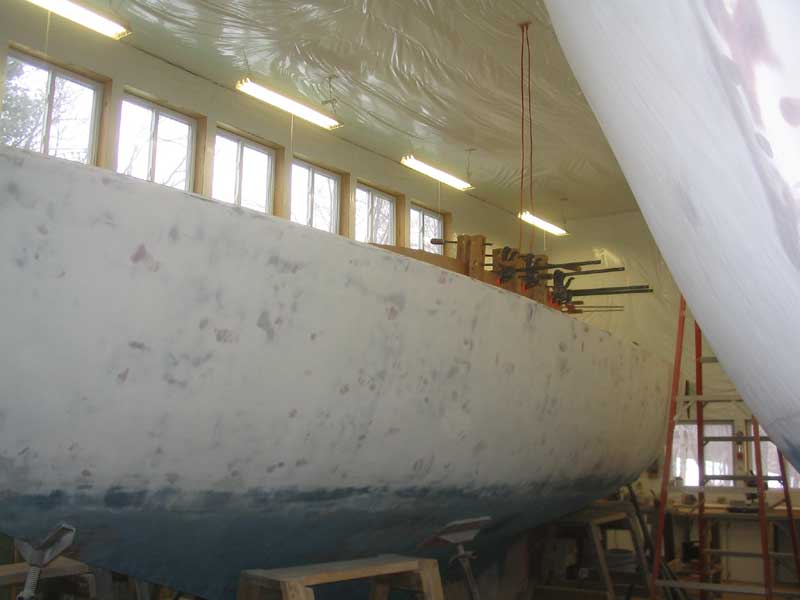
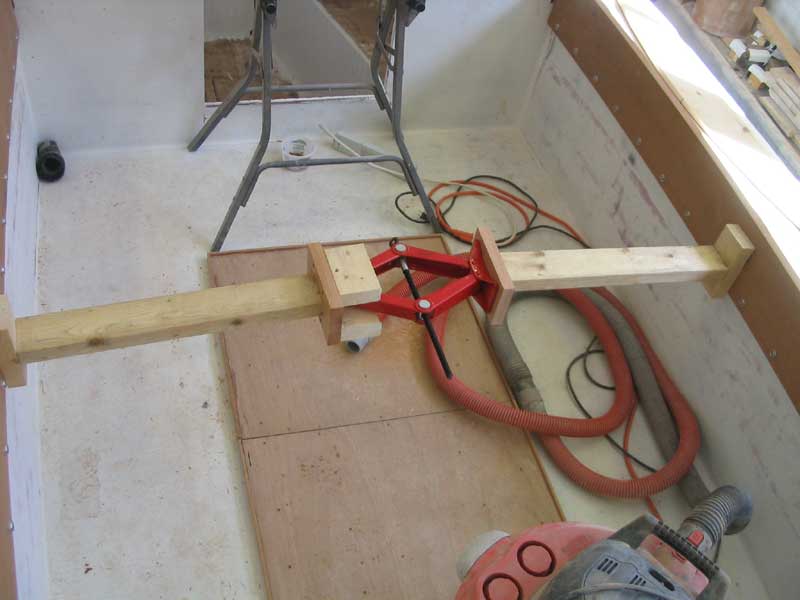 In
preparation for priming, painting, and engine installation, I removed the
cockpit coamings; the coamings also required finish work, sanding, and varnish,
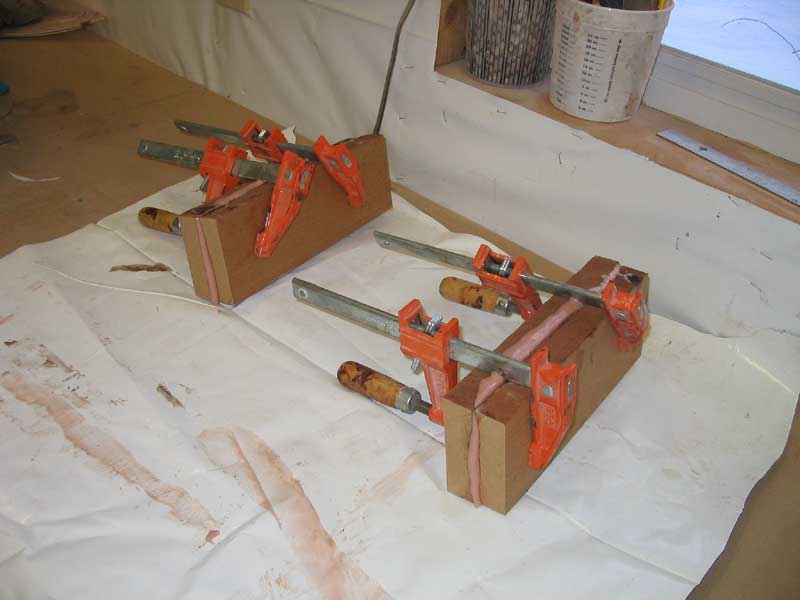
so it was time to remove them. Rather than fight with the silly jack
arrangement I had used during fitting, I purchased an inexpensive scissor jack
and built a dedicated rig to use for the coamings, both for their removal now
and for later installation. In
preparation for priming, painting, and engine installation, I removed the
cockpit coamings; the coamings also required finish work, sanding, and varnish,
so it was time to remove them. Rather than fight with the silly jack
arrangement I had used during fitting, I purchased an inexpensive scissor jack
and built a dedicated rig to use for the coamings, both for their removal now
and for later installation. |
|
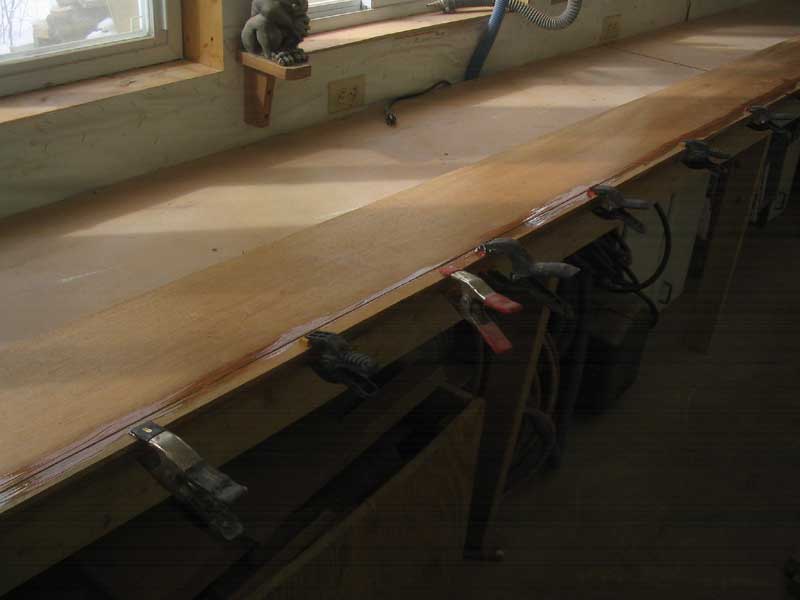
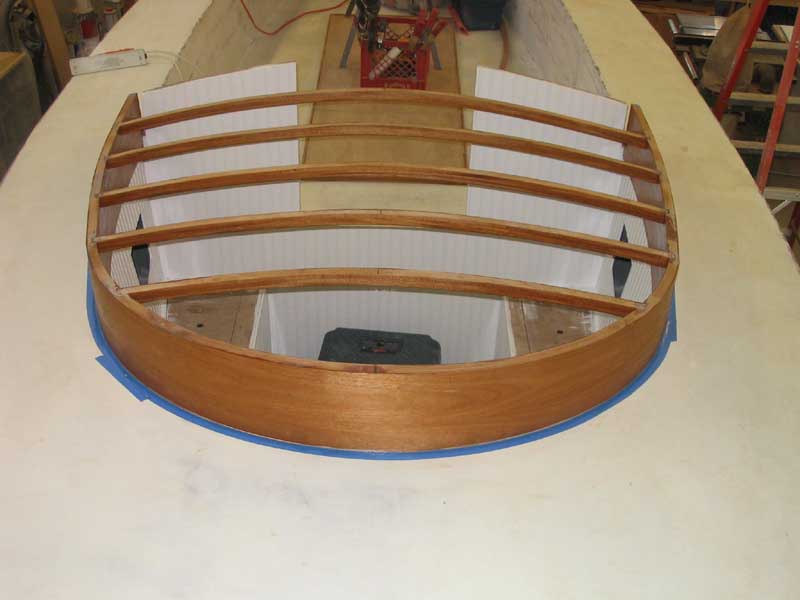
When the coamings were off, I routed edge details on the top edges, cut the after ends to their final shape, and finish sanded both pieces to 220 grit. Then, I began the long process of varnishing the coamings by applying the first of 10 coats of varnish needed. With two sides to varnish, I was looking at close to a months' elapsed time (at a day per coat, per side) before the varnish would be done. |
 On
Friday afternoon, with Nathan Sanborn's help, I lifted the new Vetus diesel up
into the cockpit, and prepared for final installation on the new engine
foundations. Saturday morning, I prepared the foundations for the
installation, by installing some threaded inserts in the foundations and then,
latte in the day, lowering the engine onto the foundations and securing it
loosely in place, awaiting final alignment and connections. On
Friday afternoon, with Nathan Sanborn's help, I lifted the new Vetus diesel up
into the cockpit, and prepared for final installation on the new engine
foundations. Saturday morning, I prepared the foundations for the
installation, by installing some threaded inserts in the foundations and then,
latte in the day, lowering the engine onto the foundations and securing it
loosely in place, awaiting final alignment and connections.Click here for more about the engine installation.
|