|
|
~MENU~ |
| Home |
| The Concept |
| The Boat |
| Bringing Her Home |
|
Weekly Progress Log |
|
Daysailor Projects |
| The Boat Barn |
| Resources |
| Other Sites |
| Email Tim |
|
|
|
From a Bare Hull: Interior (Page 7) |
|
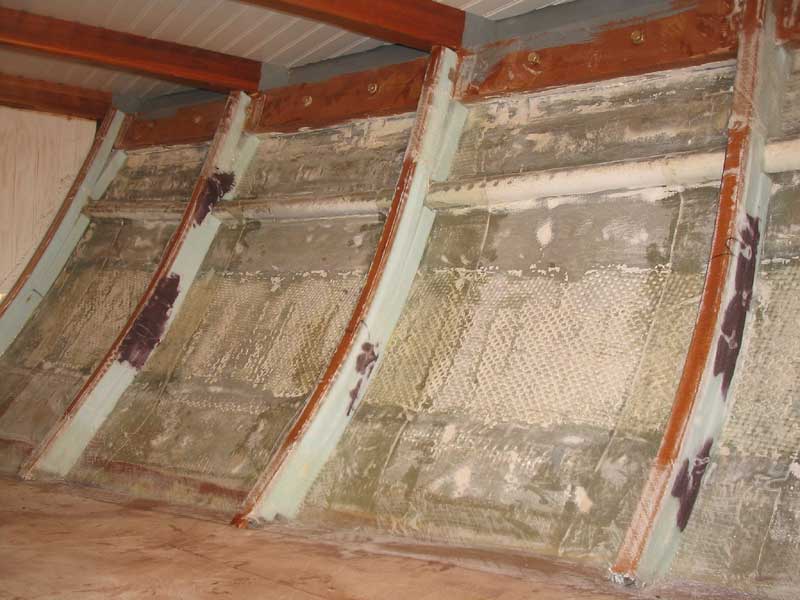
Ceiling Firring Strips I planned a wooden hull ceiling in the v-berth. The ceiling, besides being attractive and hiding the raw fiberglass of the hull, would also serve to hide some of the new wooden structural members, specifically the sheer clamp, from view. The eventual wooden strips of the ceiling would require attachment points to which to secure. To that end, I prepared to install some basic firring strips on the hull, which would provide the necessary support and screwing surface later. To begin, I first marked the locations of the new strips. Since there would eventually be a visual line of screw heads or bungs, I felt it was important that the strips appeared to be basically vertical, so I marked lines on the hull that followed a visually vertical line. |
 One
afternoon, I began work on the firring strips. In order to hide
completely the sheer clamp and the protruding nuts that secured it, the
strips had to be rather deep. To build up the material depth needed, I
decided to use more of the 1" blue insulation foam. I needed about 2"
of depth (more would be OK), so I began by cutting the foam into 2" wide
strips. This turned out to be too deep to bend properly into the
curvature of the hull; the foam broke when I attempted to press it into the
curve. One
afternoon, I began work on the firring strips. In order to hide
completely the sheer clamp and the protruding nuts that secured it, the
strips had to be rather deep. To build up the material depth needed, I
decided to use more of the 1" blue insulation foam. I needed about 2"
of depth (more would be OK), so I began by cutting the foam into 2" wide
strips. This turned out to be too deep to bend properly into the
curvature of the hull; the foam broke when I attempted to press it into the
curve. |
 To
get around this problem, I simply cut each strip into two strips, each about
1" square. The 1" strips bent easily to the hull shape. With a
hot glue gun, I installed first one strip of foam on the hull, then stacked
a second on top and glued that in place. I ran the second
strip of foam up onto the sheer clamp, creating a smooth curve between the
surface of the v-berth and the upper reaches of the overhead. Because
of the depth of the sheer clamp, the upper portion of the second strip of
foam did not fit closely to the first layer; this was unimportant, as all I
really cared about was the top surface, and the foam was only acting as a
mold for some later steps. To
get around this problem, I simply cut each strip into two strips, each about
1" square. The 1" strips bent easily to the hull shape. With a
hot glue gun, I installed first one strip of foam on the hull, then stacked
a second on top and glued that in place. I ran the second
strip of foam up onto the sheer clamp, creating a smooth curve between the
surface of the v-berth and the upper reaches of the overhead. Because
of the depth of the sheer clamp, the upper portion of the second strip of
foam did not fit closely to the first layer; this was unimportant, as all I
really cared about was the top surface, and the foam was only acting as a
mold for some later steps.
I repeated this process for each of the locations required on each side of the hull, until all the foam bases were in place. |
|
I continued by adding a couple thin strips of wood over the top of the foam. I had some thin scraps of the correct width lying around, and with a hot glue gun I bent two of these strips into place on top of the foam at each location. The wood would provide the appropriate bite for screws that would eventually secure the actual ceiling strips. |
 Once
the wood was installed, I pressed on and fiberglassed the firring strips
permanently in place. Because these pieces were entirely
non-structural in nature, and since the fiberglass was only needed to affix
them properly, I didn't bother with fillets, smoothly rounded contours, and
other important steps that I might have done had the pieces needed to be
perfectly installed. I applied one layer of 10 oz. fiberglass cloth
over each strip, using some 10" wide tape that I had in stock for the chore. Once
the wood was installed, I pressed on and fiberglassed the firring strips
permanently in place. Because these pieces were entirely
non-structural in nature, and since the fiberglass was only needed to affix
them properly, I didn't bother with fillets, smoothly rounded contours, and
other important steps that I might have done had the pieces needed to be
perfectly installed. I applied one layer of 10 oz. fiberglass cloth
over each strip, using some 10" wide tape that I had in stock for the chore.
|
 It
was surprisingly difficult to install the fiberglass, but eventually I got
it done, despite some unattractive areas that never would have suited for a
structural application. For this application, the work was fine.
I left the fiberglass to cure, and then lightly sanded the new material to
smooth the surface and rough it up slightly to accept paint. It
was surprisingly difficult to install the fiberglass, but eventually I got
it done, despite some unattractive areas that never would have suited for a
structural application. For this application, the work was fine.
I left the fiberglass to cure, and then lightly sanded the new material to
smooth the surface and rough it up slightly to accept paint. |
 To
finish off the job--the final step before installing wooden ceiling
strips--I painted out the new structure and the surrounding hull with the
same gray Bilgekote paint that I used elsewhere. After so long with
the raw, exposed fiberglass, it was a pleasure to paint out yet one more
area and bring the boat ever closer to completion. To
finish off the job--the final step before installing wooden ceiling
strips--I painted out the new structure and the surrounding hull with the
same gray Bilgekote paint that I used elsewhere. After so long with
the raw, exposed fiberglass, it was a pleasure to paint out yet one more
area and bring the boat ever closer to completion.Installing the actual ceiling strips would happen a bit later in the process, along with much of the other final trim. |
|
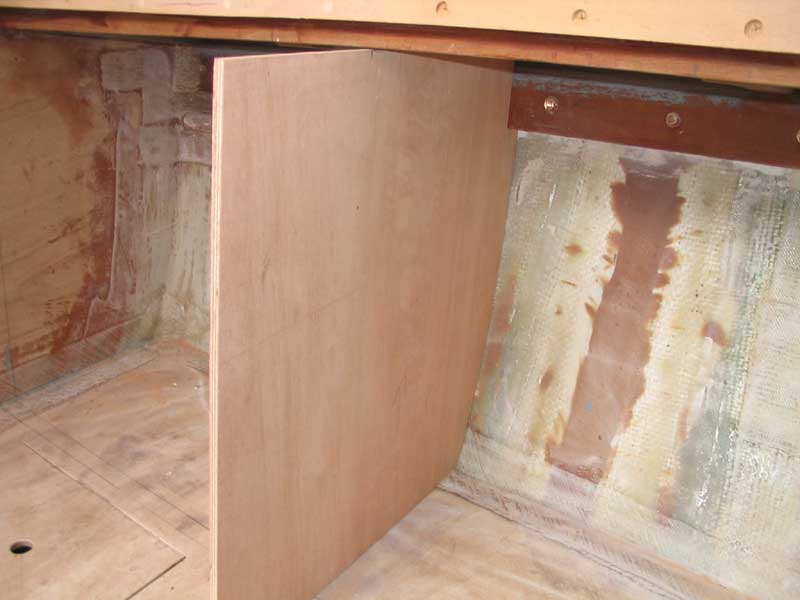
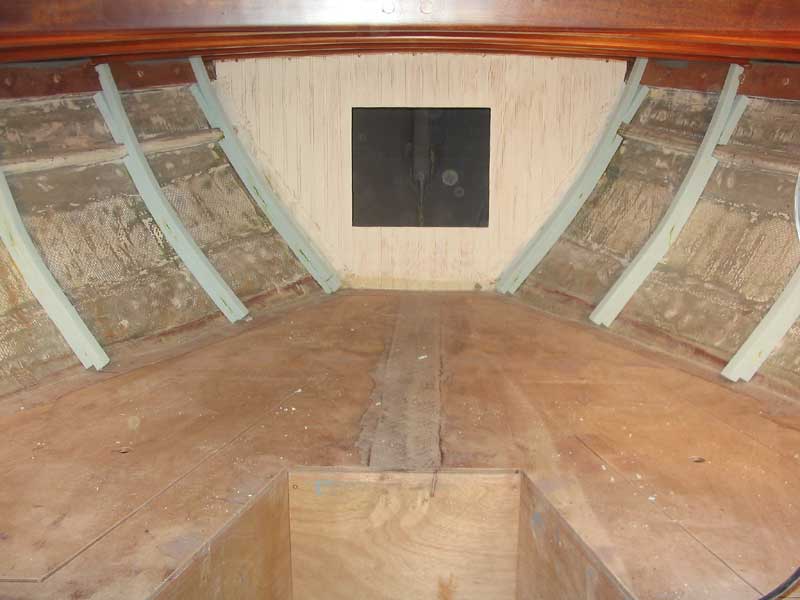
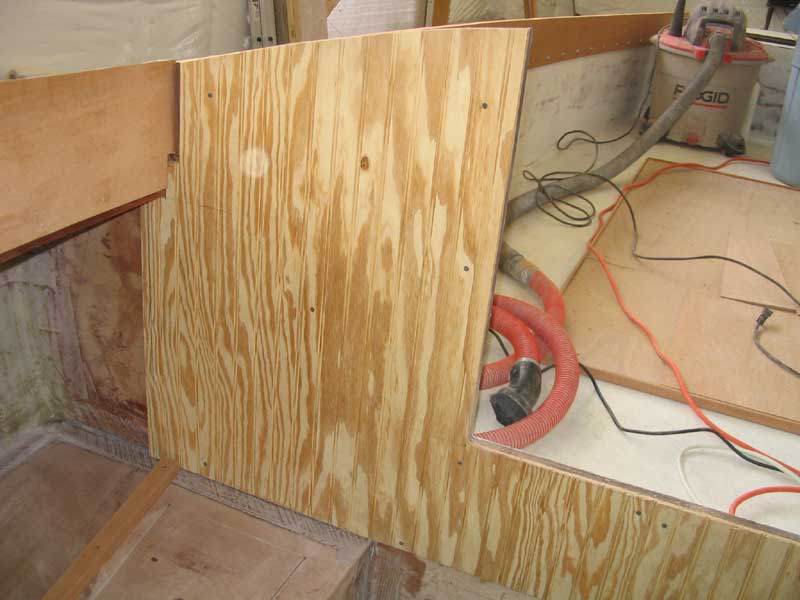
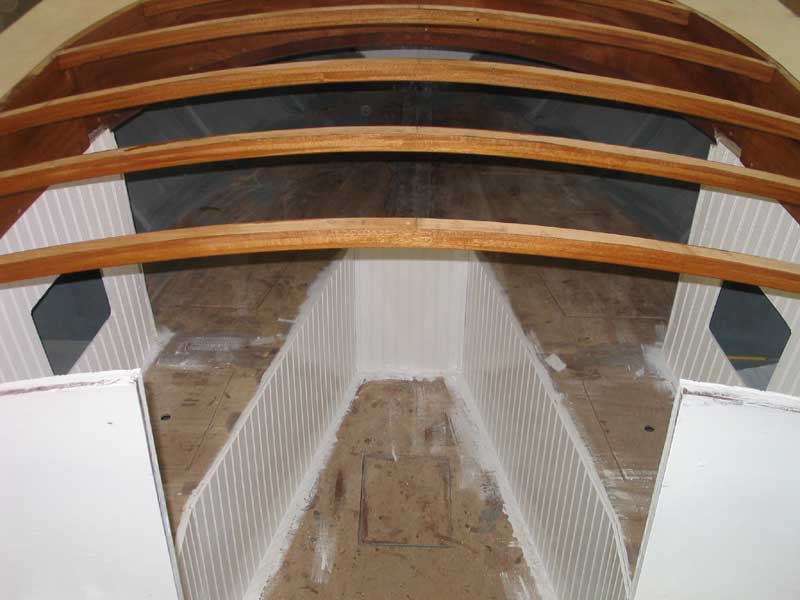
Settee Backs and Lockers Once I completed the installation of the main portion of the cabin trunk, though excepting the support beams and overhead, I pressed onwards with some minor interior construction: finishing off the settee backs and lockers therein.
After some simple layout, I began by cutting some 9mm Meranti plywood to a rectangular shape that matched the overall dimensions of the space in which the bulkheads were to fit. With the bulkhead in place, I scribed the shape of the hull onto the outside edges of each sheet and cut the curves with a jigsaw. |
|
The inner edge of the bulkheads required an angle cut, since the settee backs would slope gently from bottom to top for a more comfortable seating position. I had previously marked a line on the settee tops directly plumb beneath the carlins above, which formed the top edge of the settee backs, and now I struck a new line 1" further out to provide the angle necessary. Then, I cut off the excess bulkhead to match that angle. |
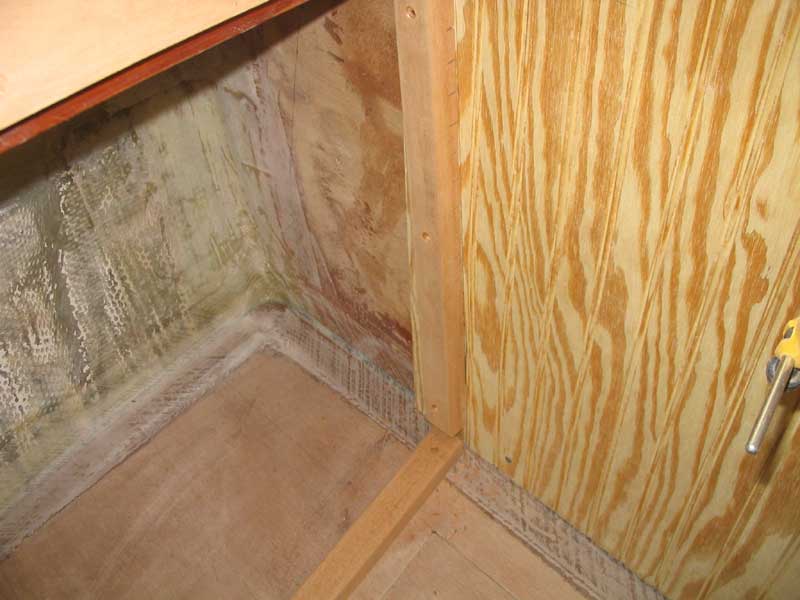
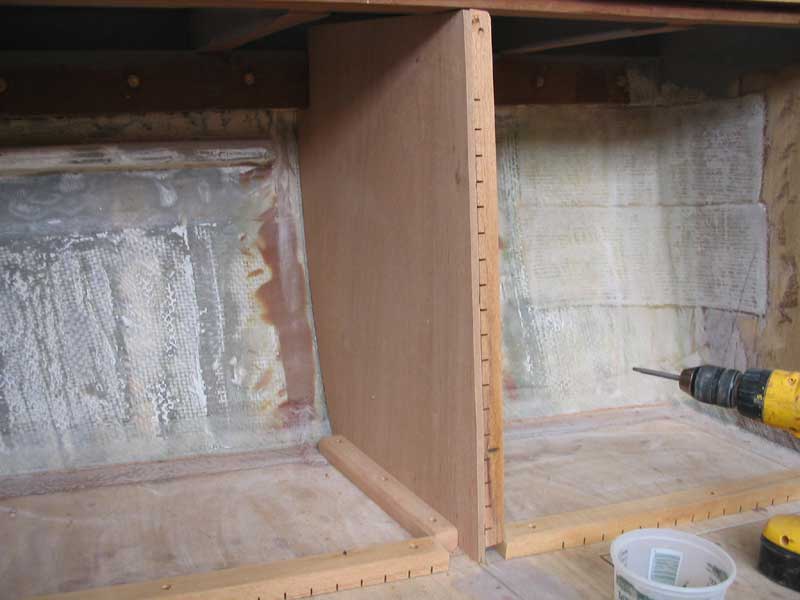 To
secure the bottom edge of the bulkheads, I screwed mahogany cleats to the
settee tops, and then screwed the plywood bulkheads directly to these
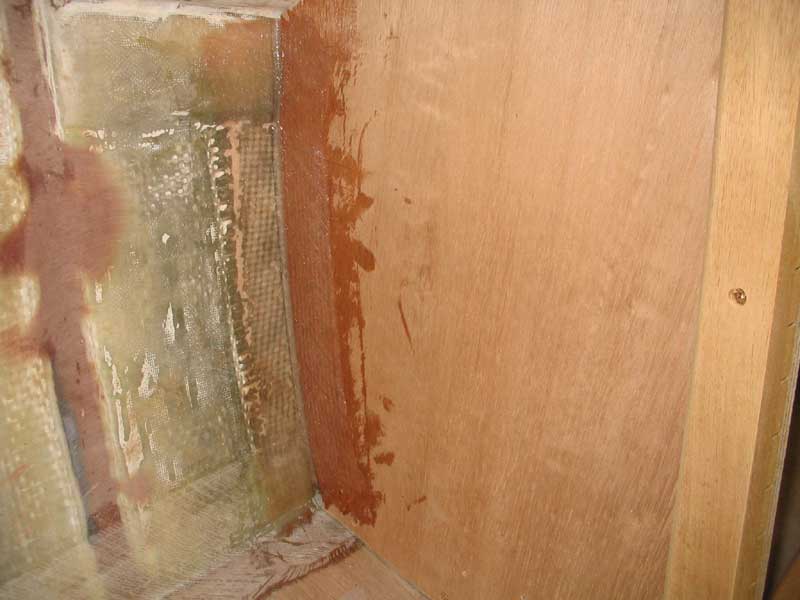
cleats. Finally, I tabbed the hull edge of the bulkheads to the hull
on each side with some 15 oz. biaxial tape and epoxy resin. To
secure the bottom edge of the bulkheads, I screwed mahogany cleats to the
settee tops, and then screwed the plywood bulkheads directly to these
cleats. Finally, I tabbed the hull edge of the bulkheads to the hull
on each side with some 15 oz. biaxial tape and epoxy resin. |
 Next,
I milled and installed a series of mahogany cleats that would support the
settee backs. I installed the cleats at the base of each of the
newly-formed lockers one each side and a vertical cleat on the new
bulkhead/dividers. Before I could add a final cleat on the existing
midships bulkhead, however, I decided to apply the beadboard paneling to
that bulkhead, so that it could slip behind the settee backs. Next,
I milled and installed a series of mahogany cleats that would support the
settee backs. I installed the cleats at the base of each of the
newly-formed lockers one each side and a vertical cleat on the new
bulkhead/dividers. Before I could add a final cleat on the existing
midships bulkhead, however, I decided to apply the beadboard paneling to
that bulkhead, so that it could slip behind the settee backs. |
 With
some basic measurements of the area as a template, I marked out the shape to
be cut on a sheet of the beadboard plywood and cut out the shape as needed.
I left excess at the top edge and in the companionway opening, as I could
easily trim this exactly later with a router. After checking the fit
of the first half (two sections were required to cover the entire bulkhead),
I determined that the opposite side was close to a mirror image, so I used
the first piece to template the second one, and cut that out as well. With
some basic measurements of the area as a template, I marked out the shape to
be cut on a sheet of the beadboard plywood and cut out the shape as needed.
I left excess at the top edge and in the companionway opening, as I could
easily trim this exactly later with a router. After checking the fit
of the first half (two sections were required to cover the entire bulkhead),
I determined that the opposite side was close to a mirror image, so I used
the first piece to template the second one, and cut that out as well. |
 I
installed the beadboard with high strength construction adhesive and held
the sheets temporarily in place with some drywall screws; I could fill the
holes later. When the two sheets were installed, I trimmed the top
edges and companionway opening with a router and a straight-cutting bearing
bit. I
installed the beadboard with high strength construction adhesive and held
the sheets temporarily in place with some drywall screws; I could fill the
holes later. When the two sheets were installed, I trimmed the top
edges and companionway opening with a router and a straight-cutting bearing
bit. |
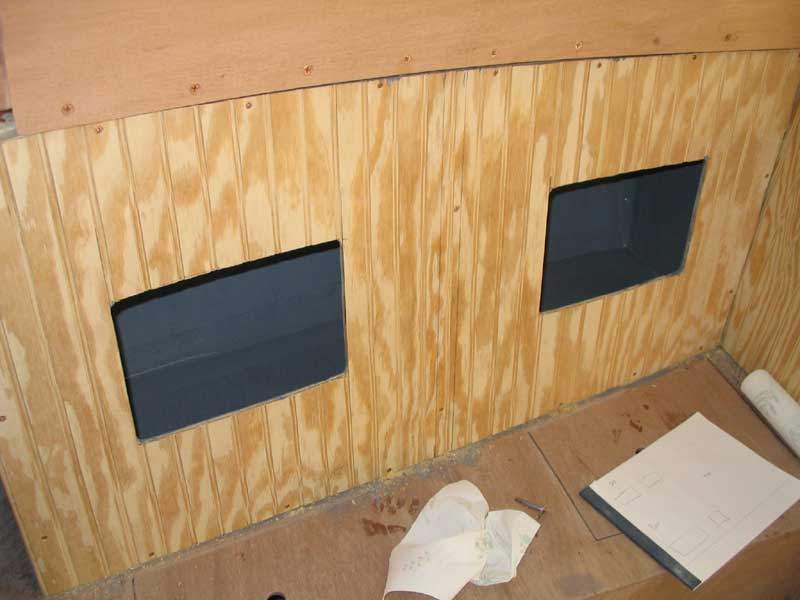
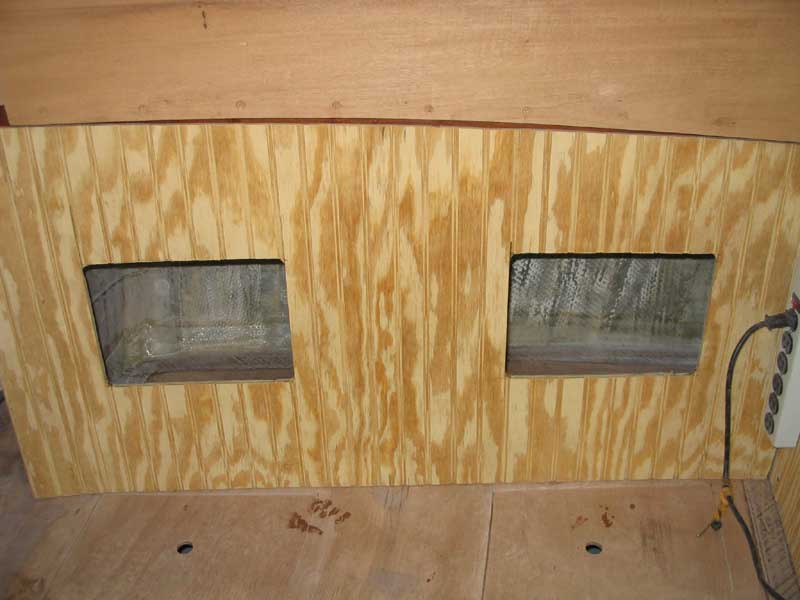
 With
that done, I could install the final cleats needed to support the settee
backs--one on each side on the midships bulkhead. After making some
measurements, I cut two sections of beadboard, one for each side, that fit
the openings. To provide access to the lockers, I cut two rectangular
openings in each side. Because at this point I was waiting to apply
fiberglass to the bulkheads at their intersection with the hull, I left the
new settee backs uninstalled for the moment. I also wanted to paint
out the insides of the new lockers before final installation. With
that done, I could install the final cleats needed to support the settee
backs--one on each side on the midships bulkhead. After making some
measurements, I cut two sections of beadboard, one for each side, that fit
the openings. To provide access to the lockers, I cut two rectangular
openings in each side. Because at this point I was waiting to apply
fiberglass to the bulkheads at their intersection with the hull, I left the
new settee backs uninstalled for the moment. I also wanted to paint
out the insides of the new lockers before final installation. |
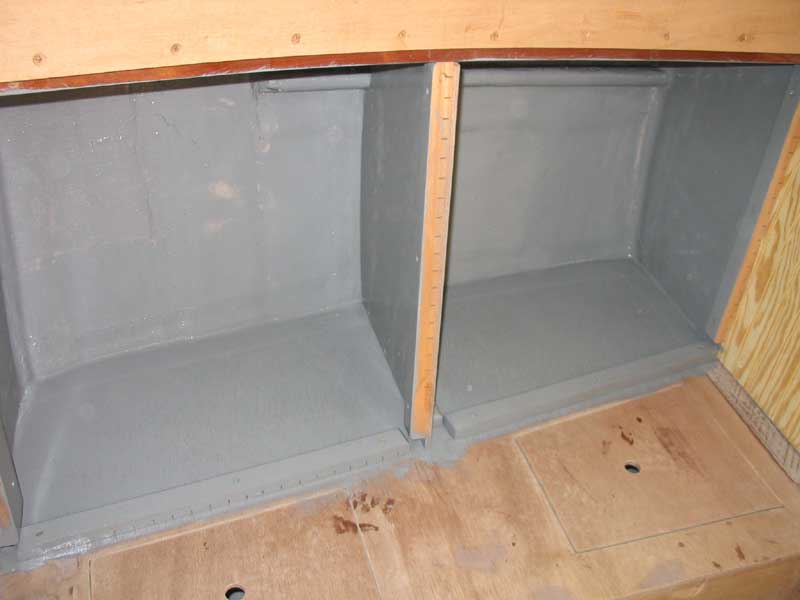
 Once
the fiberglass cured, I sanded the new tabbing and prepared the areas inside
for paint. As always, I chose to paint out all locker areas and
exposed fiberglass, partly for improved appearance and partly to seal the
raw materials and provide a smoother, cleaner surface for ease of future
maintenance. Once
the fiberglass cured, I sanded the new tabbing and prepared the areas inside
for paint. As always, I chose to paint out all locker areas and
exposed fiberglass, partly for improved appearance and partly to seal the
raw materials and provide a smoother, cleaner surface for ease of future
maintenance. |
 I
painted out the areas with a coat of gray bilgekote, as I had used on other
surfaces. The new settee back lockers represented one of the last
unpainted areas inside the hull, and I relished the opportunity to finally
cover the raw fiberglass, tabbing, and epoxied repairs for good. I
also applied a coat of the gray paint to the back side of the beadboard
plywood that would form the actual settee backs. I
painted out the areas with a coat of gray bilgekote, as I had used on other
surfaces. The new settee back lockers represented one of the last
unpainted areas inside the hull, and I relished the opportunity to finally
cover the raw fiberglass, tabbing, and epoxied repairs for good. I
also applied a coat of the gray paint to the back side of the beadboard
plywood that would form the actual settee backs. |
|
|
 When
the paint had dried, I continued installing the settee backs. First, I
applied a bead of exterior construction adhesive, a strong product well
suited for the task. Then I installed the settee backs with bronze
screws, driving the screws into the various wooden cleats that I had
installed. All that remained now was to paint out the new beadboard, a
finising process that would occur somewhat later. When
the paint had dried, I continued installing the settee backs. First, I
applied a bead of exterior construction adhesive, a strong product well
suited for the task. Then I installed the settee backs with bronze
screws, driving the screws into the various wooden cleats that I had
installed. All that remained now was to paint out the new beadboard, a
finising process that would occur somewhat later. |
|
|
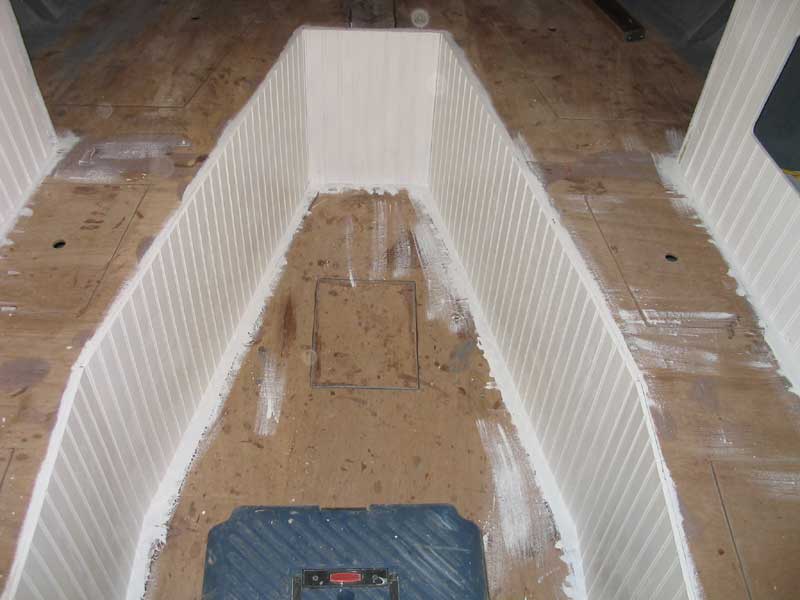
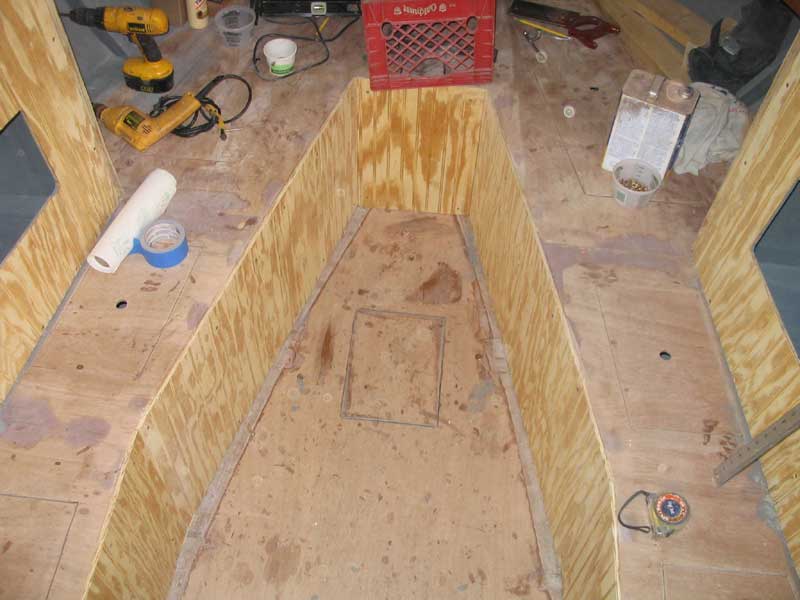 To
complete the major work in the interior, I cut, fit, and installed (in a bed
of construction adhesive) the last remaining sections of beadboard. I
covered the forward side of the chainplate bulkheads, which would be exposed
in the completed interior, and also the lower portions of the settee
structure, covering the structural Meranti plywood. This process took
a couple hours' worth of cutting and fitting. To
complete the major work in the interior, I cut, fit, and installed (in a bed
of construction adhesive) the last remaining sections of beadboard. I
covered the forward side of the chainplate bulkheads, which would be exposed
in the completed interior, and also the lower portions of the settee
structure, covering the structural Meranti plywood. This process took
a couple hours' worth of cutting and fitting. |
 A
few days later, I continued by sanding all the beadboard, after having
filled the screw holes left behind during installation. After cleaning
up, I applied a coat of white primer, drastically changing the appearance of
the cabin. A
few days later, I continued by sanding all the beadboard, after having
filled the screw holes left behind during installation. After cleaning
up, I applied a coat of white primer, drastically changing the appearance of
the cabin.
|
|
|
 When the primer dried, I sanded it with 220
paper, and applied the first of several coats of a premium semi-gloss
interior paint in bright white. Over the next week or so, I applied
three finish coats of paint, sanding between coats, until I was pleased with
the quality of the finish and prepared to call that portion of the job
complete. When the primer dried, I sanded it with 220
paper, and applied the first of several coats of a premium semi-gloss
interior paint in bright white. Over the next week or so, I applied
three finish coats of paint, sanding between coats, until I was pleased with
the quality of the finish and prepared to call that portion of the job
complete. |
|
|