|
|
~MENU~ |
| Home |
| The Concept |
| The Boat |
| Bringing Her Home |
|
Weekly Progress Log |
|
Daysailor Projects |
| The Boat Barn |
| Resources |
| Other Sites |
| Email Tim |
|
|
|
From a Bare Hull: Interior (Page 8) |
|
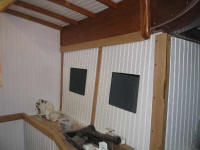
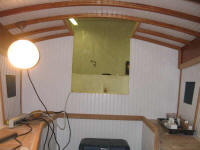
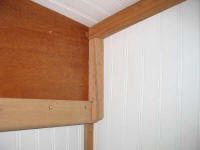
Interior Trim and Finish With all the major interior components installed, I could move on to some of the trim pieces required to cover edges and so forth. As small as the interior was, it was still surprising how many pieces of trim there were--and how long it took to fabricate and install them. I used a variety of trim pieces to cover various areas. In keeping with the nature of other wooden interior components, I beveled a nice chamfer on the exposed edges of the trim pieces to match.
|
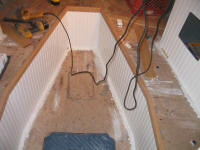 Many
of the other pieces of trim were much thinner, built from 1/4" stock.
Since securing these with hidden screws was a problem, I decided to glue
them in place, and to clamp them with temporary screws. I used
ordinary drywall screws for this temporary use, but they would be removed
later. Many
of the other pieces of trim were much thinner, built from 1/4" stock.
Since securing these with hidden screws was a problem, I decided to glue
them in place, and to clamp them with temporary screws. I used
ordinary drywall screws for this temporary use, but they would be removed
later. |
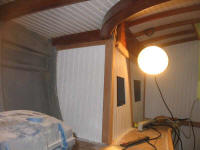 Each piece of trim required a several-step process, including conception,
milling the stock roughly to size, exact fitting, final milling and sanding,
and then installation. As a result, progress was fairly slow.
However, after a dedicated effort and a firm goal, I managed to get all the
trim build after one more full day of work, with the exception of some small
pieces needed to cover the plywood seams in the overhead. Each piece of trim required a several-step process, including conception,
milling the stock roughly to size, exact fitting, final milling and sanding,
and then installation. As a result, progress was fairly slow.
However, after a dedicated effort and a firm goal, I managed to get all the
trim build after one more full day of work, with the exception of some small
pieces needed to cover the plywood seams in the overhead. |
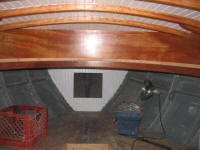 When
all the trim was installed, and once all the glue had cured, I removed all
the temporary drywall screws and bored 3/8" holes in those locations with a
Forstner bit. T hen, I cut over 100 plugs at my drill press, and,
armed with some yellow glue and a container full of bungs, I installed
100 bungs in the various locations in the trim, tapping each bung in till it
hit bottom. I left the bungs to dry overnight, then chiseled and
sanded away the excess, leaving a smooth surface. I chipped a few of
the bungs with the chisel, so I bored them out again and installed new ones. When
all the trim was installed, and once all the glue had cured, I removed all
the temporary drywall screws and bored 3/8" holes in those locations with a
Forstner bit. T hen, I cut over 100 plugs at my drill press, and,
armed with some yellow glue and a container full of bungs, I installed
100 bungs in the various locations in the trim, tapping each bung in till it
hit bottom. I left the bungs to dry overnight, then chiseled and
sanded away the excess, leaving a smooth surface. I chipped a few of
the bungs with the chisel, so I bored them out again and installed new ones. |
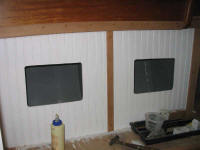 With
most of the trim installed, the cabin looked pretty good. Of course, I
needed to still apply varnish to all the new trim, add one more coat of
varnish to the previously-varnished surfaces, and build a cabin sole.
I also still had the v-berth ceiling (hull liner) to build. I looked
forward to completing these remaining projects over the next few weeks, in
and amongst the myriad other chores still waiting for completion (and, in
many cases, commencement). With
most of the trim installed, the cabin looked pretty good. Of course, I
needed to still apply varnish to all the new trim, add one more coat of
varnish to the previously-varnished surfaces, and build a cabin sole.
I also still had the v-berth ceiling (hull liner) to build. I looked
forward to completing these remaining projects over the next few weeks, in
and amongst the myriad other chores still waiting for completion (and, in
many cases, commencement).Later, I applied varnish to the trim. Details elsewhere in this site. |
|
V-Berth Ceiling In nautical nomenclature, a ceiling, of course, refers to a liner against the sides of the hull. I had planned a ceiling all along, and some time ago had installed the support strips against the hull. Now it was time to begin the actual installation. I chose cypress as my ceiling material--a traditional choice. I planned to install a wider board at the top, which would fit around the deck beams and hide the uppermost portion of the hull. To offset these pieces, I chose to build them of mahogany. I resawed a board into 1/4" thicknesses, and then began the laborious process of cutting and fitting it around the beams. This process, which took most of the day for two pieces, was frustrating and challenging, since the space was so confined. Eventually, I got the two pieces to fit, but awaited installation until I could get some fasteners appropriate for the job. I ordered some #6 x 3/4 bronze round head screws to install the ceiling, and once they arrived I installed the two top mahogany boards over which I had labored so. Then, I ignored the project for some time, dreading the application of dozens of tiny strips of wood--not to mention milling the wood in the first place. |
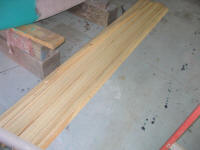 Eventually, though, it was time to address the ceiling. With seven
cypress boards on hand, which I had previously planed smooth on both sides,
I began the process of milling the ceiling strips. The only cypress
lumber I could get was in 4" widths and 8' long, with very rough edges;
several pieces even had the wane and bark on one end. The size and
condition of the boards, as well as the diminutive quantity, limited my
options as far as the size of the ceiling strips. In ordering, I had
planned on resawing the planks into three 1/4" thicknesses, and then milling
three strips out of the width of the board. Eventually, though, it was time to address the ceiling. With seven
cypress boards on hand, which I had previously planed smooth on both sides,
I began the process of milling the ceiling strips. The only cypress
lumber I could get was in 4" widths and 8' long, with very rough edges;
several pieces even had the wane and bark on one end. The size and
condition of the boards, as well as the diminutive quantity, limited my
options as far as the size of the ceiling strips. In ordering, I had
planned on resawing the planks into three 1/4" thicknesses, and then milling
three strips out of the width of the board. |
|
After measuring the boards, I decided that I could indeed squeeze this number of pieces out of most of the raw stock, so I began by straightening one edge of each board with a circular saw and straightedge--one of my all-time favorite chores. With that complete, I cut three strips, each about 1-1/8" wide, from each board, longitudinally. Finally, I resawed each strip into three 1/4" strips that I would use for the ceiling. |
|
A few days later, I began the long process of sanding the strips. Since I planned only a basic wipe-on tung oil finish for the ceiling, I fortunately did not have to worry about making each strip perfect. Instead, I concentrated on removing the saw marks and obtaining a generally clean and smooth surface. I sanded each strip with 120 grit paper on a vibrating sander, working on the exposed face only, and just easing the top corners to remove splinters and sharp edges. Sanding each strip required 2-3 minutes of time, so it was a fairly slow process. |
 Over the period of a couple days, working an hour or so each day, I sanded
about 30 of the strips, or about half of the total number milled. At
this point, I decided to try my hand at installation; the extreme
frustrations of the initial trim strips' installation remained heavy on my
mind. Over the period of a couple days, working an hour or so each day, I sanded
about 30 of the strips, or about half of the total number milled. At
this point, I decided to try my hand at installation; the extreme
frustrations of the initial trim strips' installation remained heavy on my
mind.
To install, I measured the length of the space, beginning at the top. I found that the hull span widened towards the bottom, so the strips would have to grow correspondingly, but it looked like I could install several strips of the same length before going up to a larger size; the unevenness at the ends of the strips could be covered with trim. Unless I wanted to laboriously cut and fit each piece, which wasn't going to happen accurately, the trim was required. |
|
With 6 strips cut to the first length--three for each side--I began installation. The clearance inside the v-berth was tight, and it was easy to cramp up while attempting to hunch over and work. Otherwise, installation went surprisingly well, if rather slowly and with some tedium. Each strip required five screws, preceded by predrilling the holes. I installed three on one side, then three on the other side, butting the after ends of the strips closely to the bulkhead. |
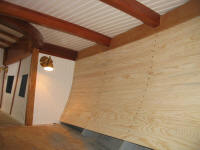 Pleased with the progress and with the look of the new ceiling, I pressed
on, and after a couple hours I had installed about 12 strips on each
side--covering a little over half of the shortest height. Yes, the
sheer of the hull also meant that the height to be covered at the forward
end was substantially greater than that at the after end. At this
point, I ran out of sanded strips, so I called it quits. Pleased with the progress and with the look of the new ceiling, I pressed
on, and after a couple hours I had installed about 12 strips on each
side--covering a little over half of the shortest height. Yes, the
sheer of the hull also meant that the height to be covered at the forward
end was substantially greater than that at the after end. At this
point, I ran out of sanded strips, so I called it quits. |
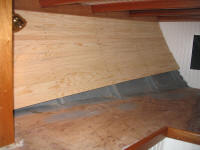 The next day, I sanded up enough strips to finish the bulk of the
job--another 16--and installed them. I used the same #6 x 3/4" bronze
round head screws as before, driving the slotted screws in by hand (and of
course lining up the slots vertically). Eight more strips per side
brought me down to the bottom at the after end, and also marked the end of
my screw supply, having expended 200 so far. I had to stop work again
to await new screws, which were not available locally. The stoppage
would also give me a chance to sand up the final boards needed to complete
the job. The next day, I sanded up enough strips to finish the bulk of the
job--another 16--and installed them. I used the same #6 x 3/4" bronze
round head screws as before, driving the slotted screws in by hand (and of
course lining up the slots vertically). Eight more strips per side
brought me down to the bottom at the after end, and also marked the end of
my screw supply, having expended 200 so far. I had to stop work again
to await new screws, which were not available locally. The stoppage
would also give me a chance to sand up the final boards needed to complete
the job.
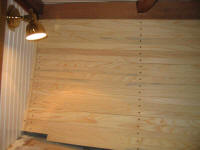
To complete the installation, I applied the remaining strips, letting them die out naturally along the bottom edge where the cushions would eventually hide the staggered joints, and then applied cypress trim to the forward and after edges of the strips. Next: final finishing with tung oil. |
