|
|
~MENU~ |
| Home |
| The Concept |
| The Boat |
| Bringing Her Home |
|
Weekly Progress Log |
|
Daysailor Projects |
| The Boat Barn |
| Resources |
| Other Sites |
| Email Tim |
|
|
| From a Bare Hull: Cabin Trunk (Page 6) |
|
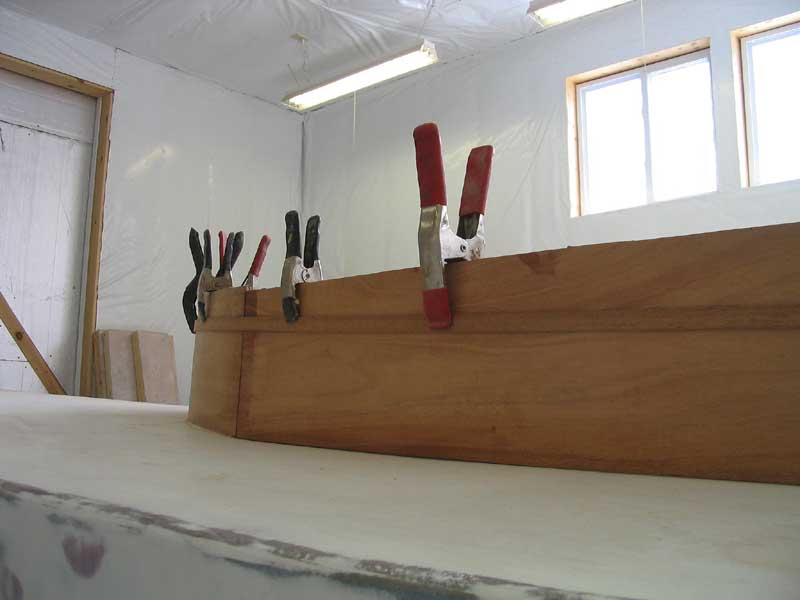
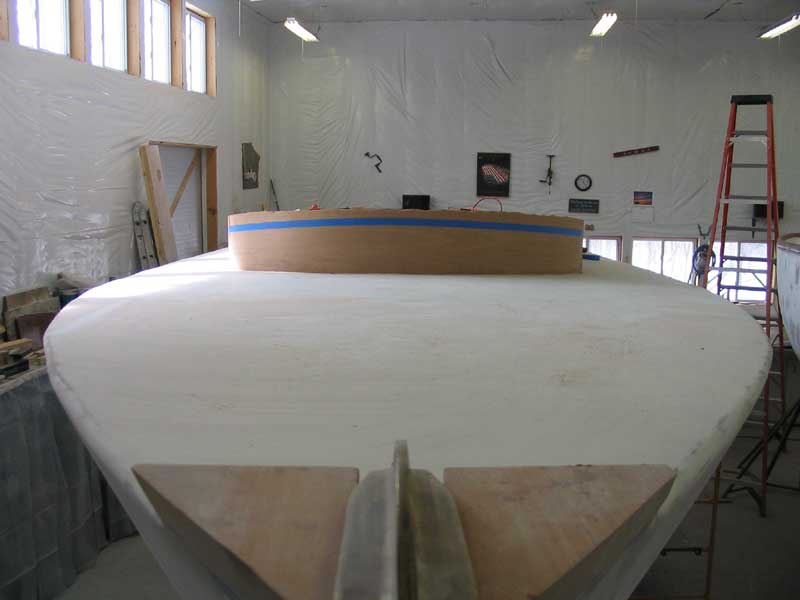
Armed with the screws- #14 x 2-1/2"" 316 stainless steel oval head--I prepared the next day to temporarily screw the coamings in place for final trimming and fitting. I chose finish washers to hold the screwheads, since countersinking the heads might have a tendency to eventually pull through the wood. Since under my new installation plan the coamings could remain removable for maintenance (my original plan would have required permanent installation with adhesive), only the screws would be holding the coaming tightly to the curvature of the cockpit, so I felt washers were necessary. I also elected to use a flat washer beneath the finish washer to prevent the sharp edge of the finish washer from digging in. (Side note: why don't they make finish washers with a flat back? I guess they'd have to be cast, rather than stamped or pressed, which would cost more. I'd pay, but I guess maybe others wouldn't.) |
 One side at a time, I used my jacking system to push the coaming into the side
of the cockpit tightly, and then drilled pilot holes through the coaming board
and into the cockpit walls (through the 3/8" plywood walls and into the solid
wood carlins behind). Then, I enlarged the hole in the coamings so that
the screws would pass through the coamings without needing threading.
Finally, I drove each screw home, complete with a finish washer and, in this
case, temporary flat washer (zinc-plated that I had on hand in the shop).
The final installation would include stainless steel washers. One side at a time, I used my jacking system to push the coaming into the side
of the cockpit tightly, and then drilled pilot holes through the coaming board
and into the cockpit walls (through the 3/8" plywood walls and into the solid
wood carlins behind). Then, I enlarged the hole in the coamings so that
the screws would pass through the coamings without needing threading.
Finally, I drove each screw home, complete with a finish washer and, in this
case, temporary flat washer (zinc-plated that I had on hand in the shop).
The final installation would include stainless steel washers. |
 I had hoped to stick with bronze for this application, but couldn't find oval
head bronze screws with a phillips head--only slotted, and then too small for my
needs. There did seem to be bronze finish washers available, though later
checking revealed that they might be only brass. In any event, I decided
to go with stainless to get the smooth oval heads that I felt provided the
cleanest appearance, coupled with the finish washers. I had hoped to stick with bronze for this application, but couldn't find oval
head bronze screws with a phillips head--only slotted, and then too small for my
needs. There did seem to be bronze finish washers available, though later
checking revealed that they might be only brass. In any event, I decided
to go with stainless to get the smooth oval heads that I felt provided the
cleanest appearance, coupled with the finish washers. |
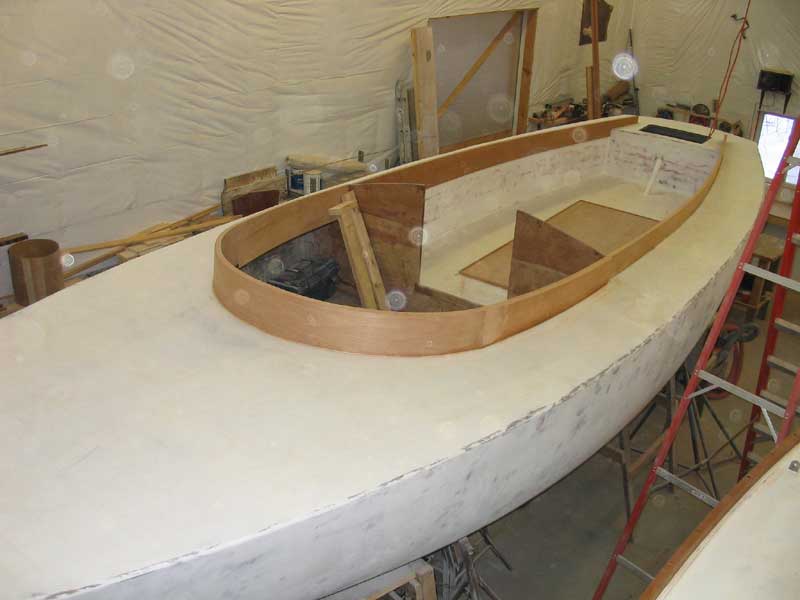
 Now that the coamings were securely installed, it was time to trim the coamings
and cabin trunk to their final height and shape--a job that I eagerly
anticipated, yet found equally frightening. I had only one chance to get
it right, so I proceeded with care and caution. Now that the coamings were securely installed, it was time to trim the coamings
and cabin trunk to their final height and shape--a job that I eagerly
anticipated, yet found equally frightening. I had only one chance to get
it right, so I proceeded with care and caution.
|
 First, I used the cardboard templates I had made
several weeks earlier during a mockup session to mark the general position of
the cut. I taped the templates in place, on one side at a time (since I
had only mocked up half of the setup earlier, the other side being an exact
reversed image of the first side), and marked the top of the template on the
wood. First, I used the cardboard templates I had made
several weeks earlier during a mockup session to mark the general position of
the cut. I taped the templates in place, on one side at a time (since I
had only mocked up half of the setup earlier, the other side being an exact
reversed image of the first side), and marked the top of the template on the
wood. |
 Next, I removed the cardboard and, using a thin
mahogany batten with straight edges, trued up and sweetened the line left from
the template, ensuring that the line flowed smoothly and naturally. I had
a few set points from which to work: the centerline forward, which was a
known height; the edge of the midships bulkhead, which demarks the end of the
cabin trunk and also is at a set height; and an arbitrary point at the after
ends of the coamings, which I determined mainly by eye. By making sure the
batten ran through these points, I ensured a smooth curve. Next, I removed the cardboard and, using a thin
mahogany batten with straight edges, trued up and sweetened the line left from
the template, ensuring that the line flowed smoothly and naturally. I had
a few set points from which to work: the centerline forward, which was a
known height; the edge of the midships bulkhead, which demarks the end of the
cabin trunk and also is at a set height; and an arbitrary point at the after
ends of the coamings, which I determined mainly by eye. By making sure the
batten ran through these points, I ensured a smooth curve. |
|
|
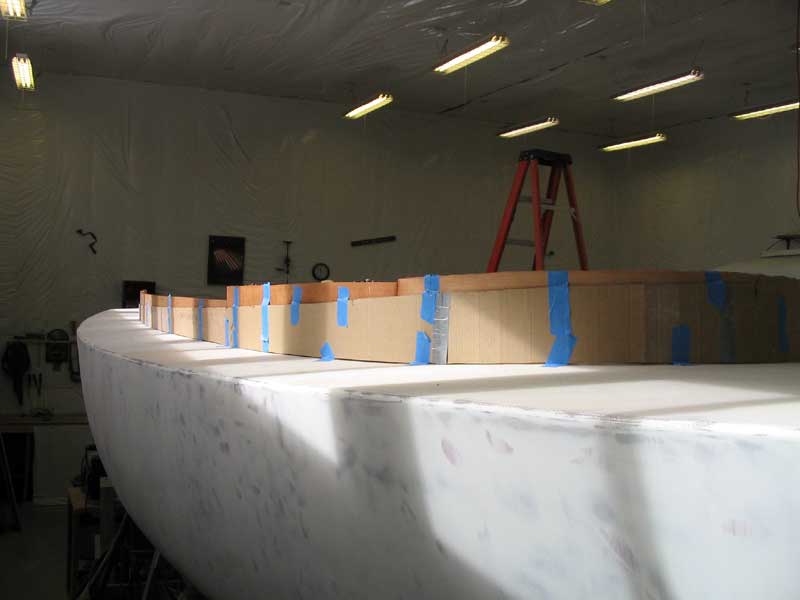
 After repeating this process on both sides, I highlighted the line by placing
blue masking tape just below the line. This served several purposes:
first, it made the marks show up better so that I could eye the proposed cutline
carefully from all angles to make sure it not only looked good, but would also
work as anticipated when building the coach roof later; second, the tape would
help protect the top edge of the cabin trunk and coaming when I came through
with the saw; ; third, pulling the tape along the line confirmed that the line
was actually smooth and true, with no humps or dips; finally, the blue tape made
an easier-seen line to follow while cutting. After repeating this process on both sides, I highlighted the line by placing
blue masking tape just below the line. This served several purposes:
first, it made the marks show up better so that I could eye the proposed cutline
carefully from all angles to make sure it not only looked good, but would also
work as anticipated when building the coach roof later; second, the tape would
help protect the top edge of the cabin trunk and coaming when I came through
with the saw; ; third, pulling the tape along the line confirmed that the line
was actually smooth and true, with no humps or dips; finally, the blue tape made
an easier-seen line to follow while cutting.At the after ends, I left the coaming planks extra long so that I could decide exactly where to trim them later. For now, I tapered the cut line off to a point 2-1/2" above the deck at the aft end of each board, and would decide over the coming days where exactly to cut them for good. |
 With the line marked on each side, and after many visual checks from all angles
and wherever possible, I prepared to finally make the cut. I chose a
jigsaw equipped with a wide, fine-toothed blade. The wide blade would help
make a smoother, straighter cut, and the fine teeth would not only make a finer
cut, but would slow down the saw significantely, meaning that I would have more
control over the cut. A mistake was not acceptable. With the line marked on each side, and after many visual checks from all angles
and wherever possible, I prepared to finally make the cut. I chose a
jigsaw equipped with a wide, fine-toothed blade. The wide blade would help
make a smoother, straighter cut, and the fine teeth would not only make a finer
cut, but would slow down the saw significantely, meaning that I would have more
control over the cut. A mistake was not acceptable. |
 Working from rolling staging alongside the boat, its height set so that my eye
was almost even with the cutline, I started cutting at the after end of the port
side and slowly worked my way along. The cutting was slow and the saw
heavy, so I took frequent breaks. I kept the saw blade above or at the
tape line all the time, never below. Since the coamings were strongly
curved, as I cut the waste tended to try to spring outwards, so I tamed it with
wooden screw clamps strategically placed as I proceeded. After some
minutes, I completed the cut on the first 12' section of coaming, and prepared
to make the cuts into the cabin trunk. Working from rolling staging alongside the boat, its height set so that my eye
was almost even with the cutline, I started cutting at the after end of the port
side and slowly worked my way along. The cutting was slow and the saw
heavy, so I took frequent breaks. I kept the saw blade above or at the
tape line all the time, never below. Since the coamings were strongly
curved, as I cut the waste tended to try to spring outwards, so I tamed it with
wooden screw clamps strategically placed as I proceeded. After some
minutes, I completed the cut on the first 12' section of coaming, and prepared
to make the cuts into the cabin trunk. |
 For the trunk, I set the saw blade at a slight angle--it turned out to be around
10°--that matched the angle that the curved coachroof would make as it
intersected the cabin trunk sides. This angle was easy to find, as the
midships bulkhead was cut to shape already, so I simply matched the saw up with
that particular angle. With the angled blade, I carefully cut my way
around the cabin trunk, remaining on the staging as long as I could, though
eventually I had to get up on deck and lie on my side to make a nice cut
following the line. I used extra caution on the cabin trunk, since an
error here would be virtually unrecoverable without redoing the entire setup.
In this manner I continued till I reached the beginning of the starboard
coaming. For the trunk, I set the saw blade at a slight angle--it turned out to be around
10°--that matched the angle that the curved coachroof would make as it
intersected the cabin trunk sides. This angle was easy to find, as the
midships bulkhead was cut to shape already, so I simply matched the saw up with
that particular angle. With the angled blade, I carefully cut my way
around the cabin trunk, remaining on the staging as long as I could, though
eventually I had to get up on deck and lie on my side to make a nice cut
following the line. I used extra caution on the cabin trunk, since an
error here would be virtually unrecoverable without redoing the entire setup.
In this manner I continued till I reached the beginning of the starboard
coaming. |
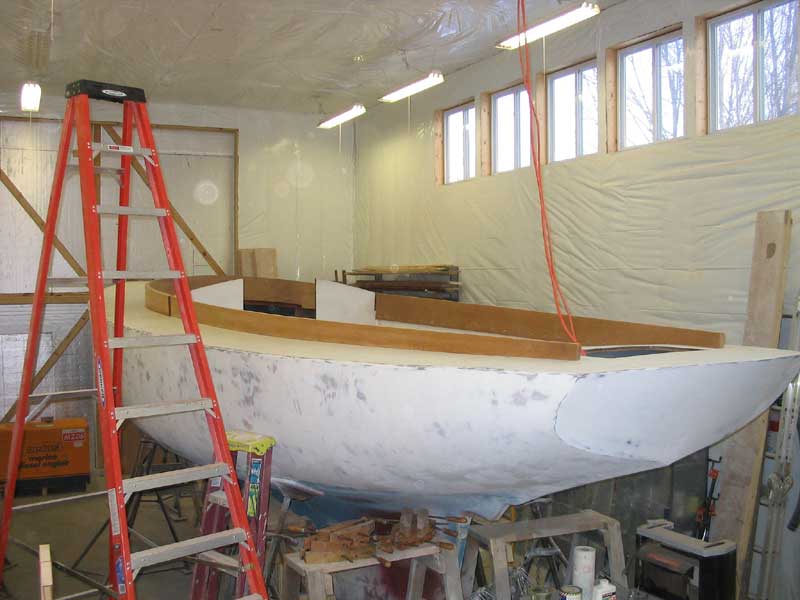
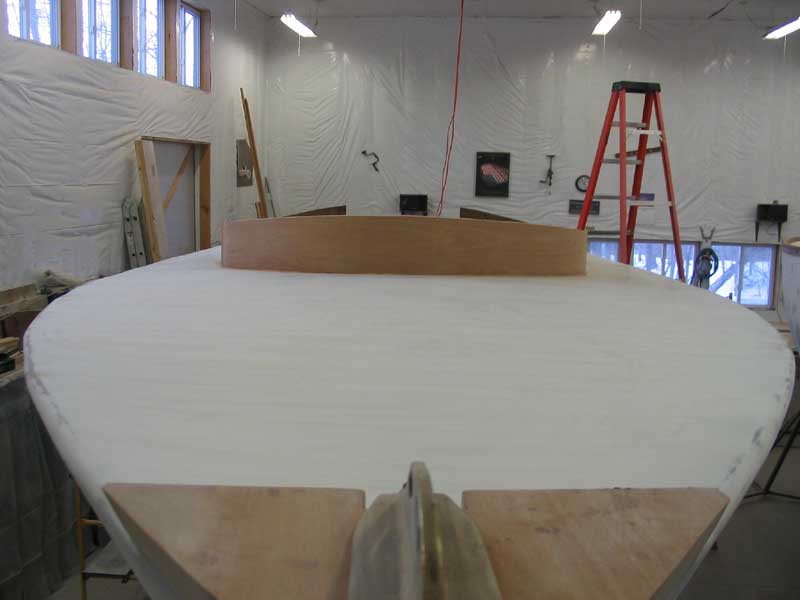 With the saw back at 90°, I finished up the last coaming. The saw cut very
slowly, and the entire job--24' of coamings and about 12-14' of curved cabin
trunk--took over two hours to complete, including frequent breaks to rest my
saw-bearing arm. However, I was thrilled with the end result: with
the scrap removed, the structure was suddenly smooth and sleek, and closely
approximated the conceptual drawing I had made over two years previously.
Finally, the ultimate appearance of the boat began to show. With the saw back at 90°, I finished up the last coaming. The saw cut very
slowly, and the entire job--24' of coamings and about 12-14' of curved cabin
trunk--took over two hours to complete, including frequent breaks to rest my
saw-bearing arm. However, I was thrilled with the end result: with
the scrap removed, the structure was suddenly smooth and sleek, and closely
approximated the conceptual drawing I had made over two years previously.
Finally, the ultimate appearance of the boat began to show. |
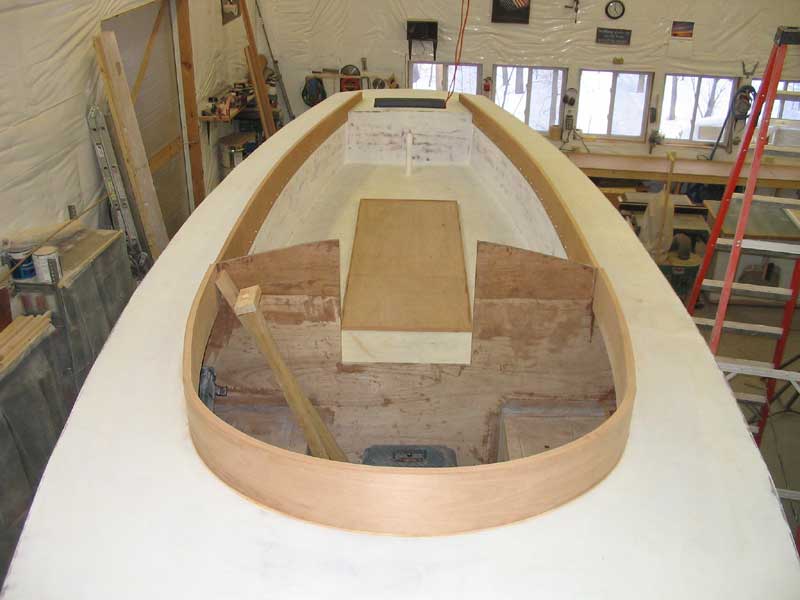 With the bulk cutting done, I used a belt sander to smooth the cut surfaces and
even out any minor undulations, which were inevitable. With the bulk cutting done, I used a belt sander to smooth the cut surfaces and
even out any minor undulations, which were inevitable. |
|
|
|
|
|
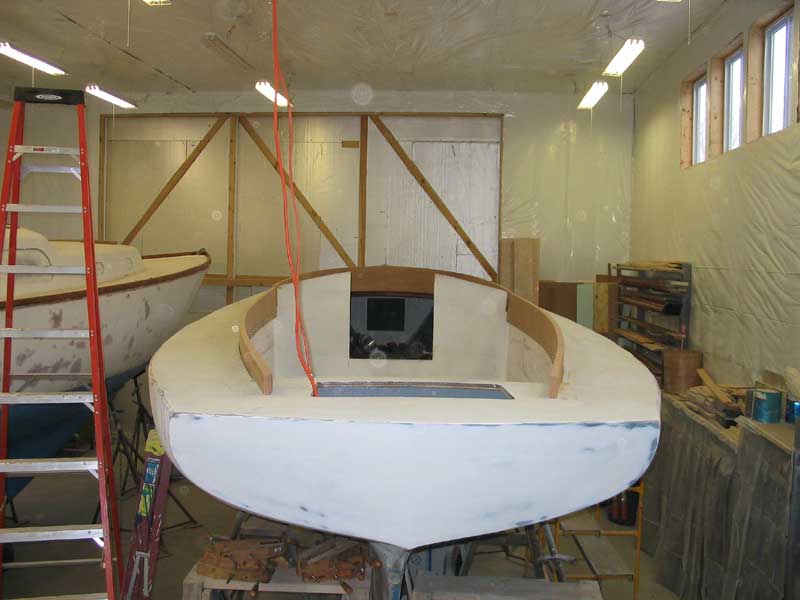
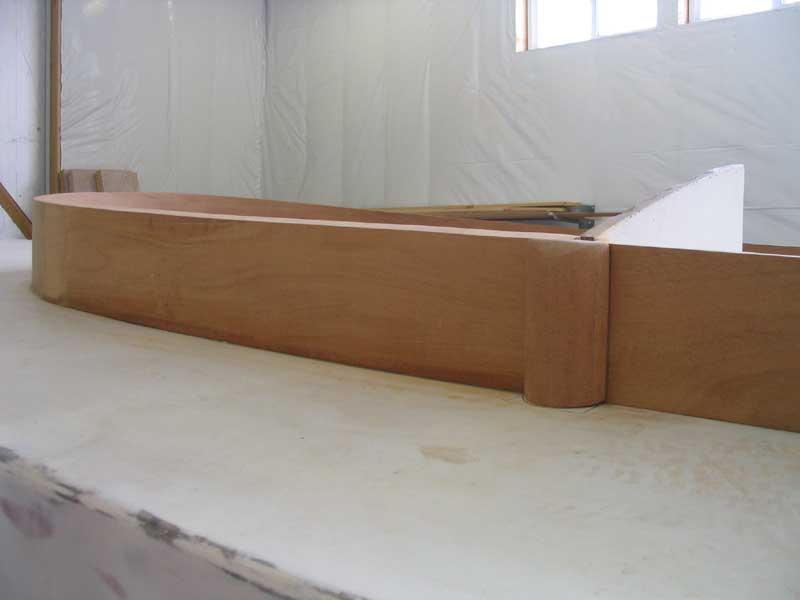
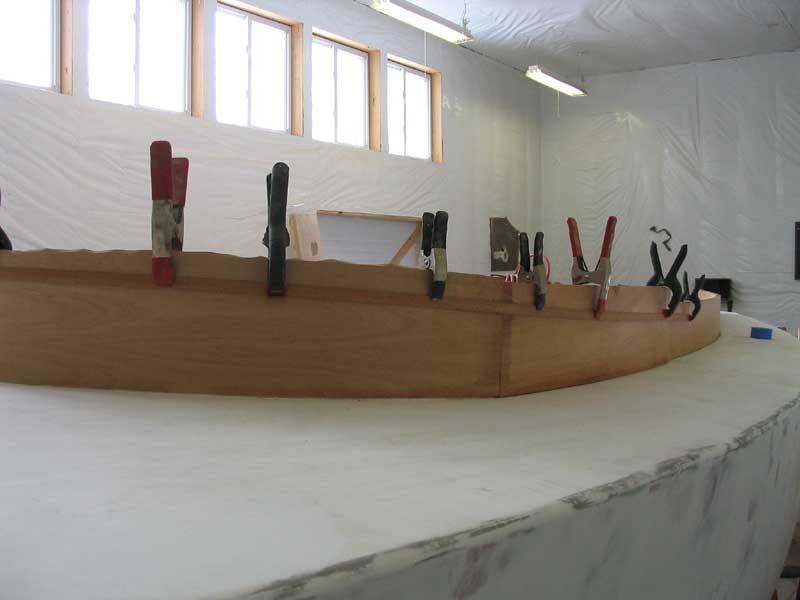
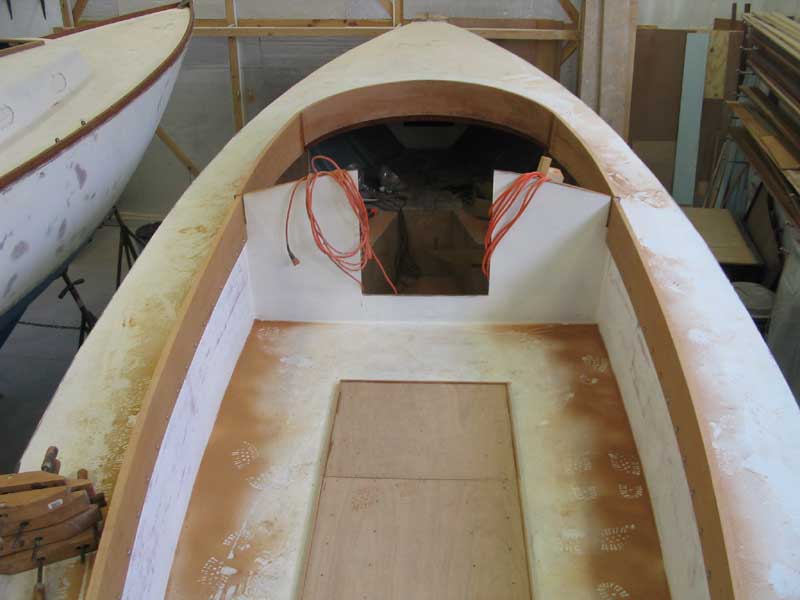
The joint where the coamings ended and the cabin trunk began was offset by about 1/2", and I made no attempt to conceal the seam during the building process. While I had originally hoped to have one seamless piece of wood, earlier events had changed my plans. Now, however, I was faced with covering up this seam to provide a pleasing appearance.
|
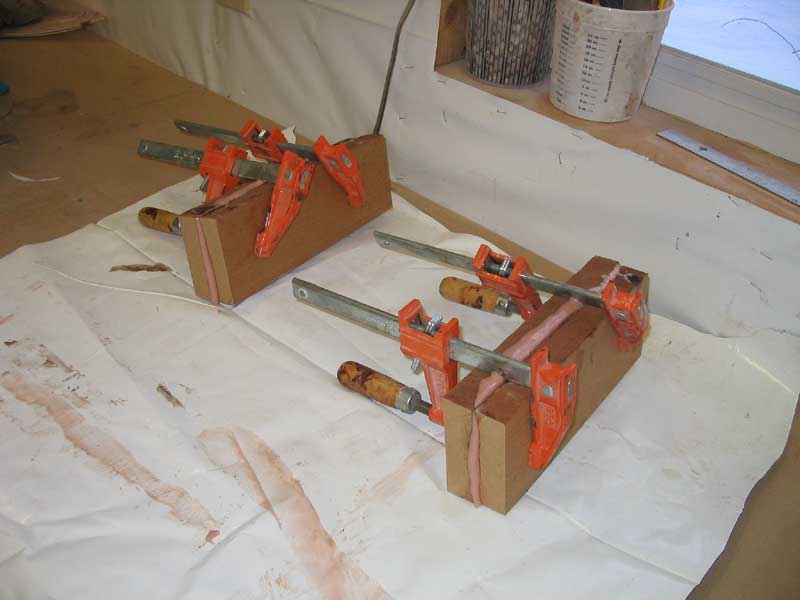
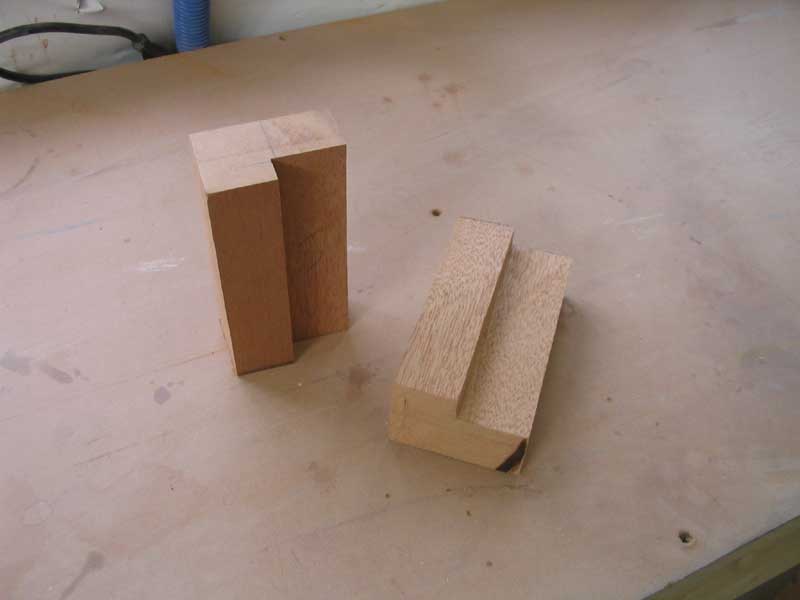 To
begin, I glued up a pair of blanks from some scrap mahogany. When the
epoxy was cured, I milled the blocks to an even shape, 3" wide, with a square
end. Then, up on the boat, I marked the blocks for a rabbet needed to
accommodate the offset in the coamings. With two quick cuts on the table saw, I
milled the rabbets in each of the two pieces; I needed to do some minor fine
tuning to make each block fit properly. To
begin, I glued up a pair of blanks from some scrap mahogany. When the
epoxy was cured, I milled the blocks to an even shape, 3" wide, with a square
end. Then, up on the boat, I marked the blocks for a rabbet needed to
accommodate the offset in the coamings. With two quick cuts on the table saw, I
milled the rabbets in each of the two pieces; I needed to do some minor fine
tuning to make each block fit properly. |
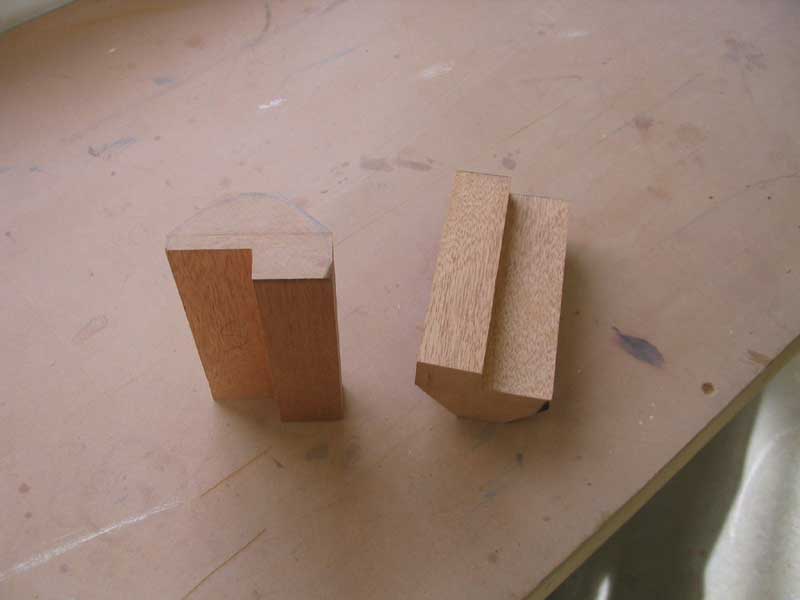
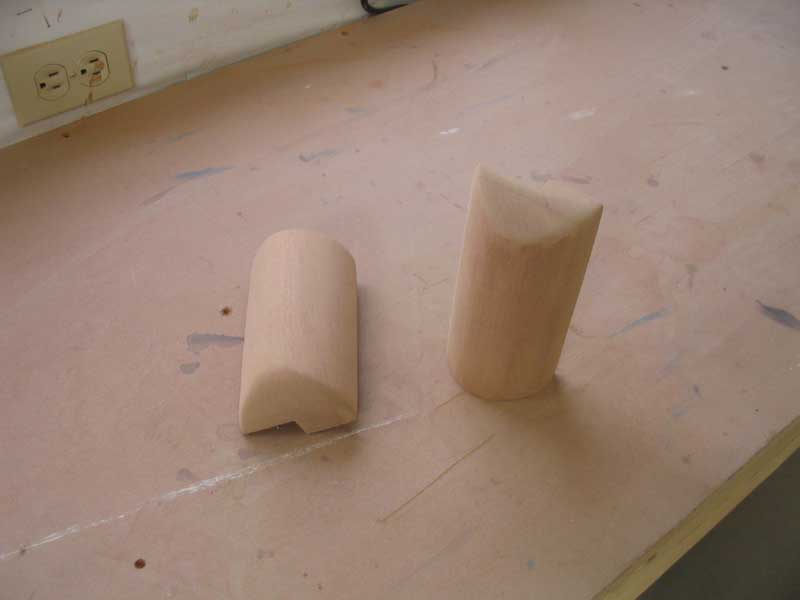
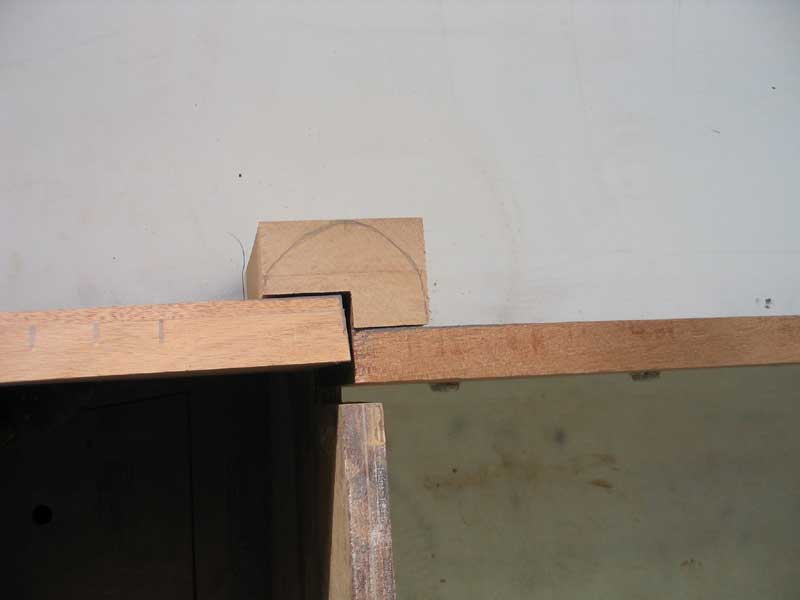 Next,
I marked off--by eye--a curved shape on the tops of the blocks. After
cutting off the corners with my table saw set at 45 degrees, I sanded the
contours in the blocks with a belt sander and, later, my palm sander. I
also sanded a bevel at the top edge of the blocks to shed water and to look
better. With some finish sanding, the blocks took on a smooth,
nicely-rounded appearance that, to my eye, hid the step in the coamings nicely. Next,
I marked off--by eye--a curved shape on the tops of the blocks. After
cutting off the corners with my table saw set at 45 degrees, I sanded the
contours in the blocks with a belt sander and, later, my palm sander. I
also sanded a bevel at the top edge of the blocks to shed water and to look
better. With some finish sanding, the blocks took on a smooth,
nicely-rounded appearance that, to my eye, hid the step in the coamings nicely.Next: Laminating and installing the cabin trunk deck beams. Please click here to continue.> |
|
|
|
|