|
|
~MENU~ |
| Home |
| The Concept |
| The Boat |
| Bringing Her Home |
|
Weekly Progress Log |
|
Daysailor Projects |
| The Boat Barn |
| Resources |
| Other Sites |
| Email Tim |
|
|
| From a Bare Hull: Cabin Trunk (Page 4) |
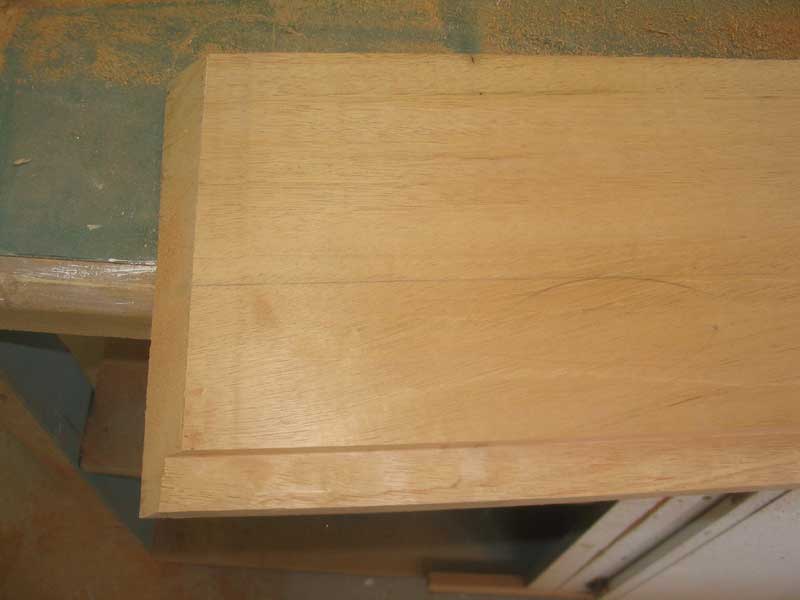
 After
some test-fitting in place on deck, I determined where I thought I should cut
off the ragged ends of the laminated section, and returned to the bench to make
the cuts. I planned a beveled butt joint between the curved section and
the adjacent sections that would make up the cabin trunk and, eventually, the
cockpit coamings. After marking both ends carefully, I made the cuts with
a variety of handsaws, carefully keeping the blade aligned with the marks and
guide cuts I had made. After
some test-fitting in place on deck, I determined where I thought I should cut
off the ragged ends of the laminated section, and returned to the bench to make
the cuts. I planned a beveled butt joint between the curved section and
the adjacent sections that would make up the cabin trunk and, eventually, the
cockpit coamings. After marking both ends carefully, I made the cuts with
a variety of handsaws, carefully keeping the blade aligned with the marks and
guide cuts I had made. |
|
|
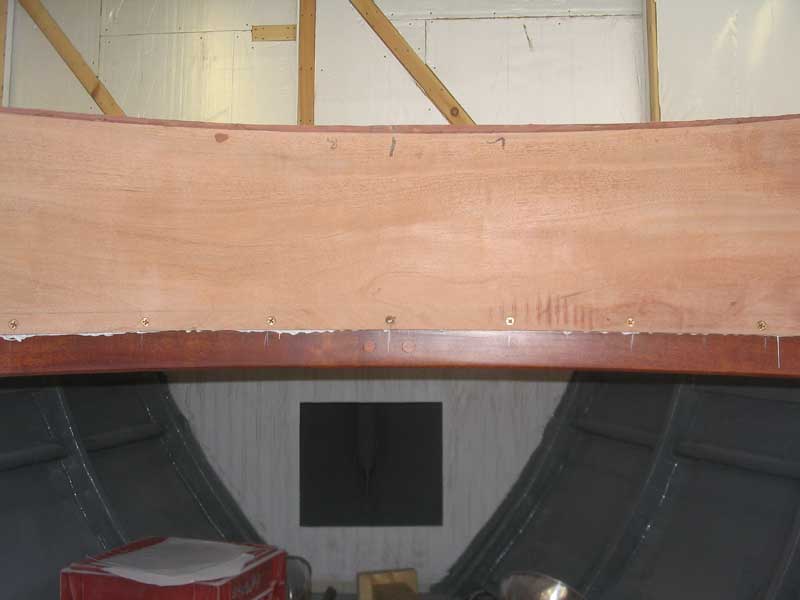
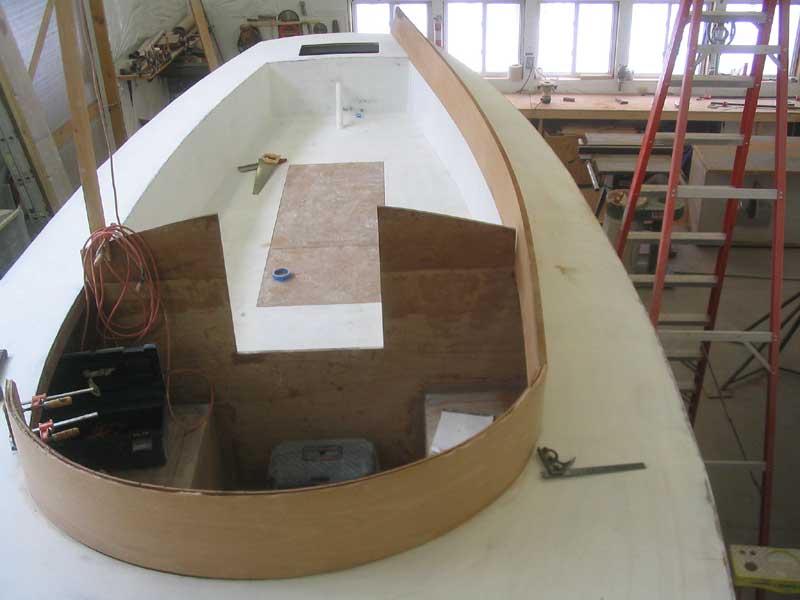
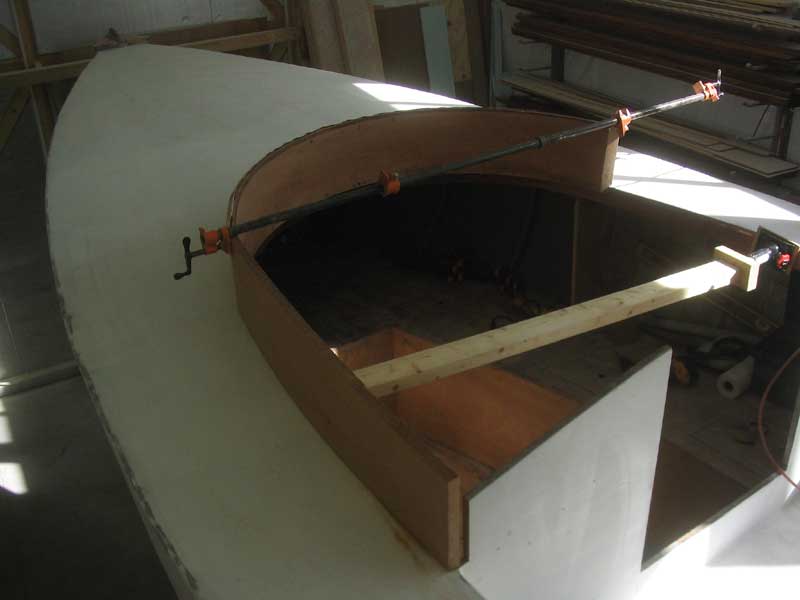
 Afterwards,
I returned the piece up to the boat for another fitting. The friction fit
of the piece inside the carlins was tight enough that the piece stayed in place;
since it was difficult to clamp, I left it that way and began preparing for the
fitting and installation of one of the adjacent cabin trunk sides, which, in
theory at least, was to be one single board running all the way to the end of
the cockpit, forming the coaming as well. Afterwards,
I returned the piece up to the boat for another fitting. The friction fit
of the piece inside the carlins was tight enough that the piece stayed in place;
since it was difficult to clamp, I left it that way and began preparing for the
fitting and installation of one of the adjacent cabin trunk sides, which, in
theory at least, was to be one single board running all the way to the end of
the cockpit, forming the coaming as well. |
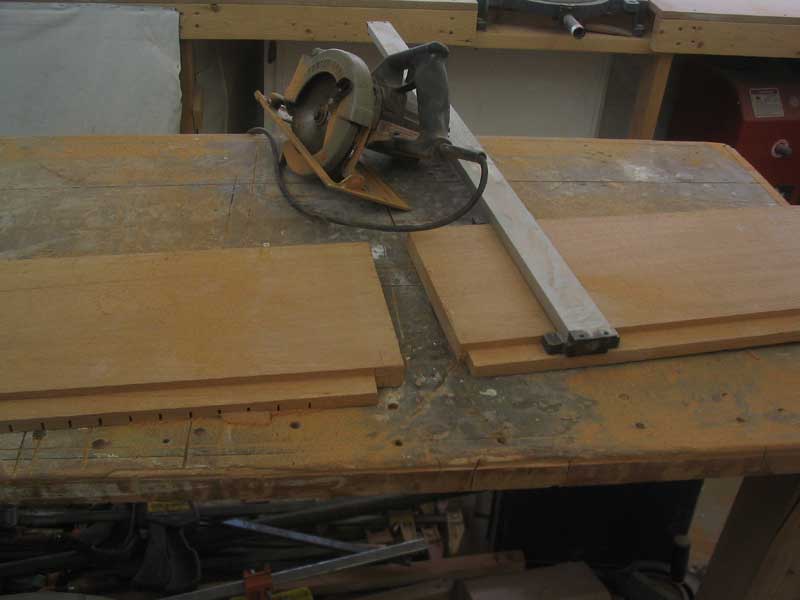
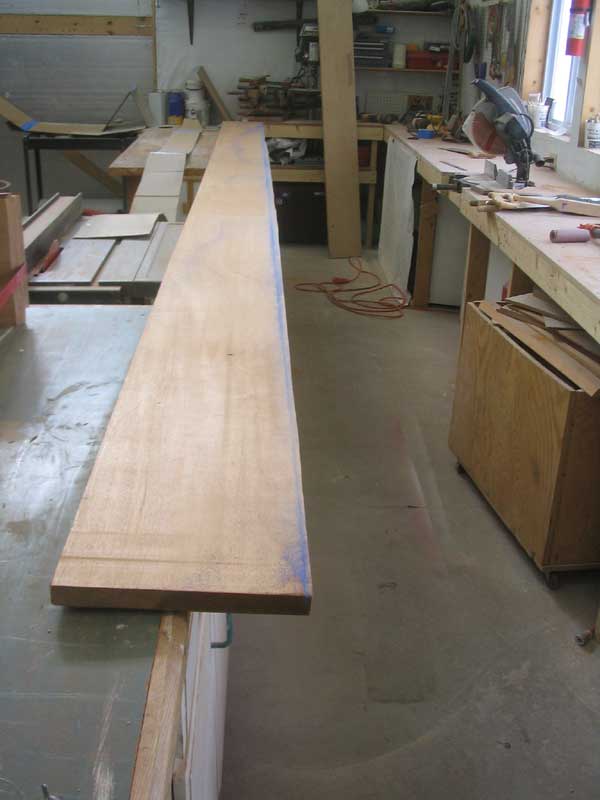 After
some consideration, I began making a few cuts on the large boards. I began
with straightening one edge--what would become the bottom edge, since the edges
of the board were still in rough form. I snapped a chalk line along one
edge of the board, keeping it as close as possible to the edge, and then set up
my 8' plywood straight edge to guide my circular saw, moving the straightedge
several times to complete the cut. After
some consideration, I began making a few cuts on the large boards. I began
with straightening one edge--what would become the bottom edge, since the edges
of the board were still in rough form. I snapped a chalk line along one
edge of the board, keeping it as close as possible to the edge, and then set up
my 8' plywood straight edge to guide my circular saw, moving the straightedge
several times to complete the cut. |
|
Next, I needed a rabbet along the bottom edge, to allow the board to overlap slightly the edge of the deck and align with the already-rabbeted curved section forward. I made this cut with a straight-cutting bit in my router, since the board was too big to handle through the table saw. |
 Finally,
I made an angle cut on the forward end that I hoped would approximate the
corresponding cut on the curved section, though I figured it would take a bit of
fine-tuning to make the pieces butt cleanly together. Then, I heaved the
huge board up on deck and prepared to make my first attempt at fitting.
Thus was the innocent beginning of what turned out to be several days' worth of
frustration. Finally,
I made an angle cut on the forward end that I hoped would approximate the
corresponding cut on the curved section, though I figured it would take a bit of
fine-tuning to make the pieces butt cleanly together. Then, I heaved the
huge board up on deck and prepared to make my first attempt at fitting.
Thus was the innocent beginning of what turned out to be several days' worth of
frustration. |
|
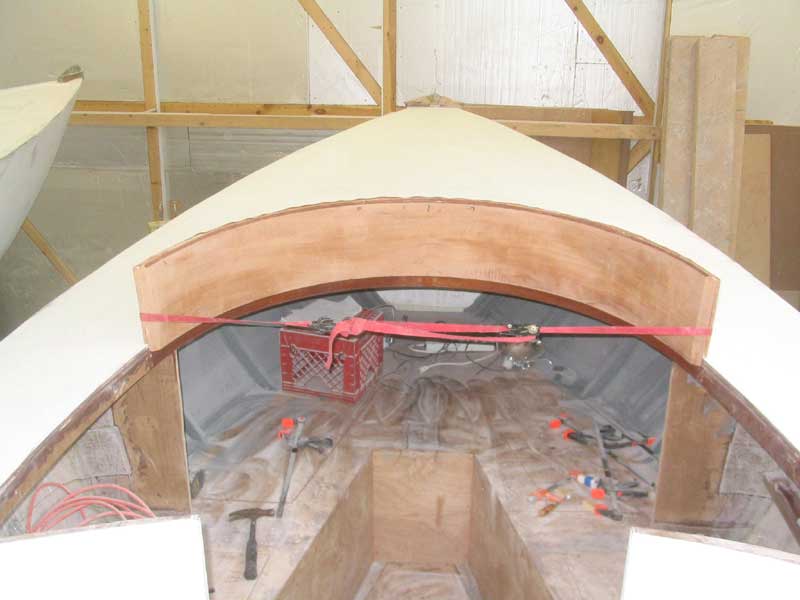
The first test fit showed me where I needed to make a slight relief cut at the after end of the still-overly long board, to allow the board to fit inside the cockpit well and then continue past onto the poop deck. After making the cut, I could get the after end to slip into place, providing the spring in the board that I needed to begin to force it into the curvature needed at the forward end. The board wasn't even close to conforming to the curve of the carlin at the forward end, and was stiff enough that I needed to use a small jack to push it in. During several repeated fitting attempts, however, this caused bad pressure on the cut end of the curved piece (which was not permanently installed), and this somehow caused the outermost lamination to begin to pull away, or delaminate, at the bottom near the deck edge. I added some clamps to hold the sections together temporarily while I continued to try and fit the large board into place. |
 But
it was not to be: with an unwelcome snap, the large board split at the
forward end, just at the shoulder of the 5/16" deep rabbet that I had cut.
This was discouraging, but I thought the board would be salvageable if I glued
the split back together. This ended my work for the day on this particular
chore. I removed the wooden pieces and glued the damaged areas back
together with epoxy, both the curved laminations and the new split on the long
board. I left those to cure overnight. But
it was not to be: with an unwelcome snap, the large board split at the
forward end, just at the shoulder of the 5/16" deep rabbet that I had cut.
This was discouraging, but I thought the board would be salvageable if I glued
the split back together. This ended my work for the day on this particular
chore. I removed the wooden pieces and glued the damaged areas back
together with epoxy, both the curved laminations and the new split on the long
board. I left those to cure overnight. |
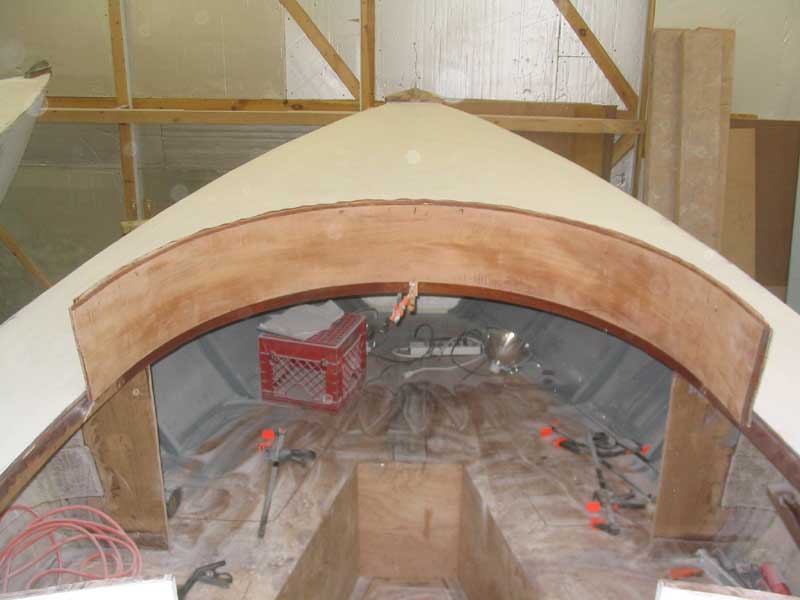
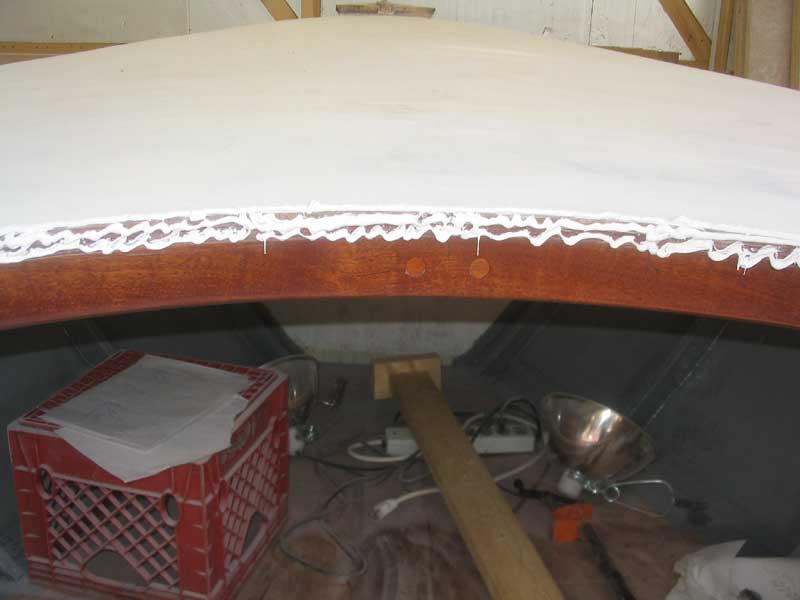 In
the morning, I hoped for better luck, though I was rather discouraged from the
day before. The epoxy had taken care of the breakage and delamination
problems, and I began by permanently installing the curved section in place,
using 5200 adhesive and bronze #12 x 2" screws through the bottom edge into the
deck framing. After cleaning up the overspilled 5200, I continued with the
adjacent pieces. In
the morning, I hoped for better luck, though I was rather discouraged from the
day before. The epoxy had taken care of the breakage and delamination
problems, and I began by permanently installing the curved section in place,
using 5200 adhesive and bronze #12 x 2" screws through the bottom edge into the
deck framing. After cleaning up the overspilled 5200, I continued with the
adjacent pieces. |
|
|
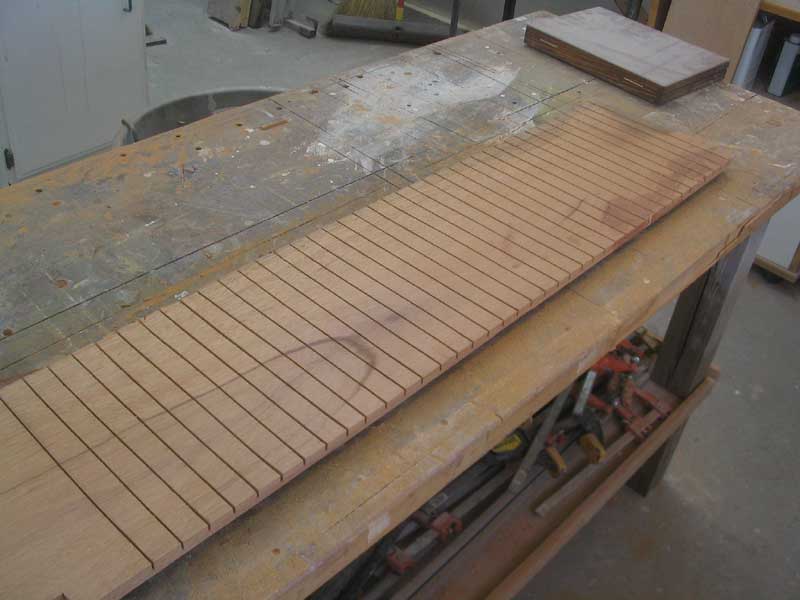
 After
much thought, I decided to cut the long board and use a shorter piece to mate
with the cabin trunk, and piece in the coaming separately. It had been a
noble thought to try to use only a single piece, but it was clear that the task
was too difficult given all the factors at hand. After some careful
measuring, I cut off a section of the board for the cabin trunk, and then took
the further step of kerfing the inside of the board with my circular saw to
hopefully allow it to bend more easily, and relieve the strain on the rabbeted
area during the installation process. Once it was installed, I figured it
would be adequately strong. After
much thought, I decided to cut the long board and use a shorter piece to mate
with the cabin trunk, and piece in the coaming separately. It had been a
noble thought to try to use only a single piece, but it was clear that the task
was too difficult given all the factors at hand. After some careful
measuring, I cut off a section of the board for the cabin trunk, and then took
the further step of kerfing the inside of the board with my circular saw to
hopefully allow it to bend more easily, and relieve the strain on the rabbeted
area during the installation process. Once it was installed, I figured it
would be adequately strong. |
 Through
several test fits, up and down to the boat and back and forth to the bench, I
fine-tuned the fit of the forward angle cut, till it was nearly a good fit with
its mate on the curved section. I was one fitting away from having it
licked, when the board split again, slightly higher than the last split above
the rabbet. By this time, I was not even expecting success, and was
therefore somehow unfazed by the new setback. I put the board aside, and
turned my attention to other jobs on board that needed completion. Through
several test fits, up and down to the boat and back and forth to the bench, I
fine-tuned the fit of the forward angle cut, till it was nearly a good fit with
its mate on the curved section. I was one fitting away from having it
licked, when the board split again, slightly higher than the last split above
the rabbet. By this time, I was not even expecting success, and was
therefore somehow unfazed by the new setback. I put the board aside, and
turned my attention to other jobs on board that needed completion. |
 The
next couple days, I didn't even bother working on the cabin trunk and coaming,
as I worked on other tasks, but the job was never far from my mind as I mulled
several different possible ways to make the whole thing work out. The
next couple days, I didn't even bother working on the cabin trunk and coaming,
as I worked on other tasks, but the job was never far from my mind as I mulled
several different possible ways to make the whole thing work out. |