|
|
~MENU~ |
| Home |
| The Concept |
| The Boat |
| Bringing Her Home |
|
Weekly Progress Log |
|
Daysailor Projects |
| The Boat Barn |
| Resources |
| Other Sites |
| Email Tim |
|
|
|
From a Bare Hull: The Cockpit (Page 4) |
|
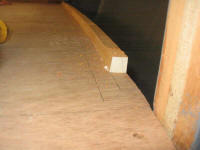
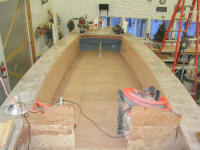
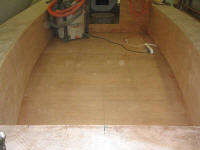
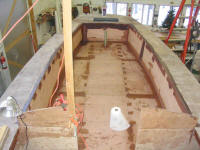
Cockpit Sides I spent some time deciding how much to angle the sides inward, if at all, and how to then secure the plywood at the bottom edge, against the cockpit sole. I thought it would look and function better if I angled the sides slightly, and eventually decided on a 5˚ angle, which had the effect of kicking the bottom edge of the plywood out (towards centerline) about 7/8" in relation to the deck edge. |
|
|
|
|
|
|
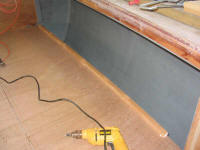
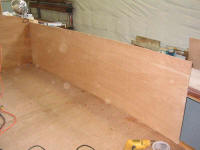 After
I had checked the dry fit and made minor adjustments (I had to trim the
forward end at a slight angle for a flush fit with the bulkhead, since the
cockpit sole was slightly pitched forward for drainage), I proceeded to
install the two large pieces with bronze screws and 3M 5200 adhesive on
the mating surfaces. I screwed the plywood into the inside edges of
the carlins at the top edge, and into the mahogany cleats at the bottom
edge--as well as additional cleats I had installed on the bulkheads for
this purpose. The screws pulled the plywood tightly into the
curvature required. After
I had checked the dry fit and made minor adjustments (I had to trim the
forward end at a slight angle for a flush fit with the bulkhead, since the
cockpit sole was slightly pitched forward for drainage), I proceeded to
install the two large pieces with bronze screws and 3M 5200 adhesive on
the mating surfaces. I screwed the plywood into the inside edges of
the carlins at the top edge, and into the mahogany cleats at the bottom
edge--as well as additional cleats I had installed on the bulkheads for
this purpose. The screws pulled the plywood tightly into the
curvature required. |
|
|
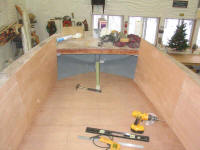
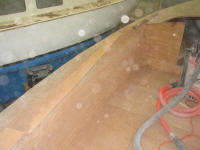 With
both sides tightly installed, I prepared my large router with a bottom
bearing straight-cutting bit, and, holding the router against the inside
face of the plywood, trimmed the top edge off flush with the sidedecks.
At the fore and aft ends, where the router couldn't reach, I finished up
the cuts with a handsaw. With
both sides tightly installed, I prepared my large router with a bottom
bearing straight-cutting bit, and, holding the router against the inside
face of the plywood, trimmed the top edge off flush with the sidedecks.
At the fore and aft ends, where the router couldn't reach, I finished up
the cuts with a handsaw. |
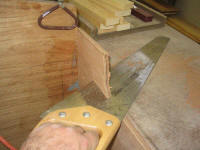 Next,
I chucked a 1/4" roundover bit into a different router, and milled the top
edge of the plywood to create a smooth, rounded edge for later
fiberglassing. At the forward end, where the router couldn't reach,
I used some coarse sandpaper to quickly round the edge by hand. Next,
I chucked a 1/4" roundover bit into a different router, and milled the top
edge of the plywood to create a smooth, rounded edge for later
fiberglassing. At the forward end, where the router couldn't reach,
I used some coarse sandpaper to quickly round the edge by hand. |
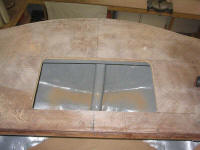 The
next step was to fill in the aftermost athwartships portion of the cockpit
well. Before doing so, however, I had to provide a means for access
into the lazarette space, partly for installing hardware and partly for
valuable storage. My first thought was a top-loading hatch in the
poop deck, but before moving ahead I carefully considered the pros and
cons (and feasibility) of some sort of removable panel in the vertical
section. In the end, I chose a top-loading hatch, and laid out
an appropriate shape in the space between the two deck beams spanning the
poop deck. Then I cut out the opening with a jigsaw, leaving a 2"
radius at the corners. The
next step was to fill in the aftermost athwartships portion of the cockpit
well. Before doing so, however, I had to provide a means for access
into the lazarette space, partly for installing hardware and partly for
valuable storage. My first thought was a top-loading hatch in the
poop deck, but before moving ahead I carefully considered the pros and
cons (and feasibility) of some sort of removable panel in the vertical
section. In the end, I chose a top-loading hatch, and laid out
an appropriate shape in the space between the two deck beams spanning the
poop deck. Then I cut out the opening with a jigsaw, leaving a 2"
radius at the corners. |
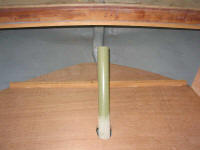 To
provide a bit more room for the rudderpost, I decided to install the final
section of the cockpit side beneath and flush with the deck beam spanning
the gap. This allowed about 3/8" additional room behind the
rudderpost, which might make a significant difference later. To
install the final plywood, I cut a pair of mahogany cleats--one for the
top and one for the bottom--and secured them with 5200 and bronze screws
to the underside of the deck beam and to the cockpit sole, respectively. To
provide a bit more room for the rudderpost, I decided to install the final
section of the cockpit side beneath and flush with the deck beam spanning
the gap. This allowed about 3/8" additional room behind the
rudderpost, which might make a significant difference later. To
install the final plywood, I cut a pair of mahogany cleats--one for the
top and one for the bottom--and secured them with 5200 and bronze screws
to the underside of the deck beam and to the cockpit sole, respectively. |
|
Then, I installed the plywood panel in a bed of 5200 and secured it to the cleats with more bronze screws.
|
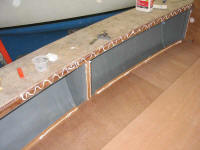
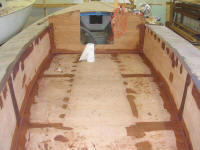 Filleting
was a time-consuming, messy job, but pleasant enough in the warm, sunny
shop on a December afternoon. When the fillets were done, I moved on
to install some fiberglass over the top edge of the plywood cockpit sides,
running between the sidedecks and the cockpit over the radius I had milled
earlier. I used some 15 oz. biaxial tape, 4" in width, saturated in
epoxy resin, and rolled the pieces into place. The tabbing's purpose
was to not only reinforce the joint, but more importantly to seal the
exposed plywood end grain of the cockpit sides. Filleting
was a time-consuming, messy job, but pleasant enough in the warm, sunny
shop on a December afternoon. When the fillets were done, I moved on
to install some fiberglass over the top edge of the plywood cockpit sides,
running between the sidedecks and the cockpit over the radius I had milled
earlier. I used some 15 oz. biaxial tape, 4" in width, saturated in
epoxy resin, and rolled the pieces into place. The tabbing's purpose
was to not only reinforce the joint, but more importantly to seal the
exposed plywood end grain of the cockpit sides.In the morning, I sanded the tapping at the top edge of the cockpit, and also lightly sanded some of the patches and fillets. Mostly, however, I wanted to prepare the top edge for deck fairing, a major step in the overall construction process that I needed to get done so that I could continue with cabin trunk construction. The cockpit fillets required additional sanding and, in some areas, a second application of filler, but that could wait till the coarse deck filling was complete. Please click here to continue.>
|
