|
|
~MENU~ |
| Home |
| The Concept |
| The Boat |
| Bringing Her Home |
|
Weekly Progress Log |
|
Daysailor Projects |
| The Boat Barn |
| Resources |
| Other Sites |
| Email Tim |
|
|
|
From a Bare Hull: The Deck (Page 7) |
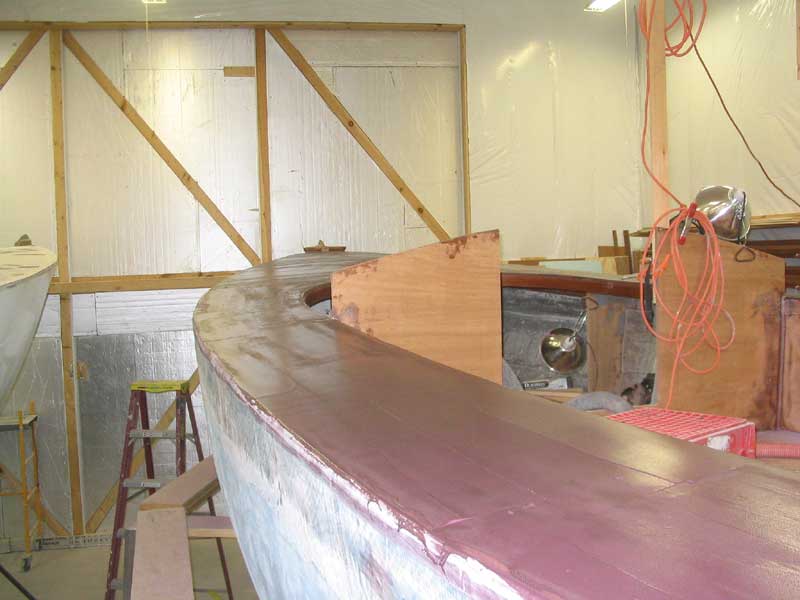
| Fairing and Surfacing Once the deck was sheathed in fiberglass, the next step was to fill, fair, and surface the decks. Before I could continue with this, however, I needed to build the cockpit, since some fiberglass needed at the upper cockpit edge would affect how the decks were faired. Once the cockpit was built, and the fiberglass in question installed, I could begin fairing the decks. Surfacing may be a more accurate term, actually, since the decks were quite fair by nature of their construction; however, the fiberglass cloth needed to have its weave filled, and some minor undulations in the surface addressed. |
 Surfacing
would in all likelihood require multiple applications of fairing compound,
interspersed with lots of long boarding and sanding. For the
fairing, I chose System Three Quik-Fair, a 2-part fairing paste that is
designed to eliminate the need to mix messy powders and such. I
found that mixing the material was messy in its own right because I had
yet to figure out a good way to measure out the two parts accurately;
spooning or scooping the two thick components into a mixing container
seemed like the neatest way, but I feared that the accuracy of the mix
would be compromised. Scooping the material into measuring cups was
messy as all get-out, but this is how I proceeded nonetheless.
Hopefully some easier means of mixing the material will come to light. Surfacing
would in all likelihood require multiple applications of fairing compound,
interspersed with lots of long boarding and sanding. For the
fairing, I chose System Three Quik-Fair, a 2-part fairing paste that is
designed to eliminate the need to mix messy powders and such. I
found that mixing the material was messy in its own right because I had
yet to figure out a good way to measure out the two parts accurately;
spooning or scooping the two thick components into a mixing container
seemed like the neatest way, but I feared that the accuracy of the mix
would be compromised. Scooping the material into measuring cups was
messy as all get-out, but this is how I proceeded nonetheless.
Hopefully some easier means of mixing the material will come to light. |
 Using
a variety of tools--but mostly small plastic squeegees--I spread a thin
coat over the entire deck. My goal in the first coat was mostly to
get a solid base for sanding, after which areas requiring additional
compound would be clearly visible. I used a total of about 60 oz.
mixed product for the first coat on the entire deck. I found the
Quik-Fair to be stickier than a traditional fairing mix made from
microballoons and cabosil, but otherwise decent to work with. One
advantage is that the material is designed to cure within 4 hours, so 2
coats in a day are possible if starting early enough. In this case,
I didn't begin the fairing till afternoon, so I left the first coat to
cure overnight before continuing. Using
a variety of tools--but mostly small plastic squeegees--I spread a thin
coat over the entire deck. My goal in the first coat was mostly to
get a solid base for sanding, after which areas requiring additional
compound would be clearly visible. I used a total of about 60 oz.
mixed product for the first coat on the entire deck. I found the
Quik-Fair to be stickier than a traditional fairing mix made from
microballoons and cabosil, but otherwise decent to work with. One
advantage is that the material is designed to cure within 4 hours, so 2
coats in a day are possible if starting early enough. In this case,
I didn't begin the fairing till afternoon, so I left the first coat to
cure overnight before continuing. |
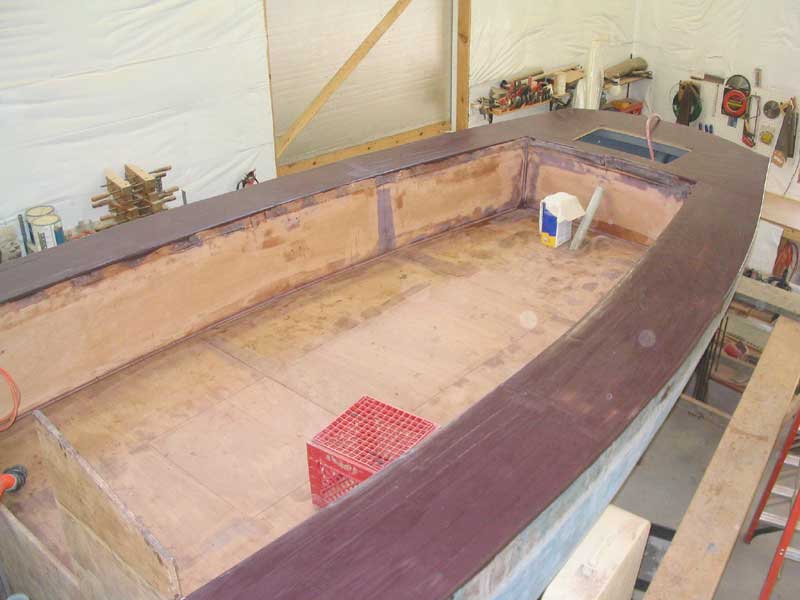
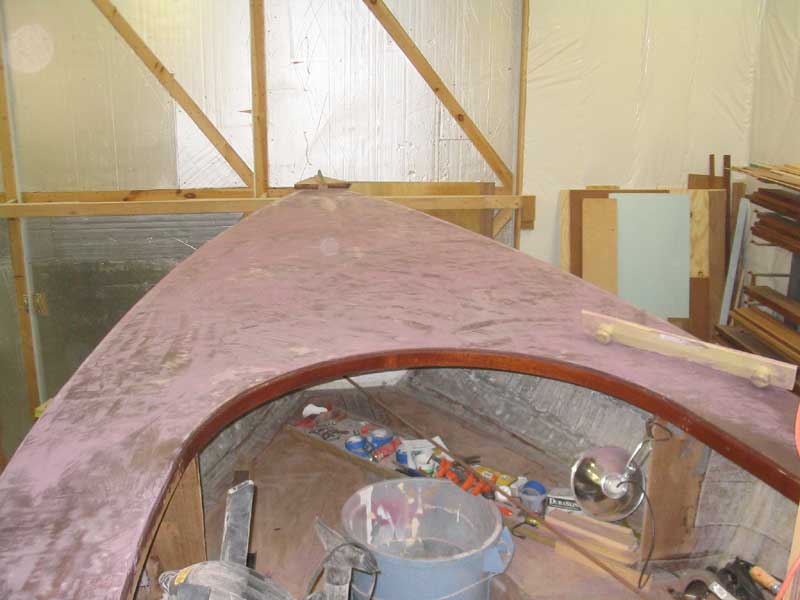
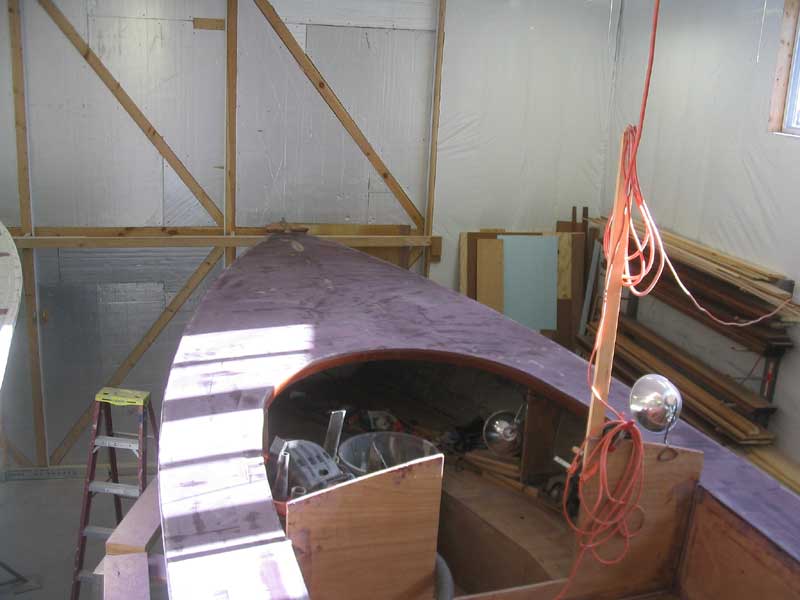
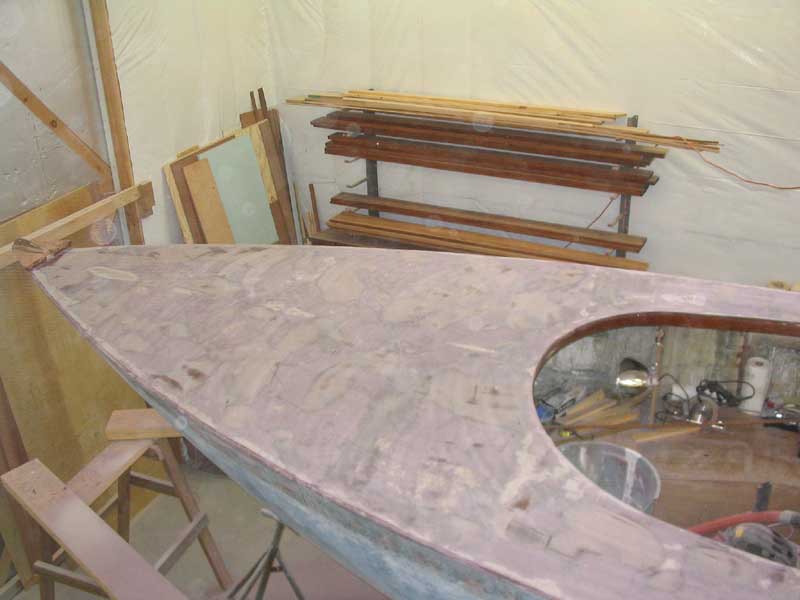
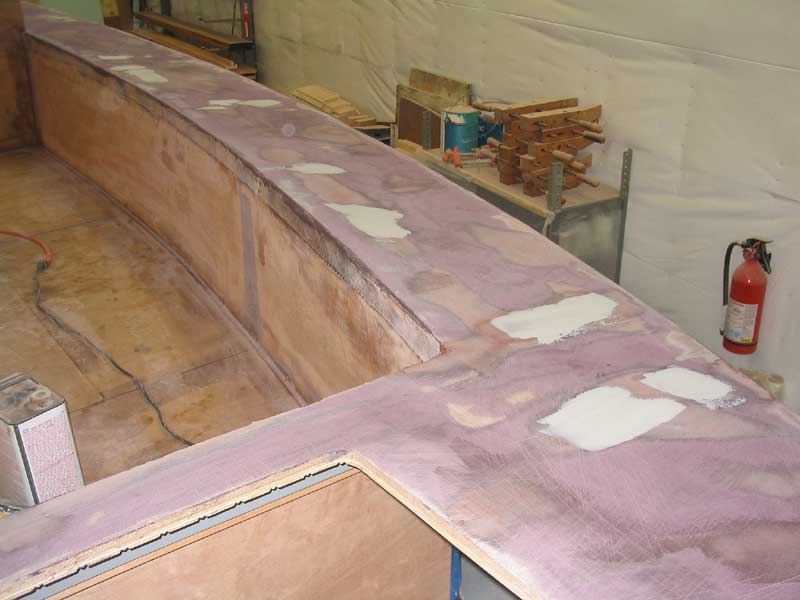
 In
the morning, I attacked the cured fairing compound with a longboard
(manual) and 60 grit paper. The fairing compound sanded fairly
easily, and only clogged the sandpaper in a few areas of the deck.
On the sidedecks, I held the longboard at an angle (relative to an
athwartships line) and sanded, noting the
low spots that showed up; the inner and outer edges of the deck should, in
theory, be the known reference marks for fairness, so I sanded more or
less until I had just removed the skim coat of compound at the edges.
This left numerous low spots in the field portion of the deck (the darker
purple areas in the photo), which I would fill in the next round. In
the morning, I attacked the cured fairing compound with a longboard
(manual) and 60 grit paper. The fairing compound sanded fairly
easily, and only clogged the sandpaper in a few areas of the deck.
On the sidedecks, I held the longboard at an angle (relative to an
athwartships line) and sanded, noting the
low spots that showed up; the inner and outer edges of the deck should, in
theory, be the known reference marks for fairness, so I sanded more or
less until I had just removed the skim coat of compound at the edges.
This left numerous low spots in the field portion of the deck (the darker
purple areas in the photo), which I would fill in the next round. |
 Sanding
the entire deck by hand took a couple non-sequential hours, as I had to
leave shortly after beginning for an appointment, but returned later to
complete the job. Sanding
the entire deck by hand took a couple non-sequential hours, as I had to
leave shortly after beginning for an appointment, but returned later to
complete the job. |
 Once
I had rough-sanded the whole deck, I vacuumed the sanding dust and washed
with acetone, then applied a second coat of fairing compound, hopefully
concentrating on the low areas left behind after the first sanding. Again,
this ended up being in the late afternoon, so I called it quits for the
day and left the second coat to cure overnight. Once
I had rough-sanded the whole deck, I vacuumed the sanding dust and washed
with acetone, then applied a second coat of fairing compound, hopefully
concentrating on the low areas left behind after the first sanding. Again,
this ended up being in the late afternoon, so I called it quits for the
day and left the second coat to cure overnight. |
|
|
 I began sanding the second coat the next day,
much later in the day than I had hoped, and, frankly, I ran out of steam
before the job was done. The sanding seemed more difficult, and
there were still numerous low spots that would require filling. I
decided to switch back to traditional self-mixed epoxy putties for the
remainder of the deck fairing, as I had in the past found these compounds
to be more user-friendly when it came time to apply them; the Quik-Fair
turned out to be terribly sticky and unruly, and was difficult to spread
cleanly as a result. I thought this was complicating the process,
and decided to return to the old standby. I began sanding the second coat the next day,
much later in the day than I had hoped, and, frankly, I ran out of steam
before the job was done. The sanding seemed more difficult, and
there were still numerous low spots that would require filling. I
decided to switch back to traditional self-mixed epoxy putties for the
remainder of the deck fairing, as I had in the past found these compounds
to be more user-friendly when it came time to apply them; the Quik-Fair
turned out to be terribly sticky and unruly, and was difficult to spread
cleanly as a result. I thought this was complicating the process,
and decided to return to the old standby. |
 After
completing sanding the second application, I spot-filled the remaining low
spots (still rather widespread) with microballoons and epoxy. After
completing sanding the second application, I spot-filled the remaining low
spots (still rather widespread) with microballoons and epoxy.Unfortunately, I could not return to sand the 3rd application until three days later. This complicated the sanding process because the epoxy had had three full days to cure. Epoxy, like most paints and resins, has several cure stages, and becomes increasingly hard and resistant the more time that has passed. |
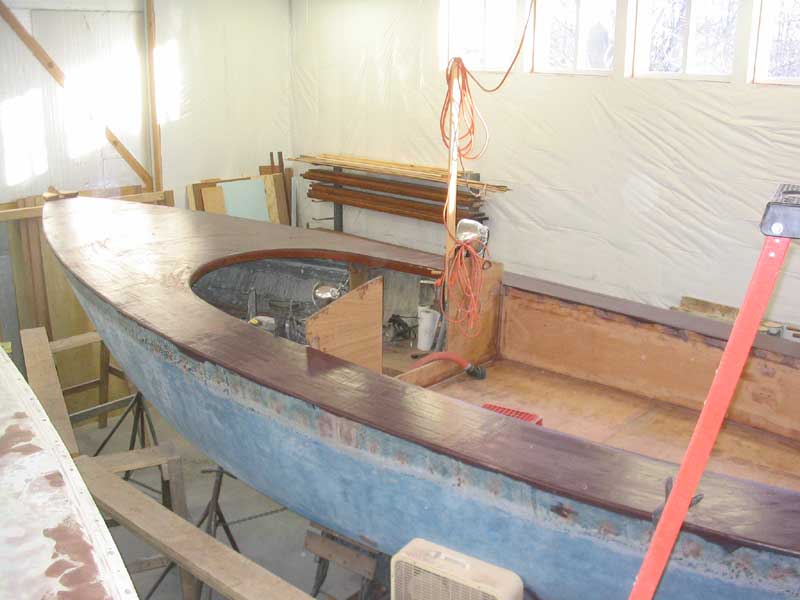
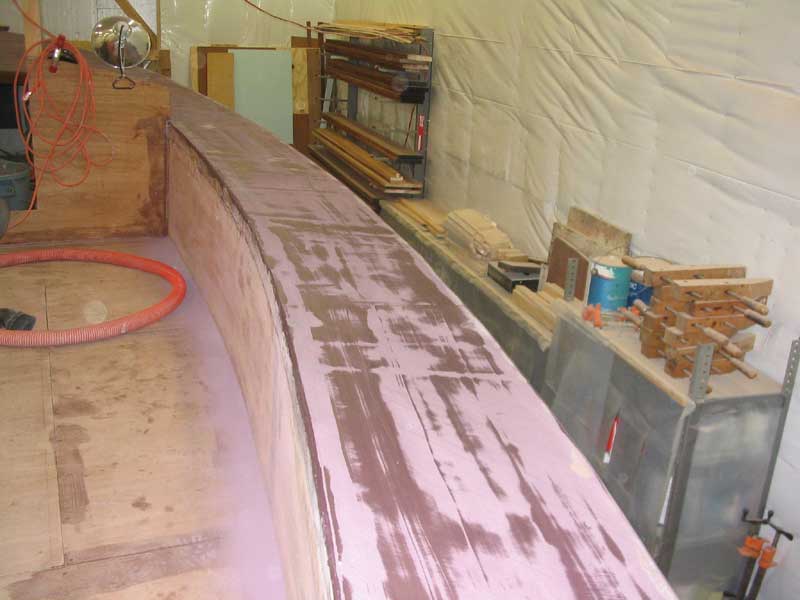
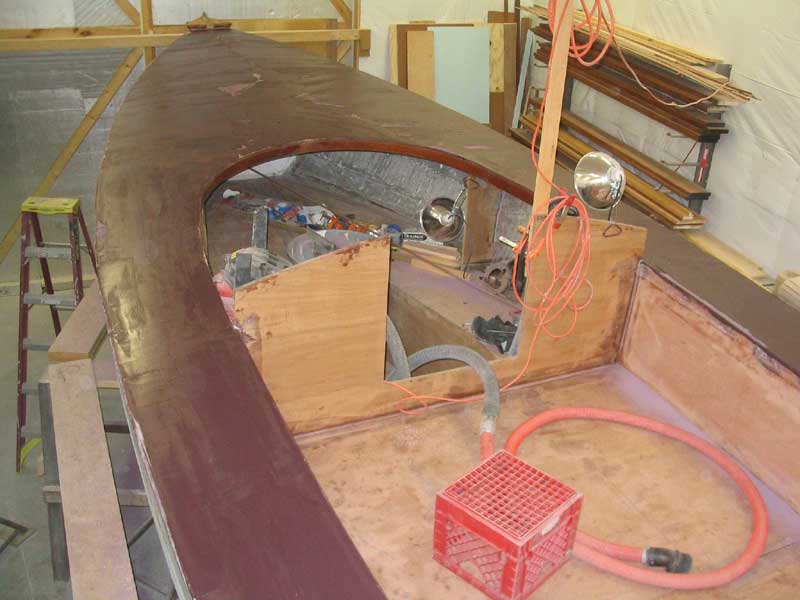
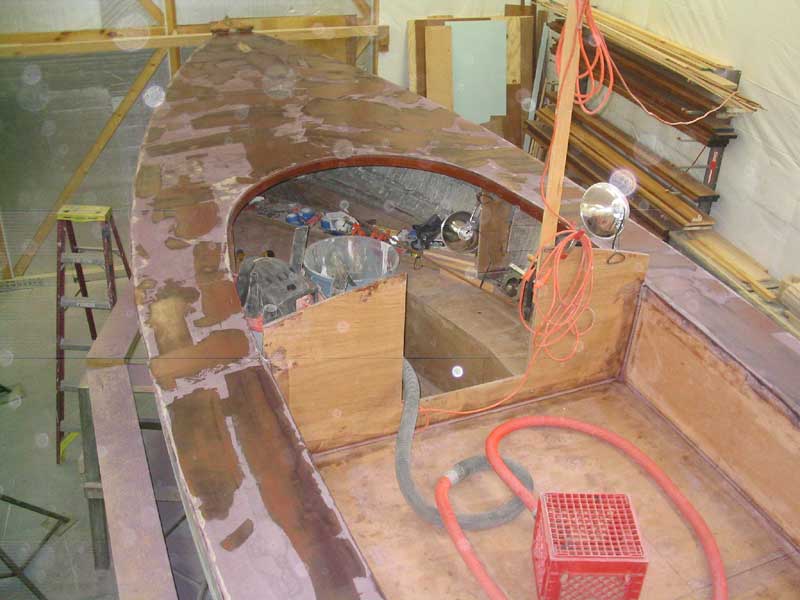
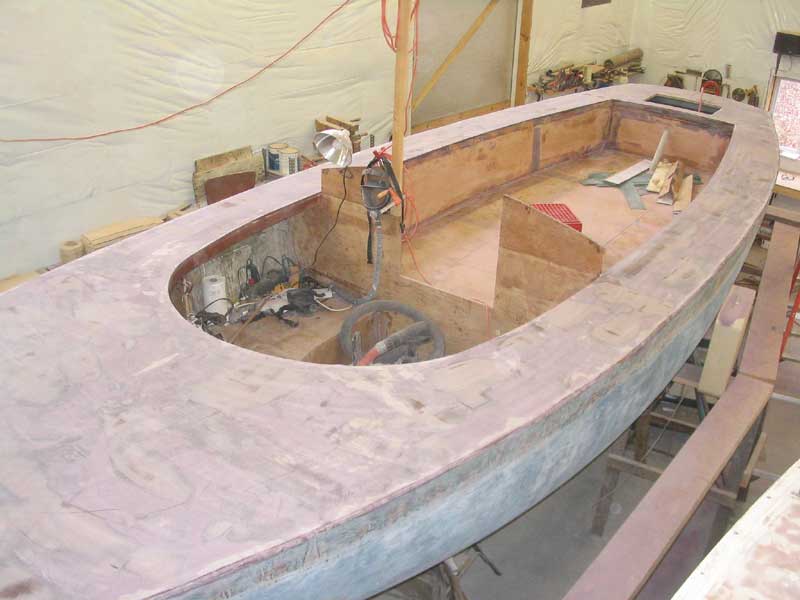
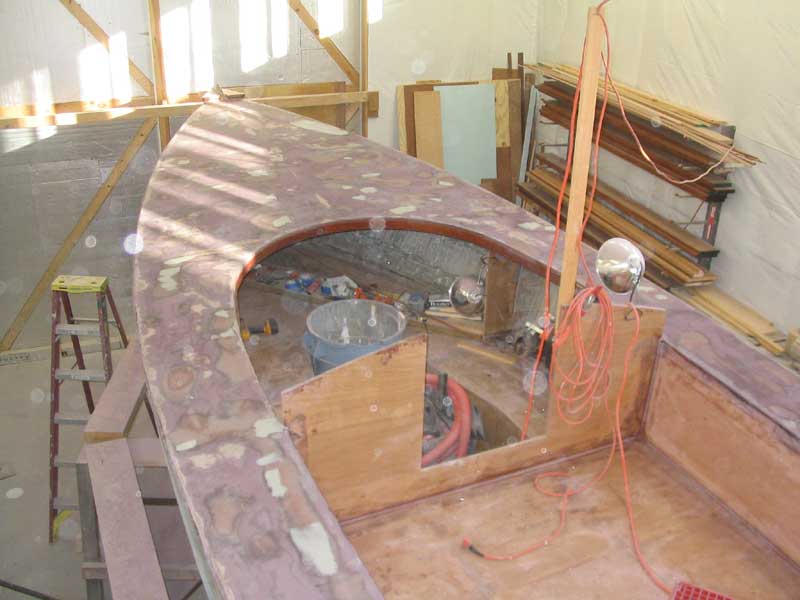
 I
found the sanding to be much more difficult after several days, and it
took me about 4 full hours to sand the entire deck again. I nearly
perished trying to finish up the foredeck, which I had left till last; the
epoxy compound there seemed particularly firm. In any event,
after those hard-won hours of hand longboarding, I finally completed the
3rd sanding, and was pleased that there were only a number of small,
shallow depressions remaining in the deck, signaling that the end of major
fairing was near--perhaps only one more application away. In the
photos, the low spots are clearly visible as the darkest brown areas
scattered about; the mottled colors of the other areas are the result of
three different applications of fairing compound, each with its own color
characteristics. I
found the sanding to be much more difficult after several days, and it
took me about 4 full hours to sand the entire deck again. I nearly
perished trying to finish up the foredeck, which I had left till last; the
epoxy compound there seemed particularly firm. In any event,
after those hard-won hours of hand longboarding, I finally completed the
3rd sanding, and was pleased that there were only a number of small,
shallow depressions remaining in the deck, signaling that the end of major
fairing was near--perhaps only one more application away. In the
photos, the low spots are clearly visible as the darkest brown areas
scattered about; the mottled colors of the other areas are the result of
three different applications of fairing compound, each with its own color
characteristics. |
 After
vacuuming the dust and then washing the deck with acetone, I applied the
4th coat of fairing filler to the low spots and left it to cure overnight;
I planned to sand it immediately the next morning to avoid the
difficulties experienced with the previous coat. After
vacuuming the dust and then washing the deck with acetone, I applied the
4th coat of fairing filler to the low spots and left it to cure overnight;
I planned to sand it immediately the next morning to avoid the
difficulties experienced with the previous coat. |
|
|
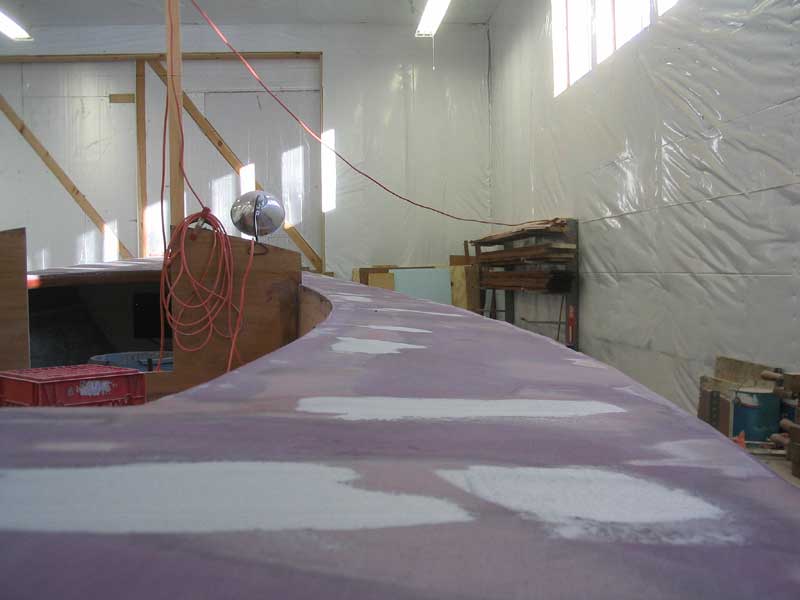
 Unfortunately,
the next morning I found that the heat in the shop had shut off overnight,
so the temperature was in the 40s. This affected the cure time of
the epoxy, and I was not able to sand the epoxy that day, as it remained
sticky and loaded the sandpaper badly, so I allowed it to cure the
remainder of the day and the next night, and sanded it thereafter.
The sanding was surprisingly time-consuming, but the 4th application of
filler seemed to pretty much take care of all the low spots, with only a
few areas remaining. Unfortunately,
the next morning I found that the heat in the shop had shut off overnight,
so the temperature was in the 40s. This affected the cure time of
the epoxy, and I was not able to sand the epoxy that day, as it remained
sticky and loaded the sandpaper badly, so I allowed it to cure the
remainder of the day and the next night, and sanded it thereafter.
The sanding was surprisingly time-consuming, but the 4th application of
filler seemed to pretty much take care of all the low spots, with only a
few areas remaining. |
 I
filled the final areas with a thin coat of Interlux Interfill, which I had
bought thinking it would be similar to the product that it replaced--and
which I had used before, Interlux 418/419. Strangely, this was not
the case: the Interfill was an odd mixture of a carbon-black tinted
epoxy base and an almost gritty amine catalyst, and was not at all
particularly smooth, either in texture or application. Nonetheless,
it was good enough for the task at hand, but I didn't think that I'd be
using it for a final, silk-smooth coat of compound anywhere. For
that, I planned to turn to the line of fairing/surfacing products from the
paint company (Awlgrip or similar). I
filled the final areas with a thin coat of Interlux Interfill, which I had
bought thinking it would be similar to the product that it replaced--and
which I had used before, Interlux 418/419. Strangely, this was not
the case: the Interfill was an odd mixture of a carbon-black tinted
epoxy base and an almost gritty amine catalyst, and was not at all
particularly smooth, either in texture or application. Nonetheless,
it was good enough for the task at hand, but I didn't think that I'd be
using it for a final, silk-smooth coat of compound anywhere. For
that, I planned to turn to the line of fairing/surfacing products from the
paint company (Awlgrip or similar). |
 The
next day, I sanded the final application, this time using an electric palm
sander for the bulk of the work. When that was done, I sanded the
whole deck one more time with the long board, using 100 grit paper.
This completed this stage of the deck fairing. The
next day, I sanded the final application, this time using an electric palm
sander for the bulk of the work. When that was done, I sanded the
whole deck one more time with the long board, using 100 grit paper.
This completed this stage of the deck fairing.
|