(page 12 of 27)

Scupper 153

Friday

The weather forecast suggested that I might have a chance the temperatures I needed to pour the epoxy countertop early in the week, so I continued some of the prep work towards that end, masking off lavishly around the countertop, and using duct tape to dam up the four openings in the countertop (stove, sink, and two storage openings).

With that complete, I sanded the companionway door trim and, after cleanup and all final preparations, applied a coat of the same rubbed-effect satin varnish used everywhere else in the cabin.  Much later, with the varnish cured, I removed the masking tape and rehung the laddor [sic].  Still ahead, I’d prime and paint the remainder of the companionway opening to complete the finishing work.

Total time billed on this job today:   3 hours

0600 Weather Observation:  45°, clear. Forecast for the day:  Sunny, 76°

Scupper 152

Thursday

Now that the first side of the forward cabin doors had had a couple days to cure, I could flip the door over and prepare the second side for the final coat of satin varnish, which I applied once preparations were complete.

In the cabin, I sanded and cleaned the companionway door trim and environs, then applied the 4th build coat of gloss varnish to these surfaces.

The port trim rings required some light sanding to finish up with the minor fairing repairs I’d completed.

Unclamping the mast compression post assembly, I used the table saw to true one glued edge, then planed the blank clean and smooth on all sides, ending up with a square blank about 2-7/8″ on a side.  I trimmed the ends and set the post aside for now.

To finish up my simple rudder stop system, which would prevent the rudder from turning too far and hitting the hull (this had caused the damage to the top of the blade that I repaired earlier), I installed a pair of stainless steel cables running between the bronze arm I’d installed on the rudder shaft and the bulkheads on either side of the engine room.  To prepare for this, from outside the boat I turned the rudder as far as it should go to one side, and used a little wedge to hold it in place at that position (i.e. the maximum turning angle).  Then, working in the after steering room, I installed the cable between new eyebolts on the steering arm and bulkhead, securing the cable as needed with simple U-clamps.  These aren’t the sleekest or strongest things out there, but in this instance they’d do the job well and easily and with sufficient strength for the job description.   They also allow easy length adjustment should it become necessary.

I finished up one side, then turned the rudder and held it in position on the other side and repeated the process.  I originally tried the eyebolts in one of the pre-existing holes near the tops of the bulkheads, but decided to move them to new holes near the bottoms of the bulkheads at the hull when I found that the cable might torque the unsupported tops of the thin bulkheads too much if someone at the tiller pushed too hard against the stops.  The attachment was much more secure at the lower, tabbed edges of the bulkheads.

Quite frankly, if someone was truly determined to push the tiller farther past the extent of the cables, I preferred that the cables slip than cause damage to some other more critical component or structure

Not that they would slip, necessarily–but the point is that ultimate cable strength here could be more harmful than not.

With the cables in place, the rudder stopped a comfortable but minimal distance from the corner of the hull on each side.

Total time billed on this job today:   5 hours

0600 Weather Observation:  58°, rain. Forecast for the day:  Rain and showers, maybe a thundershower, 71° 

Scupper 151

Wednesday

With some other commitments on the docket, it was a shorter day, some of which I spent on planning ahead for the upcoming electrical installation on the boat (both propulsion and house sides), and in the meantime I continued work on the salient ongoing chores on the boat.  With summer break approaching, the current phase of the project was winding down at this point, and the important-to-finish varnish work in the cabin was a bit of a crimp on my style in terms of switching focus to either systems or final exterior preparations, so for now I satisfied myself with short days that checked all the critical boxes on my immediate list.

One of these little boxes was the interior port trim rings, several of which required some minor cosmetic-level repair to fix some minor areas of damaged gelcoat inside the rings, and a larger area on one ring where the edge had chipped away in an unsightly manner.  I applied epoxy fairing compound as needed to these small places, and set the trim rings aside for curing.

After a session of engine (I can’t help calling it the engine just for convenience’s sake and long convention) and electrical planning and materials specifications, I moved ahead with the companionway trim work, lightly sanding, cleaning, and revarnishing (coat #3) the door trim and environs.

Perhaps the last real interior trim to deal with was the mast compression post, which fit between the deck and keel directly beneath the mast step.  As nice and open as the cabin was at the moment, the compression post was required for mast support and therefore I must build a replacement for the original one, which was in fine structural condition but cosmetically suspect and built of the wrong wood species now that the cabin was cherry-trimmed.

I had one long piece of rough cherry stock on hand, a piece left over from some long-ago order or another, and now I needed it in order to come up with enough cherry for the roughly 3″ square compression post assembly.  I began by cutting the 14′ long piece in half (the compression post was somewhere over 6′ in length), then planed it smooth on both sides, keeping the blank as thick as possible while removing all the rough milling marks.  I ended up with stock just under 1″ in finished thickness, and after straightening one edge of the rough boards I sawed three pieces 3″ wide from which to build the new post.  Finally, I laminated the three sections together with epoxy adhesive for strength, and clamped the assembly securely for curing.

Total time billed on this job today:    4.5 hours

0600 Weather Observation:  50°, light rain.  Forecast for the day:  Showers and cloudy, 65°

Scupper 150

Tuesday

With base coats complete on both sides of the forward cabin doors, I switched now to the rubbed-effect satin finish for the next coat on the main cabin side of the doors.

Working in the cabin, I lightly sanded the first coat of varnish on the companionway door trim, then cleaned up to prepare it for varnish later in the day.

In the meantime, I turned to the galley countertop.  Working with an anecdotal assumption, formed over 52 years of direct experience, that ambient temperatures in the area would someday during the coming months eventually rise back into the mid- or upper 70s or higher (an elusive benchmark thus far this season), making it feasible for me to pour the self-leveling epoxy coating for the countertop surface, I wanted to get some final preparatory steps completed now so that when the time came, there’d be nothing standing in the way of the temperature window and completion of this crucial part of the interior.  Sure, I could raise the heat in the shop to this level if needed (and I would if I had to), but I thought it seemed likely that Mother Nature could take care of the temperature if I maintained patience.  It wasn’t going to happen this week, but I’d be ready when it did.

Whether necessary or not, I wanted to seal around the edges of the countertop where it met the bulkheads, ceiling, and trim to ensure that the top surface would contain all the liquid epoxy when I installed it and to prevent any chance of leakage down some small gaps or cracks.  I’d never worked with the pourable epoxy coating before, and wasn’t about to take a chance of ruining an adjacent surface or compartment (not to mention the countertop) with seepage.  I removed the paper covering I’d had in place over the countertop for protection, then with a spacer masked off clean lines 1/8″ on either side of the seams along the edges on all sides.  I added another width of tape for extra protection.

Next, I applied a bead of brown sealant, pressing it tightly into the corners and gaps with a finger and removing most of the excess in the process.

A little later, once the sealant had tacked up, I removed the masking tape to leave clean lines on both sides.  I hoped and planned that this bead would provide the necessary damming at the countertop edges to prevent any epoxy loss through the gaps.

Afterwards, I finished up a small lingering task in the head, where I installed a pair of door catches on the engine room door to hold it securely closed.

This took care of my interior plans for the day, so I finished up with a second coat of varnish on all the companionway trim areas.

Total time billed on this job today:   5.5 hours

0600 Weather Observation:  45°, clear.  Forecast for the day: Sunny, 68°

Scupper 149

Monday

Continuing with the forward cabin doors, after a light sanding and the usual cleanup steps I applied the fourth coat of gloss base varnish to the main side of the two doors.

The main focus of my day’s work was to prepare the companionway door opening as needed for varnish and paint. The bulk of the trim work was complete, but there were  two outstanding pieces that required my attention first, starting with the top edge of the laddor [sic] back panel, which I’d left intentionally short and unfinished during original construction so that I could add in the final trim once the door was hung.  As it turned out, I could have completed this earlier, and perhaps I’d meant only to wait till the panel was installed in the door frame itself, but in the event it was a simple enough piece to cut and fit and install as needed to finish off the raw plywood edge.

The aft edge of the cabin sole, where I’d extended it somewhat into the head and through the door opening, required trim to cover the edge, where there was a small gap and the plywood edge grain exposed.  I started with a simple blank cut to fit the overlap as needed, then shaped the piece to create an appropriate threshold-type trim that wrapped over the edge of the cabin sole, covering the area in question as needed.  Various cuts and test-fits eventually achieved a reasonable fit on both sides of the confined trim area and against the curved shape of the head liner itself.  I installed the trim with glue and brads.

Meanwhile, the upper companionway area required some minor fine fairing to clean up some of the new work in the area, including on the interior face which is not visible in the photos.  All this part of the trim would later be primed and painted to match the interior; exterior portions of the old companionway trim, which I’d also sanded previously, would be finished to match the decks when the time came, leaving no untreated wood on deck.

Now I could mask off all the new companionway and related trim to prepare it for its varnish coats.

With masking complete and other final preparations done, I applied a thinned sealer coat of varnish to all the companionway and related trim.

Total time billed on this job today:   5 hours

0600 Weather Observation:  50°, fog but clear overhead.  Forecast for the day:  Sun and clouds, windy, 68°

Scupper 148

Tuesday

As per usual, I began work by sanding and varnishing the forward cabin doors (#3).

At the companionway, I cleaned up the new walkway and epoxy fillets as needed, preparing for the final trim to finish off the opening.  The edge of the trim where it met the inboard side of the companionway, which area would later be painted, required a little fillet for better appearance, and on the opposite, outboard side, there was still a gap between the molded liners and the other trim that required attention in one way or another.

I decided to fill in the large gap to starboard with a piece of cherry, which I cut to fit and epoxied in place.  Once the epoxy cured, I could sand this a little to incorporate it smoothly with the adjacent areas (again, this area to be painted), then finally complete the little bit of trim along the outboard edge of the companionway.  While I was working with epoxy, I installed a nice fillet on the inboard edge.

To trim out the opening beneath the threshold, and to starboard of the door, I made up a small piece of cherry trim as needed, and glued it in place.  I’d finish this, and the rest of the door trim, with varnish later.

The last piece of trim required was inside the door opening itself, beneath the threshold and to cover the seam between previously-installed pieces.  I patterned and cut a piece of cherry to fill the space, leaving a small reveal on the main cabin side.  Once I was satisfied with the fit, I installed the trim with glue and brads.

Other than finishing, and the small pieces of (easy) trim on the starboard (outboard) side of the companionway opening and to finish off the still-exposed top edge of the plywood on the laddor [sic] itself, this completed at last the companionway area.

With some relief, I turned to the port trim rings, the trio on which I’d performed minor fiberglass repairs earlier.  Now, I marked a cutline on the starboard forward ring so I could trim the repaired area to shape, then I sanded all three remaining trim rings to match the others.  All would now require some minor cosmetic fairing repairs before primer and paint.

Total time billed on this job today:  5.5 hours

0600 Weather Observation:  49°, partly clear.   Forecast for the day:  Sunny, 65°

Scupper 147

Monday

With four build coats on the back (actually the forward-facing, but less-visible) sides of the doors for the forward cabin, I decided to flip them and work on the build coats on the main side, so after final preparations I applied the second coat of varnish to the second side.

I cut a series of cherry bungs for the companionway, then glued these in place in all the existing screw holes.

While the glue set up, I continued work at the edge of the companionway where it met the ladddor [sic].  To fill in the space, I required another piece of angled trim, which was simple in concept but, as with most things, more complicated in execution.  The piece needed to be thicker than a single piece of stock, so I glued and fastened a piece of stock as needed for the job, then shaped it to the wedge-shaped angle required to fit in the opening.  Because of the nature of the existing structures, the new trim also required a relief cut (rabbet) on the back, hidden side in order to fit around parts of the old companionway.  The long and the short of it all was that eventually, after several test-fits and fine-tuning, I achieved a reasonable fit.  This part of the trim would later be painted, and rather than spend another week perfecting the end joint where the trim met the top of the little shelf and the old teak trim above, I planned to (and later did) fill that small void flush and smooth with thickened epoxy.

At the outboard edge of the companionway opening, and at the top of the opening into the head, additional trim would be required to finish things off, but one thing at a time.   For now, I secured the new trim with screws from the bottom side.

Before trimming the bungs and moving on to the final sanding of the companionway area, I changed directions for a few minutes and worked on the fiberglass trim rings for the insides of the deadlights.  These required basic sanding and surface prep before refinishing, and several of the rings needed some minor repair–two around the inside edge, where the thin original laminate had been chipped out, and one where the ring had been cut at one edge, I think to originally accommodate the old tall hanging lockers in the forward cabin.

After some  preparation, I installed some new fiberglass at the cut edge of the one ring to extend it, so that I could later reshape it to the proper contours.  Meanwhile, I added small bits of fiberglass to the other two rings to repair the minor damage there as well.  For the remaining three trim rings, I sanded and cleaned up the original surfaces to prepare for new paint, and would follow suit with the others once the new repair work was complete.

After lunch, I trimmed the bungs with a chisel, then sanded all the new companionway parts as required, cleaning up some of the seams and smoothing the rest of the bungs.  At the same time, I sanded the original teak lining the inside of the companionway opening above, the first step towards preparing that area for a new paint finish.

With the various repairs and extensions to the base of the companionway walkway, there were a few ways I could have addressed the area cosmetically and to finish things off, but I decided upon a new thin veneer of 6mm marine plywood to cover and reinforce the surface below, and provide a clean, new, smooth surface to better accept paint.  After my light sanding of the adjacent areas, I’d briefly considered whether I should consider finishing the old teak bright again, but it was too far weathered to bring back properly without an enormous amount of work, and that wouldn’t have addressed the problems on the horizontal walkway anyway.

I made a basic cardboard pattern of the walkway, then cut out a new plywood top to fit, leaving it just back from the forward and after edges to allow for a transitional fillet.  After final preparations, I glued the plywood in place in a bed of epoxy adhesive, and filleted the edges and ends as needed.  To secure the plywood while the glue cured, I added weight from above.

I spent the rest of the day unpacking, inventorying, and inspecting the just-arrived electric propulsion motor and some of its component parts.

Total time billed on this job today:   8 hours

0600 Weather Observation:  50°, rain.  Forecast for the day:  Rain and maybe a thunderstorm, 71°

Scupper 146

Friday

To avoid the chore being lost to absorption in the day’s other major job, I started once more with the sanding and varnish work on the forward cabin doors.

Next on the companionway trim agenda was the little shelf area to port of the ladder, covering a flat area on the top of the molded liner components.  The original trim here had been secured with heavy beads of silicone sealant, most of which was still present (as shown below), so my first task was to scrape this away.

In a series of test-fits and markings, I prepared a base piece of 1/2″ cherry plywood for the shelf.  I angled the shelf past the ladder itself, and edge-banded that portion of the shelf with solid cherry since it would be exposed when the ladder/door (should I call it a laddoor?) was opened.  I extended the shelf past the trim on the center part of the unit, and secured the platform with screws that I’d bung later.

With this basis in place, I continued with the aftermost piece to starboard, which extended up to meet the overhead and out to meet the back edge of the laddoor.  I milled a small rabbet so the fiddle could extend past and cover the plywood edge grain within.

At considerable length belying the small area in question, I laid out, milled as necessary, and installed the remaining fiddles to surround and trim out the shelf.  This was particularly complicated at the ladder side, but because the existing moldings and adjacent surfaces were all at various small yet noticeable angles to one another and everything else in creation, the cuts to conjoin various pieces of this essentially simple t rim required many small adjustments and test-fits to approach serviceability.  These remaining fiddles didn’t really come together for installation till all three pieces were carefully cut and fitted, so photo-wise, it turned in ton an all-or-nothing proposition.

I purposely left the new trim unprofiled at the top edges and corners, since I didn’t want to pre-mill anything and find that it interfered with the various joints.  Instead, I planned to profile and ease these final edges later, along with some related and similar cleanup and sanding required on much of the companionway trim area and following bunging of all the screw holes.

Next, I laid out, milled, and eventually installed a piece of trim to cover the last piece of exposed raw liner edge running from the companionway/head opening aft into the head along the overhead near) centerline.

Now all that was left (though by now I’d no illusions about this representing a straightforward nor minimal effort) was the final trimming at the top of the ladder, where the existing teak companionway trim required modification and enhancement to complete.  The minor change in how the laddoor rested in its final place meant that I needed a wedge-shaped piece of trim to fill in at the very top edge, which piece was simple to make and install with epoxy adhesive and screws (after preparing the bonding surfaces accordingly).

This filled in the top part of the gap (and later I planned to apply a new surface to the companionway walkway that would cover and reinforce these various glue joints and improve cosmetics for the planned paint finish), but there was still a substantial trim challenge ahead to finish off the remainder of the opening from inside.  This would clearly require a multi-step approach, and with the day drawing to a close I knew I’d never get it all done now, but I started with a piece of cherry to close off and support from beneath the gap between the head liner and the companionway above.  Once I’d fit this piece as needed, I secured it with screws into the wood above.

There were still gaps to be dealt with around the top of the laddoor, which I figured I’d build with additional solid wedge-shaped and angled pieces as needed, but for now, with fresh glue on the piece above and the day’s time run out anyway, I left this final trimming task for next time.

Total time billed on this job today:   8 hours

0600 Weather Observation:  Partly cloudy, 40°. Forecast for the day:  Mostly cloudy and showers likely, 53°

Scupper 145

Thursday

First thing, I sanded and varnished anew the forward cabin doors.

I made a plywood template of the shape of the side of the companionway ladder, which I could use to mark the required angle on both sides of the laminated blank I’d made for the hinge mount and trim.  I made a series of cuts into the blank from the waste side, stopping just short of the layout lines; these cuts would acted as guides as I planed and sanded the blank down to the proper shape, sneaking up on the line and final shape.

After a test-fit to measure and cut the angle at the top edge of the new trim, I installed the trim with glue and screws.  Because this trim would support the weight of the door and the users of the ladder, I added extra screws on either side of each hinge location.

Now I could install the hinges and operate the door for the first time, which I did with some trepidation, hoping it would swing as intended; it did.

With the door fully closed, there remained an angled gap on the outboard (starboard) side of the opening, since apparently the angles of the molded interior on the hinge side didn’t match that of the opposite side of the opening.  Inspecting the original trim from the starboard side, I found that an angle had been cut into the rabbet that helped make up for this in the original setup as well, but I didn’t have any detailed photos to show just how the old door/ladder unit had rested here; this was of no matter, but I would have liked to compare the original for my own edification.

Regardless, now I had to trim the opening to accommodate how the door rested now, so to begin I cut and fit a piece of trim on the head side of the opening, running from sole to overhead and following the line of the opening.  I attempted to set up the trim so it was plumb, but found that the original opening was far from this ideal, and to bring the trim out far enough to correct it would have been frankly silly, and impeded the narrow opening even more than the opening managed on its own.  I decided there was no reason the trim had to be plumb, and that it was better to match the existing angle.  Since the adjacent surfaces were angled as well, there would never be any visual cues to draw one’s eye to it, so the practical answer was to match the opening’s contour itself.

This first piece of trim provided a landing point for the next piece of trim, which would provide me with the angle I needed to close off the outboard side of the opening and meet the back side of the door.  After some measurements, I cut an oversized blank to fit in the opening and extend out as needed to meet the door.  To allow trimming the side of the opening on the main cabin side, I held the bottom edge of this trim 1/4″ out from the bulkhead; the top edge would be substantially further proud of the bulkhead.  I clamped this edge trim in place against the closed door, then marked the edge where it passed by the vertical trim I’d just installed on the inside.  Then, I cut the trim to the line, sanded and profiled the edges as needed, and finally installed the new piece with screws into the side of the head trim.

From above the companionway, it was easy to see how the new trim piece (shown in the second two photos) filled the gap where the door’s natural closure ended.  The large gap in the companionway opening itself had originally been covered with additional teak trim, which had broken free even before the boat ever arrived here for the project, and I’d kept the piece on hand for future use; in any event, this missing piece is why the opening looks so strange at the moment.

To finish off this side of the opening from inside the boat, I prepared a 2″ piece of 1/4″ thick trim.  This was too thin to secure with hidden screws, so after some surface preparation in the bonding areas I secured it to the bulkhead with a few dabs of epoxy adhesive, clamping the trim in place while the glue cured.

While I was at it, I glued back on the missing piece from the top of the companionway.  I needed this back in place just as a structural basis for the remaining new work required at this top end, and all this would later be covered and/or cosmetically enhanced as I wrapped up work in this area in the coming days.  This whole clamping arrangement obviated the use of either the swinging ladder or my construction ladder, so I had to climb out of the boat through the forward hatch; this pretty much ended any further chance for work inside the boat till the epoxy cured overnight.

Total time billed on this job today:   7 hours

0600 Weather Observation:  Partly cloudy, 40°. Forecast for the day:  Partly sunny, 62°

Scupper 144

Wednesday

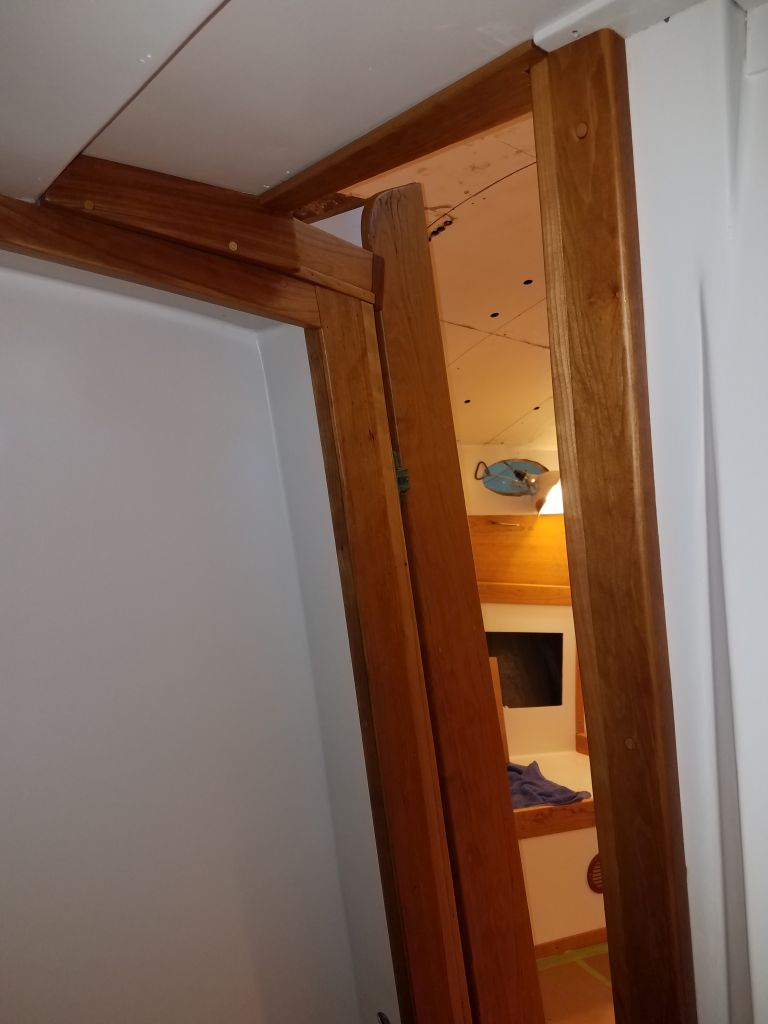
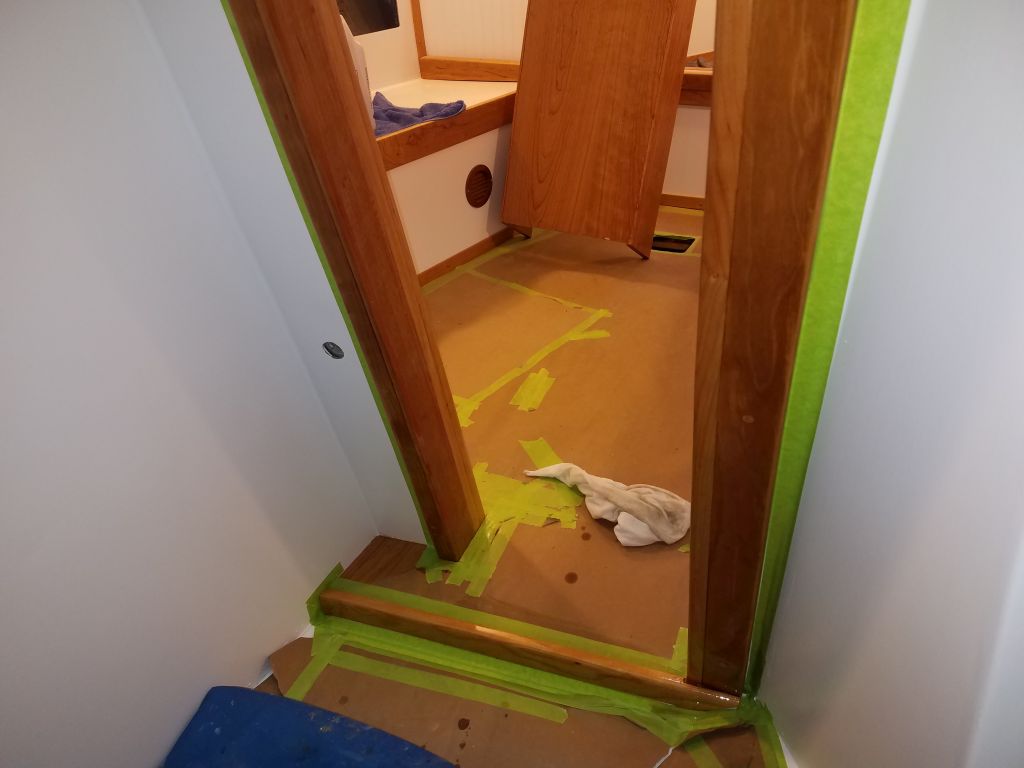
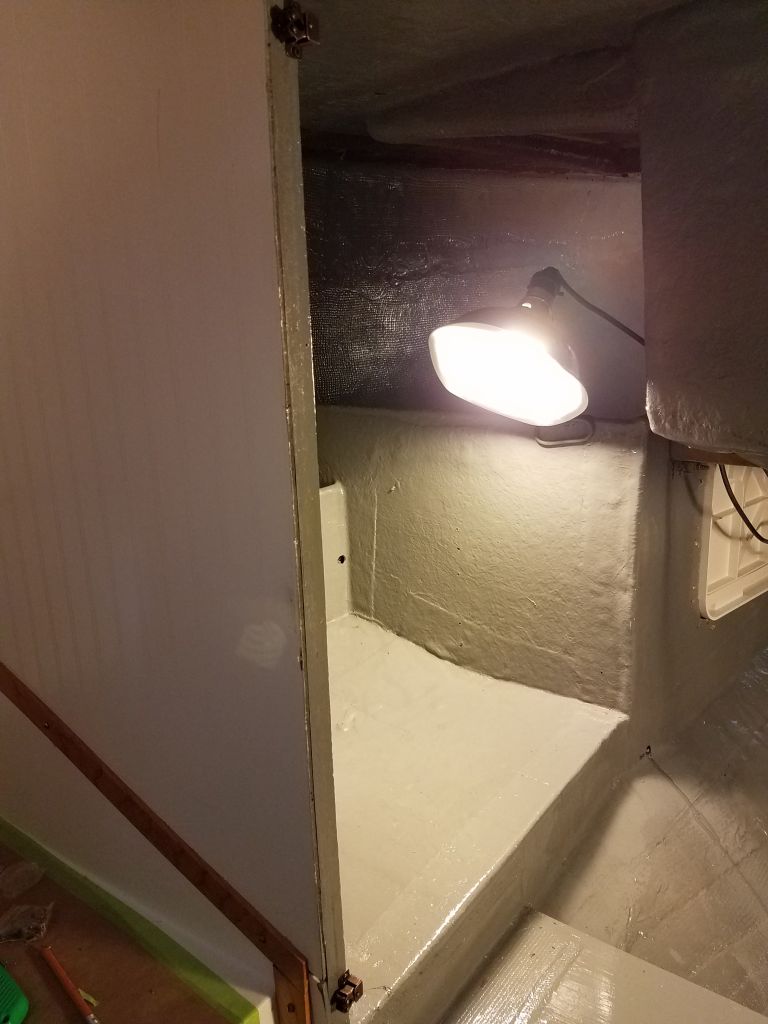
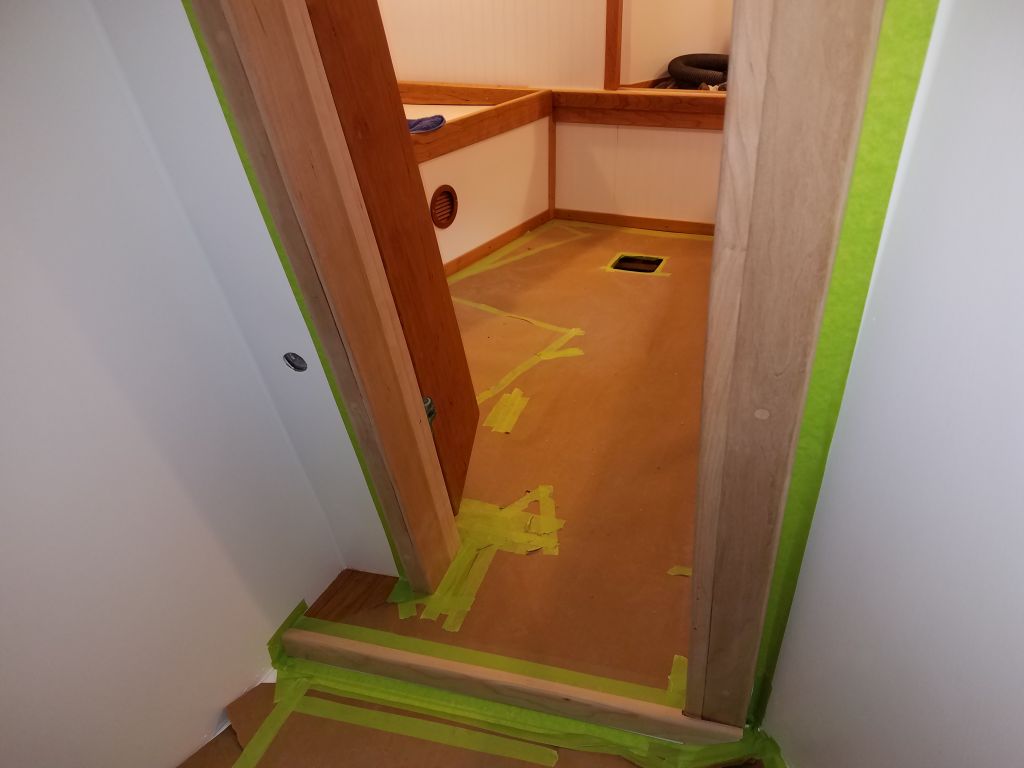
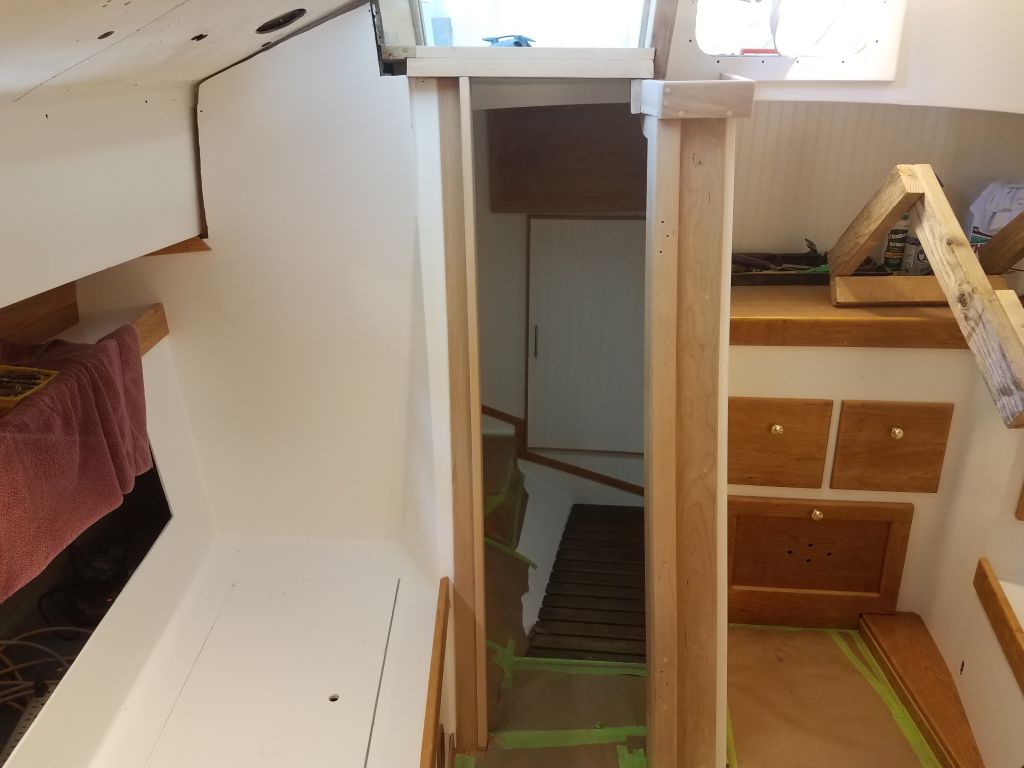
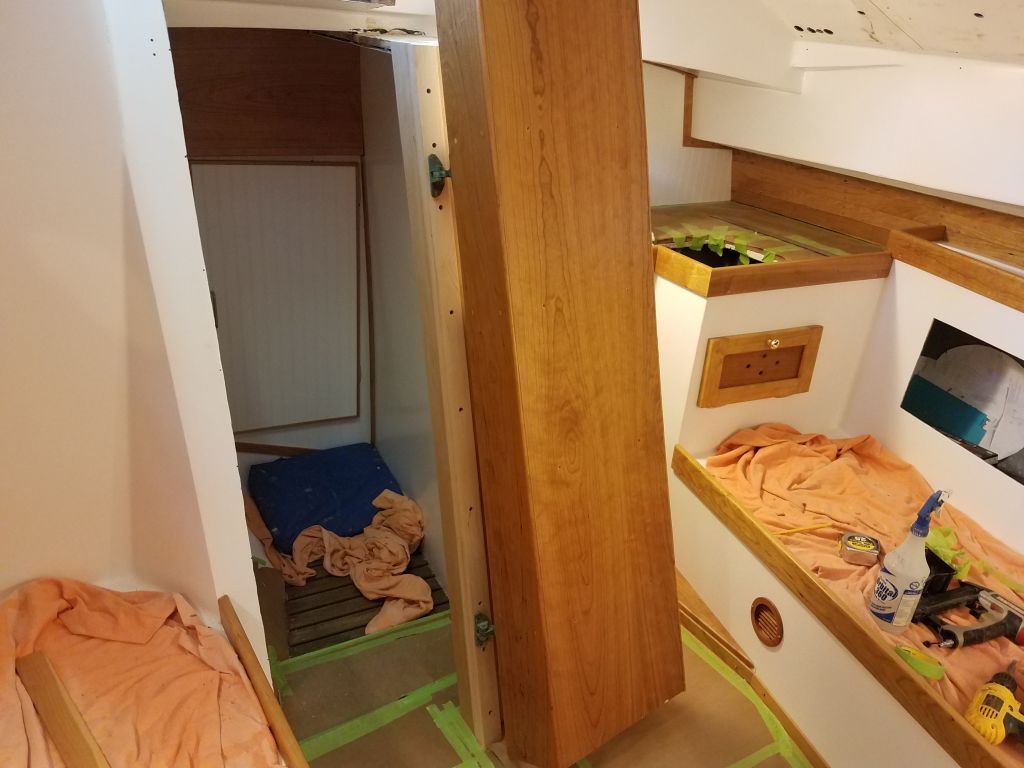
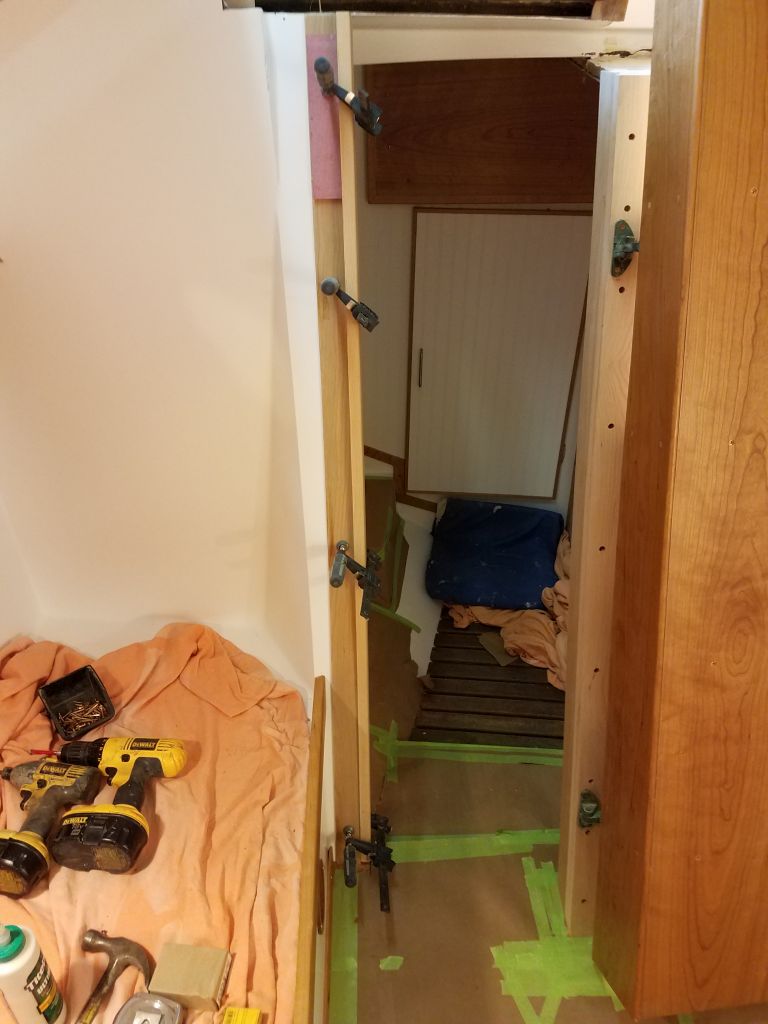
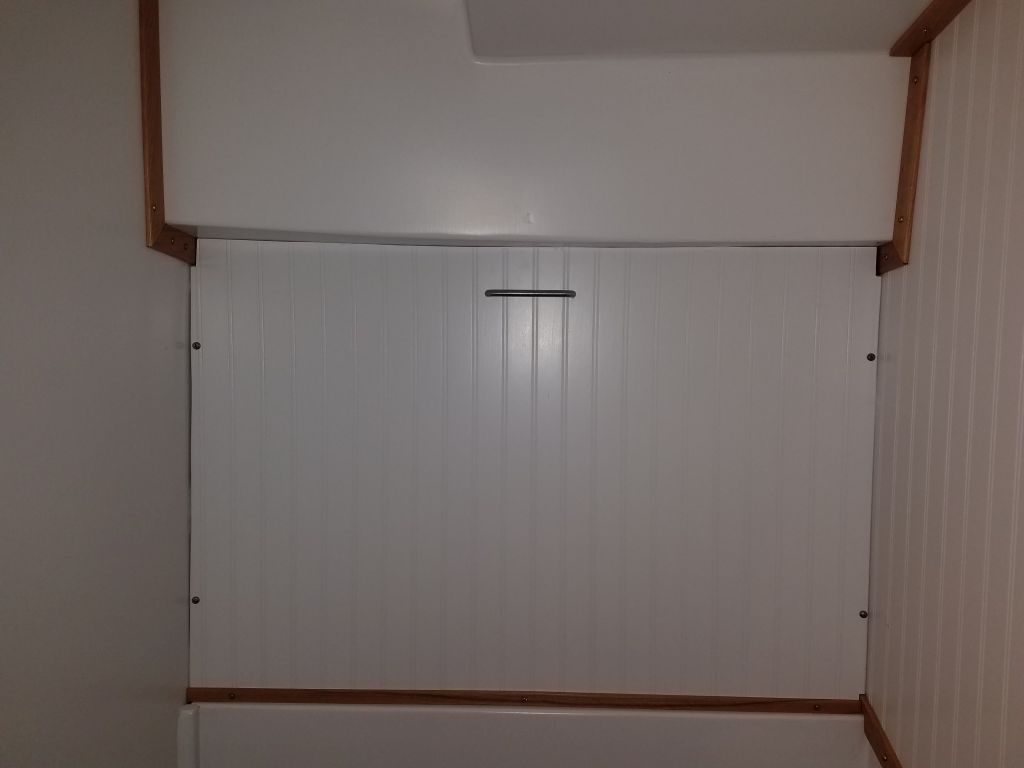
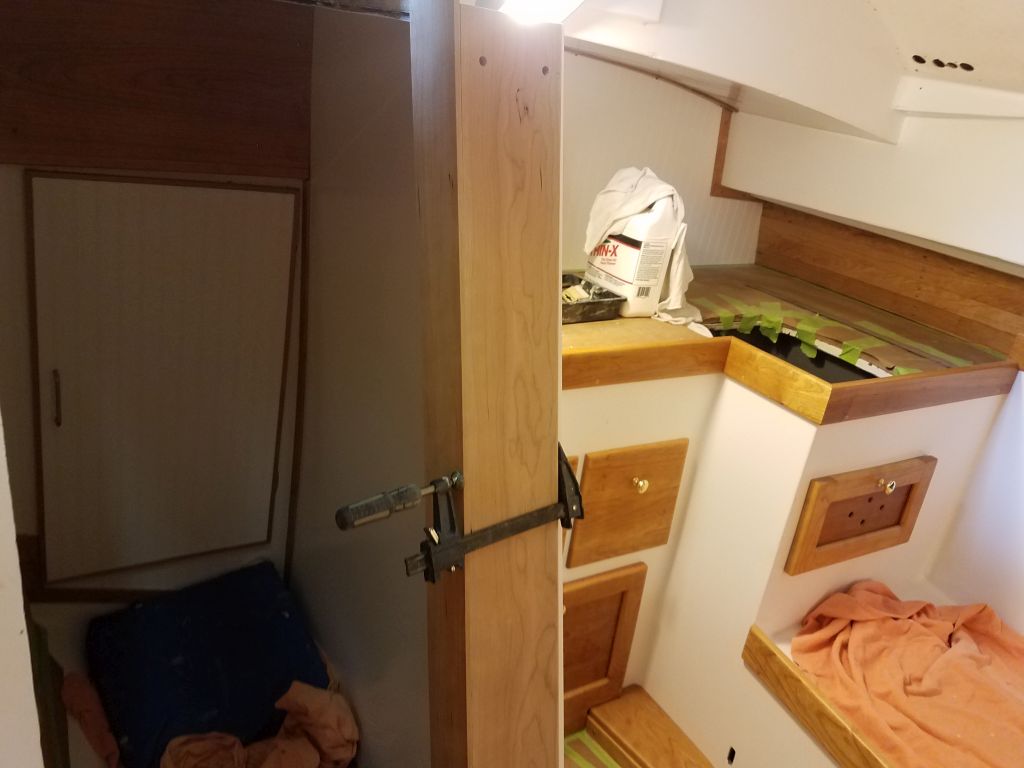
Now that the varnish work was complete, I installed the head trim pieces, and hung the door to the engine room.

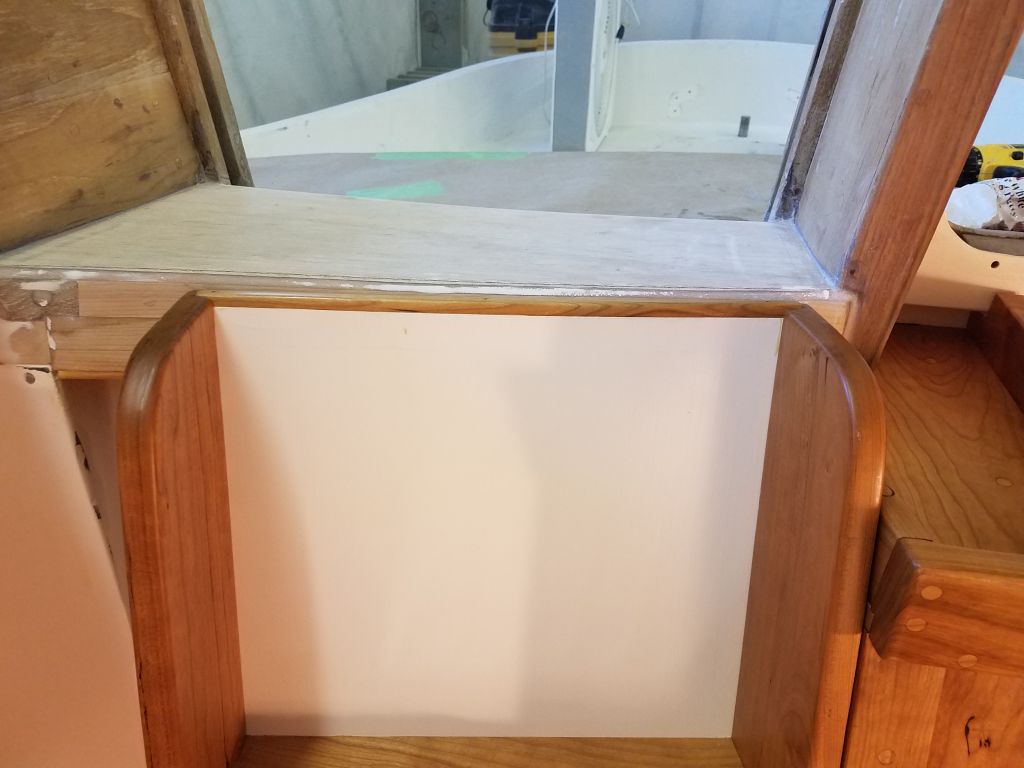
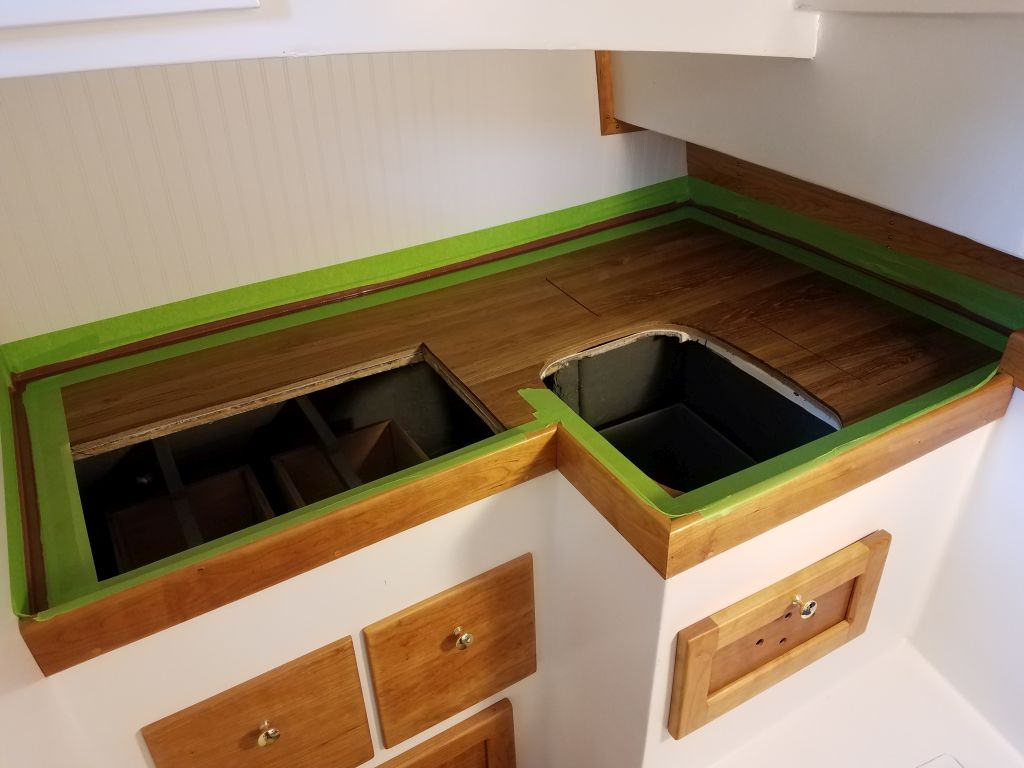
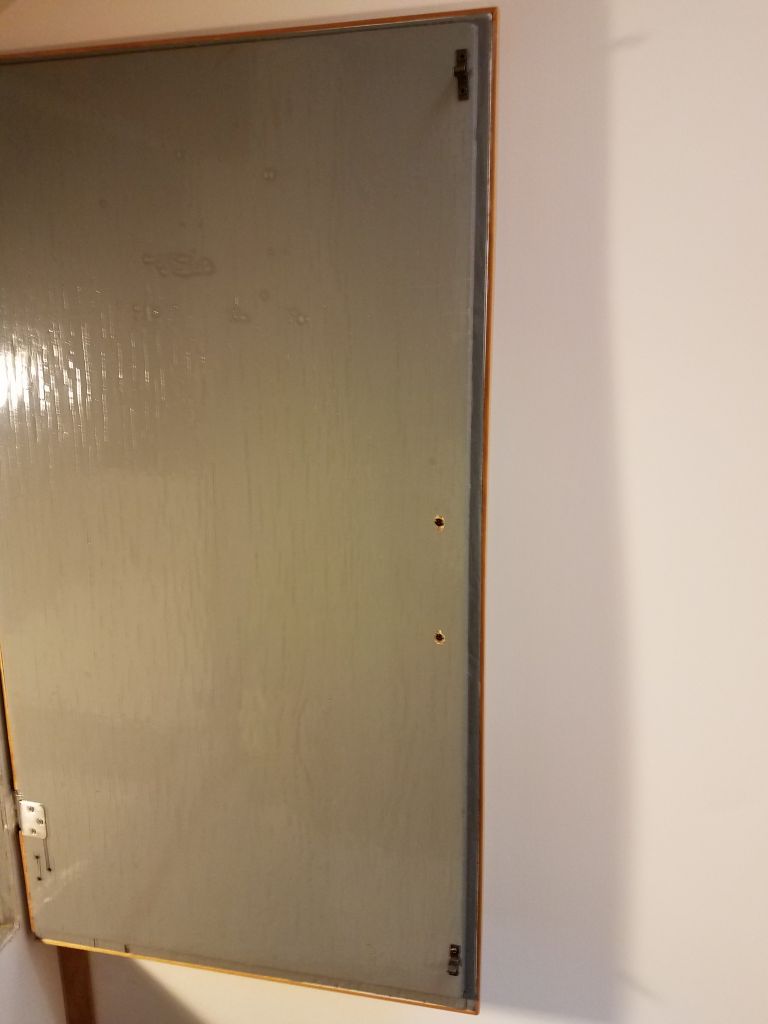
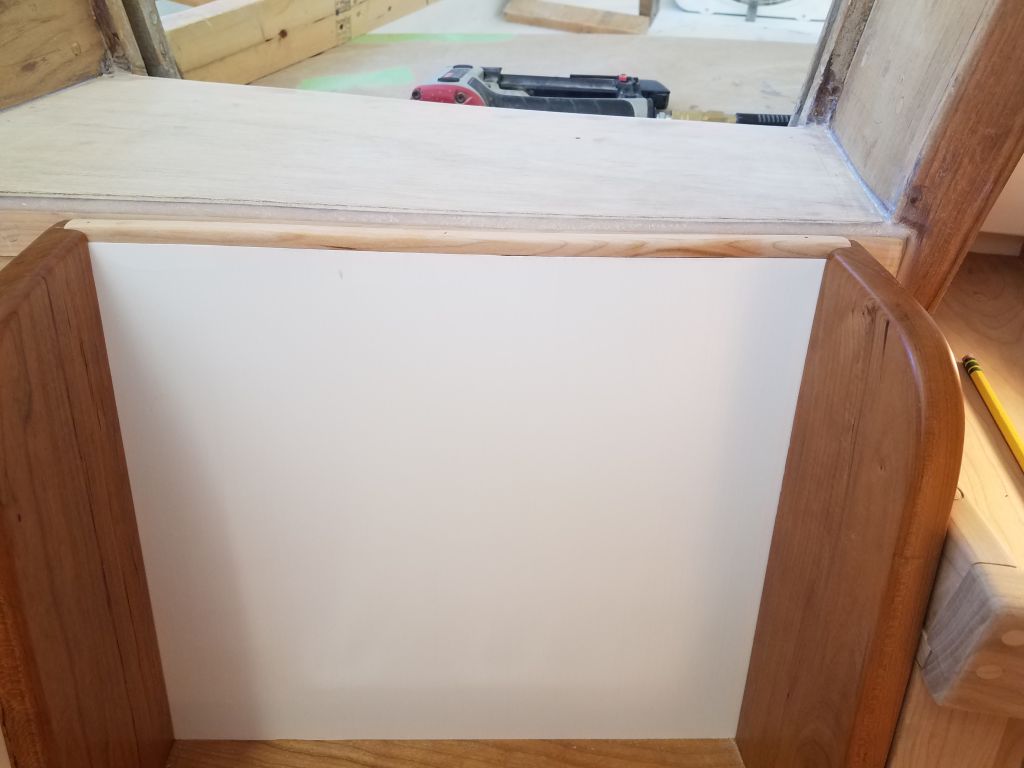
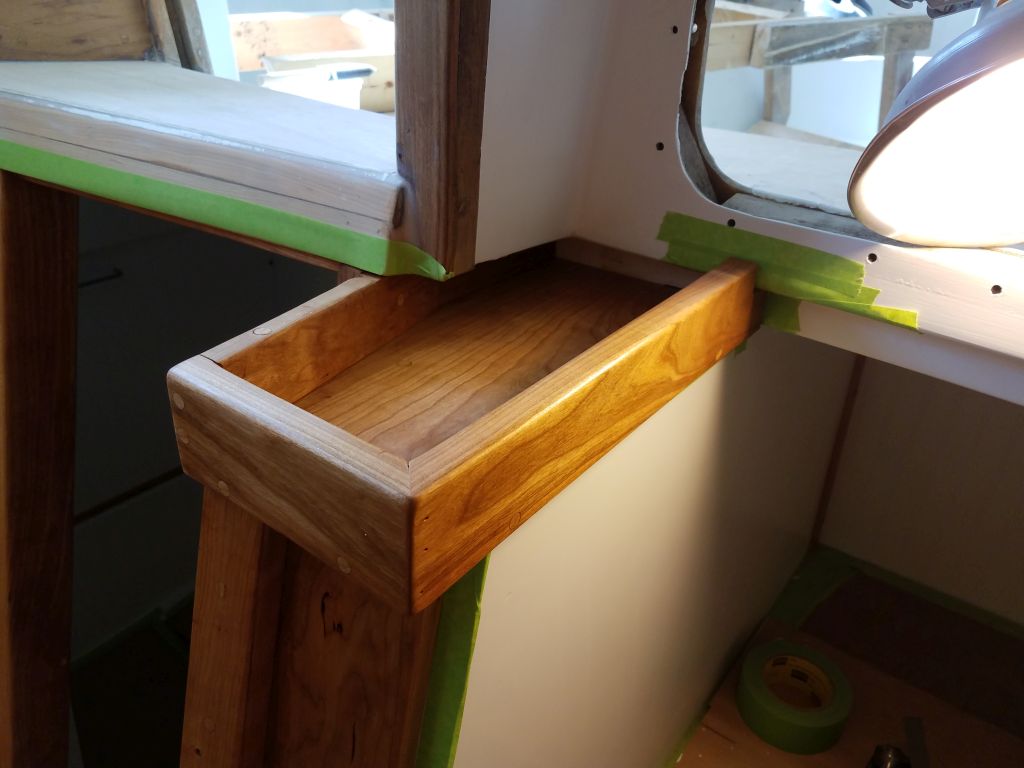
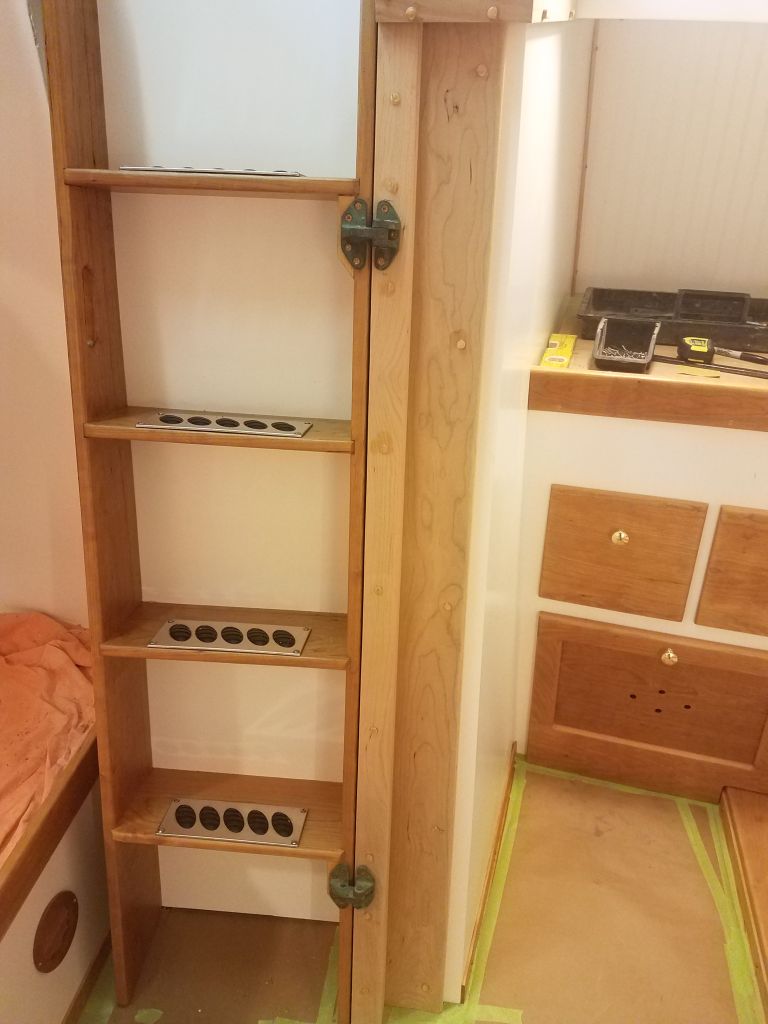
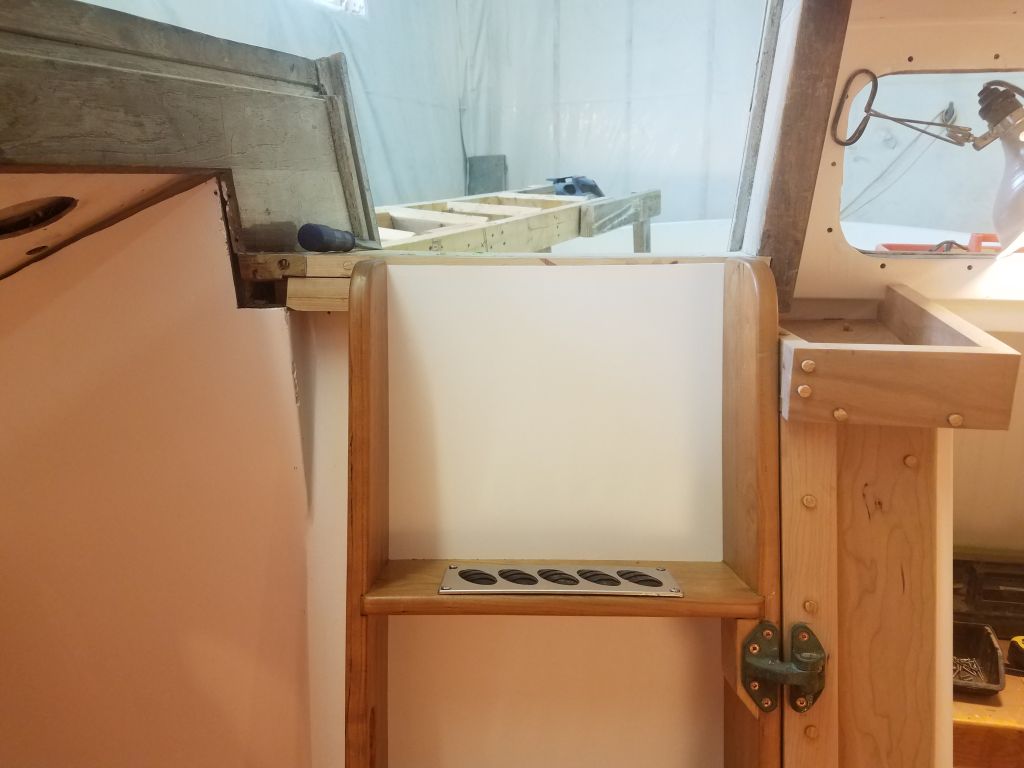
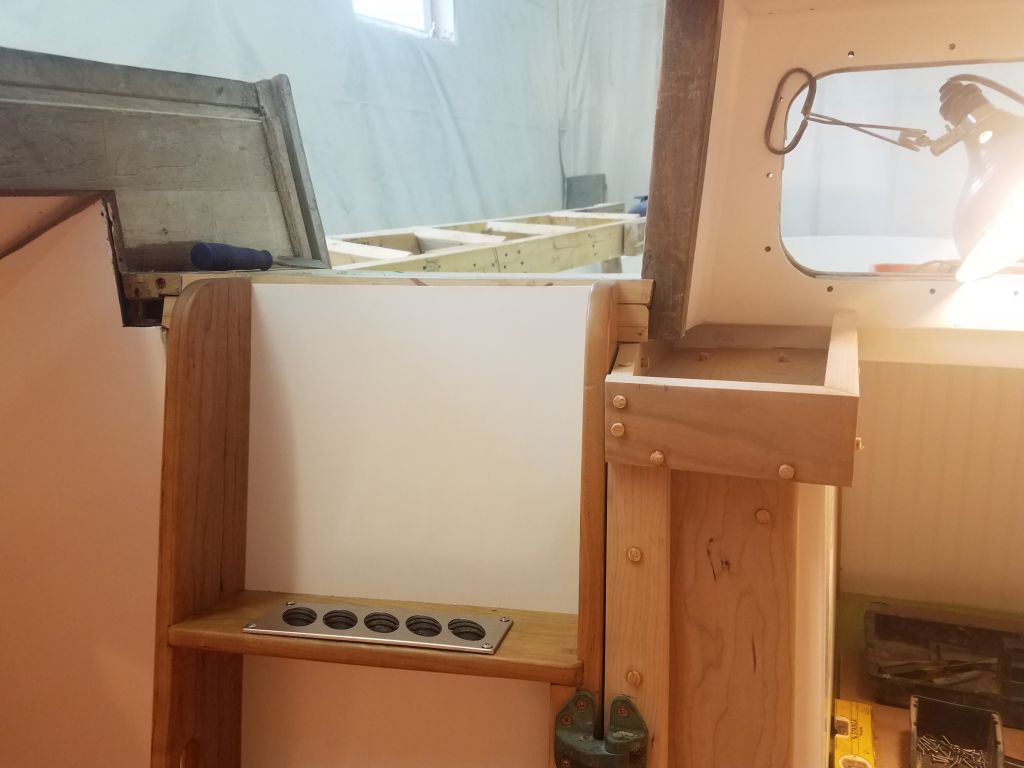
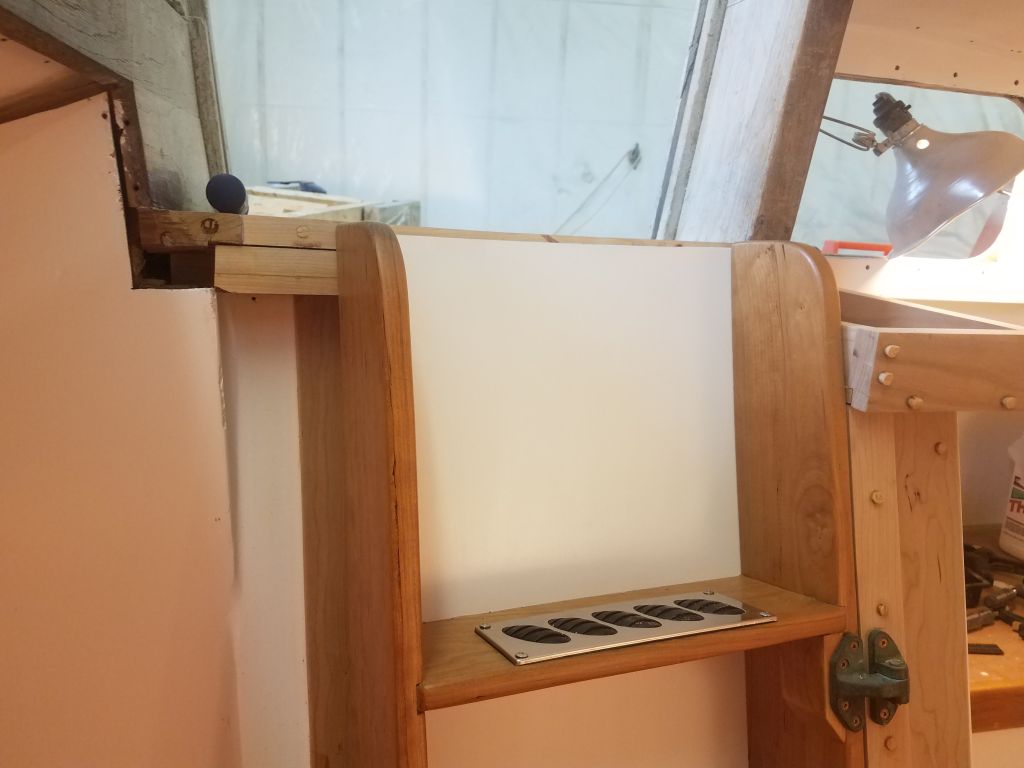
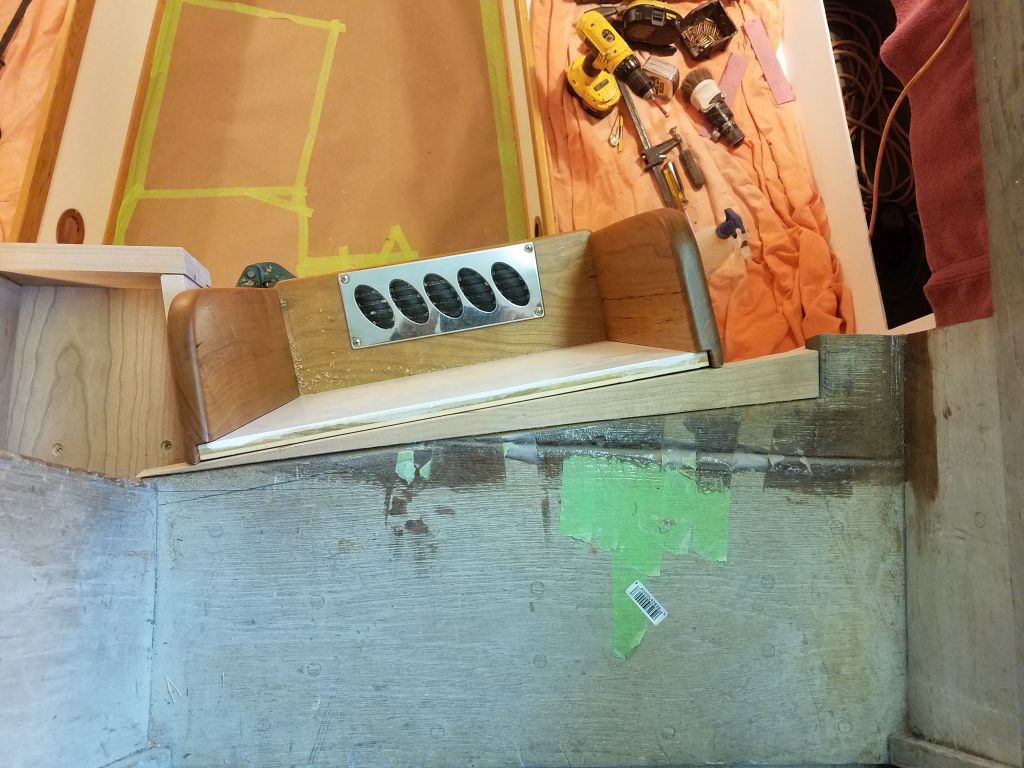
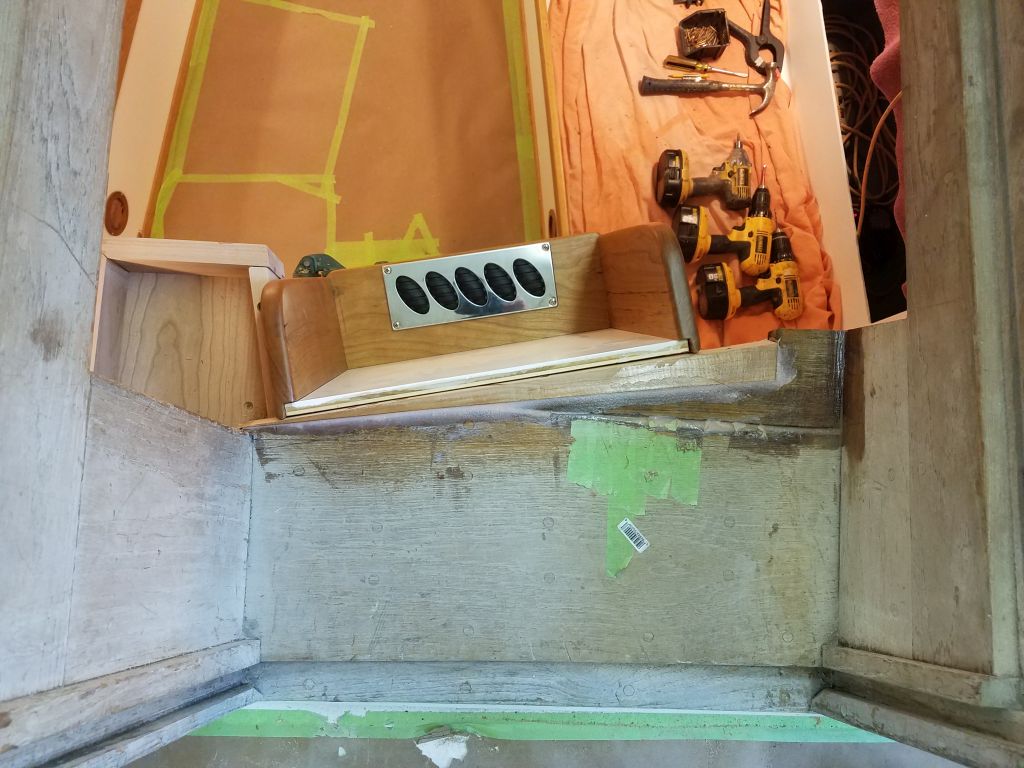
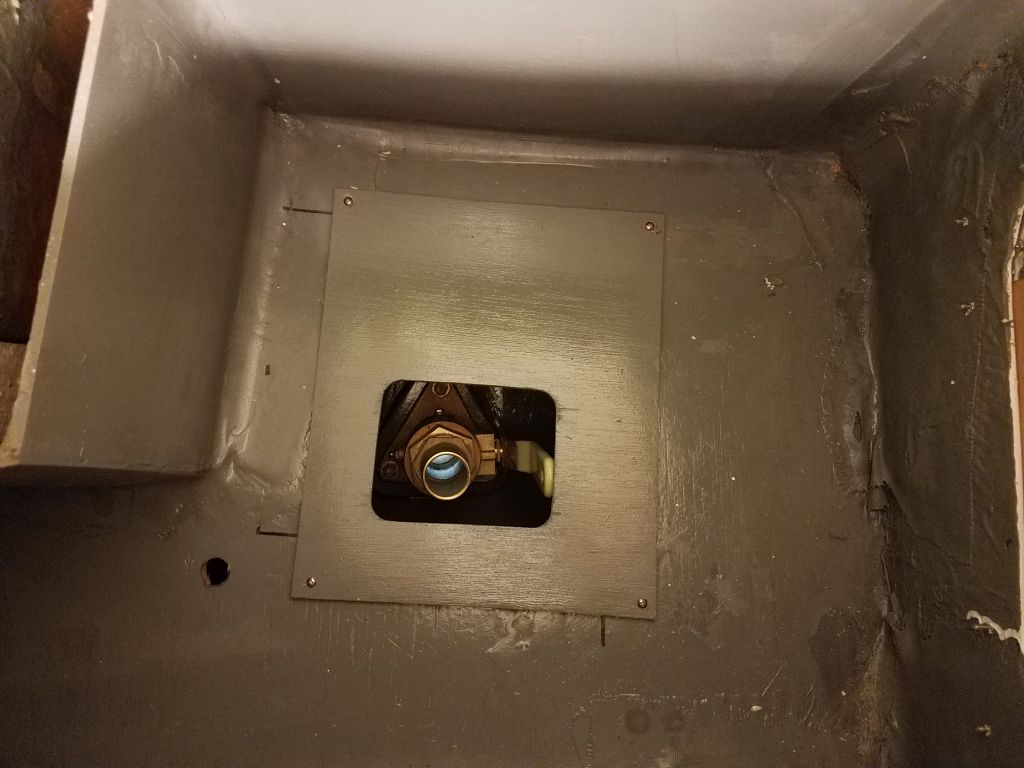
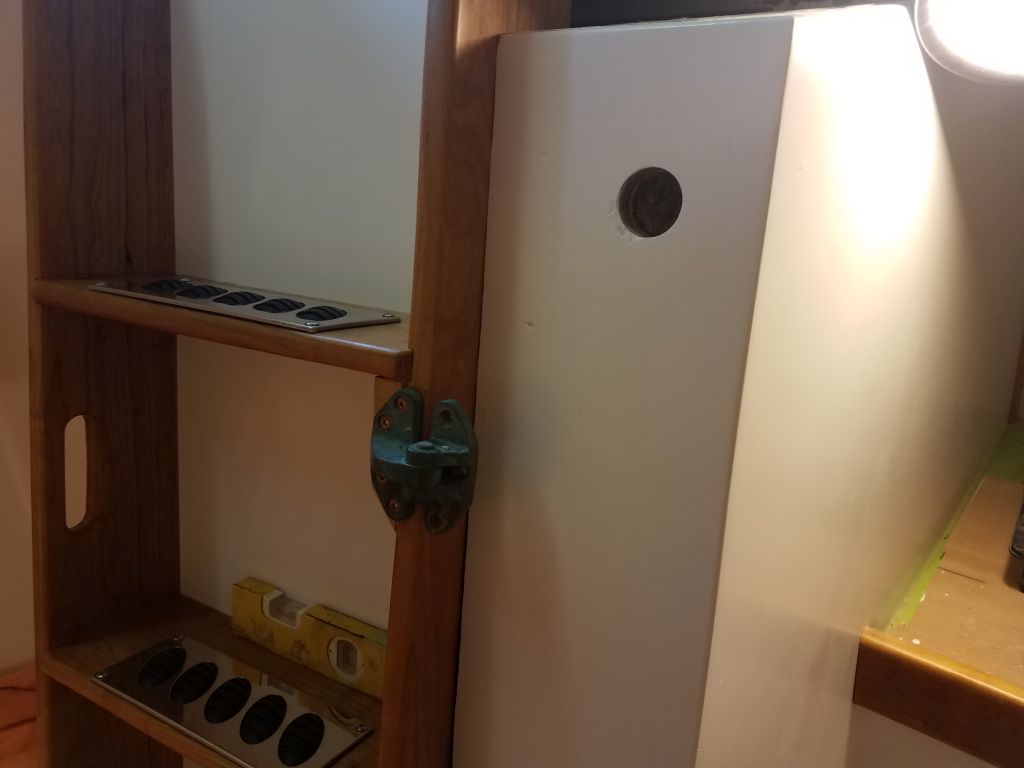
While I was being screw-y, I installed the little cover panel in the galley cabinet to cover the ugly hole over the through hull, and installed a matching handle on the port locker above the main cabin settee.

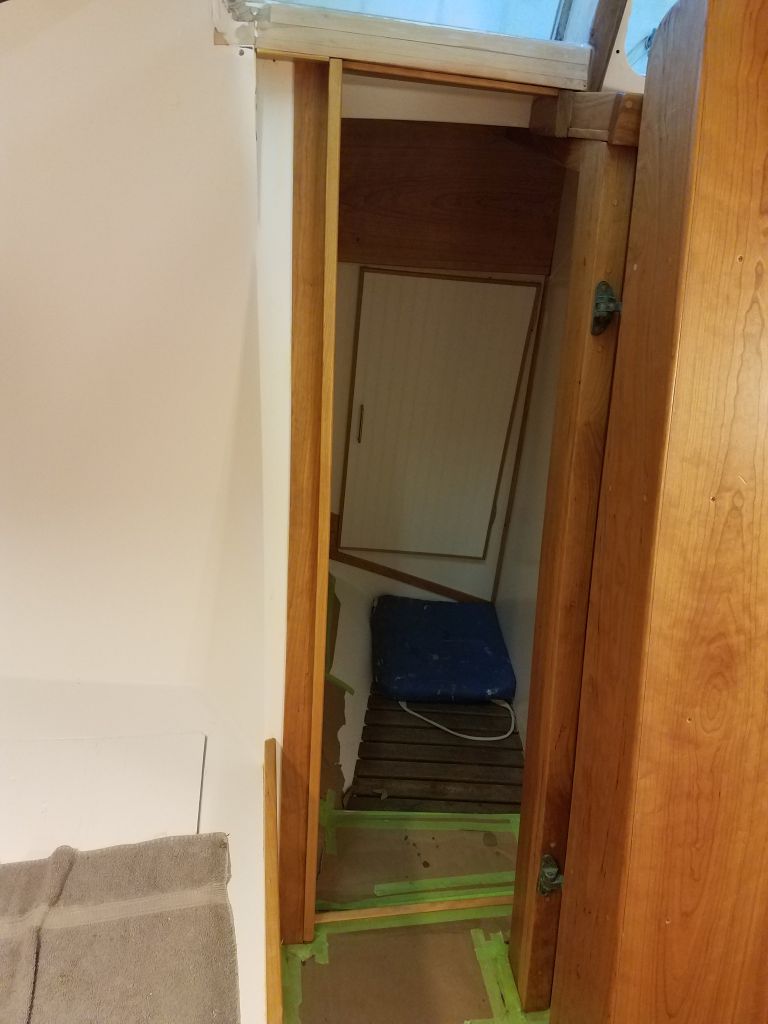
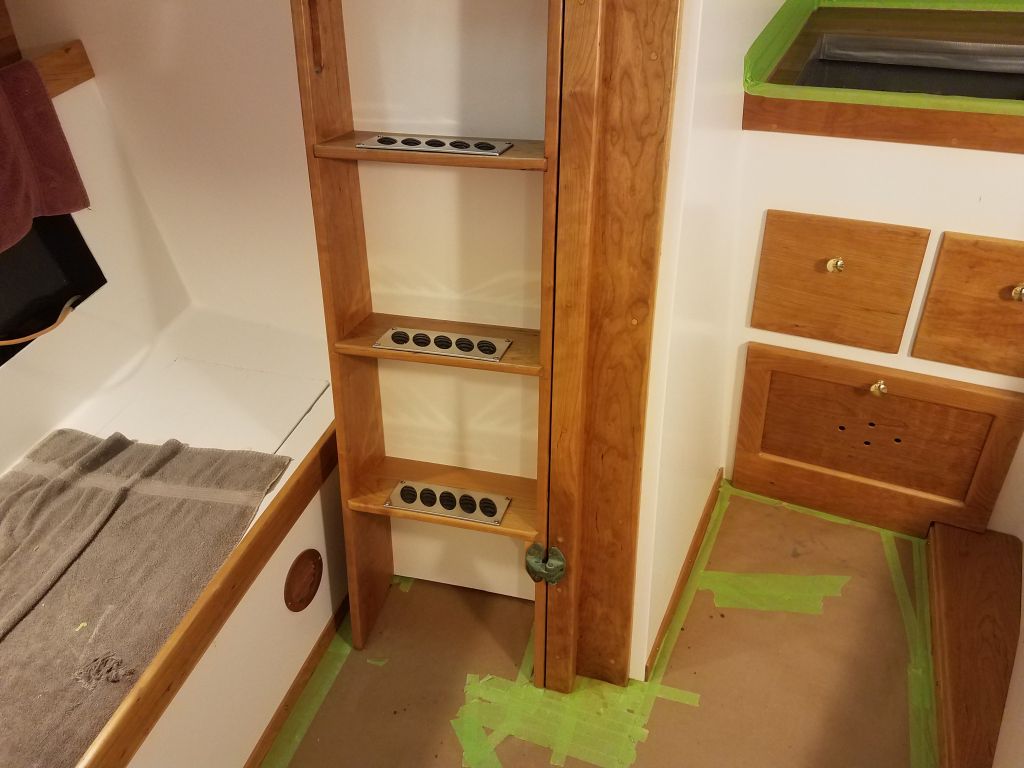
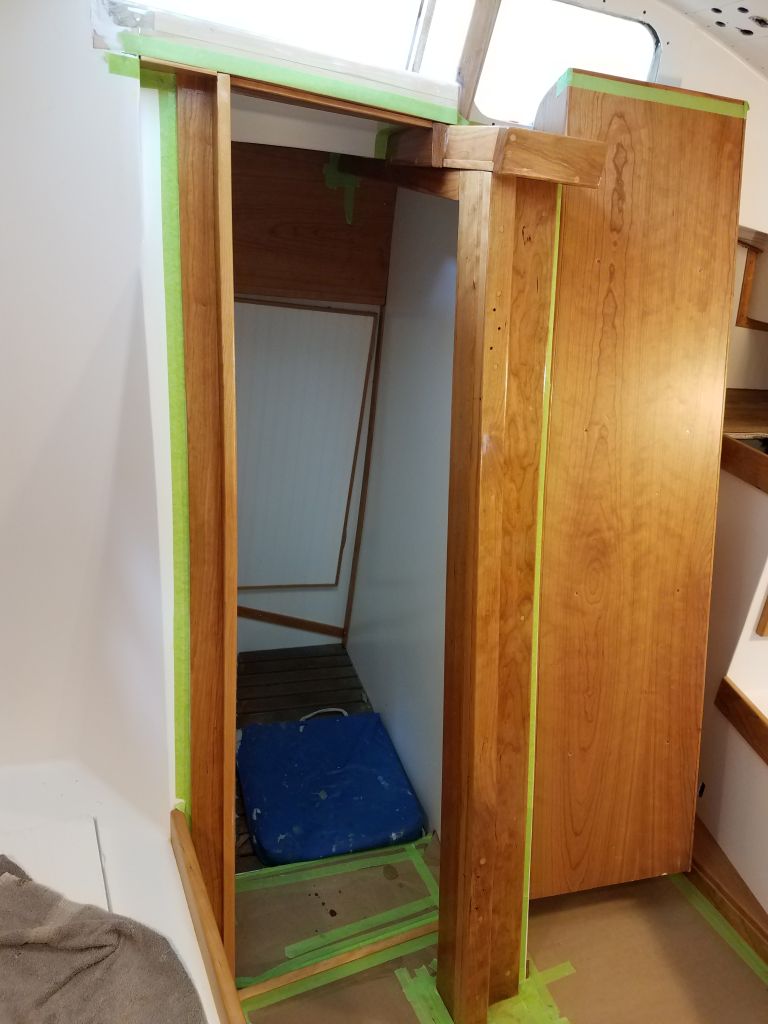
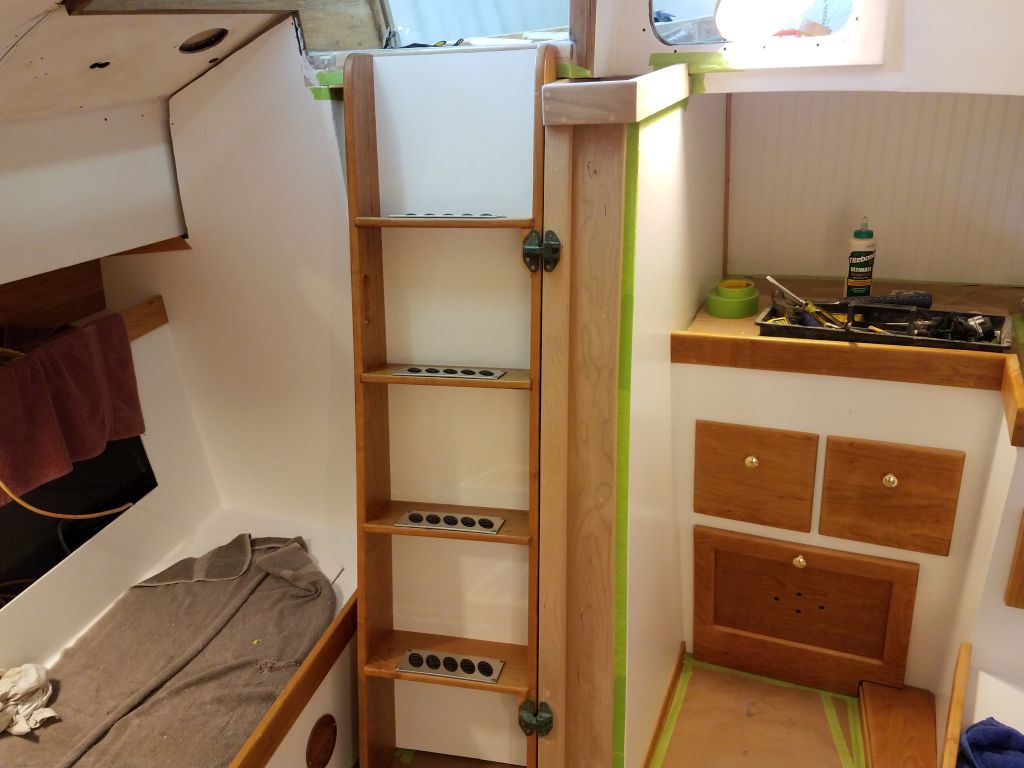
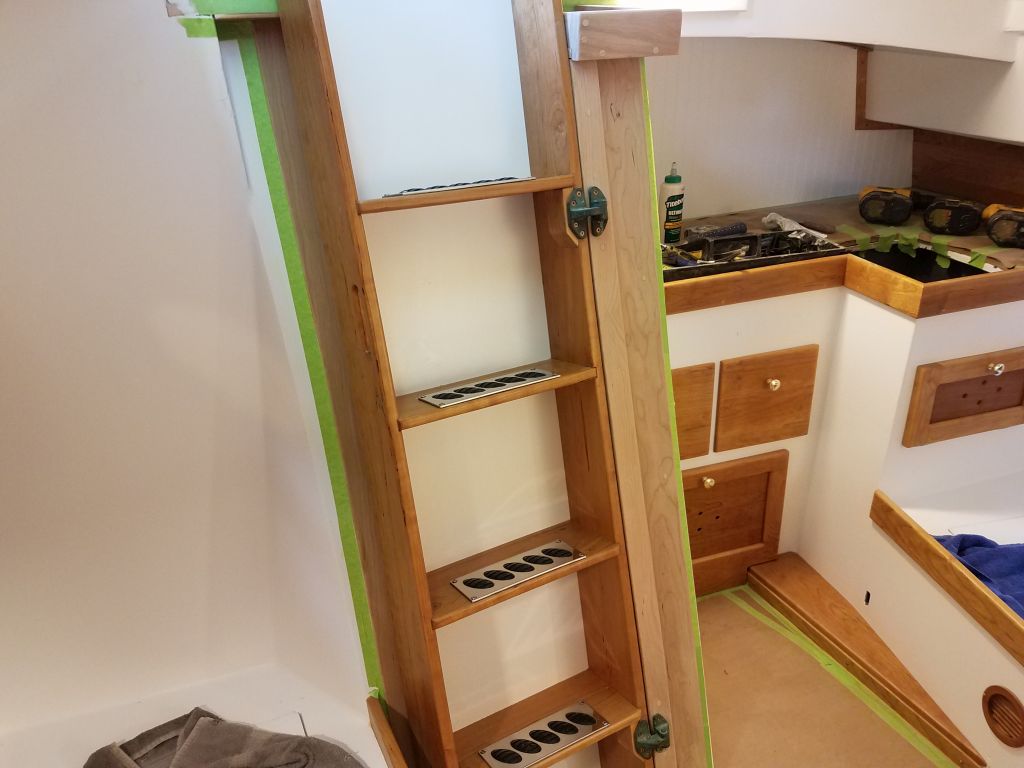
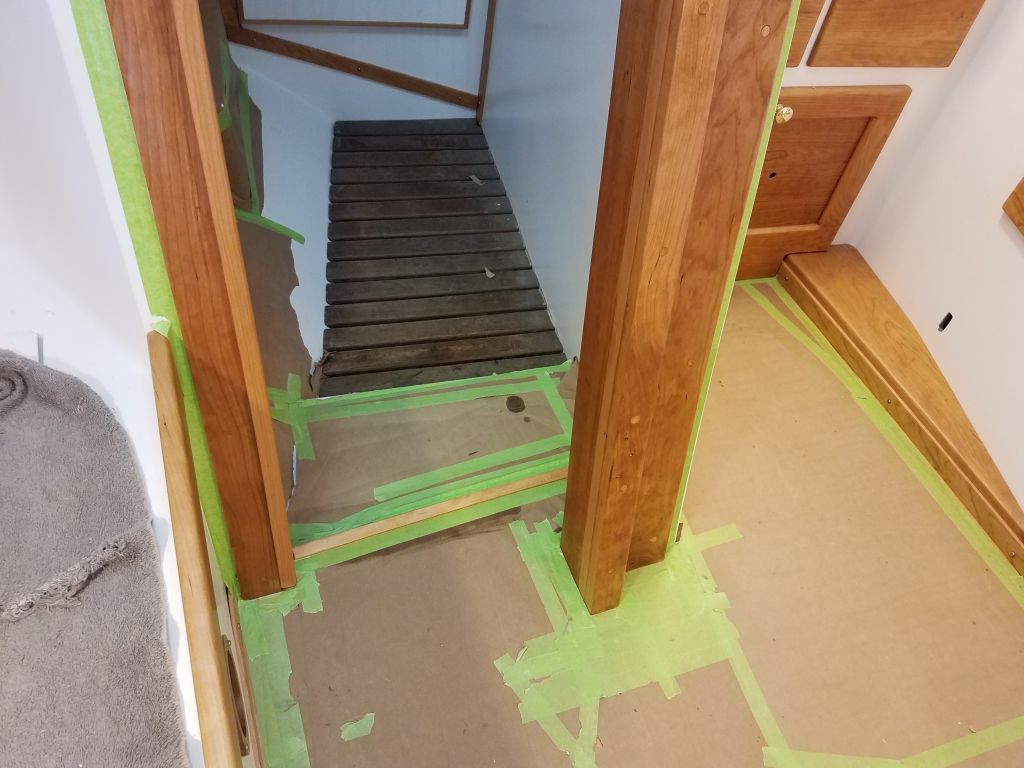
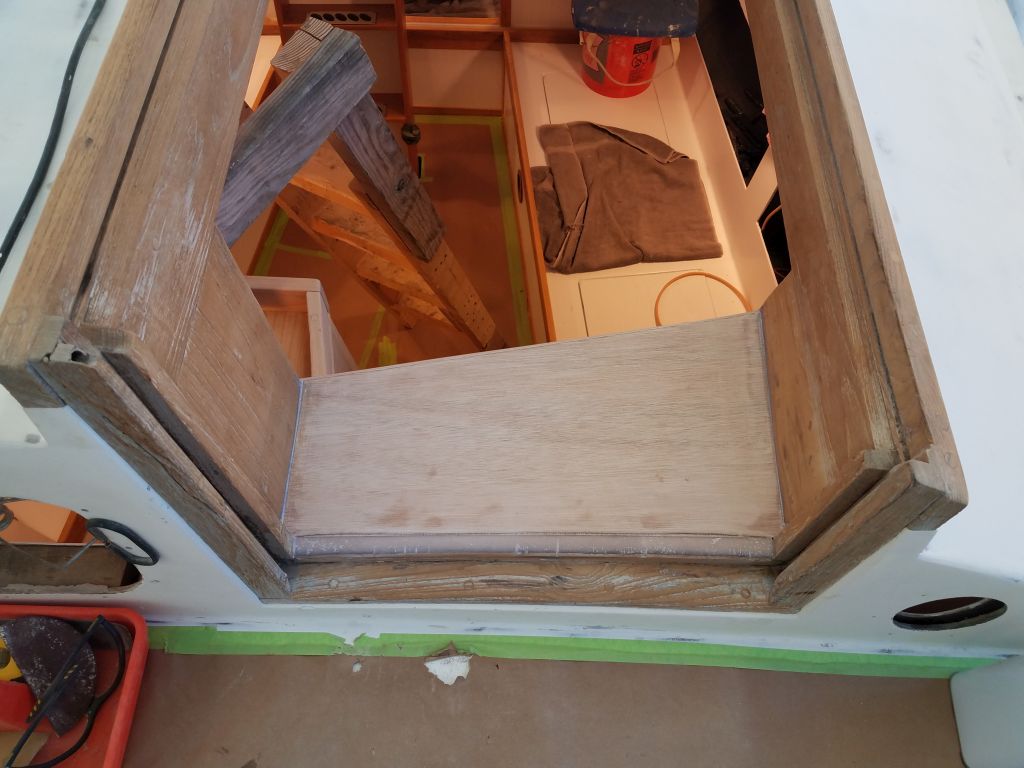
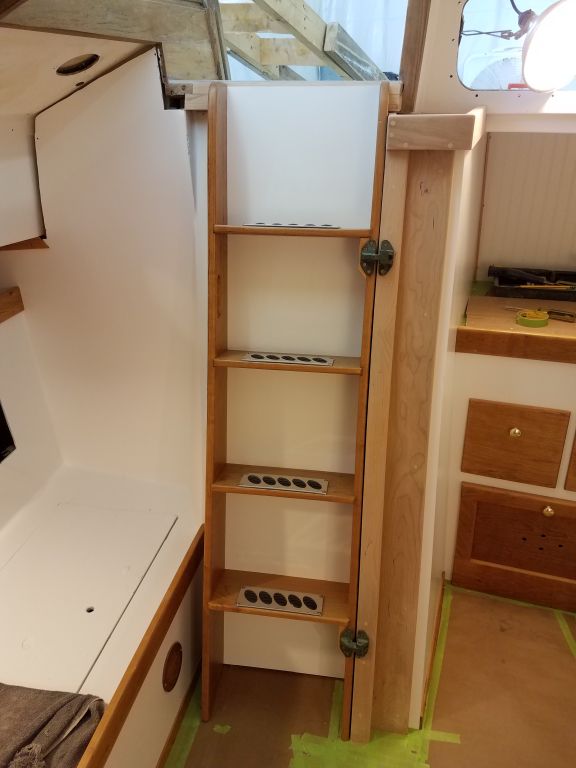
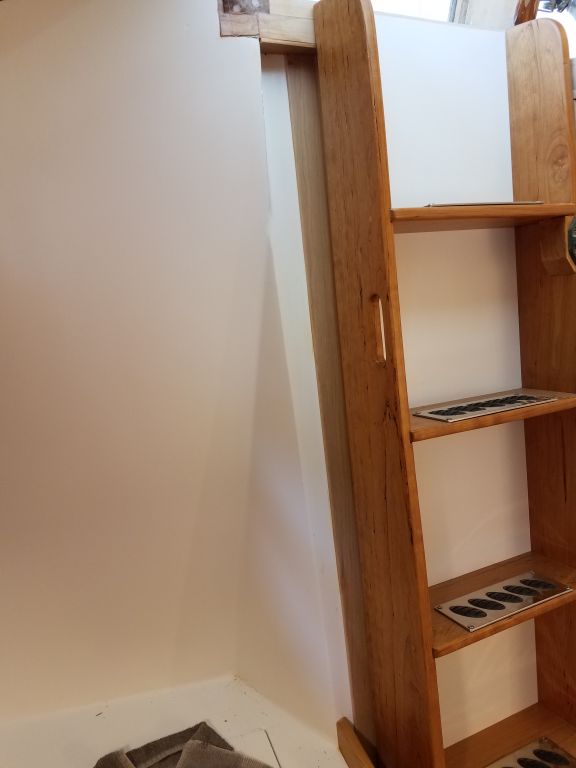
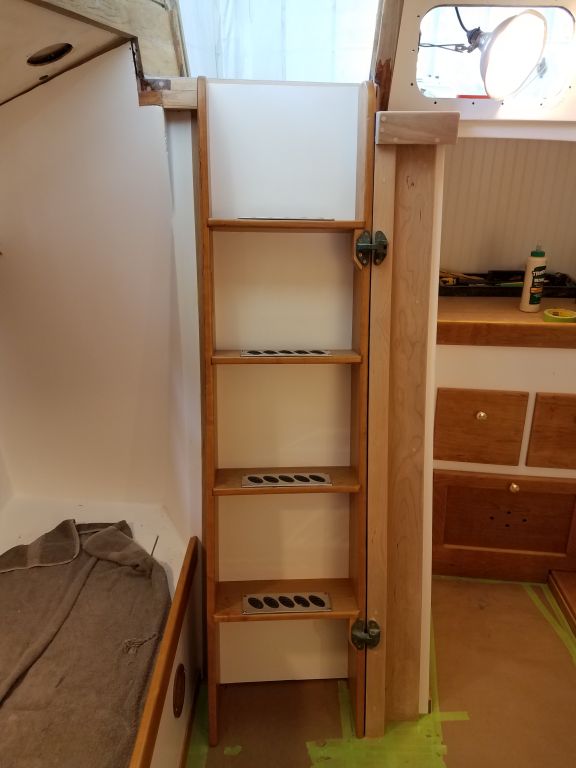
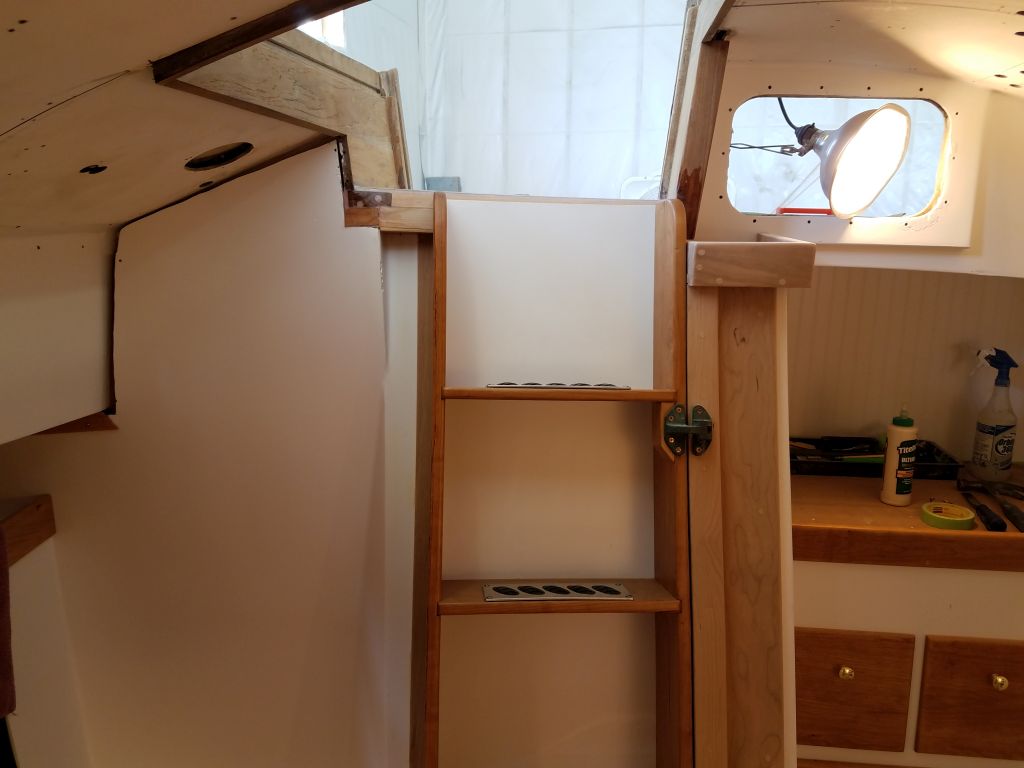
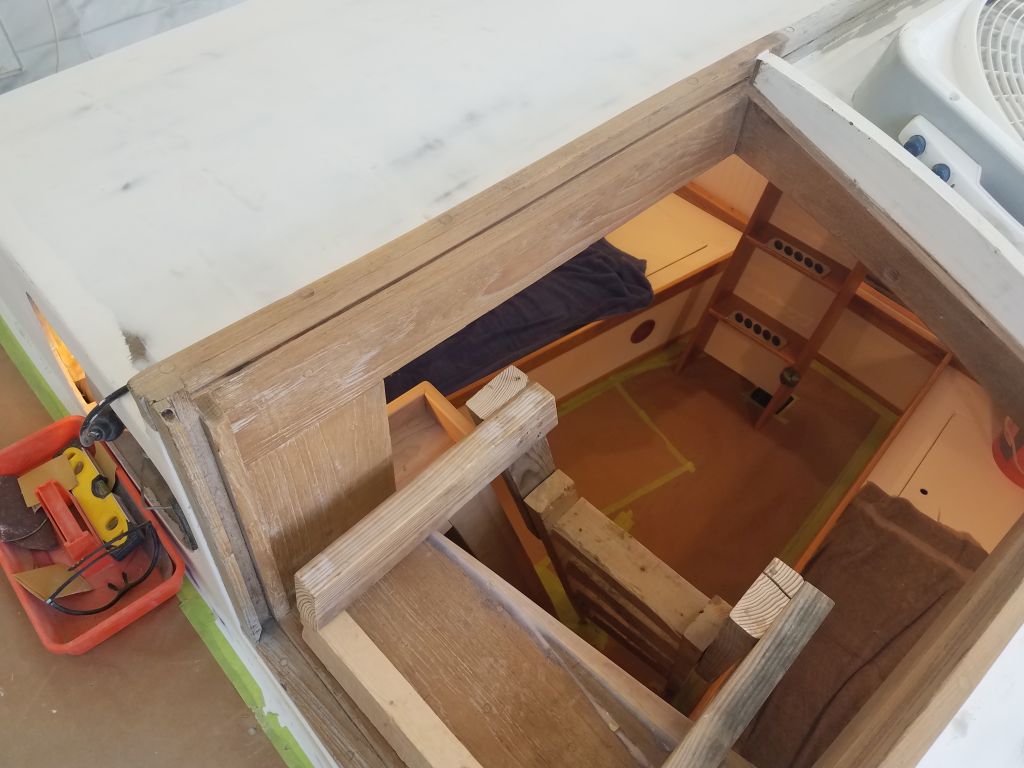
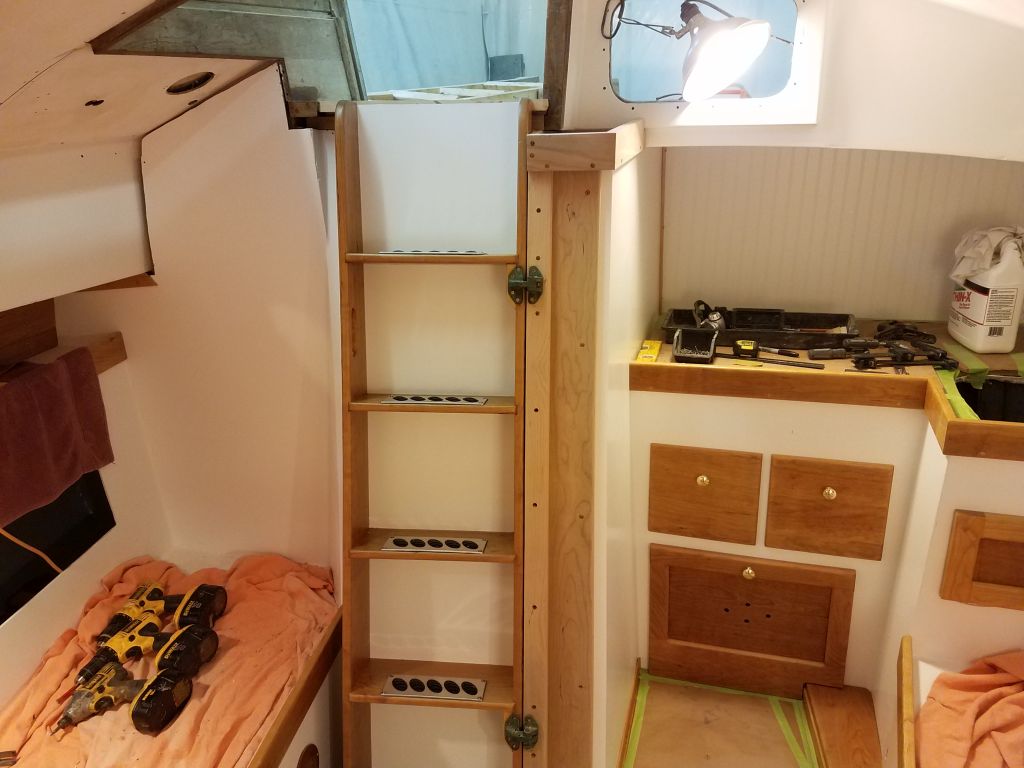
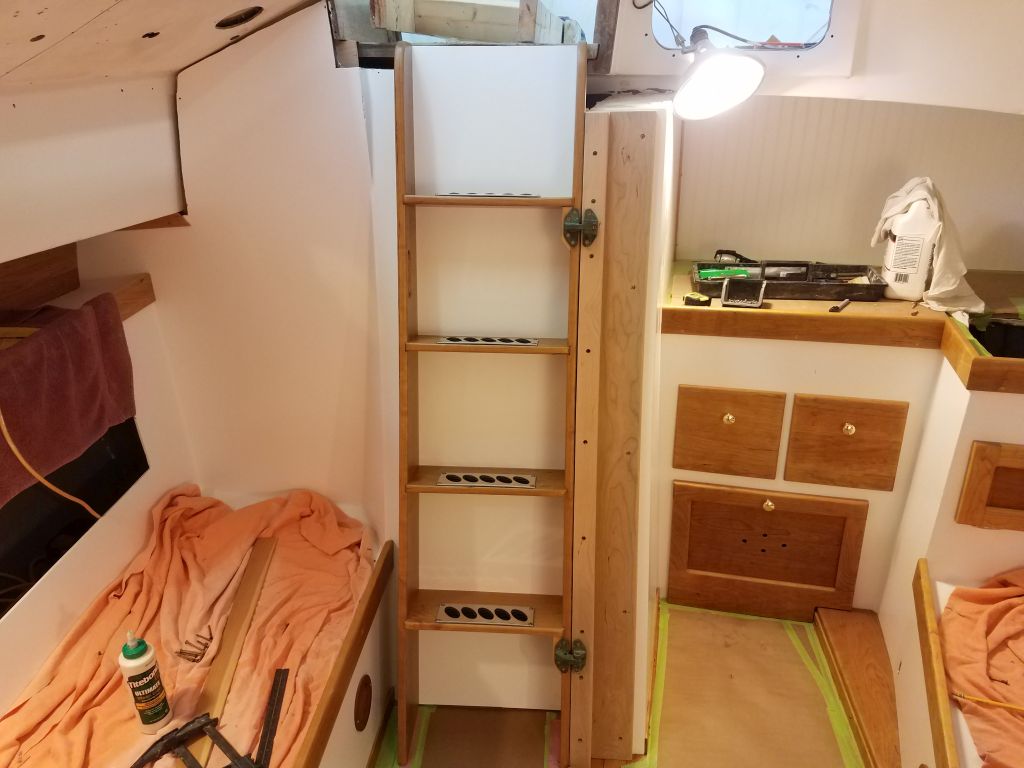
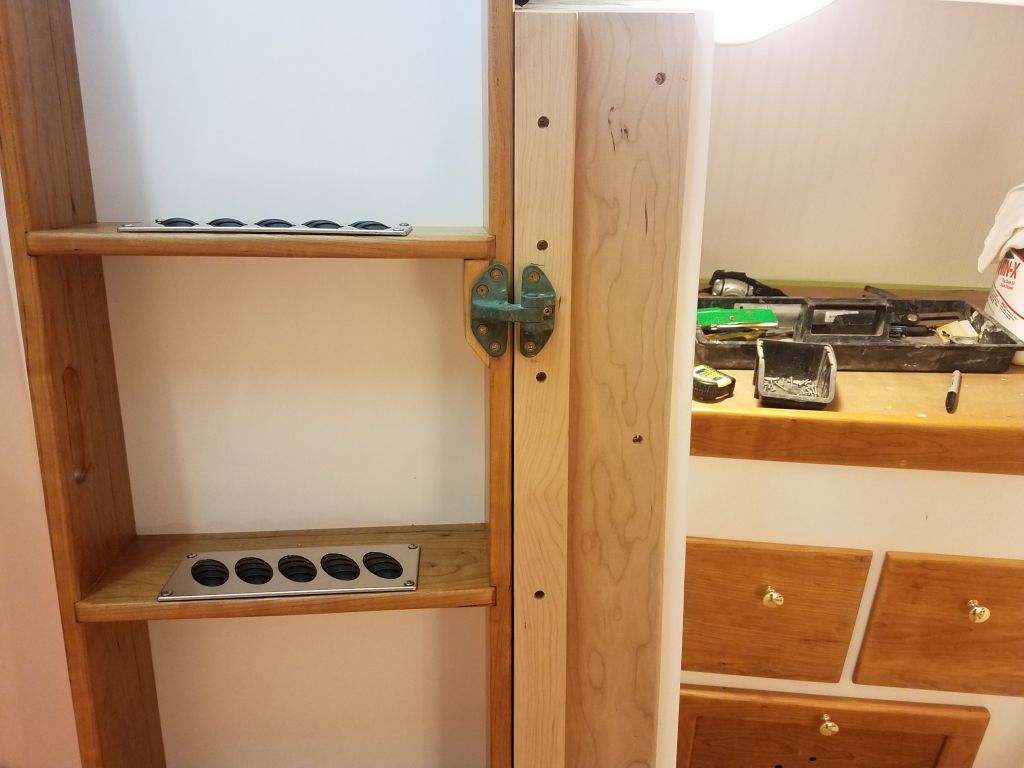
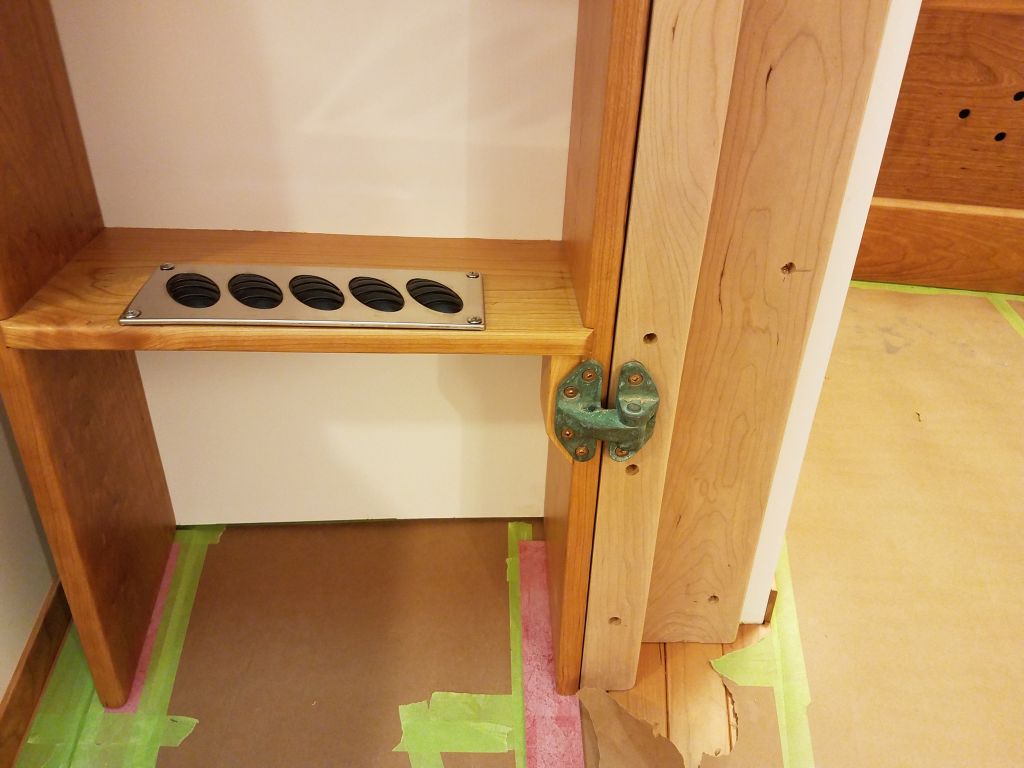
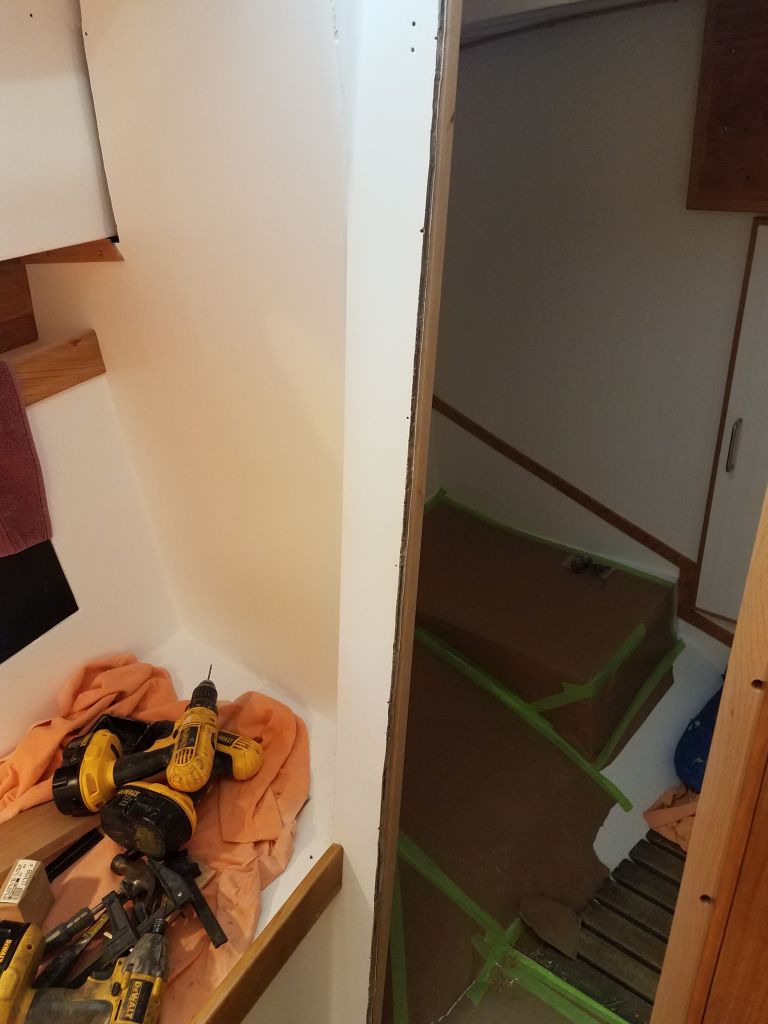
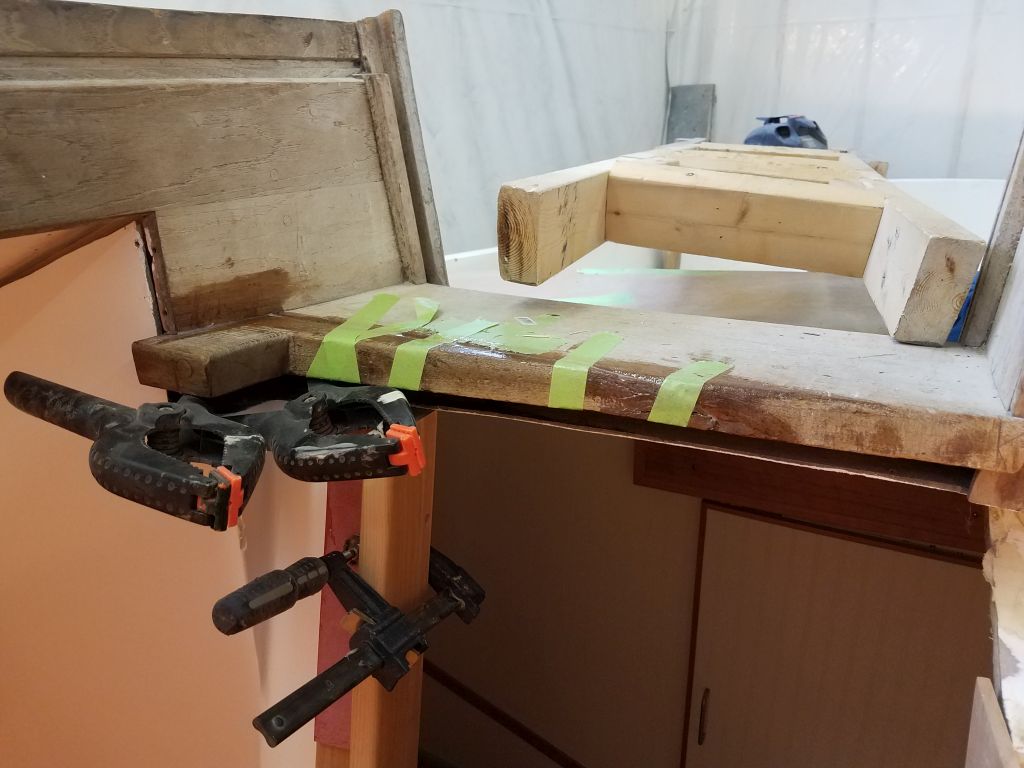
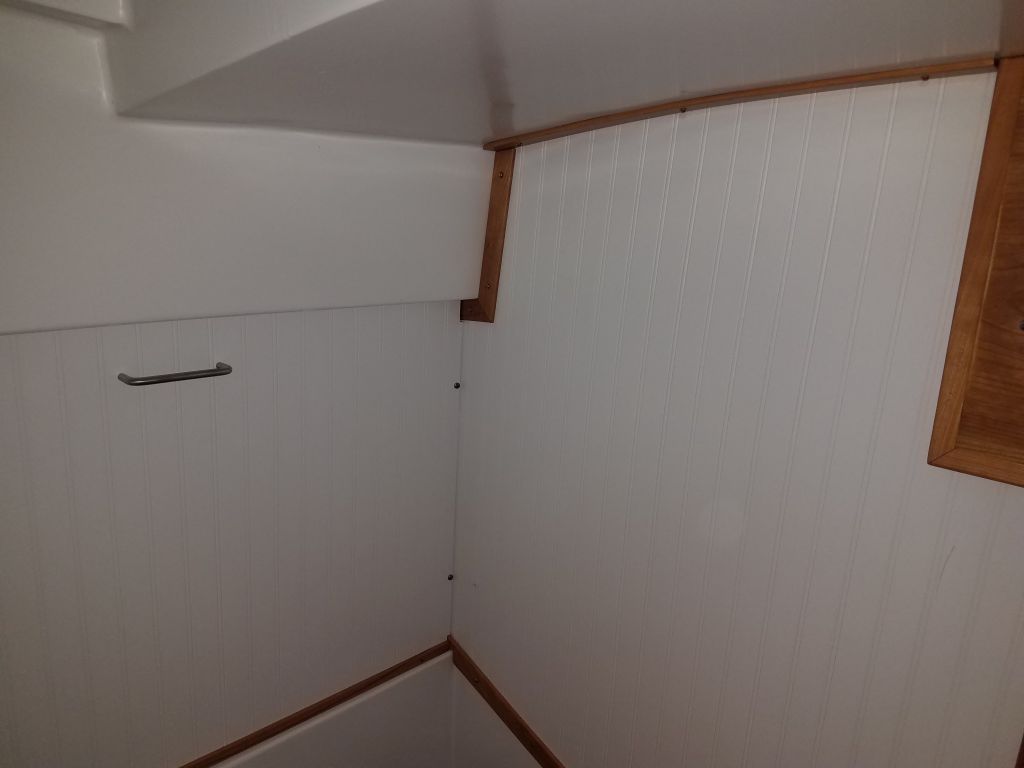
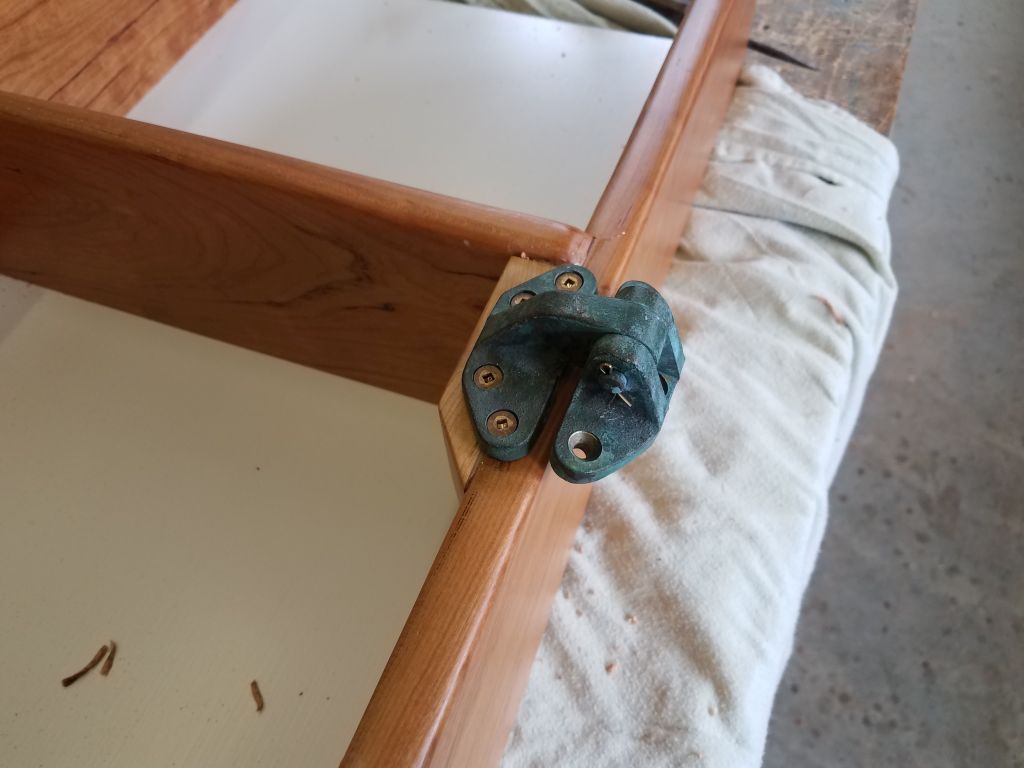
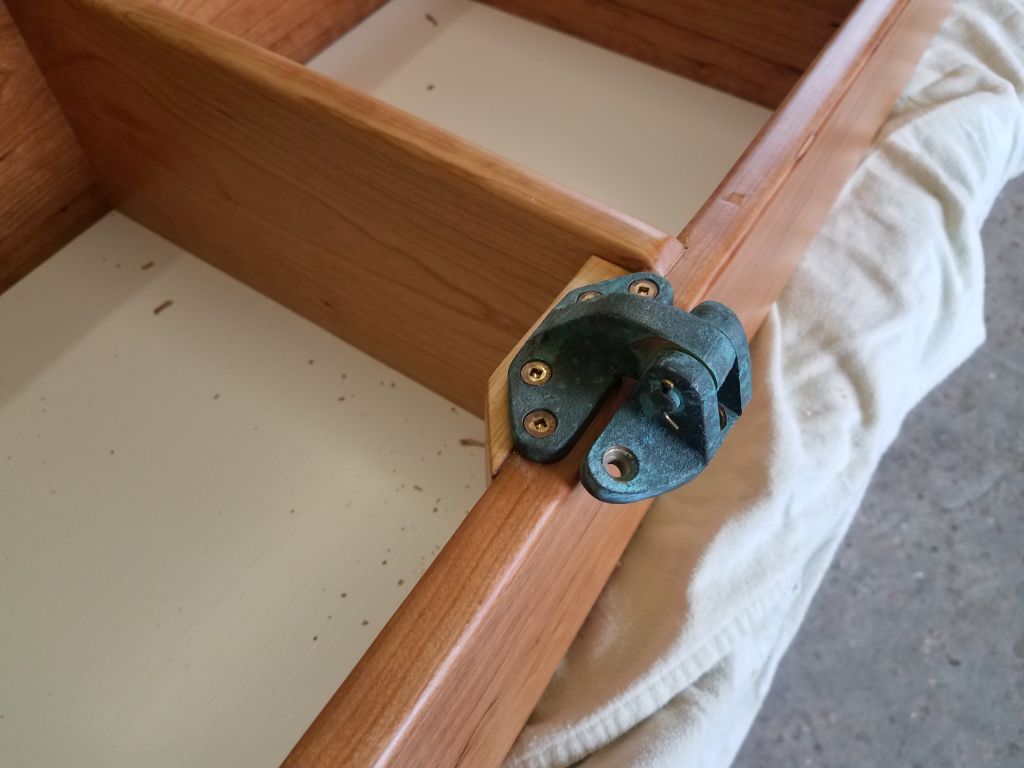
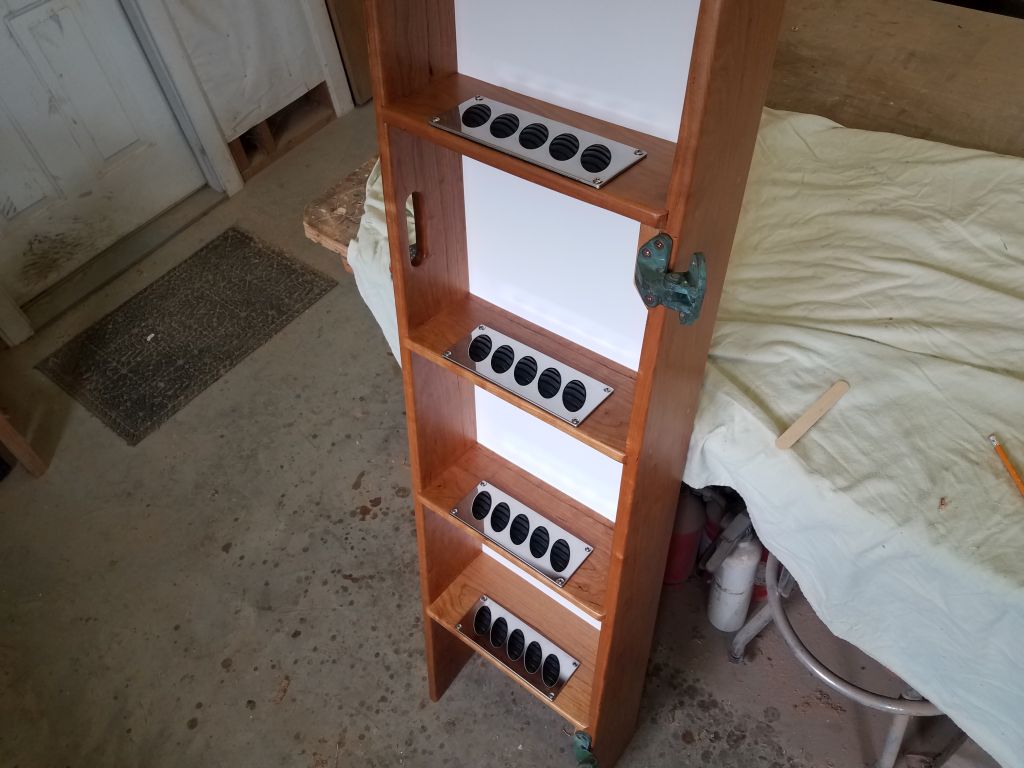
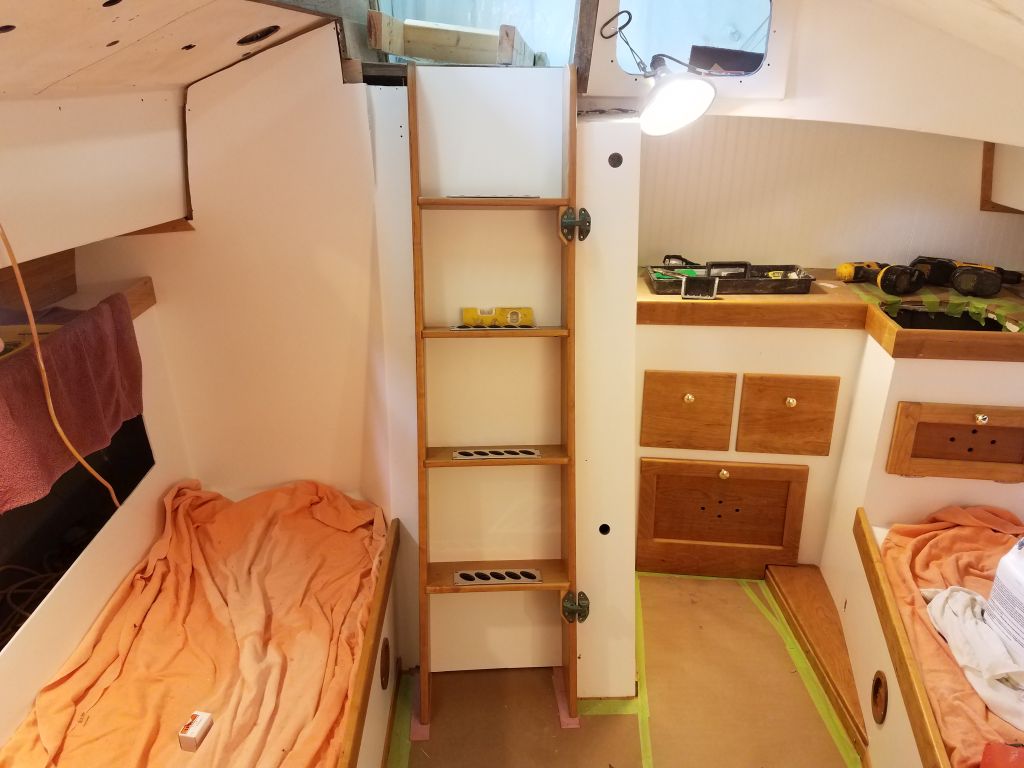
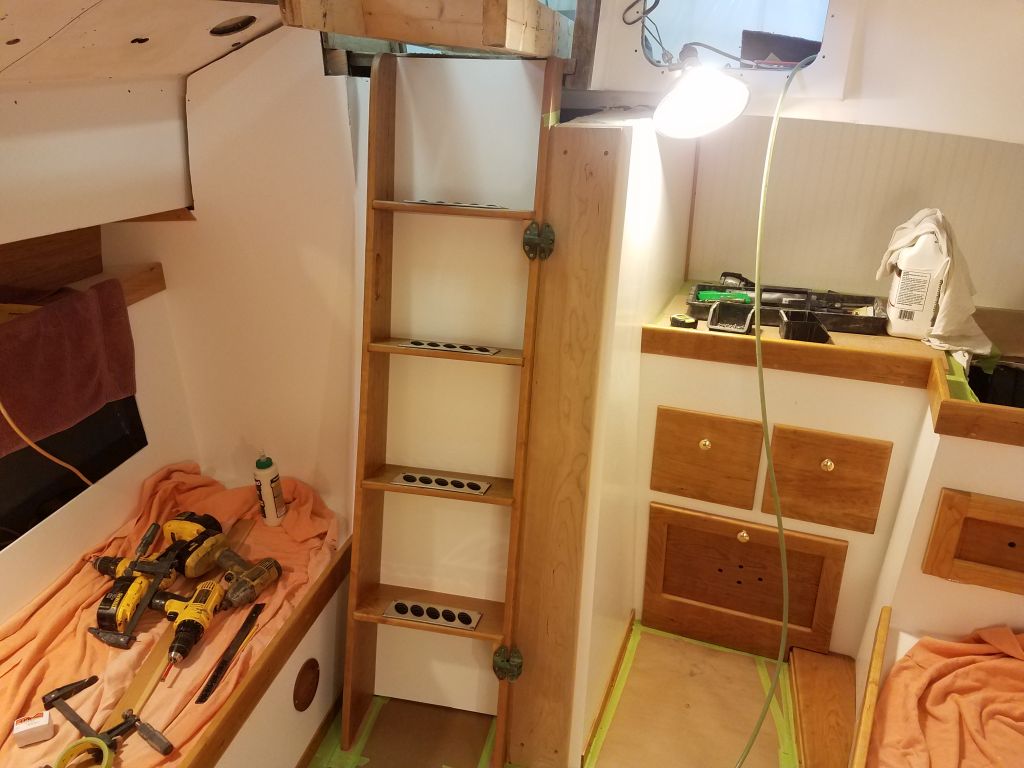
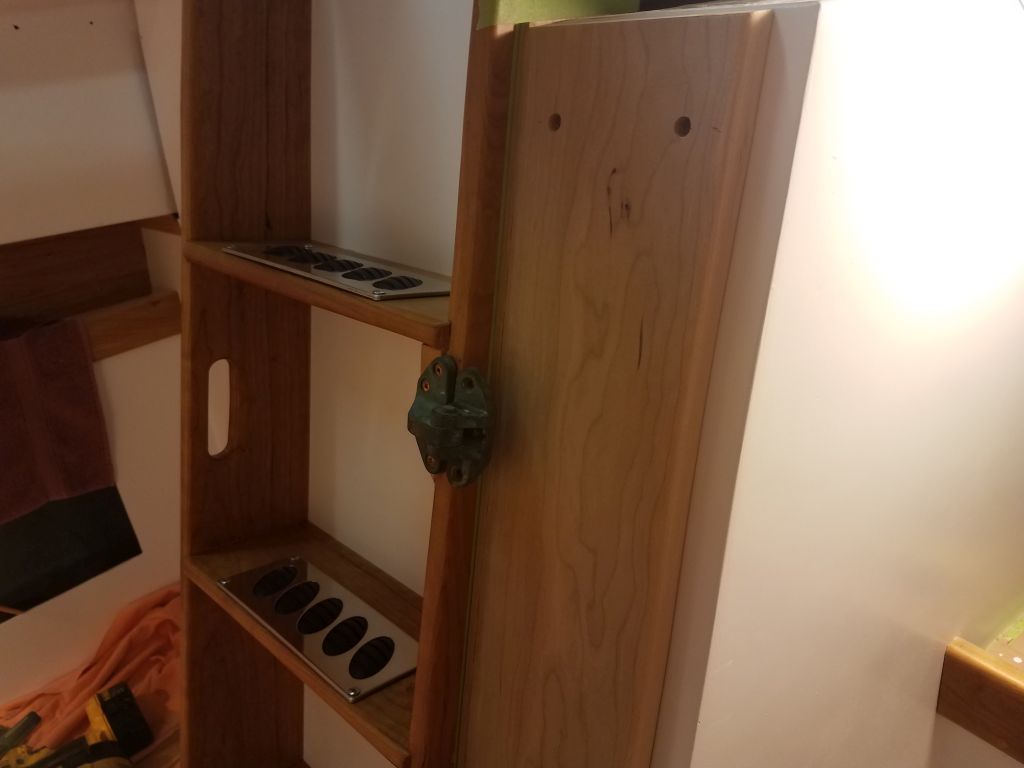
The hinge blocks for the companionway ladder would need more varnish, but for the moment I wanted to get going on the companionway and head door trim in the cabin, which required the ladder assembly to be in place, so to begin I installed the bronze hinges I took off from the old ladder.  Then, I installed some nonslip treads on the steps, which would not only protect the wood but add traction.

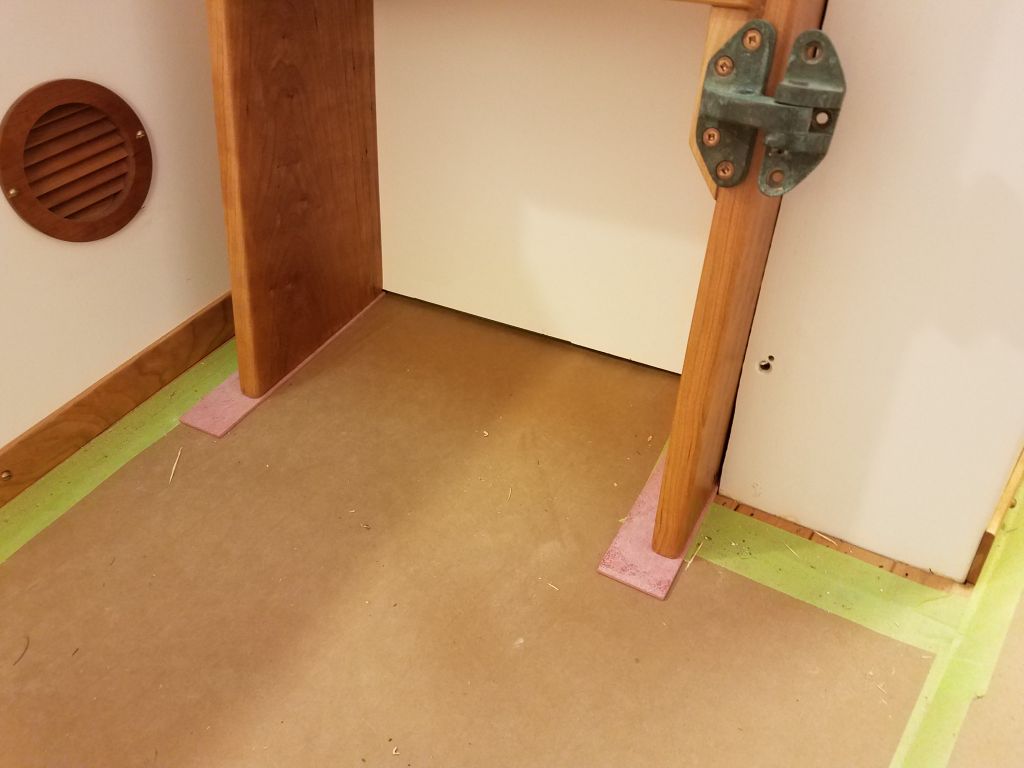
With the ladder in the boat, I positioned it as needed in the opening, using some slim 1/8″ shims beneath the ladder feet to ensure that there was clearance above the sole.

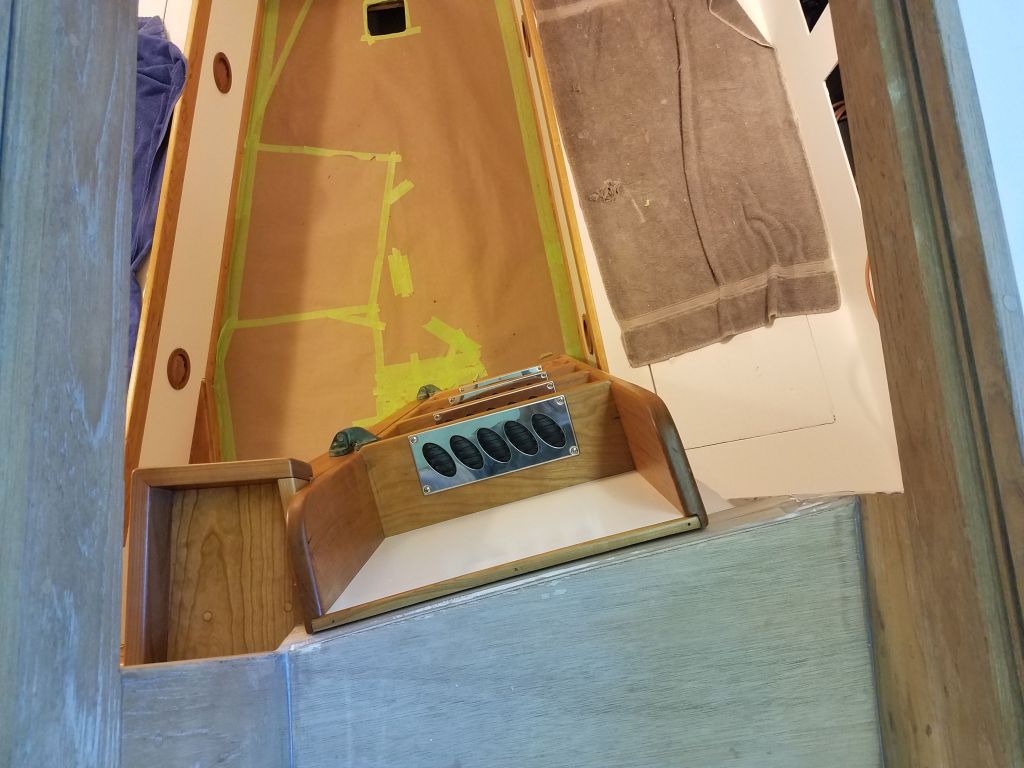
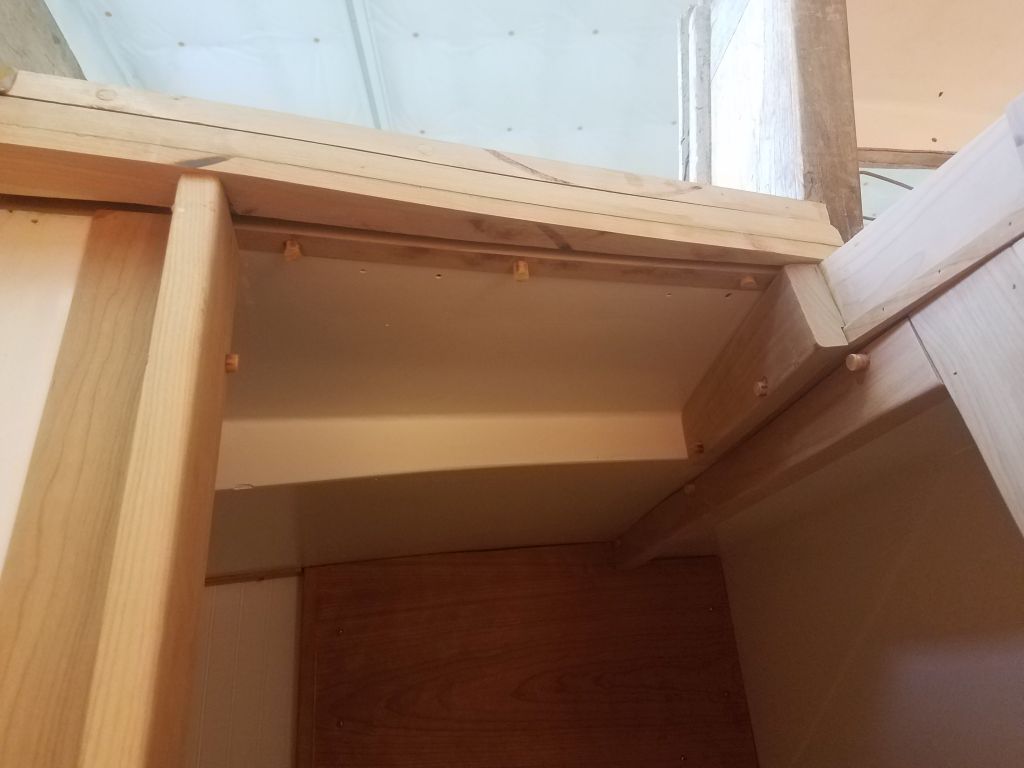
As I’d done several other times during the rebuilding of the companionway ladder area, I reviewed photos of the original setup and dismantling,  various stages of which can be seen here, here, and here.  Also, I still had the original trim pieces I’d removed on hand for reference, though I planned to use them only for general configuration rather than exact duplication.

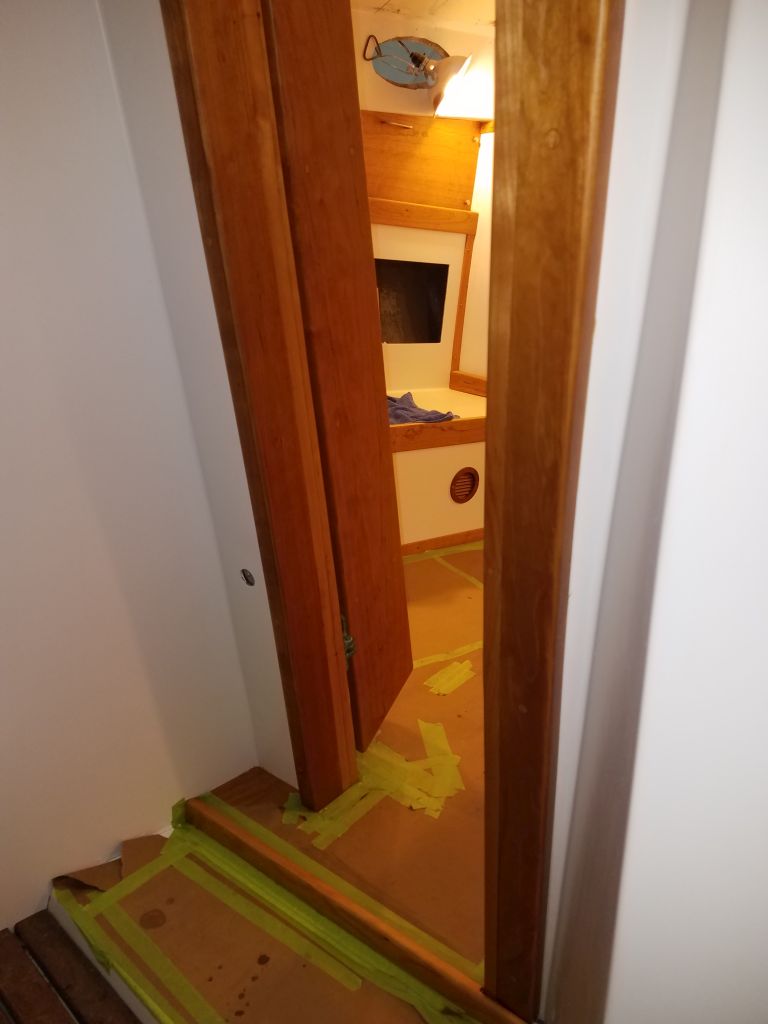
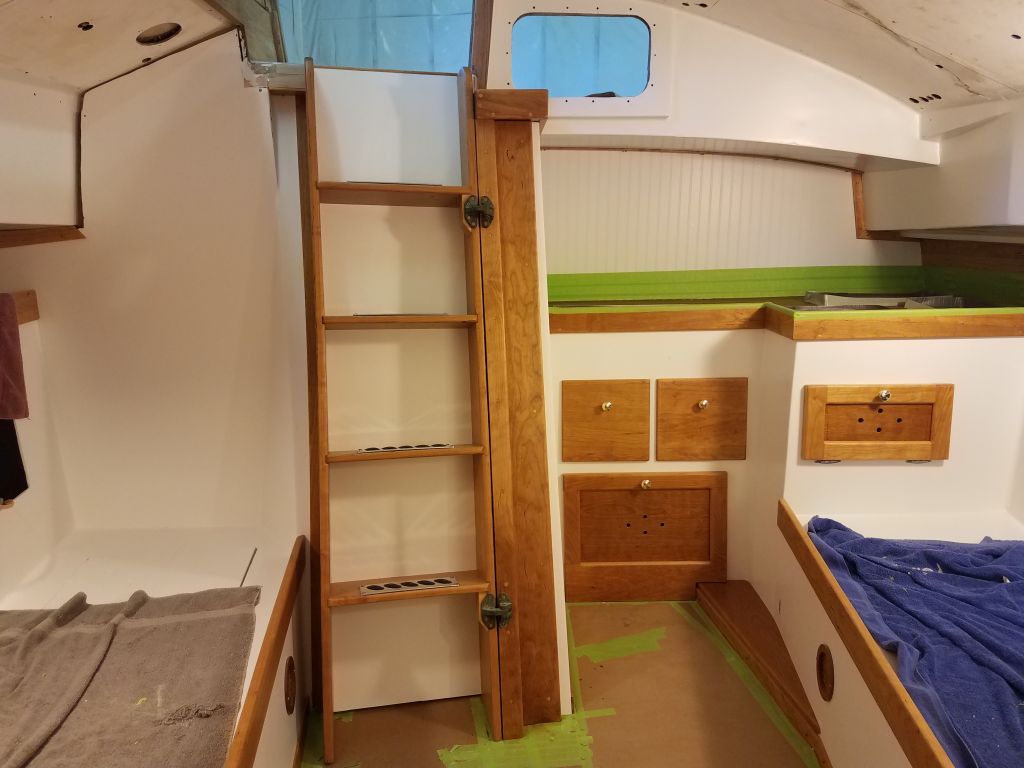
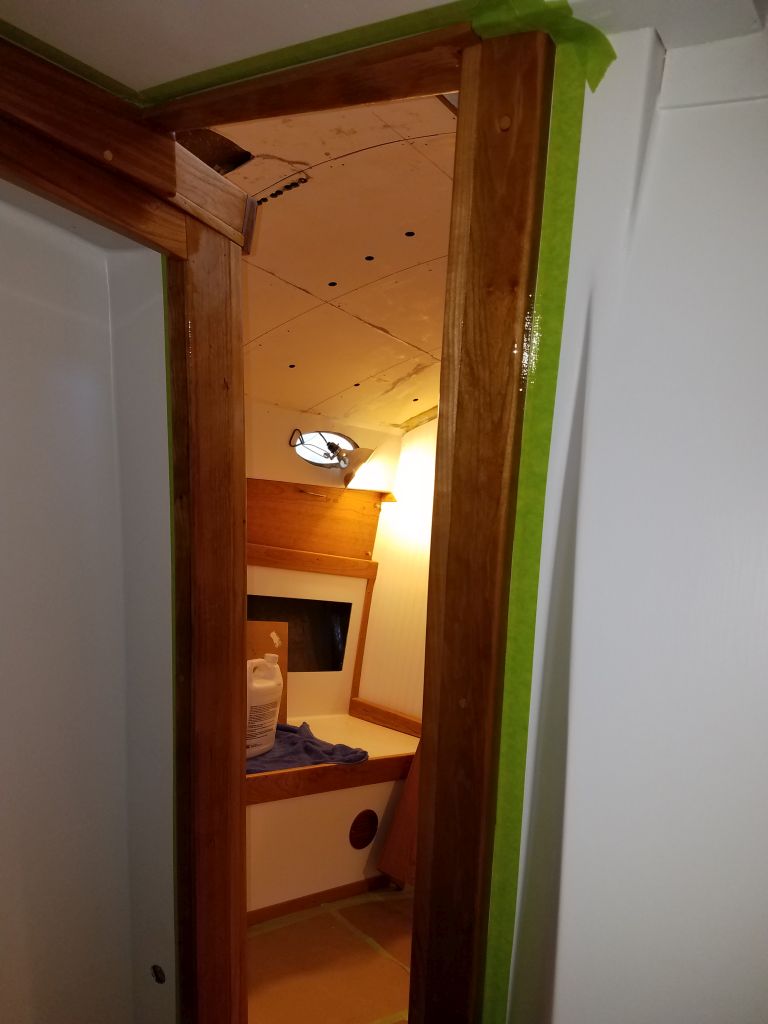
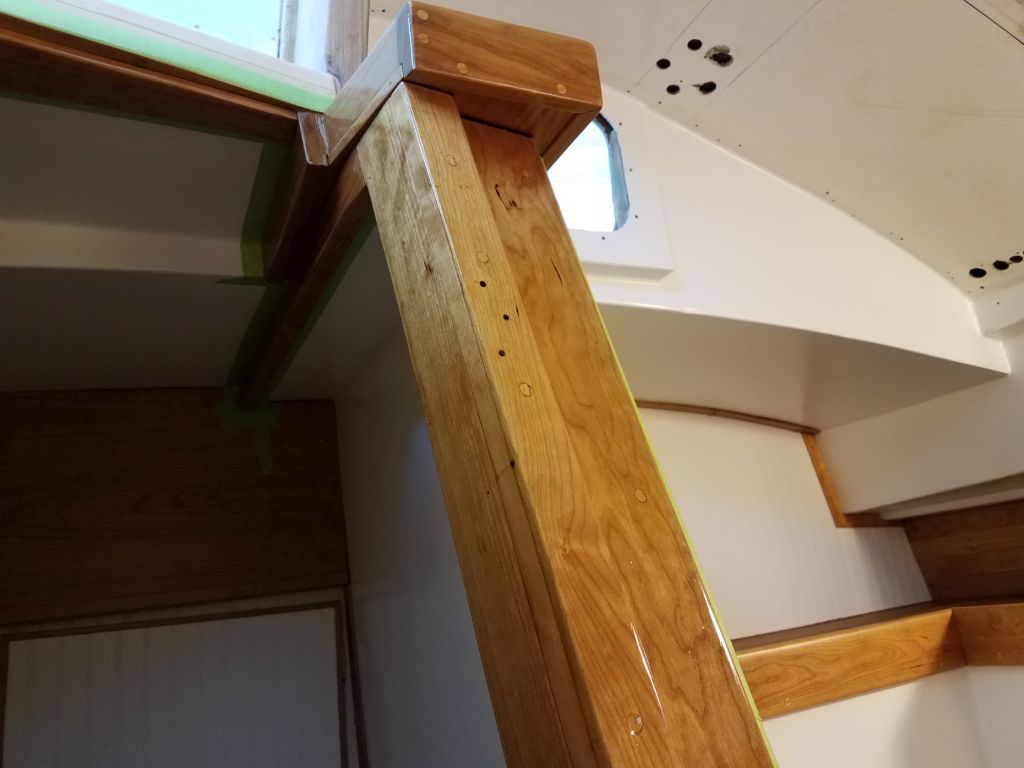
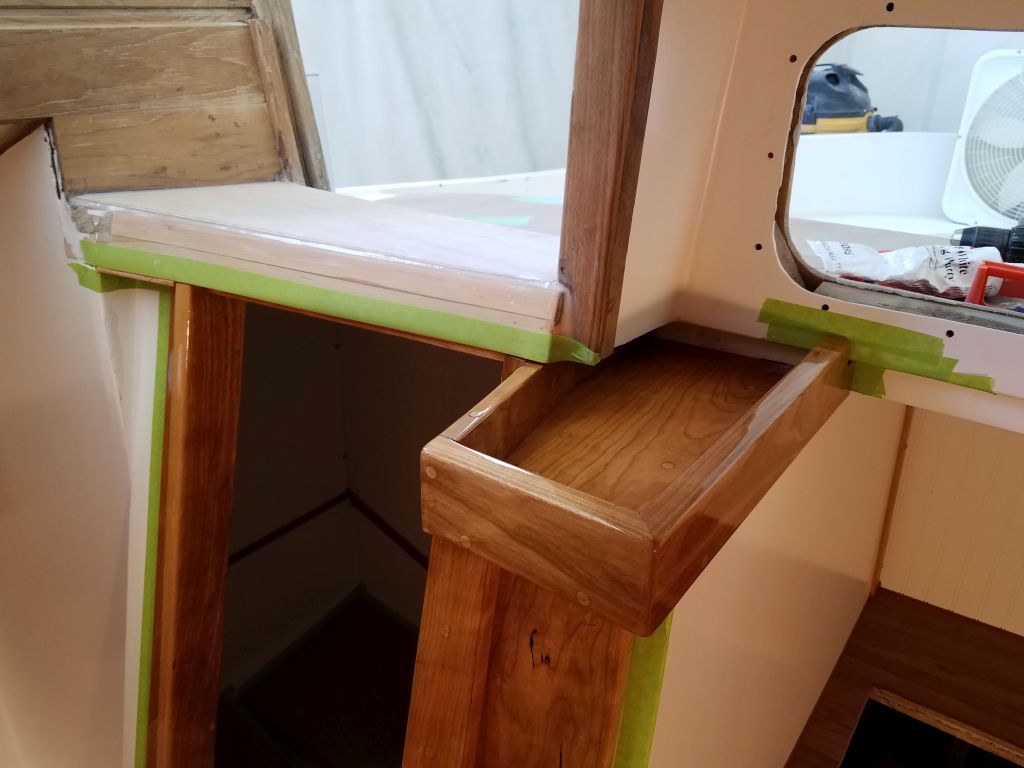
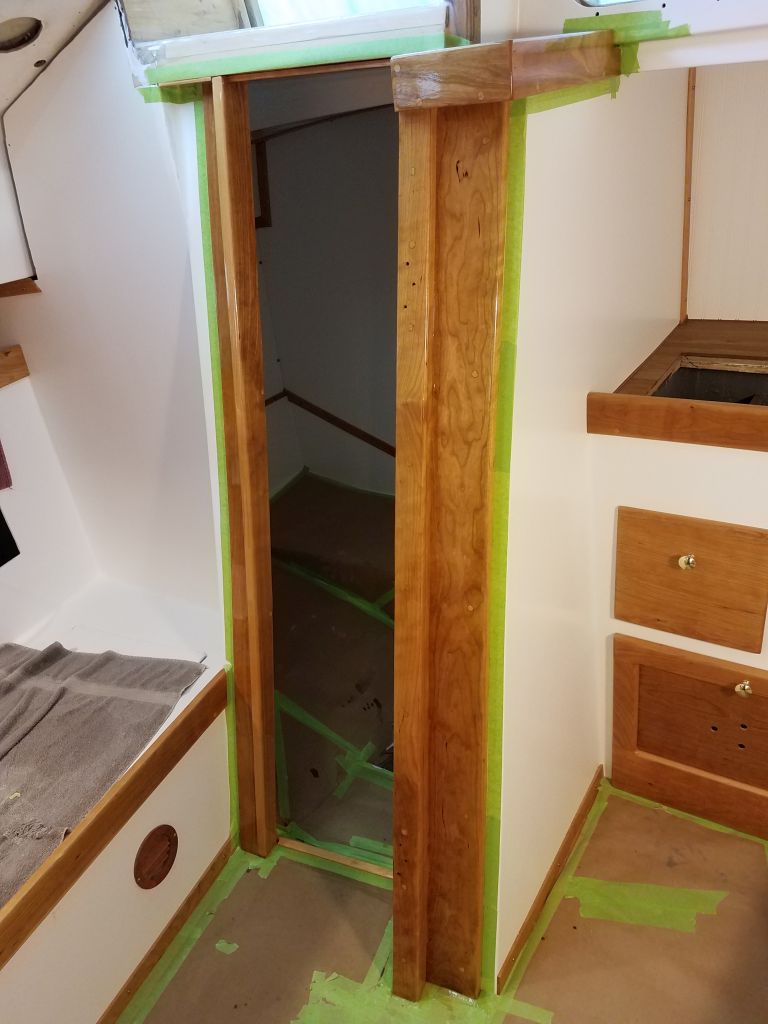
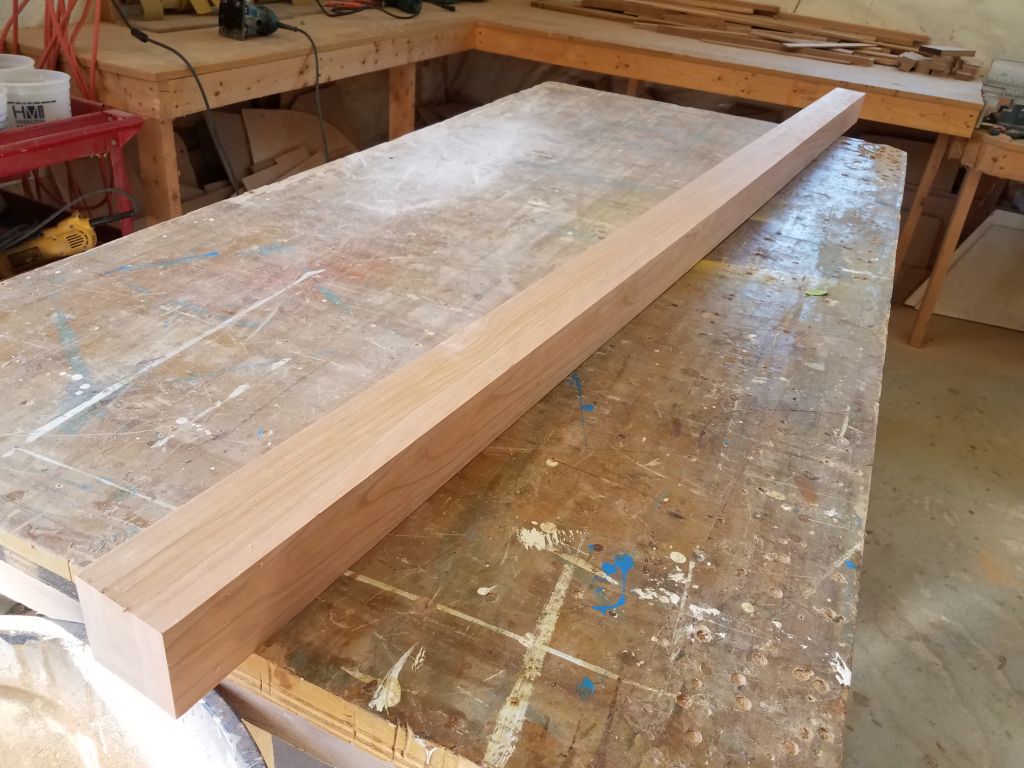
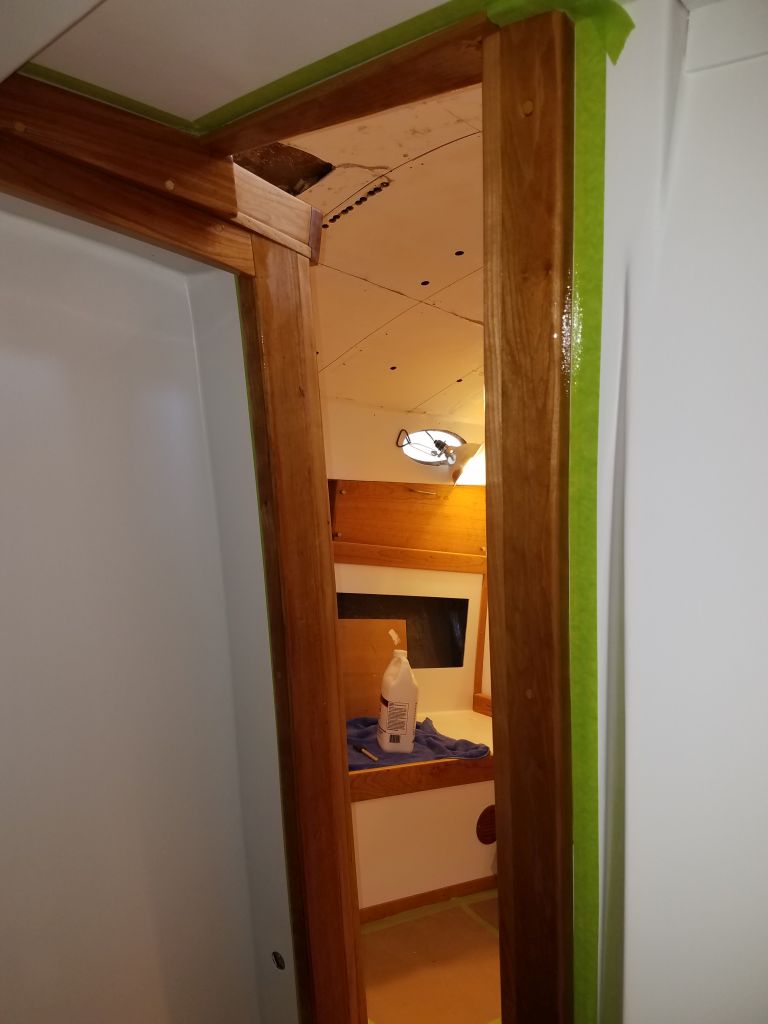
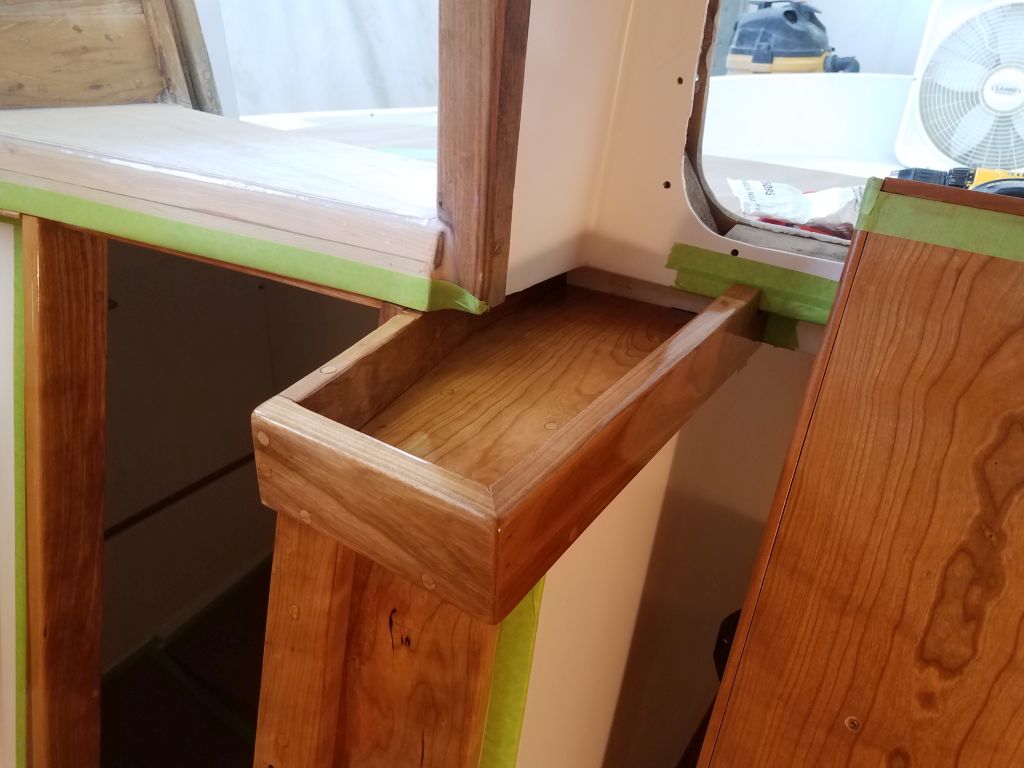
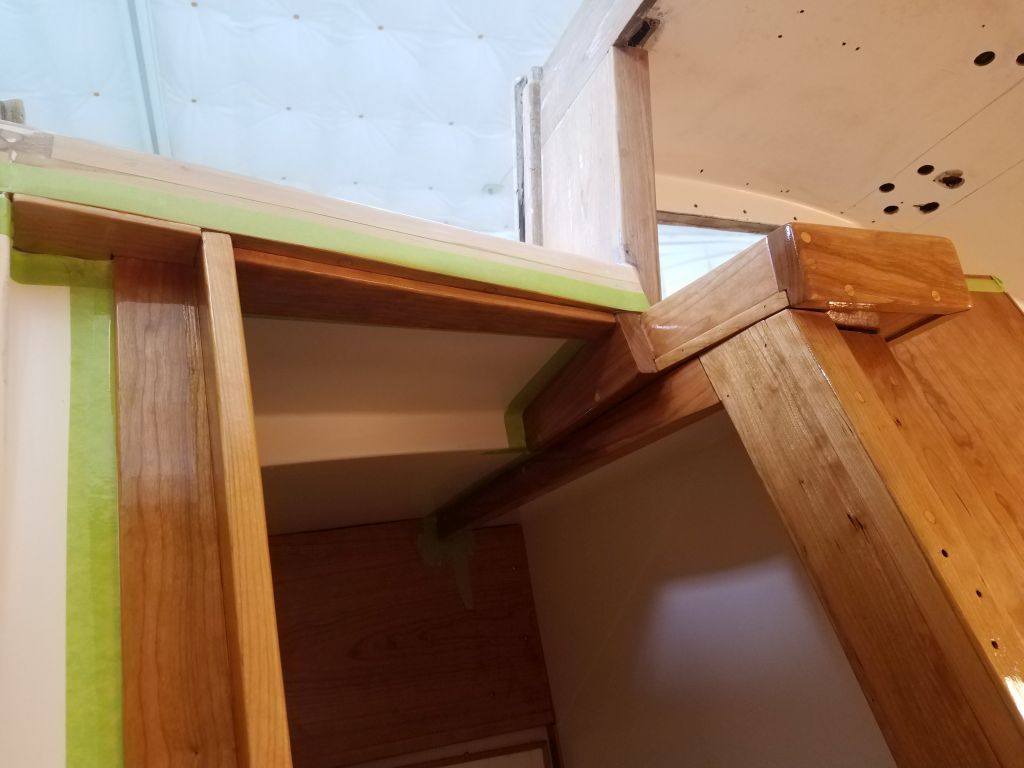
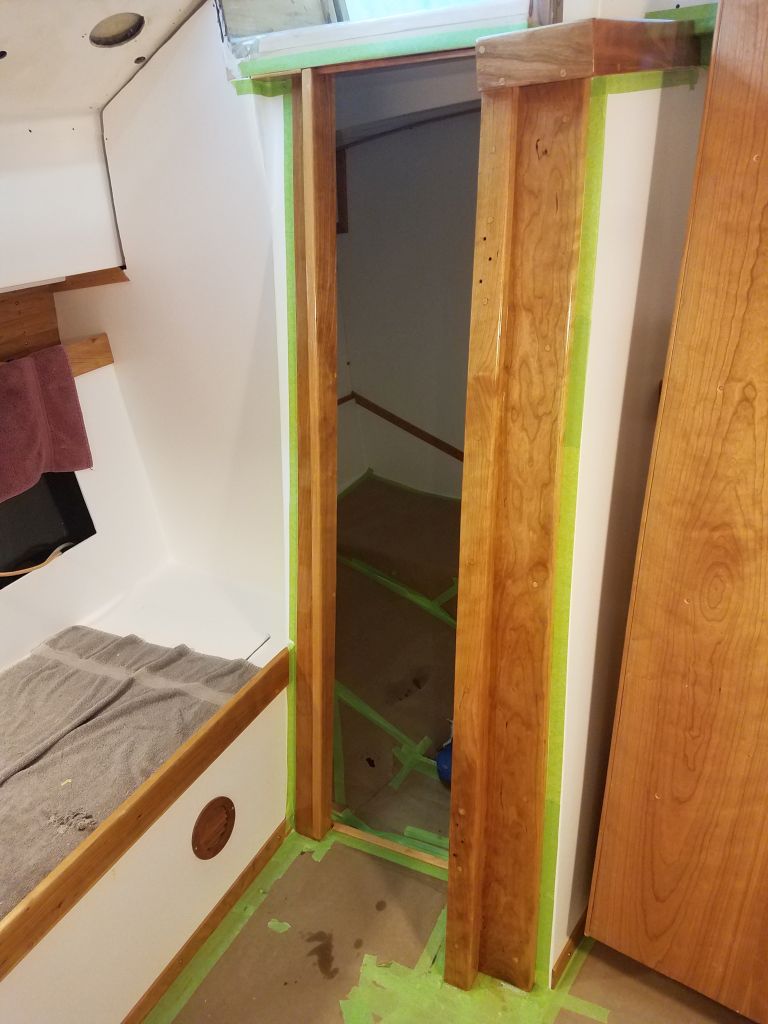
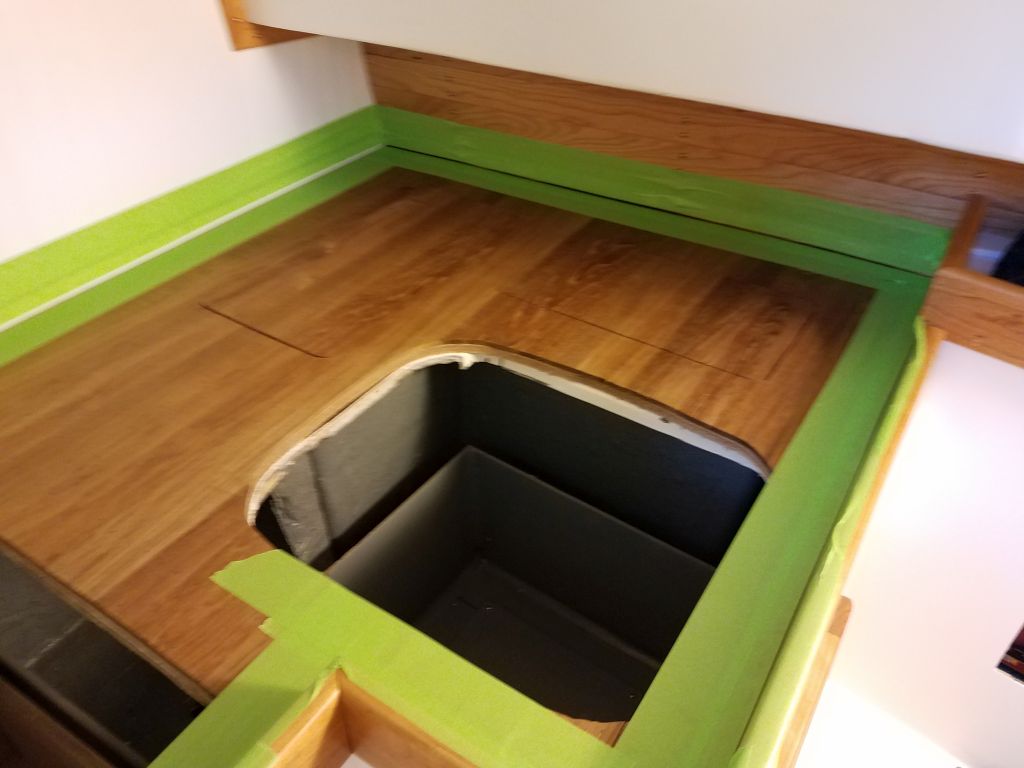
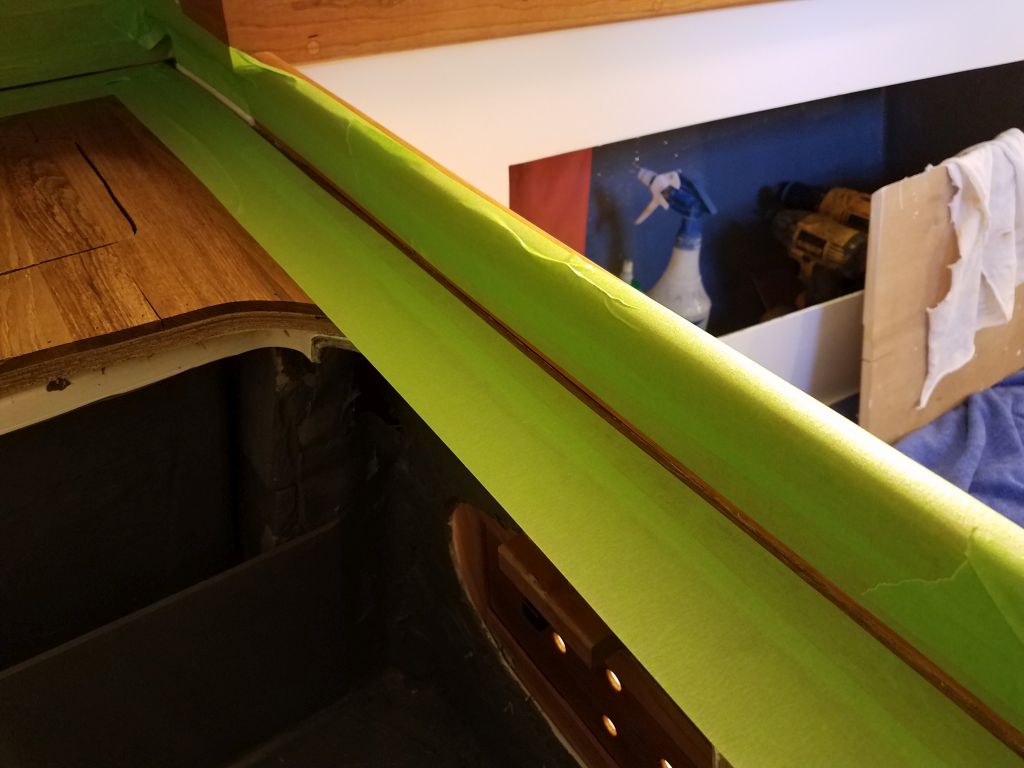
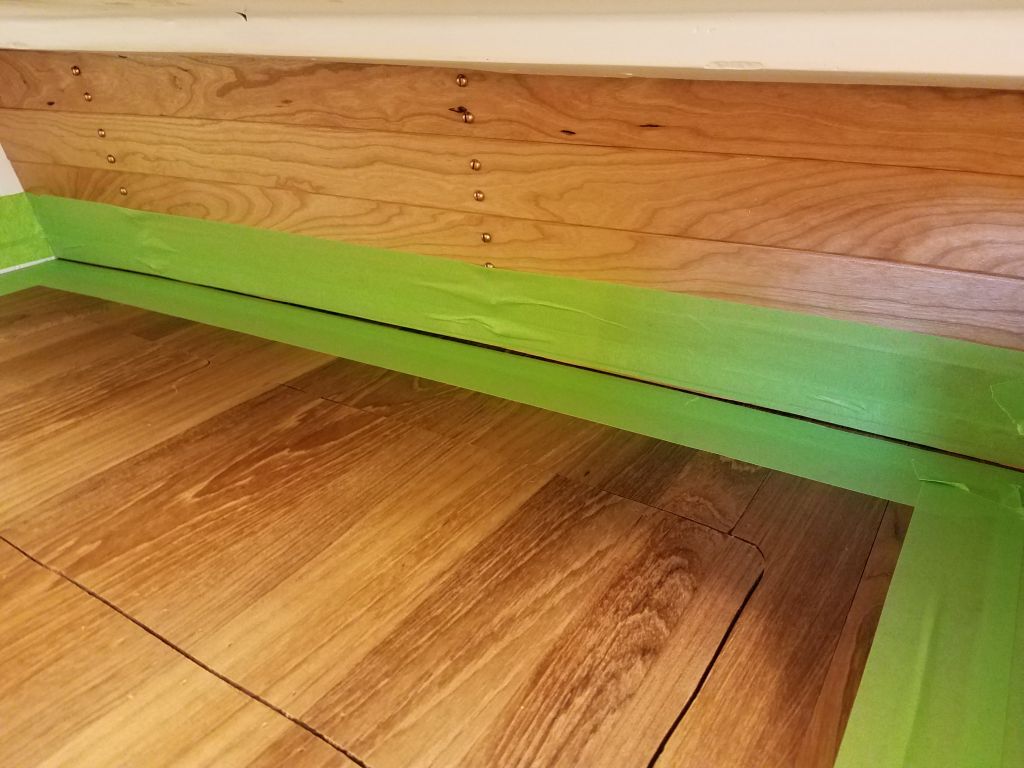
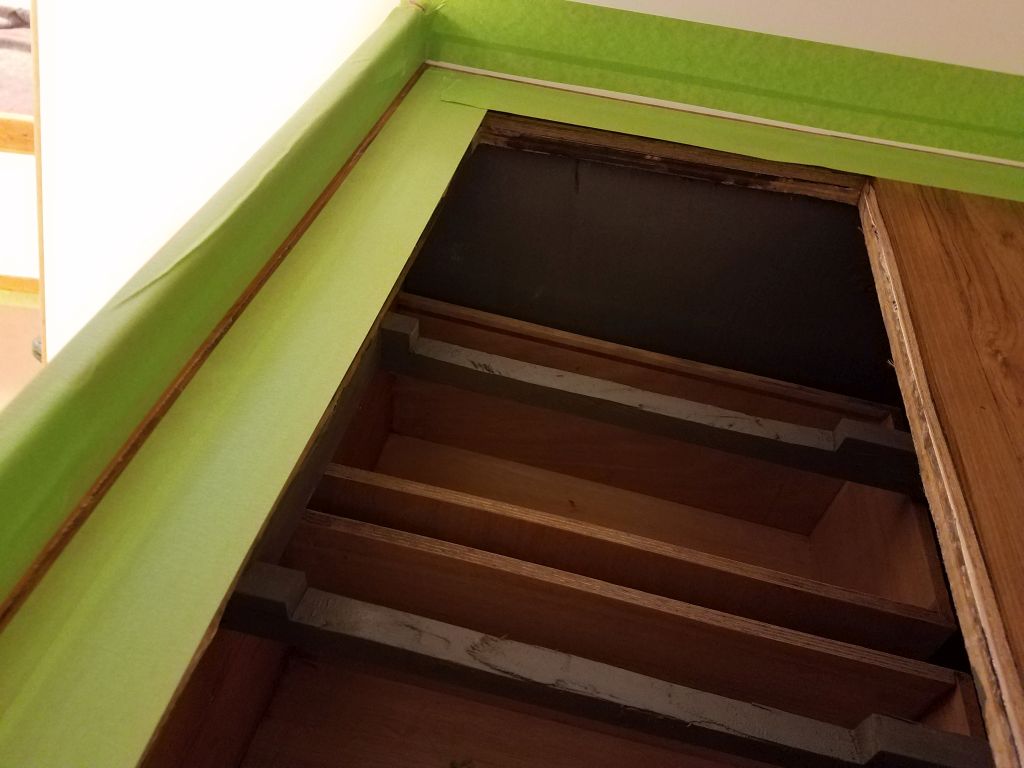
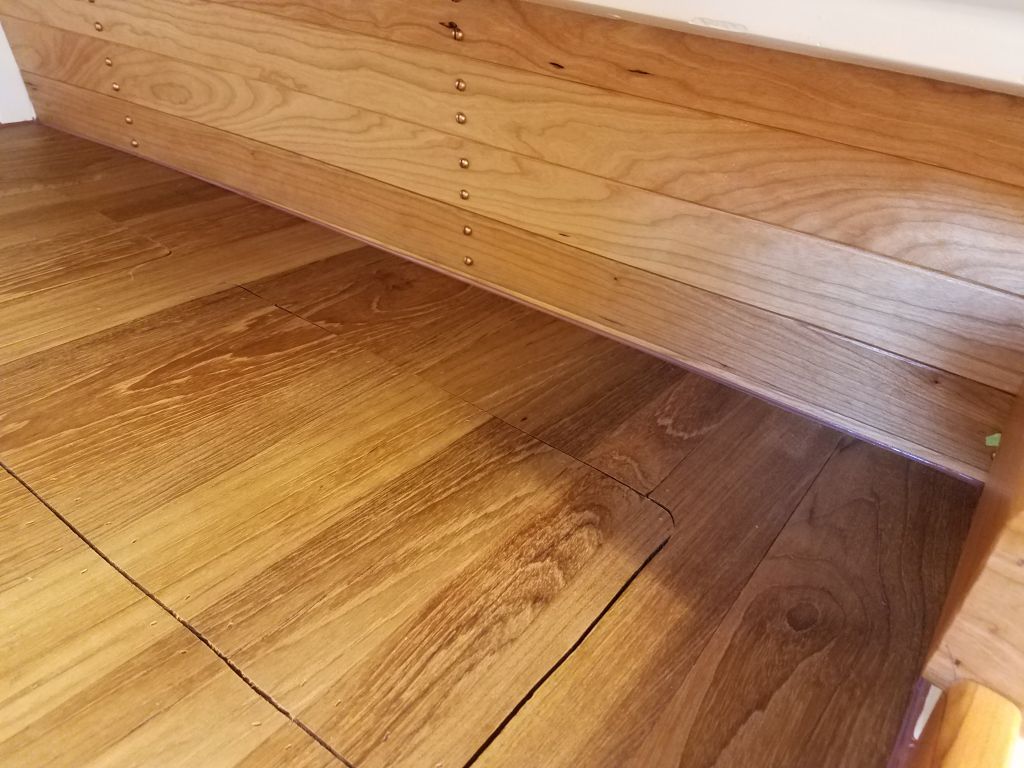
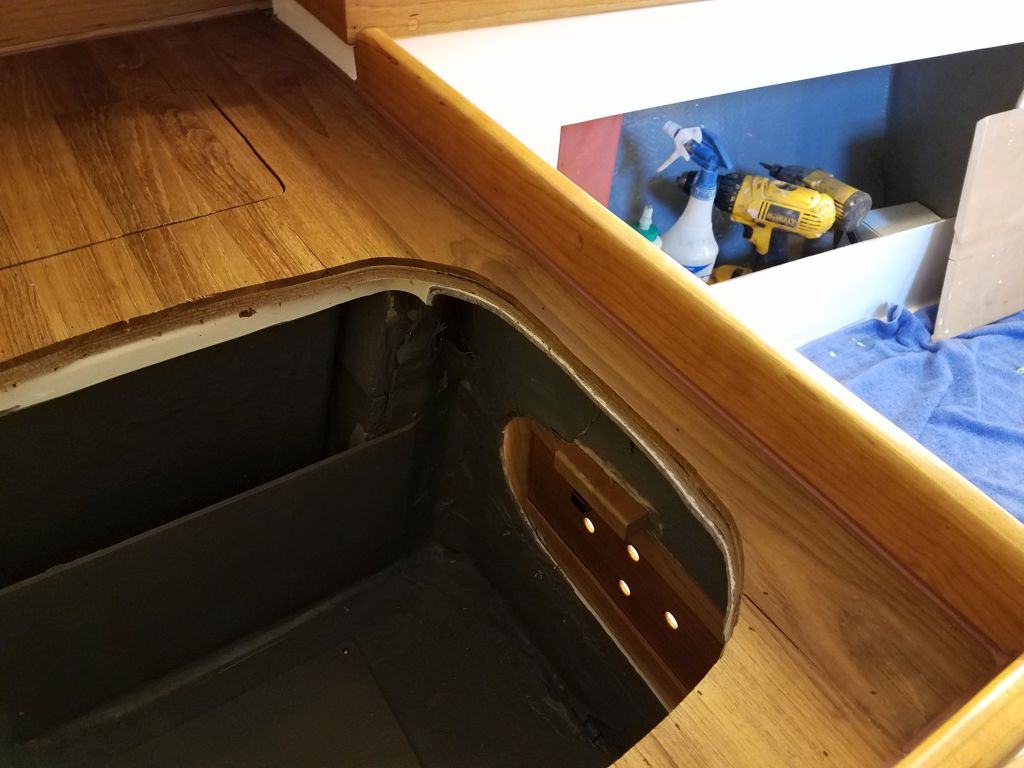
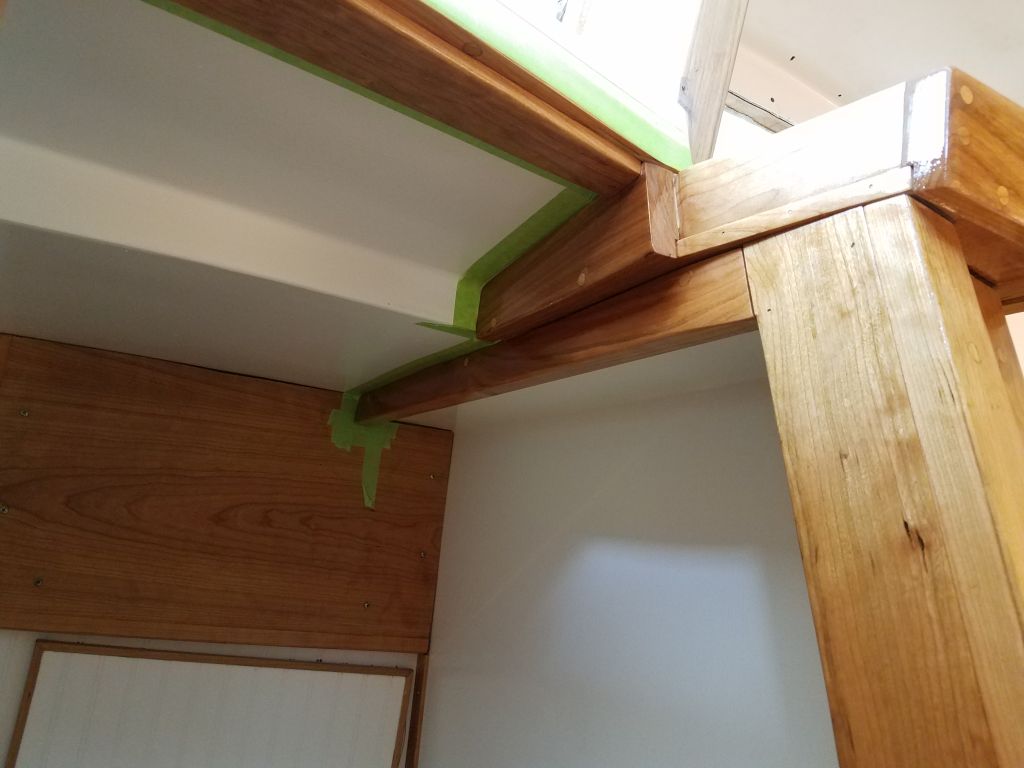
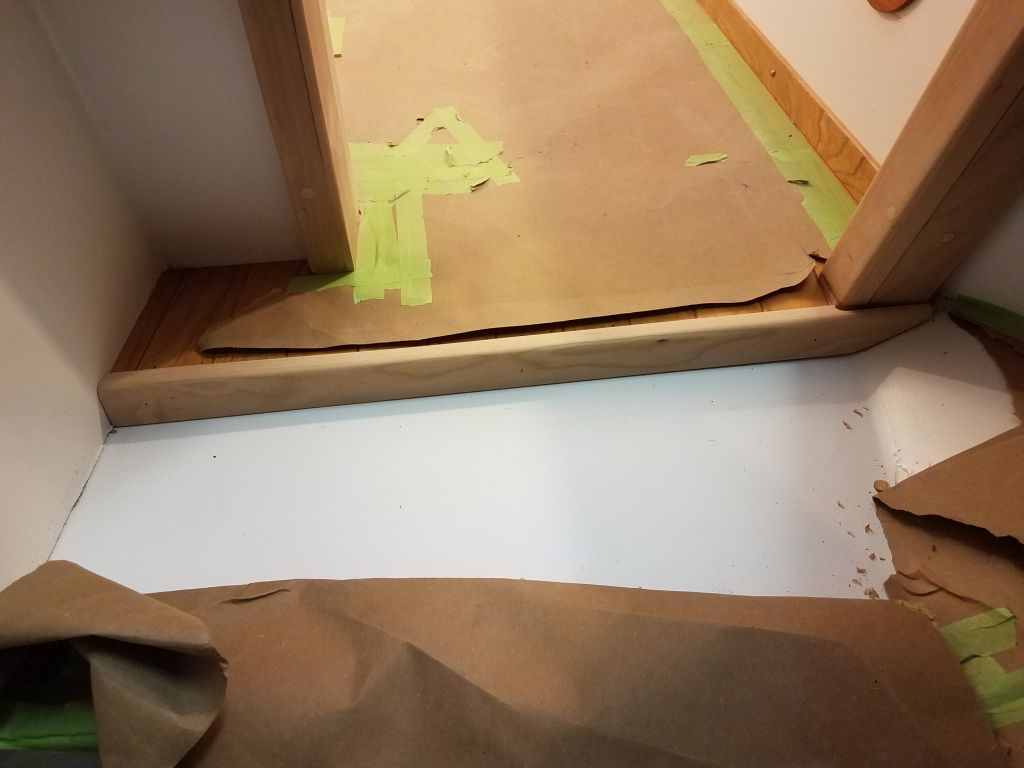
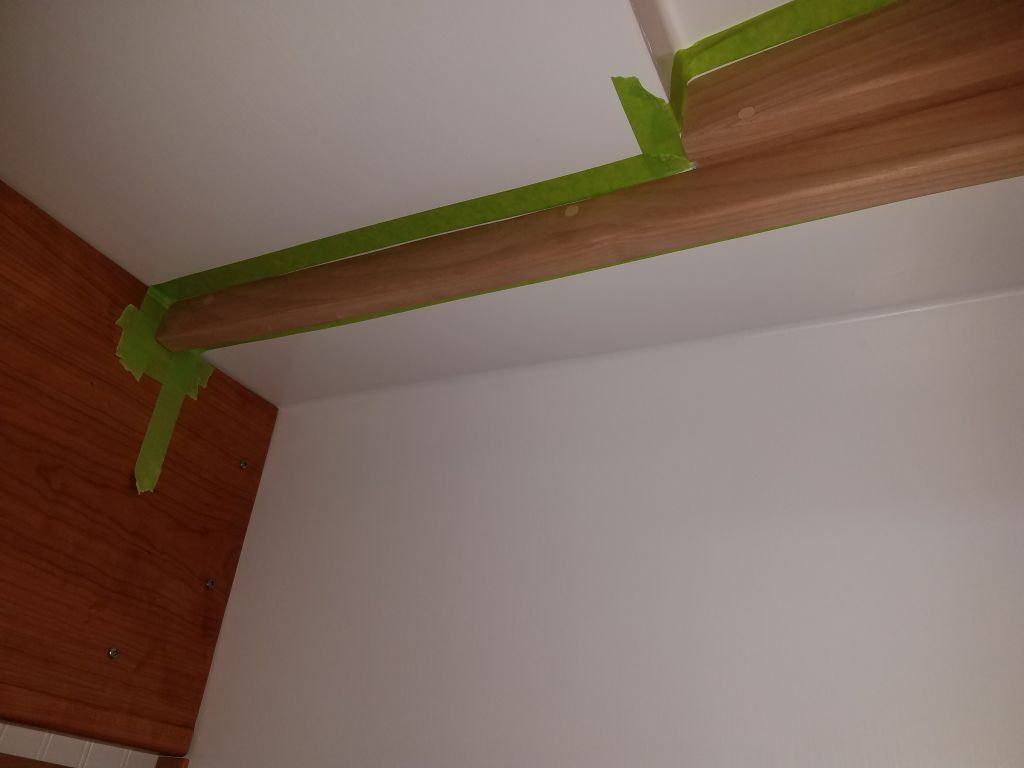
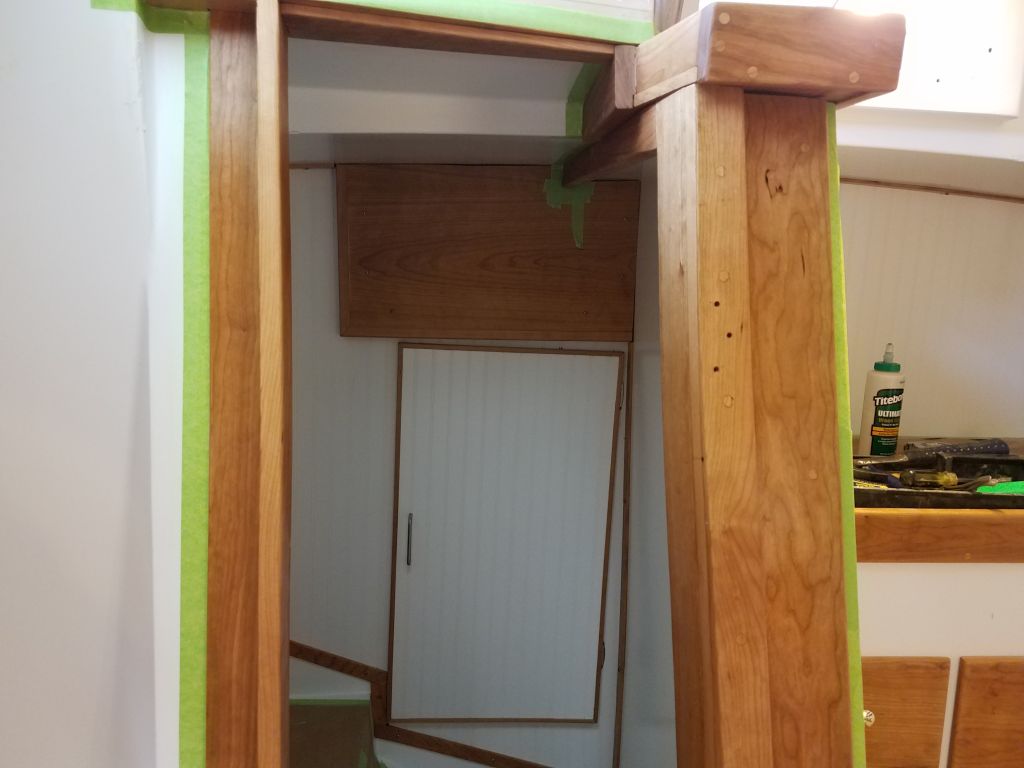
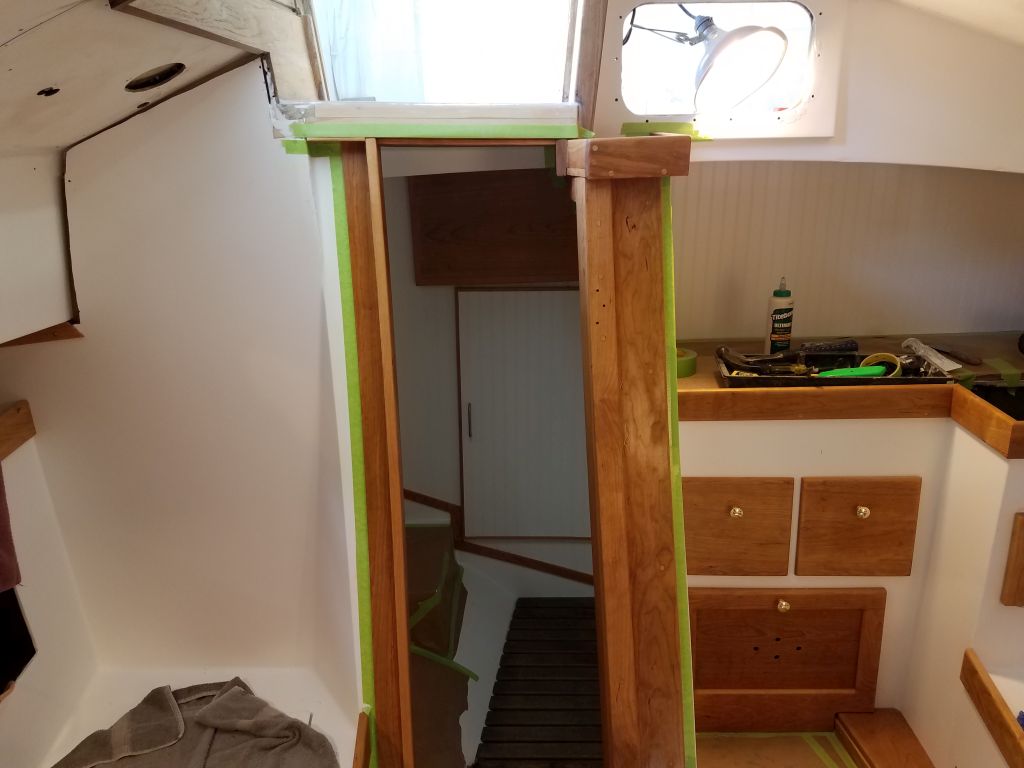
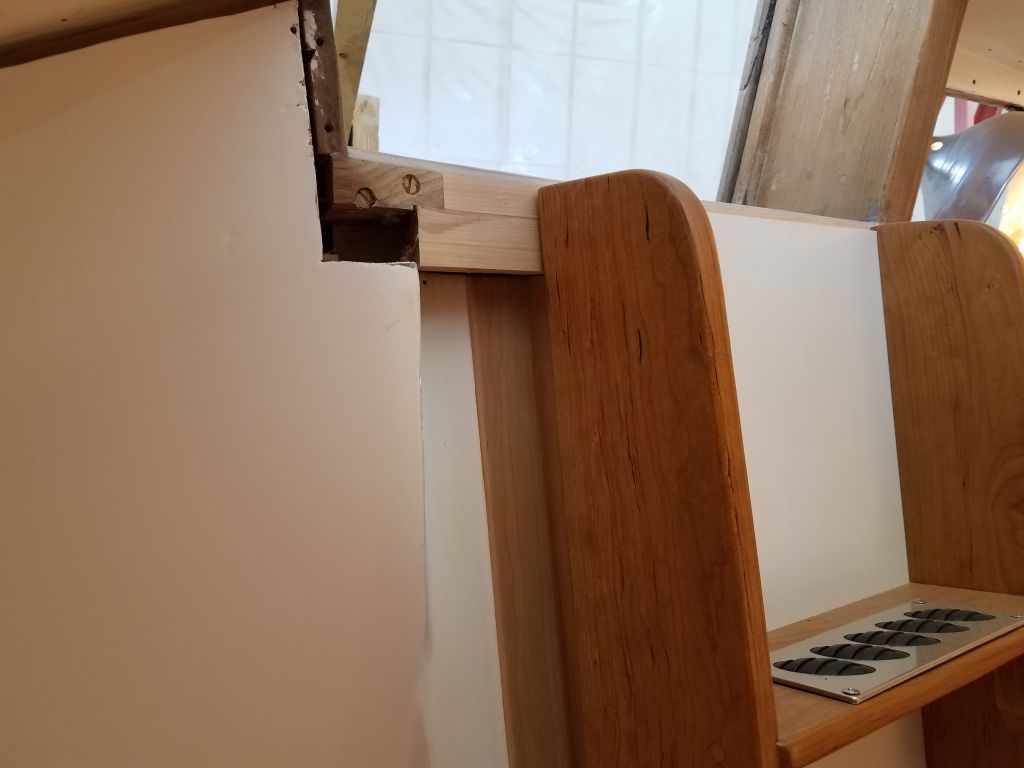
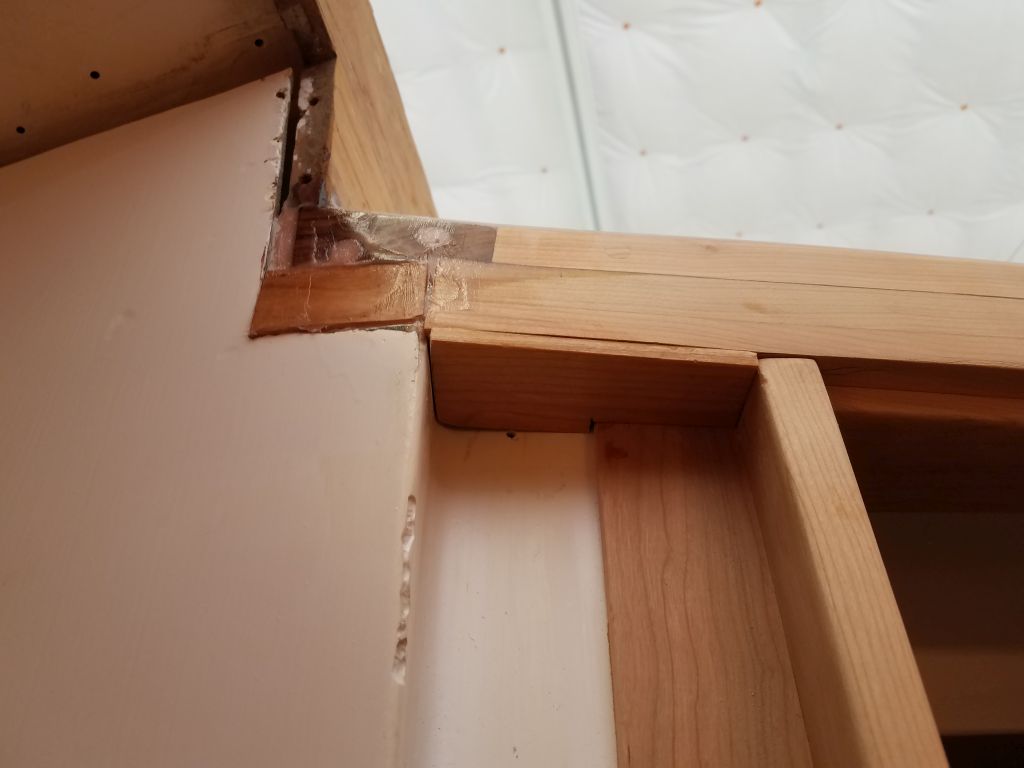
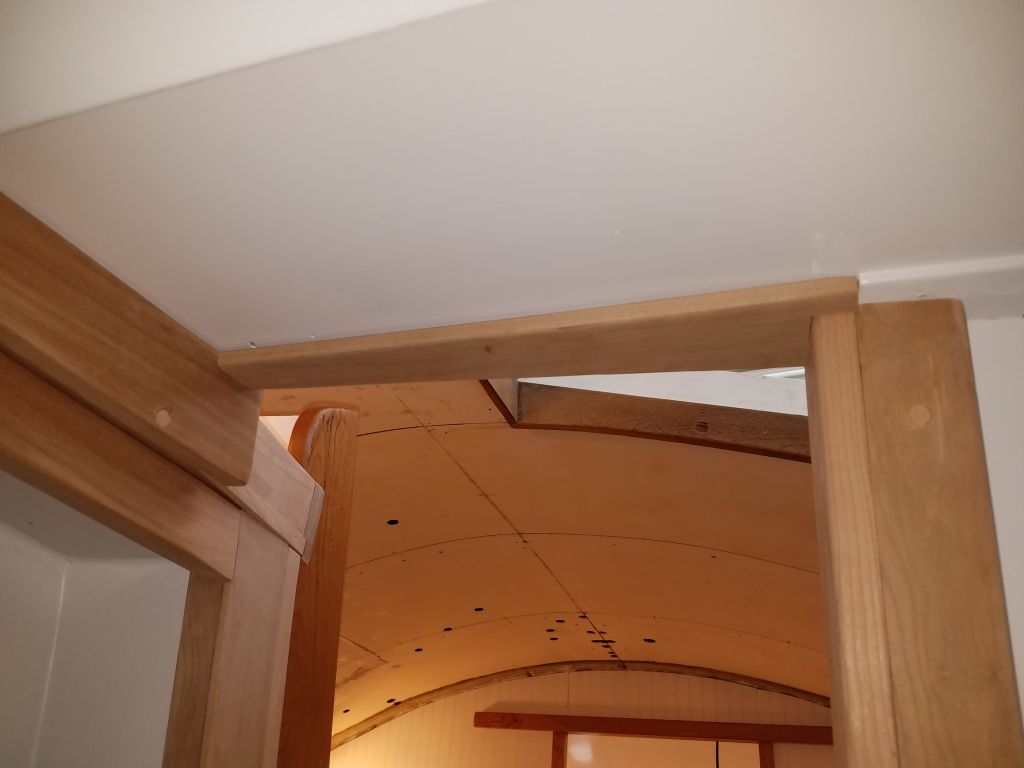
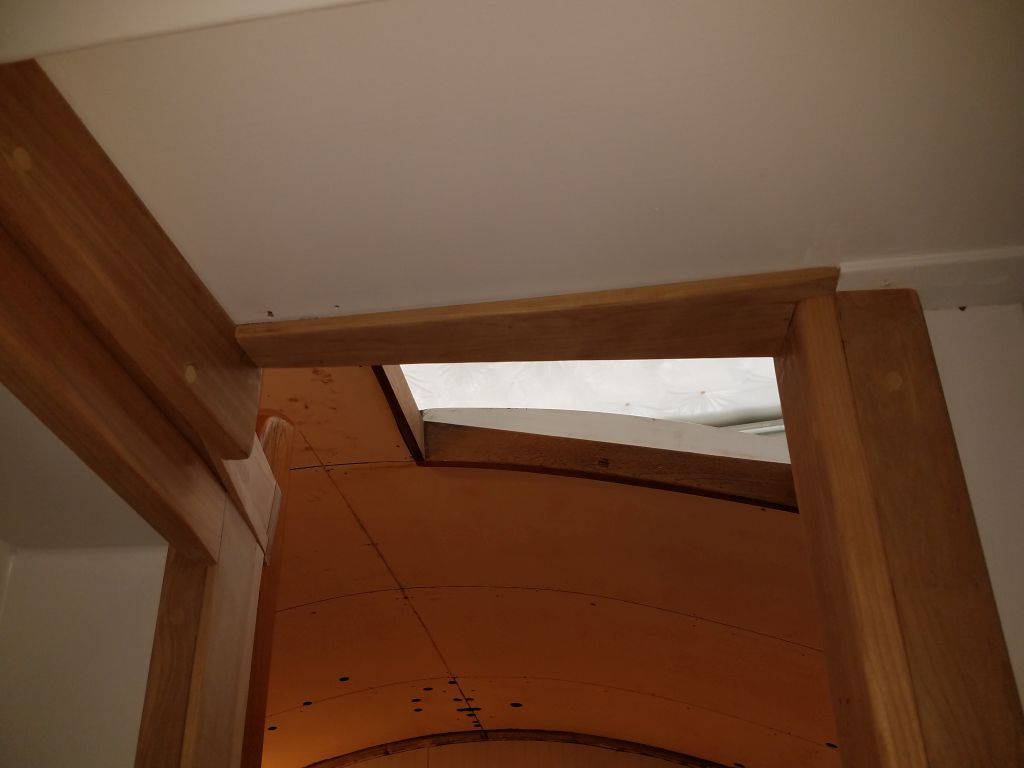
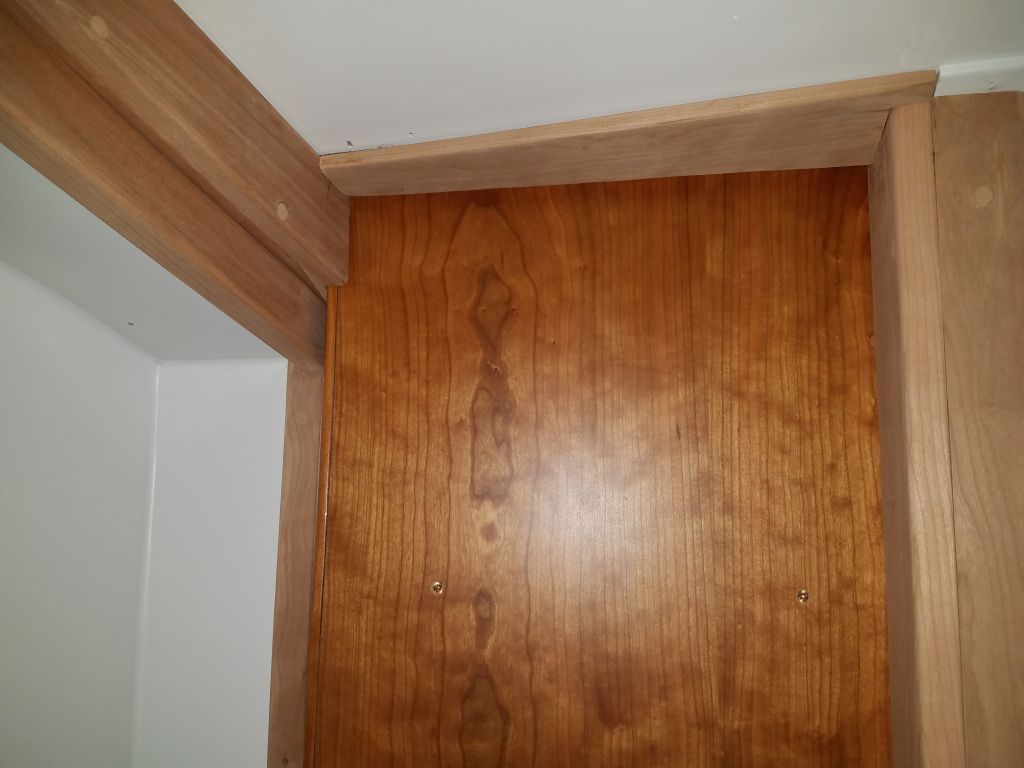
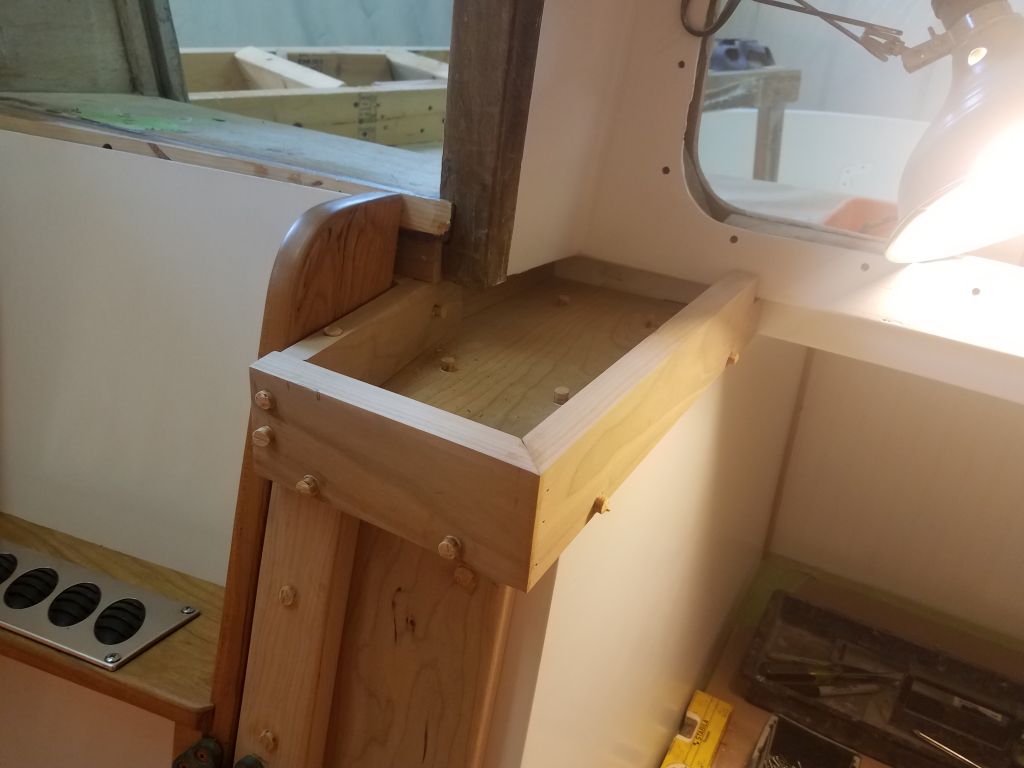
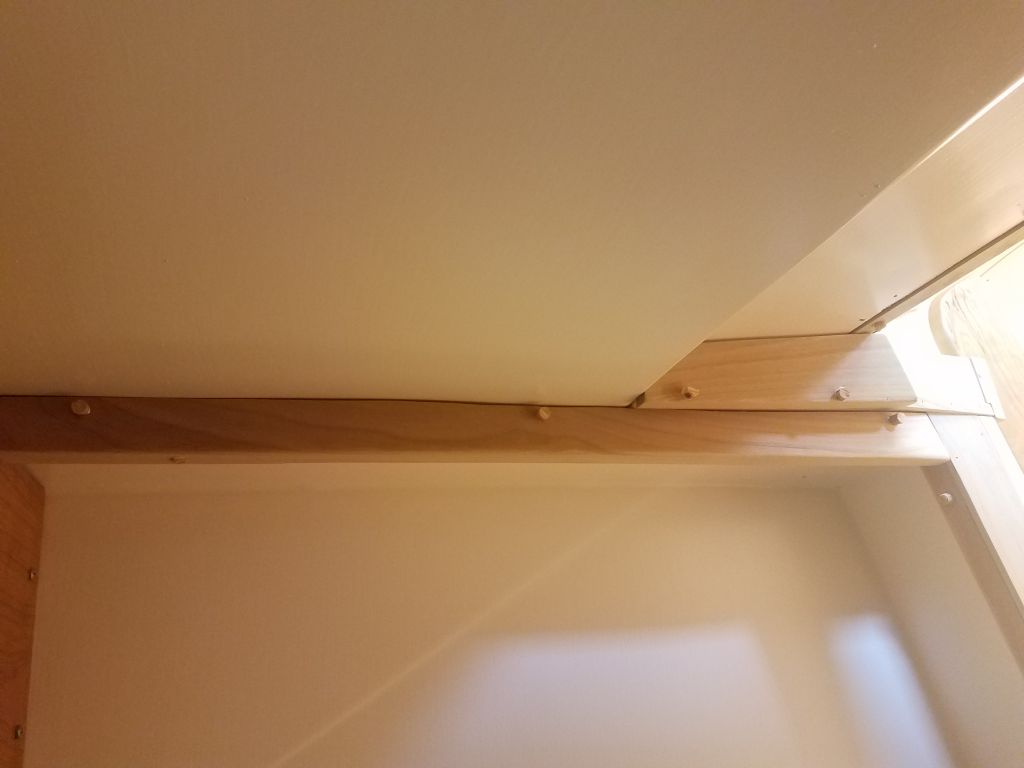
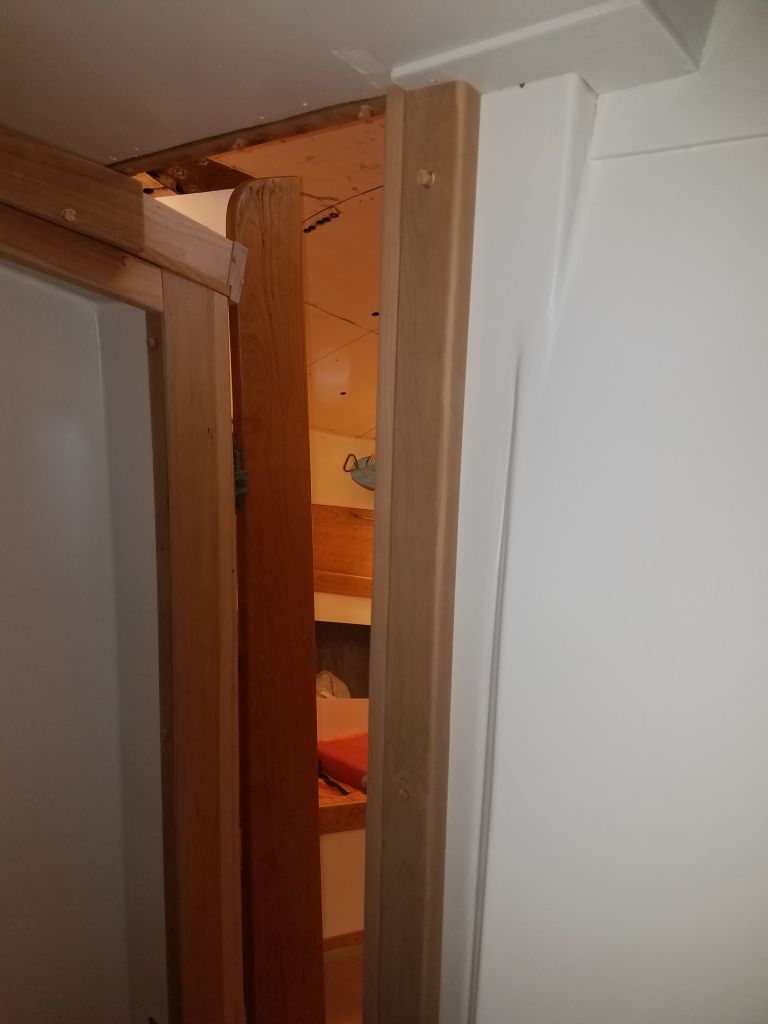
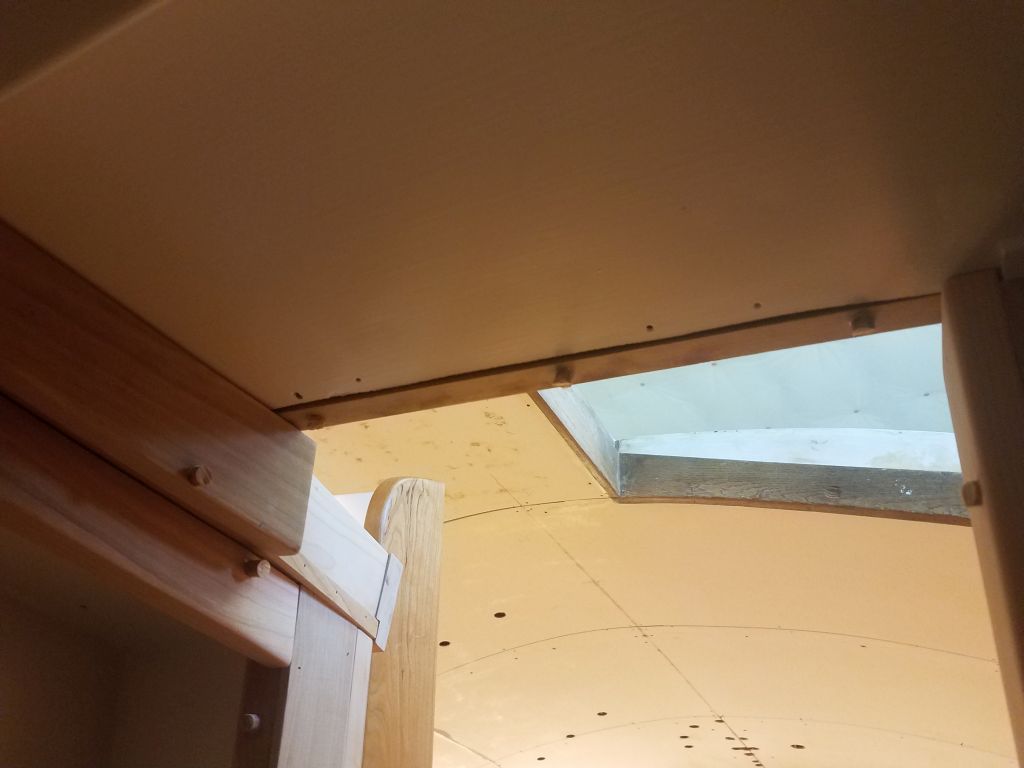
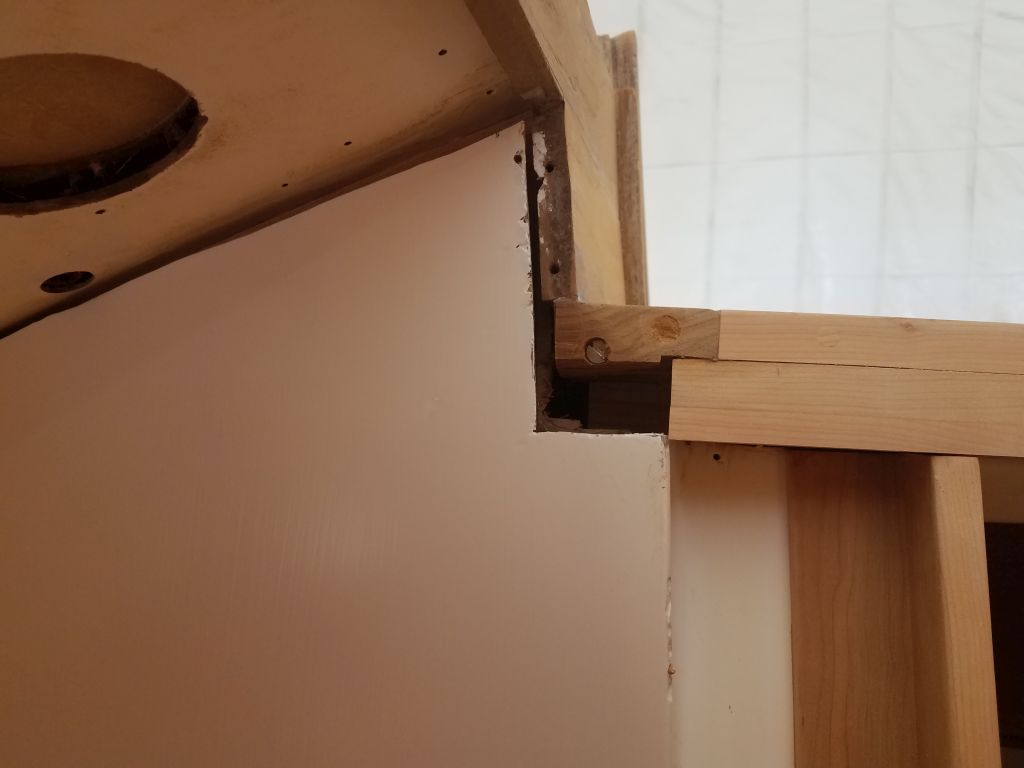
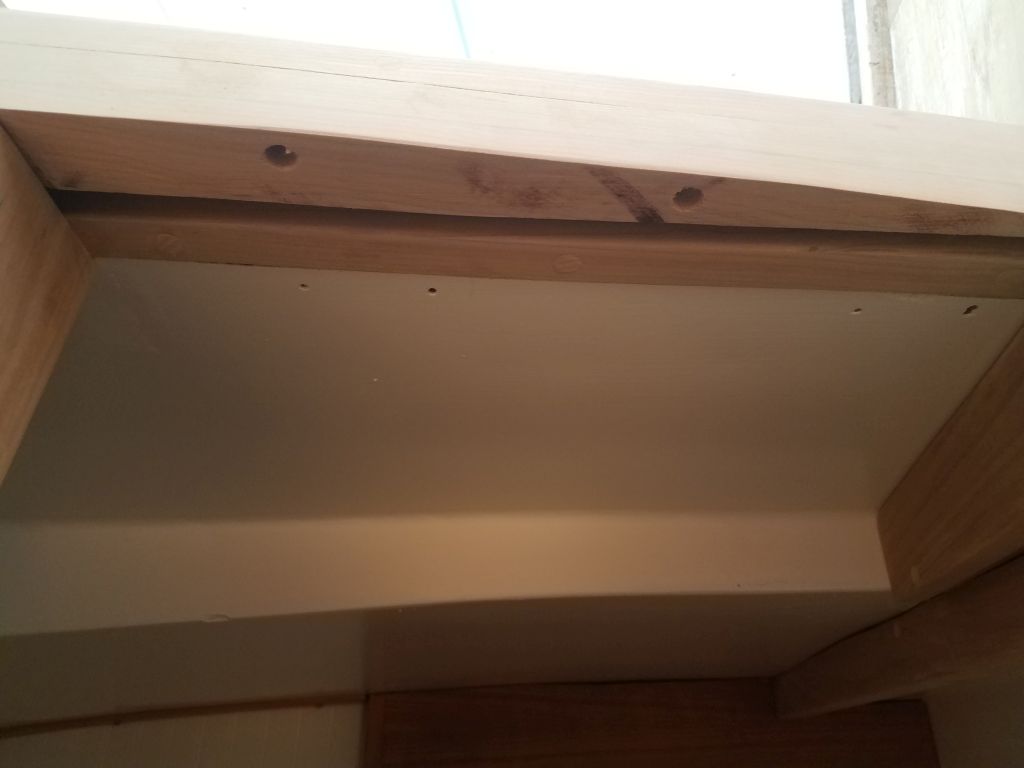
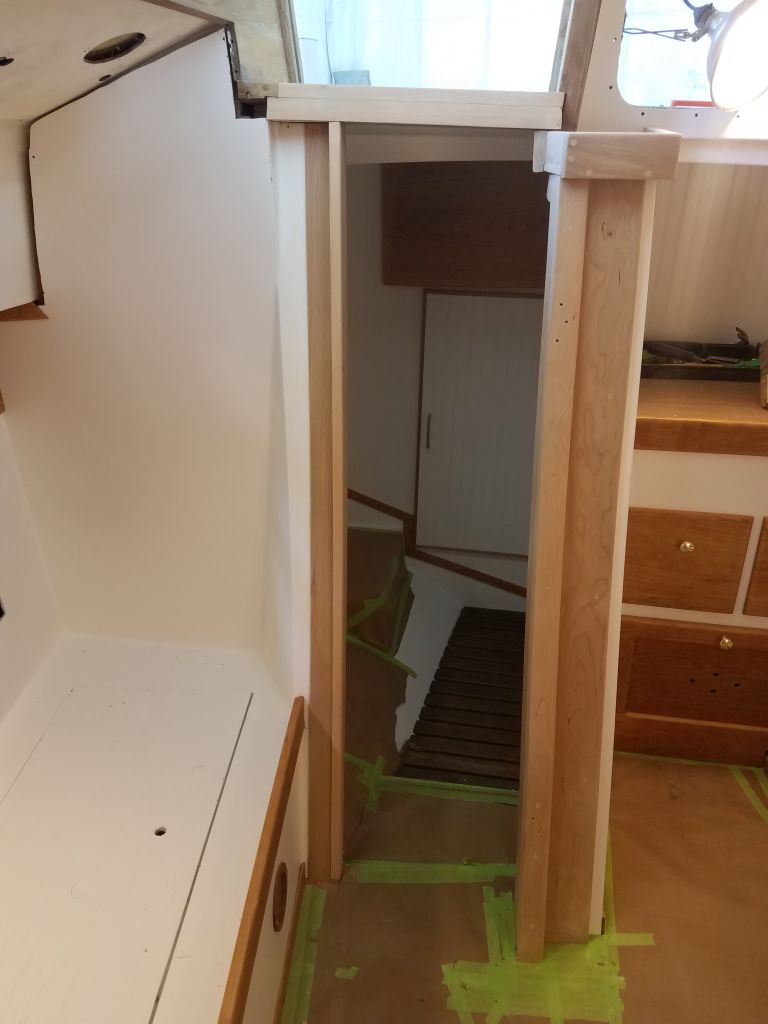
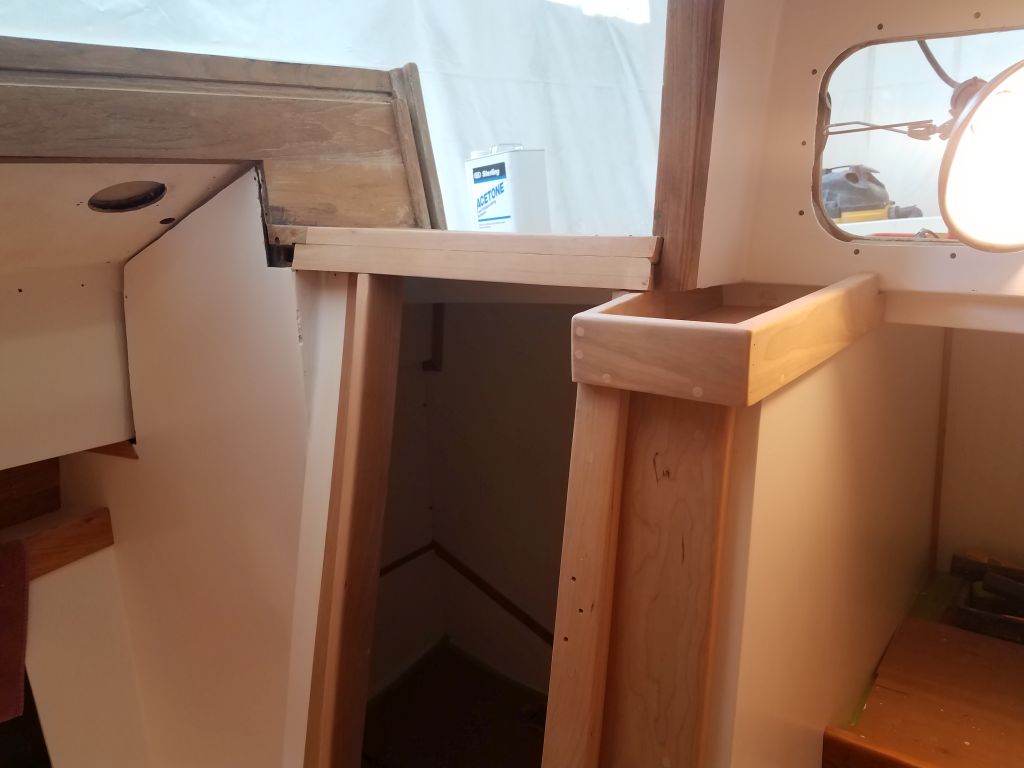
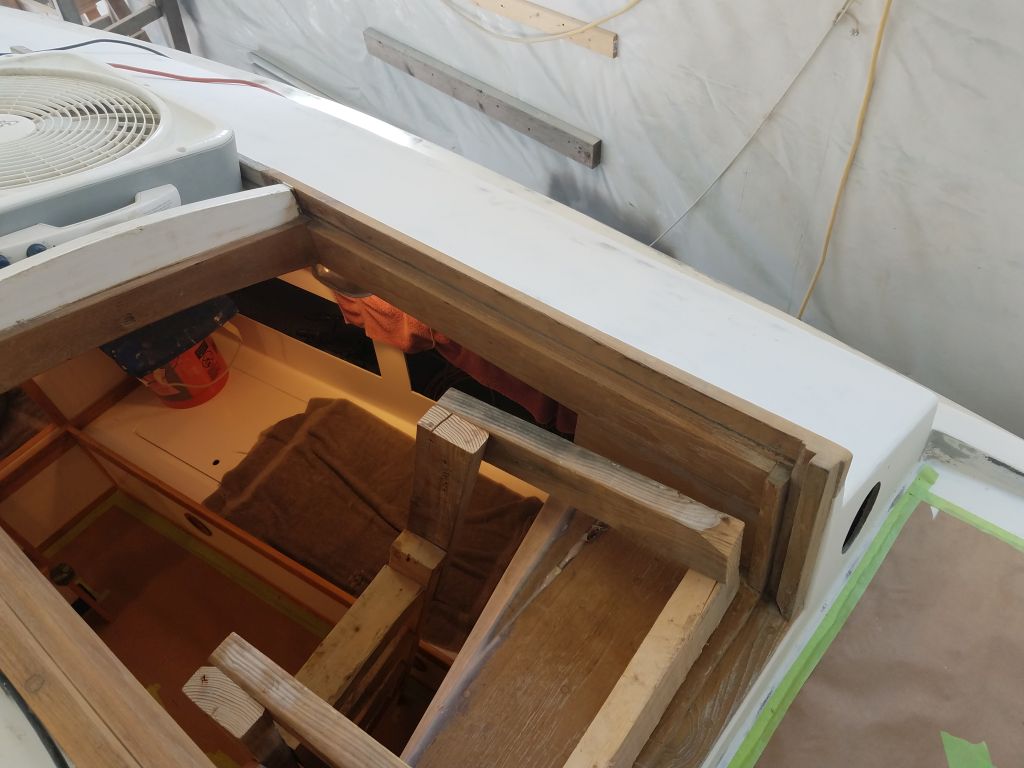
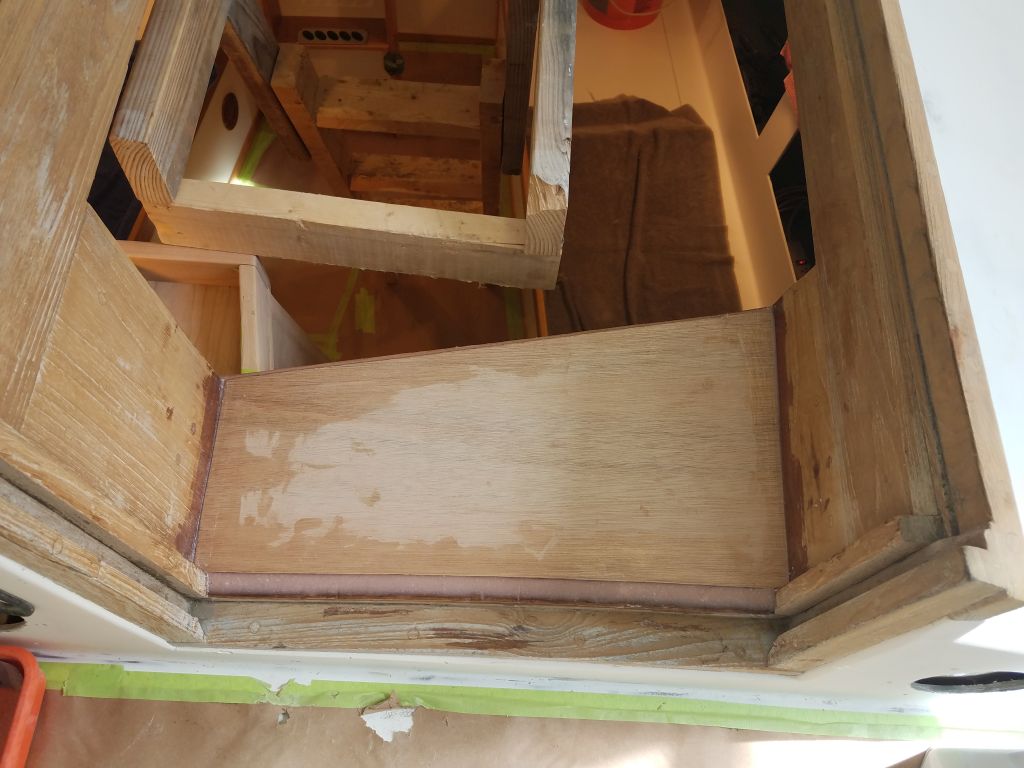
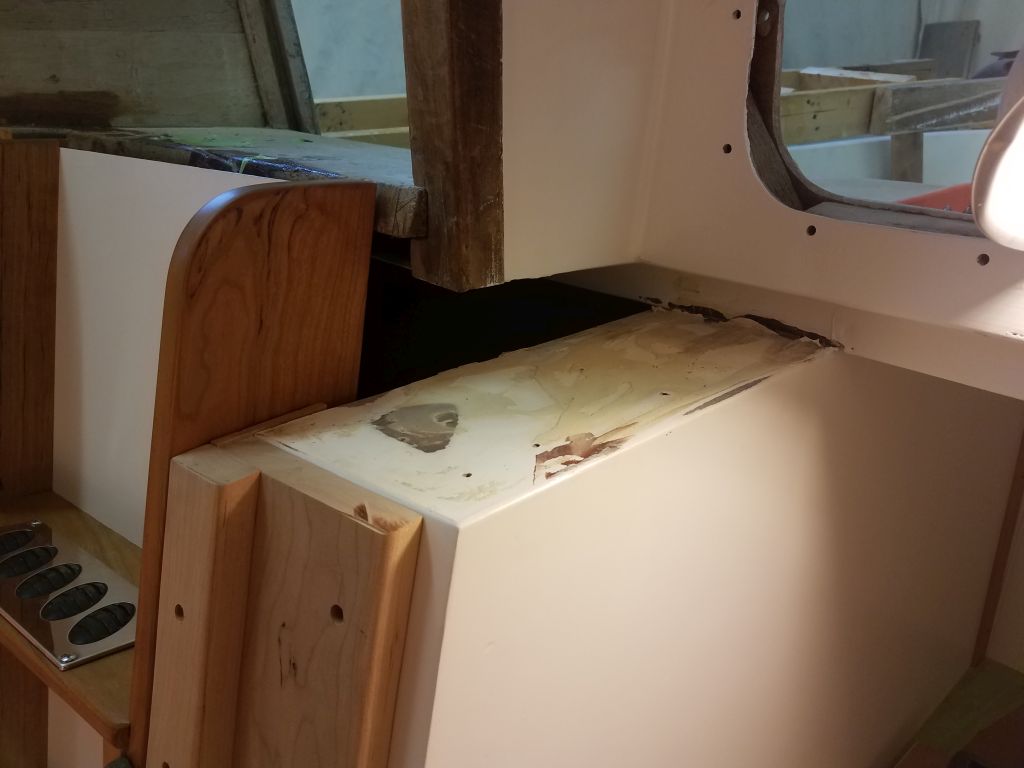
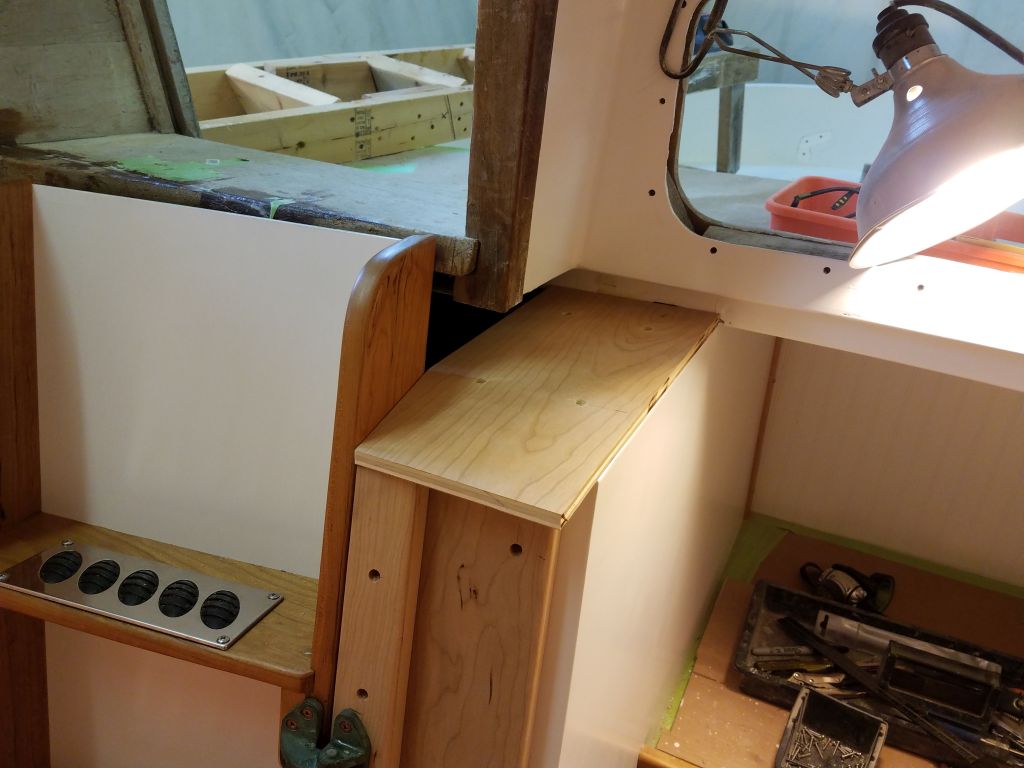
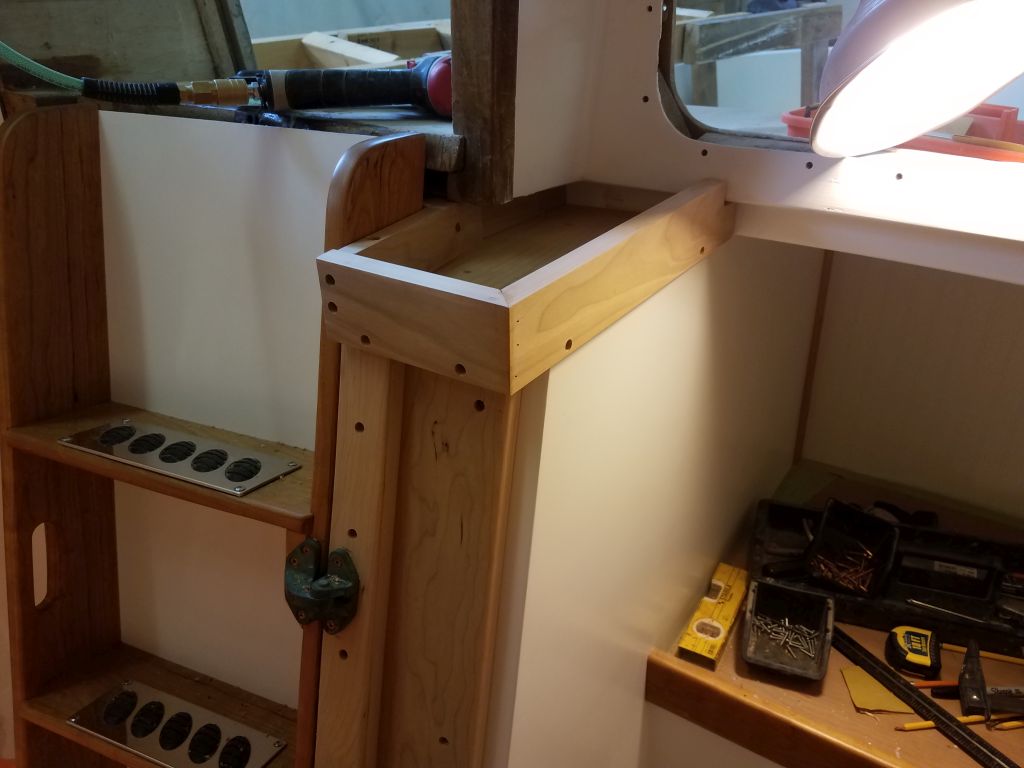
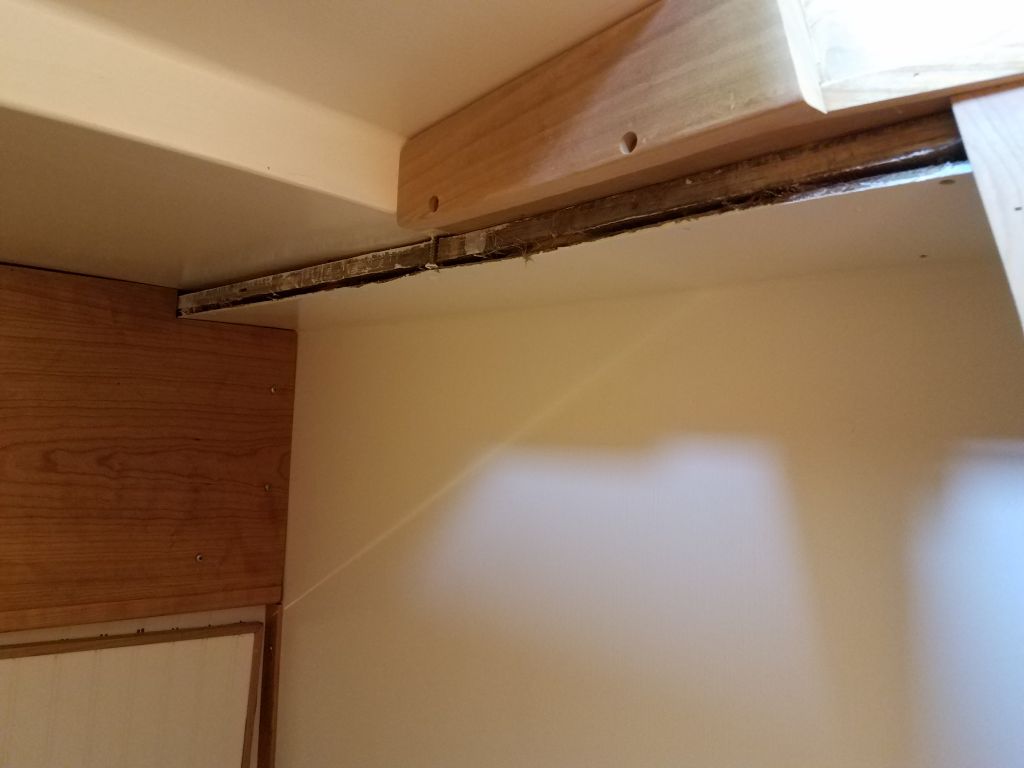
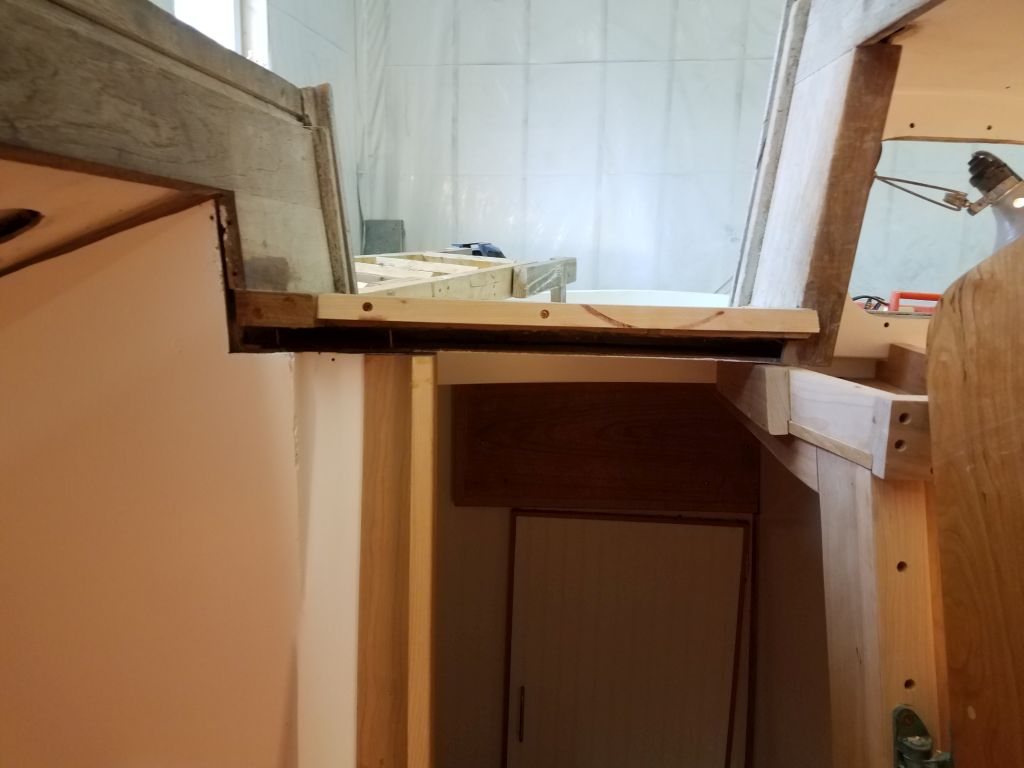
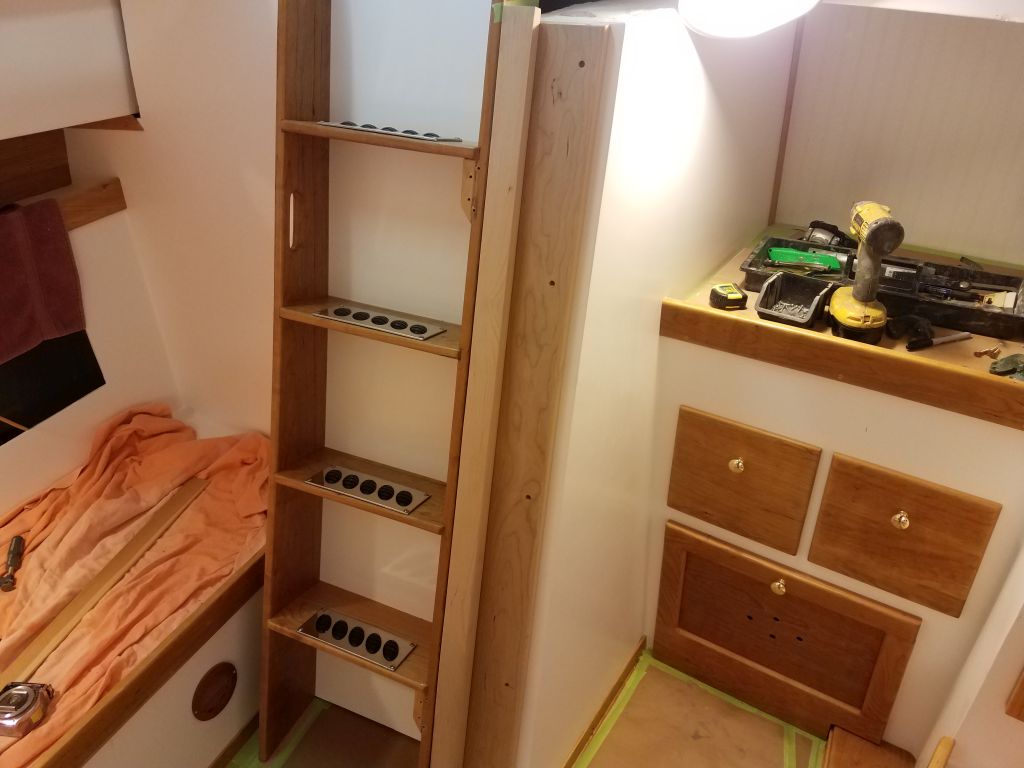
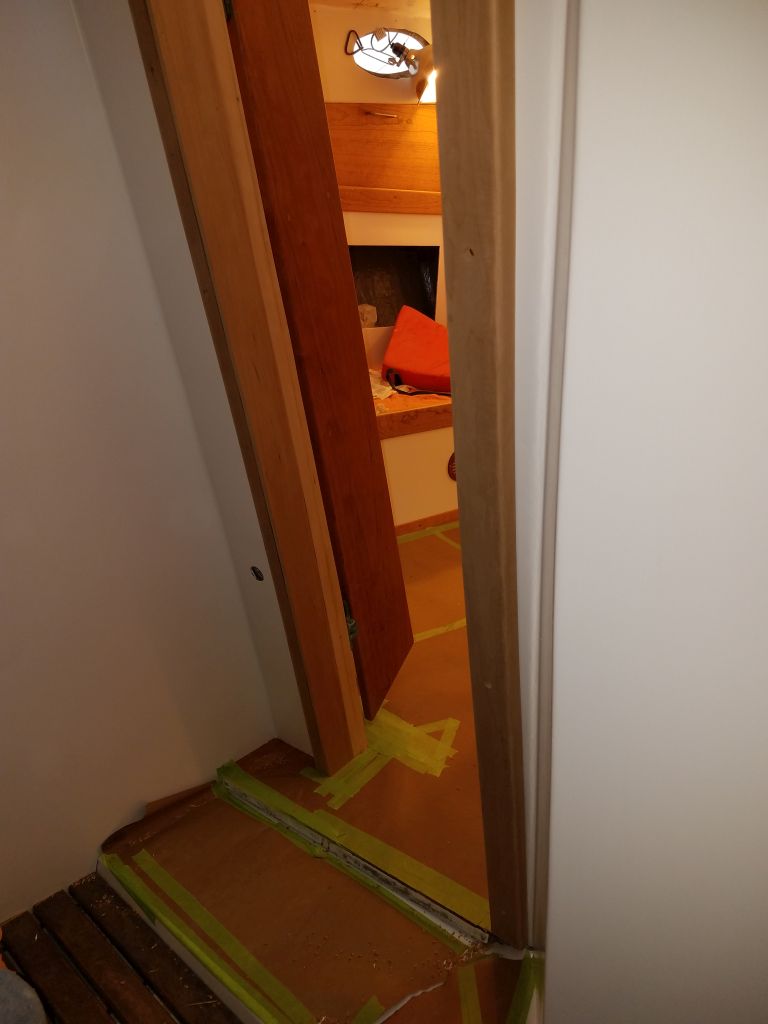
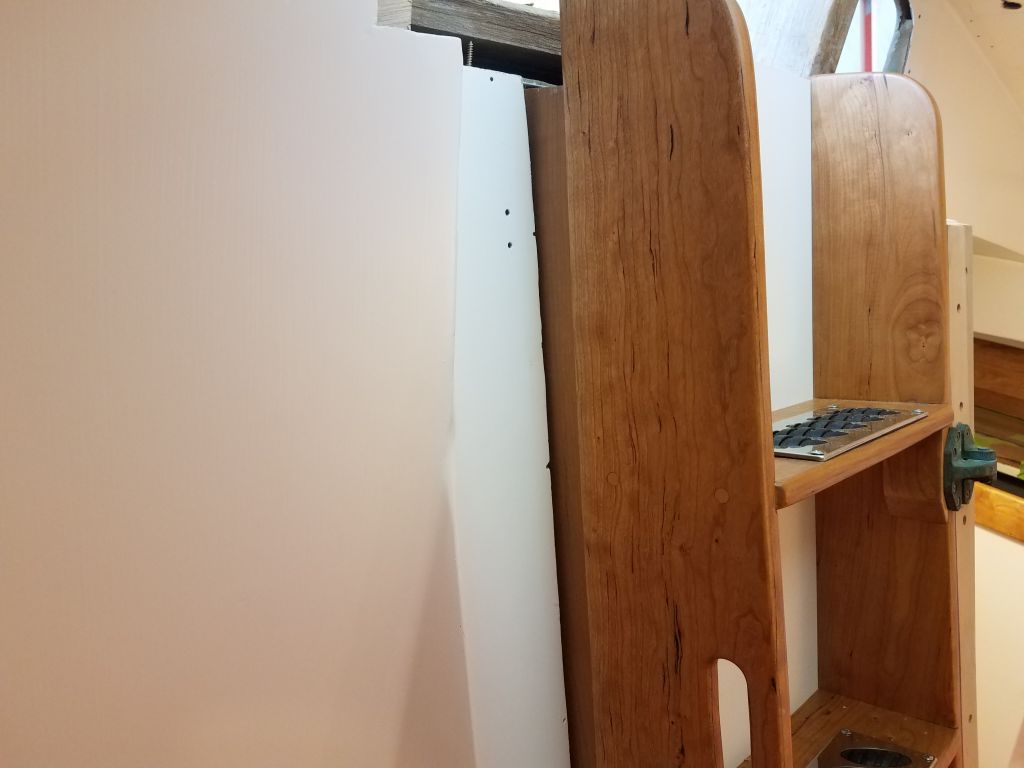
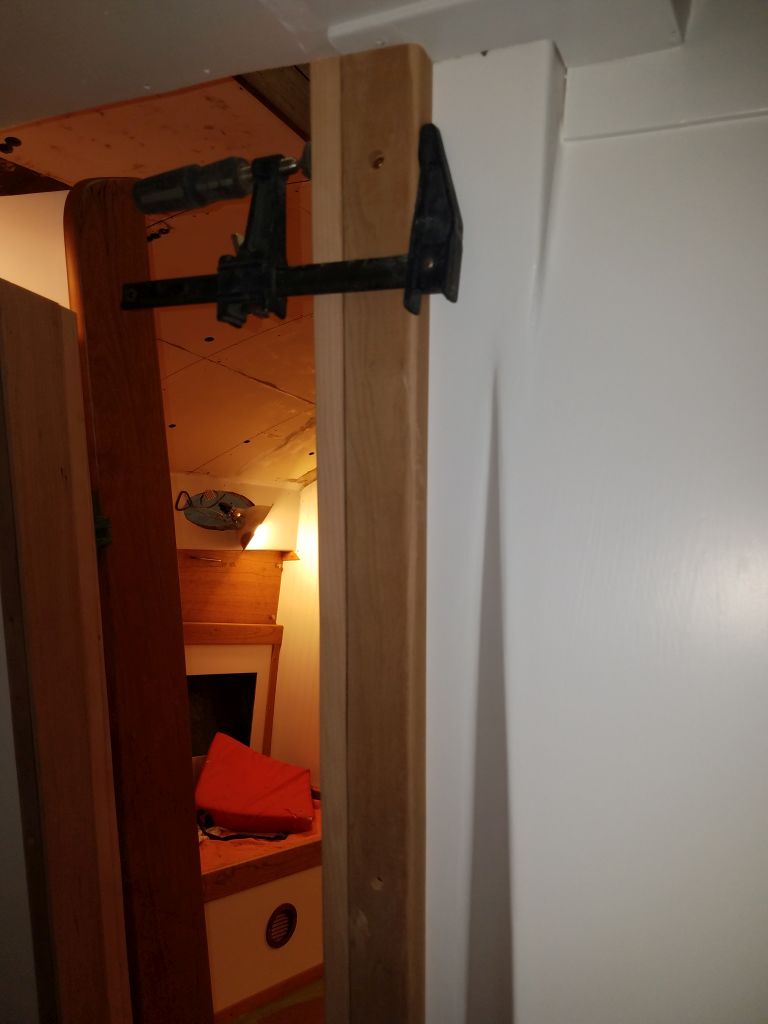
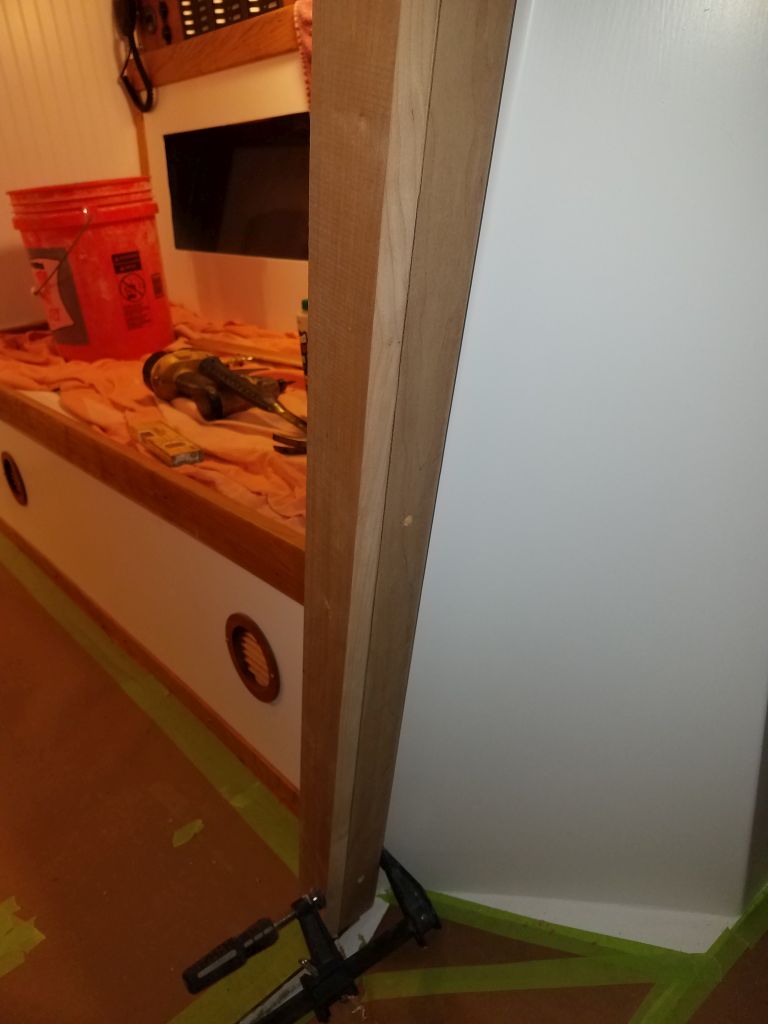
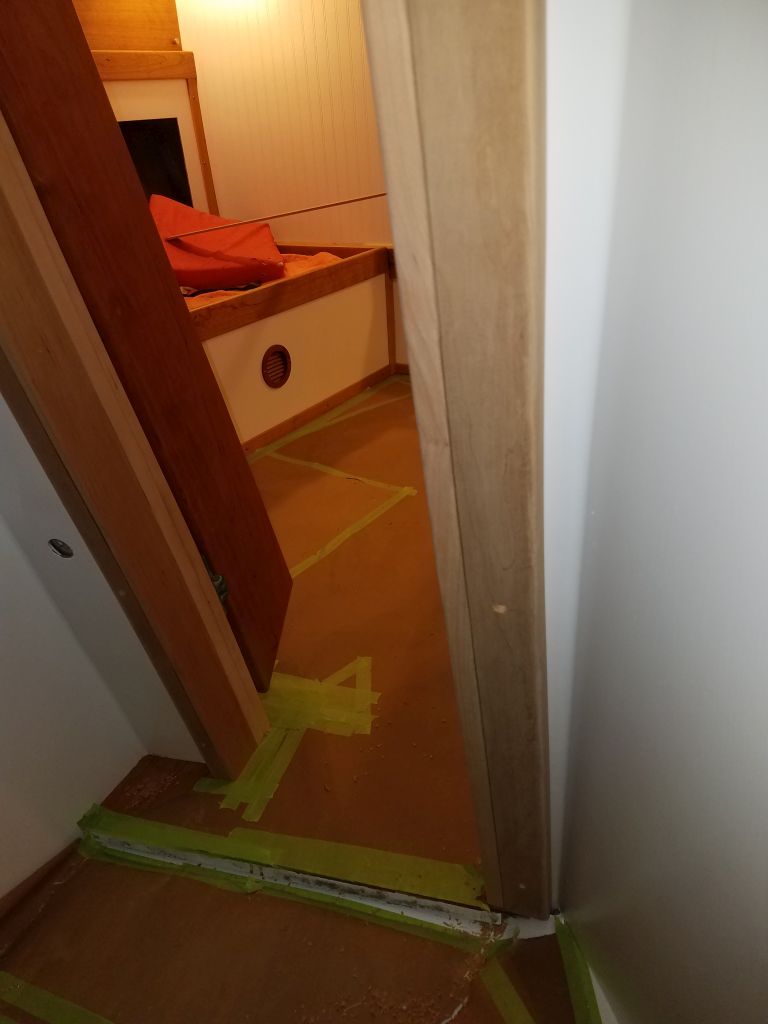
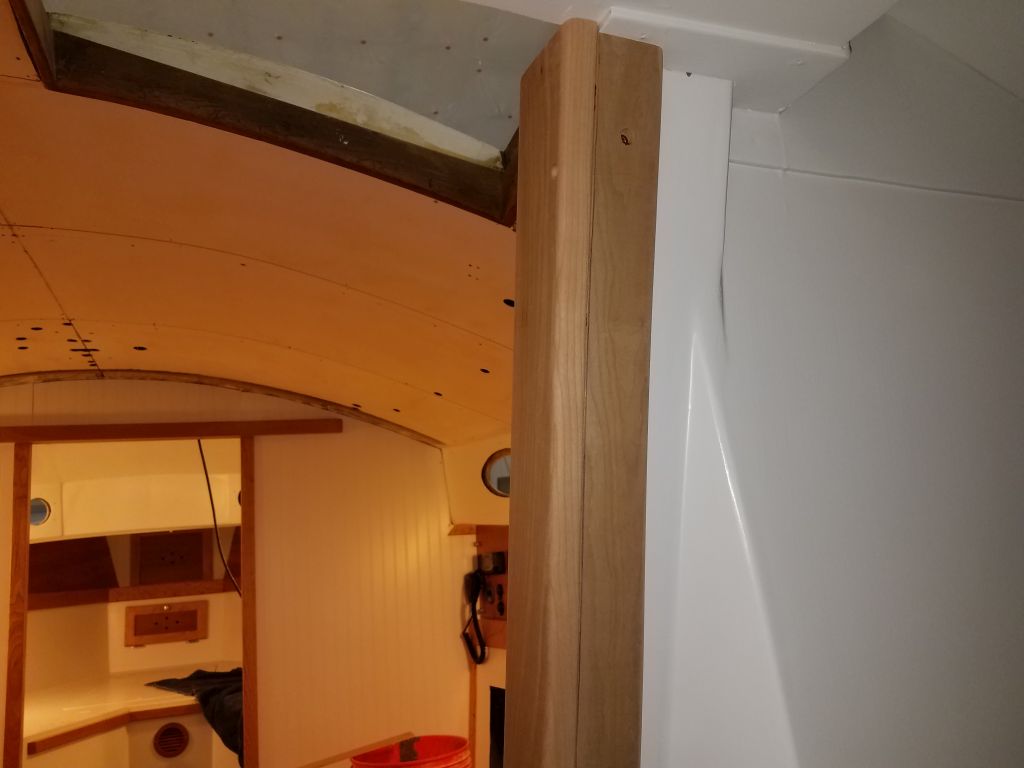
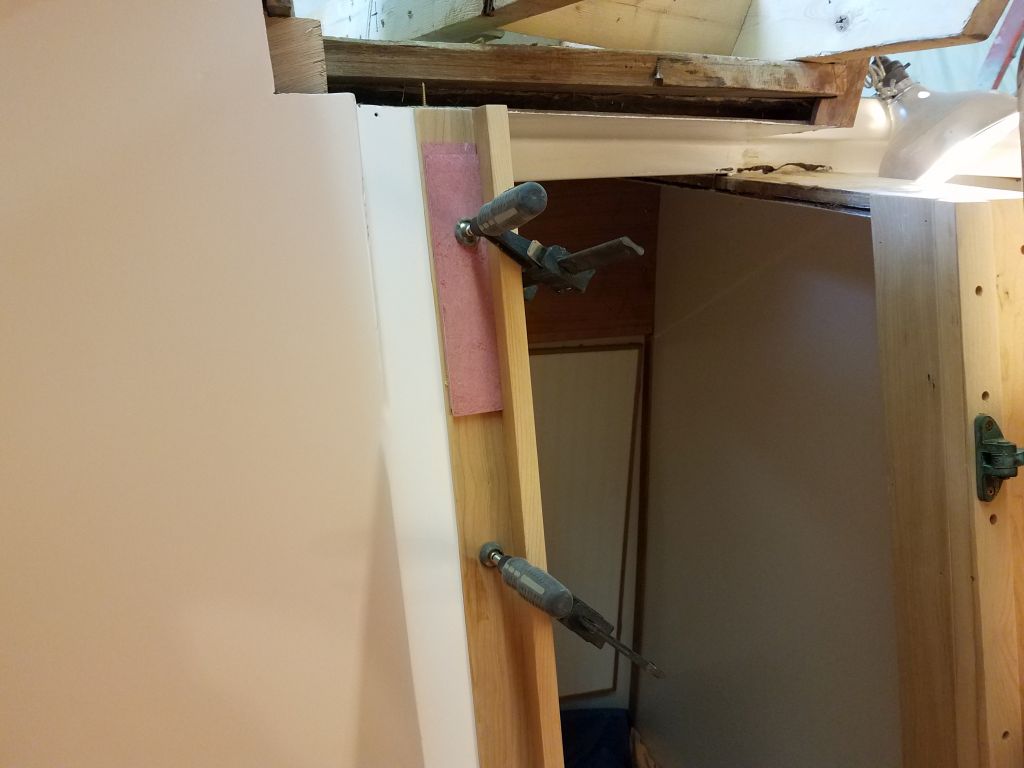
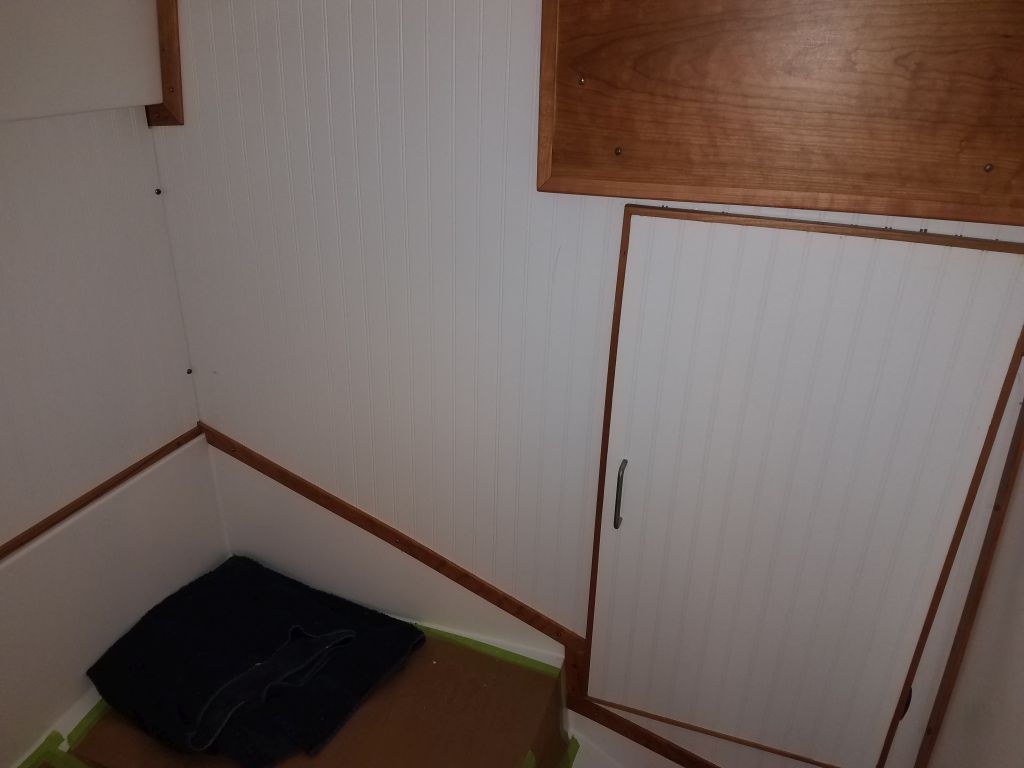
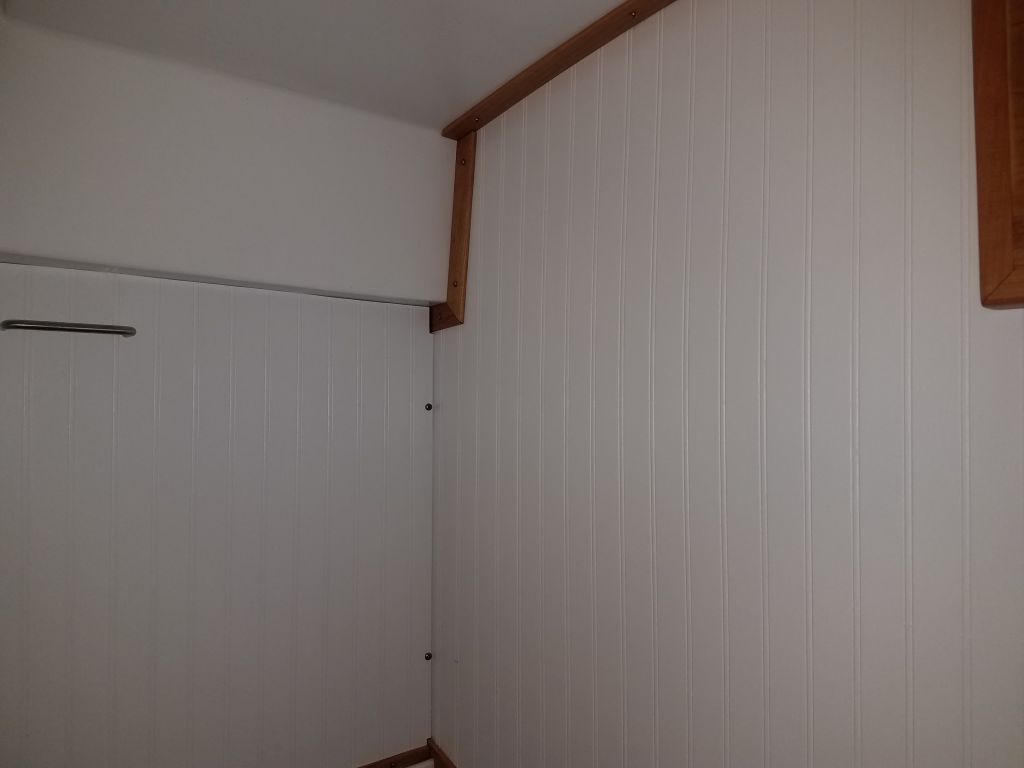
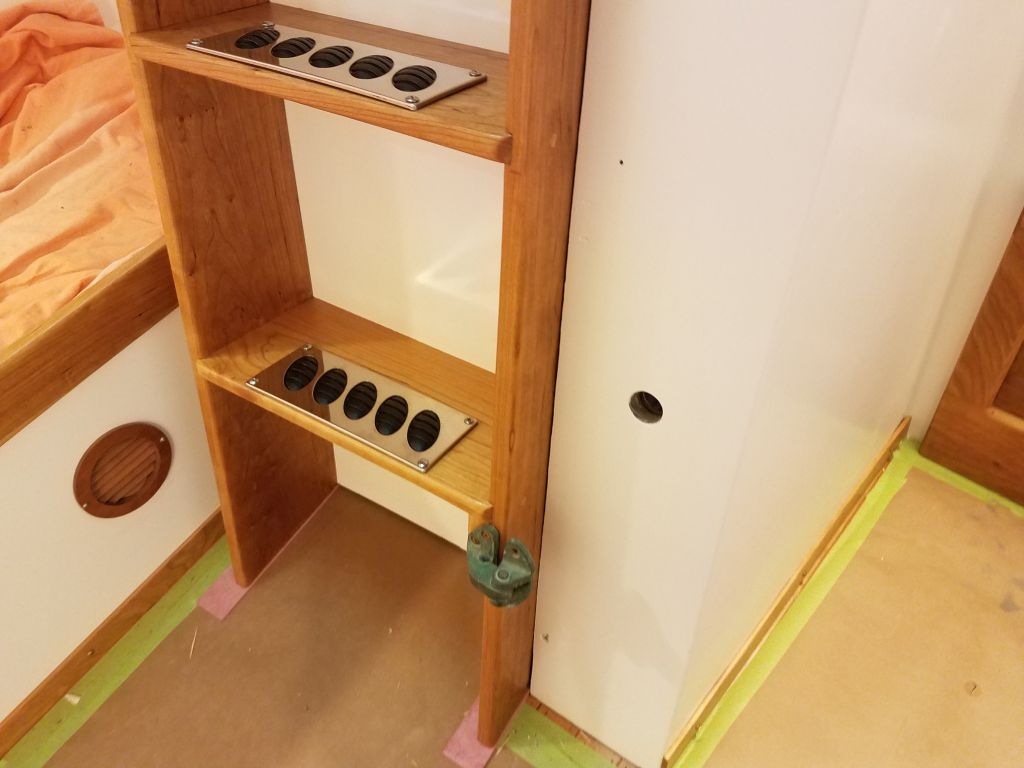
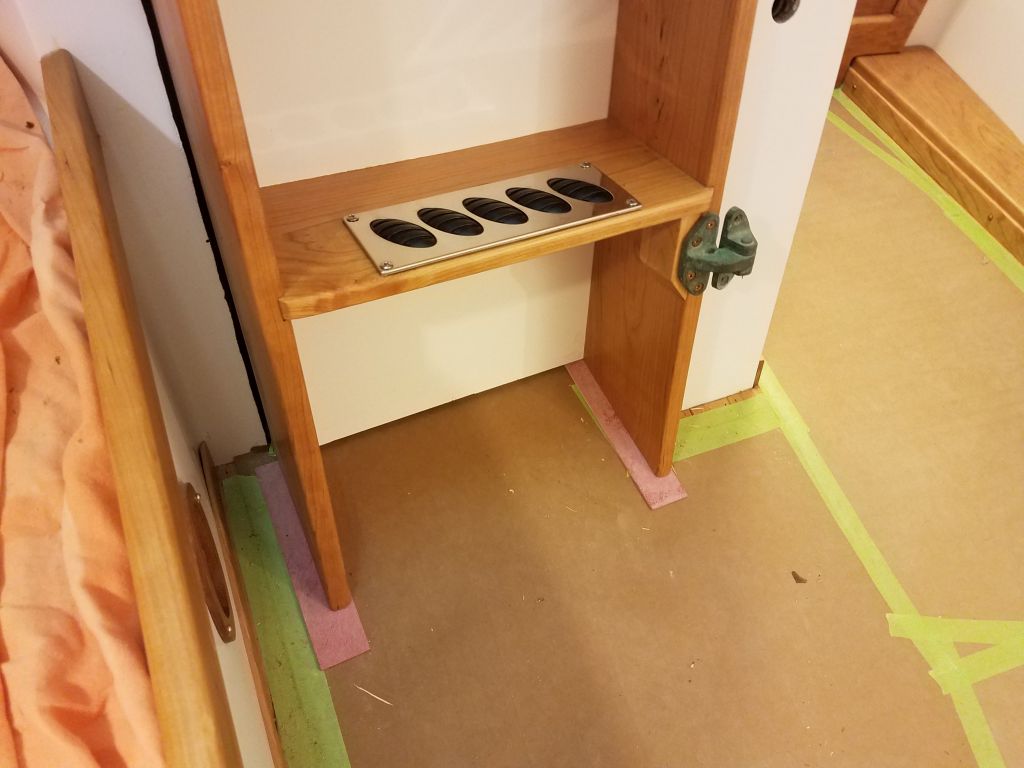
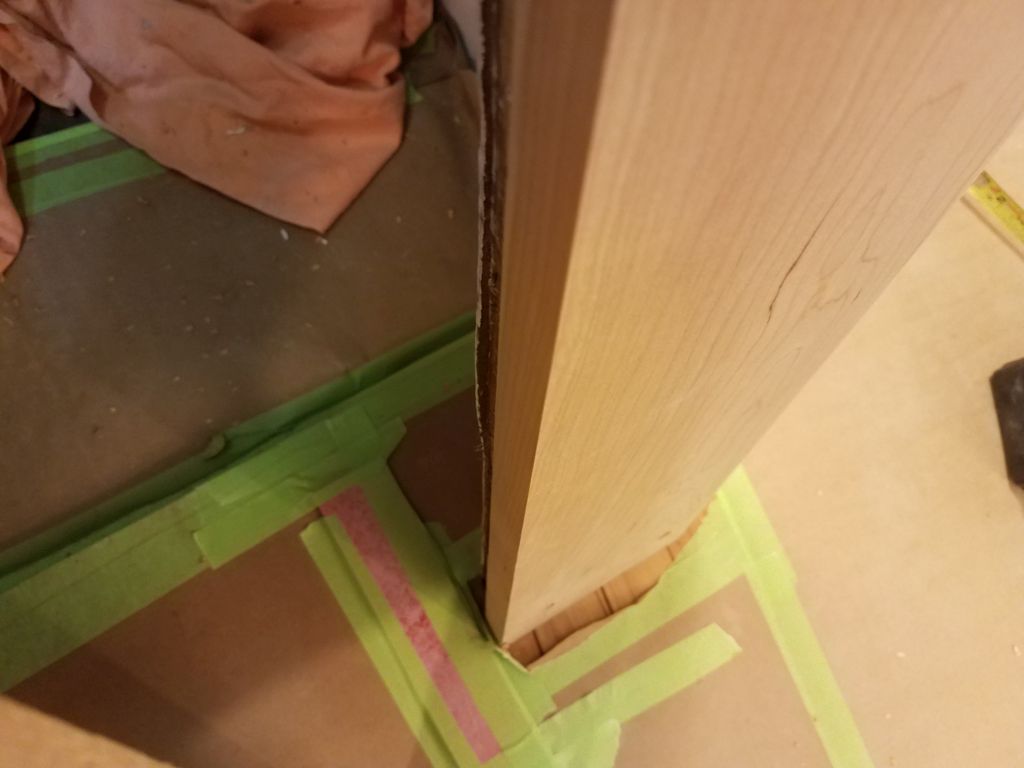
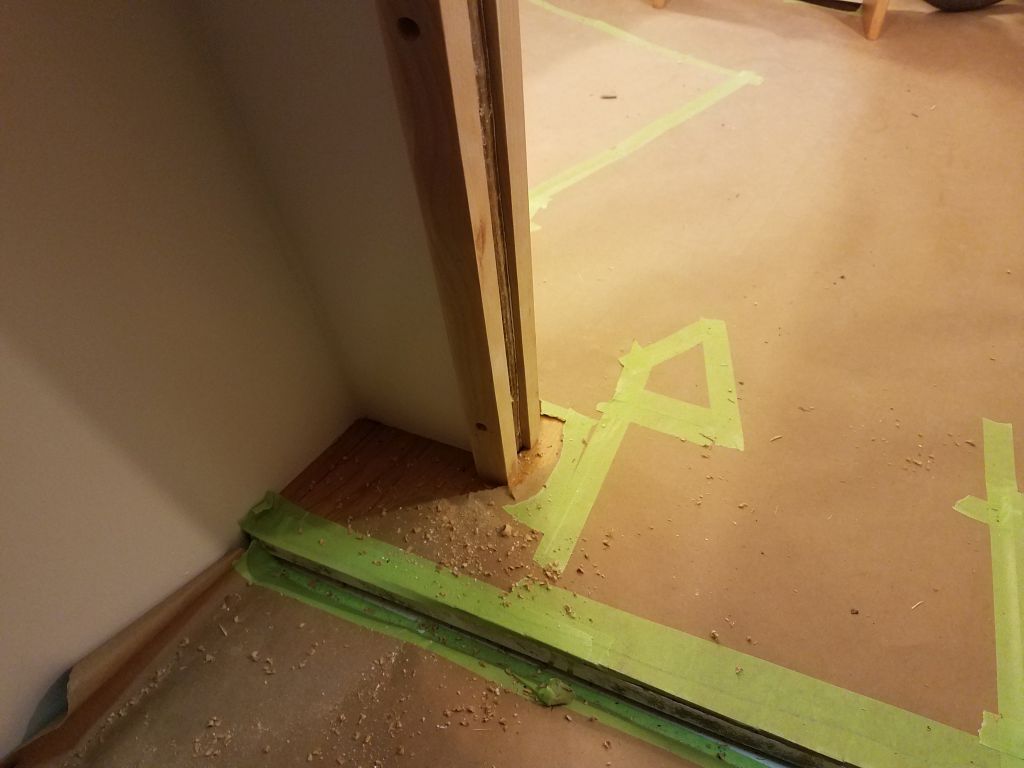
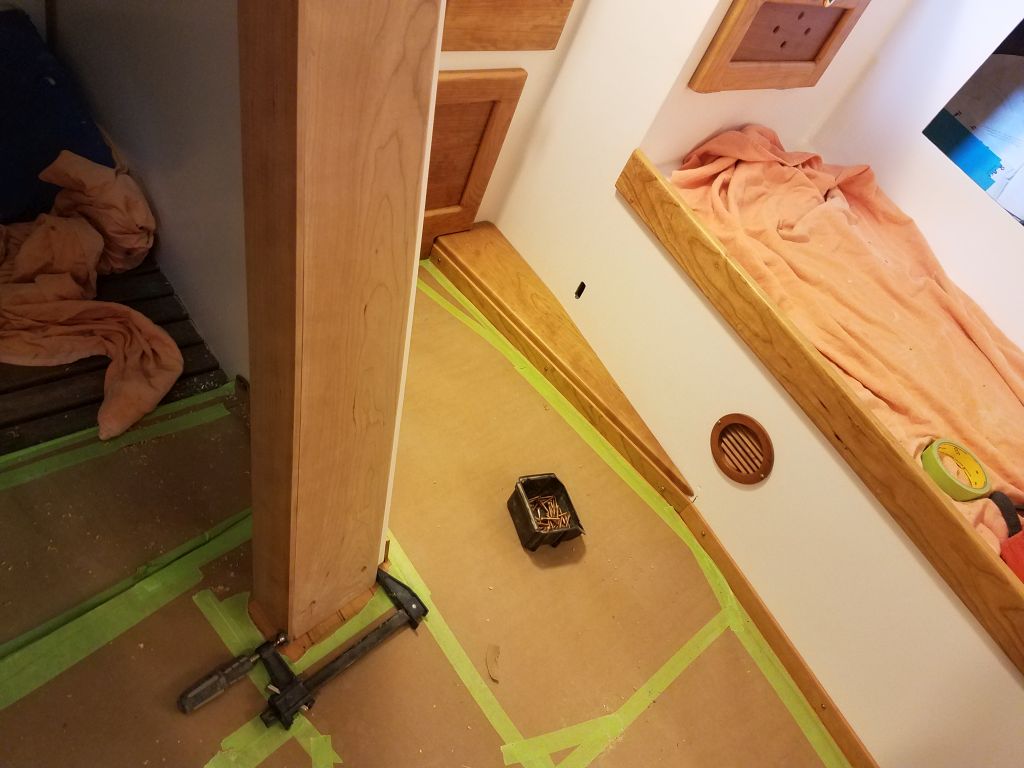
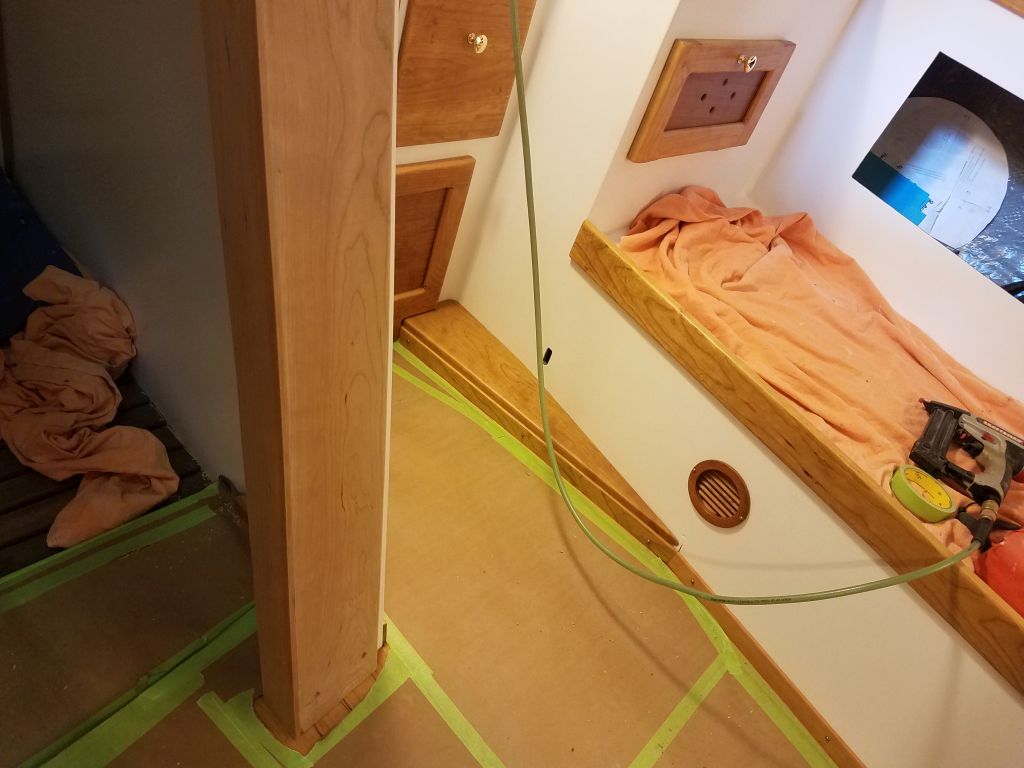
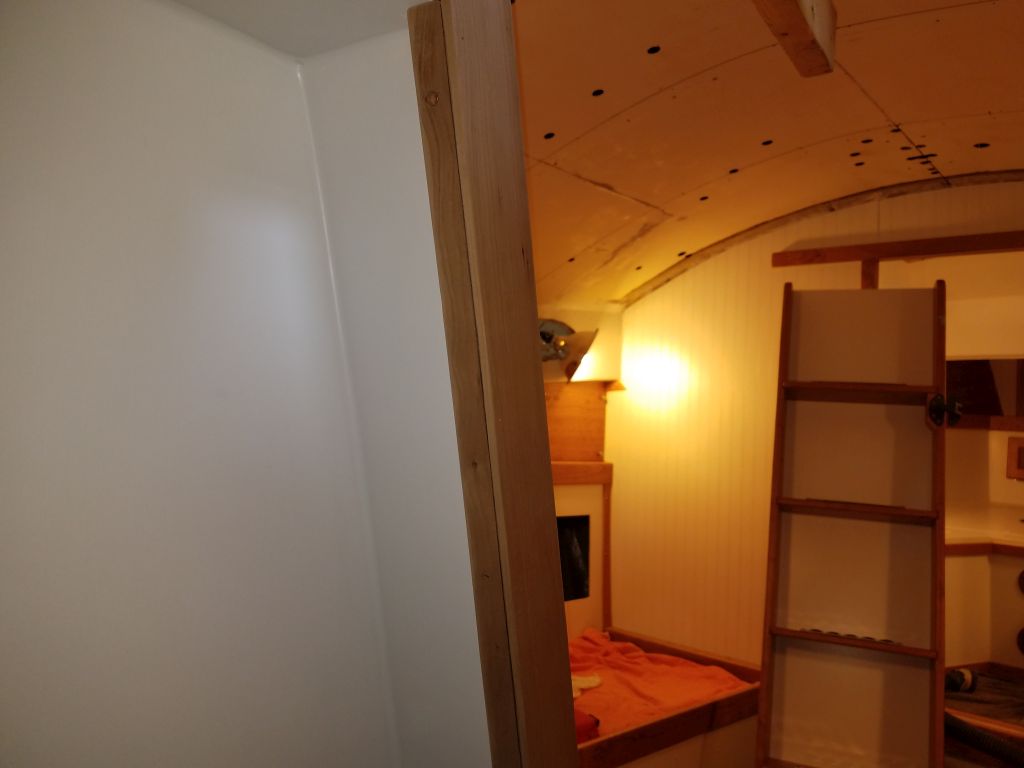
Both sides, and the top, of the opening would require substantial trim to finish off the openings, provide placement for the fixed side of the door hinges, and otherwise support the door in its closed position.  The first piece of trim I prepared was a wide piece of cherry to rest against the centerline liner of the boat, which would also cover those two large holes in the liner, the purpose of which I could never determine, but always planned to cover with trim in this way.  I cut a piece of cherry 5-1/2″ wide (leaving a reveal along the port edge), and after a test fit recut it to the final length to be flush with the top of the center liner unit, which area would later be covered with more trim to create a little storage area, as per original.

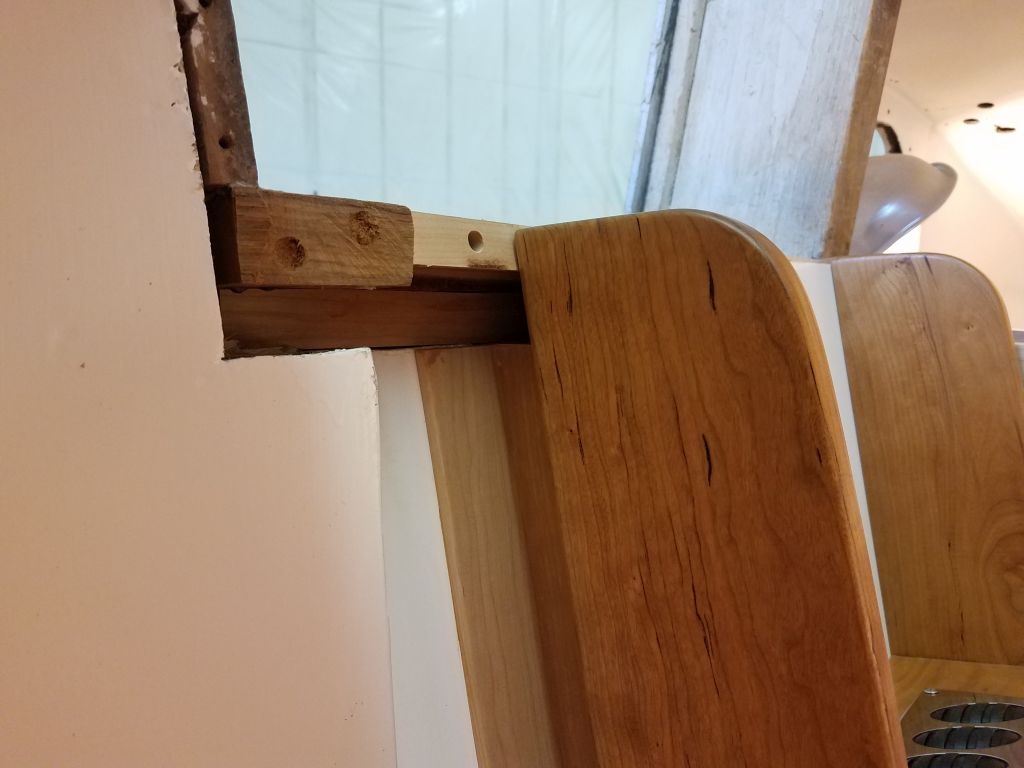
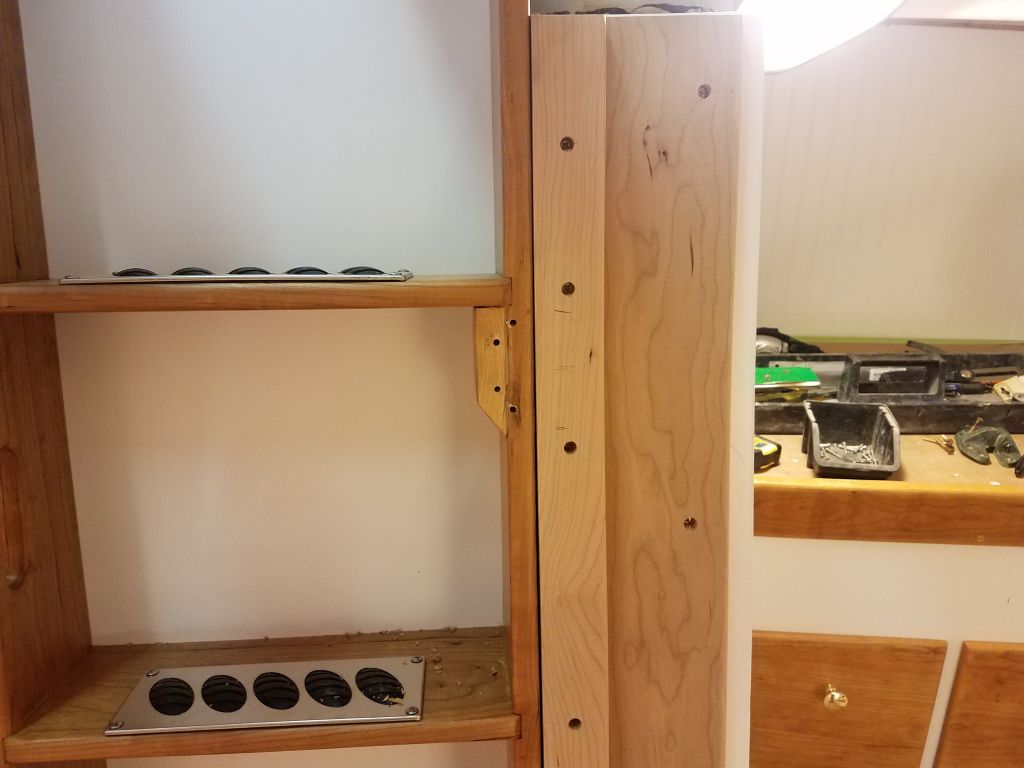
I aligned the top edge flush with the rough opening to the head, and, with the new trim plumb and clamped in place, secured it with screws in recessed holes, which I’d bung later.  Like all the molded surfaces and assemblies in the boat, the opening itself was not plumb (molded parts require small angles to successfully remove from the mold), but featured a slight angle, so the lower edge of the new trim extended past the opening at the bottom edge.

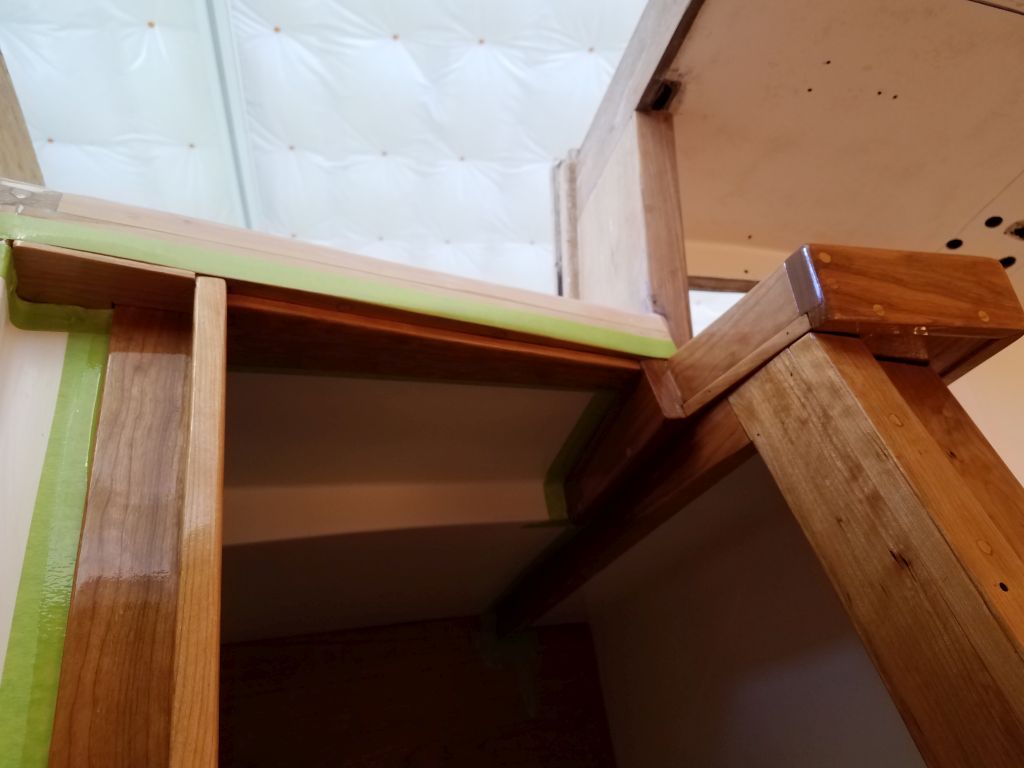
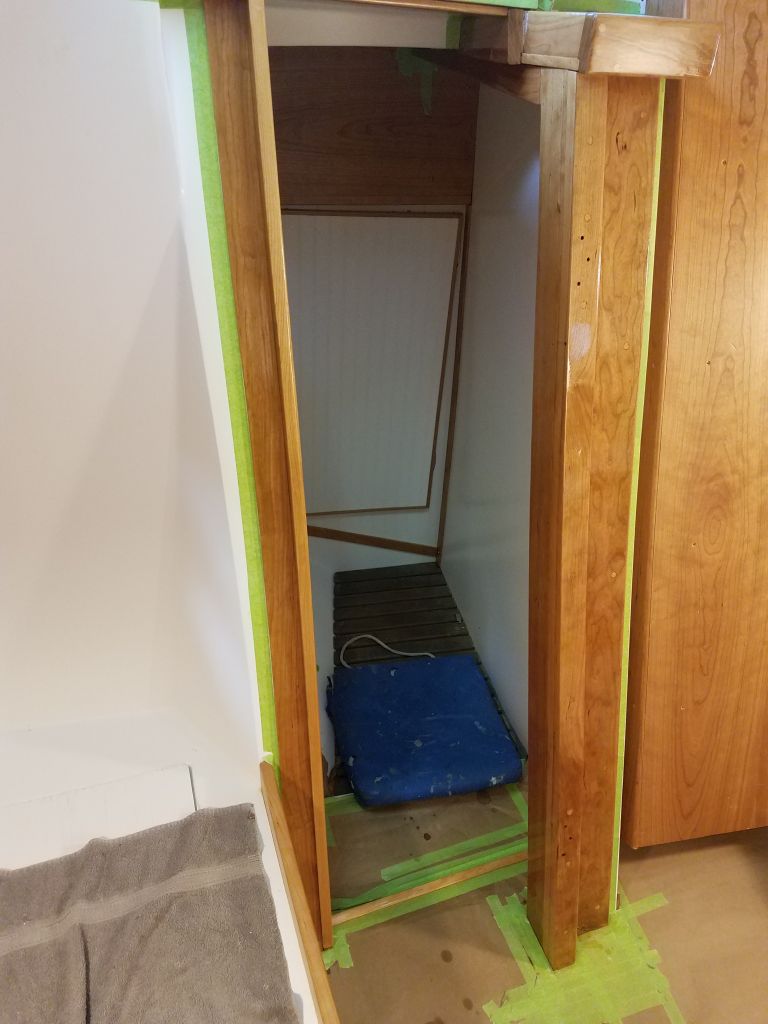
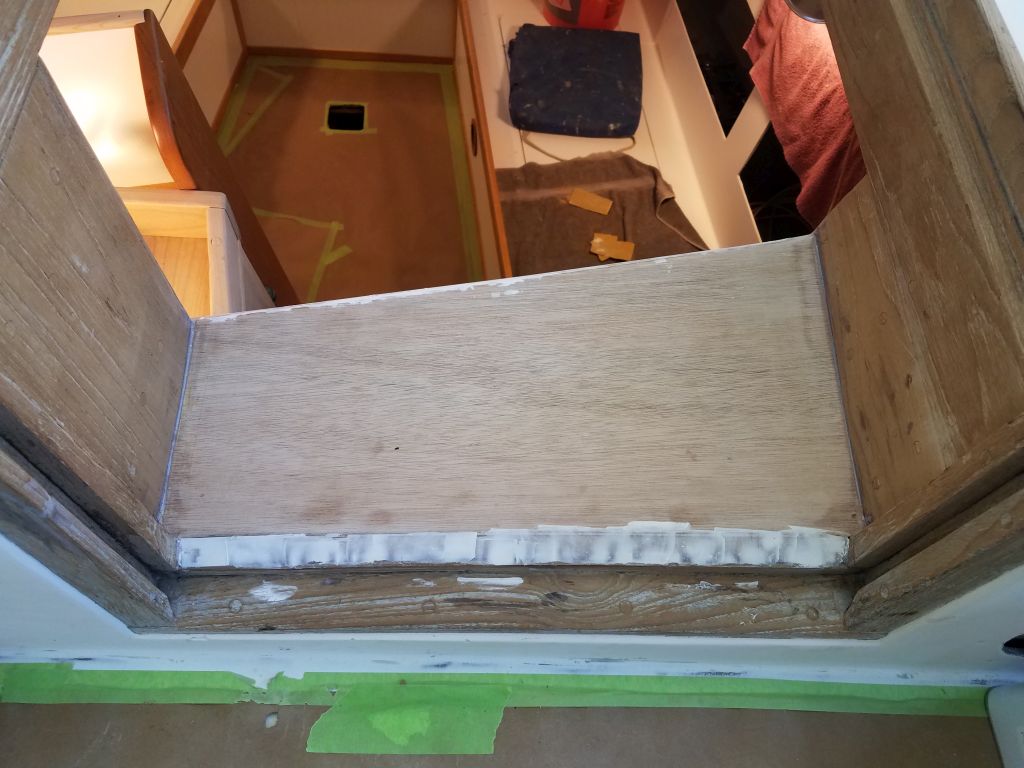
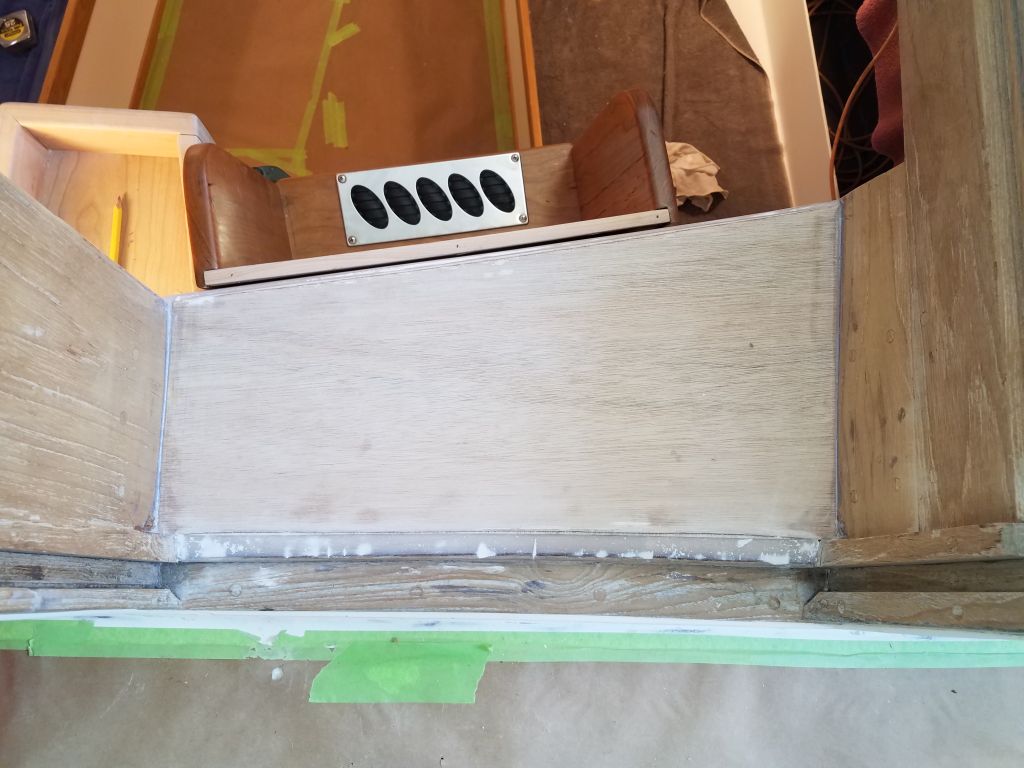
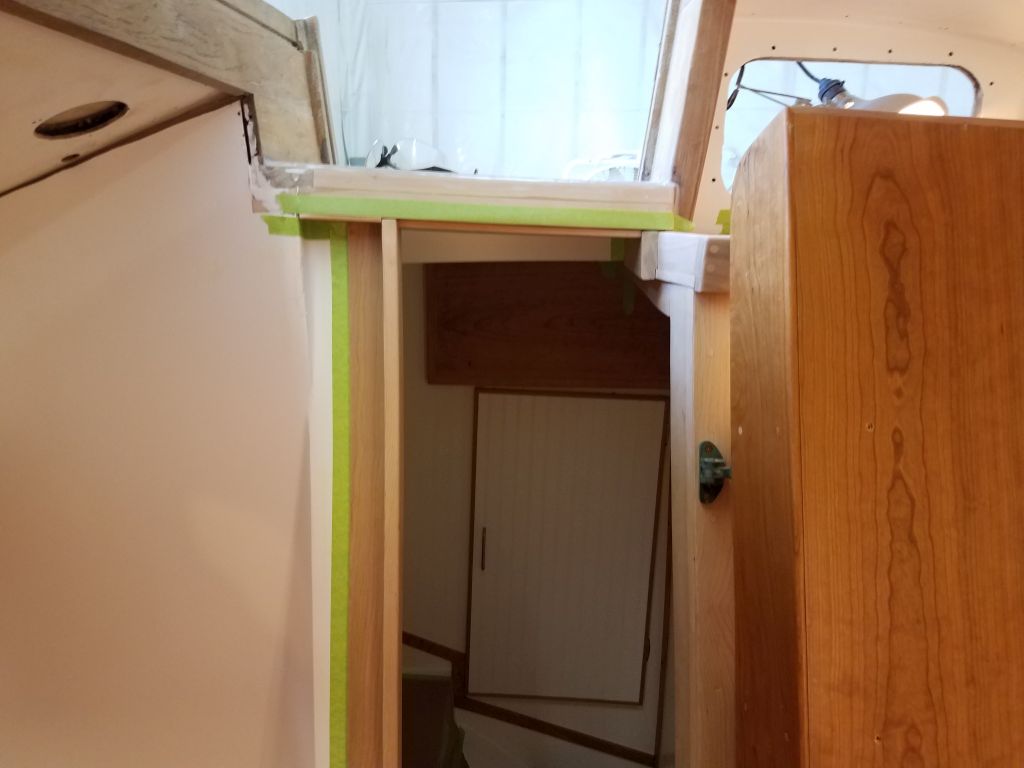
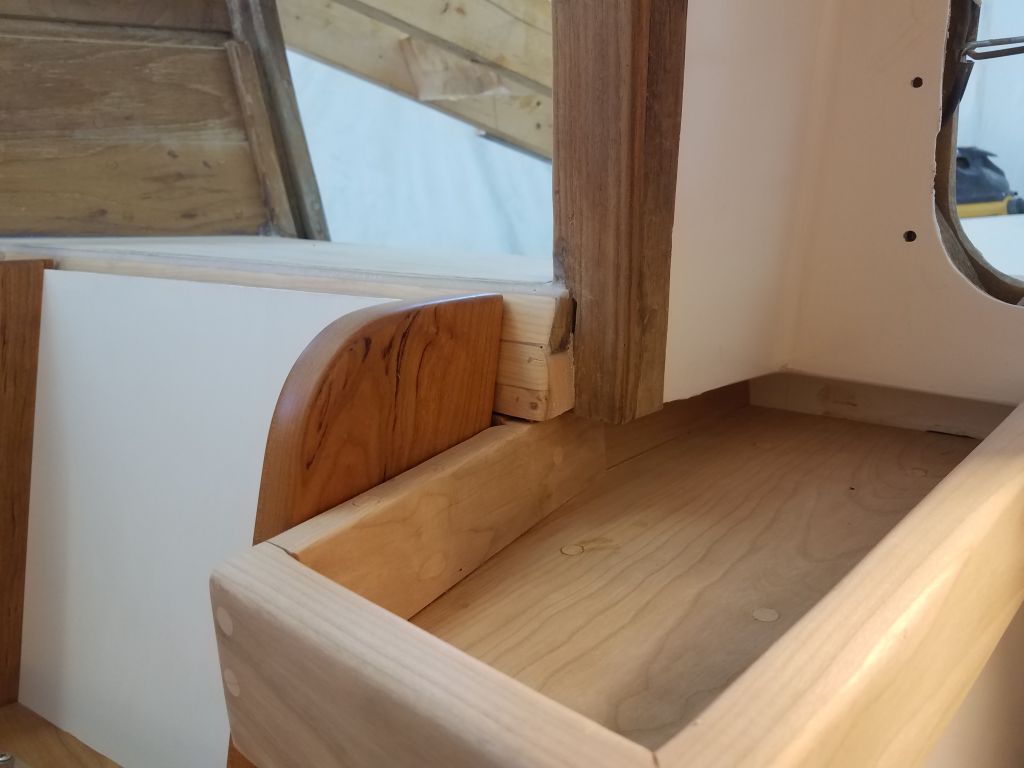
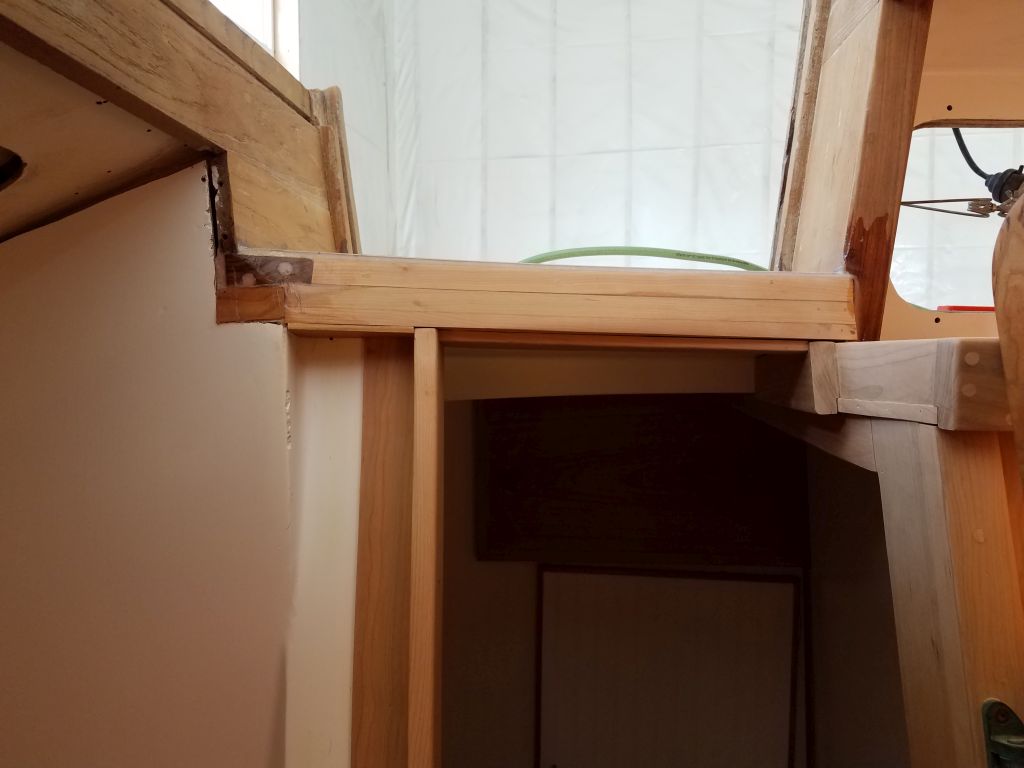
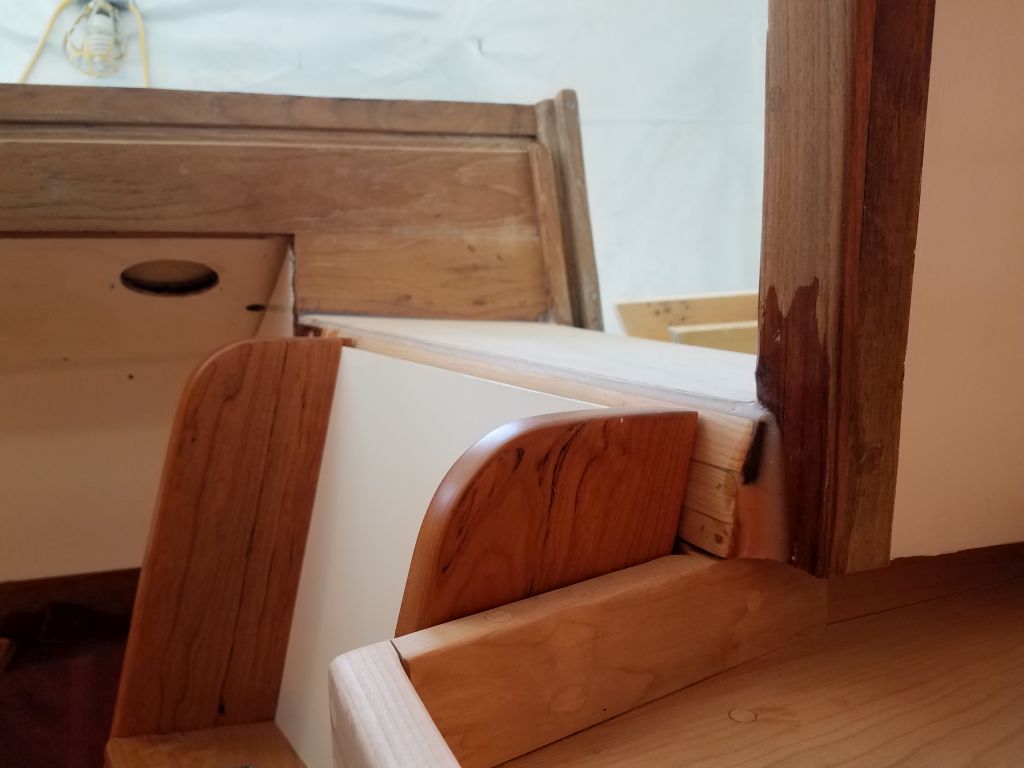
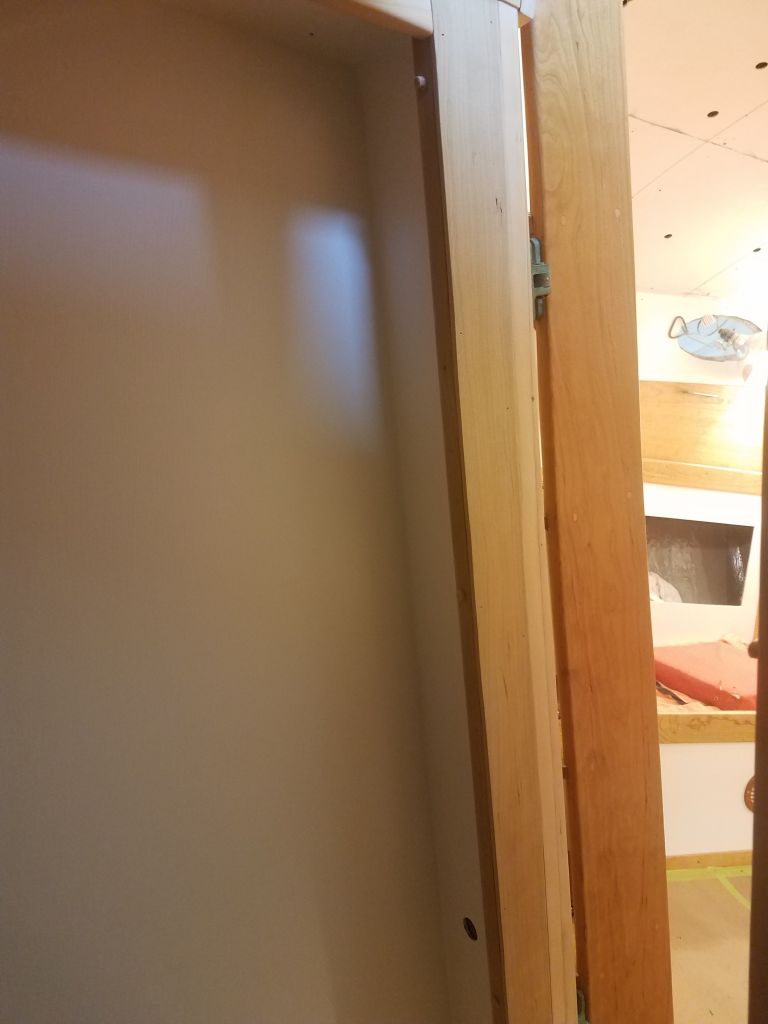
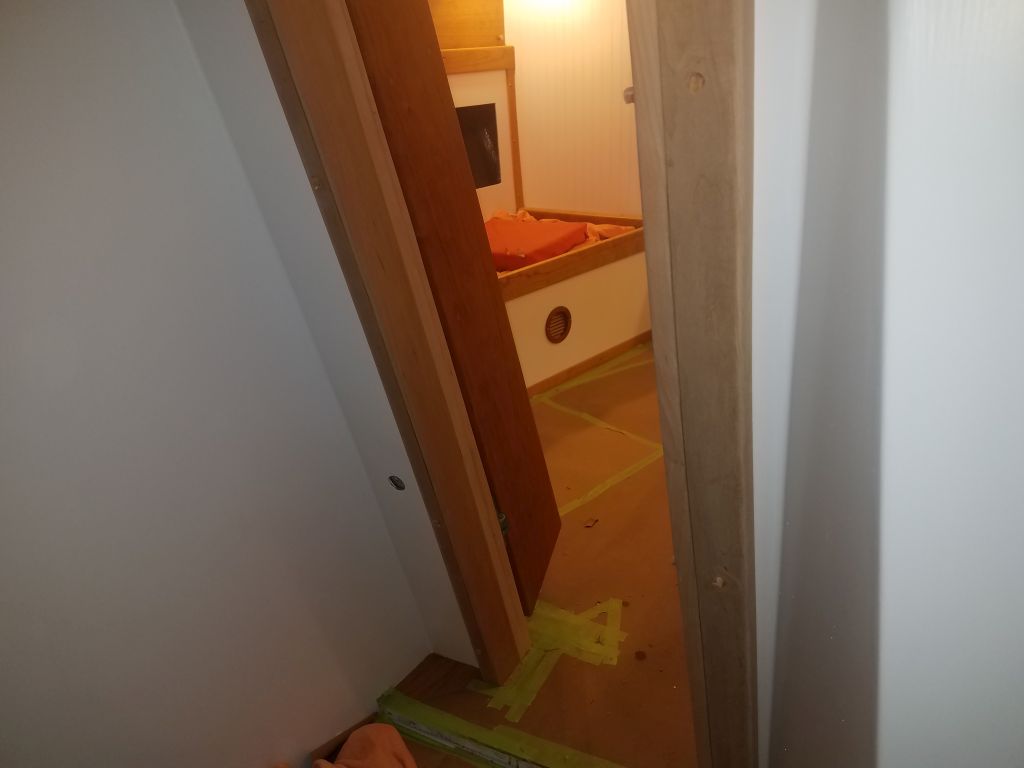
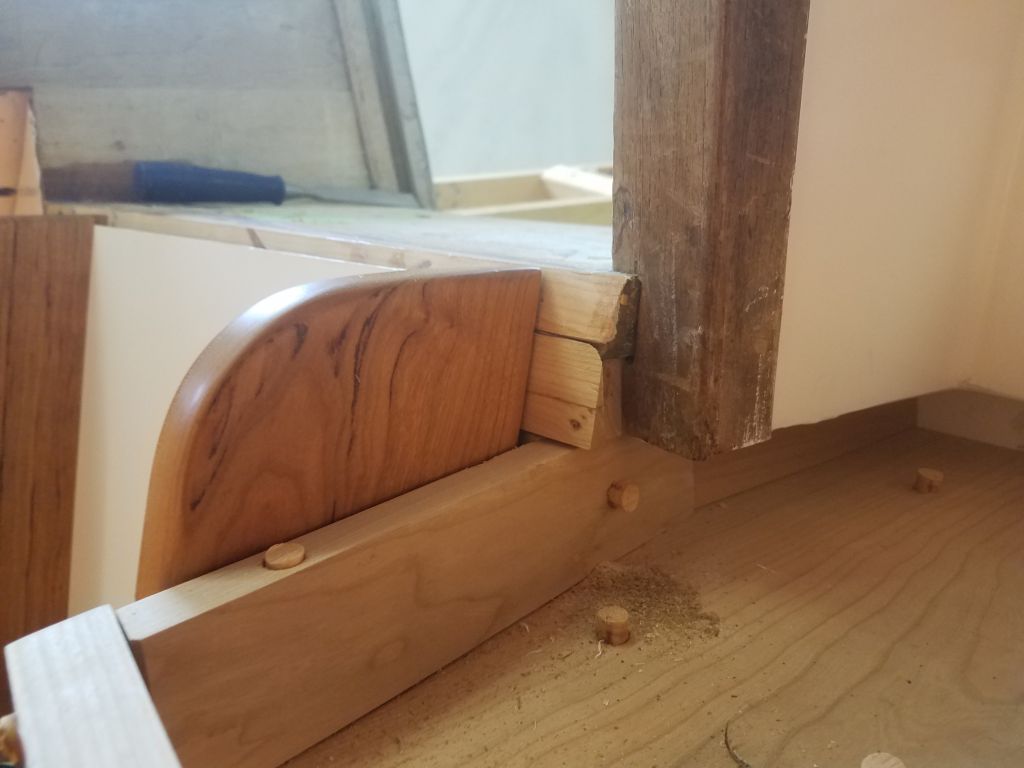
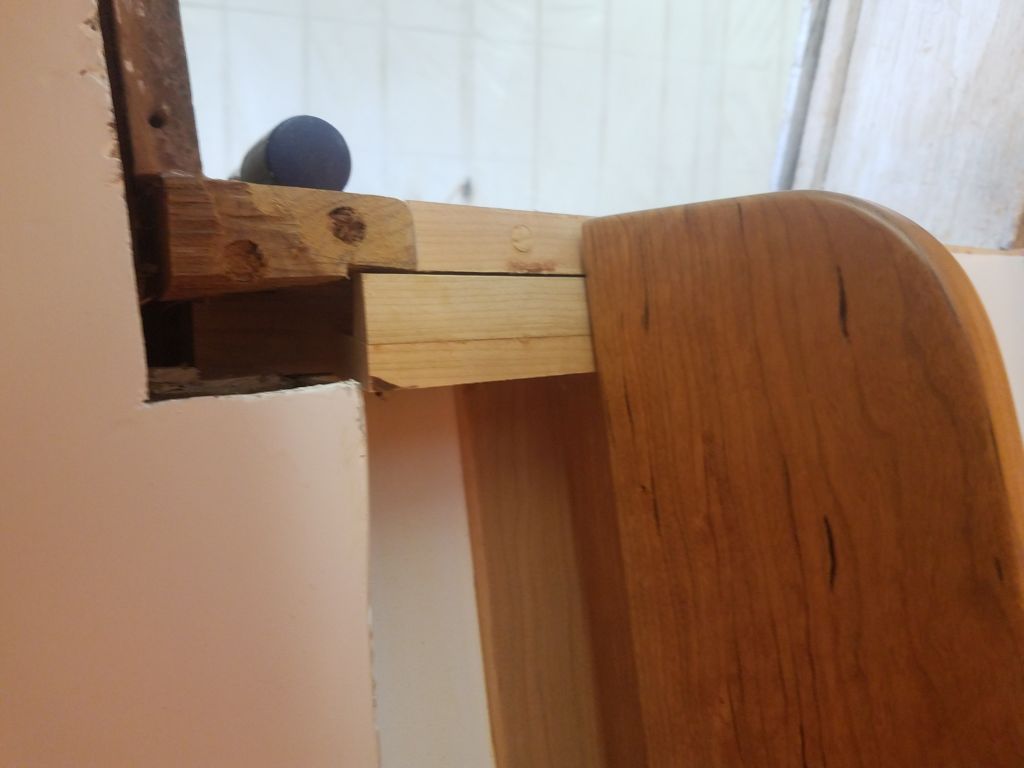
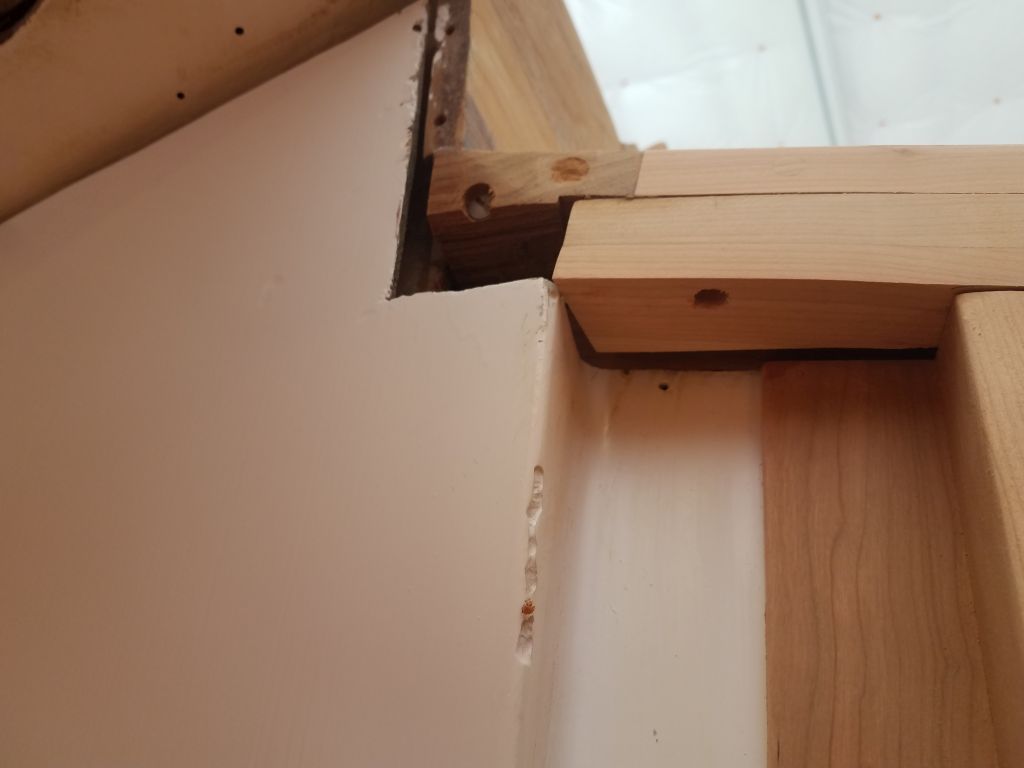
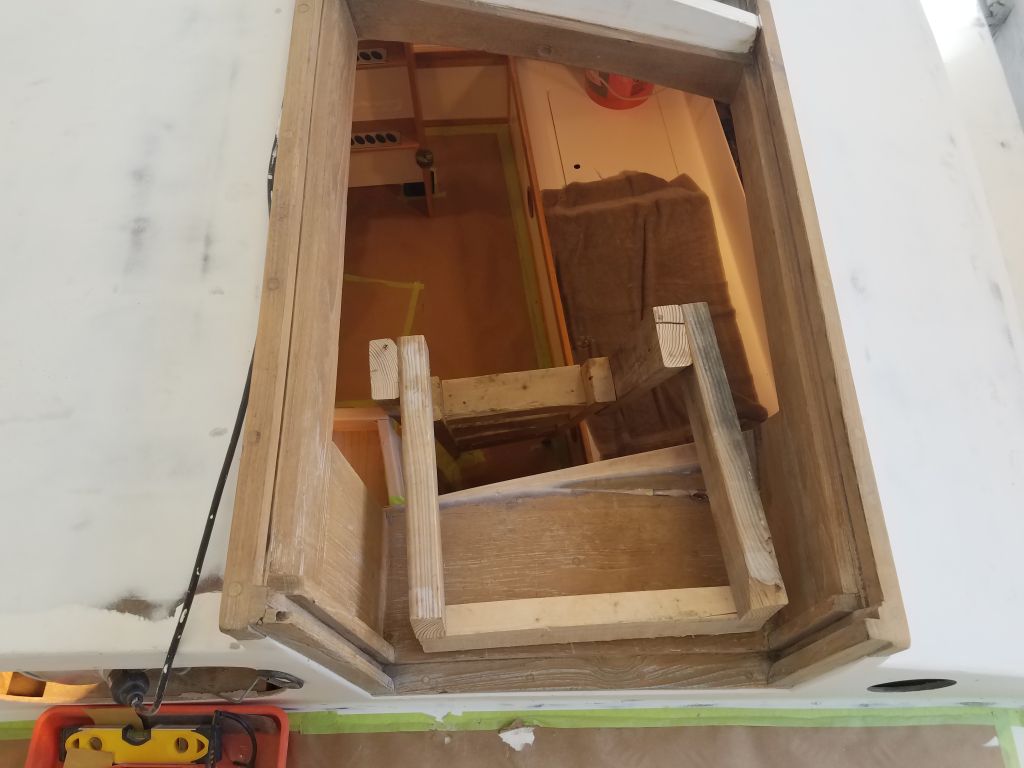
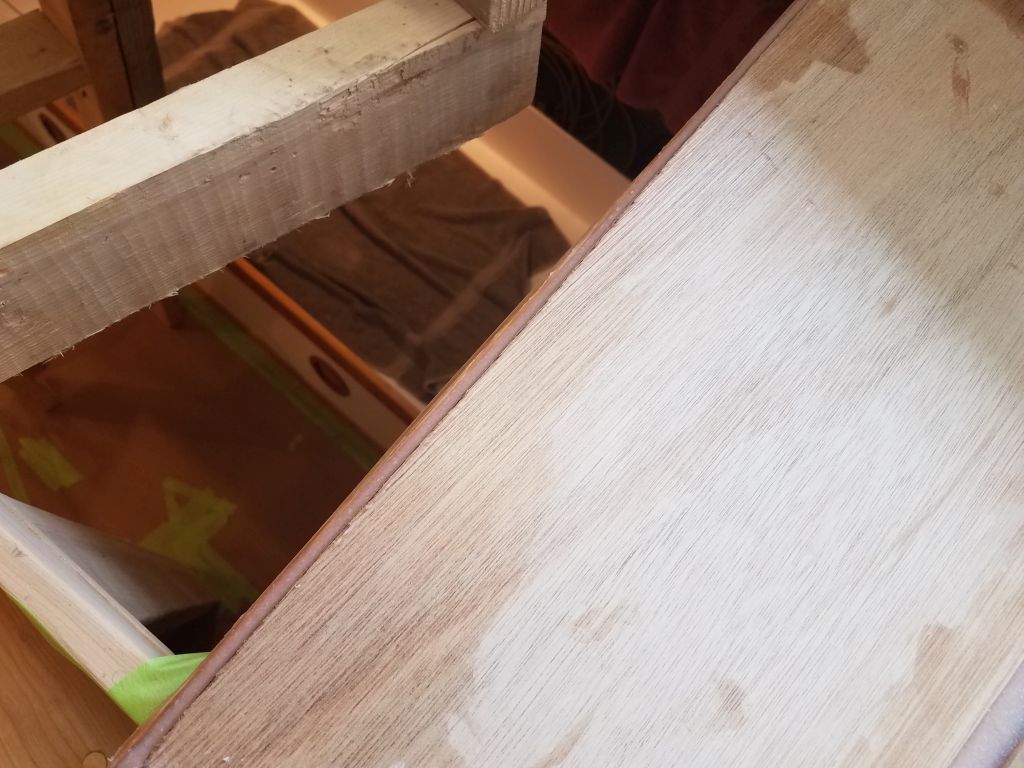
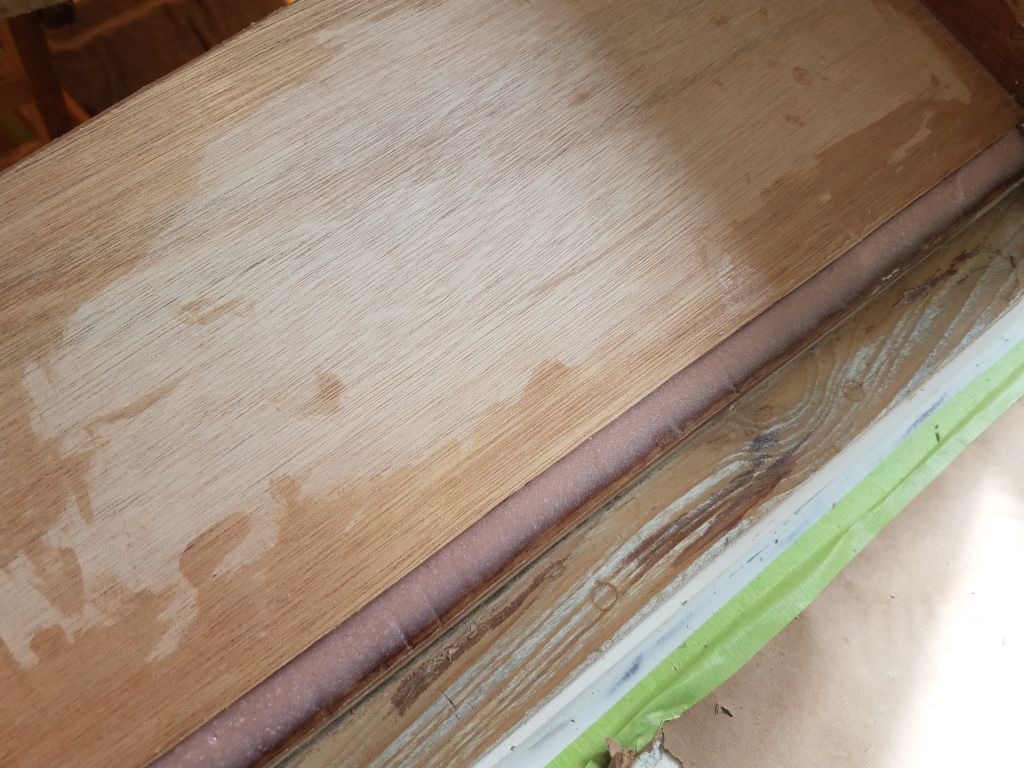
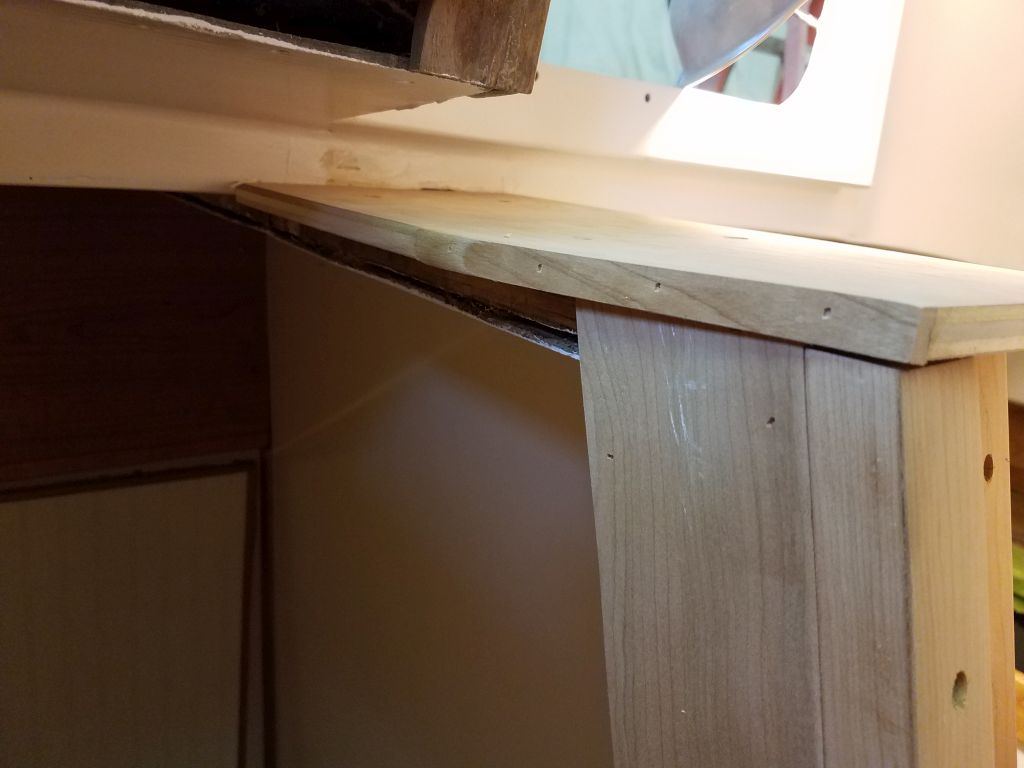
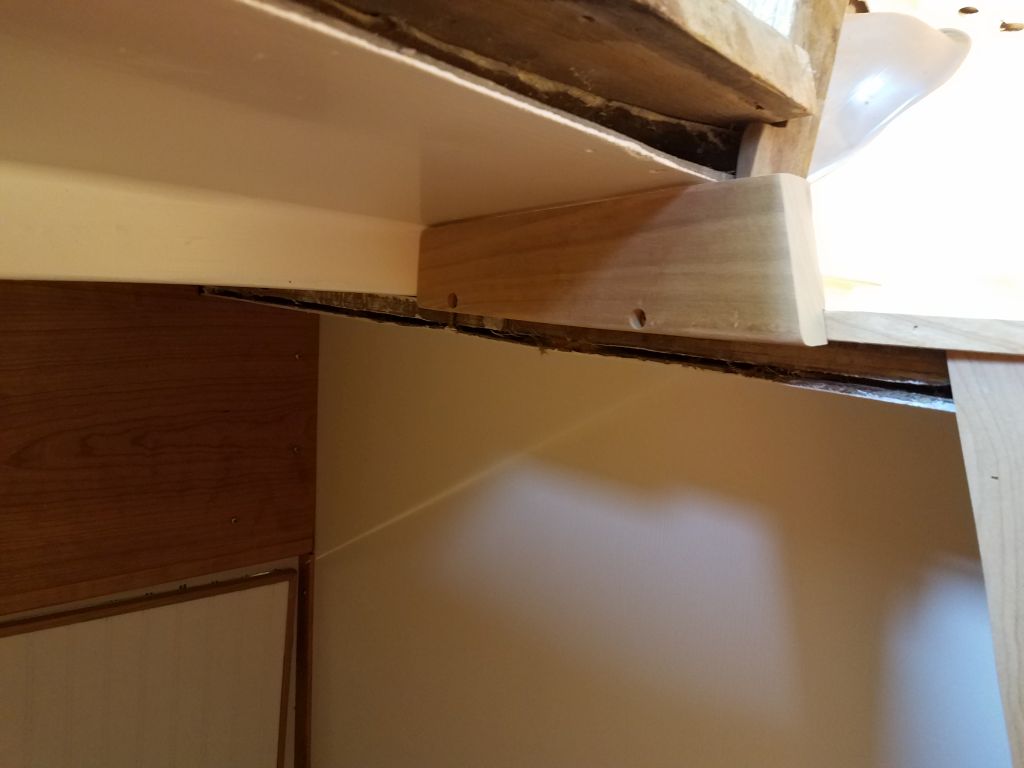
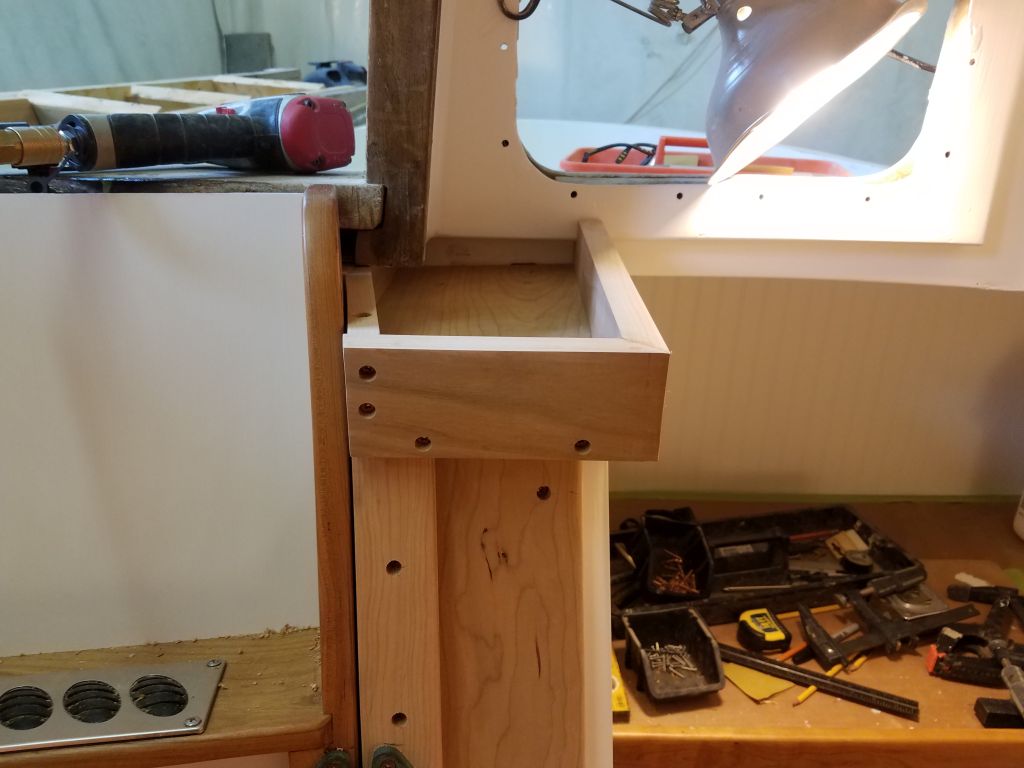
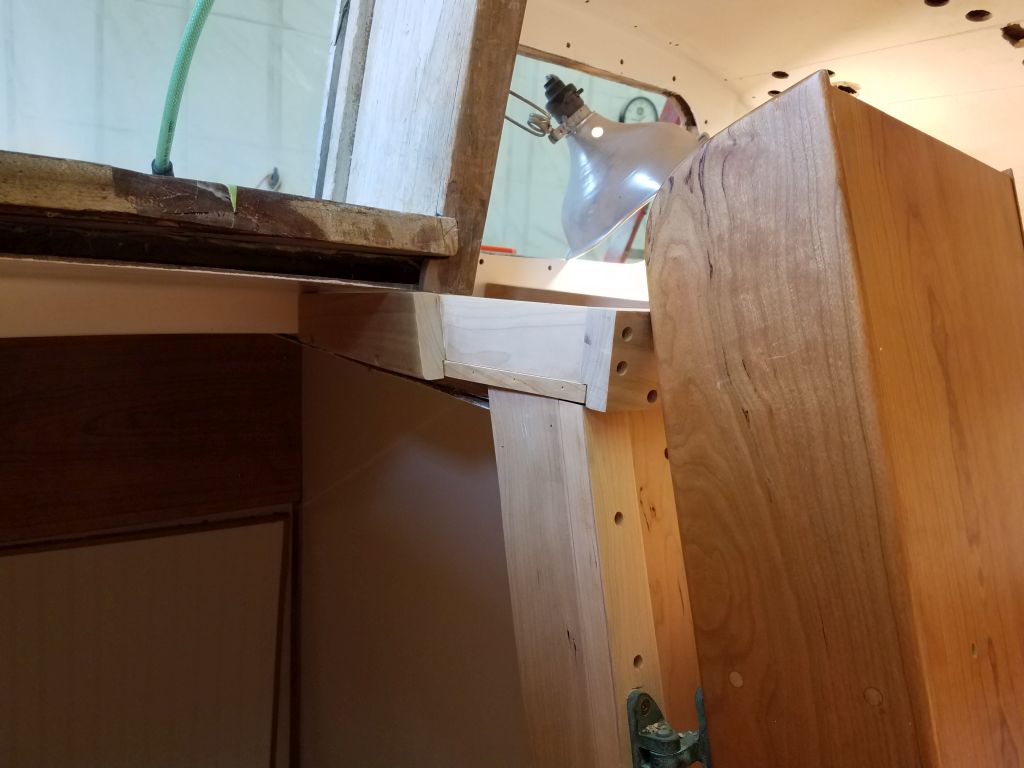
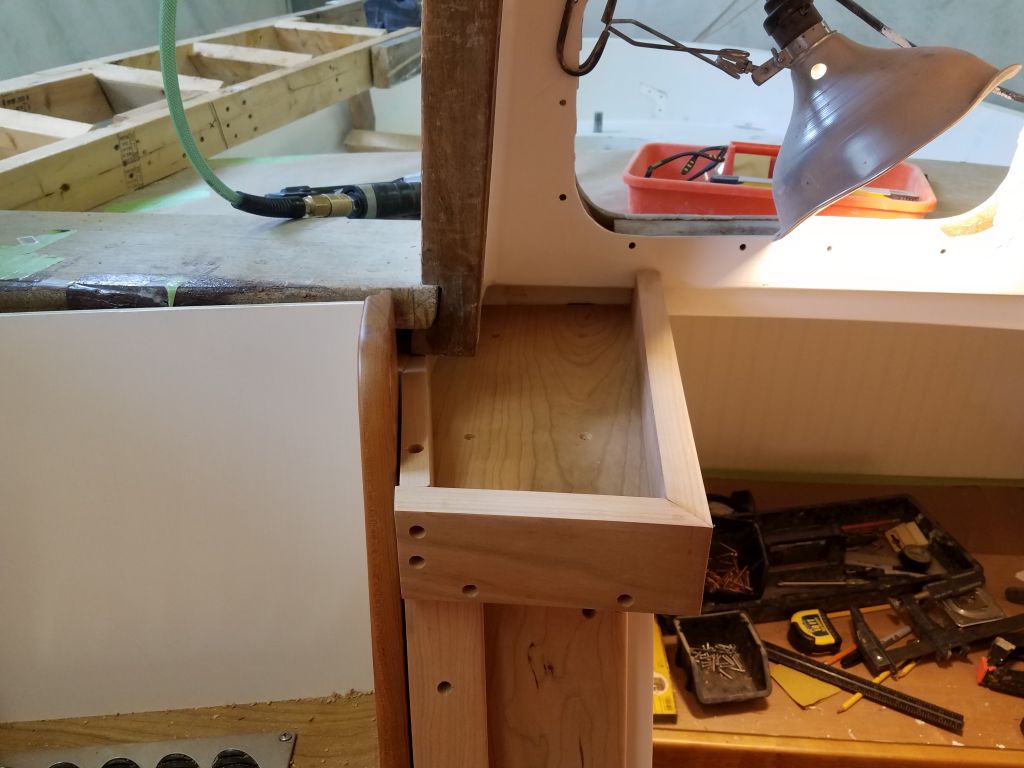
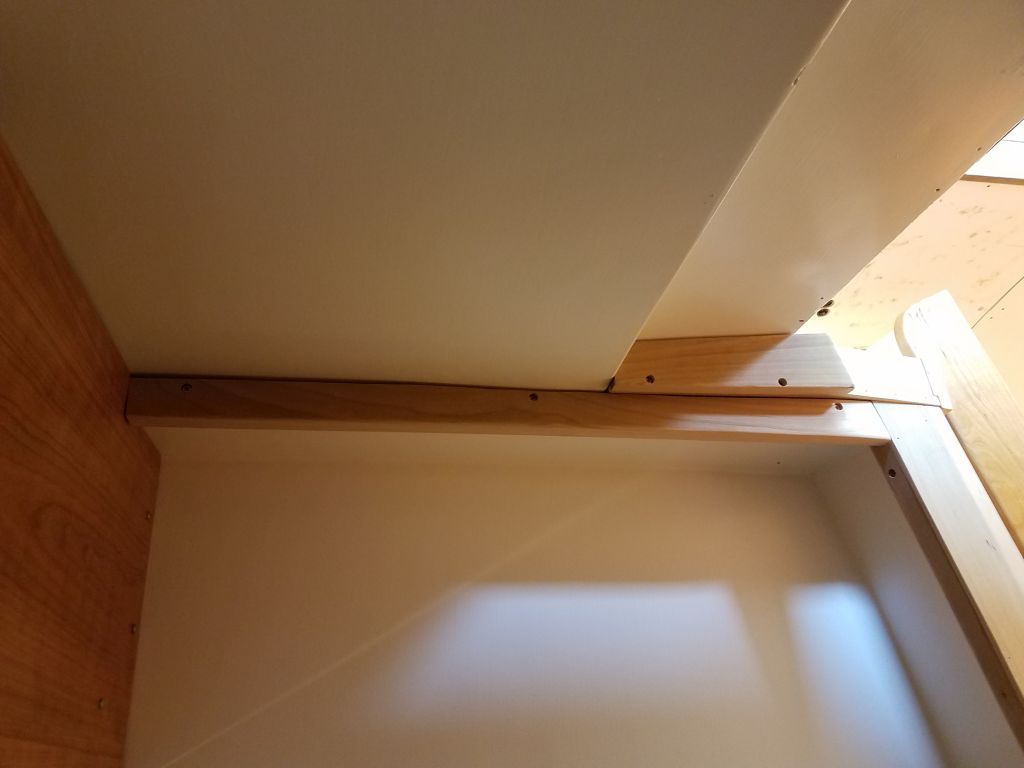
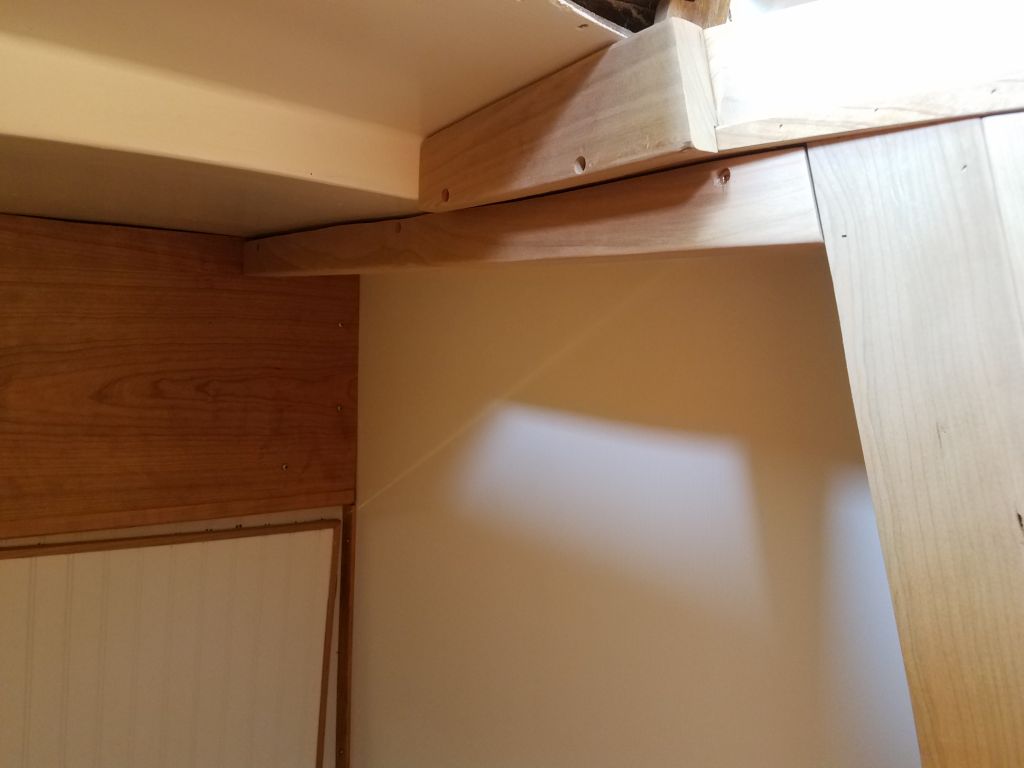
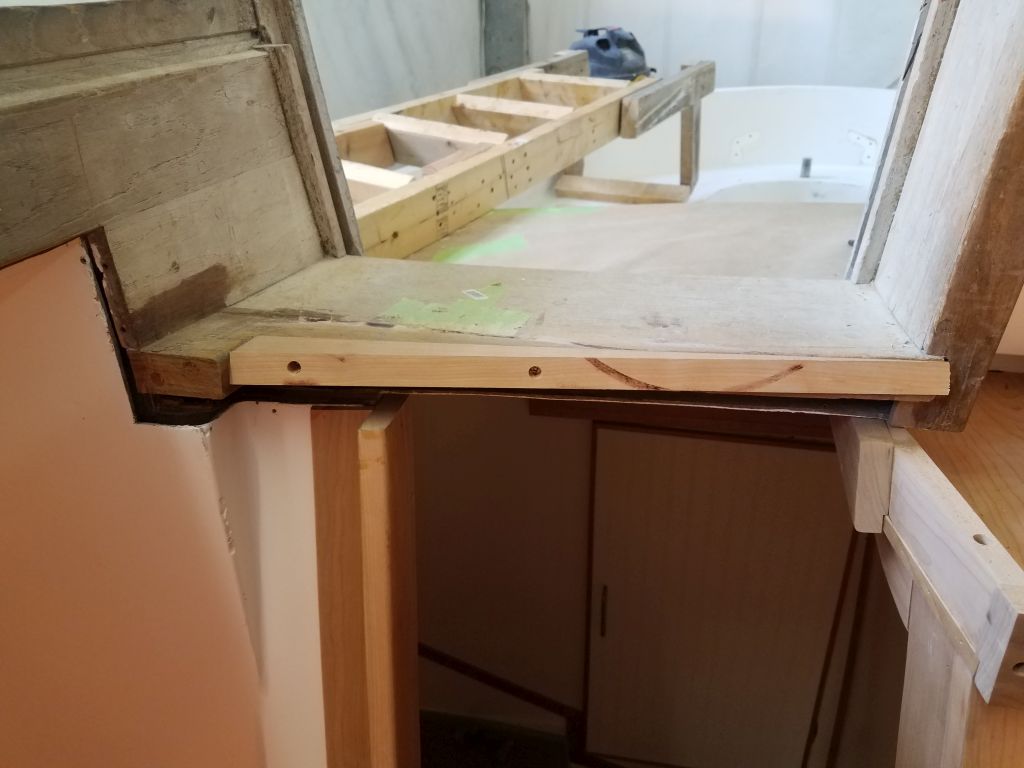
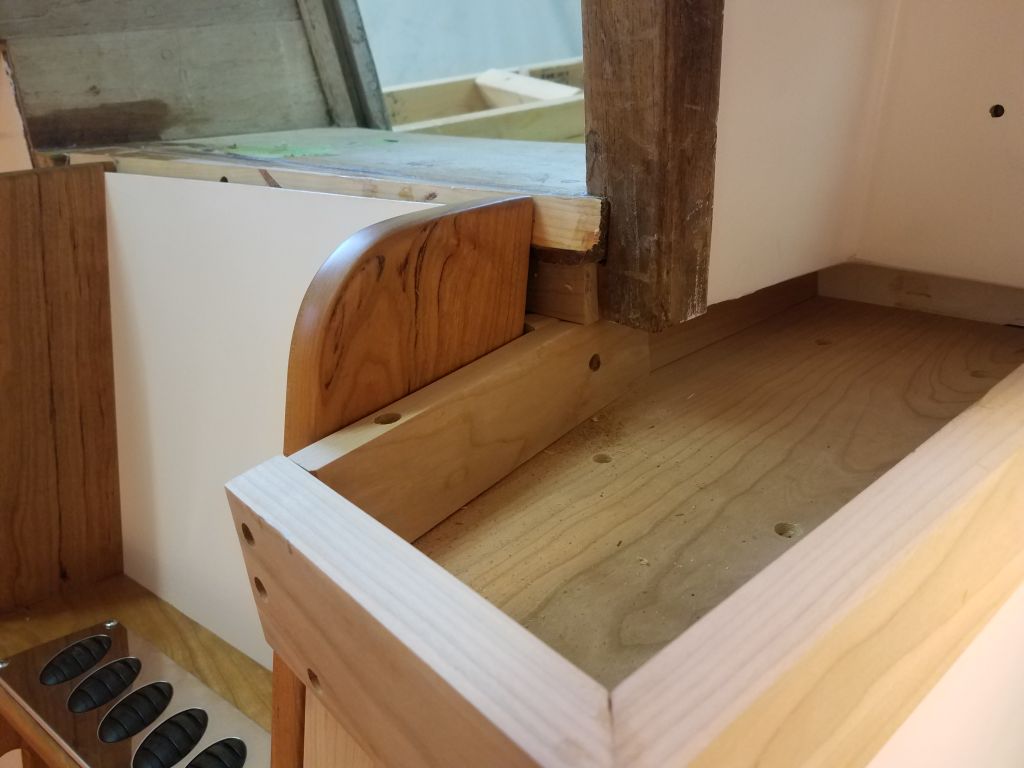
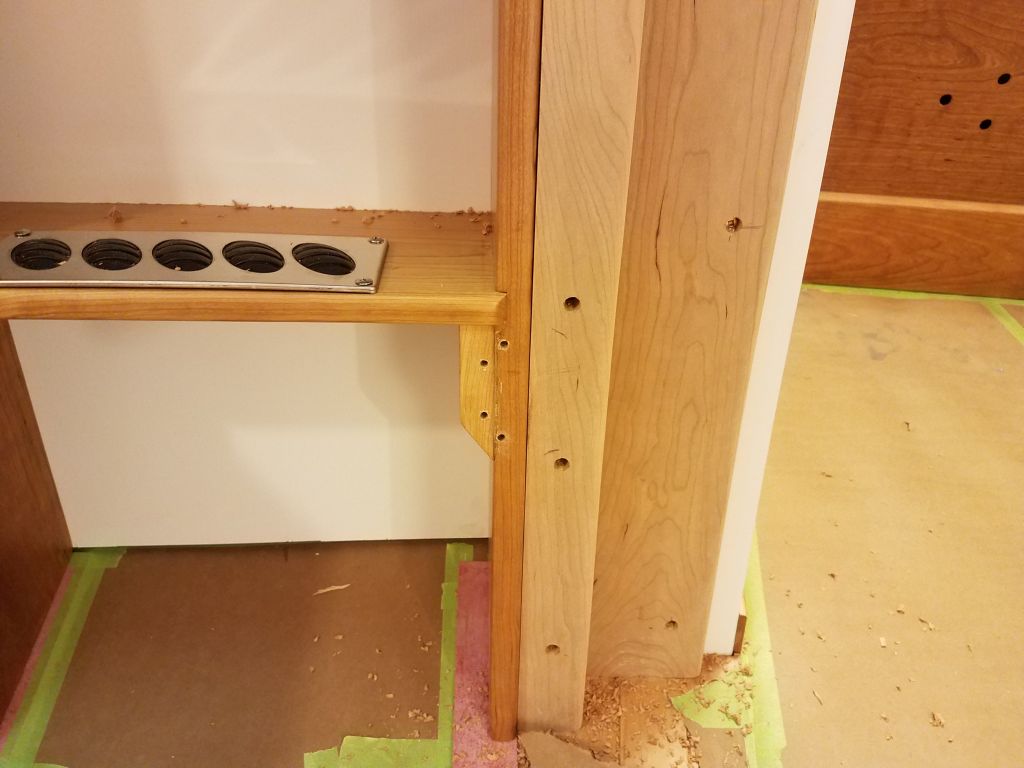
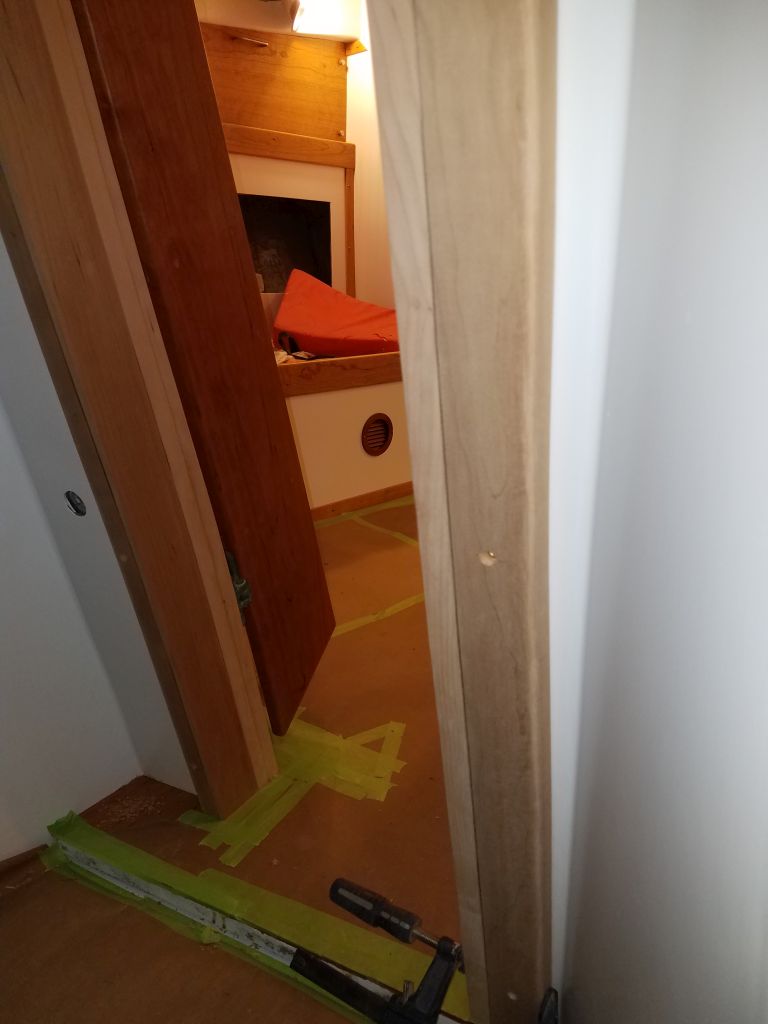
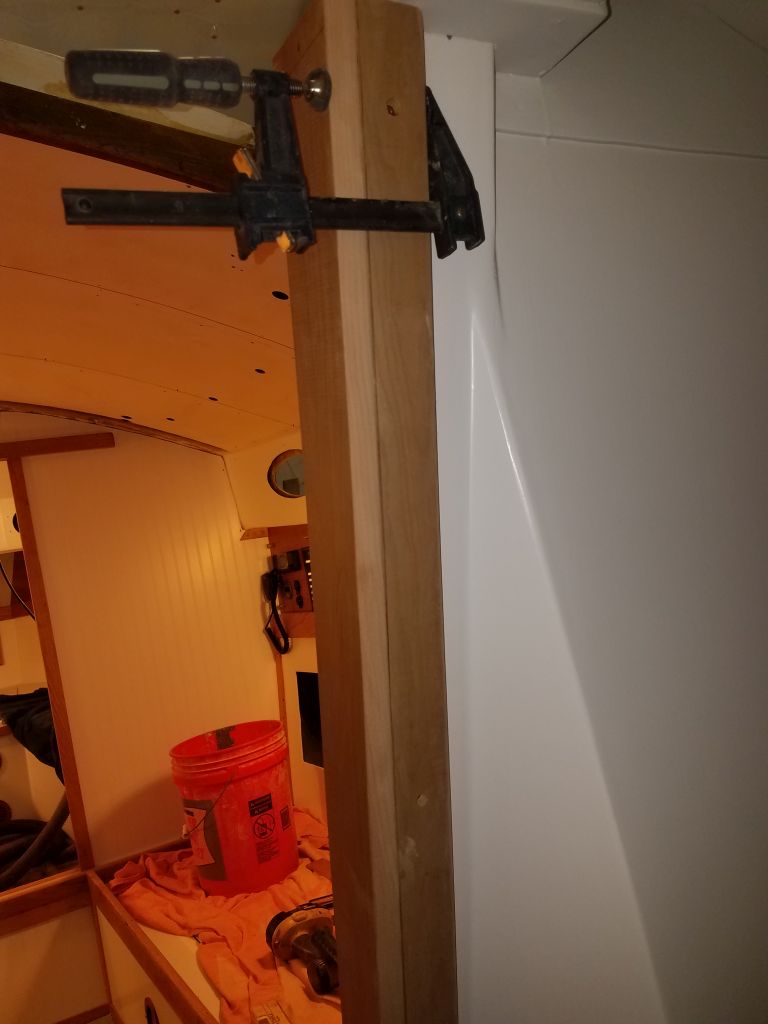
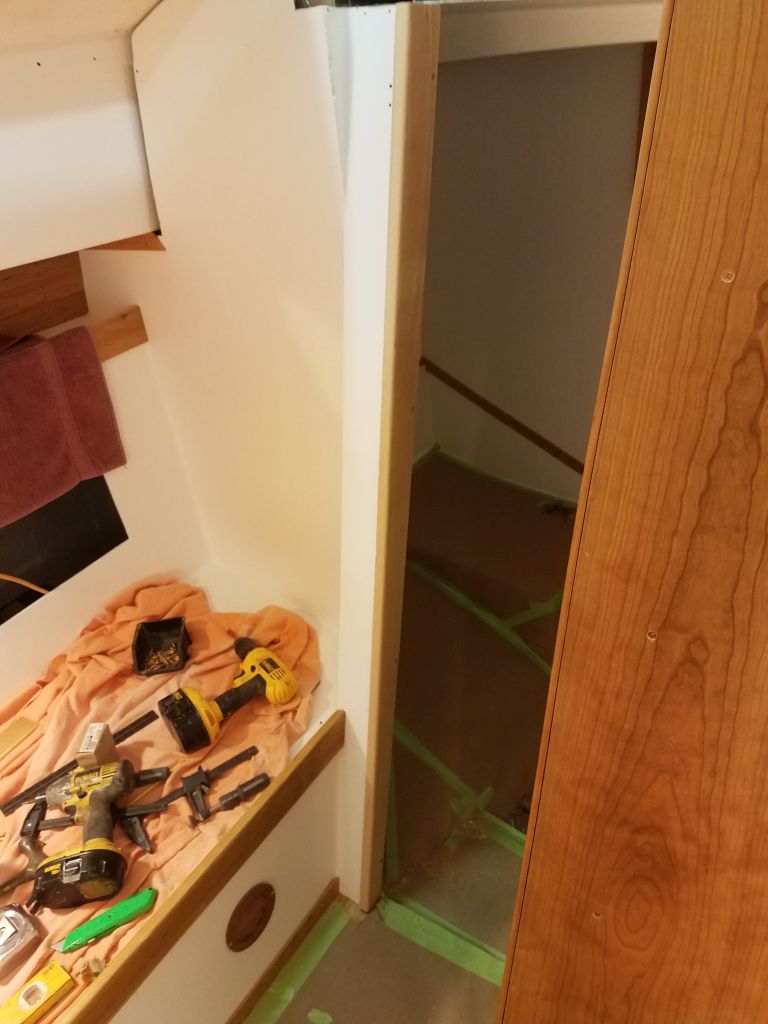
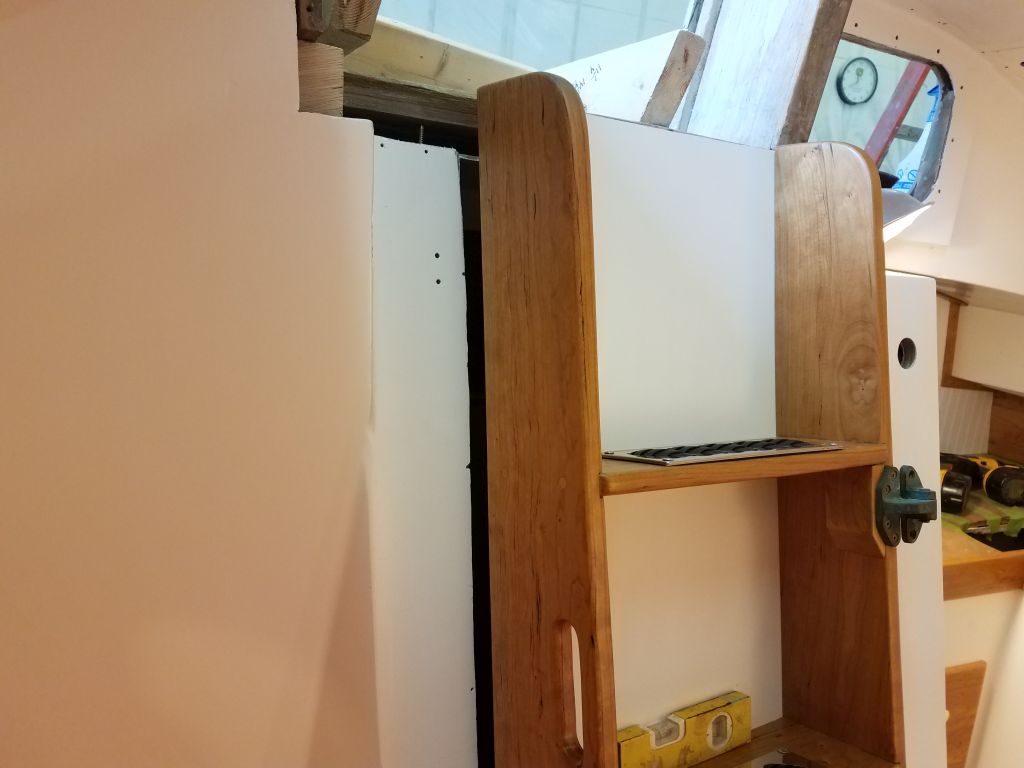
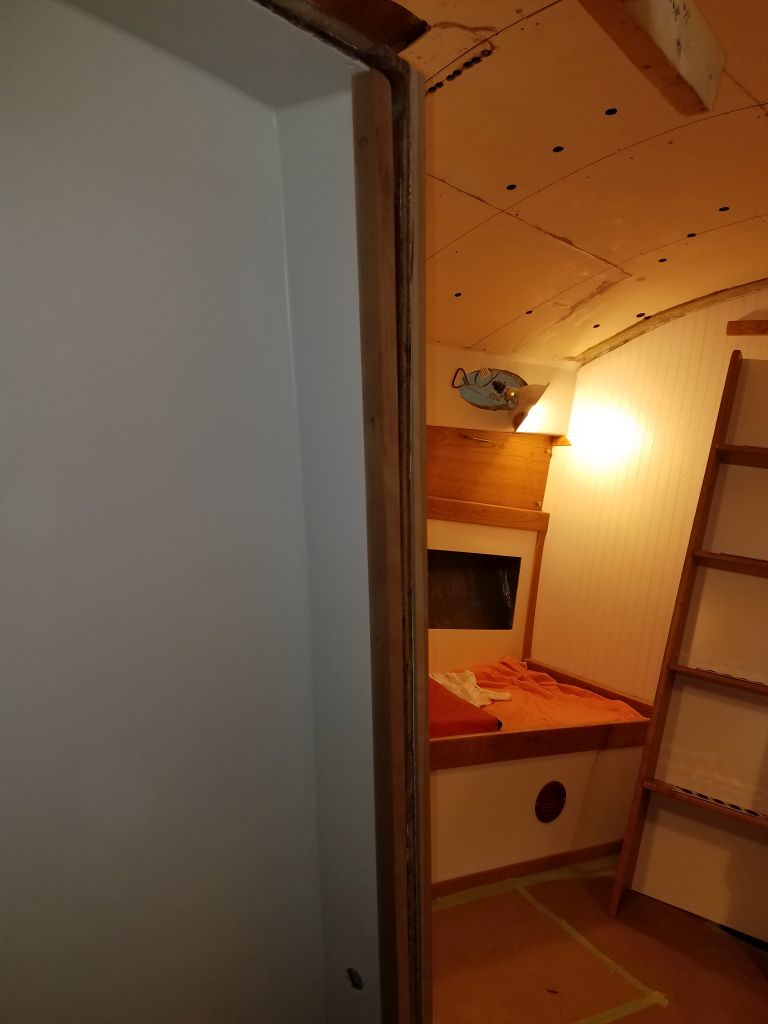
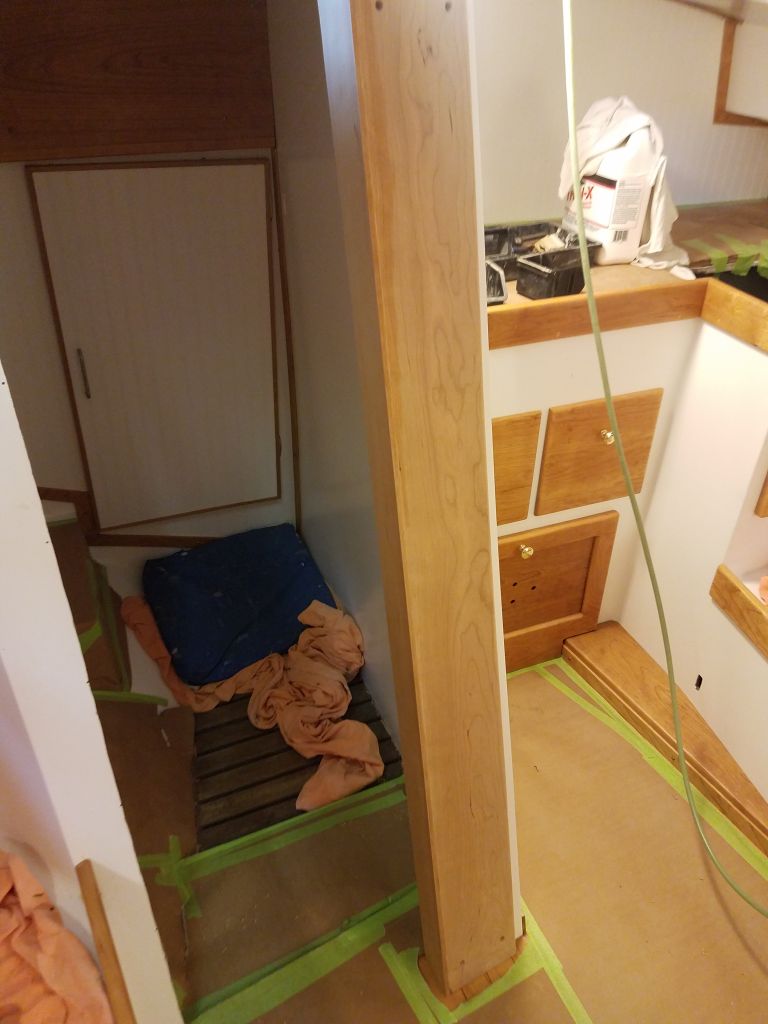
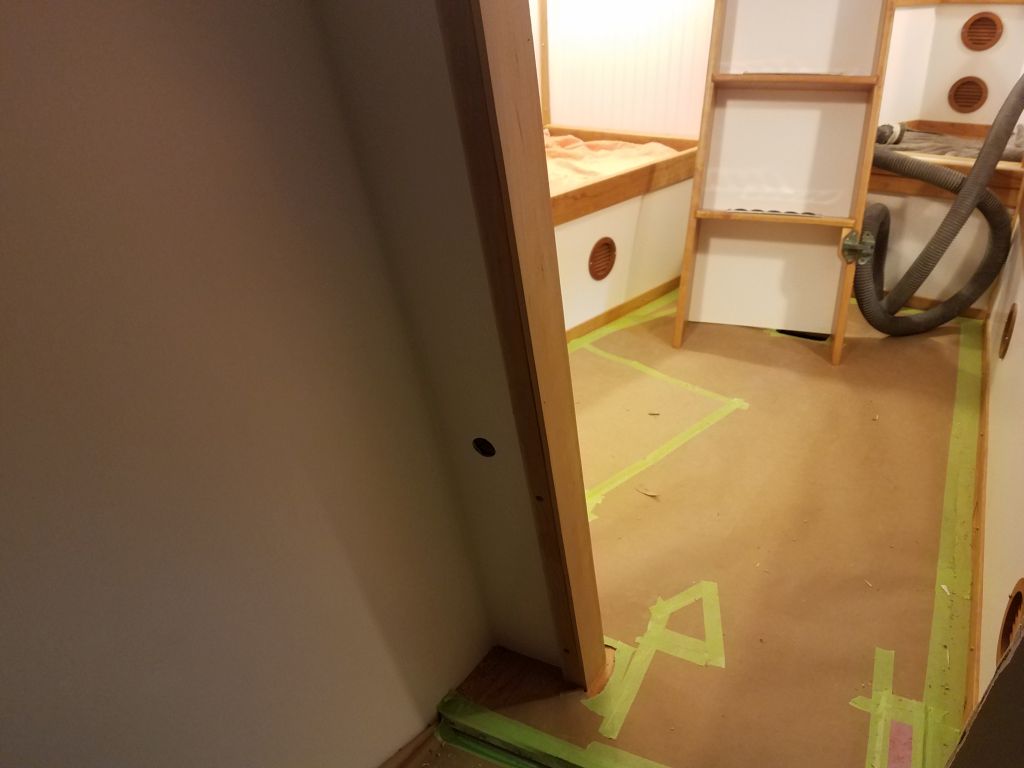
To cover the raw edge of the door opening completely, the trim needed to essentially wrap around the opening and into the head itself.  The original trim had accomplished this in two pieces:  one thick piece for the outside, which was milled in various ways to accommodate the door hinges and wrap through the opening; and another piece within.  I planned to do it in three pieces (outside and inside trim, and a thin piece to span between the two), so my next step was to mill, fit, and install another piece of trim on the head side of the opening.  I held this piece in alignment with the outside piece, using a small board to keep the edges properly aligned with one another, and secured the trim with screws in recessed holes.

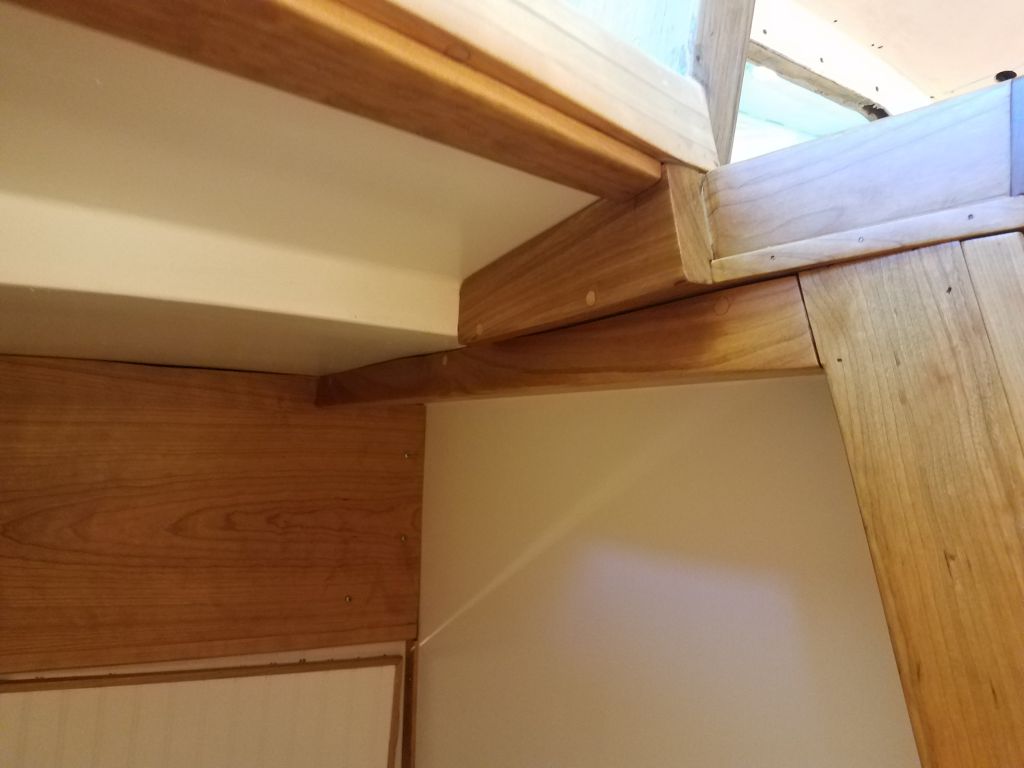
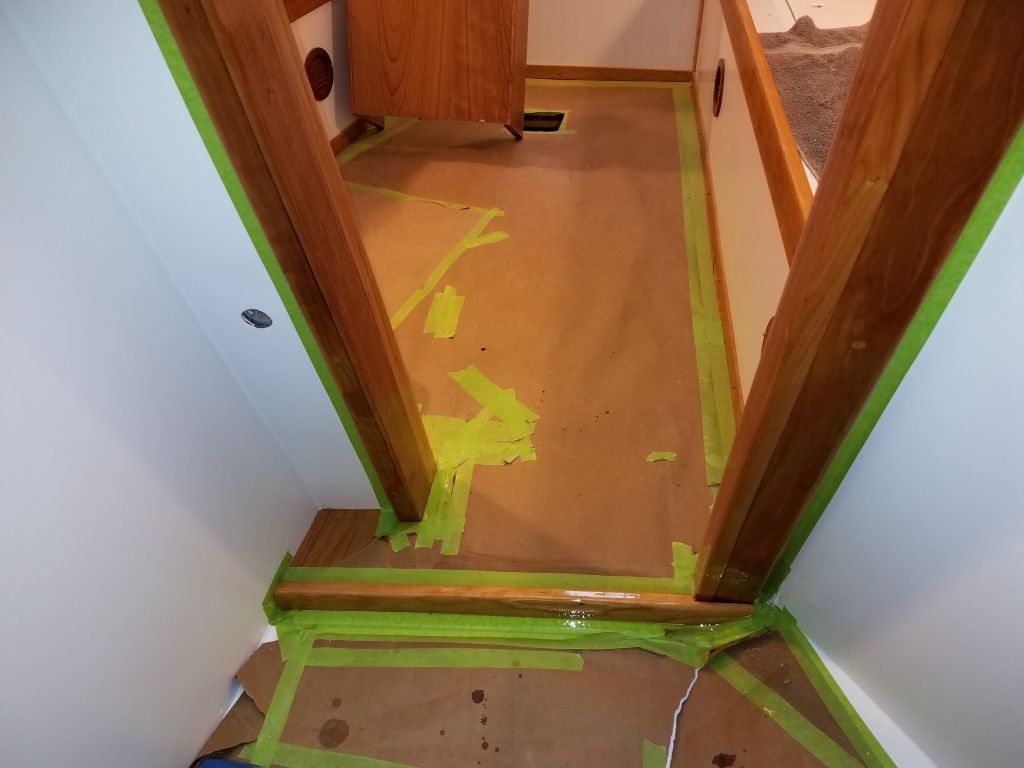
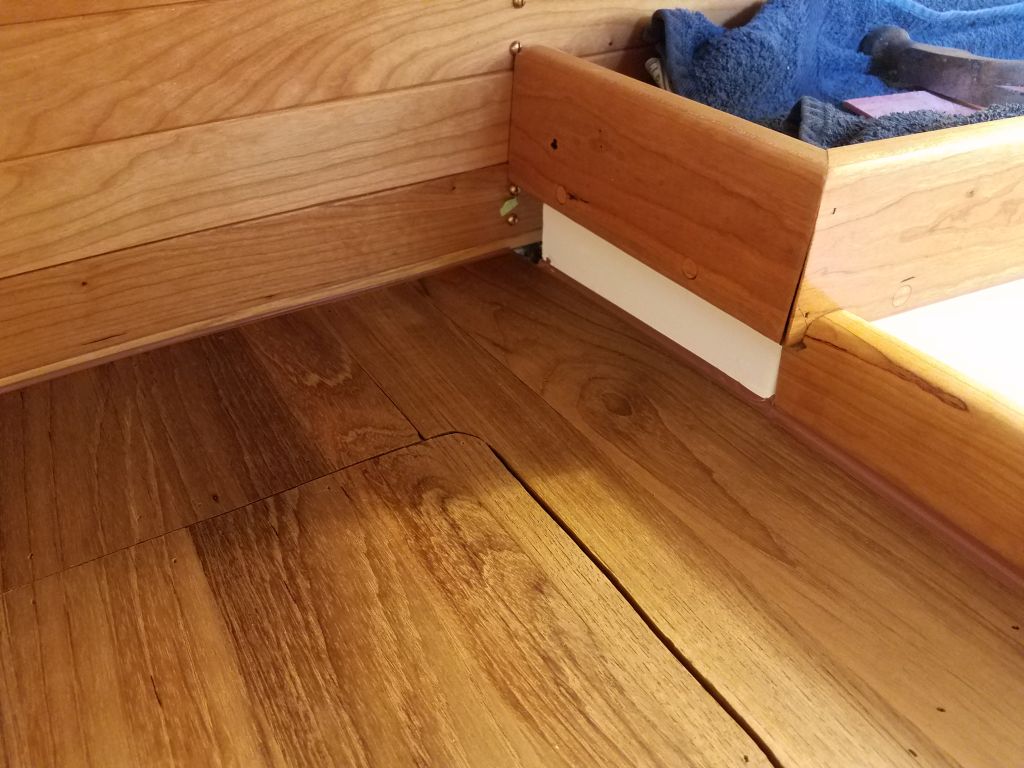
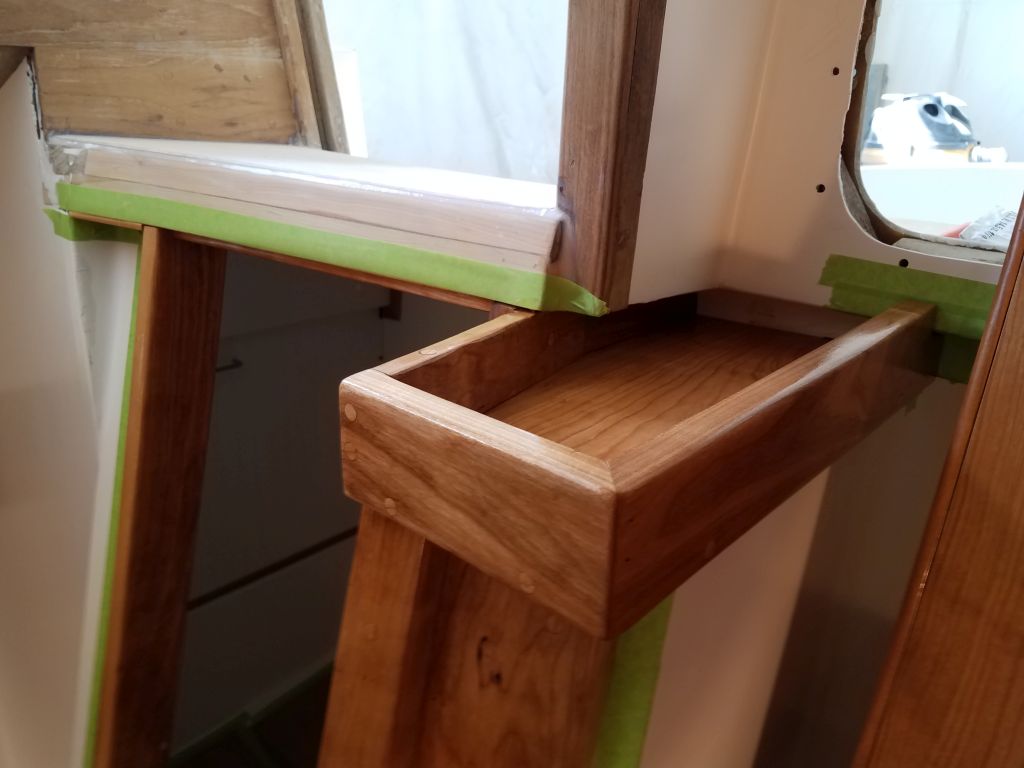
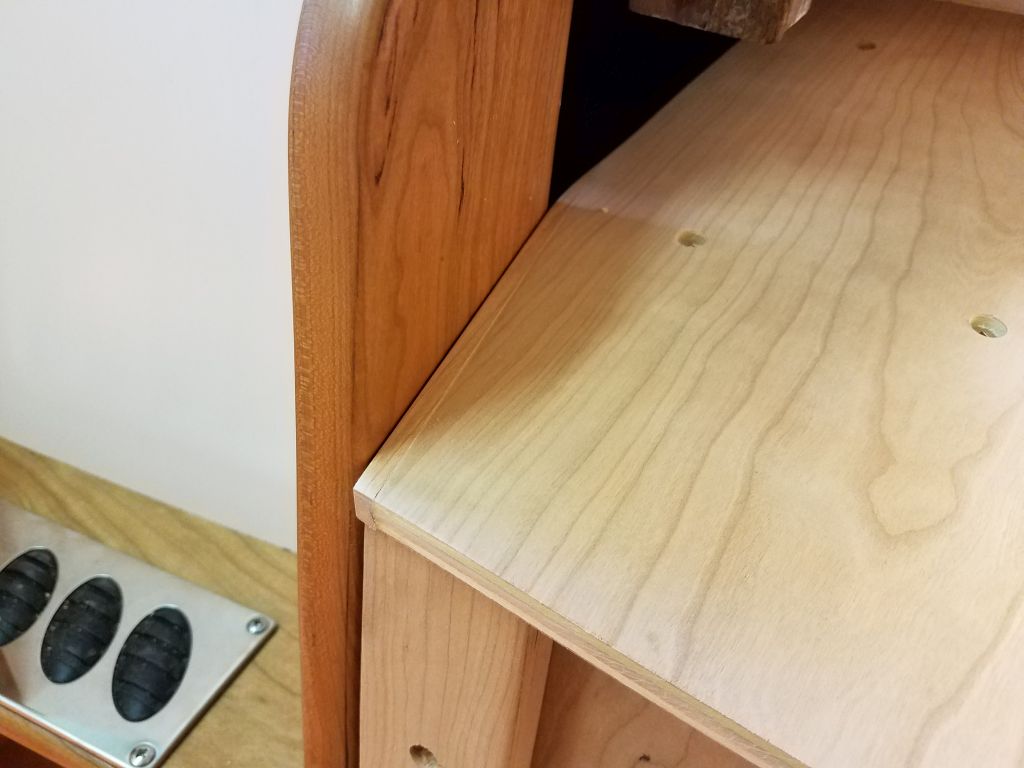
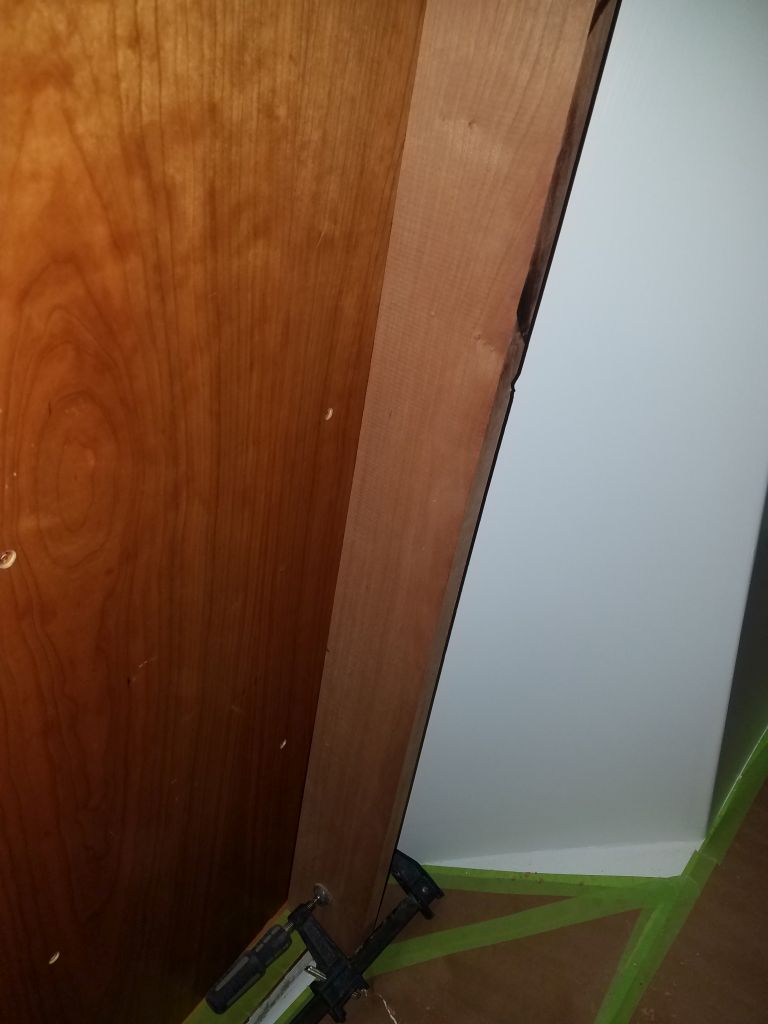
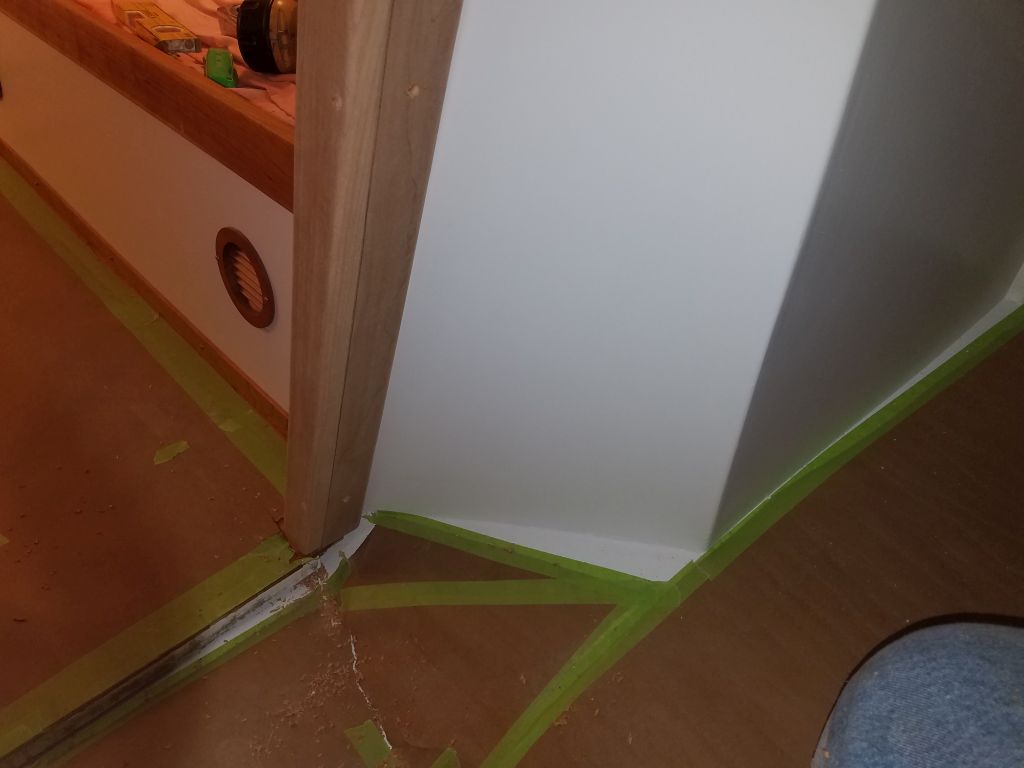
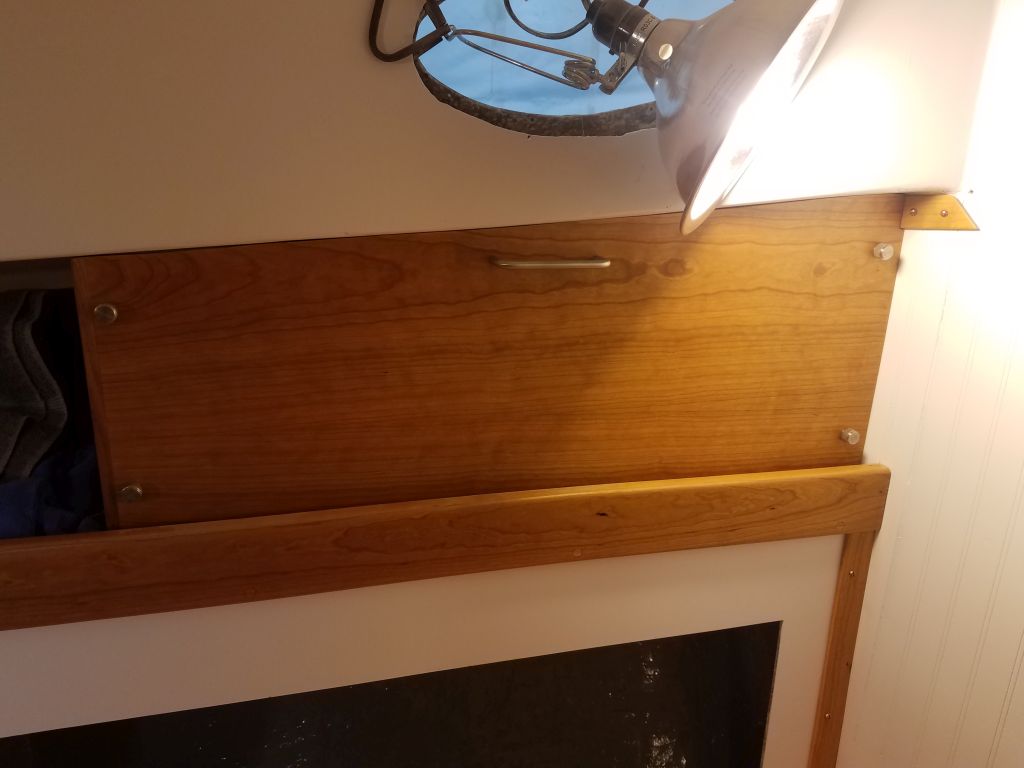
Next, I resawed a 3″ wide piece of cherry to 1/4″ thickness, and cut and fit it to cover the space between the outer and head trims.  I secured this with glue and brads, and this completed the basis of the inboard edge of the door trim.

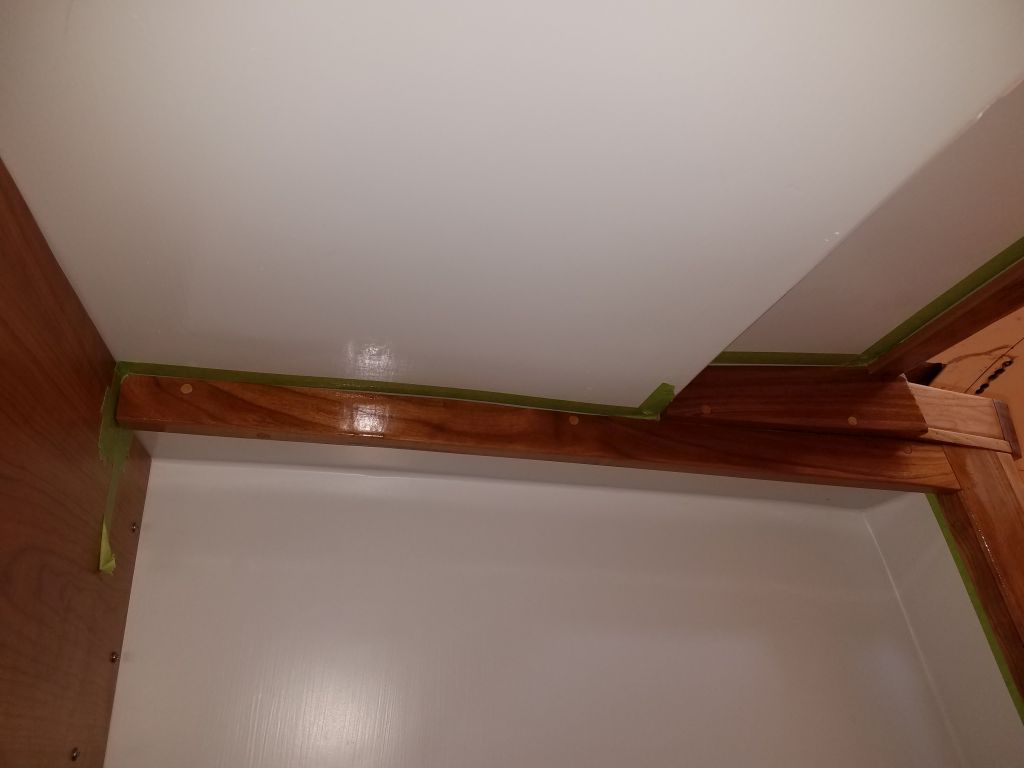
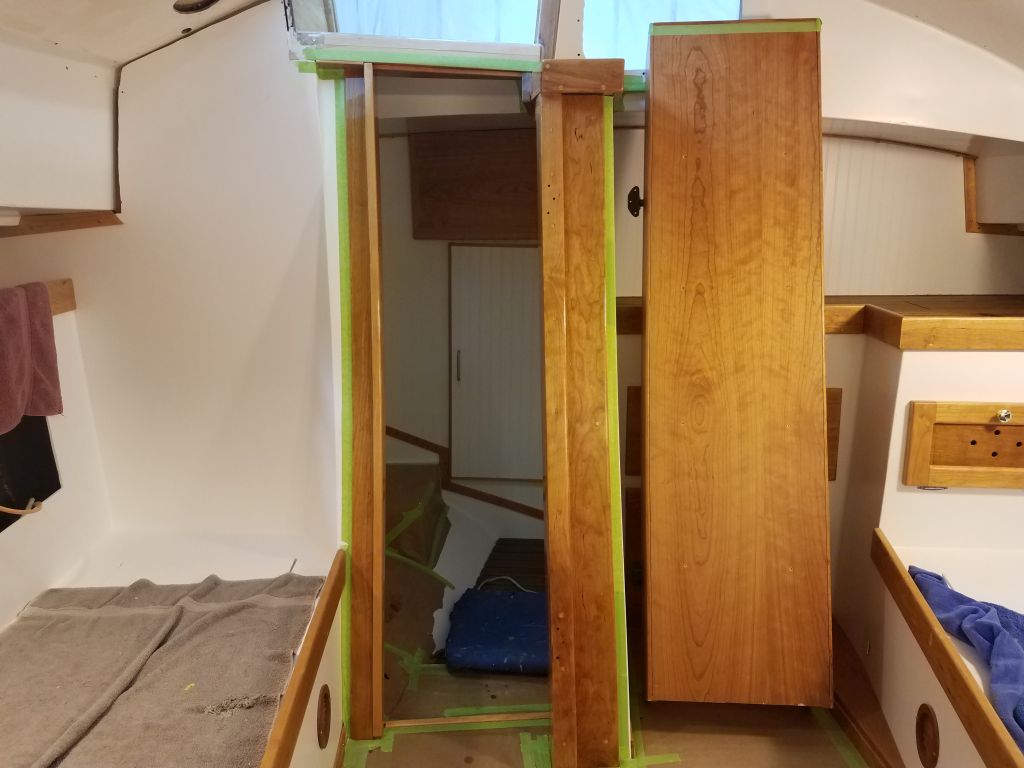
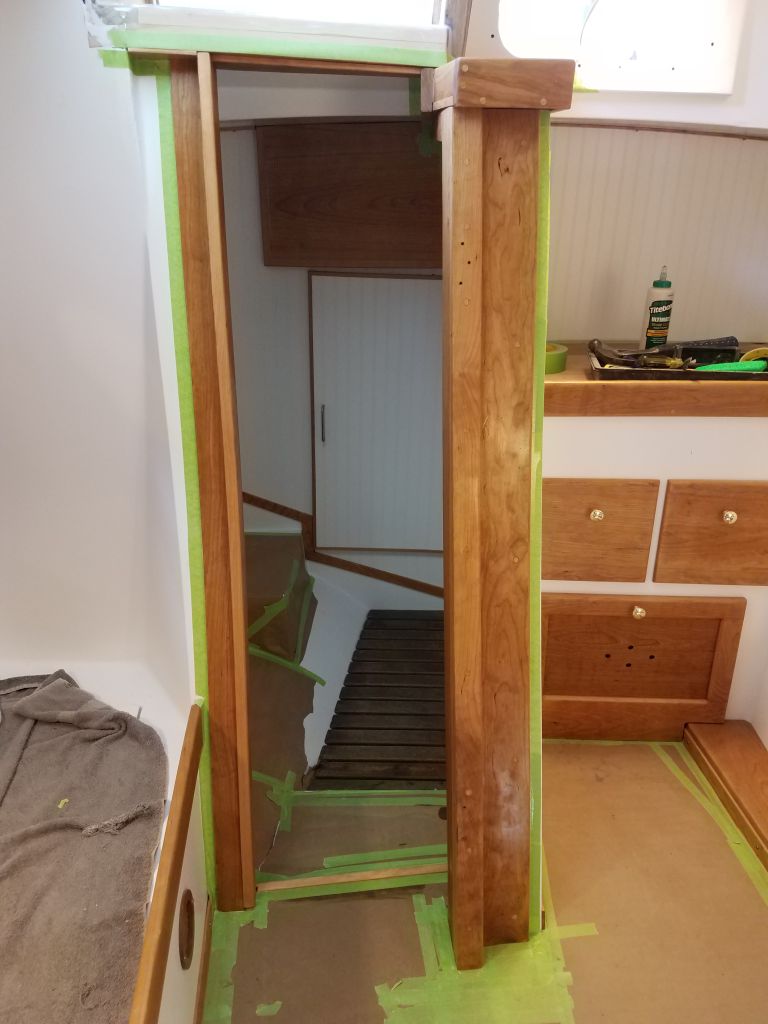
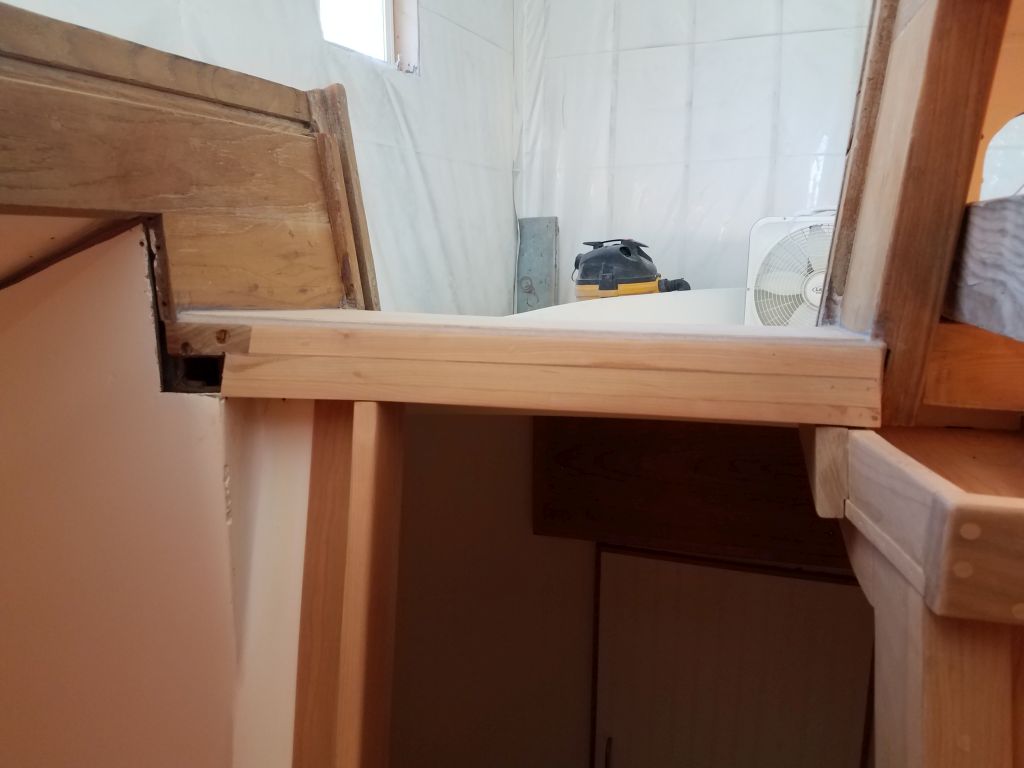
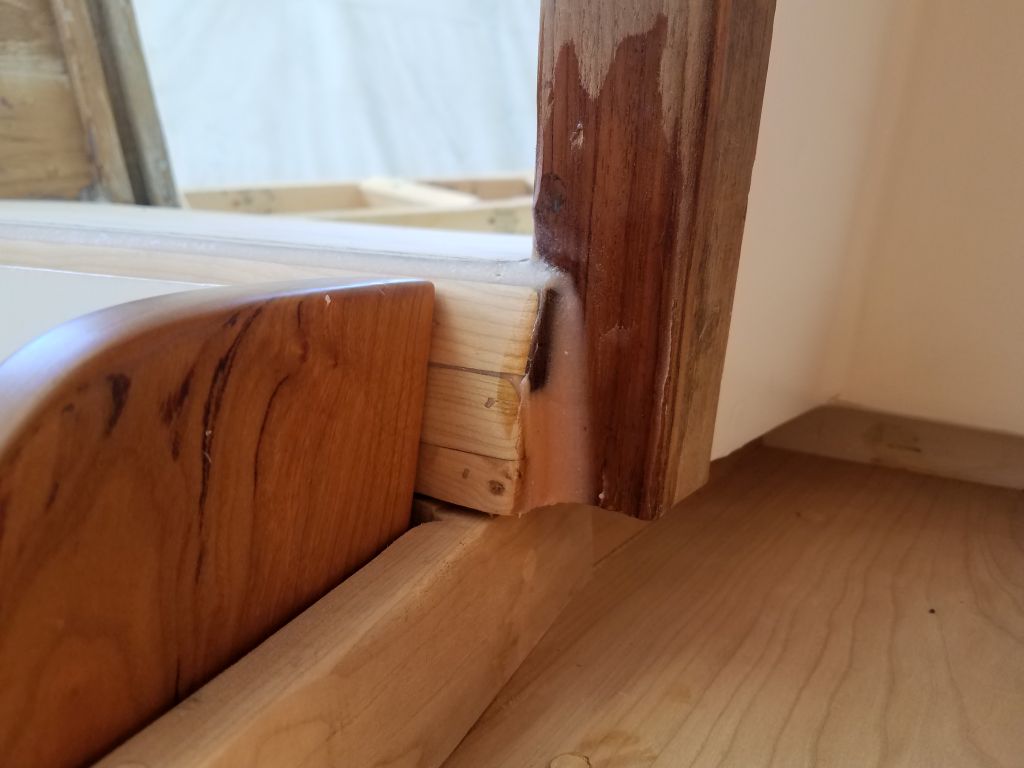
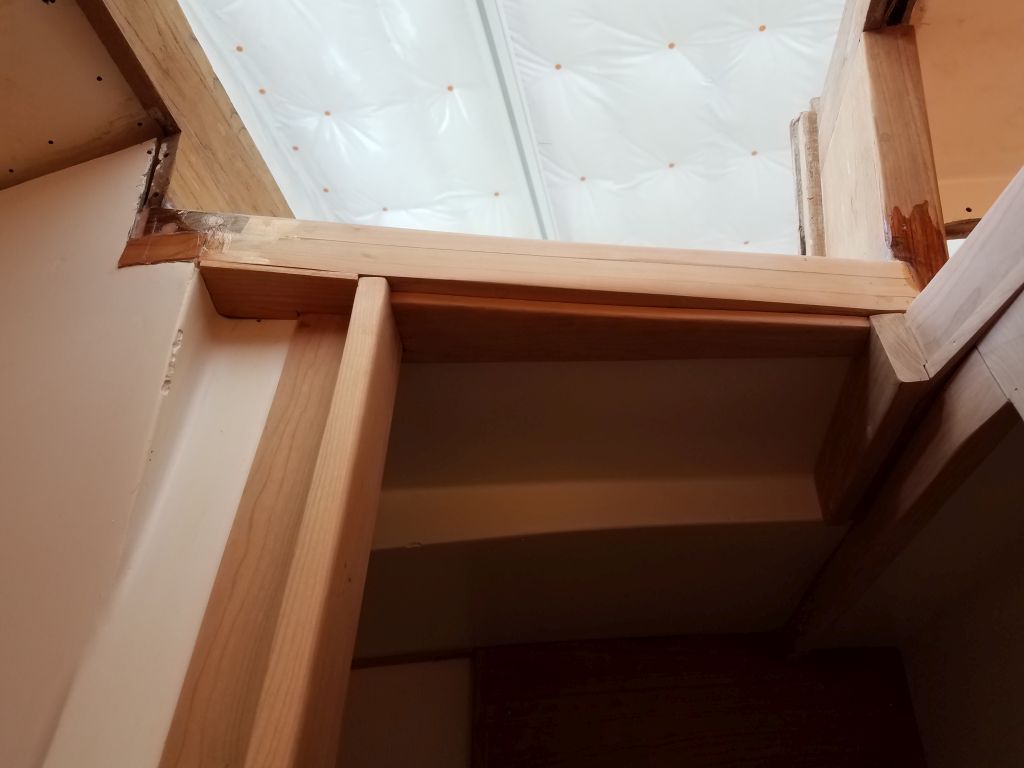
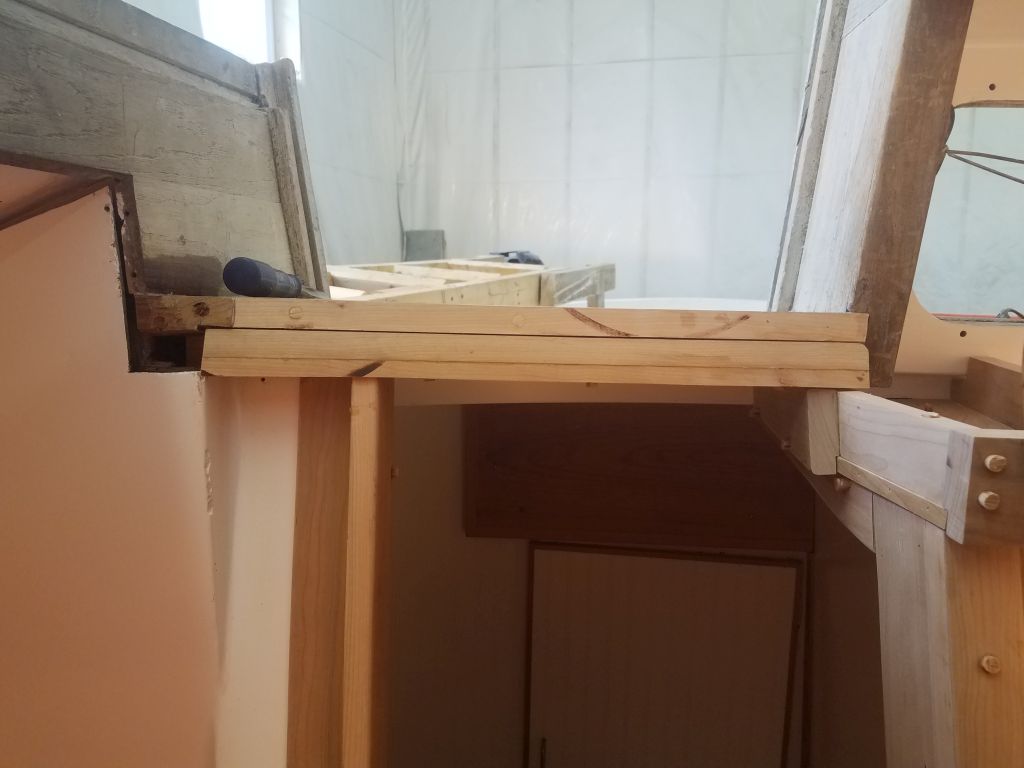
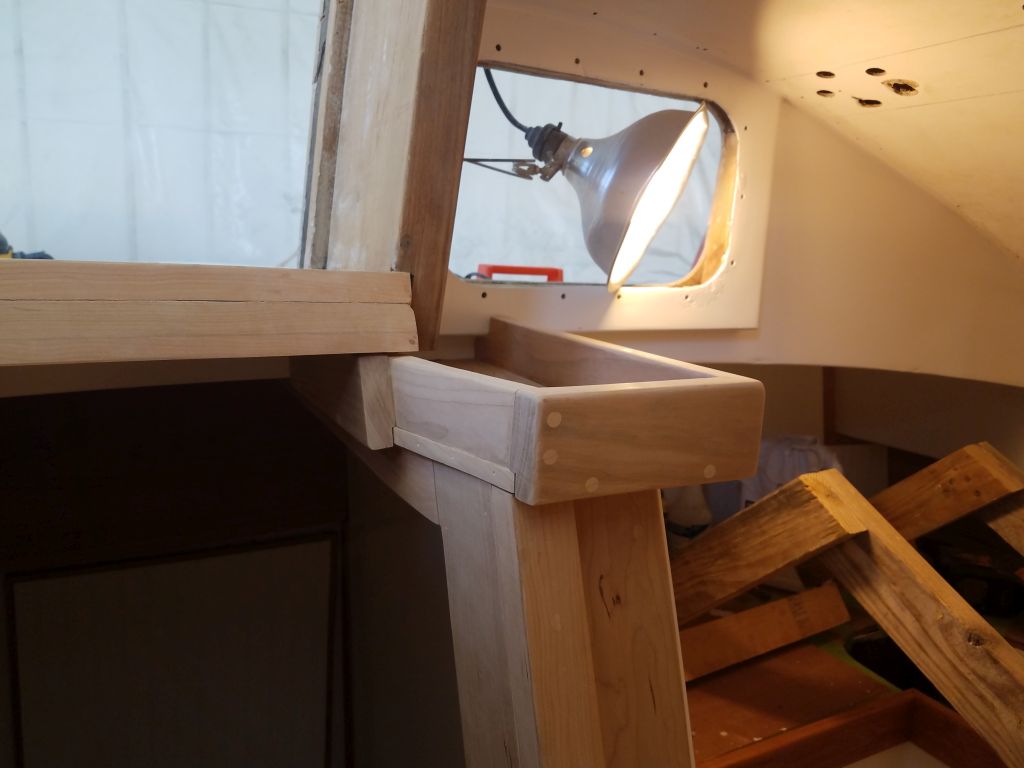
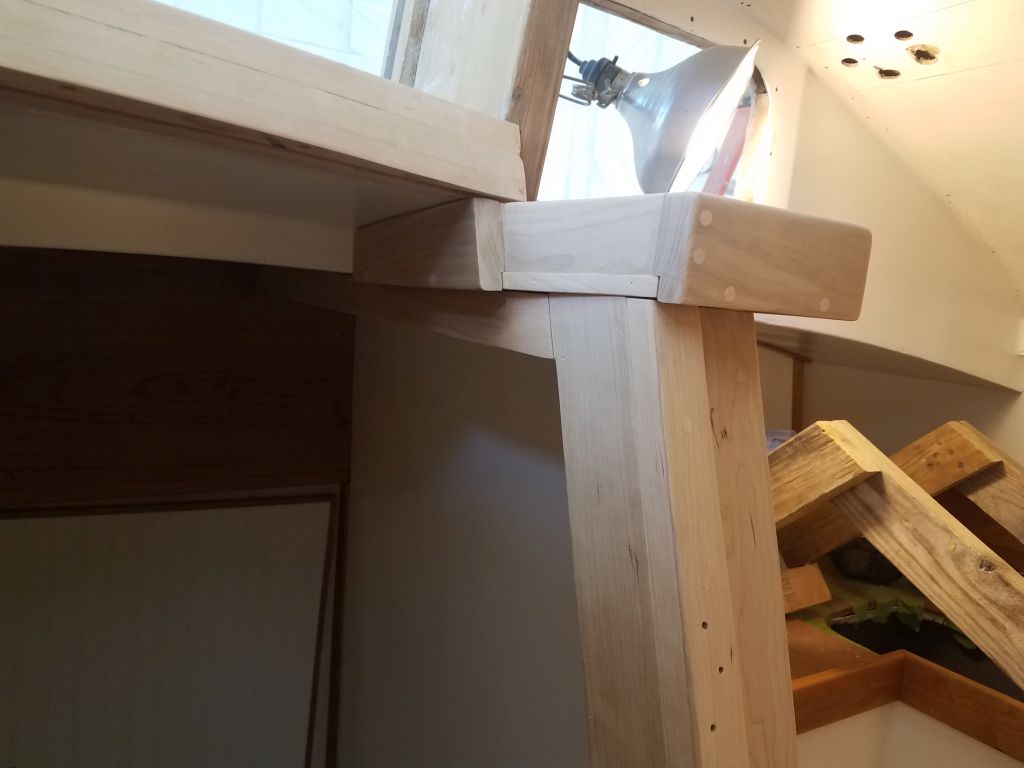
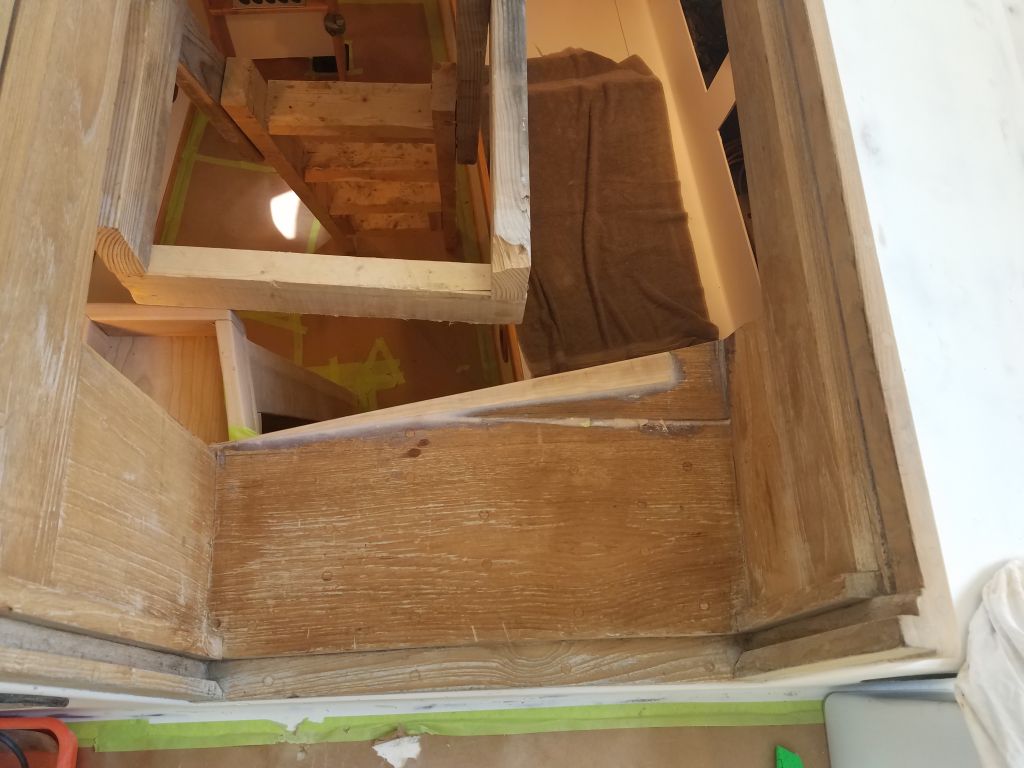
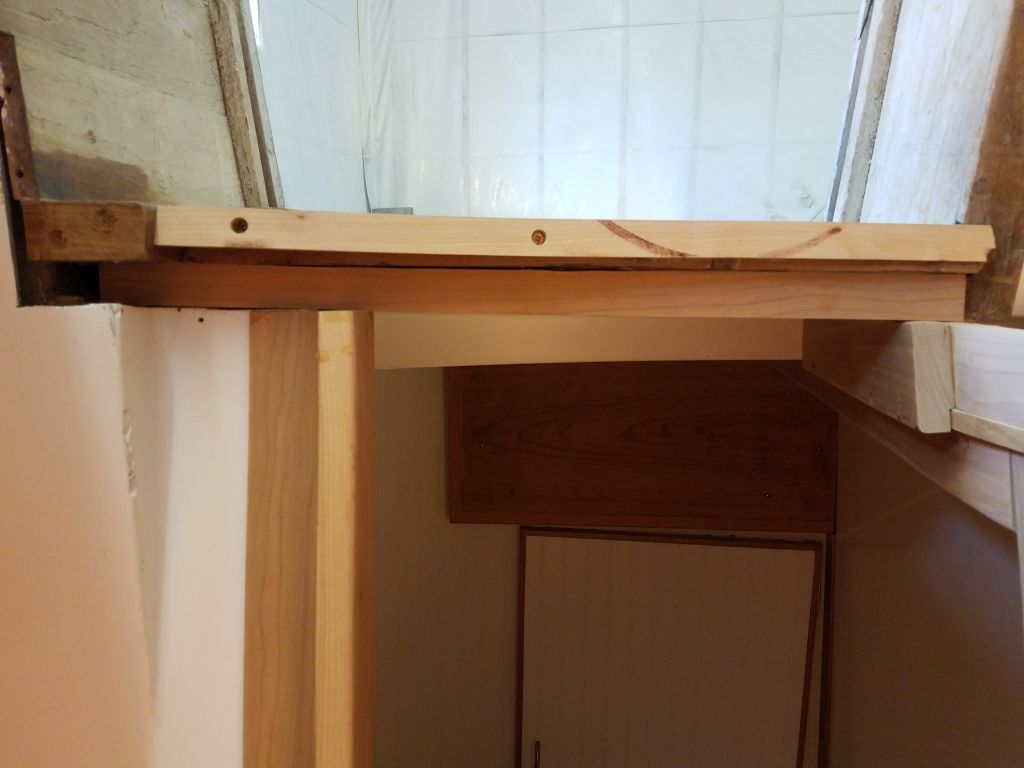
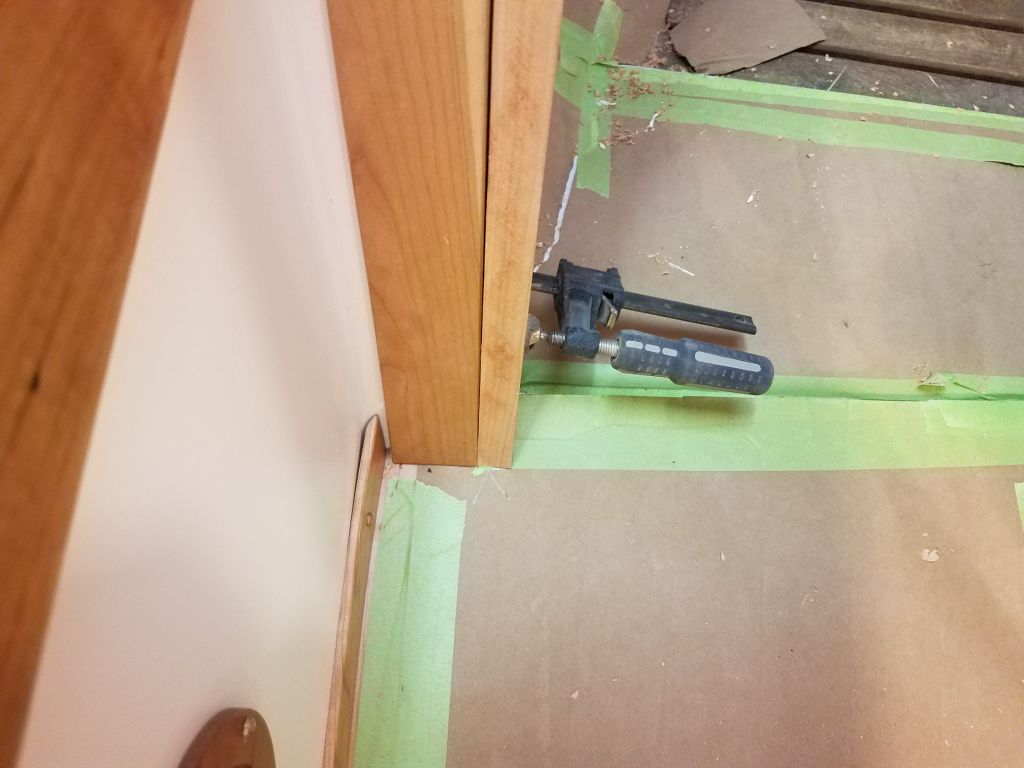
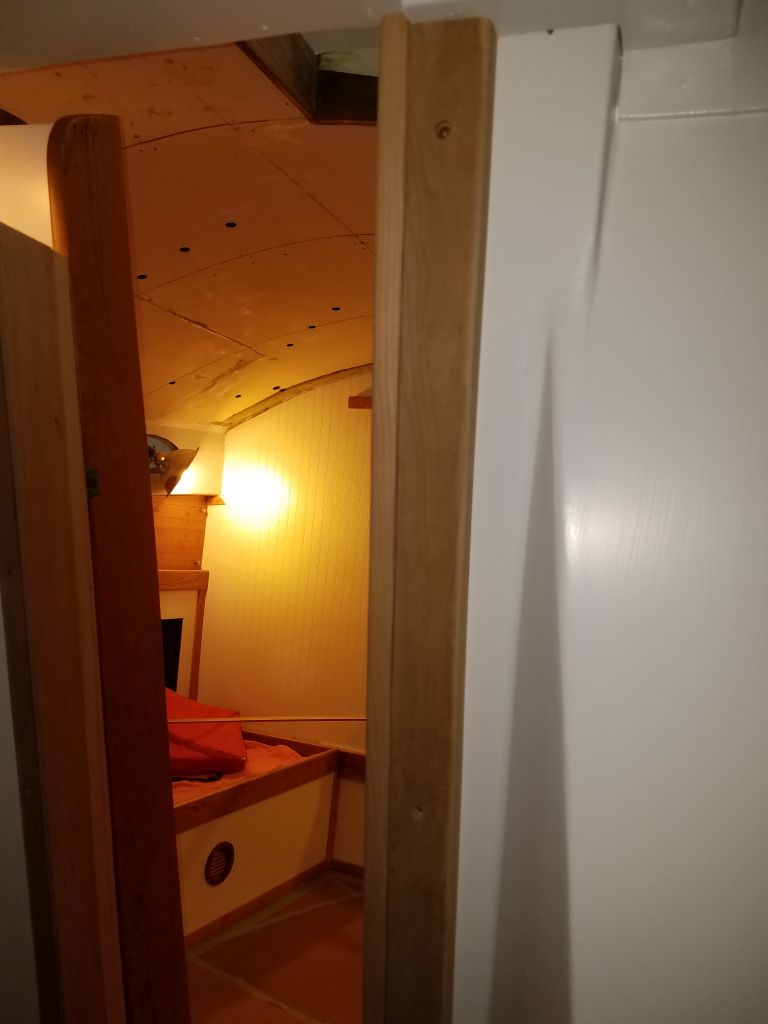
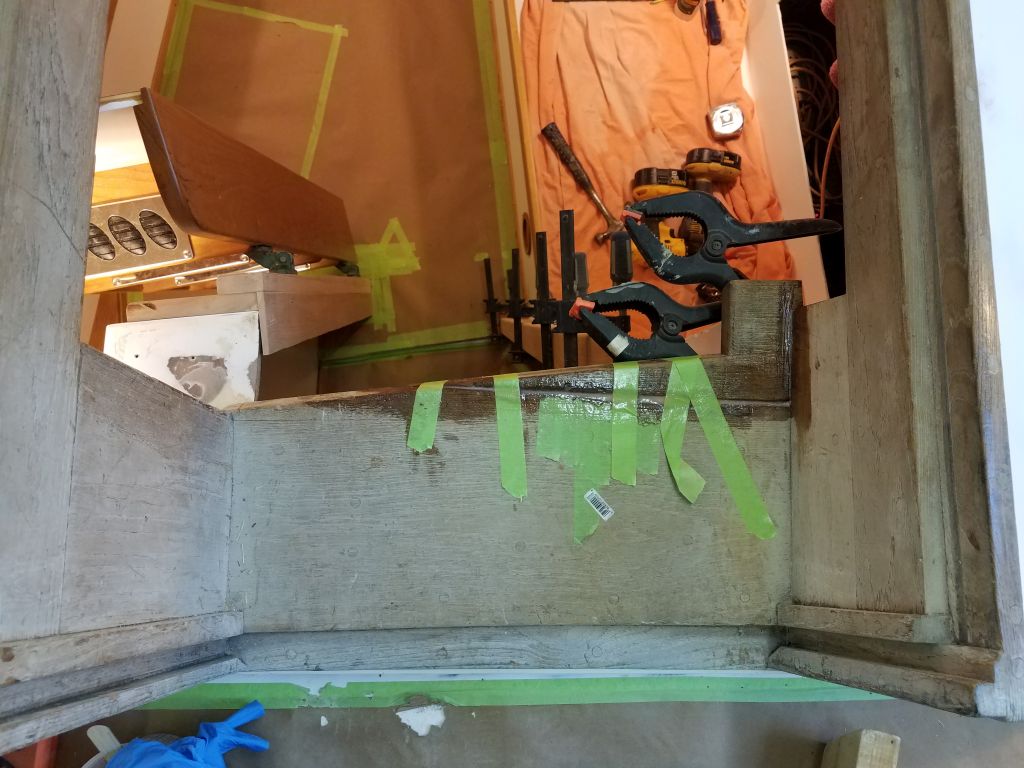
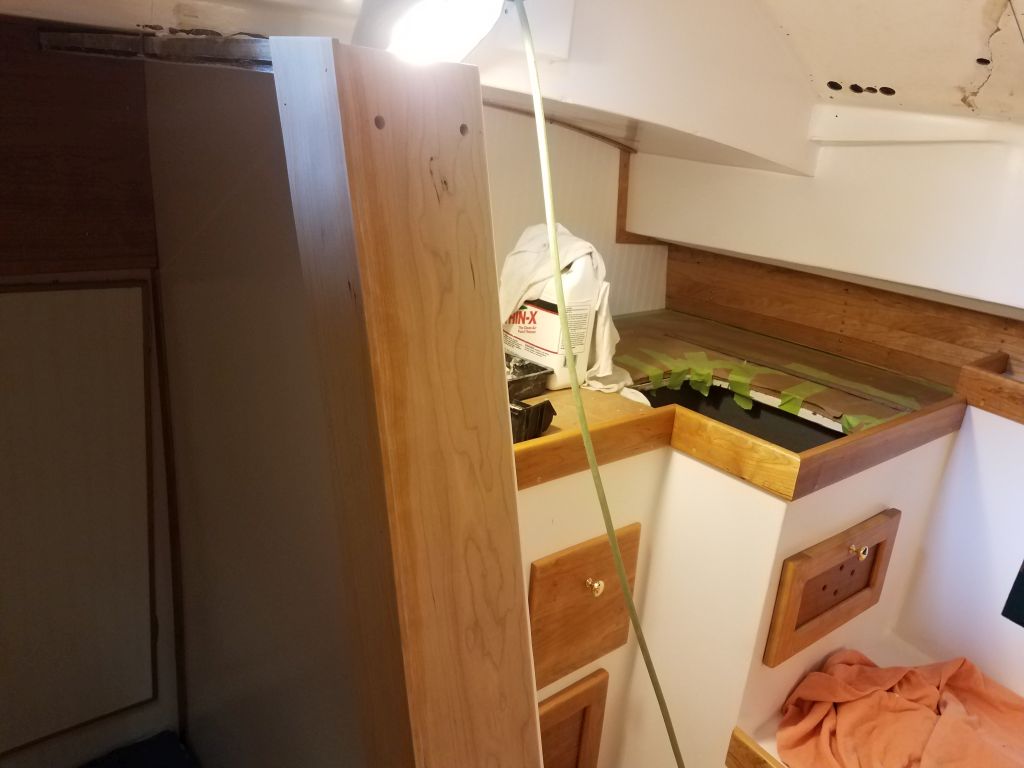
Now I could replace the ladder assembly against the new trim so I could lay out and build the next layer of trim that would support the door hinges, which were some distance above the wide trim I’d installed as a basis.  Because of how I’d changed the angle of the ladder, increasing the exposed edge’s angle to 20° (whereas the angle of the back of the ladder, and the adjacent molded interior, was 15°), now this next section of trim had to be taller at the bottom than at the top to accommodate the positioning of the ladder itself.  

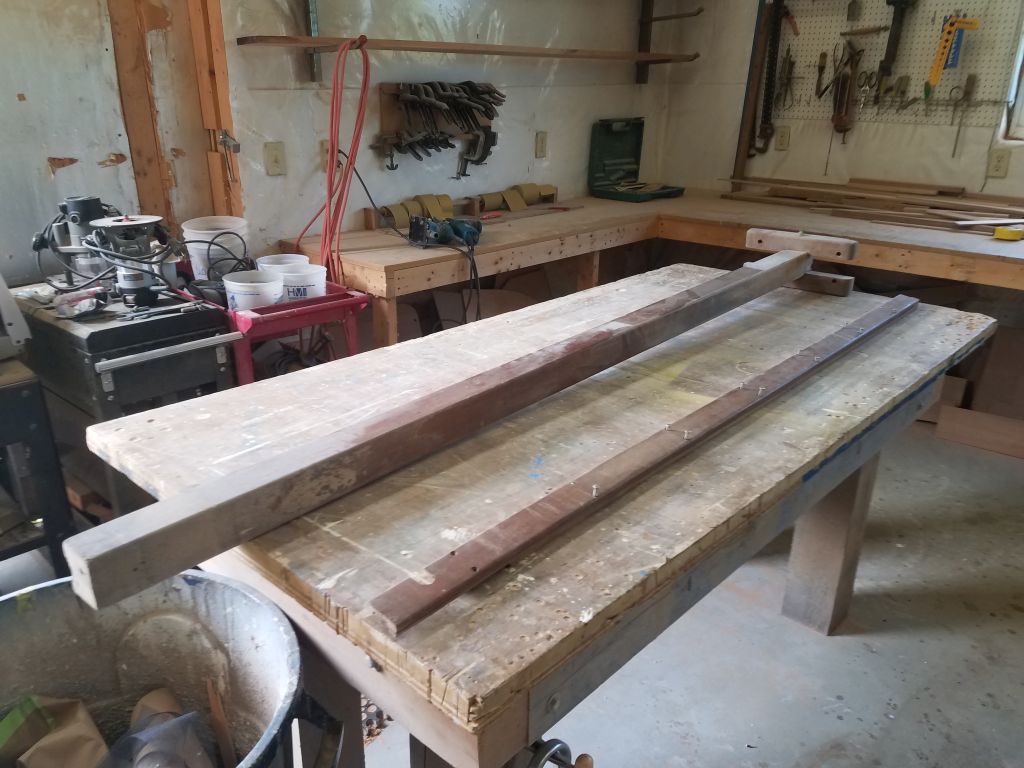
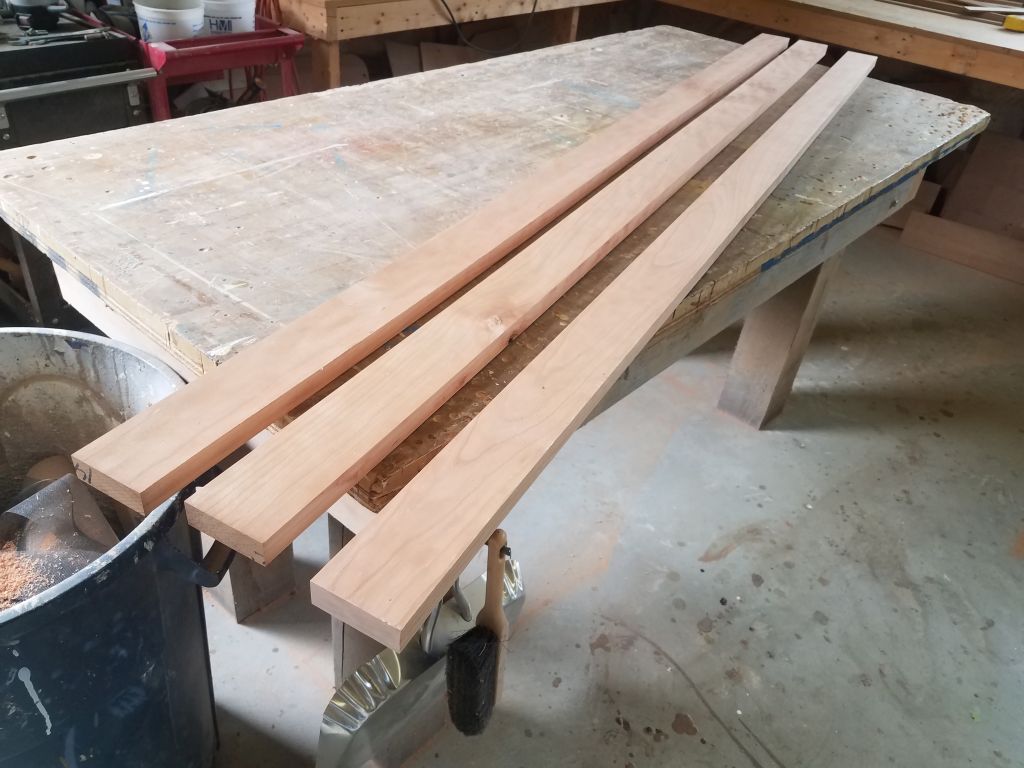
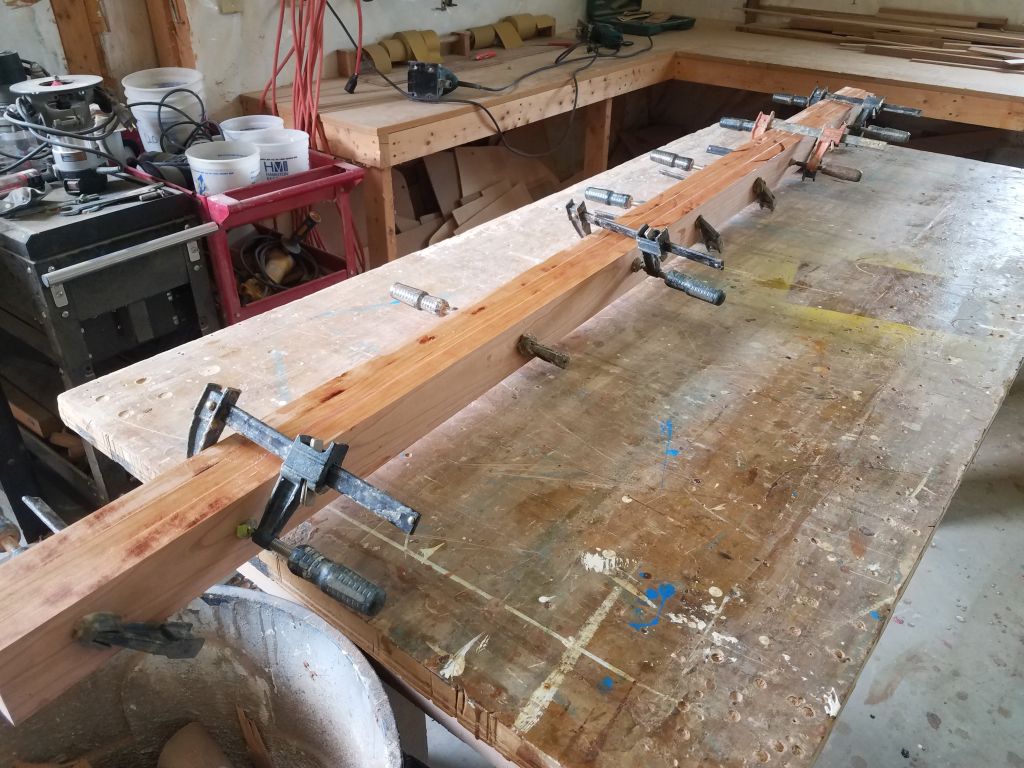
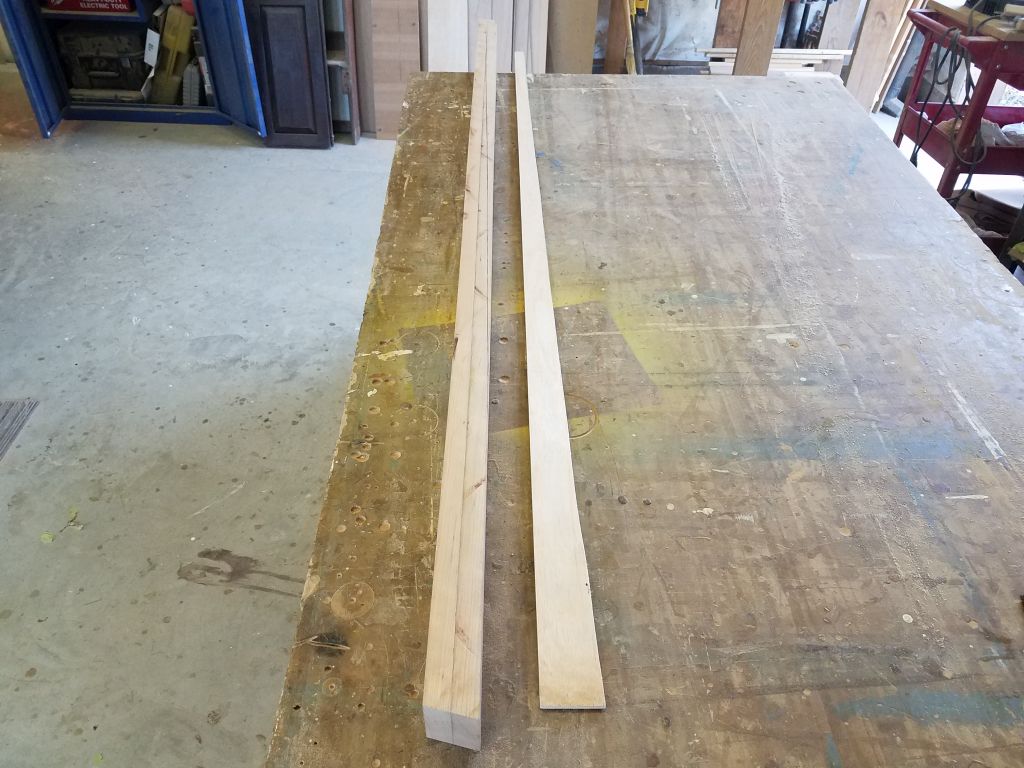
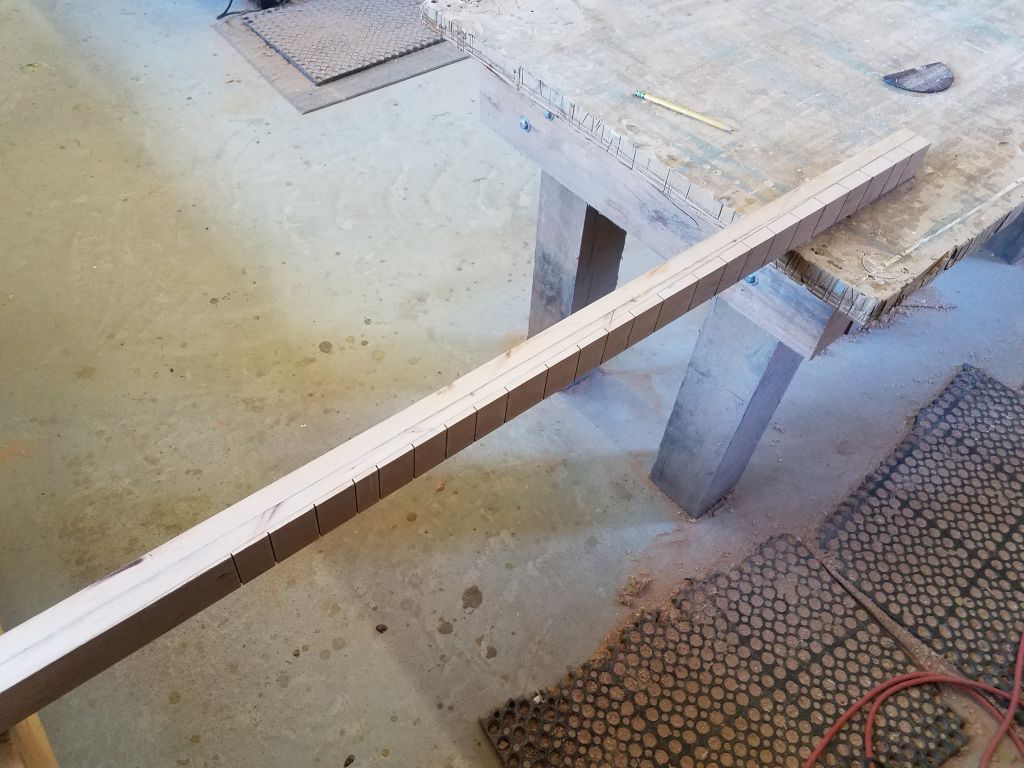
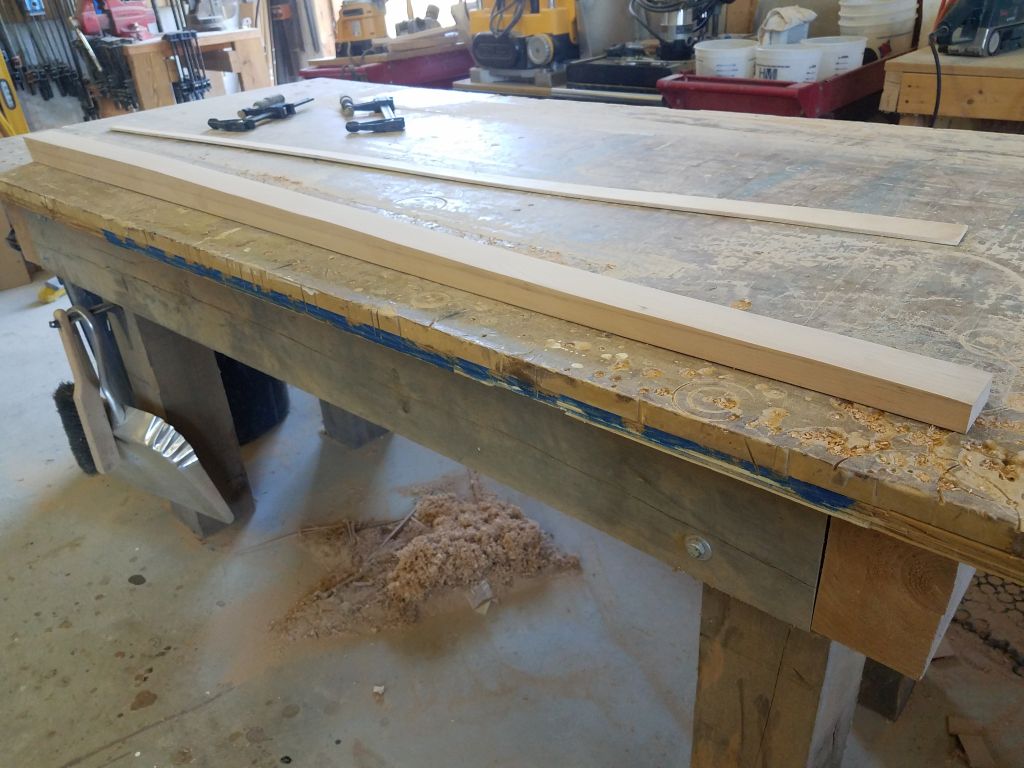
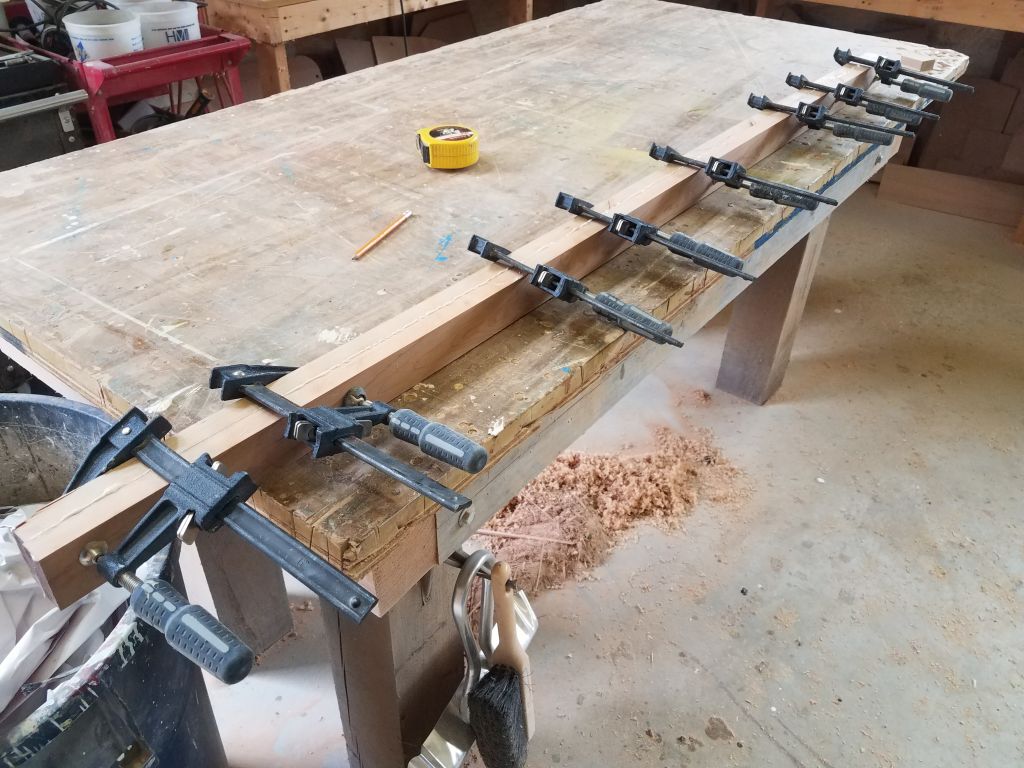
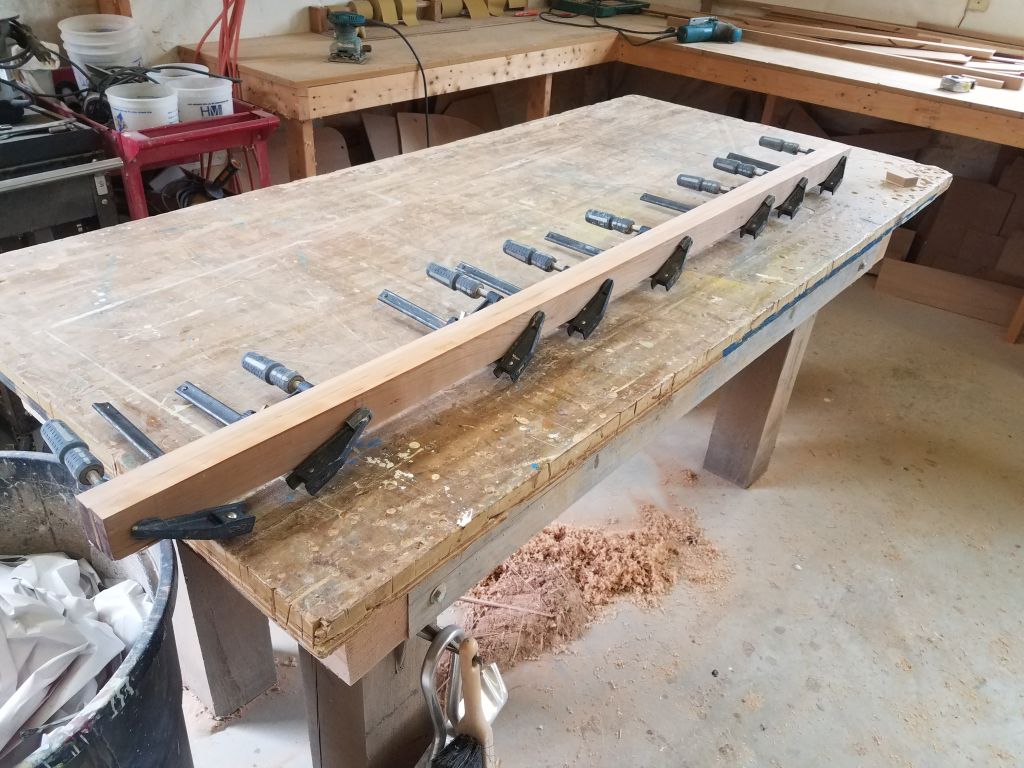
This meant I’d have to shape a piece to match the angle, and since the overall depth required was greater than the thickness of the stock I had on hand, my next step was to glue up a rough blank to use for the trim.  I set this aside in the clamps, and it’d be ready for me to continue working with next time.

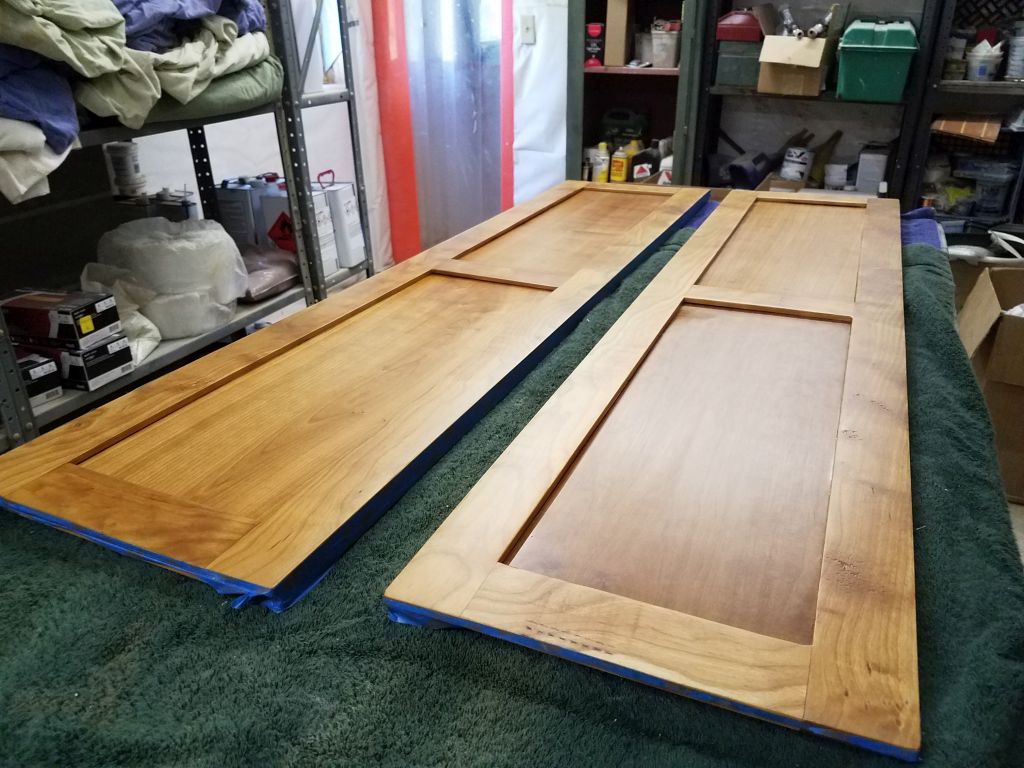
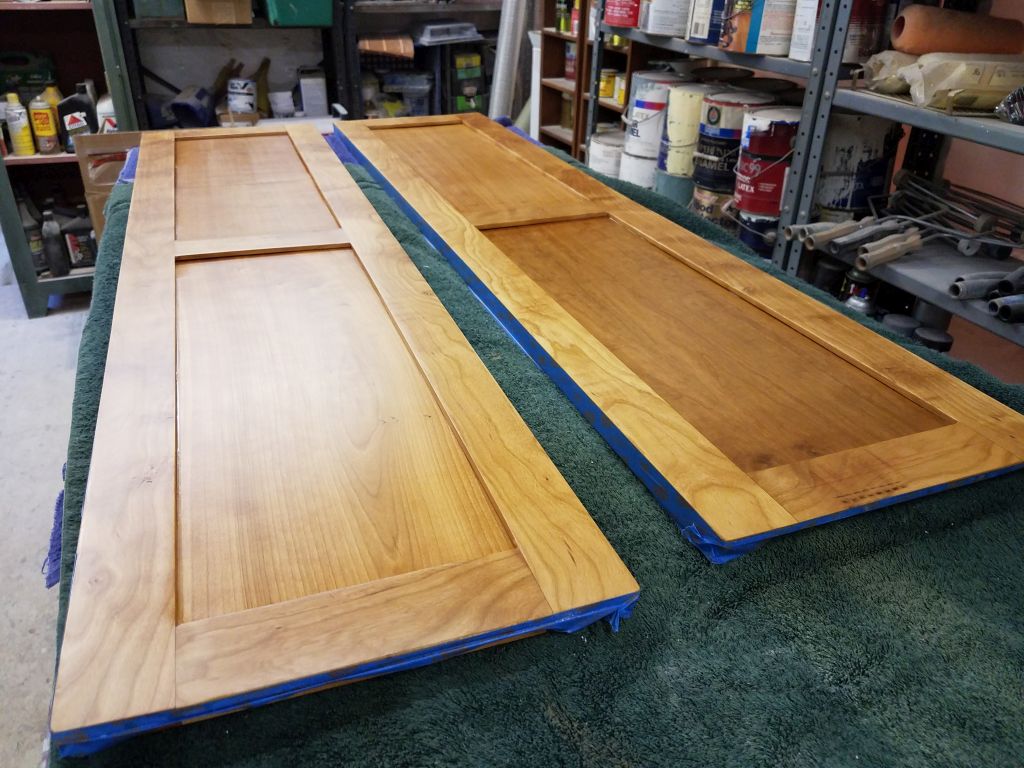
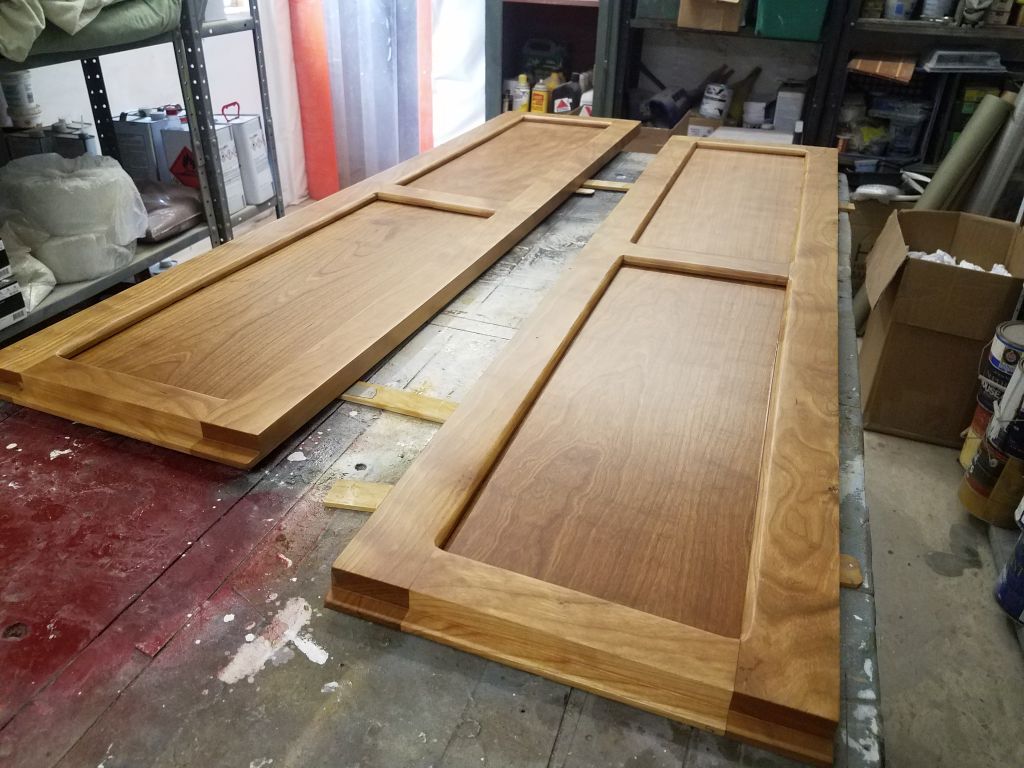
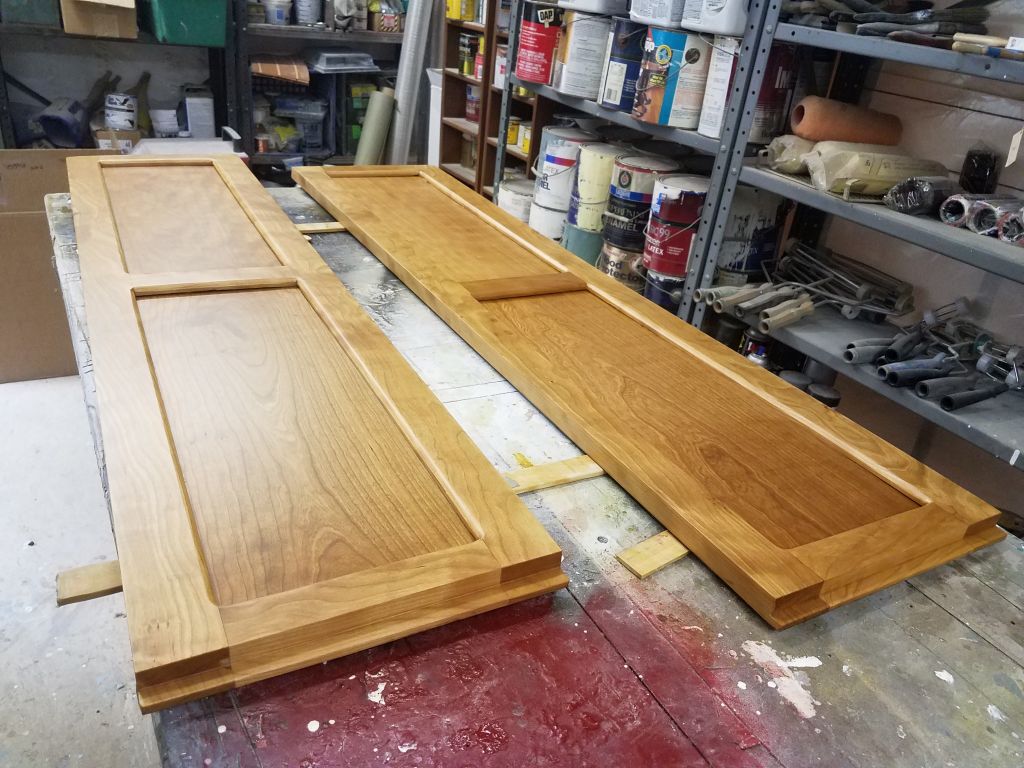
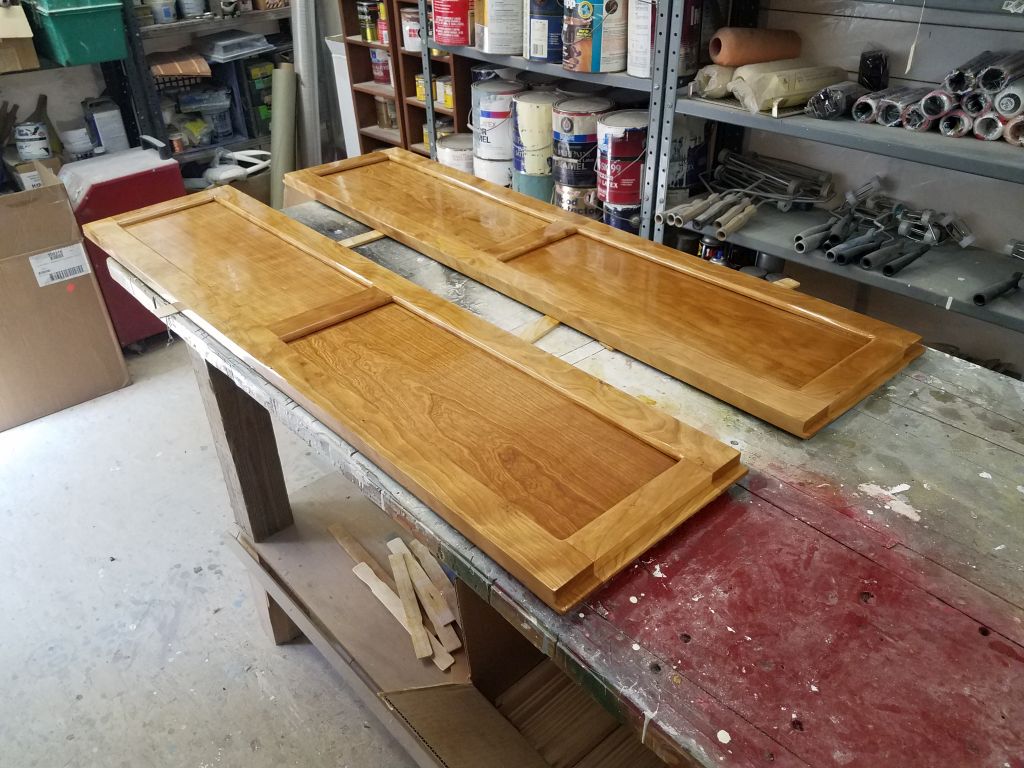
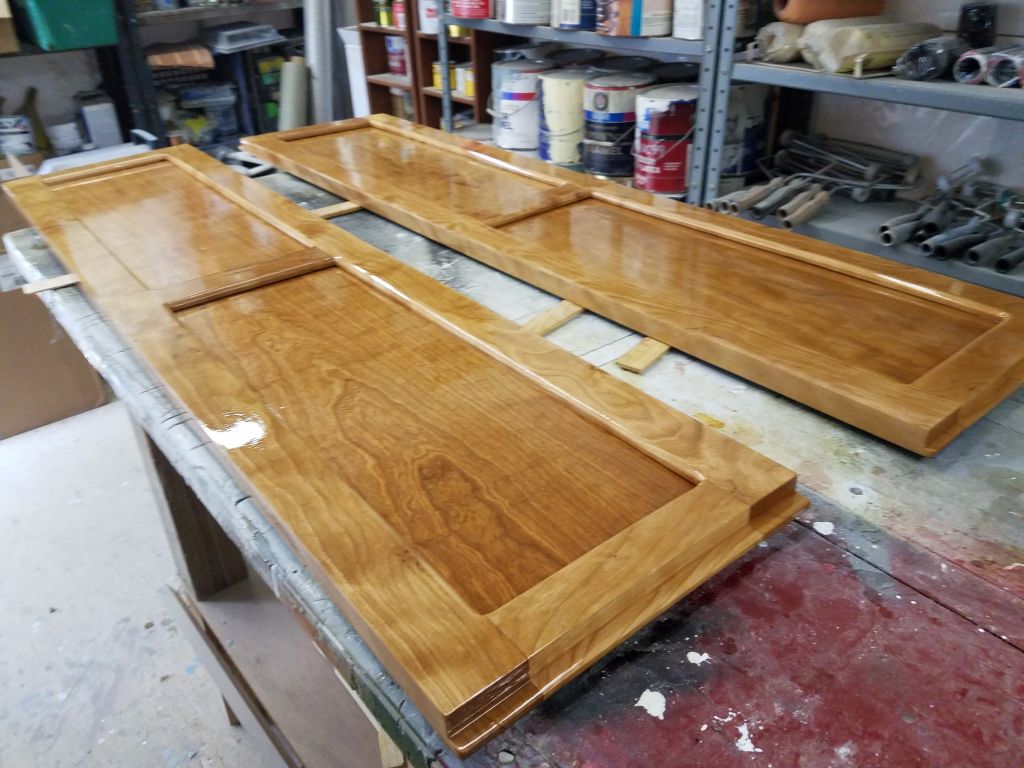
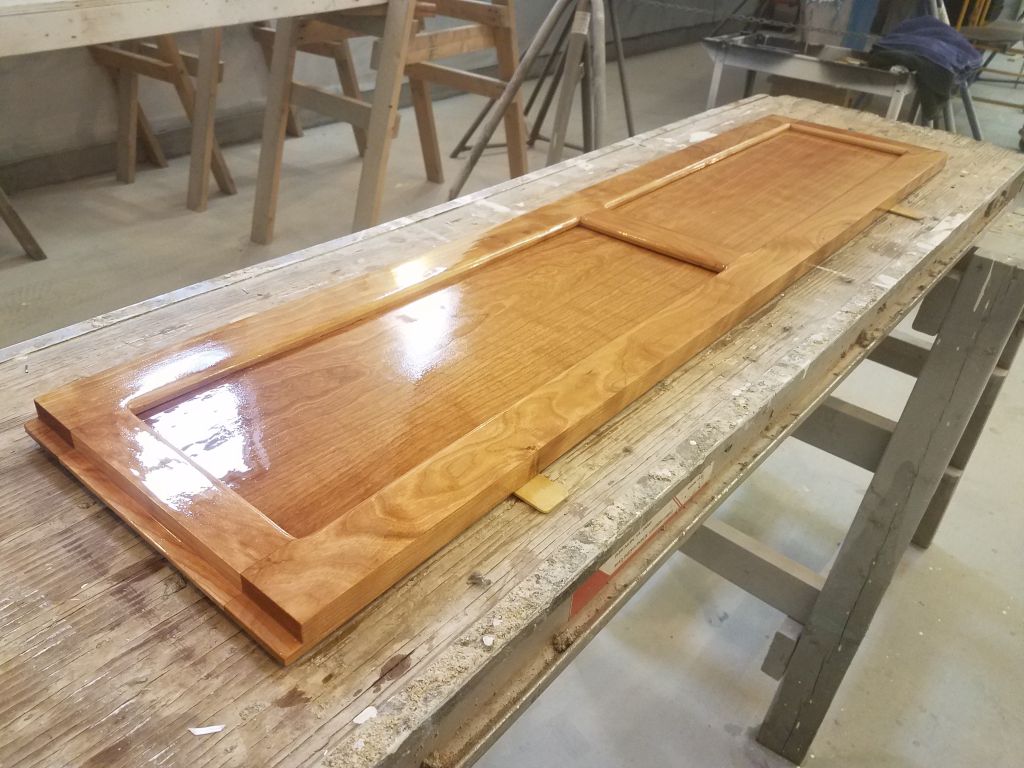
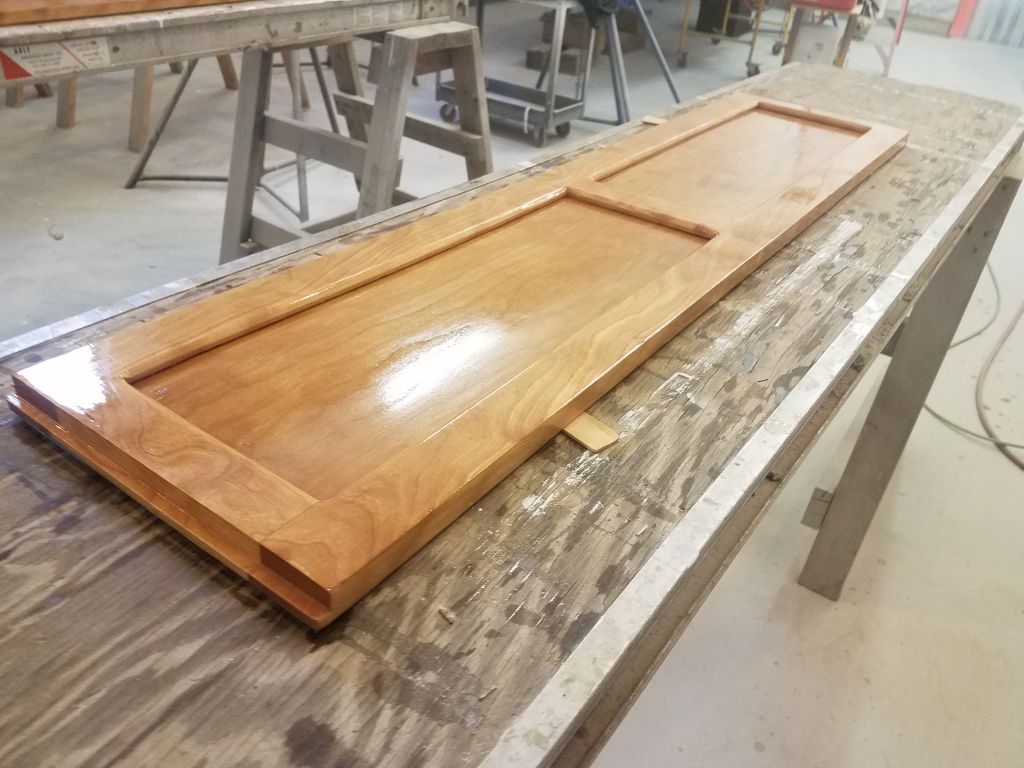
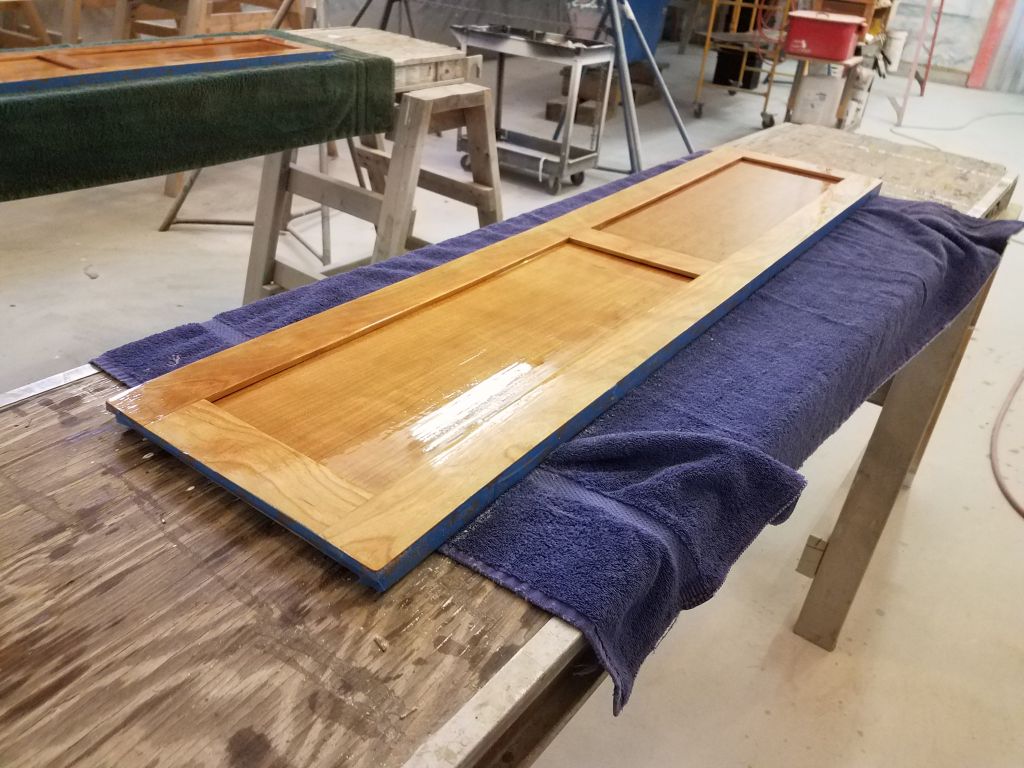
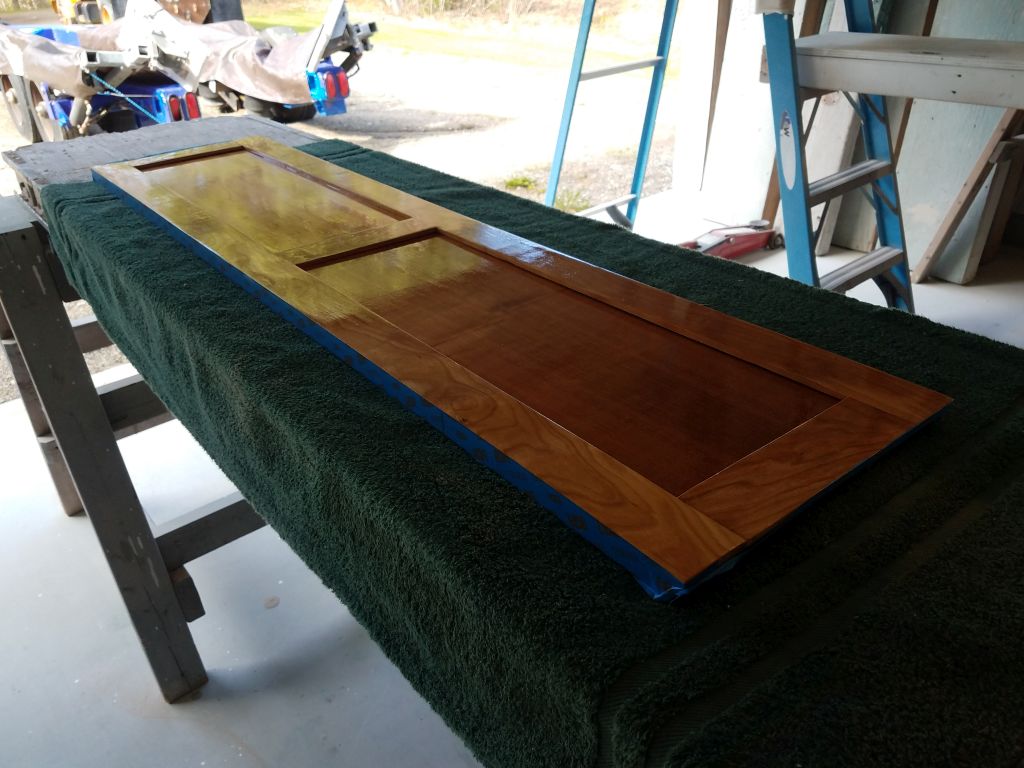
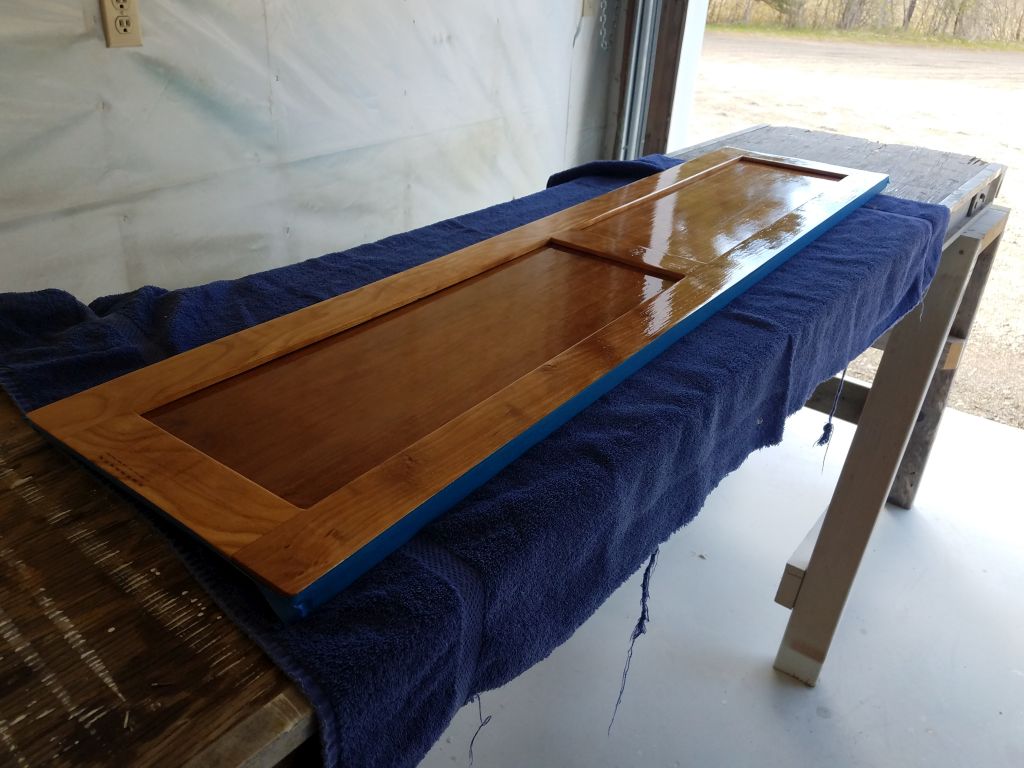
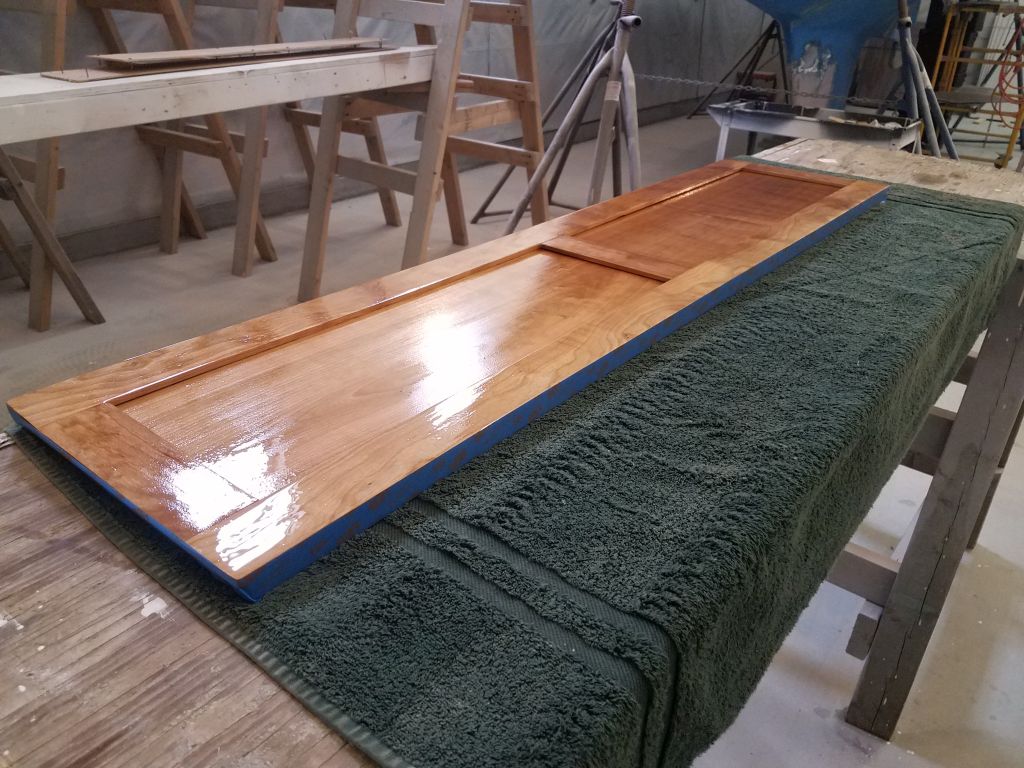
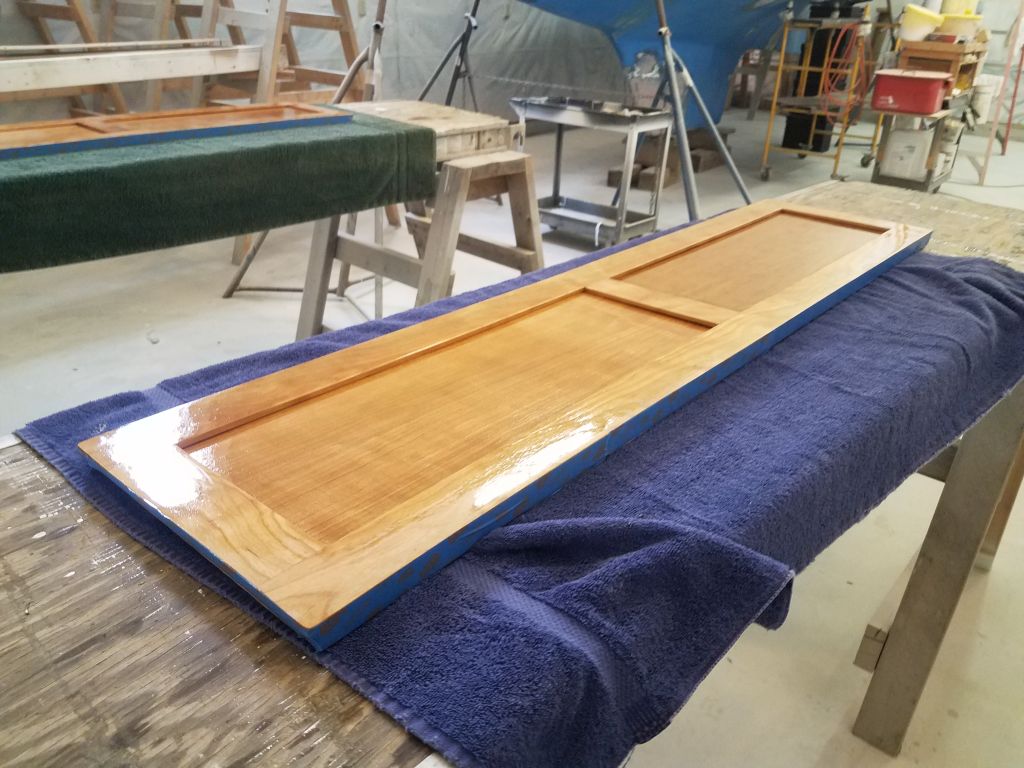
To wrap up the day, I sanded the new forward cabin doors and installed a second coat of varnish to one side of each.  Since both sides of these doors would be exposed during normal usage, I’d need to varnish all surfaces fully, which would take a couple weeks of elapsed time, so I had to be sure to get a coat on each day that I could.

Total time billed on this job today:   7 hours

0600 Weather Observation:  Cloudy, drizzle, 40°. Forecast for the day:  Showers, then cloudy, 54°

Older posts Newer posts