(page 5 of 6)

Aventura 16

< Back to Aventura

Monday

In a short work session after an appointment ran much longer than expected, I managed to complete another round of finish sanding on the deck areas (including four loose hatches), this time with a vibrating finishing sander and 120 grit paper to take care of the fine fairing compound I applied last time, as well as to sand all other areas and get into some of the corners that I’d not yet addressed.

In the immediate future I’d finish up the major deck surface prep with some hand and detail work as required, and do a final assessment of all areas to determine whether any additional work would be required before final high-build primer preparations.

Total time billed on this job today: 2 hours

0600 Weather Report:
30°, clear. Forecast for the day: sunny and breezy, temperatures in the high 40s.

Aventura 15

< Back to Aventura

Thursday

I spent most of the day sanding the decks, eventually going over most areas four separate times.  I began with the main deck areas and cockpit, where I sanded with two grits of coarser paper the excess skim coat, leaving it only in the areas of remaining nonskid pattern as intended.  During this round, I also sanded the poop deck and ongoing recore patches as needed.

With that round of sanding complete, I switched tools to a finishing sander and sanded the entire decks twice more, this time including all the areas I’d not yet sanded–the cockpit seats and well, the cabin trunk, and other areas.  Since these surfaces were original gelcoat, sanding was fairly straightforward and quick, leaving only corners and detail hand-sanding to complete another time.  I went over all the nonskid and patched areas as well, bringing all surfaces close to their final requirements with some minor spot and pinhole fairing remaining.

After cleaning up, I applied minimal amounts of epoxy fairing material as required, mainly on the poop deck, former stanchion base locations, and a few small lows on some of the patchwork.


Total time billed on this job today:  6 hours

0600 Weather Report:
45°, cloudy.  Forecast for the day:  cloudy, chance of showers, around 60

Aventura 14

< Back to Aventura

Wednesday

Another round of sanding on the deck patches brought them nearly to finished tolerances, with mainly spot-filling remaining ahead.

The molded companionway hatch rails featured some cracking gelcoat, so I sanded these areas to remove loose material and prepare the rails for cosmetic repair.  Meanwhile, I sanded the loose hatches to prepare them for minor repairs as well.

I sanded the new fiberglass on the poop deck, removing hard edges and blending the outer edge as required into the adjacent deck areas.

Next, I cleaned up the deck and interior, and spent a little time masking over some of the fastener holes from inside to allow me to fill from the outside.  Then, I applied a coat of fairing filler over the decks, mainly as a skim coat to fill remnants of the old nonskid pattern. I’d sanded this mostly smooth earlier, but there were areas where the pattern was too deep to completely remove.  At the same time, I applied more of the filler to the deck patches to take care of the remaining low spots as needed.

I applied a coat of fairing compound over the new poop deck, filling the material weave and any minor low spots.

In the cabin, I sanded and applied filler to the inside of the instrument holes patch.

After final preparations, I filled the open edges off the rebuilt lazarette hatch with thickened epoxy filler, as well as around the opening for the recessed lifting ring.

fair8-102115


Total time billed on this job today:  4.5 hours

0600 Weather Report:
40°, mostly cloudy.  Forecast for the day:  partly sunny, low 50s


Aventura 13

< Back to Aventura

Tuesday

Starting once more at the controls of a sander, I went over the various deck areas as needed, sanding the fairing compound and revealing, as expected, various low spots and areas requiring additional attention.

At the poop deck, I sanded the structural filler as required, working to form relatively clean and true edges at the locker openings that would allow me to continue rebuilding work before fine-tuning the openings’ cosmetics later on.

Next, I prepared additional fairing compound and installed a second round on all the deck recore patches, focusing on a clean contour and consistency with the adjacent areas.  Small voids would be easy to fill later.

Inside the cabin, I prepared as needed the inside faces of the old instrument hole patch and deck water fill patch, and applied a layer of fiberglass over these areas.

Back at the poop deck, I used some clear pattern material left over from an upholstery job to create a pattern for the new fiberglass top skin.  Then, I mixed a small batch of filler and took care of any minor voids from the first round, and used it to fill and wet out the top side of the core material.  I left this application to cure over lunchtime, and while I prepared the fiberglass for the deck.

Down at the bench, I cut two layers of fiberglass to fit, with well-staggered joints between the pieces of each layer, then wet out the layers and applied them to the deck.

With nice weather on hand, and effectively all done that could be done, I used the remaining couple hours of the afternoon to work on  winter details of some of the storage boats outdoors.

 
Total time billed on this job today:  5 hours

0600 Weather Report:
37°, rain showers.  Forecast for the day:  showers ending in the morning, becoming partly sunny and warming to the low 60s.

Aventura 12

< Back to Aventura

Monday

After the usual water wash, I prepared all the newly-laminated deck patches for the next steps by sanding as needed, concentrating on the edges to ensure they were flush with the surrounding deck areas, and lightly scuffing the entire areas as required.

After cleanup and final preparations, I applied a coat of epoxy fairing compound to all areas.

On the poop deck, I removed the weights from securing the core, and lightly sanded the area as required.

sand1-101915

Next, I cut pieces of fiberglass to fill in several of the voids I’d left in the core, specifically at the hardware locations and other larger, deeper areas.  I wet out and installed the fiberglass, and later filled in other areas with high-density structural filler.  At the edges of the two hatch openings, where I’d omitted the core, I strove to define the inner edge as cleanly as possible at this early stage, though final shaping would require additional applications later.

Meanwhile, I prepared new core for the lazarette hatch itself, and, after final preparations, installed it in thickened epoxy adhesive, securing the two hatch skins together with weights and screws through some of the existing holes to align the two panels properly.  Later, I’d fill the edges with thickened epoxy

On deck, I removed the metal companionway tracks to allow better access to the surrounding areas for surface preparations.

Finally, I prepared several existing hardware locations–more specifically their fastener locations–by overboring the fastener holes, reaming out the core in a larger area so I could later fill the voids with thickened epoxy. which I’d do during later deck preparation steps.

Total time billed on this job today:  6 hours


Aventura 11

< Back to Aventura

Friday

I removed and set aside the sand weights and plastic that I’d used to secure the new core, and, with the core exposed, lightly water-washed and sanded as needed to remove any adhesive ridges and the like to prepare the core for fiberglassing.  I also sanded the mast step area and other deck patches (instrument holes and water fill) as needed.

Once I’d vacuumed up the sanding debris, I used paper to create patterns for the new fiberglass deck skin, and afterwards filled the kerfs and any small voids around the edges with thickened epoxy (oops–no photos of that stage).

Down at the bench, I cut two layers of woven fiberglass for each of the recored areas–one layer extending to the edges of the ground flanges, the second layer about an inch smaller on each side.

Before jumping into an afternoon of laminating, I worked on the poop deck to fill as needed the outer edges with structurally-thickened epoxy, then installed the core pieces I’d cut earlier, covering with plastic and weighting down as needed.

poopdeck1-100915

Now I wet out and installed the two layers of fiberglass on each of the newly-recored areas, plus the mast step.

To round out the day, I applied a coat of epoxy fairing filler to the now-patched old instrument holes and water tank deck fill.

Total time billed on this job today:  4.5 hours

0600 Weather Report:
35°, mostly cloudy.  Forecast for the day:  rain, high in the 50s.


Aventura 10

< Back to Aventura

Thursday

After final cleanup and preparations, I installed new balsa core in most of the areas on deck (excepting, for the moment, the poop deck).  For each instance, I wet out the core on the bench, and wet out the edges and flanges of the deck area before filling, as needed, the space around the edges with epoxy thickened with structural fillers.  Finally, I applied thickened epoxy adhesive to the inner deck skin with a notched trowel and pressed the new core in place, weighting as needed.  The messy and time-sensitive nature of this work prohibited photos till the core was in place and weighted.

At the forward cockpit seat area, where I’d begin to rebuild the locker lid gutter, before installing core I added a tab of fiberglass where the gutter met the cockpit seat, and led it partially cure before next filling the gap above (originally filled with balsa core) with structural epoxy filler from the gutter side.  Once that had cured for a couple hours, sealing off the opening from that side and helping to support the little strip of top skin above, I continued with the core installation in that spot, filling in the rest of the gaps and edges with more structural filler and installing the core in thickened epoxy adhesive.

At the same time, I filled the outboard edge of the gutter with the thickened epoxy.

At the mast step, working in batches of several layers at a time to avoid overheating, I installed 10 layers of biaxial fabric to fill the area nearly flush with the adjacent tapered deck edges.  Some of the layers “grew” a bit when wet out, so I just let them wrap up the edges as needed, leaving the top edge for later trimming.

With all the core in place, I continued work on the old water deck fill and bulkhead patches.  After masking over the holes tightly from within, I installed some thickened epoxy to fill the holes and, after allowing it to cure for a while, appliied layers of fiberglass from the outside.  Sometime later I’d complete the patches from inside

Preparing for the poop deck rebuild, I laid out several pieces of core as needed, leaving core-free several areas around known hardware locations (mainsheet blocks and centerline mooring cleat).  Because of the way the inner skin tapered up to meet the top skin at the edges of my cut–the builders had created very broad, shallow tapers at the core edges during construction–I kept the new core back from those areas as needed, and also held the core back from the edges of the two locker openings to avoid the issue that had caused all the damage here in the first place.  I’d fill all these areas with solid material.

I’d had enough epoxy mixing for the day, and I didn’t think I had enough sandbags left, so I held off on installing this core for the moment, choosing instead to wrap up the day with framing some of the boats outdoors to prepare for their winter covers.

Total Time Billed on This Job Today:  5.25 Hours

0600 Weather Report:
40°, clear.  Forecast for the day:  Sunny, 60.


Aventura 9

< Back to Aventura

Wednesday

With a late start after a morning appointment, I got back to work on the hull, and once more prepped and sanded the remaining patches on the keel, completing the repairs there for now

I removed the remaining bits of old core from the lazarette hatch that I’d disassembled earlier, and sanded the surfaces clean to prepare for rebuilding.  At the same time, I sanded the forward hatch and cockpit locker hatch to begin the necessary preparations there.

hatches1-100715

During my initial round of “uncoring”, I’d left alone for the moment the poop deck.  Now I went ahead and cut off the top skin over the entire area, staying back far enough to remain within the boundaries of the core within.  After removing bits of old core that remained, I sanded the whole area, and ground tapered edges as needed to prepare for new material during a later stage of reconstruction.  I saved the old top skin so I could later recreate the raised hinge mounts for the hatch.

After cleaning up the boat and shop from the past few days’ efforts, I got back to work on the areas requiring new core, and, using a variety of tools, stiff sandpaper, and whatever was neeeded, reamed out any remaining old core from beneath the edges of the repair zones before blowing out the gaps with compressed air and vacuuming the remains.

With green masking paper, I prepared simple templates of the various areas, which I used to cut core to fit or, in the case of the mast step area, fiberglass to till the void.

As a first step in the ultimate repair of the cockpit locker gutter system, which had pulled away at the forward and outboard edges, I prepped and cleaned up the area as best I could, and forced a thickened epoxy adhesive into the cracks before clamping the gutter tightly, and applying weight to the inner skin of the forward cockpit seat.  This portion of the repair would hold the gutter where it needed to be as I continued work nearby, and would better allow me to address a more structural repair a little later.


Total Time Billed on This Job  Today:  5.75 Hours

0600 Weather Report:
40°, mostly clear.  Forecast for the day:  Mostly sunny, near 70

Aventura 8

< Back to Aventura

Tuesday

Beginning once more with the hull, I sanded the keel patches as needed, revealing a few lingering low spots on the port side; the starboard side patches were looking good.

After cleanup, I applied a third round of fairing compound as required.

After tooling up, I go to work on the decks.  The sidedecks and foredeck, and cockpit sole, featured a molded nonskid pattern–the original surface–that I needed to remove to prepare the deck areas for new paint.  Other areas of the deck had no molded pattern, and with original gelcoat on those surfaces I’d get to them during a later round of finish sanding.

nonskid1-100615

Starting with the cockpit sole, I spent the remainder of the day removing the molded nonskid pattern from the entire boat, starting with 40 grit paper and finishing up with 80 grit.  Because of the way the pattern was molded, it was deep enough in some areas as to resist complete removal, at least without removing altogether too much material.  So I balanced the need to remove the pattern with the practical consideration of leaving the gelcoat as intact as possible.  Later, as needed, I’d fill any remaining vestiges of the old pattern with epoxy fairing compound as I continued work elsewhere on deck.

Afterwards, filling in some time before an appointment in the afternoon, I disassembled the lazarette hatch for rebuilding, and removed hardware from the forward hatch to prepare it for sanding as I continued work on deck repair and surface prep.

Total Time Billed on This Job Today:  5.75 Hours

0600 Weather Report:
40°, mostly clear.  Forecast for the day:  sunny, near 70.

Aventura 7

< Back to Aventura

Monday

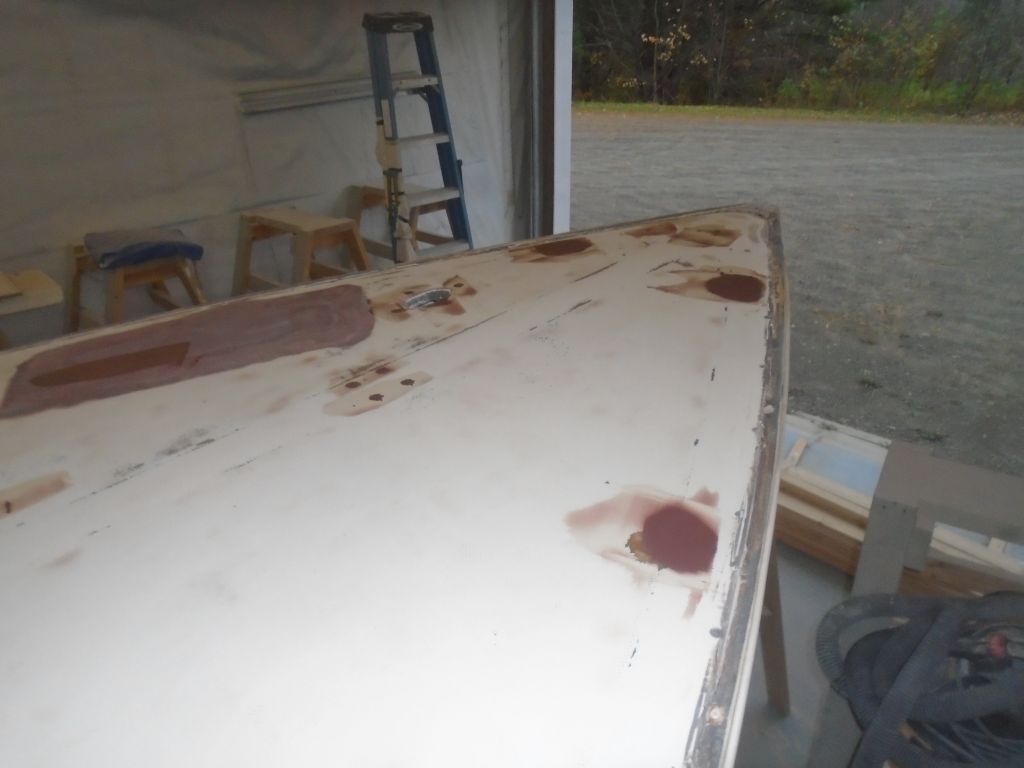
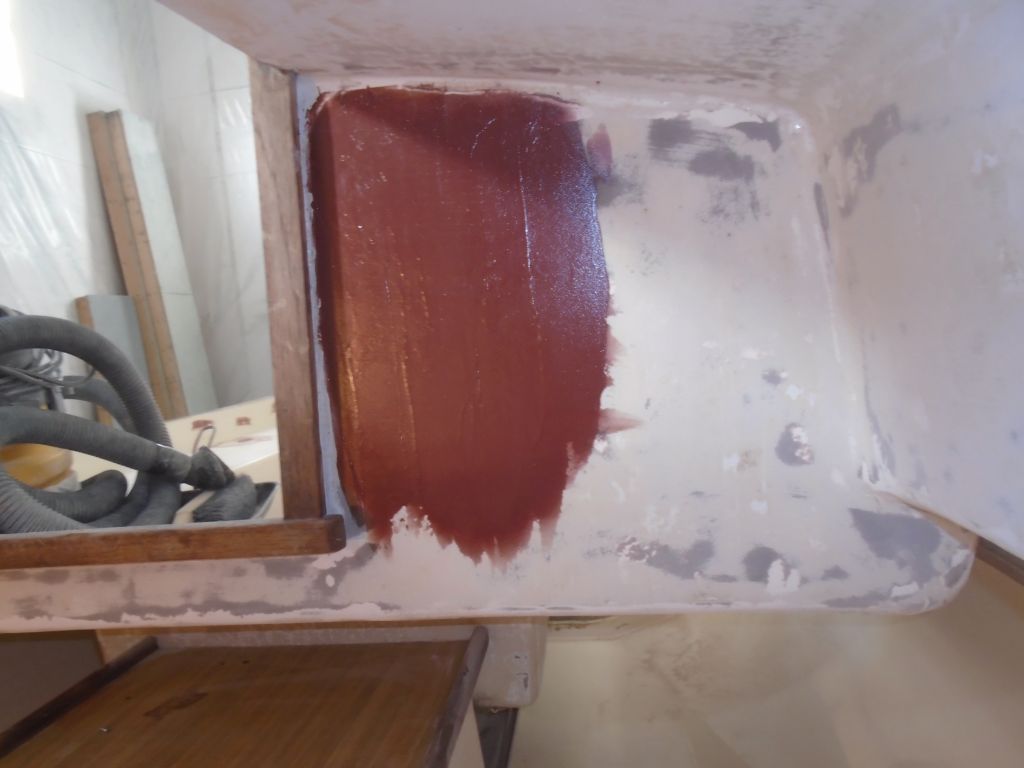
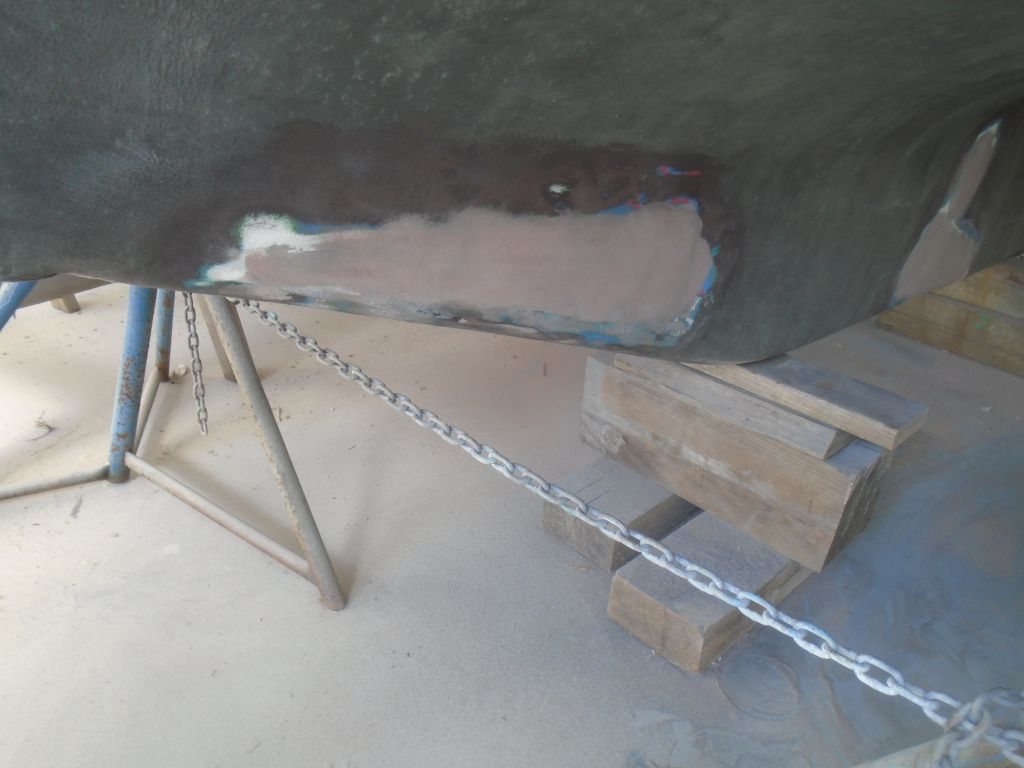
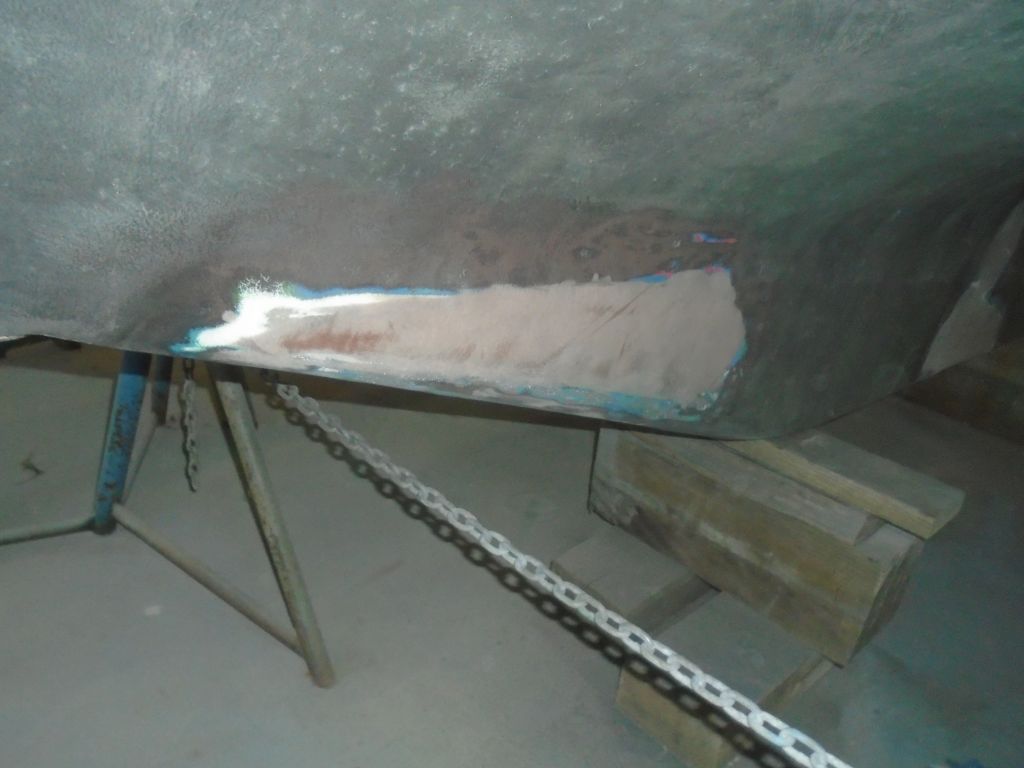
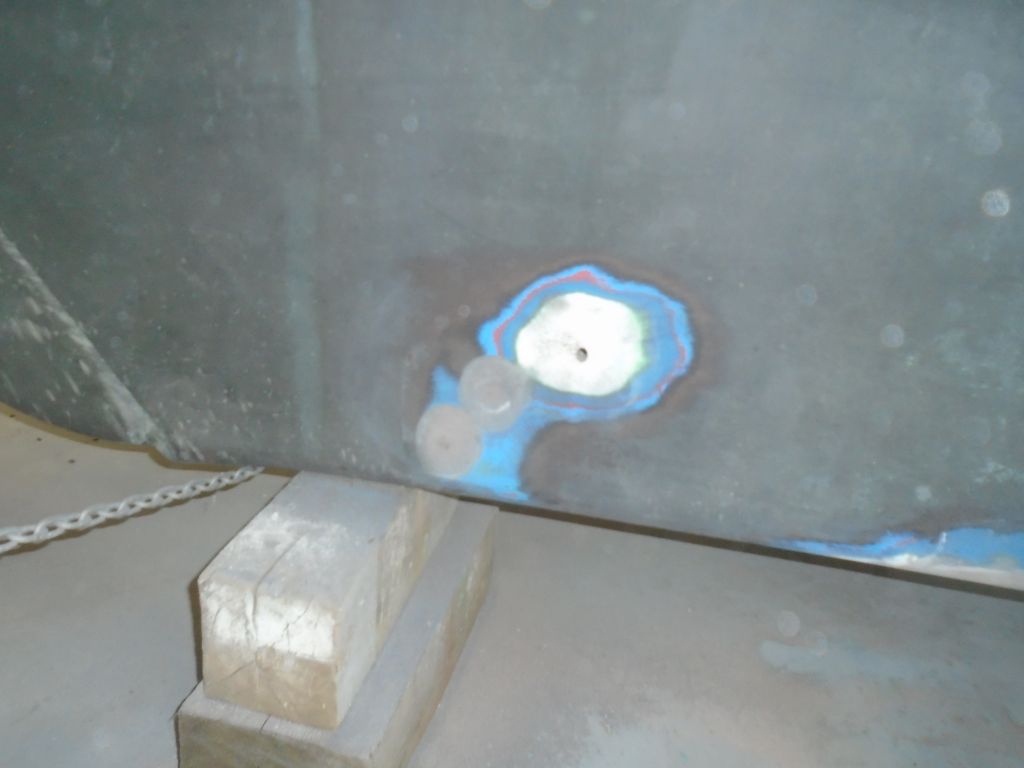
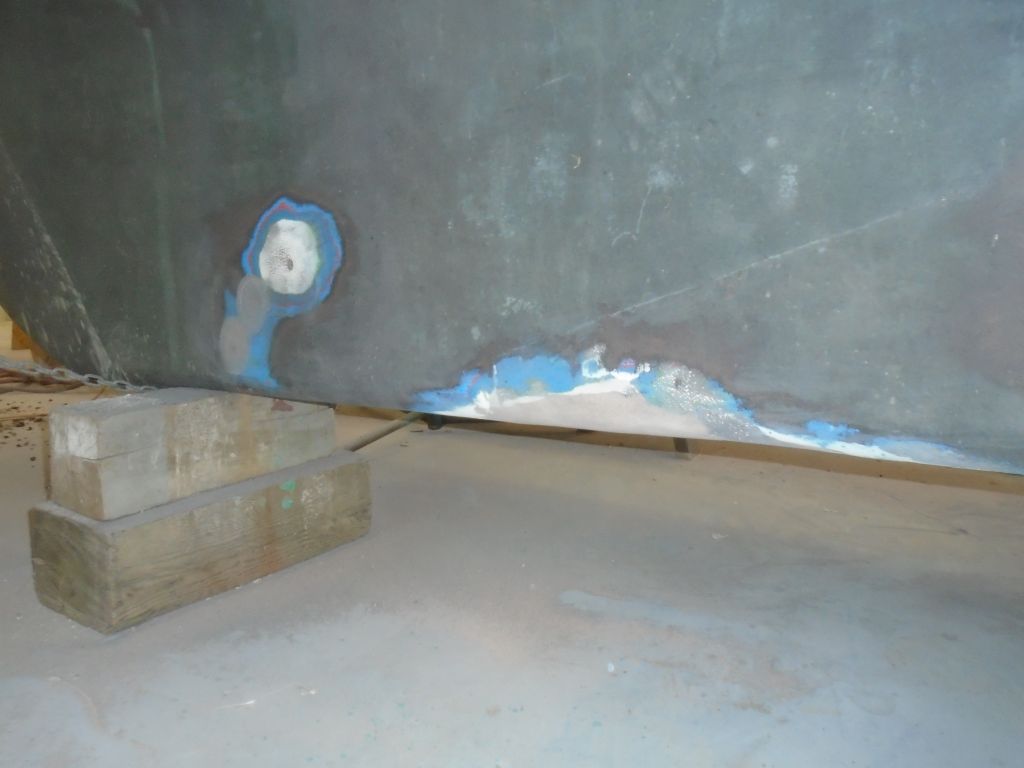
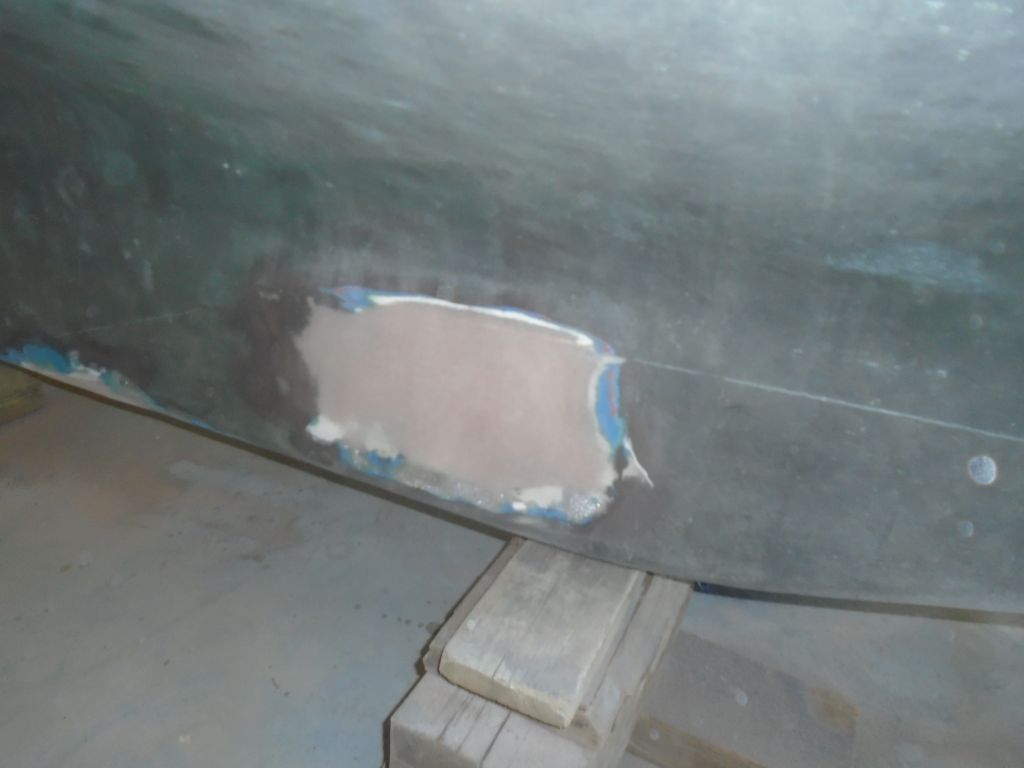
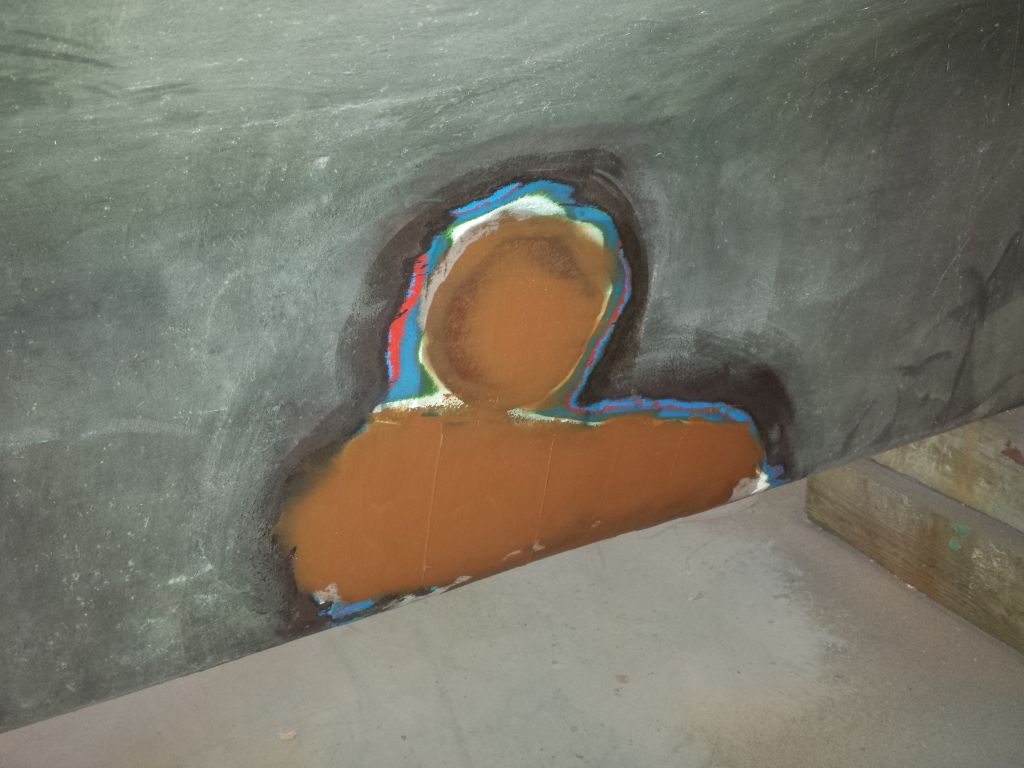
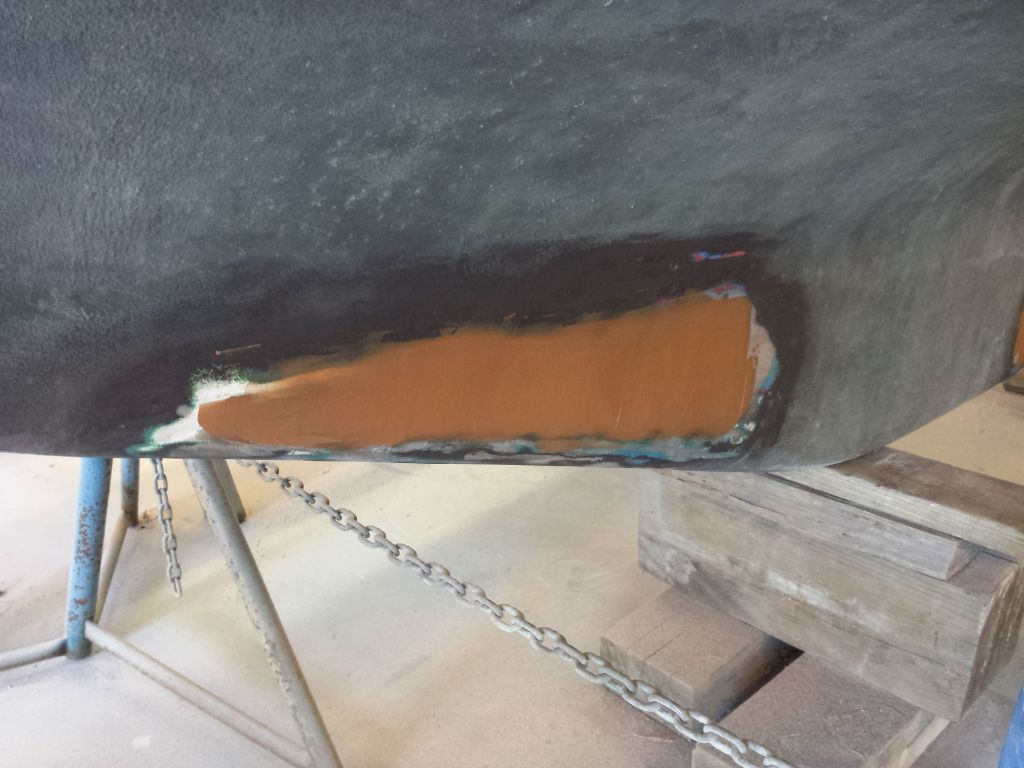
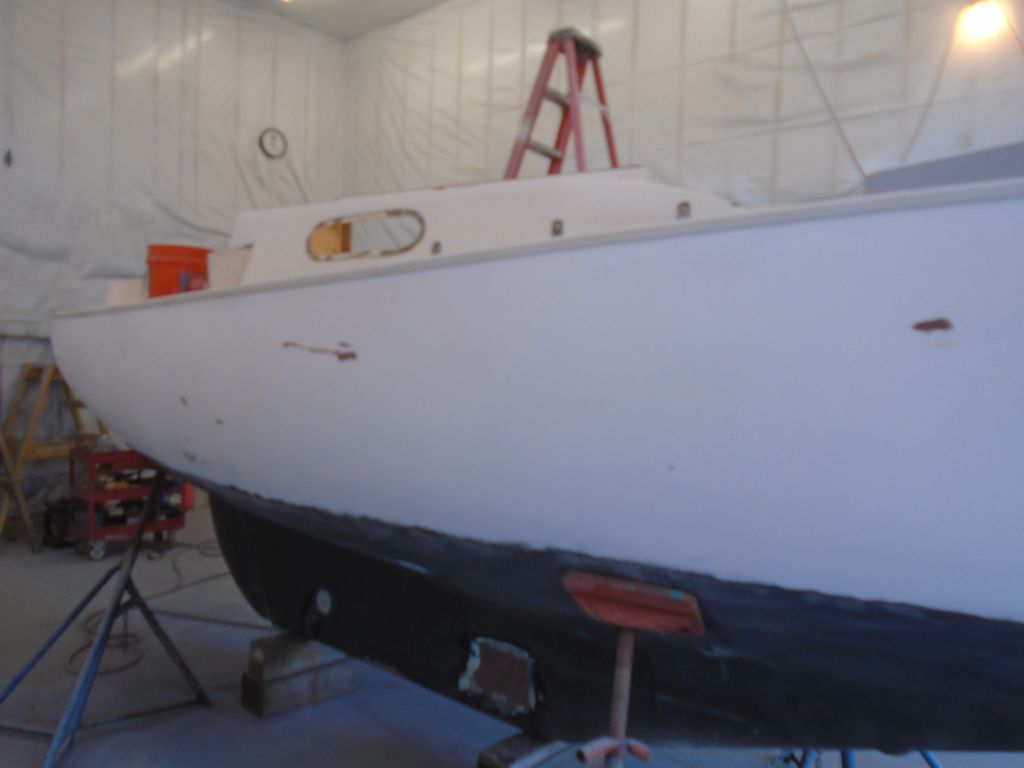
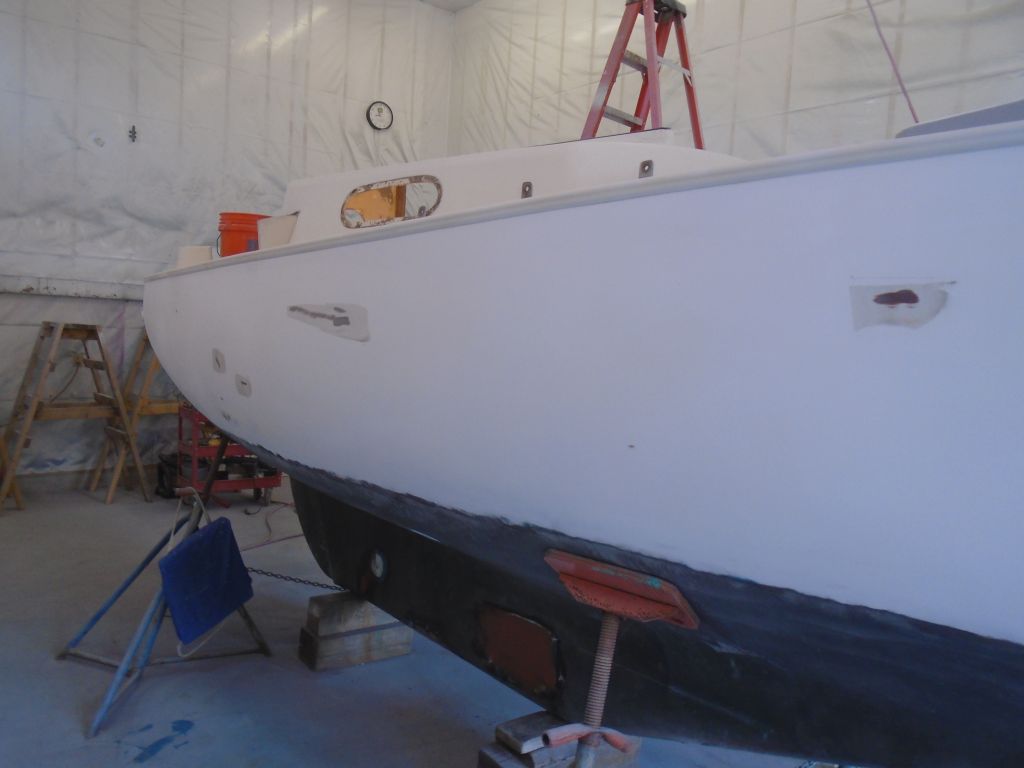
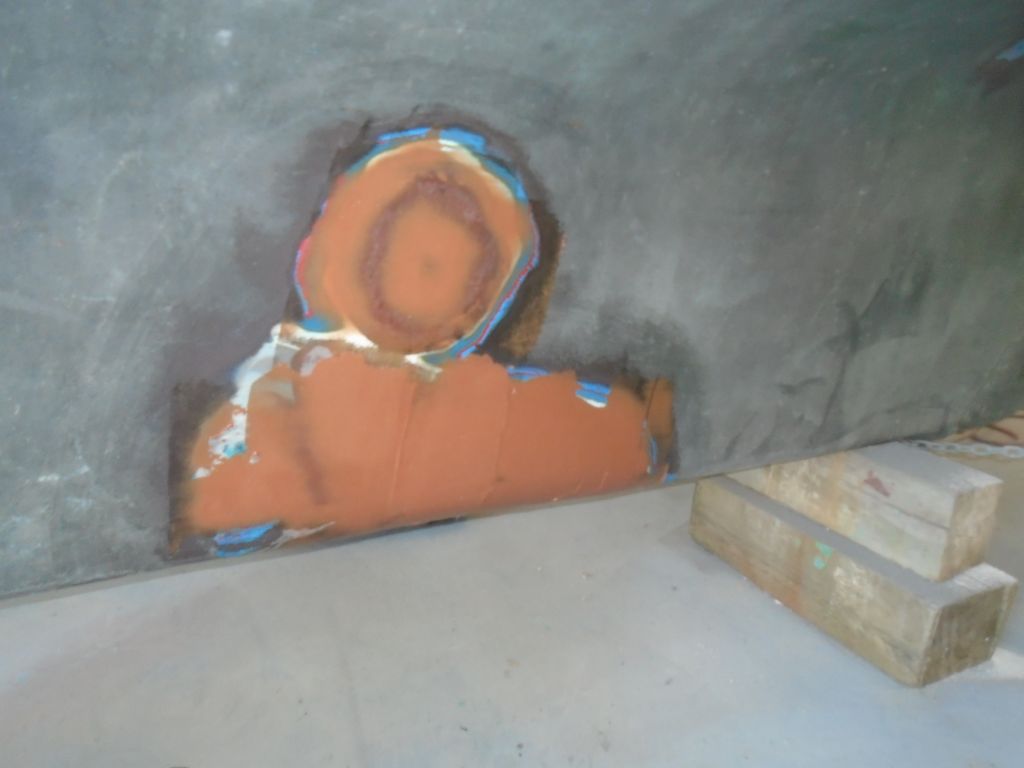
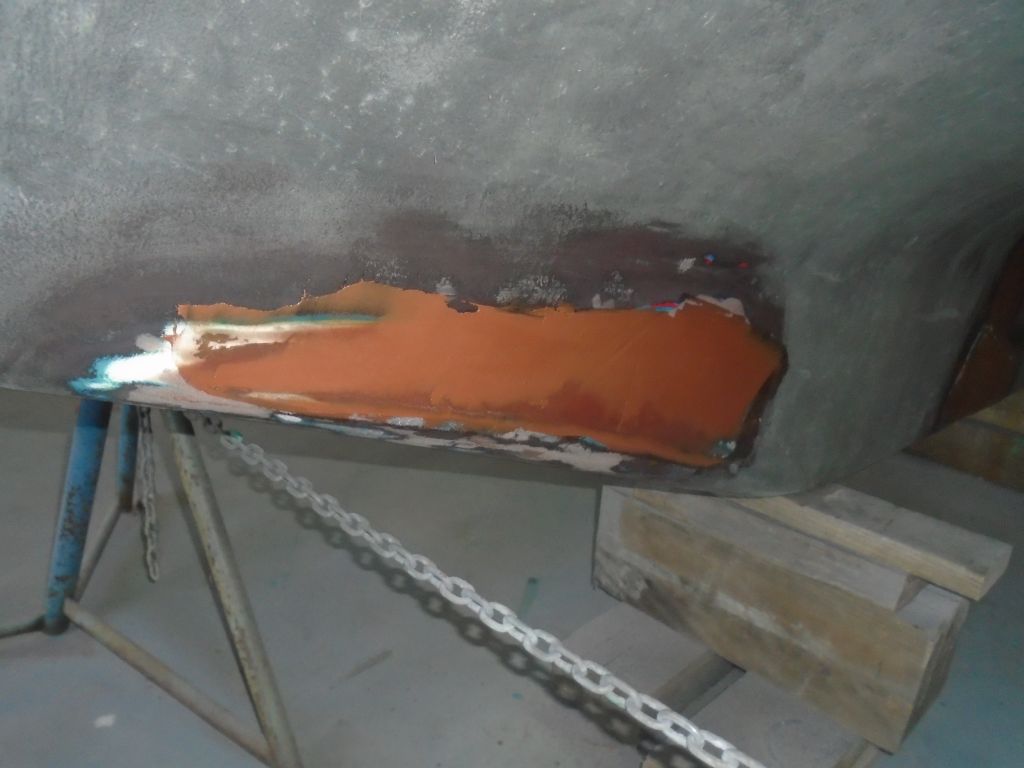
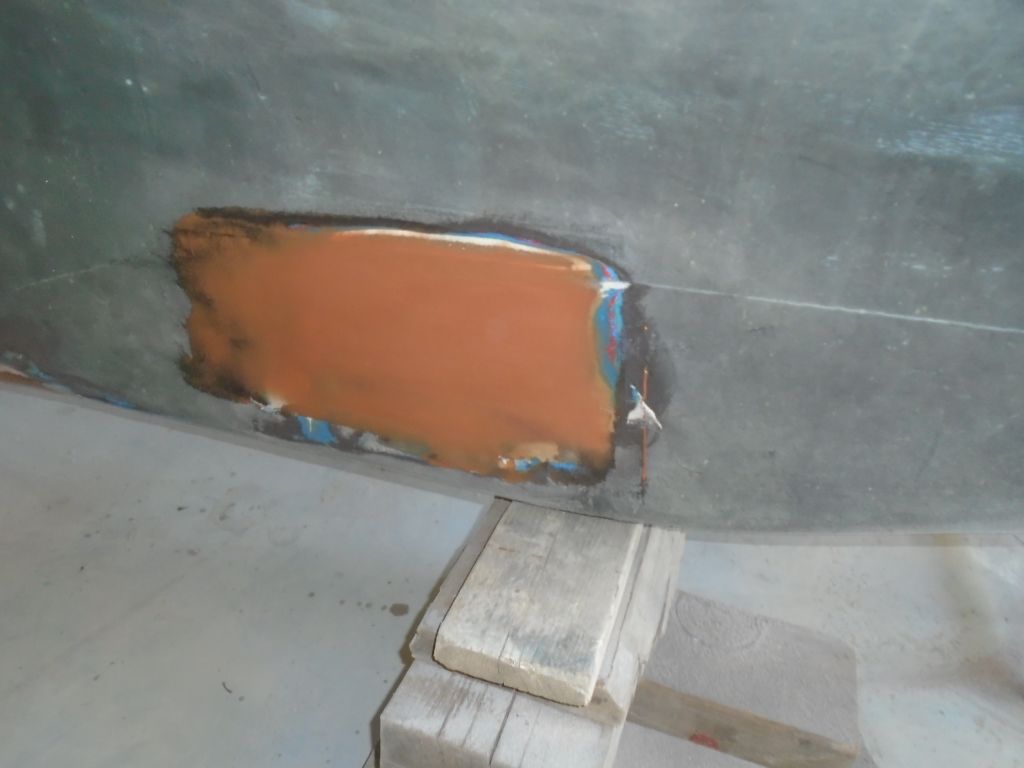
After a light water wash, as per usual, I sanded the various patches on the keel as needed, and cleaned up to prepare for additional work and fairing filler as required.

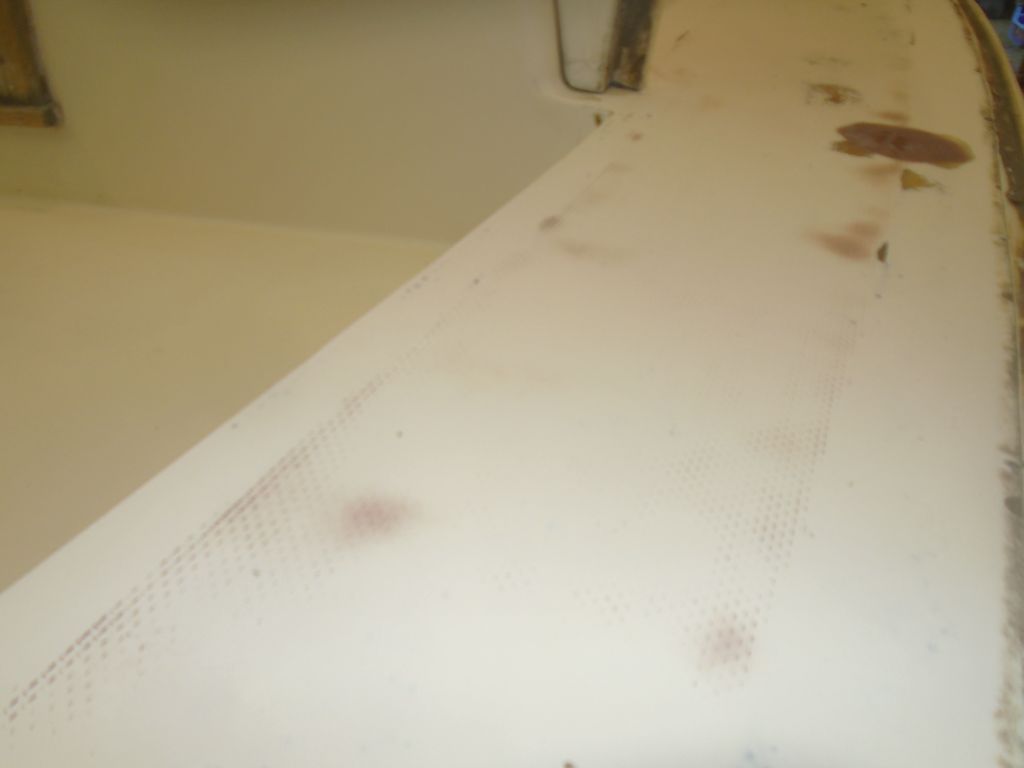
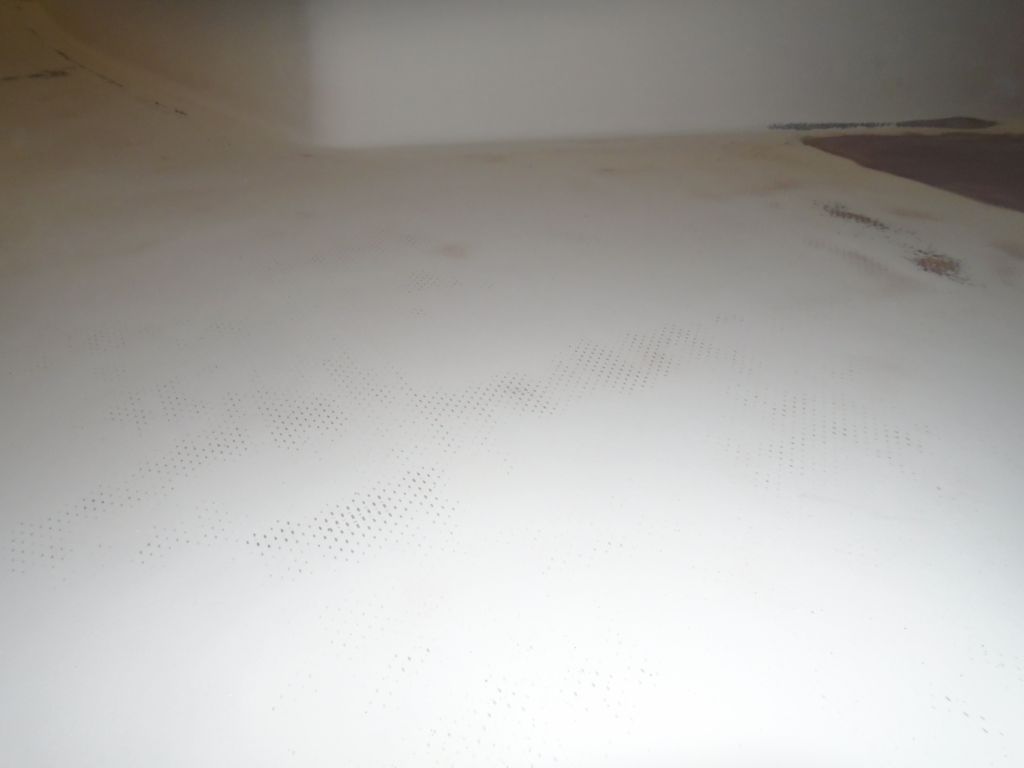
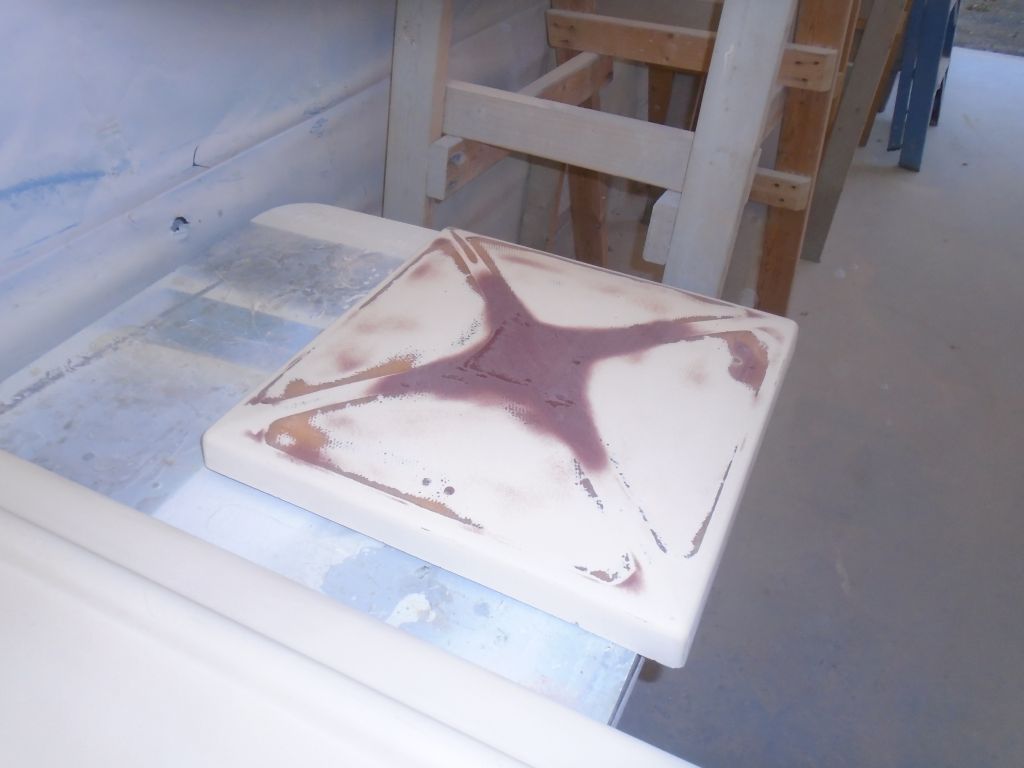
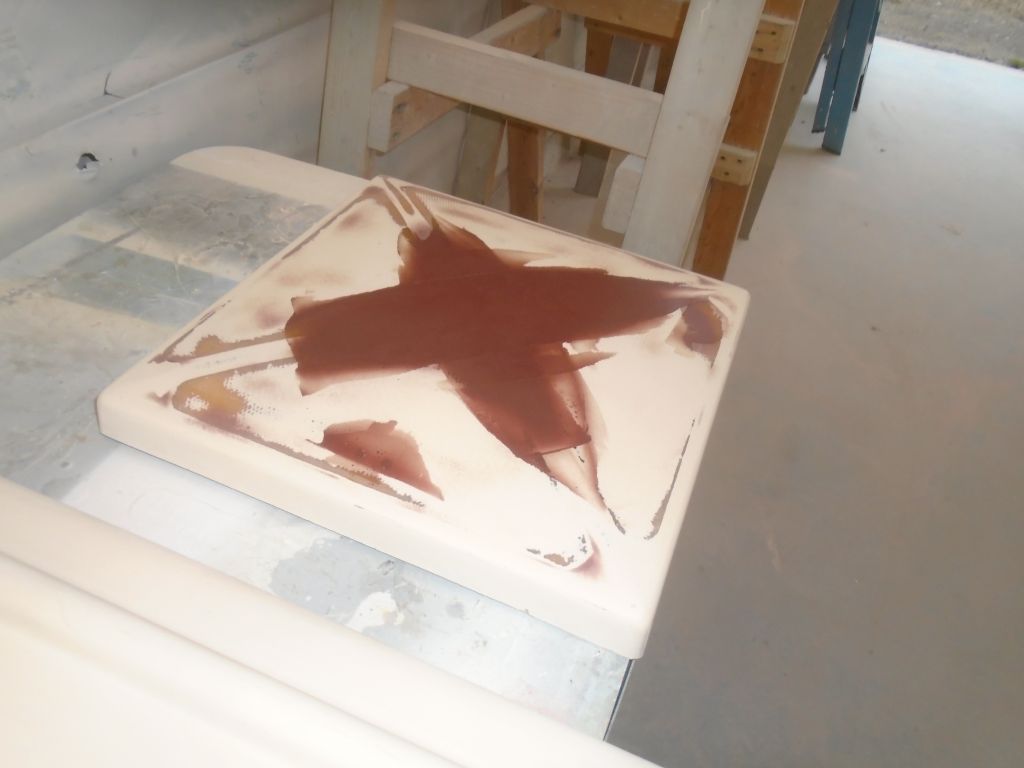
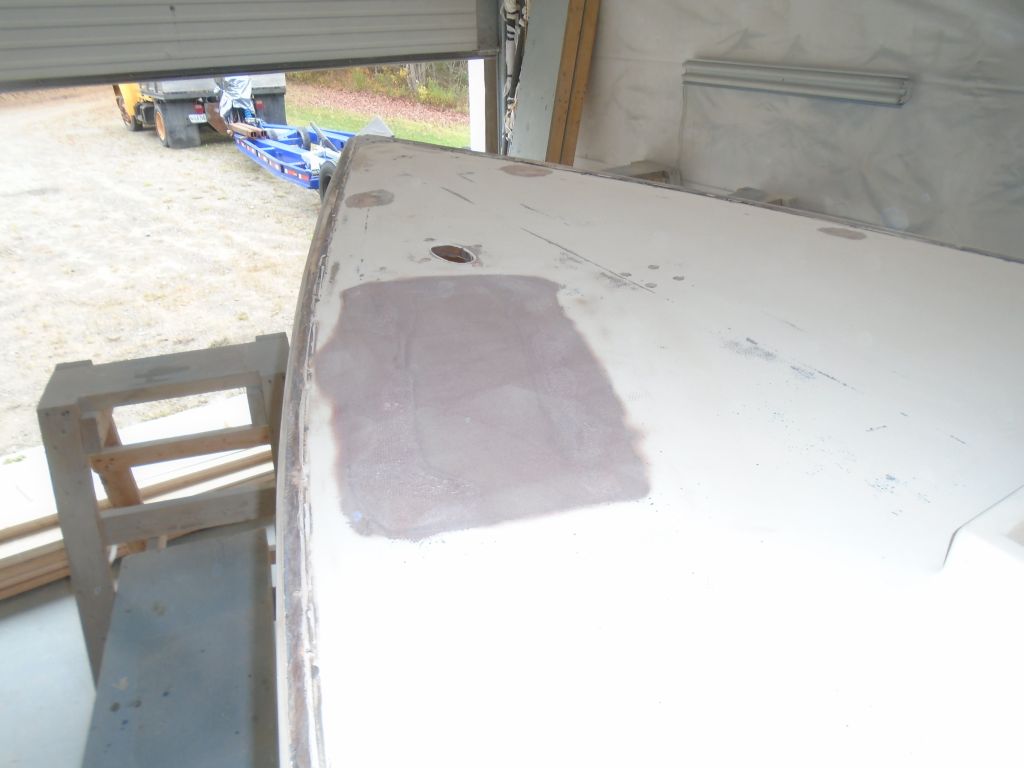
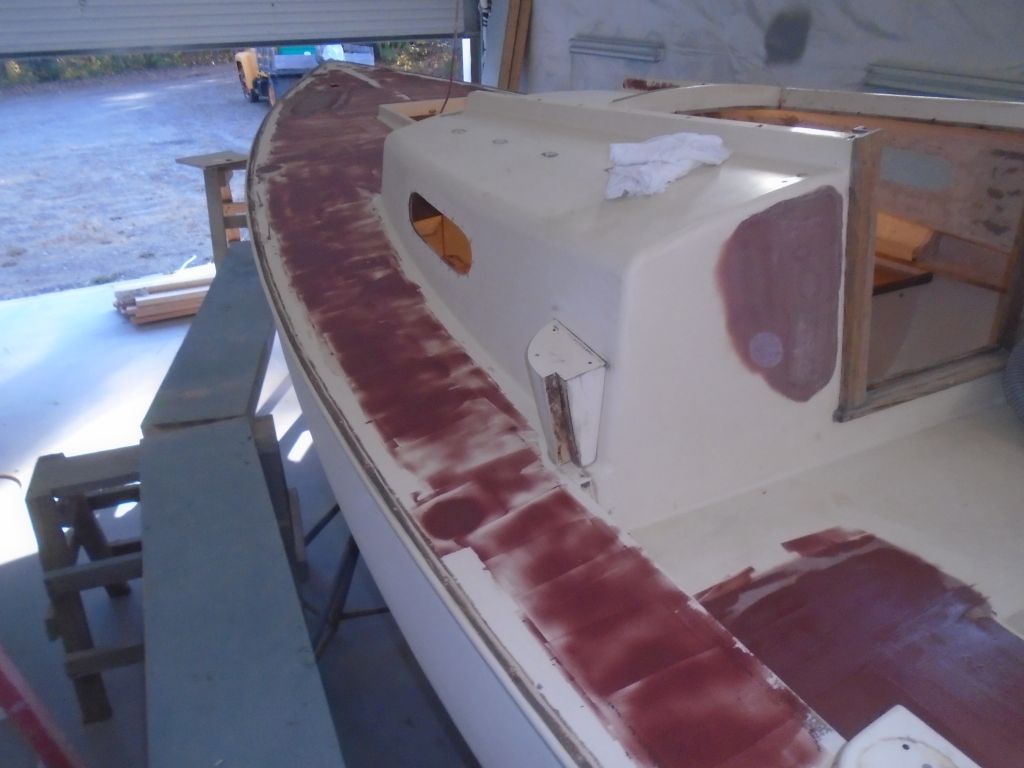
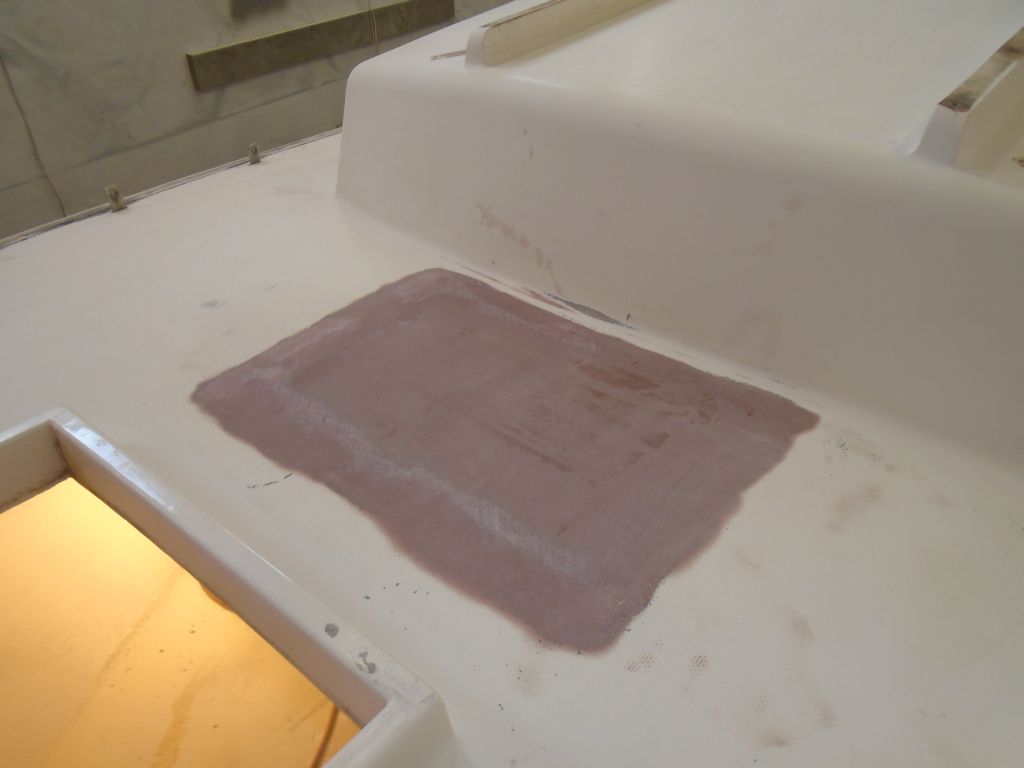
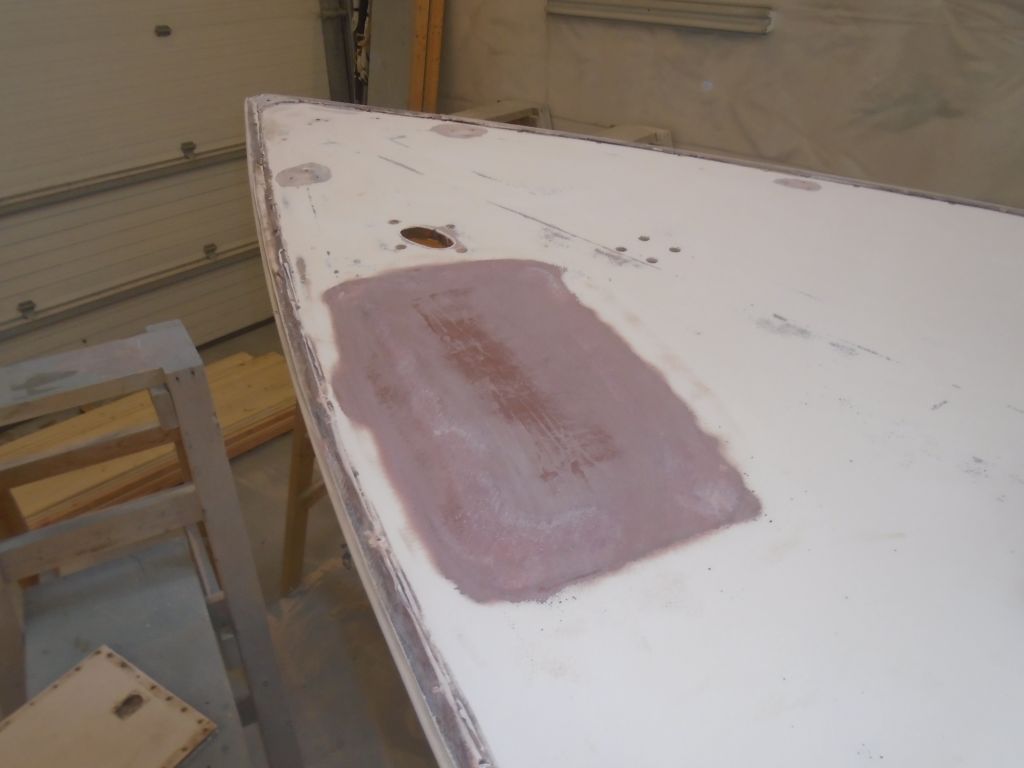
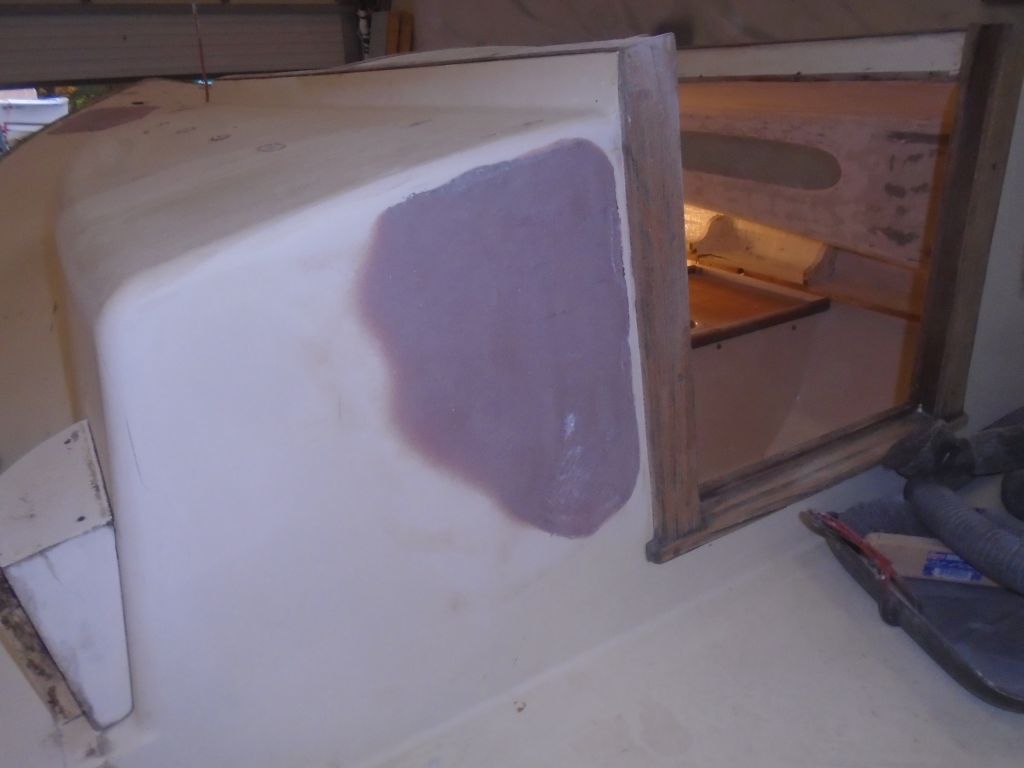
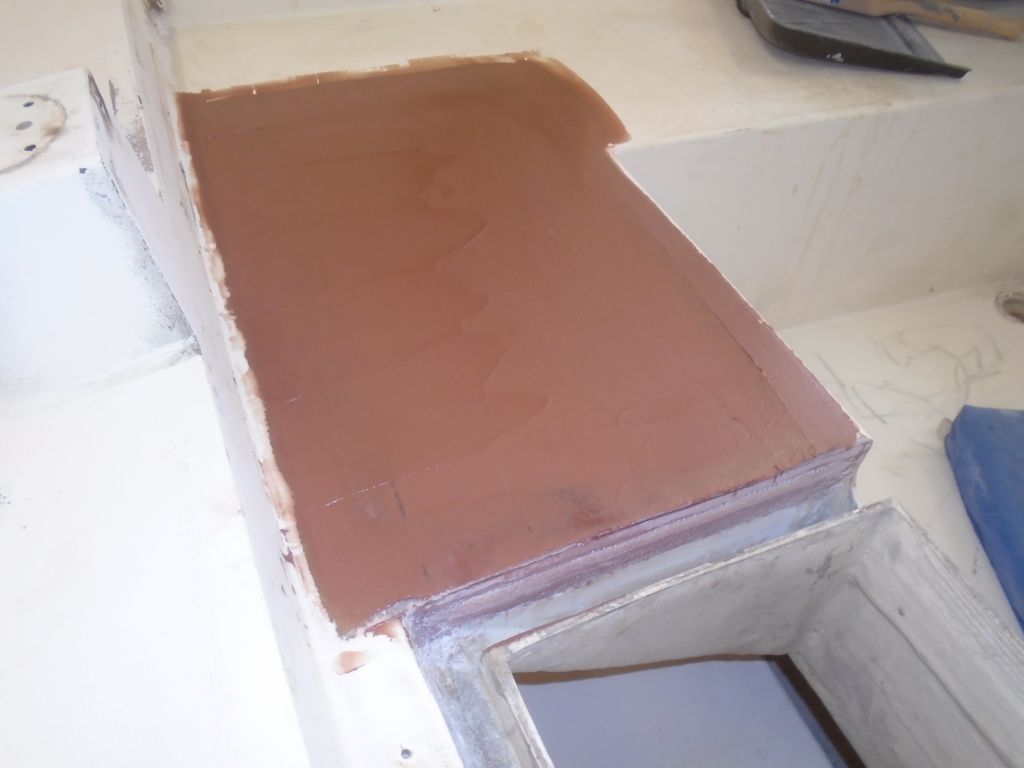
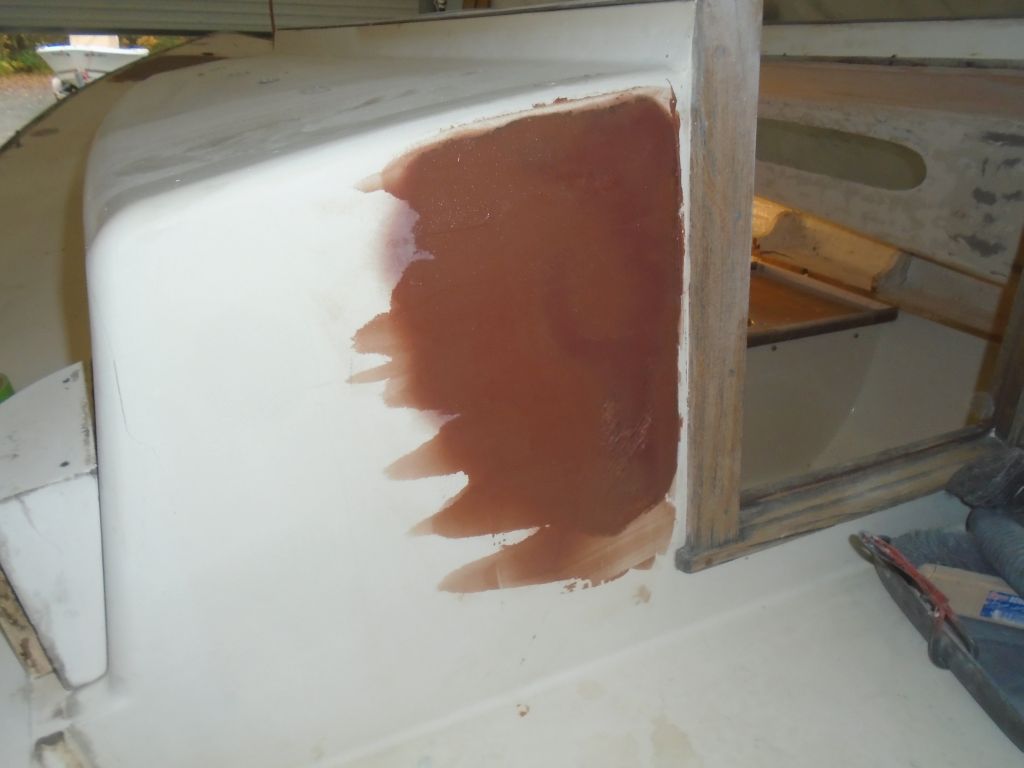
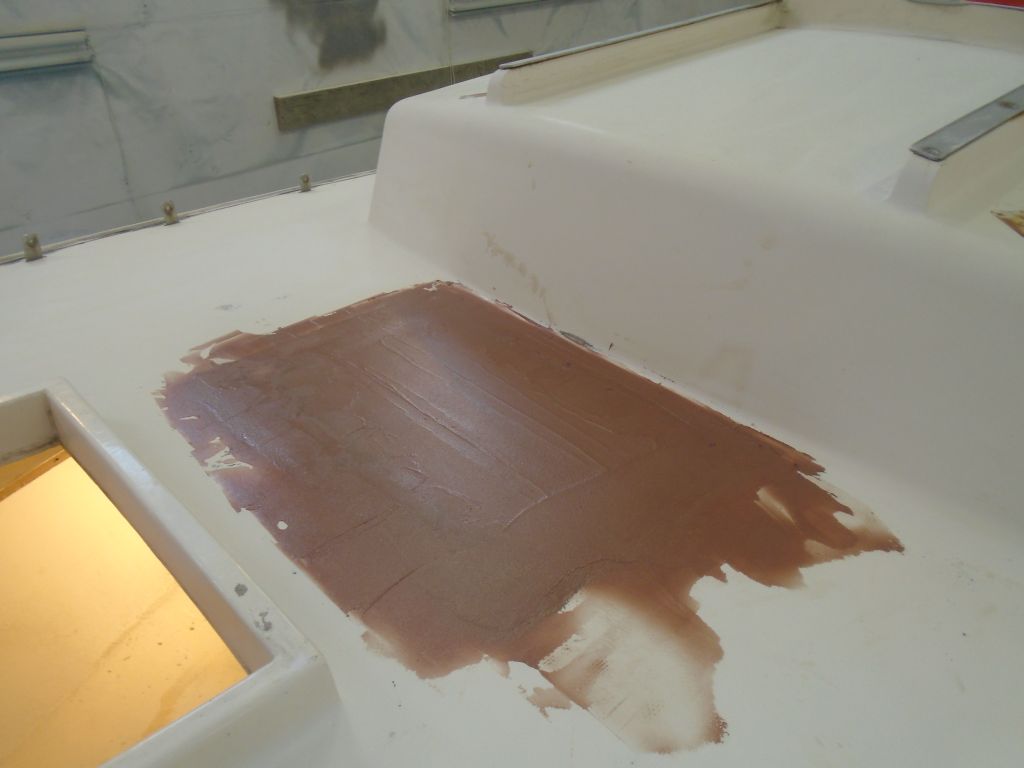
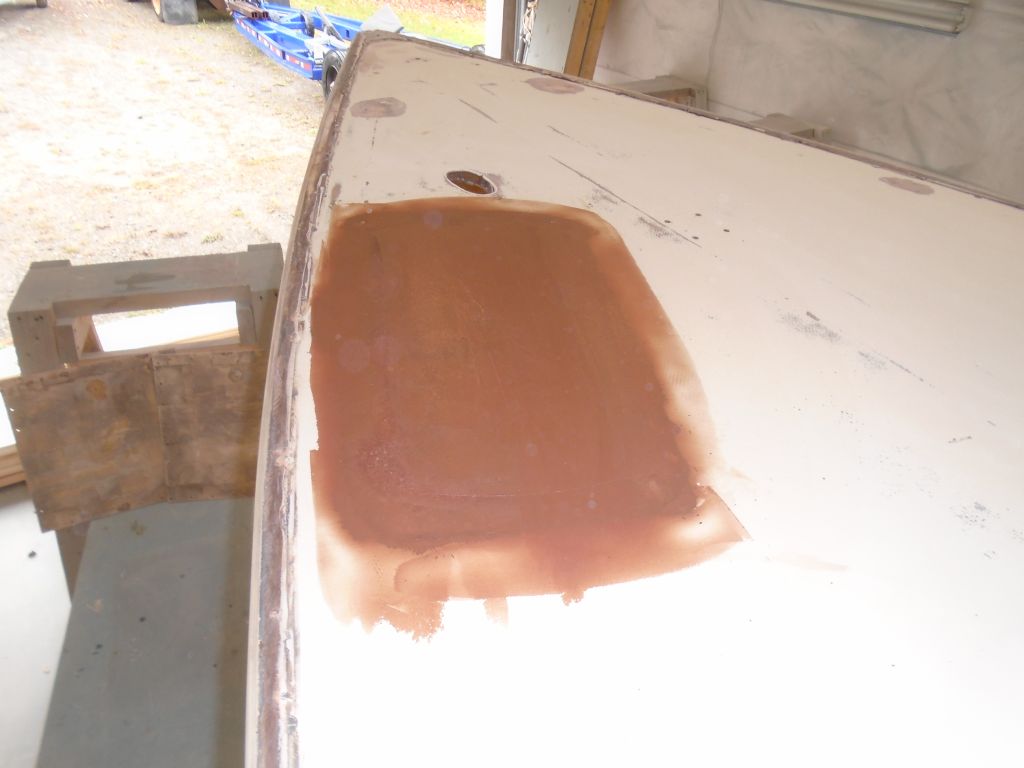
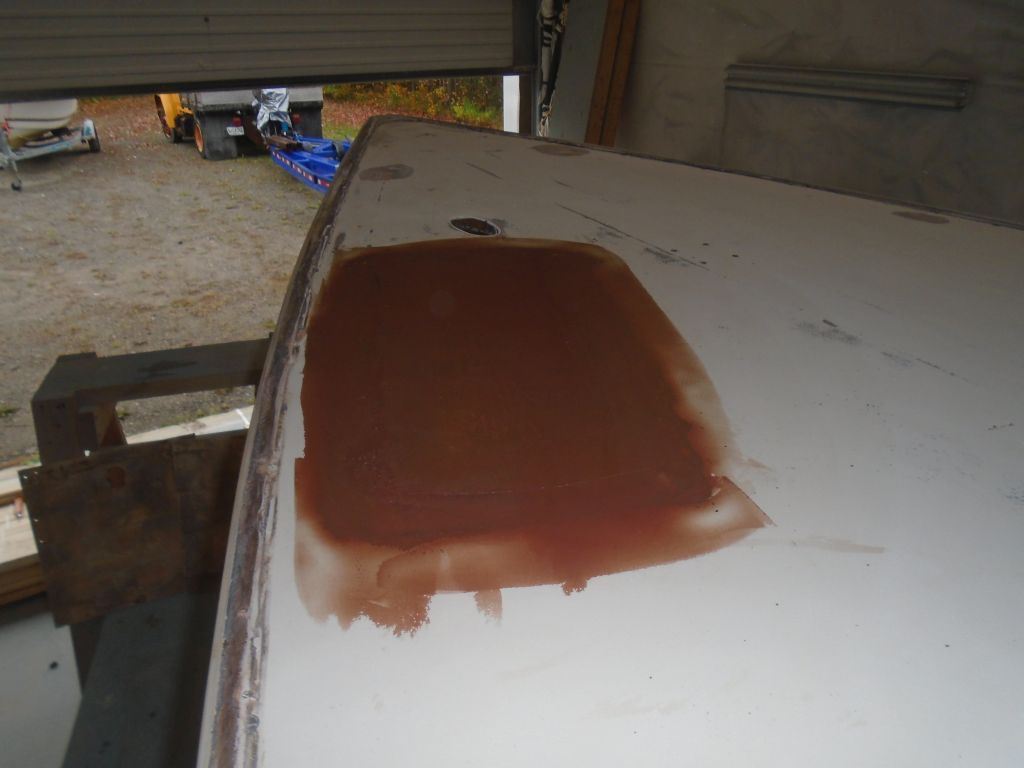
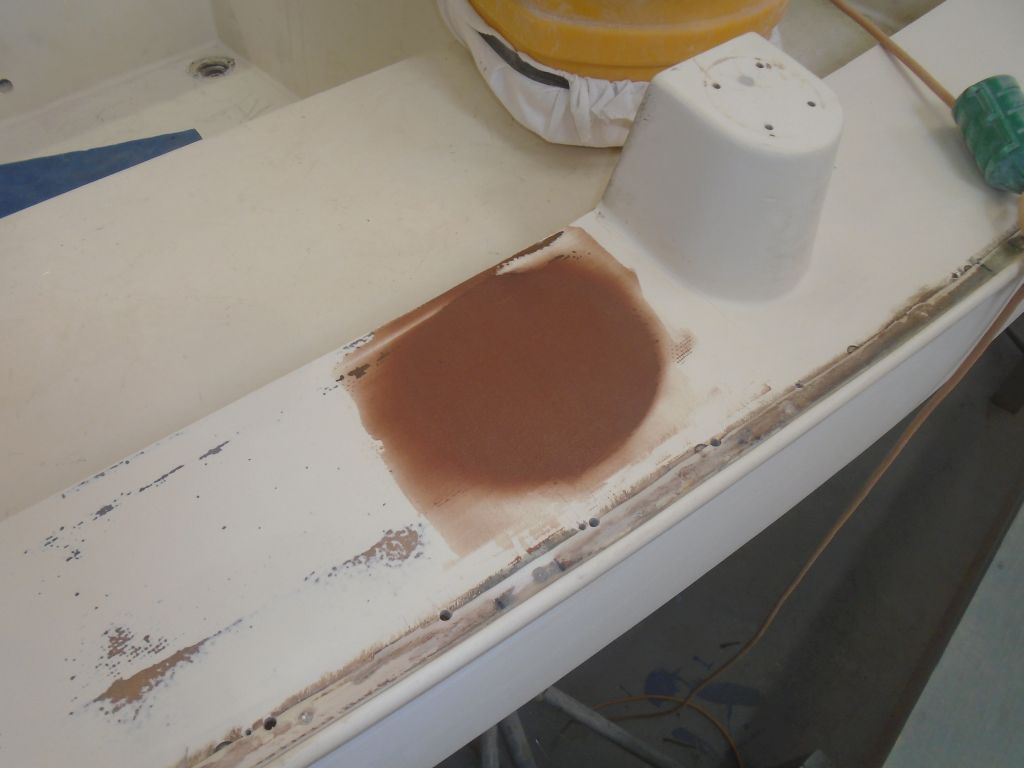
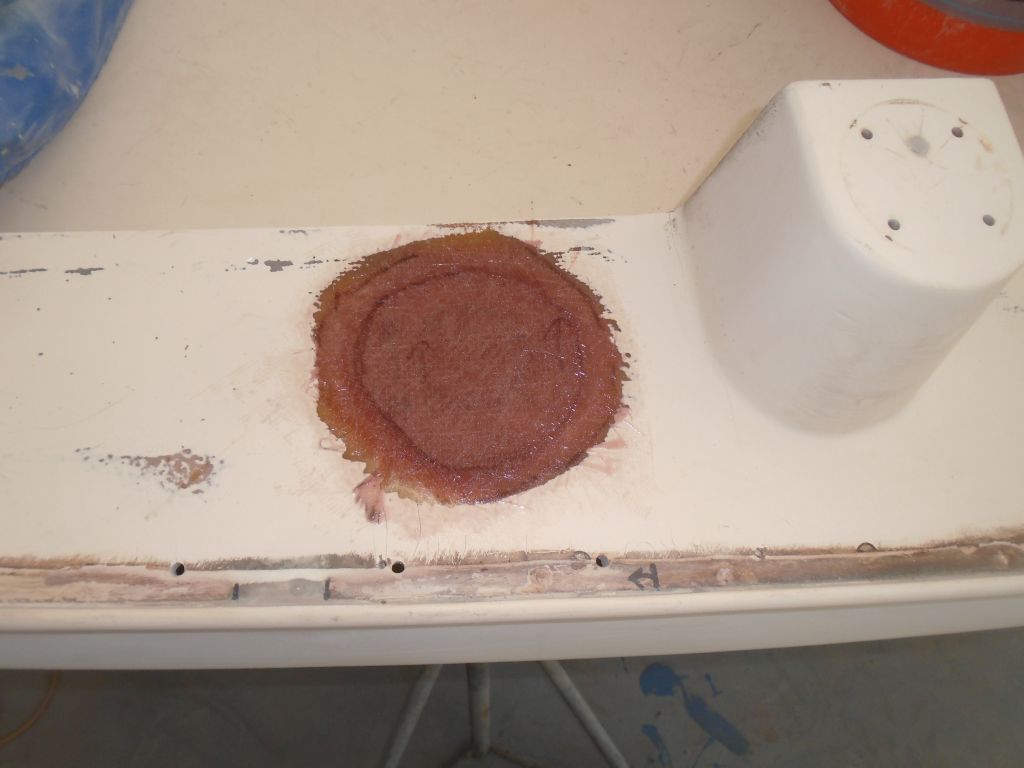
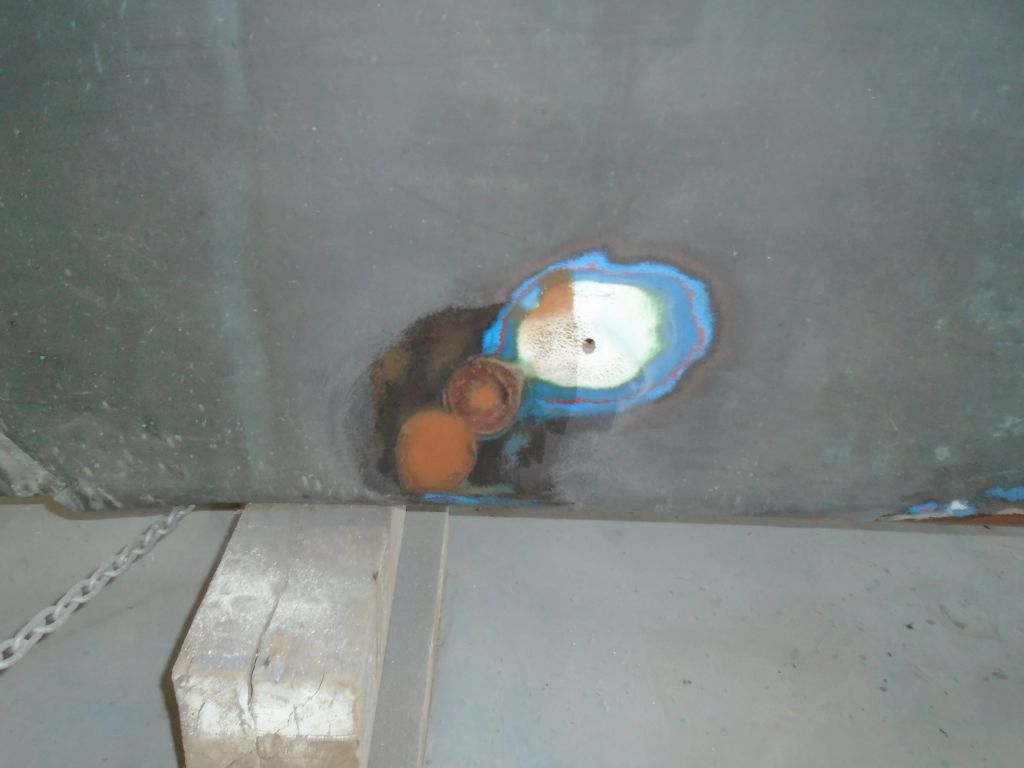
With a finishing sander, I lightly sanded the newly-filled gouges in the topsides.  The smallest areas were fine after this round, but a few of the deeper areas would require additional fairing filler, which I applied now using a fine, smooth gray epoxy filler.

Next, I applied additional fairing compound as needed to the keel areas on both sides, concentrating on getting the overall shape and contours right rather than worrying about every ridge or minor void.

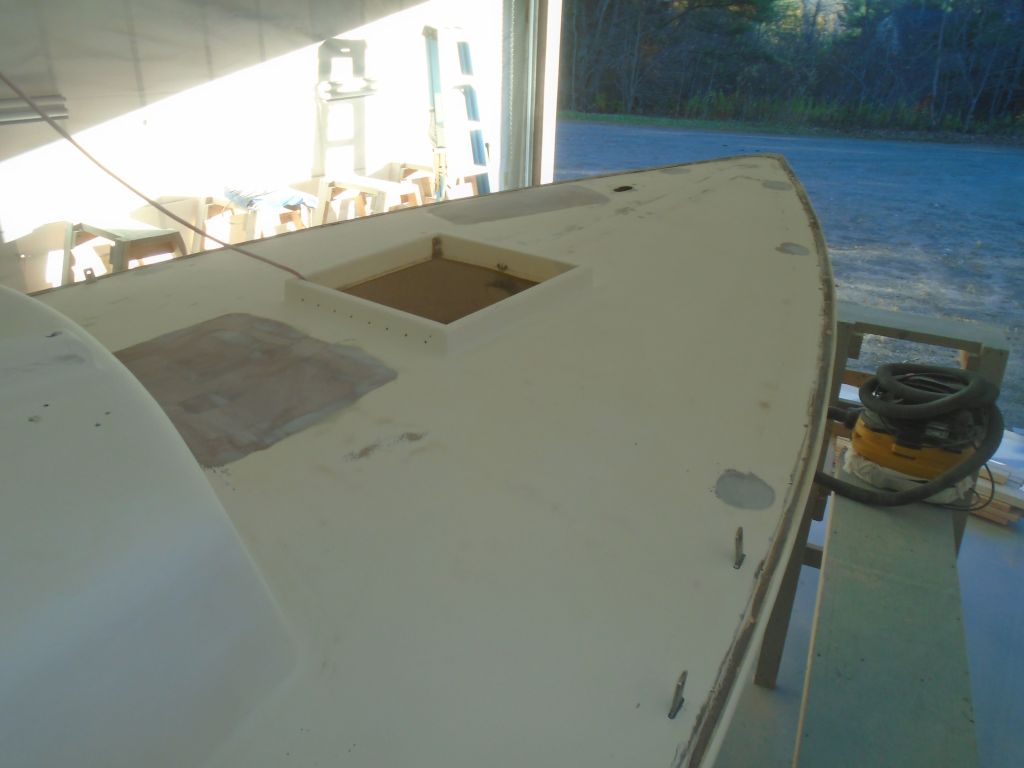
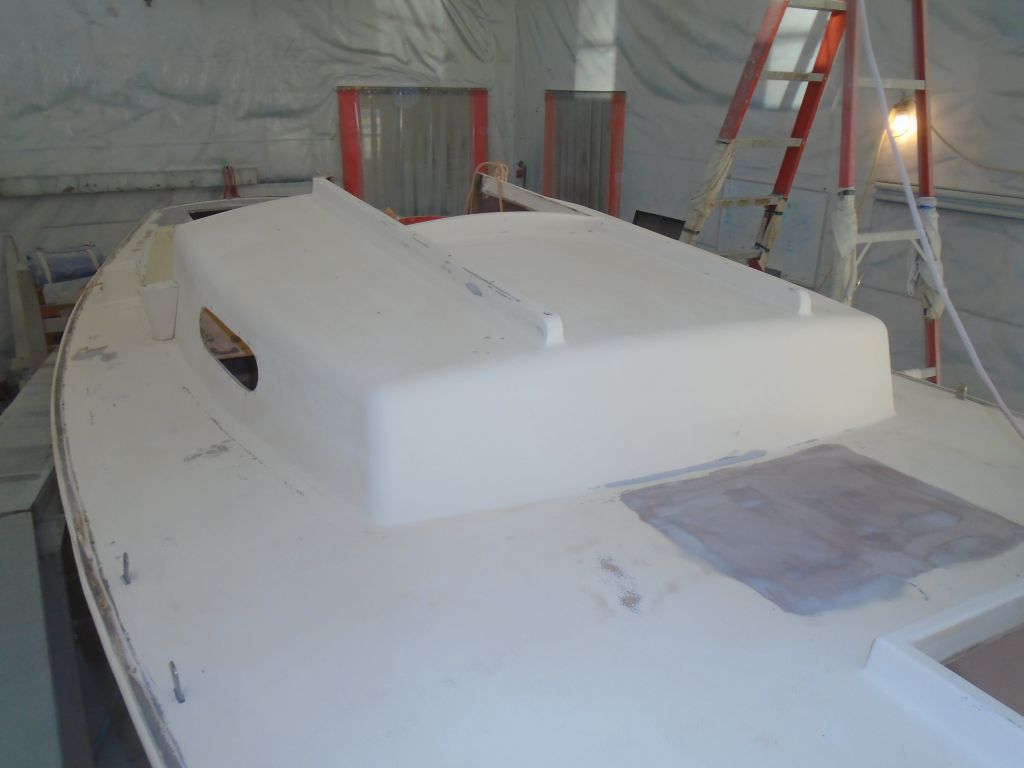
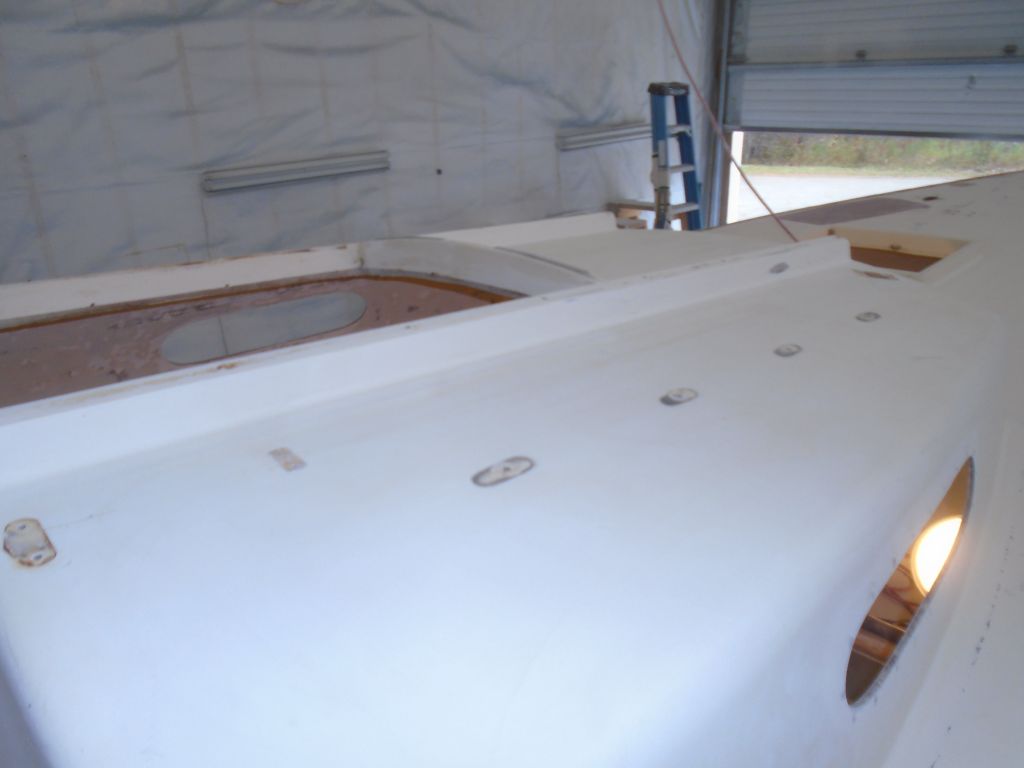
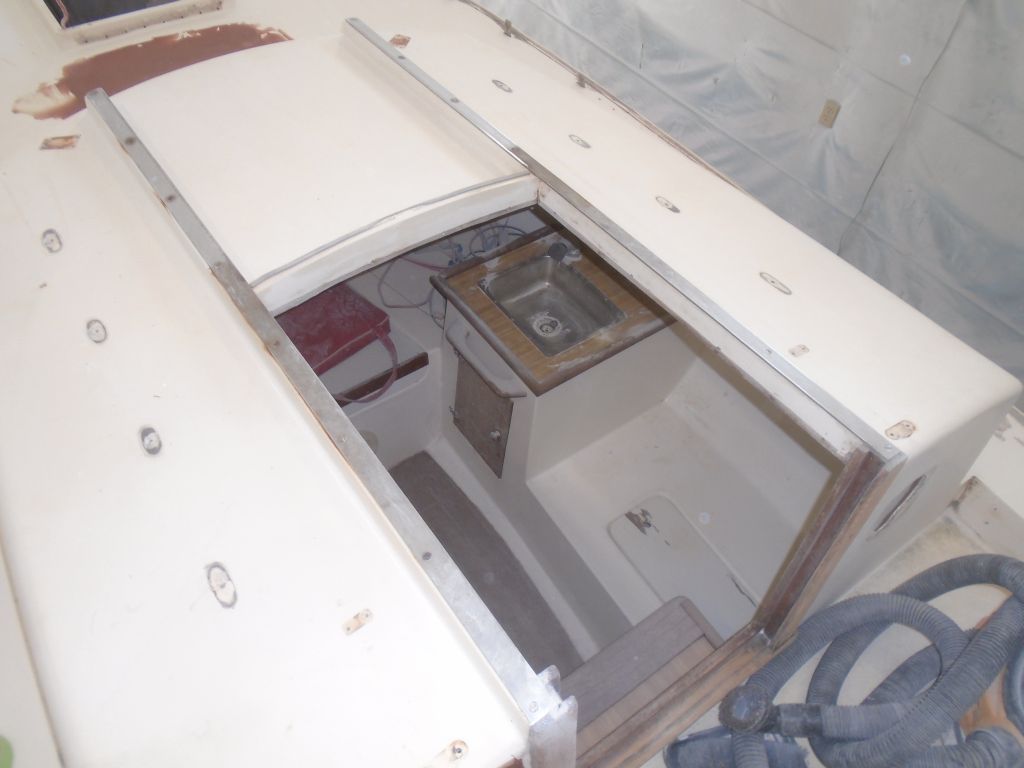
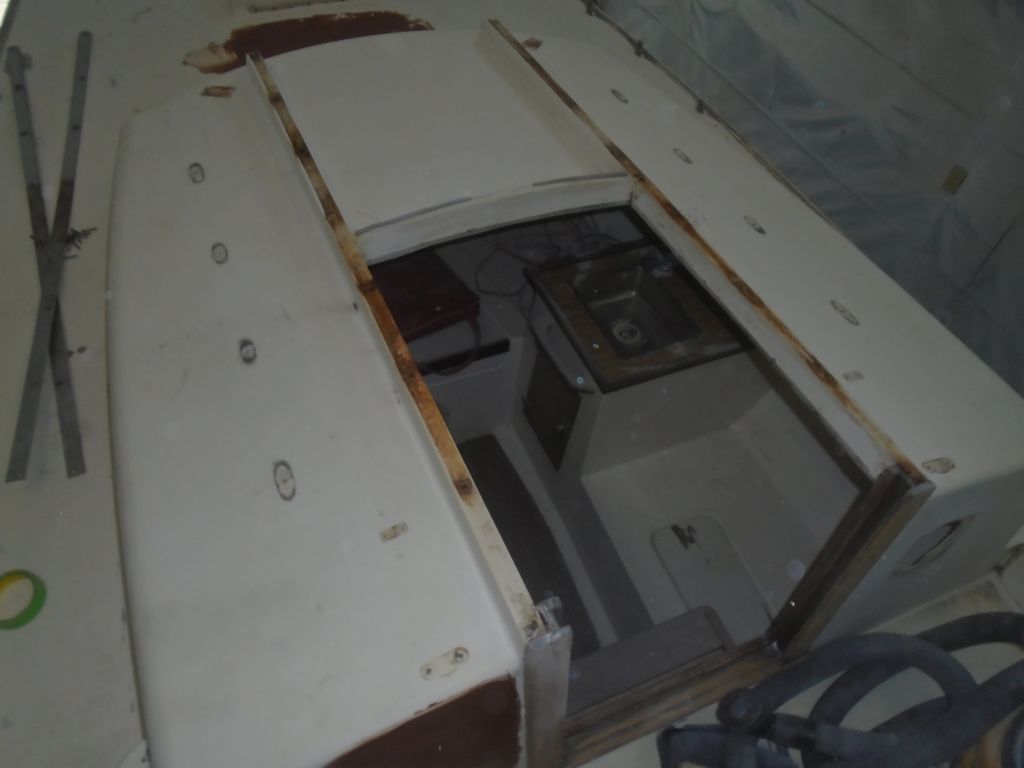
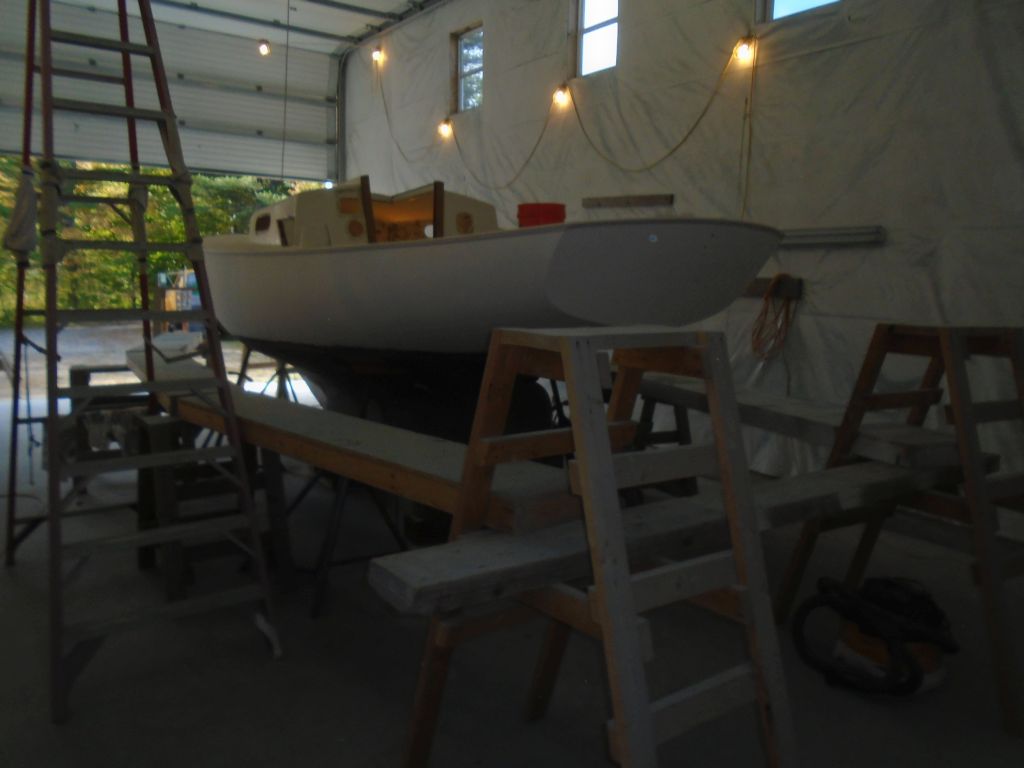
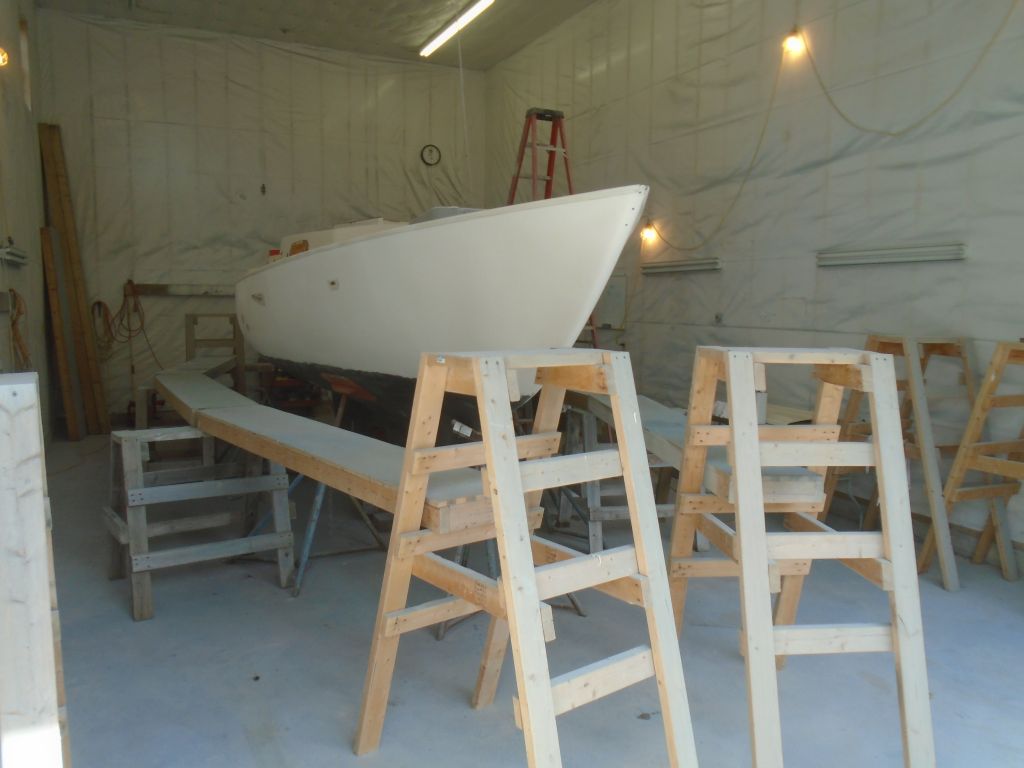
To get ready for the deck work ahead, I set up staging around the boat at deck height.

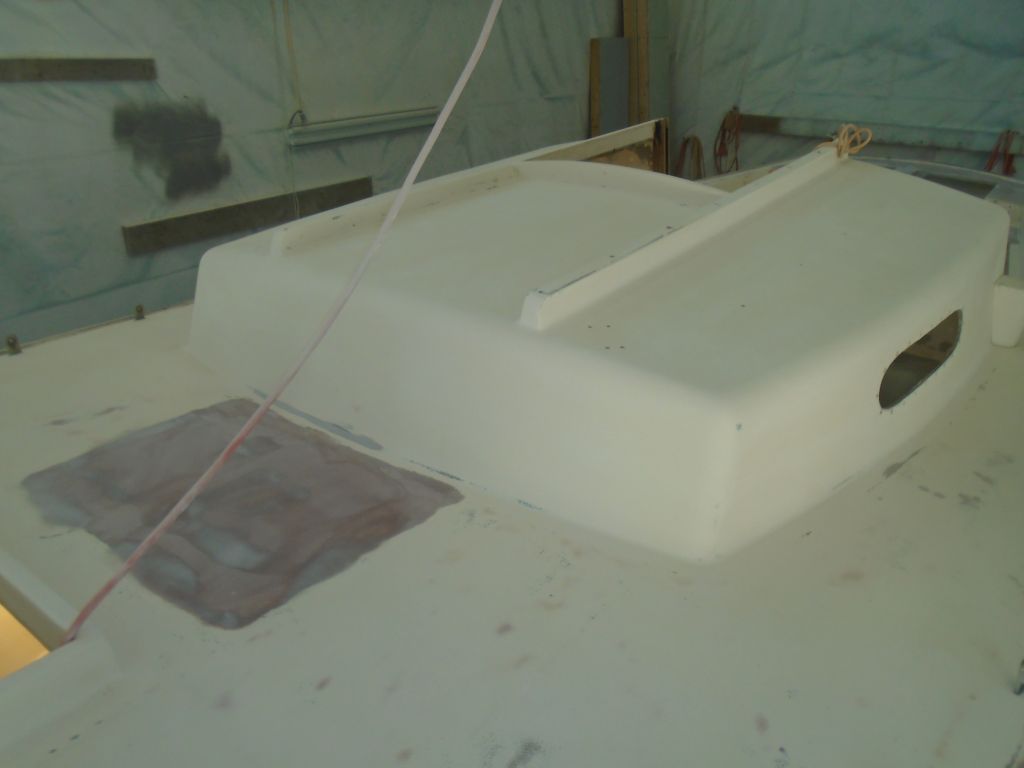
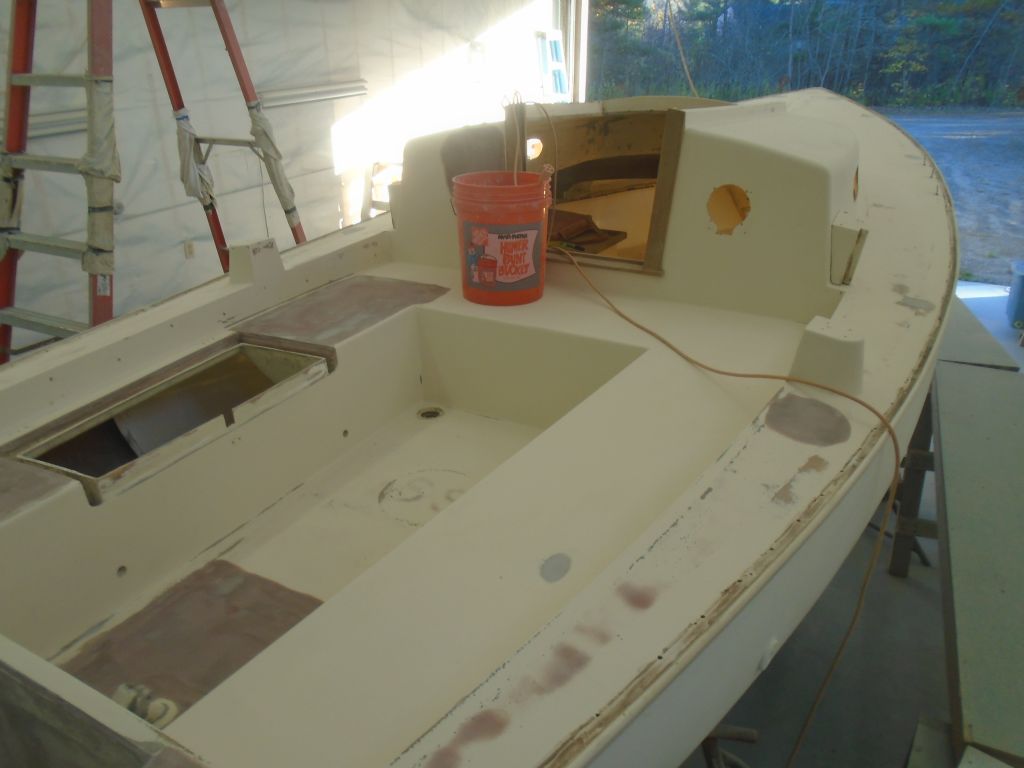
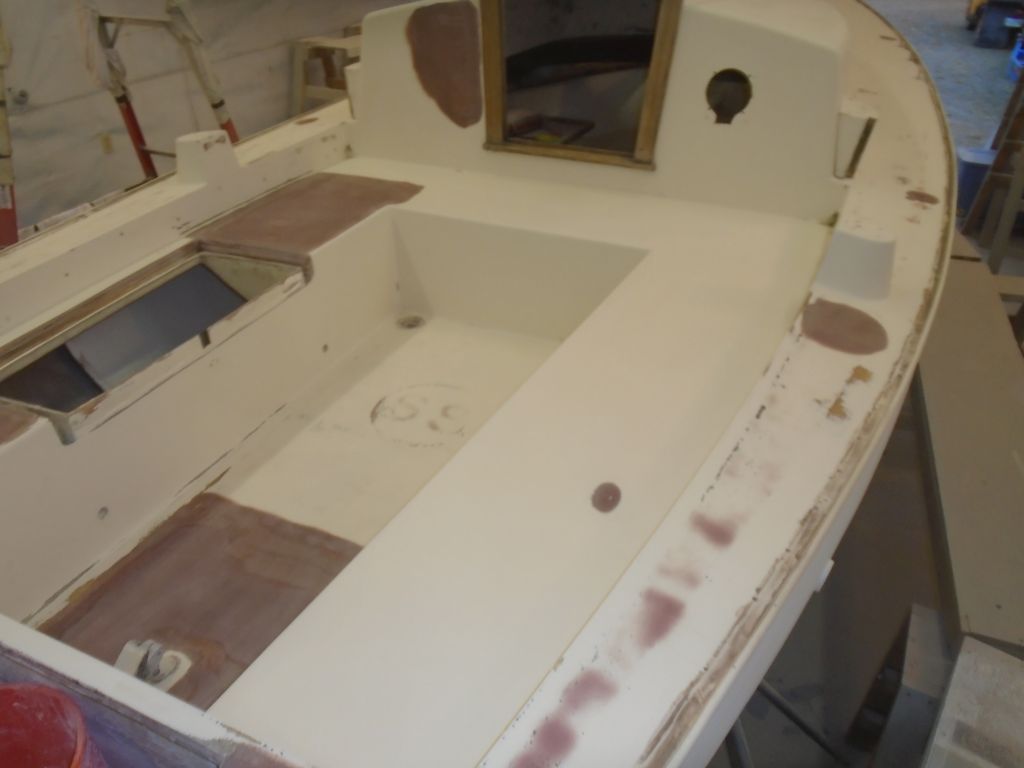
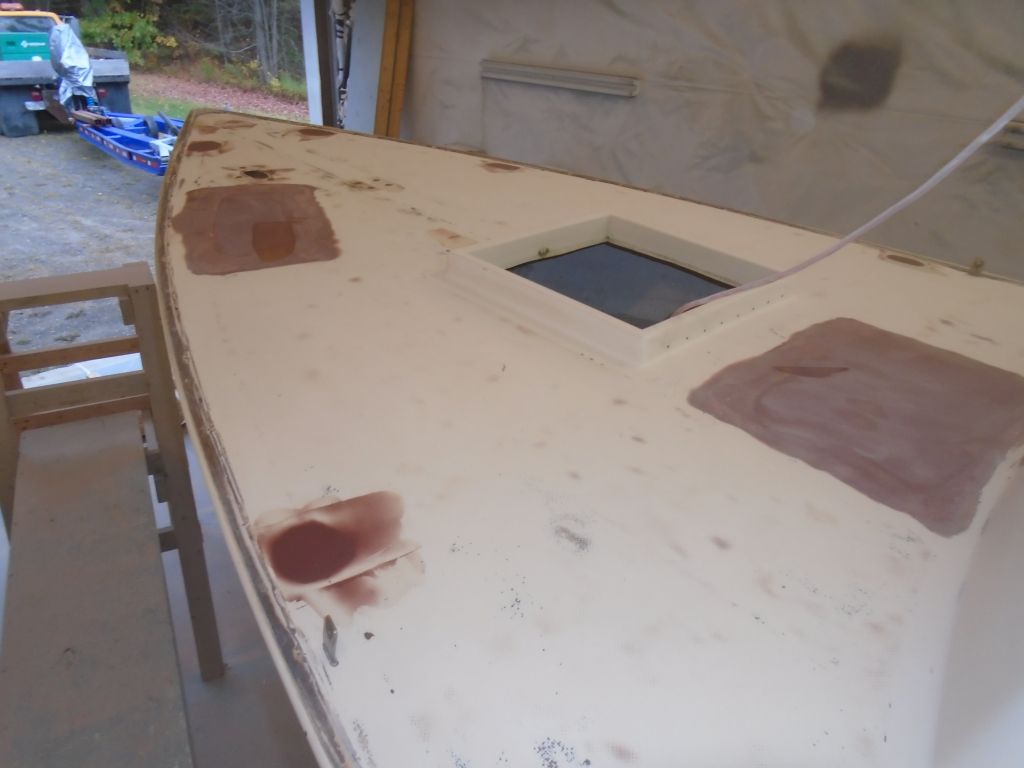
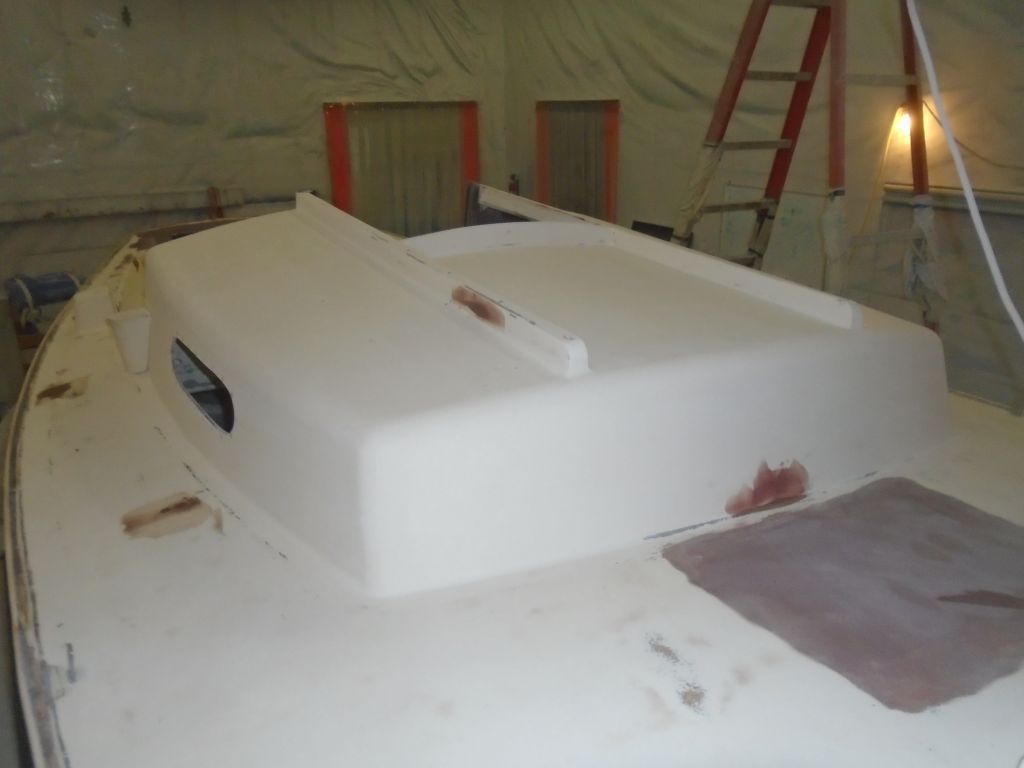
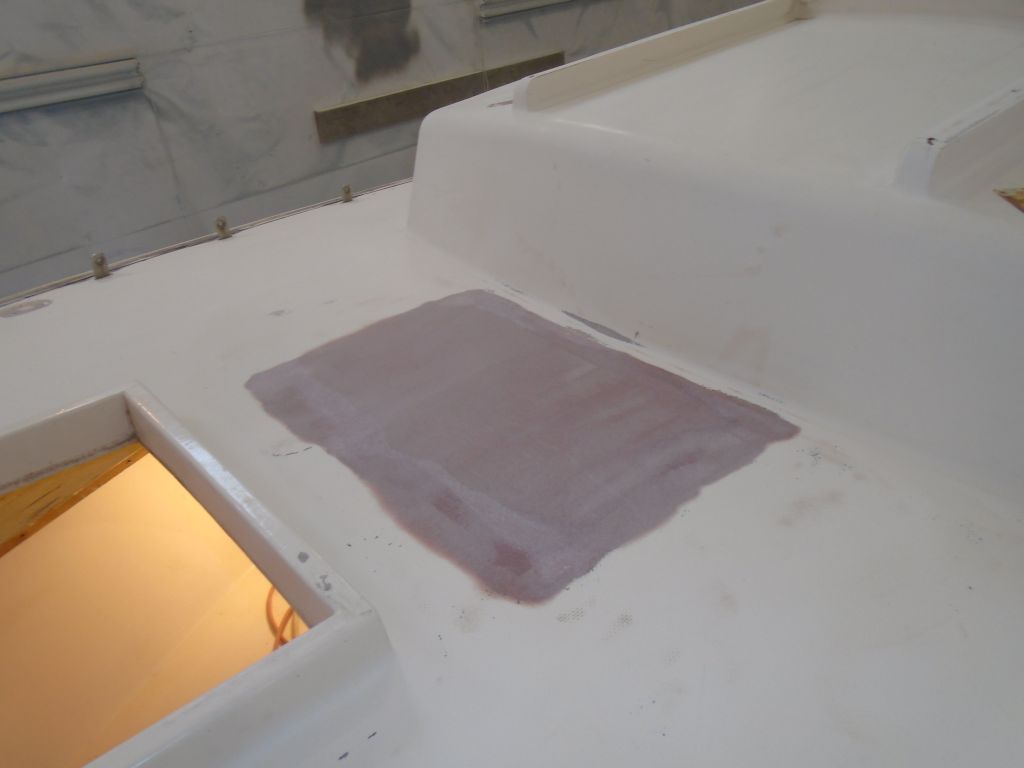
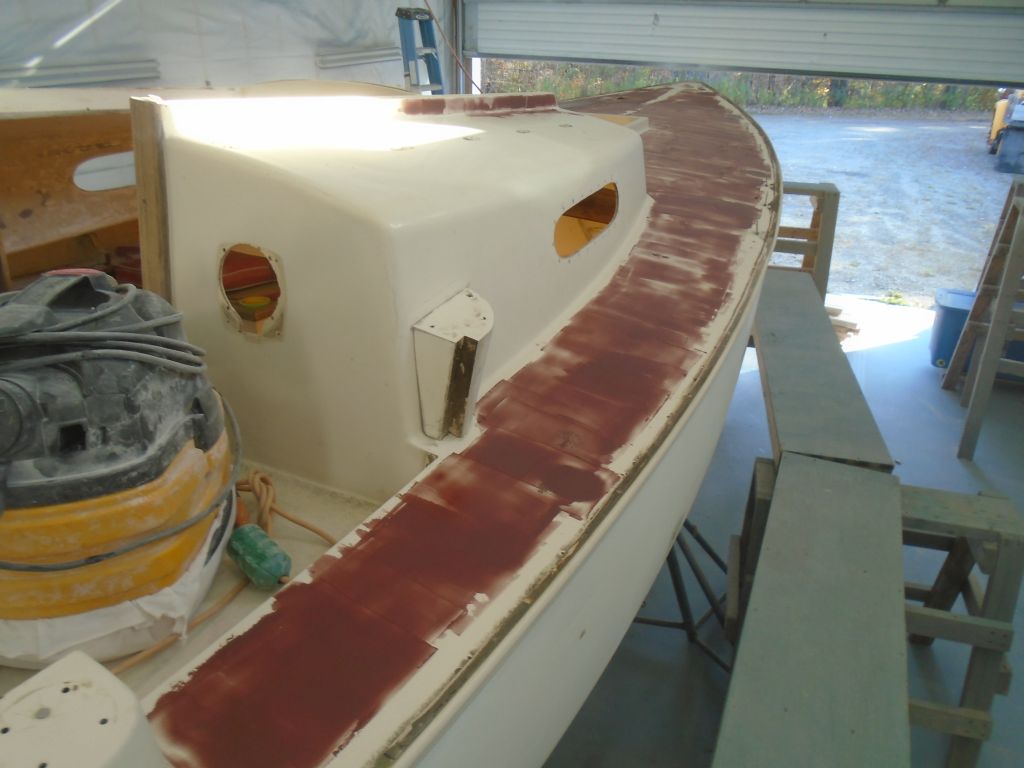
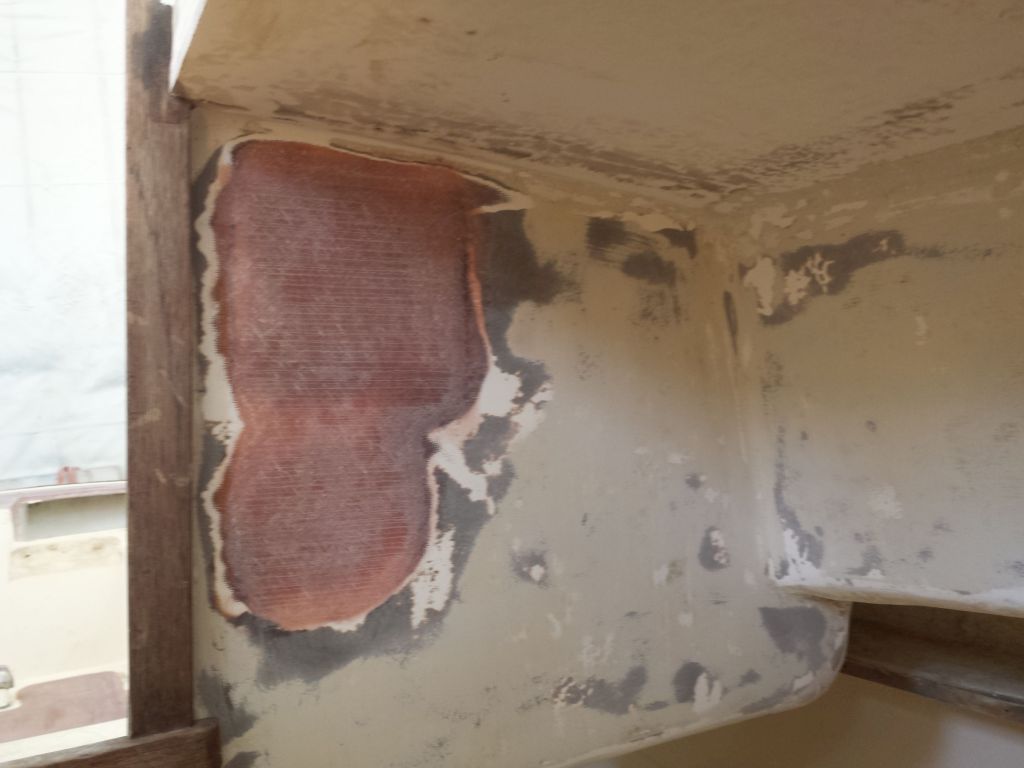
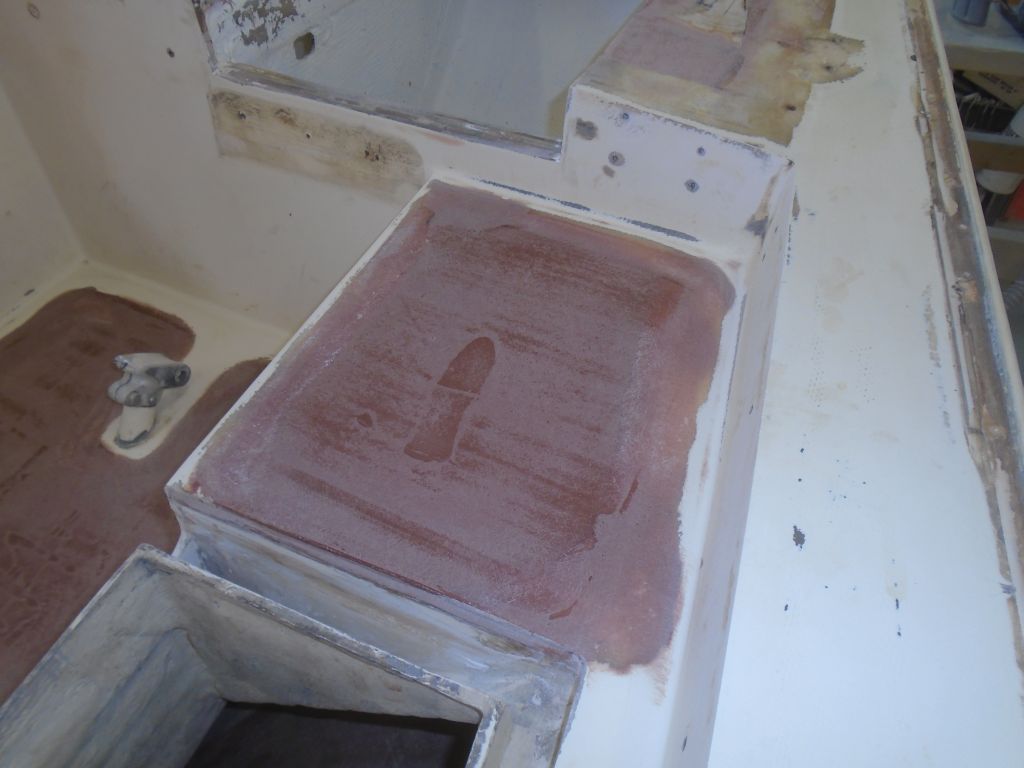
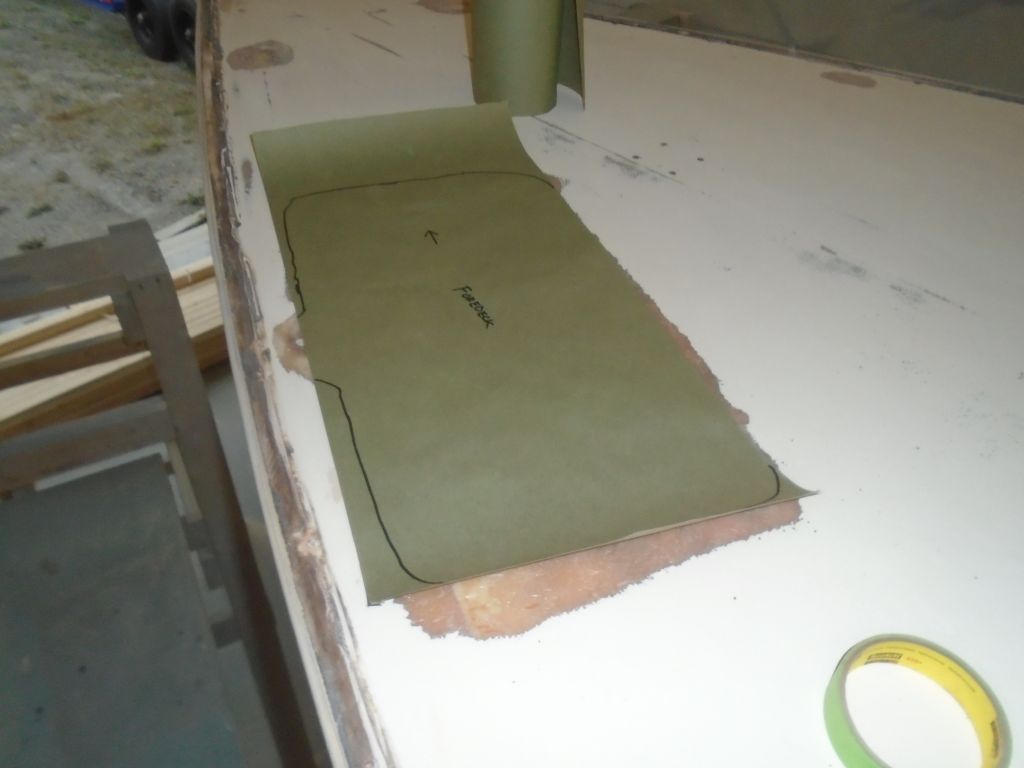
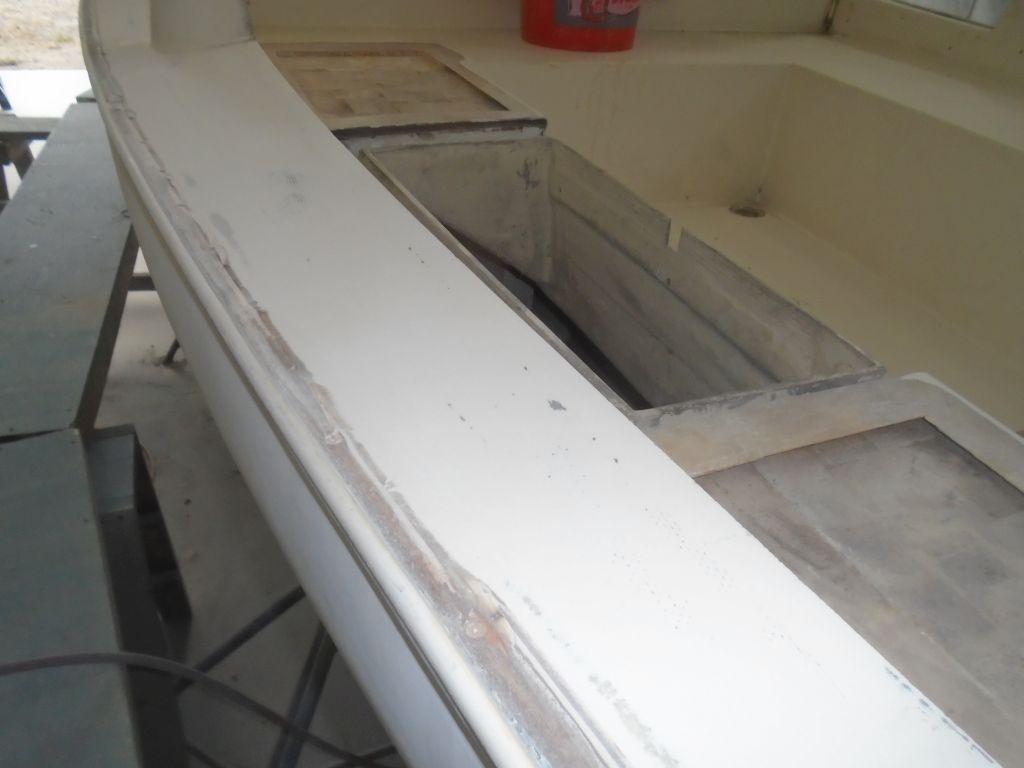
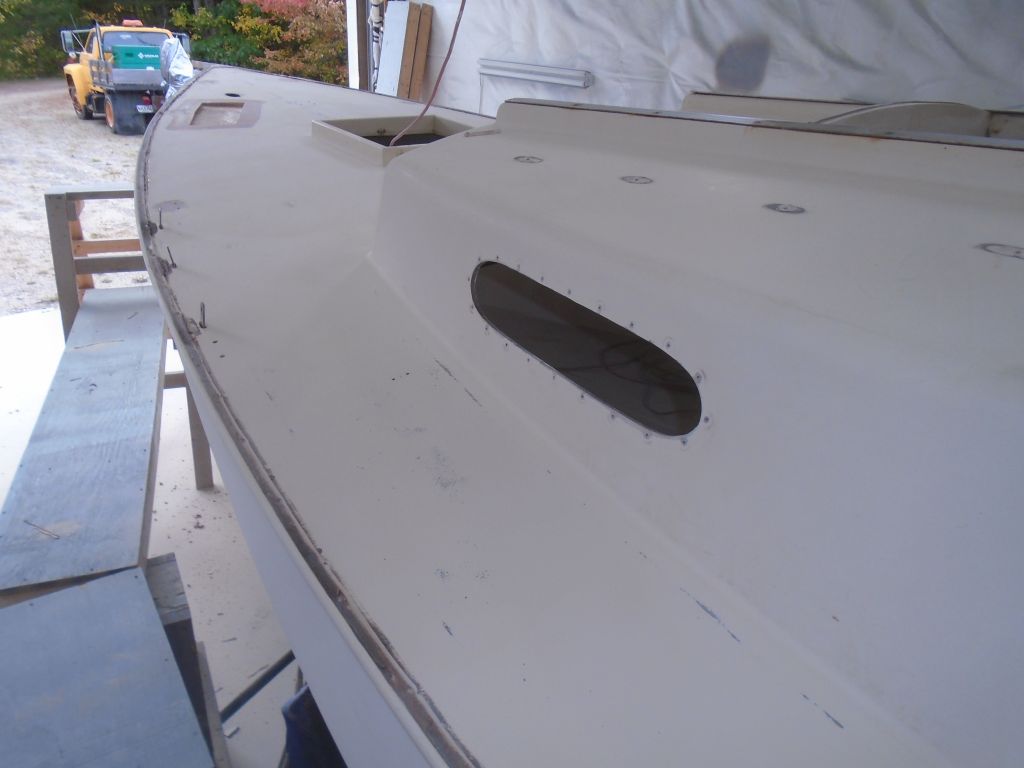
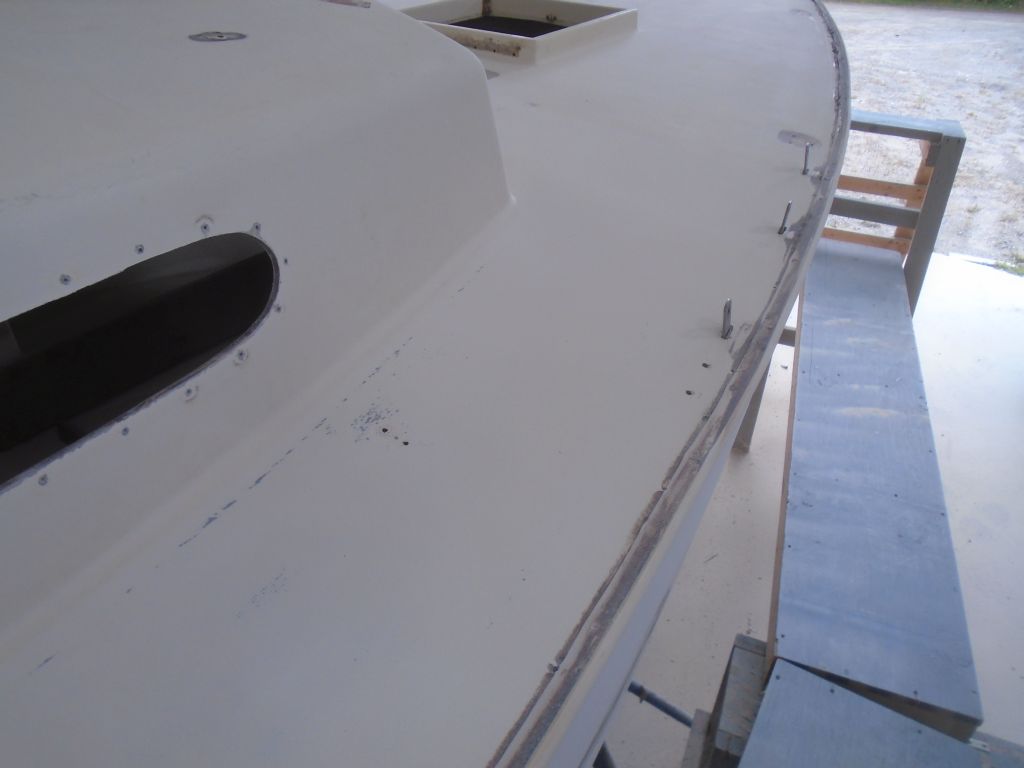
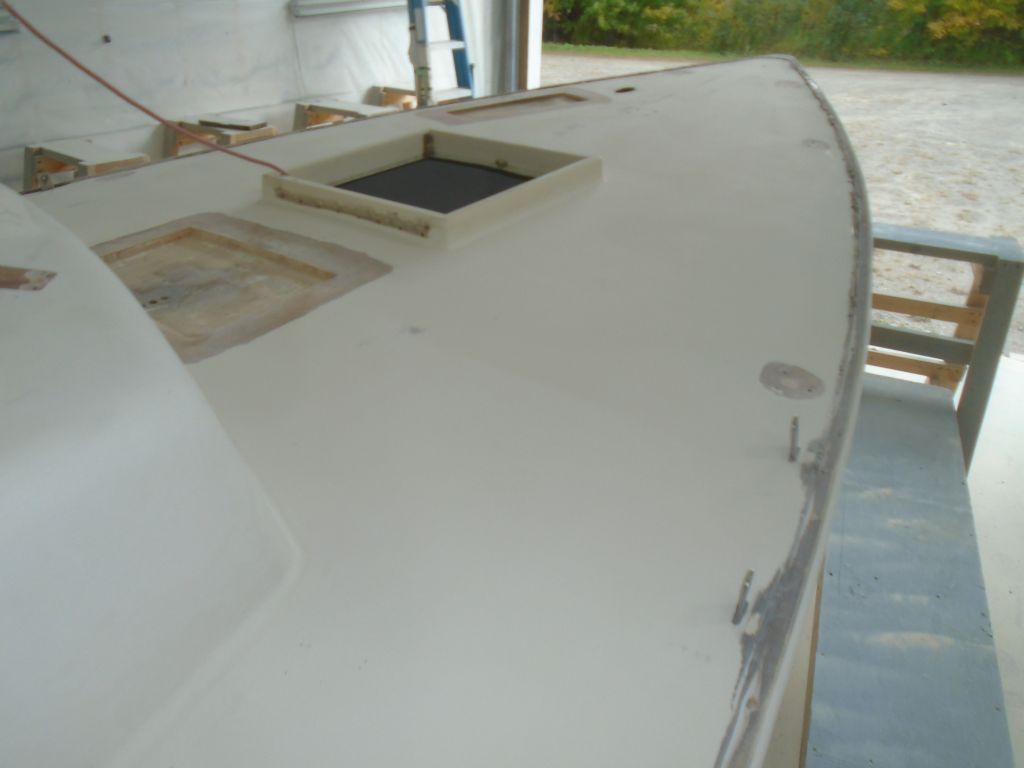
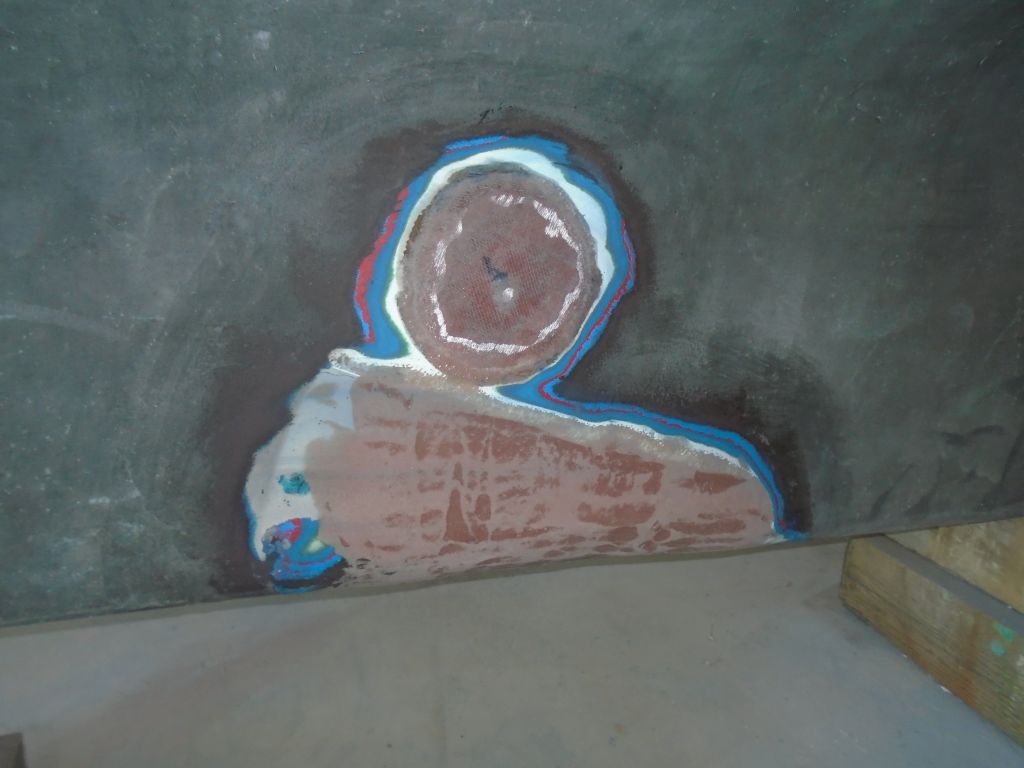
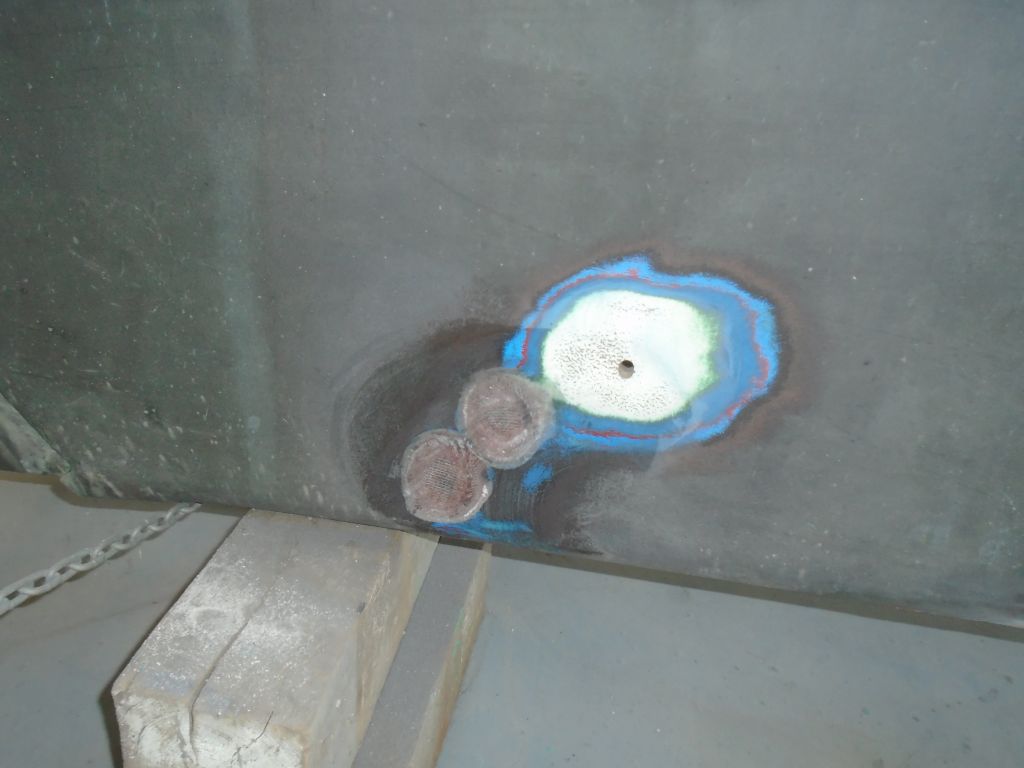
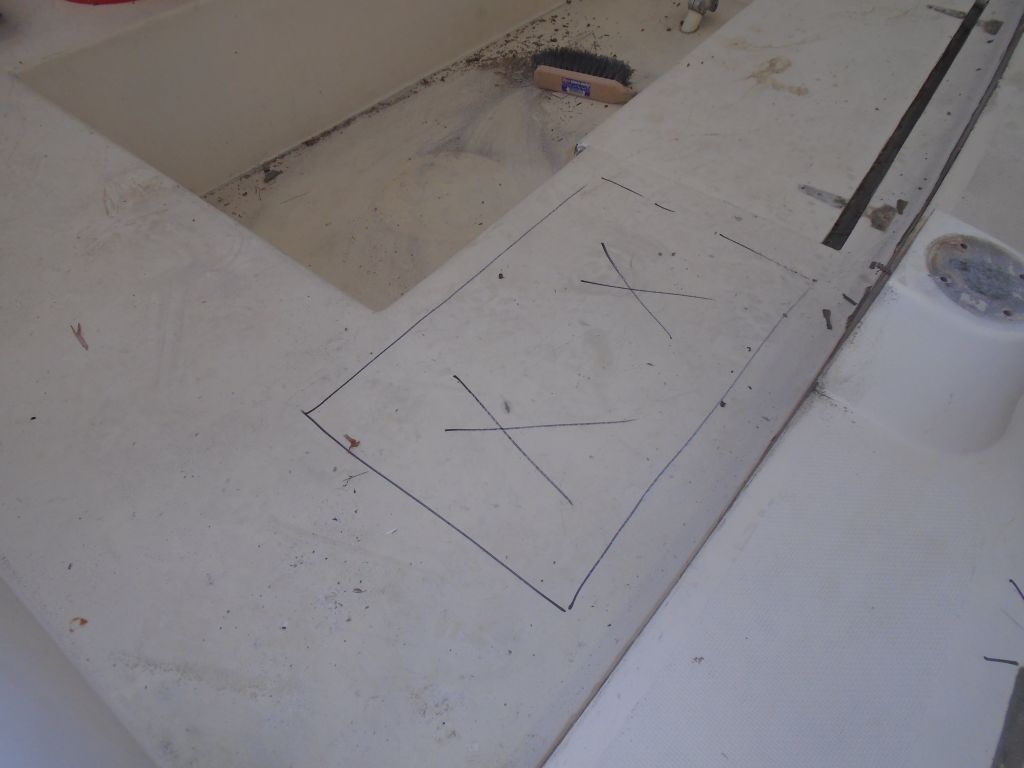
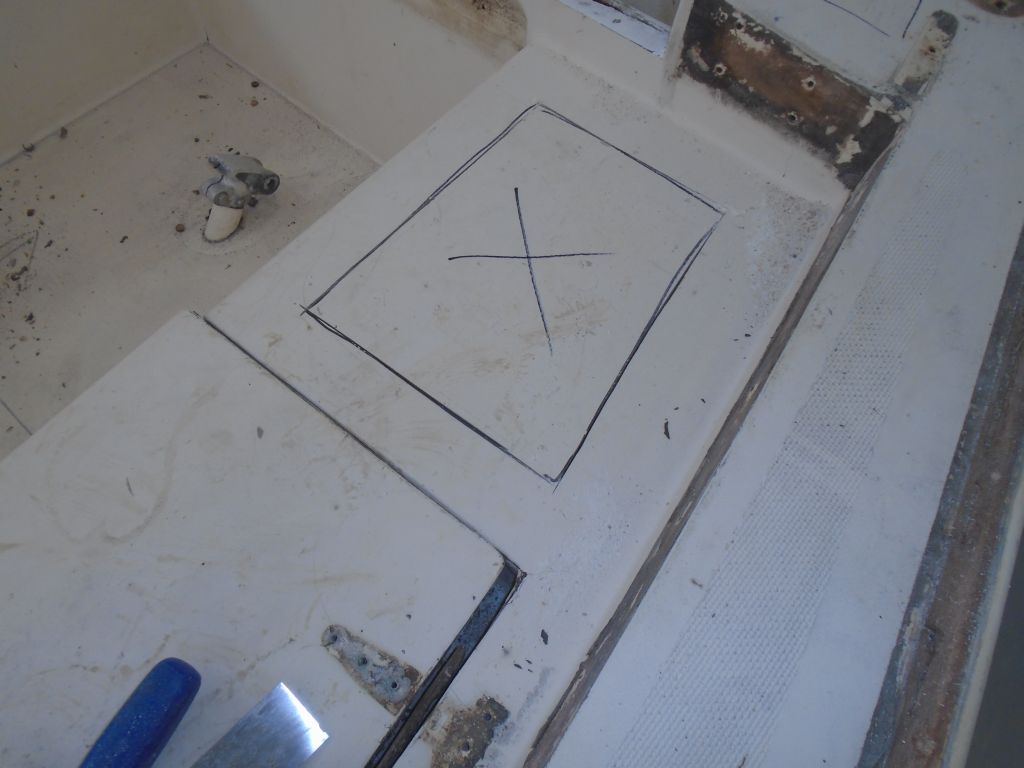
While working on and around the boat during the past week, I’d already determined several deck areas that would require core repair, but now I went over the deck carefully, sounding all areas and marking those where there was clearly an issue beneath.  Most of the deck was sound, but these areas in the cockpit and foredeck would require repair.

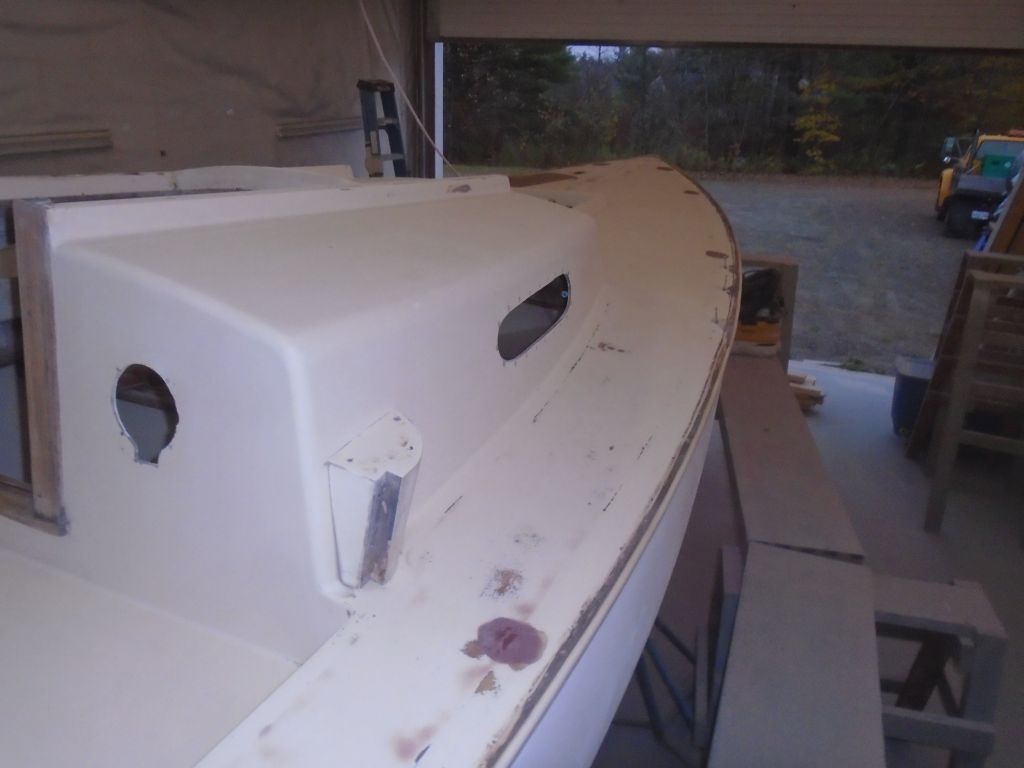
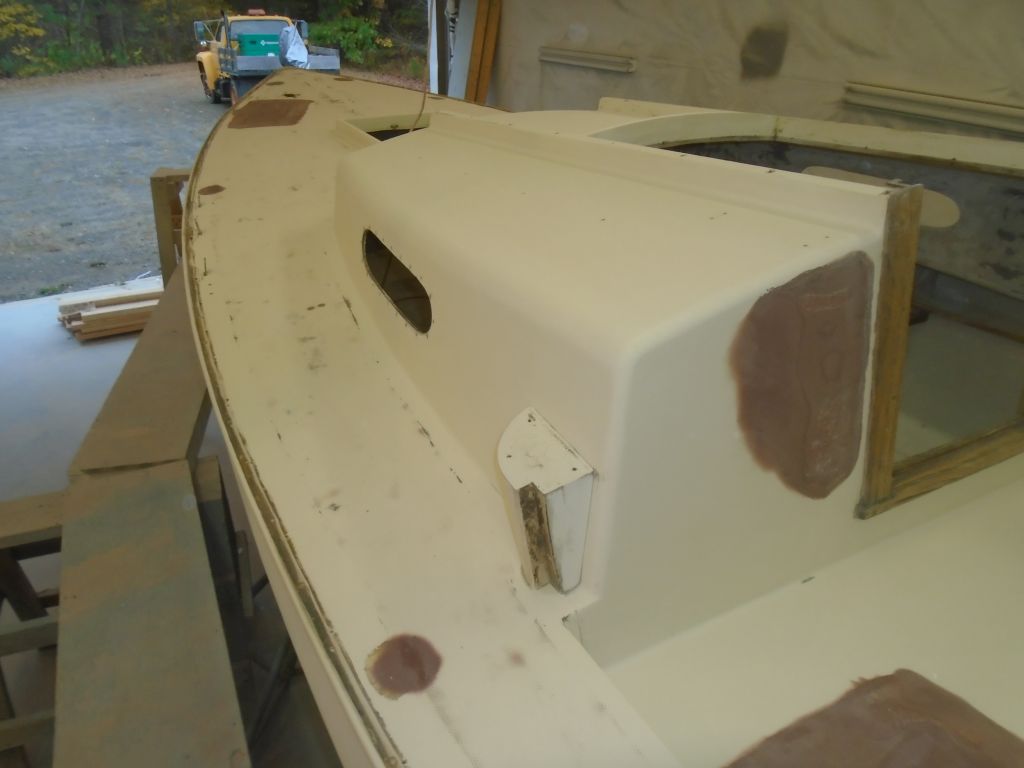
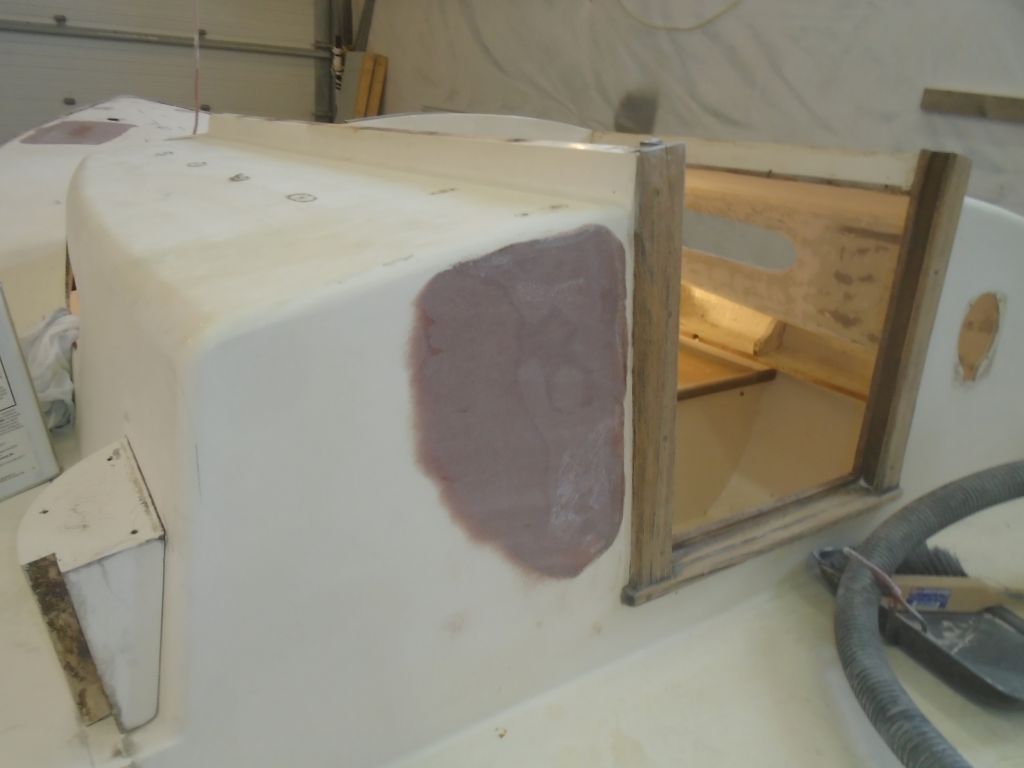
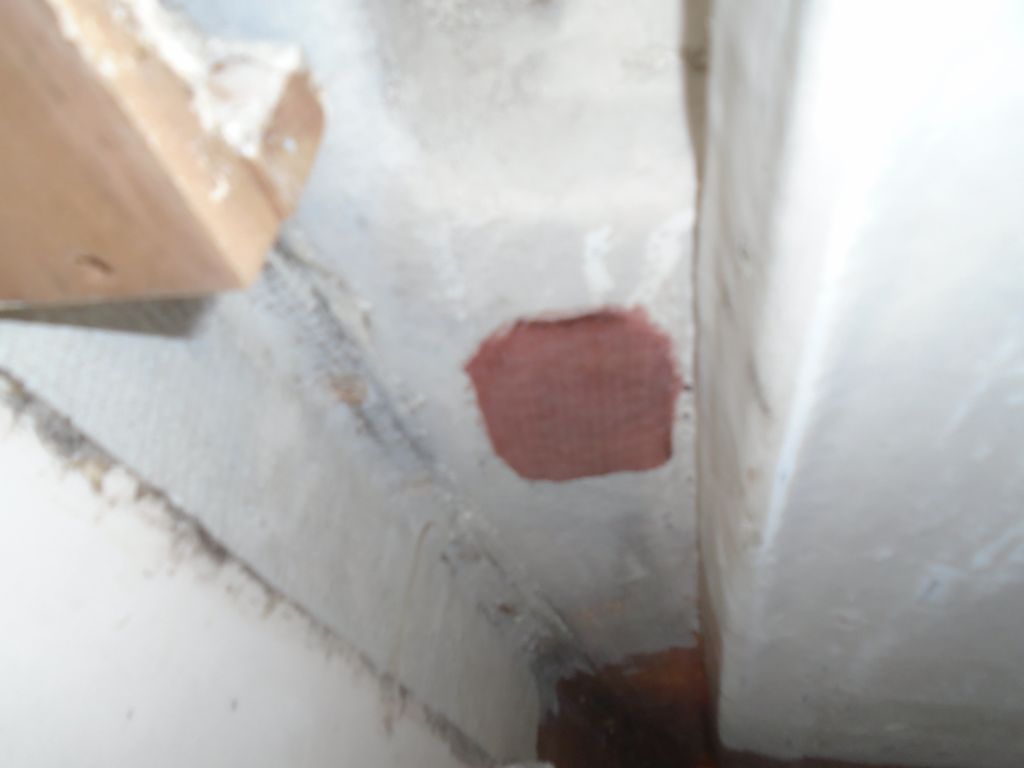
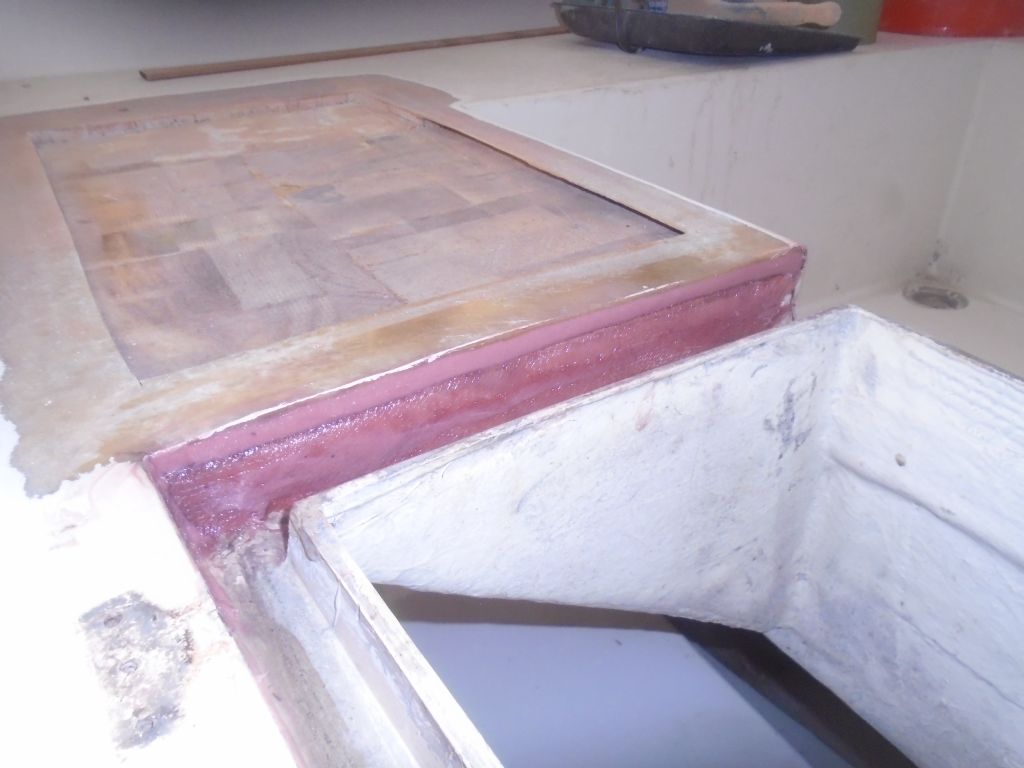
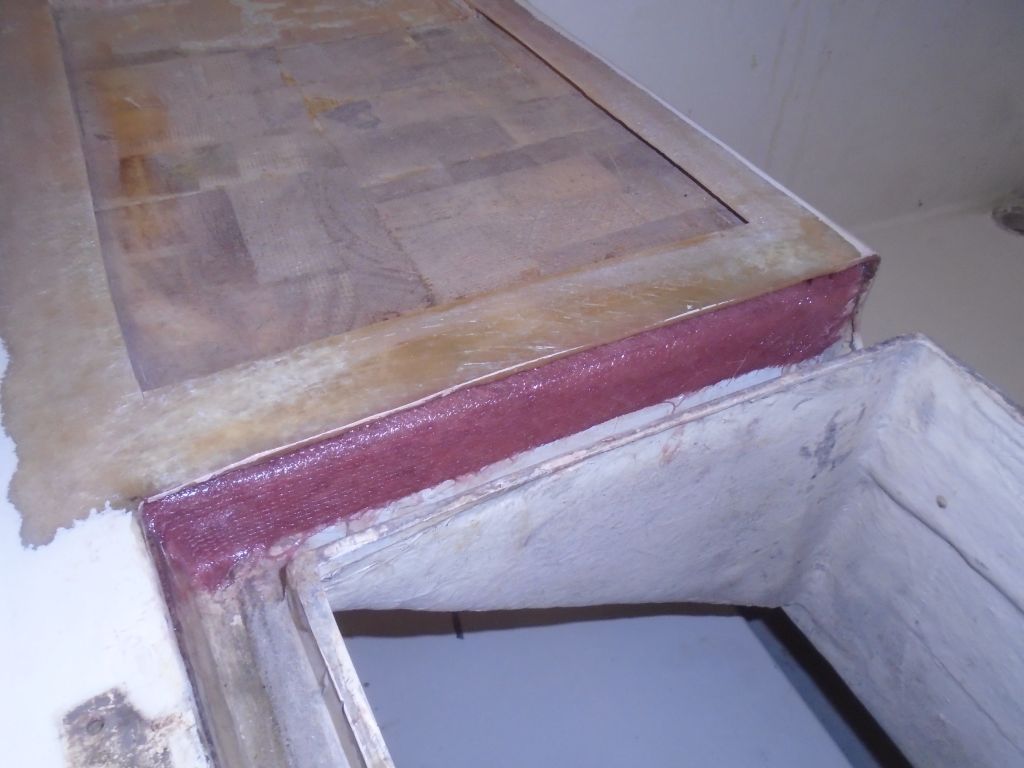
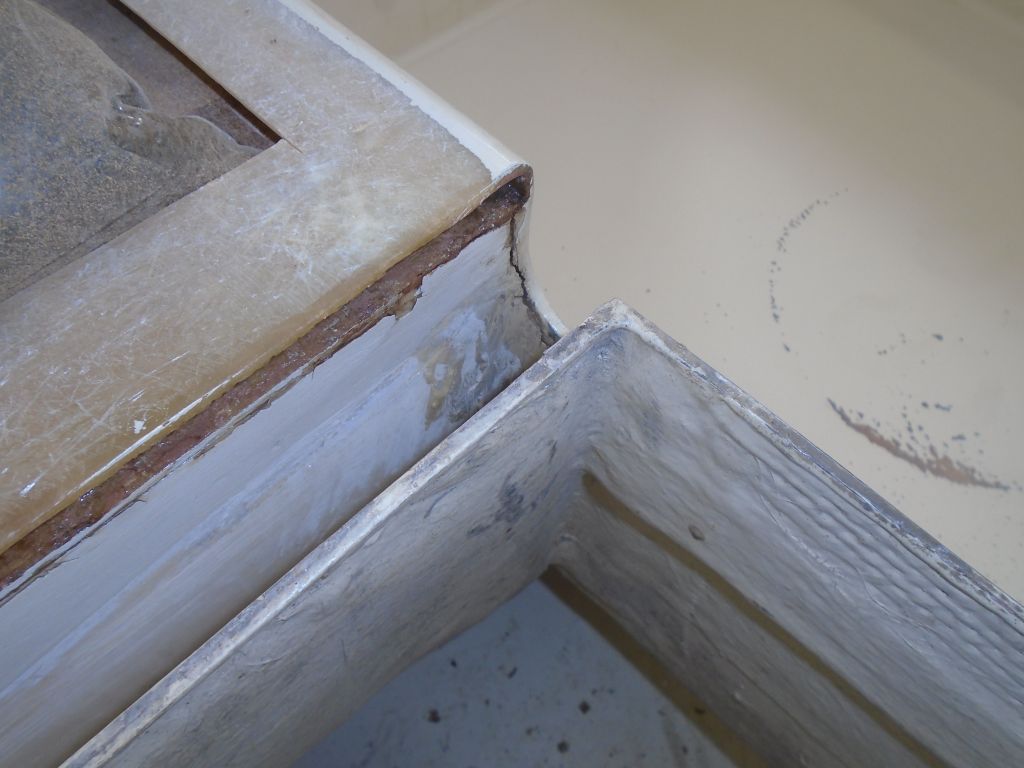
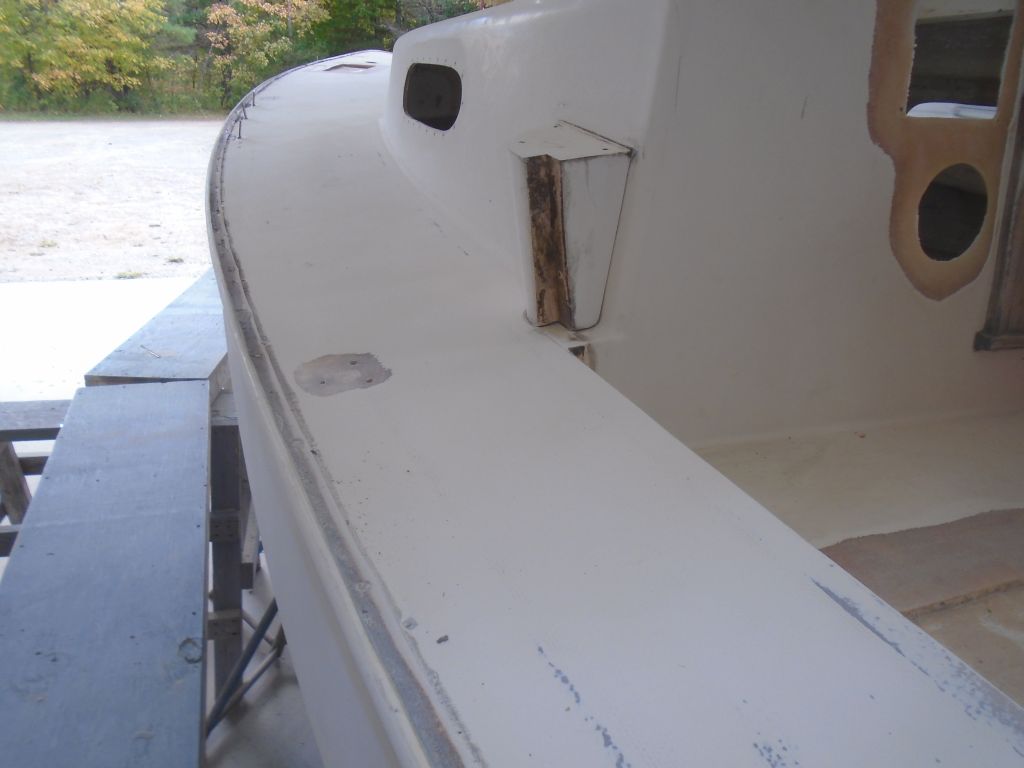
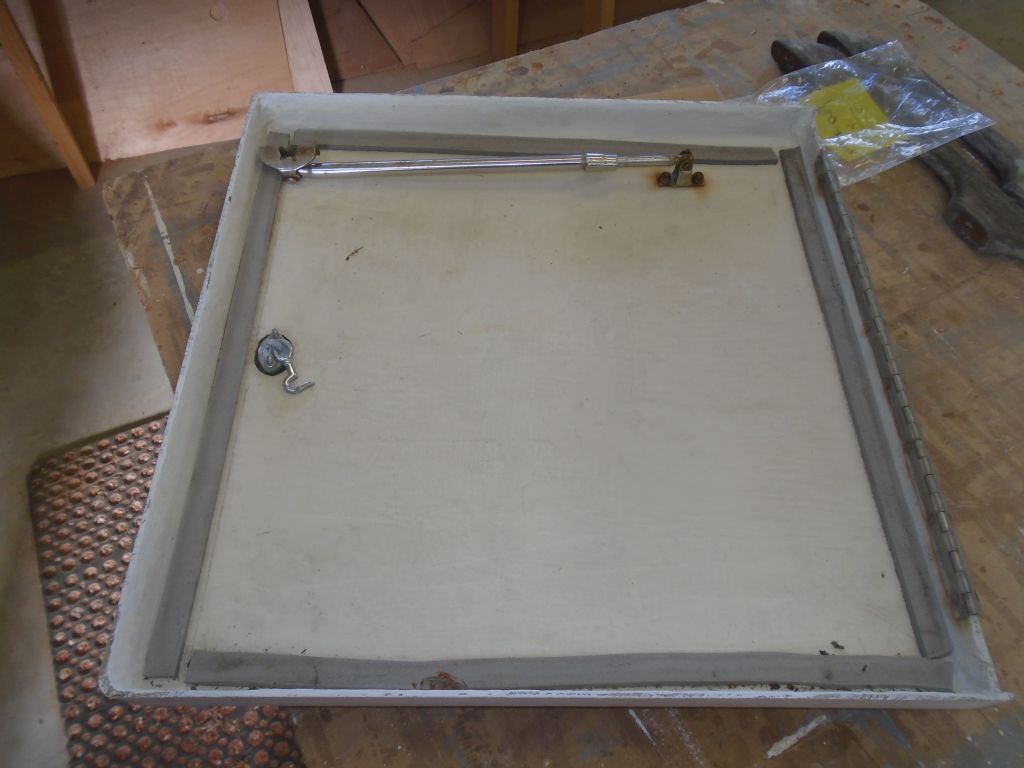
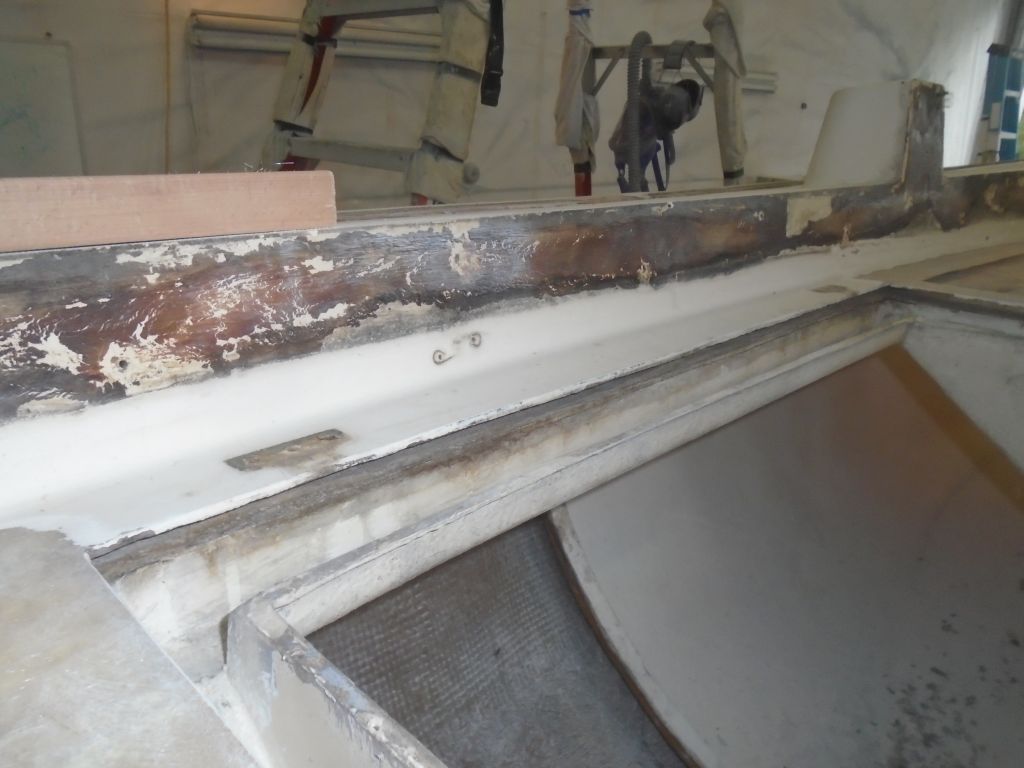
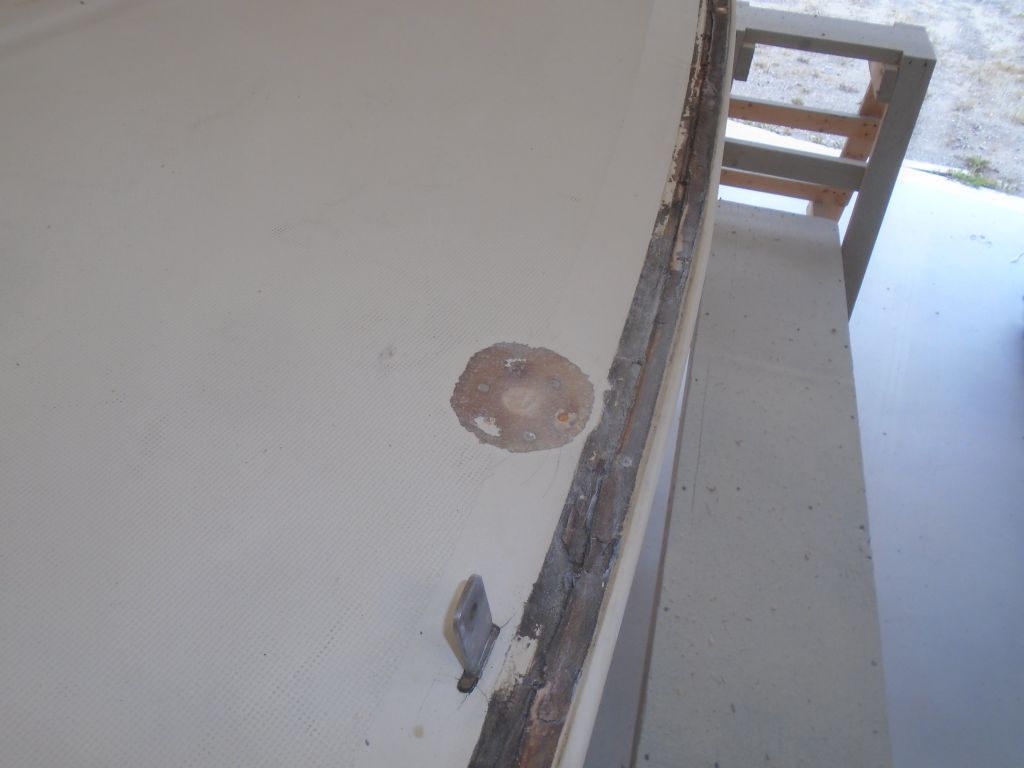
During this inspection, I also determined that the port cockpit locker gutter system was coming loose from the deck; I’d noticed evidence of this from inside the boat when I was sanding the interior earlier, but from outside the issue became even more clear.

inspection2-100515

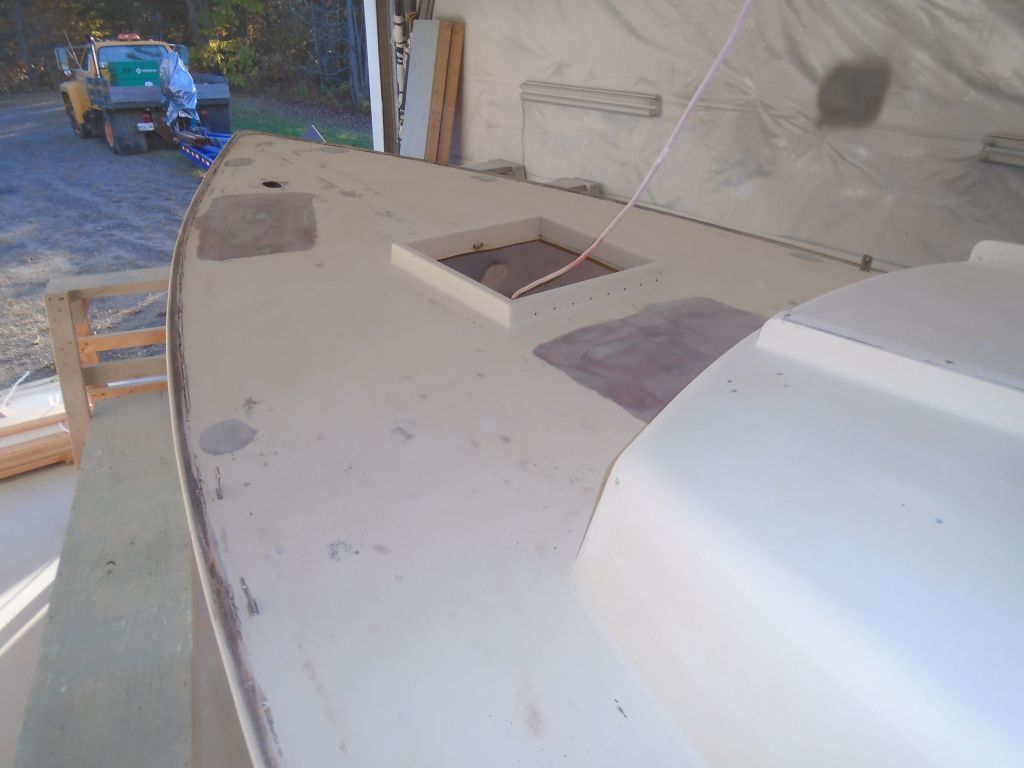
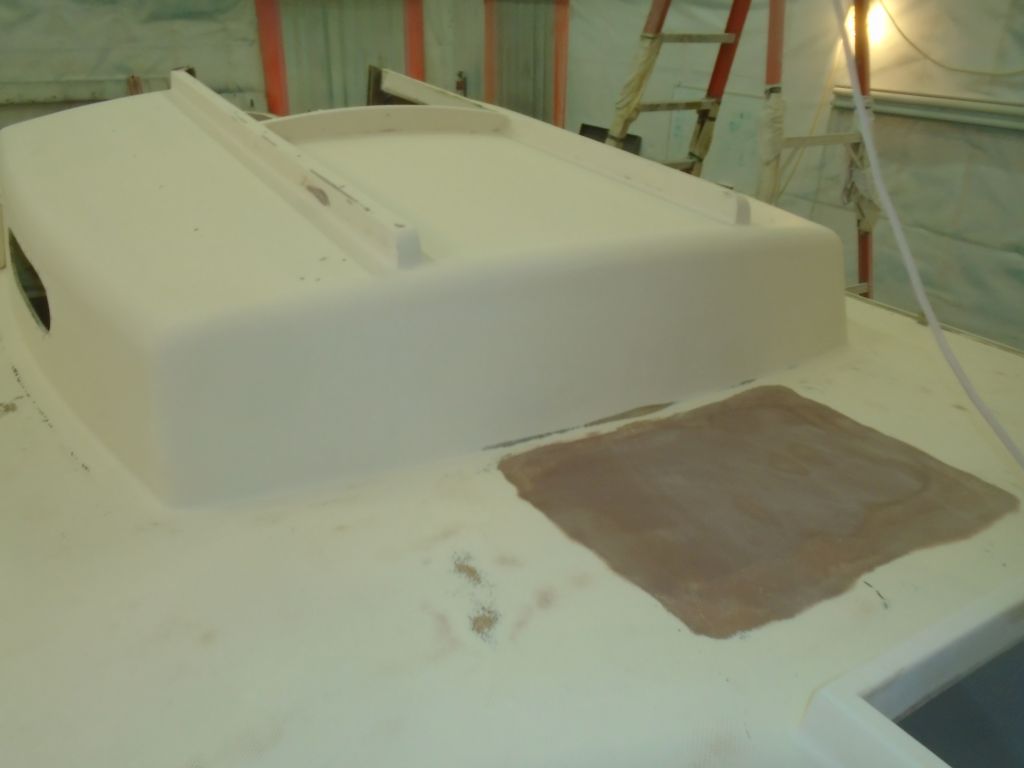
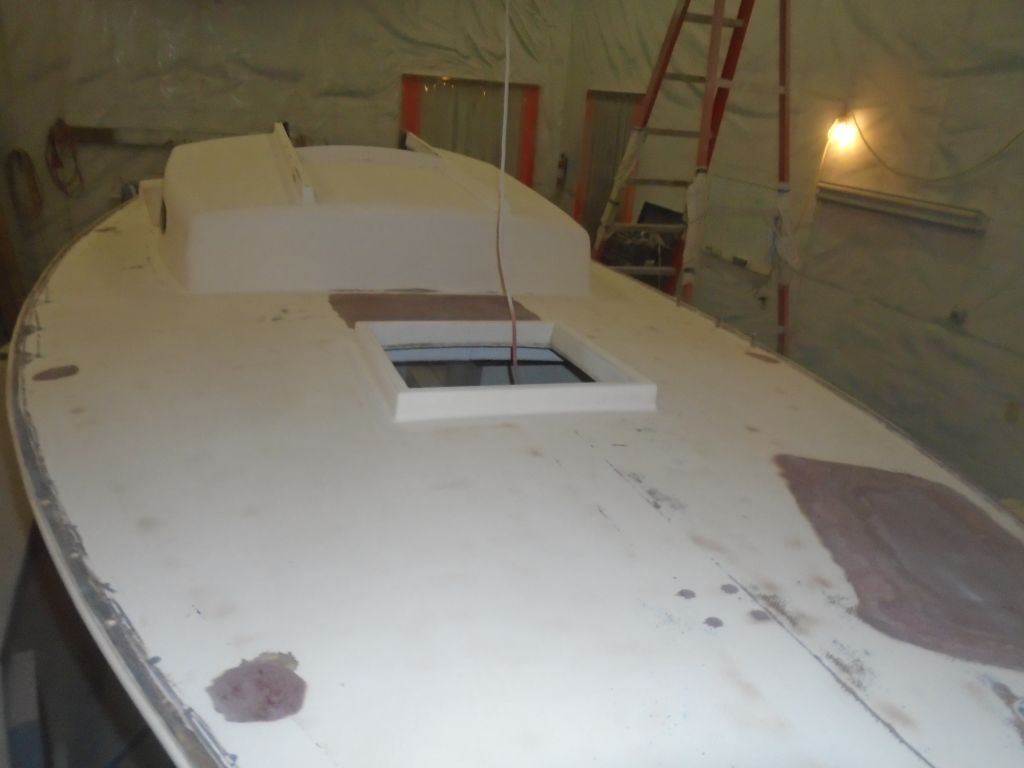
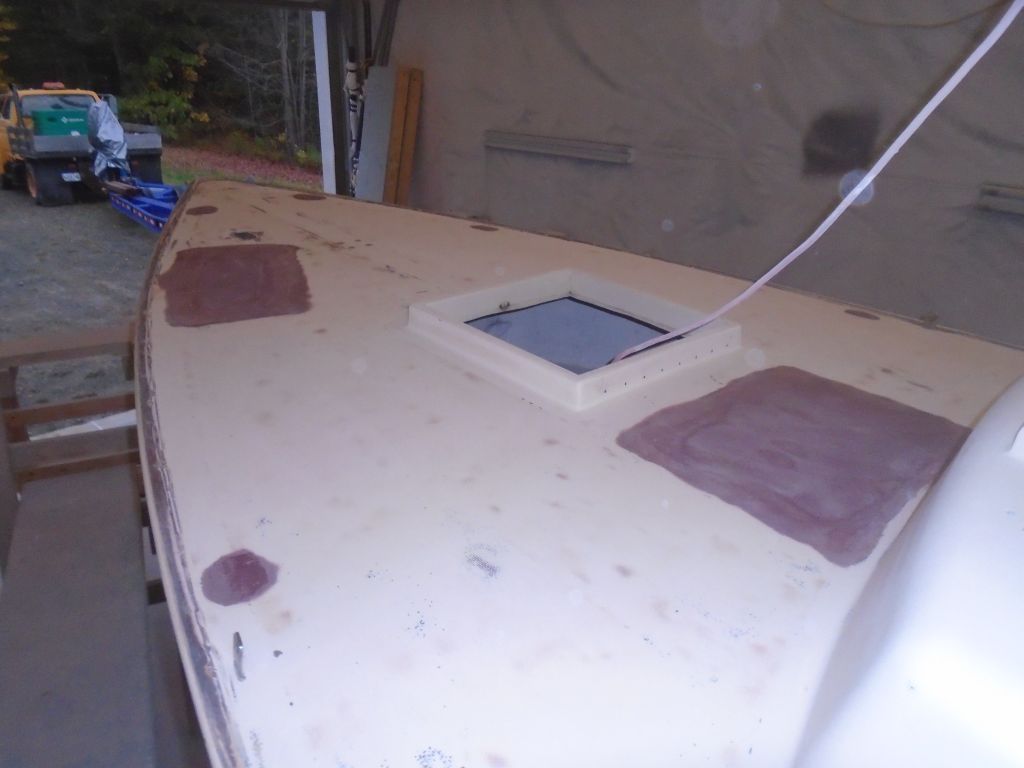
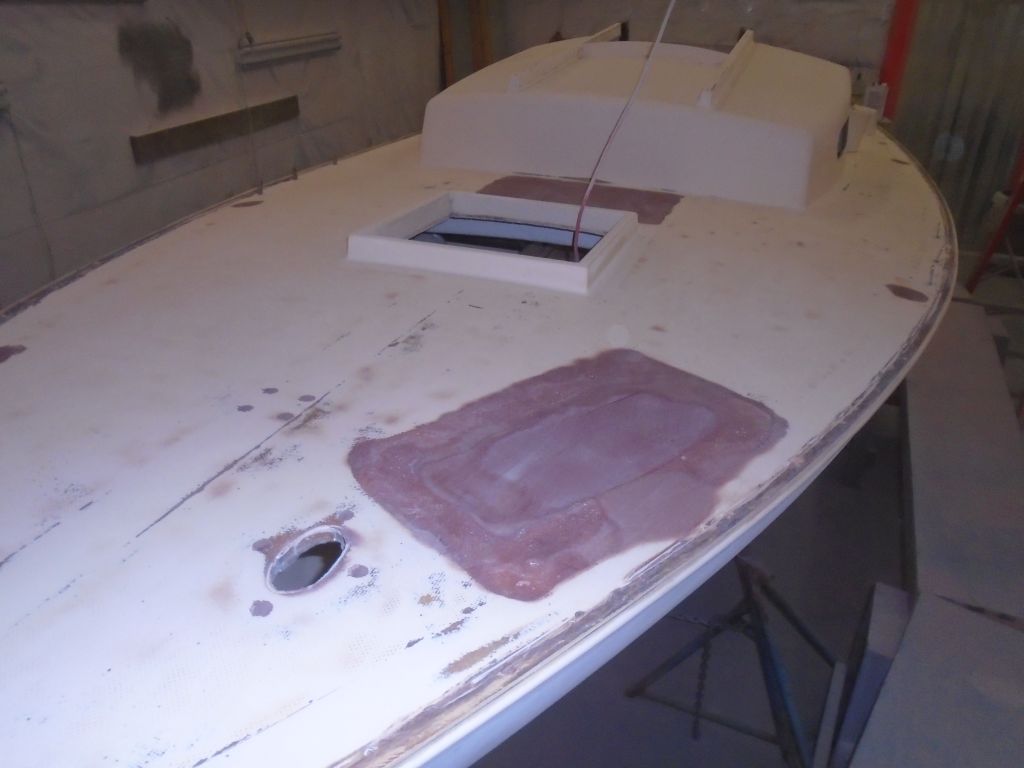
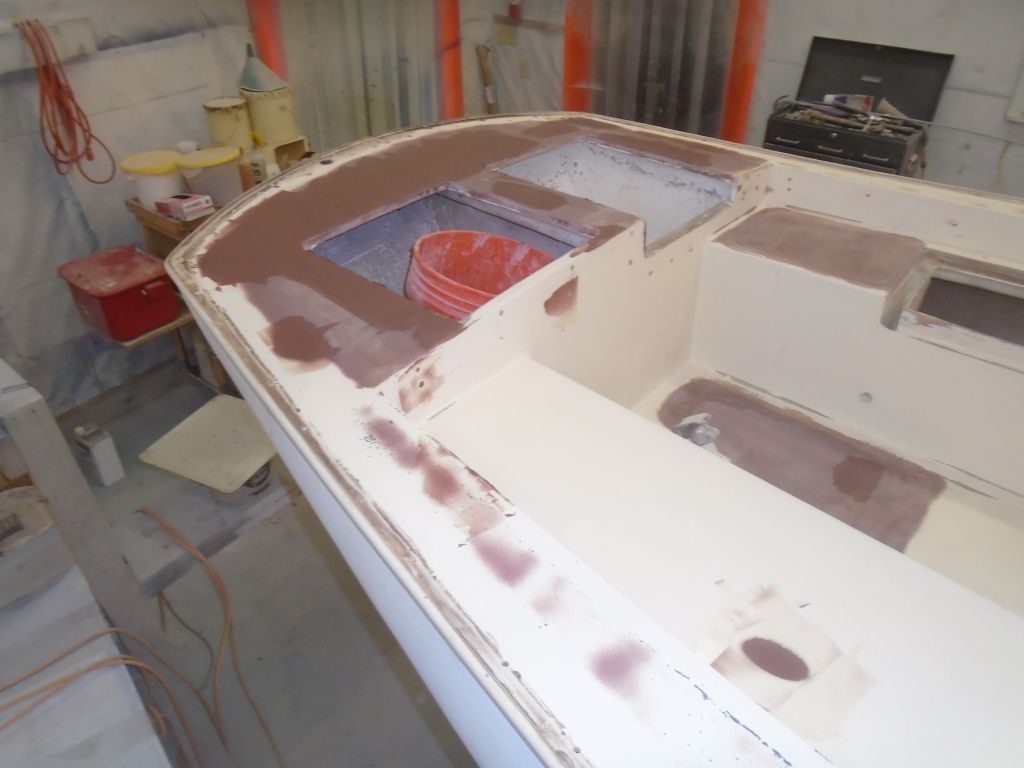
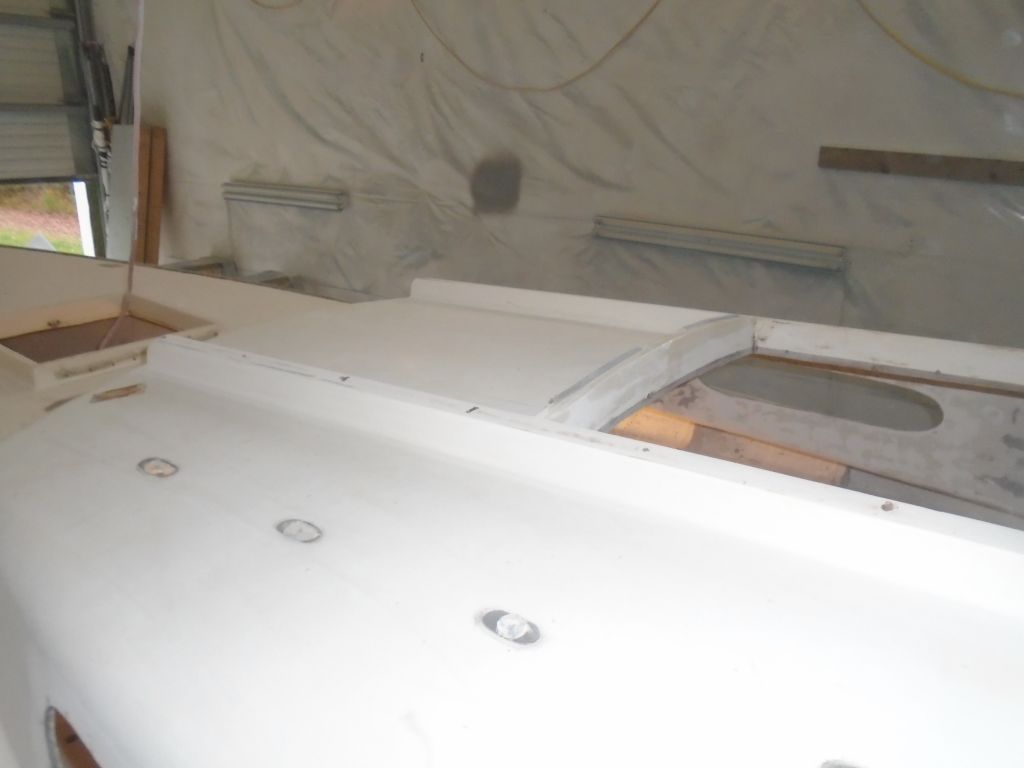
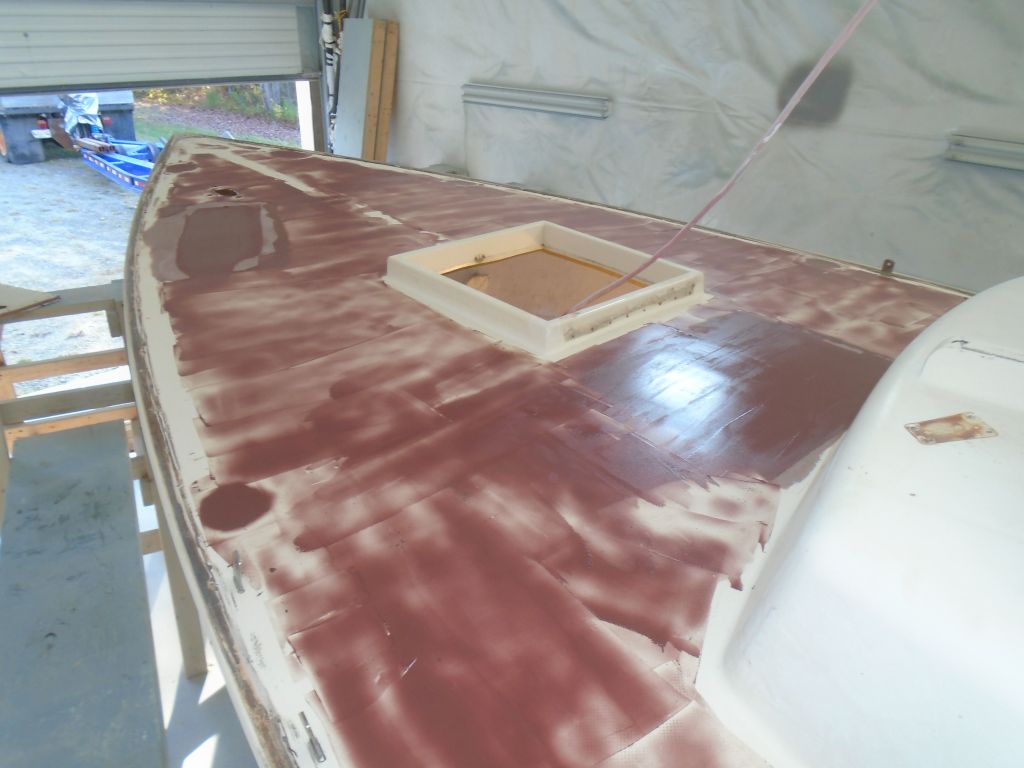
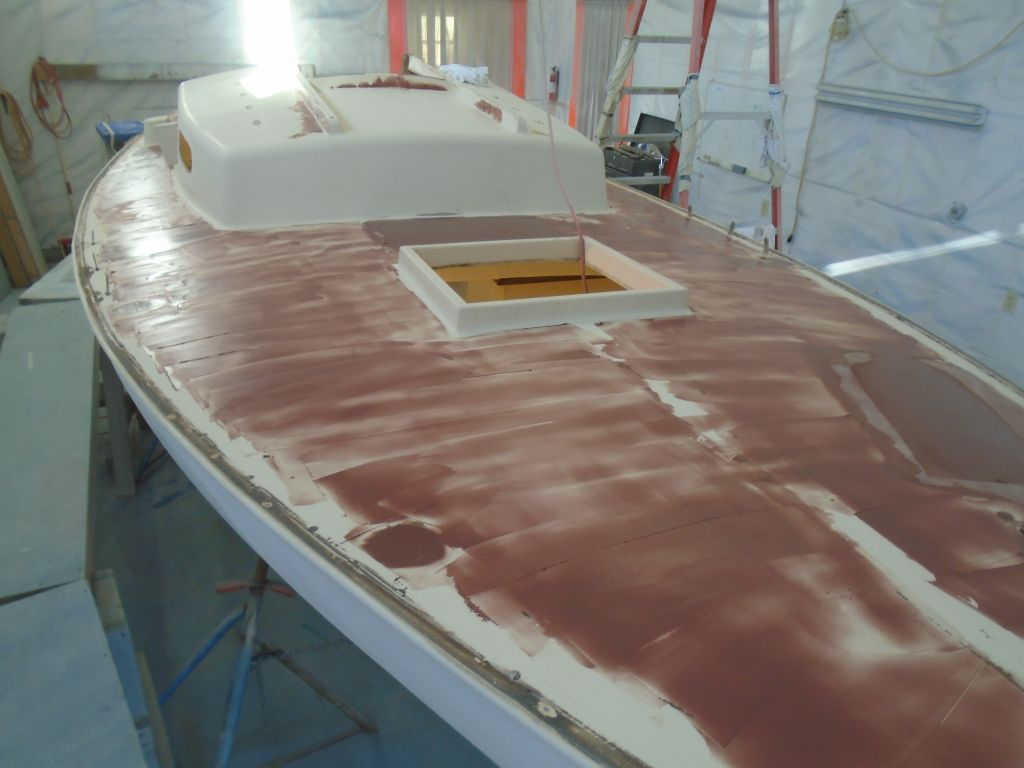
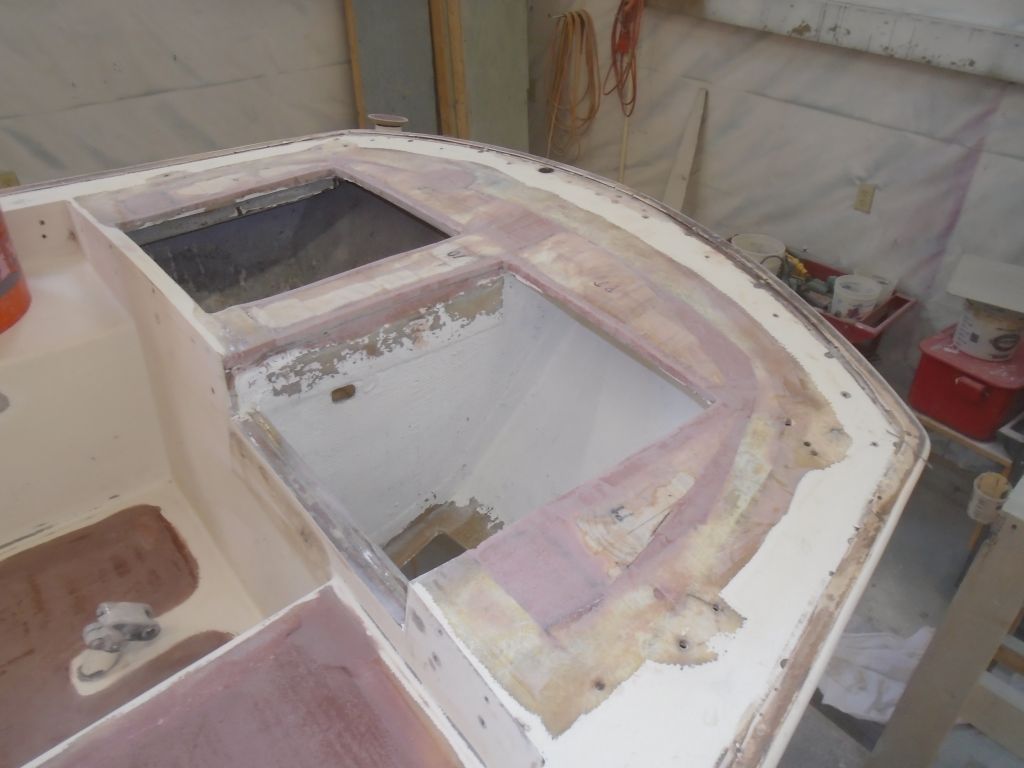
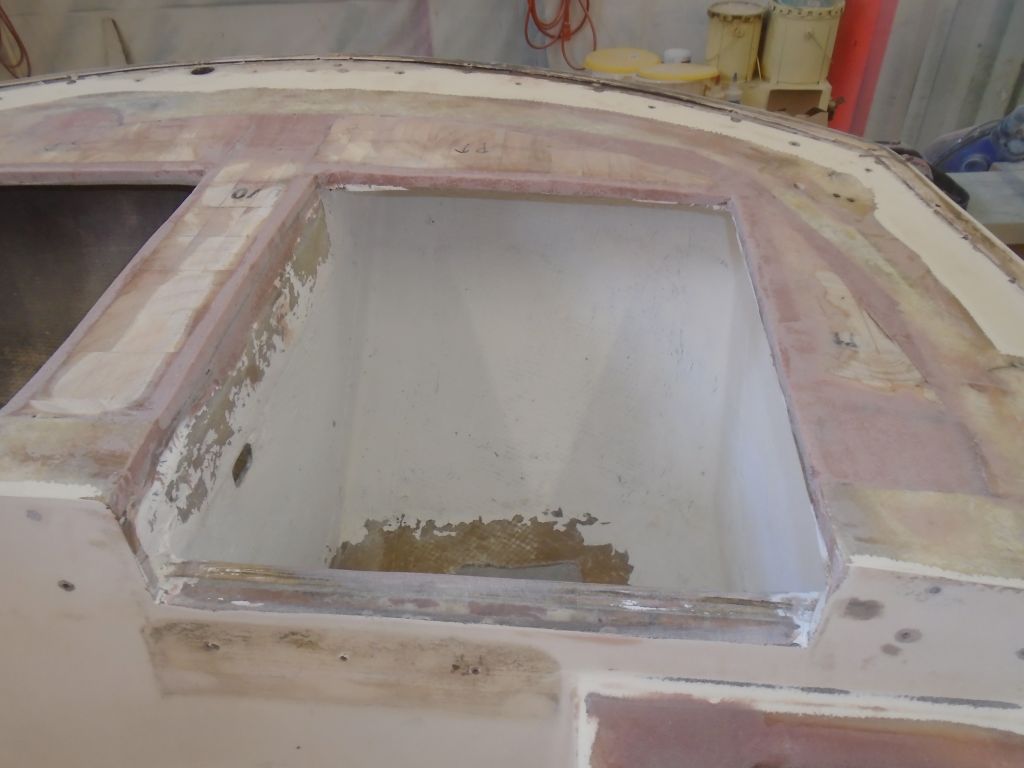
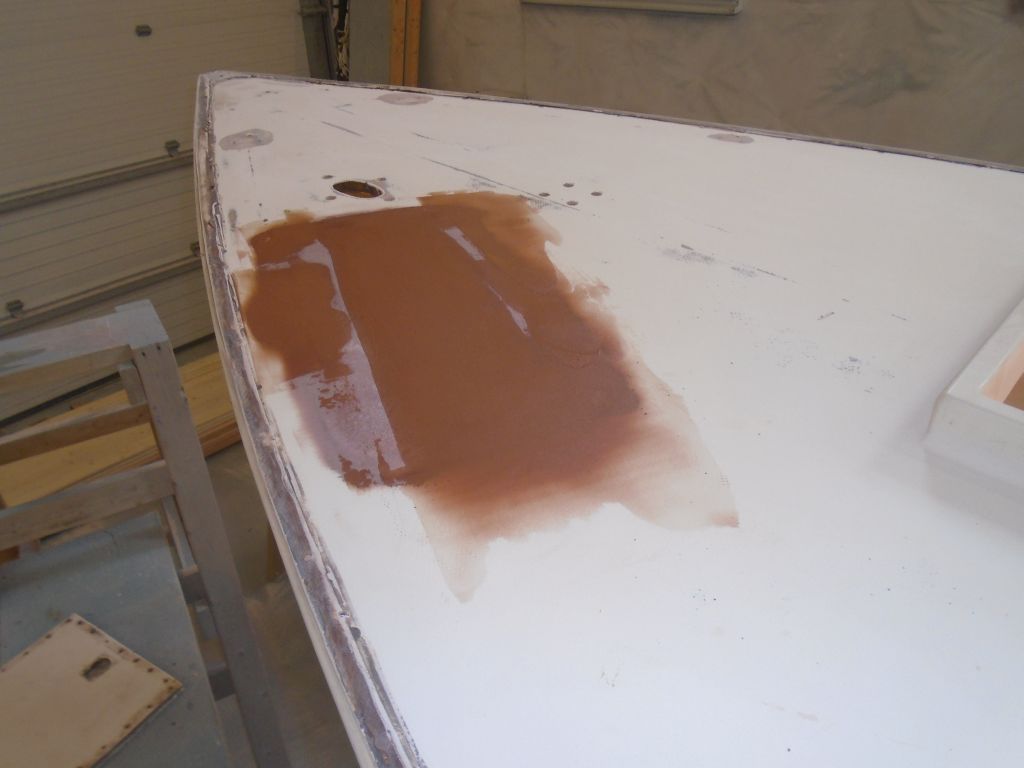
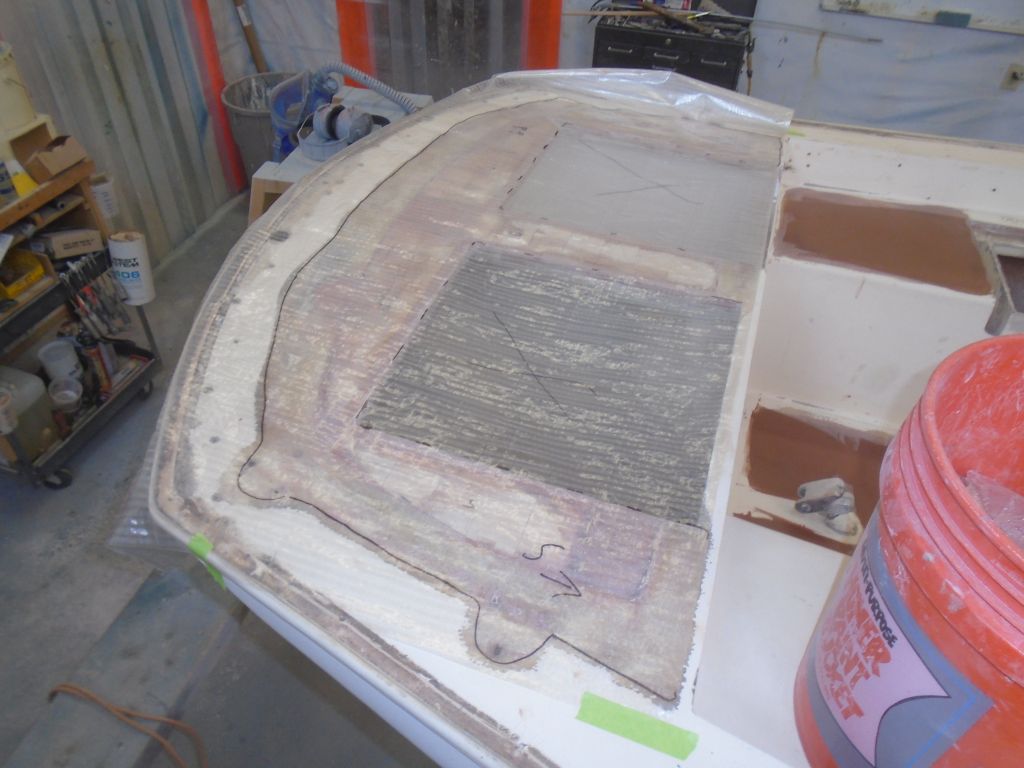
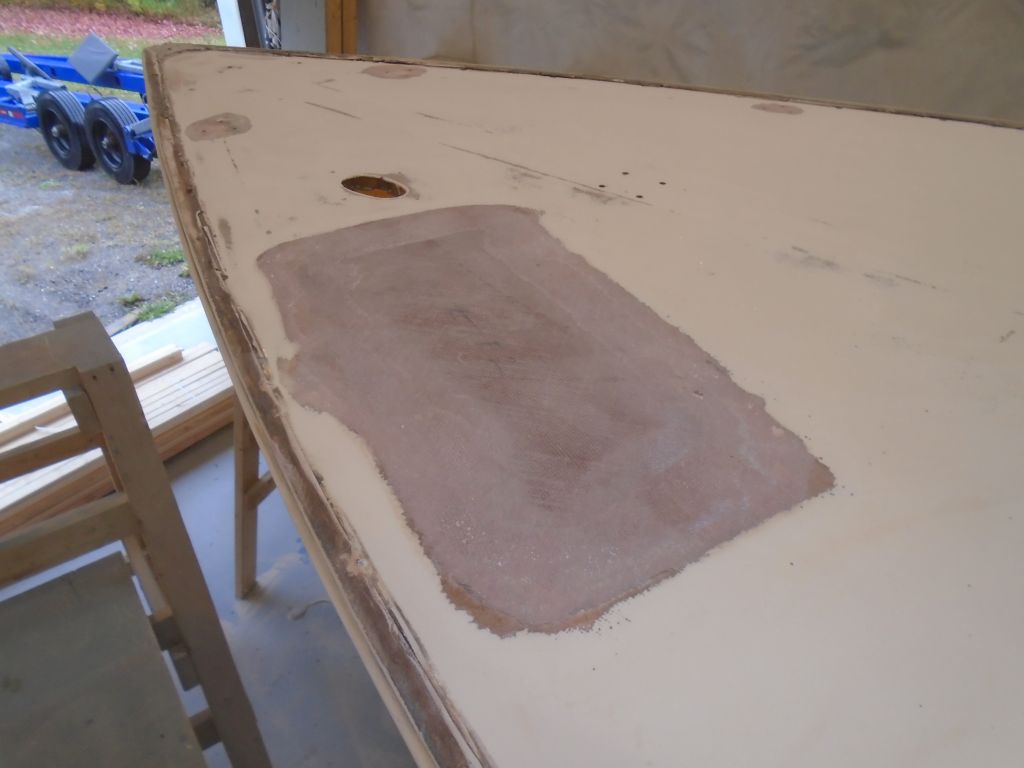
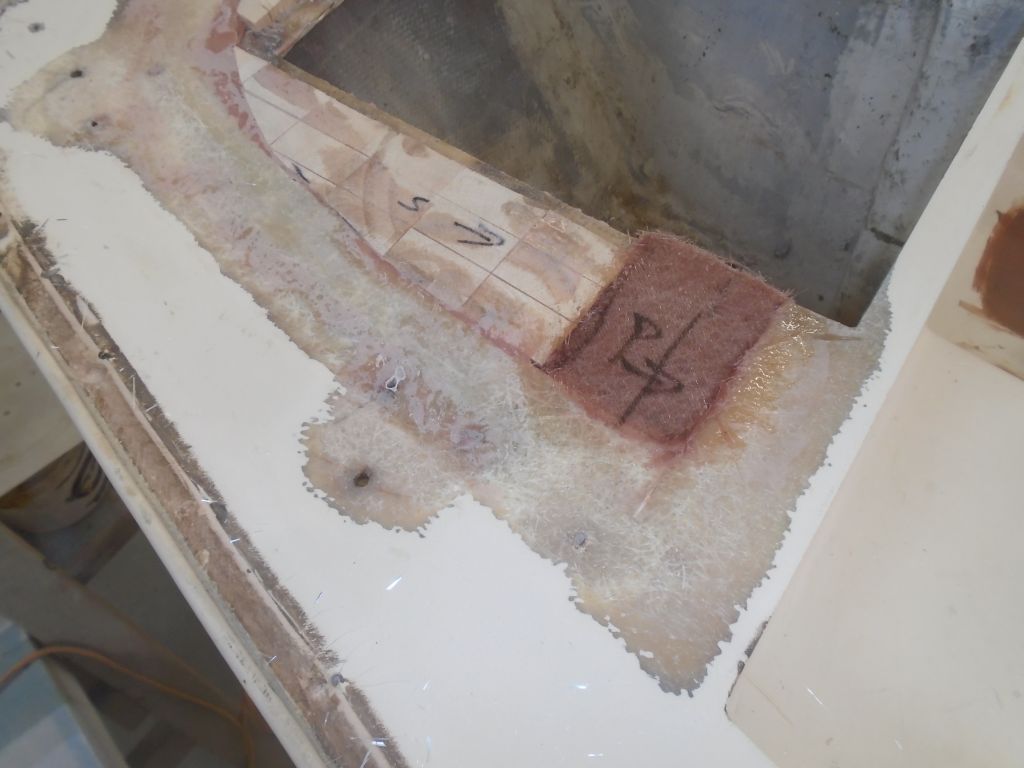
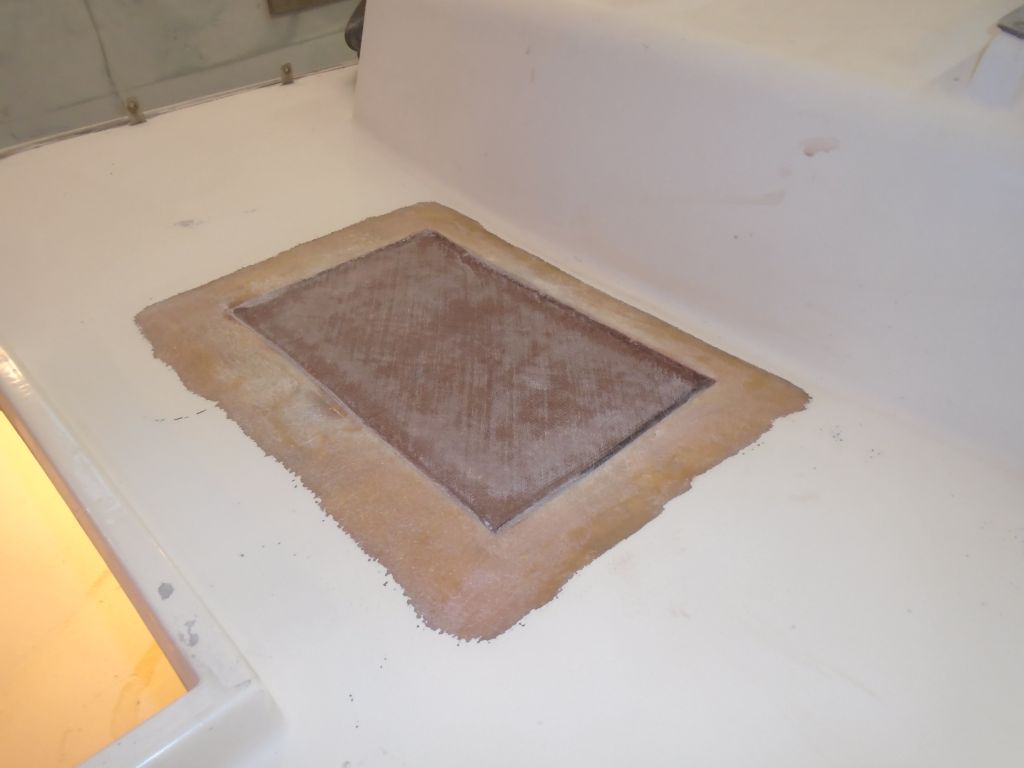
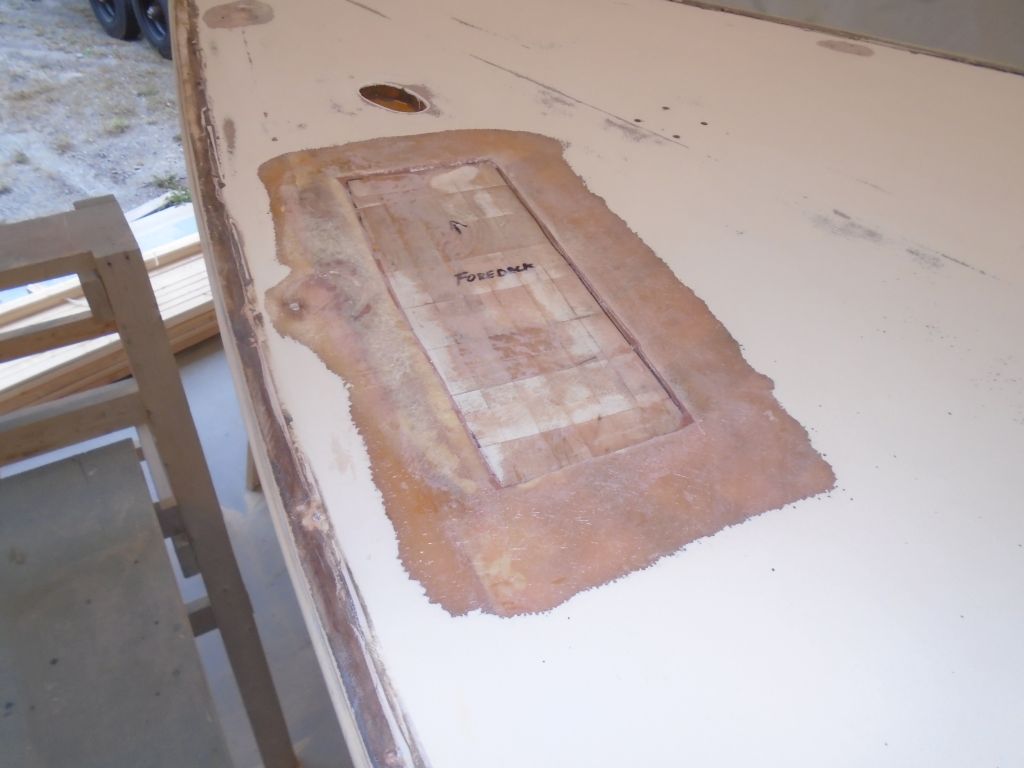
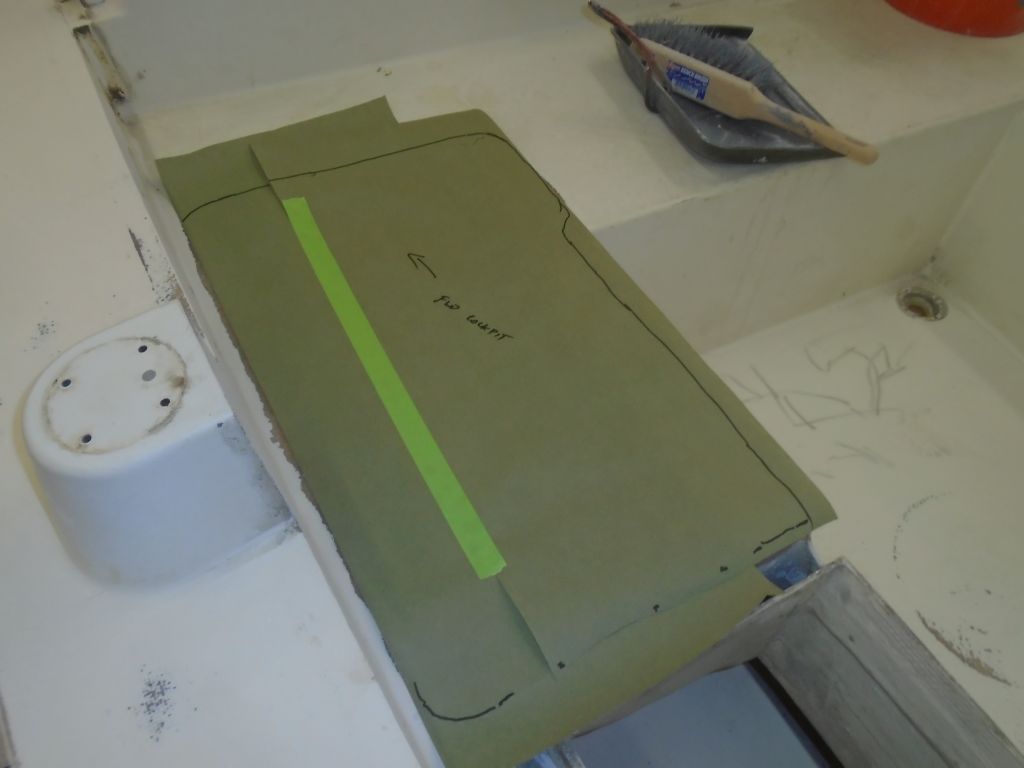
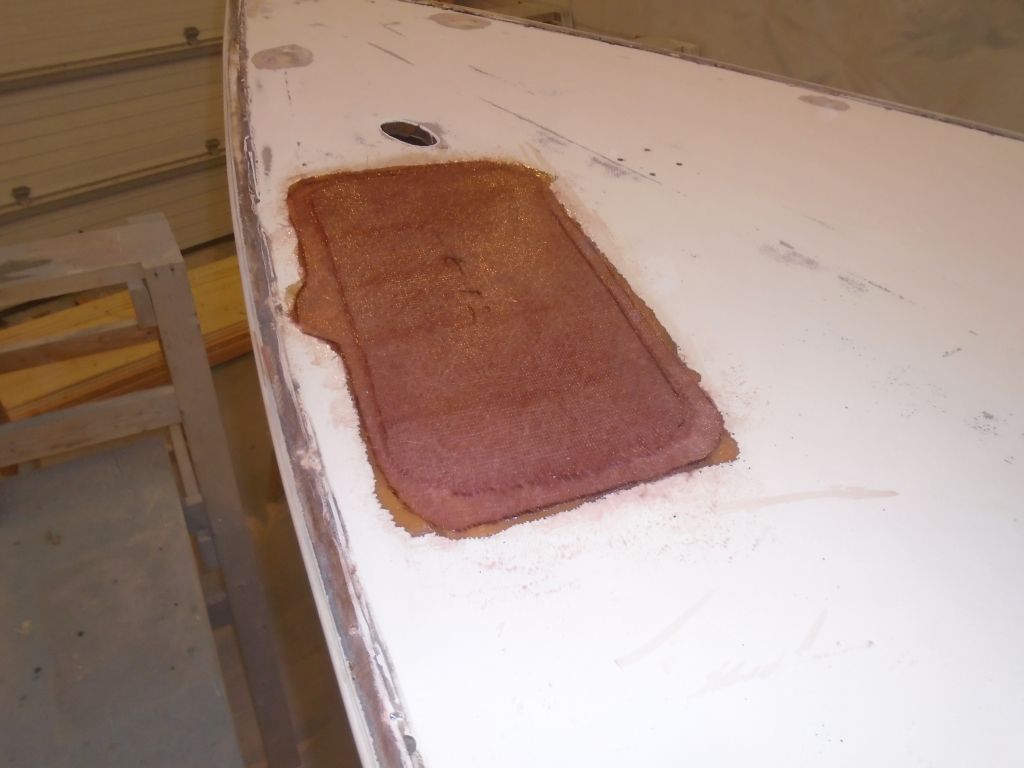
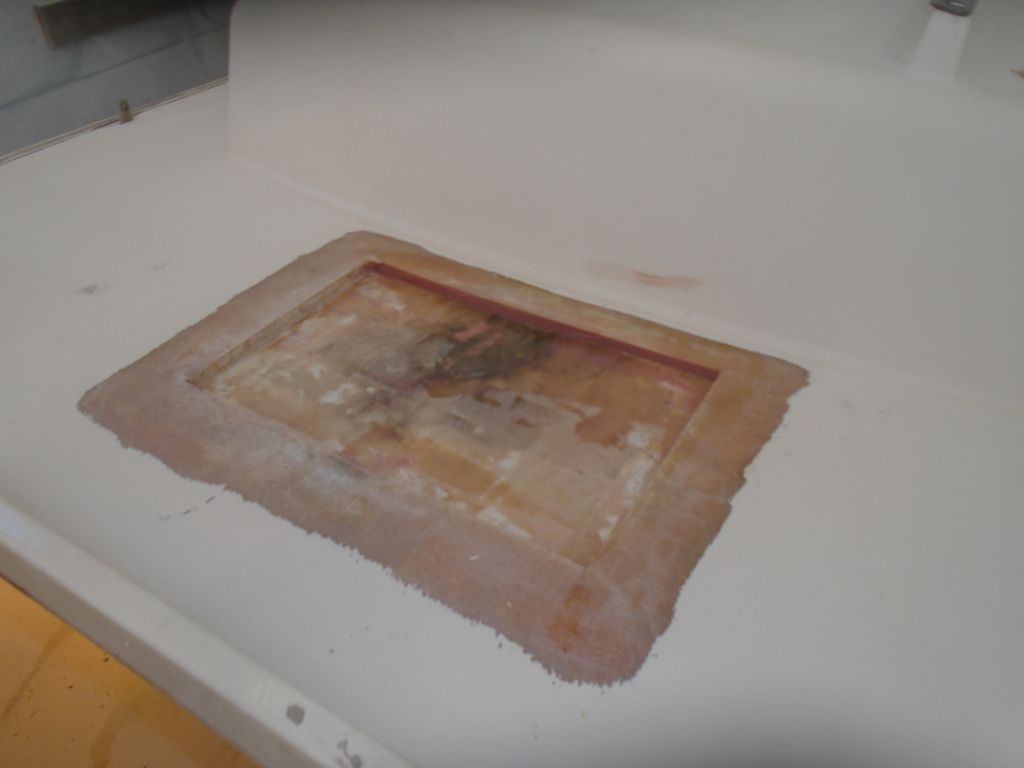
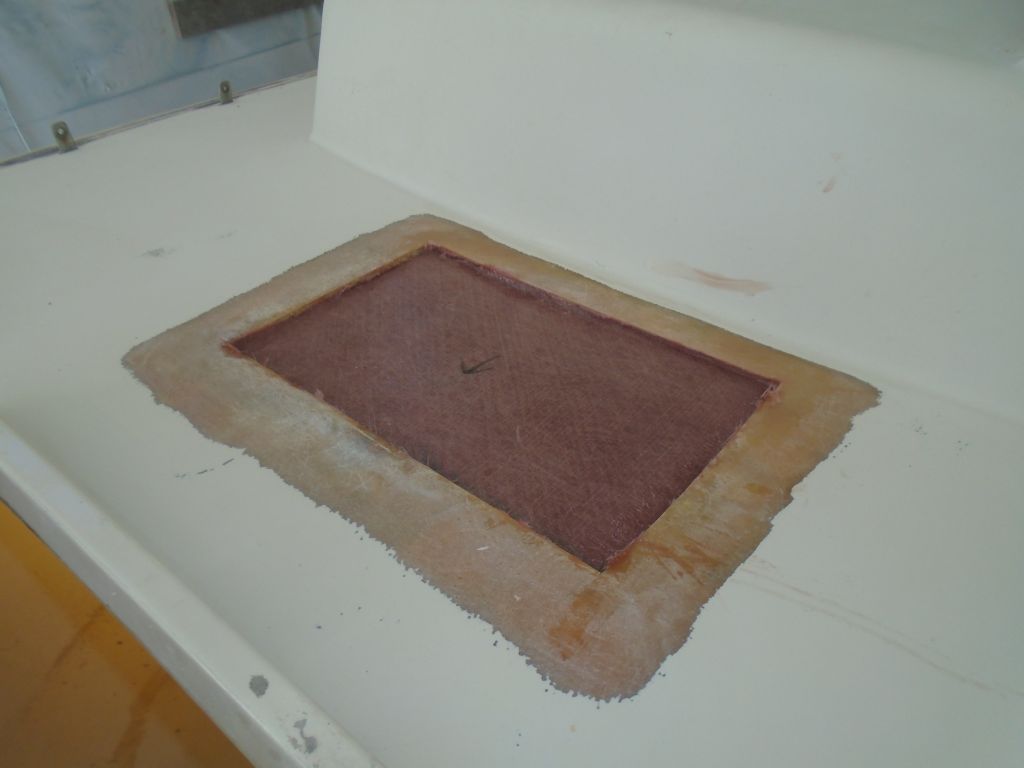
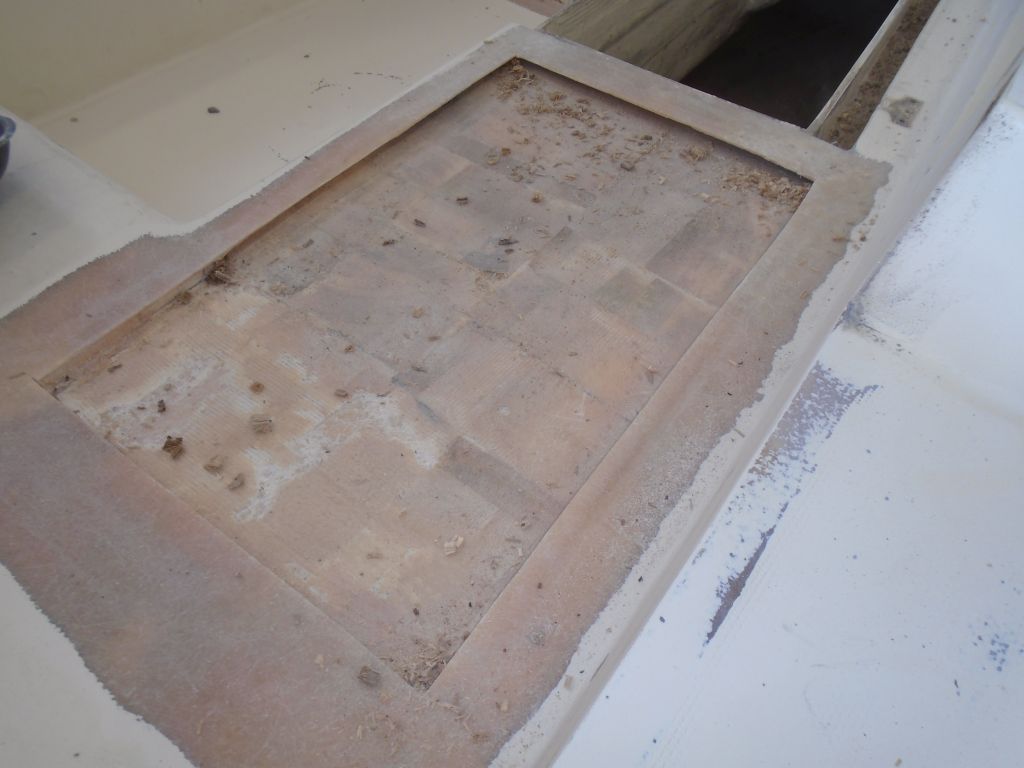
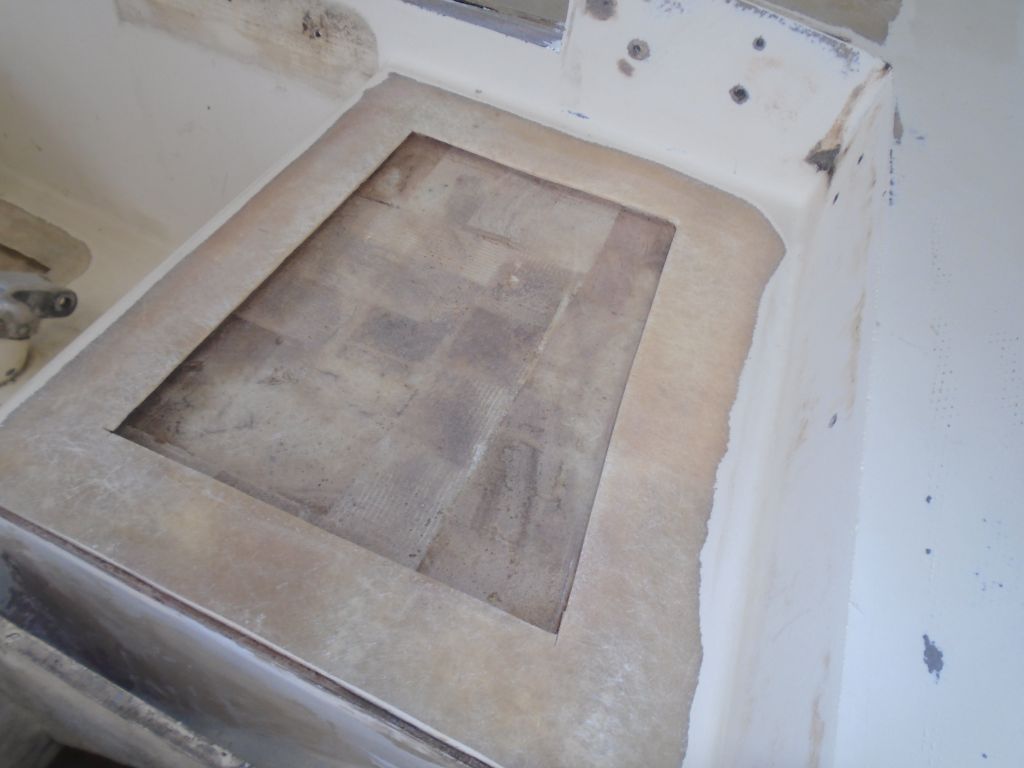
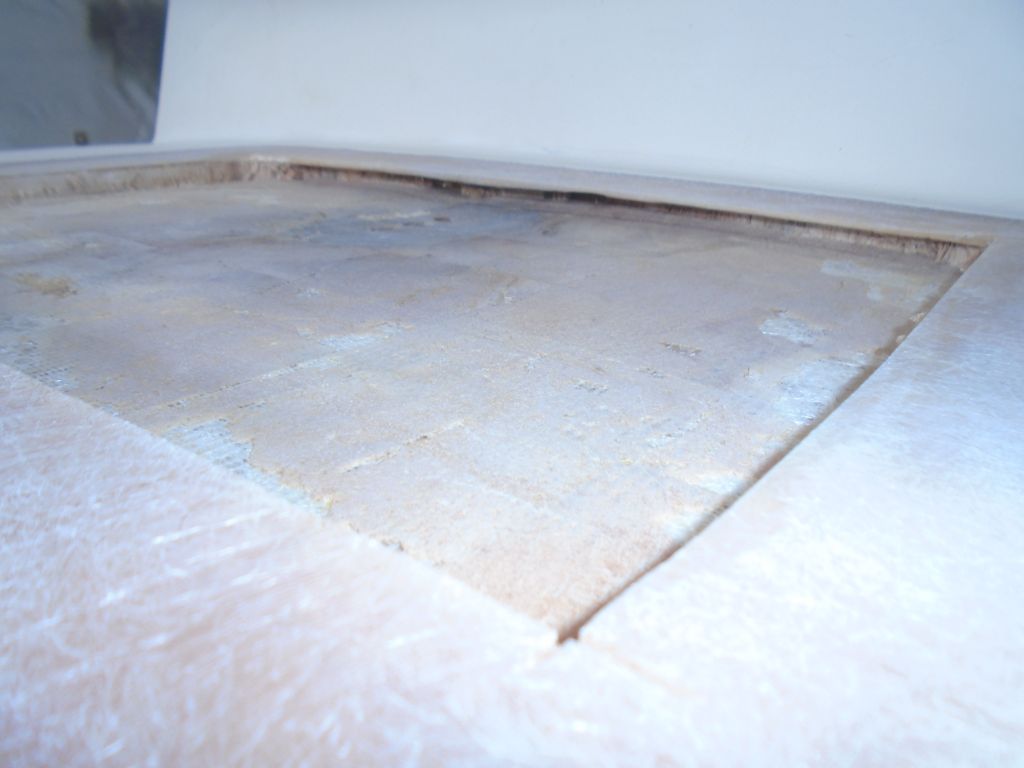
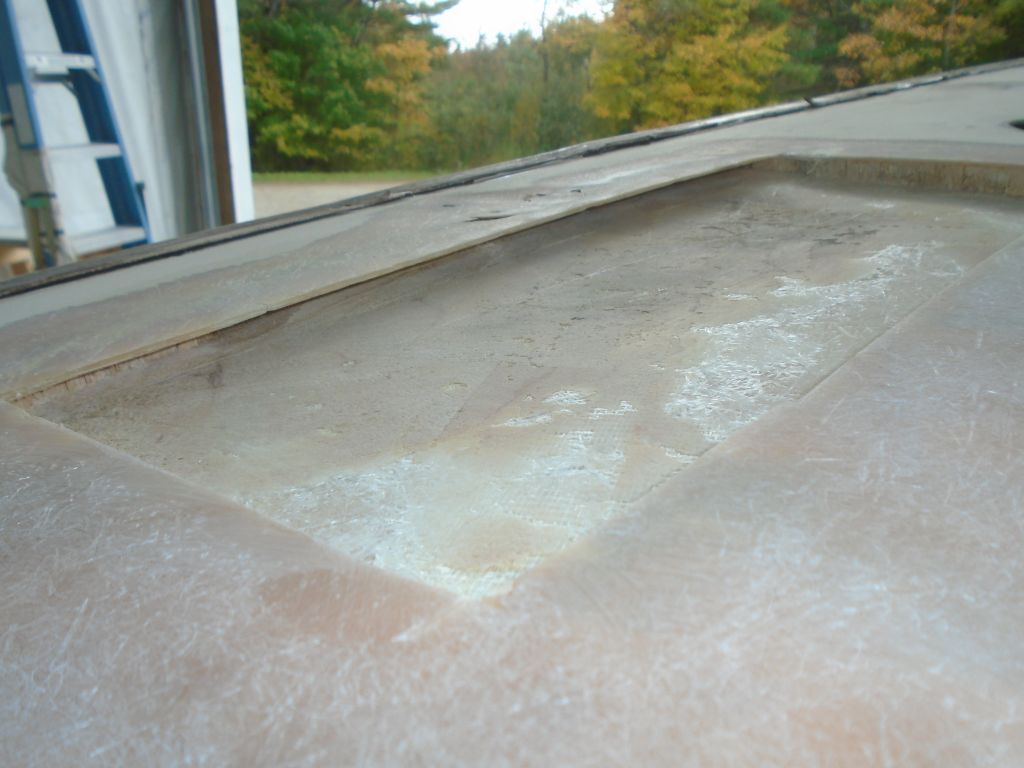
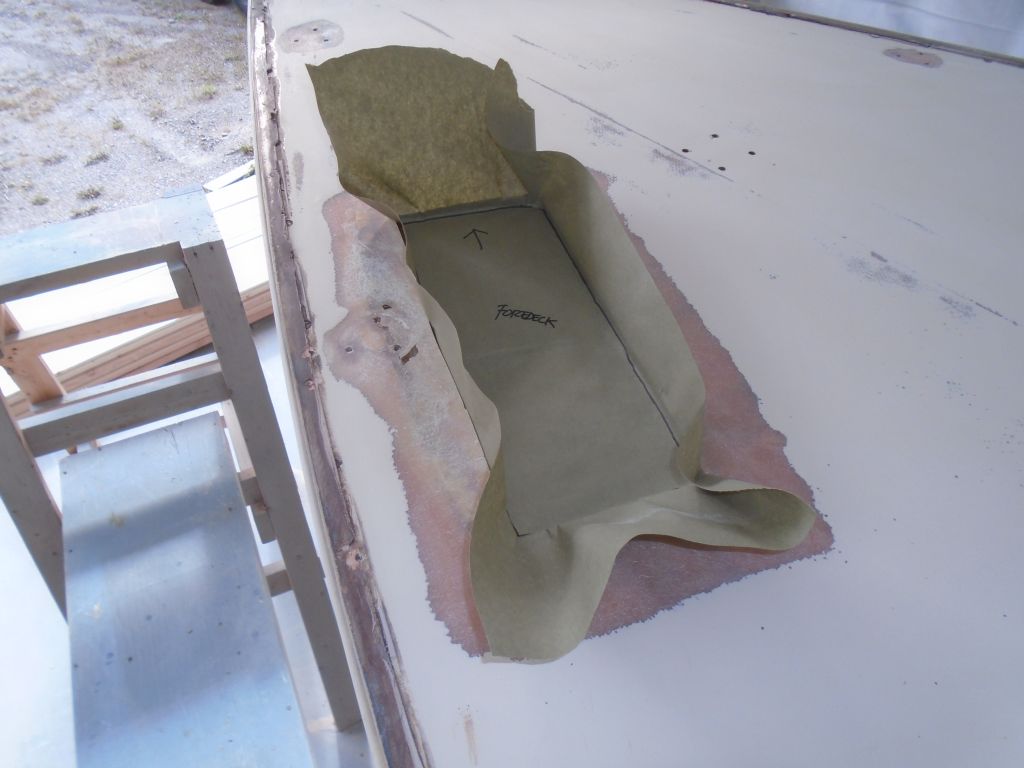
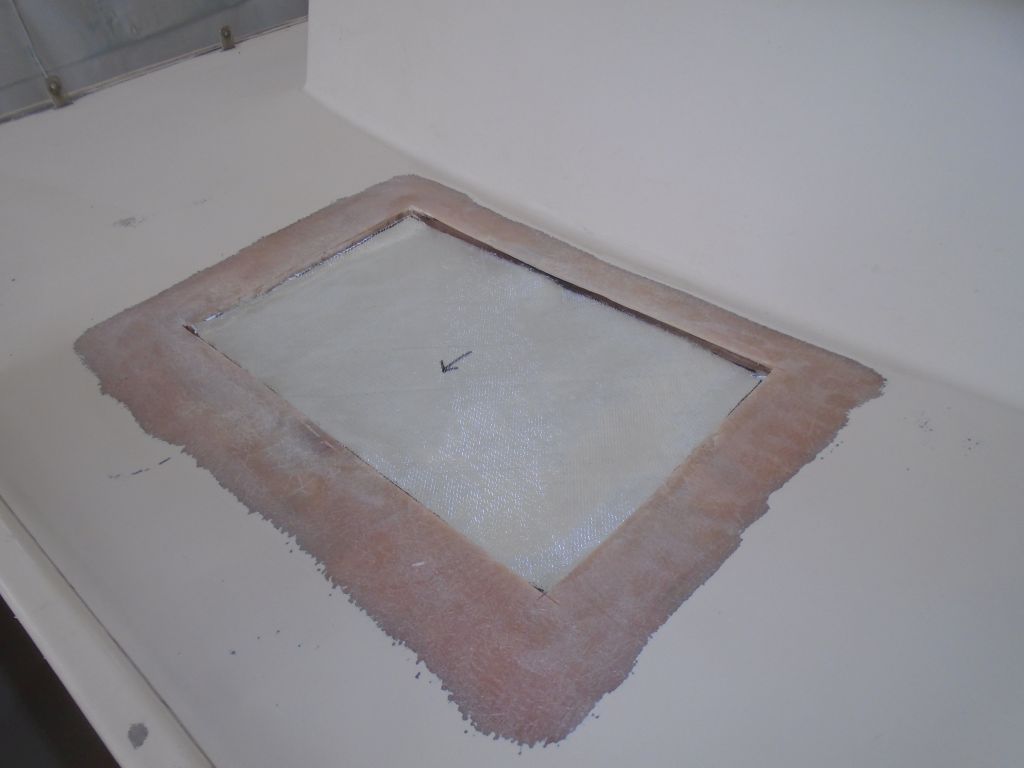
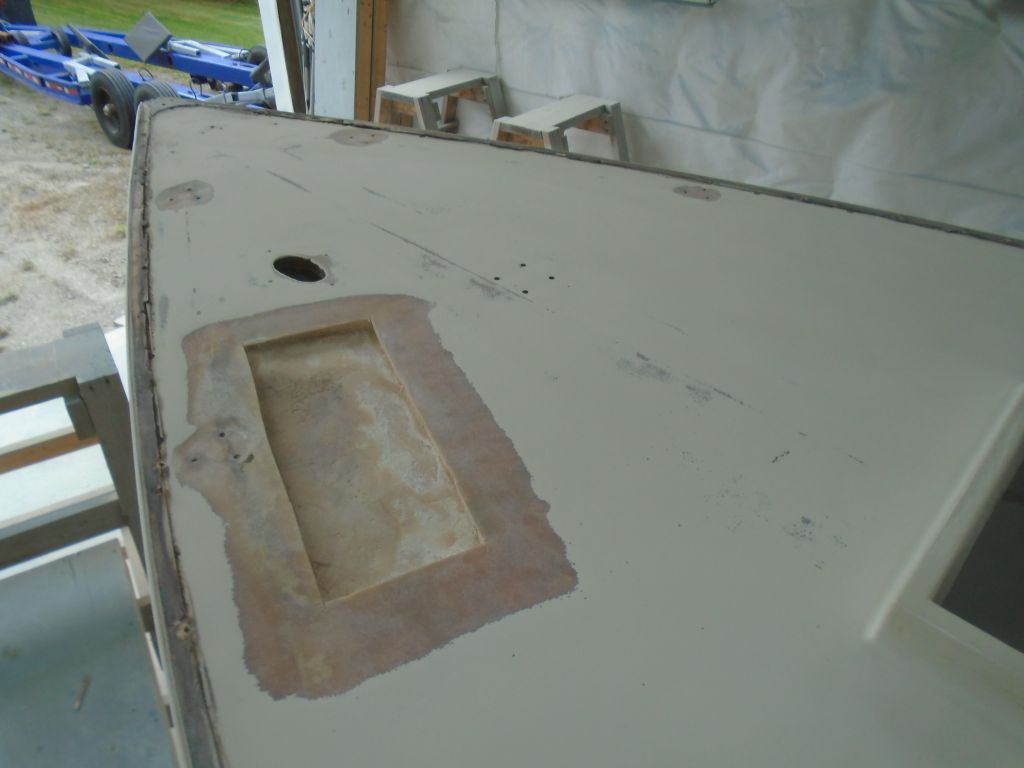
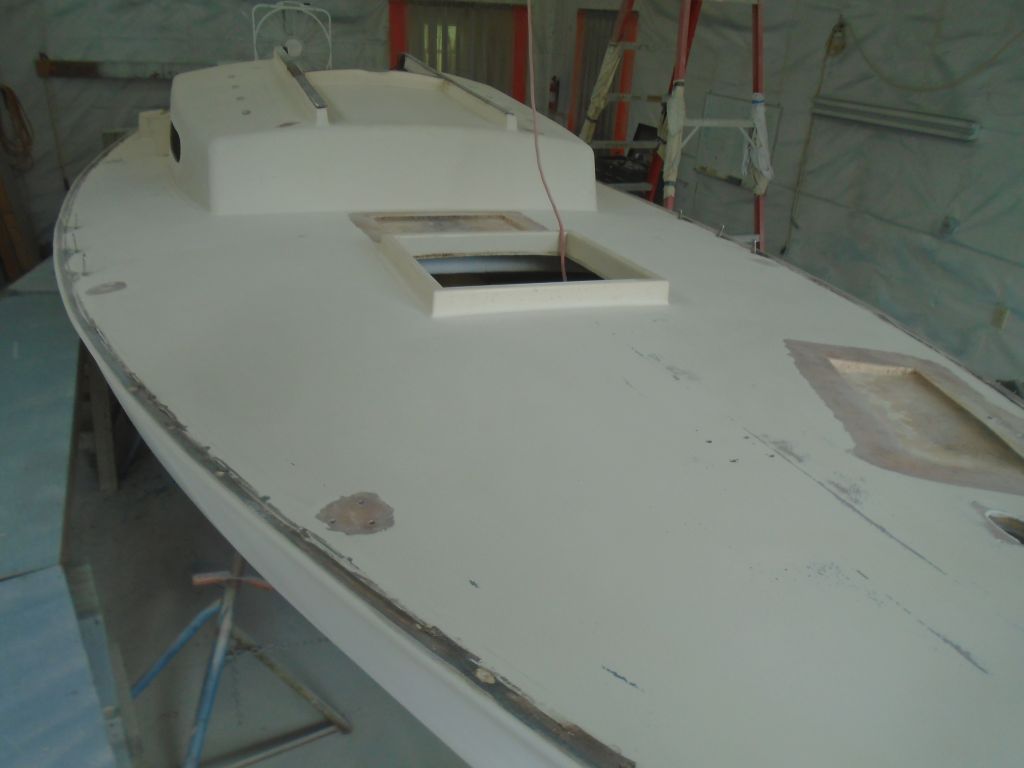
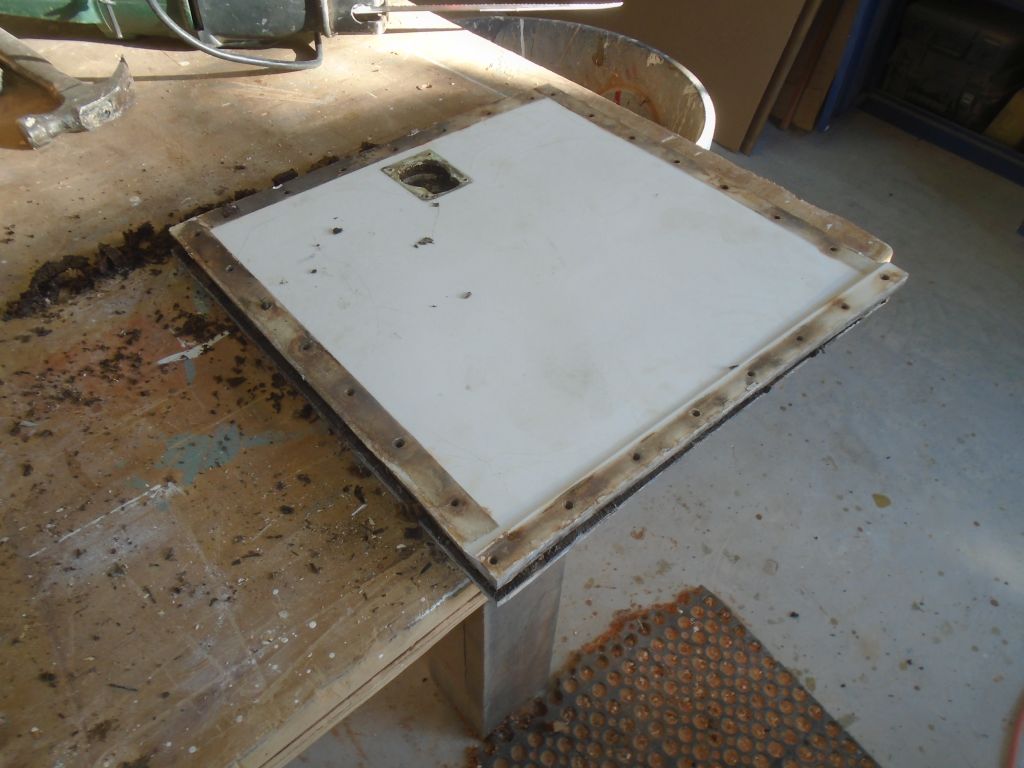
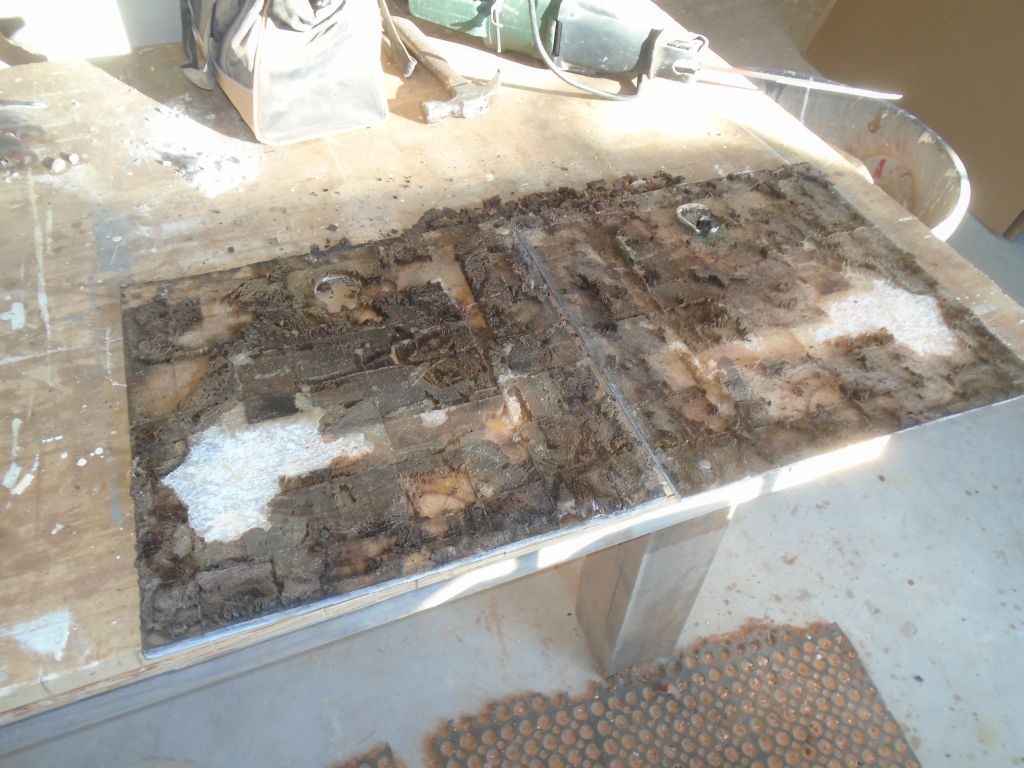
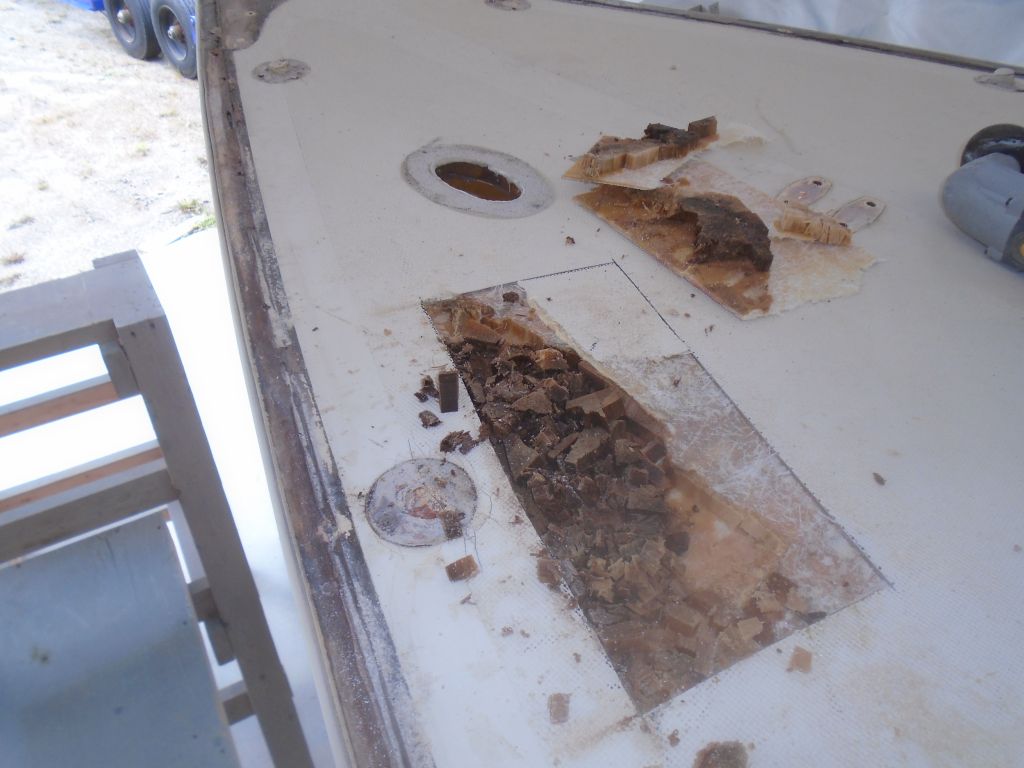
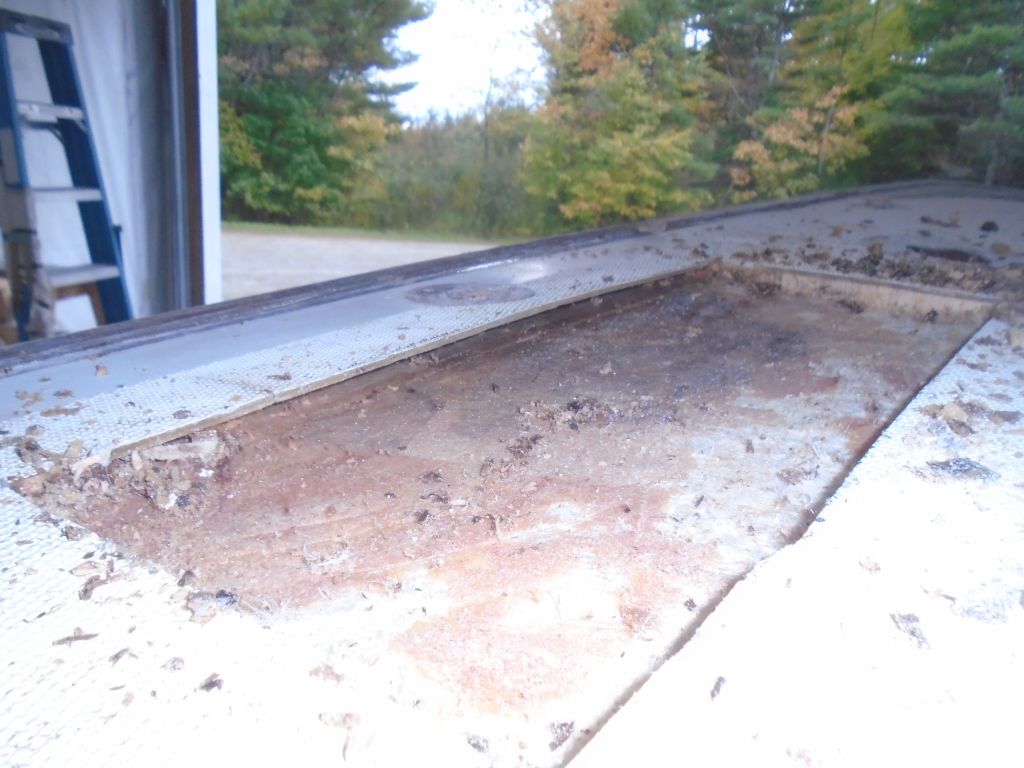
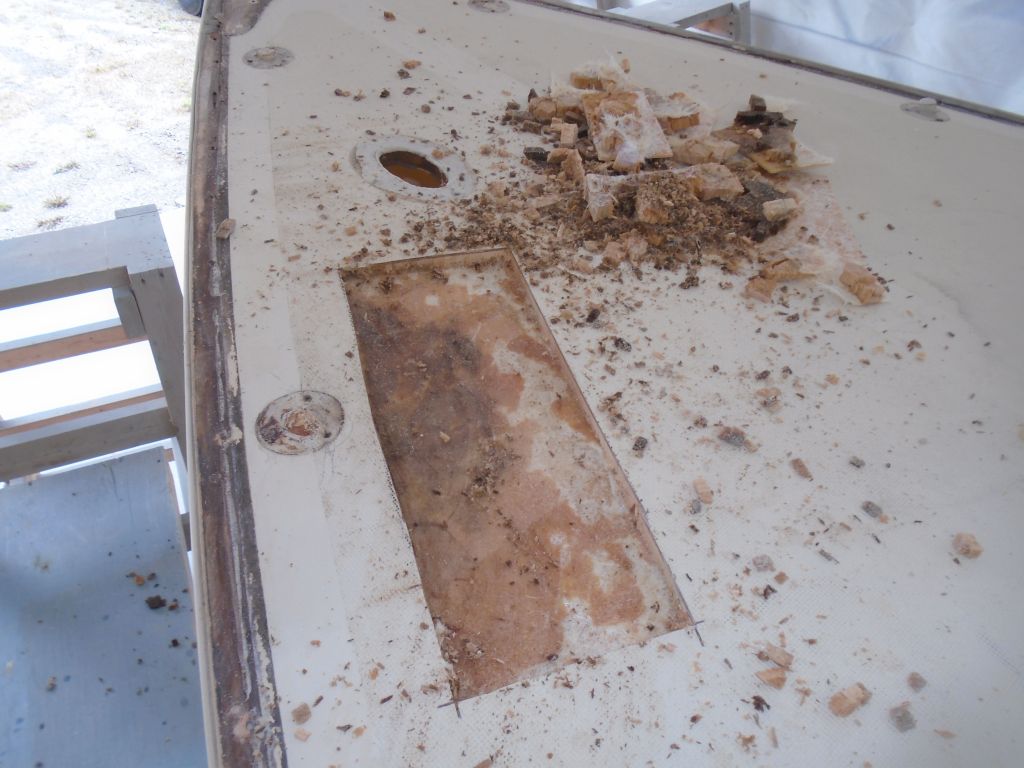
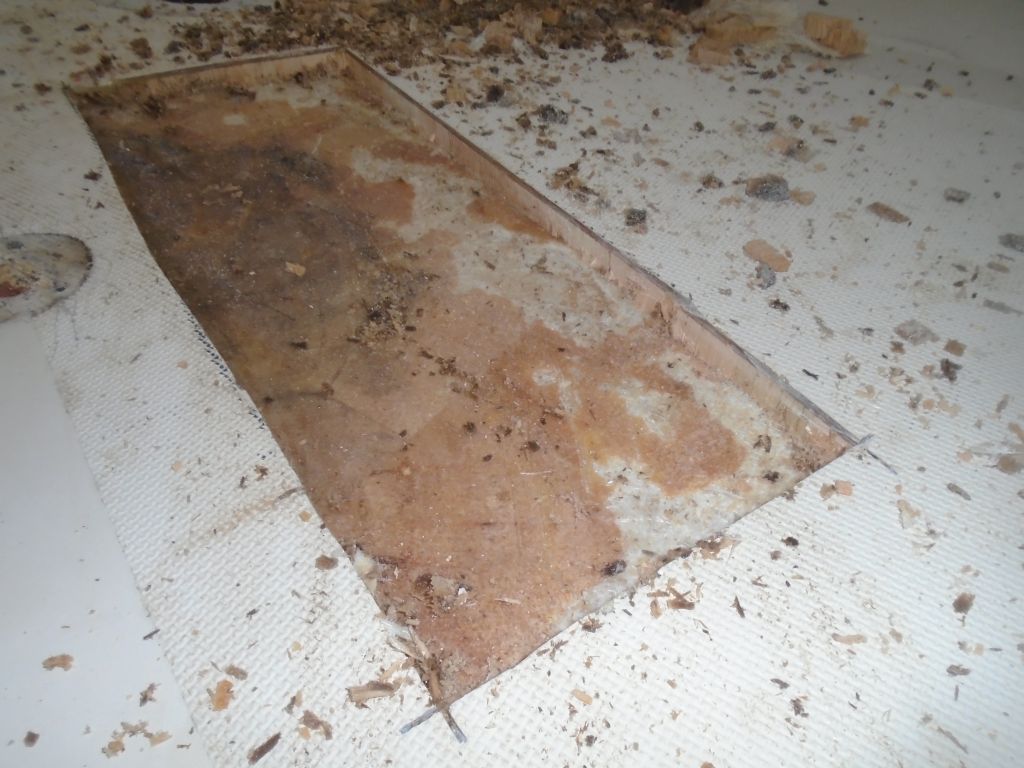
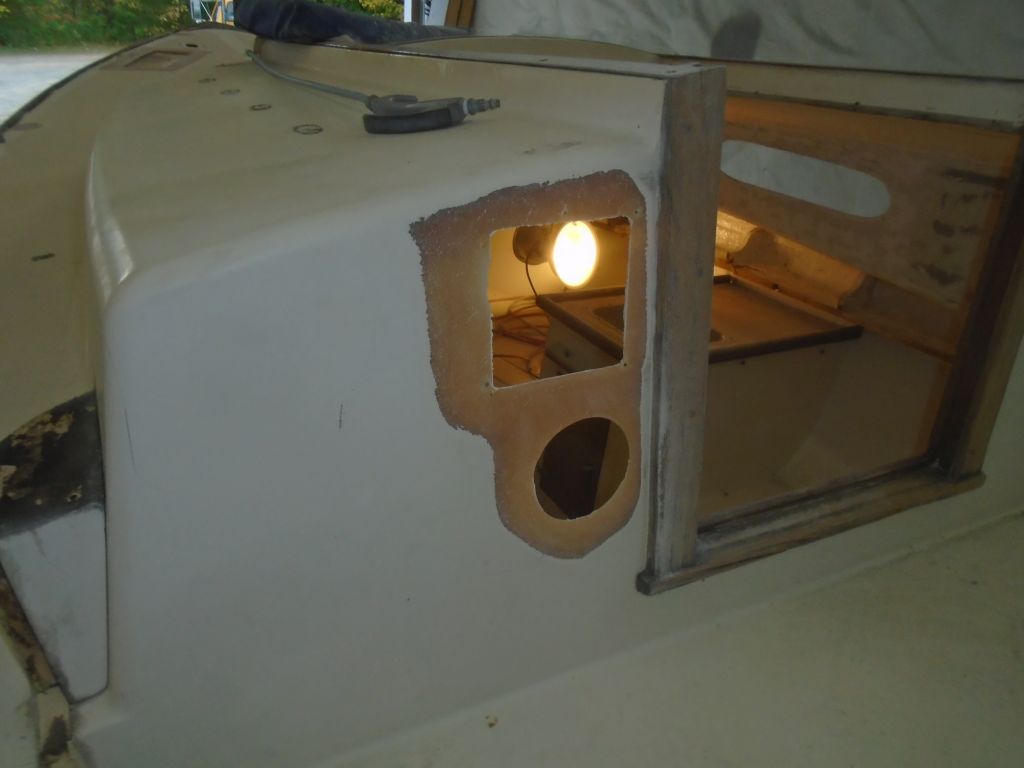
Starting with the foredeck, I cut open the deck to expose the core within the area I’d marked, the boundaries of which I’d left well outside the known bad area to ensure that the cut would extend into sound core.  Then, I chiseled out the old core and dug it out from beneath the outer edge, where the core ended.

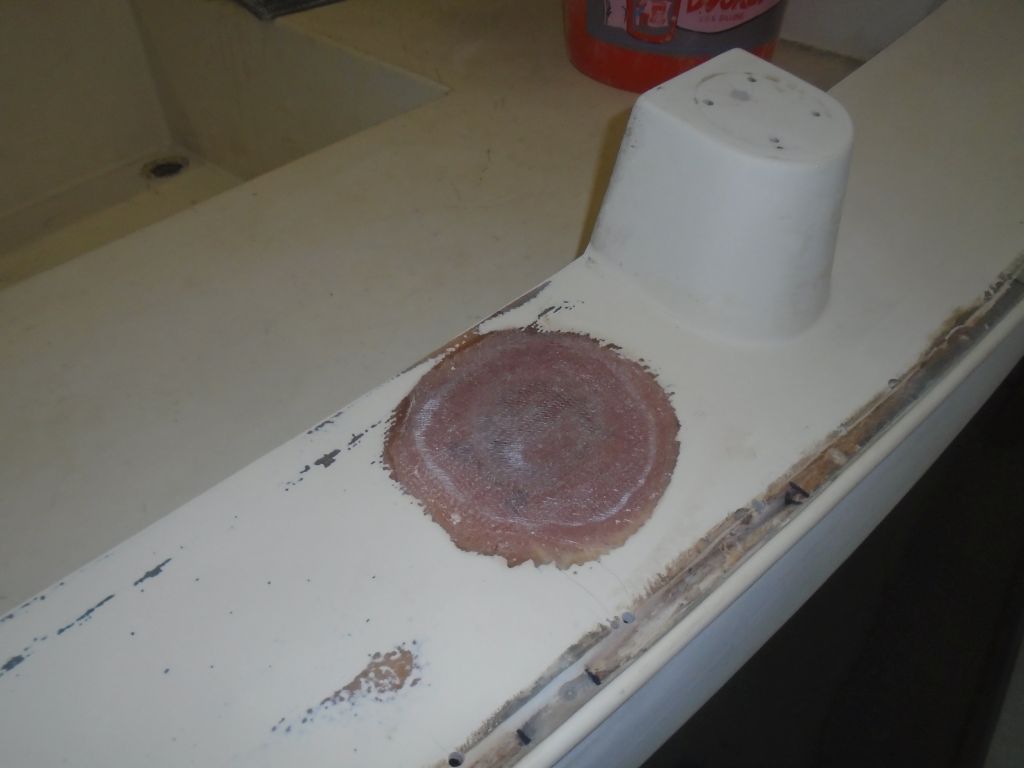
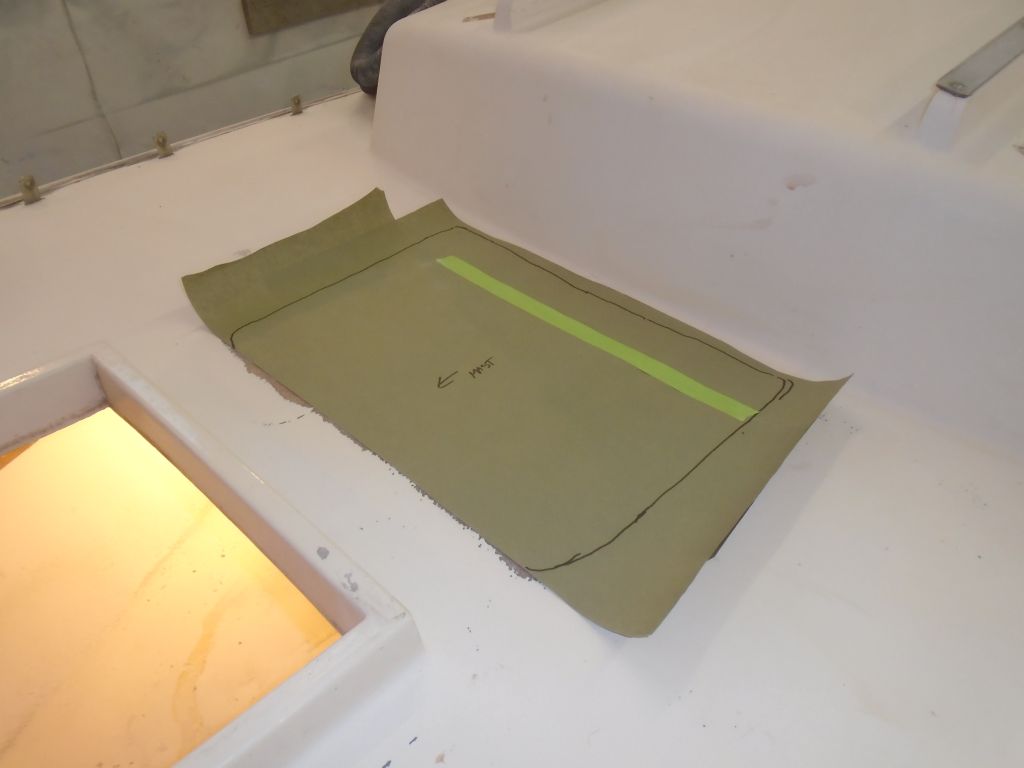
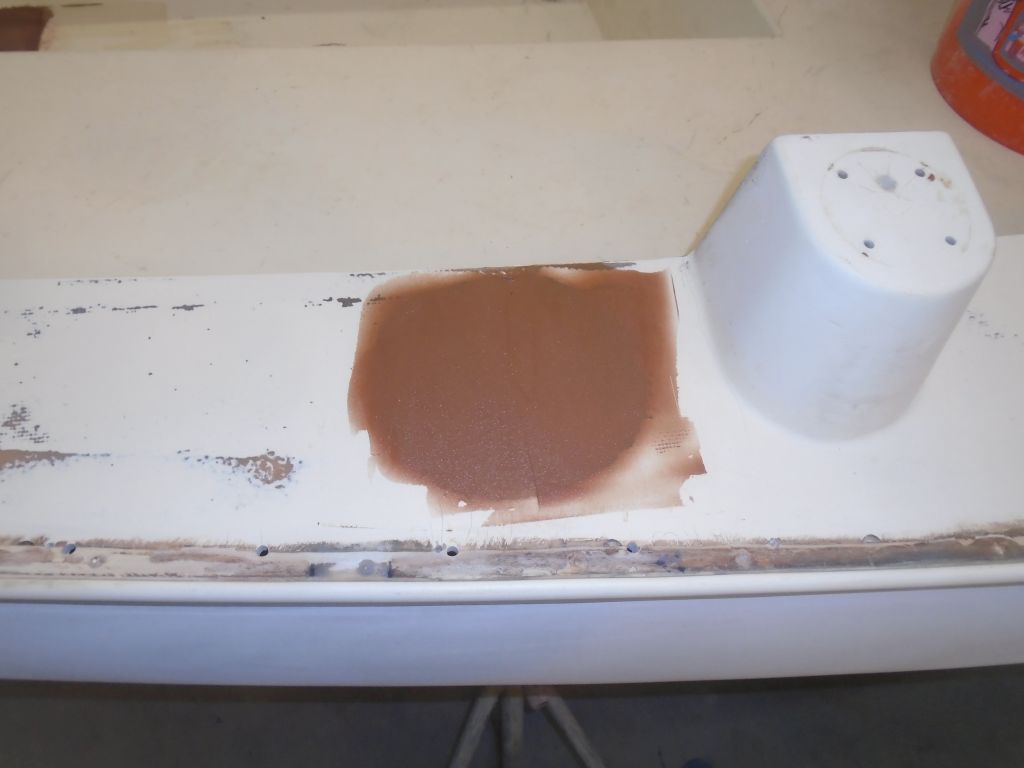
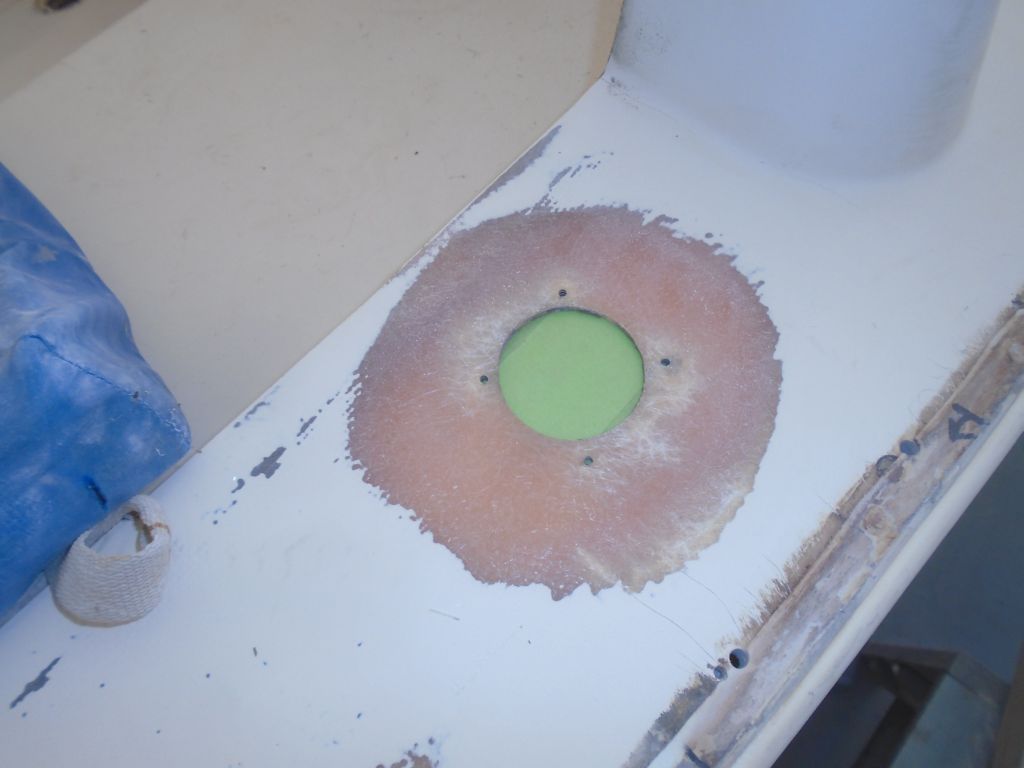
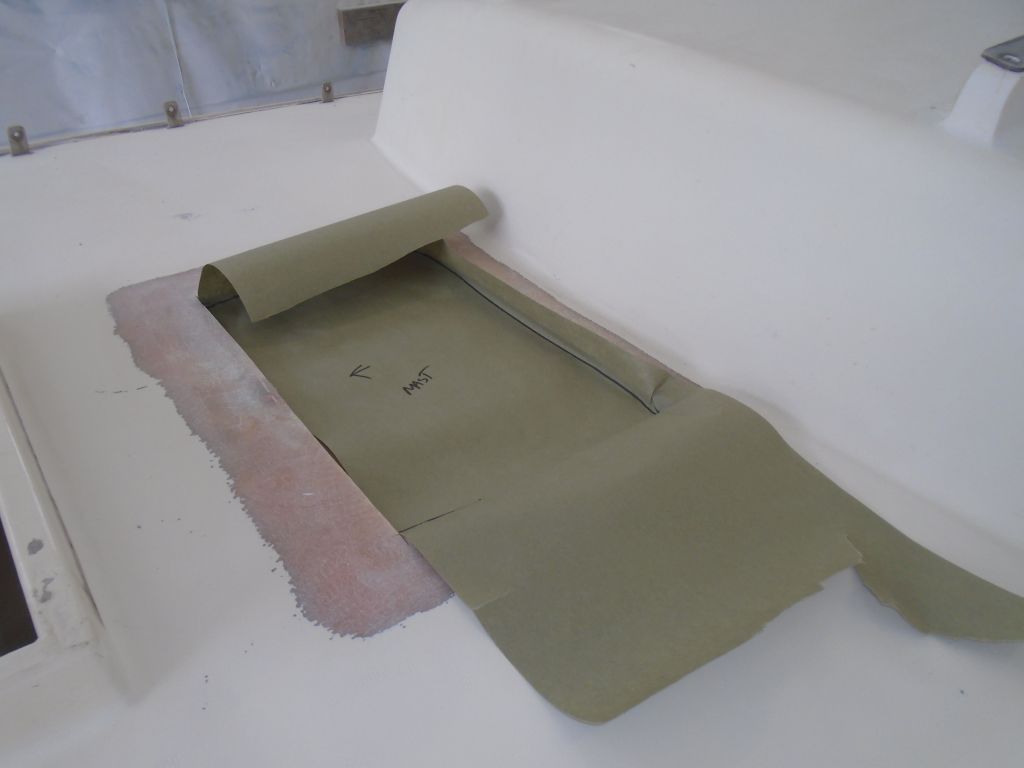
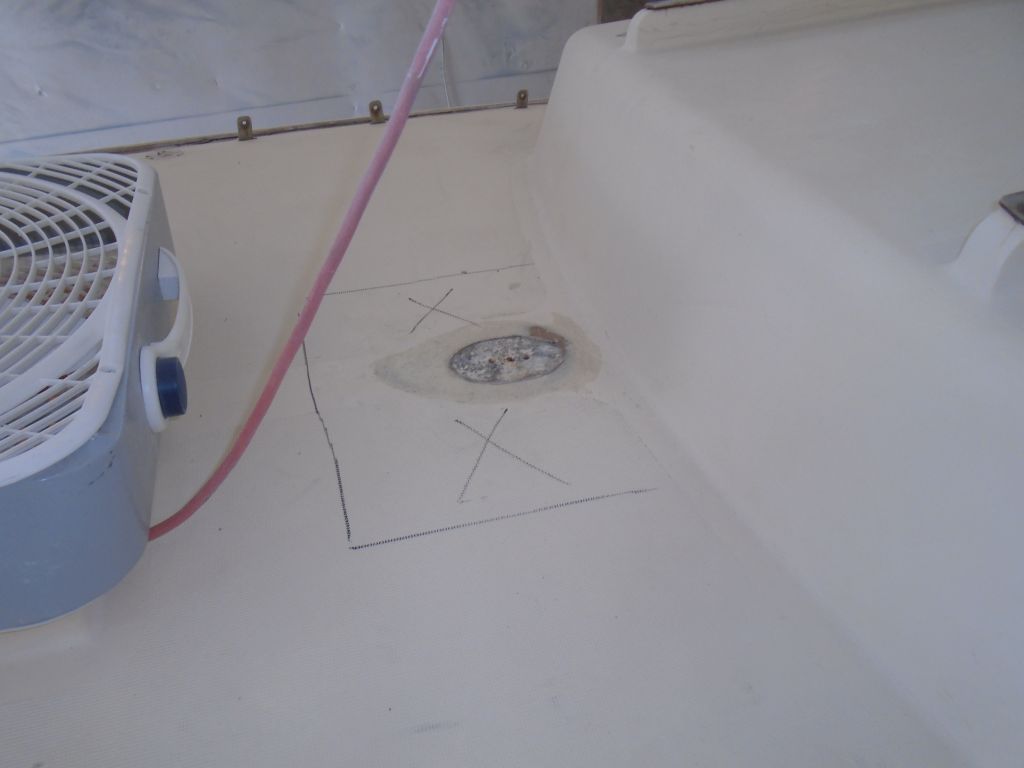
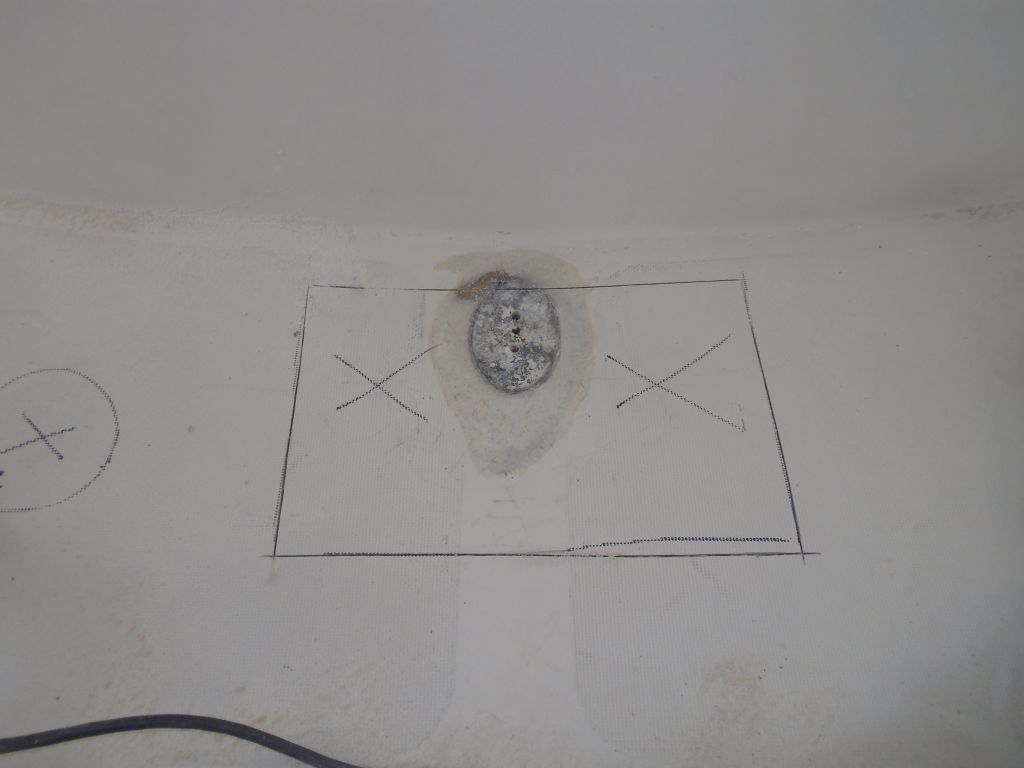
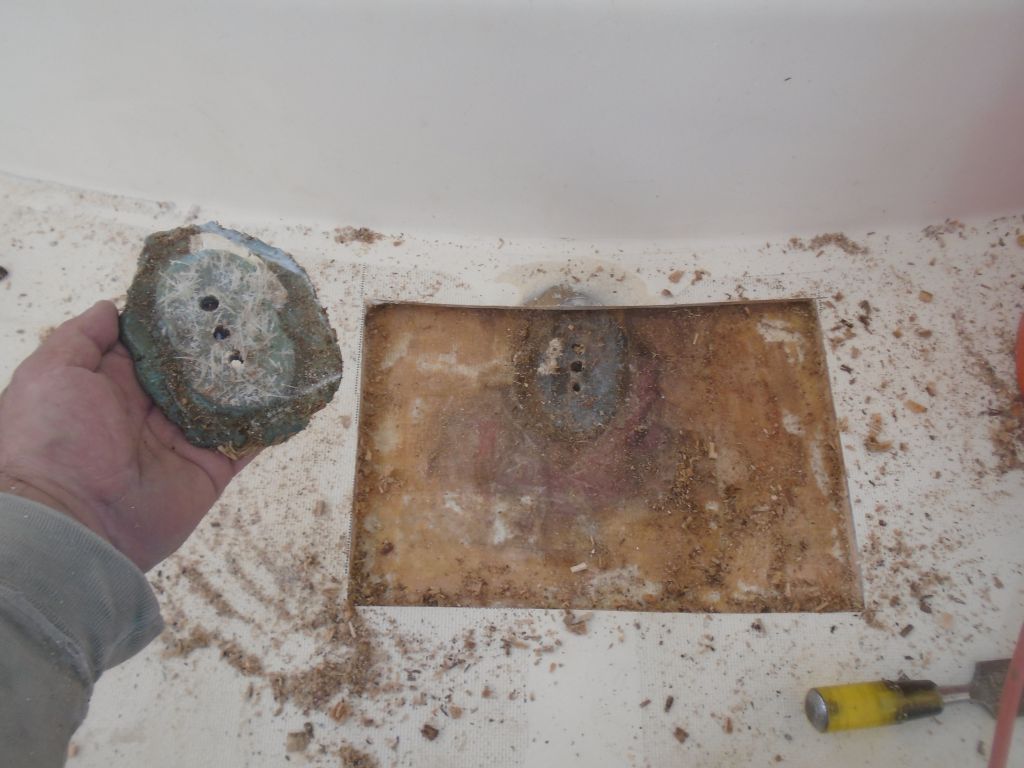
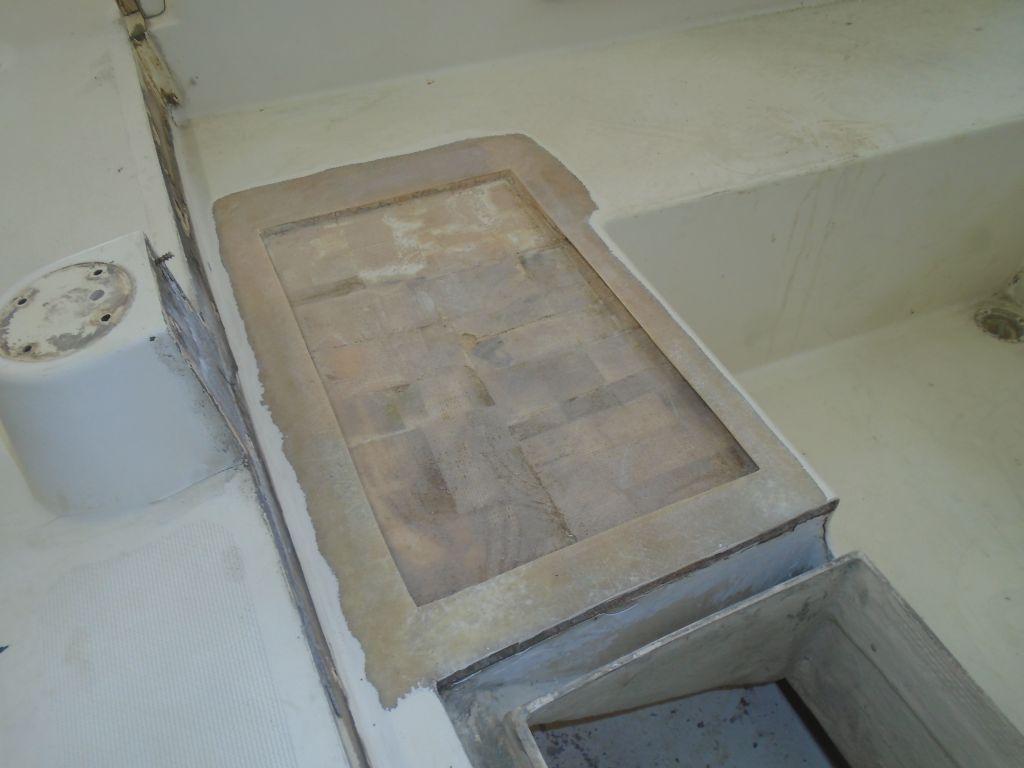
I continued the process with the area beneath the mast step.  Someone had previously opened a small area of the deck here and installed a greenish polyester filler beneath the step itself, apparently in response to the sort of deck compression one might expect when locating a mast step on a cored structure.  I removed this material as well for a fresh start:  I planned to reinforce this area with solid fiberglass to better accept the compression loads of the mast and rigging.

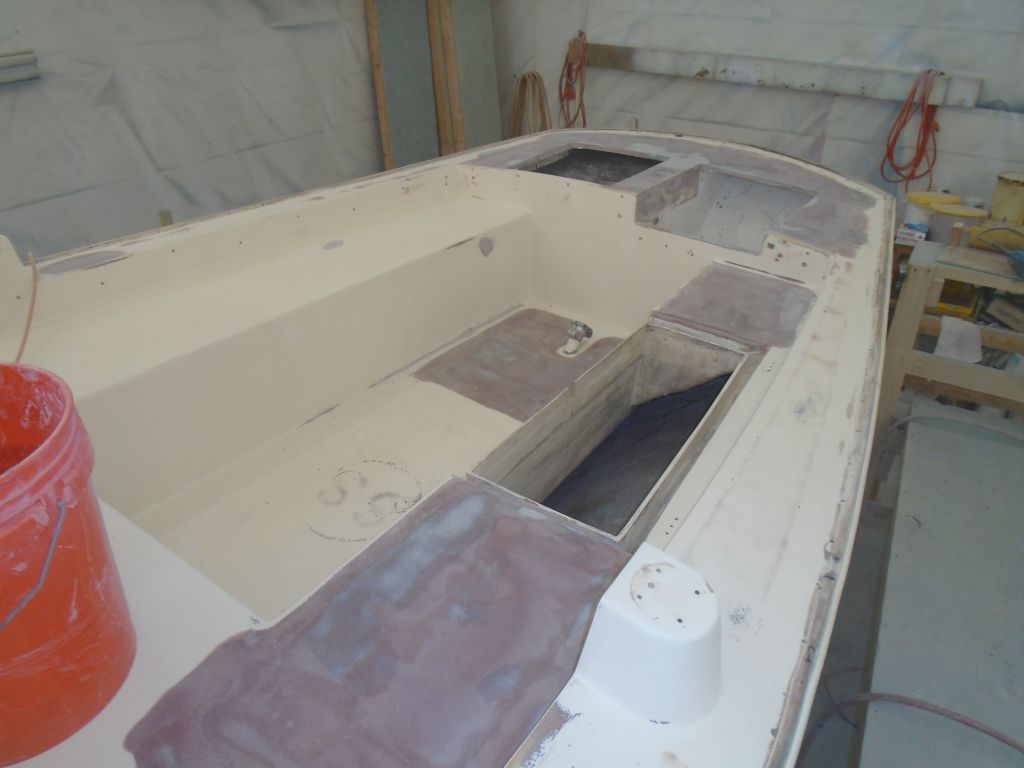
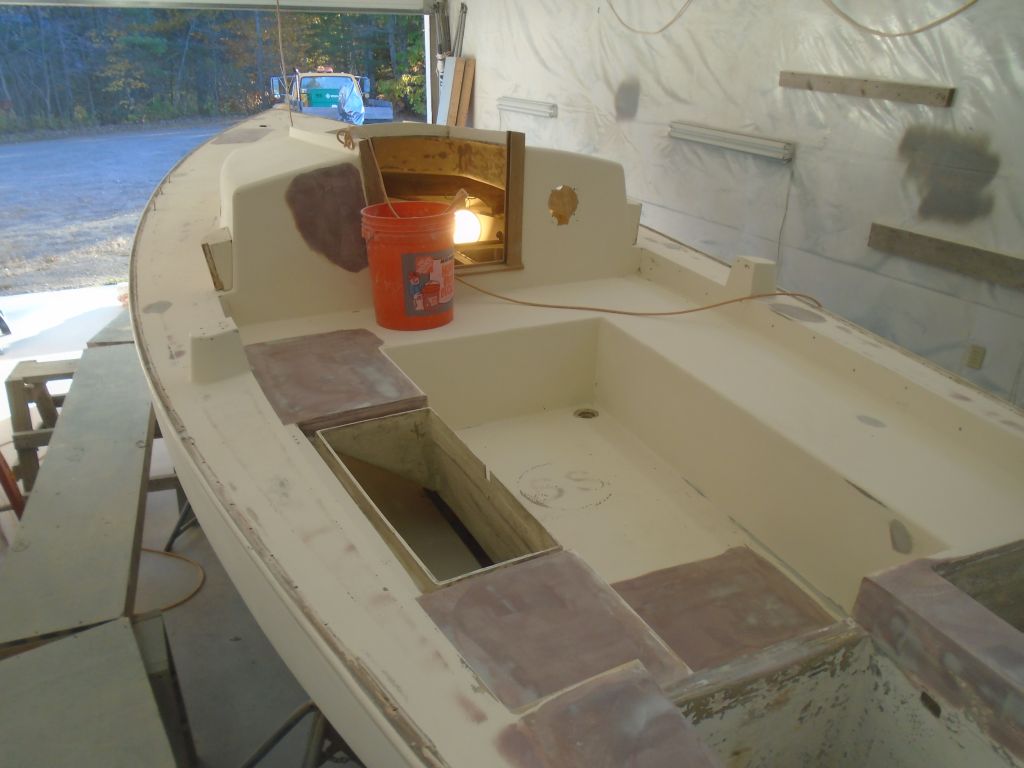
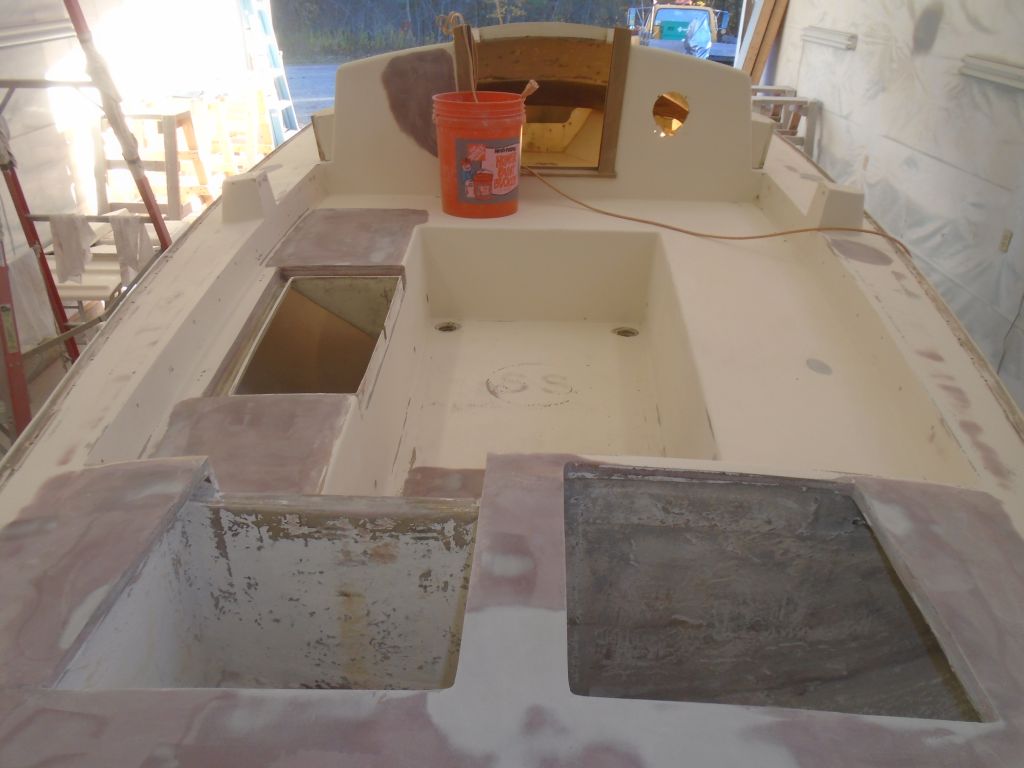
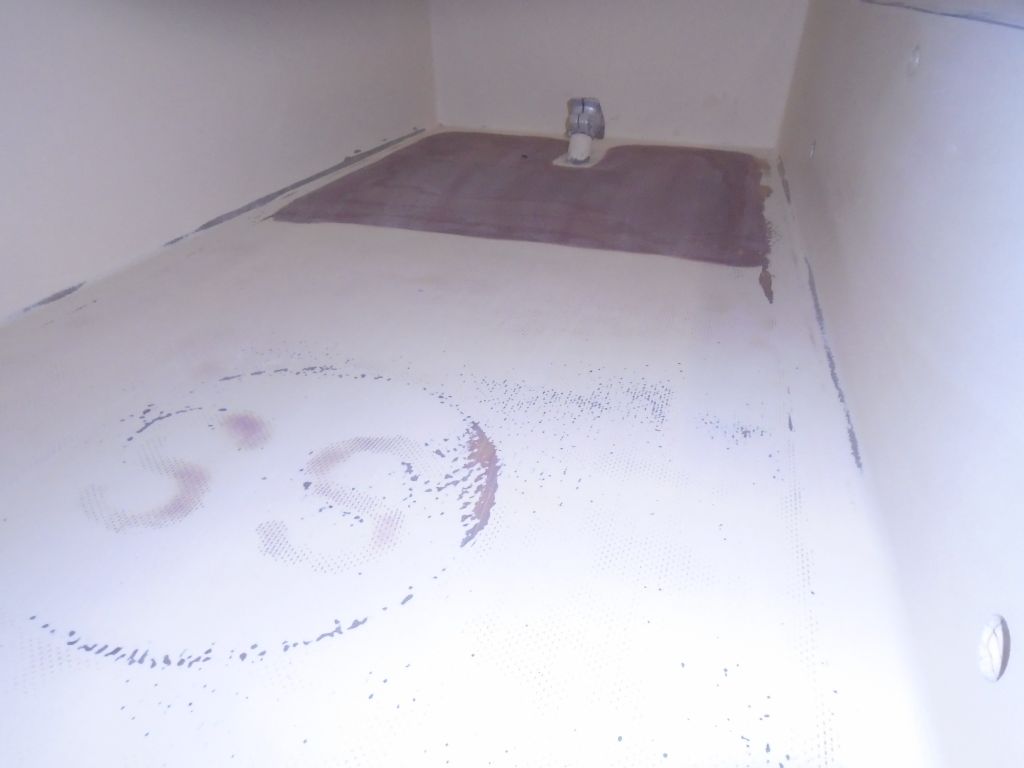
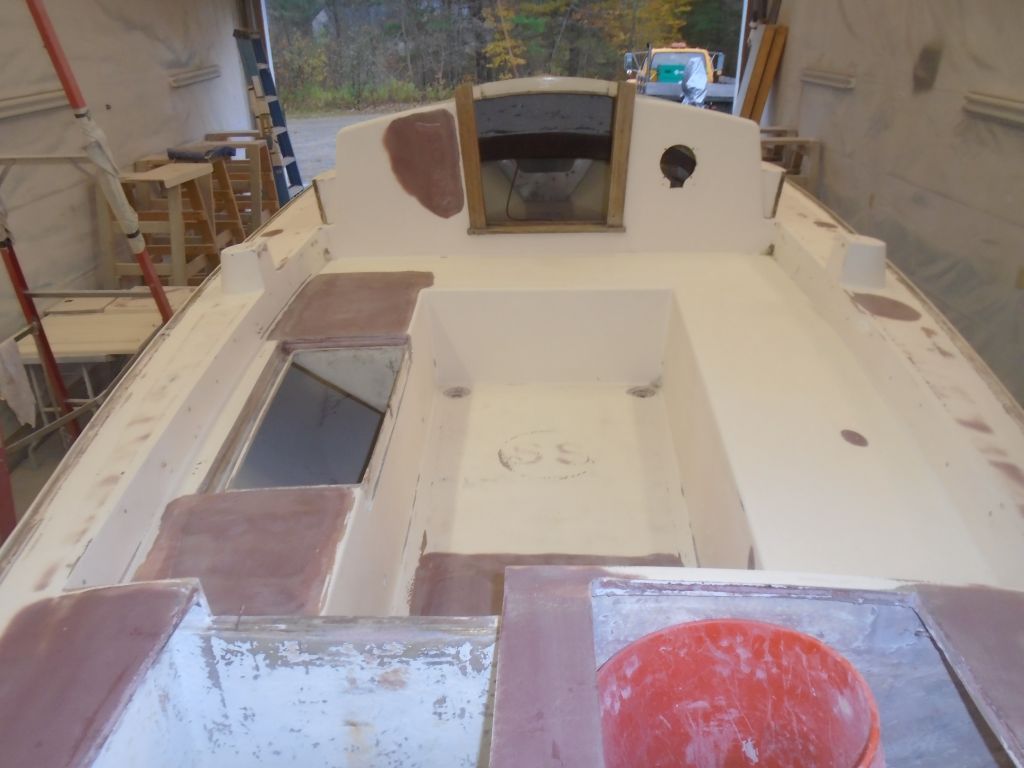
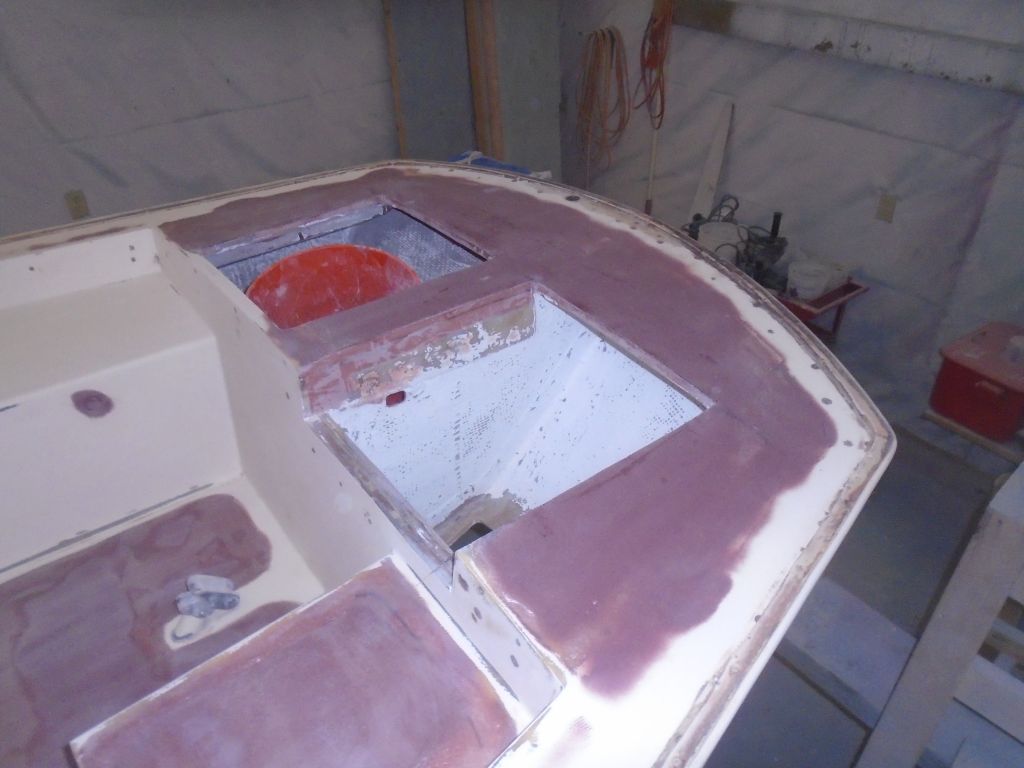
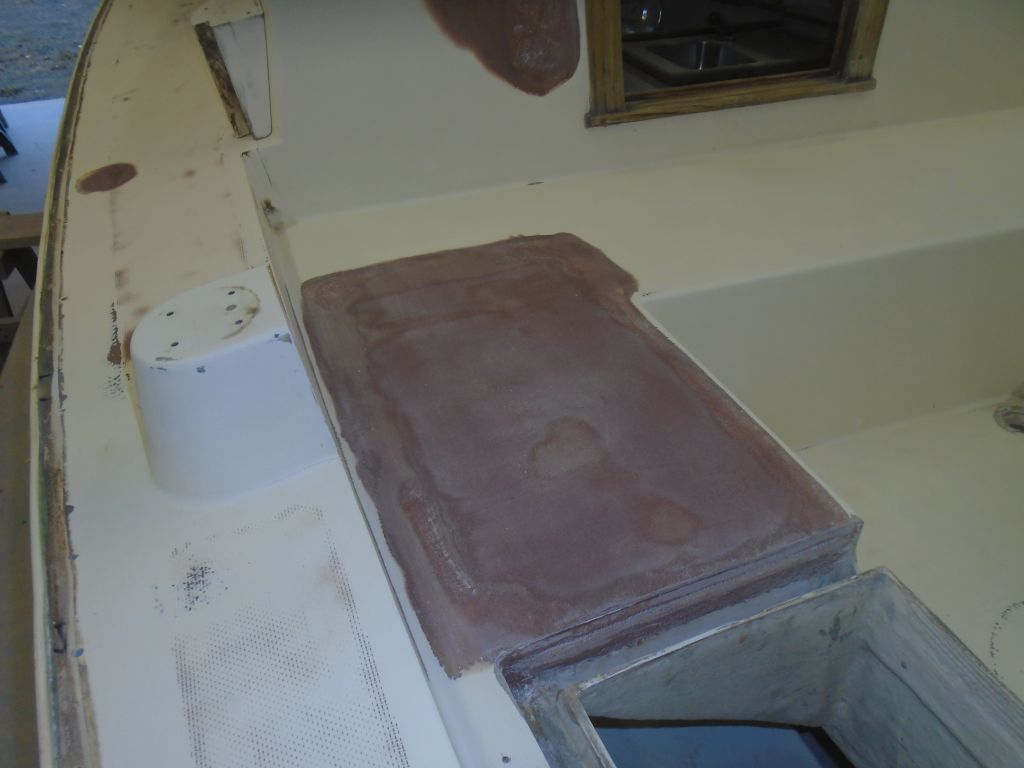
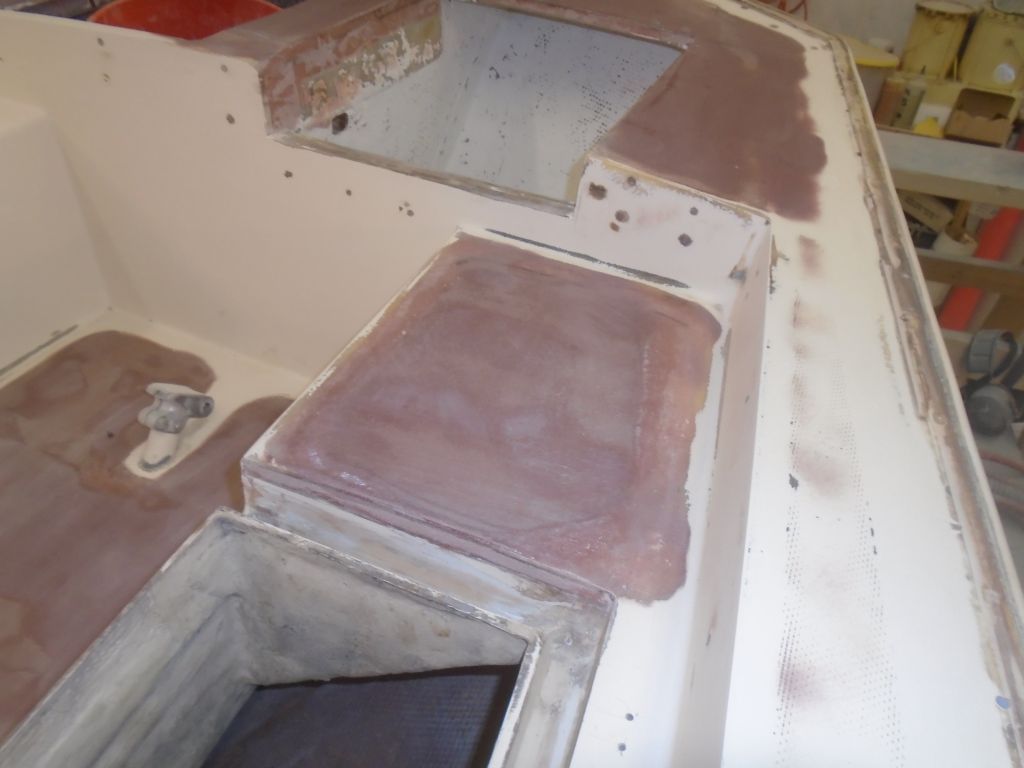
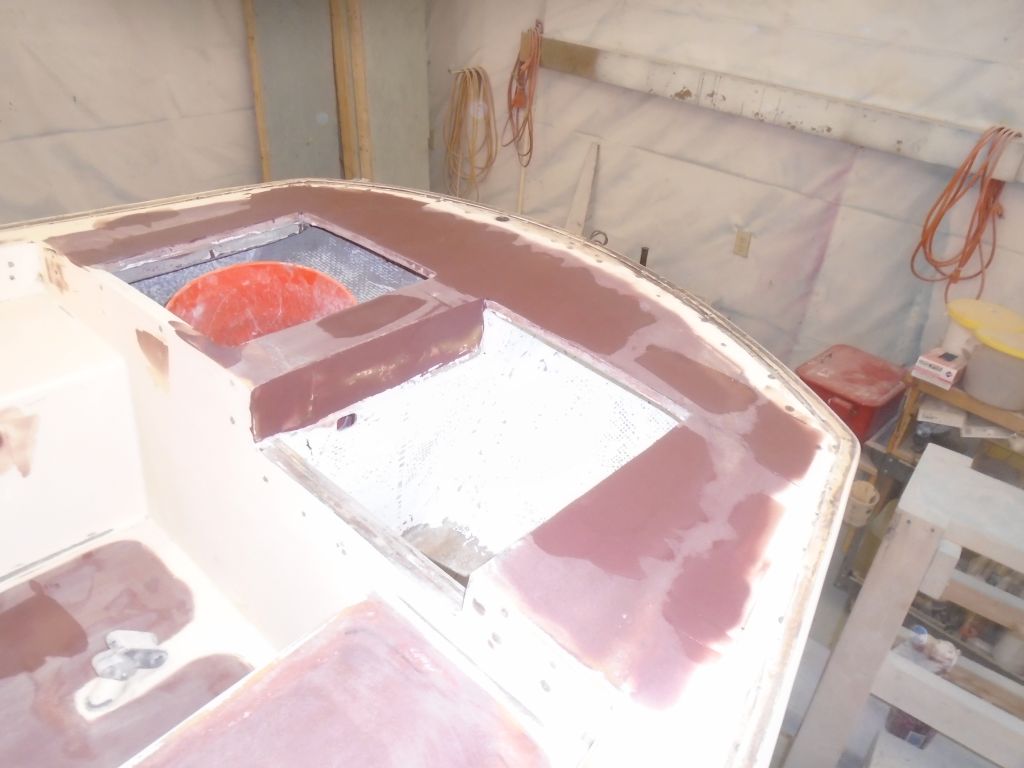
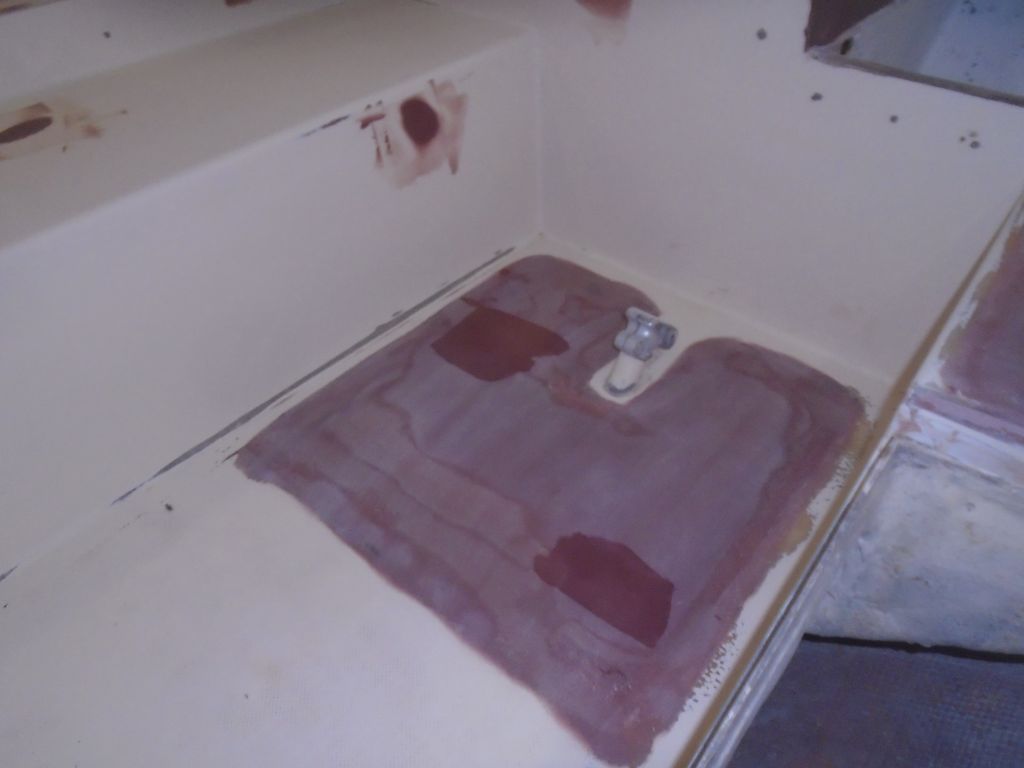
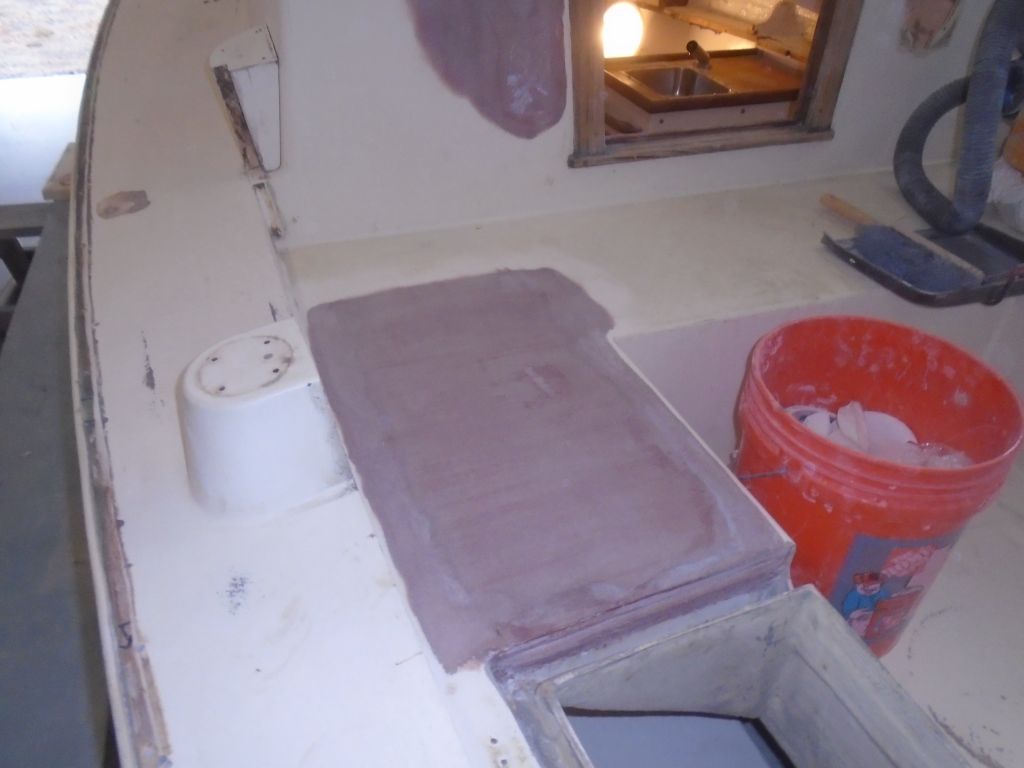
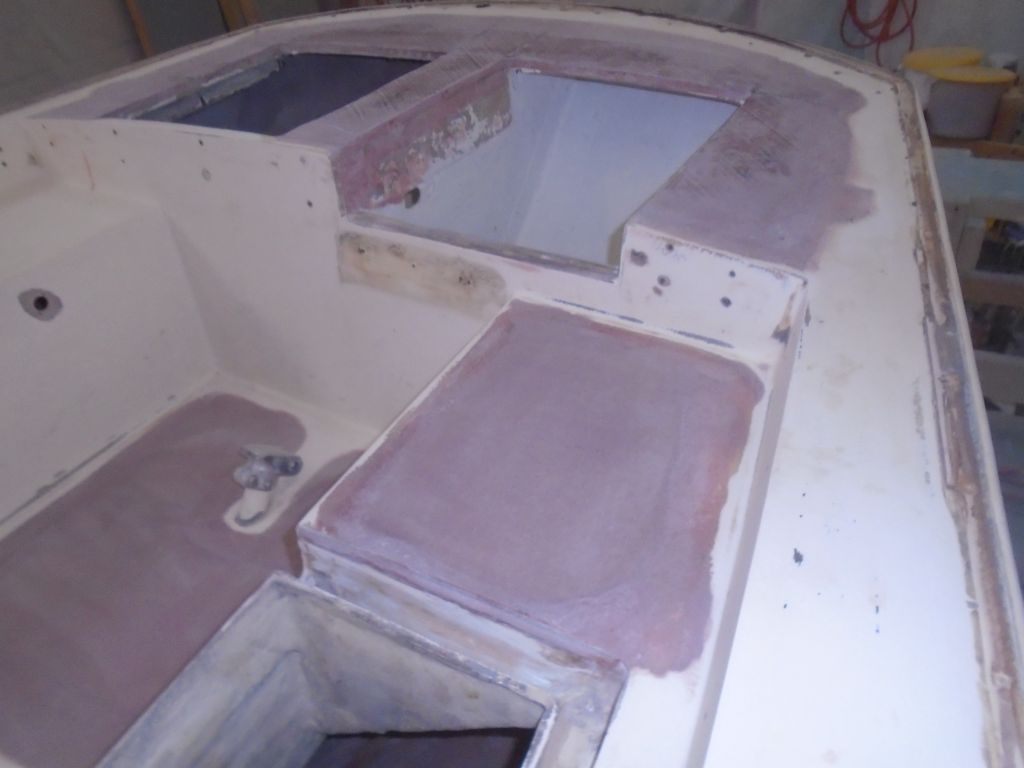
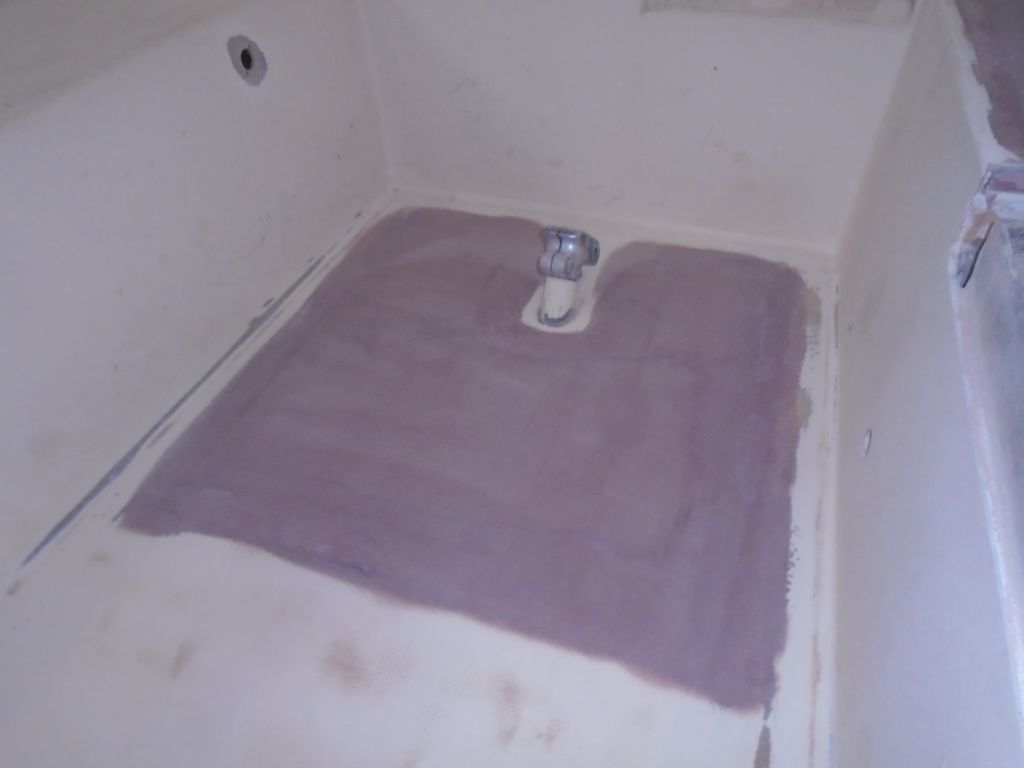
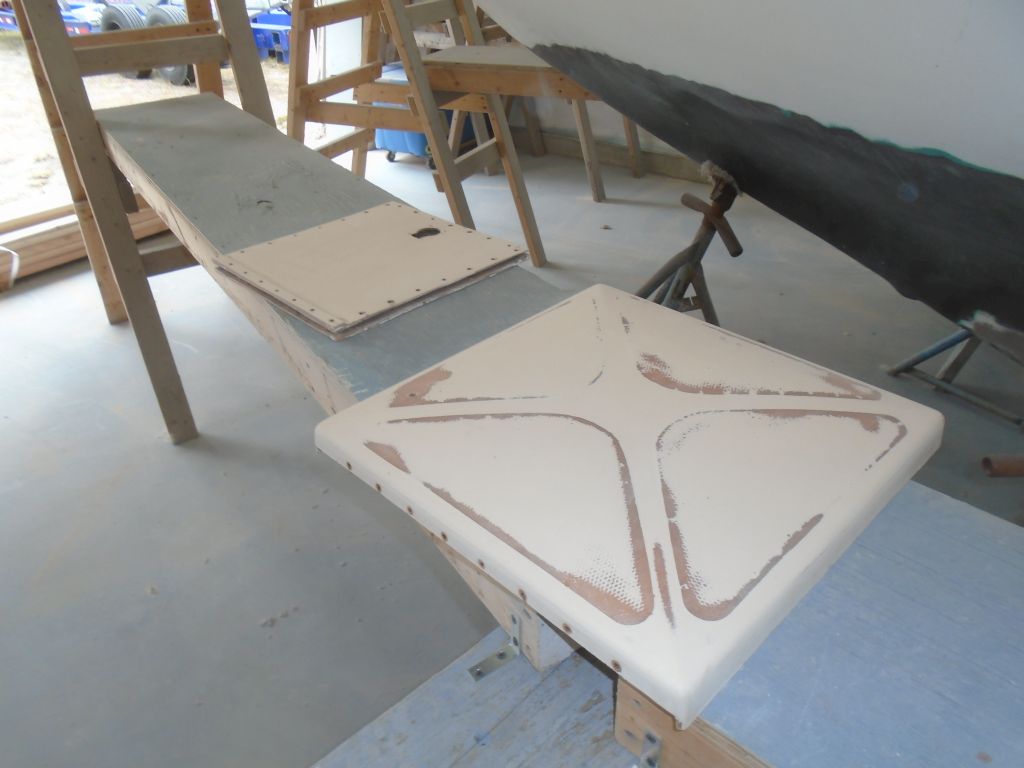
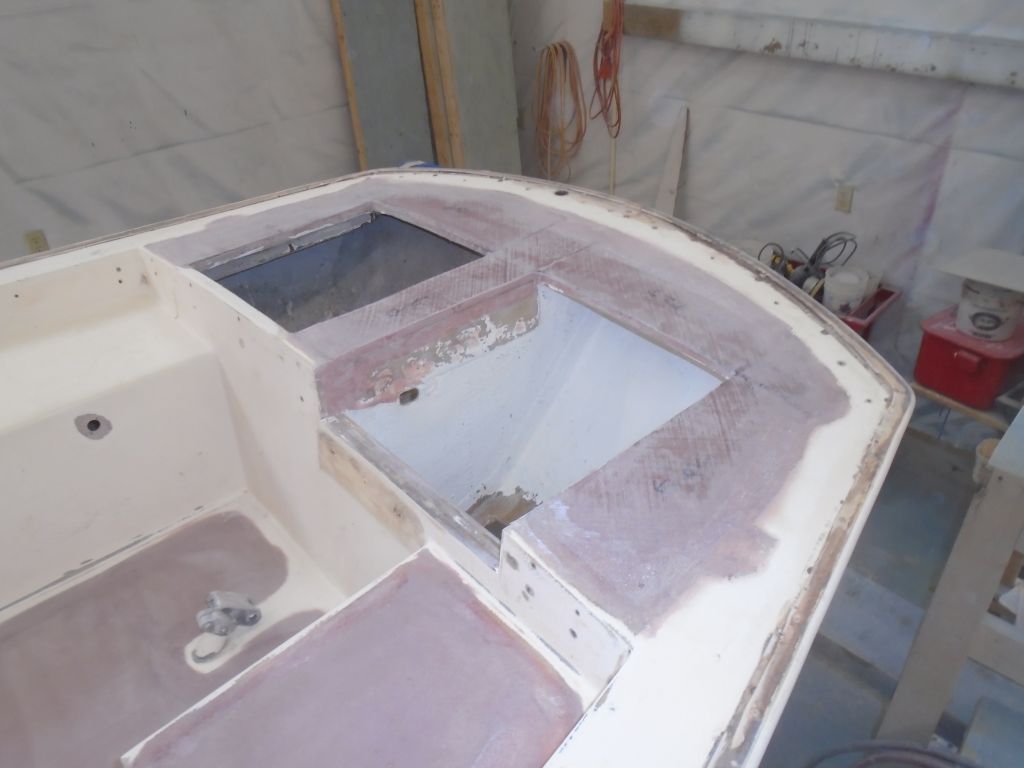
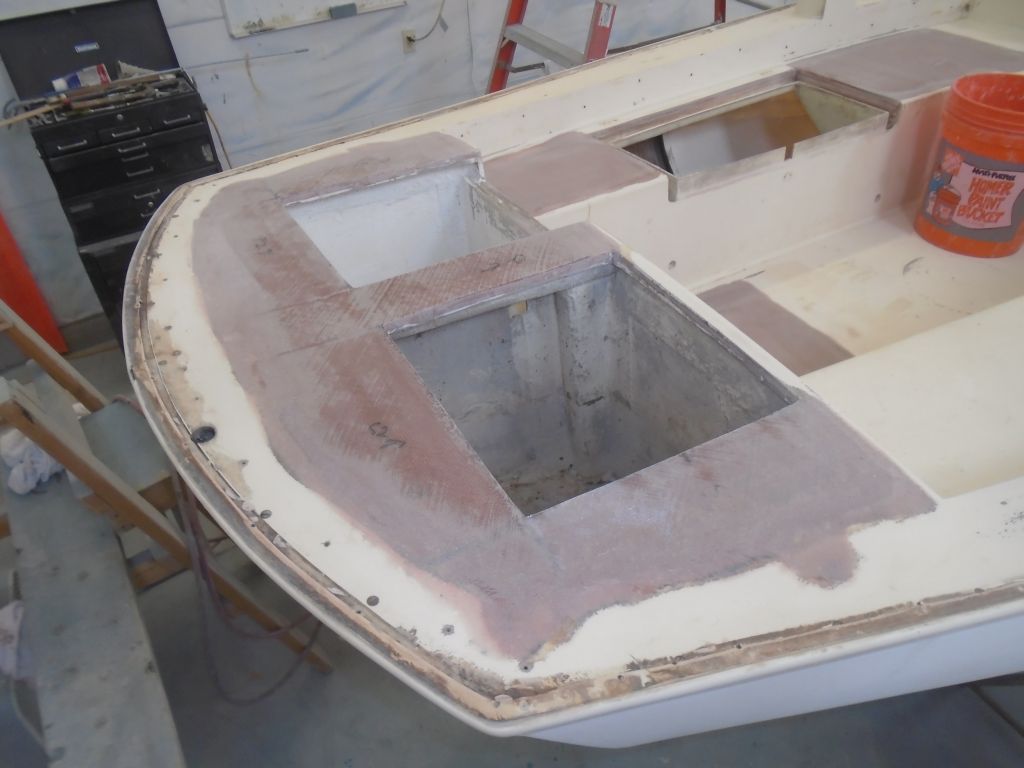
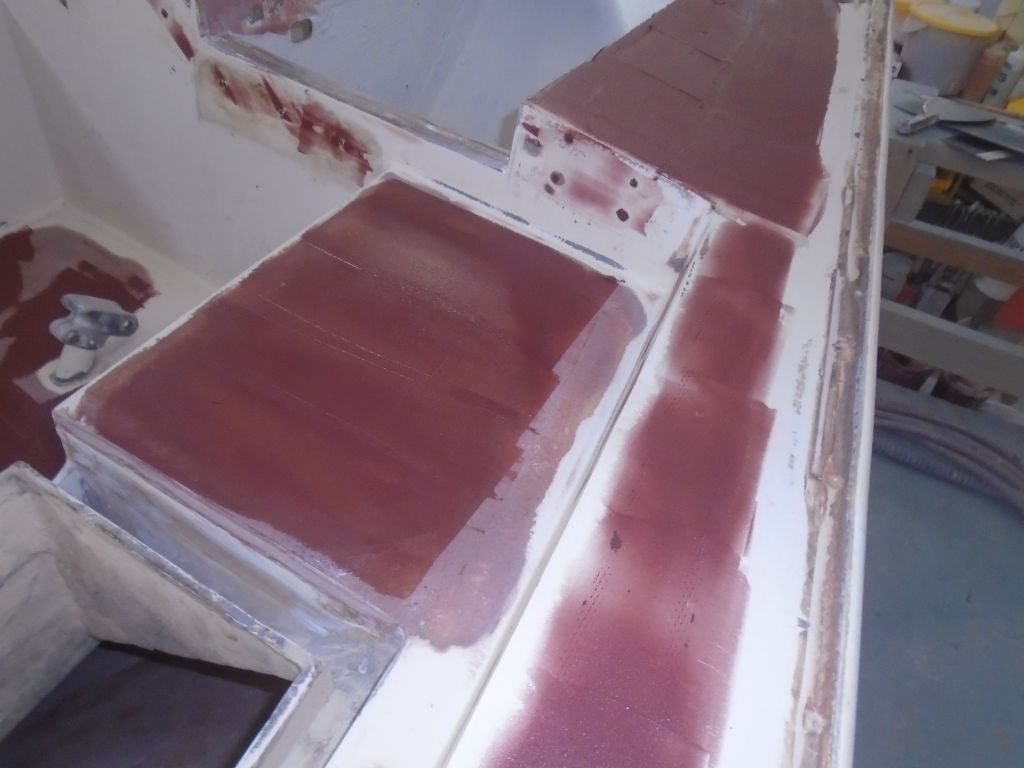
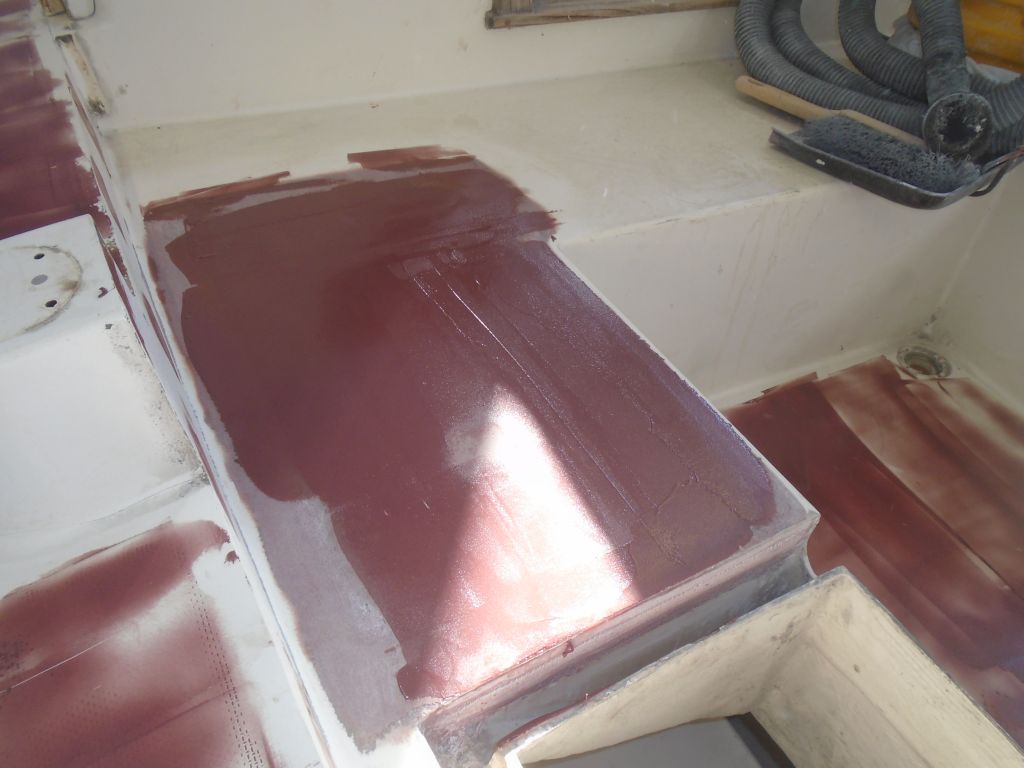
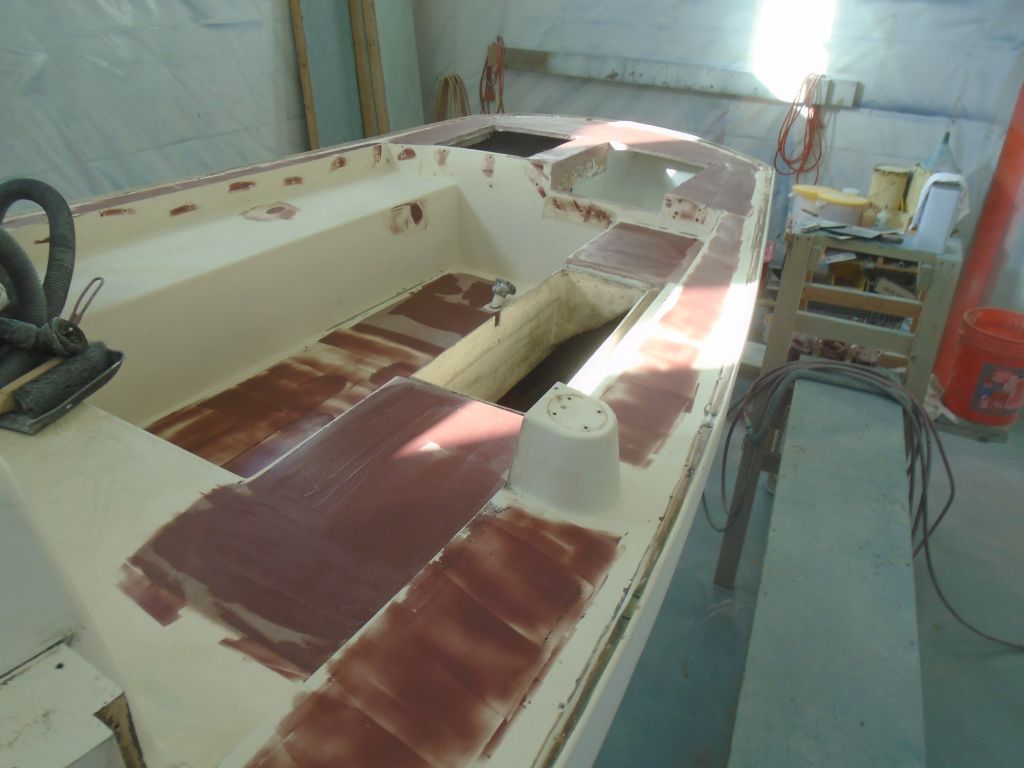
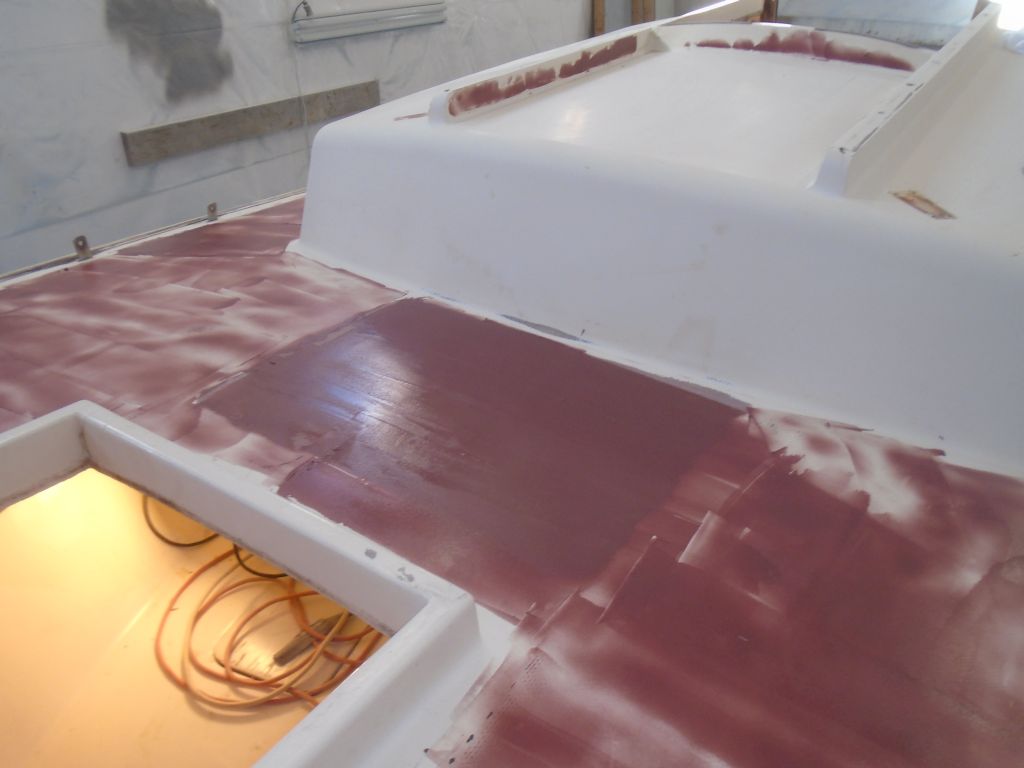
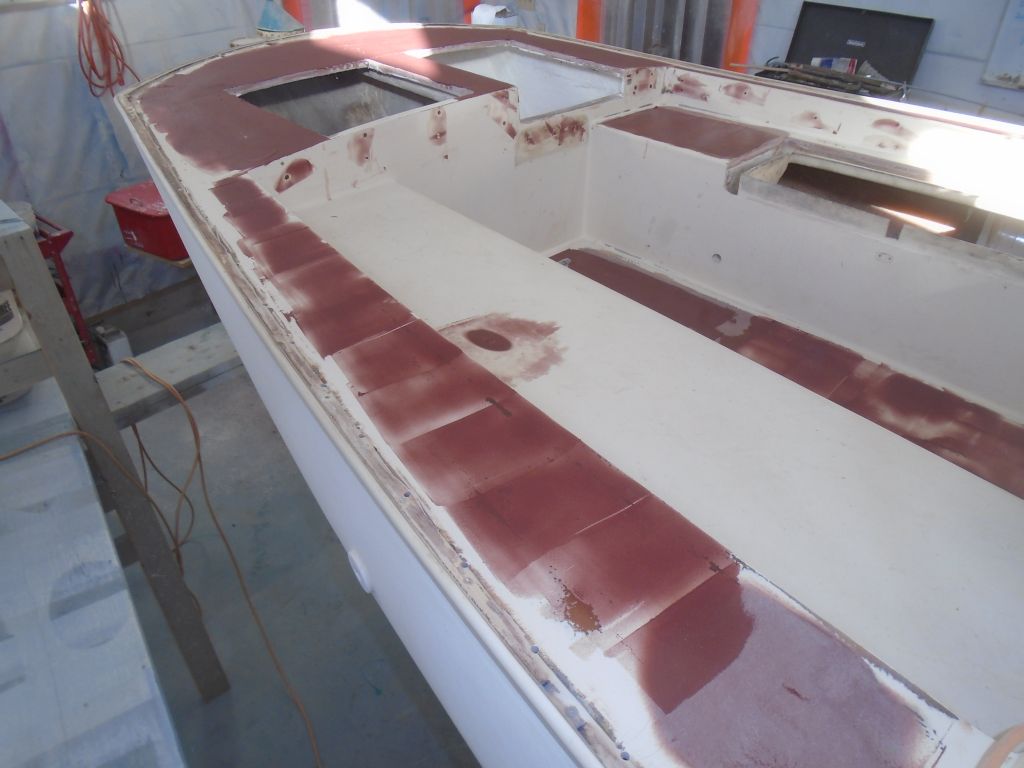
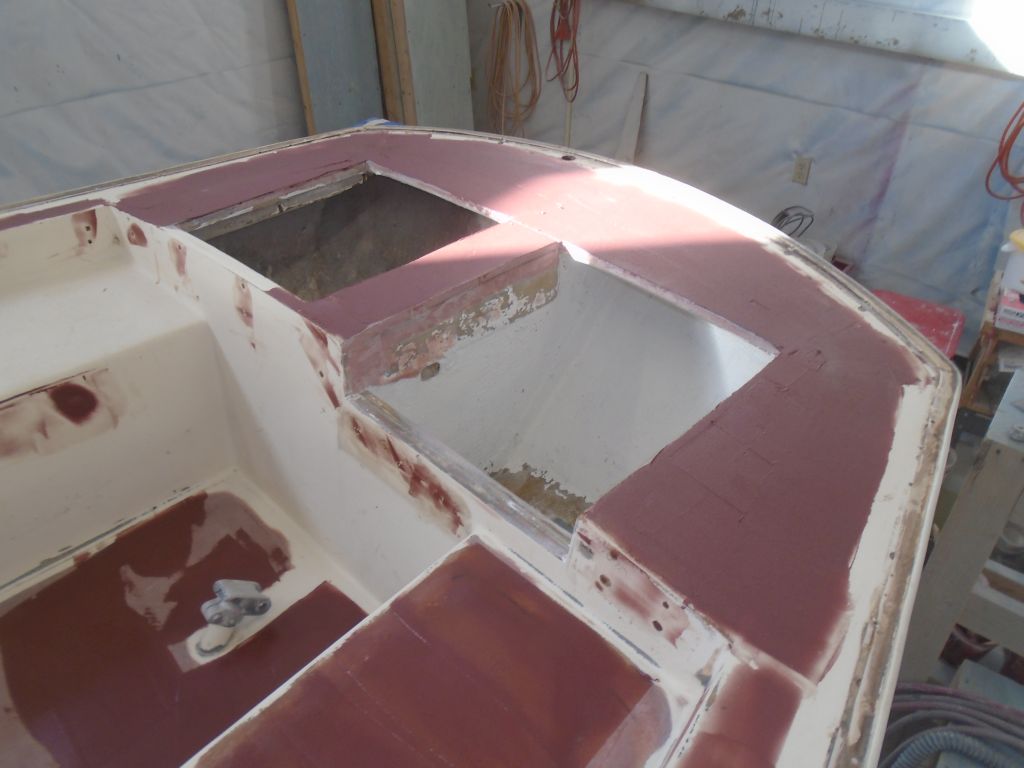
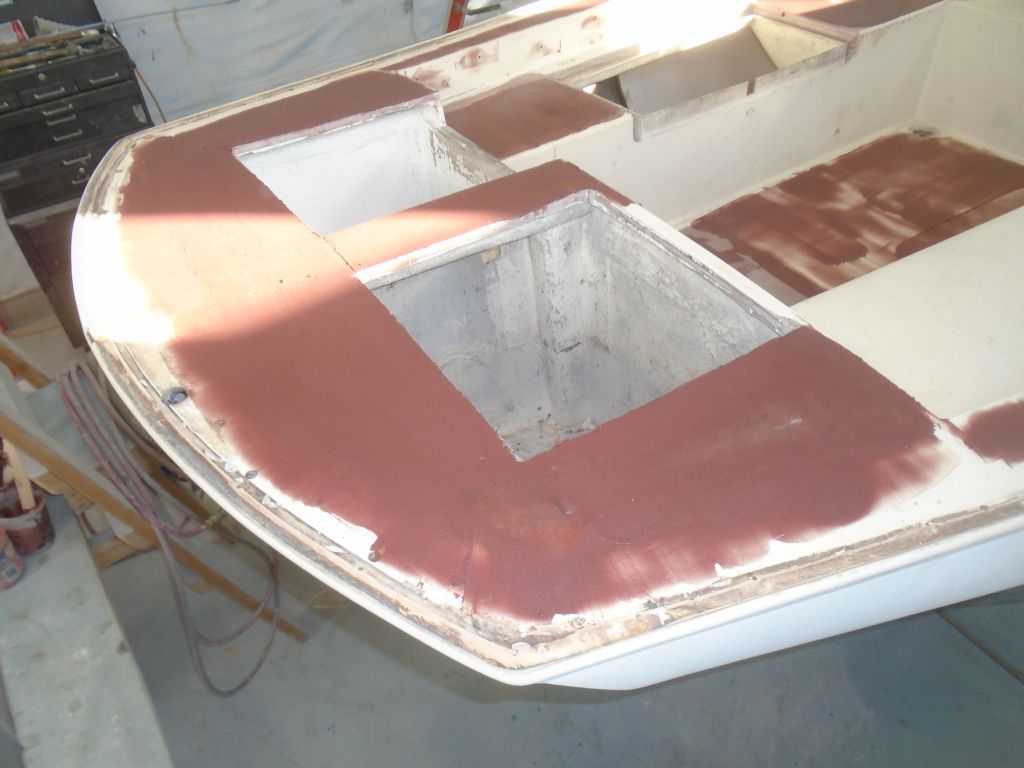
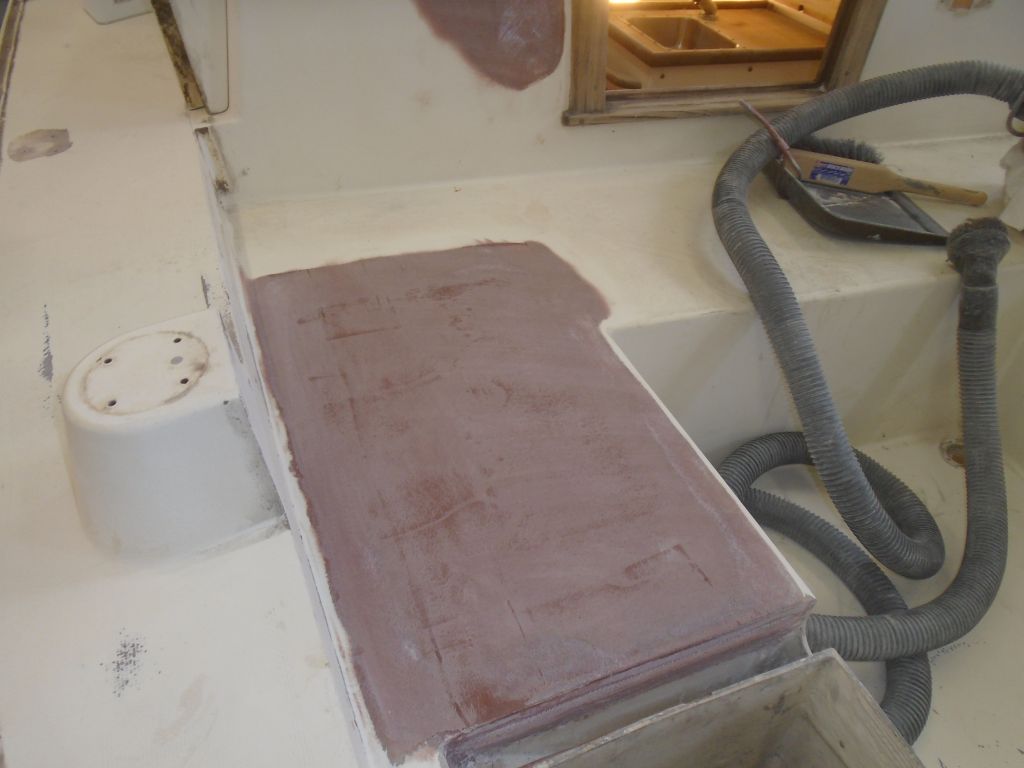
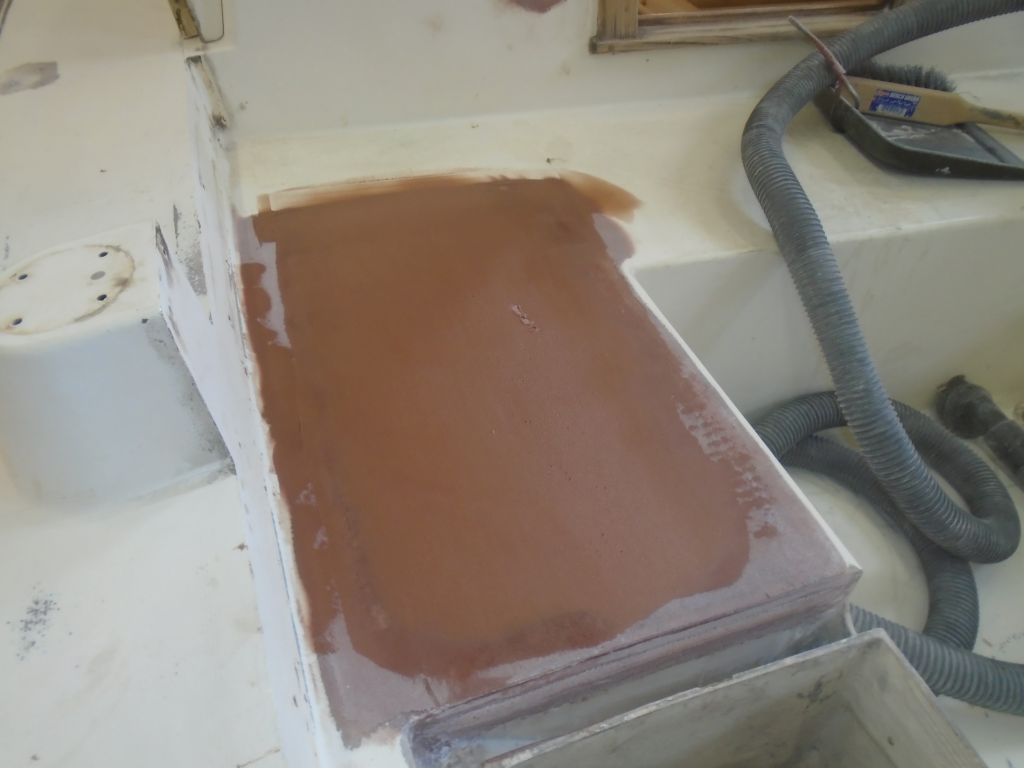
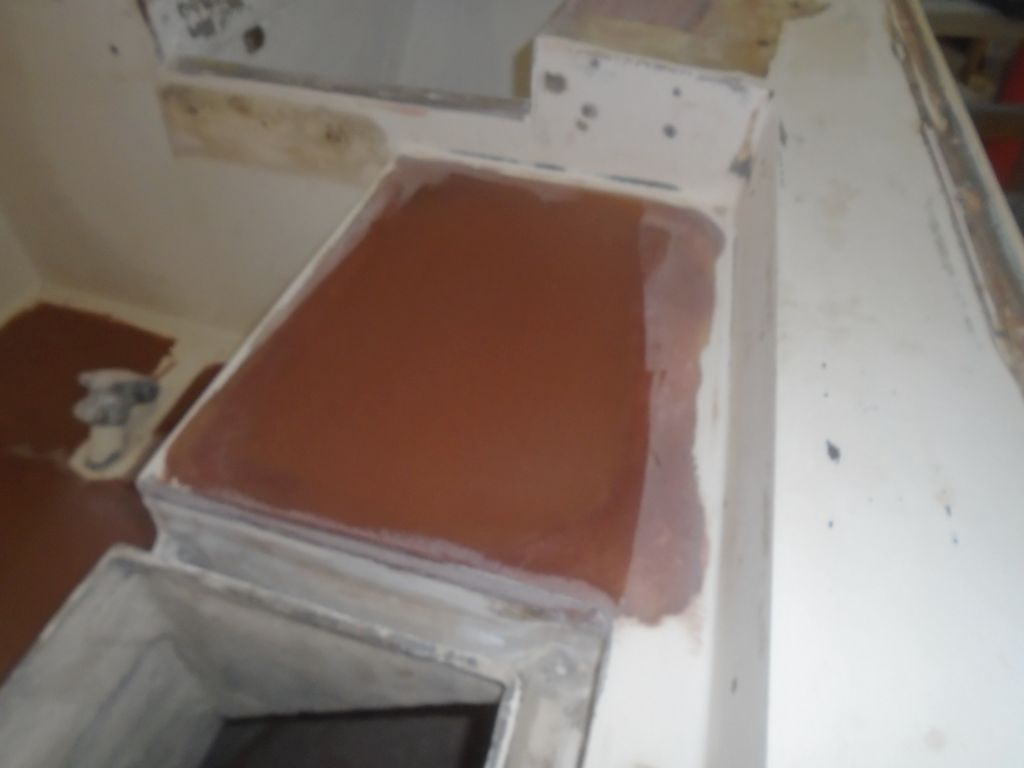
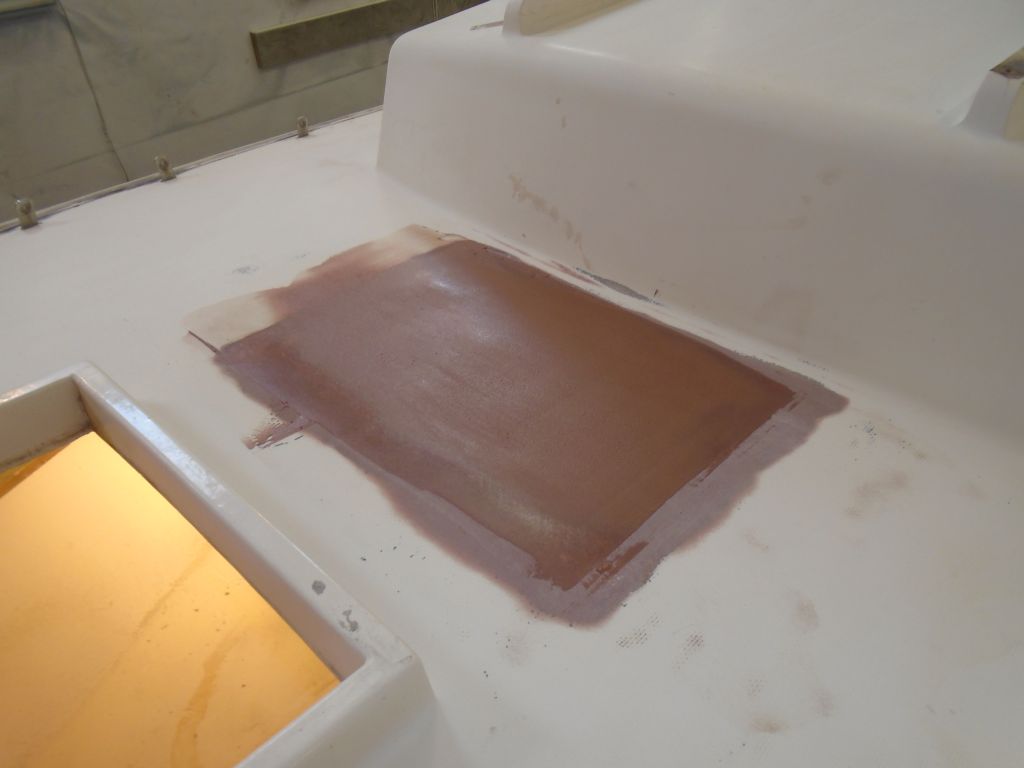
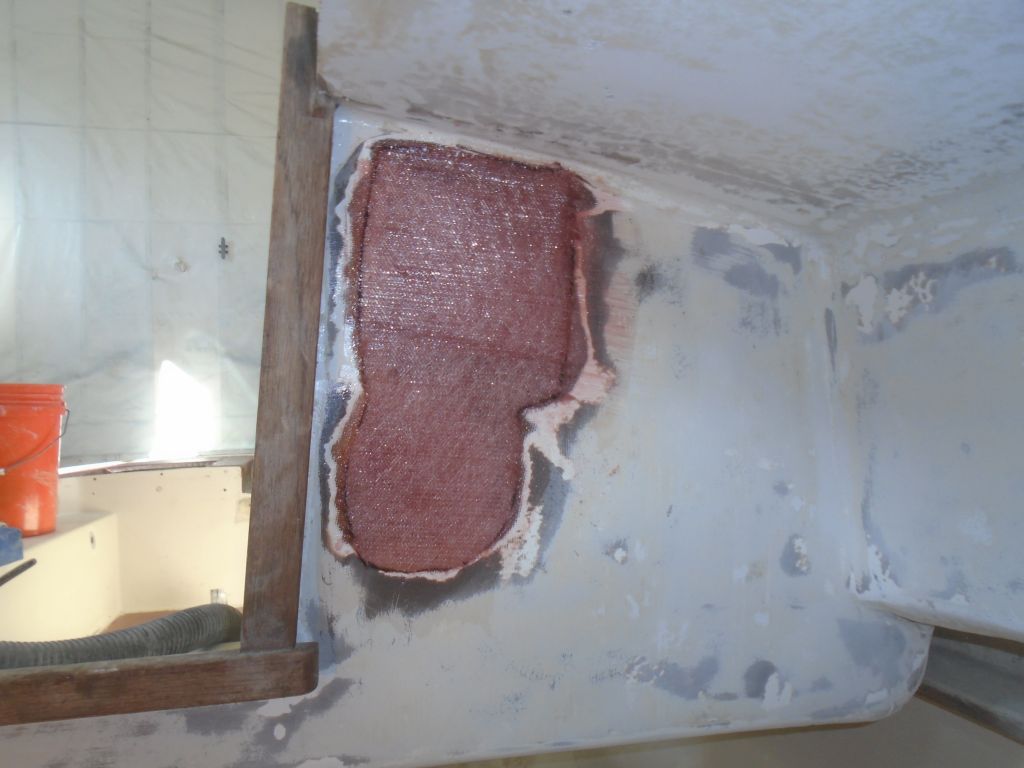
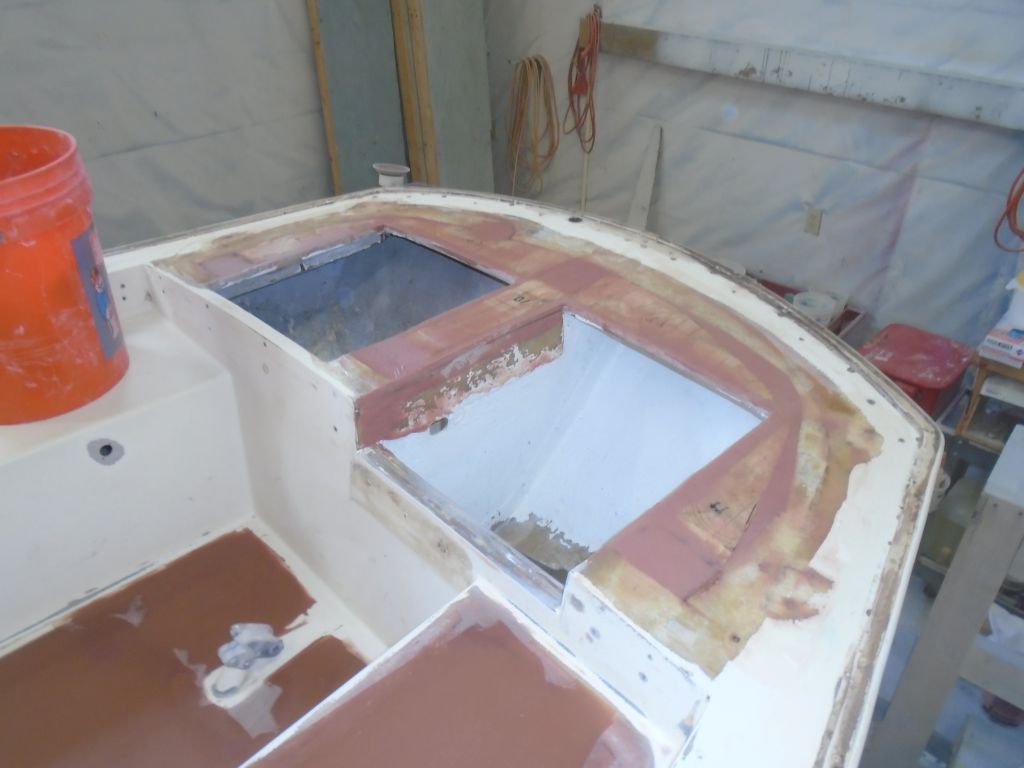
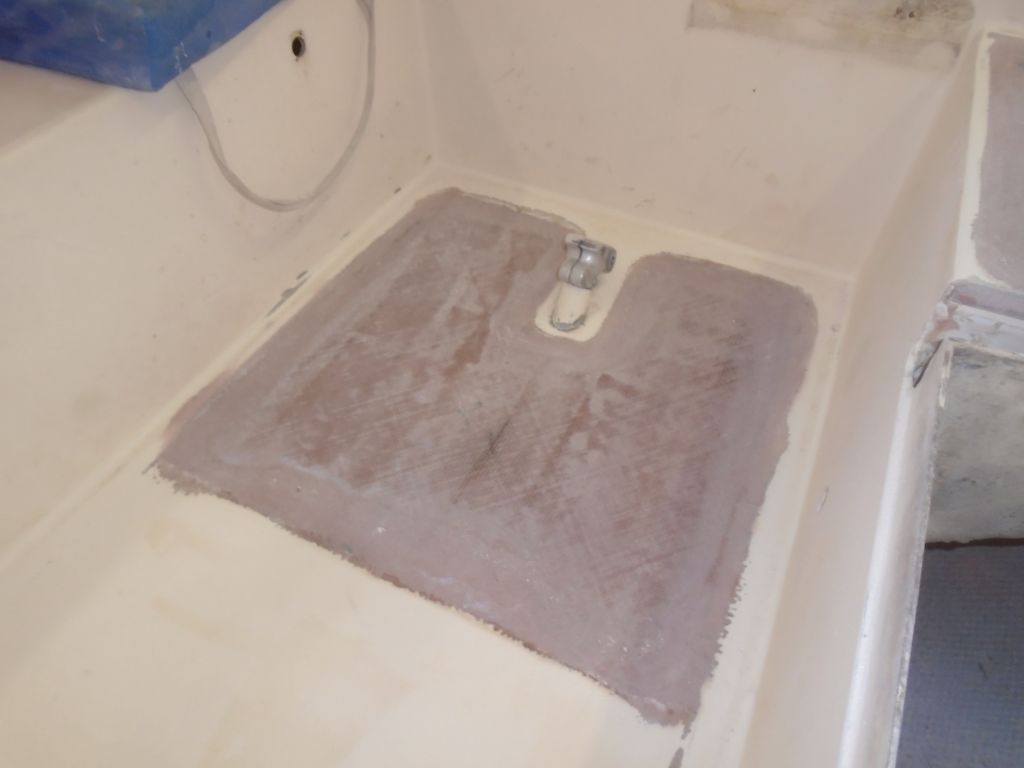
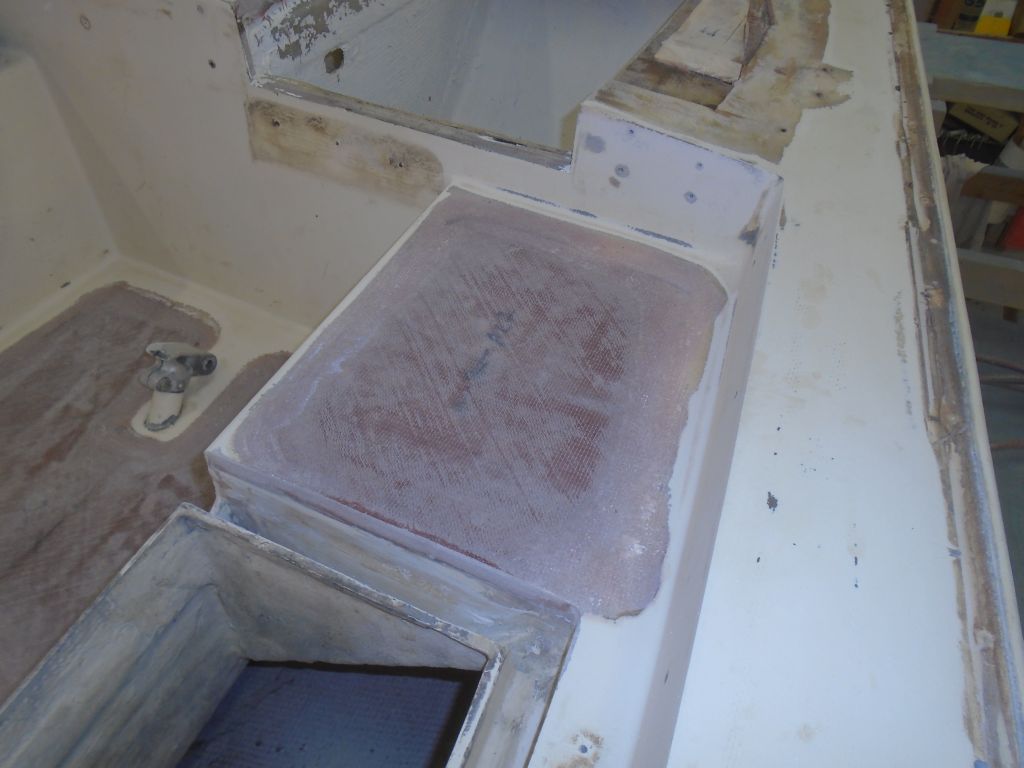
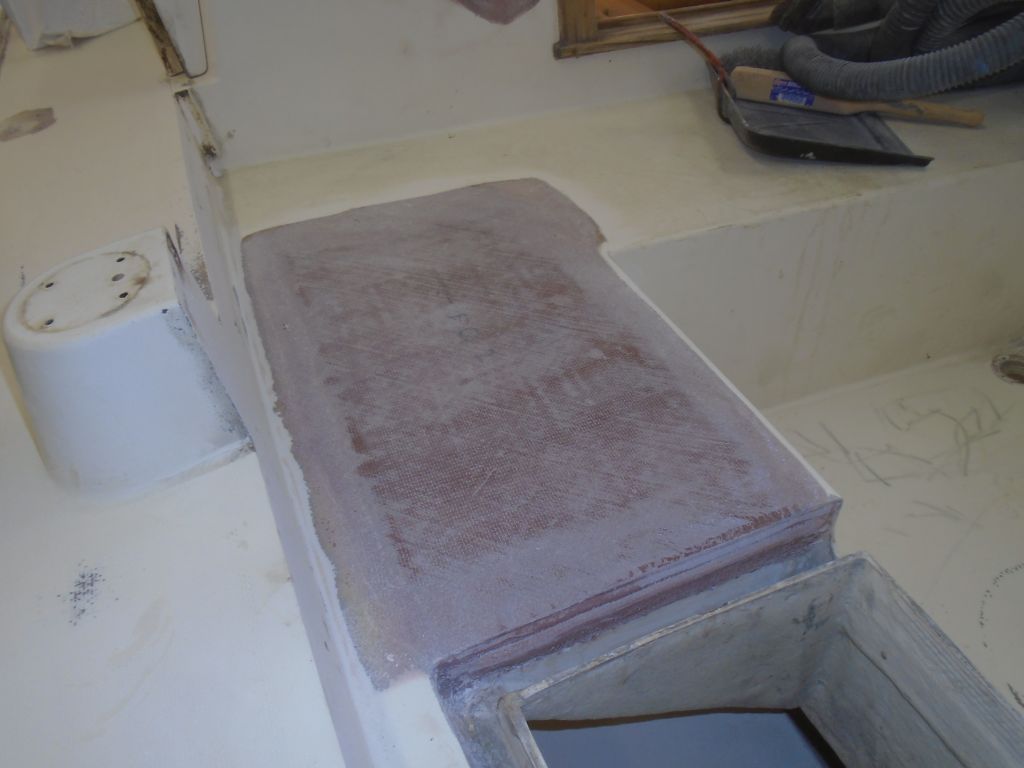
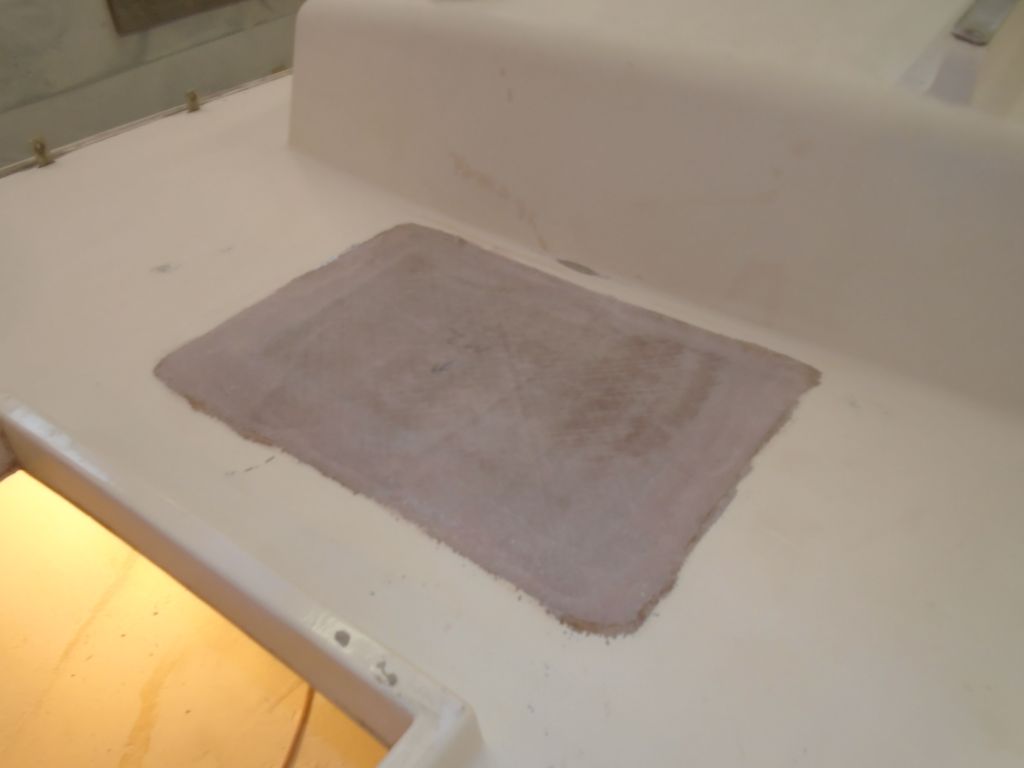
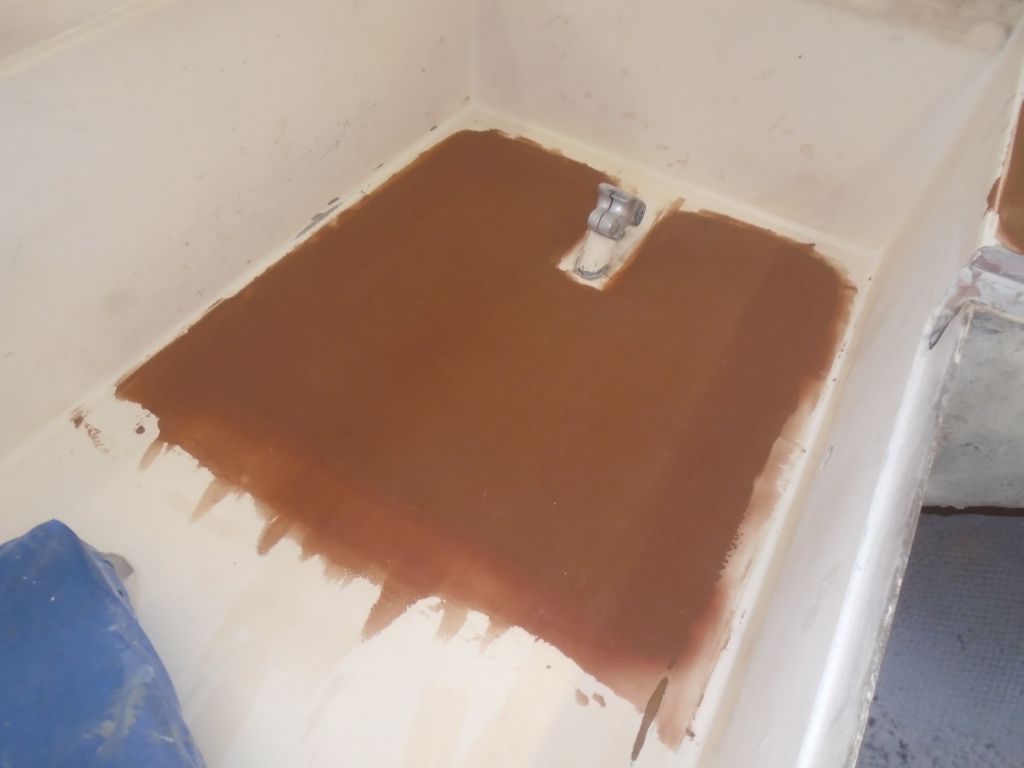
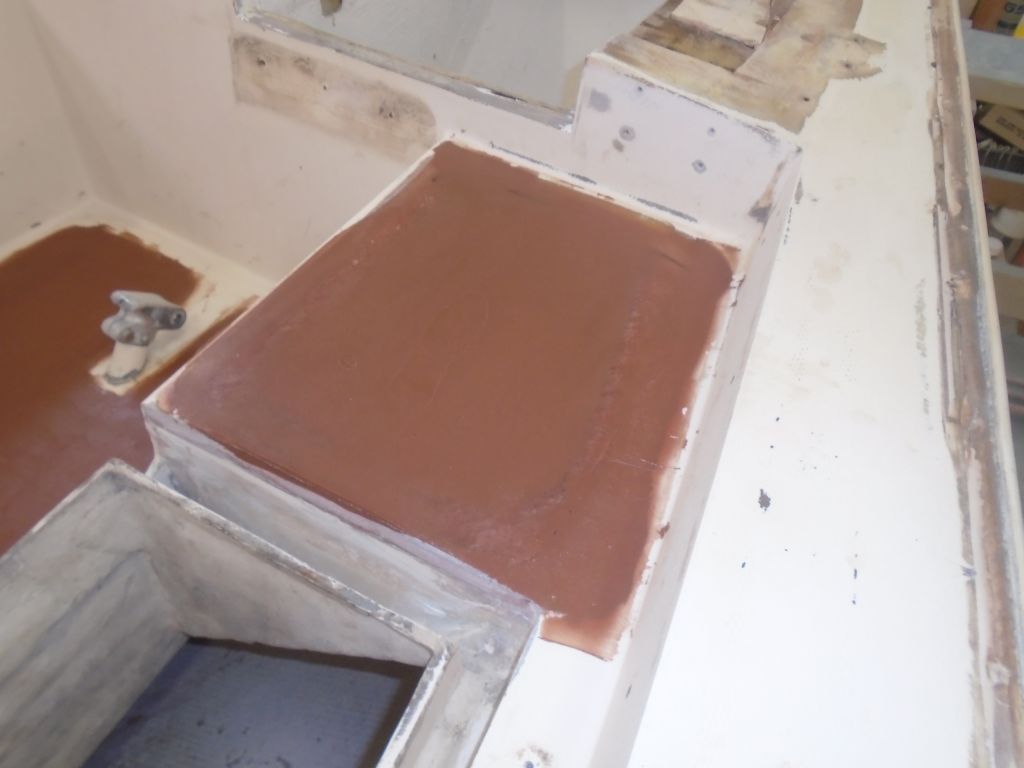
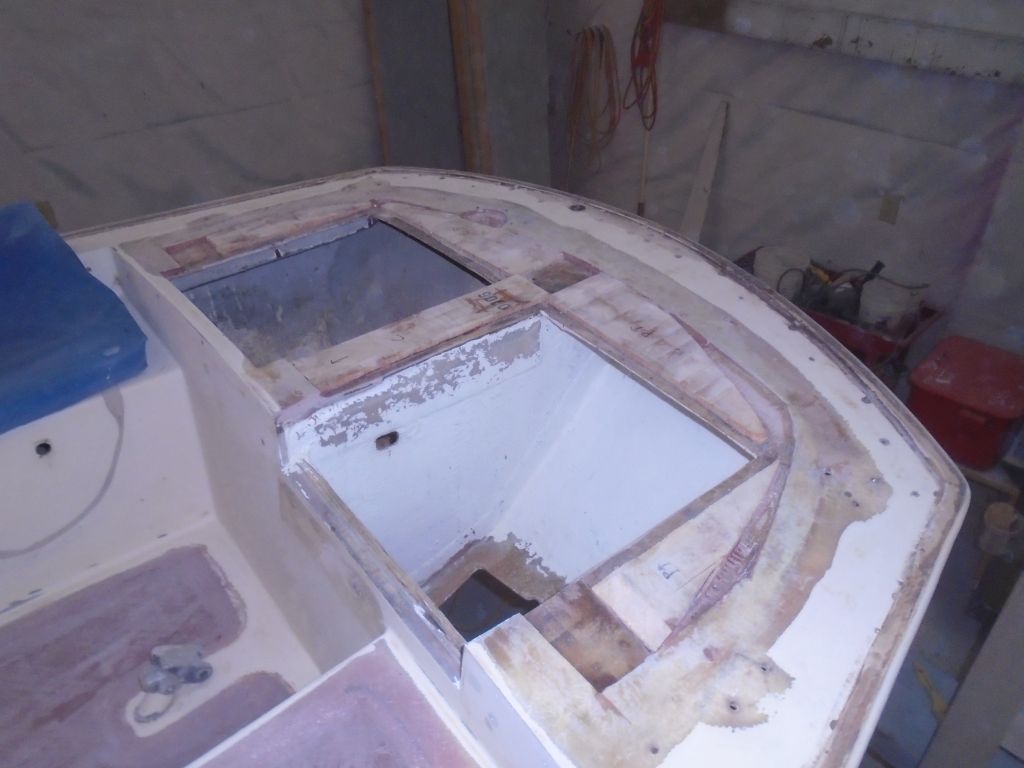
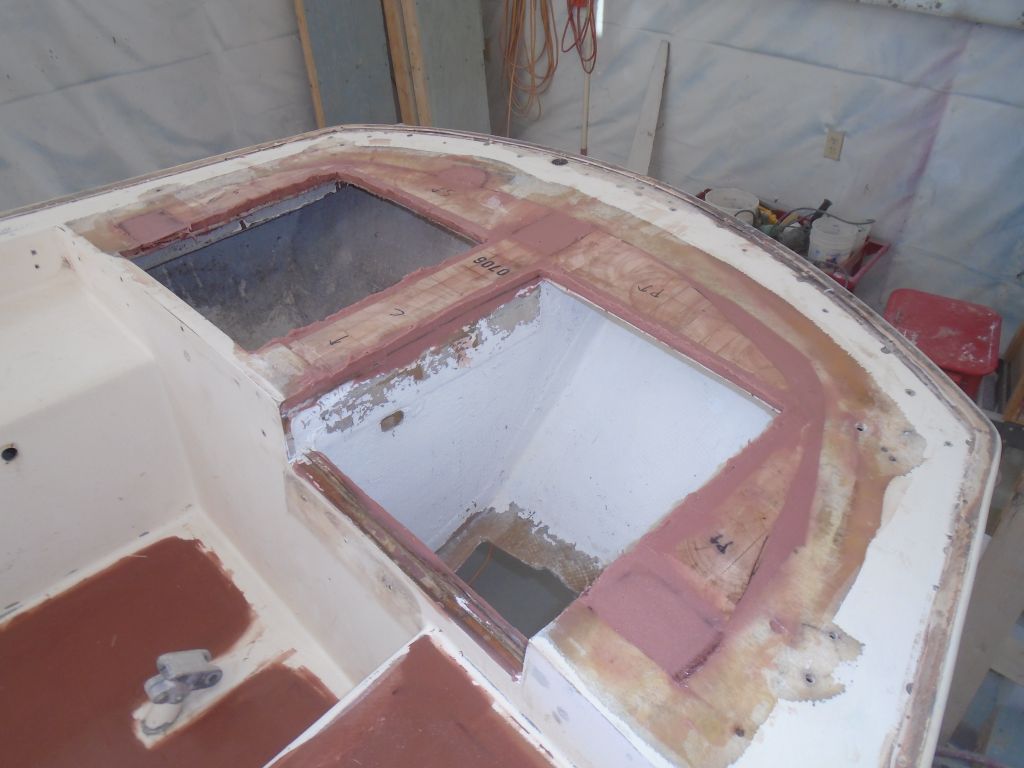
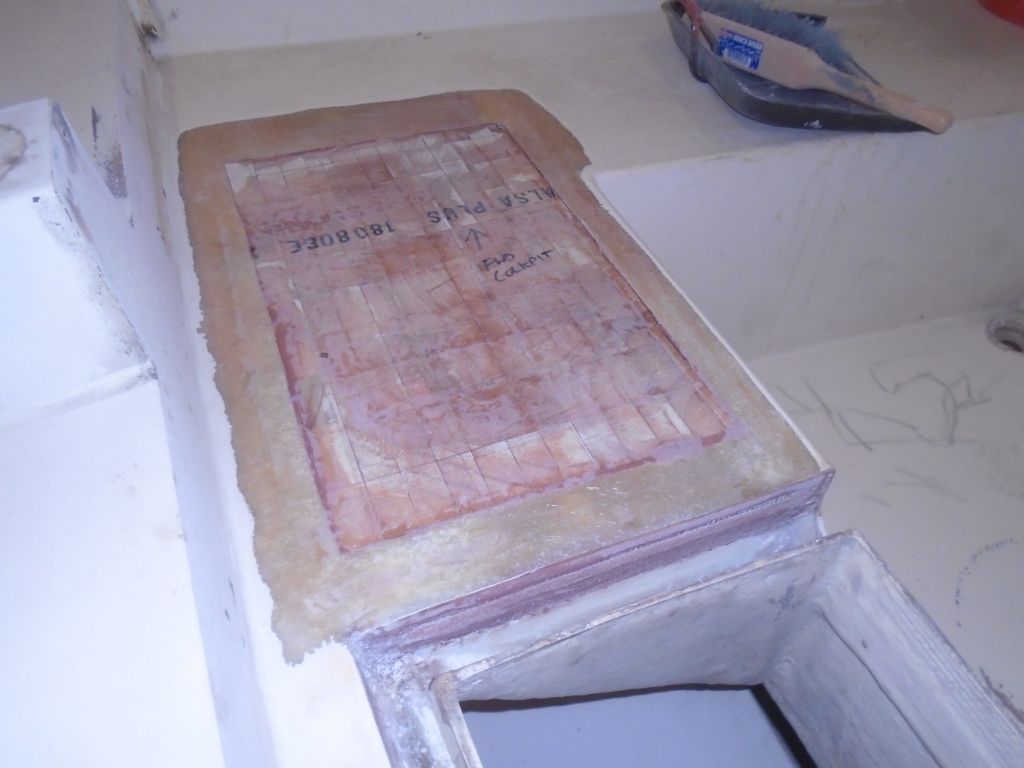
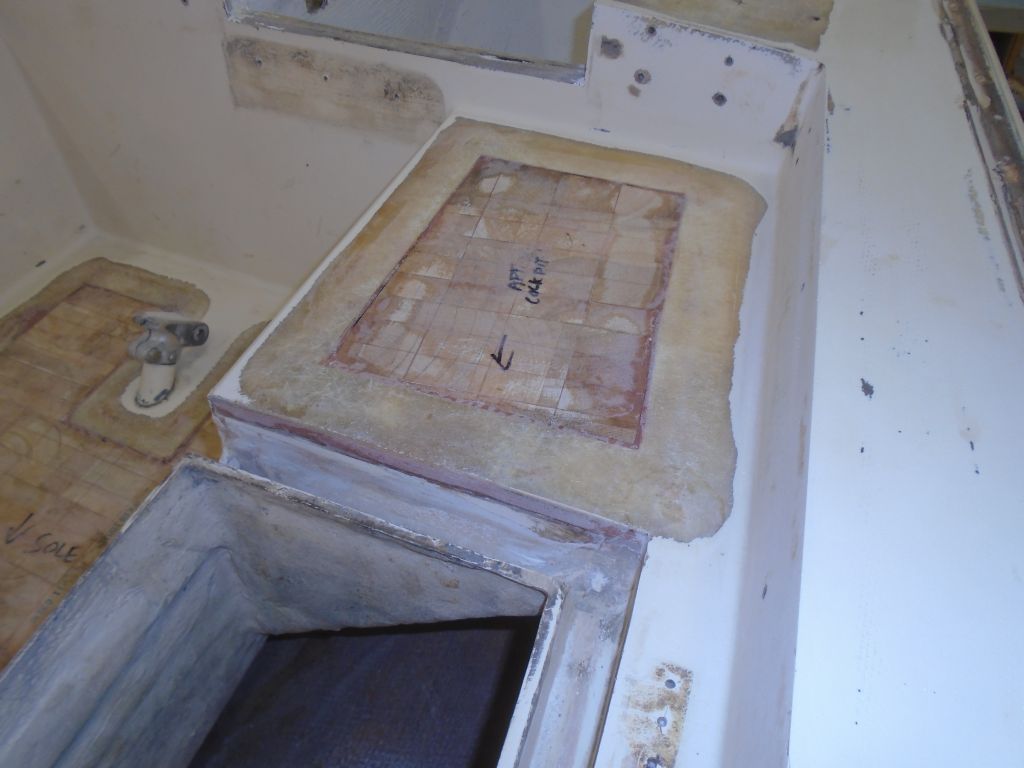
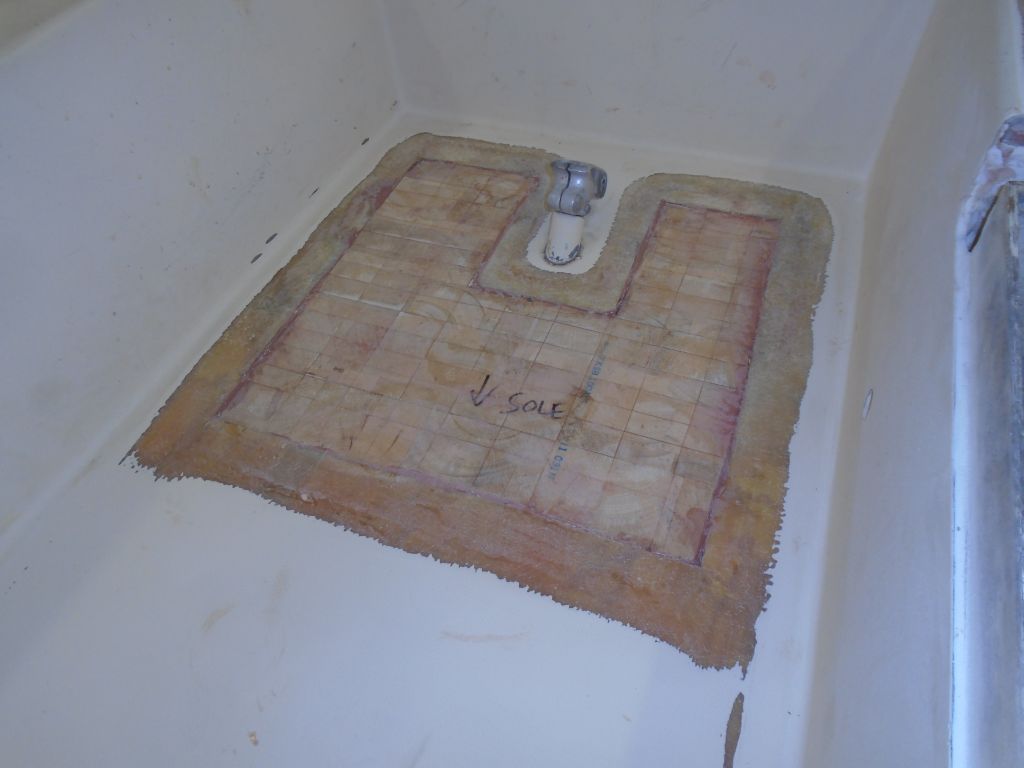
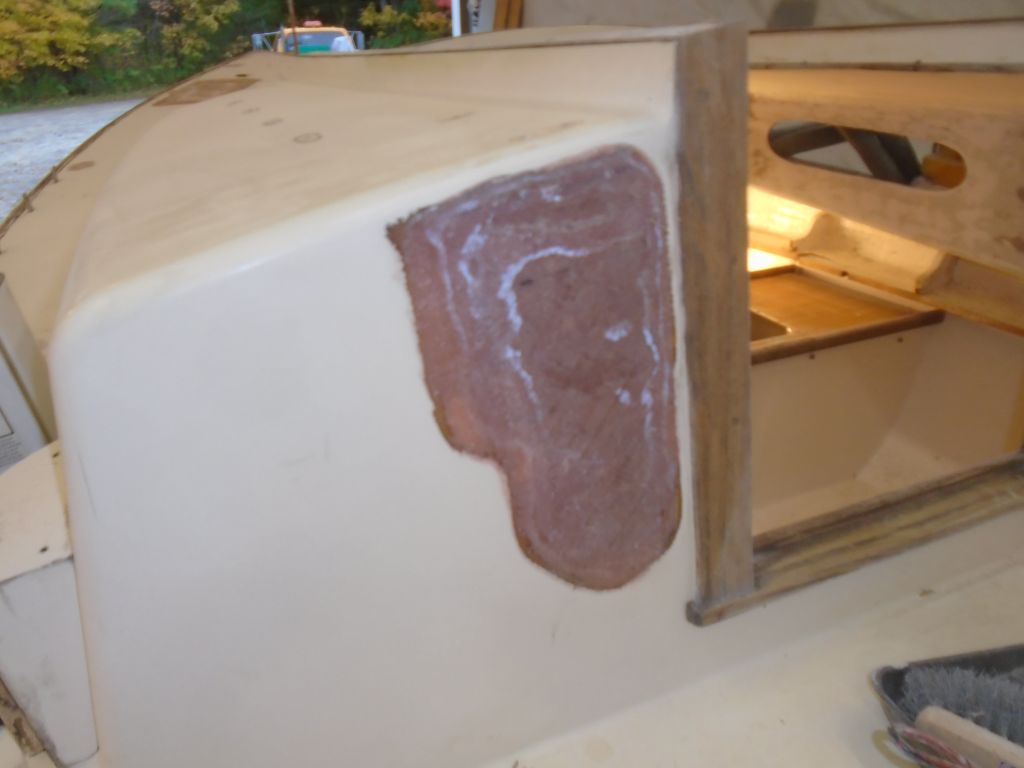
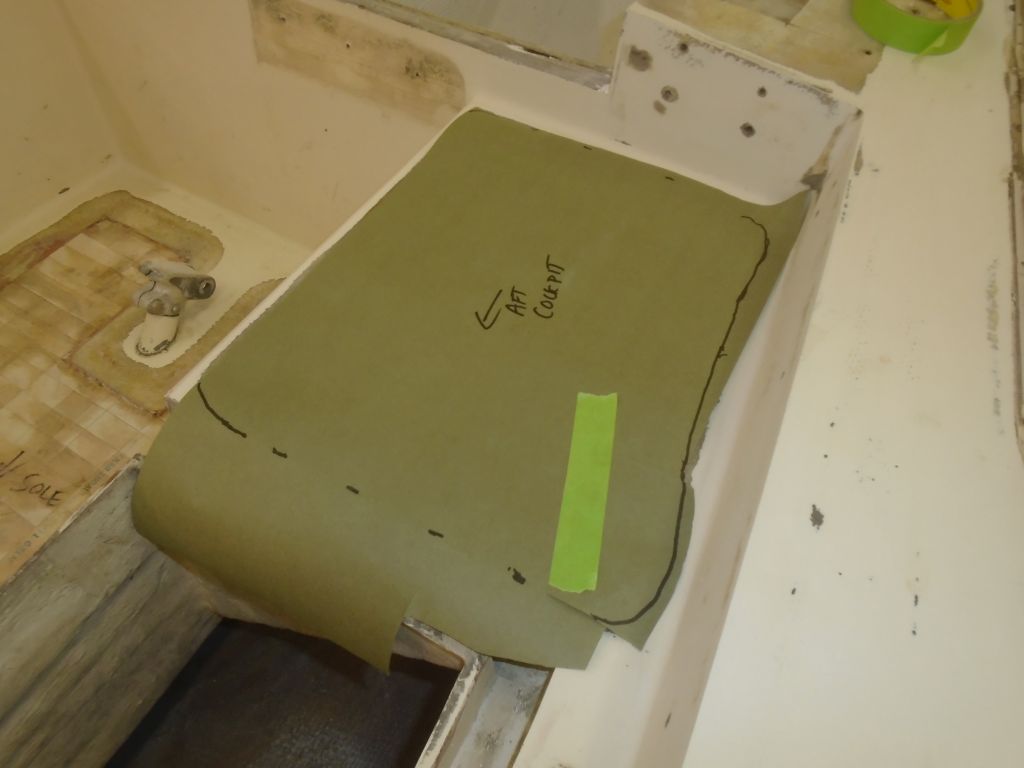
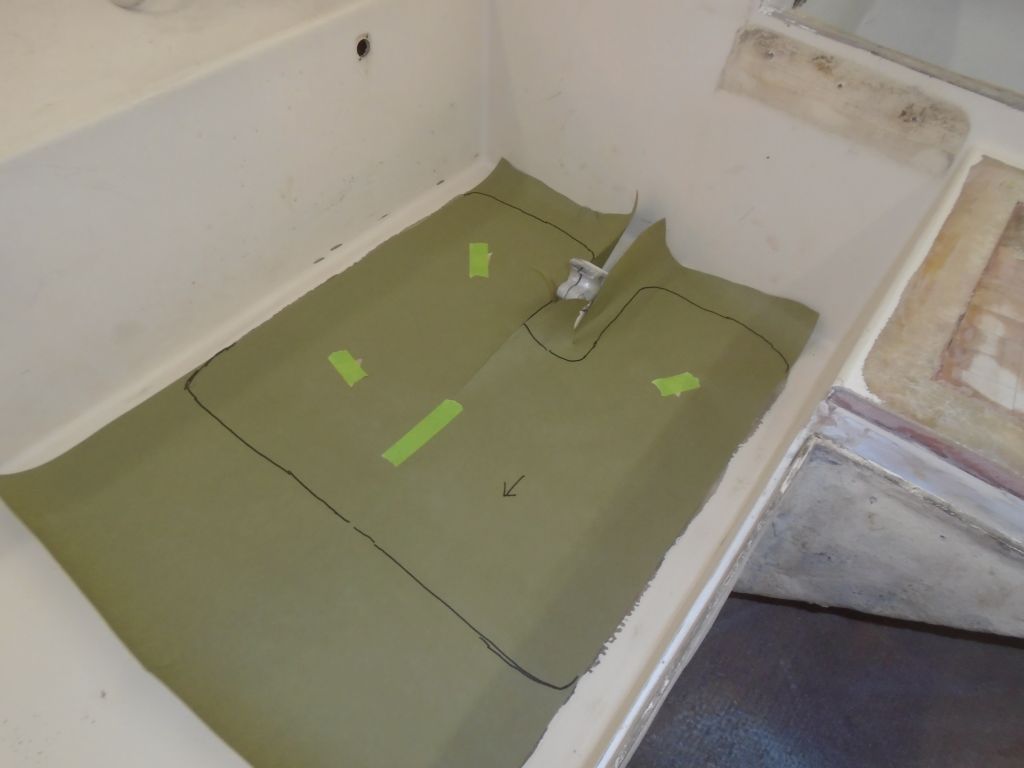
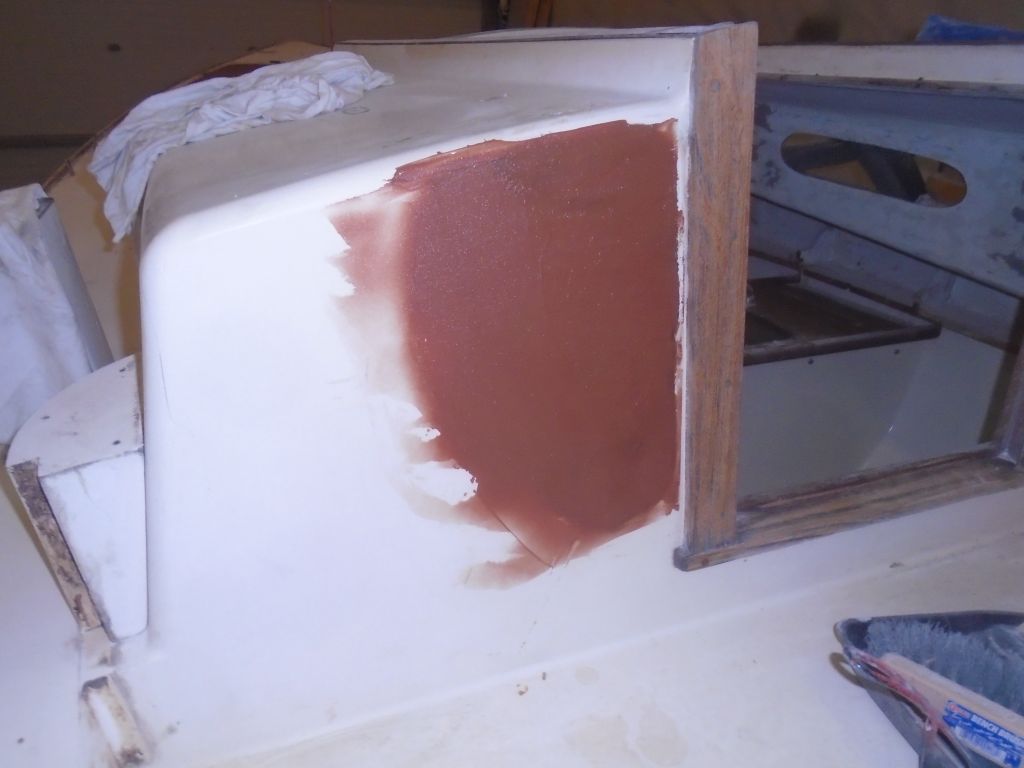
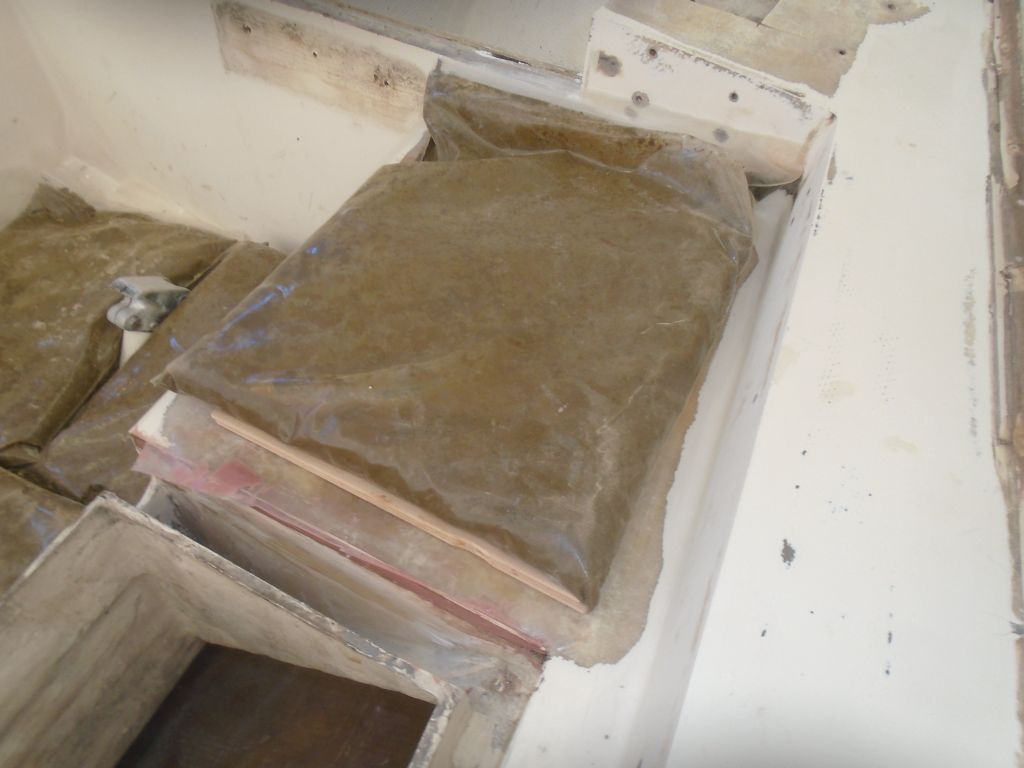
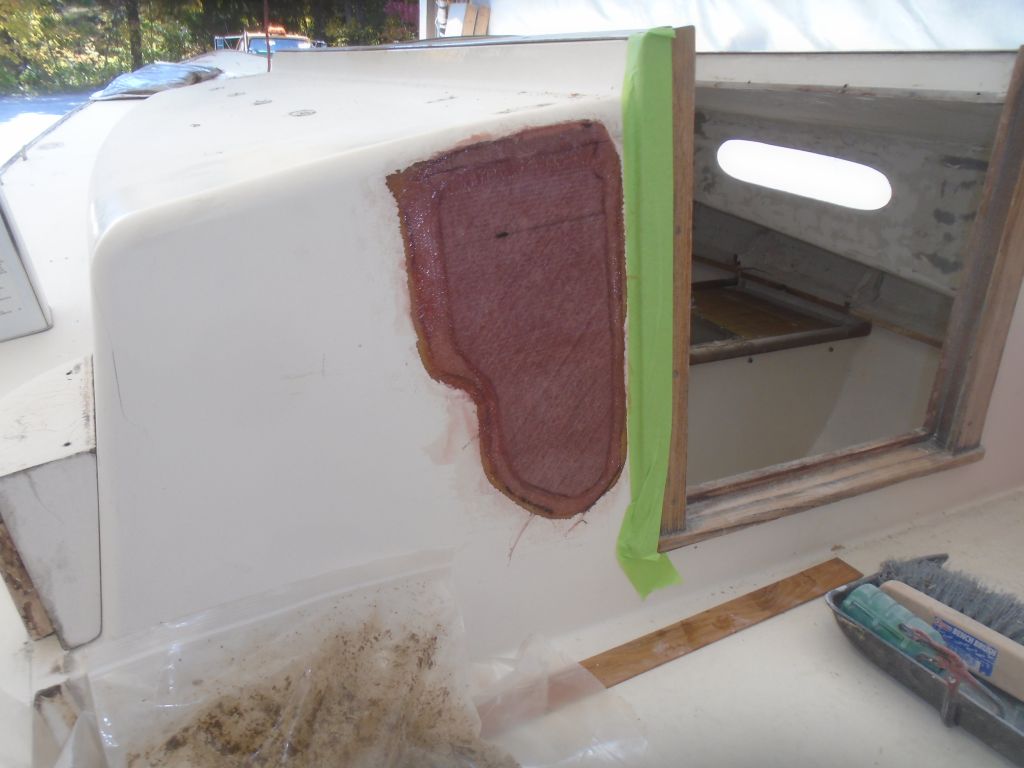
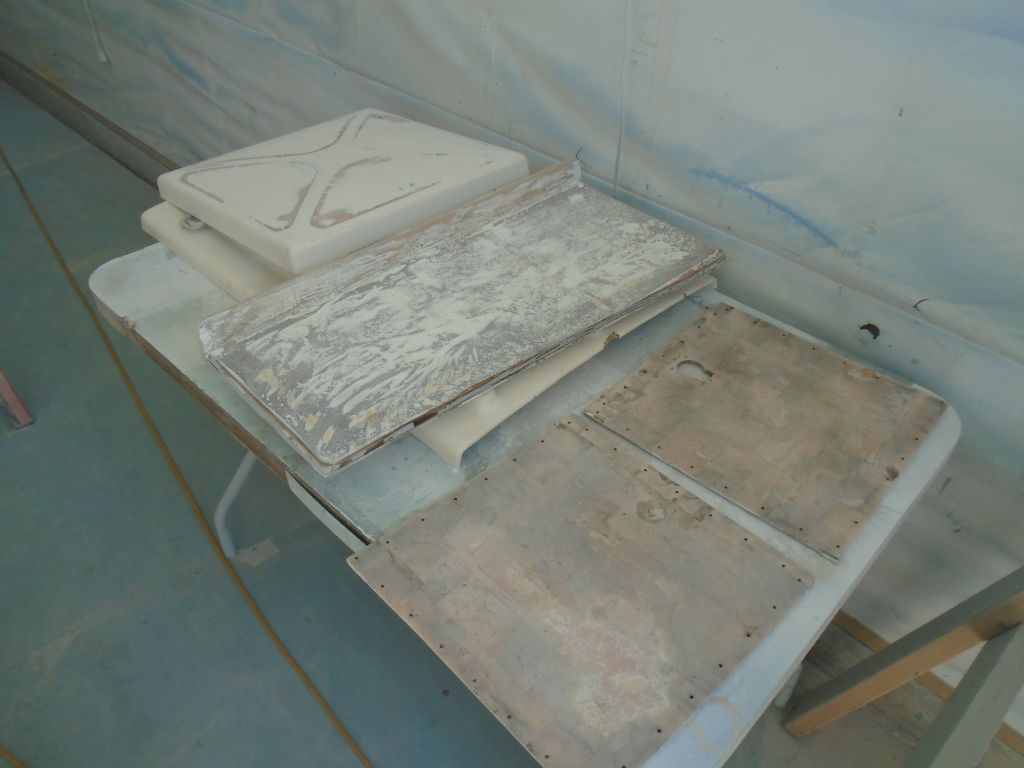
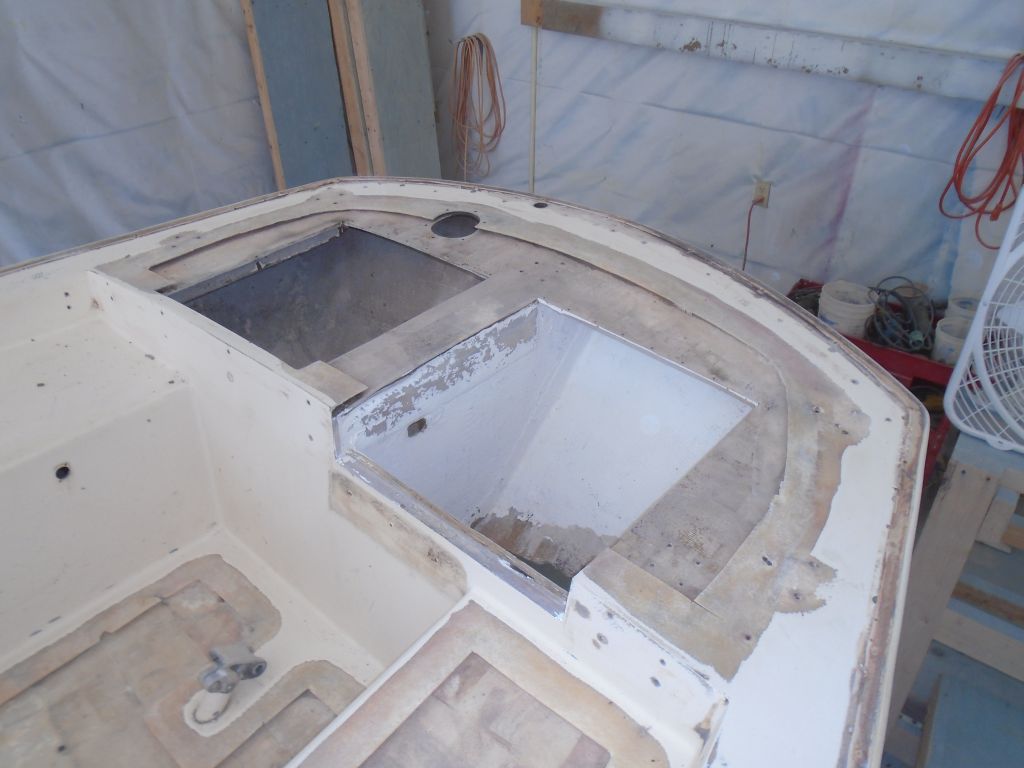
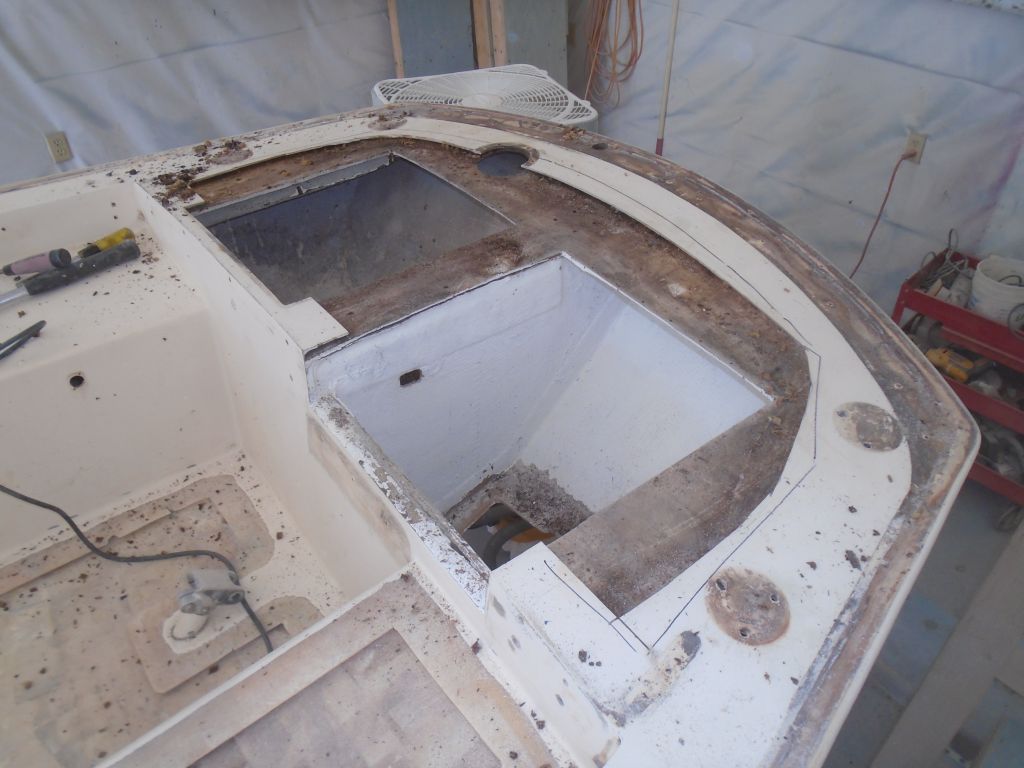
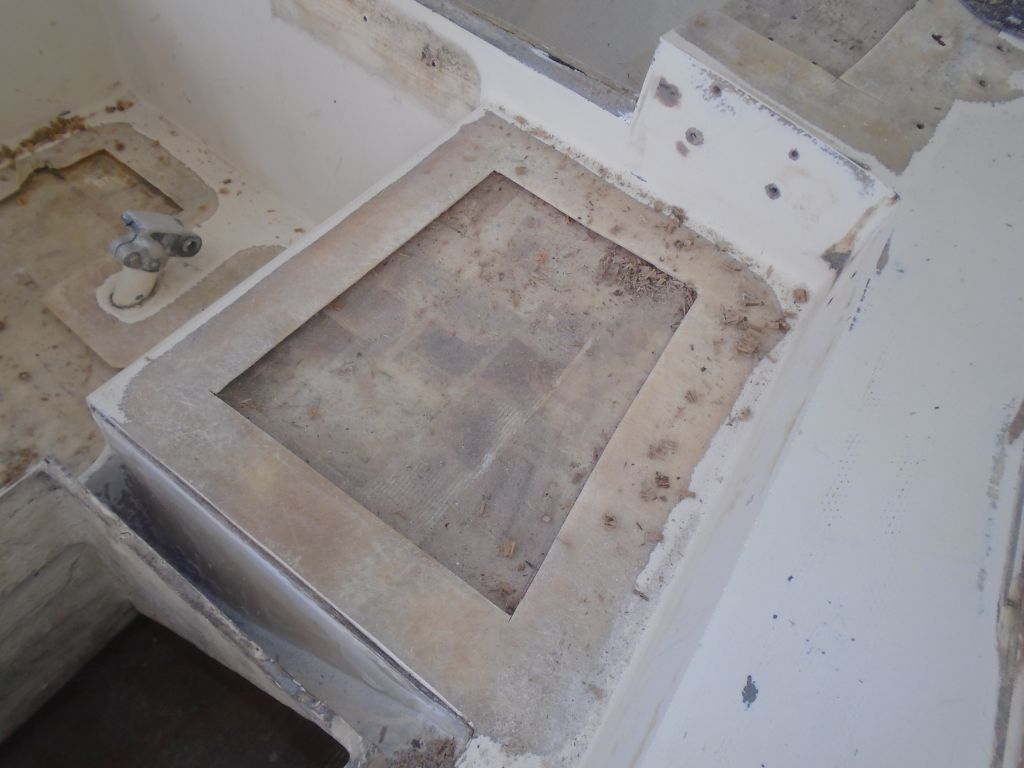
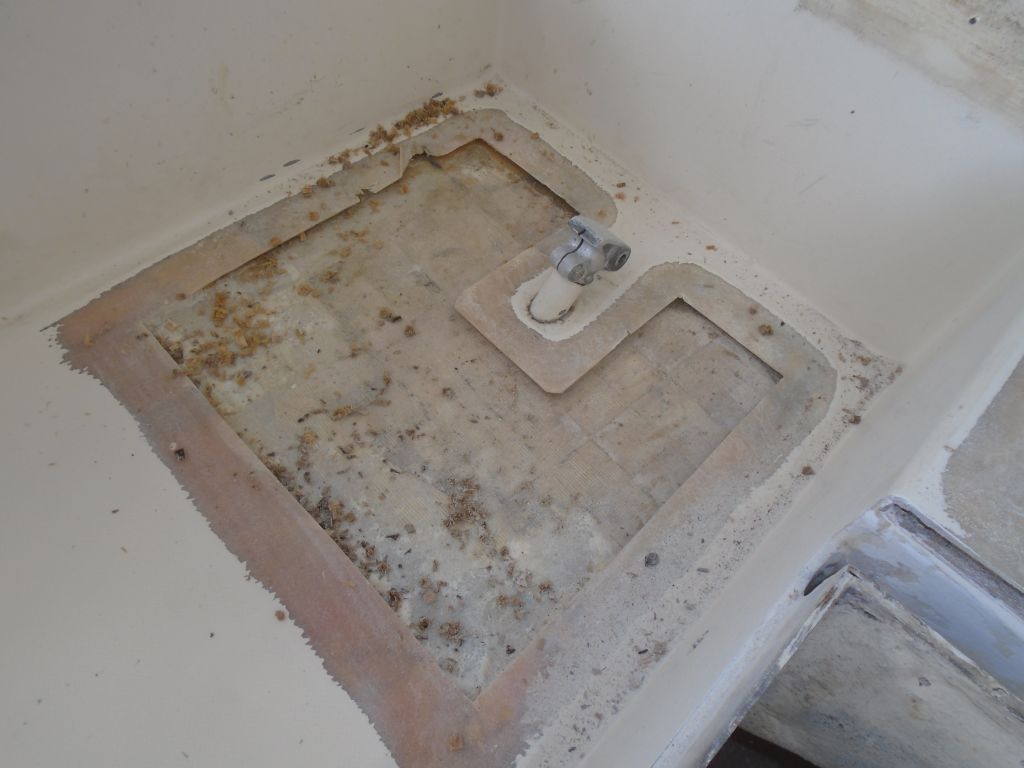
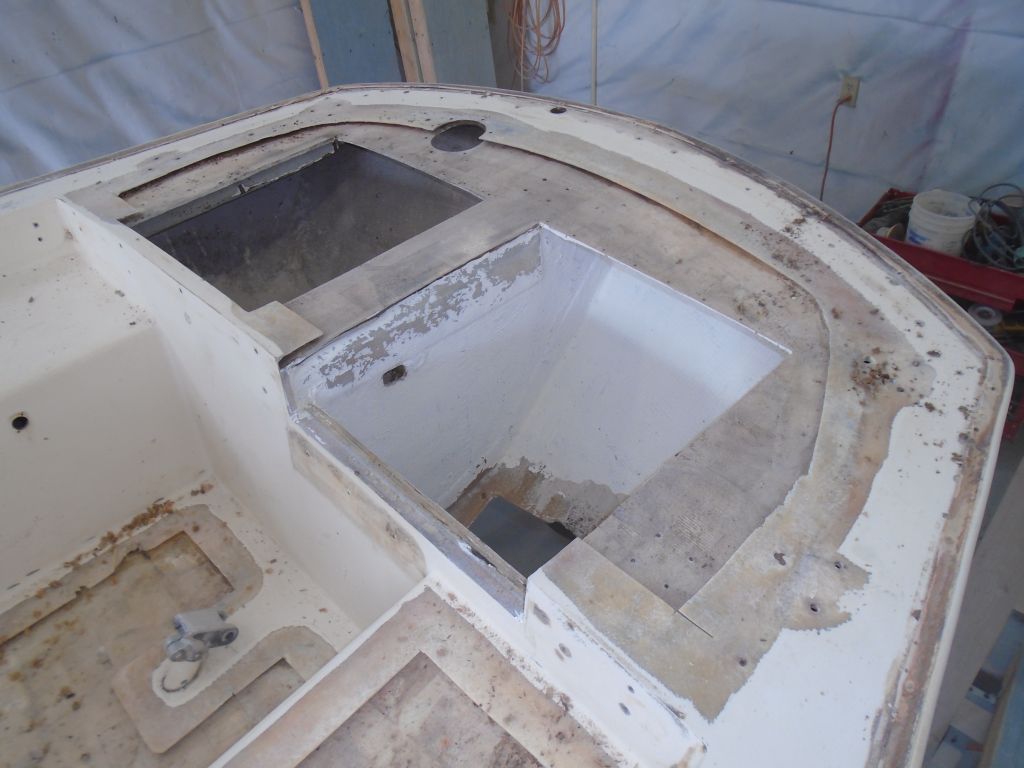
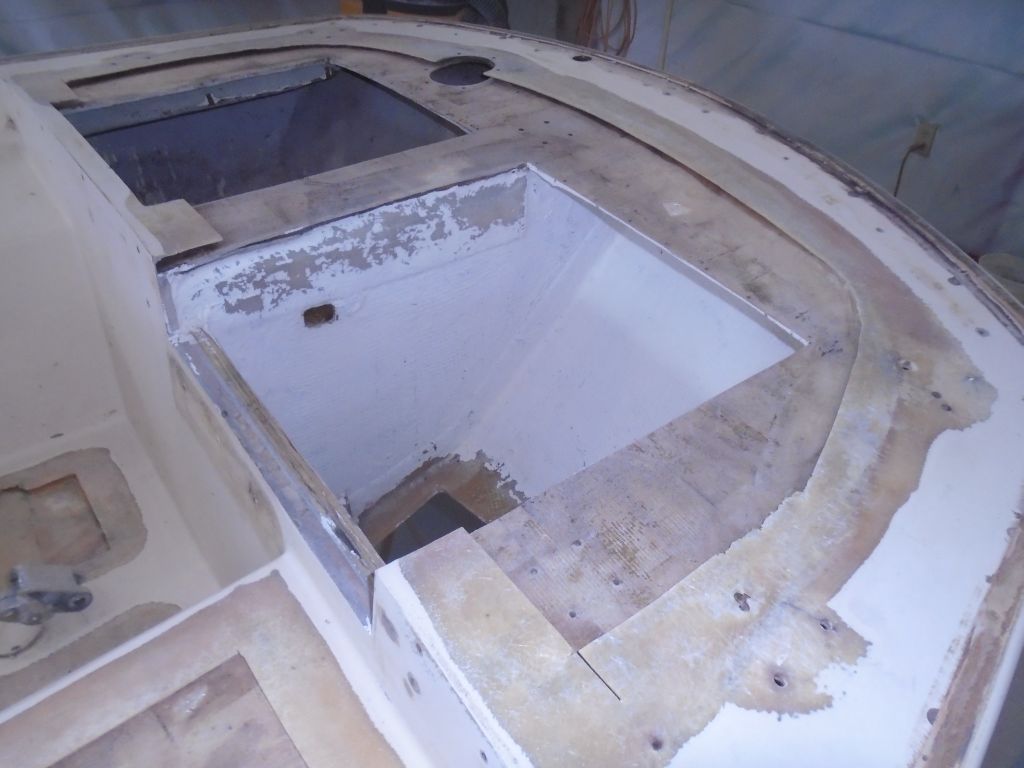
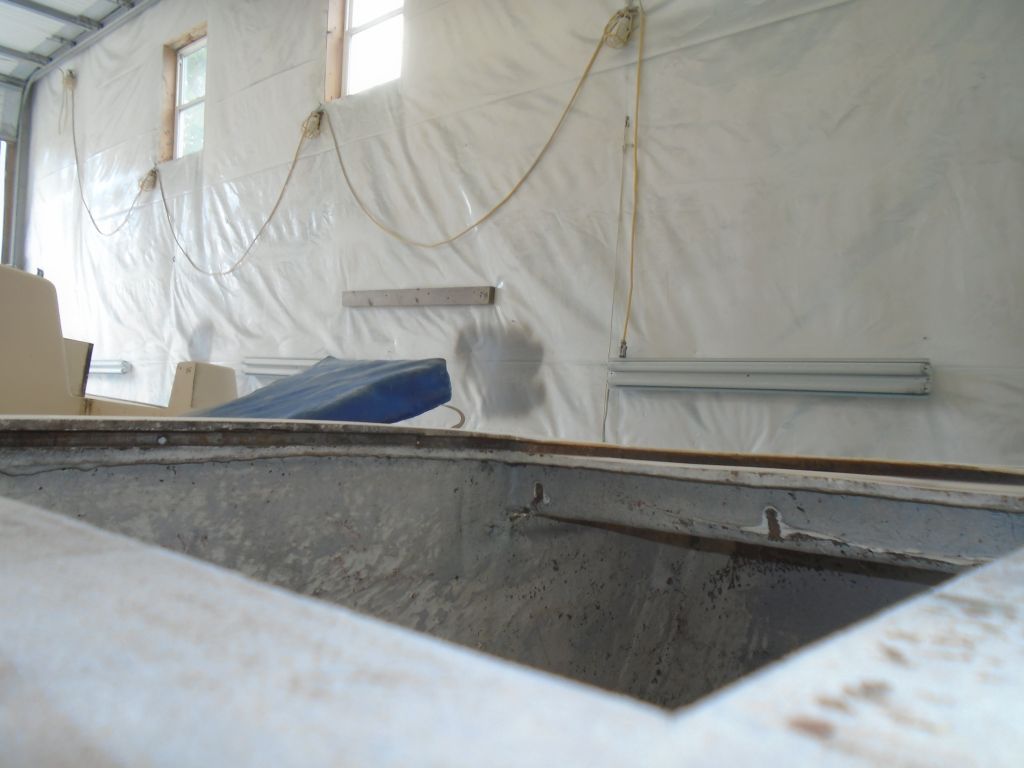
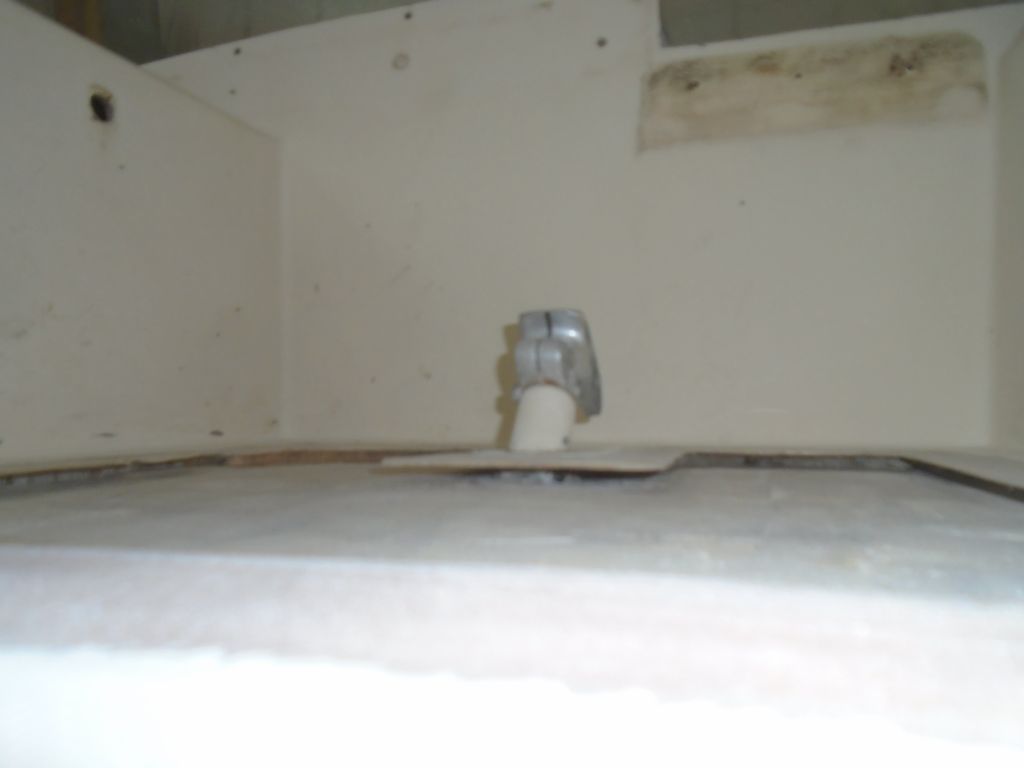
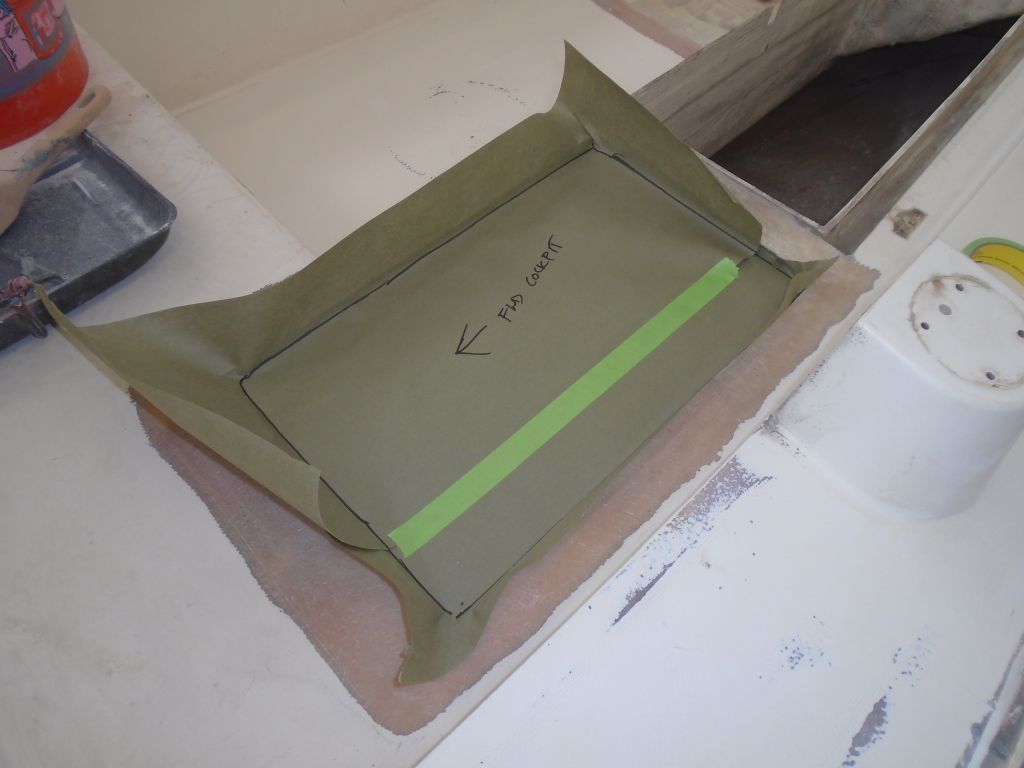
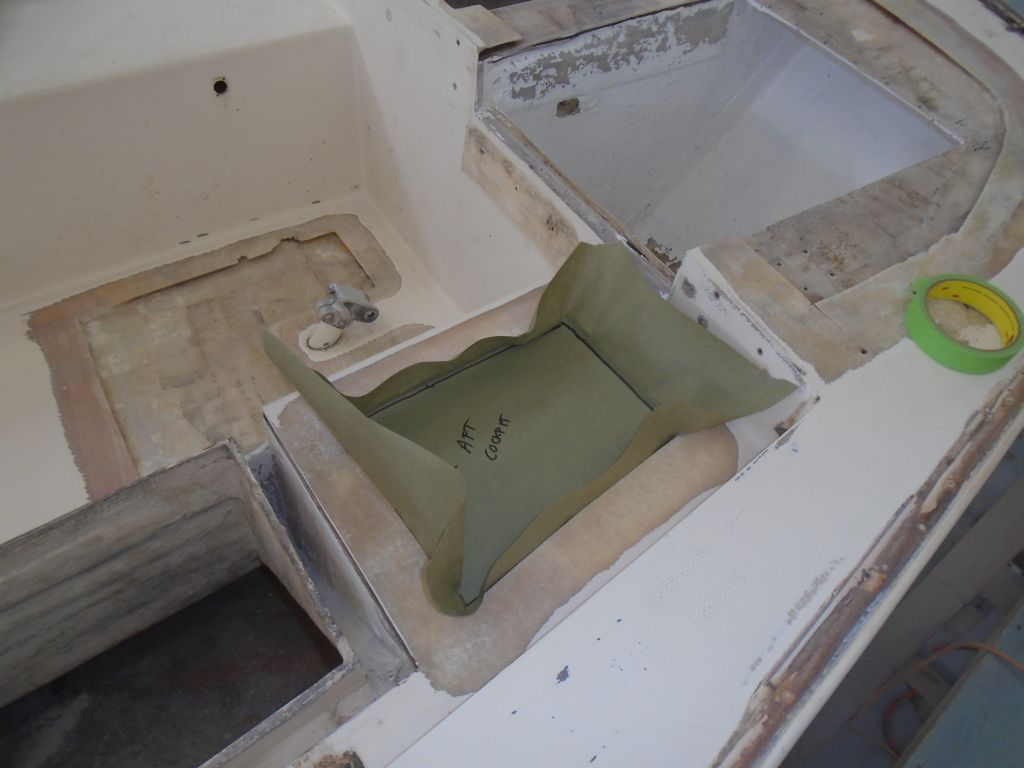
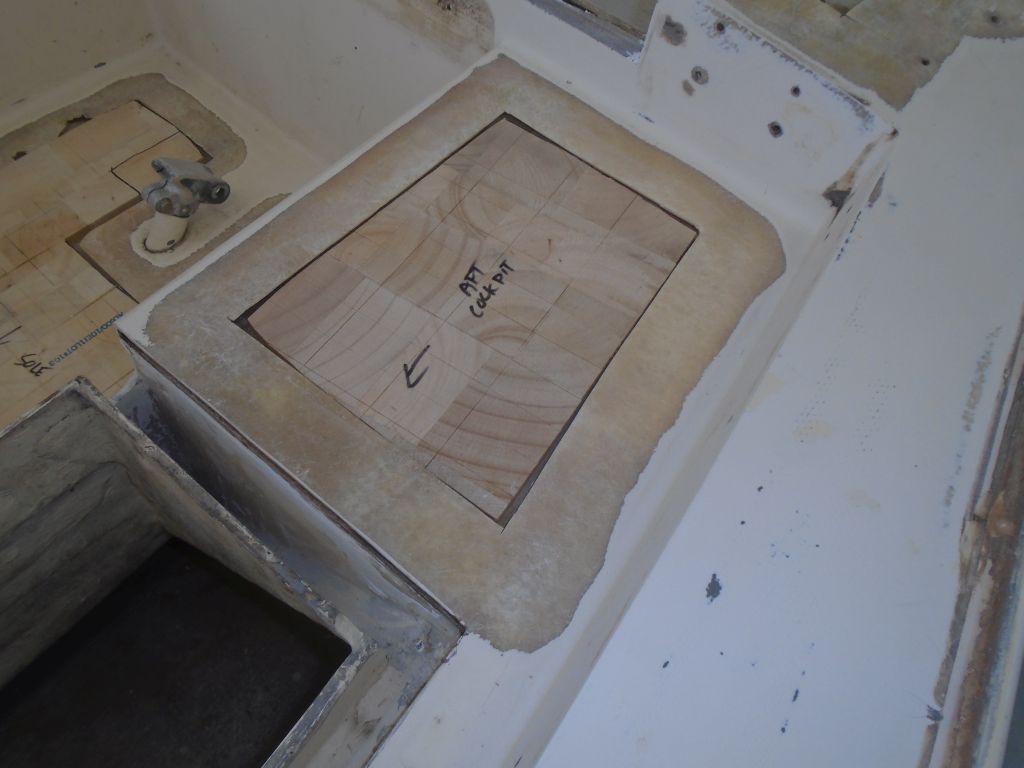
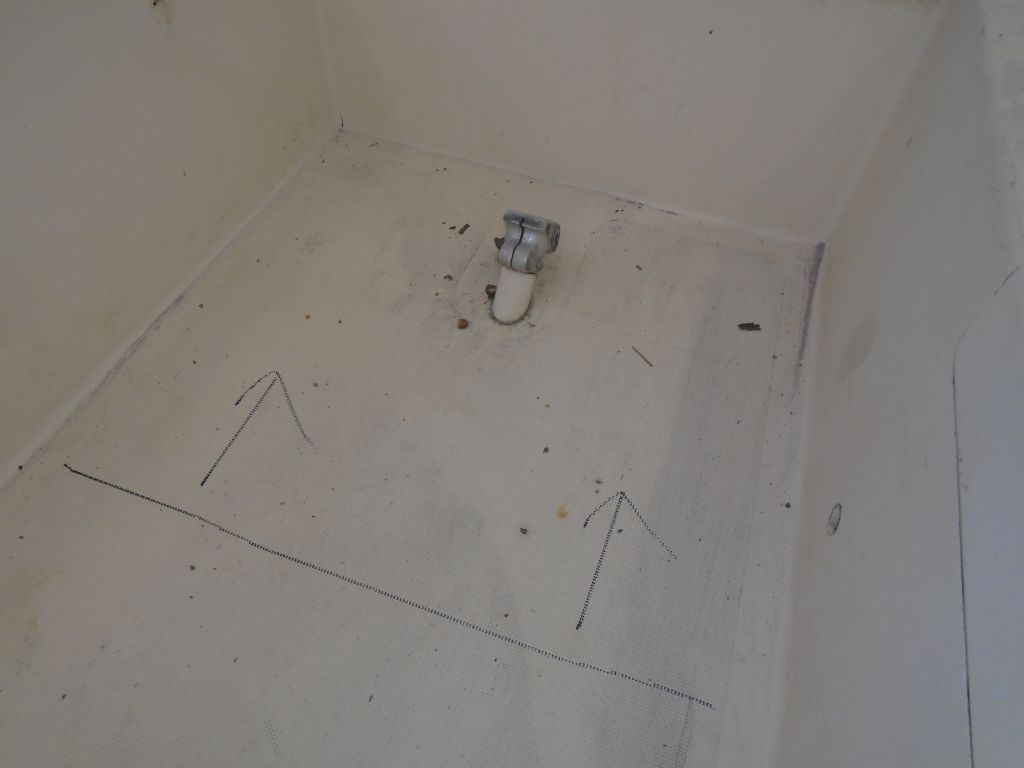
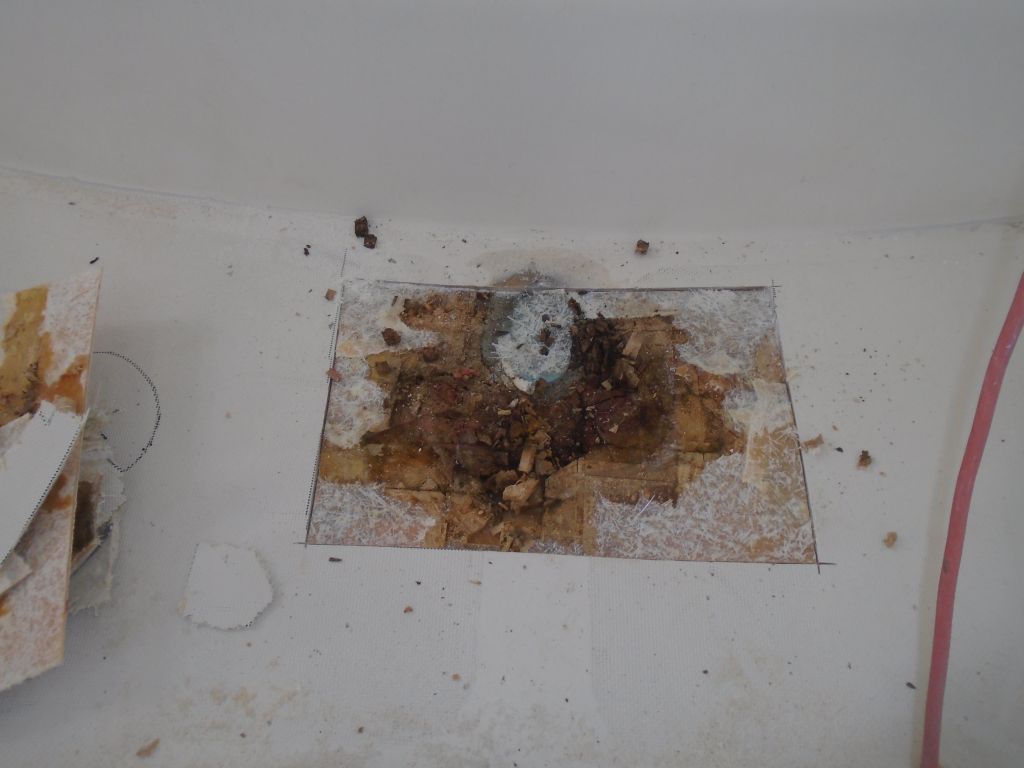
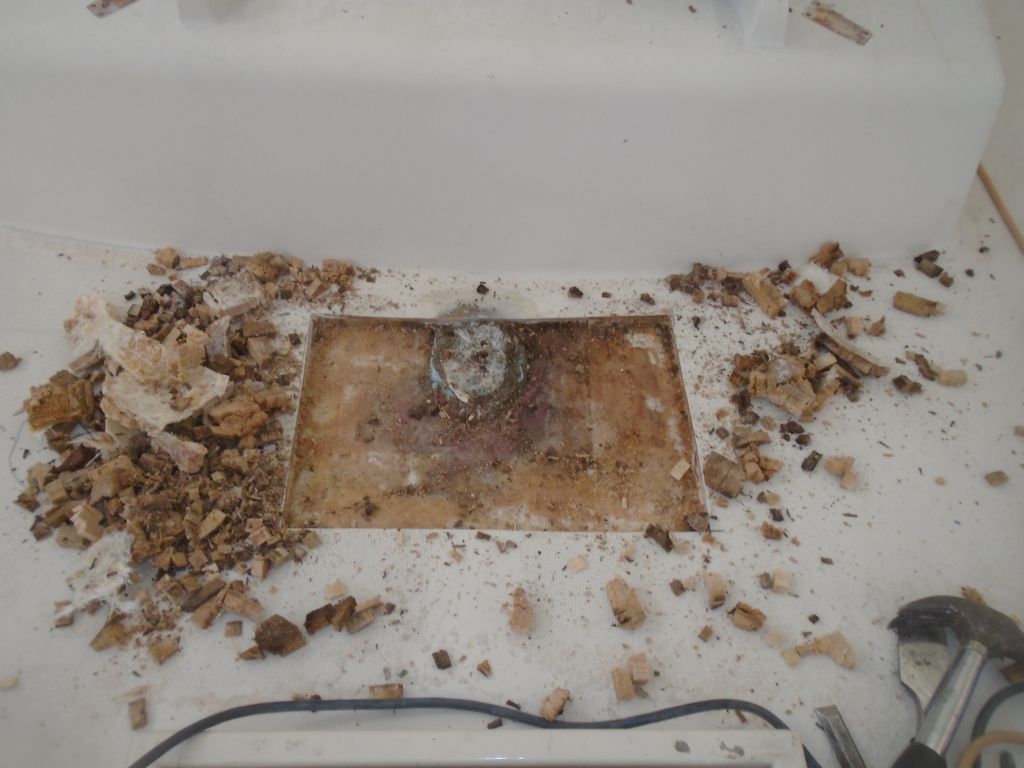
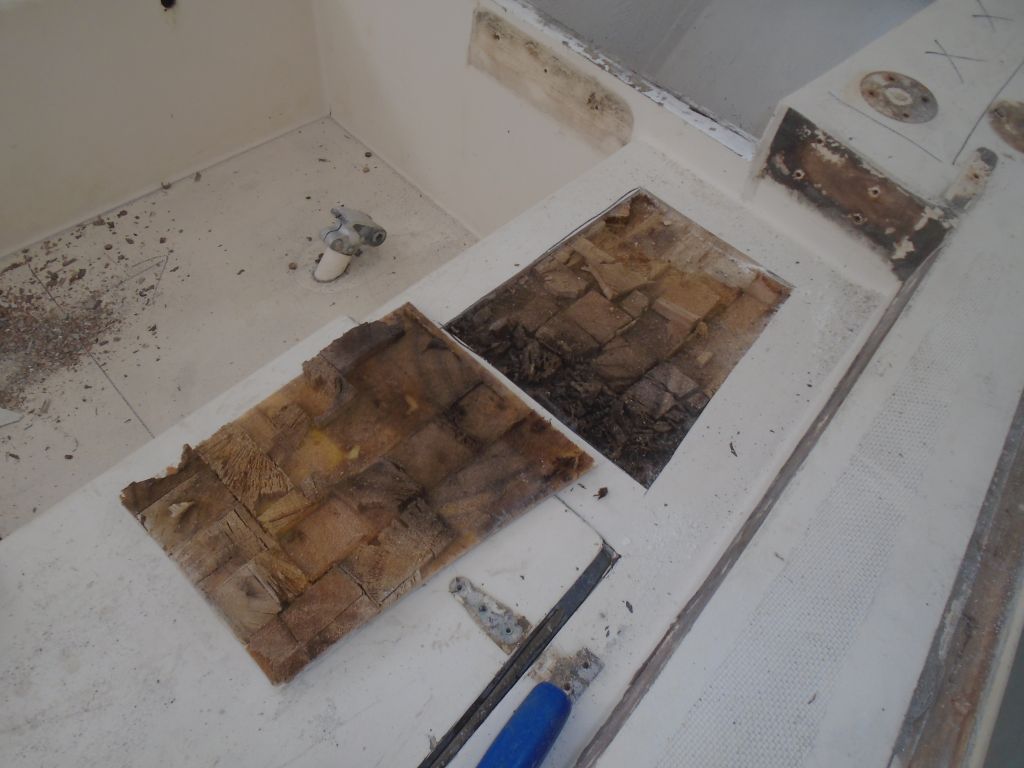
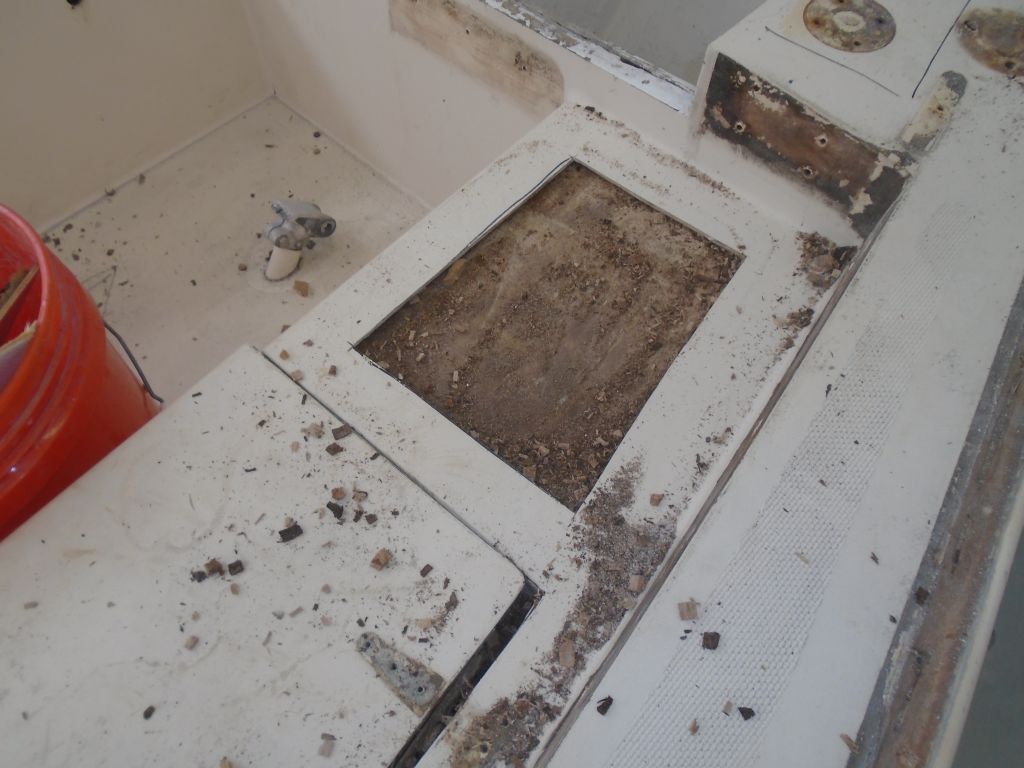
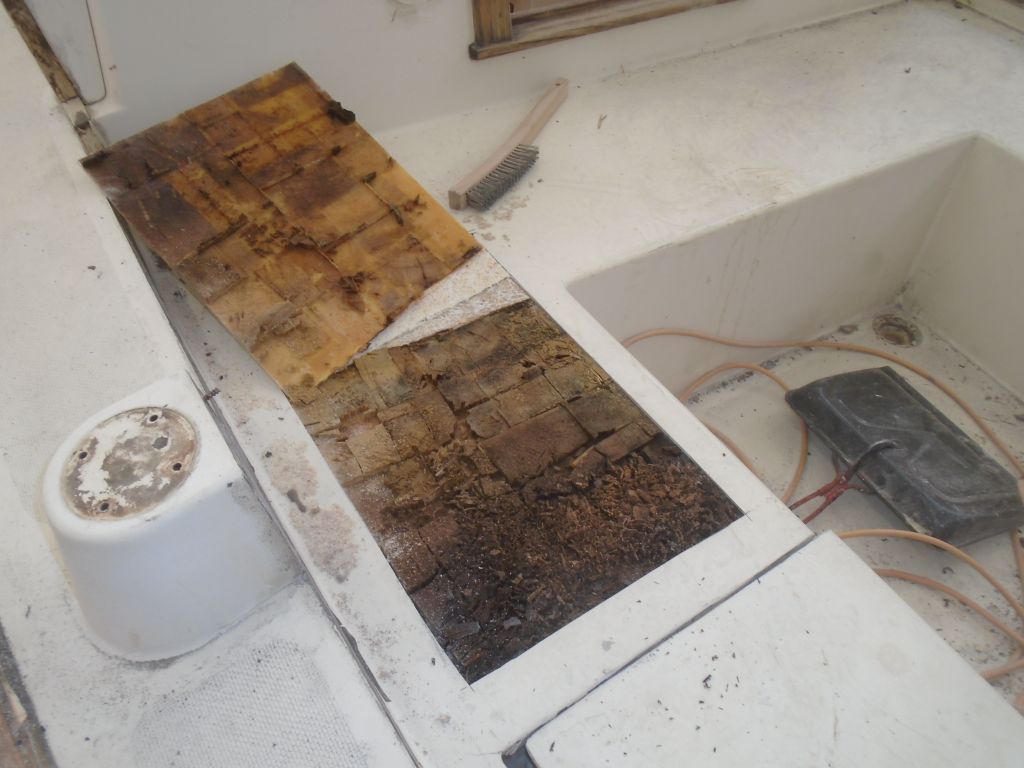
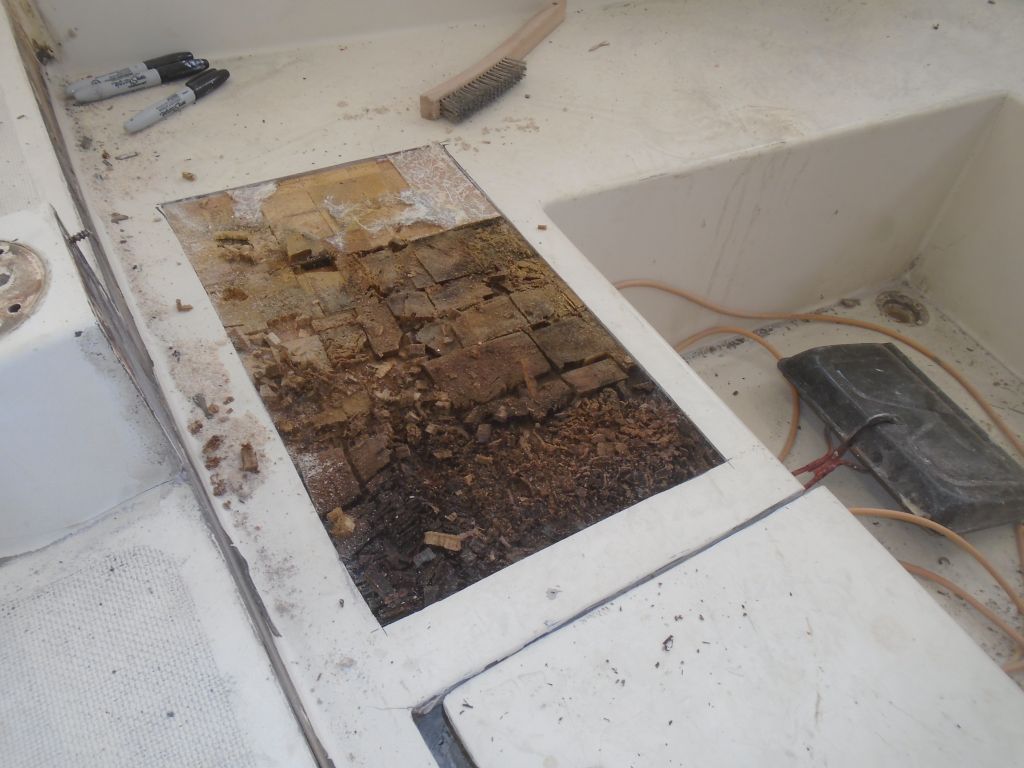
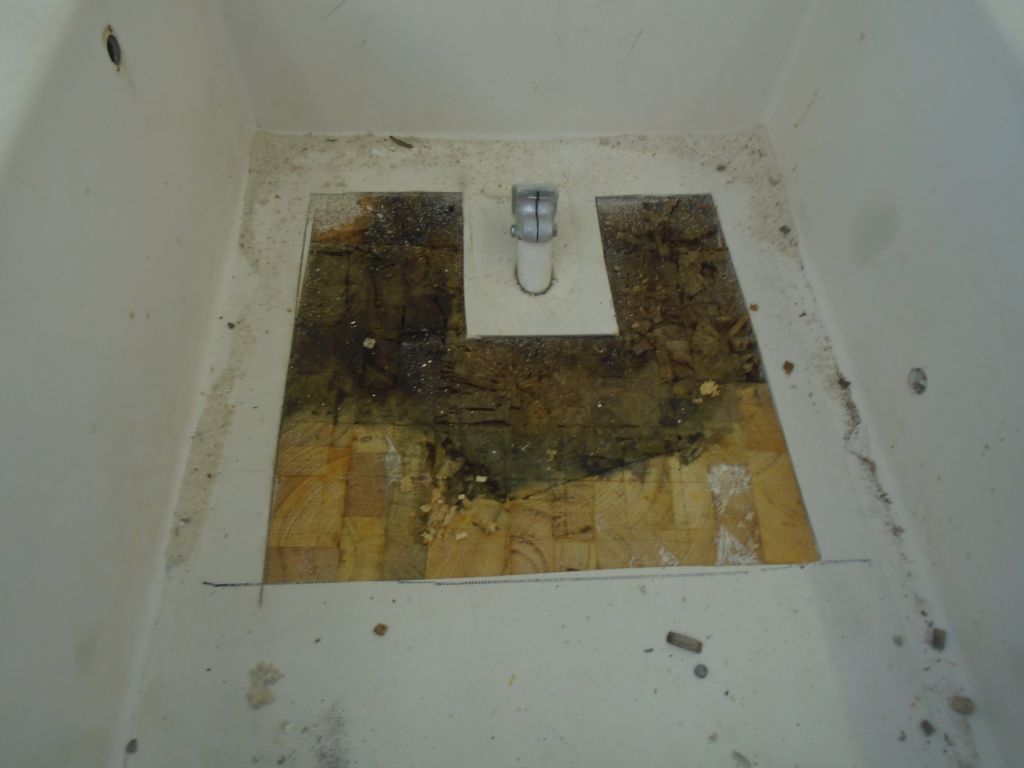
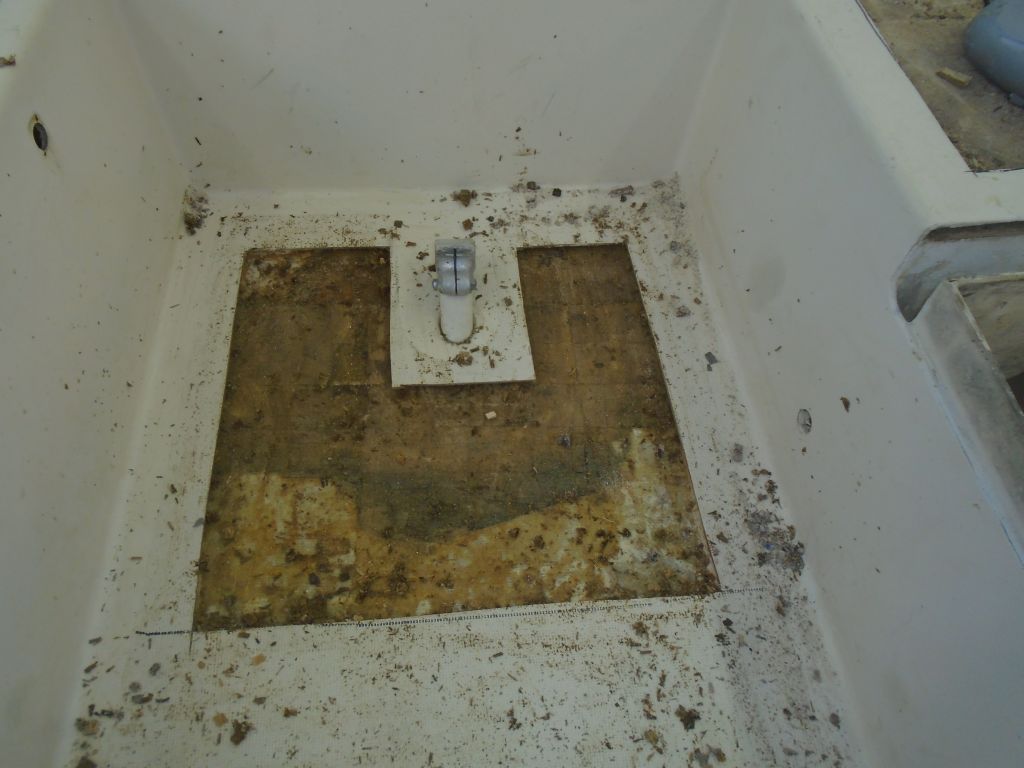
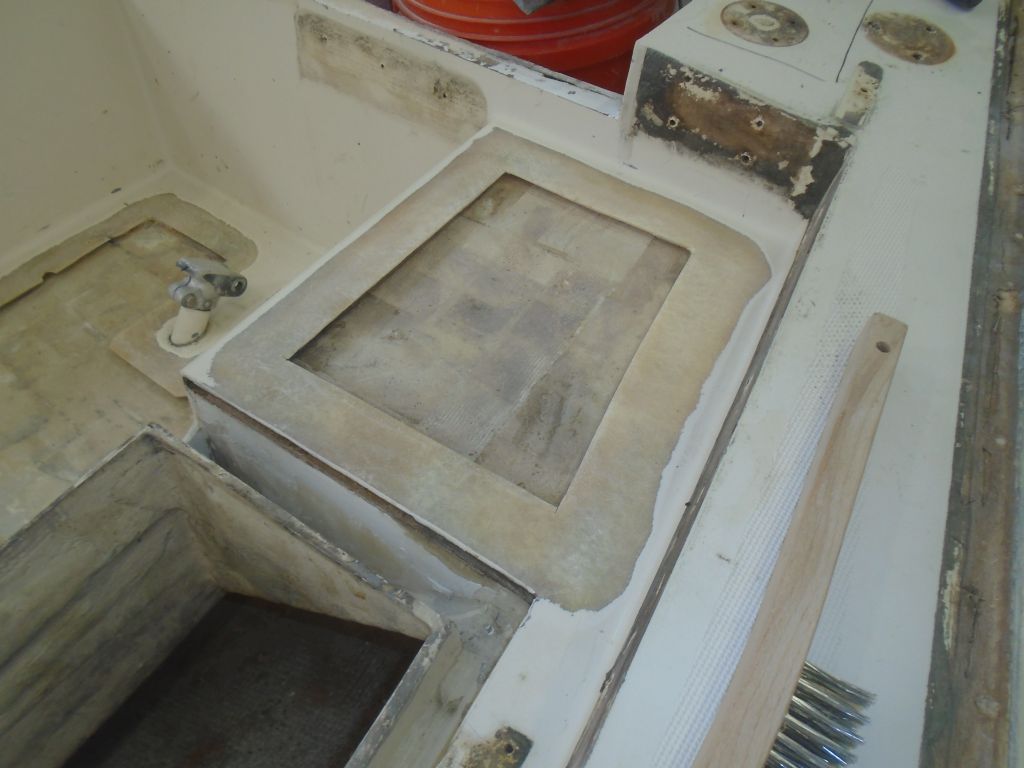
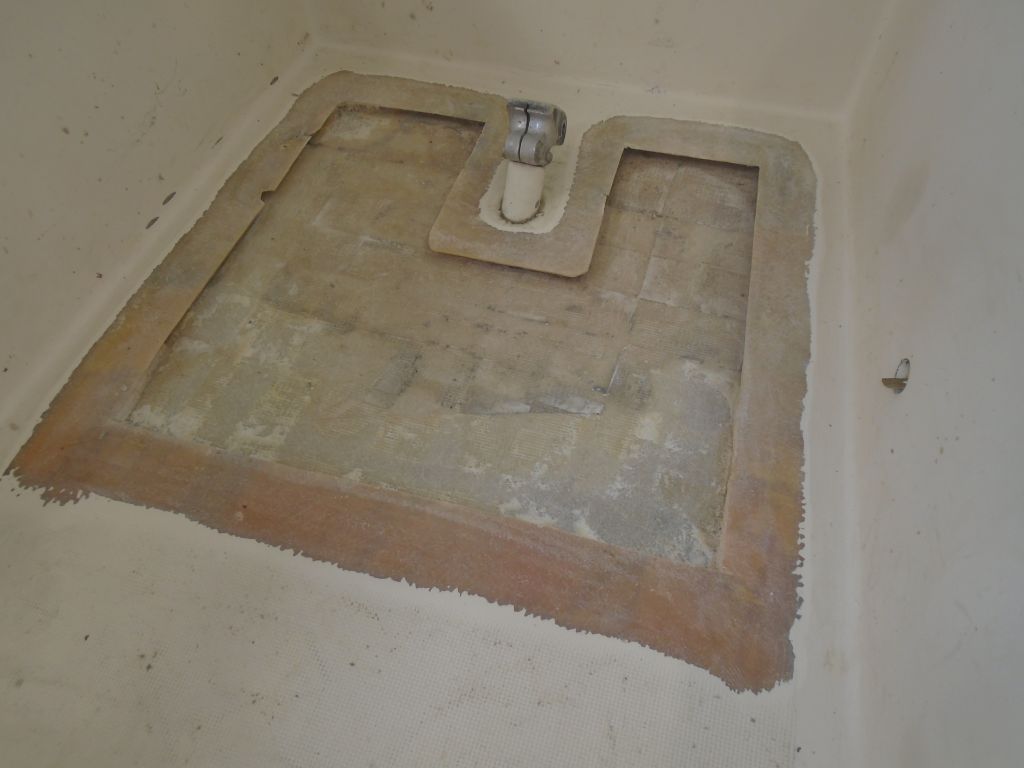
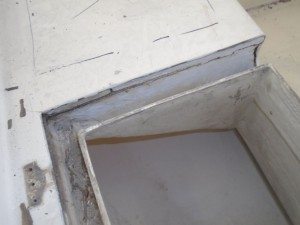
In the cockpit, there were three areas:  the port cockpit seat (ahead and behind the locker opening), and the cockpit sole around the rudder post.  Even before beginning, I could tell the seating areas were badly deteriorated, and when I made the saw cuts I was able to completely release the top skin and some of the core just by banging the skin like Fonzi at the jukebox.  This made core removal in these areas a snap.  Around the locker opening, I found that the builder had left exposed core at all edges, and that it communicated directly with the seating areas; this is clearly how these seating areas became wet and damaged in the first place, and I’d reconfigure the construction to prohibit this (and make the whole area stronger) as I went forward.

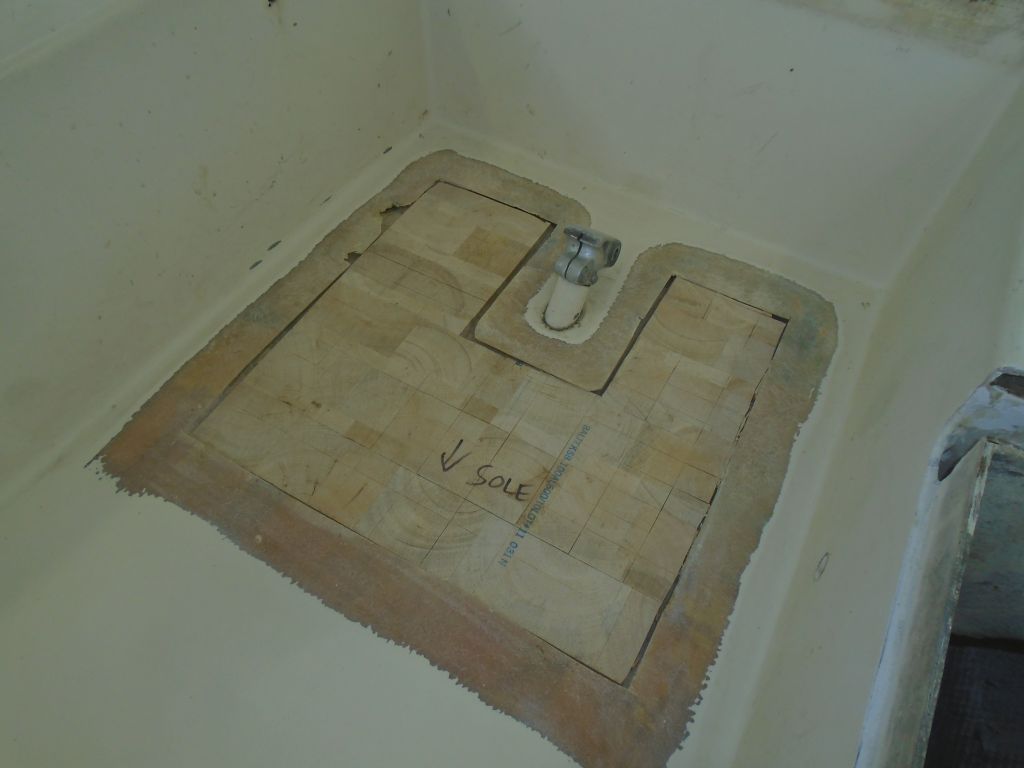
I made the cockpit sole cut well ahead of the known bad areas, and well into sound core material.  As with all other areas, I strove to ream out most of the old core beneath the outer edges, as needed, but would come back during a later stage to continue that process.

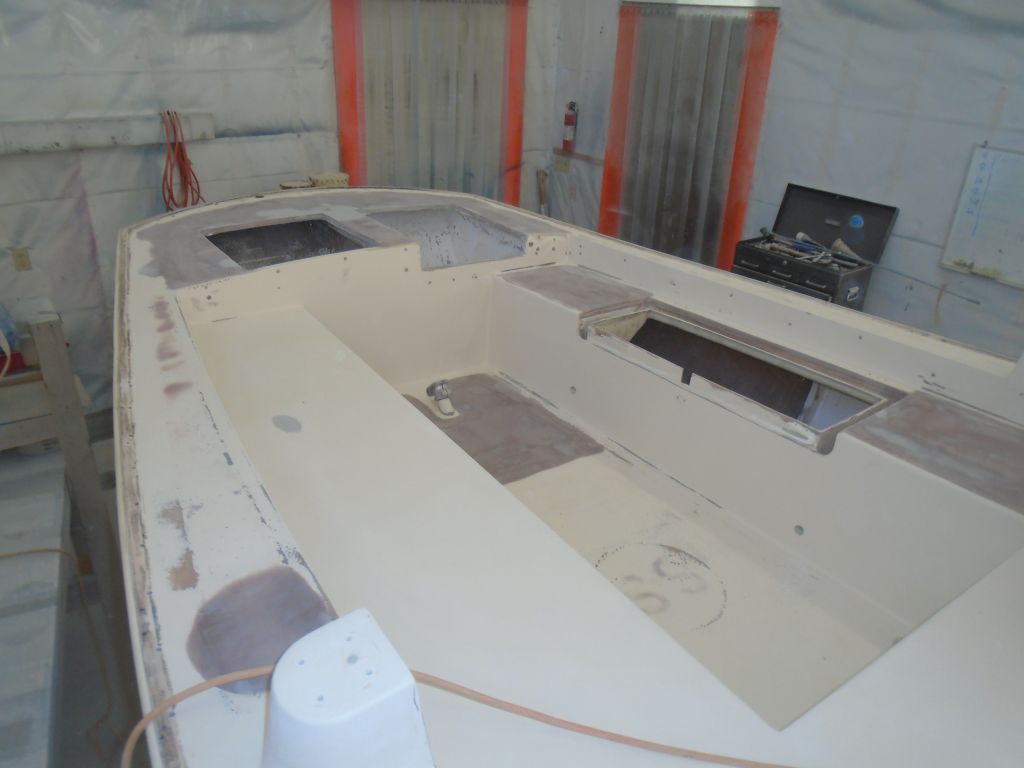
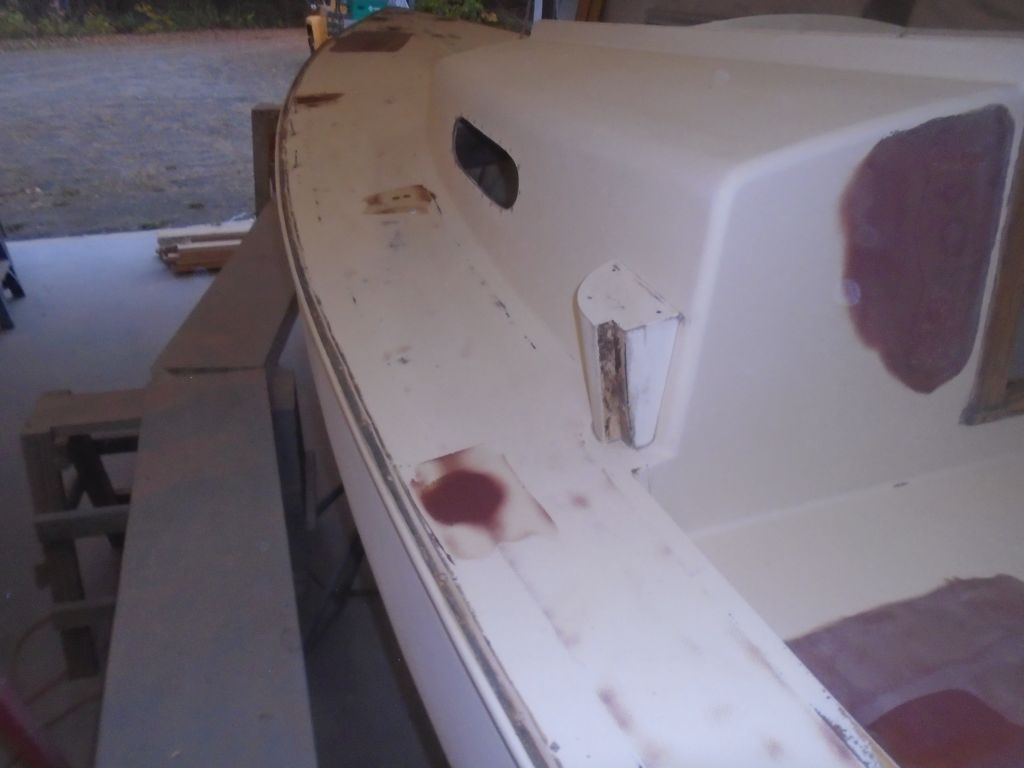
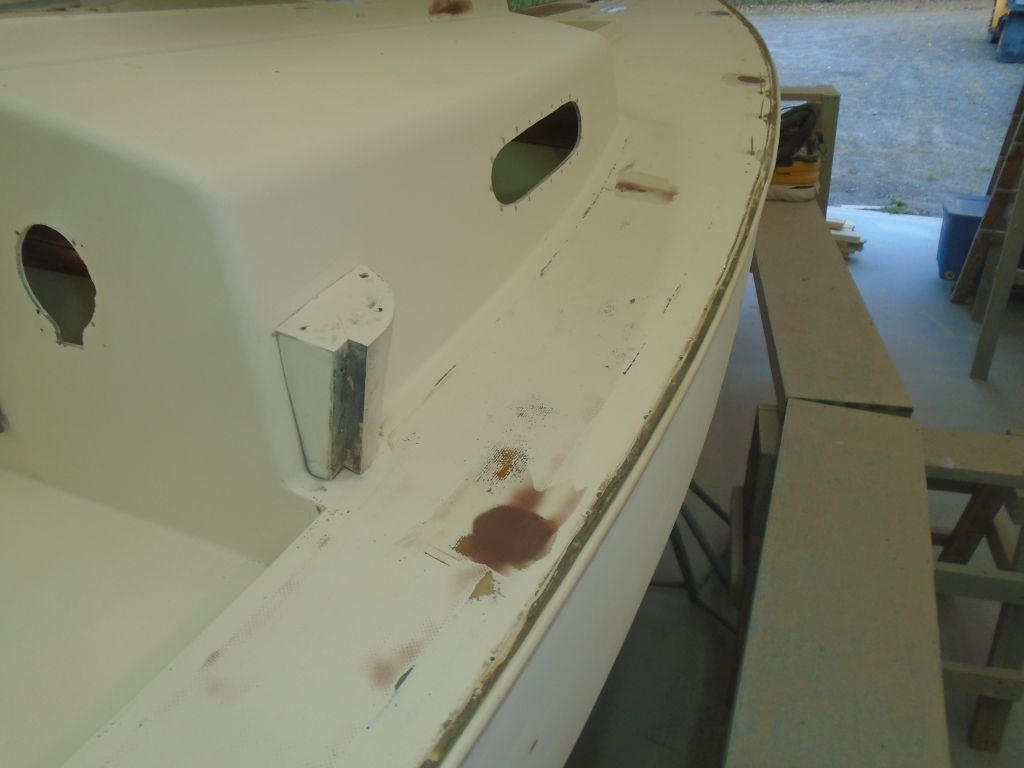
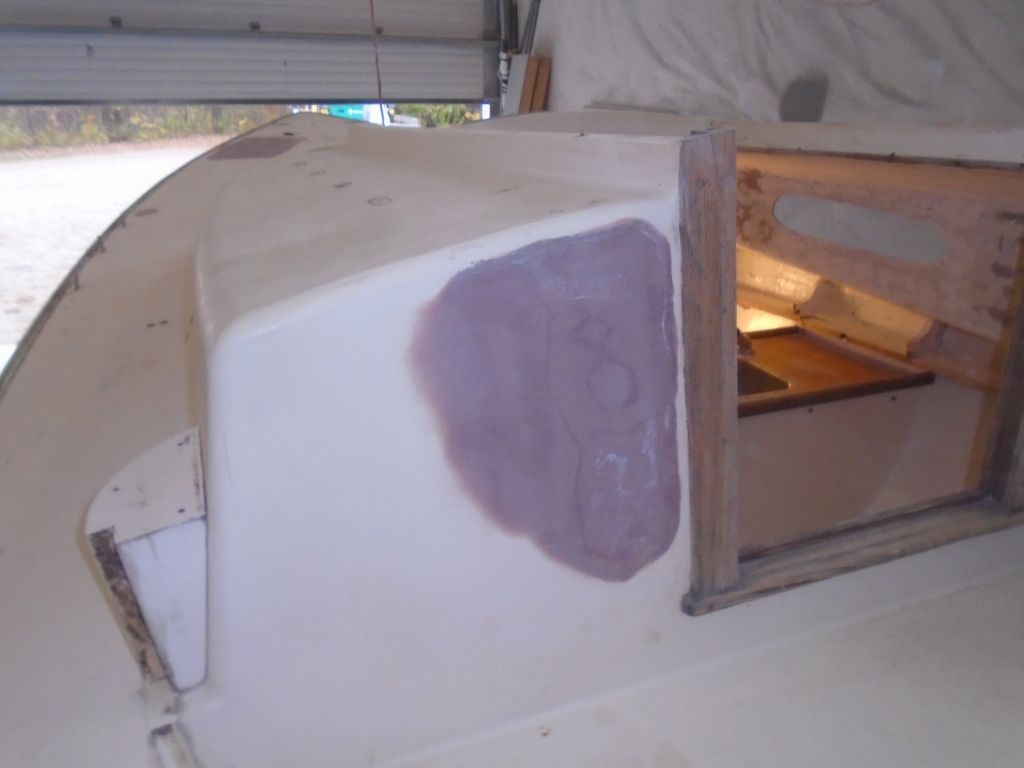
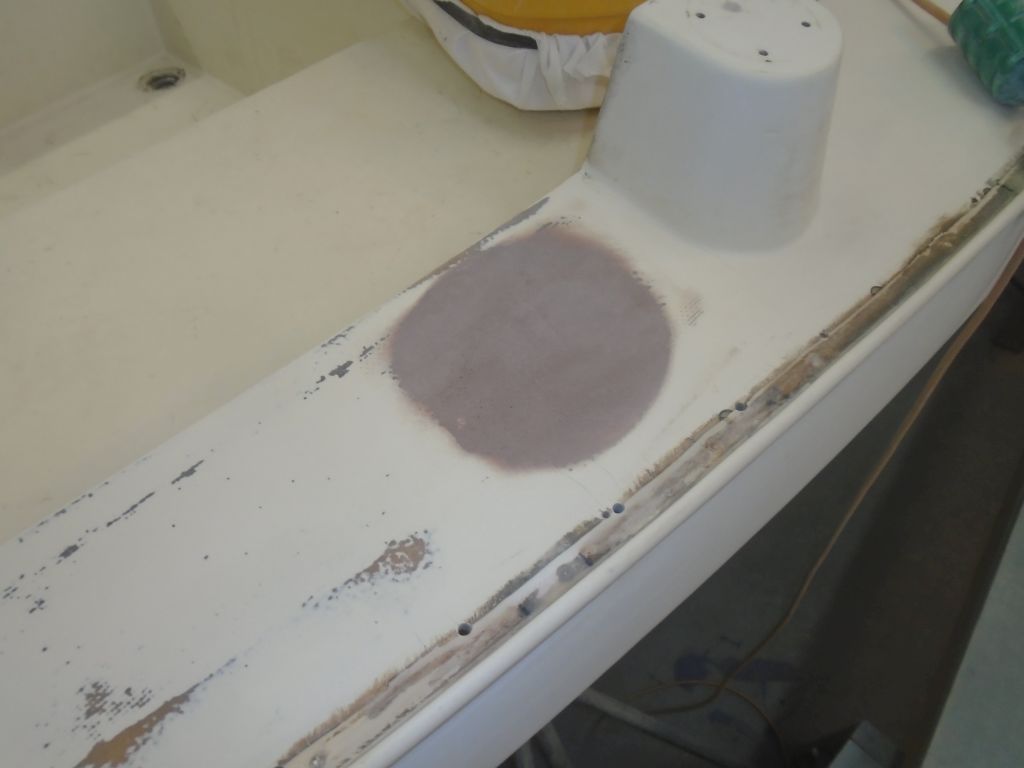
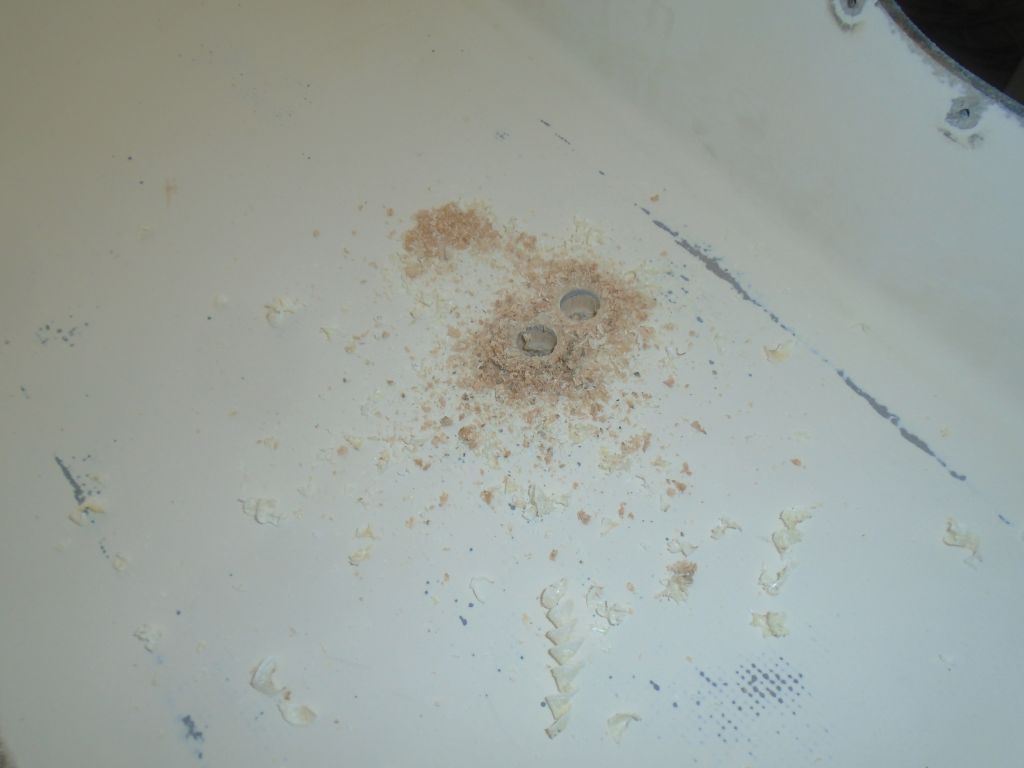
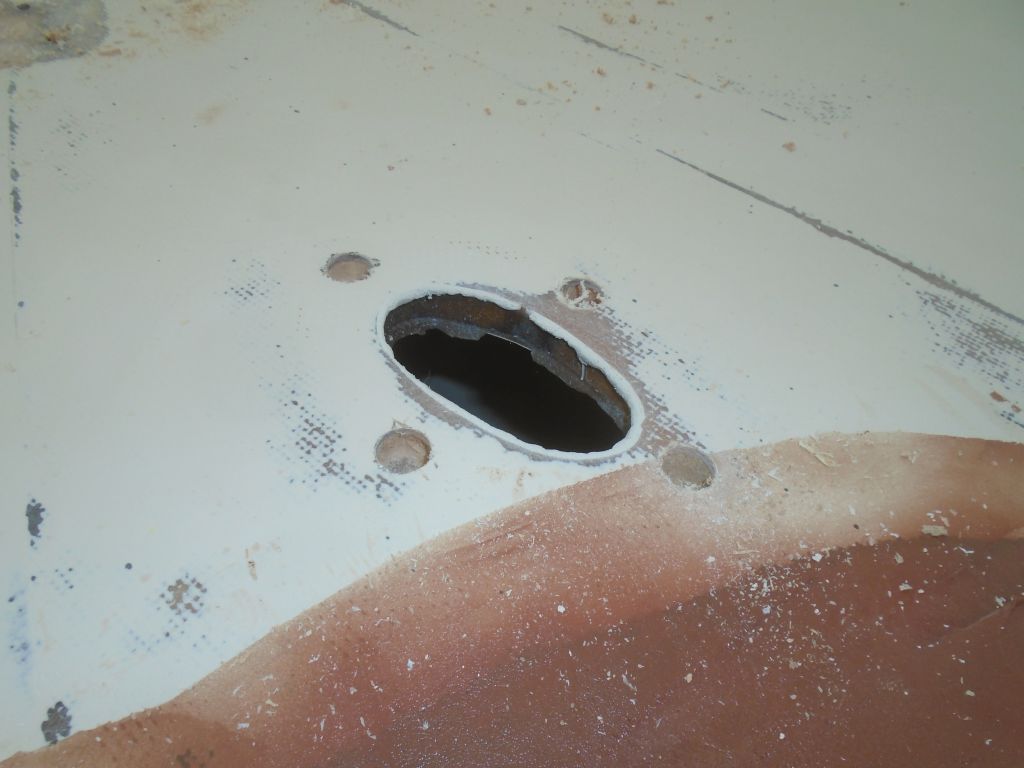
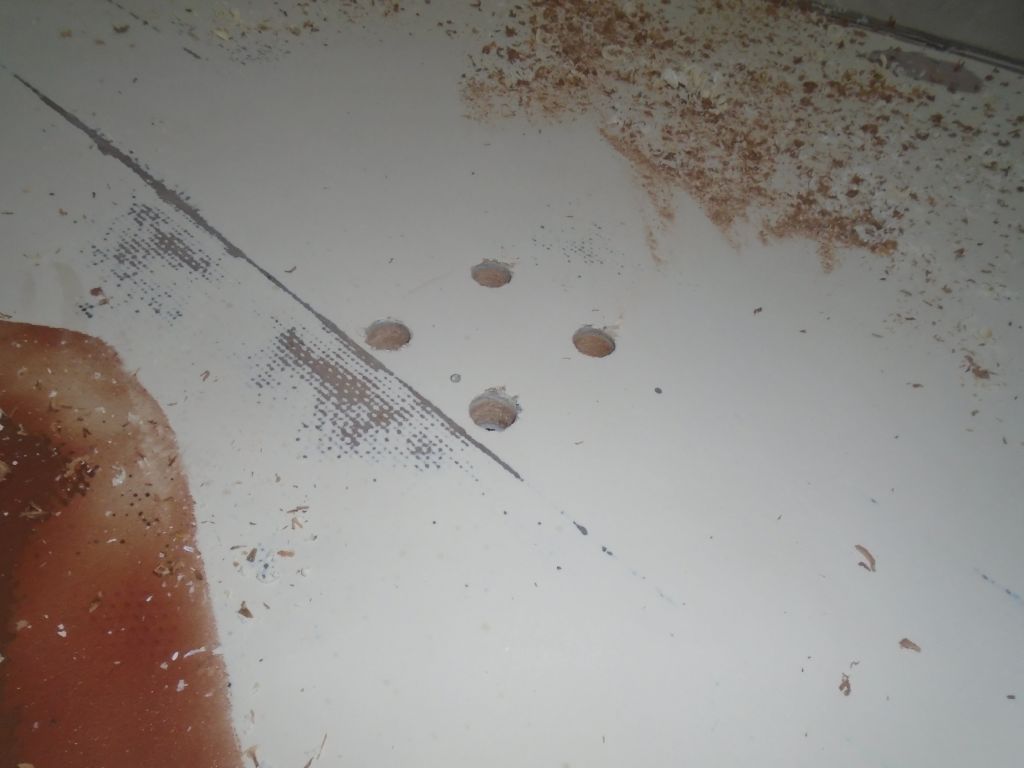
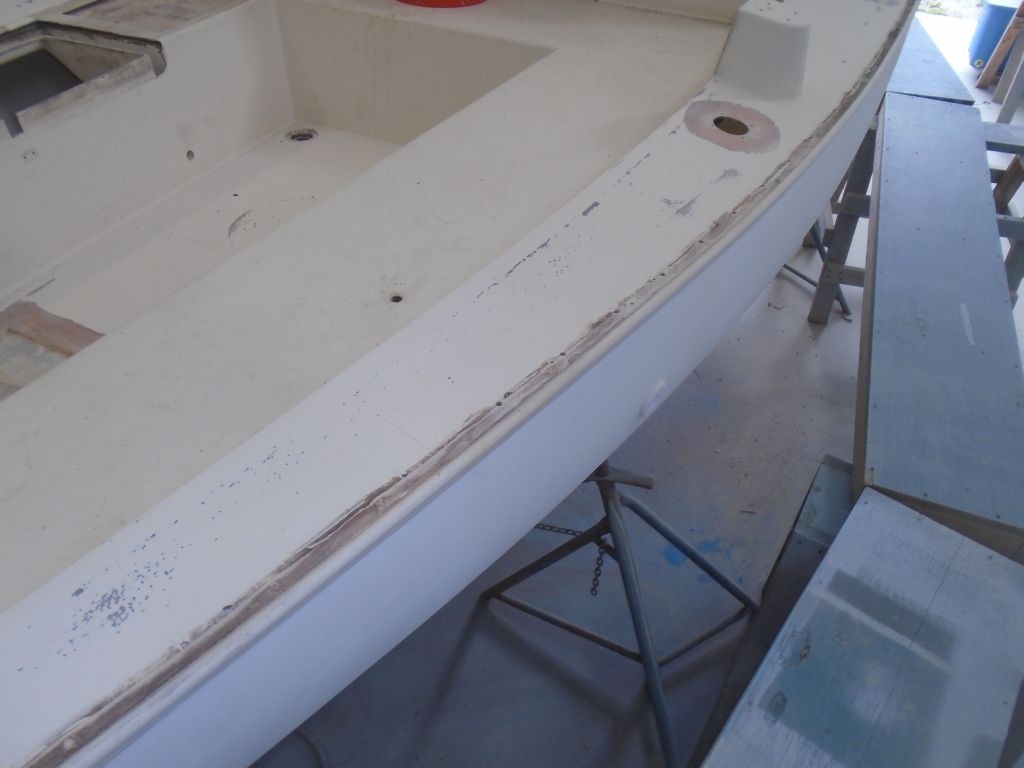
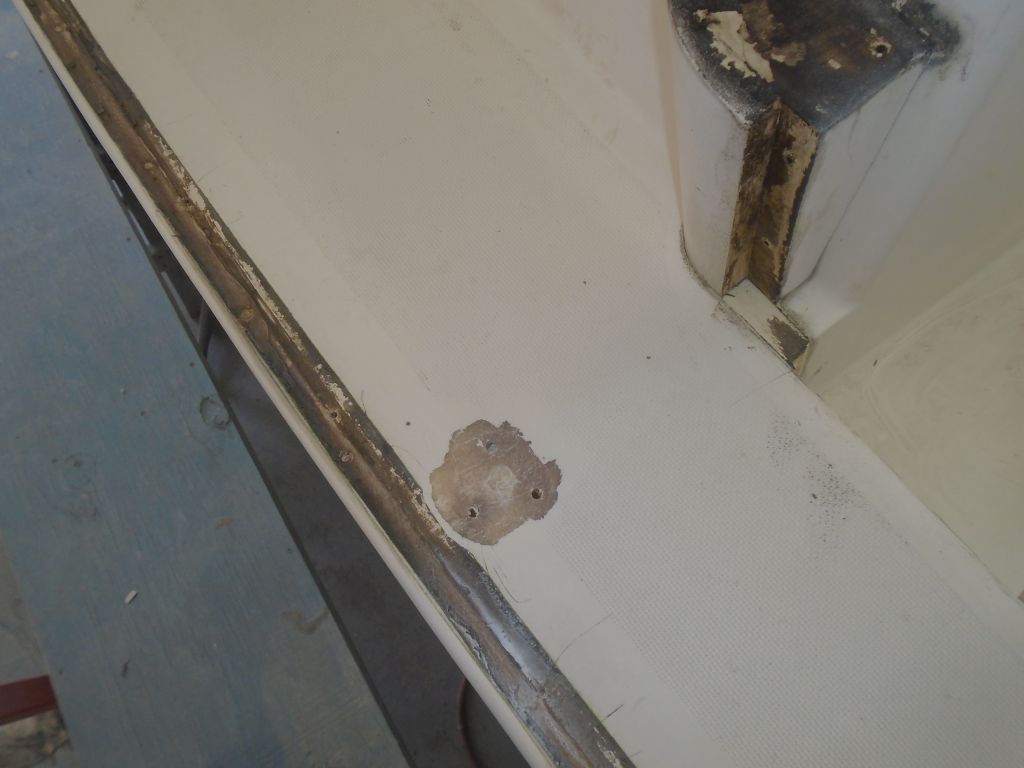
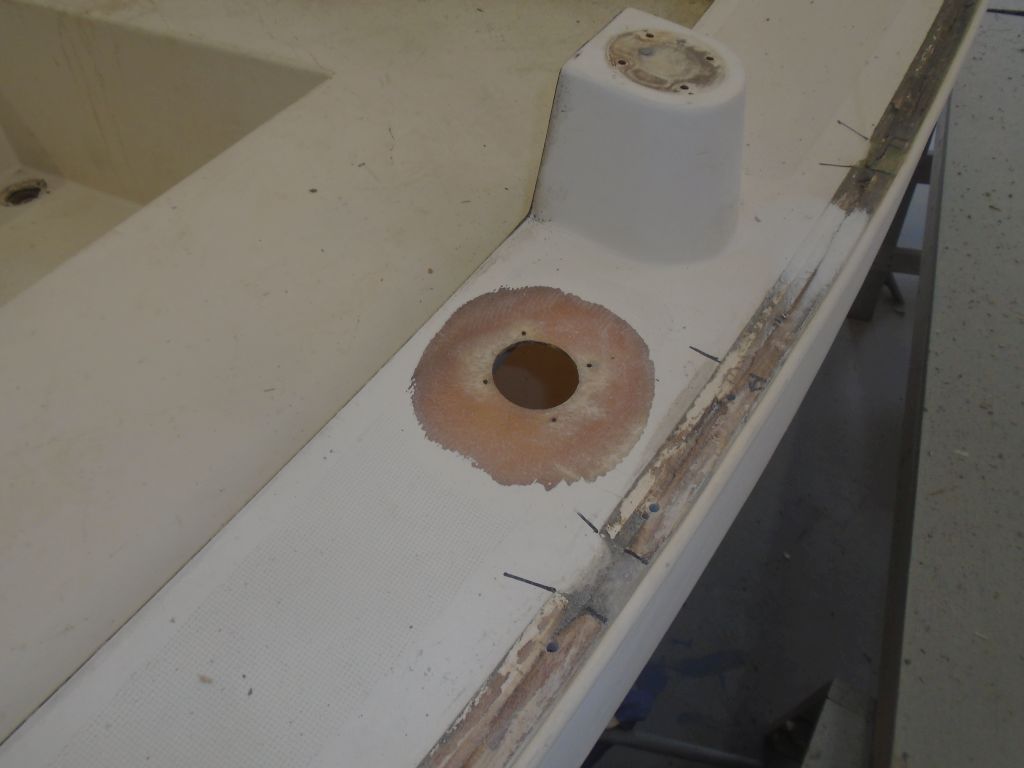
With all the core removed, I used a grinder to sand away the gelcoat and create tapered bonding surfaces all the way around all of the areas in question.  At the same time, I ground out a few other areas on deck that would require patching or additional work, including the old water tank fill location, the old electronics holes in the cockpit bulkhead, and all the stanchion base locations, which, being located on thin, solid fiberglass outboard of the stiffer cored areas of the deck, had caused various stress cracking that required minor repair.

With the bulk grinding complete, I sanded the inner skin surfaces of all the uncored areas to remove vestiges of the old core and prepare the surfaces for later steps.

Total Time Billed on This Job Today:  7 Hours

0600 Weather Report:
Mostly clear, light fog, 32.  Forecast for the day:  Partly sunny, light wind, around 60.

Older posts Newer posts