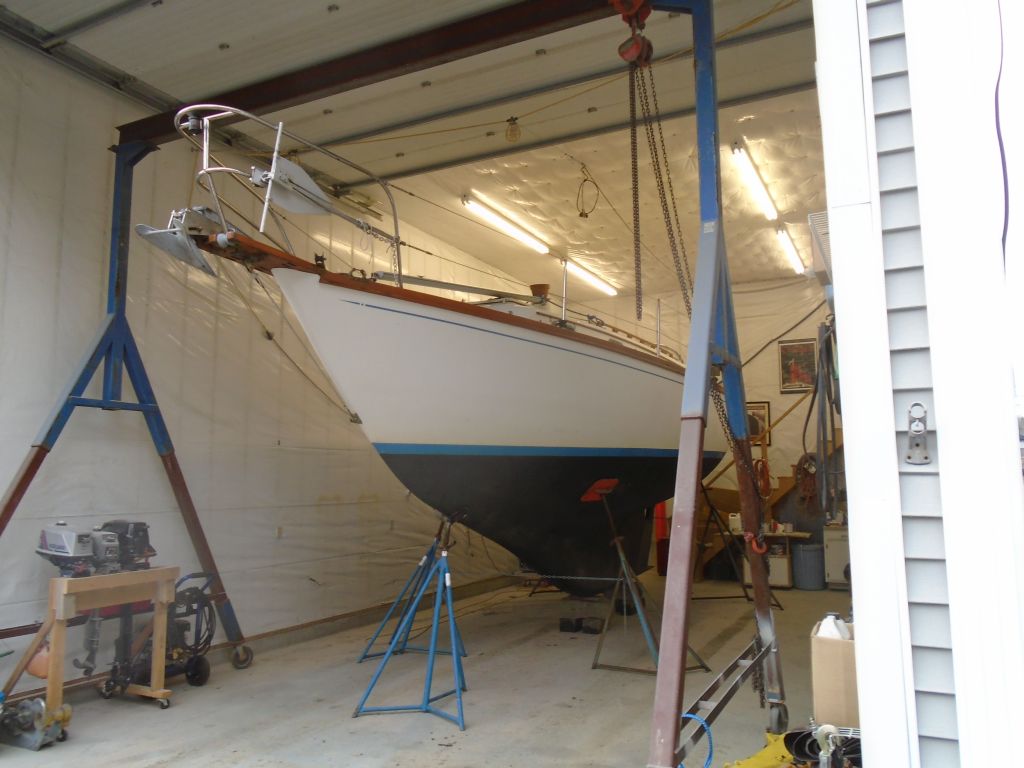
< Back to Danusia
Thursday
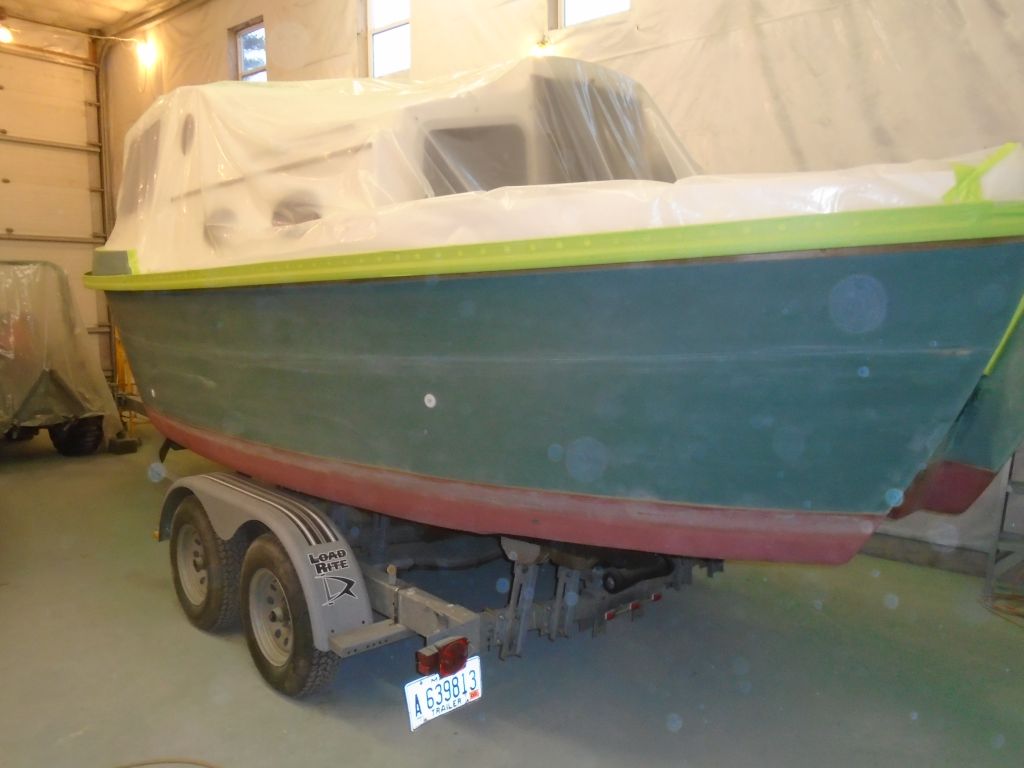
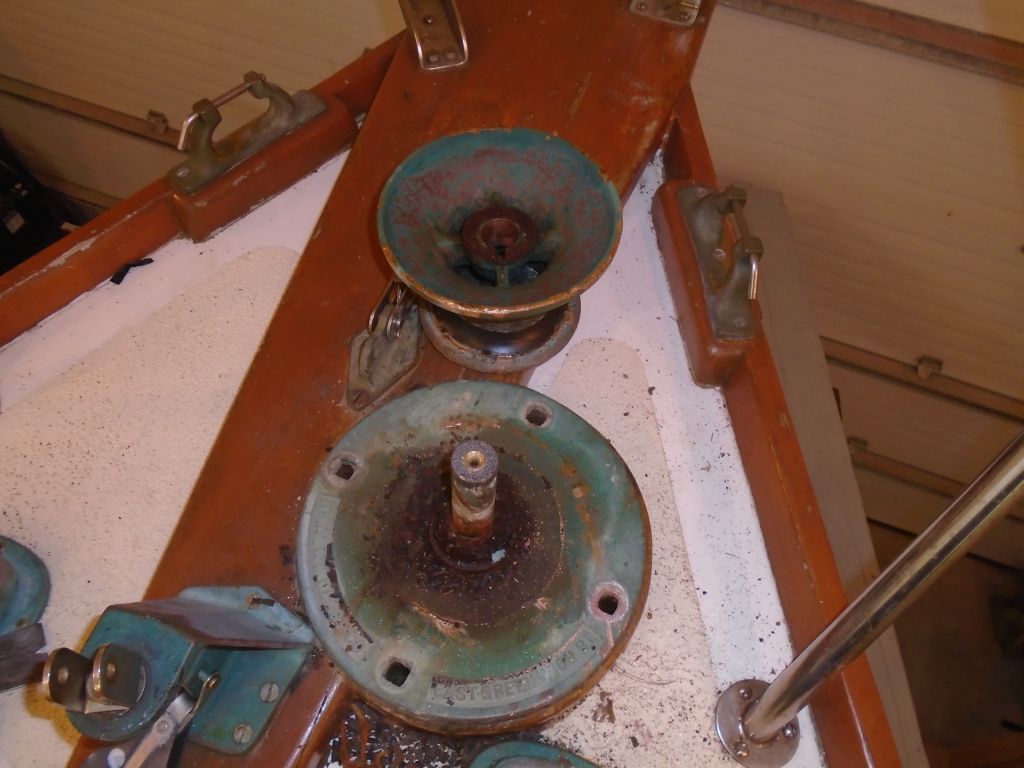
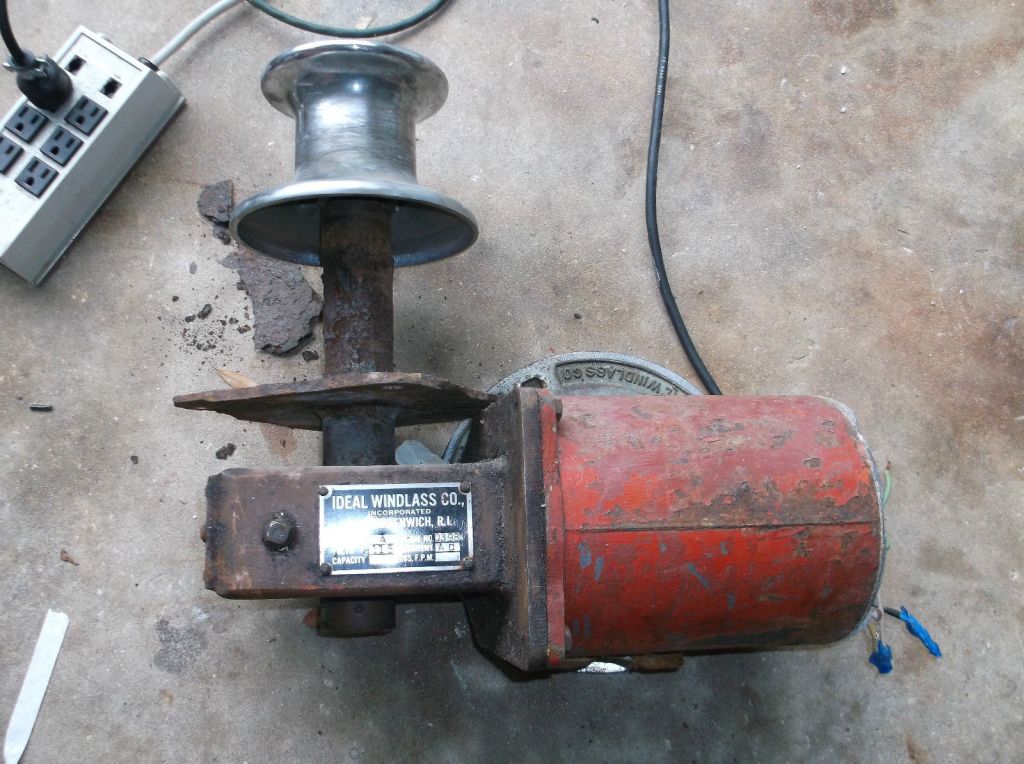
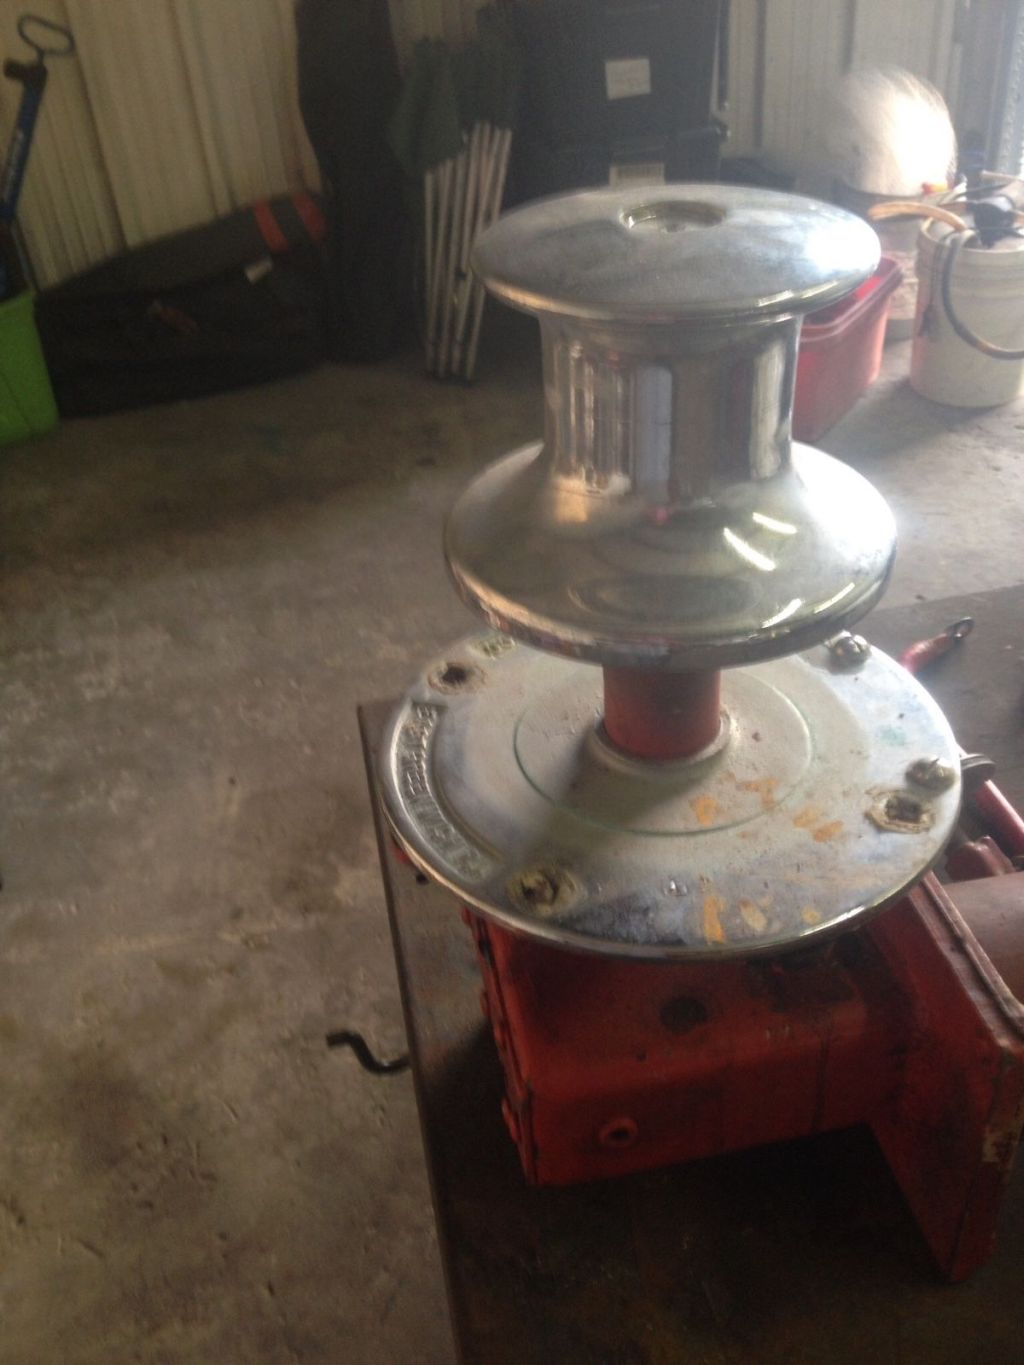
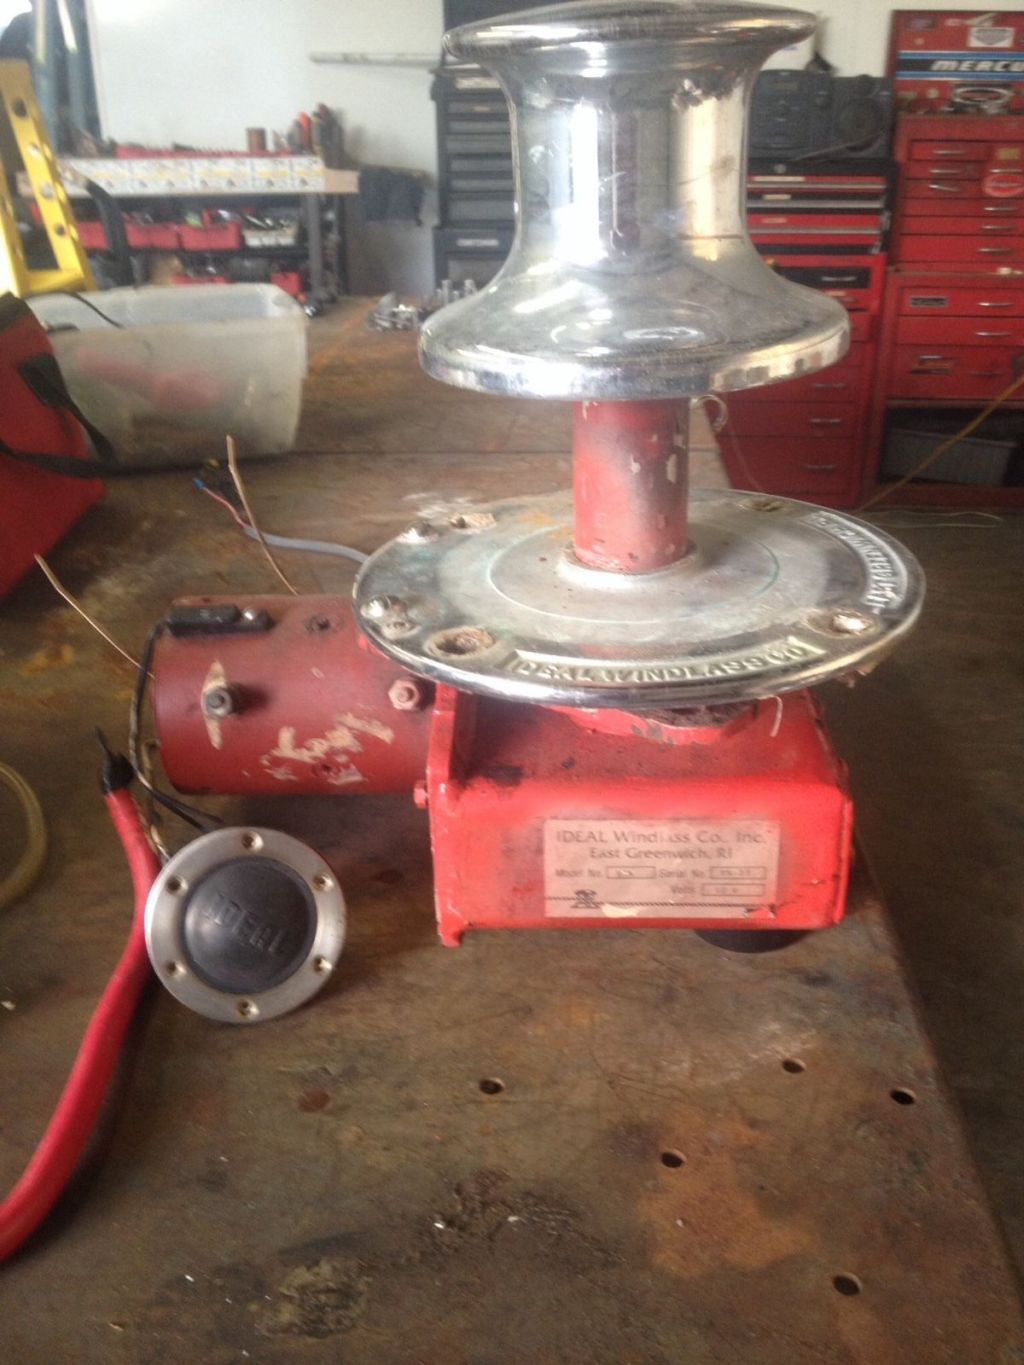
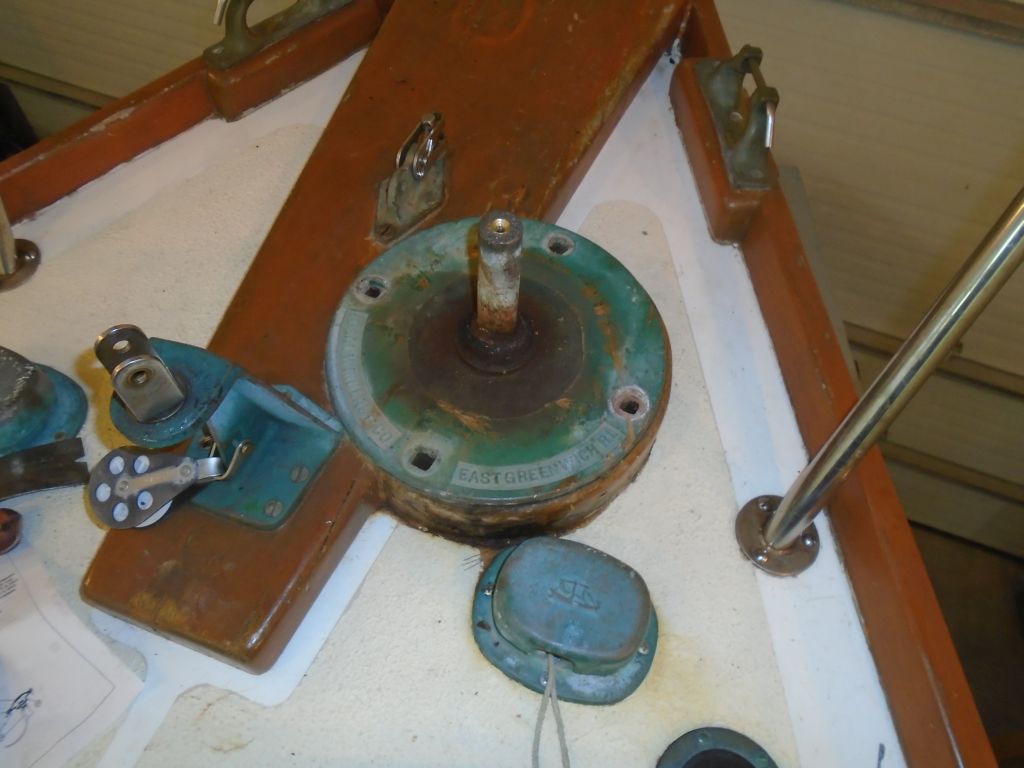
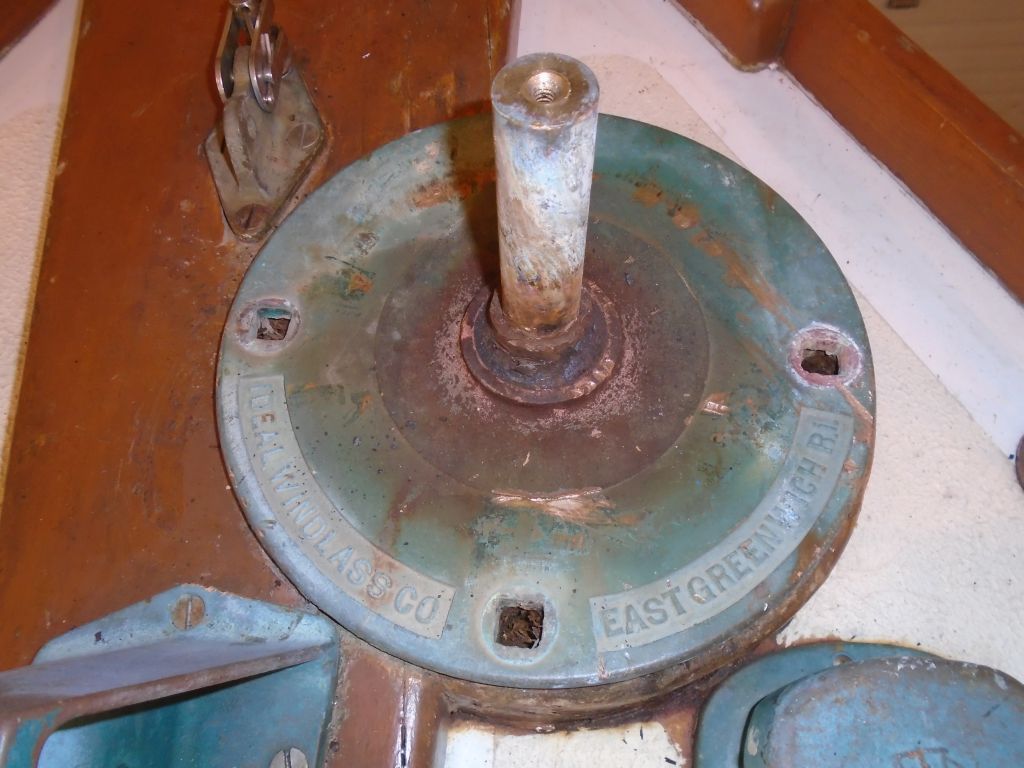
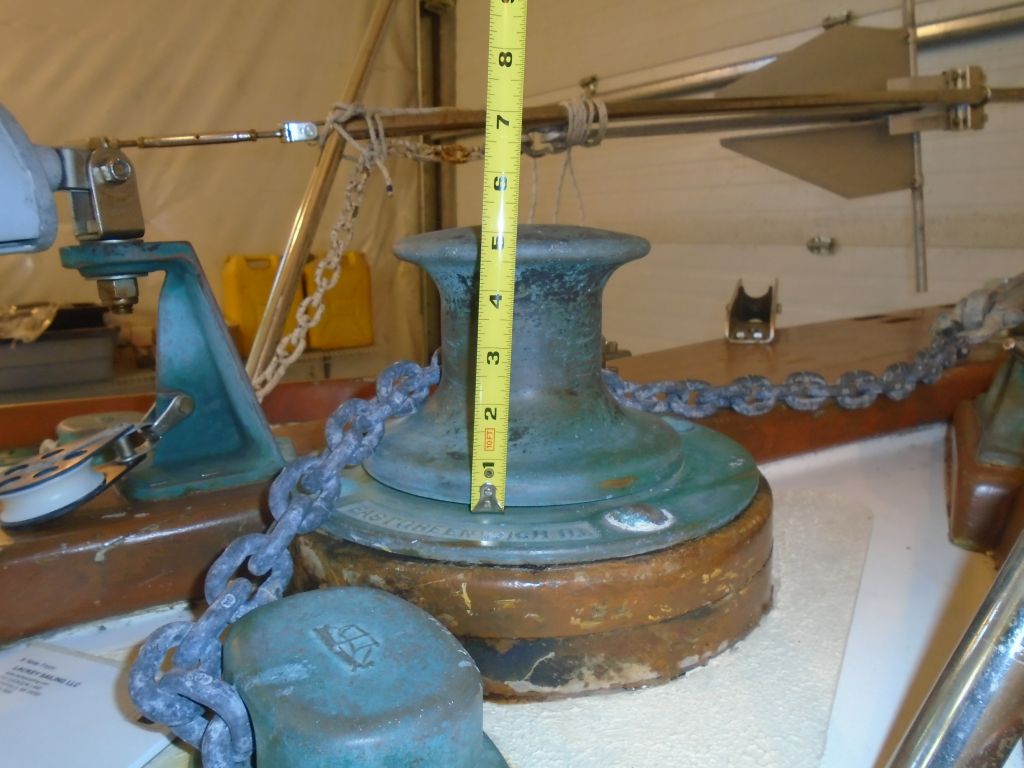
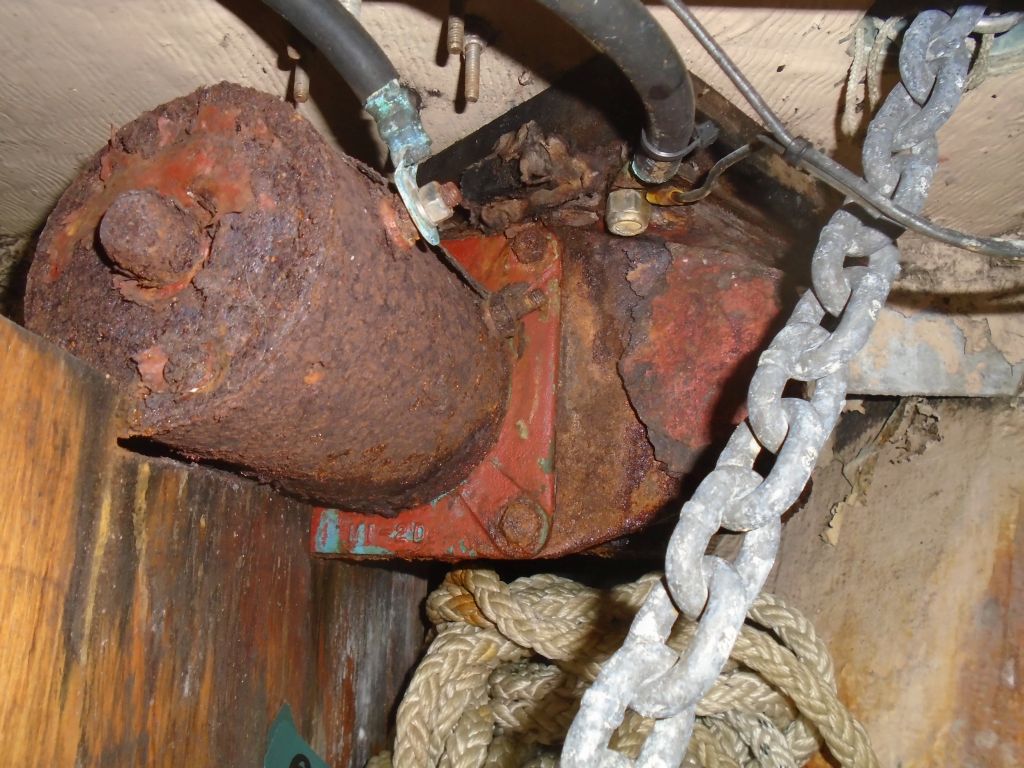
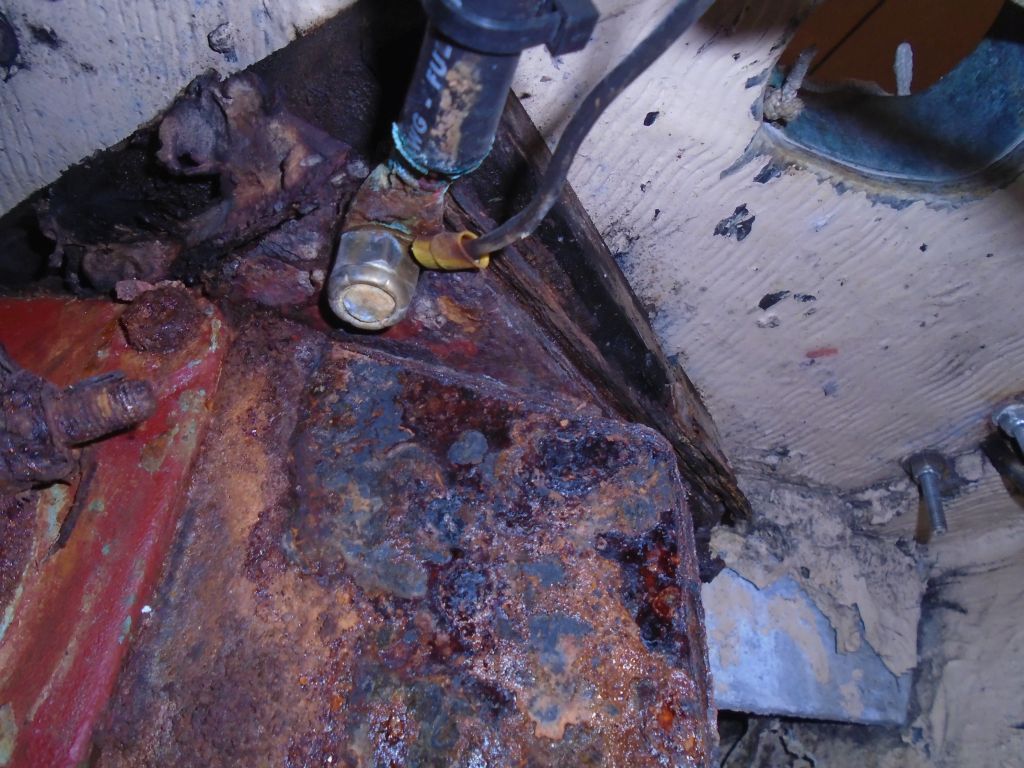
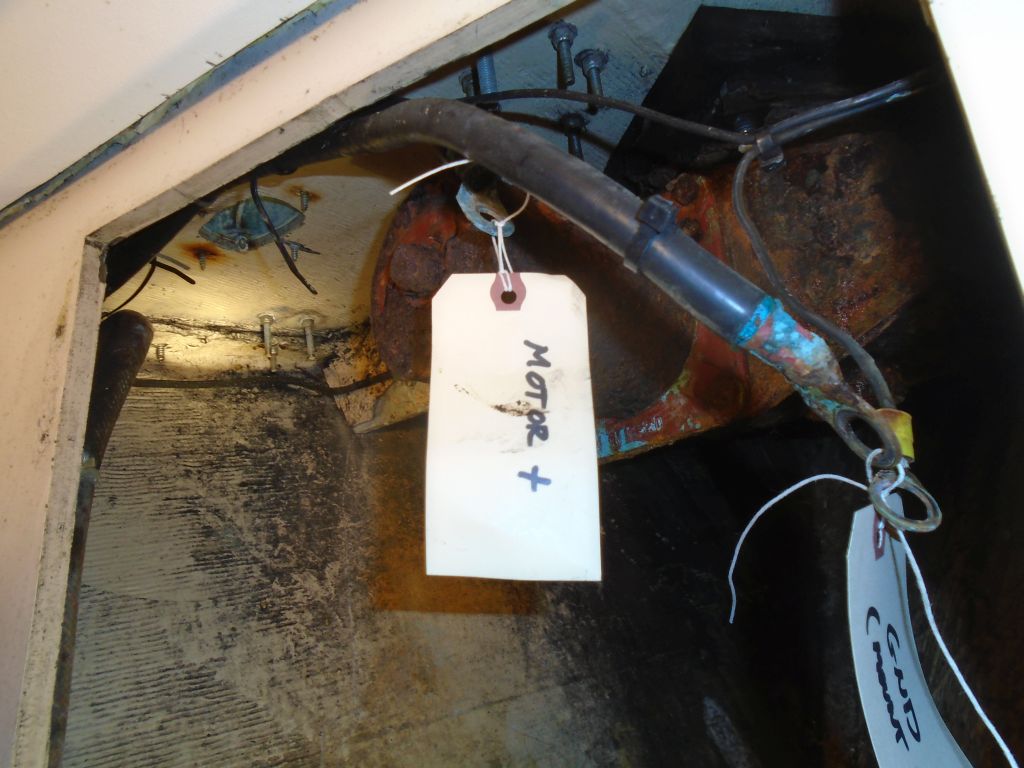
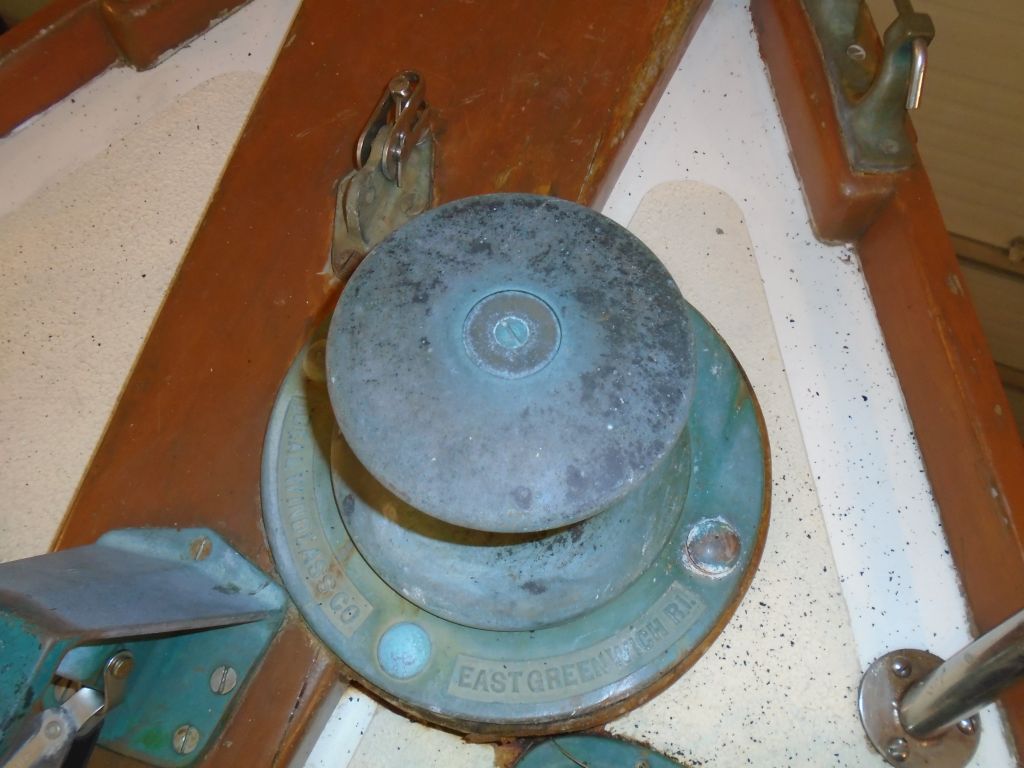
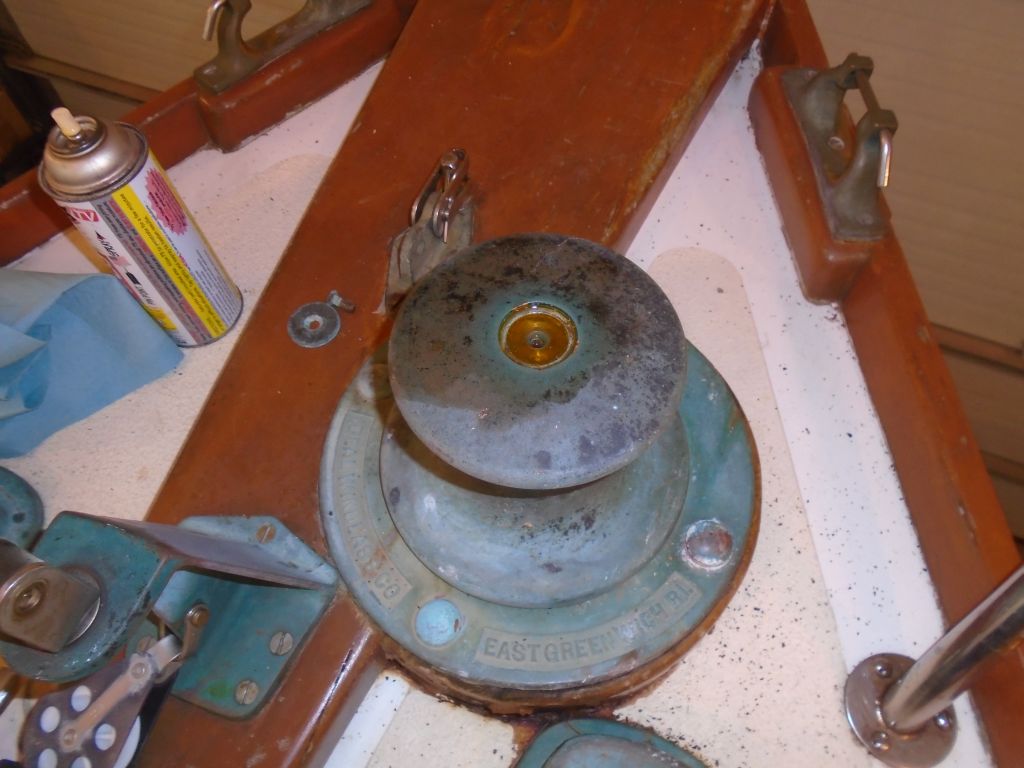
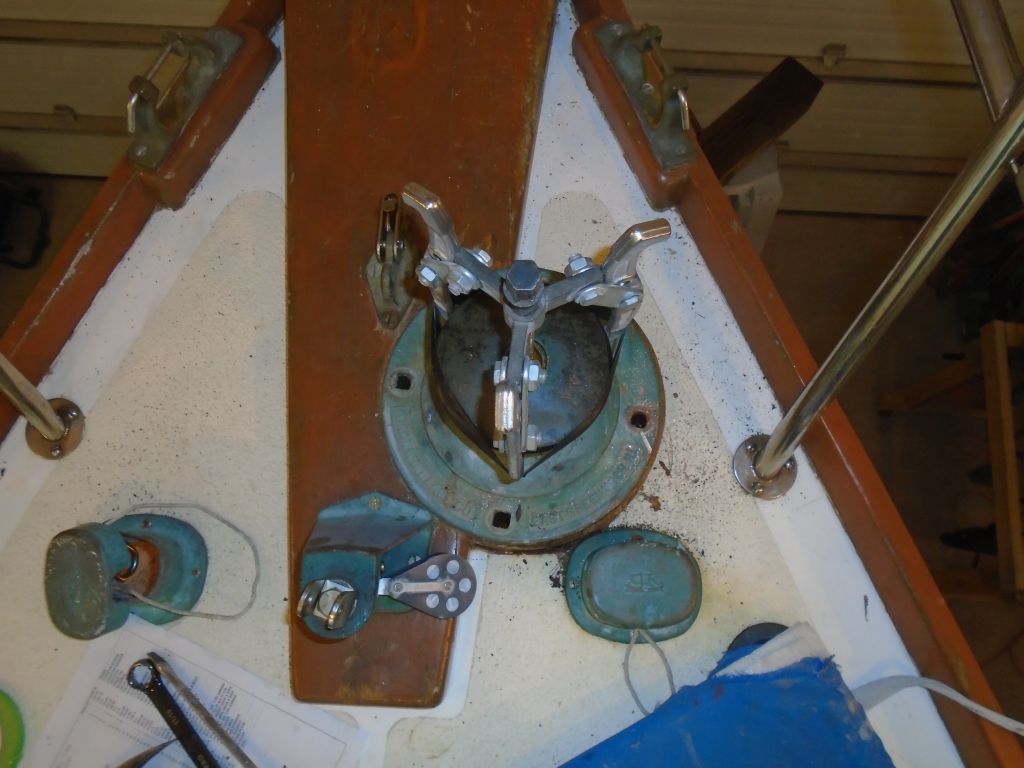
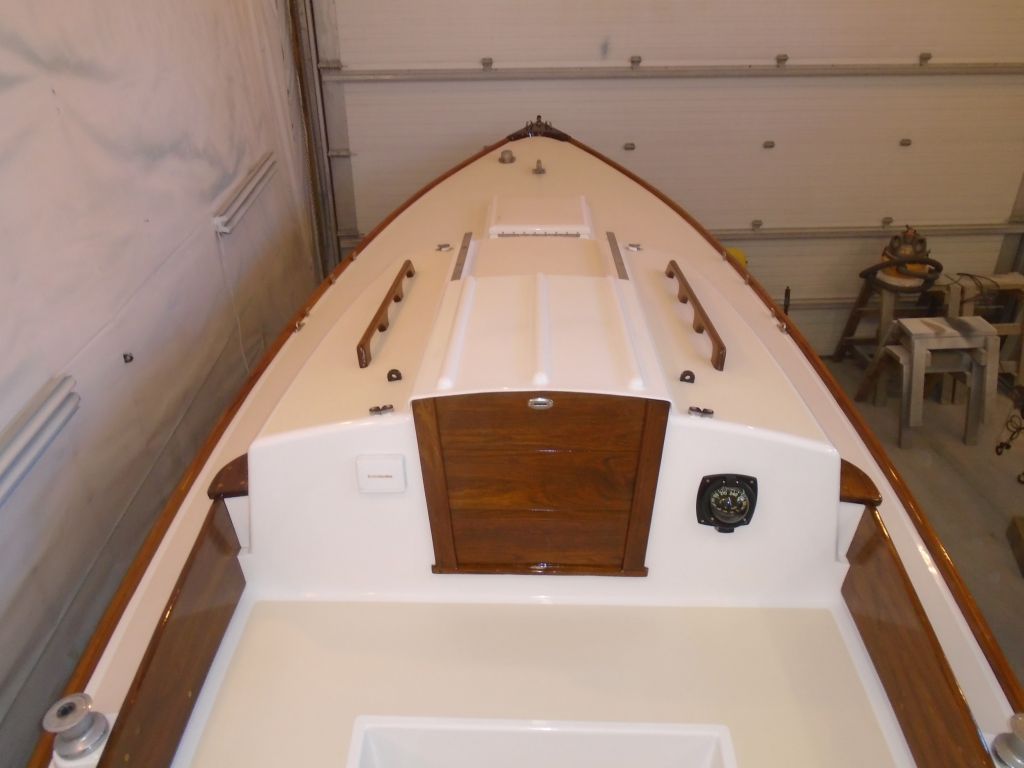
Danusia was equipped with a bronze (the on-deck portion, that is…mostly) Ideal vertical windlass. Various measurements and online investigation suggested it was a model A or 3VA, which appeared to be the same thing. Equipped with a capstan only, the owner reported that the windlass had not worked since he purchased the boat. It didn’t take much to figure out why: the belowdecks components, including the electric motor and gearbox, were terrible nightmares of heavy rust, as they were constructed of plain steel that belied the rugged marine-specific appearance of the nice weathered bronze capstan and deck plate above. Moisture and the leakage that seems inevitable with vertical windlasses, along with the typical neglect that so often afflicts ugly components stuck in out-of-sight-out-of-mind places, had taken their toll on the mechanical side of the windlass.
We hoped to remove the windlass and send it off to the factory to be rebuilt, and to be converted to include a chain wildcat. No matter what else, however, the windlass had to come off, whether for rebuilding or replacement with something else, as it was useless in its current state, though that green bronze sure looked nice. So I decided that the windlass removal had to be at the top of the work list, to give time either for it to be rebuilt, or to decide on how else to proceed.
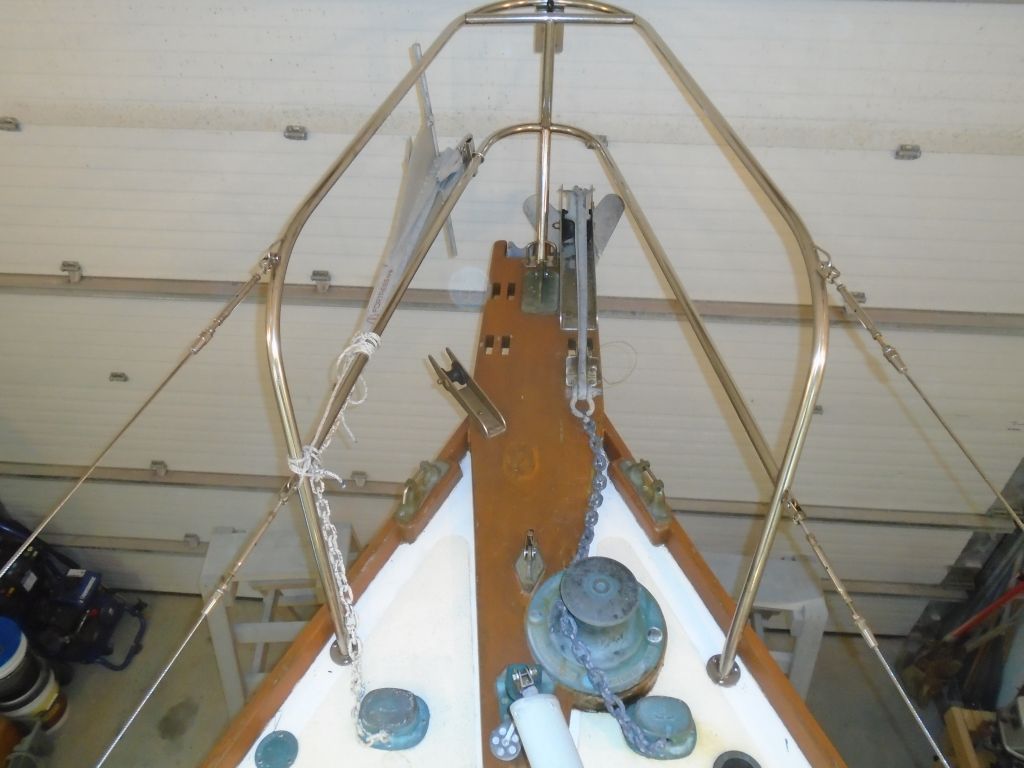
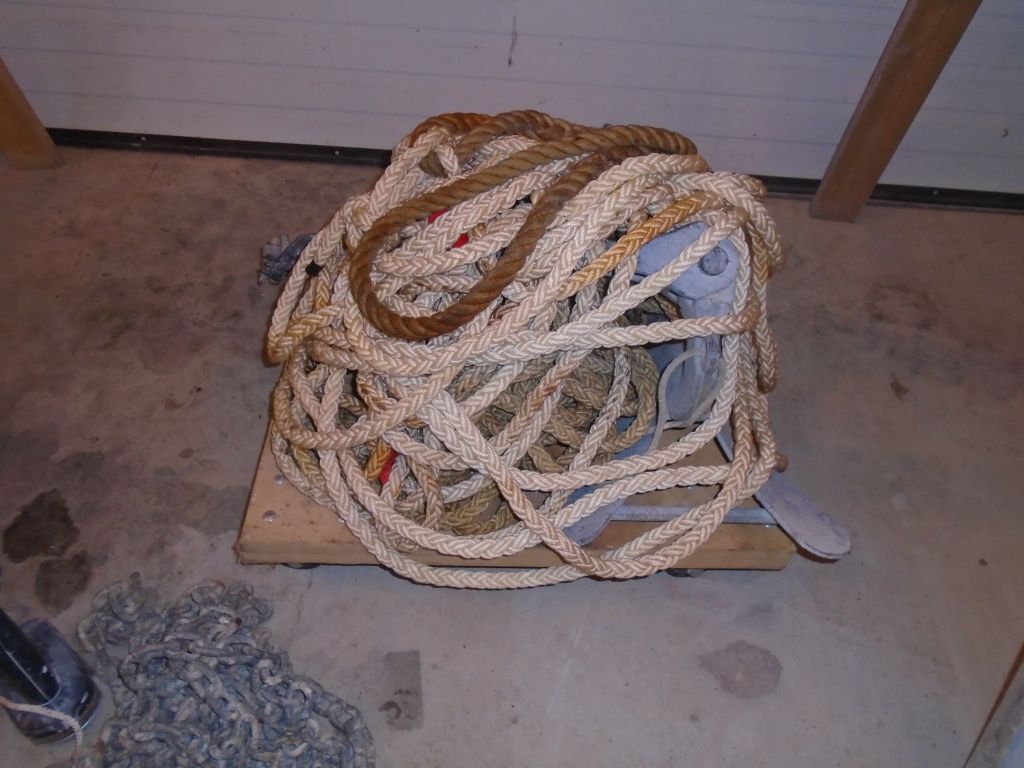
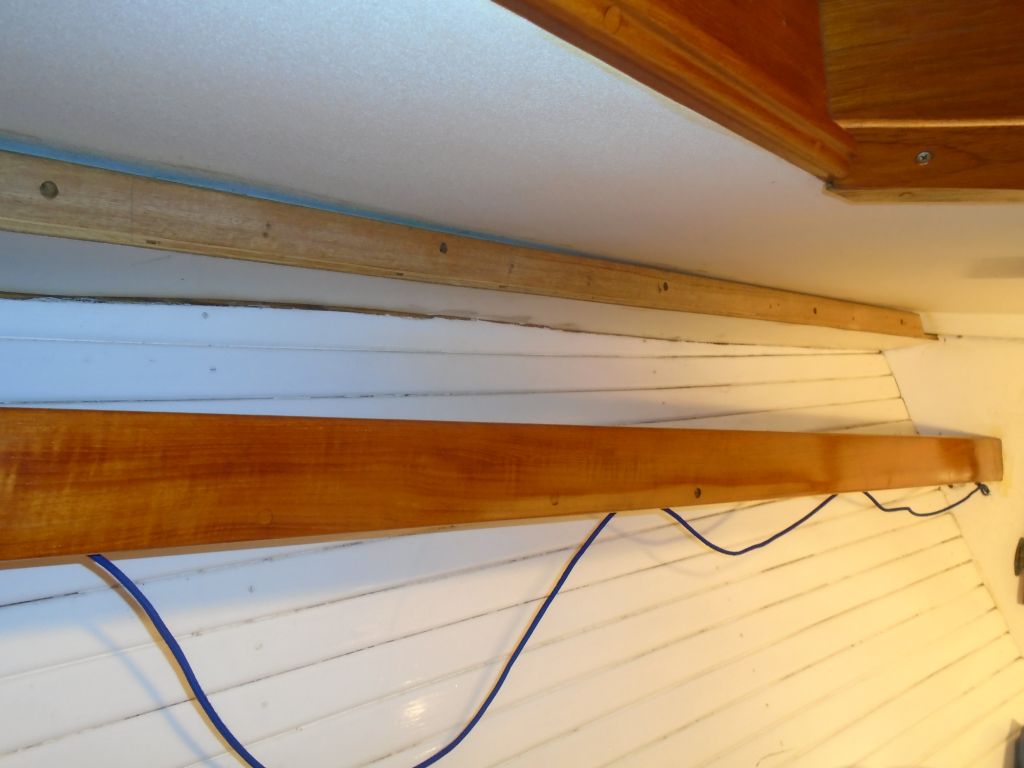
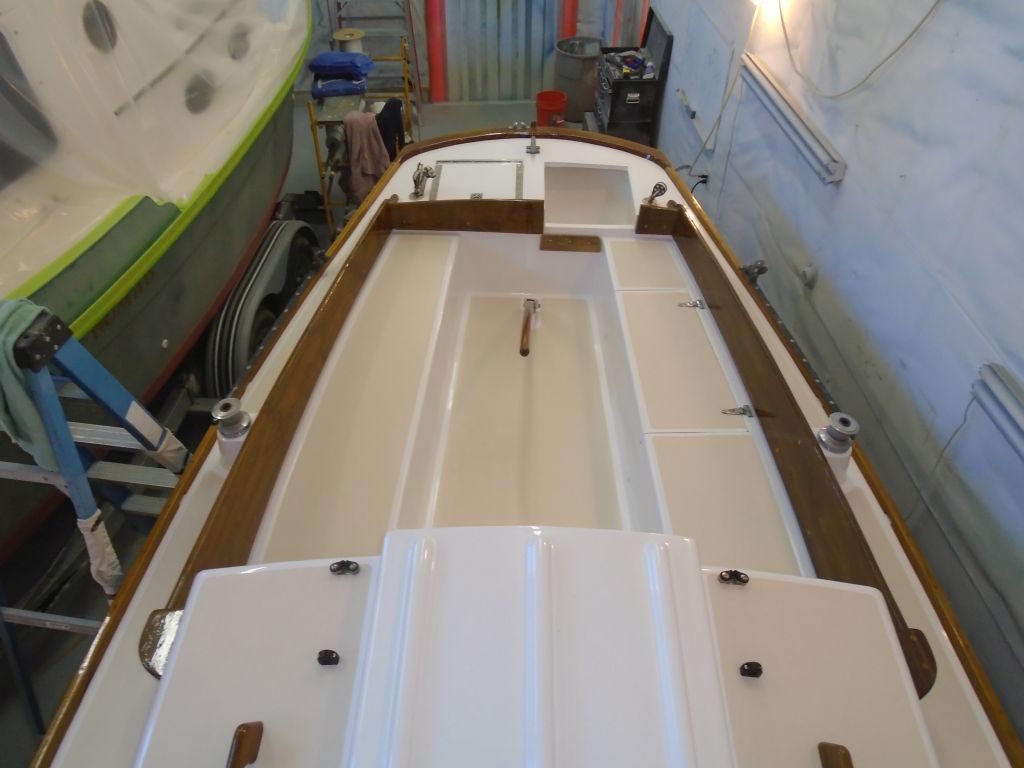
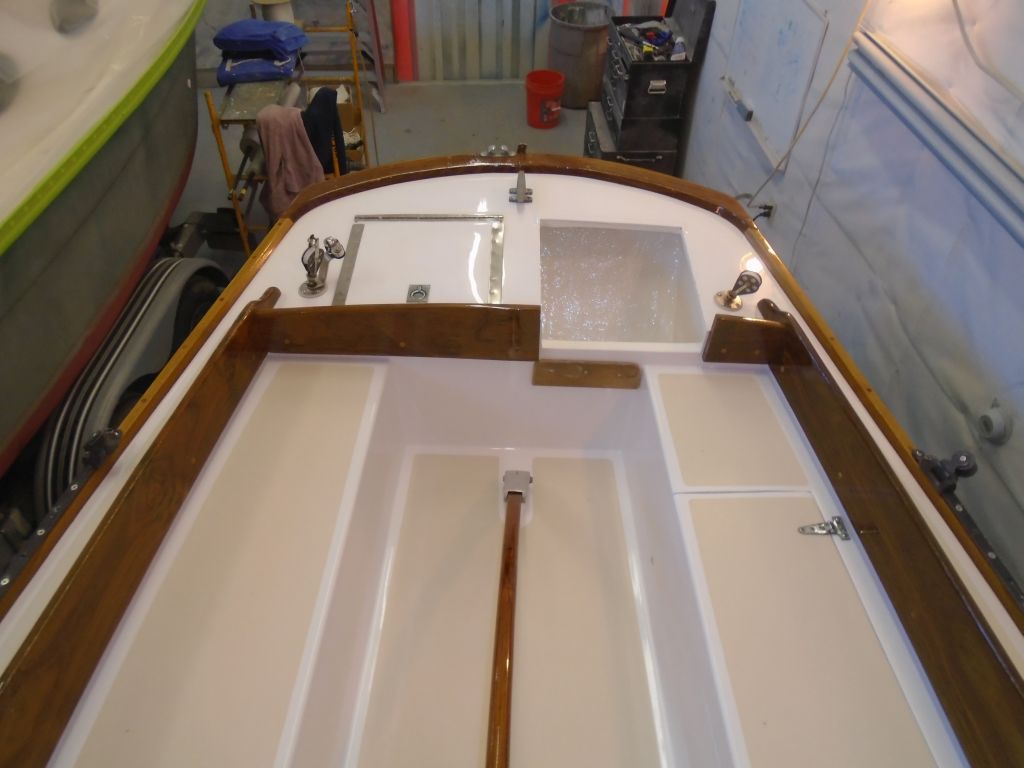
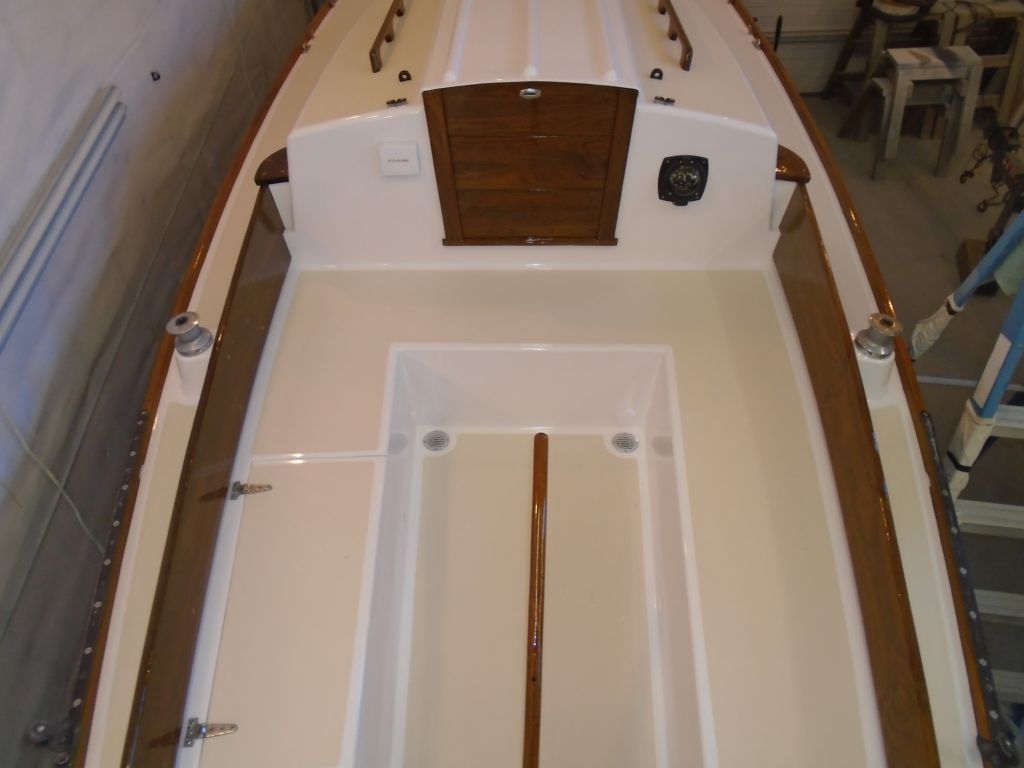
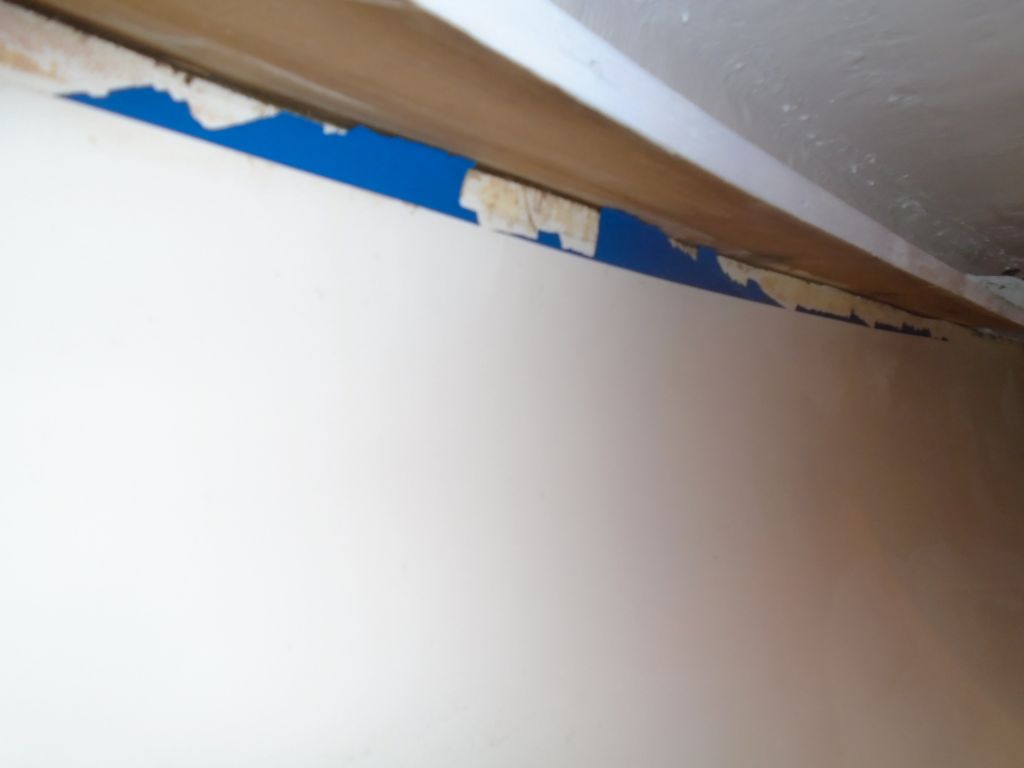
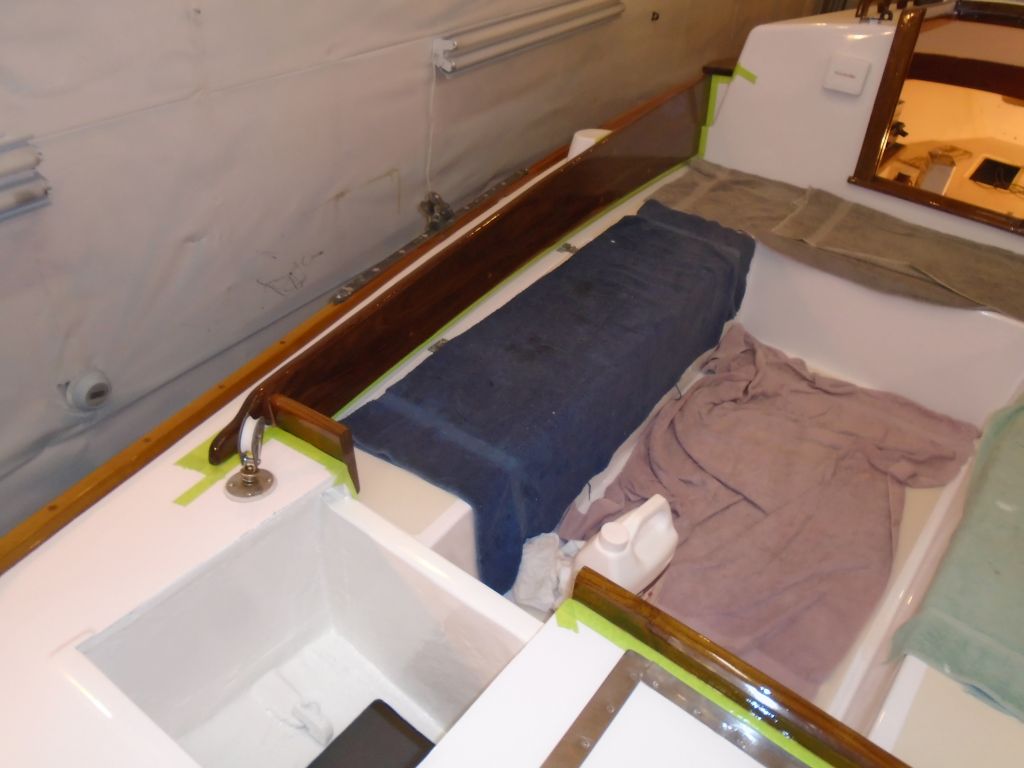
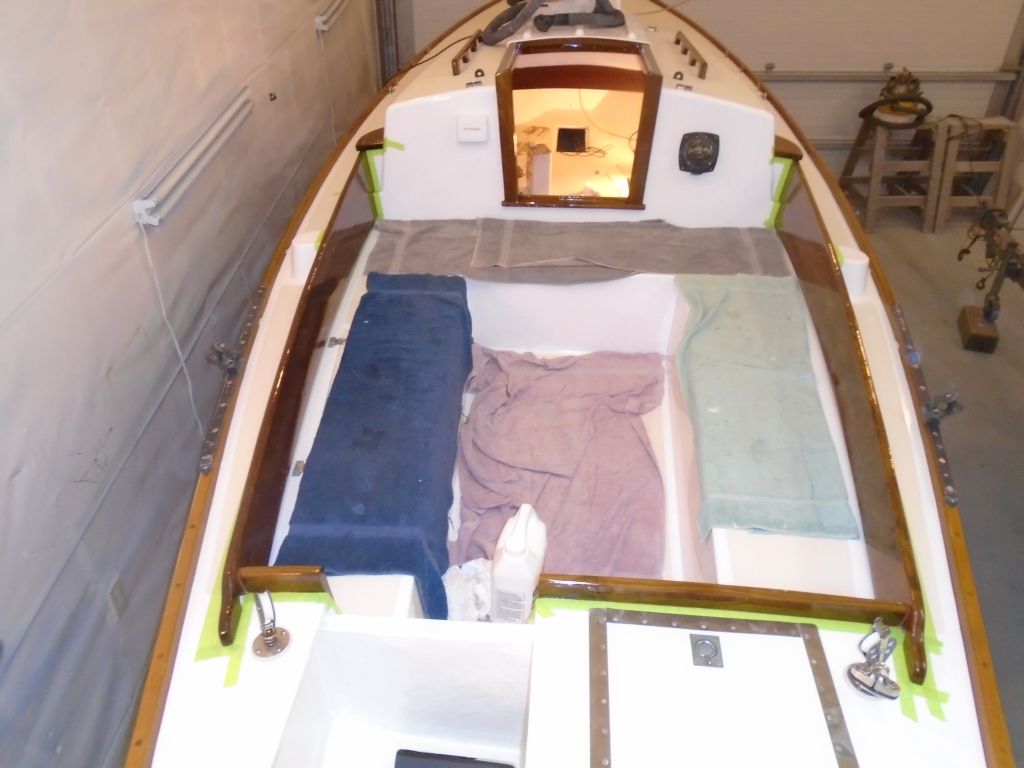
My first order of business was to remove the anchors and rodes and open up the chainlocker as much as possible. Once I’d removed the rodes, I removed a plywood divider that someone had put in to allow two rodes to fit, and which completely impeded access to the windlass above. In yet another example of why polyester resin makes such a poor choice for any repair or new work added to a boat after the initial construction at the factory, I pulled the divider–and its tabbing–out with only the smallest hand effort. In this case I was certainly grateful that it was so easy to remove, though.
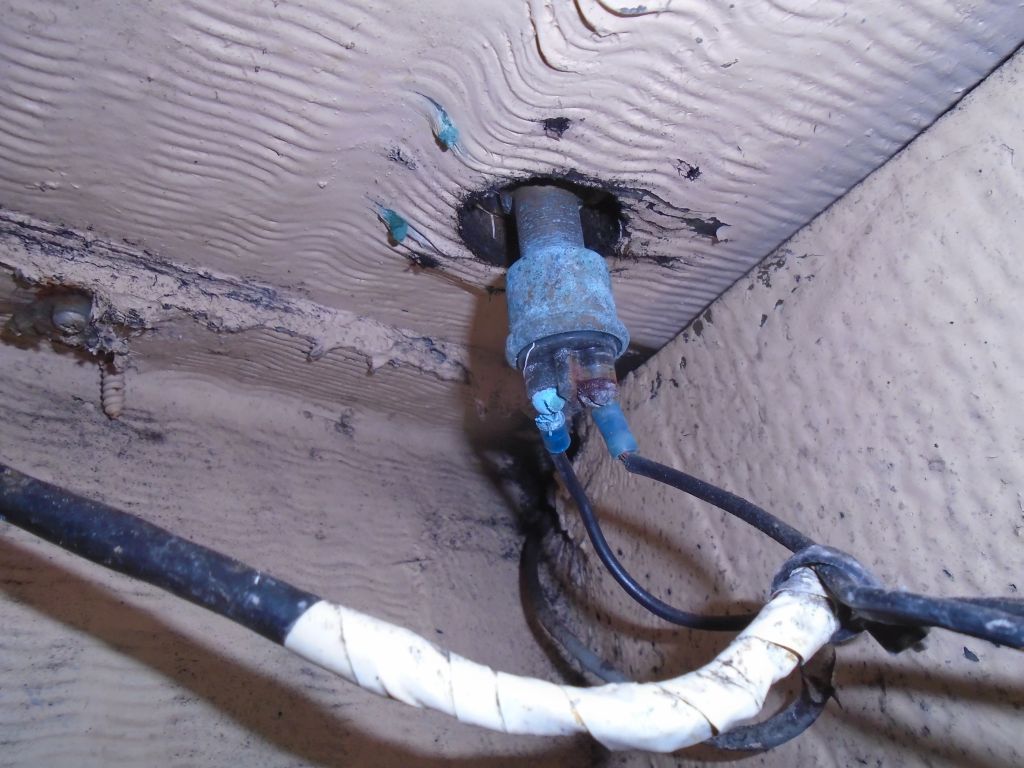
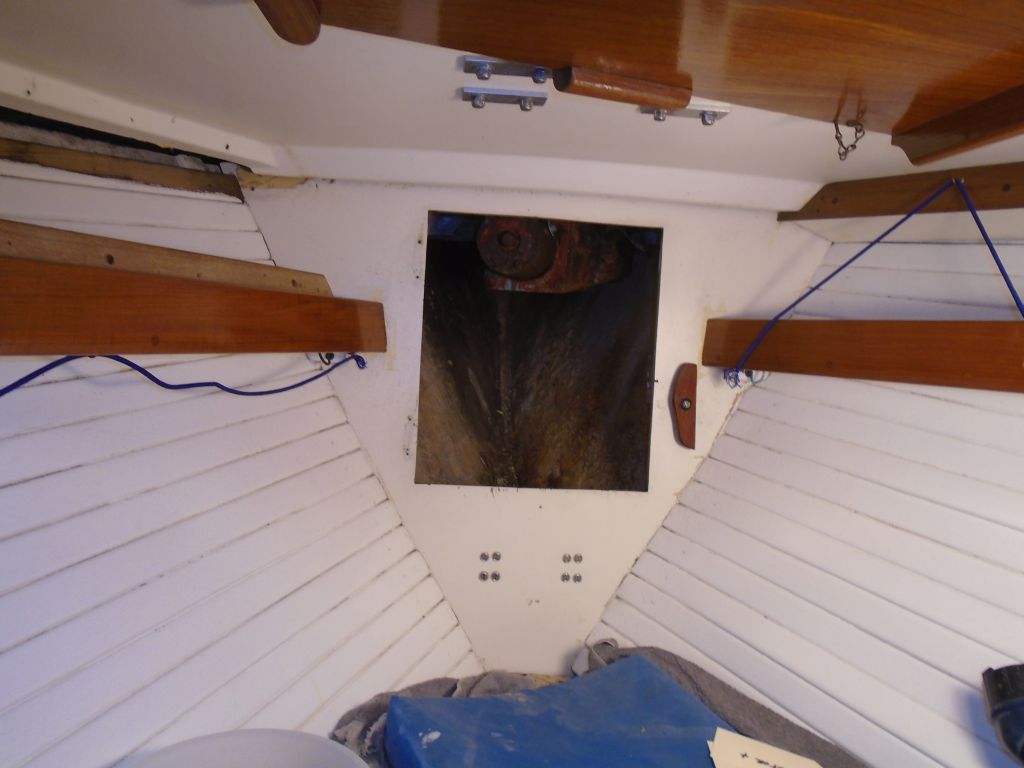
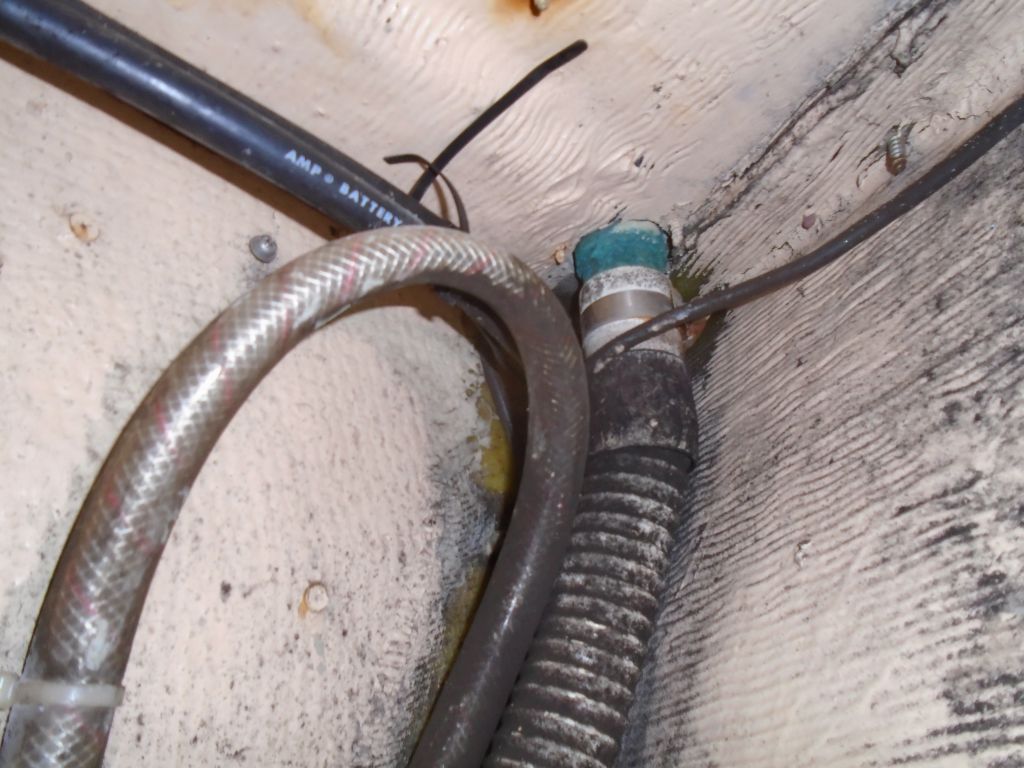
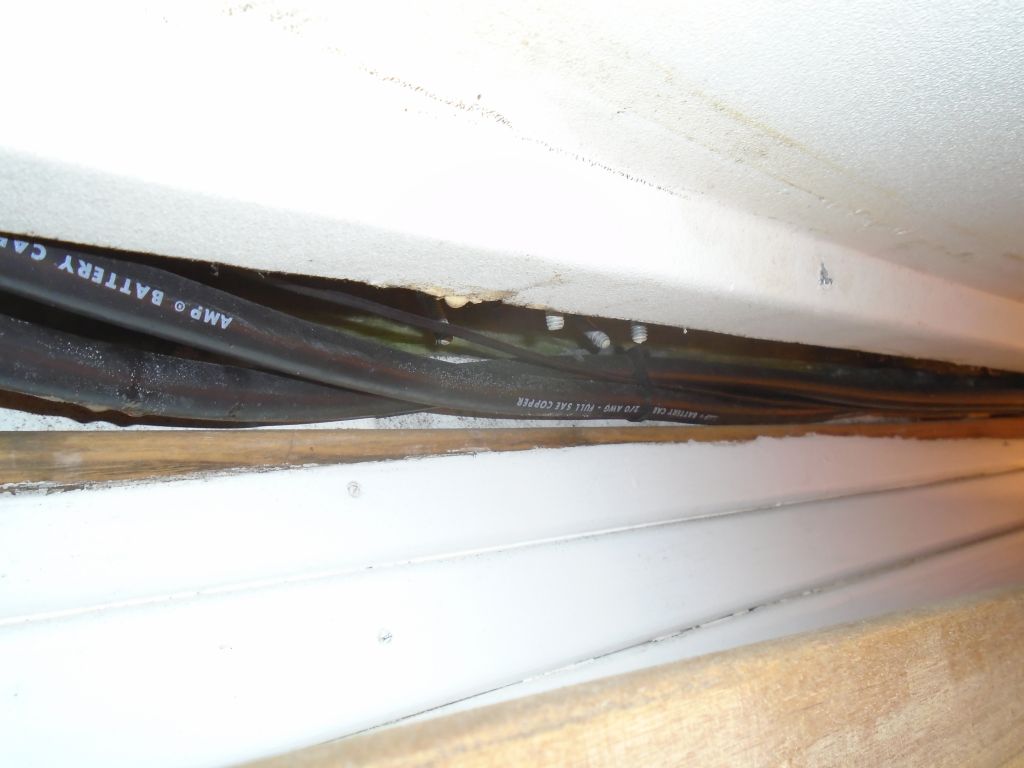
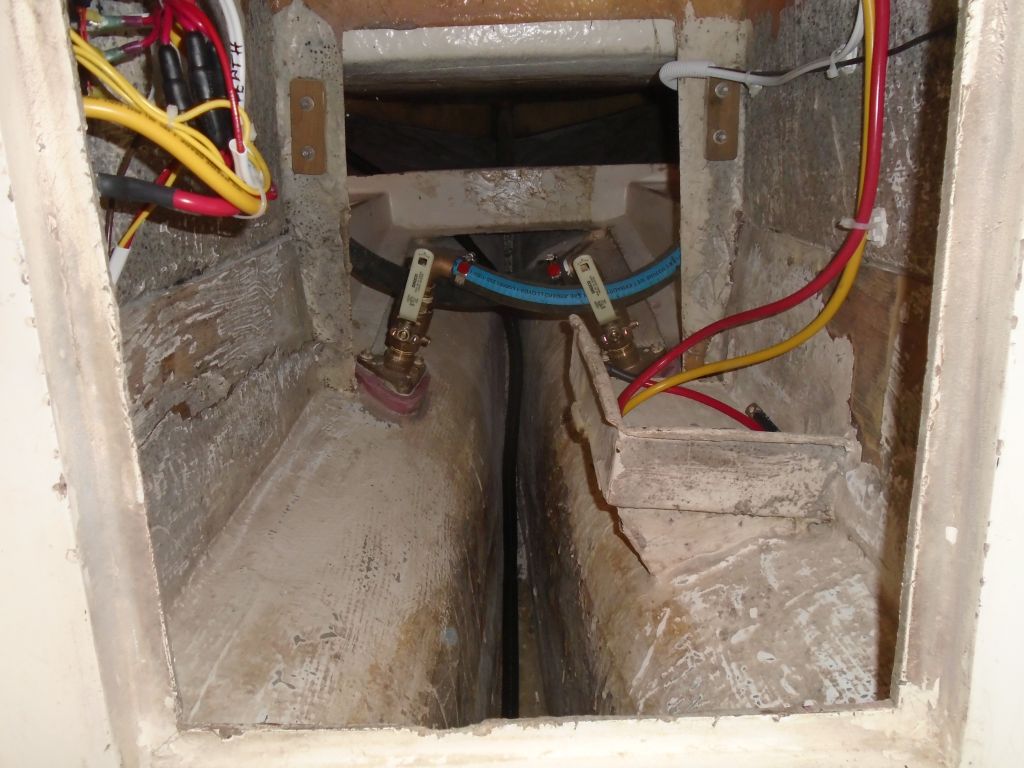
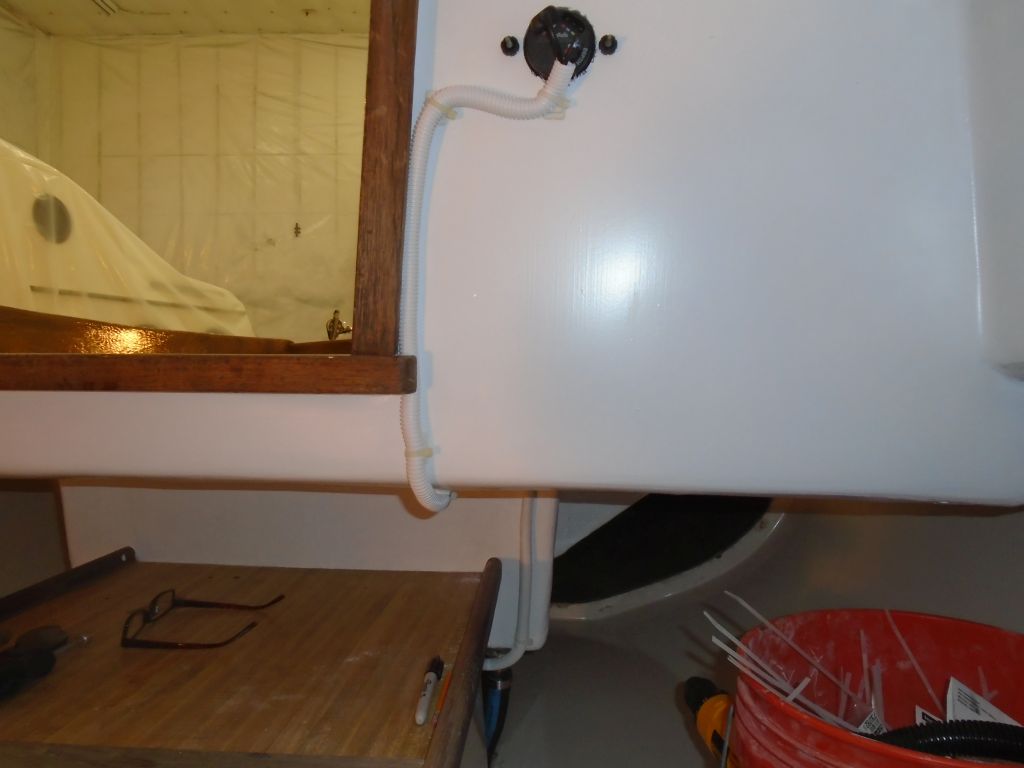
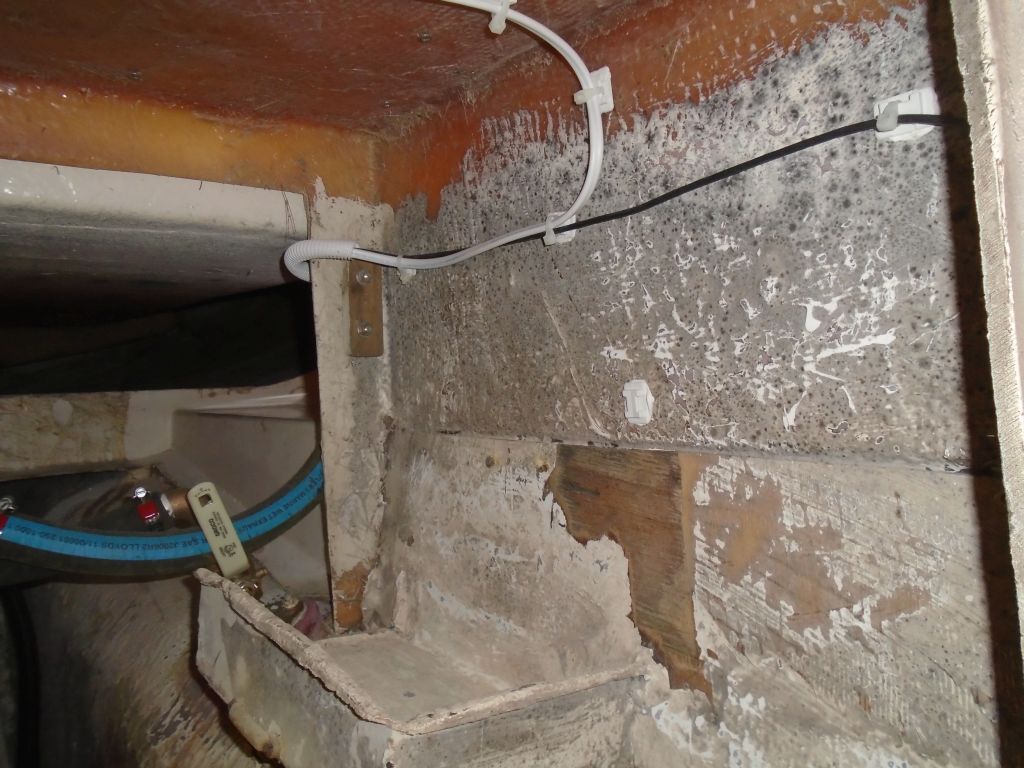
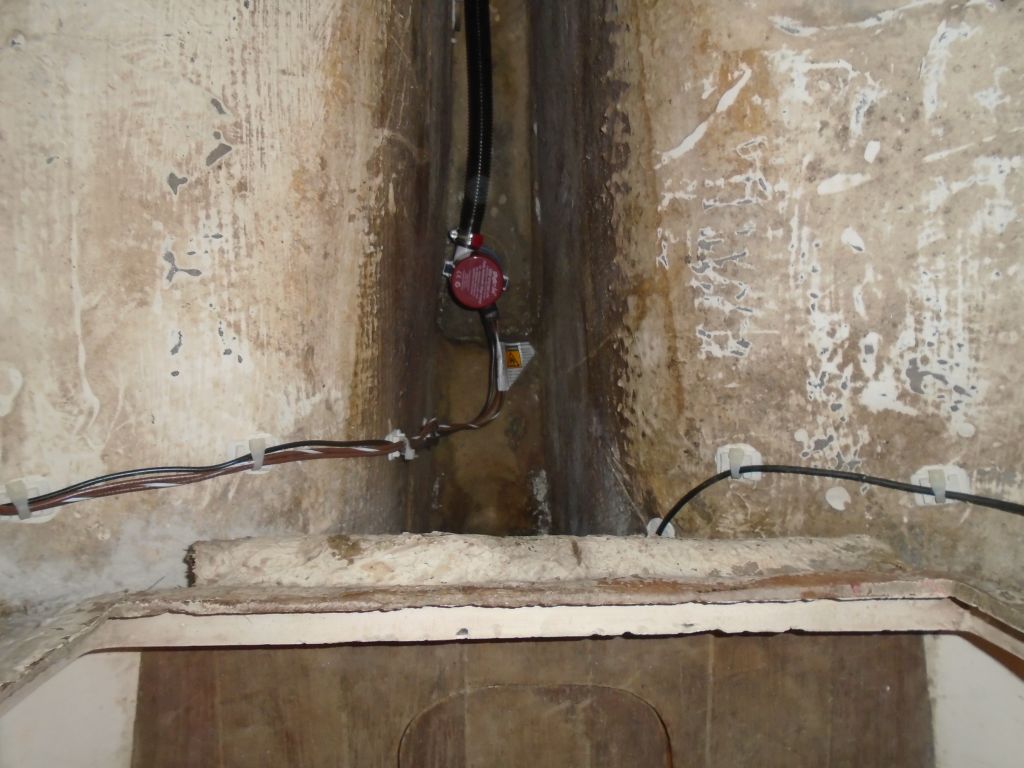
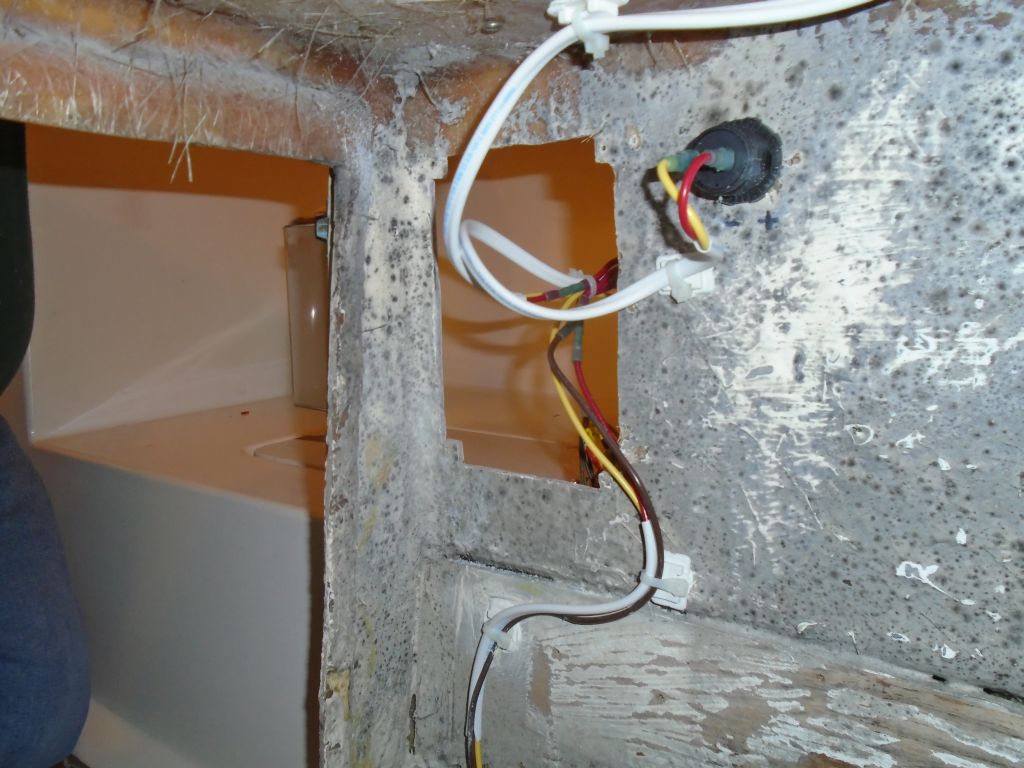
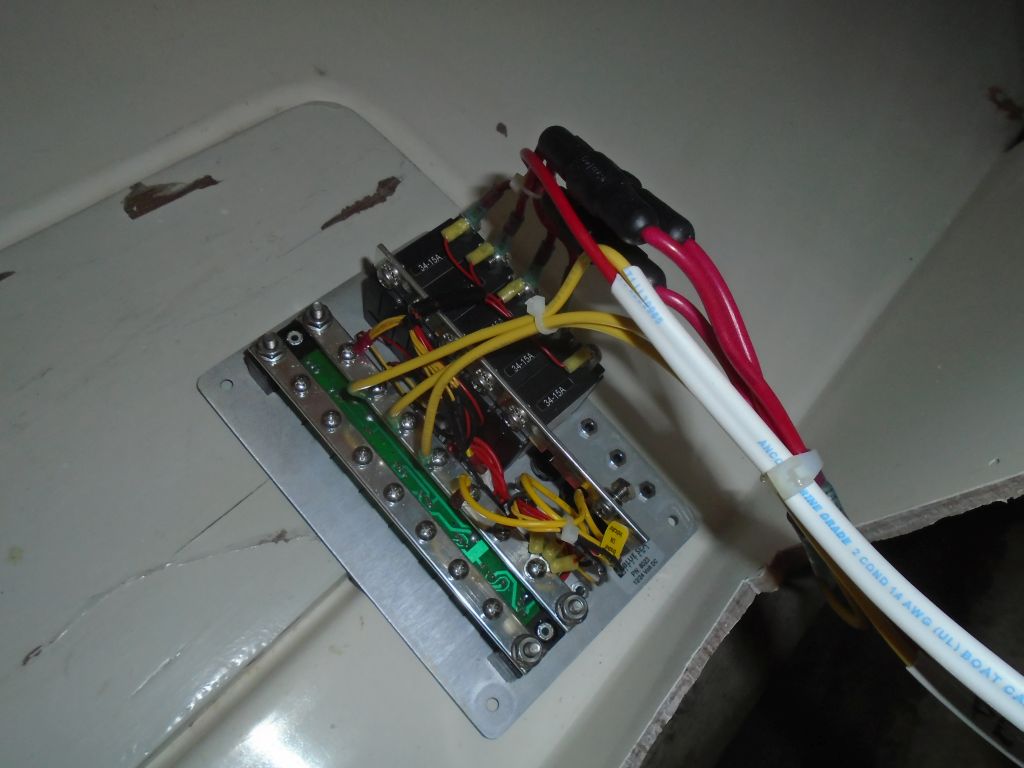
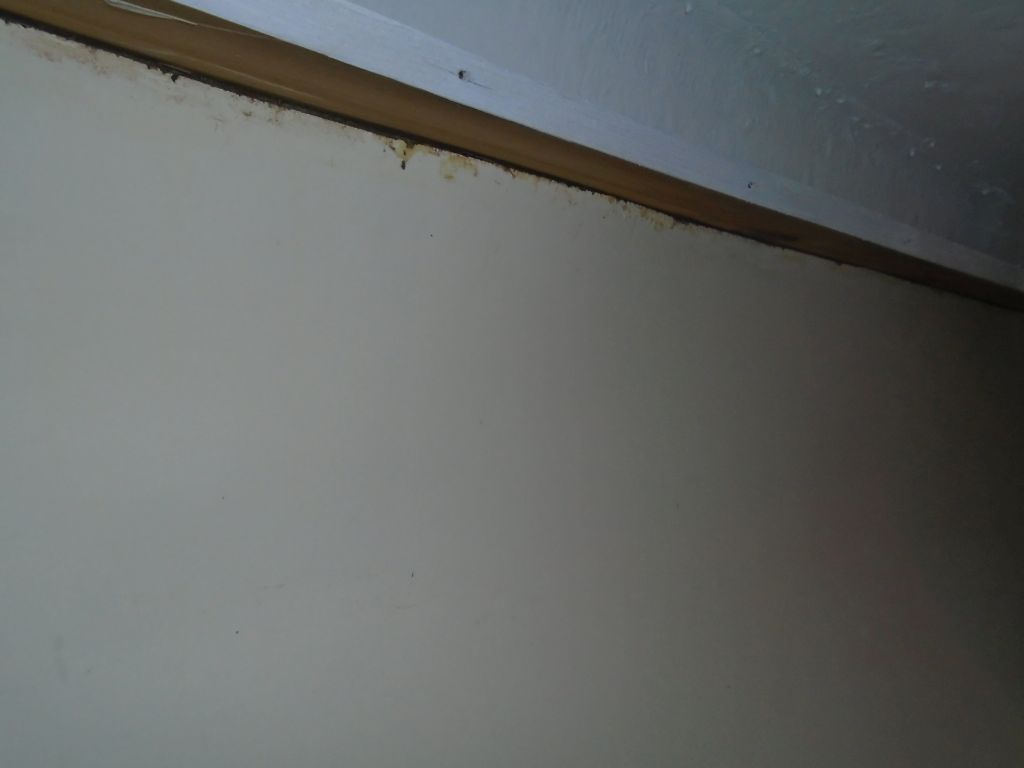
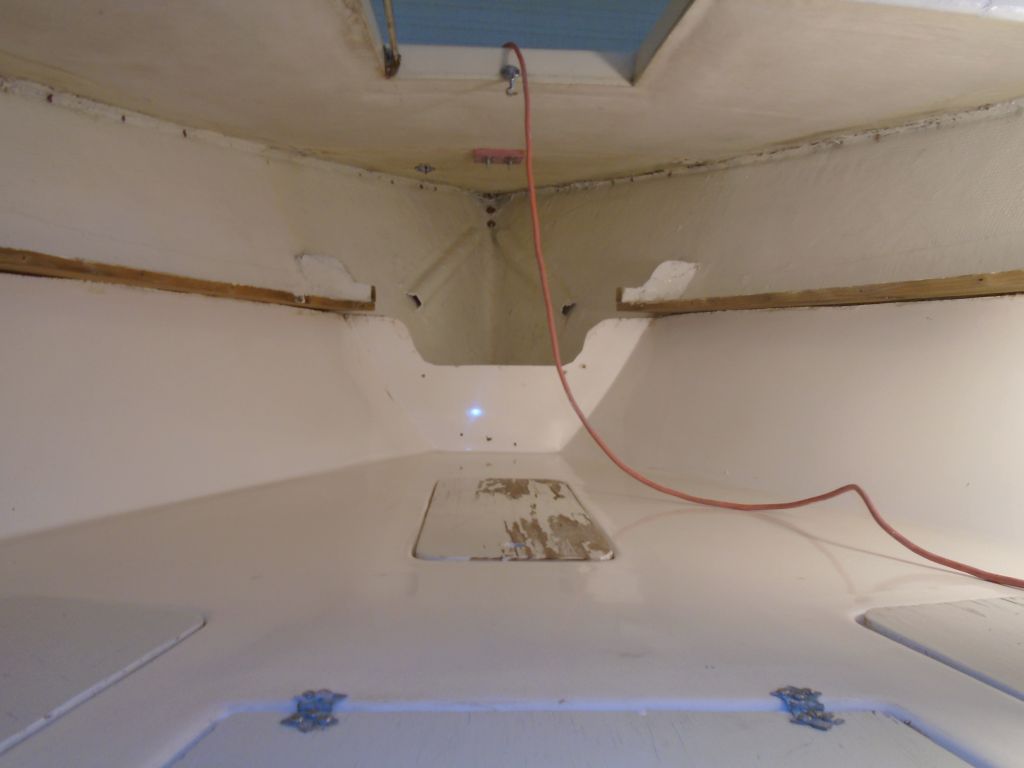
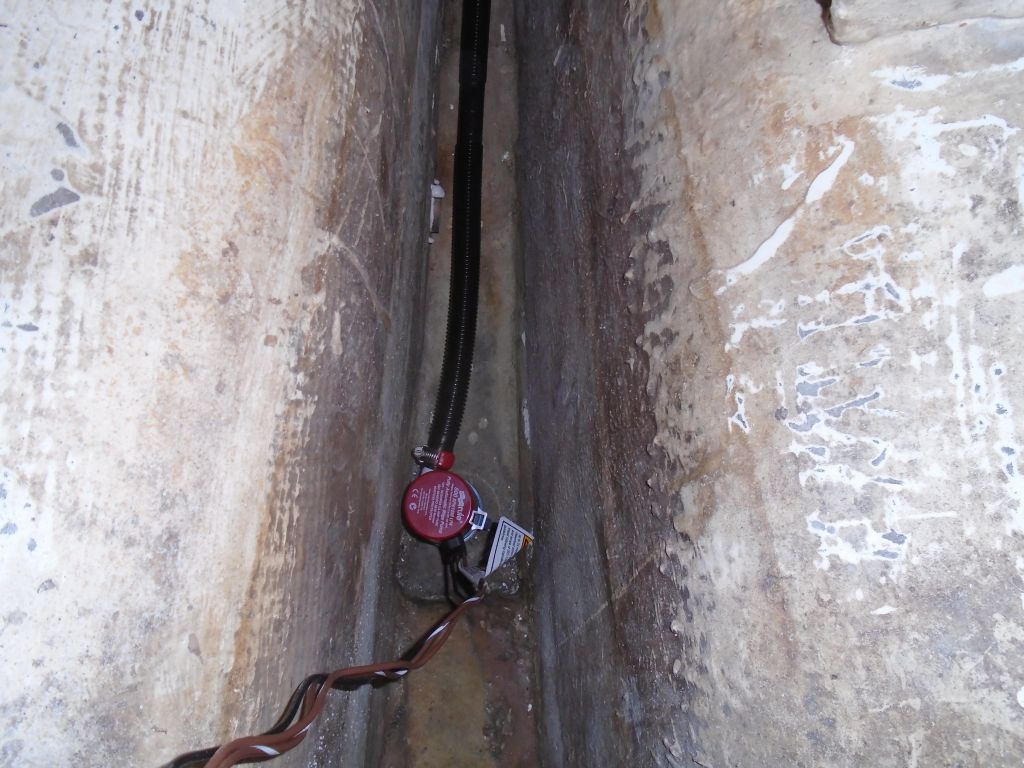
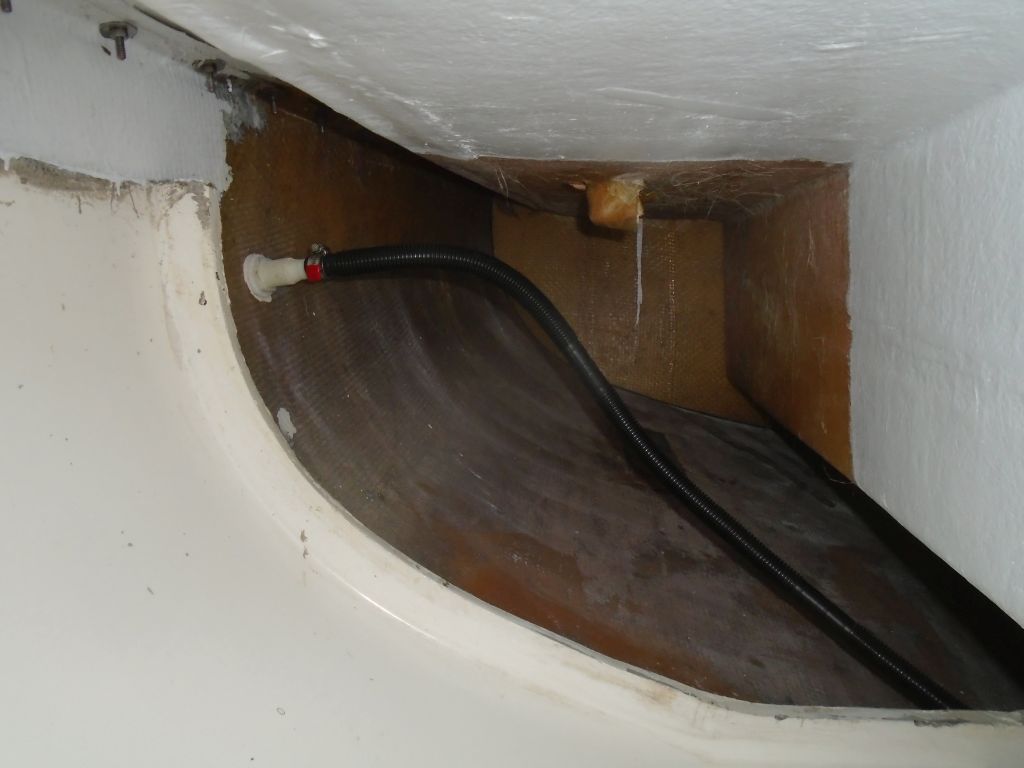
With as much room as I was going to get–which wasn’t really enough but would have to do–I inspected the windlass and documented its condition, as well as its wiring. To improve access and avoid damage, I removed the door to the chainlocker for the time being, and looked around for the windlass solenoid switch, normally installed near the windlass motor and typically an integral part of the required wiring. None was to be found, and, wondering if it might be hidden beneath a wiring access panel running alongside the v-berth at the overhead. I removed some trim for access, which exposed more of the heavy 2/0 cabling but no solenoid. Weird.
Armed with some information from the Ideal website, I went about the steps that might eventually lead to removal, starting with removing the cables attached to the windlass motor and one of the deck bolts. These came off easily, and I marked the wires for future reference and later assessment.
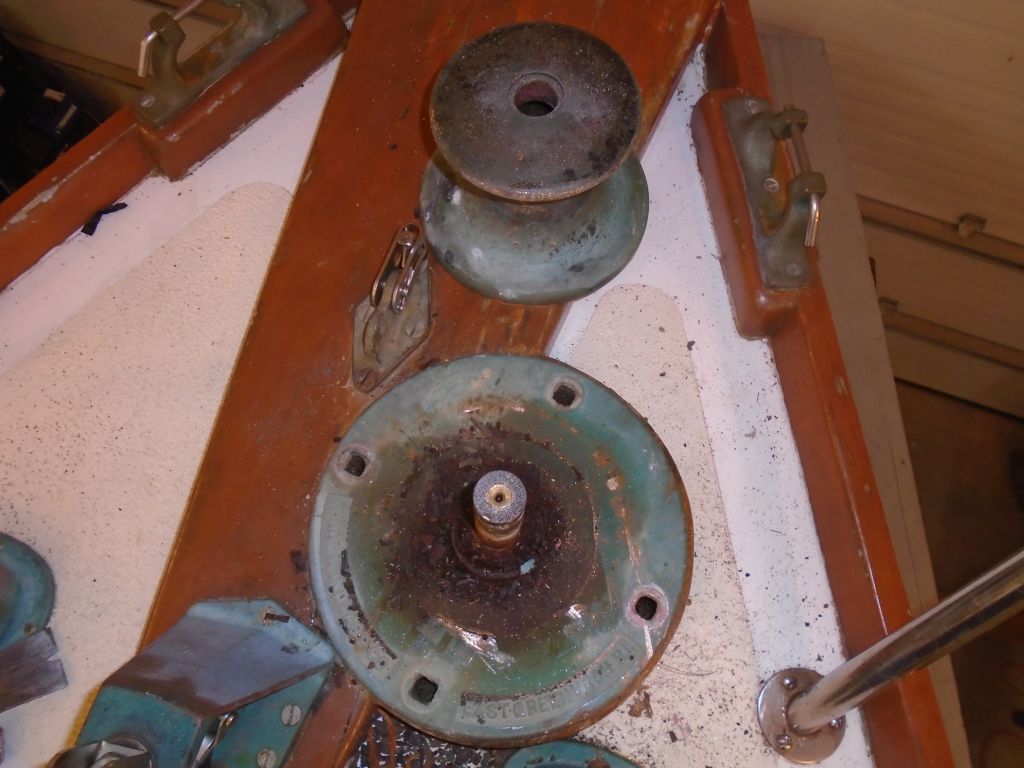
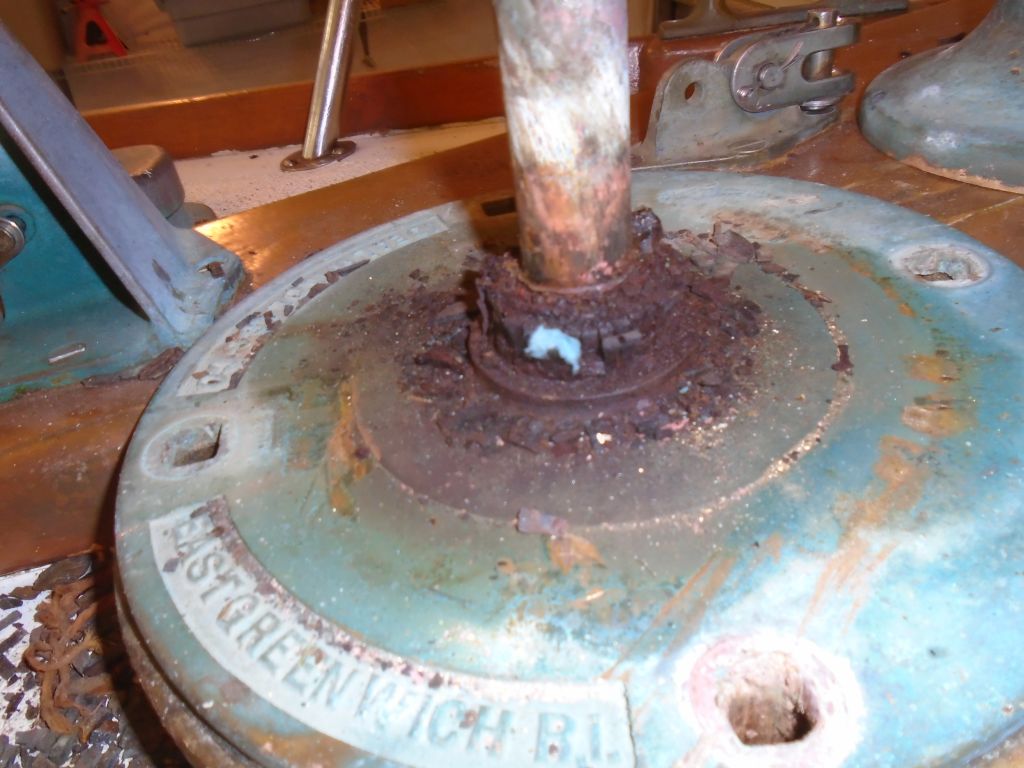
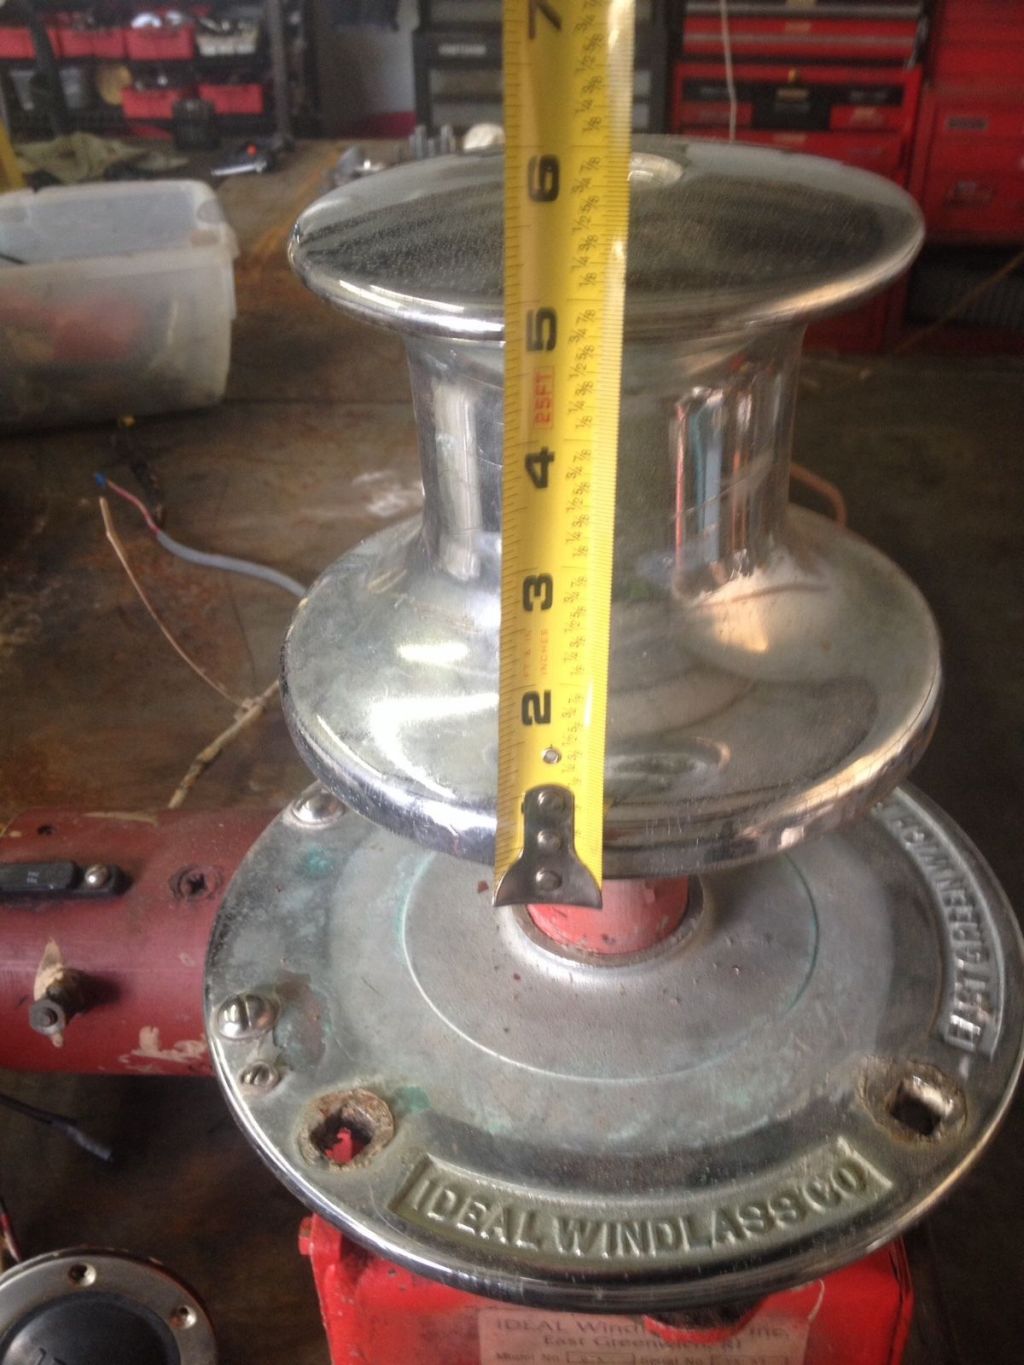
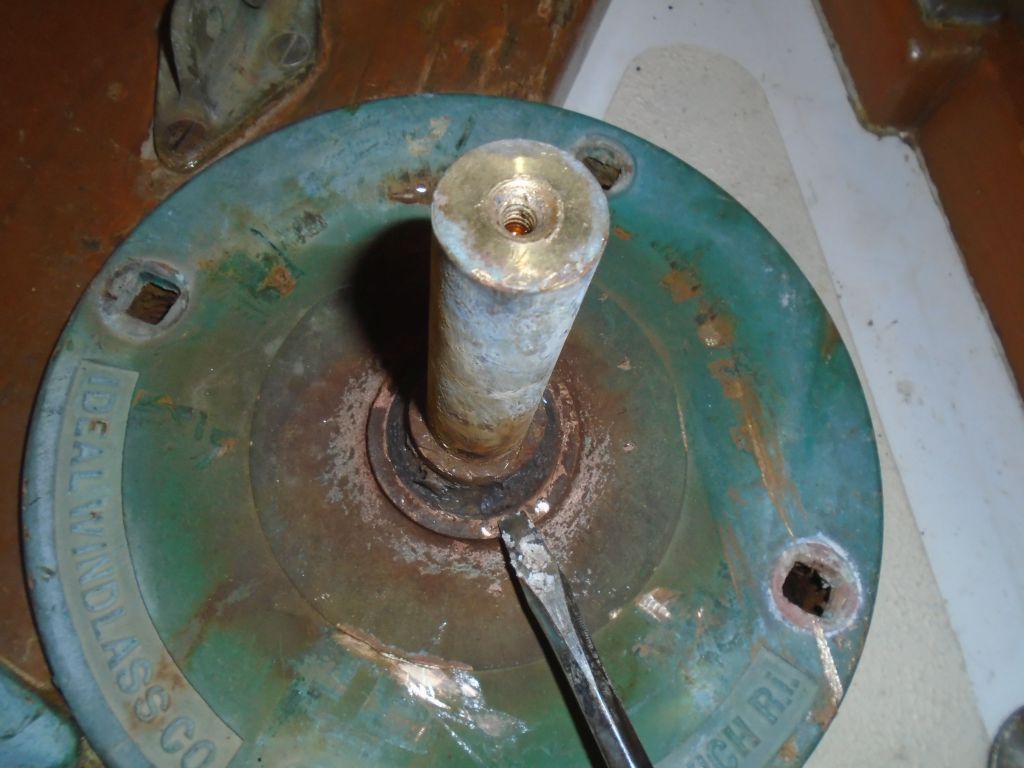
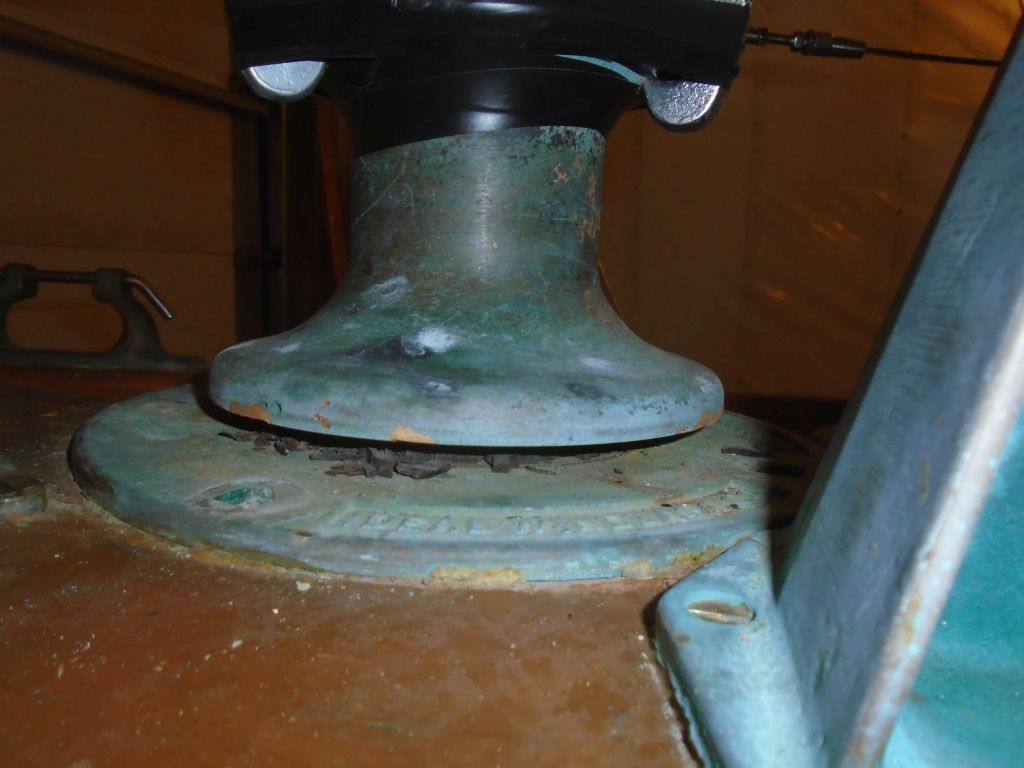
The removal instructions called for me to remove the capstan drum, which in theory would release the gearbox and motor below. So I removed the small screw and washer from the top, and sprayed in some penetrating oil, as the instructions kindly suggested that the drum might just be kind of hard to remove. Indeed this proved to be, and with no immediate movement of the drum possible, I returned to the chainlocker below to work on the four bolts that secured the windlass deck plate to the housing below.
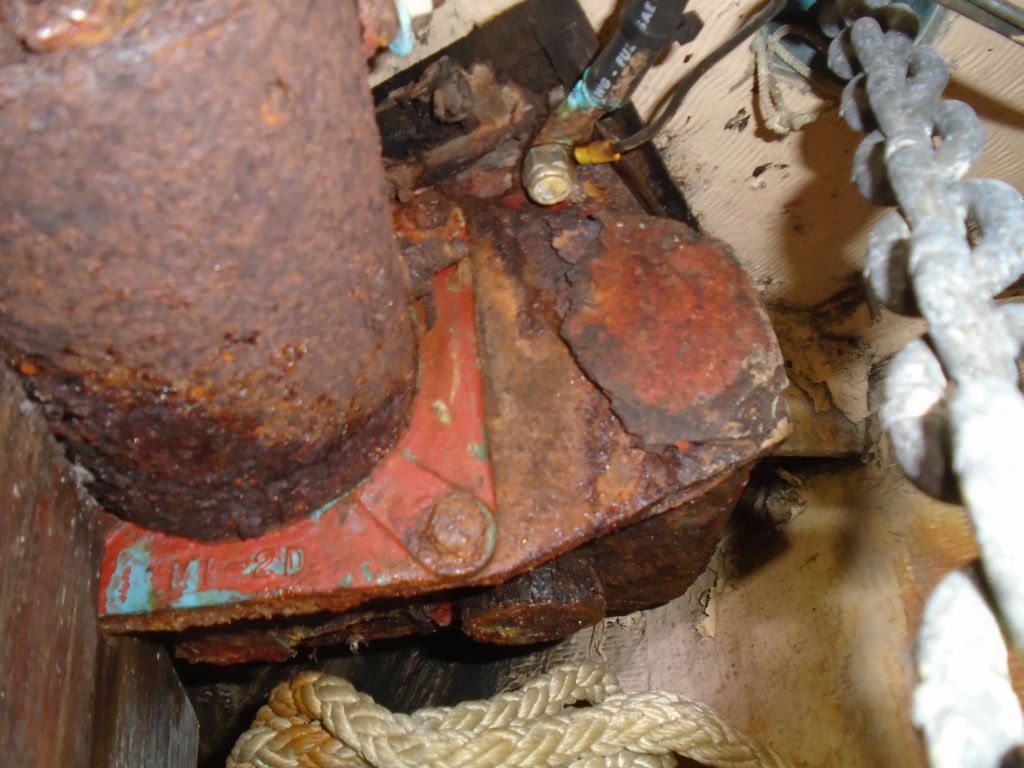
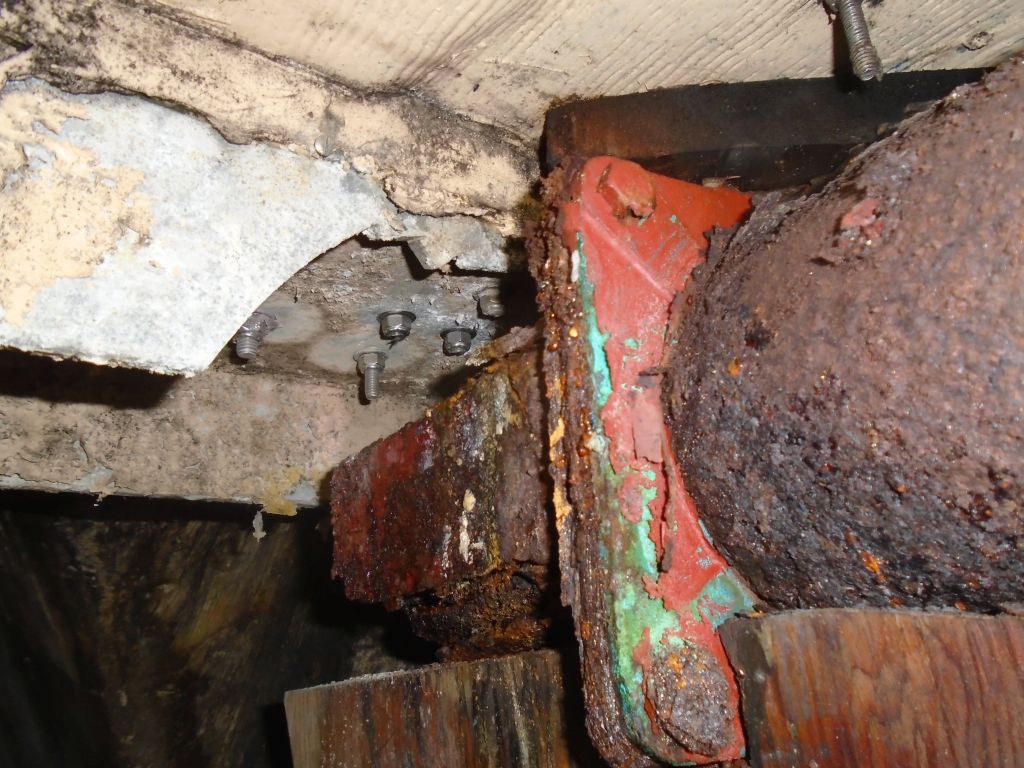
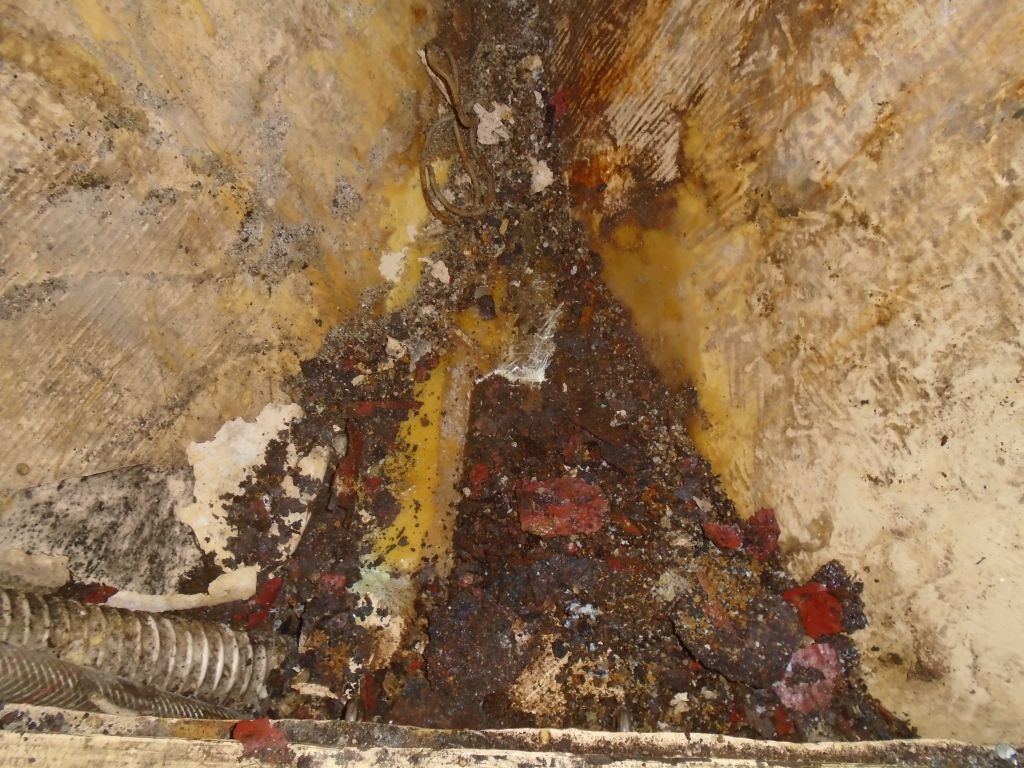
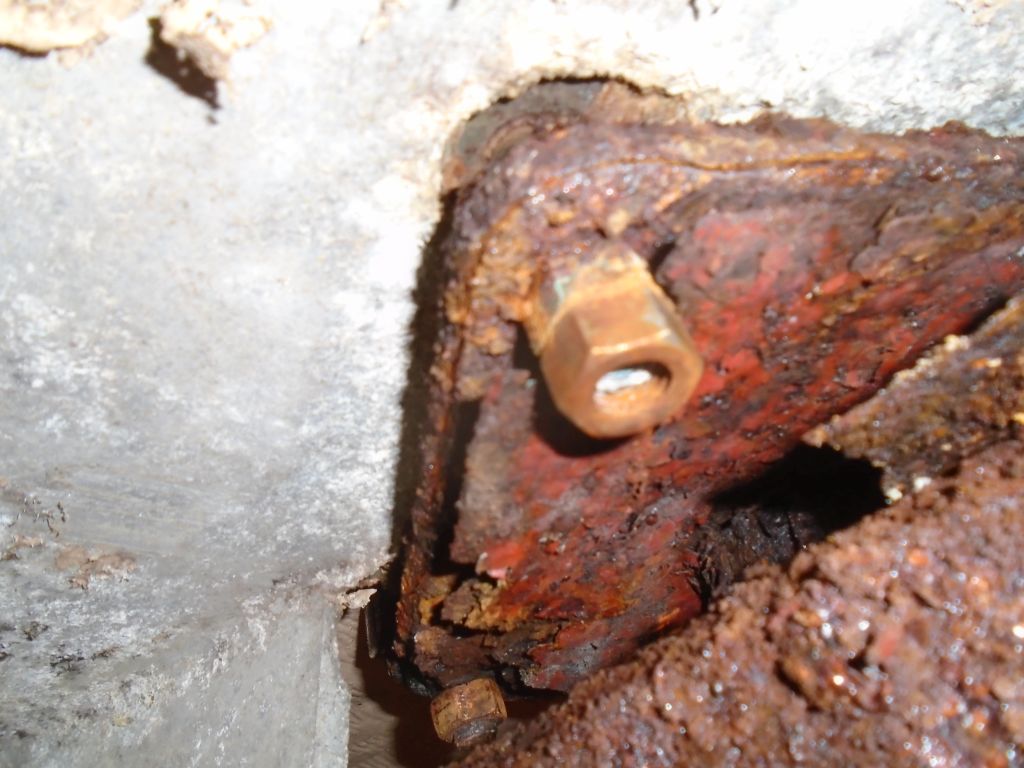
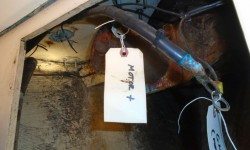
One of these bolts had also been the mounting point for the negative battery cable, and I’d already removed that nut, so I was 25% there. First inspection of the rest revealed the depressing news that the whole underpinnings were so heavily corroded as to virtually eliminate any hope for finding–never mind removing–some of the nuts, but after flaking off a few pounds of iron oxide and ruined steel, I visually located the second of four bolts–it looked like I might be able to get a wrench on it after all–and, with difficulty and by feel only (as well as the magic view provided by a digital camera held into an otherwise inaccessible space) I eventually chipped away enough heavy corrosion to expose the final two nuts, which were in a tight space between the deck and the housing.
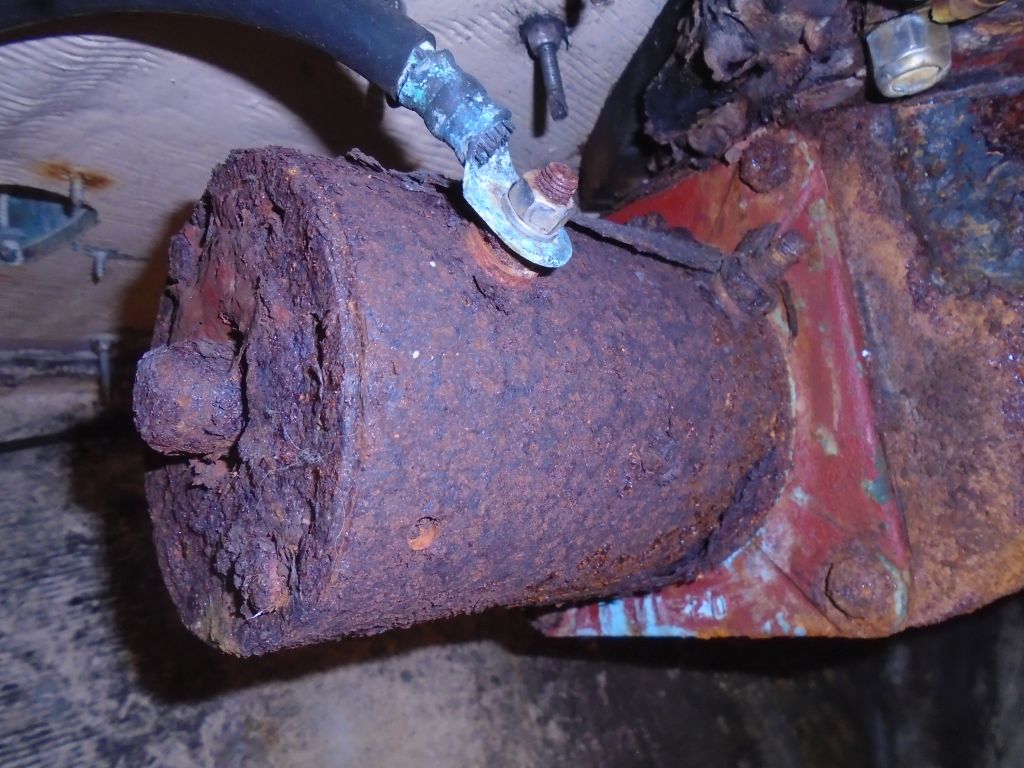
I did manage to get a socket, extension, and ratchet on the second visible nut, and made some progress unwinding it before it became apparent that the carriage bolt at the deck plate was simply spinning, having rounded off the soft bronze edges, so for the moment that was all I was going to get on that second bolt. At this point still fairly early in the day, I’d barely even considered how or if I’d ever get to the two invisible nuts forward, but even the second bolt was taking substantial amounts of time. I eventually determined that the nut was galled on the threads, and would never release, but fortunately I’d loosened it enough so I could pull the head of the carriage bolt up and cut it off with a saw from above. Two down, two to go.
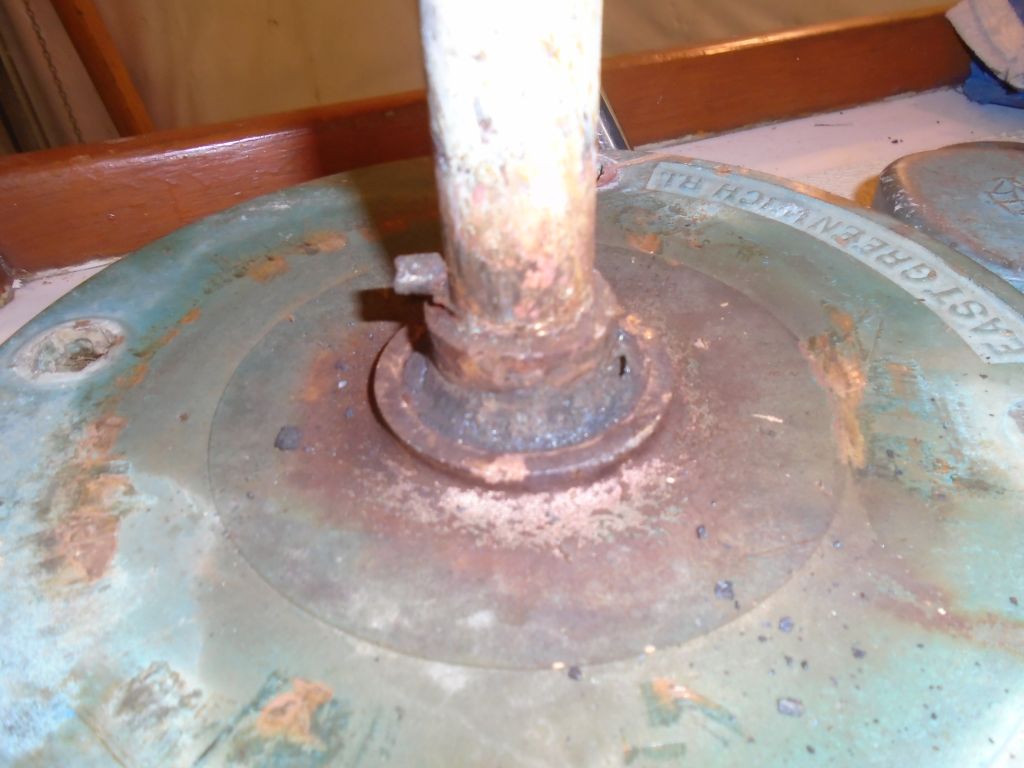
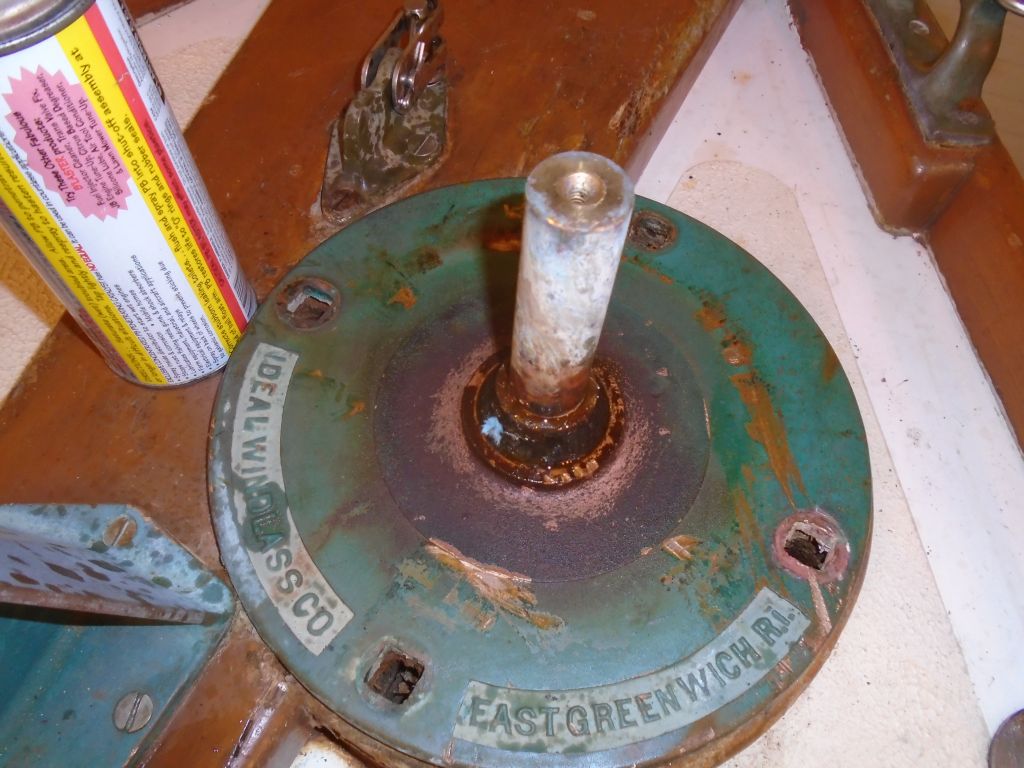
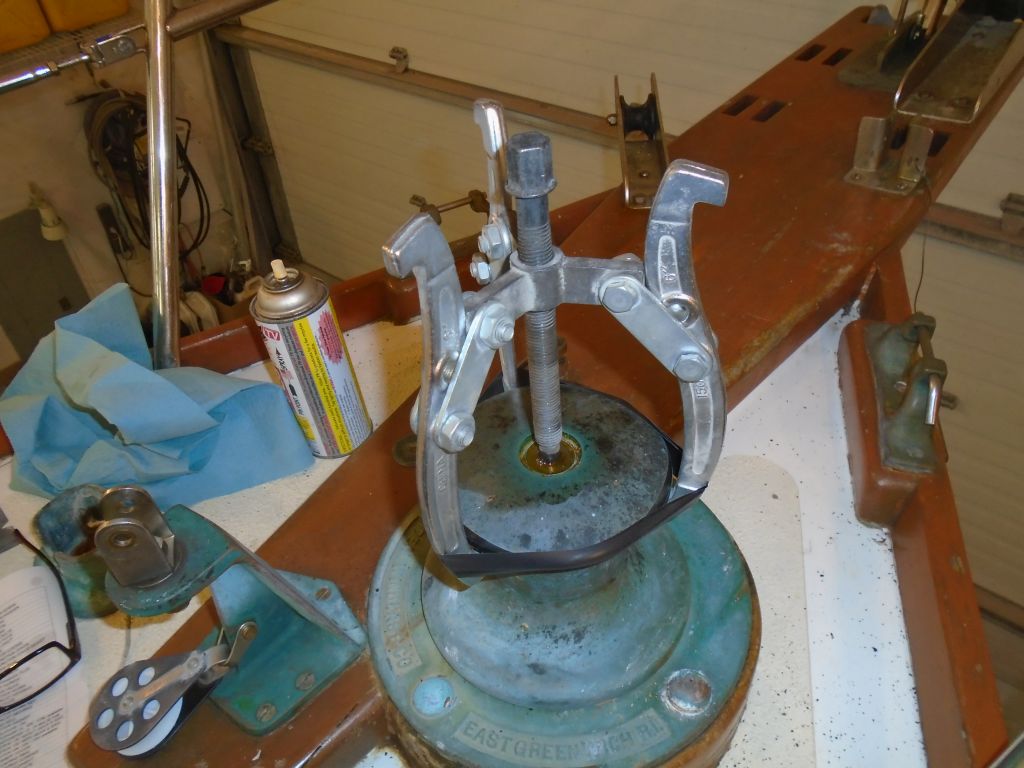
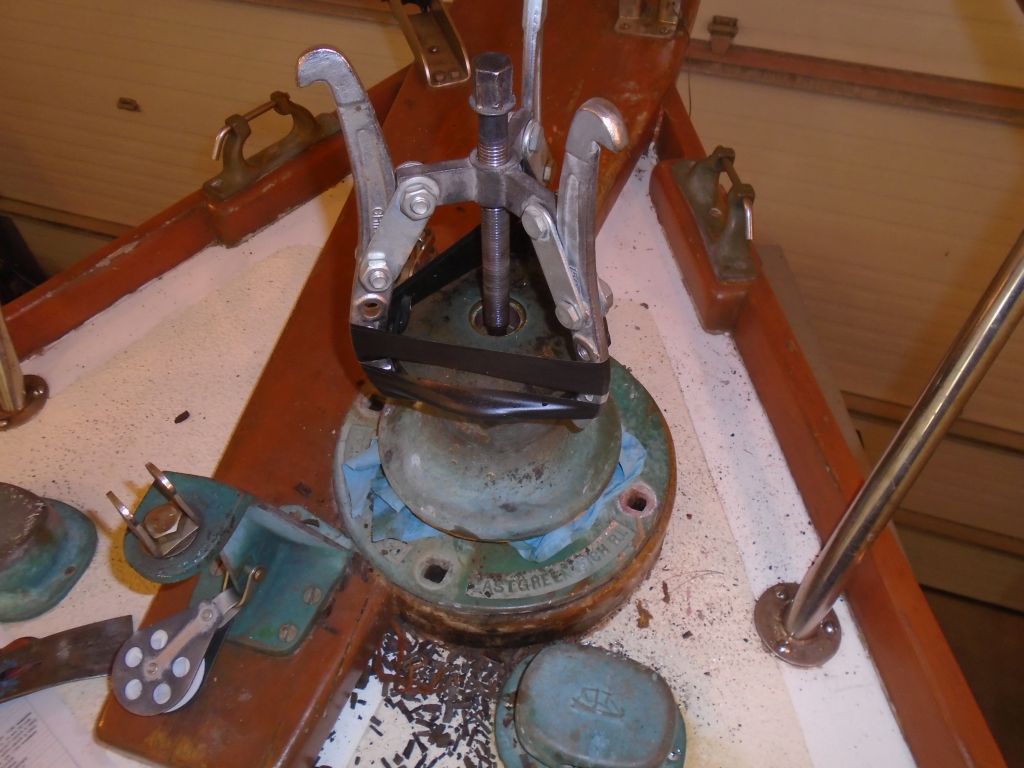
Meanwhile, I returned to the deck side to work again on the capstan. By now it was obvious that the drum was very stuck on the shaft, and prying it up wasn’t going to work, so I turned to a gear puller, as suggested in the removal instructions. These usually work pretty well, but I cranked it as tight as I could, well past what I could do by hand (I hammered the end of the wrench–not the little ratcheting one shown in the photo, but a heavier box end wrench that I switched to by this point– in order to turn the puller’s screw), but this seemed to make no difference to the position of the drum. So I added more penetrating oil, cranked a little more on the screw for good measure, and returned belowdecks to keep working on what I could there.
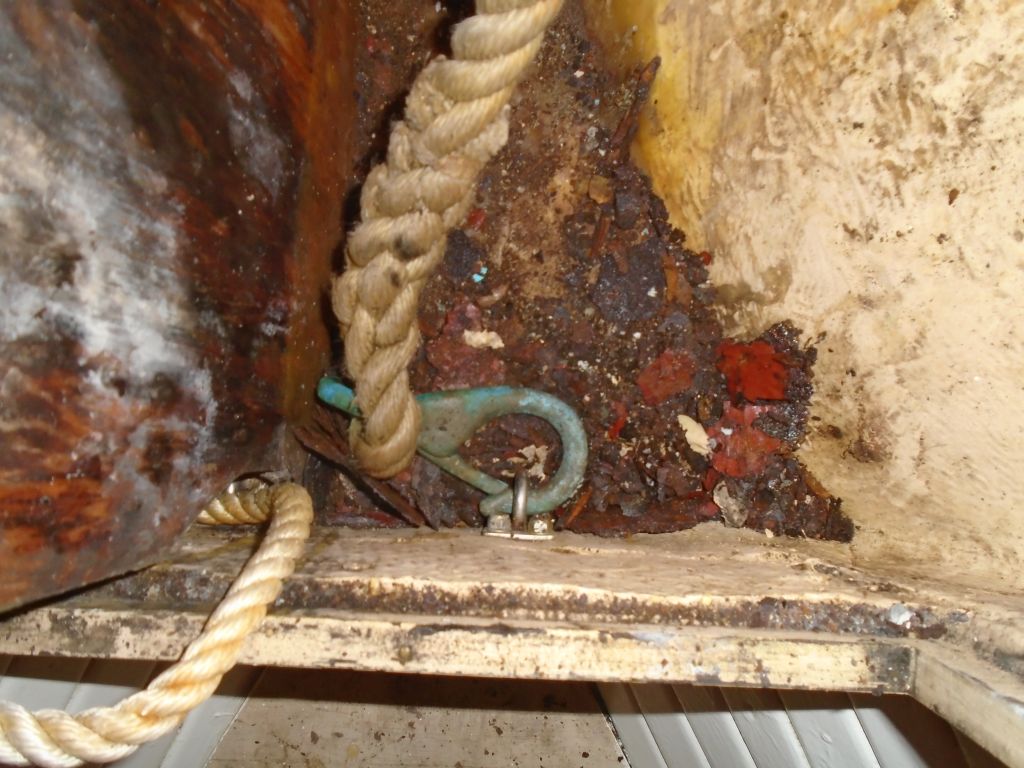
In this way passed the remainder of the day. Against all odds–I never would have taken that bet–I found that the two hidden nuts at the forward side of the windlass gear housing were accessible (with great difficulty and by feel only) with a wrench, and actually turned. The bolts were bronze, which was their saving grace, and I felt an indescribable pleasure at having succeeded at their removal. I’d already been working through various means of simply getting this windlass off the boat, whatever it took. The instructions joked about C4, and I wondered if it might actually take something almost that destructive just so we could move forward with another plan. Getting the bolts removed was a victory, but I was still far from having the windlass off.
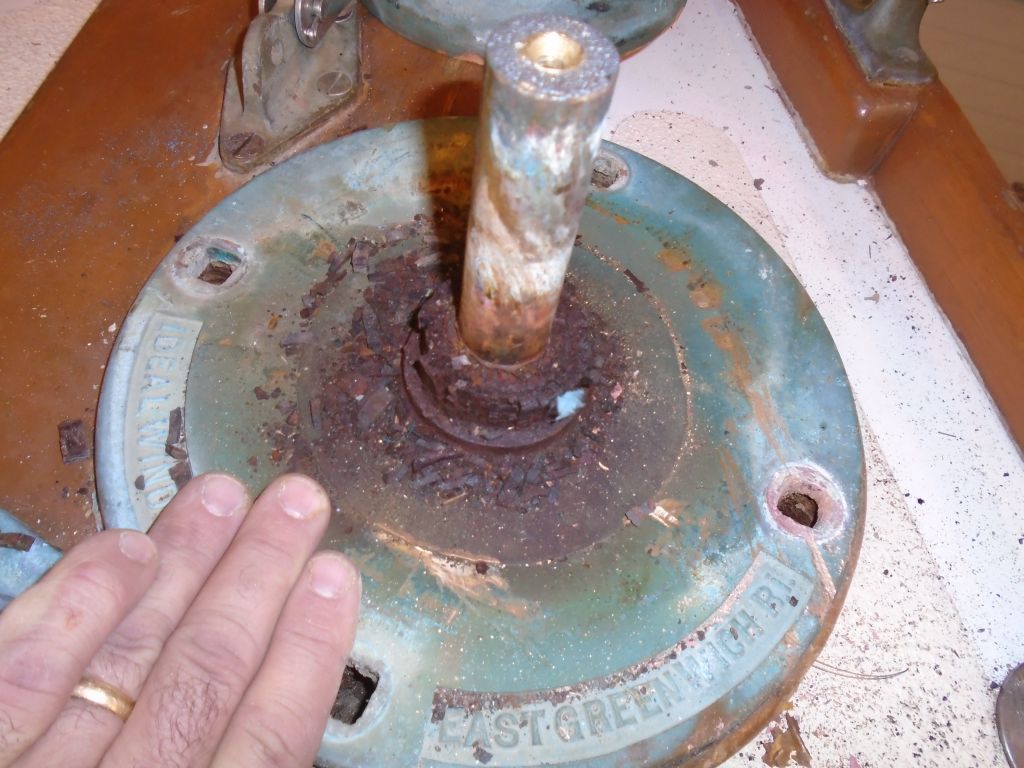
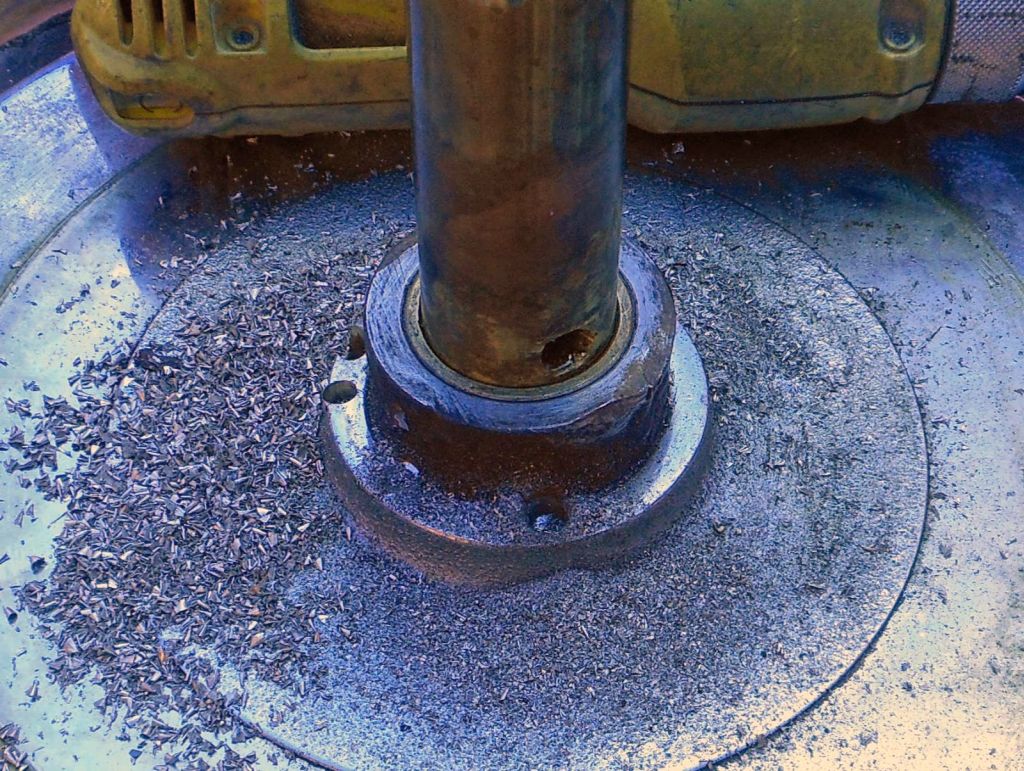
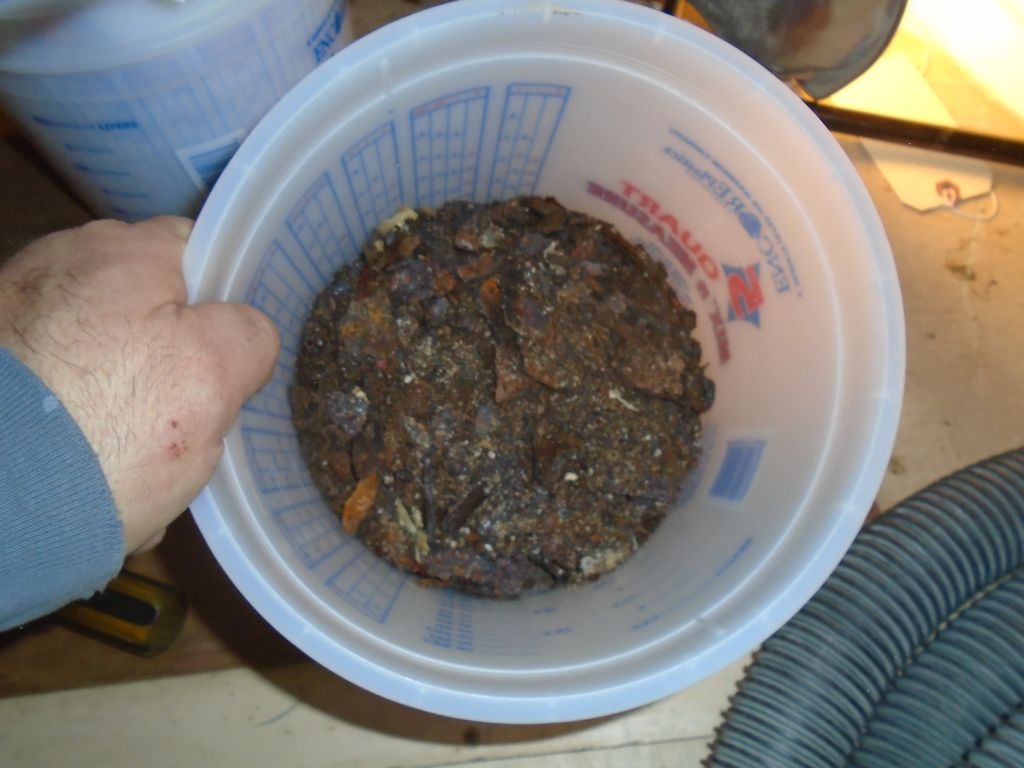
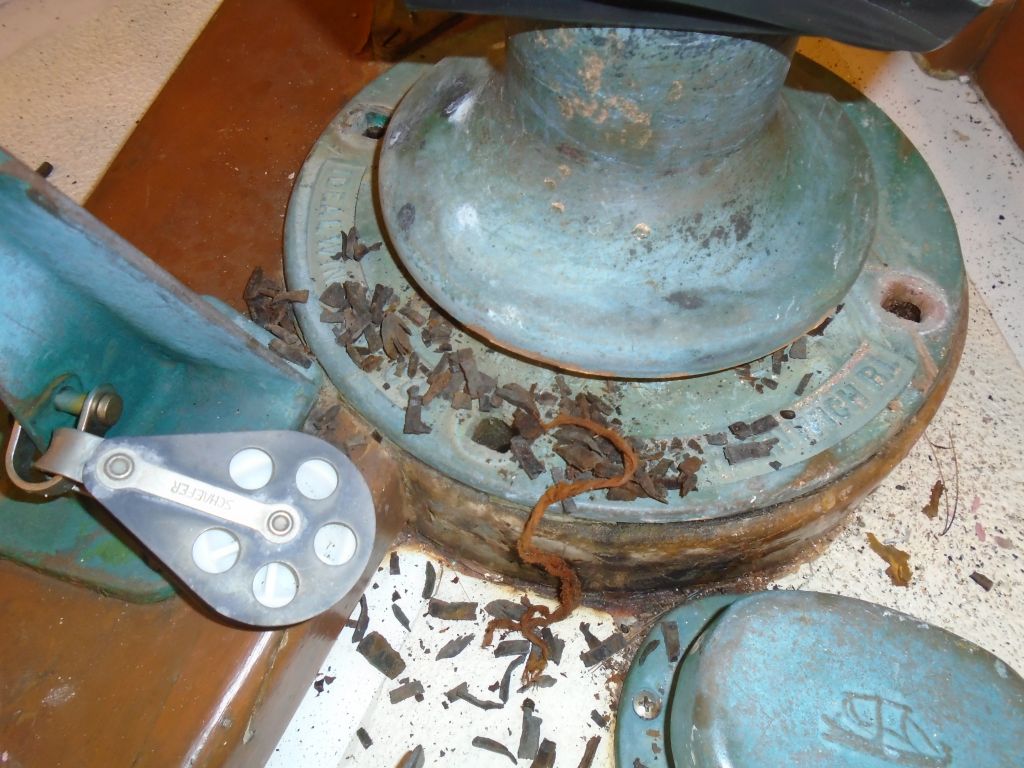
In between fighting the tight and miserable access below, I went on deck periodically to beat on the wrench and keep tightening the puller. It seemed to be doing nothing for hours, but then suddenly I happened to notice that there appeared to have been some movement. I’d not seen the drum move, mind you–it wasn’t like it just released and popped off–but the top of the shaft, which had been flush with the inside of the washer recess at the start, was now slightly more recessed, meaning the drum had moved upwards. This was a positive development, but even so I spent the rest of the day slowly hammering the wrench–and therefore the puller screw–tighter. with great effort. But at least now the progress was visible, with the drum slowly lifting from the deck. Once I could get some fingers in there I found one likely cause of the extreme level of stuck-ness: I pulled out ferrous chunks of junk that were clearly coming off the shaft or housing–from where exactly was not clear, but it was there. It was very disappointing to see so much plain steel in this windlass. This work was the unfortunately inevitable result of that sort of construction.
In the event, I kept at it till the end of the day, resetting the puller once after I’d exhausted the travel of the screw. The tightening of the puller–and removal of the drum–didn’t get any easier as the day wound down, and while I’d made about an inch of progress it was obvious that I probably wasn’t going to get the drum off in the next 15 minutes, so I resoaked the shaft with penetrating oil and left it overnight, hoping perhaps it would get a little easier next time–in any case my arms would be in better shape for more hammering.
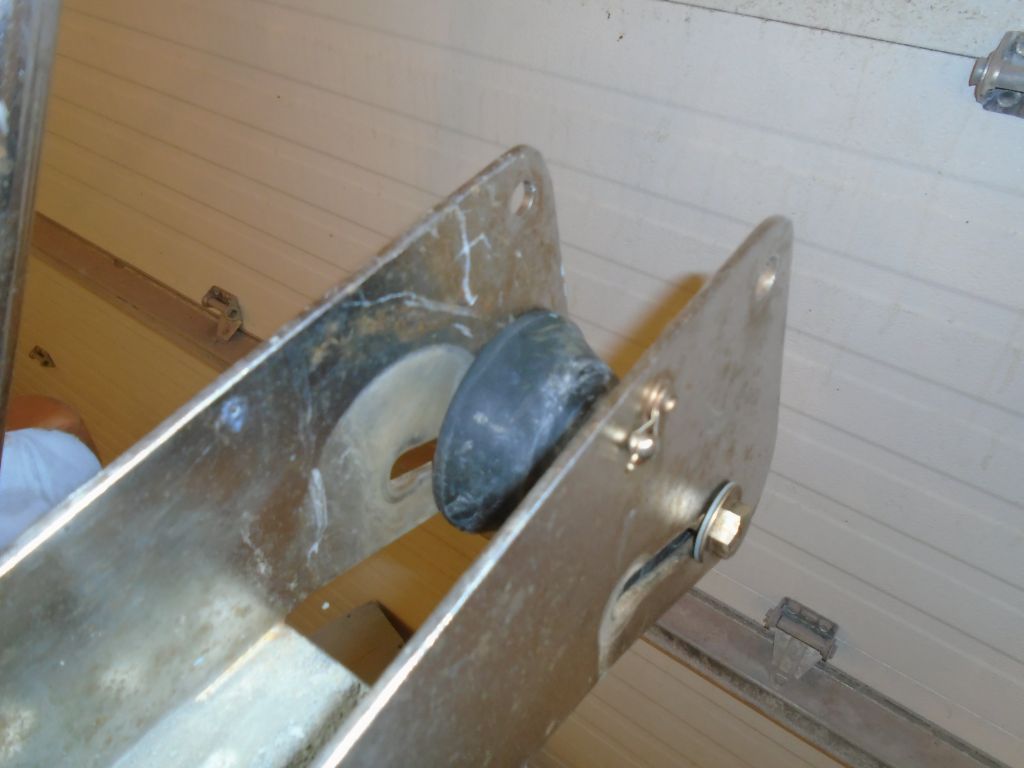
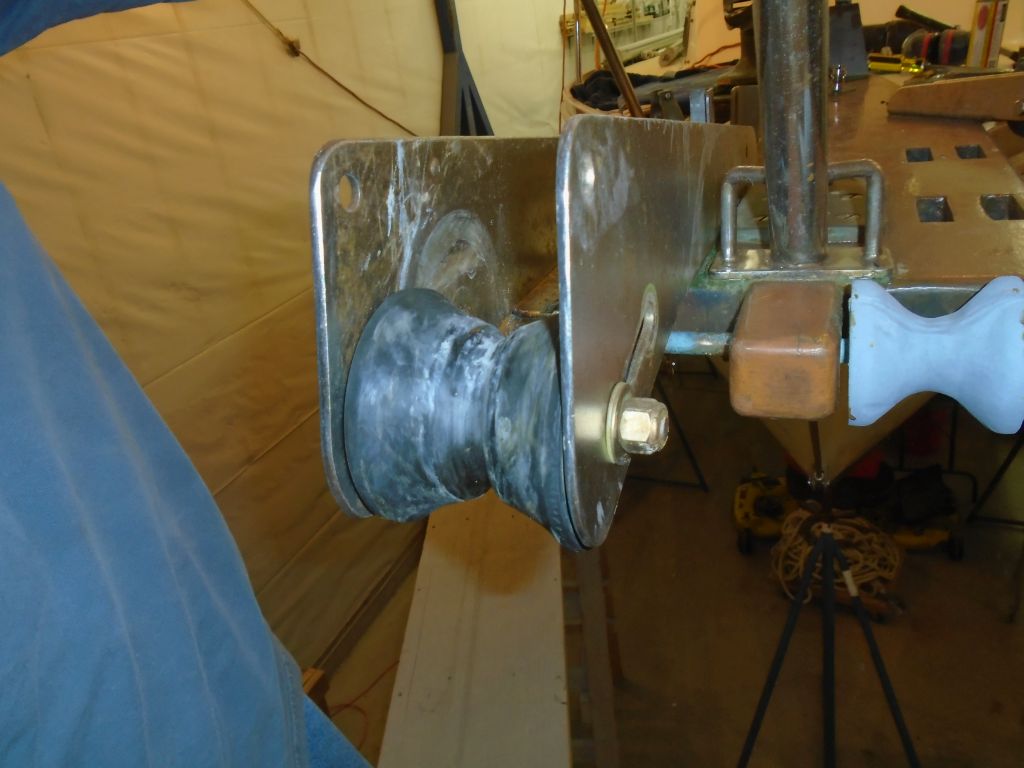
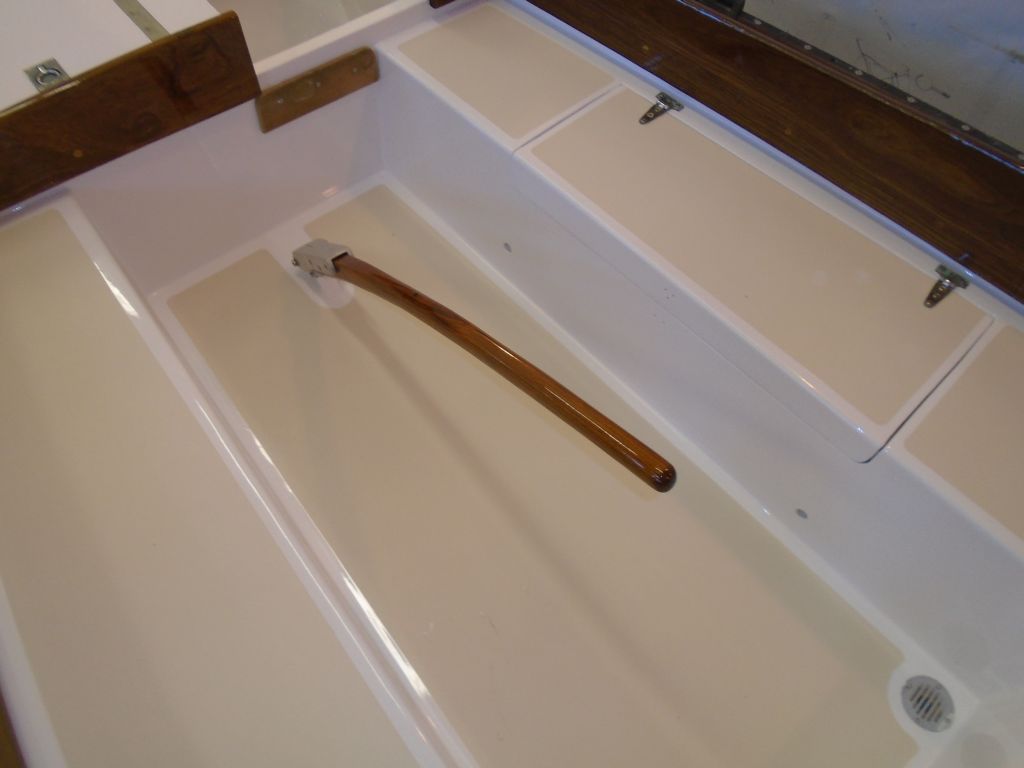
To take the edge off the exhausting day, I took care of one of the easy (and it actually was) tasks from my list. Someone had overtightened the bolt securing the roller on the main anchor roller, which pinned it tightly and didn’t allow it to roll. Loosening the nylon locknut on the pin a bit allowed the roller to spin, and also allowed the whole arrangement to slide up and down in the intended slot.
Total time billed on this job today: 7 hours
0600 Weather Report:
32°, cloudy with light snow and mixed freezing showers. Forecast for the day: Showers, clouds, and more rain later in the day, high near 44.