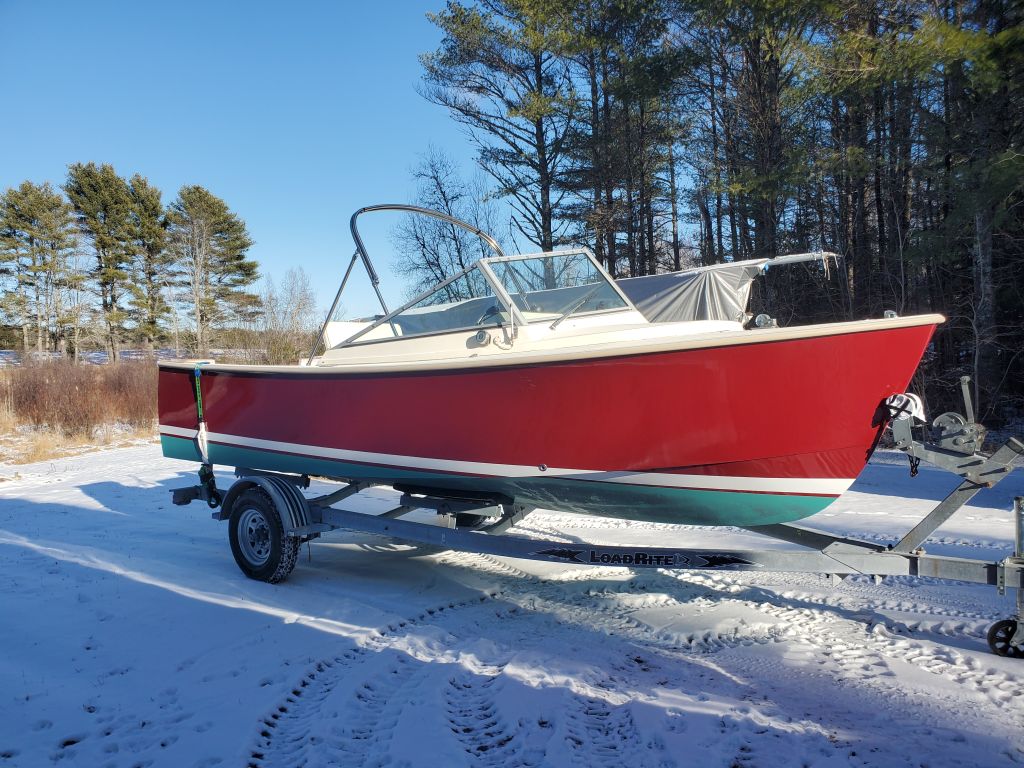
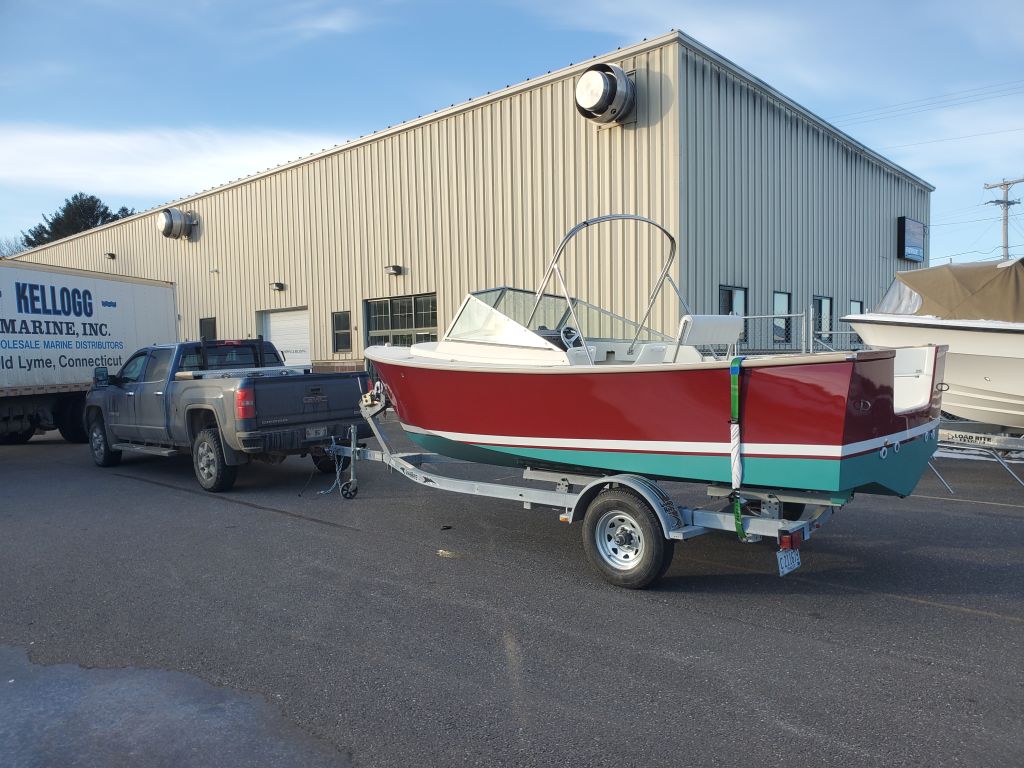
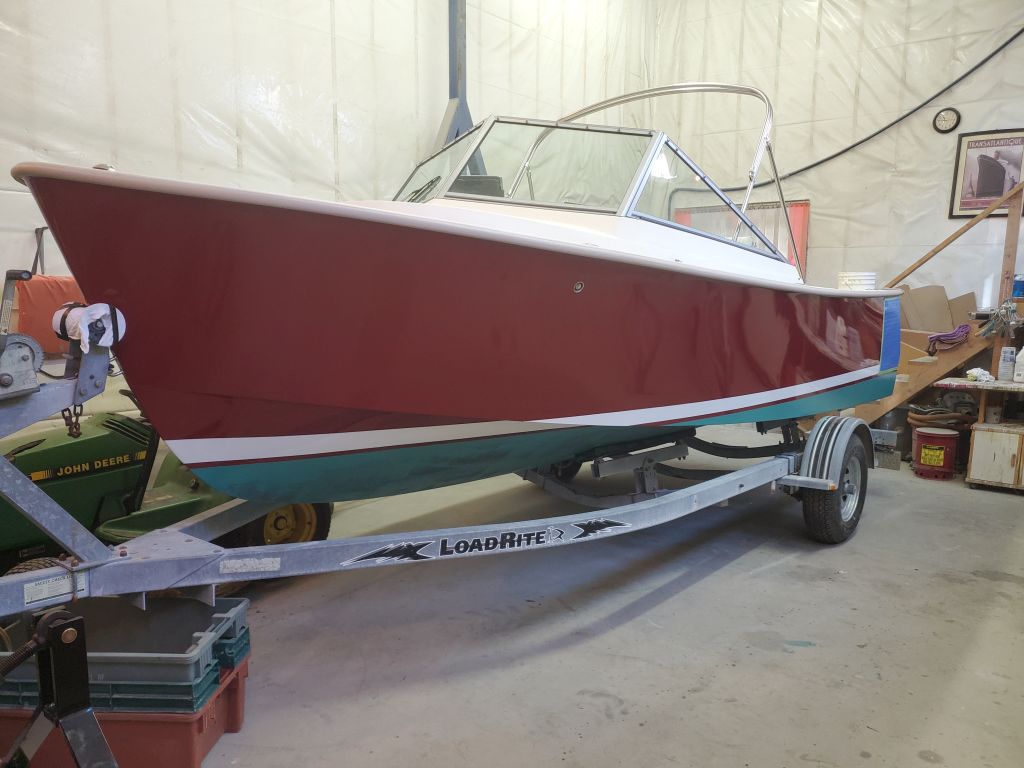
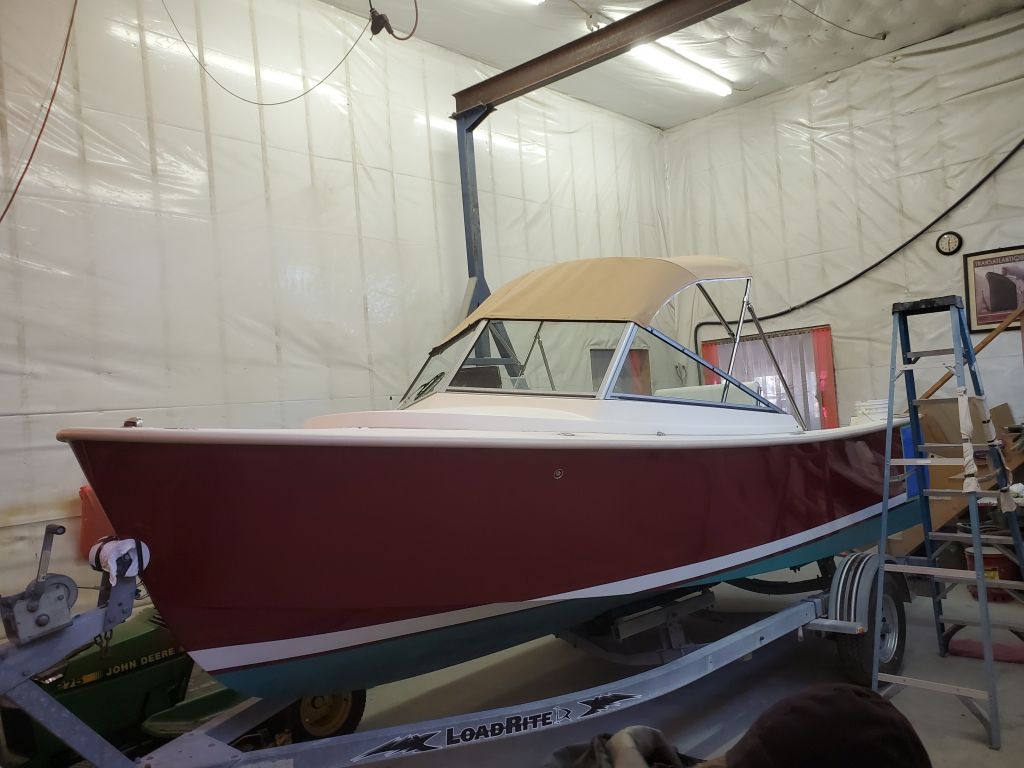
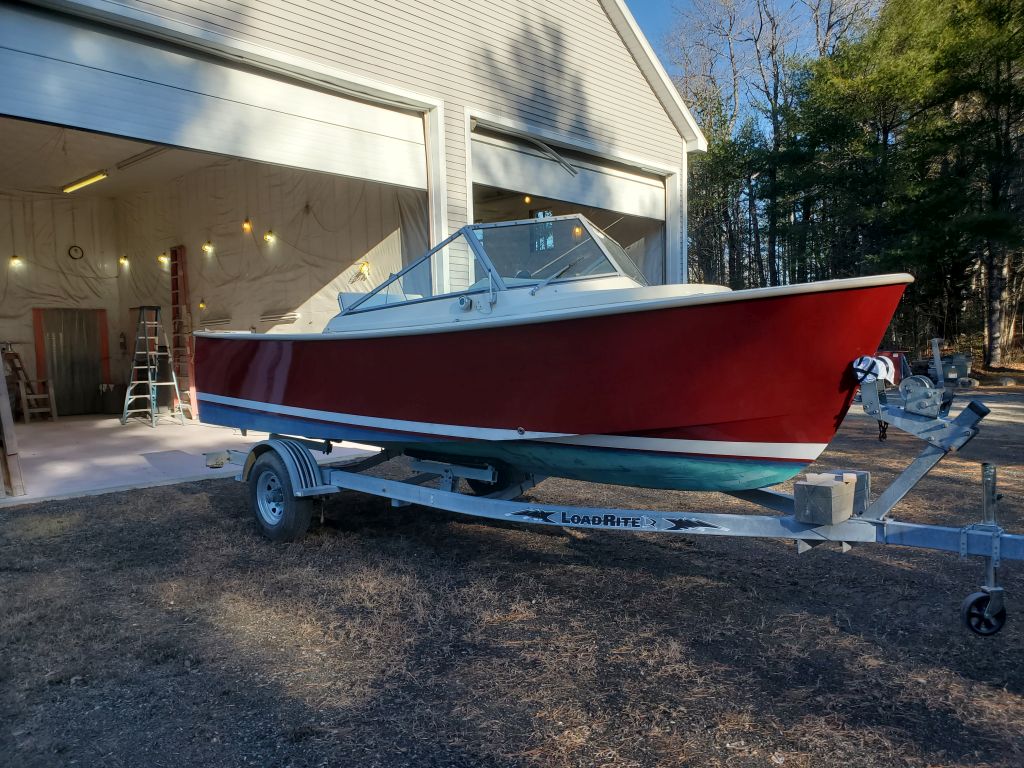
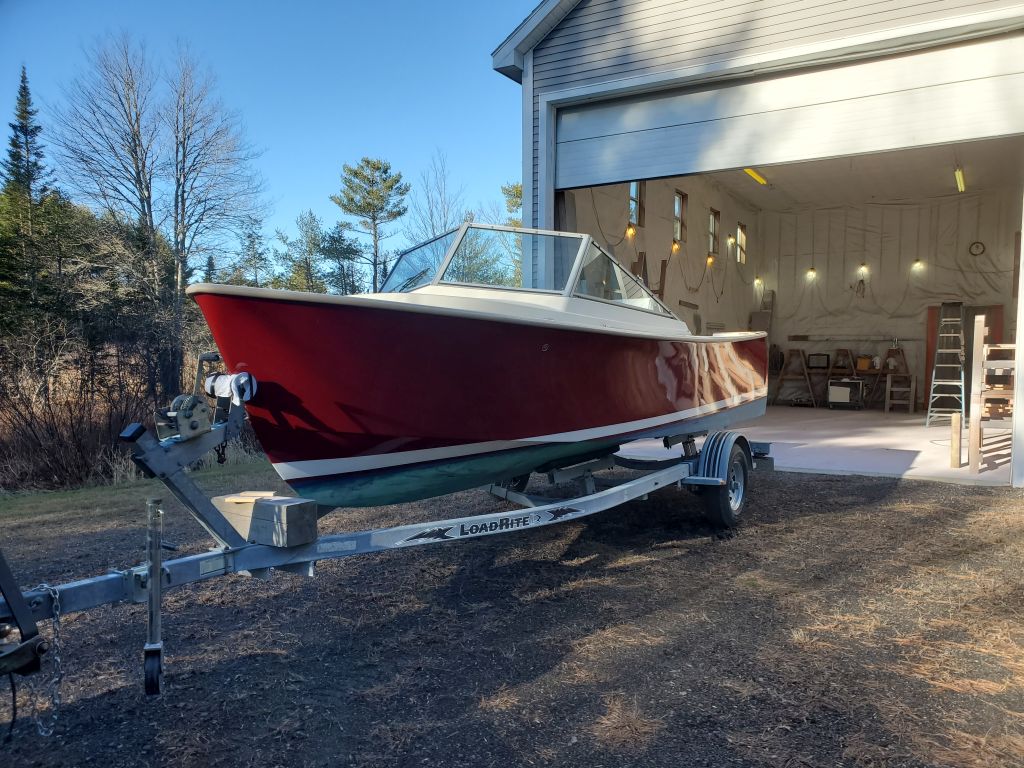
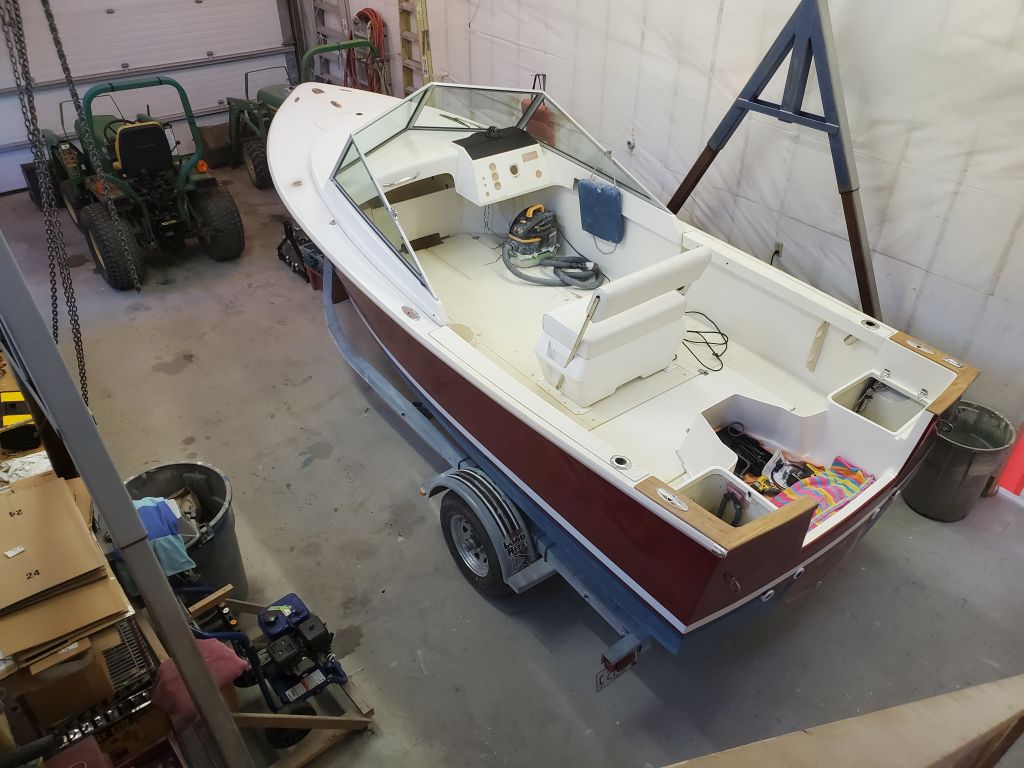
The outboard dealer doing the new engine rigging sent these photos showing the completed job.
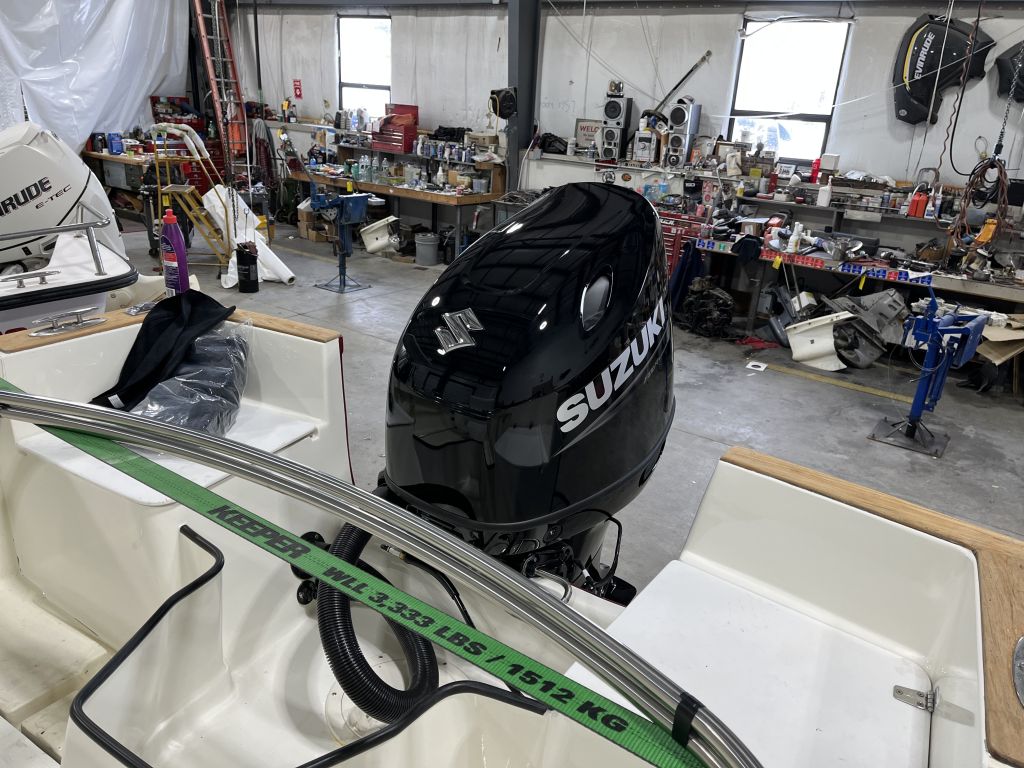
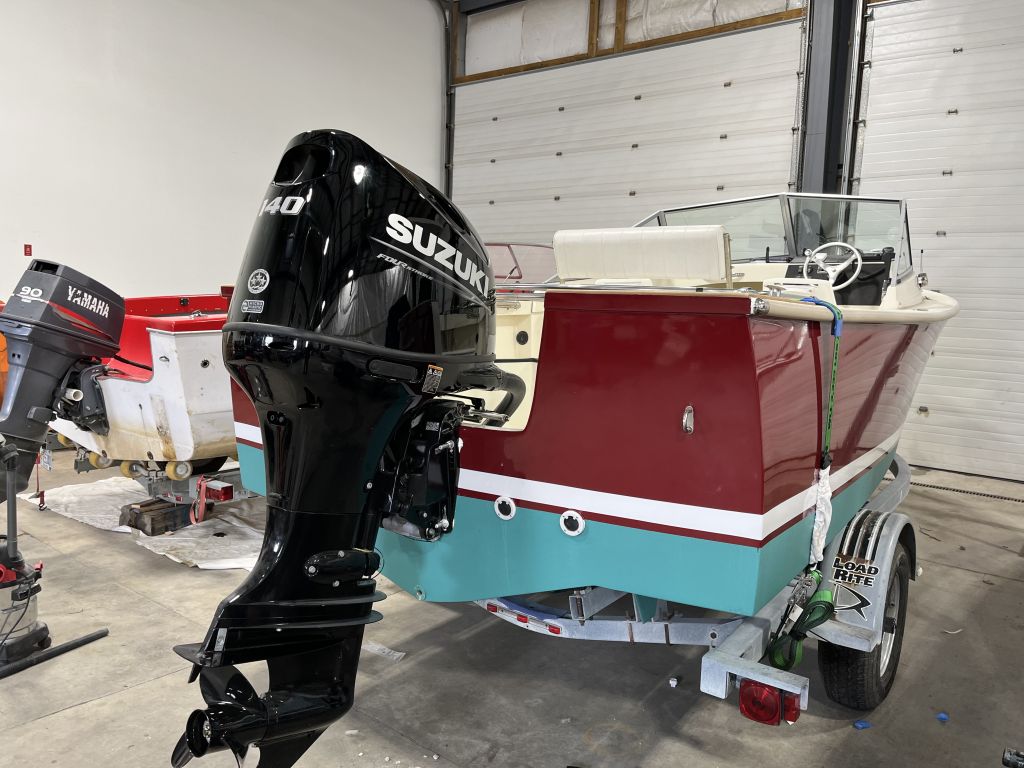


The outboard dealer doing the new engine rigging sent these photos showing the completed job.
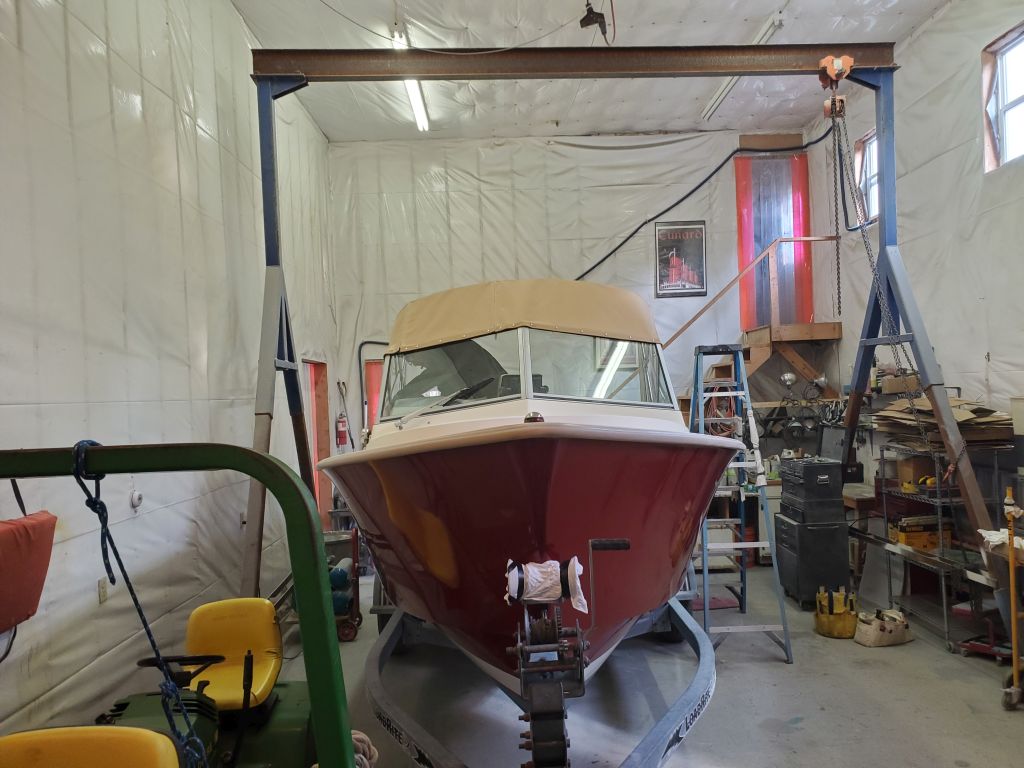
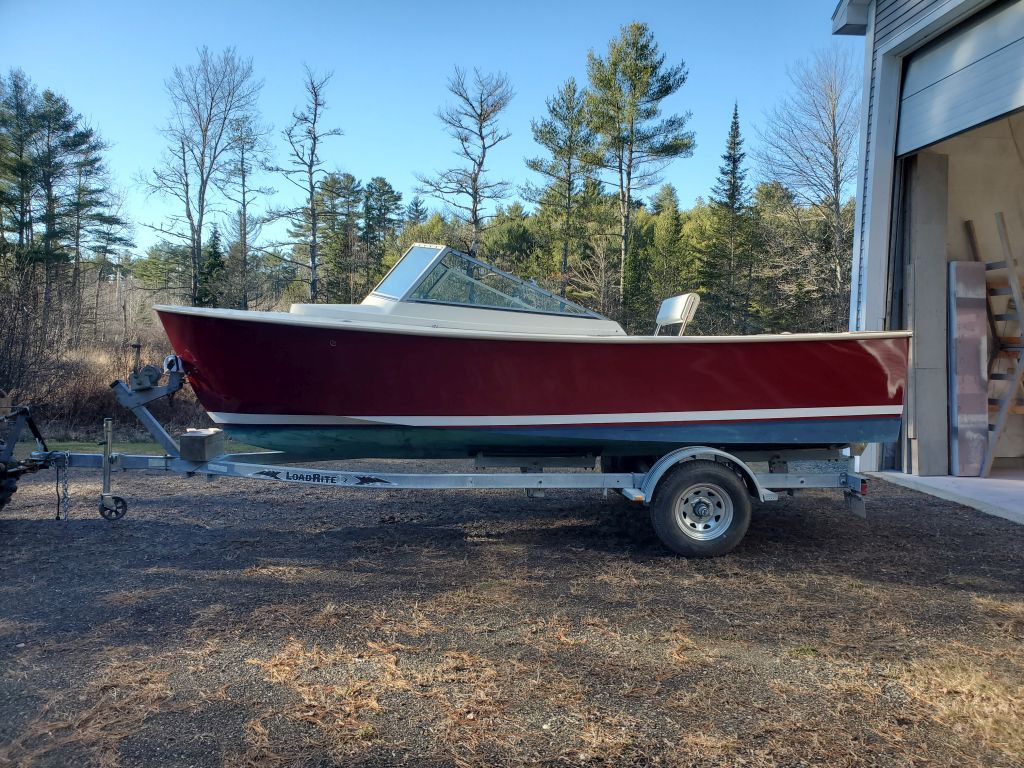
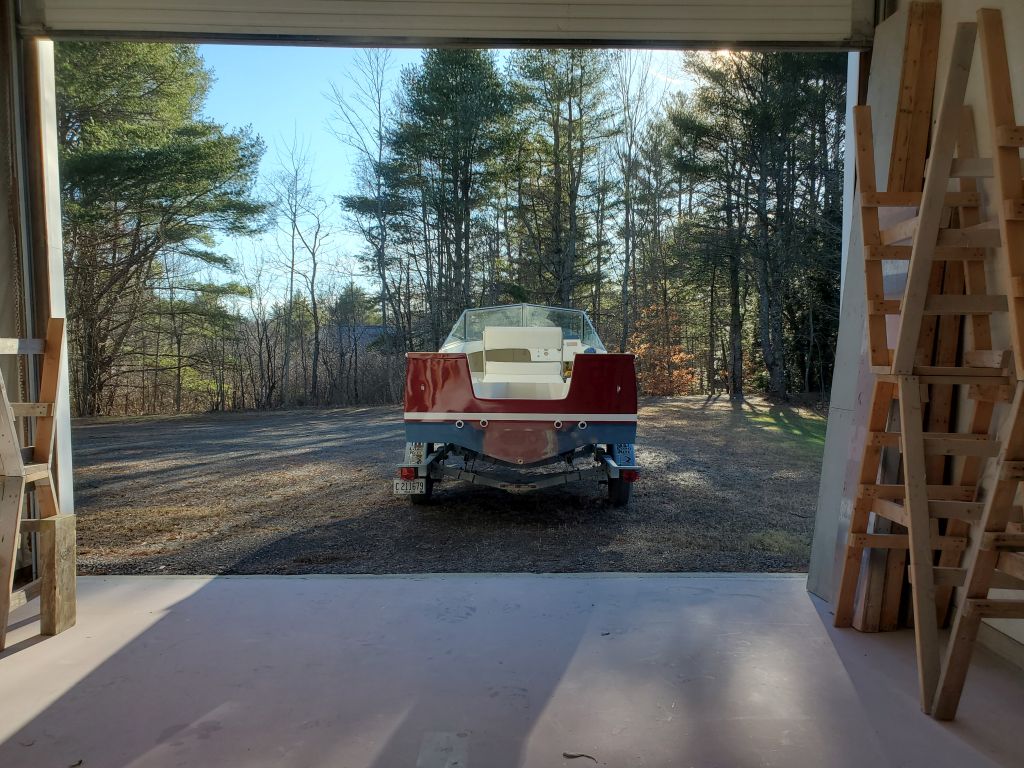
The owner’s new outboard, ordered a few months earlier, had arrived at the dealer, so now I made plans to deliver the boat so the outboard could be rigged. Looking at forecast ahead, I chose a day with cold temperatures (an increasing rarity around here) to ensure that the roads would be as clean as possible, with no meltwater to besmirch the boat (there’d been just a little snow a few days earlier, and it was hanging around), and also planned to depart early, not only to avoid meltwater during the sun’s higher moments of the day, but also so I could get the boat delivered and then get back to the shop for work.
A few days ahead, I removed and stored the new canvas and GPS for safekeeping, and otherwise prepared the boat for transport.
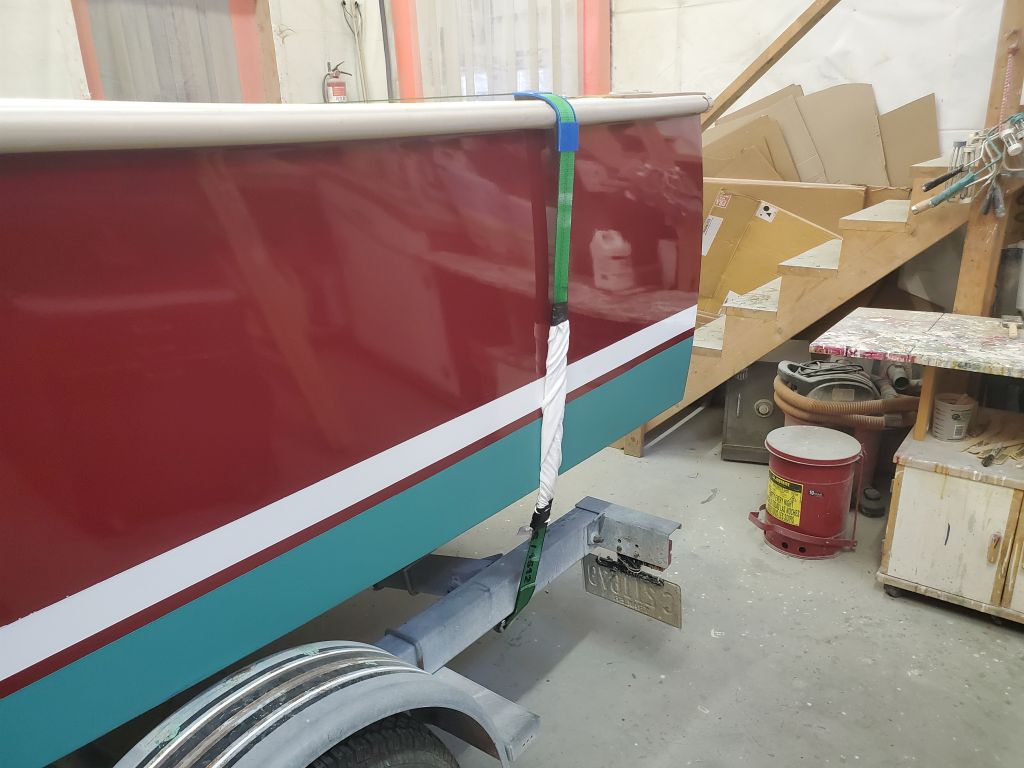
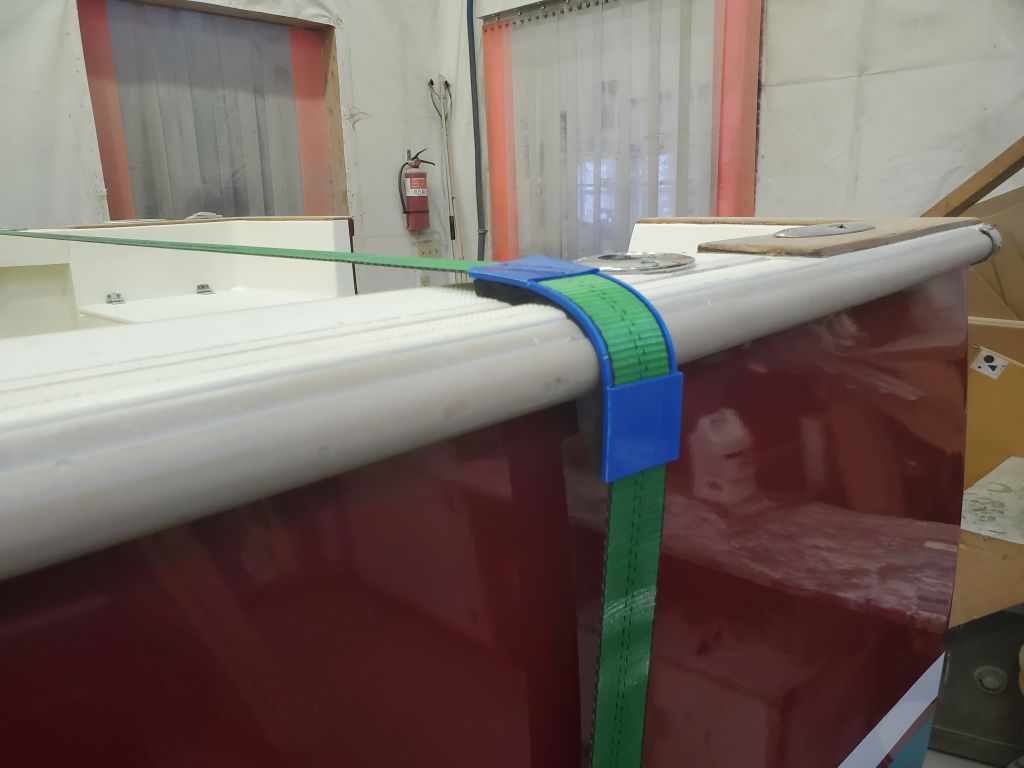
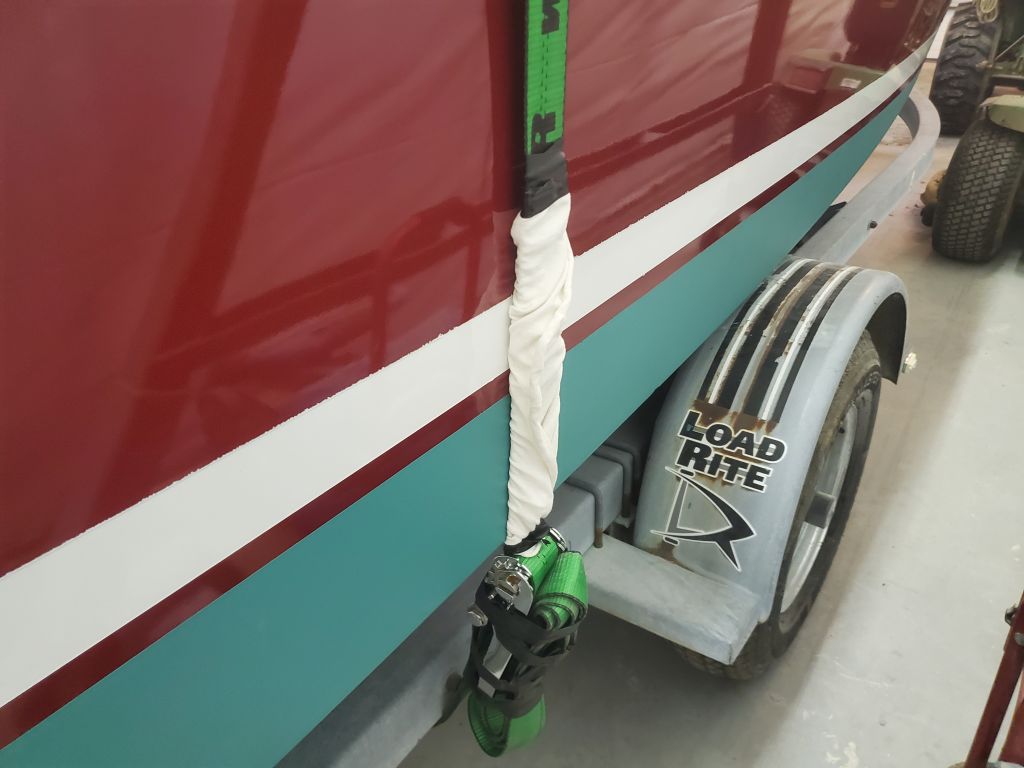
The afternoon before, with good weather and no precipitation expected overnight, I moved the boat outdoors and hitched to the truck so I could be ready to go in the morning without effort.
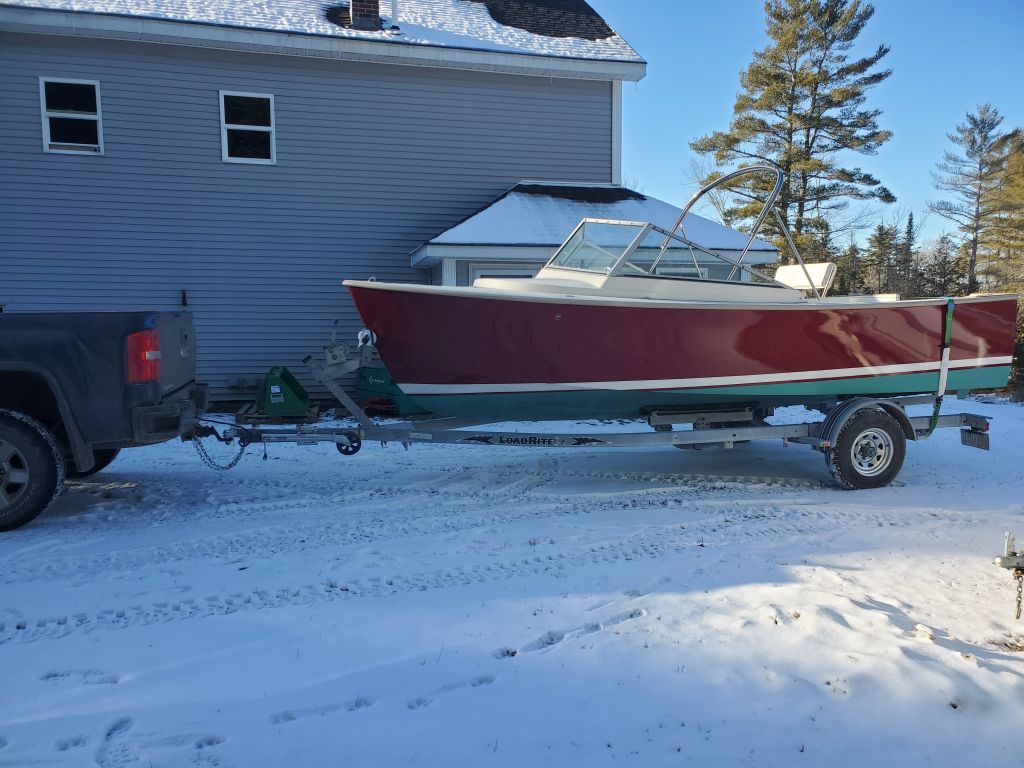
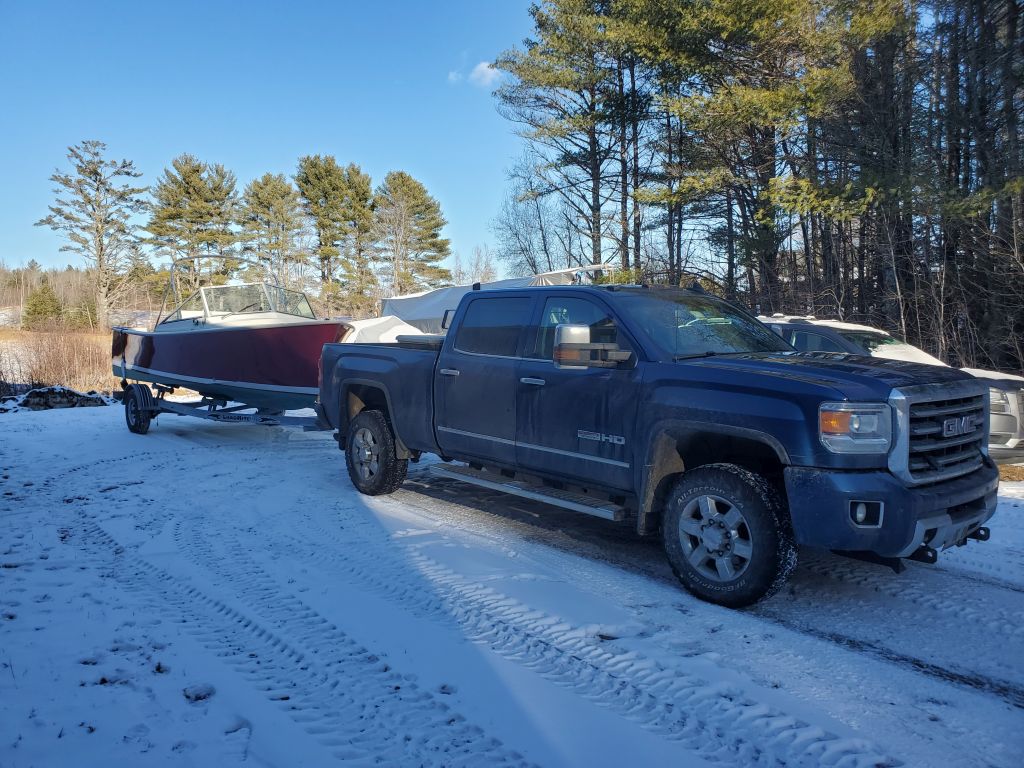
Delivery to the outboard dealer first thing the next morning was successful and uneventful.
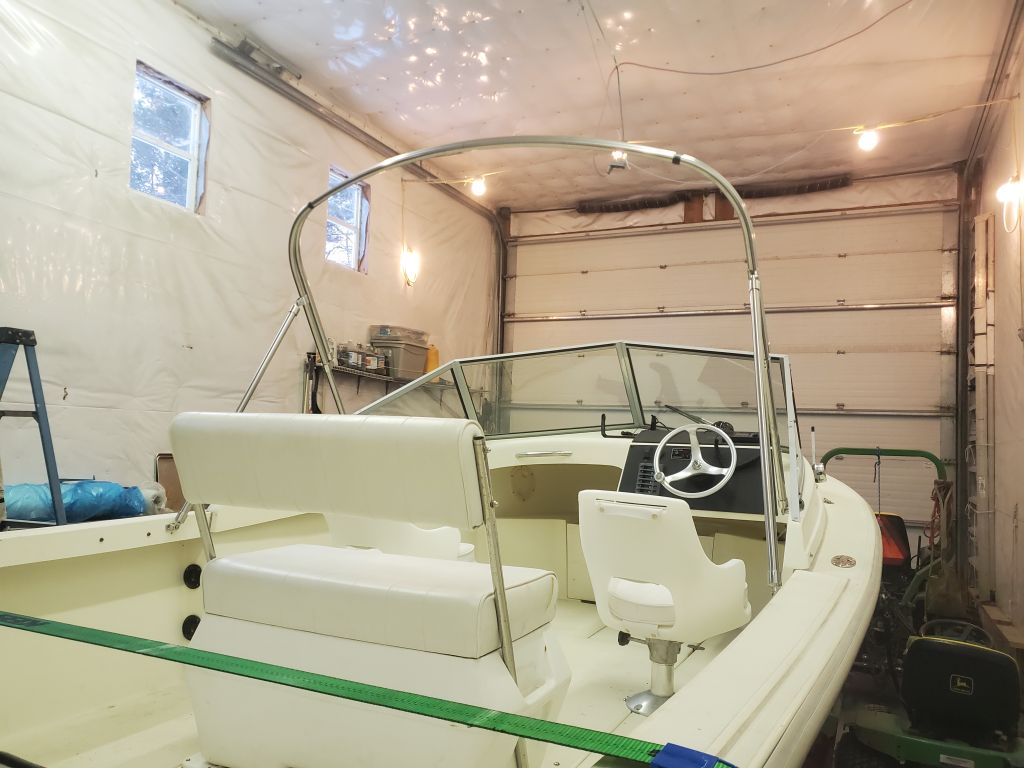
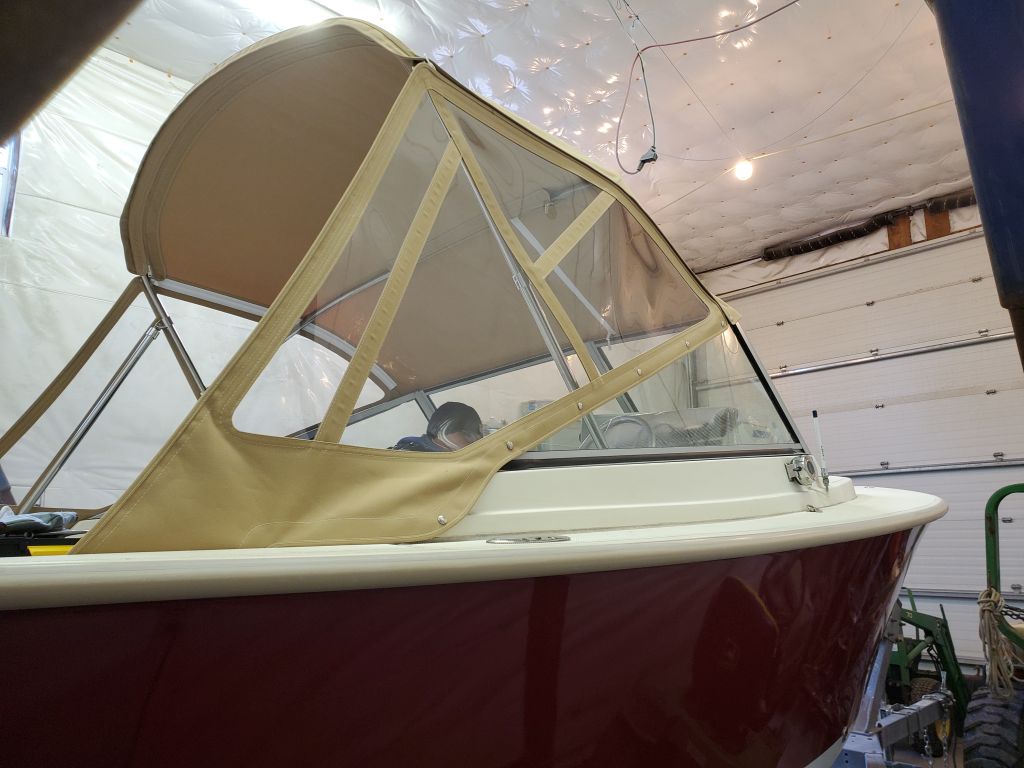
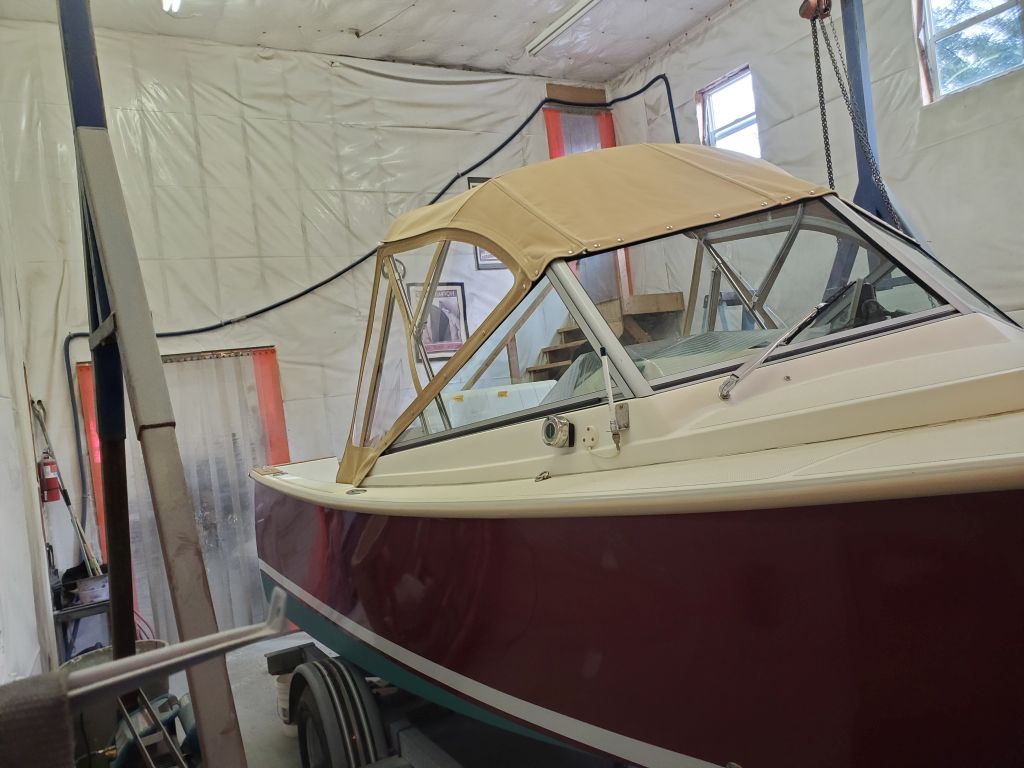
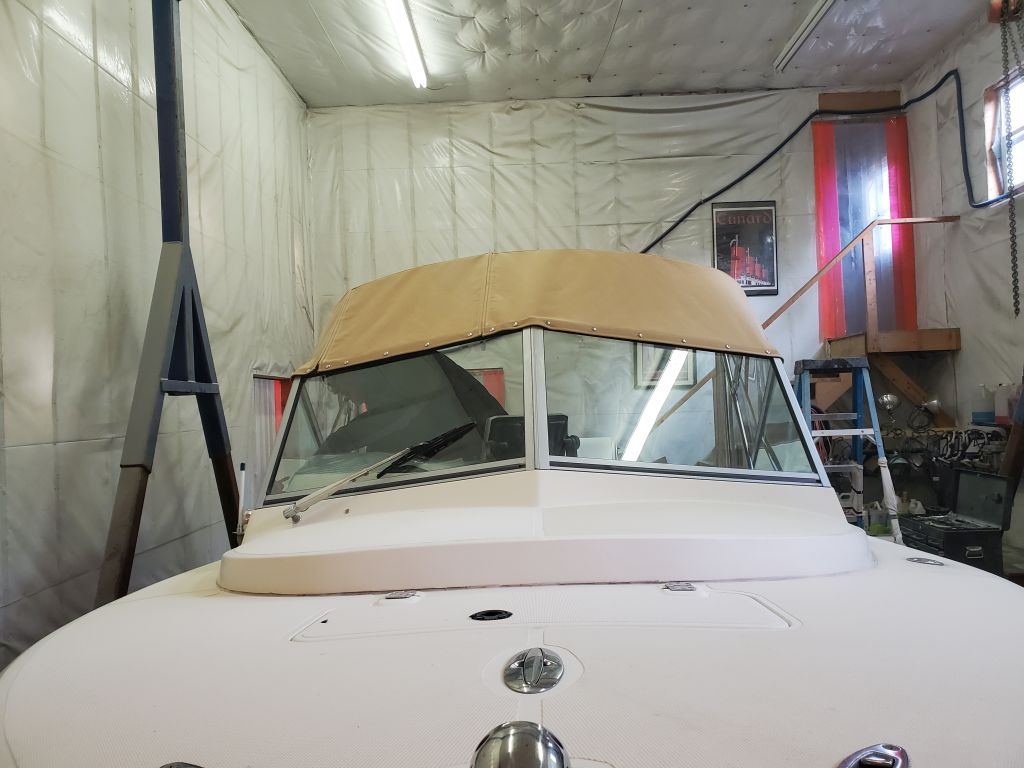
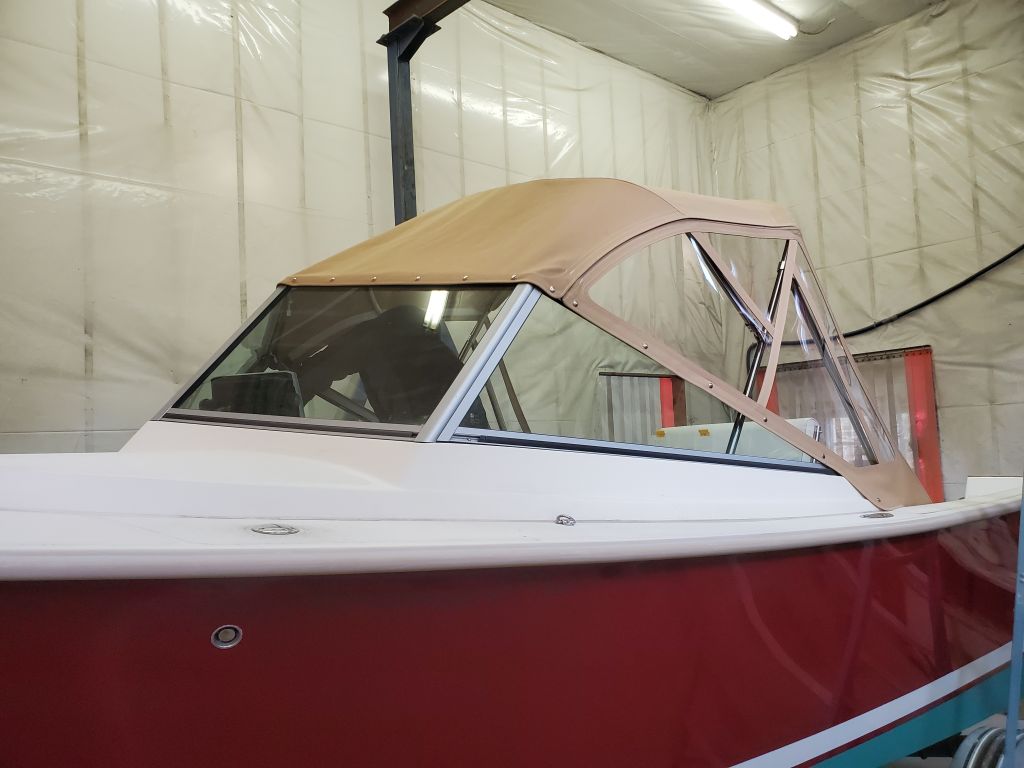
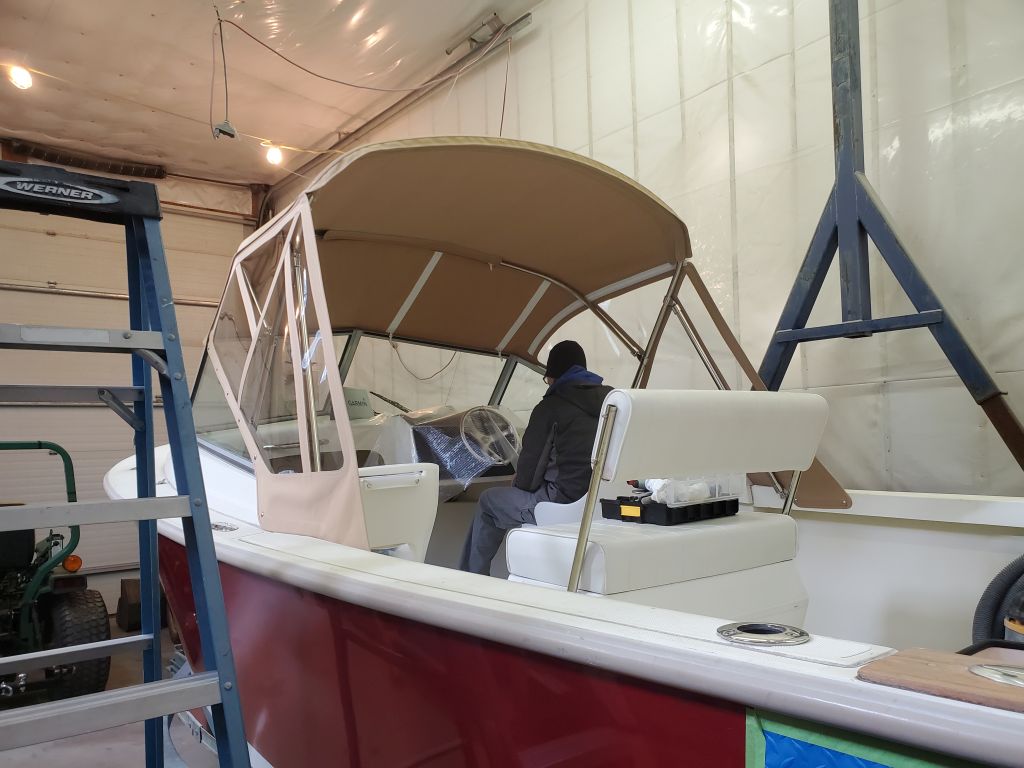
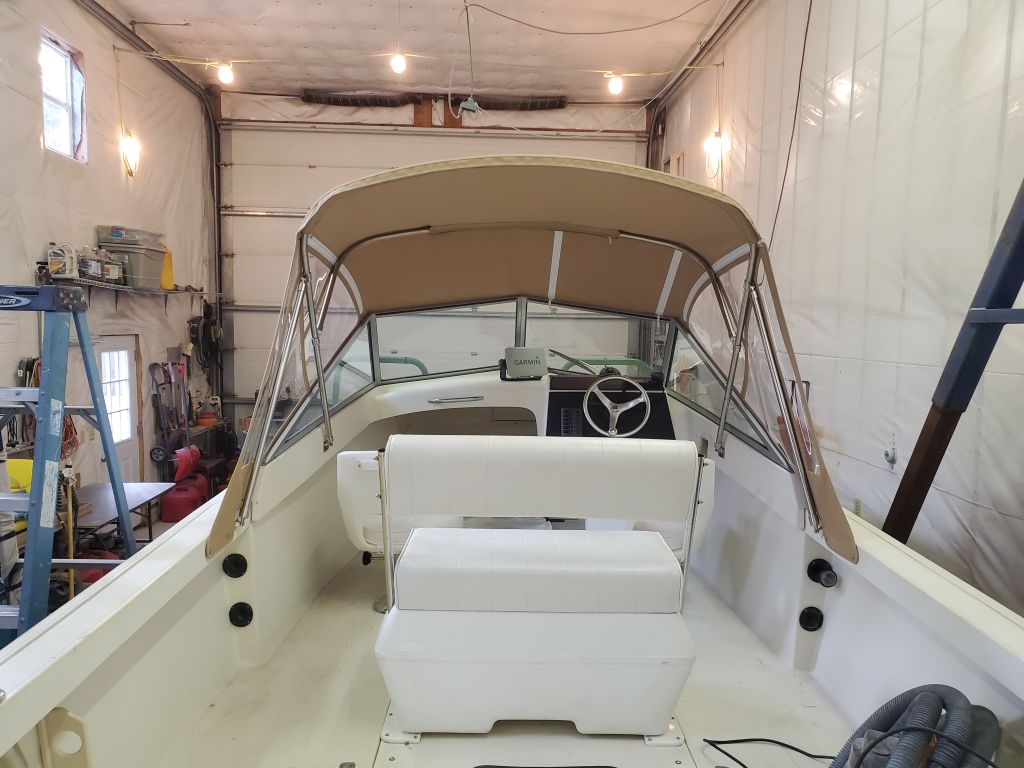
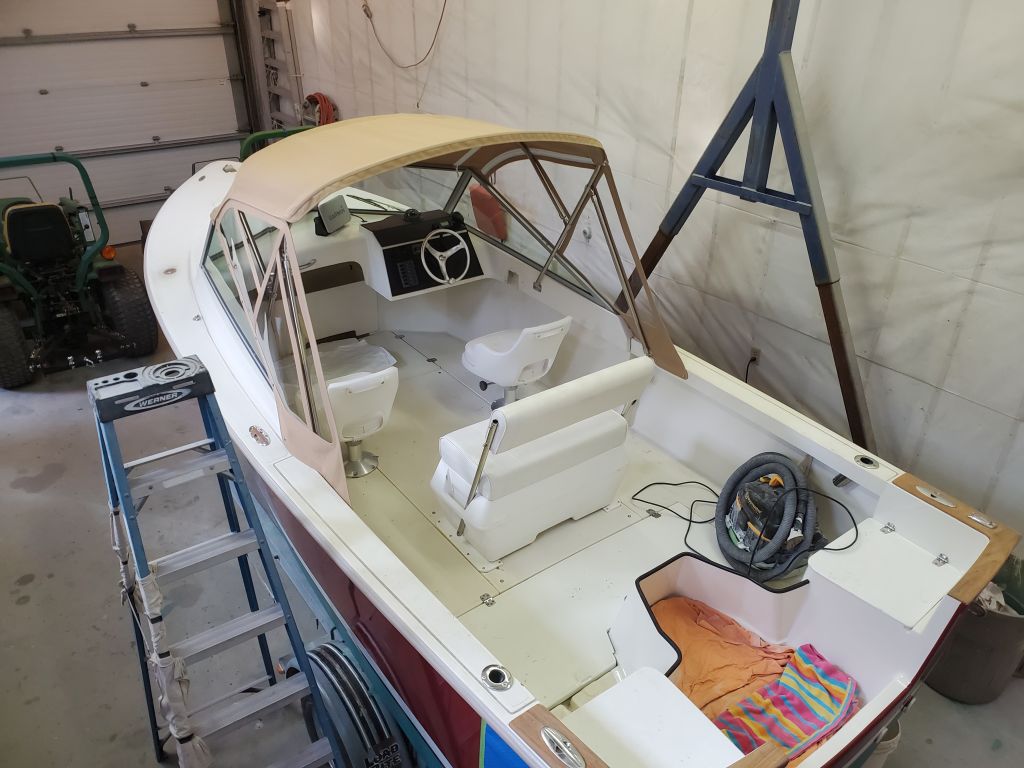
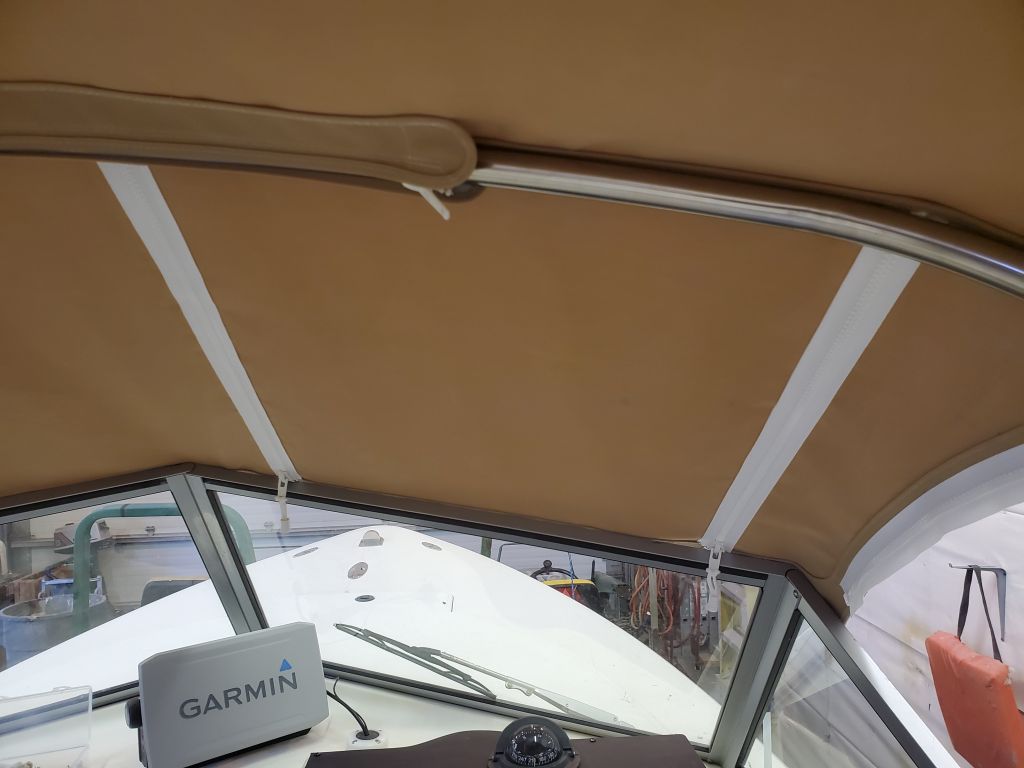
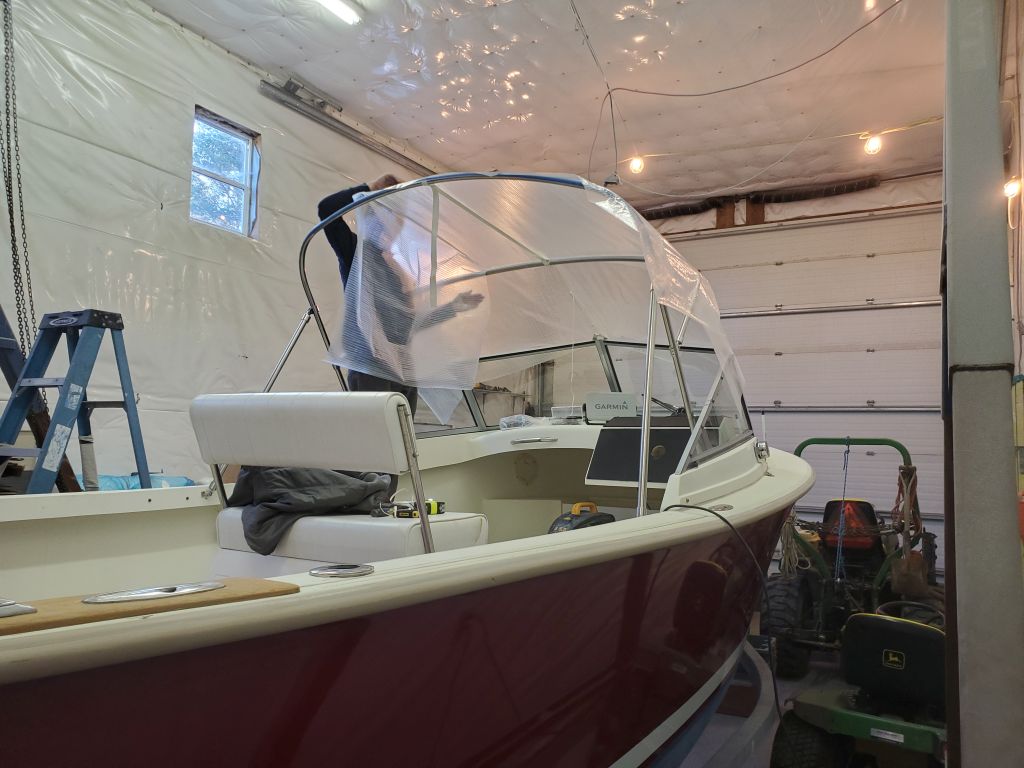
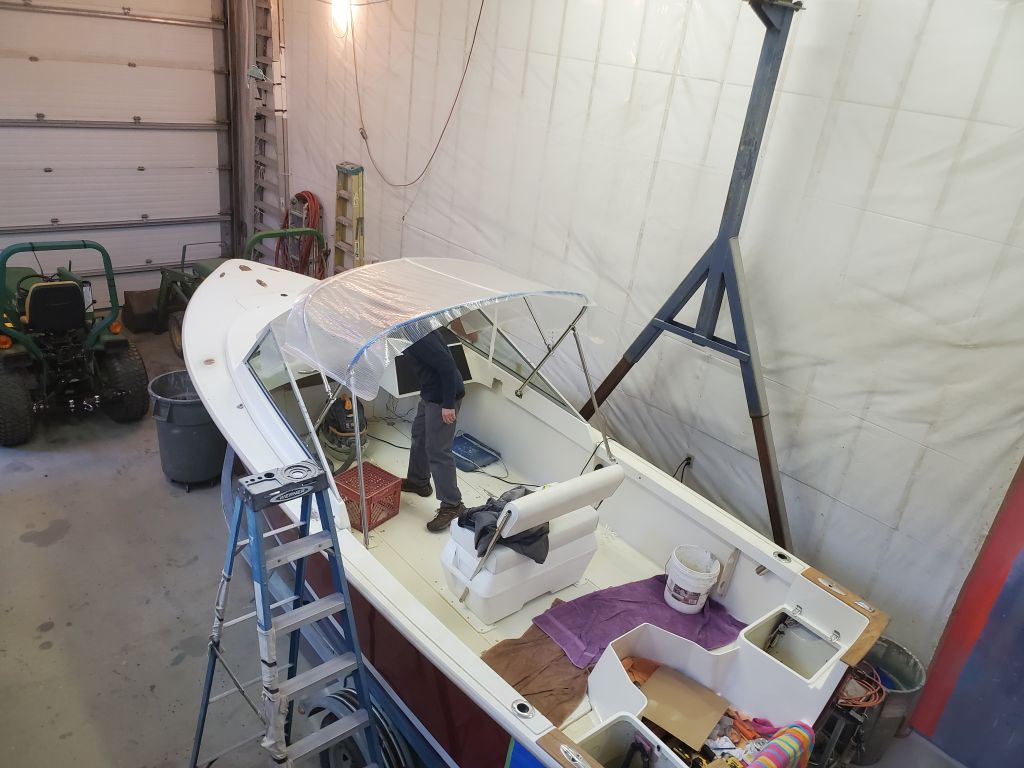
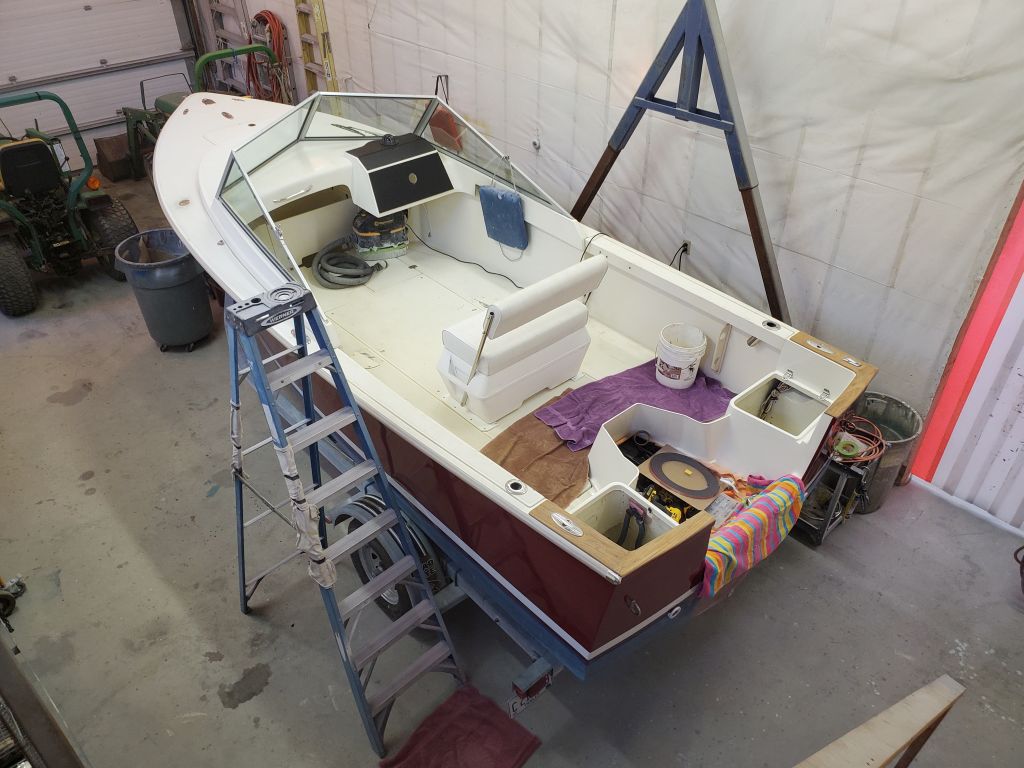
The final step in this project was finishing up the new canvas installation with the side curtains, which Jason had built over the past several days and now installed permanently.


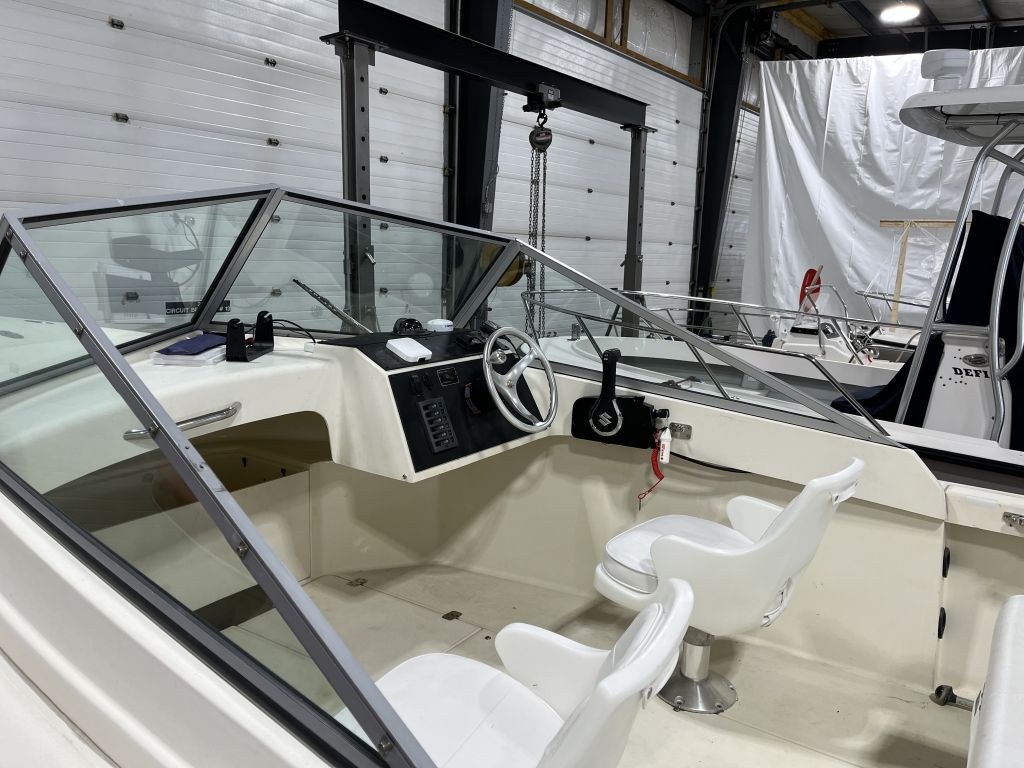
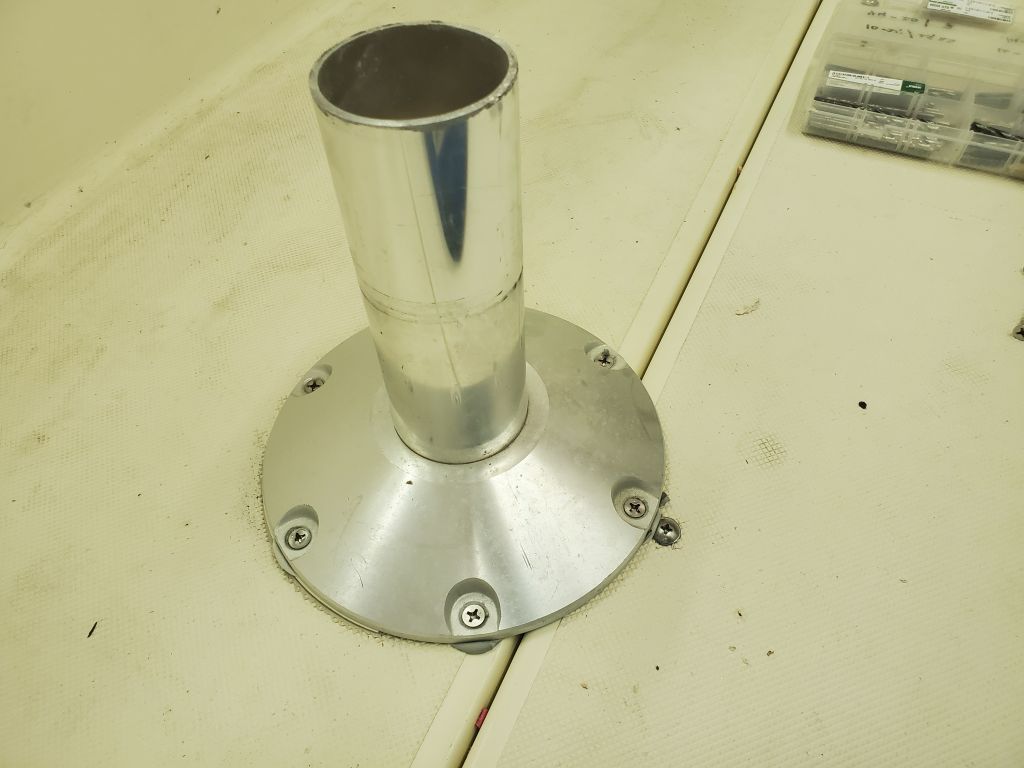
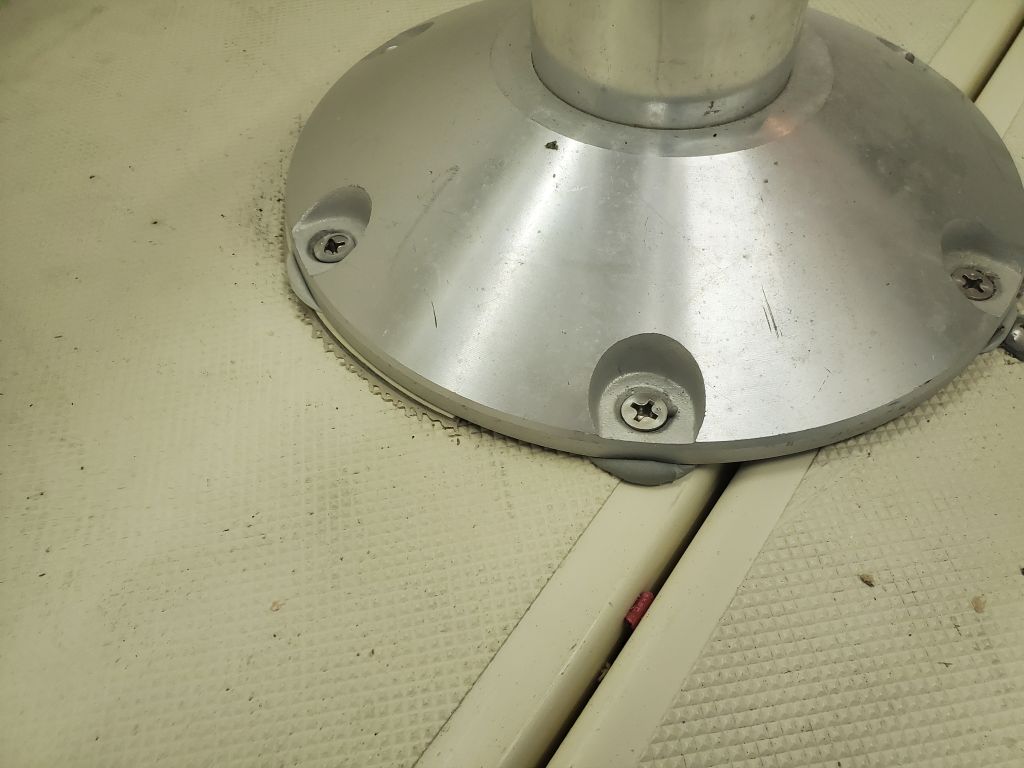
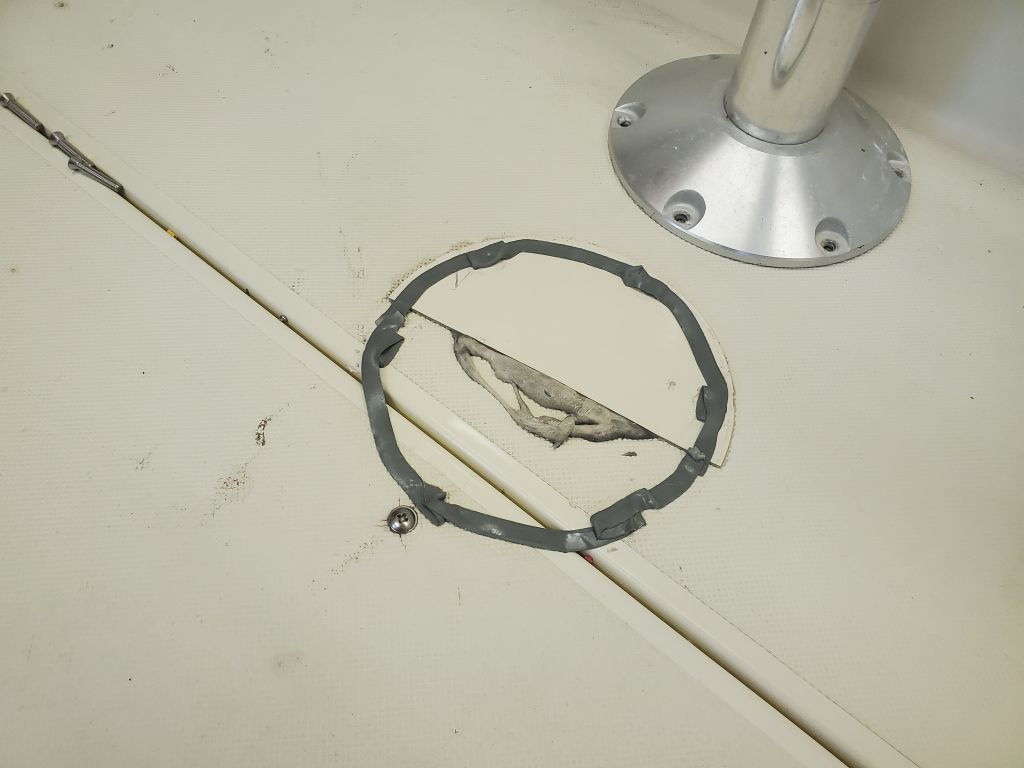
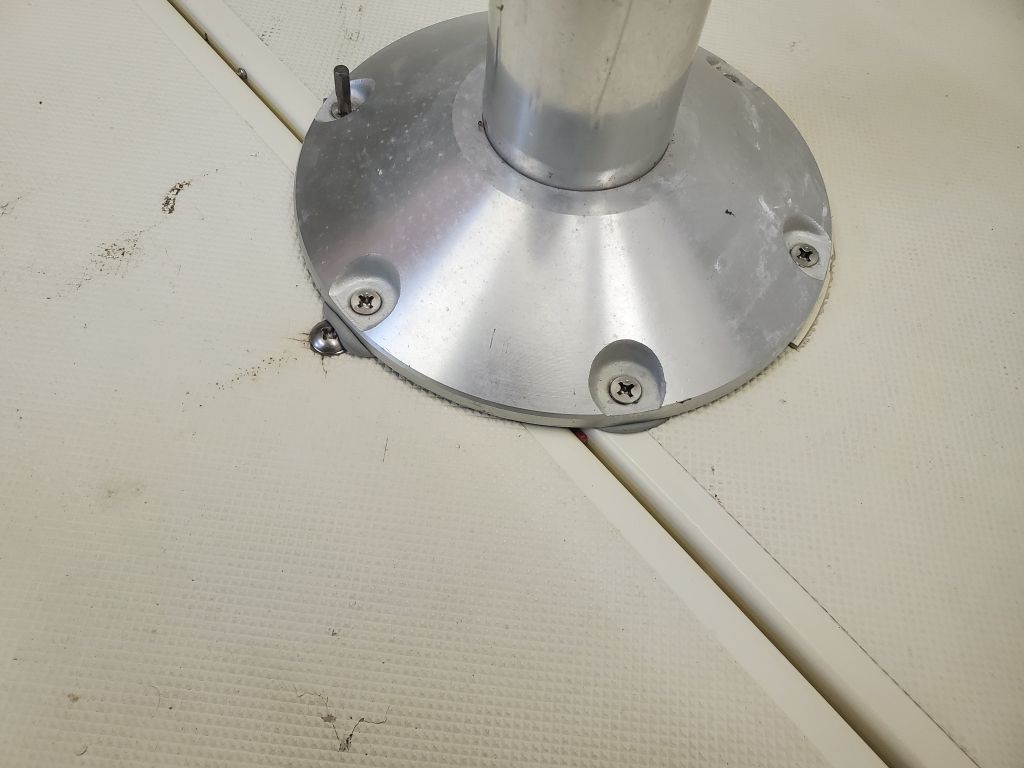
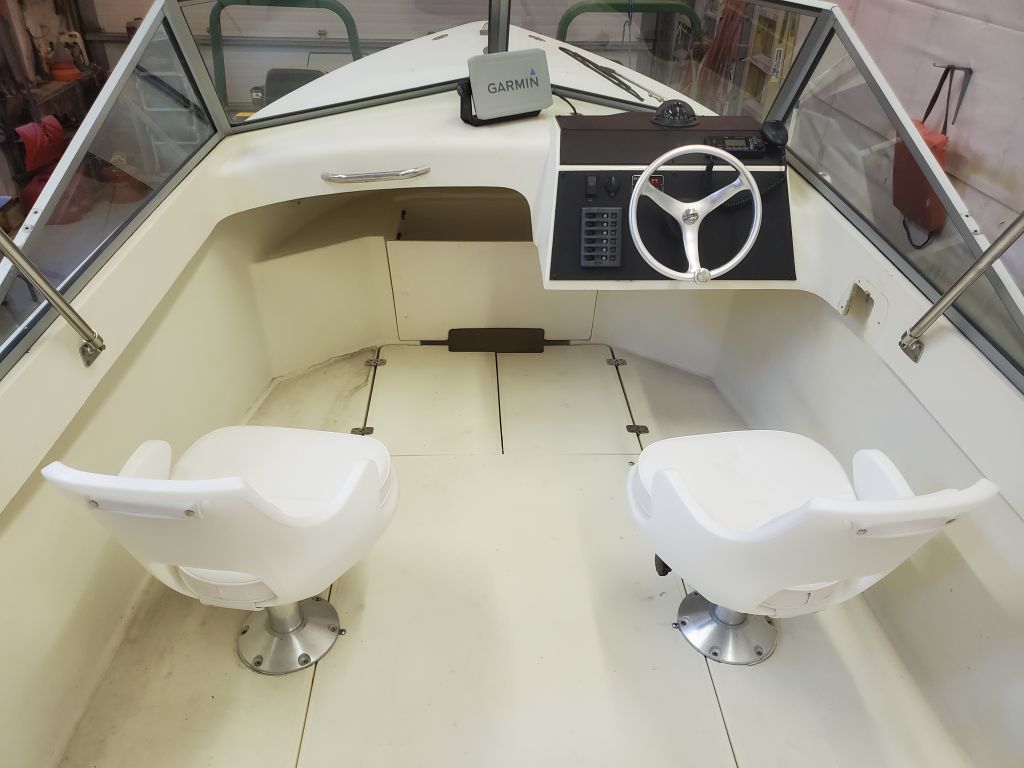
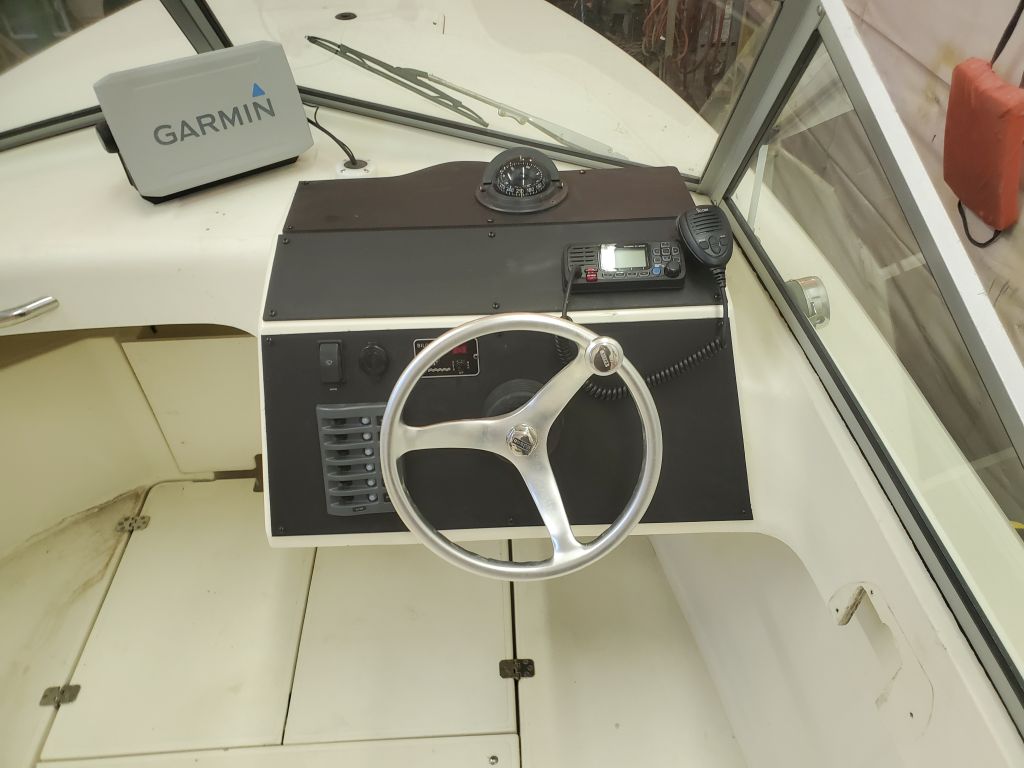
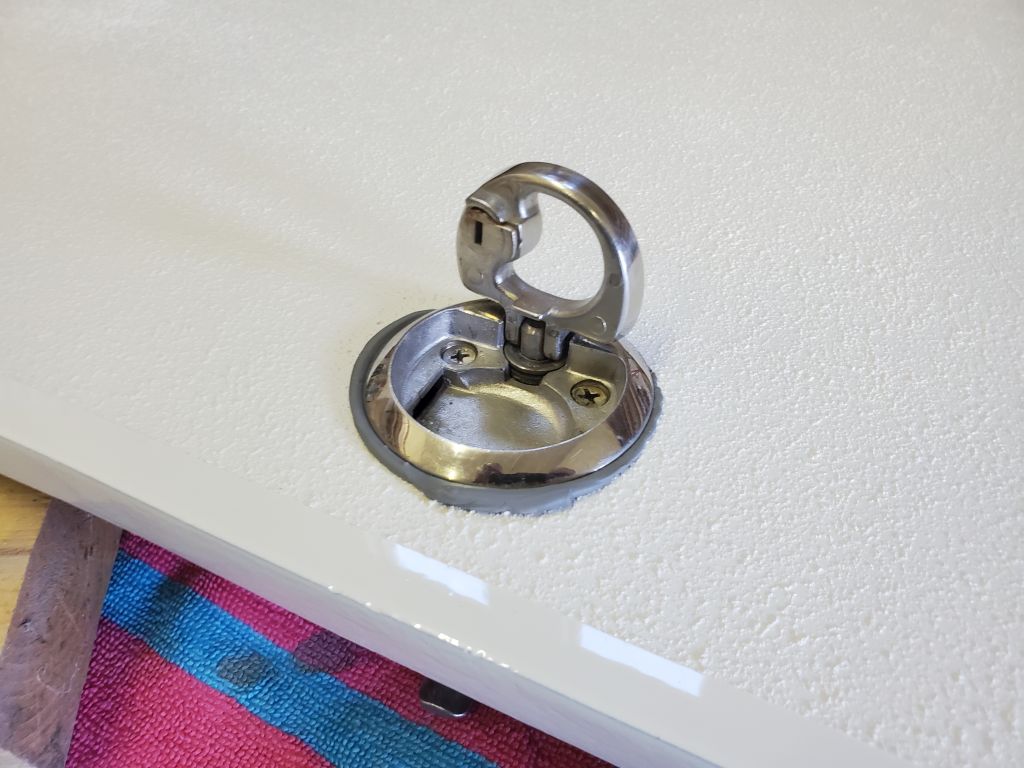
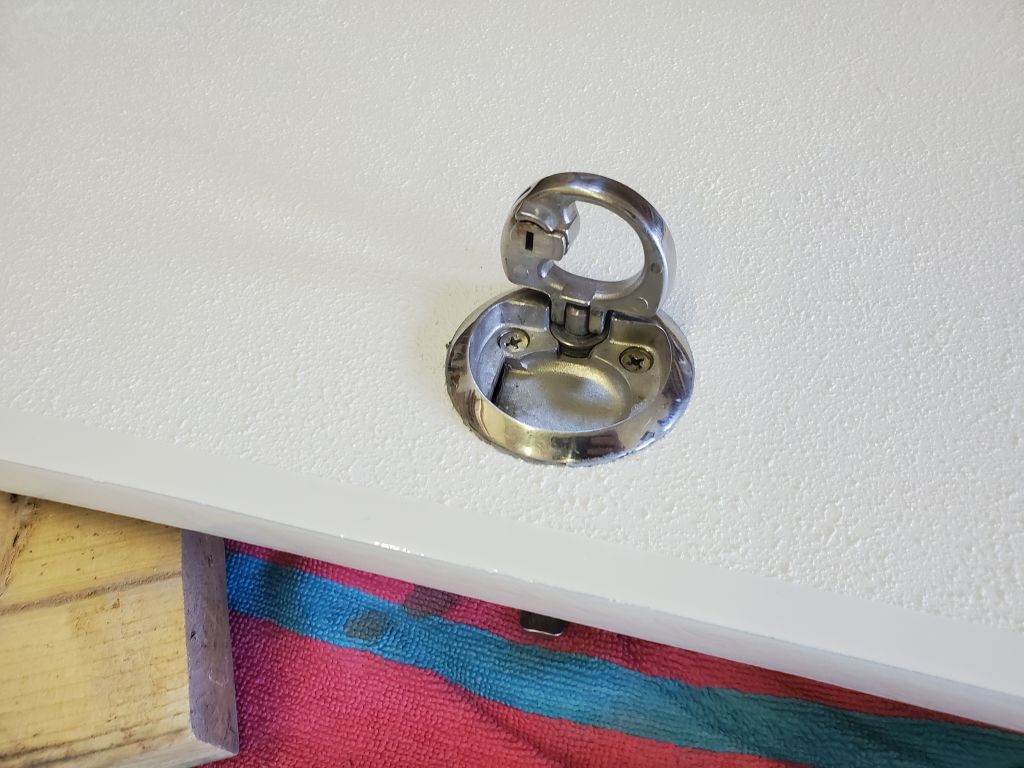
Wrapping up a couple final tasks on my list, I began with the two pedestal seats at the helm. These were straightforward to reinstall in their original locations (they’d been removed before the boat came to the shop) with new fasteners and sealant. The helm chair to starboard was missing its plastic bushing, so I ordered a replacement.

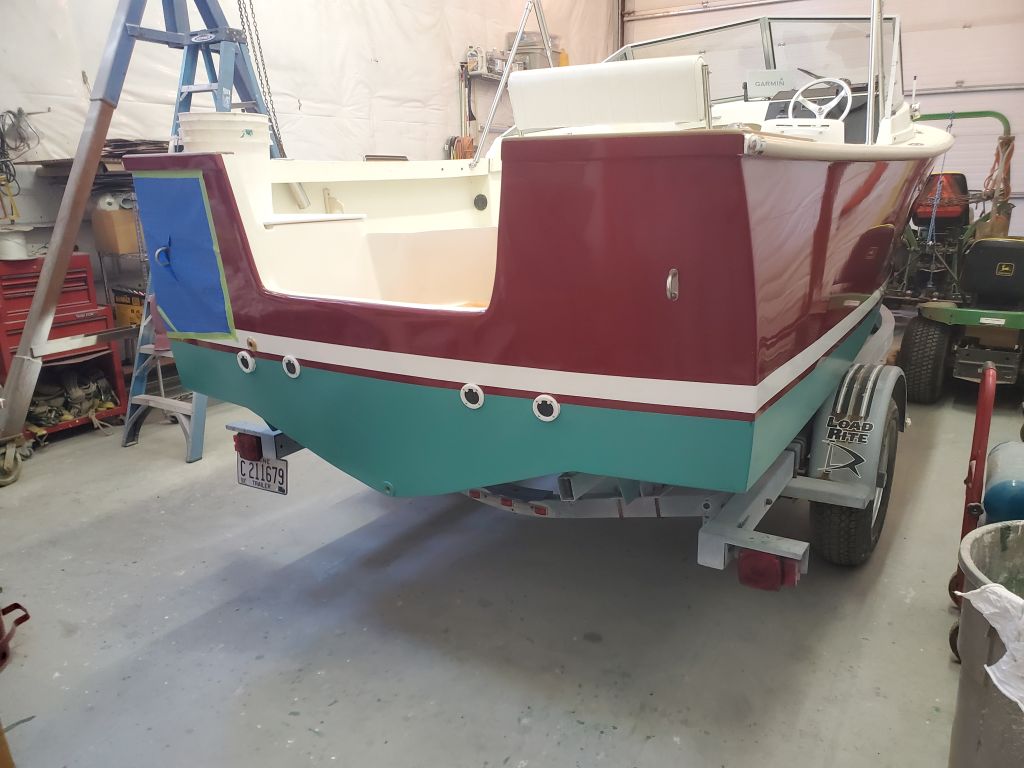
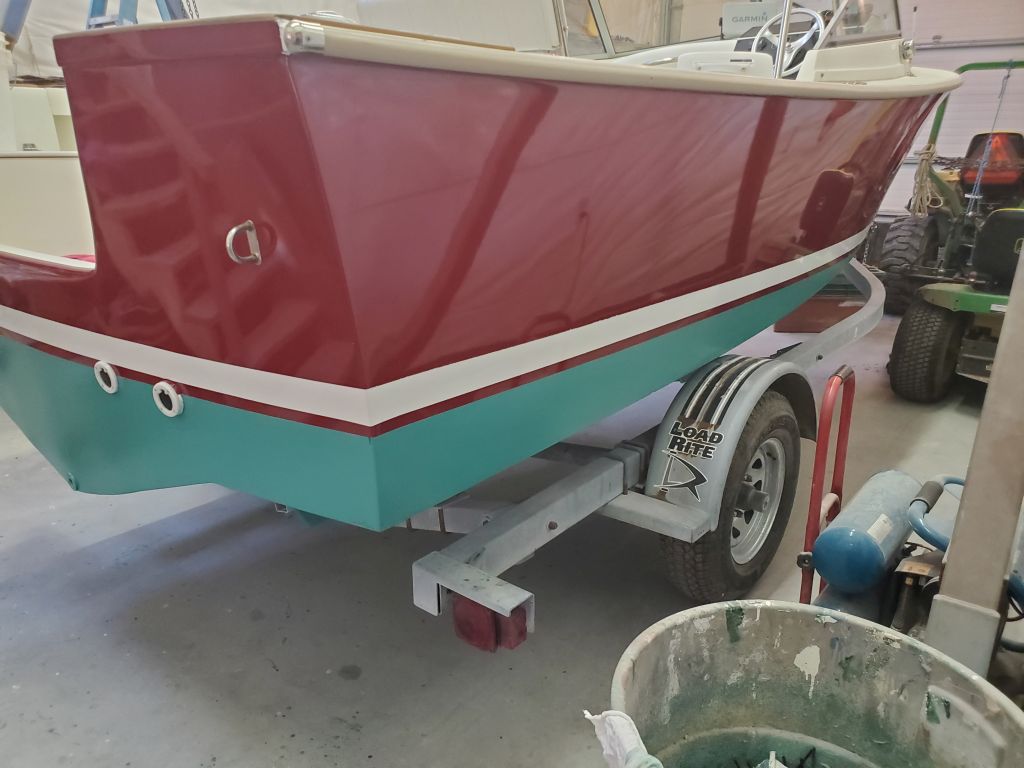
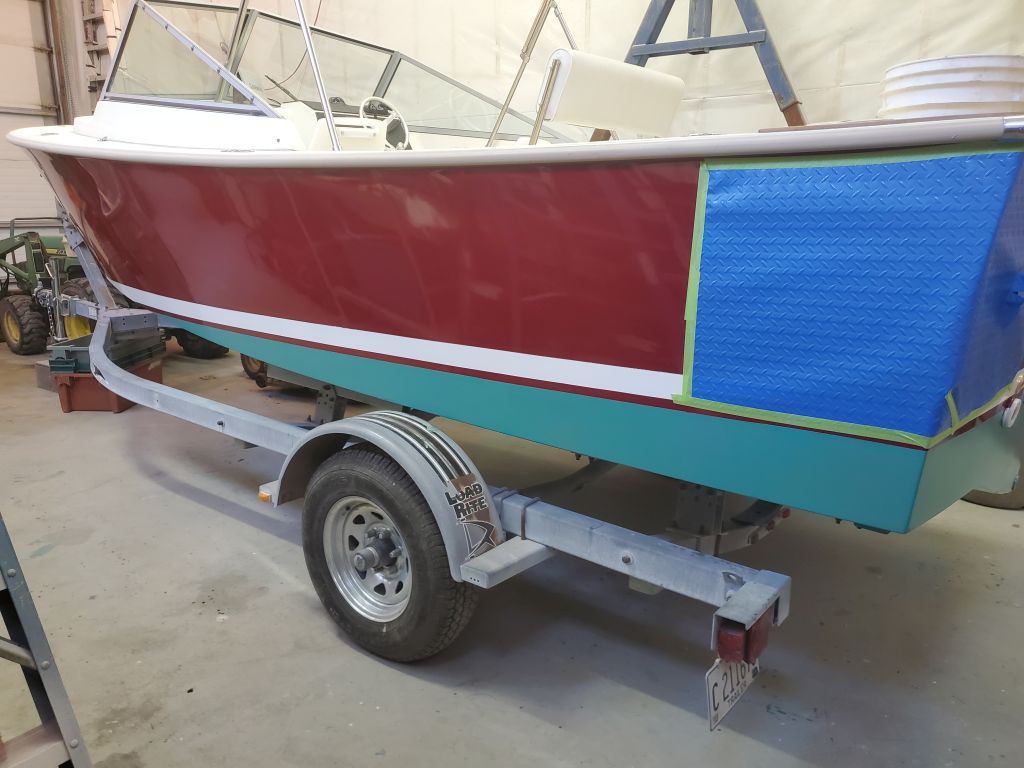
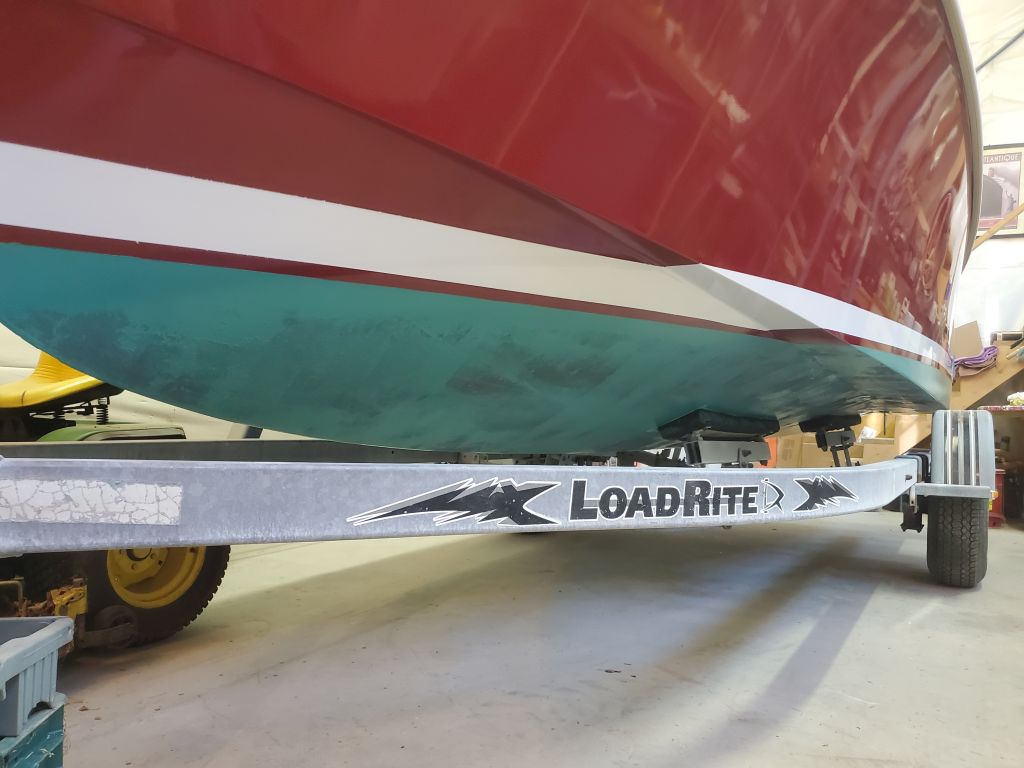
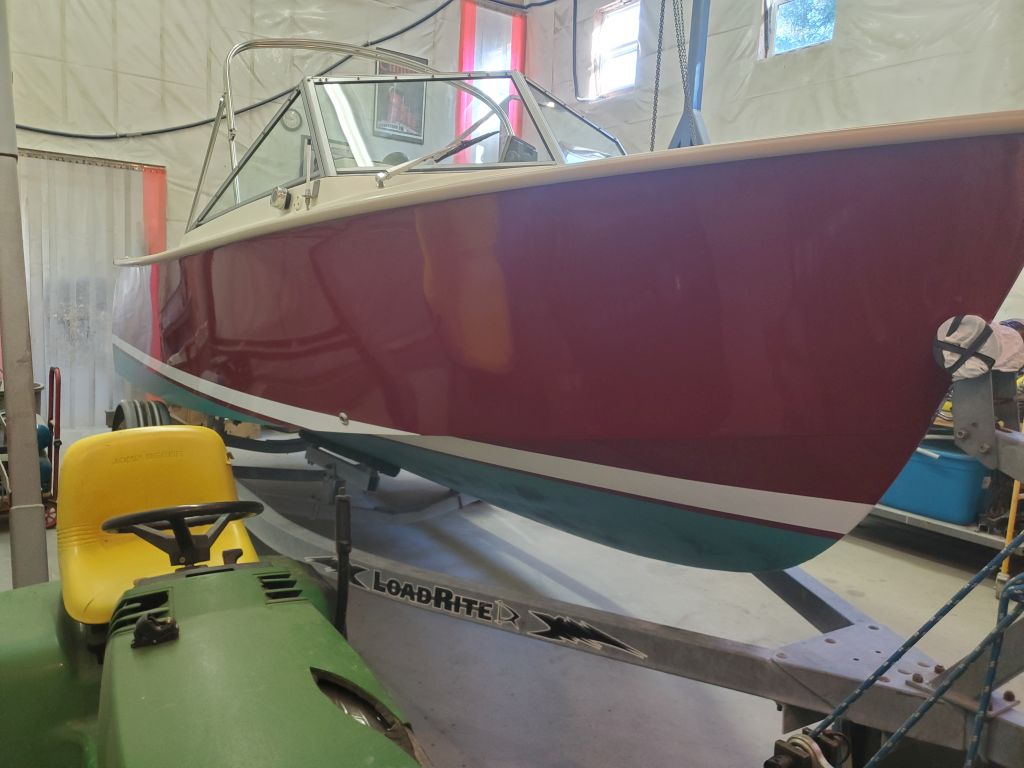
Afterwards, I masked off and painted the bottom. The owner selected green bottom paint, and this finished off the boat’s new appearance nicely. The blue plastic on the port quarter is there because the passageway there is narrow and frequently transited, so this simply provides some protection for the hull paint for now.

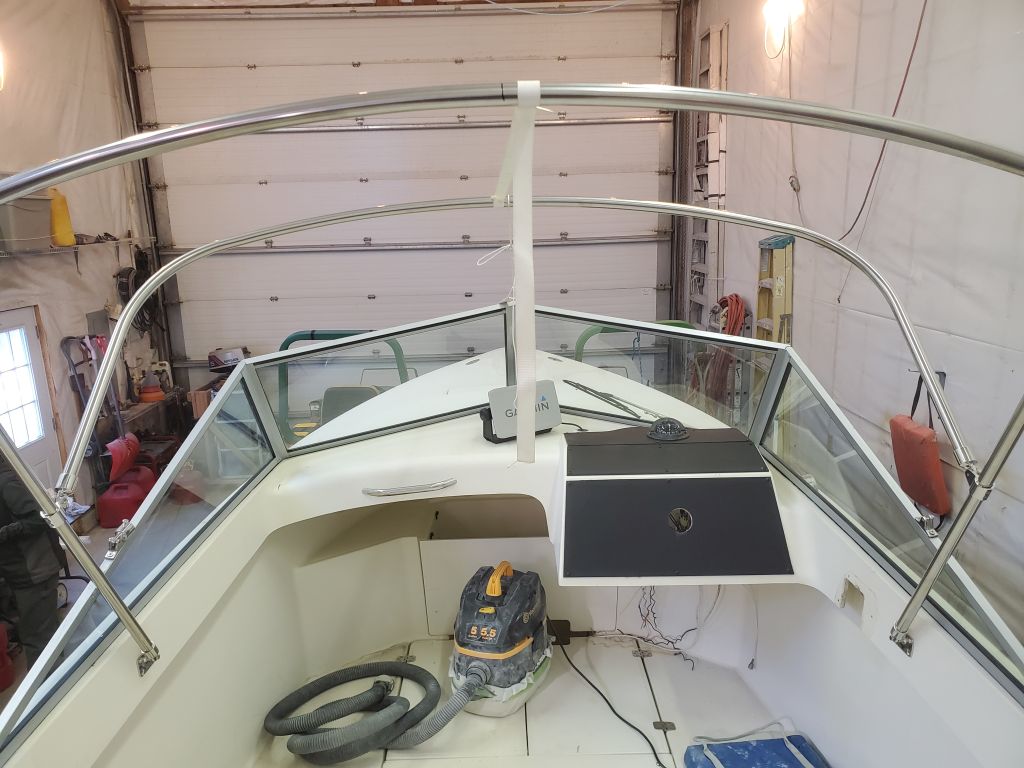
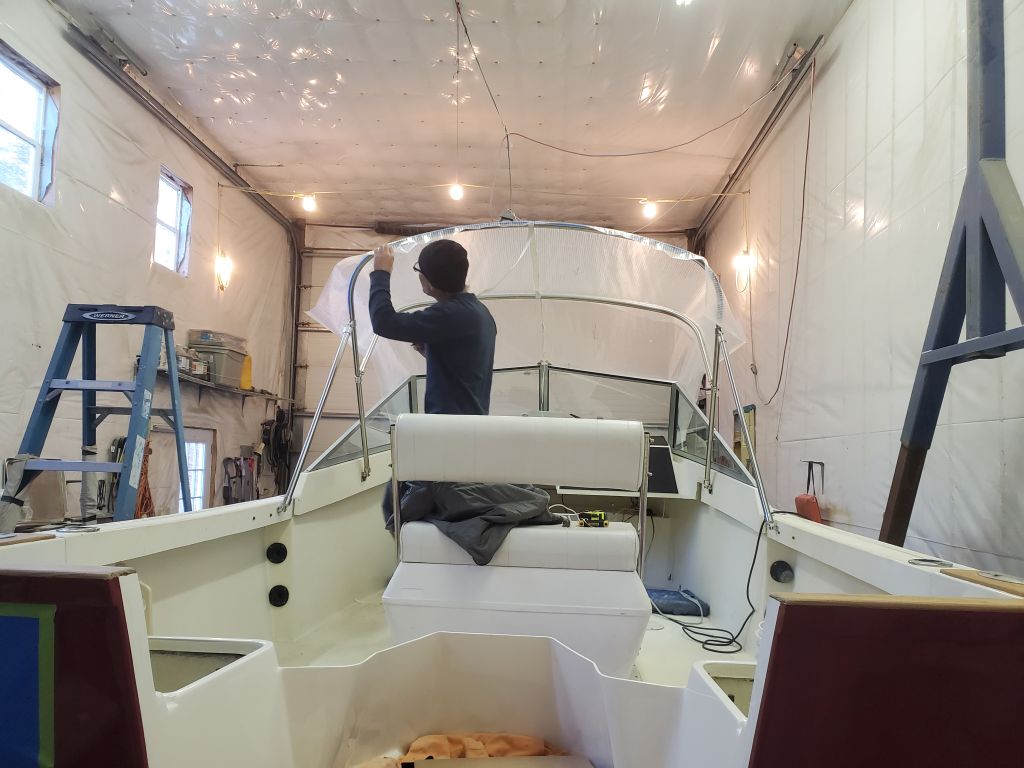
Later, Jason the canvas contractor was back with the new top, which he’d patterned earlier in the week. The top included a zippered panel over the helm station to allow the operator to poke their head through the canvas if standing was desired. With the top fitted, Jason could make the patterns for the side curtains, which he finished in my absence as I had to leave on other business. He anticipated having the new panels complete in the near future.


With that, the only task remaining on my list was to fabricate some trim for the top edge of the new outboard well (forward end), which I’d take care of sometime over the coming days.
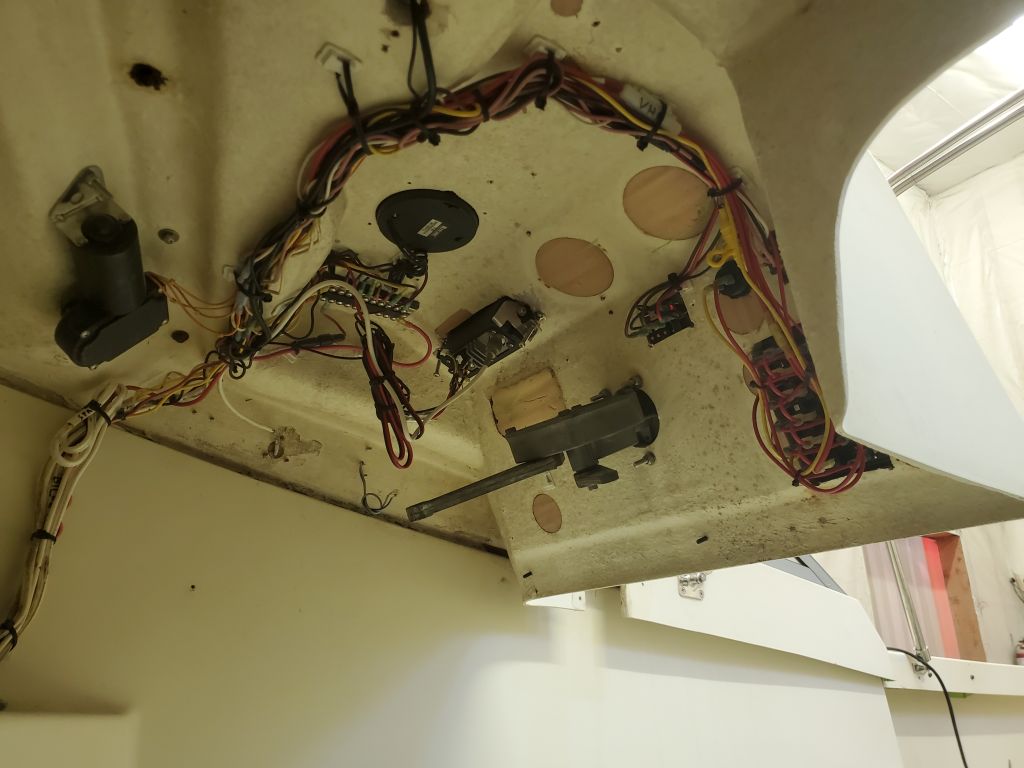
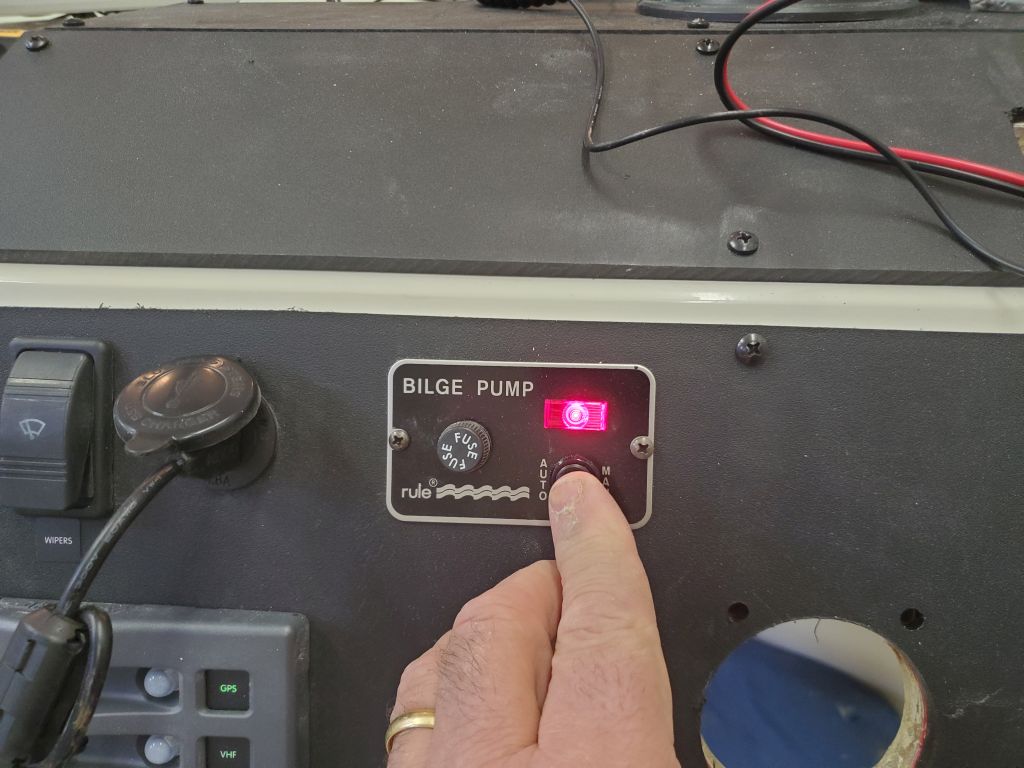
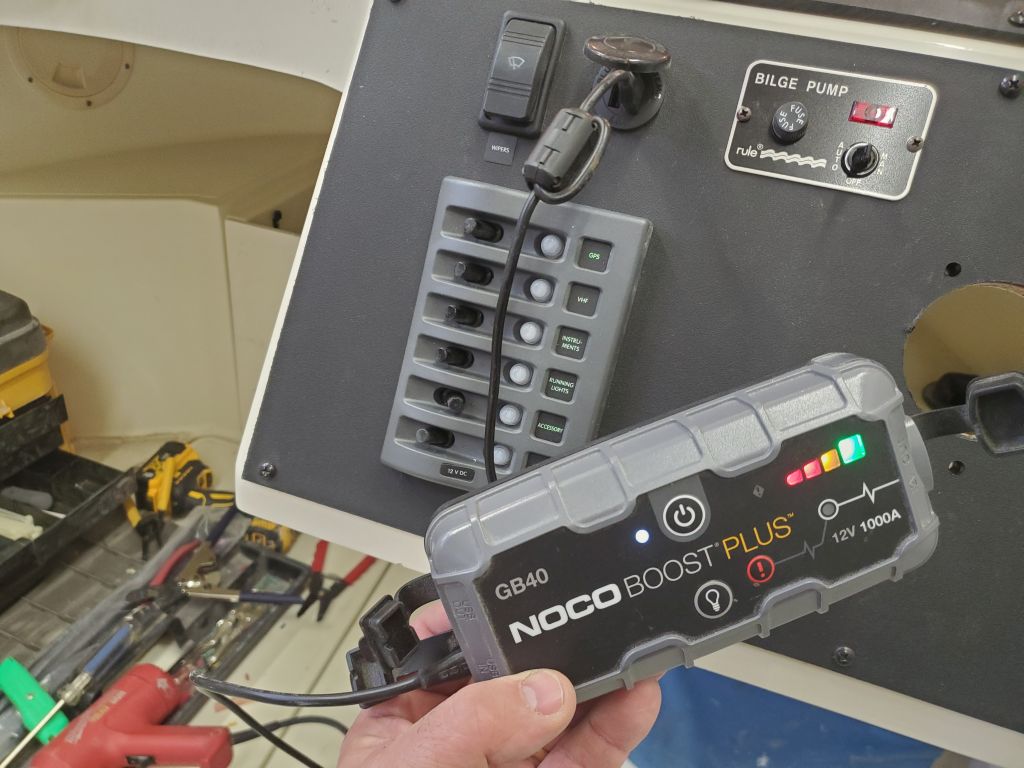
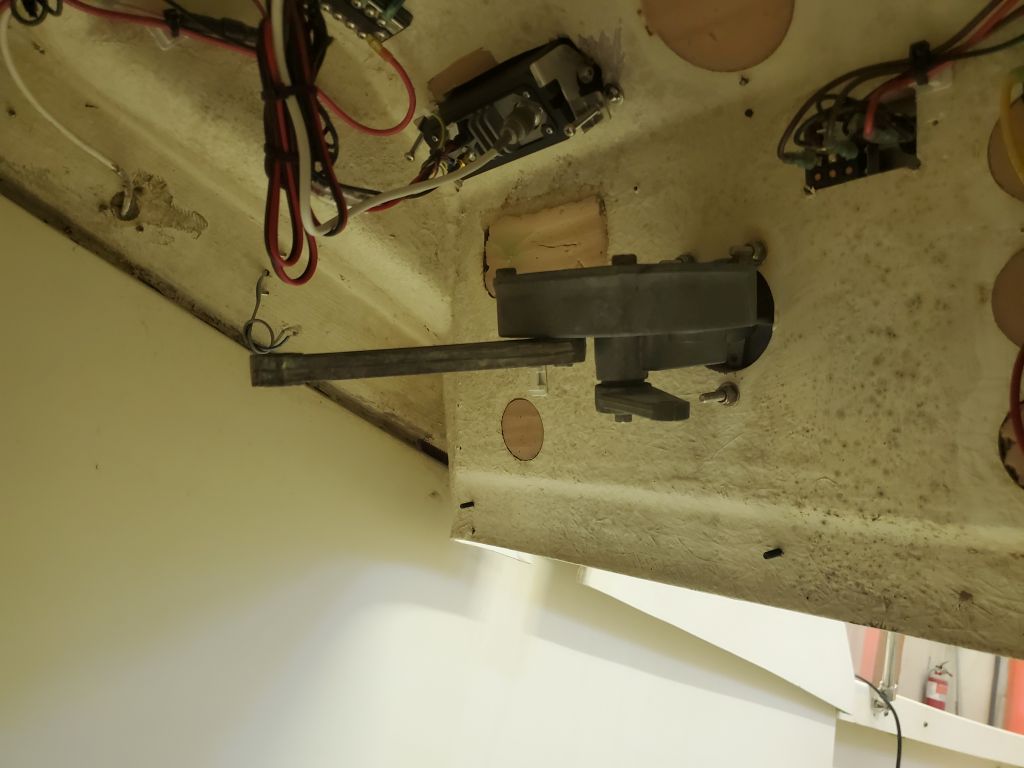
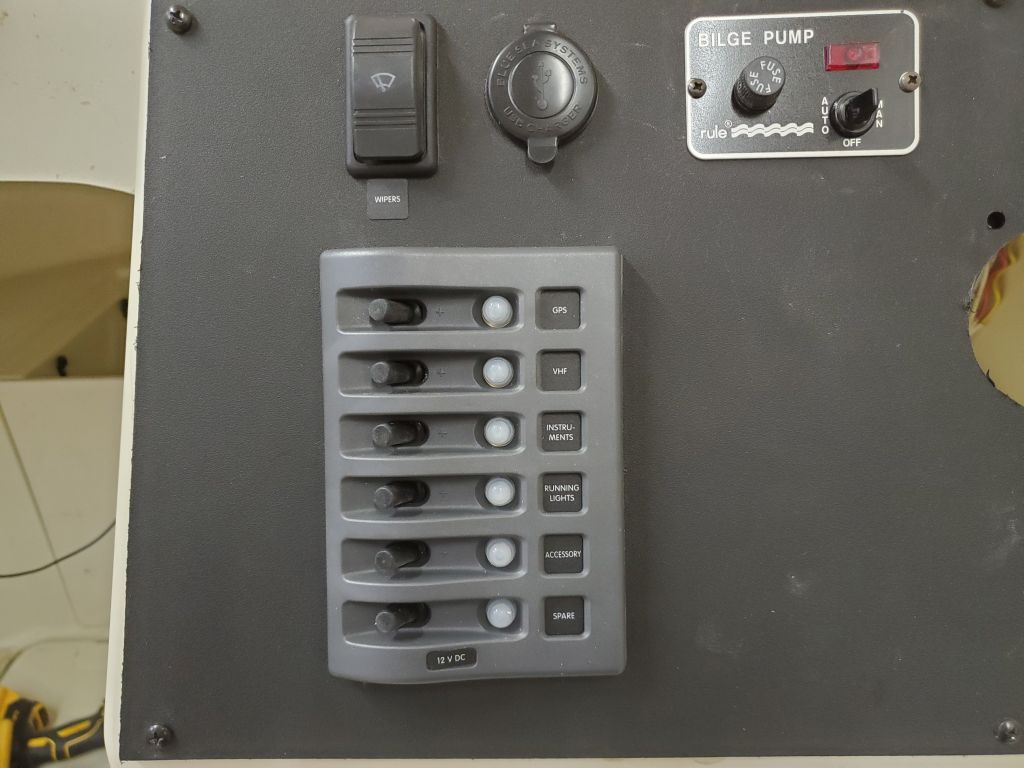
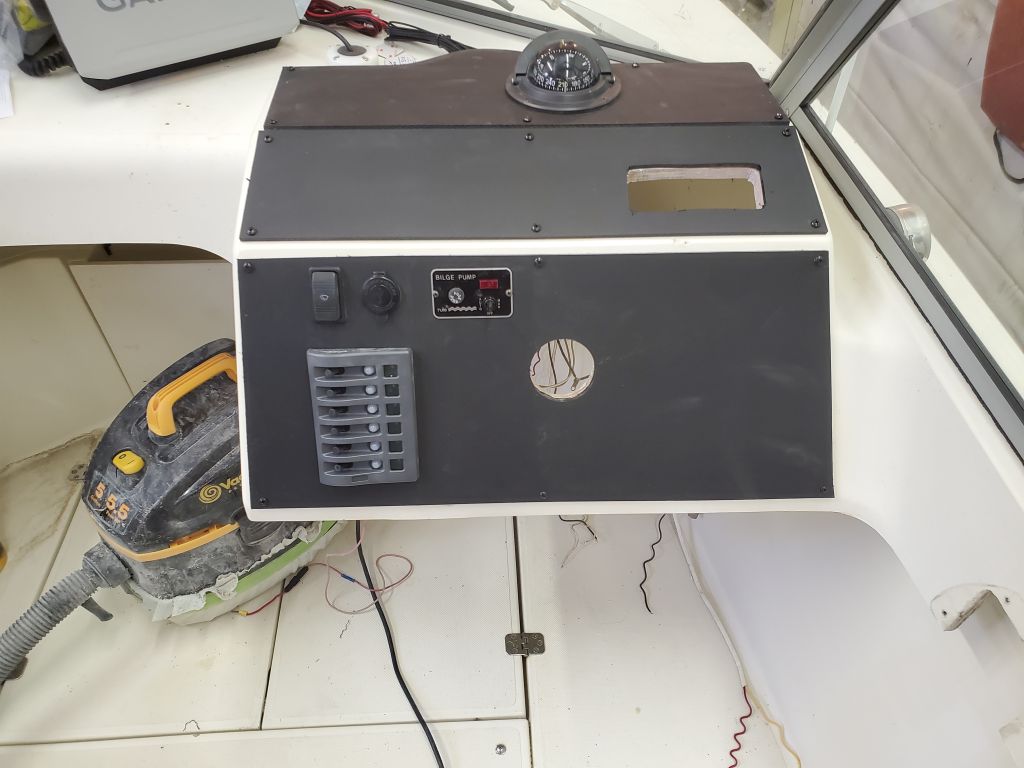
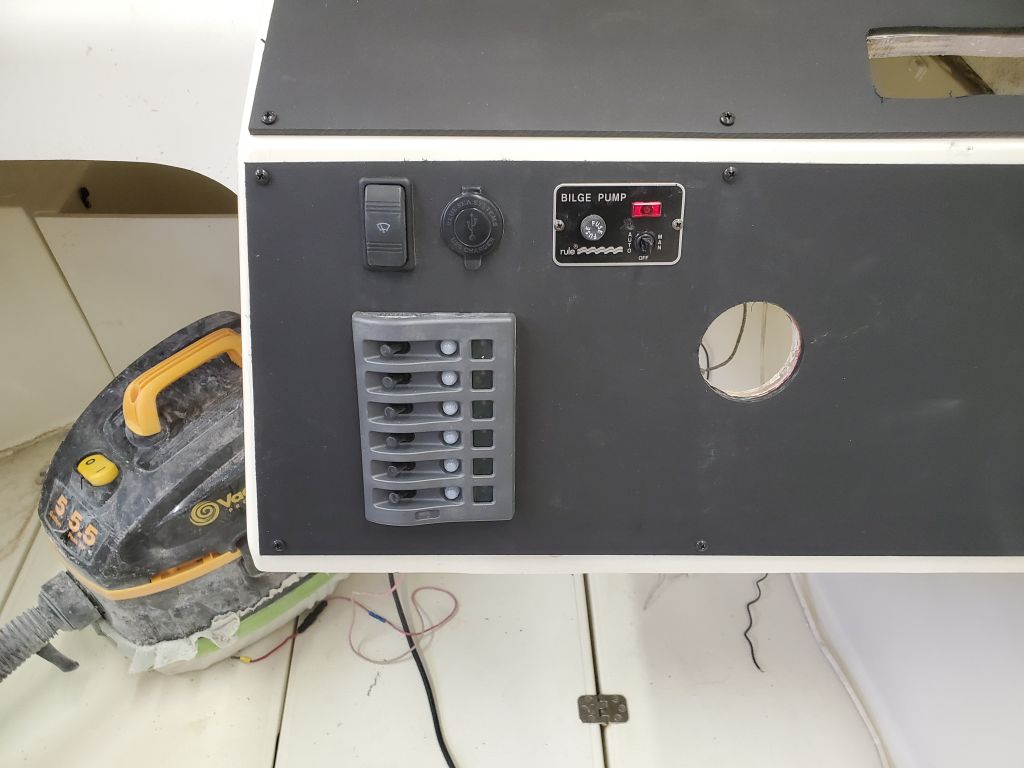
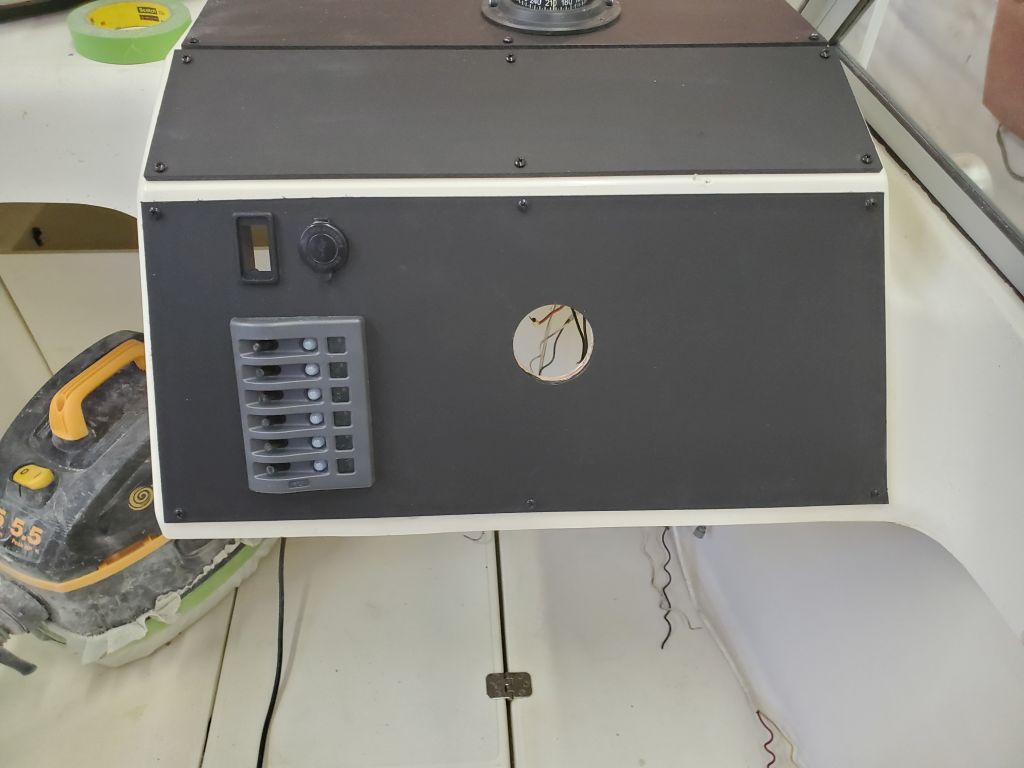
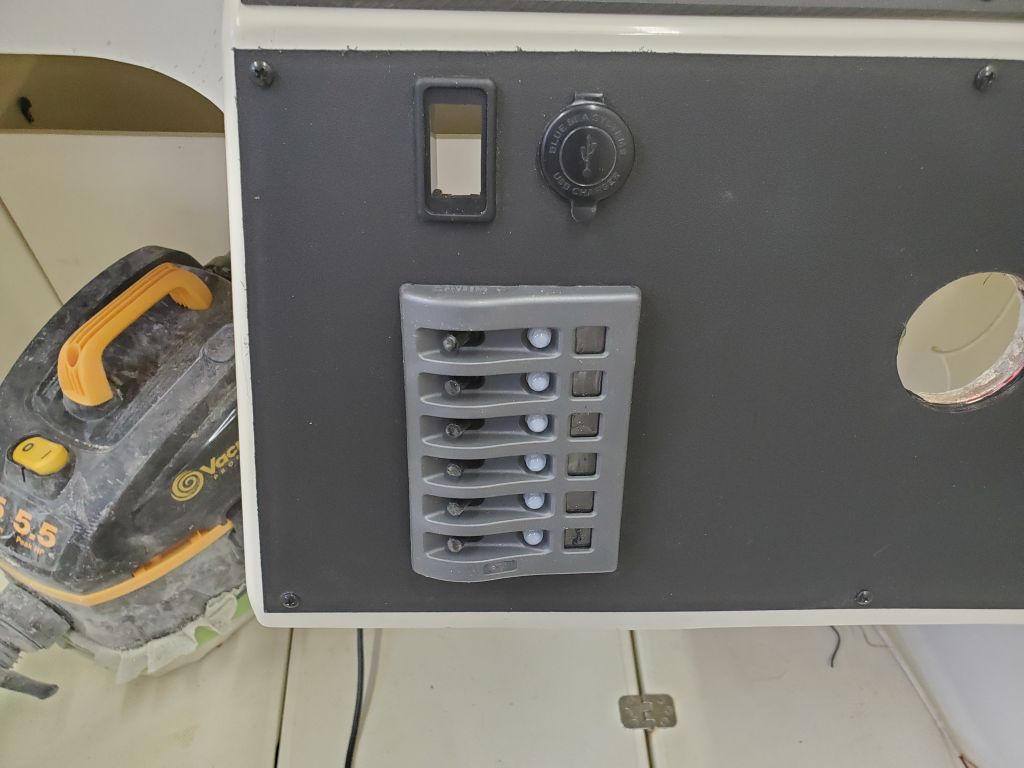
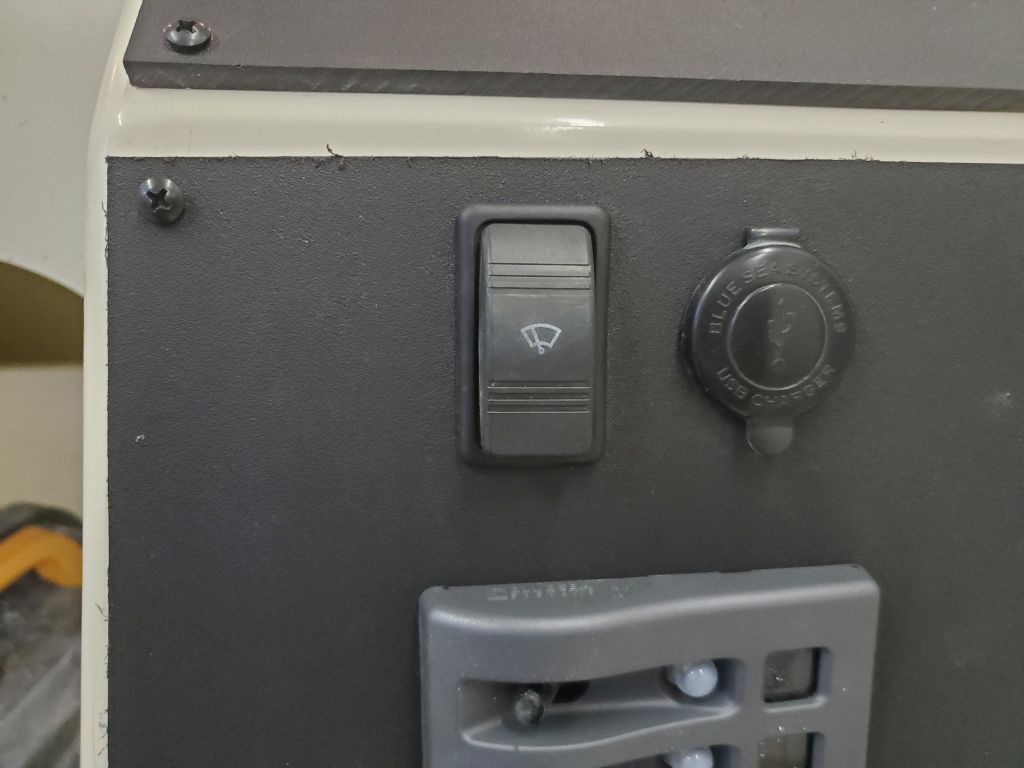
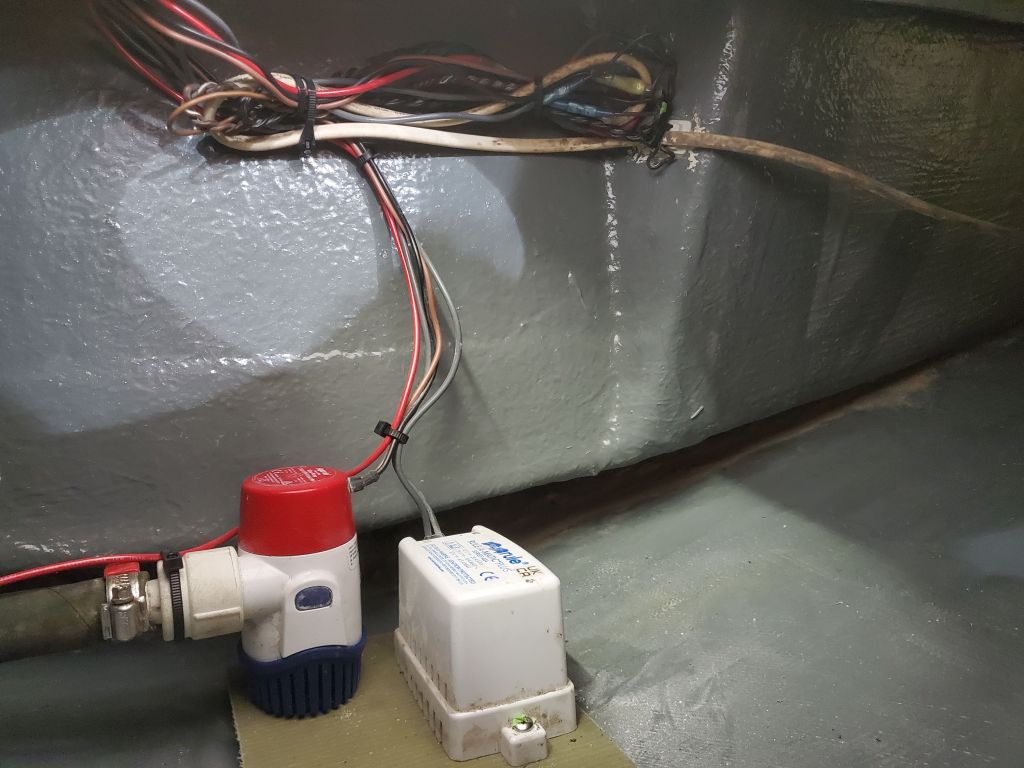
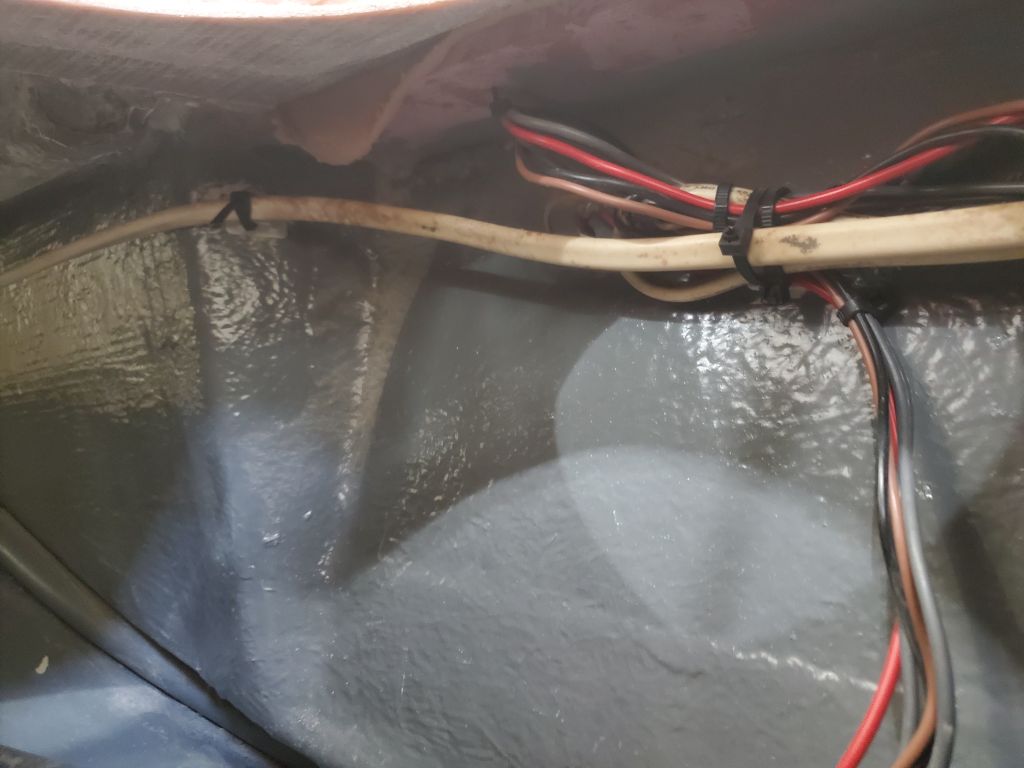
In a short afternoon at the shop, I finished up the final wiring tasks beneath the helm console, including permanent installation of the VHF radio, and secured the wire bundles as neatly as possible. I corrected a minor wiring issue with the bilge pump switch to activate the pump properly. Earlier, I’d failed to test the USB outlet pair in the accessory outlet, so now I grabbed the only thing I could quickly find with a USB power plug–my battery jump pack–and plugged it in to ensure the outlets were powered correctly.
With everything functional and now secured, I finished up work at the console by installing the original helm unit once more.

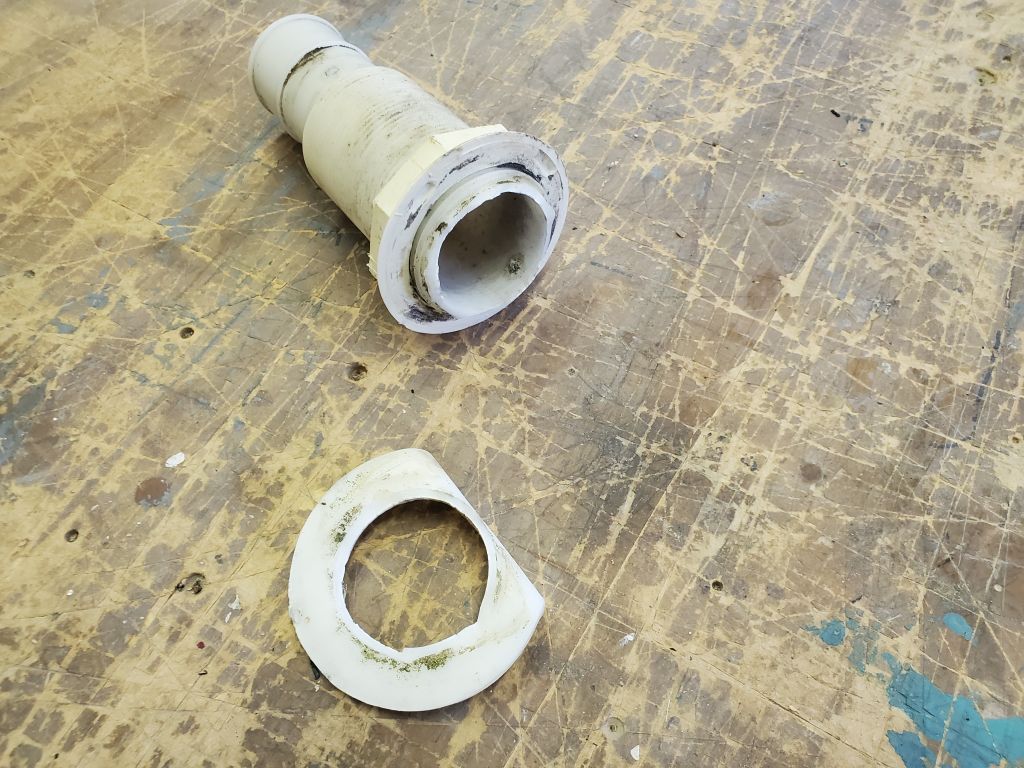
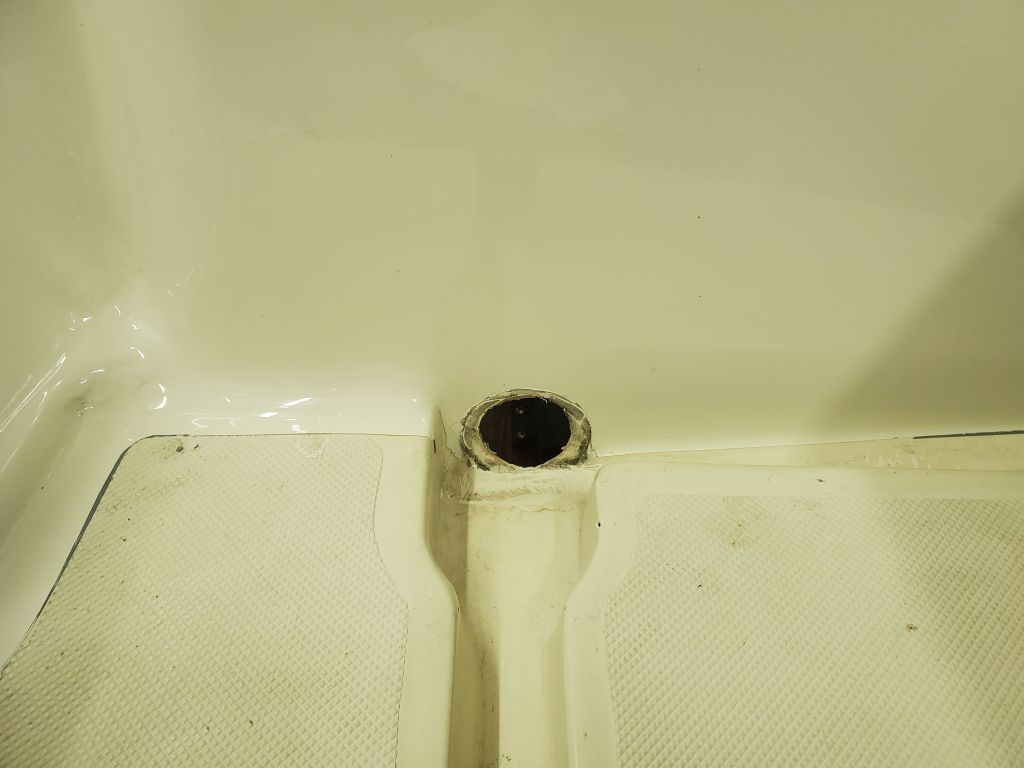
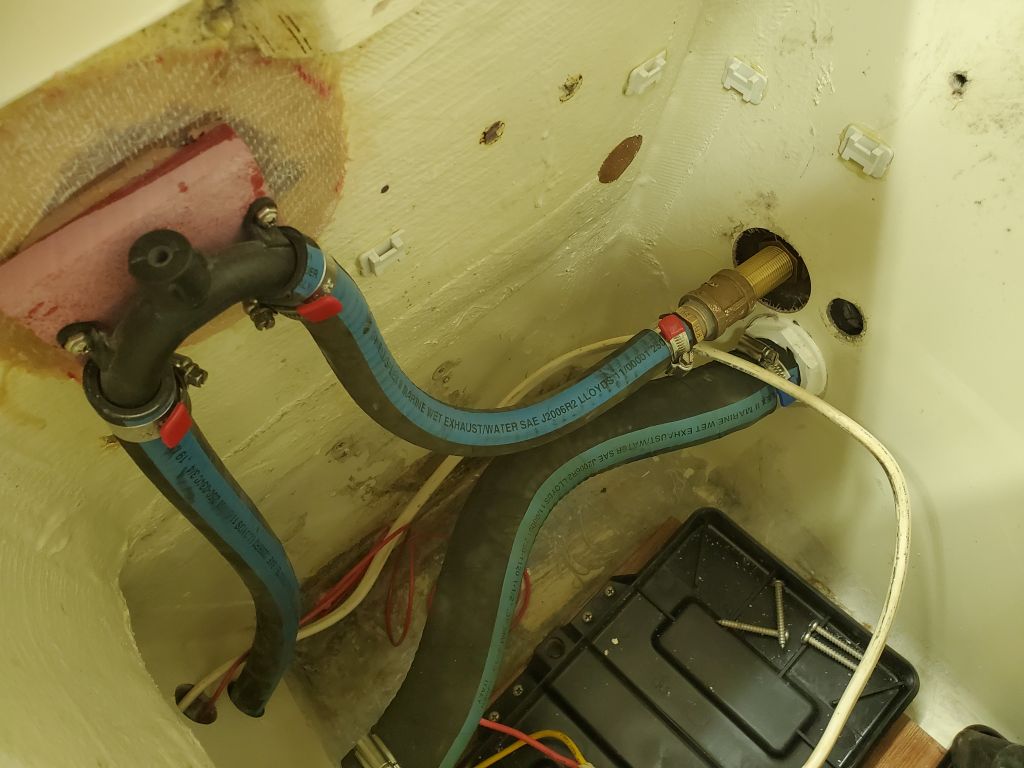
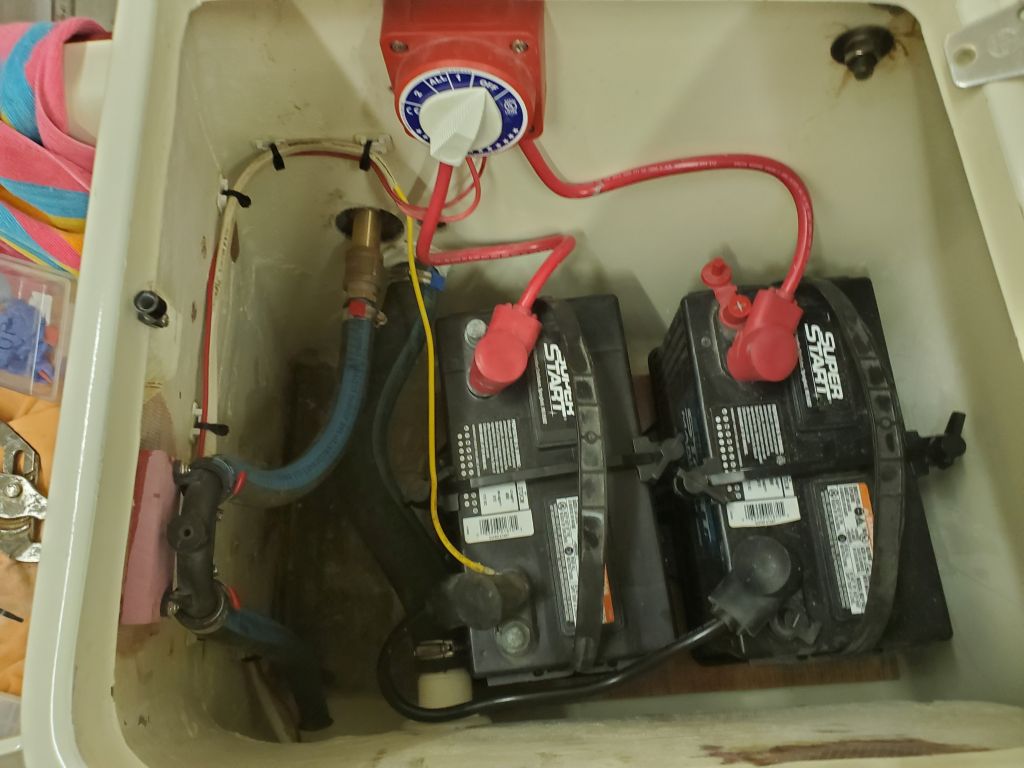
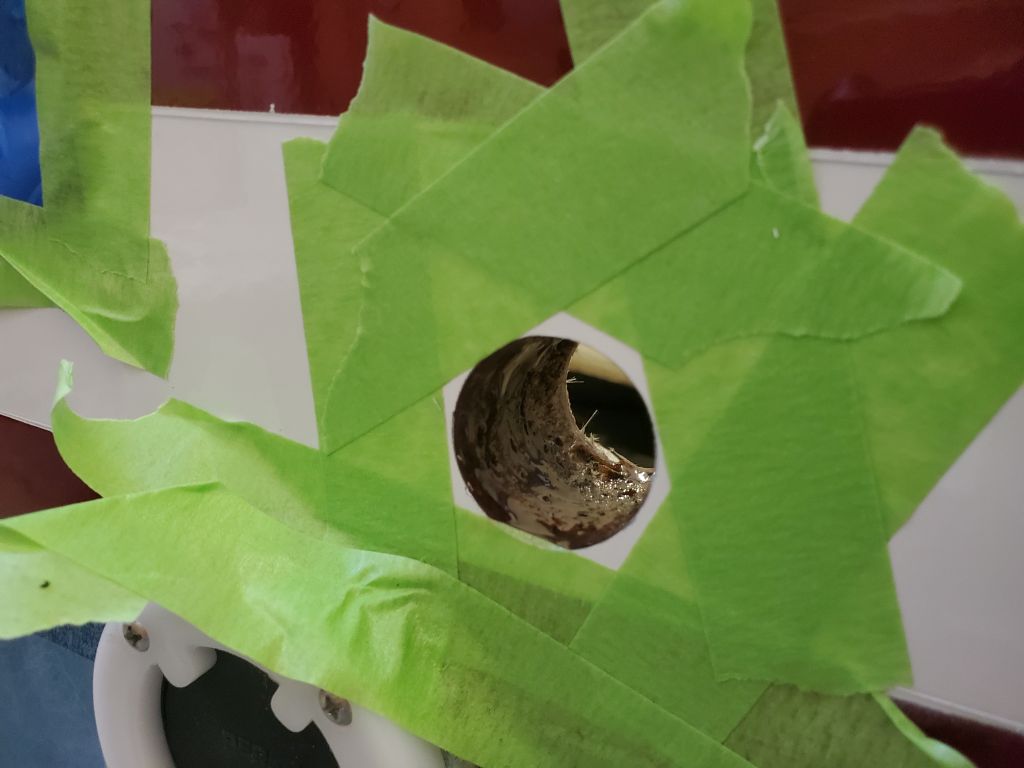
Earlier, I removed the port scupper hose, which led directly across the battery location and would interfere with the new battery trays. Of course in the process of removing the hose the fitting on the cockpit end broke, so I ordered a replacement Marelon fitting, which was now on hand. I modified the mushroom head as needed to fit flush against the molded channel where it was to be placed, then installed the fitting with sealant. Afterwards, I installed a new drain hose, intentionally leaving an oxbow bend in the hose to help clear the stud in the battery tray system.


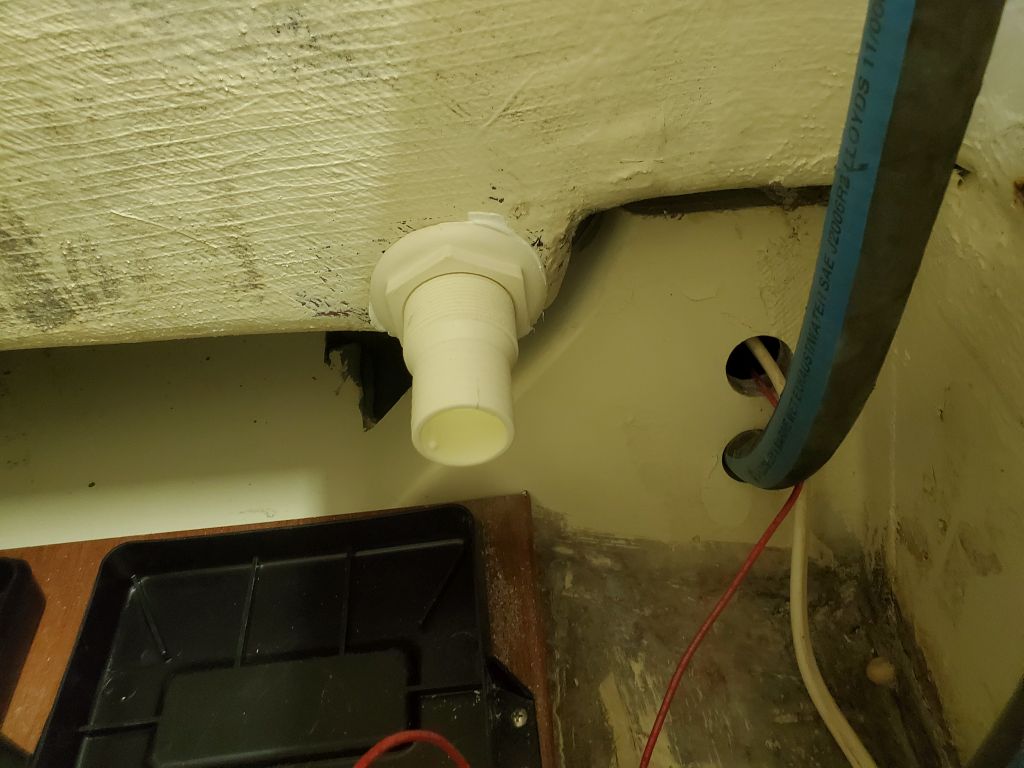
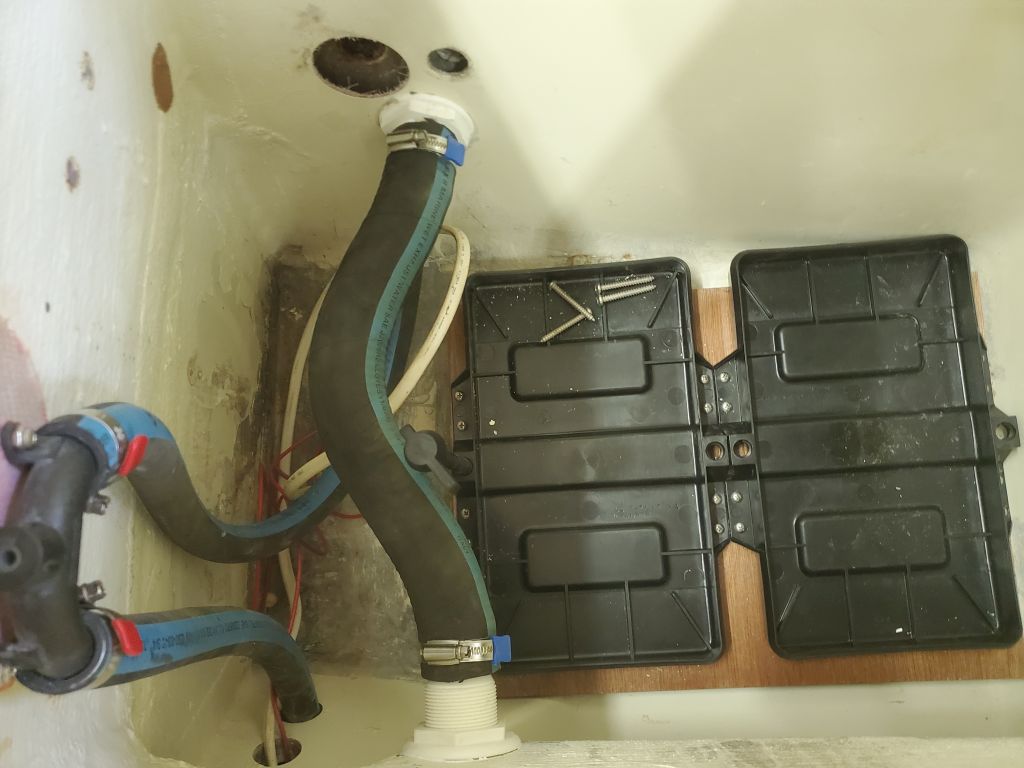
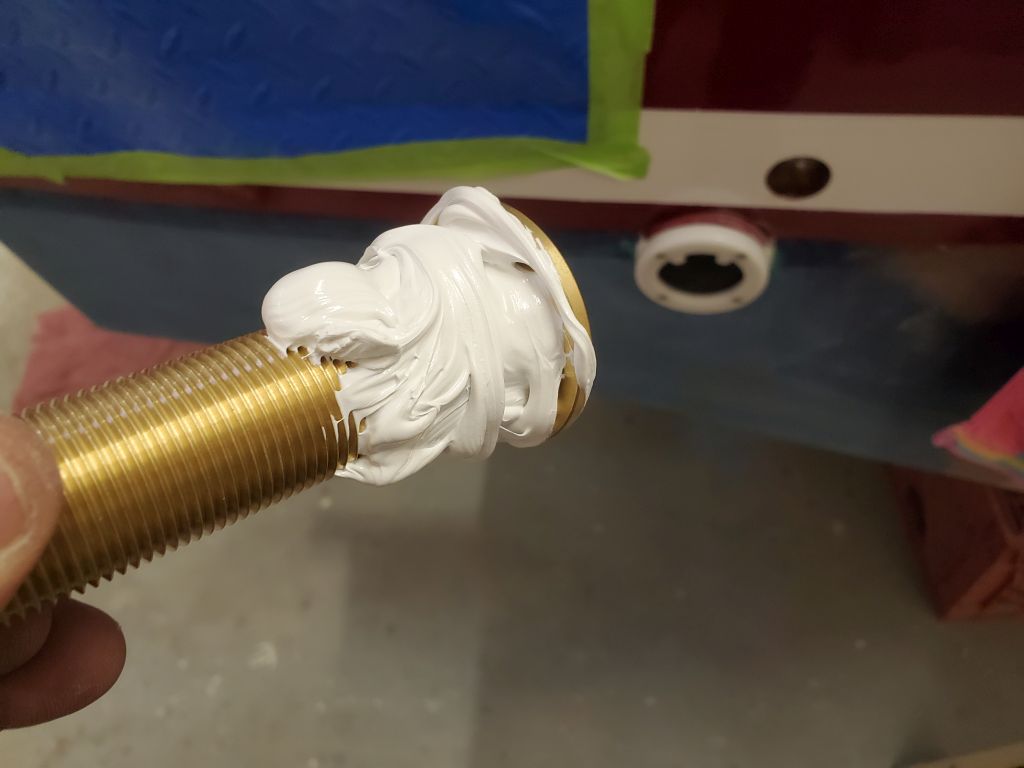
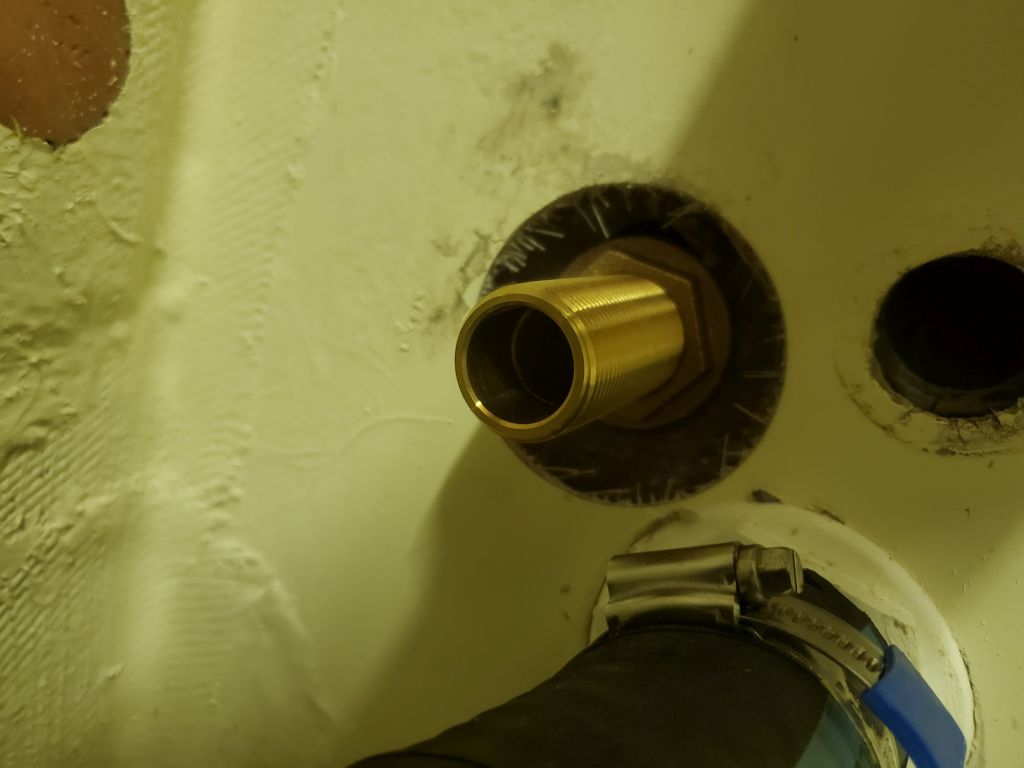
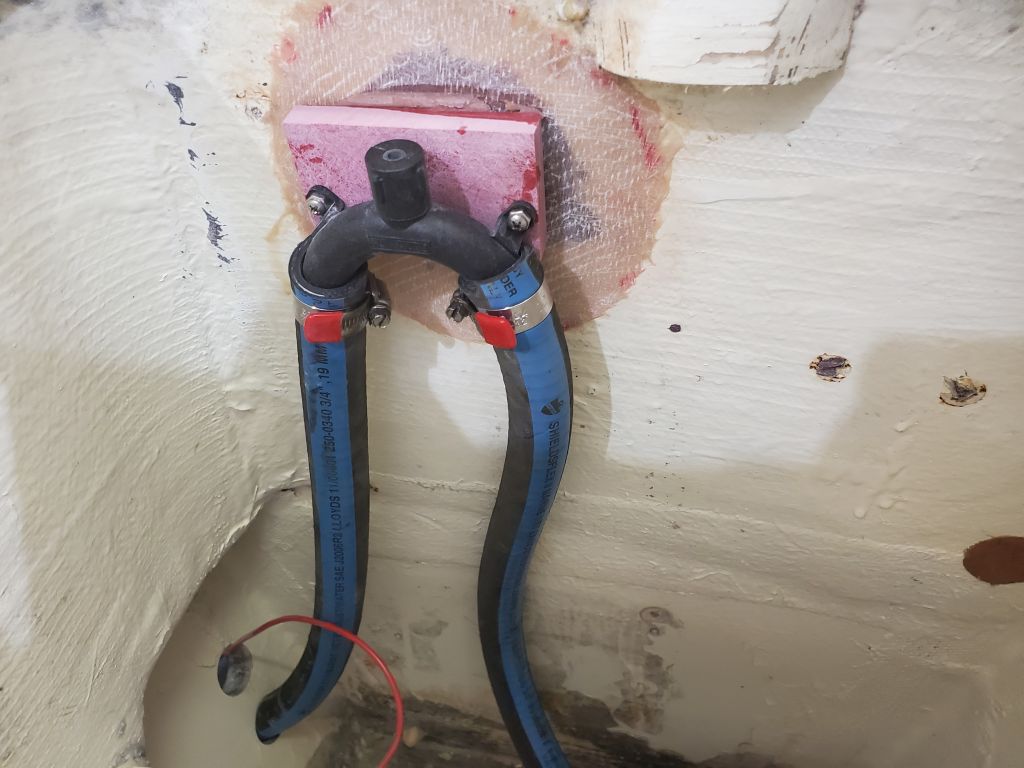
With a new long bronze through hull fitting on hand now for the bilge outlet, I finished up that installation, installing the mushroom fitting with sealant and its fixing nut, then threading on a collar and pipe-hose connector to make up the final connection for the bilge pump.

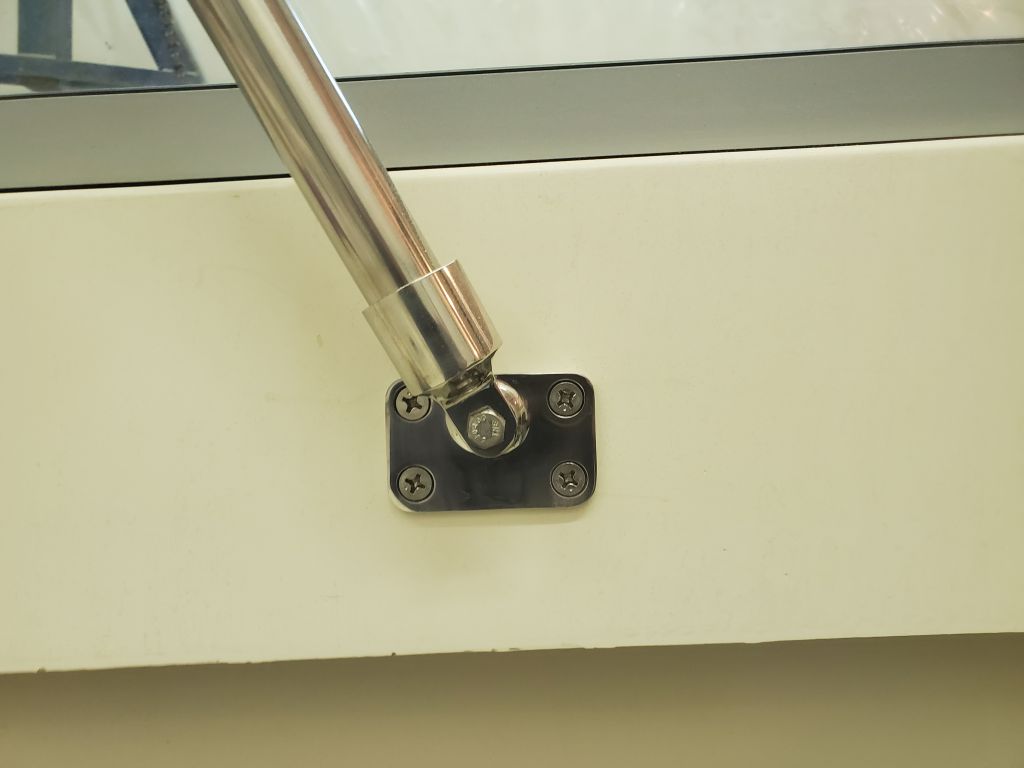
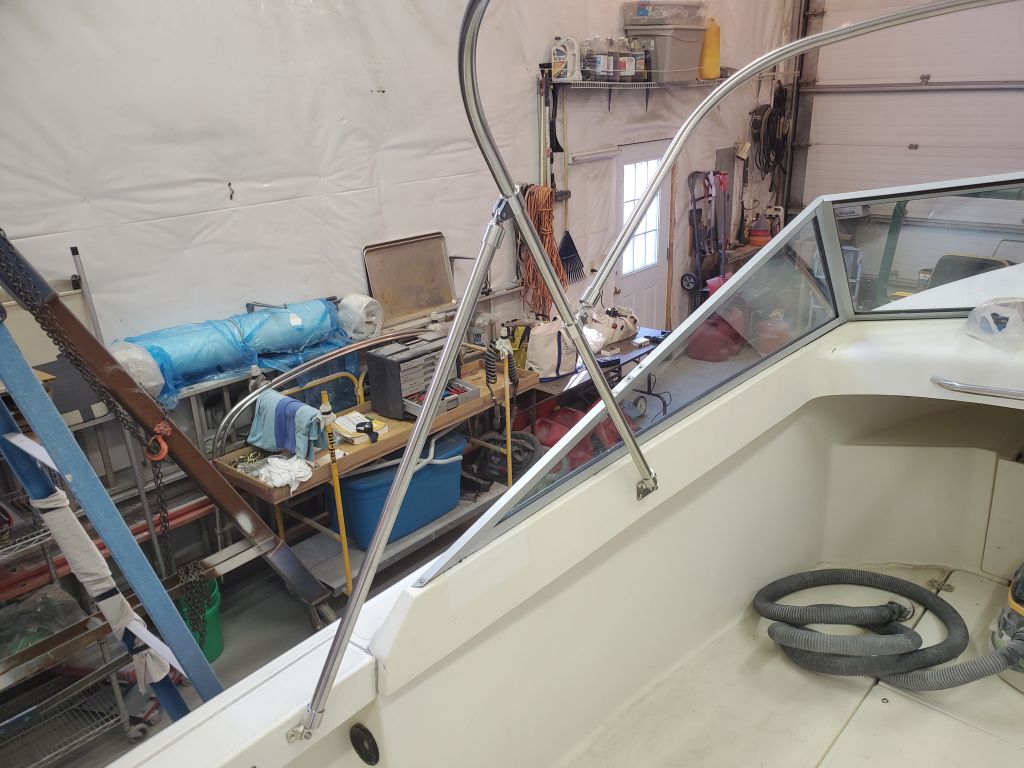
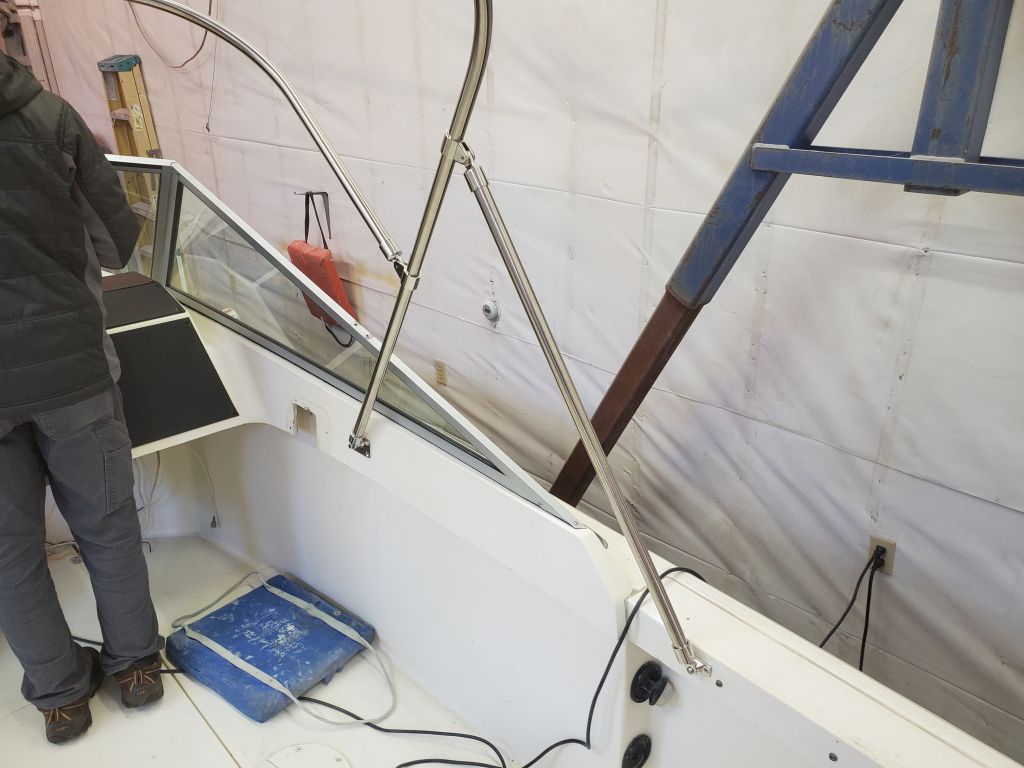
From prefab stock, I made 1/2″ thick backing plates for the new bimini top framework, then replaced the pair of temporary screws on each side with four proper machine screws, threaded through the deck molding and backing plates. I thought the extra reinforcement was necessary given the generally flimsy nature of the coaming molding. Later, I’d perhaps add washers and nuts to the back side, though these weren’t really necessary here.


With the scupper and bilge hoses now complete, I could finish up the battery switch installation and related wiring to the batteries.
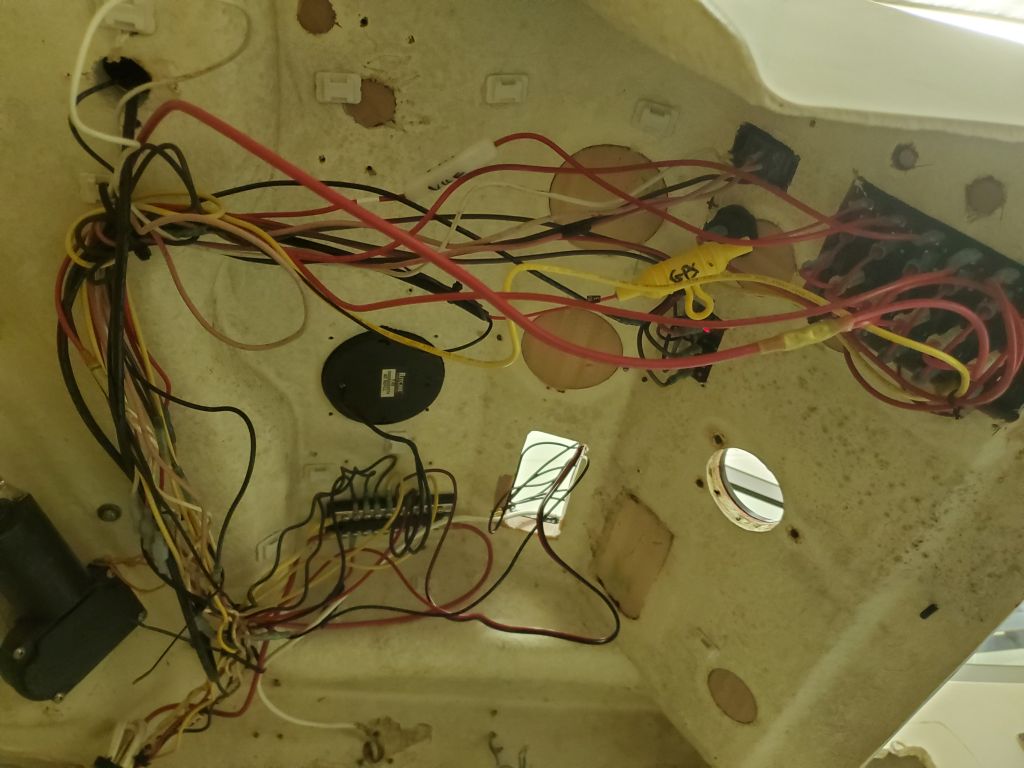
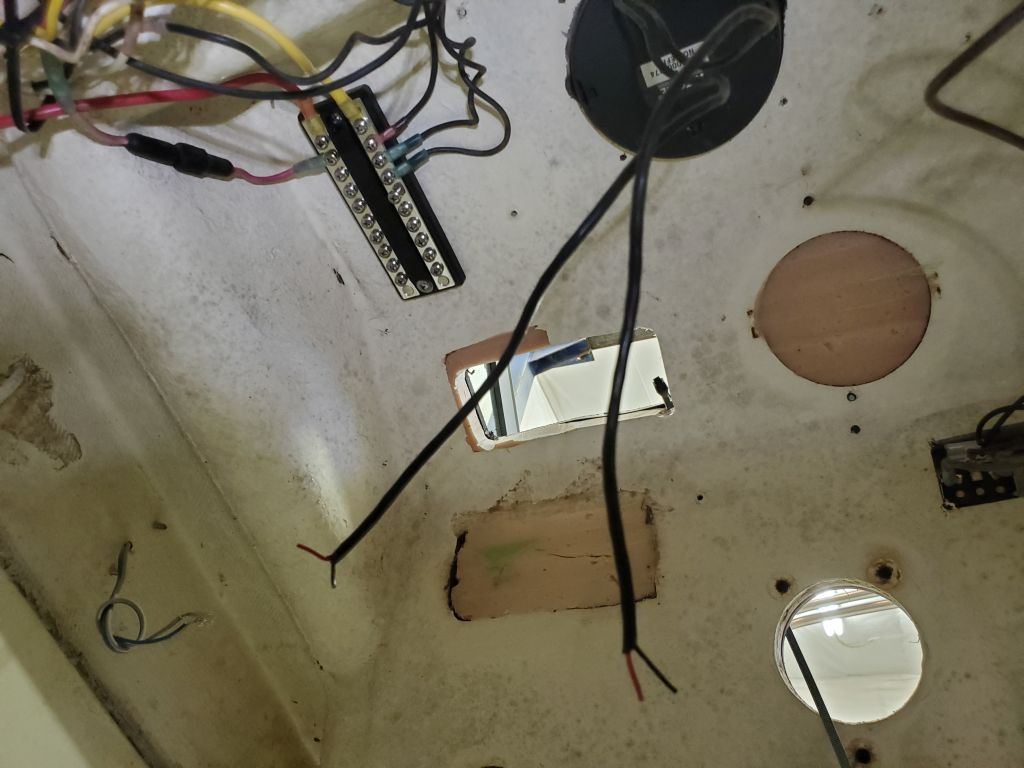
I spent most of the rest of the day making up the final connections beneath the console as needed. For the moment, I still had only temporary means of securing and organizing the wires, but late in the day, with the arrival of my new adhesive, I was able to install new wire mounts throughout, which I’d use later to clean up the wiring runs and finalize the installation. With the batteries now connected, I could test all the final wiring connections and functionality of the installed components. I still awaited the brackets for the VHF, so I’d not yet fully installed it.


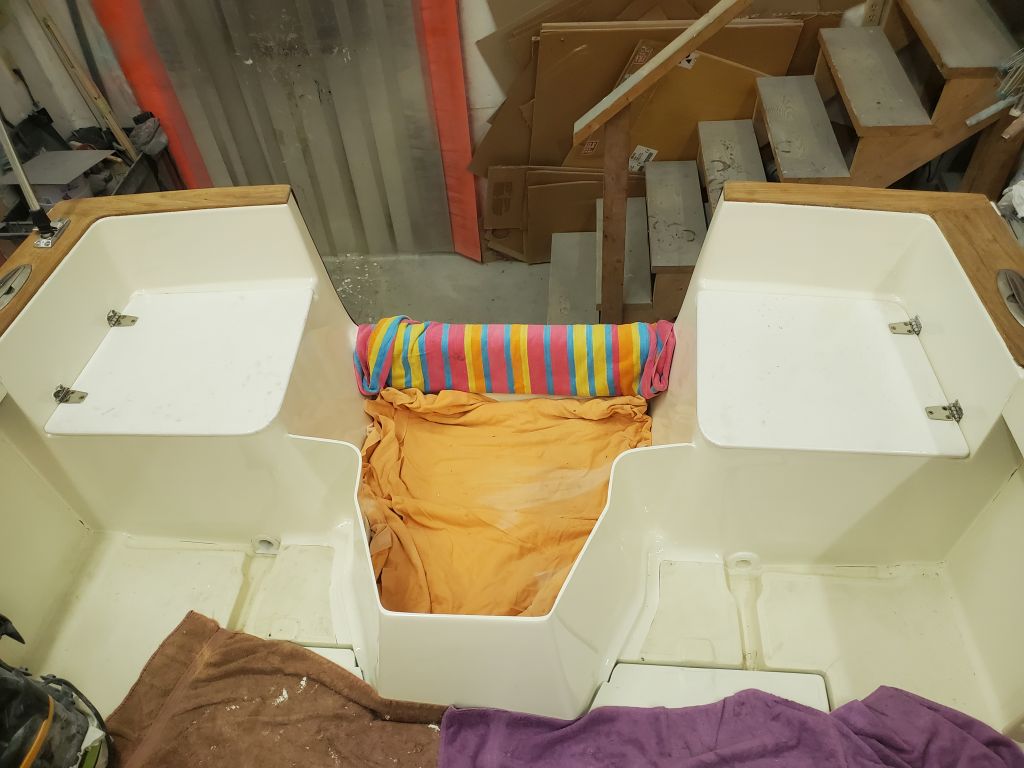
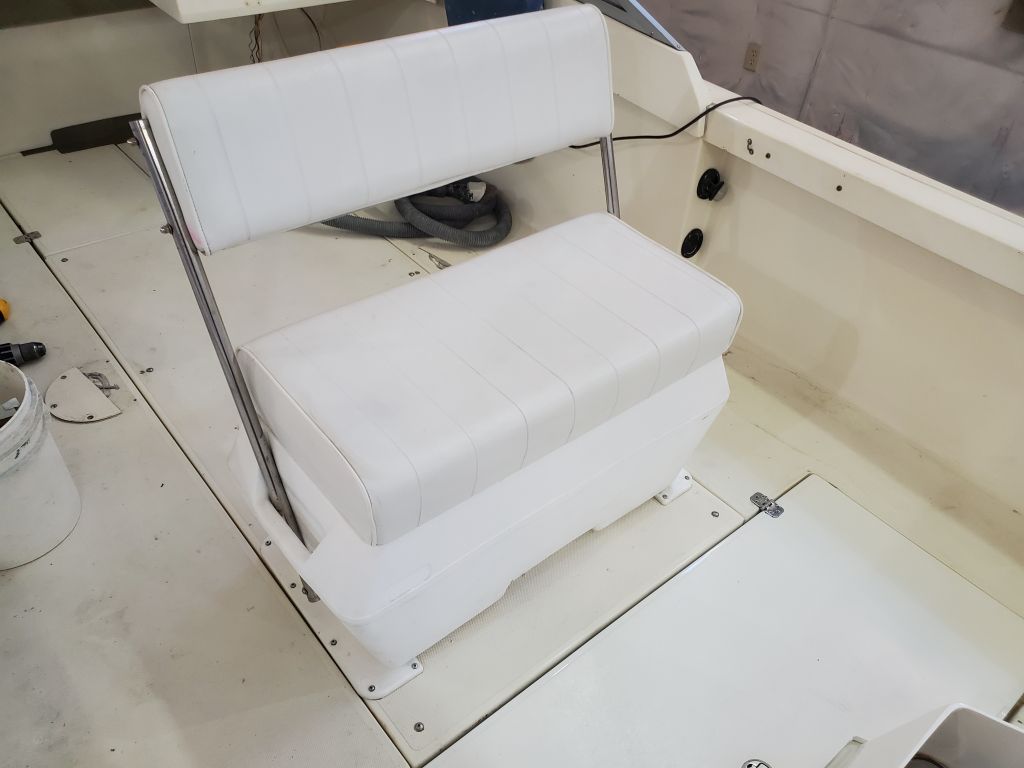
Finally, with the work done in the aft compartments, I went ahead and reinstalled the locker lids/seats.

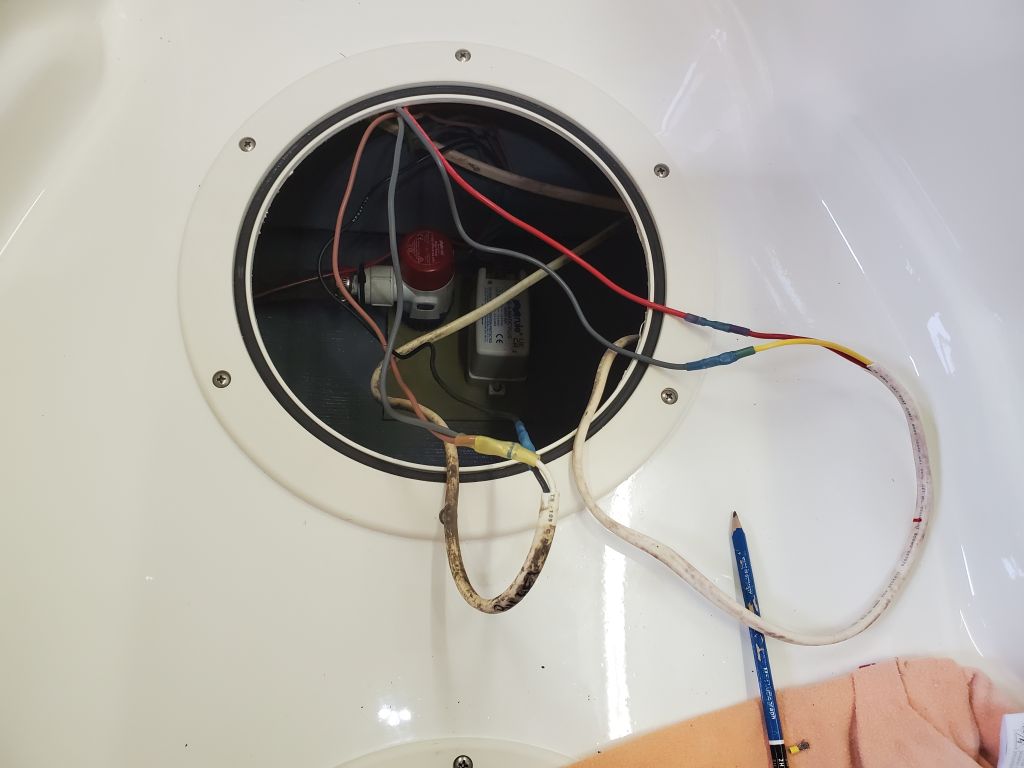
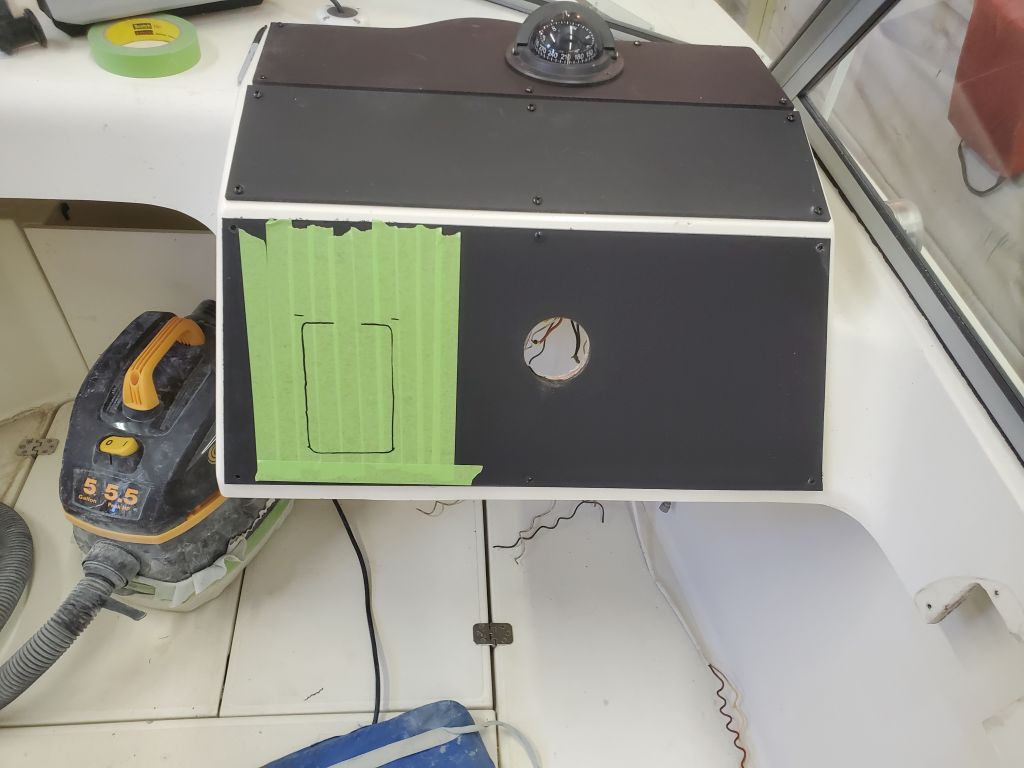
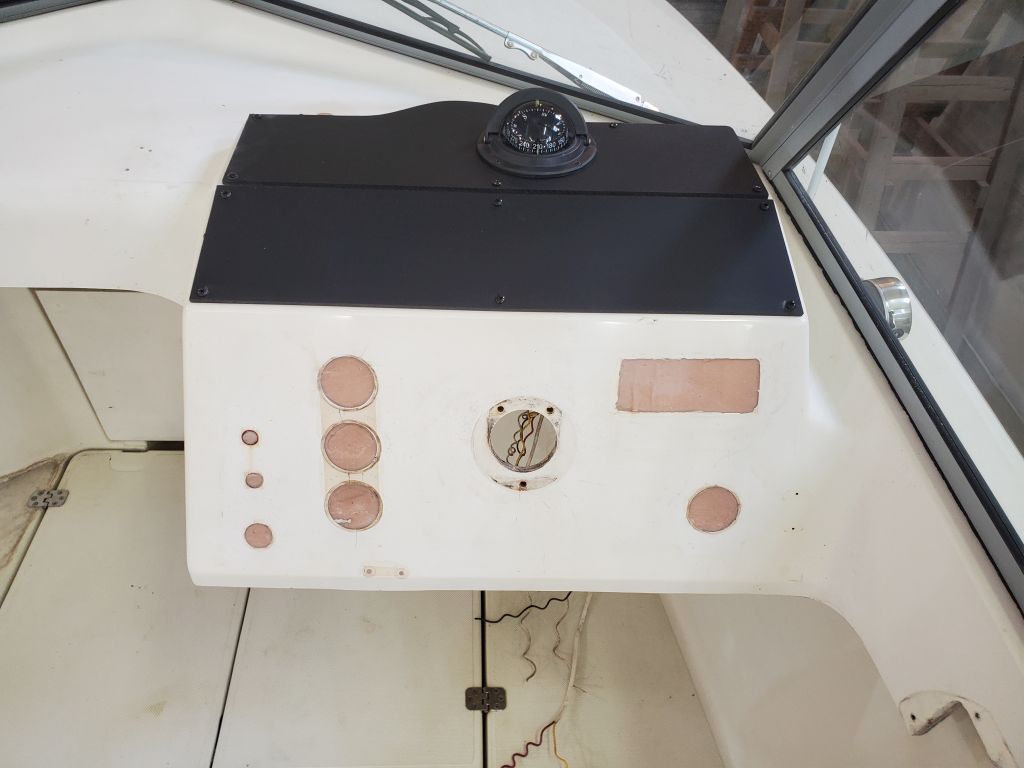
On the middle section of the console, I laid out the position for the flush-mount VHF, using the template included with the unit, then cut out the opening in the cover panel and structural panel to fit. I didn’t yet have the flush-mount securing brackets, so I didn’t proceed with installation–but I wanted to get all the cutting done.
Similarly, I laid out and cut an opening to fit a bilge pump switch, the standard type allowing automatic or momentary manual operation. I knew by now that the boat wasn’t wired for this switch at the moment–there was only a wire pair leading to the console, whereas the manual/automatic switch ultimately required four–ground, main power supply, manual pump and automatic pump (float switch). Fortunately, there was a spare 14/2 wire pair already led through the conduit to the stern, leftover from a now-defunct livewell pump, so once the new panel switch was done I removed the existing wiring and connections from the bilge pump and switch (I’d rewired it according to how I’d removed the wires originally) and made up the connections as needed for the 3-way operation, using the spare wires to complete the new circuits required.

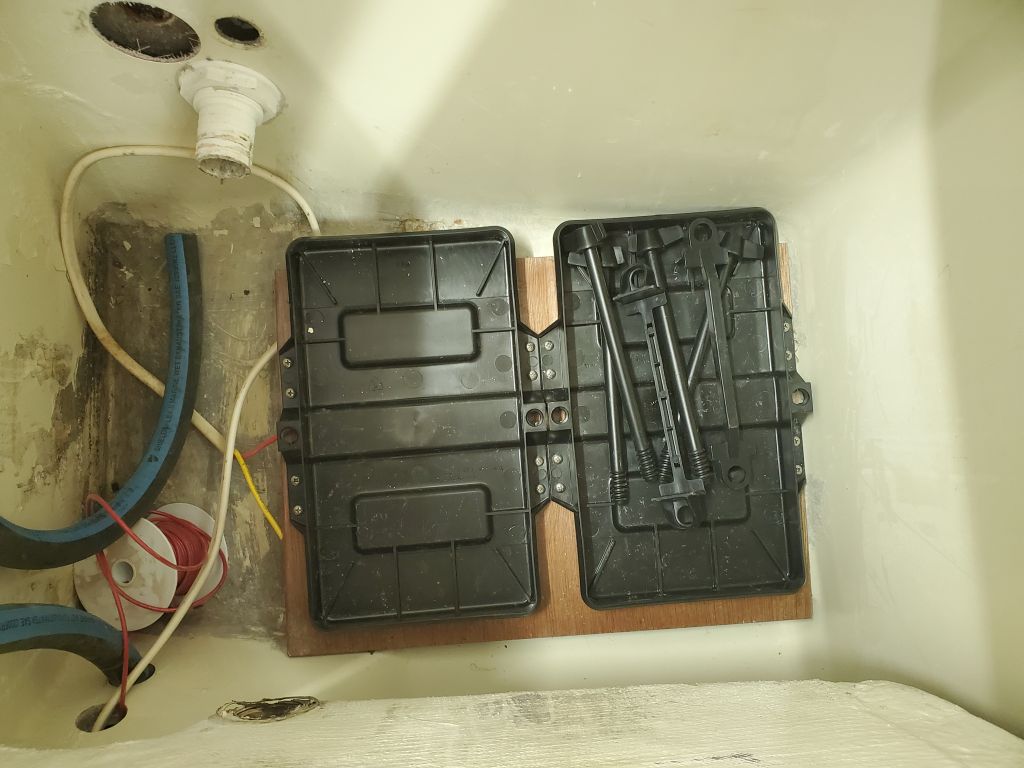
A simple task was to install the new battery mounting bases in the aft port compartment. Final installation would wait till the bitter end to maintain ample room to finish up the bilge pump hoses (when the through hull arrived) and battery switch and related wiring.
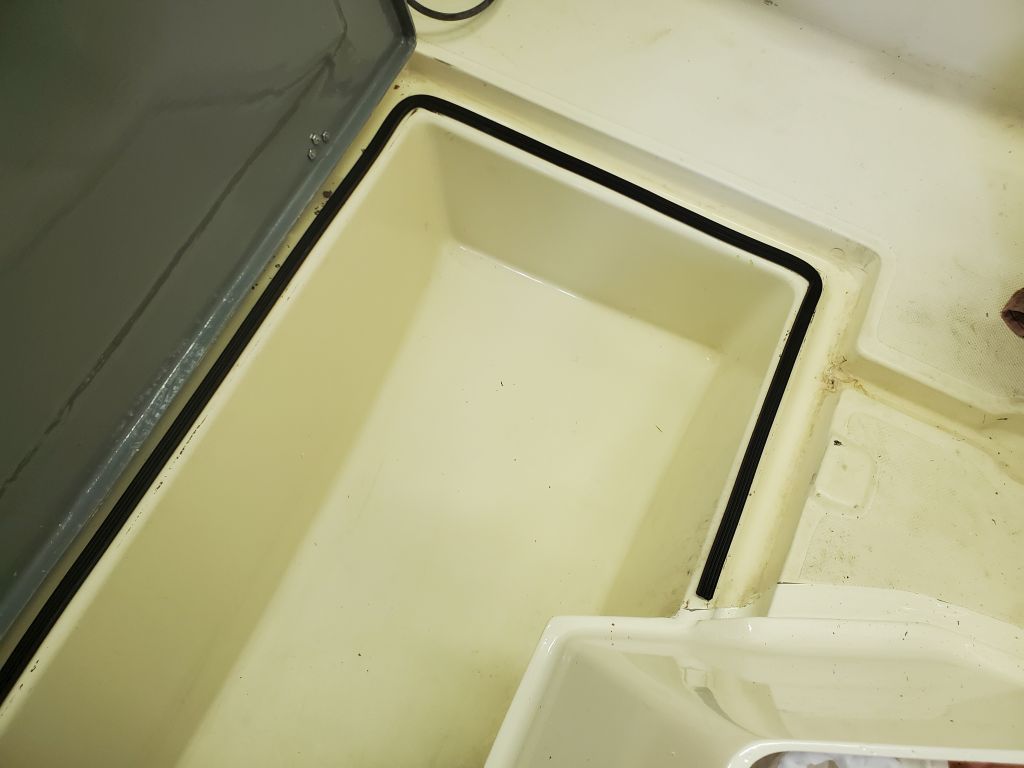
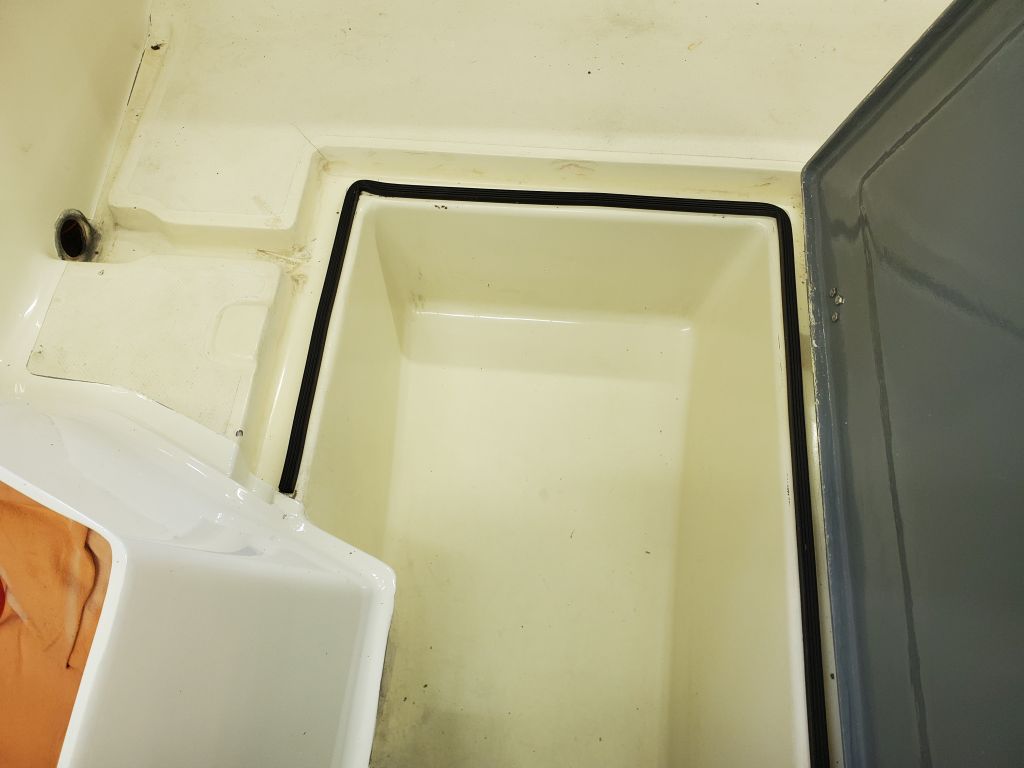
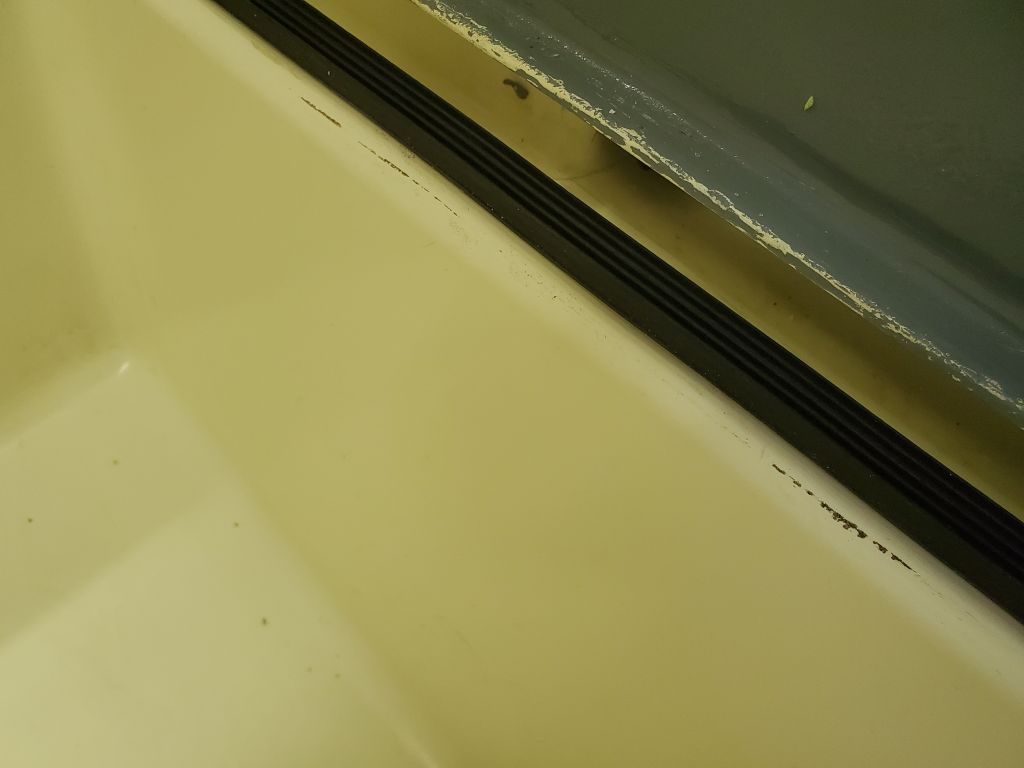
I scraped and solvent-washed the lip beneath the livewell hatch, removing the last vestiges of the old gasket, then installed a new self-adhesive gasket around the perimeter.
Mid-day, I had another boat arrive at the shop, taking my attention for a time, but later, behind the helm console, I started work on the final wiring connections, beginning by making up the bilge pump connections as needed to the new panel. For the moment, since I was lacking enough installed wire mounts (awaiting new adhesive), I led the wires through several temporary wire-securing locations in a rough estimate of the final wiring path, which allowed me to continue working even while I awaited the final materials required. During the afternoon, I got a good start on the wiring, installing a new dual buss bar for positive and negative and making up several connections of existing and new wiring. There’d be more to come and the situation was still a bit of a mess, but would come together nicely once I could install the proper number and location of wire mounts. All to come in coming days once I get some deliveries. I count on having most things I need for this sort of job on hand, so it’s frustrating when I find that my supplies are lacking or, in the case of tye adhesive for the wire tie mounts, unexpectedly unusable.

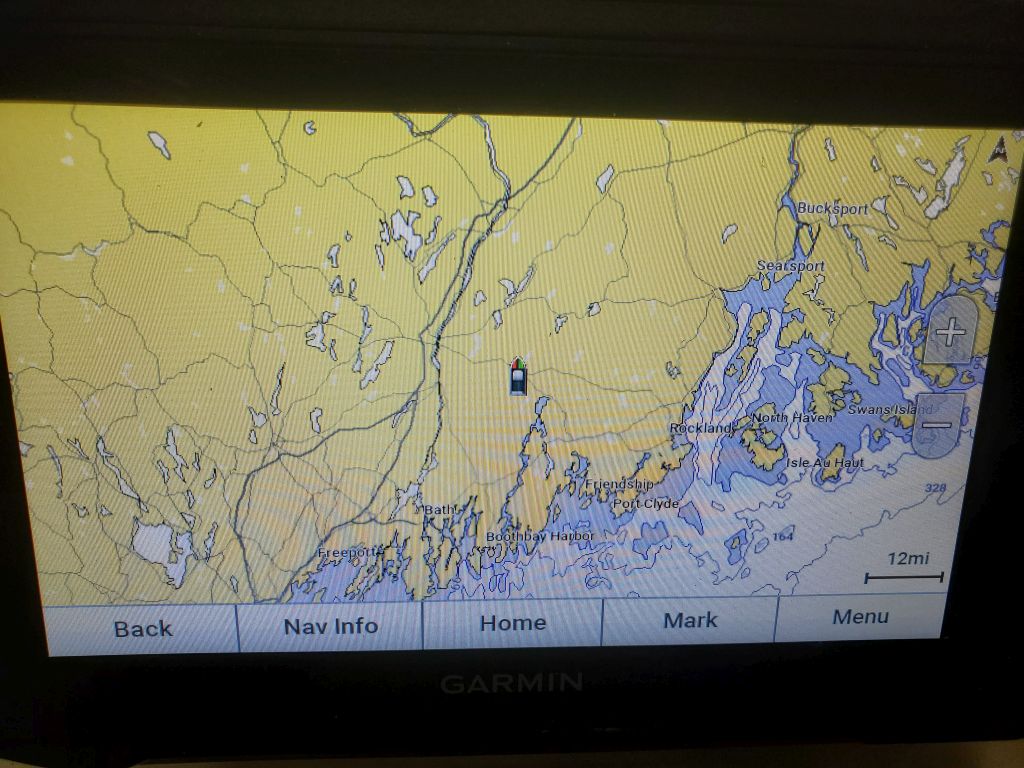
I got started with the installation of the new GPS/plotter unit on its bracket, mounted on the dashboard near centerline. The display was too large to fit comfortably as a flush-mount anywhere in the console, so during an earlier meeting the owner and I had determined this general location instead. For now I just mounted the unit; I’d finish up the wiring later, once I had the panel in place in the console. I’d hoped also to lay out and install the new VHF radio, but found that (of course) it didn’t include the flush-mounting hardware, which I had to order now. (Expressions of displeasure reserved.)

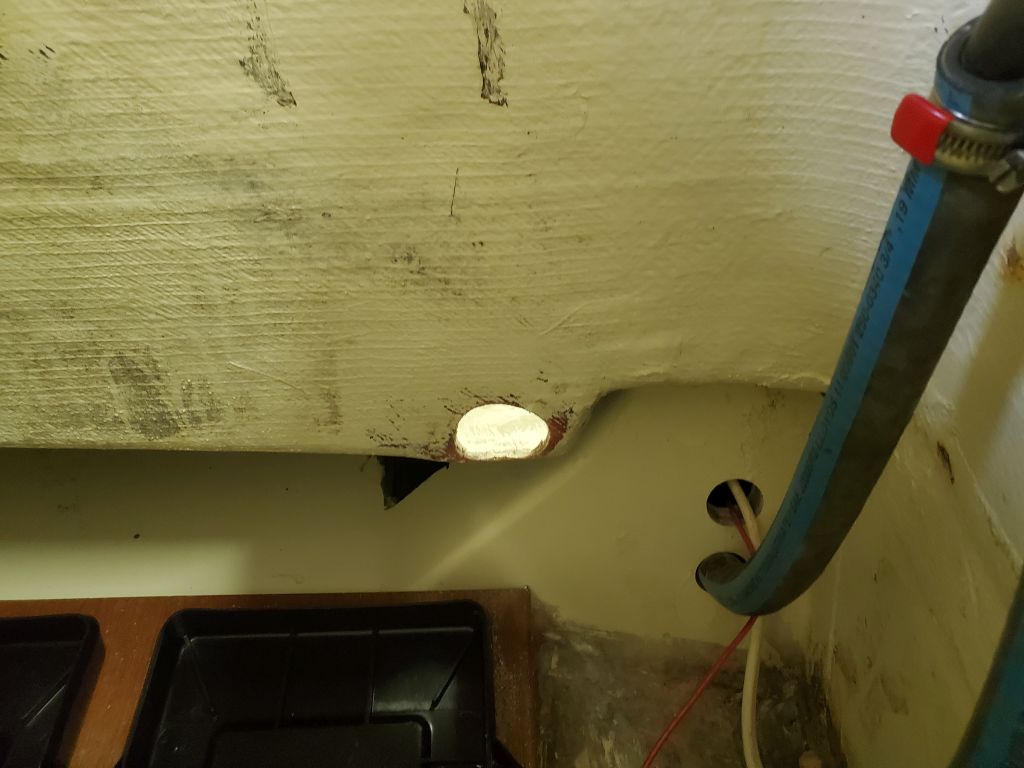
Preparing to install the bilge pump through hull, I started from inside the boat, in way of the old hole that I’d filled from outside before painting, and drilled a pilot hole through the hull, then finished the 1″ hole for the fitting from the outside. I also removed, with a larger hole saw, a section of the molded interior liner to make room for the through hull nut and access. Unfortunately, I discovered that the SS through hull I’d purchased was not long enough to fit through the extra-thick transom construction, so this stymied progress while I found and ordered something suitable. For now, I had to content myself with epoxy-coating the exposed coring within the new cutout. All in all the morning hadn’t gotten off to a stellar start so far.
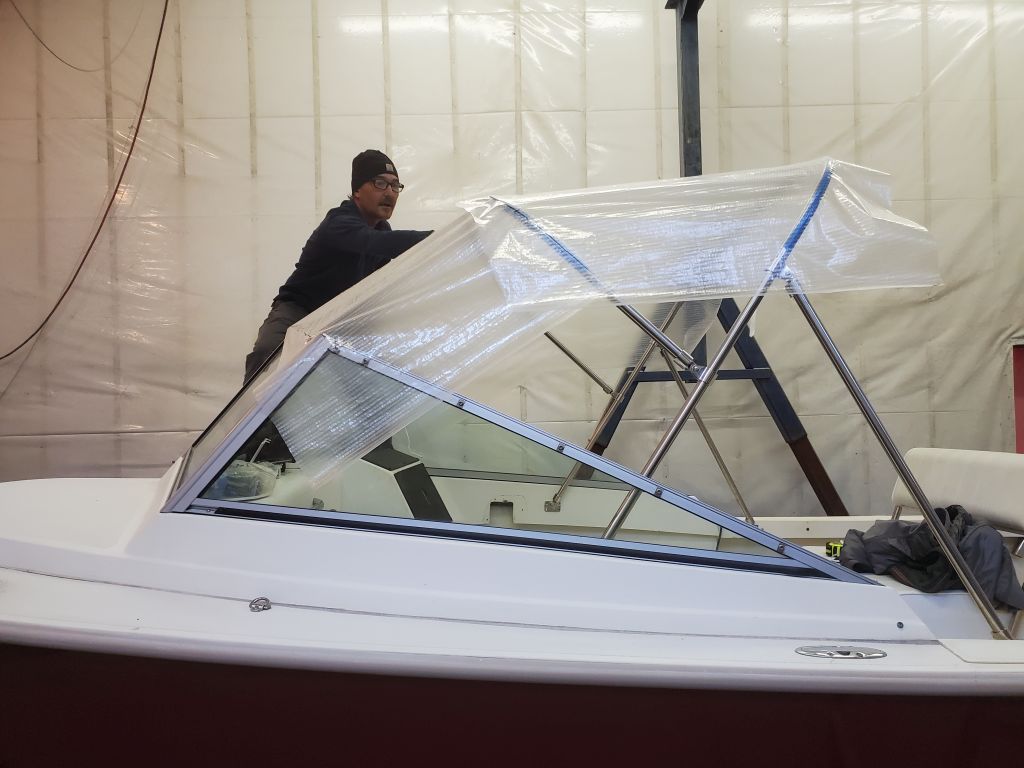
My canvas contractor arrived with a new frame to set up and make a pattern for the new top. He chose to mount the new frame on the inside of the windshield, secured to the fiberglass molding, as he wasn’t a fan of using the shaky aluminum windshield as a mount for the frame. With the new frame properly positioned and mounted temporarily on its brackets (I’d finish the installation later with backing blocks for added strength), Jason proceeded to pattern the top and front of the new enclosure, leaving the side panels for later, once the top was complete.

During the afternoon, I laid out and installed the new switch panel, along with an accessory outlet and wiper switch, on the port side of the main console panel, adjacent to the helm. I removed the black cosmetic panel and made the cuts there first, then transferred the openings to the console itself to finish things off before installing the new components permanently.

Armed with a battery and test leads, I went through the various wires remaining in place to determine what was what, hooking each pair up in turn to see what turned on or lit up, then marking the wires as needed. Then, preparing for the final wiring connections to come, I installed a few wire mounts below the console before discovering that most of the tube of adhesive I was using was in fact semi-cured and unusable, so I didn’t get as far with these preparations as I’d hoped either. In any event, the end of the day was nigh and I bid a fond farewell till next time.
I was away from the shop for part of the morning on other business. When I returned, I began by installing the new battery platform in the port aft locker, though as of this writing I seemed to have no photos of this.
Next, I got to work on the livewell hatch installation, starting with drilling a 2″ hole for the latching hardware; I’d installed solid fiberglass in this area during the repairs. I installed the latch with new fasteners and butyl sealant. Afterwards, I installed the hatch in the boat and reinstalled the hinges, drilling and tapping for #10 machine screws in each location, with more butyl sealant. I had new gasket material for the hatch opening on order and would install it upon arrival.


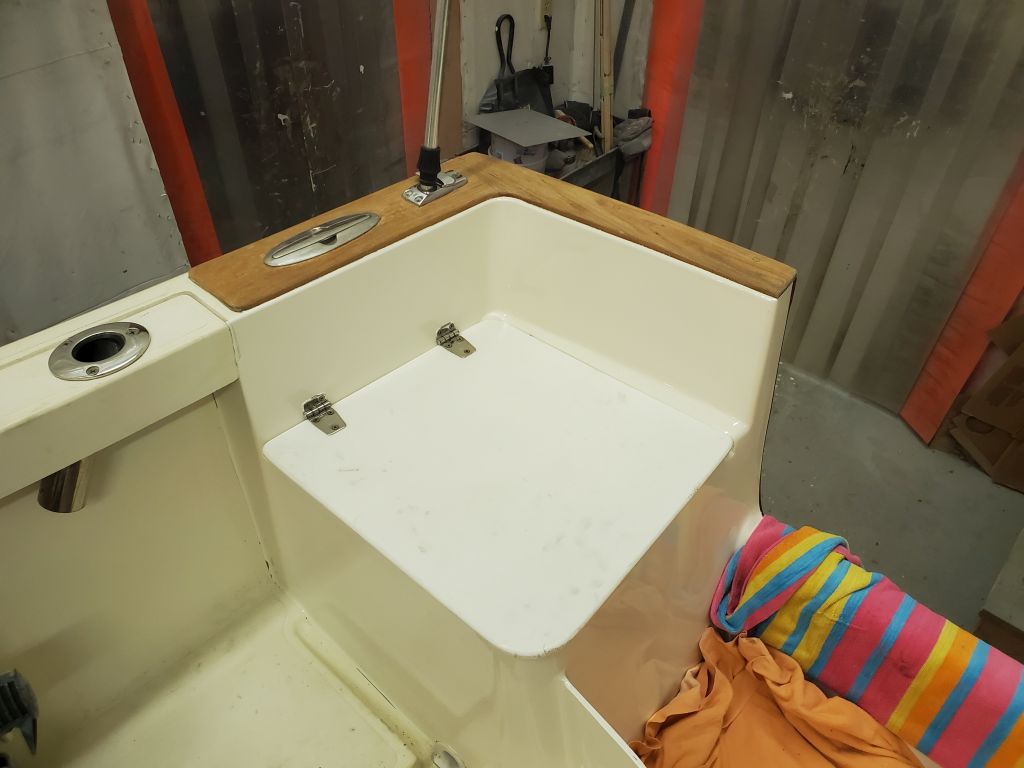
With the hatch reinstalled, I continued with the large cooler/pushmi-pullyu seat, located just forward of the hatch. This was a different unit than had originally been installed, but ’twas of little matter as I’d filled the old fastener holes before, and the new seat fit in more or less the same space and covered the old location entirely. After aligning the seat as desired, I installed it with new fasteners and butyl sealant. There were two pedestal-mount seats to be mounted behind the helm and console, but I planned to wait on these installations till I’d finished the wiring and other work at the helm.


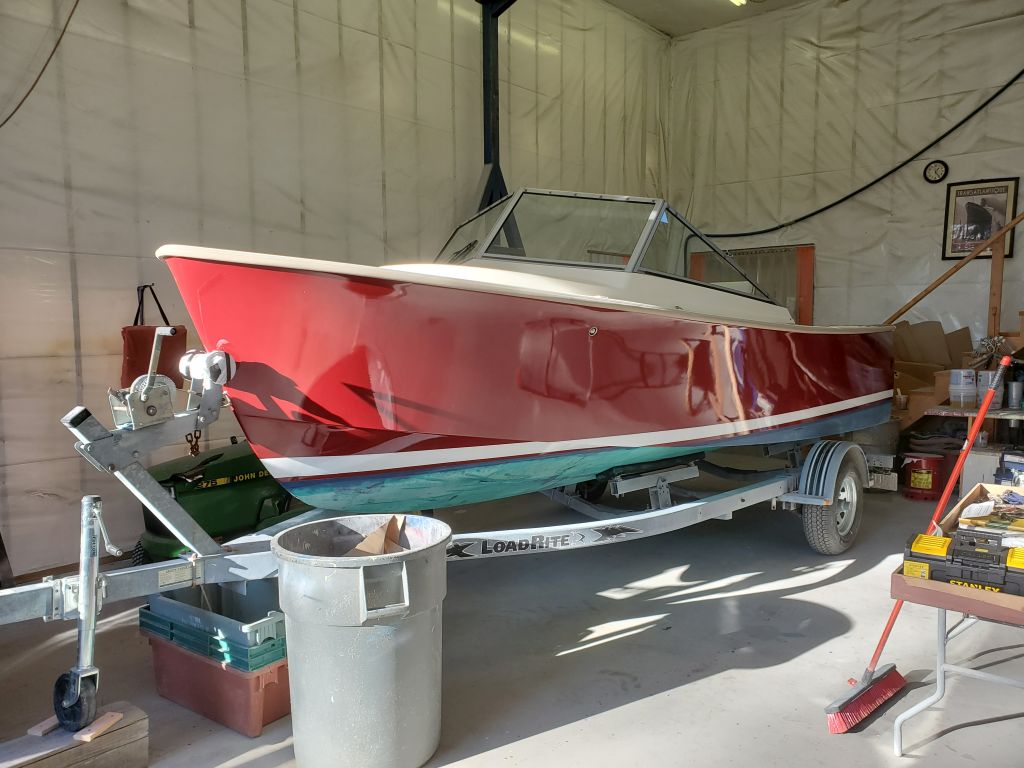
With another boat arriving in a few days, and requiring the “real” side of the workshop, I took advantage of a nice afternoon to reposition the Holby in the other side of the shop, where I could continue working on the various remaining tasks on my list over the coming days and before the boat had to leave for the outboard dealer where the new powerplant would be rigged.

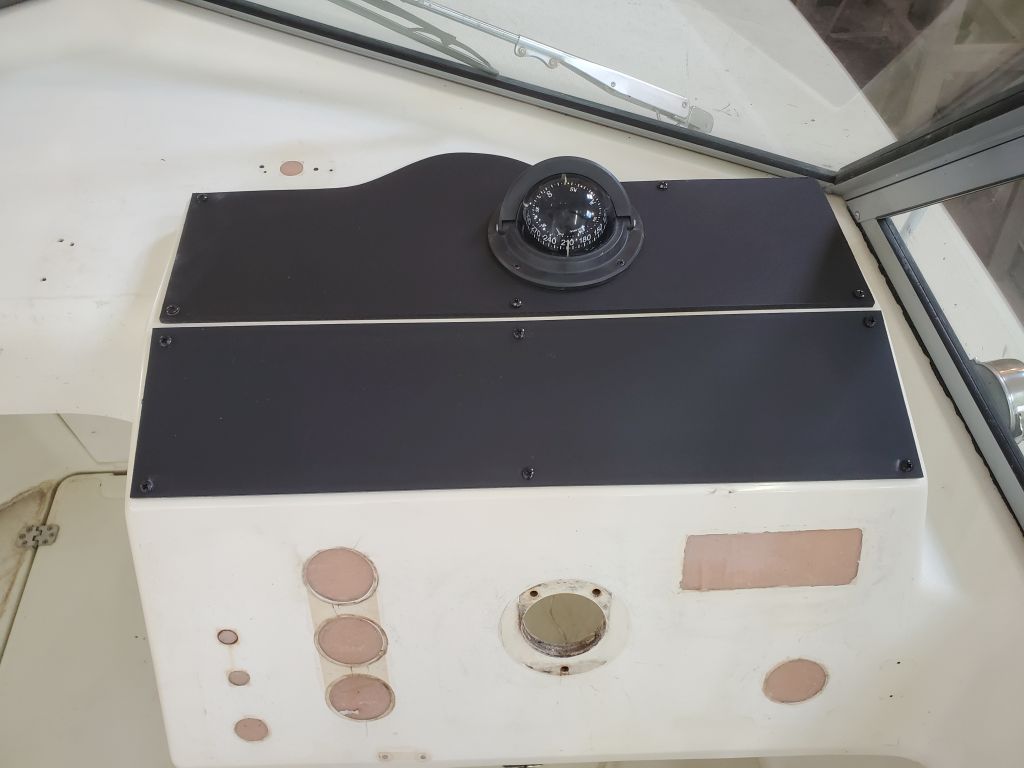
With the afternoon courier delivery of the new panel for the last section of the console, I finished up the day cutting and installing the final section. There’d be additional work on the console to install the switch panel and a flush-mount radio, both of which were now also on hand, and I looked forward to finishing up that work in the immediate future.
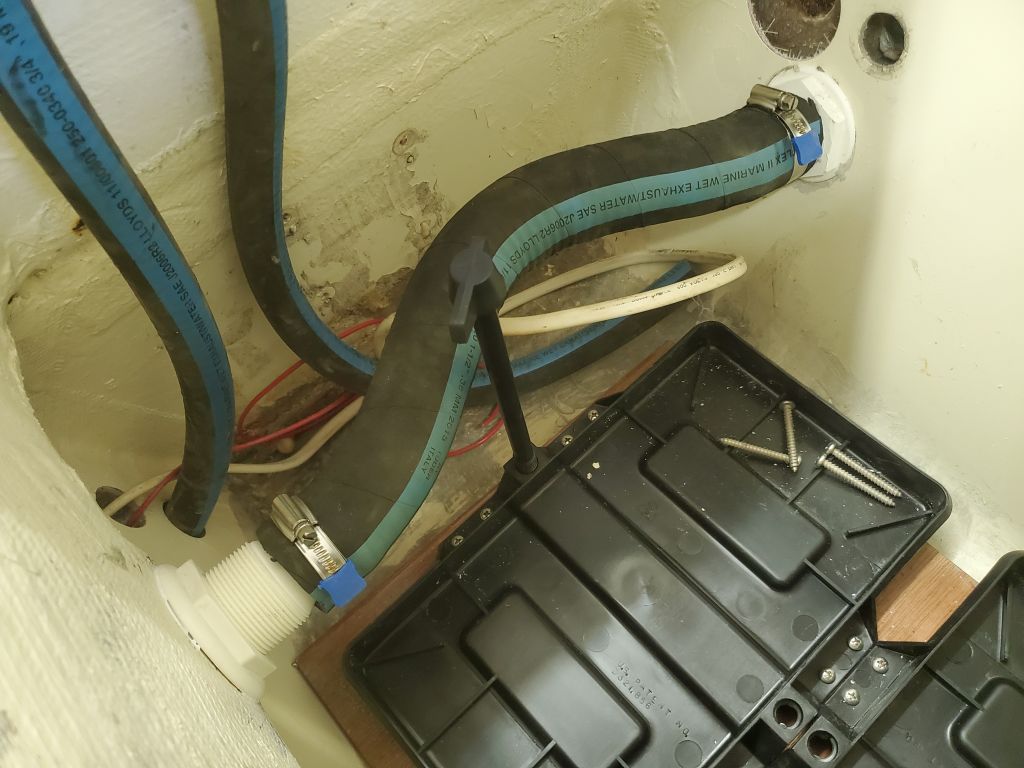
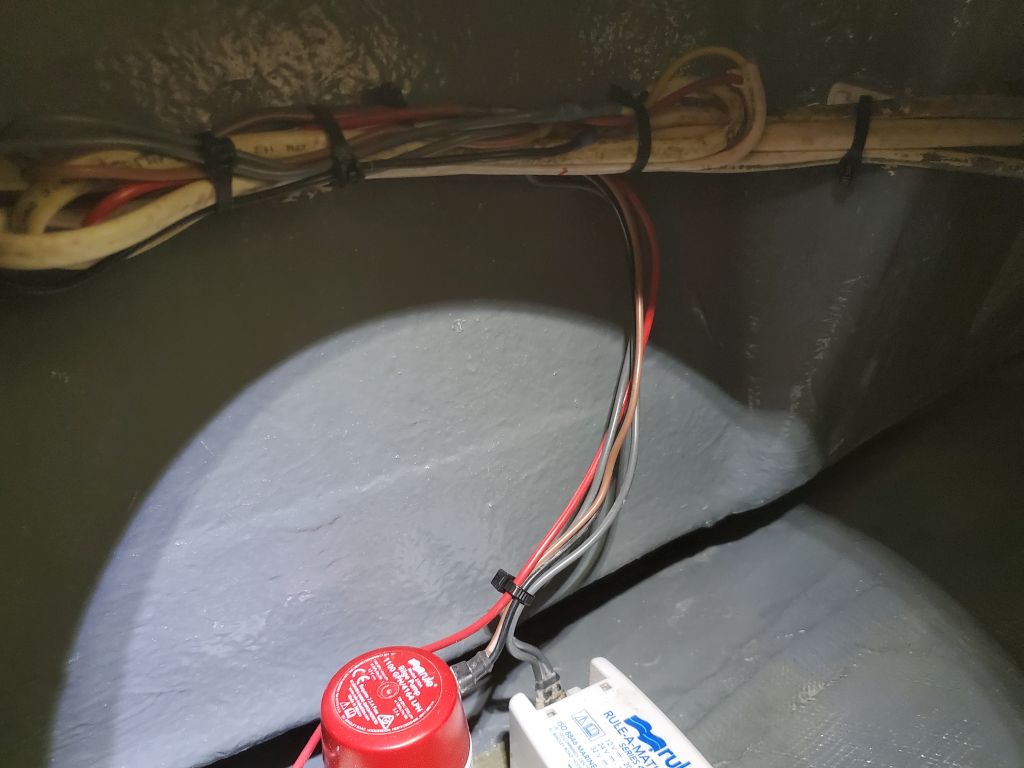
I finished up the basic bilge pump wiring by bundling and securing the wire harness to the newly-installed wire mounts beneath the deck. I also took the opportunity to run the main power cable leading to the console (which I’d had coiled and secured in a nearby locker) across to the port side battery locker, where it would eventually be connected to the battery switch once installed. I secured the siphon break to its new support, and attached the hose from the bilge pump (left of photo) and an extra length of hose that I’d connect to the through hull once I installed it.

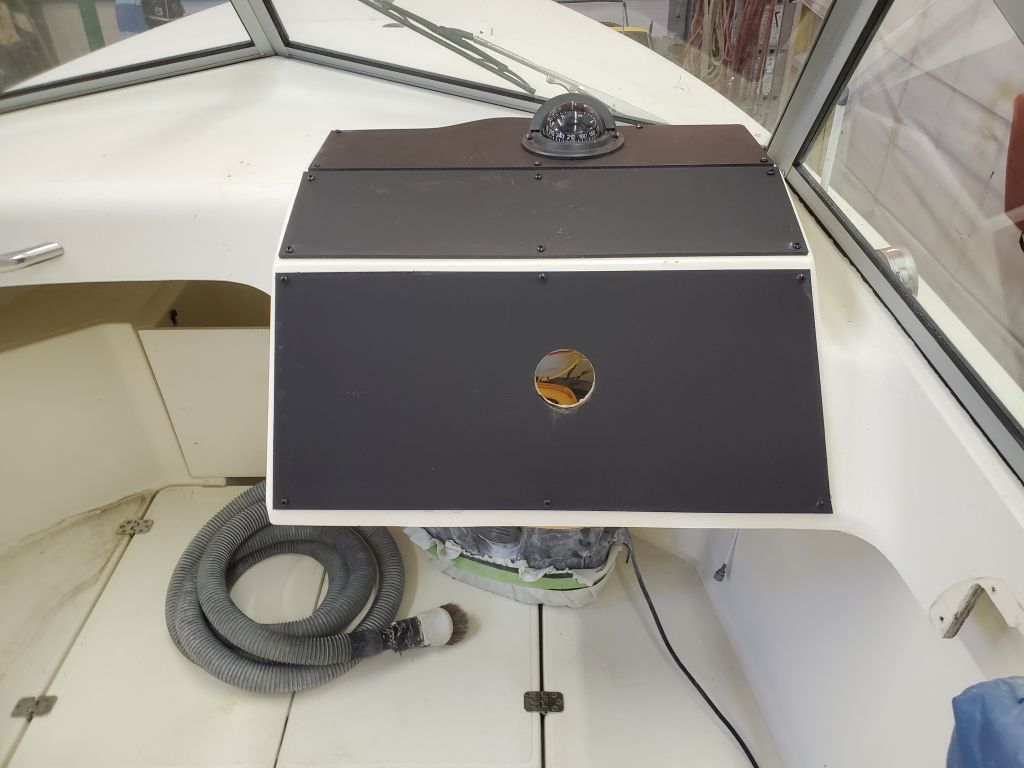
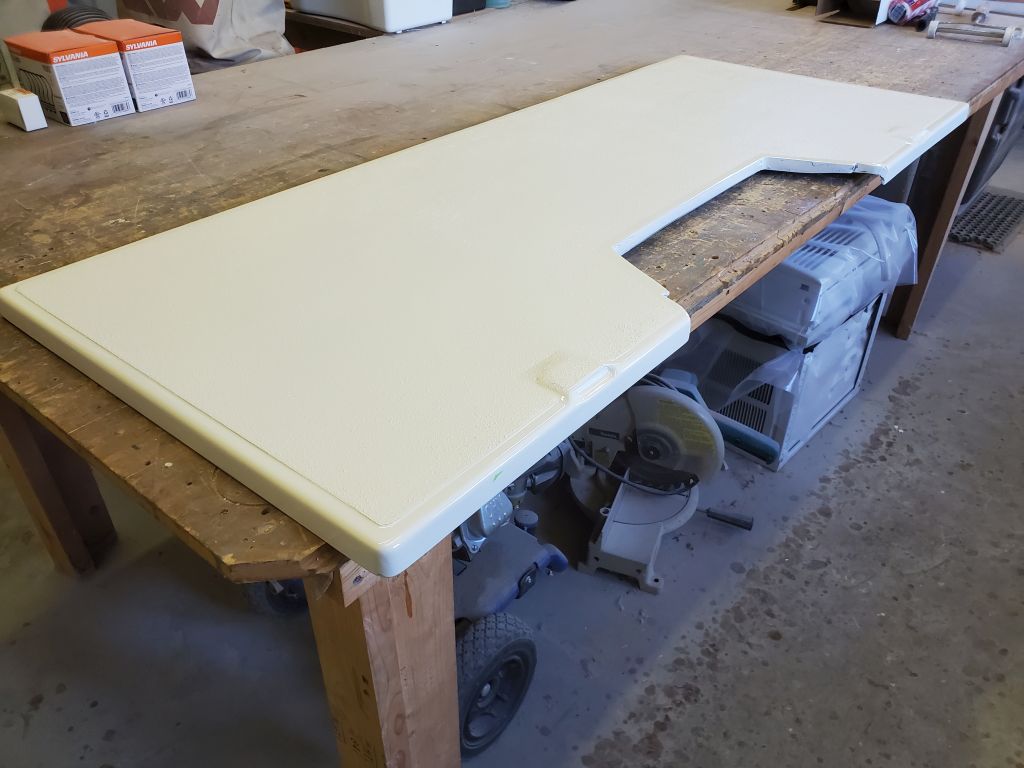
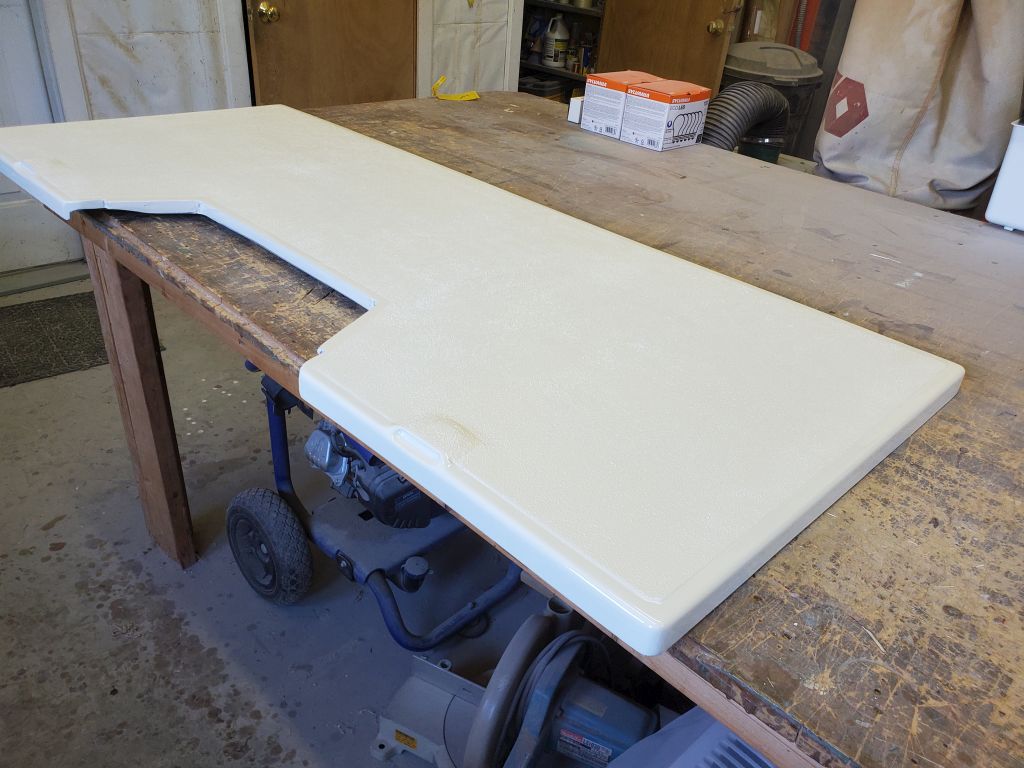
Next, I turned to the console, using my previously-made templates to prepare the new black textured UV-stabilized polyethylene surface for the three facets of the console. I found to my dismay and disbelief that the lower, largest section was too large for any dimension of the product I’d ordered weeks before, so alas, I had to await its completion till I ordered a larger piece suitable for the dimensional requirements. But I cut and installed the two upper sections, including installing the compass back in its original location.
I removed the masking from the nonskid on the livewell hatch, completing the paint work there.


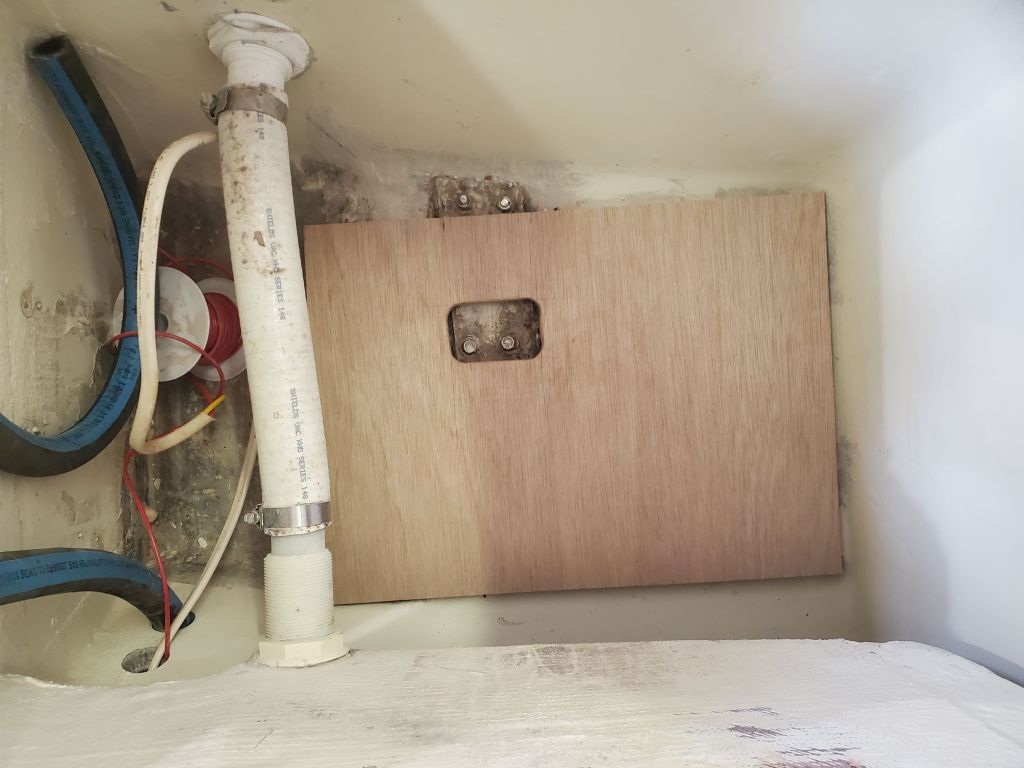
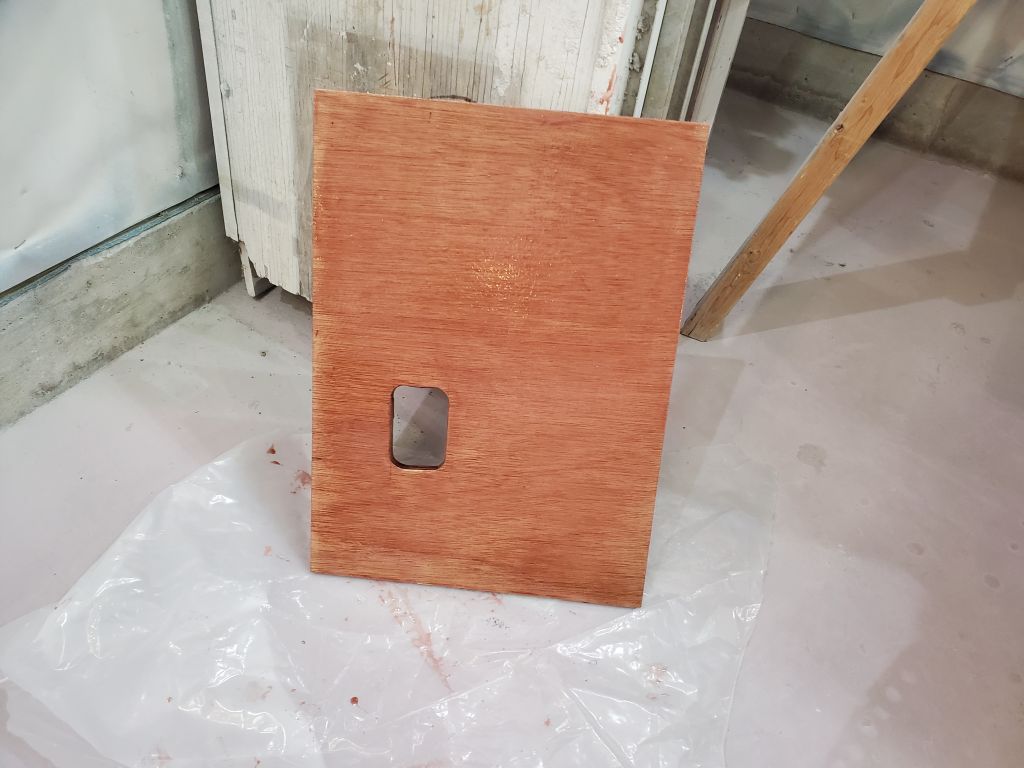
The owner provided two new battery hold-down trays for the two batteries, to be installed in the port aft locker. The style of tray and the dynamics of the locker required that I build a simple plywood platform to support the battery trays and allow them to be properly secured within the locker. Once the new platform was cut to fit satisfactorily, I applied a couple coats of epoxy over the remainder of the day, which coating would help protect the plywood from moisture in the locker. It looked to be a tight fit against the scupper drain hose for the inboardmost battery clamp, so I thought I might have to replace that hose with one slightly longer that I could bow out of the way in the center.


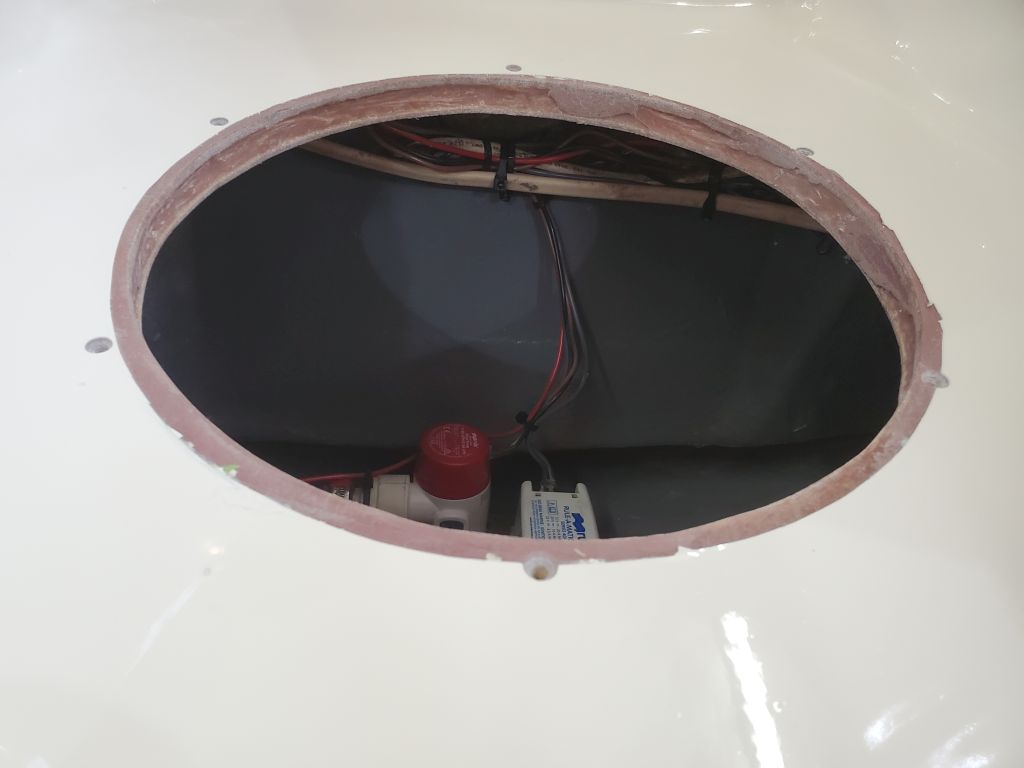
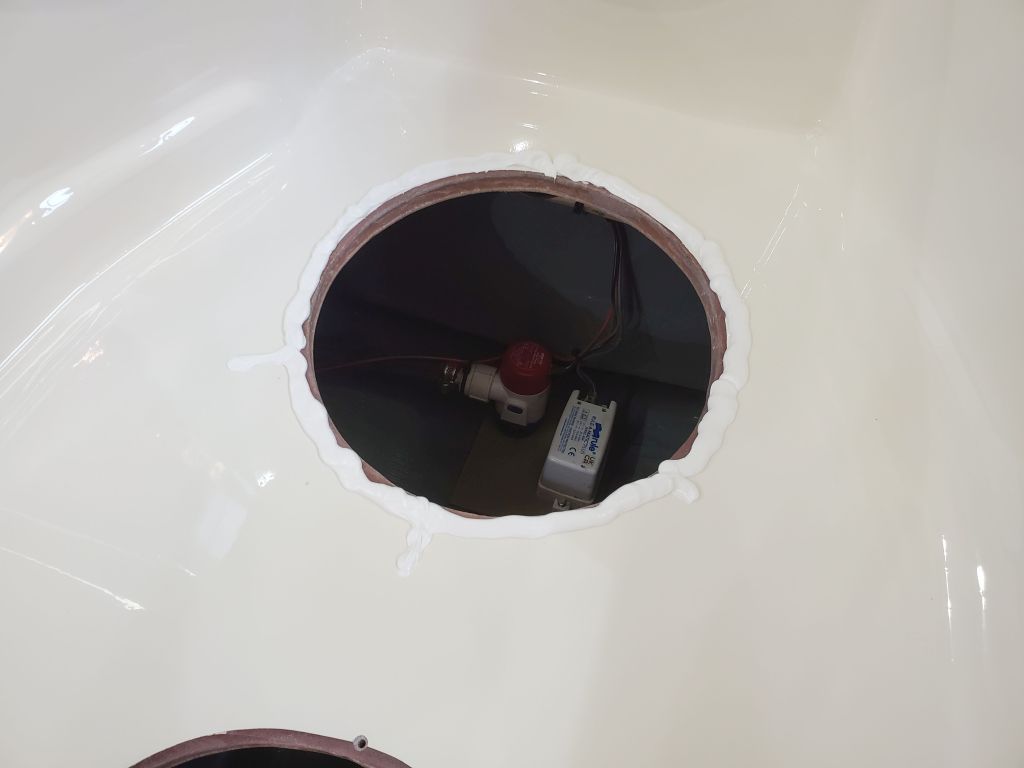
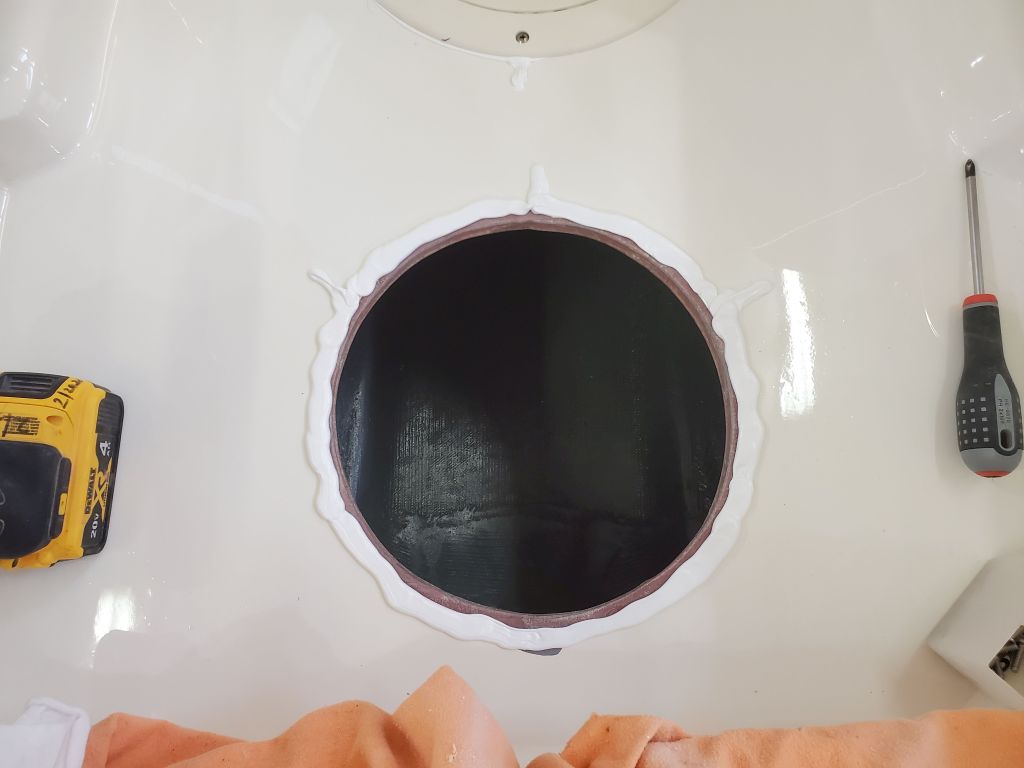
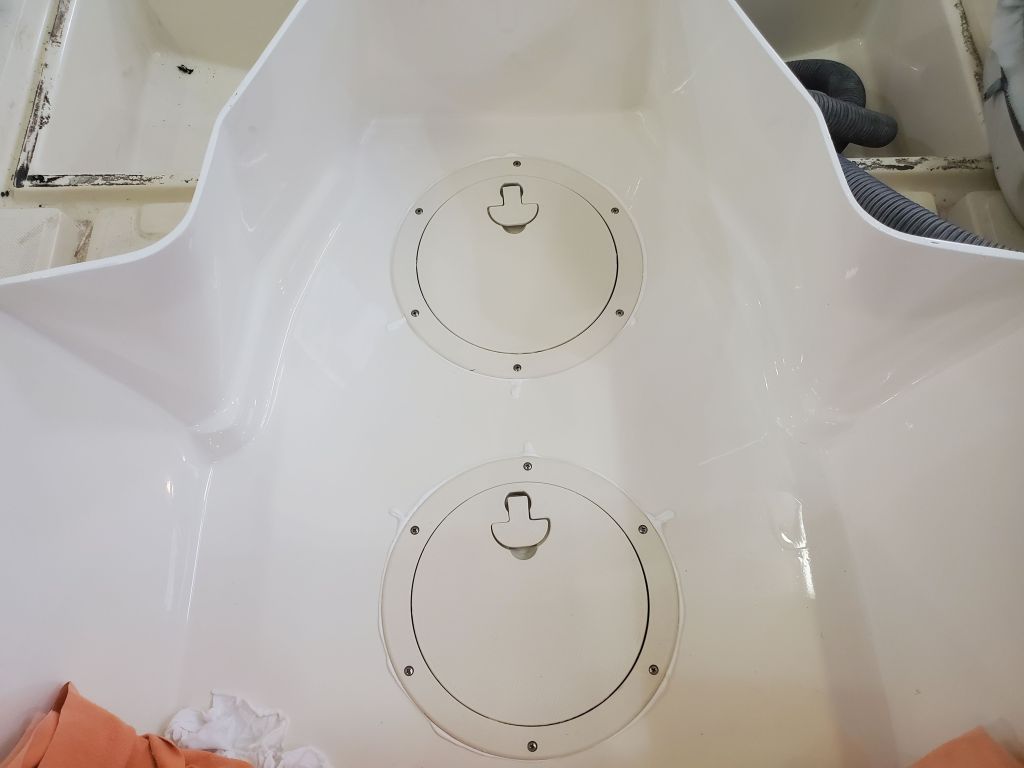
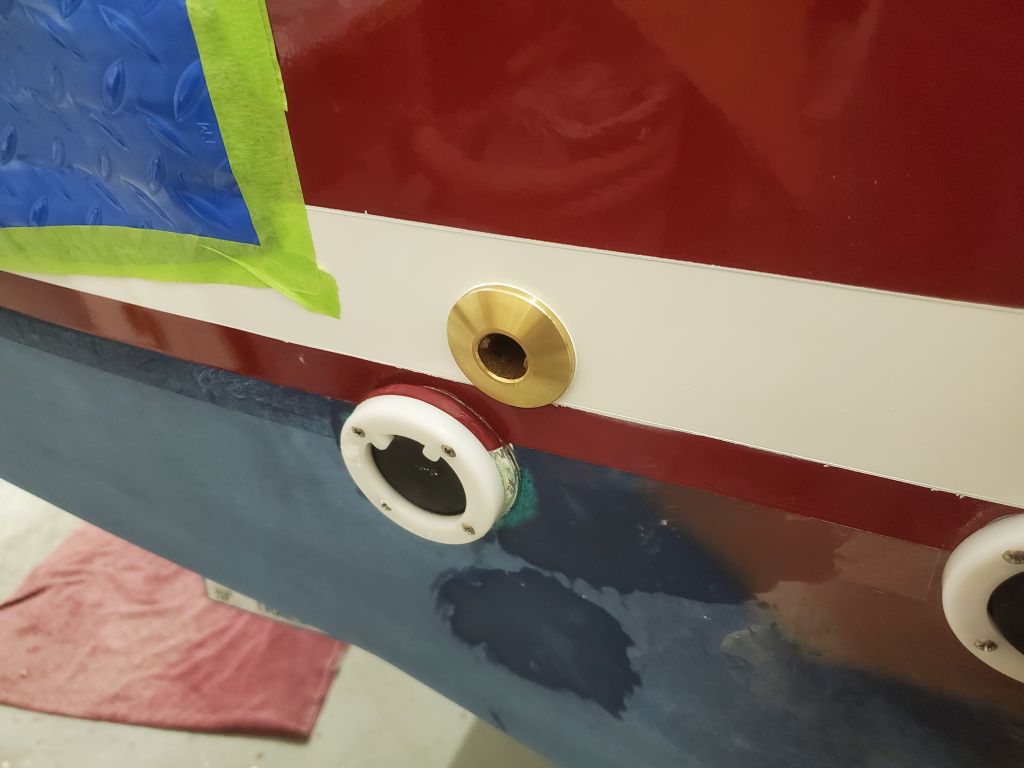
At this point most of the remaining tasks on my list required materials and parts not yet on hand (but on the way), so to wrap up the work for now I installed the inspection ports in the outboard well. The fastener holes projected through the epoxy-filled edges of the holes, so installation was a straightforward matter of drilling, tapping, and installing the plastic units with sealant and machine screws.