Phase 3: Finish
Work
|
Shop Home
Page
Shop
Planning
Phase 1: Site Prep and Foundation
Phase 2: Framing
Phase 3: Finish Work
Phase 4: Shop Setup |
Office
 I
originally planned for the office to be a 15' square,
sort of "inserted" into the back corner of the building
(that is, extending five feet beyond the corner in both
directions). During framing of the interior walls,
however, we discovered that there was not enough space
for the bathroom to be properly functional. As a
result, we bumped the inner wall of the office into the
shop area by a few feet, allowing for a reasonable
bathroom, slightly shortening the wood shop, and
actually increasing the size of the office. For
more exterior views of the office wing, please visit
other portions of this site, where you will find them in
evidence. I
originally planned for the office to be a 15' square,
sort of "inserted" into the back corner of the building
(that is, extending five feet beyond the corner in both
directions). During framing of the interior walls,
however, we discovered that there was not enough space
for the bathroom to be properly functional. As a
result, we bumped the inner wall of the office into the
shop area by a few feet, allowing for a reasonable
bathroom, slightly shortening the wood shop, and
actually increasing the size of the office. For
more exterior views of the office wing, please visit
other portions of this site, where you will find them in
evidence. |
During the electrical phase of construction, I installed
outlet boxes and ran wiring, Internet, phone, and coax
cable into the office walls, to several locations that
would allow for versatility in the use of the space now
and in the future. Then, with the framing
complete, no further work occurred on the office wing
until after the insulation was installed in late
January. |
In early February, I prepared to install drywall on the
office walls and ceilings--the only space in the shop
(along with the bathroom) to receive this treatment.
Doing some rough calculations of the area, I determined
that I needed 23 sheets, though there would be
substantial waste from off cuts and window/door
openings. Grabbing a solitary fair weather day in
a week of rain and freezing drizzle, I managed to safely
deliver the drywall to the shop in preparation for a
hanging marathon on the upcoming weekend. A
friend, John Irving, had amazingly volunteered to help
with this task, and even seemed excited about it.
(So was I, truth be told...) |
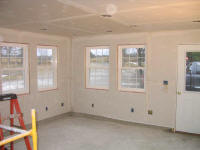
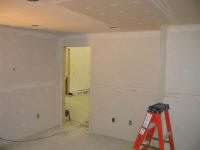
 In
a 10-hour day, we managed to hang all the rock on the
walls and ceiling. I had arrived early and
installed some insulation batts in the office ceiling
and the interior wall, since the insulation contractor
only insulated the exterior ceilings and walls; I wanted
the additional insulation for a sound barrier and to
help the office to maintain its own temperature, since
the other three heating zones in the shop would likely
remain at a lower temperature than the office. In
a 10-hour day, we managed to hang all the rock on the
walls and ceiling. I had arrived early and
installed some insulation batts in the office ceiling
and the interior wall, since the insulation contractor
only insulated the exterior ceilings and walls; I wanted
the additional insulation for a sound barrier and to
help the office to maintain its own temperature, since
the other three heating zones in the shop would likely
remain at a lower temperature than the office. |
Certainly the pros would have been
quicker at hanging the drywall, but we got the job done.
The job was complicated by numerous cutouts for ceiling
fixtures, outlet boxes, doors, and windows, but we
prevailed and, by the end of a long and tiring day, the
office was ready for the tape coat of joint compound
("mud"). I had hoped to be able to apply the tape
coat on the same day, but it was too late in the day and
clearly it would have to wait. |
The next day, I returned alone to install a few small
pieces of drywall and to apply the tape coat over the
seams. I completed this all in an easy 5 hour day,
and was pleased with the results. |
|


 |
| Over the next several
days, I continued working on the office (and the
adjacent bathroom),
and applied two additional coats of mud to all the
seams. Each coat required 2-3 hours to apply,
followed by an overnights' drying time. With so
much to do, I commuted daily to ensure that I kept the
progress moving along. |
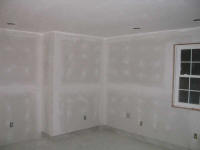
With the final coats of mud complete, I next turned to
an unenviable task: sanding. Maybe the pros
can lay this stuff down well enough to avoid any
sanding, but I cannot. So in a fun-filled 3 hour
marathon one morning, I hand sanded all the joints to
smooth them out and remove any minor ridges. While
none of the sanding was particularly heavy, every part
of the job did require sanding. When complete,
however, I was pleased with the results, and moved
forward with ceiling paint. I applied two coats of
flat white to both the bathroom and office ceilings. |
|


|
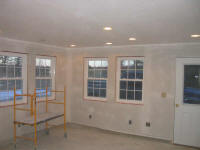
With the ceiling paint complete, I could install the
trim rings and bulbs for my recessed cans. This
went quickly, and after I wired up the switch I could
finally energize the circuit. I discovered to my
dismay that one of the 7 cans in the office did not
light--must be a loose wire nut or something. With
the drywall in place, there was no way to access the
wiring box without removing a portion of the drywall, an
irritating setback. Lesson learned: energize
and test the circuit for hidden fixtures before covering
with drywall. Much as I hated too, I supposed I'd
have to open up the ceiling in that area and repair the
wiring. Please see below
to read about the fix. |
|

|
In any event, it was time to continue
with the finishing work in the office. I made an
appointment for a carpet installer to measure and then
order the carpet for the room, and in the meantime I
wanted to wrap up the trim and painting, so that I
wouldn't have to worry about soiling the carpet. I
chose carpet because it is easy, inexpensive, quiet, and
comfortable for an office. More on the carpet
later in the process.After some
thought, I decided to press forward with painting the
walls first, and install the trim afterwards. I
chose this particular progression since the trim I
bought was pre-primed (making it easier to paint later),
and if I installed the trim after the walls were painted
it would be quicker to paint the walls; I'd still have
to cut in the trim paint later, but I would have had to
do that regardless. |
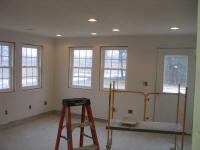
I began with a coat of some awful drywall primer.
It was terrible to work with, as it was cheap and
unsatisfying to apply, but it did the job and covered
the walls evenly. The primer would help the finish
coats spread more evenly, and avoid differences in
texture between the paper drywall surface and the mudded
areas. |
|


|
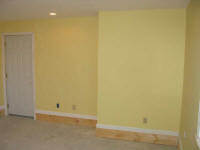
Once the primer was dry, in a couple hours, I rolled on
two coats of the final wall color. The actual name
of the paint is too embarrassing to post here, but I
chose a high quality Sherwin-Williams satin paint in a
pleasing yellow (with help from Heidi).
Note: all the pictures of the painted walls
also show the trim, since I only took pictures at that
juncture. |
|

|
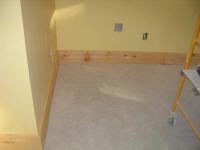
 With
the paint dry, it was time to attack the trim. I
began with the baseboard trim, partly because it would
be the least likely to damage the fresh paint, and
partly because it was the most potentially challenging
portion of the trim installation, as well as the trim
most critical to have done before carpet. With a
6" concrete curb along the bottom edge of the wall--and
a uneven curb at that--it seemed the best approach would
be to simply cover it with a wide board, and then
install additional trim above as needed. I used
1x8 pine for the baseboard, which was tall enough to not
only cover the concrete completely, but also to allow me
to nail into the base plate of the wall. I used
construction adhesive to secure the pine to the concrete
where applicable; in some areas, I needed cleats at the
bottom edge, since the concrete was recessed from the
drywall in some areas, flush in others, and standing
proud in one corner. With
the paint dry, it was time to attack the trim. I
began with the baseboard trim, partly because it would
be the least likely to damage the fresh paint, and
partly because it was the most potentially challenging
portion of the trim installation, as well as the trim
most critical to have done before carpet. With a
6" concrete curb along the bottom edge of the wall--and
a uneven curb at that--it seemed the best approach would
be to simply cover it with a wide board, and then
install additional trim above as needed. I used
1x8 pine for the baseboard, which was tall enough to not
only cover the concrete completely, but also to allow me
to nail into the base plate of the wall. I used
construction adhesive to secure the pine to the concrete
where applicable; in some areas, I needed cleats at the
bottom edge, since the concrete was recessed from the
drywall in some areas, flush in others, and standing
proud in one corner. |
|

|
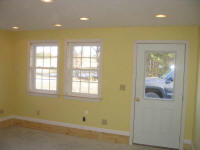
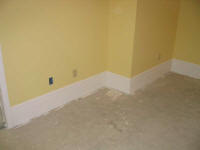
Over the top of the baseboard, I installed a pre-milled
base molding to finish off the edge and help hide the
uneven transition between the pine baseboard and the
walls. I nailed the base molding into the studs. |
|


|
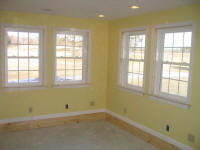
The windows and doors required some pine extension jambs
to make up the wall thickness, and then I cased out
these openings using standard window and door casing,
with pine stools on the four windows. |
|

|
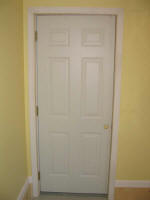
Between the office and the woodshop, I decided to
install an exterior steel door, as it would provide a
better seal against dust and noise. |
|

|
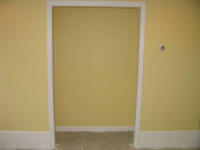
 The
supply closet received some pine trim around the inside
of the opening, finished off with more door casing
around the edges. I planned to install a 48"
bi-fold door later in the process. The
supply closet received some pine trim around the inside
of the opening, finished off with more door casing
around the edges. I planned to install a 48"
bi-fold door later in the process. |
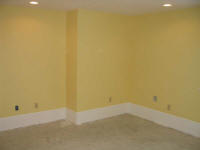
A week later, I painted the trim: 2 coats of
semi-gloss pure white on everything. |
|





 |
 With
the bulk of the office work complete, I took advantage
of a slow day to cut open the ceiling around the
non-functioning light fixture. I hated to open the
ceiling, but could see no other way around the problem,
as I was unwilling to live with the light in its current
condition. With
the bulk of the office work complete, I took advantage
of a slow day to cut open the ceiling around the
non-functioning light fixture. I hated to open the
ceiling, but could see no other way around the problem,
as I was unwilling to live with the light in its current
condition. |
 I
rounded up a photo of the ceiling from before I
drywalled, so that I could determine the location of the
wiring box and the nearby framing. Then, I opened
the ceiling with a knife, gradually widening my opening
till I exposed the strapping on each side, and enough of
the ceiling was open for me to reach the fixture's
wiring box. Inside the box, I discovered that the
fixture's neutral wire had not been tightly secured in
the wire nut, so I replaced the nut and ensured the
connection, and also tested the light to make sure that
all was well. (It was.) I
rounded up a photo of the ceiling from before I
drywalled, so that I could determine the location of the
wiring box and the nearby framing. Then, I opened
the ceiling with a knife, gradually widening my opening
till I exposed the strapping on each side, and enough of
the ceiling was open for me to reach the fixture's
wiring box. Inside the box, I discovered that the
fixture's neutral wire had not been tightly secured in
the wire nut, so I replaced the nut and ensured the
connection, and also tested the light to make sure that
all was well. (It was.) |
 Next,
I cut a patch of drywall for the opening, and screwed it
in place, installing additional pieces of strapping at
the short ends to support the seams there. Then, I
mudded and installed the paper seam tape. Next,
I cut a patch of drywall for the opening, and screwed it
in place, installing additional pieces of strapping at
the short ends to support the seams there. Then, I
mudded and installed the paper seam tape. |
 Later
in the week, when I was back up at the shop, I applied
two more coats of joint compound to the repair. I
was fortunate to be able to not only apply two coats of
mud in one day, thanks to the relative thinness of the
coats over the repair, but also to be able to apply 2
coats of ceiling paint late in the same day, compressing
the final stages of the repair into a pleasantly short
time. Later
in the week, when I was back up at the shop, I applied
two more coats of joint compound to the repair. I
was fortunate to be able to not only apply two coats of
mud in one day, thanks to the relative thinness of the
coats over the repair, but also to be able to apply 2
coats of ceiling paint late in the same day, compressing
the final stages of the repair into a pleasantly short
time. |
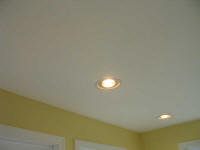
 With
the patch completed and covered with paint, it wasn't
even visible, unless one were looking for it (and even
then, it was tough). I was pleased with the
results, and glad to have the job behind me--an
irritation for which I had no one to blame but myself. With
the patch completed and covered with paint, it wasn't
even visible, unless one were looking for it (and even
then, it was tough). I was pleased with the
results, and glad to have the job behind me--an
irritation for which I had no one to blame but myself. |
|


|
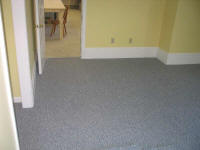
I like carpet for offices--it's quiet and warm.
With Heidi's help, I chose a nice Berber in a blue/gray
tone, with multi-colored flecks. I ordered the
carpet from Lowes, and while the installation and carpet
was satisfactory, I found the whole process to be
unnecessarily complex and cumbersome.
The carpet installation virtually
completed the office work. All that remained was to
get some real furniture in there, and get to work!
For now, though, this folding banquet table would have
to serve as the nerve center for Lackey Sailing's world
headquarters. |
|


|
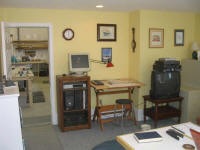
Some weeks later, I managed to complete
the work in the office. I built a large desk using
some basic Formica-covered tops (on MDF substrate),
which I installed using several filing cabinets as the
base. The three-sided desk filled most of the
corner of the office, and provided more than adequate
space for computers, printers, and other gear. I
looked forward to settling into my new, expansive work
space for good. I filled the other corners of the
office with a bookcase, drafting table, television, and
a chair. |
|

|
Click here to continue... |
This page was originally
posted on February 5, 2006
|
Updates |
2/12/06 |
| |
2/23/06 |
|
2/26/06 |
|
2/28/06 |
|
3/5/06 |
|
3/18/06 |
|
4/10/06 |
|
|