|
|
~MENU~ |
| Home |
| The Concept |
| The Boat |
| Bringing Her Home |
|
Weekly Progress Log |
|
Daysailor Projects |
| The Boat Barn |
| Resources |
| Other Sites |
| Email Tim |
|
|
| Unbuilding: Engine Removal | |||
|
The Atomic 4 belongs to the previous owner of #100. I didn't want it to begin with. As with everything else--out it must come. |
Interior Demolition | ||
| Engine Removal | |||
| Parts Removal | |||
| Projects Menu | Deck Removal | ||
May 5, 2003
With the surrounding cabinetry already removed, access to the engine mounting bolts and the still-attached copper exhaust system was as good as it could get. Fortunately, when I bought the boat, the propeller shaft and coupling had already been removed by someone else, so I didn't have to fight with any of that; I would have just cut the shaft anyway. A few days earlier, while already up in the boat with some tools and my reciprocating saw, I had made a half-hearted attempt to cut the engine bolts, but the saw blade was old and couldn't do the job. Of course I had no spares at that time. Armed with new blades, I attached the engine with a vengeance a few days later. It was a gorgeous, warm Sunday afternoon. We had company coming for dinner later that day, but I had several hours to play with. I knew I could get the thing out with no problem. |
|||
|
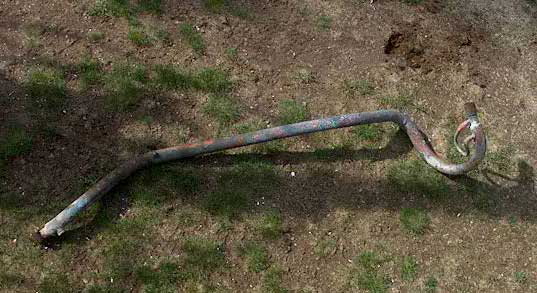
The first thing to do was unhook the original copper, water-jacketed exhaust system from the manifold. Of course, the bolts were rusted in place. Not amused by the prospect of days of flooding with PB Blaster and waiting, I carefully cut the exhaust free by running the saw through the gasketed area between the manifold and the exhaust flange, erring on the side of cutting the flange instead of the manifold, since the flange was most definitely a throwaway item; I didn't know what the manifold status was, but didn't want to damage it nonetheless. Thanks to some bad aim and a slightly bad cutting angle, the blade didn't cut through the gasketed area (and the two bolts holding the exhaust to the manifold) as straight as I had hoped, but the error, as planned, was on the flange side. It took a couple or three blades to get through the tough cast iron; the blades tended to snap off at the chuck on the saw from the angle. But soon enough, it was free; I found that with the icebox removed, I could actually sit on what remained of the settee and pole part of my head through the opening, making cutting about as comfy as it could have been. With the exhaust free, I remembered one final connection I had to remove before pulling the engine: the mechanical gear linkage. What luck--the cotter pin actually pulled immediately free, and the clevis pin came right out, freeing the linkage in a pair of seconds. When I did the same operation a few years ago on Glissando, the pin was frozen solid, and was a real bear to break free. |
|||
|
|
|||
|
With a fresh blade in the reciprocating saw, I made short work of the four bolts securing the engine; the engine was installed with small spacers, or shims, between the mounting flange and the engine foundation, so it was a cinch to get the blade in there and cut the decades-old bolts. With the bolts cut, it took only a little gentle persuasion with a flat bar to get the engine to move forward, and then swing free into the cabin. I lowered it temporarily to the cabin sole, since I had to reposition and raise the lifting beam in order to get the engine through the companionway. From here, it's probably best to let
pictures do the talking. Please click on the small photos to see a
full-size version. |
|||
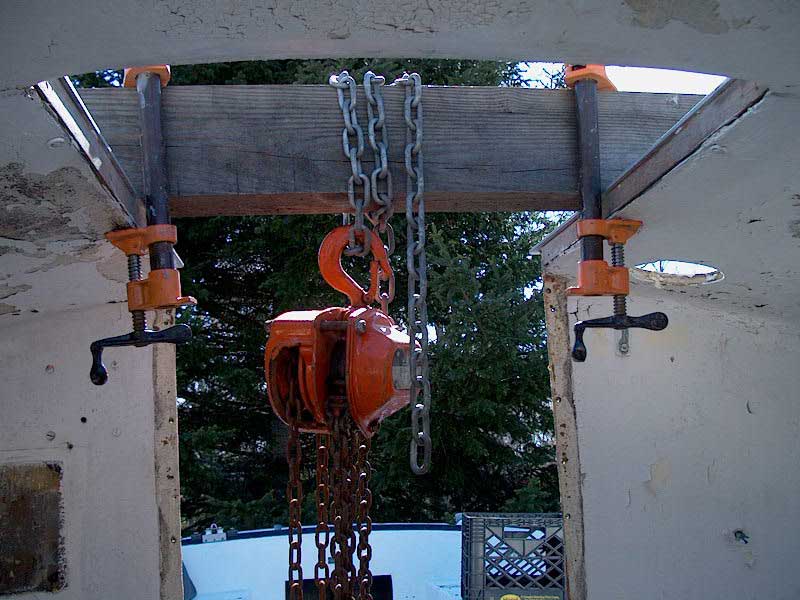 |
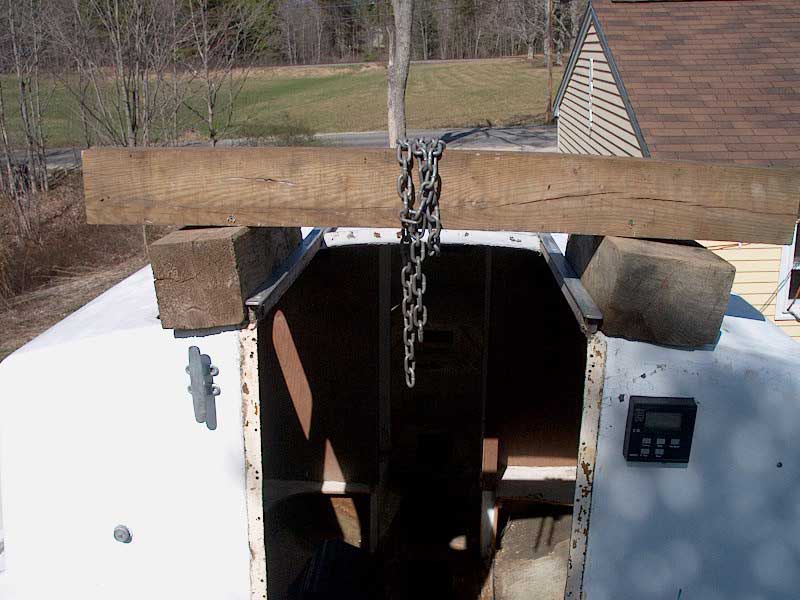
To pull the engine from its beds, and into the cabin, I first set up a basic hoisting rig consisting of a 4x6 pressure-treated beam that I laid across the companionway. Because of the rearward angle the chain would have to take initially, I clamped the beam in place. I hit my head many times on those pony clamp handles! | The hoist is attached to the lifting ring on the engine, and ready to pull it up and out. Some gentle persuasion with a flat bar was necessary to help it off the foundation, since the aft end lifted first, tending to make the forward end stick. | 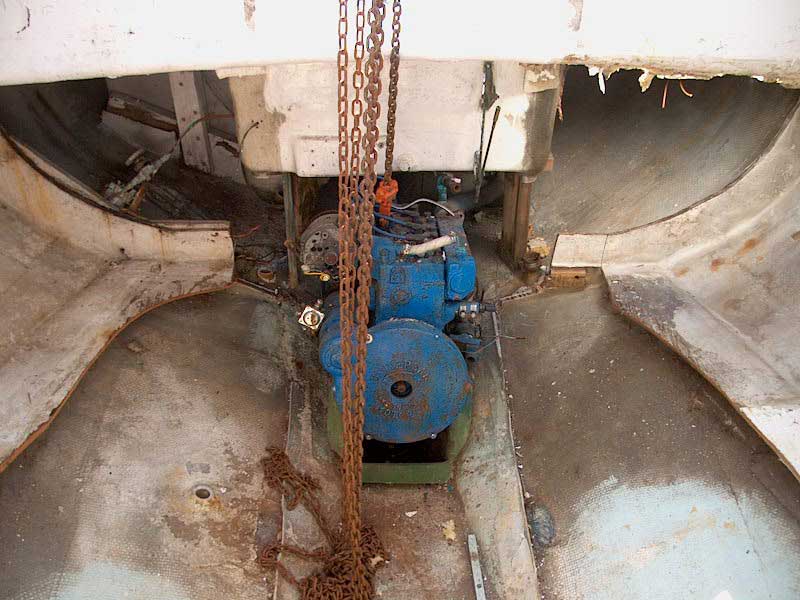 |
 |
Soon, though, the engine was free and swung forward beneath the hoist. | I lowered the engine temporarily to the cabin sole so I could reposition the hoist and raise it up a bit for the next step. I could have done this all with only one hoist position, but didn't realize at first that I'd need additional clearance to hoist the engine from the cabin. | 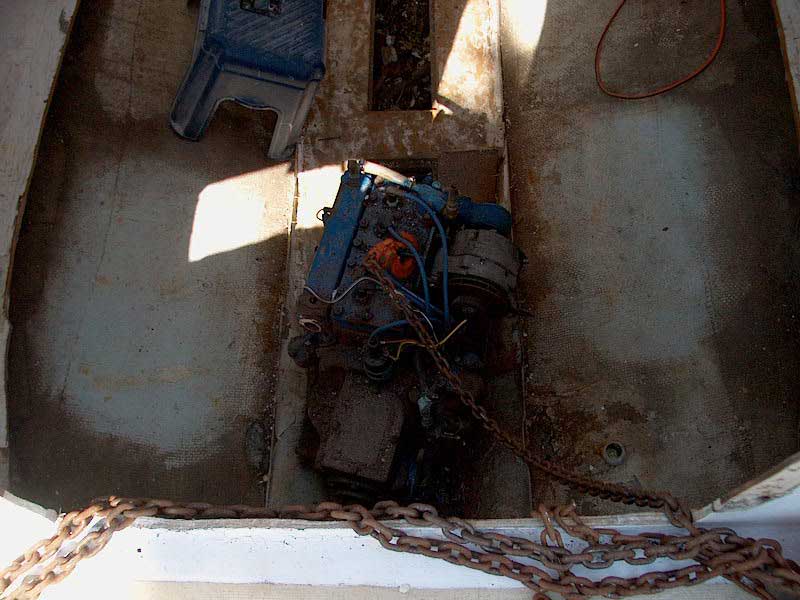 |
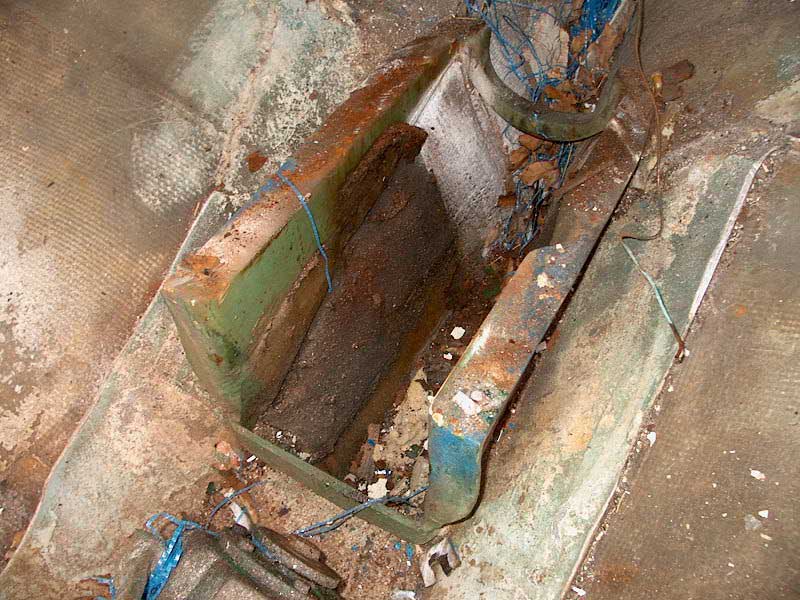 |
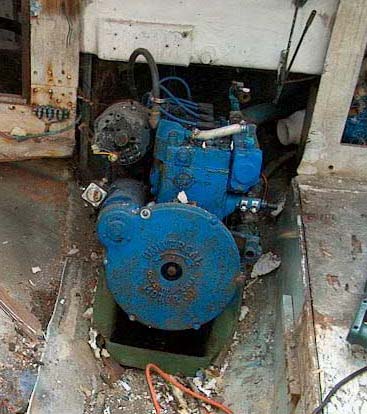
Where the engine had resided for who knows how long (perhaps never removed?), there was a lovely collection of gunk. This engine foundation will be removed later. |
I raised the beam up with a couple blocks, and actually screwed the beam to the blocks, and the blocks directly to the companionway trim. This stuff is all expendable since the whole deck will be removed and thrown away for this project. |
 |
 |
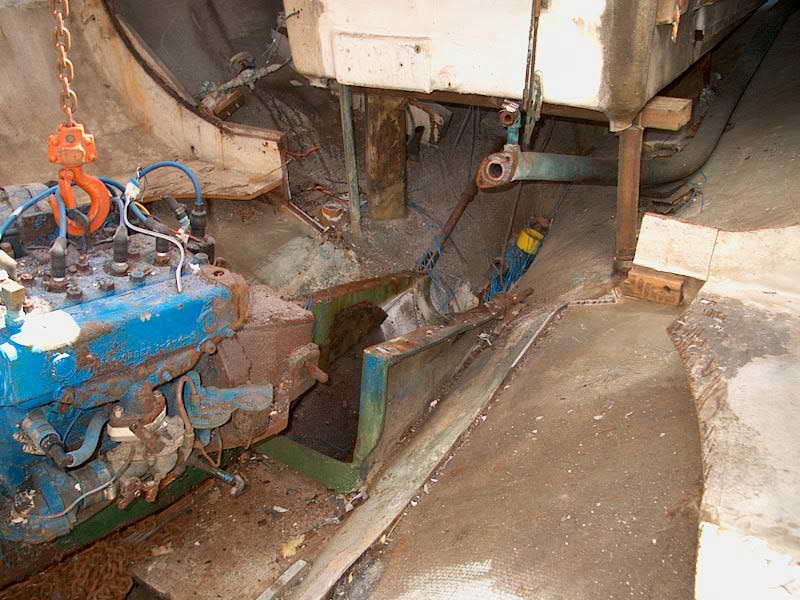
With the new beam position, it was no problem to lift the engine up and pull it onto the bridgedeck. Still, I virtually two-blocked the hoist in the process--another few inches would have been nice, but I always seem to end up with minimal hoist clearance for some reason. | The engine, resting on the bridgedeck. Just another view. | 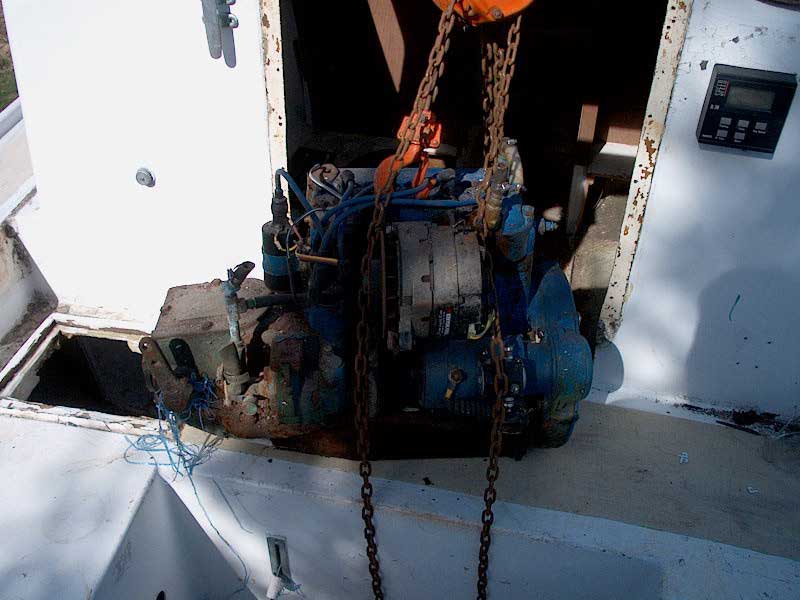 |
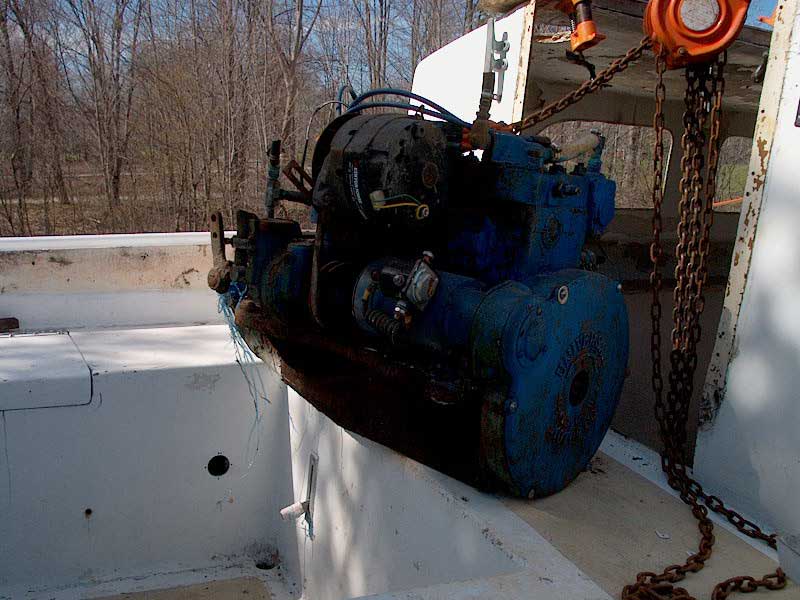 |
Another view of the rusty Atomic 4. | I pushed the engine over to the side of the cockpit, as I didn't have time to rig a hoist to lower it to the ground. Later, I covered it with some plastic to protect it from rain. | 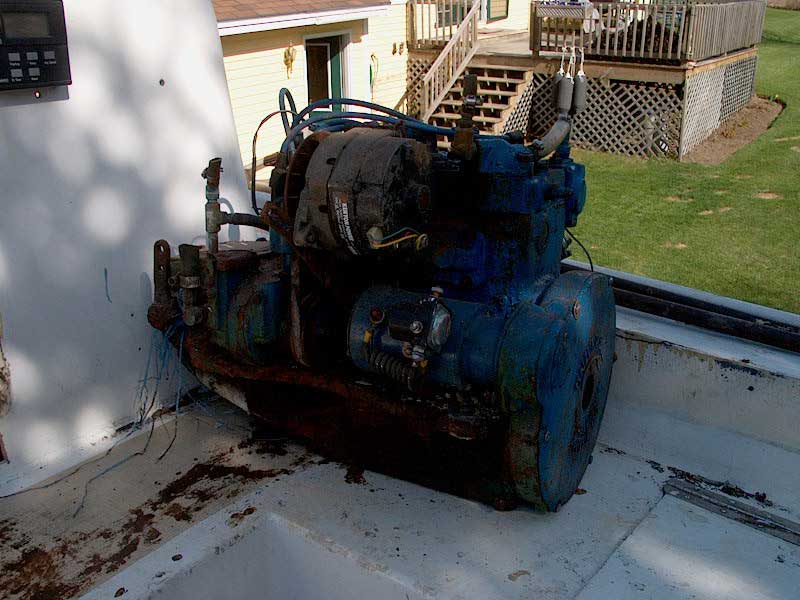 |
|
|
|||
|
|
|||
 During
some of my earlier days working on the interior of the boat, I had managed
to disconnect some of the engine connections (wiring, fuel line,
throttle). But I hadn't really concentrated on removing it.
When spring arrived, and I had cleared out more of the debris from earlier
interior demolitions, I decided one Sunday afternoon, spur of the moment,
that the time had come to pull the old Atomic 4 off its beds and out of
the boat, which could clear the way for further interior demolition.
During
some of my earlier days working on the interior of the boat, I had managed
to disconnect some of the engine connections (wiring, fuel line,
throttle). But I hadn't really concentrated on removing it.
When spring arrived, and I had cleared out more of the debris from earlier
interior demolitions, I decided one Sunday afternoon, spur of the moment,
that the time had come to pull the old Atomic 4 off its beds and out of
the boat, which could clear the way for further interior demolition.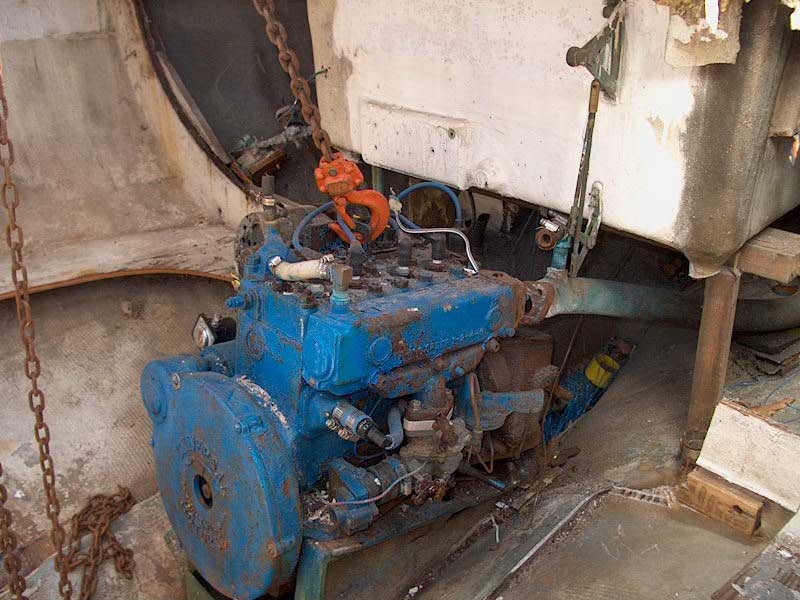 Before
continuing, I decided to set up my chain hoist and attach it to the
engine, so that in case the engine wanted to move once the bolts were cut,
it couldn't go far. I was a little wary of the remaining strength in
the coachroof, which would have to support the beam and weight of the
engine; the coachroof is so water-soaked that it's sagging from weakness
and additional weight. Still, all I wanted to avoid was injury; if
the coachroof broke from the weight, no big deal, since it's going to be
cut off anyway. With that in mind, I placed my lifting beam--a
length of pressure treated 4x6--across the companionway, wrapped a chain
around it, and hooked up the chain hoist, attaching the hook to the
lifting ring on the engine and taking up most of the slack.
Before
continuing, I decided to set up my chain hoist and attach it to the
engine, so that in case the engine wanted to move once the bolts were cut,
it couldn't go far. I was a little wary of the remaining strength in
the coachroof, which would have to support the beam and weight of the
engine; the coachroof is so water-soaked that it's sagging from weakness
and additional weight. Still, all I wanted to avoid was injury; if
the coachroof broke from the weight, no big deal, since it's going to be
cut off anyway. With that in mind, I placed my lifting beam--a
length of pressure treated 4x6--across the companionway, wrapped a chain
around it, and hooked up the chain hoist, attaching the hook to the
lifting ring on the engine and taking up most of the slack.