|
|
~MENU~ |
| Home |
| The Concept |
| The Boat |
| Bringing Her Home |
|
Weekly Progress Log |
|
Daysailor Projects |
| The Boat Barn |
| Resources |
| Other Sites |
| Email Tim |
|
|
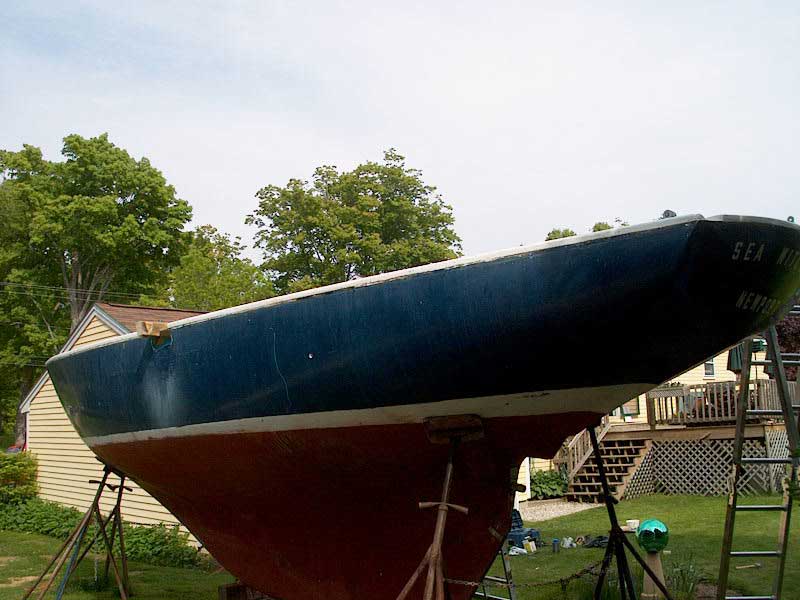
| Unbuilding: Deck Removal (Page 2) | |||
|
In a short period of time, it's amazing the sort of irreversible destruction one can wield with a power saw. |
Interior Demolition | ||
| Engine Removal | |||
| Parts Removal | |||
| Projects Menu | Deck Removal | ||
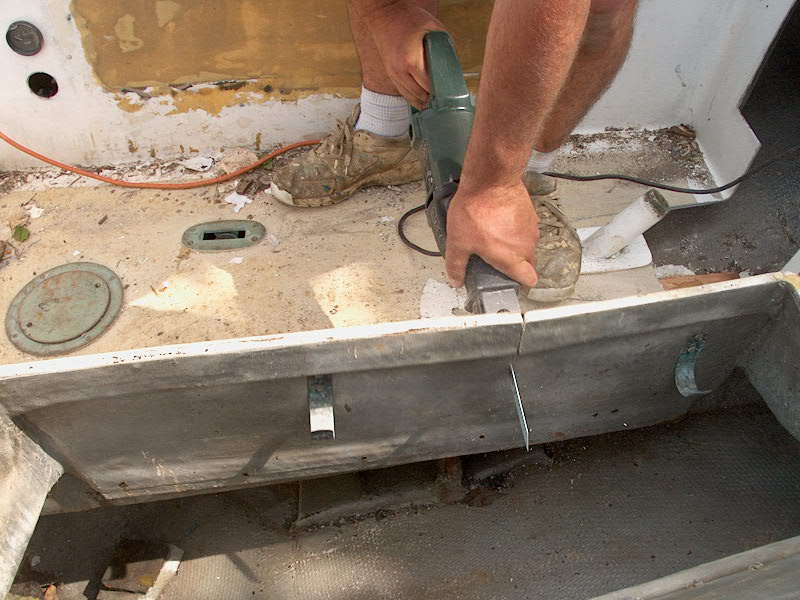
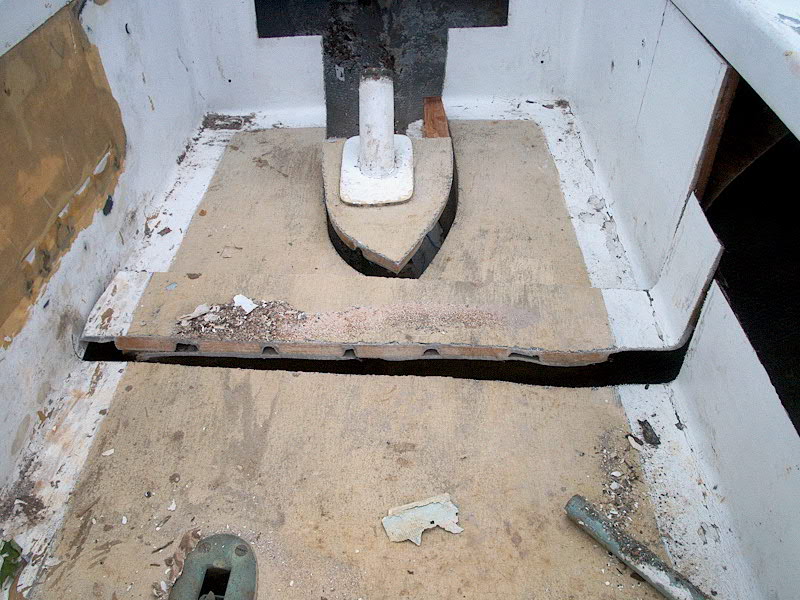
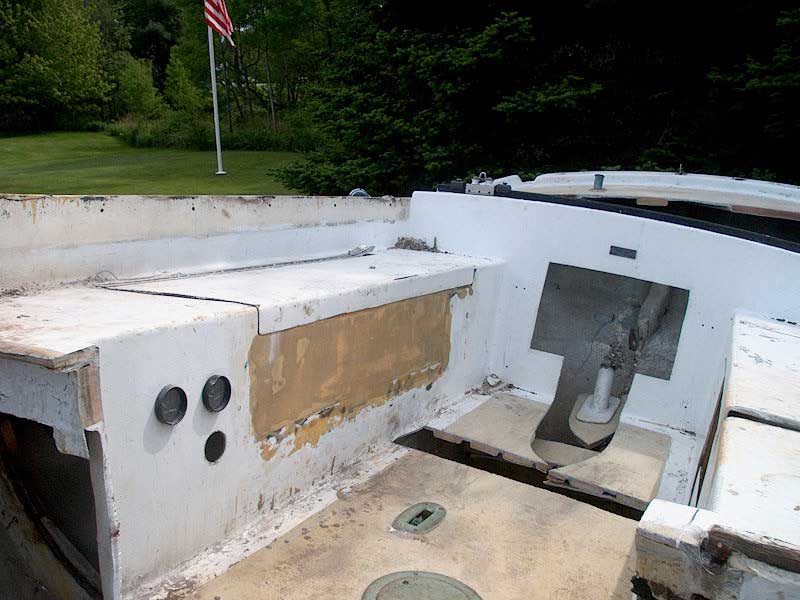
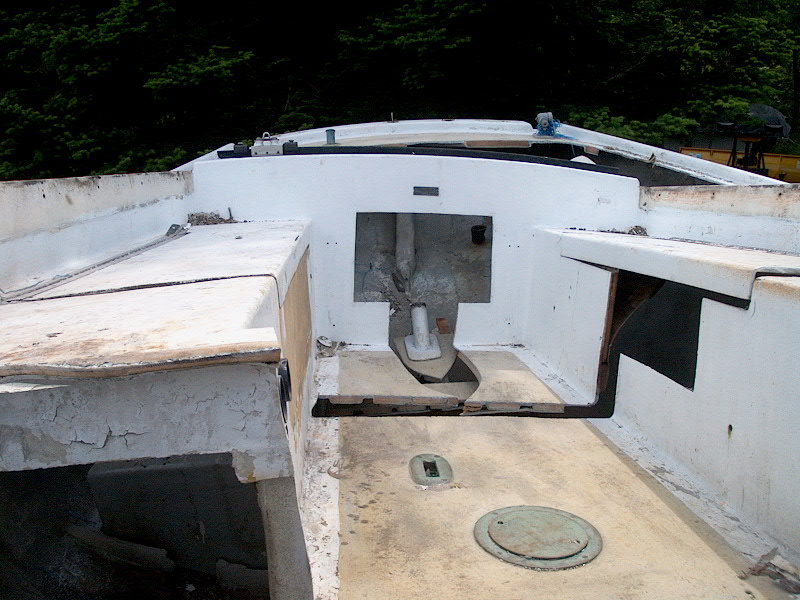
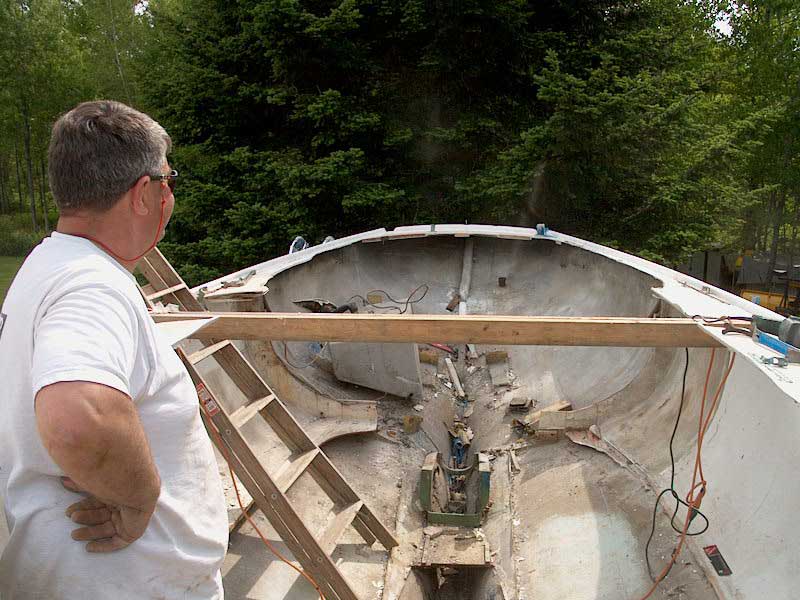
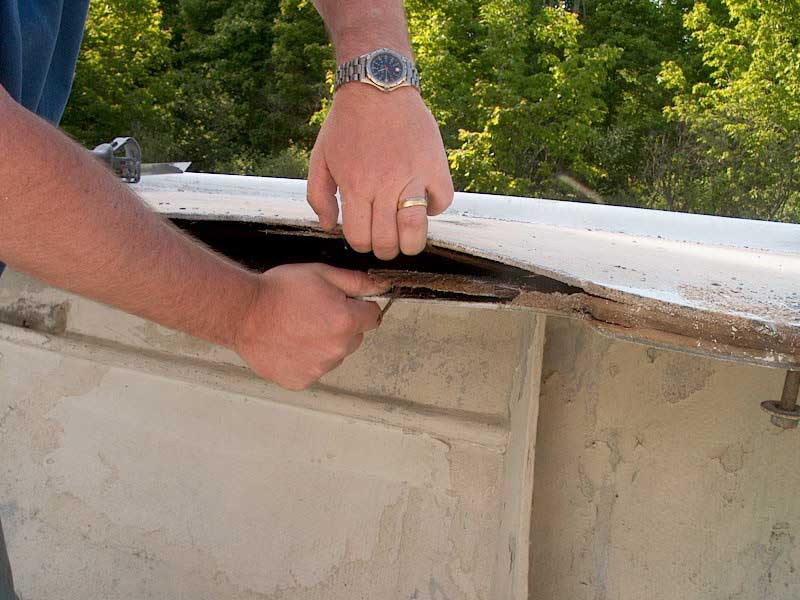
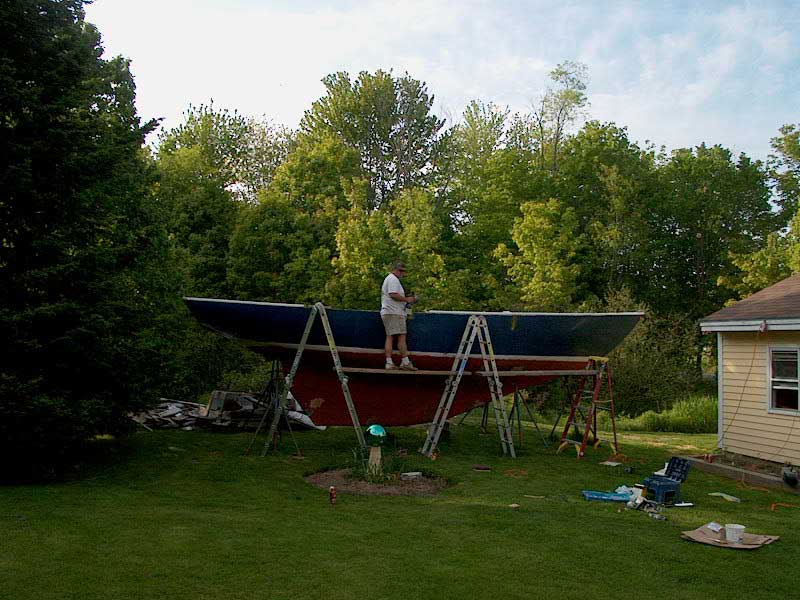
| Wednesday, June 4, 2003 With the cabin trunk off in one piece, we turned our attention to the remaining sidedecks, cockpit, and toerail. The cabin trunk had come off so easily, and with a minimum of fuss; certainly, having Nathan on hand was a big help so far, since I never would have tried moving the cabin trunk in one piece otherwise. (My plan had been to cut it into manageable pieces as needed.) But it soon became apparent that the trunk was the easy part of the job. The cockpit was next. I hoped to remove it in one large piece, since in demolition it always pays to get at much out in as few pieces as possible--less work, obviously. So we cut around the edges of the cockpit along the narrow sidedecks and across the poop deck, which more or less freed the bulk of the cockpit. However, there were a couple thorns in our side: a plywood brace that was installed athwartships beneath the middle of the cockpit, and the rudder tube, located just aft of the brace. I wanted to retain the rudder tube at least for now, since I didn't know exactly how I planned to handle that later on, so the easiest thing to do was to basically cut out around the rudder tube through the cockpit floor, beginning at the lazarette hatch beneath the poop deck and cutting a roughly boat-shaped piece of the cockpit sole that would allow the rest of the cockpit to be removed without harming the rudder tube.
|
|
|
|
|
|
With all the various freeing cuts made, the cockpit became loose and dropped down a small amount. At first, we tried prying up one side, while standing on ladders outside the boat, in the hopes of catapulting it over the opposite side. Nope--that wasn't going to happen. The cockpit was too heavy, too bulky, and hung up on a couple of the cut areas. So, instead we climbed into the boat and began selective surgery on the front part of the cockpit, cutting away first the bridgedeck (cored, on this boat), then the forward end of the cockpit to allow a better grip and simply to remove some weight. The cutting was somewhat complicated by a deep pool of water in the forward corner of the cockpit, right where I wanted to cut. I didn't relish the idea of running my electric saw through deep water, so eventually we managed to twist and torque things till the water ran off into the bilge. With the forward portion of the cockpit cut away, we found we could more easily heft things around. Still, the unit was badly hung up on the double cuts we had made across the center, in way of the underlying support. Nathan climbed back there, gingerly making his way across the shimmering cockpit, and increased the size of the cut in a few places, and with that, we were finally able to free the cockpit and start moving it to the side. It was still heavy and awkward, but we soon had it perched on the port rail, and after freeing the copper fuel tank vent, we gingerly made the attempt to throw it over the side. It didn't quite act the way we anticipated as it fell, but the end result was what we wanted: it was now on the ground and out of the boat. No harm done to anything or anyone. |
|
|
|
|
|
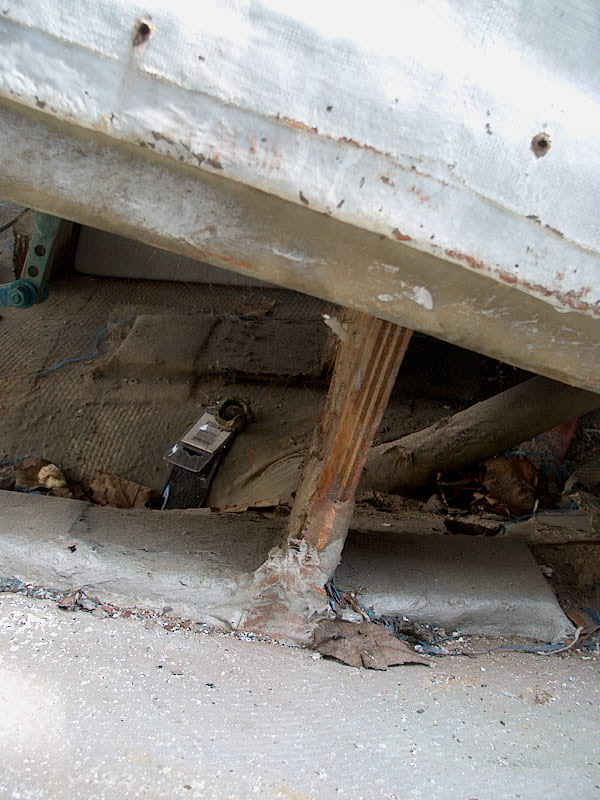
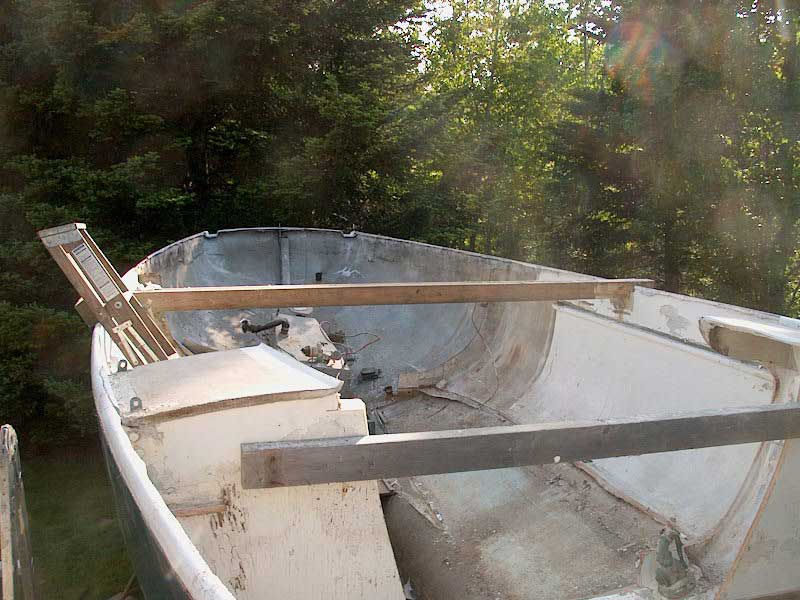
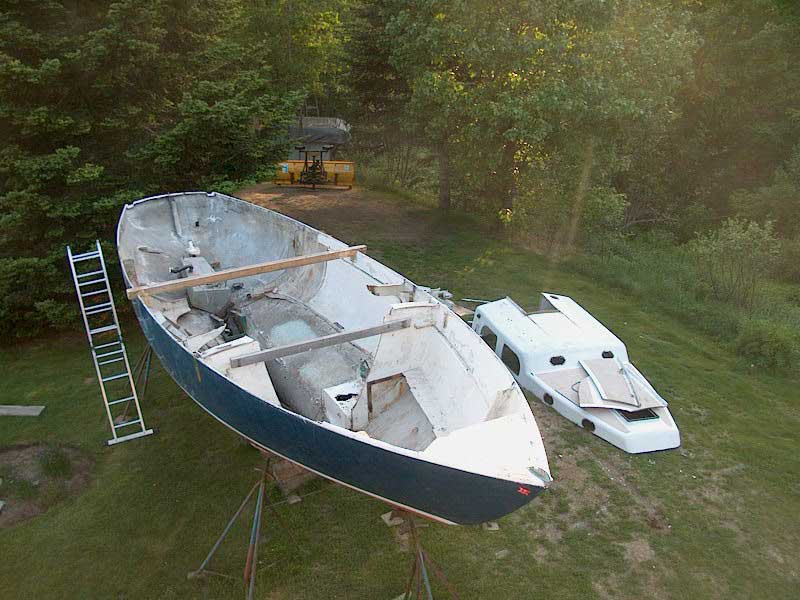
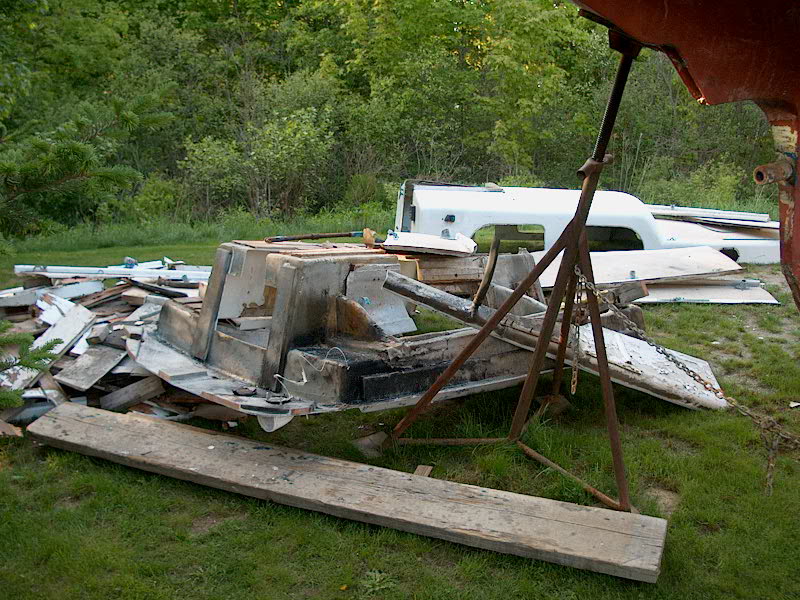
With the cockpit now out of the boat, the hull really looked empty. Of course, the hull was full of debris, both from the demolition and plenty of pre-existing stuff that had already been jammed in beneath the cockpit and other areas. It seemed really odd to look aft and see only the inside of the hull! The ornery brace beneath the cockpit could now come out with a few hard kicks. |
|
|
|
|
|
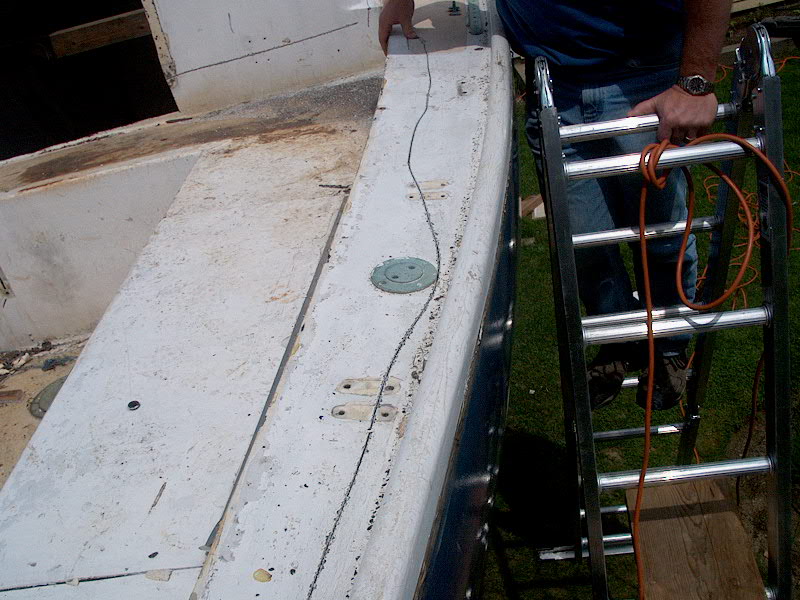
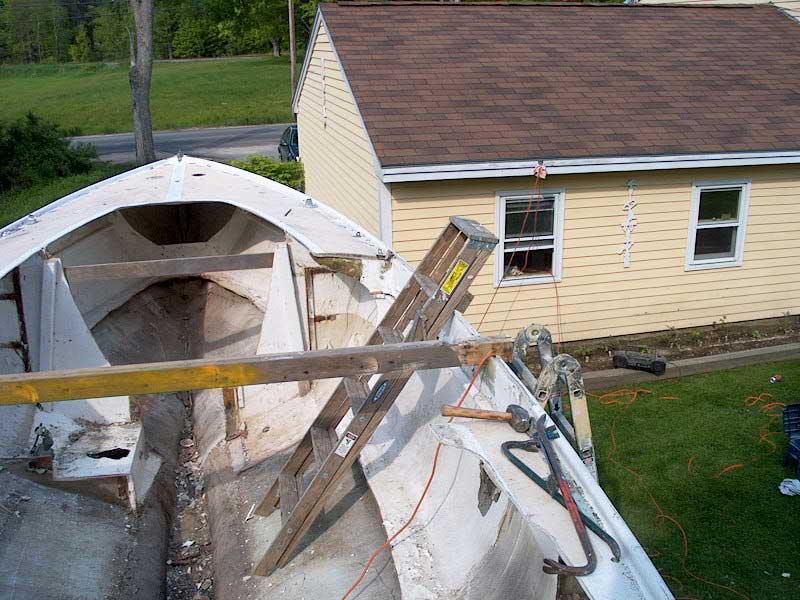
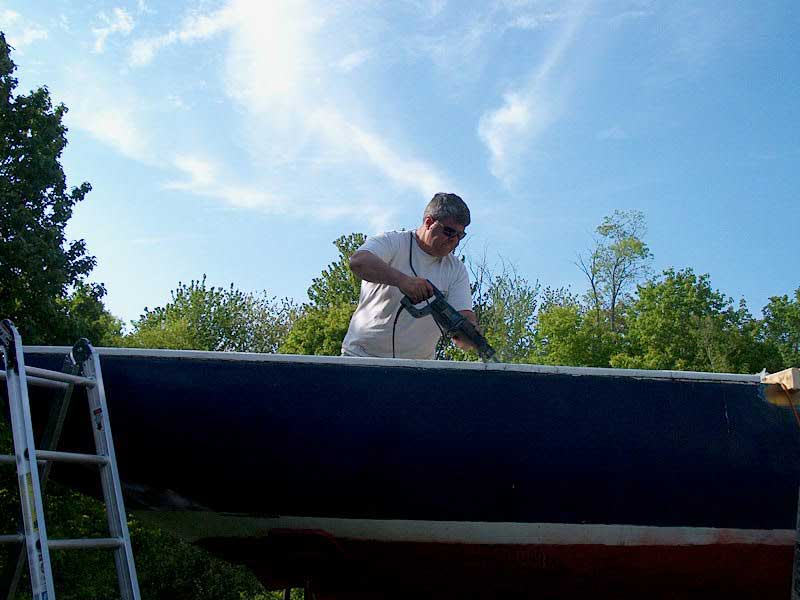
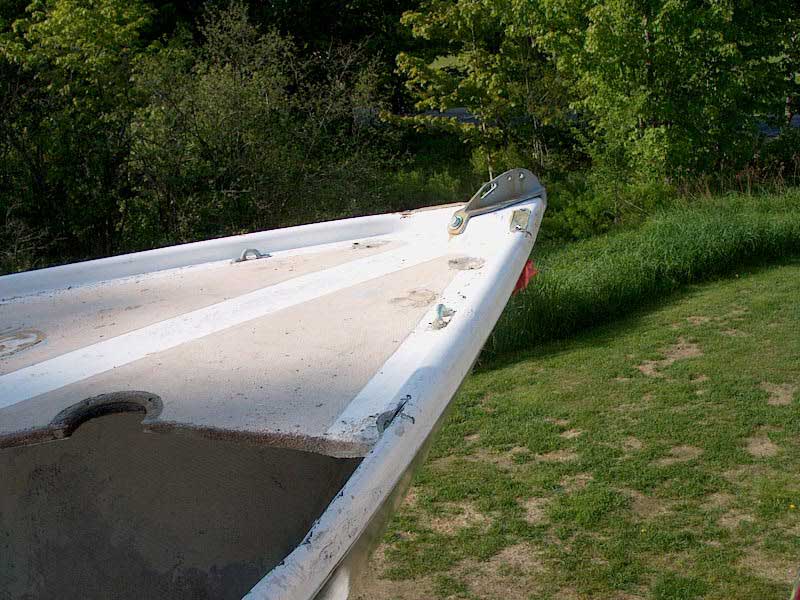
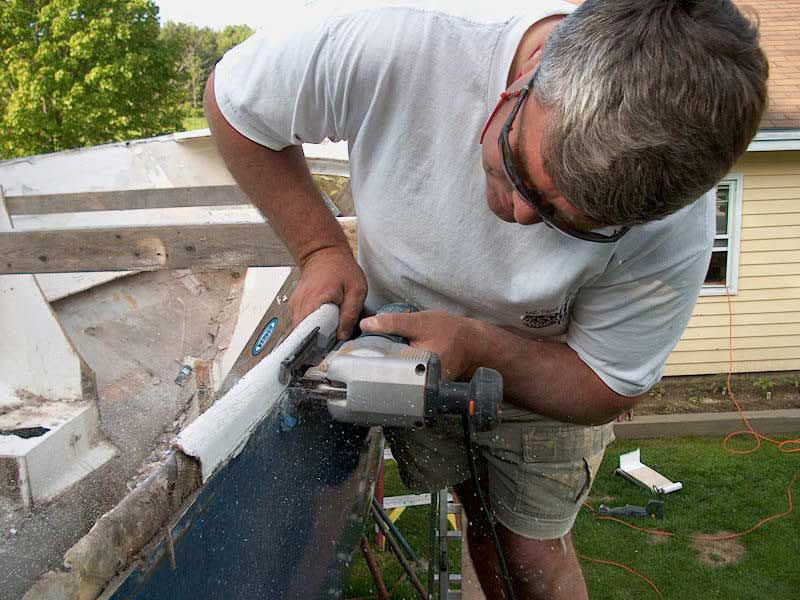
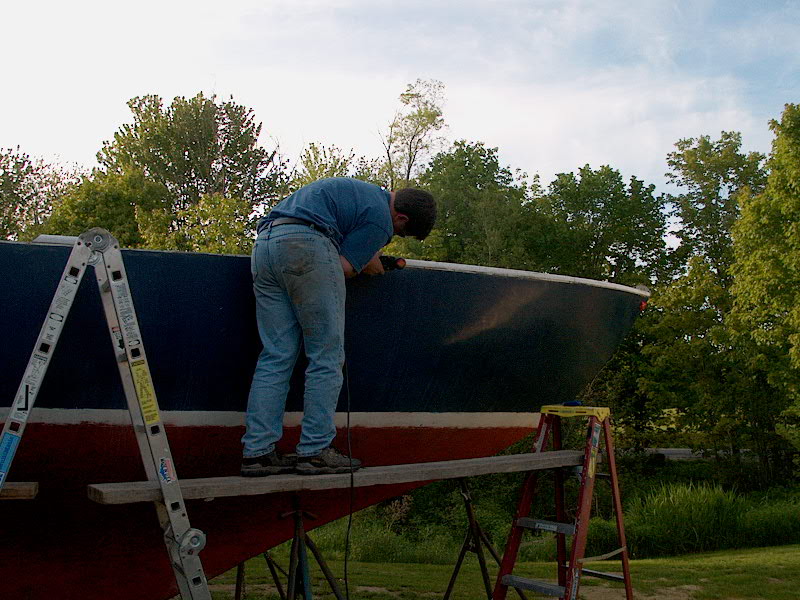
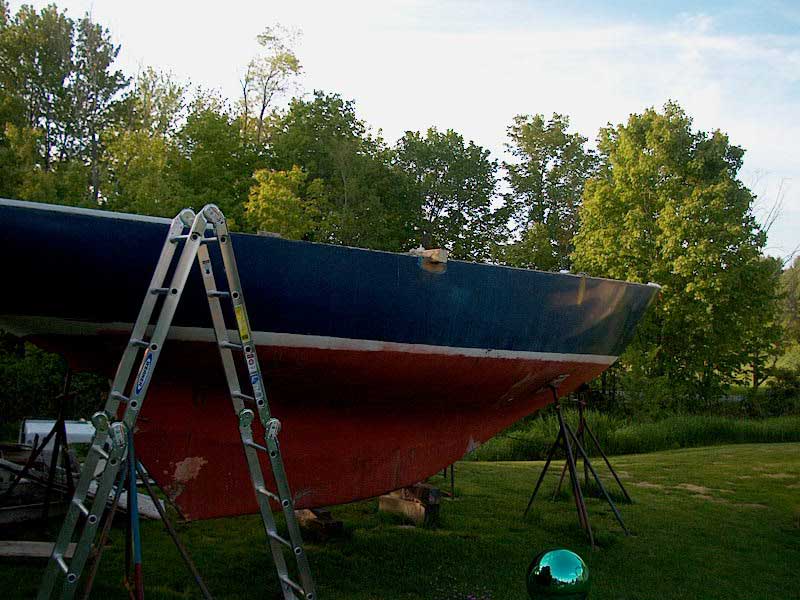
After taking several minutes to marvel at the mess we had created, it was time to saw out the remaining sidedecks. I planned to remove the decks and toerail down to the natural seam between deck and hull, which seemed like the most logical--and cosmetically pleasing--line to which to cut. When I cut out the small deck sections earlier in the day to install my cross beam, the cut provided a clear insight into the toerail construction. It looked like the best way to remove the decks would be to cut vertically through the toerail, which would free the bulk of the sidedecks and remove any further obstructions to cutting the remaining part of the toerail off from the outside by following the seam. While it would have been nice to simply make one cut from outside the boat, following the seam, I found that because of the design of the toerail and deck, the saw would have to angle slightly downward (from outside to inside) to clear the inside of the toerail; this would leave an angled cut on top of the hull, which I didn't want, and since this particular cutline is very important--it will define the sheer from here on out--I didn't want the cut to be imprecise. Cutting through the toerail vertically through the top, down its basic centerline, was fairly straightforward and wend pretty fast. It got trickier near the stem, where the flare of the hull started to interfere with cutting, so we left a small section of the foredeck in place to be dealt with later. Taking turns, Nathan and I sawed our way all around the boat, freeing small sections of the deck at a time. The pieces of sidedeck and foredeck were inordinately heavy, it seemed, especially after we had found the entire coachroof to be lighter than expected. All the core was wet and saturated with water, and was badly damaged in all areas (not a surprise). Because the forward two bulkheads were still at least partially intact, we simply cut around them for now, leaving small sections of the deck in place for cleanup later. |
|
|
|
|
|
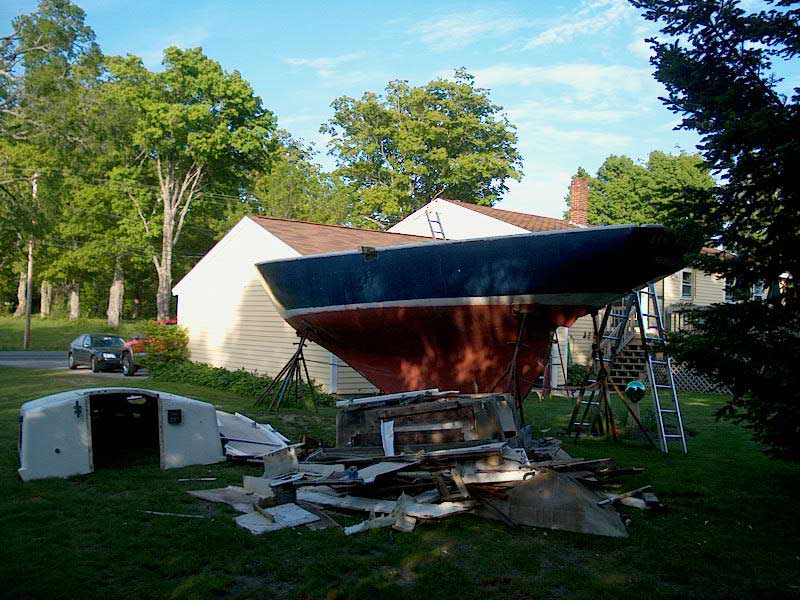
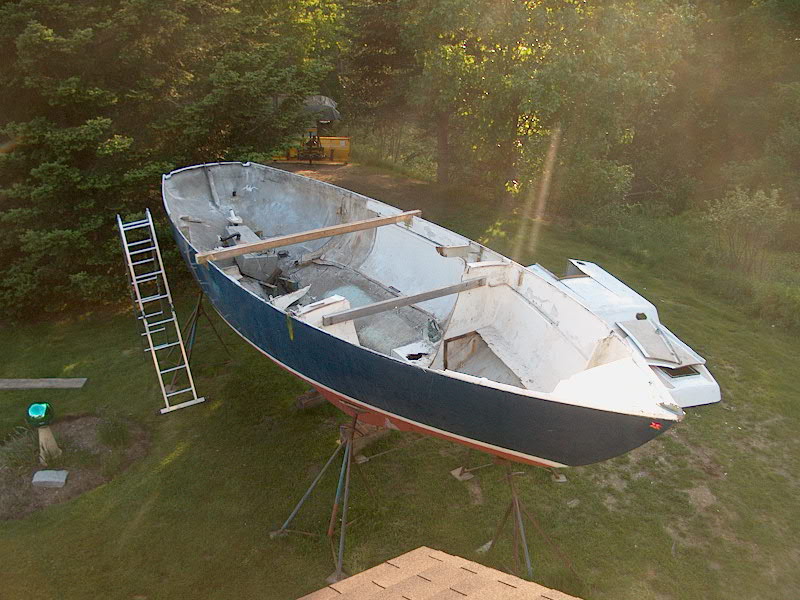
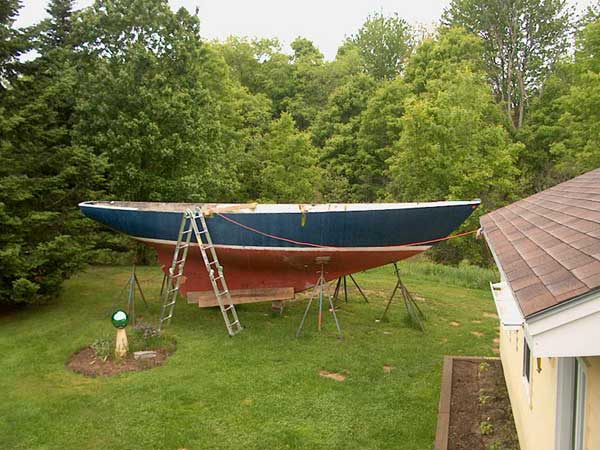
It was getting late in the day now, and we were both pretty tired. Still, we hoped to get the remainder of the toerail sawed off, which would really give a clear picture of what the hull was going to look like sans deck. I decided that it made sense to use my jigsaw to cut through the seam, since it was a much more precise tool than the Sawz-all. The cutting wasn't too bad, but cutting thick fiberglass with a small blade is always something of a slow process, and after a while it became clear that we were pretty much ready to stop for the day. After breaking a series of blades, I decided that it must be a sign, and called a halt to the work. In about 6 hours' time, we had managed to stiffen the hull, removed the entire deck (except for a few small portions), and make a huge pile of trash next to the boat. We decided that we had to climb up on the nearby shop roof in order to get a better view of the boat in its entirety. The view was definitely pretty cool! It was a long, but very satisfying, day's work. Special thanks to Nathan for his help, without which the process never would have gone as quickly or smoothly--and also for his assistance in taking photos of me at work, something that is impossible during all the time I work alone.
|
|
|
|
|
|
|
|
|
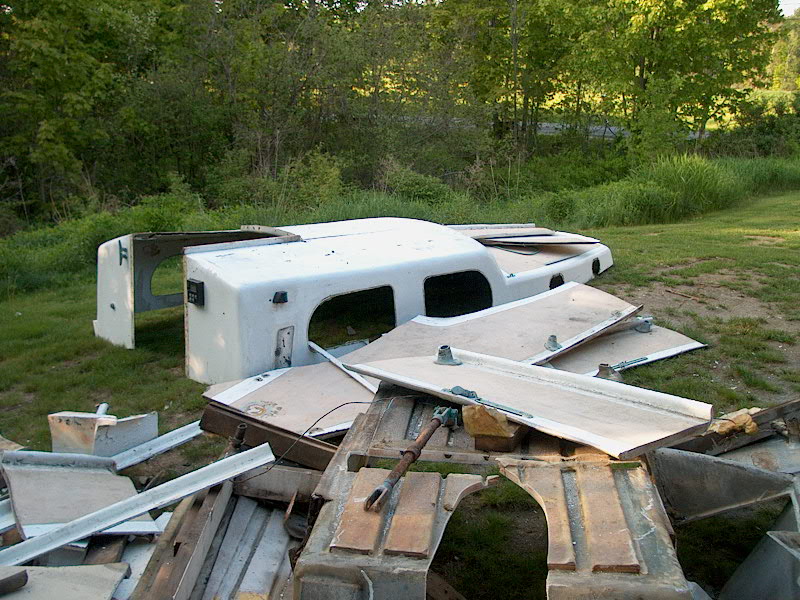
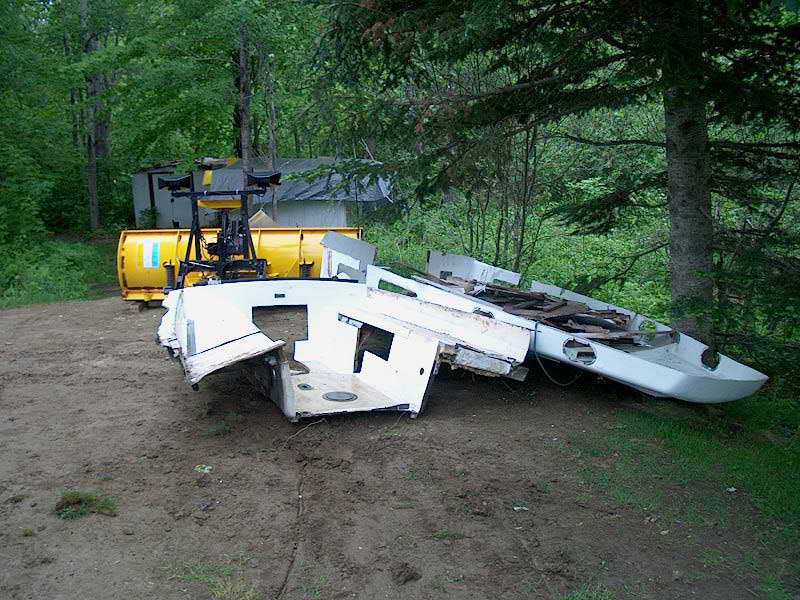
A few days later, I cleaned up the trash pile next to the boat, moving it to a nearby section of the yard where it was less in the way. I found I could drag the large pieces--the coachroof and the cockpit--with my tractor, and then I stacked all the smaller bits inside the upturned coachroof for temporary storage while I cut up the larger pieces, remove any remaining deck hardware that needs to be saved, and prepare everything for disposal. Bit by bit, as time allows, I'll carve things into manageable pieces and throw some away in the weekly trash pickup (I love my trash pickup. They take everything--glad I get something for my tax dollars, after all!)
|
|
|
|
|
|
|
|