

January 2, 2025
PT11-46
Thursday
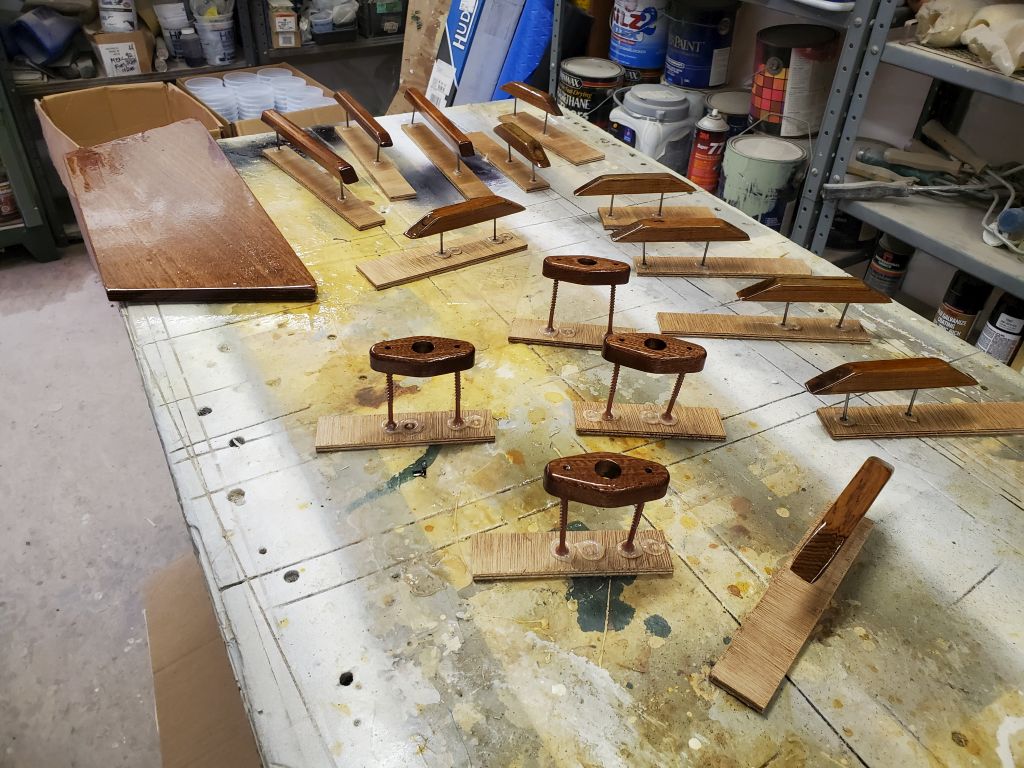
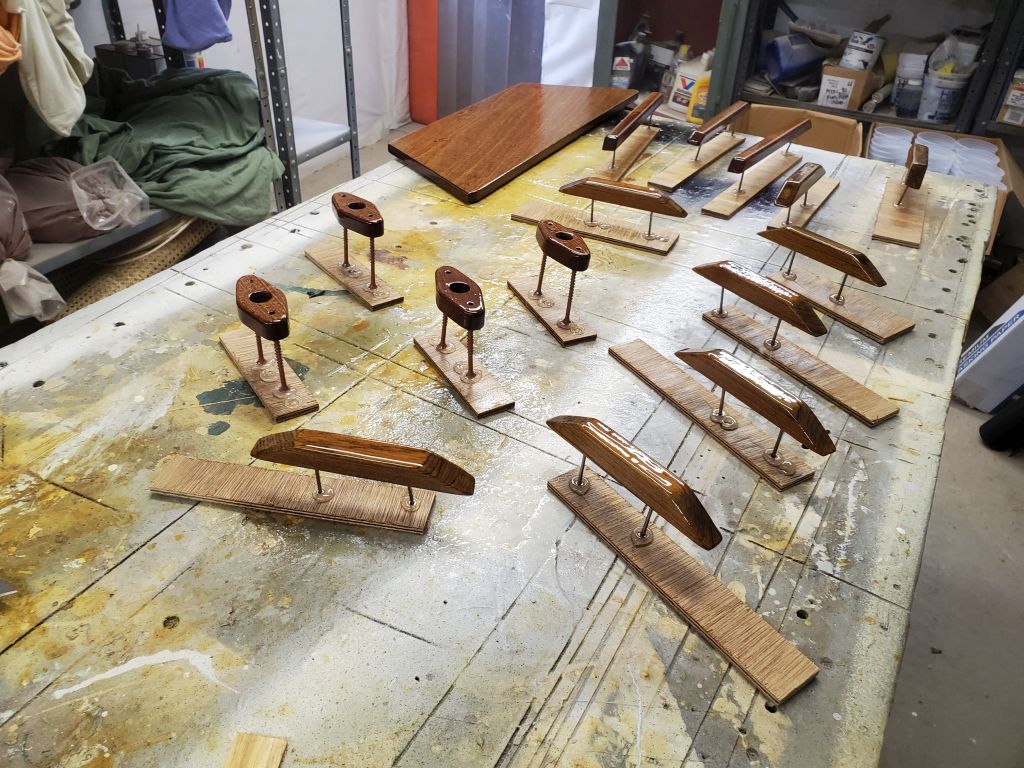
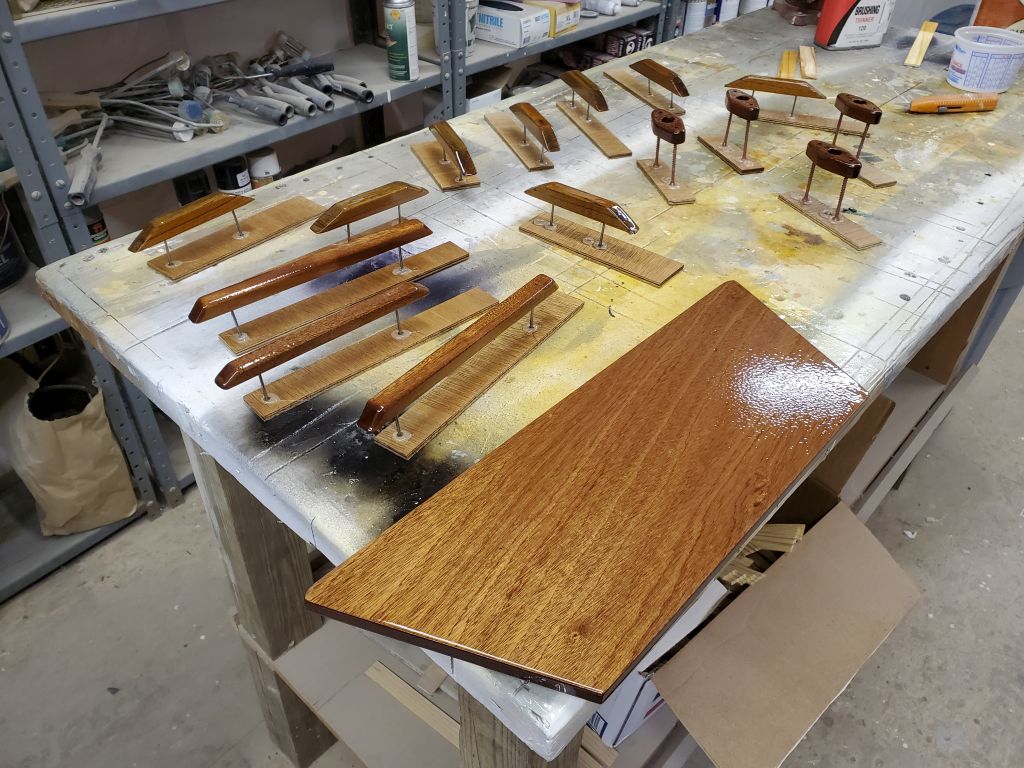
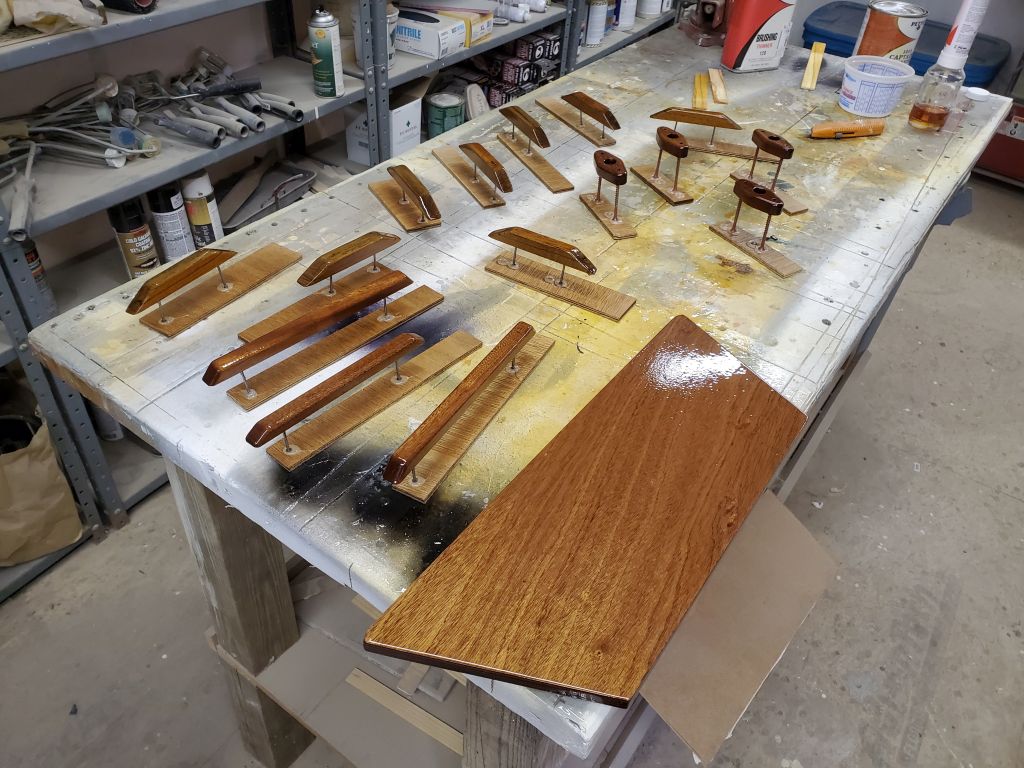
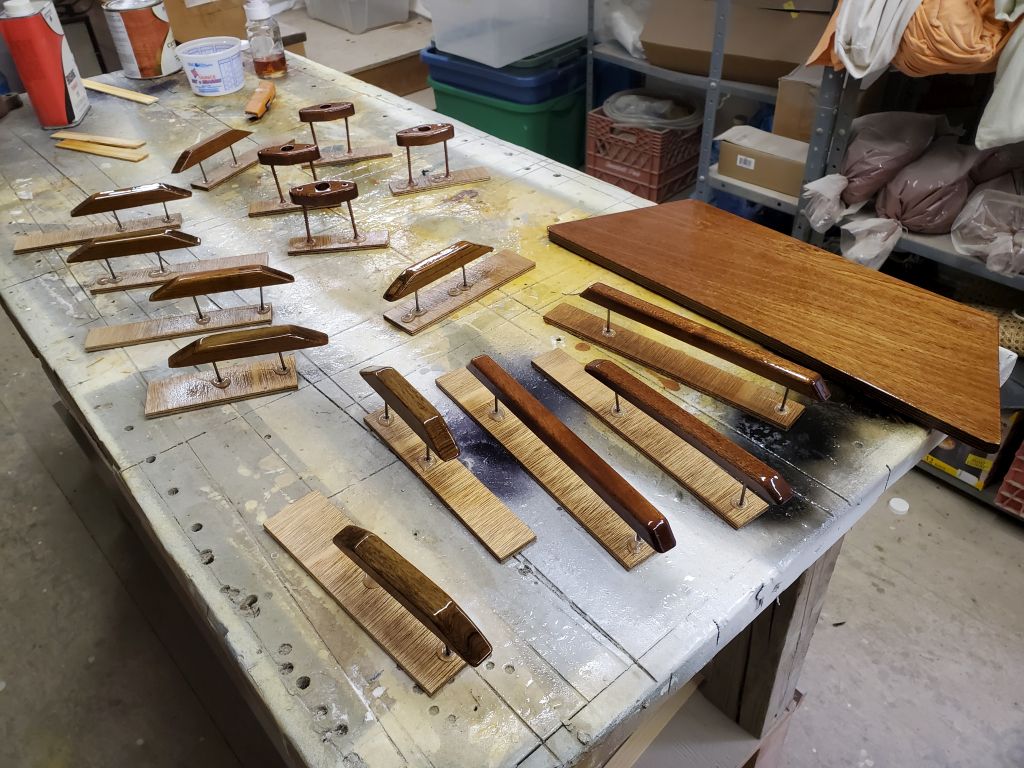
I like to start the day with any routine sanding work, to get it out of the way and be able to continue whatever next steps there might be, so with the 17 small parts (plus the aft seat) now heavily epoxy-coated, it was time to lightly sand the epoxy to prepare it for the final finish. These were nice mahogany parts, and I elected to go with a varnish finish for these small bits as an offset to the rest of the boat. I lightly sanded the epoxy with 220 grit paper to remove gloss and any surface interruptions.
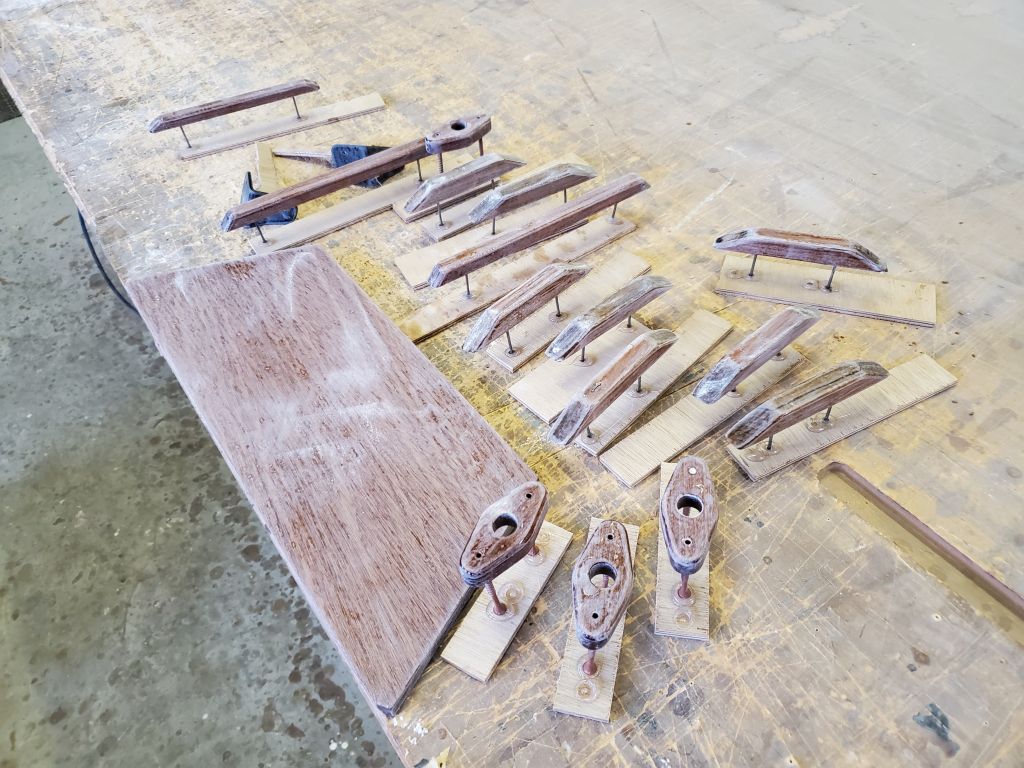
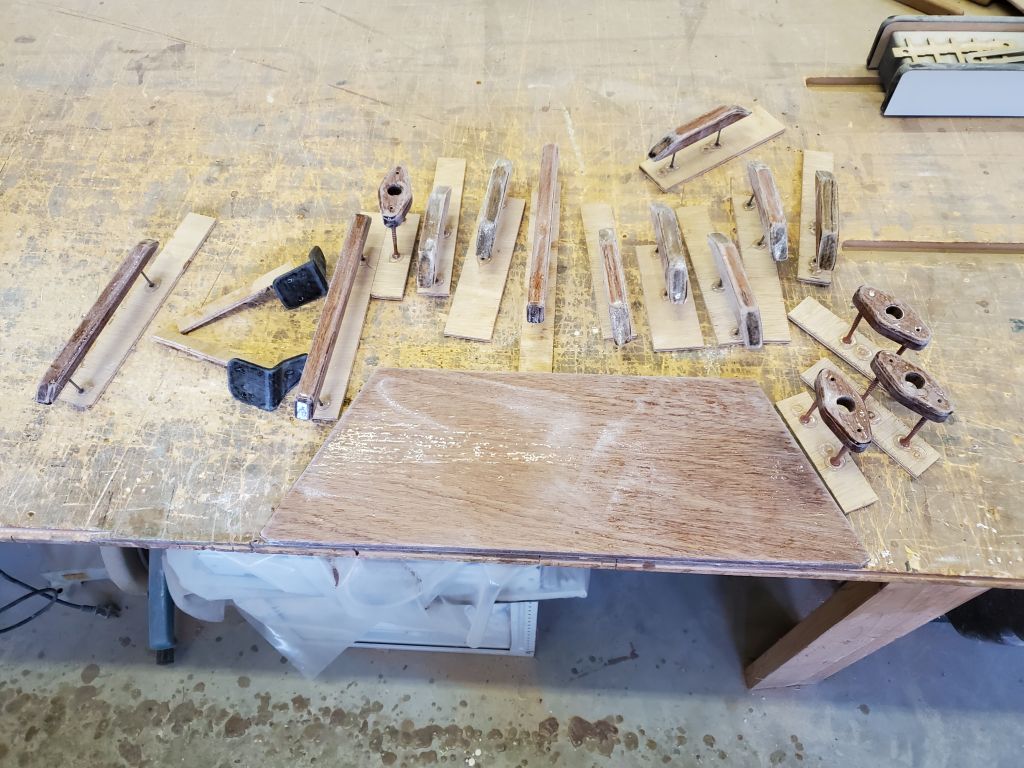
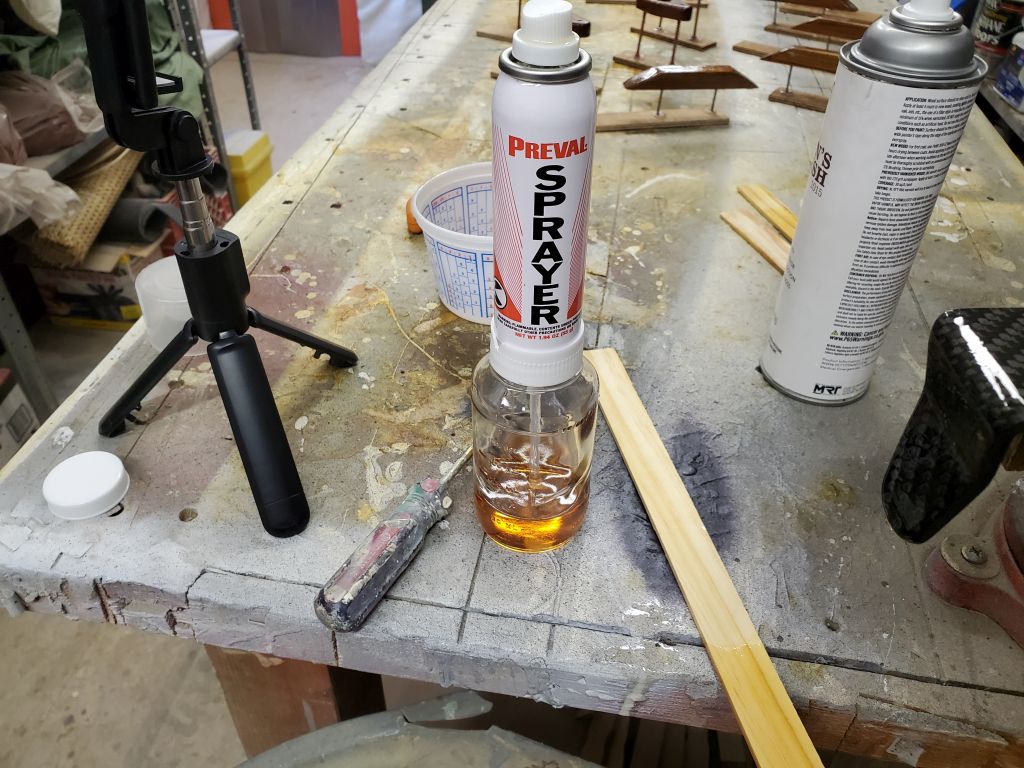
These parts were perfect candidates for spray varnish, which would be quick and easy to apply for many coats over a relatively short timeframe. I happened to have a spray version of Captain’s Varnish, a relatively new offering that I’d had on hand for a while, but had only rarely used. Unfortunately, the spray mechanism failed as I tried to use it, which was disappointing since the product had worked well during my earlier uses, so instead I mixed some varnish with enough thinner (no more than needed) to allow me to use a small DIY spray bottle instead, and this worked well throughout the day. I returned several times during the day to spray on additional varnish, a quick process each time.
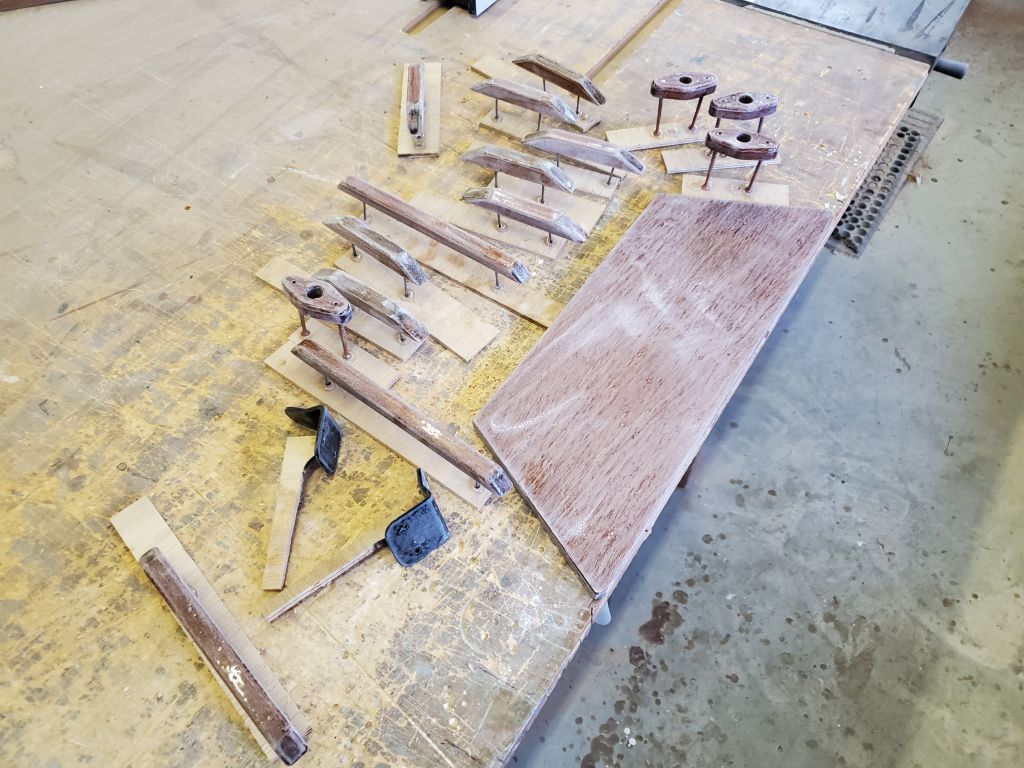
First coat:
Second coat:
Third coat:
Fourth coat:
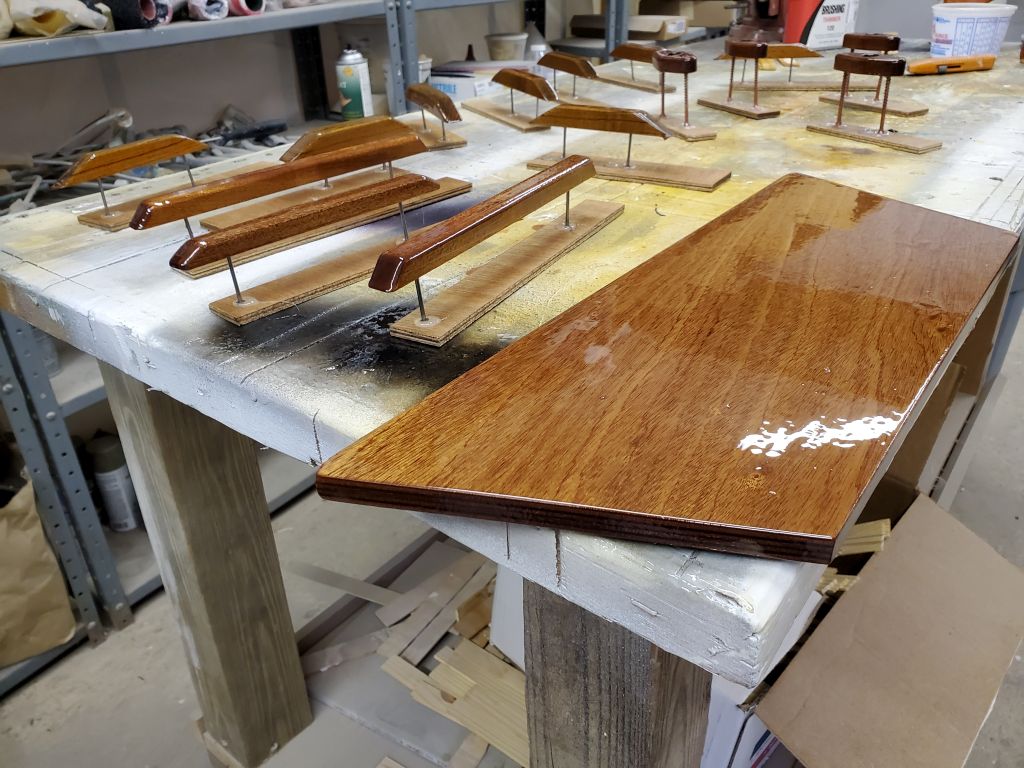
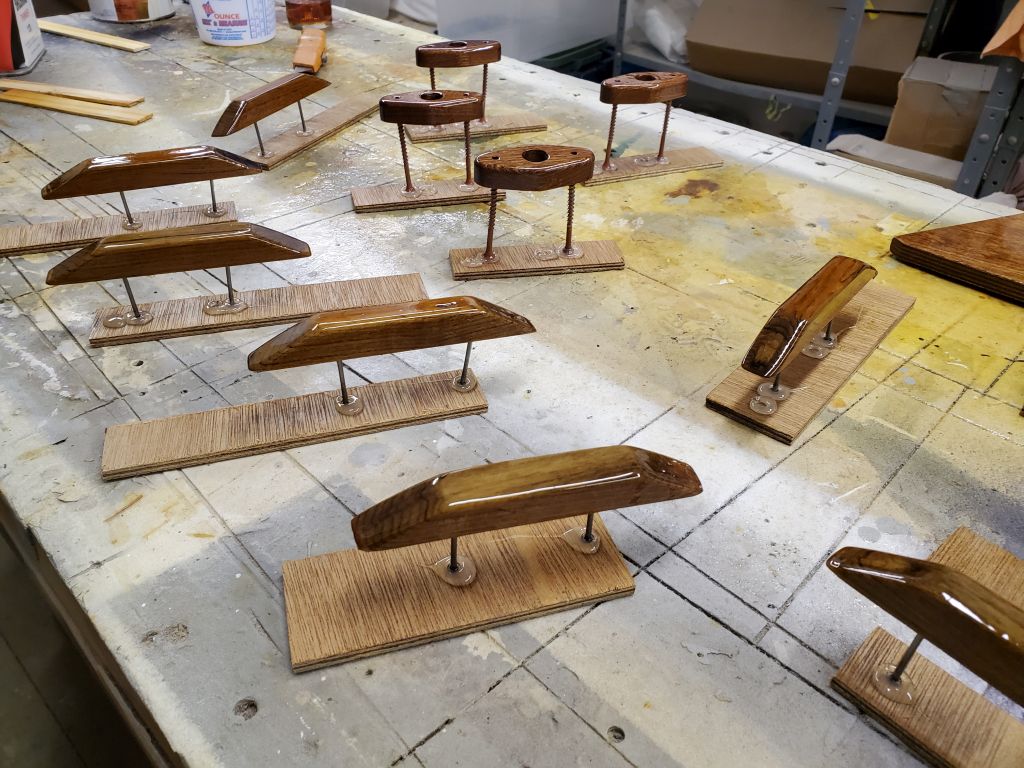
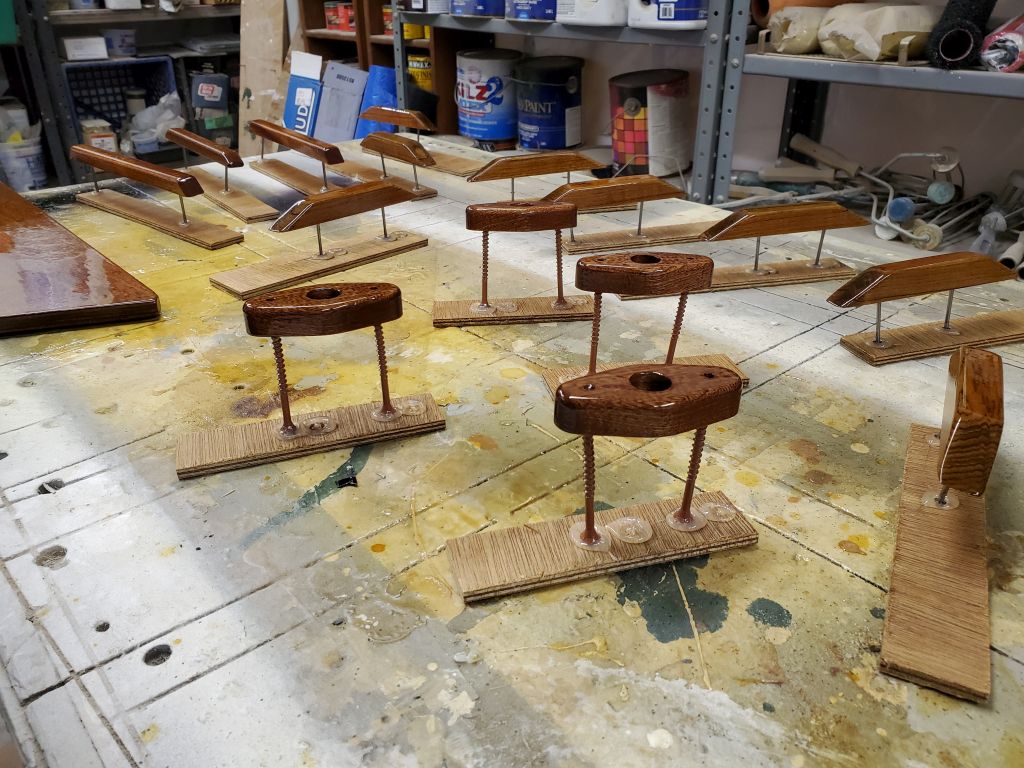
After the 4th coat, I decided that was enough for one day, to avoid excess coating thickness that might not cure properly, but planned to apply additional coats next time.
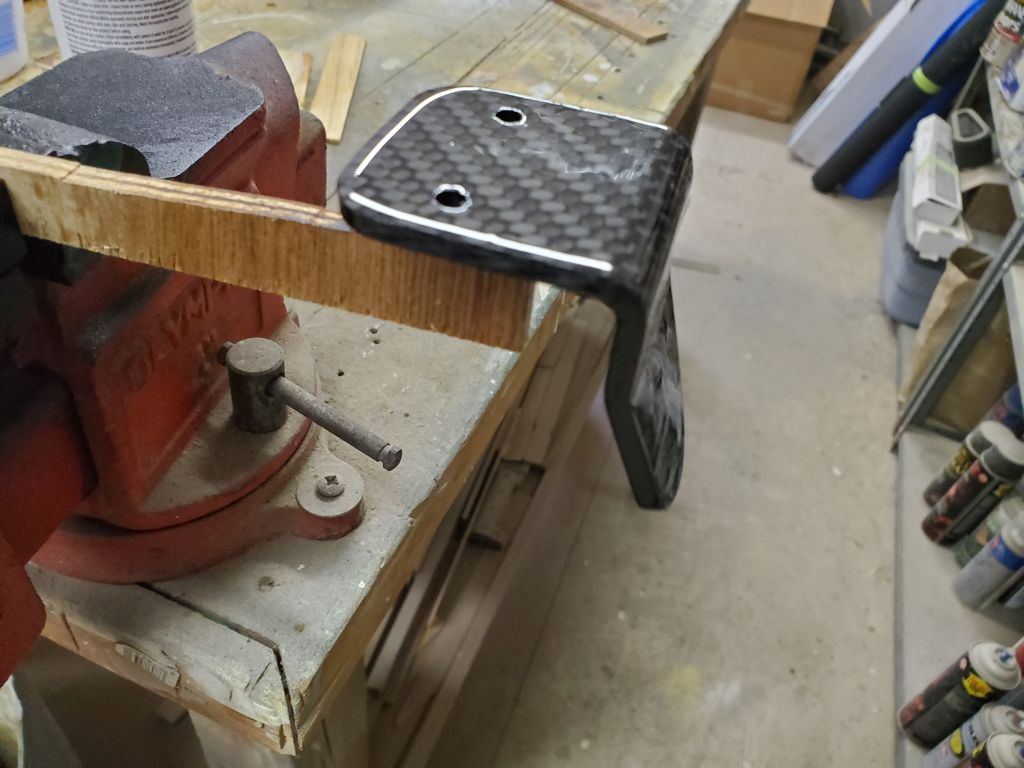
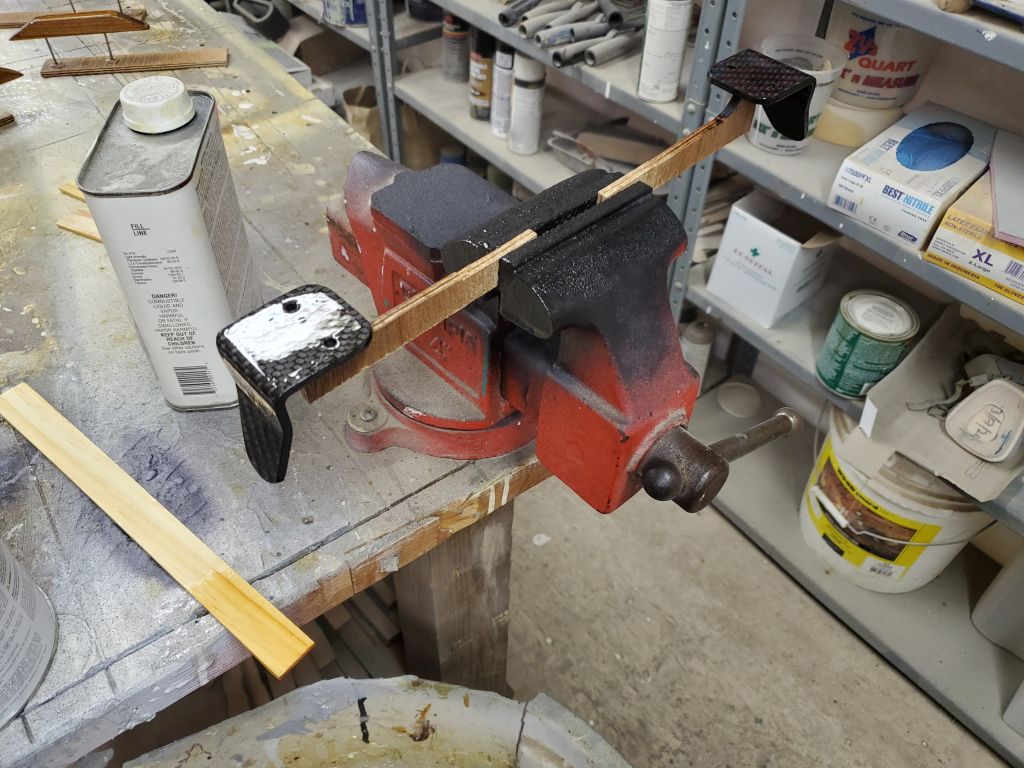
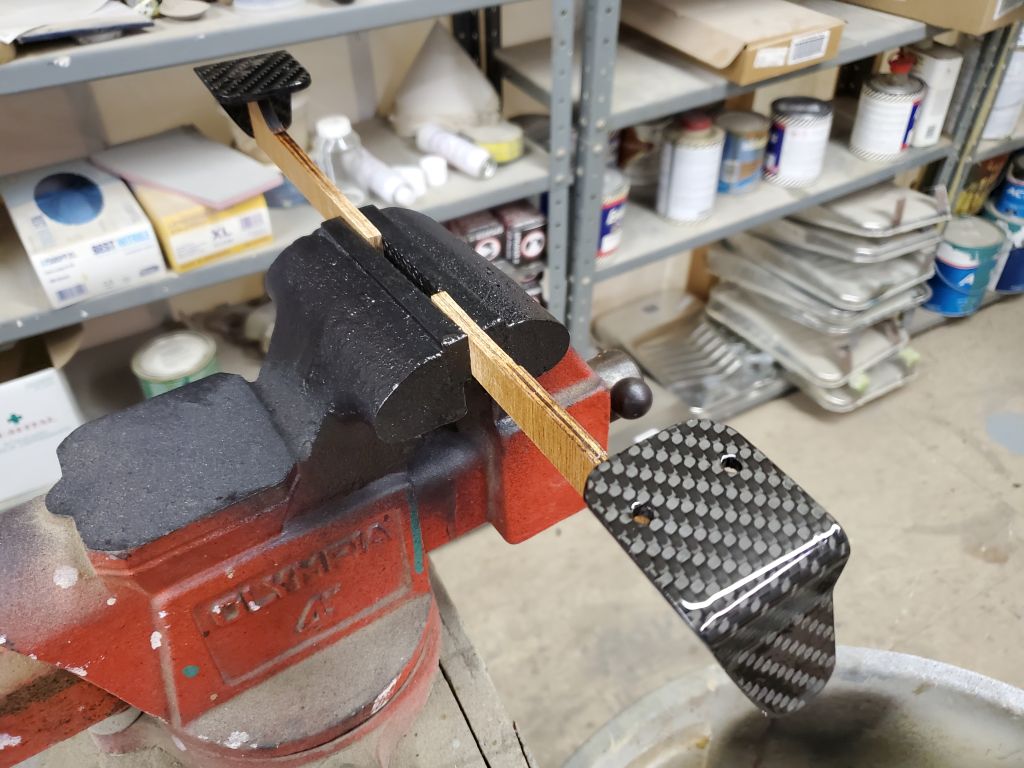
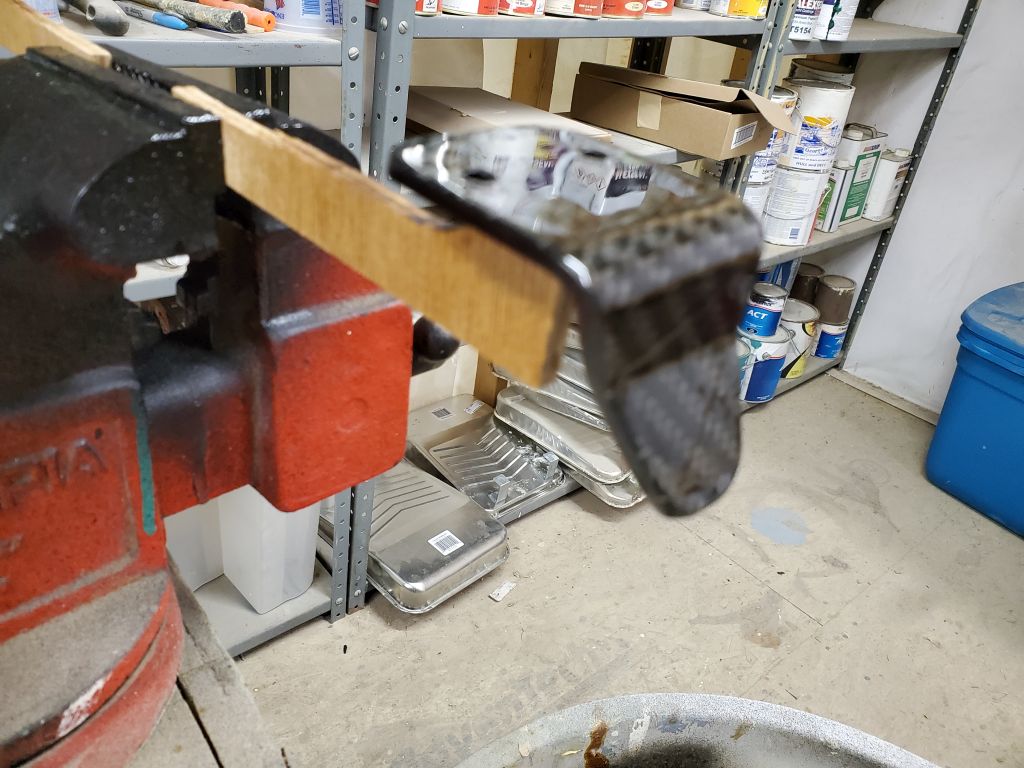
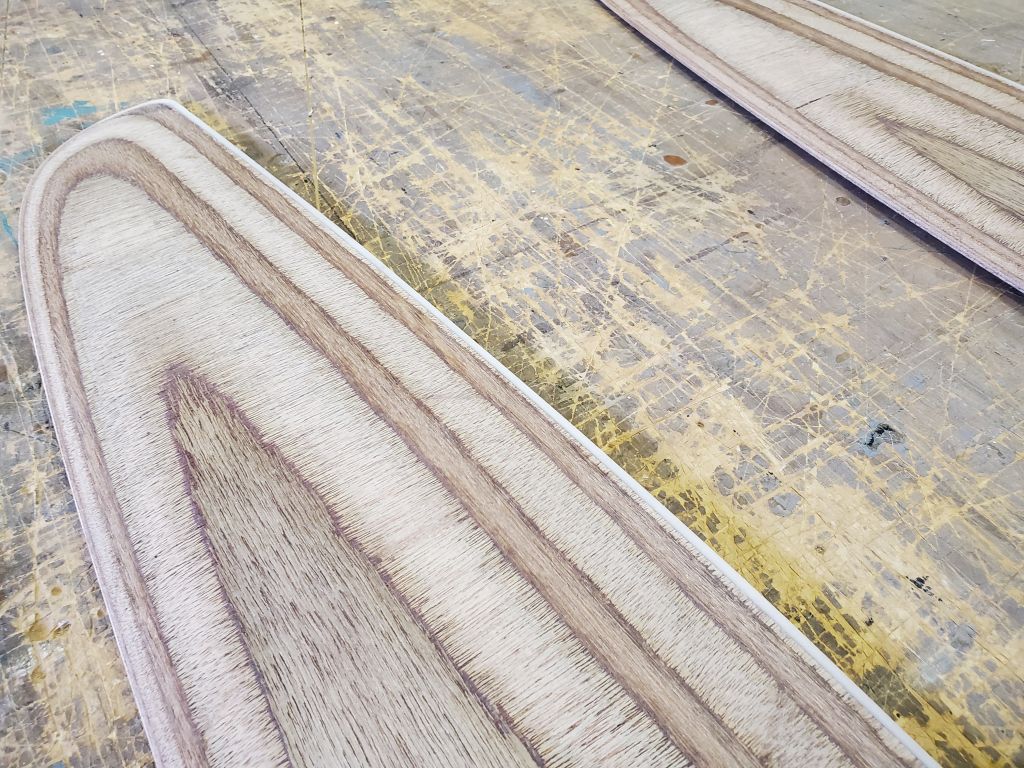
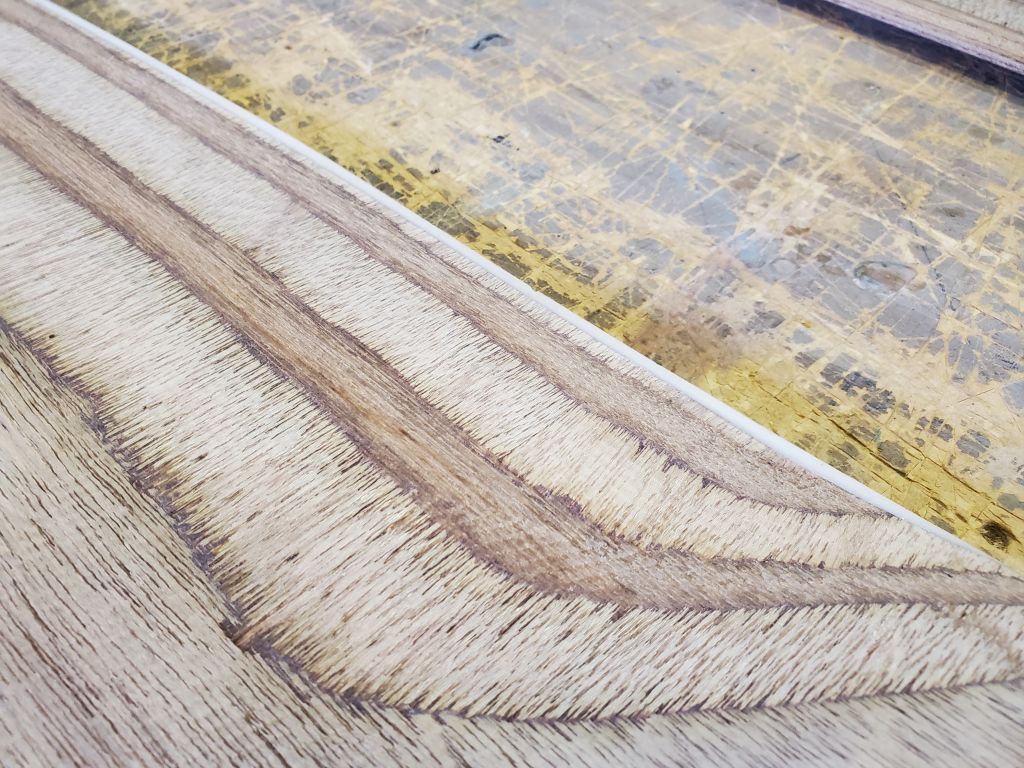
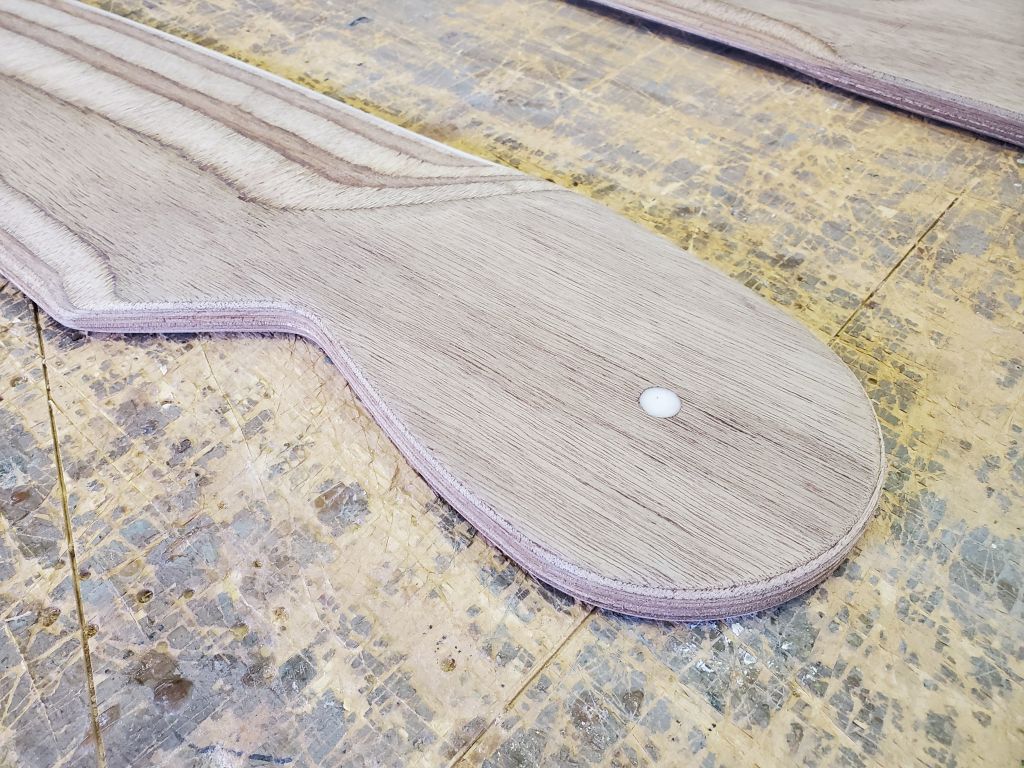
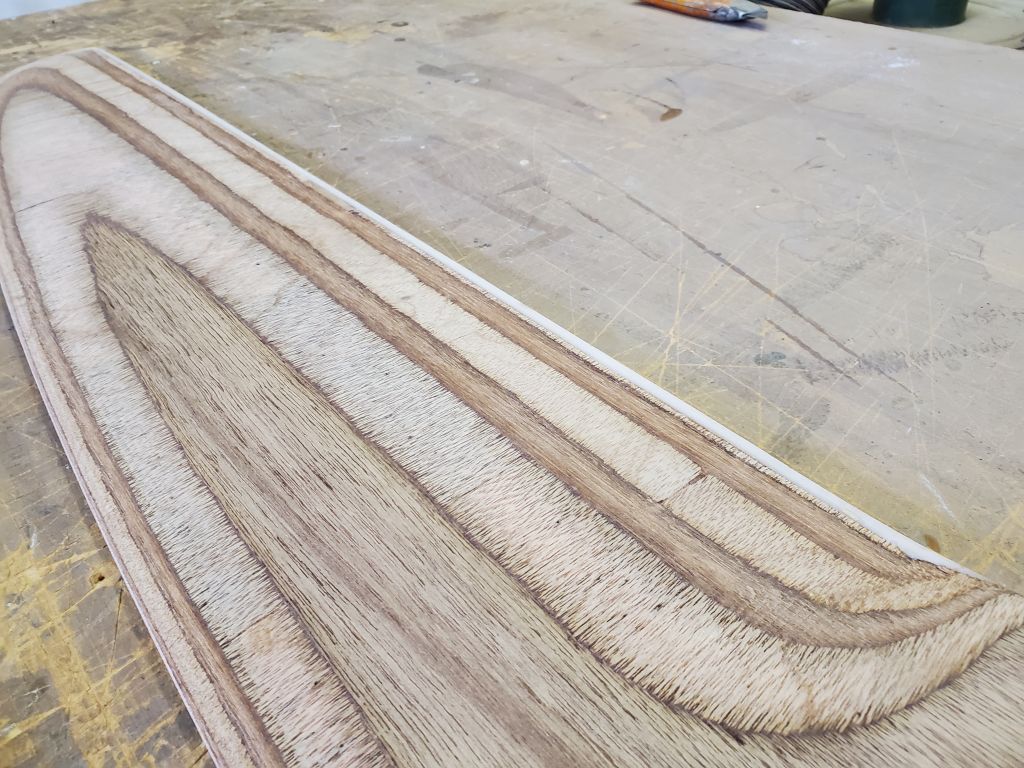
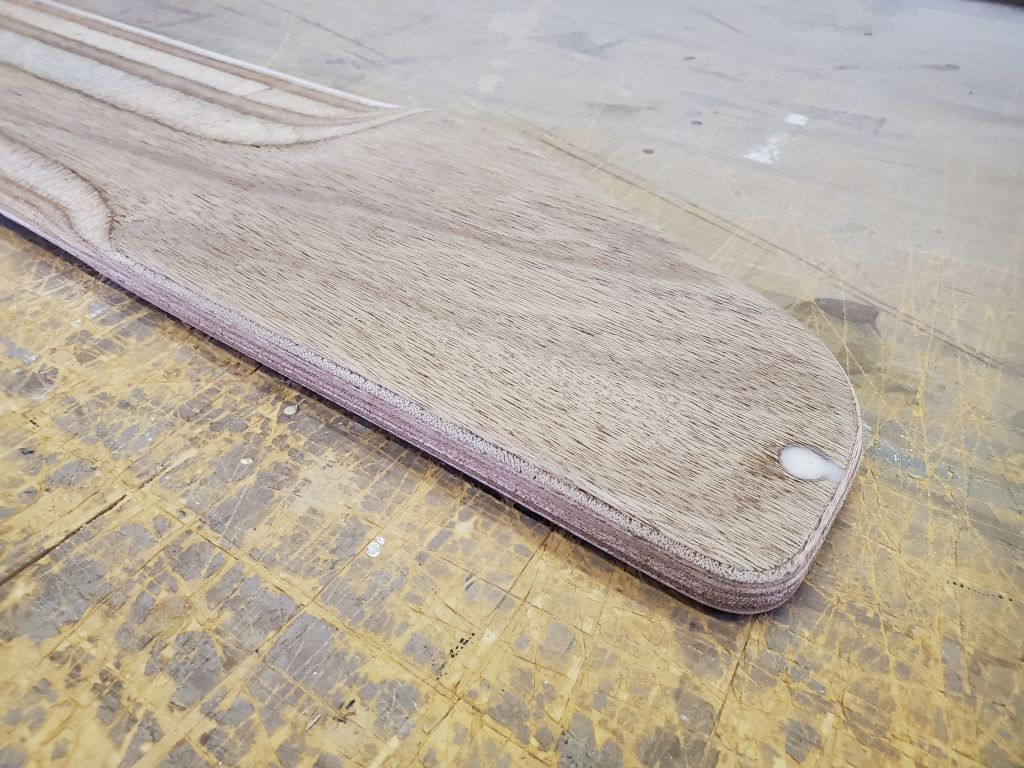
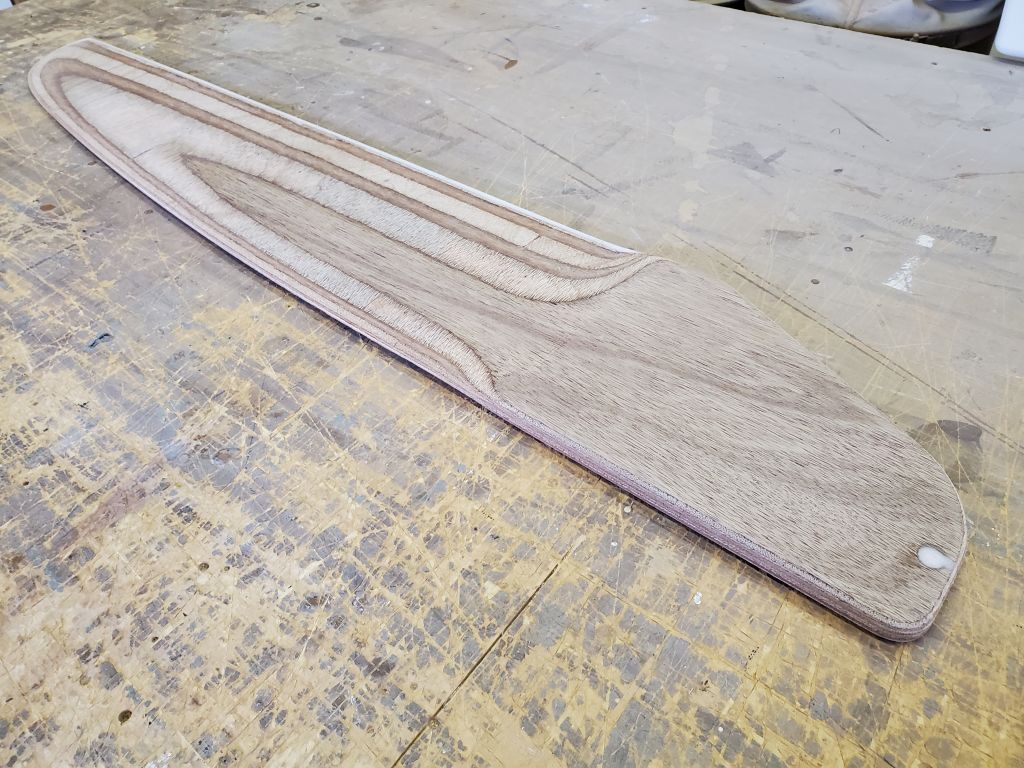
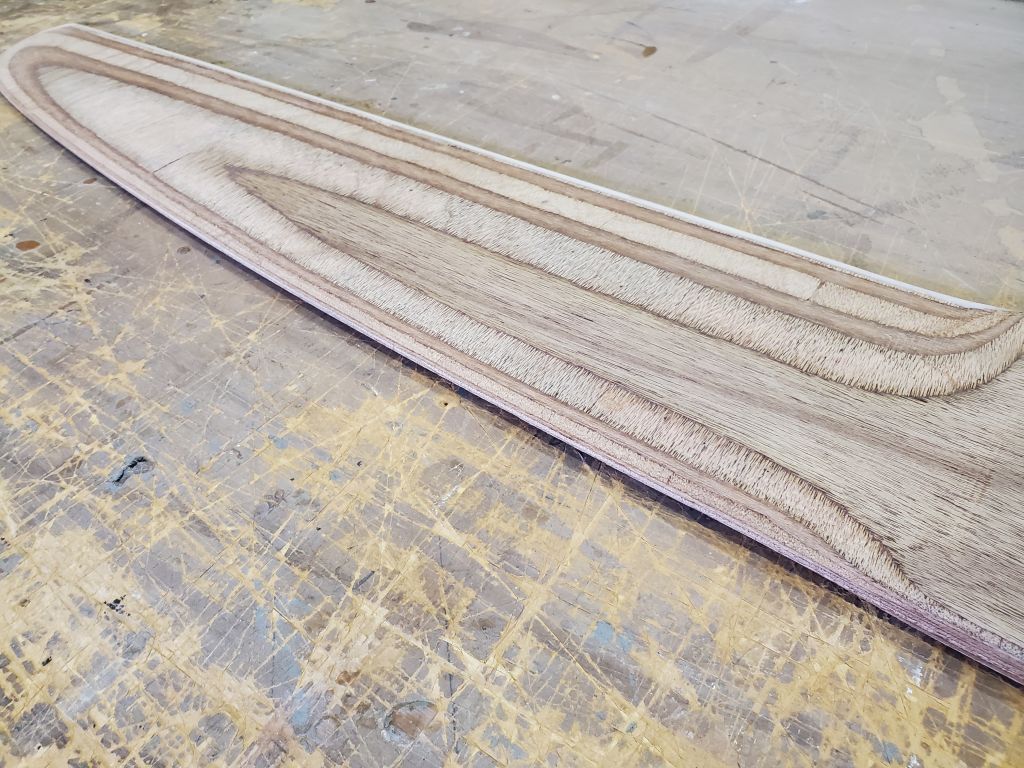
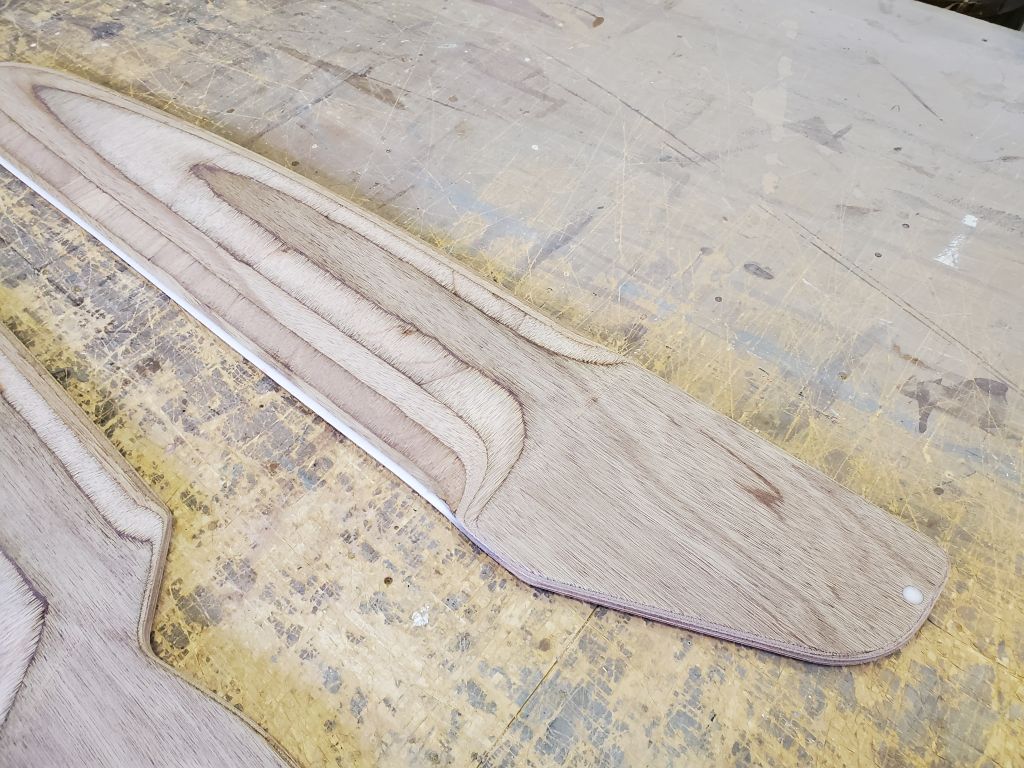
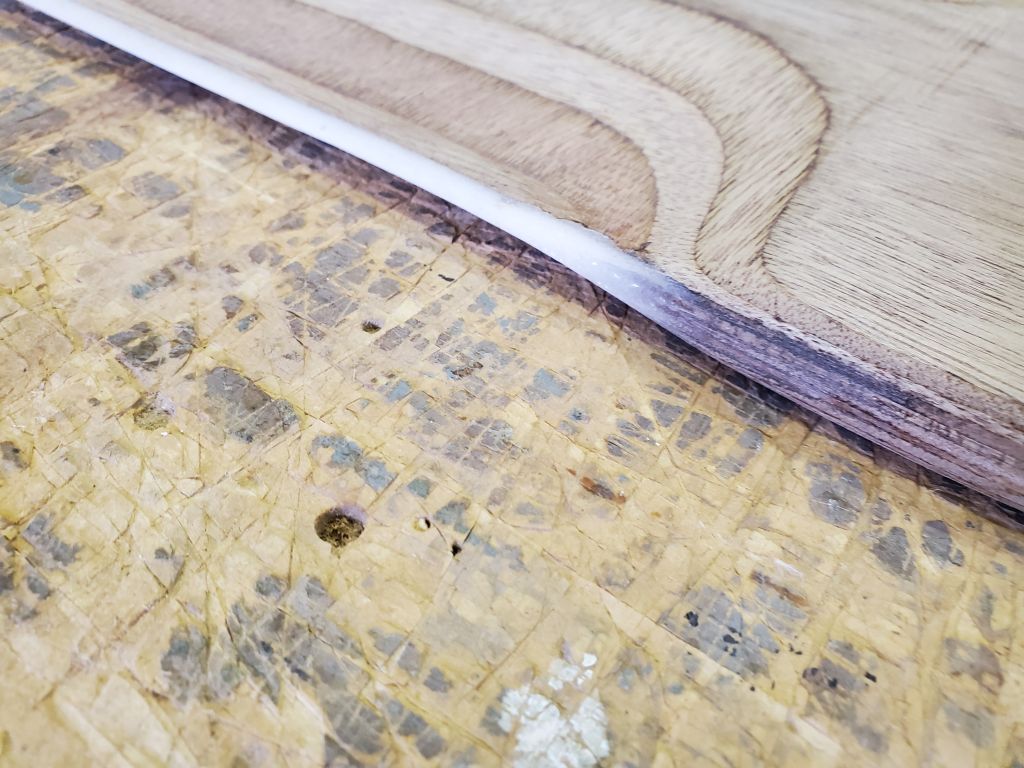
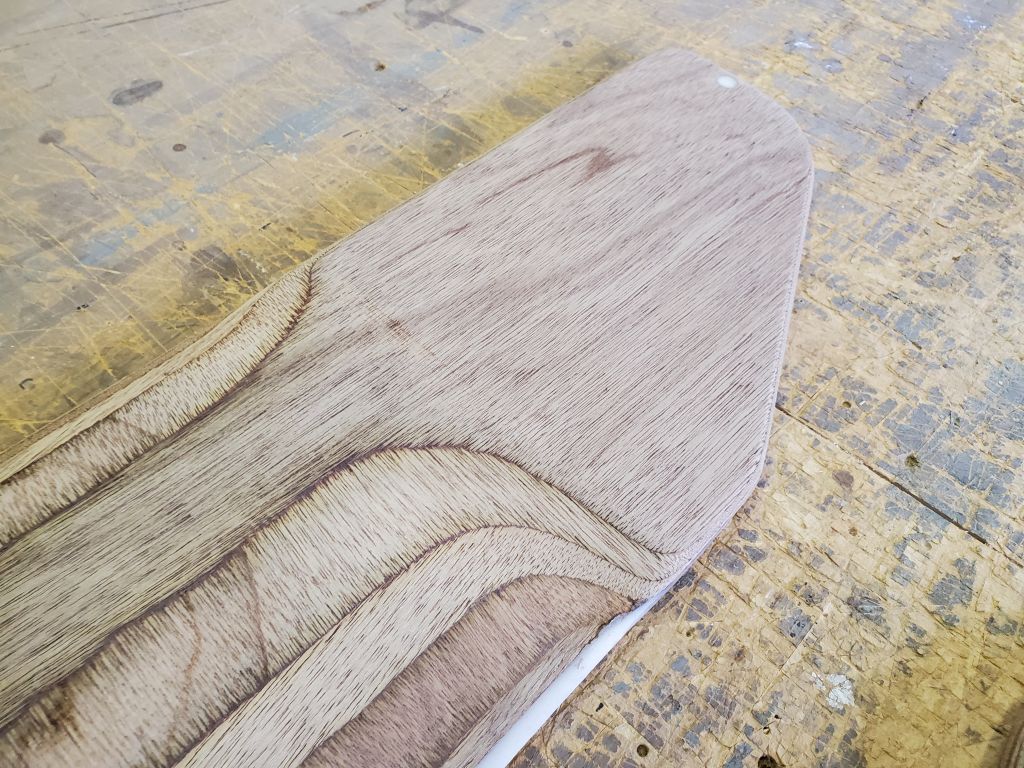
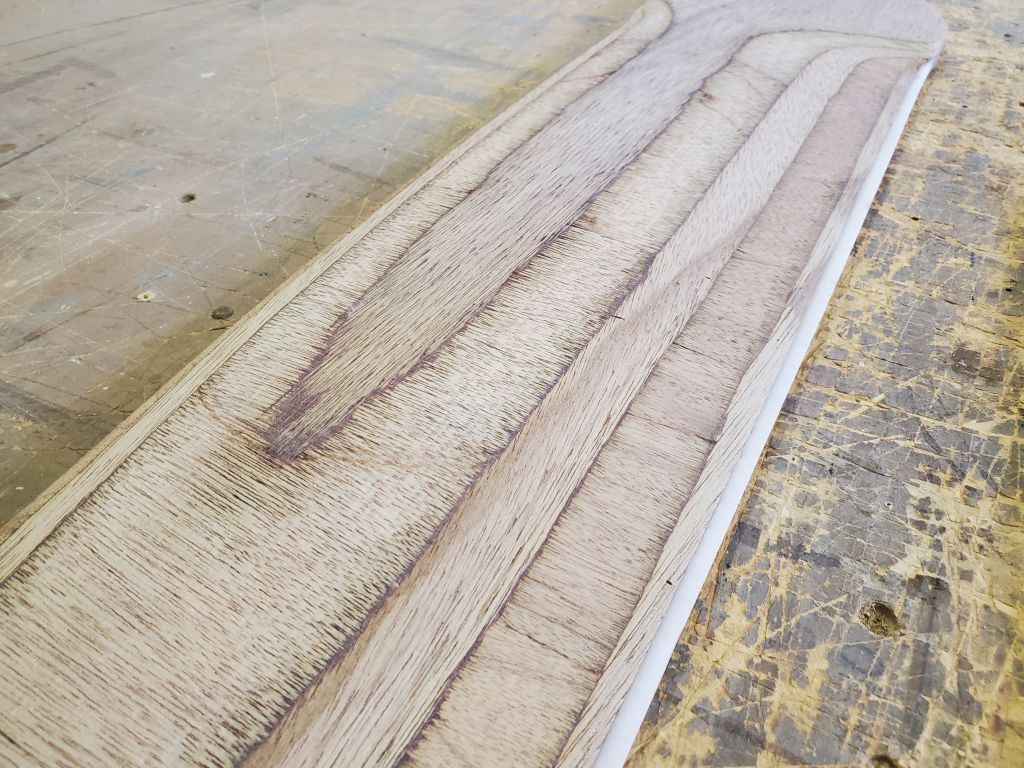
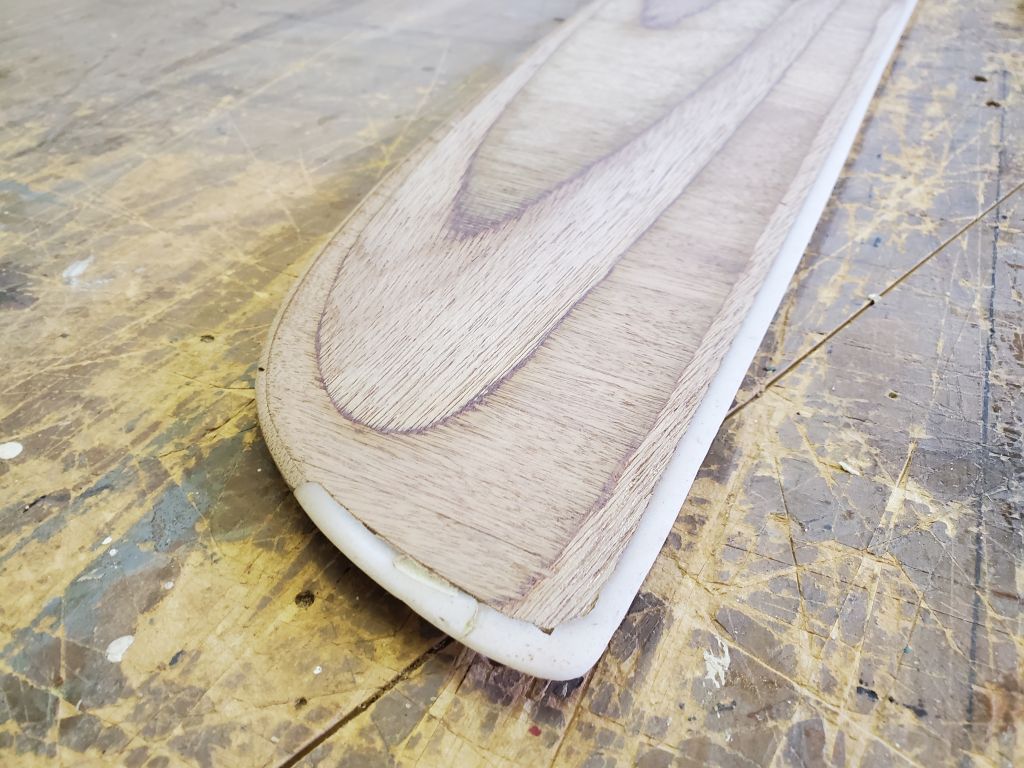
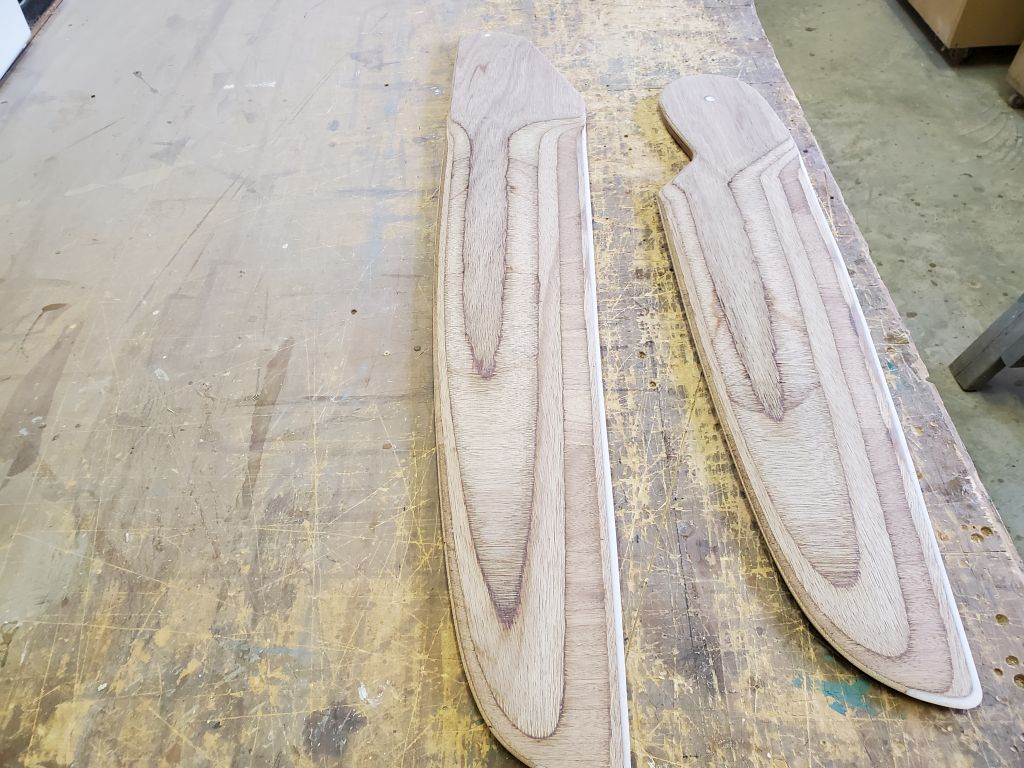
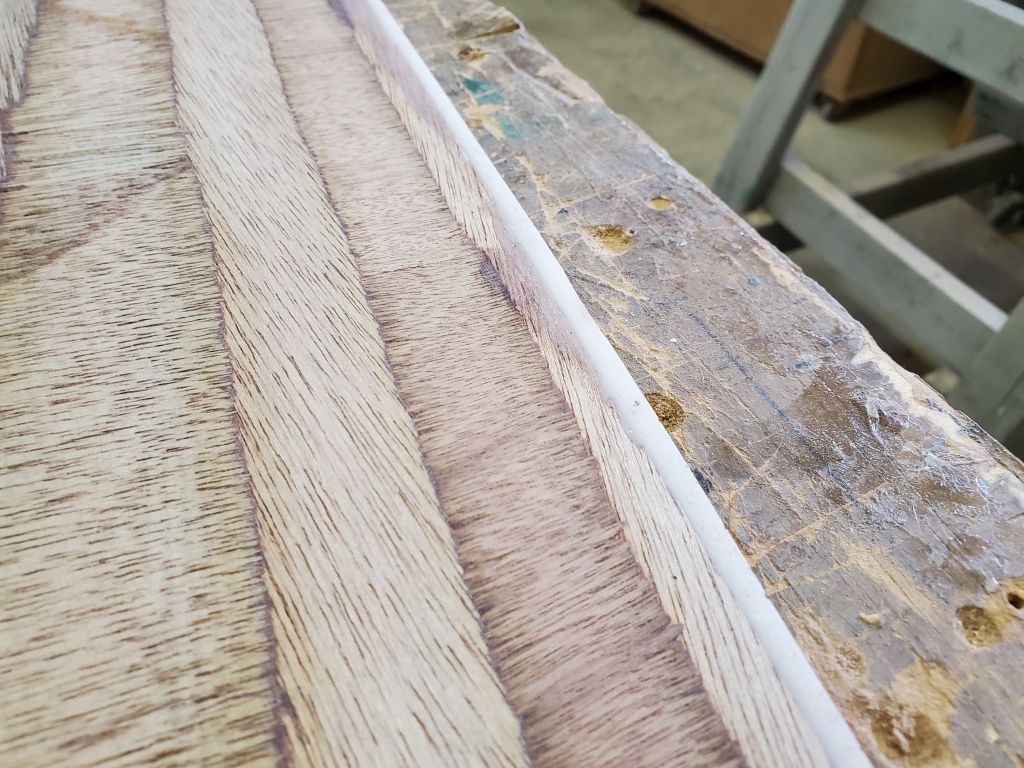
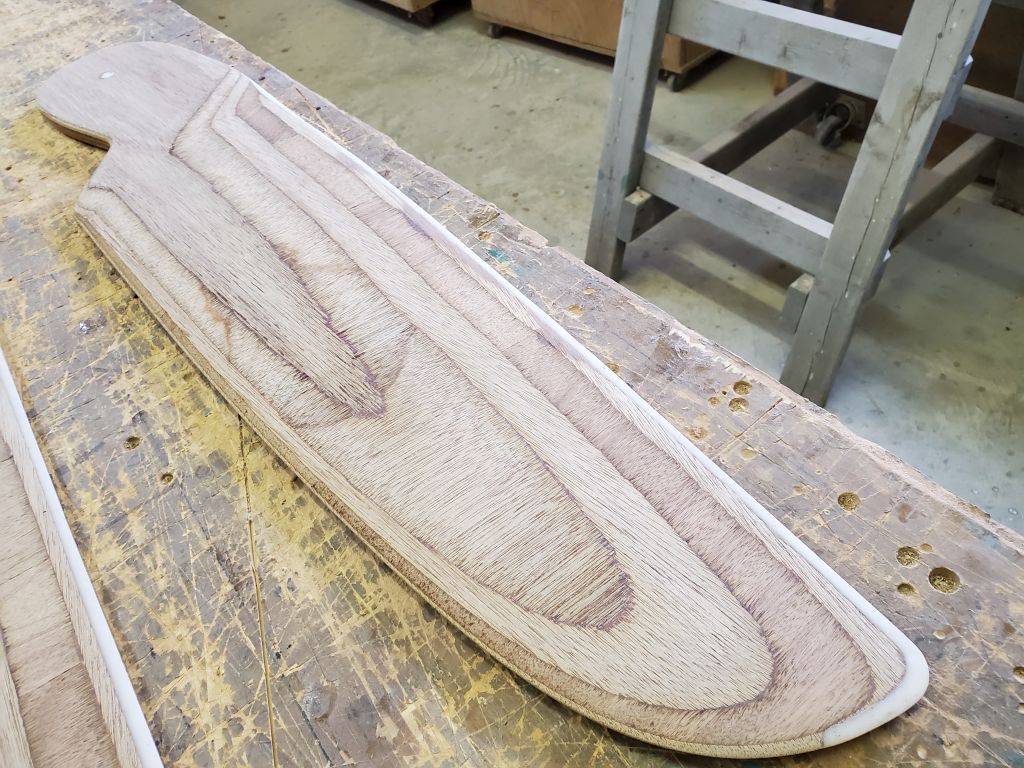
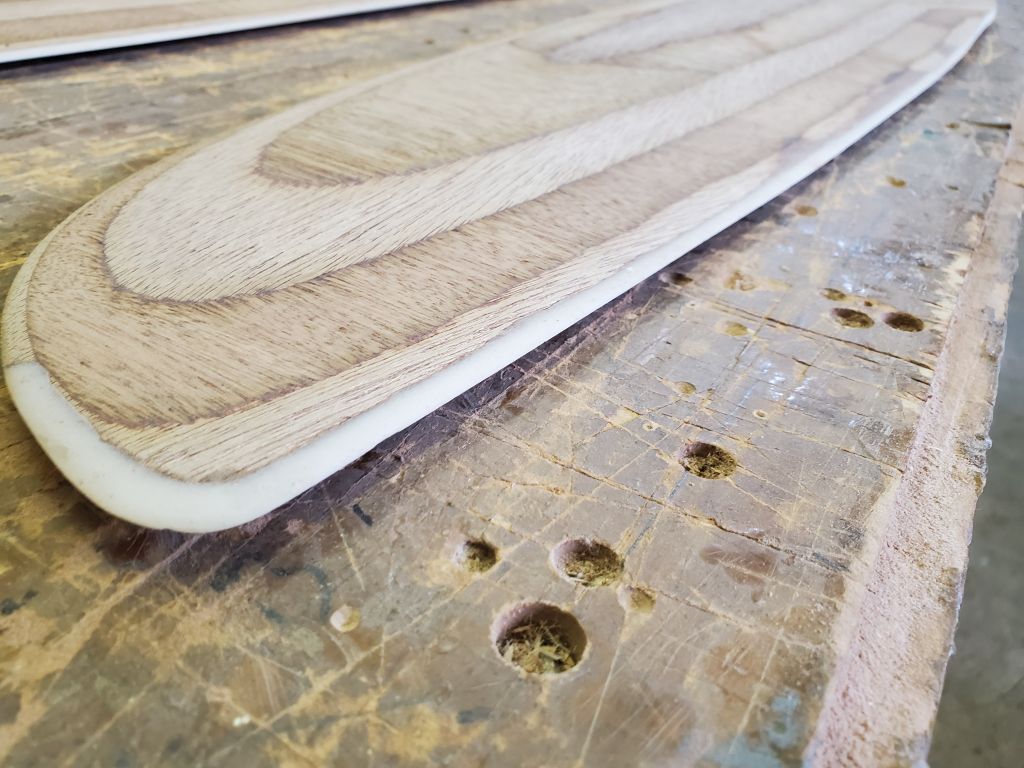
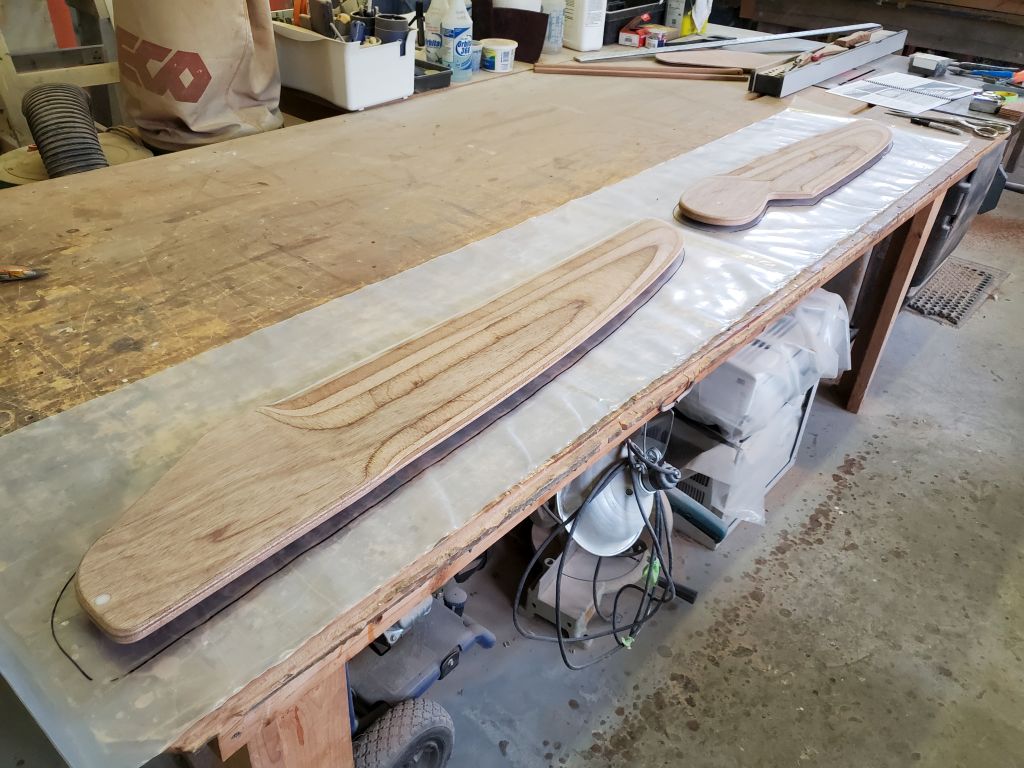
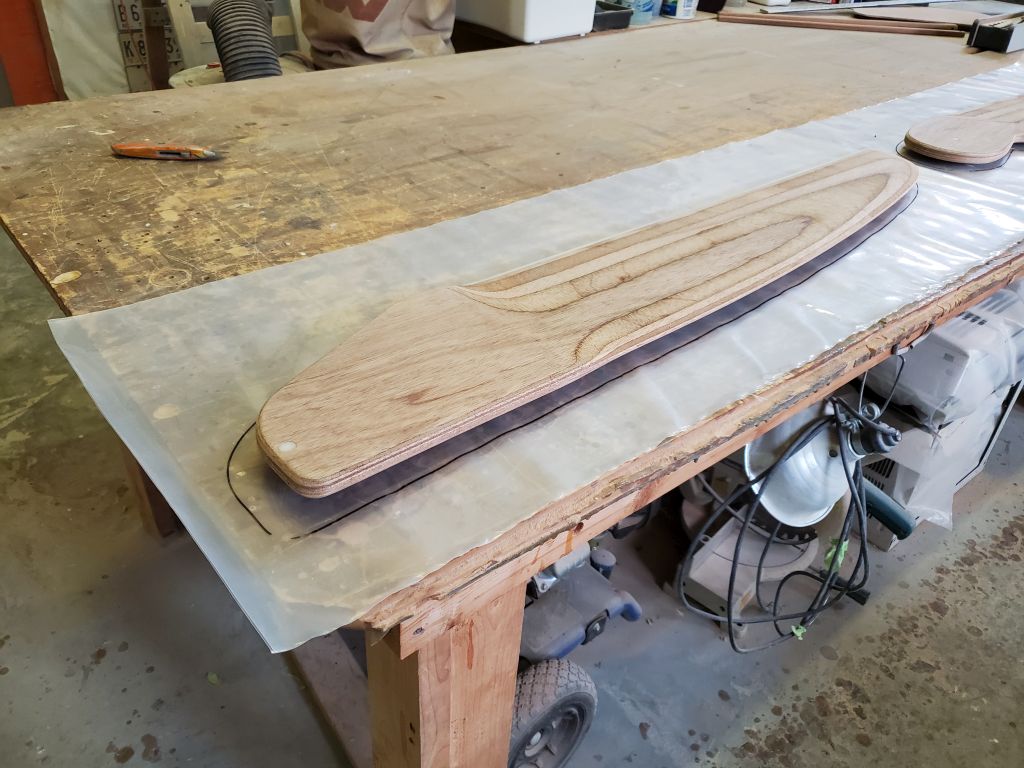
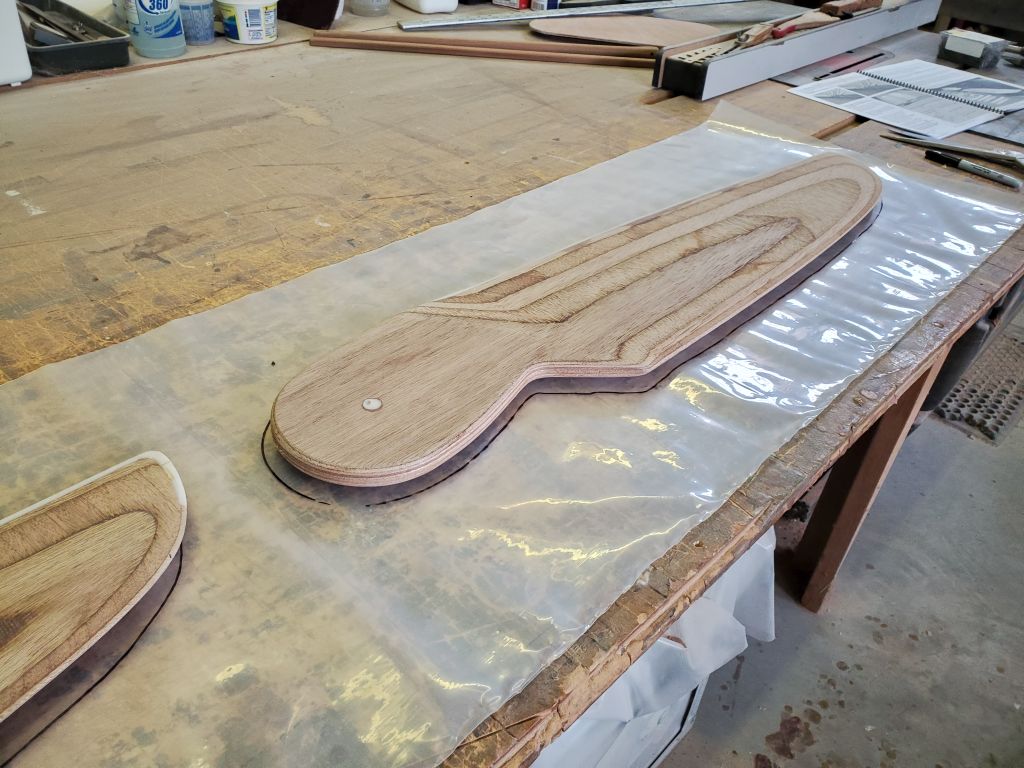
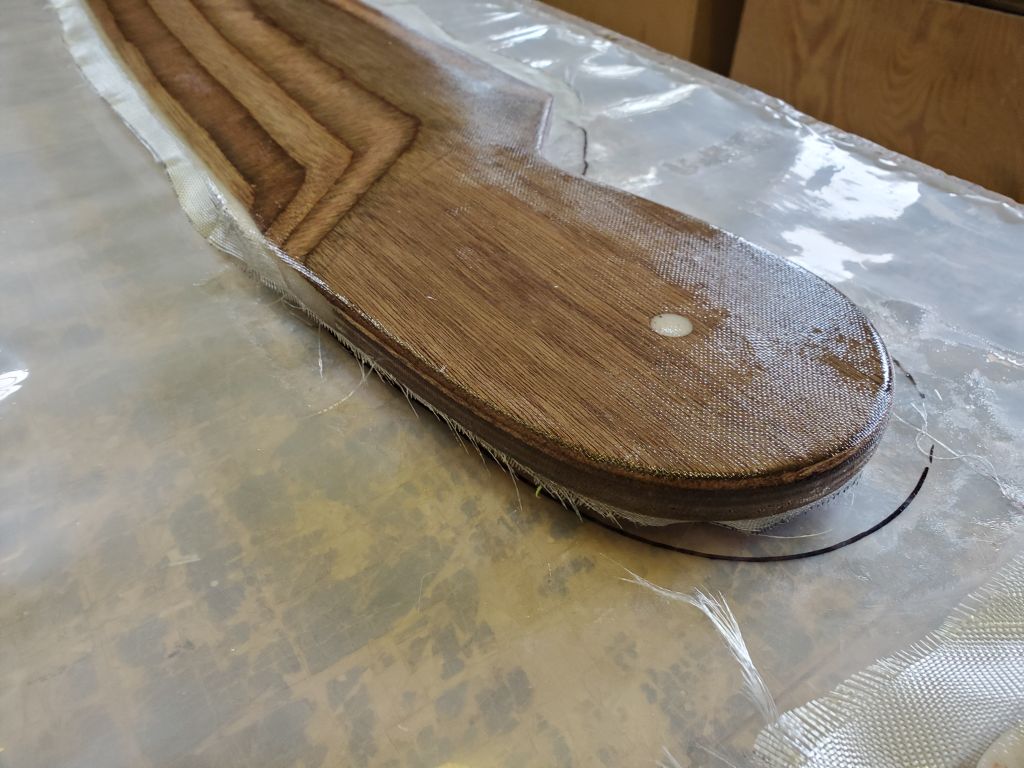
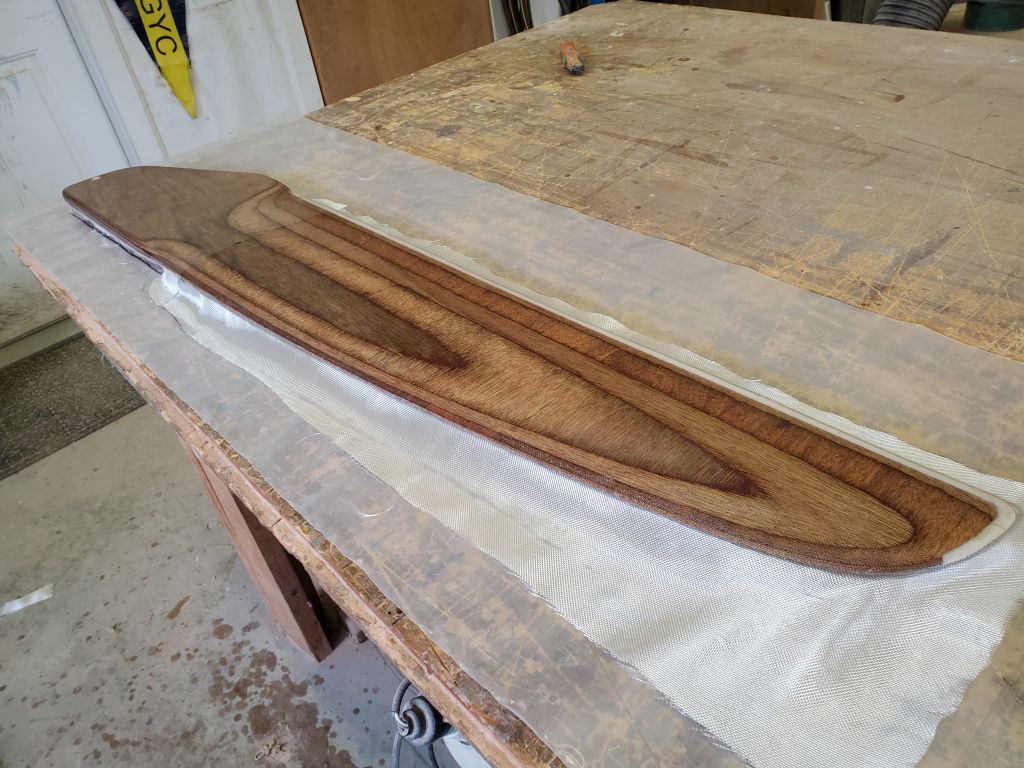
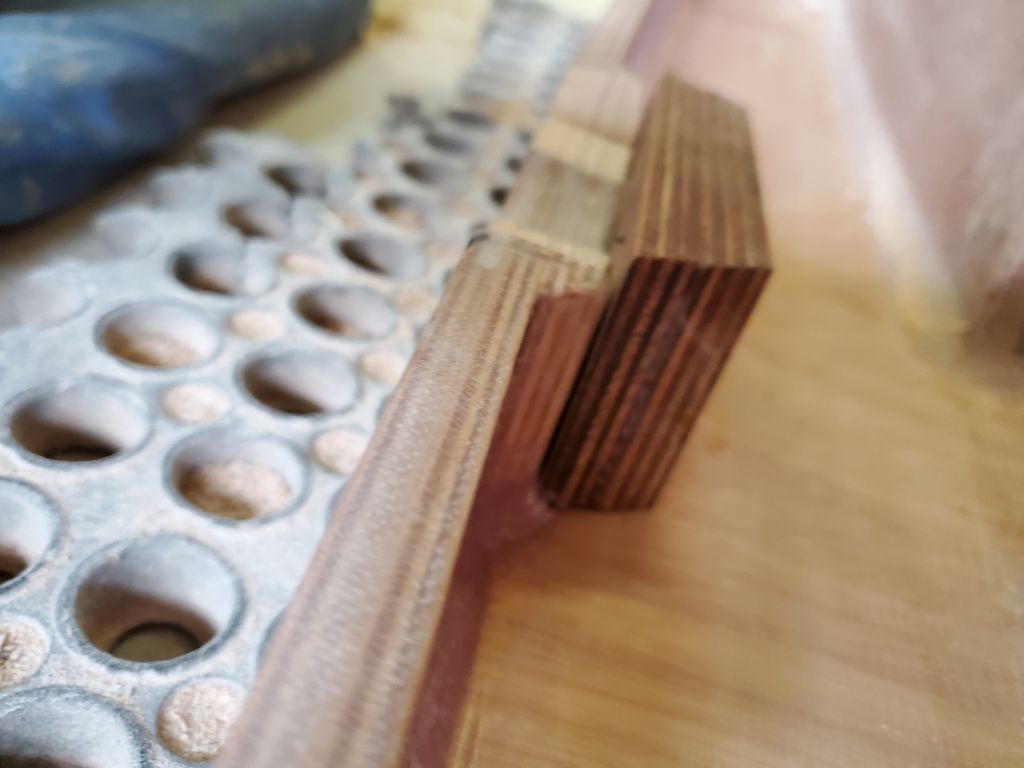
The day’s main focus was the daggerboard and rudder. A couple days had elapsed since I’d created the epoxy trailing edges on the foils, and now I could sand and shape these properly to finish off the foils. There were several different sanding and milling steps required; the photos show the finished results.
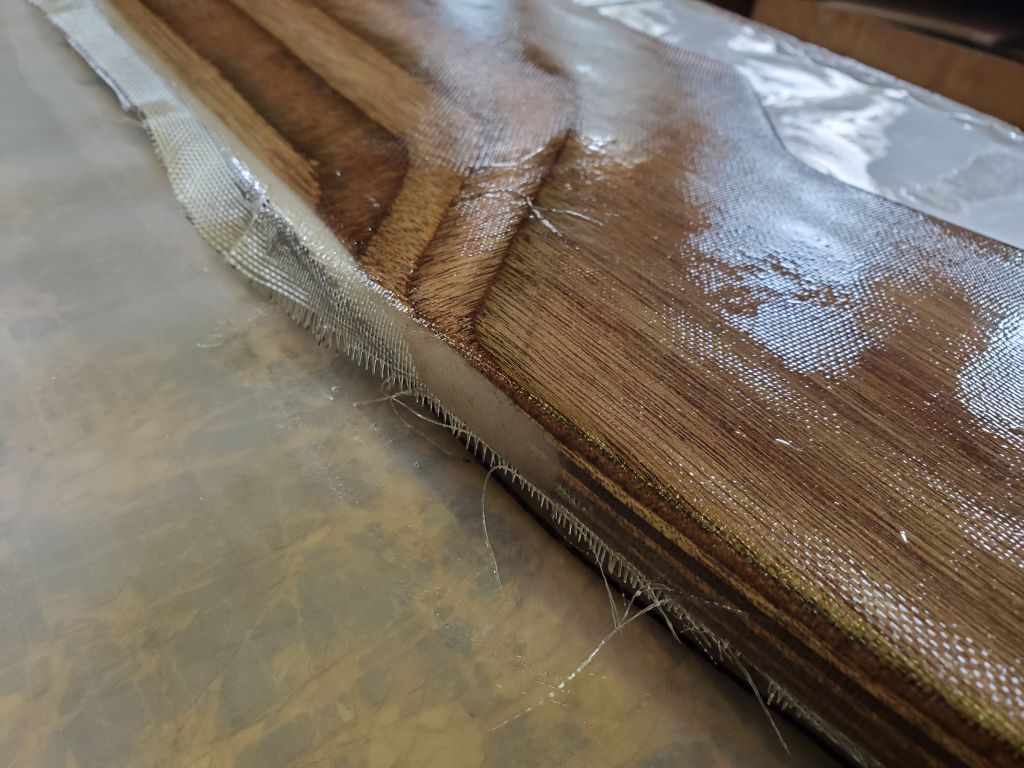
To start, I made a few marks 3/16″ out (onto the epoxy) from the edge of the plywood on the trailing edges, then sanded the epoxy edges back to these lines, as the epoxy portions were specified to be this width. Then, with a small block sander I sanded the new epoxy smooth on both sides, using the shaped plywood as the guide for the shape and contours, and also shaped the over-epoxied tips by hand and eye to match the adjacent areas.
At the top part of each foil, where the plywood was full thickness, I used a router to round over the edges on both sides, then sanded everything smooth through 12o grit, including the foil tops, and over the milled/shaped portions of the foils and their leading and trailing edges. This finished off the shaping work on the new epoxied areas, and also removed any milling marks.


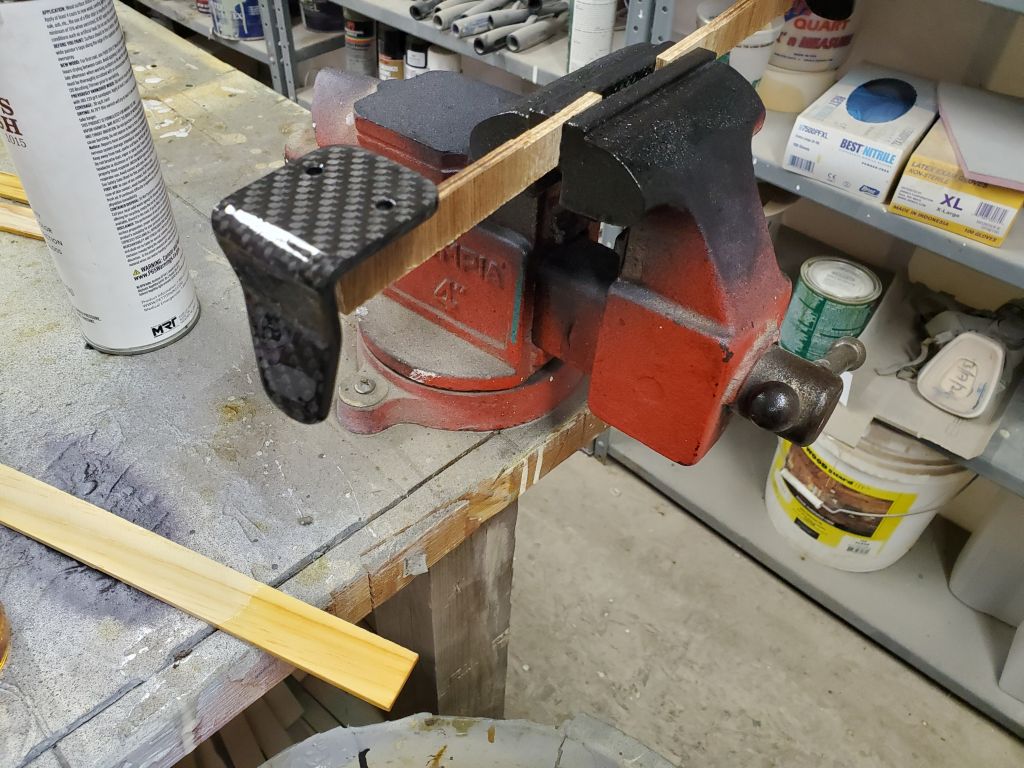
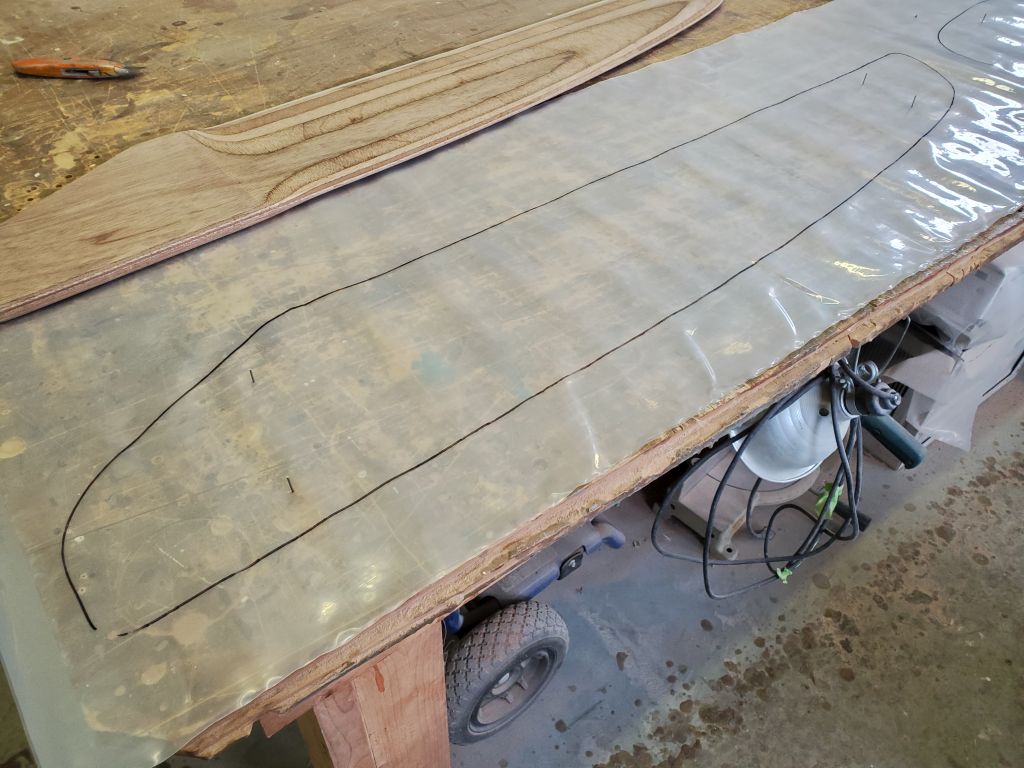
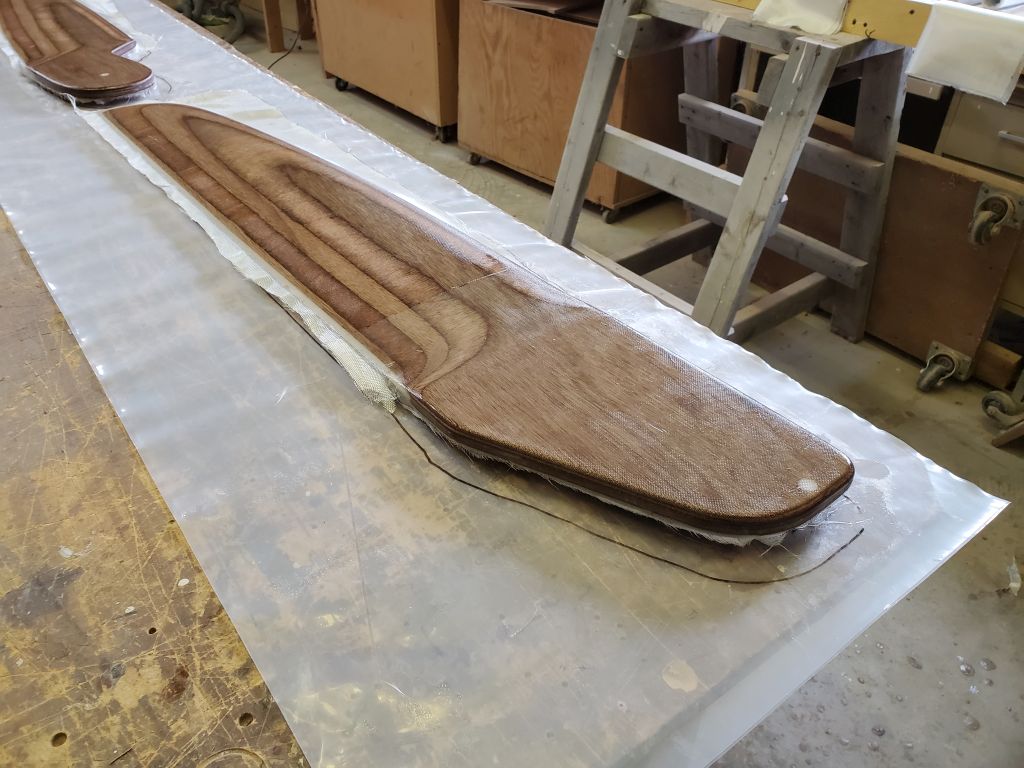
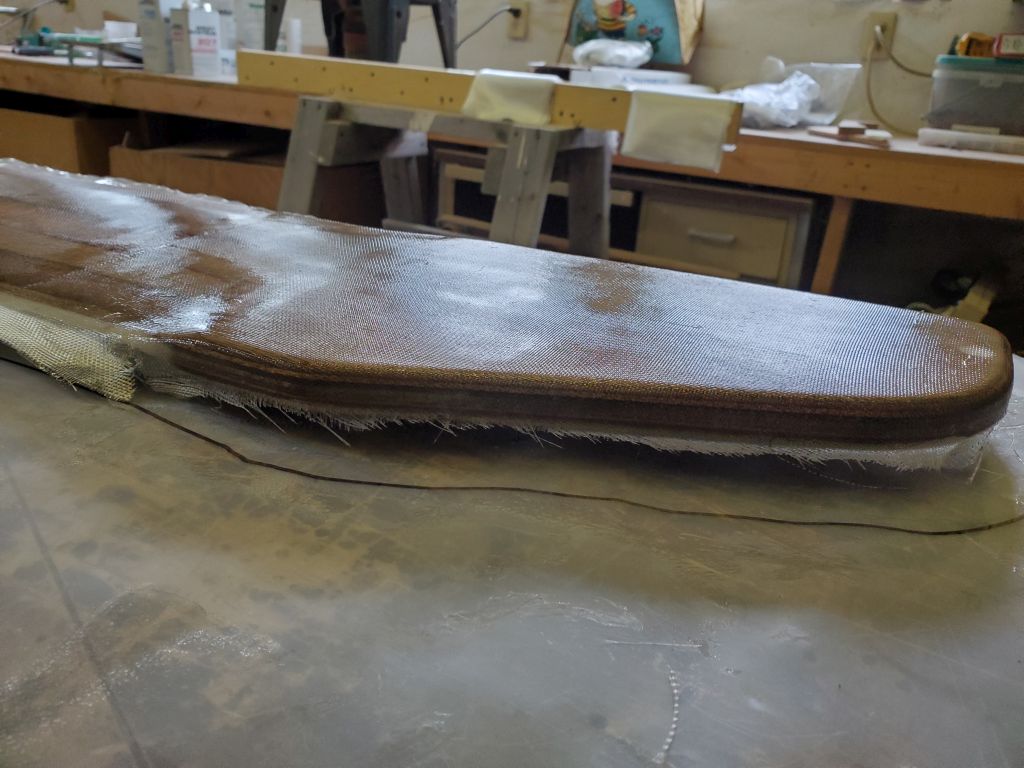
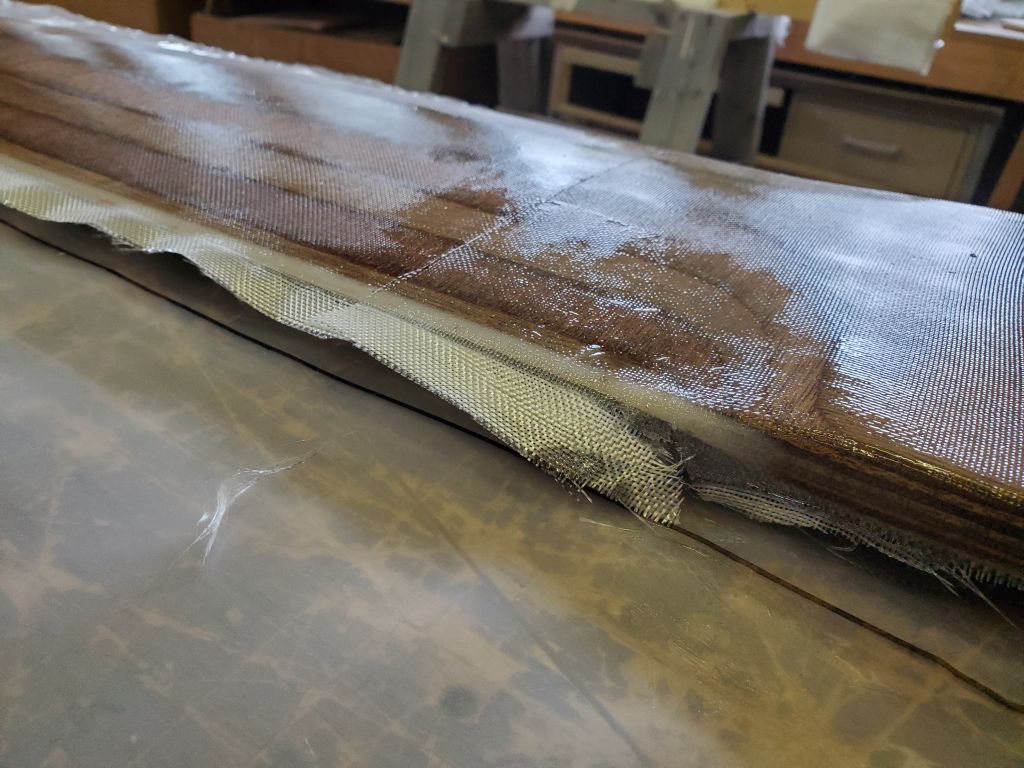
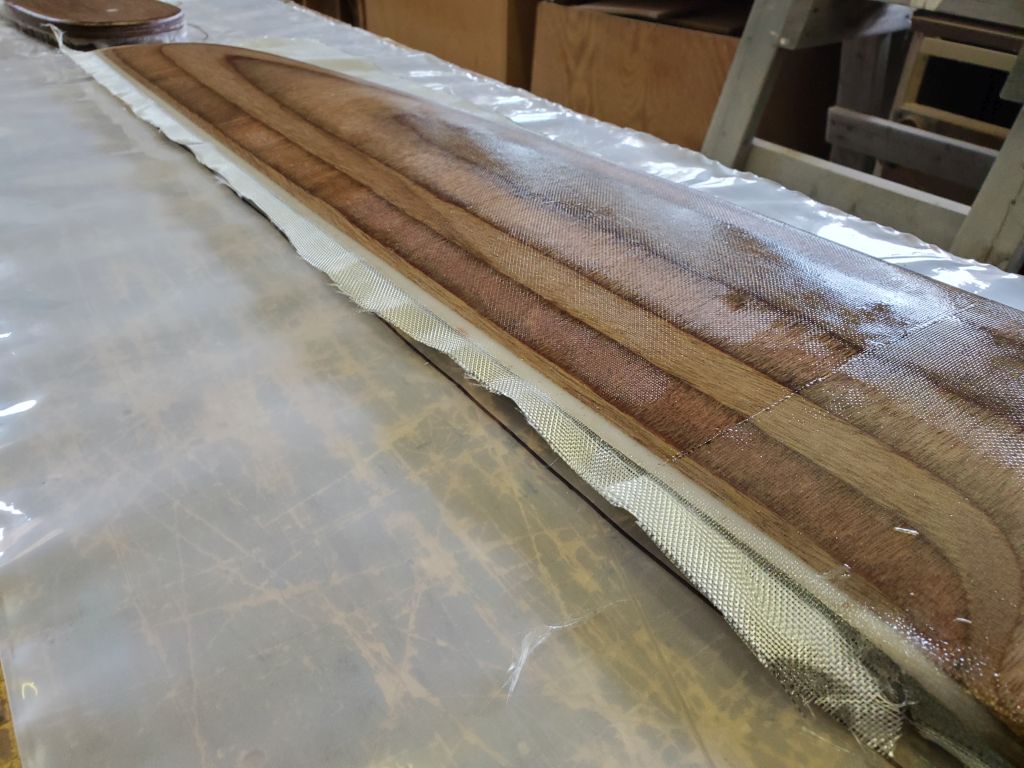
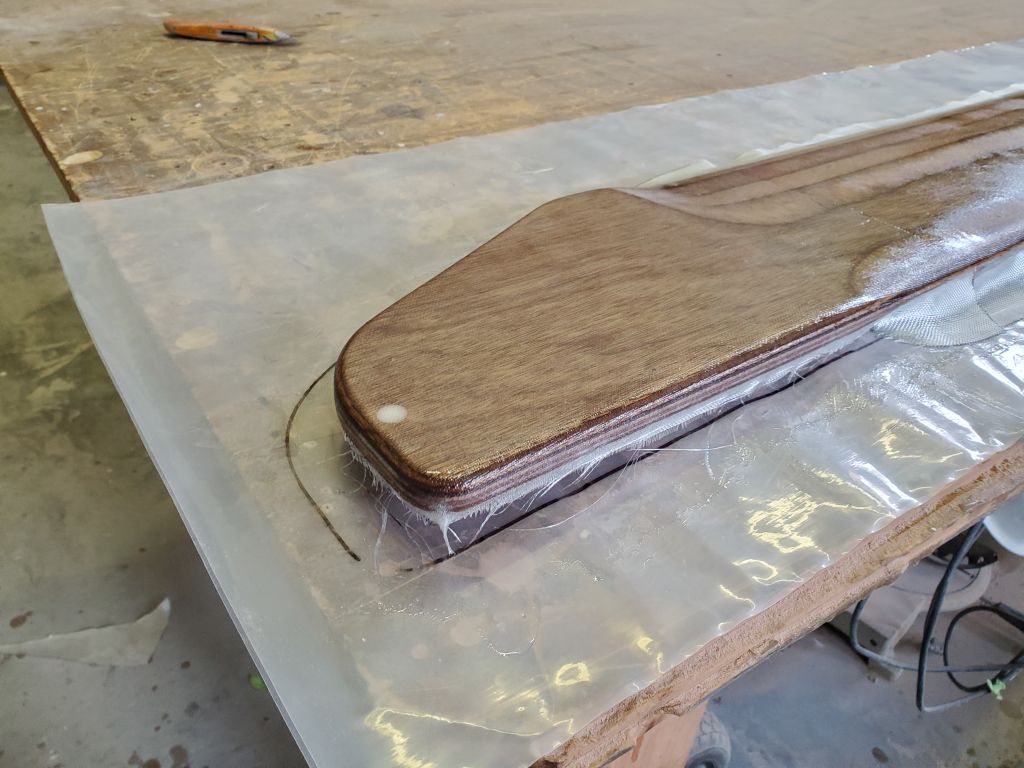
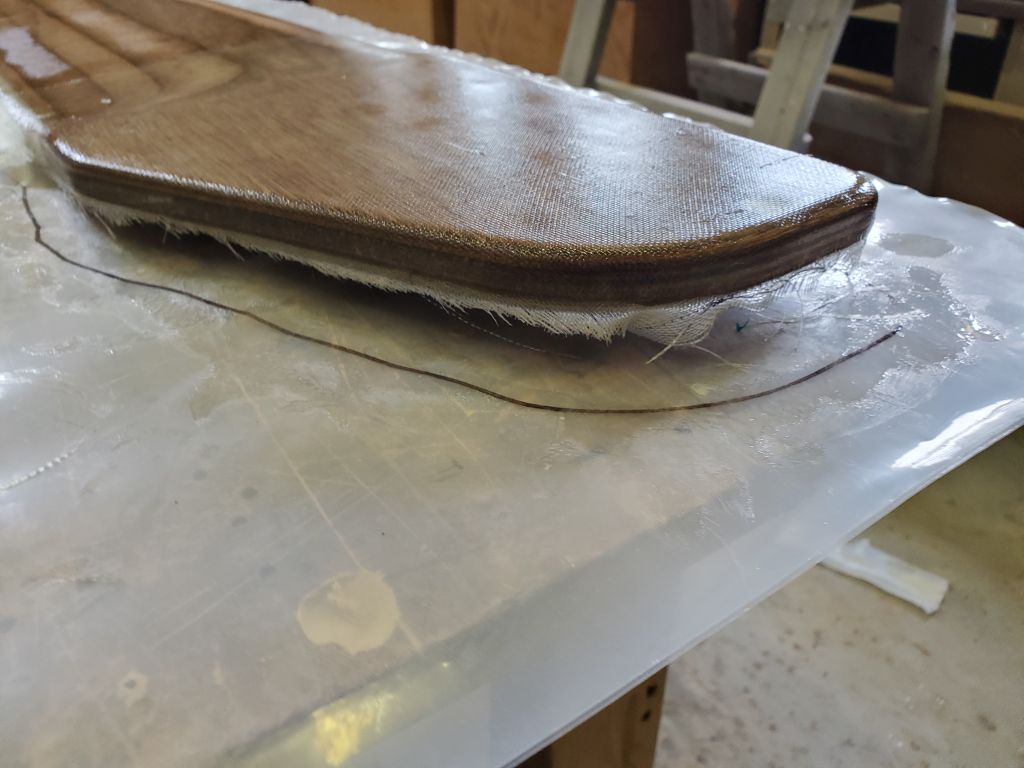
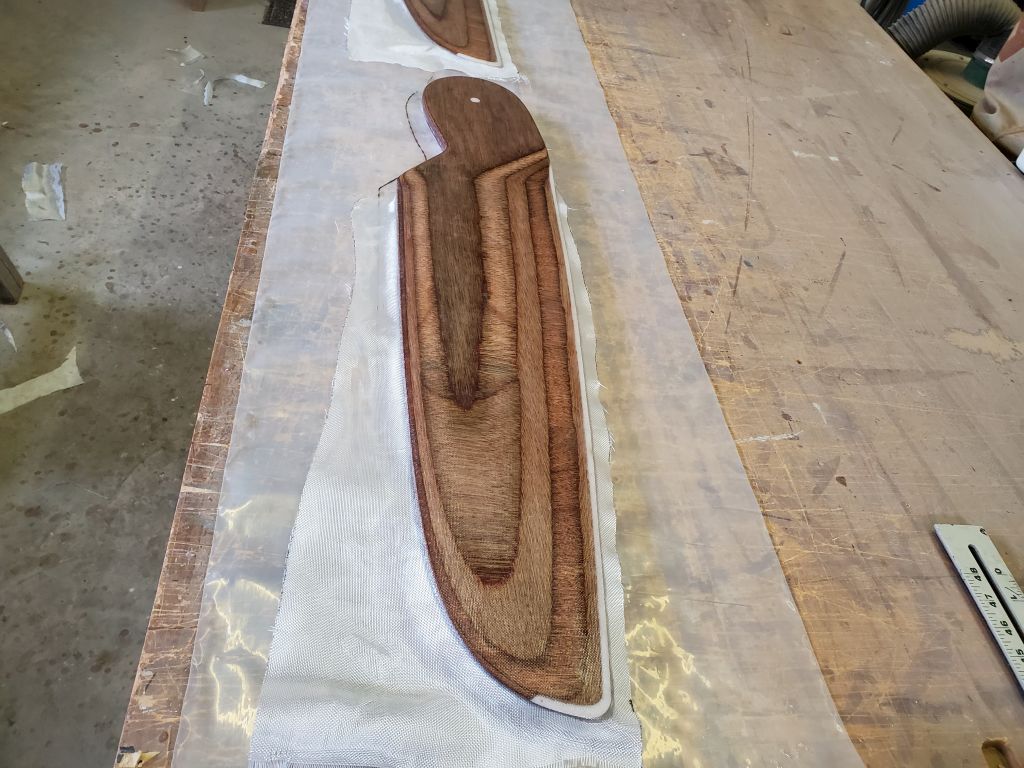
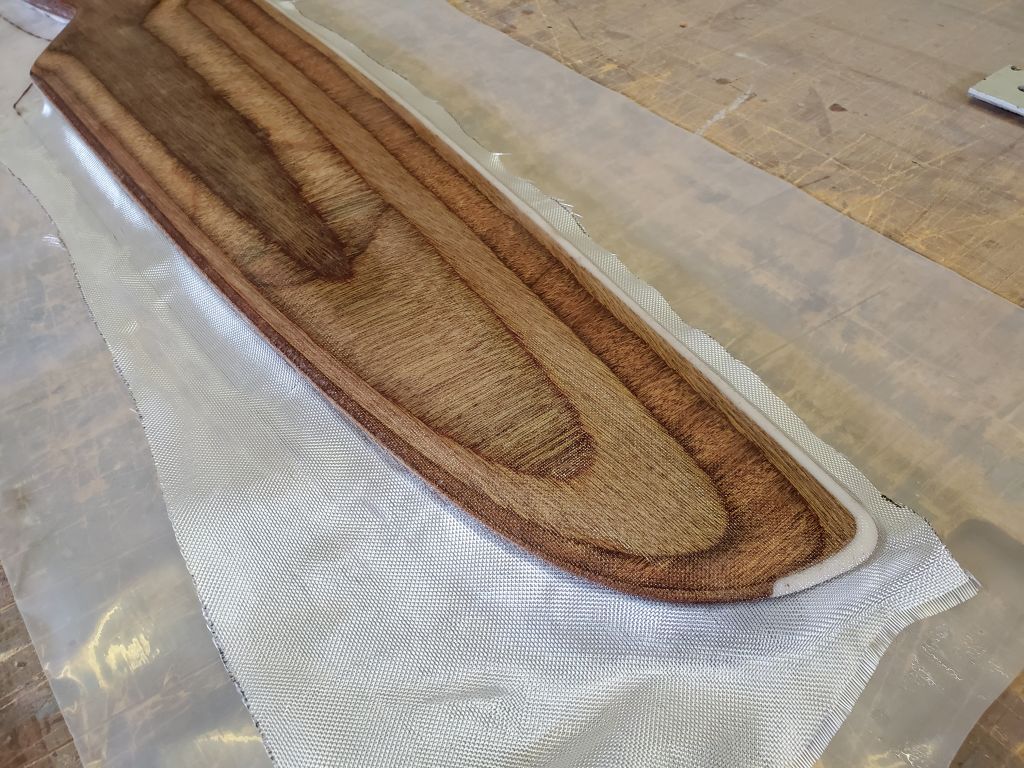
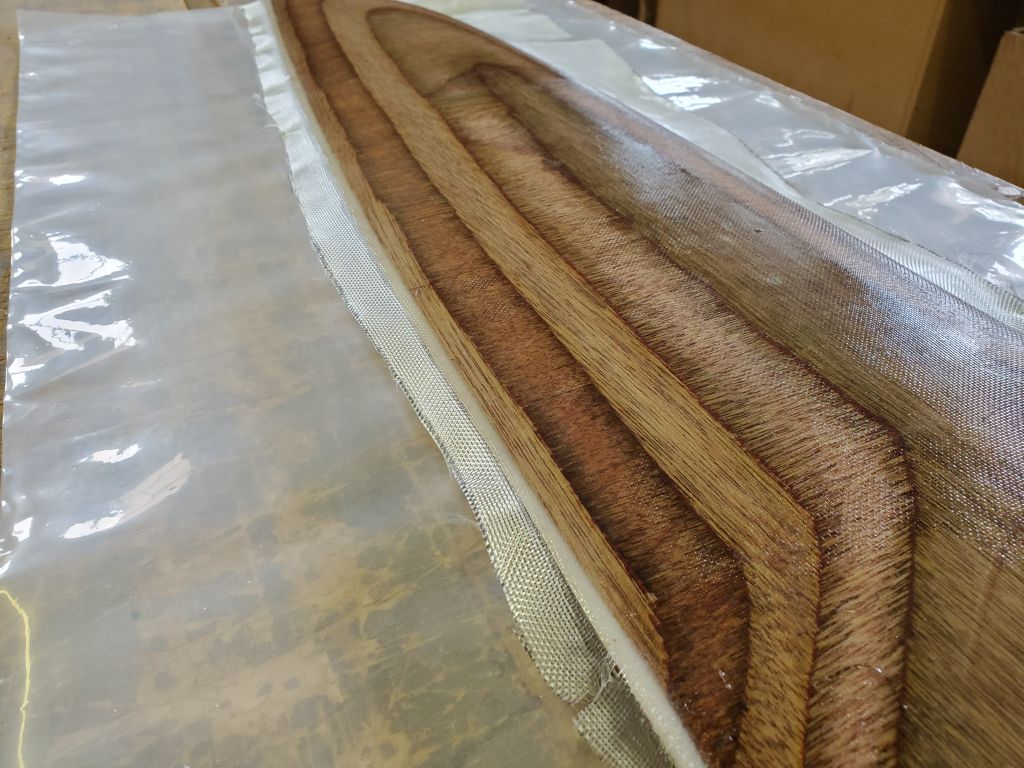
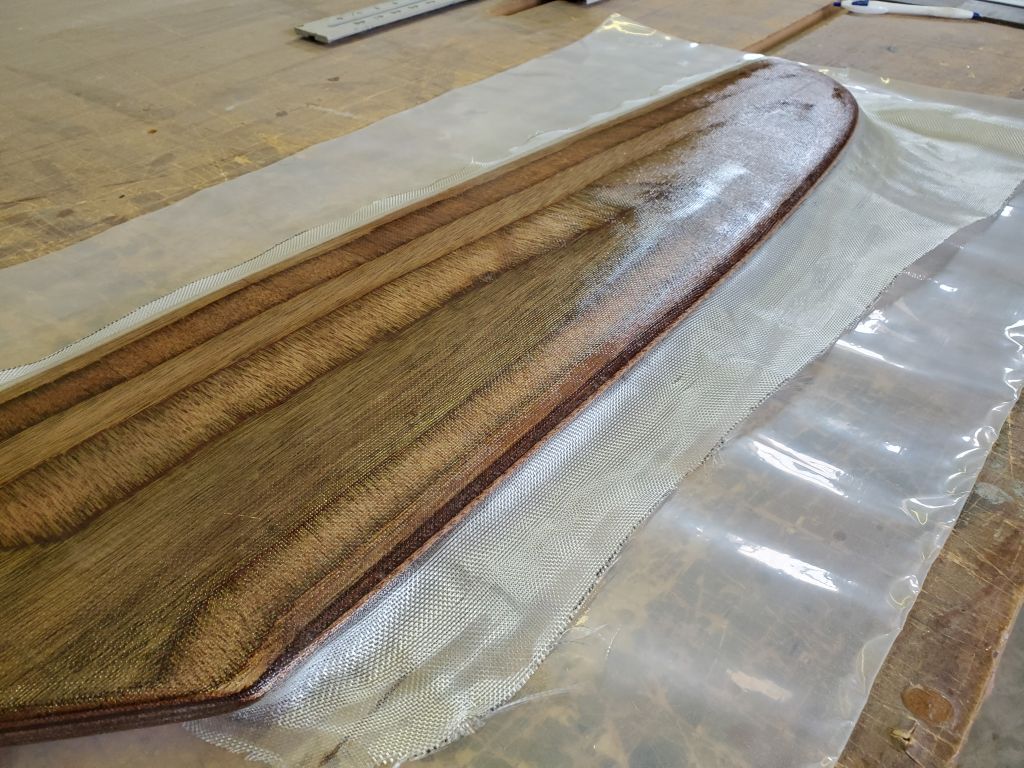
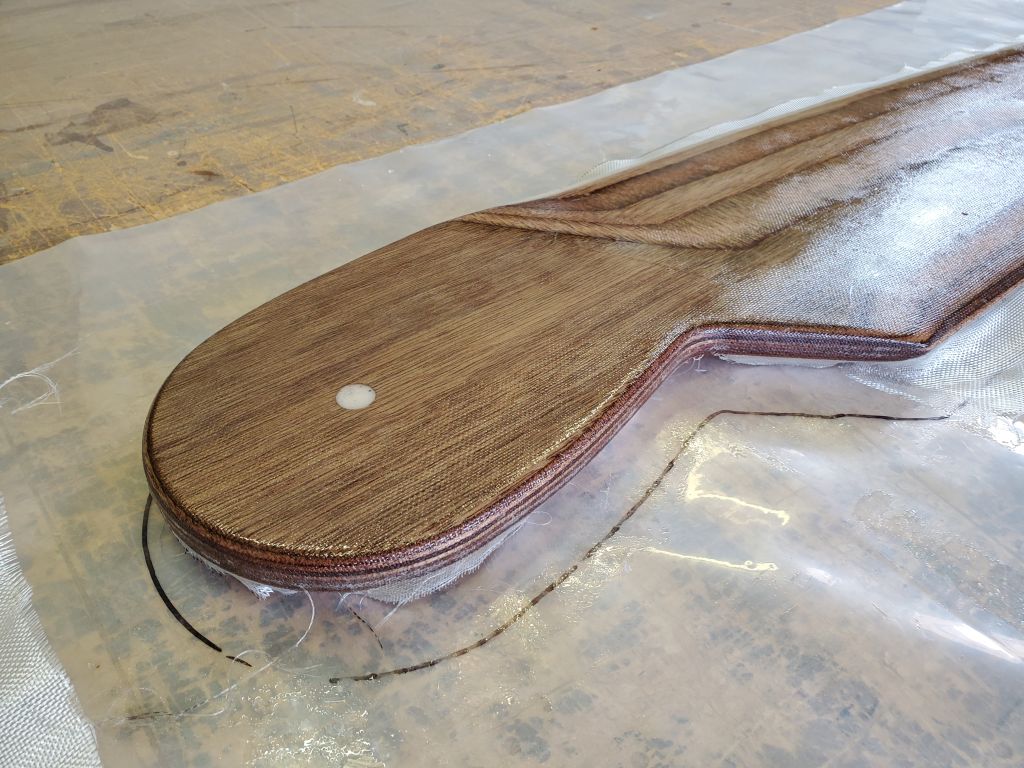
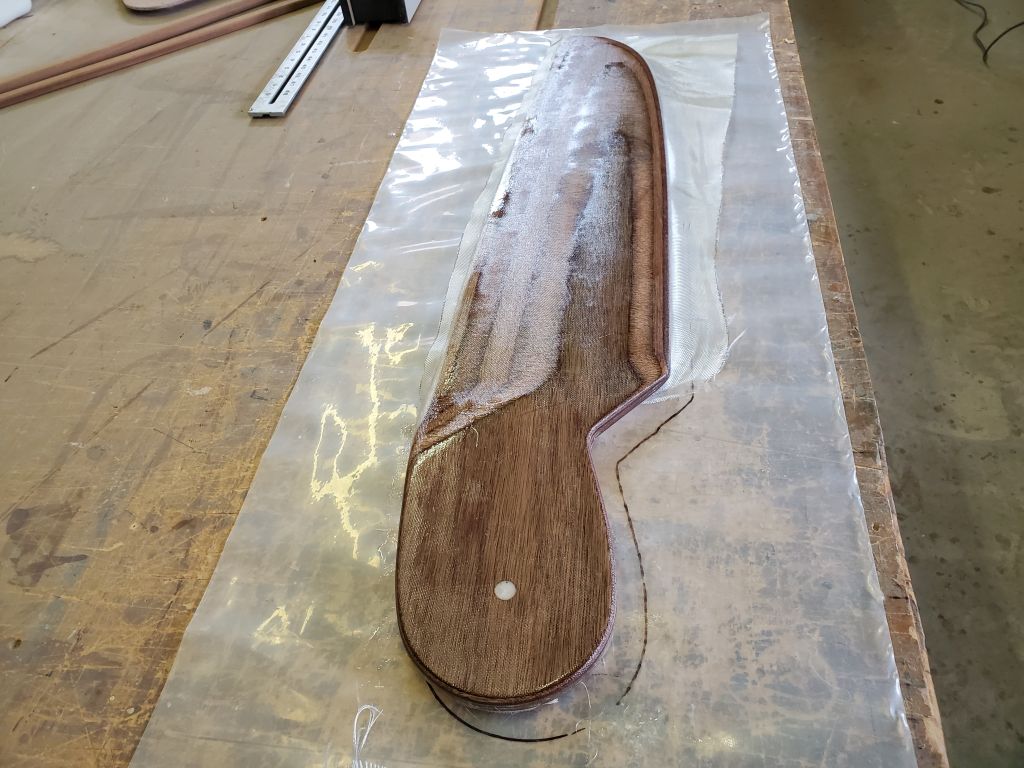
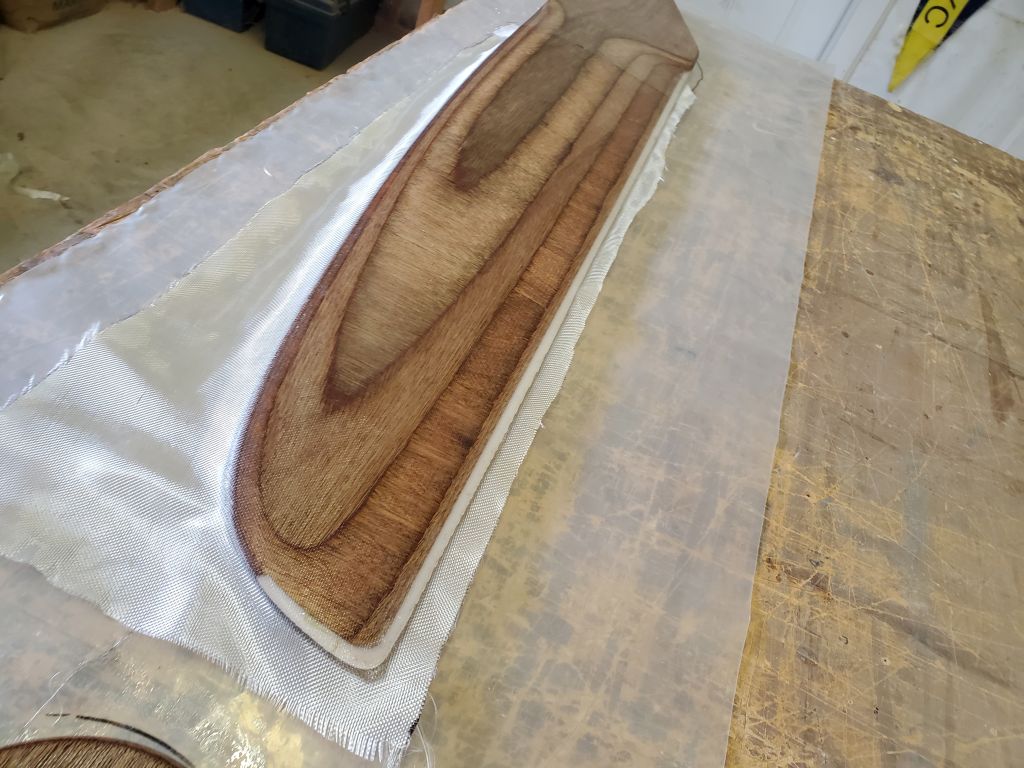
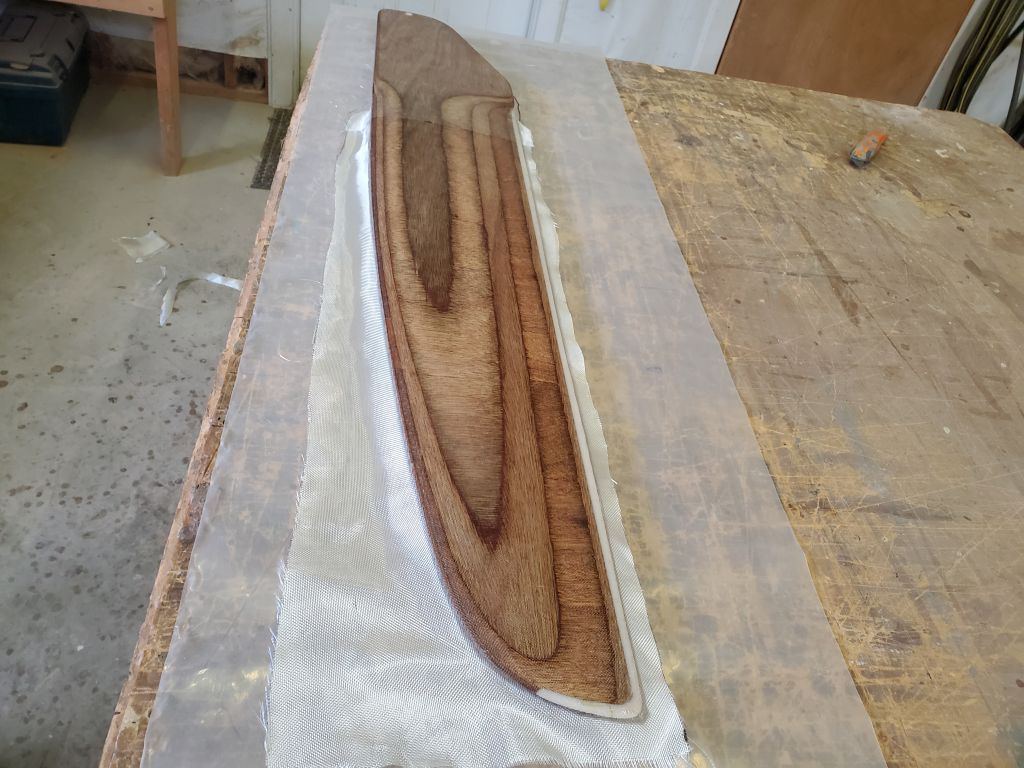
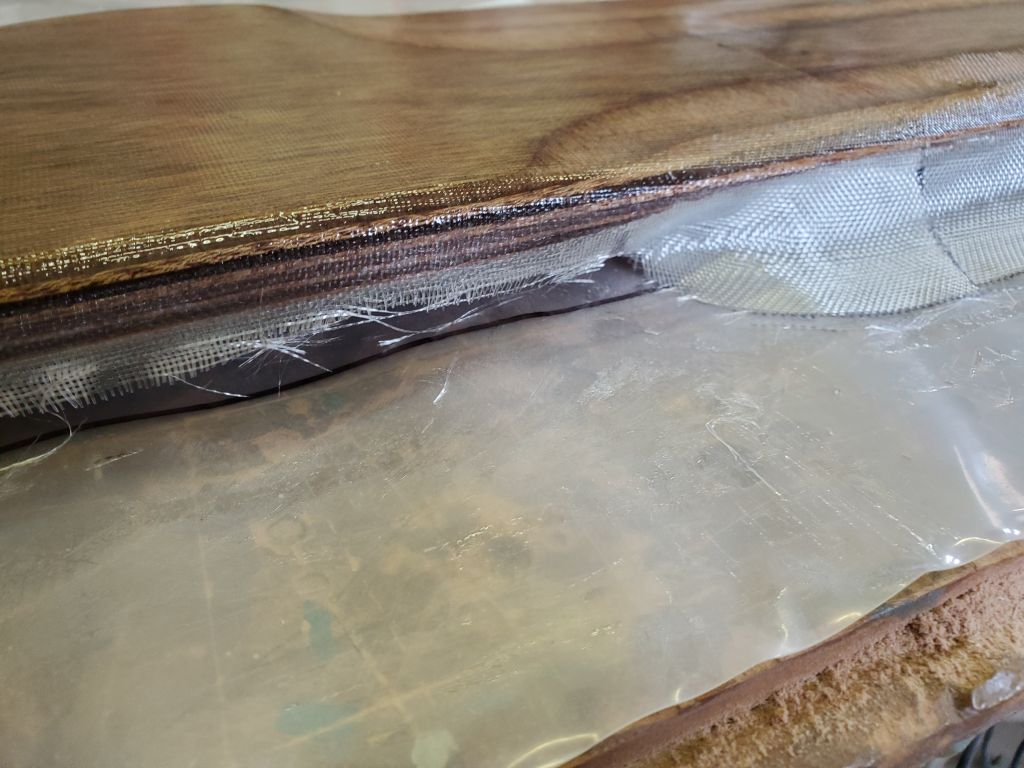
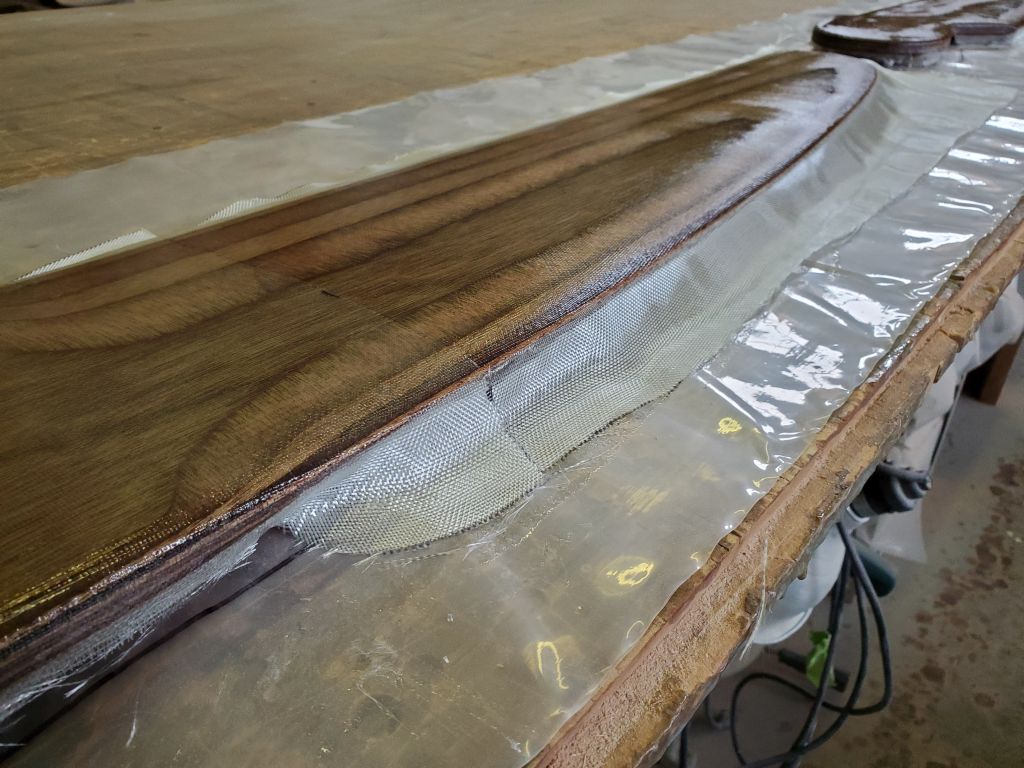
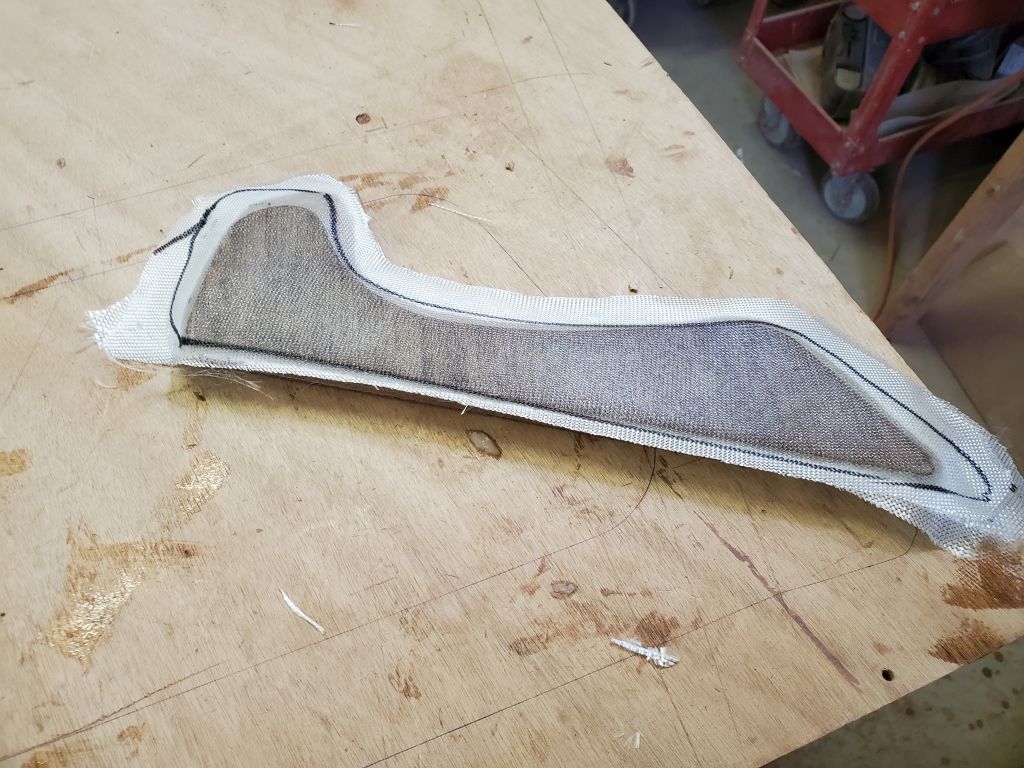
I cut pieces of 4 oz fiberglass (the foils kit came with its own small roll of fabric) as required for both foils, and set up the bench to sheathe the parts. With protective plastic laid down, I first traced the shape of the parts so I’d have an easy reference to drive four nails per foil, and cut off their heads, which would support the pieces above the bench for fiberglassing. The book called for sheathing one side at a time.
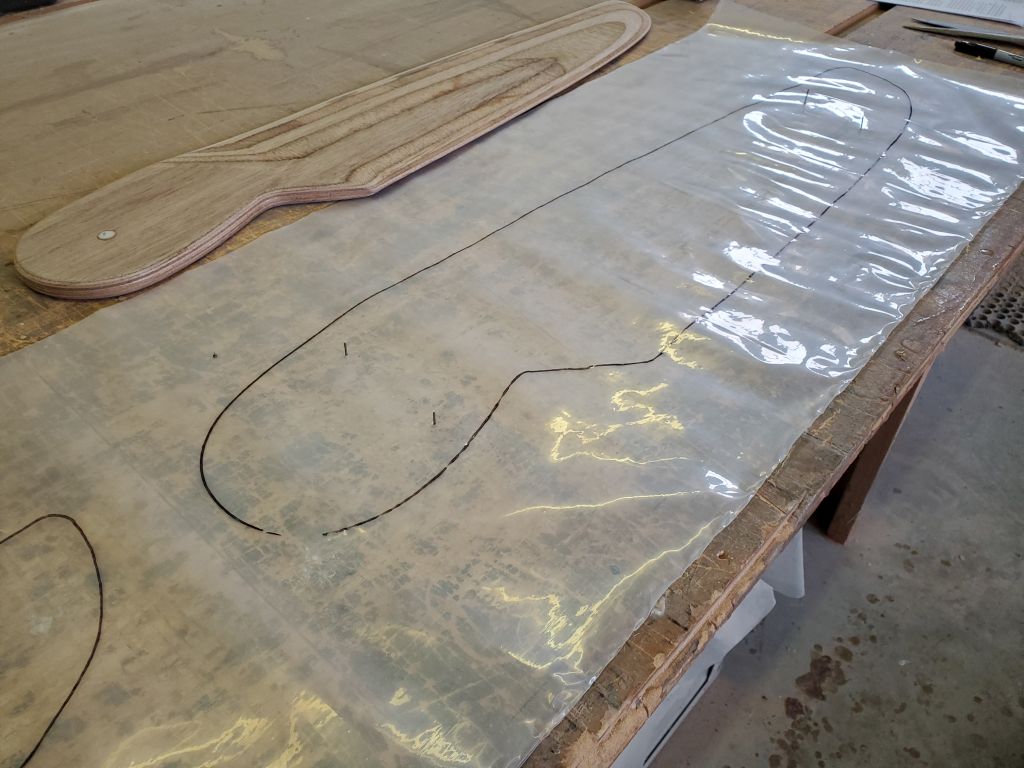
I installed the light cloth in epoxy and as directed, with an additional reinforcing layer on the top part of the daggerboard. The excess cloth extended well past the leading edges of the foils by design, as this helped keep the saturated fabric tight against the curve, and on the unshaped upper portions of each part I wrapped the cloth over the rounded edges and down; the cloth on the second side would later do the same, and thus overlap slightly the first layer. This would become more clear once it actually happened.

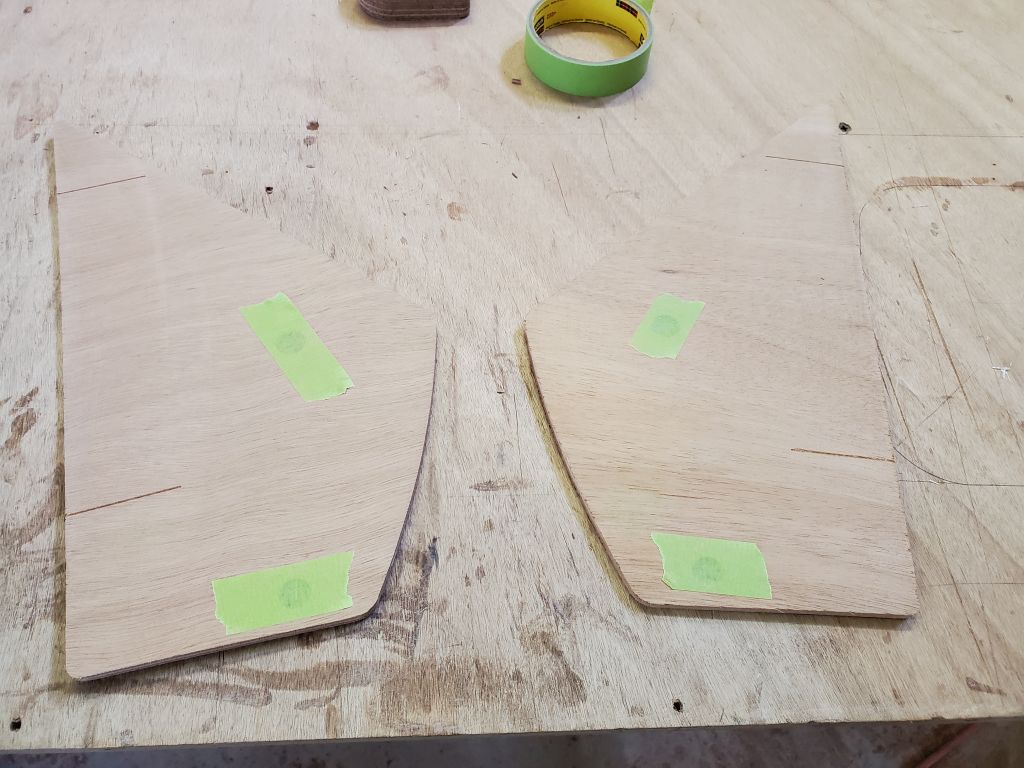
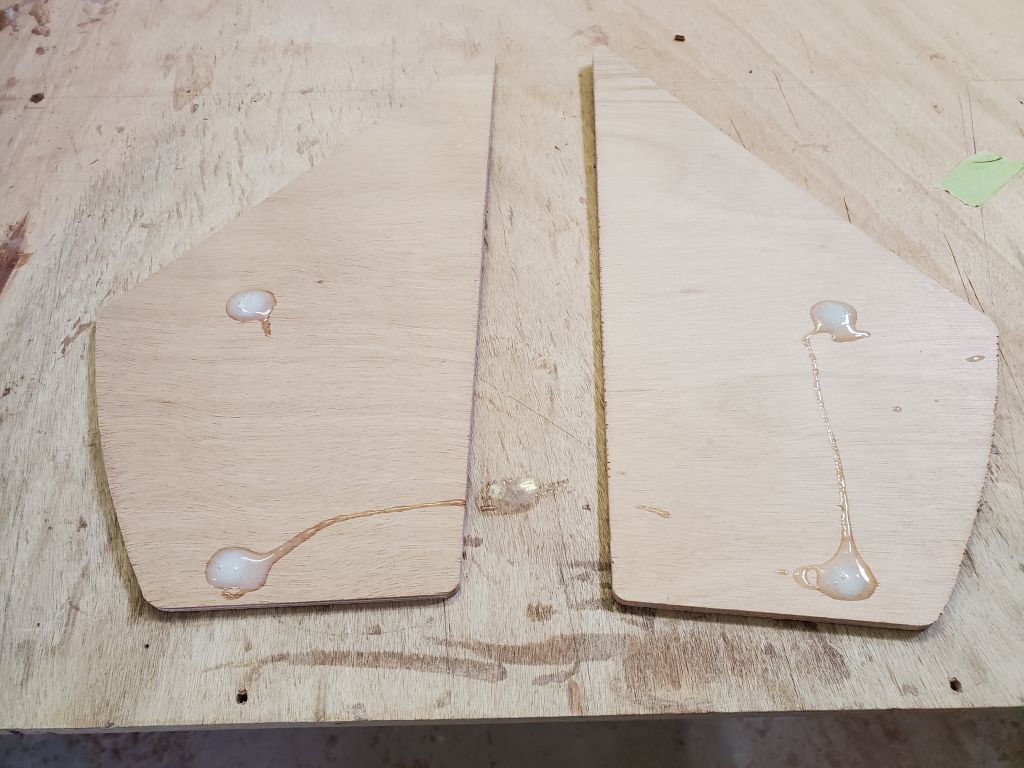
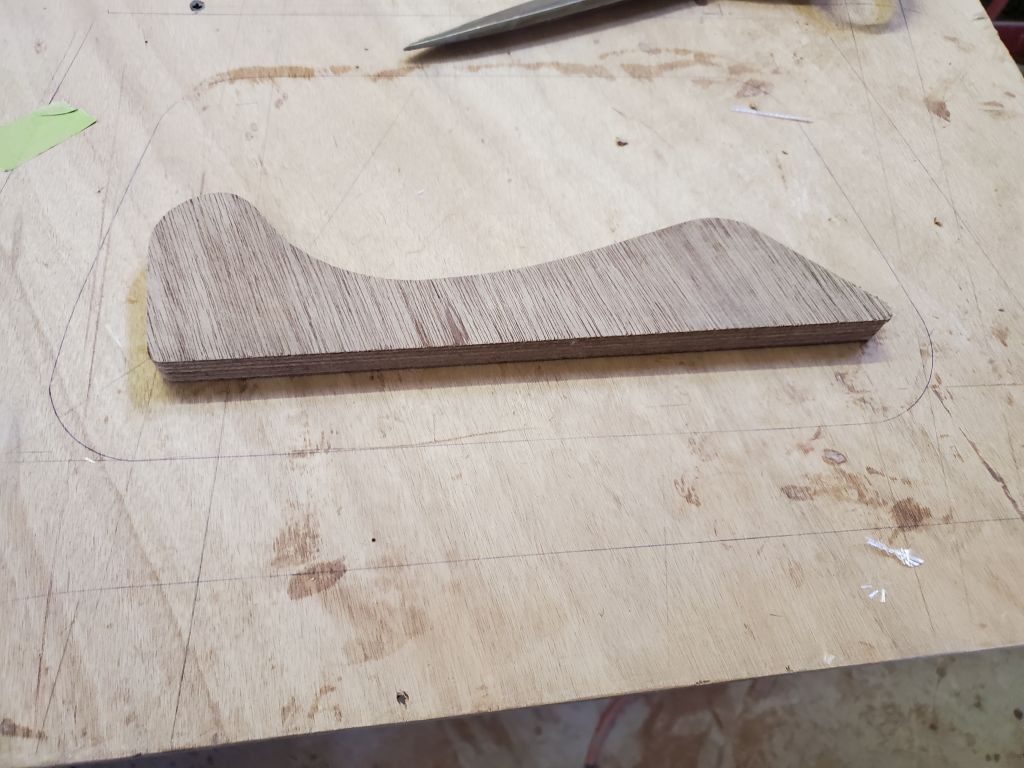
I’d cut a few small pieces of cloth for some subassemblies that I could do now as well. The so-called rudder case, which would support the top of the rudder and connect it with the tiller, would be formed from two small pieces of 1/4″, which I prepared now by masking over the four holes on one side and filling the holes with a thickened epoxy mixture. I also prepared an 18mm plywood spacer for eventual assembly with the side panels. Because the rudder was formed from 18mm plywood, but would have two layers of fiberglass to thicken it slightly, the spacer required additional thickness to prevent the rudder from binding, so the book suggested two layers of 6oz. cloth and one layer of 4 oz. cloth, applied to one side of the spacer.
These small steps would prepare these parts for additional pre-assembly steps next time.
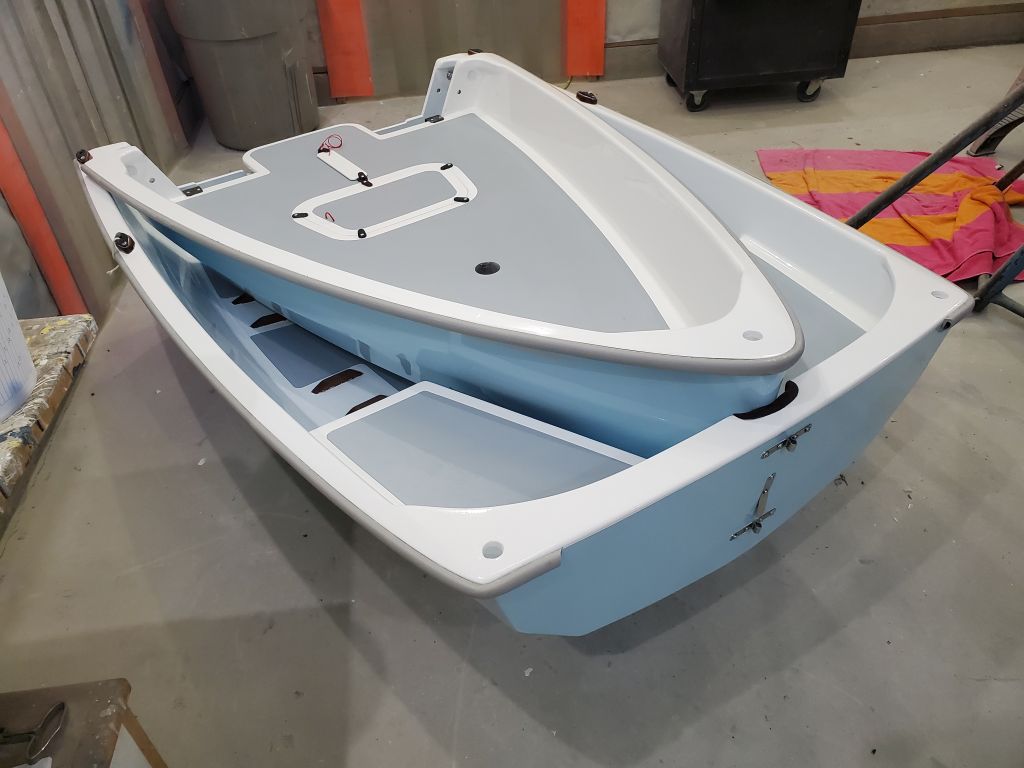
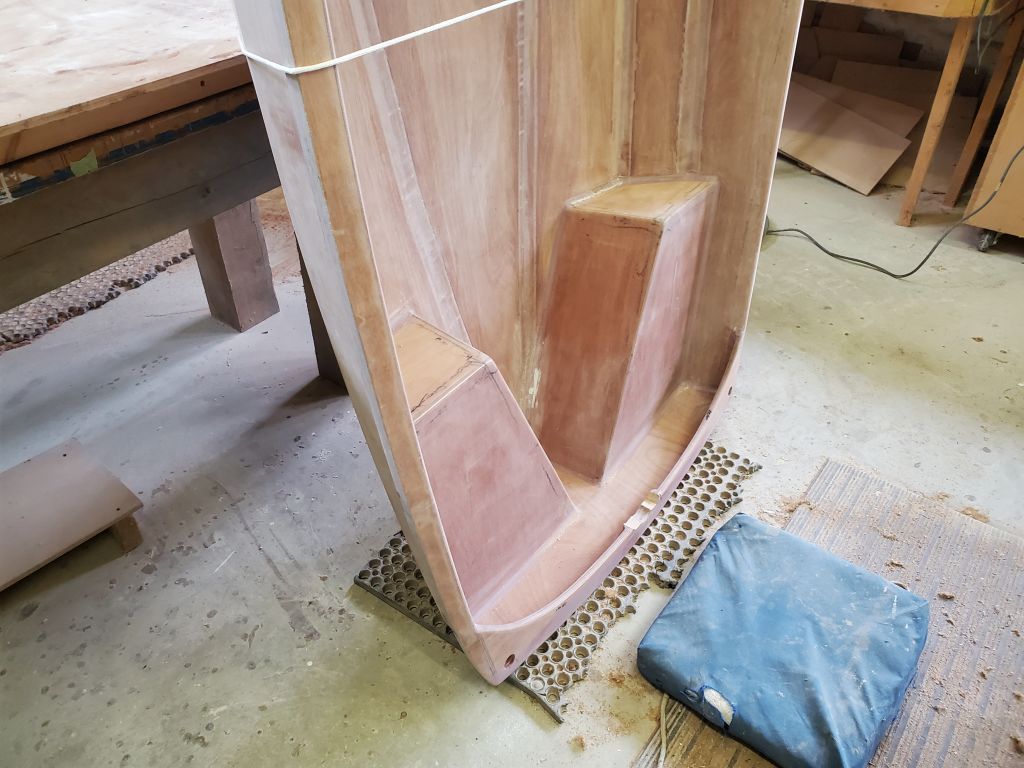
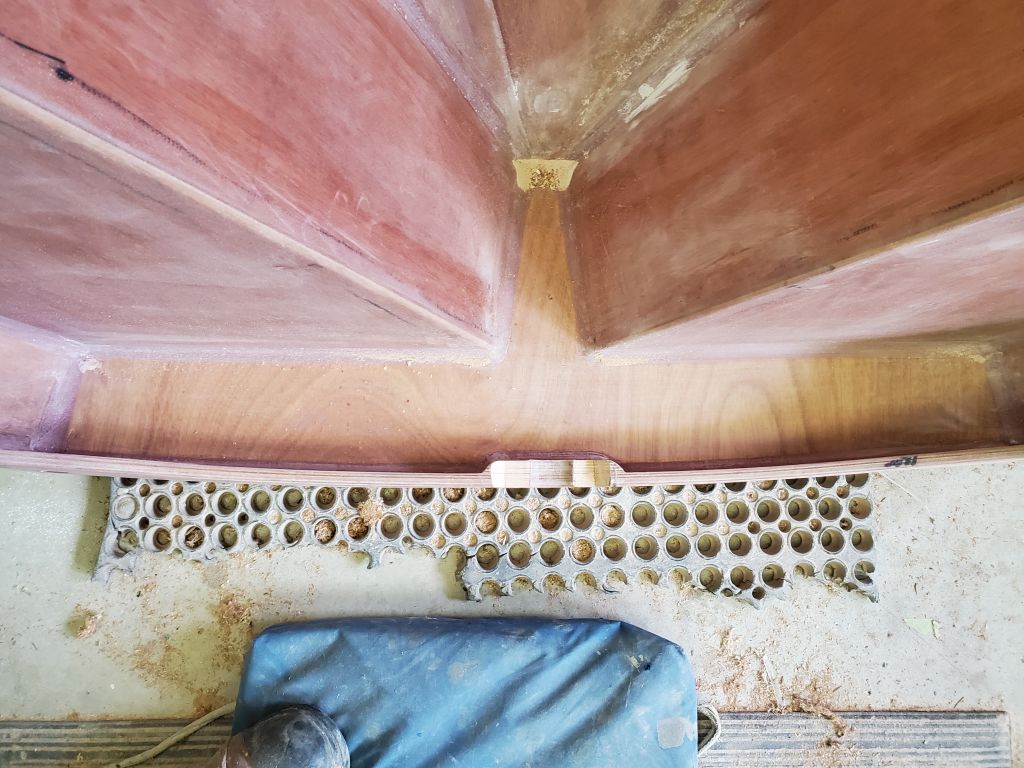
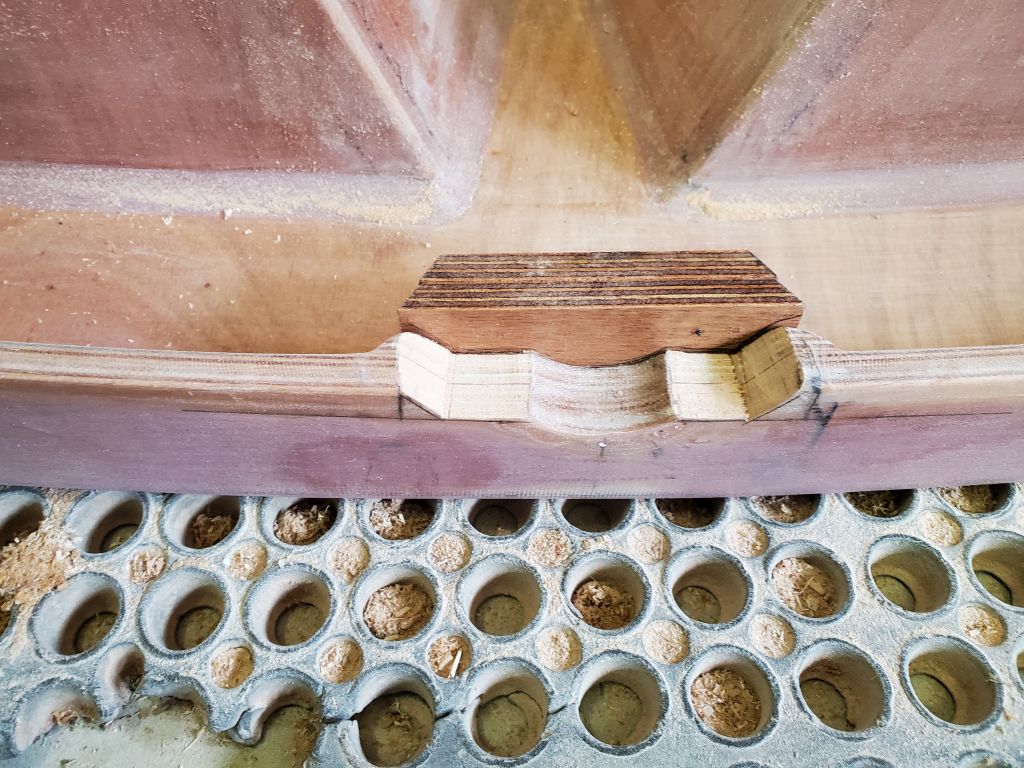
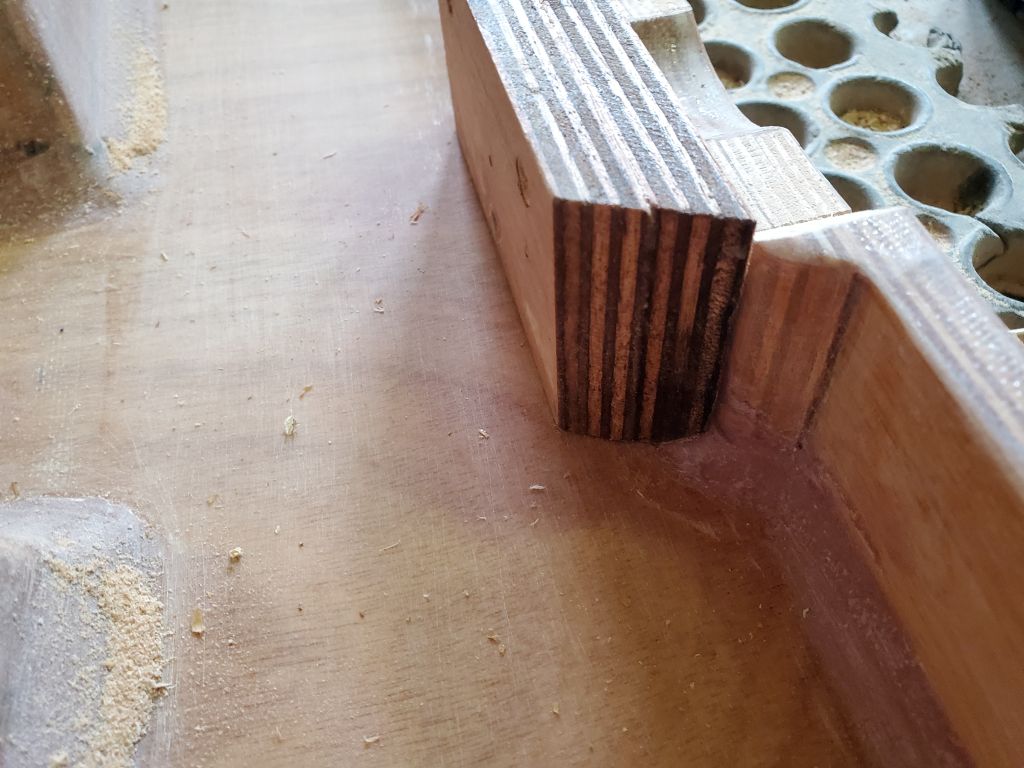
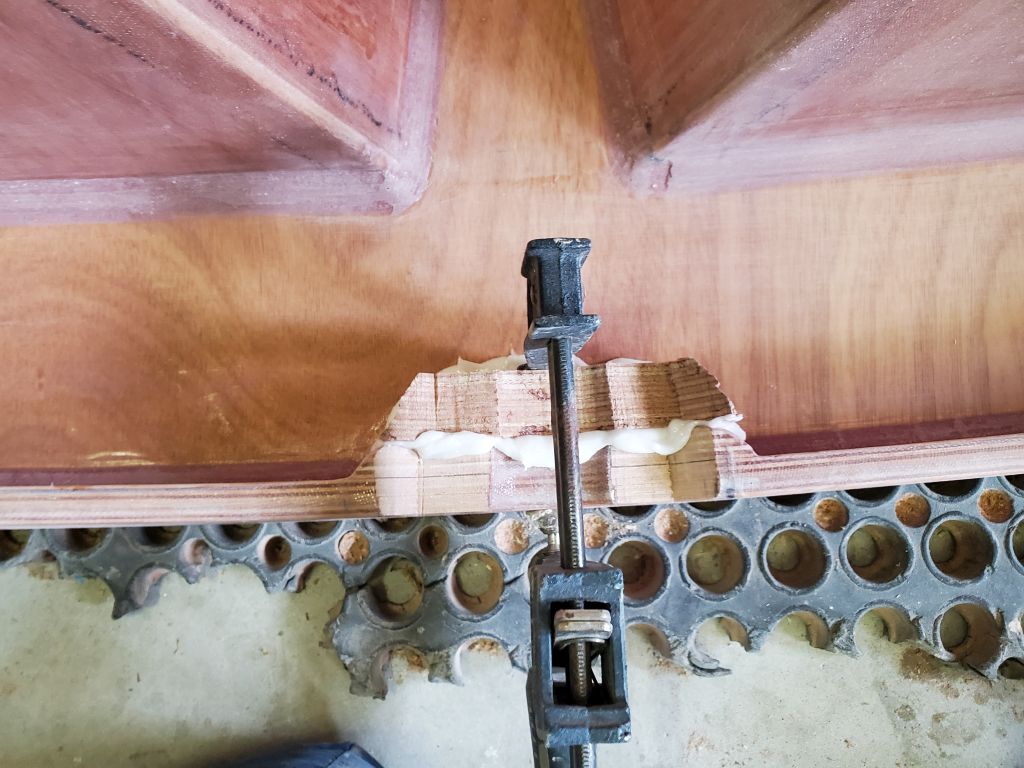
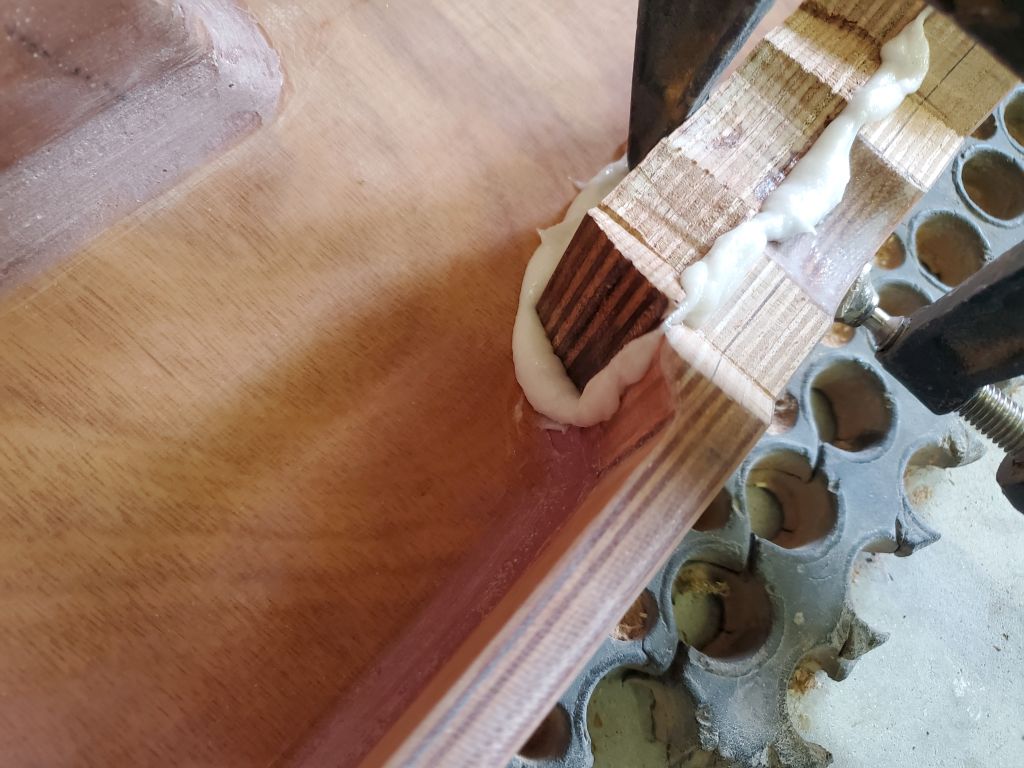
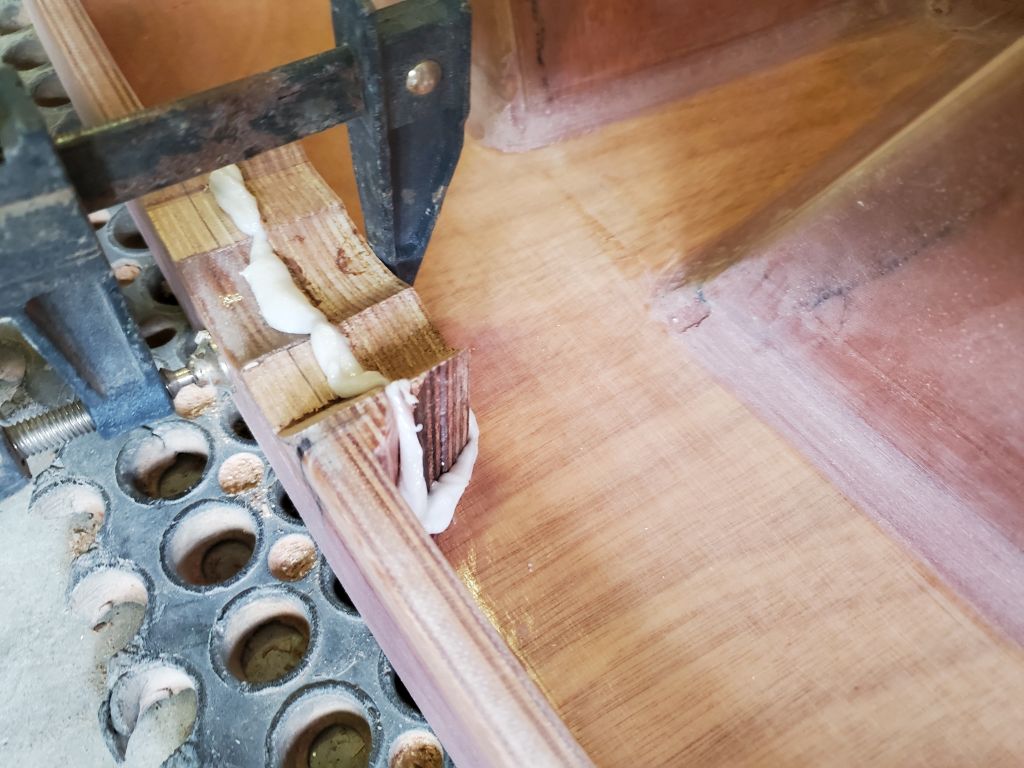
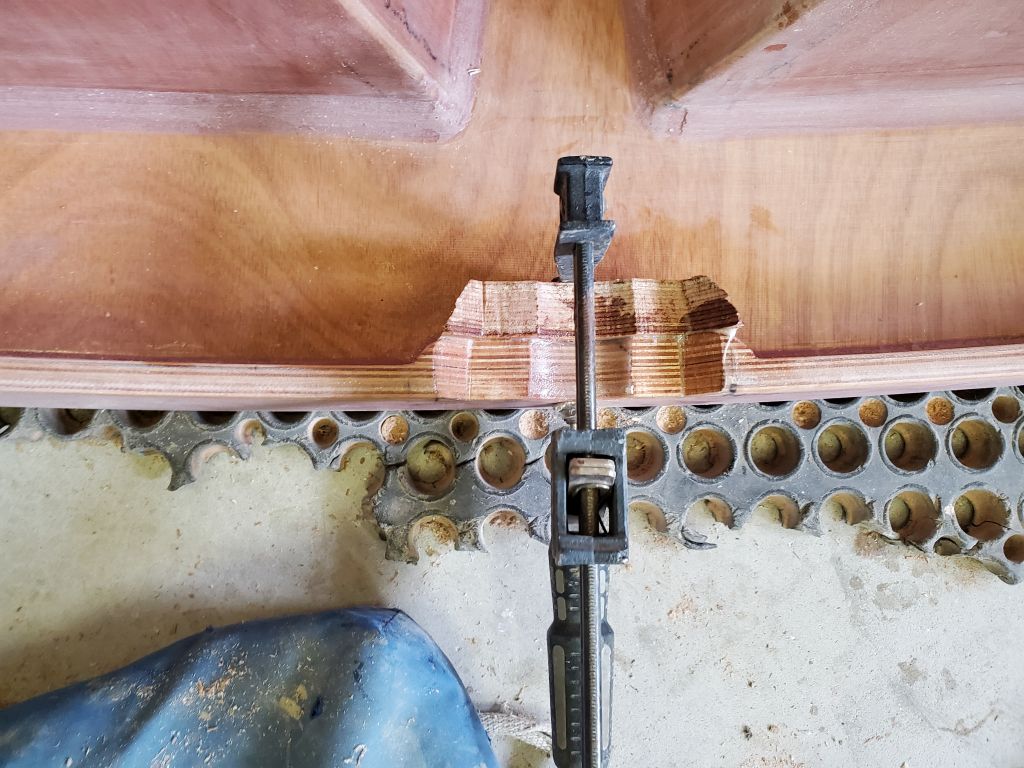
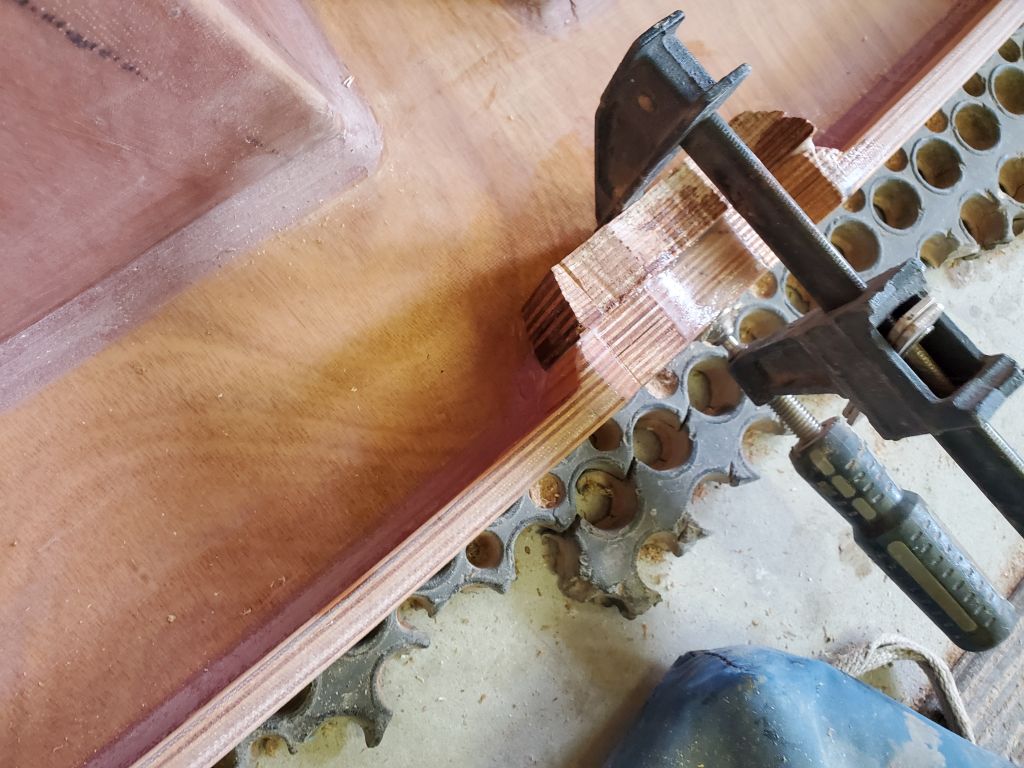
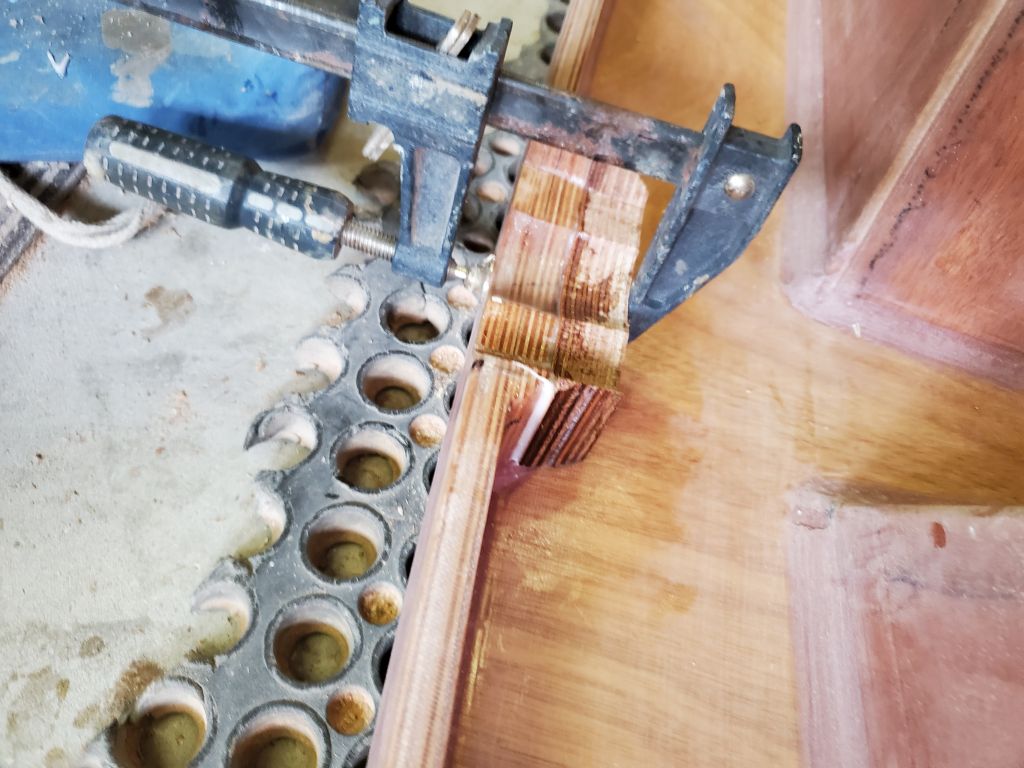
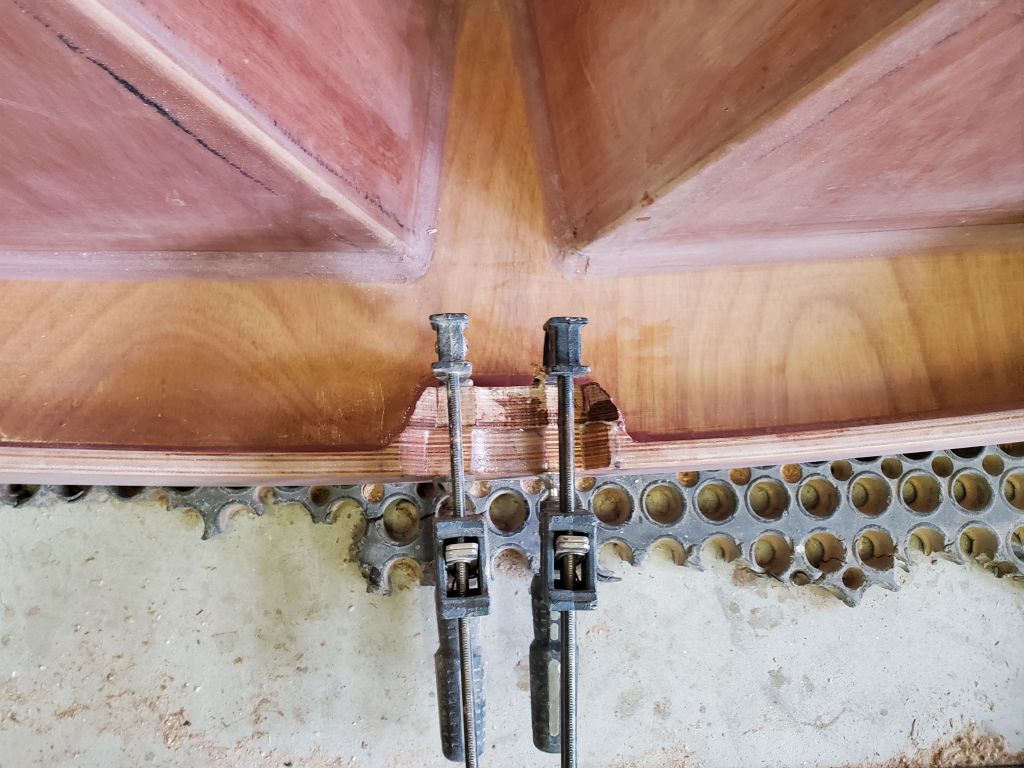
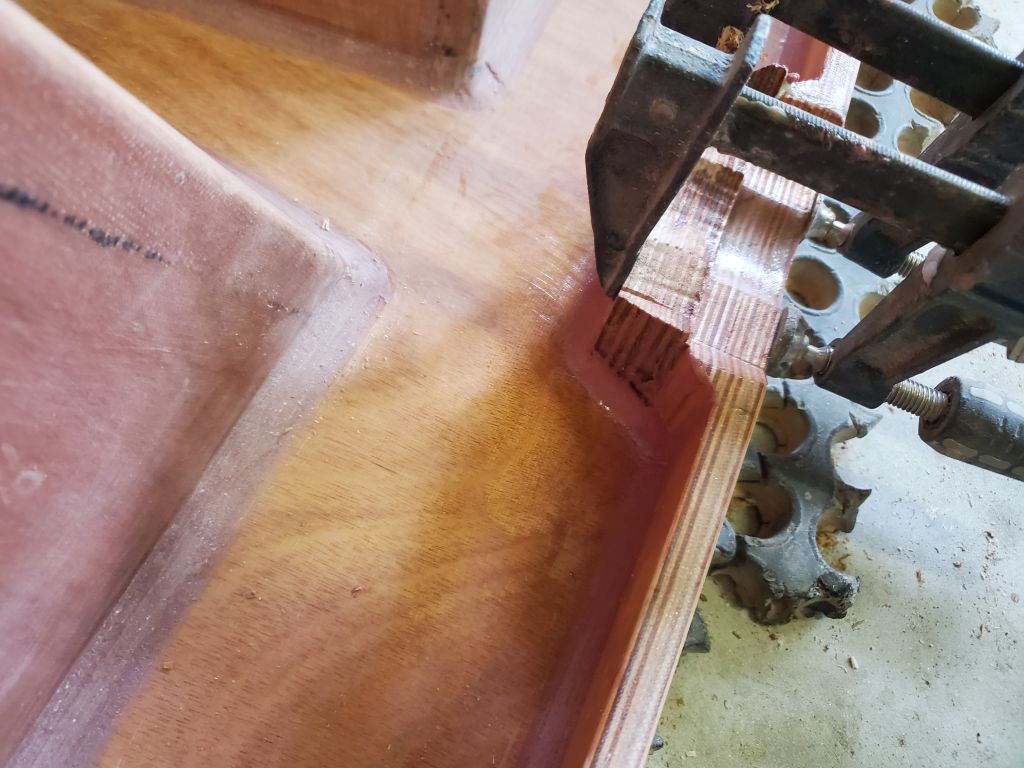
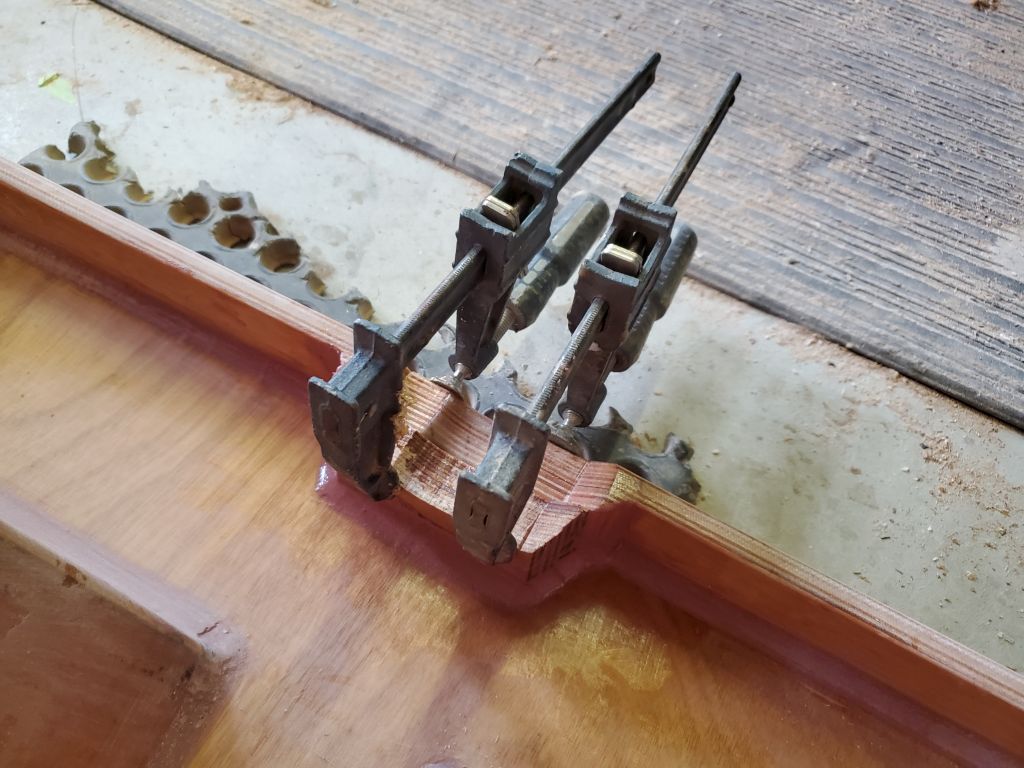
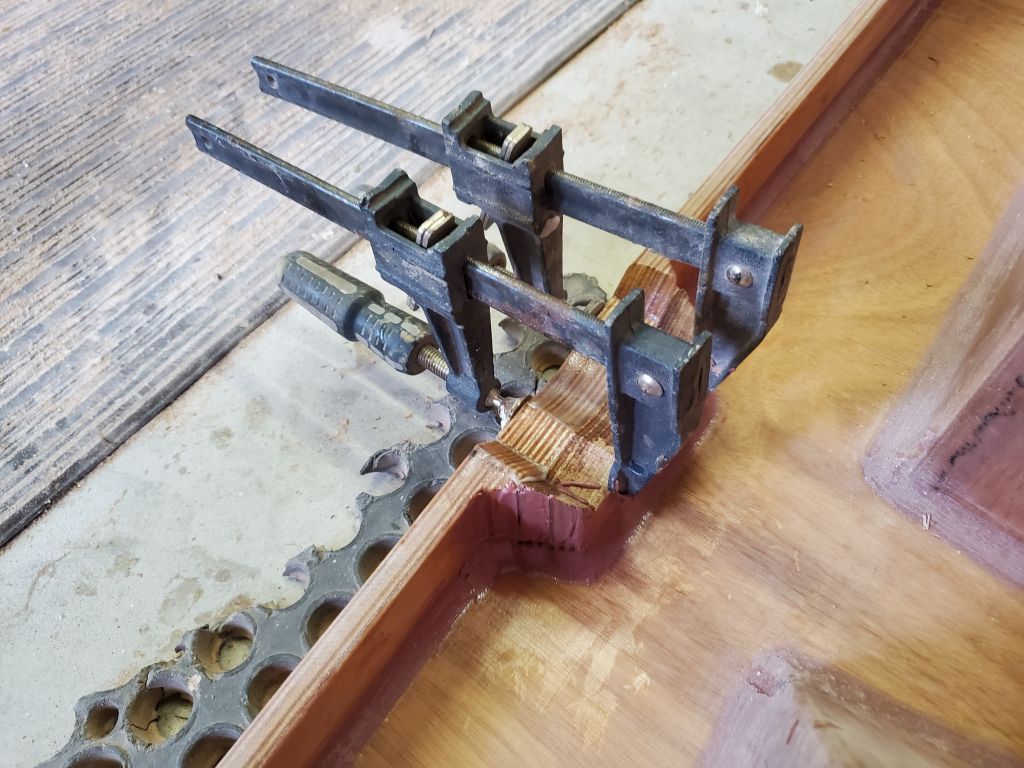
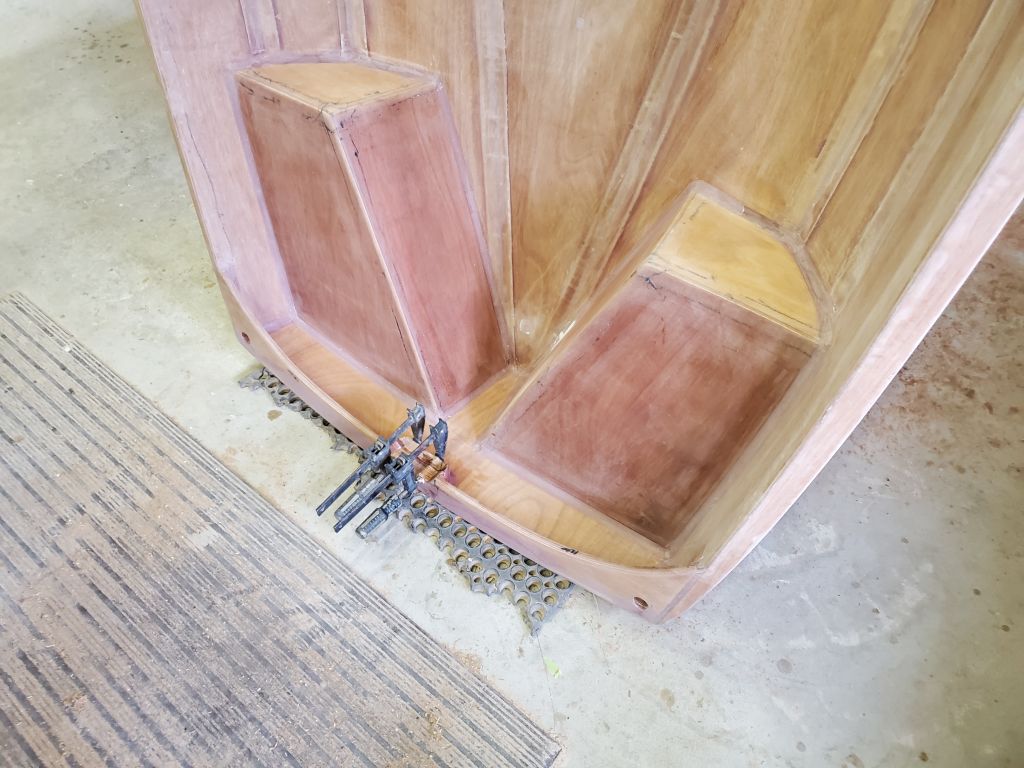
Next, I continued work on the transom modifications for outboard use. To ease access to the area for the next steps, I set up the stern half of the boat with the transom down on the floor and the boat resting against the bench. The laminated plywood block I’d made up last time was ready for use now, and after slightly shaping the aft edge to fit against the transom and existing fillet, I traced the rough cutout I’d made on the inwale and cut the block accordingly, then glued it to the inwale and transom with a thickened epoxy mixture, securing it with clamps while the epoxy cured, I cleaned up the excess gluing squeezeout, and then finished off the installation with a 3/4″ radius fillet around the lower corners, to match and tie in with the existing inwale fillets.
Once this assembly cured overnight, I could continue with final shaping and sanding to clean up the end result.
Total time billed on this job today: 6.25 hours