(page 1 of 2)

Patience 13

< Back to Patience

Monday

Preparing for another project, and now that the bottom paint had had the weekend to cure, I moved Patience back outdoors to await her departure for the water in  a few weeks.  I thought the new striping looked terrific, and really made a difference to the boat’s appearance.

I offset the jackstands from the original locations so I could patch in the bottom paint, which I took care of once the boat was set.

< Back to Patience

Patience 12

< Back to Patience

Friday

I decided to mount the little solar controller near the companionway, where it’d be readily accessible for connection to the removable solar panel abovedecks, and also where I could run wiring conveniently (and out of sight) into the battery compartment for connection.    After bolting the controller in place, I led wiring from the output side down behind the companionway steps and then along an existing wire run into the battery compartment, where I connected the leads to the battery terminals as required.  When not in use, the connector for the solar panel could be easily tucked in behind the controller for safekeeping.

The owner requested a simple lead through the companionway for the wires, so I modified the top drop board in the companionway to accept the wire from the solar panel–it was easy to slip in and out on its way down to the controller, but allowed the sliding hatch to cover the opening.

With other work in the cabin complete, I installed the new cabin sole panels, and cleaned up any final remnants of the project.

Finally, I masked off and painted the bottom, completing the new appearance, and completing the project.

Total time billed on this job today:  4.25 hours

0600 Weather Observation:
56°, fog and clouds, light drizzle.  Forecast for the day:  cloudy, maybe a shower, 60s

Patience 11

< Back to Patience

Thursday

The final cosmetic change planned for the hull was to add a cove stripe near the gunwale.  The owner selected black to match the name, and I installed the new stripe so it was even with the top of the name, which was 5″ down from the edge of the gunwale above–or, more specifically, two strips of 2″ masking tape and one of 1″ .  I created a series of these tick marks along the length of the hull as required to give me a guideline for the new vinyl striping.

I left a 3″ space between the name and the stripe on each side, and ended the stripe 12″ ahead of the transom, and 36″ aft of the stem, and applied the striping to both sides, following my alignment marks and fairing the actual tape installation by eye accordingly.

Late in the day, some supplies I needed for the final job arrived.  To help keep a fully-charged battery topped off while the boat was not in use, the owner requested a small solar panel, with a portable, removable installation.  This 14W rollable panel seemed to fit the bill for the minimal electrical needs of the boat (mainly ensuring the battery stayed fresh for the new and improved automatic bilge pump system), and taking into account budget and portability requirements.  It wouldn’t light the charging world on fire with its performance, but would be up to the task of maintaining the state of the battery.  The panel could be placed just about anywhere, but on the coachroof tied to the handrails seemed a generally convenient spot despite some loss of production likely from boom shading when the boat was rigged.  The portable nature of the panel, and the non-permanent nature of its eventual wiring, meant that it could be moved around as needed.

solar1-60216

To be sure the panel wouldn’t have any negative effects on the battery from overcharging–not likely, but still–I specified a small solar controller, which I thought would also provide a convenient place to hook and unhook the panel wiring, which the owner wished led through the companionway.  I spent a little time mulling over possible ways I could install the internal wiring to the battery in a pleasing, useful, and safe way, keeping in mind the need to remove the panel and its wire when not in use.  I’d finish up the installation next time.

Total time billed on this job today:  1.75 hours

0600 Weather Observation:
45°, sunny.  Forecast for the day:  mainly sunny, increasing clouds late in the afternoon, high in the low 60s

Patience 10

< Back to Patience

Wednesday

Back at the shop after a long weekend, the colored stripes of the new boottop had had a lavish amount of time to cure, so I continued the process by masking over the new stripes as needed so I could paint the white (i.e. hull color) portions between them, which was required in this case because the original condition of the underlying hull surface dictated this approach.

After final preparations, I applied a coat of gloss white enamel to these areas.

Next, I applied a second coat of light gray nonskid paint to the new cabin sole sections.

Late in the day, after a close inspection, I decided I was pleased with the new white paint at the boottop, and decided to remove the masking tape.  All that remained to complete the new look now would be to repaint the bottom up as far as the lowest white stripe, which I’d do as soon as I felt I could overmask the fresh paint.

Total time billed on this job today:  2 hours

0600 Weather Observation:
50°, sunny.  Forecast for the day:  sunny, 70s

Patience 9

< Back to Patience

Thursday

To finish up the knotmeter patch, I lightly sanded the fairing compound, bring the area smooth and level with the adjacent surfaces.  No further fairing was required, so after a solvent wash I applied a coat of plain epoxy over the fairing material as a sealer.

I sanded the primer on the cabin sole panels, and after final preparations applied the first of a couple coats of nonskid paint, which I mixed to a light gray color.

In the cabin, I finished up the new bilge pump wiring, leading four wires as needed to the new switch location, on the starboard bulkhead just beneath the electrical panel.  I made connections in the battery compartment as required to connect the new wiring to the wires already leading to the bilge, and this completed the electrical side of the pump installation.

With the connections made, I could test-run the pump.  These pumps have the idiosyncrasy, as it were, of running capably in either direction, and with two unmarked black wires leading from the motor, there’s no required–nor conveniently marked–polarity.  So determining the pump inlet and outlet ports for the hoses requires operating the pump first, once wired, to determine which is the suction side.  Both the manual switch and auto switch tested operational, and with the ports’ correct orientation determined, I could make up the inlet and outlet hoses as required.  (The inlet has the strainer.)

This quickly pushed out the remaining water in the long hose leading to the transom, leftover from the old installation.

Total time billed on this job today:  3 hours

0600 Weather Observation:
55°, sunny.  Forecast for the day:  sunny, high near 80

Patience 8

< Back to Patience

Wednesday

After a quick water wash, I lightly sanded the new patch over the knotmeter through-hull hole, sanding it flush on the outside as needed.  Then, I applied a coat of fairing filler over the area, leaving it to cure overnight.

With the epoxy coating on the bottom sides of the cabin sole panels now cured, I turned them over and sanded the top surfaces to smooth them as needed.  Then, after cleaning up and solvent-wash, I applied a coat of primer to the panels.

I installed the new bilge pump on its platform, and the float switch in the keel sump, then began some of the wiring, leading a new 2-conductor wire between the bilge and the compartment containing the pump, and making up the various connections in the bilge area between the switch, pump, and an existing wire leading to the battery compartment.   In this case, there was really no way to avoid having wires running through the bilge compartment, but I kept the wires as high as possible with wire clamps.  The old pump had been wired directly to the battery without a separate on/off switch, so I’d finish up power wiring and wiring to the new panel switch next time, along with the pump hose connections.

Total time billed on this job today:  4.5 hours

0600 Weather Observation:
58°, foggy.  Forecast for the day:  Becoming partly sunny, high 73°


Patience 7

< Back to Patience

Tuesday

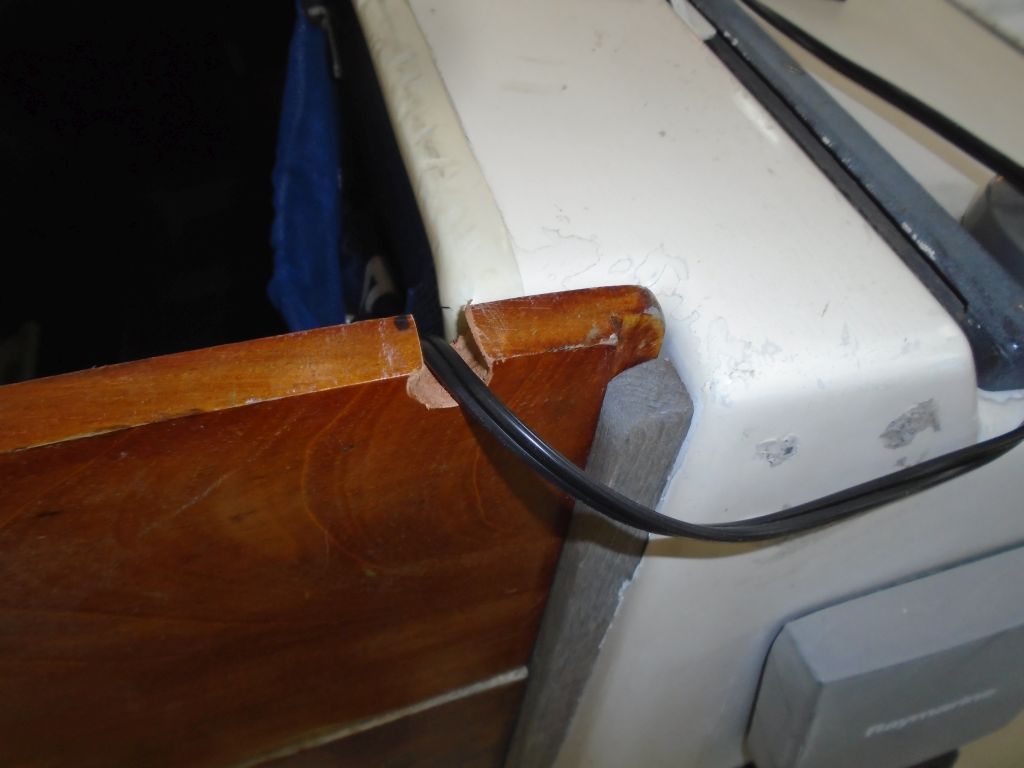
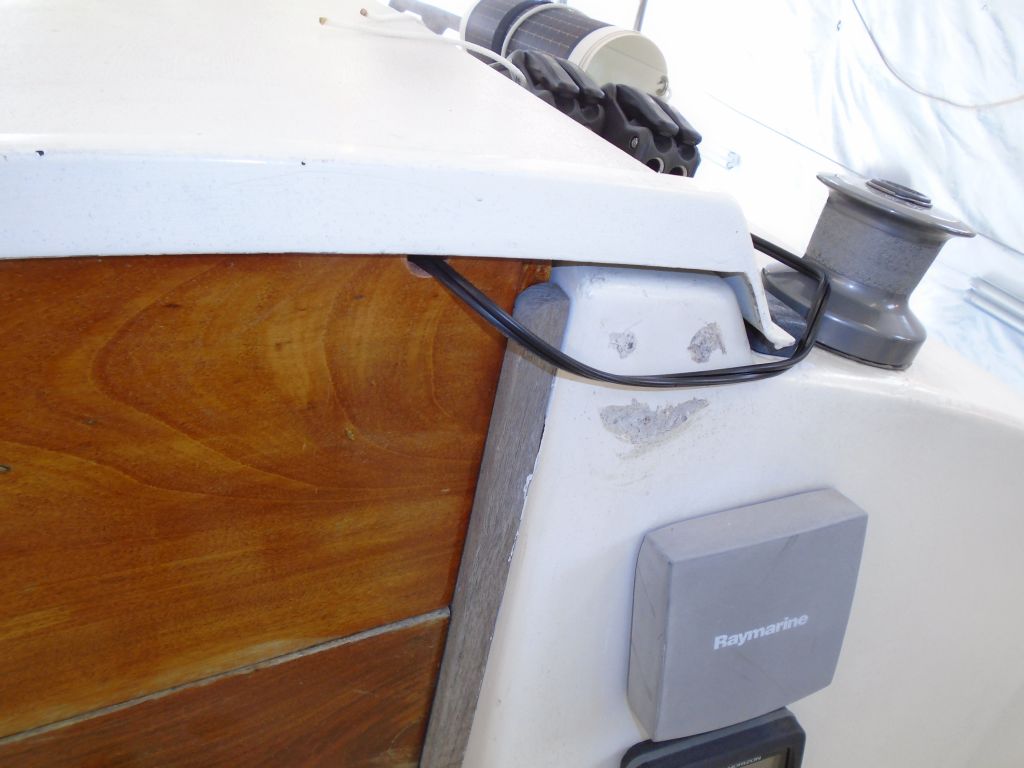
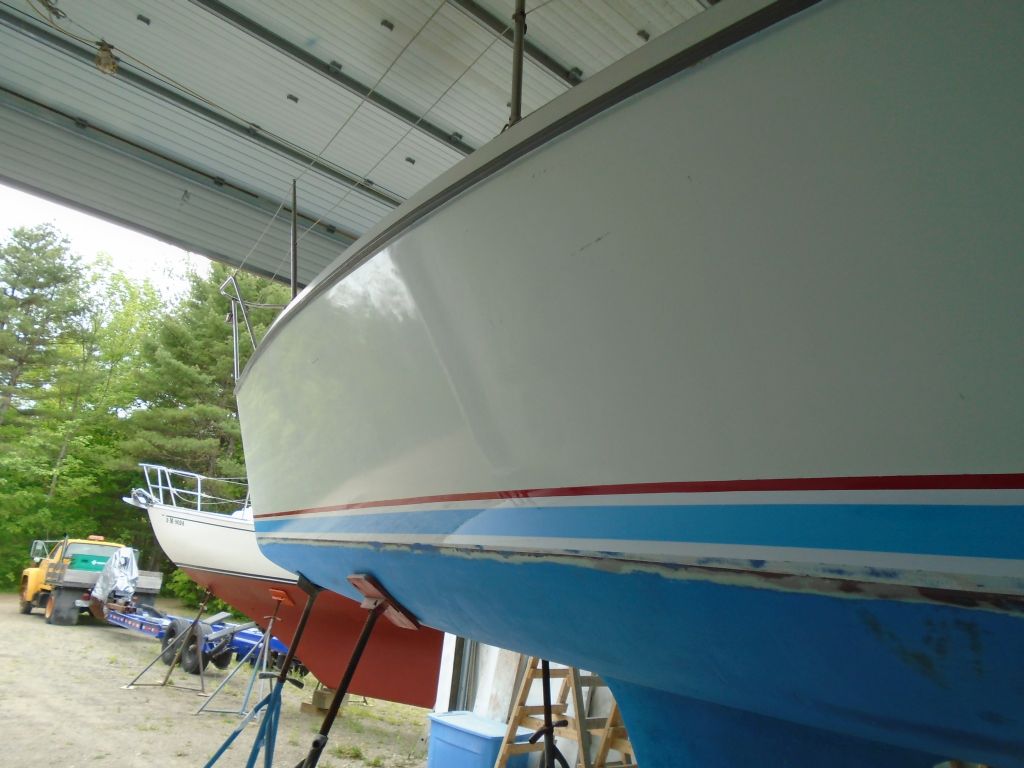
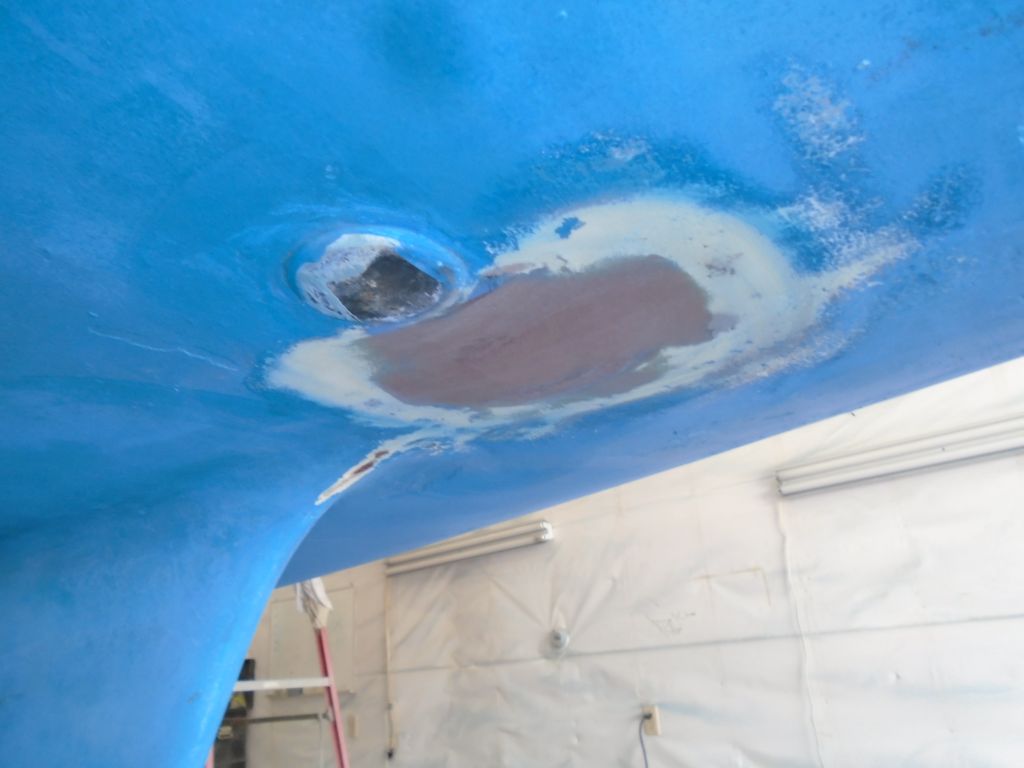
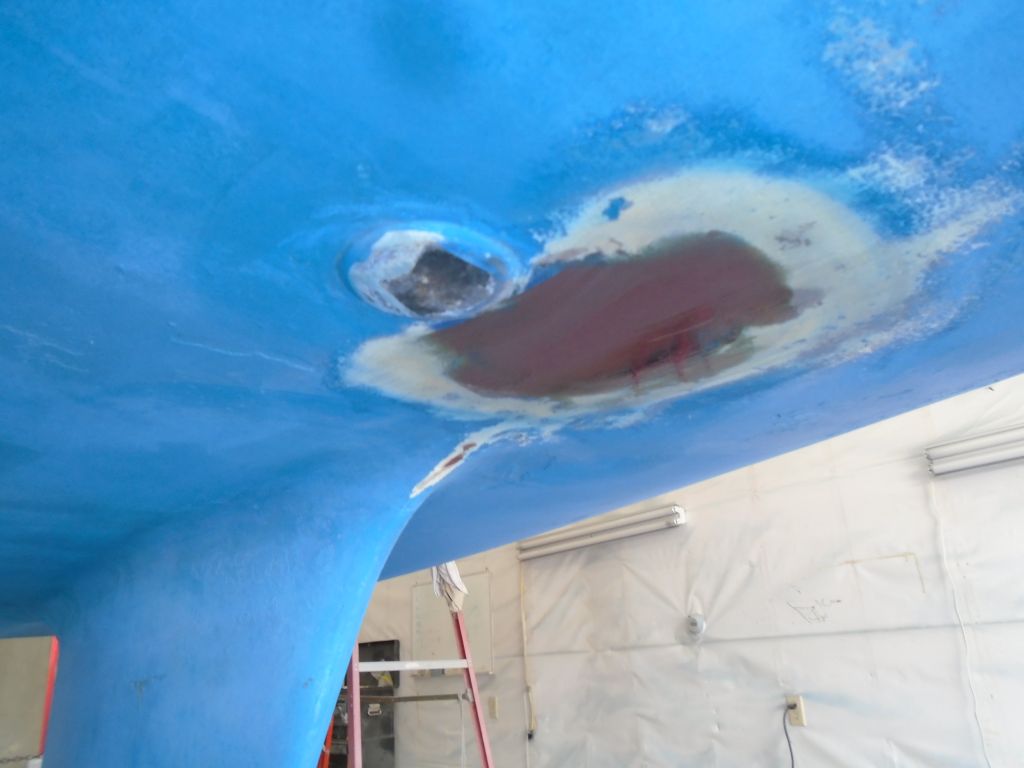
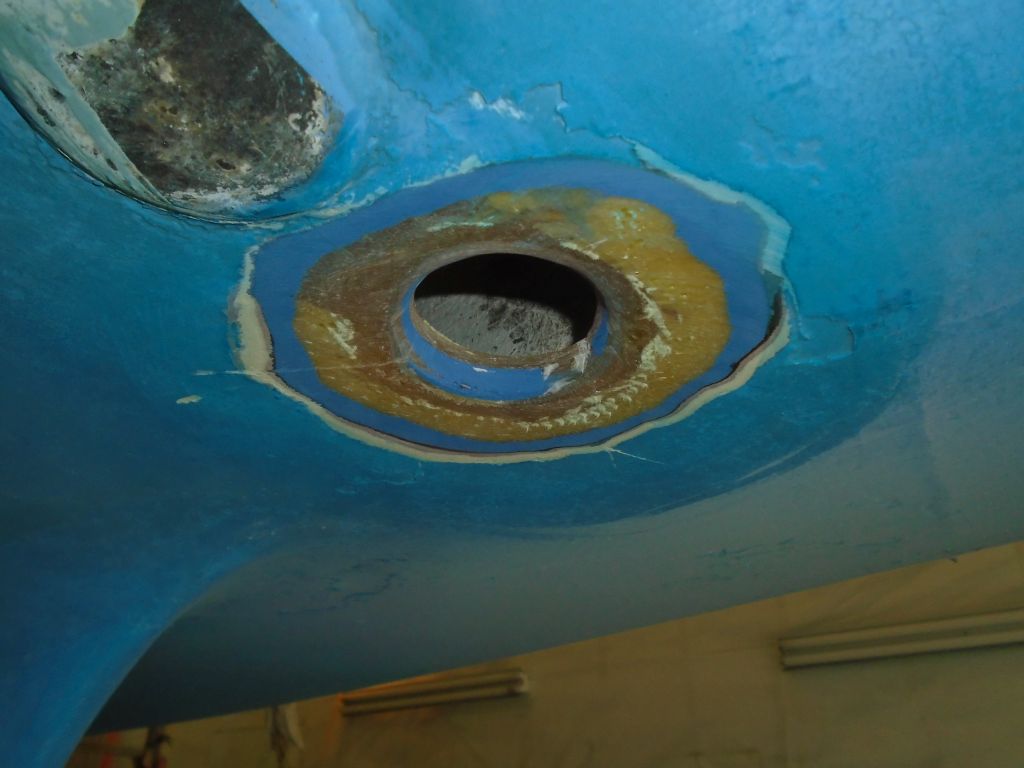
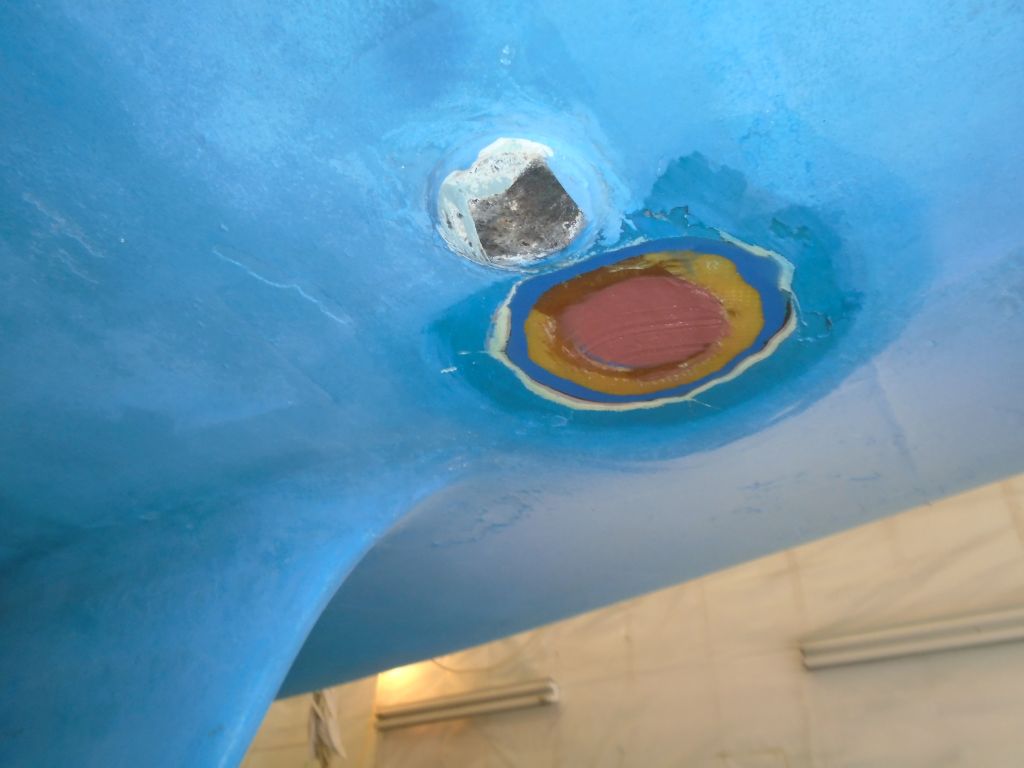
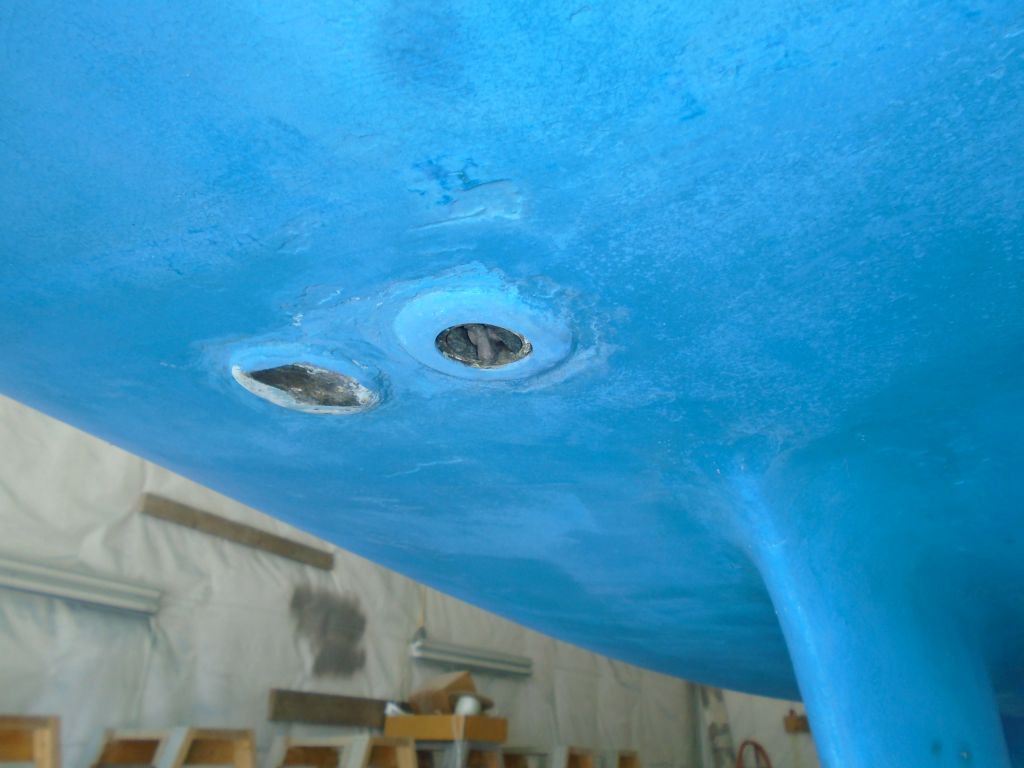
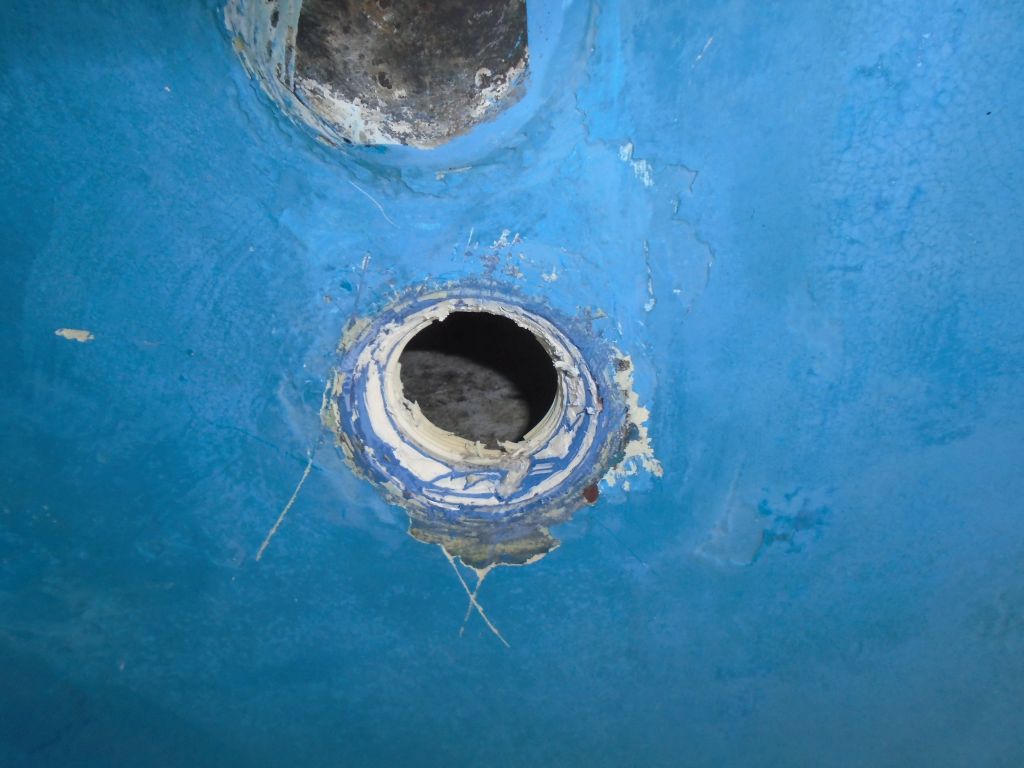
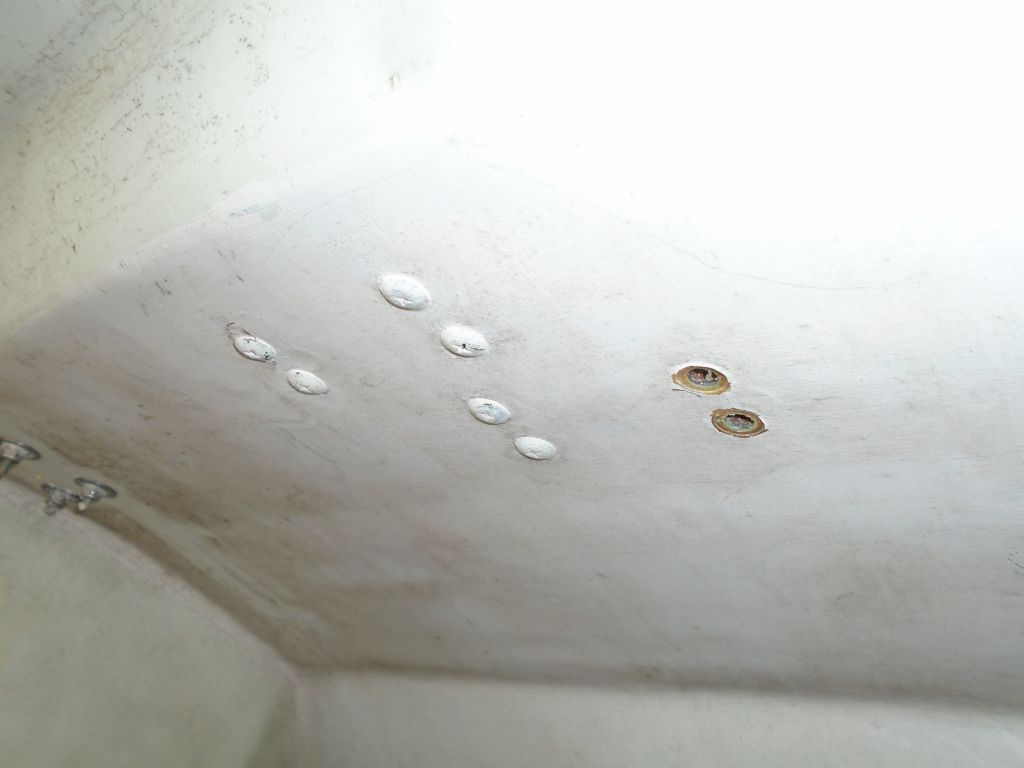
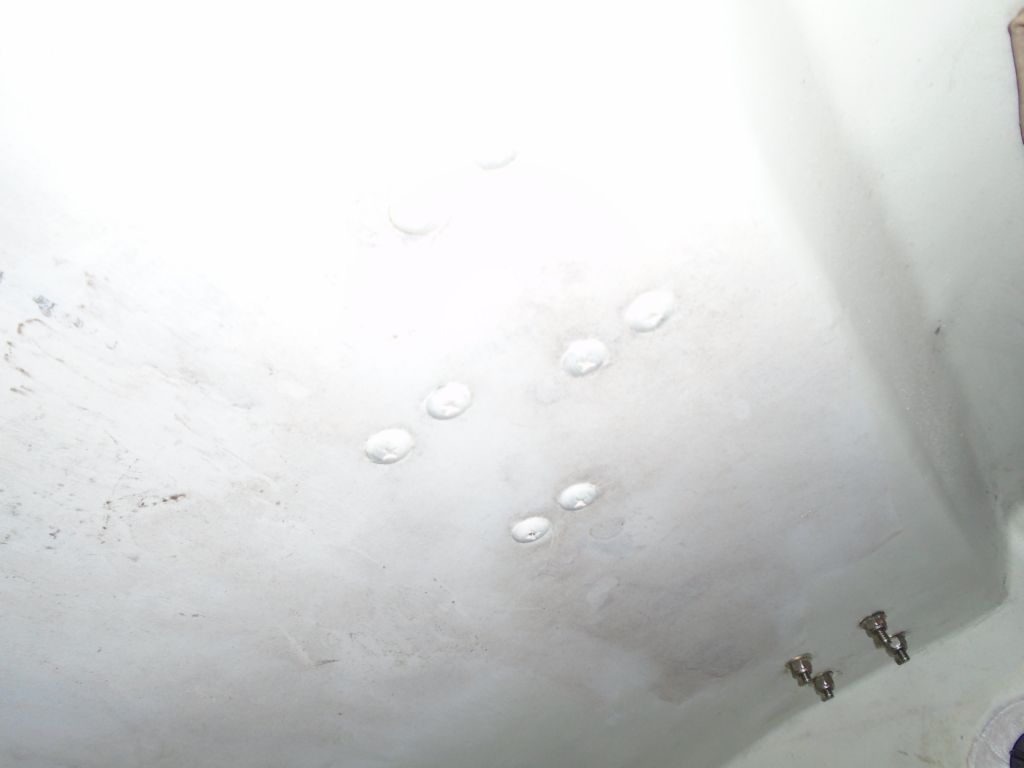
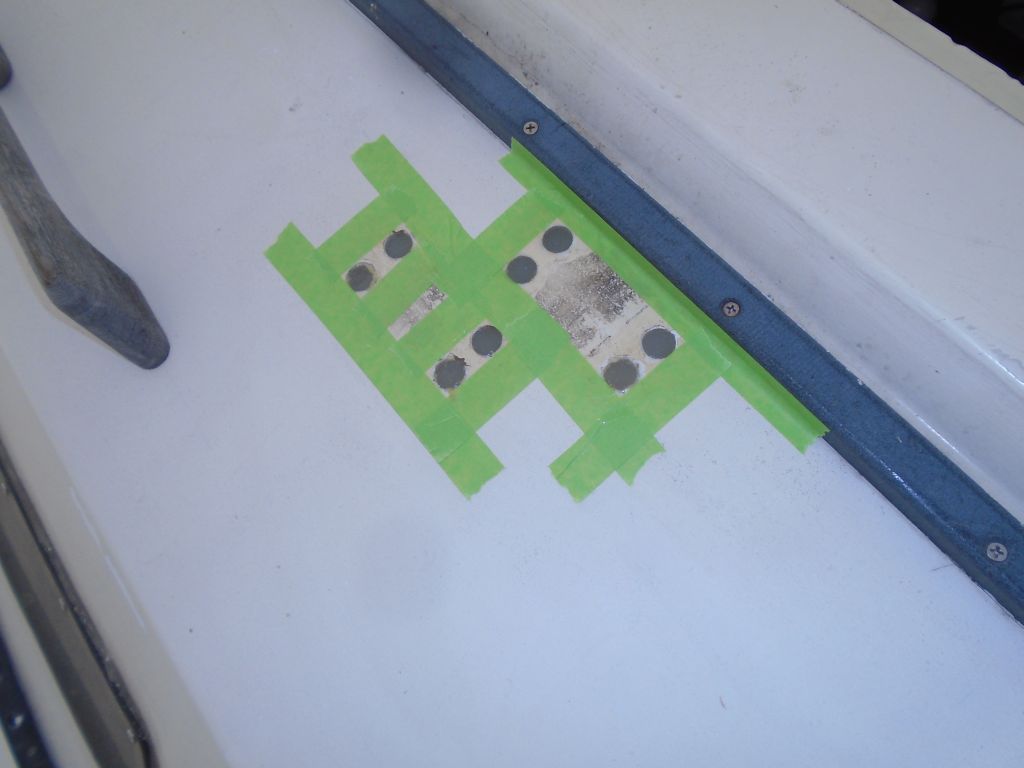
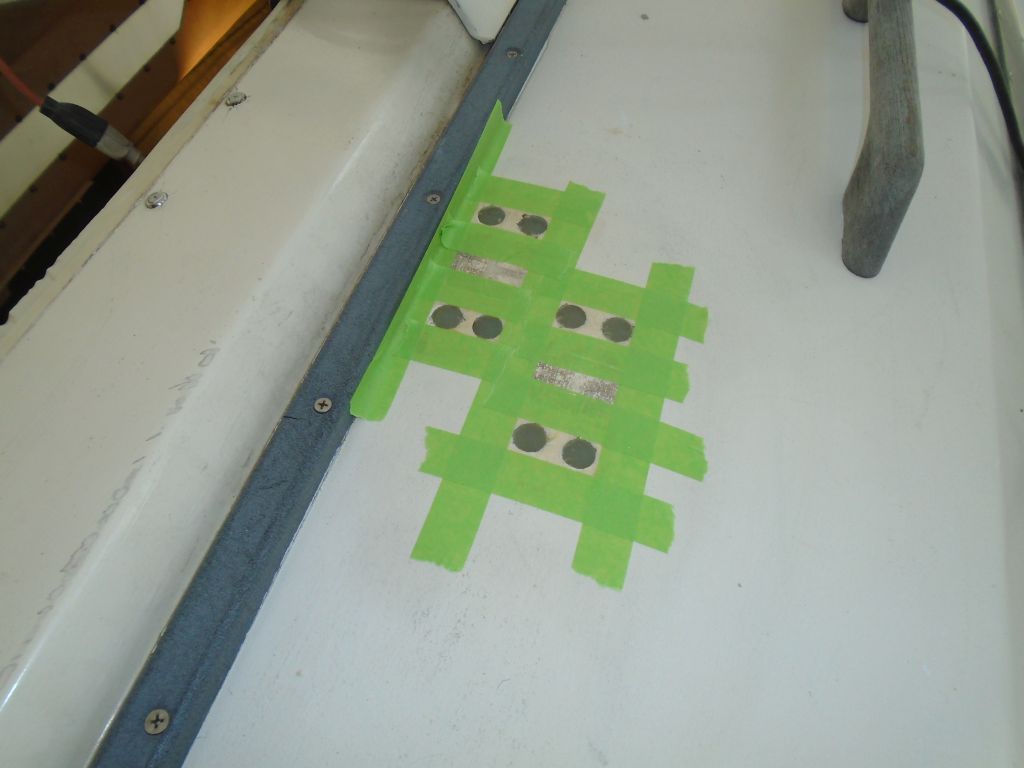
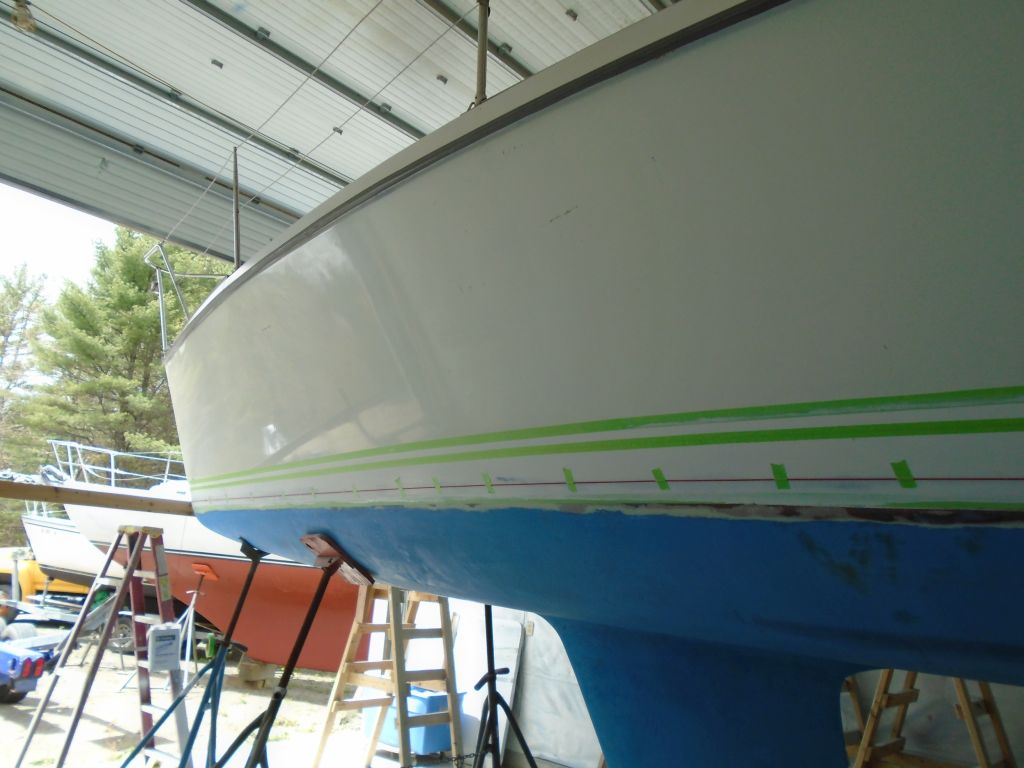
To prepare the old knotmeter through hull hole for patching, I ground the exterior to remove paint and taper back the laminate accordingly, as needed to install new flush fiberglass to cover the opening. This area of the hull was solid fiberglass with no core.  Inside, I sanded away the interior gelcoat/paint to bare fiberglass.  Then, I masked over the opening from inside, and filled the round hole with a thickened epoxy mixture.

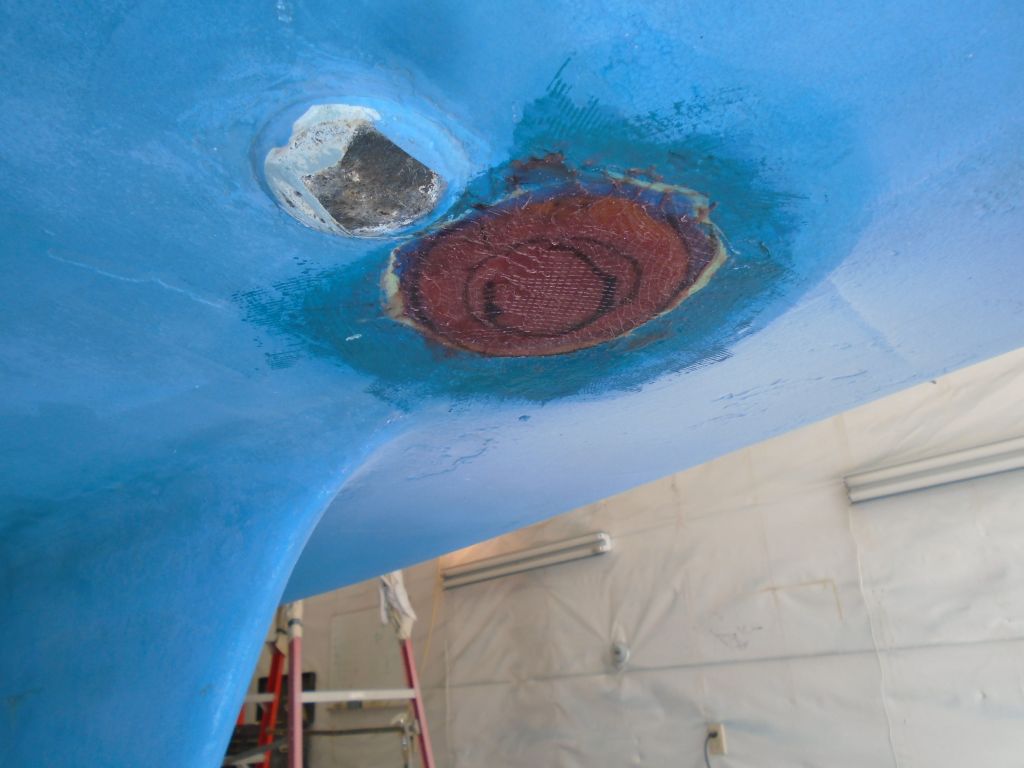
A bit later, the epoxy plug had cured to the green stage, and I applied three layers of fiberglass in epoxy resin from the outside, and a layer on the inside to complete the structural patch.

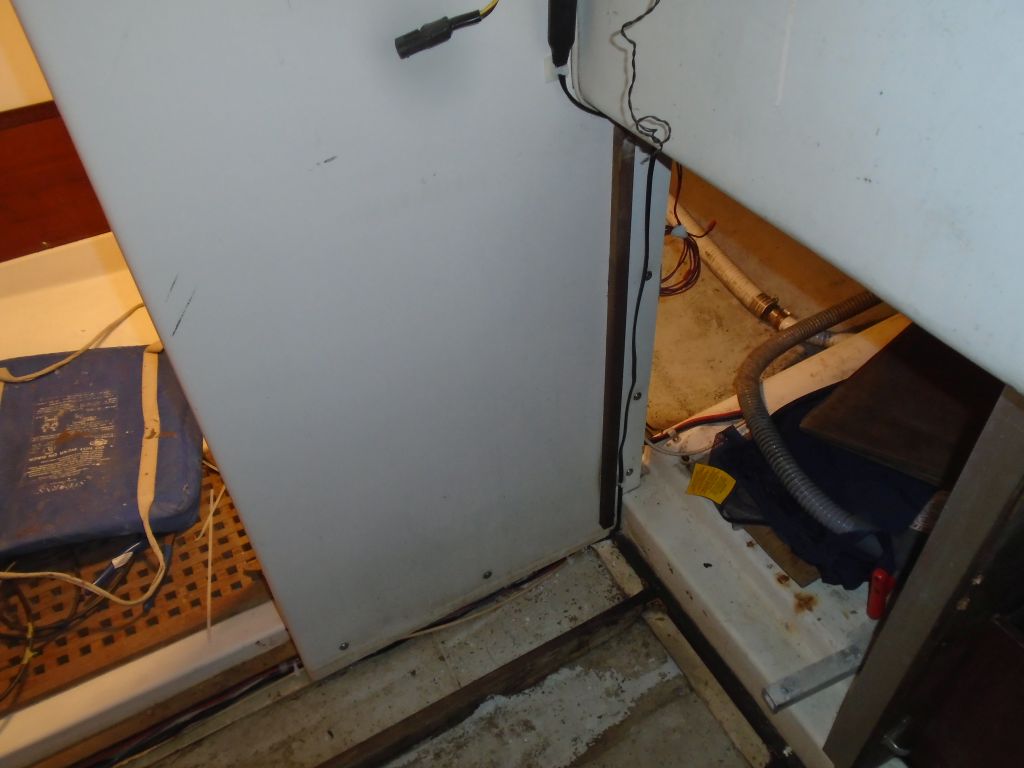
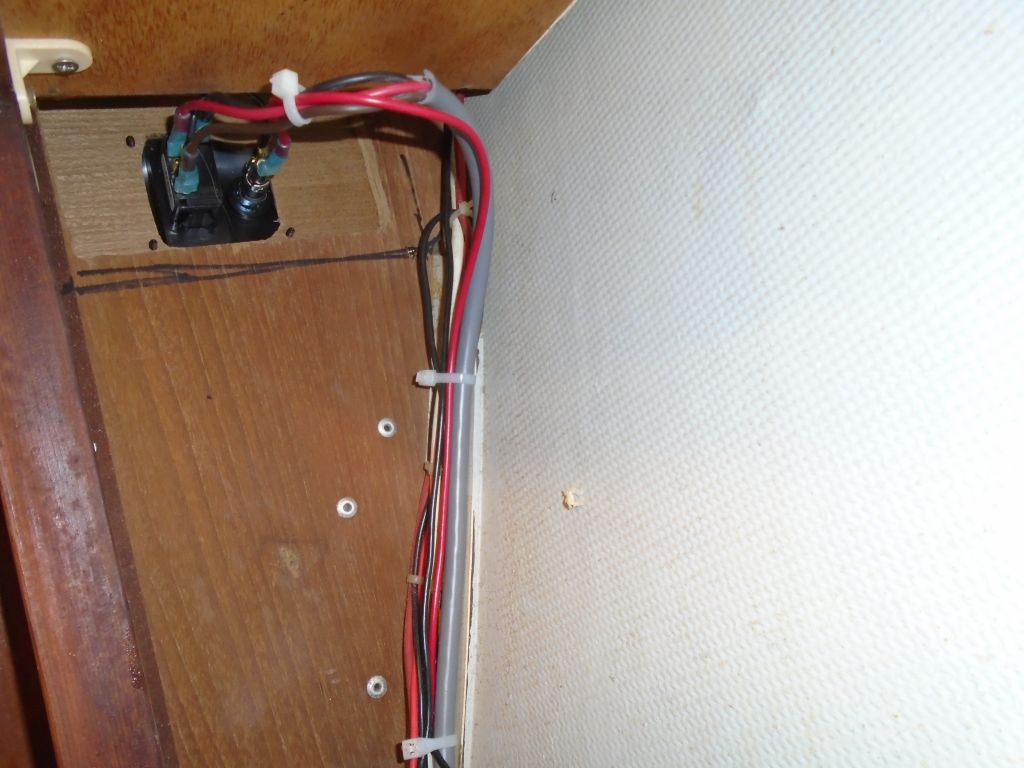
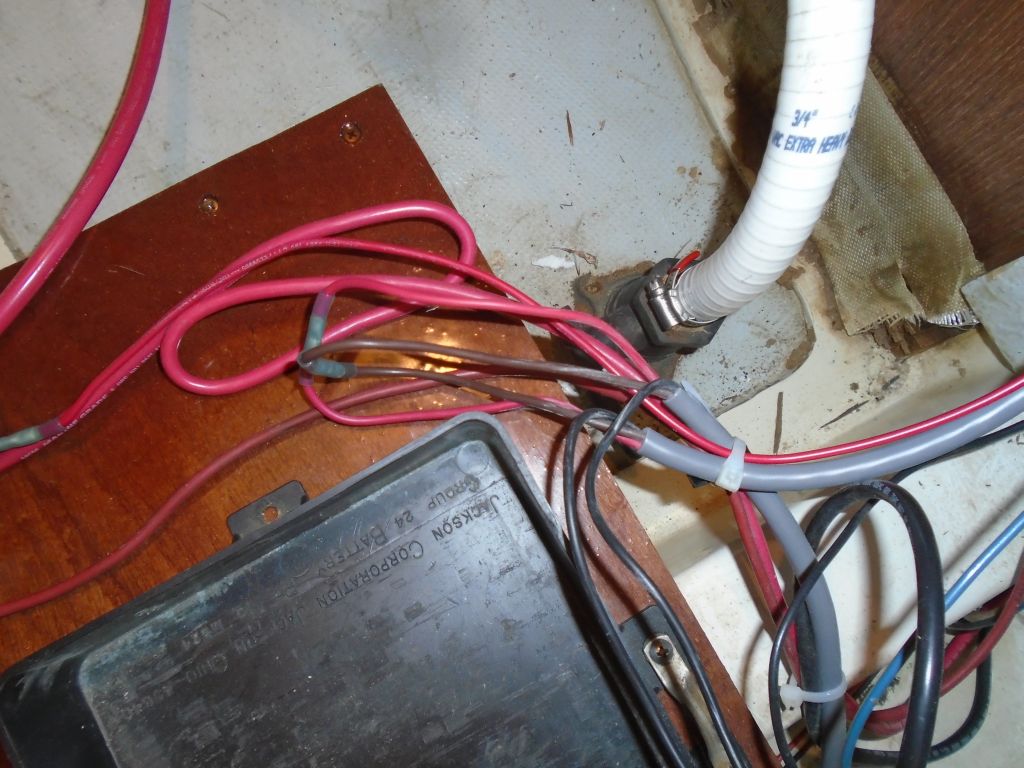
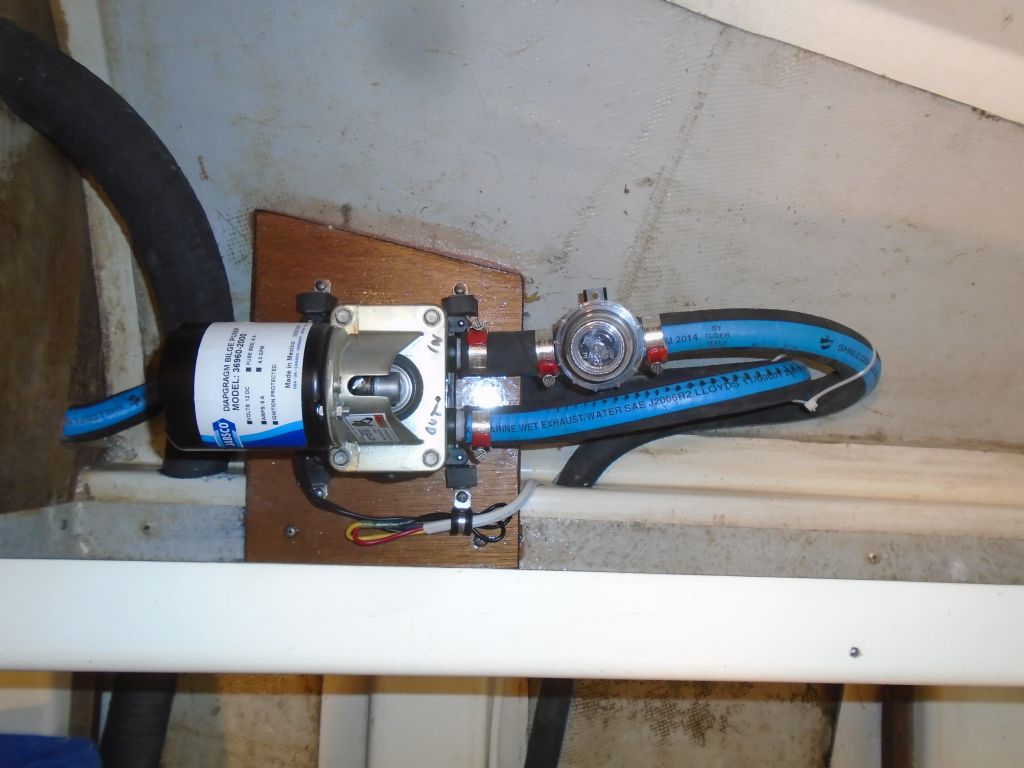
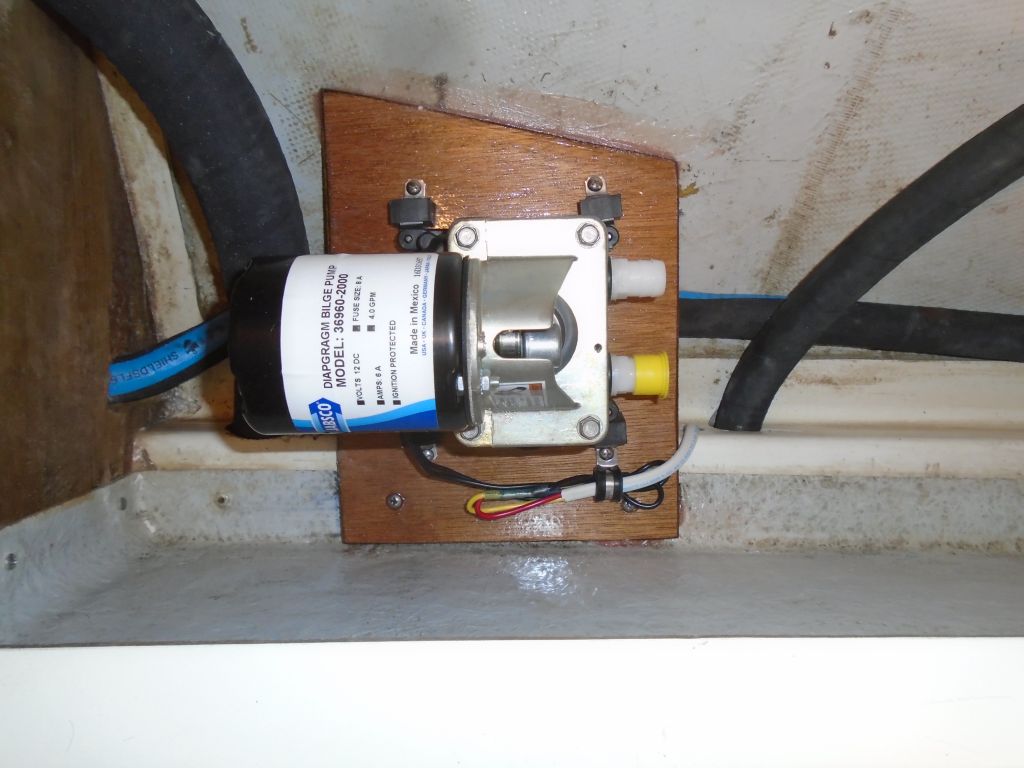
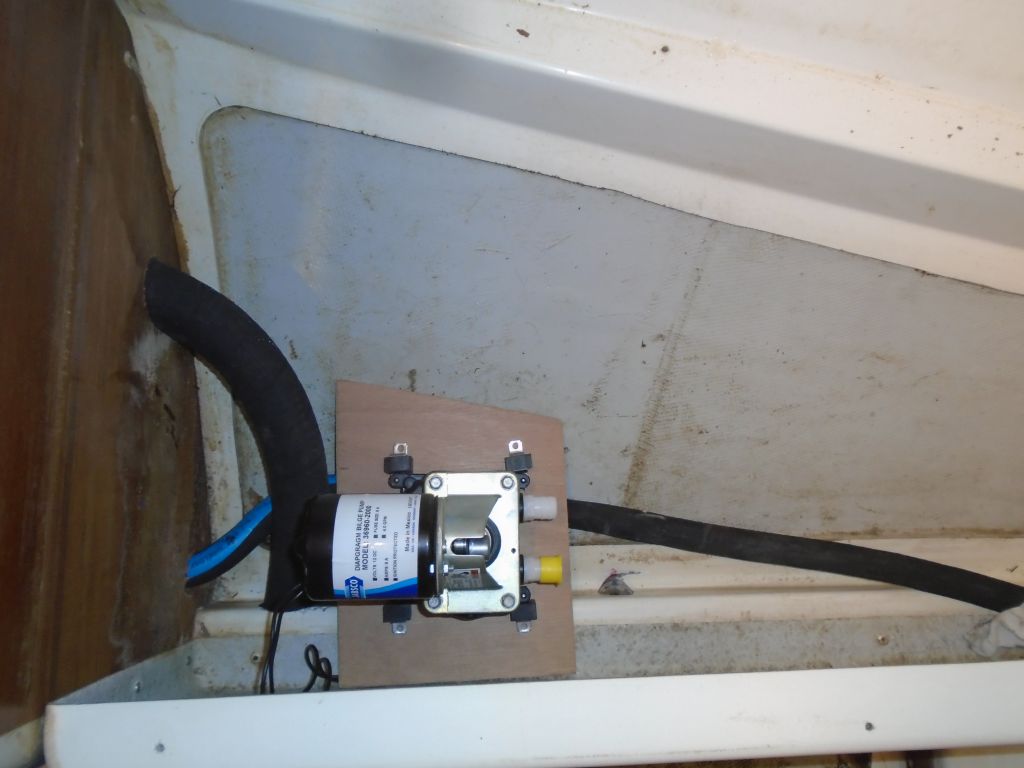
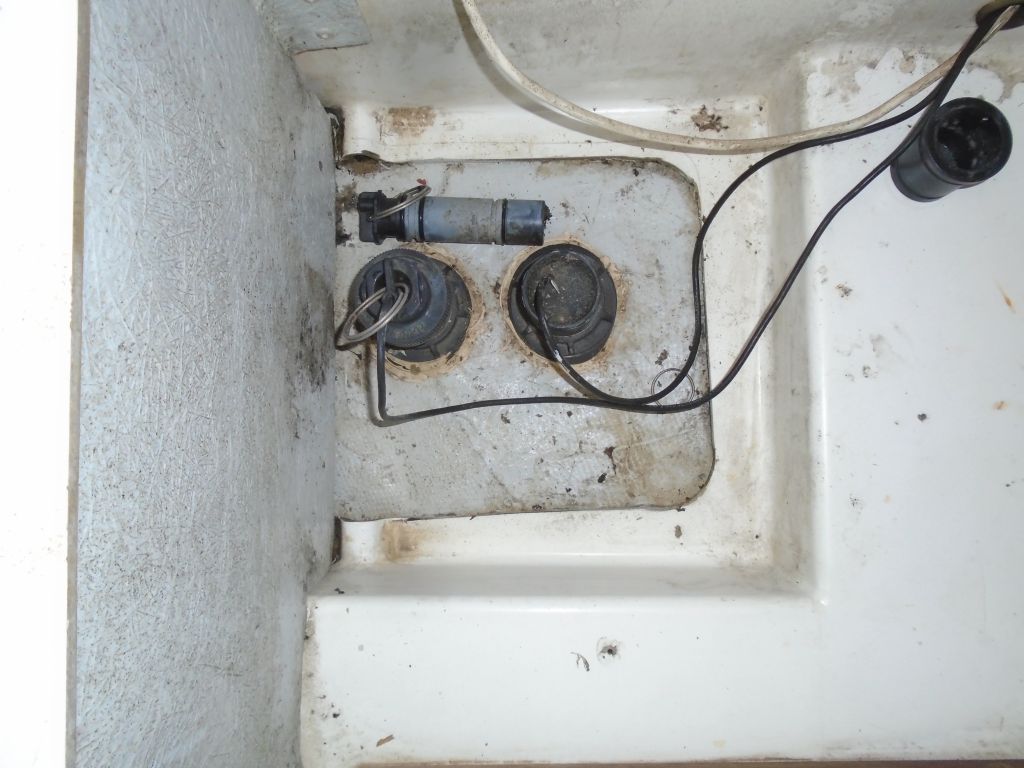
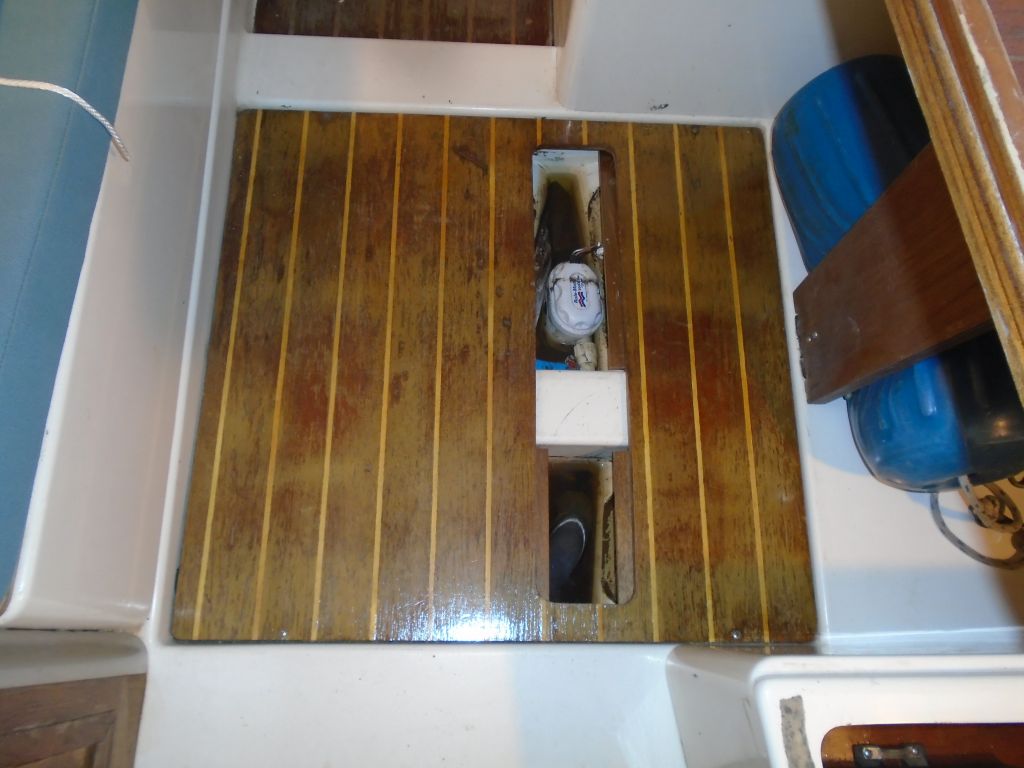
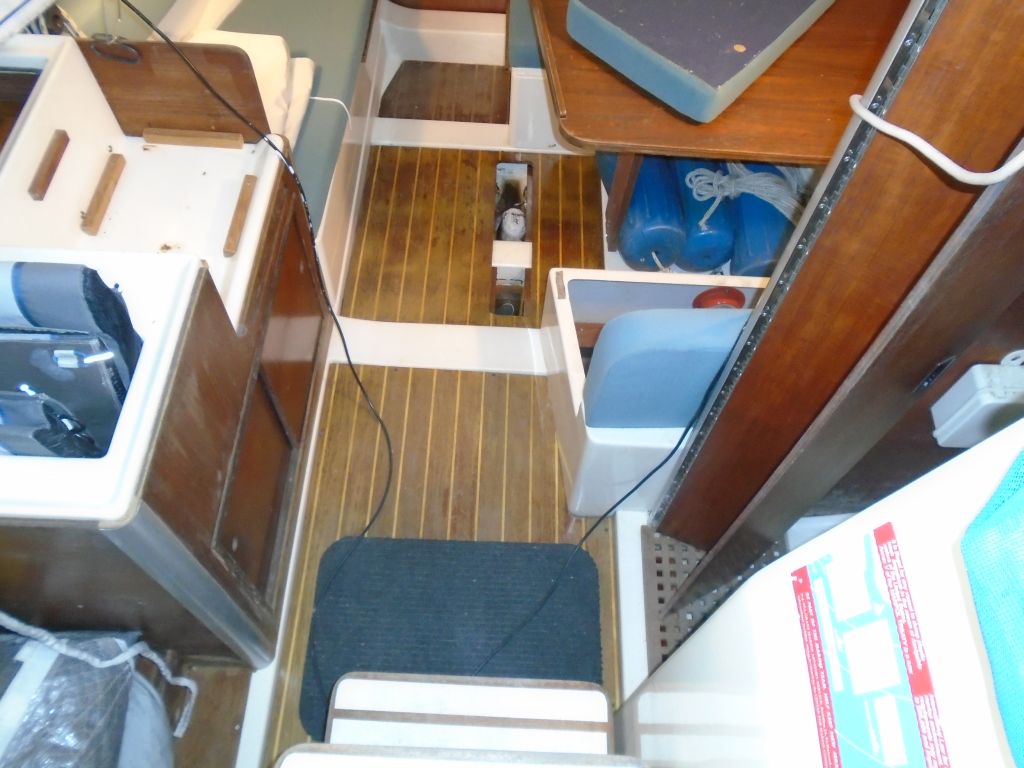
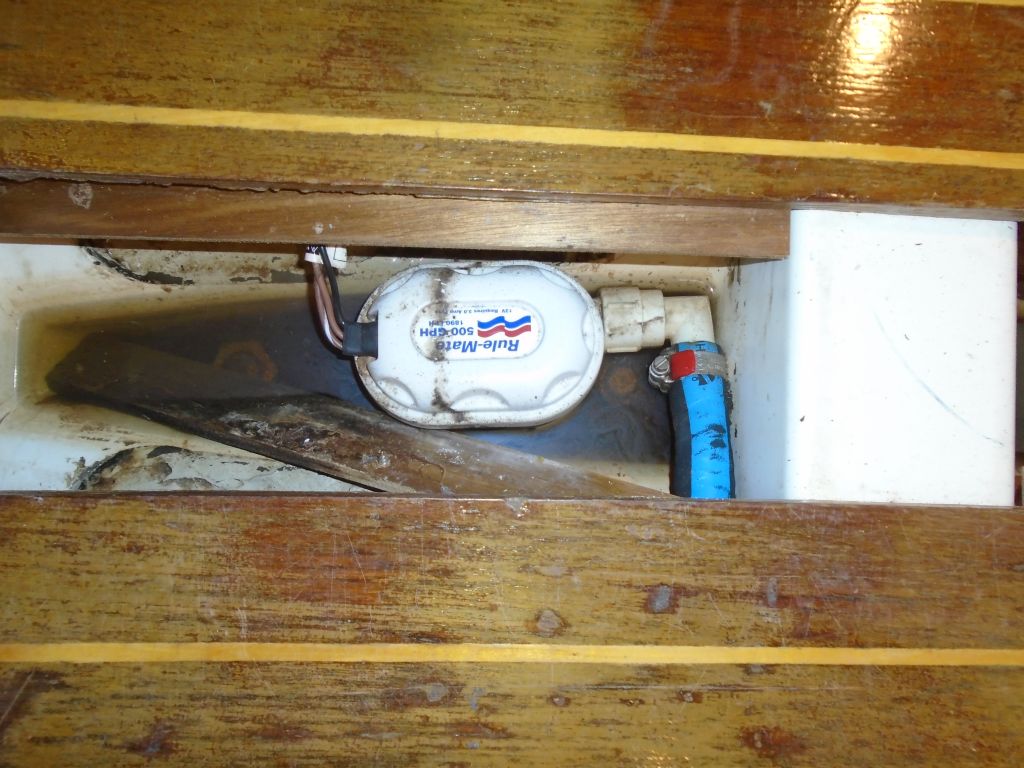
To replace the ailing and ineffective self-contained bilge pump in the keel sump–which operation was hampered by the long hose run to the transom–the owner selected, at my suggestion, a remote-located diaphragm pump that would be more effective at dewatering and would avoid backflow issues into the tiny sump that we thought had kept the pump running too frequently during the previous season.  Because of where the existing discharge hose led (which I’d installed the year before), and also because it was a good location on its own, I chose to locate the new pump in a roomy storage space beneath the port settee.

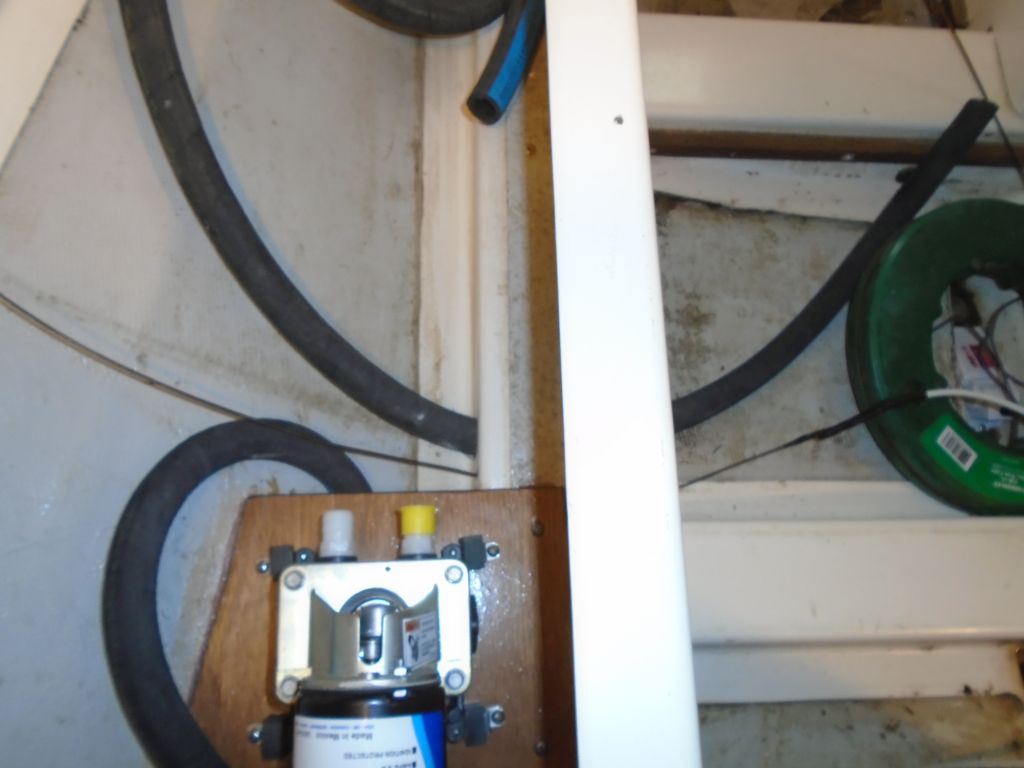
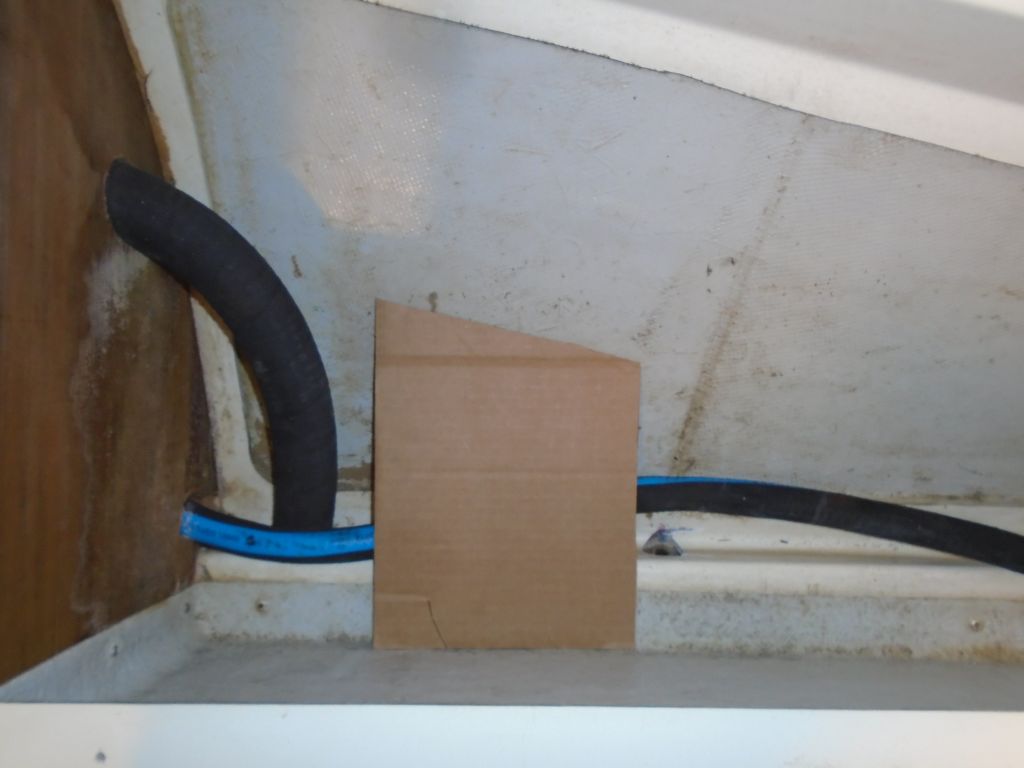
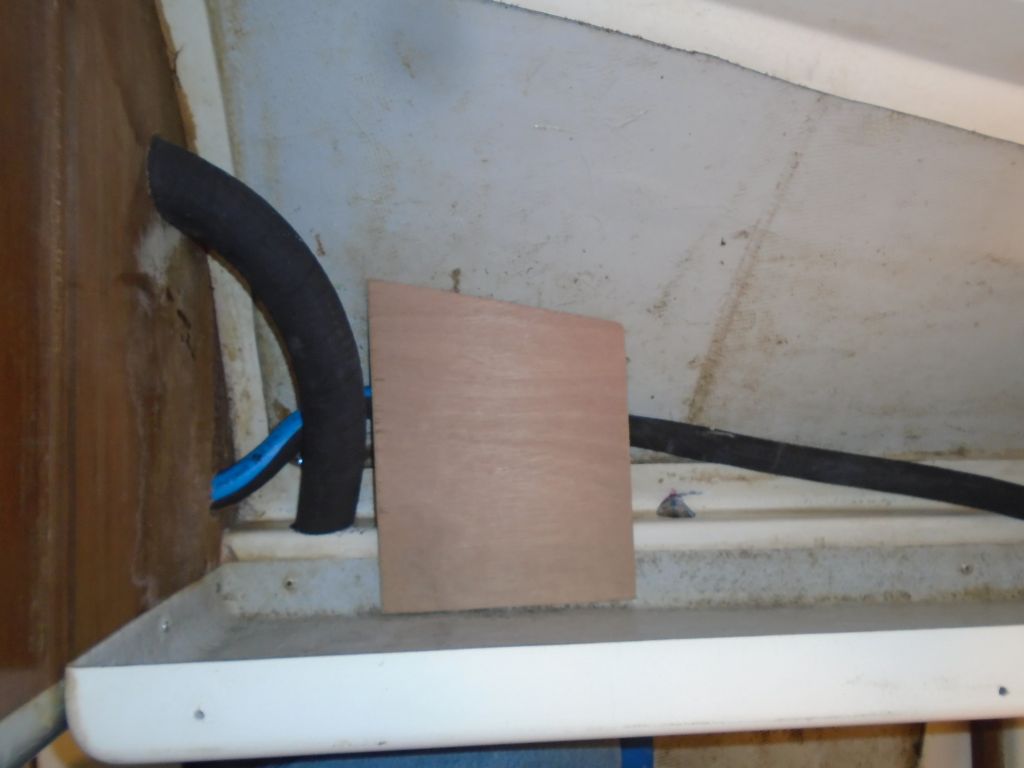
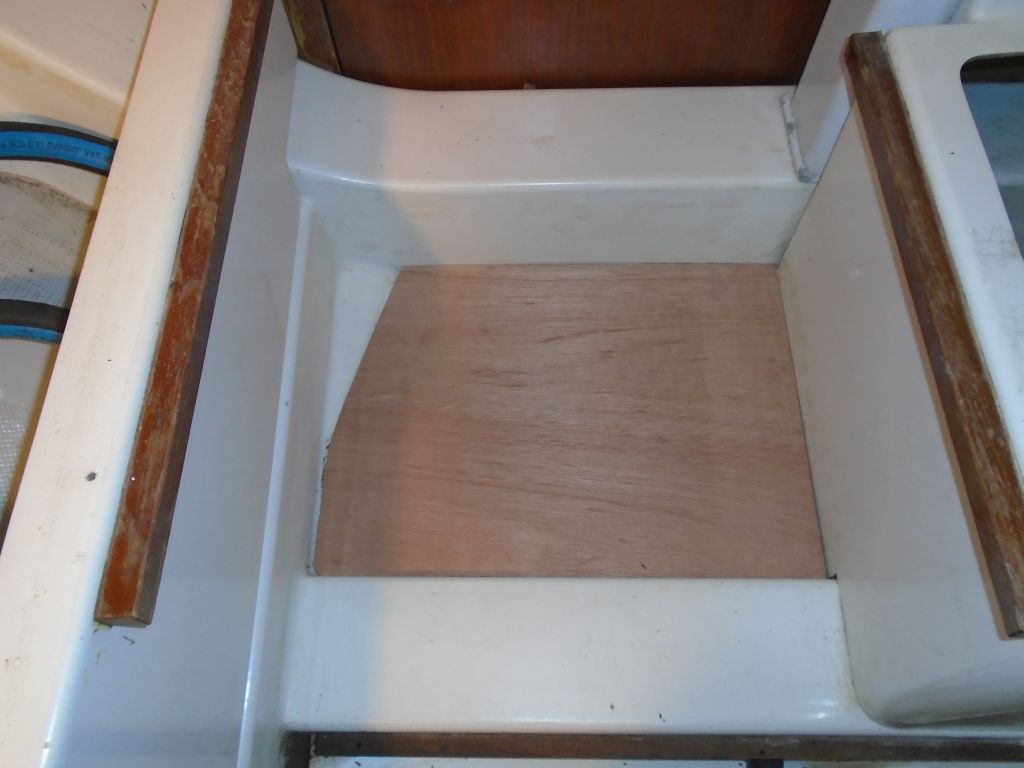
After ensuring there was ample headroom for the pump, I prepared a basic cardboard template of the platform required, which would run between an internal structural member and the nearby hull for support.  I positioned and sized the platform to avoid the existing hoses and the hole through the structural stringer that led to the sump, and through which I’d run the suction hose.

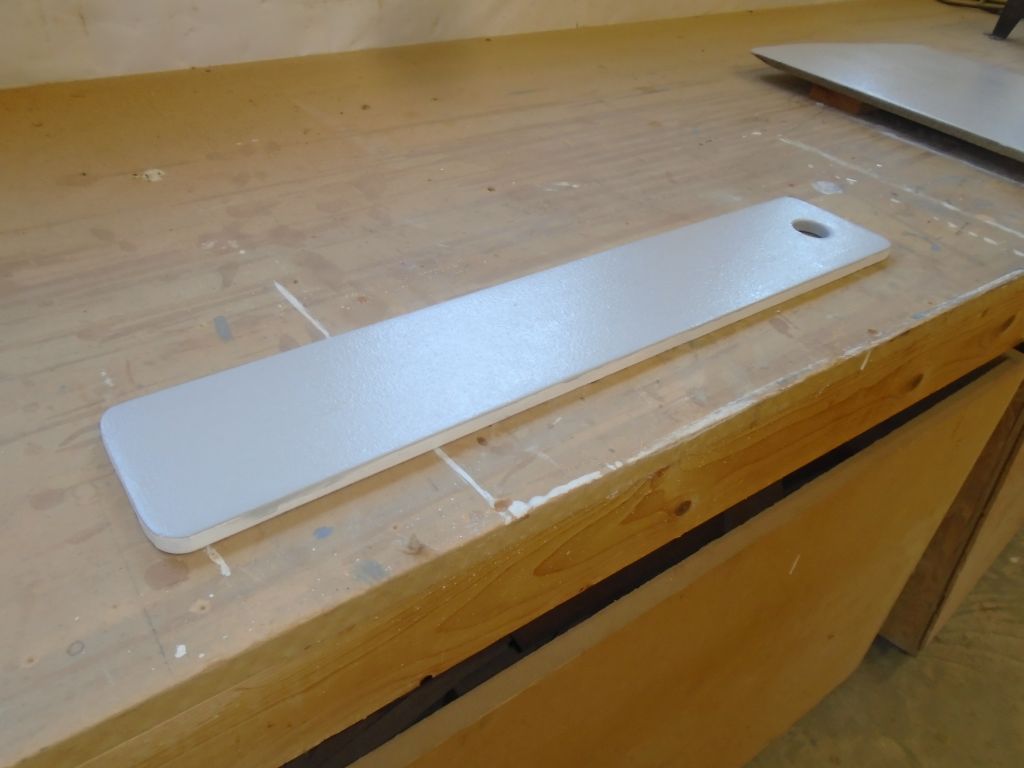
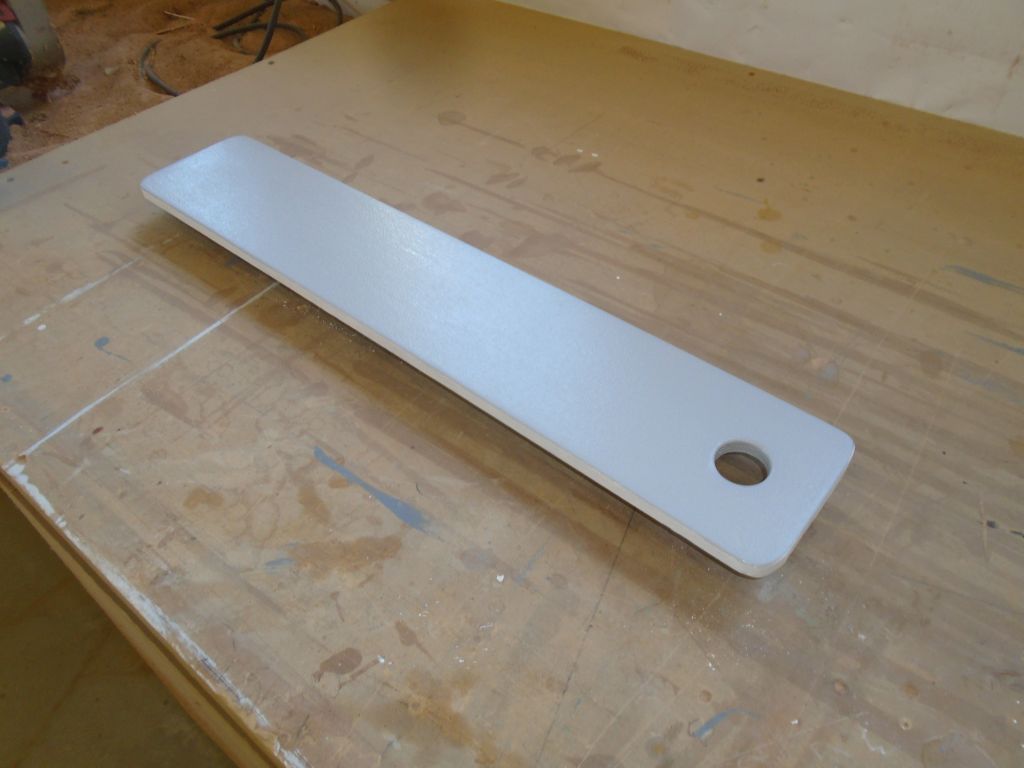
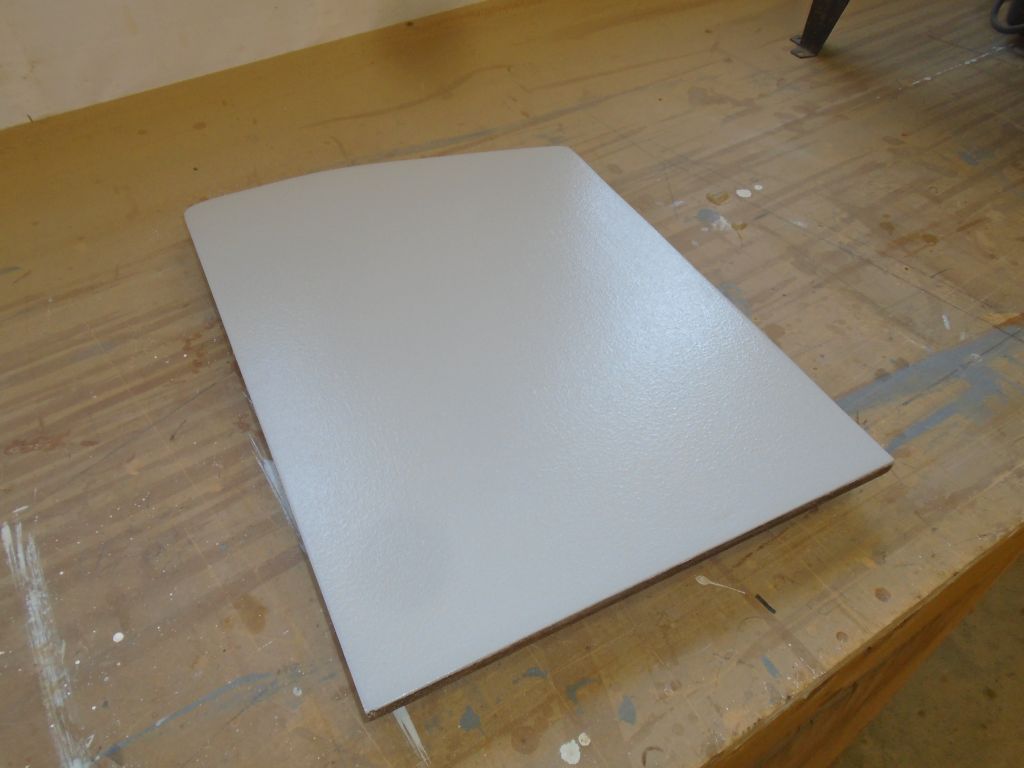
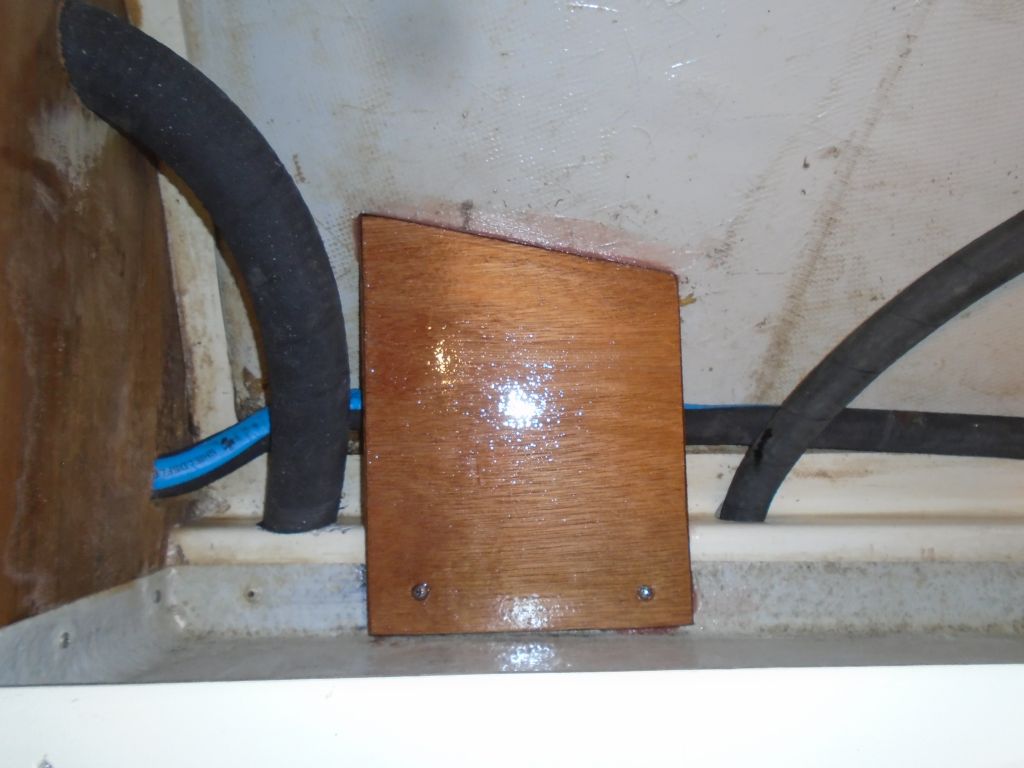
From the template, I cut a platform from marine plywood, and after a test-fit and dry run with two fasteners on the inside, I epoxy-coated the bottom side and edges, then secured the platform in place with epoxy adhesive where it met the hull, and a pair of screws (and a little epoxy) at the inside.  Finally, with the platform in place, I epoxy-coated the top surface as well.

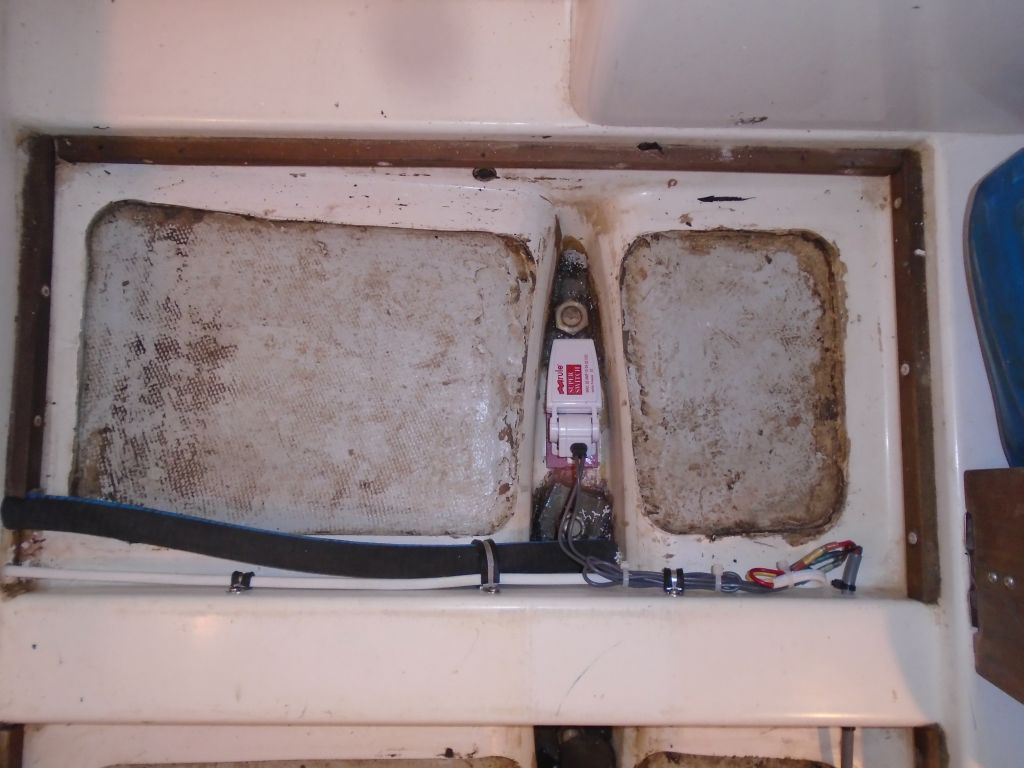
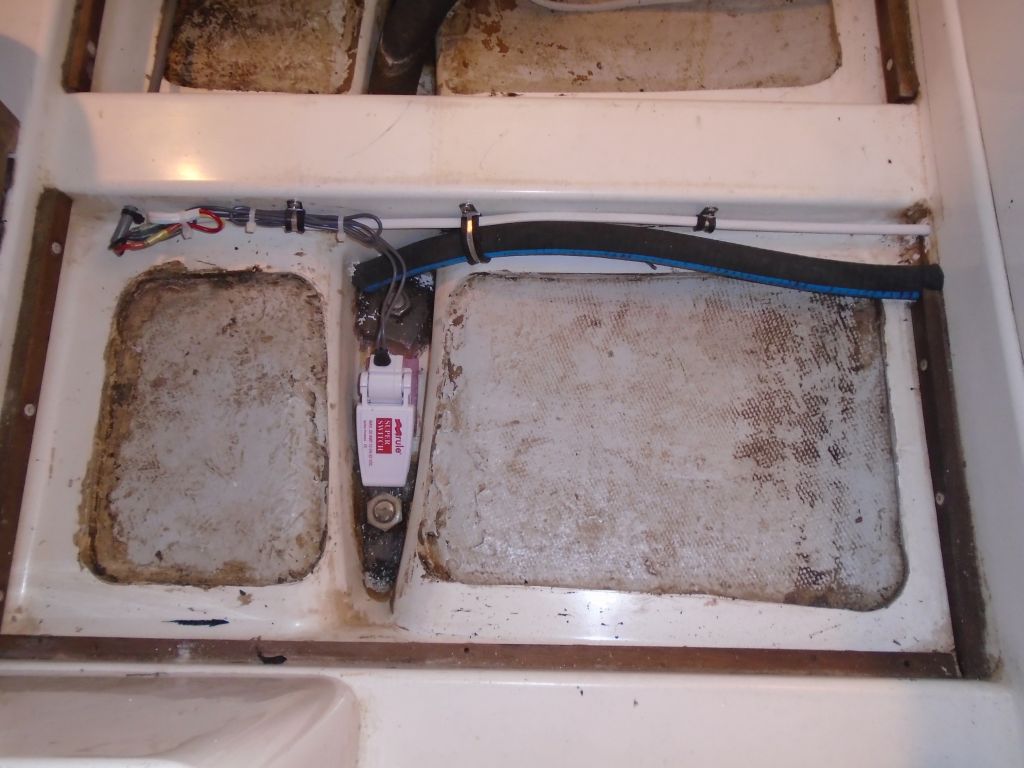
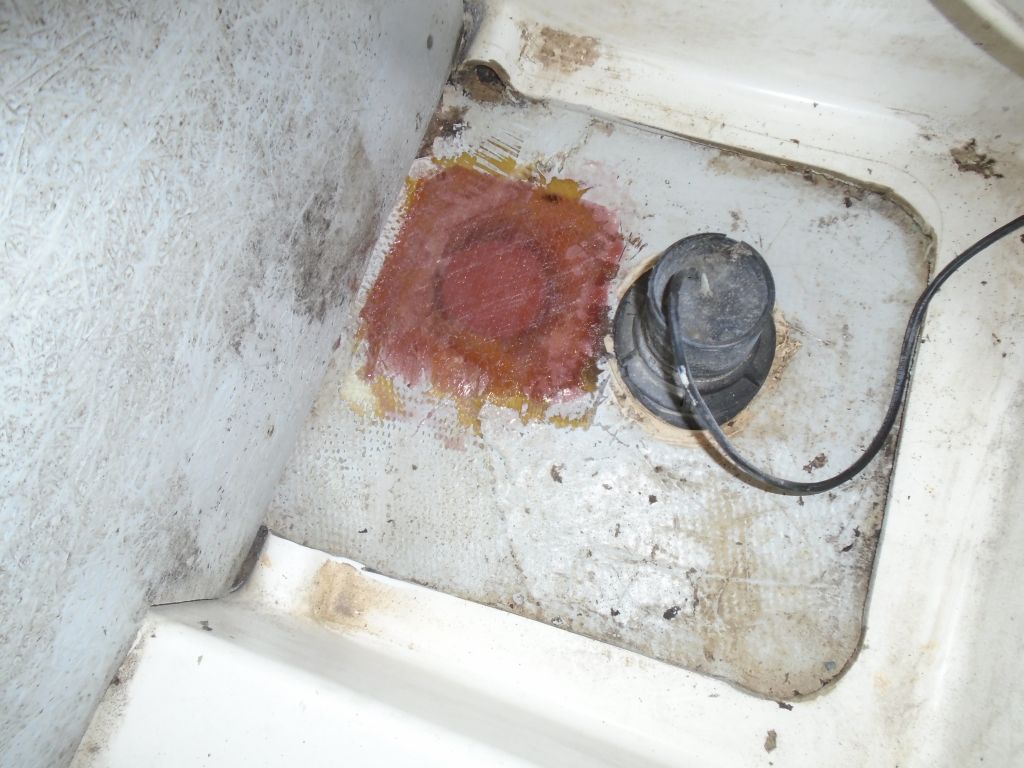
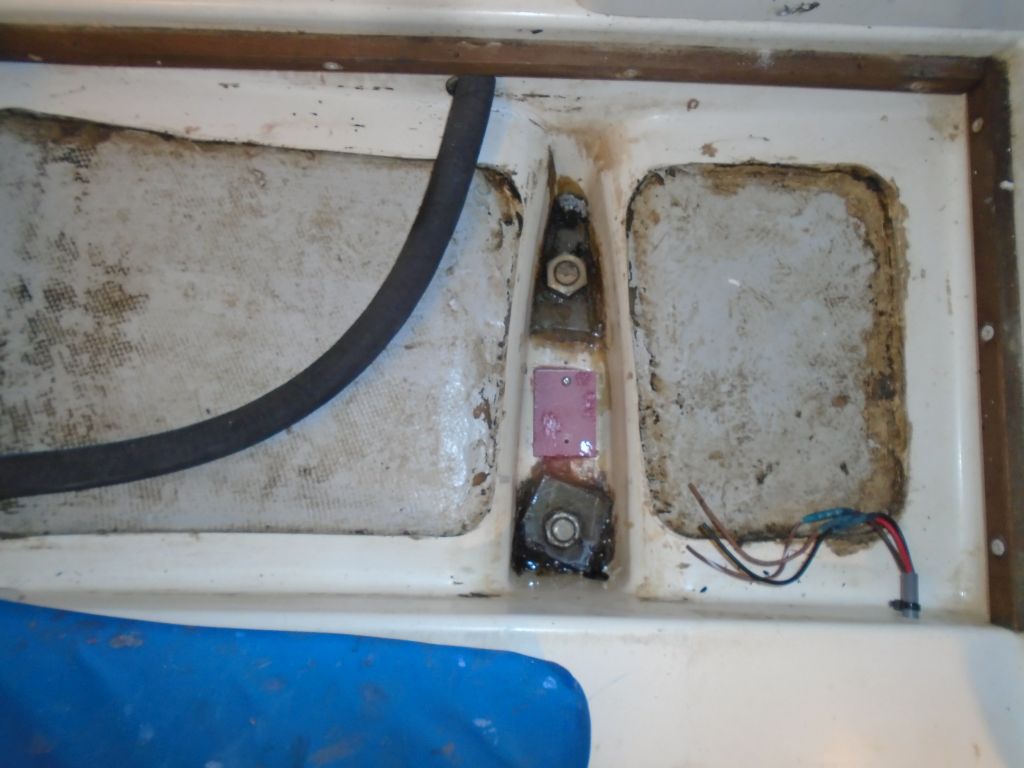
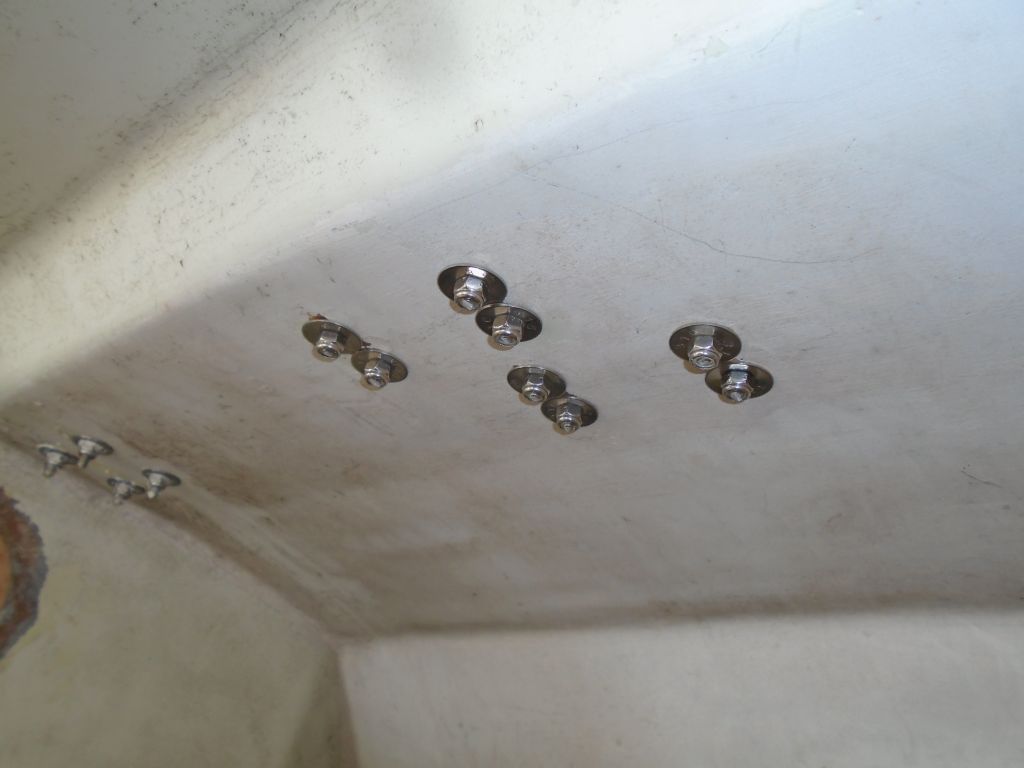
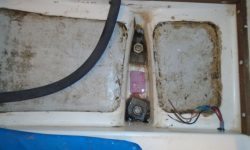
To give me a mounting location for the float switch that I’d install in the keel sump (thus avoiding fasteners directly into the bottom of the sump), I epoxied in a small fiberglass block, which I’d pre-drilled to accept the float switch later.

bilge6-52416

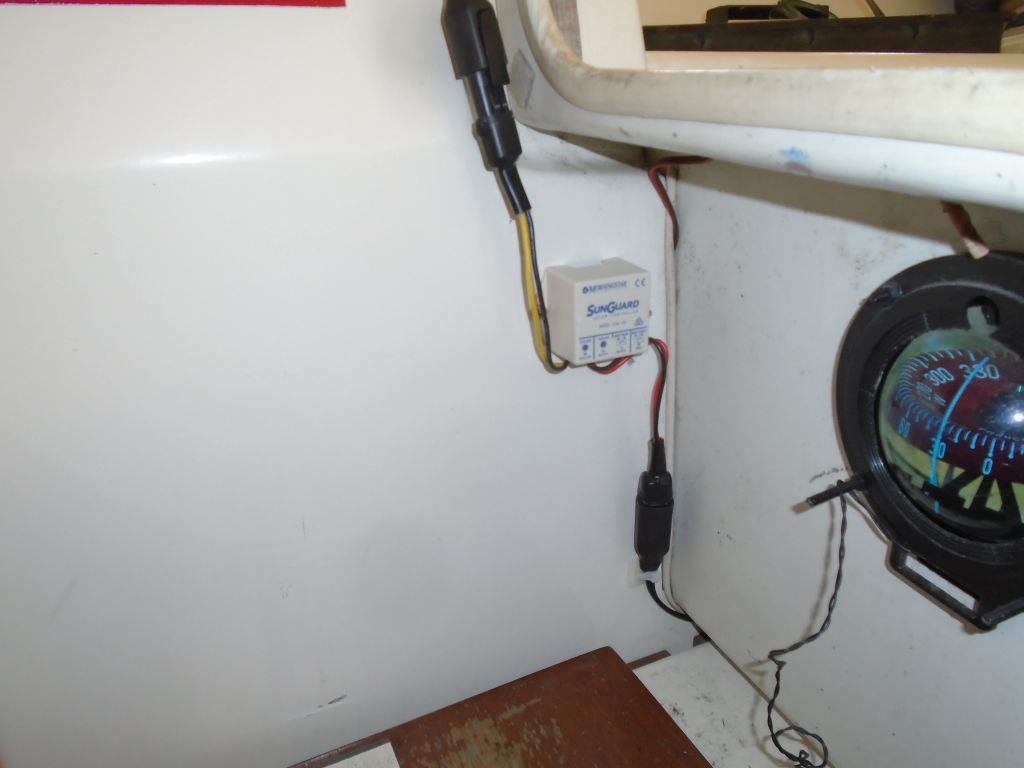
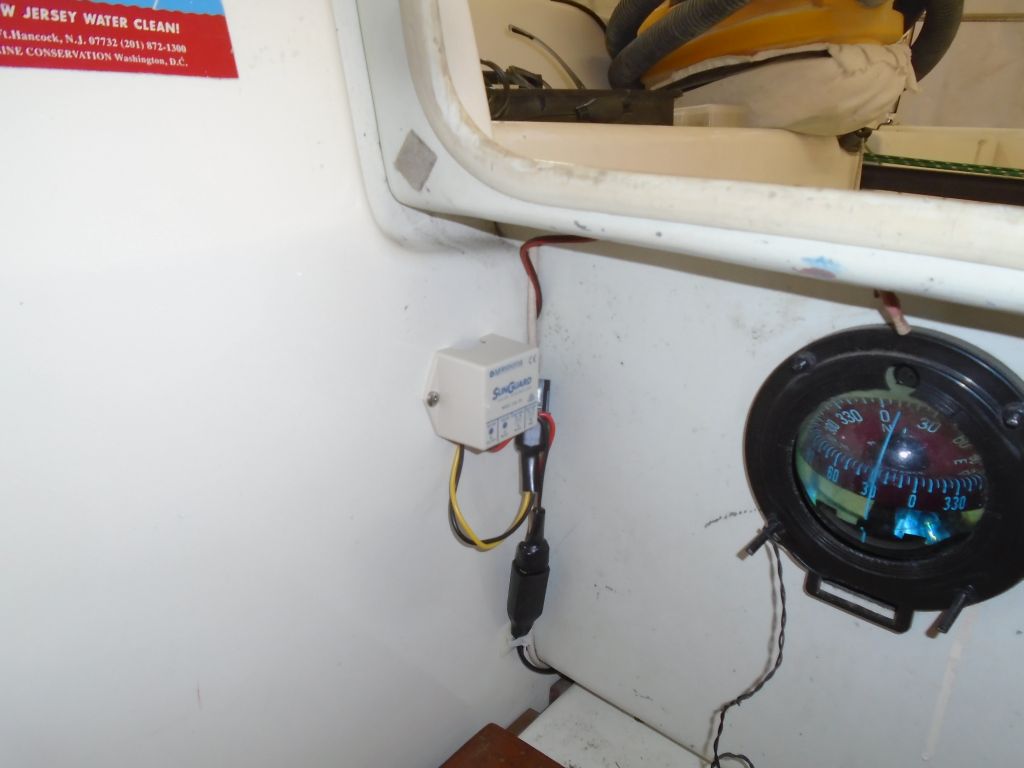
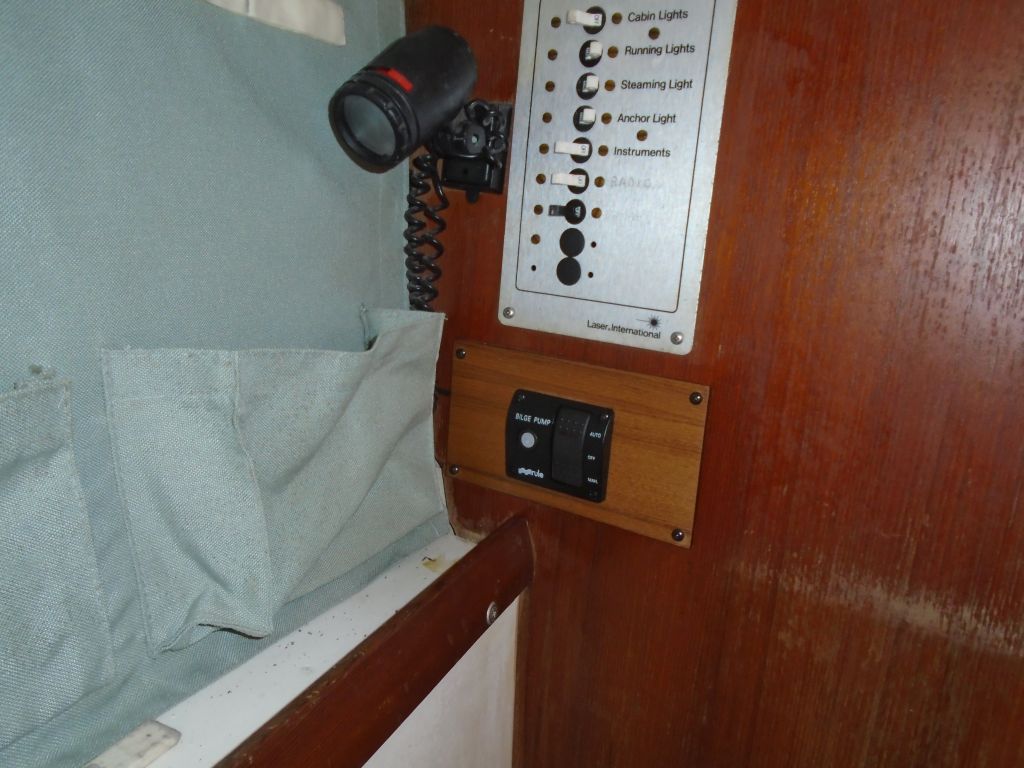
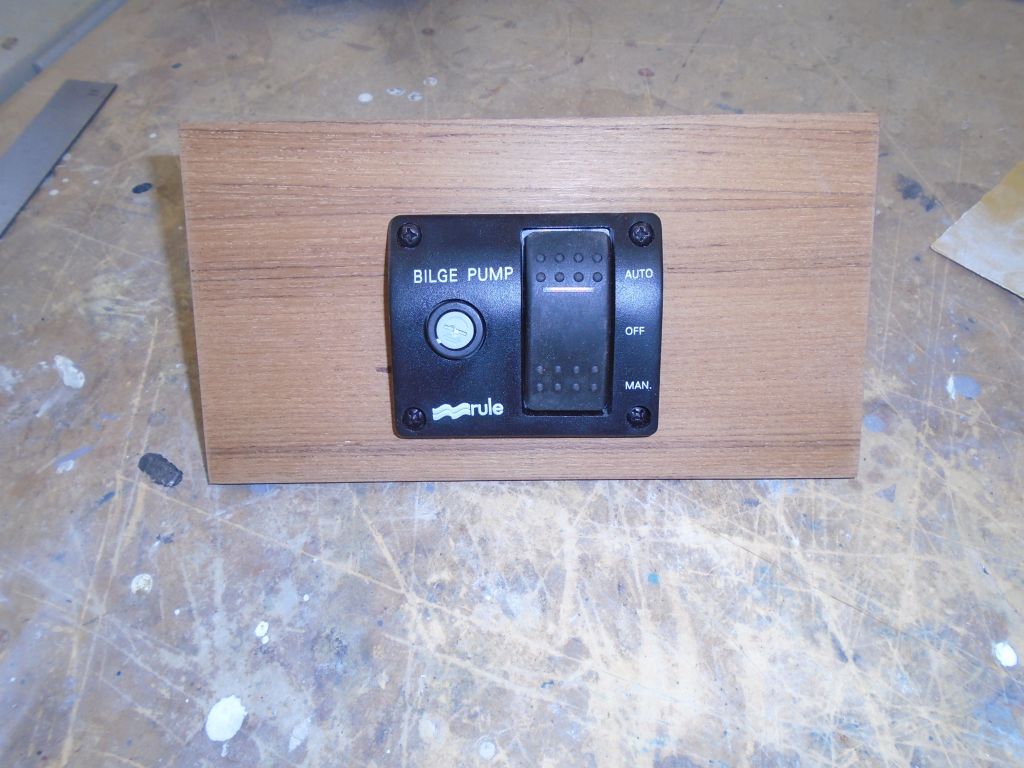
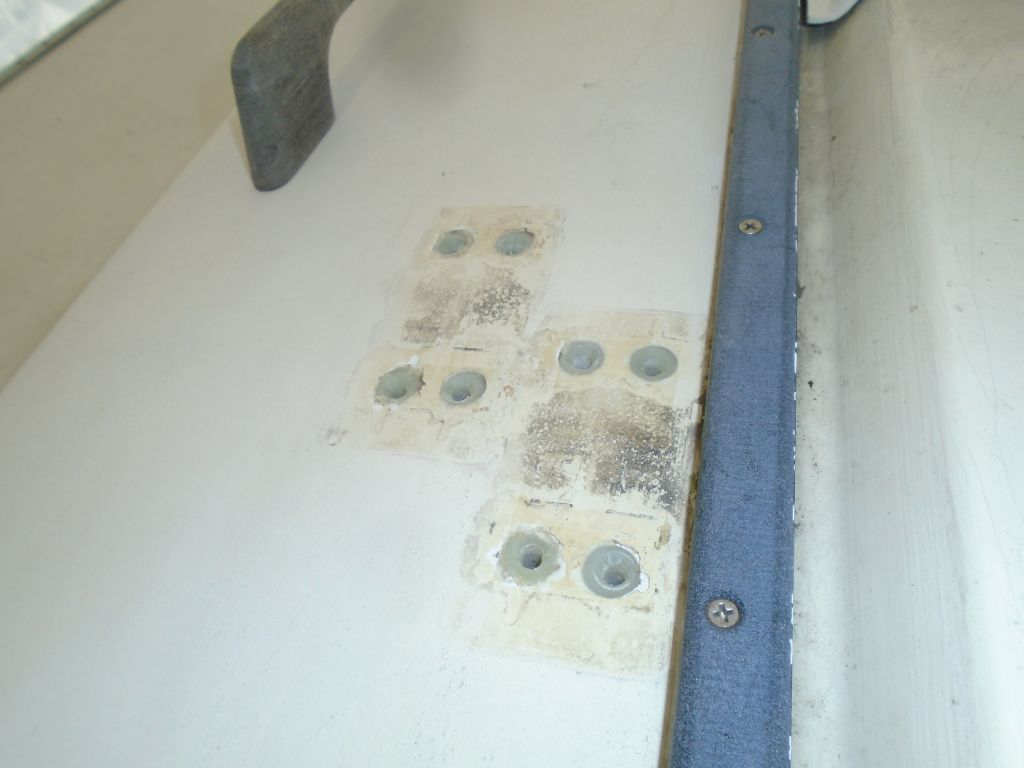
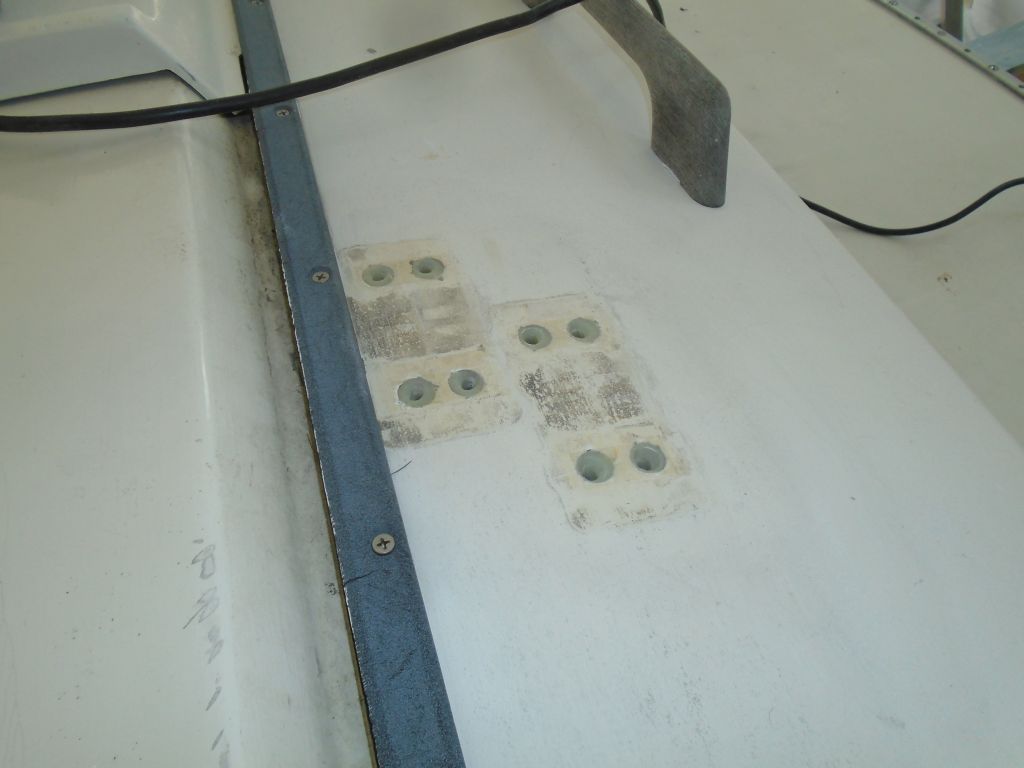
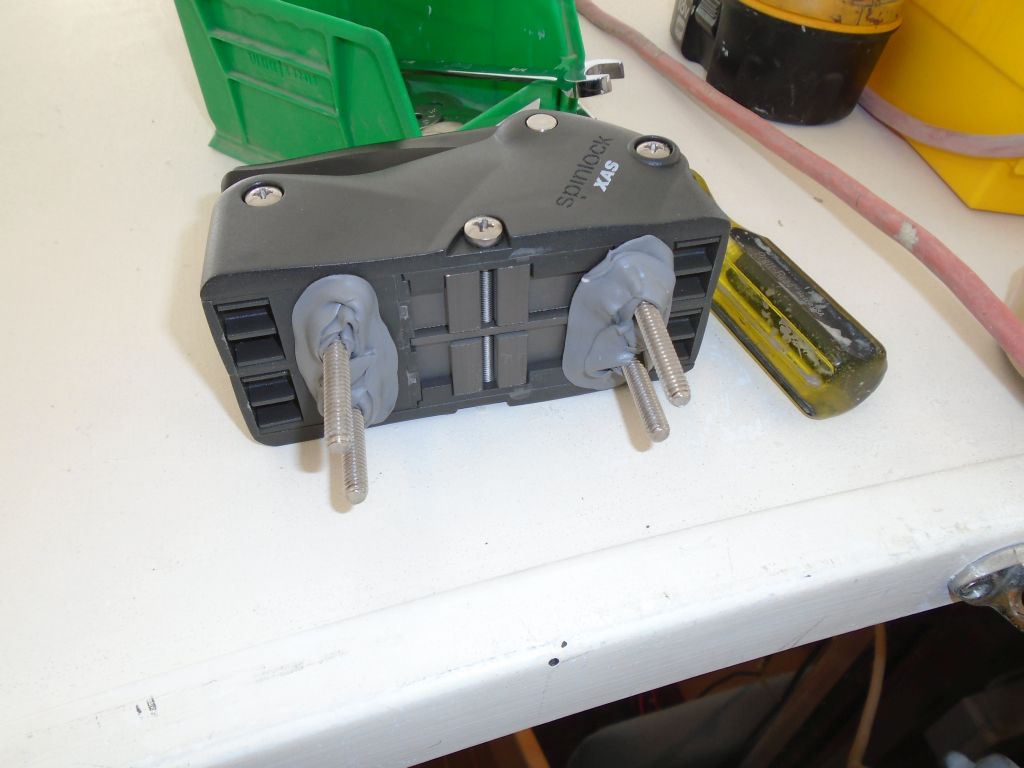
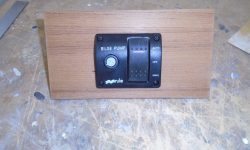
As it happened, there was a large hole in the starboard bulkhead just below the electrical service panel, where some old control panel had been installed, and this seemed a good location for the new bilge pump switch.  I cut a piece of teak plywood large enough to cover the old opening, and installed the new switch in the teak panel, which would cover the old hole and provide a convenient mounting spot for wiring and operation.

bilge7-52416

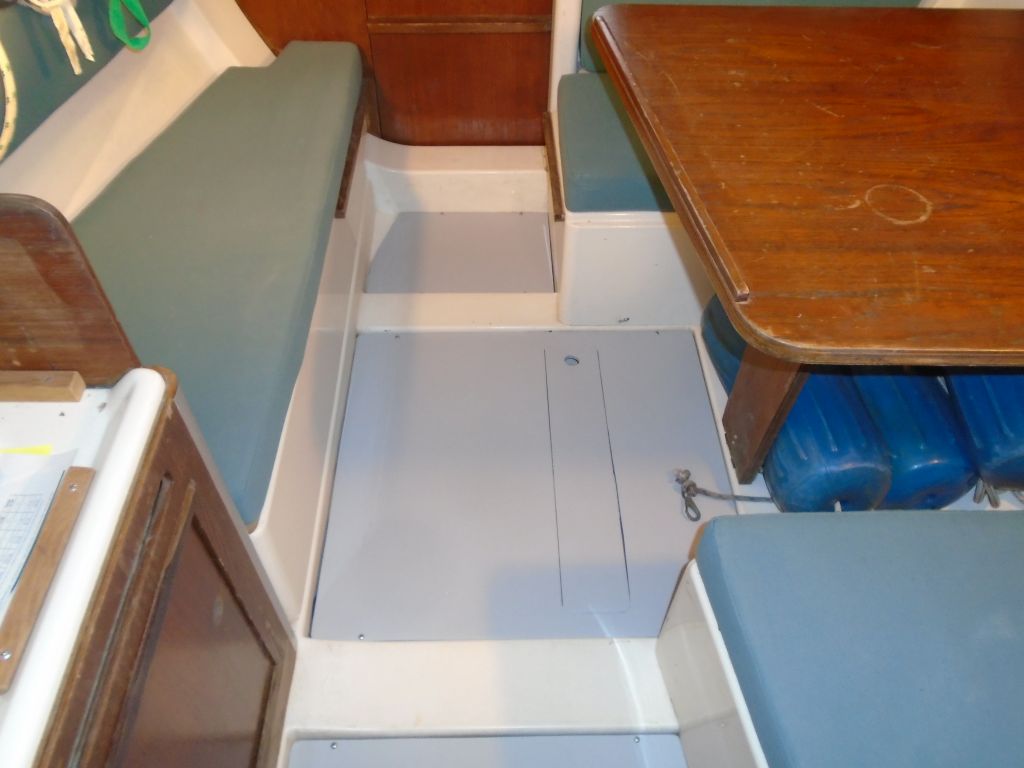
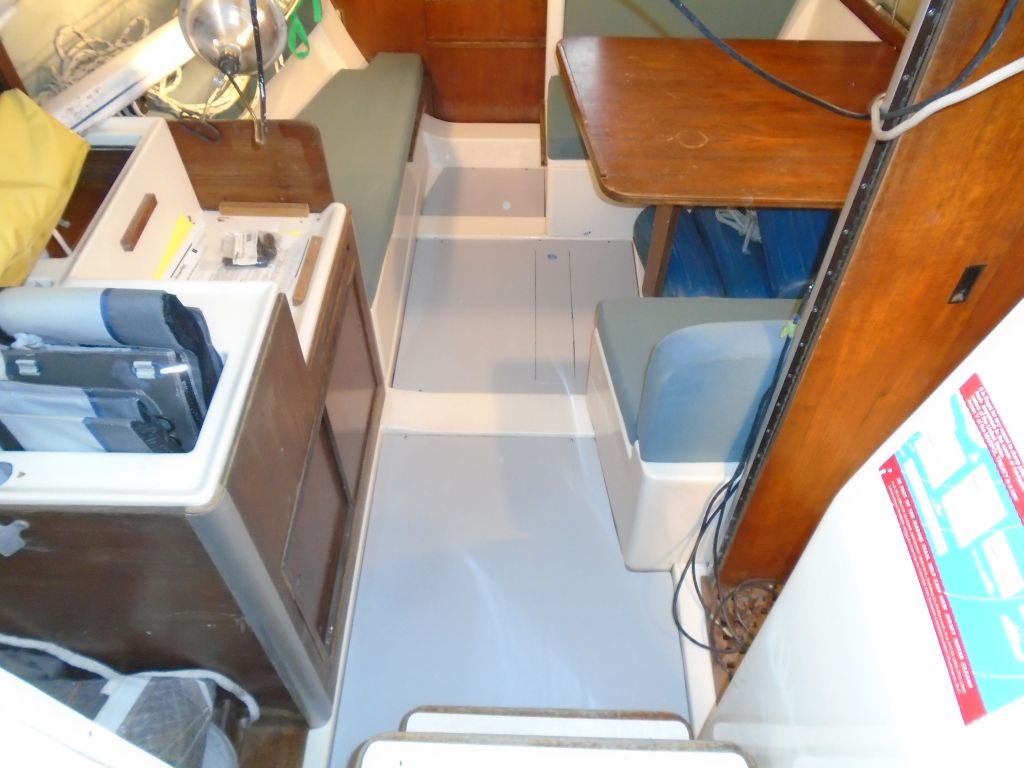
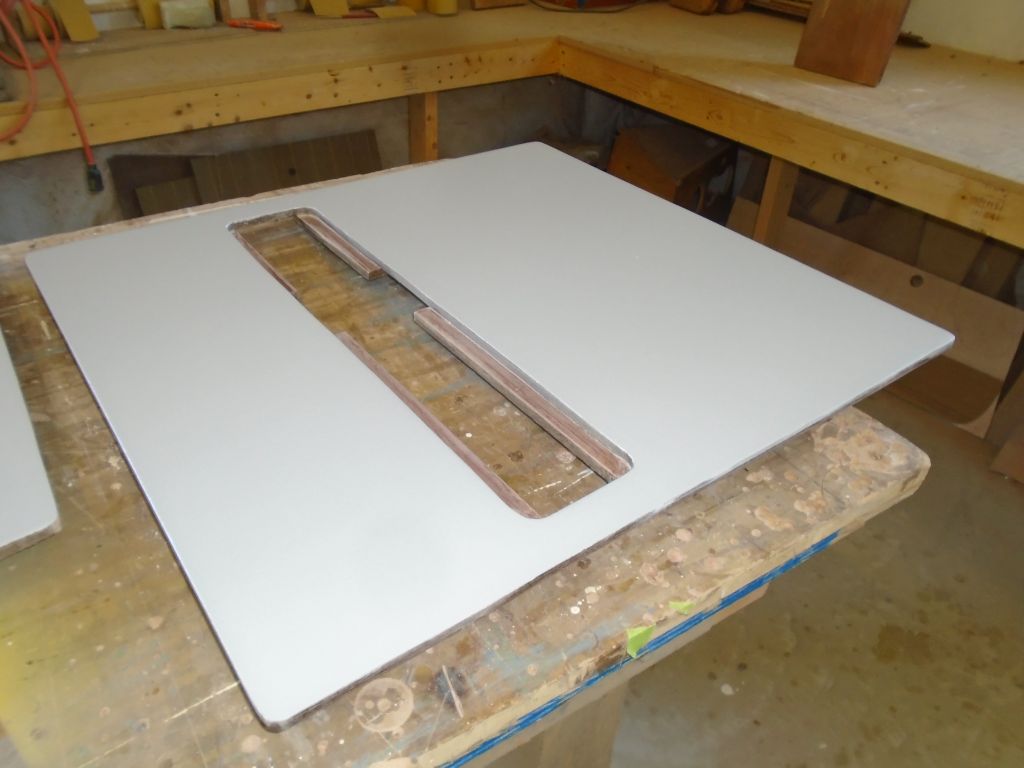
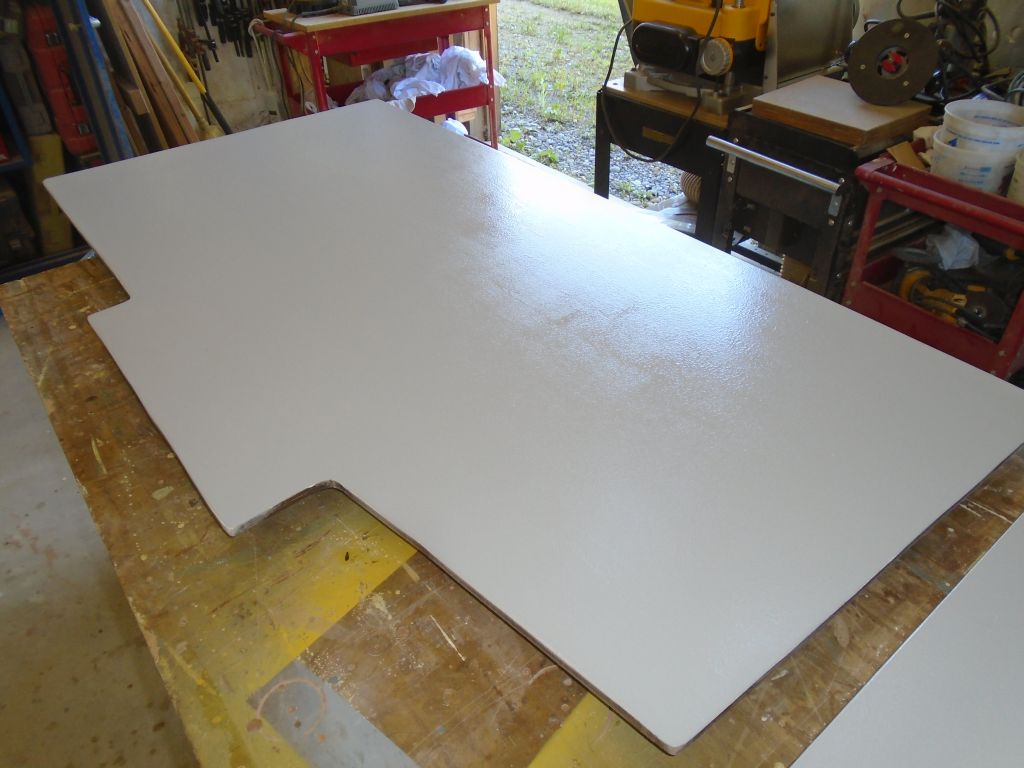
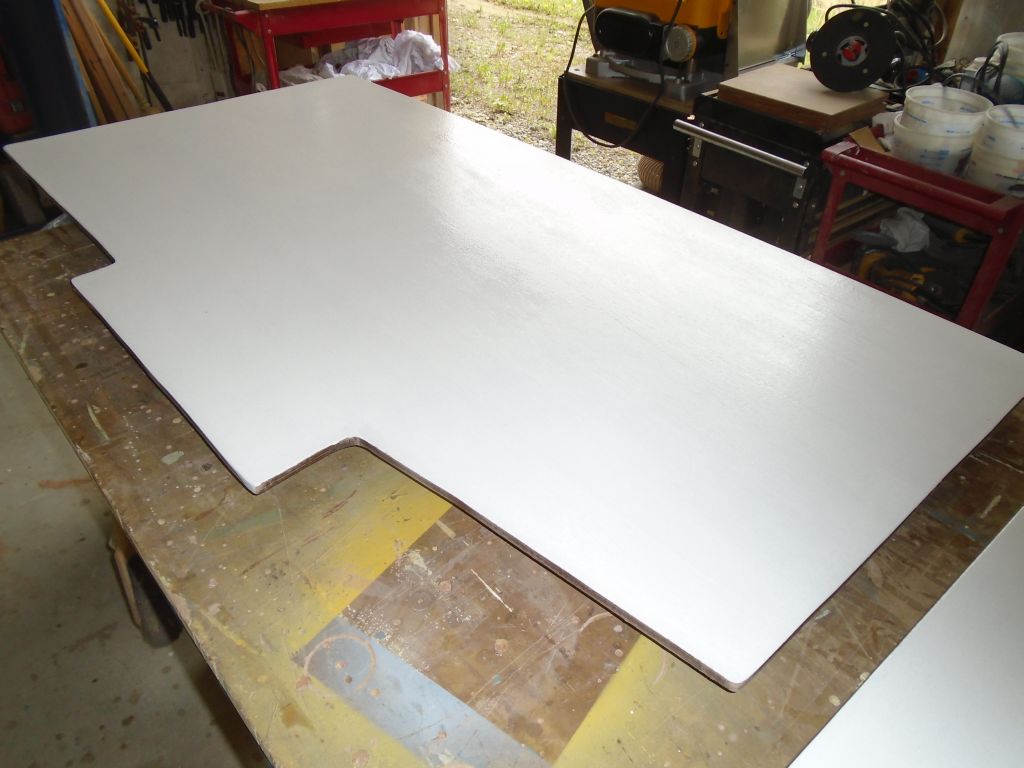
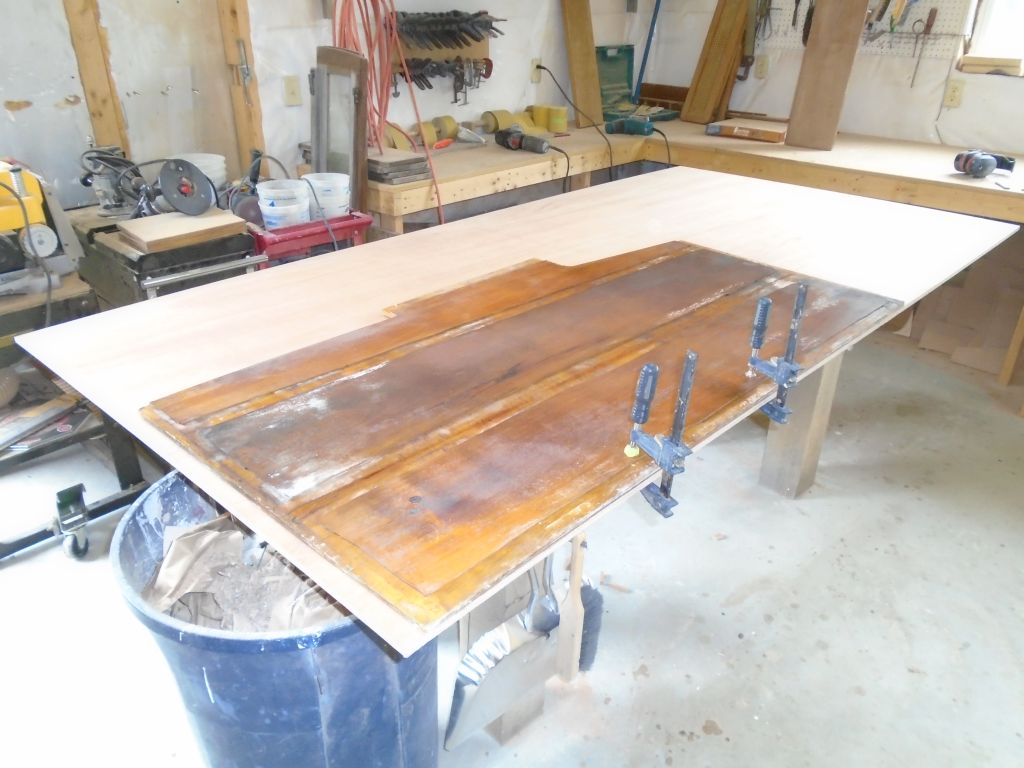
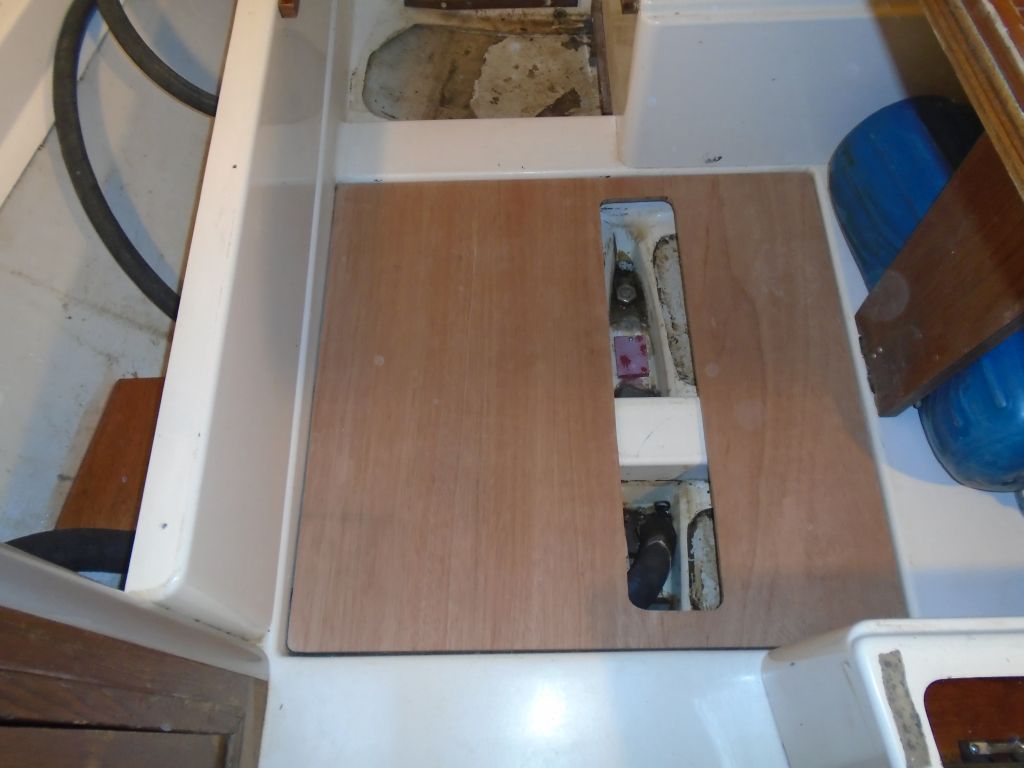
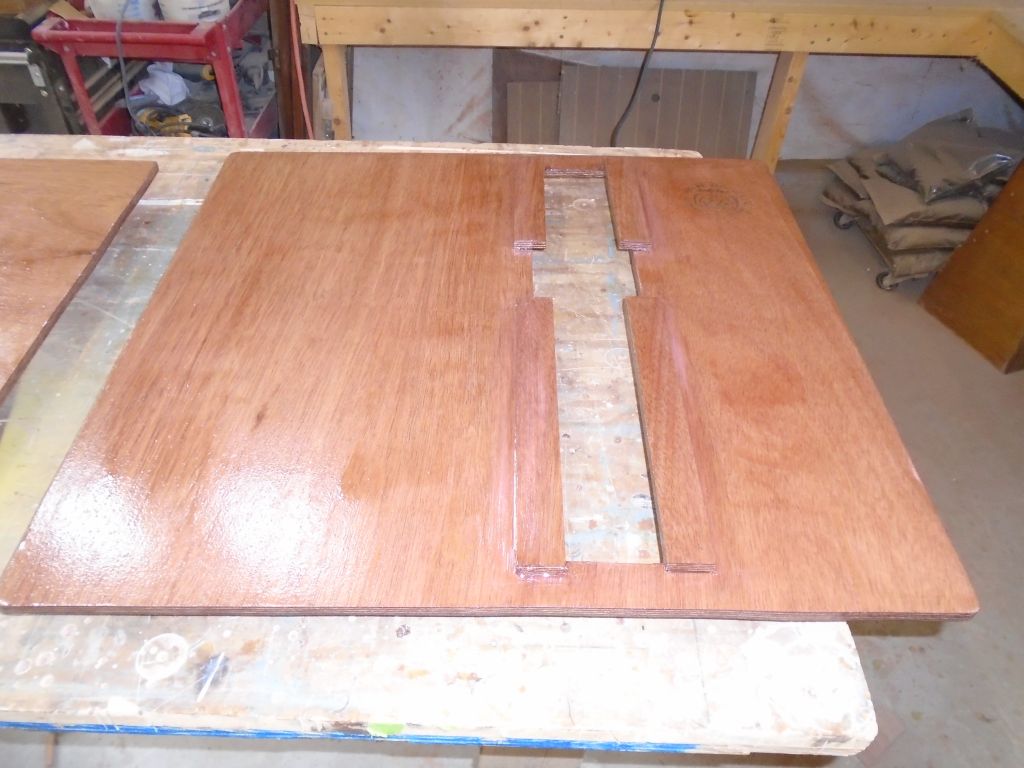
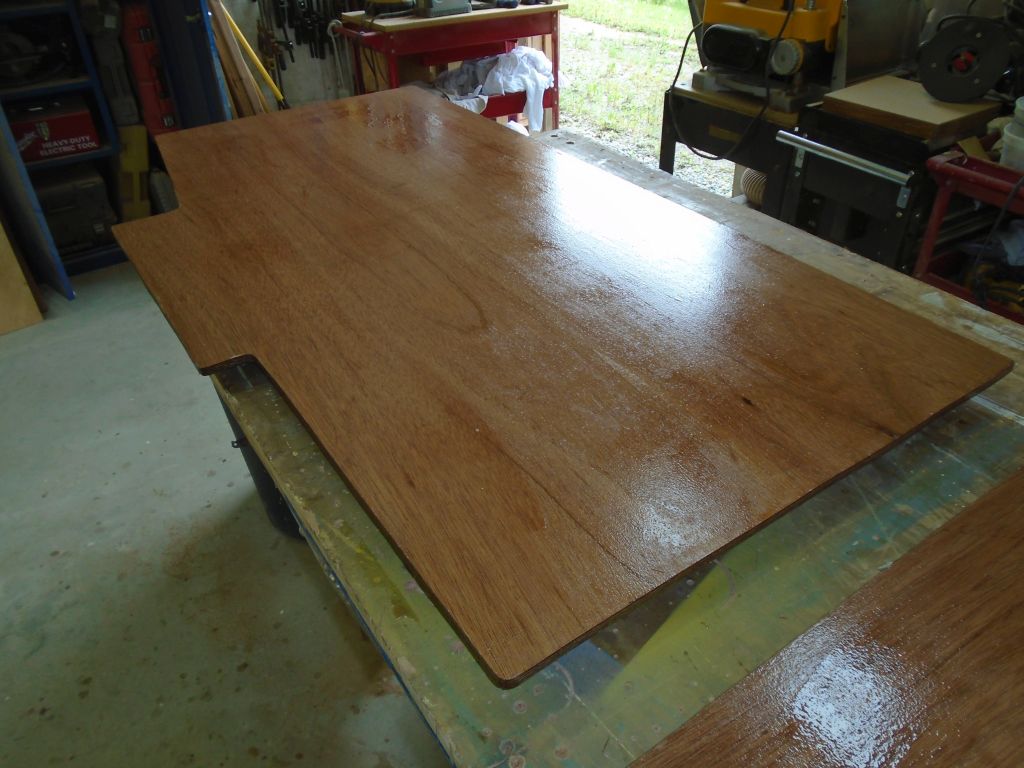
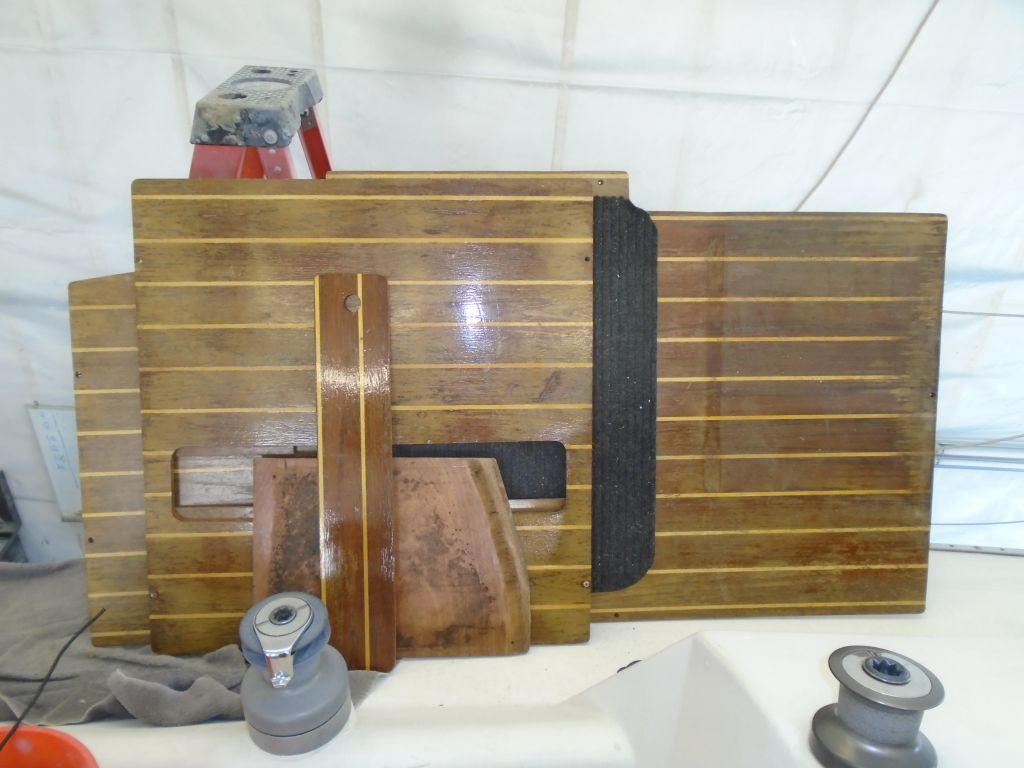
Down in the shop, I used the existing cabin sole pieces as exact patterns to cut new 12mm marine plywood to the correct sizes.  The largest piece, the aftermost one, had its bottom side routed out in way of the support cleats inside the boat, which I didn’t plan to emulate unless I absolutely had to.  At the moment, I could see no reason for lowering the apparent height of the aft piece.

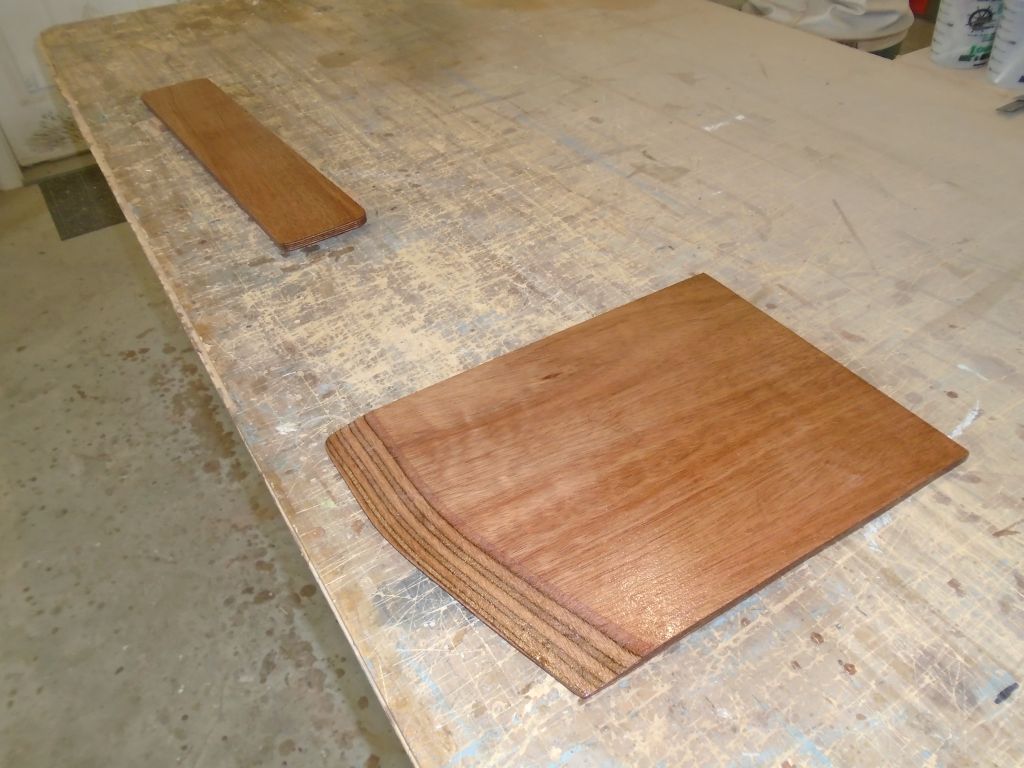
Once I had the pieces trimmed to size as needed, and tapered to fit the hull (the small forward section only), I test-fit all three in the boat.  All fit well without a need for further trimming.

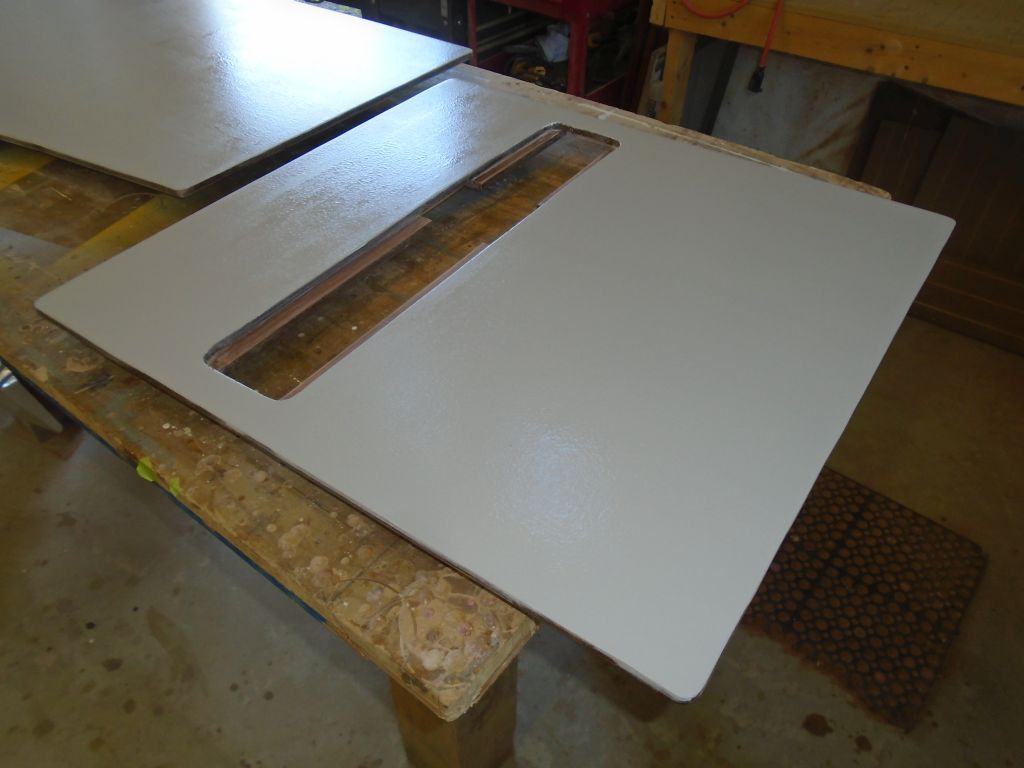
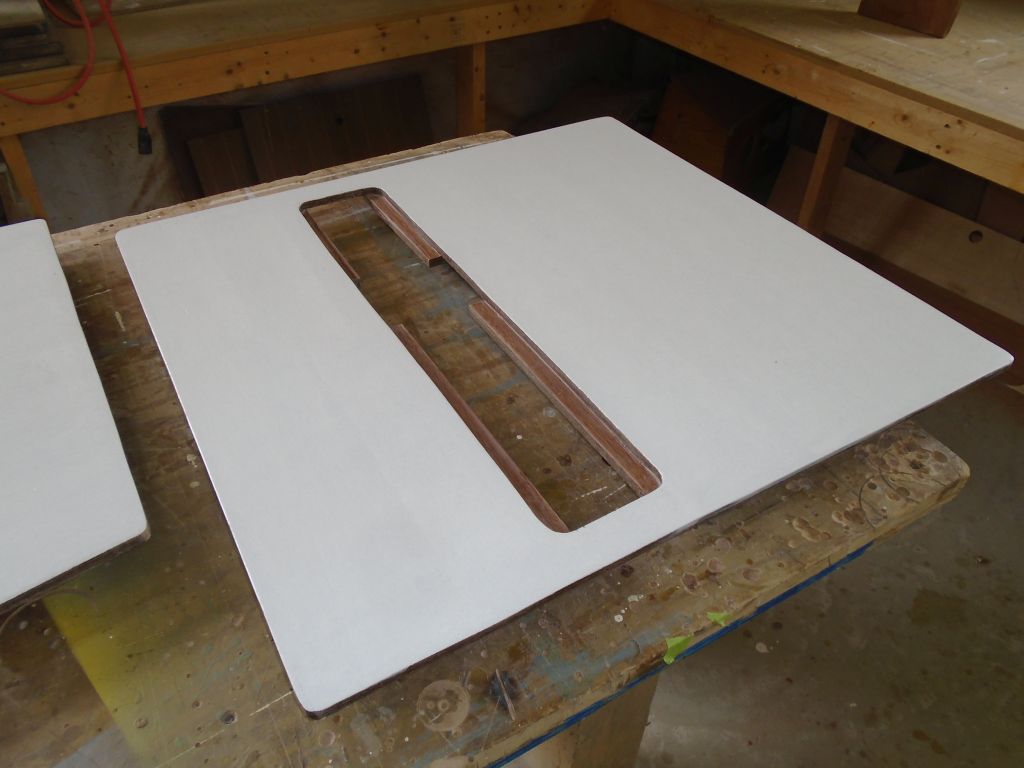
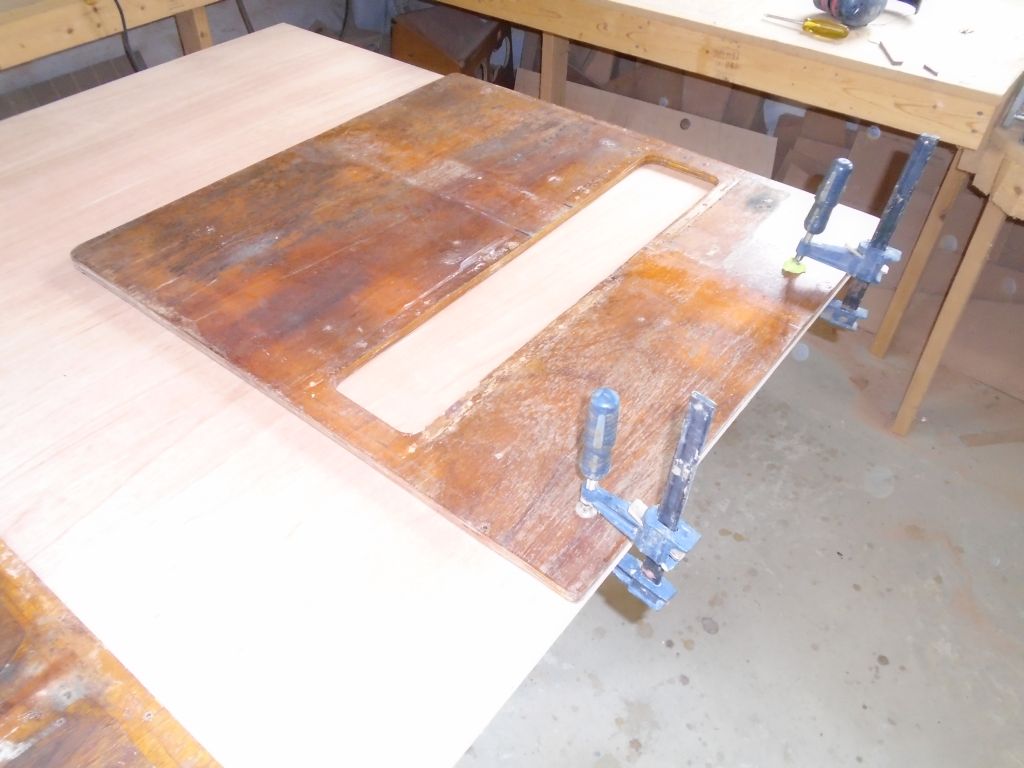
With the sole panels back on the bench, I prepared support cleats for the small access hatch over the bilge sump, and secured them in place with epoxy adhesive and temporary fasteners.  Then, I epoxy-coated the bottom sides and edges of the plywood panels.

Total time billed on this job today:  6.5 hours

0600 Weather Report:
58°, cloudy.  Forecast for the day:  clouds, maybe showers in the afternoon, low 60s

Patience 6

< Back to Patience

Monday

I lightly sanded the first coat on the boottop stripes, then vacuumed, solvent-washed, and tacked off before applying a second coat of the bright red and light blue paints.

Meanwhile, I continued work on the new halyard stoppers on the cabin top.  The epoxy plugs had had the weekend to cure, and now I drilled for the new fixing bolts, and installed the new hardware in butyl sealant, which was a good choice in this instance since the hardware specifically admonished against using other common sealants.

There was a defunct knotmeter transducer in the boat, which the owner requested I removed and patch.

From inside, I removed the plug itself, then cut away the plastic housing and, from outside, removed the through hull flange.  Later, I’d prepare the hole and fill and patch to complete the job.

The original cabin sole, made from teak-veneer plywood, was in poor-ish condition, and the owner requested I replace it with new painted panels.  So I removed the old panels from the boat so I could pattern them and build the new pieces forthwith.

I also removed a stand-alone automatic bilge pump, which I’d soon be replacing with a remotely-located diaphragm pump.

By the end of the day, the new boottop paint had tacked up sufficiently to allow me to remove the masking tape.  Now I’d leave the fresh paint for a few days before I considered overmasking it to paint the white striped between.

Total time billed on this job today:  5.5 hours

0600 Weather Observation:
42°, sunny.  Forecast for the day:  mainly sunny, some increasing clouds in the afternoon, high in the 70s

Patience 5

< Back to Patience

Friday

After finishing up some work on another boat, and awaiting a shipment paint later in the day, I turned to the halyard stoppers located on the cabin trunk.  There were four of these, and they appeared original.  The owner requested replacement.

Removal was straightforward.  The barrel nuts on the interior had been painted over, but fortunately came off without issue, and soon the old hardware was removed.

The new stoppers were essentially identical to the old, with the same bolt pattern.  I extend my congratulations to Spinlock for not changing something just for the sake of change, even decades later.

After cleaning old sealant and debris from the deck, I used a 5/8″ bit to overbore the old bolt holes, removing the top skin and core at each location.  The core (plywood) was in good condition in all areas.  Drilling this deck, which was fabricated from Kevlar cloth, brought back lots of memories from my first boatbuilding job in 1990, at a well-known builder that was, at the time, experimenting with Kevlar and E-glass hybrids.  My enduring memory of Kevlar cloth was the fuzzy nature of the material whenever one cut the raw cloth, or sanded/cut the finished laminate, and the fuzzy bits that came up as I drilled into this deck now just reminded me of it all, oh so long ago.

Once I had the holes cleaned up, and masked over the bottom openings, I filled the holes with a thickened epoxy mixture, leaving it to cure before continuing.

My new paint for the boottop arrived just in time, and I looked forward to getting the first coat on.  The owner had a clear sense of the color scheme he wanted, but working with online color samples (notoriously inaccurate) we’d eventually decided to purchase two different shades of the blue he hoped for.  The first shade that arrived looked a close match to the samples, but might have been too light on the boat itself, so I’d ordered the next-darker shade, called Sky Blue.  When this arrived, I thought it looked like the right color for the main, wide stripe of the boottop.  The narrow upper stripe was to be bright red.

paint

After final preparations, and starting with the red on the uppermost stripe, I applied the first coat of paint to the boottop, finishing up with the sky blue on the lower stripe once the red was done.  To my eye this all looked pretty good.

Total time billed on this job today:  3.5 hours

0600 Weather Observation:
48°, mostly clear.  Forecast for the day:  mainly sunny, 76°

Patience 4

< Back to Patience

Thursday

Starting from the existing top line, which I’d struck and masked earlier, I worked my way down the various boottop stripes, lowering my beams at each end the proper amount to strike each line in turn.  Once I’d made the tick marks for each stripe, I masked off the line accordingly.

The first new line, representing the bottom edge of the top stripe, was 3/4″ below the topmost line.

The next line, representing the bottom edge of a hull-color band, and the top edge of the lower, wider colored stripe, was a further 3/4″ down.

The final line, representing the bottom edge of the wider stripe, was 2-1/2″ below that, leaving a 1″ band of hull color above the bottom.

With all the masking completed, there was finally a reasonable visual sense of the new striping, and it looked great.

We were still finalizing the paint colors, and awaiting some of the product, so with another boat awaiting my attention I moved on to other things for now.

Total time billed on this job today:  4 hours

0600 Weather Observation:
40°, mostly clear.  Forecast for the day:  sun and clouds, showers in the afternoon, 60s

Older posts