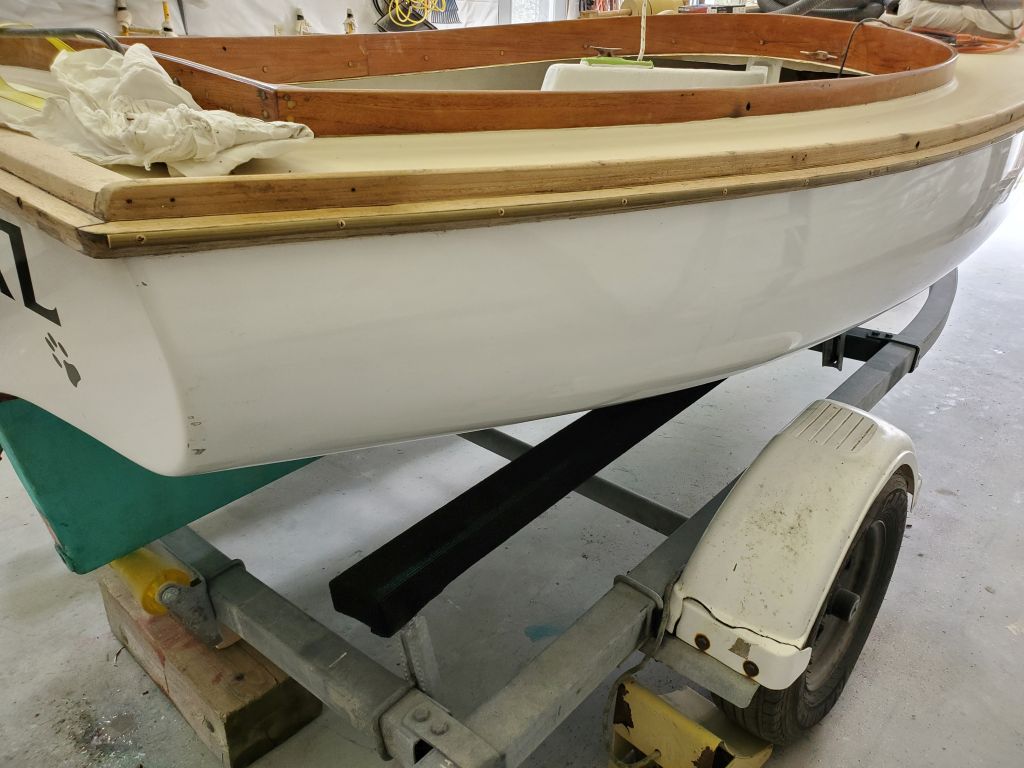
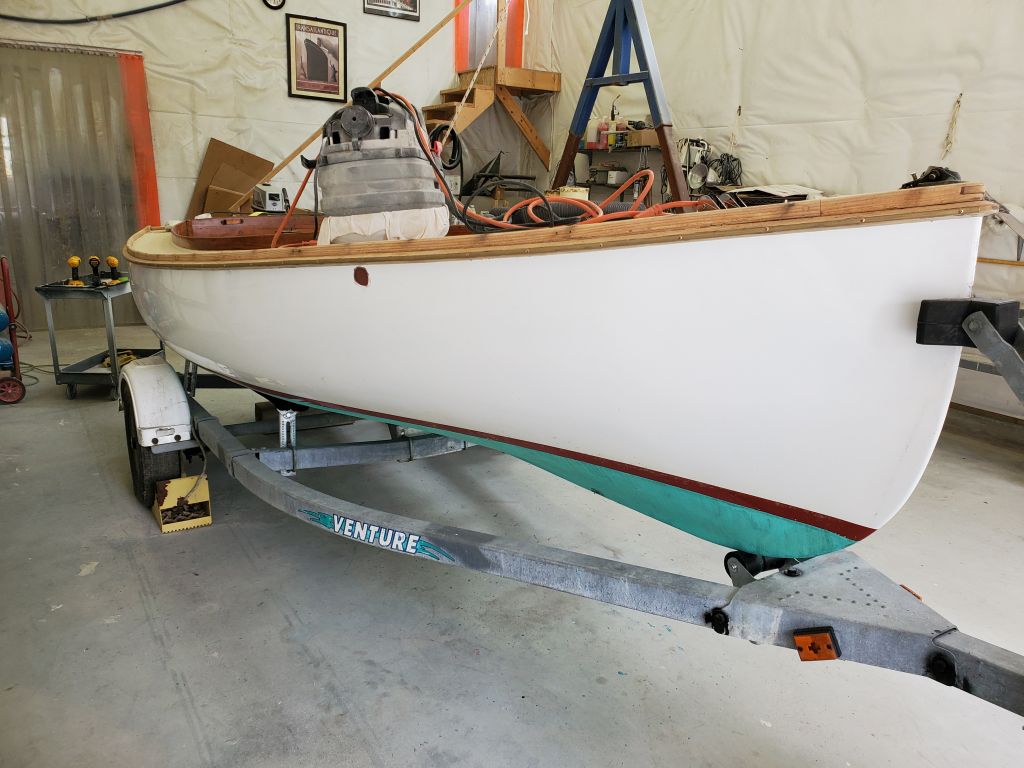
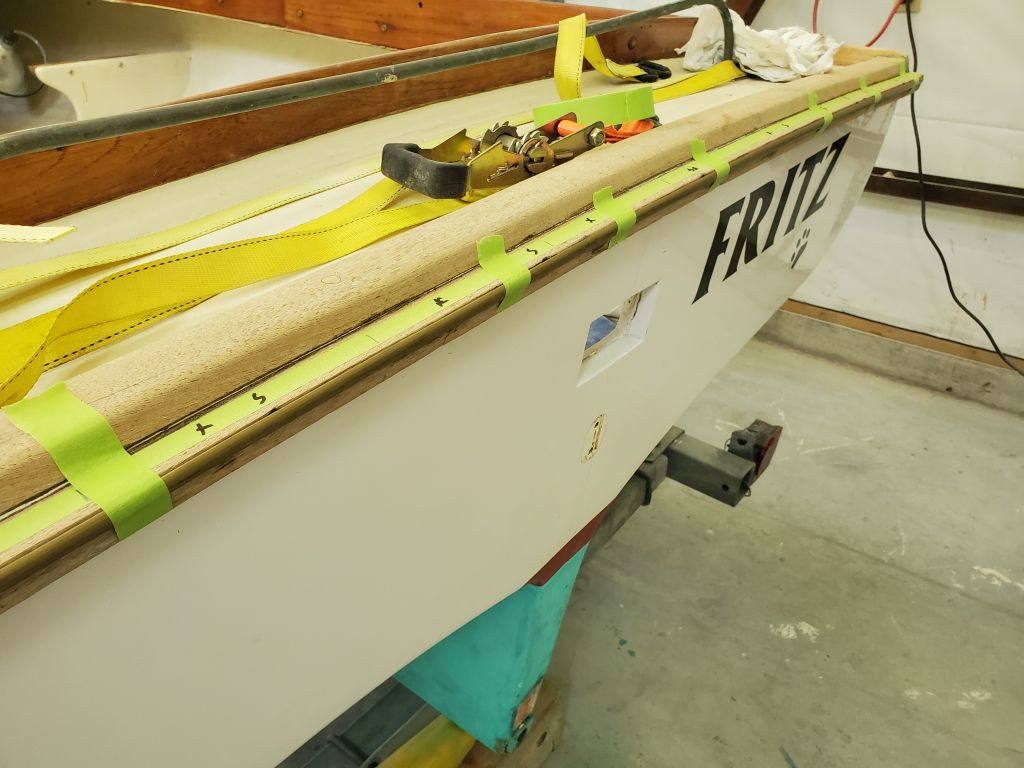
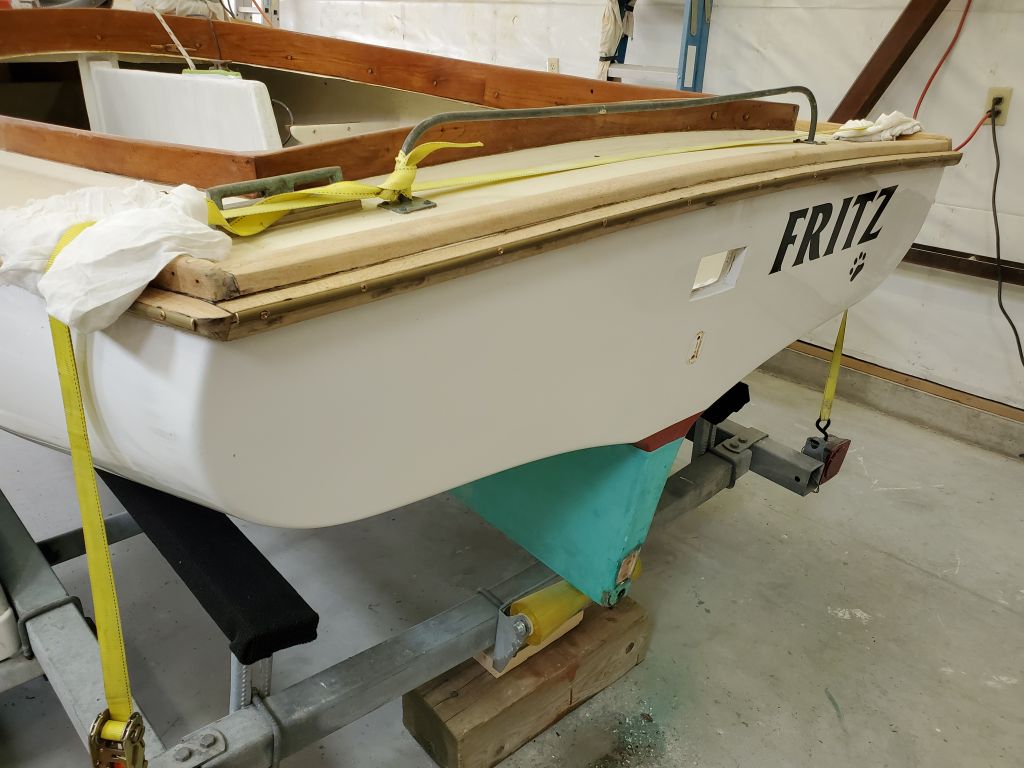
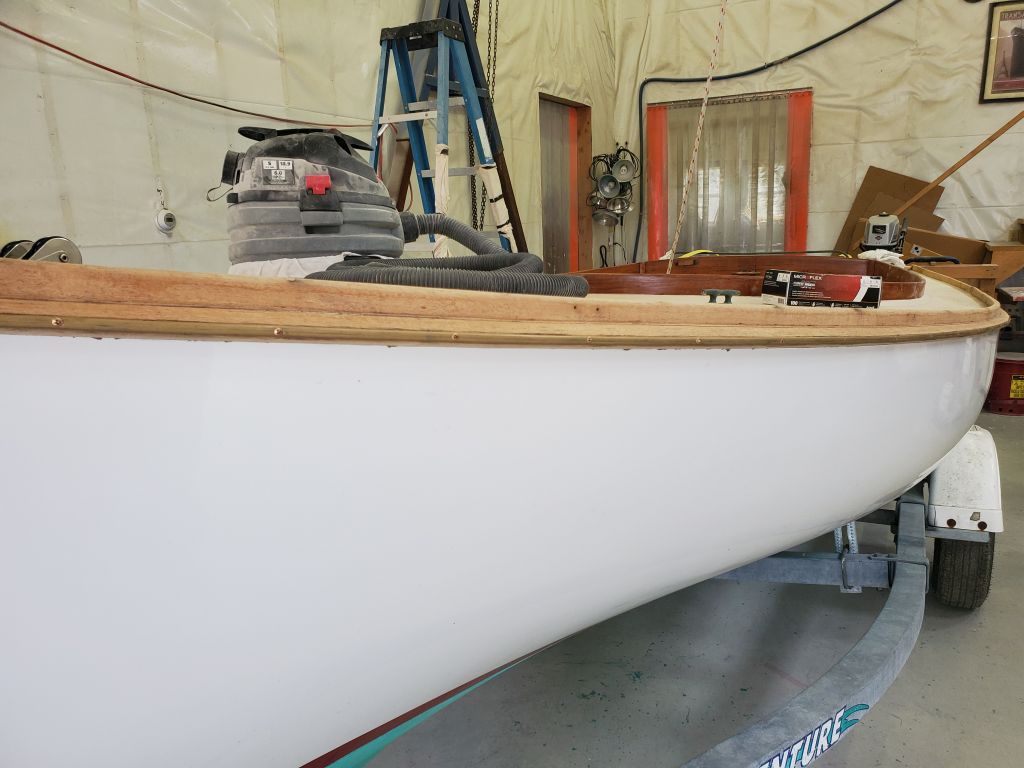
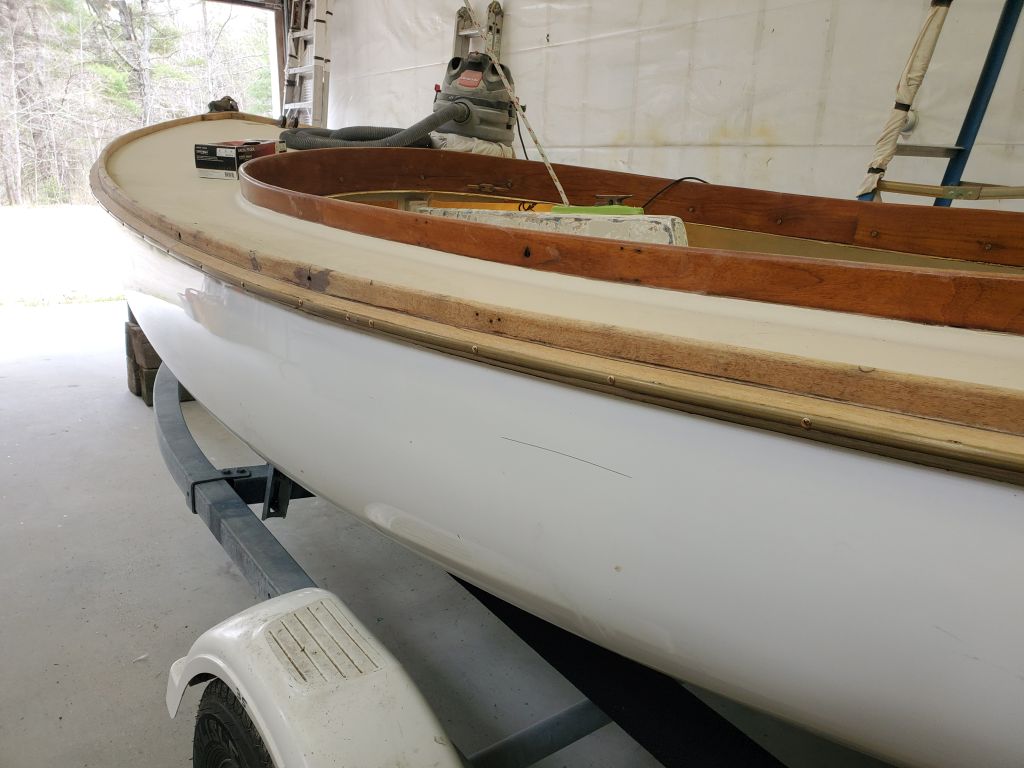
Fritz 9

Thursday

Now that the paintwork on the centerboard trunk repairs was complete, I removed the masking tape.

Next, I reinstalled the two wooden seat assemblies; each had six screws to secure it to the support cleats beneath.

With that, the project was complete.

Total time billed on this job today:  .75 hours

0600 Weather Observation:  Clear, 40°.  Forecast for the day:  Sunny, 75°

Return to Fritz

Fritz 8

Wednesday

I began with a light sanding of the first coat of finish paint on the centerboard trunk repairs, after which I cleaned the area as required and applied a second coat of the Hatteras off-white with flattening agent mixed in.

To finish up the small hull repairs at the stem and starboard bow, after final preparations I masked off the areas with foam tape and masking paper, then, over the course of the remainder of the morning, sprayed on three coats of gloss-white LPU topcoat that matched the existing hull finish and paint system.

Later in the day, the paint had cured to the point that I could remove the masking from both areas.

With just a few final details to take care of, I expected to complete work on the project next time.

Total time billed on this job today:  1.25 hours

0600 Weather Observation:  Clear, 35°.  Forecast for the day:  Sunny, 65°

Fritz 7

Tuesday

After lightly sanding the all-over primer and cleaning and preparing the area, I applied the first coat of finish paint.  To match the existing interior color, I happened to have a can of Hatteras off-white on hand, leftover from something or another, which was a reasonably close match.  I added some flattening agent to the paint to tone down the gloss, as I didn’t think the finish should be high-gloss on the non-smooth centerboard trunk housing.  The paint still appears glossy in the photos since it was wet at the time, but I’d judge whether to add more flattener to the second coat once I saw how the first coat turned out.  I hoped two coats would do the job.

After lightly sanding the through hull patch on the starboard bow, I applied a couple coats of the epoxy-based primer to the fresh epoxy, which would allow me to do the topcoats next time.

Total time billed on this job today:  1 hour

0600 Weather Observation:  Clear, 40°.  Forecast for the day:  Sunny, 63°

Fritz 6

Monday

Now that the “tie coat” primer had had the weekend to cure, I could lightly sand it to prepare the centerboard trunk repairs for the next step, which was an overall coat of one-part primer to cover the entire trunk and repair area.

After a light sanding to the patch at the old through hull location, I applied a coat of epoxy fairing material, keeping the work as contained as possible.  The old eyebolt hole at the stem was basically fair and ready for paint whenever the larger through hull repair was ready.

Next, I continued work on the brass rubstrip, this time on the starboard side.  As before, I laid out a strip of tape onto which I marked existing screw (and broken stud) locations, then secured my flexible tape measure in place so I could locate all the new fasteners accordingly.  Fortunately, with only a minor manipulation here and there, the new spacing worked out well to avoid all the existing screws.

Using temporary clamps as loose guides through which to thread the recalcitrant rubstrip, I taped the metal in place along the rubrail as needed, keeping the forward end aligned with its counterpart to port.  Then, for each screw location, I went through the 5-step process to install the fasteners:  center punch; pilot hole; larger pilot hole for the screw shank; countersink; and finally install the #6 x 1/2″ oval head bronze screw (Freason).

Working my way down the boat, I secured the new rail, adding a short length as needed to reach the corner of the transom.

Then, I repeated the layout and installation process for the final length of rubstrip across the transom itself.

The epoxy I’d used to fill the old fastener holes at the lower gudgeon location had had ample cure time, and now I used the new gudgeon to lay out for its fastener holes, keeping the outline of the gudgeon itself aligned with the shadow of its predecessor.  Since there was no access within, I used bronze screws to secure the lower gudgeon in place with lots of sealant.  For the top gudgeon, I secured it with more sealant and two 1/4″ x 2″ bolts through the transom, since the inside was accessible for nuts and washers.

All that remained to complete the project was to finalize the paint coatings on the repaired centerboard trunk and other minor repairs in the hull, which I’d complete over the next few days as necessary.

Total time billed on this job today:  4 hours

0600 Weather Observation:  Mostly clear, 42°.  Forecast for the day:  Mostly sunny, 65°


Fritz 5

Friday

After a light sanding–much of it by hand because of tight access–I deemed the centerboard trunk repairs ready for primer.

Because one-part paints and primers don’t cure properly over fresh epoxy, and because schedules always demand moving forward rather than waiting some days or weeks for the epoxy to cure sufficiently to allow these paints to work, I always apply what I call a tie-coat of two-part epoxy primer, and this was my next step.  After masking off the area as needed for the primer and subsequent coats of paint, I applied a coat of the epoxy primer over the fresh work (staying away from the existing painted surfaces, which I imagined were one-pack paint).  Should any further fine-tuning of the fairing work be required, I could take care of that once the primer was cured and sanded.

To complete the structural (as it were) part of the through-hull hole repair, I applied two layers of fiberglass over the inside of the patch, and a single layer of light cloth over the exterior.

Afterwards, I completed the brass rubrail installation on the port side, working my way down and installing fasteners every 6″.  The length of the boat required a short second section of the rail to reach the transom.  I’d planned on doing the starboard side during the afternoon, but a change of plans required my presence elsewhere.  With a few days ahead requiring short painting sessions, I’d easily finish up the rest of the project list early in the week.

Total time billed on this job today:  3 hours

0600 Weather Observation:  Cloudy, 40°.  Forecast for the day:  Cloudy, showers in the afternoon, 55°

Fritz 4

Thursday

My first order of business was to prep and lightly sand the new fiberglass work on the centerboard trunk, just easing any sharp edges and scuffing the surface to prepare for the next steps.

While I was at it, I prepared a couple other small areas of the boat for repair:  an old hole leftover from a bow eye system the owner didn’t want, and an inexplicable plastic through hull mounted below the rail on the starboard bow.  After removing the through hull, which was just screwed in place with no sealant, I prepared the hull for a fiberglass patch inside and out, keeping the outside area as small as possible to minimize paint patching.

After final preparations, I applied a coat of epoxy fairing compound to the centerboard trunk repairs, mainly to fill the weave and clean up the transitions at the edges of the new cloth.   I anticipated that the one coat of filler would be sufficient to match the texture and appearance of the surrounding areas.

Meanwhile, I filled the bow eye hole and the hole leftover from the through hull with leftover thickened epoxy.

The wooden toerail and rubrail had been stripped to bare wood sometime in the past, which is how the owner wanted it, and now I prepared to install a new half-oval brass rubstrip on the exterior face of the rubrail.  With numerous screws holding the wood to the boat, and broken-off studs of the old screws leftover from the original rubrail, there were many impediments to future screw placement.

Starting with the port side, I laid out a strip of masking tape along the rail, which gave me a place to mark all the existing screw and broken screw locations.

The brass stock (bronze half oval is not available other than, I suppose, through custom order) came in 12-foot lengths without screw holes, and in the 3/8″ x 3/32″ size required for this boat, was delicate, easy to damage, and hard to control at the early stages.  I planned to drill and countersink the rail in place to avoid trying to move the flimsy material when full of screw holes, but first I had to tame it enough to get it in place temporarily.  I used a few clamps over the rail to help hold the rub strip roughly in place without bending, while I secured it more permanently with masking tape every so often along its length.  Then I laid out a flexible tape measure and, keeping clear of the various old and existing screw locations, laid out the new screw locations every six inches on center.

Starting at the bow, I began to attach the rail with #6 bronze oval-head wood screws.  At each location, I center-punched; drilled a pilot hole through the brass and into the wood; enlarged the pilot hole through the brass for the screw shank; and milled a countersink for the screw head.  As proof of concept, this procedure worked well, and while I was out of time for the moment, I expected the rest of the rail installation would proceed accordingly.

Total time billed on this job today:  3.25 hours

0600 Weather Observation:  Clear, 30°.  Forecast for the day:  Sunny, 65°

Fritz 3

Wednesday

After getting set up with tools and equipment, I prepared the area around and including the centerboard trunk for the intended repair.  With flaking paint here and there along the full length of the tabbing seam where the cockpit sole had been secured to the trunk, I decided early on to grind away the paint and any loose material from the full length of the trunk, not just the forward section that I’d pinpointed as a possible cause of the water leakage into the keel sump.

This was a disproportionately unpleasant chore, but eventually I’d removed paint and loose material from the lower 6″ or so of the cabin trunk, spanning the original tabbing seam and extending to the bottom of the trunk where it met the recesses sumps, and around the myriad corners and crevices of the remnants of the old forward bulkhead, which had been mostly cut out during the much-earlier cockpit modifications.  This preparation would allow the new tabbing to bond sufficiently in these areas.  In the seam where the cockpit met the cabin trunk in these areas, I found some soft adhesive/sealant-type material in the corners; whether this was part of the original construction (which seemed odd) or whether it was a more recent attempt at a fix I did not know, but in any event I scraped, with some effort, all this material out of the various crevices.  While I was making a mess, I also sanded the whole remainder of the centerboard trunk to prepare it for repainting when the repairs were done.

I also inspected the centerboard trunk and pin from below the boat, where I had a relatively clear view.  In discussions with the owner, some of the original details of the centerboard pin and its installation became more clear, and for a while we debated whether to install inspection ports in the cockpit above to access–or even replace–the pin in case that was the source of the leak, though we also now knew that rainwater in the cockpit did eventually and slowly drain into the sump; whether that was the only source of the water, or whether there was still and outside source, was as yet unknown.

Since I could confirm from below that the pin was in good shape where visible and made from bronze, we ultimately decided not to install deck plates at this time, largely because any deck plates in this cockpit would simply leak into the bilge, defeating the whole purpose of the modified cockpit arrangement and not in keeping with the original goals.  Should problems persist, or the centerboard pin require maintenance later, we’d re-address the issue then.

After cleaning up and preparing new fiberglass for the areas I’d ground earlier, I applied a heavy epoxy fillet around all the forward portions of the centerboard trunk and where it conjoined the vertical remnants of the bulkhead, not only to fill and seal the corners of the juncture, but also to ease all abrupt transitions for future fiberglass work.

While I left the fillets to gel, I removed the old bronze gudgeons from the stern.  The holes for the lower gudgeon near the base of the skeg were ratty, so I reamed them out a bit and filled with a strengthened, thickened epoxy mixture so I could redrill the holes for the new gudgeons as needed.

I took a minute or two to pare away and lightly sand the bungs on the replacement cockpit seat slat, completing the seat repair for now.

When the fillets were ready for the next step, I wet out and applied biaxial tabbing to the centerboard seam, and around the forward corners, using a few layers of lighter cloth as needed to cover and seal the tightest corners (mainly around the slim bulkhead remnants) that the heavier material couldn’t handle.

Total time billed on this job today:  5.75 hours

0600 Weather Observation:  Clear, 30°.  Forecast for the day:  Sunny, 56°

Fritz 2

Tuesday

During a short work session, I completed the repair to the port cockpit seat.  I got started by unclamping the glue-up I’d finished earlier, then running the assembly through the planer on both sides to reduce its thickness by nearly half, from about an inch to start, down to a final dimension of 9/16″ thick to match the existing seat slats.

Now I could lay out the shape of the replacement board using the mirror-image starboard side as a pattern.

Thus marked, I cut out the shape and smoothed and finished the top edges of the new plank with sandpaper.

Shaping complete, I secured the new plank to the remaining part of the port seat with two screws at each cleat location, and bunged the screw holes.

Exhausted by the long hours and brutal work, I turned in for the day.  (Actually, I had other business to attend to away from the shop in the afternoon.)

Total time billed on this job today:  2 hours

0600 Weather Observation:  Mostly cloudy, 40°.  Forecast for the day:  Becoming mostly sunny, 54°

Fritz 1

Monday

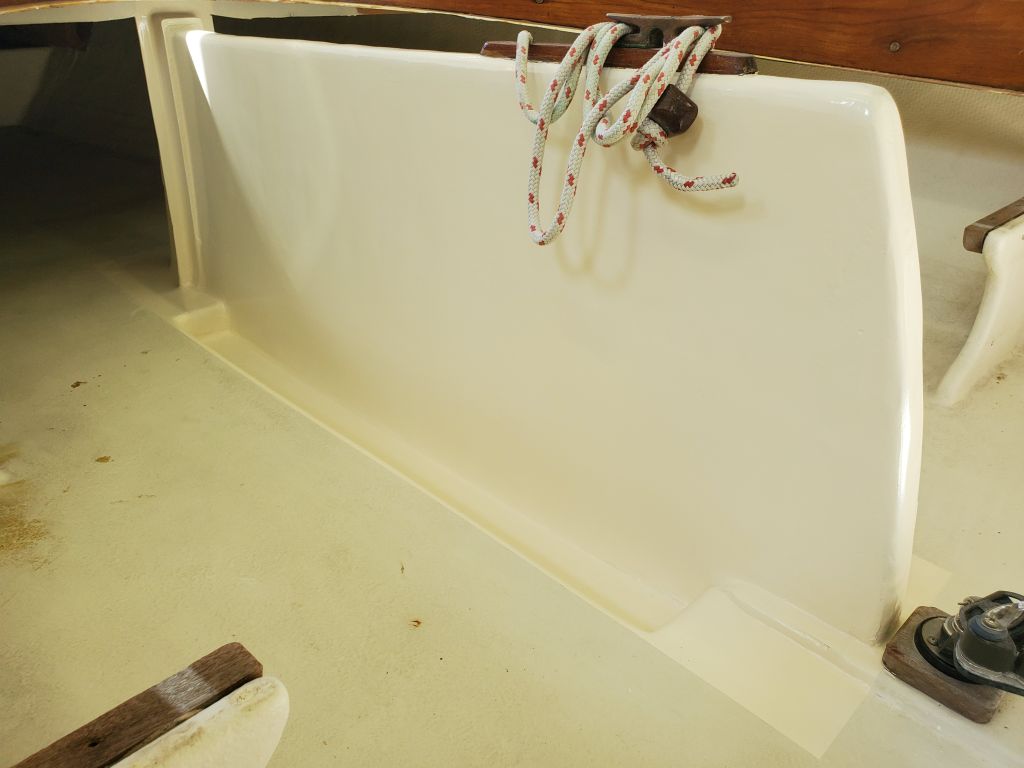
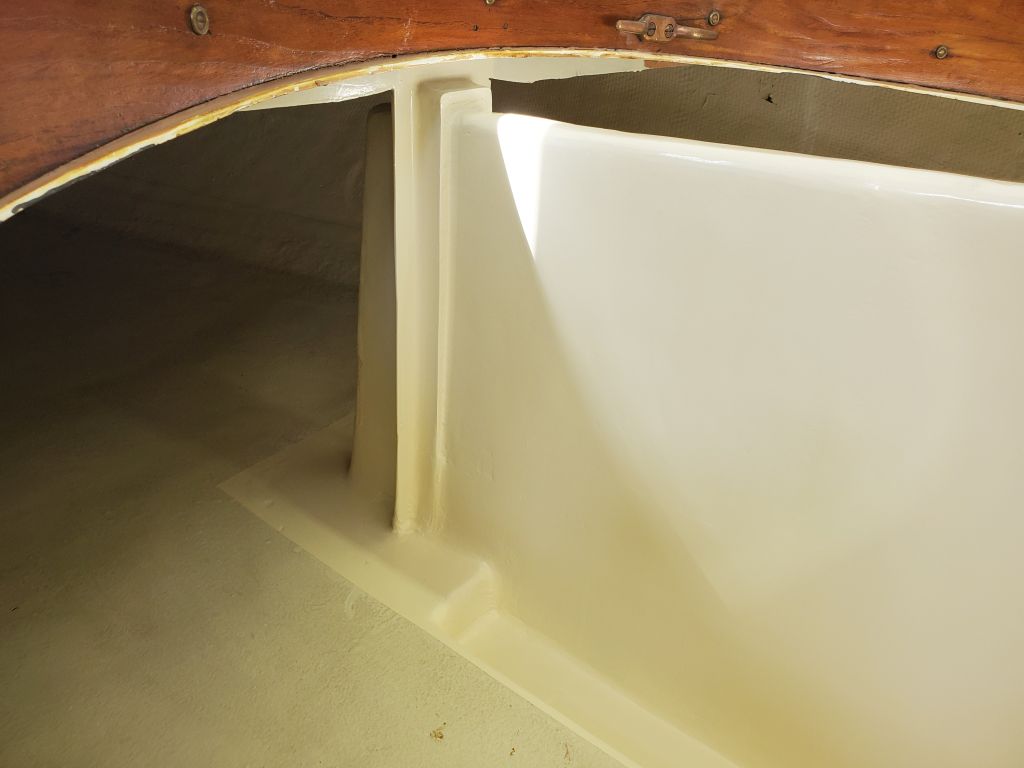
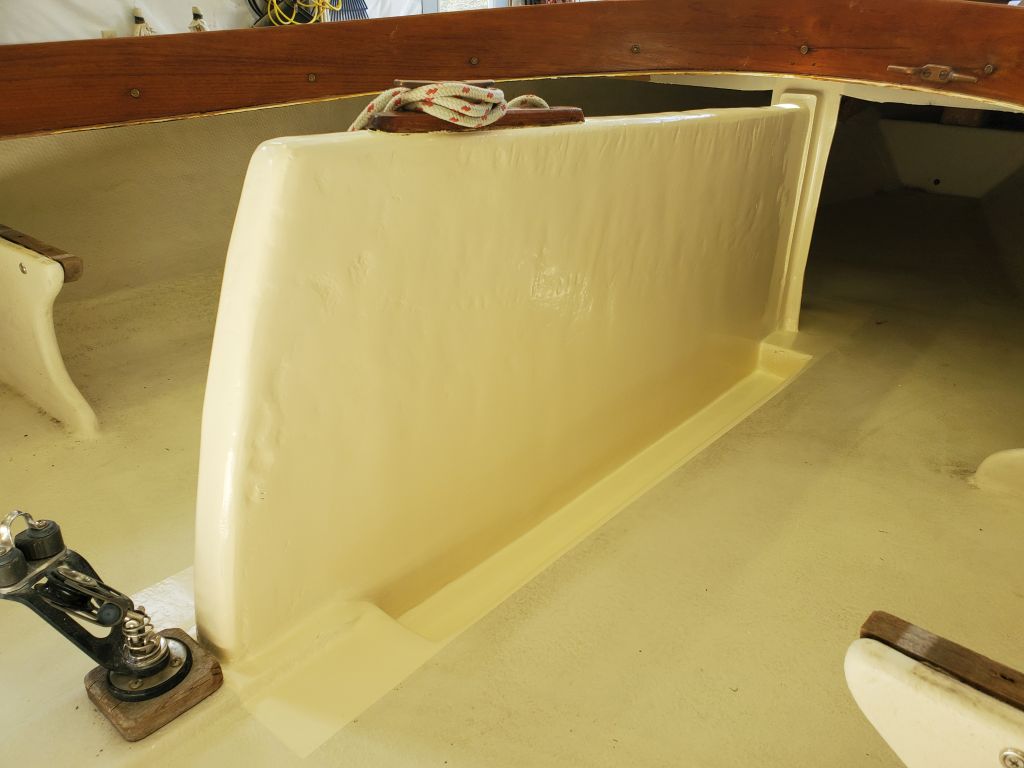
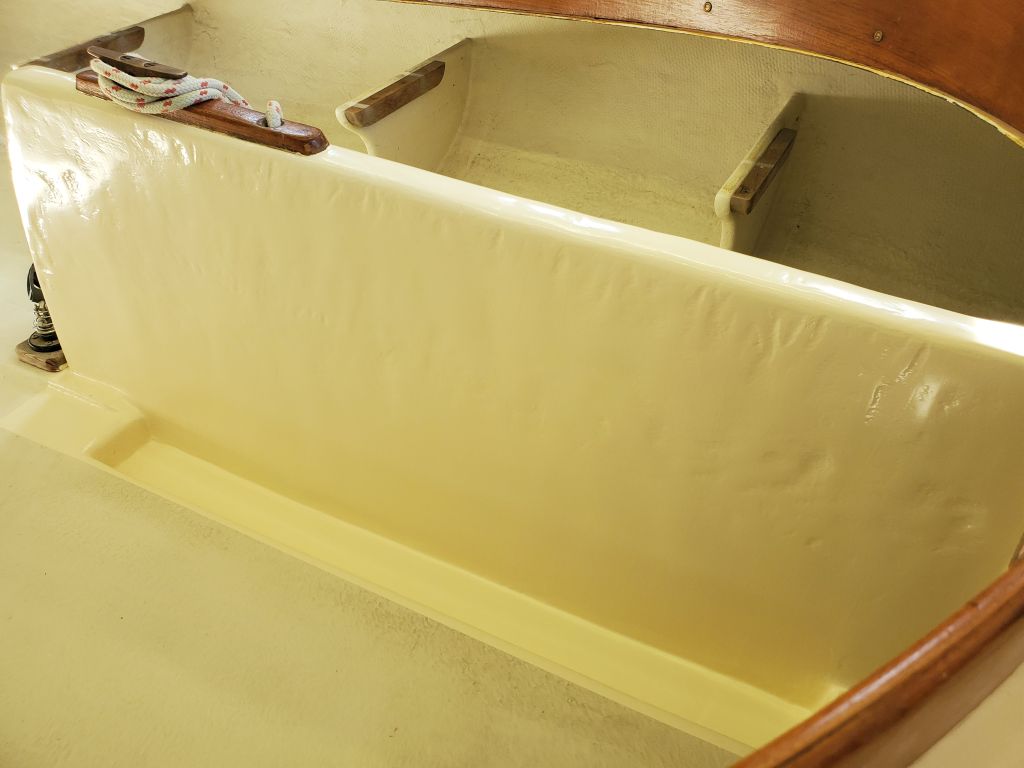
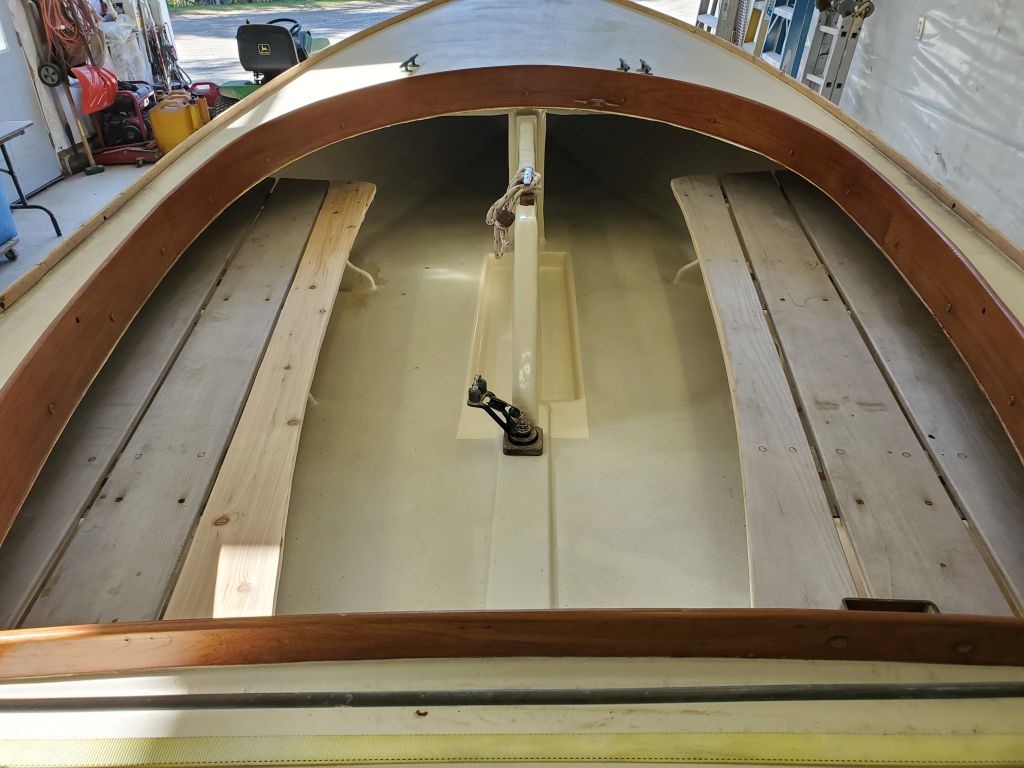
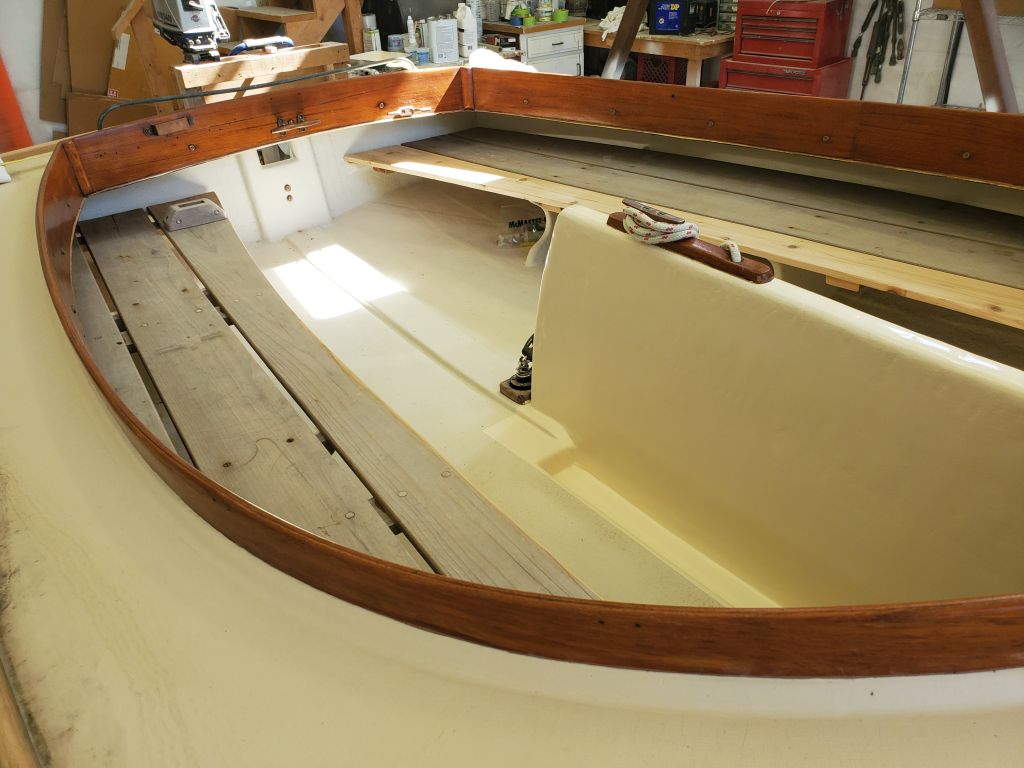
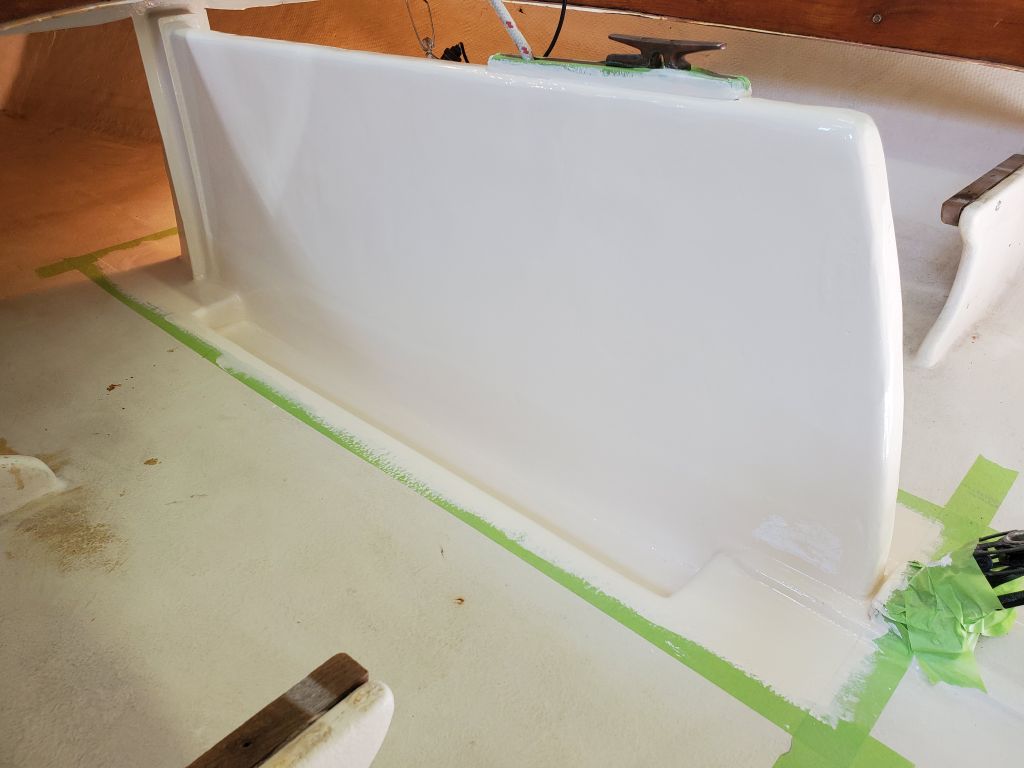
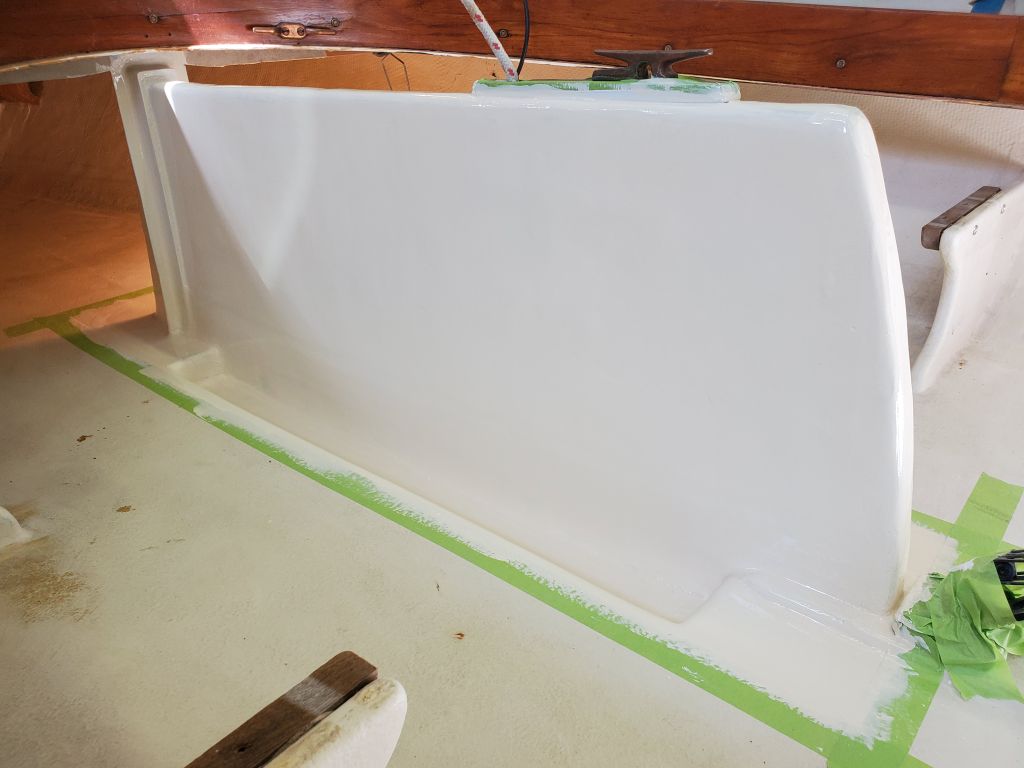
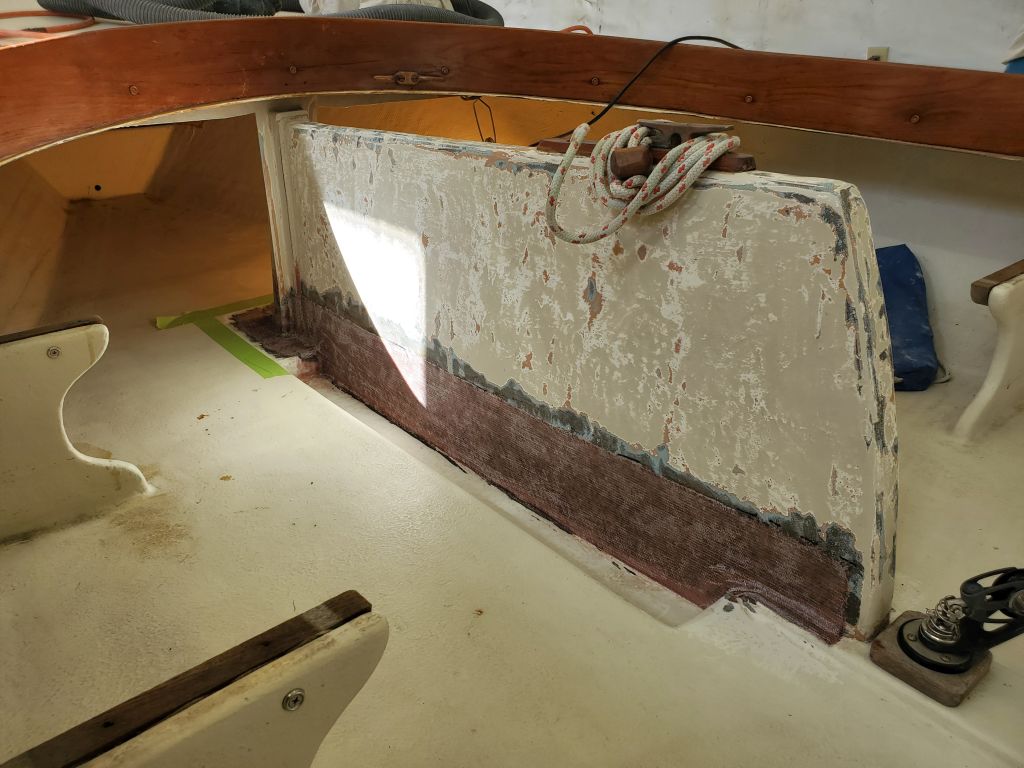
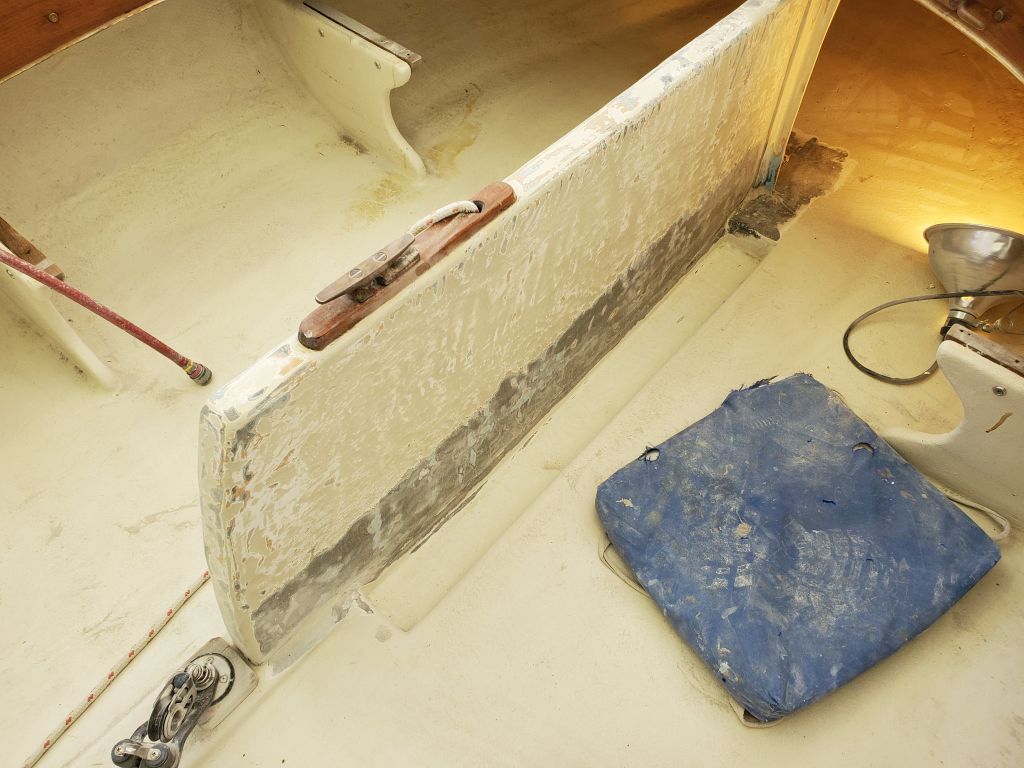
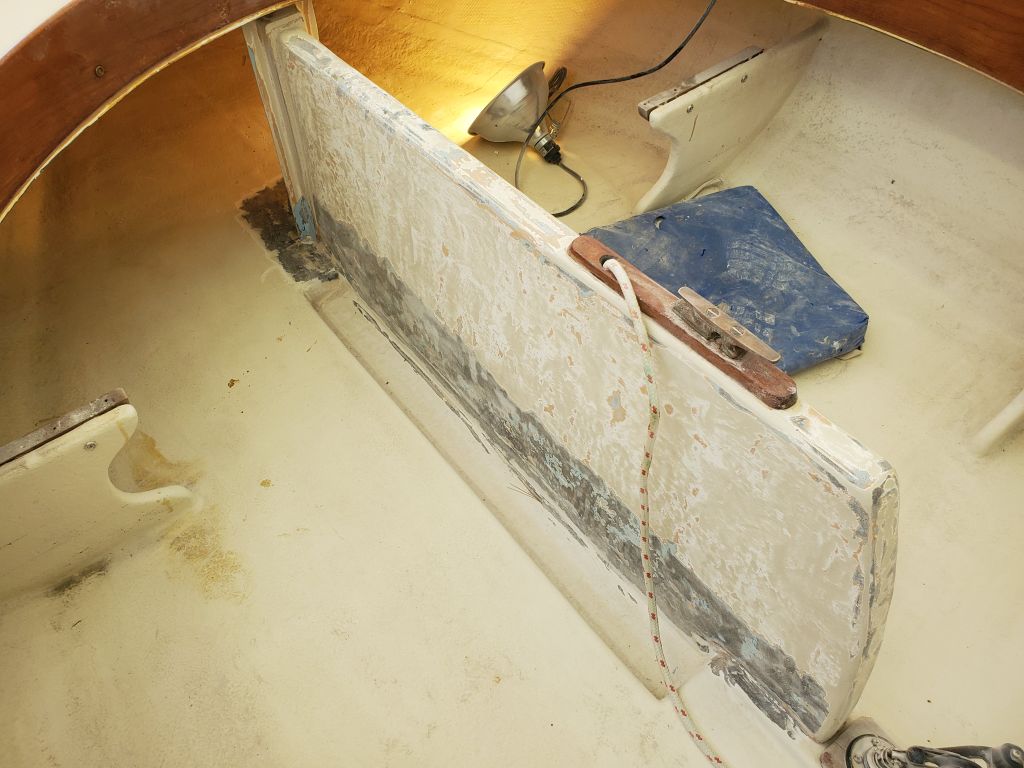
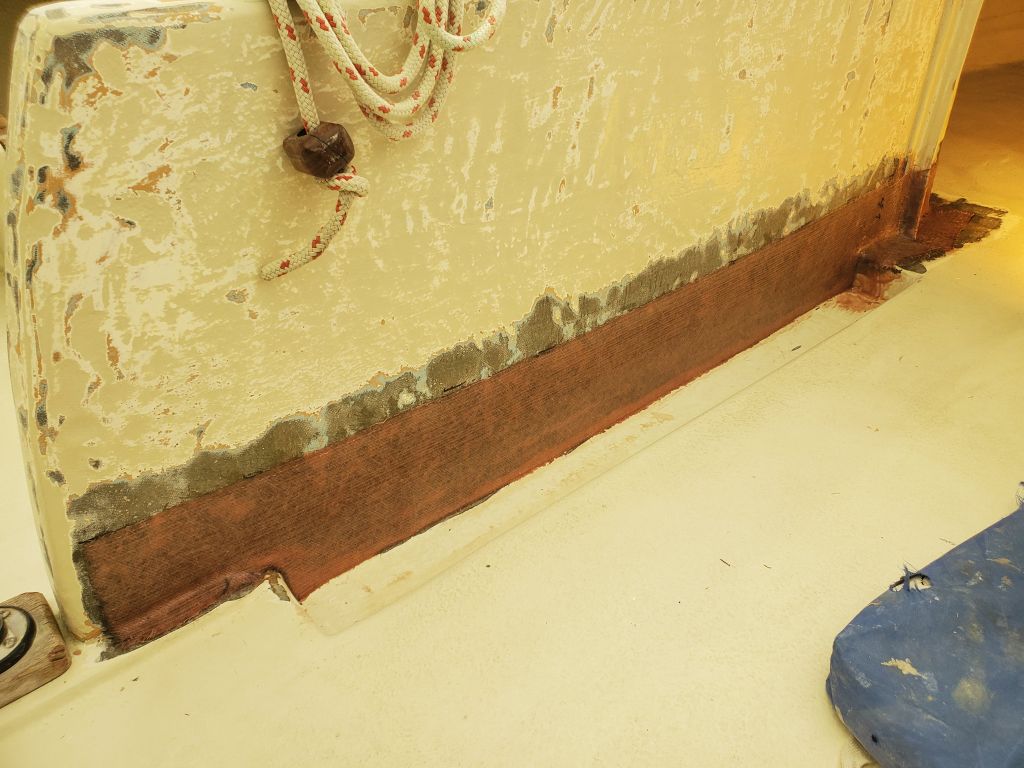
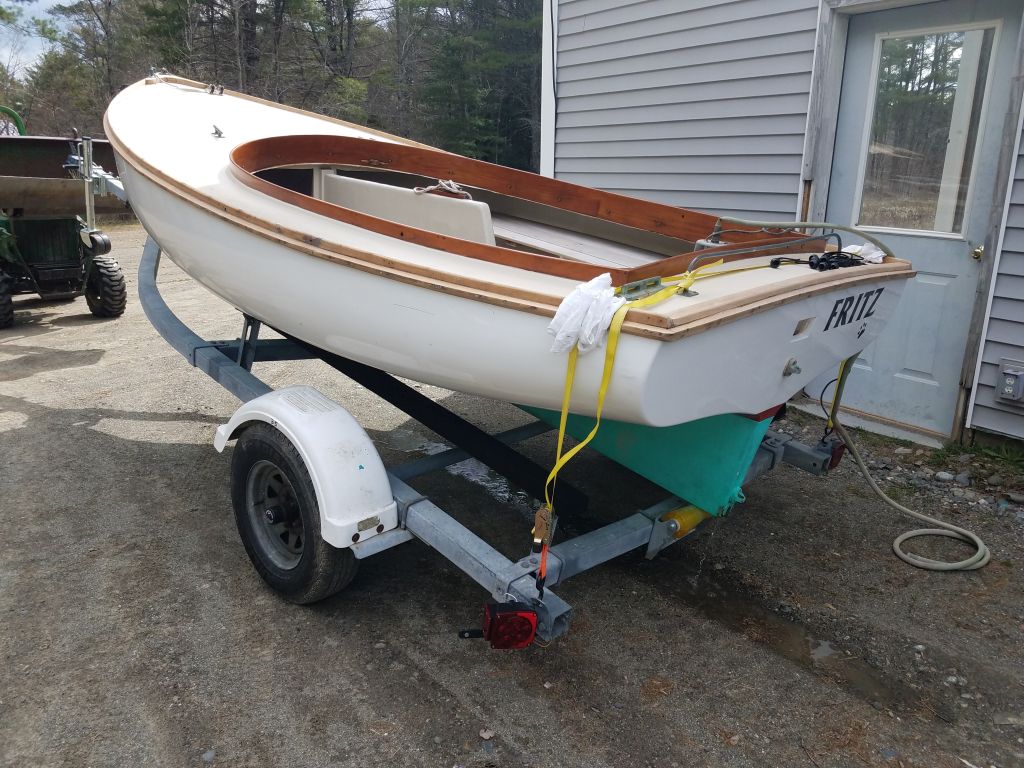
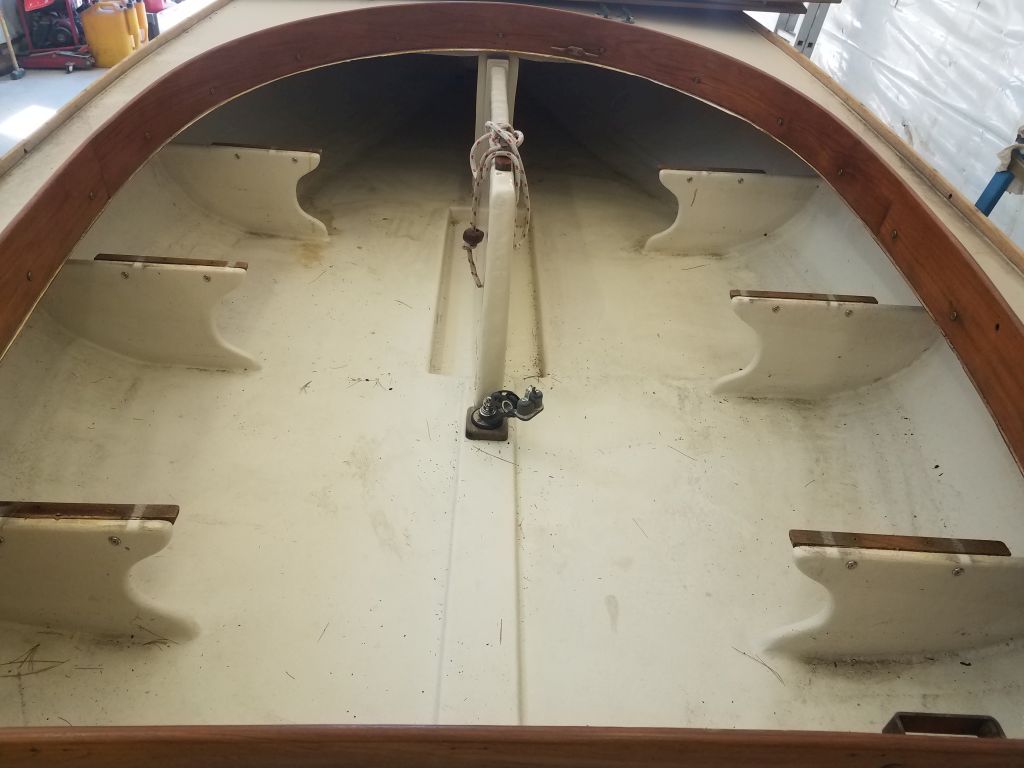
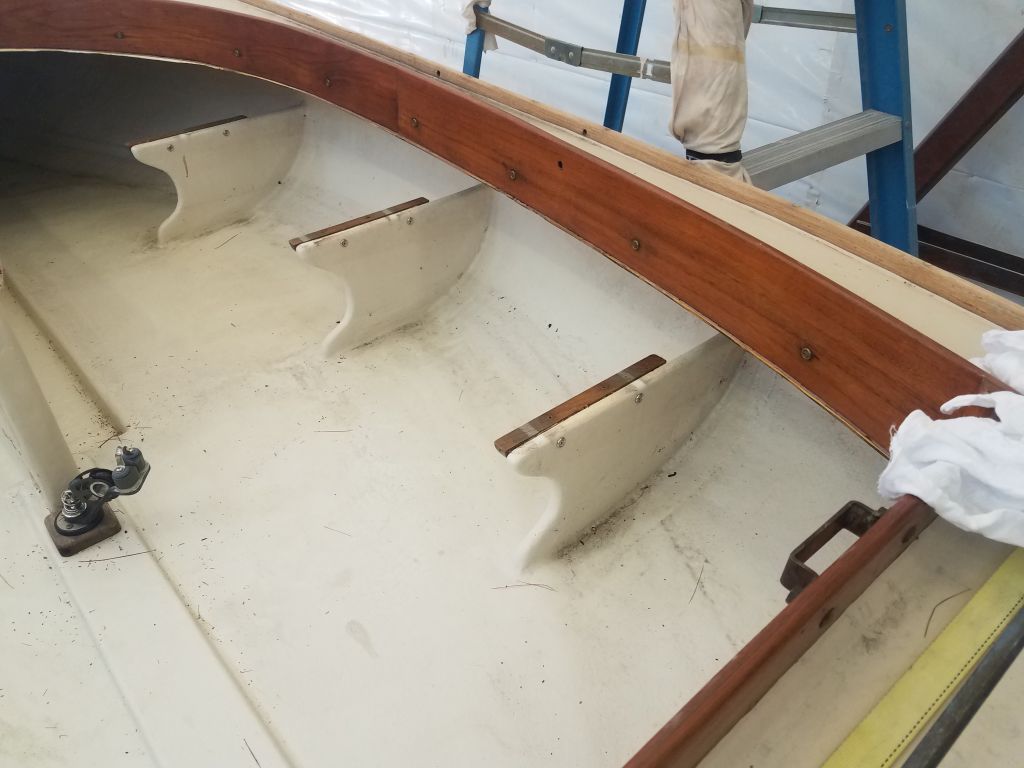
The owner of this 14′ Handy Cat had a short list of small items he hoped to address this season.  We’ll get to the list of projects later in this post, but perhaps the most significant of the jobs ahead was to track down and solve a mystery the owner had observed during previous seasons’ use.  This particular boat had been modified from original at some point in the past:  the original molded interior liner, which had incorporated floor and seat bases, had been cut out aft of the foredeck, and a new permanent sole glassed in place, along with knees to support wooden seat slats.  This new installation was supposed to isolate the bilge sump from the cockpit, but the owner had observed that when the boat was in the water, water got into the sump somehow anyway.

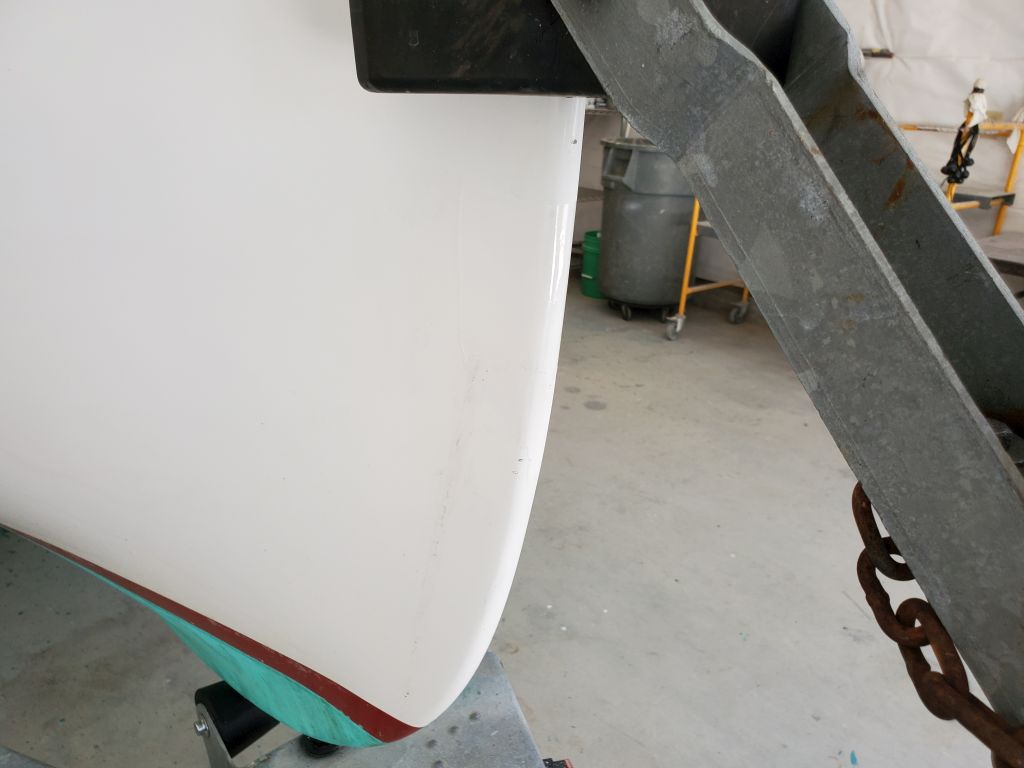
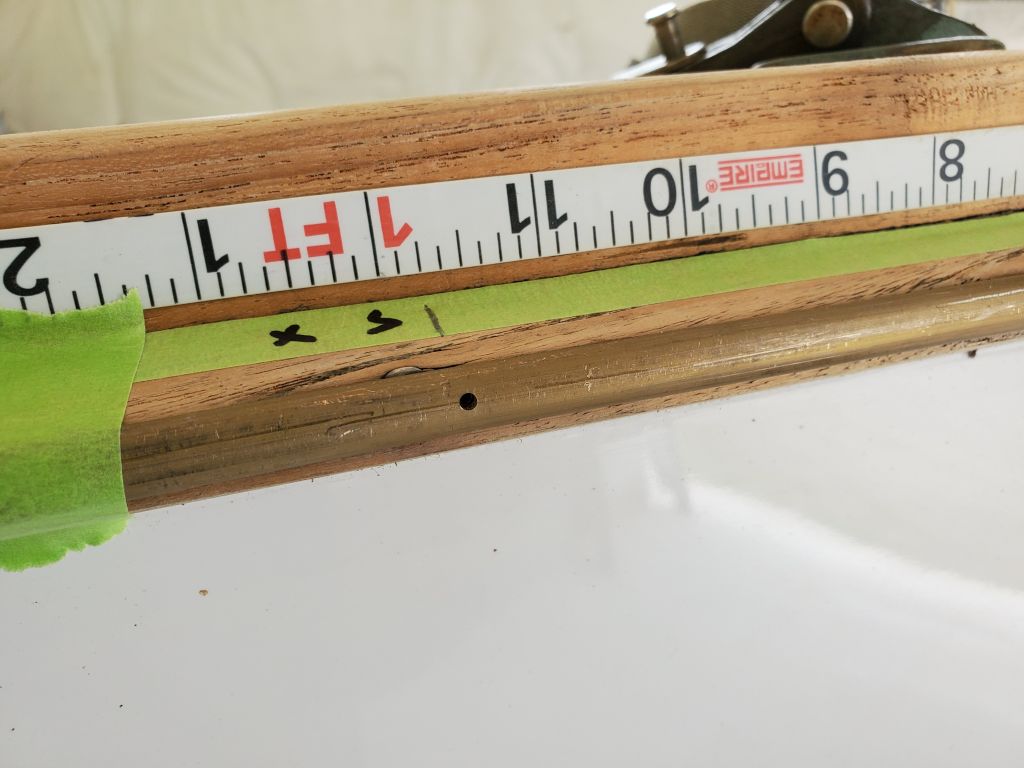
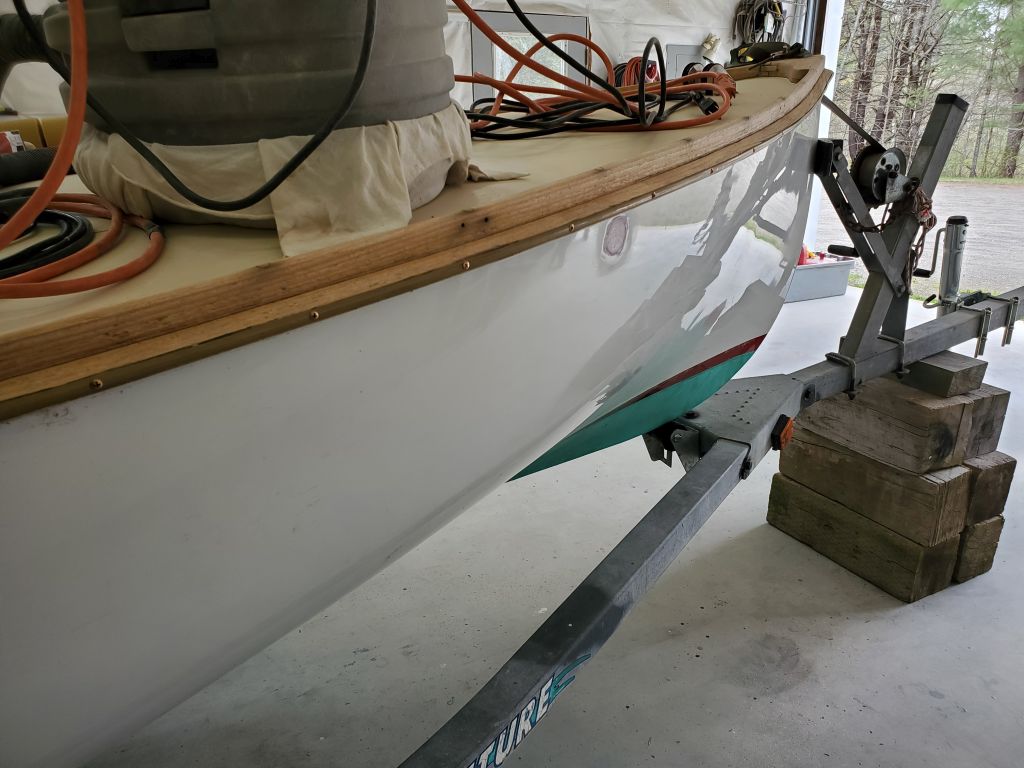
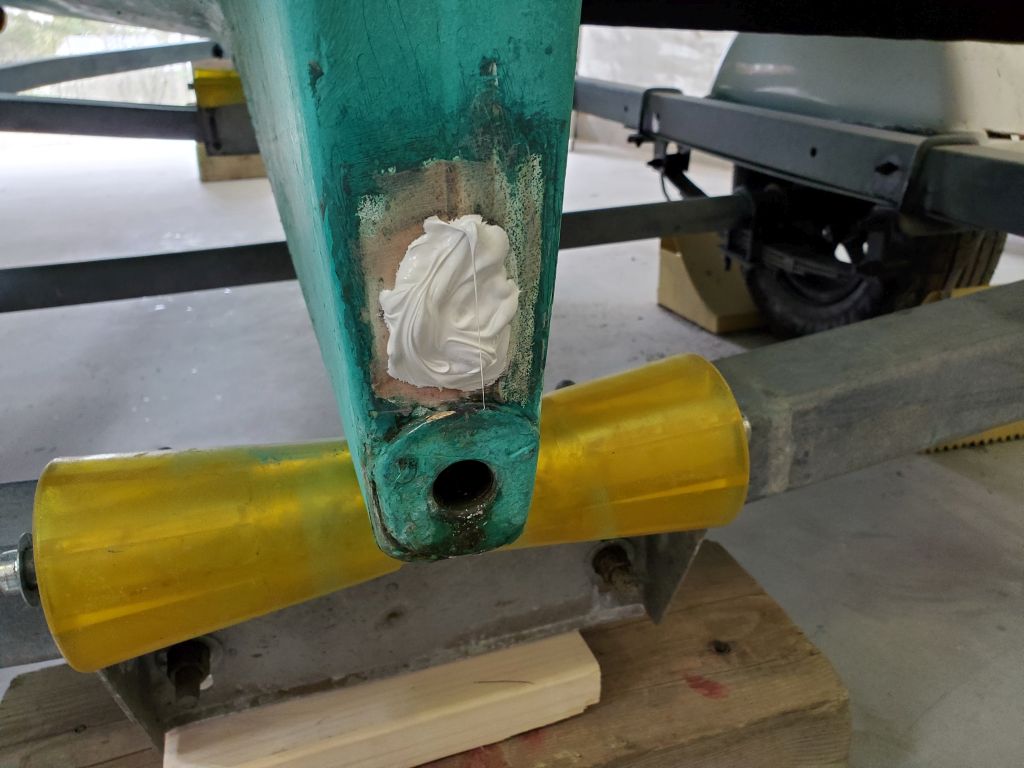
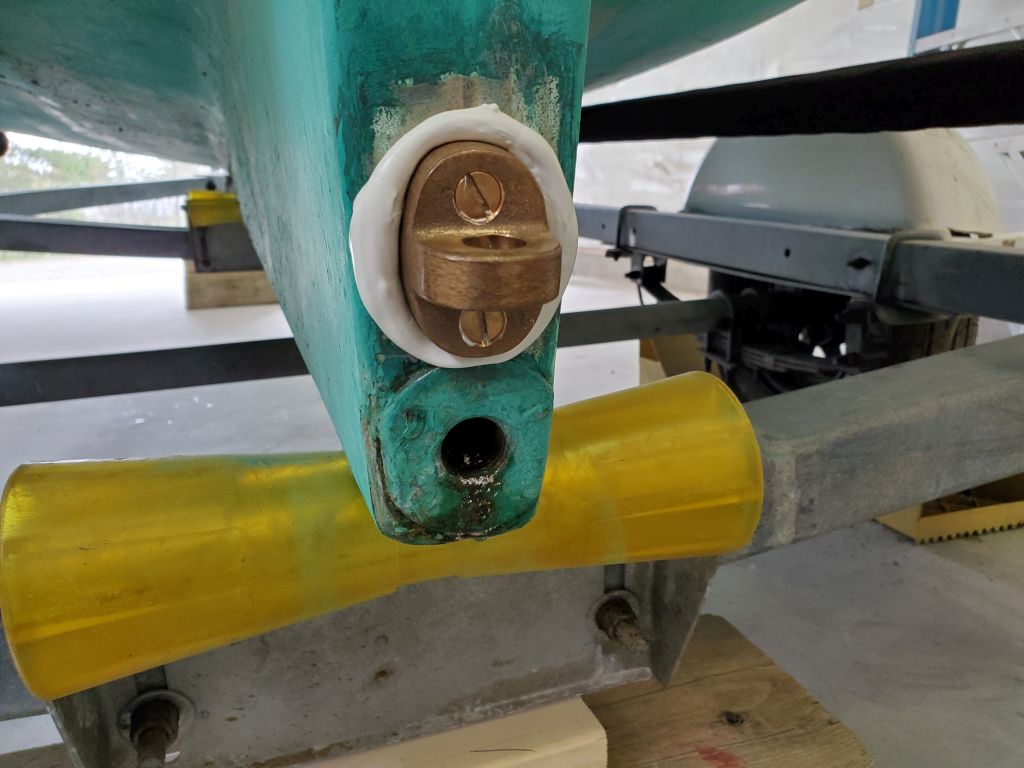
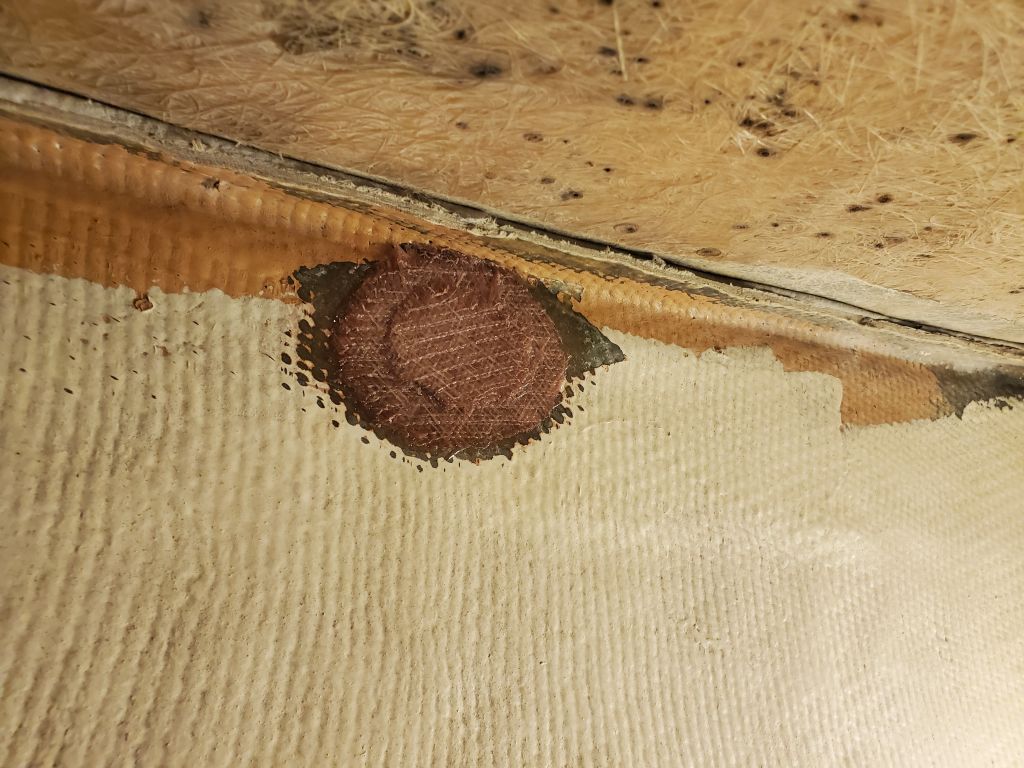
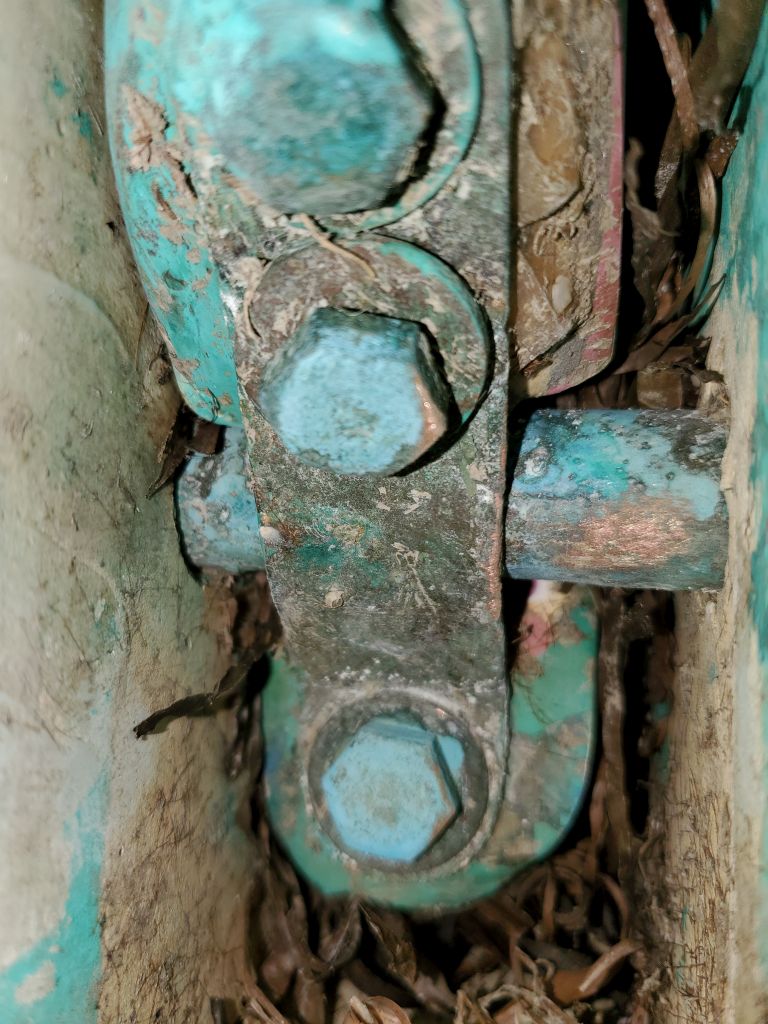
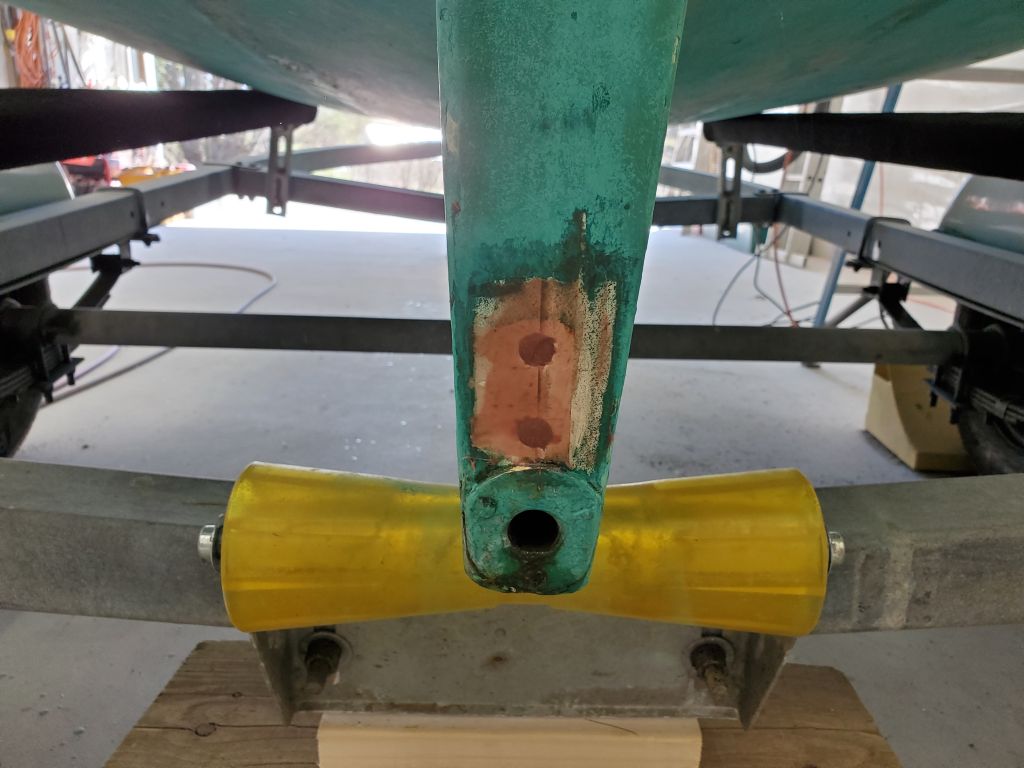
It wasn’t clear where the water came from, but the owner wondered if it was coming up from around the centerboard slot, or centerboard pin, or thereabouts.  However, while I had the boat in outdoor storage for some weeks leading up to the project, during which time the boat filled partially with rain (and snow) water, I noticed that water was slowly draining out of the cockpit, and dripping ever so slowly from the sump drain in the keel.

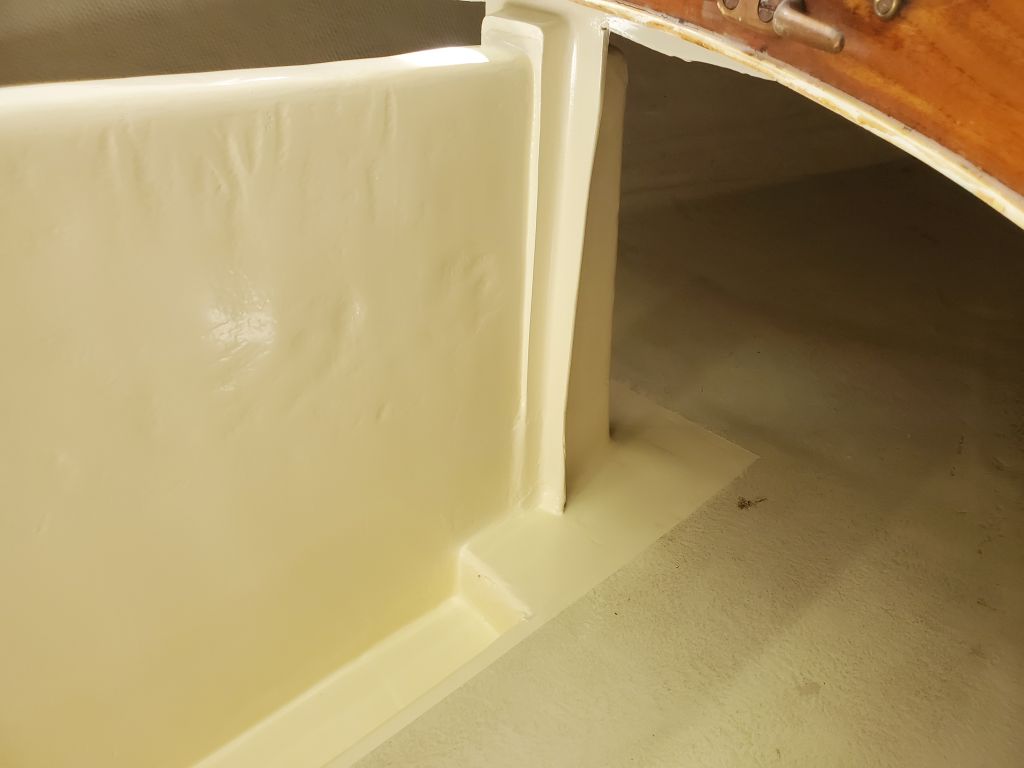
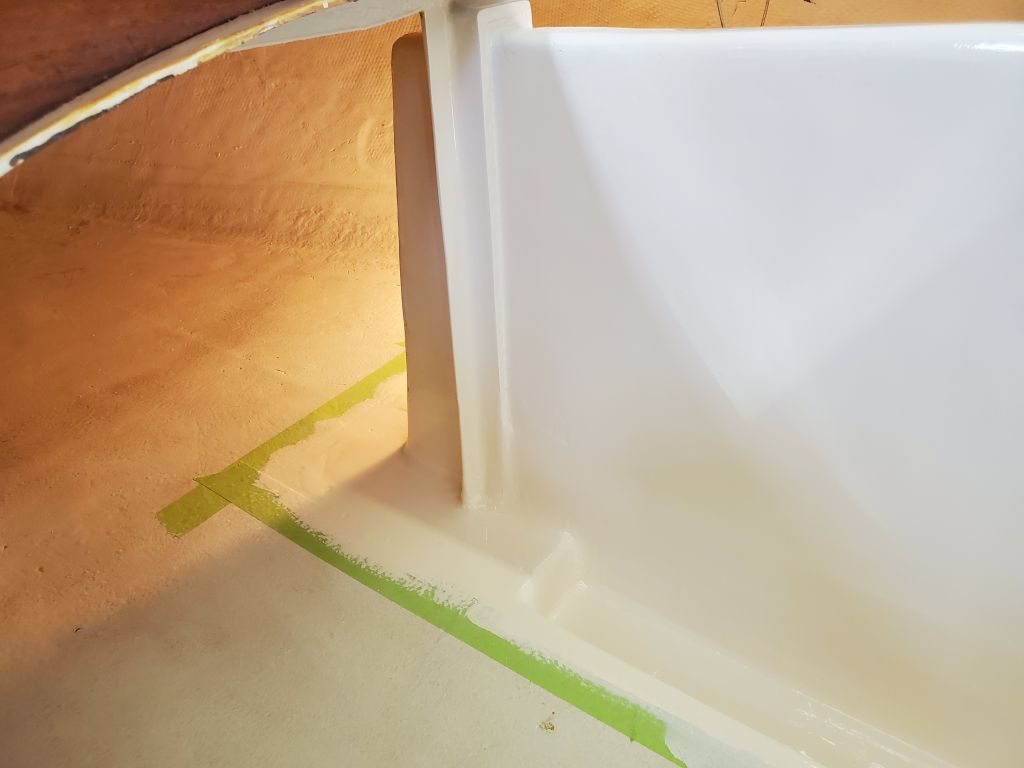
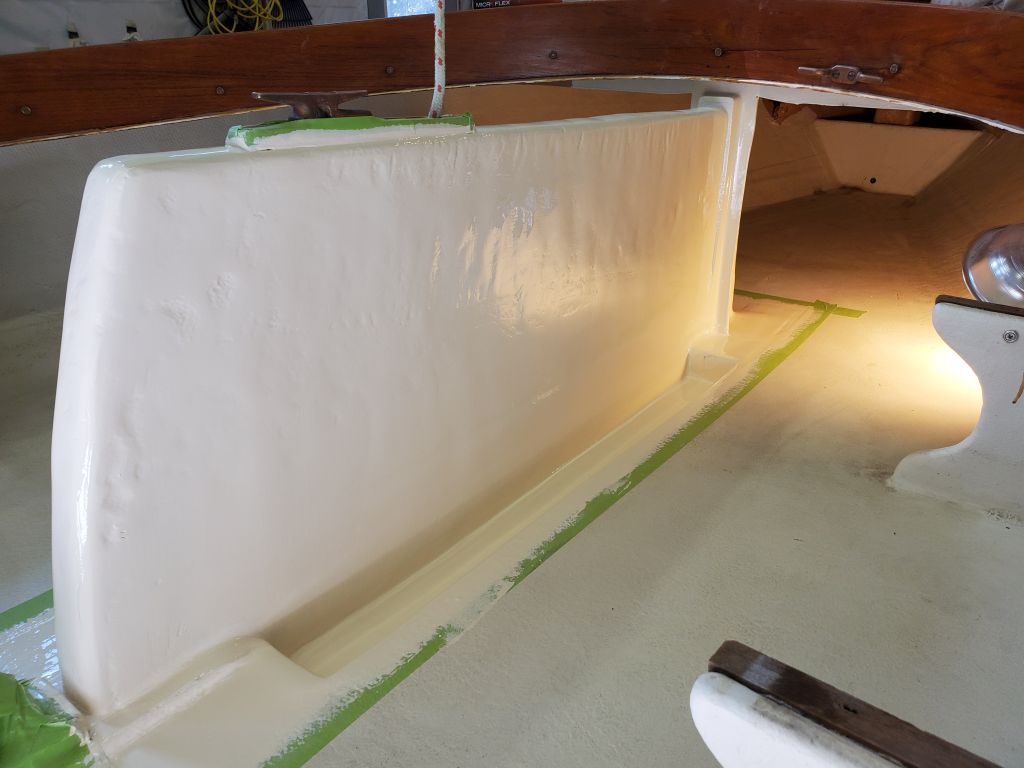
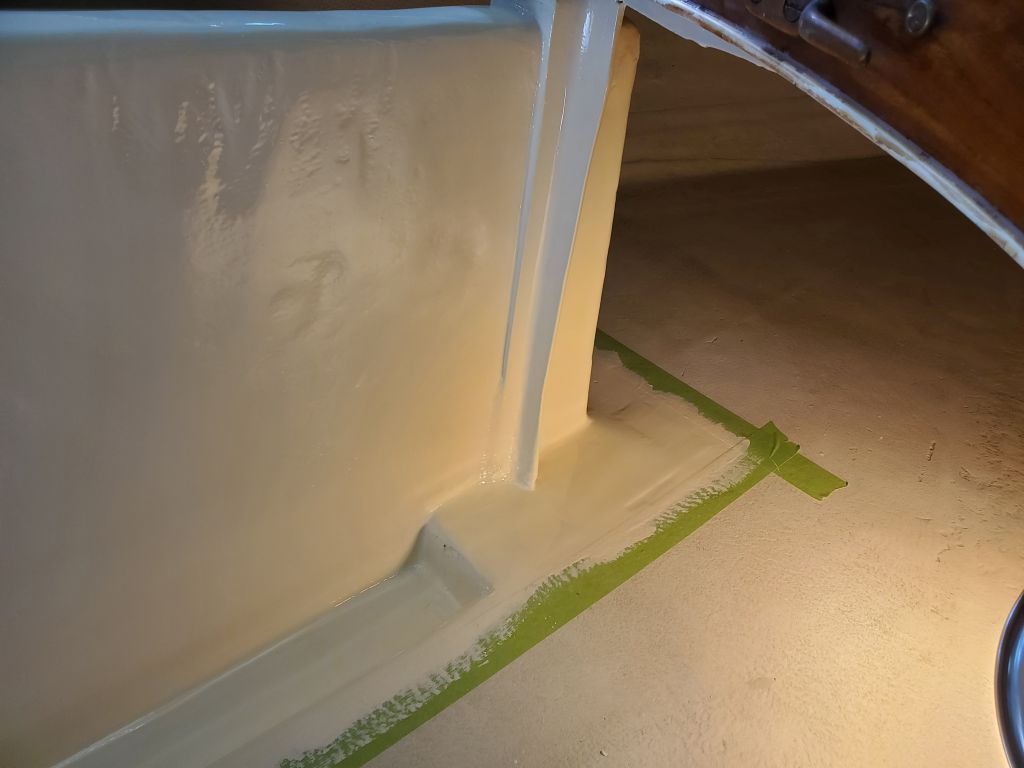
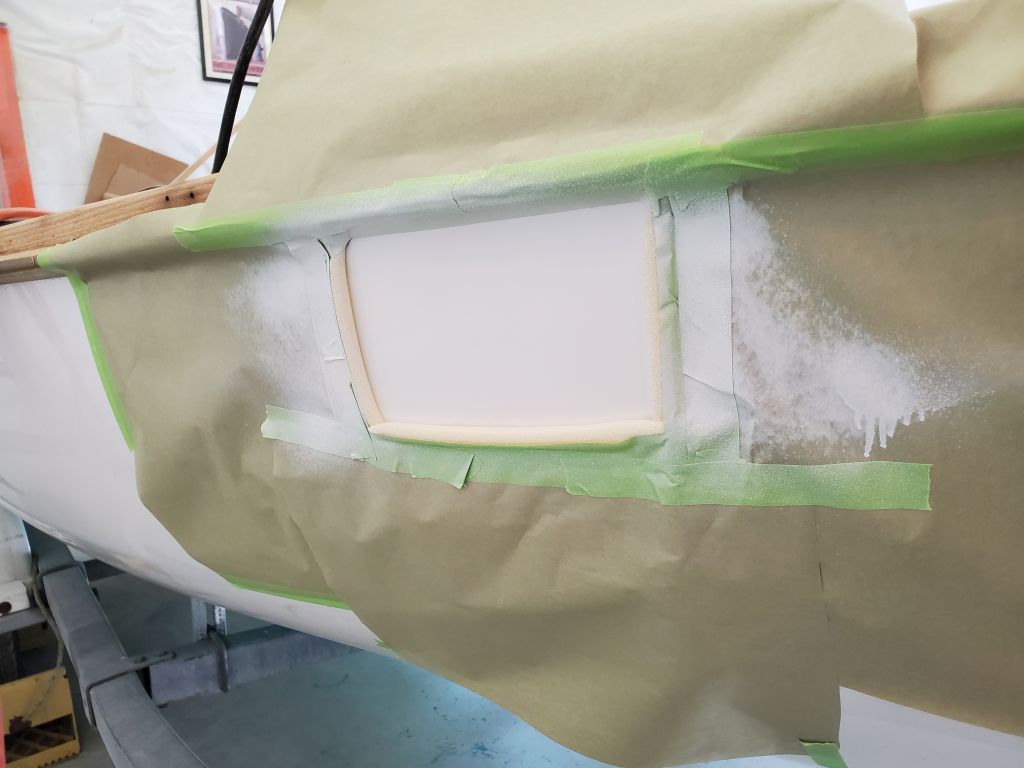
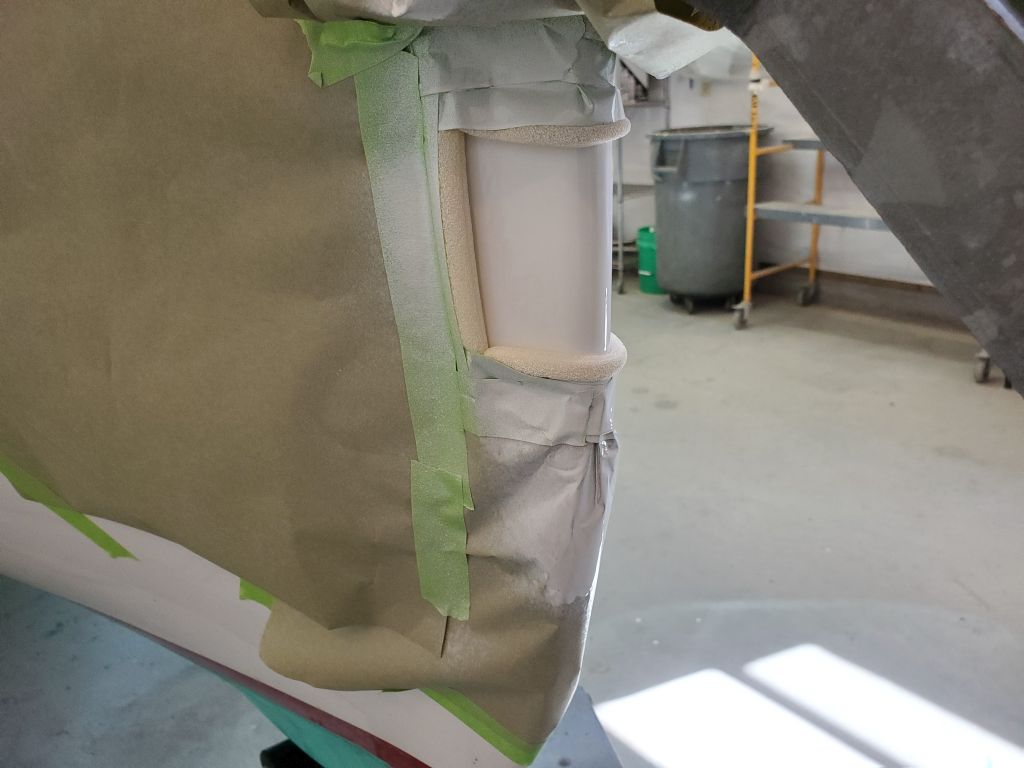
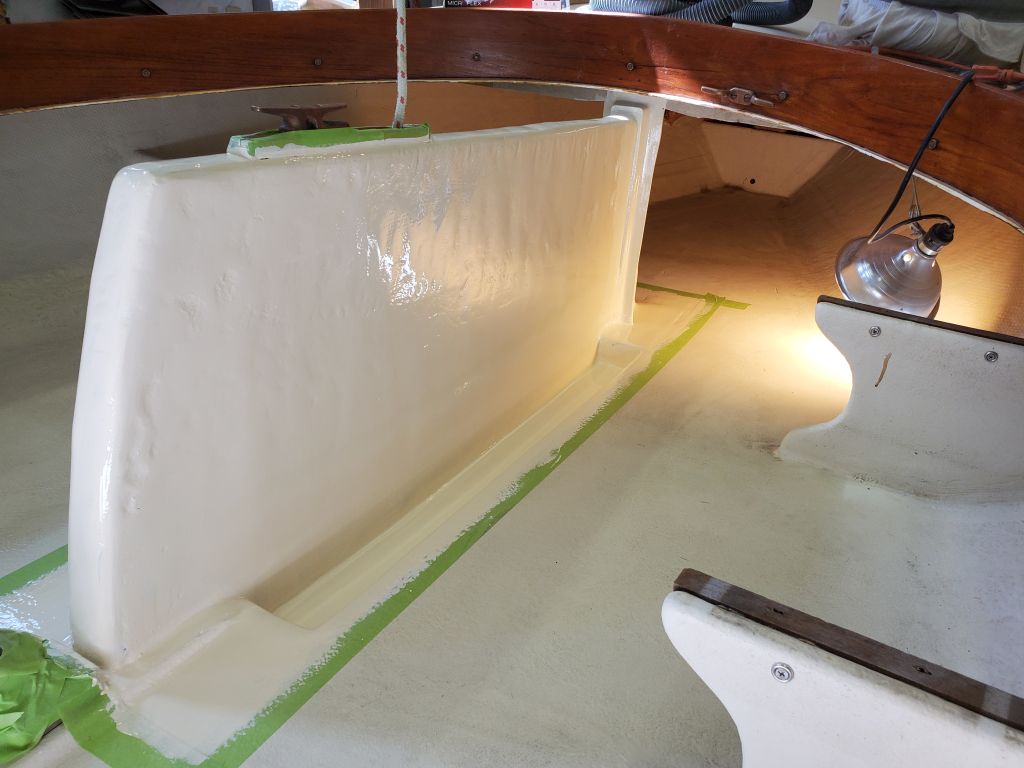
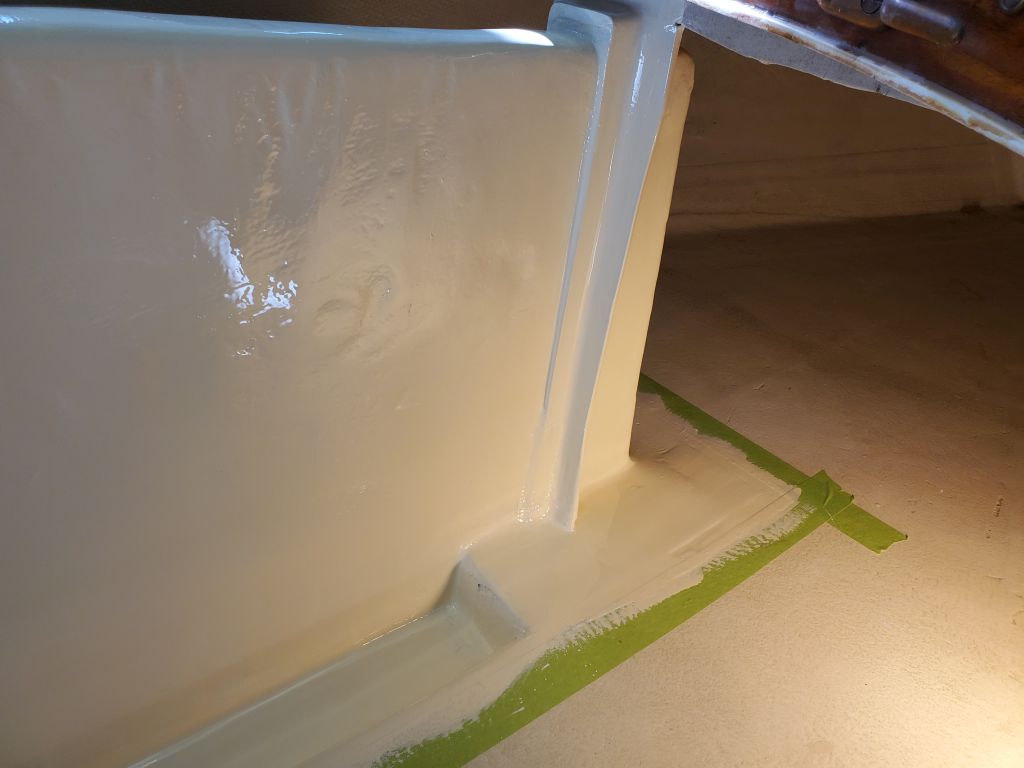
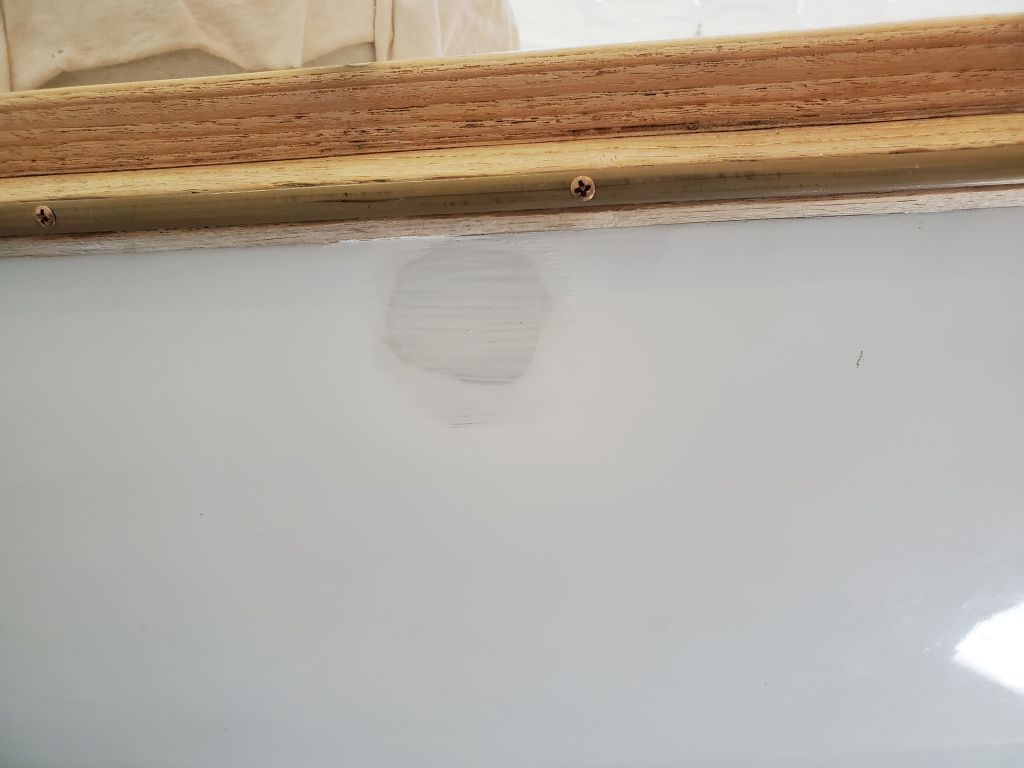
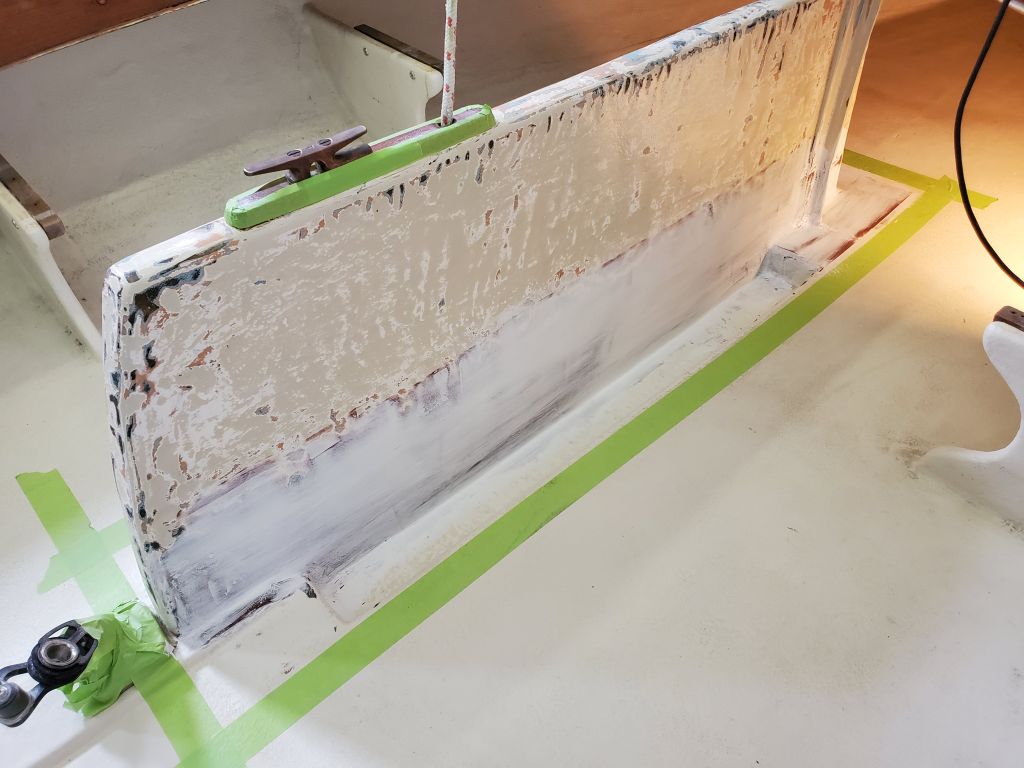
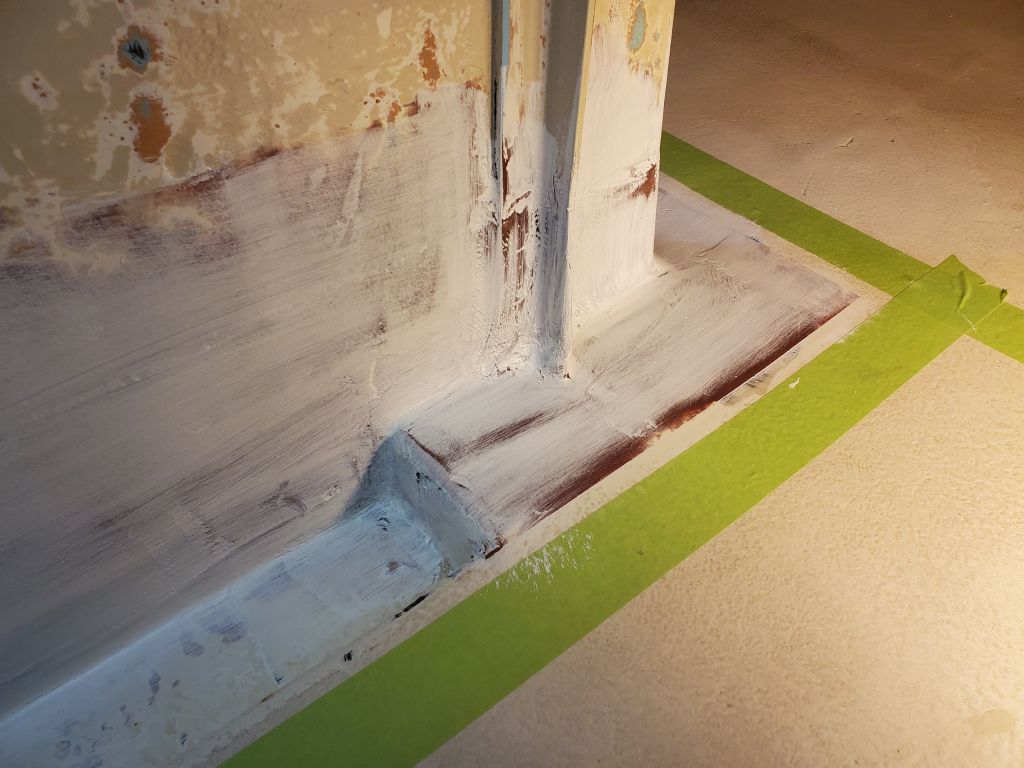
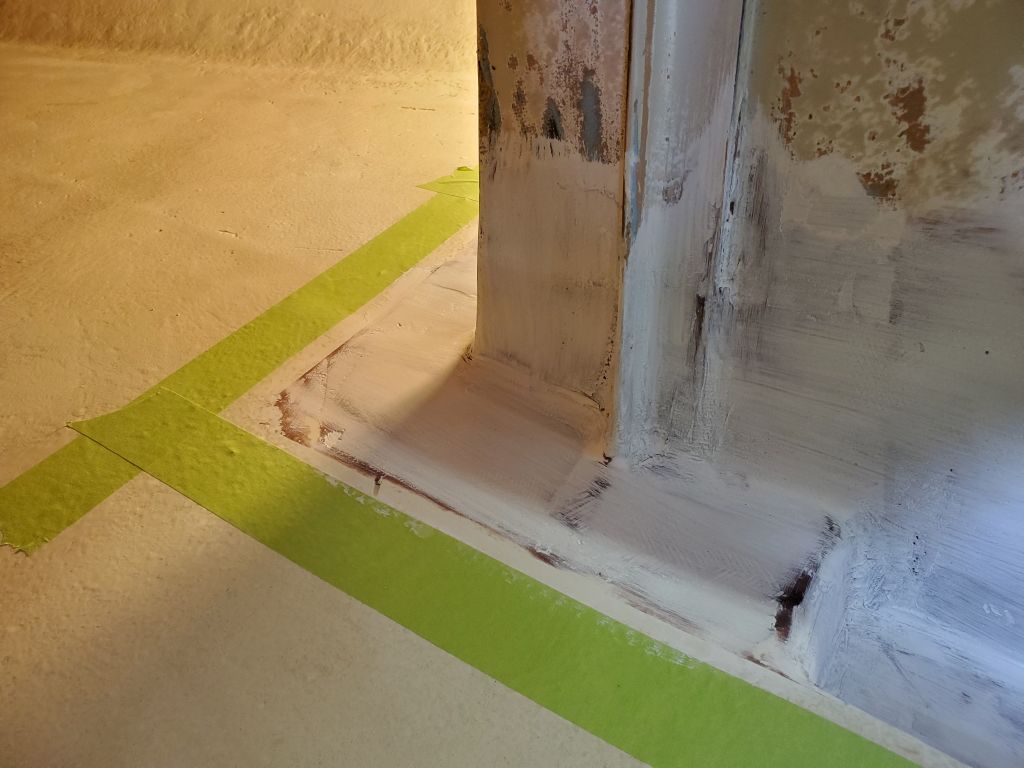
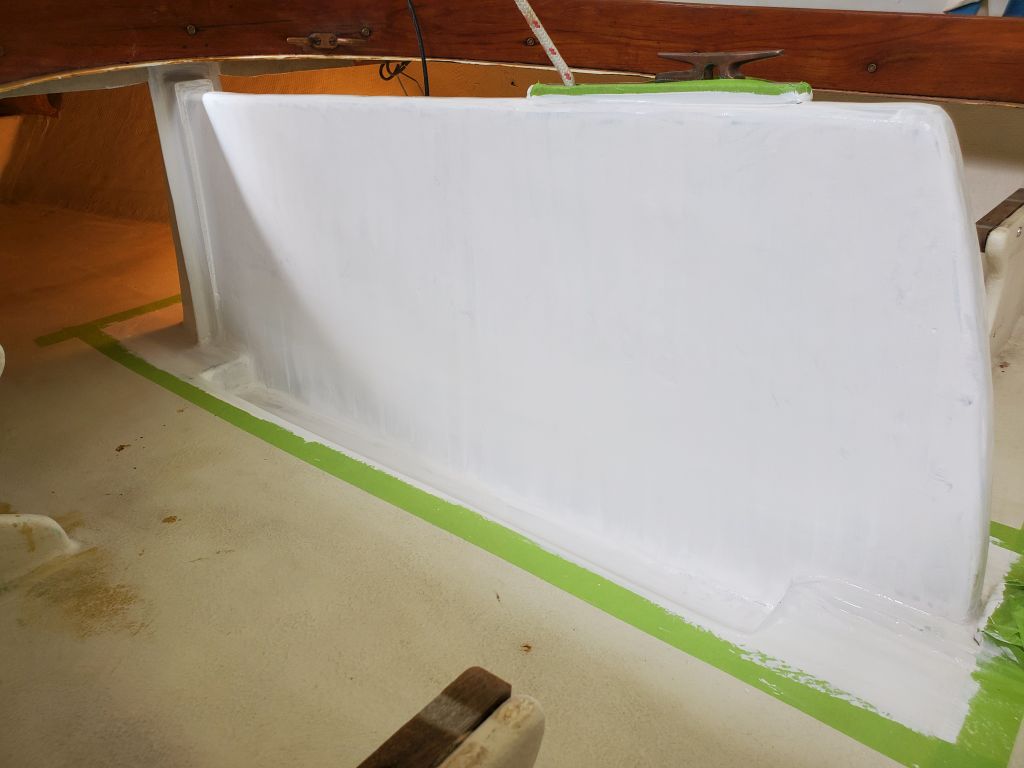
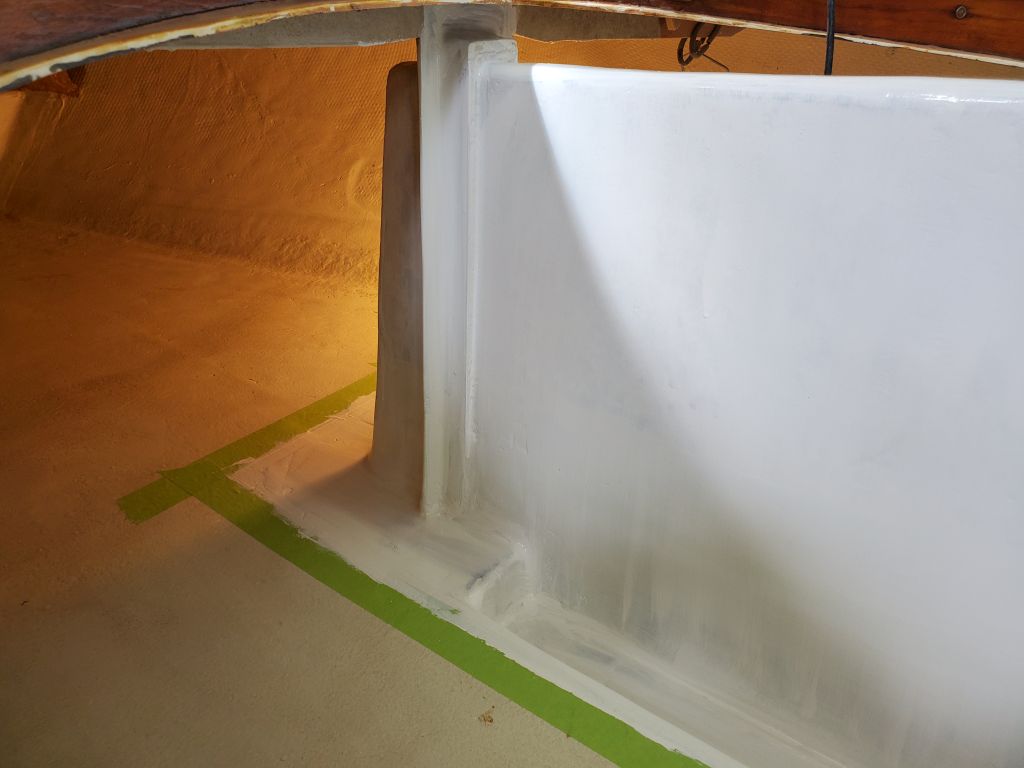
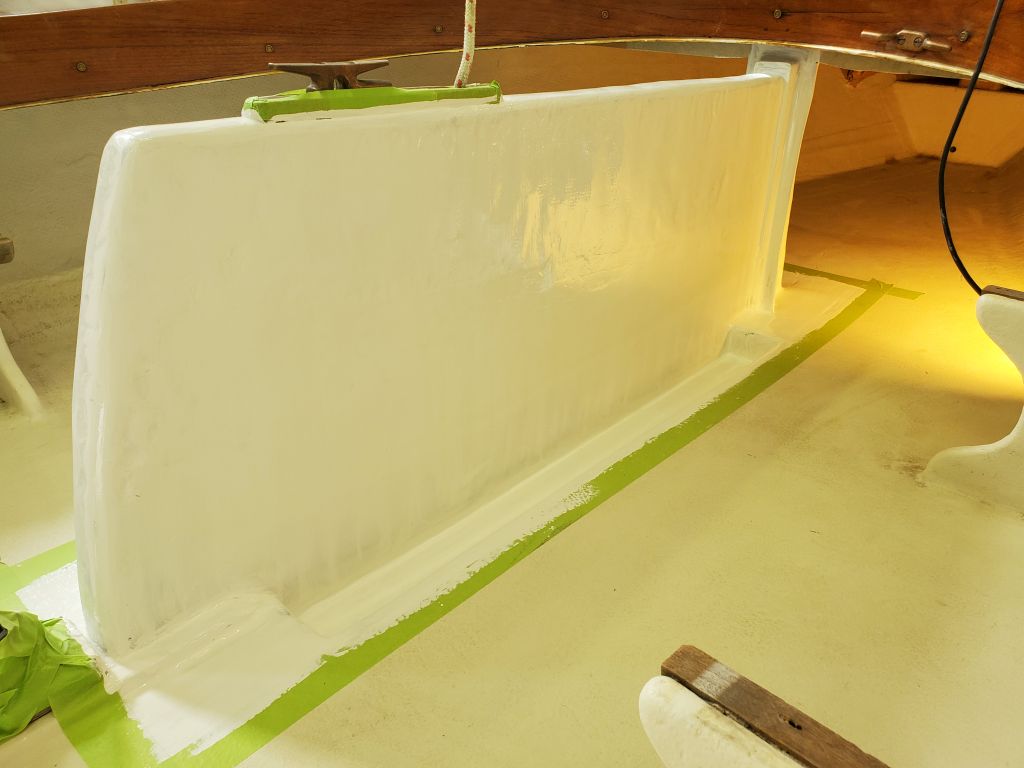
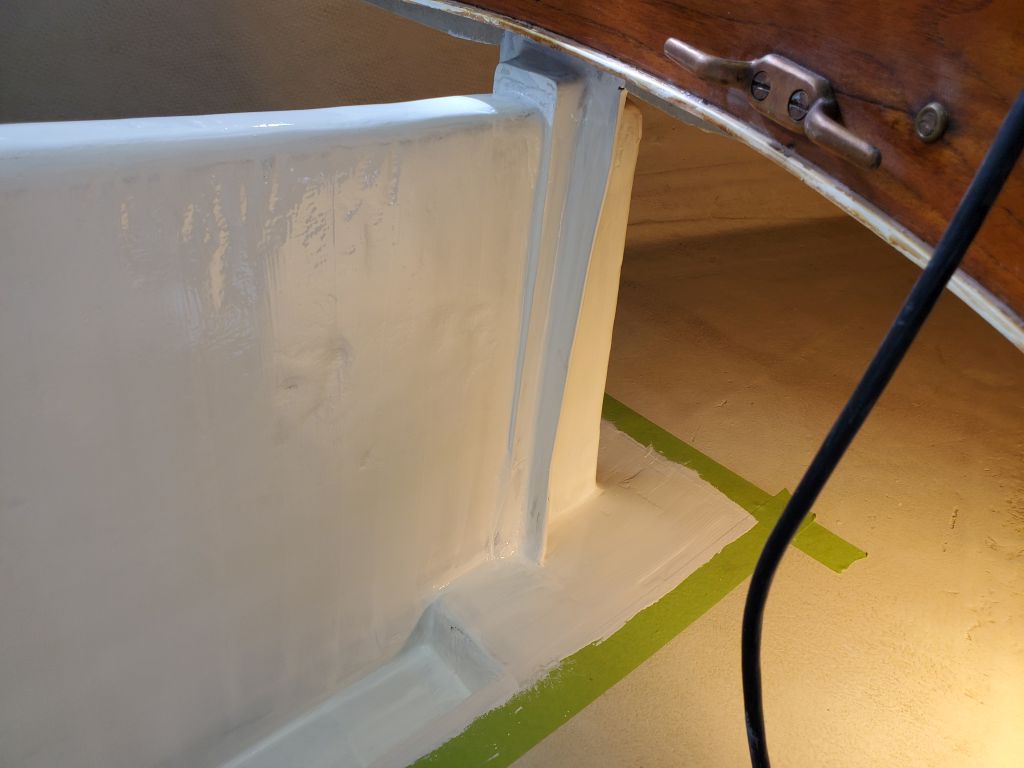
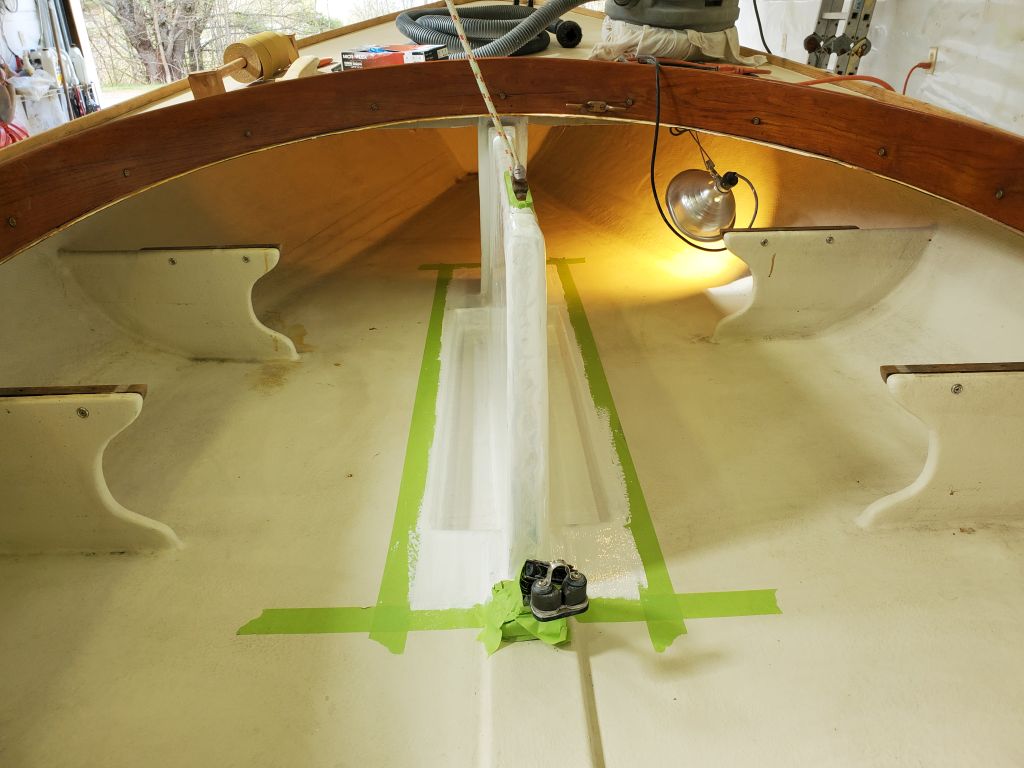
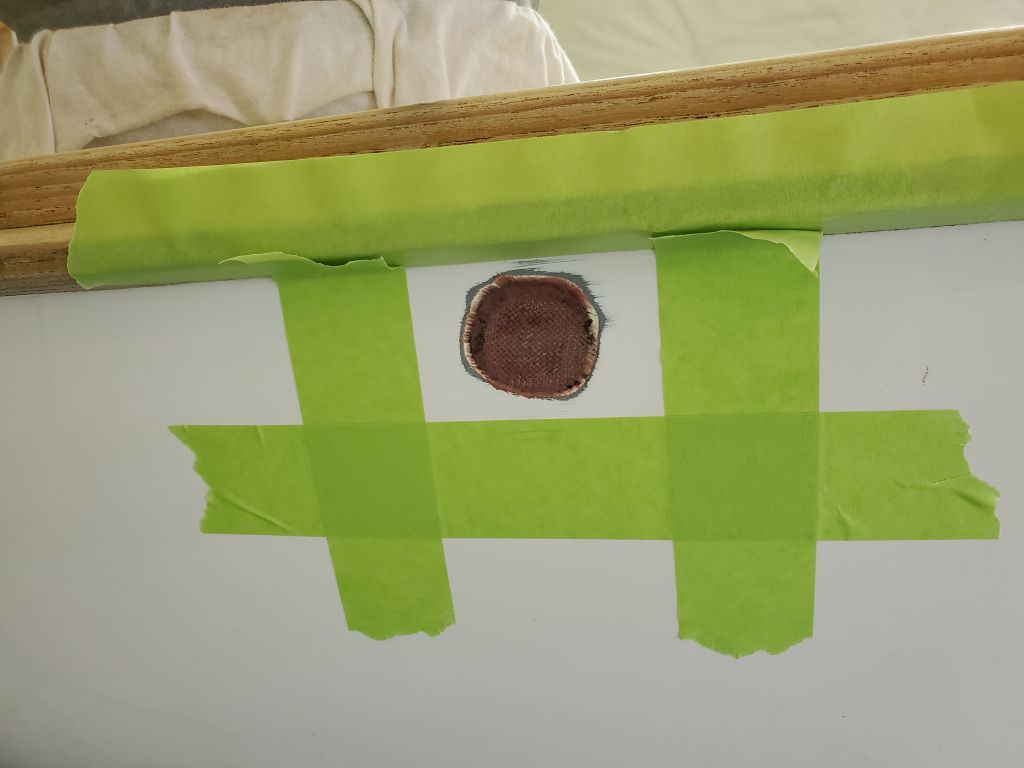
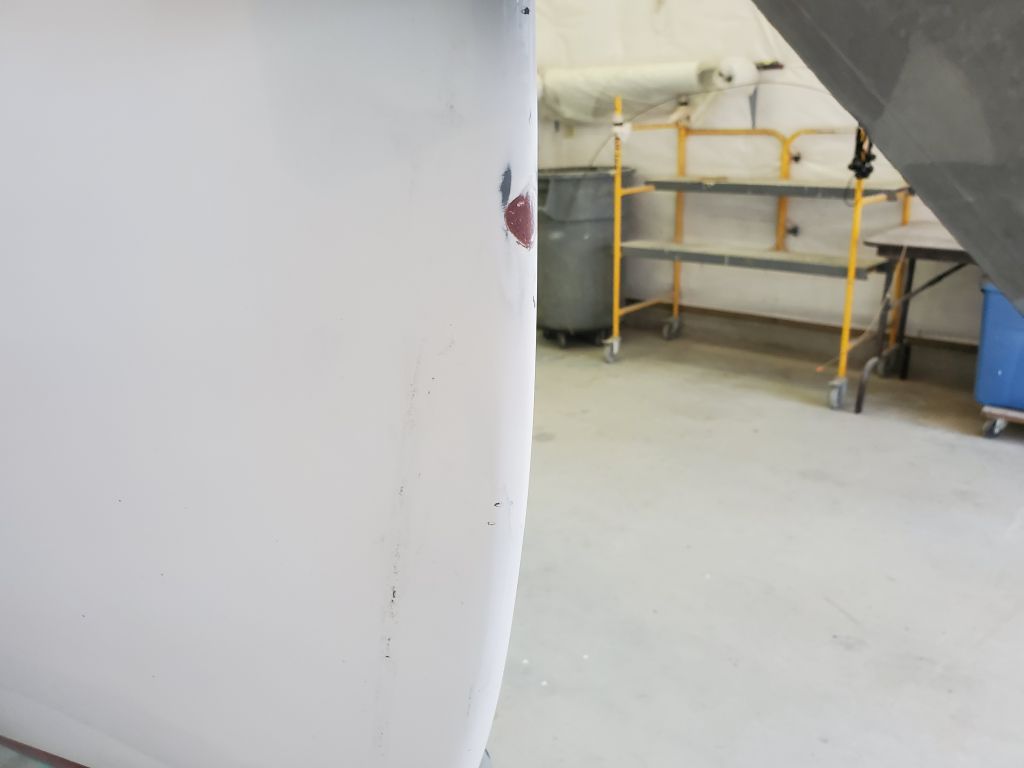
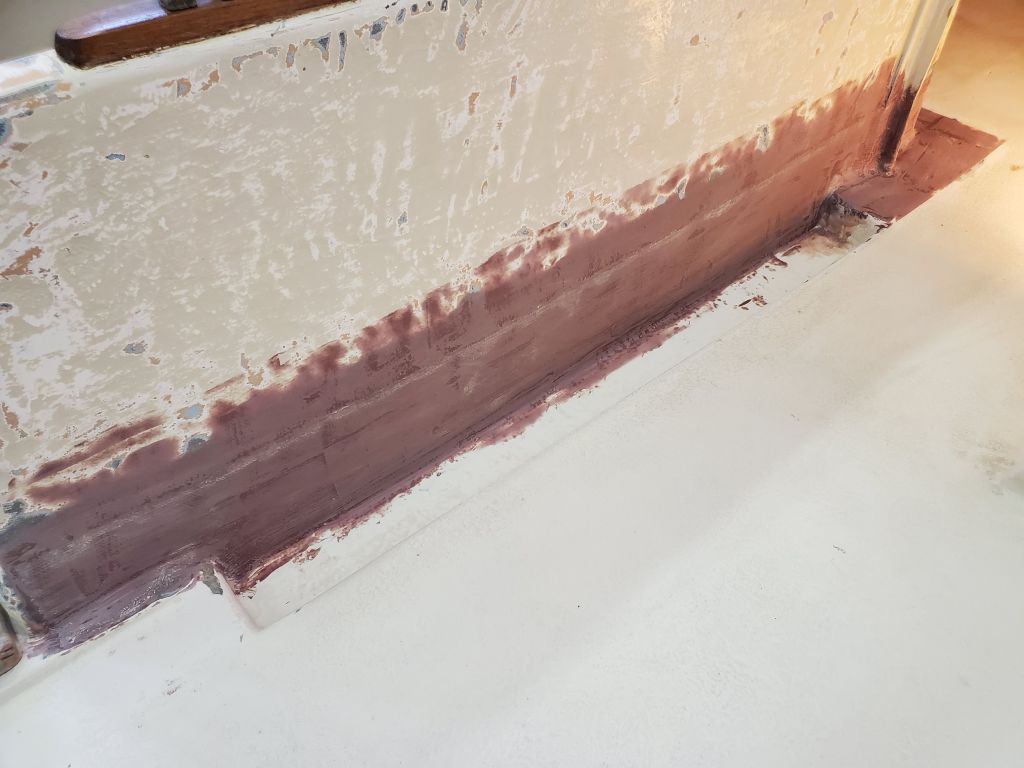
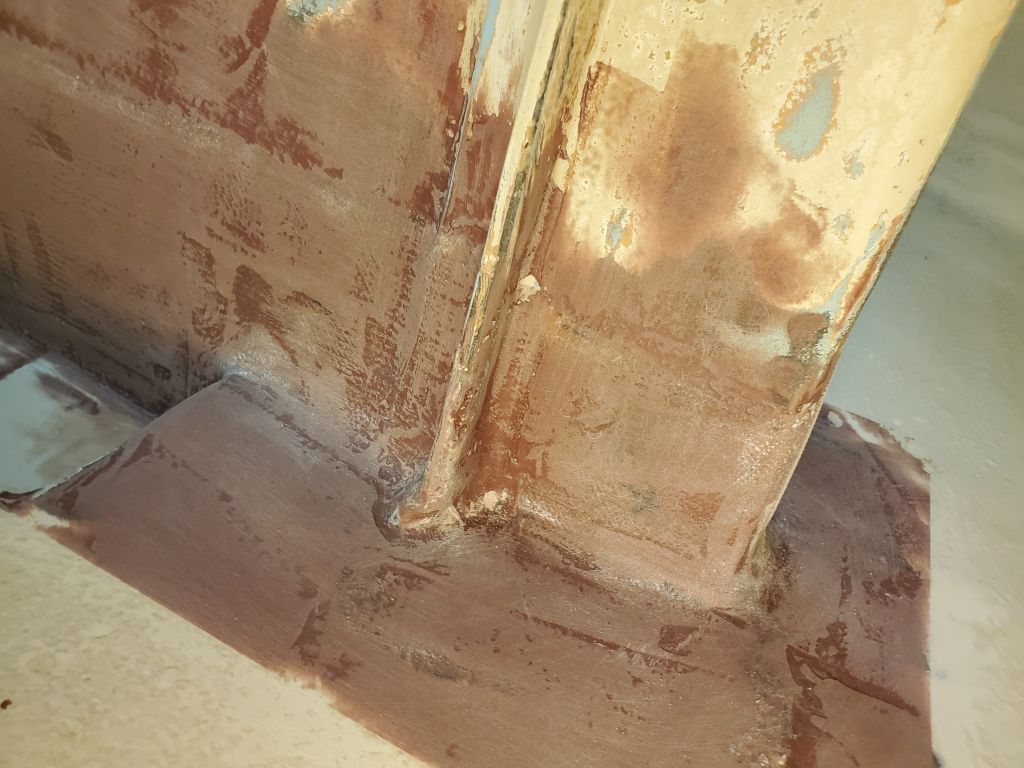
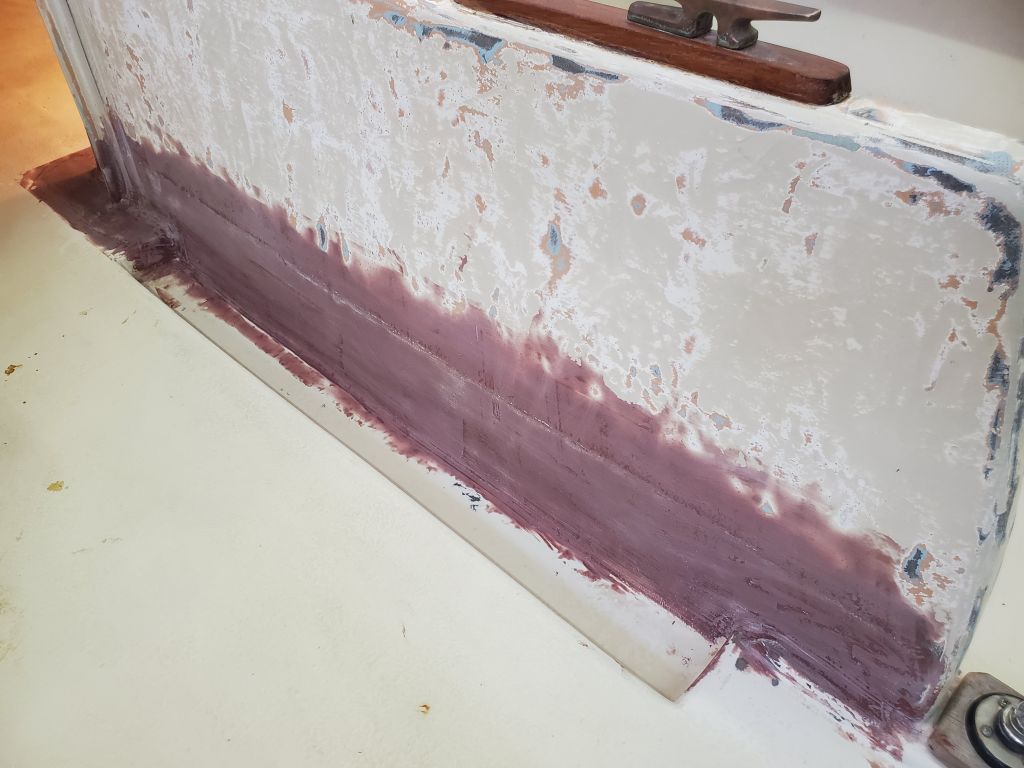
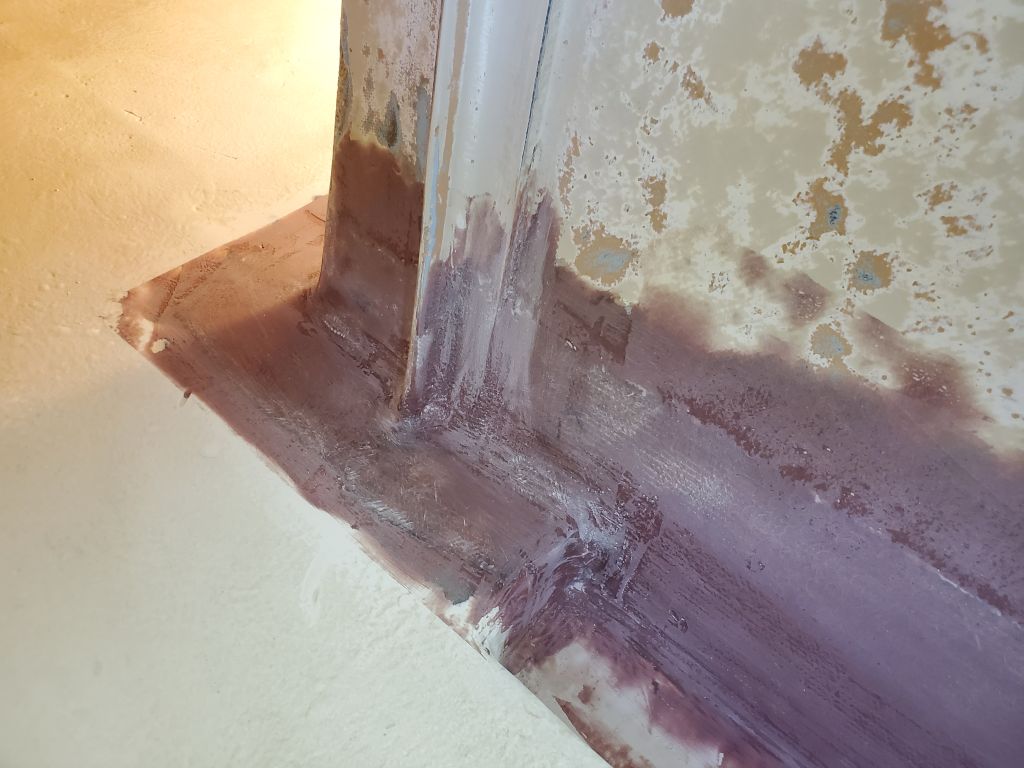
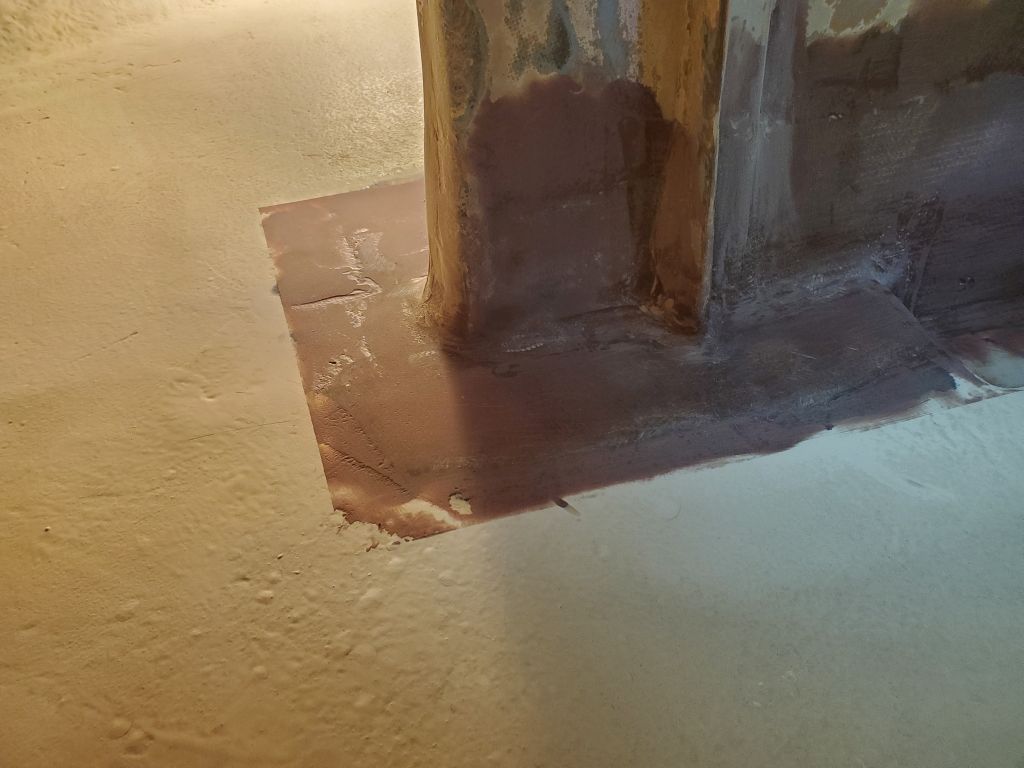
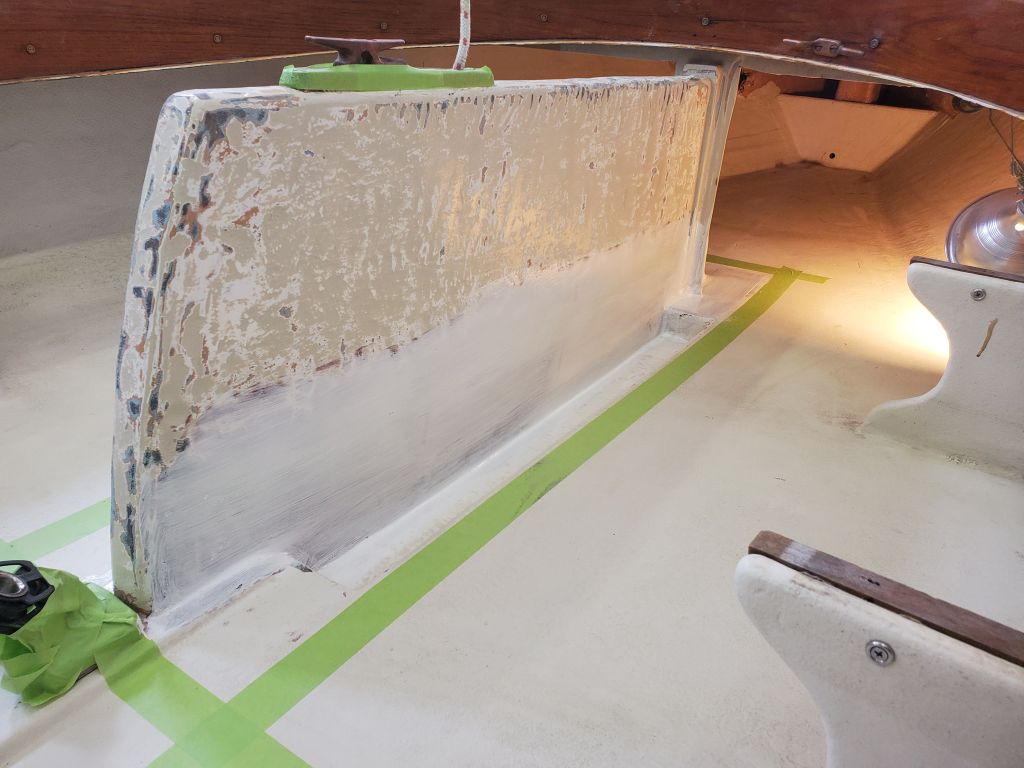
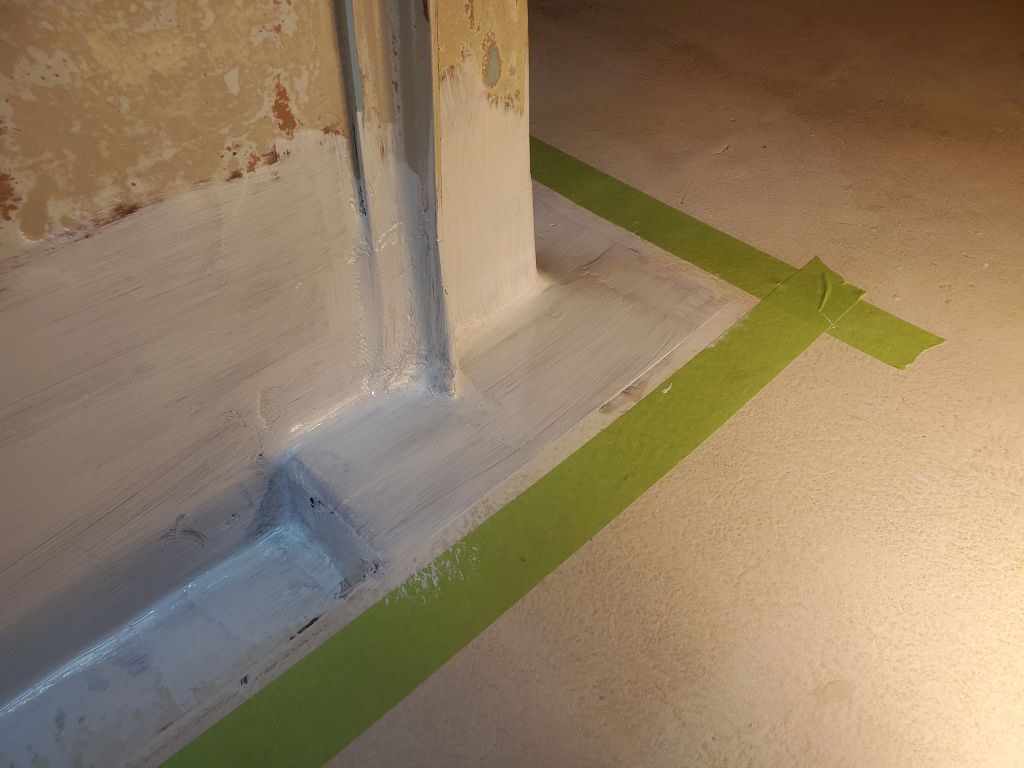
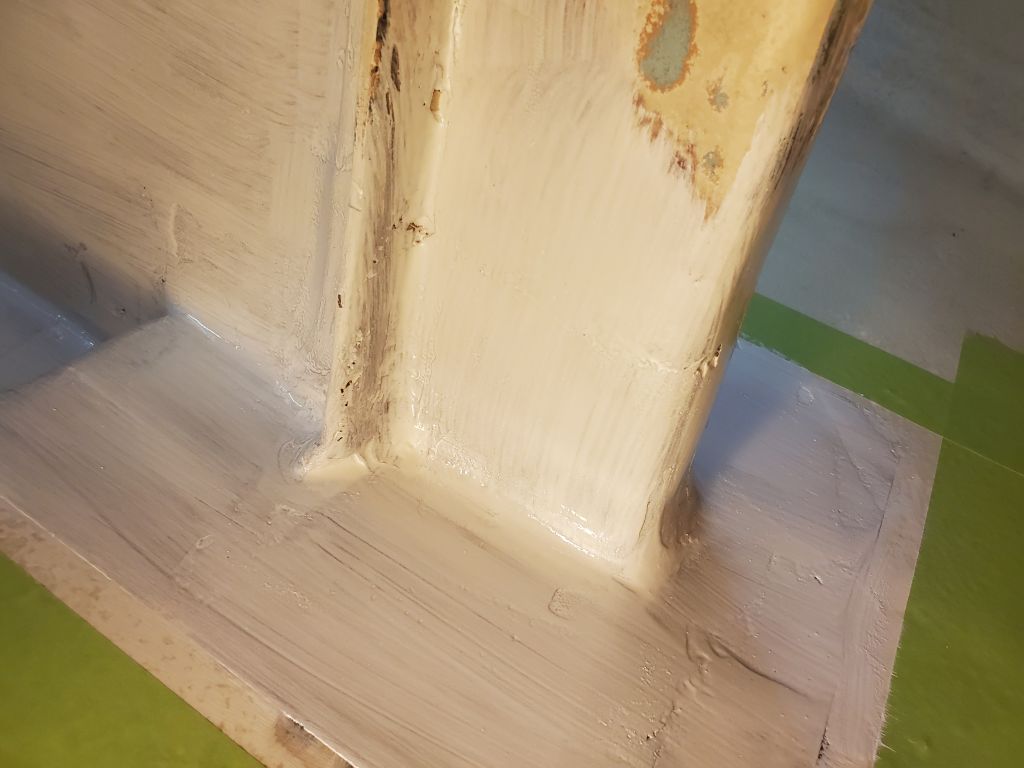
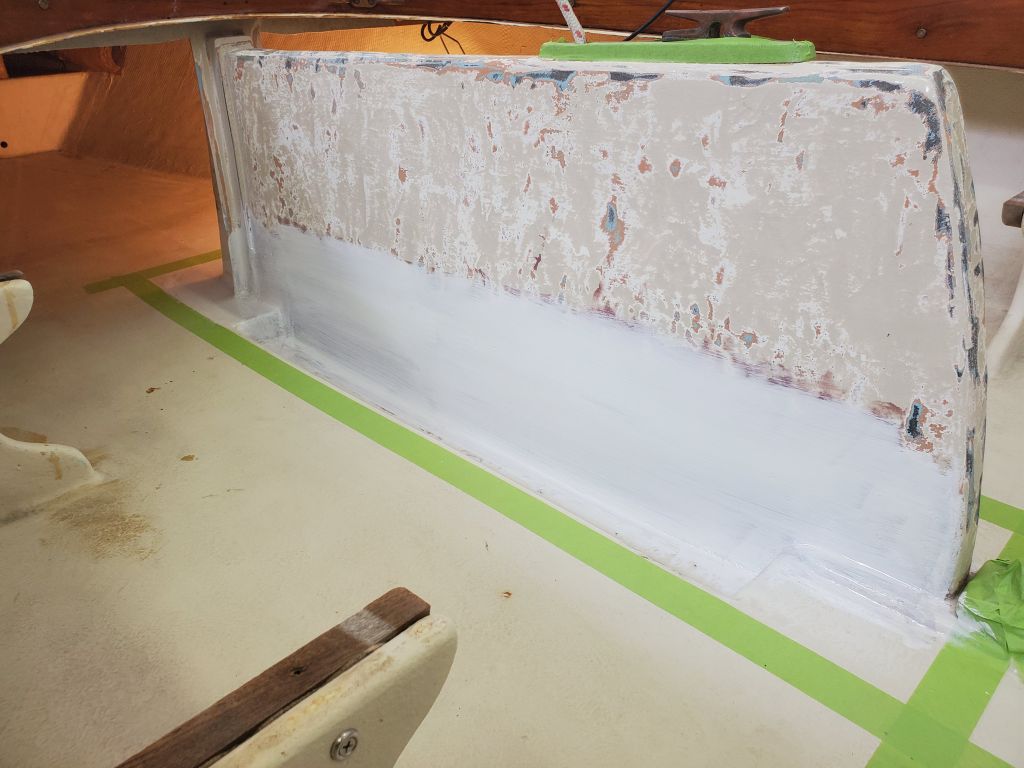
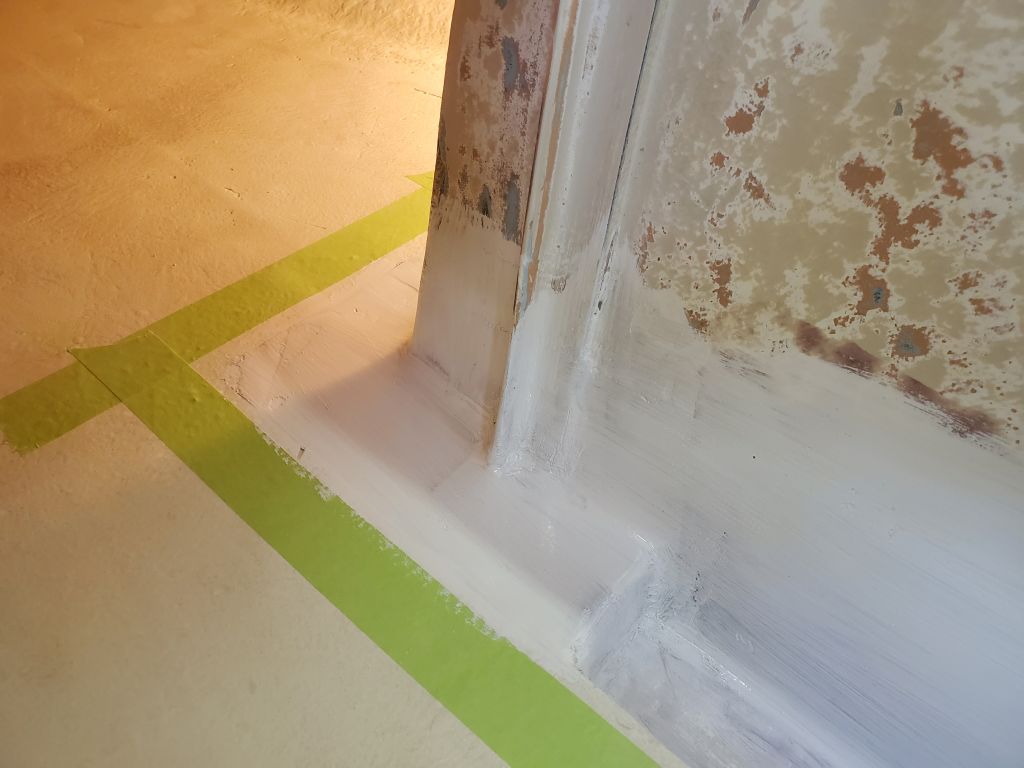
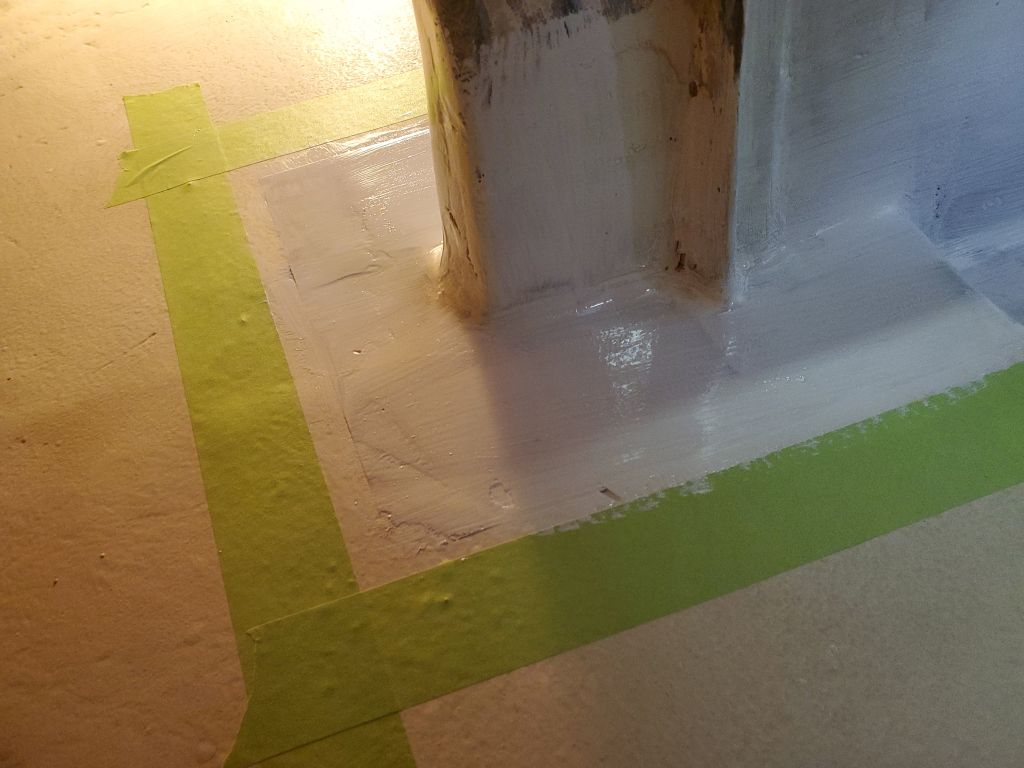
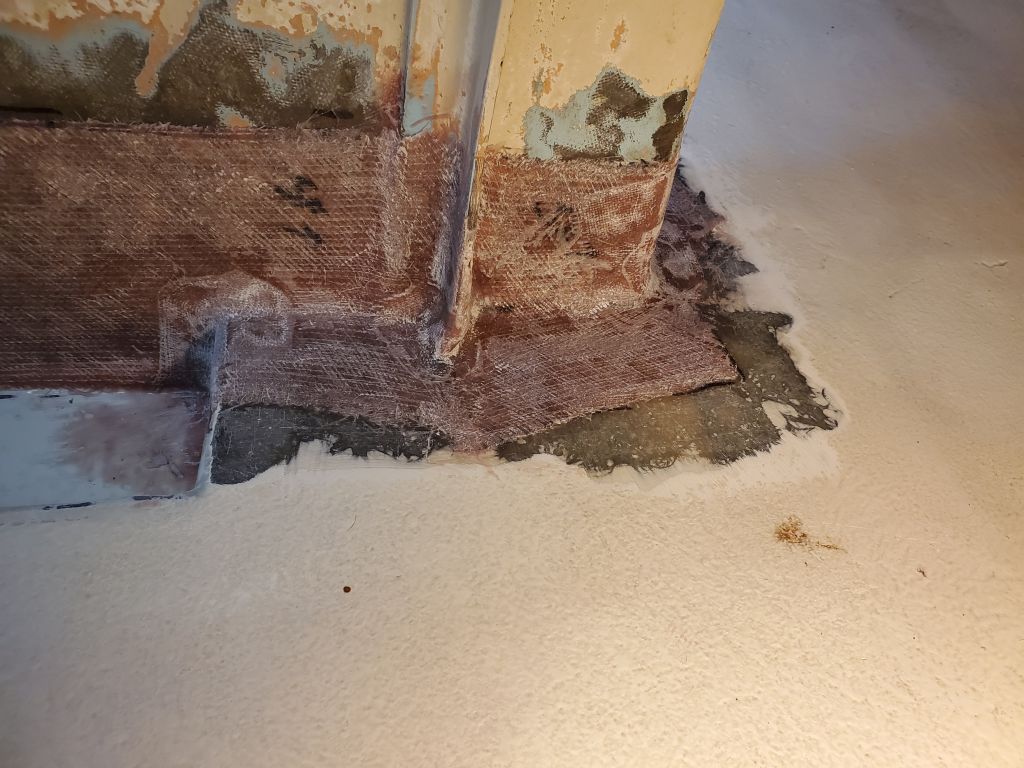
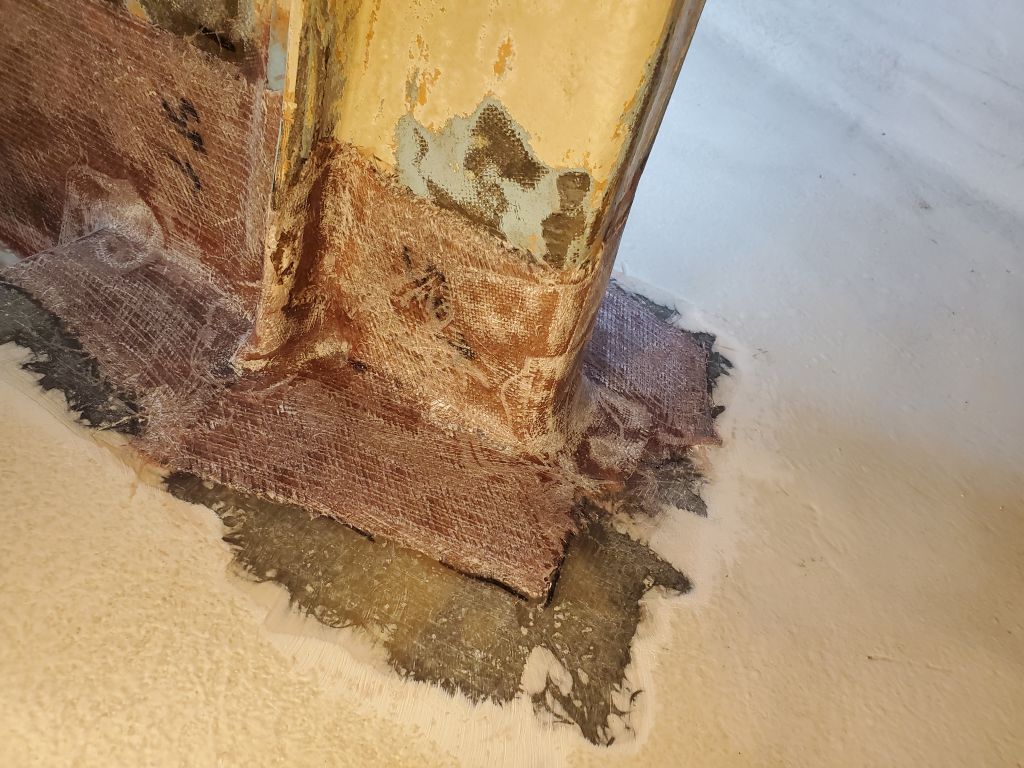
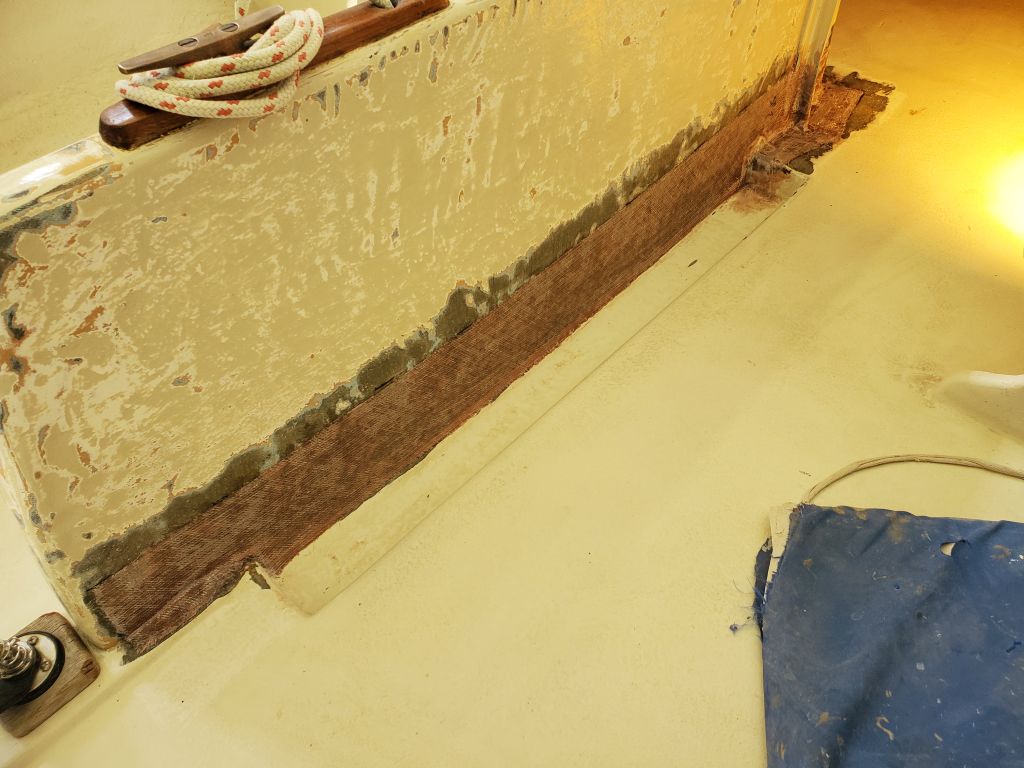
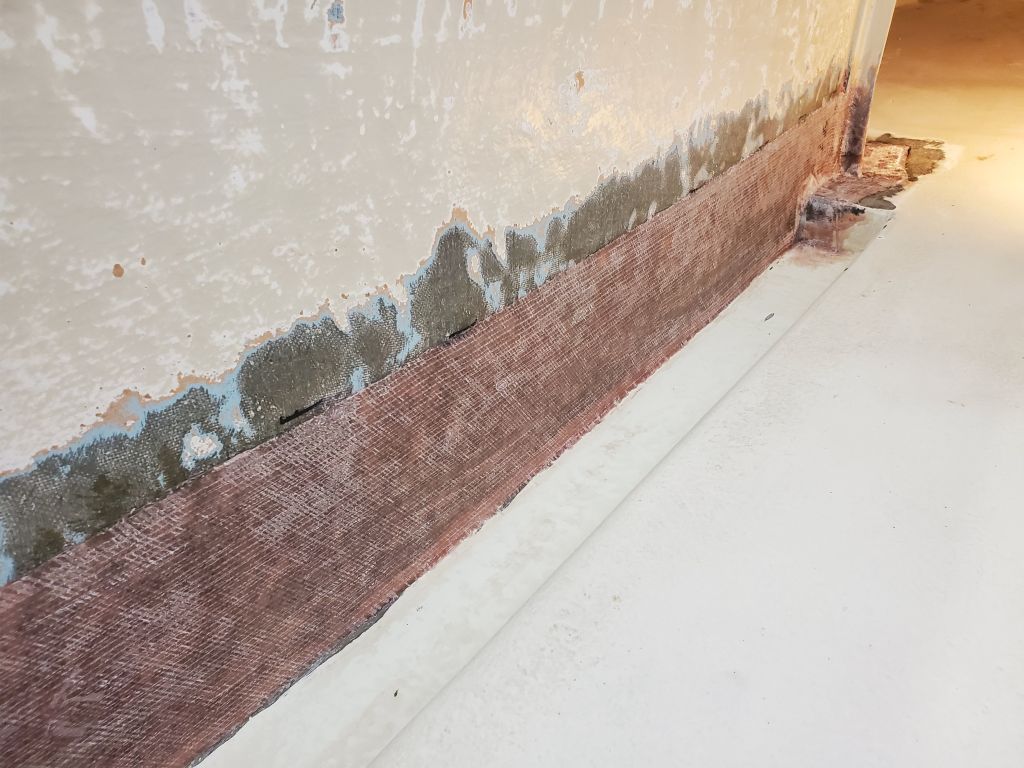
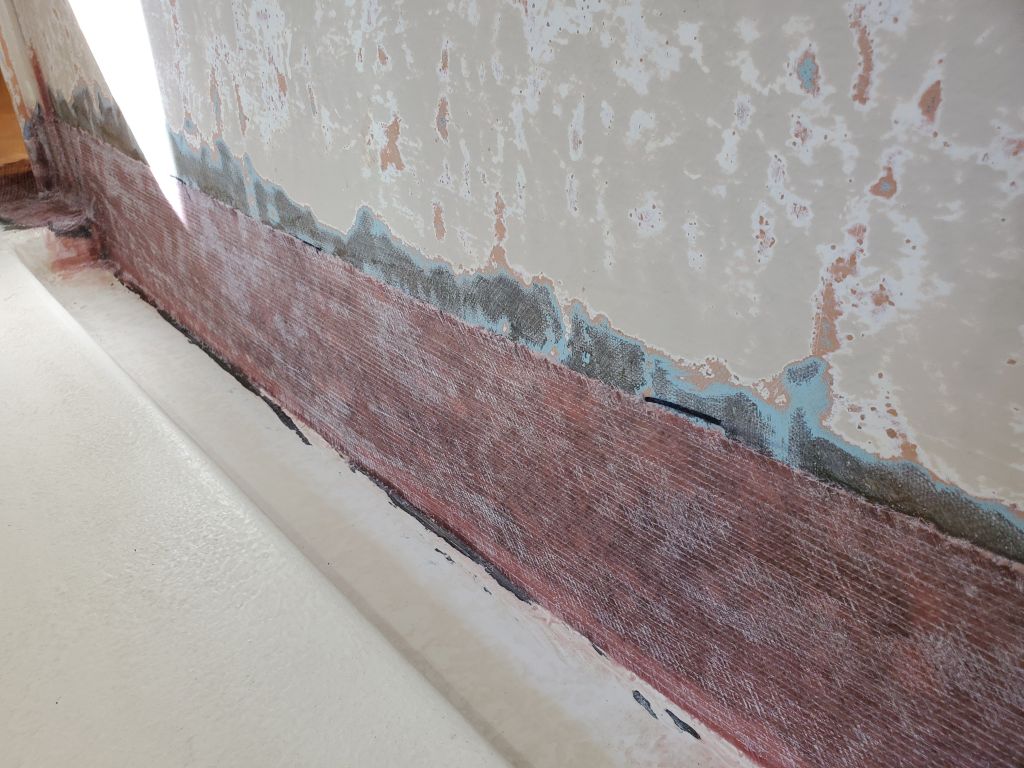
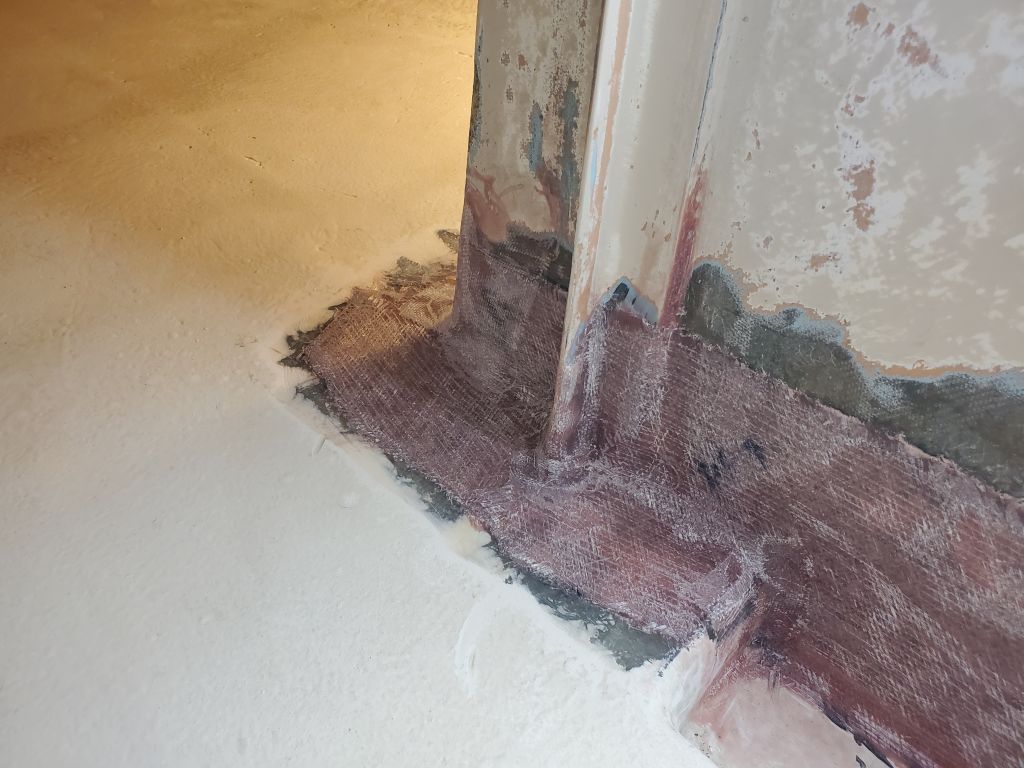
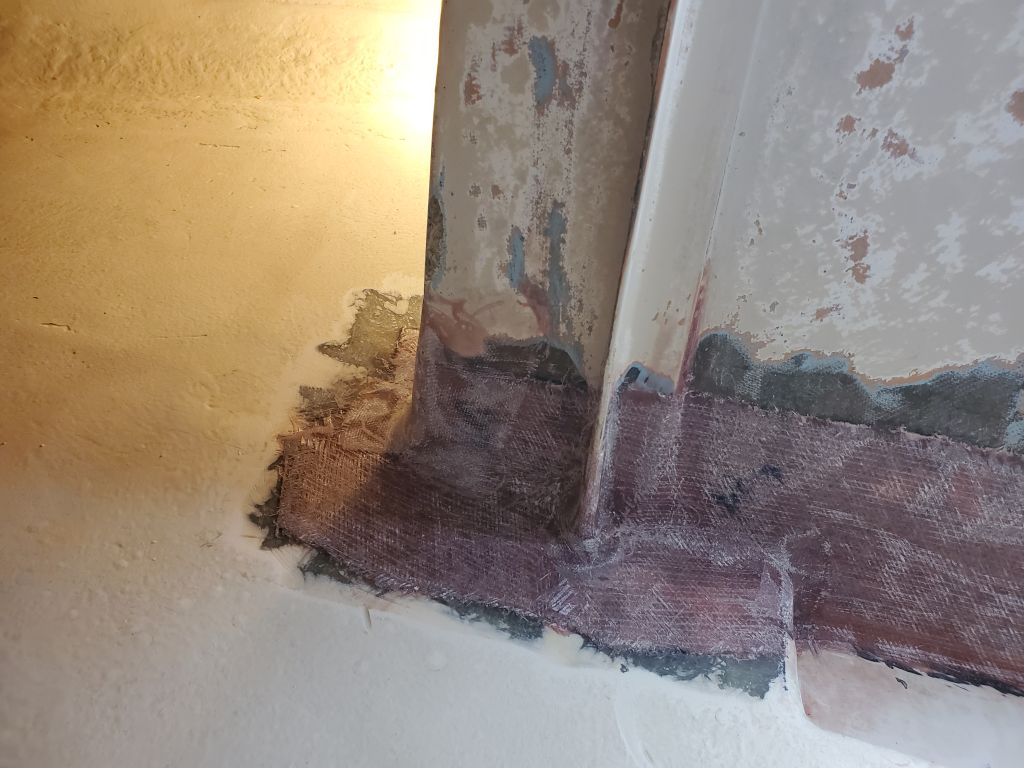
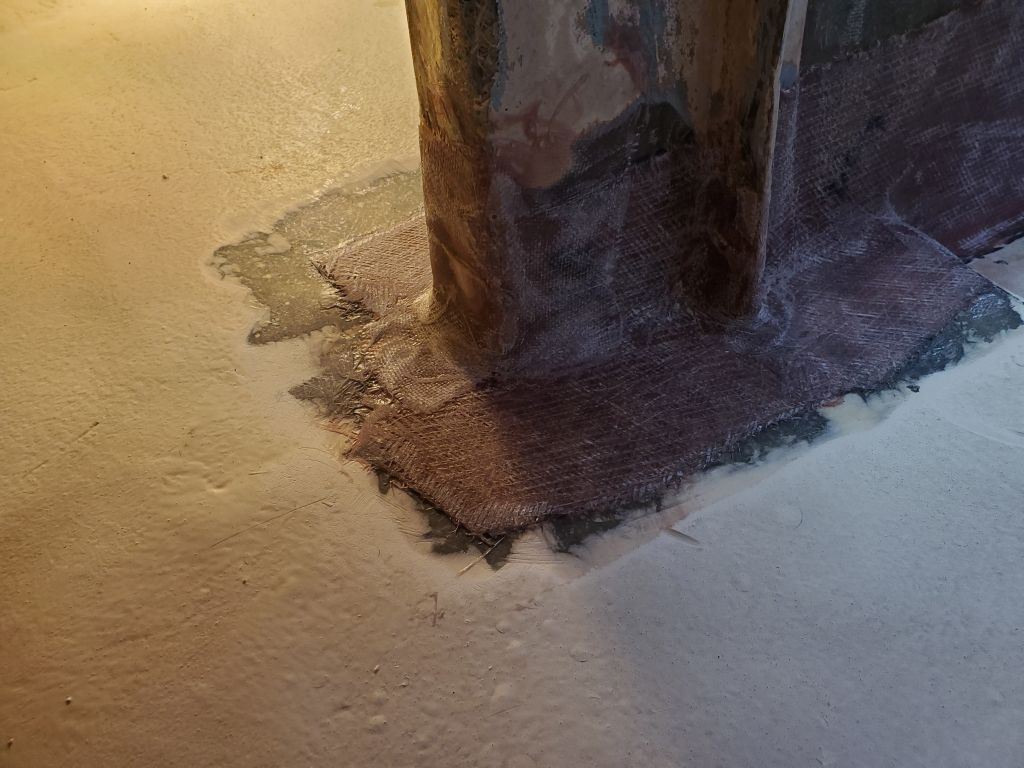
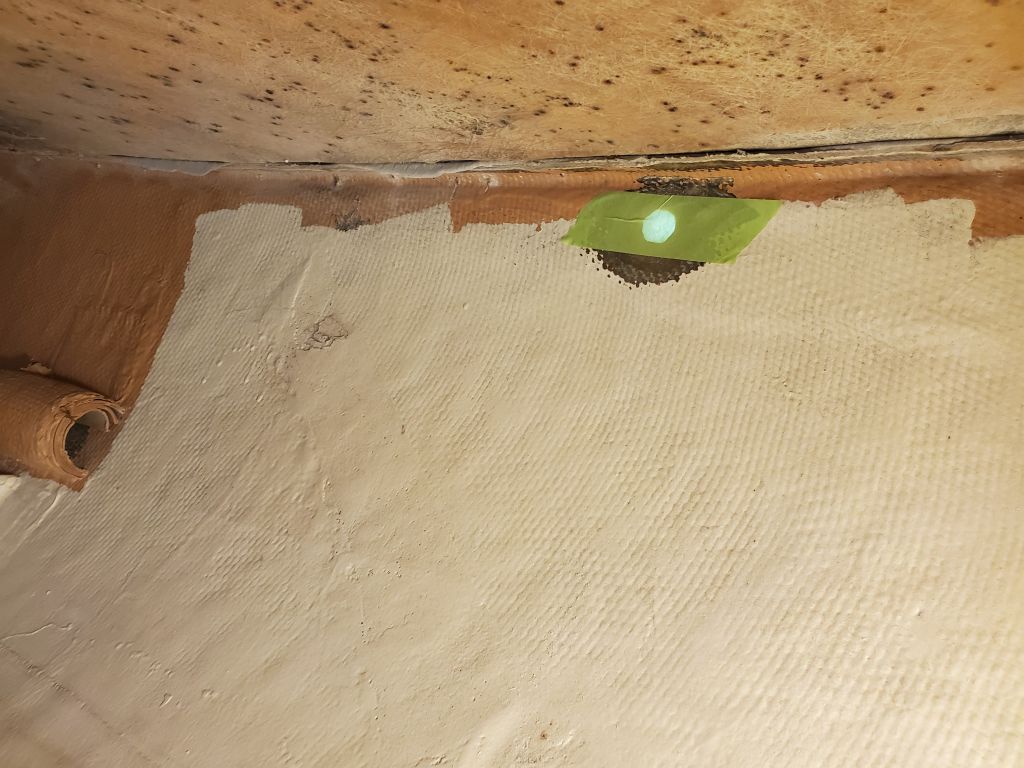
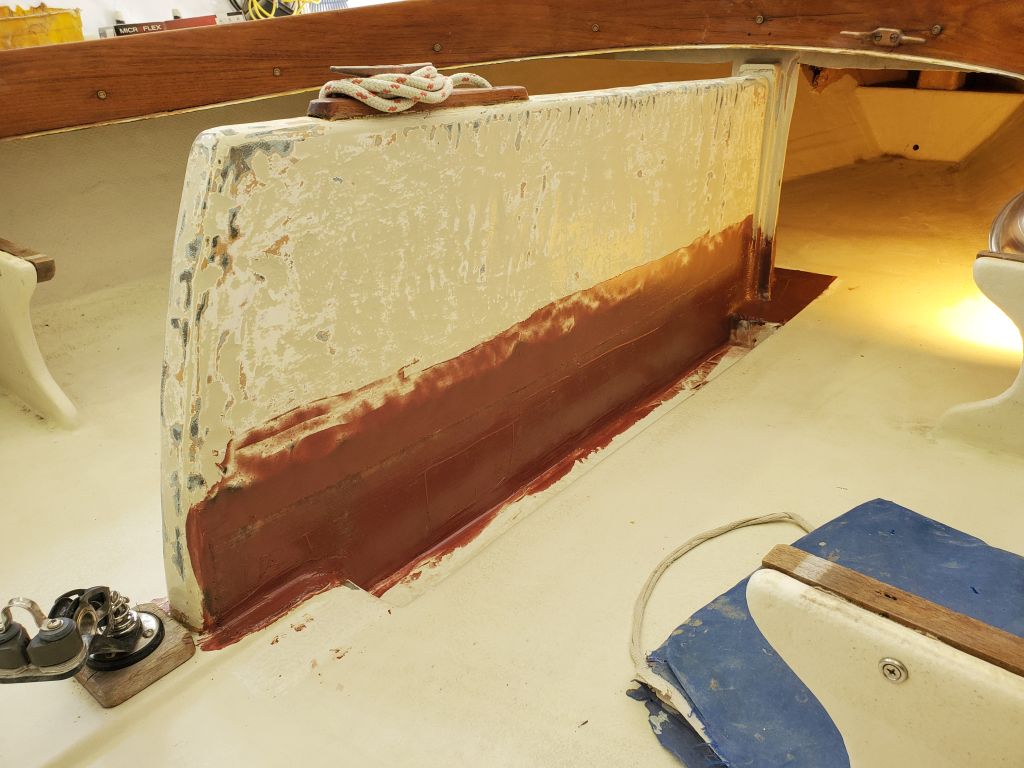
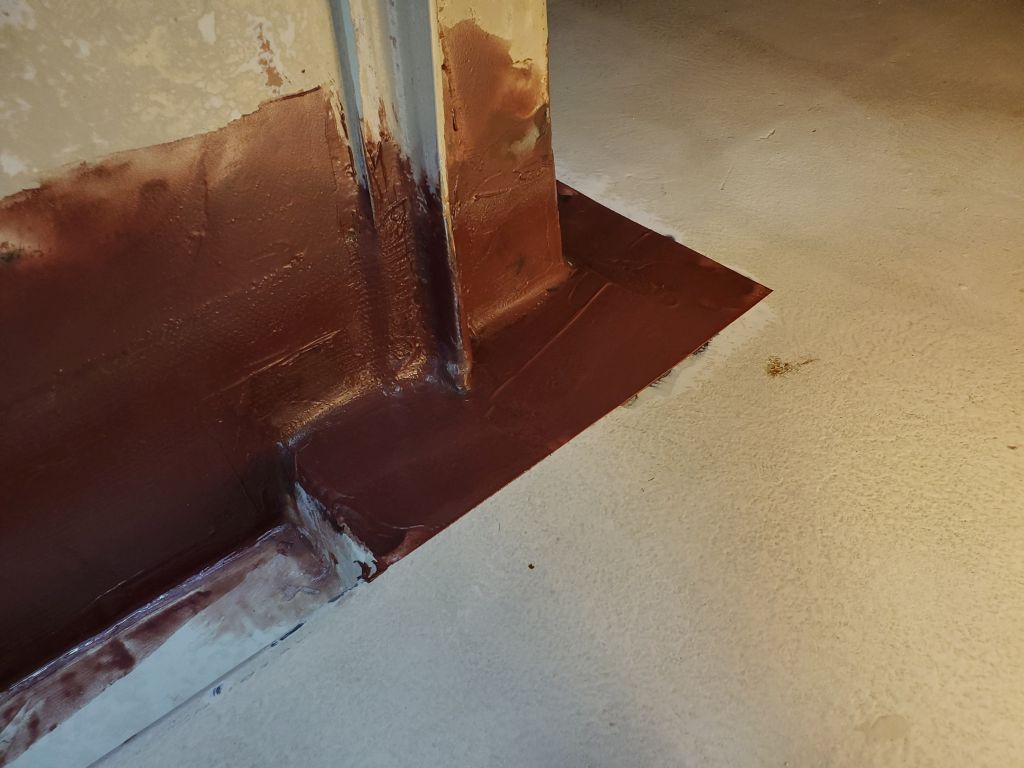
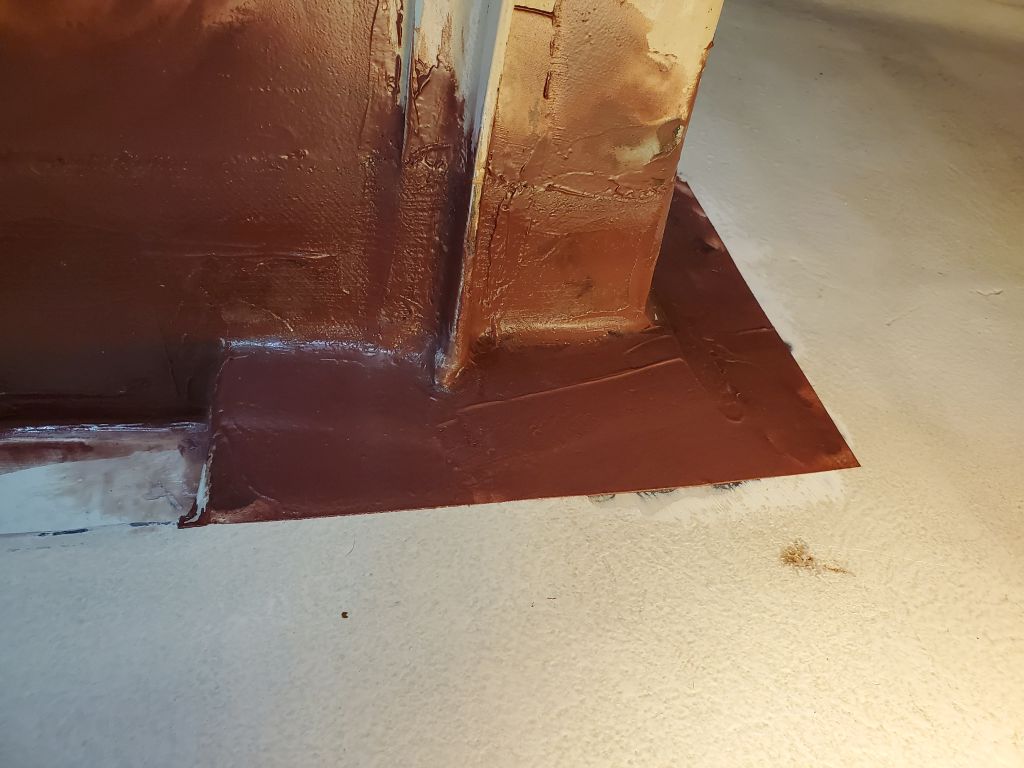
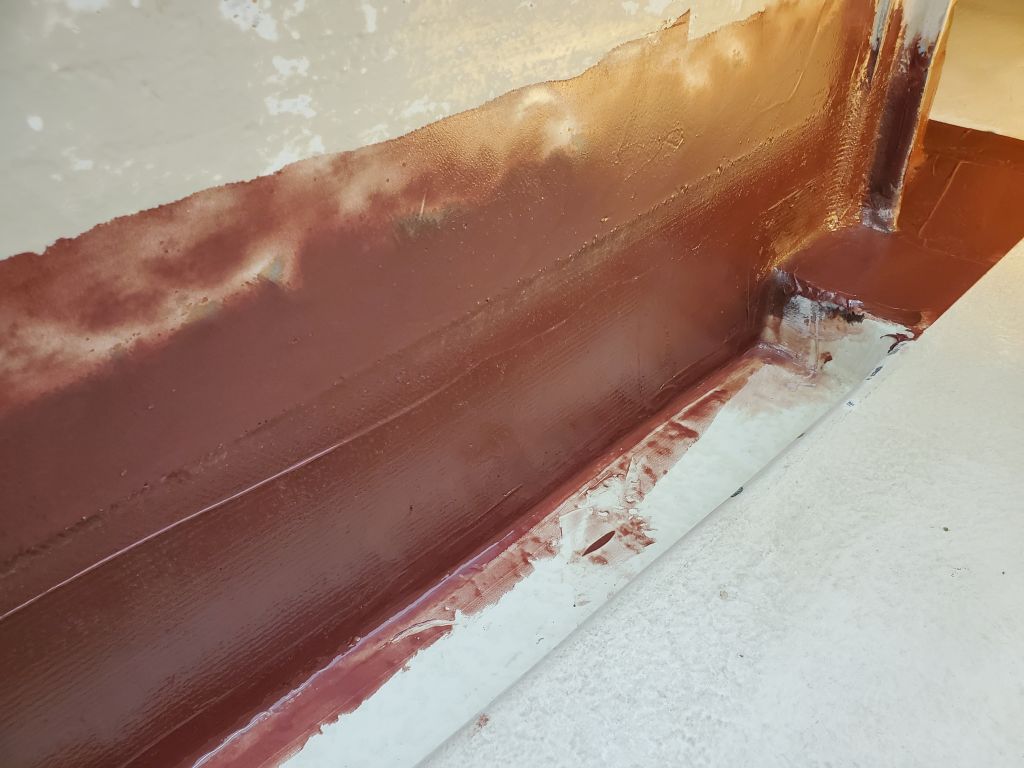
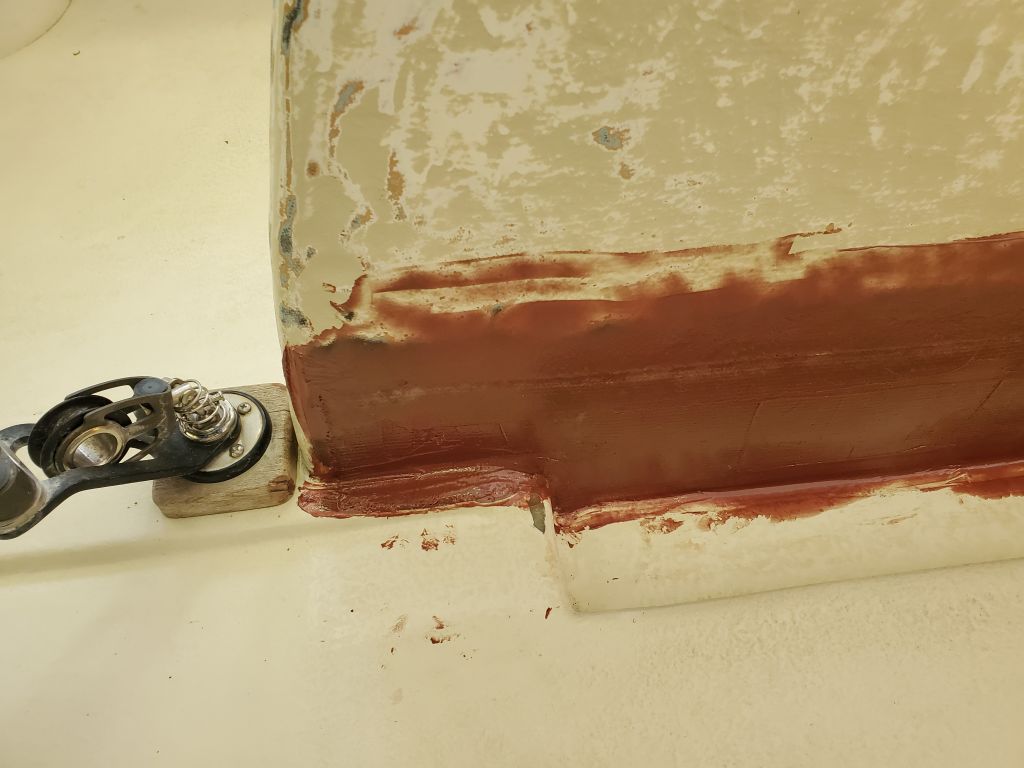
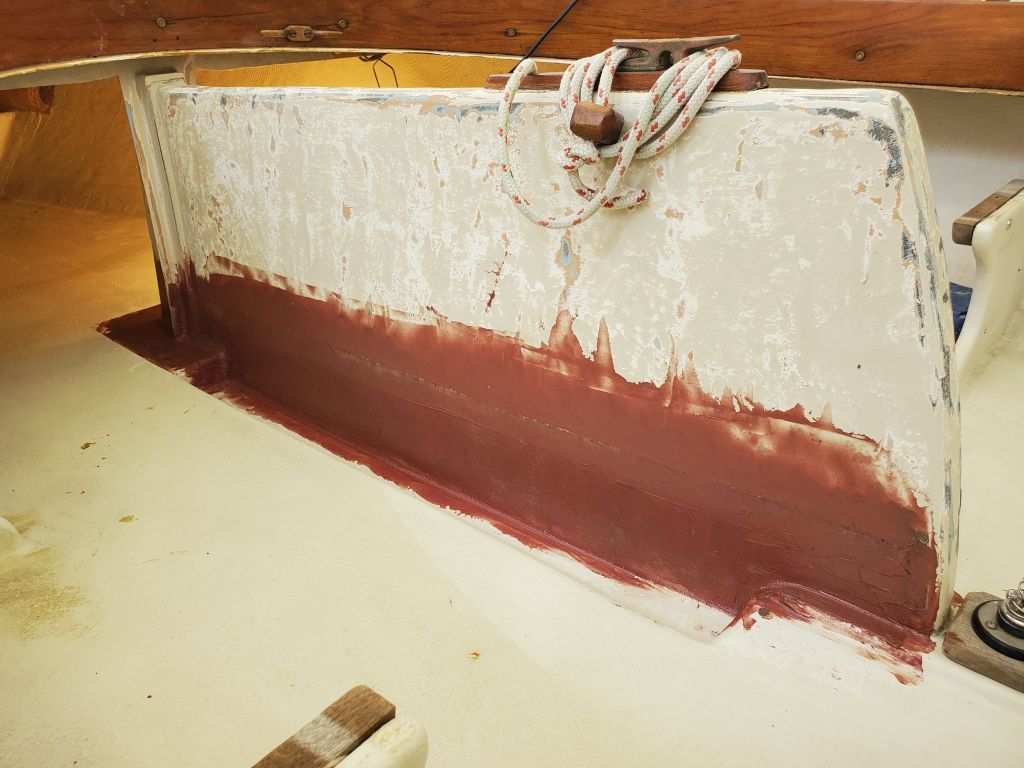
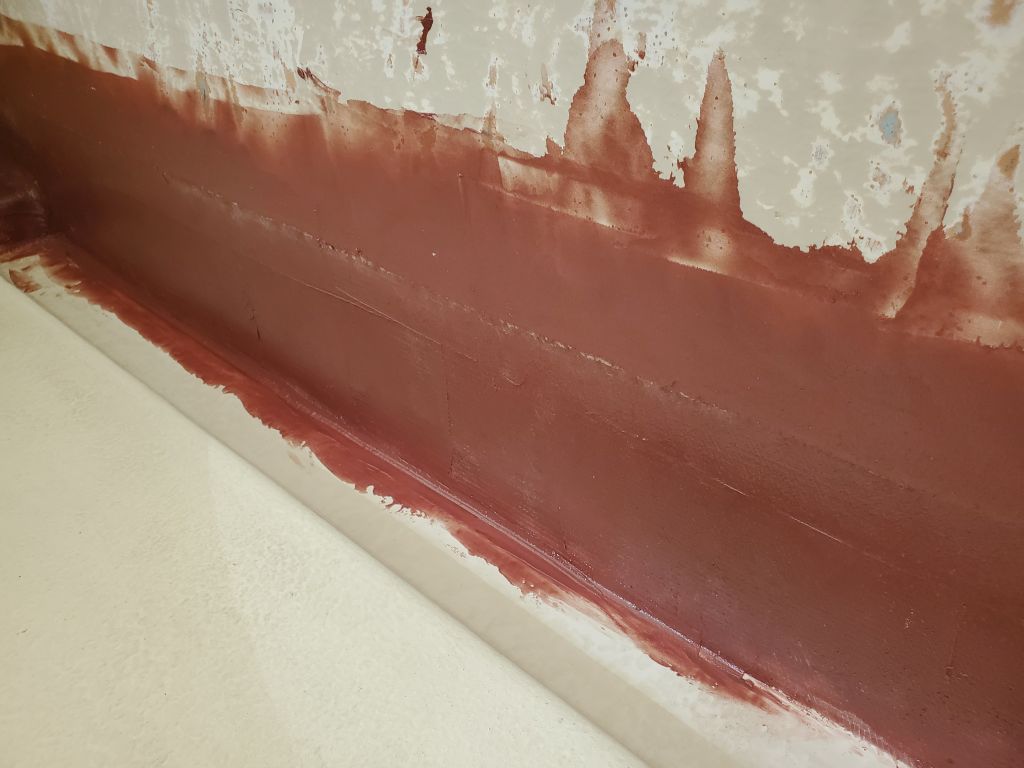
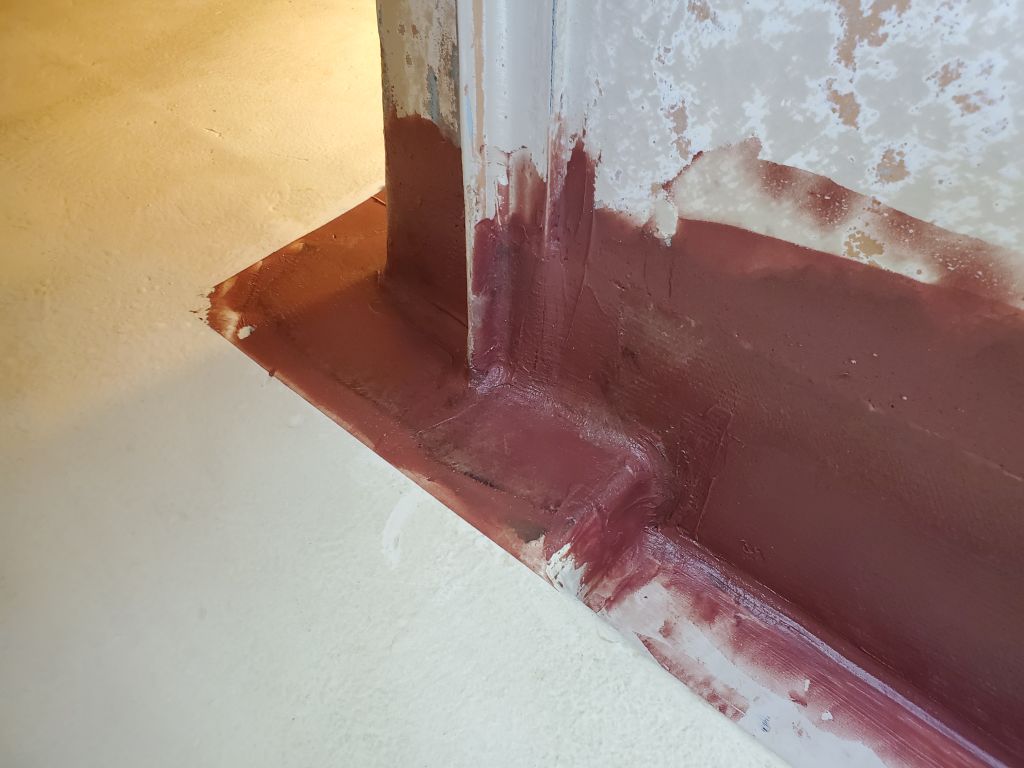
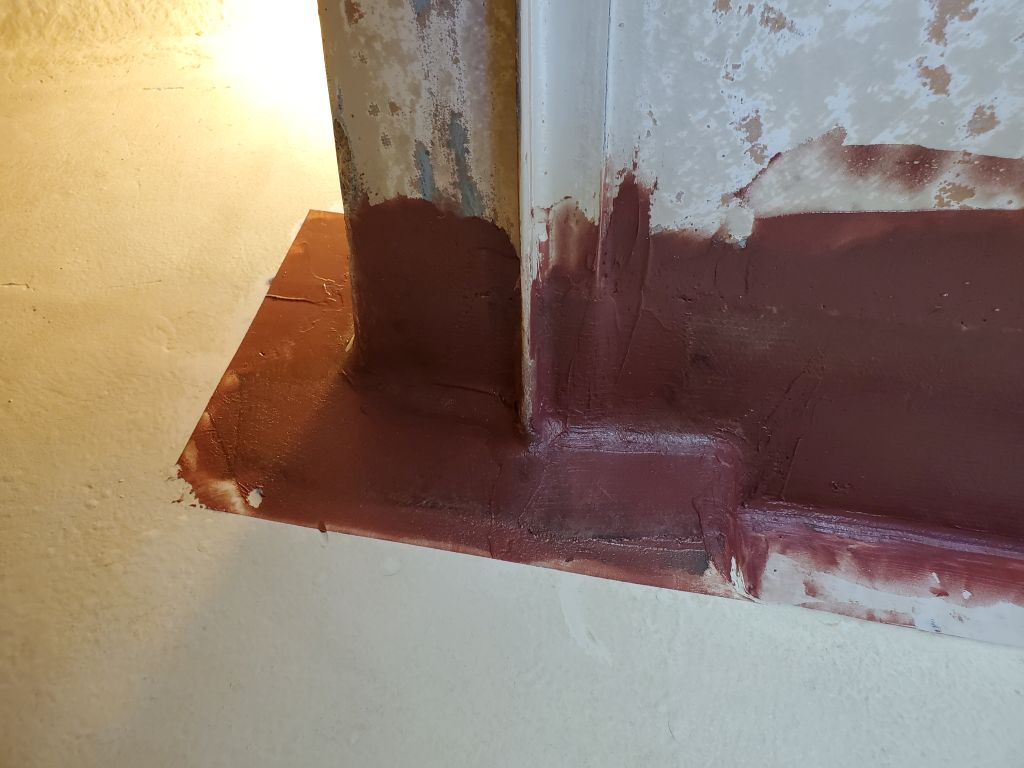
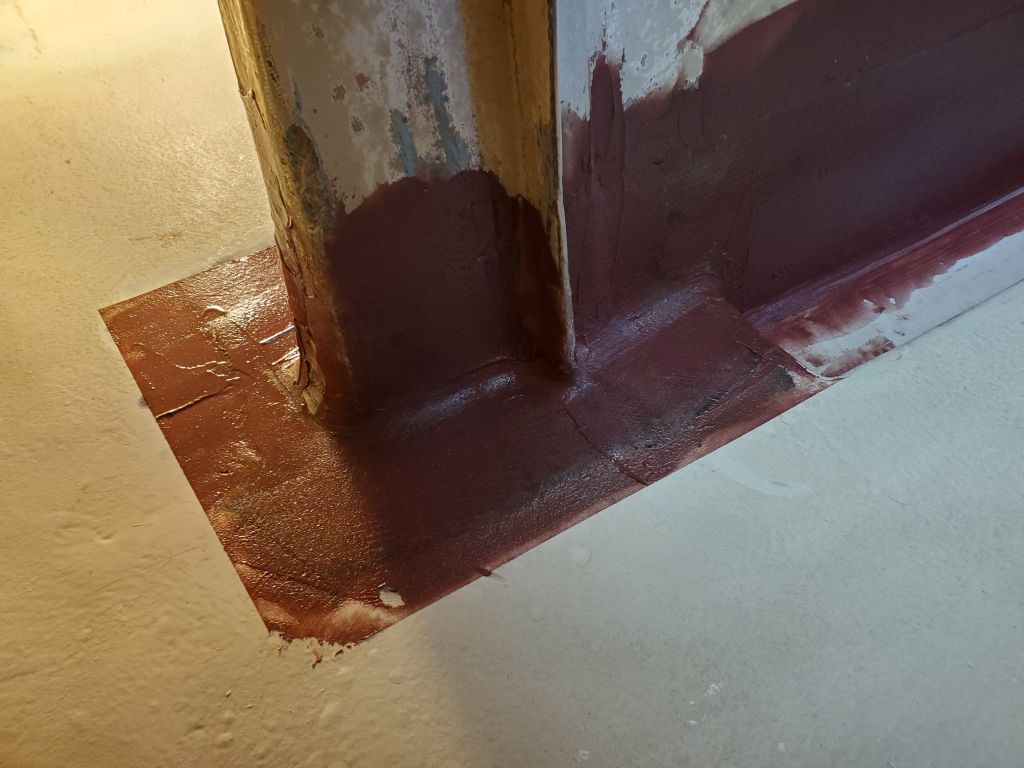
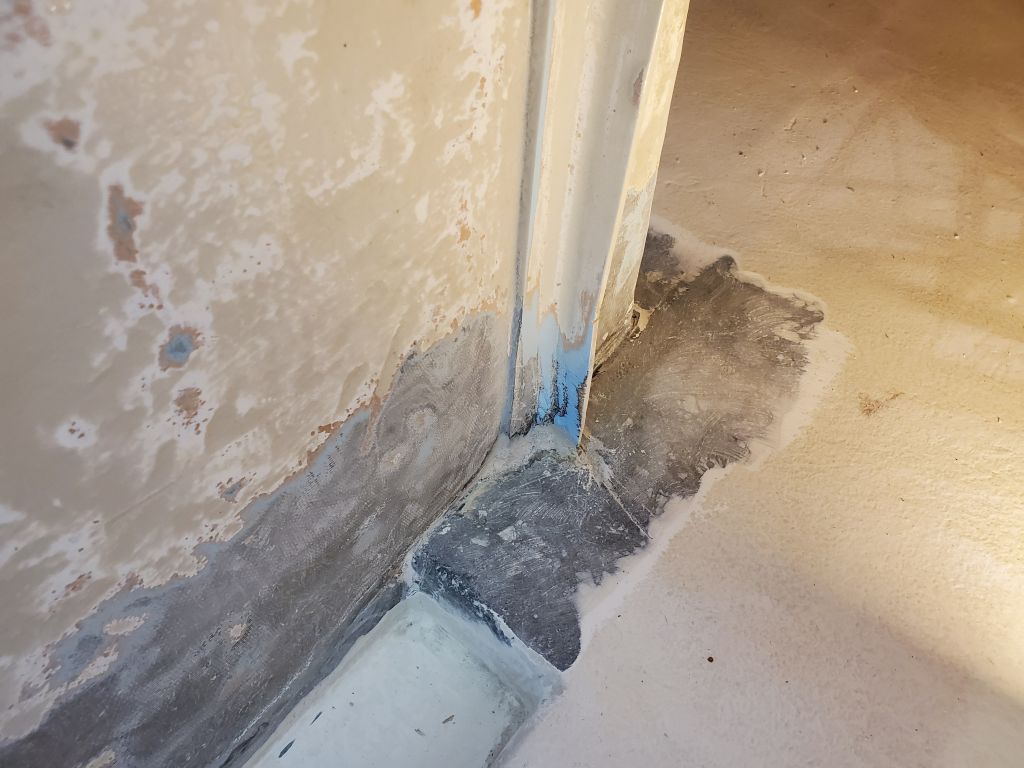
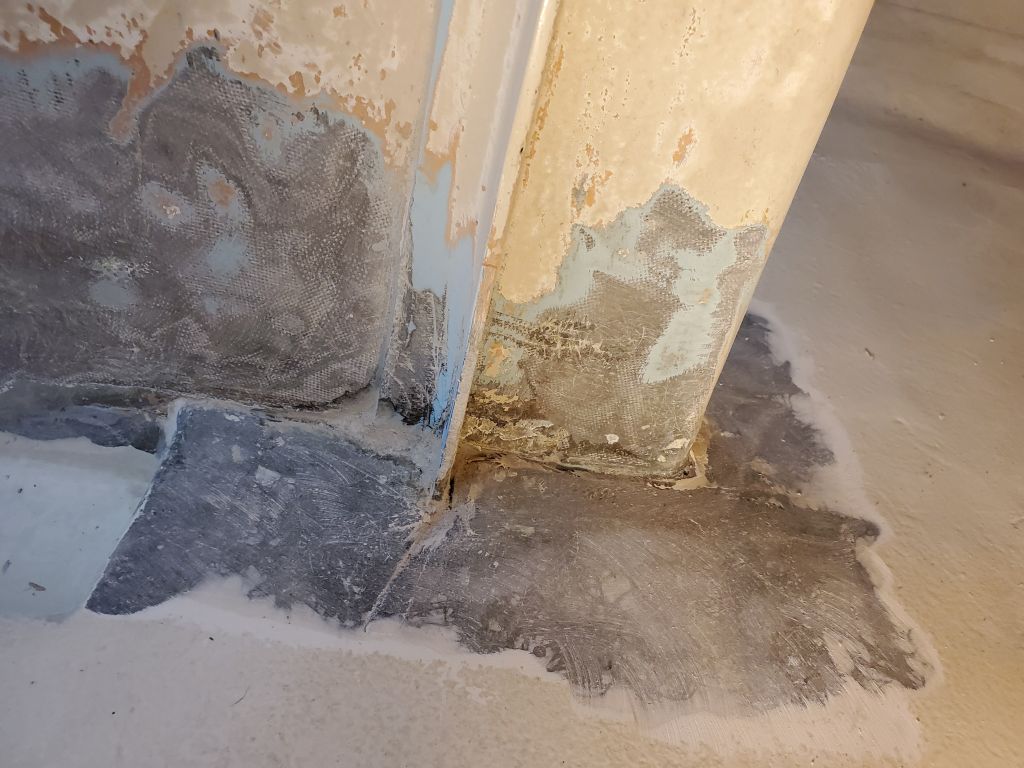
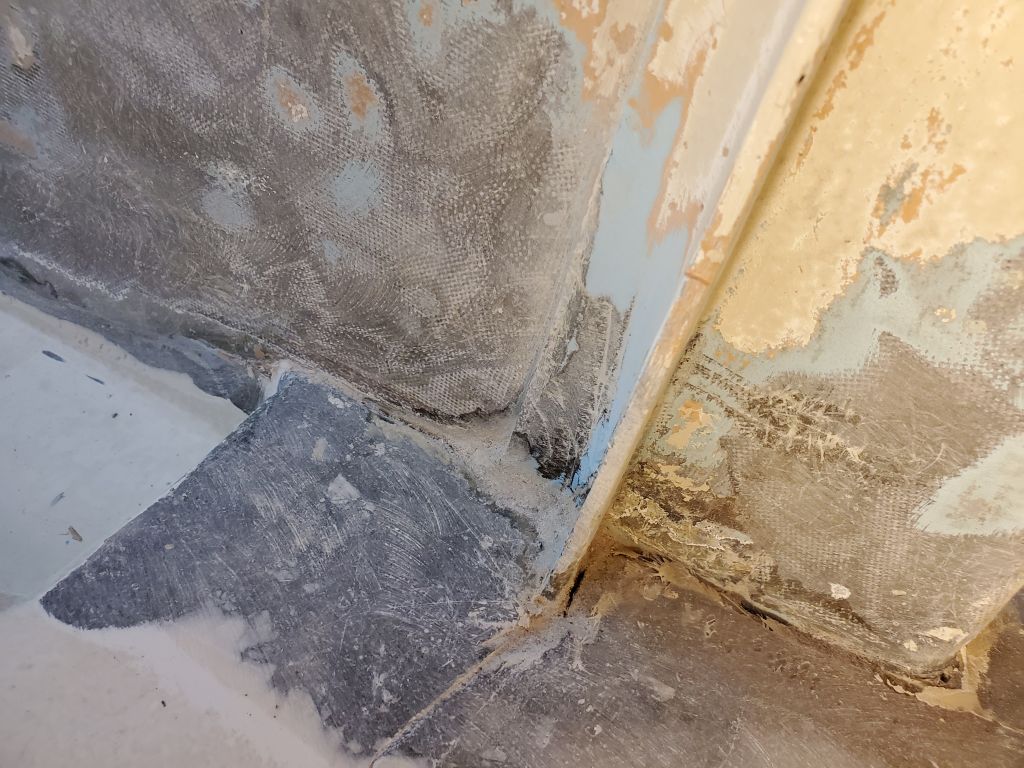
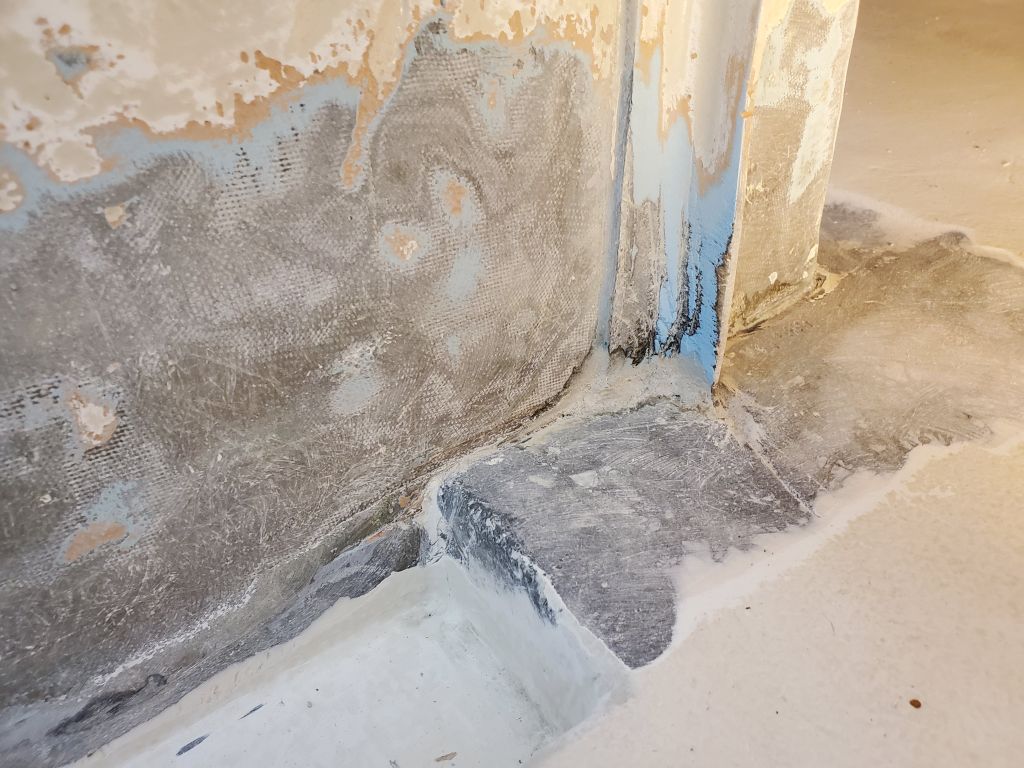
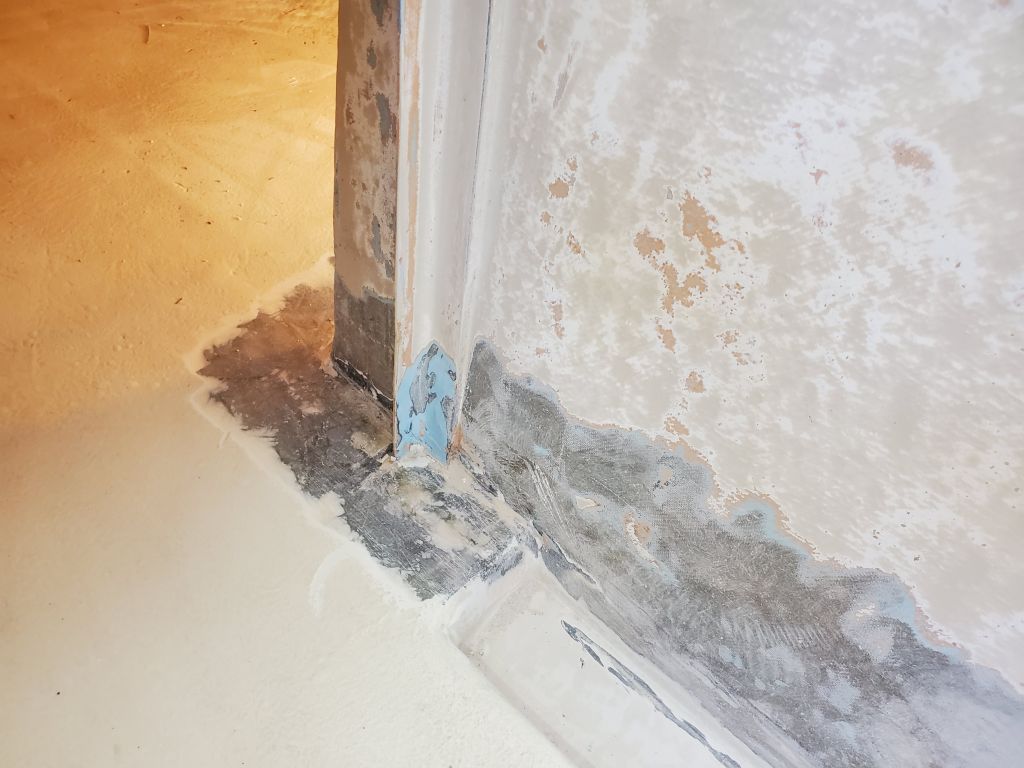
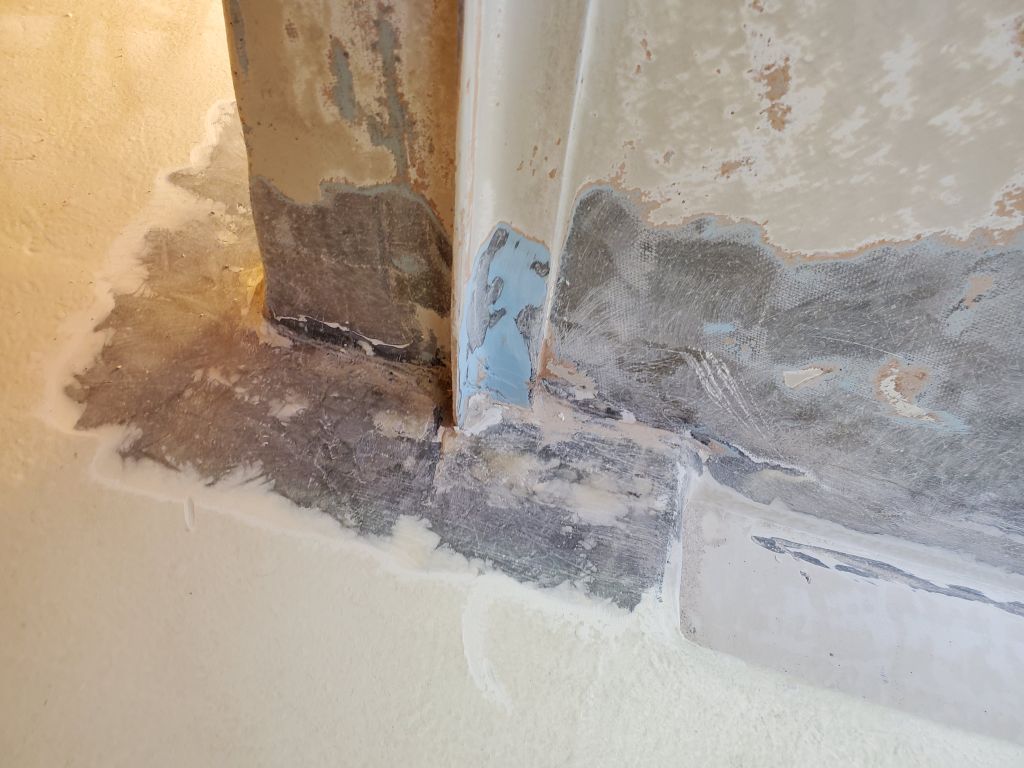
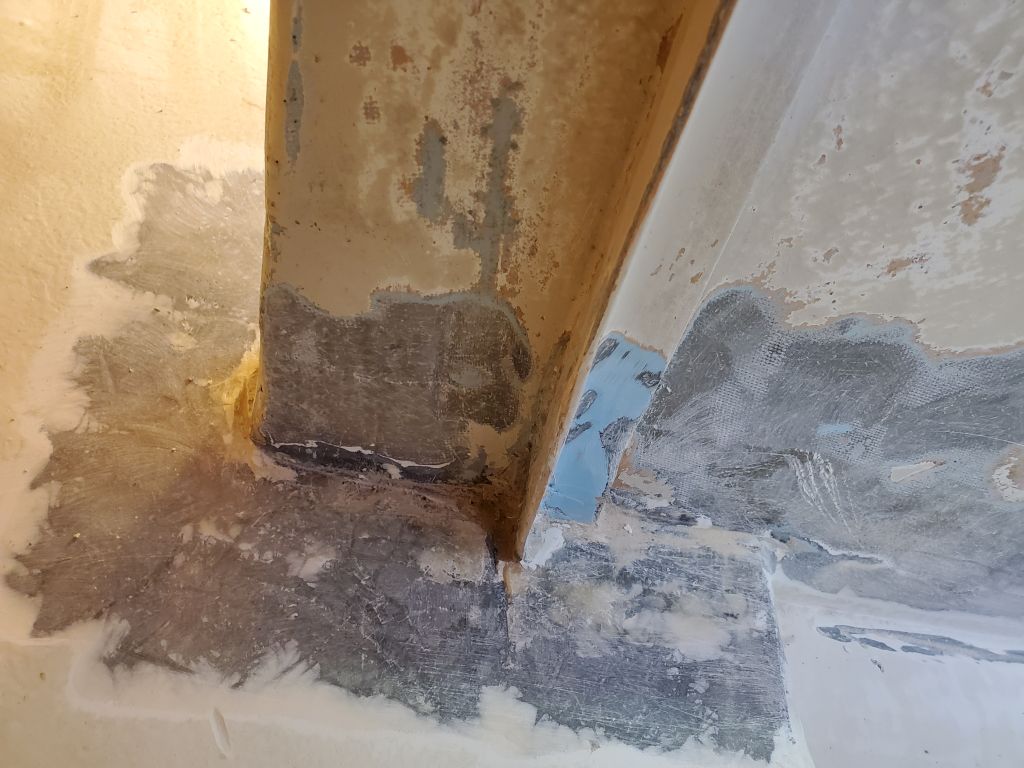
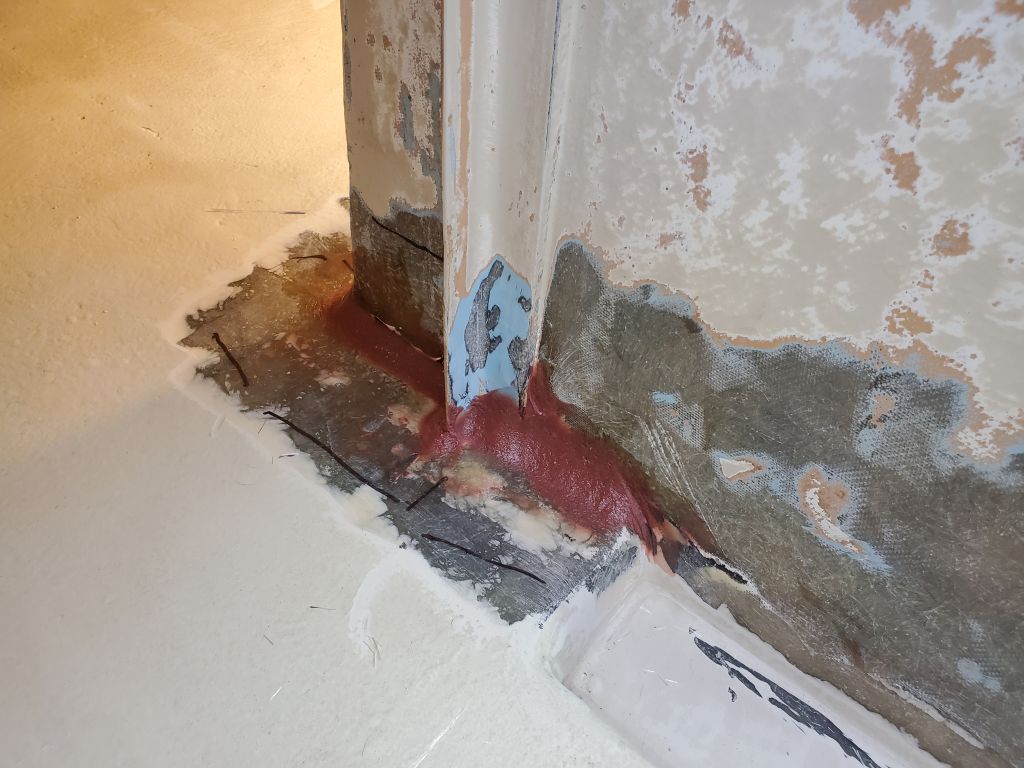
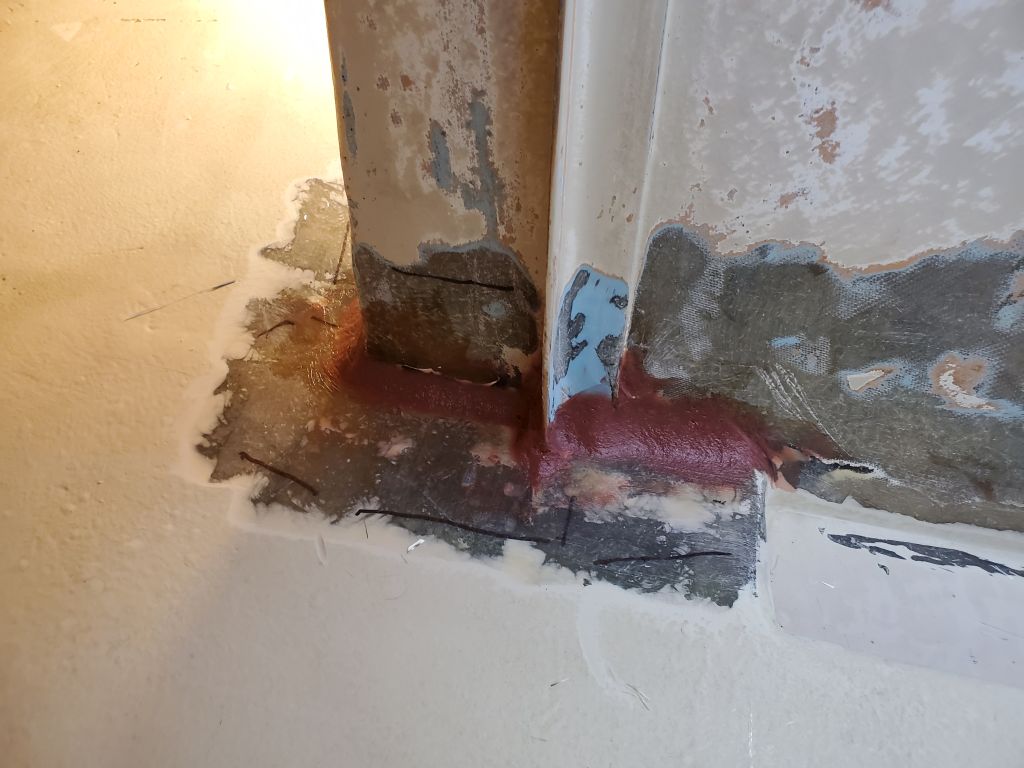
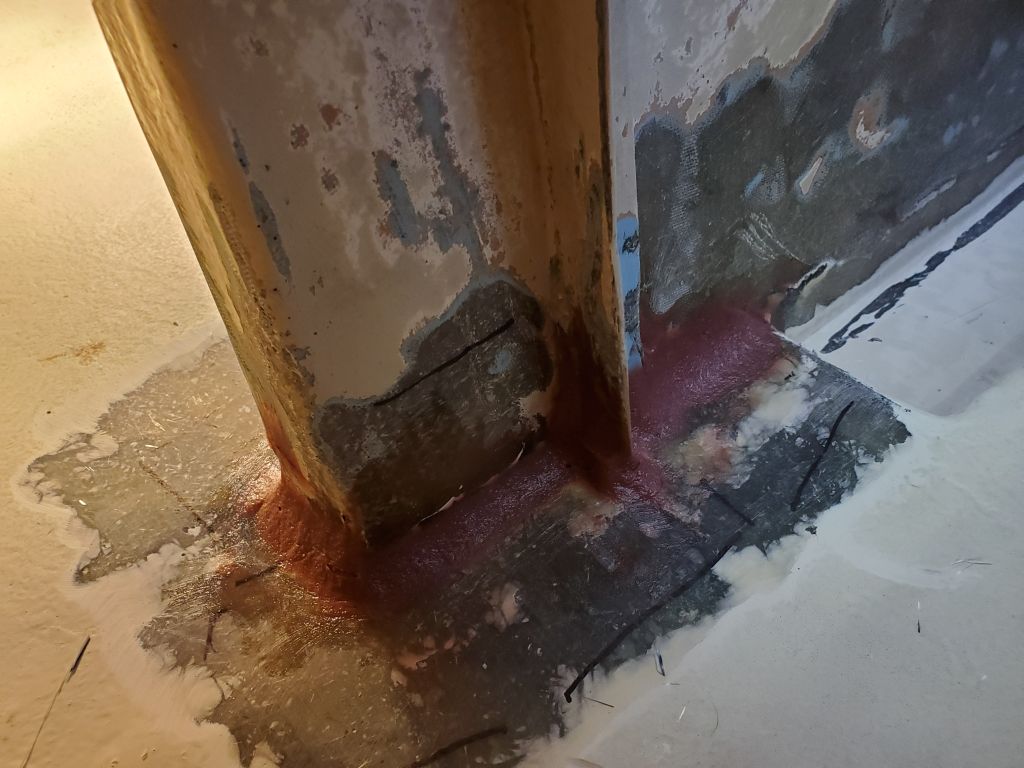
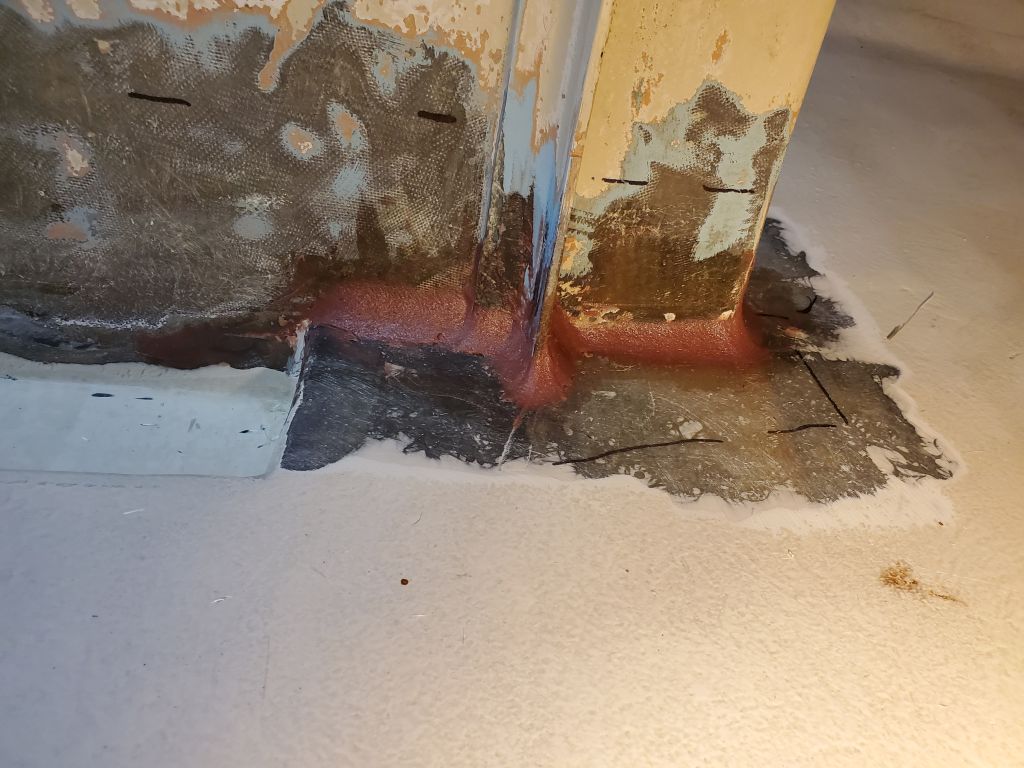
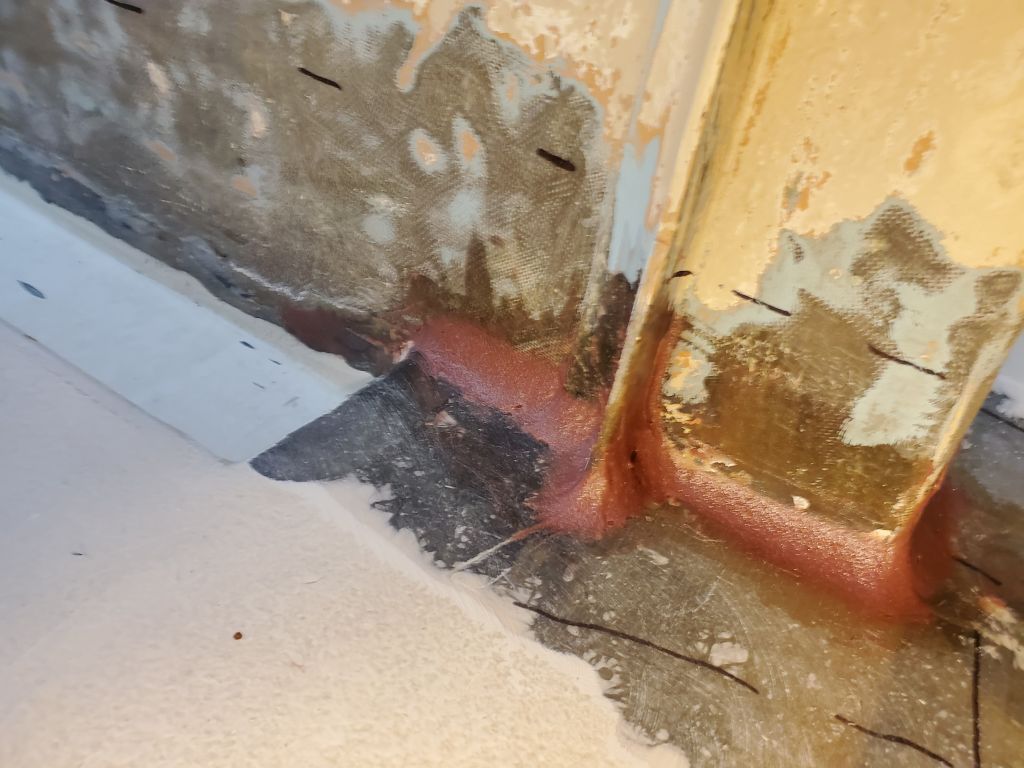
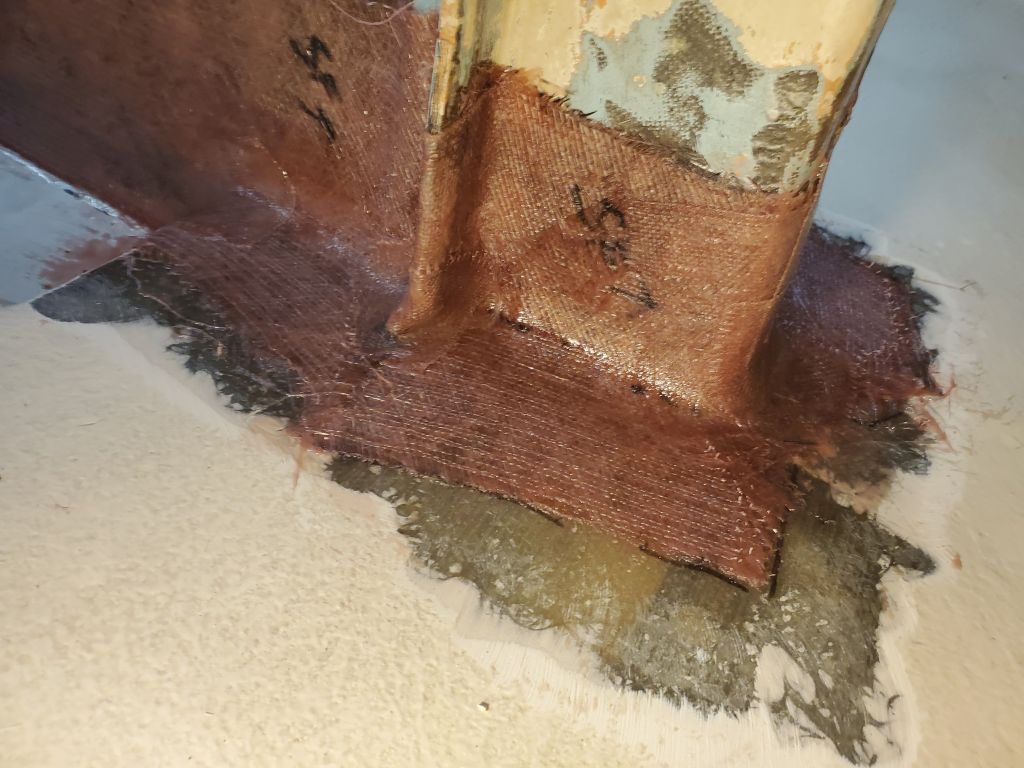
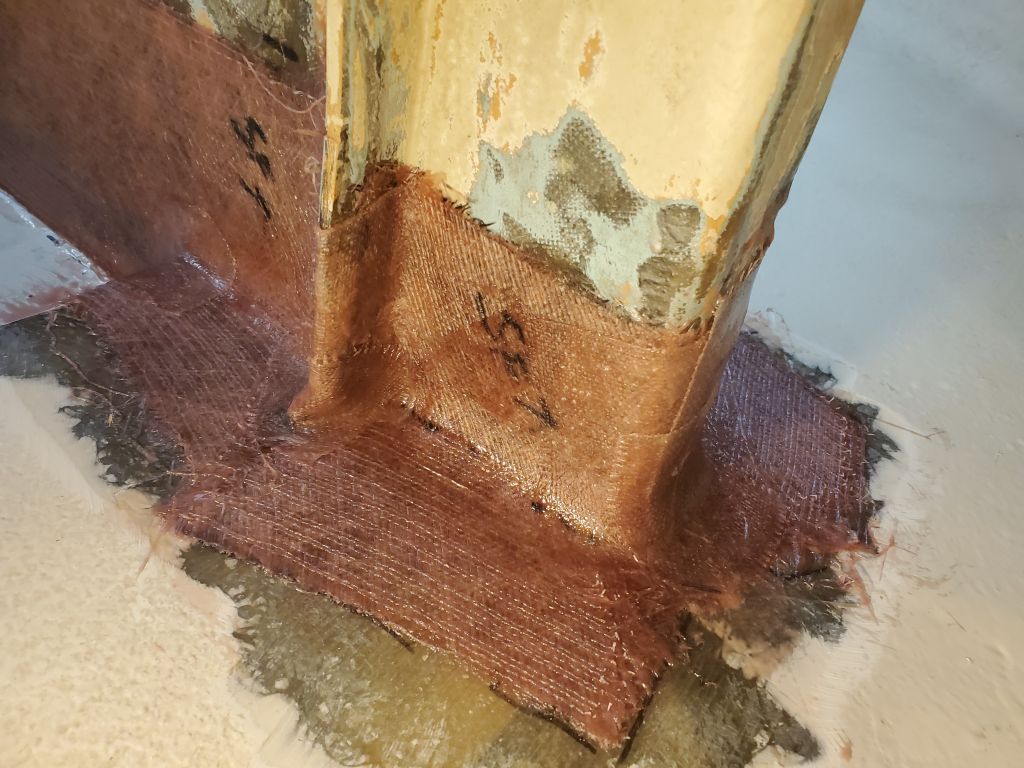
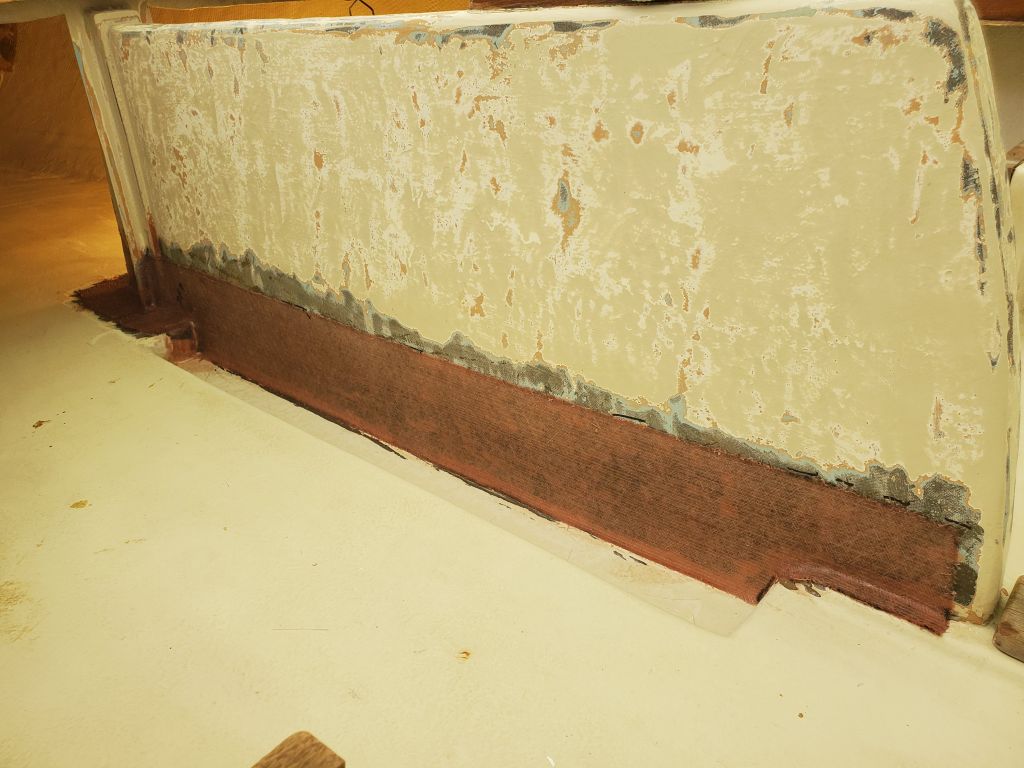
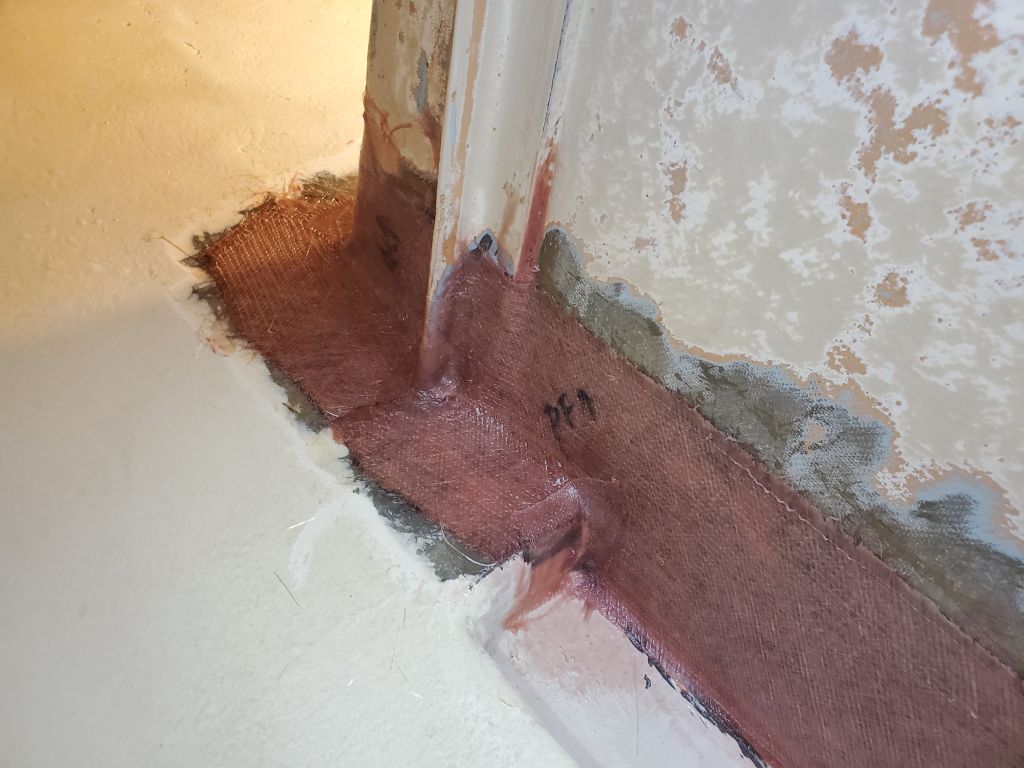
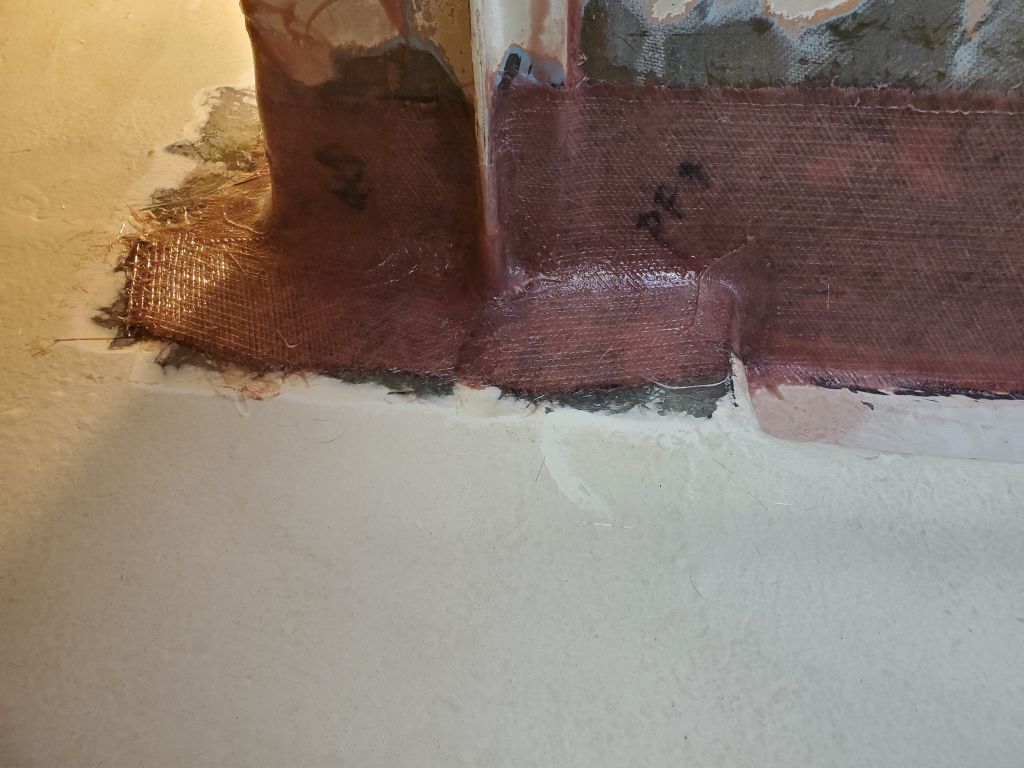
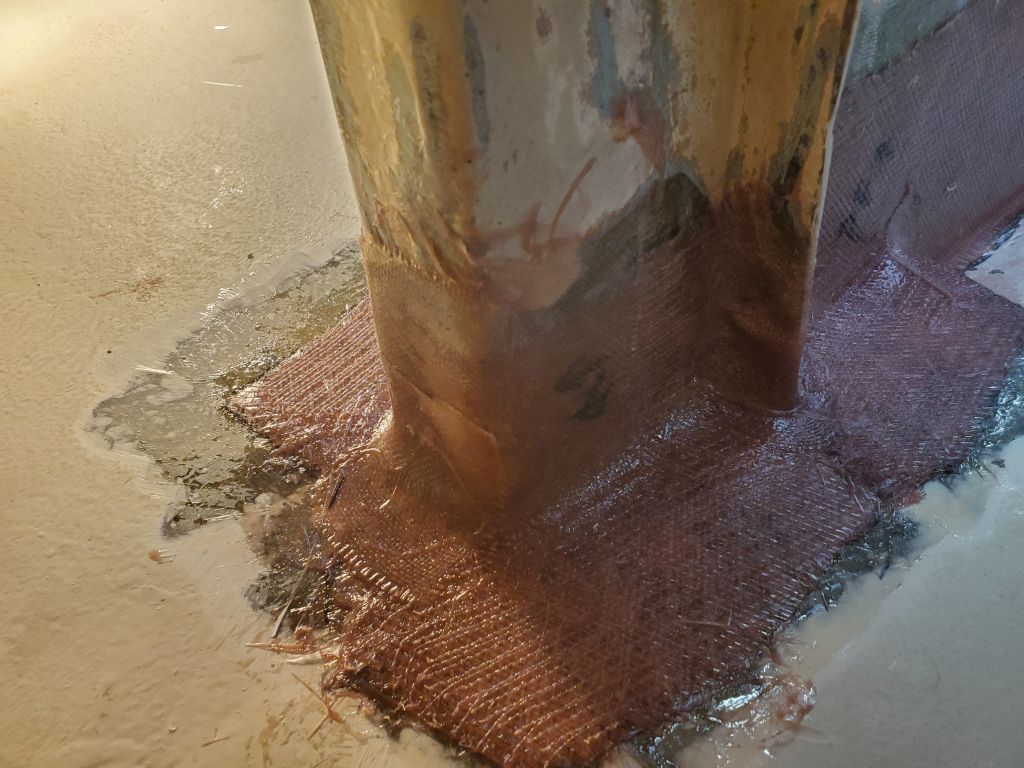
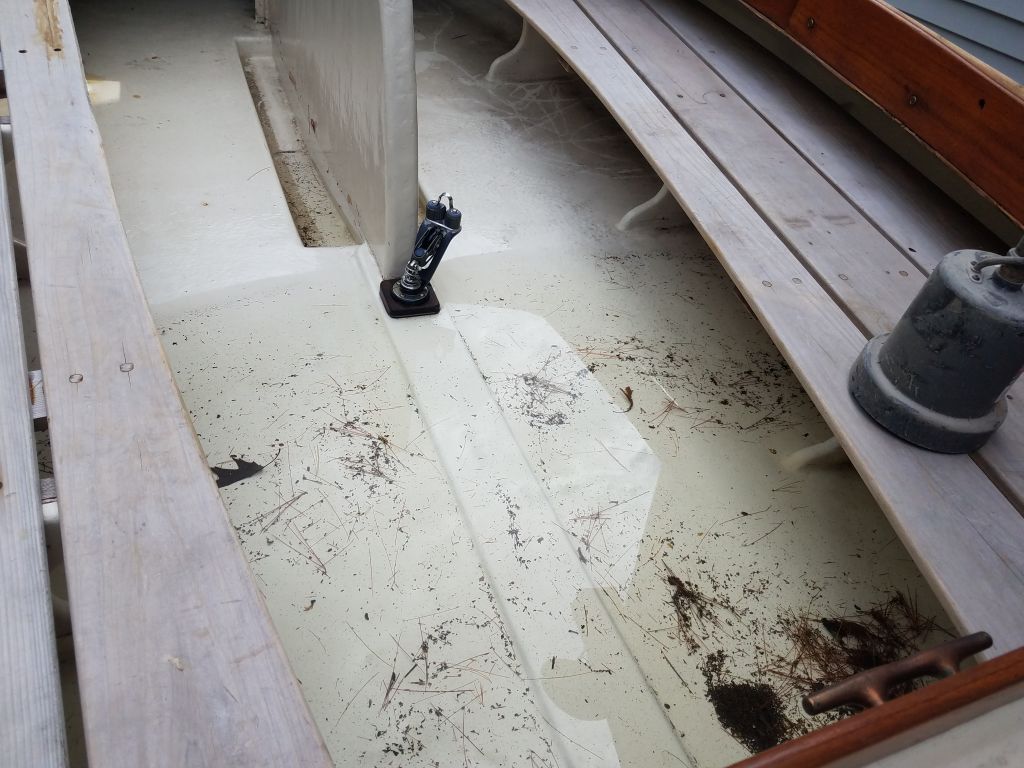
Repeated observation (helpfully, it rained and snowed frequently during this period) showed no signs of water leaking from outside the centerboard slot in the bottom, but I did notice that there were a few small cracks in the tabbing where the new cockpit sole had been glassed to the centerboard trunk, mainly on the forward starboard side.  With the way the boat sat on the trailer, with a bow-down orientation, these cracks remained below the surface of the water, and water kept slowly draining out through the sump.  Never did the drainage stop, since with frequent rain the level never dropped below these cracks, so to that extent I couldn’t confirm that the cracks were the culprit, but this seemed the most logical starting point in terms of stopping the problem.  I planned to inspect the bottom around the centerboard slot as well, hopefully to eliminate that as a further possibility, but it seemed likely that reglassing the centerboard trunk ought to help the problem.

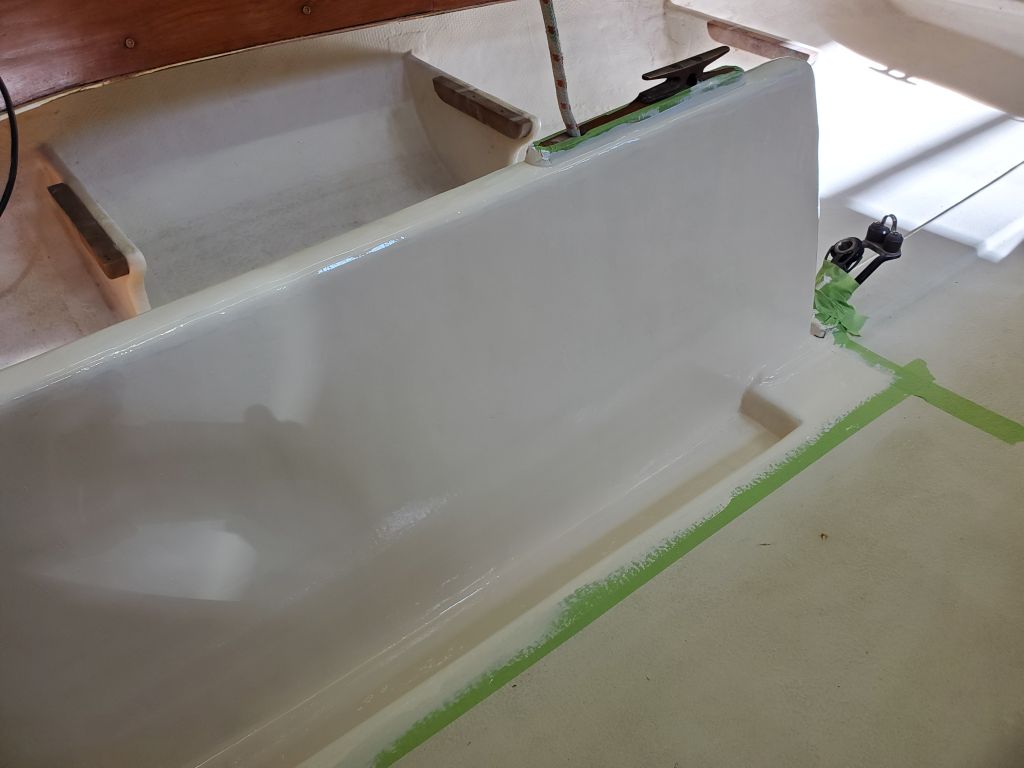
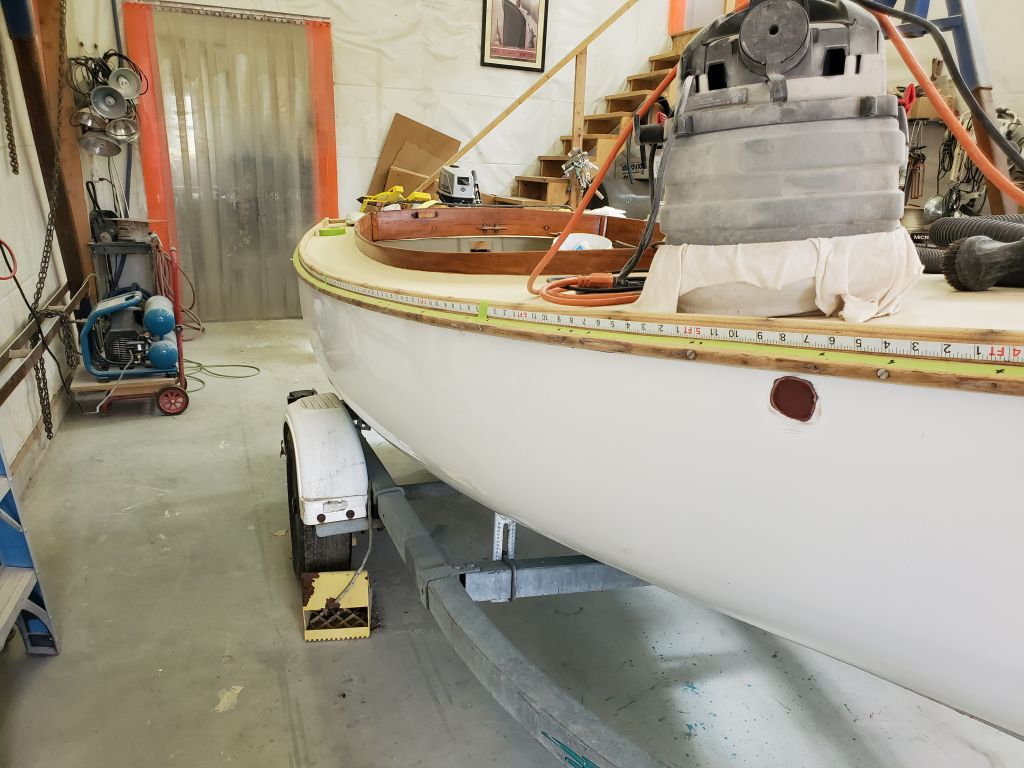
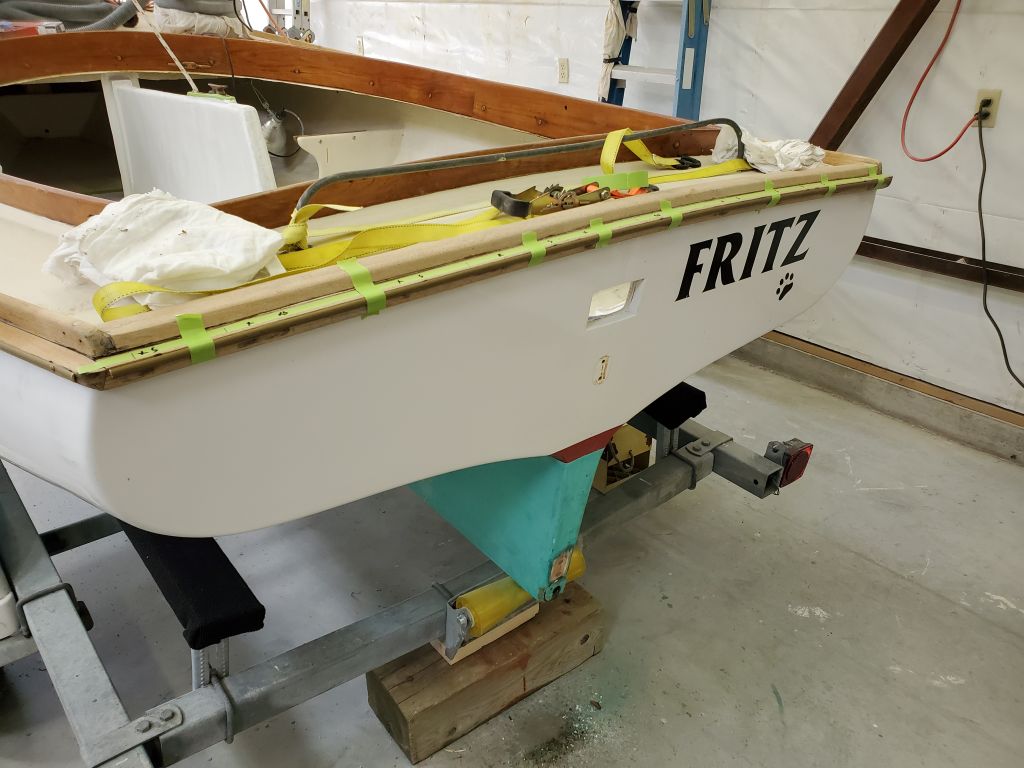
In any event, with the time at hand to bring the boat indoors for the project, my first step was to drain out the water in the cockpit, and in the sump as well, so I lifted the trailer high and pumped out the cockpit with an electric sump pump, and allowed the remaining water in the sump to seep out as well.  Once the boat had drained, I moved her indoors.

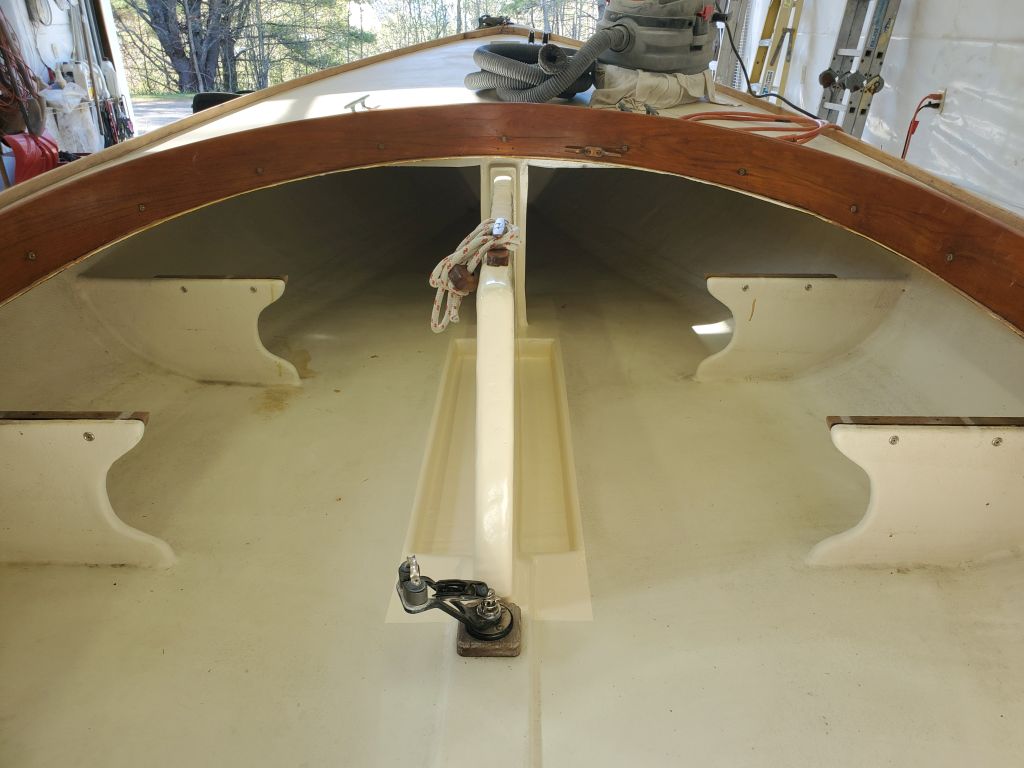
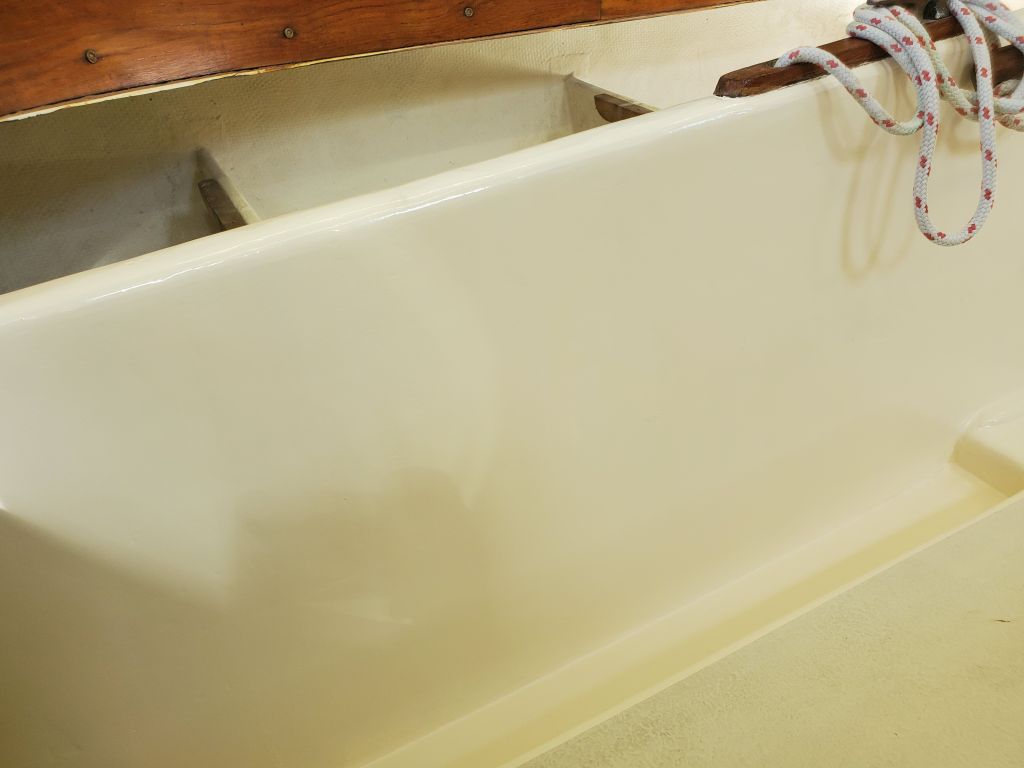
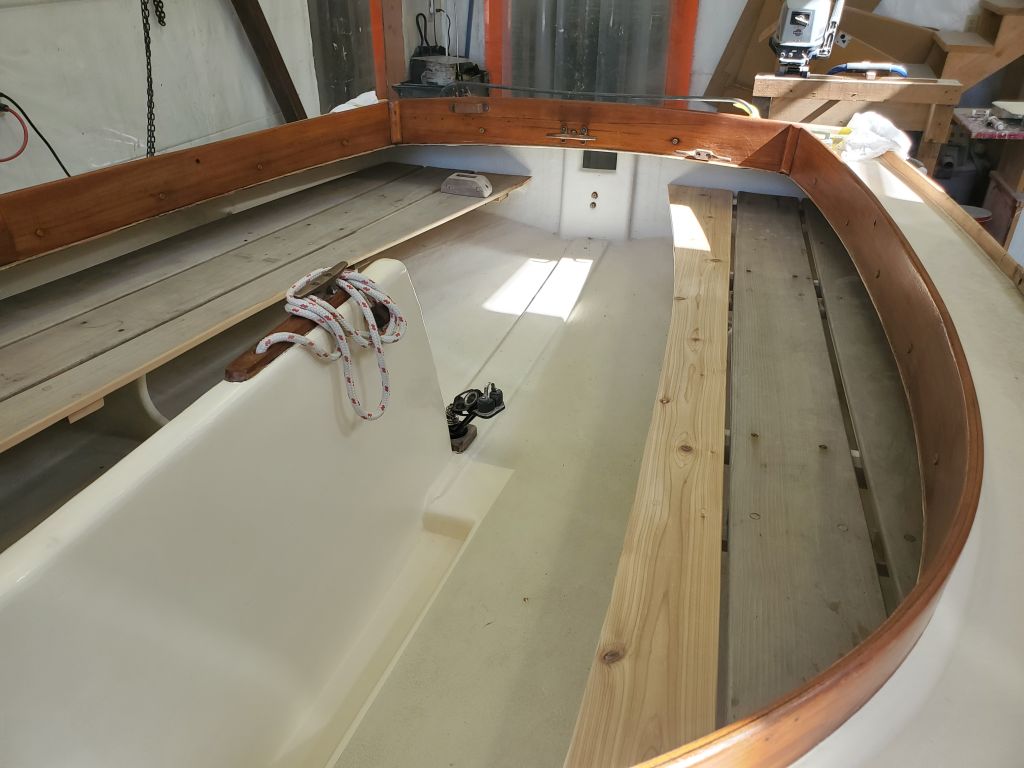
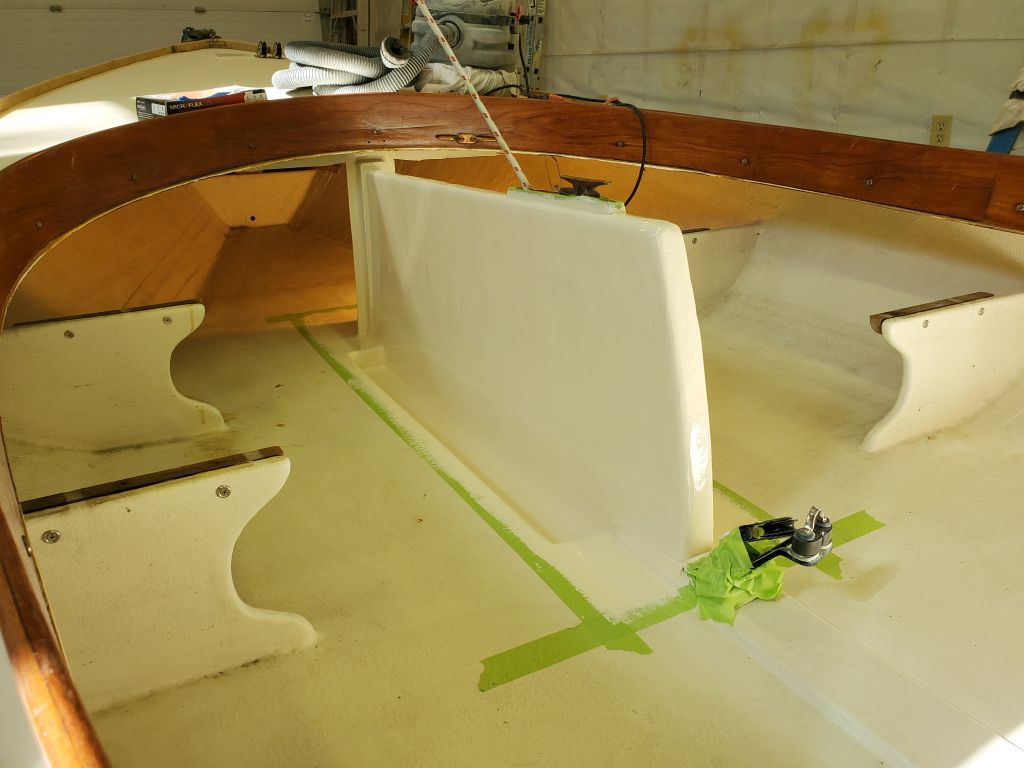
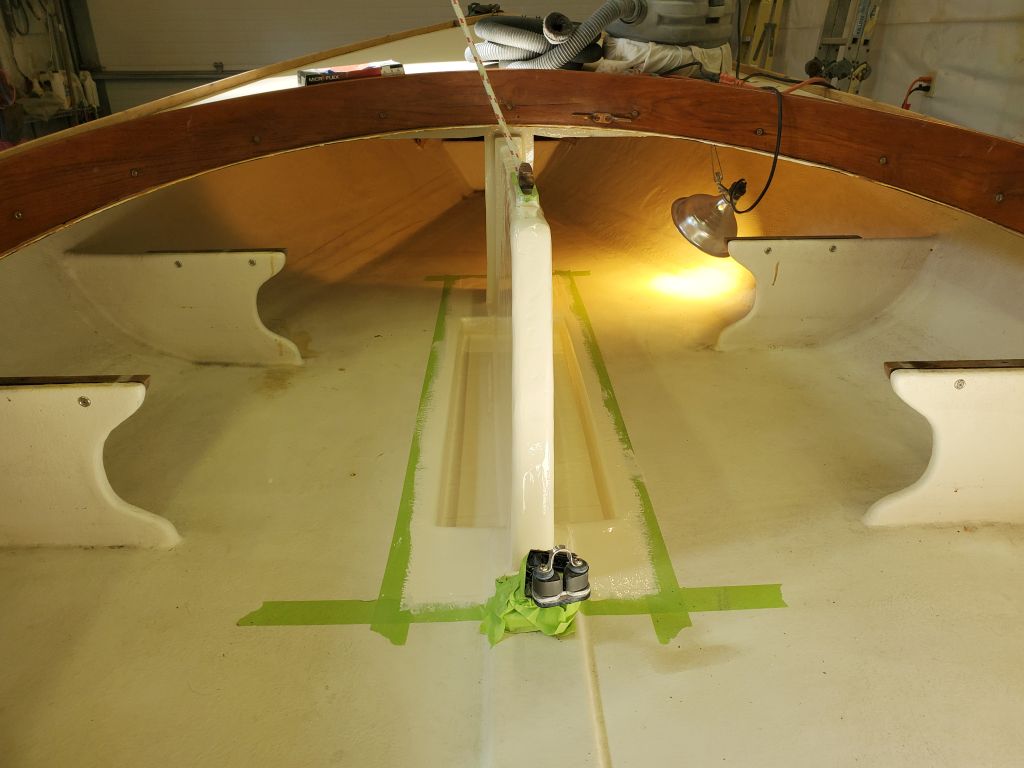
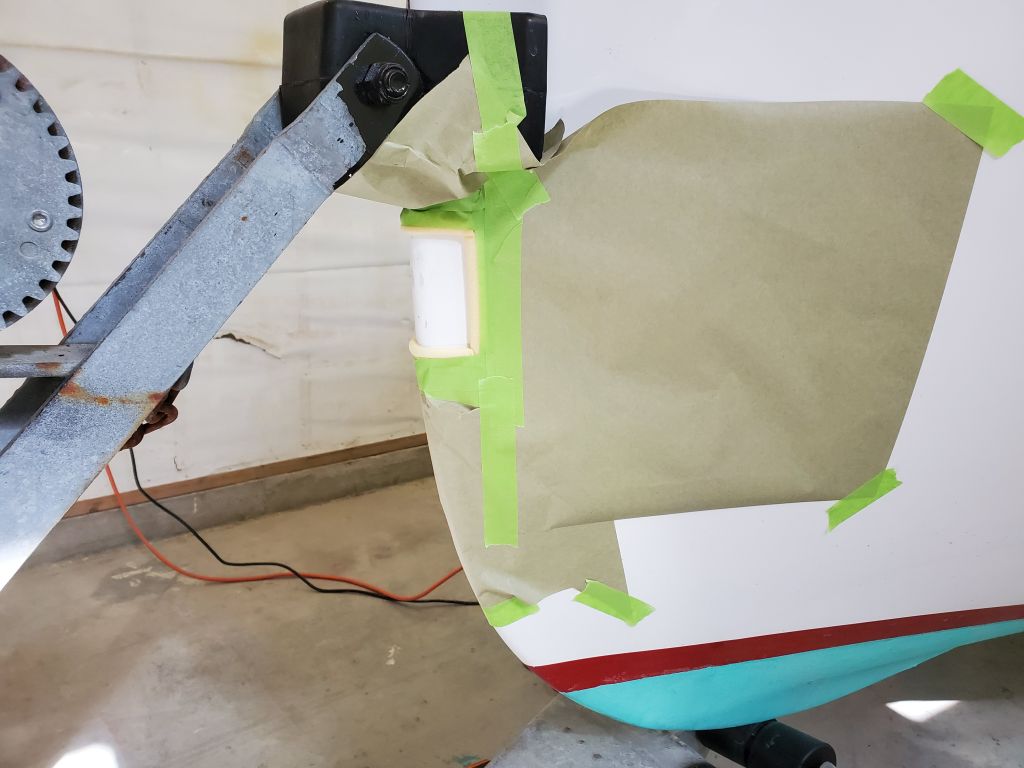
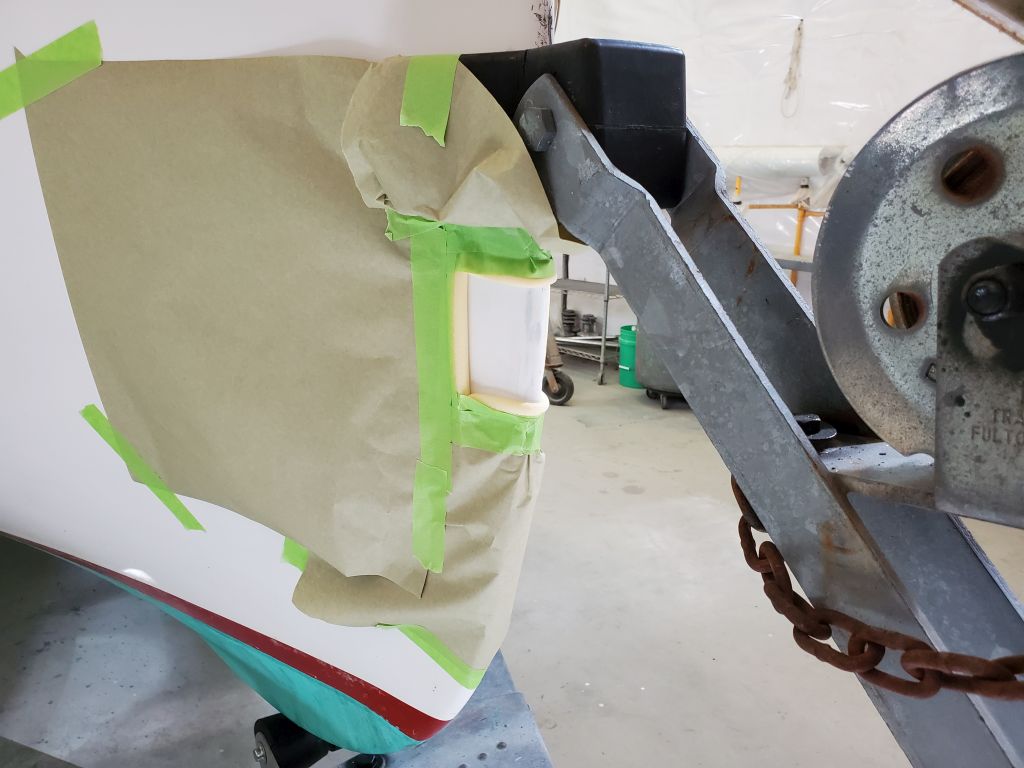
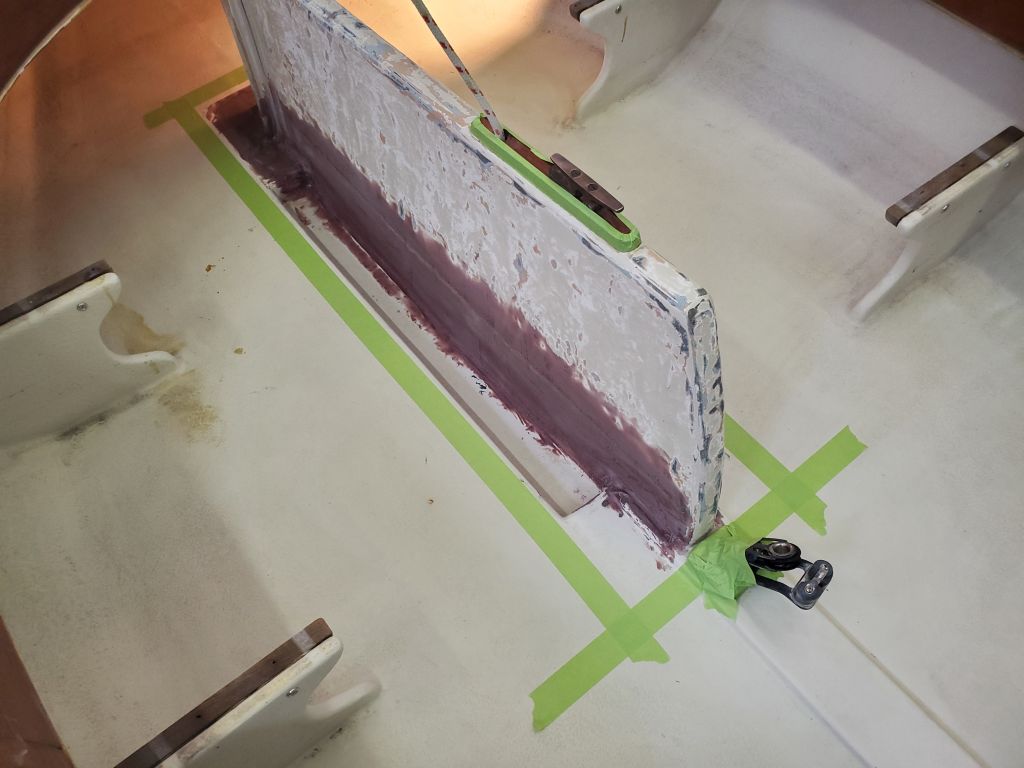
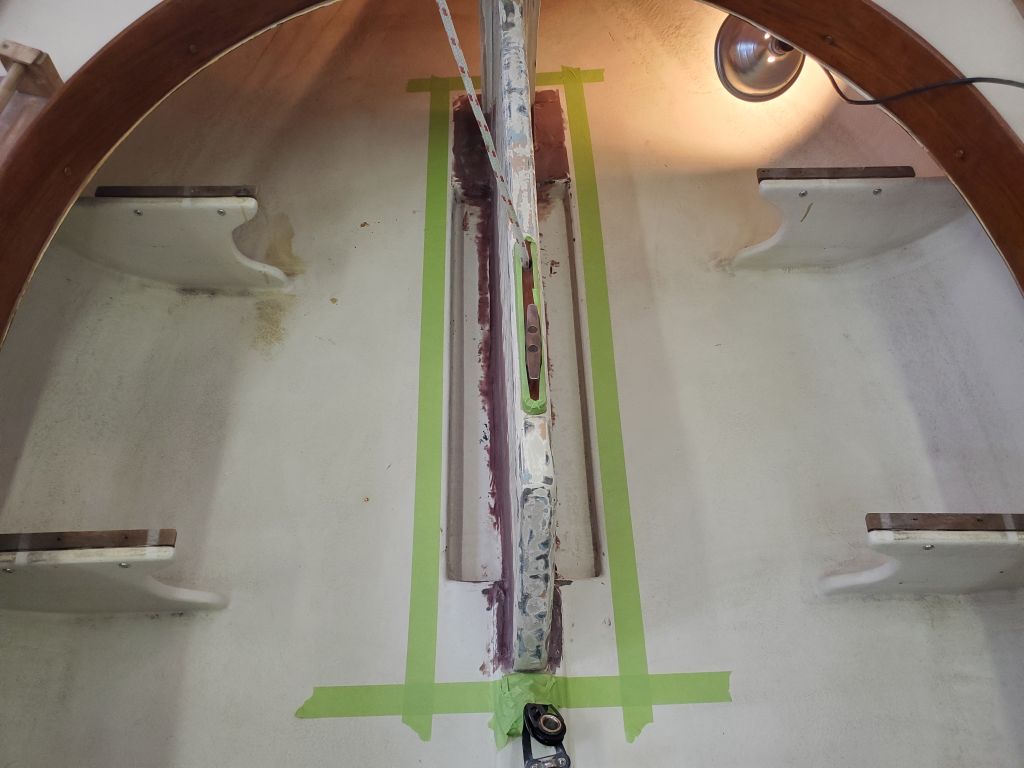
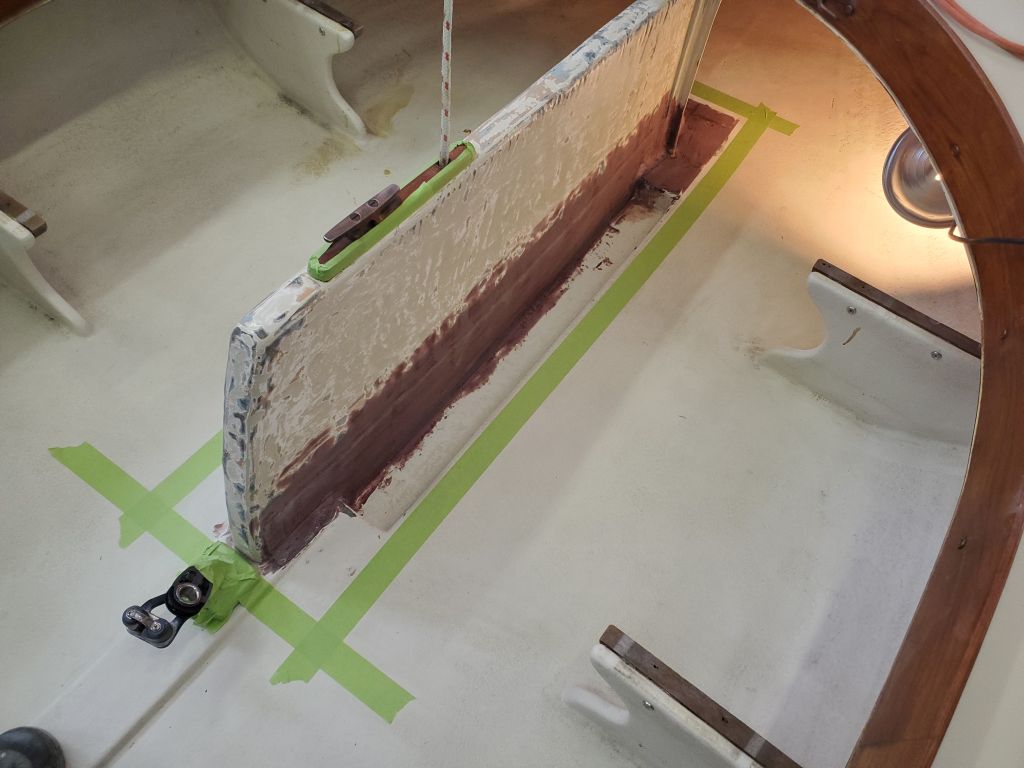
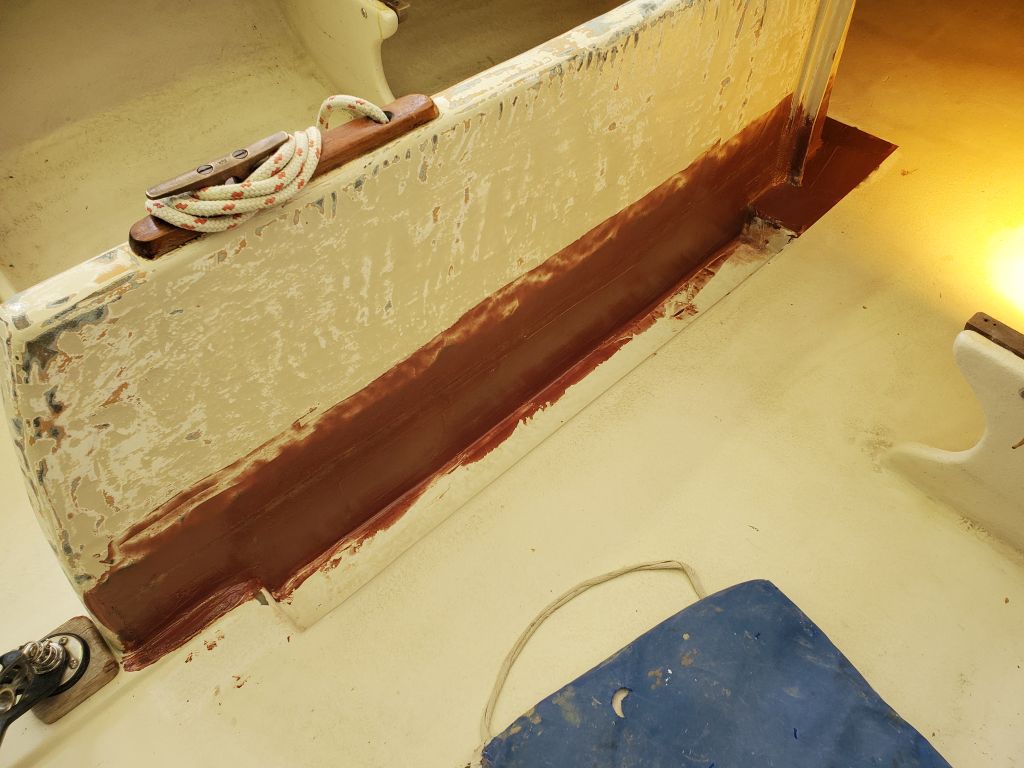
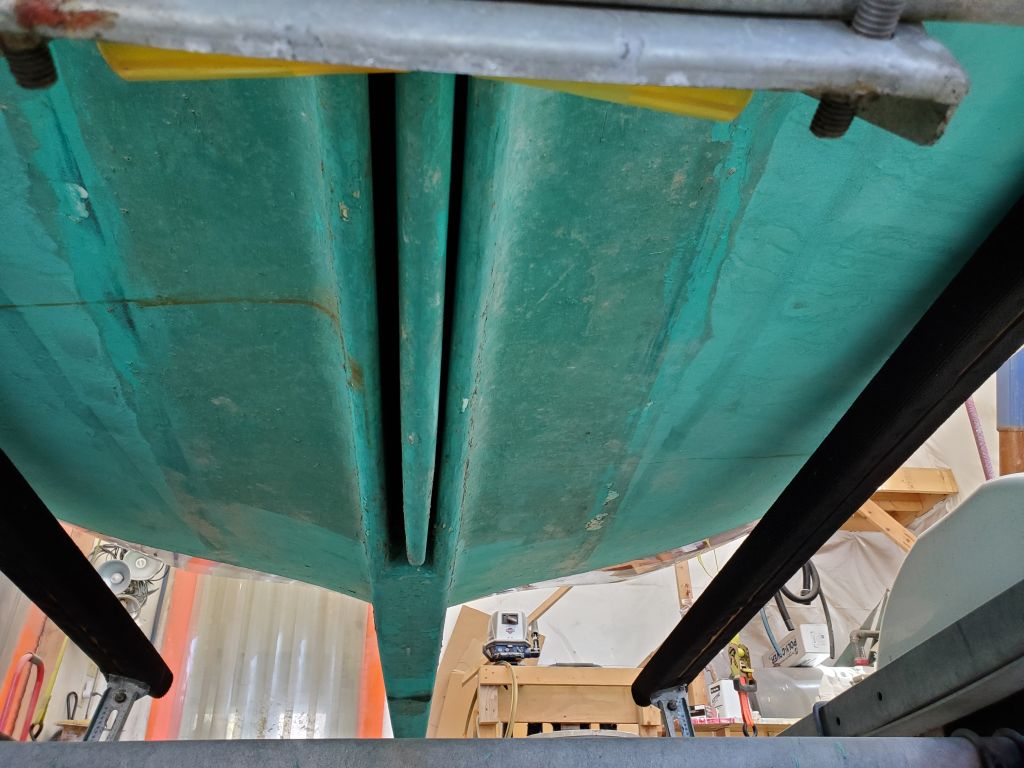
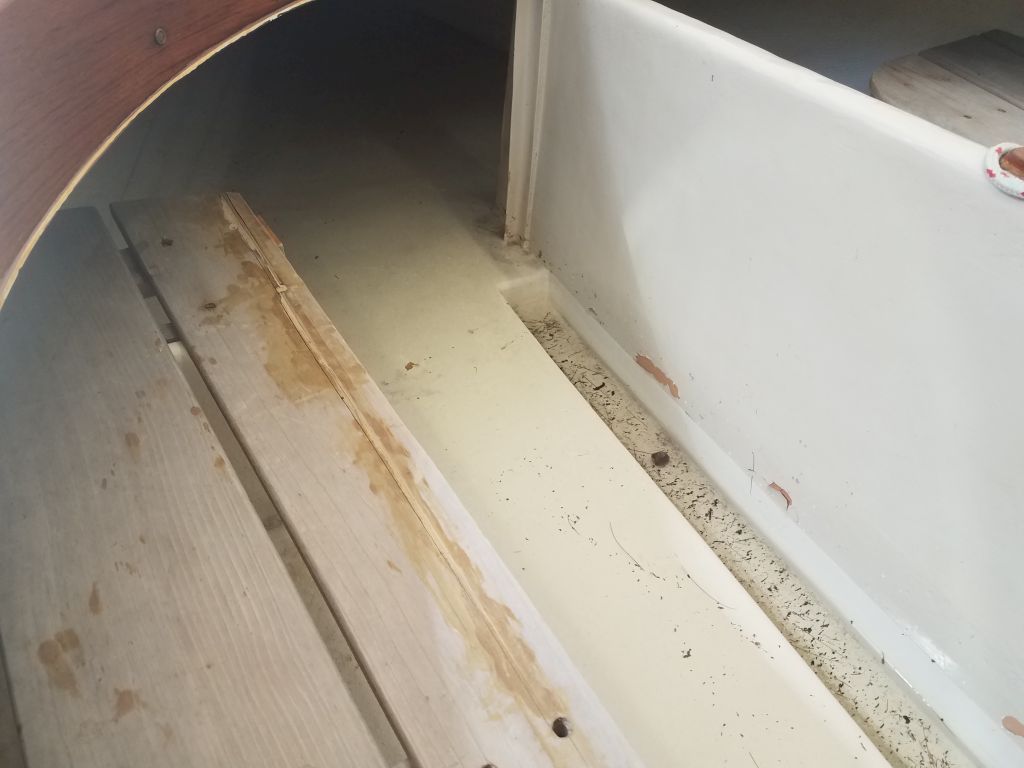
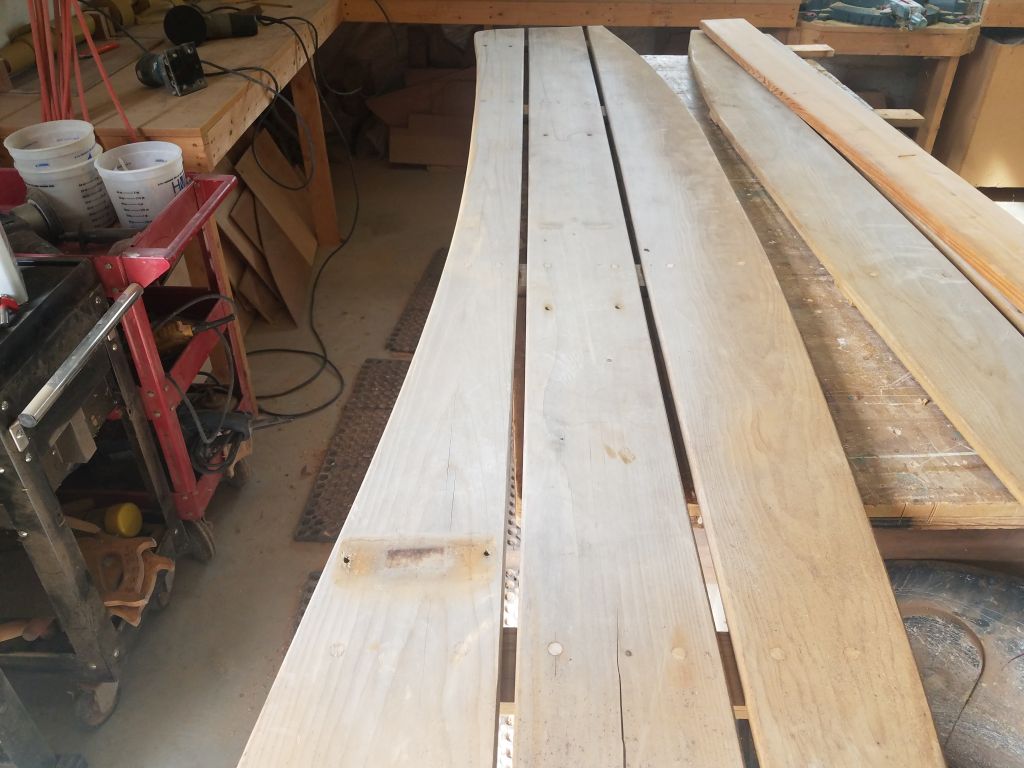
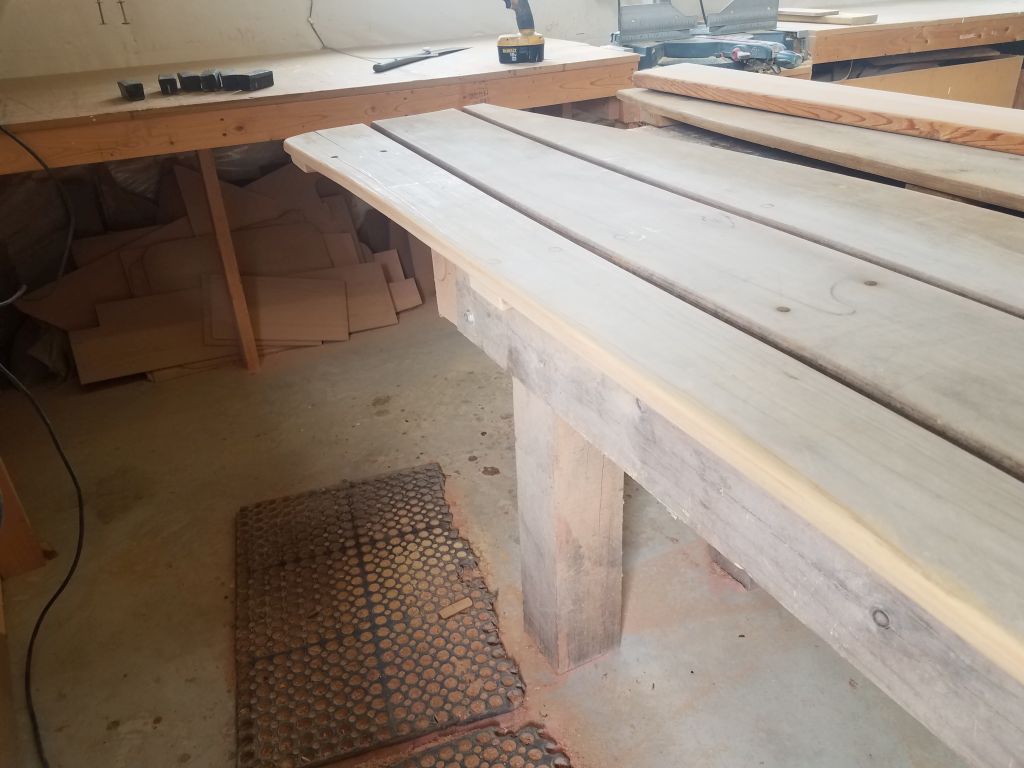
With the front end of the trailer propped up enough to bring the boat more or less level on her waterline, I mopped out any remaining water from the two narrow sumps built into the cockpit sole around the centerboard, and cleaned up various pine needles and other debris left behind.

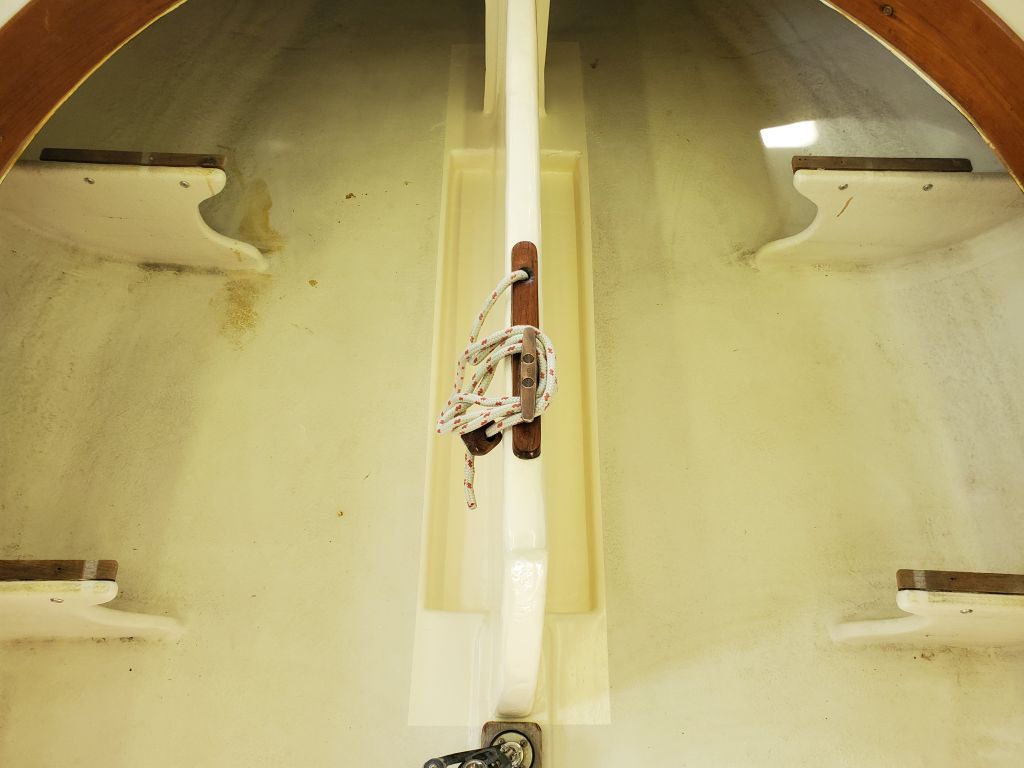
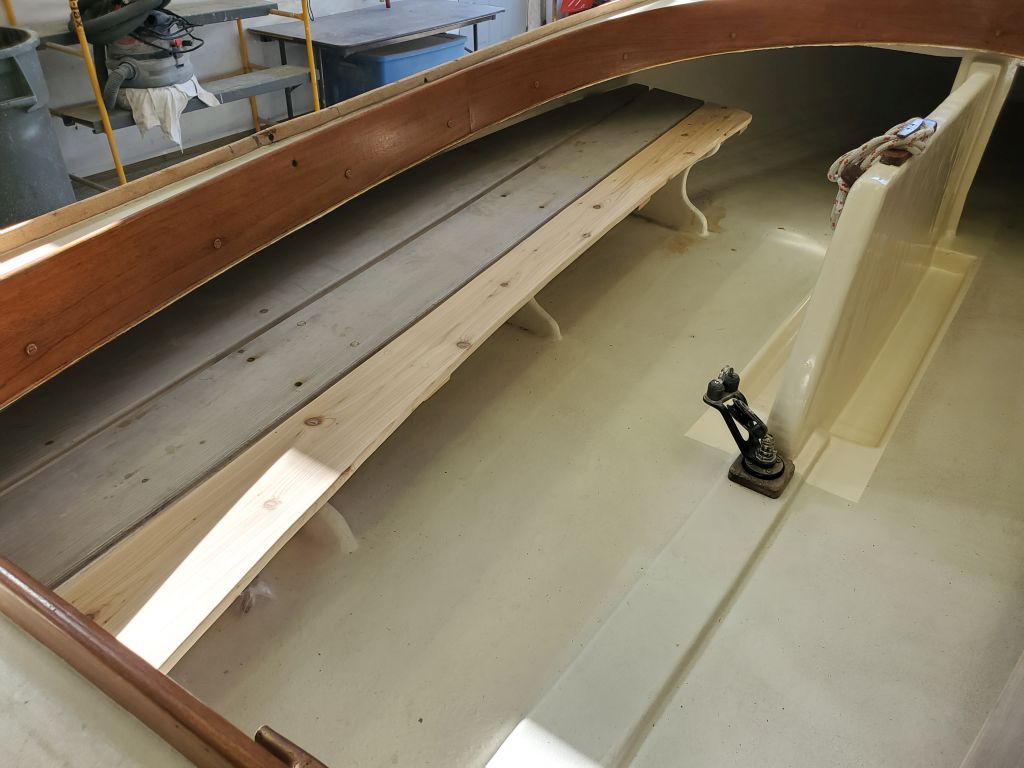
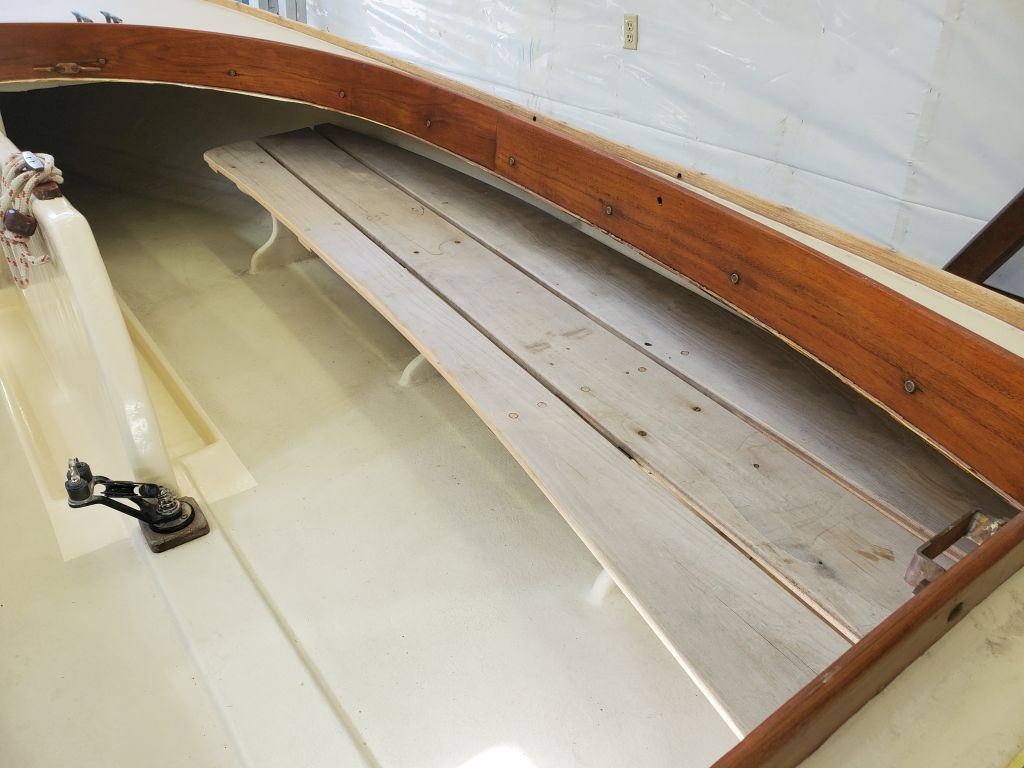
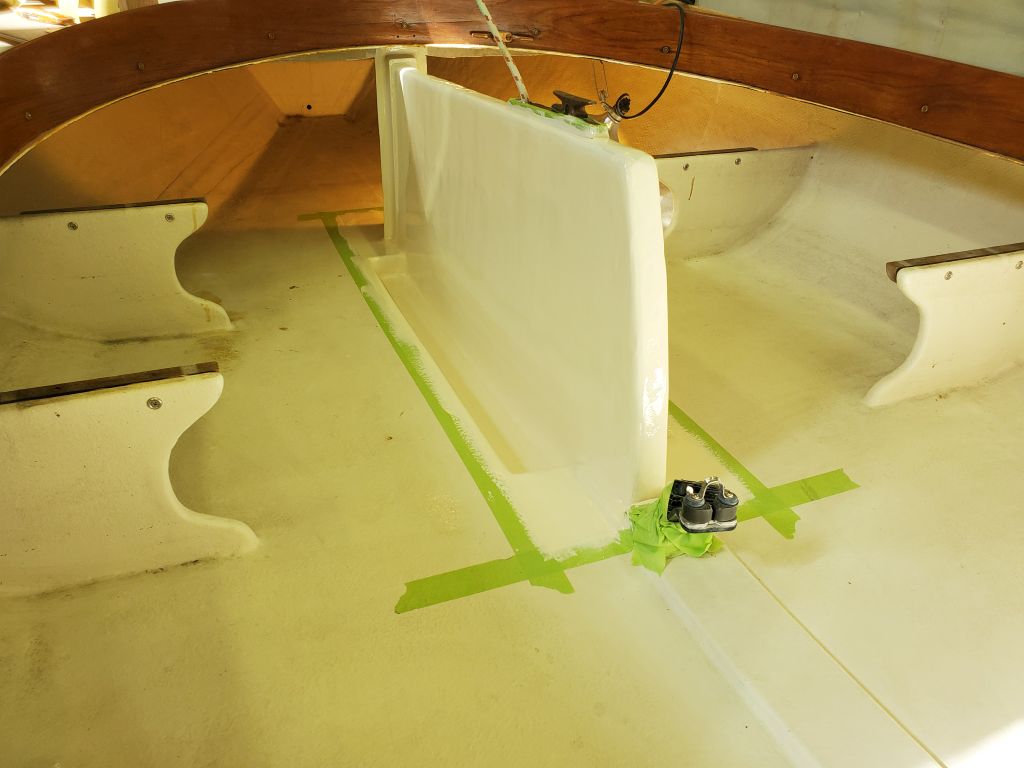
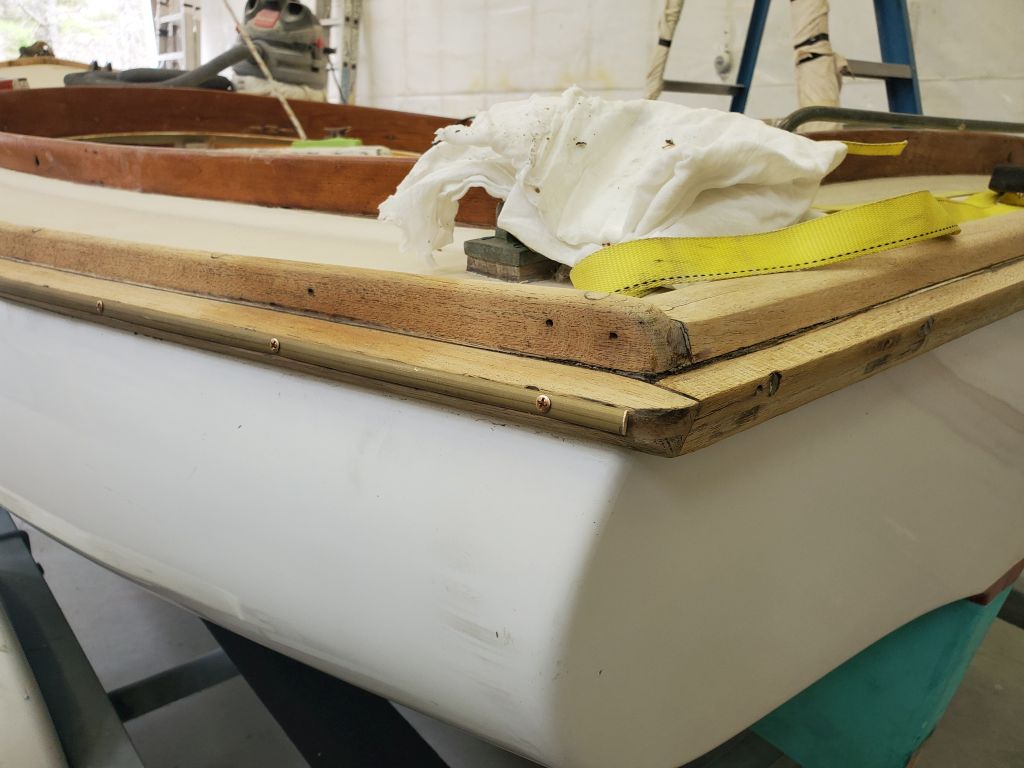
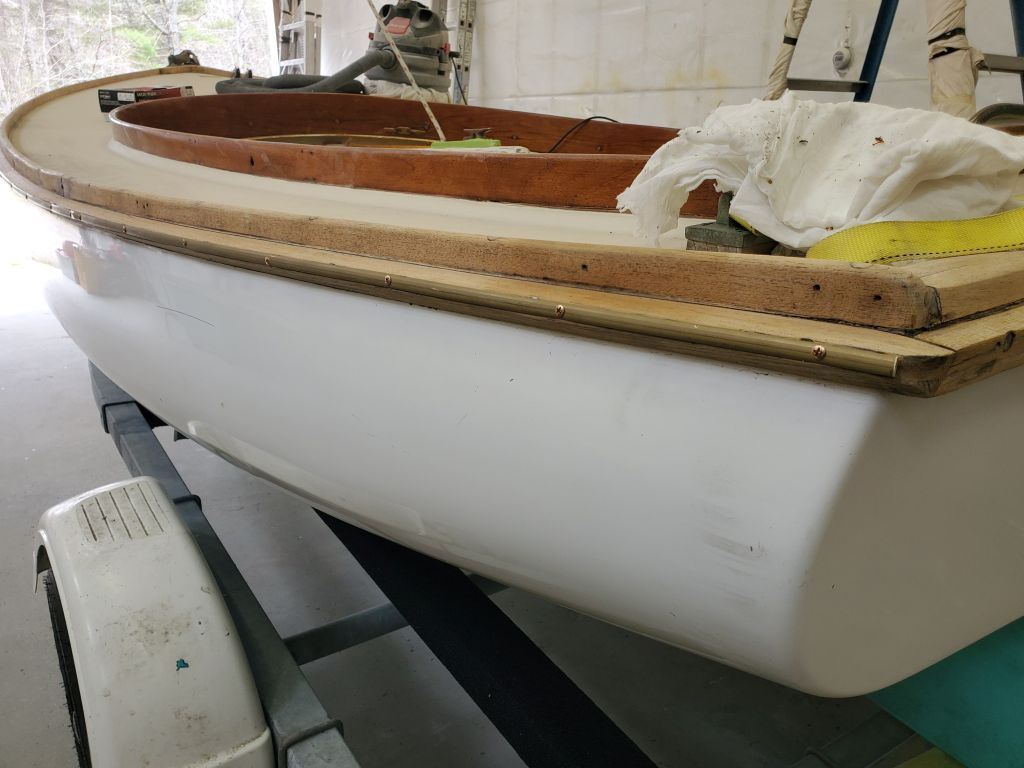
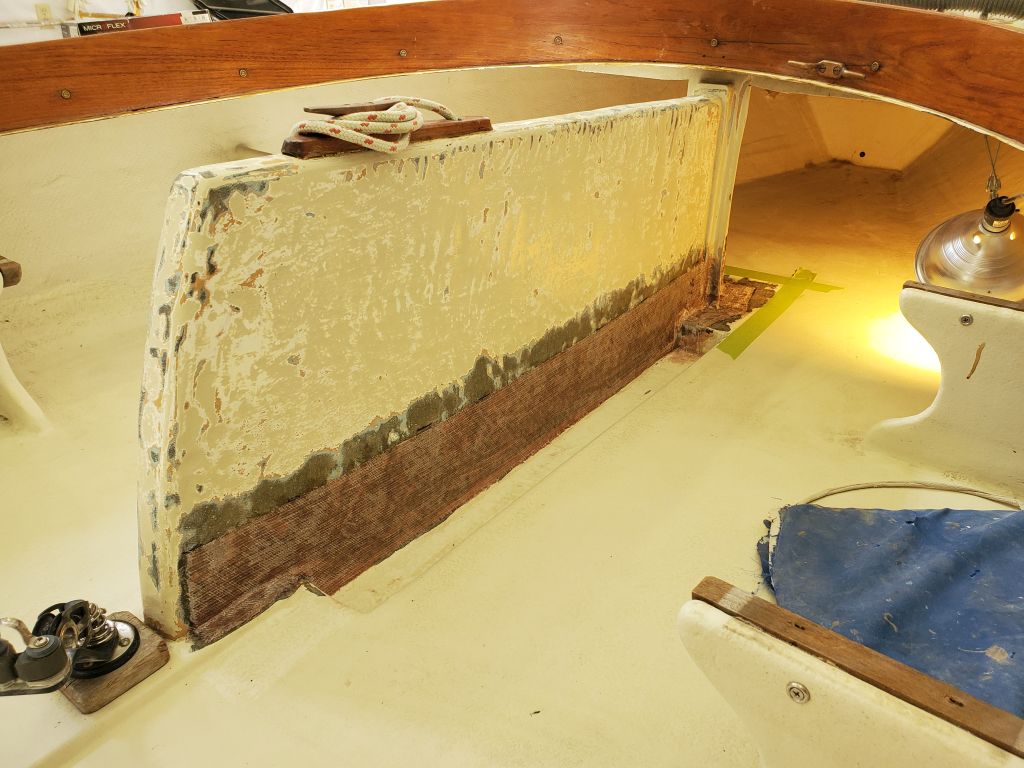
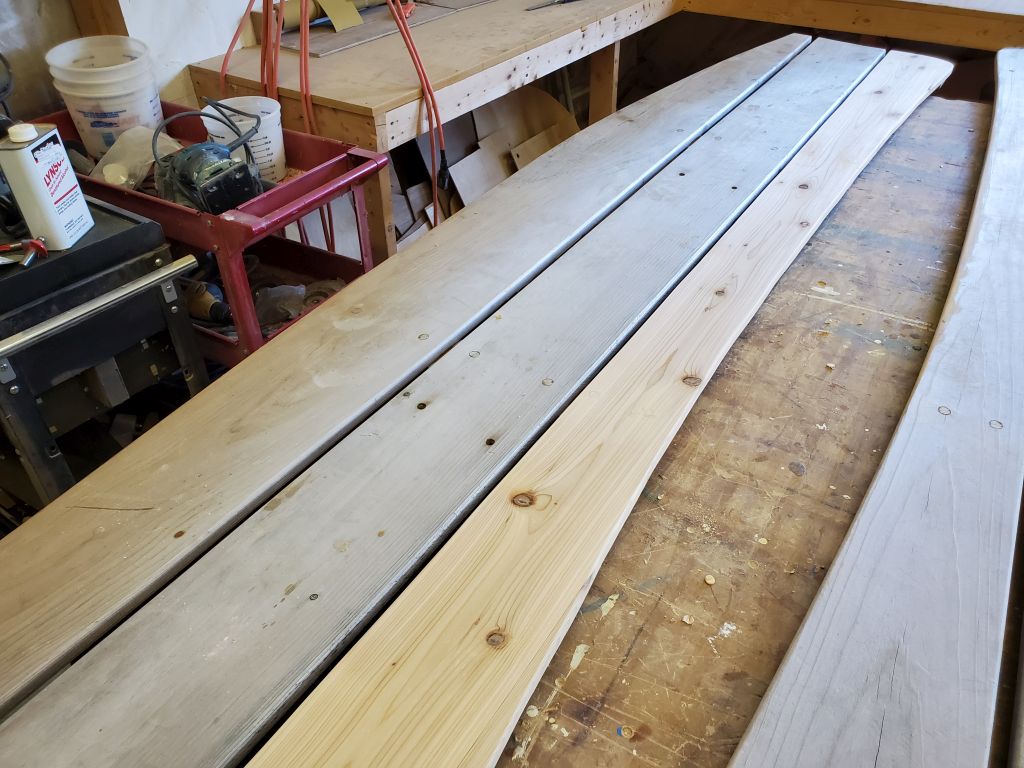
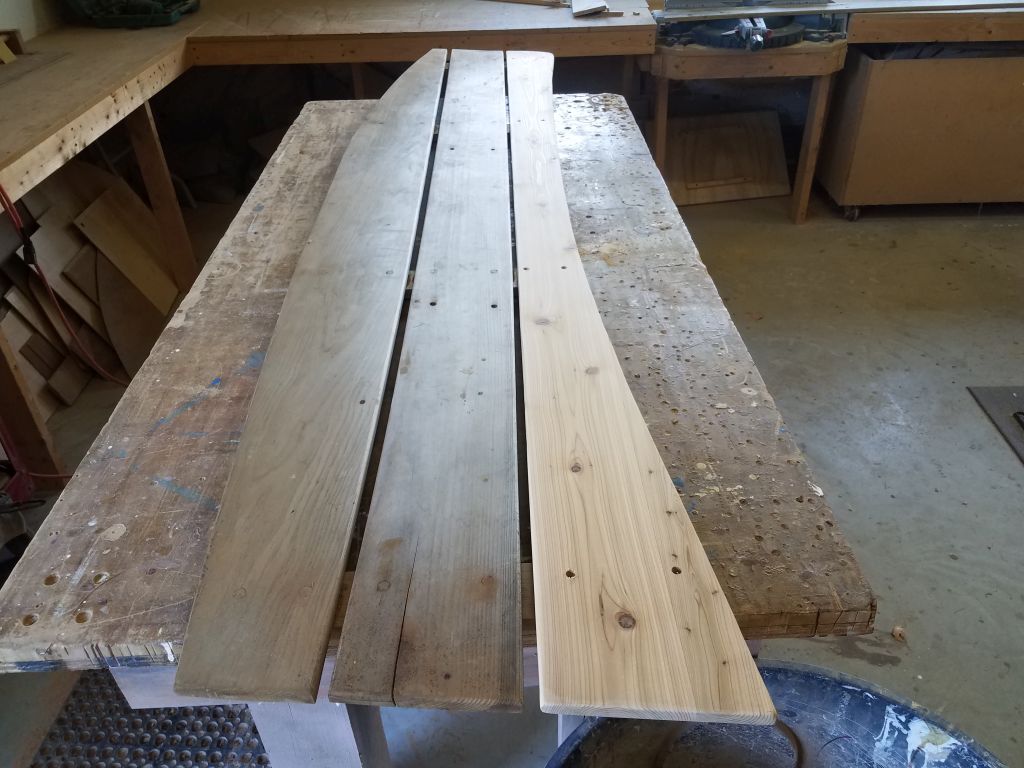
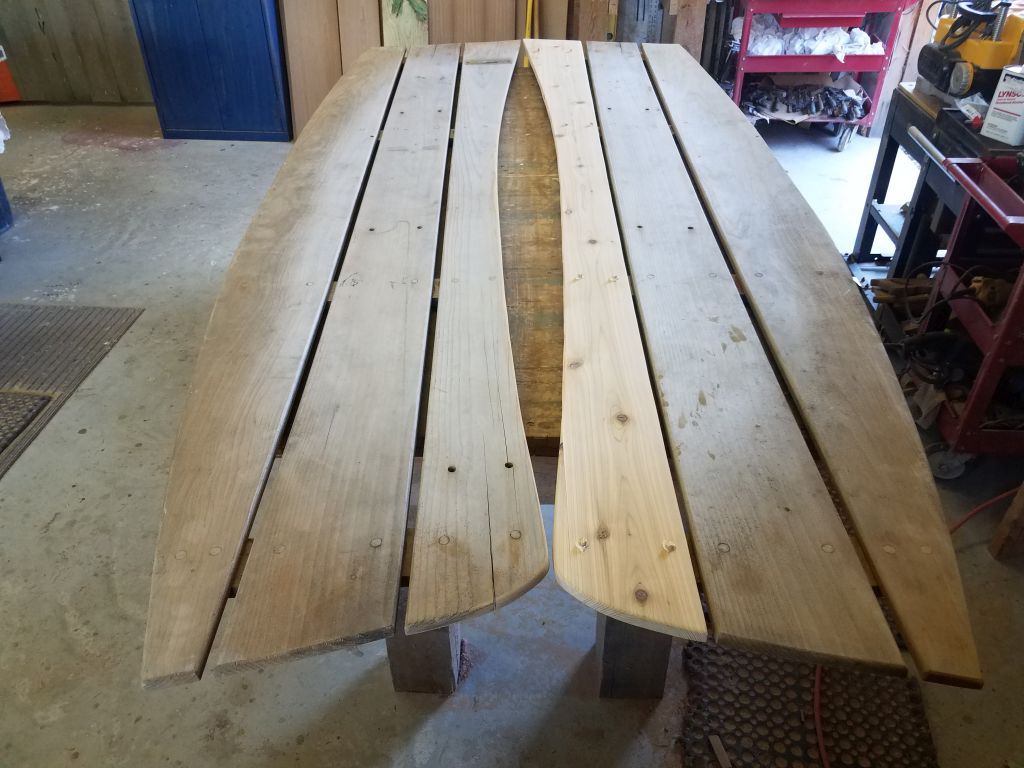
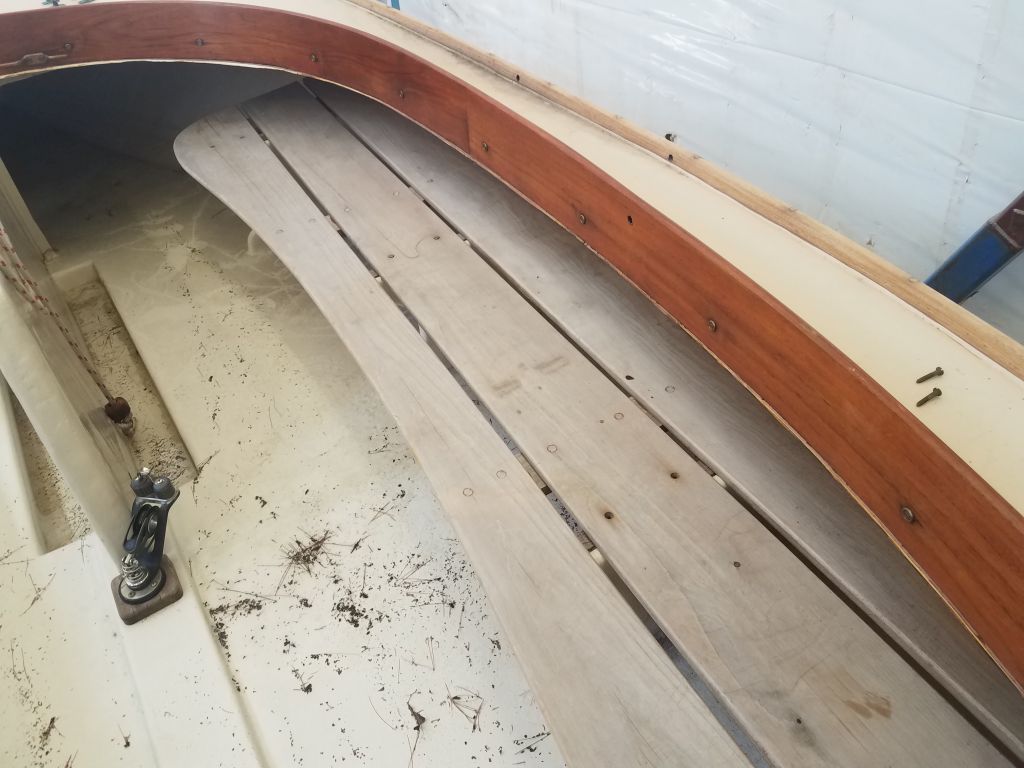
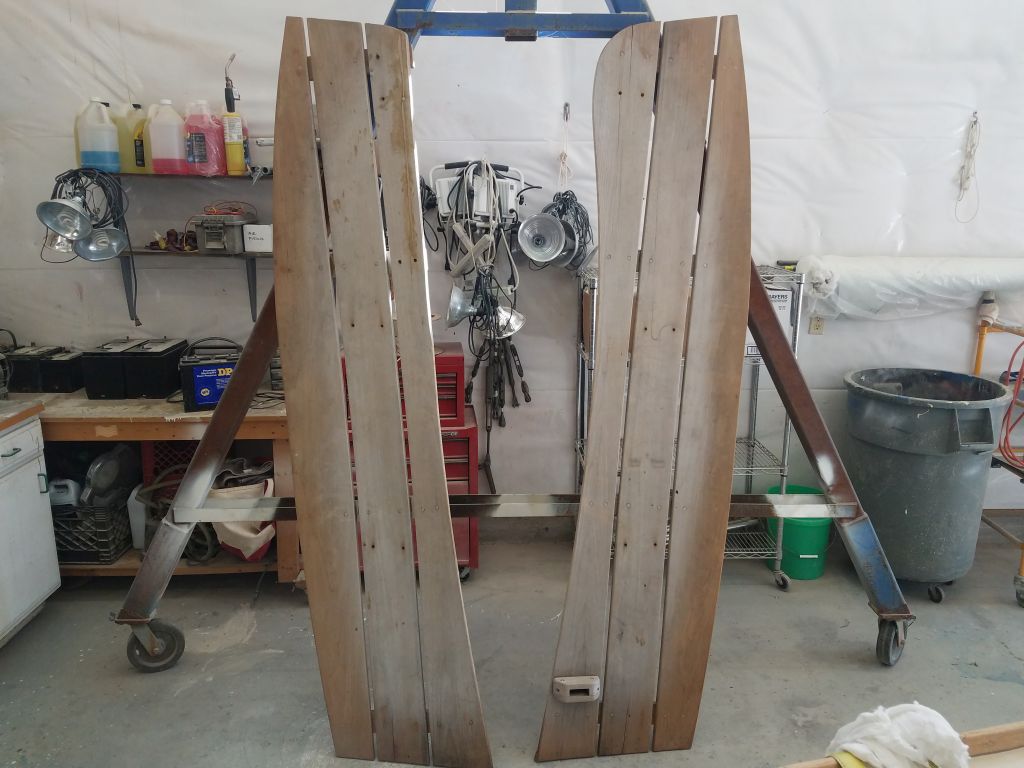
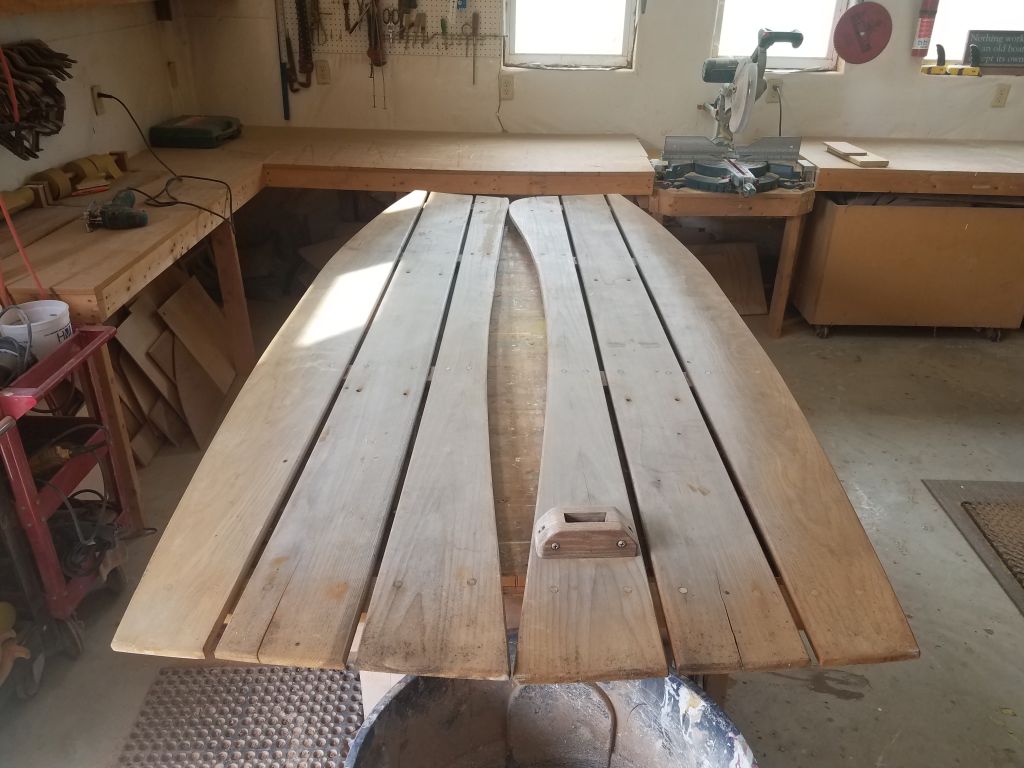
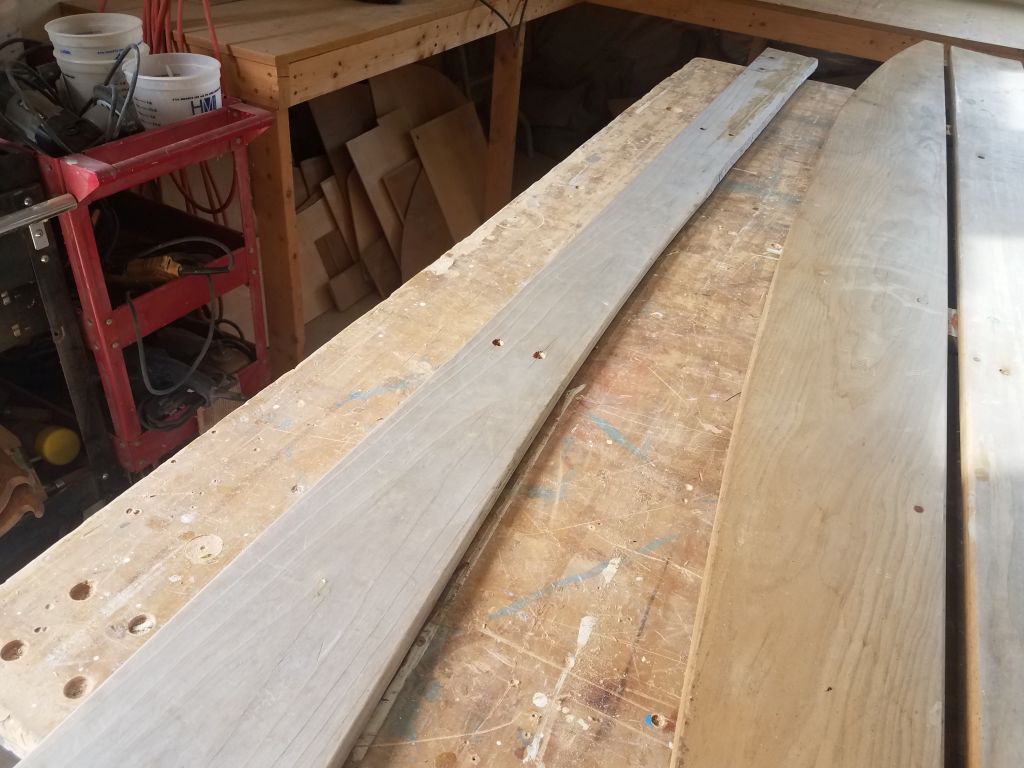
The wooden slat seats had suffered some damage on the forward port side, where the inboard-most board had been broken off, and badly “repaired”.  These seats were built from a softwood of some sort–it looked to me like cypress–and the damage to the seat was from a combination of factors:  weak wood; a curvy design that was unsupported at its outboard edge; and stock that was thinner (1/2″) than it probably should have been.  The starboard seat still had the original shape of its innermost board for comparison.  Repairing the broken board, and changing the shape of the starboard seat, were on my to-do list, though for the moment the owner wanted to refrain from completely rebuilding the seats in a more appropriate material–a possible job for another time, but not now.

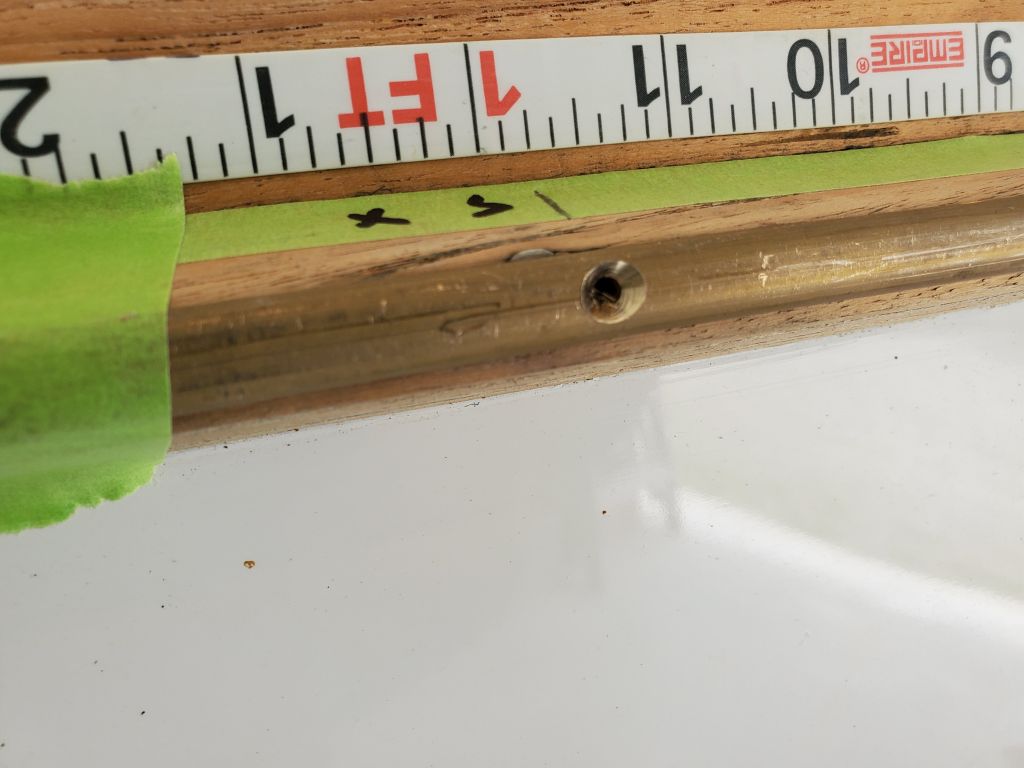
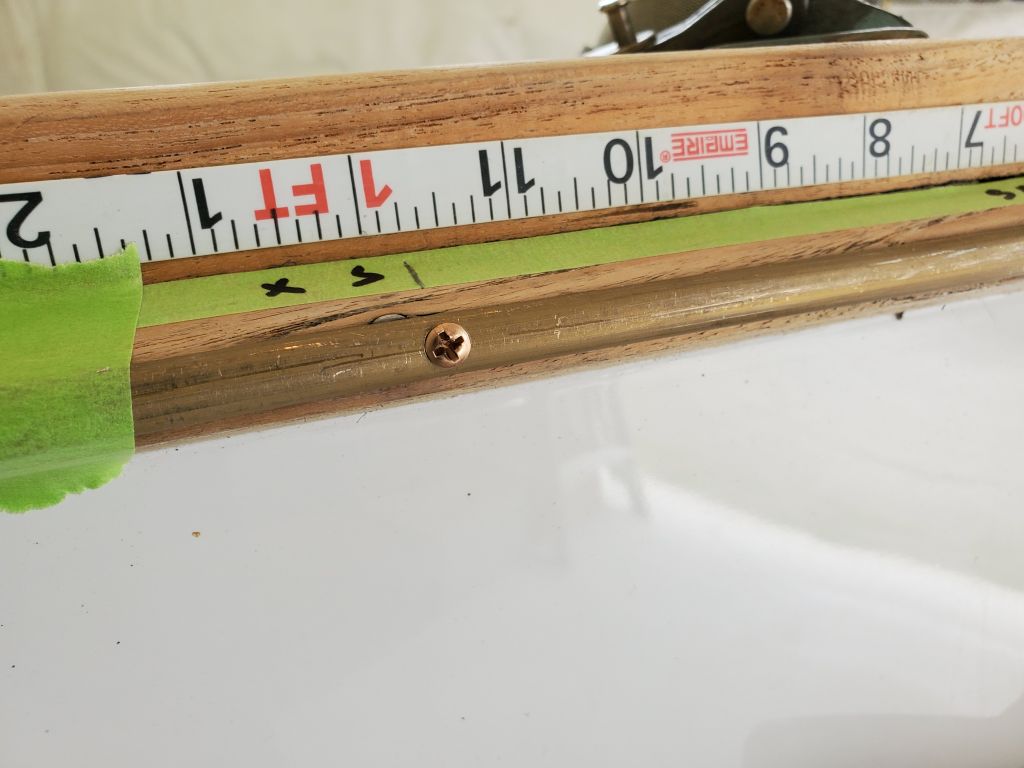
I found that the seats were easily removable:  there were four exposed screws holding the seats in place to the knees beneath, and the three seat slats on each side were held together independently by additional cleats beneath.  So in short order I had both seats out of the way, which would not only make repair easier, but also opened up access to the inside of the boat for the centerboard work.

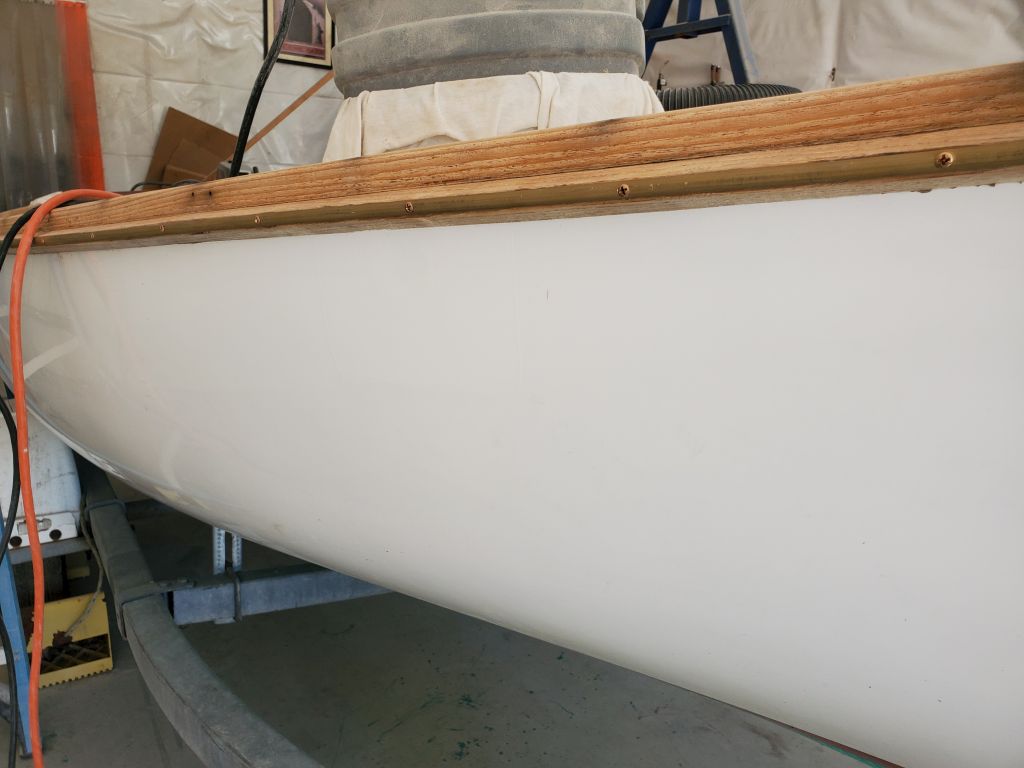
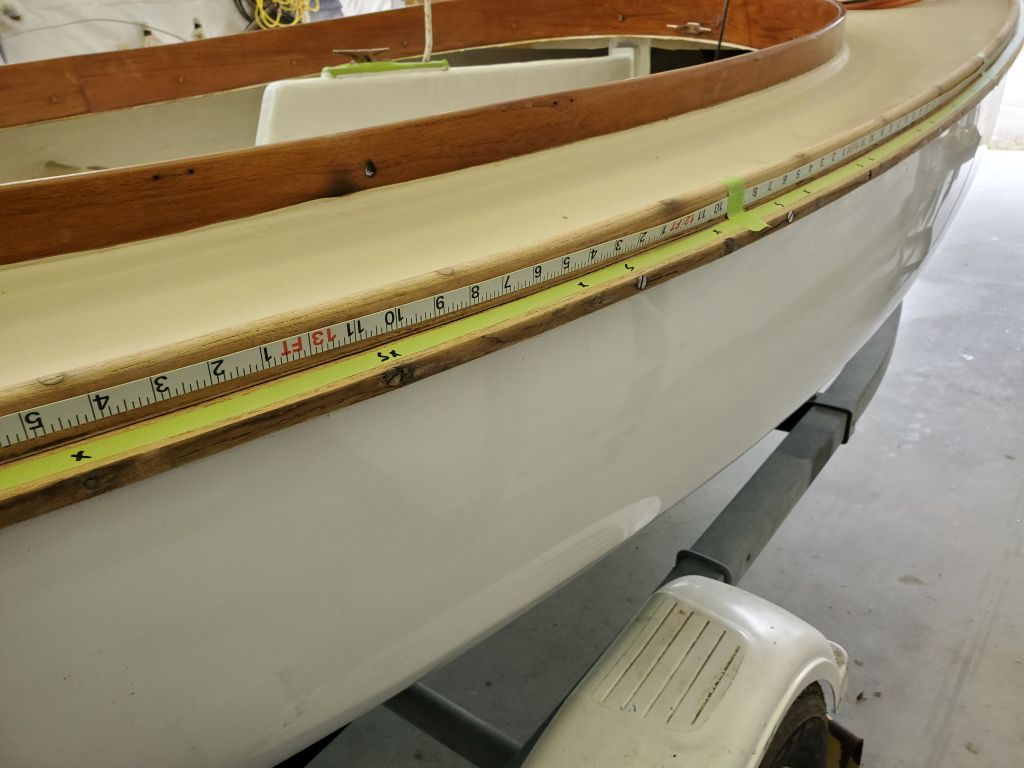
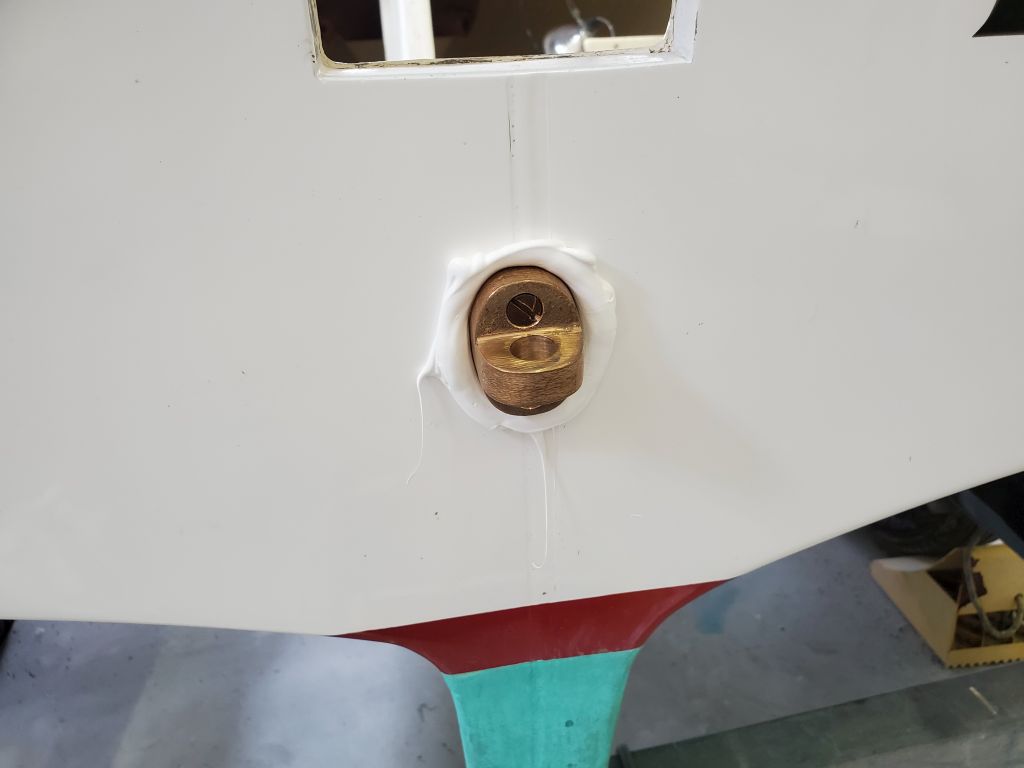
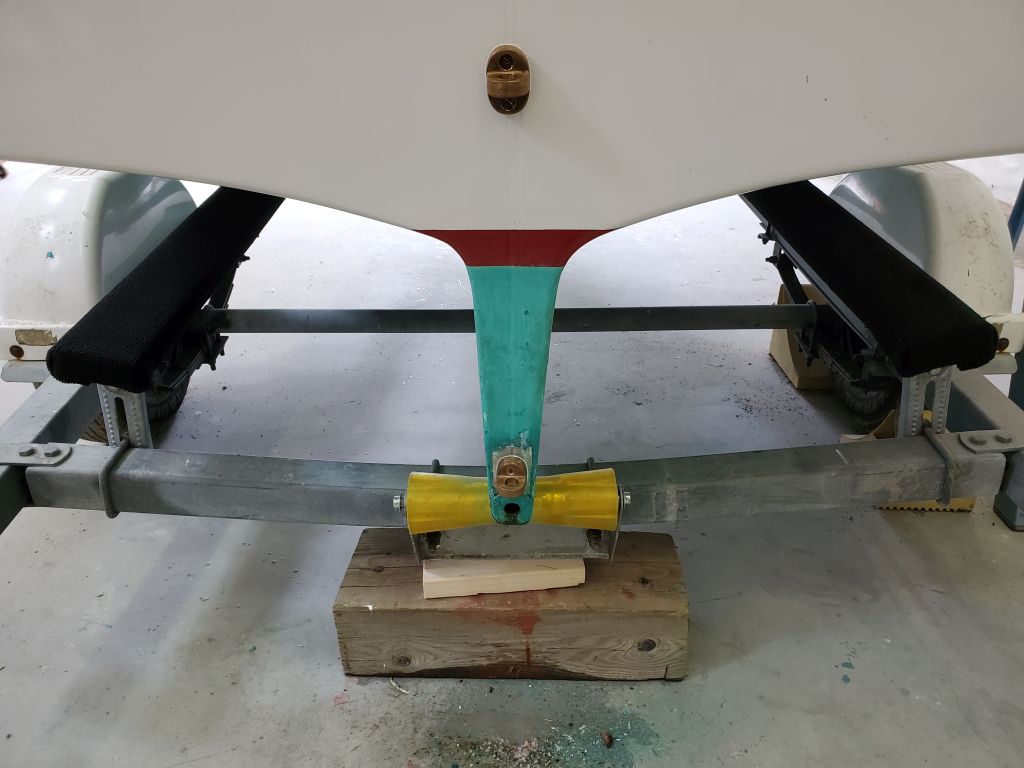
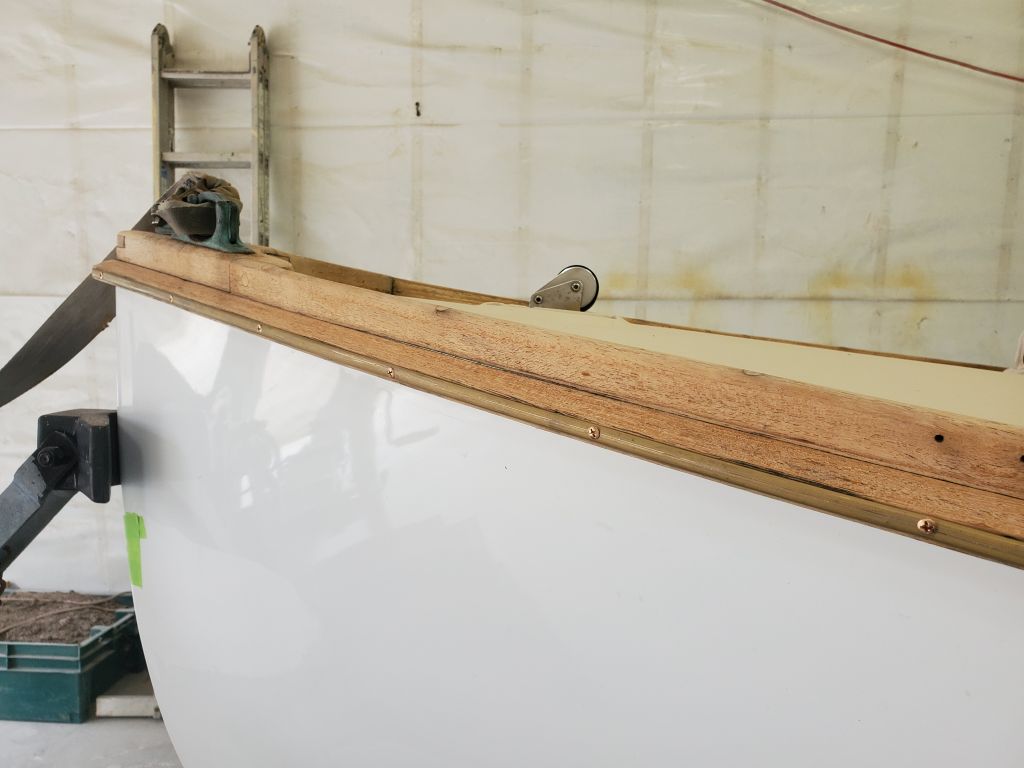
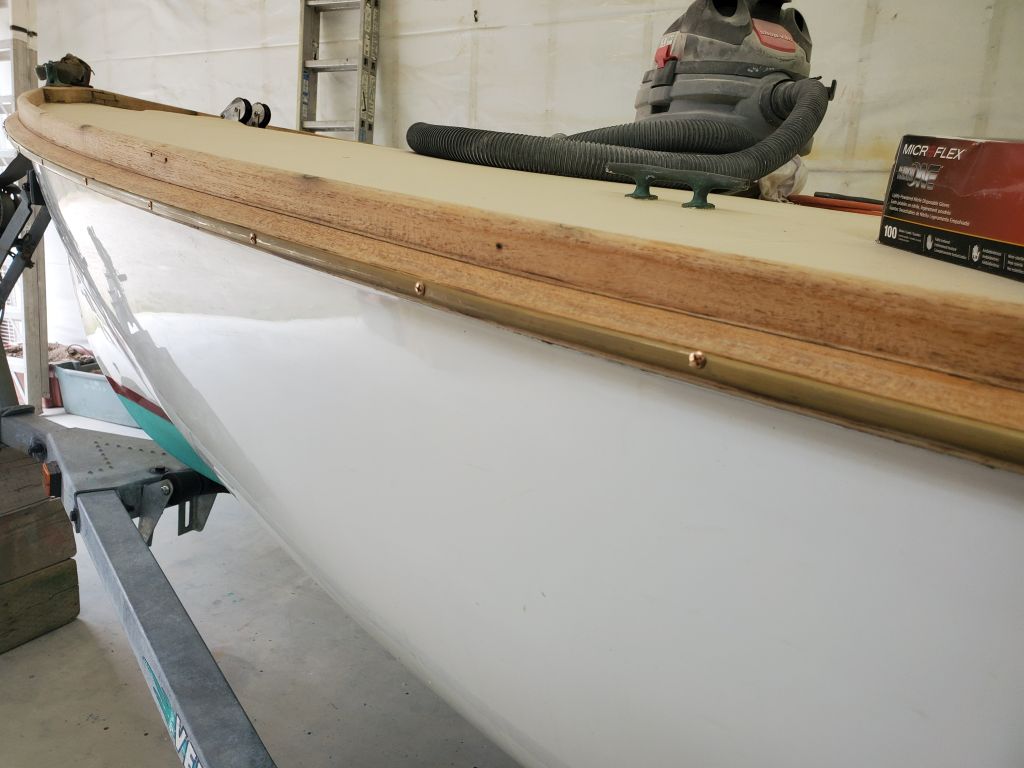
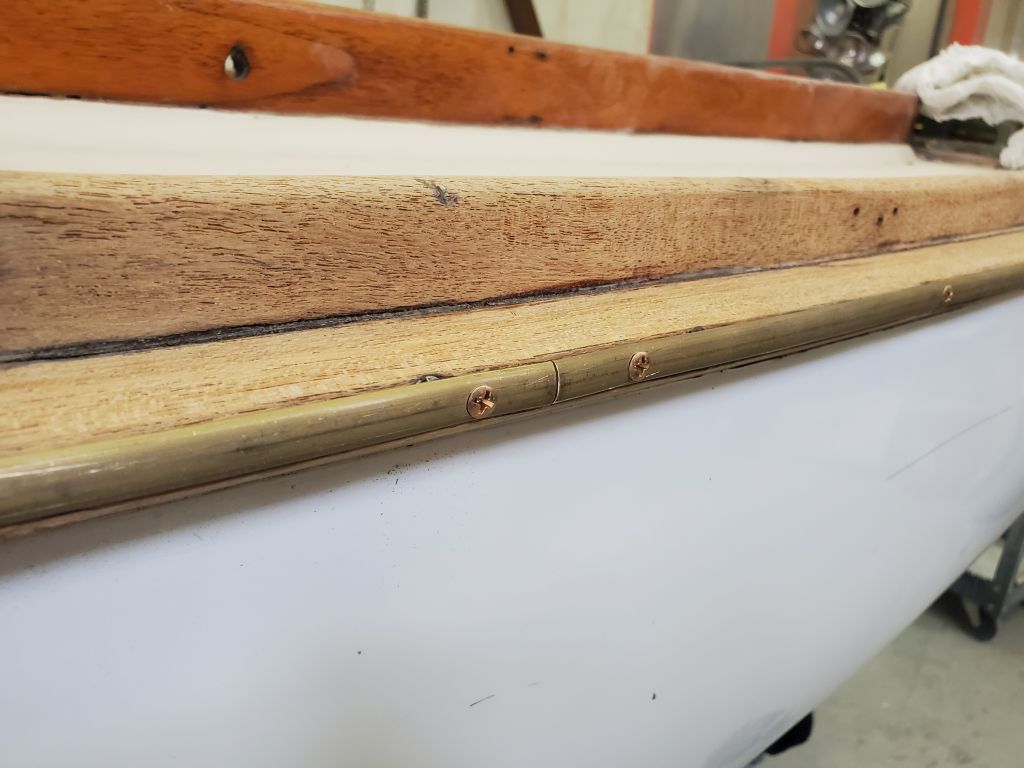
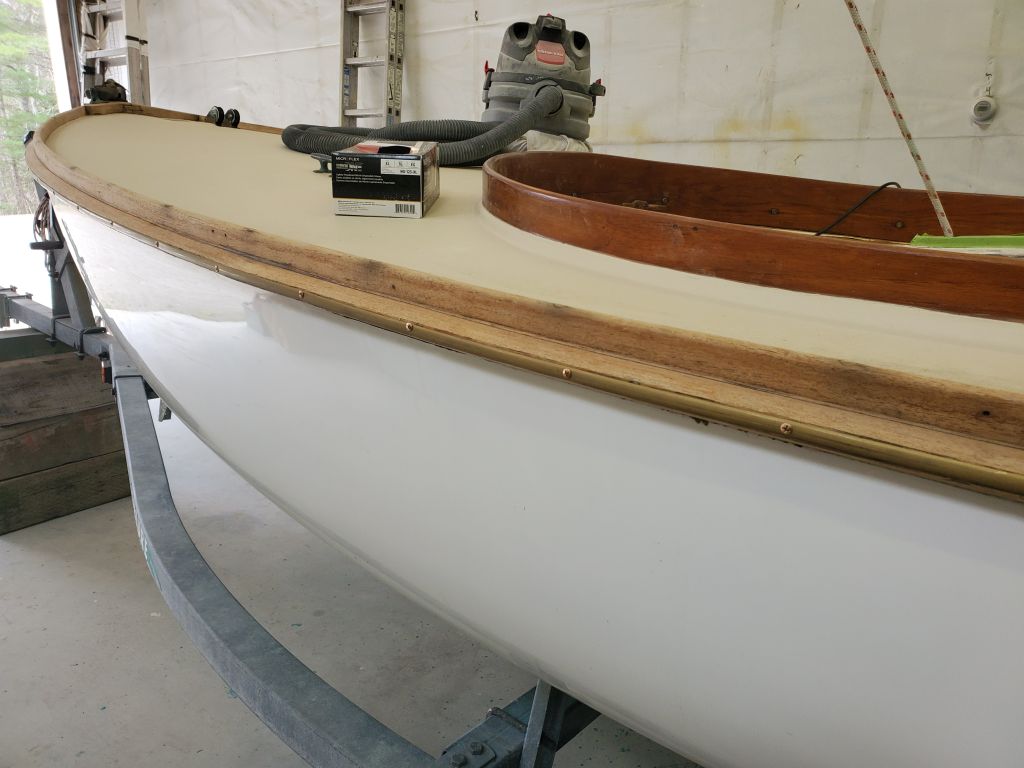
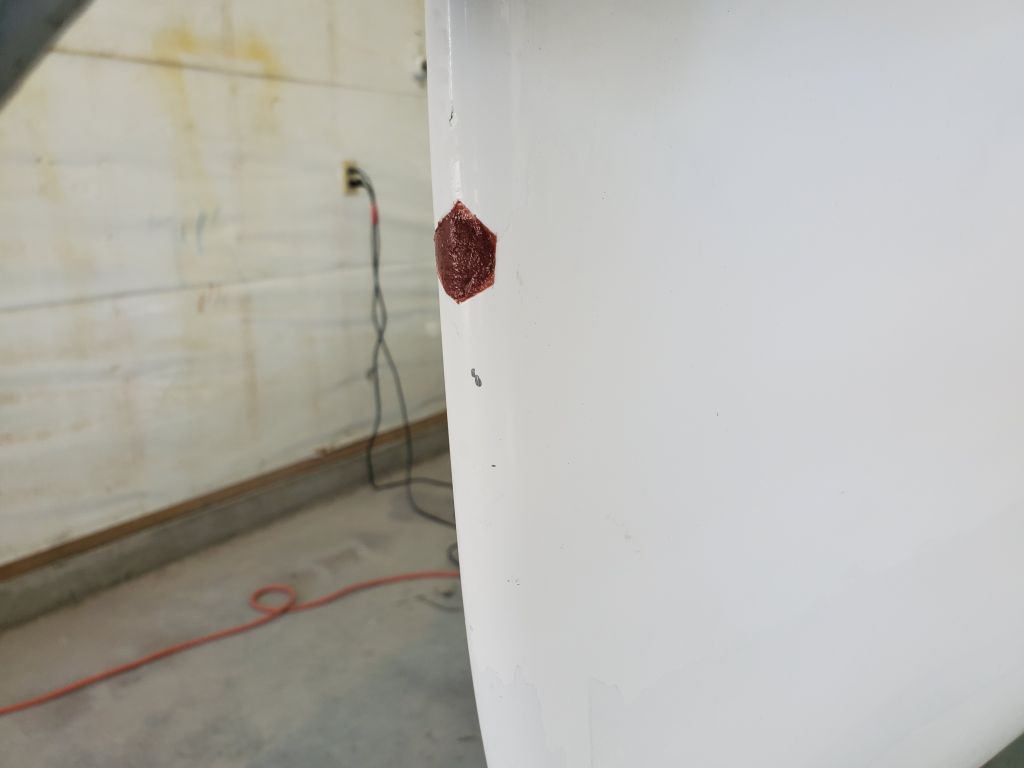
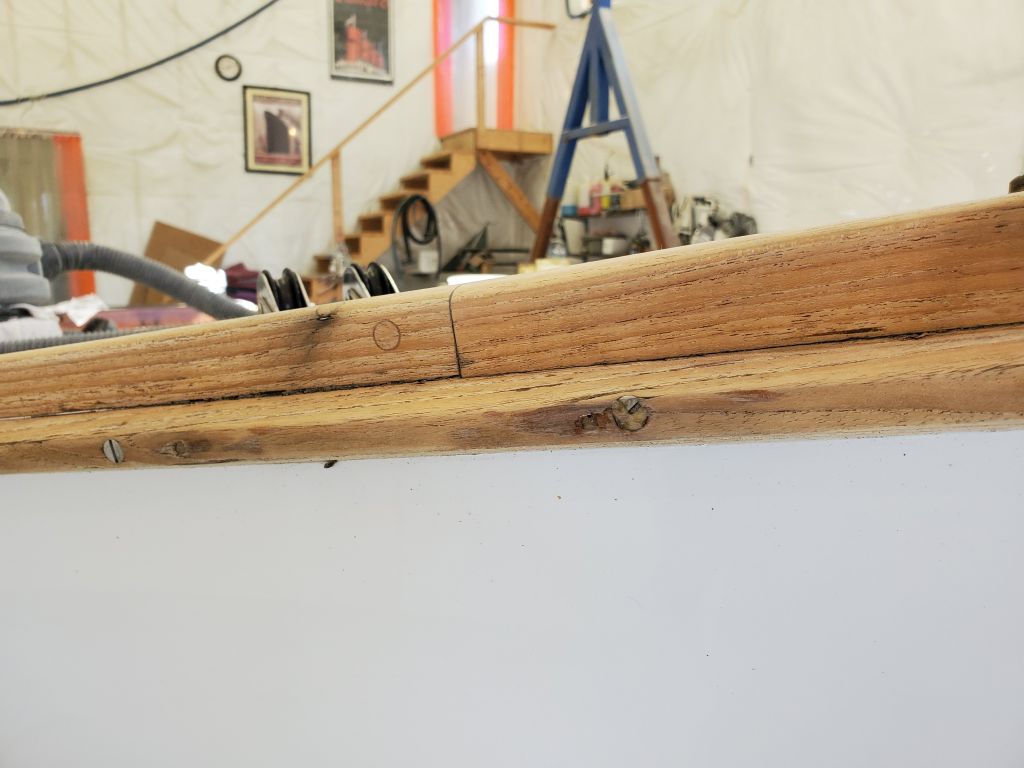
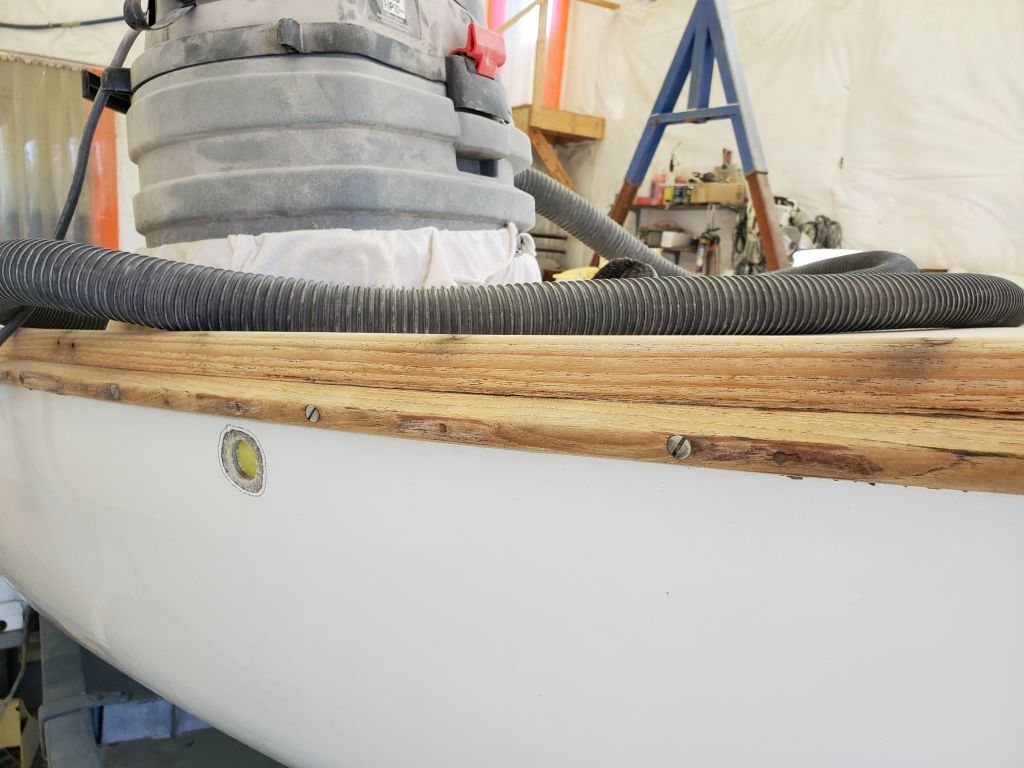
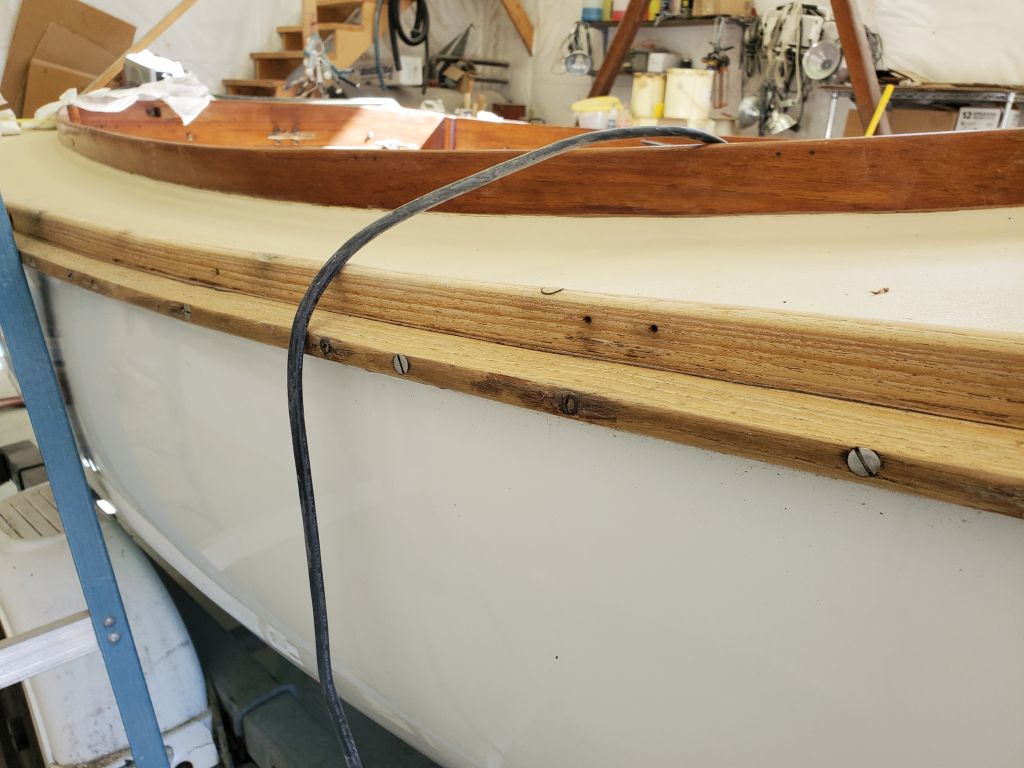
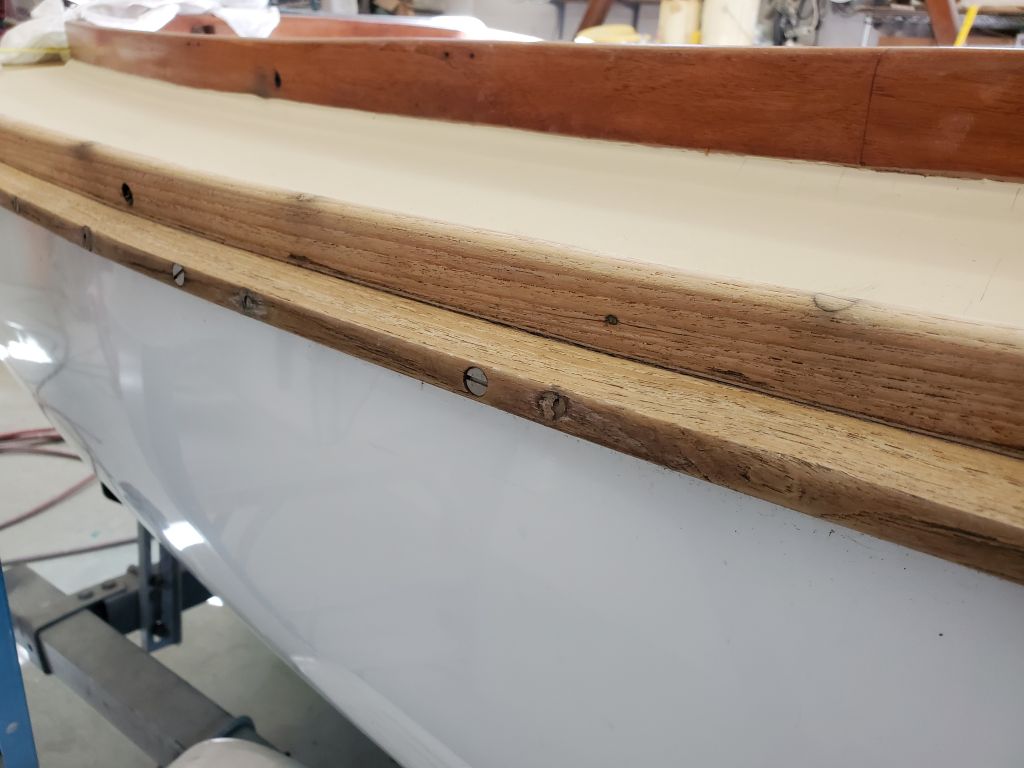
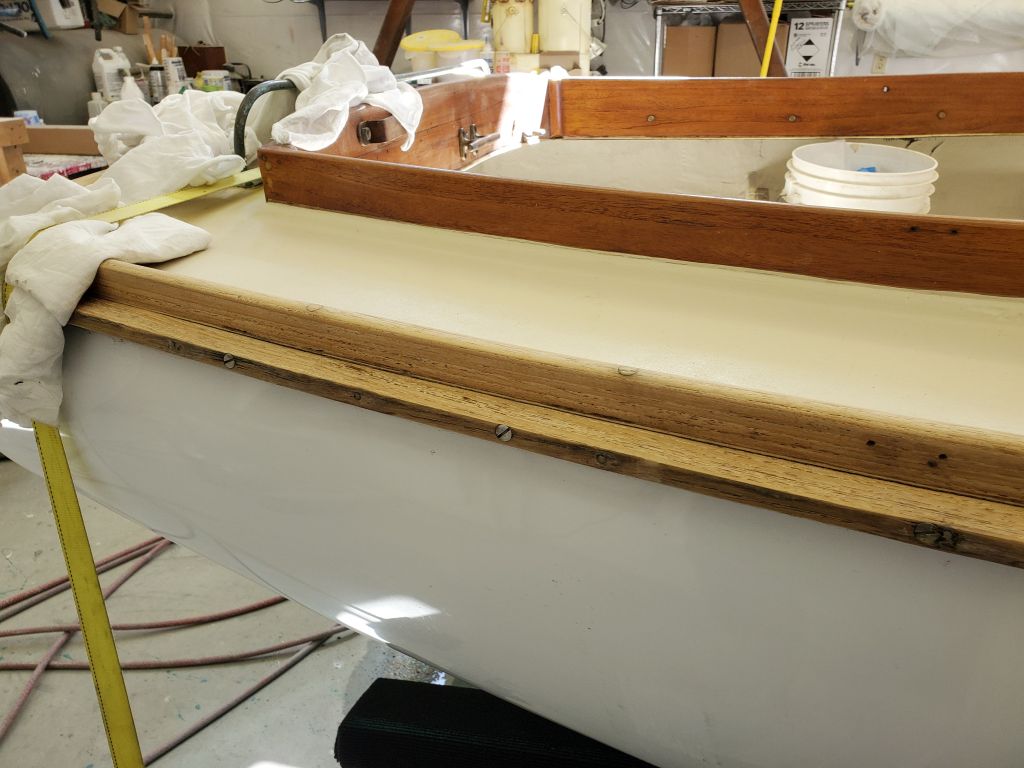
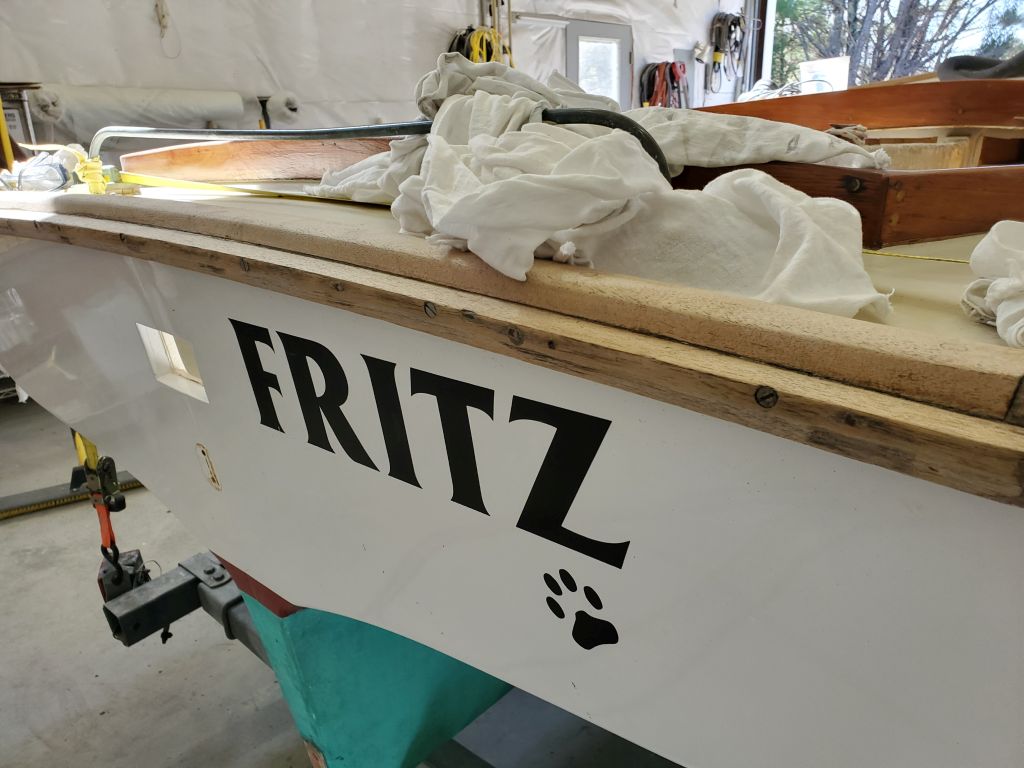
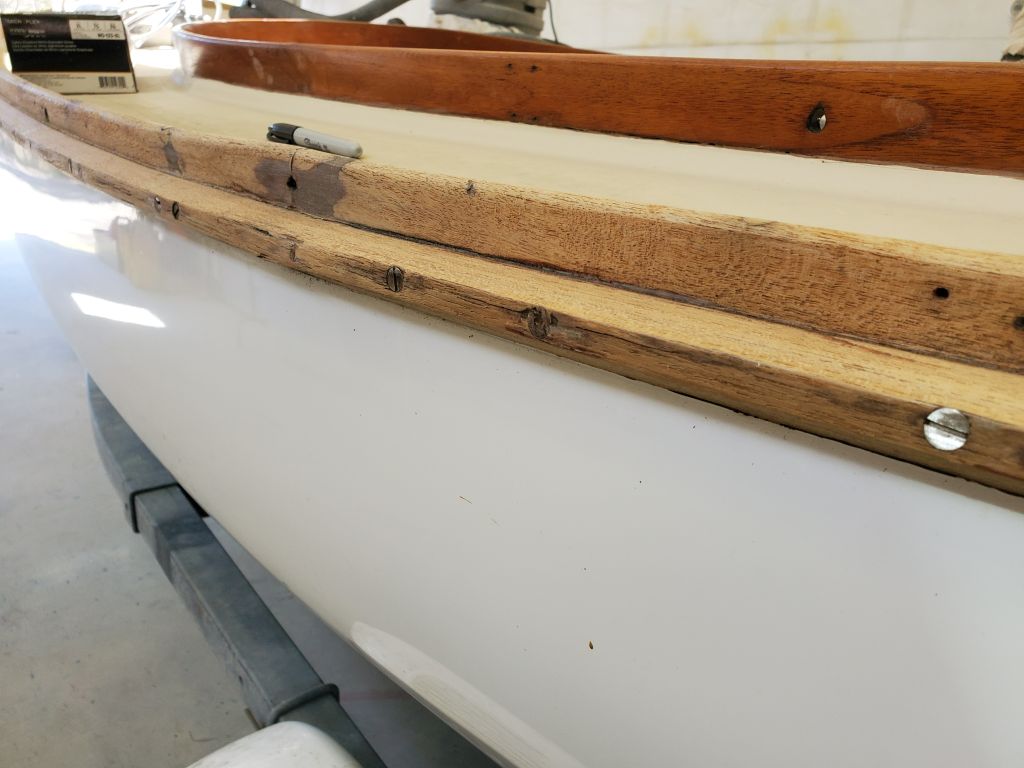
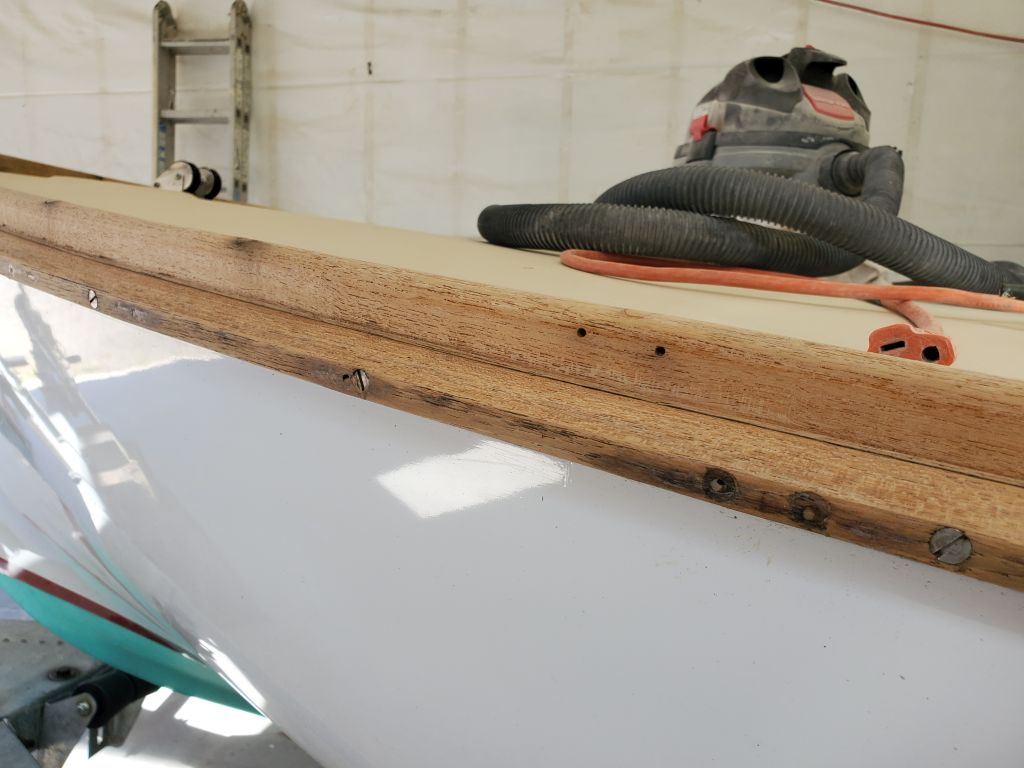
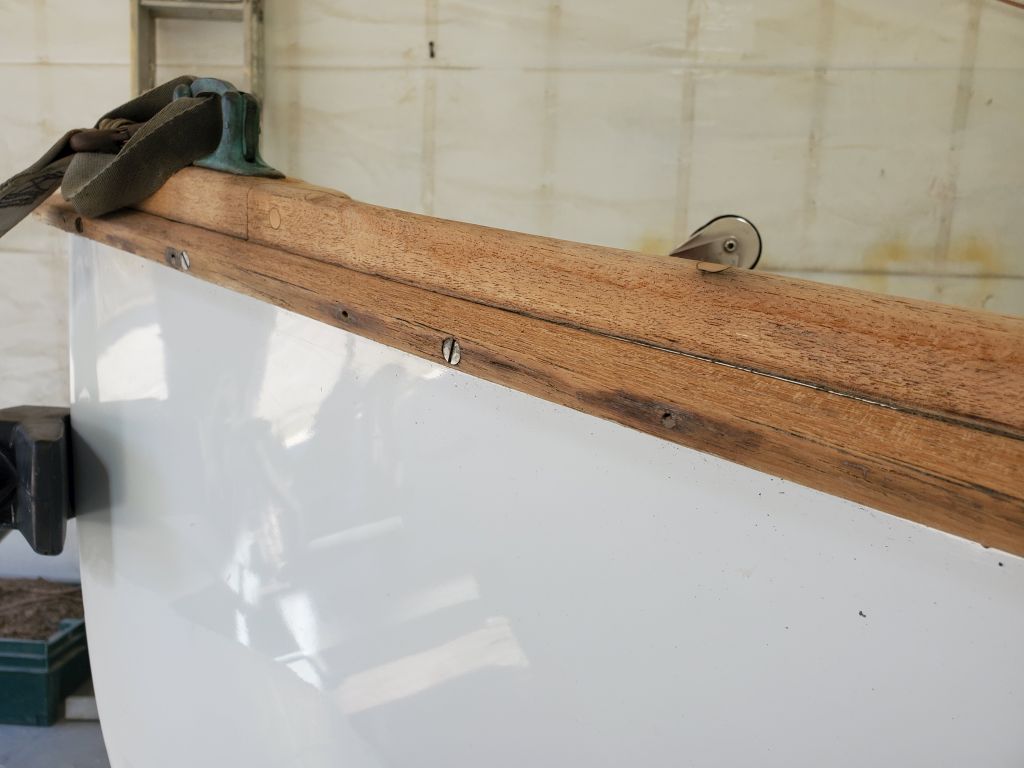
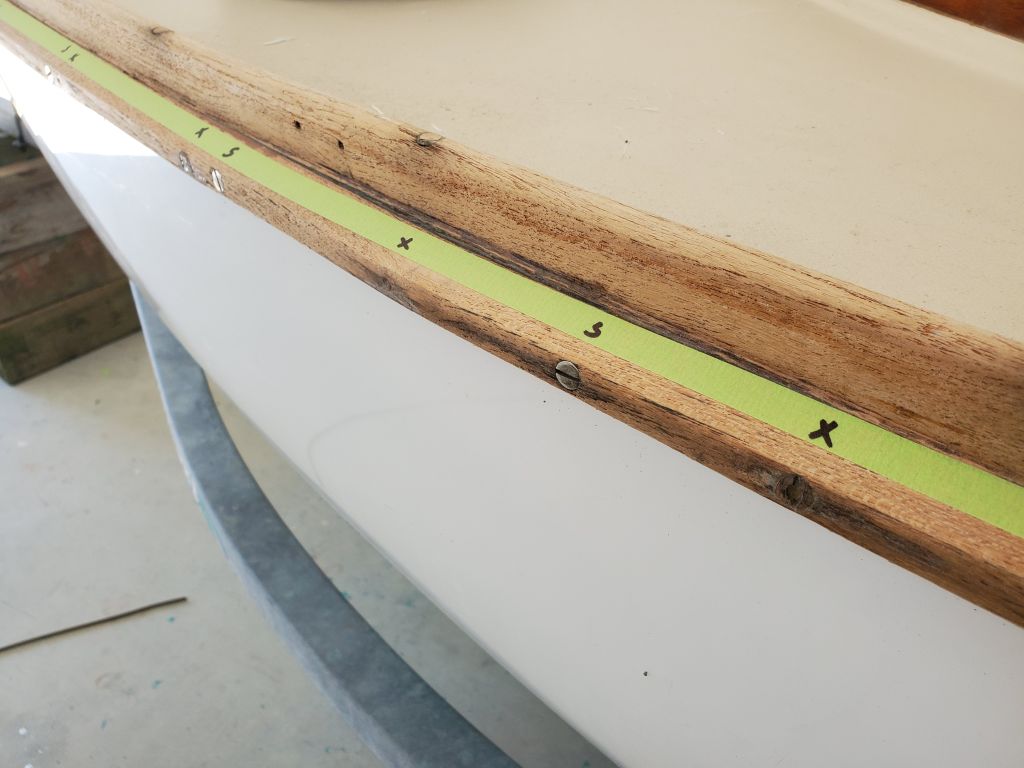
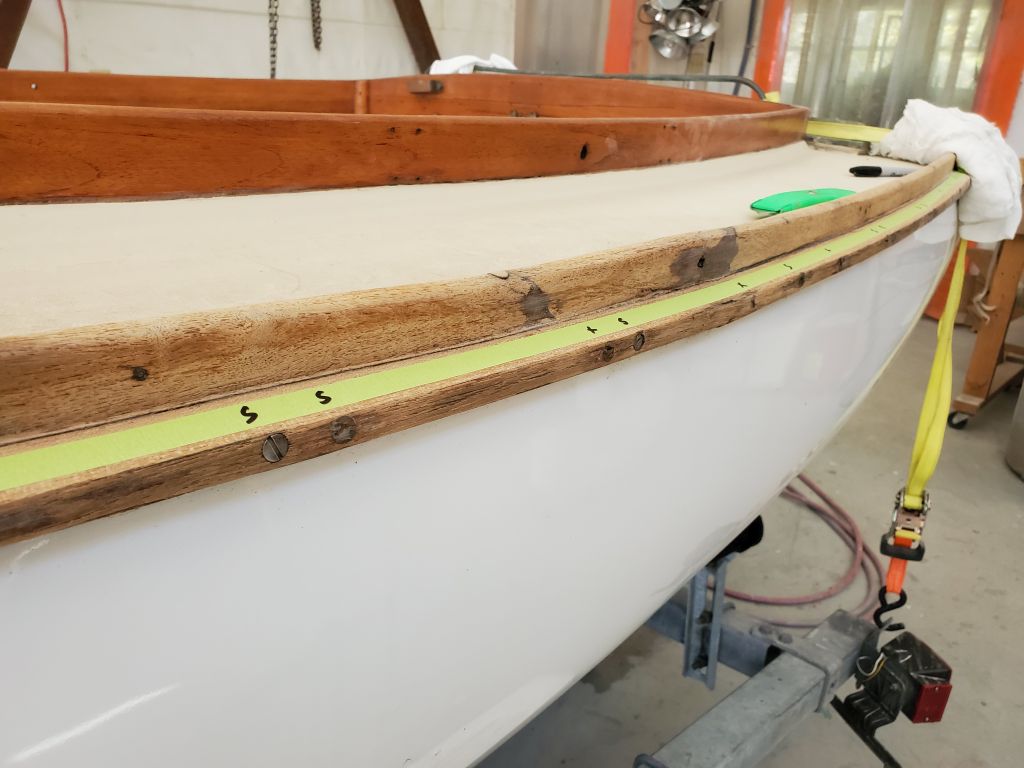
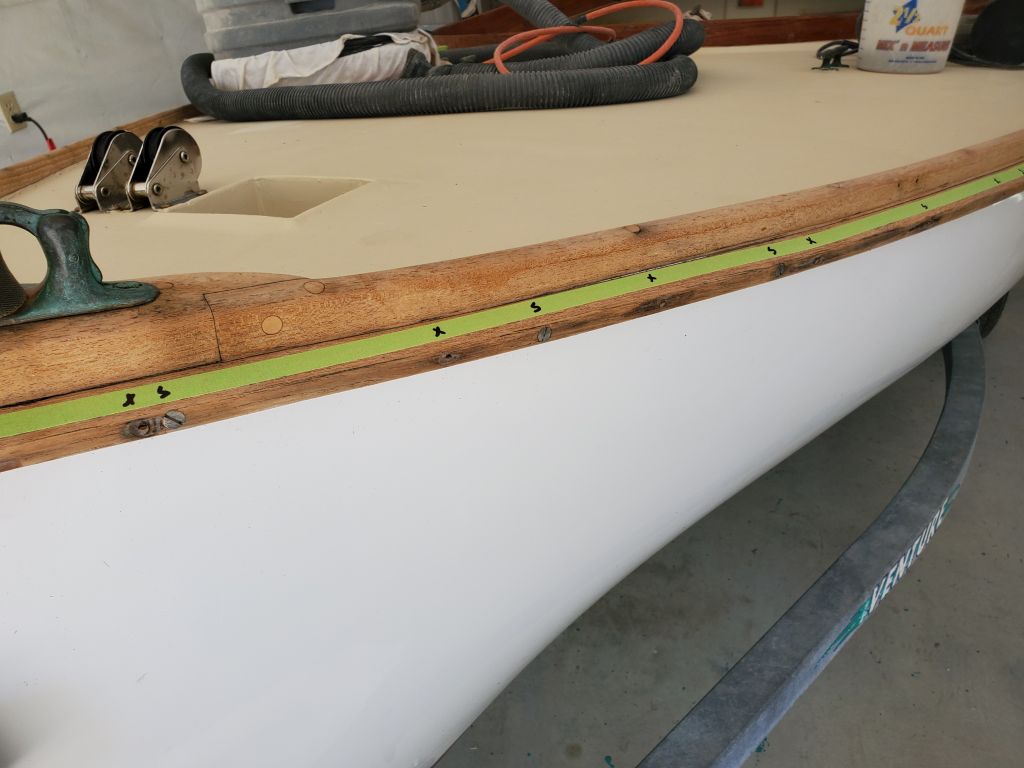
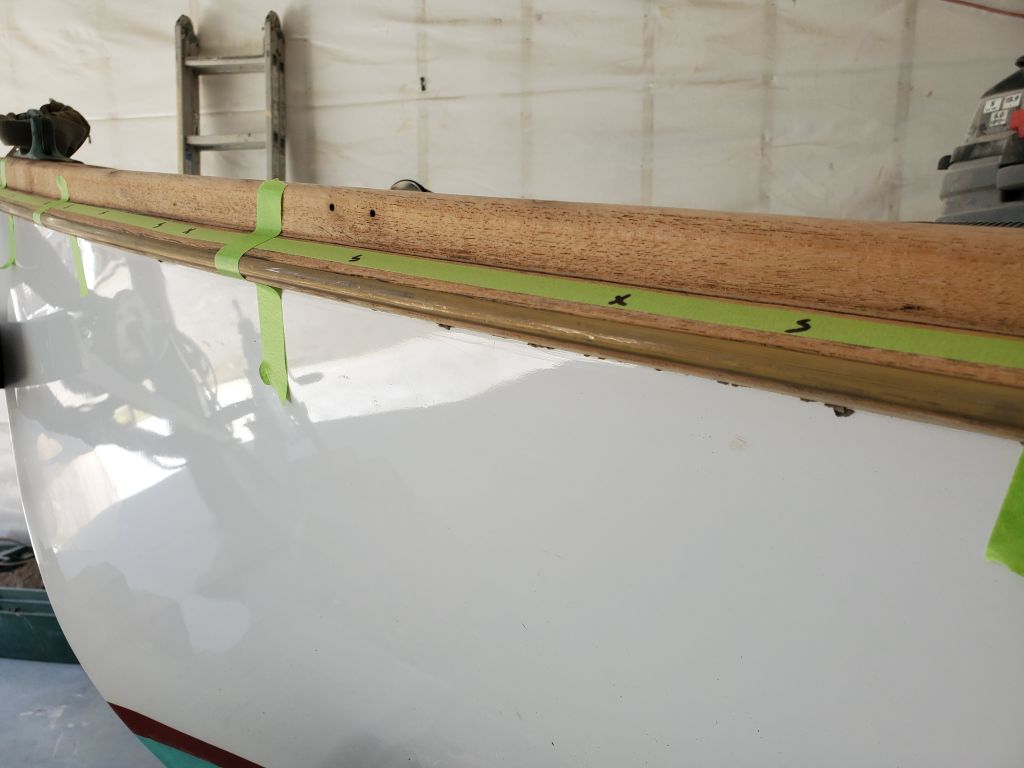
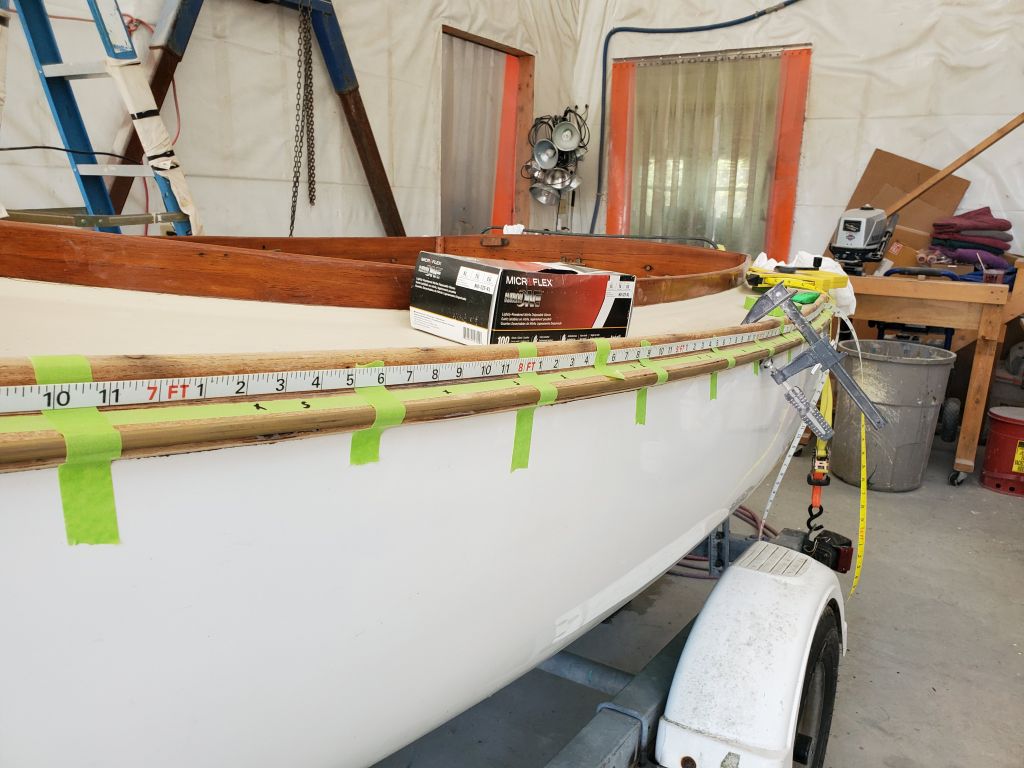
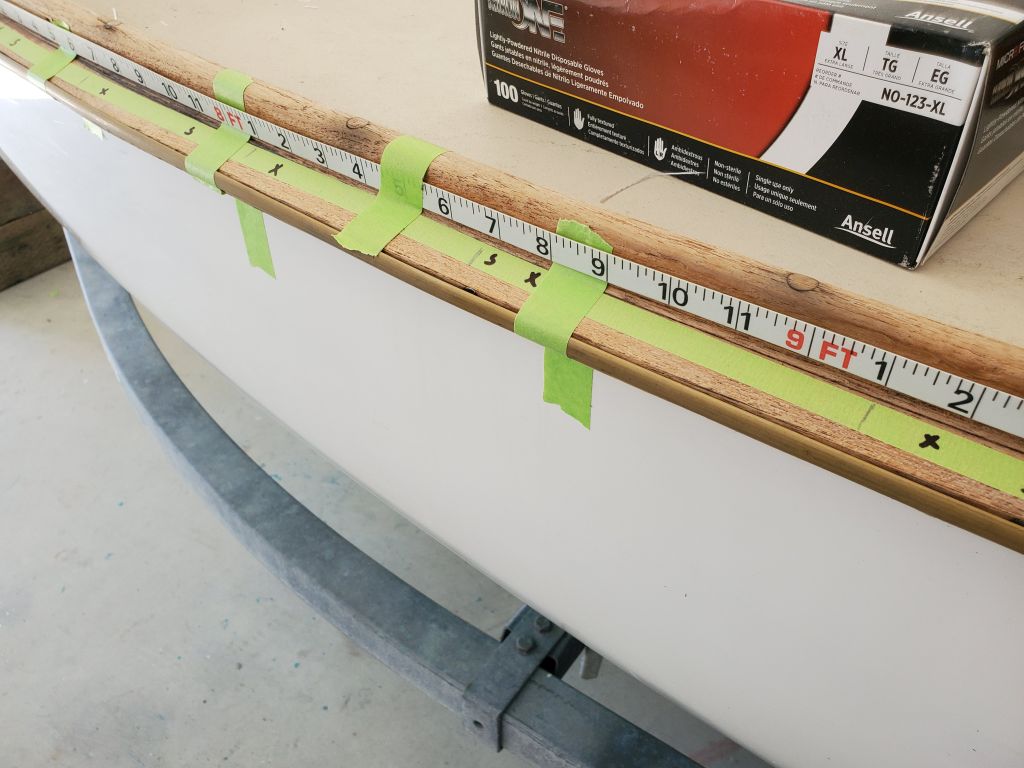
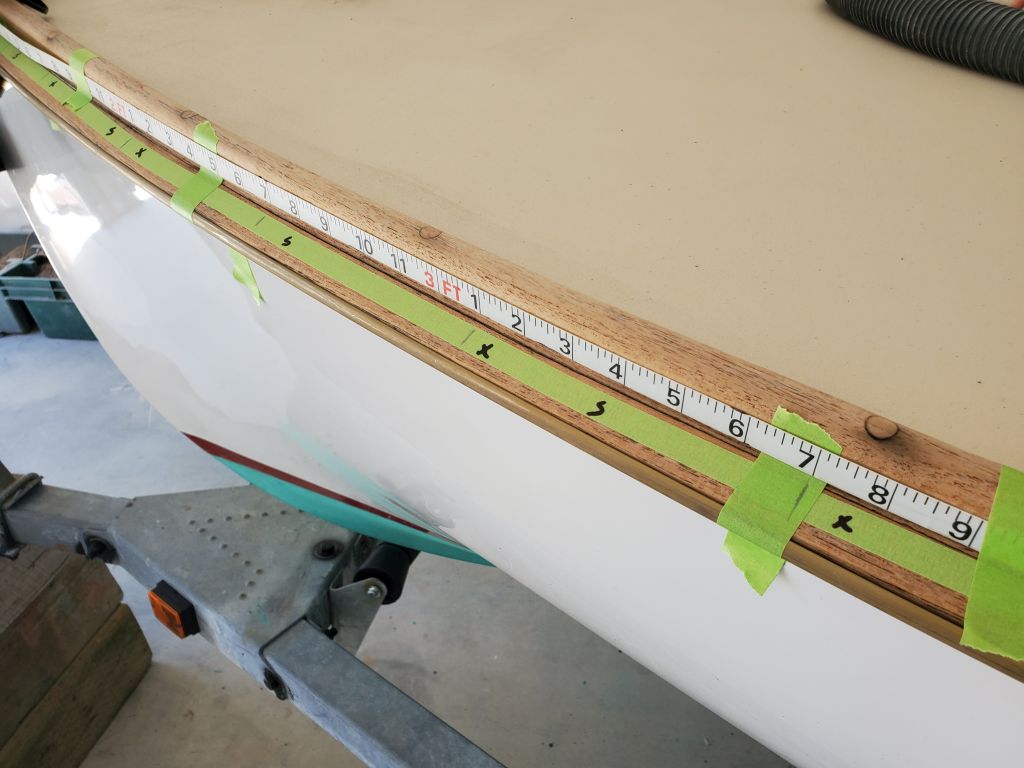
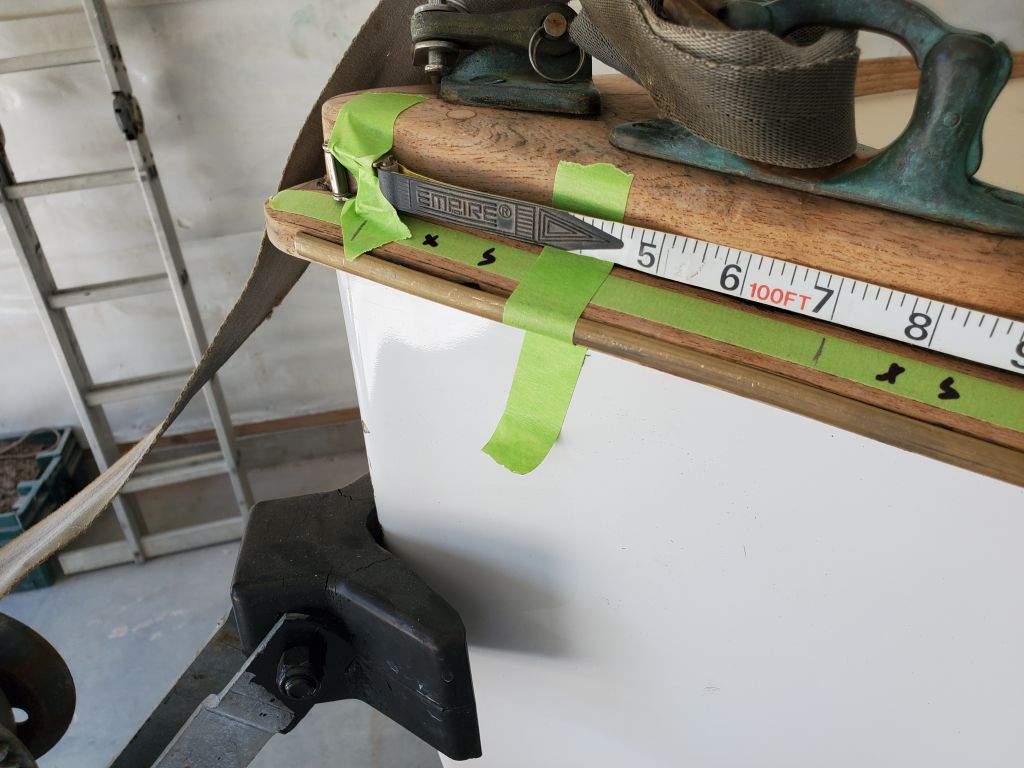
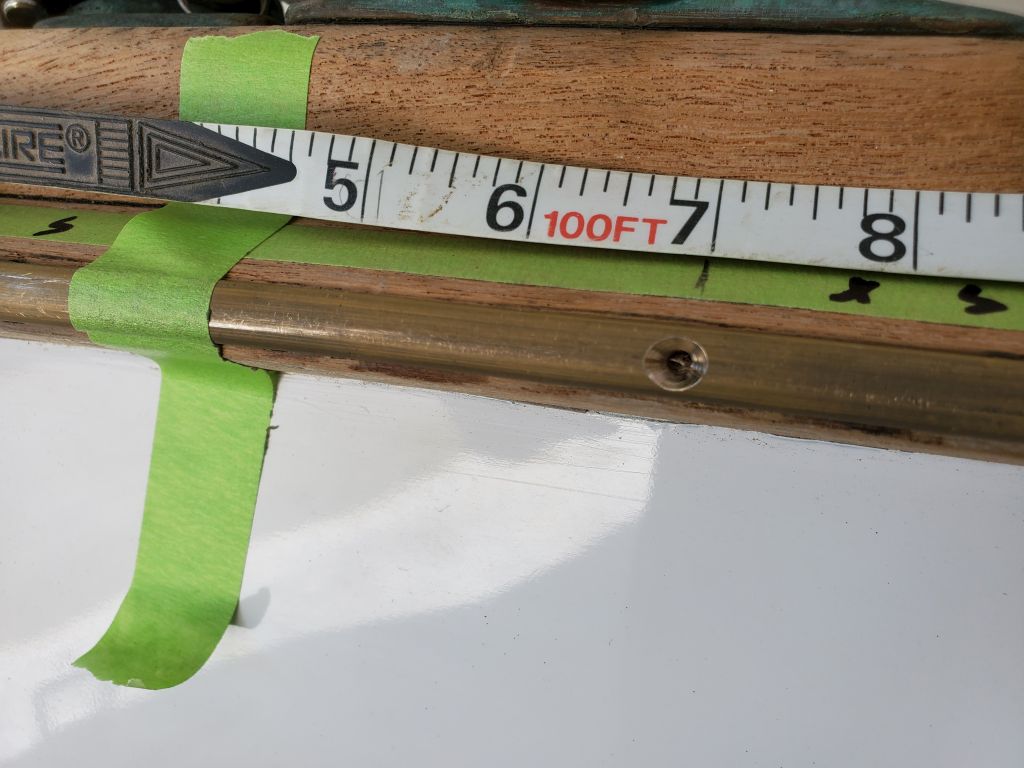
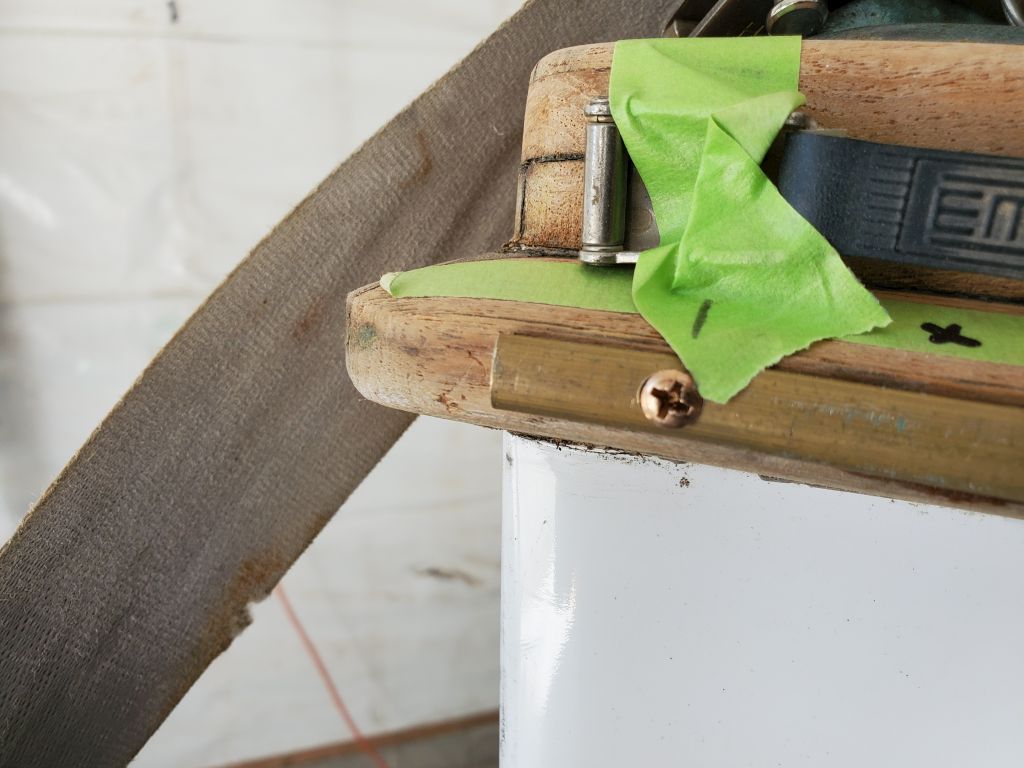
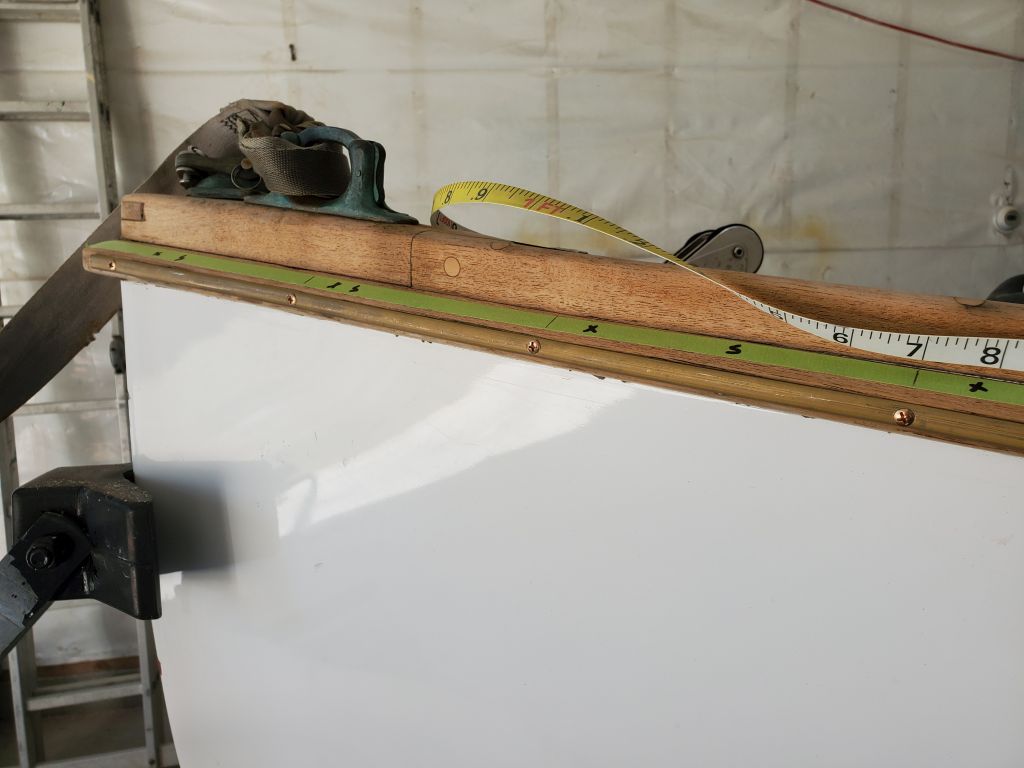
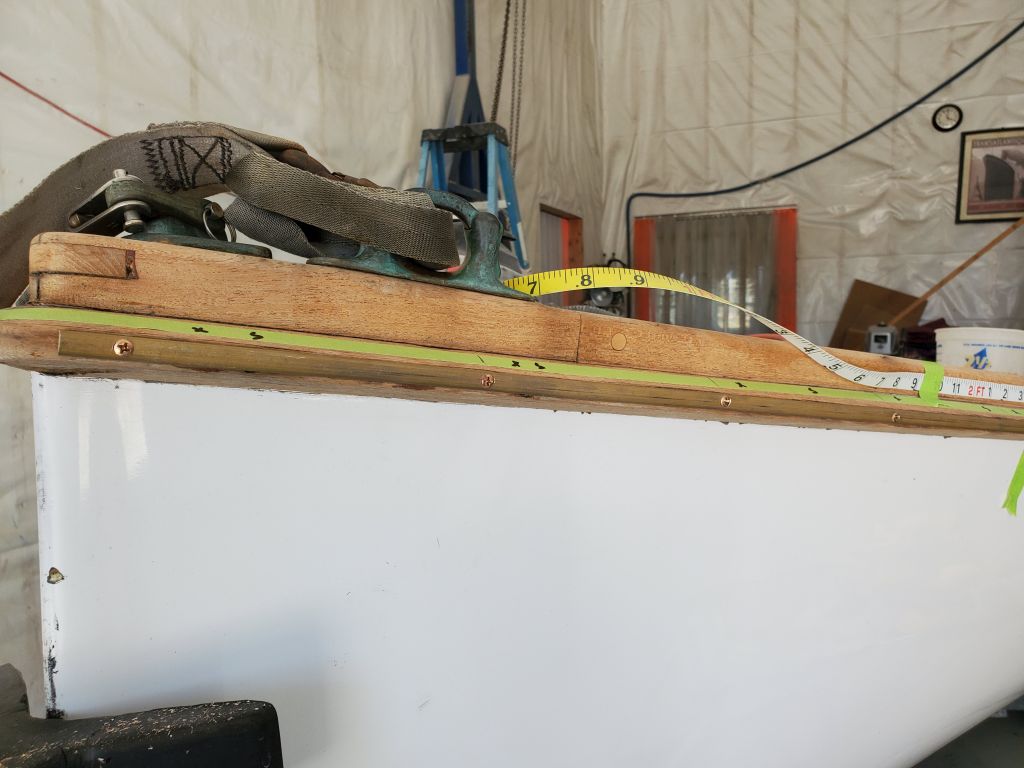
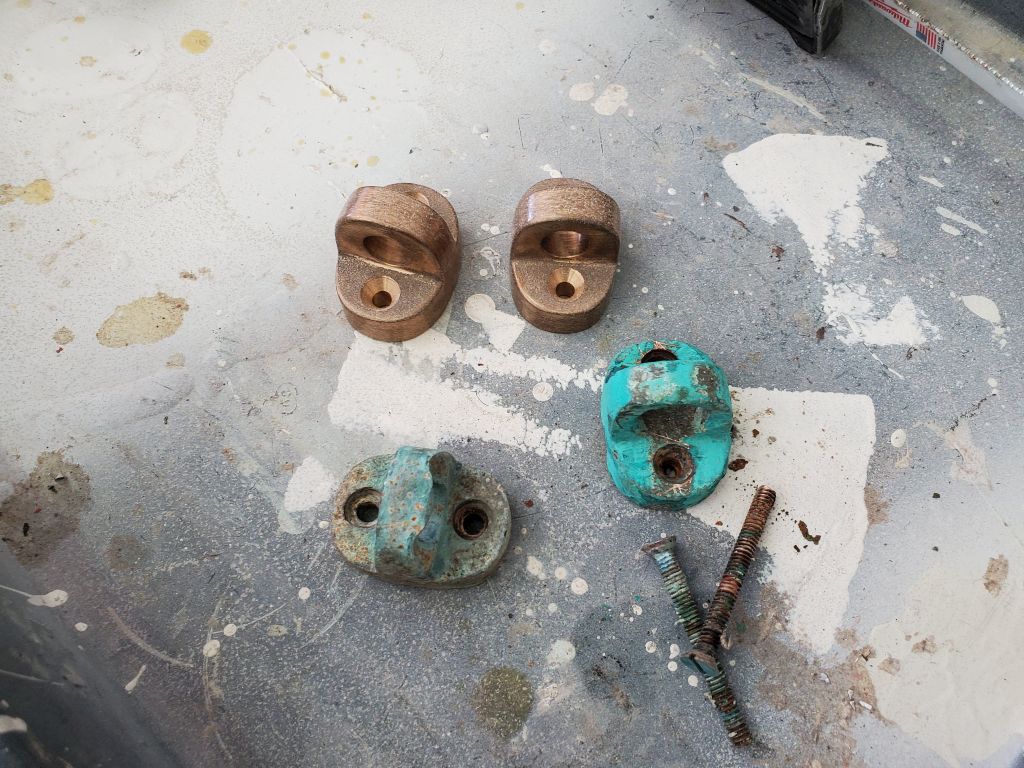
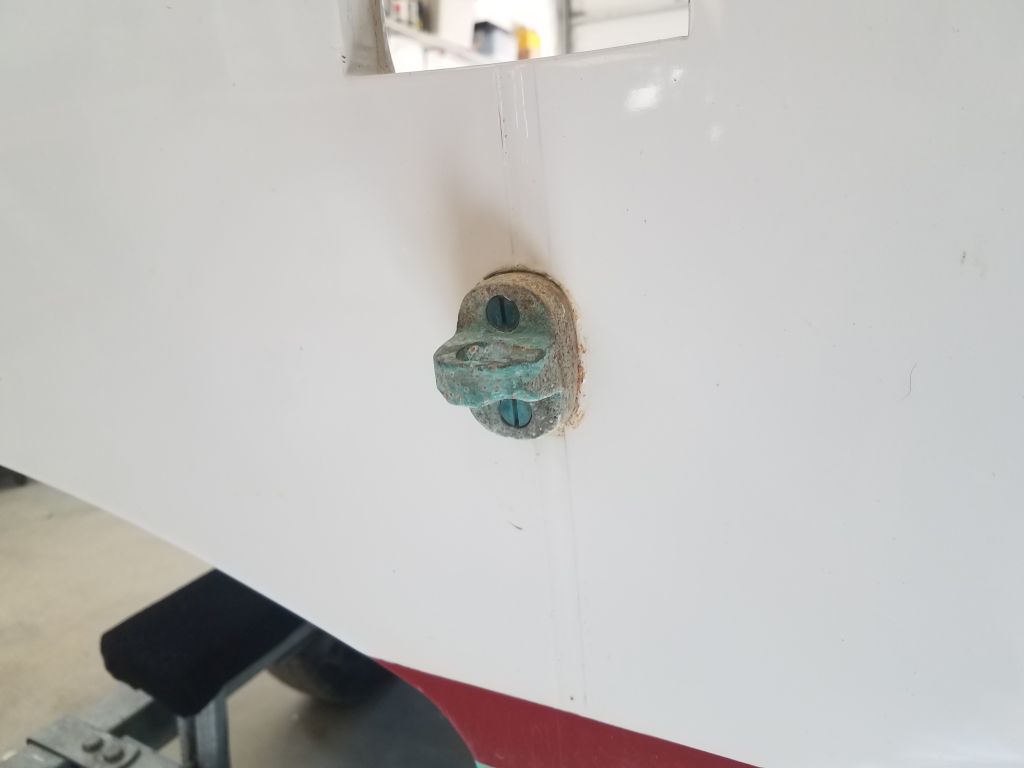
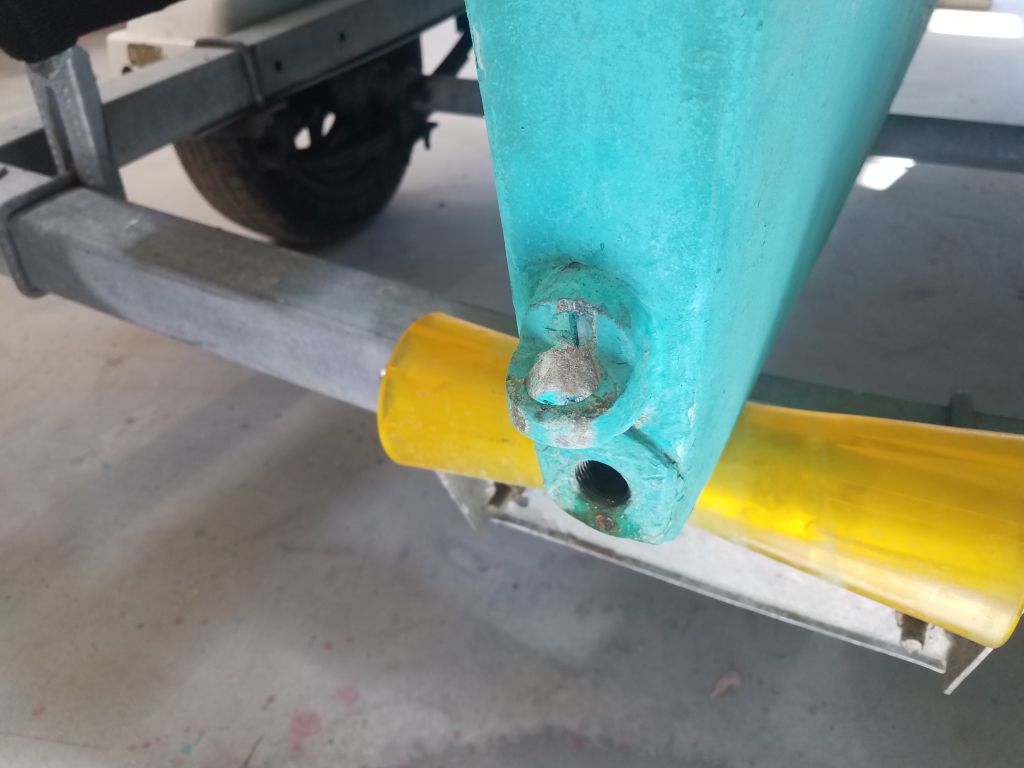
Among the other jobs on my list were to install a brass (no one makes bronze half oval) half-oval trim on the rubrail to replace one that had been damaged and removed previously, and to install new gudgeons for the rudder, which the owner had ordered and had on hand.  So I spent a few minutes determining what was needed for each job and ordering the required materials, since in our new world shipments tend to take a few days longer than in the past.

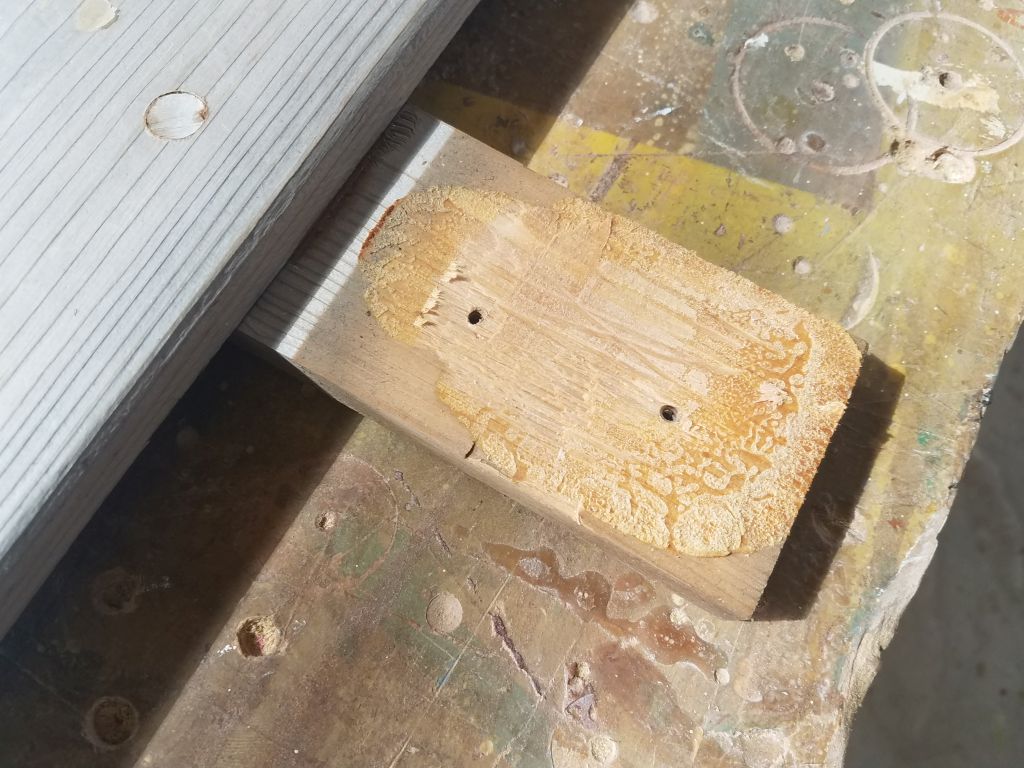
In the woodshop, I removed the broken board from the port seat.  I found that the slats were also glued to the cleats below, with Gorilla glue, but I didn’t have much trouble getting the slat off without damaging the cleats beneath.  I wasn’t worried about the slat itself, though I did manage to get it off in a whole piece.

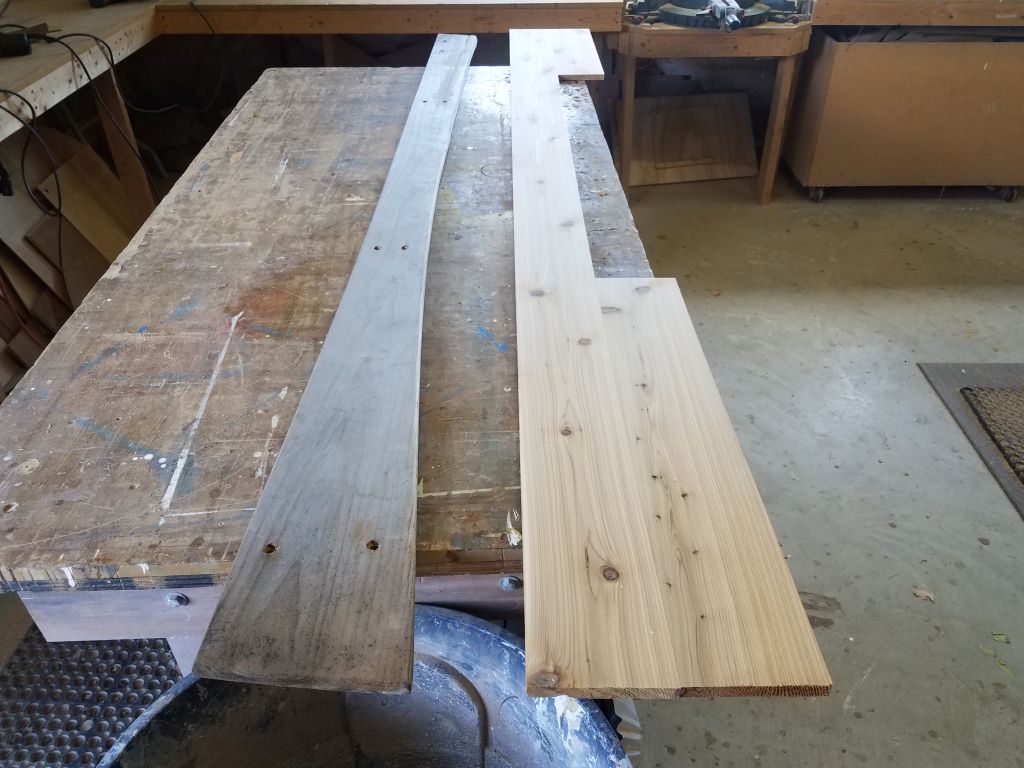
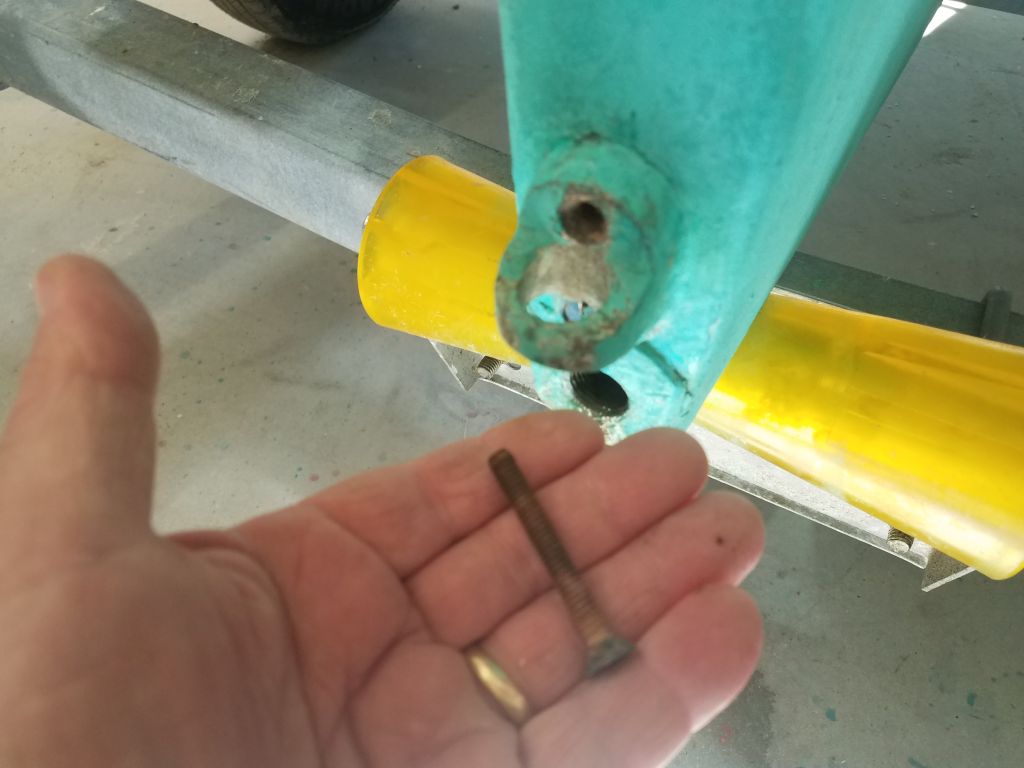
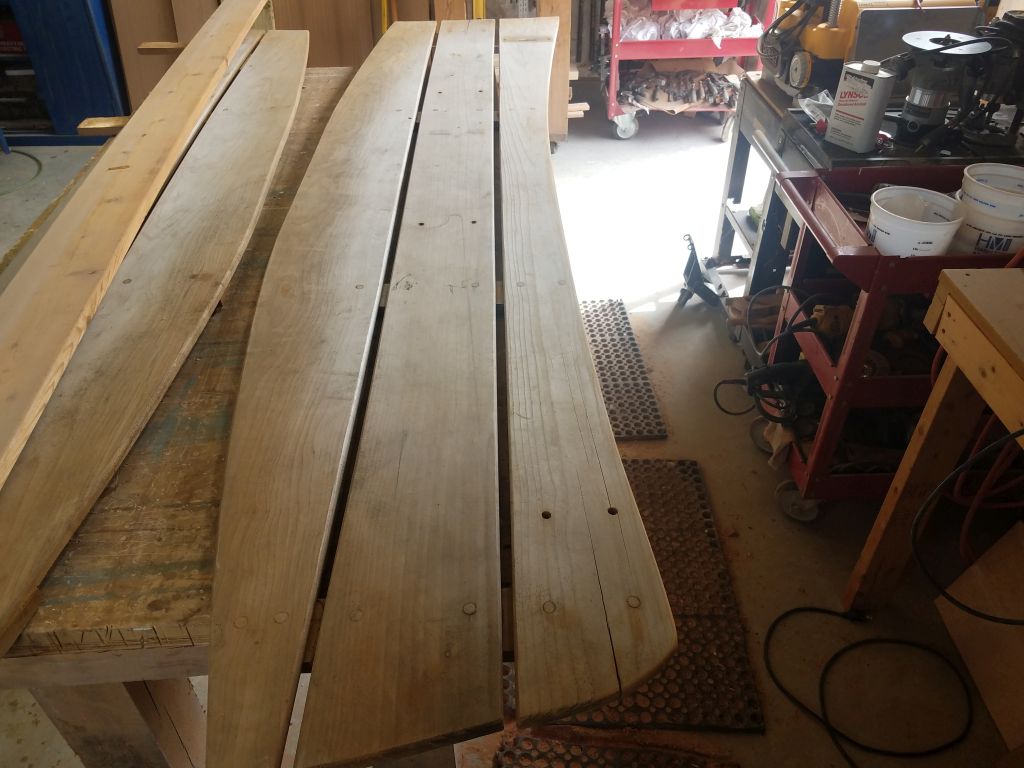
Leaving the starboard inboard slat in place, I laid out a new shape for its forwardmost end, creating a new curve that was less wide at its extreme, and cut and sanded the new shape as needed.  I planned to use this plank to pattern the replacement on the port side.  I temporarily removed the wooden base for the boom crutch from the aft end to allow me to more easily pattern the new piece; as it happened, this block was already half-loose, as one of the nuts had fallen off sometime in the past.  I had to slightly cut back the support cleats in way of my new plank shape, bringing the ends back 1/4″ or so from the edge.

Because of the owner’s stated wishes, and the fact that these seats weren’t something worth spending a lot of time on with their questionable construction and oddball materials, I had to make my repair appropriate to the existing conditions–a type of work Larry Pardey would have called “cheap and cheerful”.  As it happened, I had some red cedar deck boards on hand–hardly my first choice for boat seats, but red cedar would soon weather gray in keeping with the existing condition of the seats, I had it on hand–thus it was cheap and available now–and it would do the job for a finite period of time while the owner decided how better to proceed in the future.  I didn’t have any more suitable material on hand, wasn’t sure where I could source cypress, and it didn’t really seem important to match the material that closely anyway.

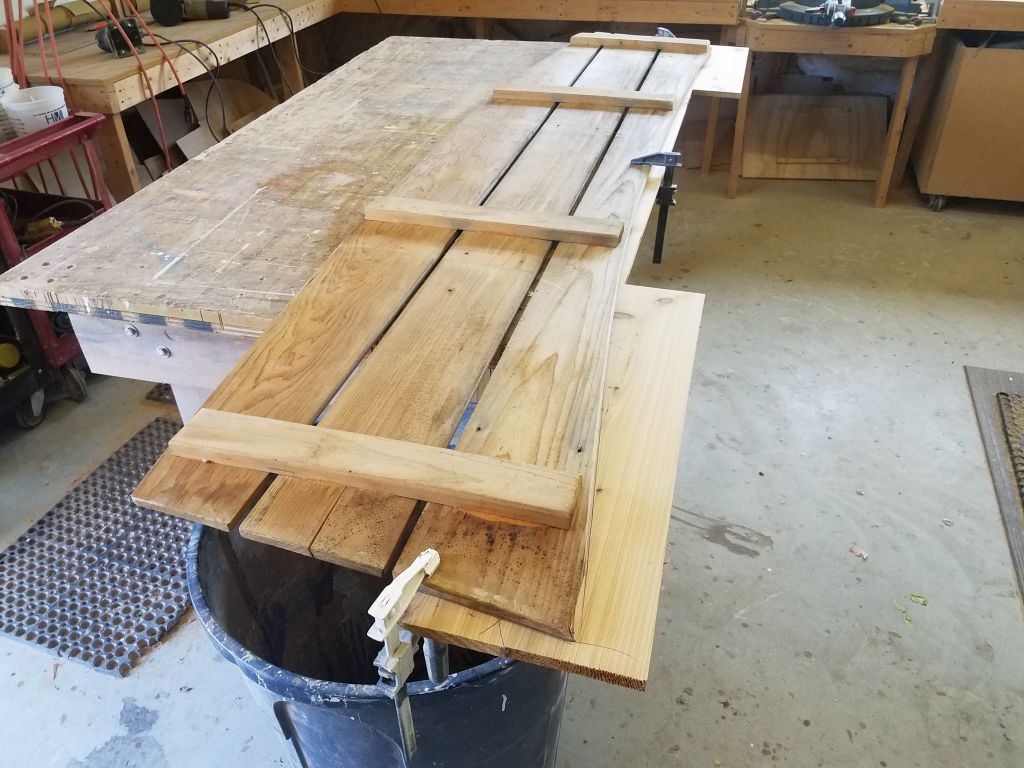
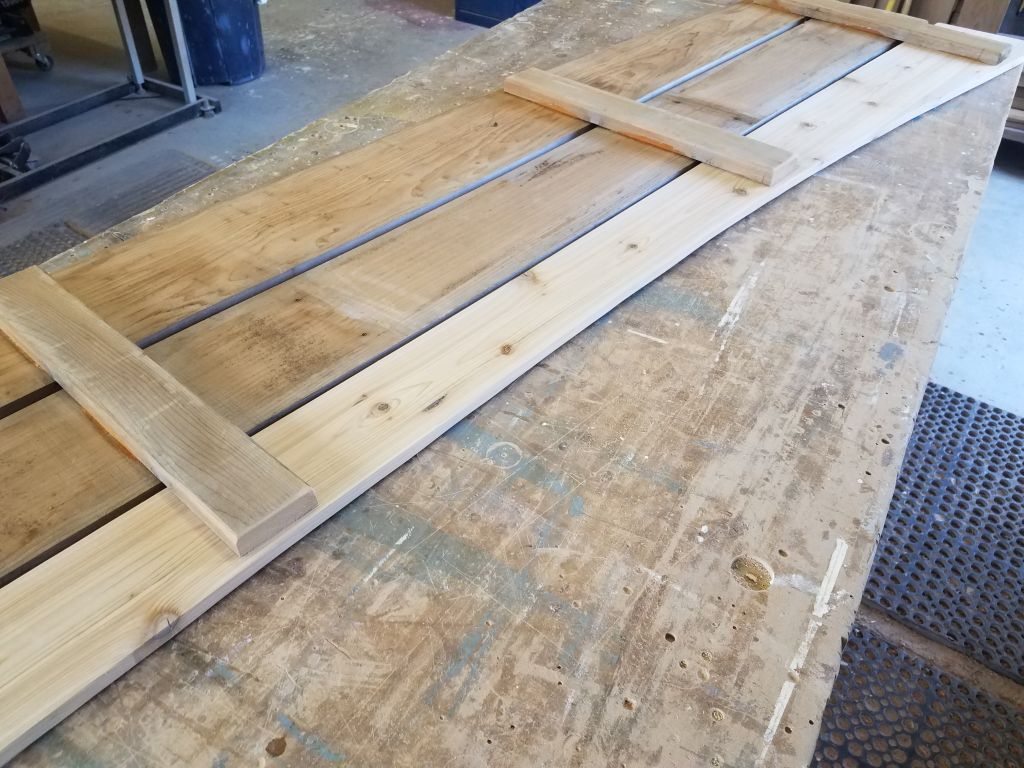
A single board wasn’t wide enough to handle the curves at the ends of the seat slat, so I with epoxy I glued up extra width forward and aft as needed to make the final shape required, and clamped the assembly together overnight.

Total time billed on this job today:  2.25 hours

0600 Weather Observation:  Mostly cloudy, 40°.  Forecast for the day:  Becoming mostly sunny, 54°