(page 1 of 2)

Dory 16

< Back to Oyster Dory

Thursday

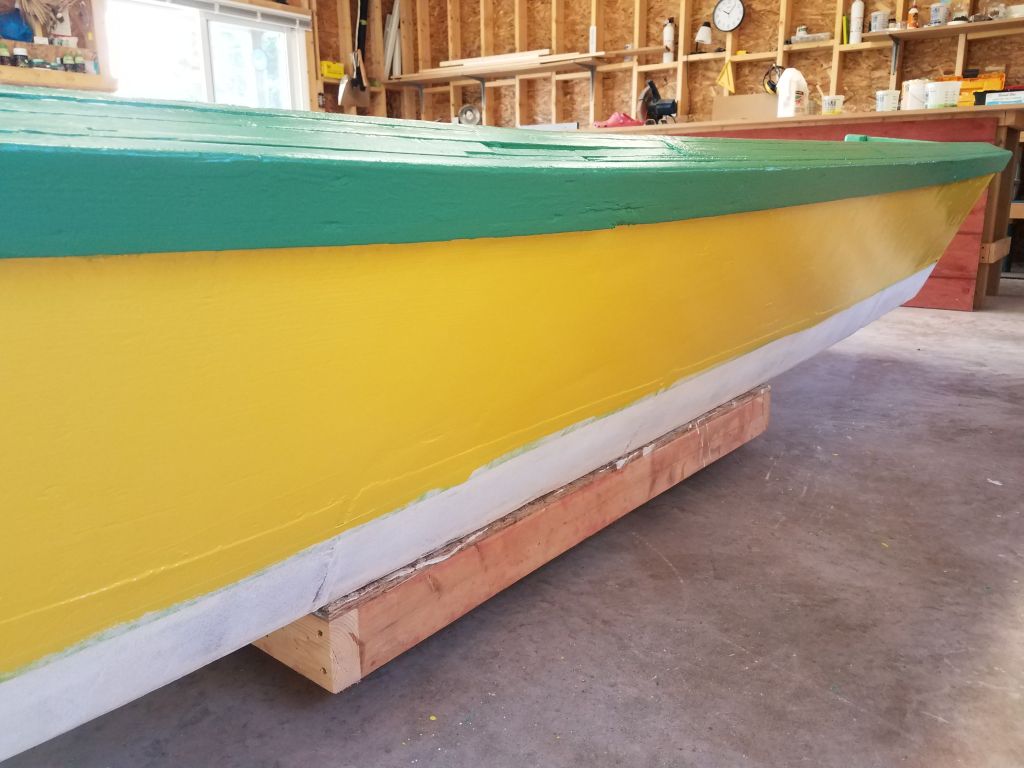
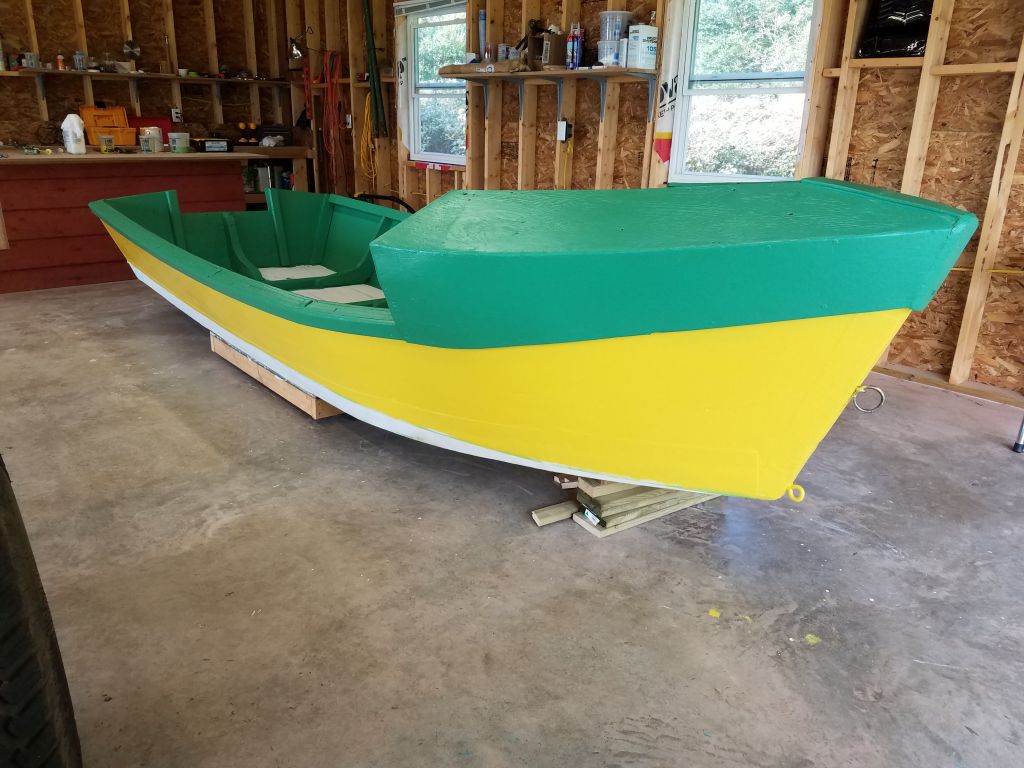
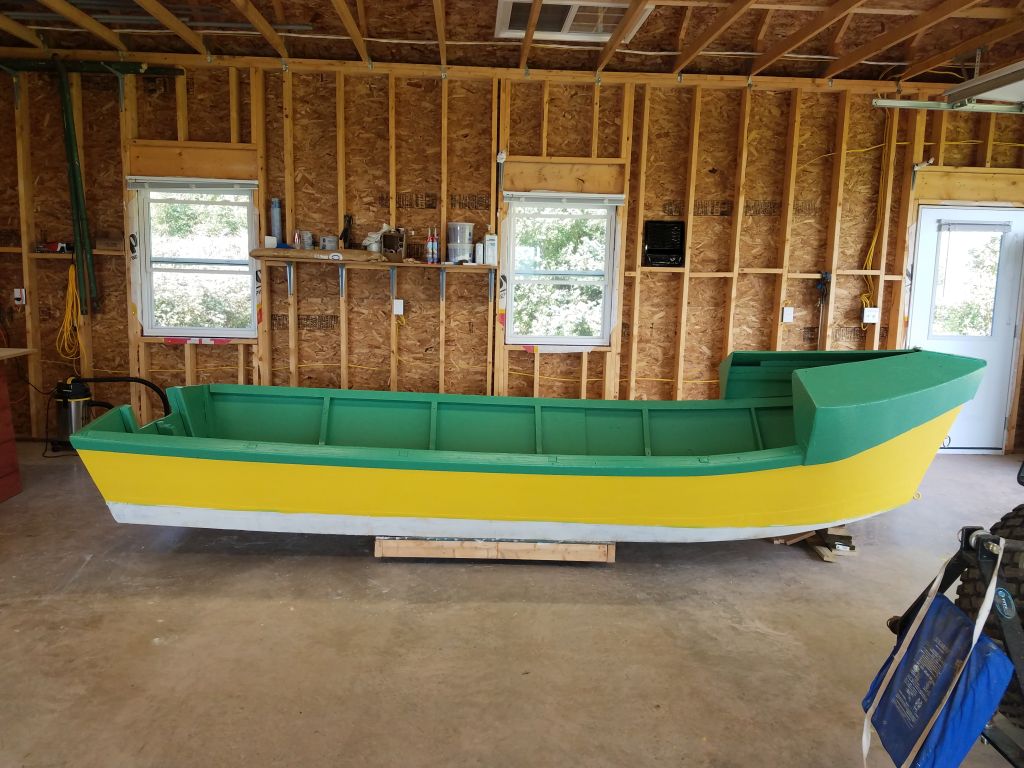
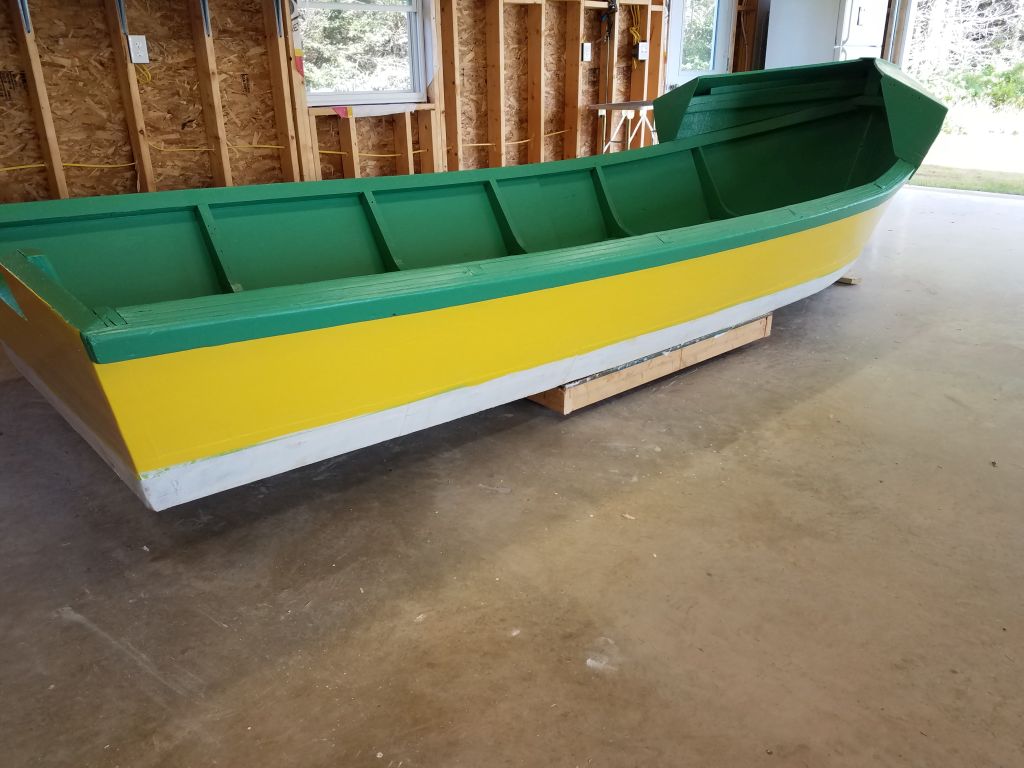
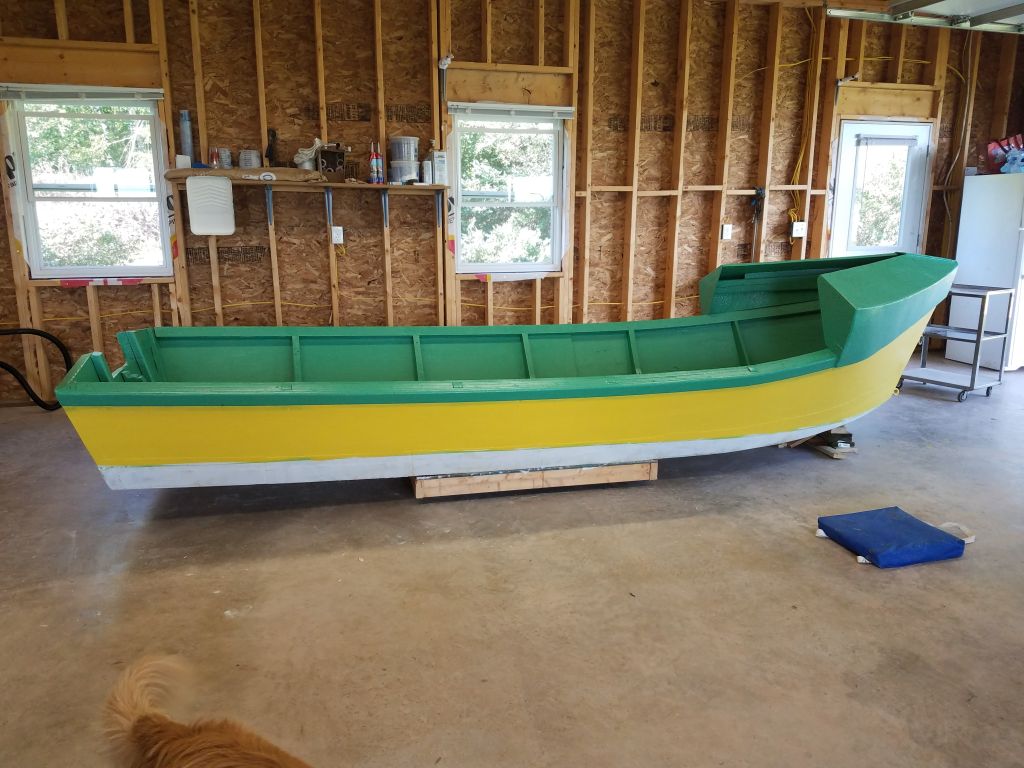
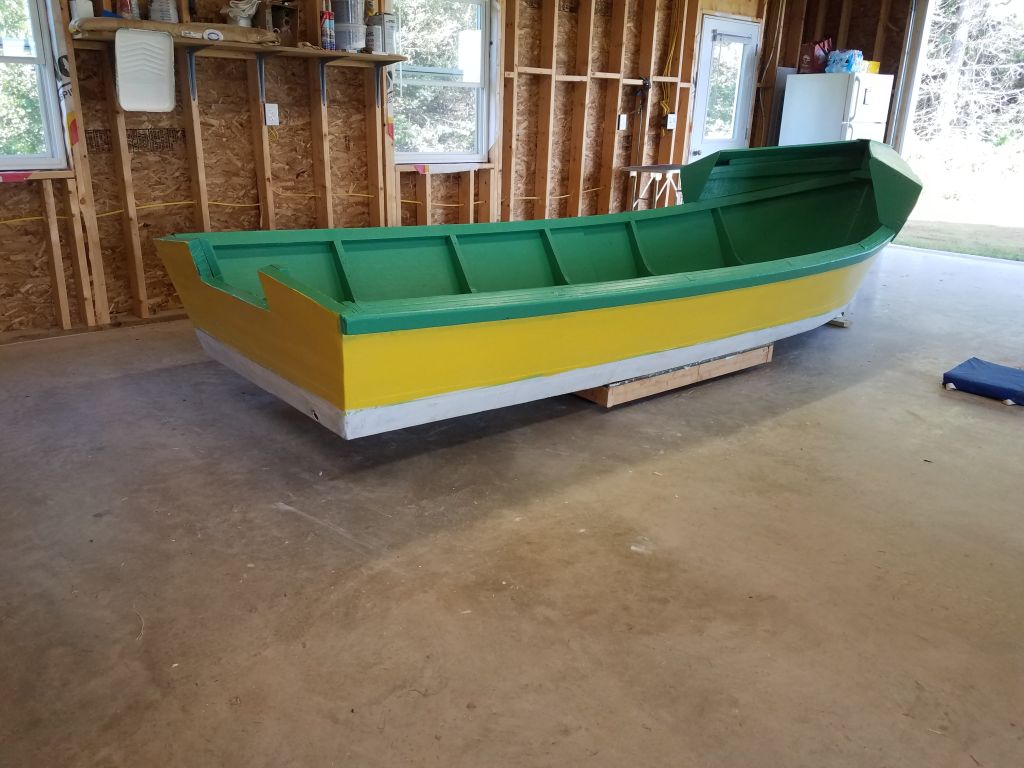
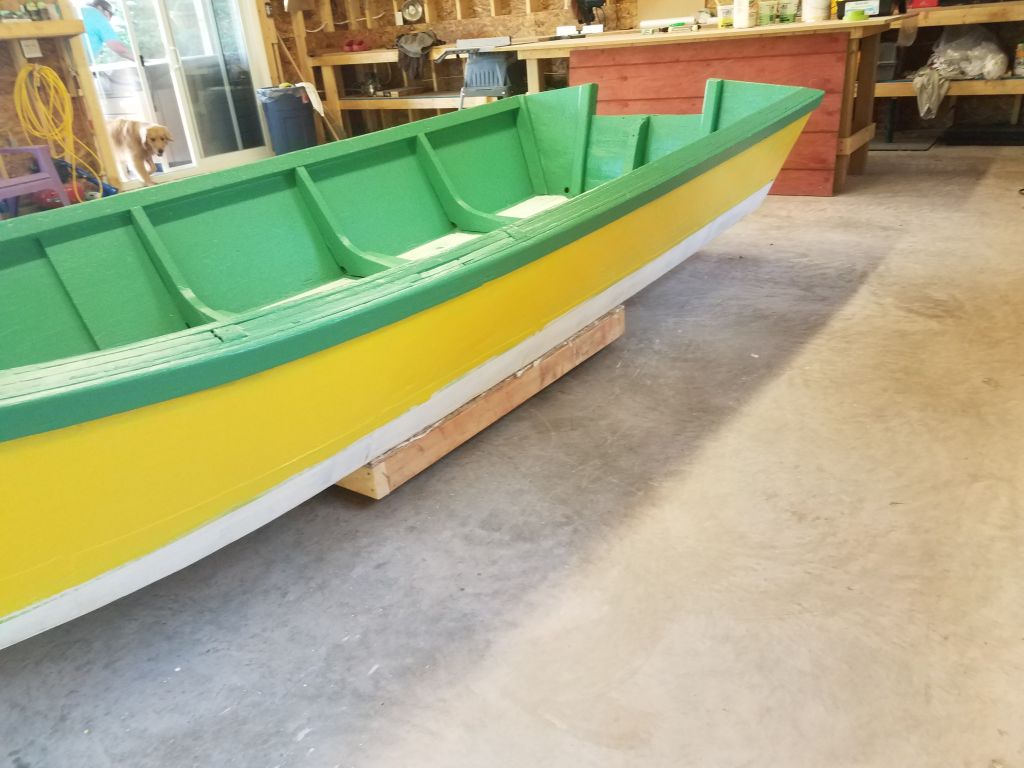
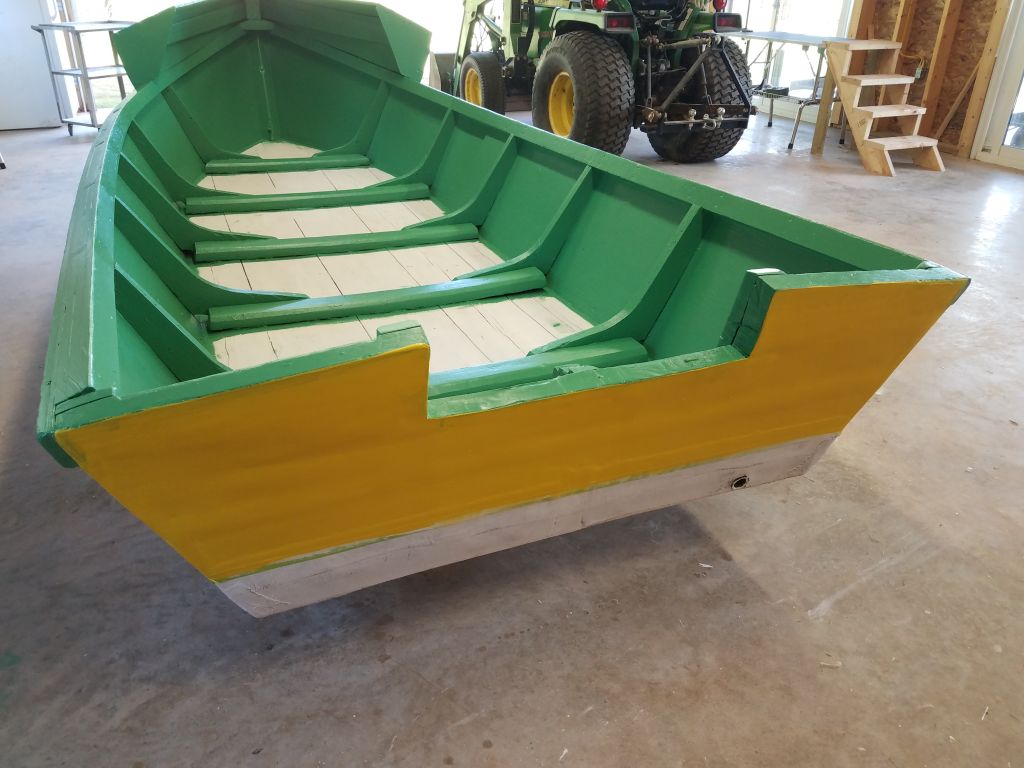
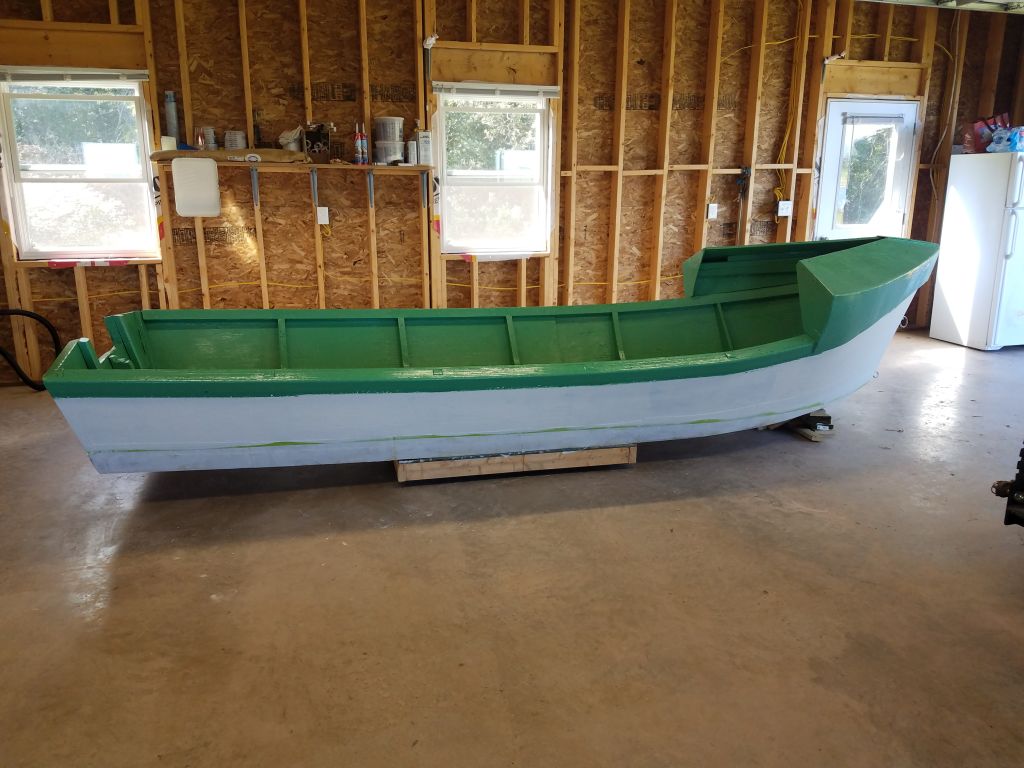
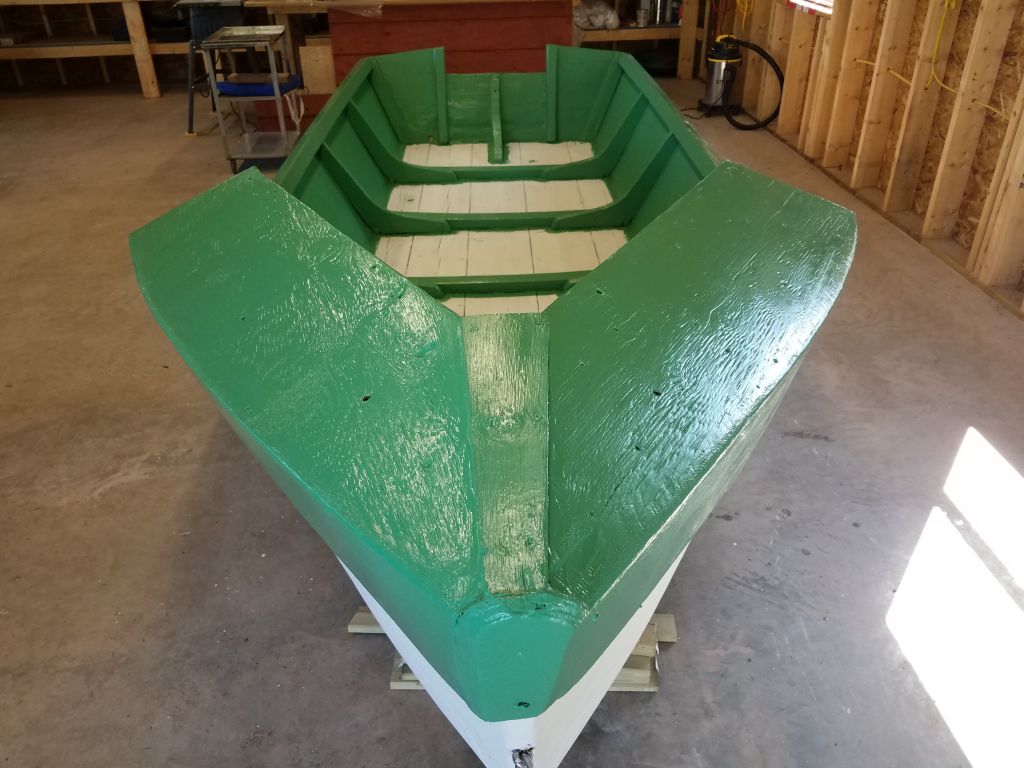
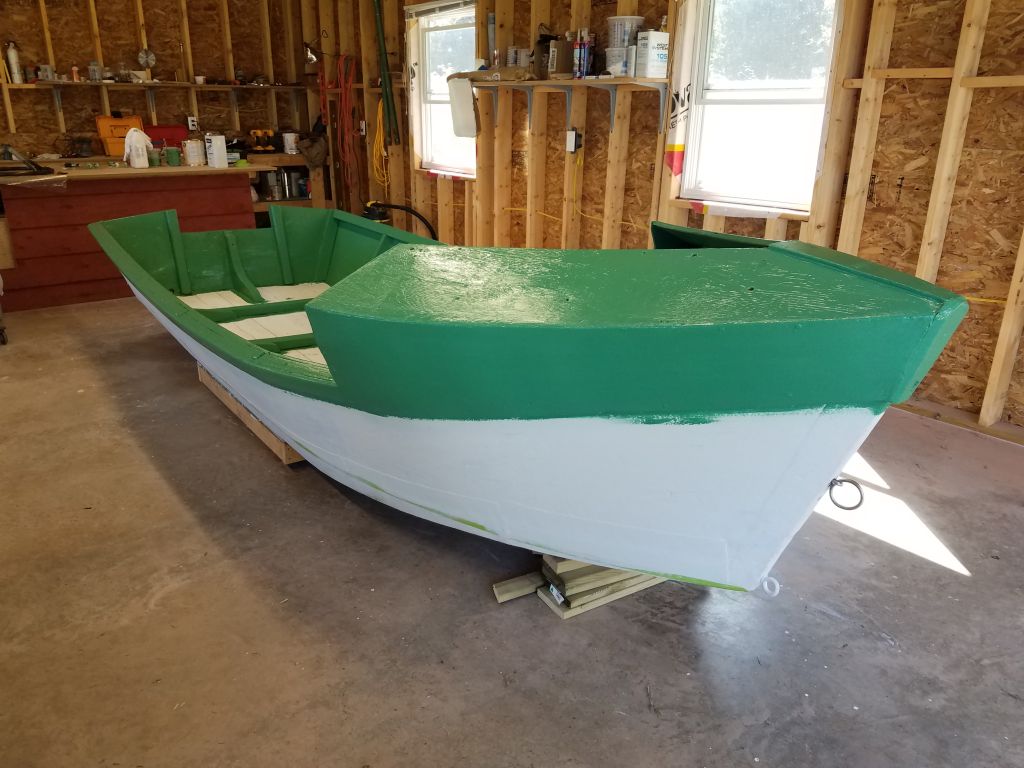
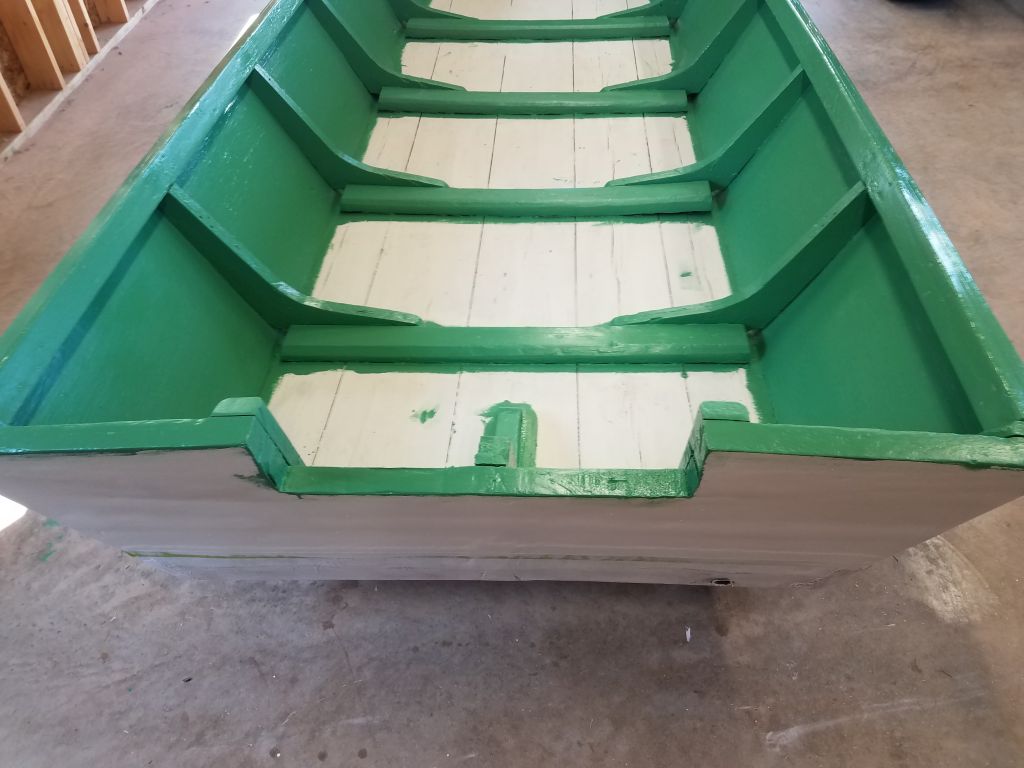
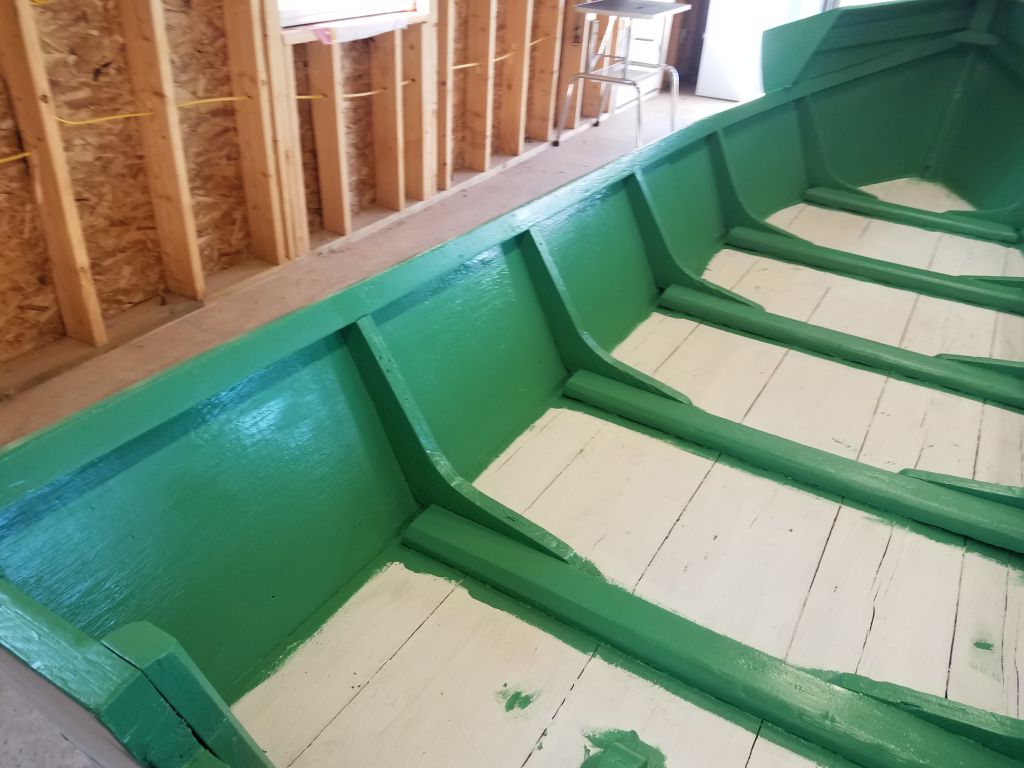
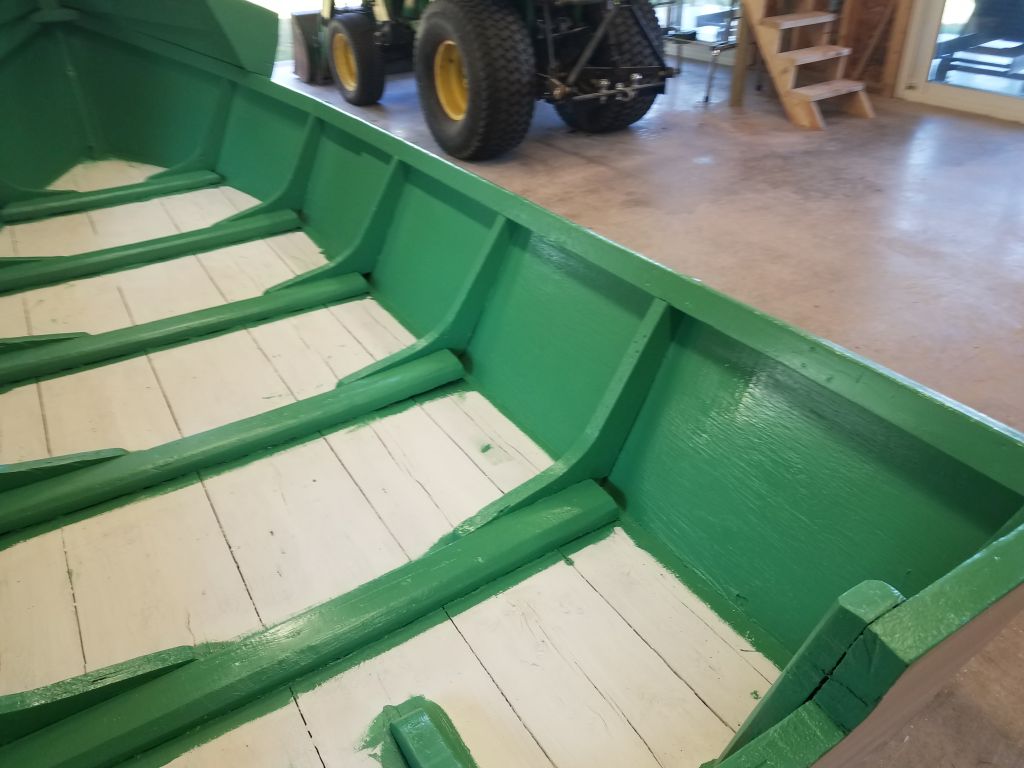
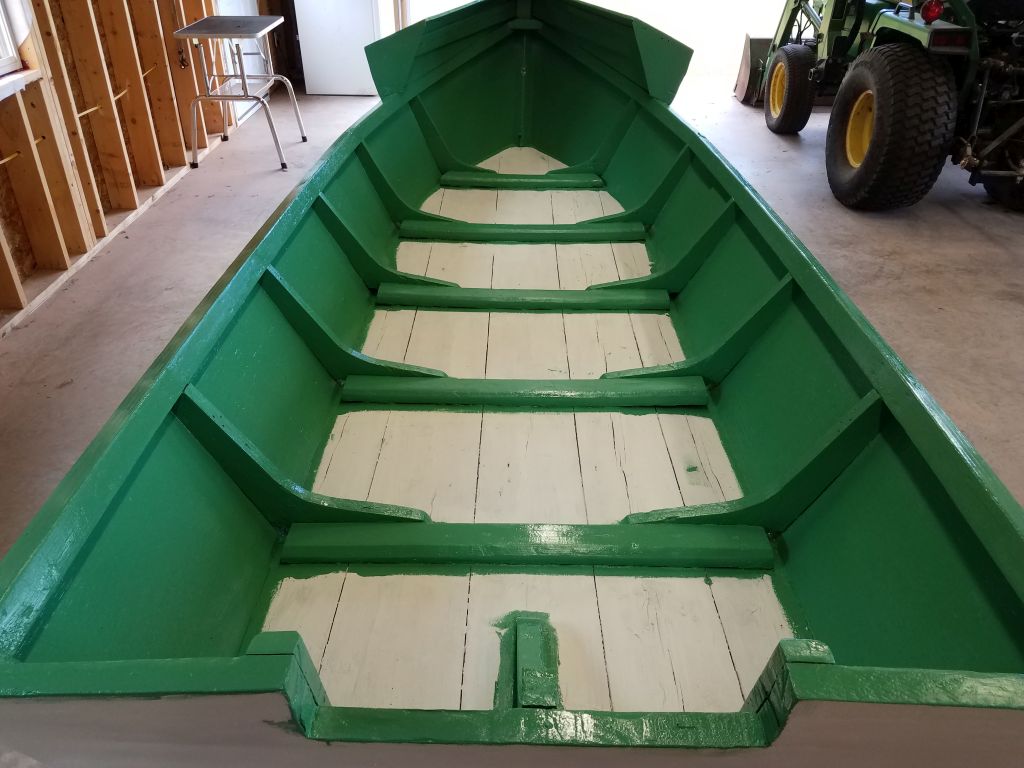
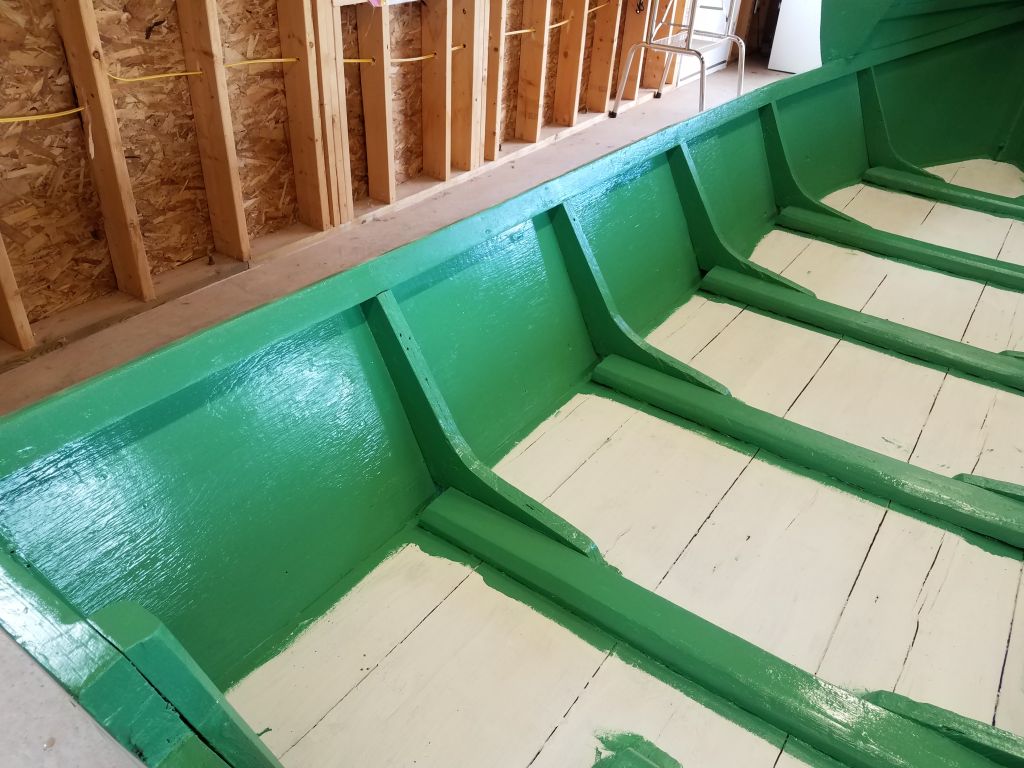
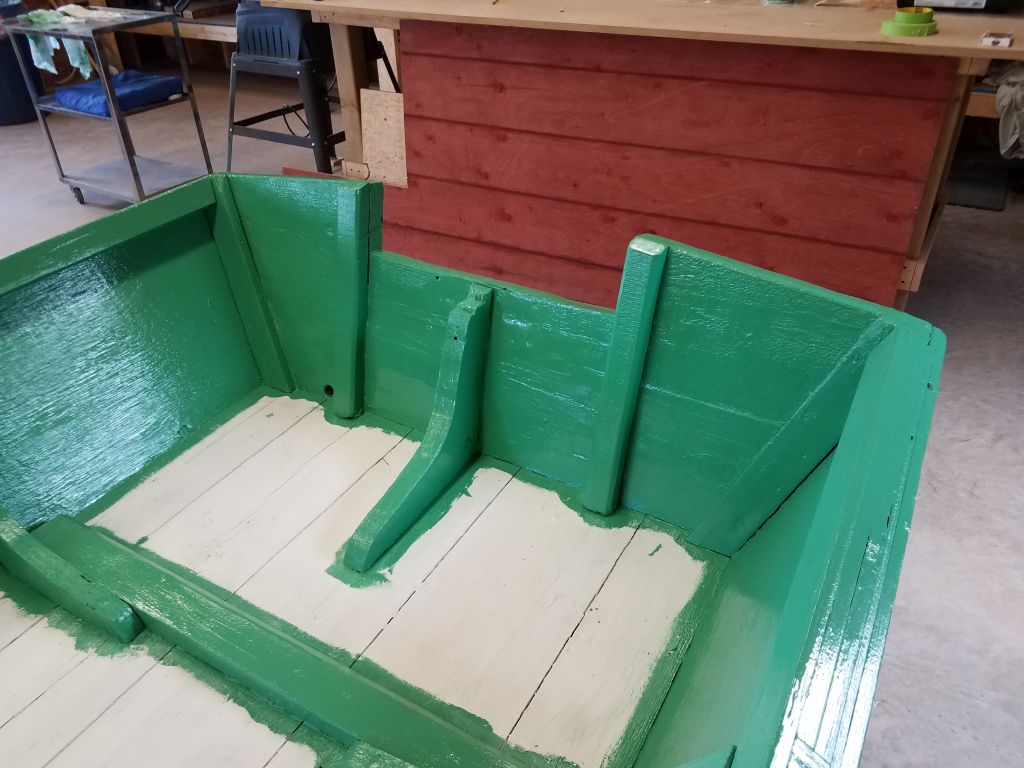
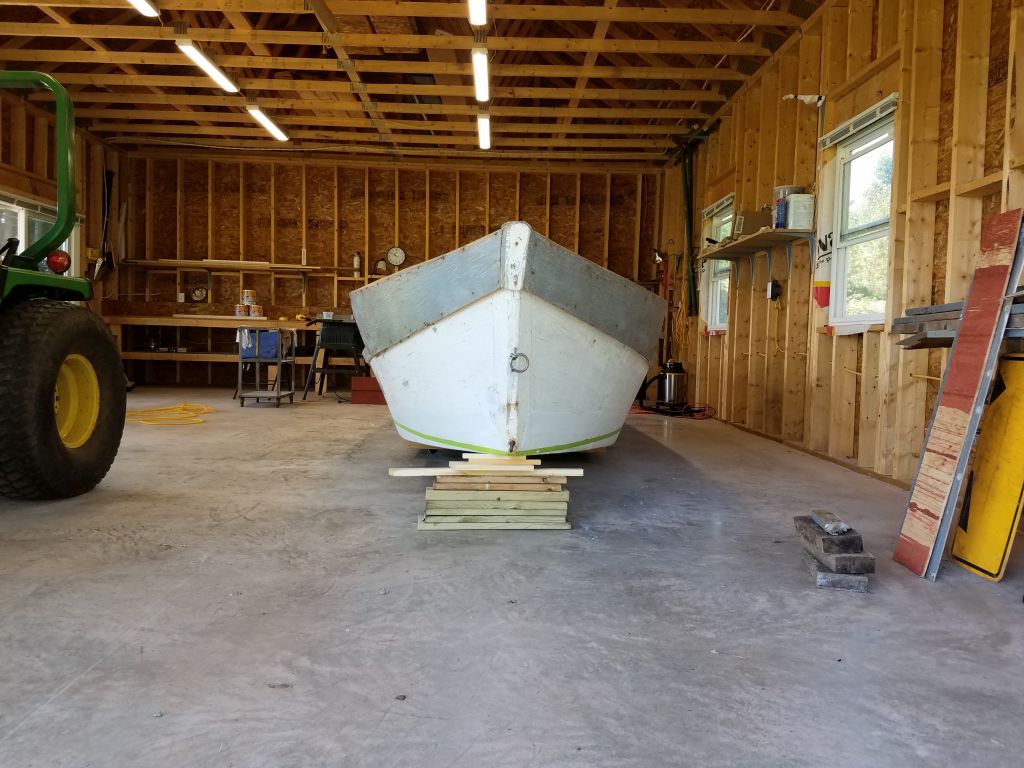
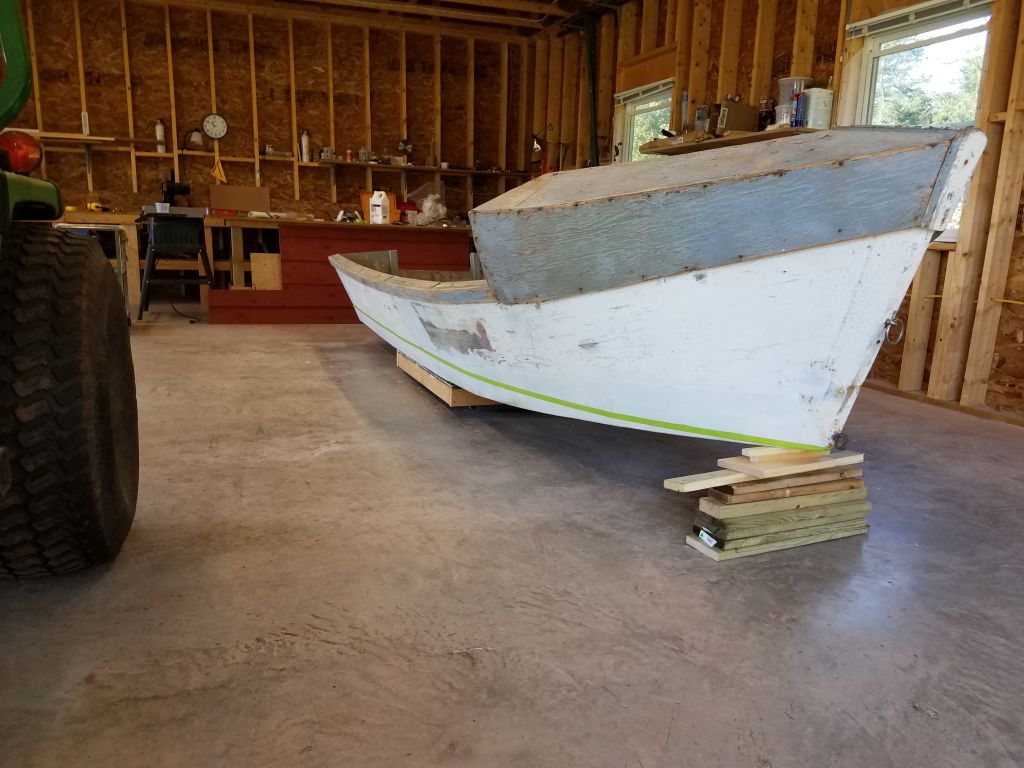
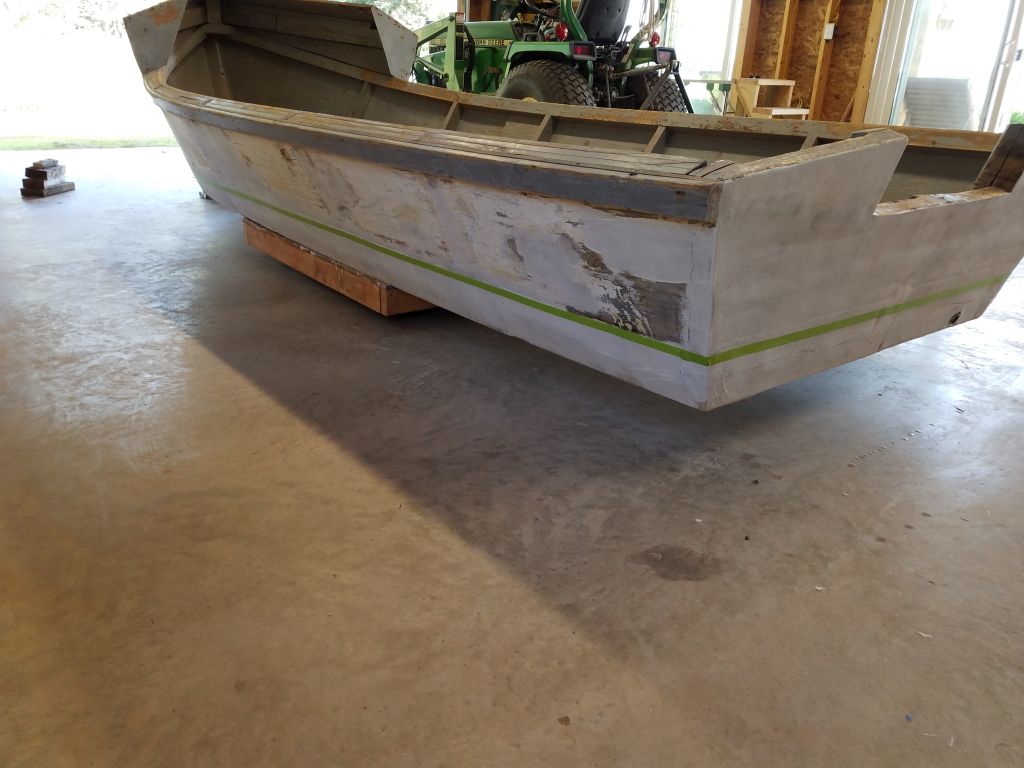
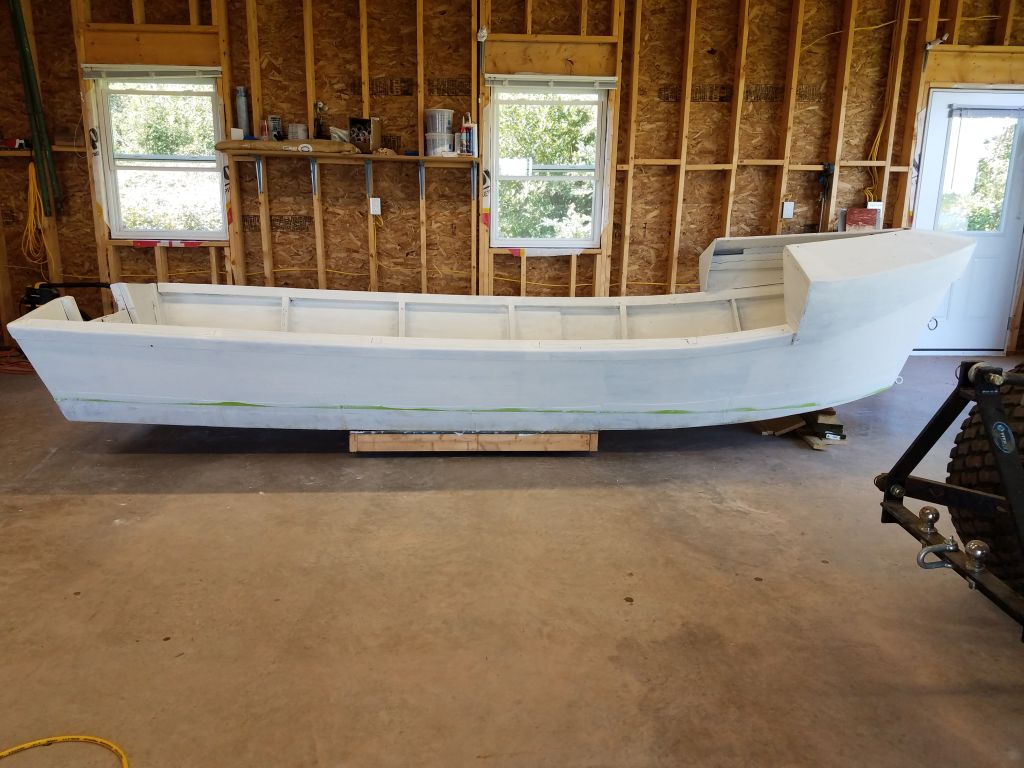
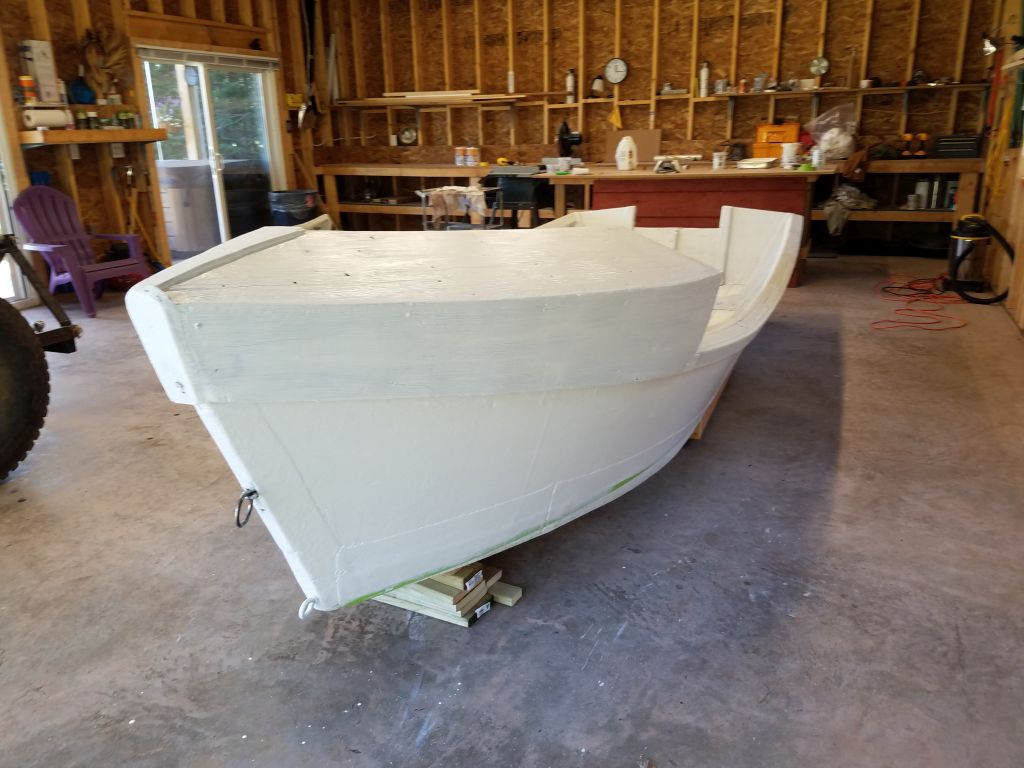
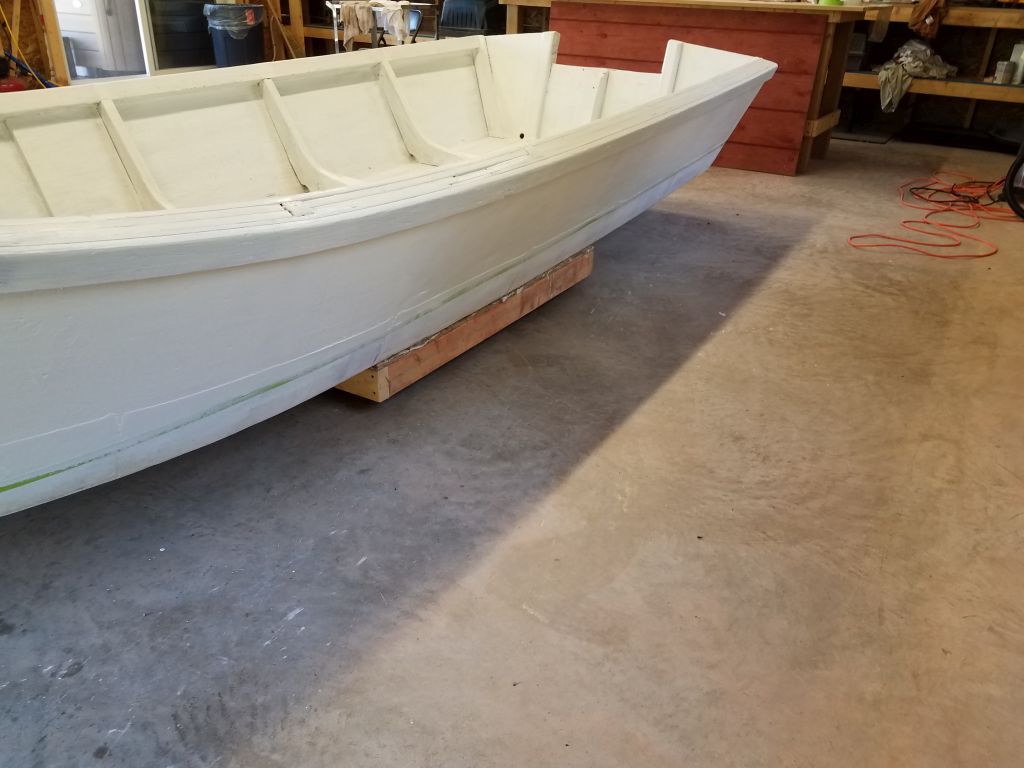
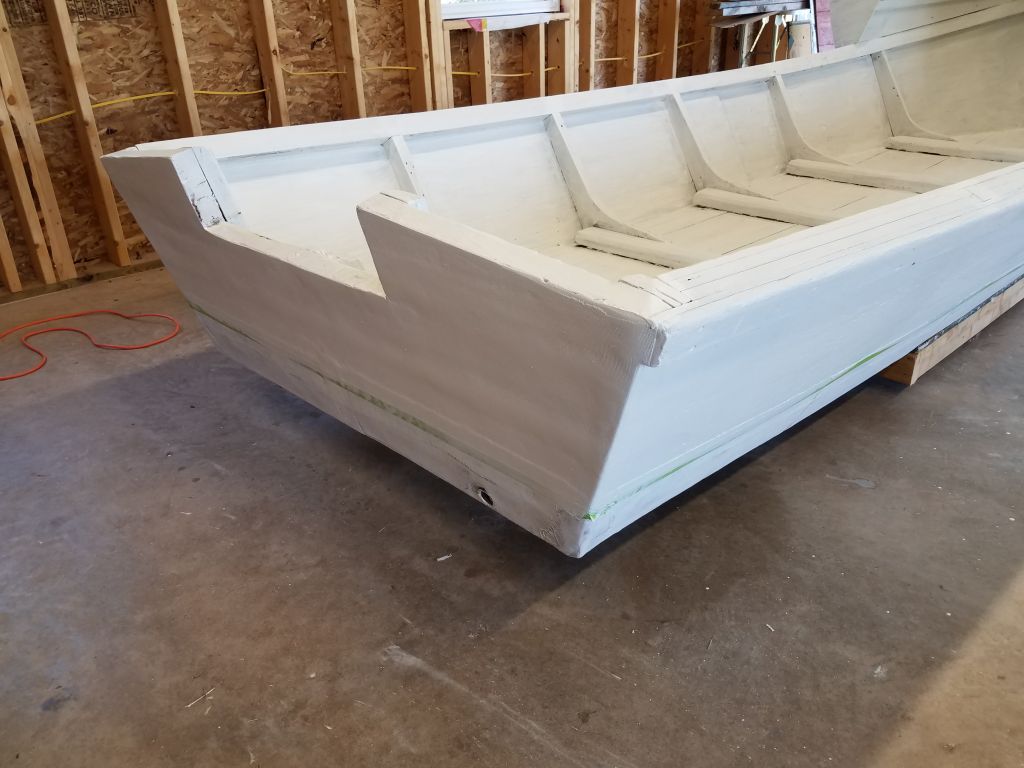
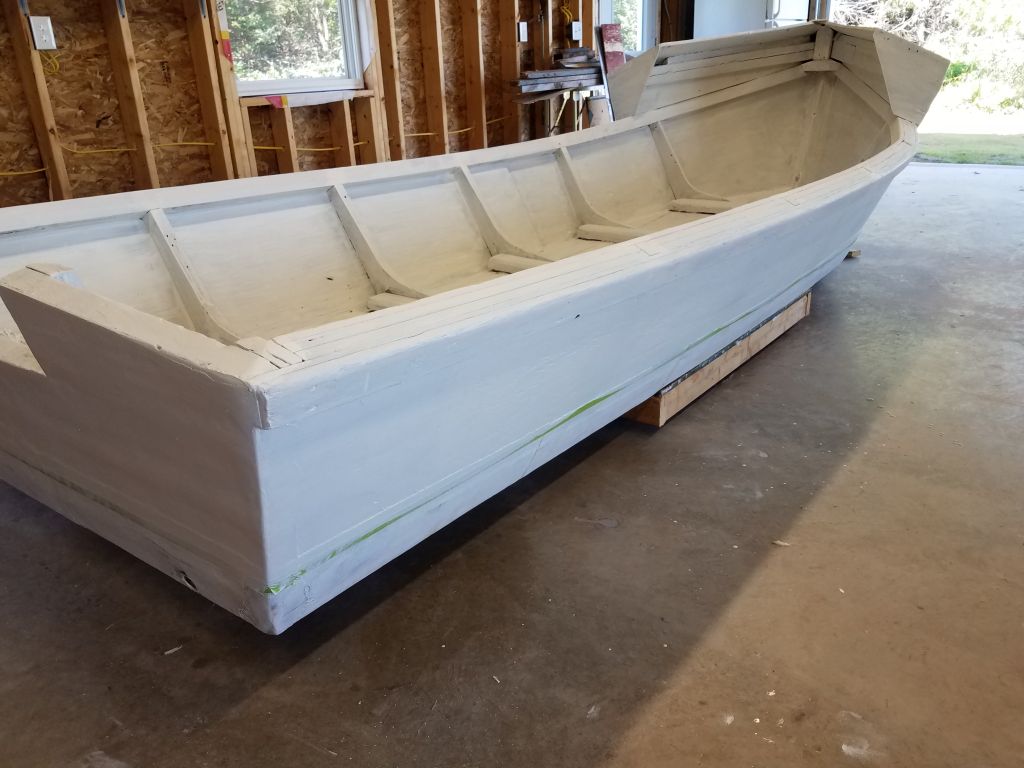
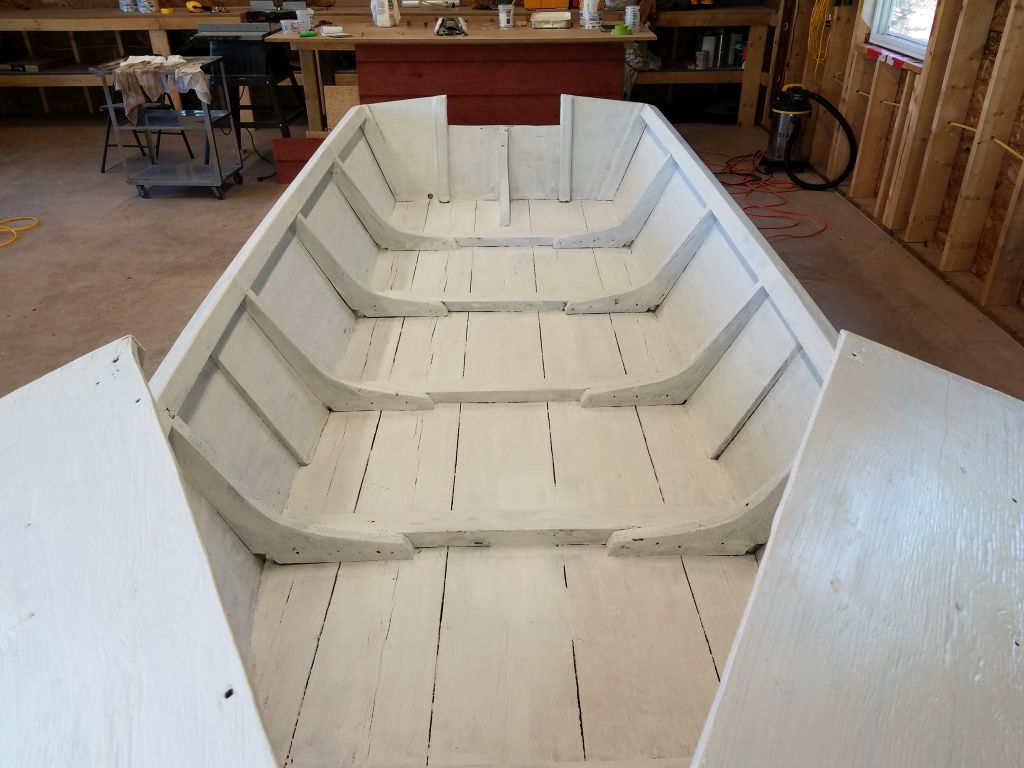
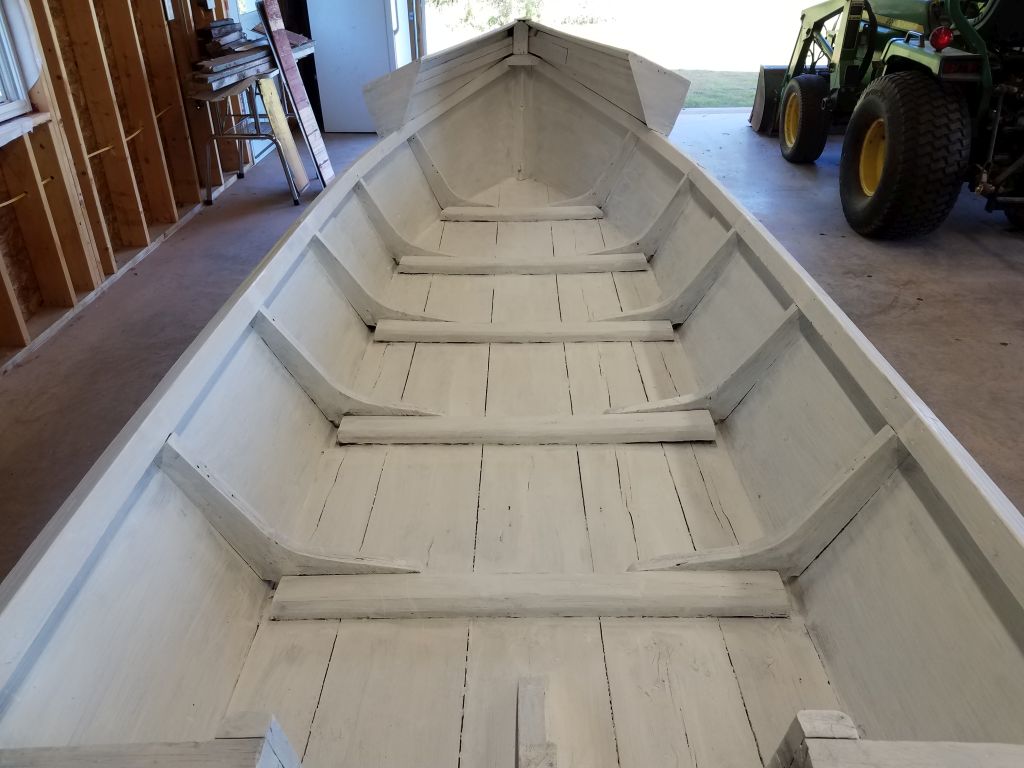
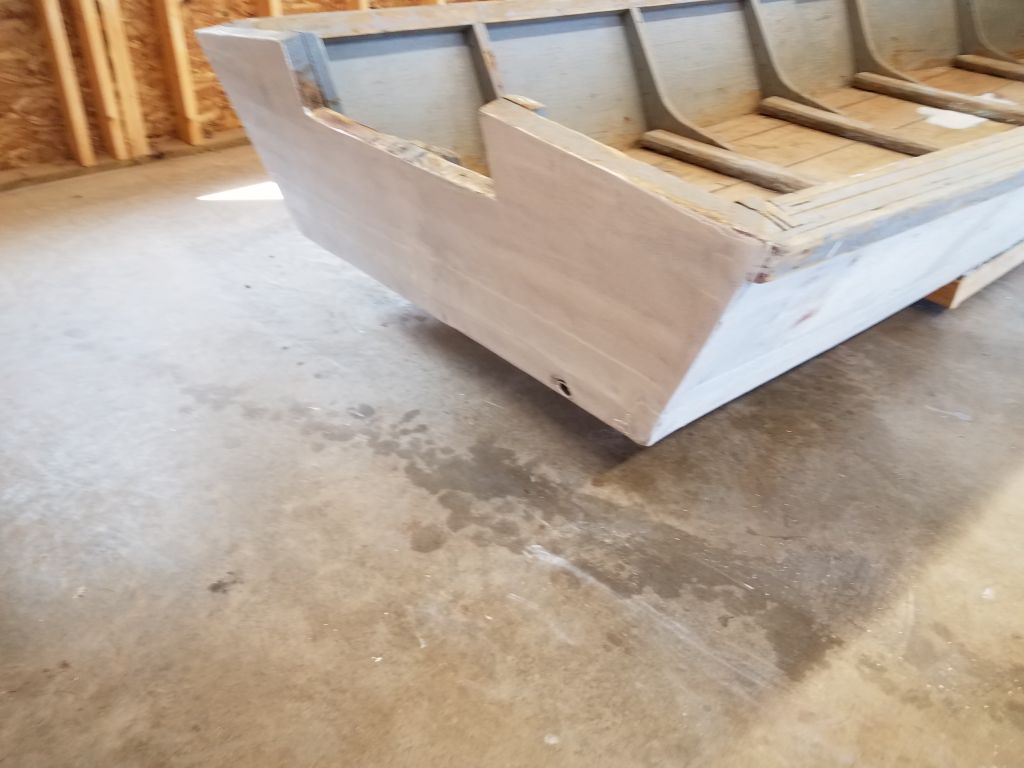
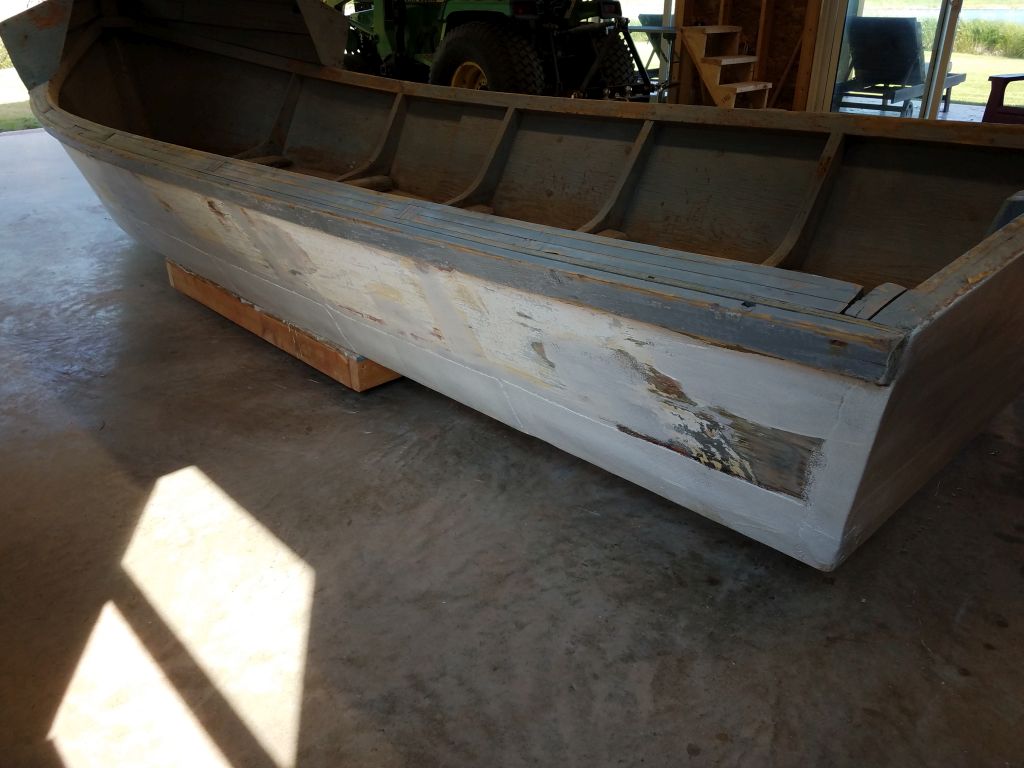
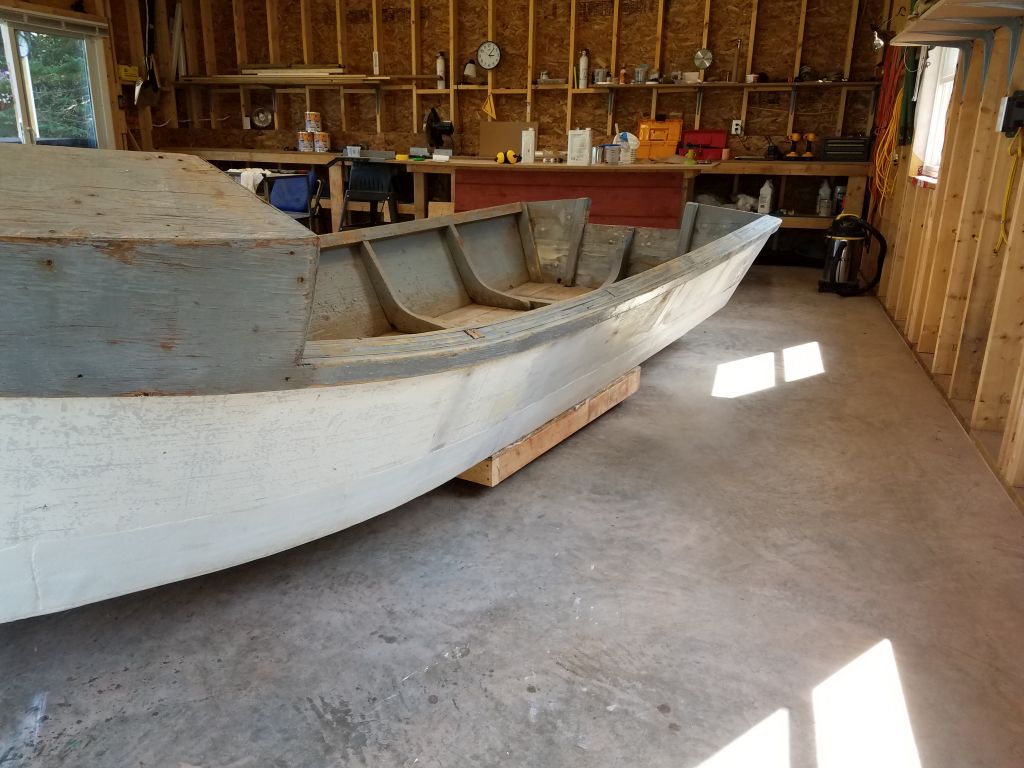
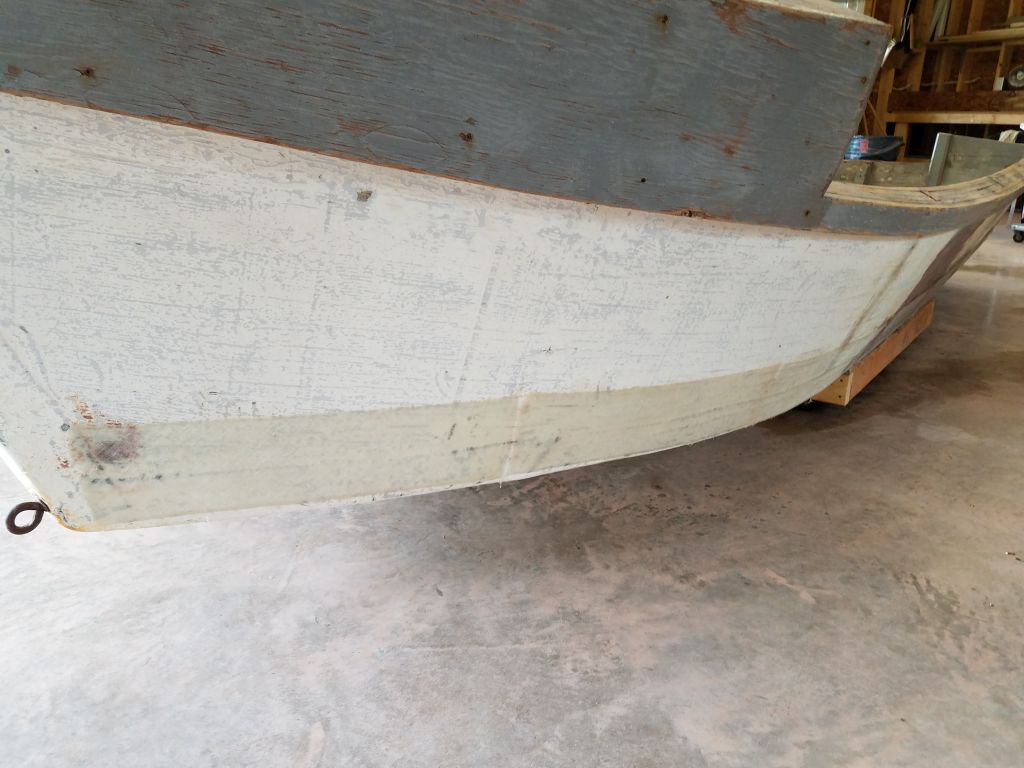
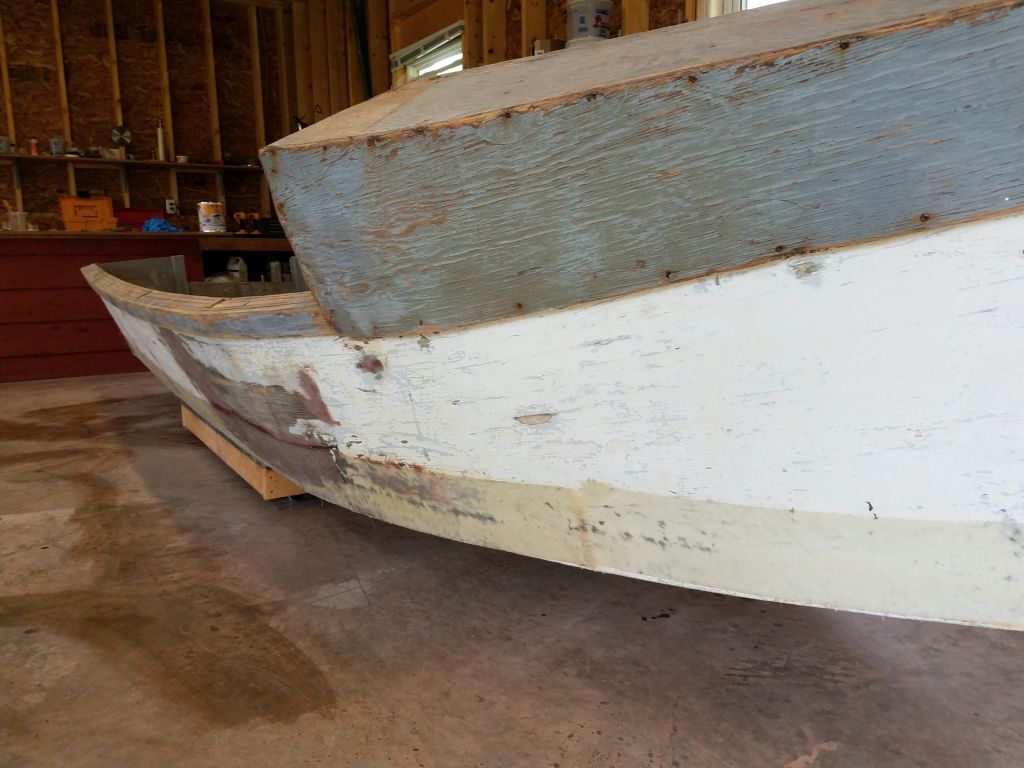
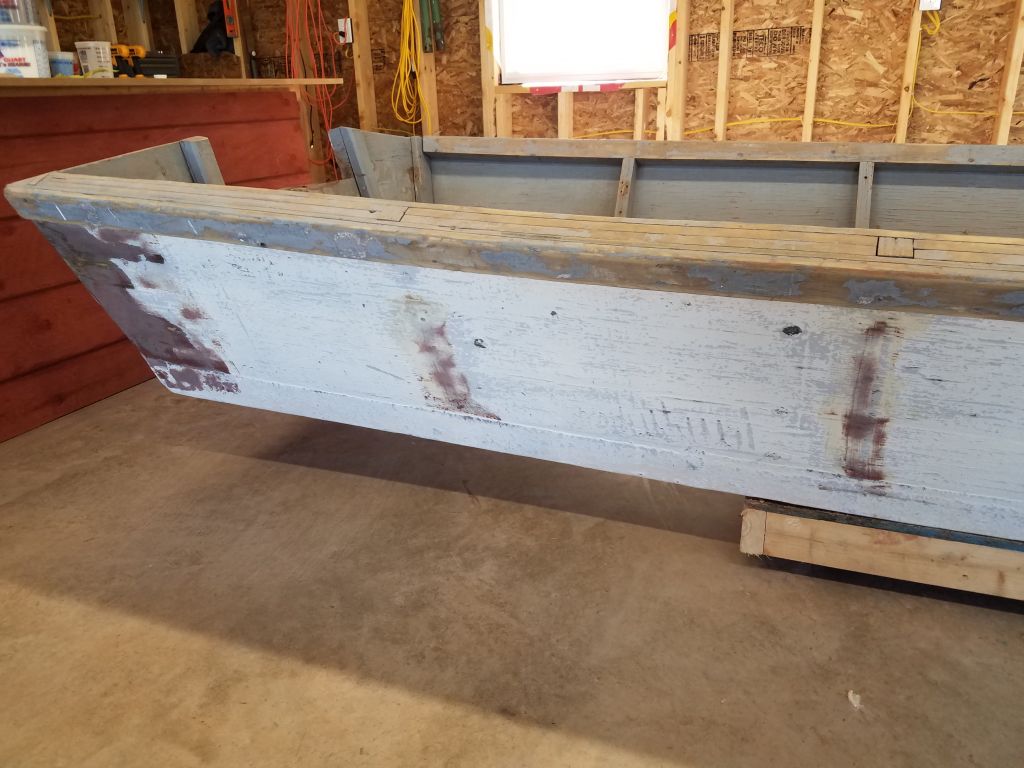
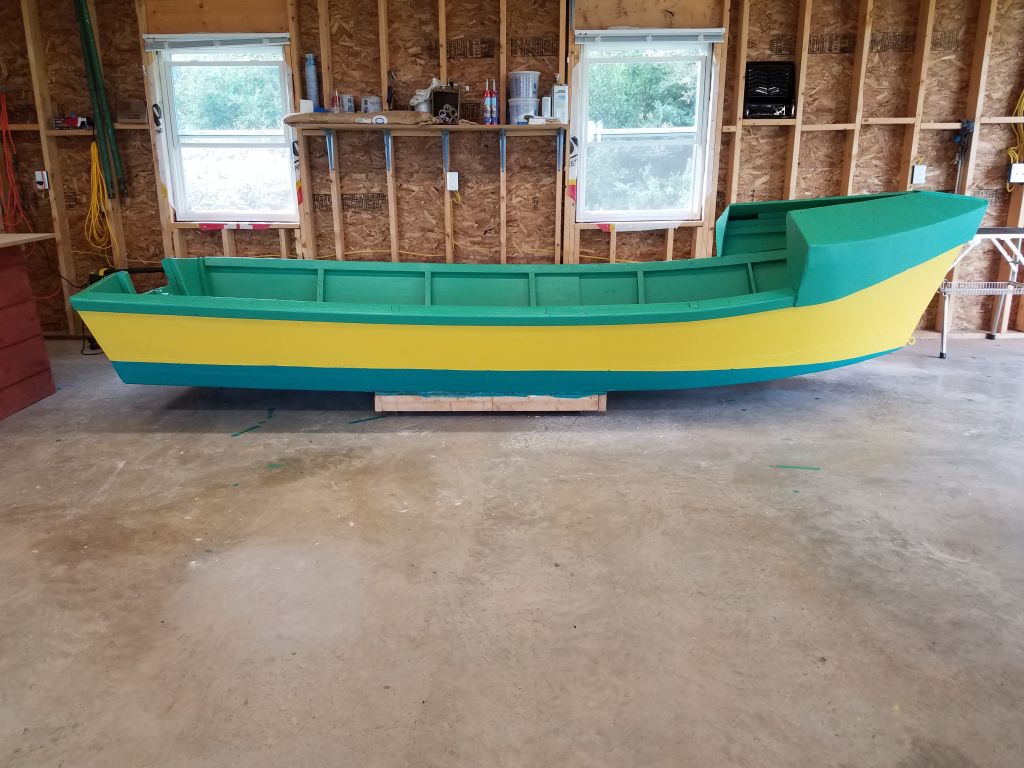
To complete the refinishing part of the project, after the hull paint had cured a couple days I continued with some green bottom paint–chosen  because I had it on hand, not necessarily because it matched the color of the interior trim (though it did closely match, as it happened).

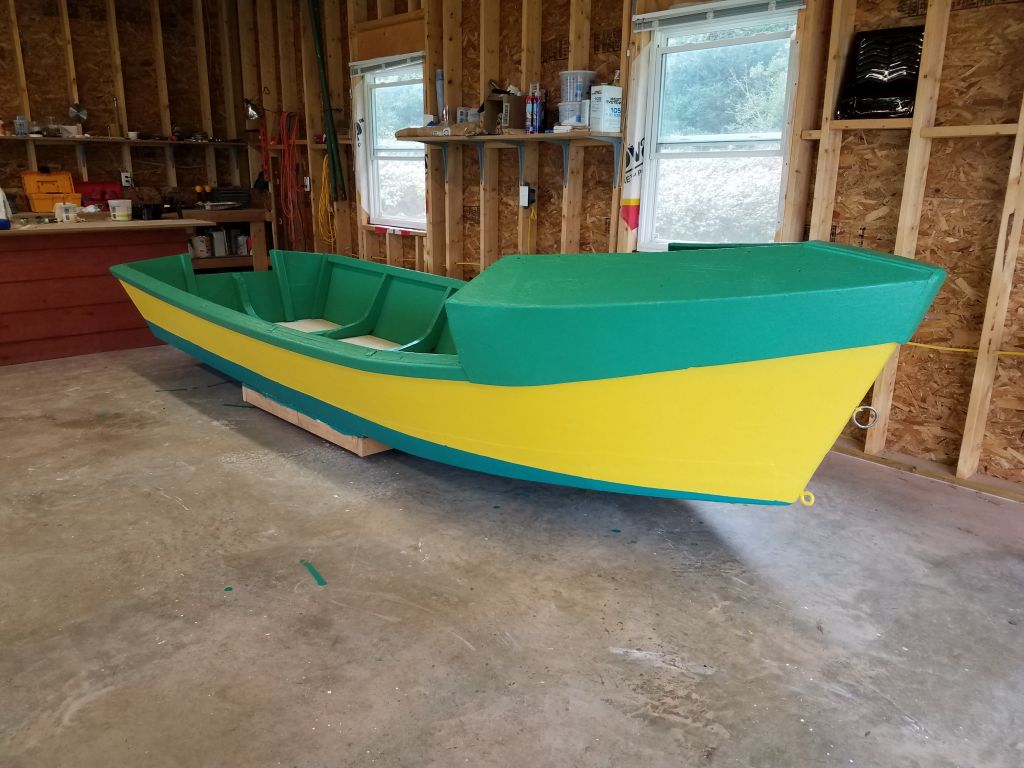
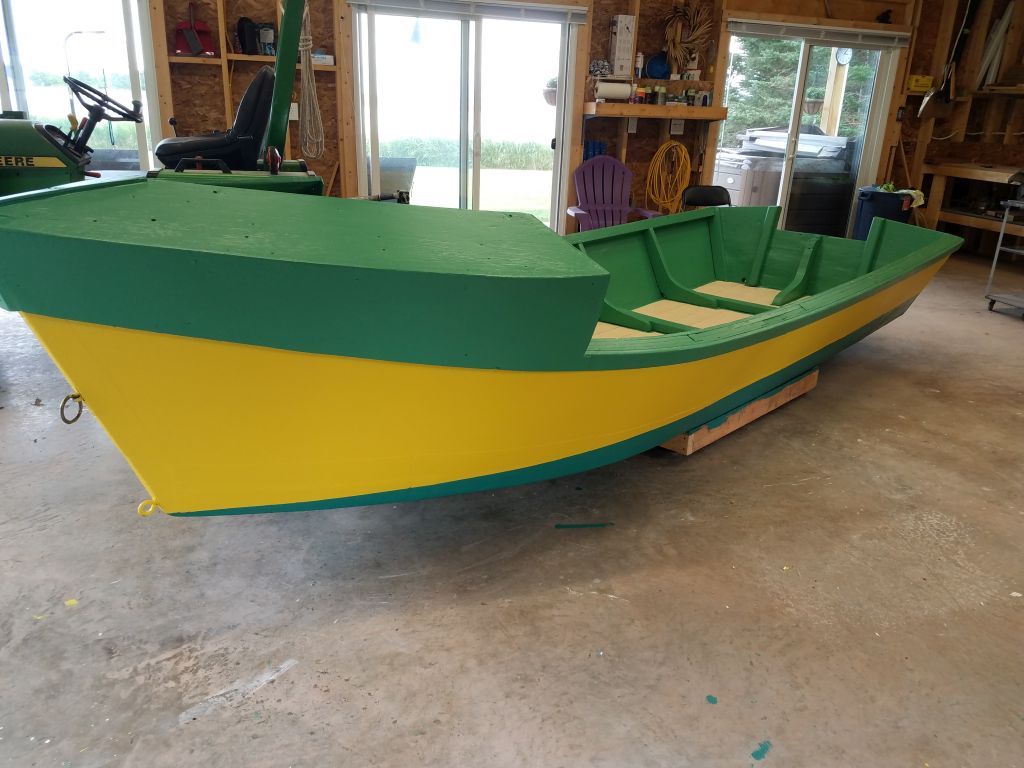
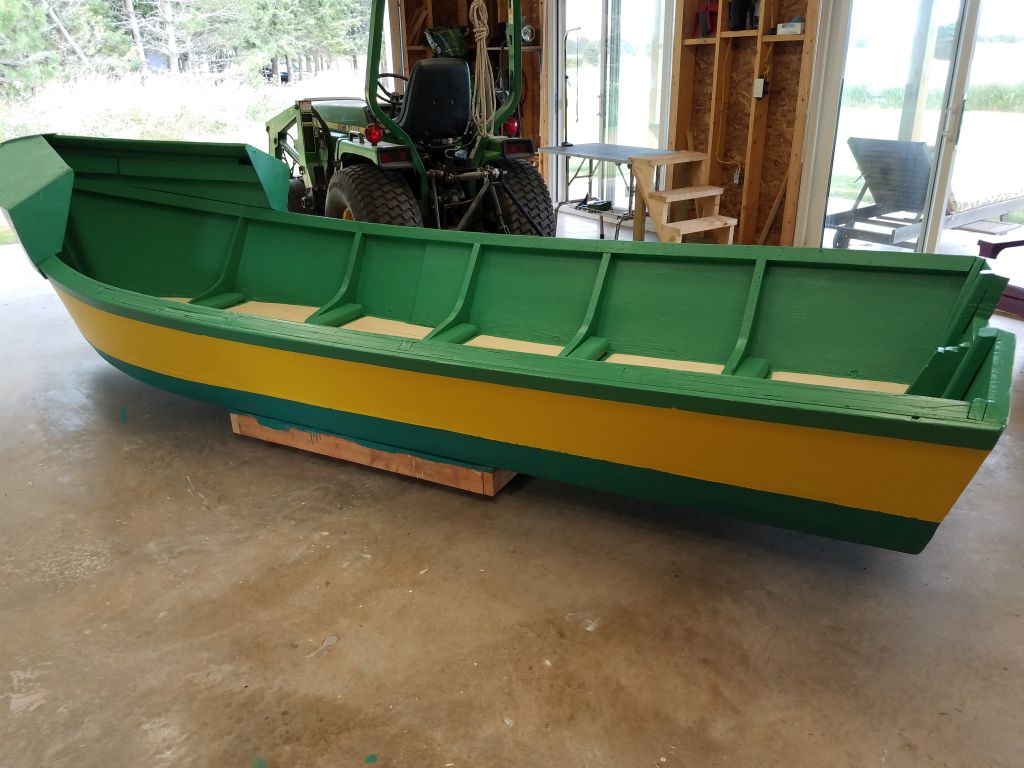
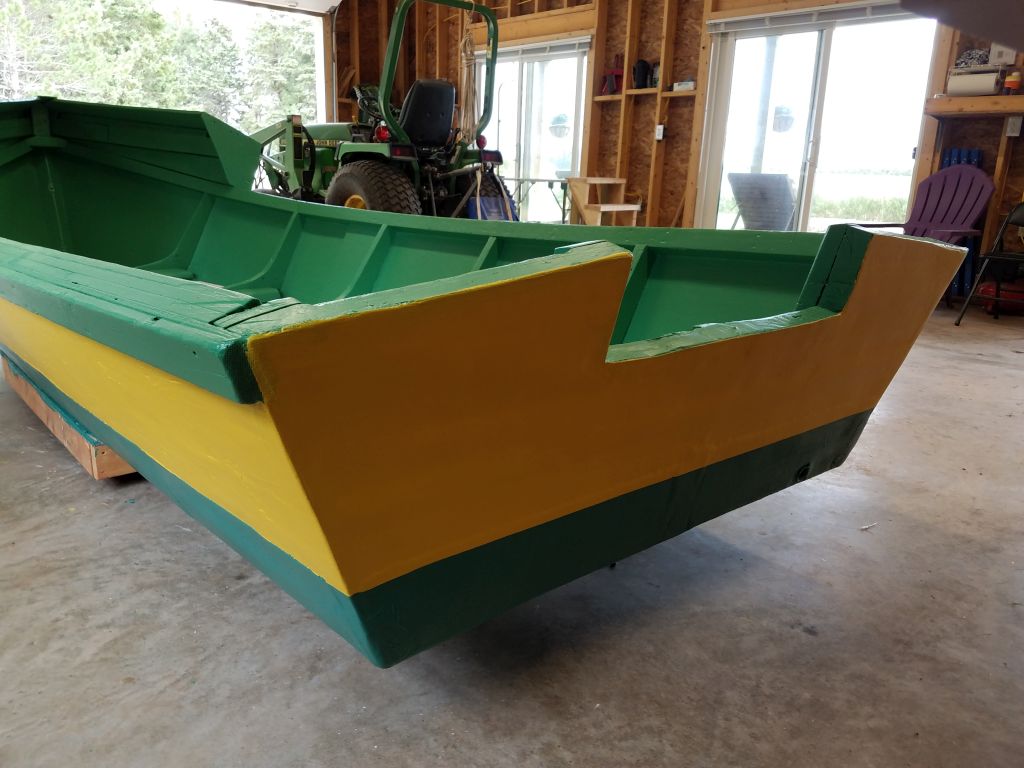
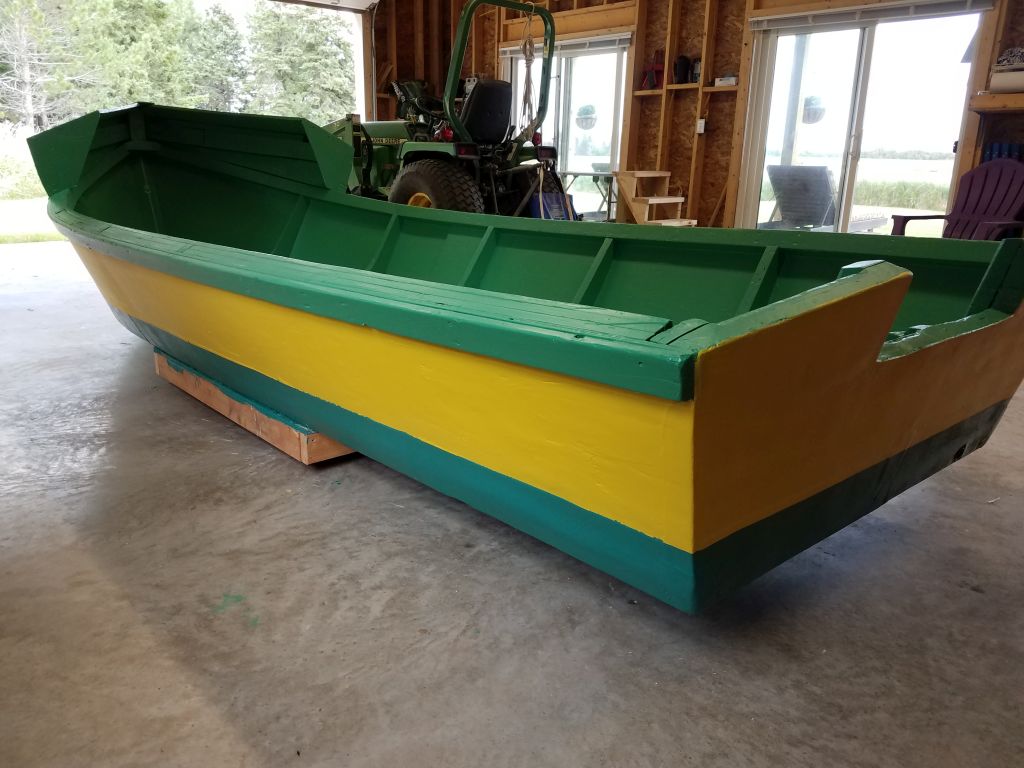
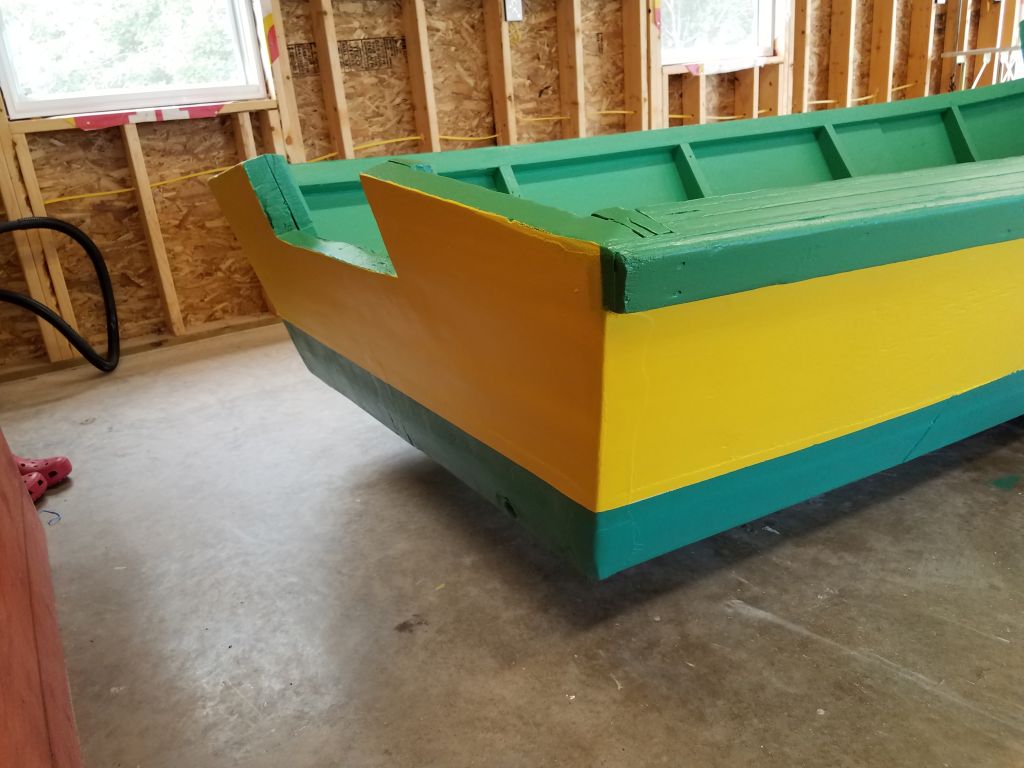
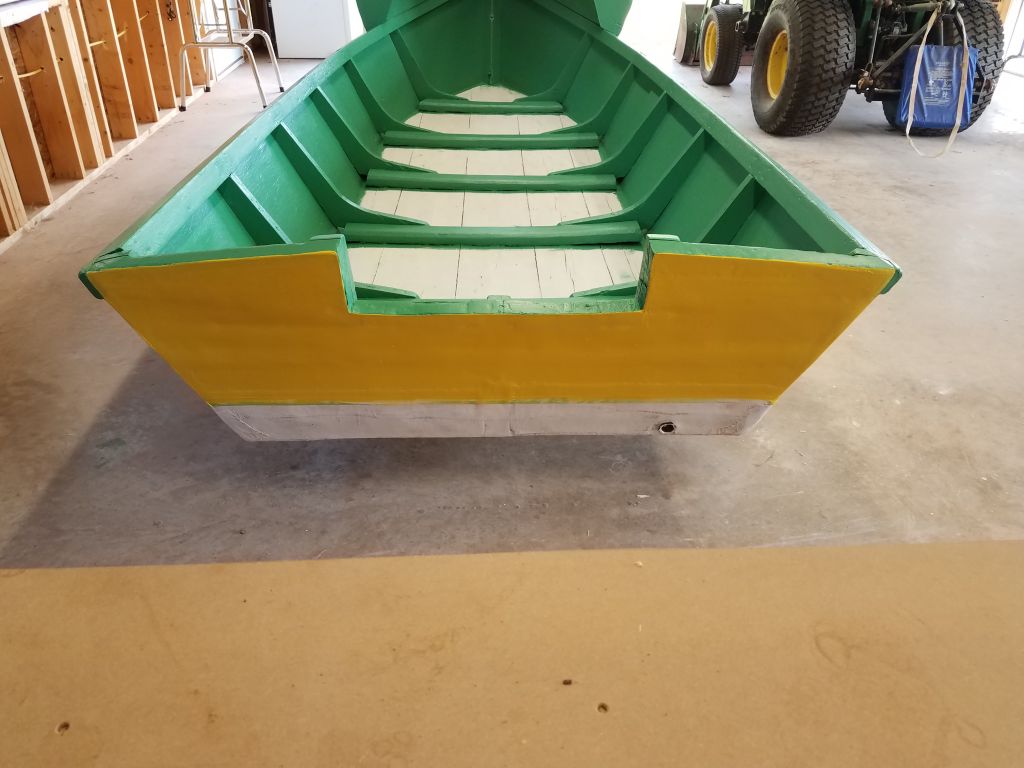
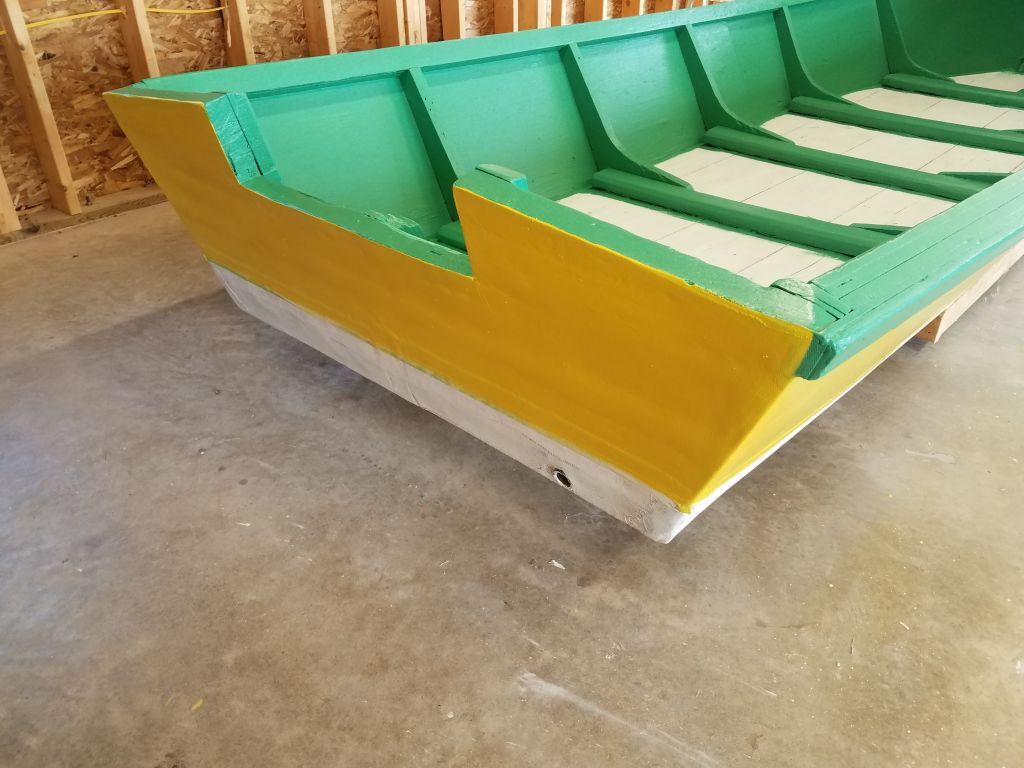
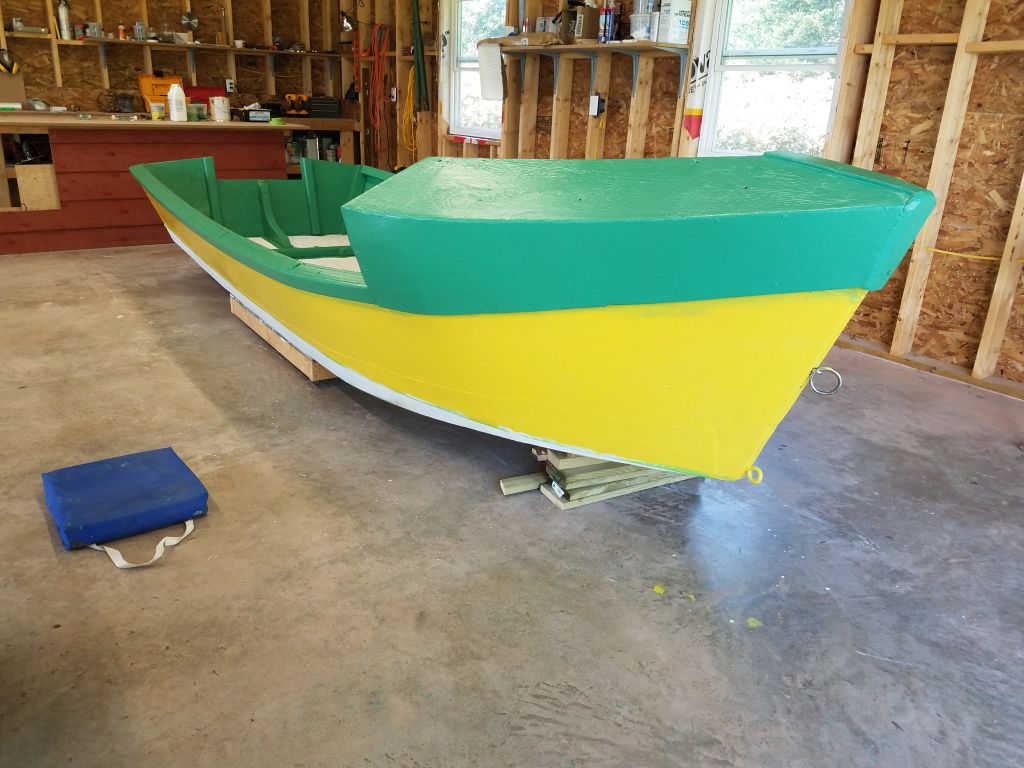
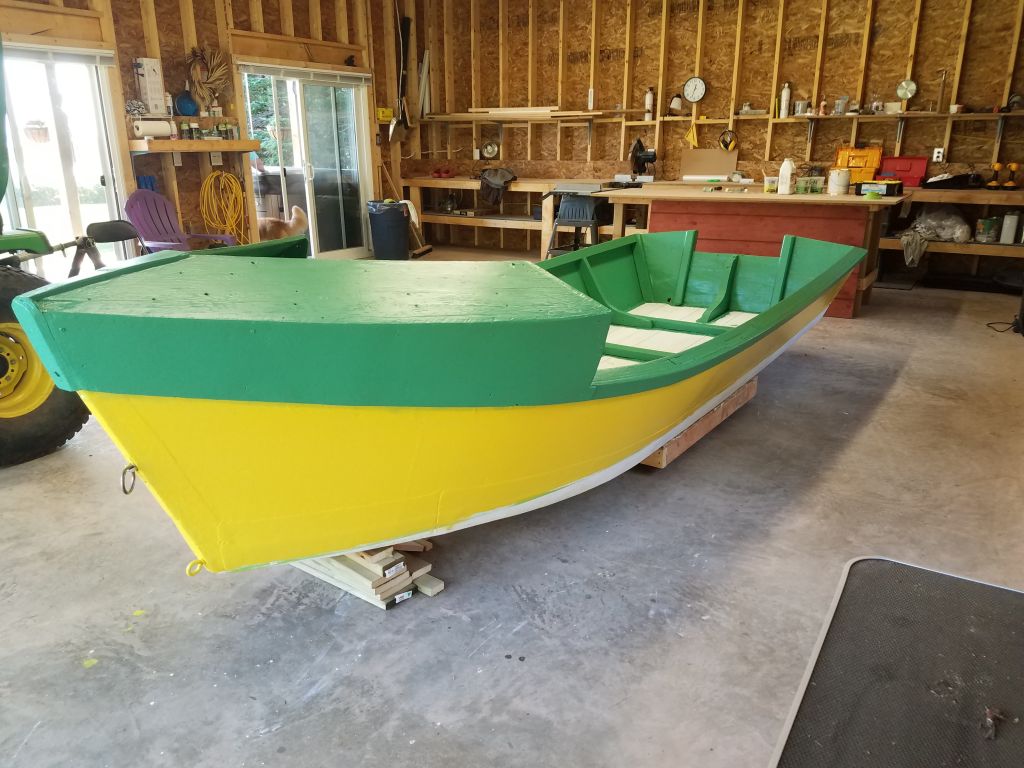
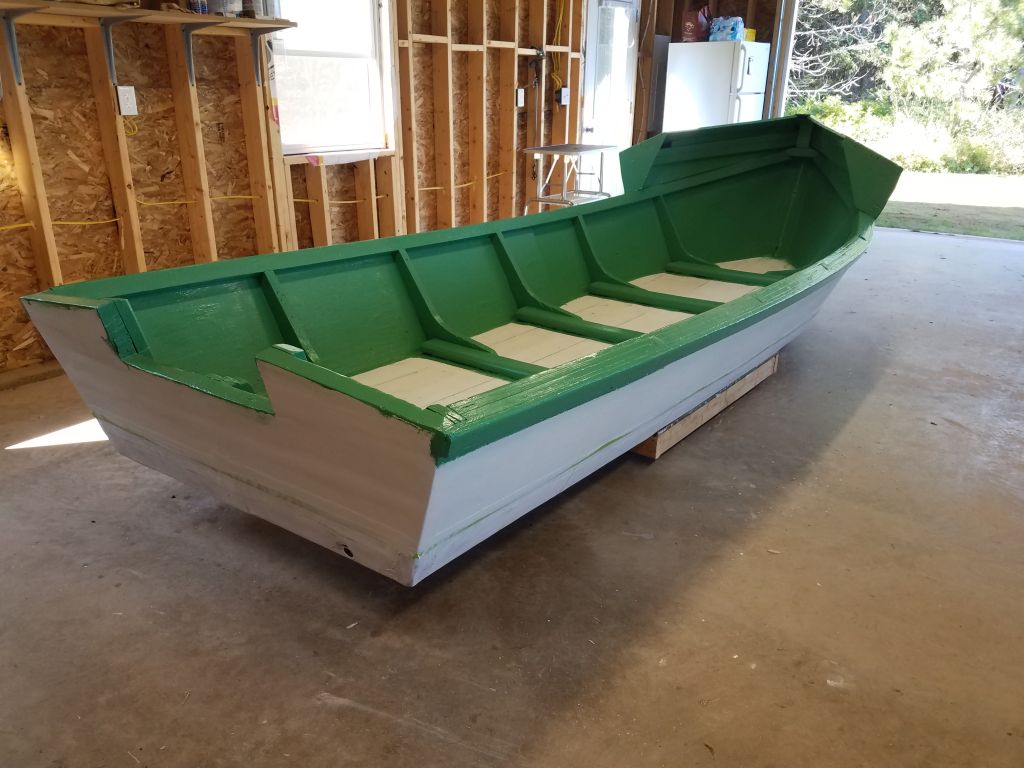
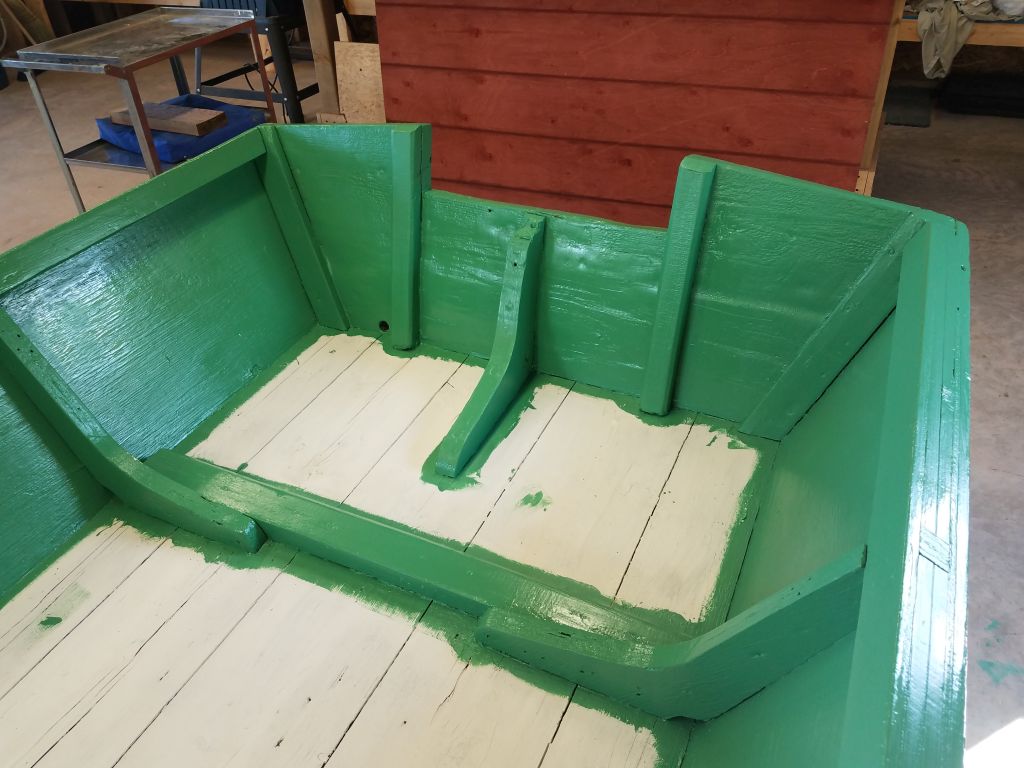
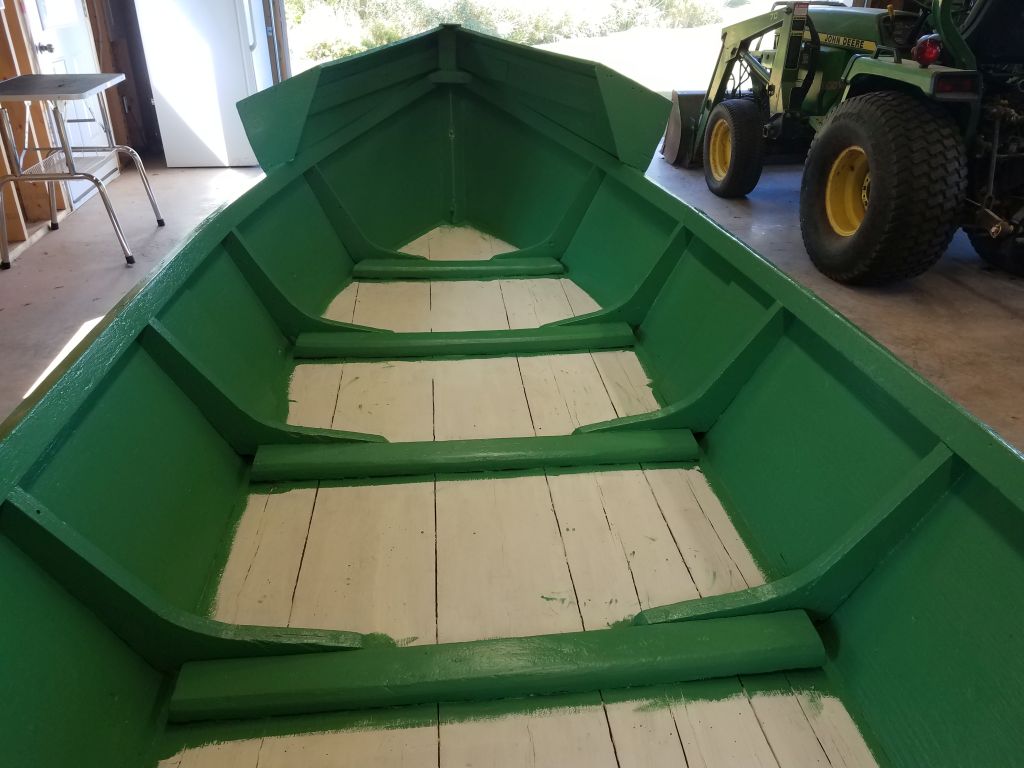
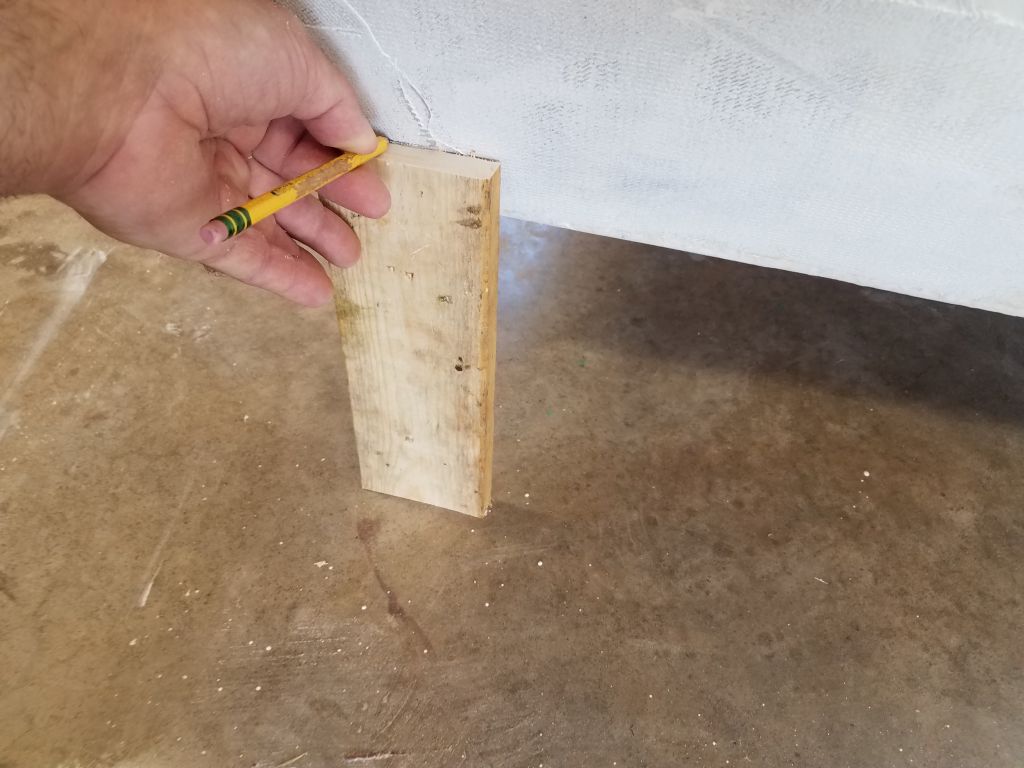
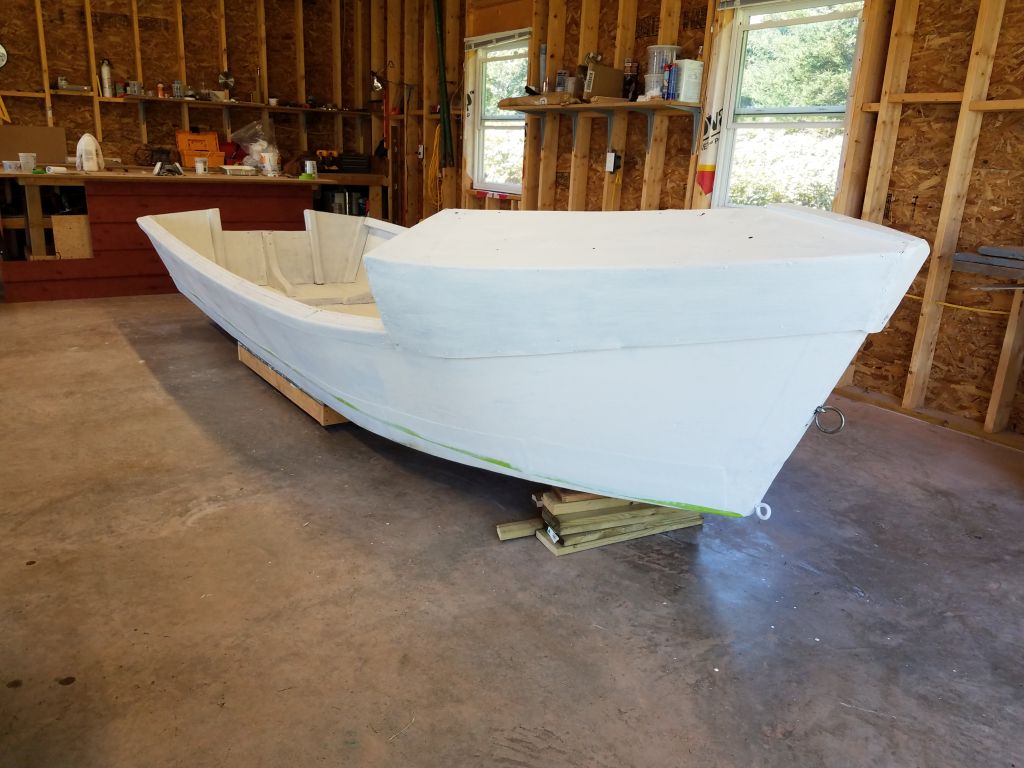
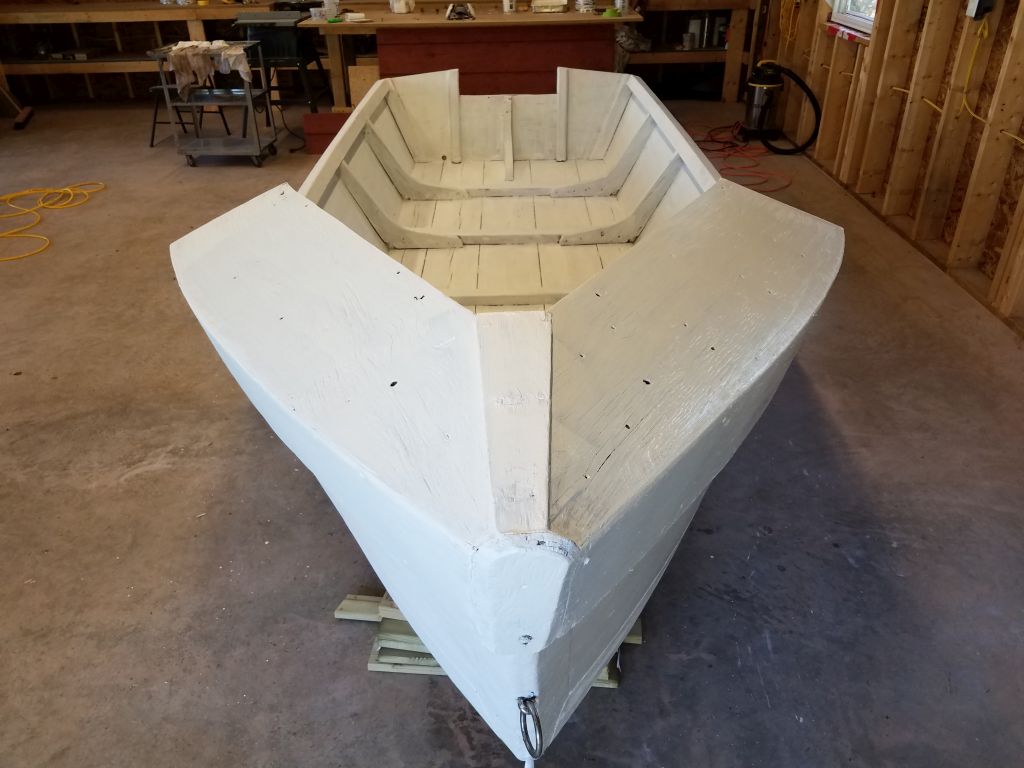
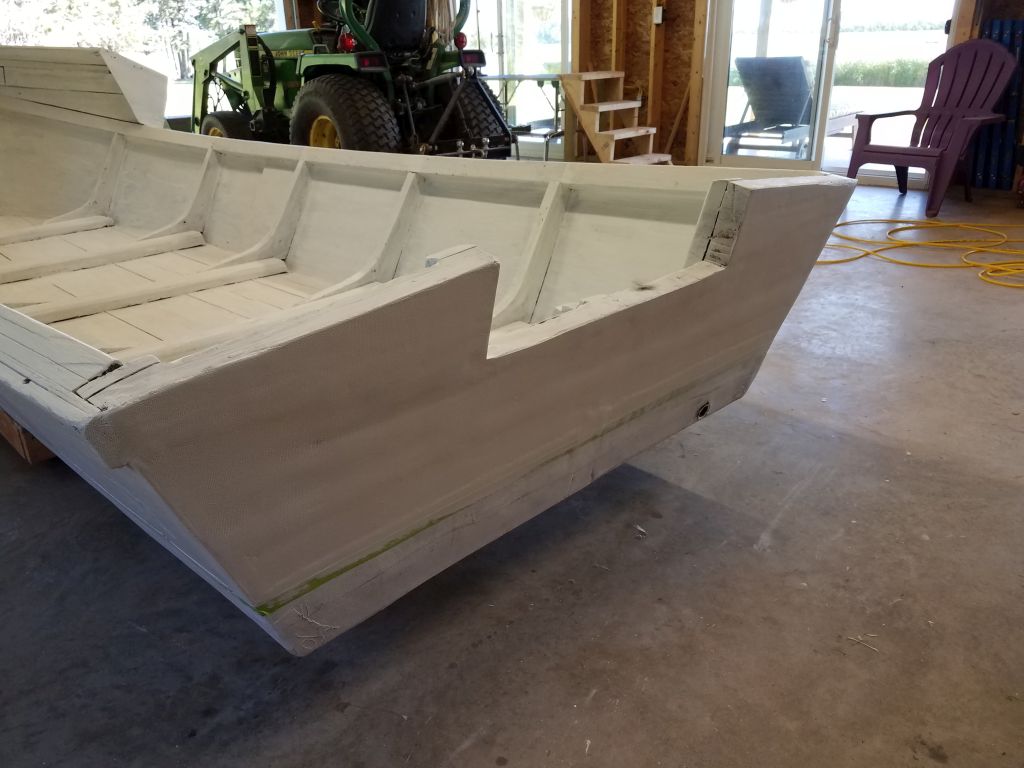
To round out the interior, I painted the flat surfaces of the deck with a cream-colored nonskid paint.  Originally I’d planned to cut this in closely to the sides and other framing members, but in practice I quickly discovered that the thick brush I had was not adaptable to this sort of detail, nor was the roughness of the bottom planking and other surfaces.  Instead, I ultimately chose to paint up to about 1/2″ of the structure all around, leaving a band of the overlapping green paint in all areas.  There was no way I was going to mask around all the members for this project; frankly, it wasn’t worth the time.  While my freehand lines were imperfect, so too was the whole boat, and the net effect was what I wanted.

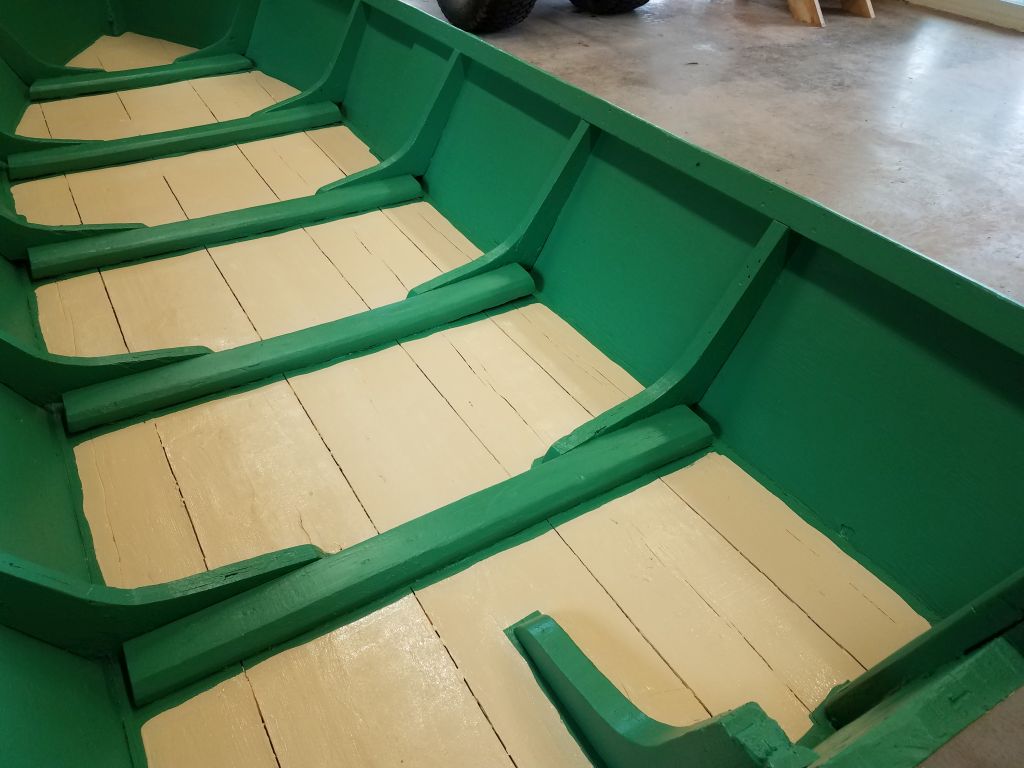
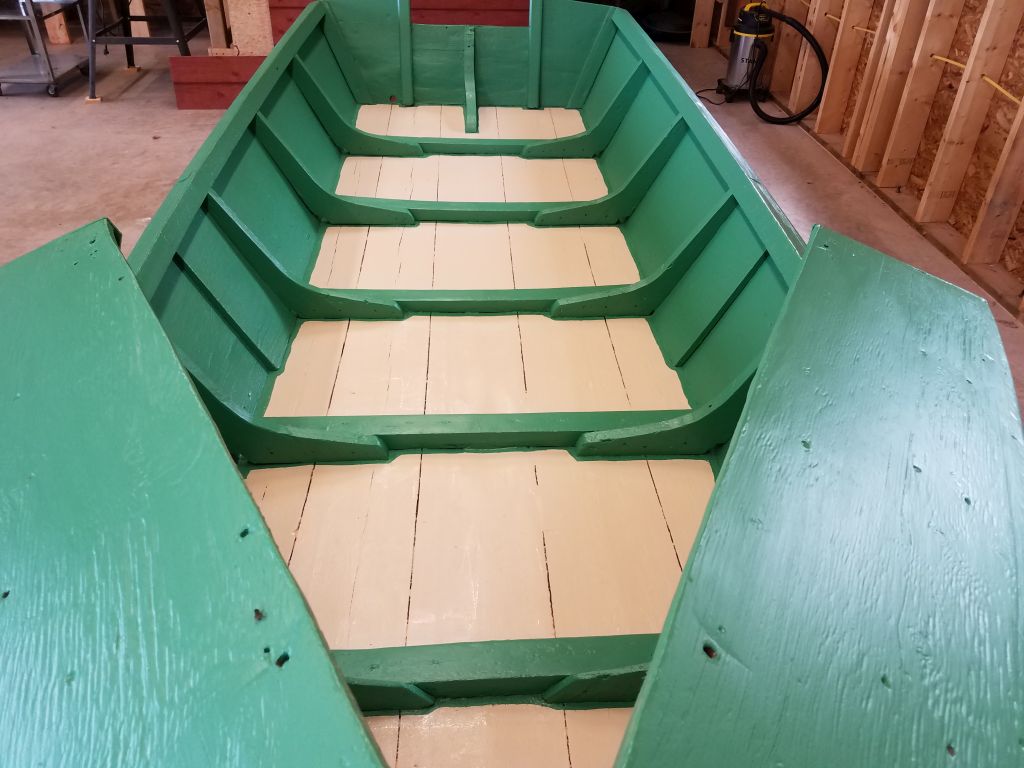
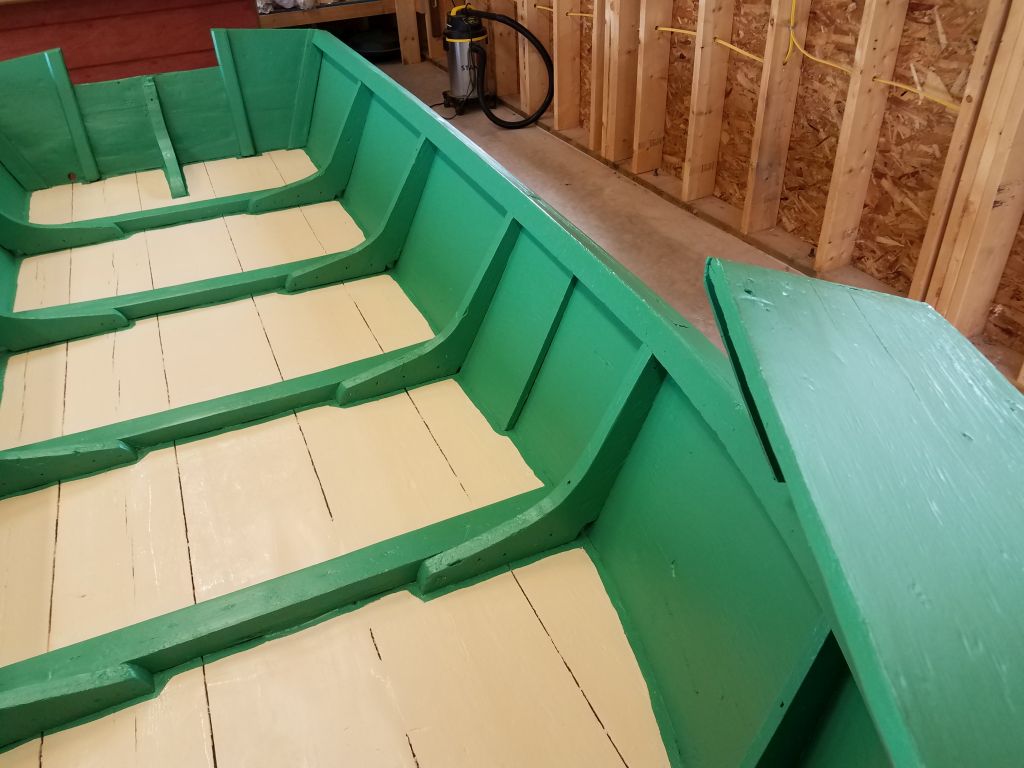
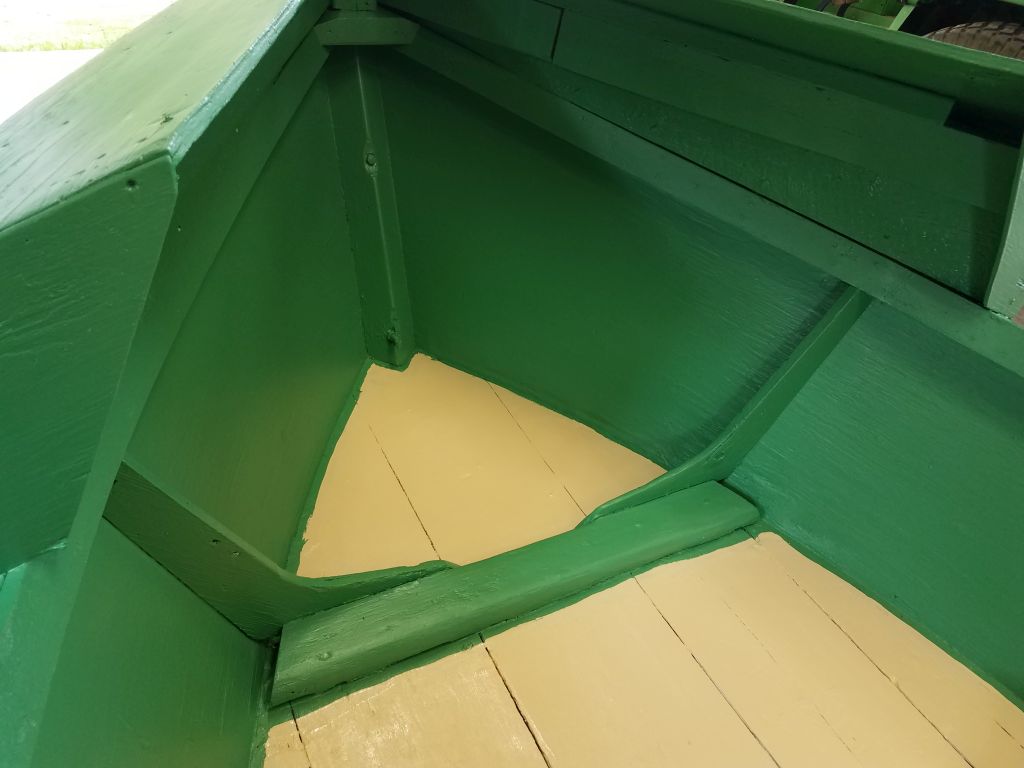
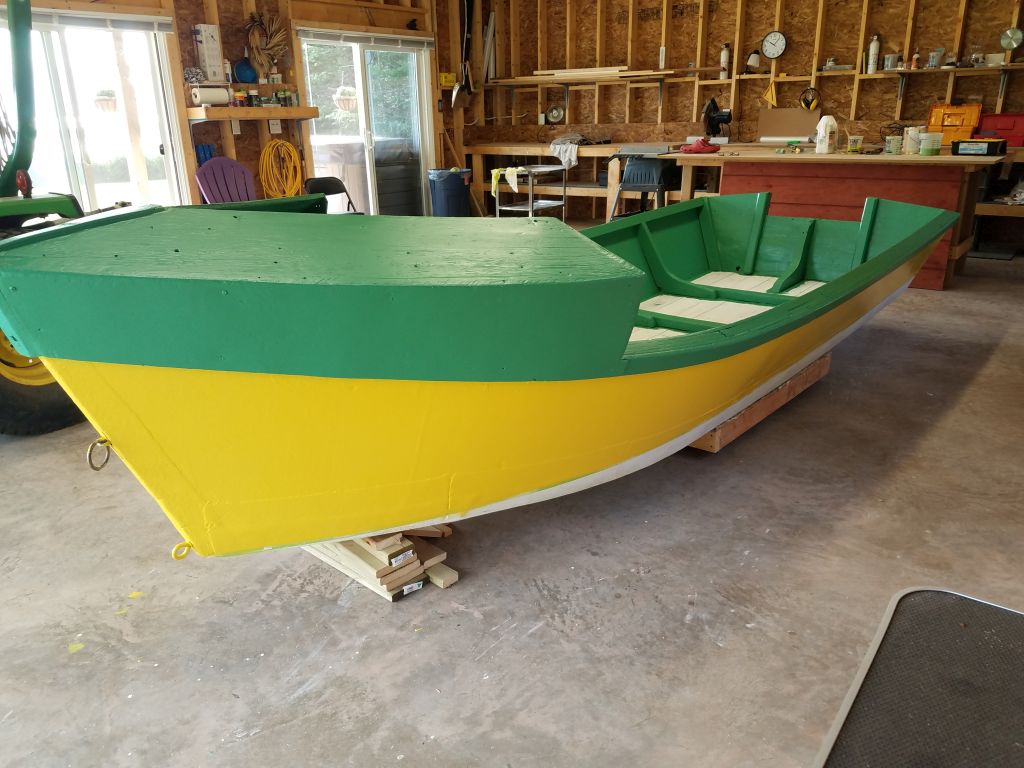
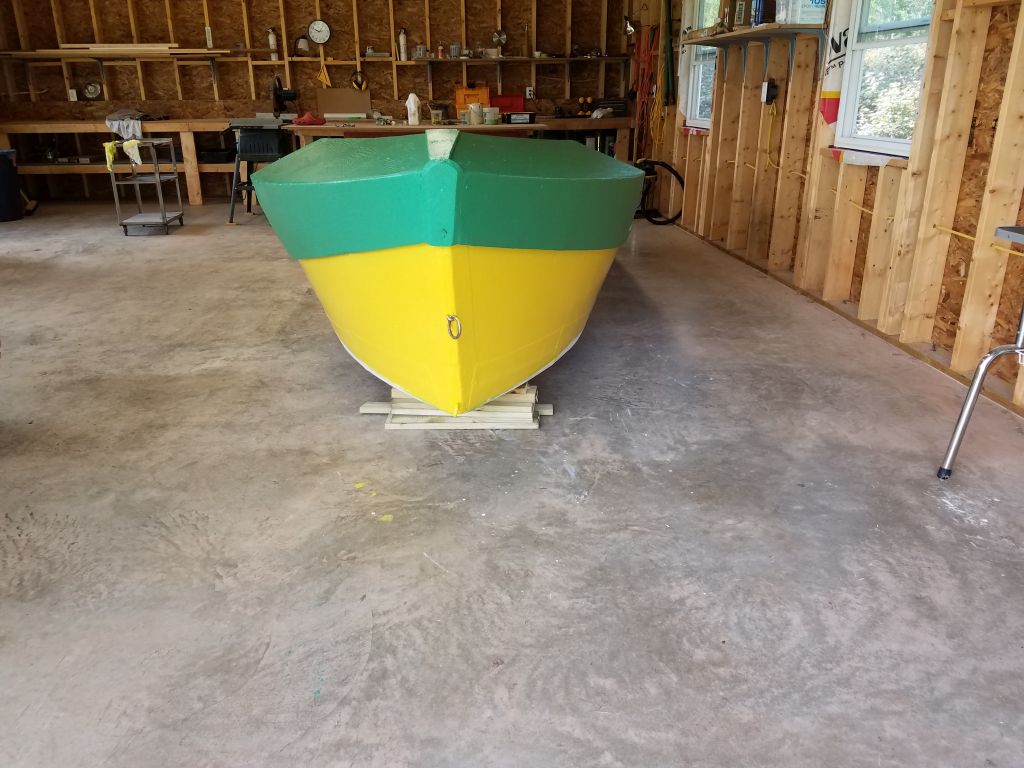
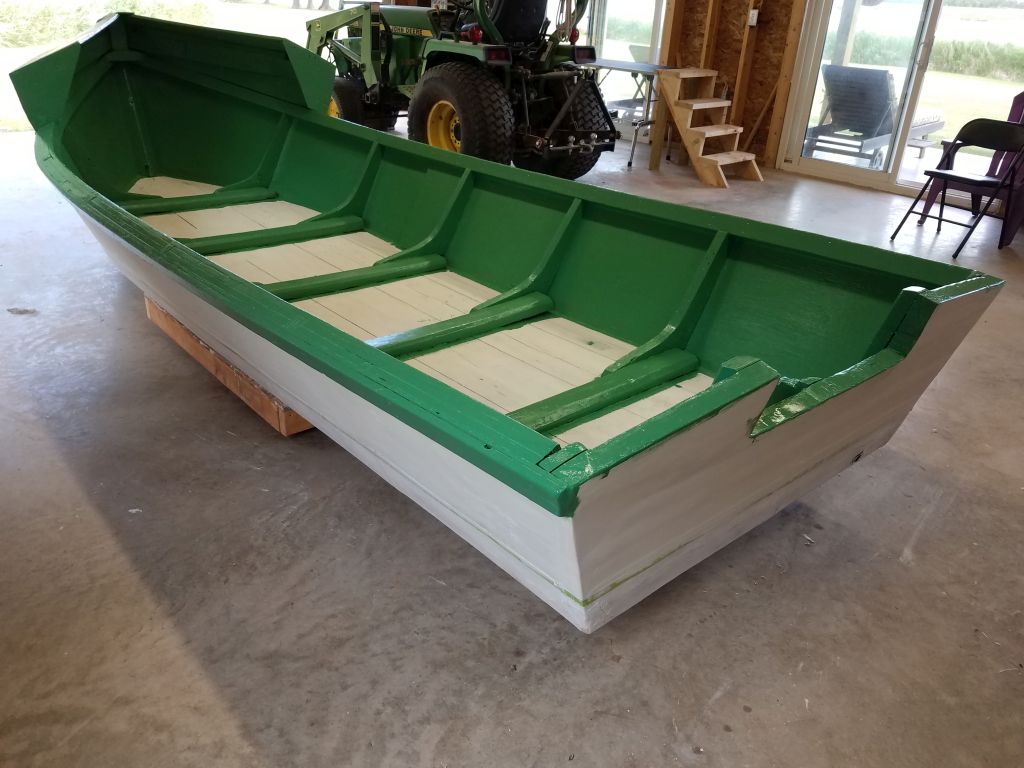
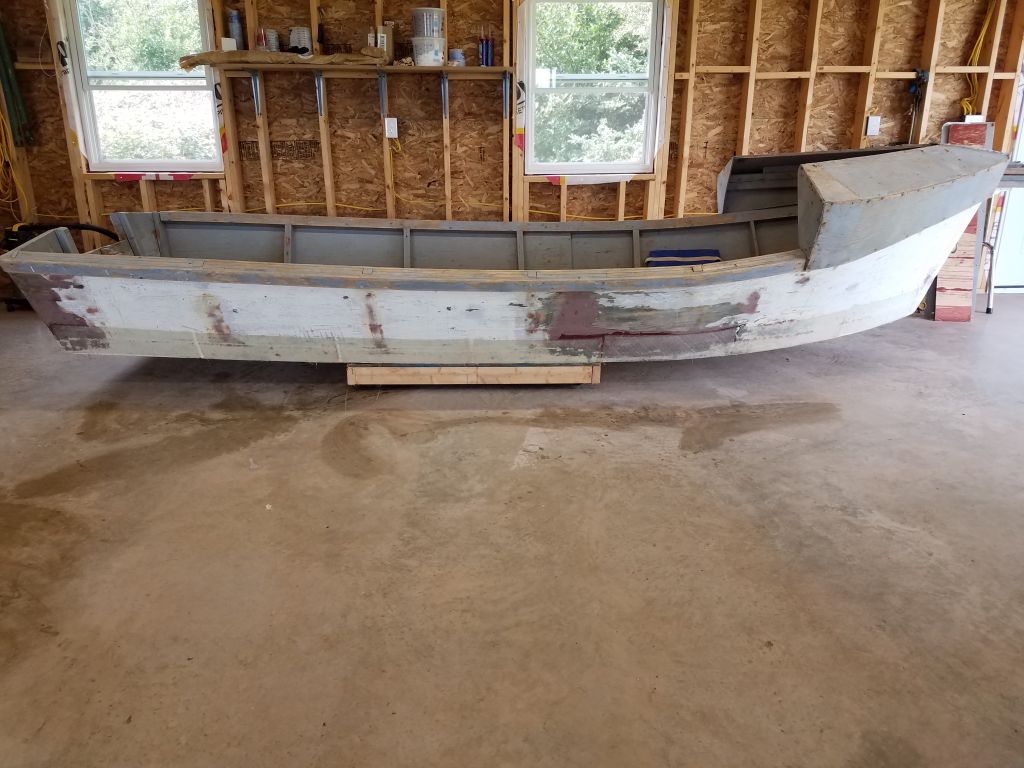
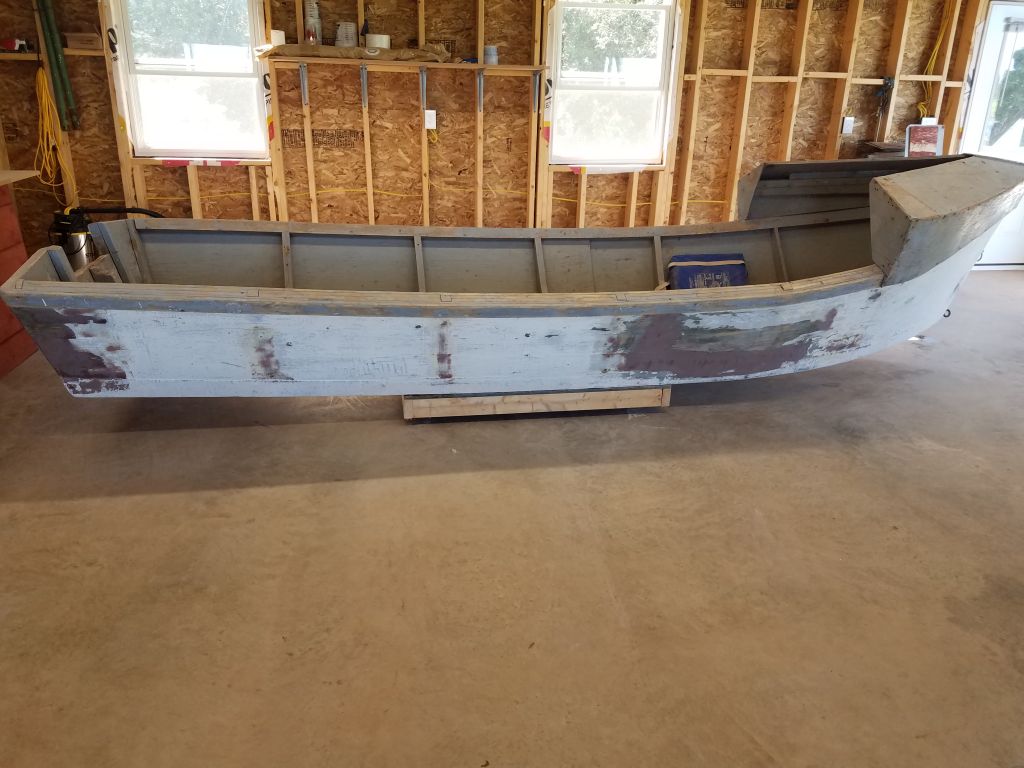
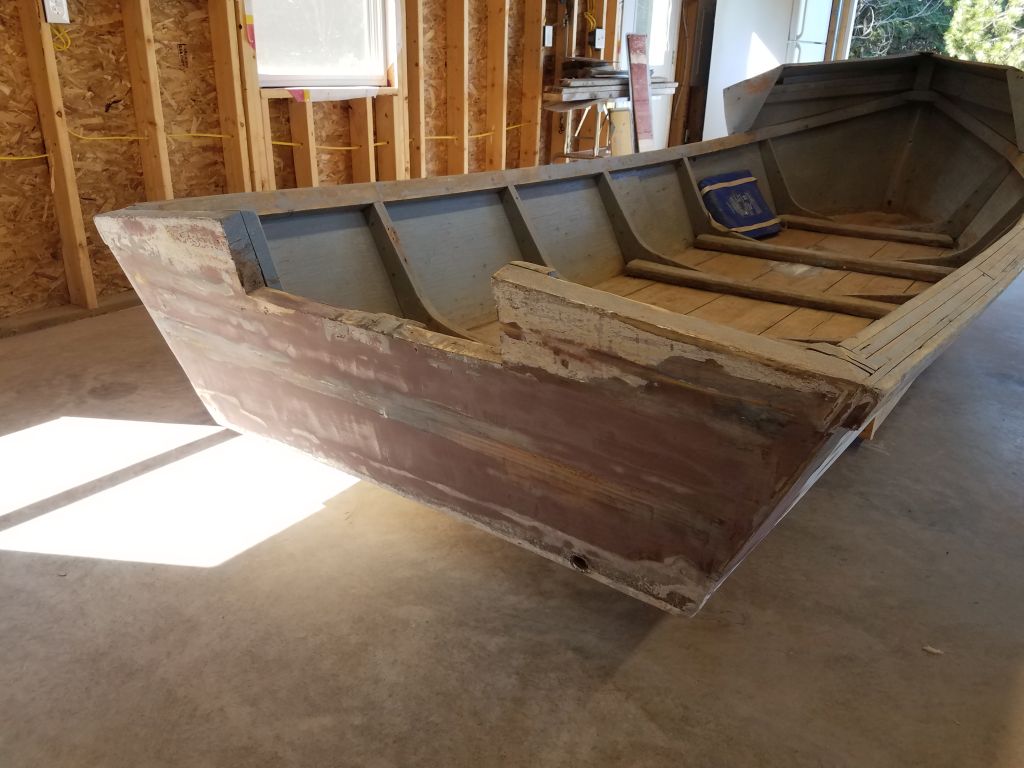
Overall, I thought the boat looked good, and a whole lot nicer than the original boat.  I was pleased with the transformation, and thought it represented a reasonable blend of practicality and good looks.

Total time on this job today:  1.5 hours

Dory 15

< Back to Oyster Dory

Tuesday

Second coat, same as the first.

Total time on this job today:  .5 hours

Dory 14

< Back to Oyster Dory

Sunday

Now that the two coats of green paint for the interior and trim were dry, I could continue with the hull paint.  There was no need to mask, since the overhanging gunwale gave me a good place to cut in by hand, and the waterline was already ready.  For the hull, I chose a paint called Shaw’s Yellow, and in little time applied the first coat with roller and brush.

Total time on this job today:  .75 hours

Dory 13

< Back to Oyster Dory

Saturday

I applied a second coat of the green interior and trim paint right over the first.

Total time on this job today:  1 hour

Dory 12

< Back to Oyster Dory

Thursday

With the primer cured, I continued with the first coat of paint on the interior surfaces and gunwale trim.  For this, I chose a light green color.  When I chose the color, I’d been going for that sort of very light, Bahamian teal green sometimes seen on old wooden Maine lobster boats or Novis, but the actual color was somewhat different than I’d expected–but I liked it anyway.  I overlapped the color from the various framing members onto the floor of the dory to ease cutting in later.

Total time on this job today:  1.5 hours

Dory 11

< Back to Oyster Dory

Wednesday

Now that the two-part epoxy primer had cured overnight, I could continue with final preparations before the regular one-part primer that I planned to use over the entire boat.

Before priming, I decided to mask off a waterline, as I planned to paint the bottom for looks, contrast, and function.  Not knowing exactly where the boat would float, but having observed other dories over the years and thus with a general idea how the boat should float, I chose to strike a line from just barely above the knuckle at the stem and run it straight aft from there.

First, I leveled the boat fore and aft; I had to lift the bow several inches before the bottom was approximately level, not only according to the tool but also to the logical eyeball.  Then, I measured from the floor (smooth concrete and level enough for this purpose) to the point on the bow (12″), and made up a quick guide block of the same dimension.  I used this block and a pencil all around the boat to mark the new waterline in all areas, 12″ up from the floor, creating a level line around the boat.  I masked below the marks, and was ready for primer.

I chose a one-part primer from a small company that produces traditional paints for traditional boats–I also selected two of their topcoat enamels for the finish coats–and painted the entire boat inside and out. Despite the sundry shortfalls of my overall execution throughout the painting preparations, the new primer made an immediate difference to the feel and appearance of the dory, and it felt great to be making visual rather than structural progress on the boat.

Total time on this job today:  2.5 hours

Dory 10

< Back to Oyster Dory

Tuesday

After a light sanding for the transom, which took care of the edges of the new material and also prepared the field for additional work, I used a two-part epoxy-based primer to pre-prime all the new fiberglass, including the various areas of fairing compound and other work, as a safeguard against problems with curing of other one-part paints over the fresh epoxy, which can be an issue.  If nothing else, using the epoxy primer helps to speed up the painting process rather than awaiting for some weeks the complete curing of epoxy resin required to ensure proper paint curing otherwise.

Total time on this job today:  .75 hour

Dory 9

< Back to Oyster Dory

Monday

Now I sanded the new fiberglass, just enough to ease any hard, sharp edges and prepare the tabbing for the next steps.

Afterwards, I prepared a layer of 10 oz. cloth to sheathe the entire transom, running from the gunwale down below the top edge of the new bottom tabbing.  With the cloth cut oversize by a few inches in the top three dimensions (all but the lower edge), I wet the transom with epoxy resin, then pressed the cloth into position, holding the two side edges with some masking tape to keep them from wanting to peel away from the hull.  I wet out the dry cloth with a roller as needed, and finished the application with a brush and air roller as required.

I wrapped the edges of the material a couple inches around each transom corner, leaving the dry cloth beyond for later trimming, along with the oversized top edges, all of which I cut with a sharp knife a few hours later once the resin had cured to green stage.

Total time on this job today:  2.25 hours

Dory 8

< Back to Oyster Dory

Saturday

To reinforce the seam between the existing fiberglass and the hull, my next step was to install 6″ biaxial tabbing across the joint, holding the bottom edge just barely above the turn of the bilge, which meant the new tabbing overlapped the seam and up onto the hull above by 2-3″.  I set the biax in epoxy resin, and worked along both sides and the transom using pieces about two feet in length for ease of installation; there was no need in this application for the tabbing to be continuous, nor to worry about the butted seams, since the point of this new work was only to further secure the original fiberglass beneath.

Again with this project, and despite certainly knowing how I could and (probably) should do it better, I knowingly accepted some shortfalls in preparation, applying the tabbing in some areas over some of the original paint (though the paint had been thoroughly sanded with coarse paper), since I felt this was more than adequate given the proposed use and anticipated lifespan of this basic and tired old skiff.

Total time on this job today:  1 hour

Dory 7

< Back to Oyster Dory

Friday

Now that the fairing filler had cured, I lightly sanded it as needed, completing the initial rounds of prep work.  The boat was now ready for new fiberglass (to over-tab the existing seam near the bottom of the topsides), and, eventually, primer, paint, and other new work on the interior.

Total time on this job today:  .75 hours

Older posts