(page 2 of 2)

Dory 6

< Back to Oyster Dory

Thursday

After lightly sanding the initial epoxy work and cleaning up, I continued with a round of fairing filler (epoxy) to clean up some of the areas and to smooth the transition between the now-secure old fiberglass and the surrounding hull.  I planned to retab (or, more specifically, tab over) this seam once all the prep work was complete.

Total time on this job today:  1.5 hours

Dory 5

< Back to Oyster Dory

Tuesday

After final preparations and cleanup, I used a mixture of thickened epoxy to begin some of the minor repairs needed, including filling some of the dry-rotted areas of transom and “sole” inside the boat, and regluing the loose existing fiberglass on the port side of the hull (and a smaller area to starboard).  As needed, I used temporary screws (covered with tape to avoid epoxy getting in the screw heads) to secure the tabbing to the hull while the epoxy cured.

Total time billed on this job today:  2 hours

Dory 4

< Back to Oyster Dory

Thursday

Once I received a replacement pad for my sander, I could turn to the exterior of the hull and sand/prep this area for the work ahead.  I concentrated on the areas requiring fiberglass work, but went over the entire surface as needed to remove loose paint and otherwise prepare the surface for new work.

Total time billed on this job today:  1.5 hours

Dory 3

< Back to Oyster Dory

Wednesday

To begin the surface preparations, I used a putty knife to scrape away any loose paint and fiberglass sheathing from various areas, especially the transom (which had been fully sheathed on the outer side) and portions of the lower hull on each side.  I had to stop short of what I might do in other circumstances–i.e. additional. more complete surface prep–because frankly, the boat simply wasn’t worth that amount of effort given its entry price, existing condition, and my intended use.  I kept repeating the mantra:  workboat finish, workboat finish.   This is not to excuse poor work, but simply the practical understanding that this old boat was basic in nature, old and well-used, and my time didn’t need to be spent on spit and polish–and indeed, any such attempts would be wasteful.  That said, I wanted the boat to be sound, and to look decent when complete, but in the end if I wanted it to be more of a showpiece, I’d be better off simply building new.  But for now, I just wanted to bring this particular boat back and up to a usable and acceptable standard.

With the scraping complete, I began to sand the inside of the boat to remove loose paint and clean up any areas as needed to prepare for new finish and repairs.  Before long, though, the pad on my sander disintegrated, forcing me to use a less-aggressive sander that I had on hand to continue the work.  No replacement pads were available locally, so I had to order what I needed before I could continue using my favorite and most effective sander.   As a result, I worked only on the interior for now, as I knew I wanted/needed the better sander for the hull and to prepare the damaged fiberglass areas for repair.

With the interior sanding complete–this was where I really had to start saying “good enough” for my prepwork–I turned to the first of the repairs I had in mind:  refastening the plywood hull panels to the interior frames.  There were four double-thick plywood frames on each side, plus a single thickness of plywood for the forwardmost frame on each side.  The hull had pulled away from the frames, and I planned to install new screws from outside to pull the hull back in tightly.

At each of the eight frame locations (I didn’t need to fasten to the forwardmost pair of frames, as these areas were tight as is), I drilled pilot holes and counterbores for #10 x 2″ galvanized screws, which I installed and used to pull the hull sheathing back tightly to the frames.  I used three to five screws at each frame location as required.  Please refer to some of the original-condition photos to see the gaps between the frames and hull in their original condition.

Total time on this job today:  3.5 hours

Dory 2

< Back to Oyster Dory

Friday

The first steps in any project always involve assessment and dismantling, and the dory was no exception.  Now ready to begin the restoration (using the term quite loosely), I once more inspected the vessel and documented the initial condition for posterity.  The nature of the boat’s requirements and design mantra meant that construction was basic and functional–no frills or fancy detail to be seen in this pure workboat.  The bottom and transom were constructed of 2″ thick rough planks, while the topsides were 3/8″ thick plywood (it appeared to be pressure-treated ply), with laminated plywood frames, solid wood floors (using true nomenclature here to refer to the structural cross members across the bottom of the boat and connecting the frames), and gunwales formed from basic inexpensive strapping material.

At the bow, there was a built-on, raised section, known as tong boards, where an oyster fisherman would stand and rest the long-handled oyster tongs for harvesting the shellfish.  While the tong boards had no particular use for me and how I planned to use the boat, I liked the look and planned to keep them.

Most of my work on this project would revolve around various fiberglass repairs to deal with the loose sheathing on portions of the hull, and to generally clean up and improve the appearance of the boat.  In the main, the overall structural condition was fairly sound and would do what I needed (which wasn’t much), and my biggest challenge with this project would be to limit my natural inclination to do more or make a better finish, rather than keep this basic boat at the workboat-level finish and quality of repair needed.

To begin, I removed whatever I could from the interior, including the cross thwarts, some stringers at the transom corners, wooden blocking on the bottom (purpose still unknown), and some of the aluminum sheathing from the tops of the tong boards.  I was interested to see that these sheets were actually recycled road signs–the real question was, were they old signs that someone repurposed, or (just as likely) did someone help themselves to the handy supply of road signs still in use by the side of the road?  During this dismantling, I had to wait several days before I could remove all the through-bolts securing the aluminum signs fastened to the transom, as the threads were stripped on several bolts and I didn’t have a cutting tool on hand at my remote shop.  Eventually, I got the tool I needed and removed the offending bolts, completing the dismantling process.

Total time on this job today:  1 hour

Dory 1

< Back to Oyster Dory

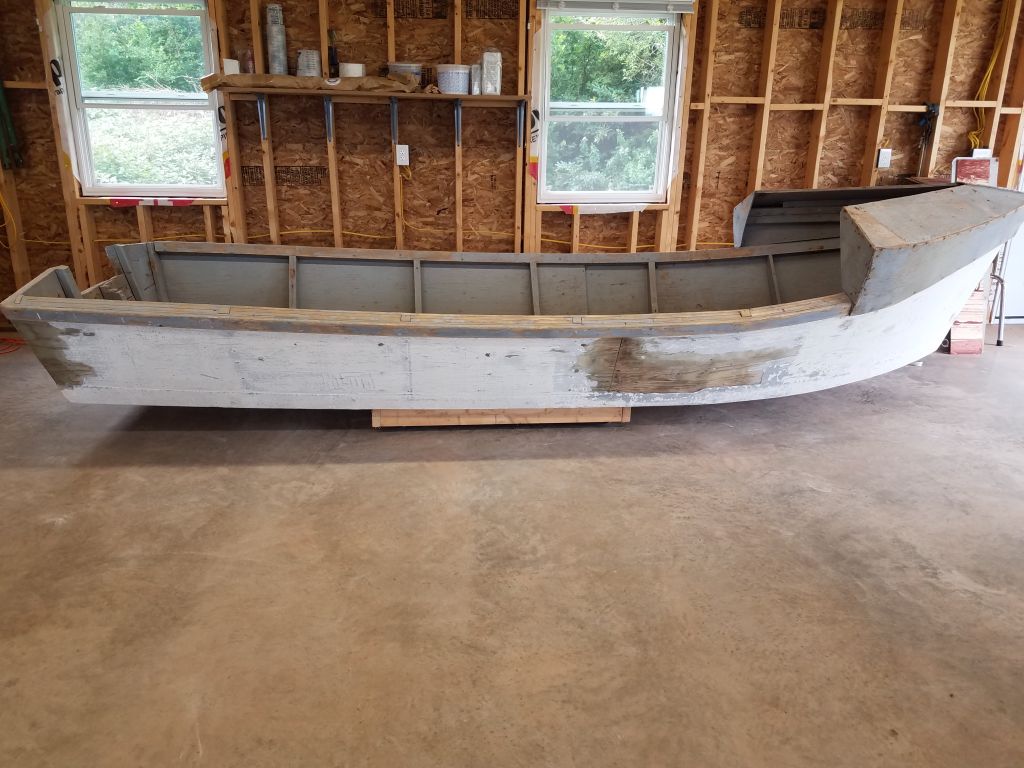
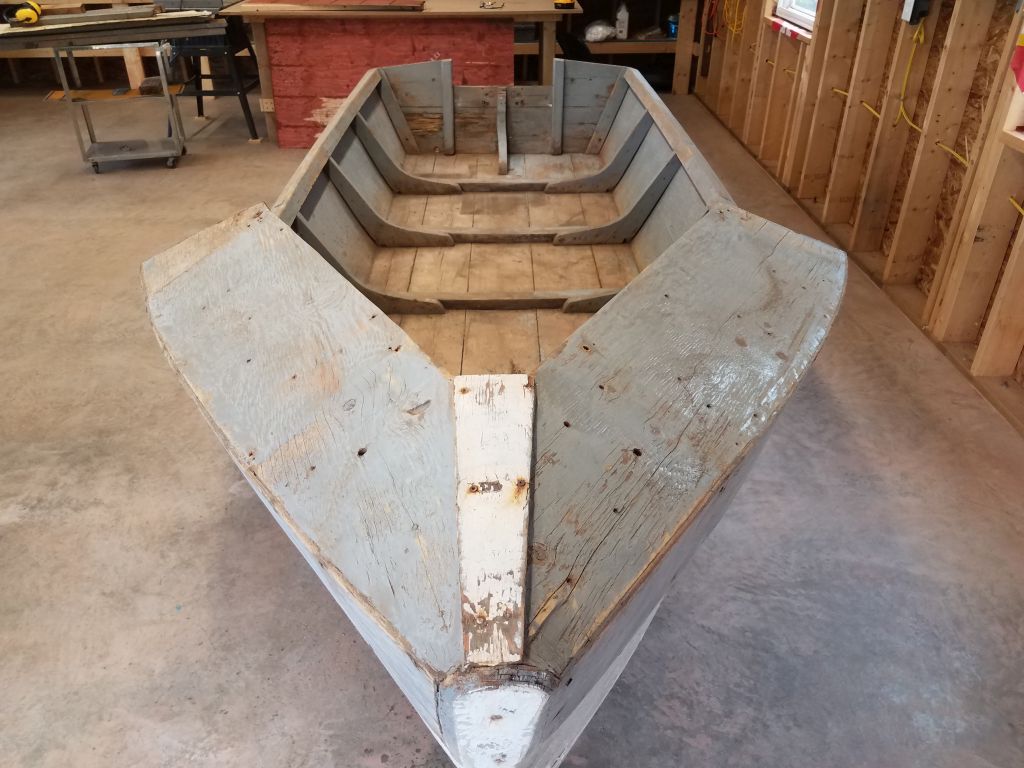
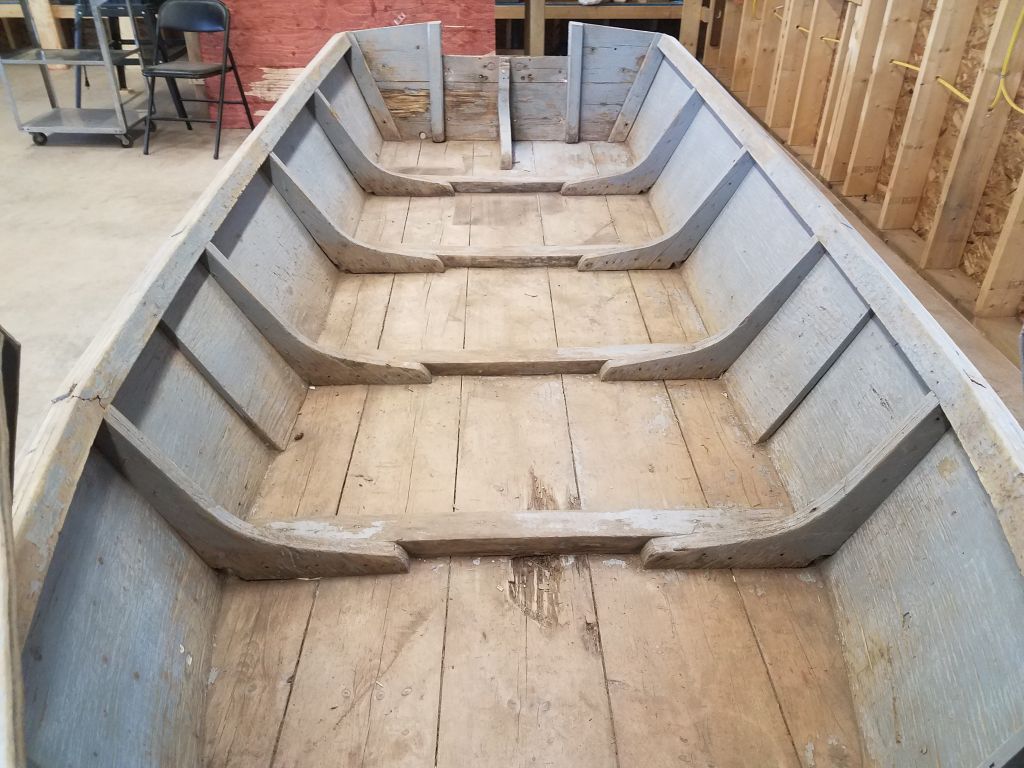
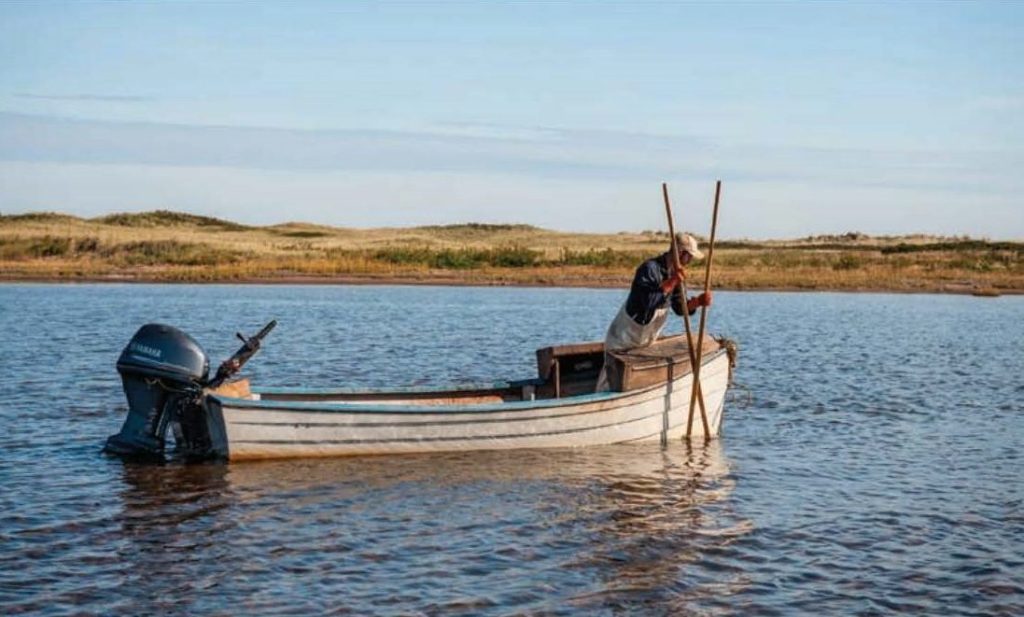
The Prince Edward Island (PEI) Oyster Dory, a basic flat-bottomed skiff usually around sixteen feet in length, is a no-nonsense design well-optimized to the local fishing conditions.  With shallow, sandy, protected waters in and around the island, this simple design, usually equipped with raised bow platforms called tong boards, appealed to me, and over the years I’d come to the opinion that the best boat for any local area should  mimic the local fishing boats.  I thought it’d be fun to find an old one in need of repairs and refreshing and spend a little time bringing it back to life.

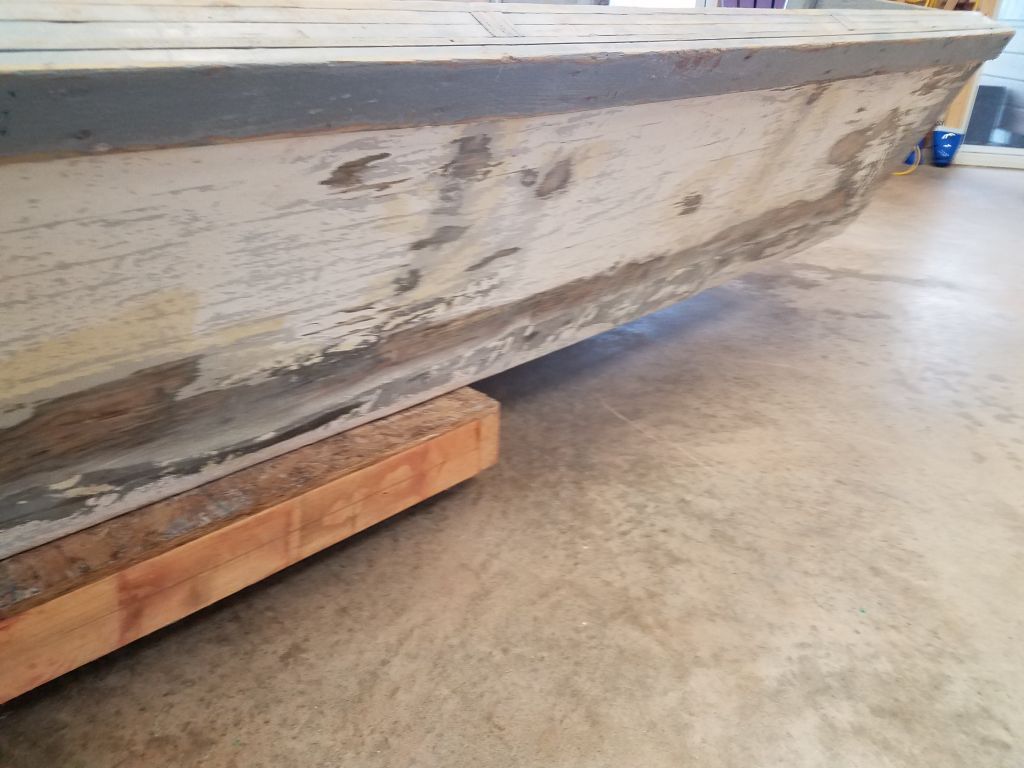
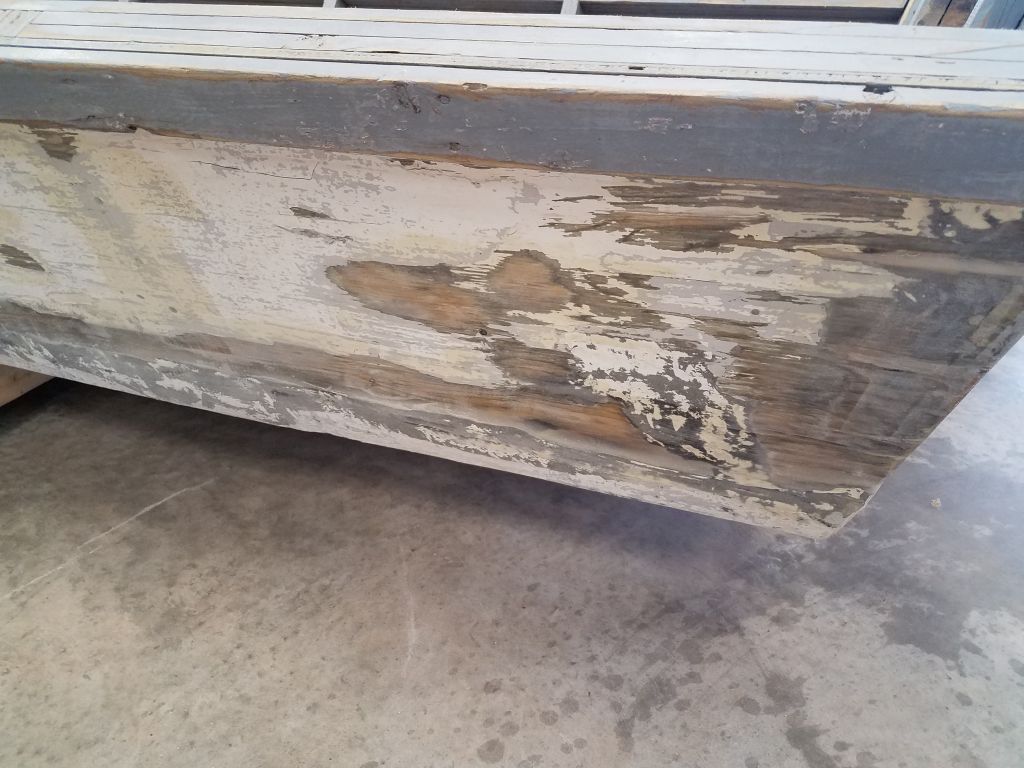
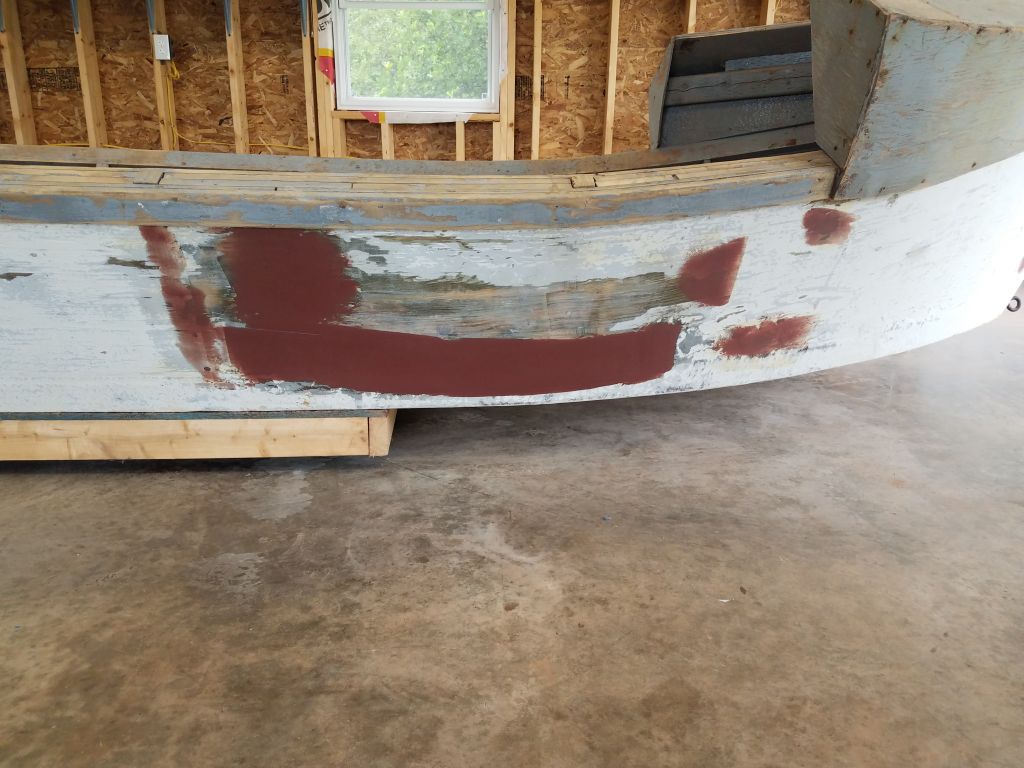
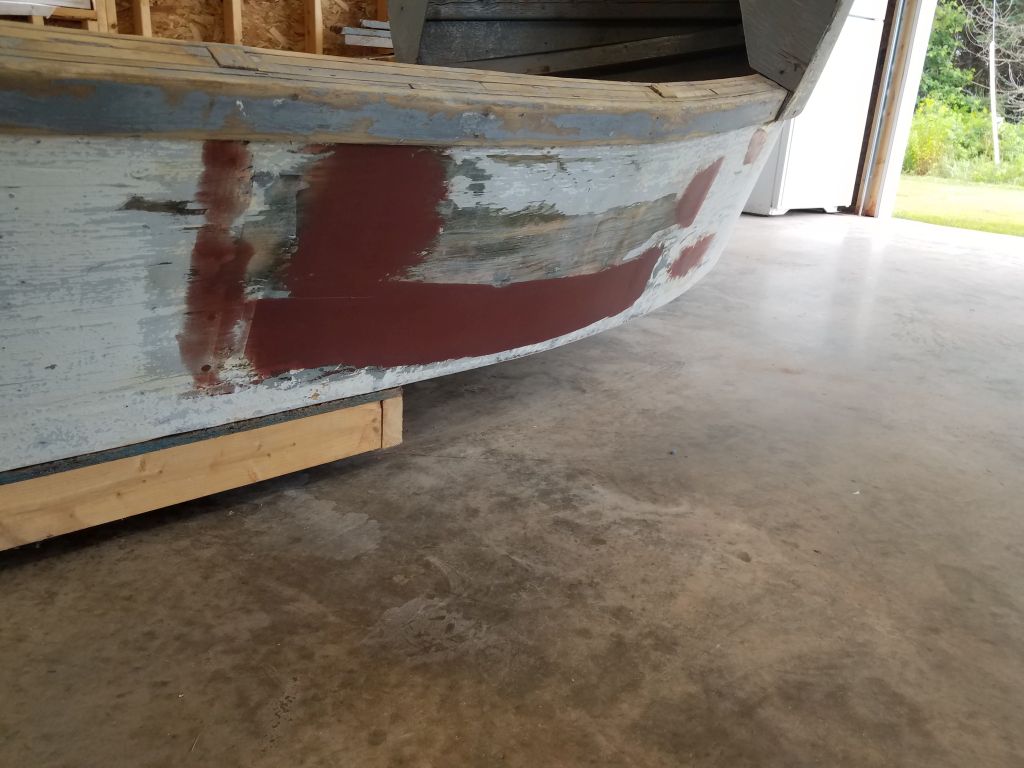
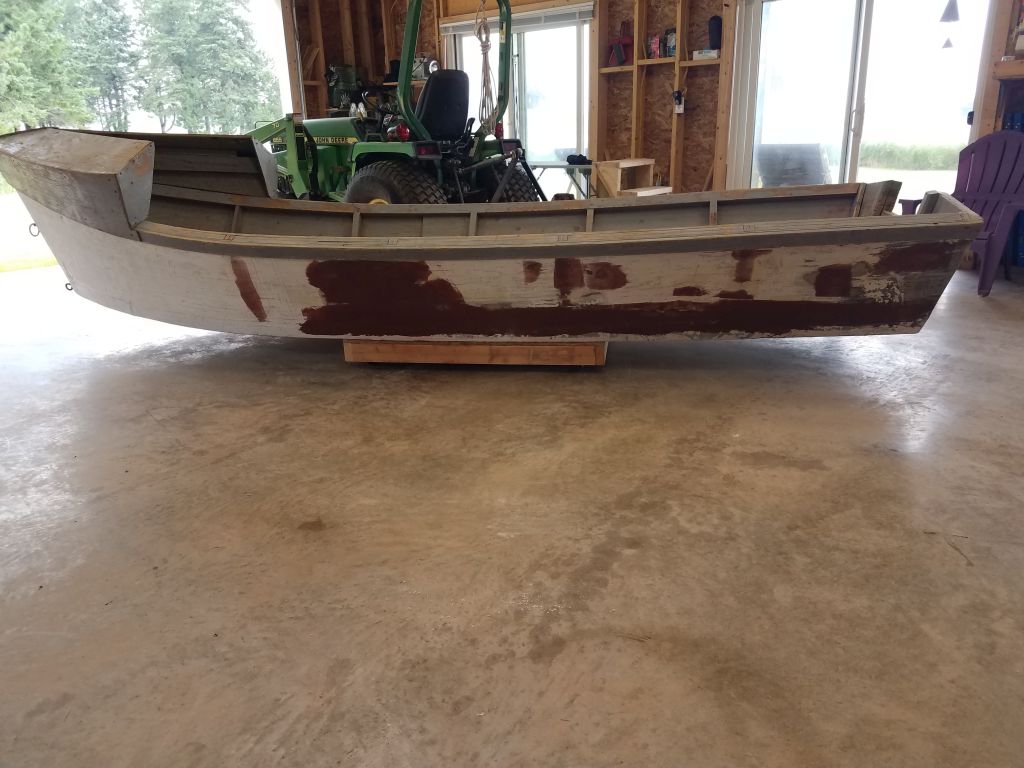
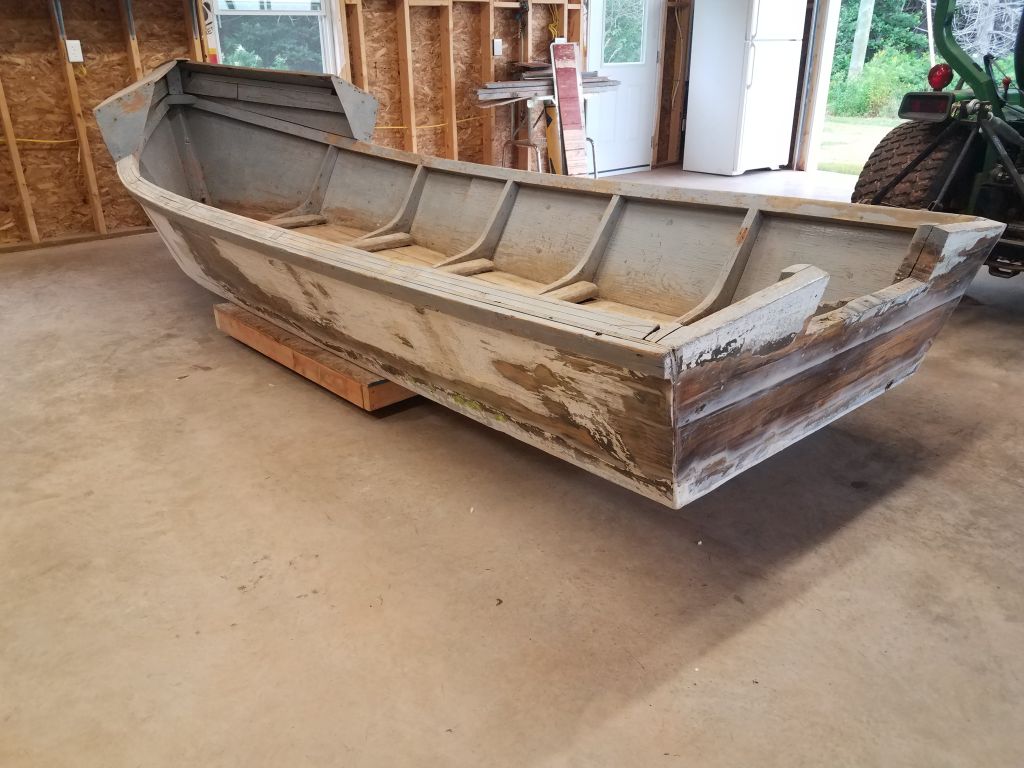
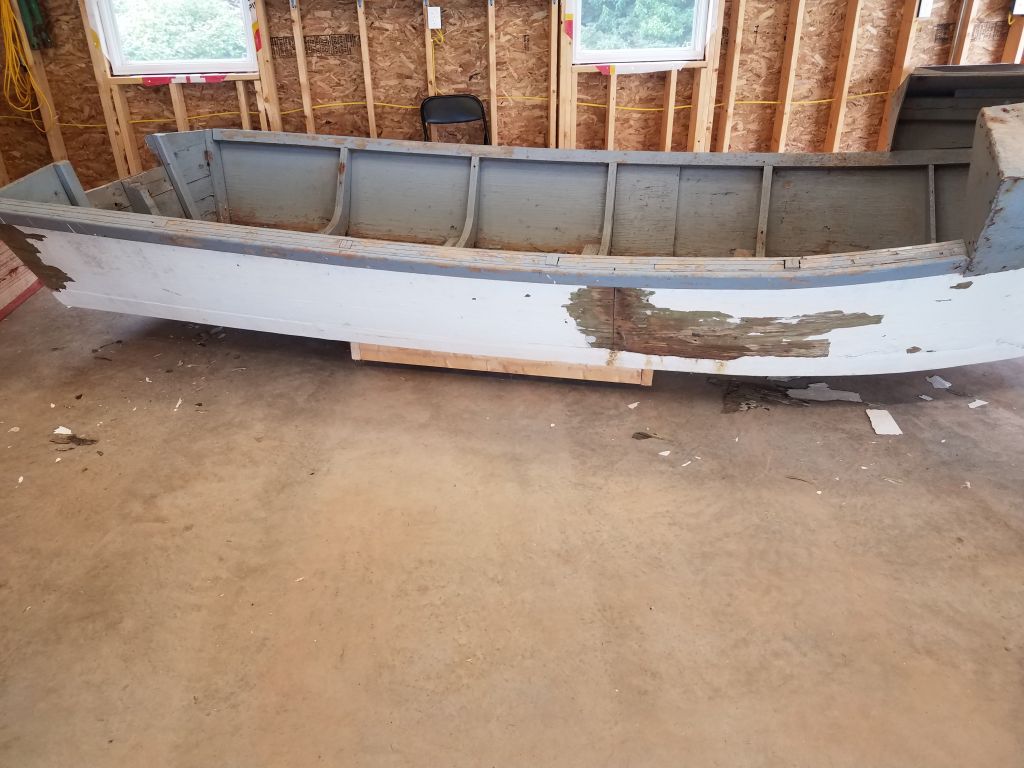
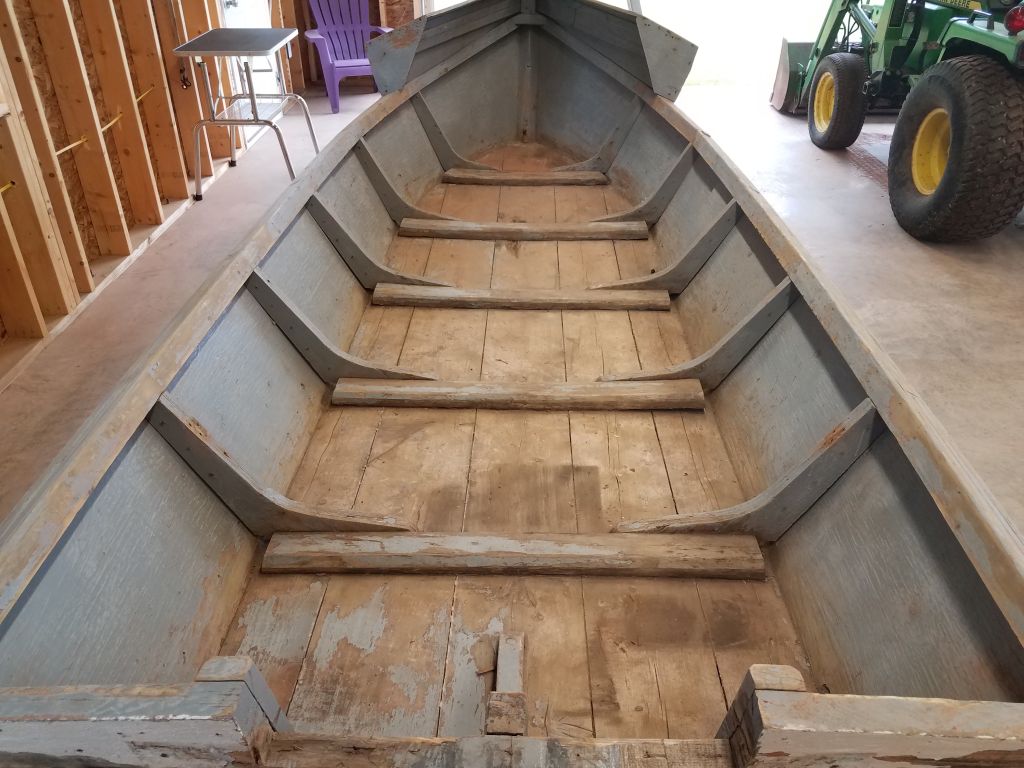
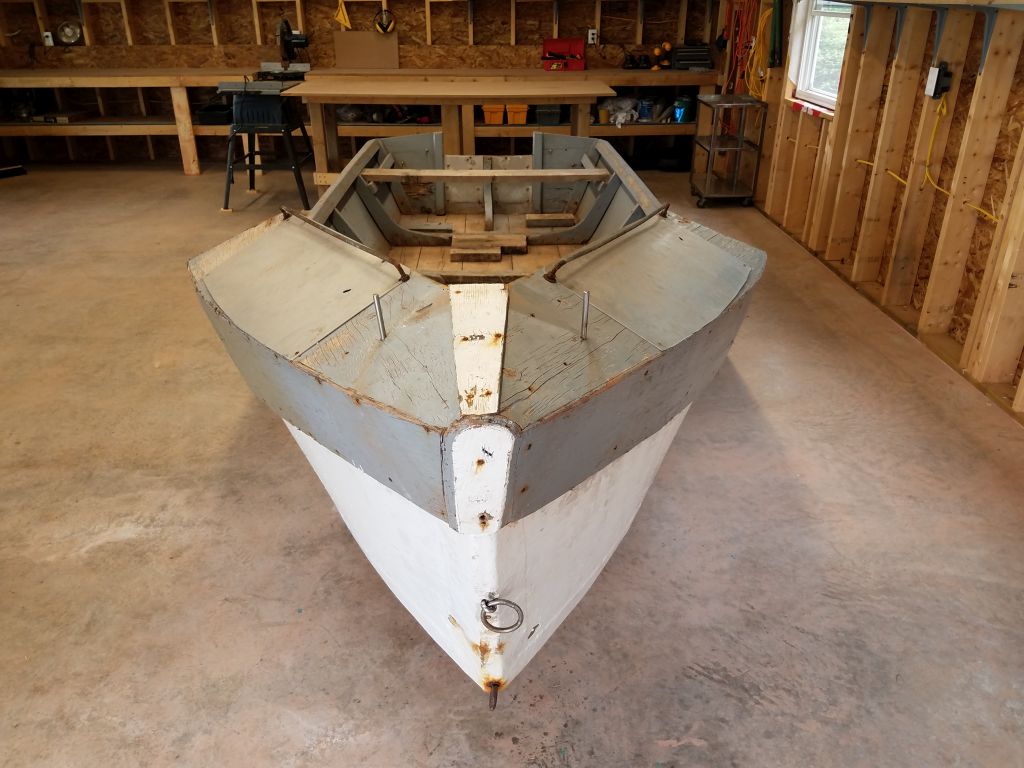
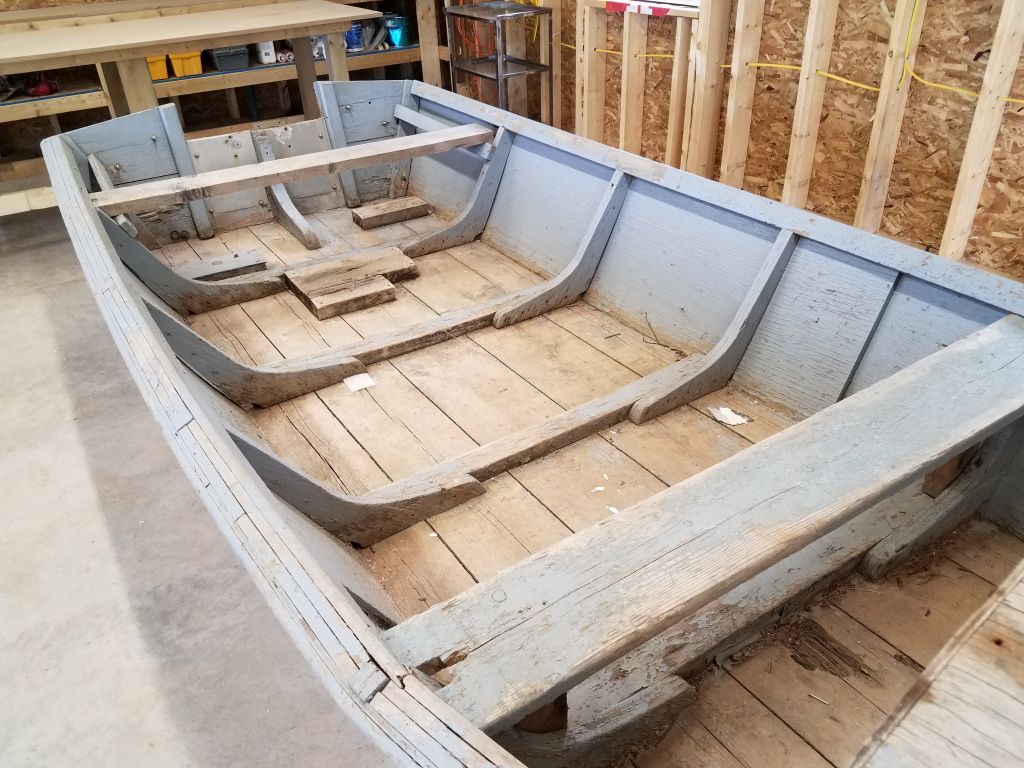
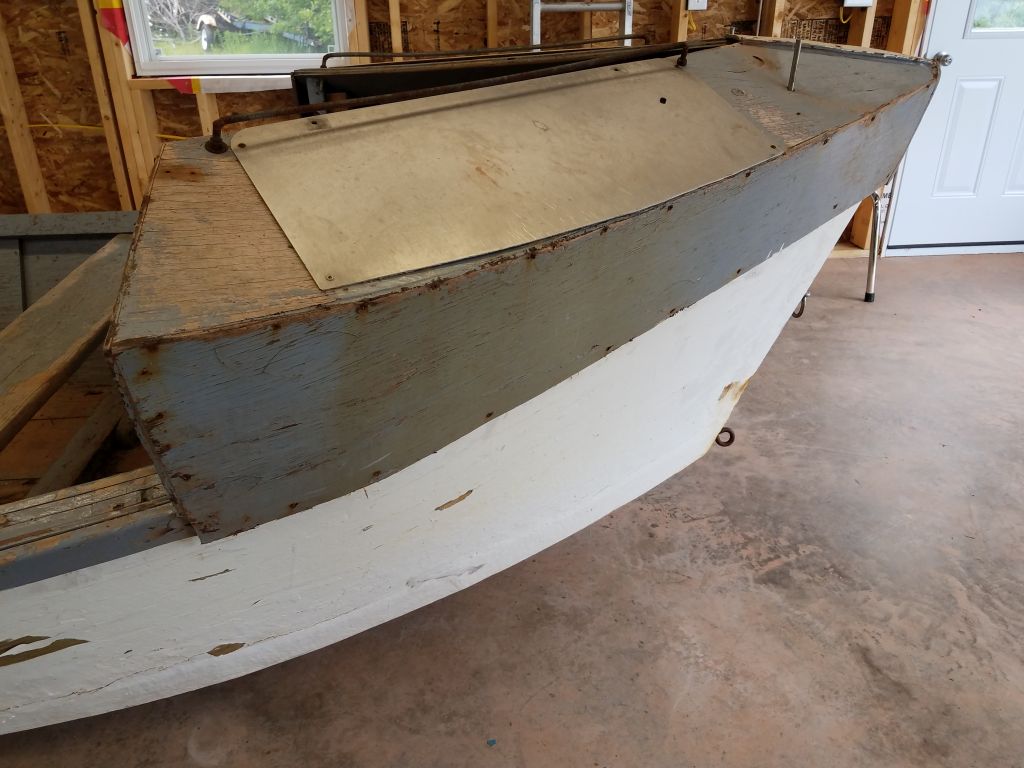
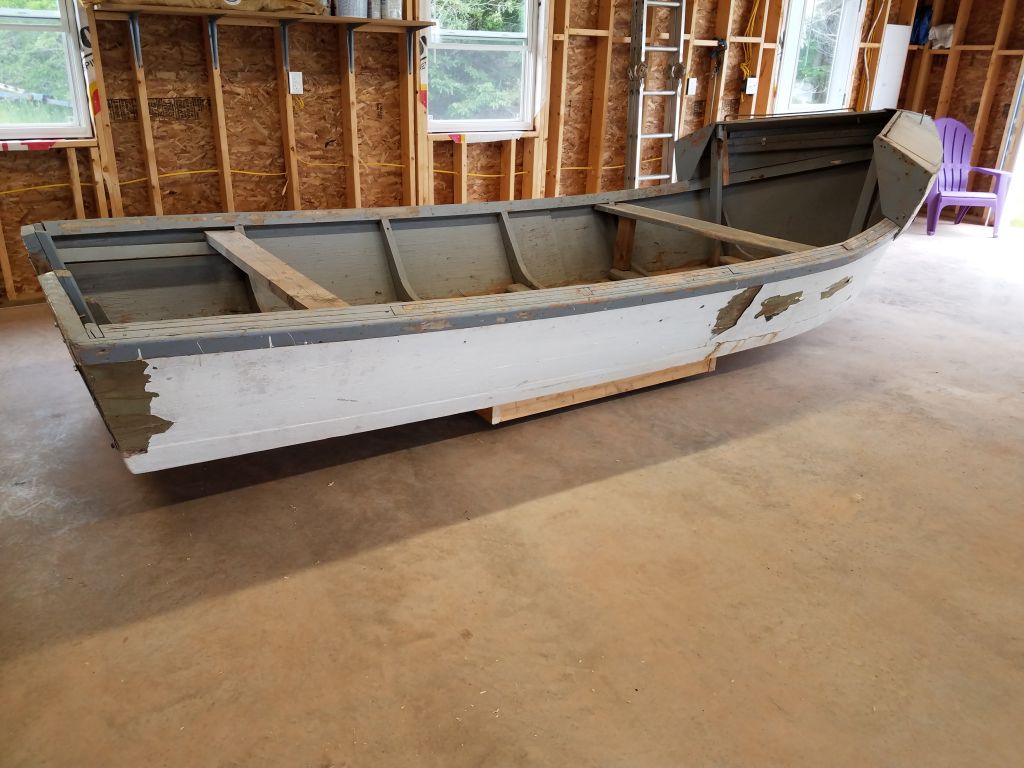
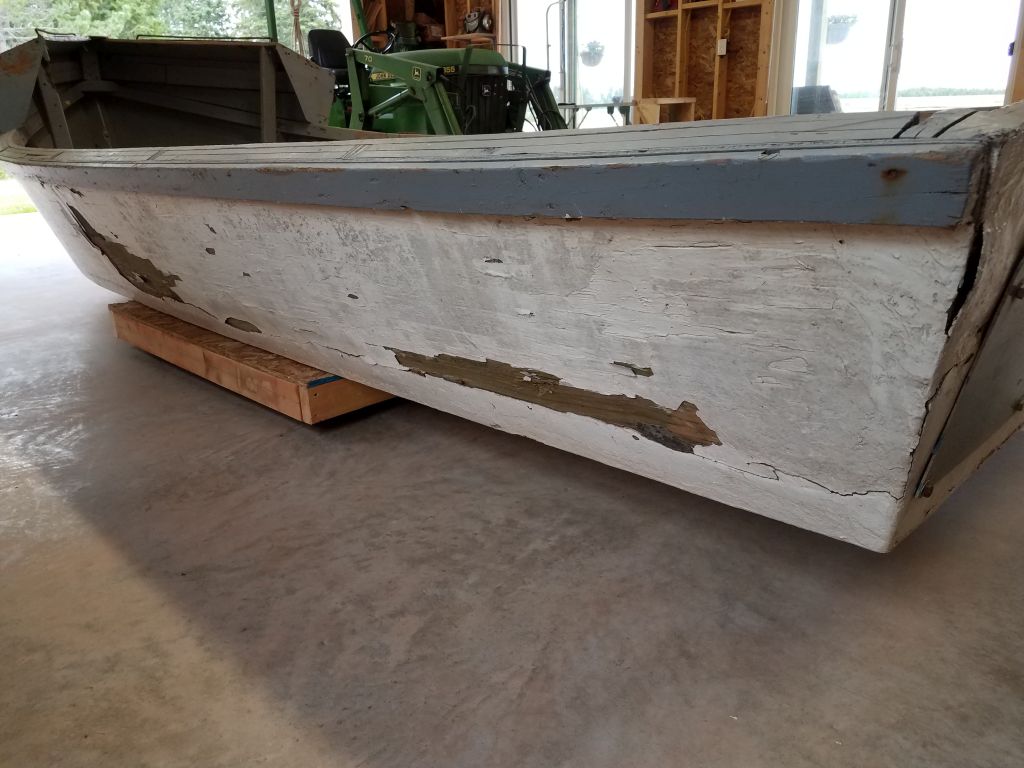
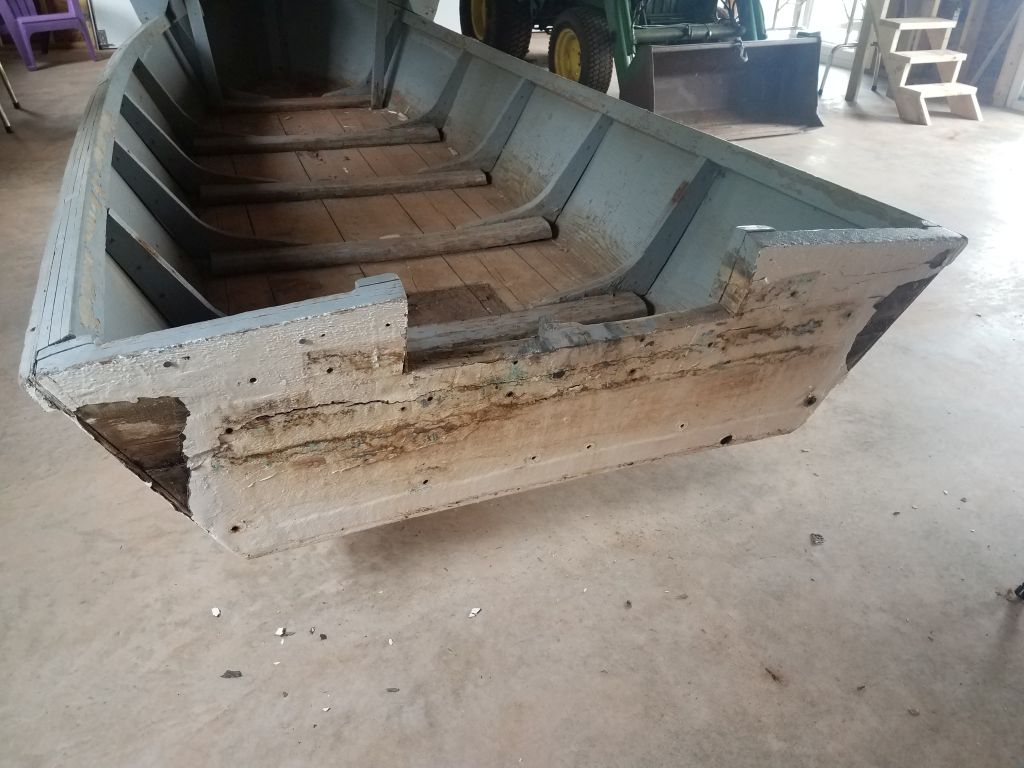
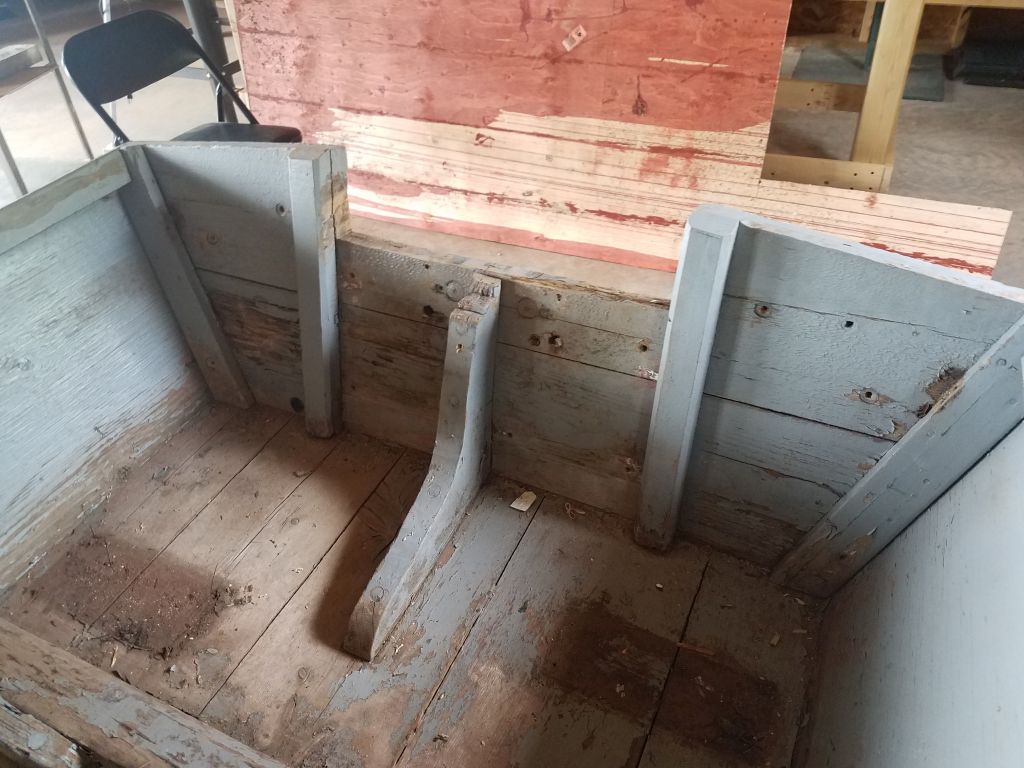
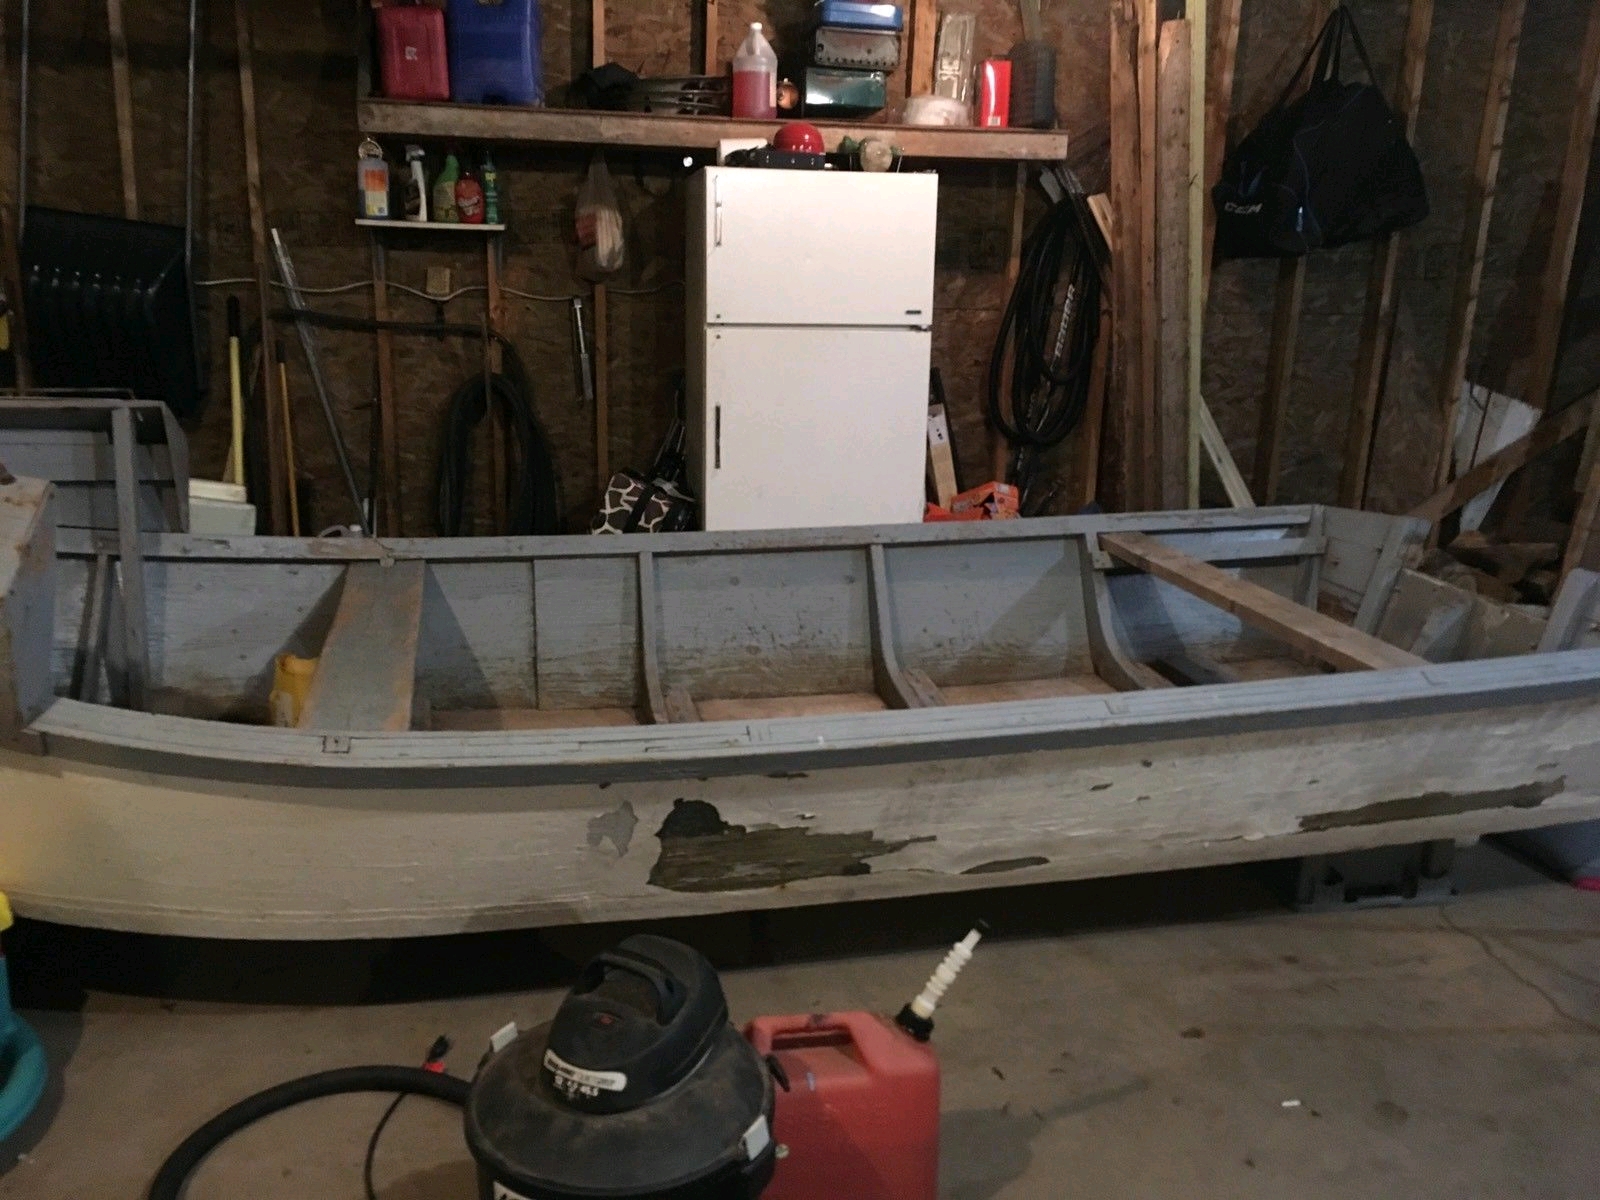
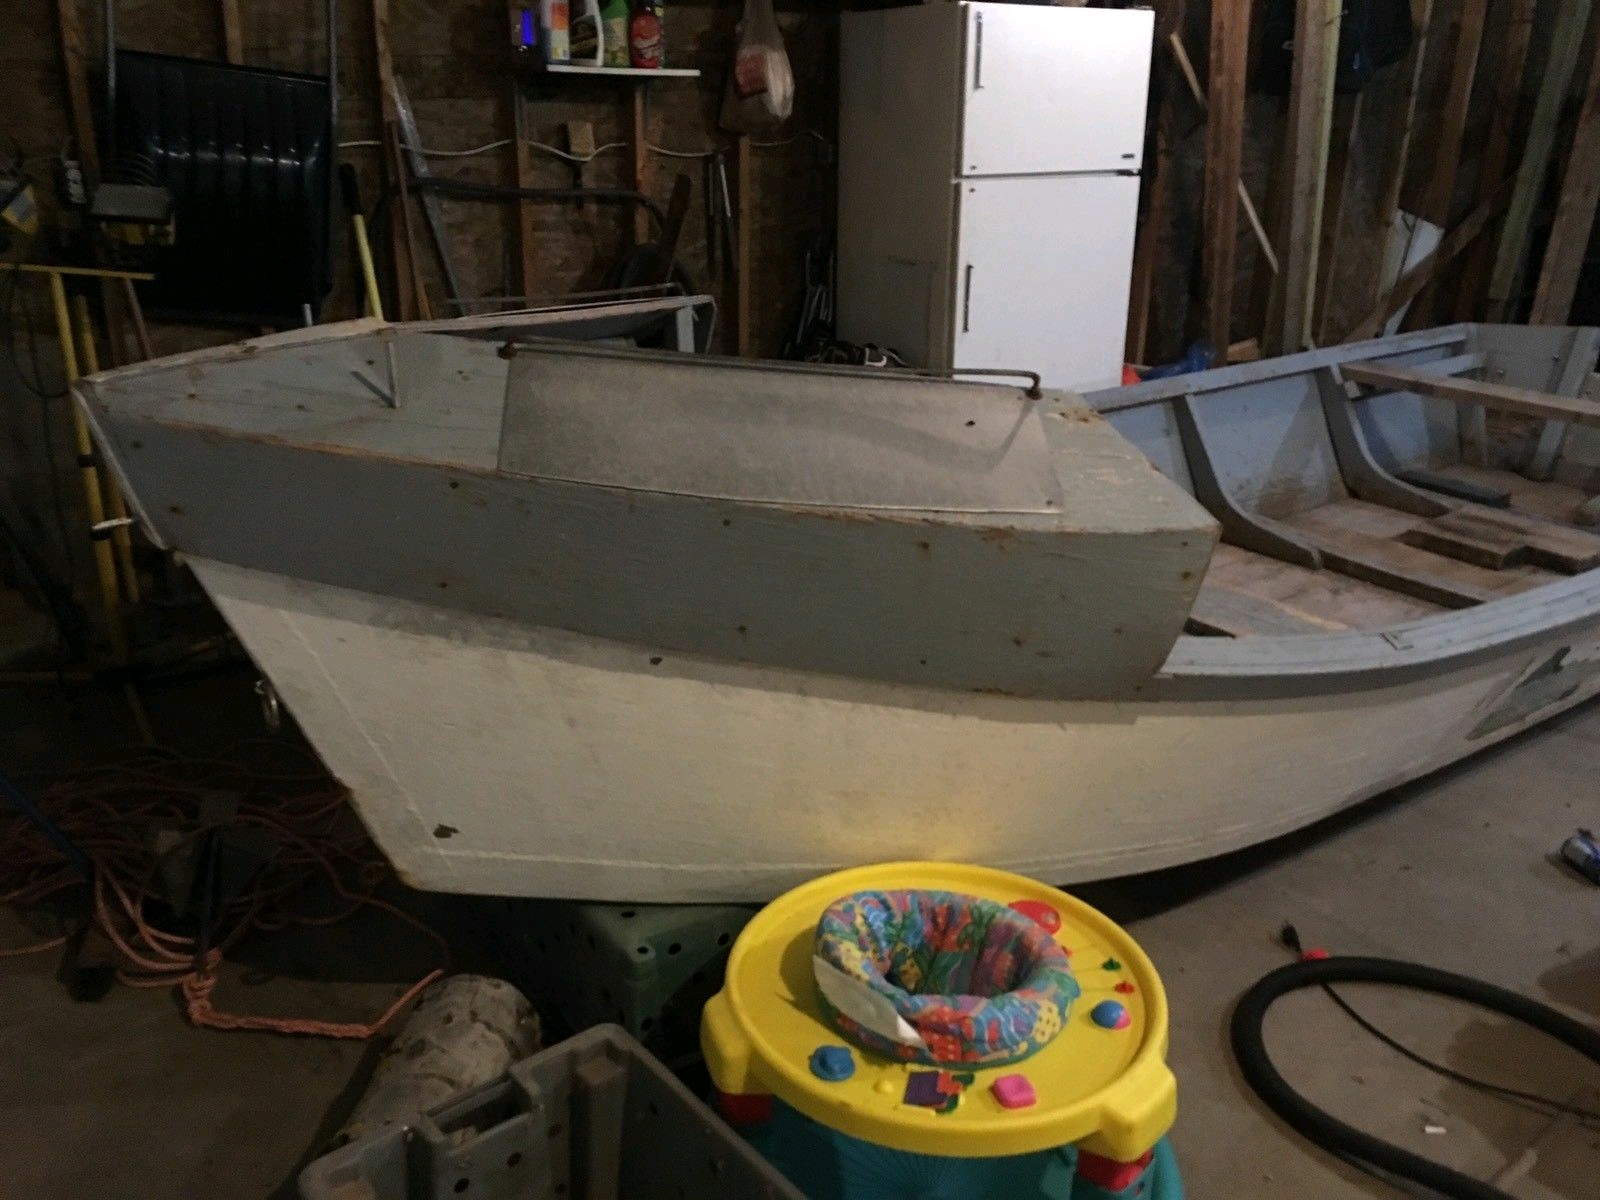
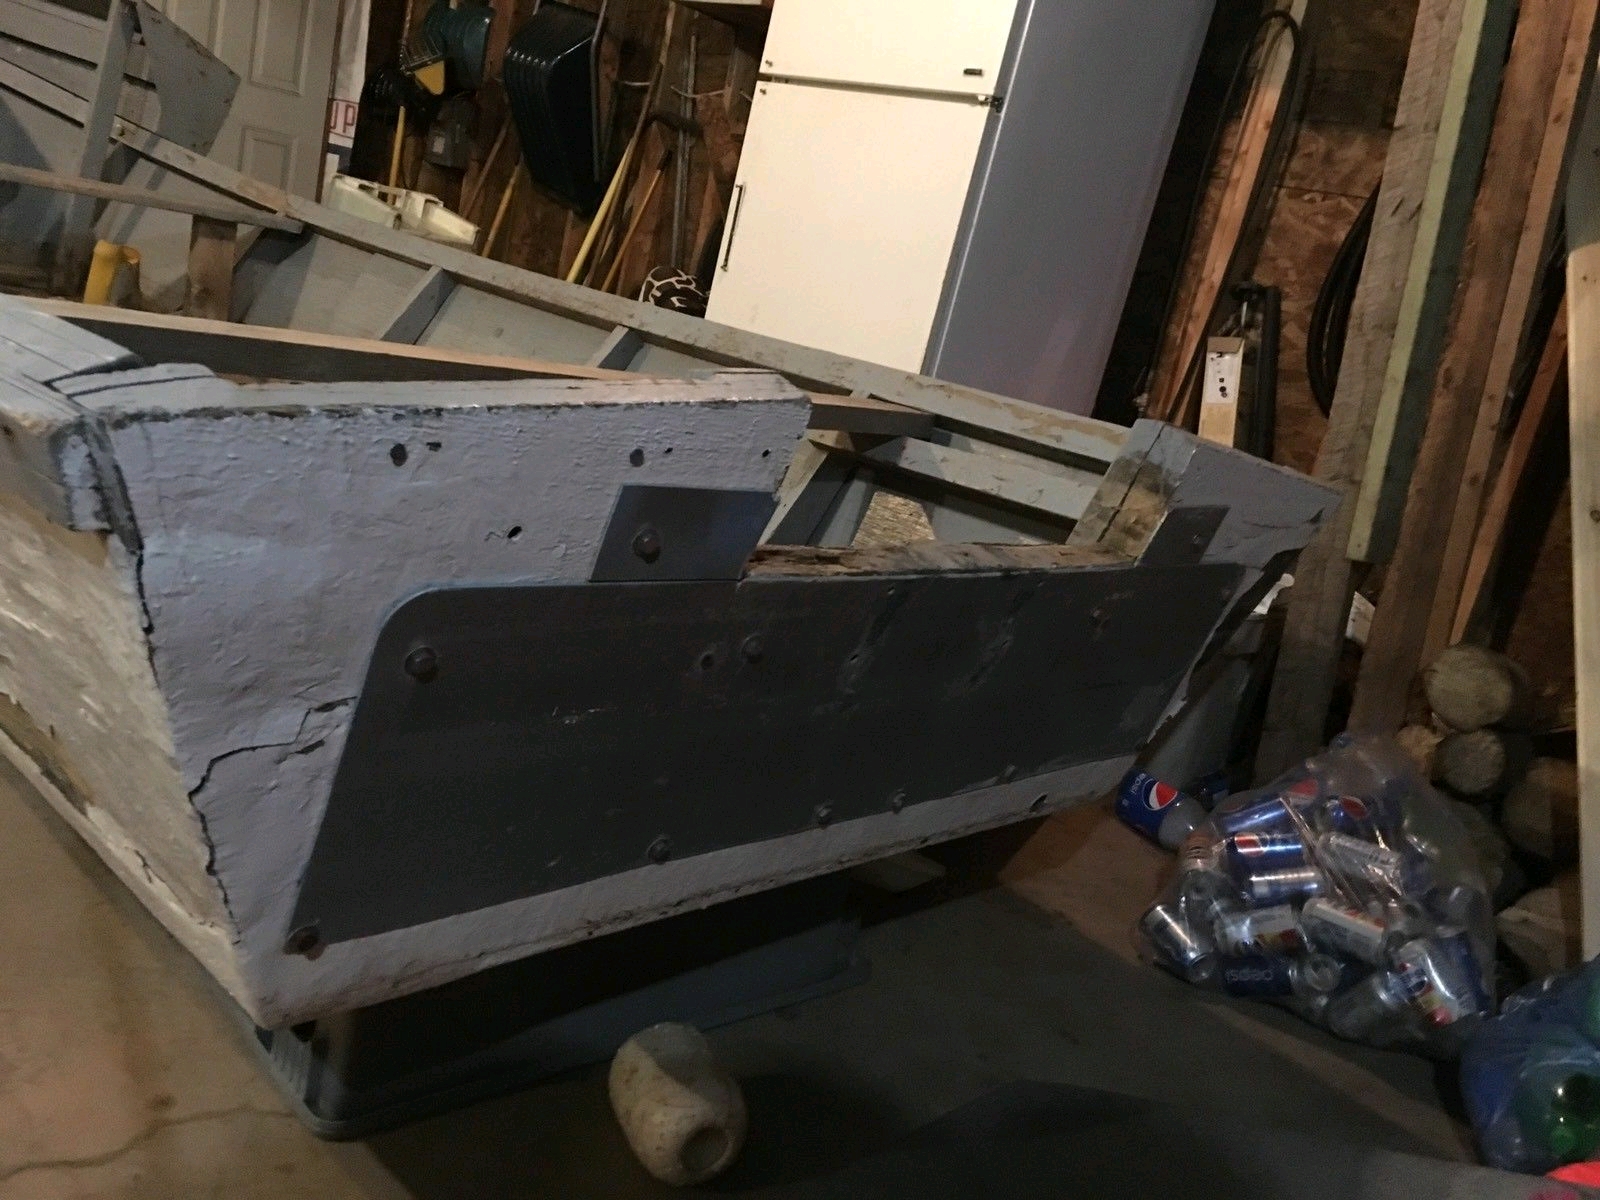
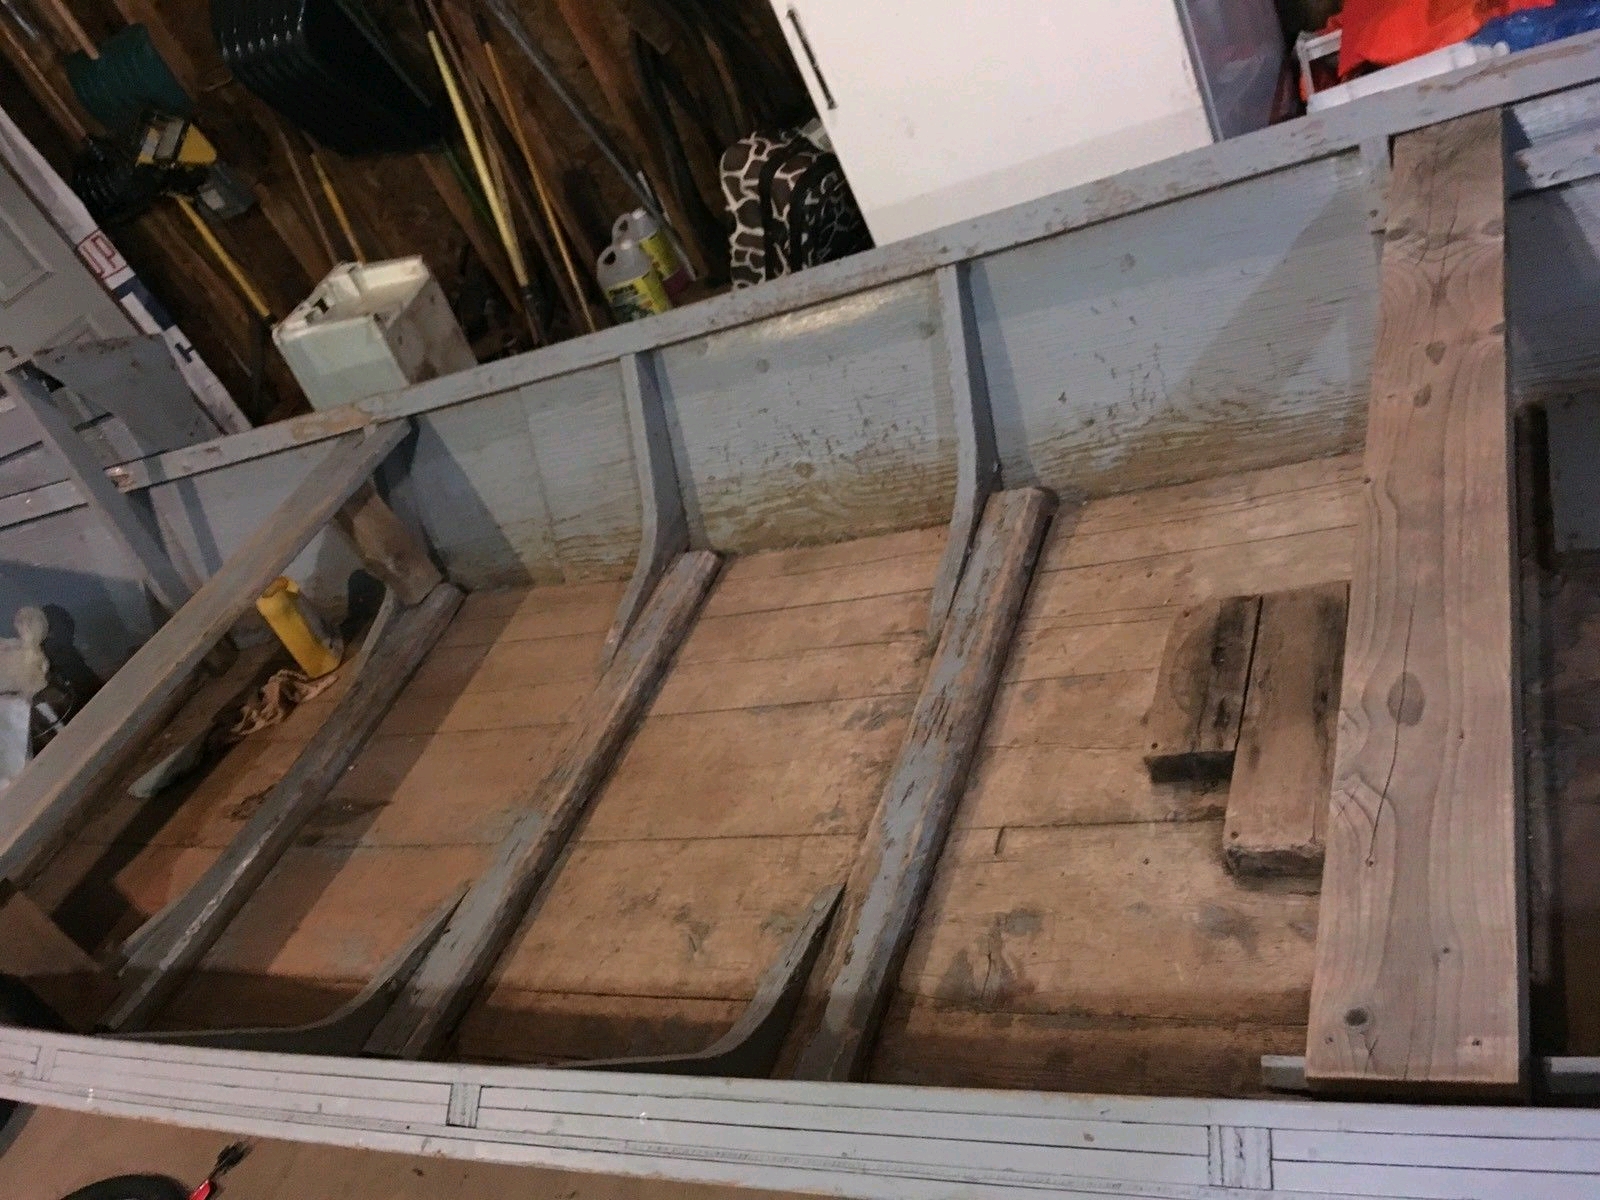
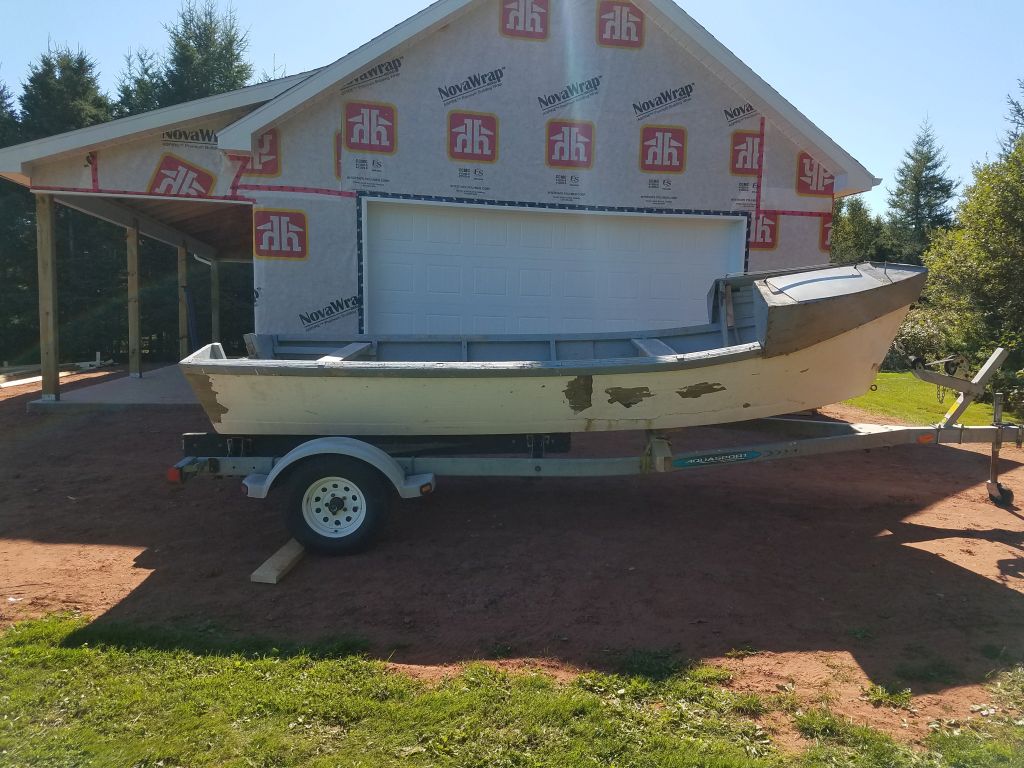
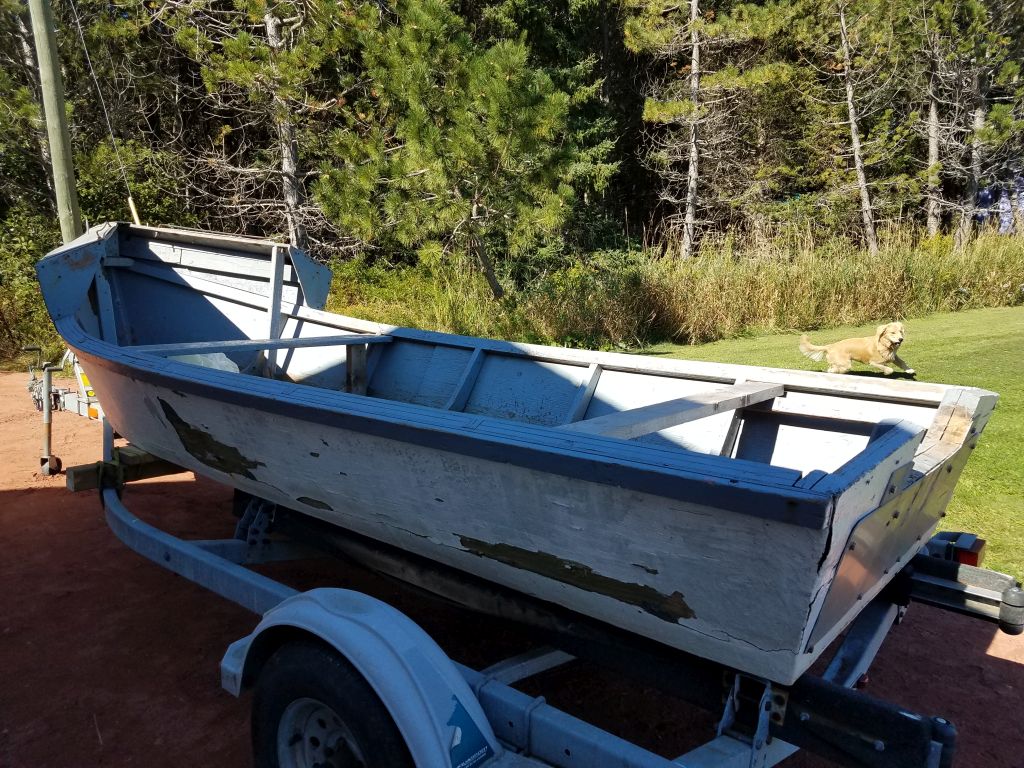
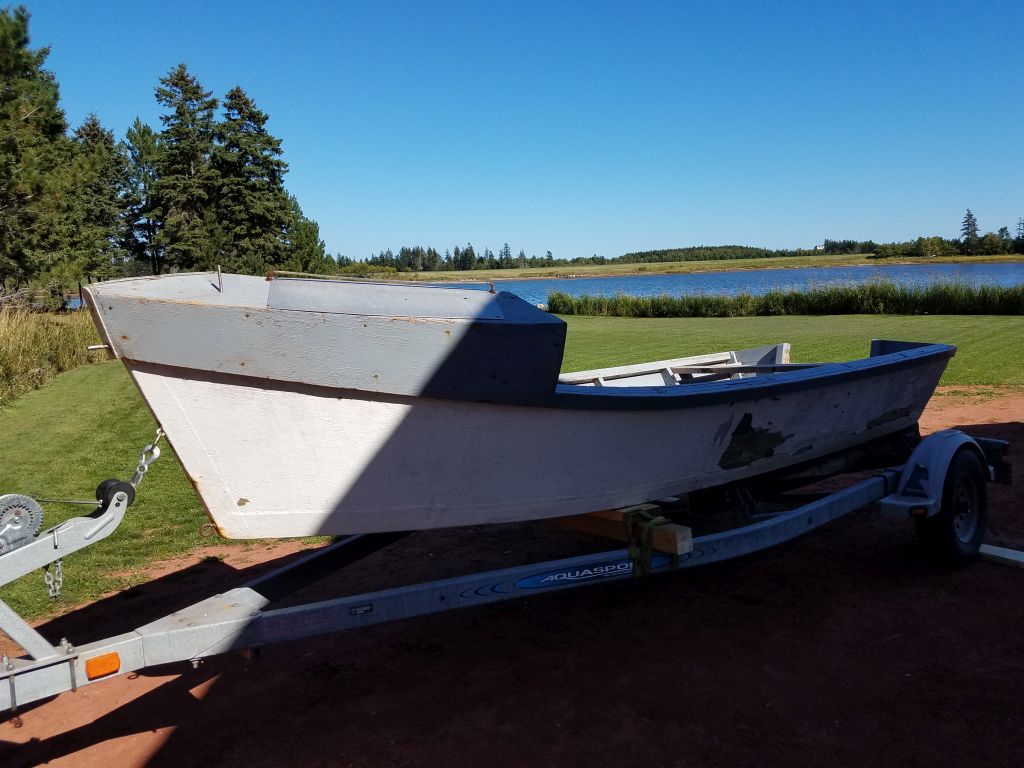
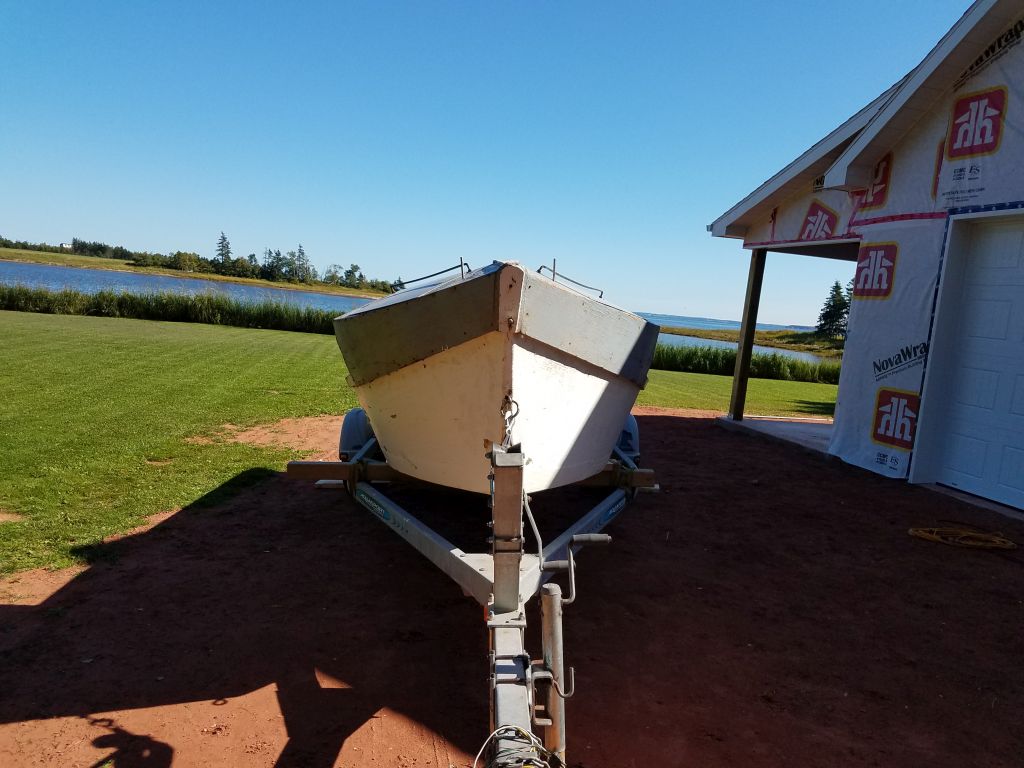
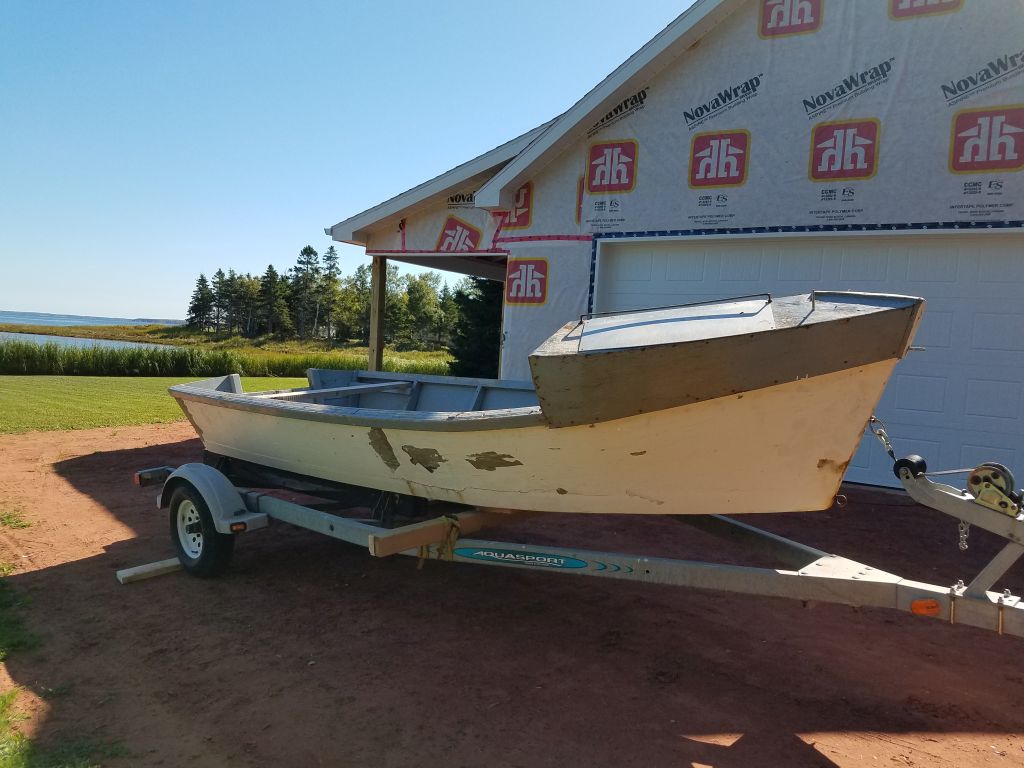
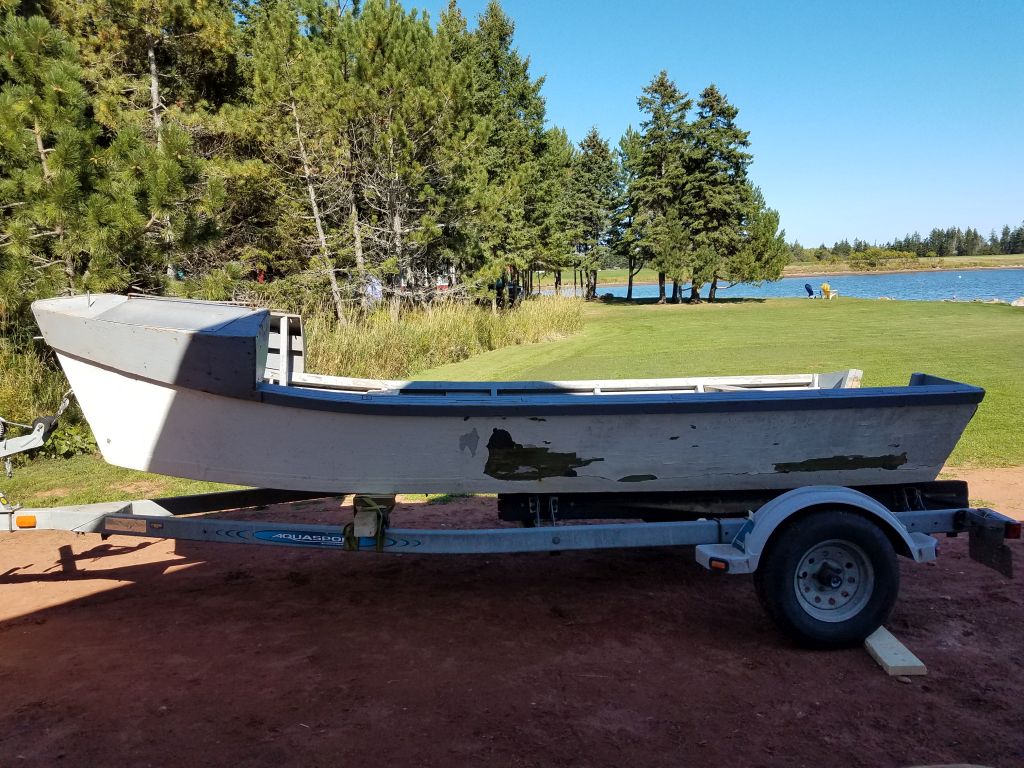
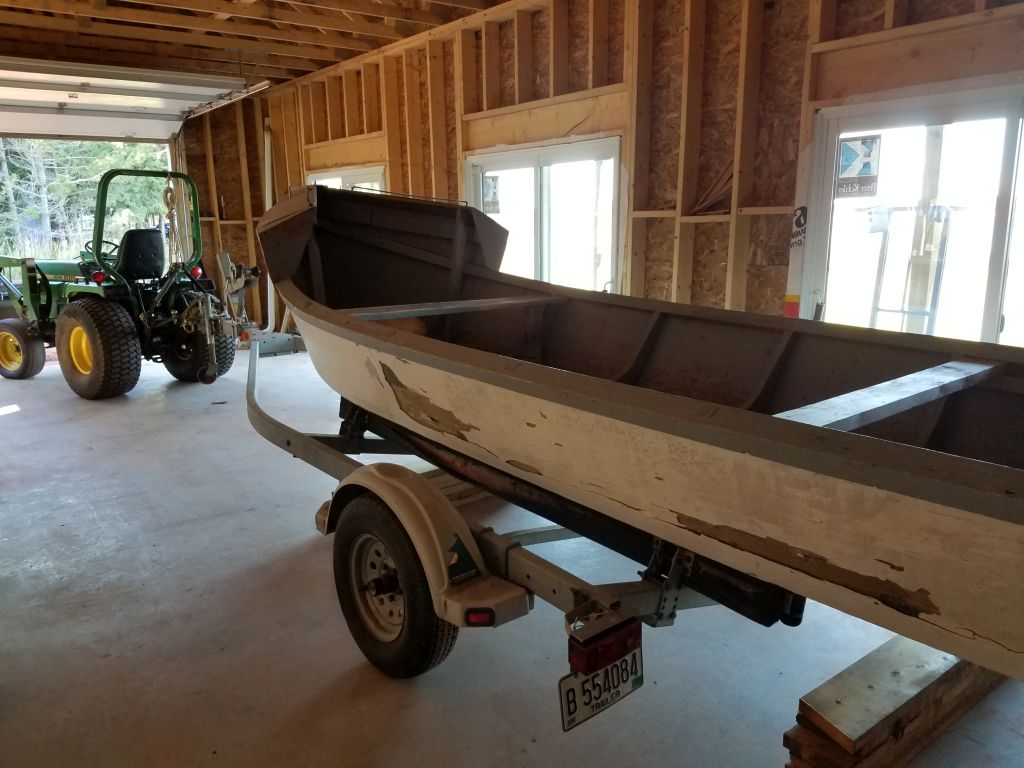
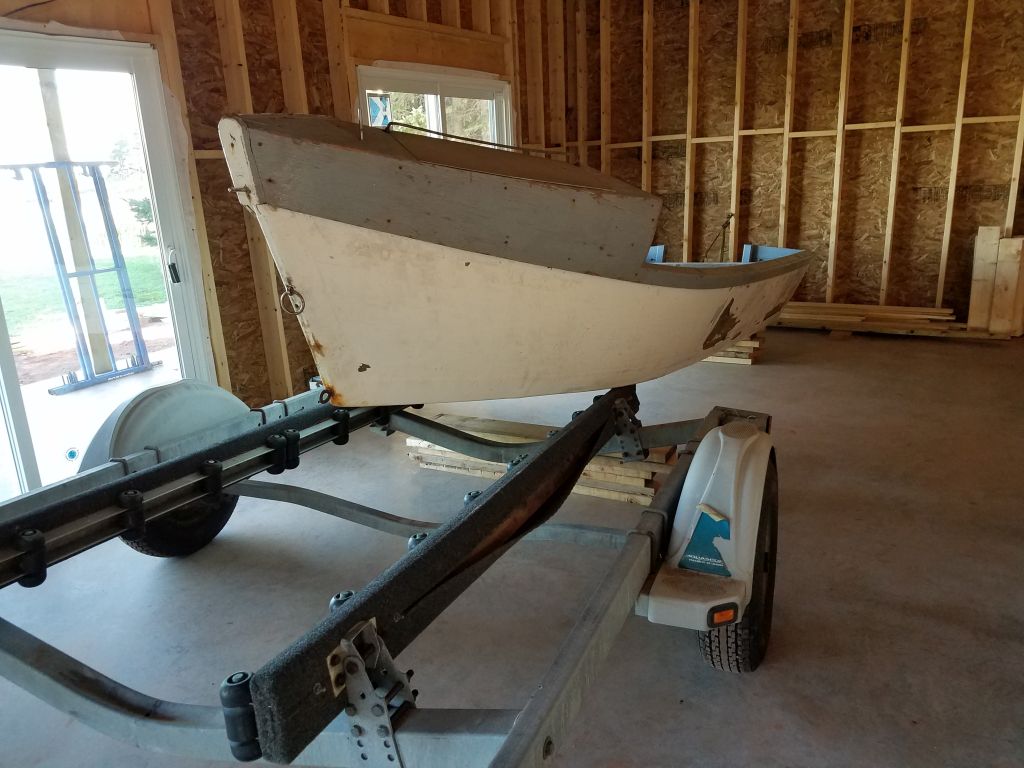
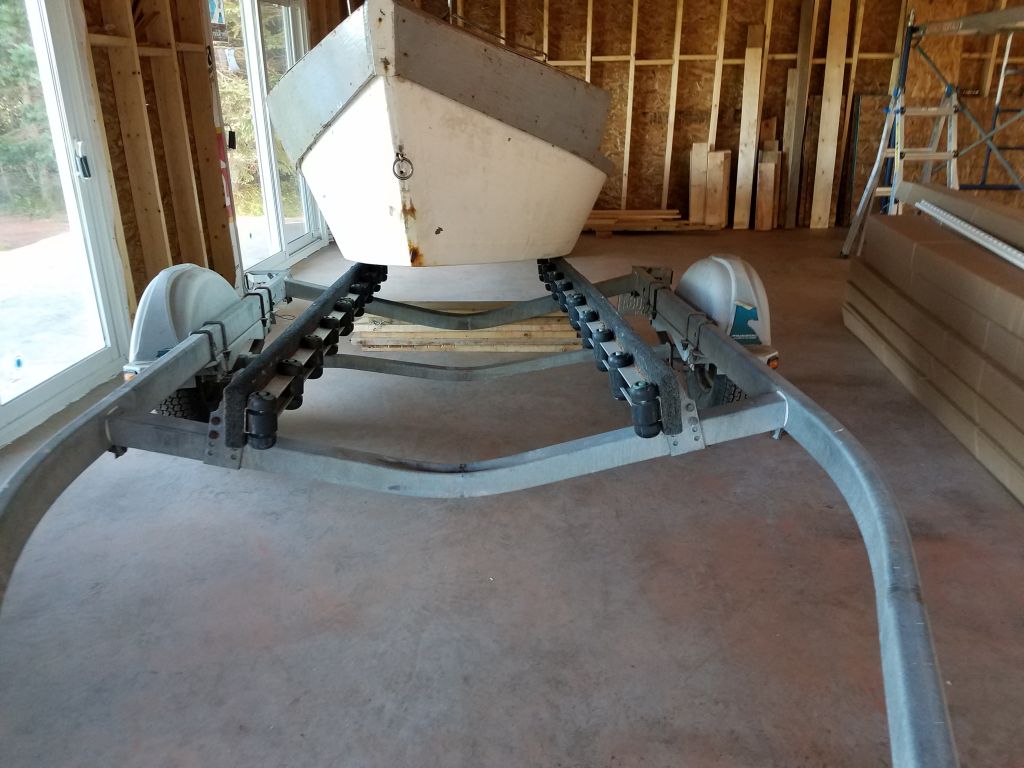
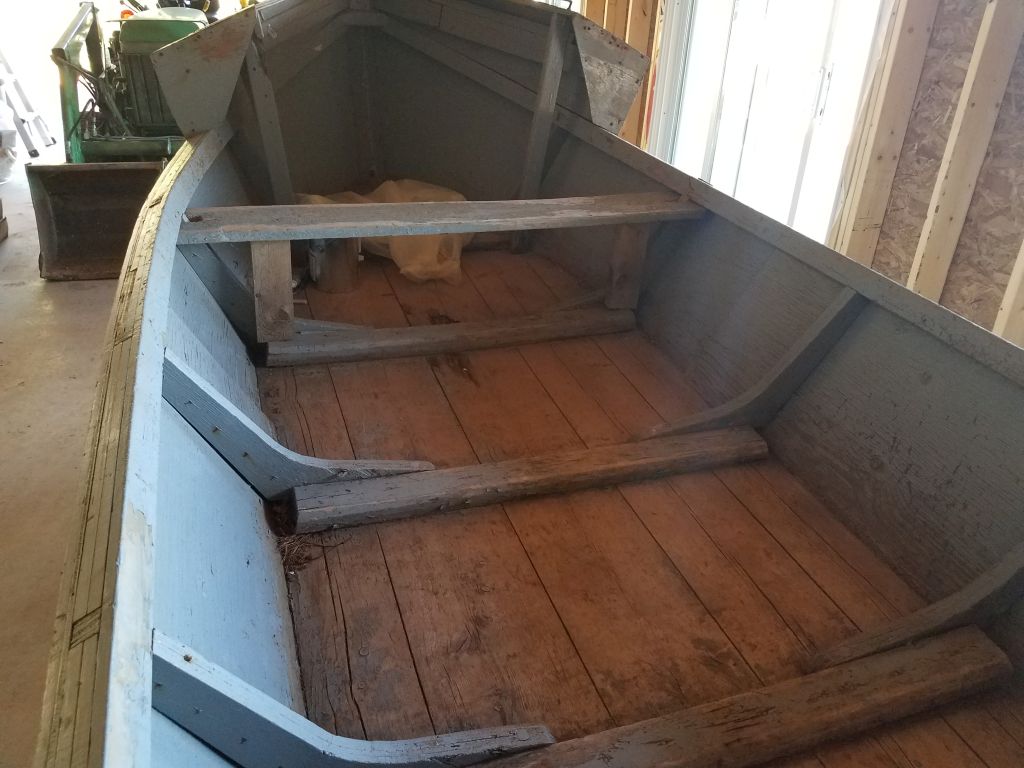
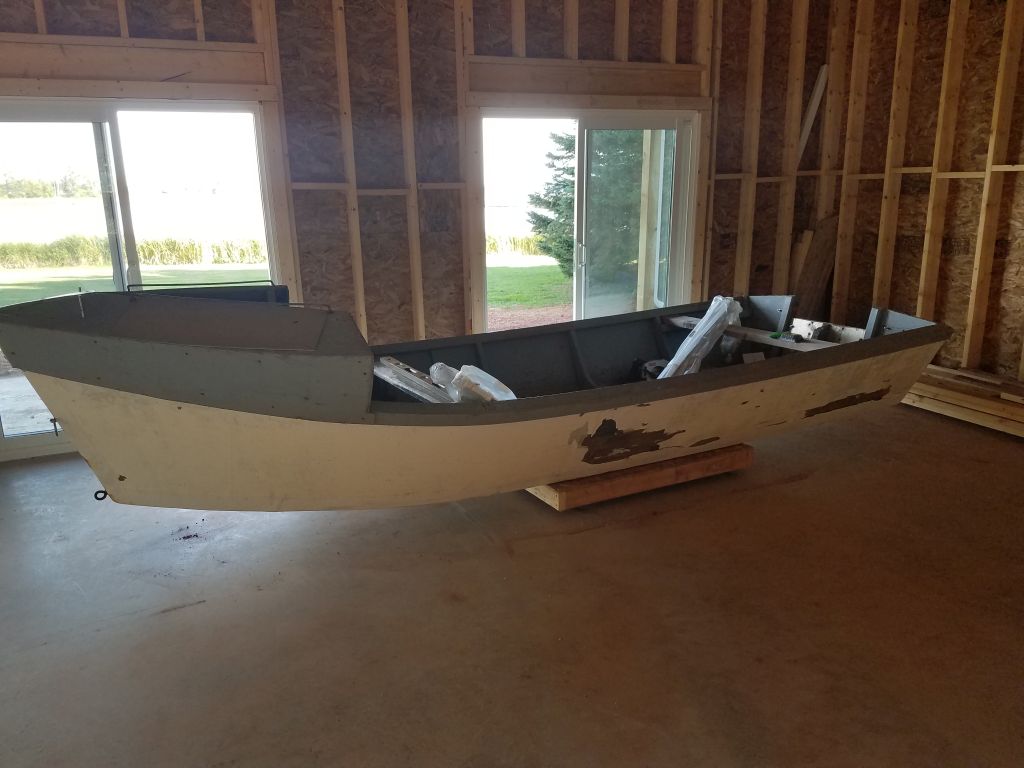
While the dories all share a basic design and function, there are many different individual boats and various design and construction differences, from home-built plywood and plank-on-frame to contemporary molded fiberglass versions.  After spending the summer casually searching the local want ads and online, in September of 2017 I finally found an old well-used wooden dory that fit the bill for me.  Built from plywood and solid planks on the bottom, the dory was partially fiberglass-sheathed and nearly seaworthy as is, but it required glasswork, refastening, and some general maintenance, paint, and upgrades.  The price was right at $100 and I thought it would be a good entry and basic project for me.  These photos, taken from the original advertisement, show the basic original condition of the boat.

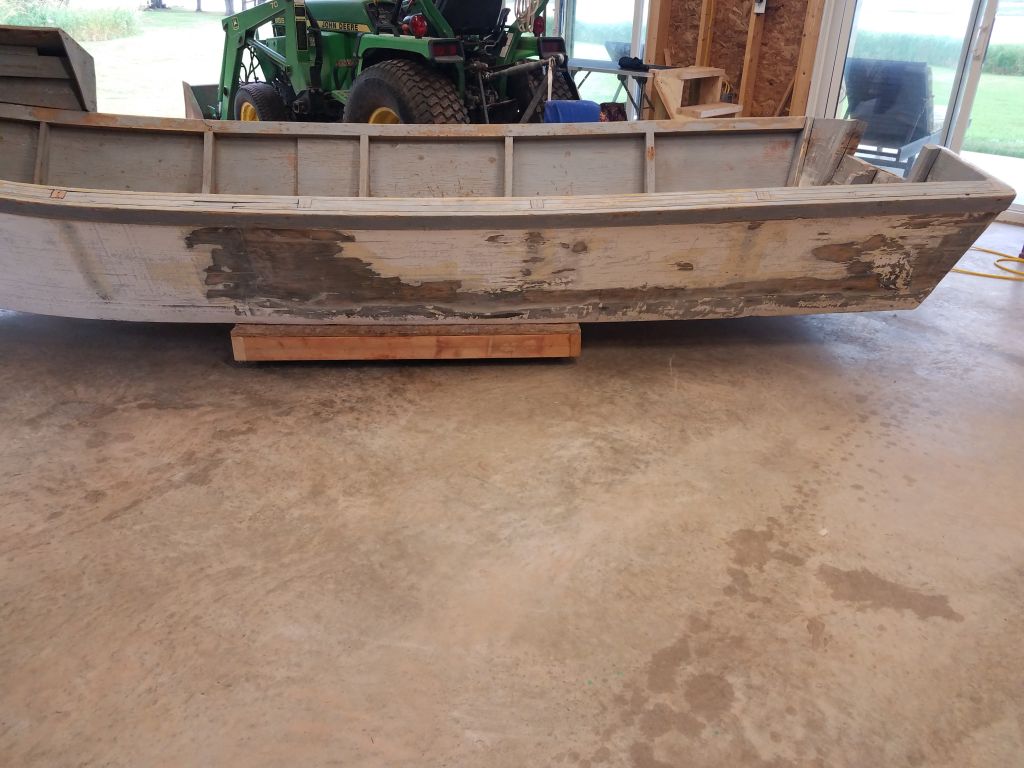
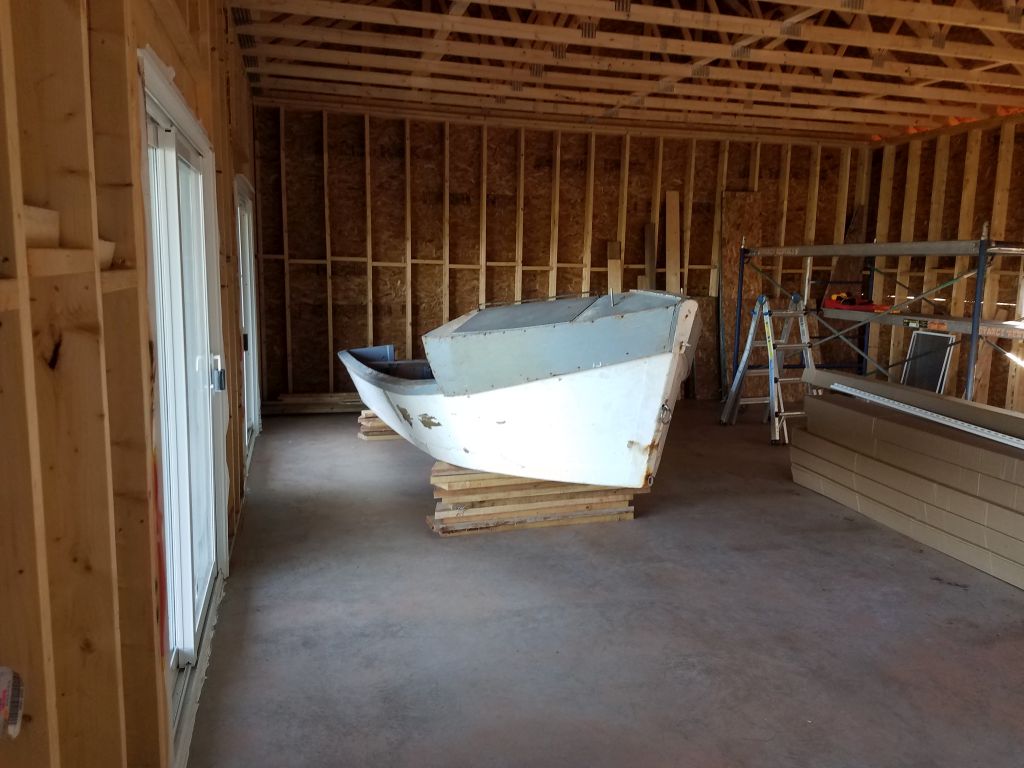
I picked up the boat using a trailer from another boat I had, and brought it home, where I deposited the boat in my garage to await the work.

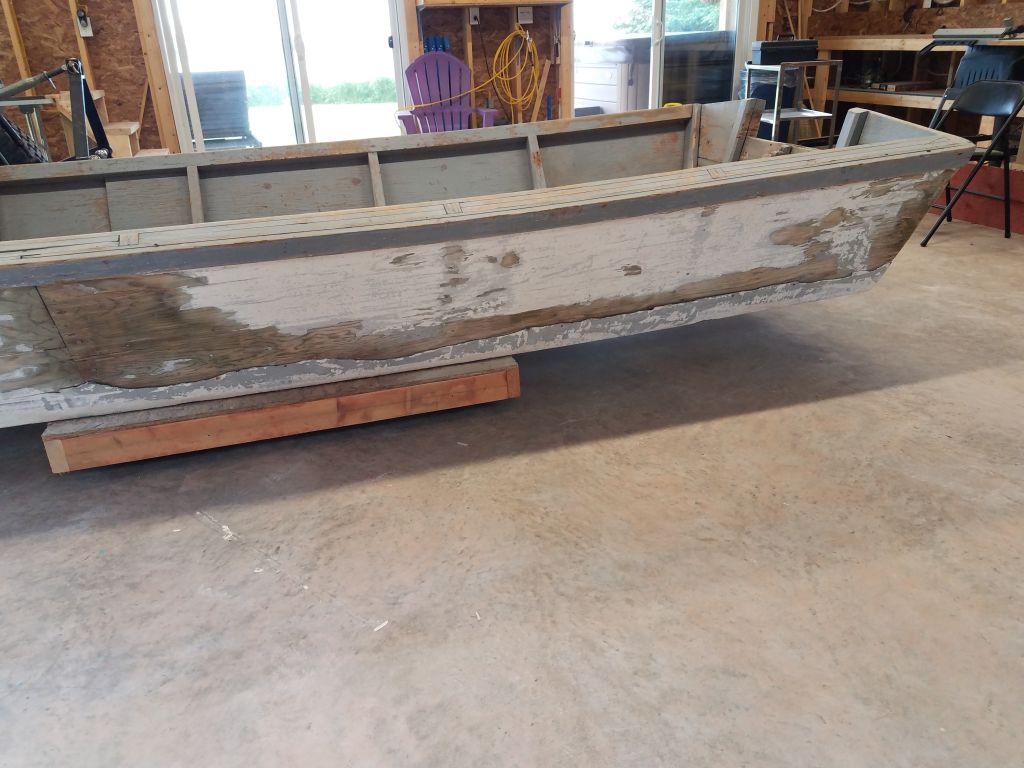
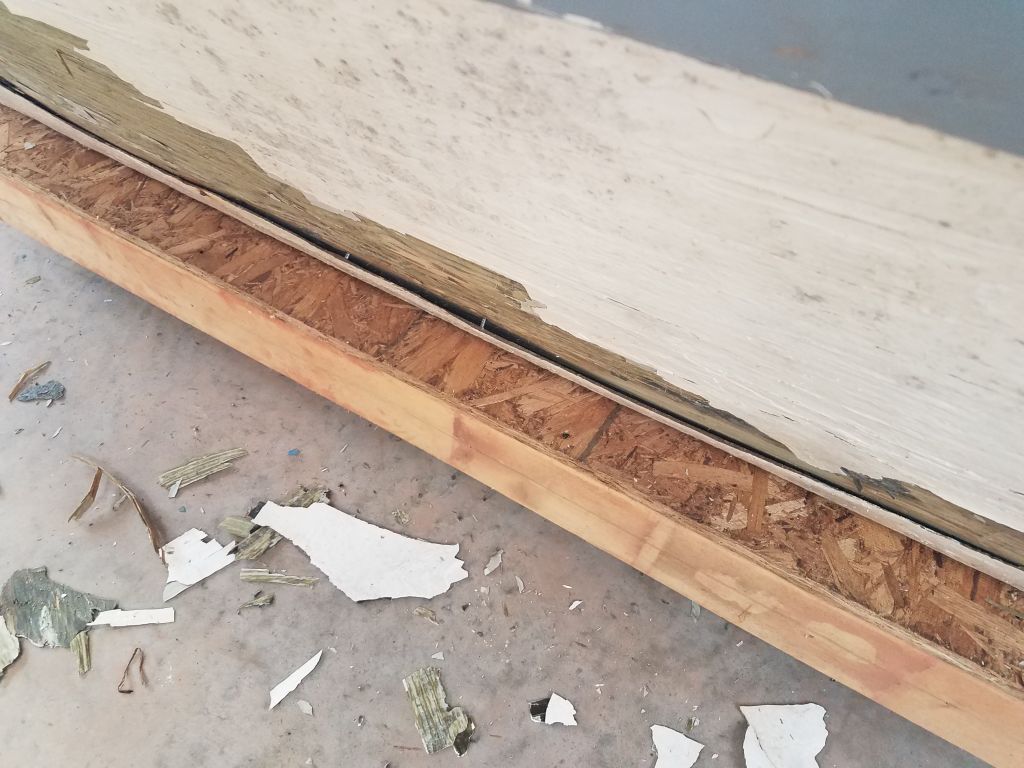
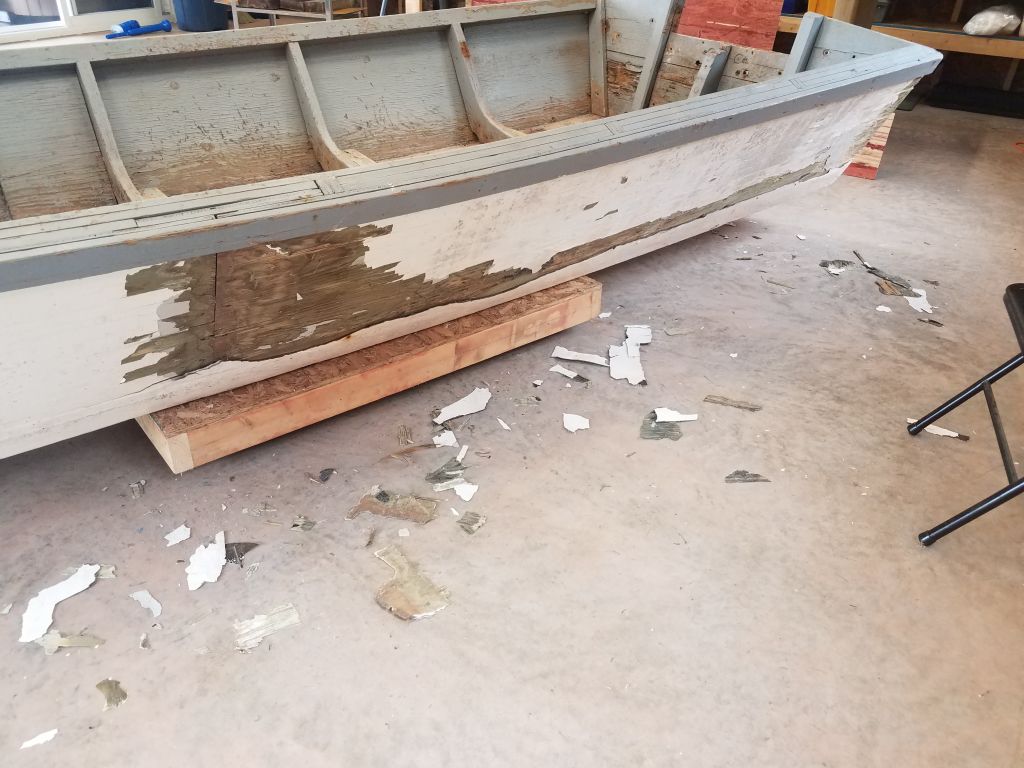
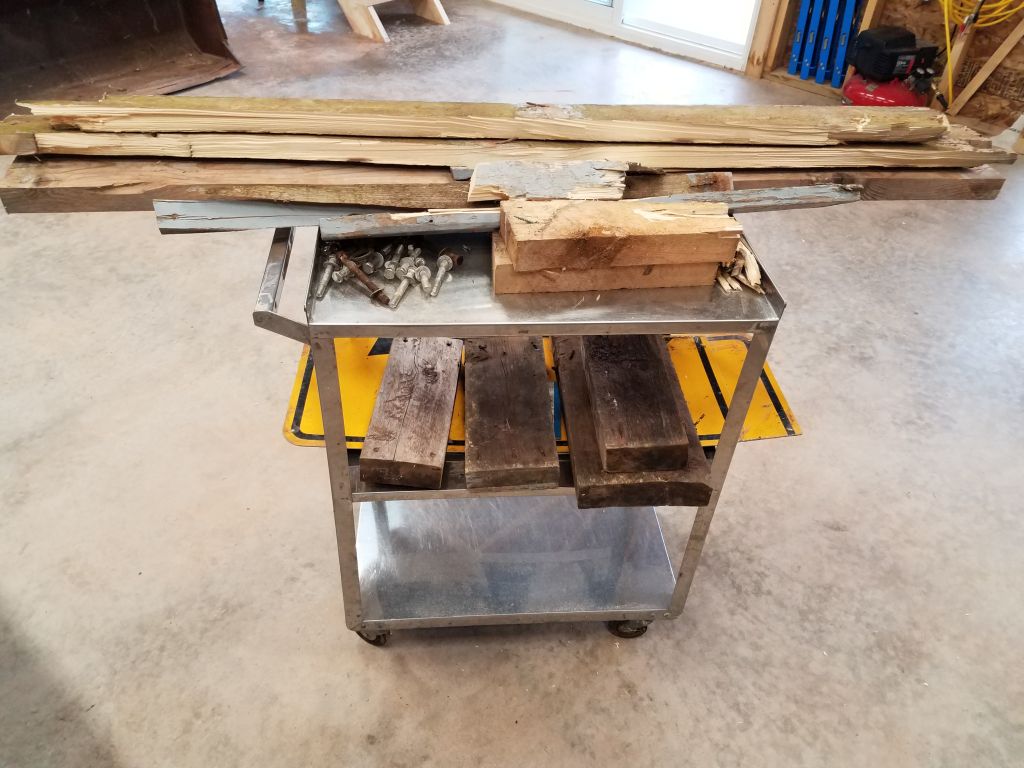
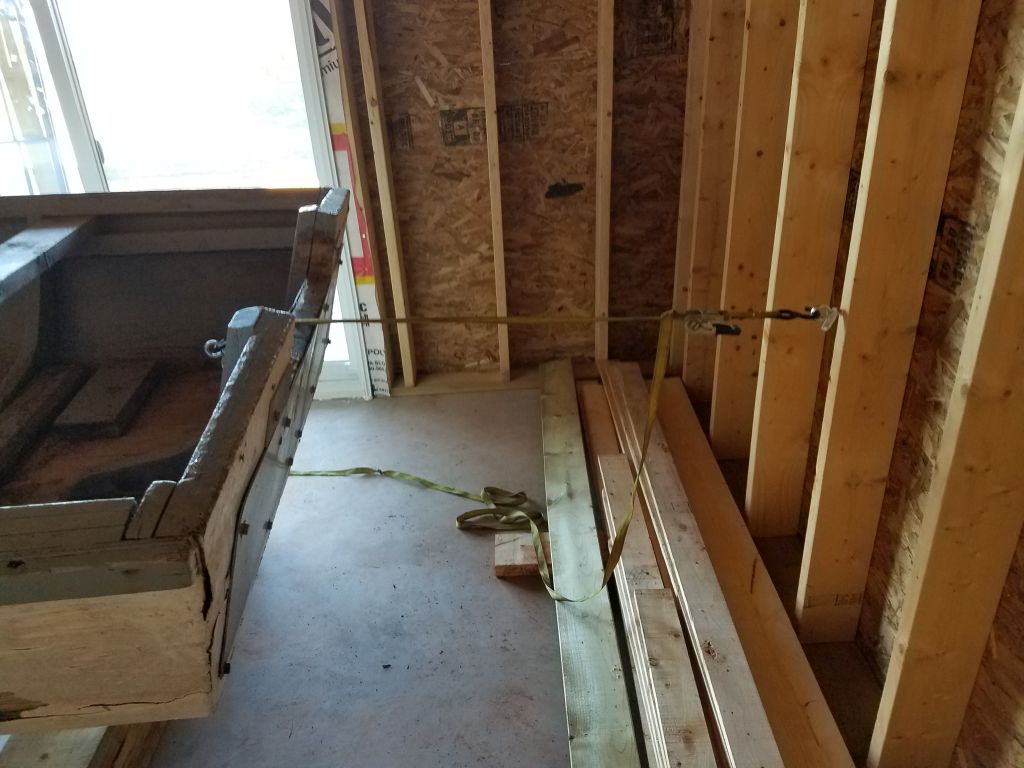
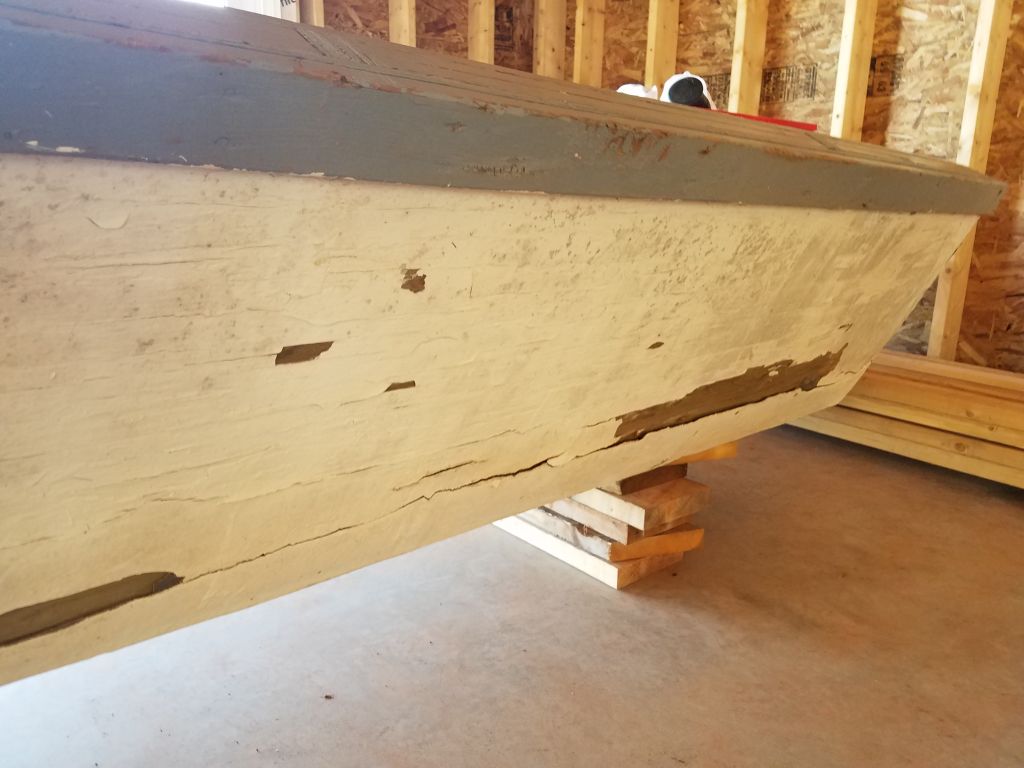
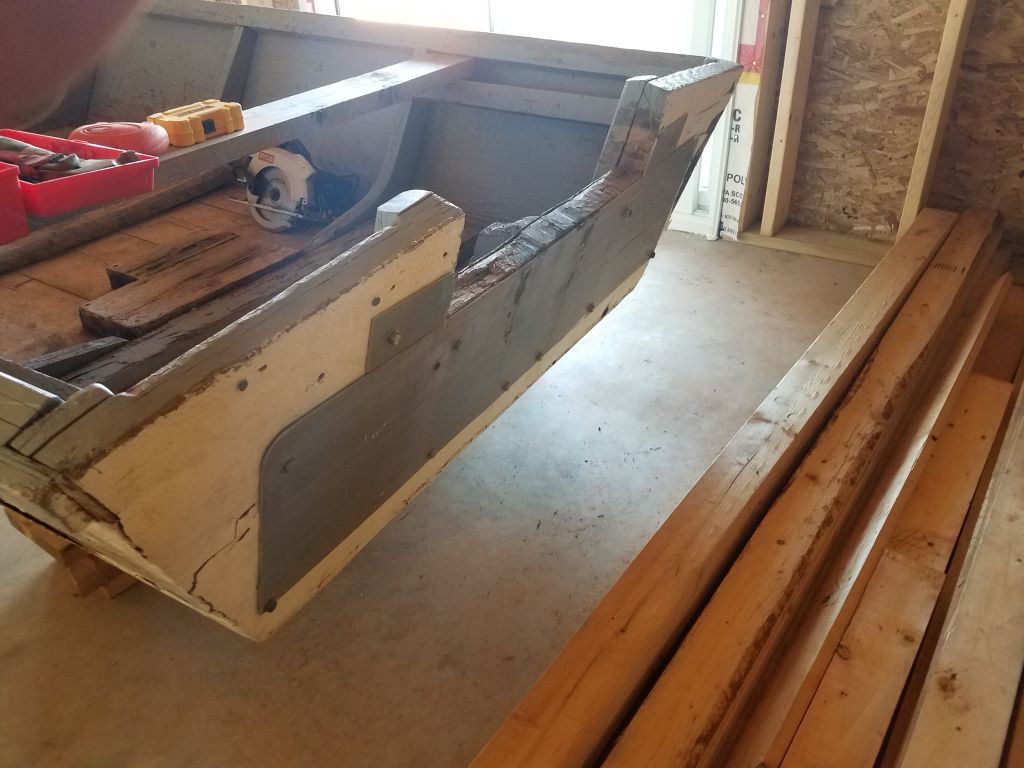
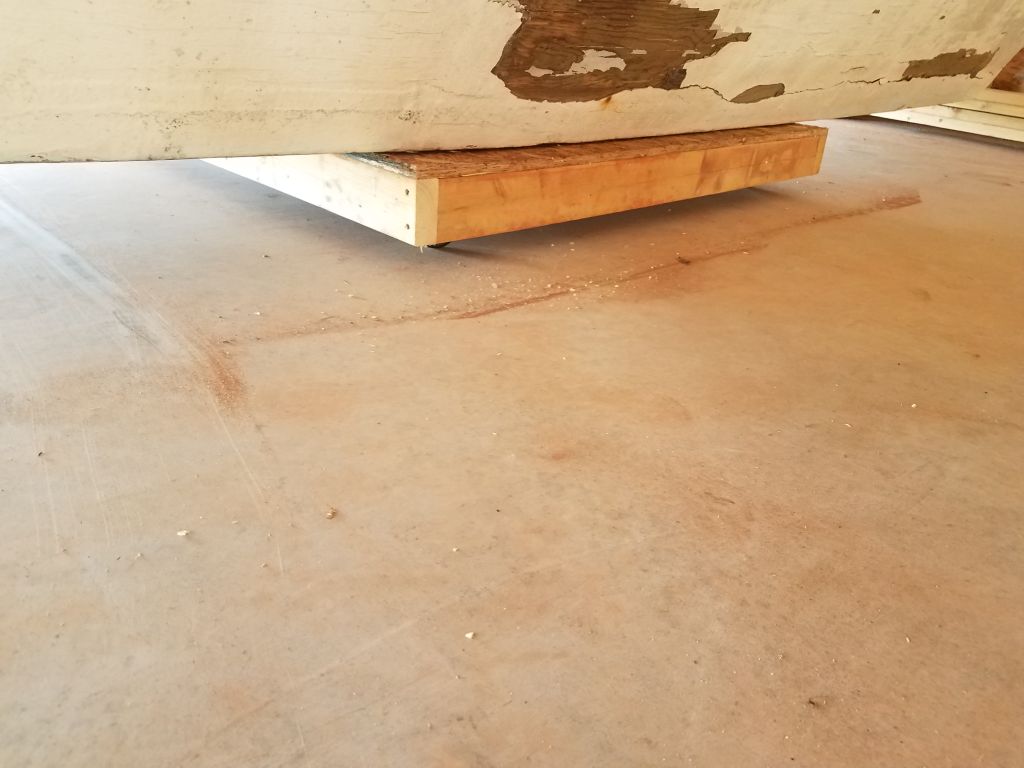
At first, I set the boat on some piles of offcut lumber so I could get it off the trailer, which I’d soon need for another boat.

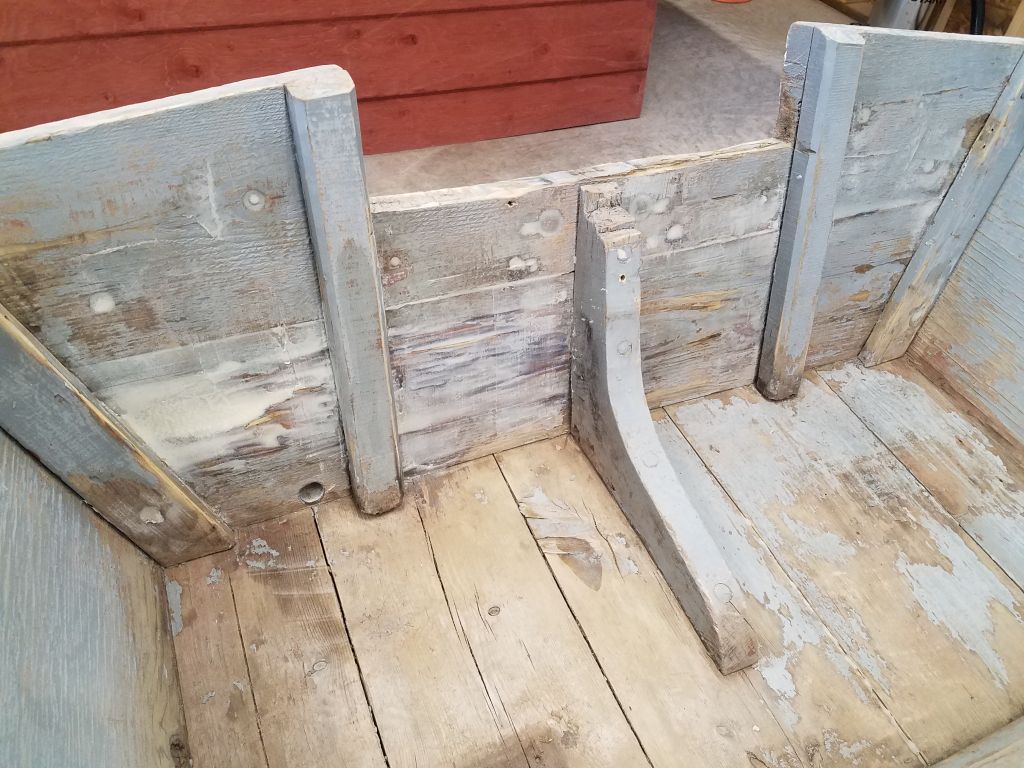
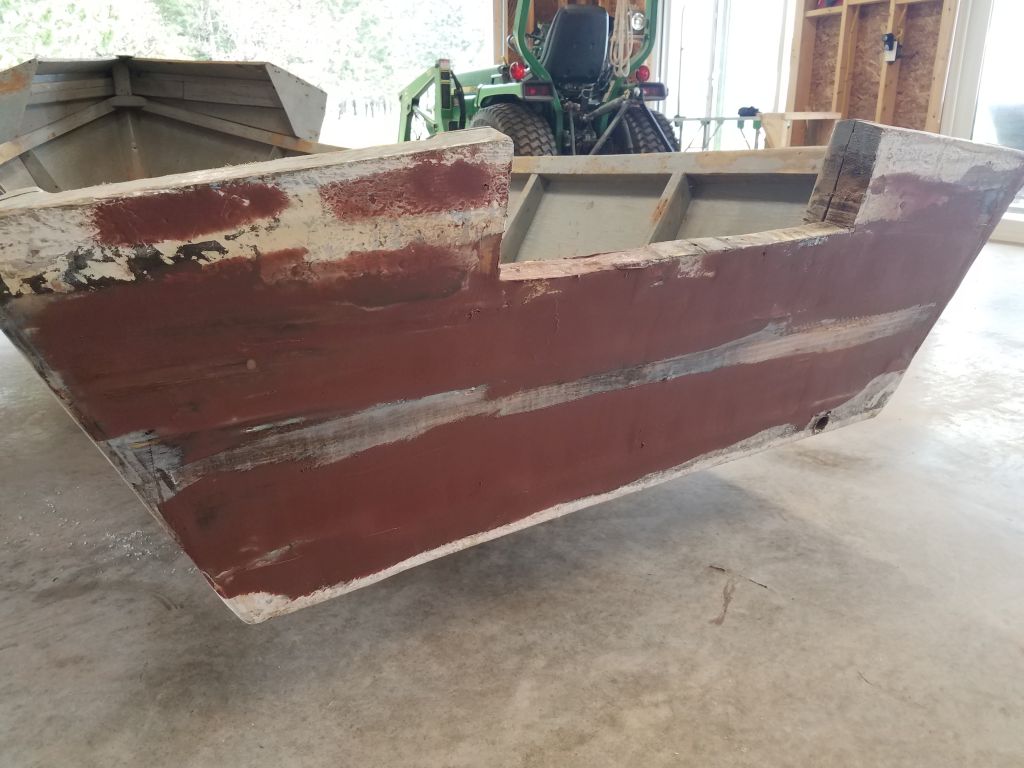
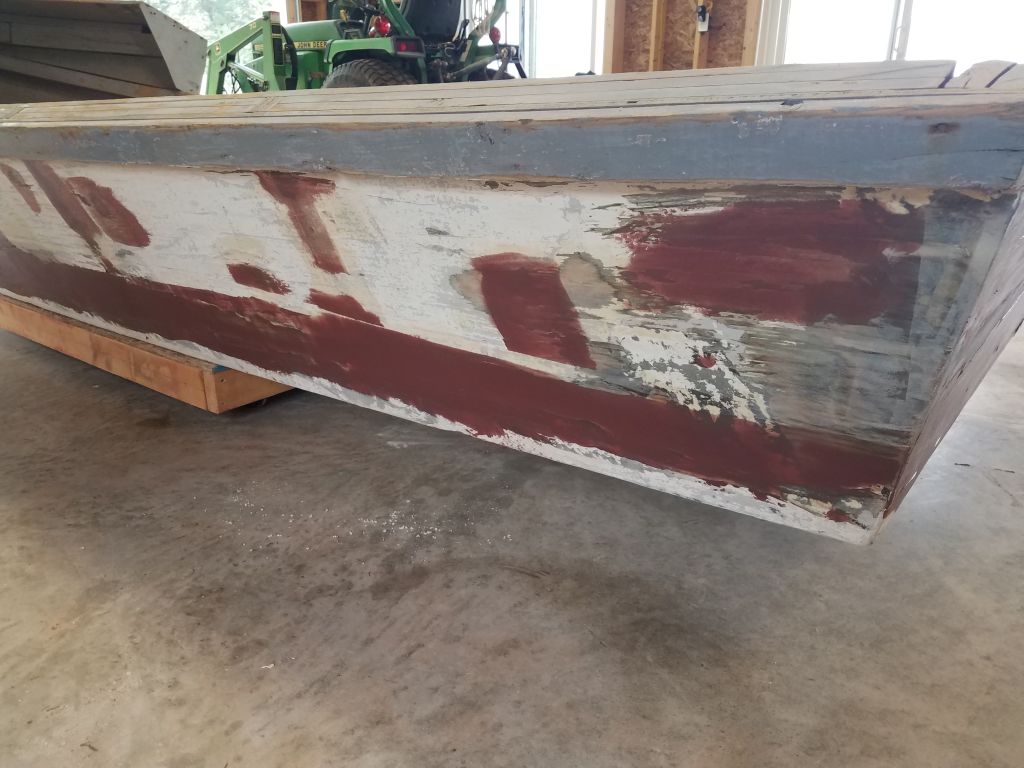
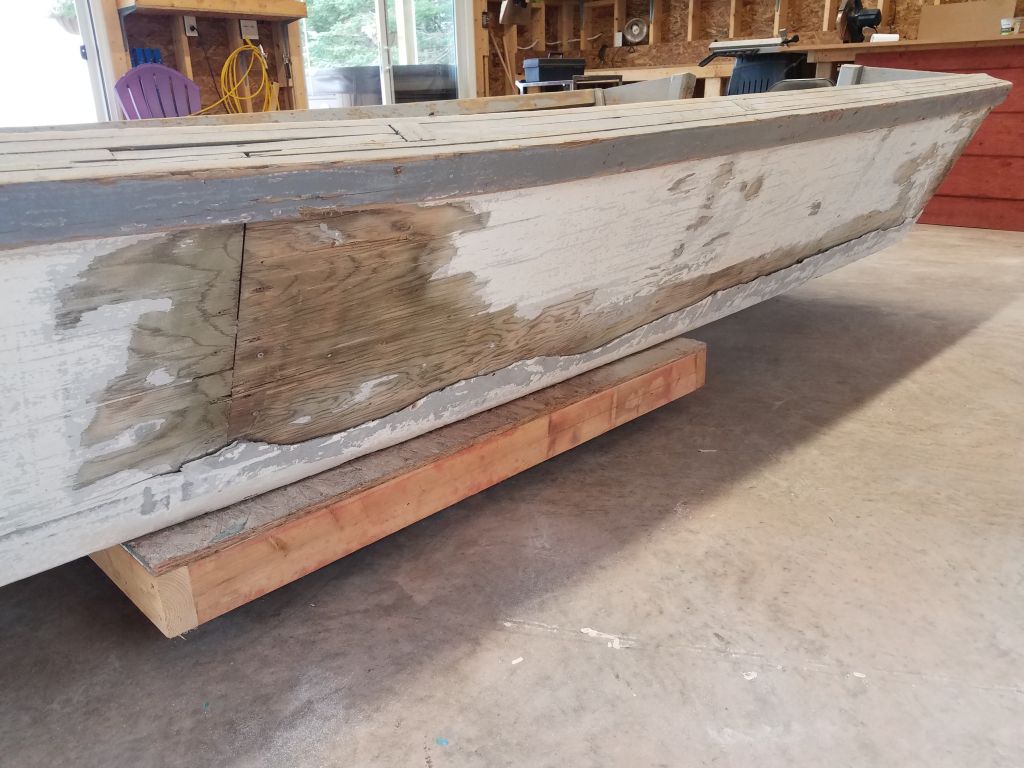
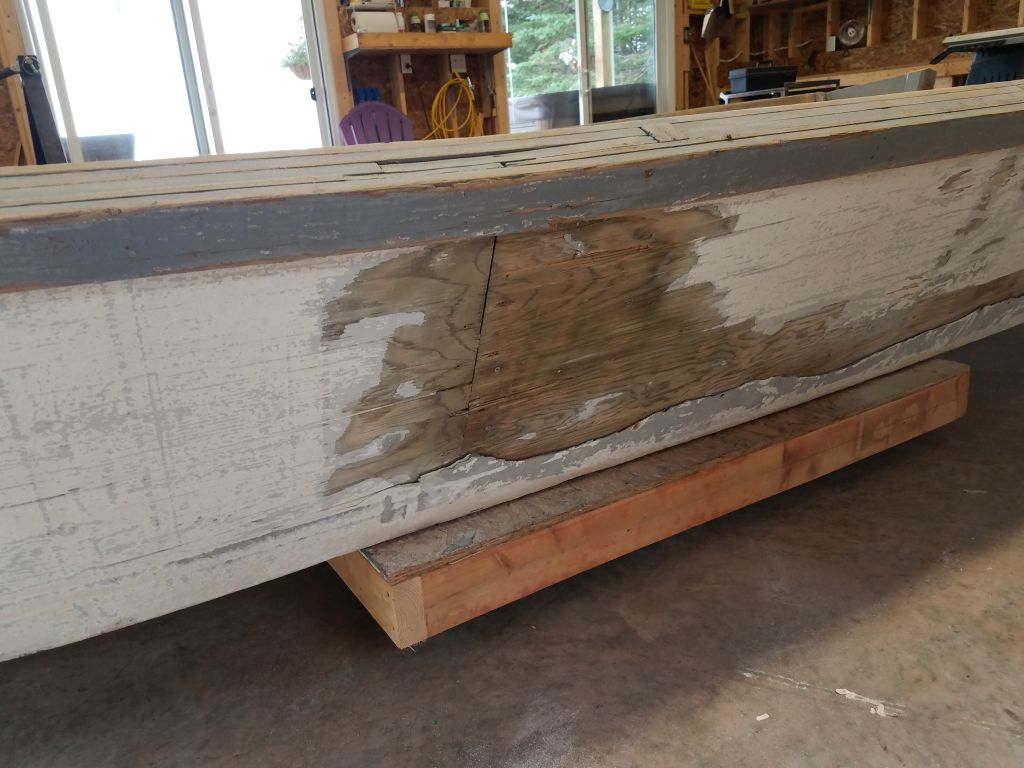
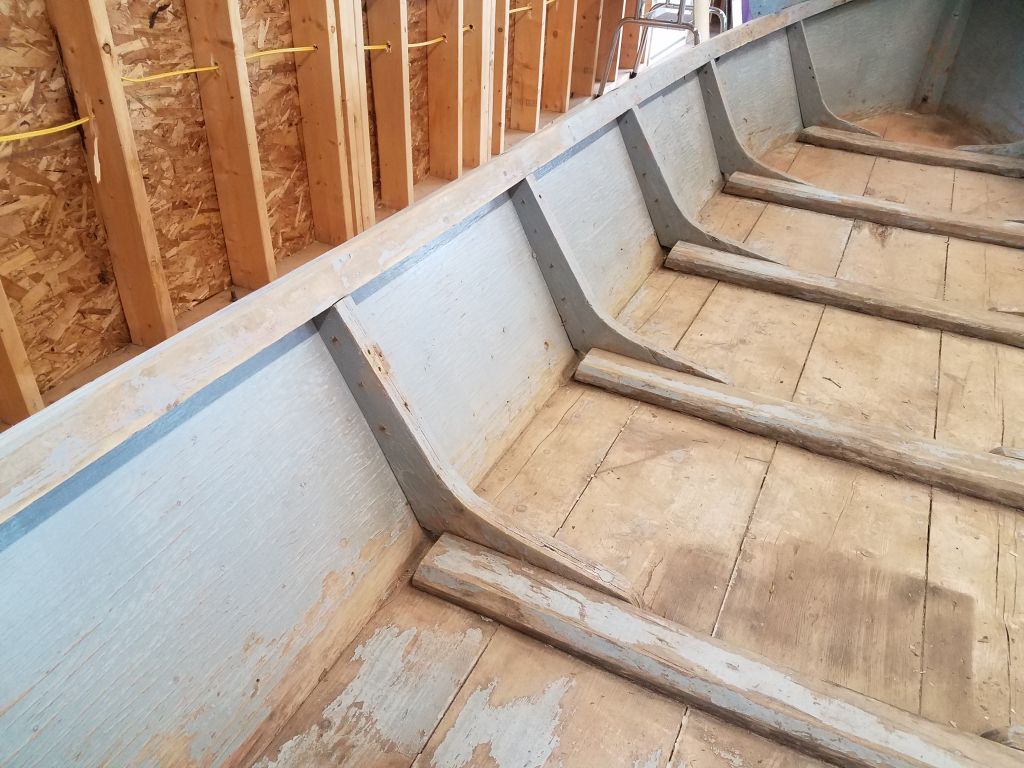
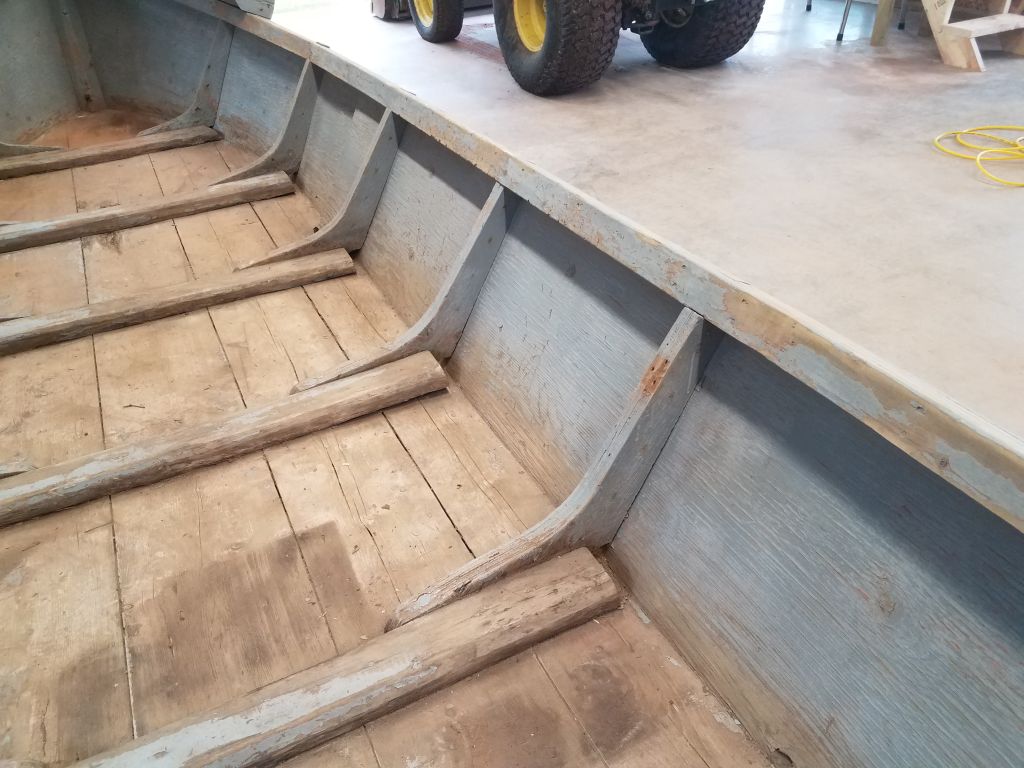
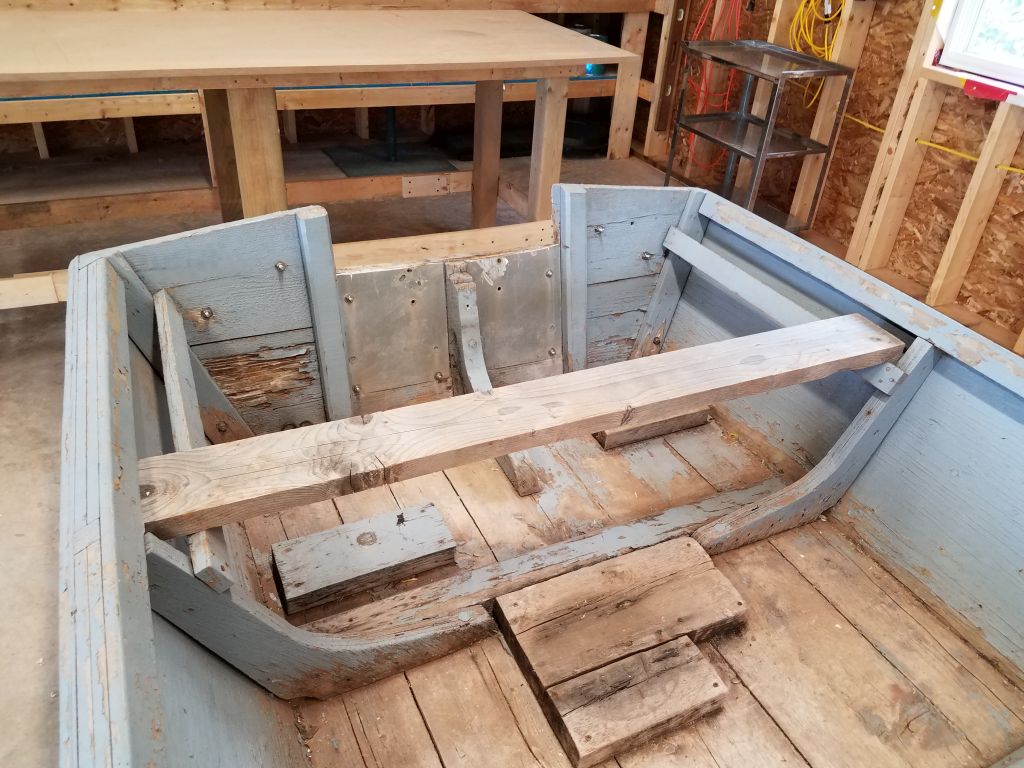
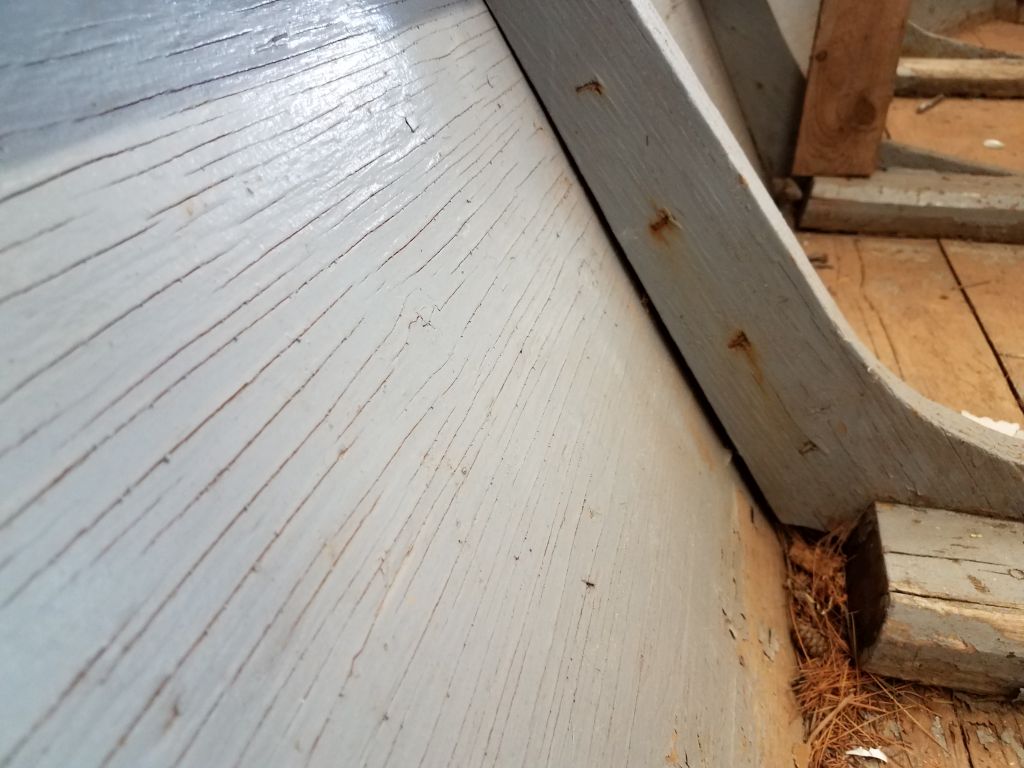
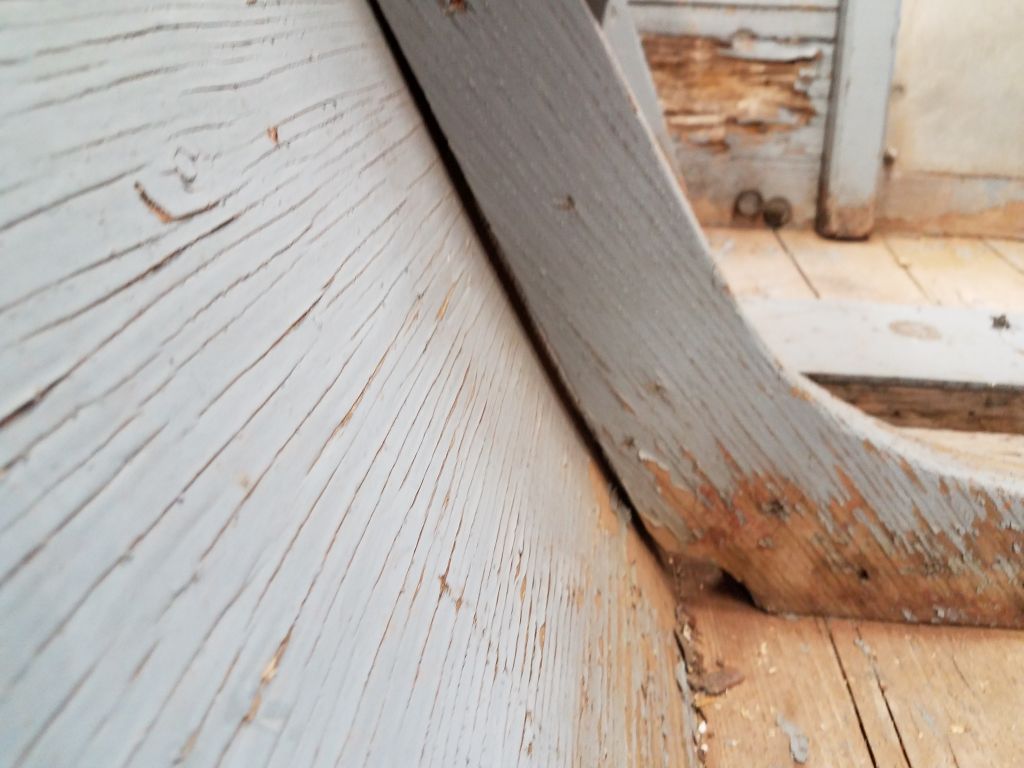
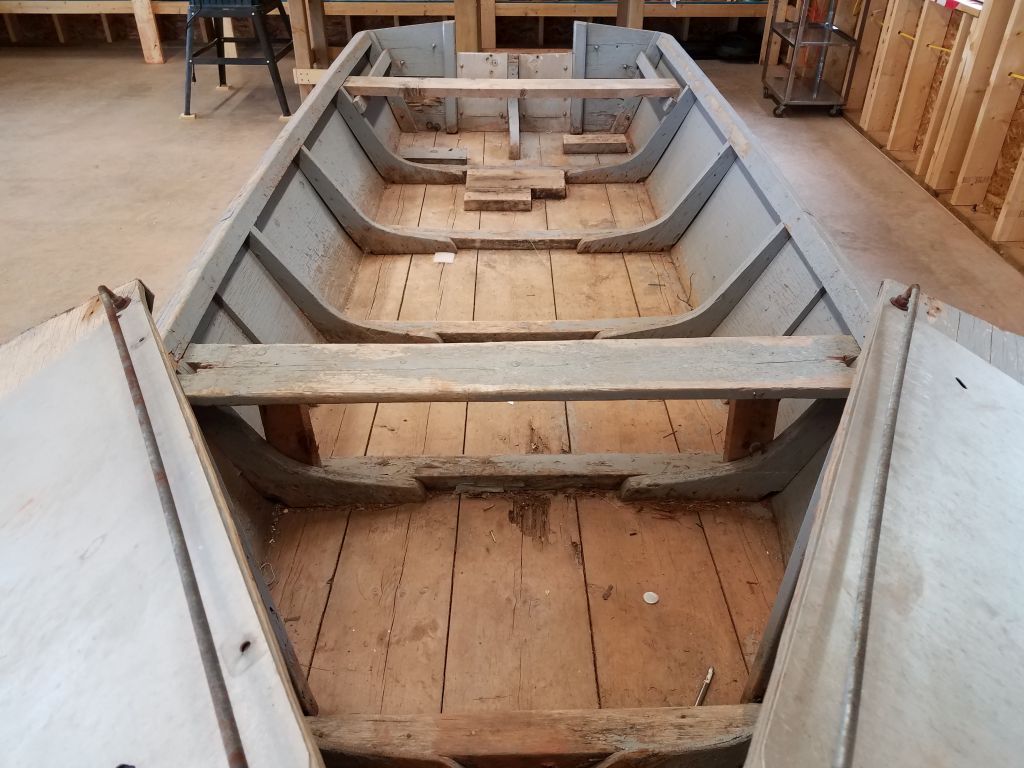
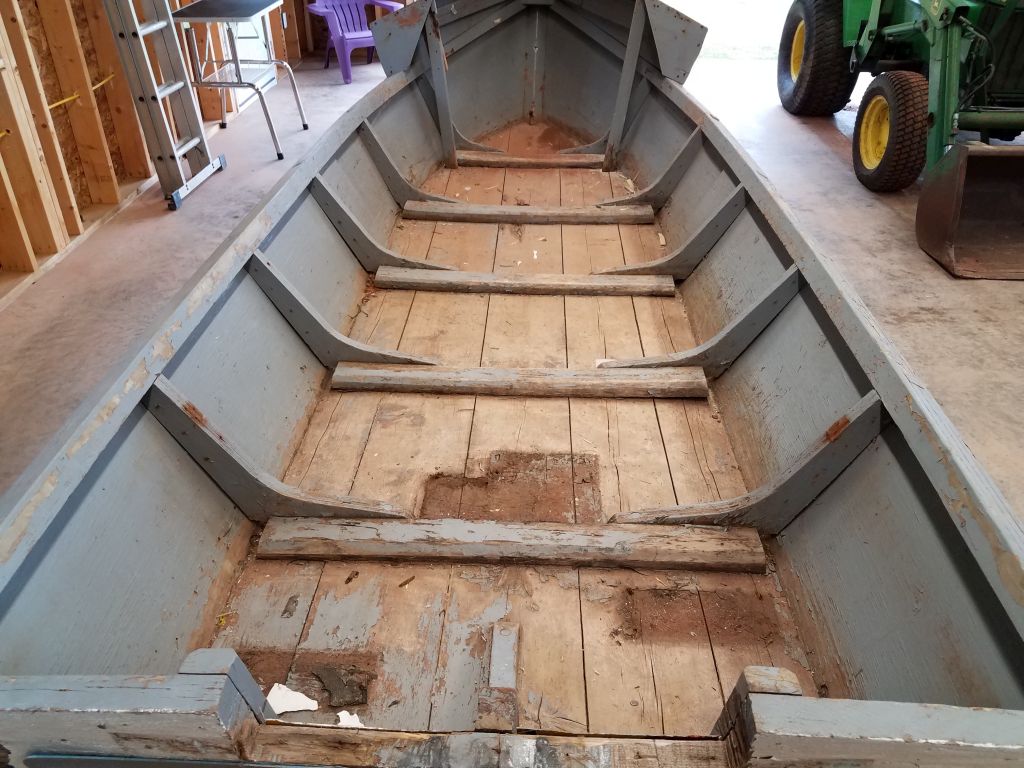
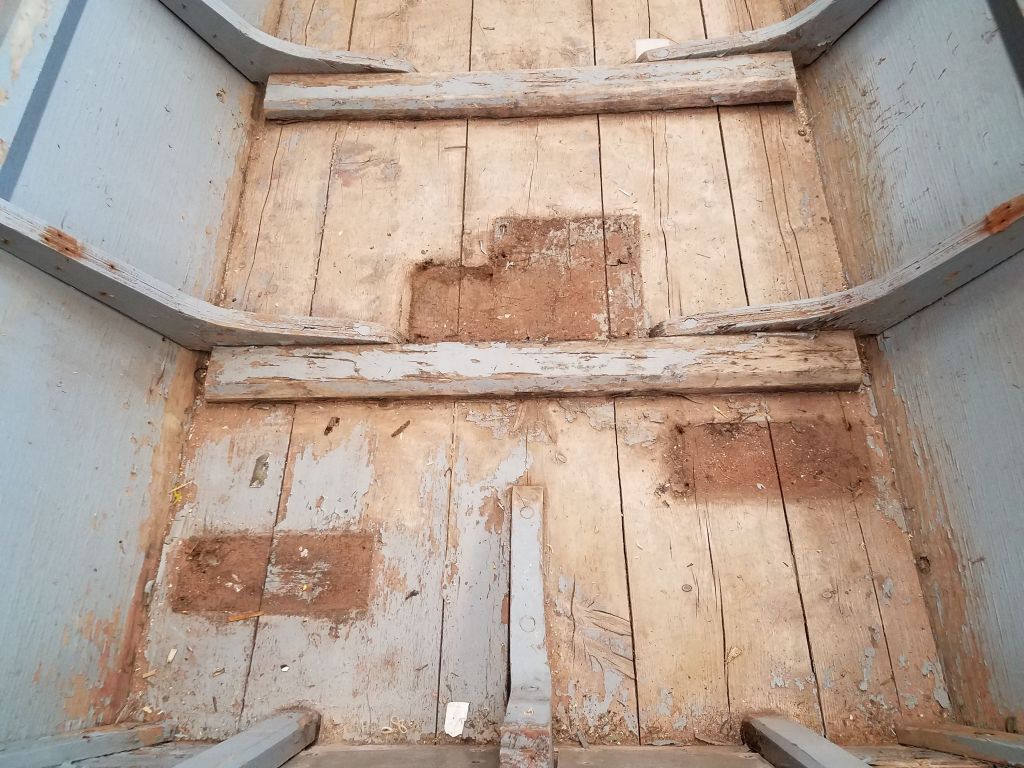
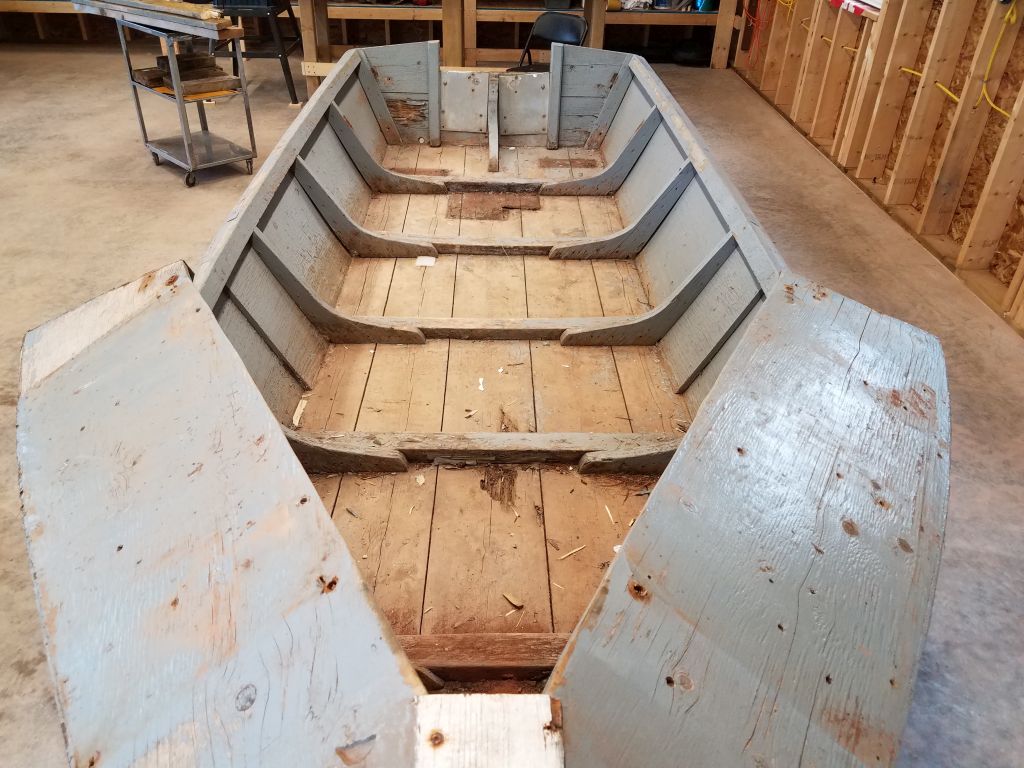
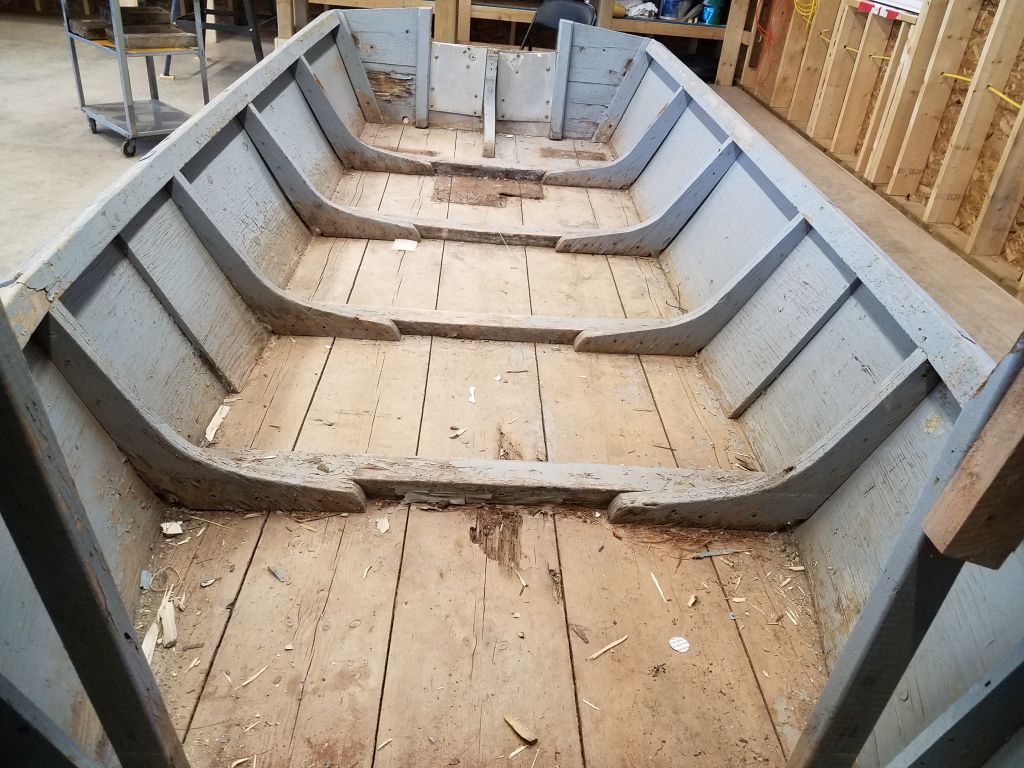
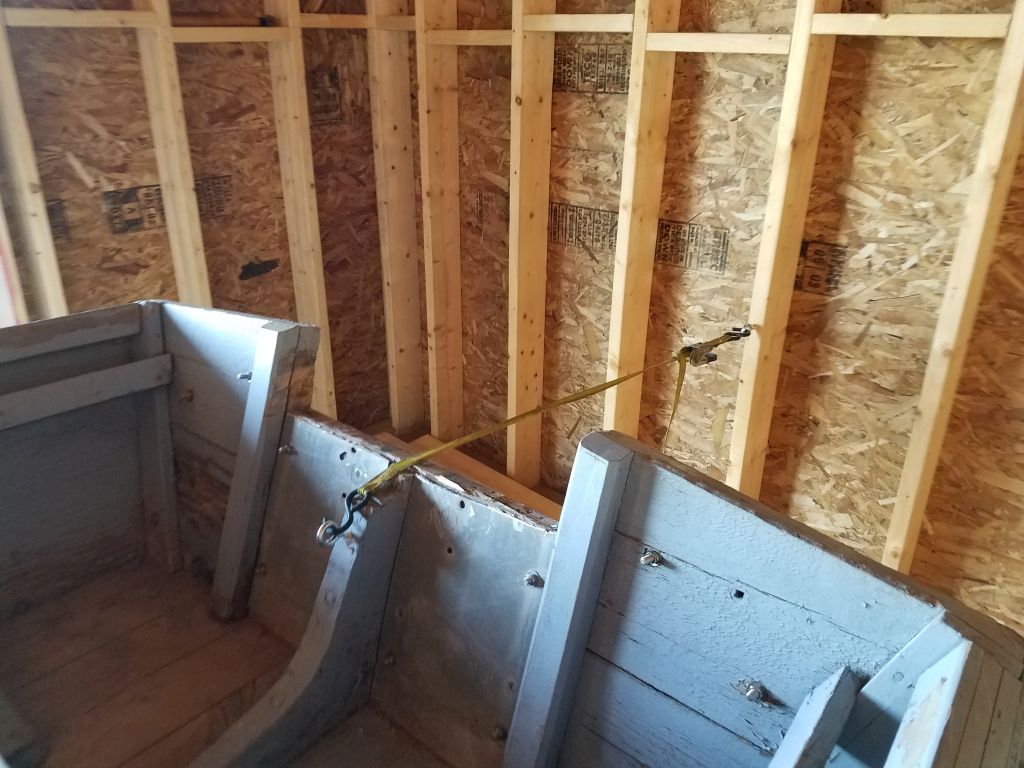
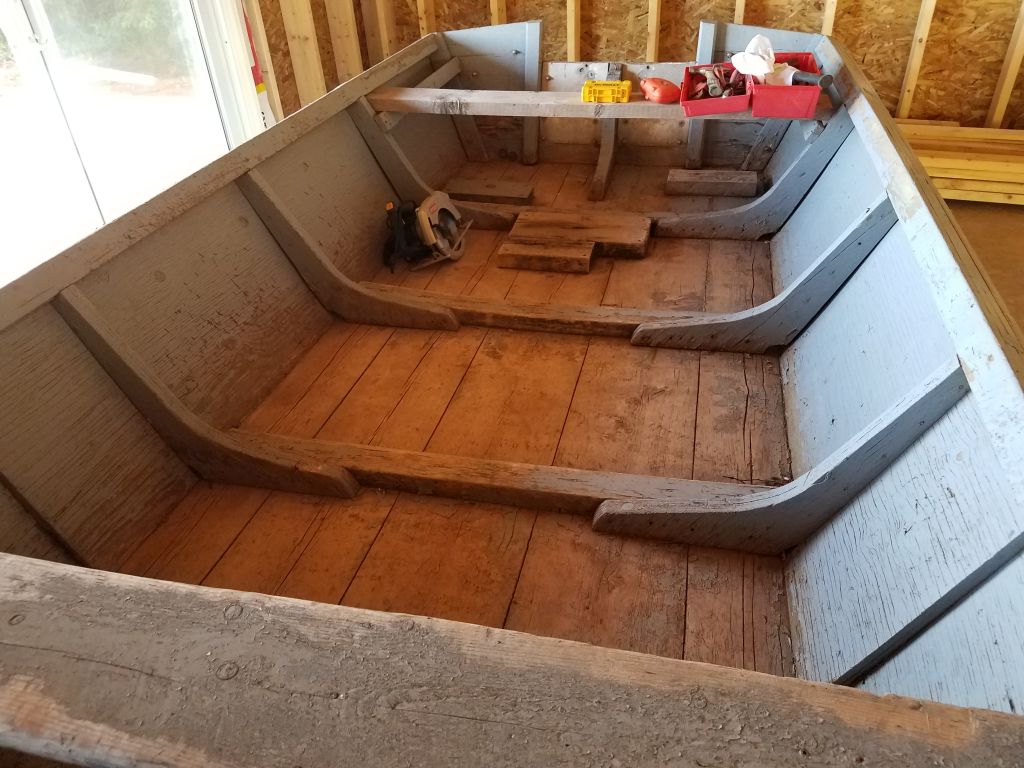
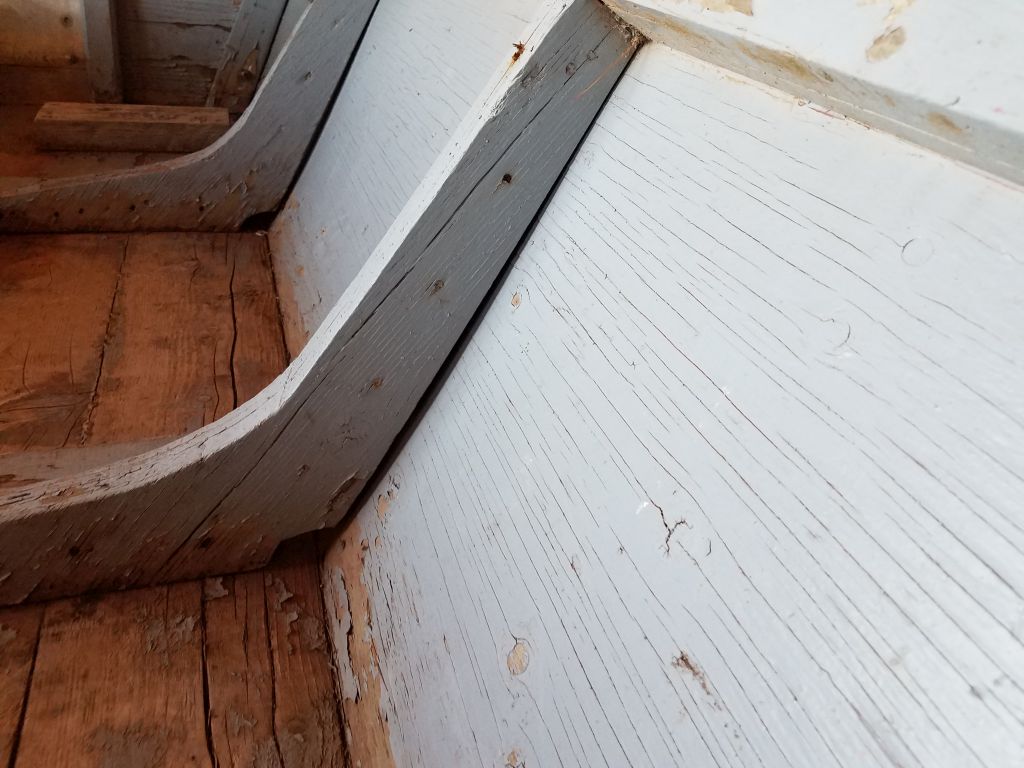
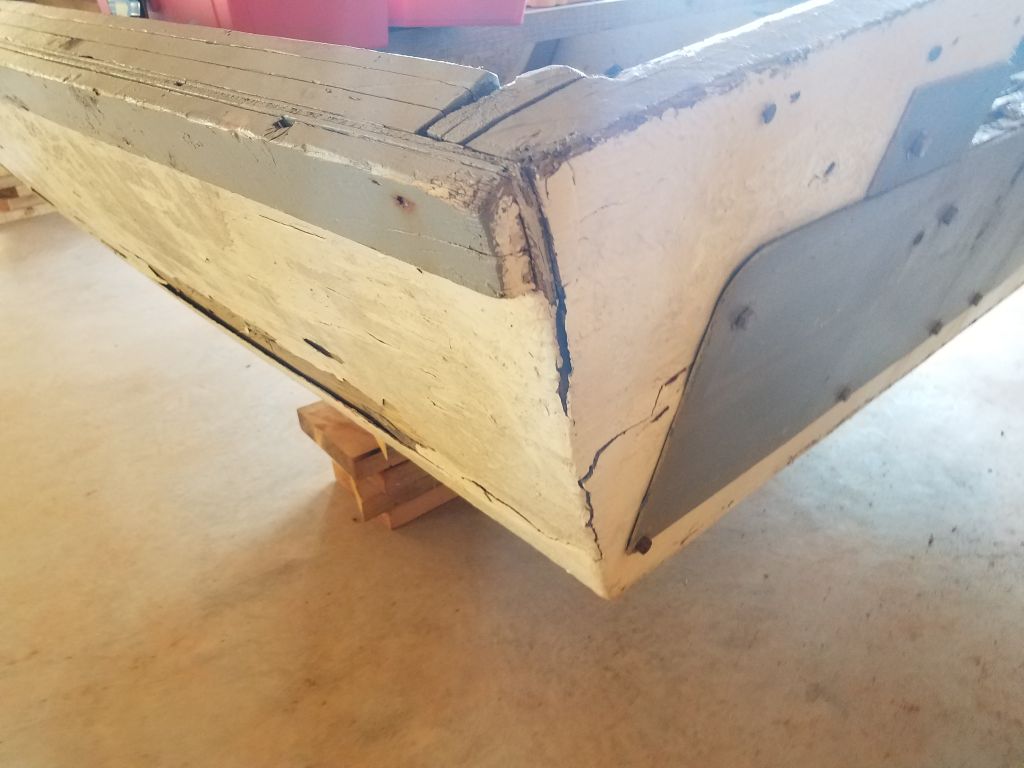
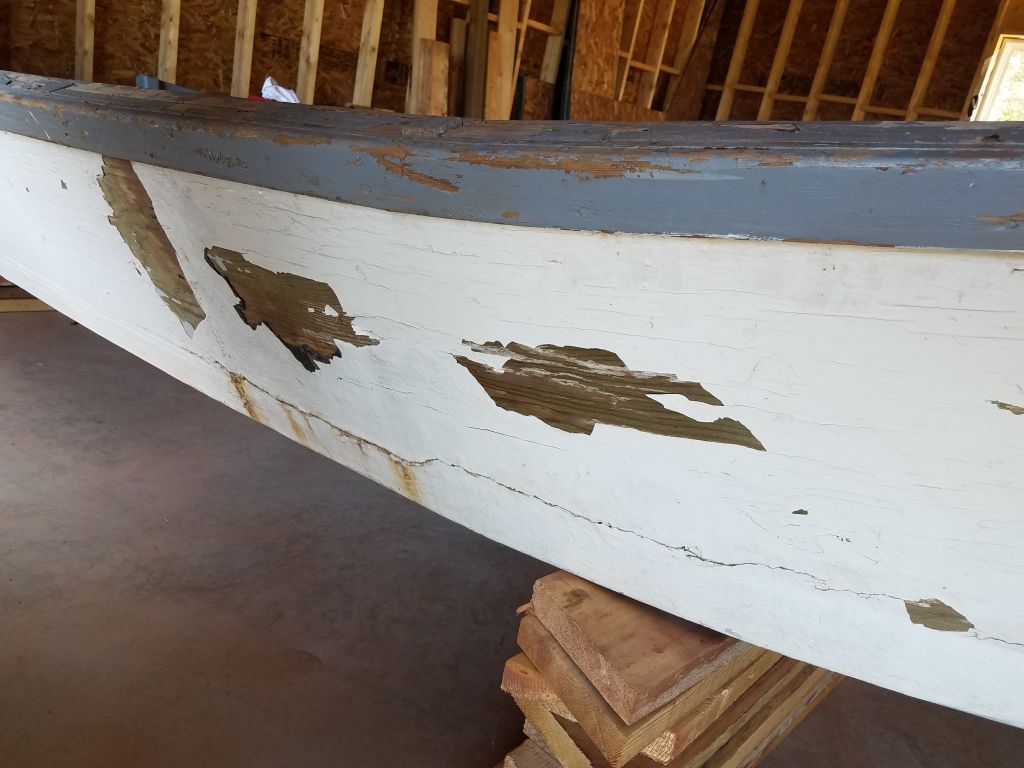
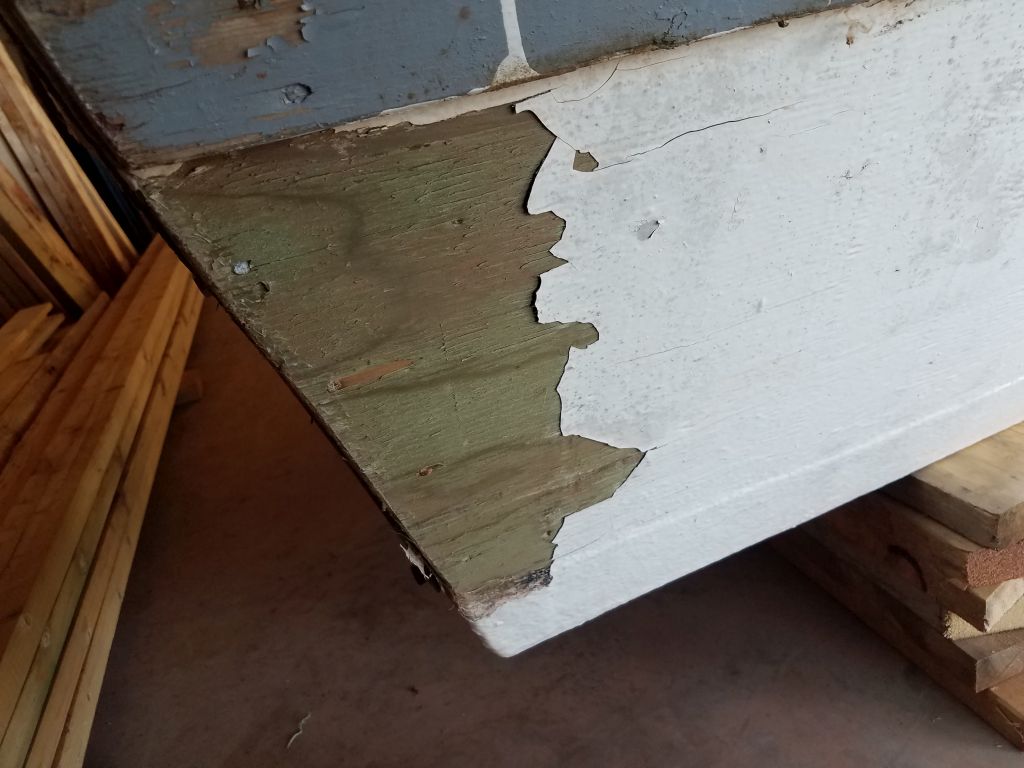
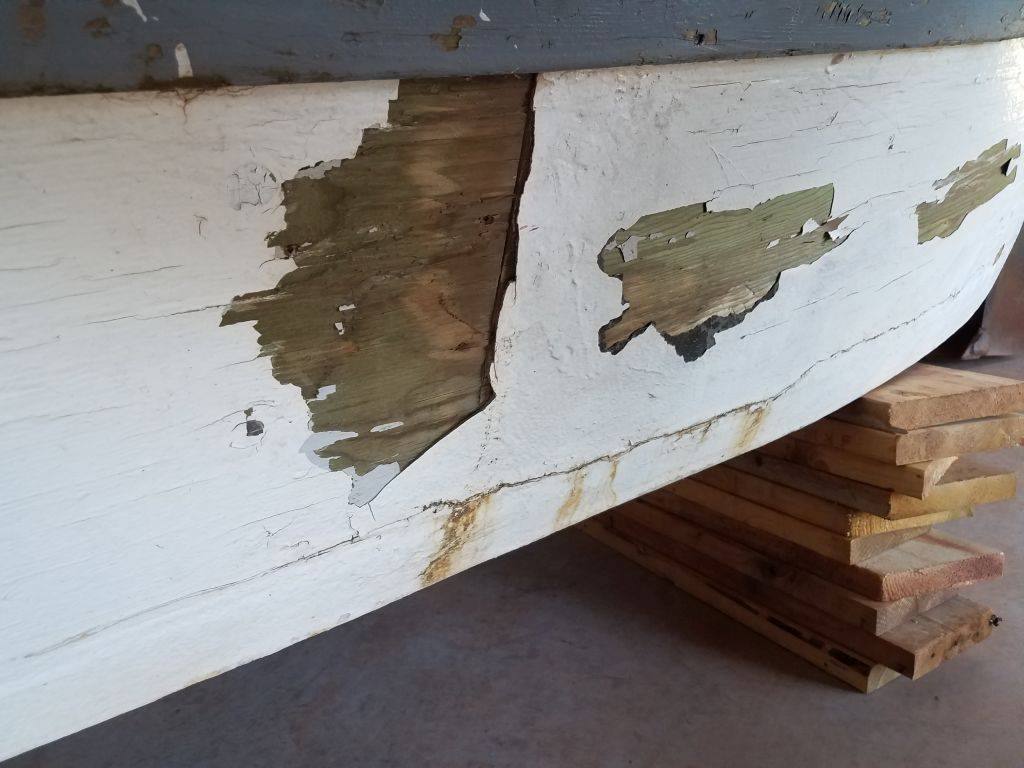
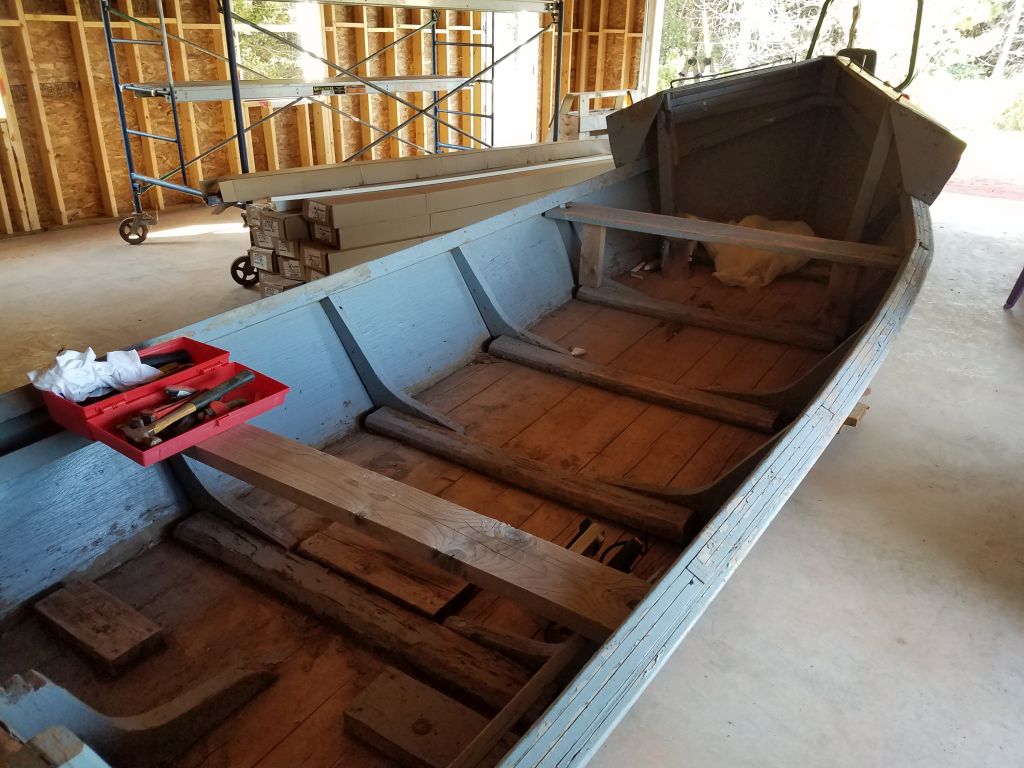
Now that I had the boat home, I spent some time going over the boat and more accurately determining the condition.  My only criteria during my initial inspection before purchase was to confirm that the vessel was more or less boat-shaped and sound enough to turn in to a most basic workboat (both criteria well-satisfied, and frankly the boat could have been used as is, at least for a little while).  But now I could start assessing what she would actually need, and there were myriad issues.

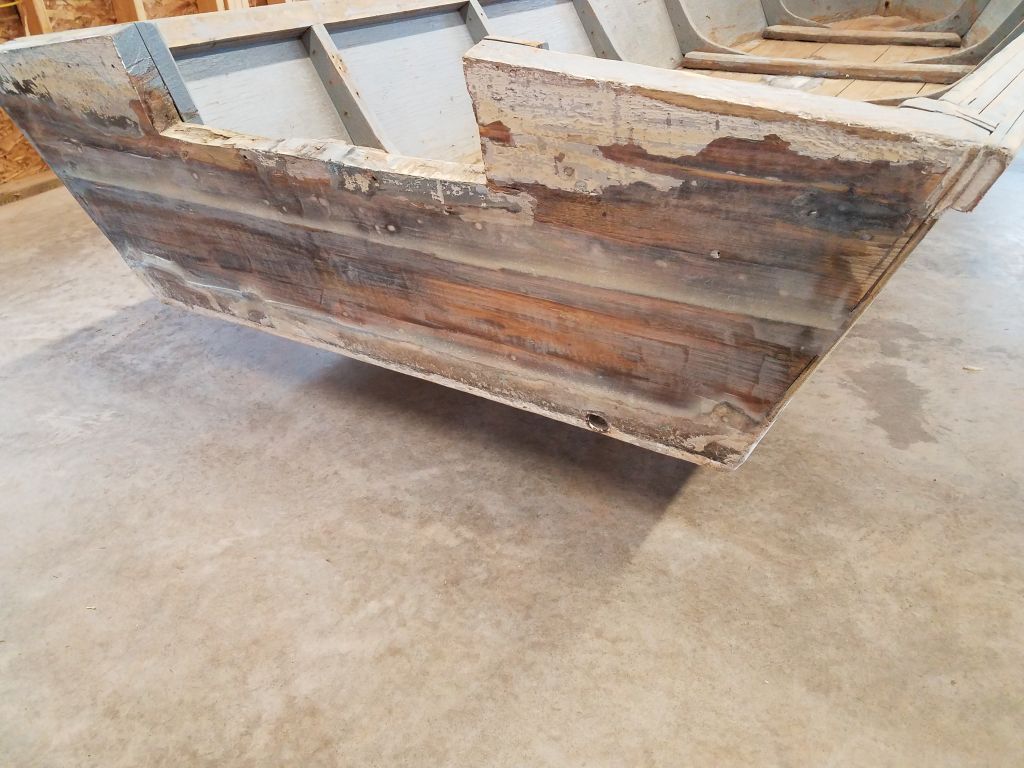
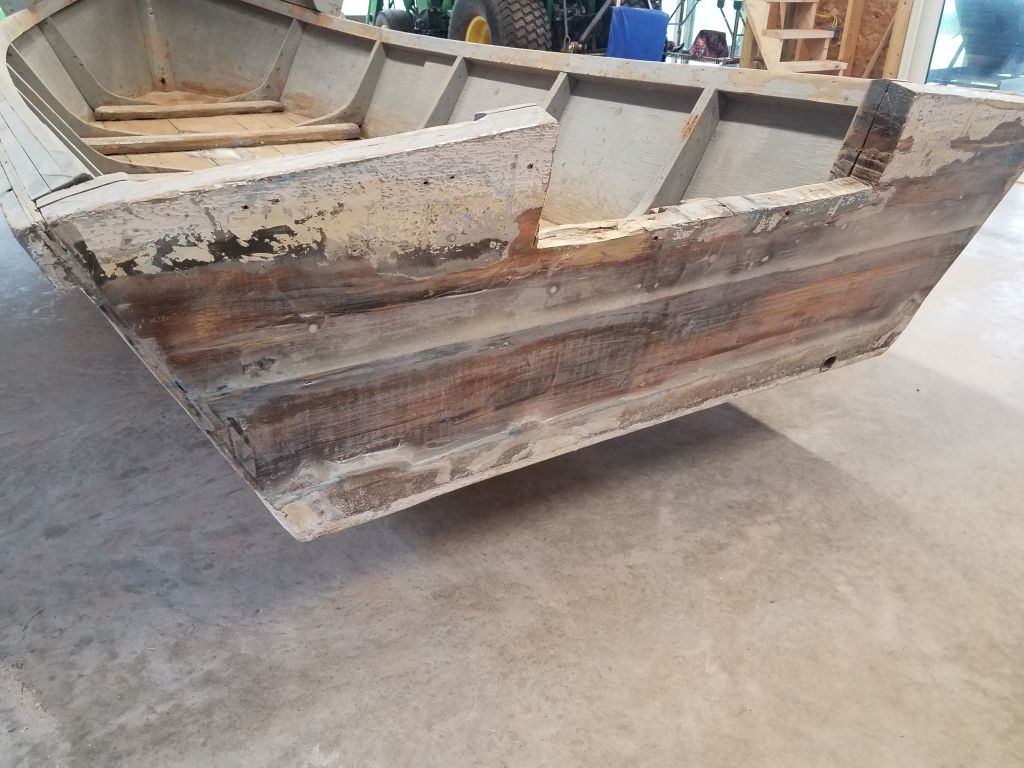
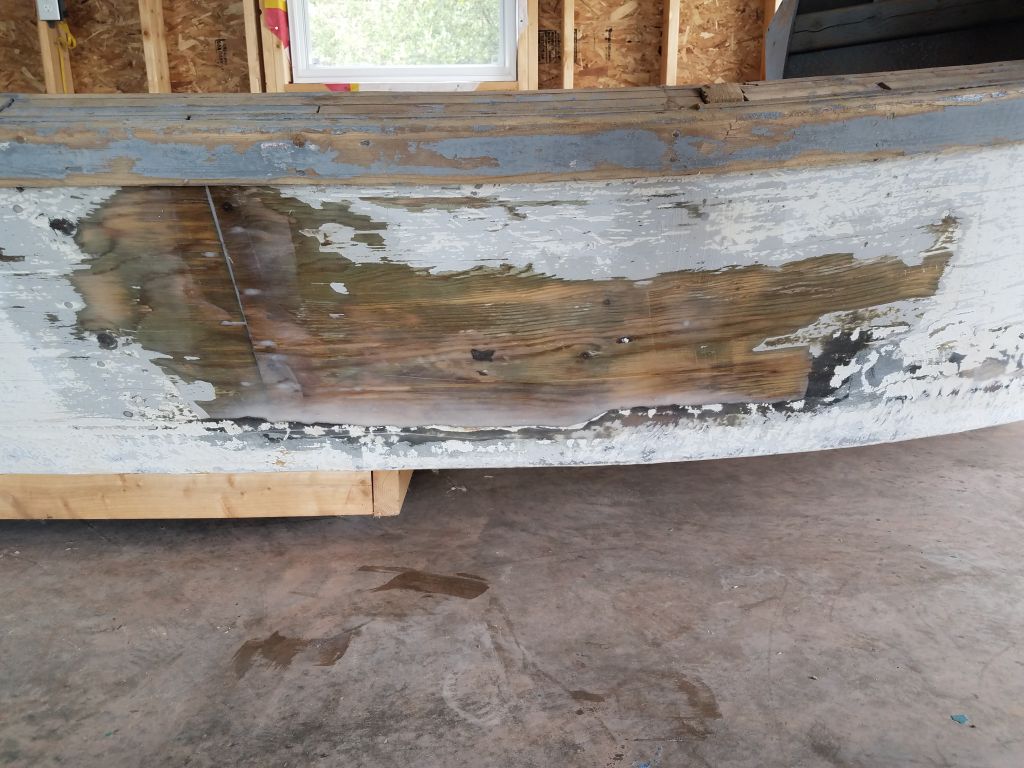
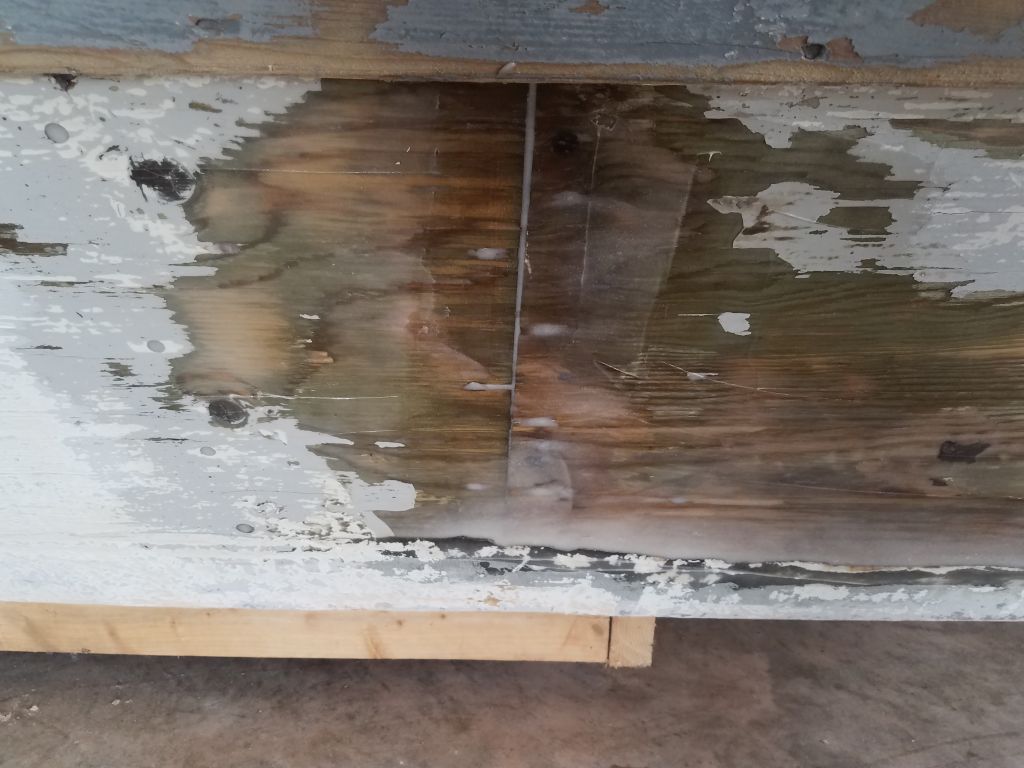
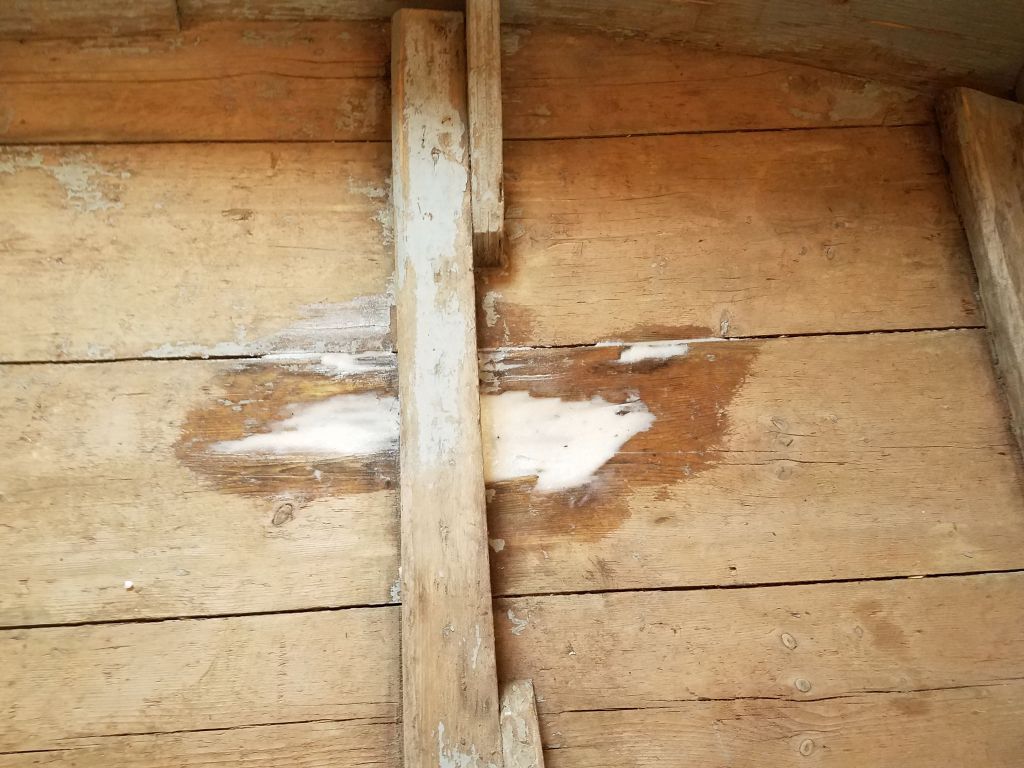
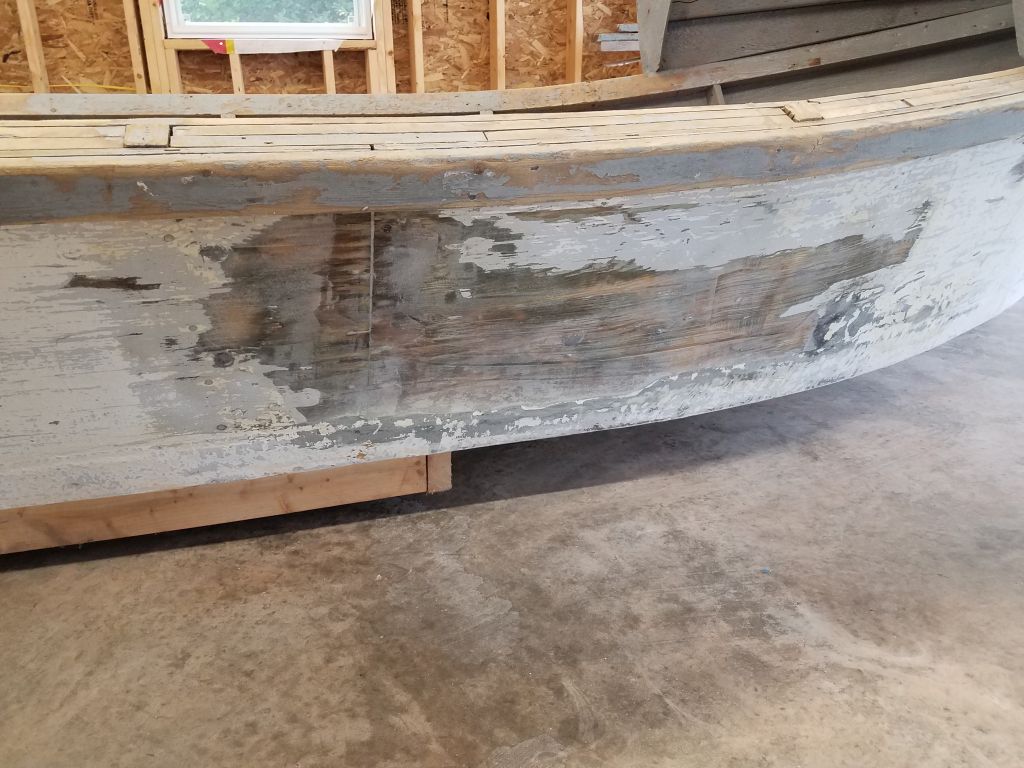
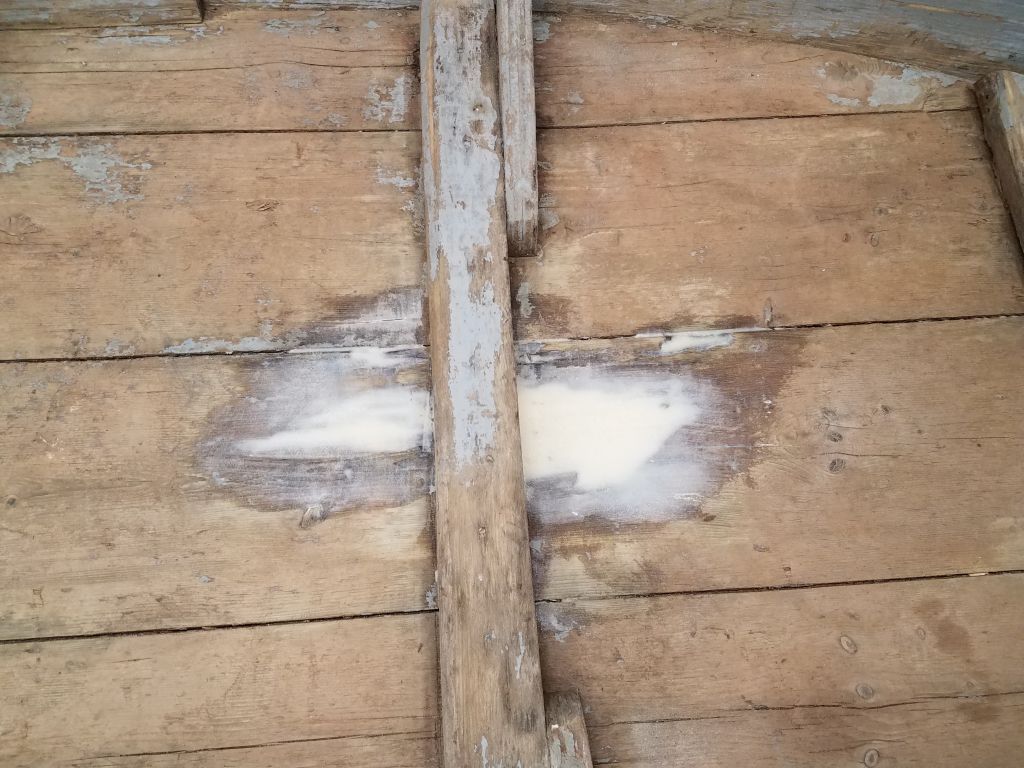
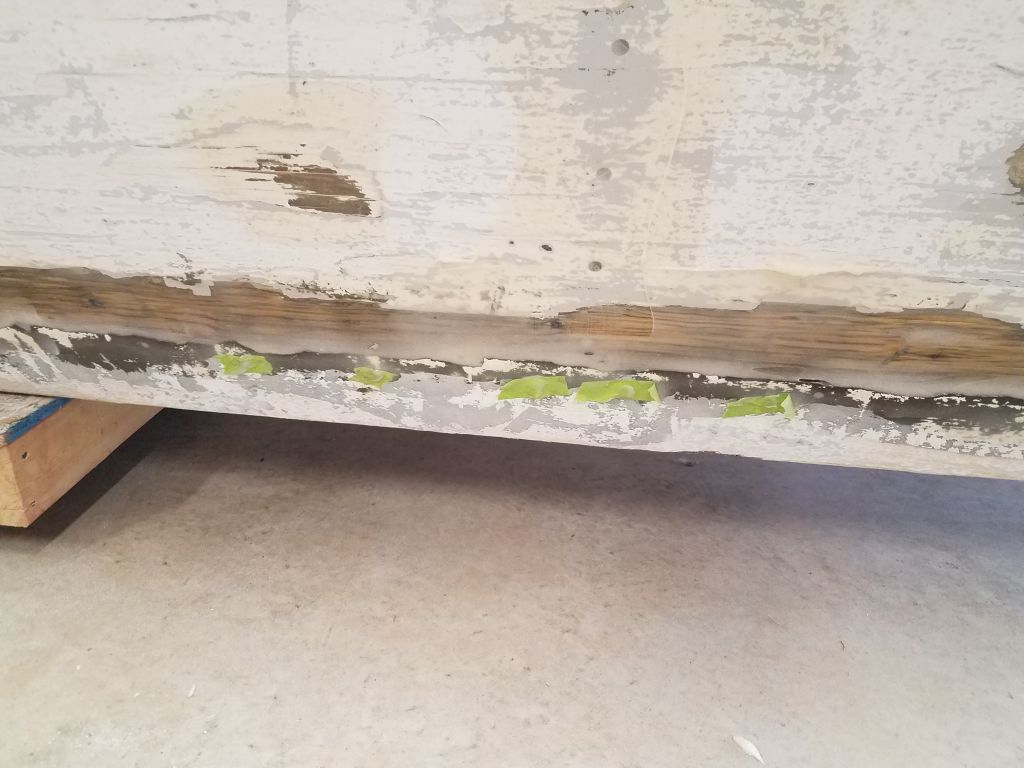
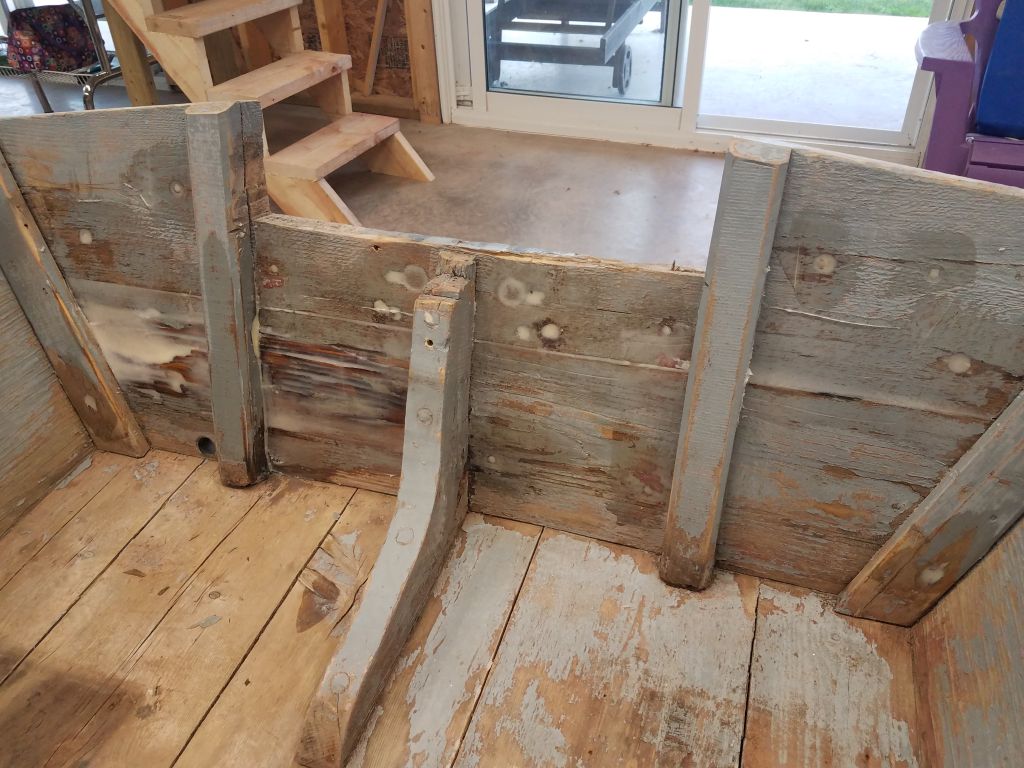
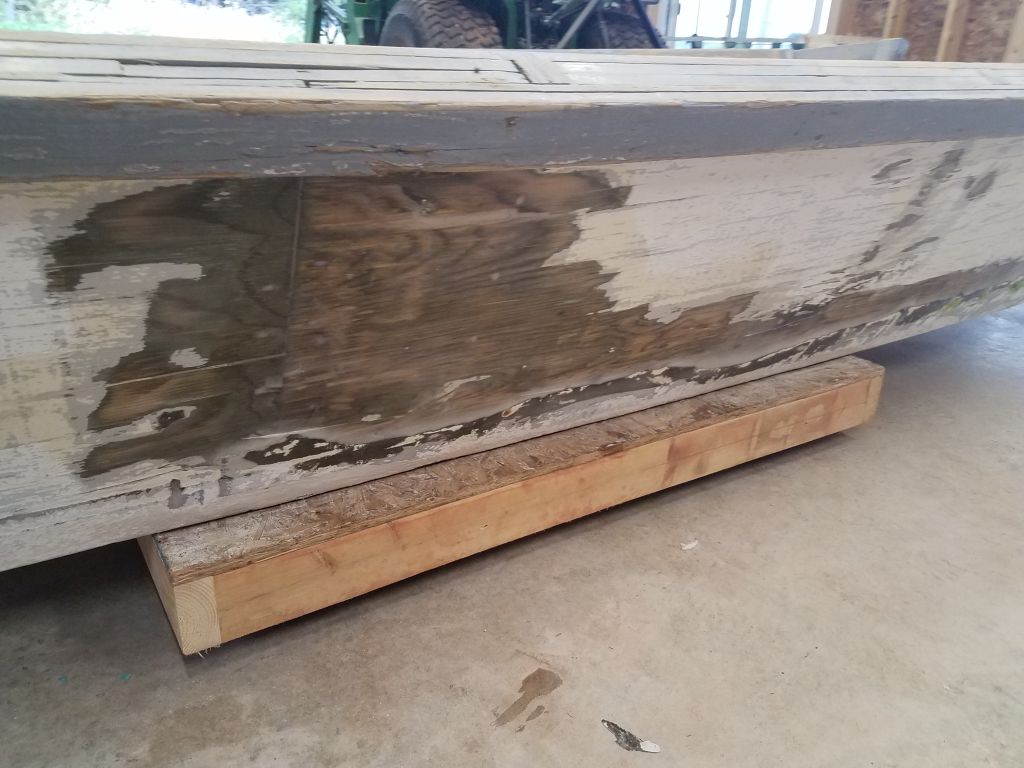
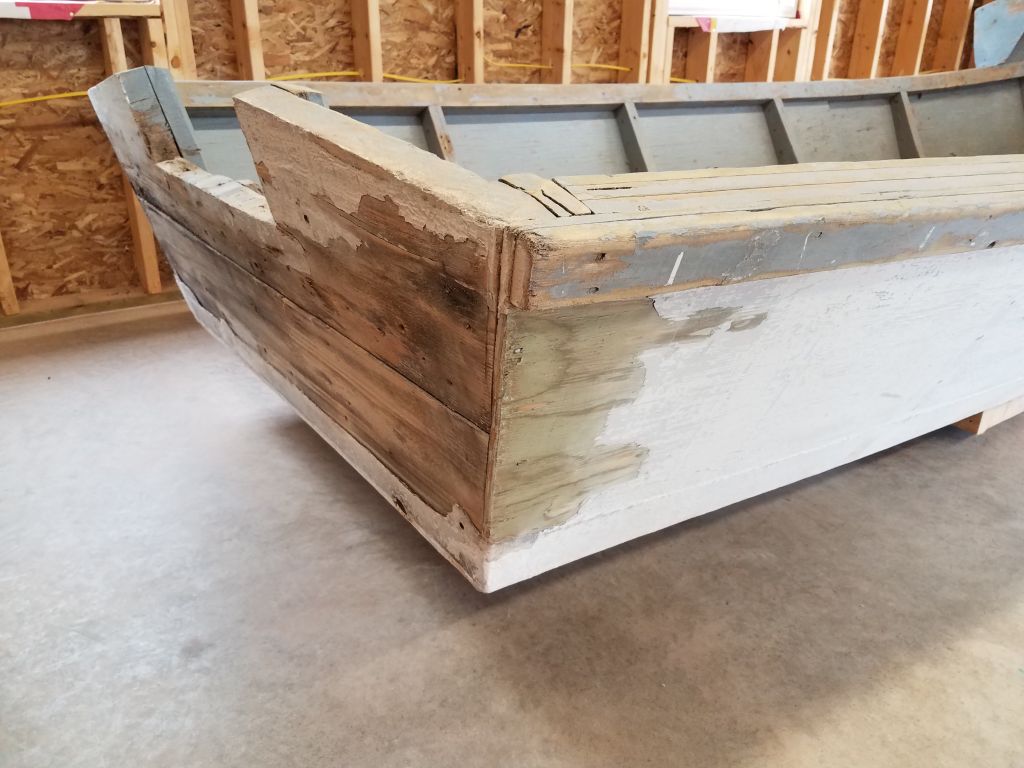
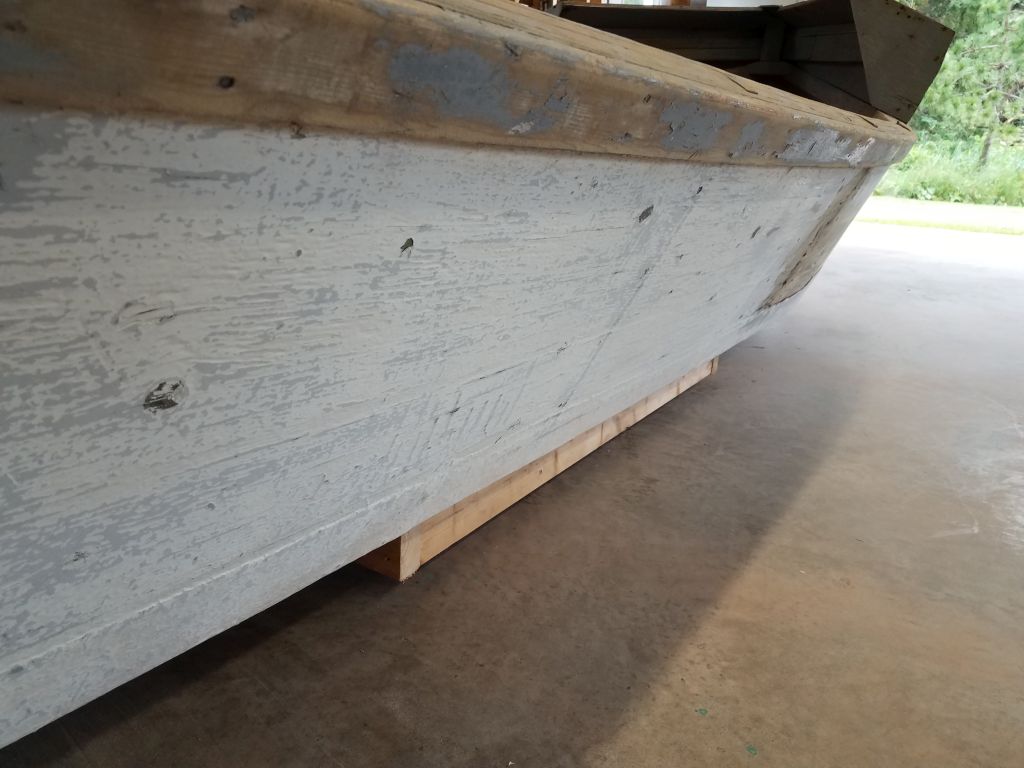
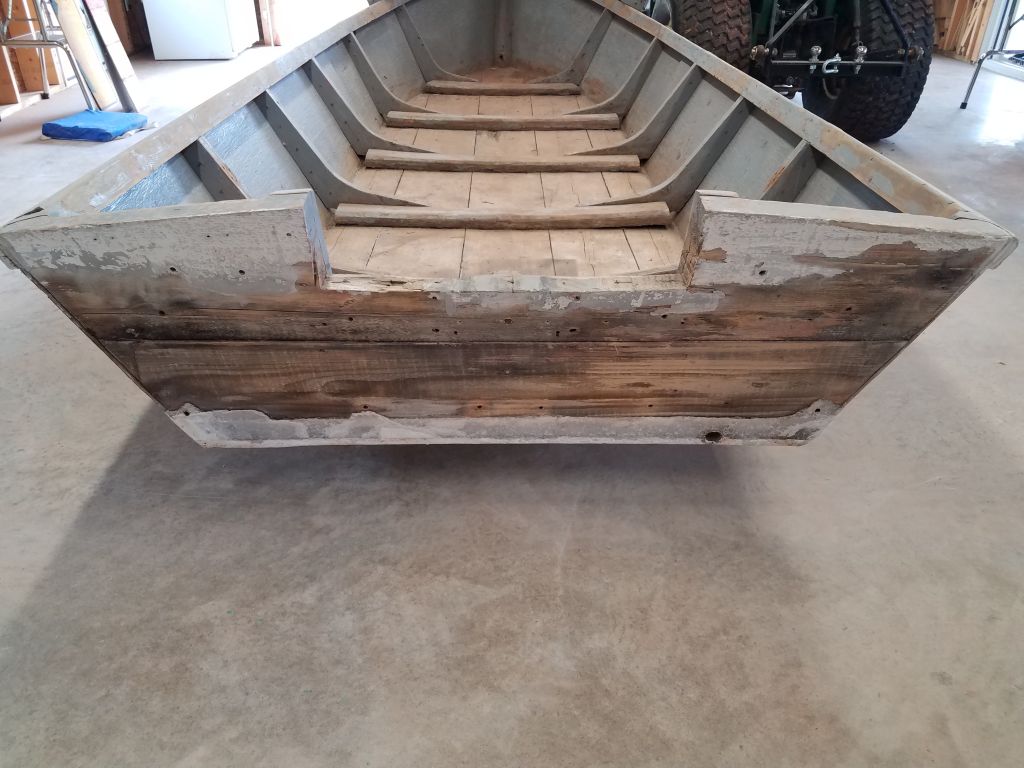
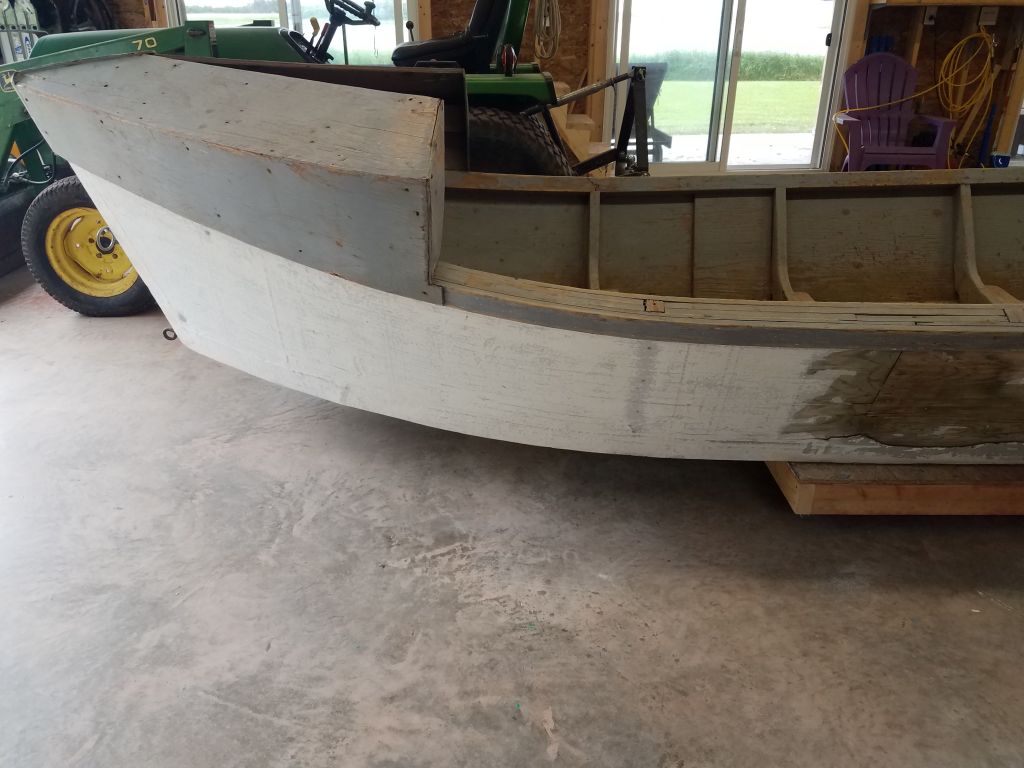
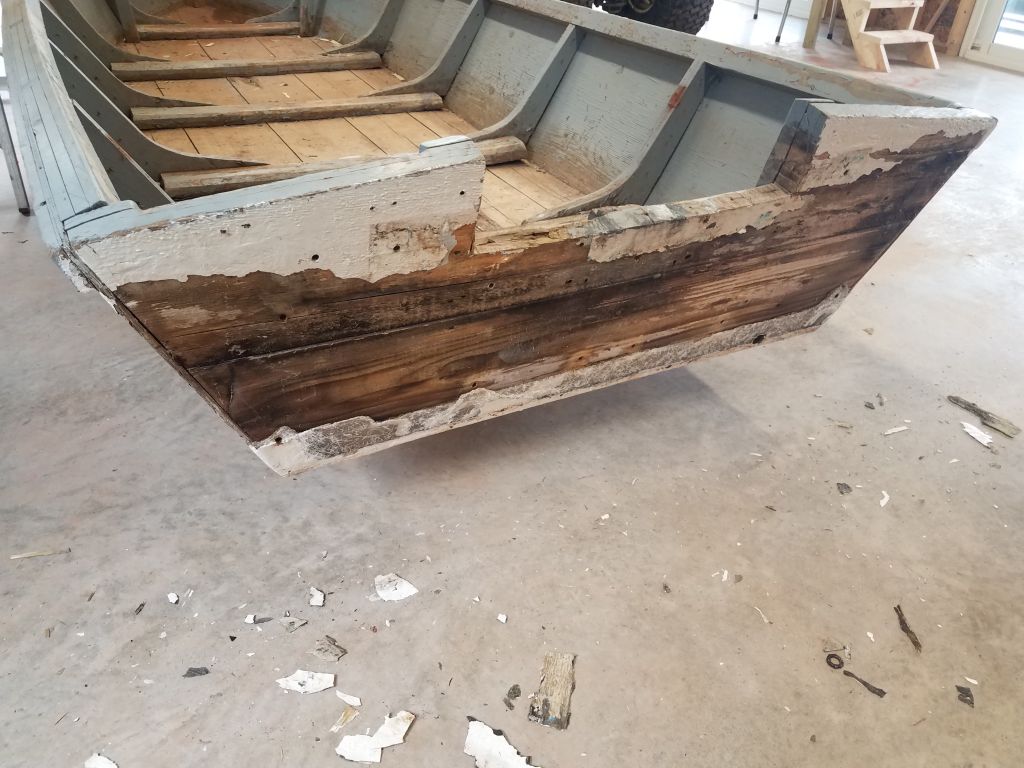
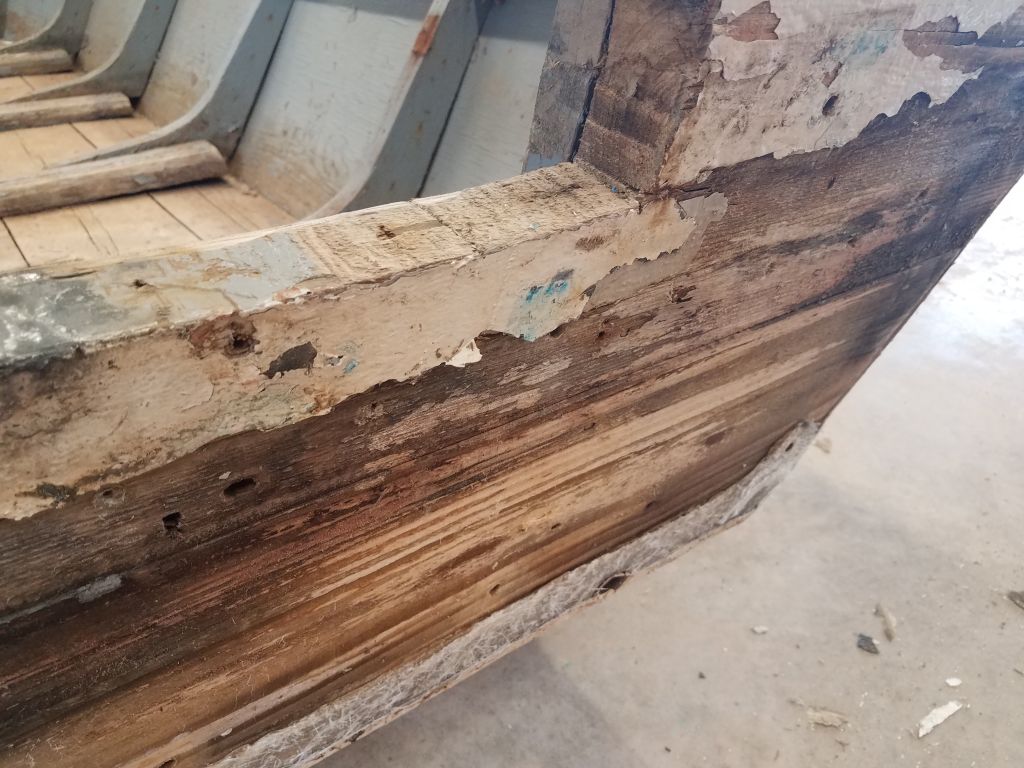
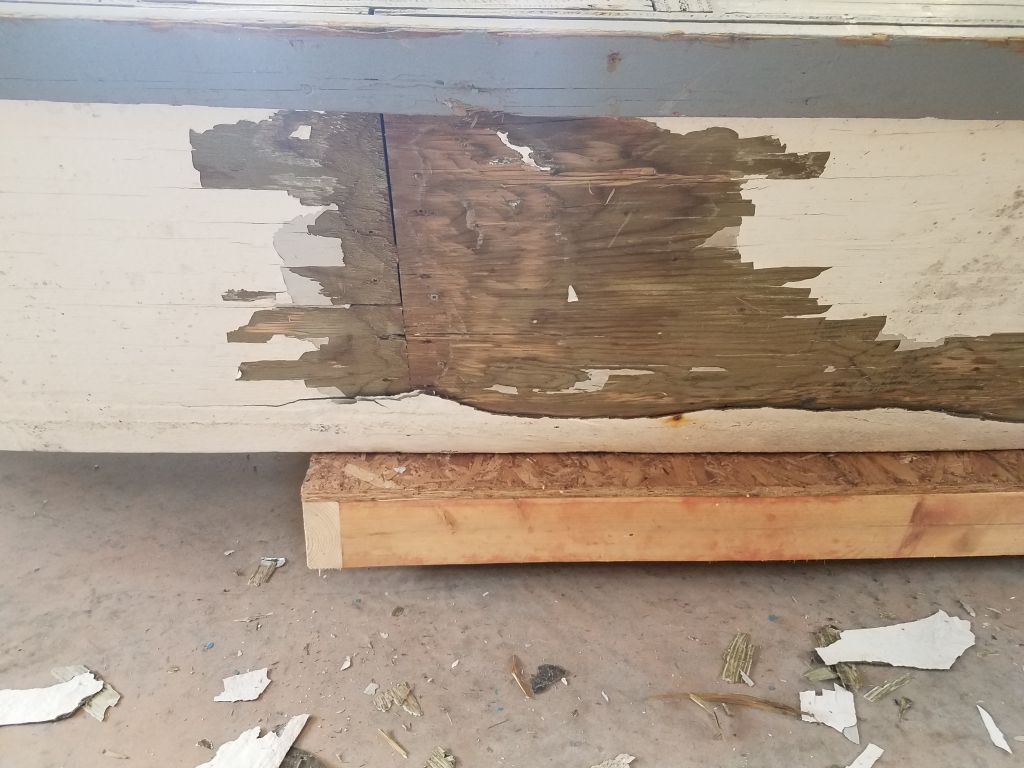
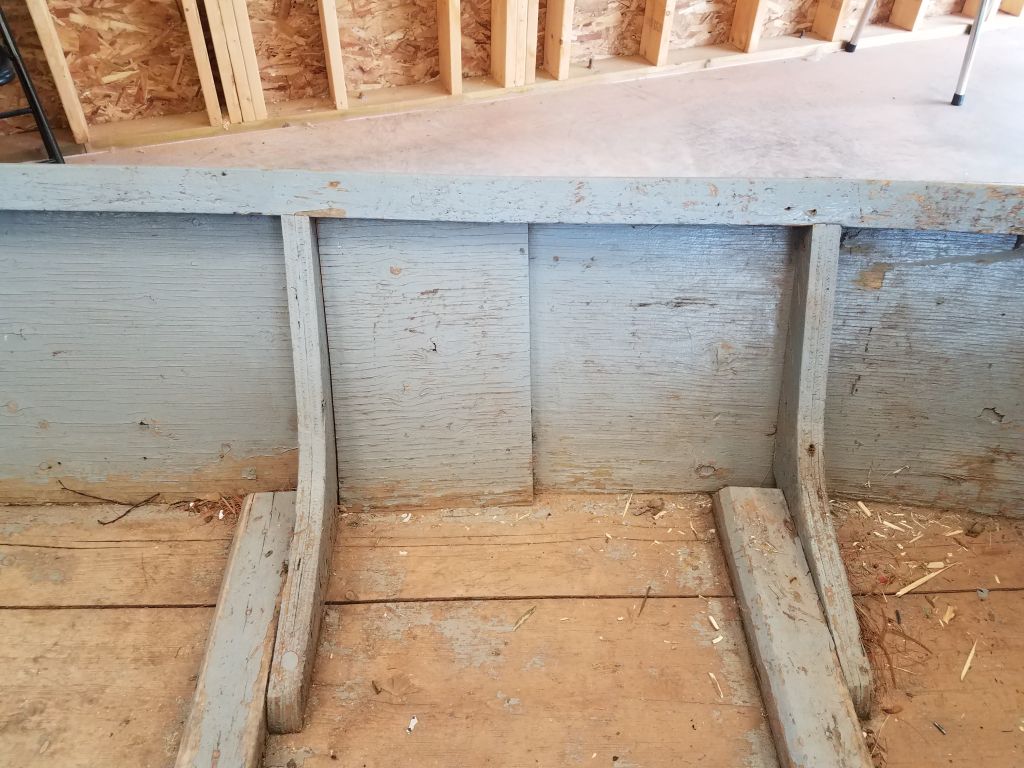
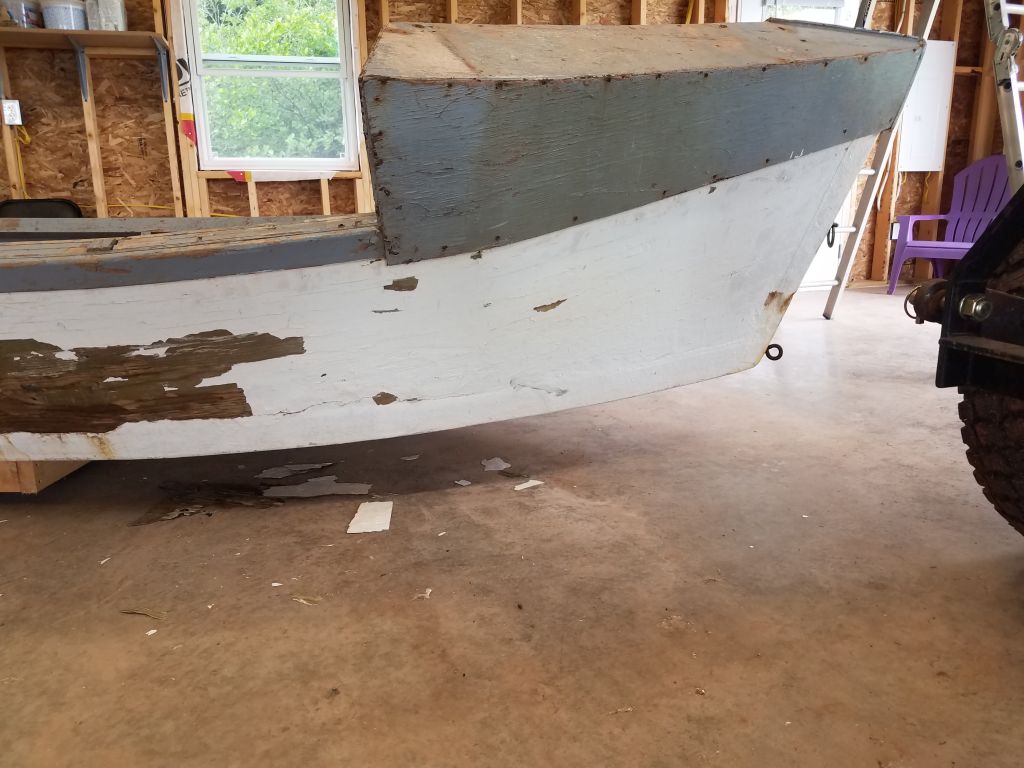
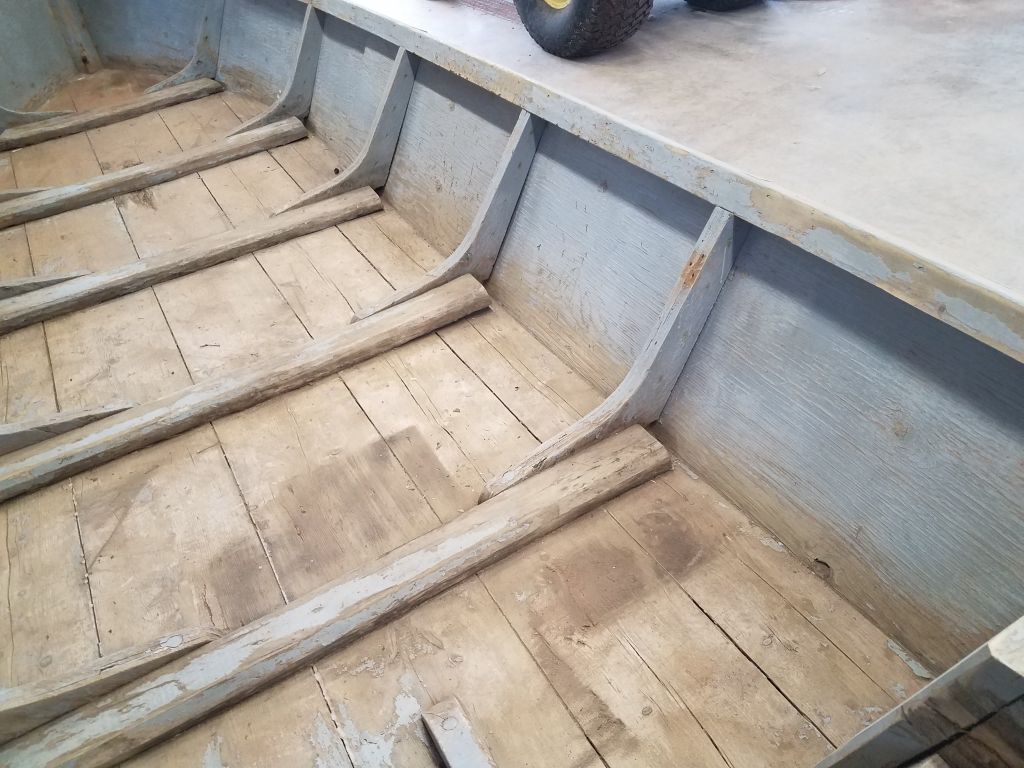
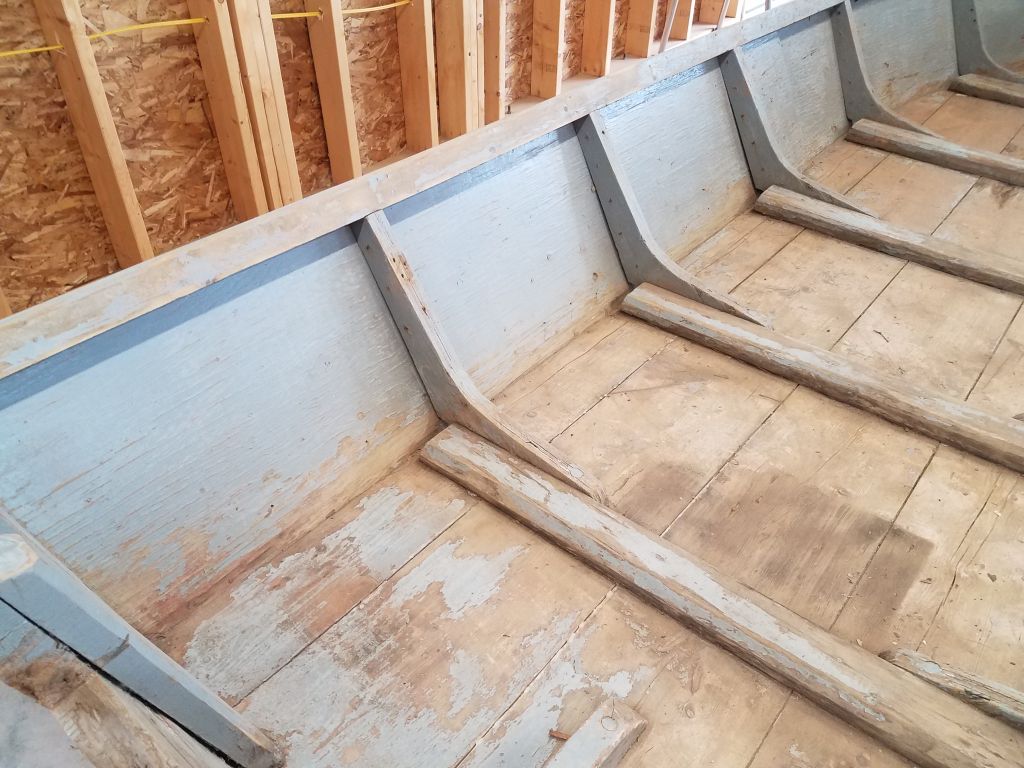
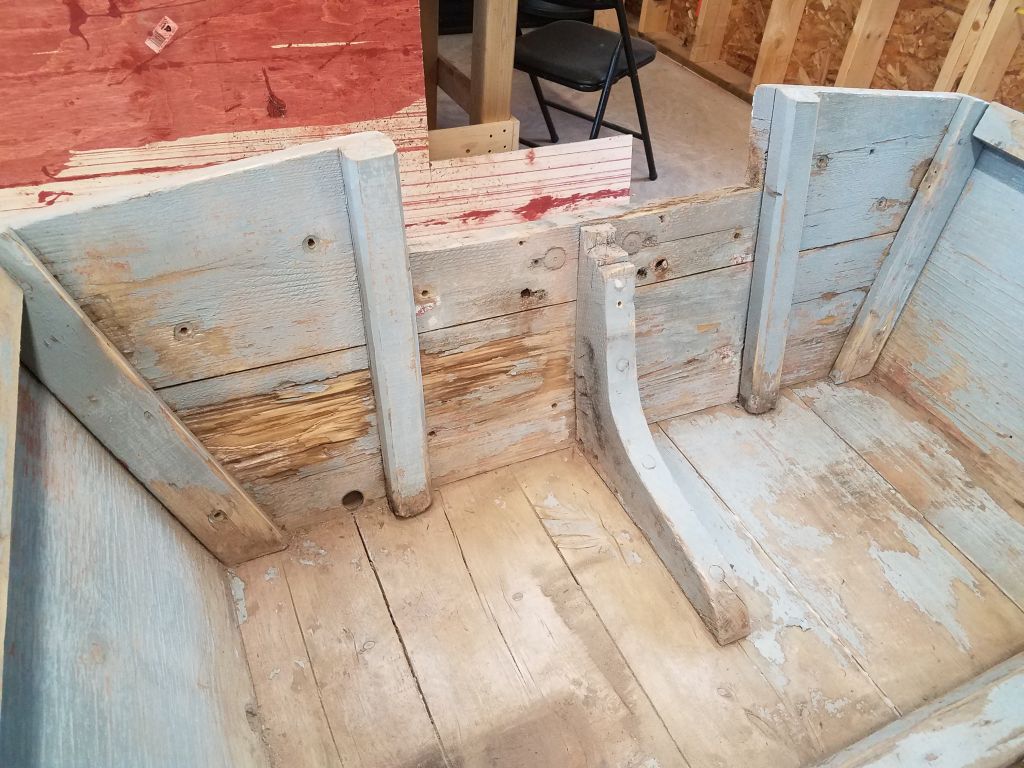
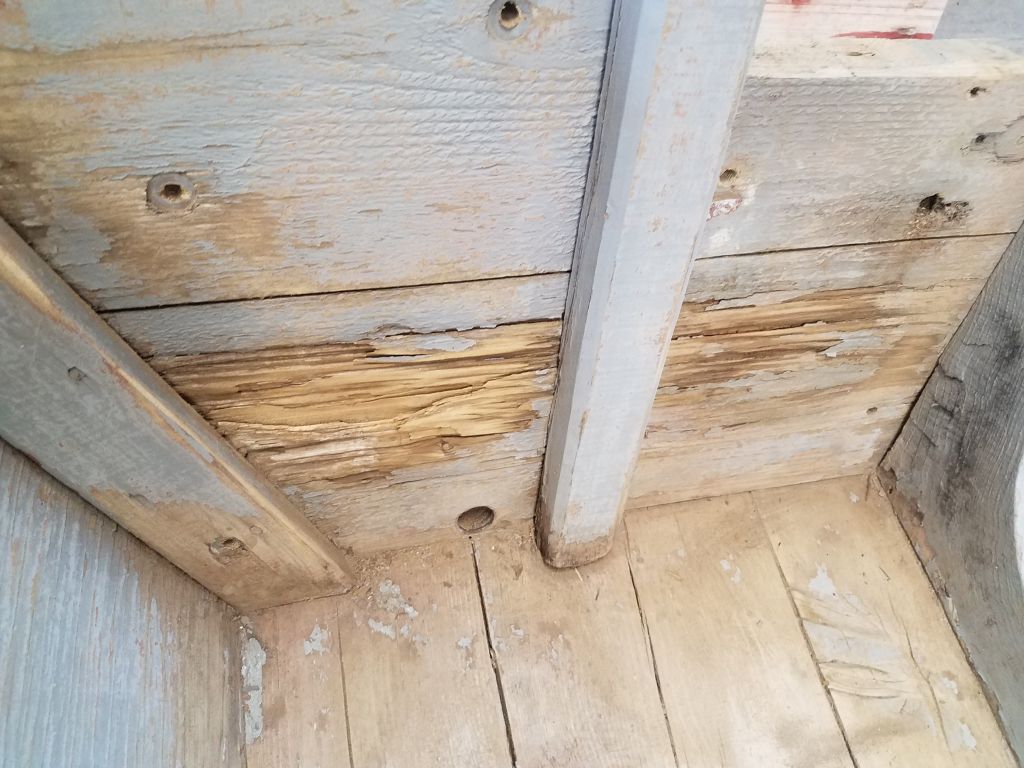
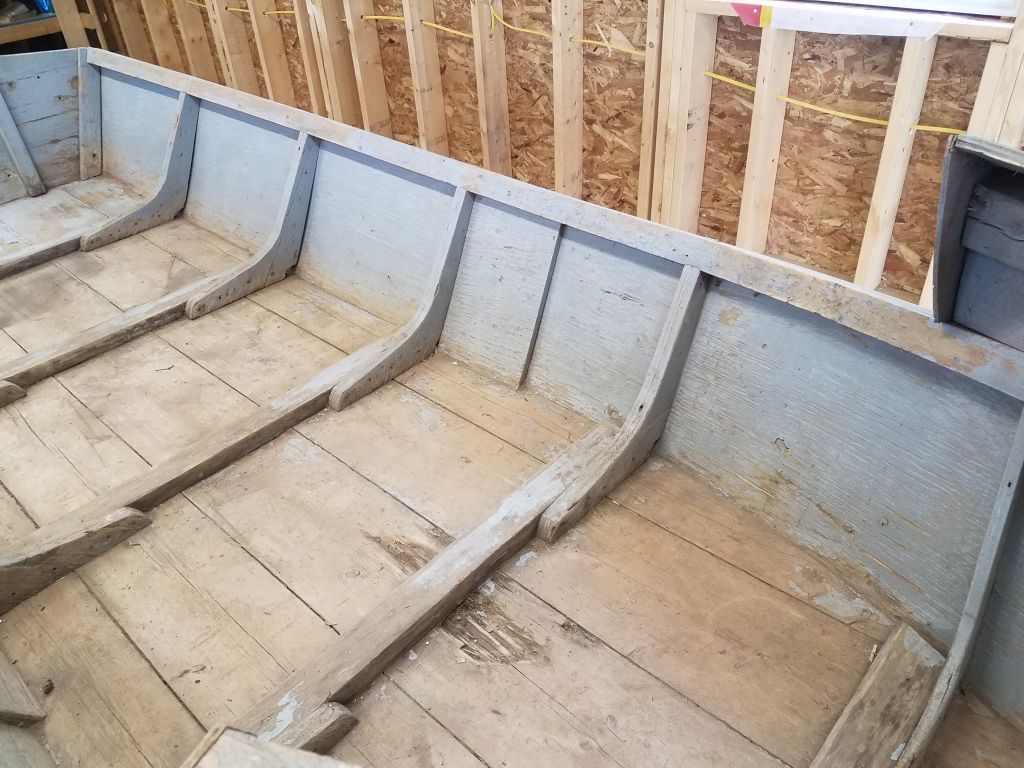
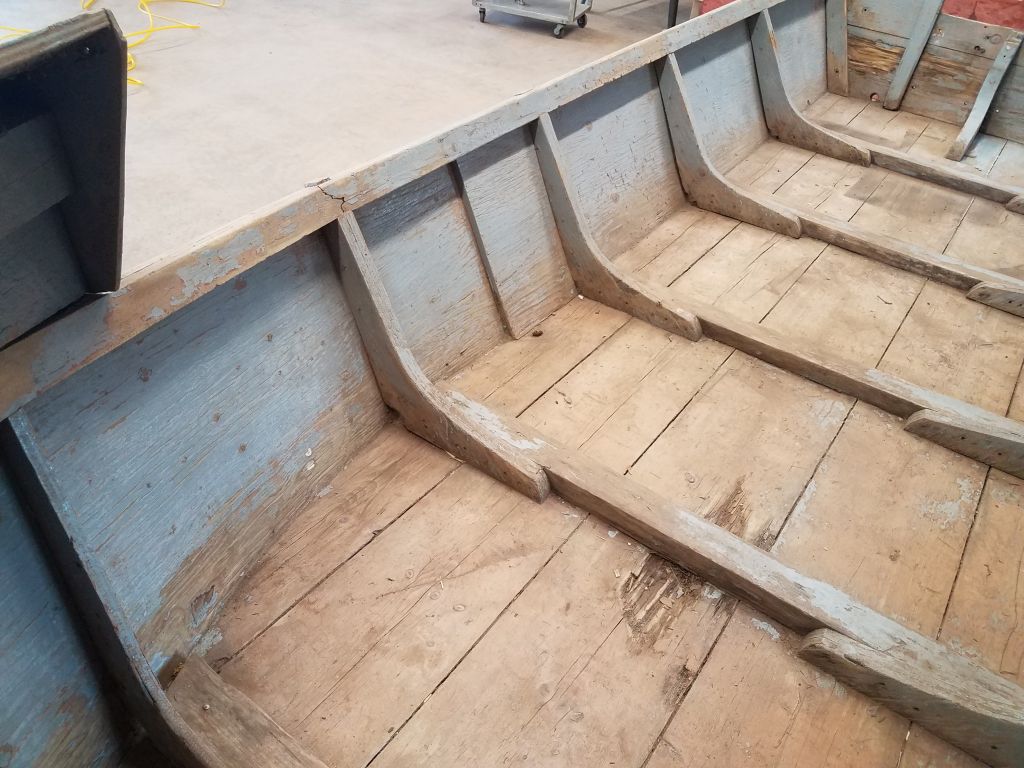
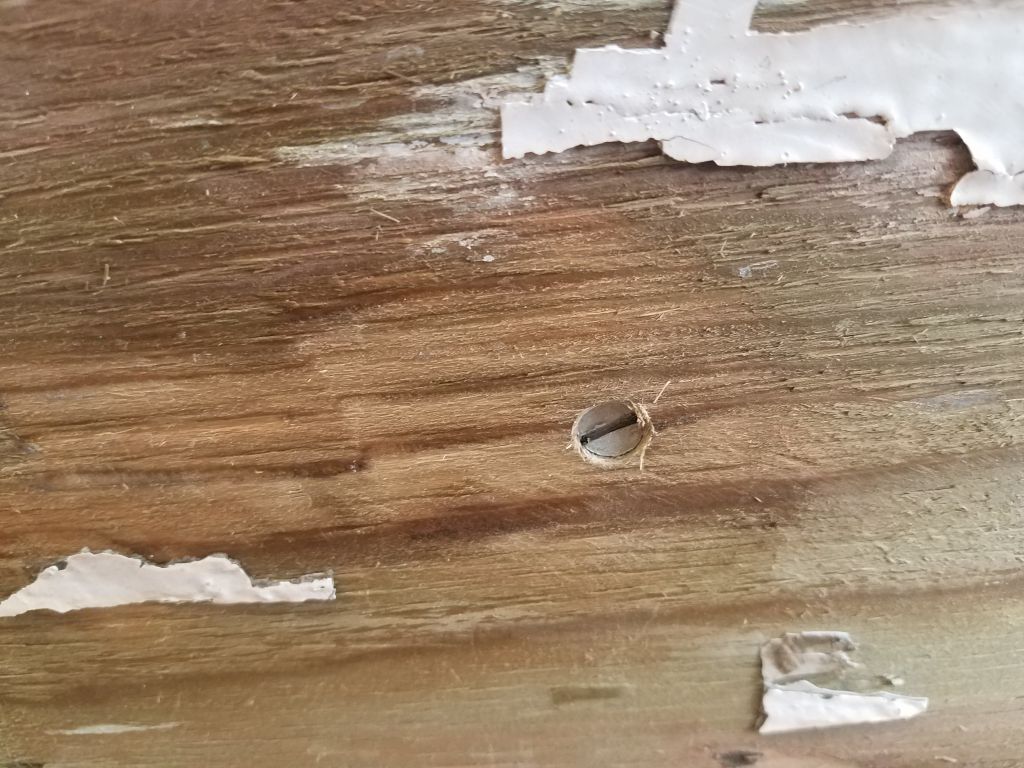
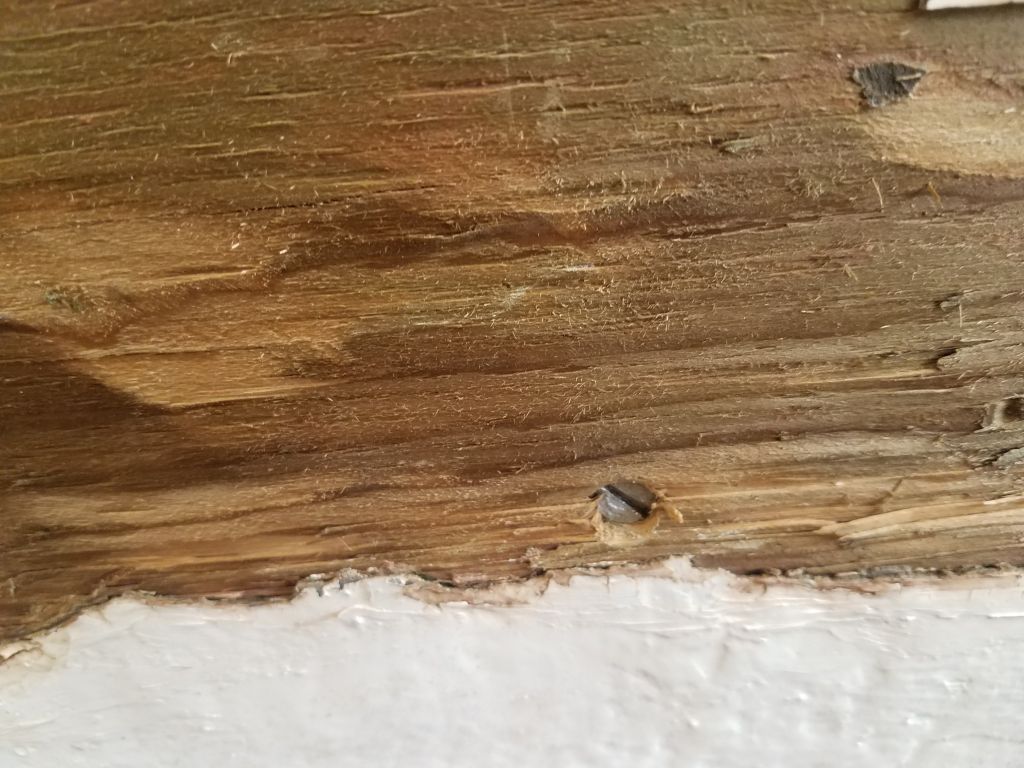
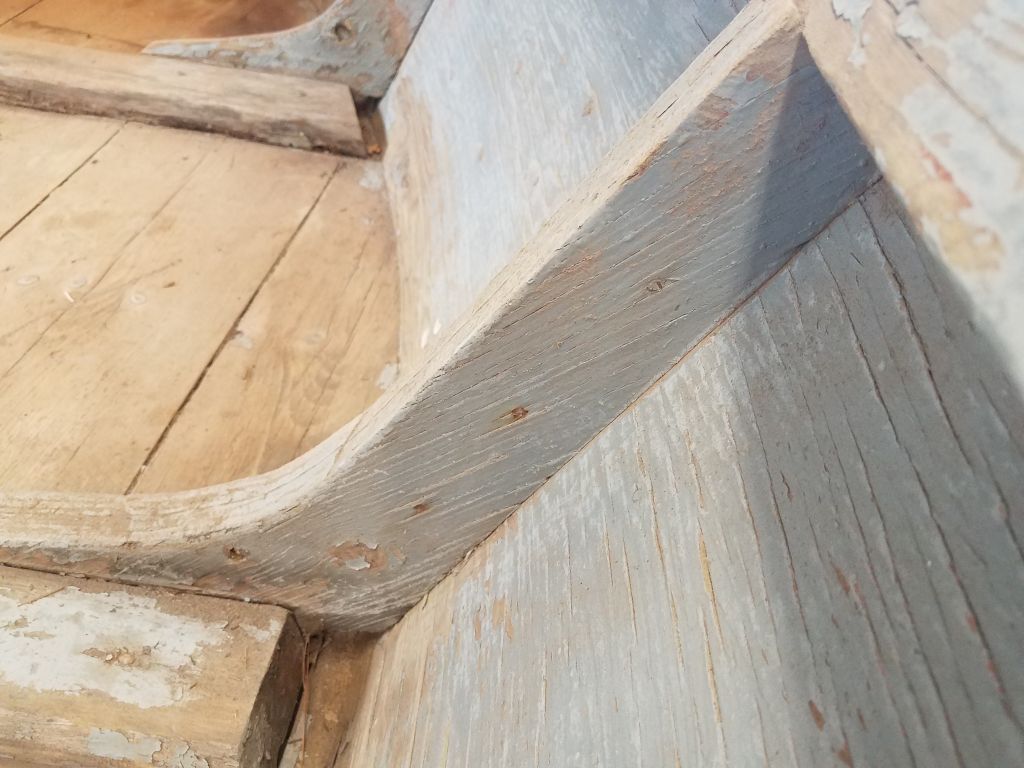
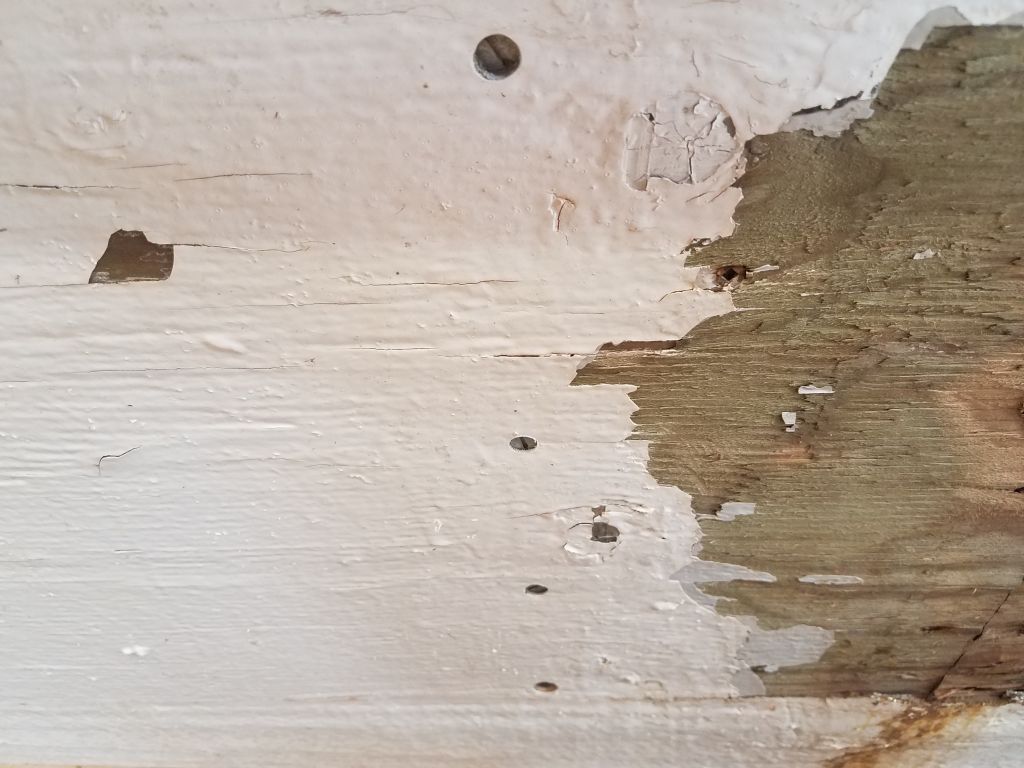
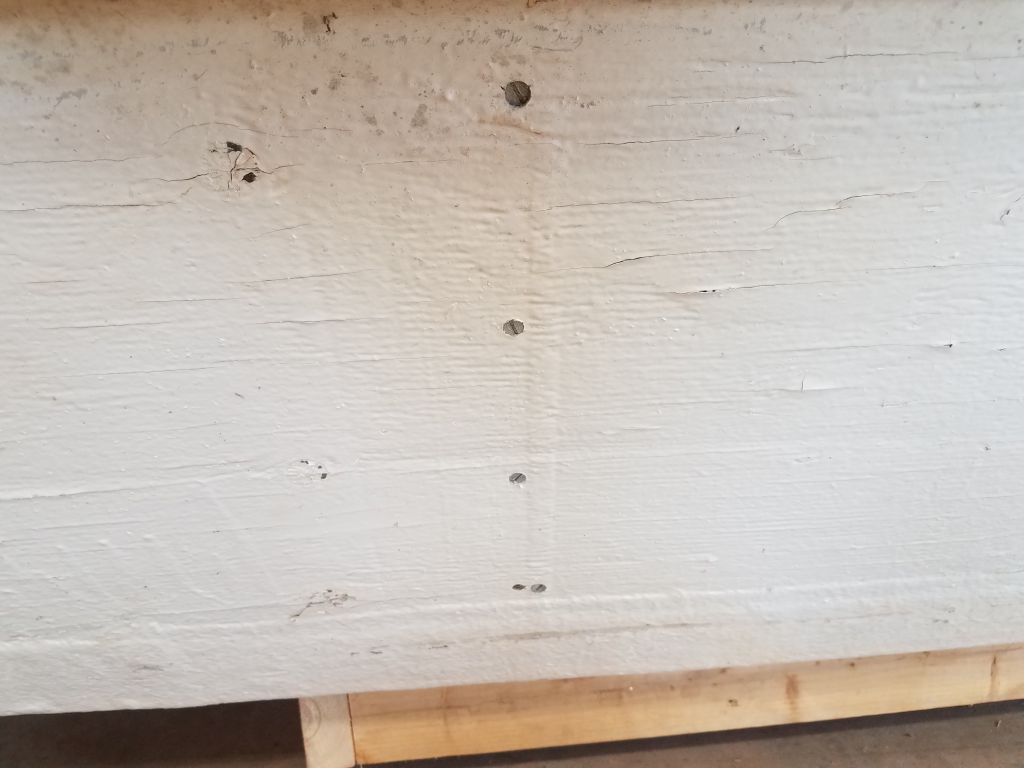
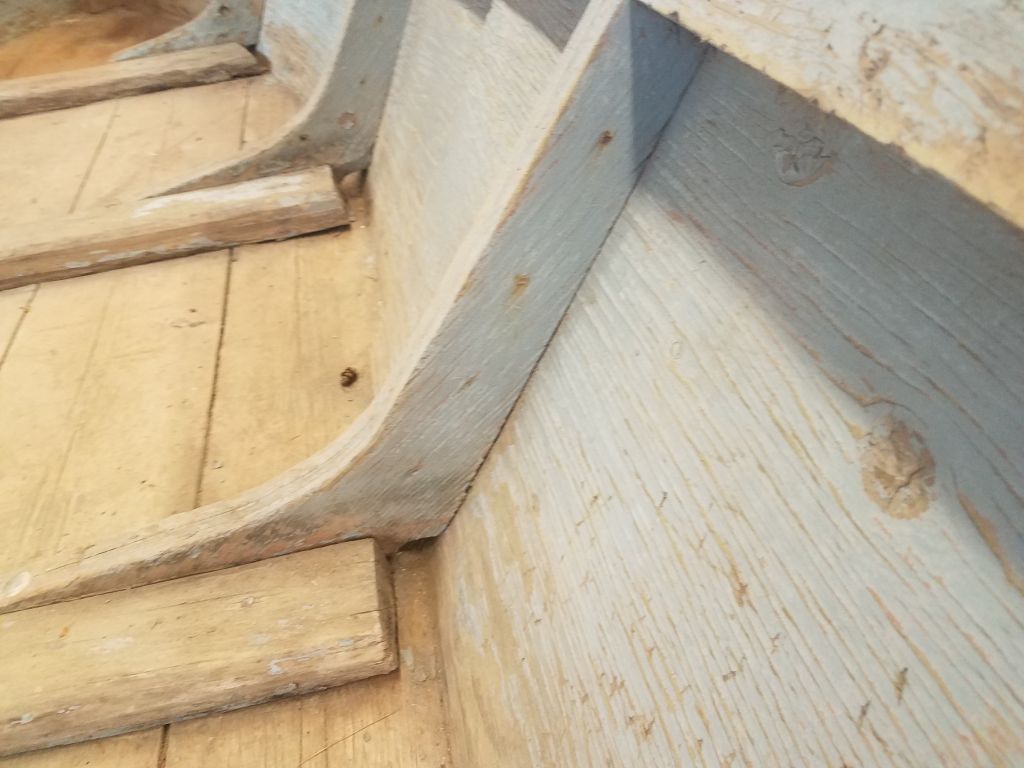
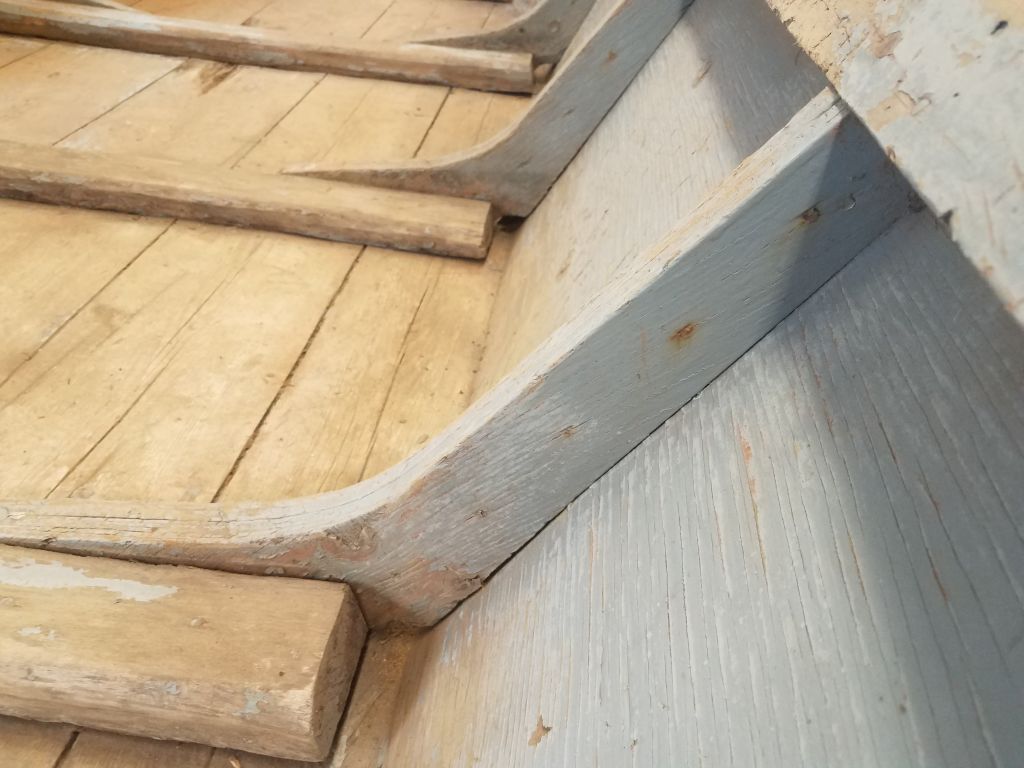
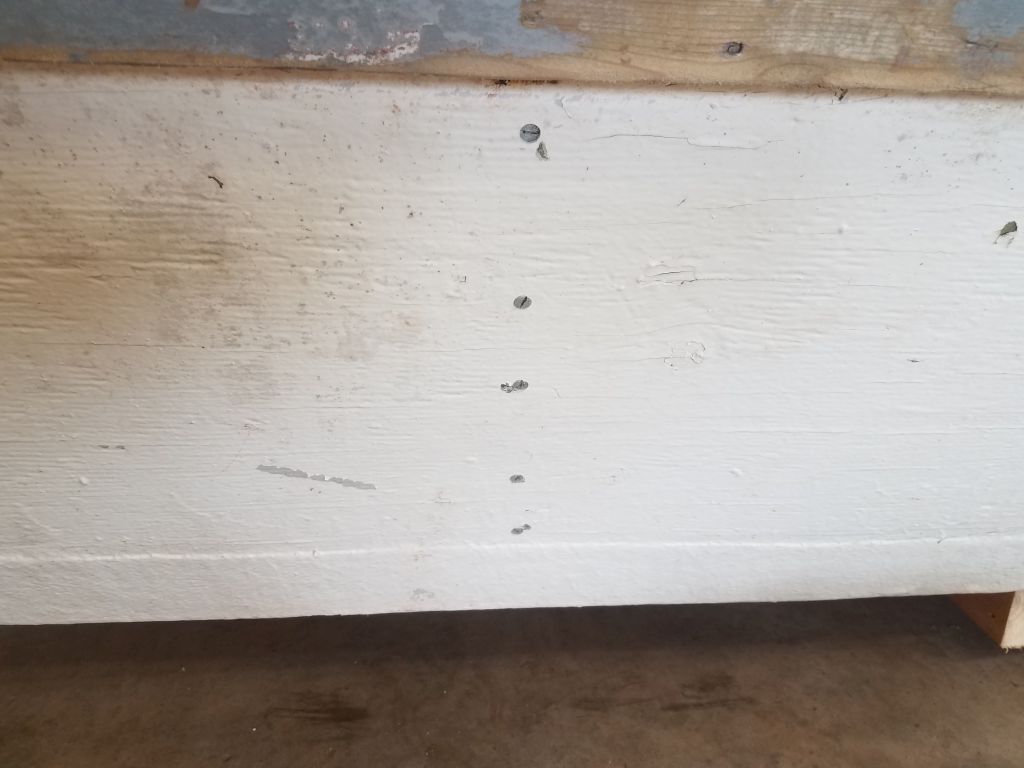
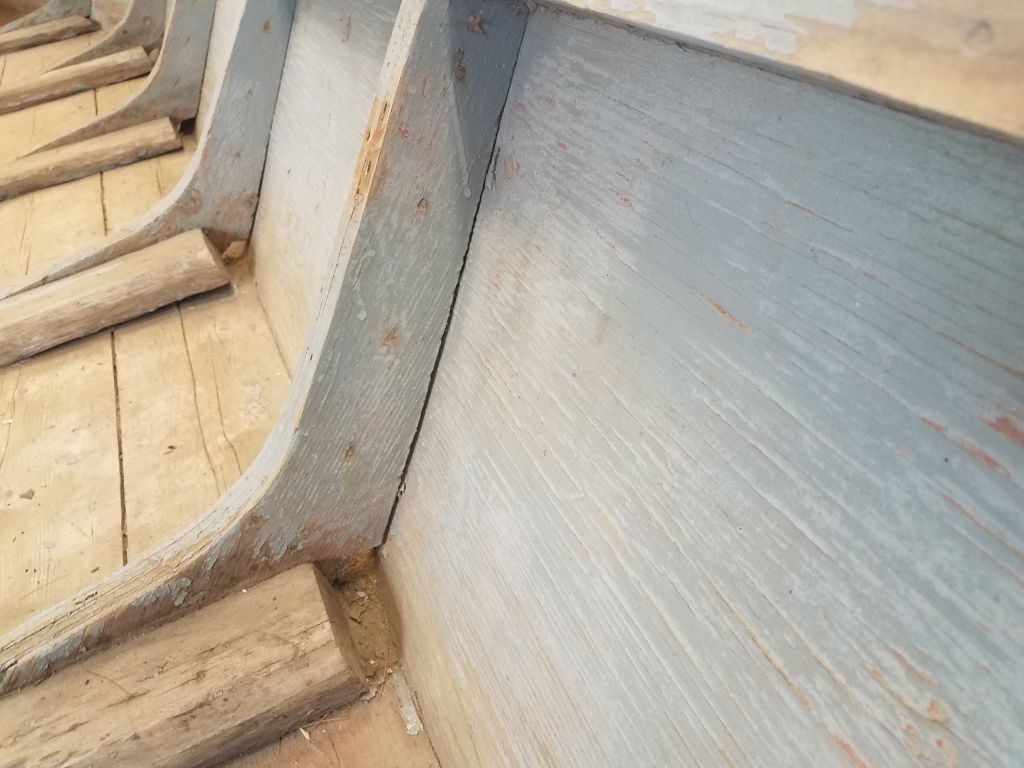
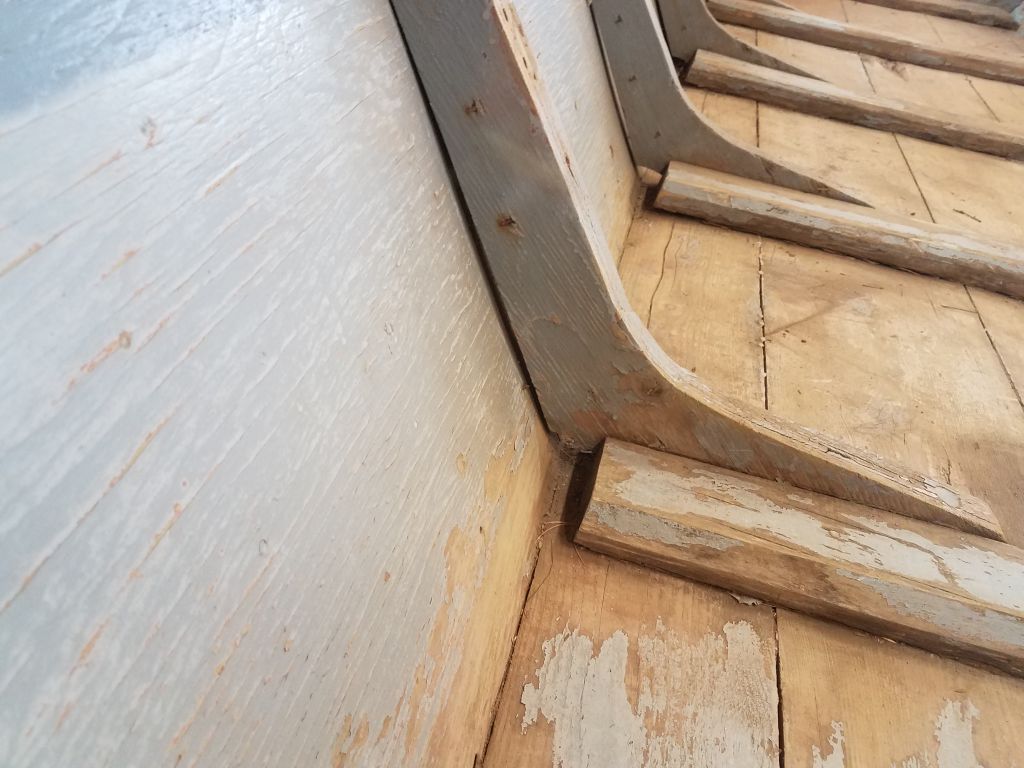
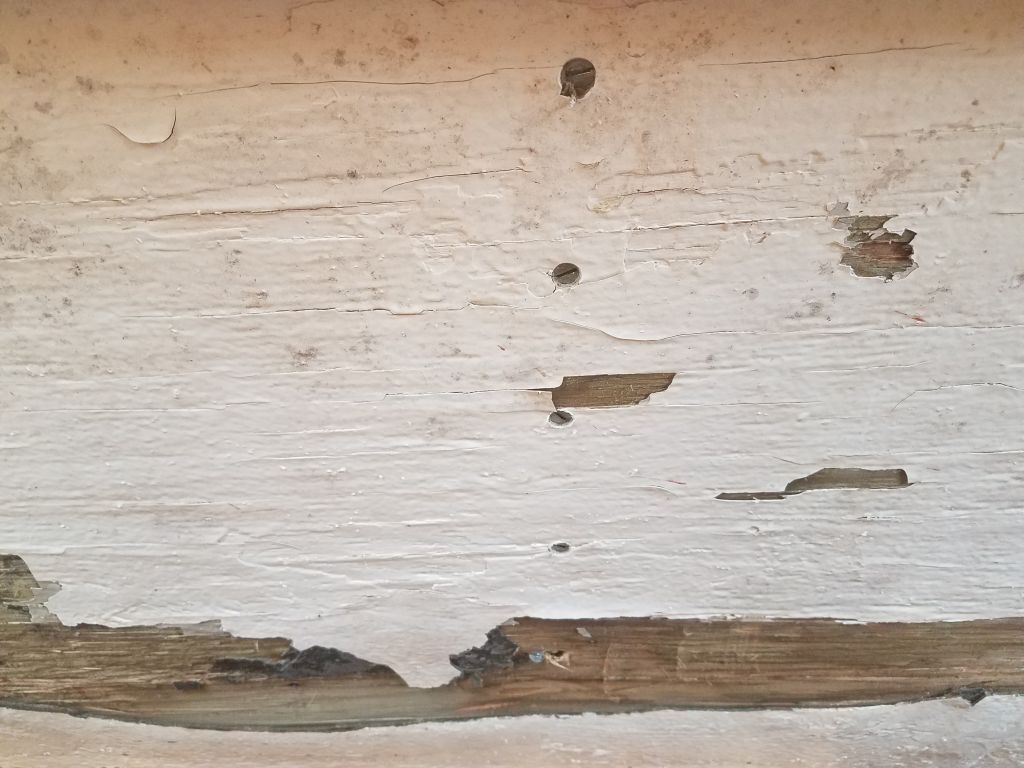
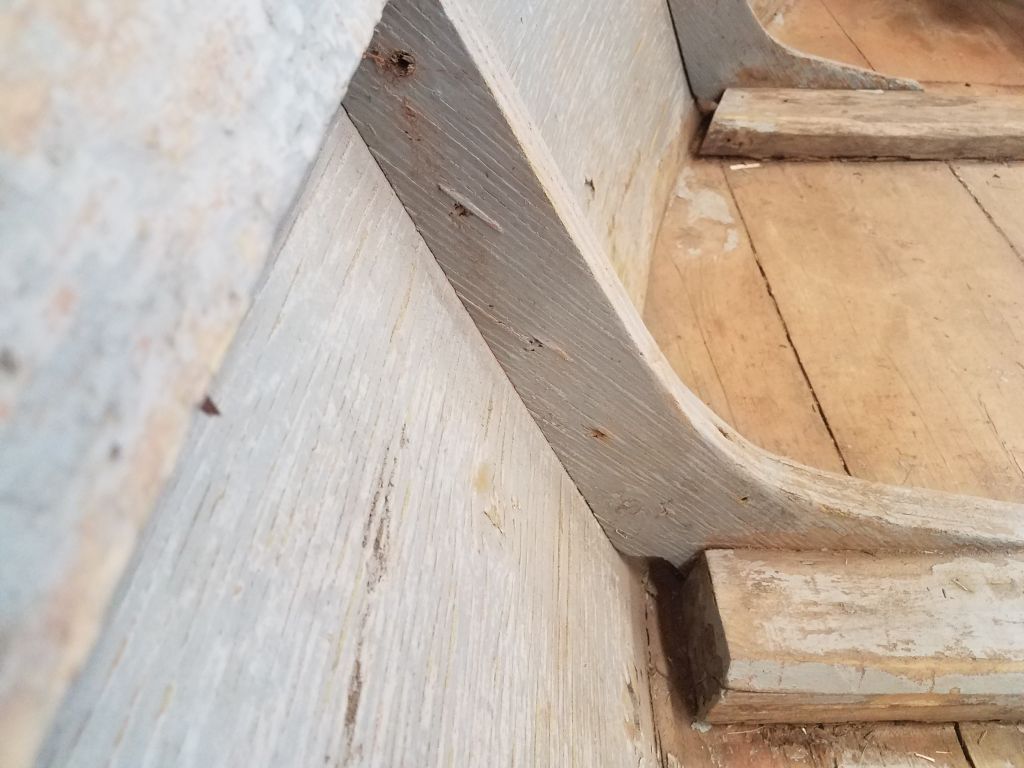
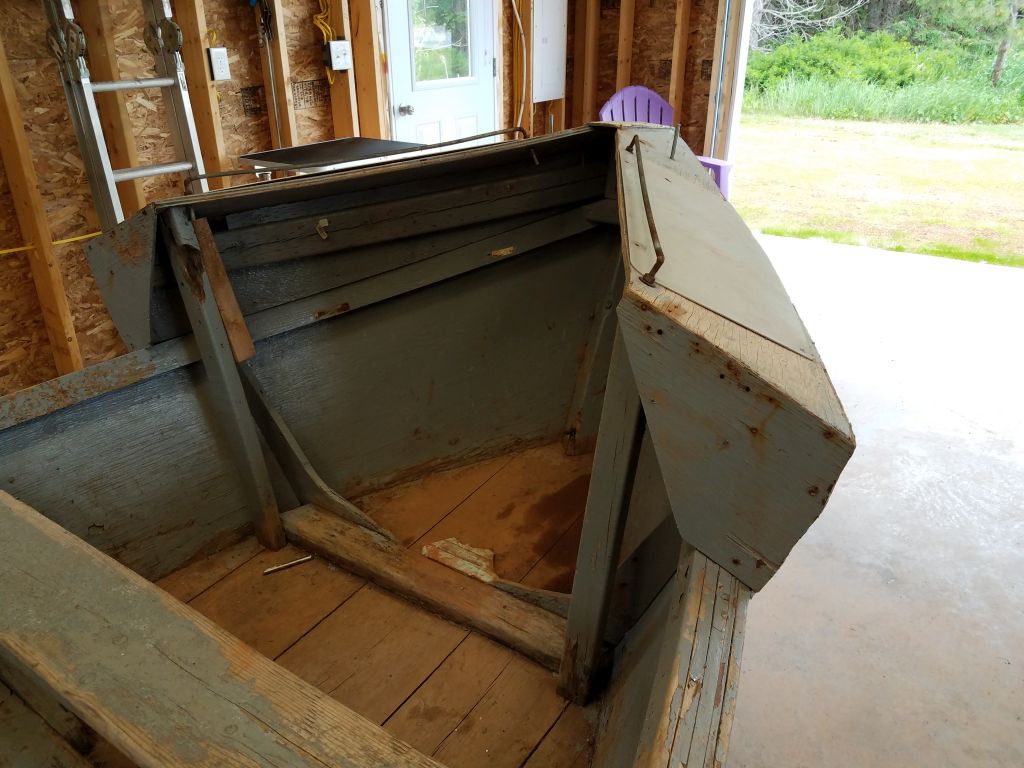
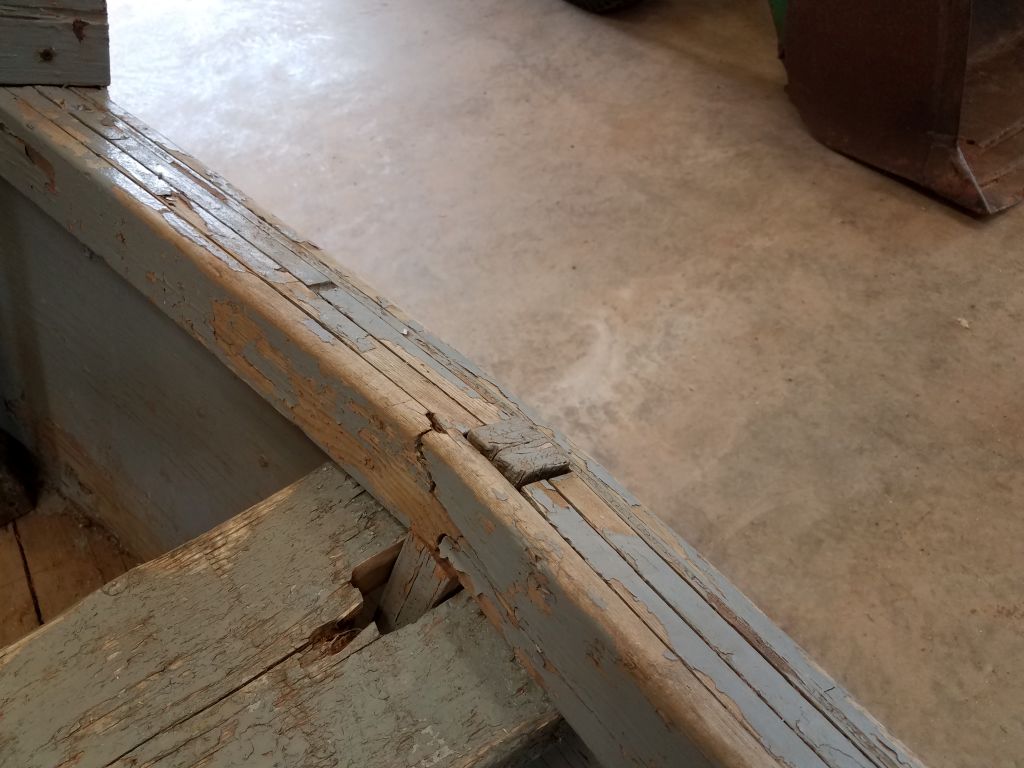
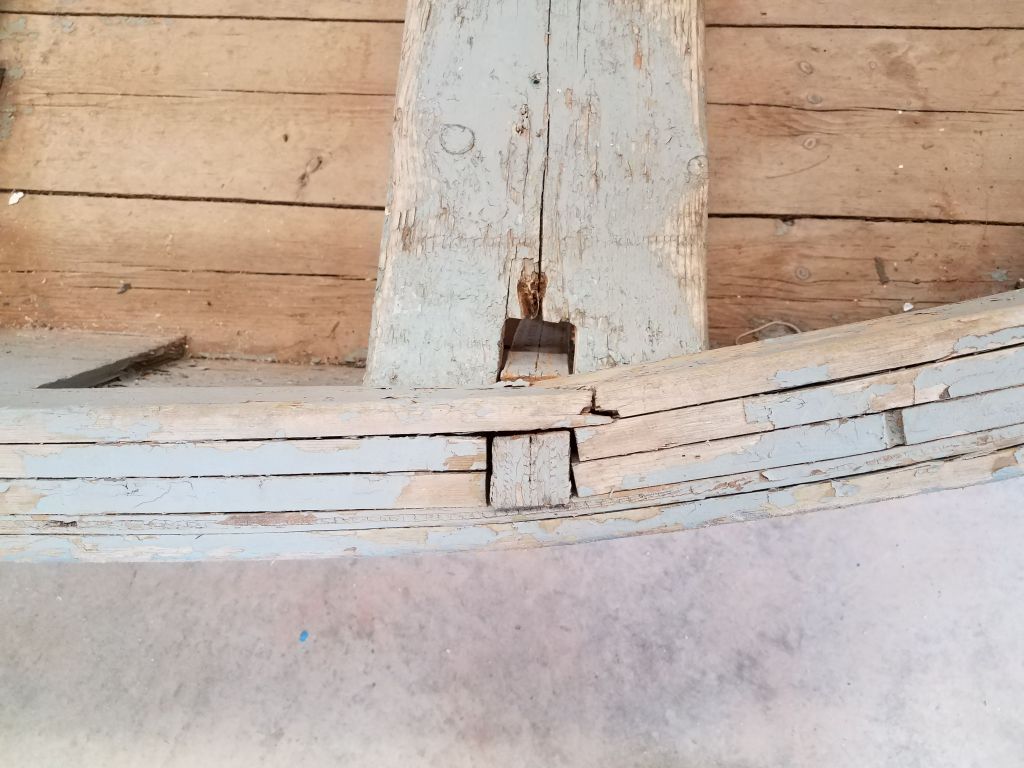
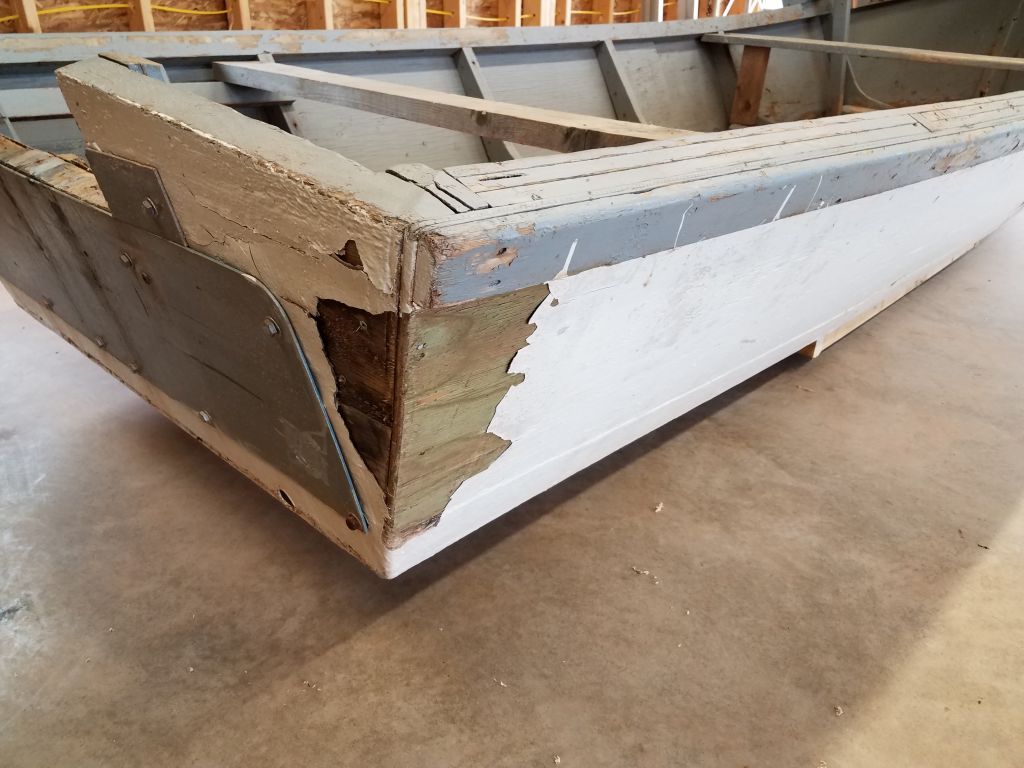
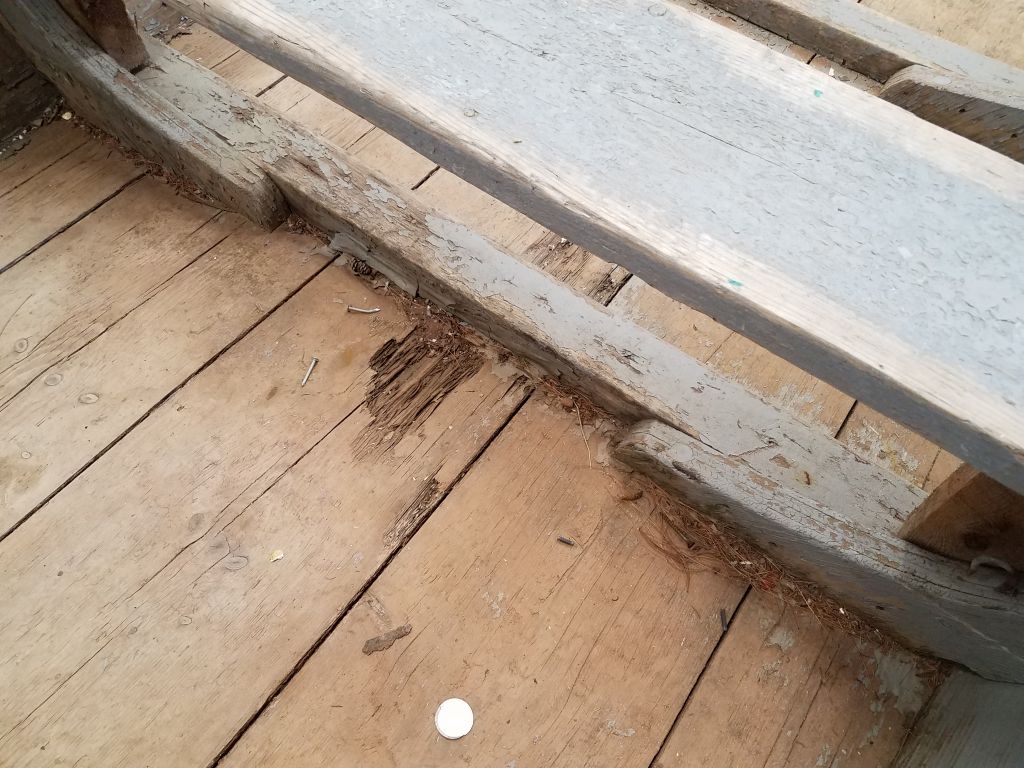
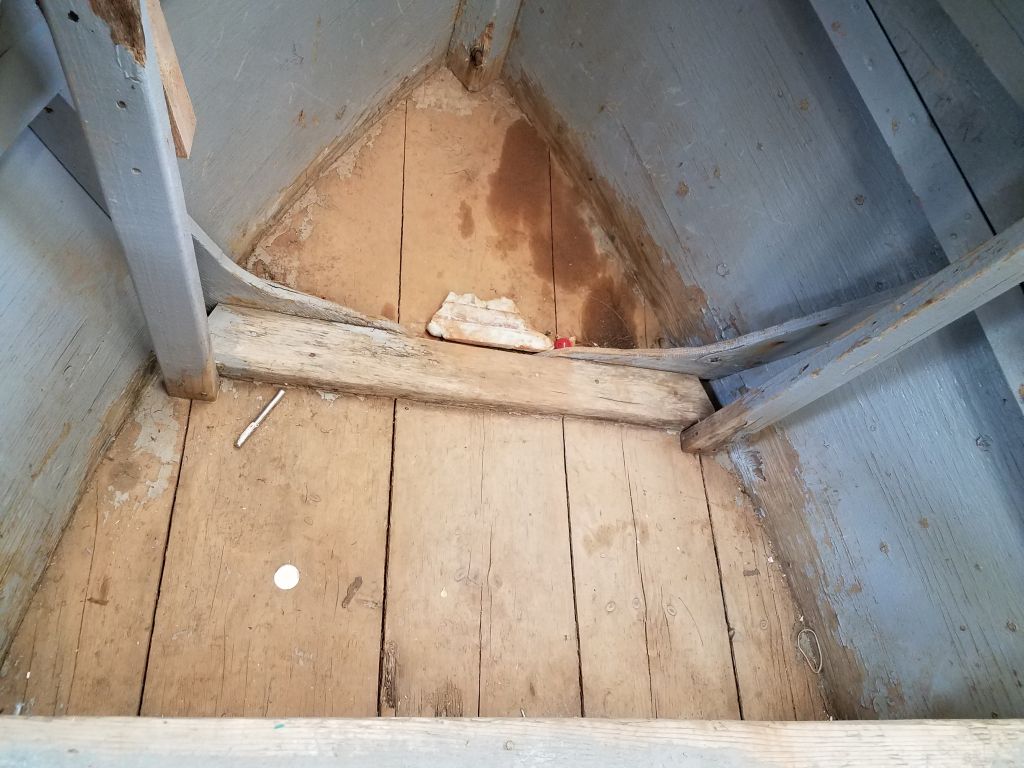
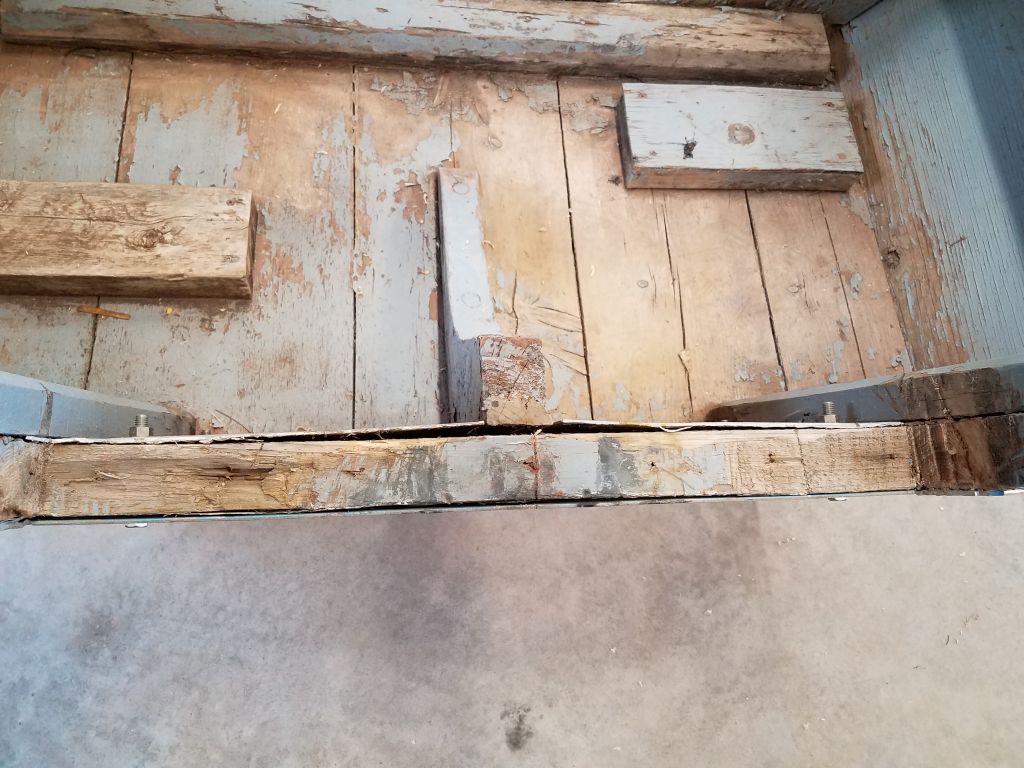
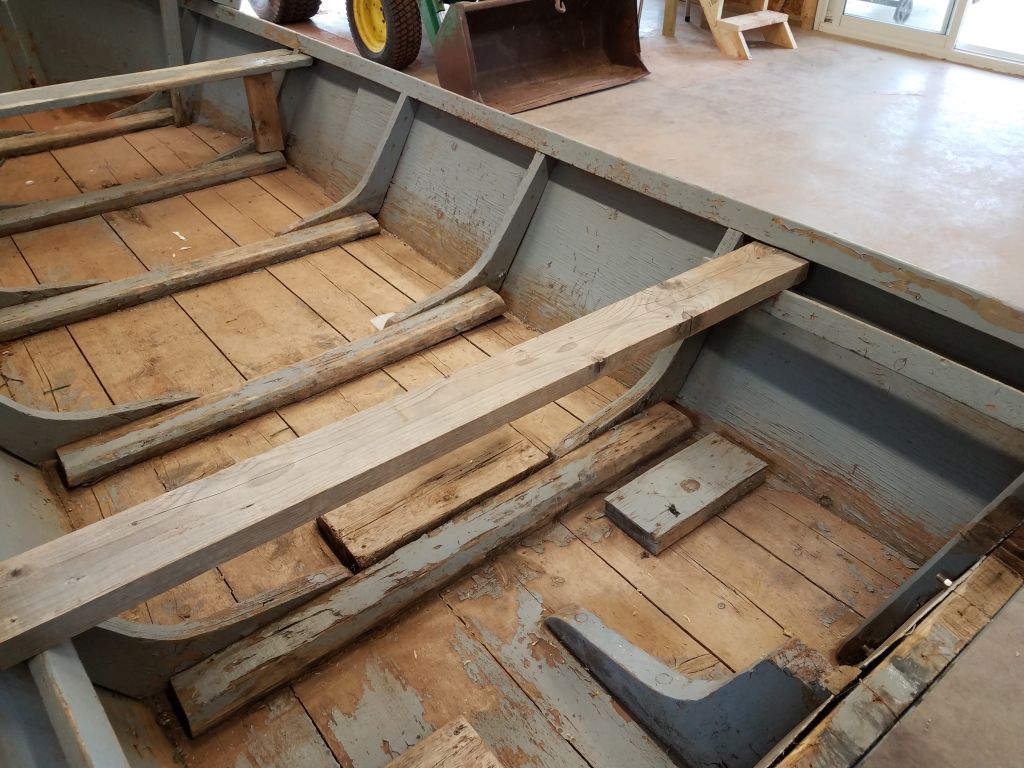
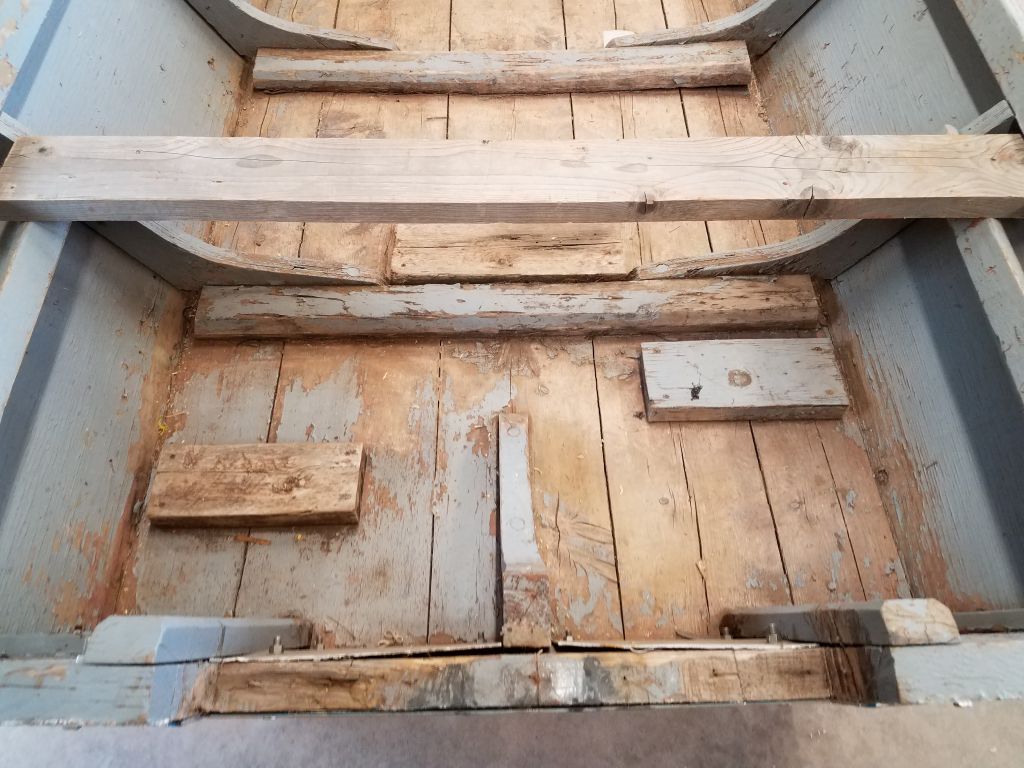
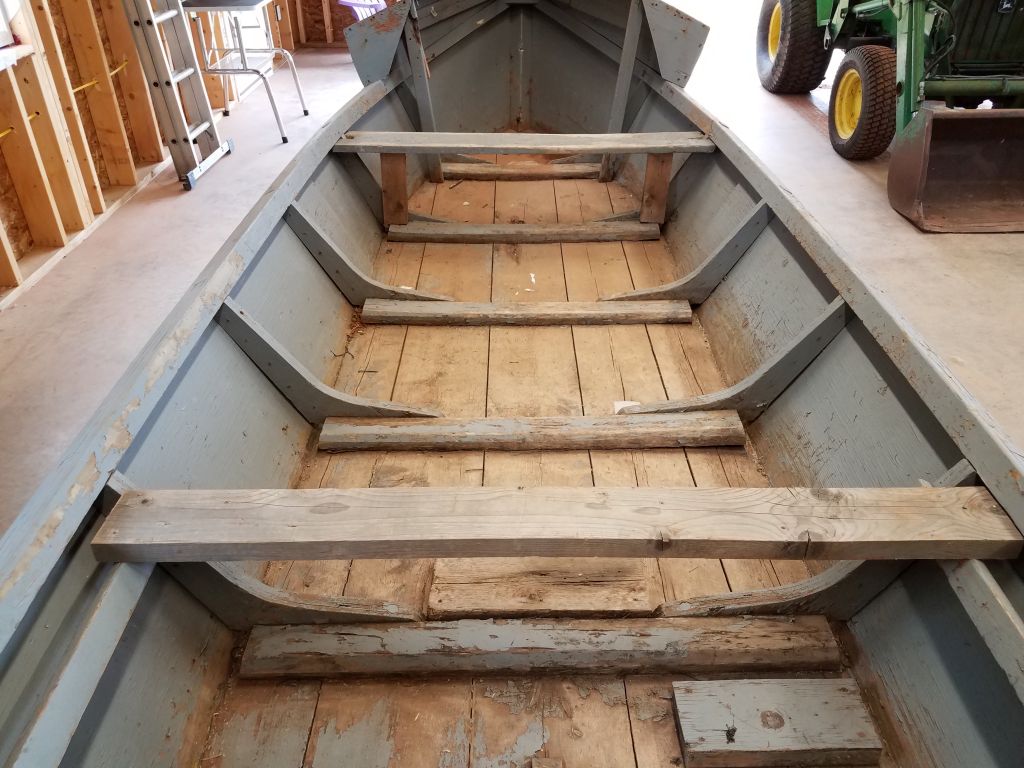
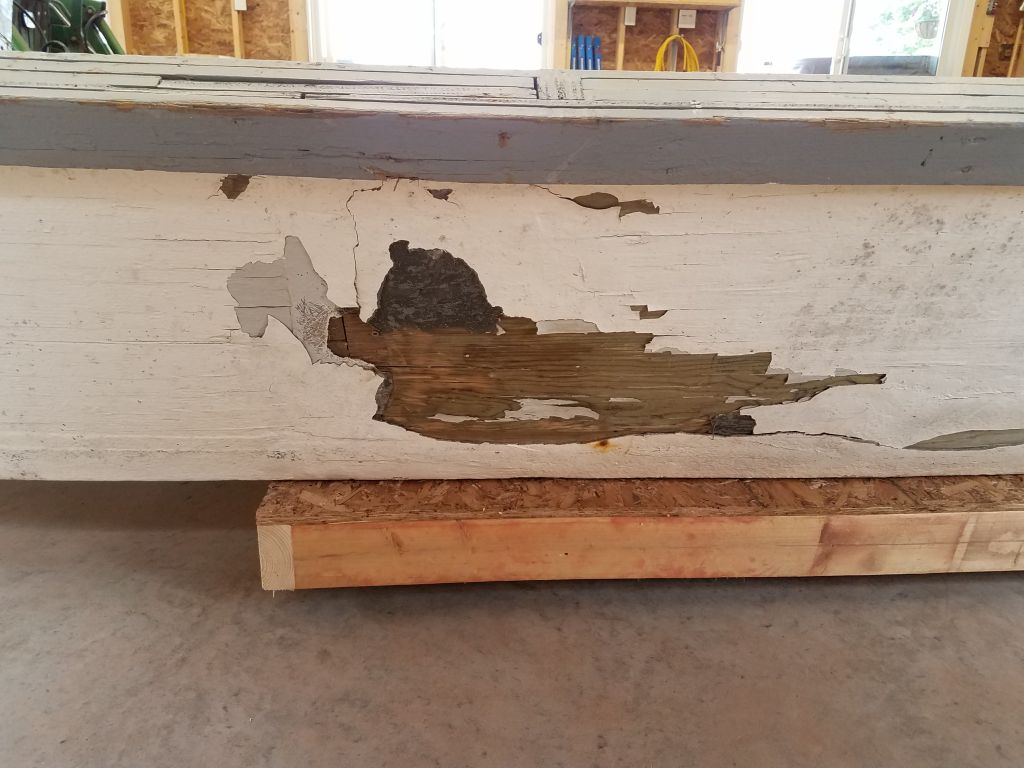
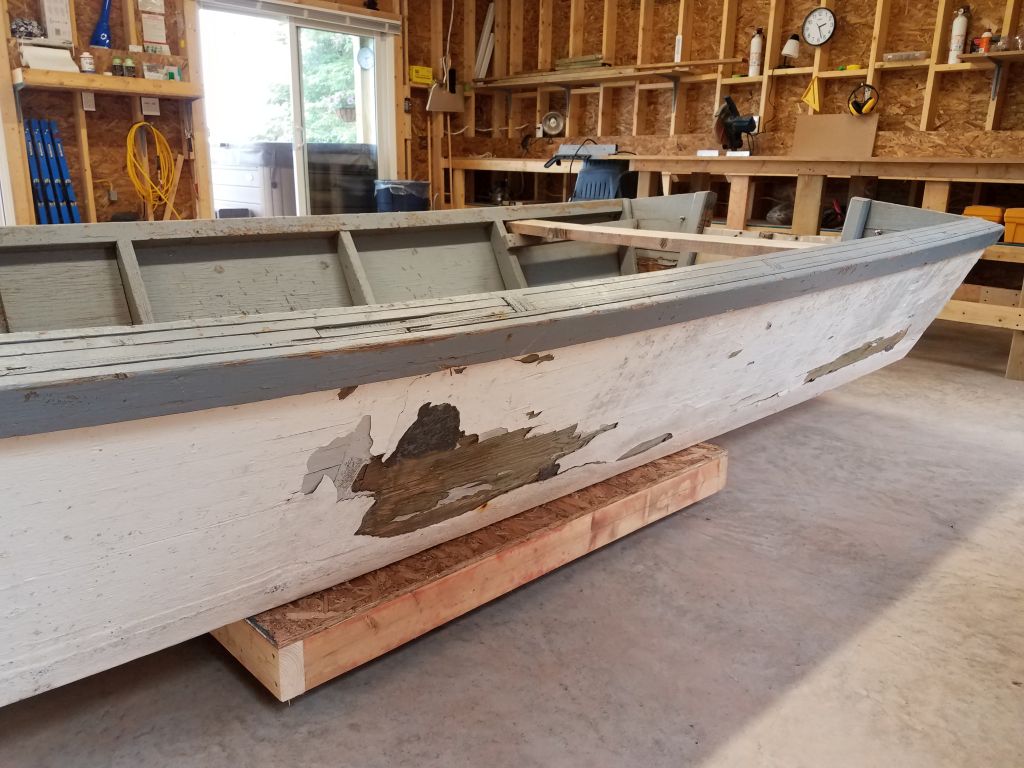
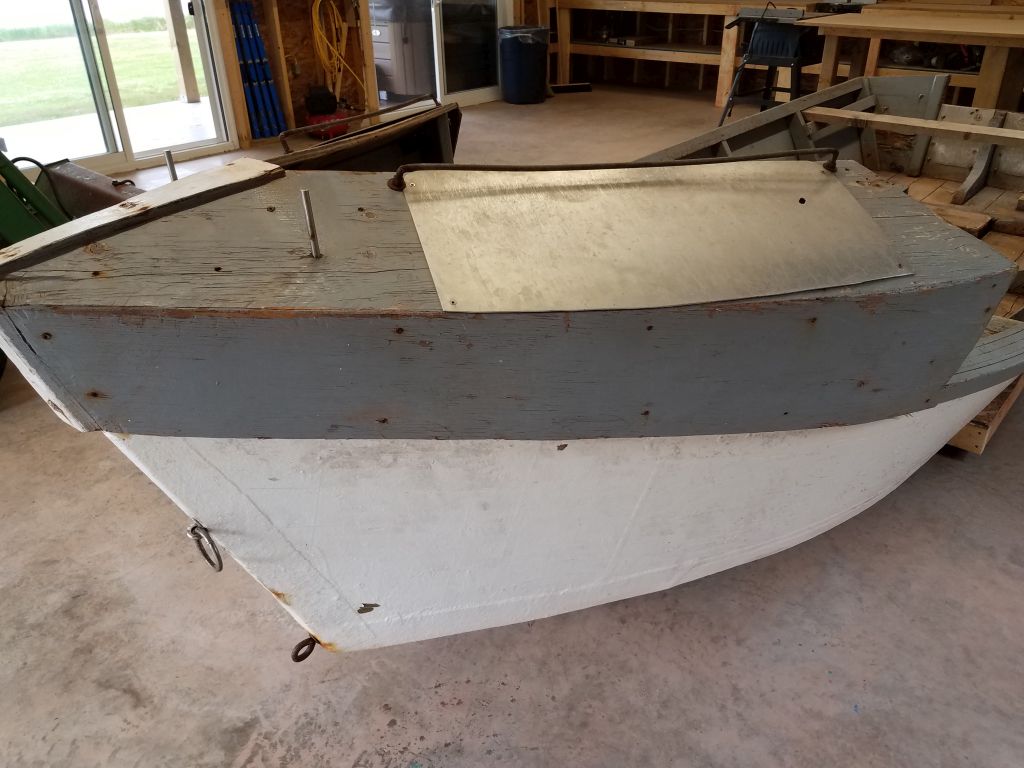
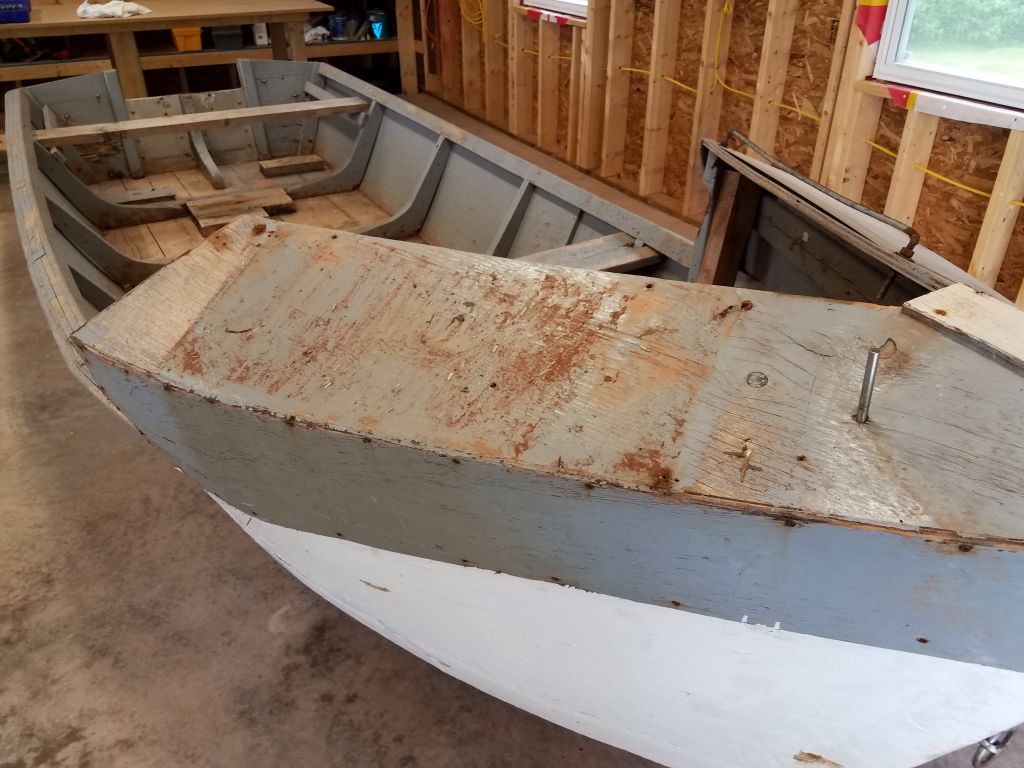
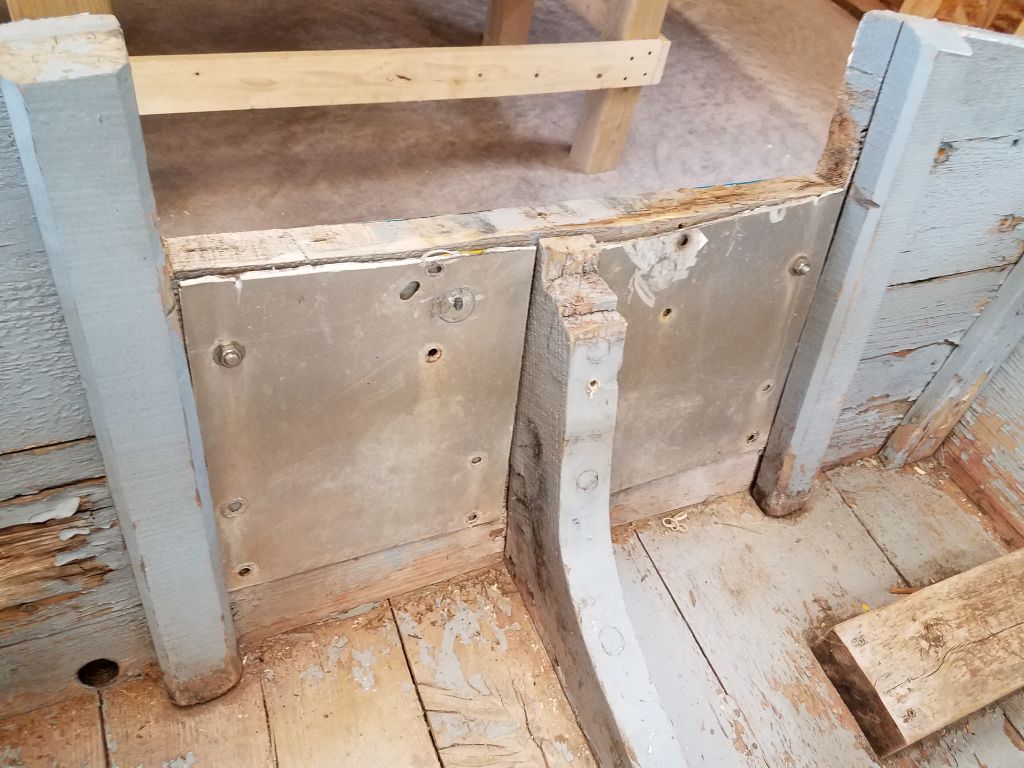
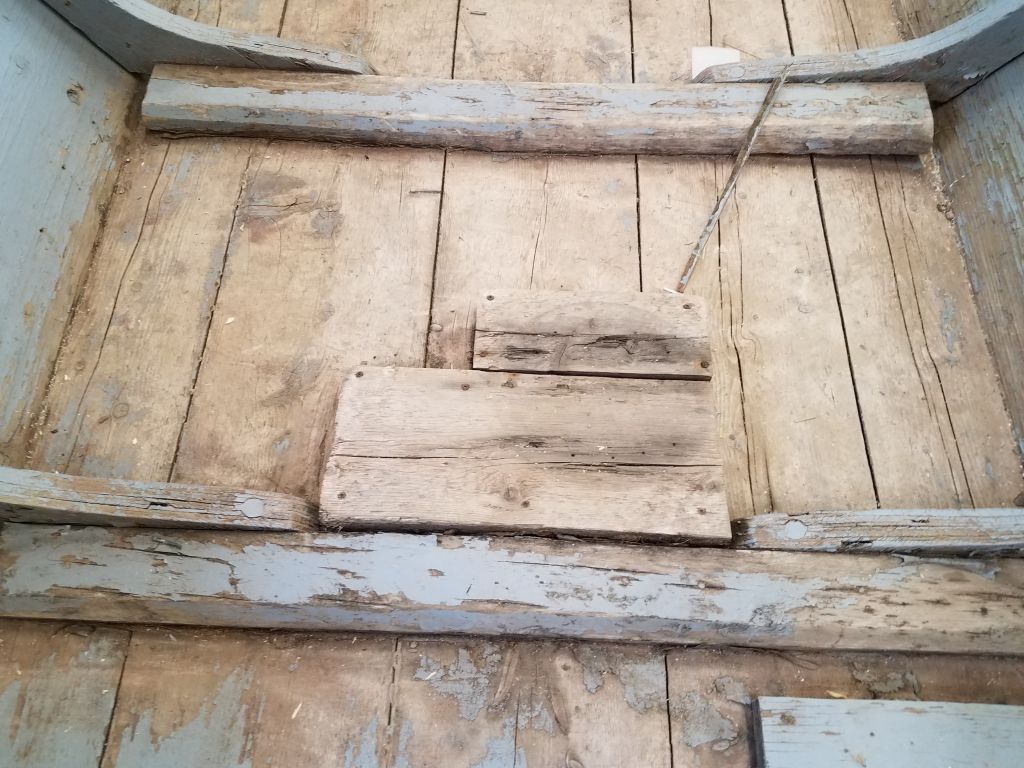
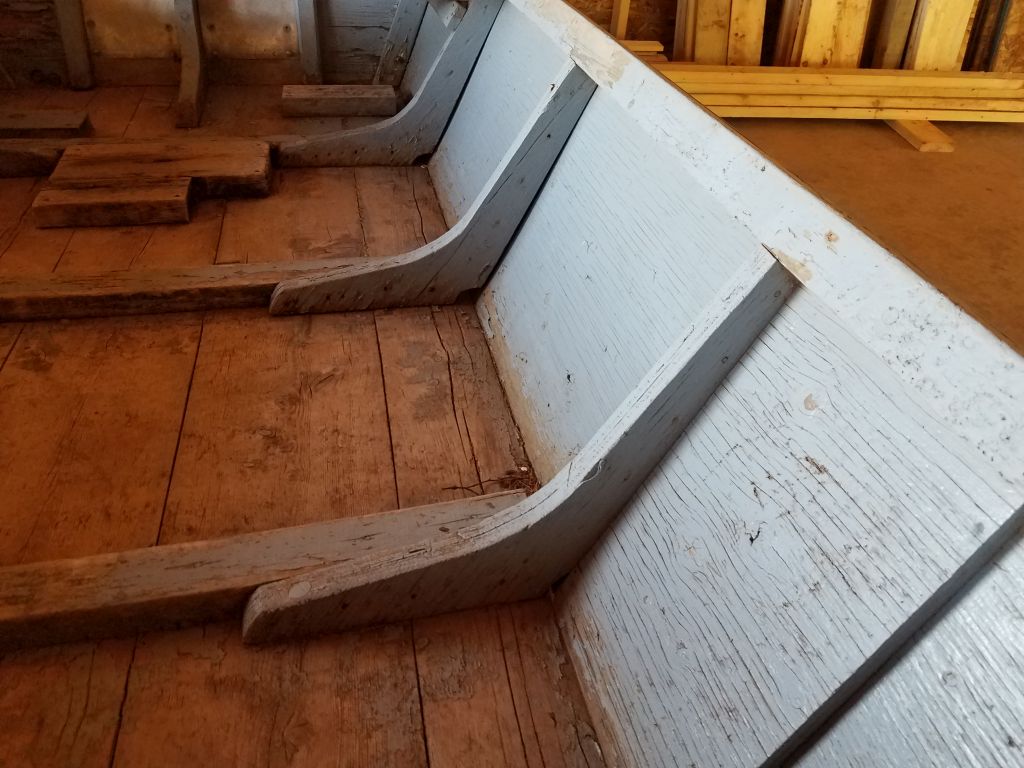
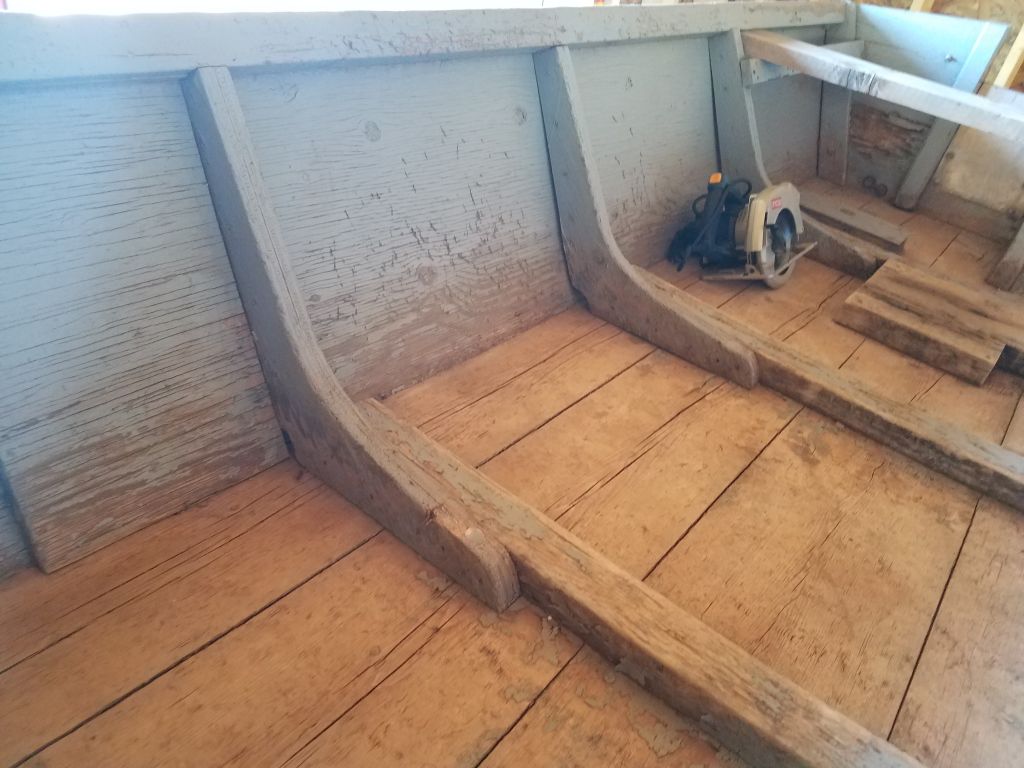
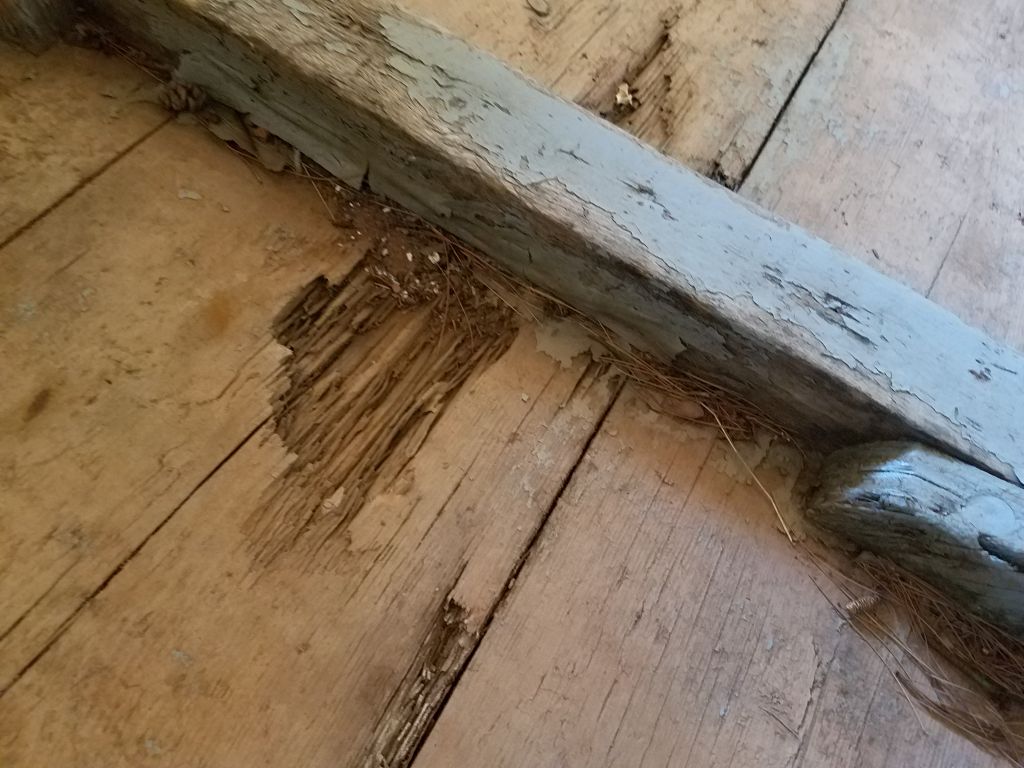
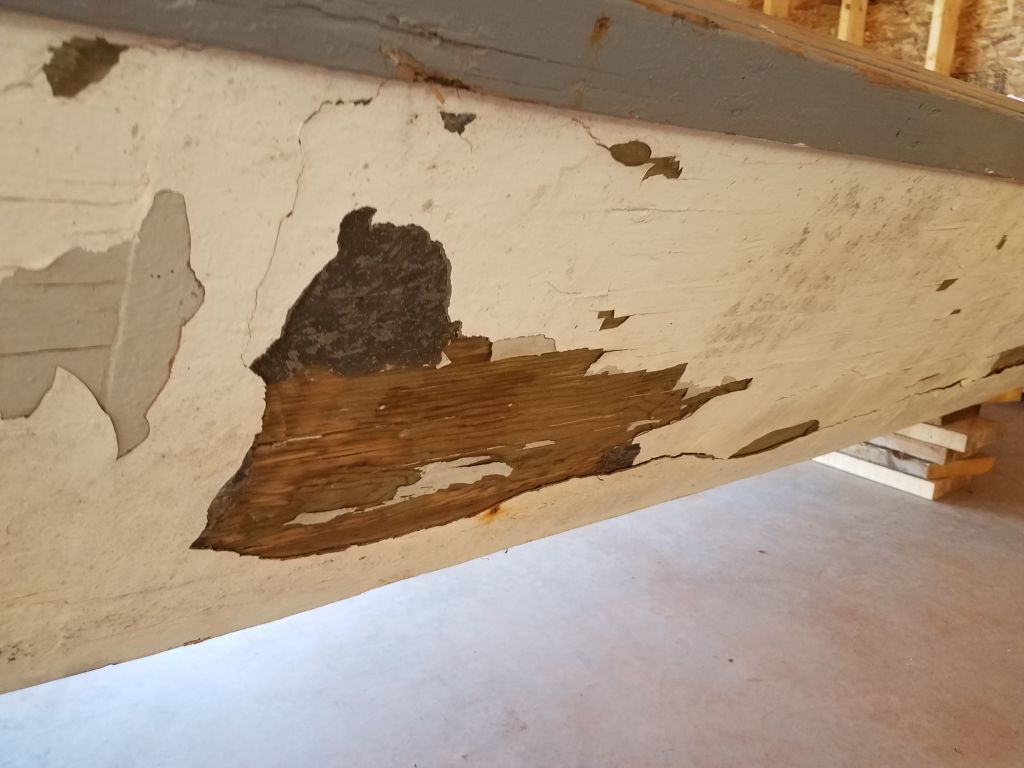
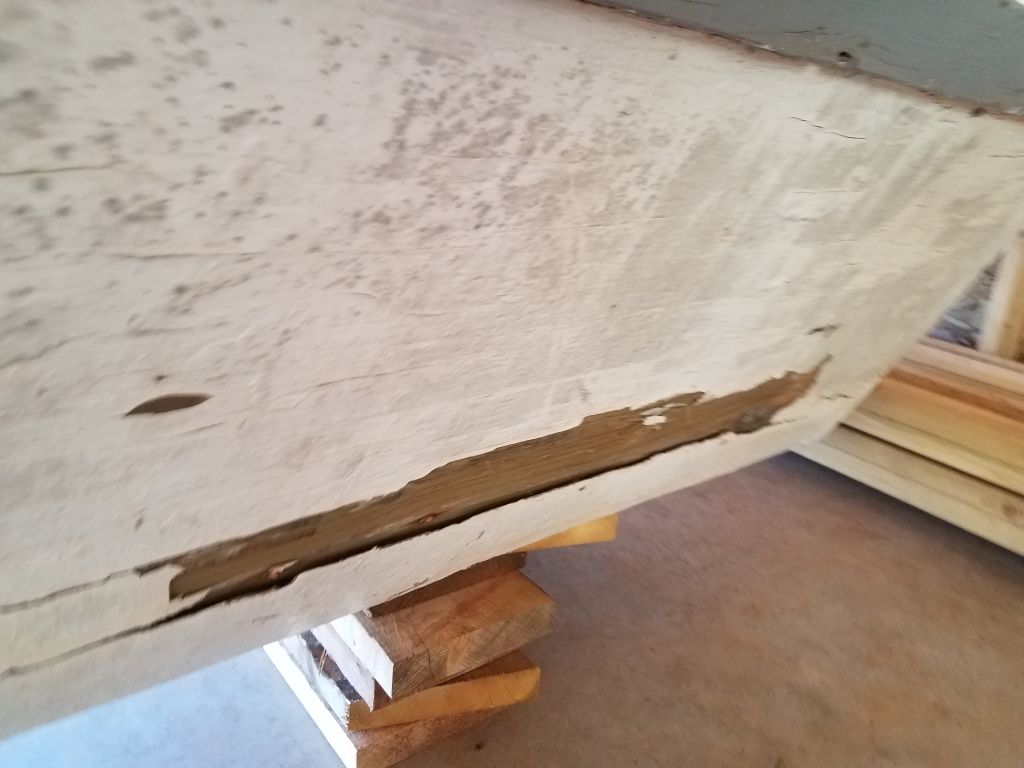
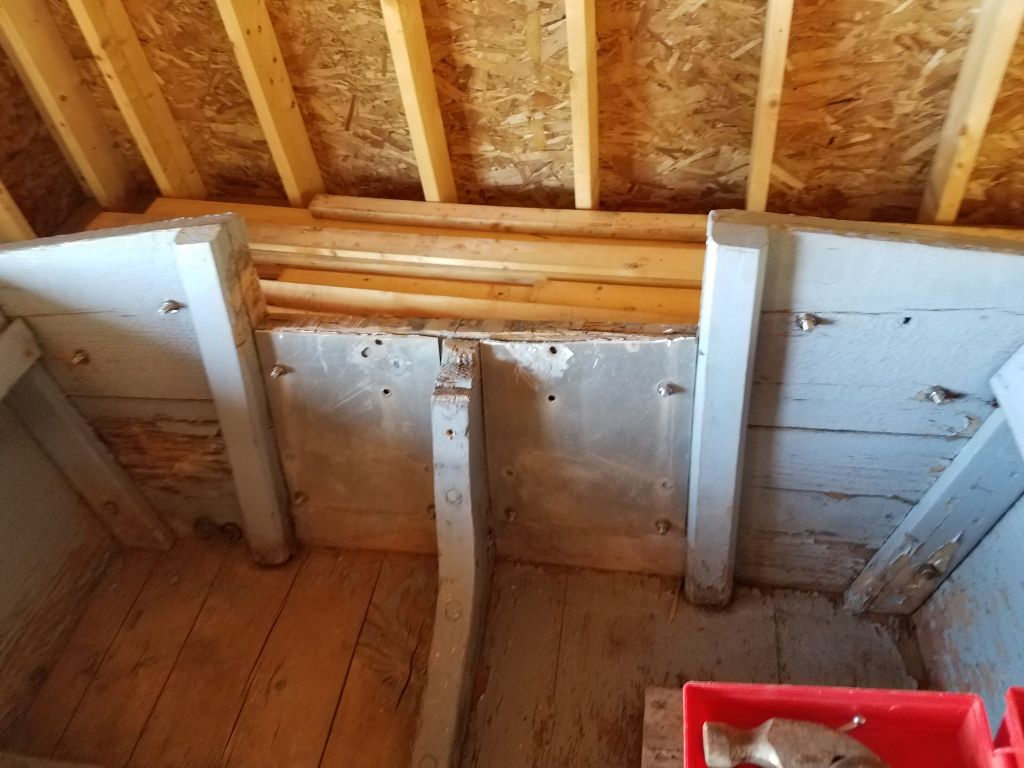
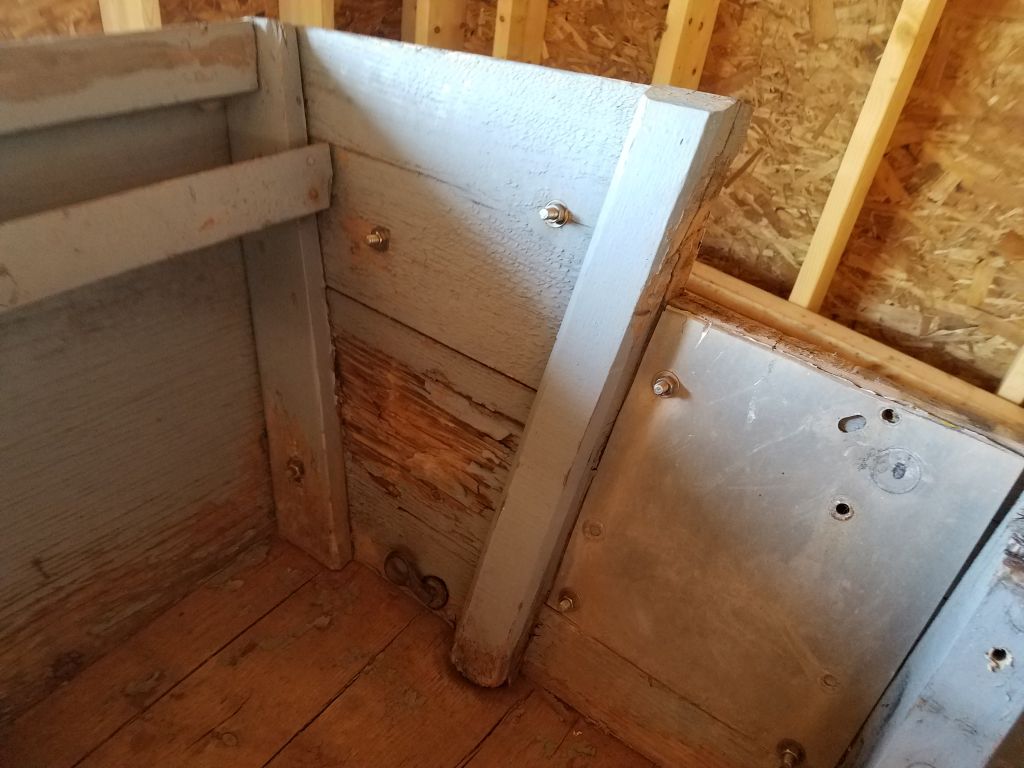
There were several areas of dry rot in the transom and floor (both built from solid planks), and the plywood hull sides were loose and pulled substantially away from the interior frames in most areas.  The bottom of the dory had been fiberglassed about 3″ up  past the turn of the bilge (polyester resin and chopped-strand mat), and this sheathing was generally sound, though the tabbing had pulled away from the topsides in some areas, most notably the transom and port after two-thirds, as well as a section on the starboard side.  The plank transom had been reinforced with some thin aluminum in a stop-gap attempt to strengthen the weakening structure.  The two thwarts were rough and of a stop-gap nature as well, plus there were several oddly-placed wooden blocks screwed to the floor hither and thither.

A little later I built a basic roller platform out of some readily available scrap lumber so I could easily move the boat around the shop as needed.


Newer posts