Monday
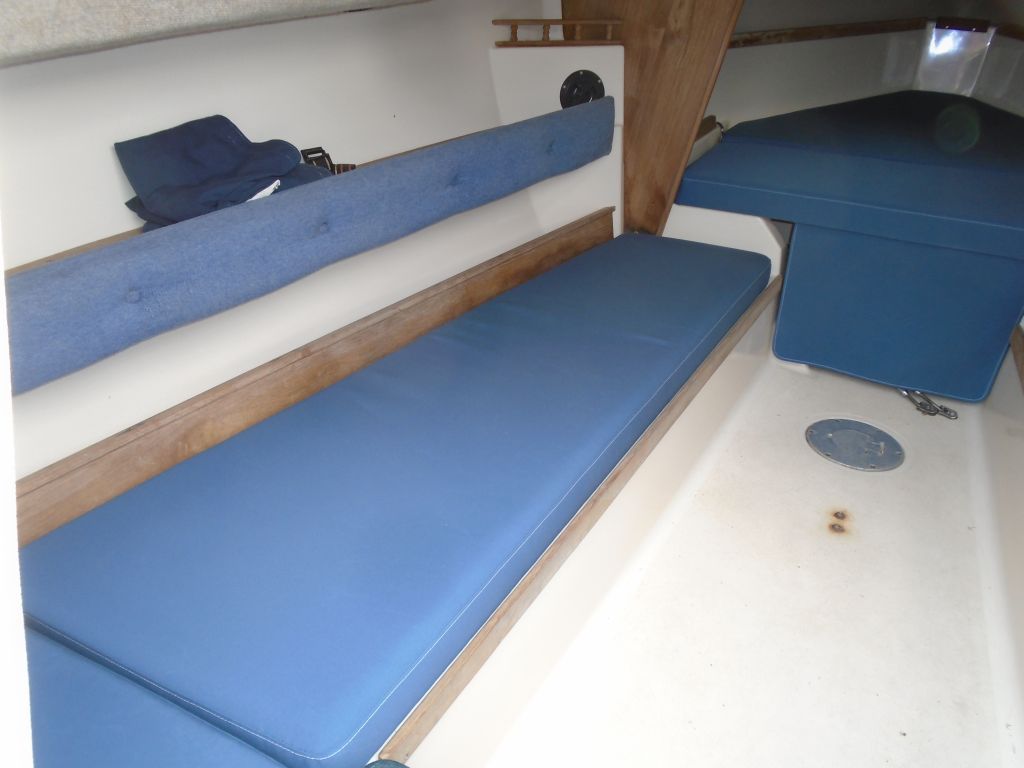
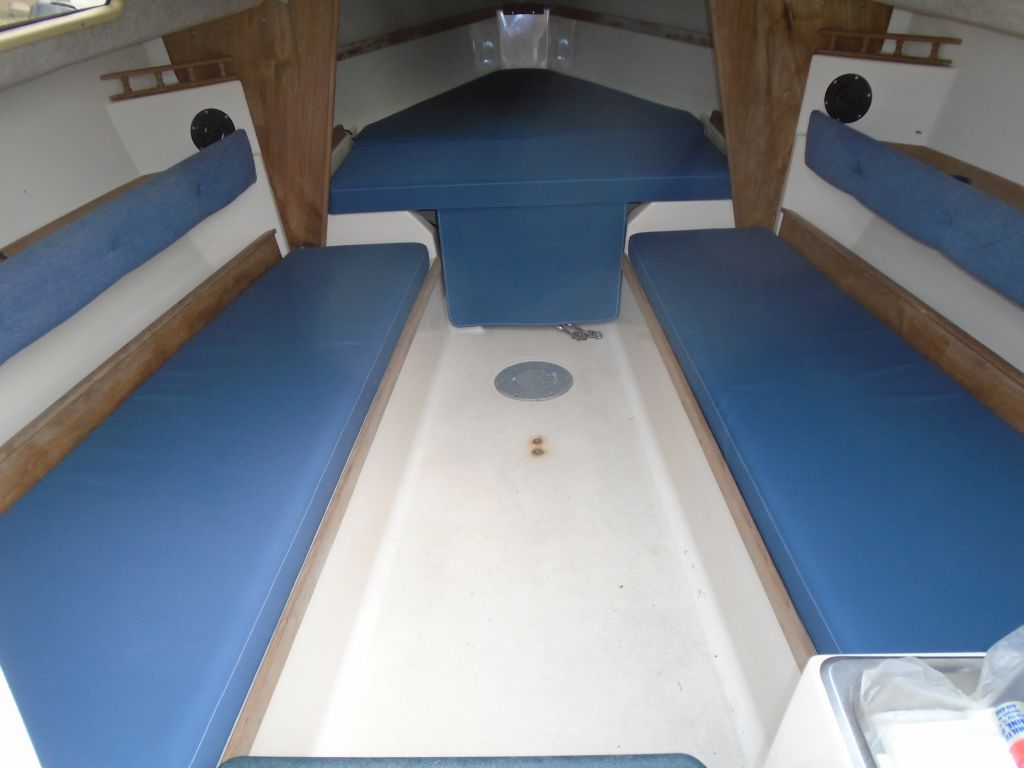
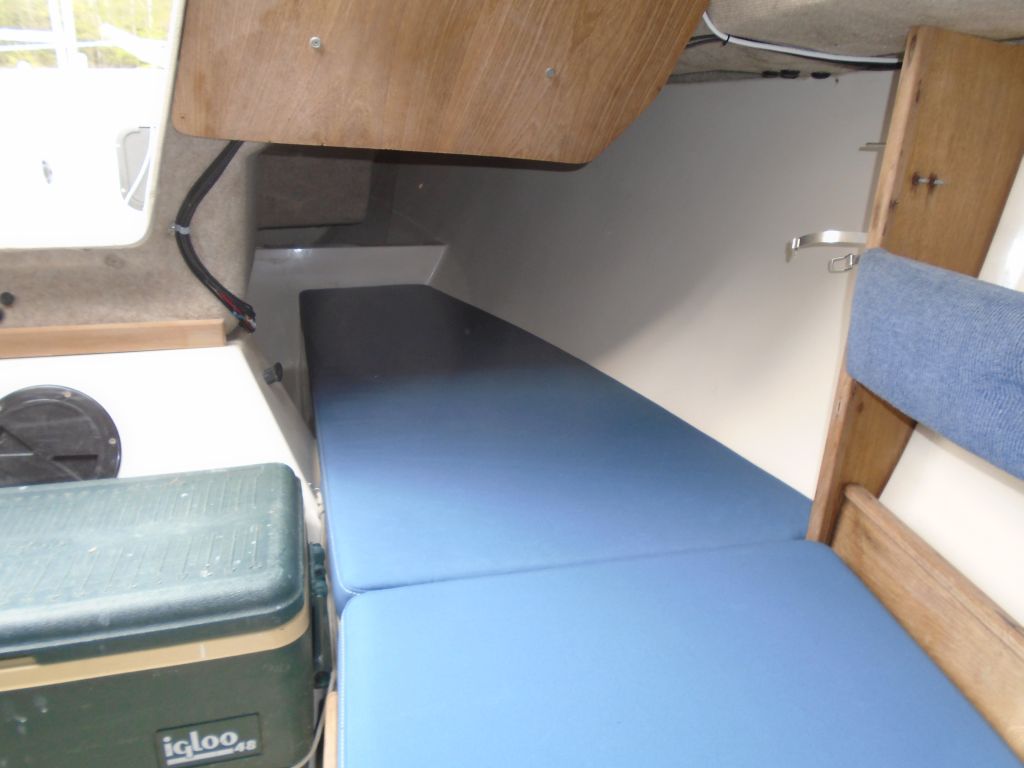
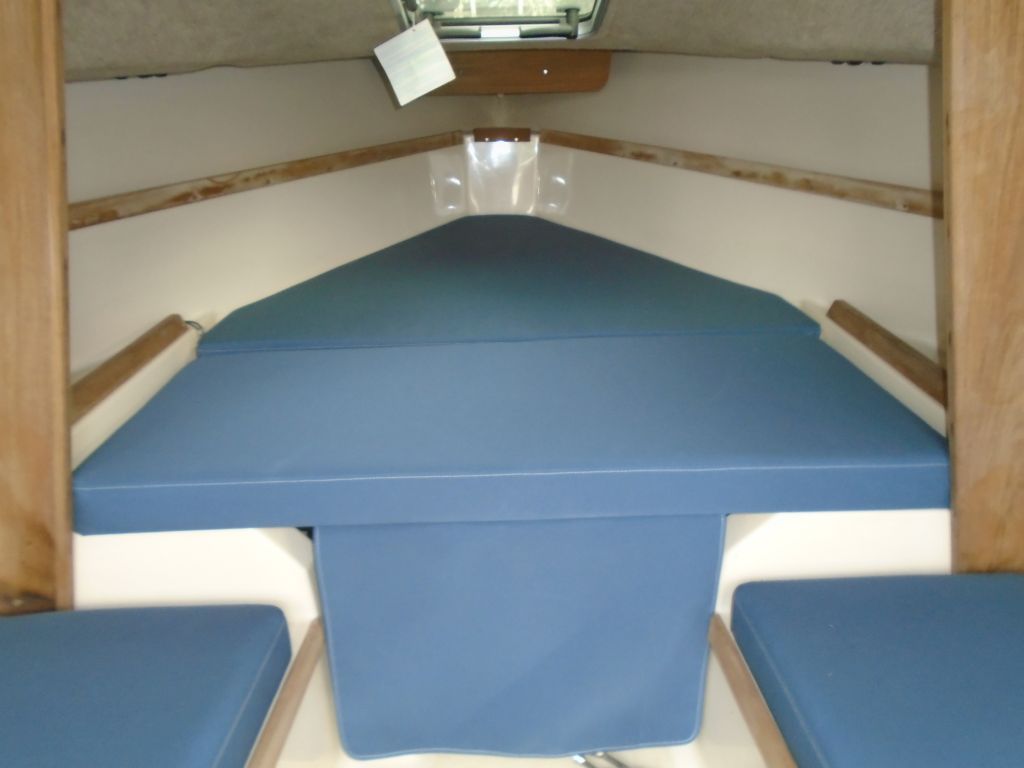
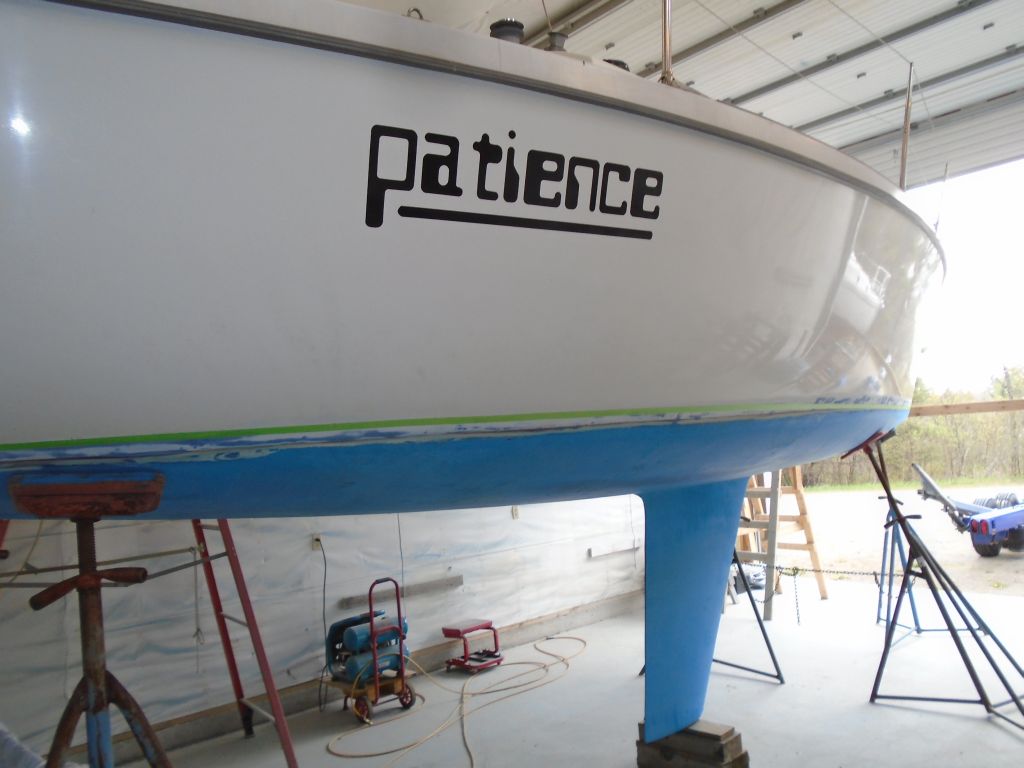
The final item outstanding from the original project list was new interior cushions, and these were now complete and looked terrific. The color is sapphire blue.


Monday
The final item outstanding from the original project list was new interior cushions, and these were now complete and looked terrific. The color is sapphire blue.
Monday
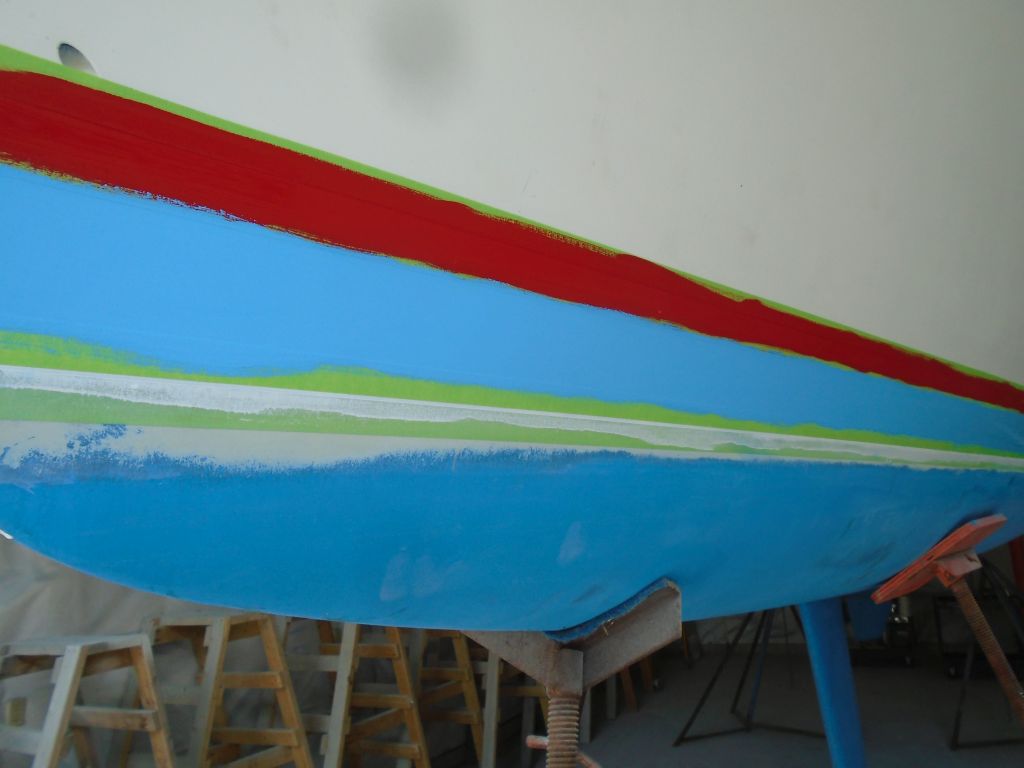
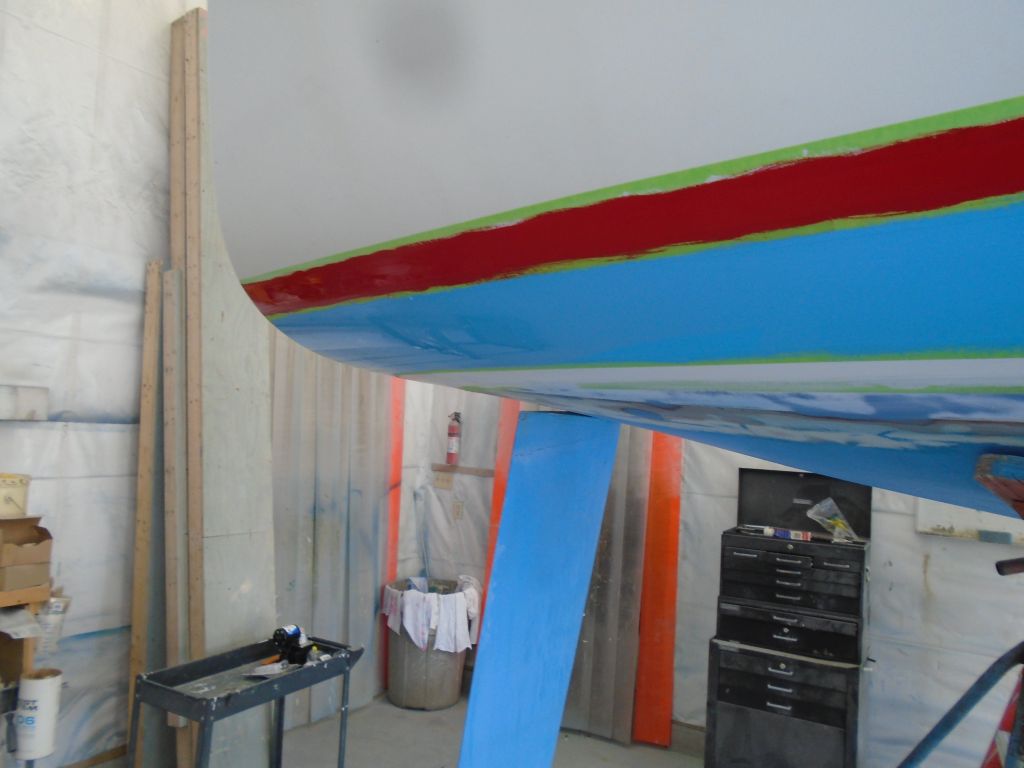
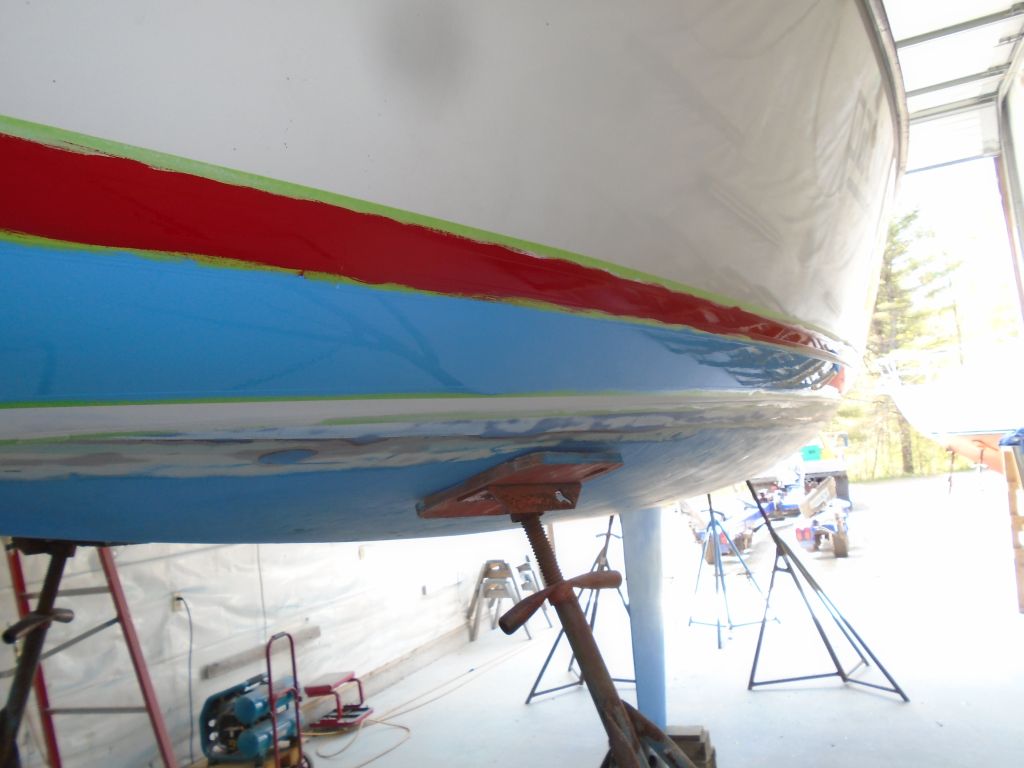
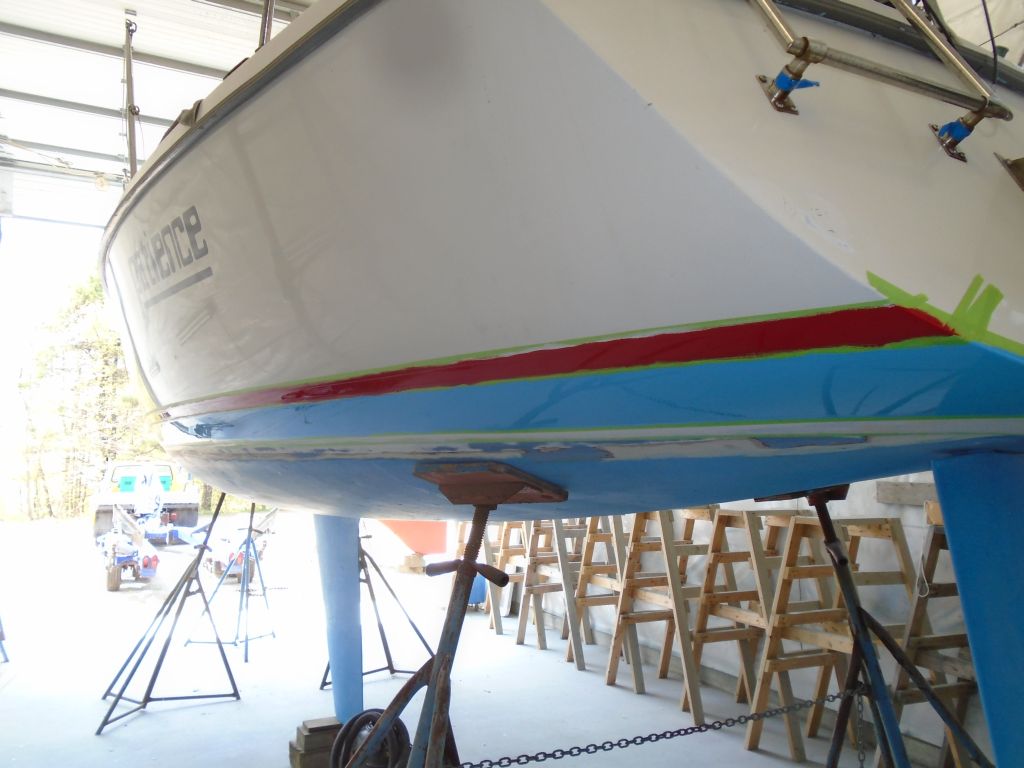
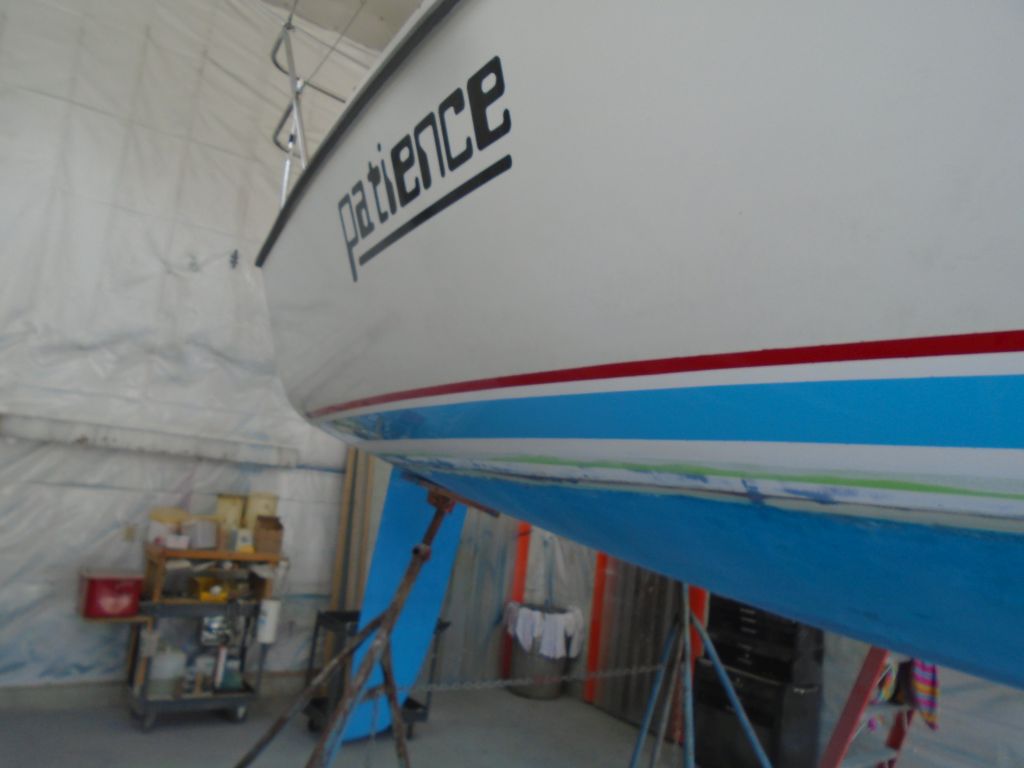
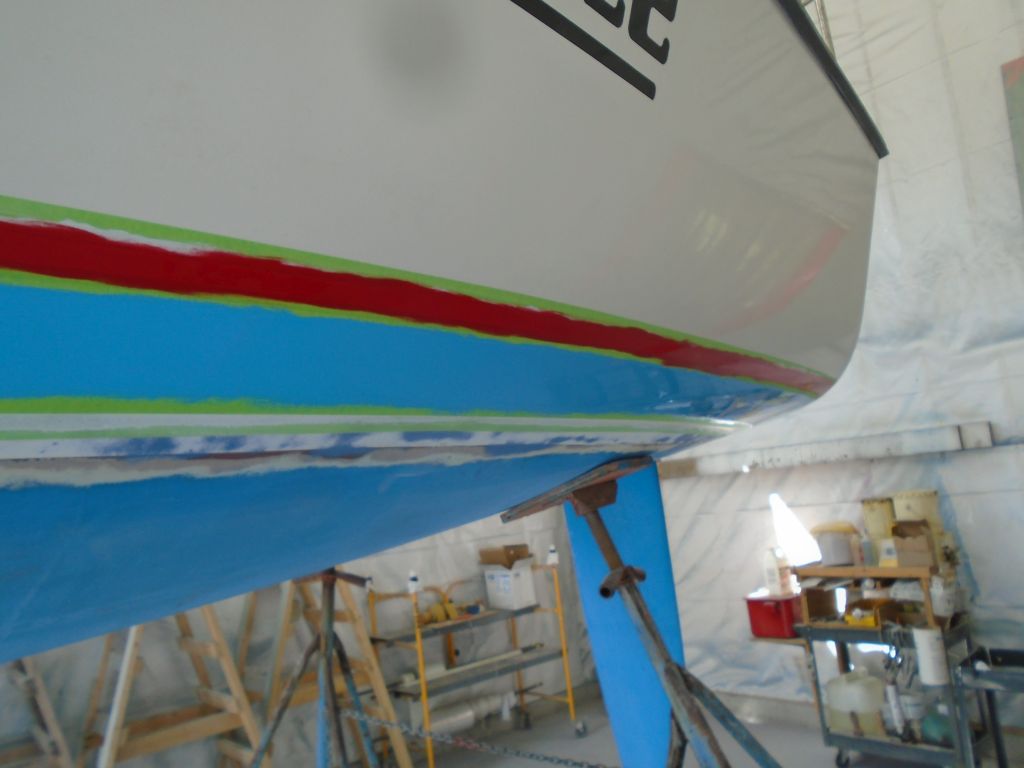
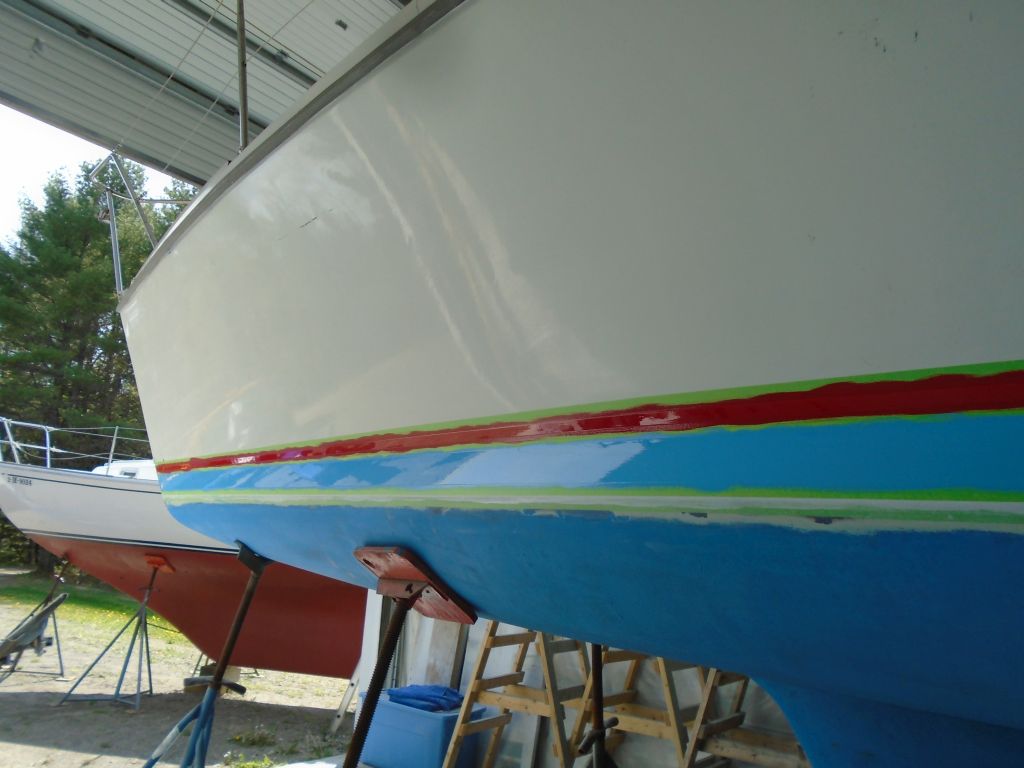
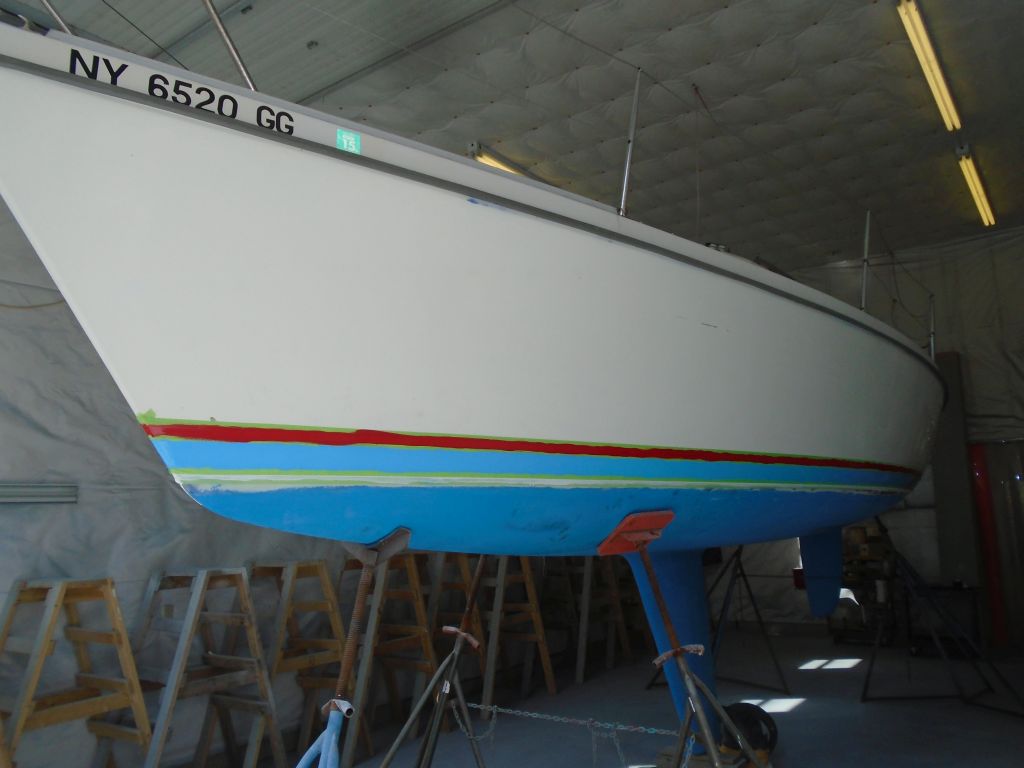
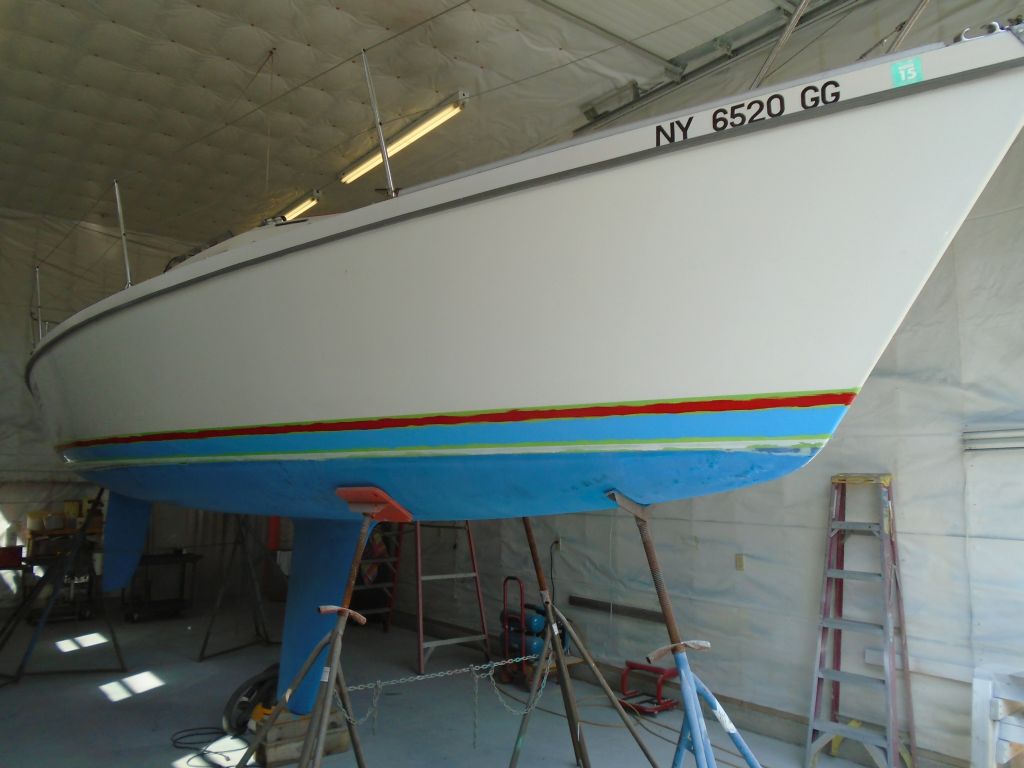
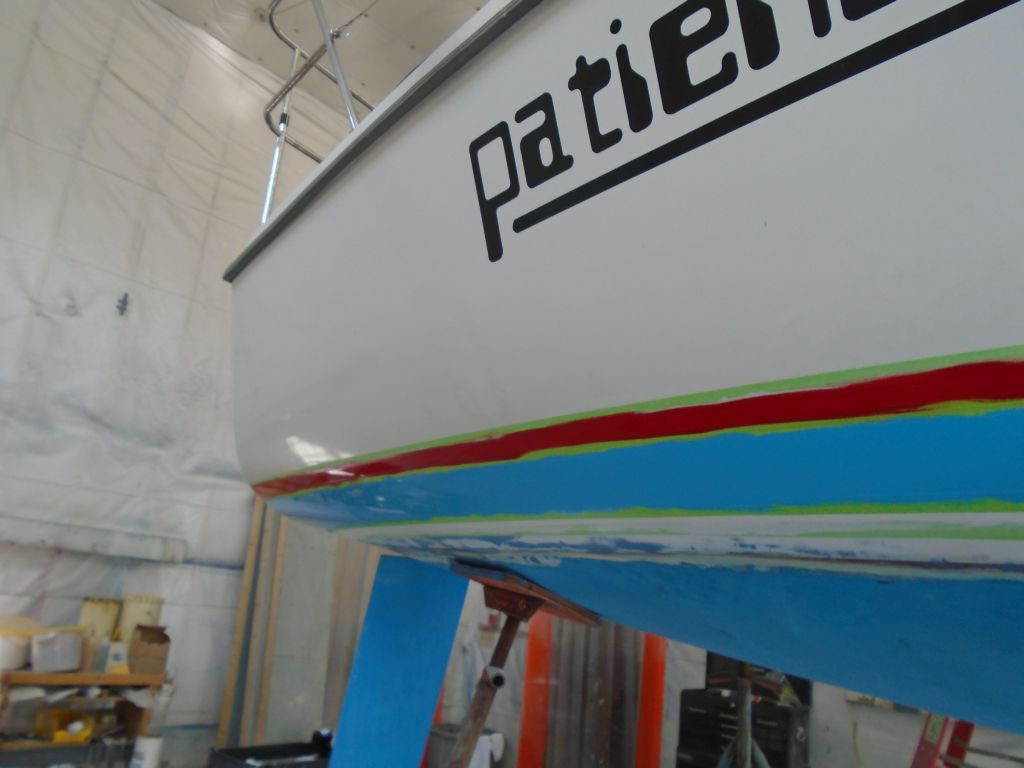
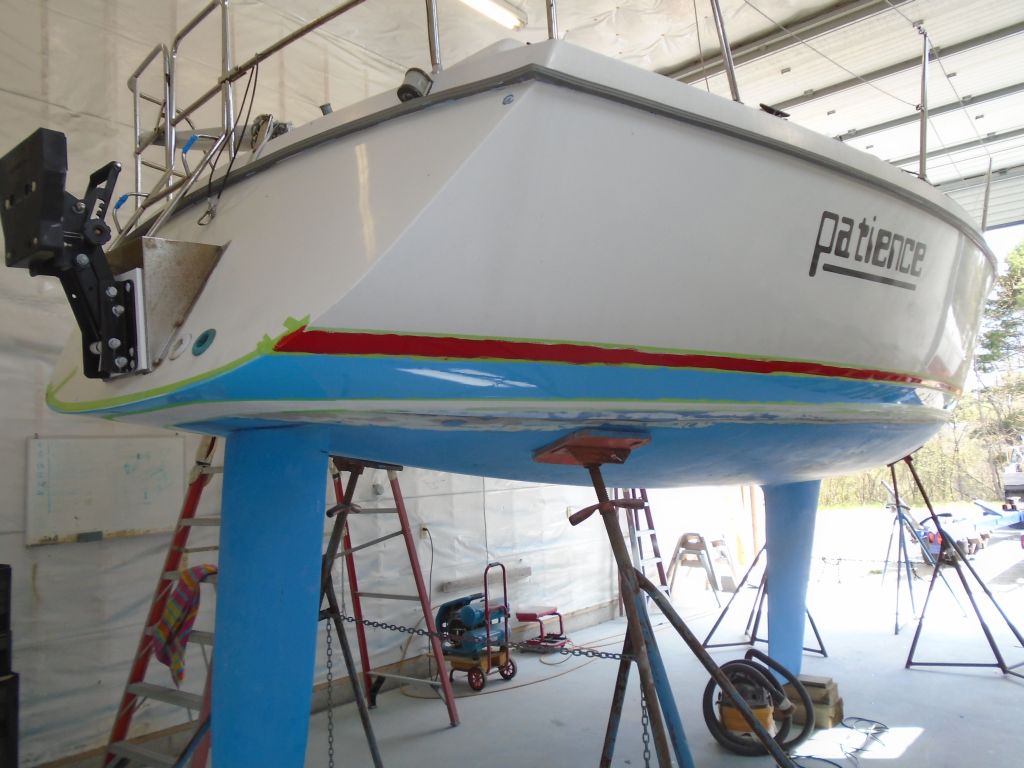
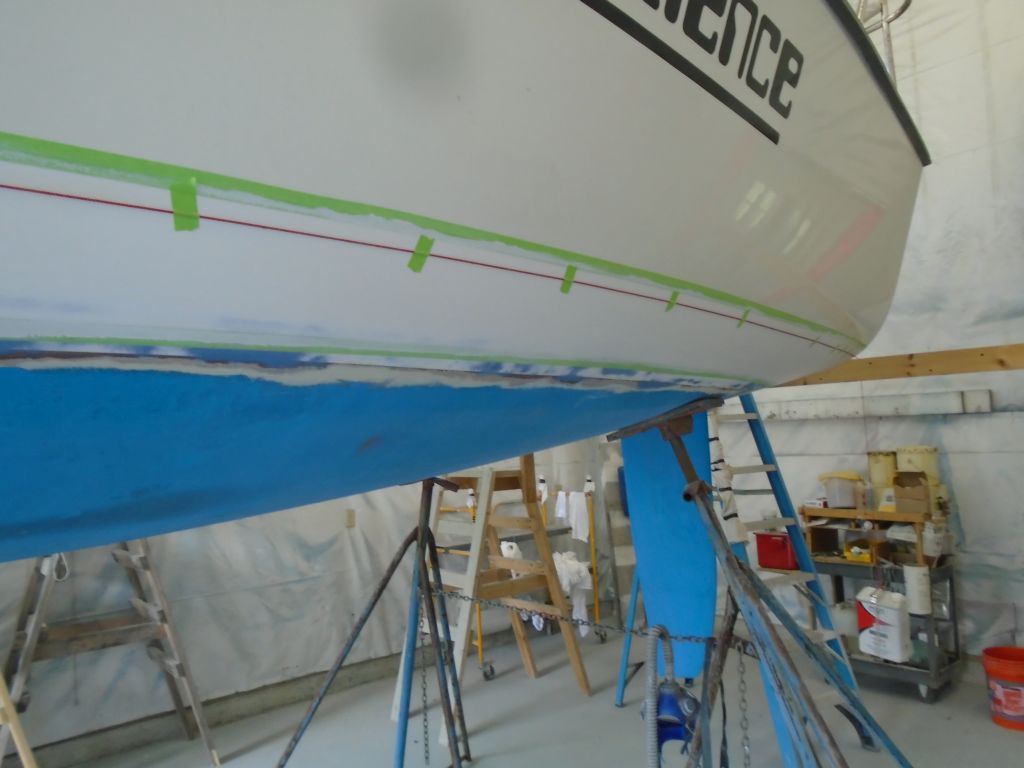
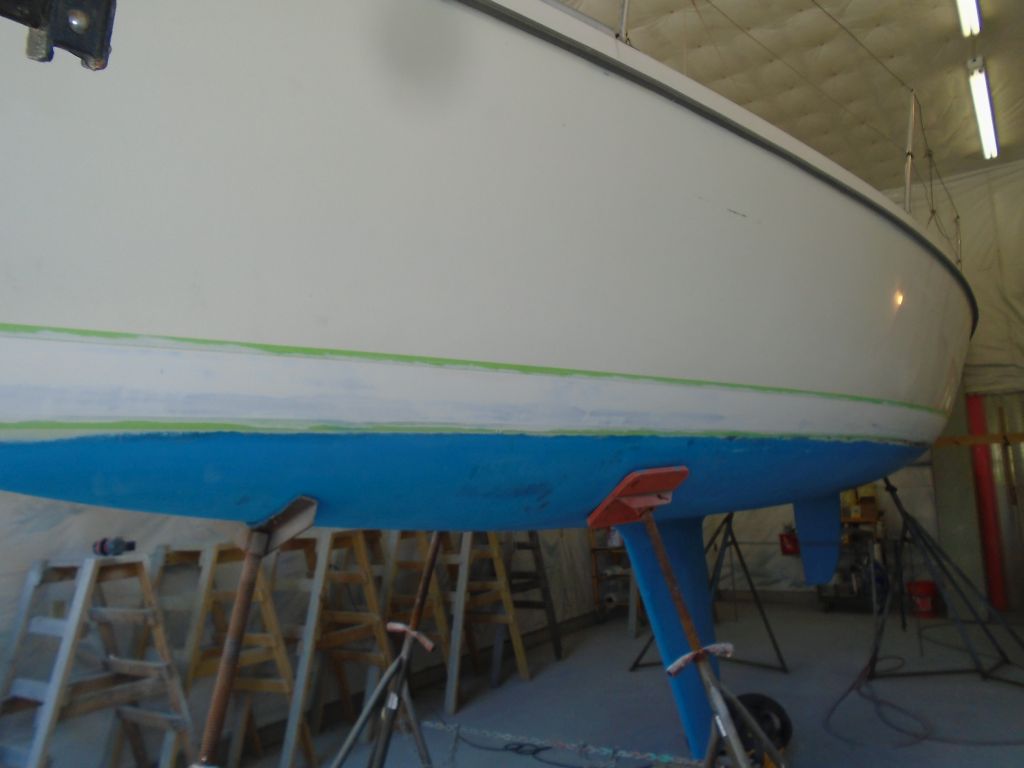
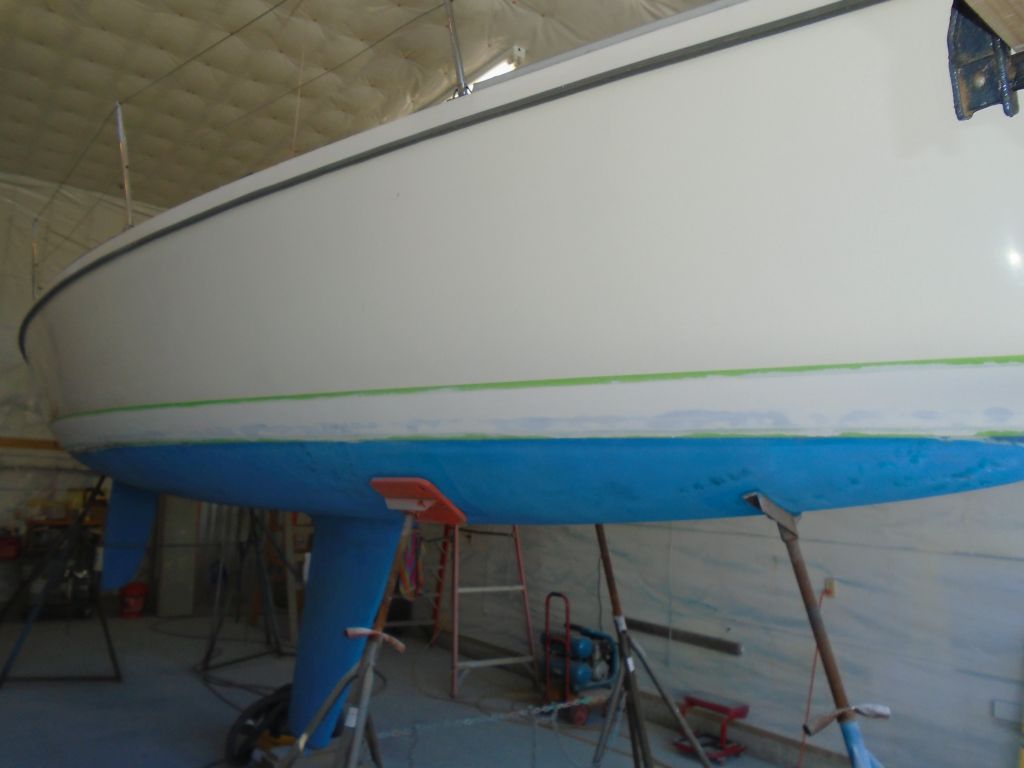
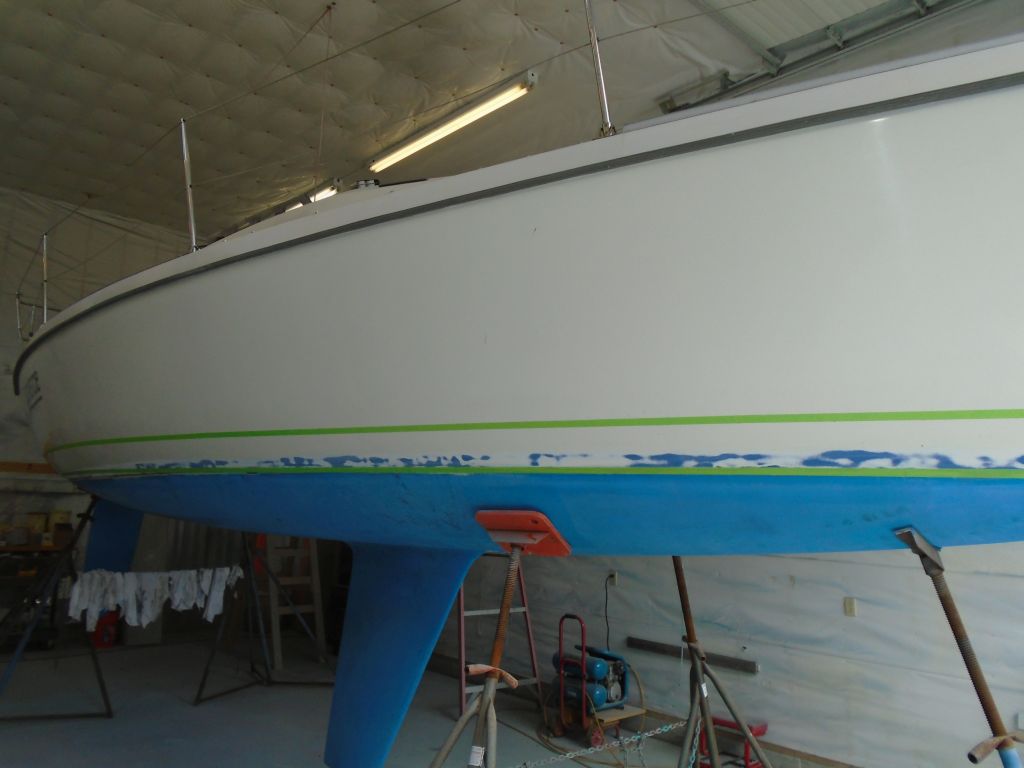
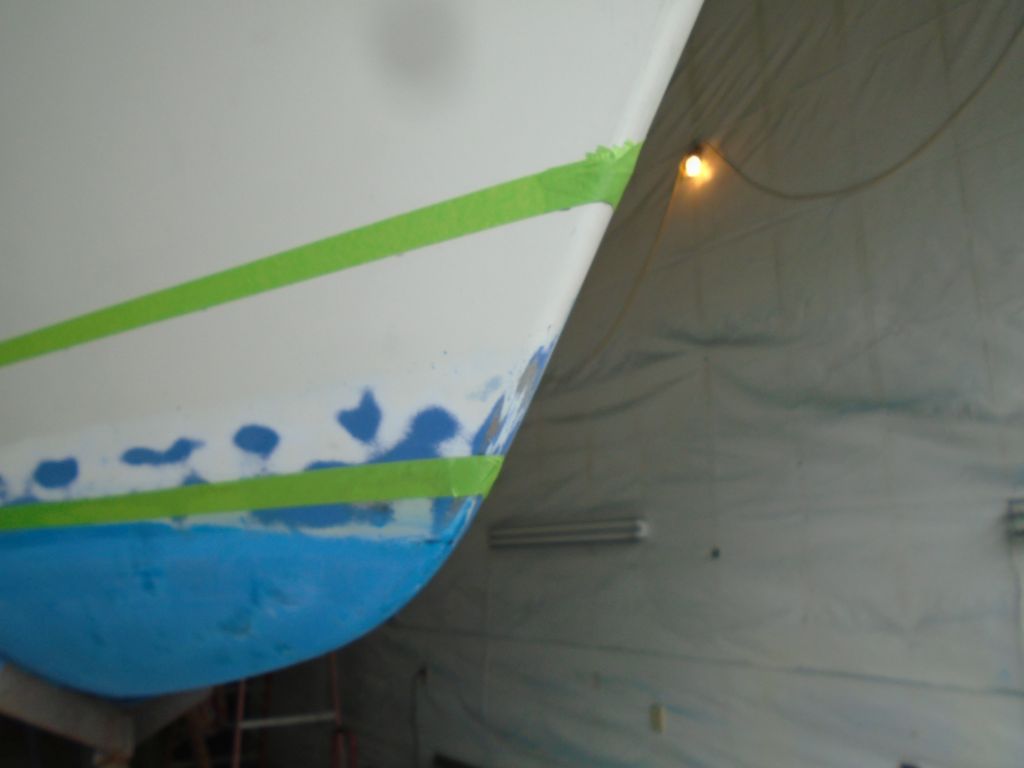
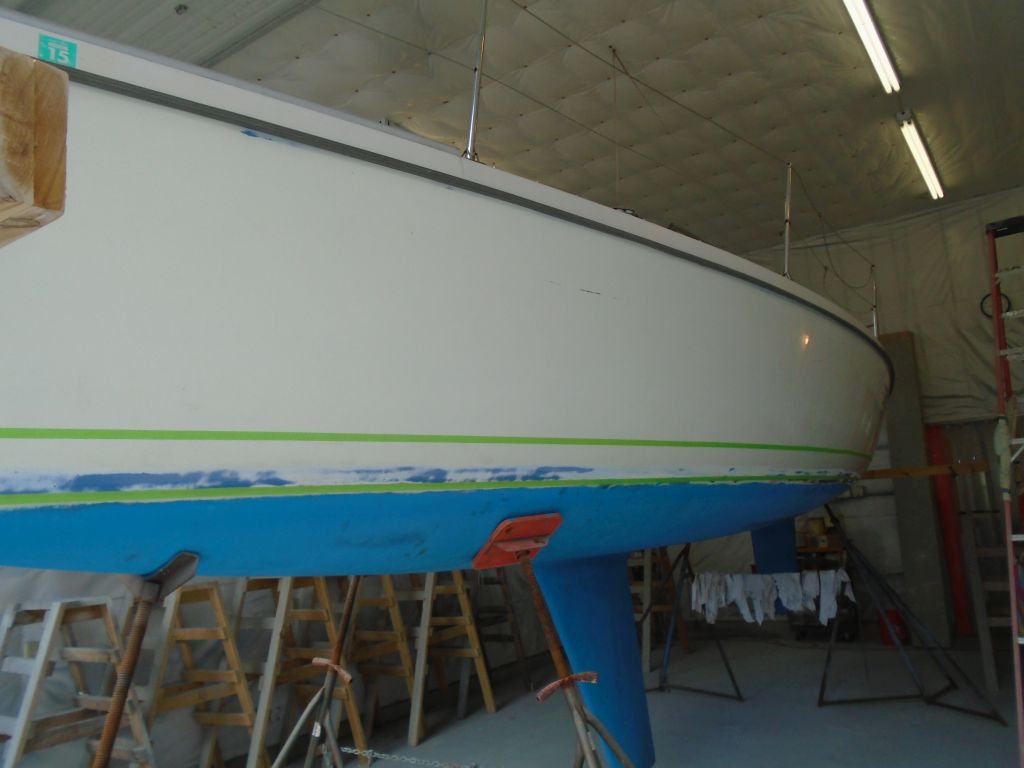
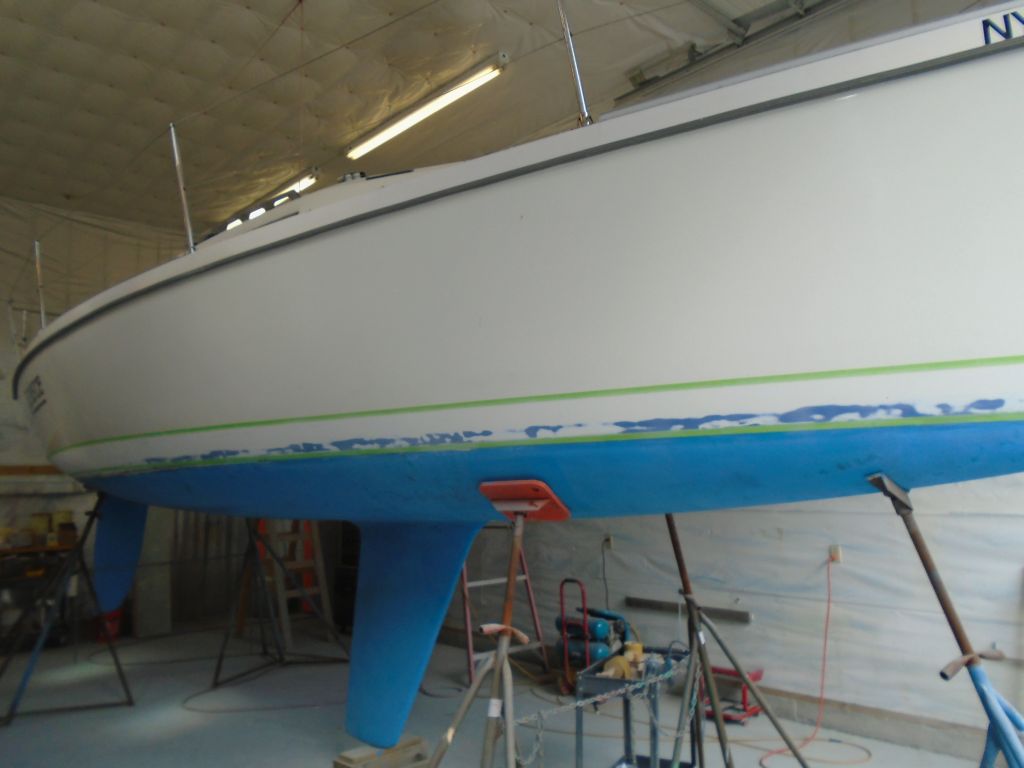
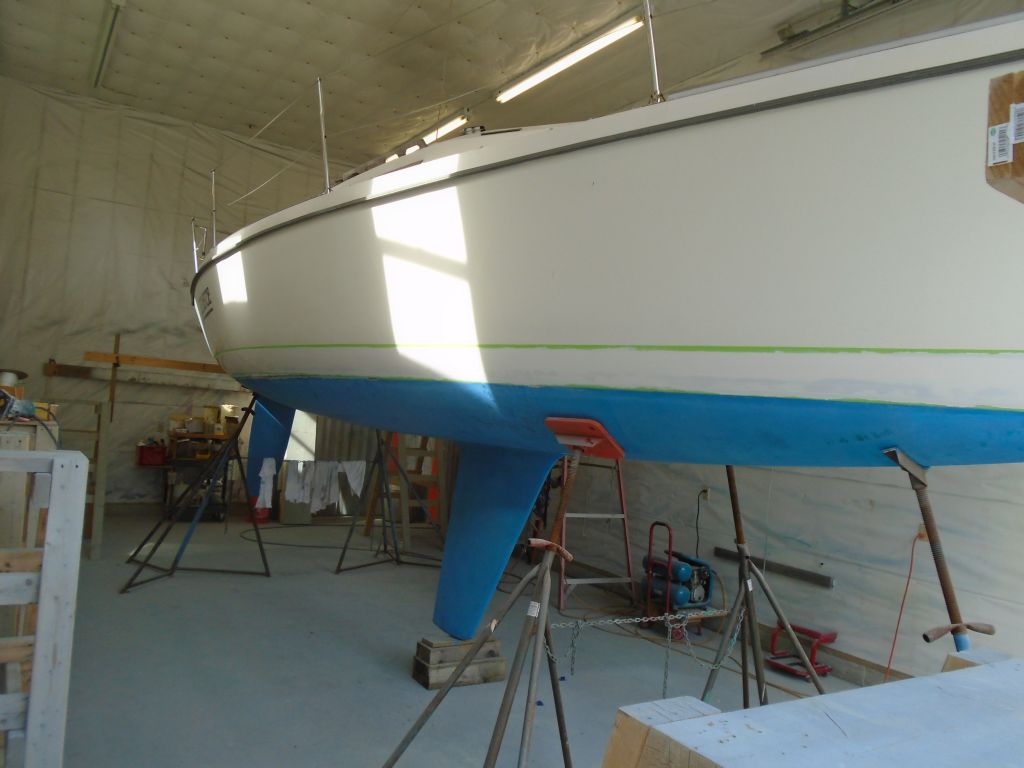
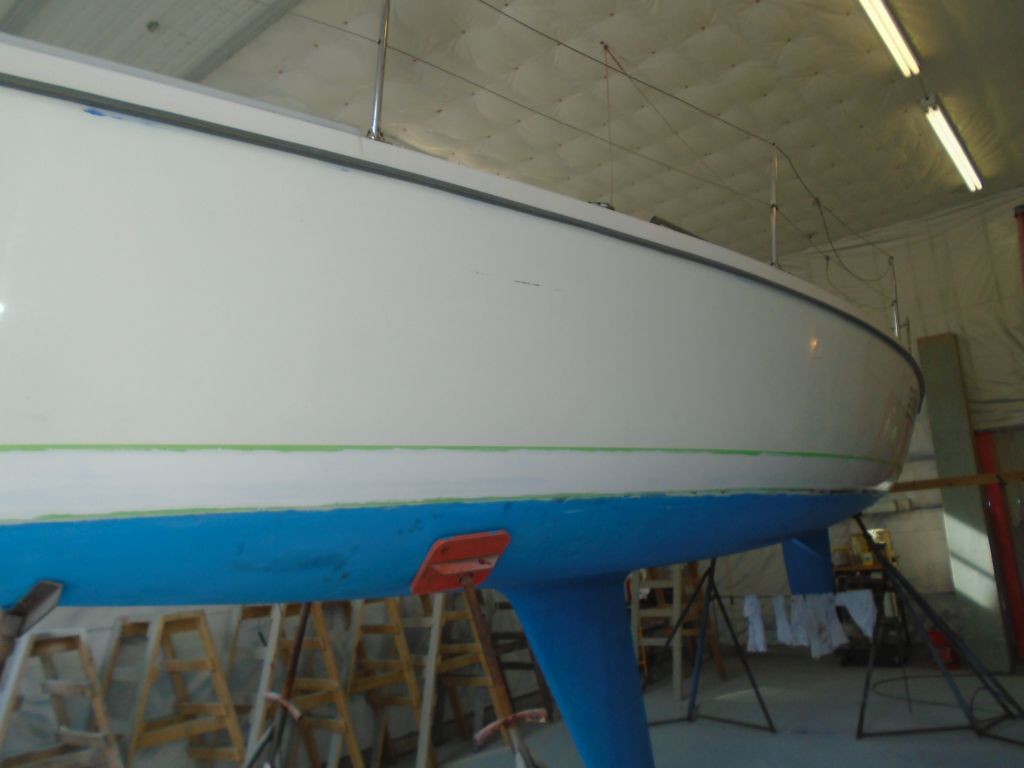
I lightly sanded the first coat on the boottop stripes, then vacuumed, solvent-washed, and tacked off before applying a second coat of the bright red and light blue paints.

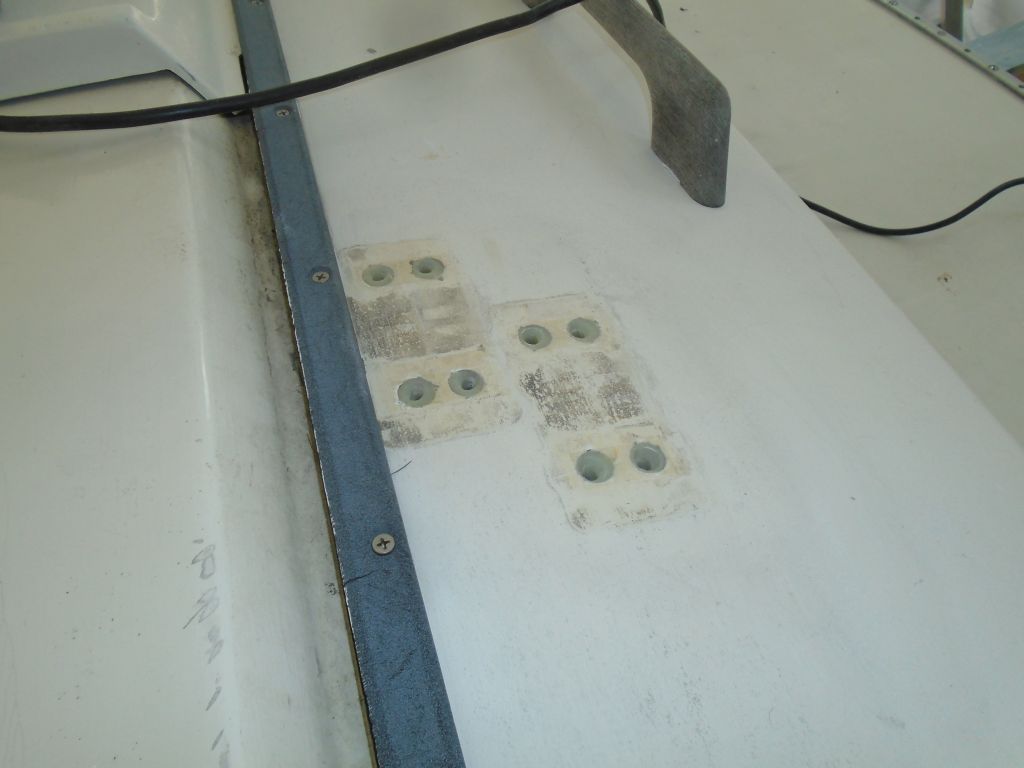
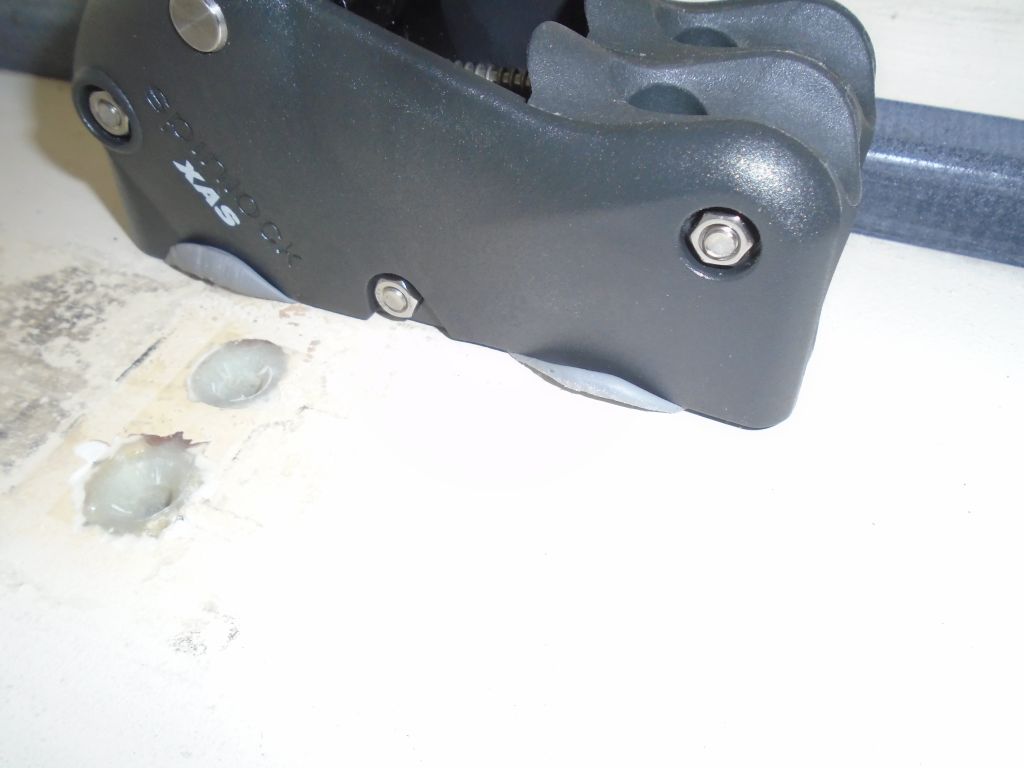
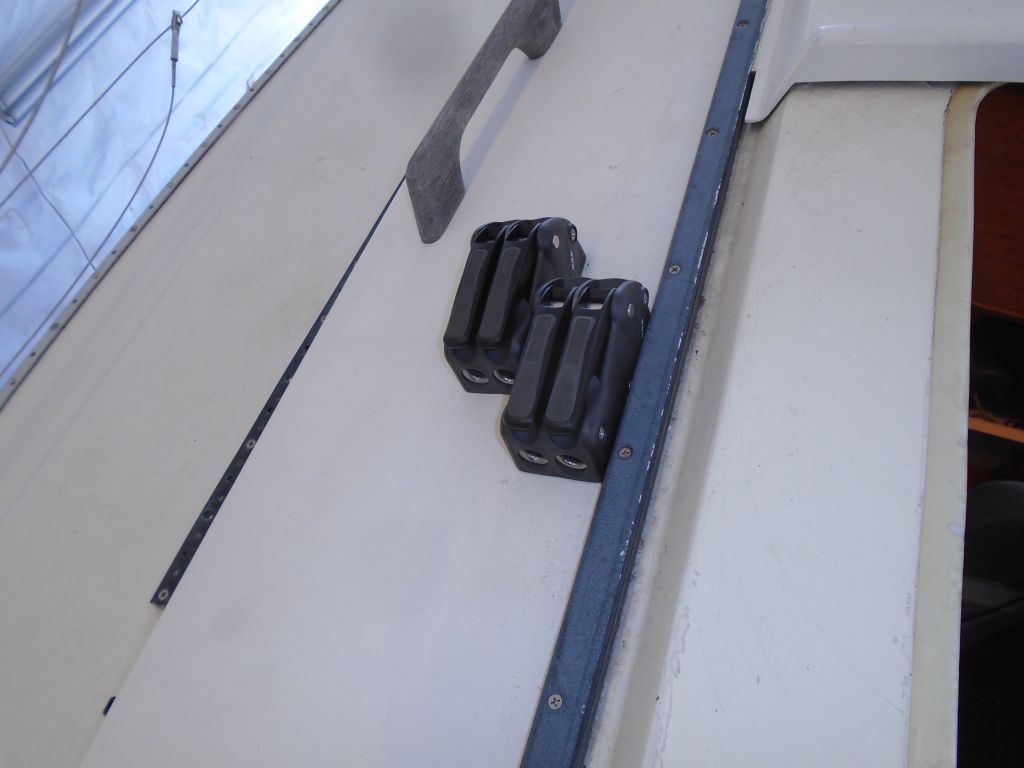
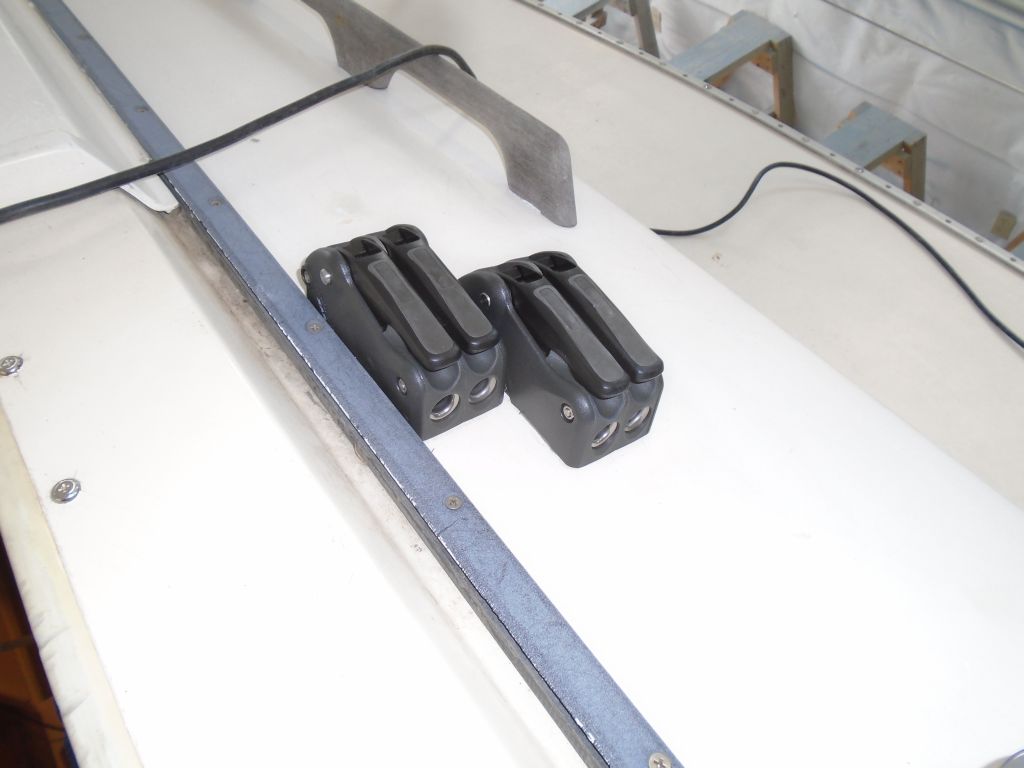
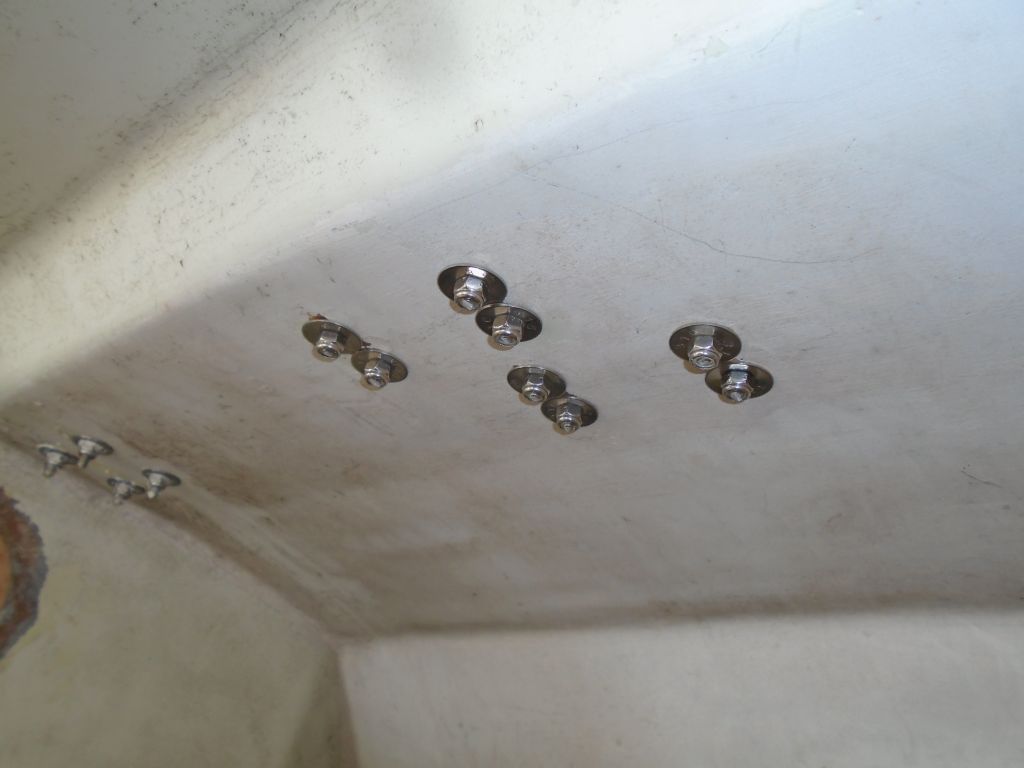
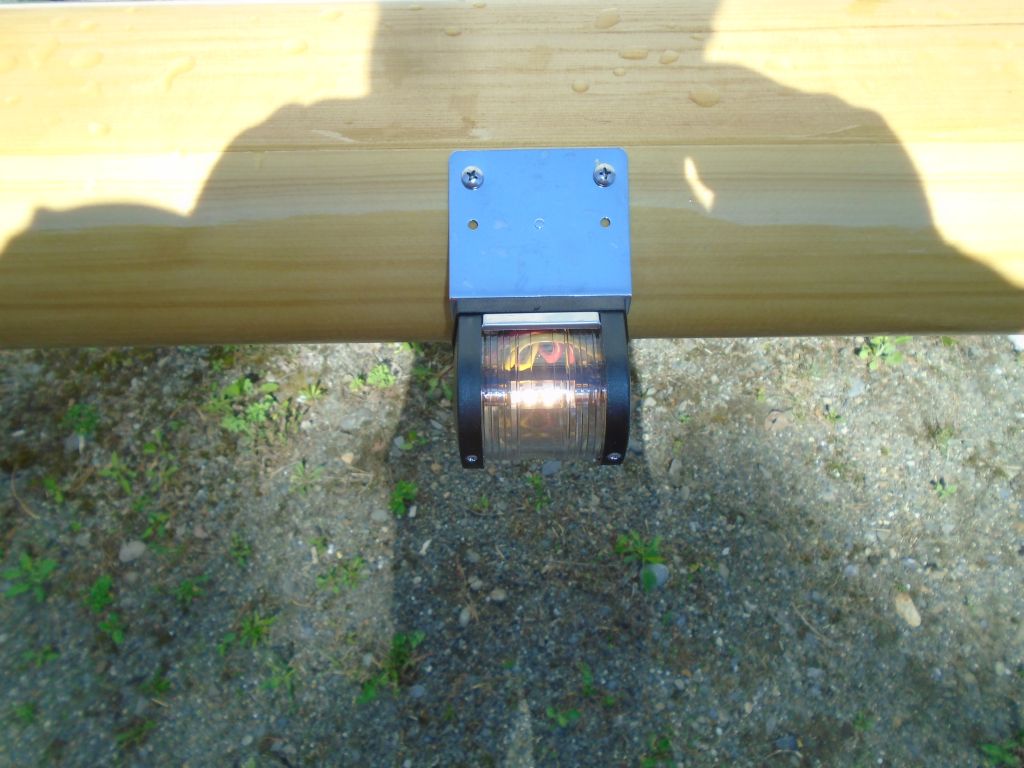
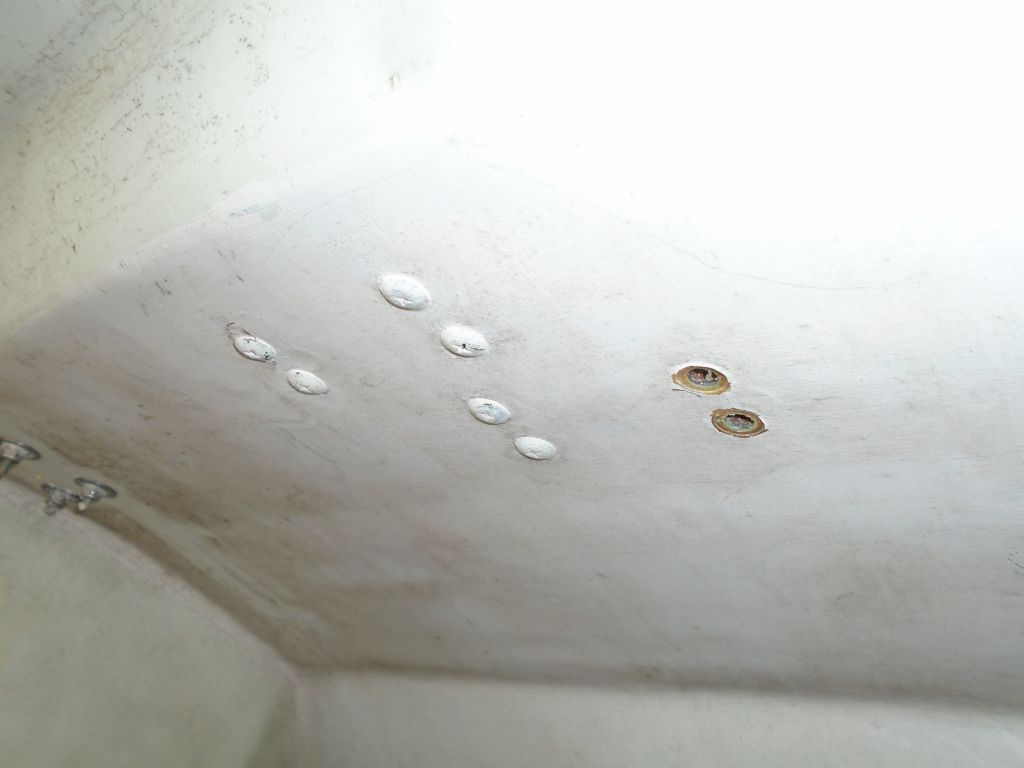
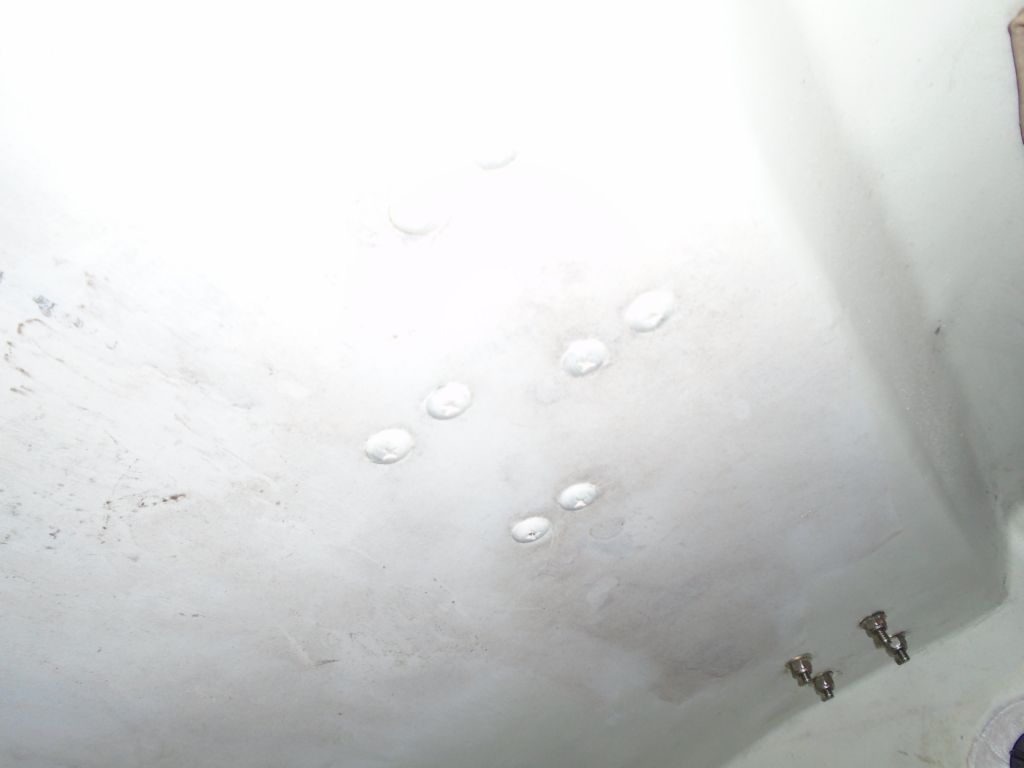
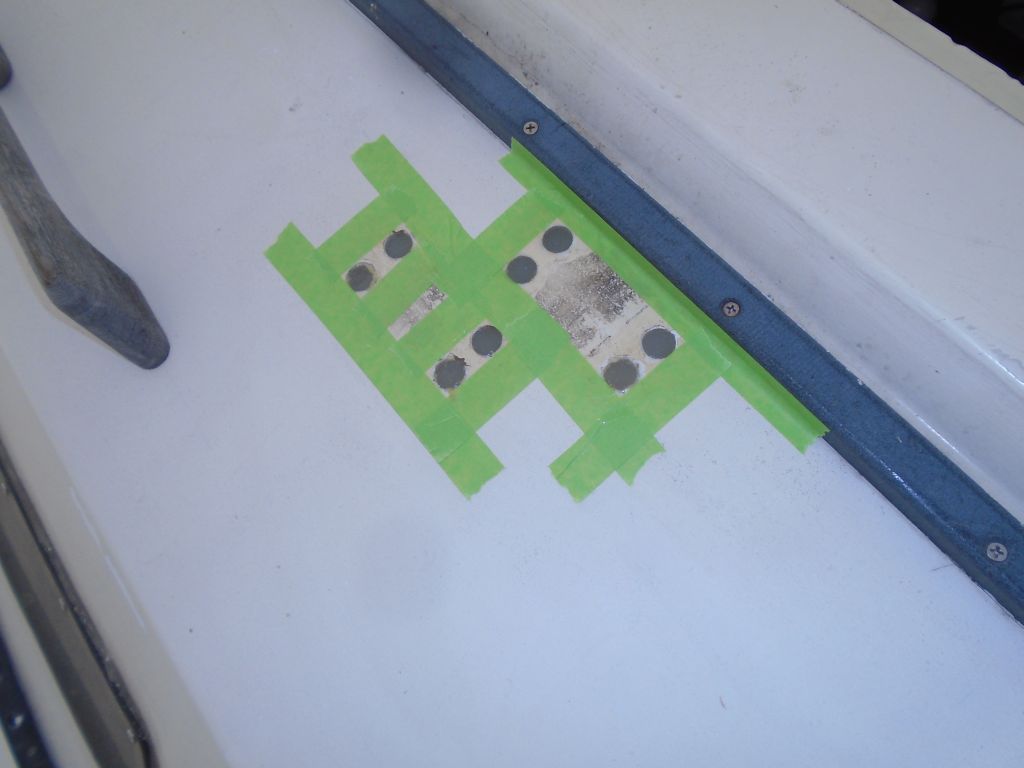
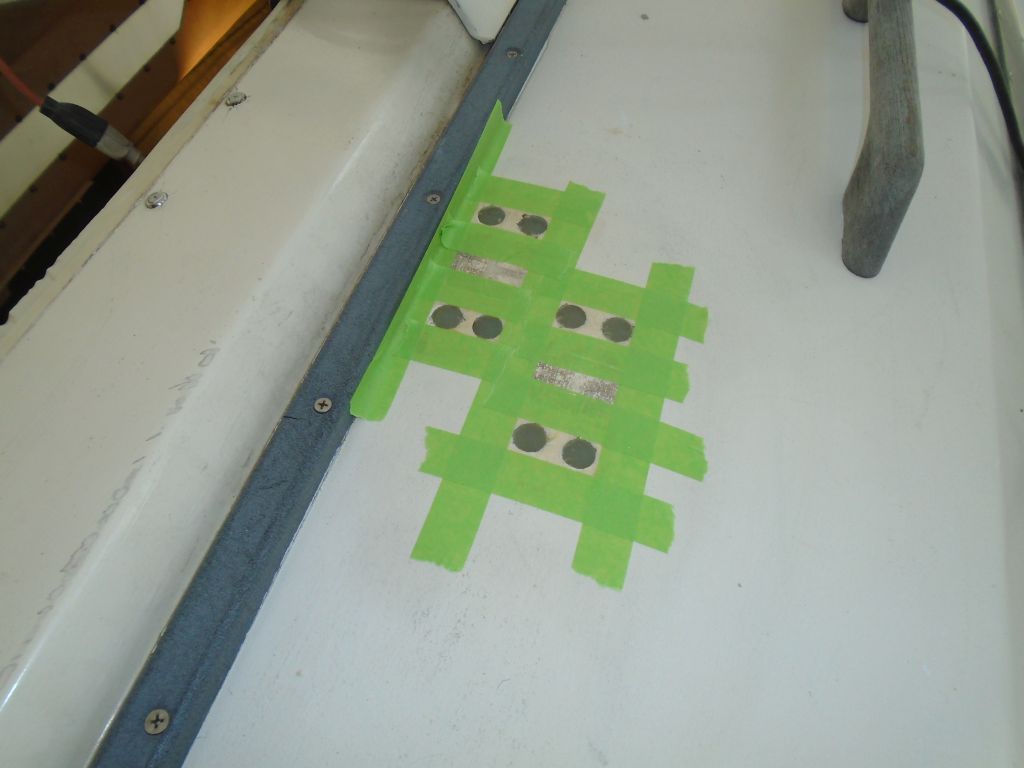
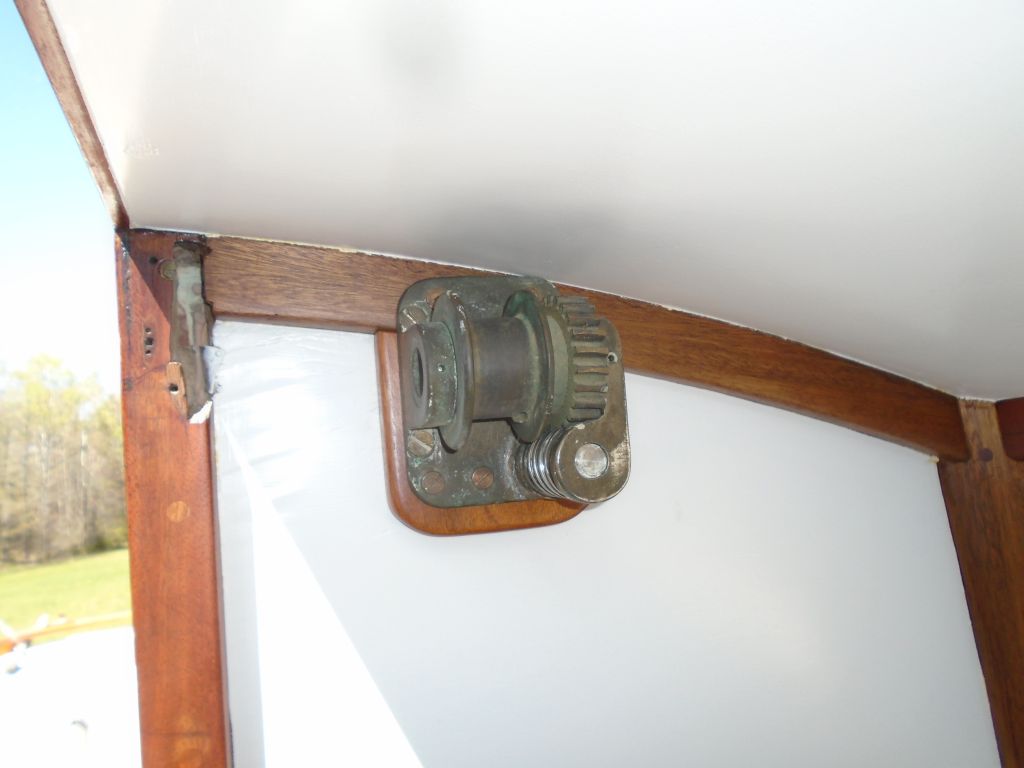
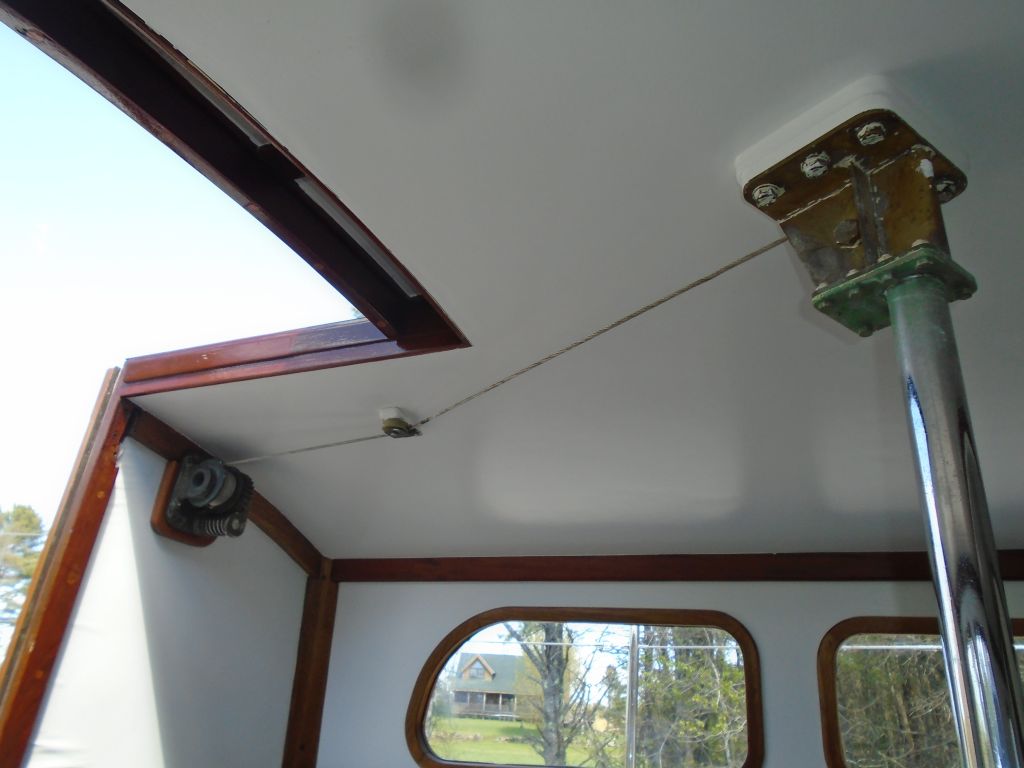
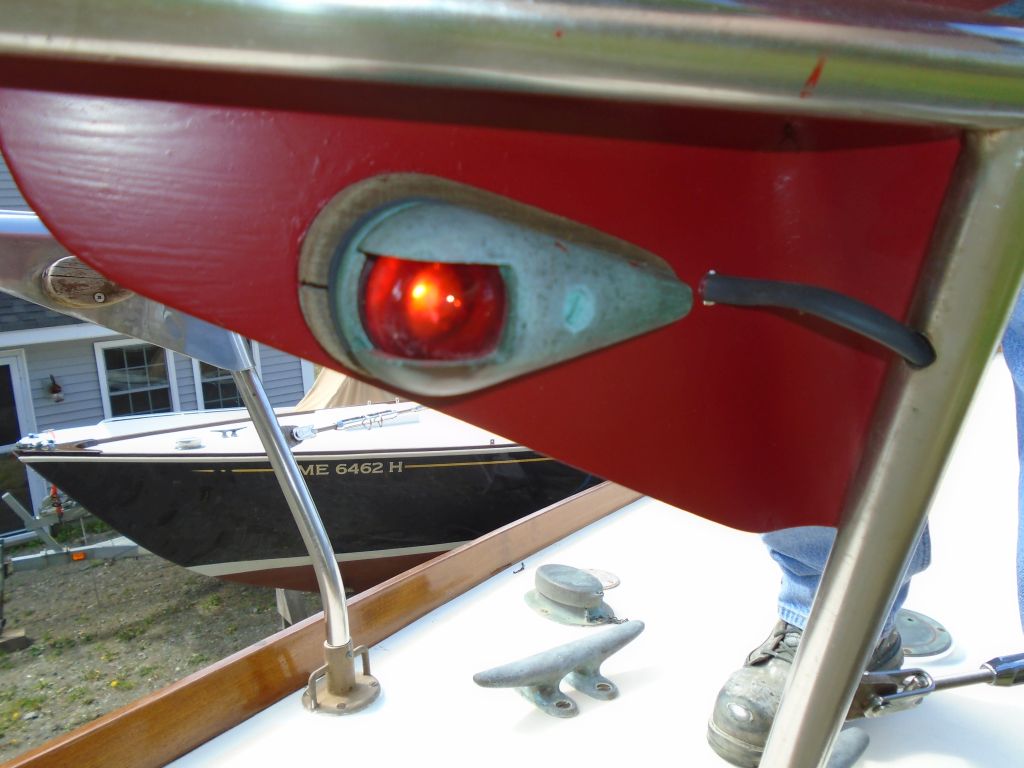
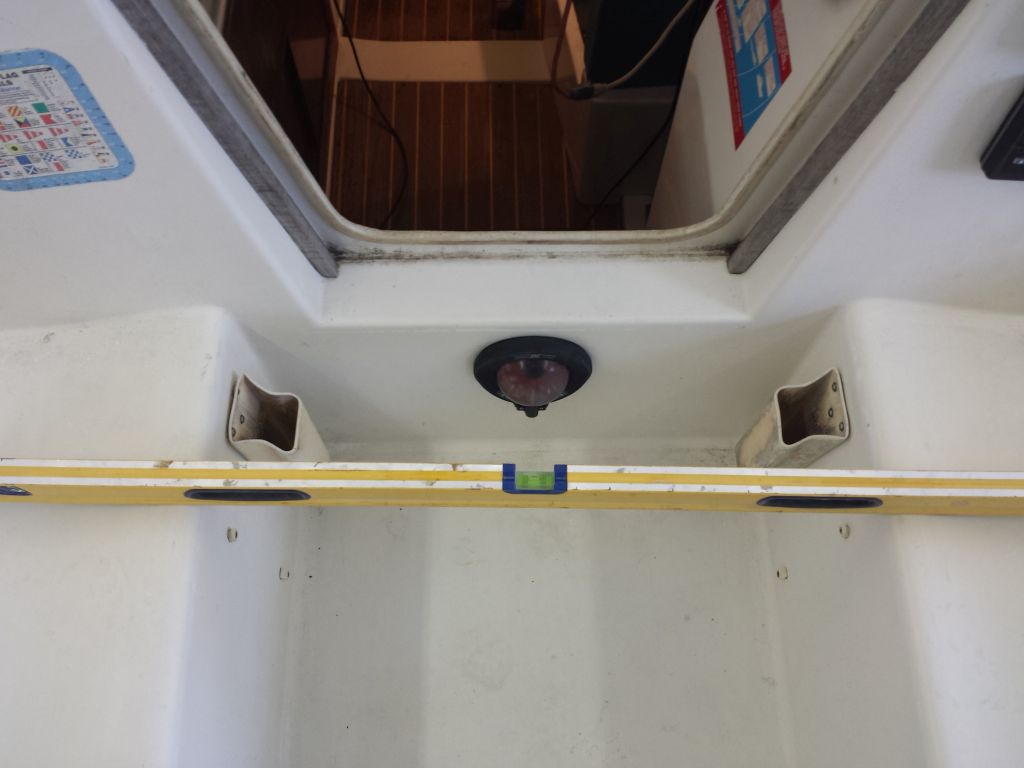
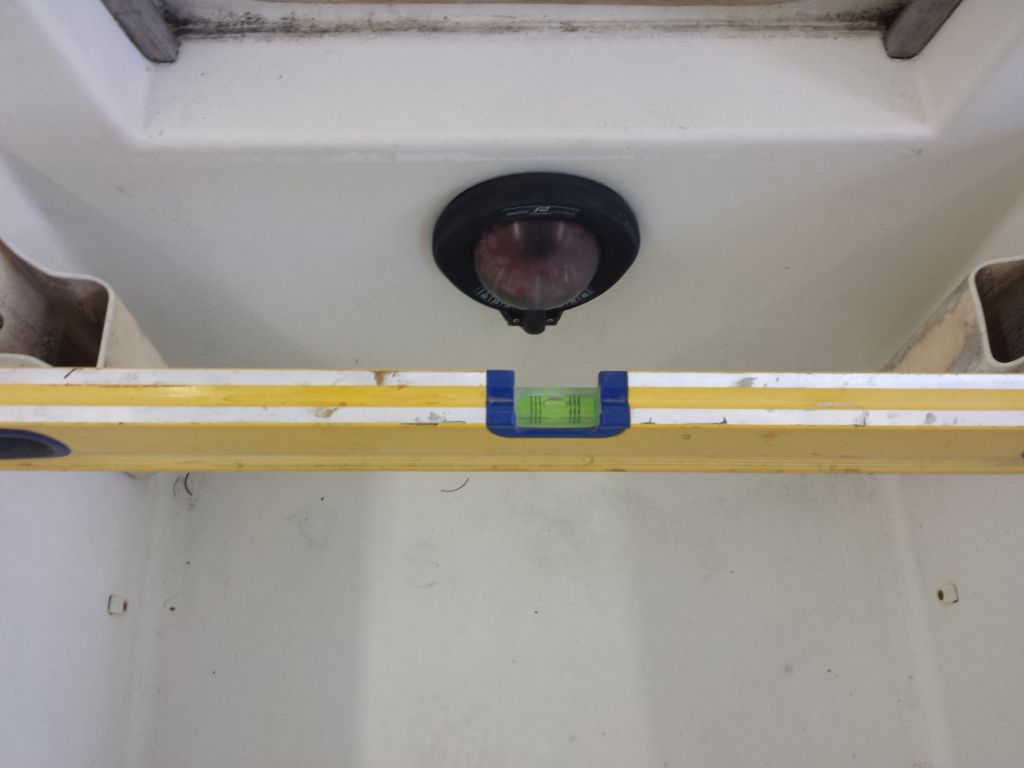
Meanwhile, I continued work on the new halyard stoppers on the cabin top. The epoxy plugs had had the weekend to cure, and now I drilled for the new fixing bolts, and installed the new hardware in butyl sealant, which was a good choice in this instance since the hardware specifically admonished against using other common sealants.
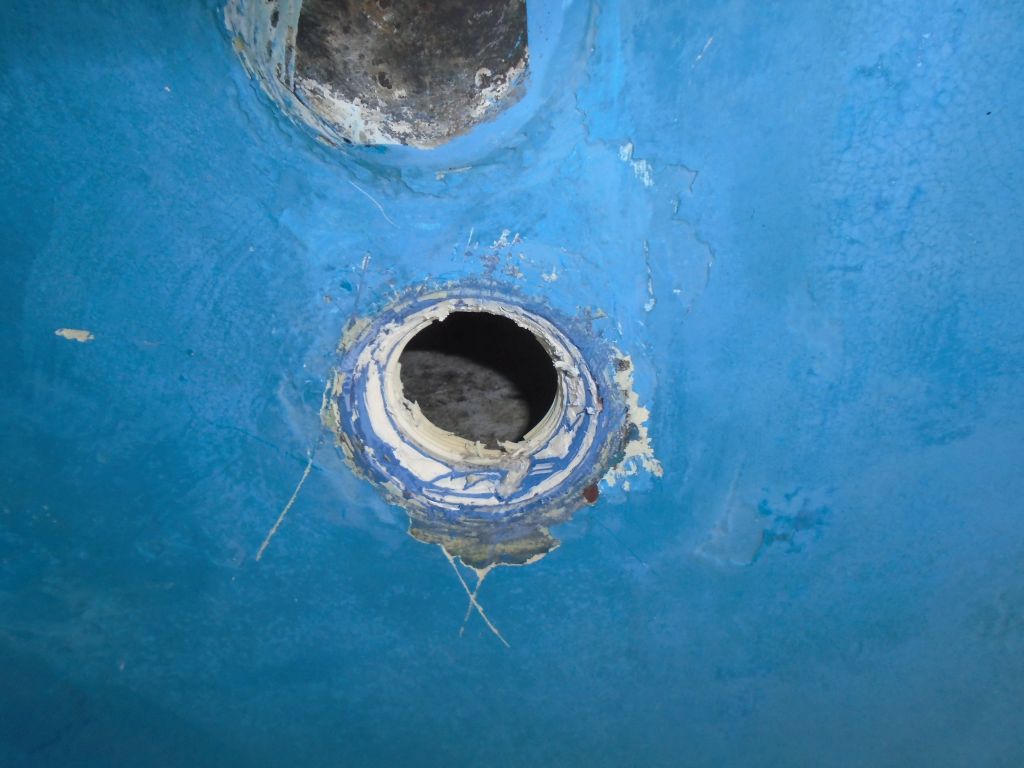
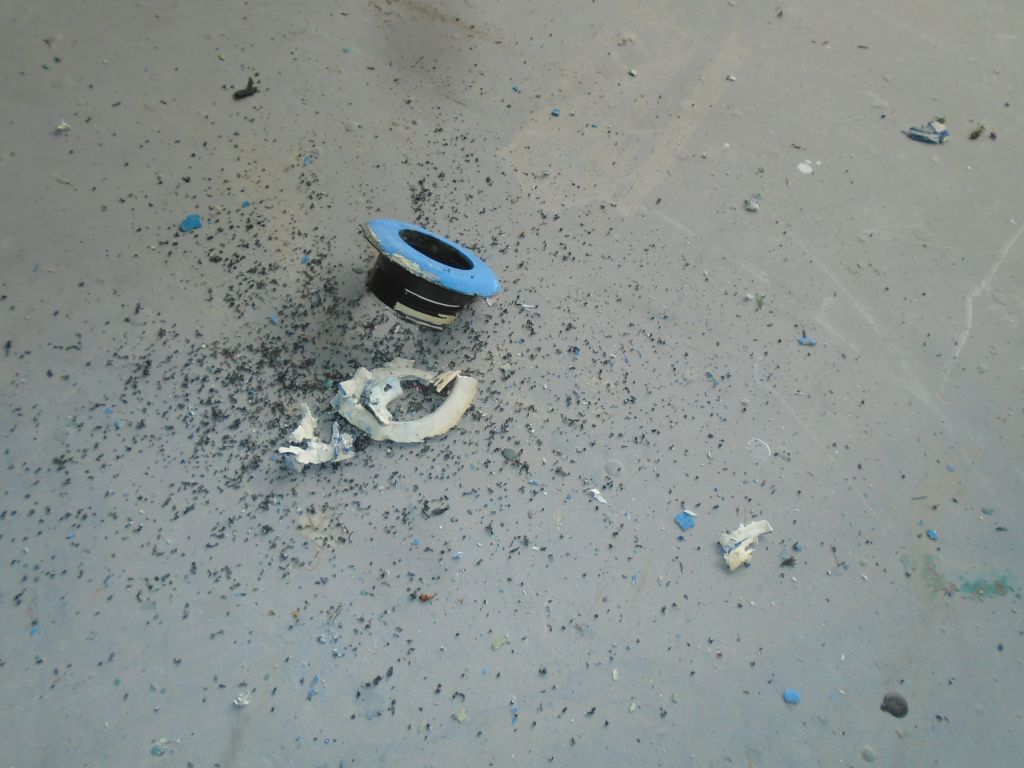
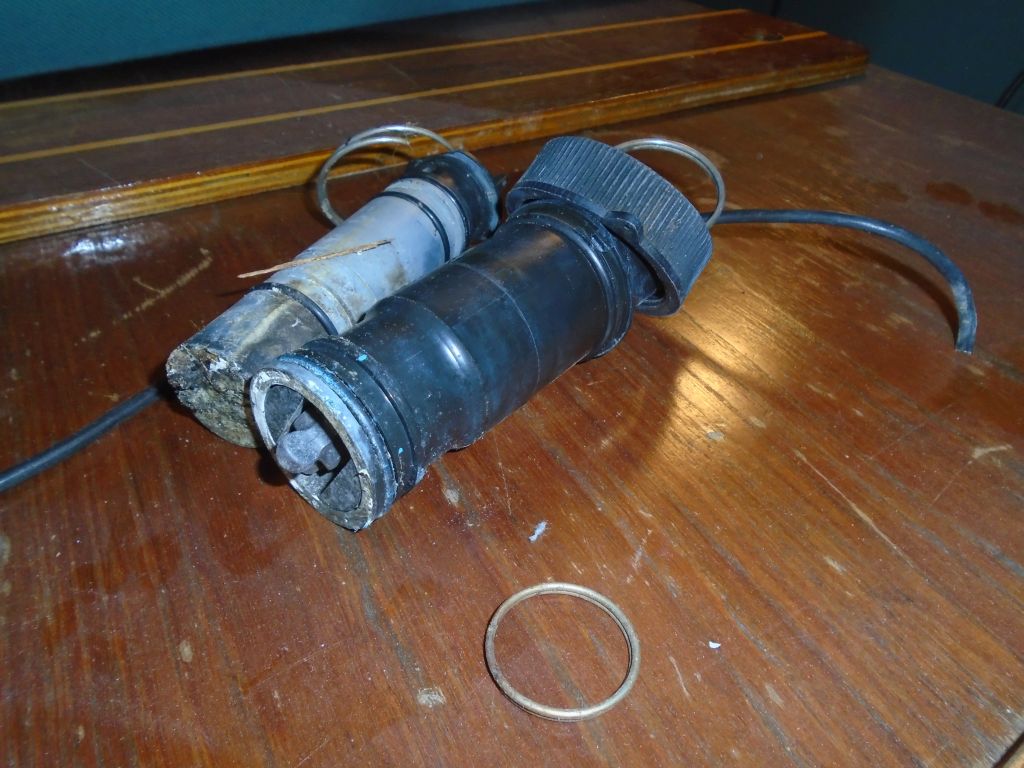
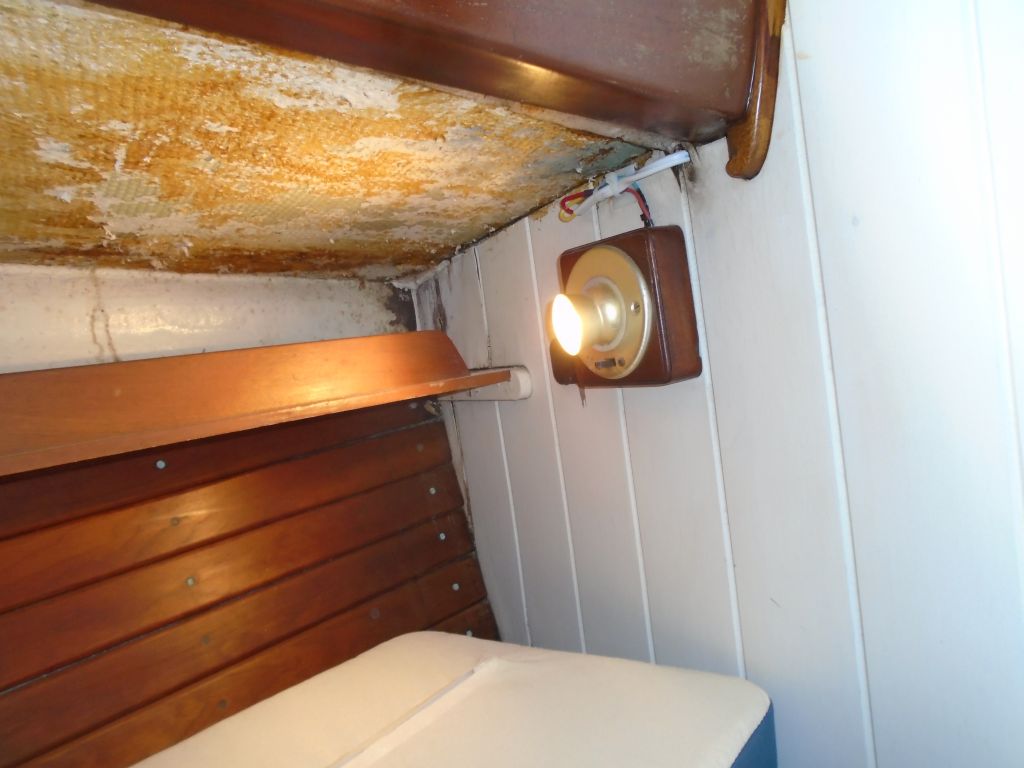
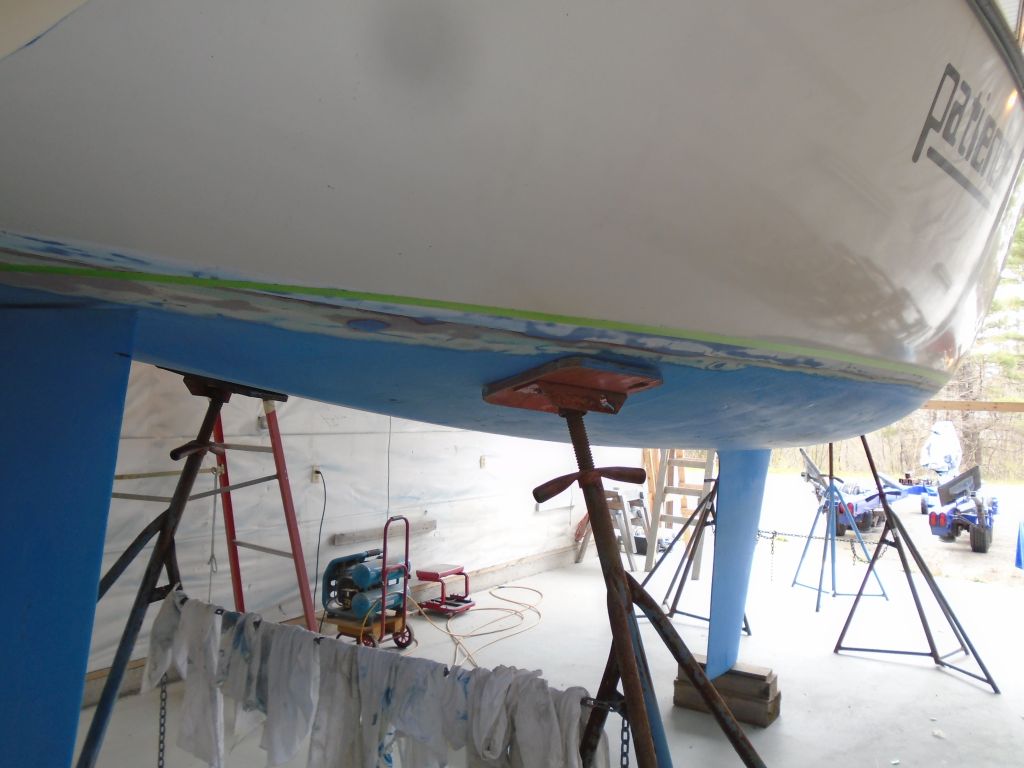
There was a defunct knotmeter transducer in the boat, which the owner requested I removed and patch.
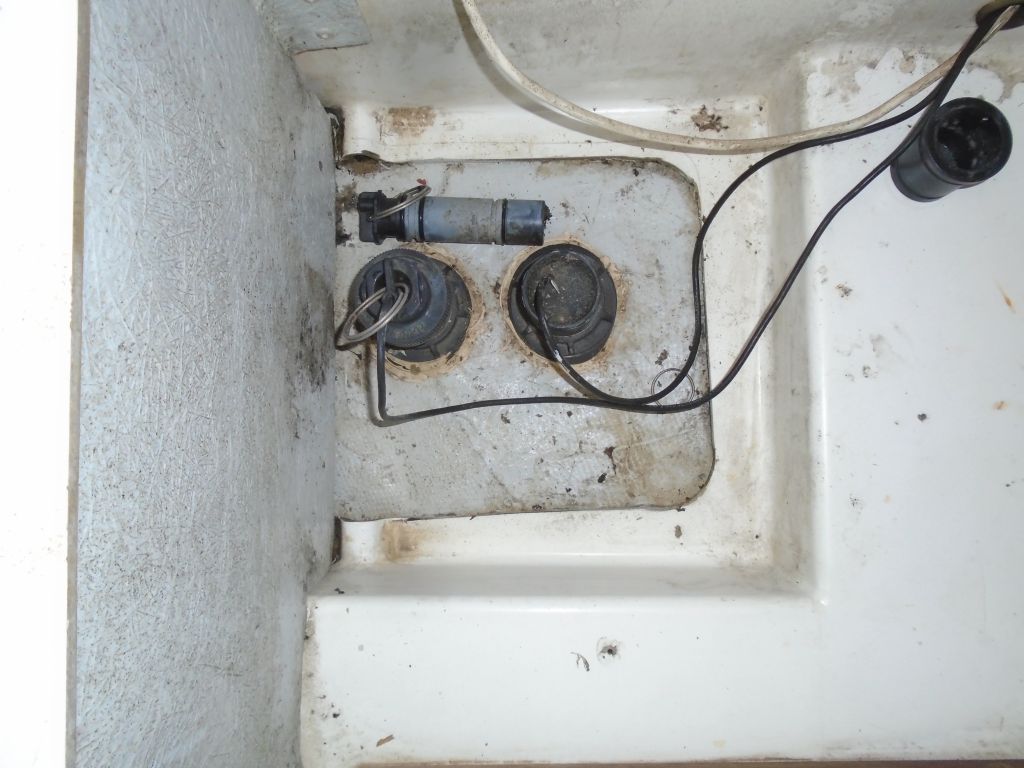
From inside, I removed the plug itself, then cut away the plastic housing and, from outside, removed the through hull flange. Later, I’d prepare the hole and fill and patch to complete the job.

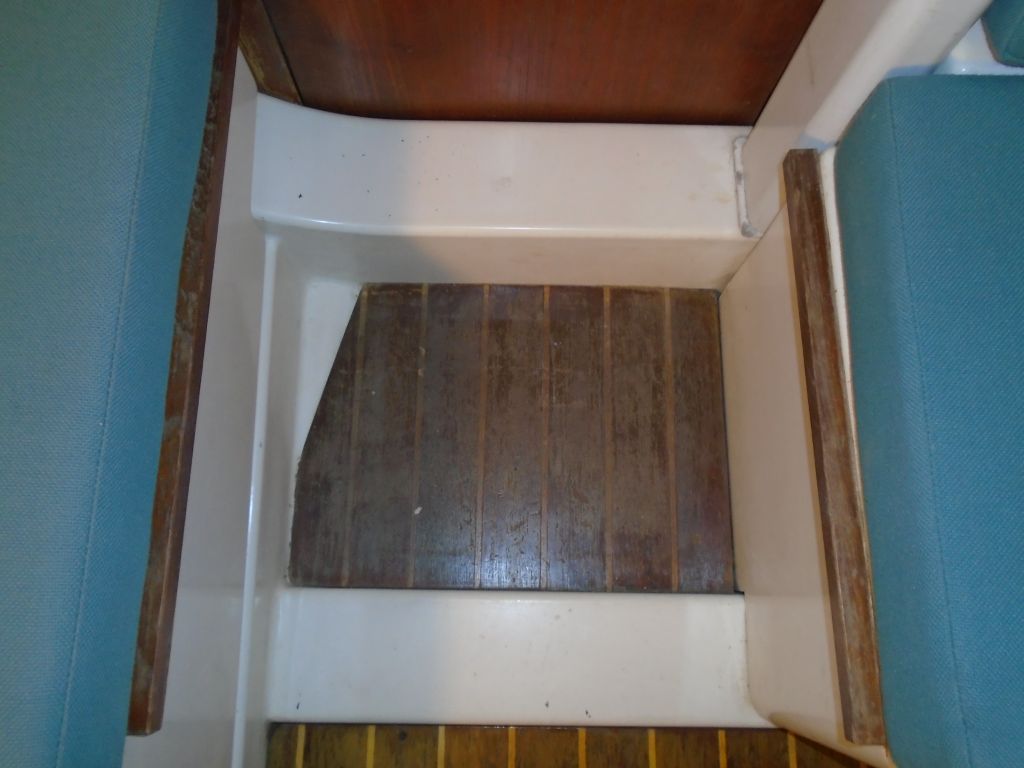
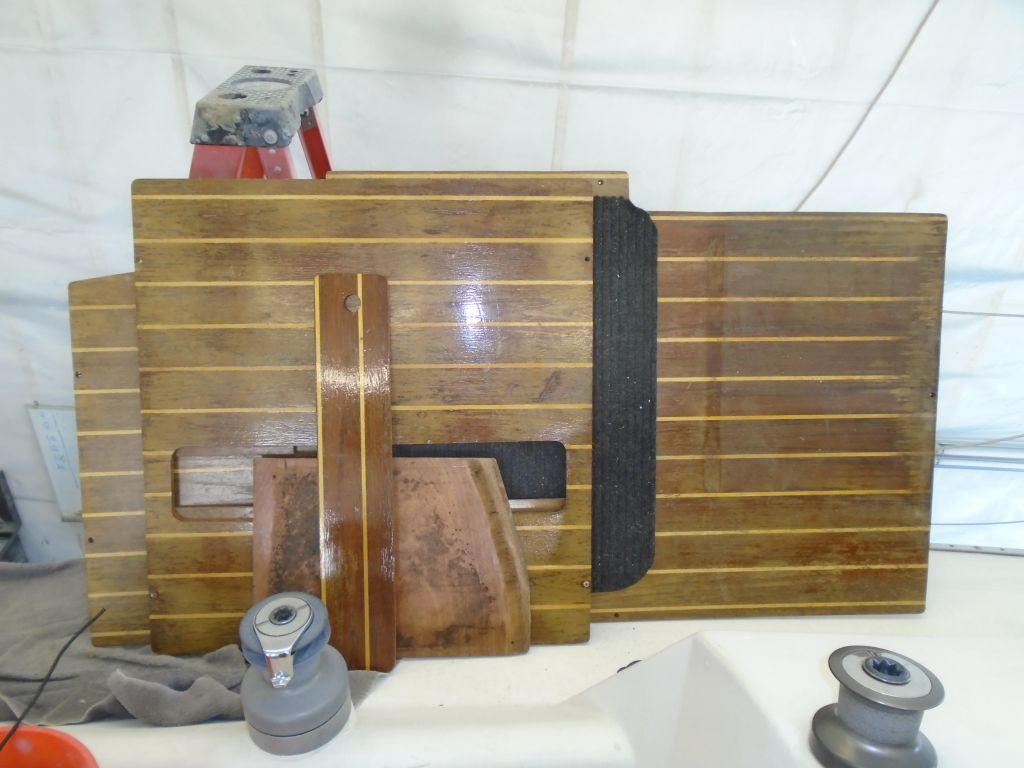
The original cabin sole, made from teak-veneer plywood, was in poor-ish condition, and the owner requested I replace it with new painted panels. So I removed the old panels from the boat so I could pattern them and build the new pieces forthwith.
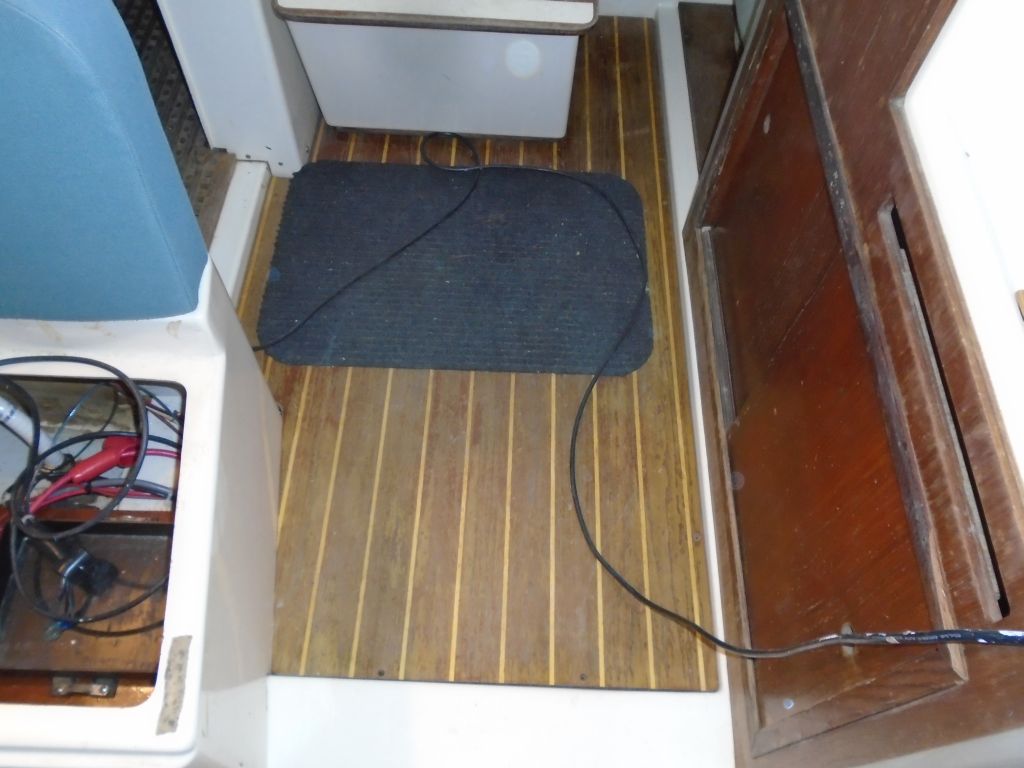
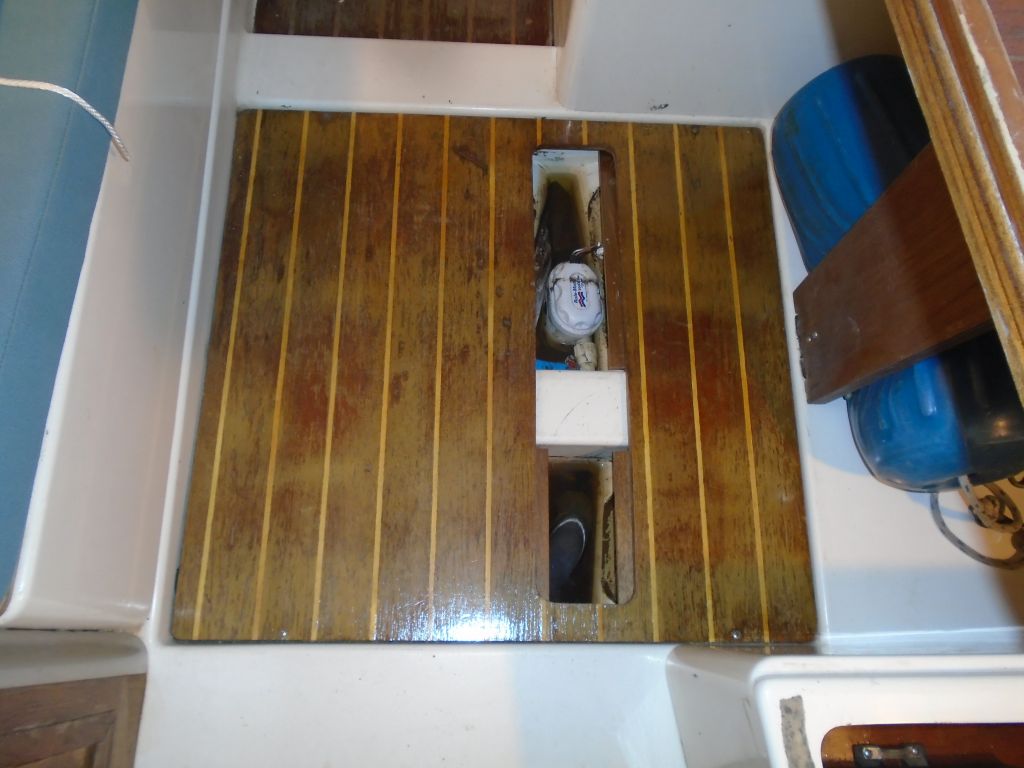
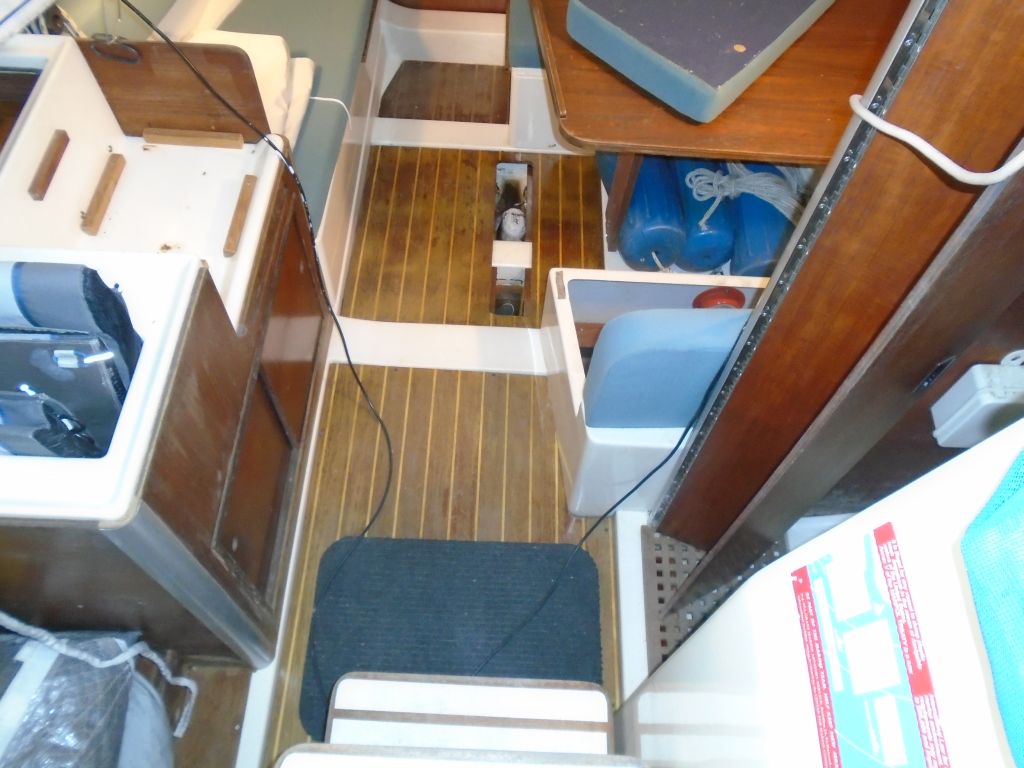


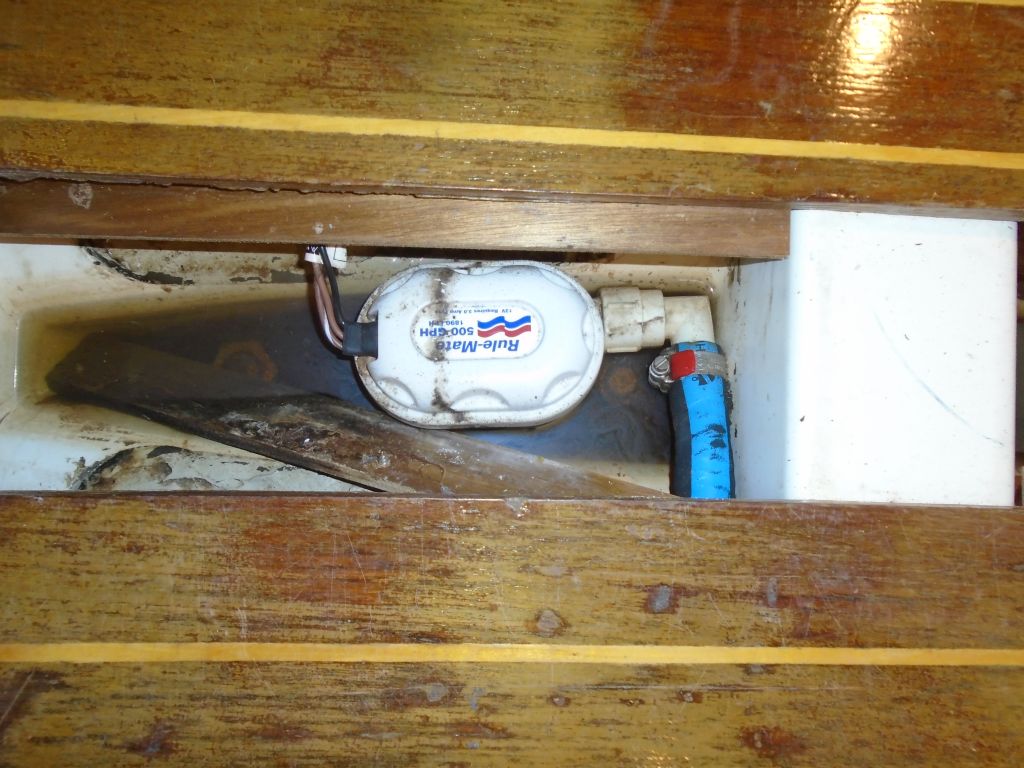
I also removed a stand-alone automatic bilge pump, which I’d soon be replacing with a remotely-located diaphragm pump.


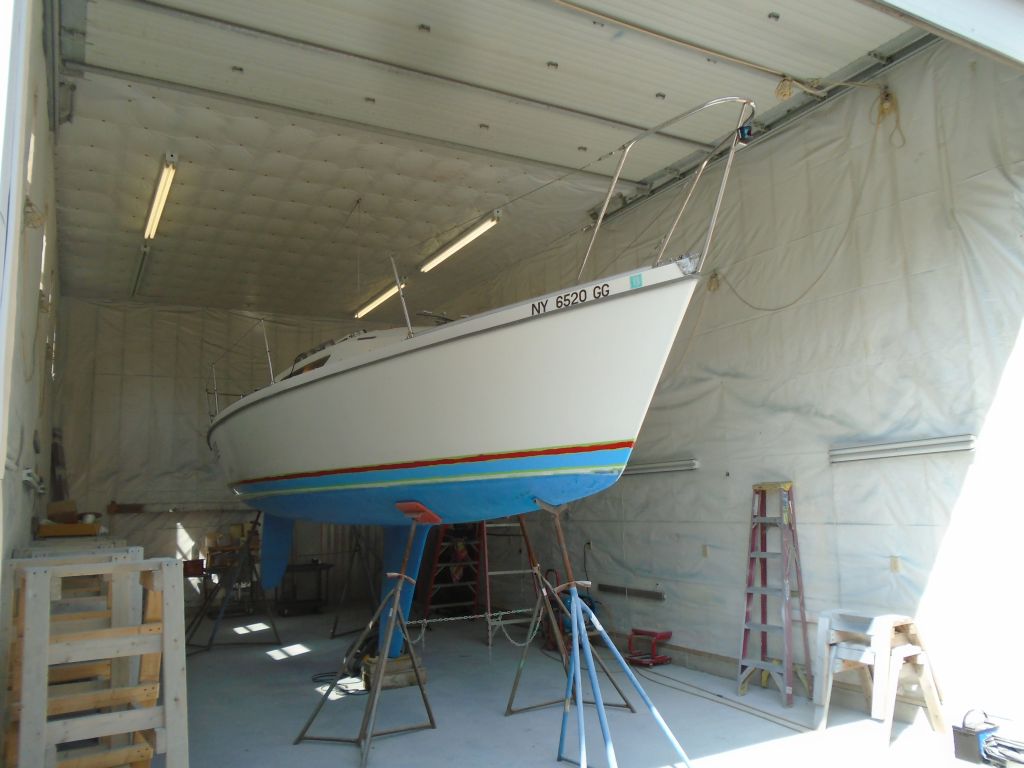
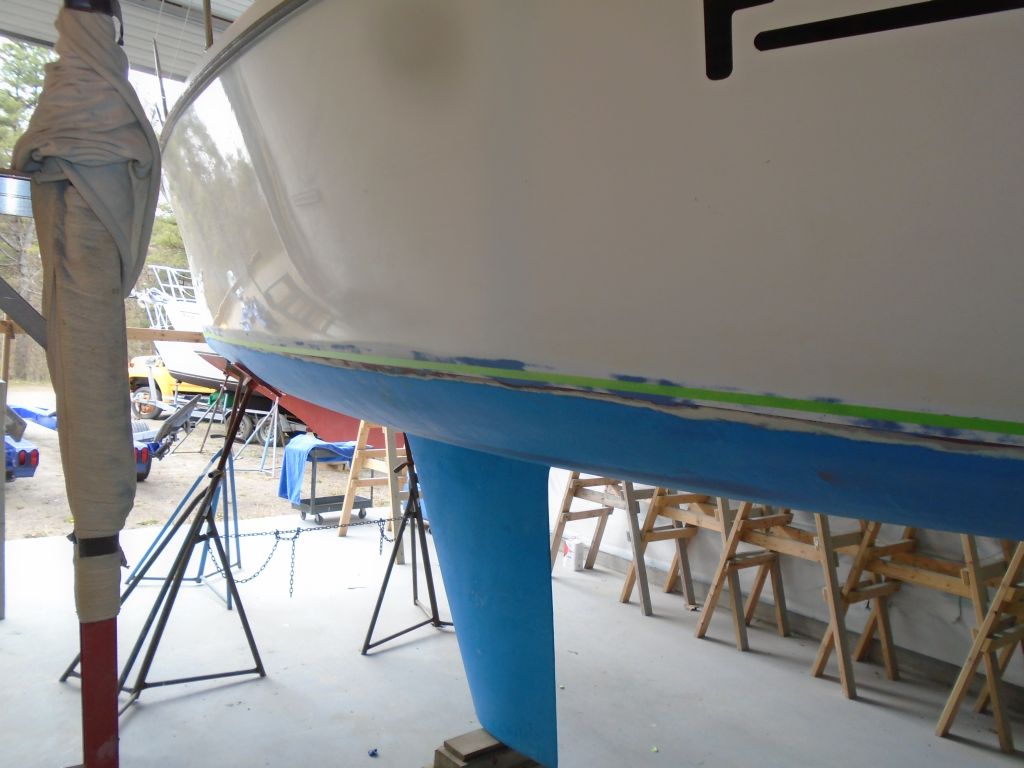
By the end of the day, the new boottop paint had tacked up sufficiently to allow me to remove the masking tape. Now I’d leave the fresh paint for a few days before I considered overmasking it to paint the white striped between.


Total time billed on this job today: 5.5 hours
0600 Weather Observation:
42°, sunny. Forecast for the day: mainly sunny, some increasing clouds in the afternoon, high in the 70s
Friday
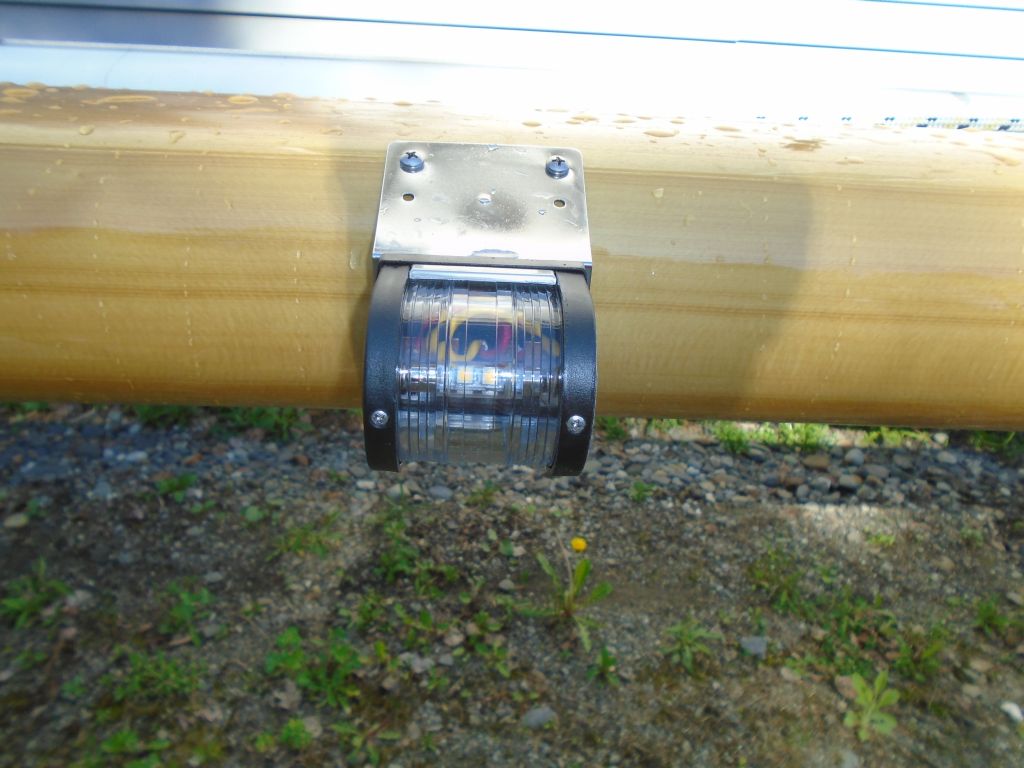
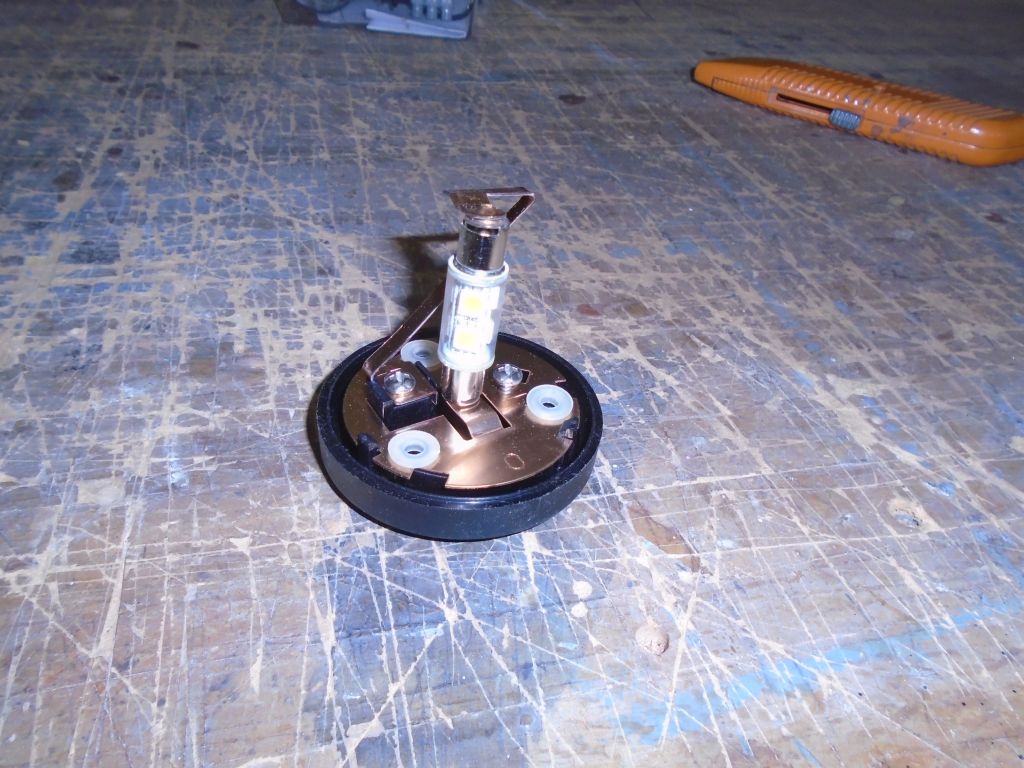
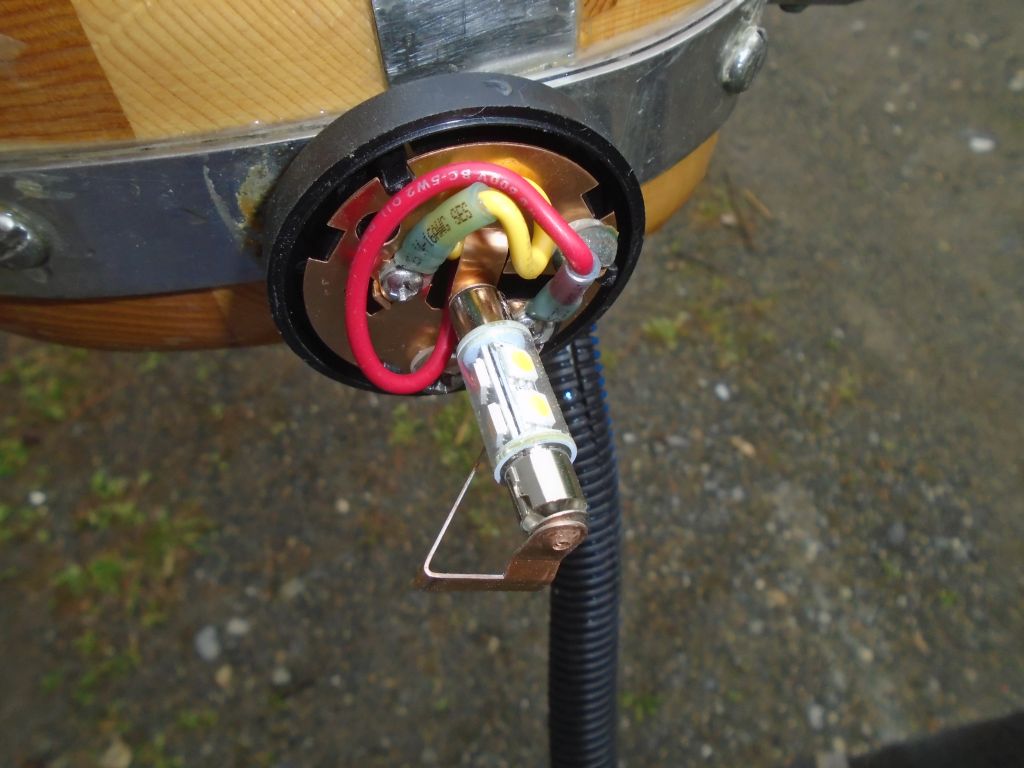
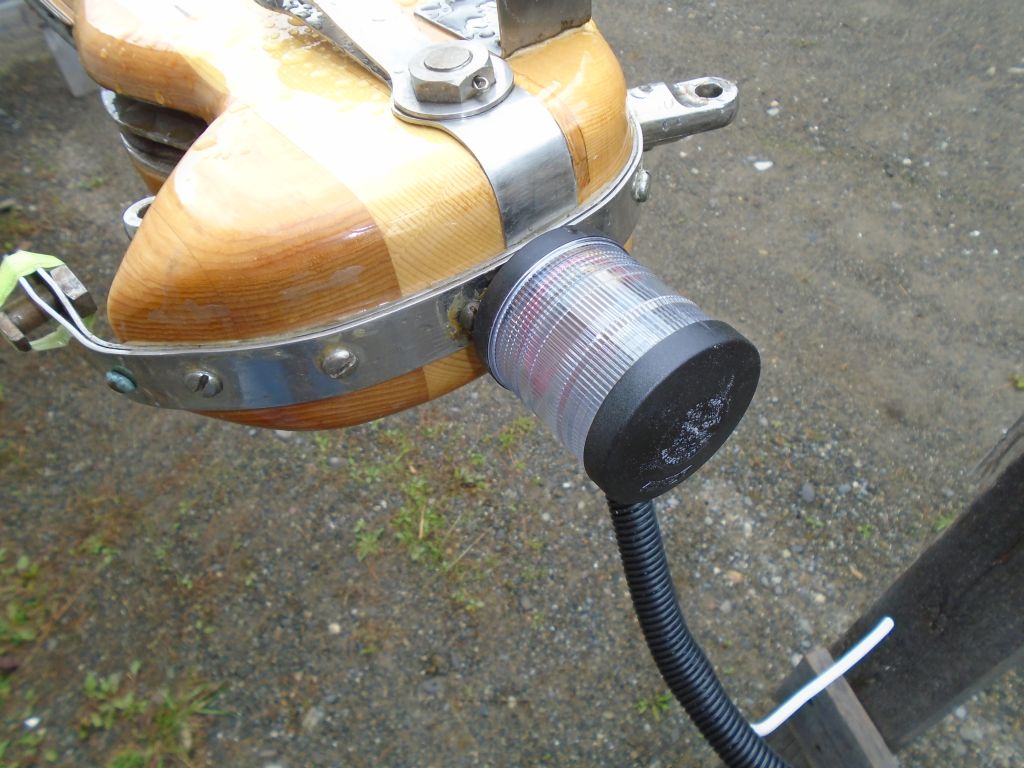
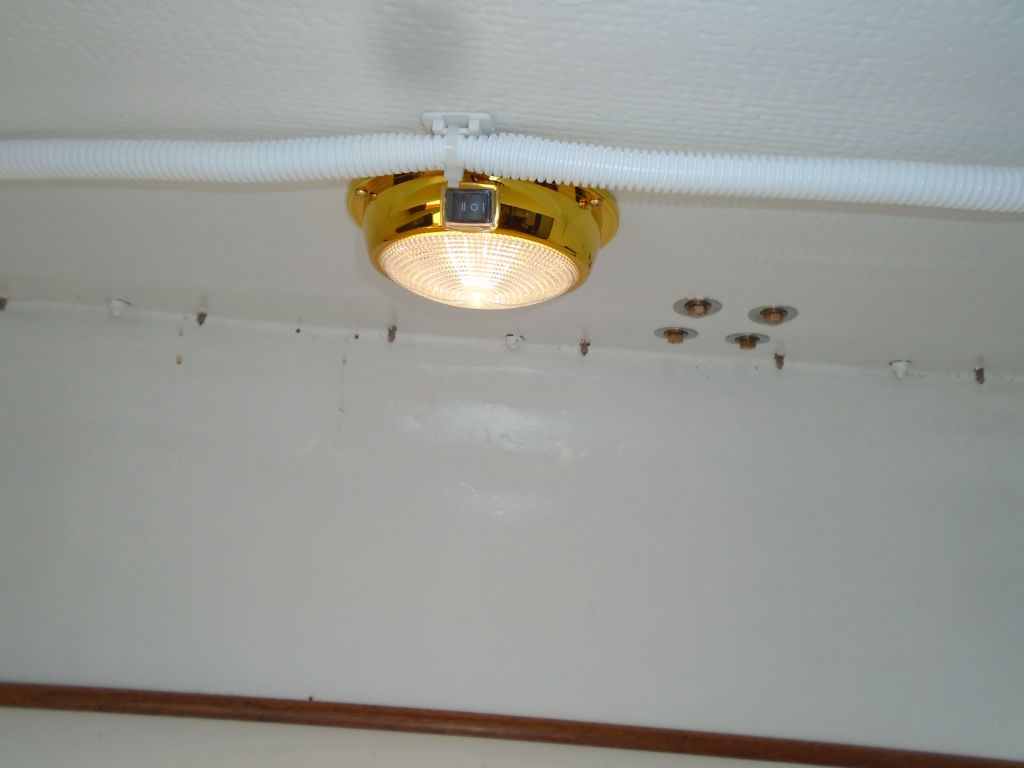
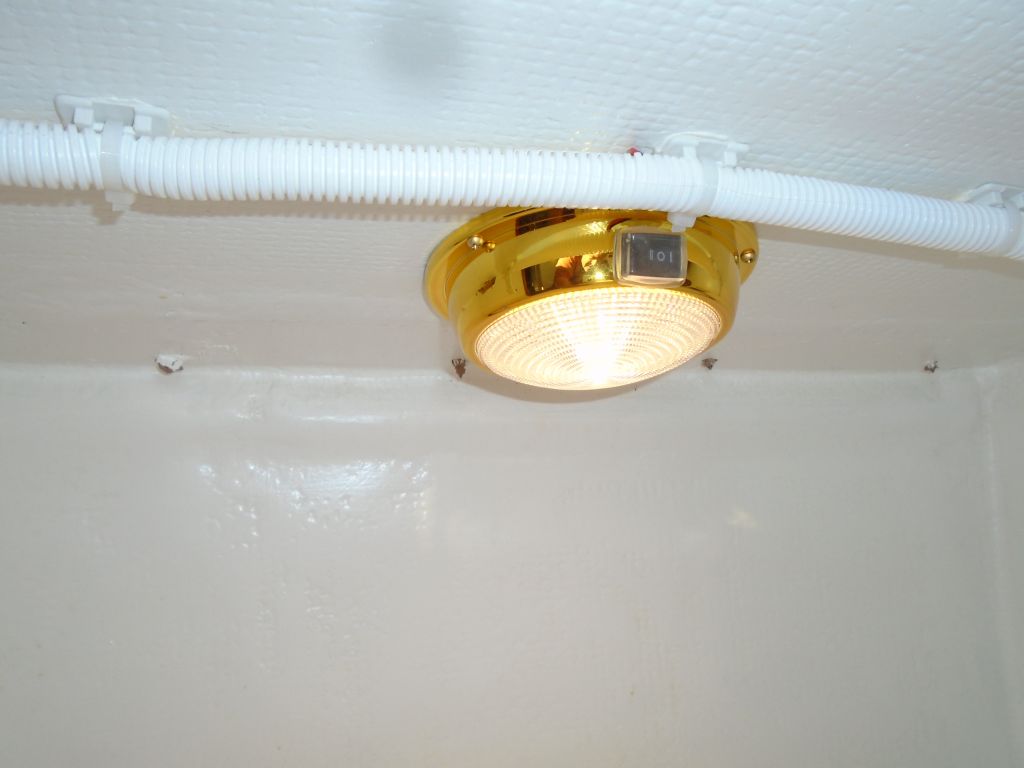
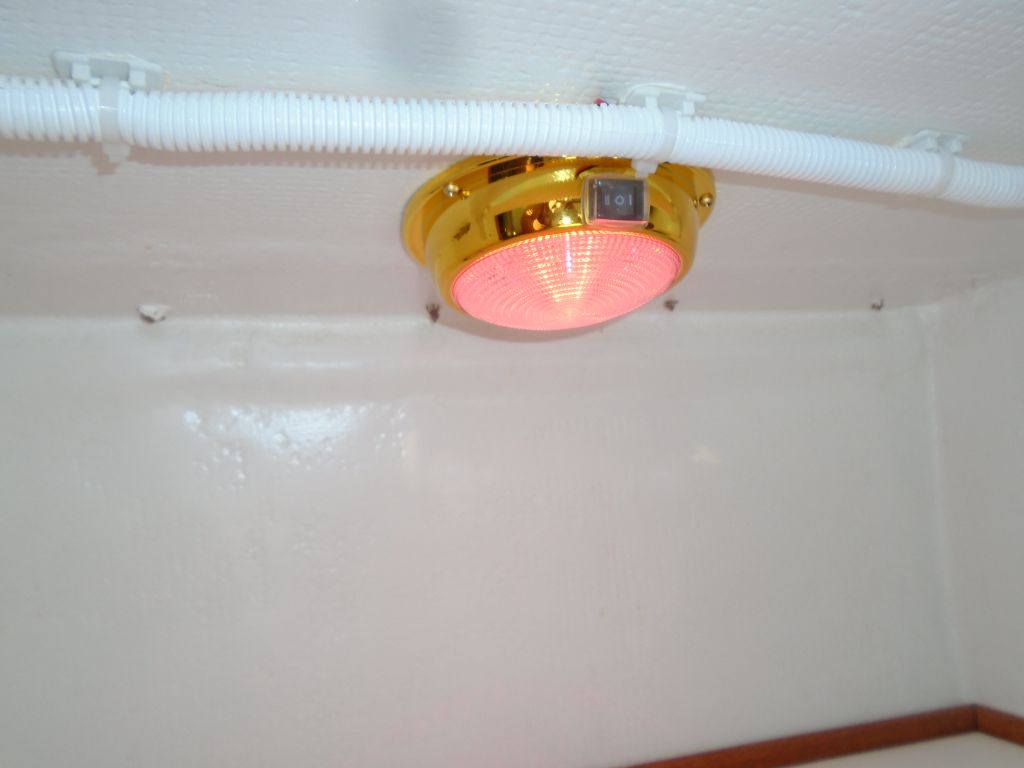
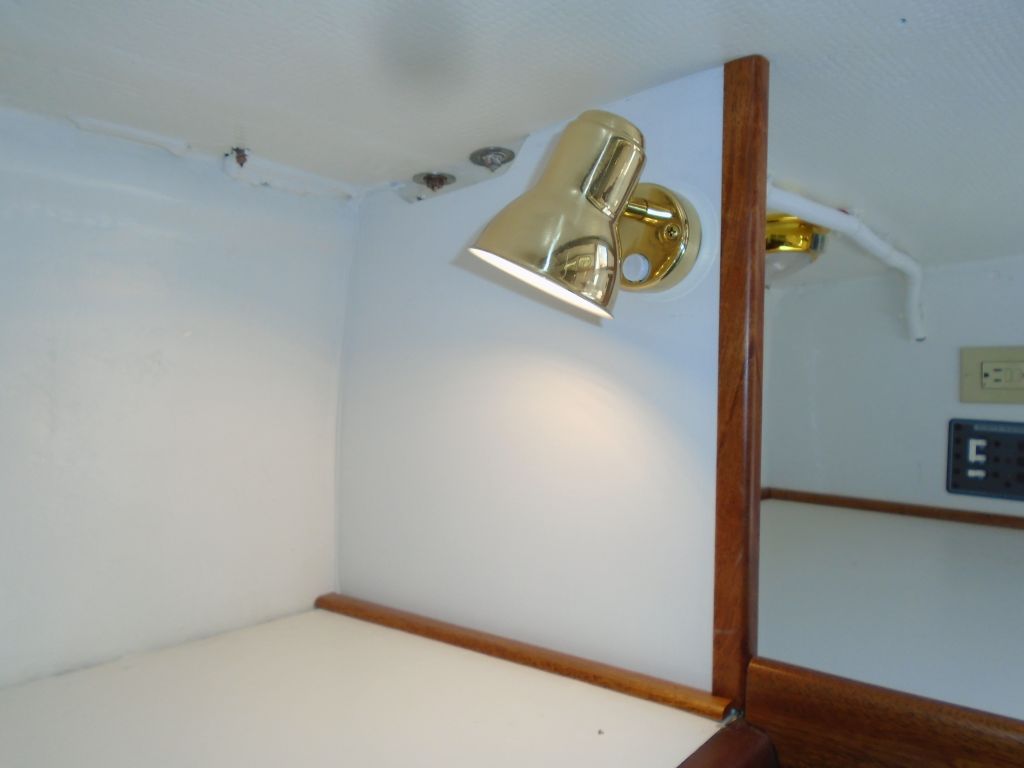
I finished up the mast electrical trim-out with the steaming light (actually called a masthead light), located on the front of the mast below the spreaders. This light required a mounting bracket that I secured to the mast with screws. As with the anchor light at the top of the mast, I replaced the stock incandescent bulb with an LED version.
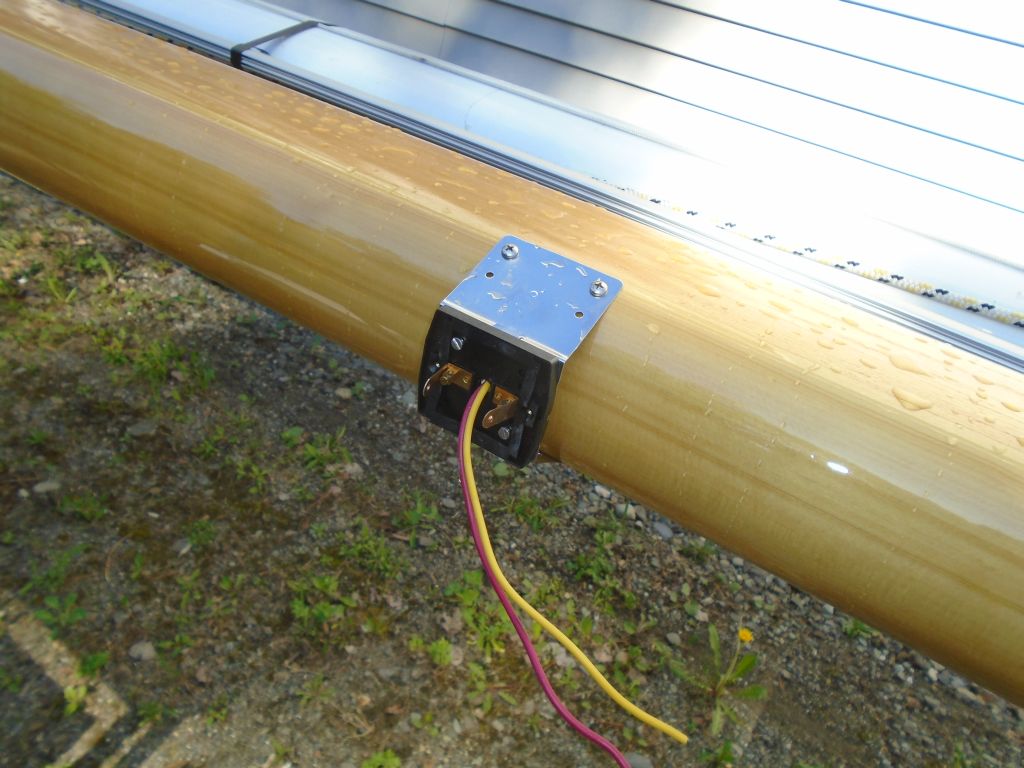

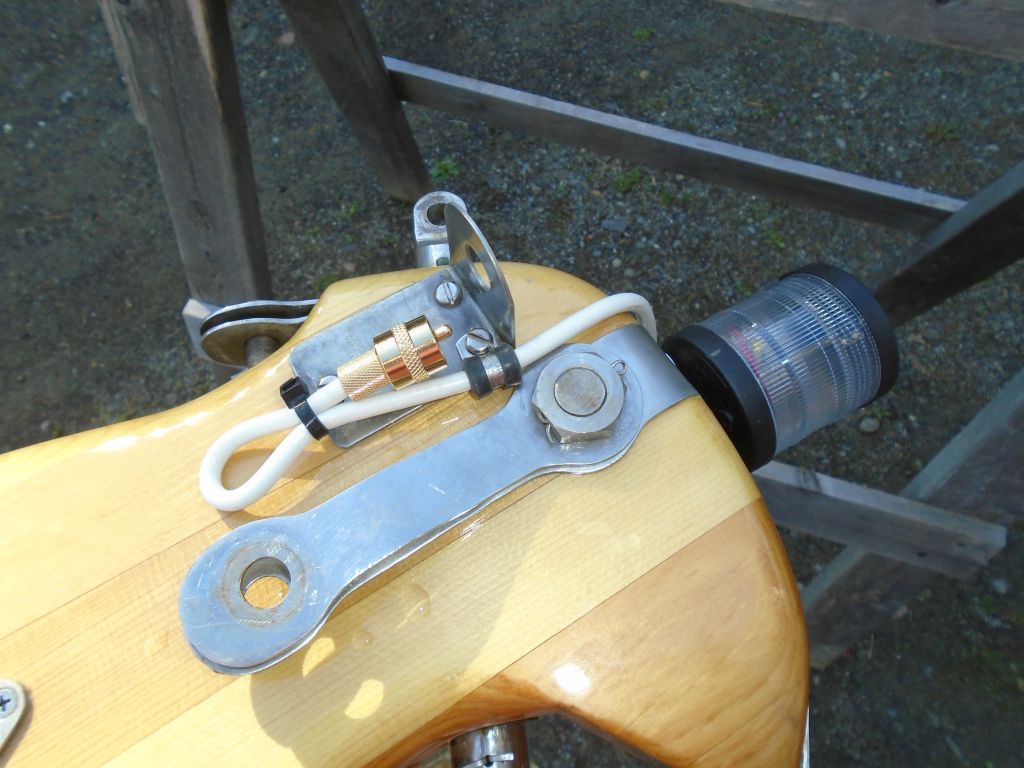
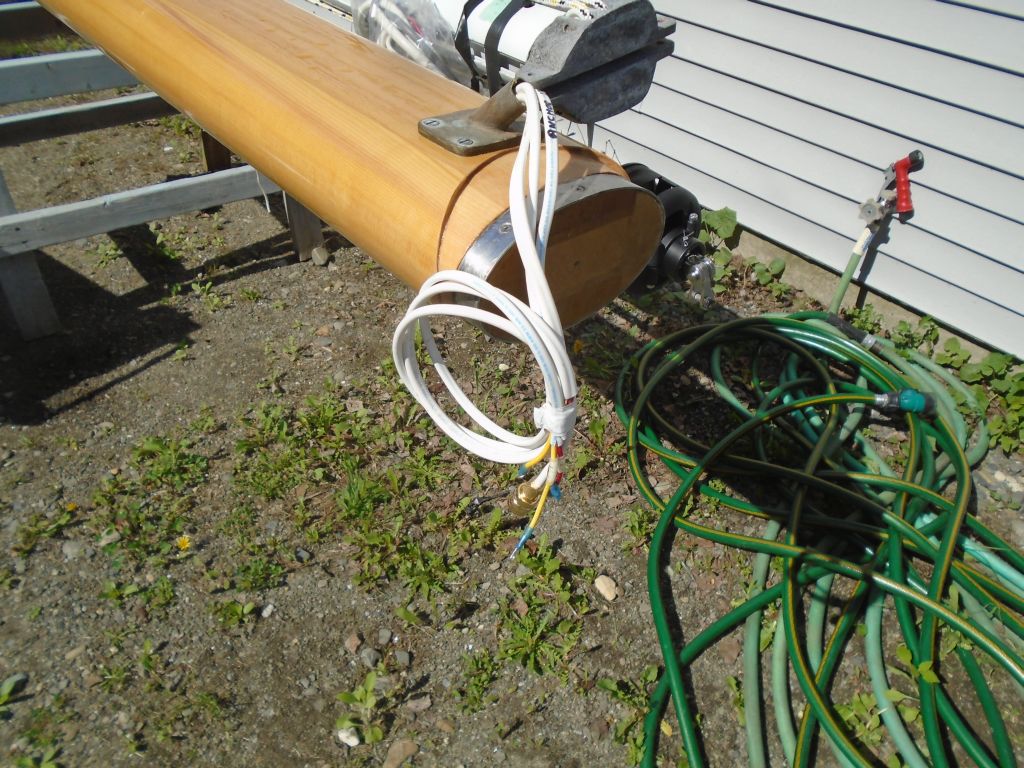
Afterwards, I finished up the wiring at the masthead with a VHF connector (the antenna was due soon), and at the mast base by making up the ends of the two sets of wires (labeled and numbered according to their function for ease of connection to the terminal block belowdecks).
LED bulbs like this have distinct polarity, meaning the bulb only works when inserted correctly. And indeed, inevitably, when I tested the two new fixtures with a battery, I found that in both cases I had to turn the bulbs over in order to get them to light.

This completed the mast work for now. I had new halyard winches on the way, and would complete their installation upon arrival.
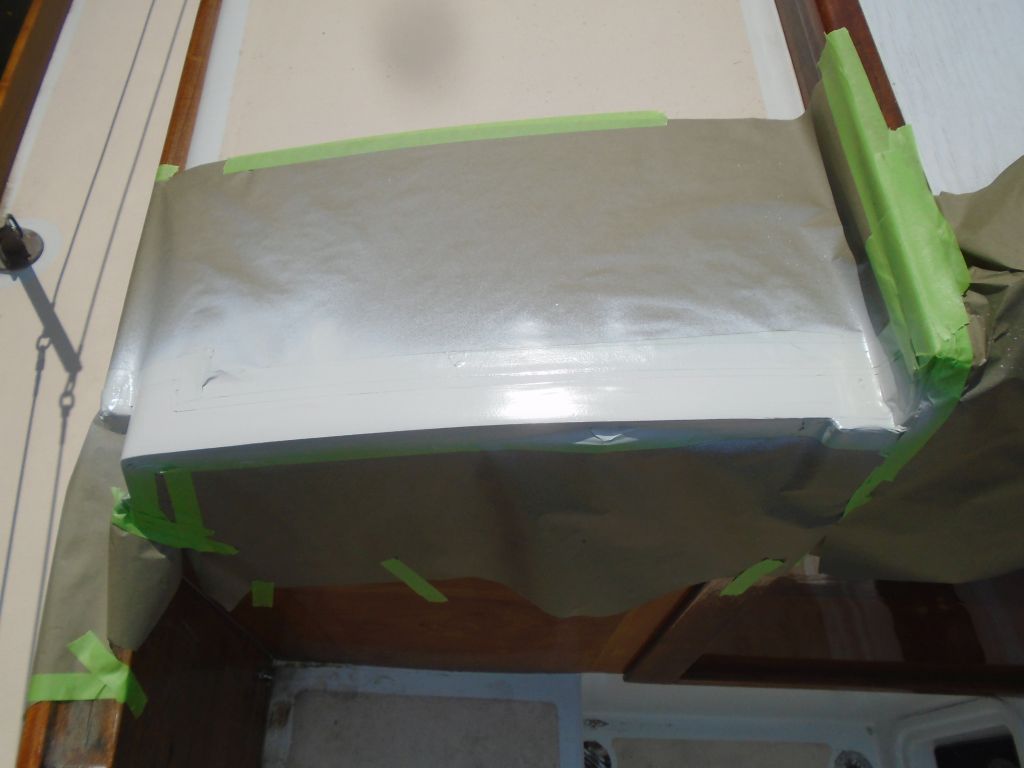
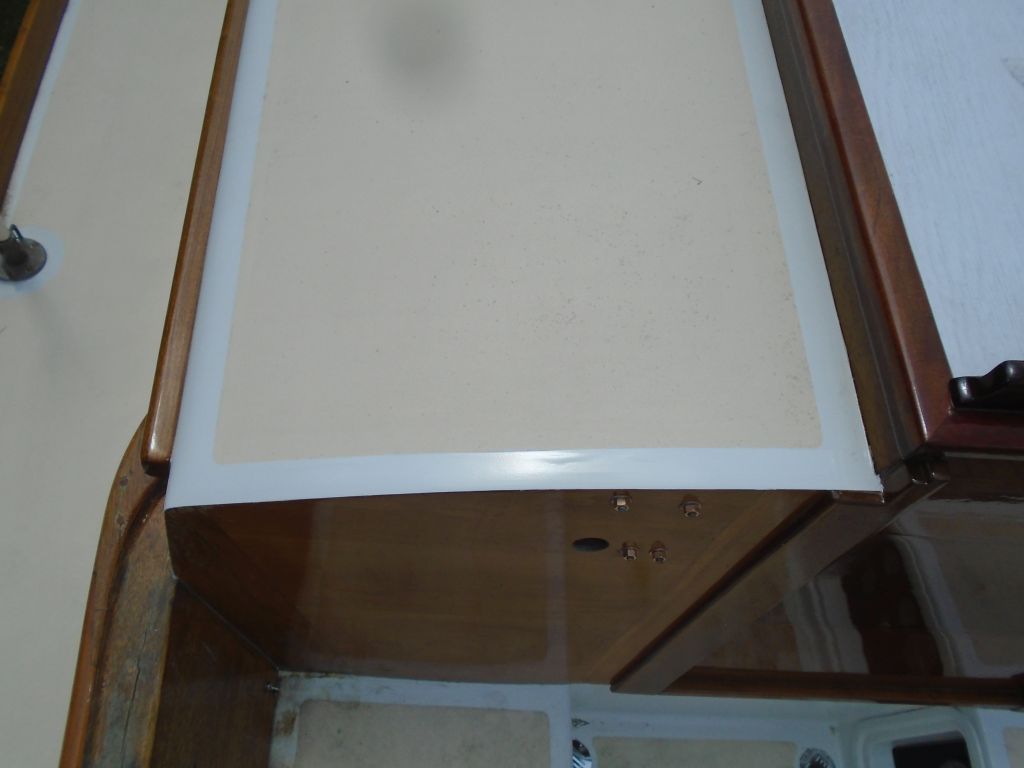
With good weather forecast all day, I finished up the little coachroof repair. After masking off the surrounding areas to protect against overspray, and other final preparations, I spray-applied several coats of off-white LPU mixed with a flattening agent to match the remaining areas of the deck.

Total time billed on this job today: 2 hours
0600 Weather Observation:
48°, mostly clear. Forecast for the day: mainly sunny, 76°
Friday
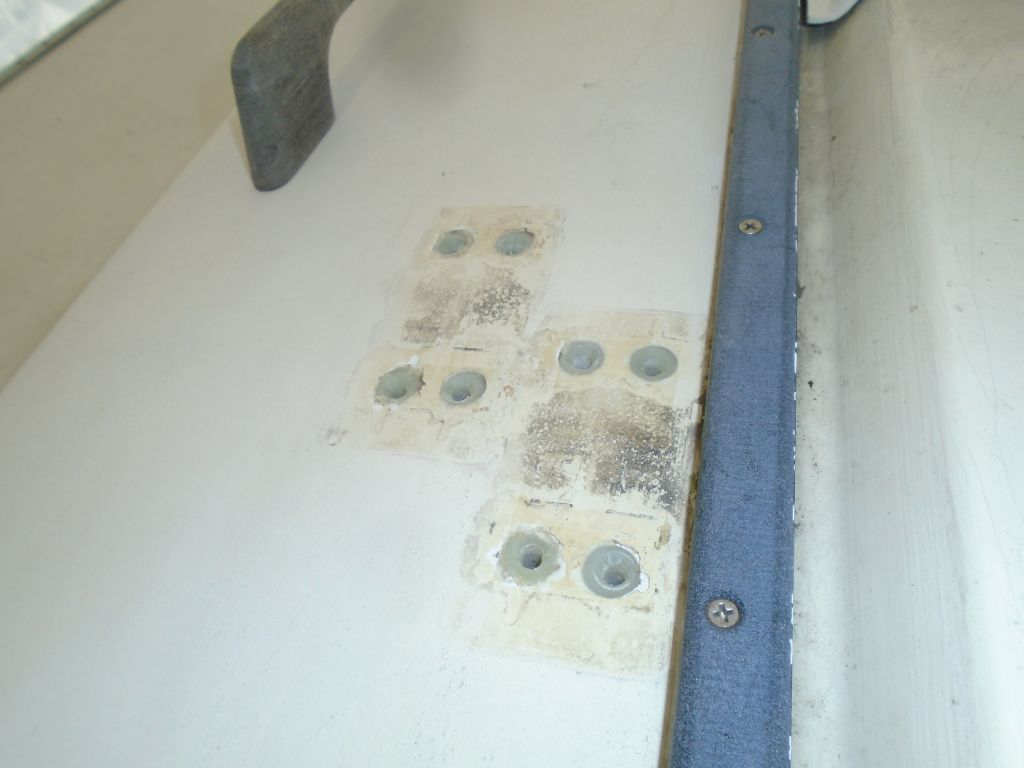
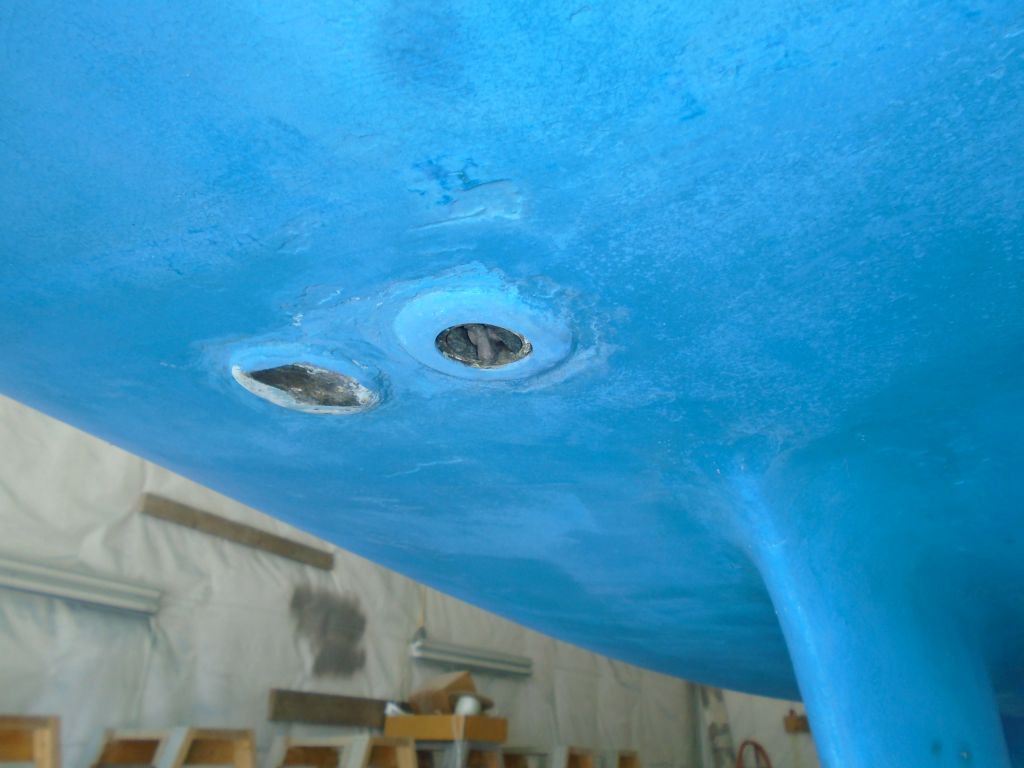
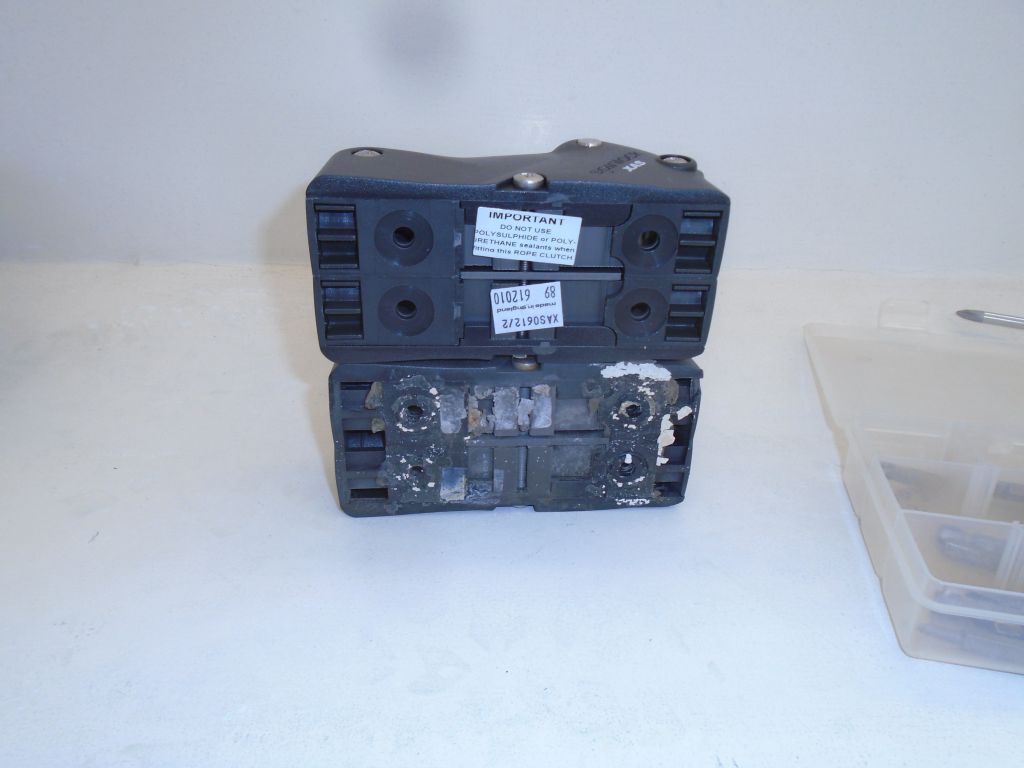
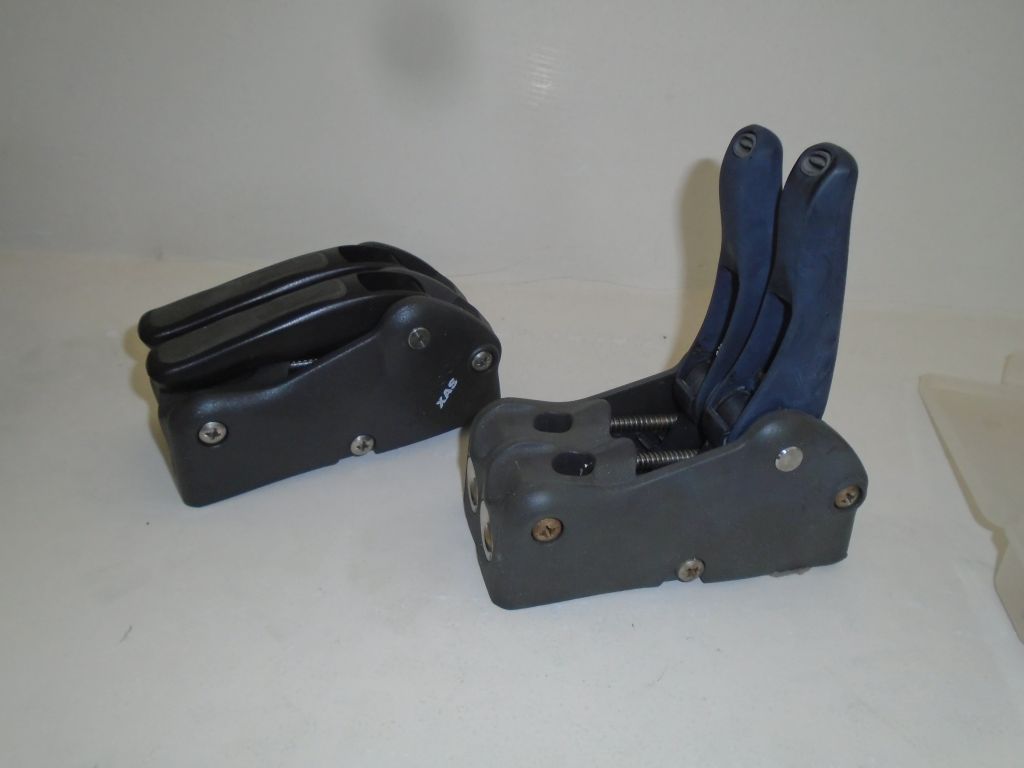
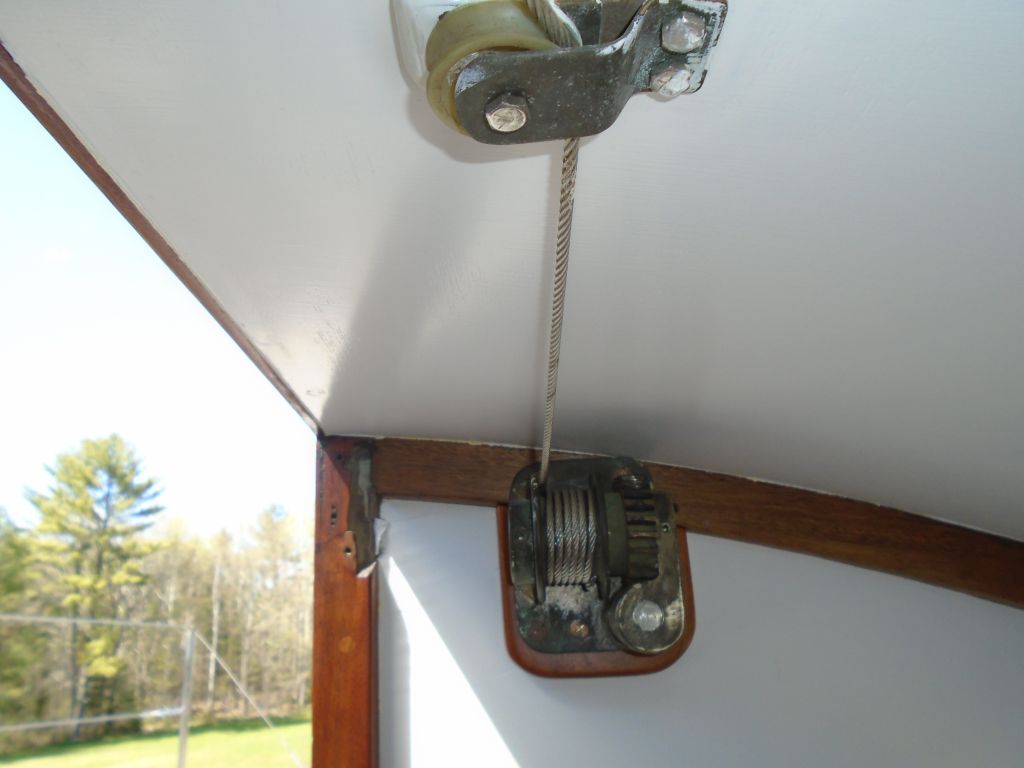
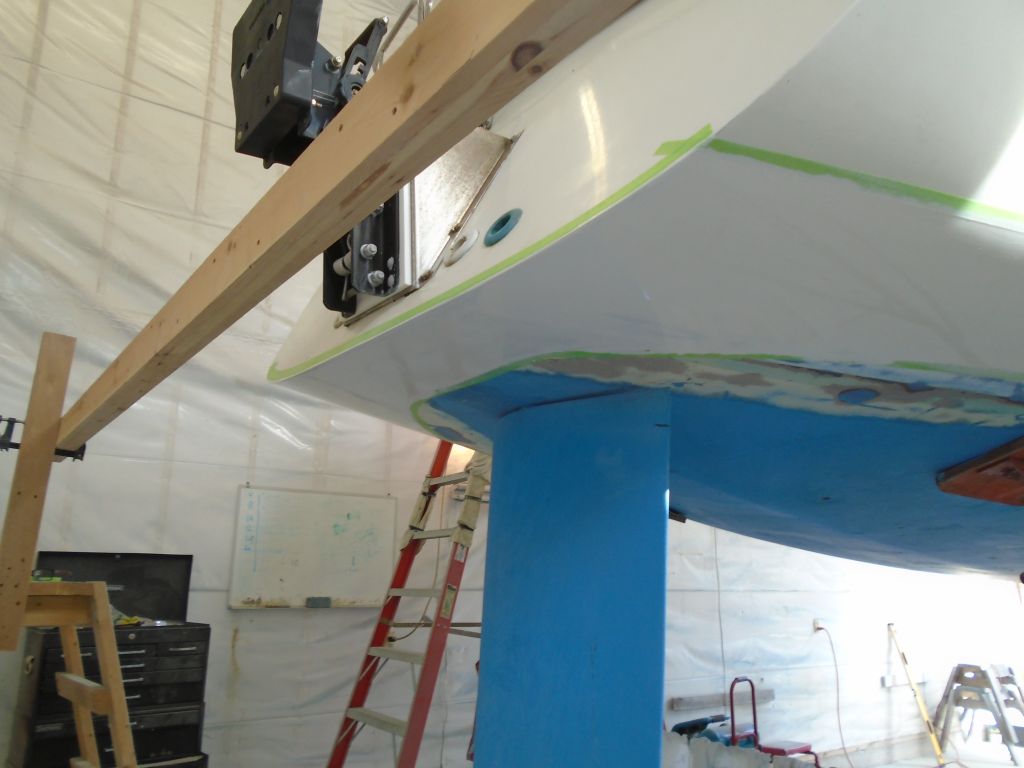
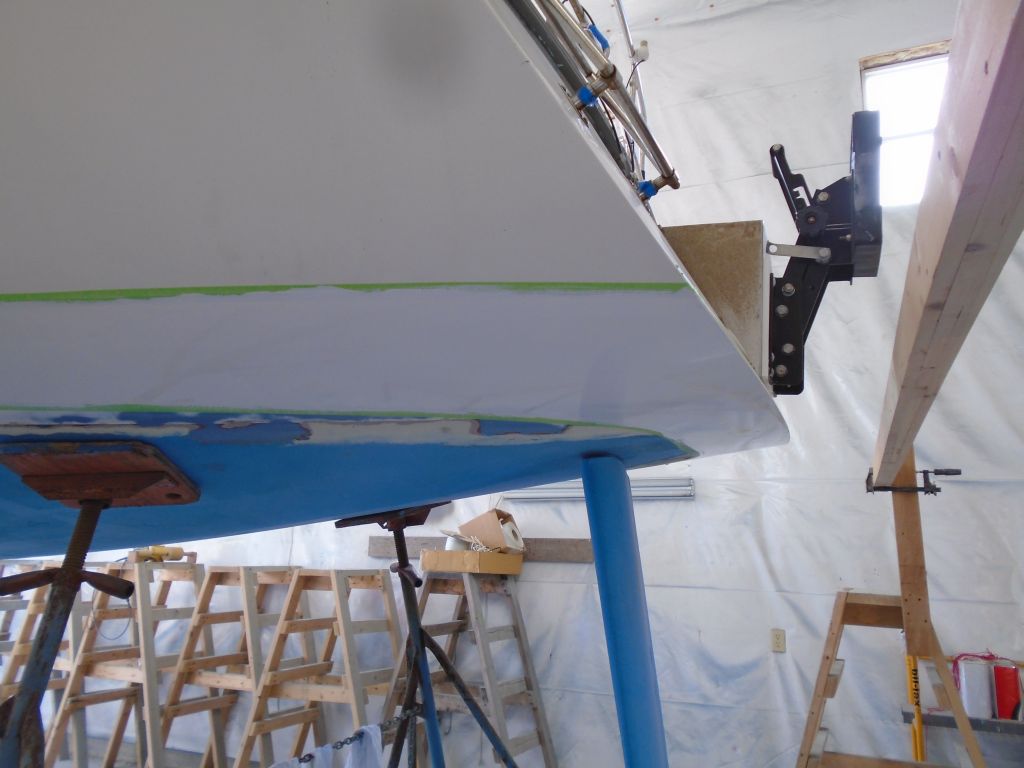
After finishing up some work on another boat, and awaiting a shipment paint later in the day, I turned to the halyard stoppers located on the cabin trunk. There were four of these, and they appeared original. The owner requested replacement.

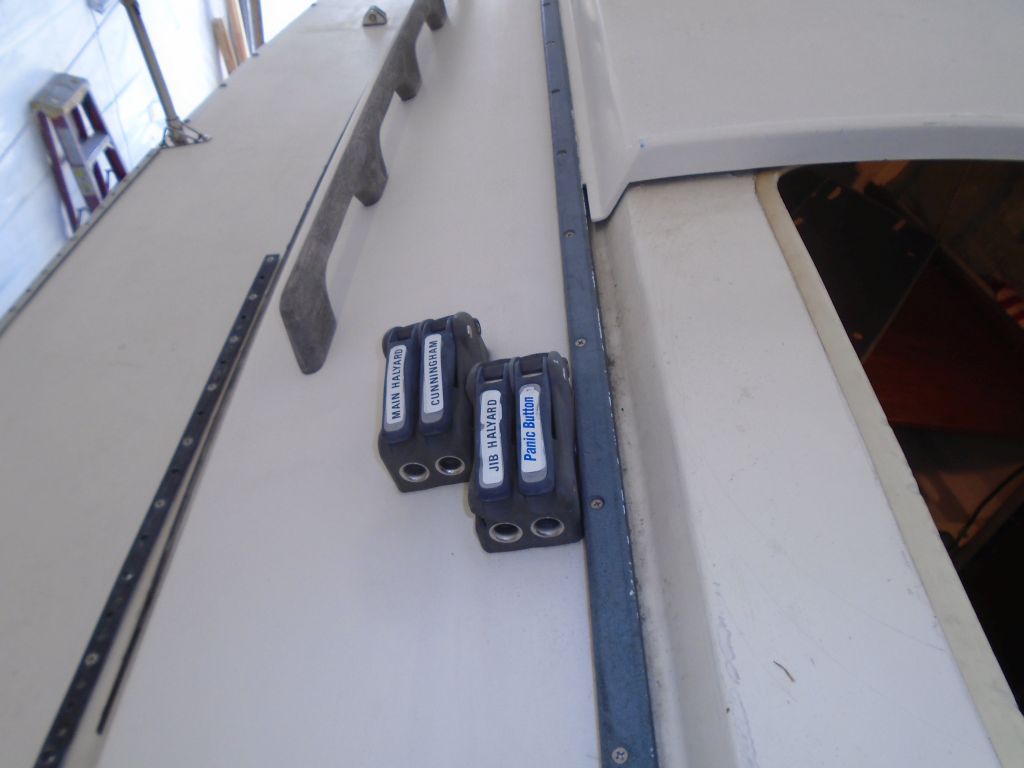
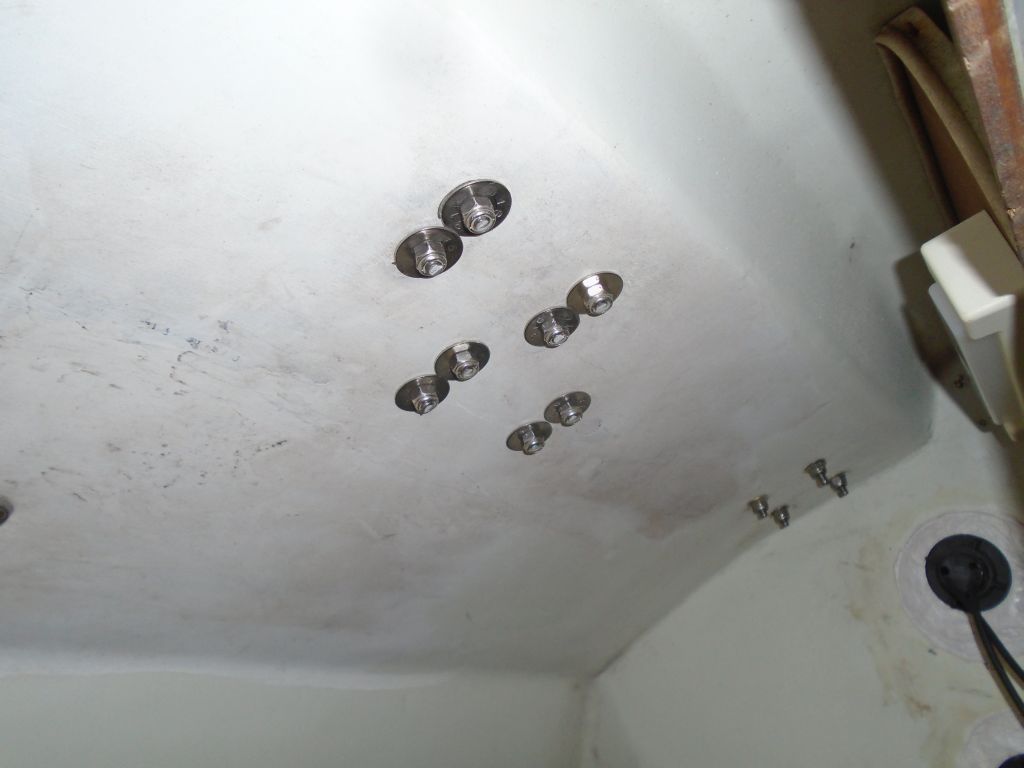
Removal was straightforward. The barrel nuts on the interior had been painted over, but fortunately came off without issue, and soon the old hardware was removed.
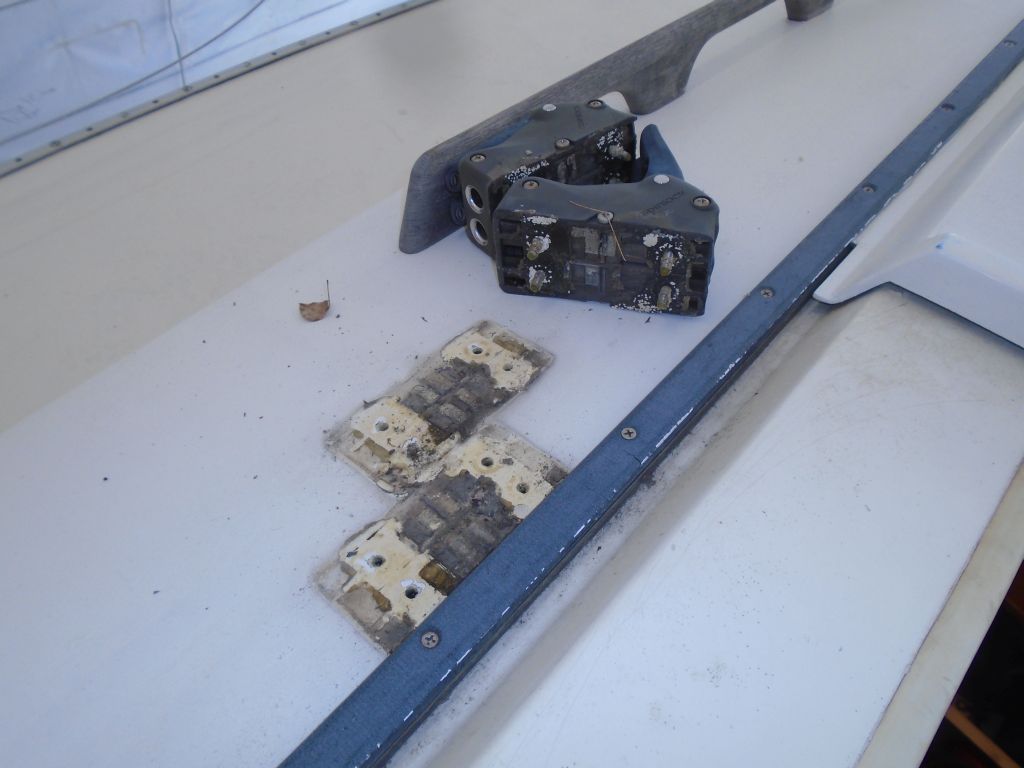
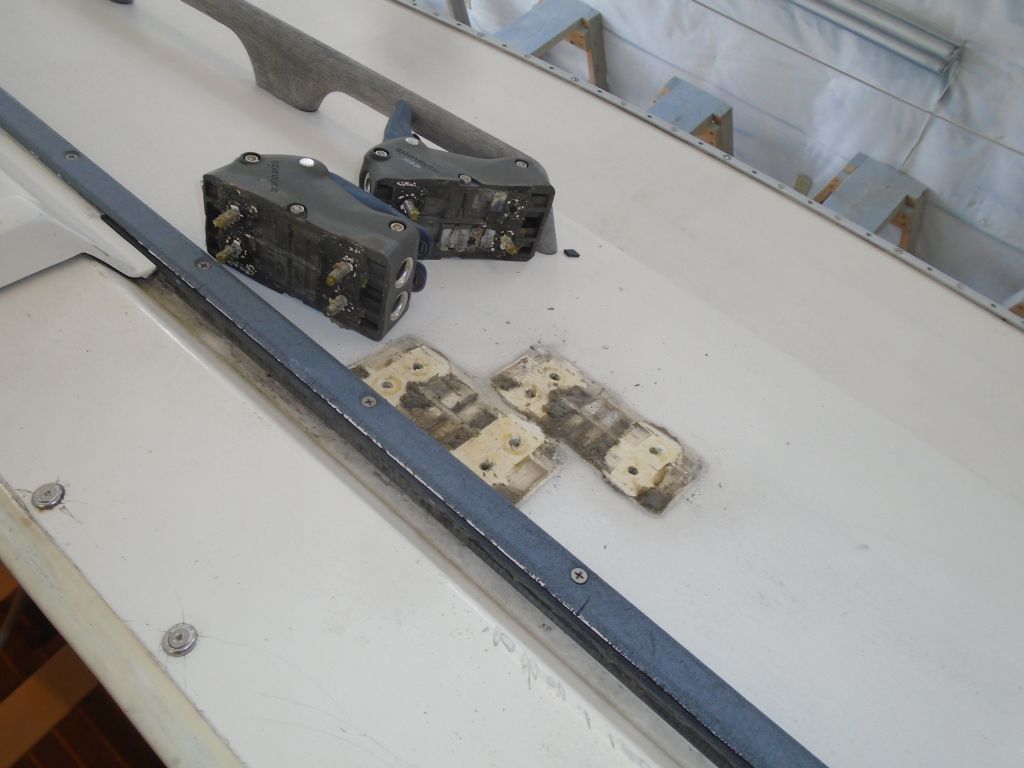
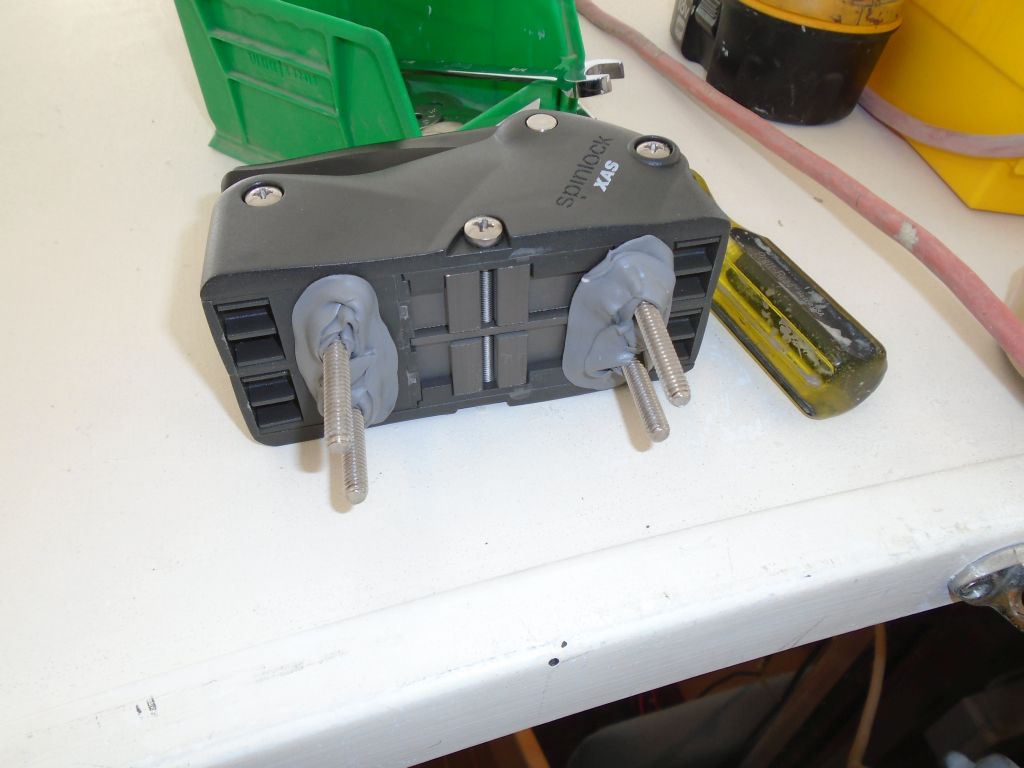
The new stoppers were essentially identical to the old, with the same bolt pattern. I extend my congratulations to Spinlock for not changing something just for the sake of change, even decades later.
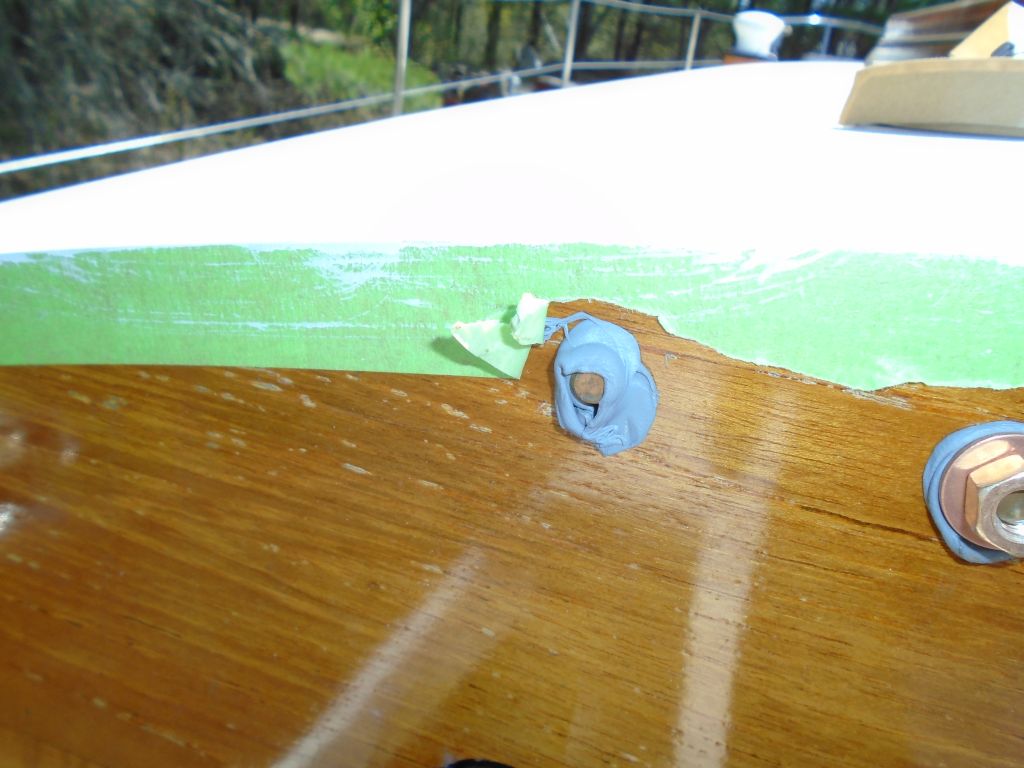
After cleaning old sealant and debris from the deck, I used a 5/8″ bit to overbore the old bolt holes, removing the top skin and core at each location. The core (plywood) was in good condition in all areas. Drilling this deck, which was fabricated from Kevlar cloth, brought back lots of memories from my first boatbuilding job in 1990, at a well-known builder that was, at the time, experimenting with Kevlar and E-glass hybrids. My enduring memory of Kevlar cloth was the fuzzy nature of the material whenever one cut the raw cloth, or sanded/cut the finished laminate, and the fuzzy bits that came up as I drilled into this deck now just reminded me of it all, oh so long ago.
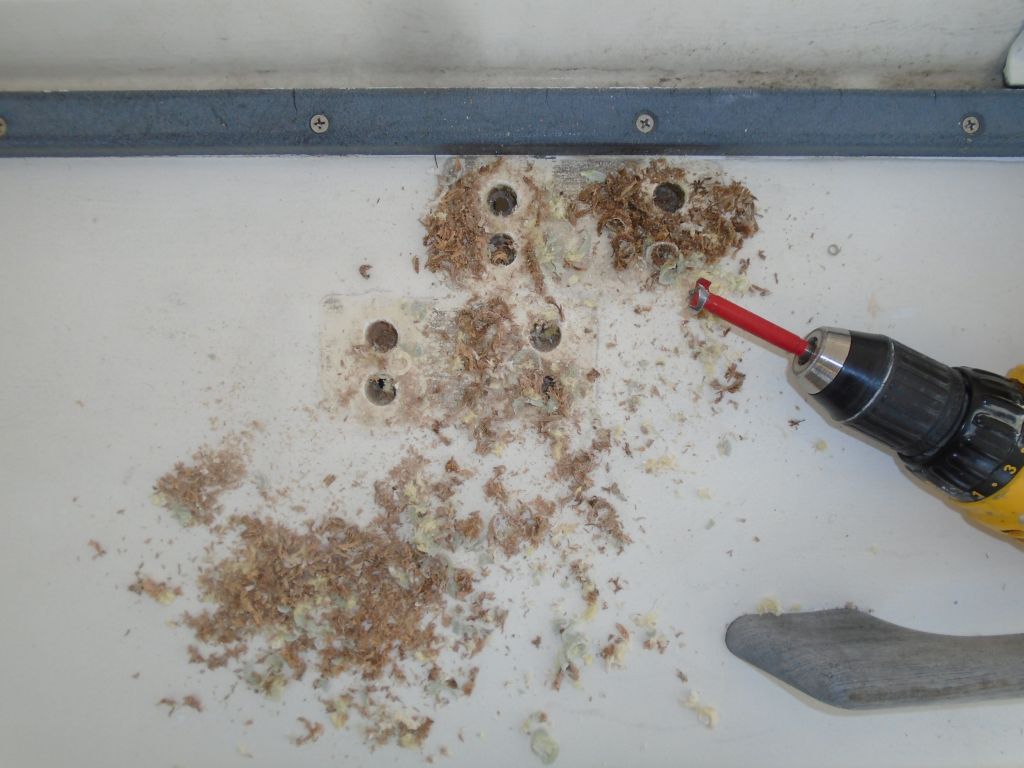
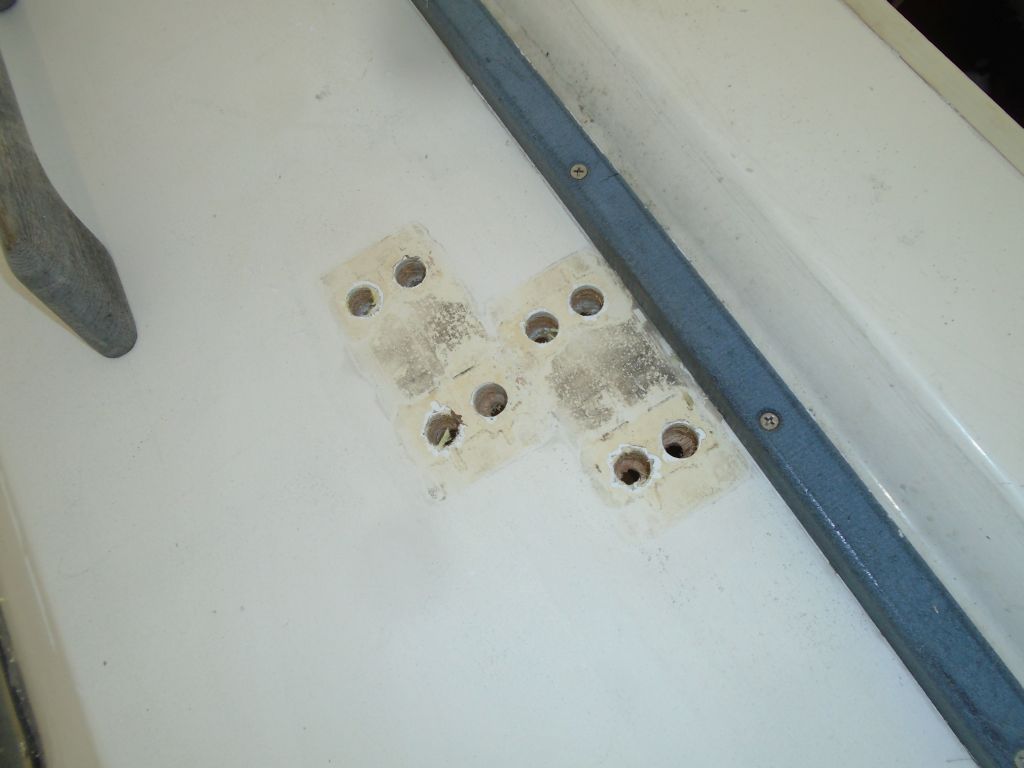

Once I had the holes cleaned up, and masked over the bottom openings, I filled the holes with a thickened epoxy mixture, leaving it to cure before continuing.
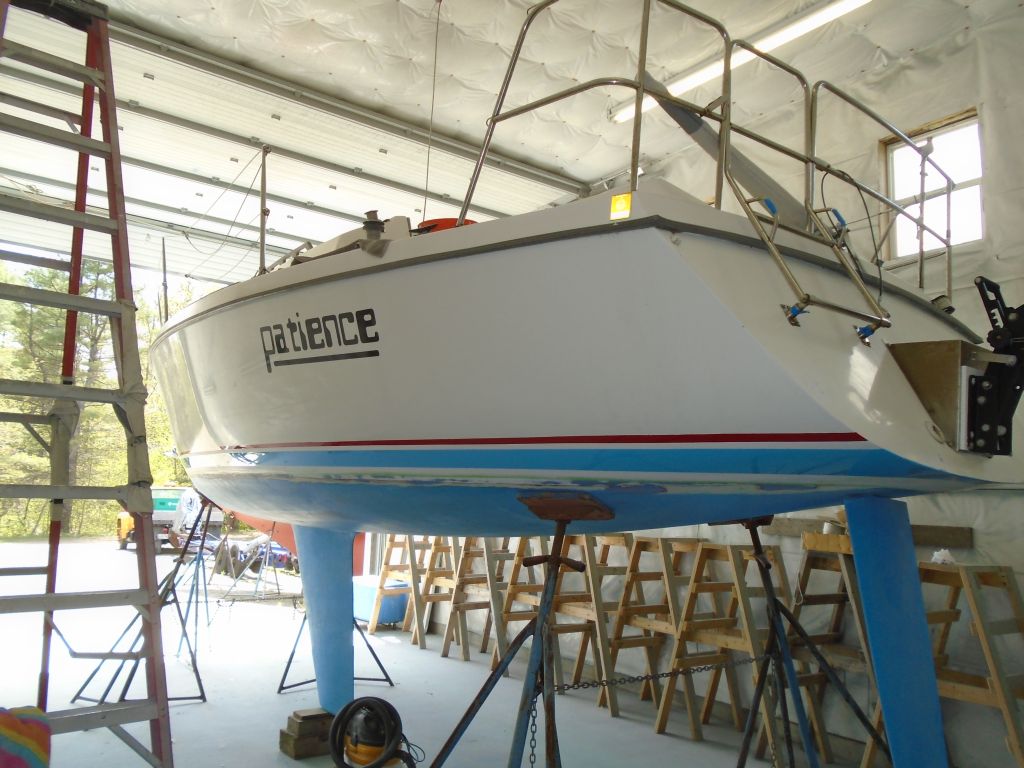
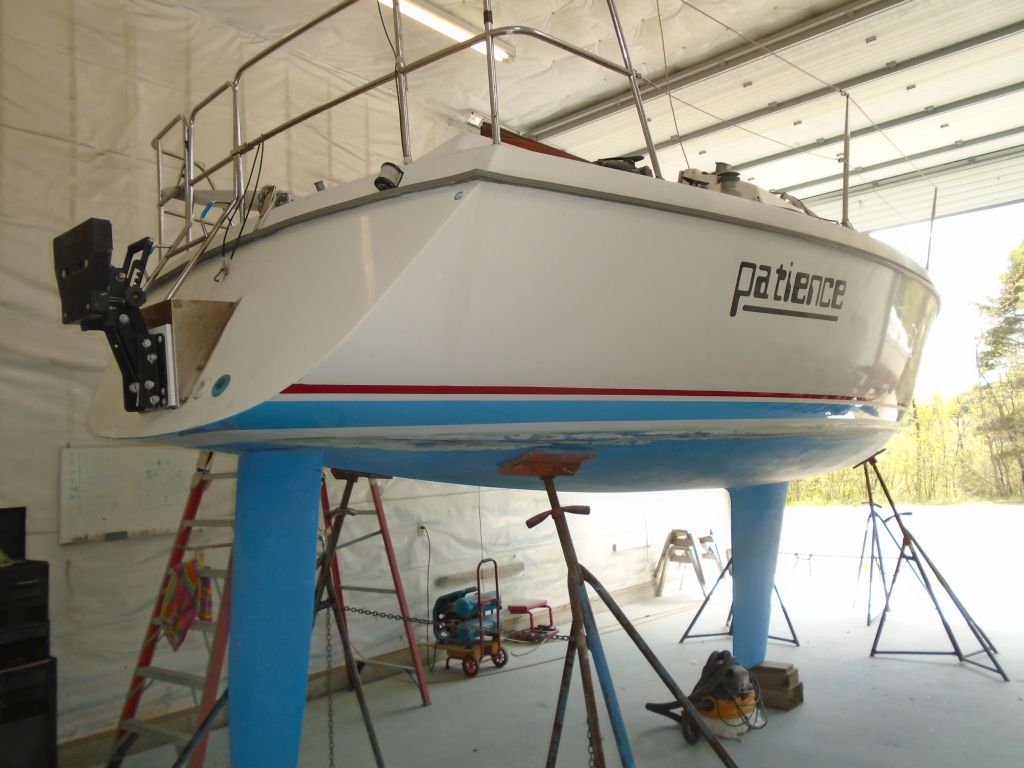
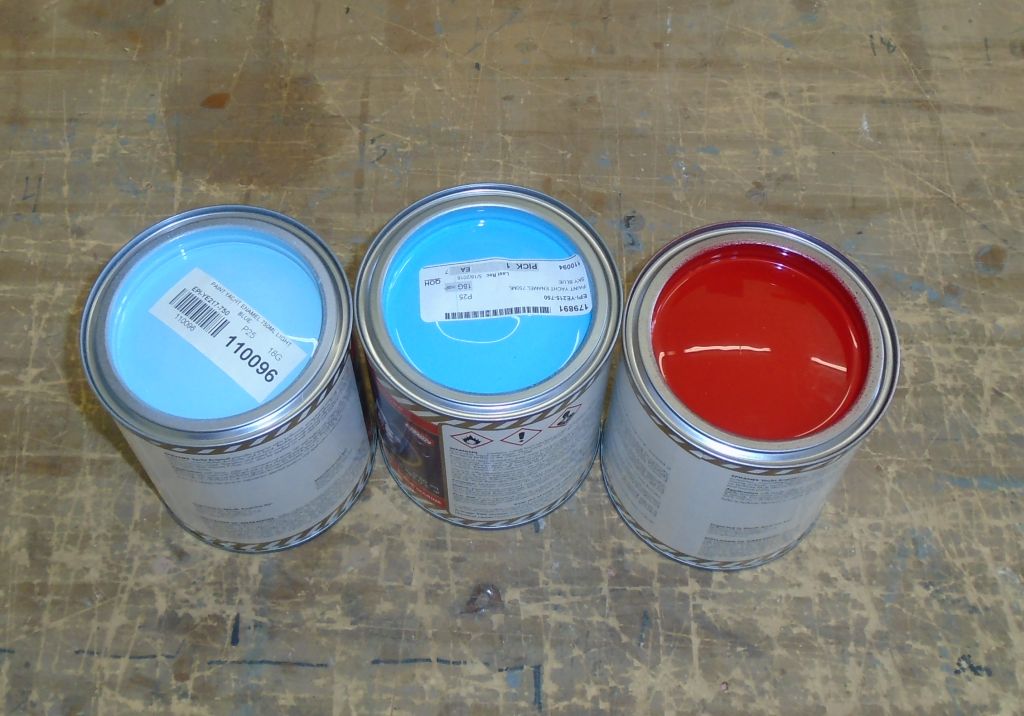
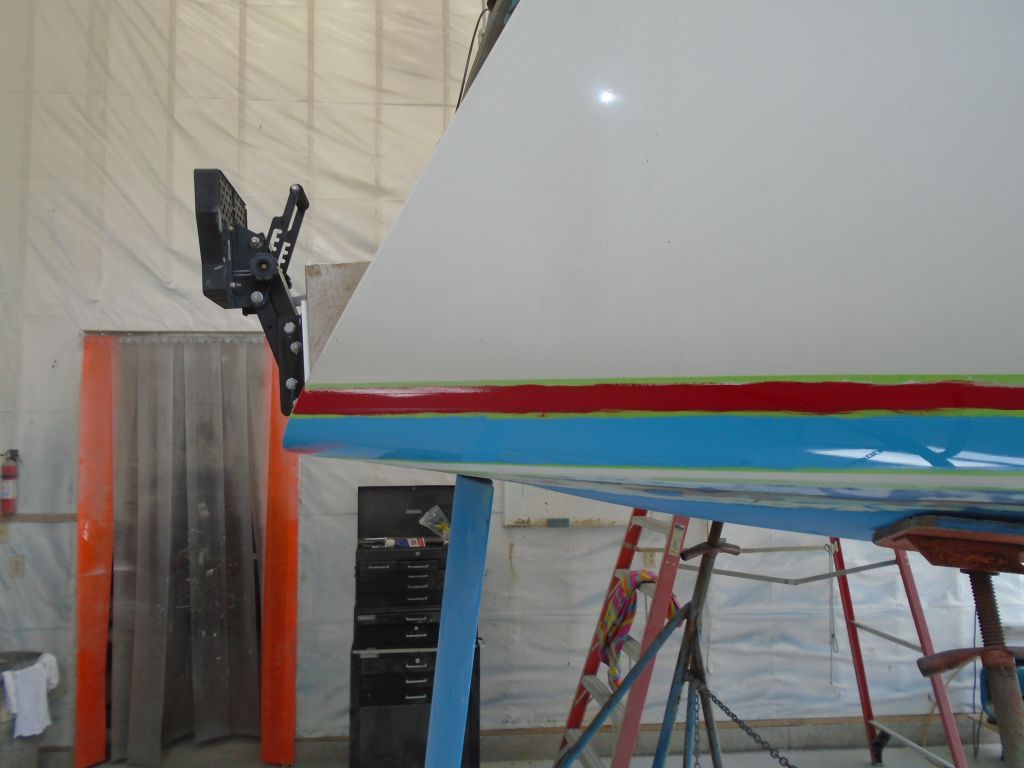
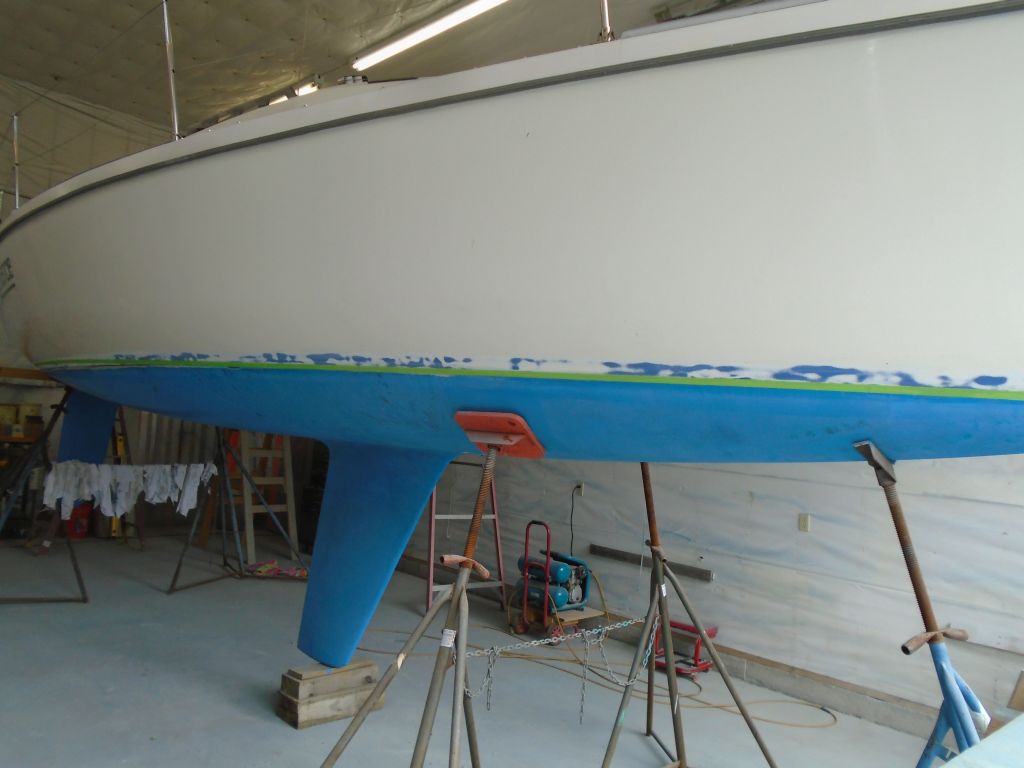
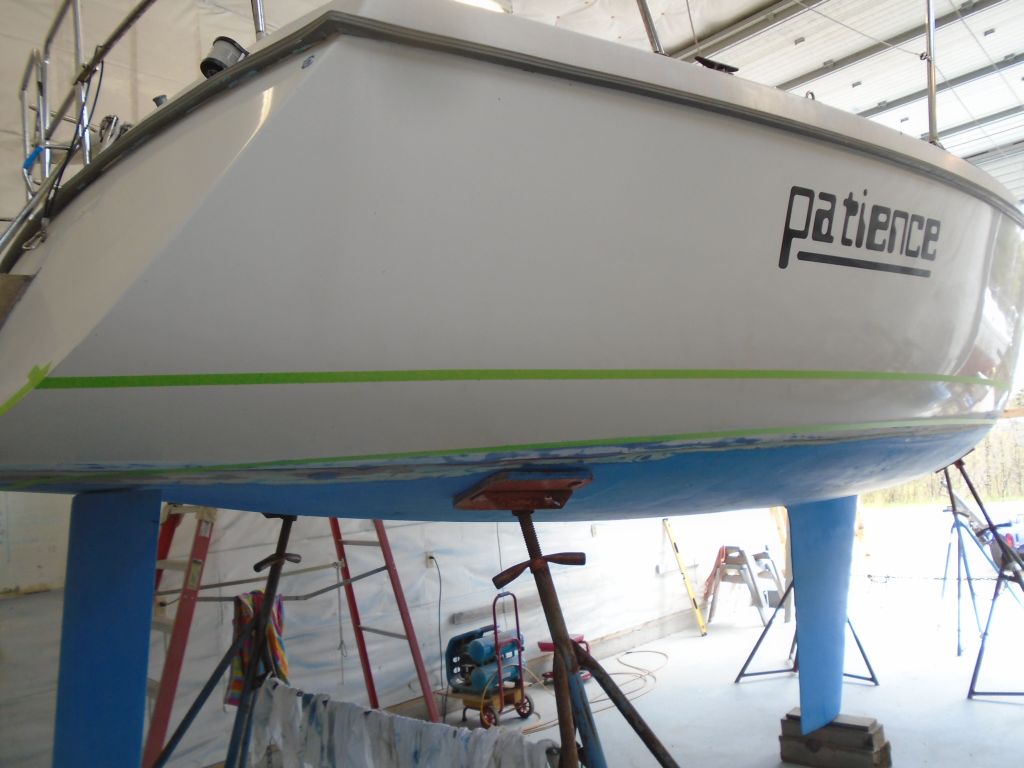
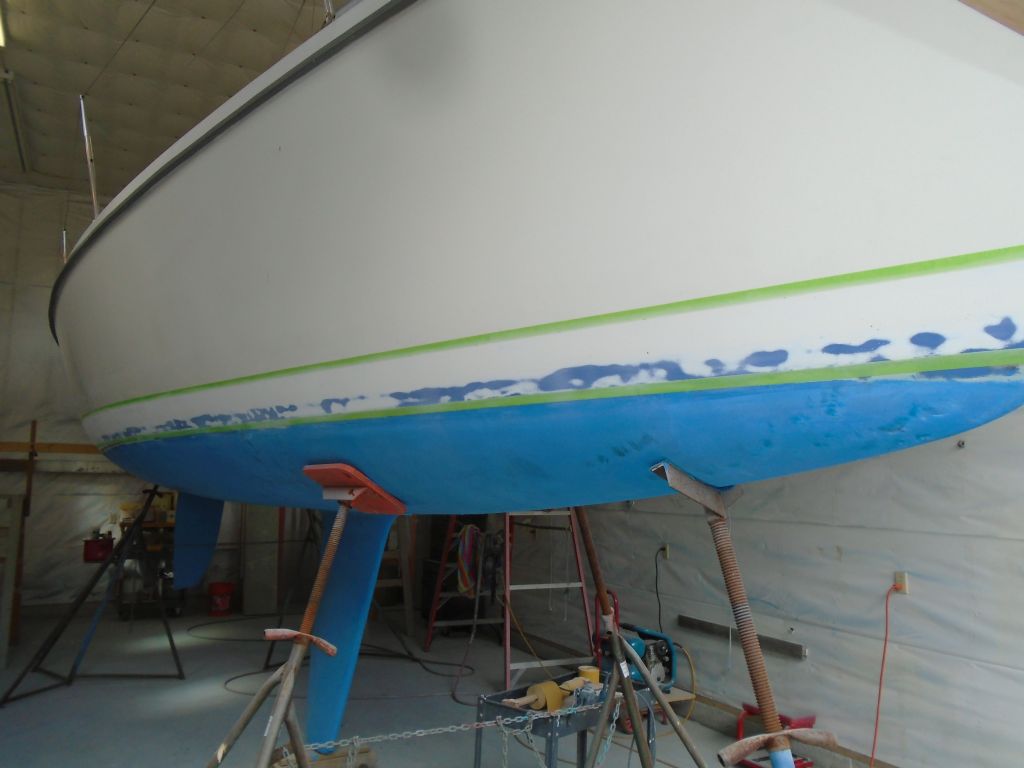
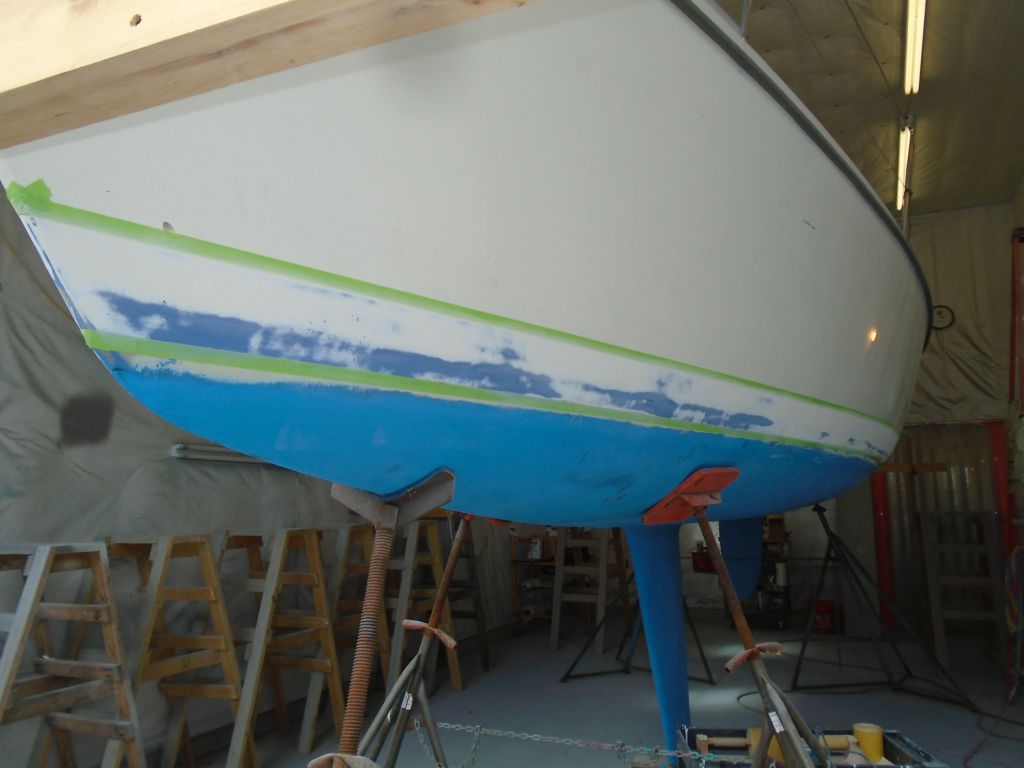
My new paint for the boottop arrived just in time, and I looked forward to getting the first coat on. The owner had a clear sense of the color scheme he wanted, but working with online color samples (notoriously inaccurate) we’d eventually decided to purchase two different shades of the blue he hoped for. The first shade that arrived looked a close match to the samples, but might have been too light on the boat itself, so I’d ordered the next-darker shade, called Sky Blue. When this arrived, I thought it looked like the right color for the main, wide stripe of the boottop. The narrow upper stripe was to be bright red.
After final preparations, and starting with the red on the uppermost stripe, I applied the first coat of paint to the boottop, finishing up with the sky blue on the lower stripe once the red was done. To my eye this all looked pretty good.

Total time billed on this job today: 3.5 hours
0600 Weather Observation:
48°, mostly clear. Forecast for the day: mainly sunny, 76°
Thursday
In 2011, after reconfiguring the galley and engine room spaces in this boat (the original area had been completely rotted out), I installed a new Beta 25 diesel engine in this boat (during Phase III of the project), but the engine had sat idle and untested until now. With various factors and complications at hand, the owner had put the entire project on hold shortly after the engine installation, with work only resuming in fall 2015 and, of course, now. The long delay had not been anticipated at the time.
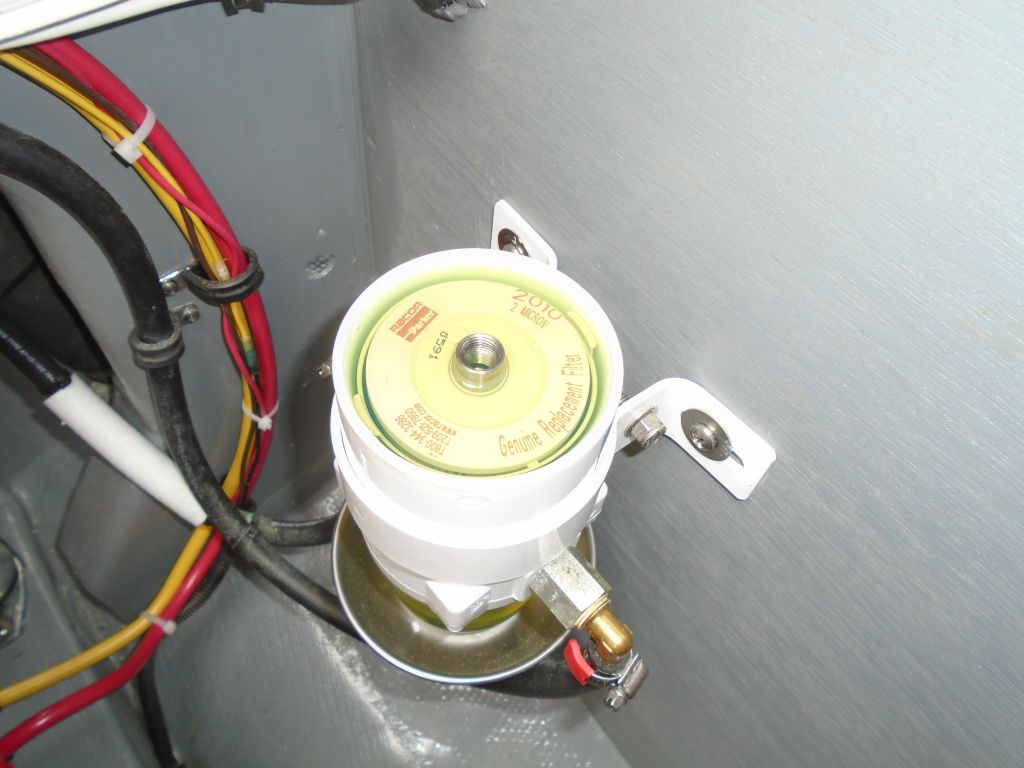
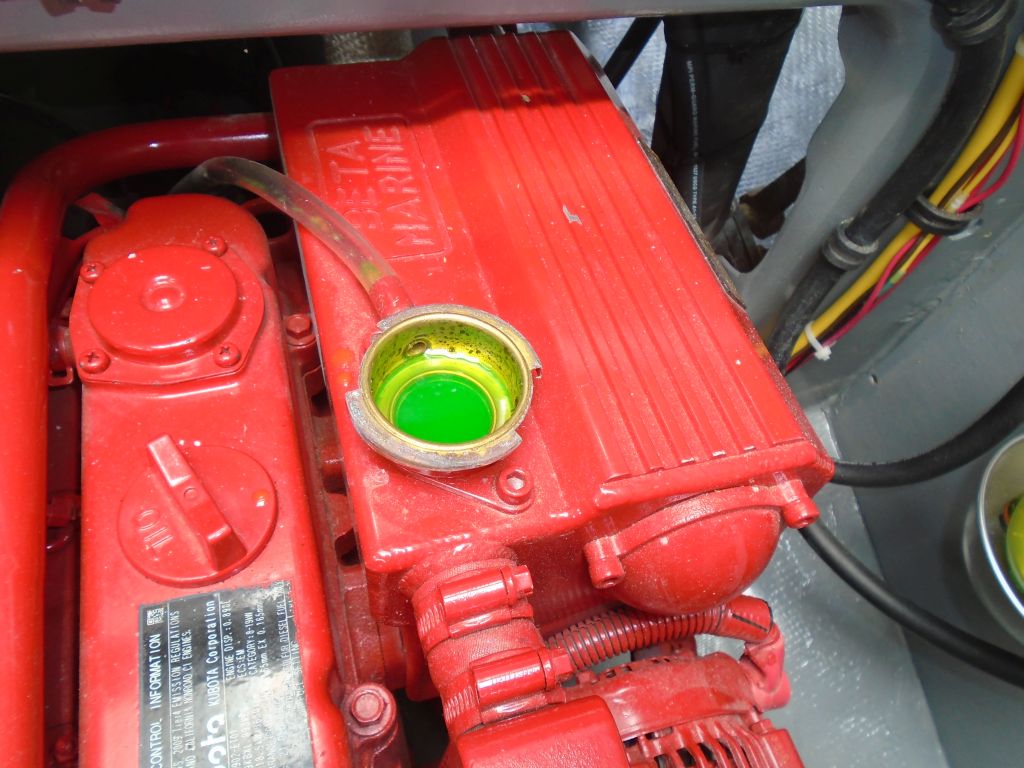
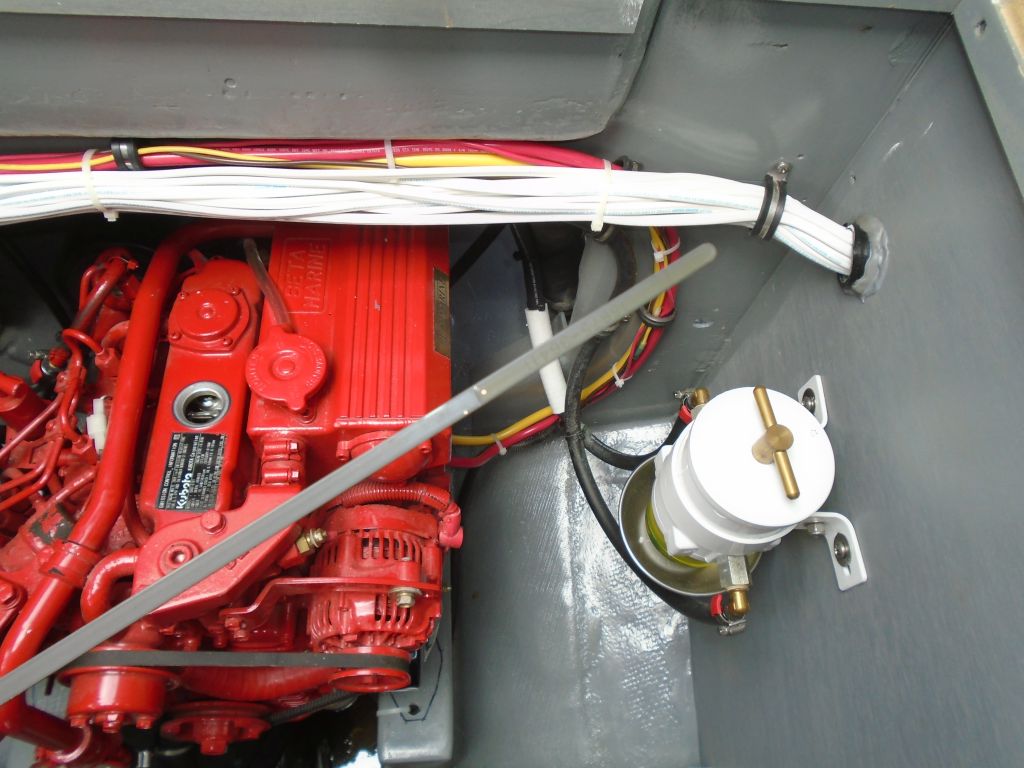
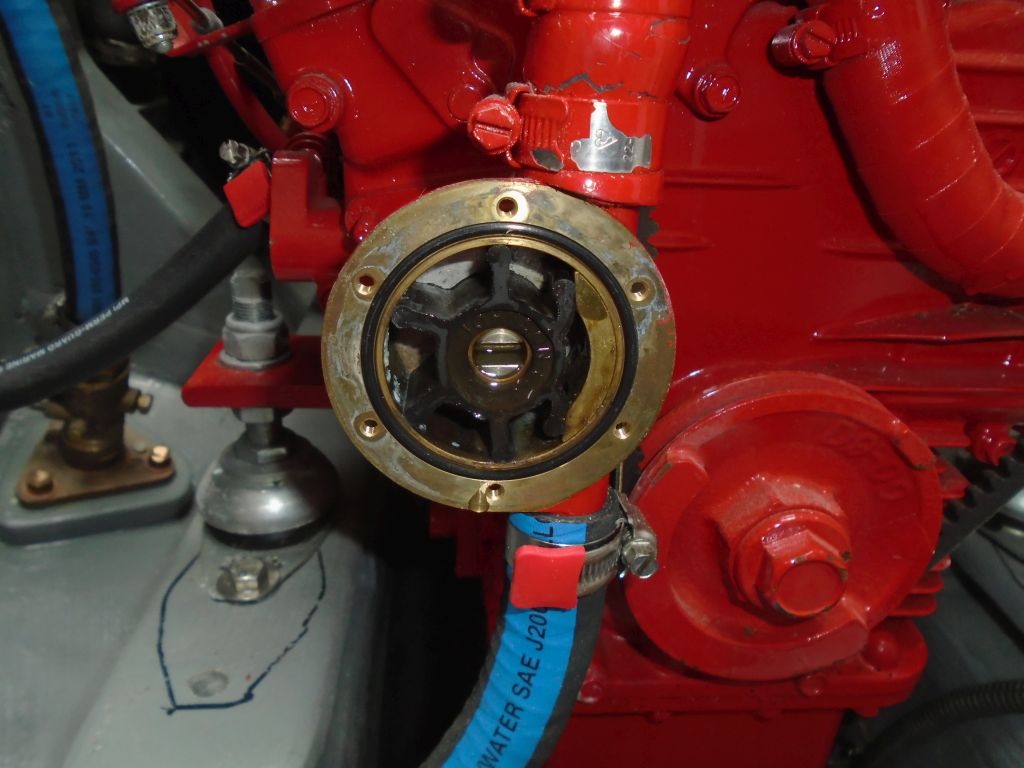
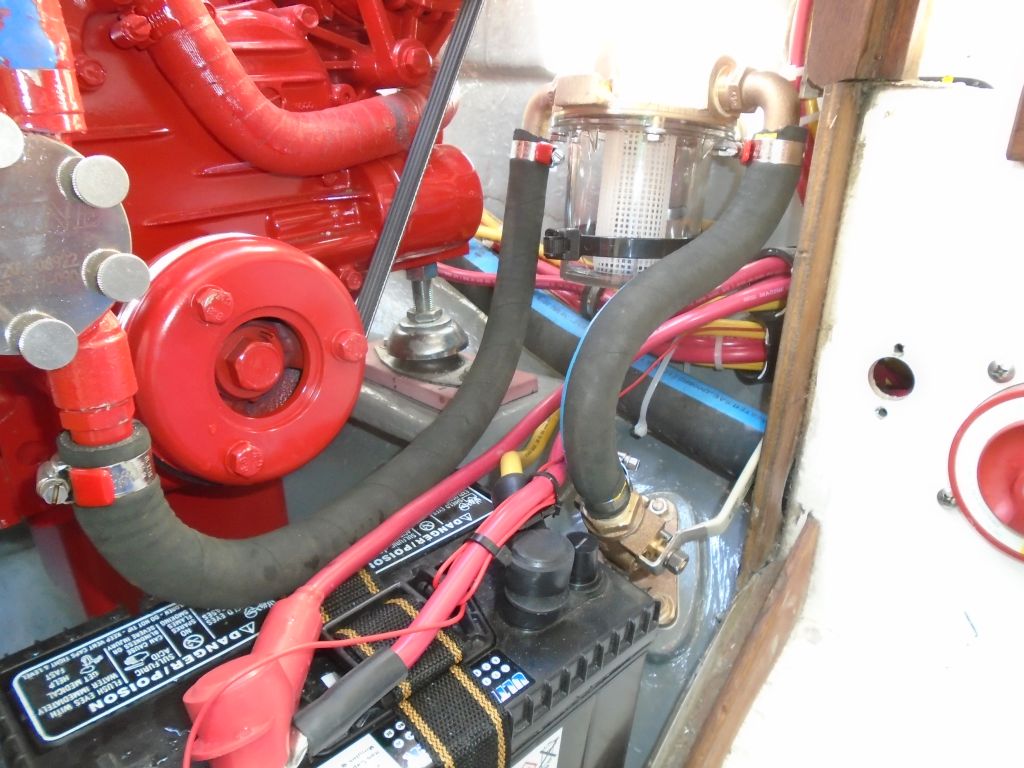
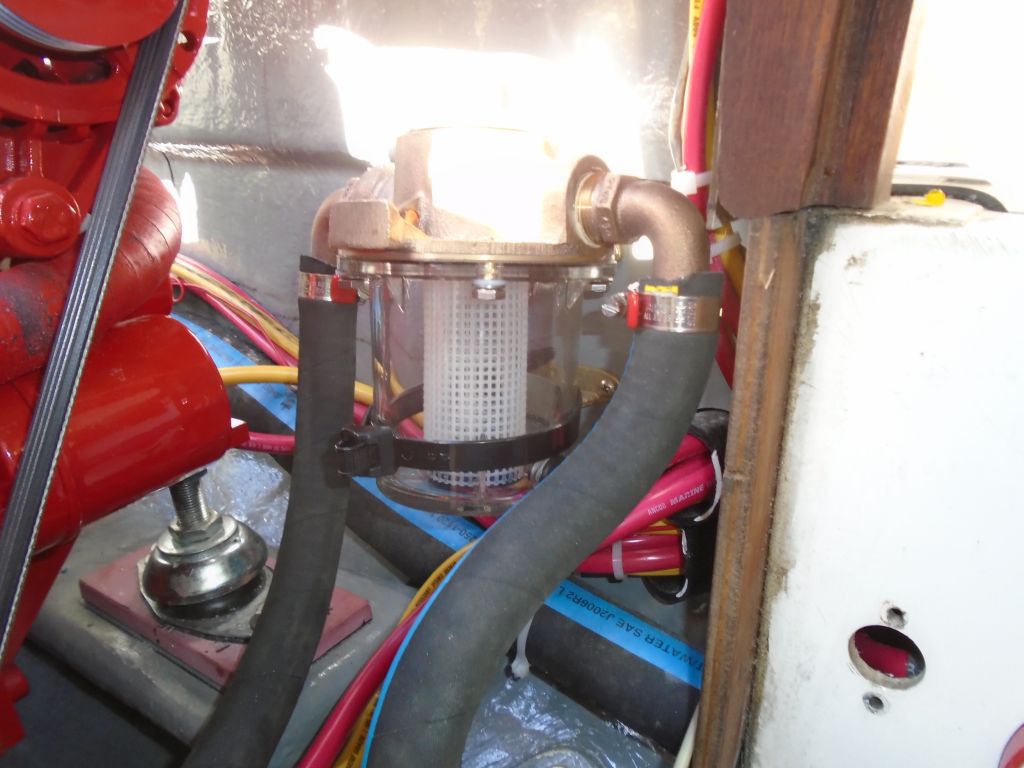
So, five years later, I looked forward to finally test-firing this “new” engine. I started by adding fuel (6 gallons to the new tank), coolant, and oil as needed, and checked the raw water pump impeller to inspect its condition. I filled the fuel filter with clean diesel, and bled the engine at the secondary fuel filter until I got clear fuel from the bleed screw. (14mm) This is a really nice engine room, if I do say so. Roomy and with outstanding access to the engine. This made all the preparation and testing work a real pleasure.

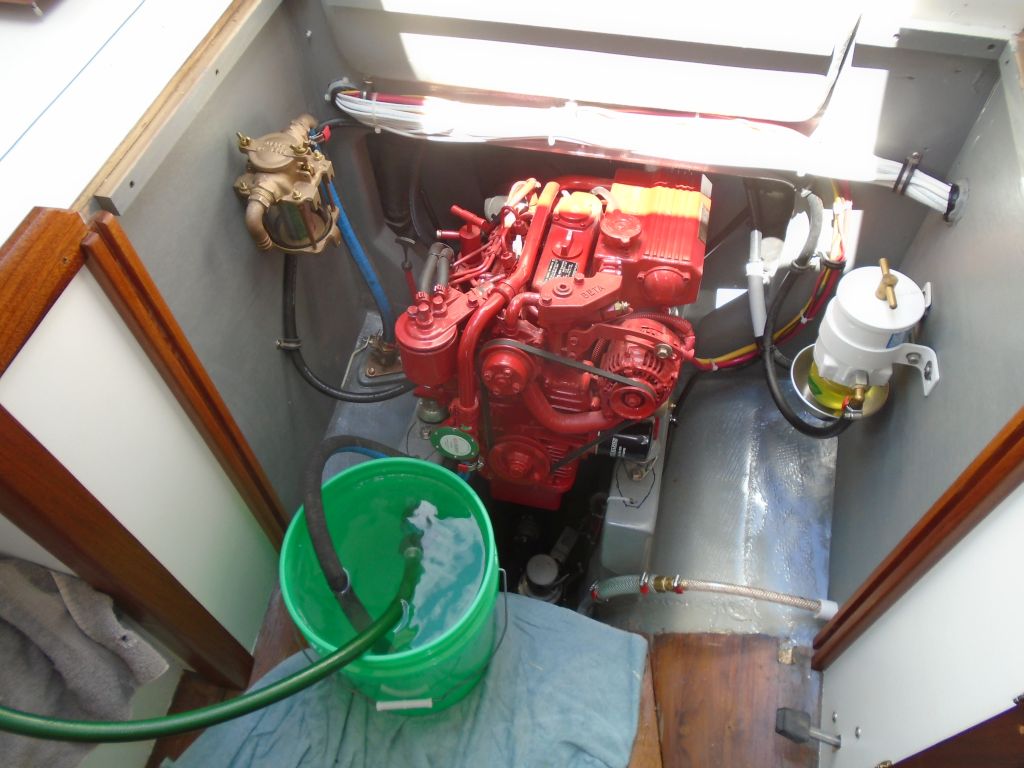
With all initial preparations complete, I started the engine. It started right away, and nearly kept running, but there was still air for it to work through its system. The second time, the engine kept running, even as it worked through a few air-related fuel hiccups, as per usual.
After running the engine for a couple minutes, I shut down in order to check the fluid levels. I added a bit of coolant and engine oil as needed to top up the levels once more. Then, I proceeded through a longer engine test, which I recorded in the following videos. I found that the new engine control was loose, and allowing the engine speed to change on its own, so after a while I stopped the engine again and adjusted the control as needed, after which I could actually leave things alone without holding the control lever or manipulating the lever on the engine itself.
The test was a complete success, and after running the engine up to temperature and for about 20-30 minutes’ total time, I shut down, with the last major check mark off my work list.
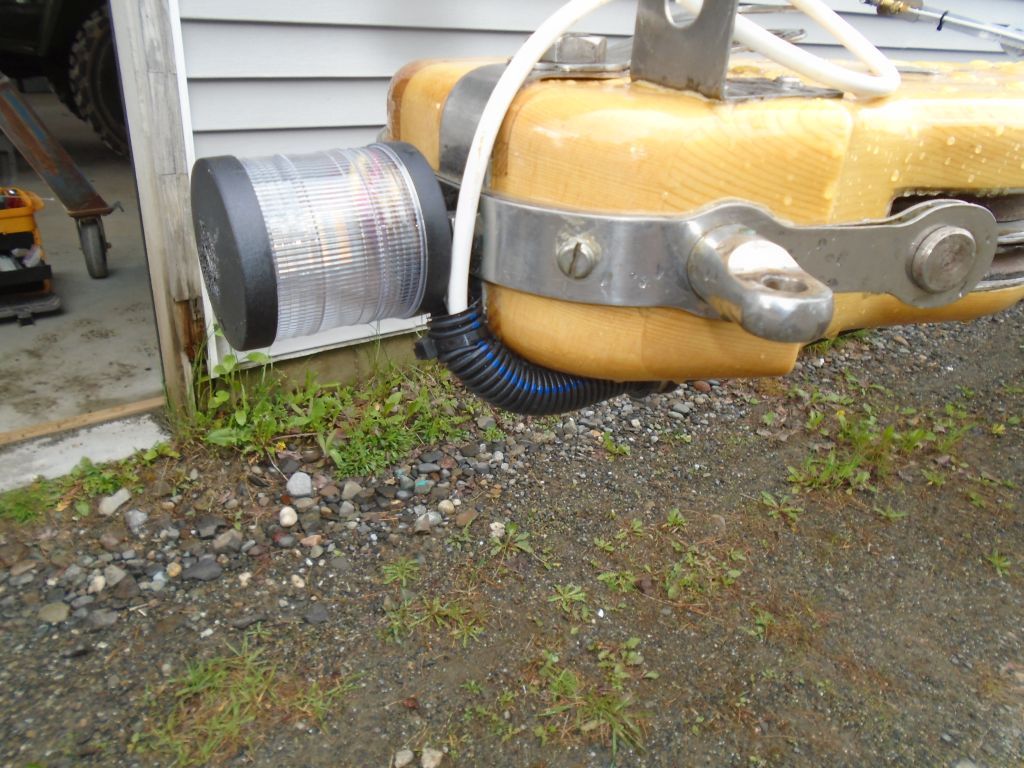
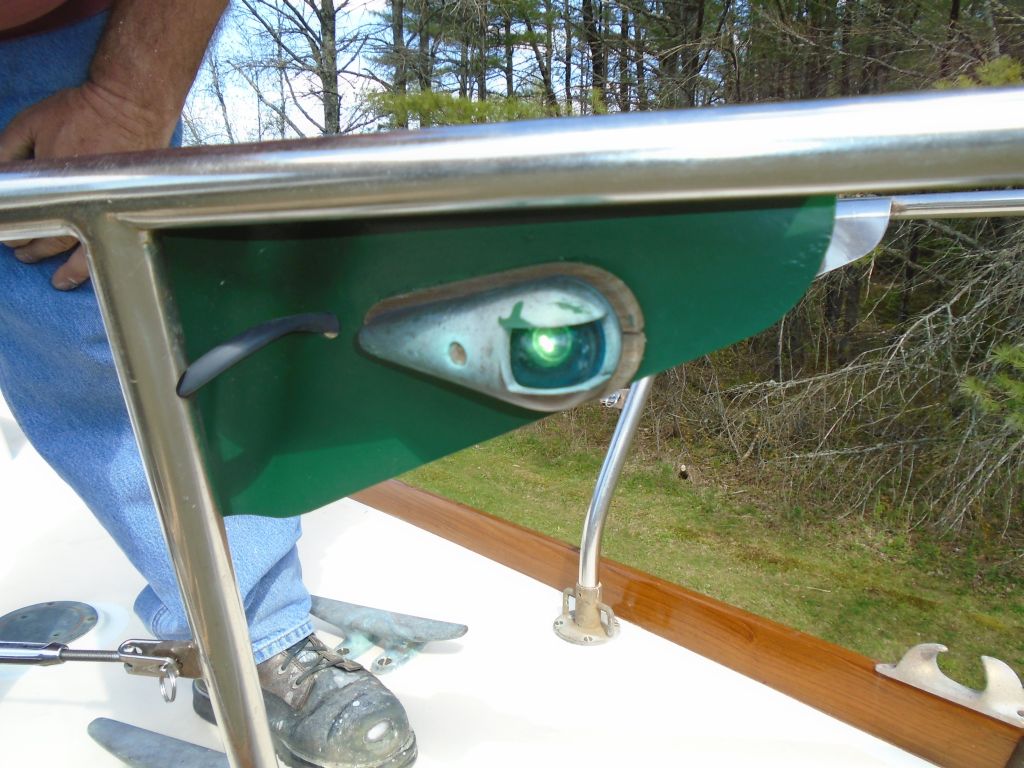
After cleaning up and buttoning up the boat again, I turned to the new mast, which required a couple lights and a VHF antenna. All the wiring was pre-installed by the mast builder, but it was up to me to source and install the fixtures.
The wiring at the masthead exited the spar (by necessity) just below the halyard sheaves, and to improve appearance and secure the wiring on its way to the ultimate masthead, I sheathed it in some flexible conduit and secured it to the spar in a couple places with rubber-lined clamps.

During a brief rain delay, I unpackaged the new fixtures (the VHF antenna was backordered briefly) and changed out the incandescent light bulbs for some new LED bulbs that I purchased for the purpose.
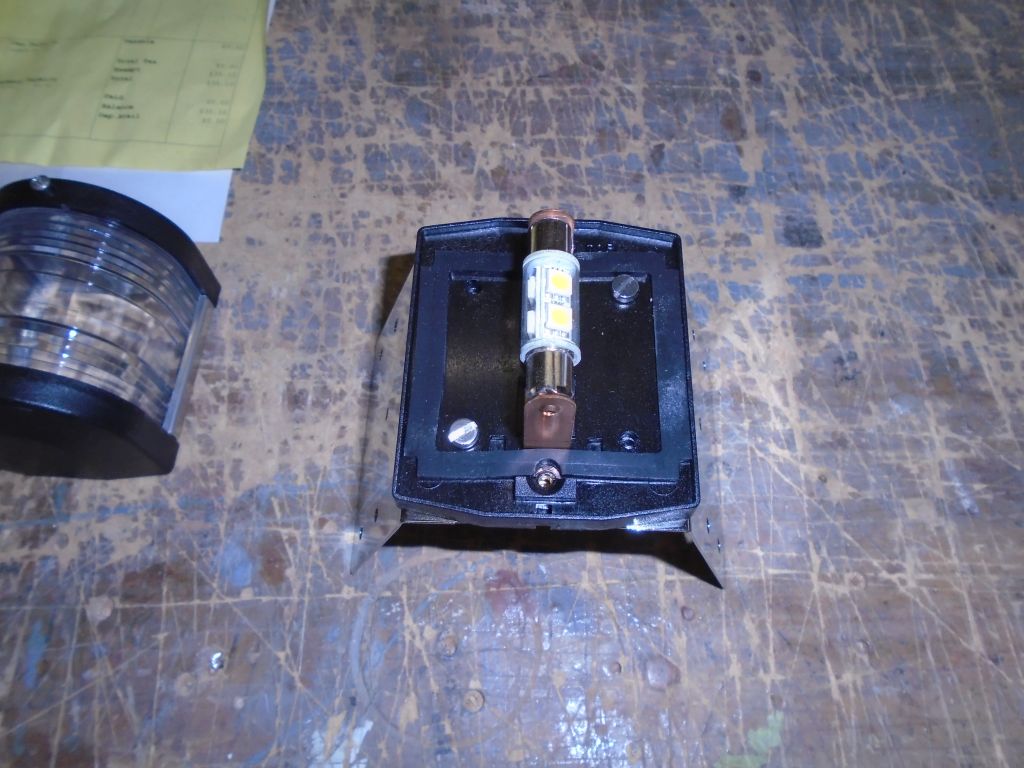
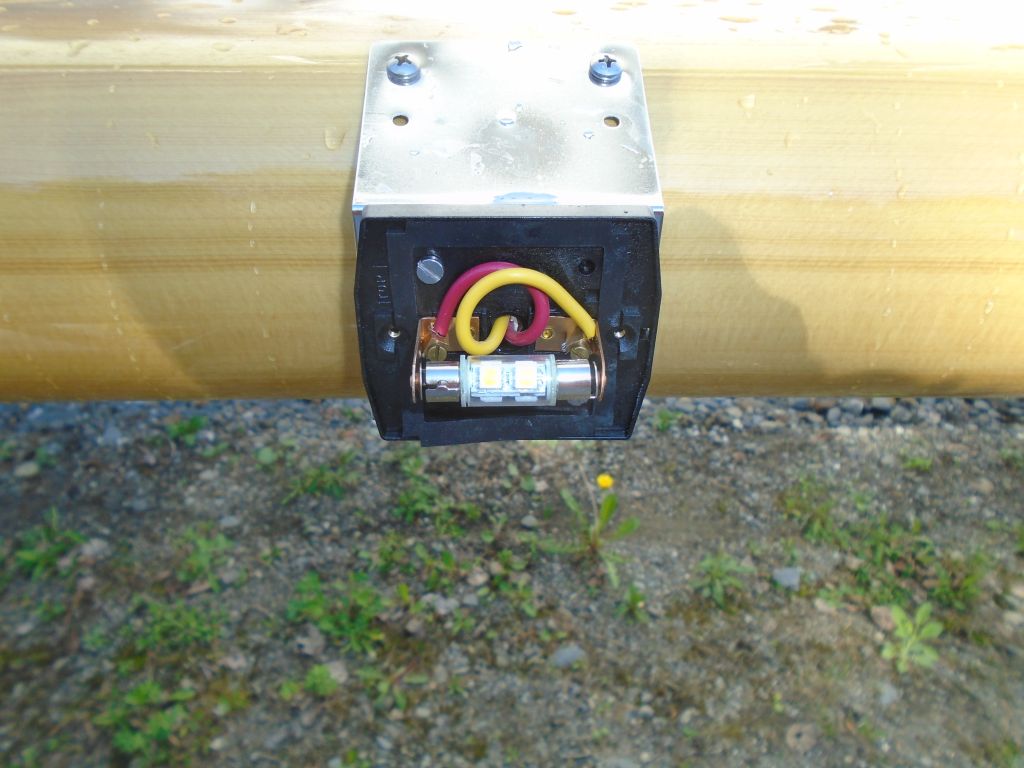
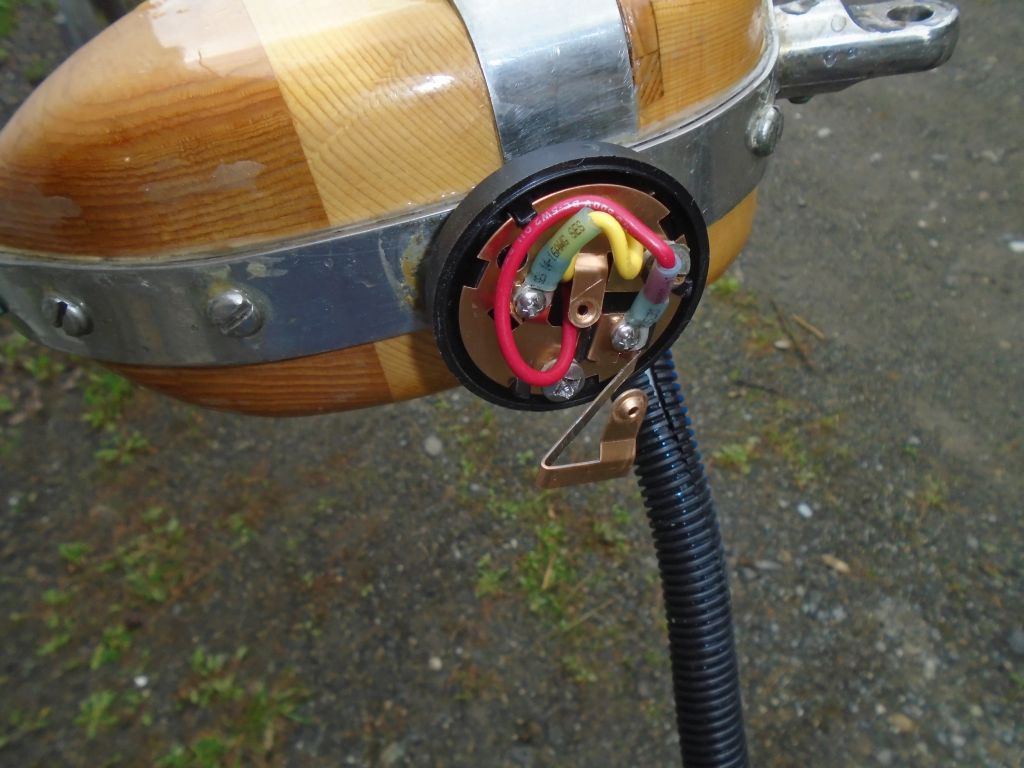
After the rain shower ended, I got back to work on the anchor light at the masthead, which I installed on top of the masthead strap. I repurposed one of the screws securing this strap, and used it to also secure the light fixture, and added a second screw (with spacers beneath each to allow room for wiring) to finalize the installation. I made up the wire ends and secured the screw-on lens for the fixture.

I’d continue with the VHF antenna and the steaming light, along with the wiring at the mast base, next time.
Total time billed on this job today: 3.75 hours
0600 Weather Observation:
40°, mostly clear. Forecast for the day: sun and clouds, showers in the afternoon, 60s
Thursday
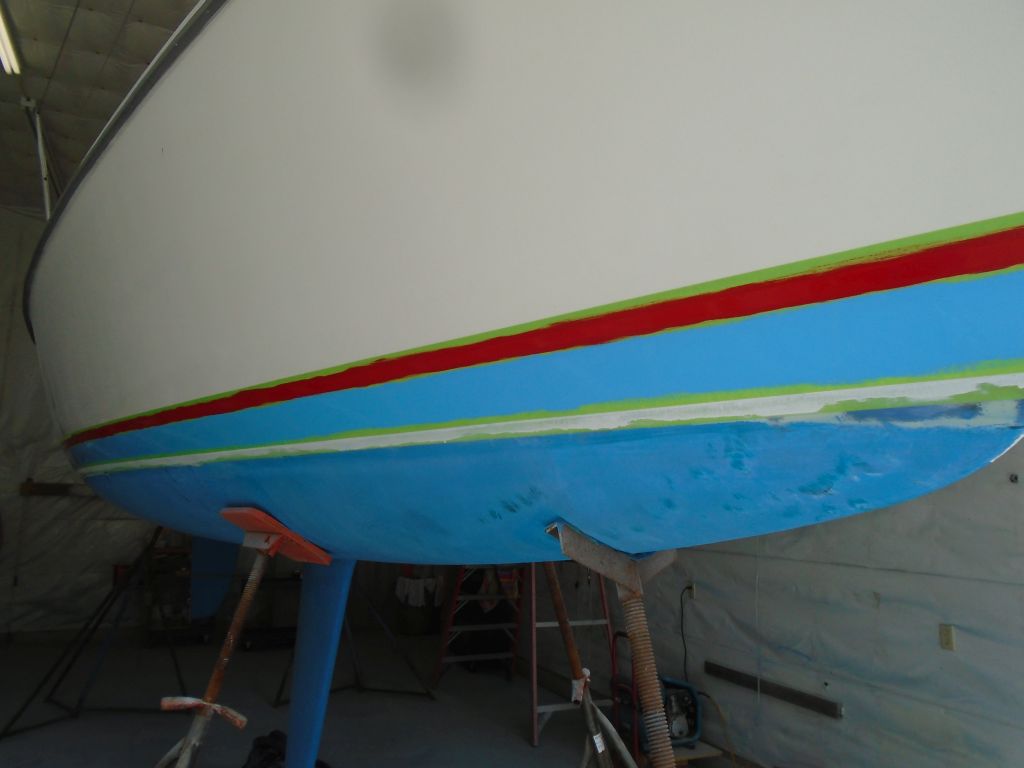
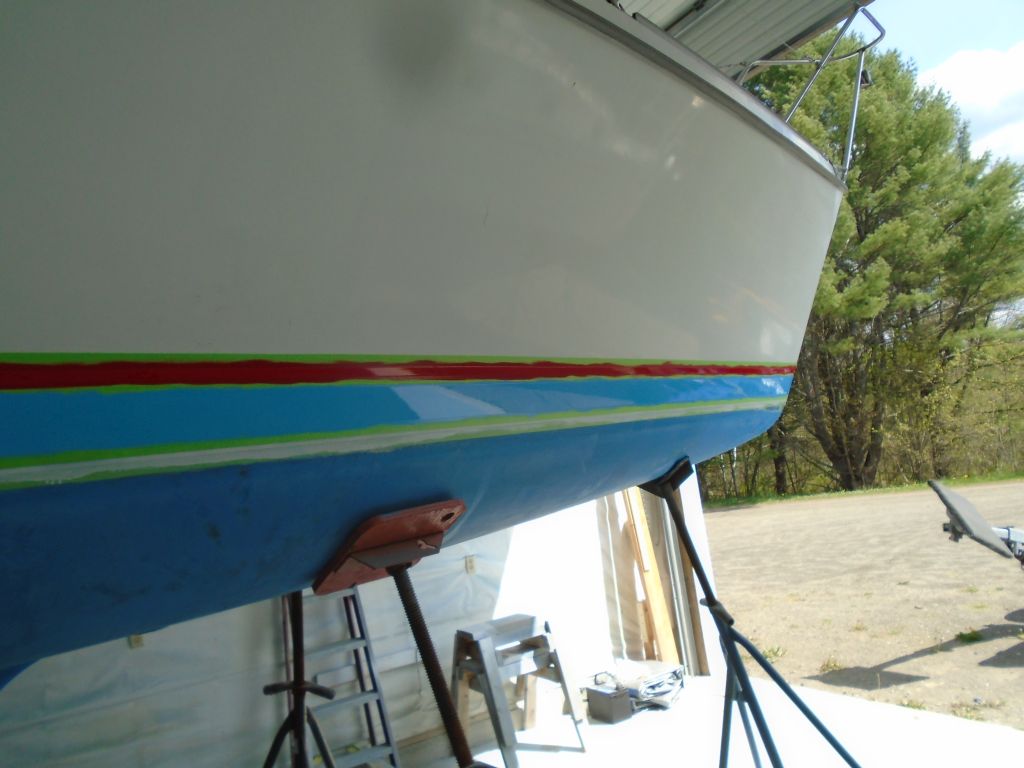
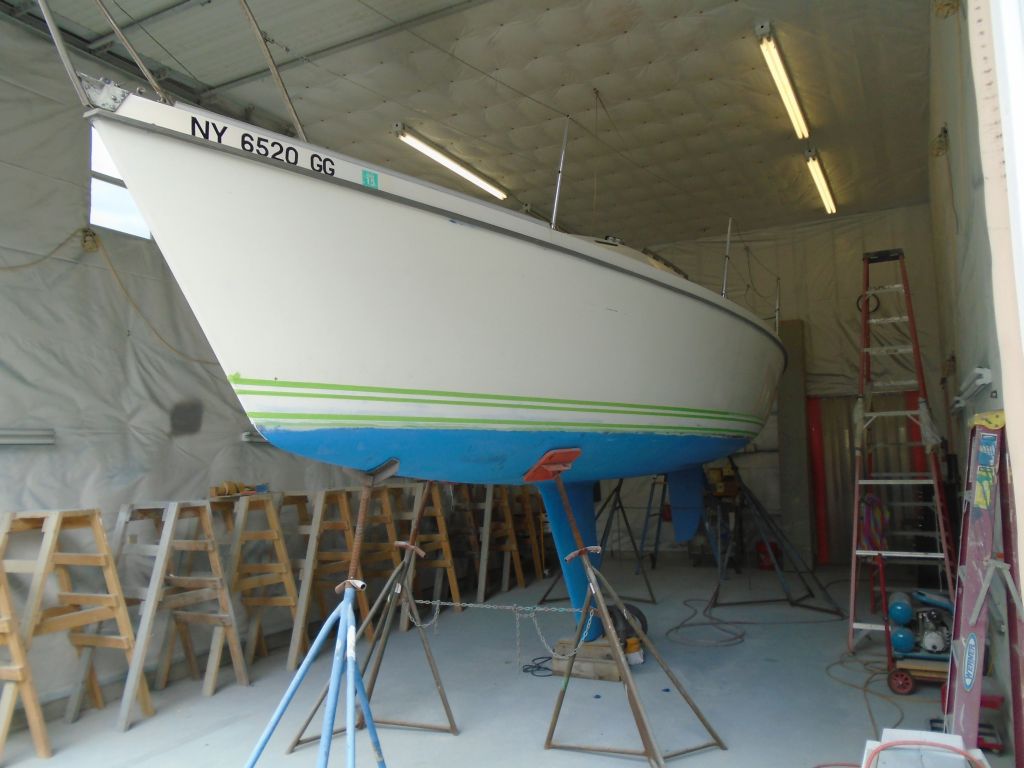
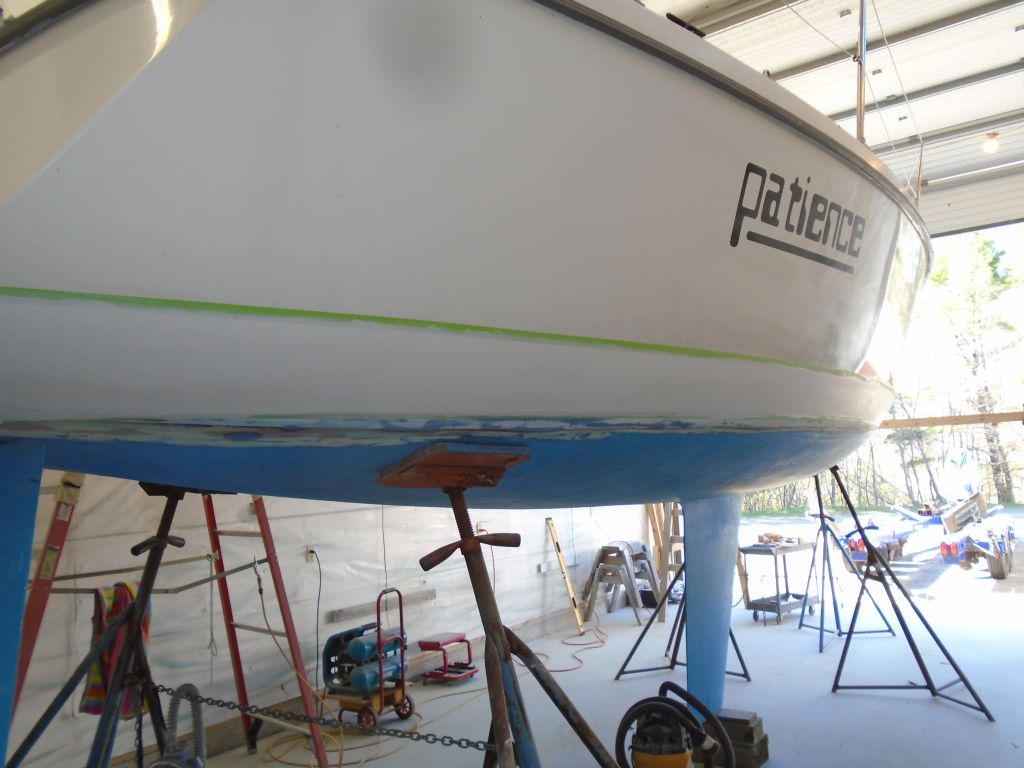
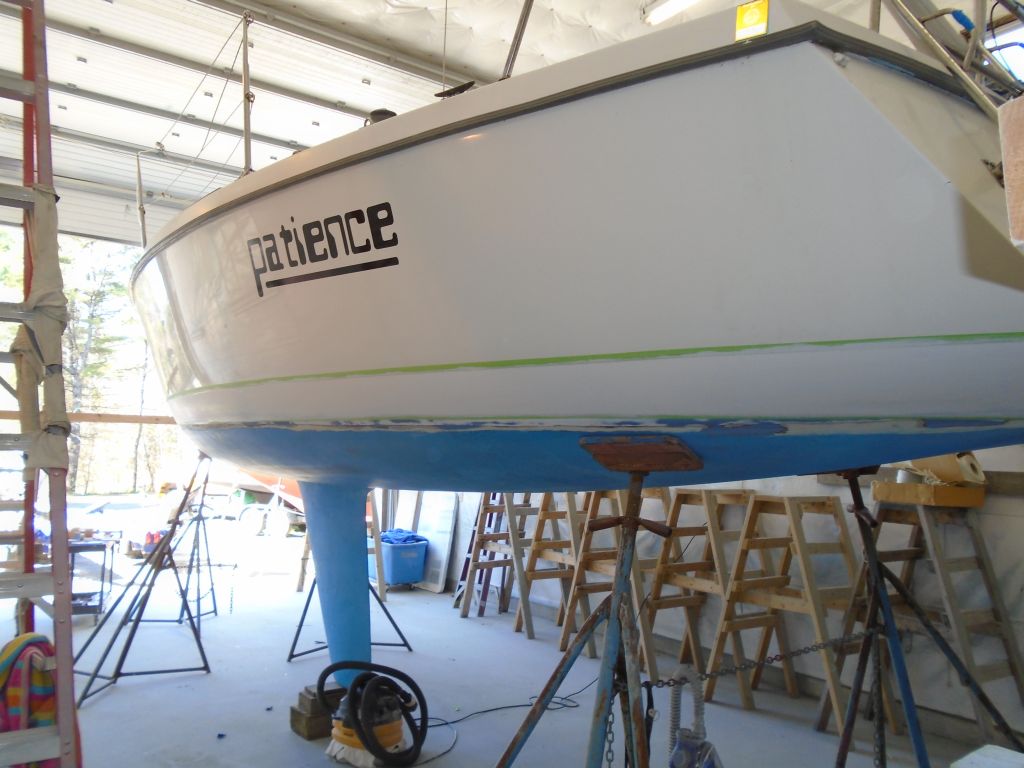
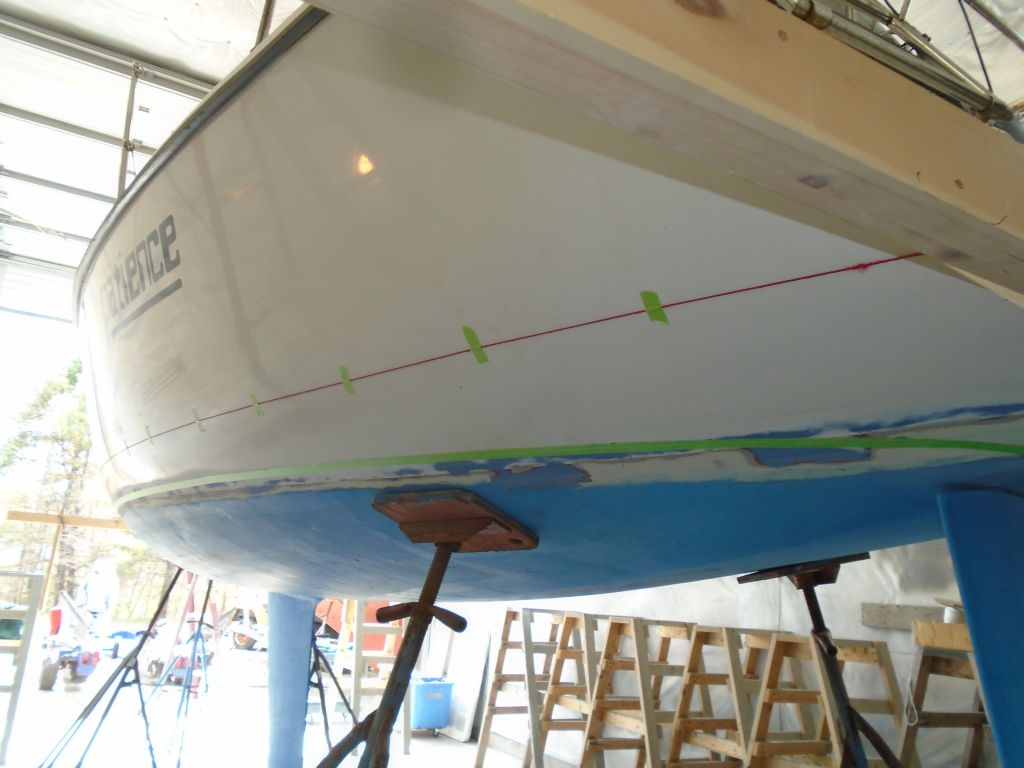
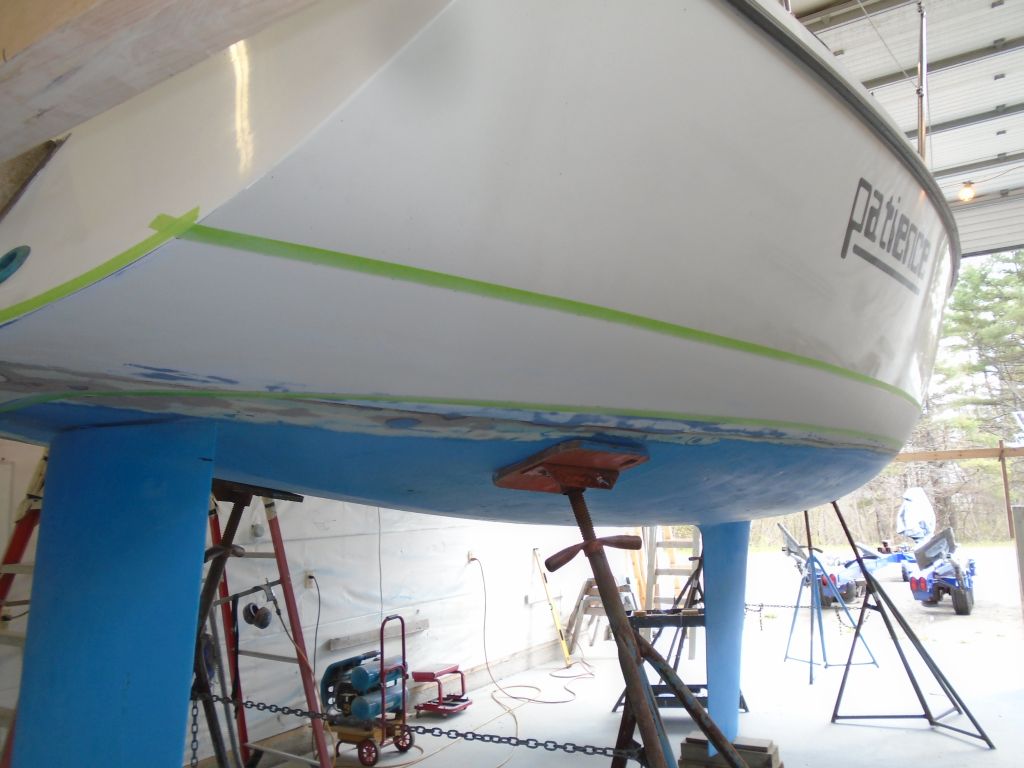
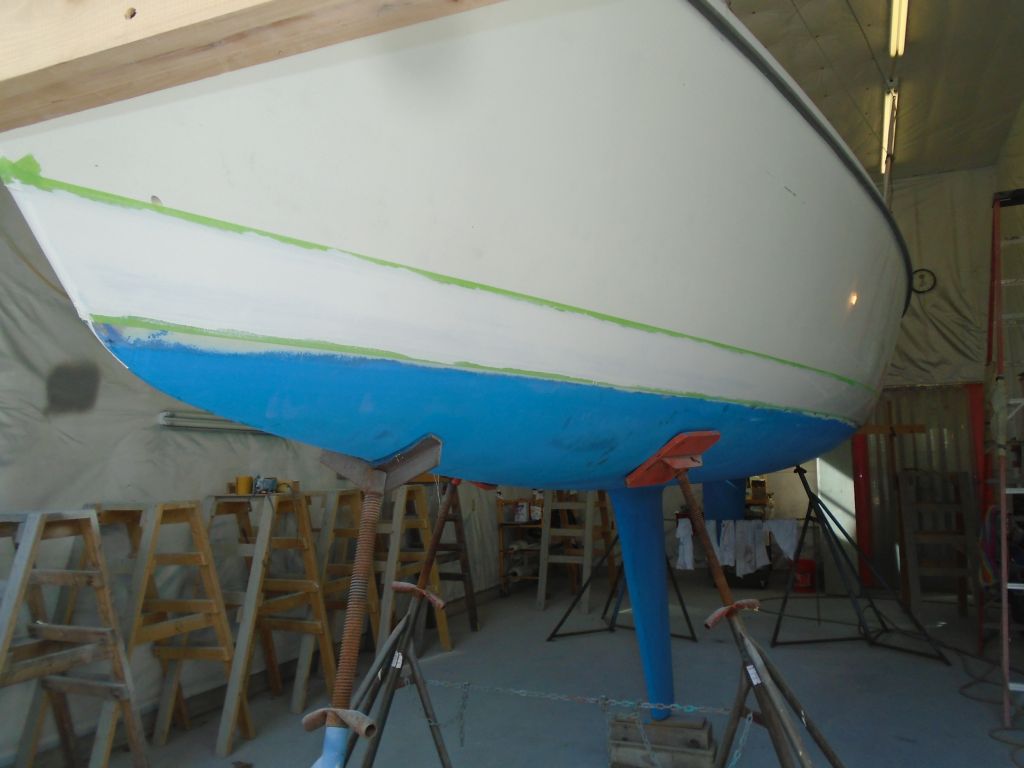
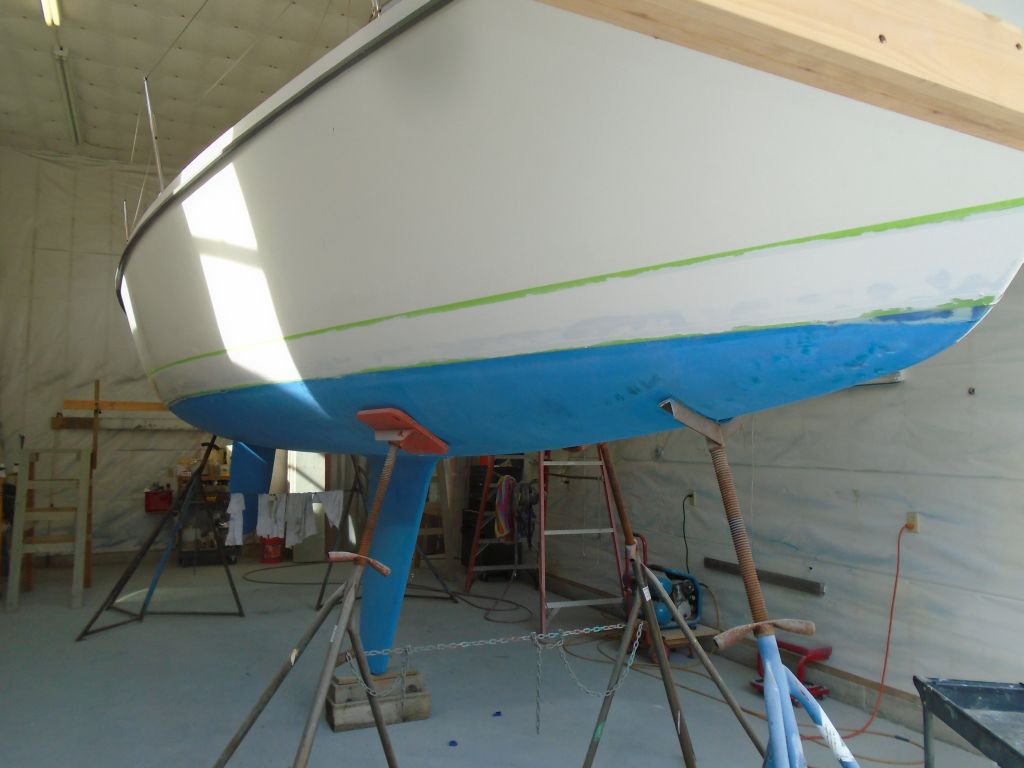
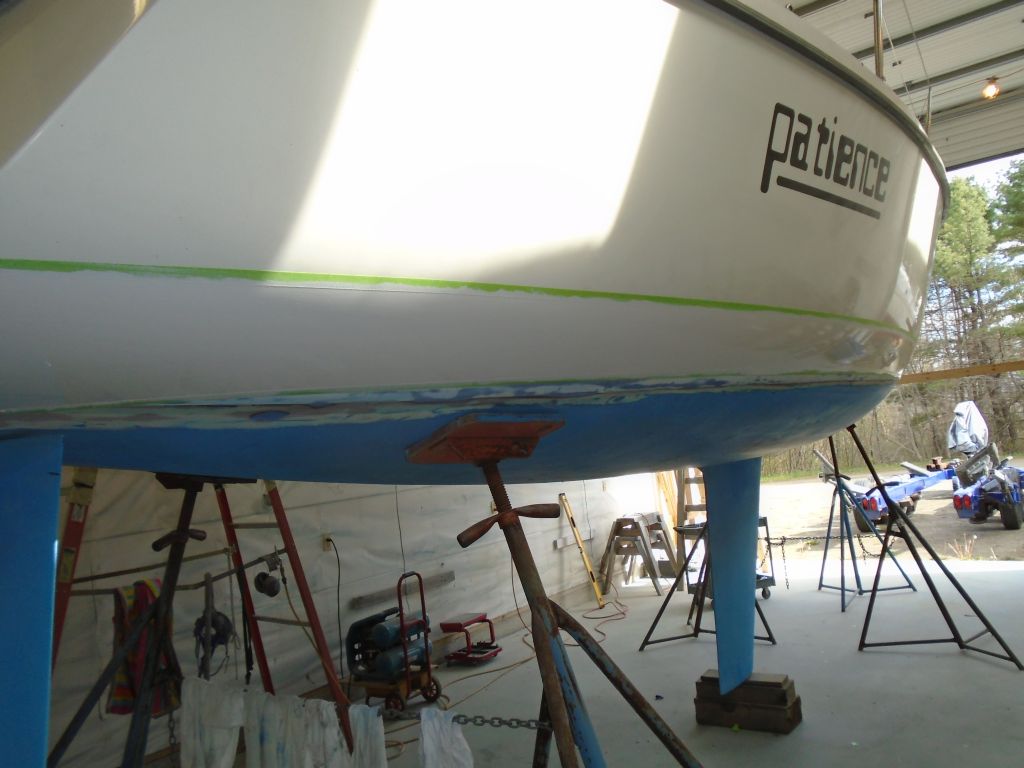
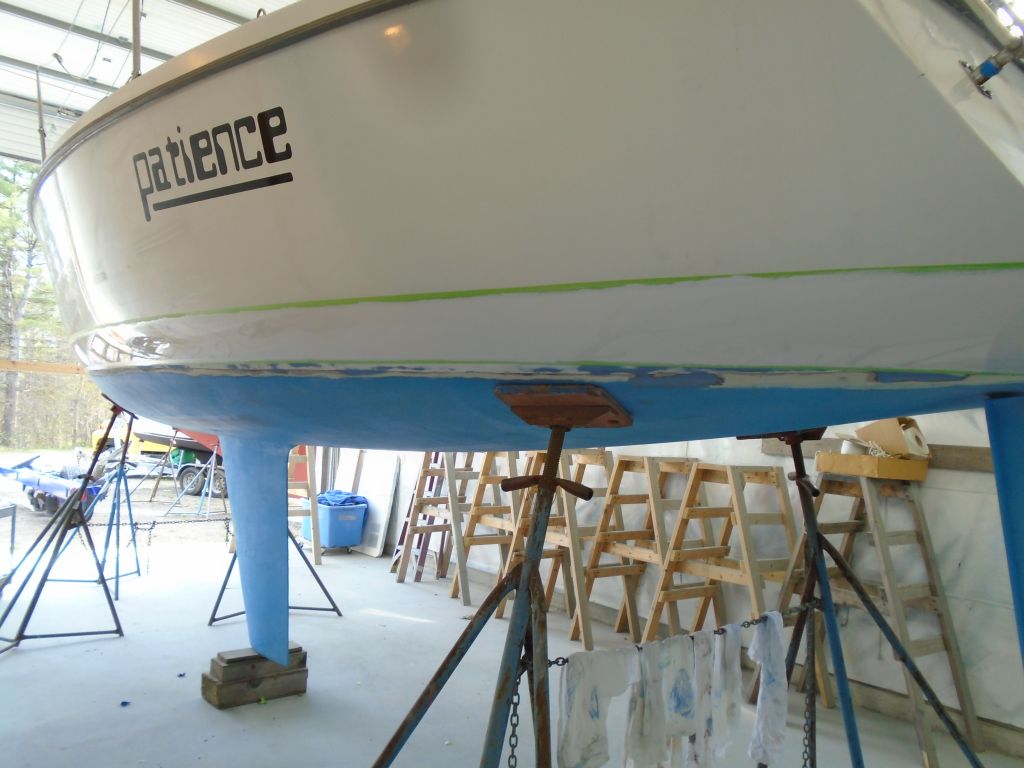
Starting from the existing top line, which I’d struck and masked earlier, I worked my way down the various boottop stripes, lowering my beams at each end the proper amount to strike each line in turn. Once I’d made the tick marks for each stripe, I masked off the line accordingly.
The first new line, representing the bottom edge of the top stripe, was 3/4″ below the topmost line.
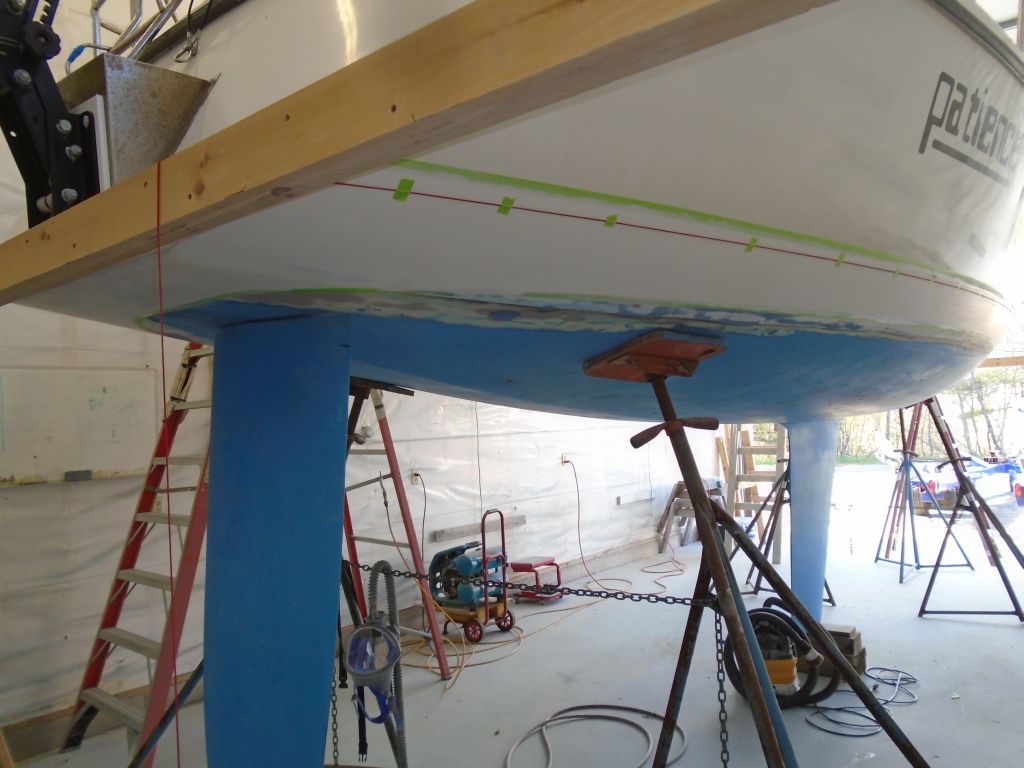

The next line, representing the bottom edge of a hull-color band, and the top edge of the lower, wider colored stripe, was a further 3/4″ down.
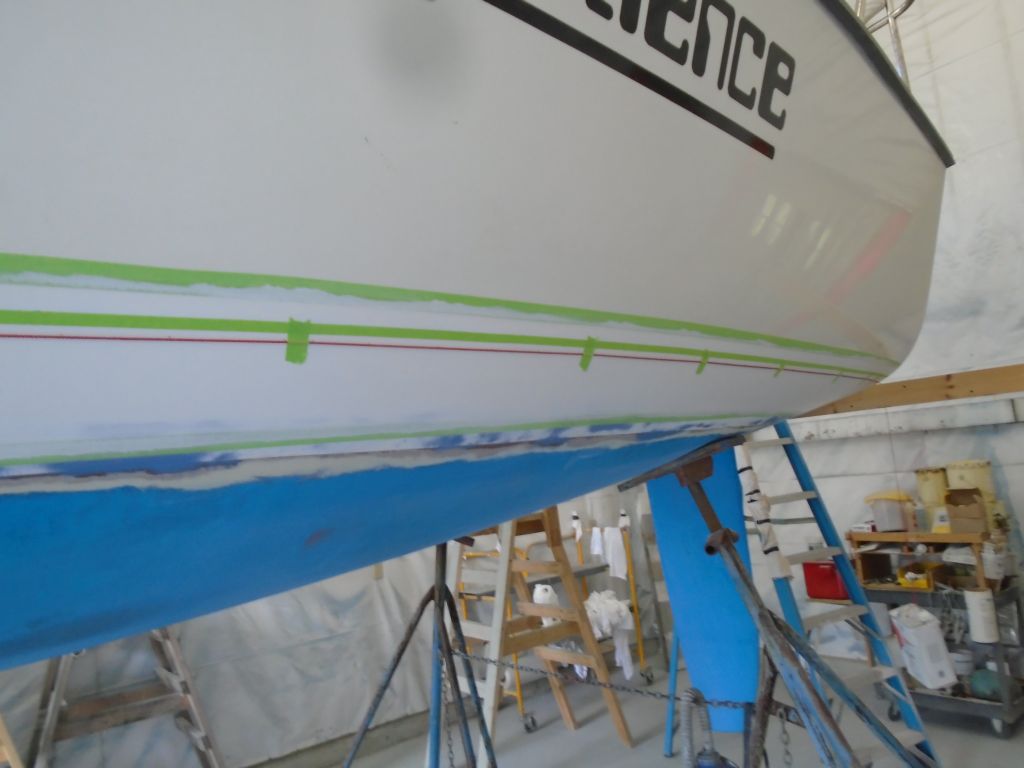

The final line, representing the bottom edge of the wider stripe, was 2-1/2″ below that, leaving a 1″ band of hull color above the bottom.

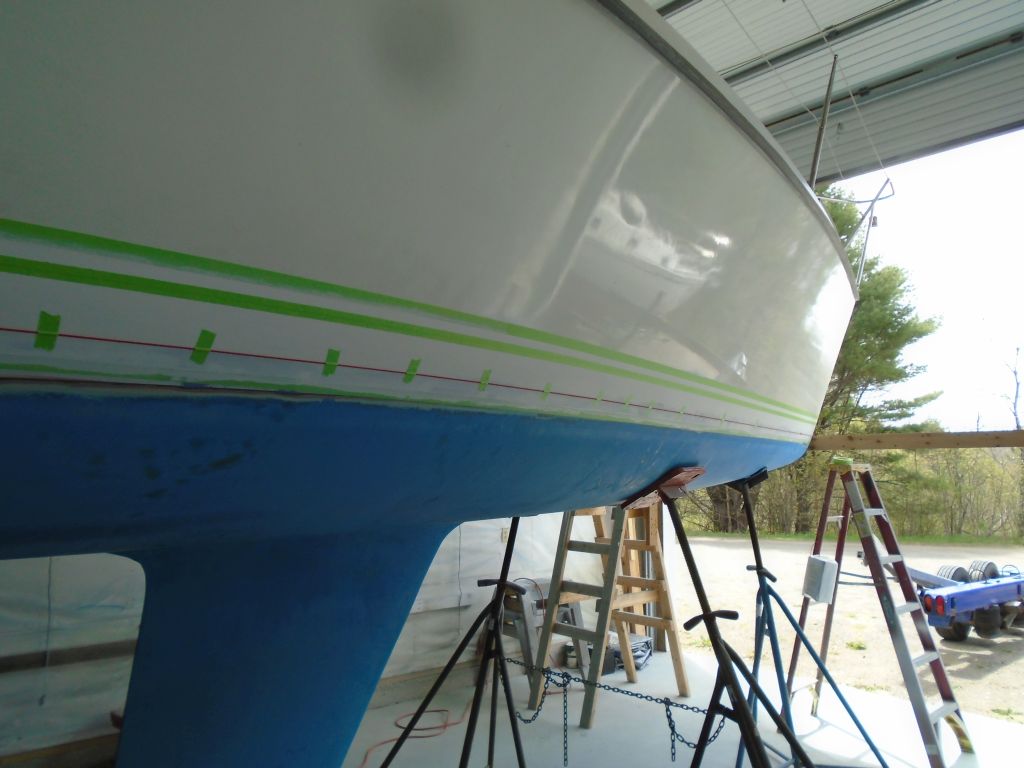
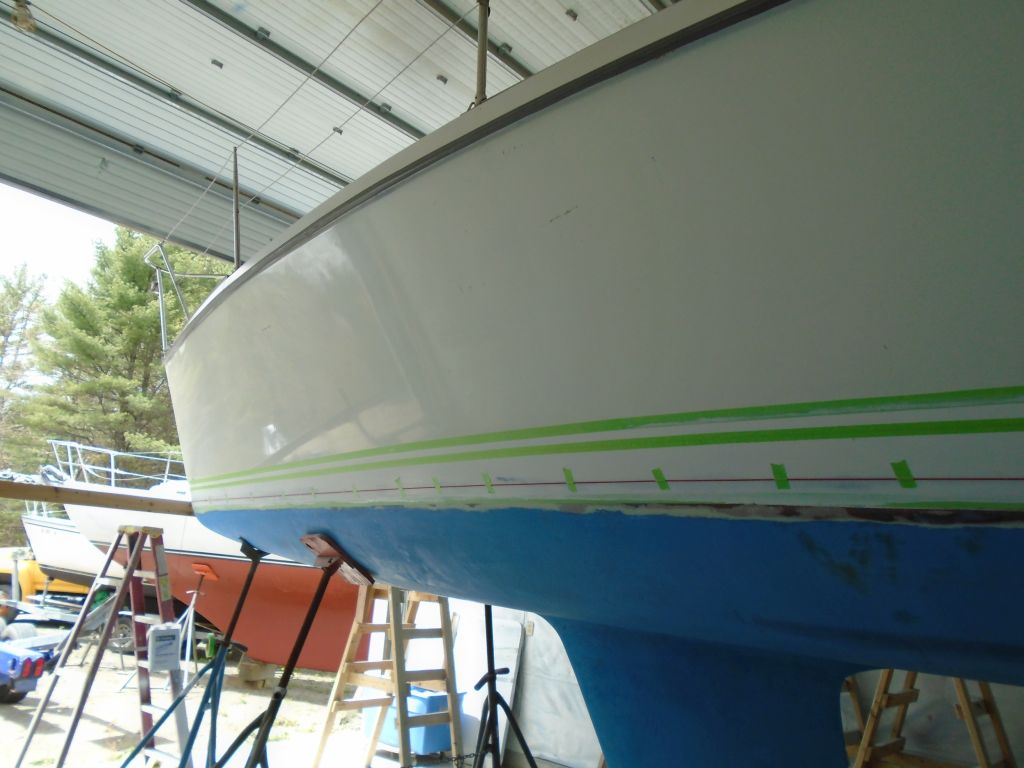
With all the masking completed, there was finally a reasonable visual sense of the new striping, and it looked great.


We were still finalizing the paint colors, and awaiting some of the product, so with another boat awaiting my attention I moved on to other things for now.
Total time billed on this job today: 4 hours
0600 Weather Observation:
40°, mostly clear. Forecast for the day: sun and clouds, showers in the afternoon, 60s
Wednesday
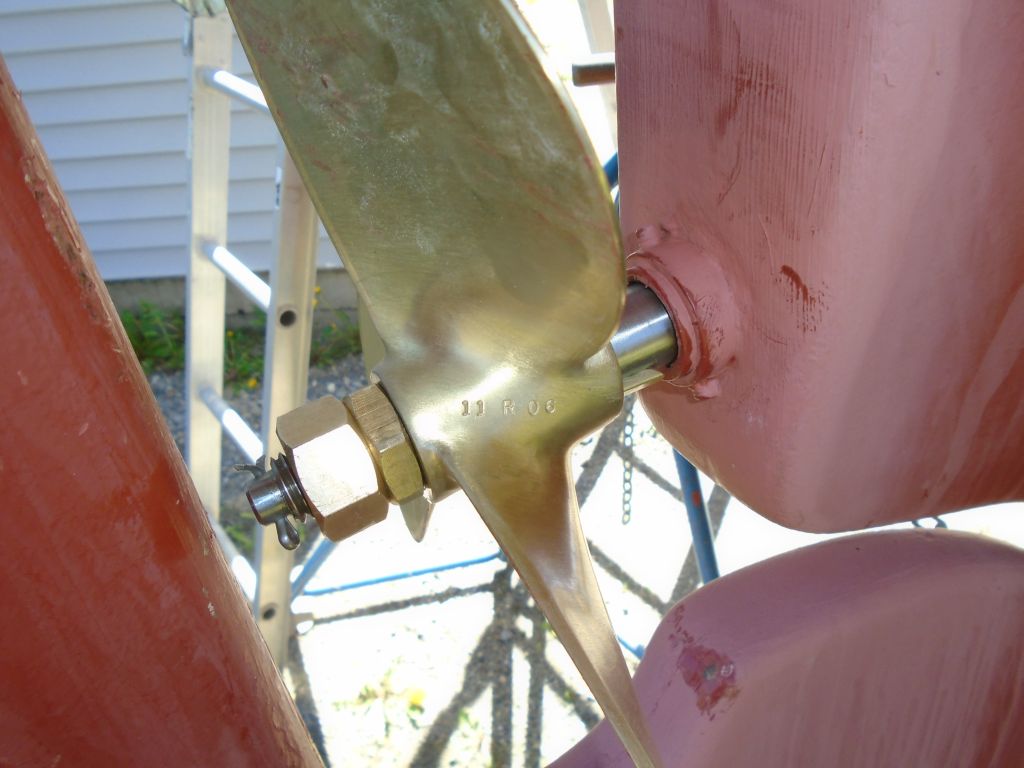
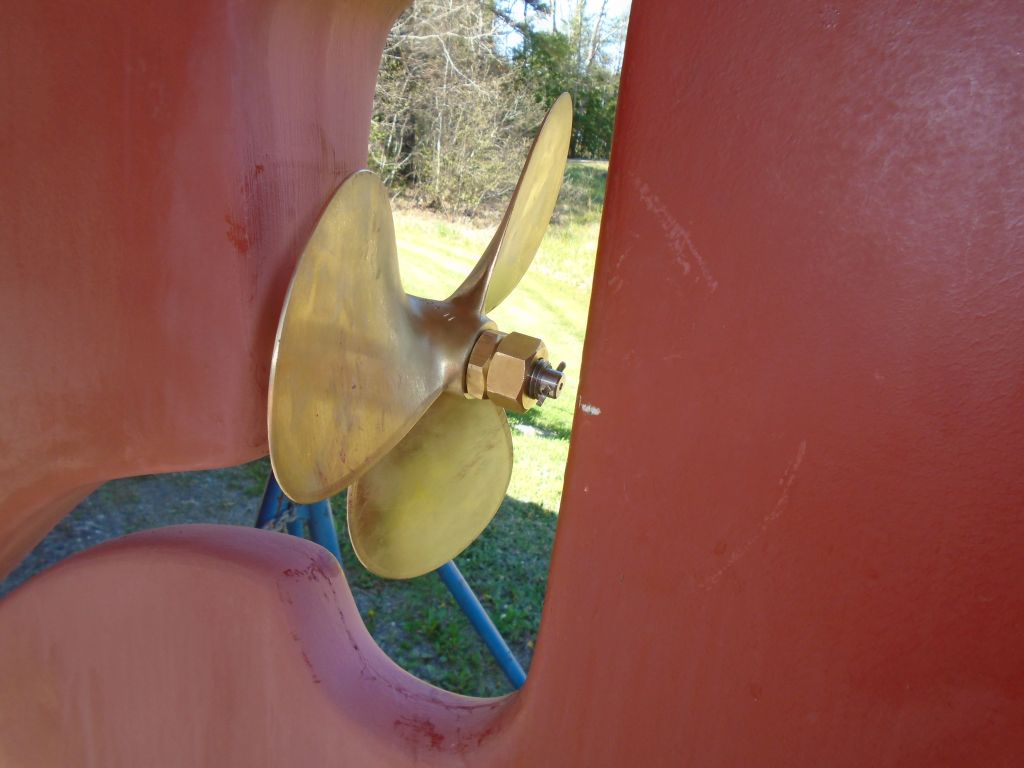
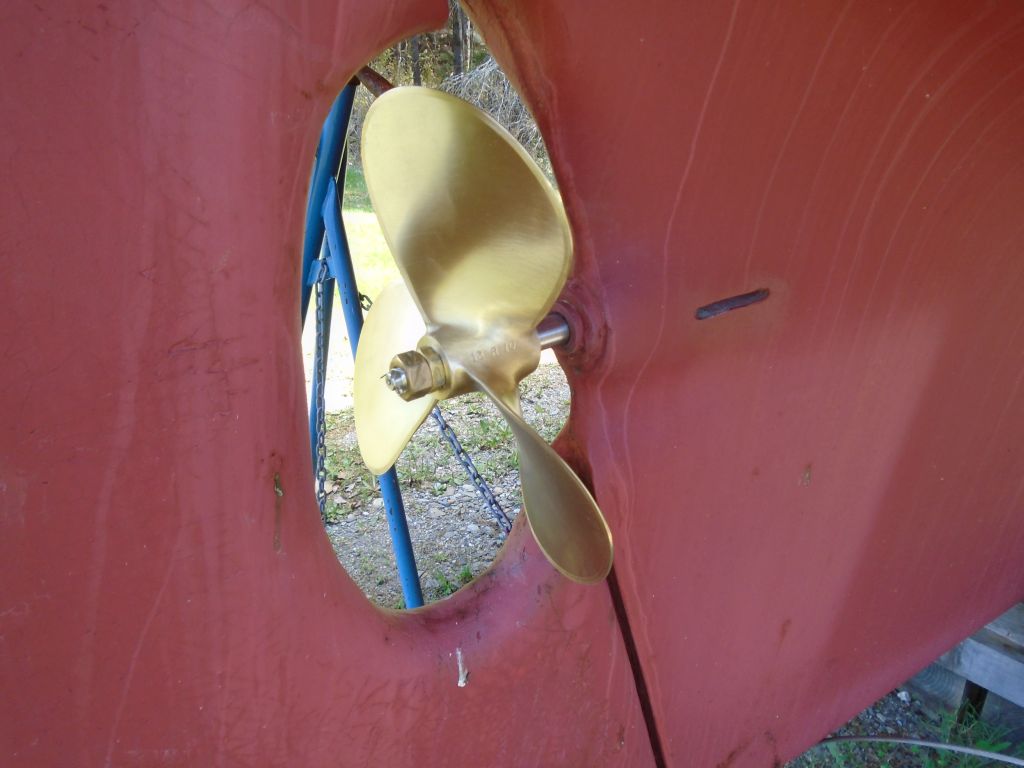
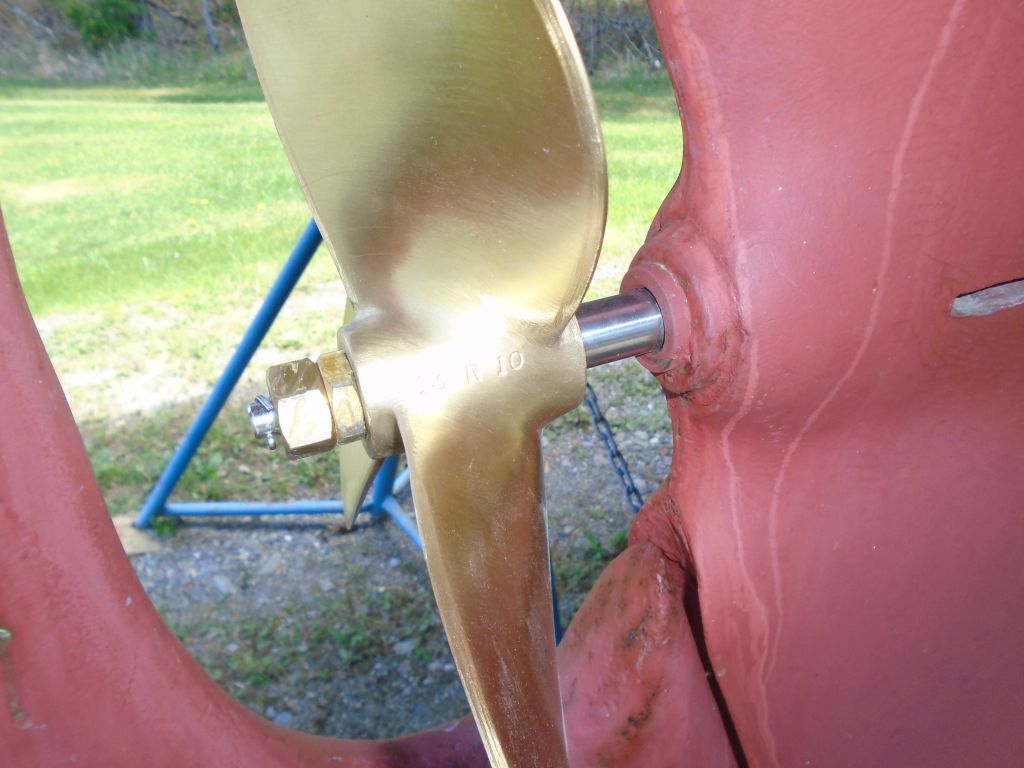
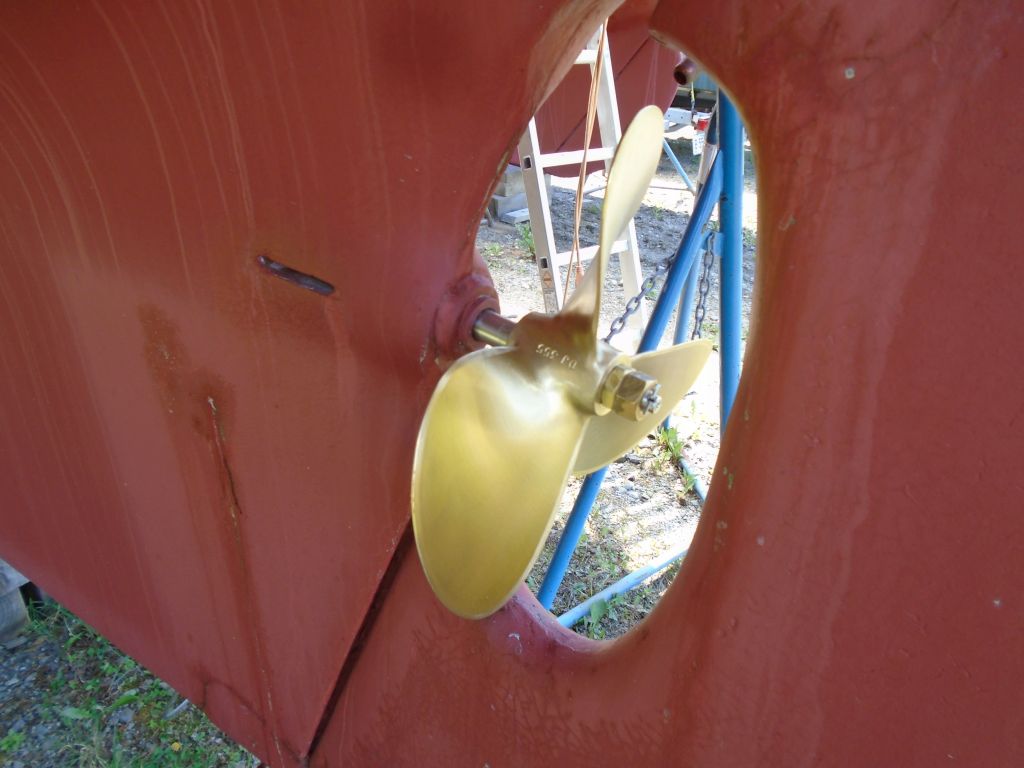
After one final, hopeful, yet unsuccessful attempt to somehow twist the new propeller onto the shaft in the tiny space before the rudder, I gave in and went up and removed the flexible coupling from the shaft. This gave me additional space to slide the shaft forward, which allowed me to get the prop into position without removing the rudder. Then, I slid the shaft (with prop loosely in place) as far aft as possible so I could reconnect the couplings inside.
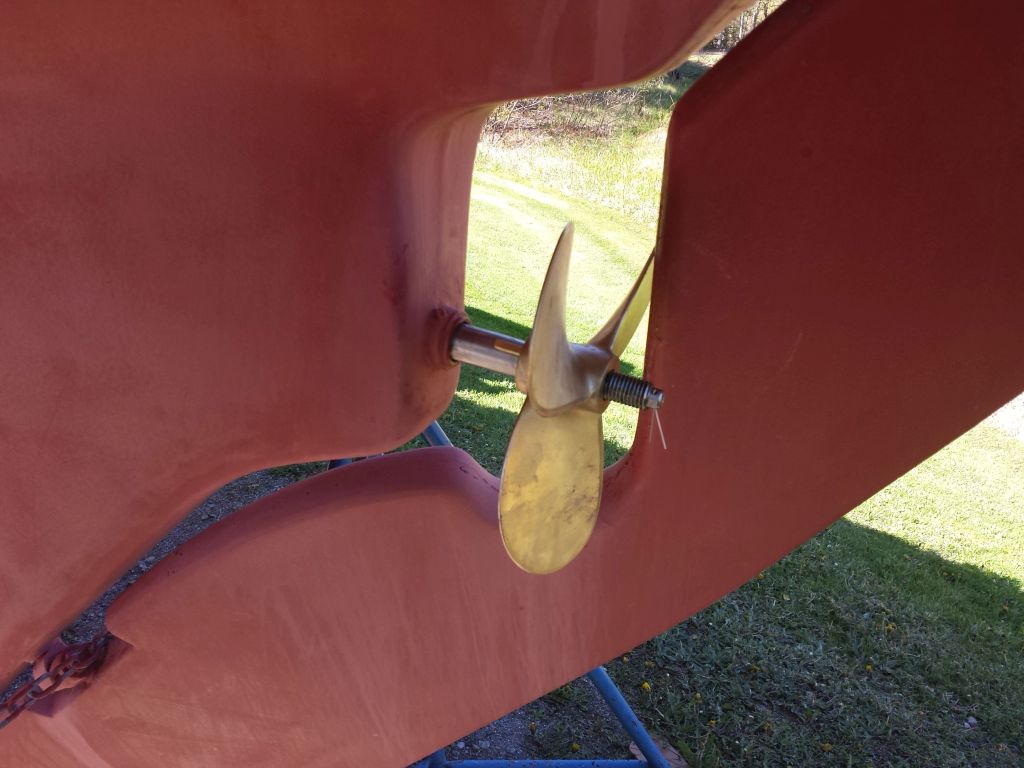
Afterwards, with the couplings reinstalled and bolted tightly into place, I finished up the propeller installation by securing it in place with its nuts and cotter pin. The propeller size is 11RH6.
Now, I prepared the engine for its initial firing by adding fluids as needed: engine oil and coolant. Fuel had partially filled the fuel filter by gravity from the tank since I’d made those connections, but I added more fuel to the filter to fill it to the top. I installed the start battery, and prepared a temporary cooling water intake line with a length of hose and a bucket.
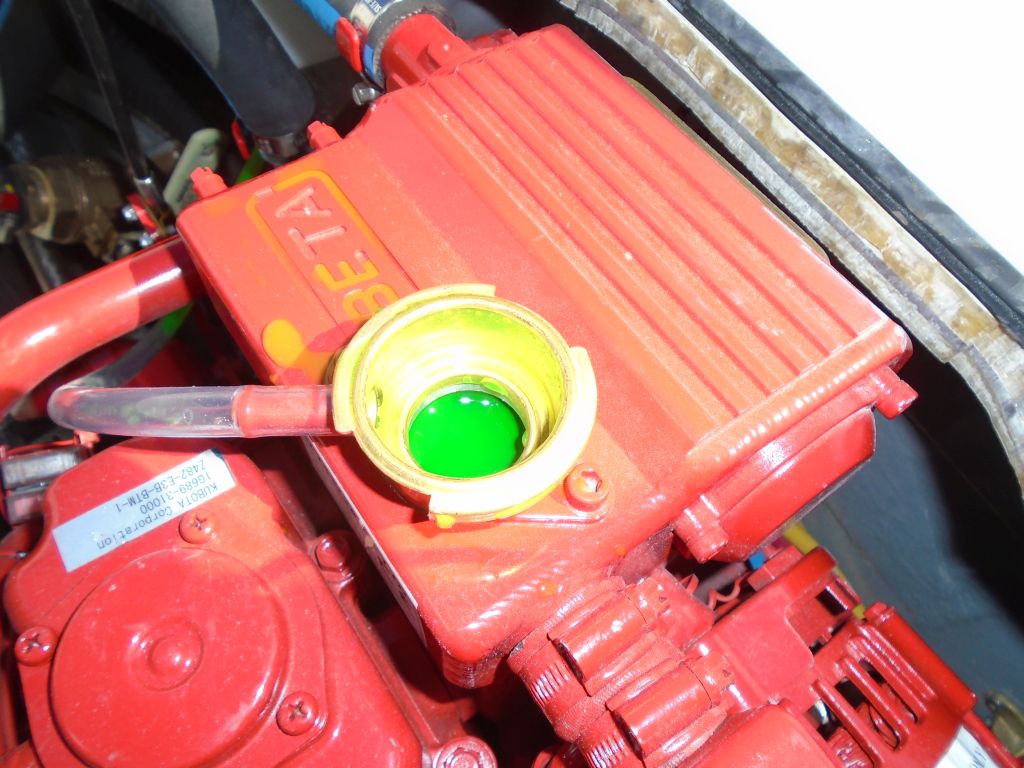

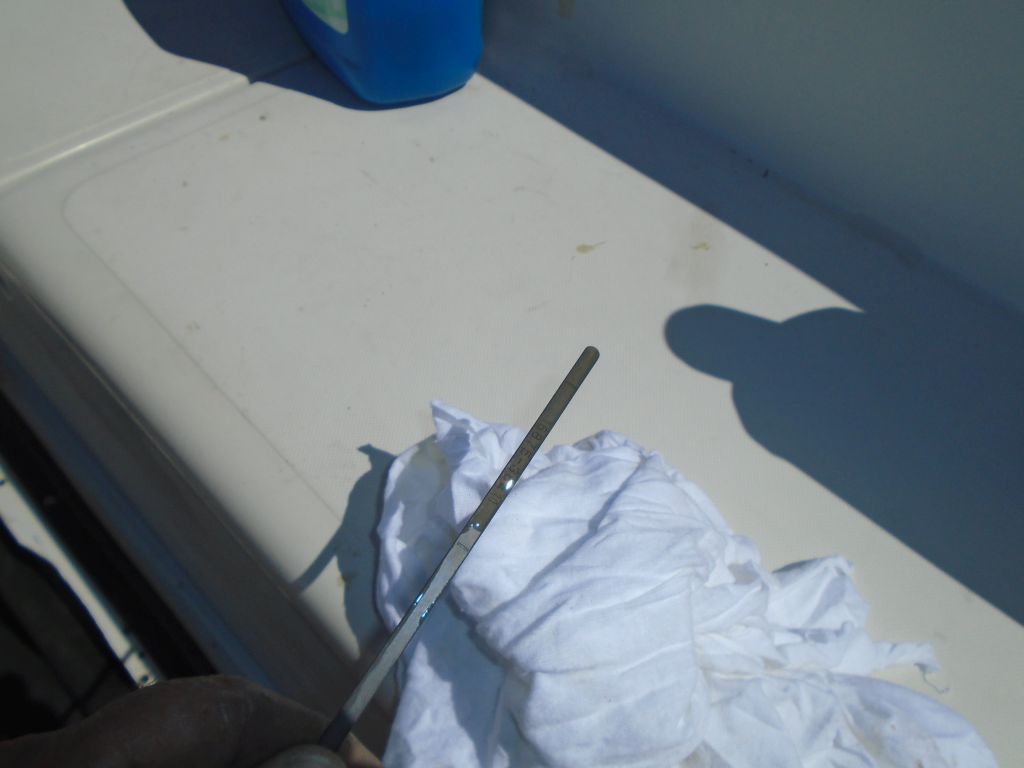

With everything in place, I bled the engine at the secondary fuel filter, using the engine’s built-in pump lever to prime the system till I got fuel (and air) out of the bleed screw at the top. (14mm) Once I saw relatively clear fuel, it was time to fire the engine. I knew from past experience that these engines were almost completely self-bleeding, so there was no need to chase fuel through the rest of the system.

Once I started the engine, it took a few times to get it to run properly as it worked fuel and air through its system. After two starting attempts–the engine started, but wouldn’t run for long–I rebled the fuel system at the secondary filter, and afterwards the engine stayed running once I’d started it. Easy peasy.
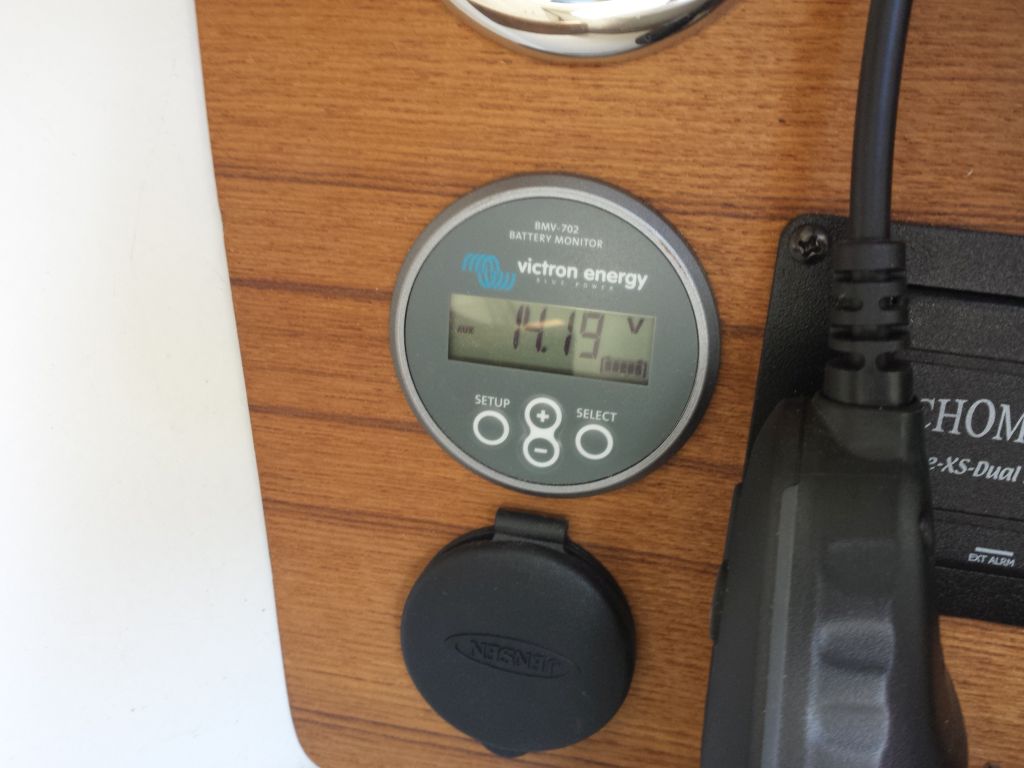
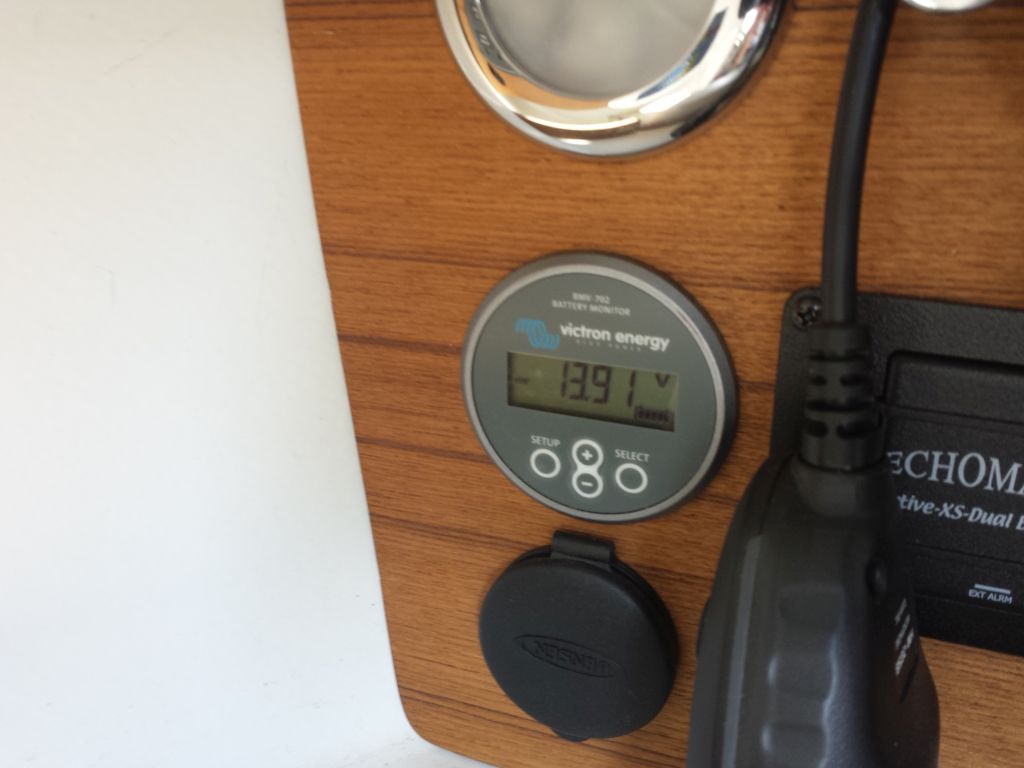
After running the engine for a few minutes, I shut down so I could check the fluid levels again. Both oil and coolant were fine and I didn’t need to add any. With this check complete, I started the engine again for a longer run. The three videos below show various stages of the process.
Sorry about the bad reflection on the battery monitor in the video above. These photos show the battery charging amps at higher speed and again at idle speed.
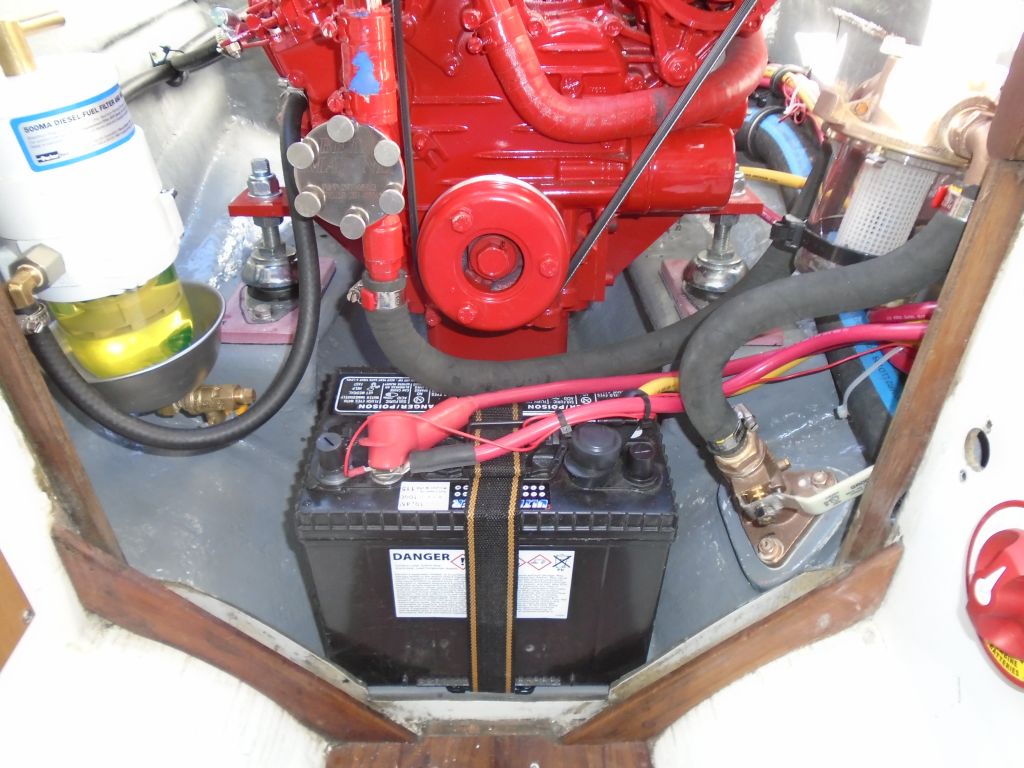
With the successful test firing behind me, the job was complete, and I spent the last minutes of the day cleaning up a bit and putting the boat back together. I installed the raw water strainer and its hoses, and buttoned up the engine compartment.
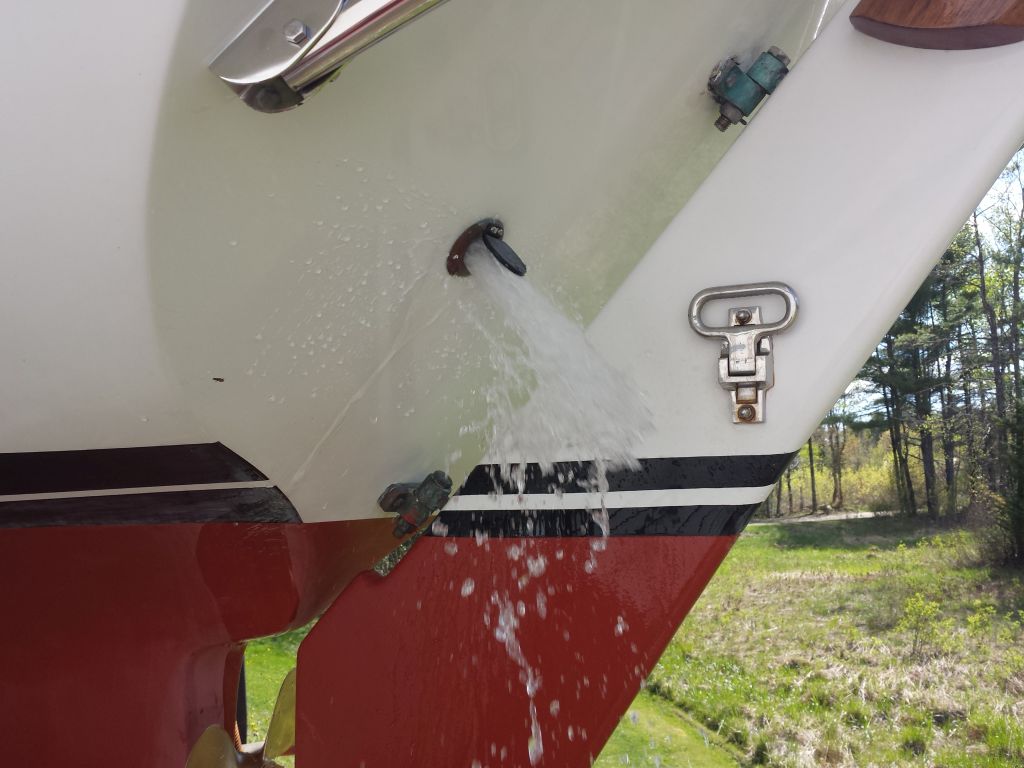
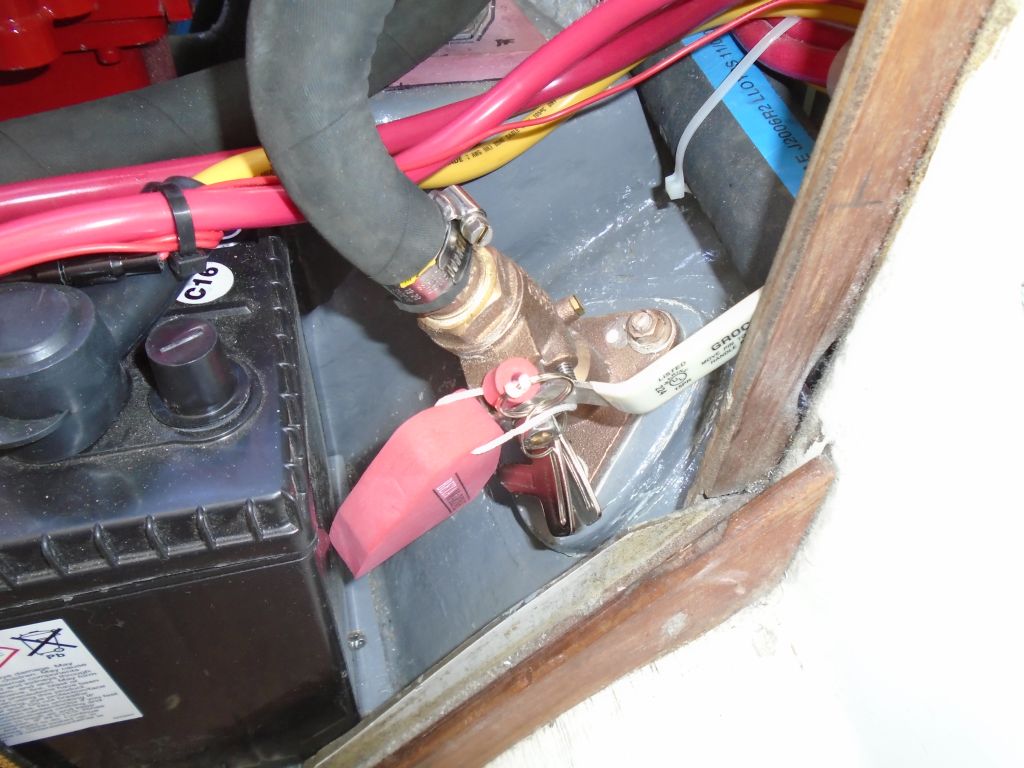
I left the engine raw water seacock closed, and since I wouldn’t be there at launching, to help future operators remember to open the seacock before starting the engine I hung the engine keys right on the seacock (located at the forward end of the engine room and accessed from the panel behind the companionway).
I installed the engine hatch with four screws (out of a total of about 12) so it’d be secured during transport, but easy enough to remove at launching to check the stuffing box and engine.

Total time billed on this job today: 5.25 hours
0600 Weather Observation:
40°, clear. Forecast for the day: mainly sunny, 60
Wednesday
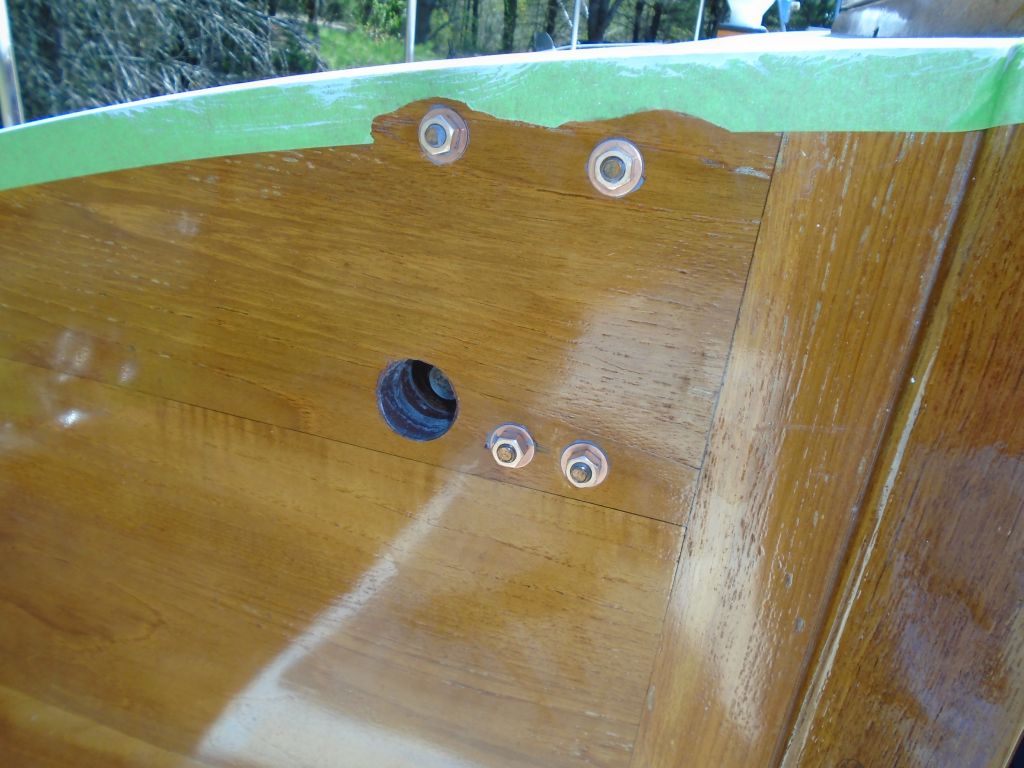
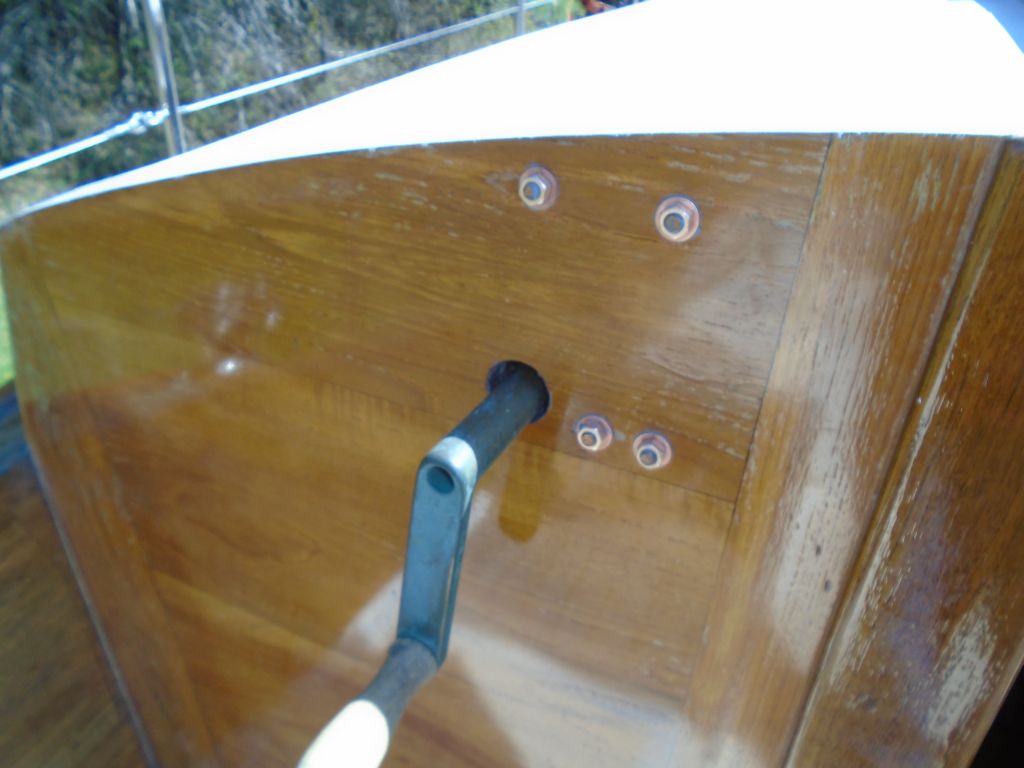
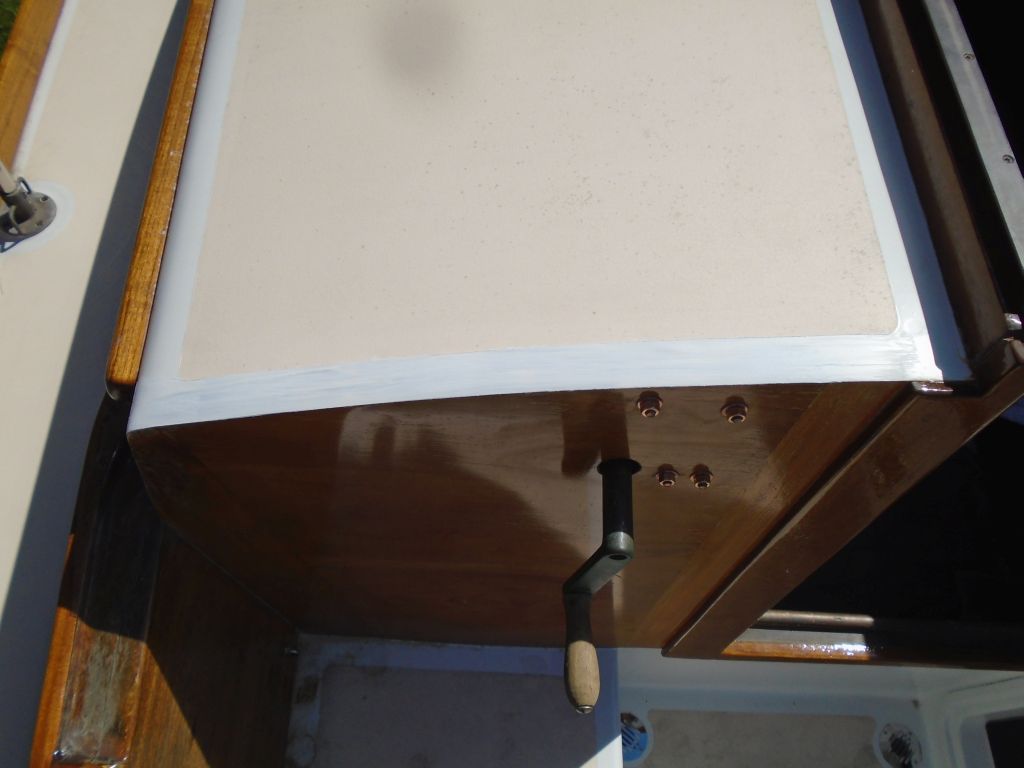
Now that the backing block was complete, there was nothing holding me back from completing the centerboard winch installation. I bolted it into place with 3-1/2″ bronze bolts from inside, adding butyl sealant and washers/nuts from outside to hold the winch in place securely.
The centerboard cable had been wrapped and secured around the pole that led from the centerboard trunk to the overhead, and now I used a small jack to push and support the centerboard itself (which had been drooping down slightly from the keel) into its trunk so I could unwrap the cable and lead it to the winch. I secured the bitter end of the cable within the winch drum, and then tightened the drum with the handle to take up the cable accordingly, completing the installation.
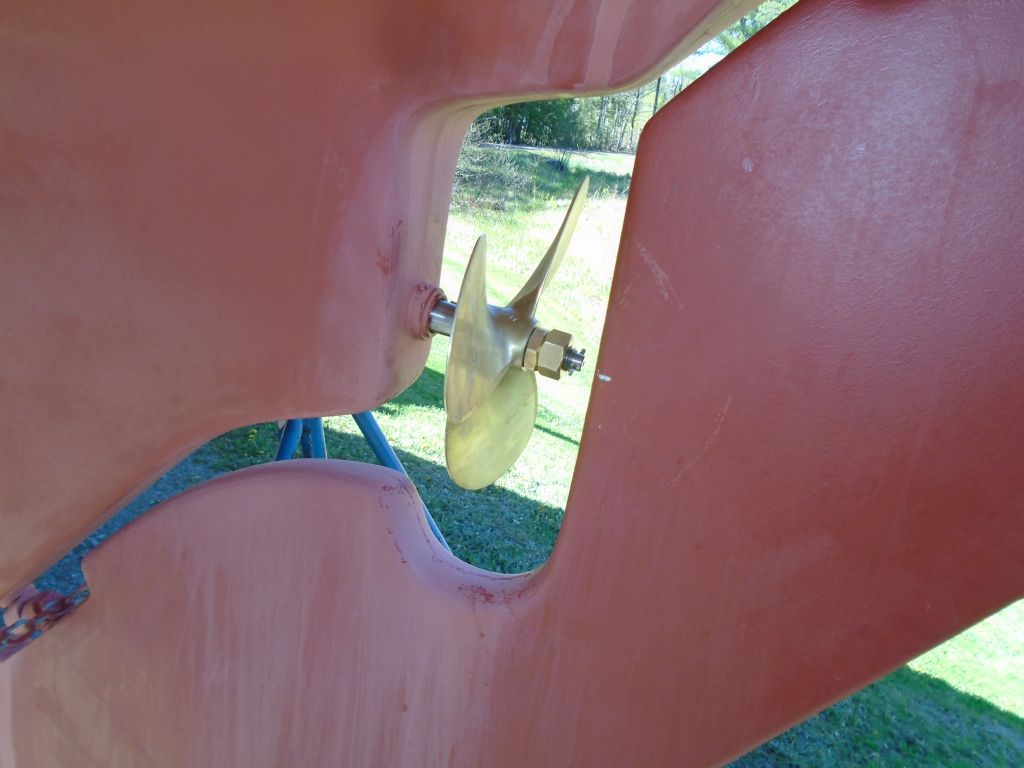
The new 13RH10 3-blade propeller was now on hand, so I installed it on the shaft.
Though there’d been no evidence originally (from when the boat arrived here) of debris screens over the cockpit scuppers, they’d clearly shown a propensity to clog with debris through their wide-open tops, so I installed simple screens over the openings to keep out large pieces of debris.

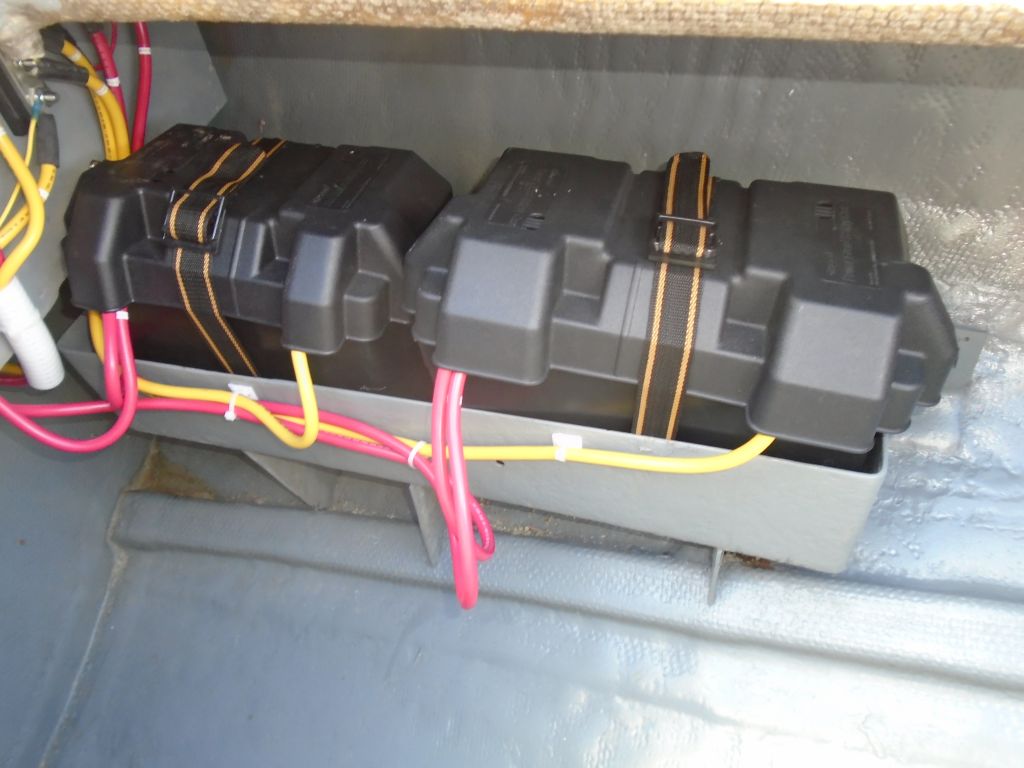
I’d purchased batteries for the boat earlier in the week, and now I installed them: a group 24 starter battery, and a group 27 house battery. All the wiring was already in place and awaiting the installation. Afterwards, I tested all the lighting aboard and everything I could for now.


Continuing the minor repair to the port coachroof edge, I sanded the epoxy from last time, preparing it for primer. After masking off, I applied a few coats of white epoxy-based primer to the area.
Total time billed on this job today: 2.5 hours
0600 Weather Observation:
40°, clear. Forecast for the day: mainly sunny, 60
Wednesday
The primer had cured overnight, and now I lightly sanded it with 220 grit paper to prepare it for the next steps, and to smooth the surface. Afterwards, I vacuumed and solvent-washed.
My next steps would include masking the actual stripes below the top line, and I chose to let the primer cure for another day before proceeding with overmasking. Although there was other work I could do on this boat not related to the boottop, it was a good chance to move forward a couple other projects I had going on outside at the shop, so I spent most of the day on those boats.
Total time billed on this job today: 1.25 hours
0600 Weather Observation:
40°, clear. Forecast for the day: mainly sunny, 60
Tuesday
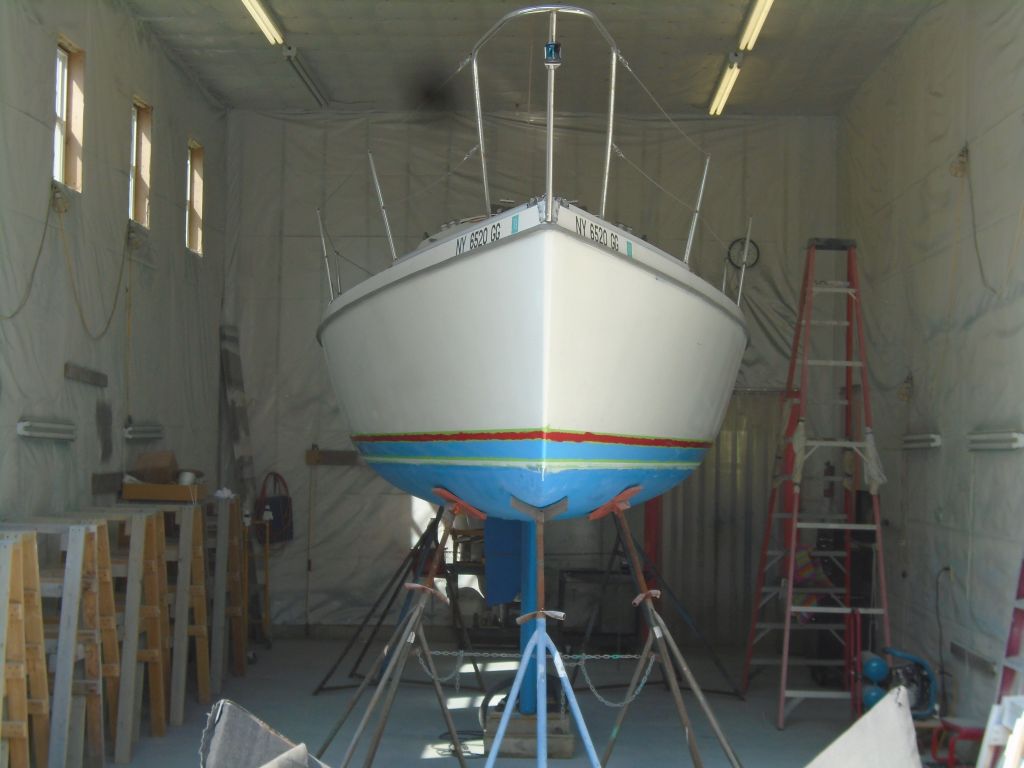
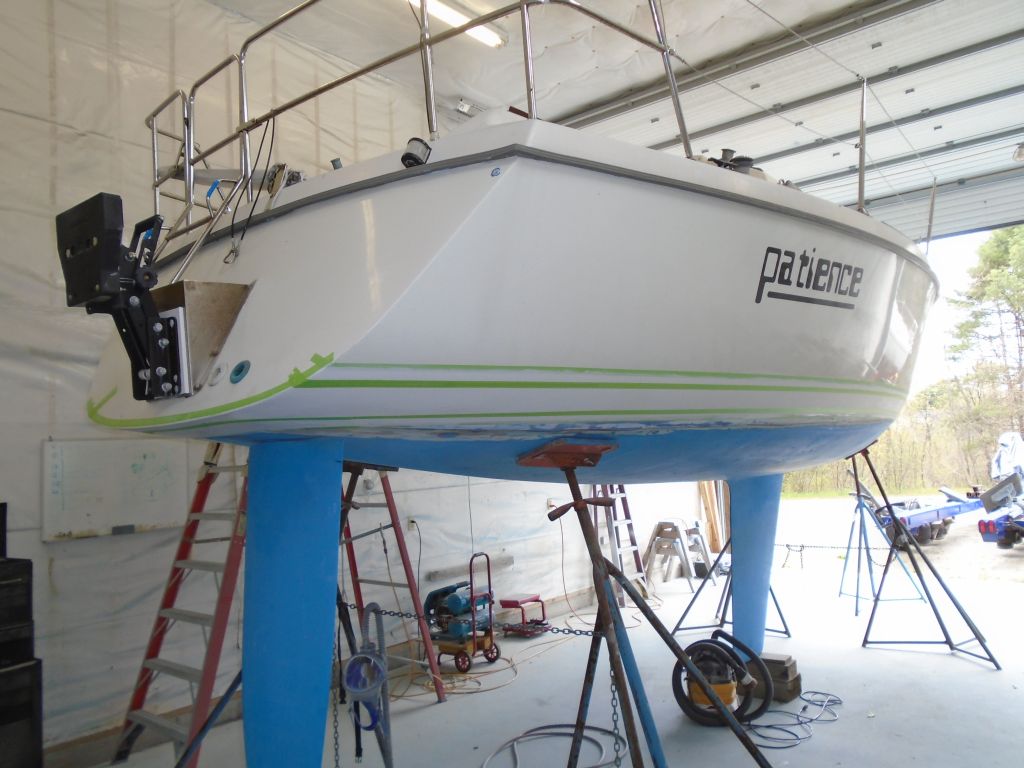
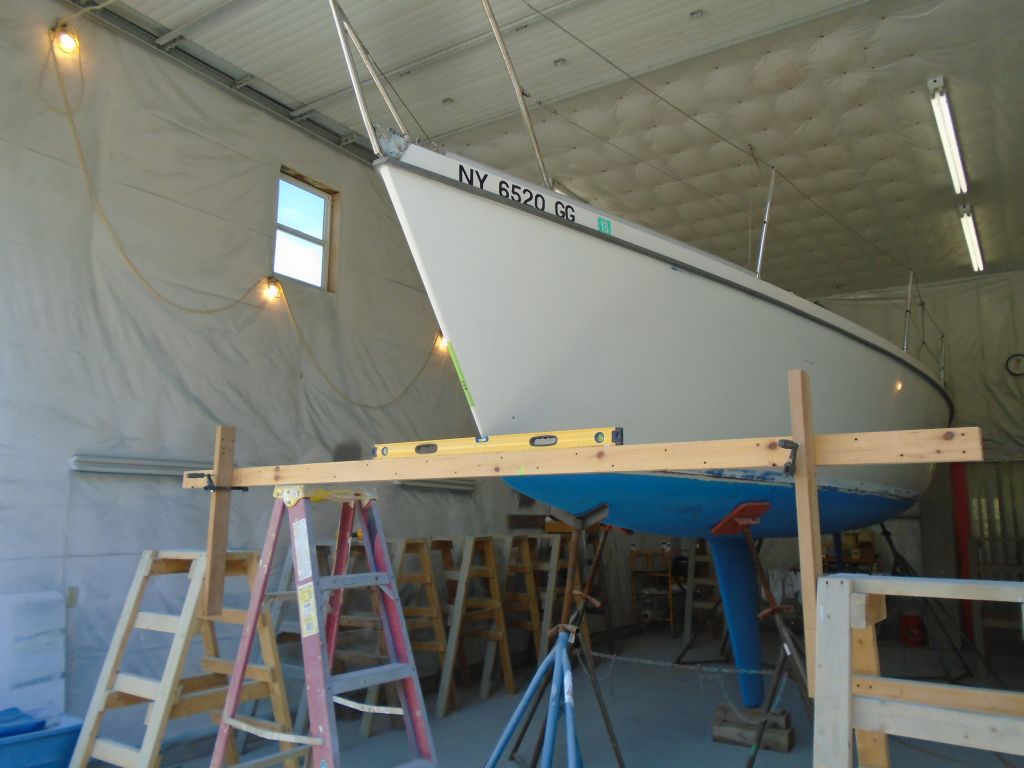
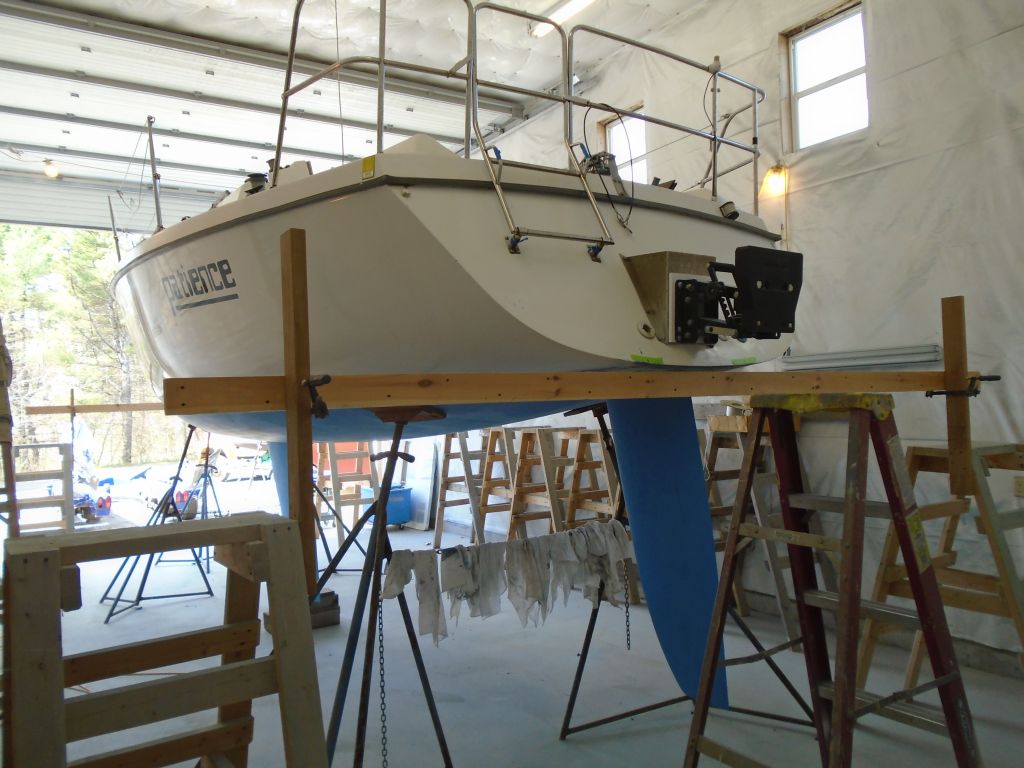
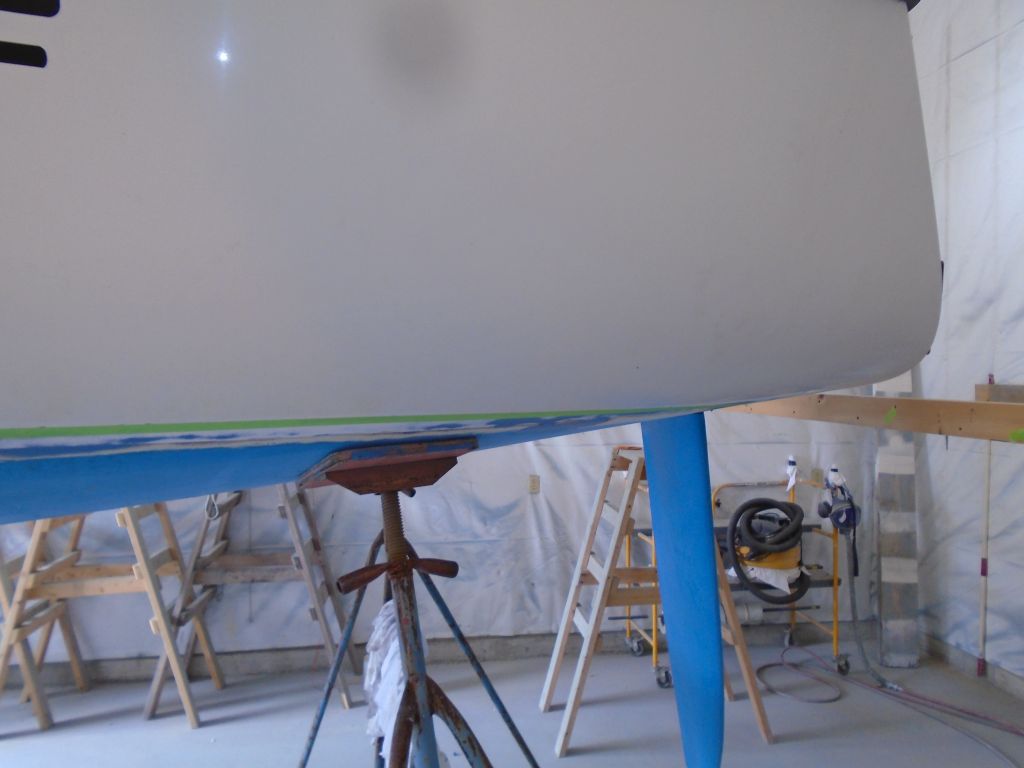
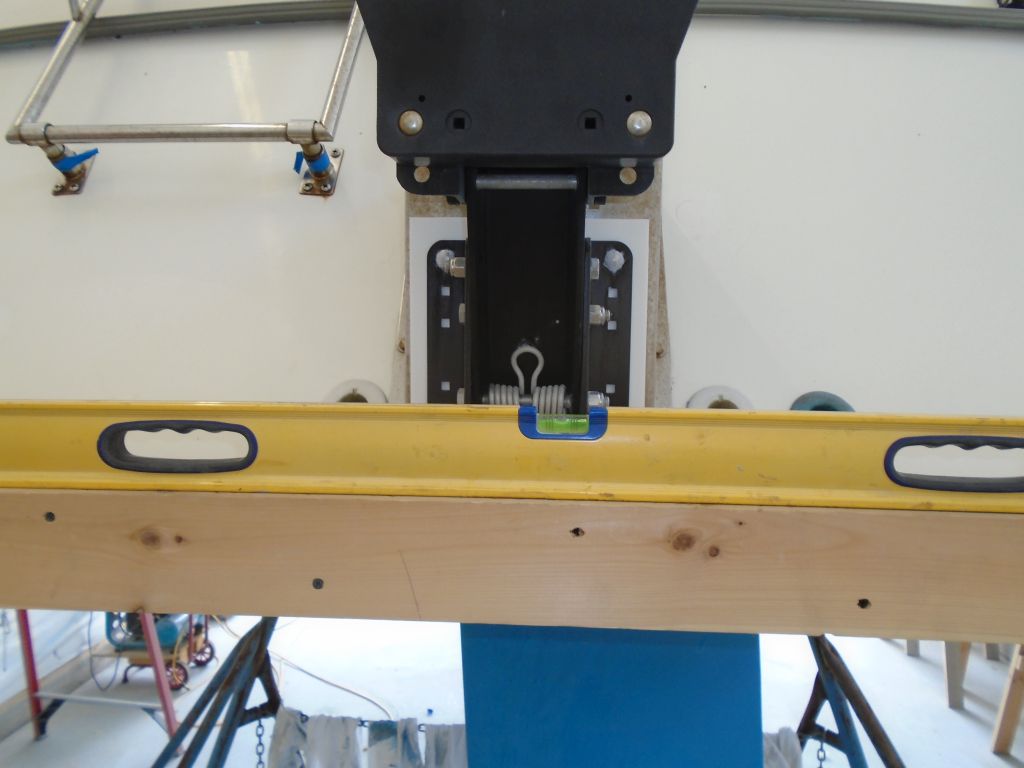
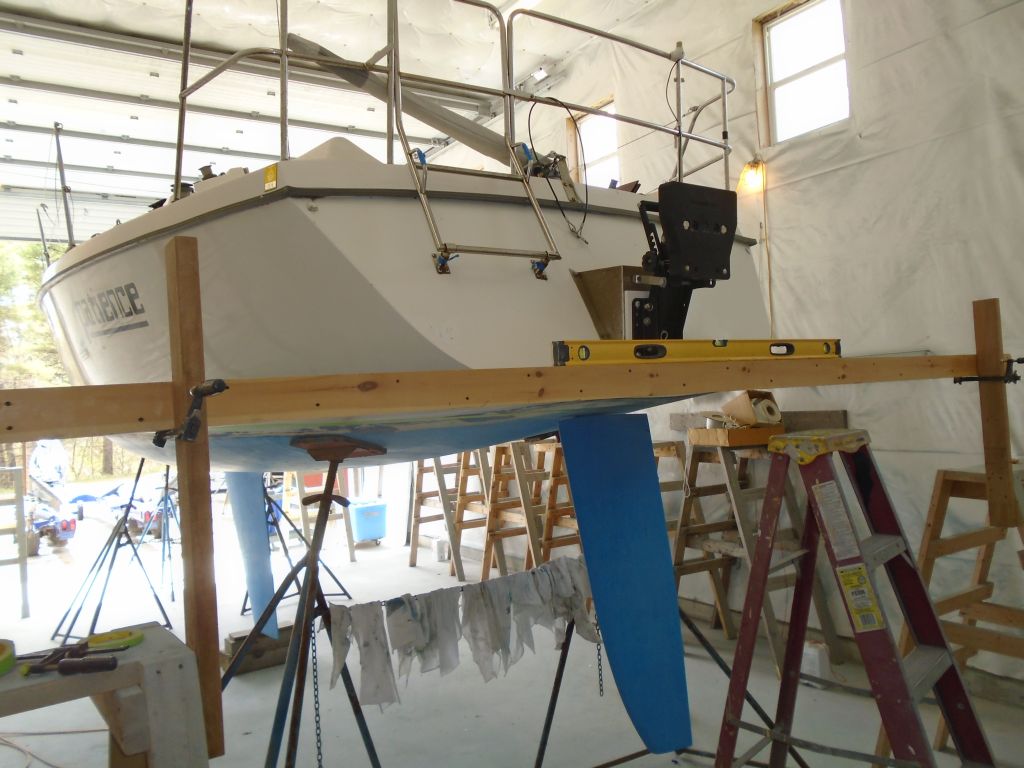
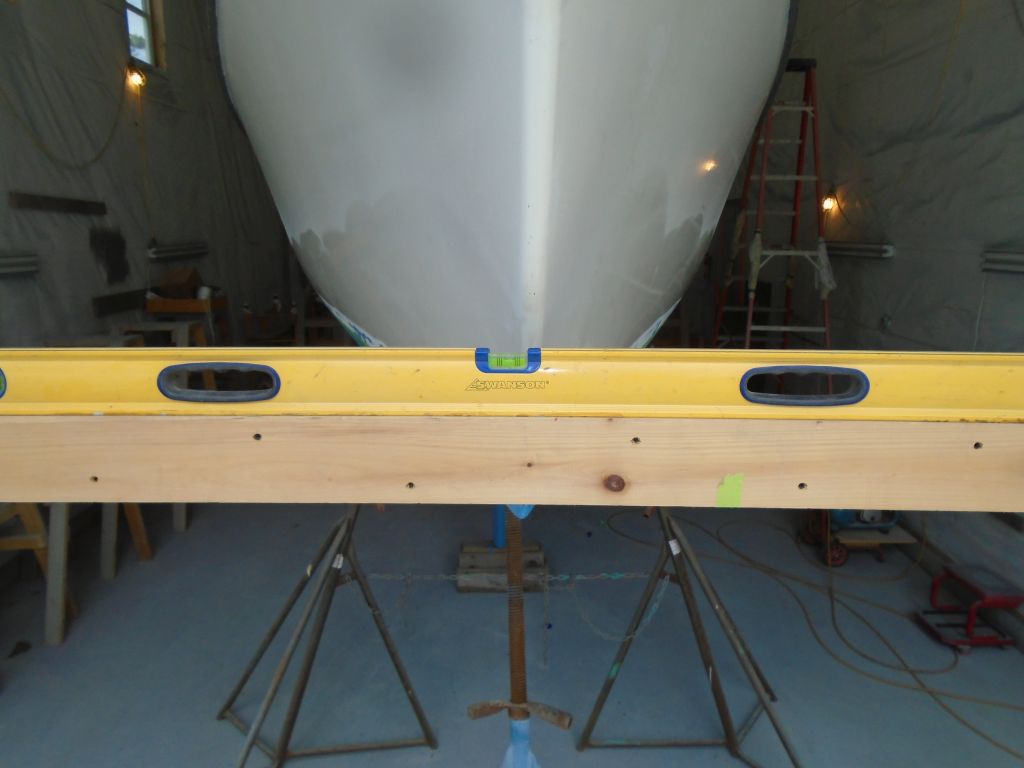
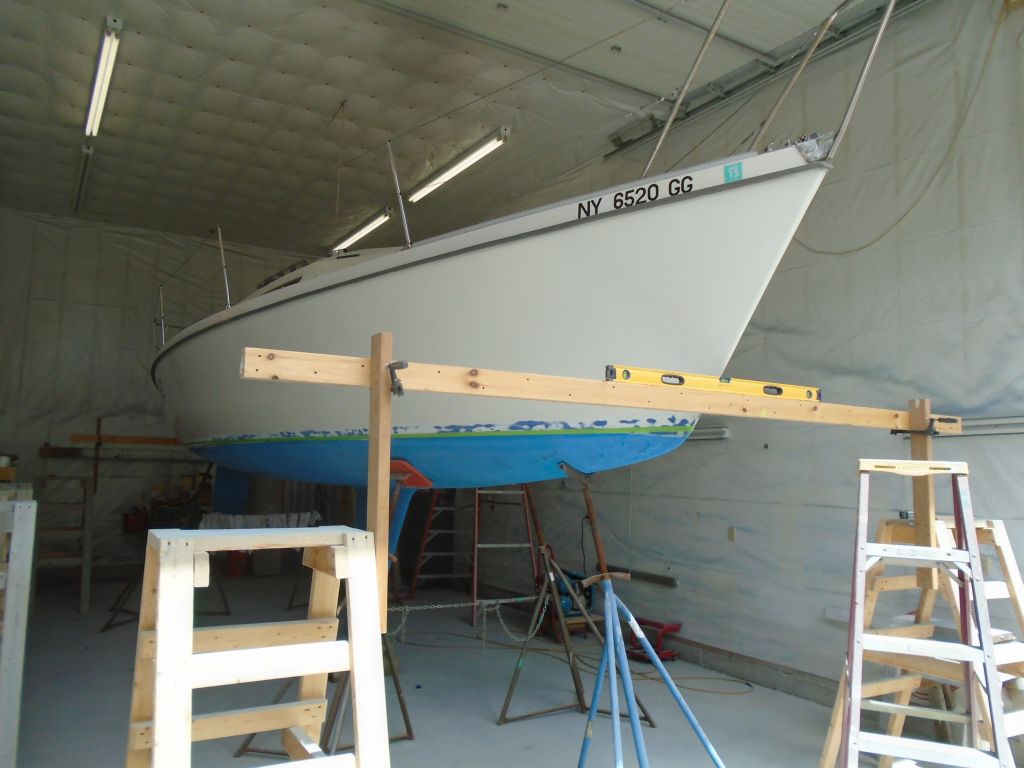
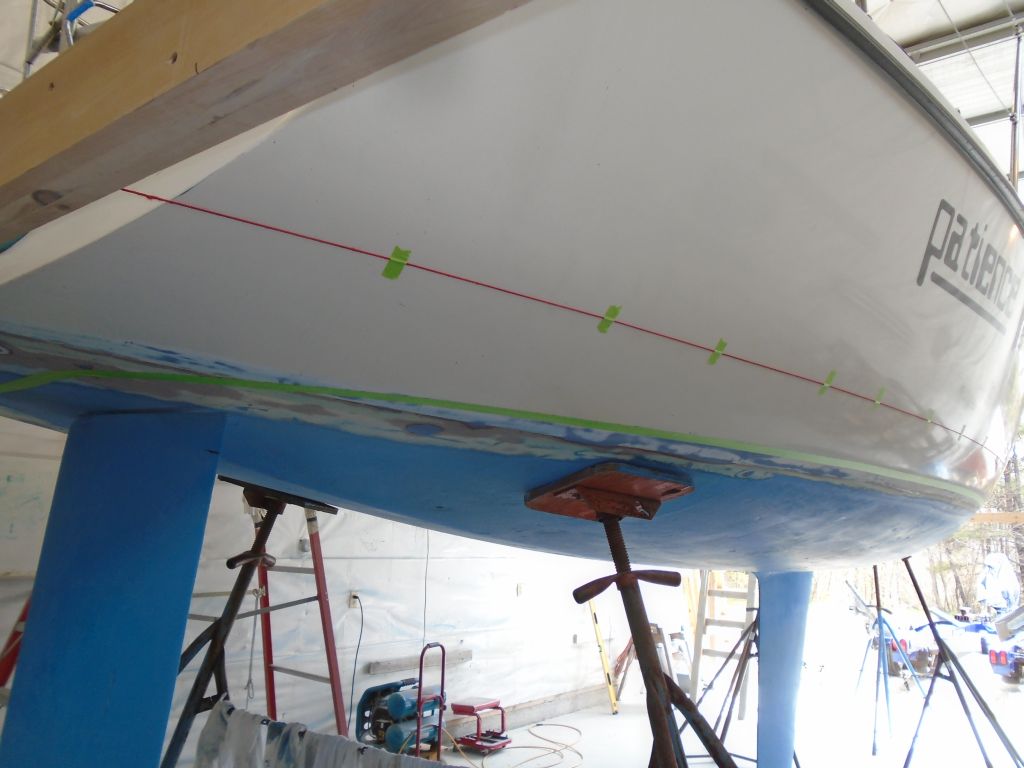
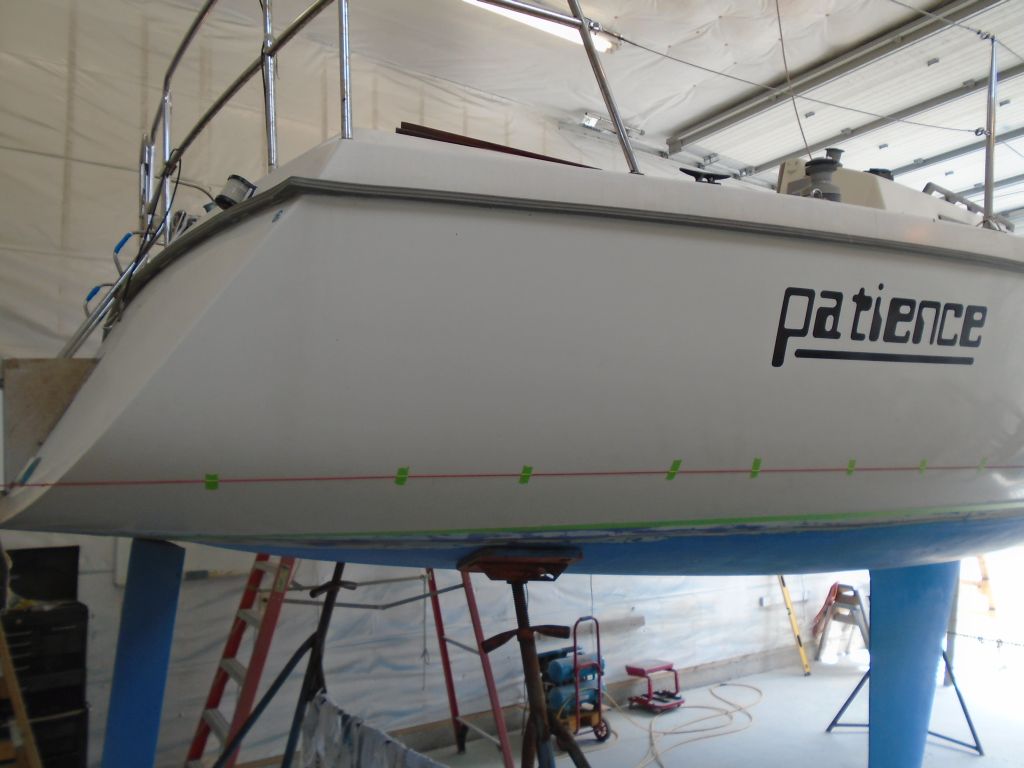
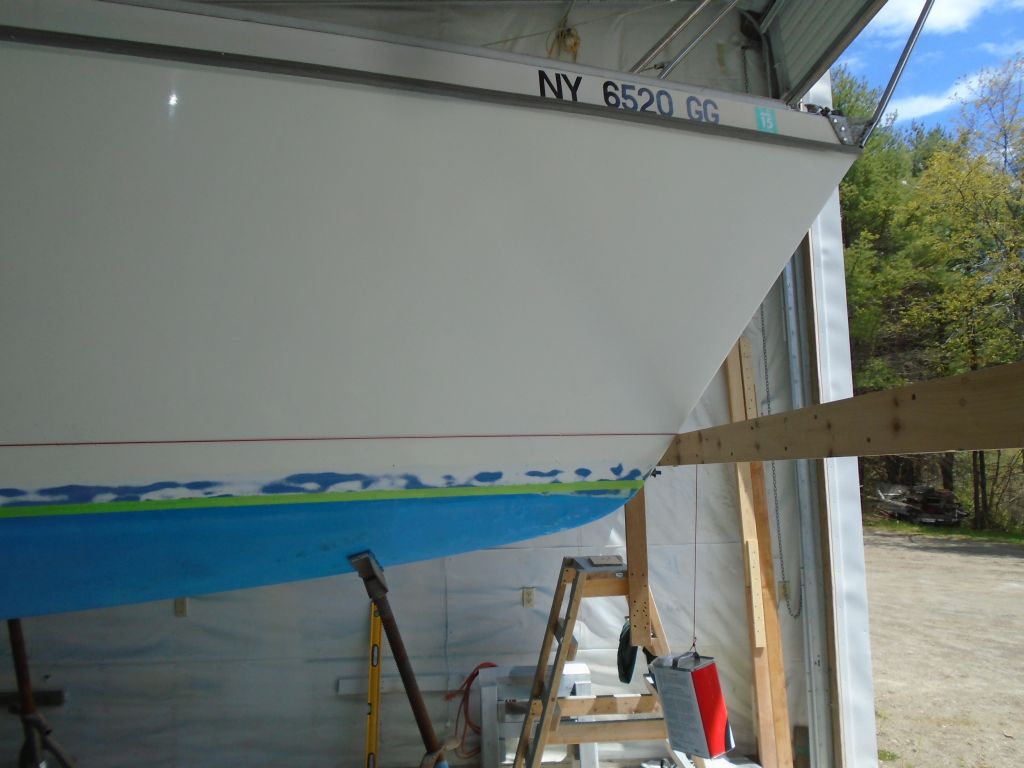
I spent the first part of the day leveling the boat accurately from side to side, and cleaned up the lower part of the hull to prepare it for the layout work ahead for the new striping.
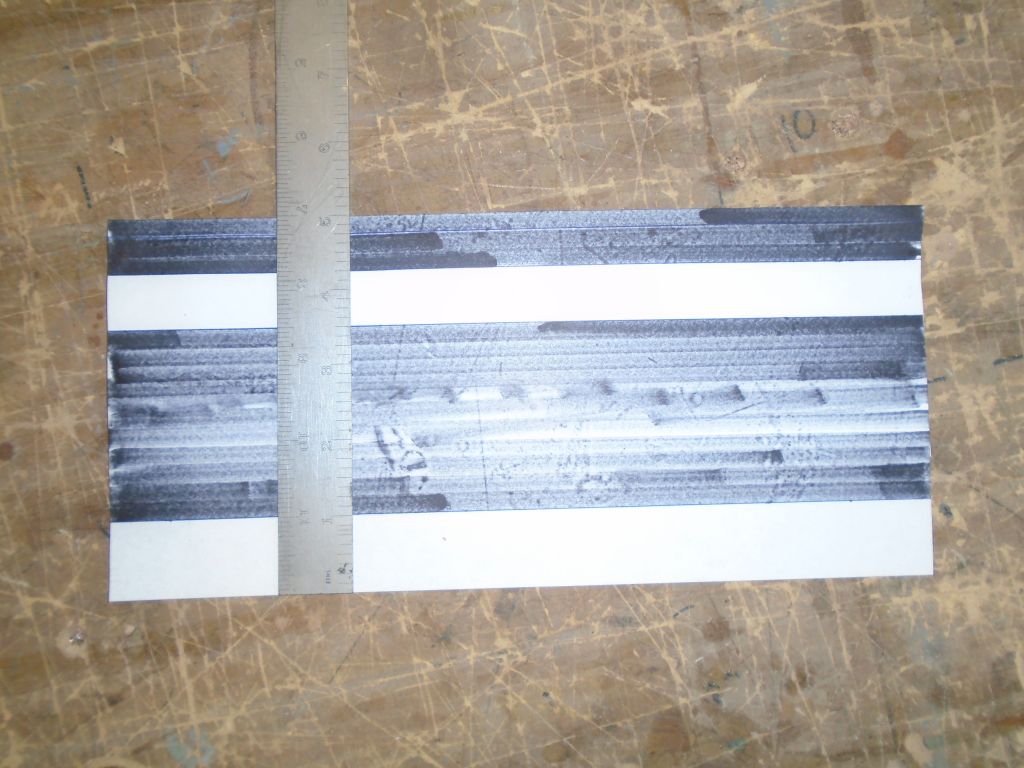
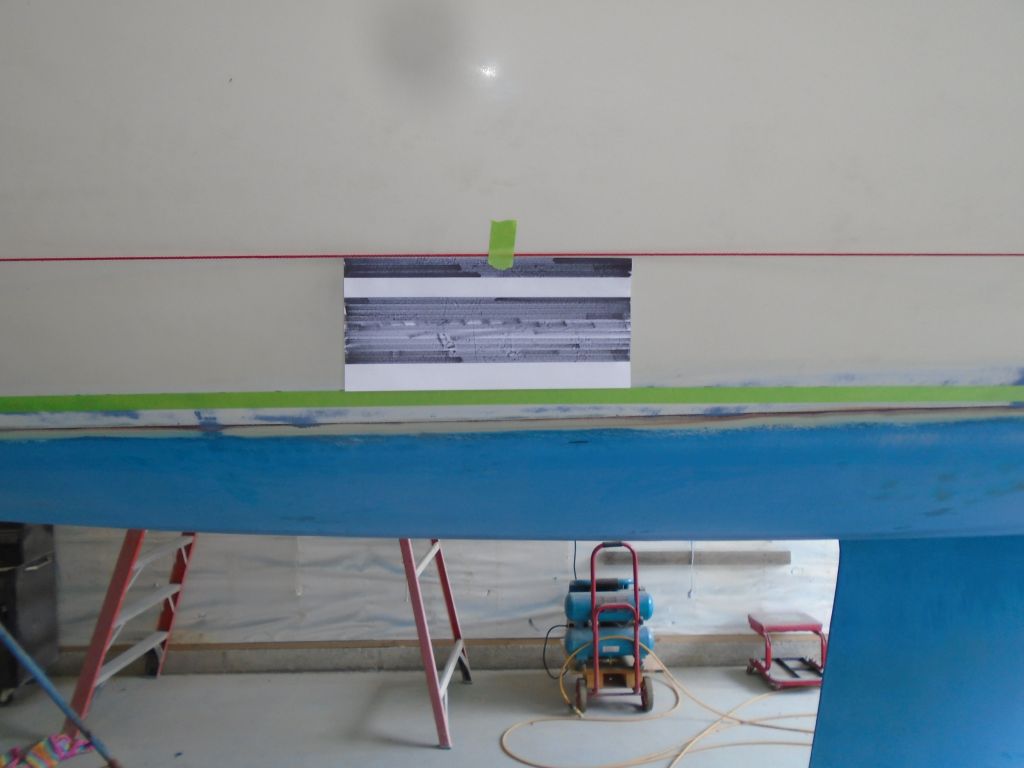
Afterwards, I set up my special 3D marking system to strike and mark the waterline (aka top of the bottom paint). At the stem, I used the existing paint line as my mark, as all indications suggested this was a good point. I had to use more guesswork at the stern, where there was not as clear an indication of the actual waterline. There was a light scum line on the rudder that helped, and I spent some time searching online for photos of other Laser 28s to help; there were few relevant photos that I could find that really showed me what I wanted to see, which was the stern quarters of a sistership out of the water, but after a while I got the idea, and made my mark at the aft side so I could set up the second cross beam. Ultimately, the chosen spot ended up 2-1/4″ above my best guess at the actual floating waterline, which corresponded to the height at the stem. This seemed to tie in with what limited information I could find online, and from the owner’s recollections.
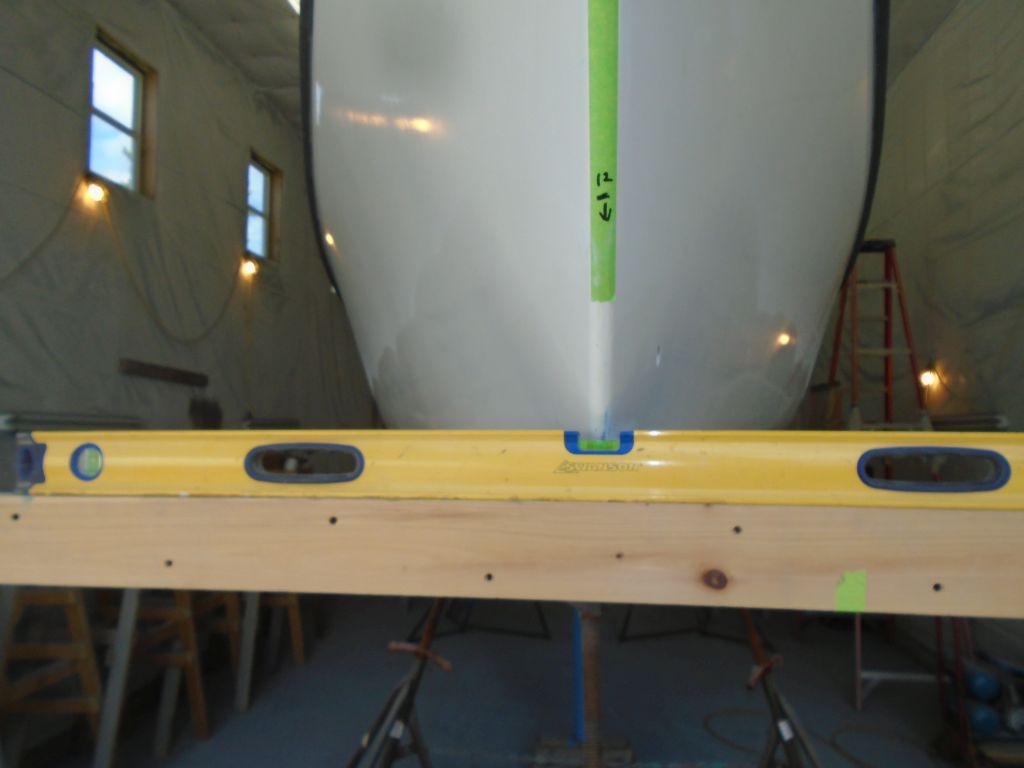

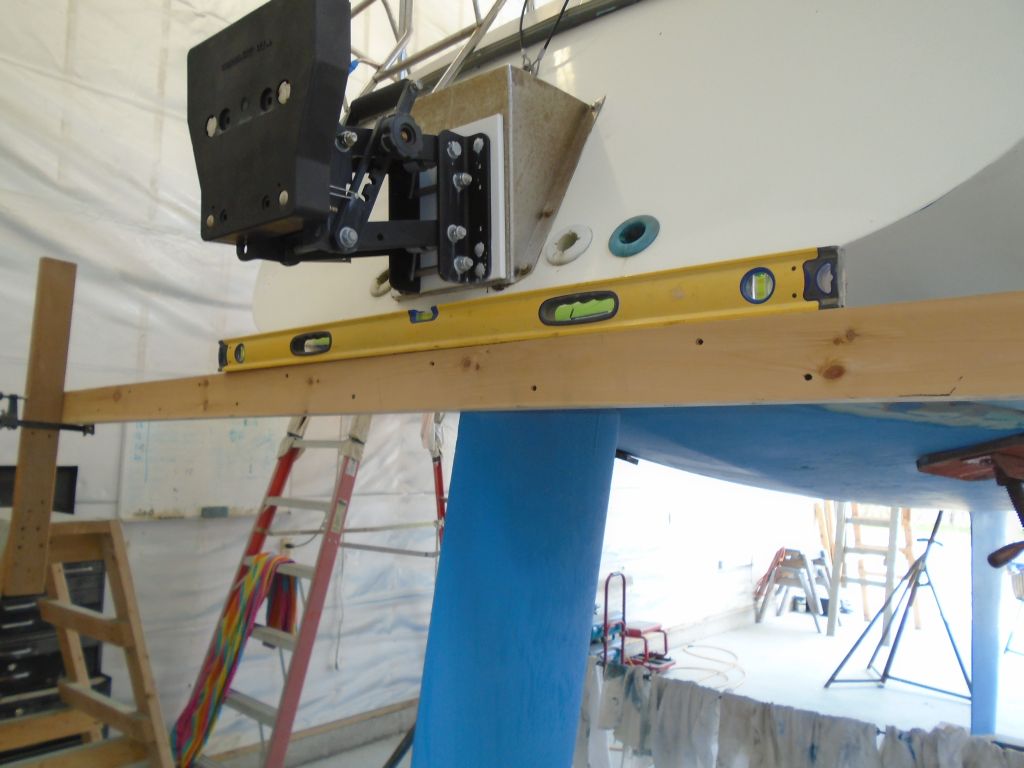
With the beams set up and leveled at the final height, I strung a string between the two and, in my usual way, marked the waterline on both sides. Doing this on a boat with a suspect waterline is always a leap of faith, and here was no exception. Though I knew that the after part of the bottom paint on this boat was wonky, I was surprised to find that the new and level, planar line demarked by the red string was as much above the old line as it was and as far forward as this extended, even though the forward end was at the original starting point. But the new marks looked good when viewed properly, and created the correct shape for the new line at the aft end, where the flat aft sections of the boat exited the waterline plane. The idea of this exercise is for the lines to appear visually straight in profile. In this way, I made a series of tick marks on both sides of the hull to demark the new waterline.

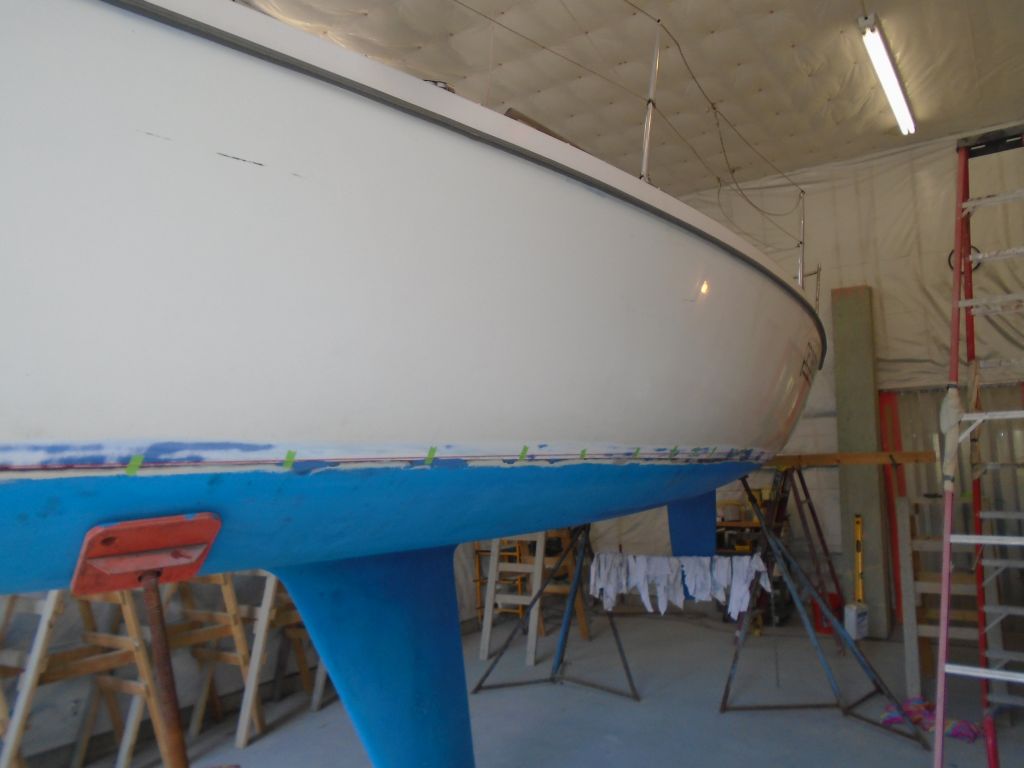

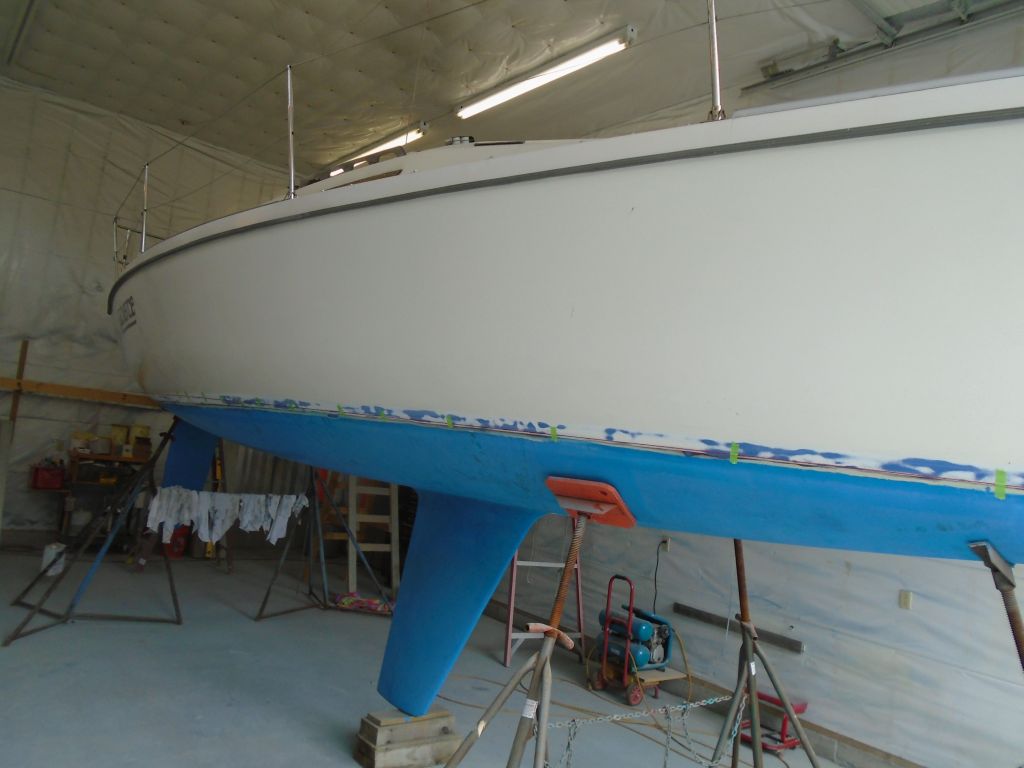
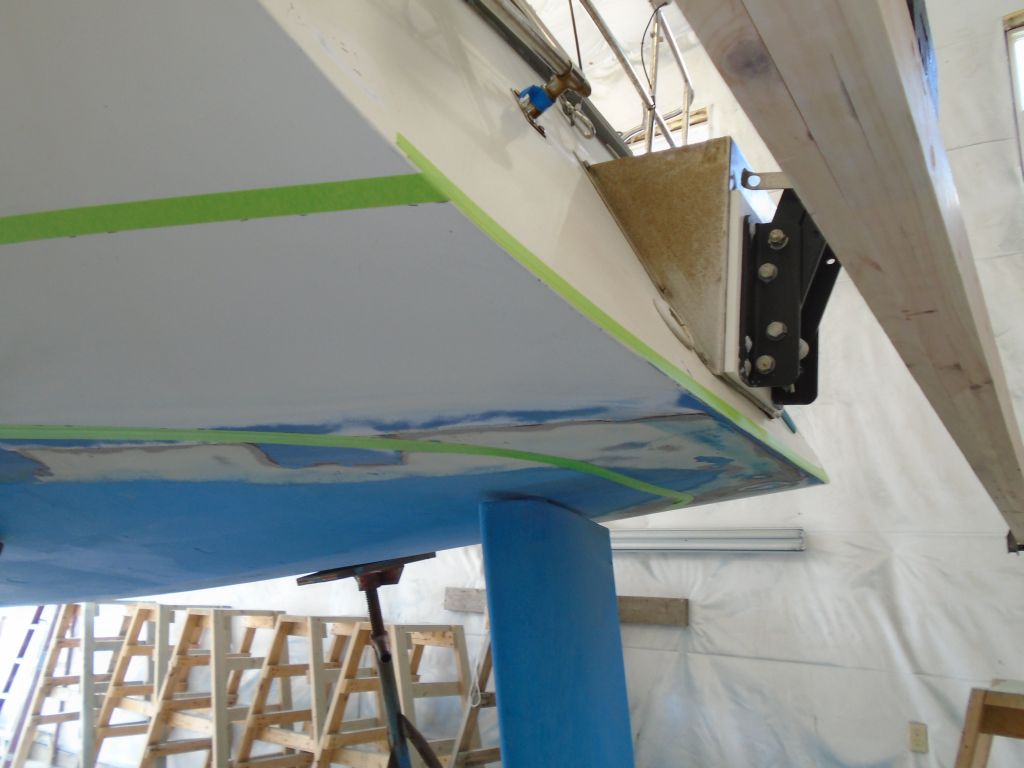
Afterwards, I masked to the new marks, leaving the top edge of the tape at the marks to signify the eventual top edge of the bottom paint. But all the striping would occur above, and down to, this line.
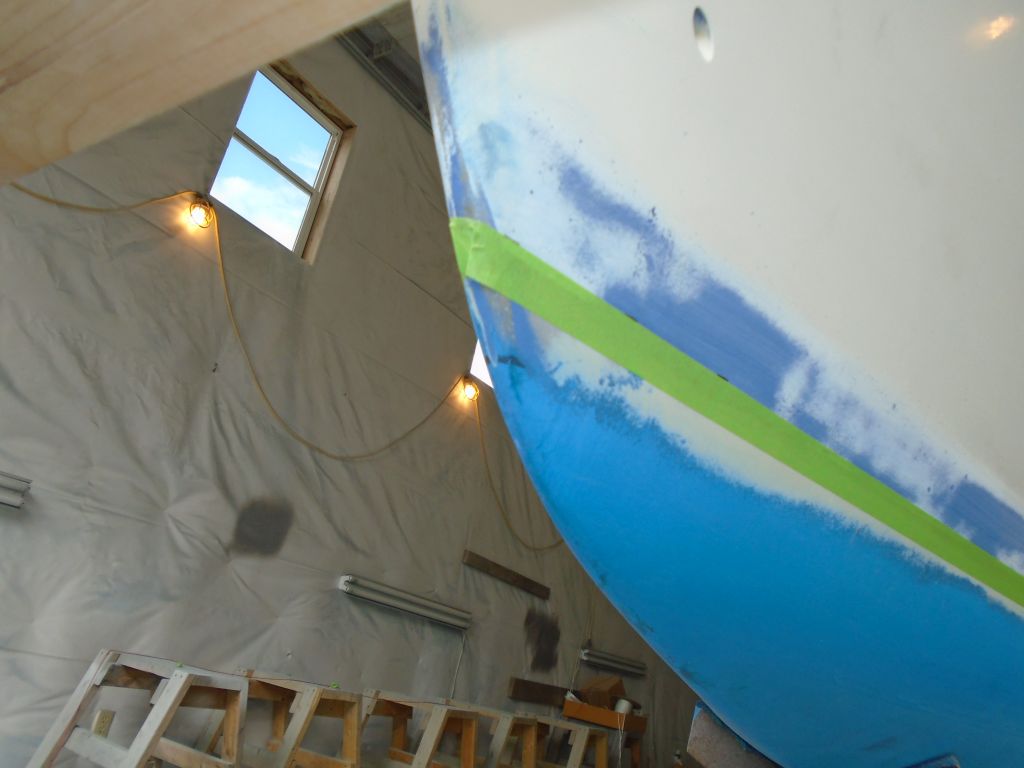
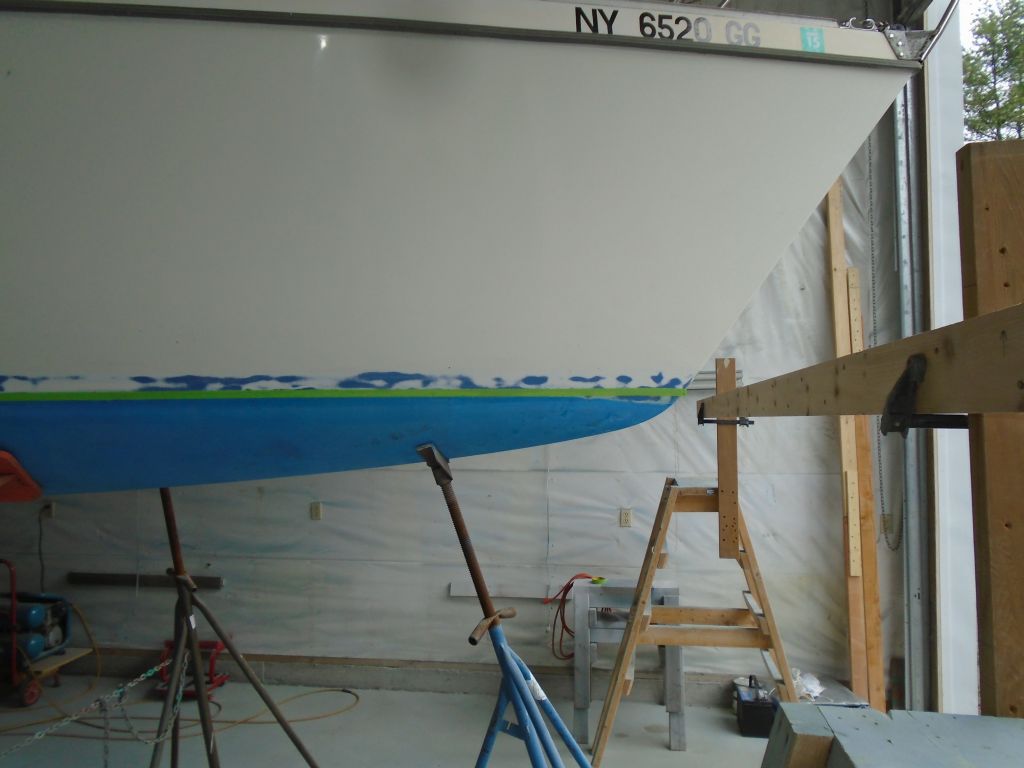


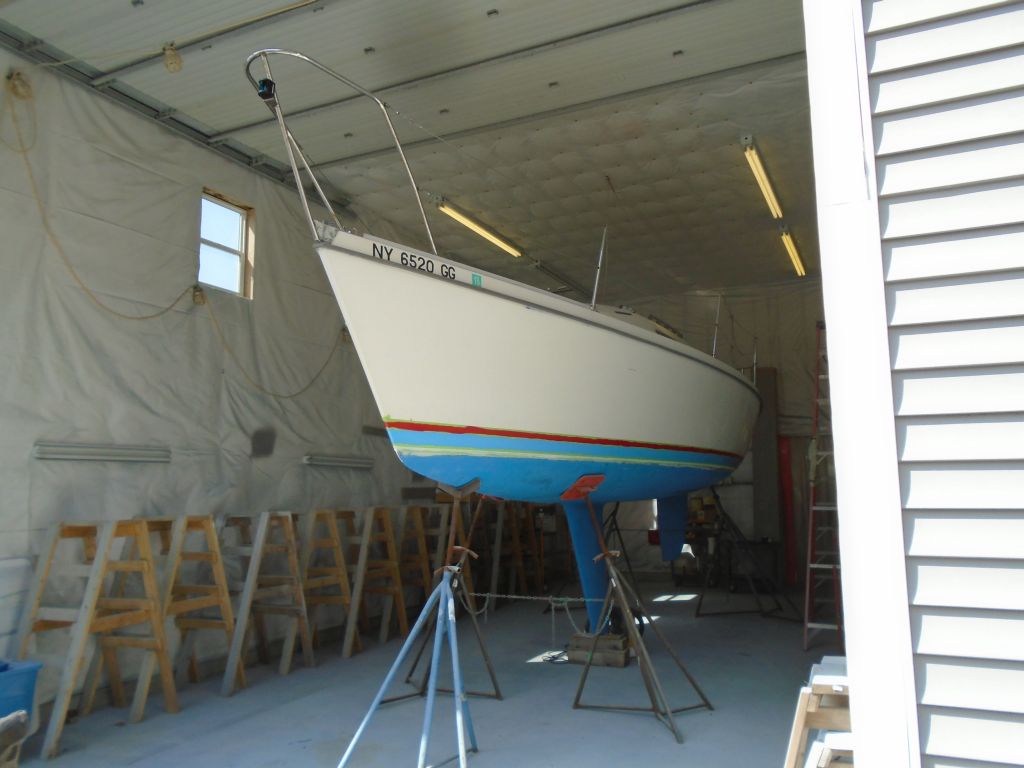
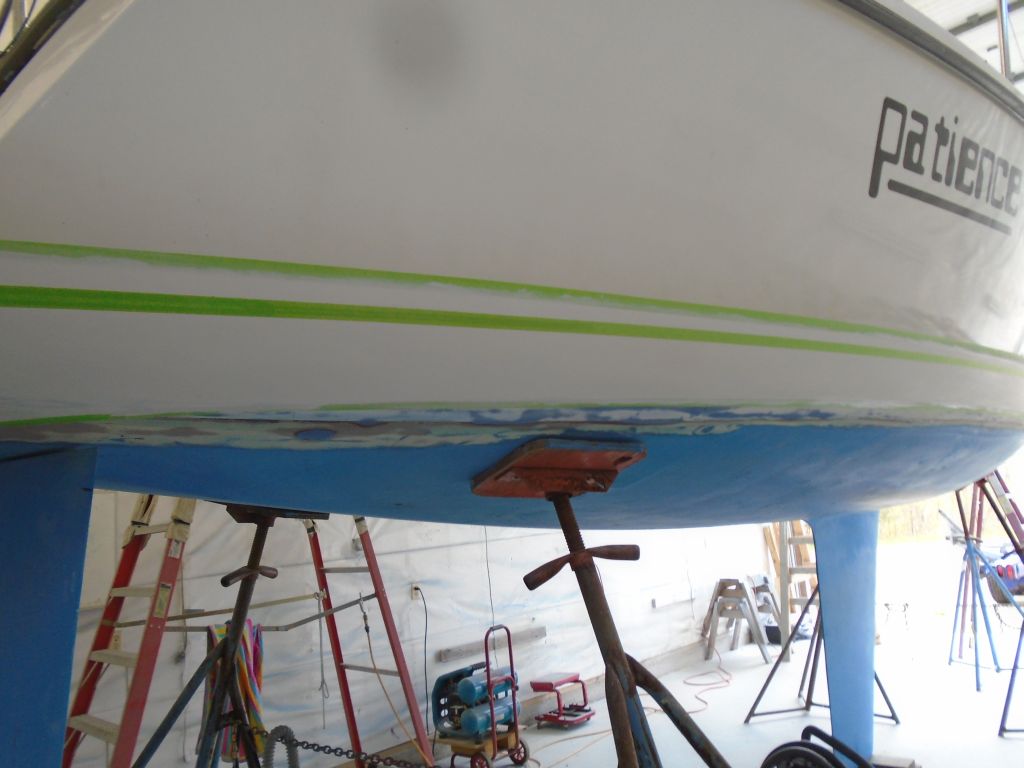
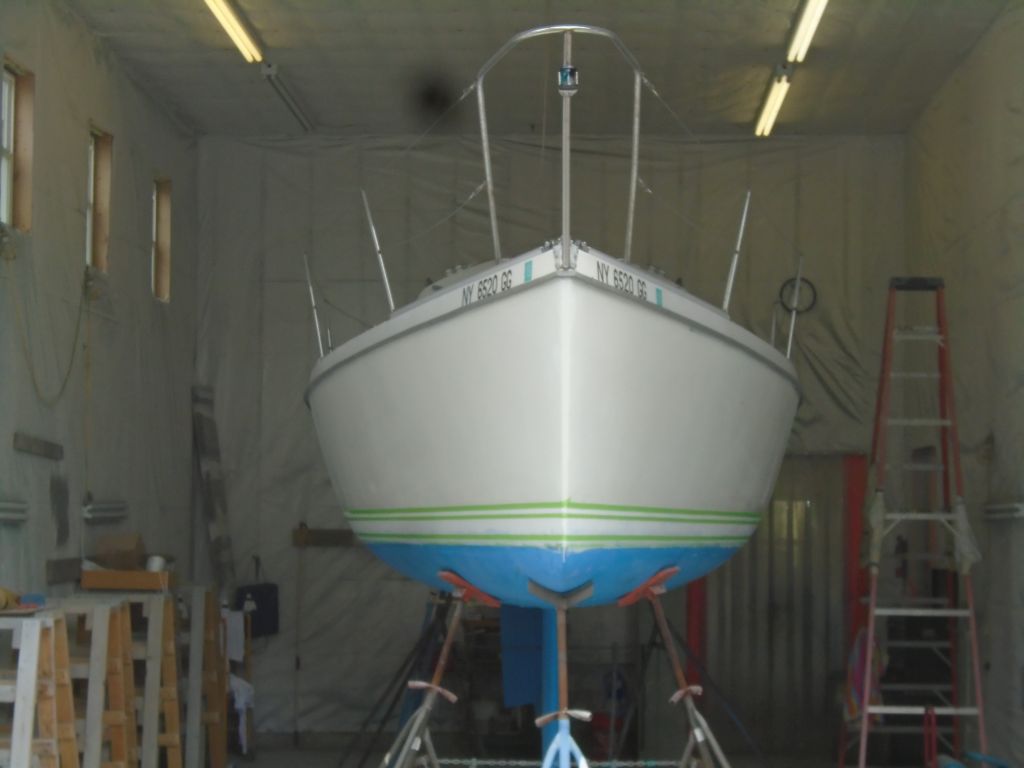
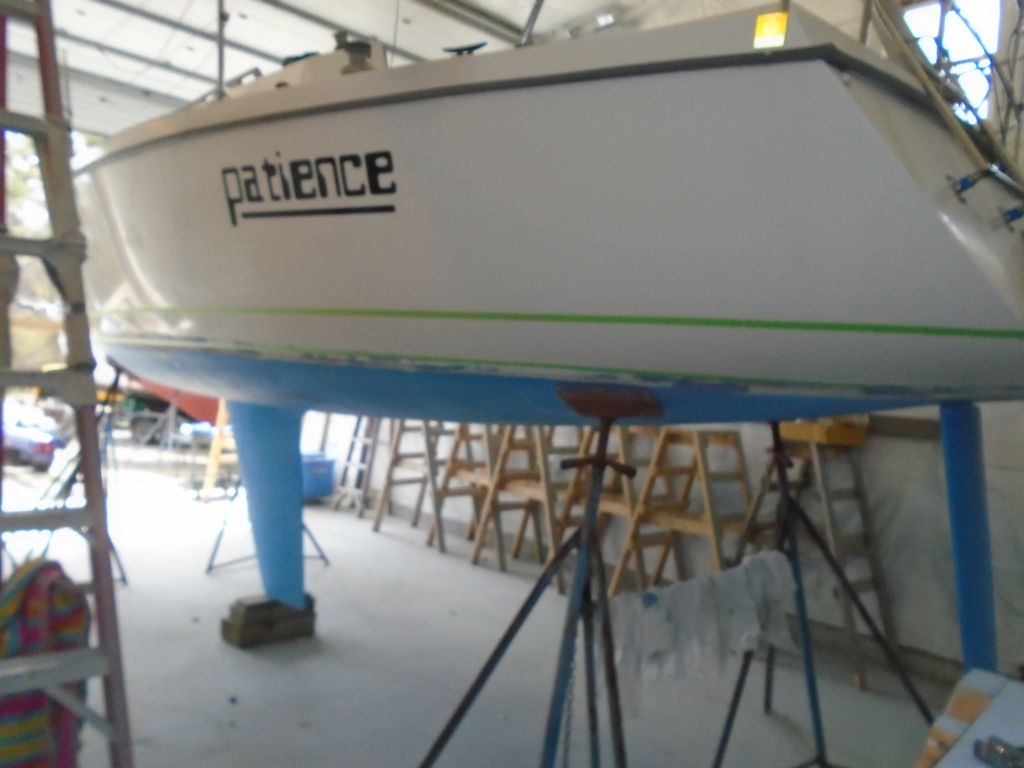
The new striping scheme the owner requested would include two main stripes: a wider, lower stripe in one color, and a narrower, upper stripe in a different color, both to match a color scheme he had in mind. This boat had high topsides that offered plenty of room for striping options, and in addition to properly laying out the new striping, the new appearance would help lower the visual height of the topsides, which as of now were a sort of featureless white expanse. So with all this in mind, I laid out on a piece of paper my thoughts for the new striping as a mockup, which I then taped in place in a couple places on the hull so I could get a visual sense of how the new stripes worked. The overall height of the new scheme was 5″ from bottom to top, and would include two hull-color (white) bands to separate the stripes from each other and from the bottom paint as well.
From bottom to top, the mockup shows a 1″ white band; then a 2-1/2″ wide band (light blue); then a 3/4″ white band; and finally a 3/4″ top stripe (red). The tall topsides offered ample room for the overall height of this new boottop.

Satisfied with my mockup, I prepared to move on with the preparation and marking. After some thought, I decided to strike the topmost line (5″ above the waterline) and sand and prime the entire area beneath it all at once before doing the final striping. Although there were two hull color bands in the stripe, the lower one would have to be painted separately anyway, since the position of the waterline had changed and I’d sanded away the mess of the old boottop, and although the second hull color band could have worked as is, on balance I thought the process would work better–and the end result be better–if I didn’t try to tape and sand each line individually from the getgo. While this would eventually lead to an additional painting step, I thought that compromise was preferable and that sanding and priming the whole area en masse would be faster, easier, and more efficient in the end.
To this end, I moved my cross beams up the required 5″ at each end, leveling them in turn, and then I marked the new top edge of the boottop at this height, masking it off afterwards. While this looked foolishly high and wide by itself, remember that this is just the top edge, and that the area beneath would be filled with multiple stripes later.


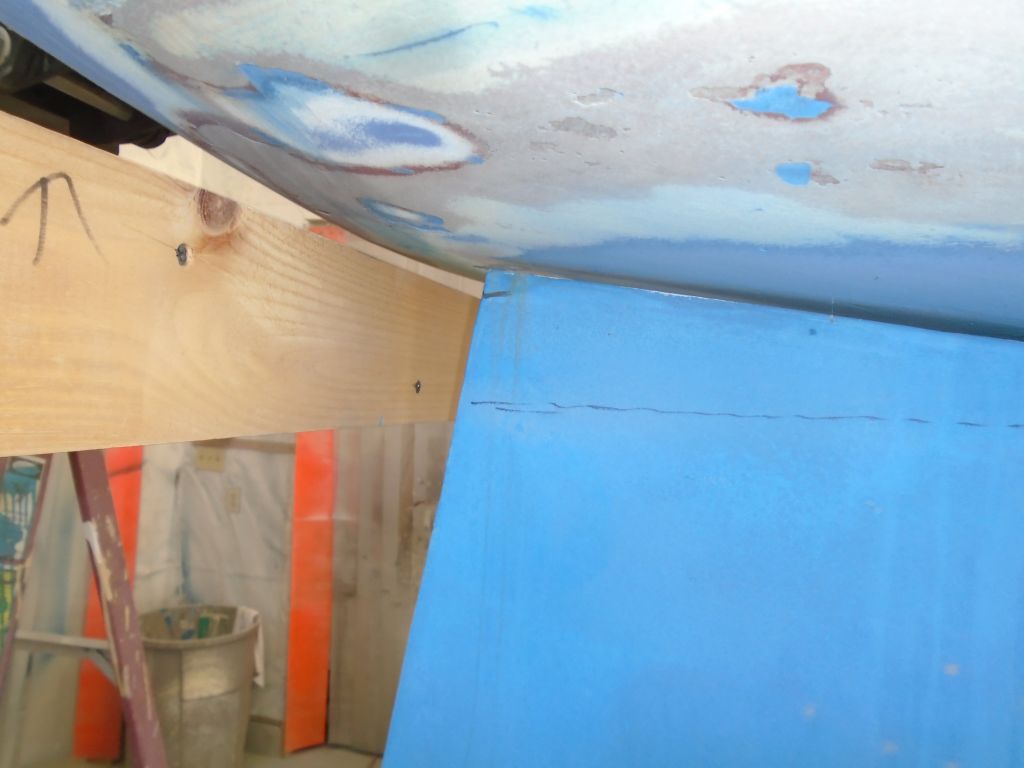
With the whole boottop area now defined and masked, I sanded the area within as required, using 80-120 grit paper. The existing hull paint was generally in fair condition and suitable for use as a substrate in this case, so I made no attempt to remove it all, instead simply sanding the area till it was properly scuffed and prepared for the work ahead. Afterwards, I vacuumed and solvent washed the area. The stern quarters took a bit more work, as I had to clean up the old transition where the old bottom paint had been, and also remove a bit of additional bottom paint at the very stern and just above the newly-taped waterline, where I’d not removed enough during my early round of sanding the day before.

To round out the day, I applied a coat of white primer over the entire boottop area.
Total time billed on this job today: 8 hours
0600 Weather Observation:
40°, clear. Forecast for the day: Mainly sunny, high in the low 60s