Monday
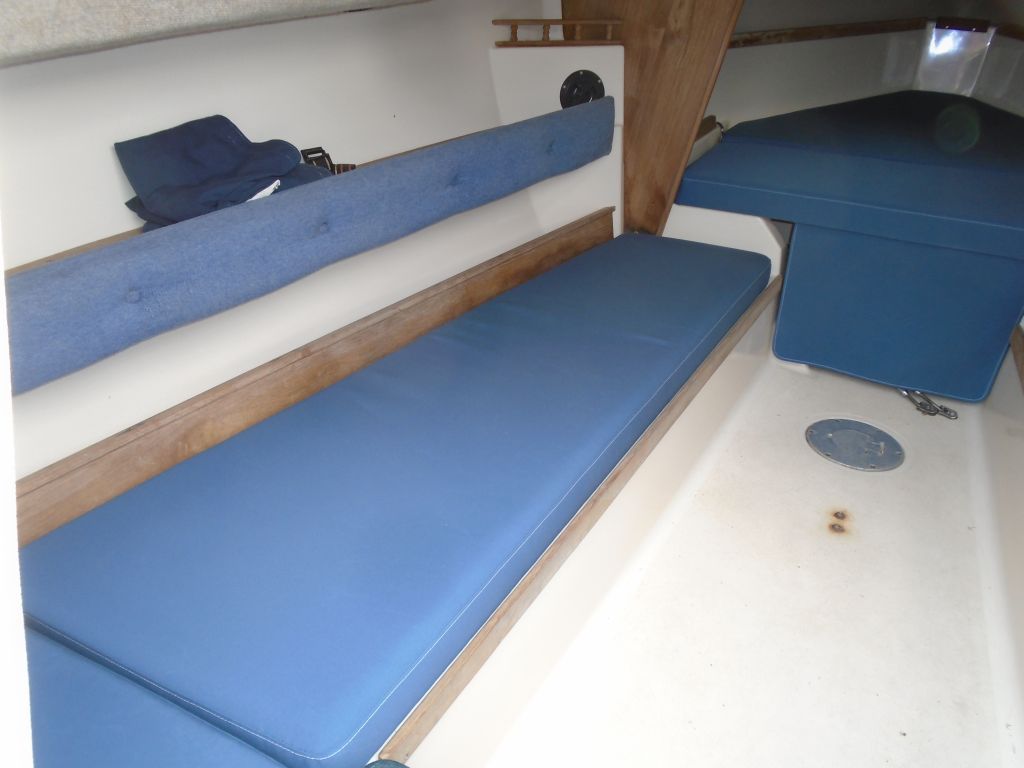
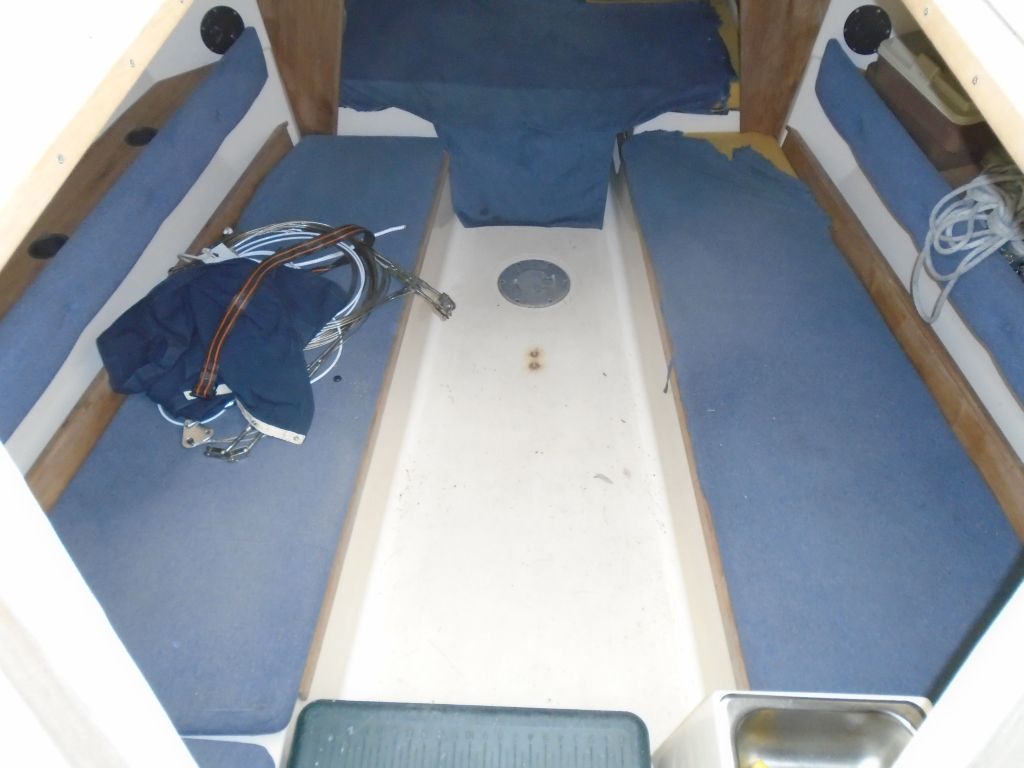
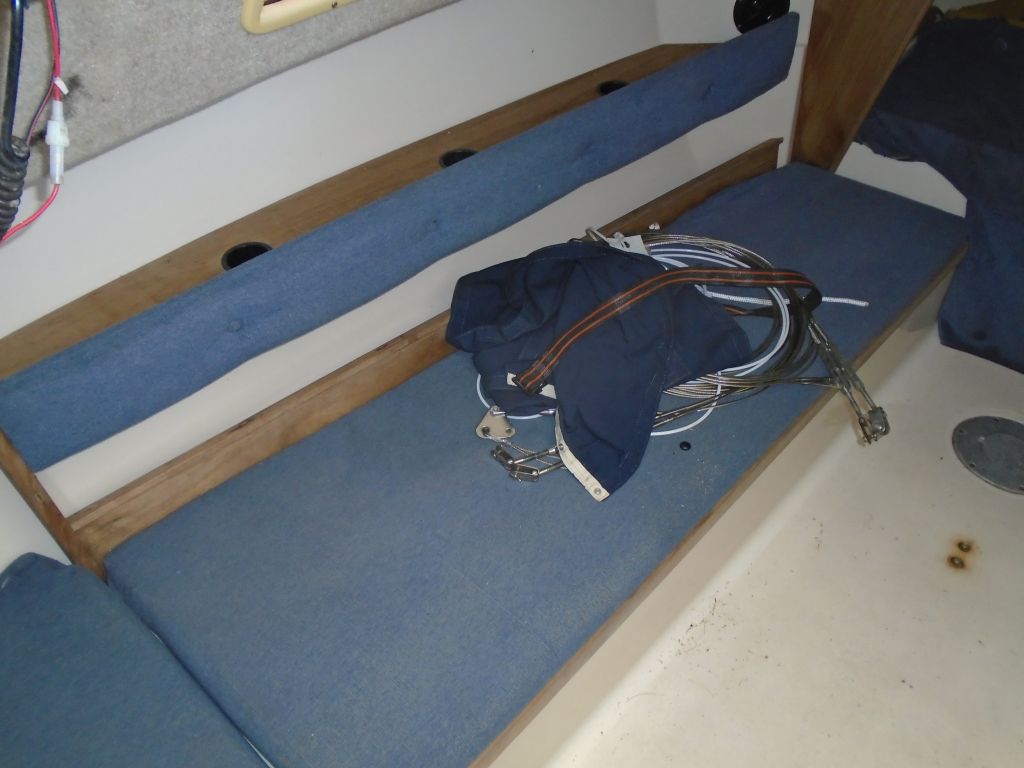
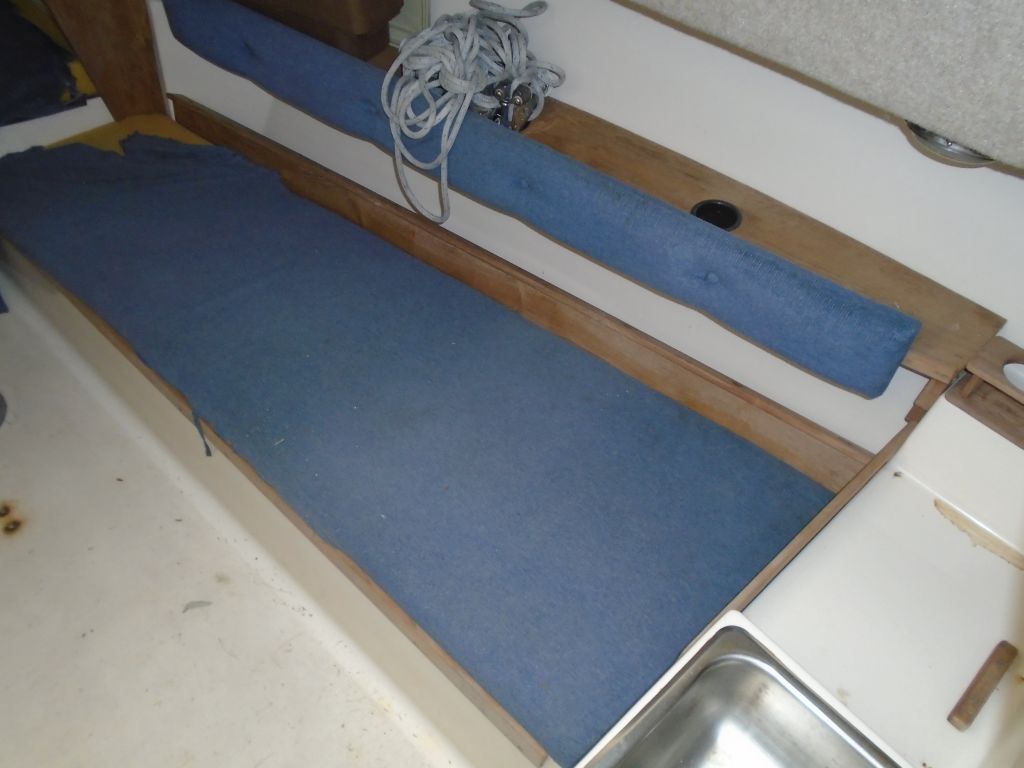
The final item outstanding from the original project list was new interior cushions, and these were now complete and looked terrific. The color is sapphire blue.


Monday
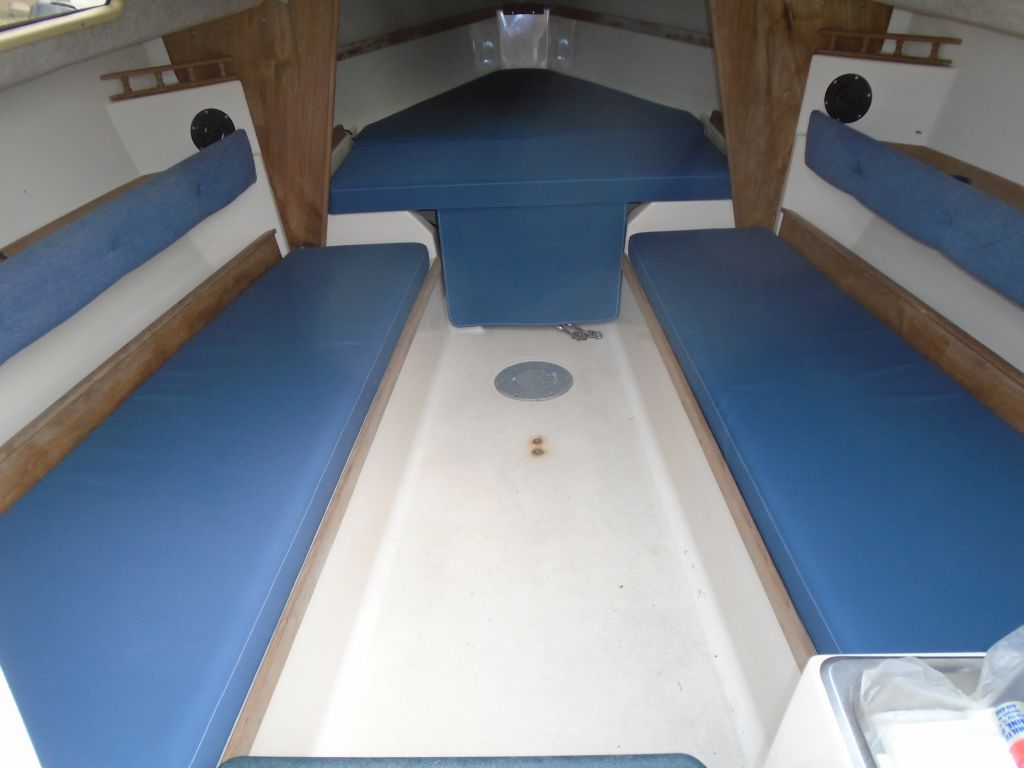
The final item outstanding from the original project list was new interior cushions, and these were now complete and looked terrific. The color is sapphire blue.
Friday
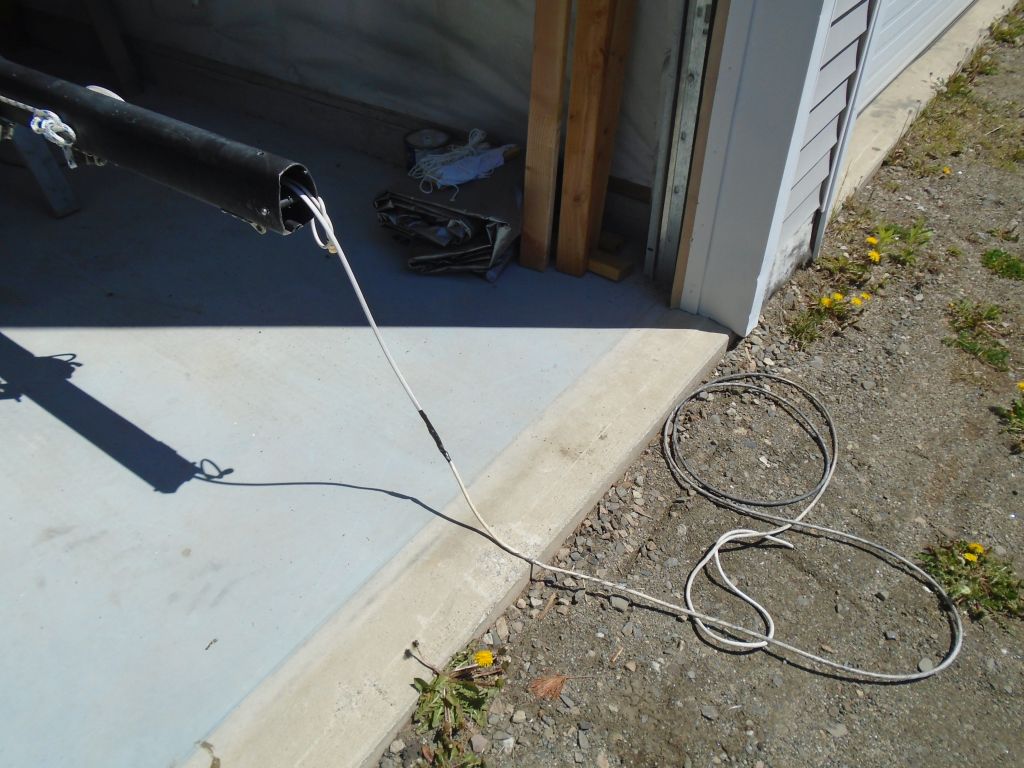
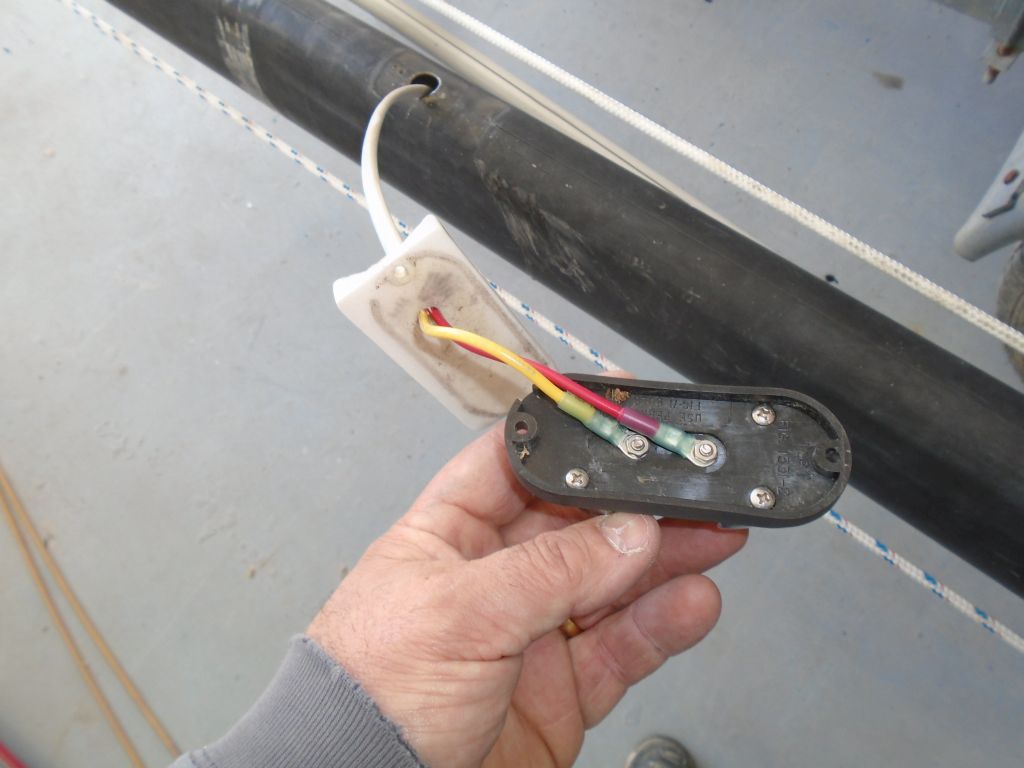
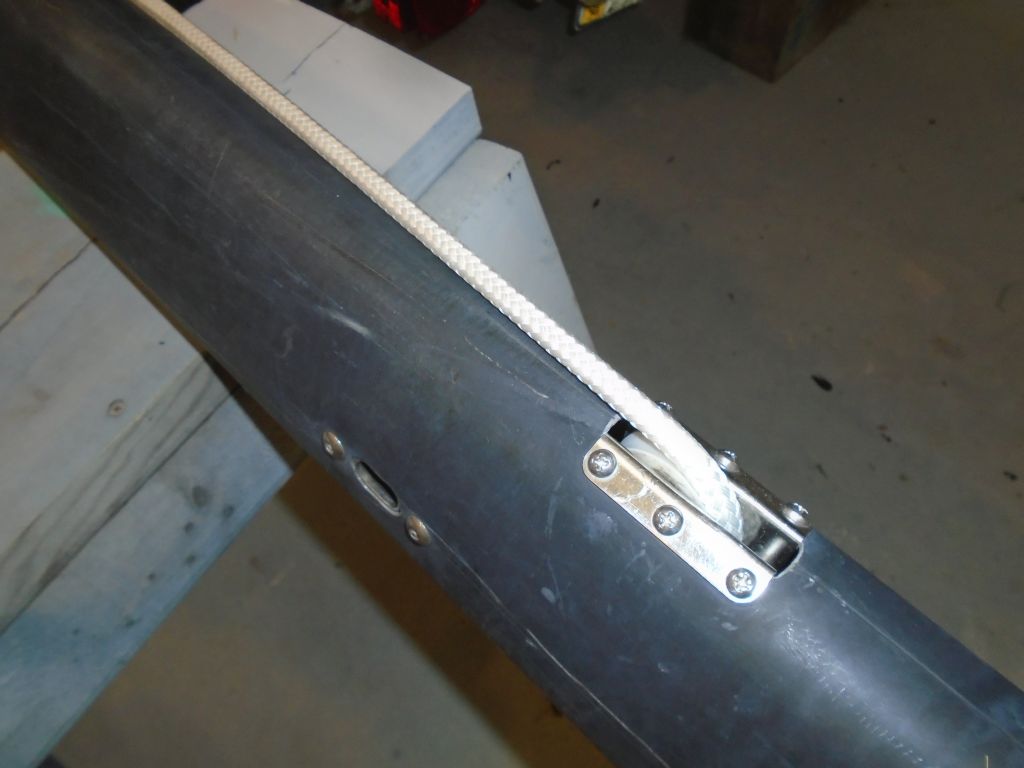
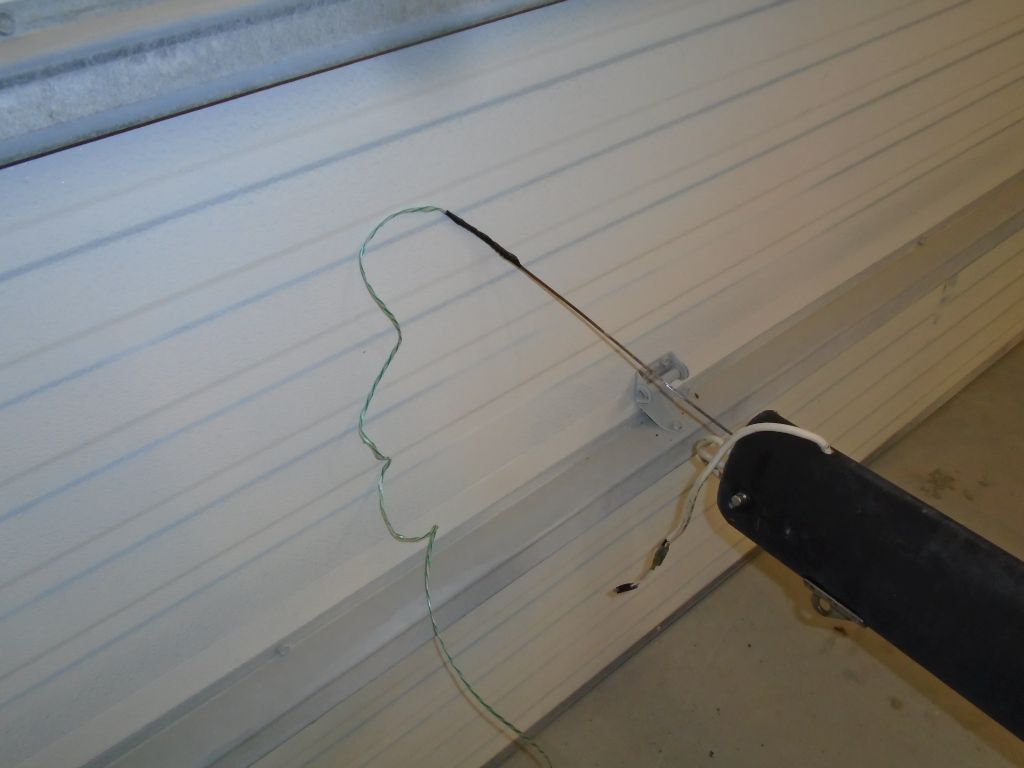
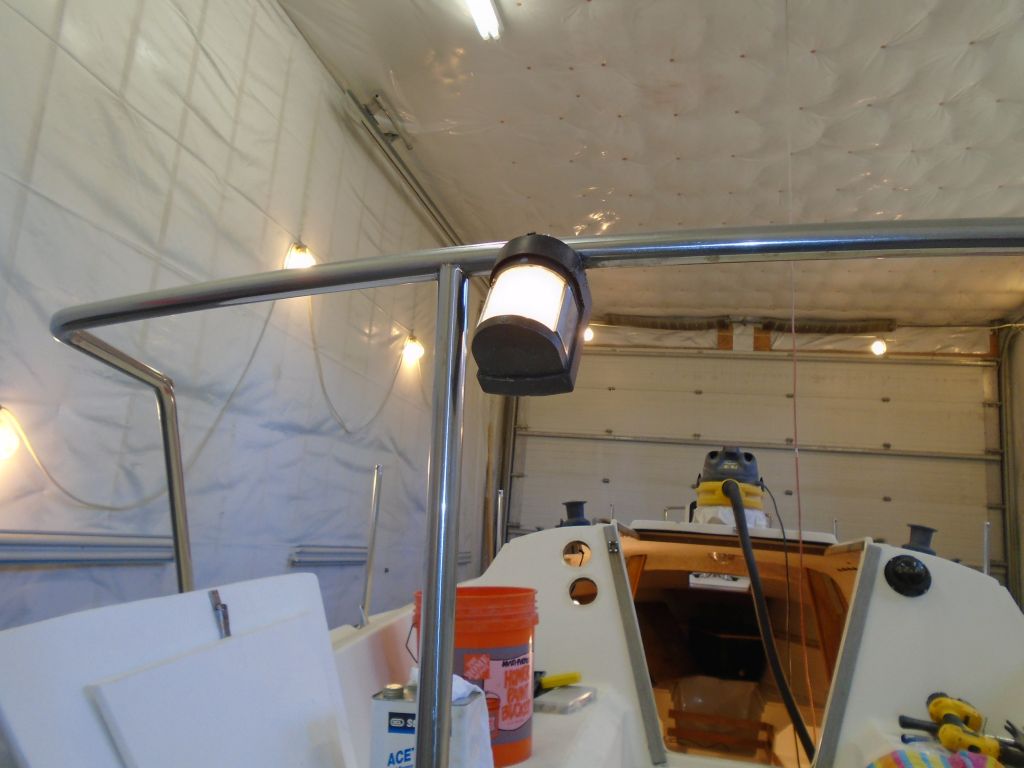
The steaming light (officially called a masthead light regardless of position) on the mast near the spreaders required new wiring, or at least new wiring seemed prudent since it would be simple to do and the old wiring’s condition was unknown. I removed the light from the mast, noting the wire color conventions and placement of the terminals, then pulled in a new length of 14/2 wire, using the old wire to do the job.
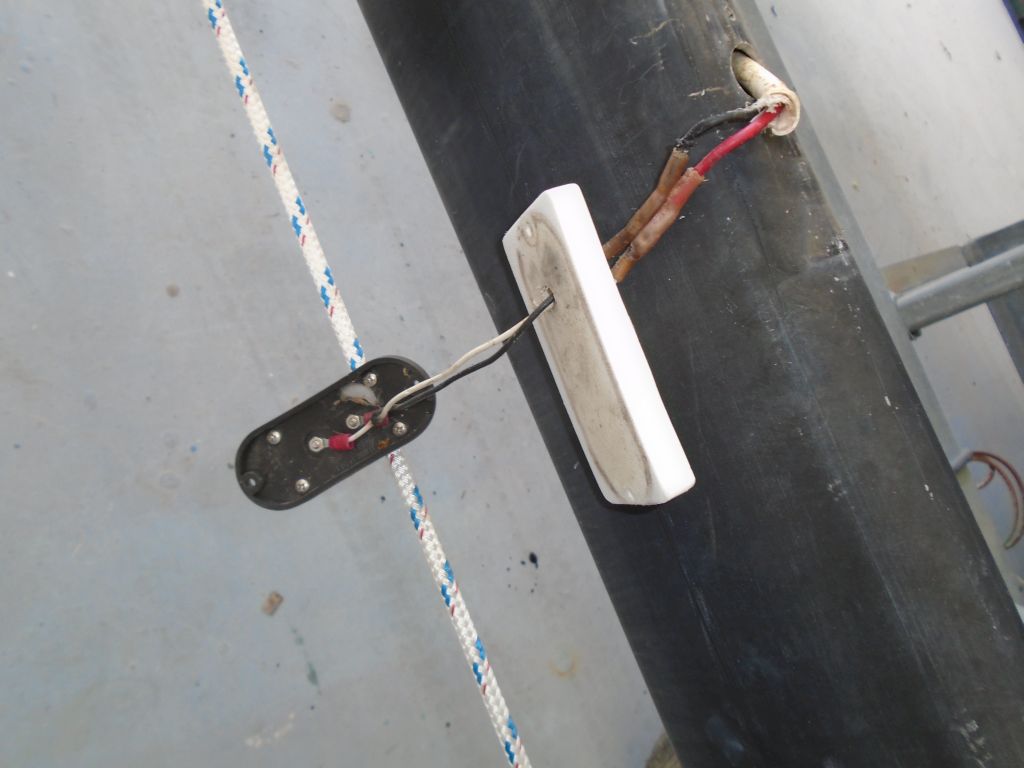
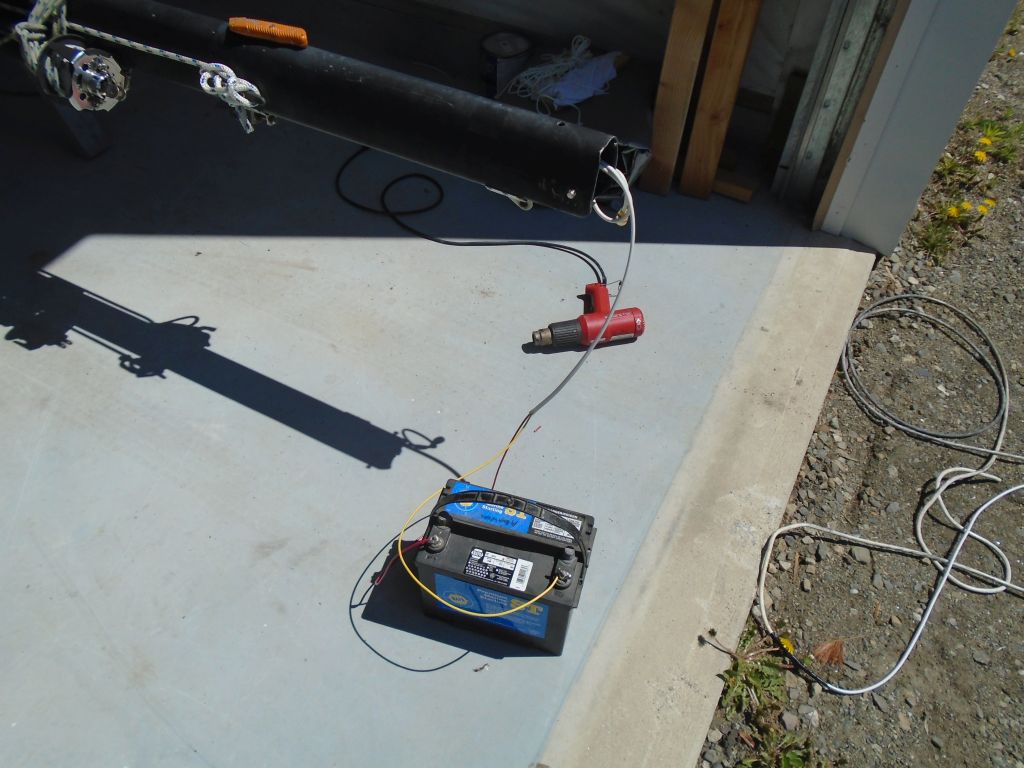
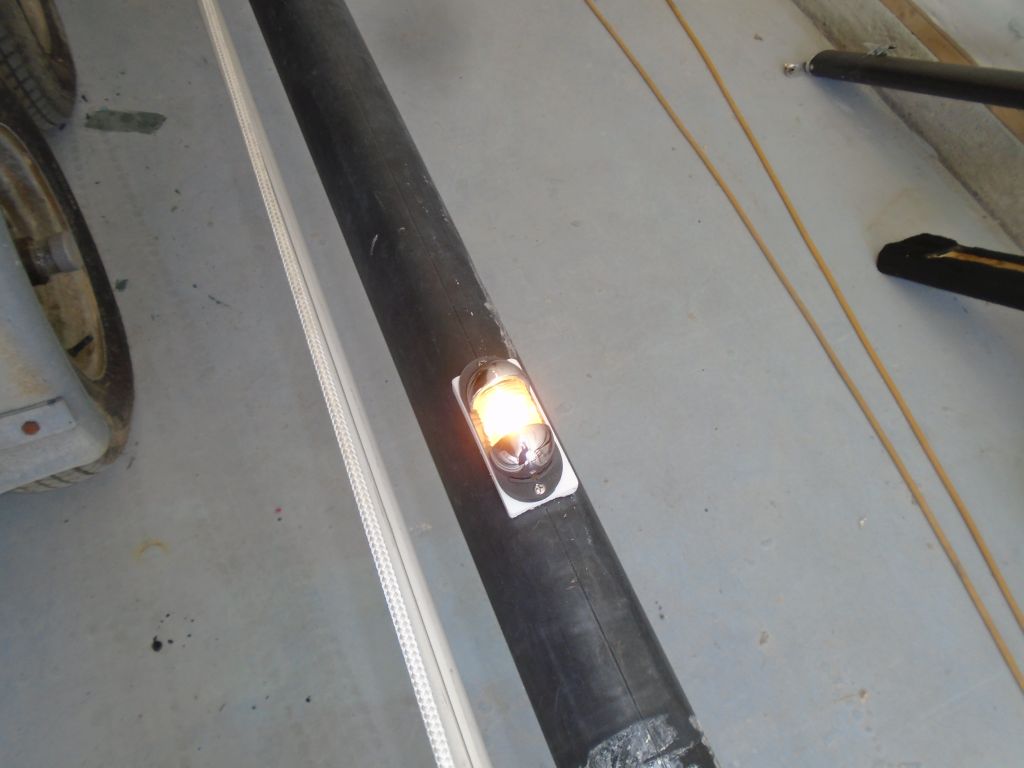
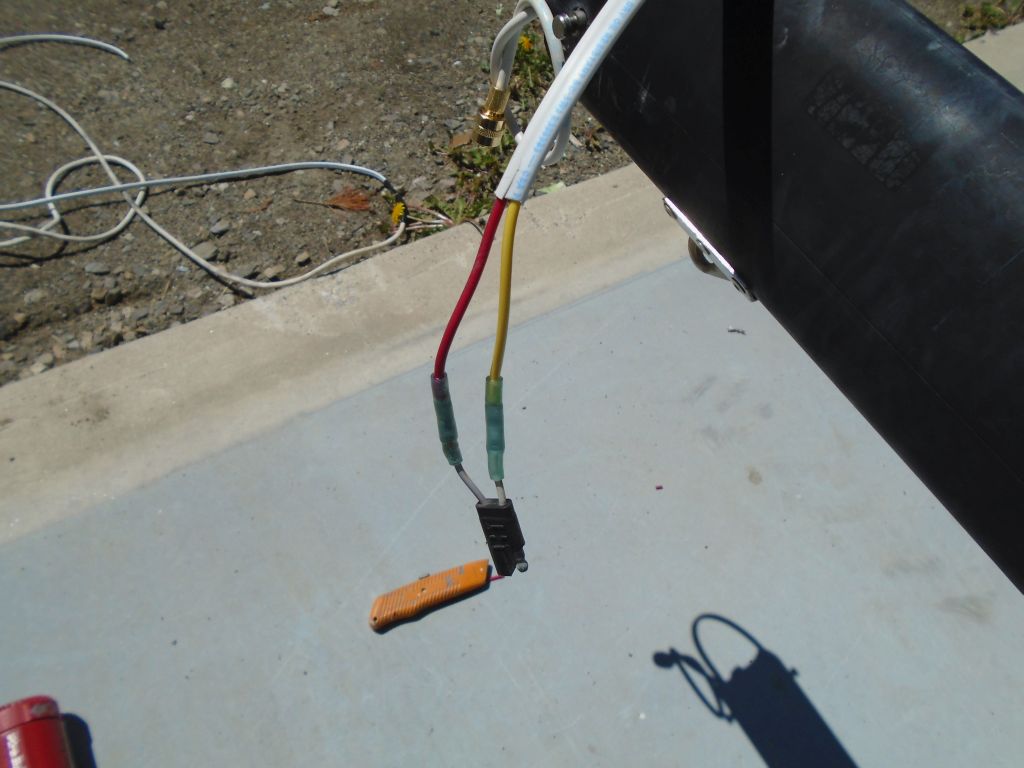
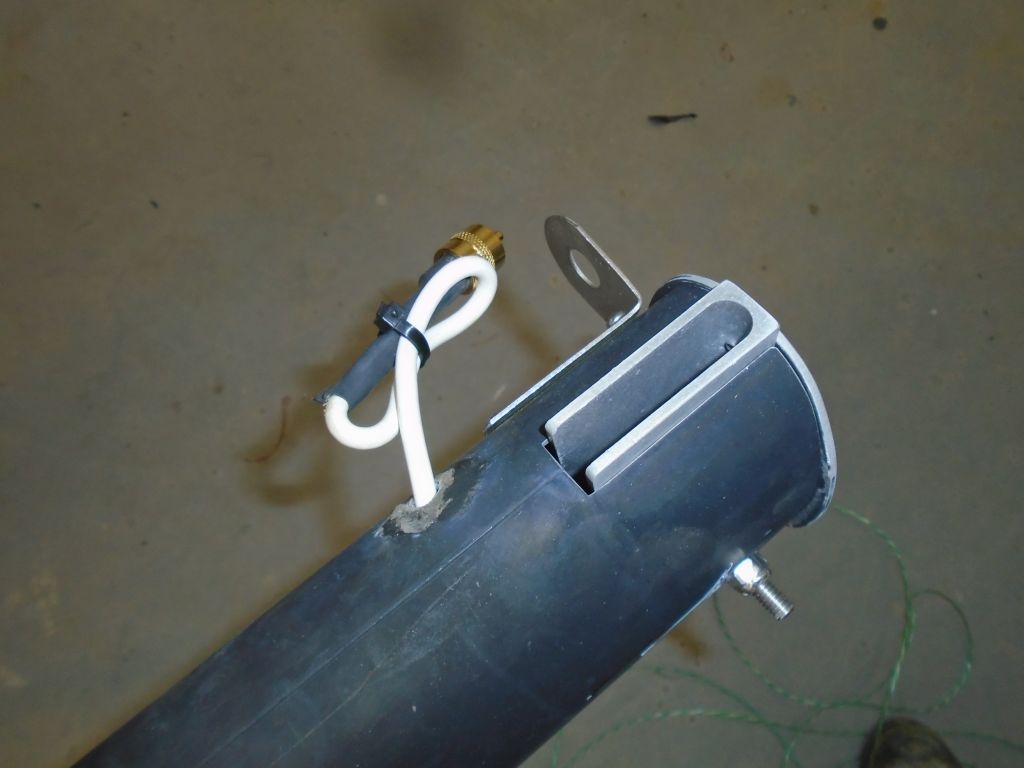
Next, I made up the light end of the wires, installing new ring terminals to the light fixture and reinstalling the fixture to the front of the mast. Then, I stripped the wire ends at the bottom and temporarily hooked them to a battery so I could check the light’s operation: all good.
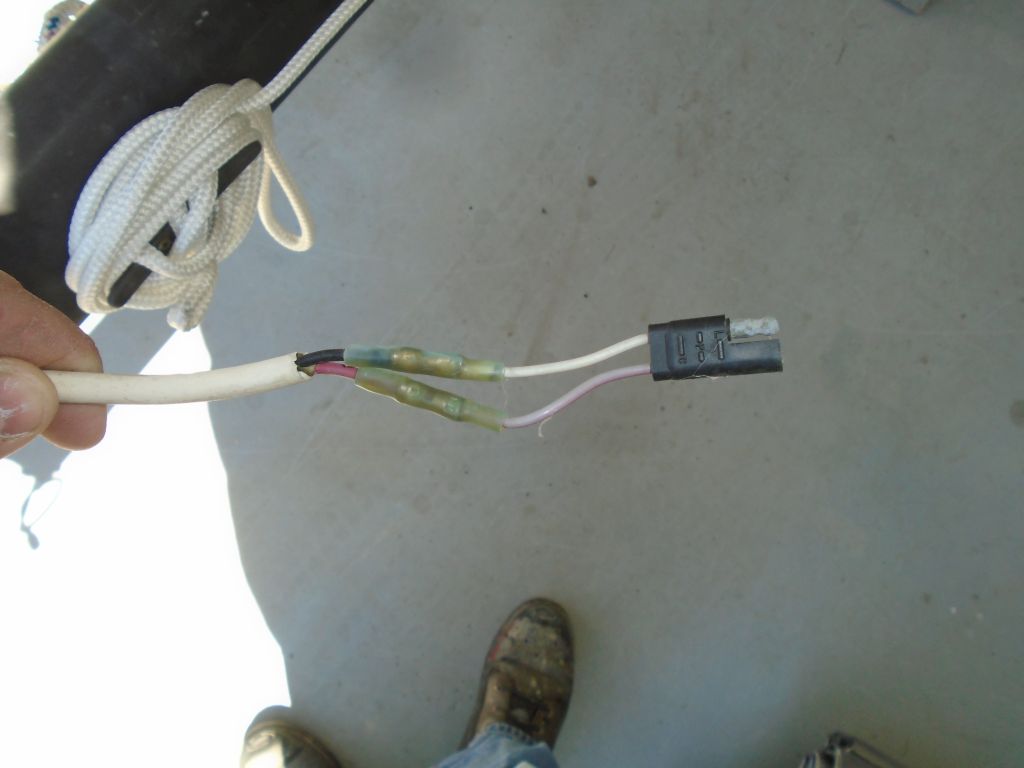
At the bottom end, I left enough wire slack and made up the end to the existing 2-prong plug, which mated with the one on deck. I double-checked the wiring conventions in each case to ensure that the plug polarity would be correct.
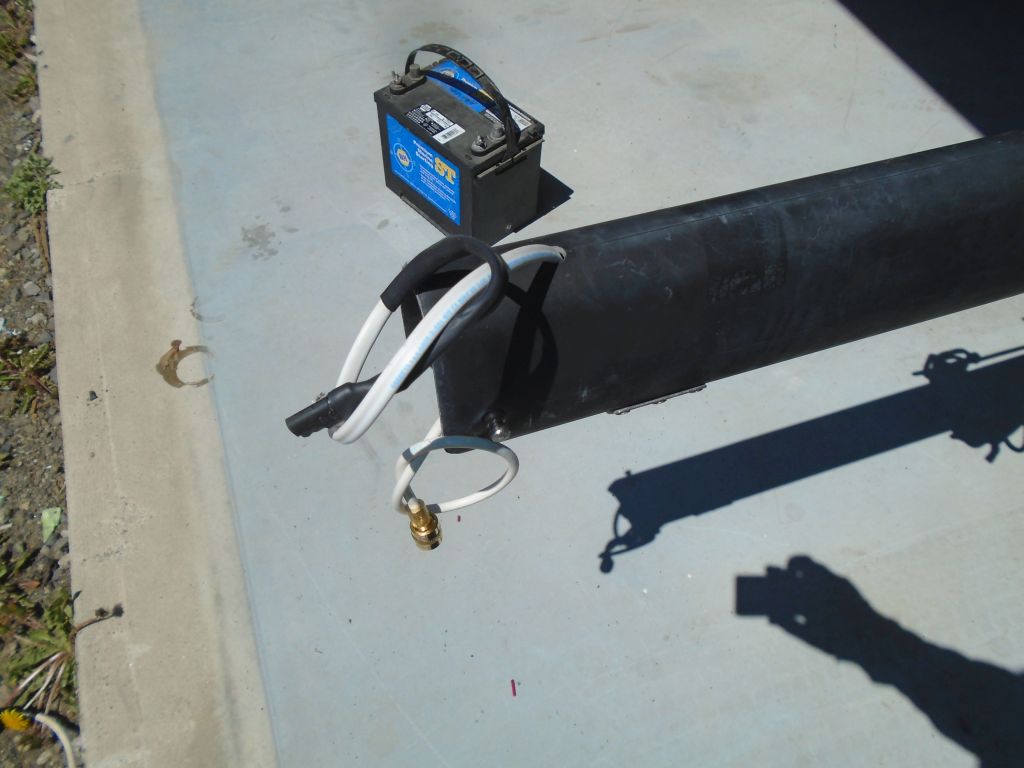
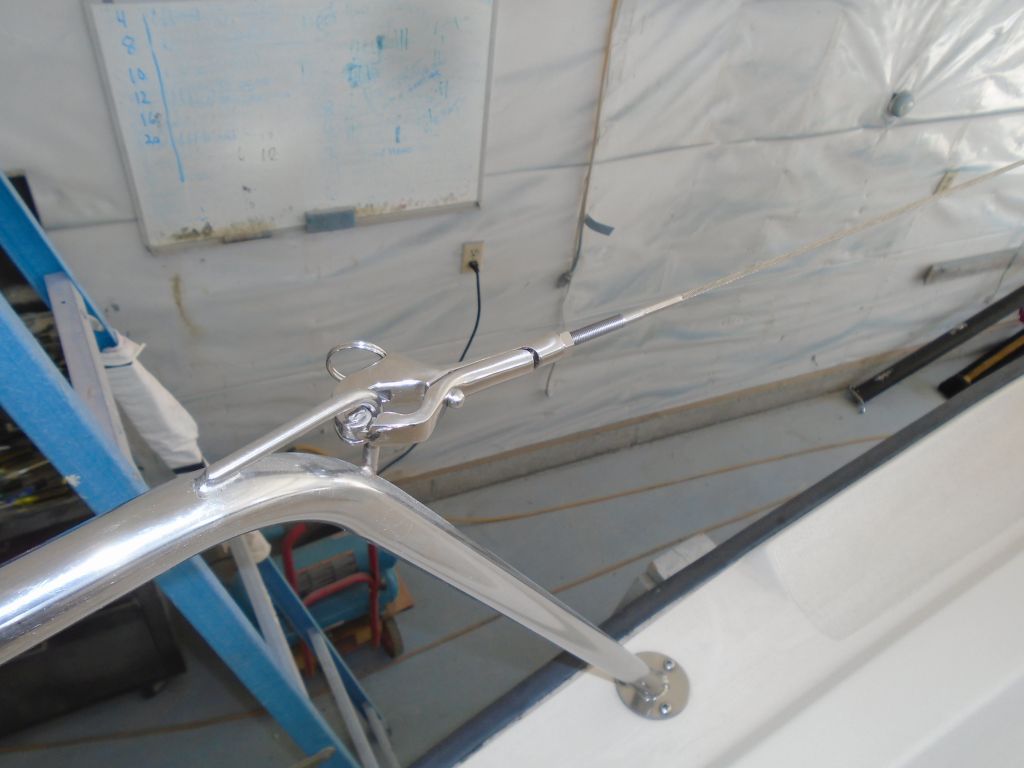
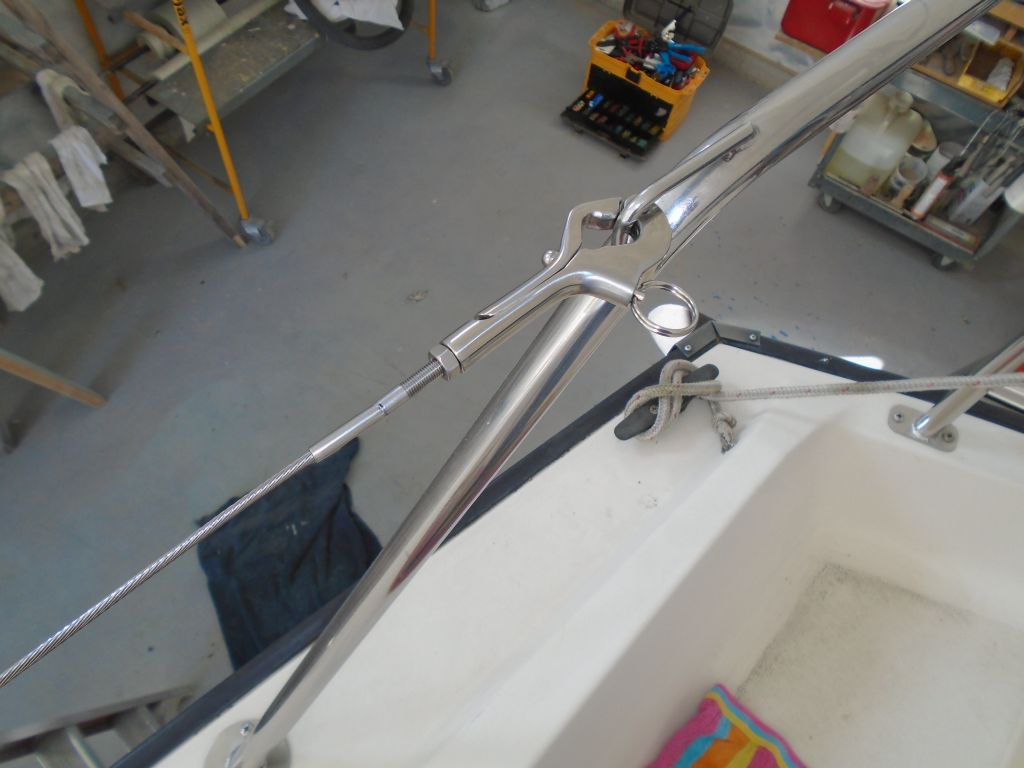
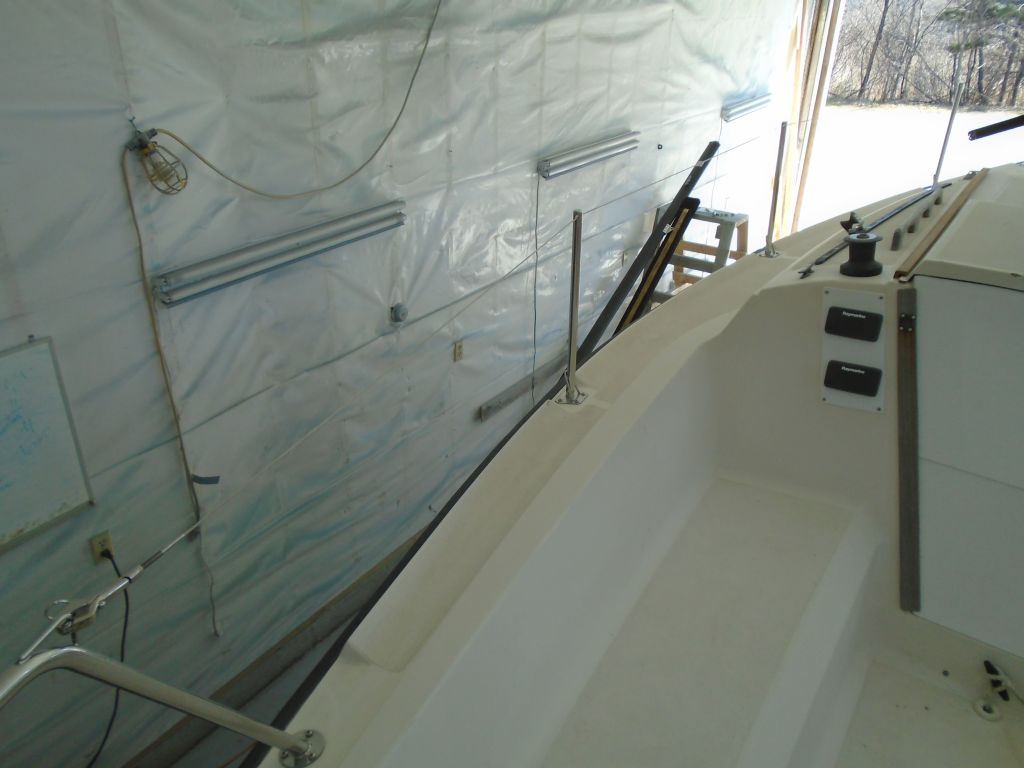
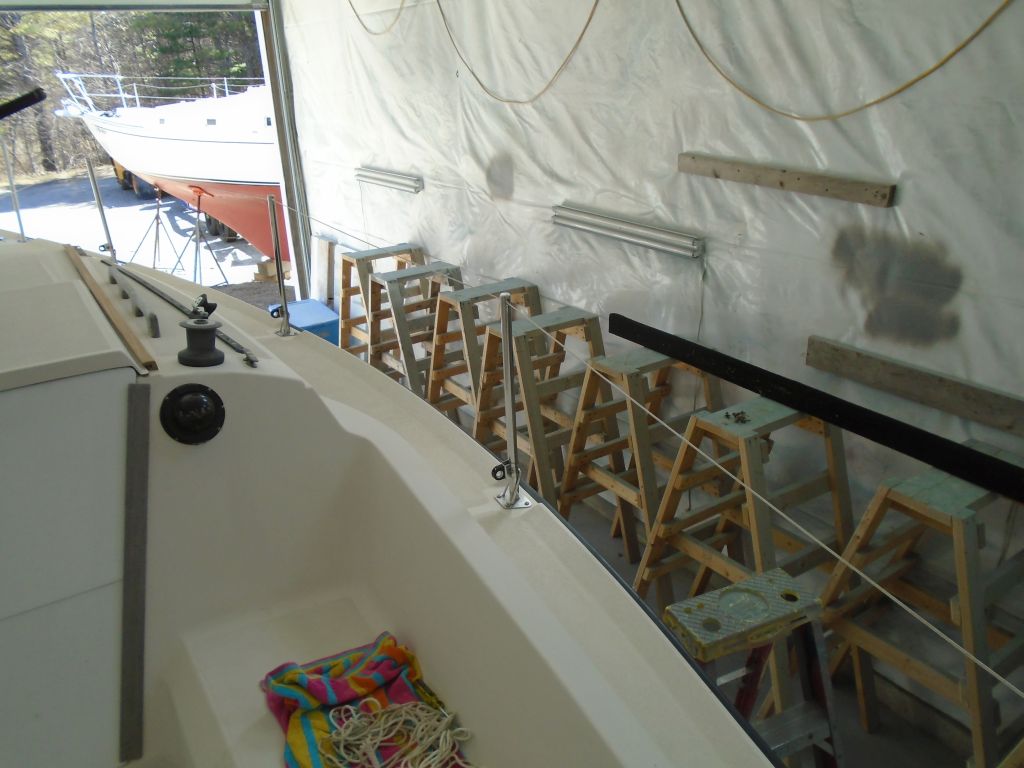
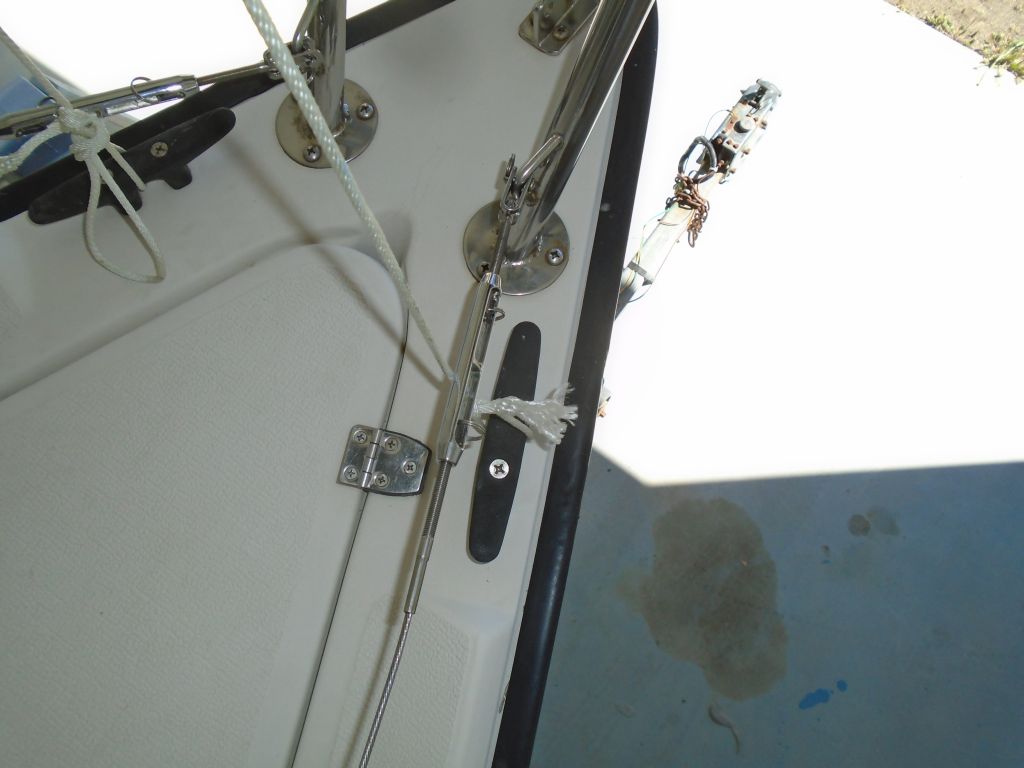
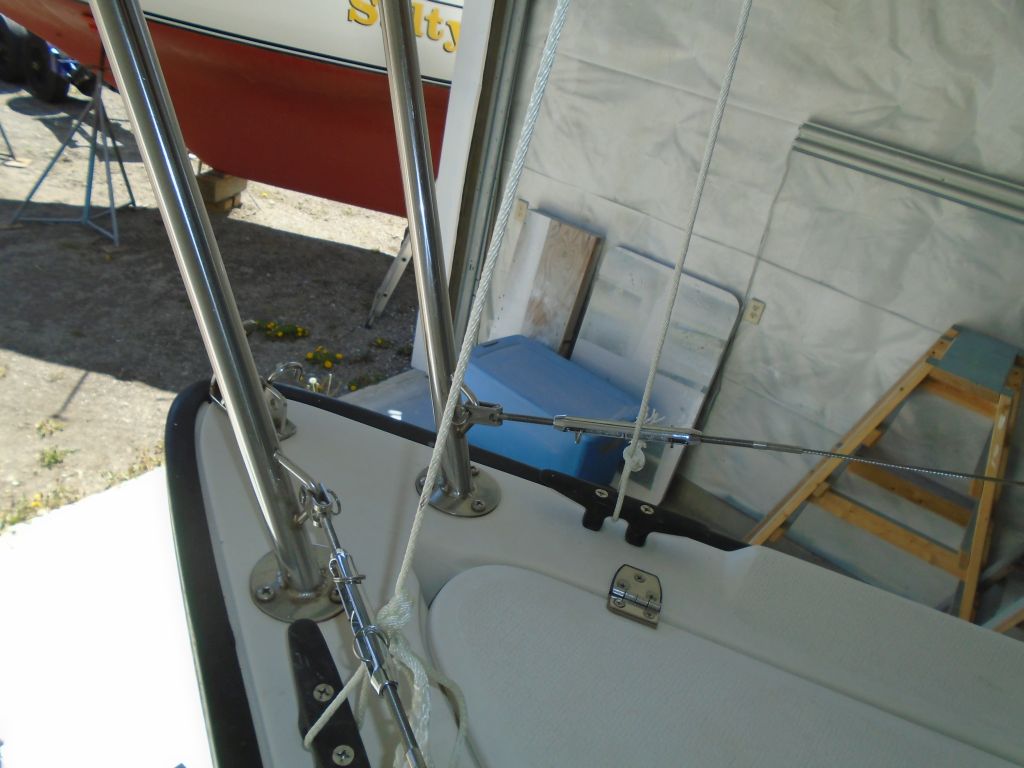
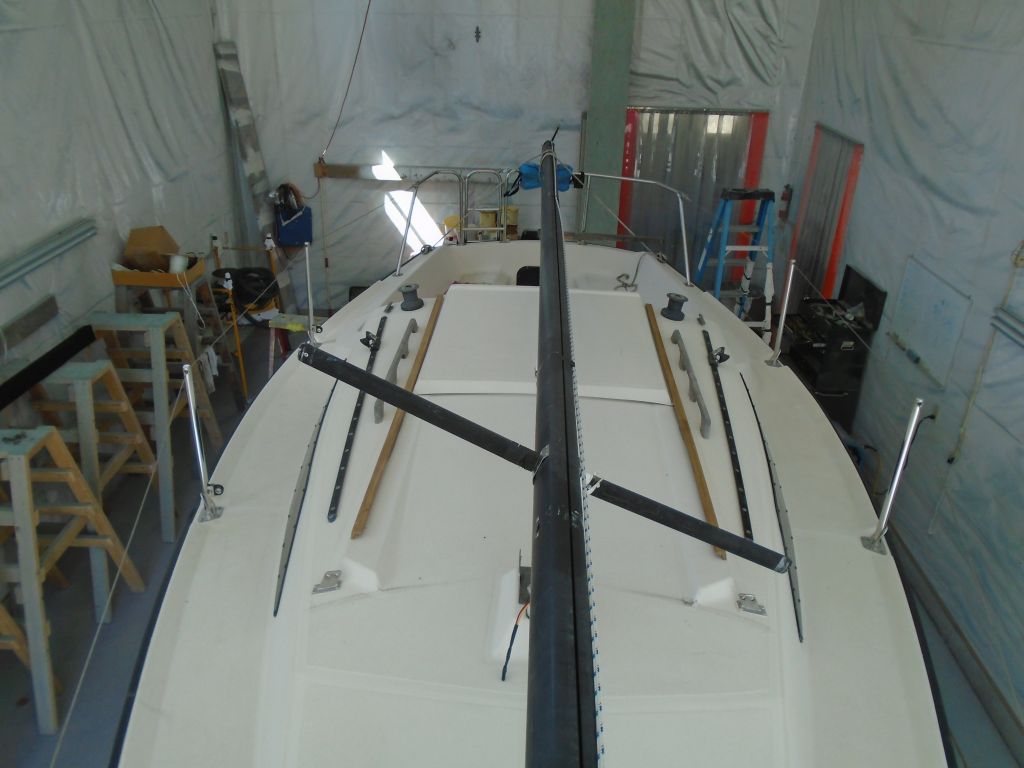
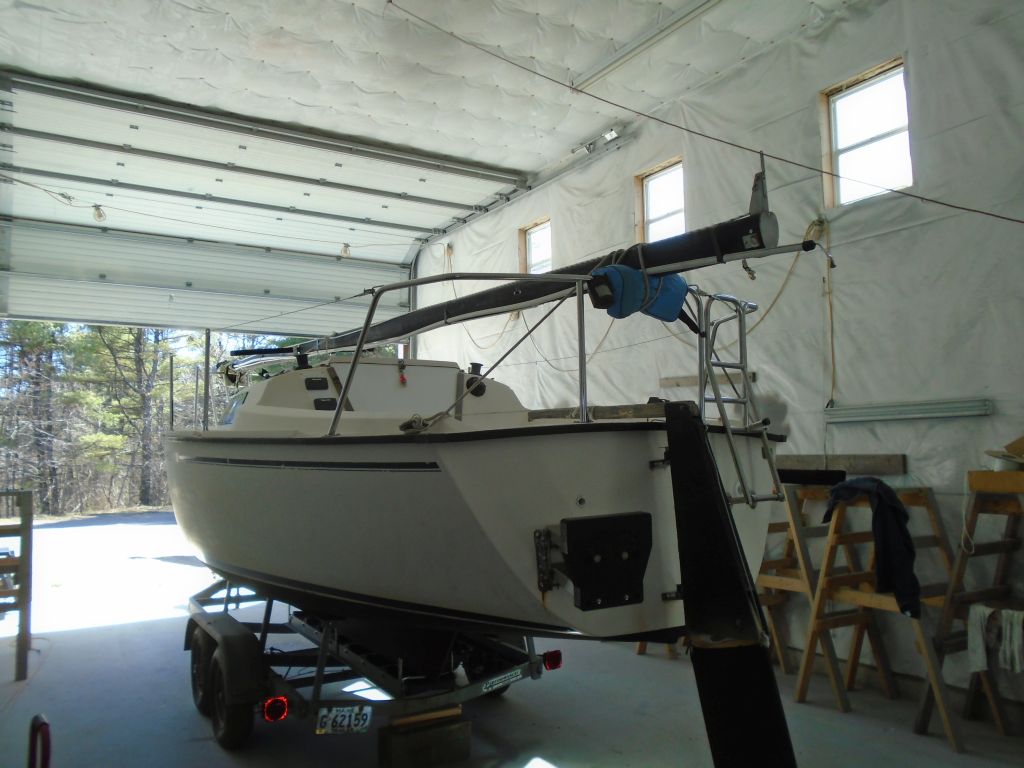
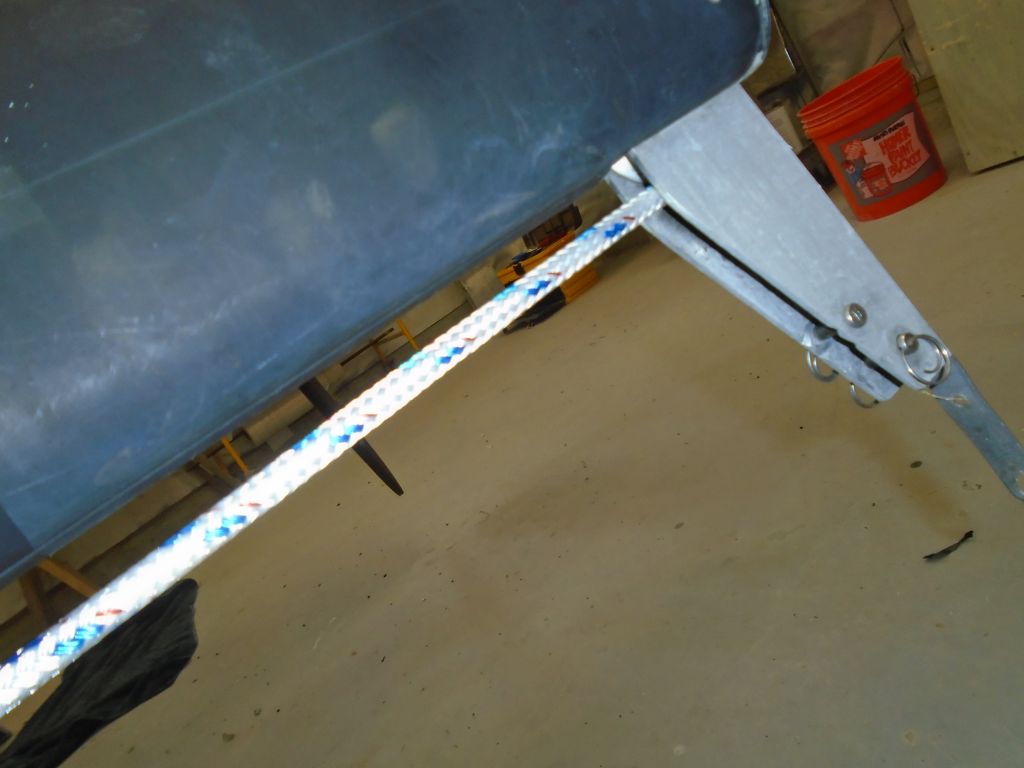
Now I put the mast back on deck, supporting it on the pulpits as it’d been upon arrival, and strung new wire lifelines through the stanchions. This completed my current task list, though the new cushions were still in production and would be ready in a couple weeks, probably.

Total time billed on this job today: 2.5 hours
0600 Weather Observation:
42°, cloudy. Forecast for the day: decreasing clouds (so they say), high in the 60s. Dare we hope? It’s been a dismal week.
Thursday
It’d been a busy week filled with other (unrelated) complications that limited my time in the shop, but fortunately this project was winding down anyway, with only a few tasks remaining on the list before completion.
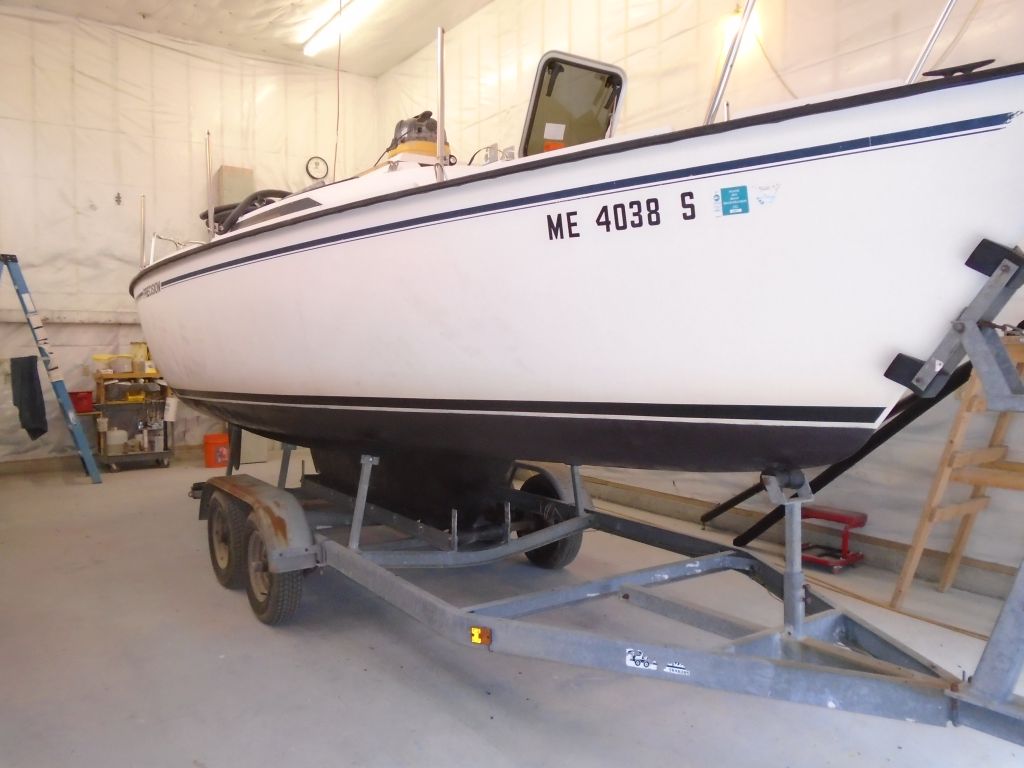
To begin, I painted the bottom with black bottom paint, removing the masking tape afterwards.

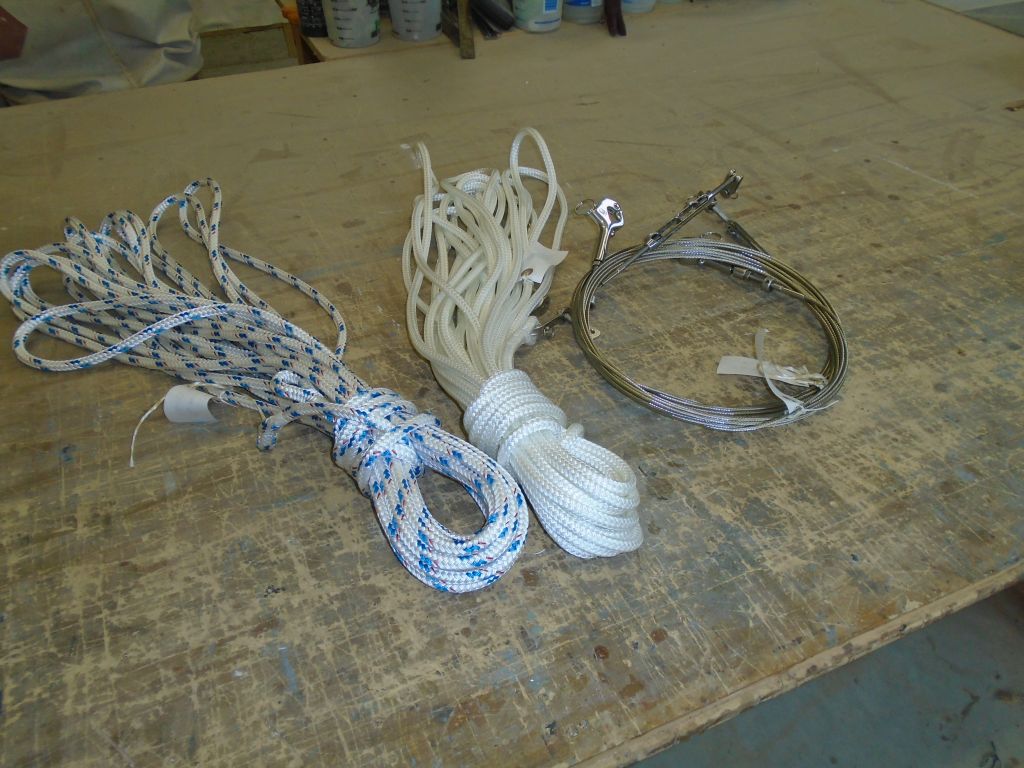
With a raw and miserable, and wet-ish, day outside, later on I moved the mast indoors next to the boat so I could get started on the work required. The two new halyards had arrived from the rigger, along with replacement lifelines, so I strung in the new halyards, using the messenger lines I’d installed when removing the old ones at the beginning of the project.

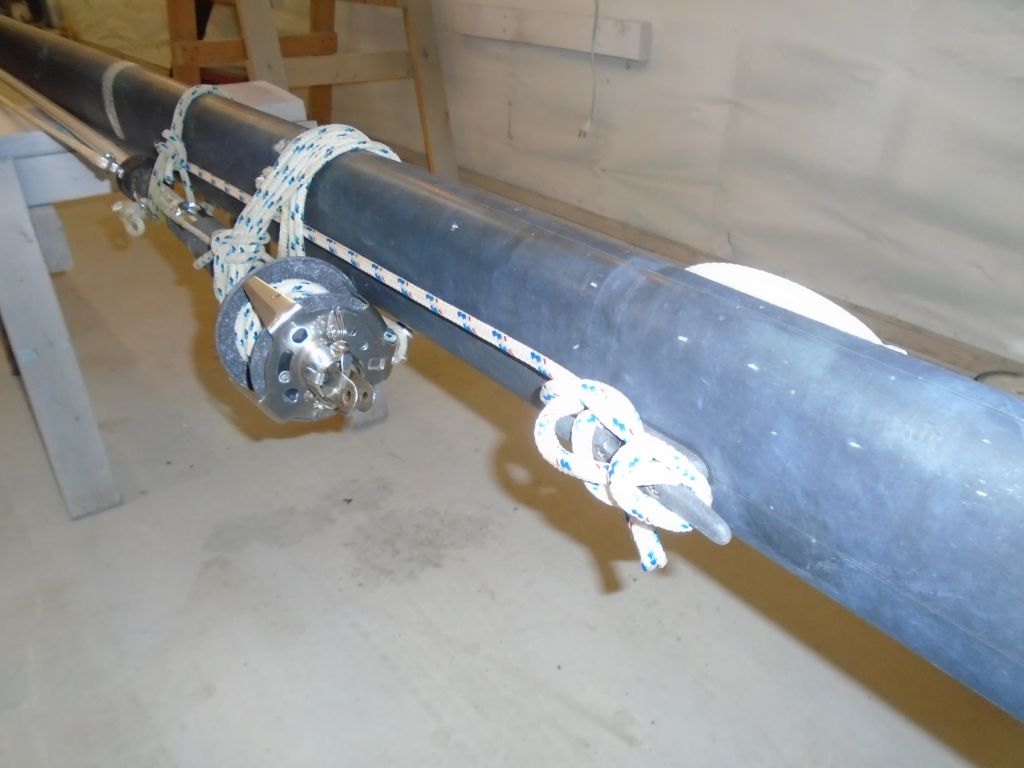

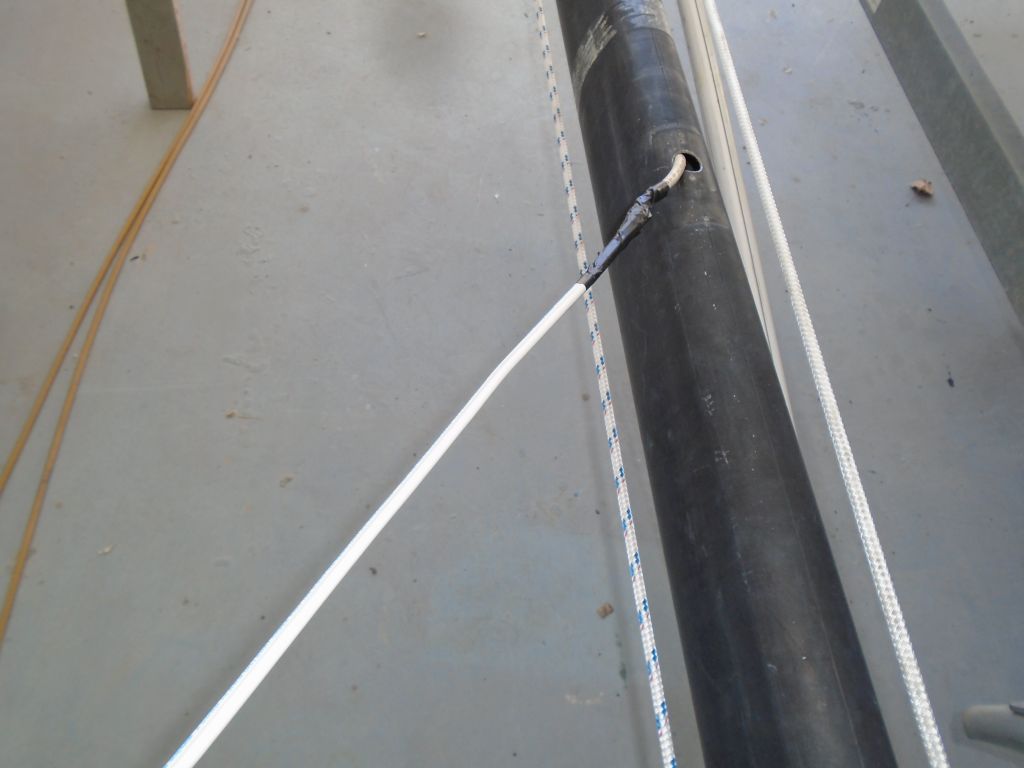
The old VHF cable to the masthead was shot, at least at the bottom end, so I prepared to run in a new one. I tried using the old cable to pull through the new, but the way the exit hole at the top of the mast was, the cable didn’t pull in cleanly, and the old cable parted from the tape I’d used to secure the two together, so instead I had to use a wire snake pushed down the mast to string a messenger line, which line I then used to pull through the new cable from top to bottom. Then, I made up the ends, completing that assembly.

All that remained was to rewire the masthead (by technical definition) located near the spreaders, but I’d do that next time.
Total time billed on this job today: 2.75 hours
0600 Weather Observation:
44°, clouds and drizzle. Forecast for the day: 44°, clouds and drizzle.
Tuesday
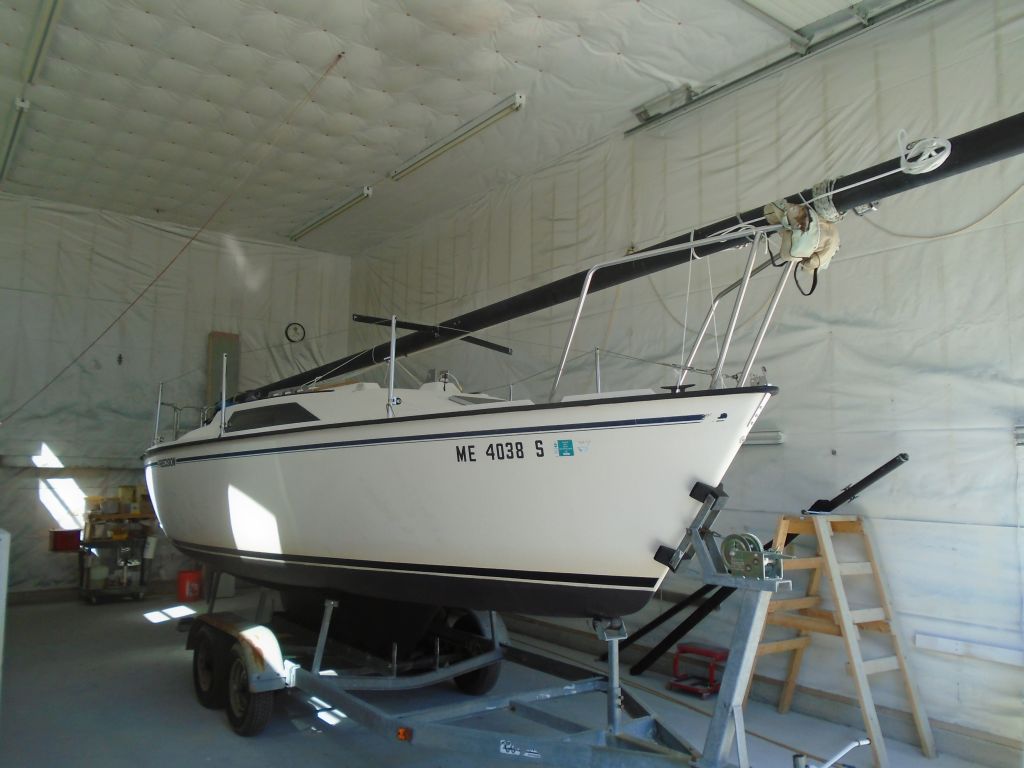
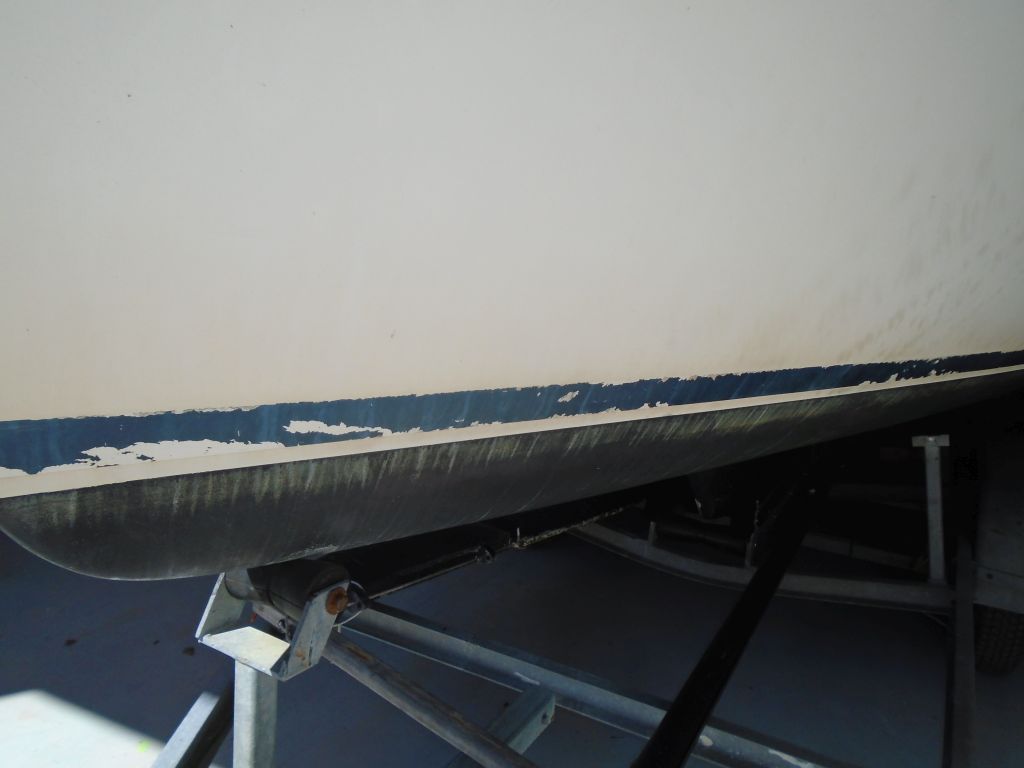
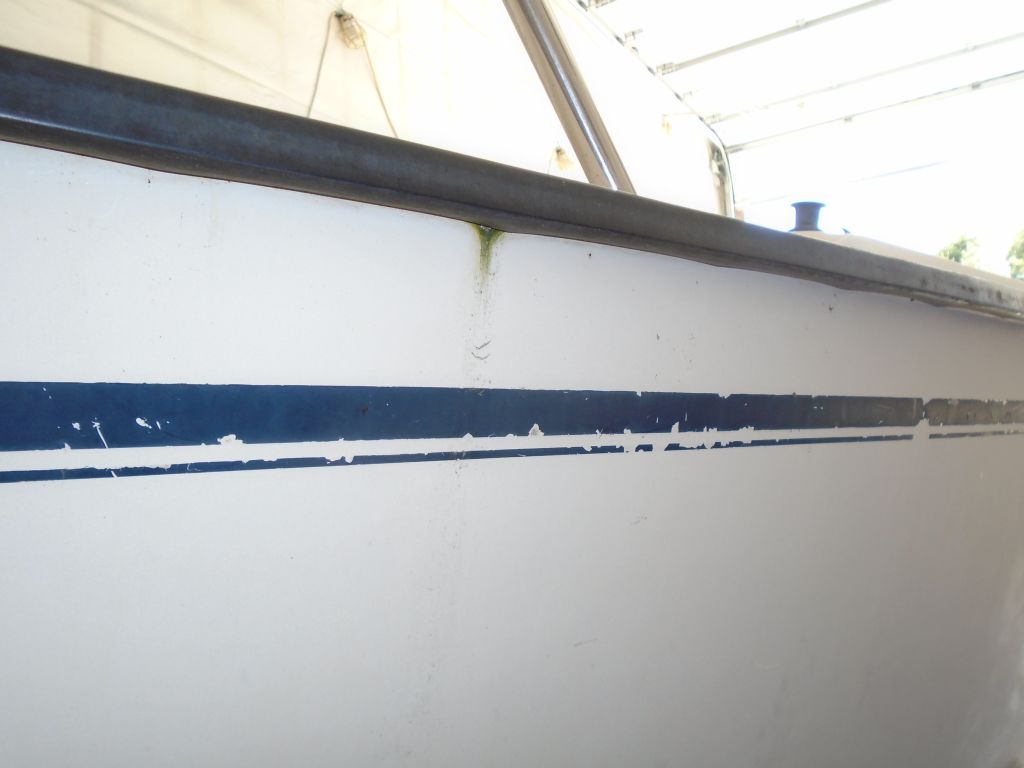
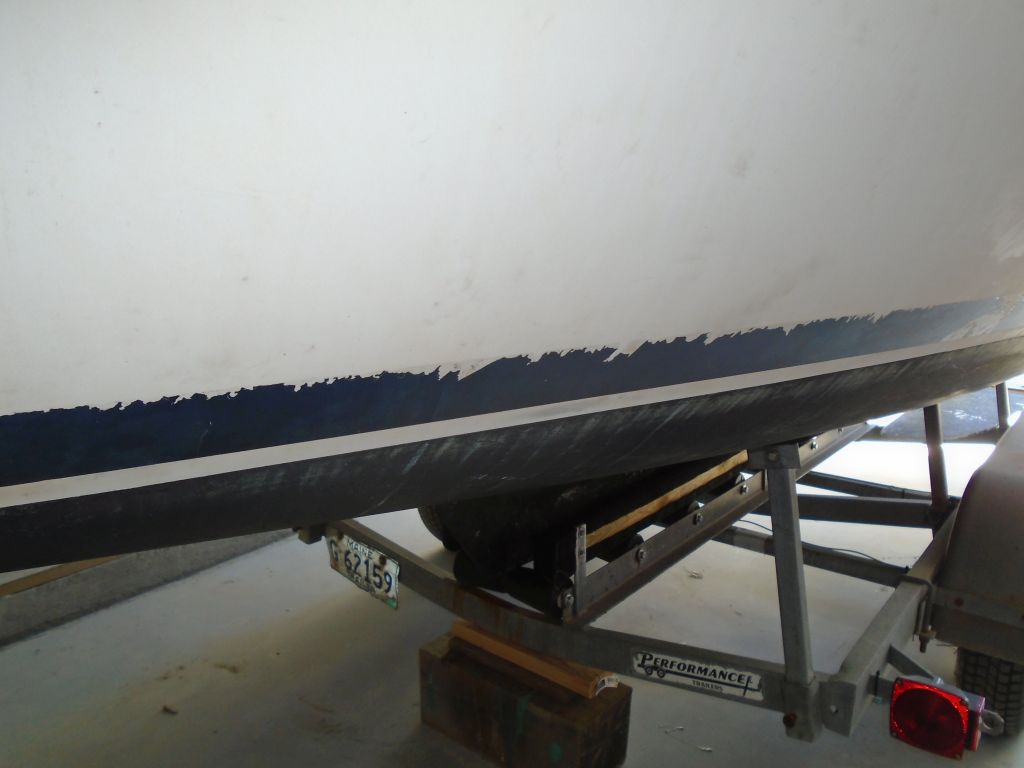
As the work list wound down, I turned to one of the last jobs: replacing the boottop. The original, made from vinyl tape, was in poor condition.


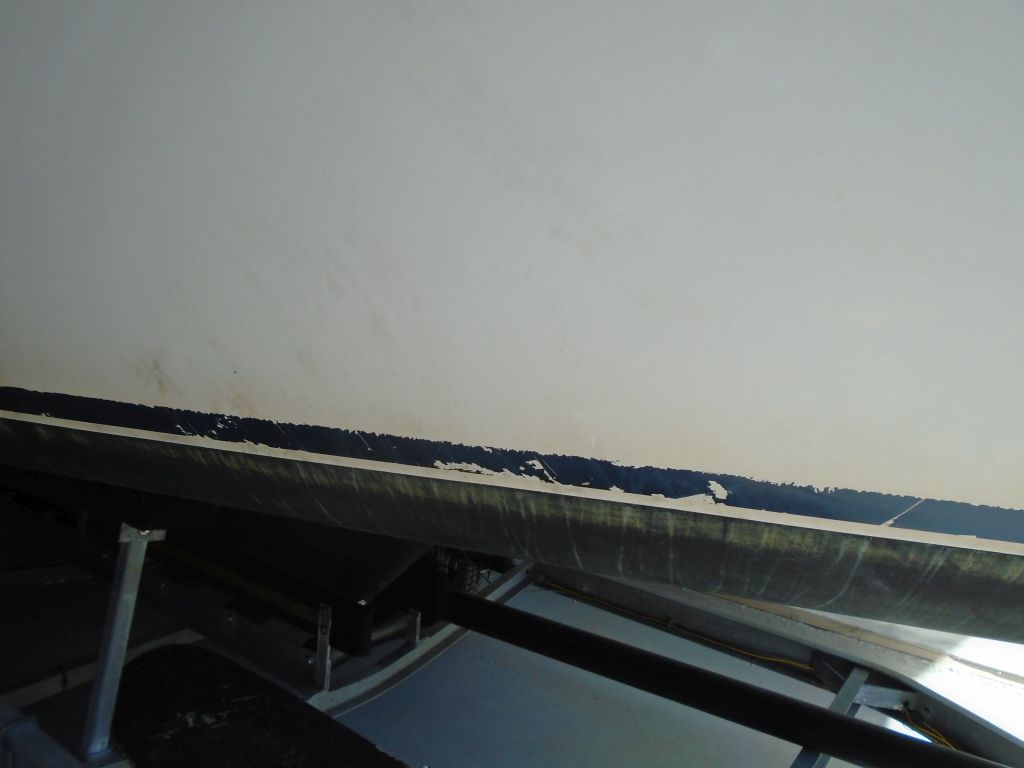


With a heat gun, I removed the old striping tape. This took a long time since the old tape was so scarred and damaged, and it wasn’t possible to release and pull large sections, so it required plenty of scraping with a putty knife. This also left behind quite a bit of adhesive.
I used solvent and elbow grease to remove the old adhesive left behind.

Afterwards, I applied a new stripe from 2″ vinyl striping tape, like the original.

With other commitments, I’d had a late start and there was only a bit of time left in the day, so I used it to prepare the bottom for painting, first masking off the waterline as needed.

The trailer had keel guides, which blocked most of the keel, so I removed them for painting access. I’d await the painting till next time.

Total time billed on this job today: 4.5 hours
0600 Weather Observation:
44°, cloudy. Forecast for the day: Mostly cloudy, high in the 50s
Monday
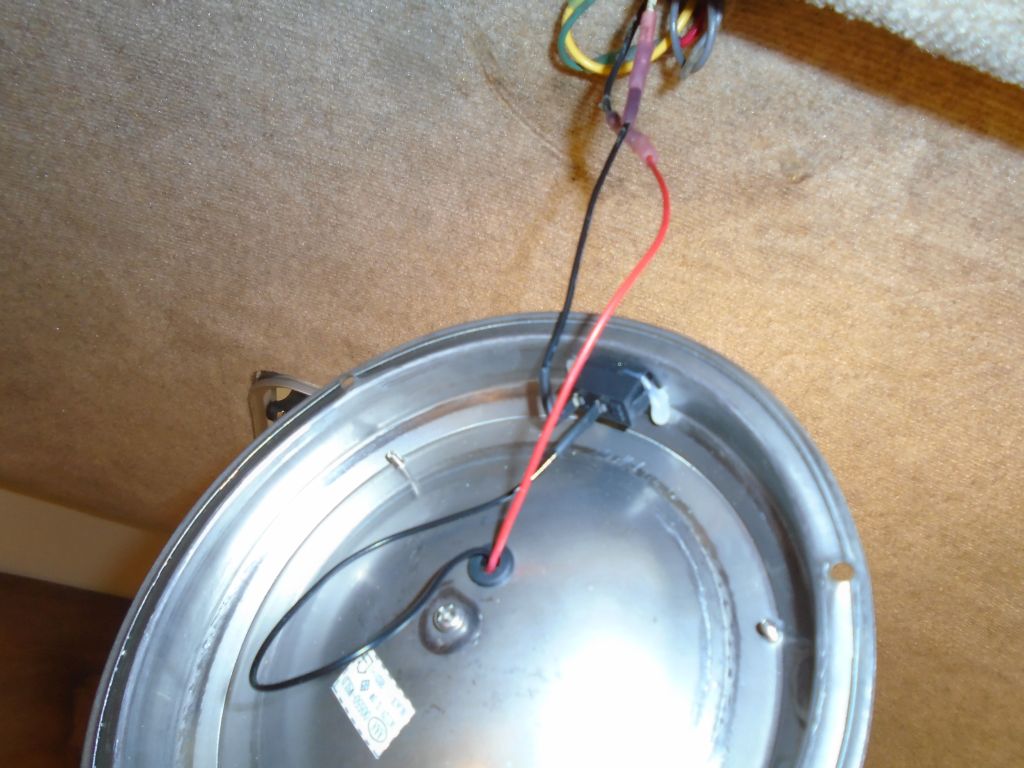
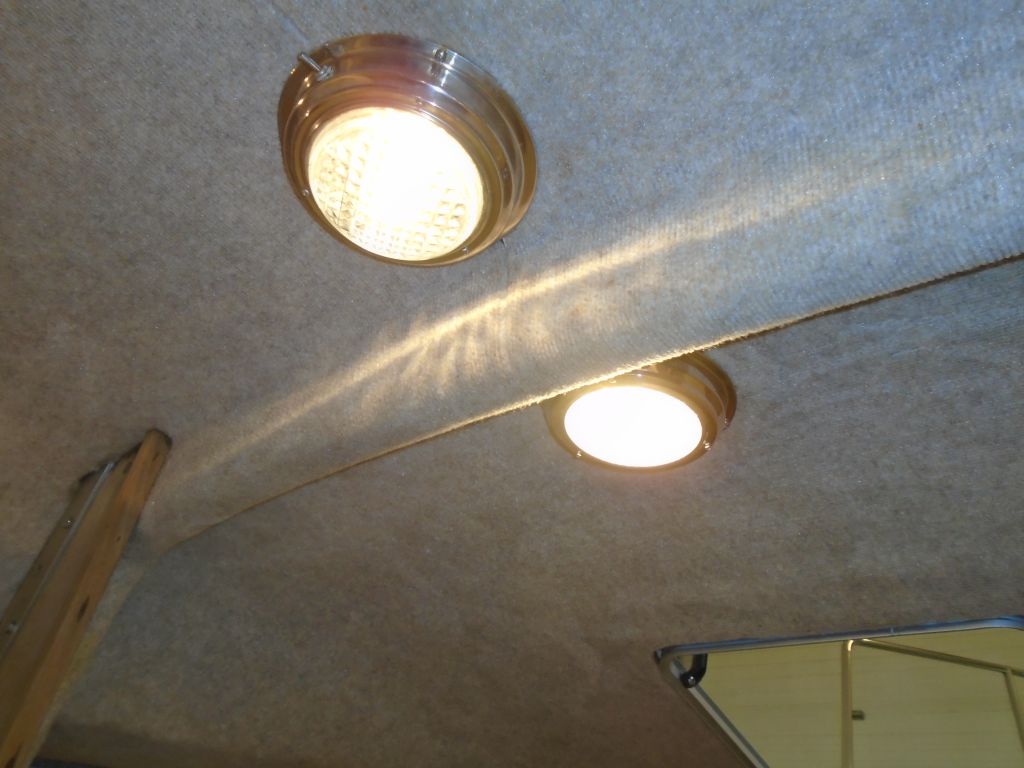
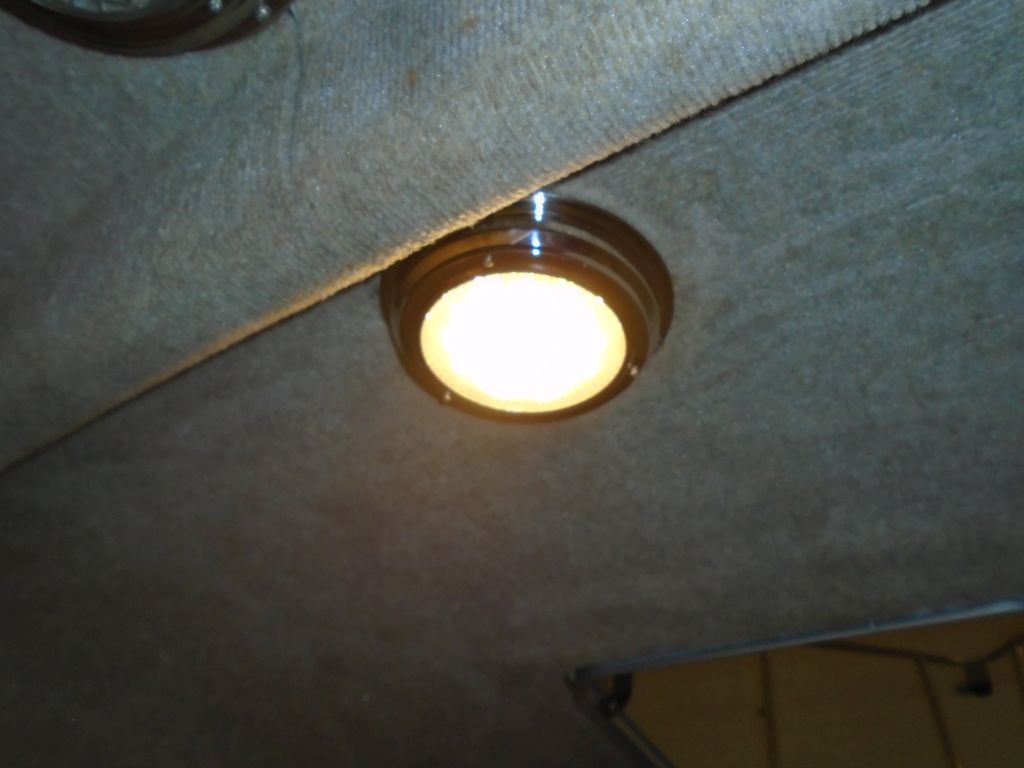
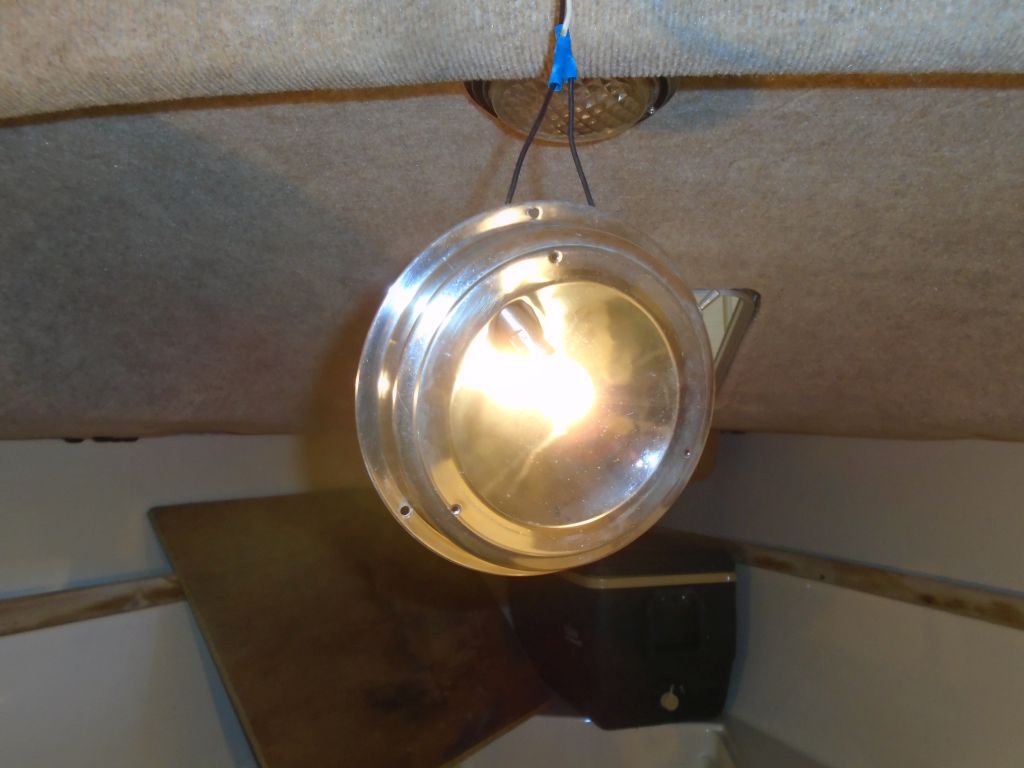
Back at work after a long weekend, I found various new supplies on hand that I’d ordered earlier, so I got started with what I thought would be the simplest task: installing the new 6″ light fixture in the forward cabin, which I’d ordered after finding that the original was rusted and inoperable. Double-checking, I powered up the boat’s circuits and used a meter again on the exposed wires, getting the appropriate reading, so I connected the wires from the light fixture, only to find that it didn’t work. It took a few moments for me to realize that (silly me) I’d assumed that the red wire coming off the light was positive, and the black negative. As it happened, the wiring convention on this fixture was backwards, which a simple glance at the way the wires ran through the switch would have revealed, but one becomes quite conditioned to normal wire colors and their supposed meanings.
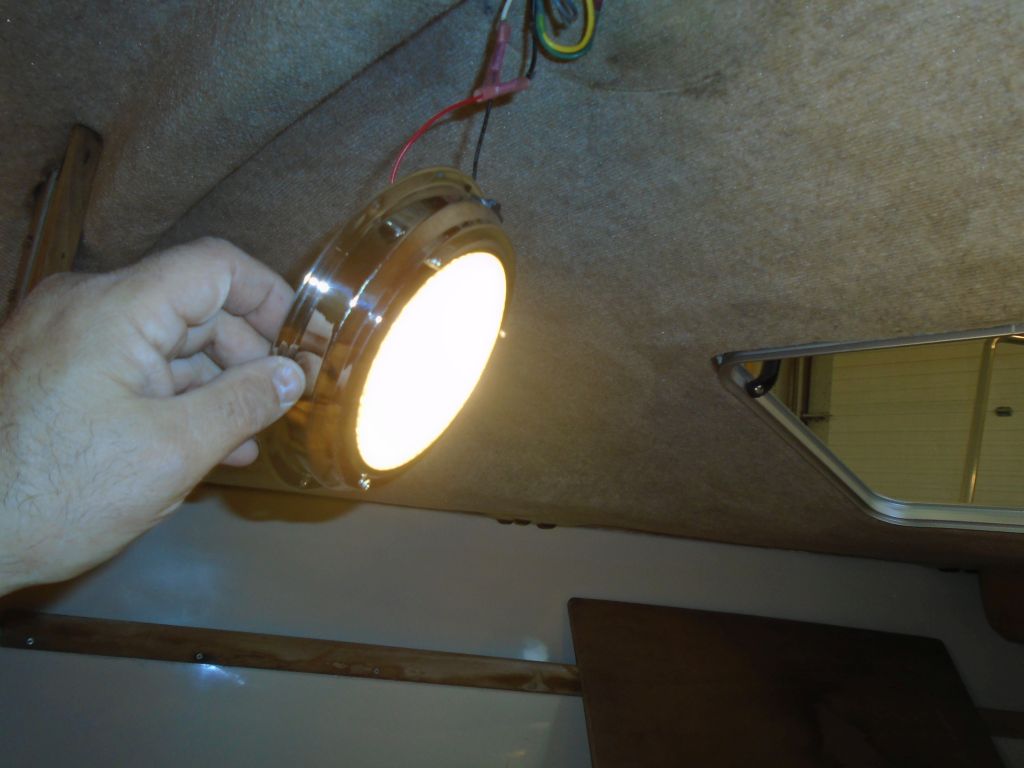
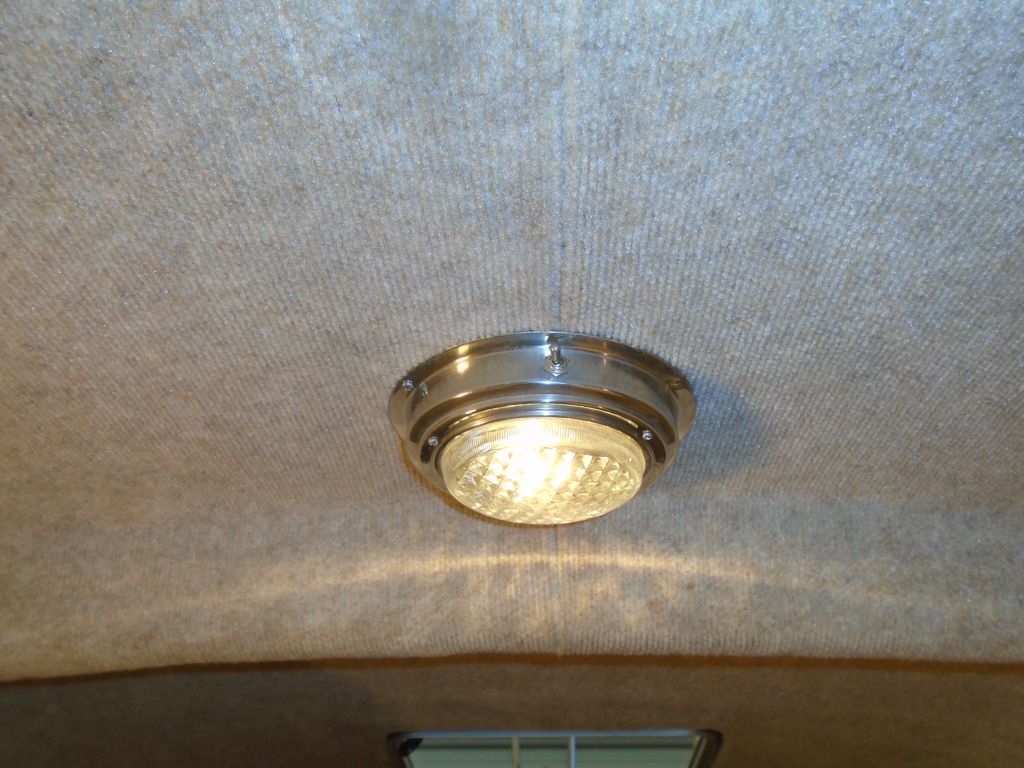
With the wiring reversed, the light operated, and I secured it to the overhead with screws, as per the original. This fixture also hid the wiring passing through the deck to the mast lighting.
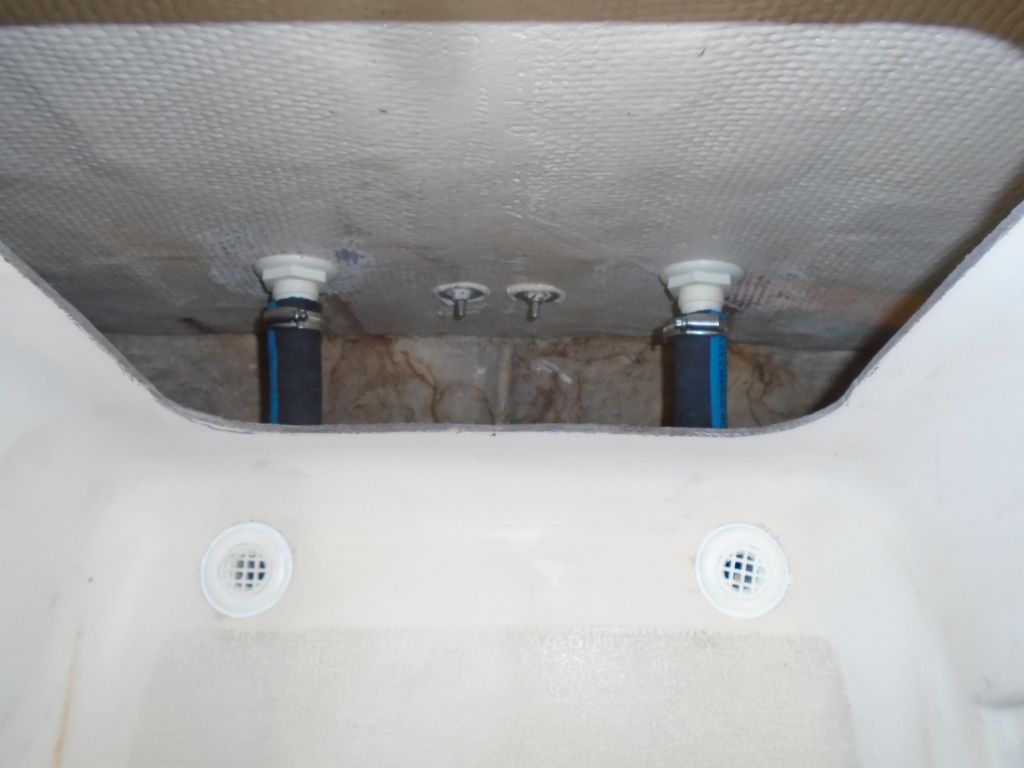
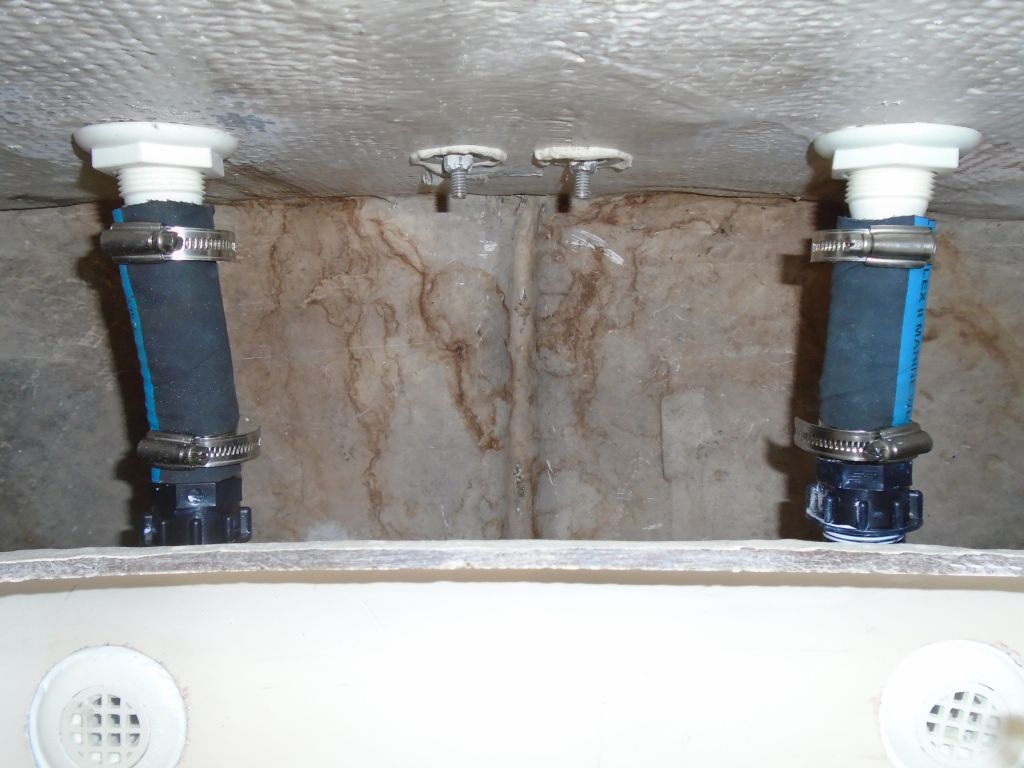
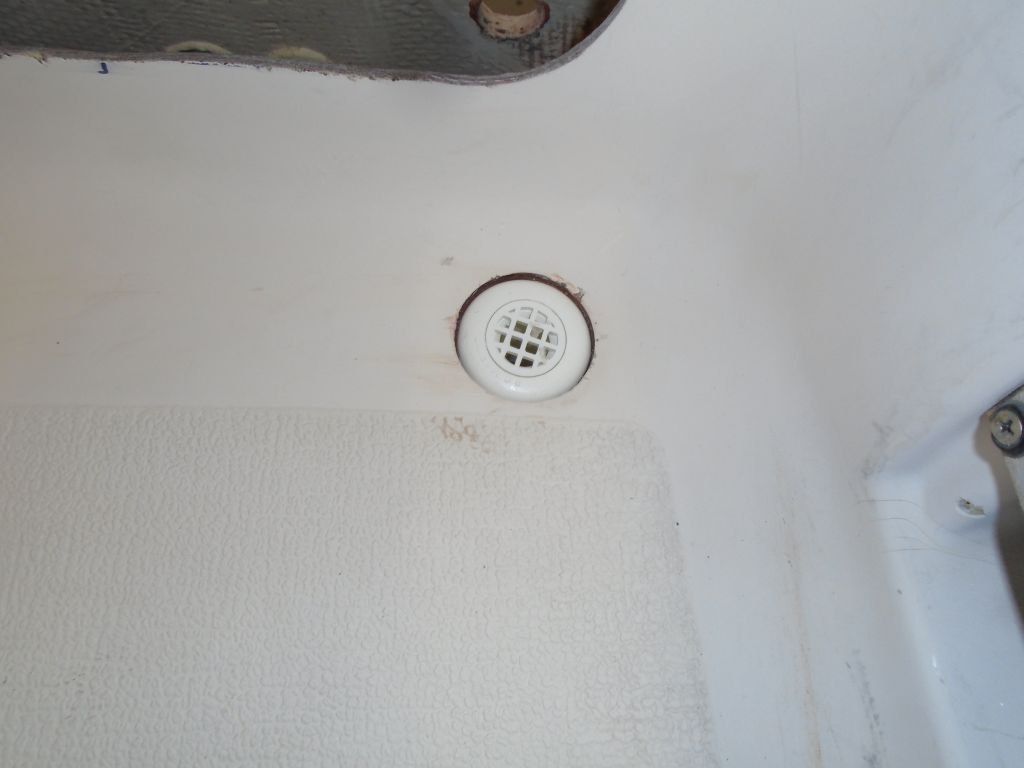
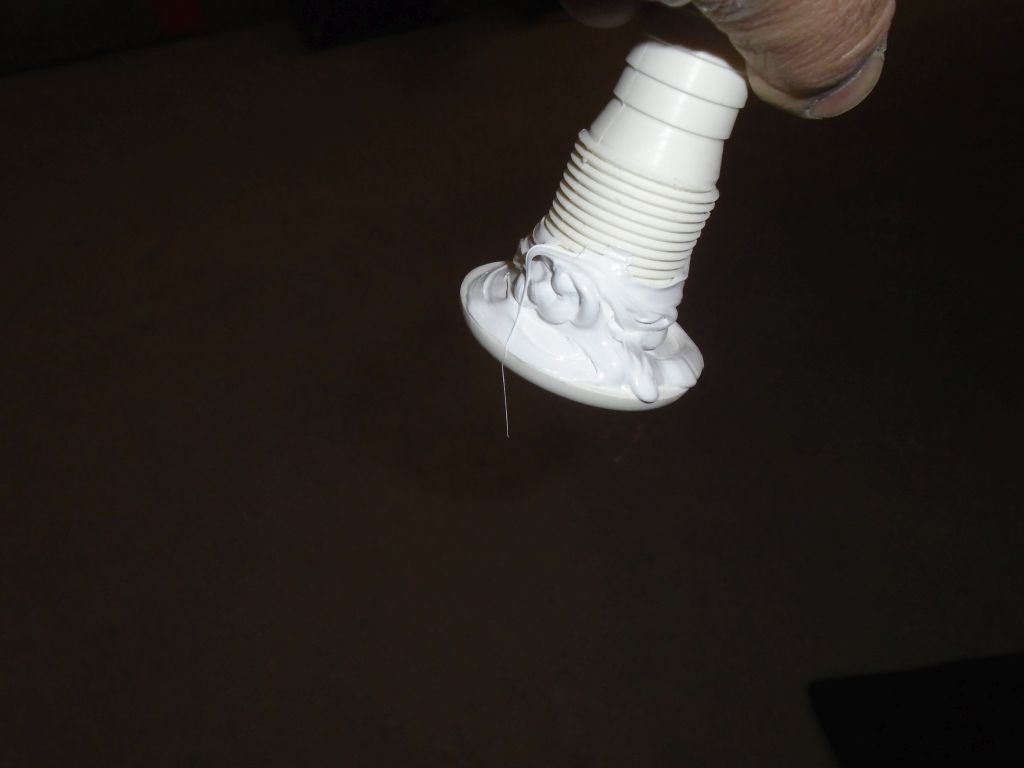
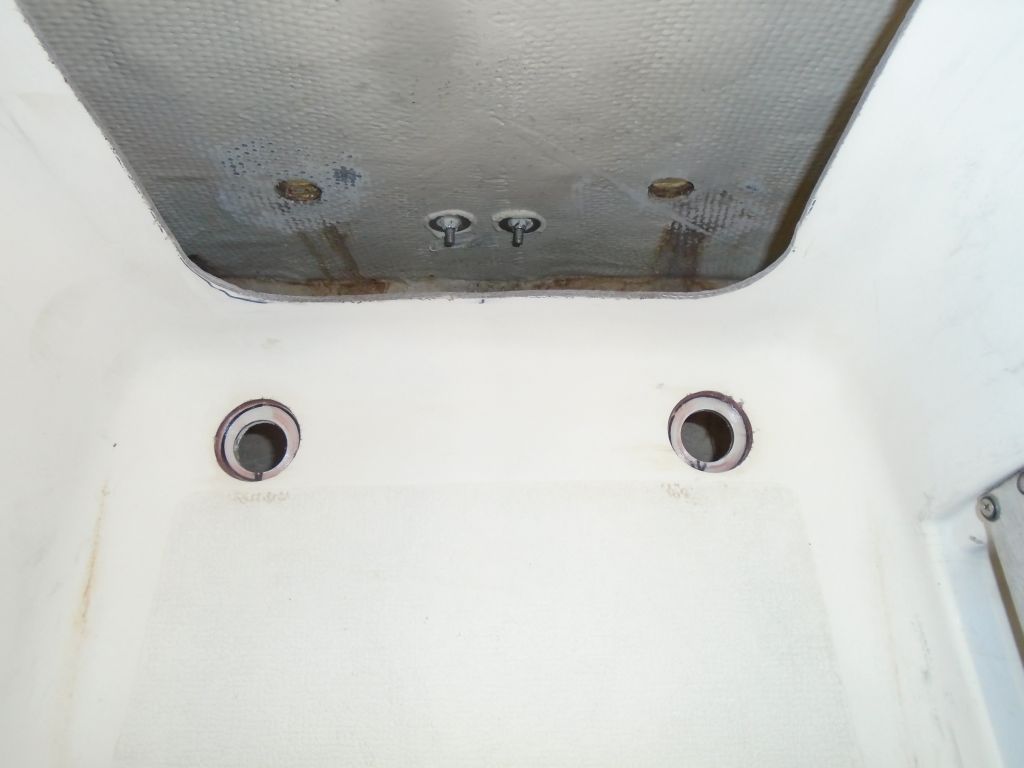
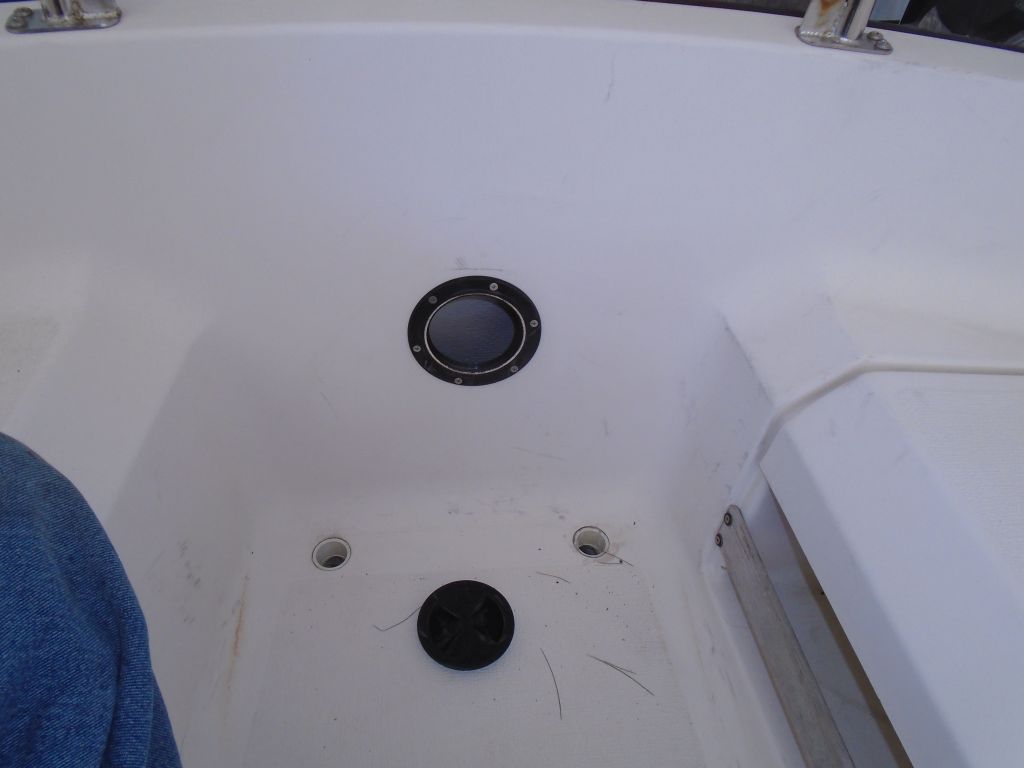
Next, I turned to the scuppers. All parts were now on hand, so I completed the installation by installing the screened cockpit fittings along with elbows and hose adapters so I could lead hoses the short distance to the transom outlets. I debated crossing the hoses but found that I could get short lengths on to keep the drainage as short and direct as possible. Before final installation, I cut off excess thread length from the cockpit fittings to keep the elbows as close to the cockpit as possible. I installed the cockpit fittings in beds of sealant in their newly-built recesses.
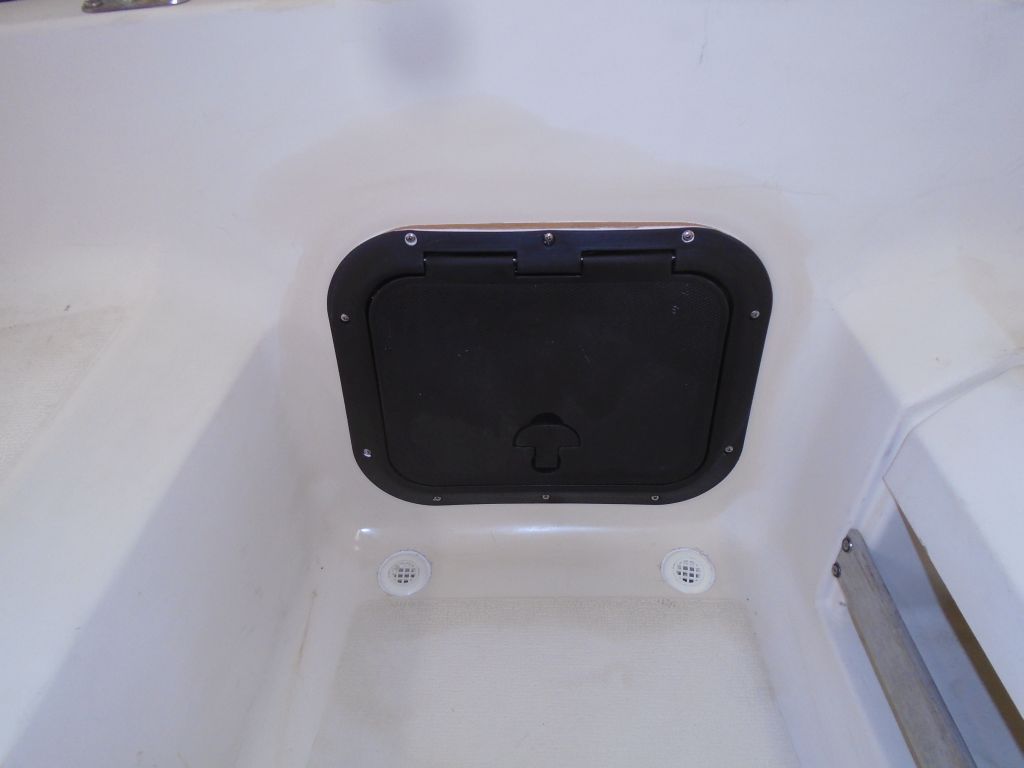
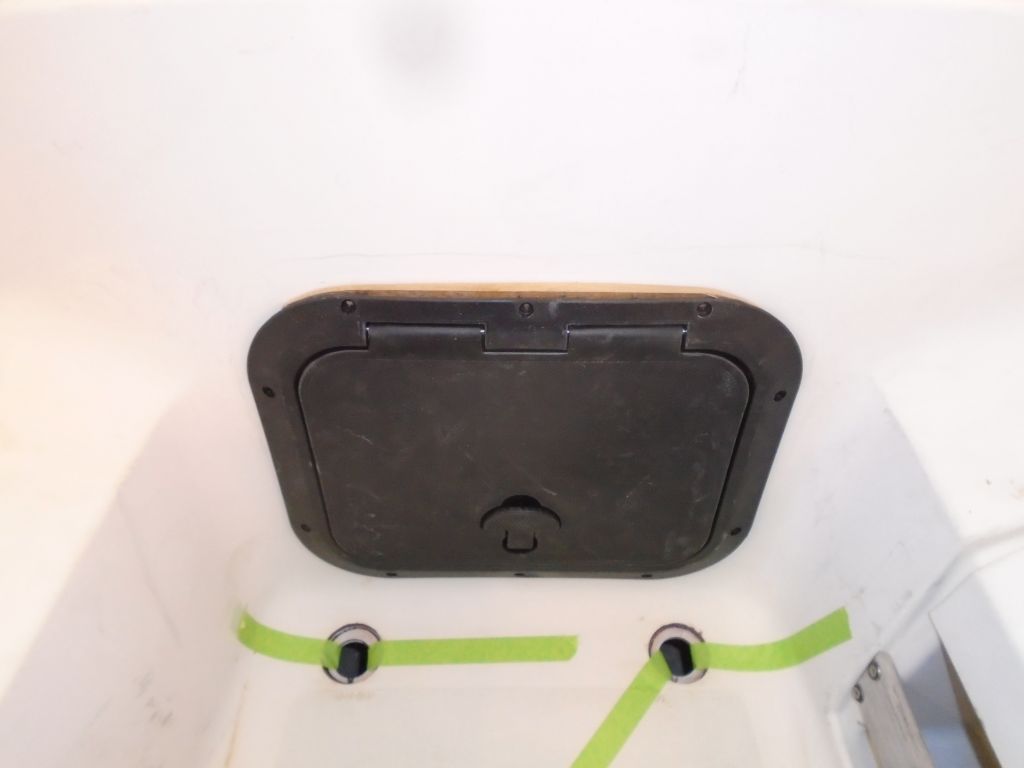
Afterwards, I installed the plastic access hatch with machine screws and sealant.

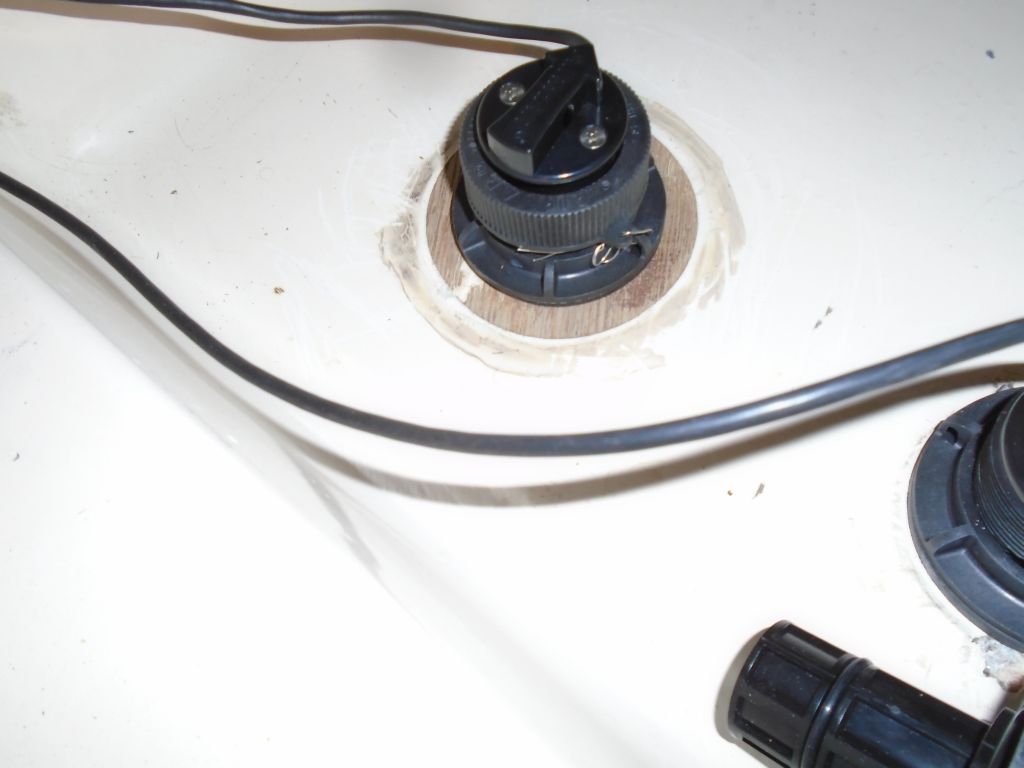
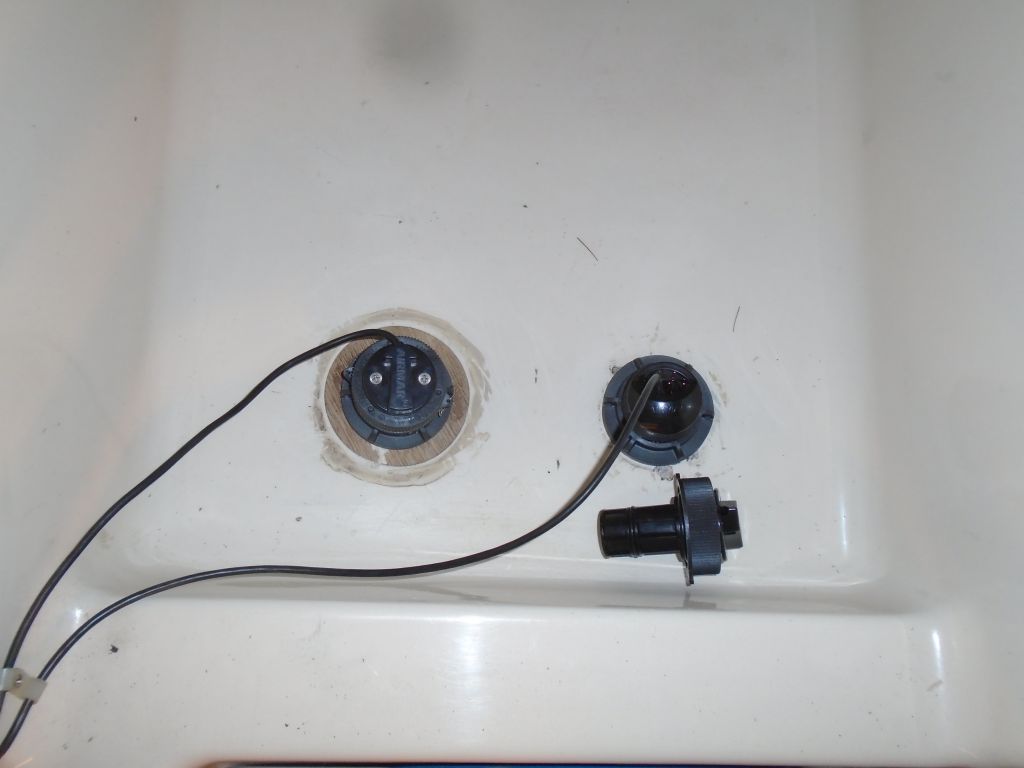
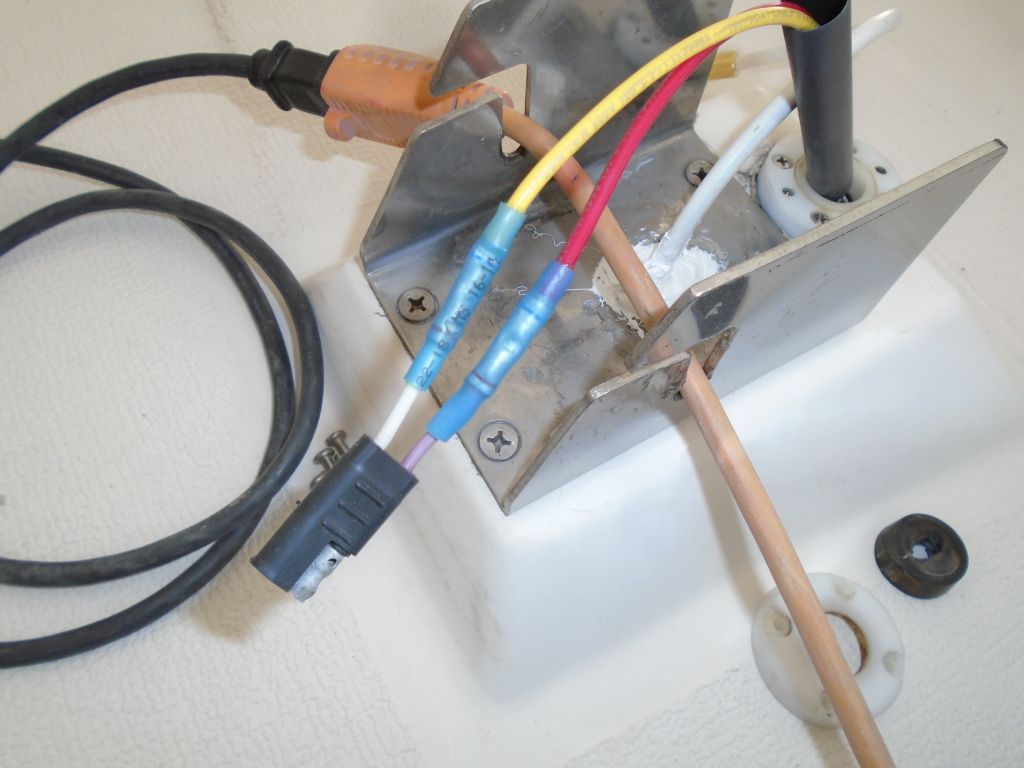
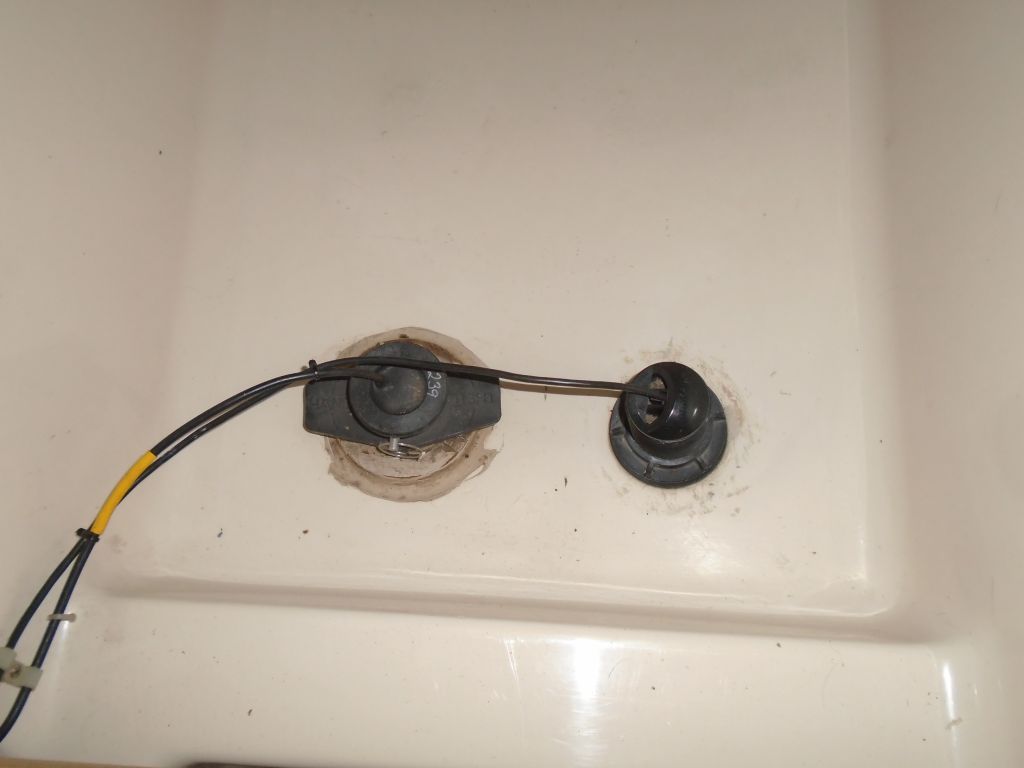
Before it slipped my mind, I went ahead and installed the knotmeter impeller in its new through hull–the impeller was removable from inside for cleaning, ostensibly. I’d left this out during initial through hull installation and until the sealant had had adequate cure time.
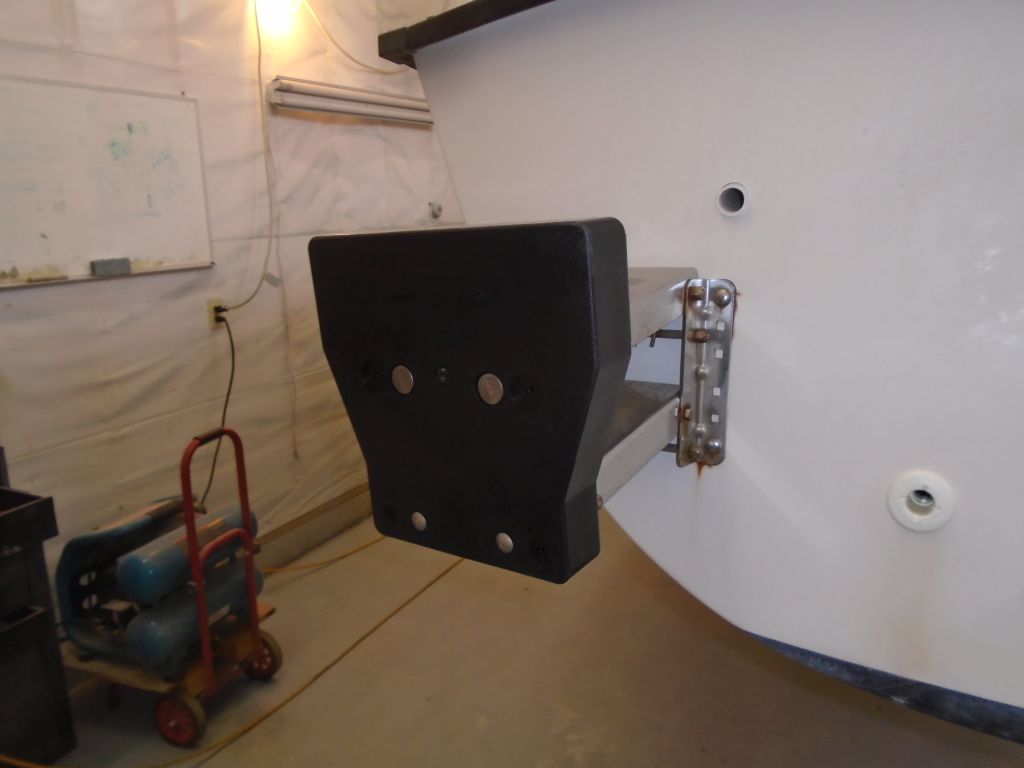
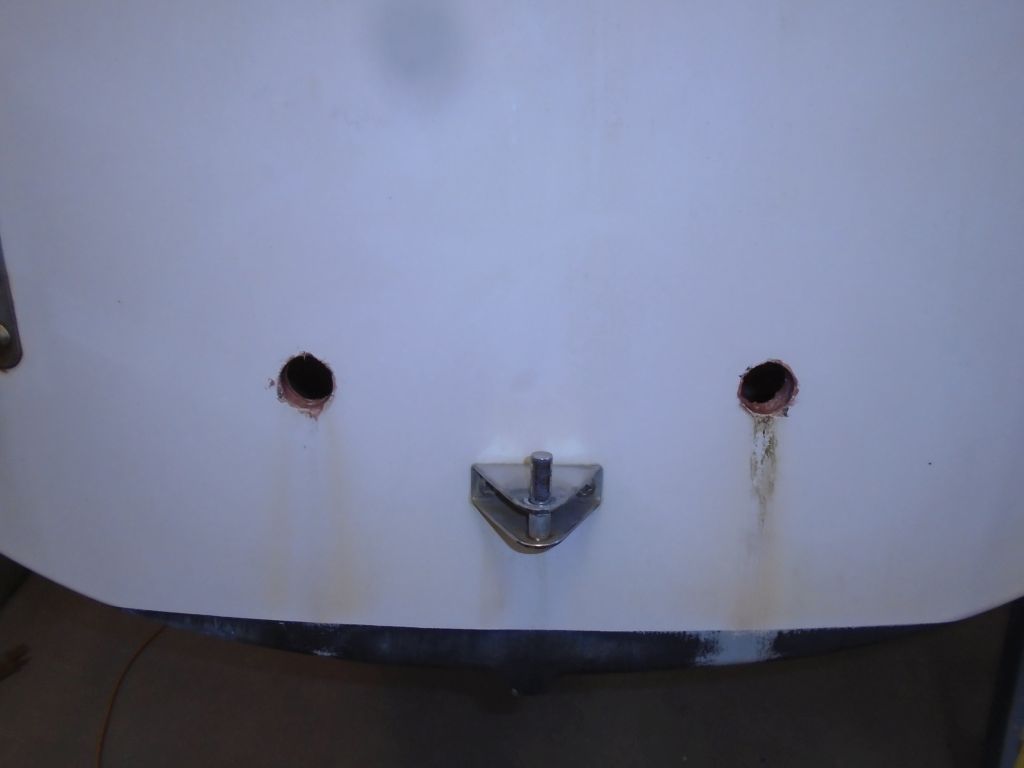
The new outboard motor bracket pad had arrived, and I installed it.
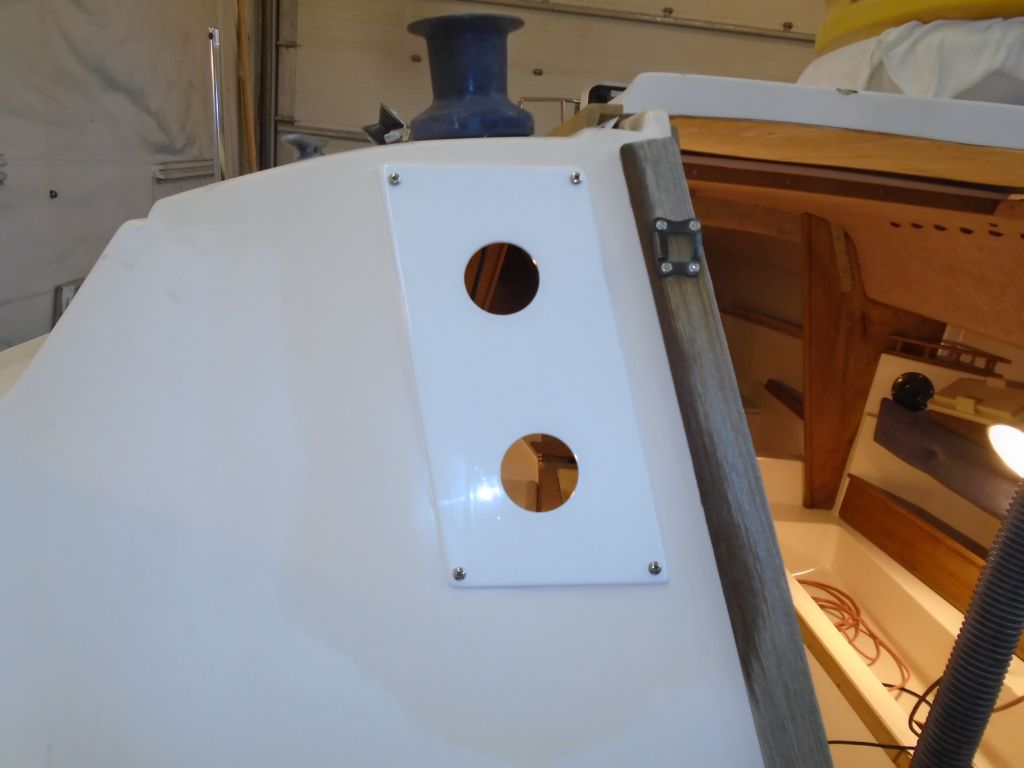
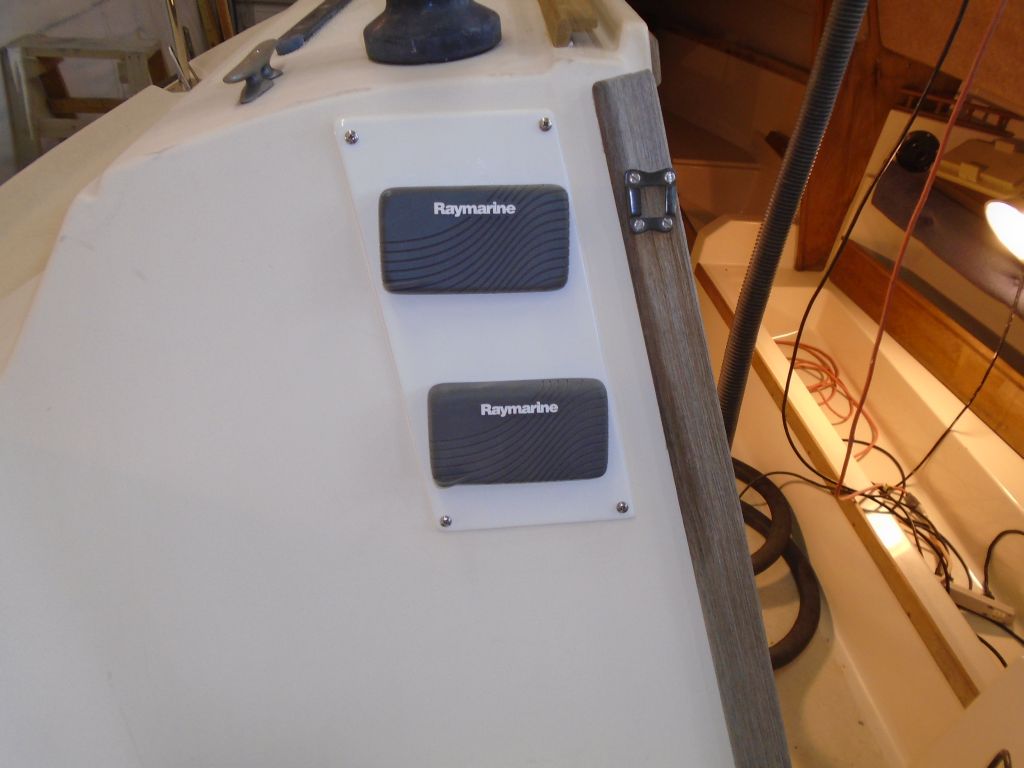
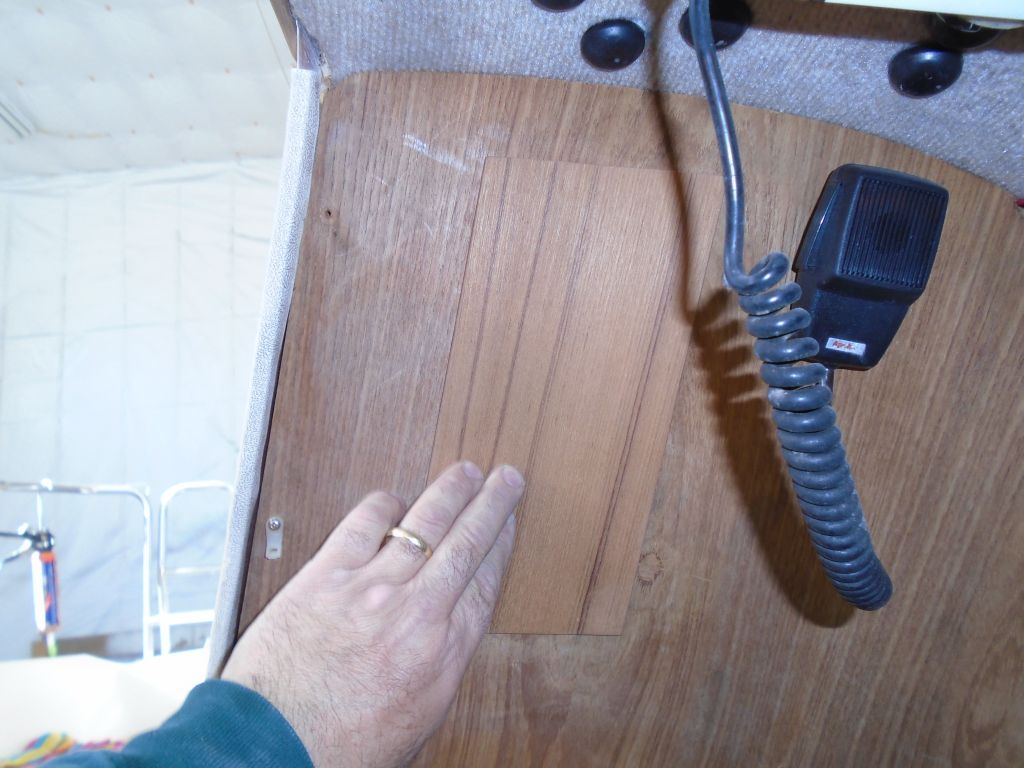
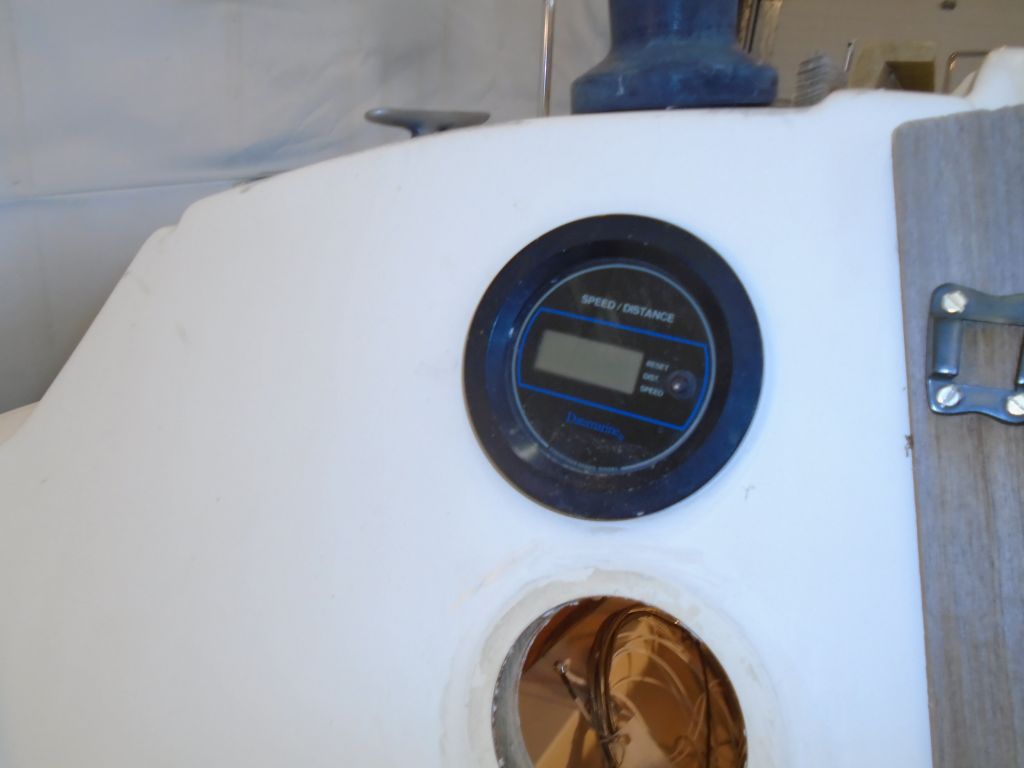
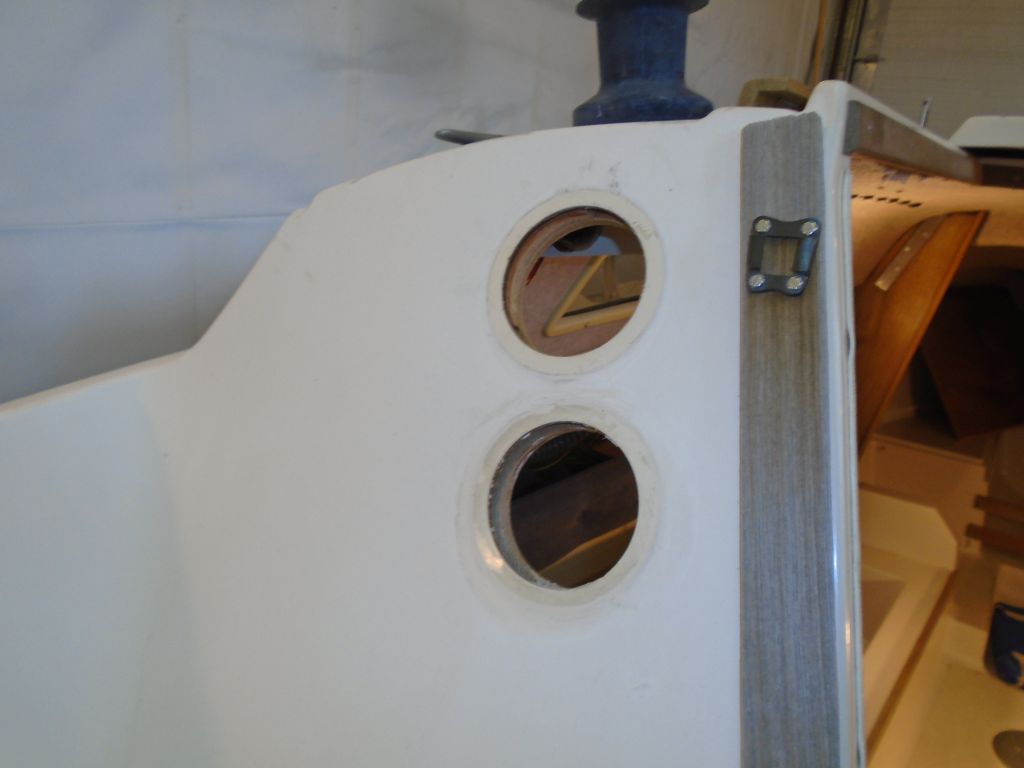
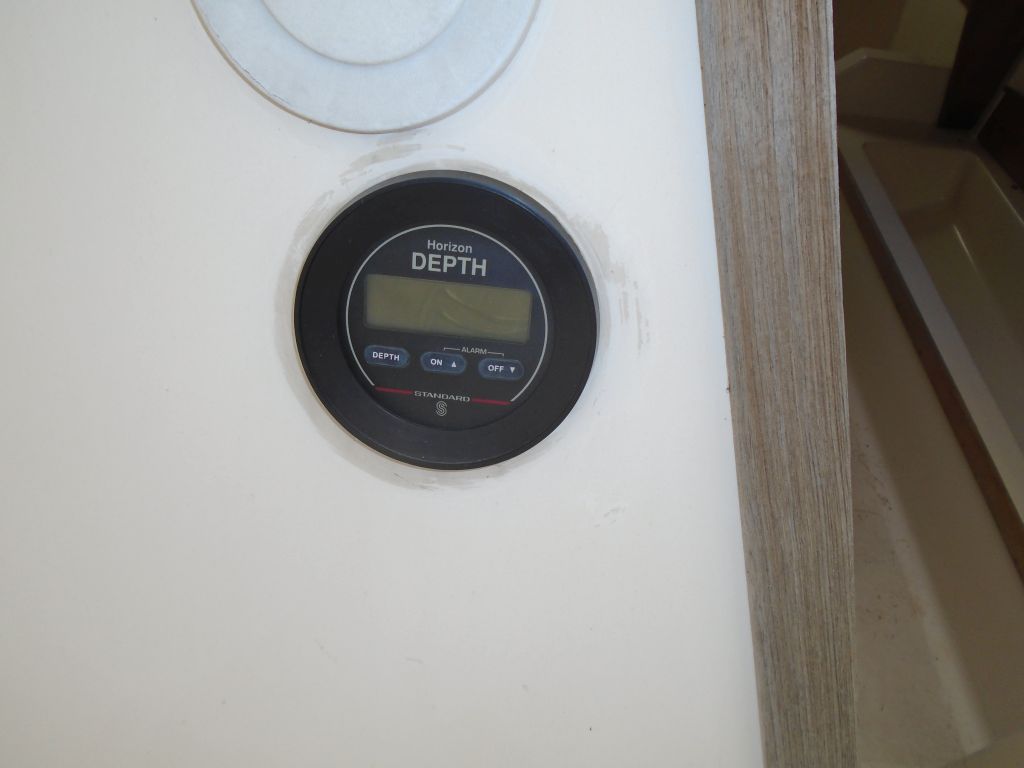
My new cover plate for the instrument installation was complete, the new paint having had several days’ cure time, so I installed it over the old openings with screws and sealant, centering the new instrument holes over the old ones for access within.
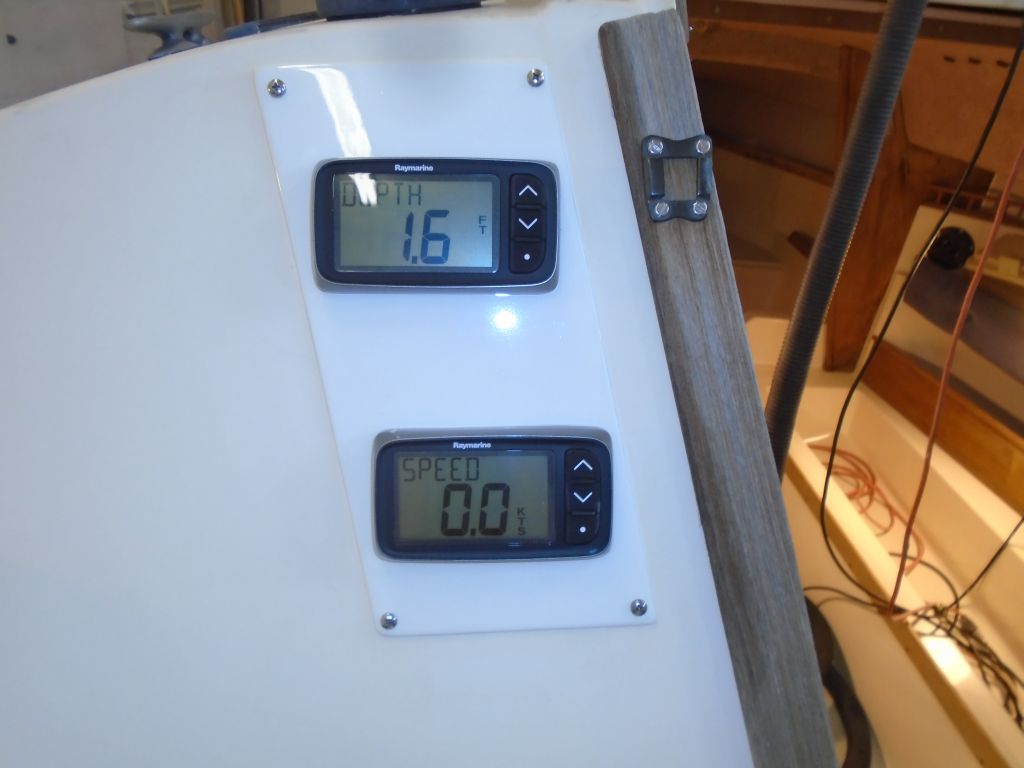
Now I installed the two new instruments, securing them with the supplied clamps from behind, and made up the final wiring connections–power and transducer cables in each case. I found I could run these wires through a space between the fiberglass bulkhead and the wooden interior of the bulkhead for a clean appearance.
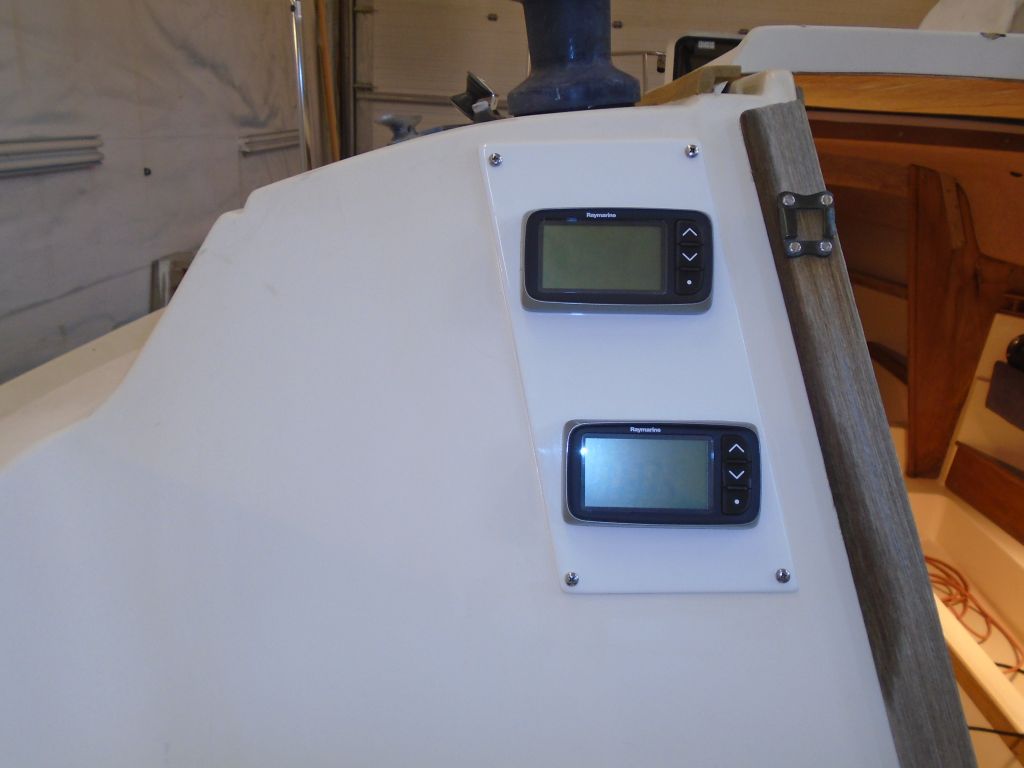
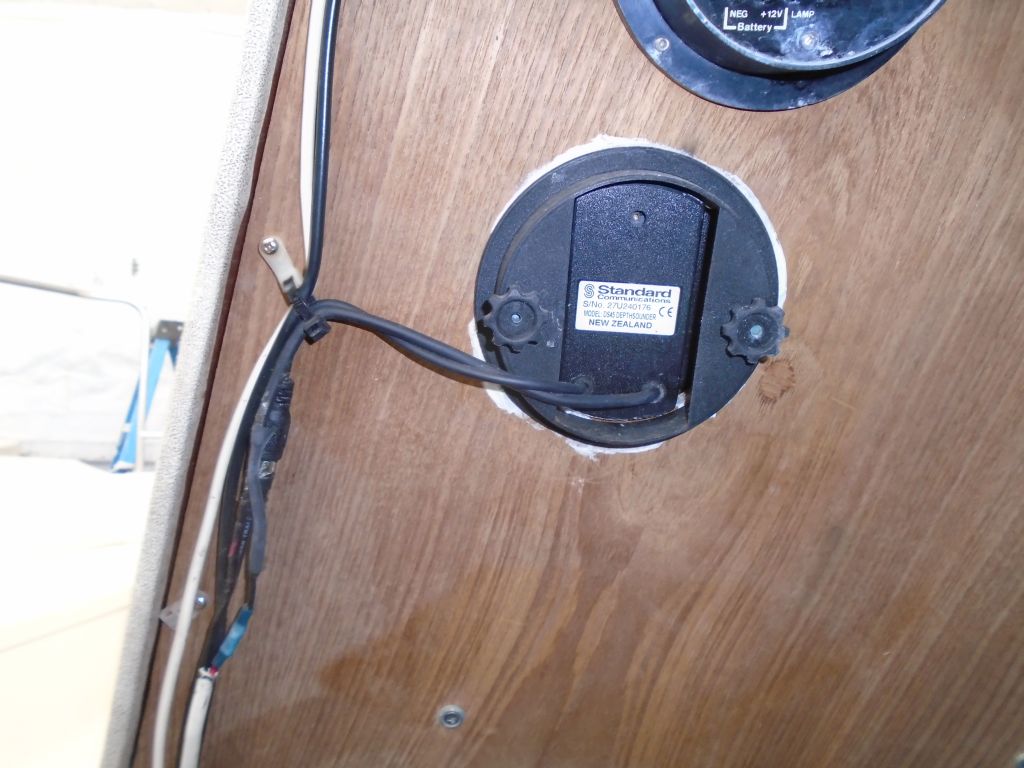
During an earlier wiring session, I’d run wire blanks from the nearby fuse panel for these instruments, and now I made up the final connections and secured the excess transducer cables out of the way beneath the cockpit. The instruments tested operational.

To complete the installation, I installed a teak cover over the interior side of the instruments. I had to build the original plywood cover out slightly to clear the wiring leads at the back of the instruments, but otherwise it was a clean interior appearance with no exposed instrument wires.
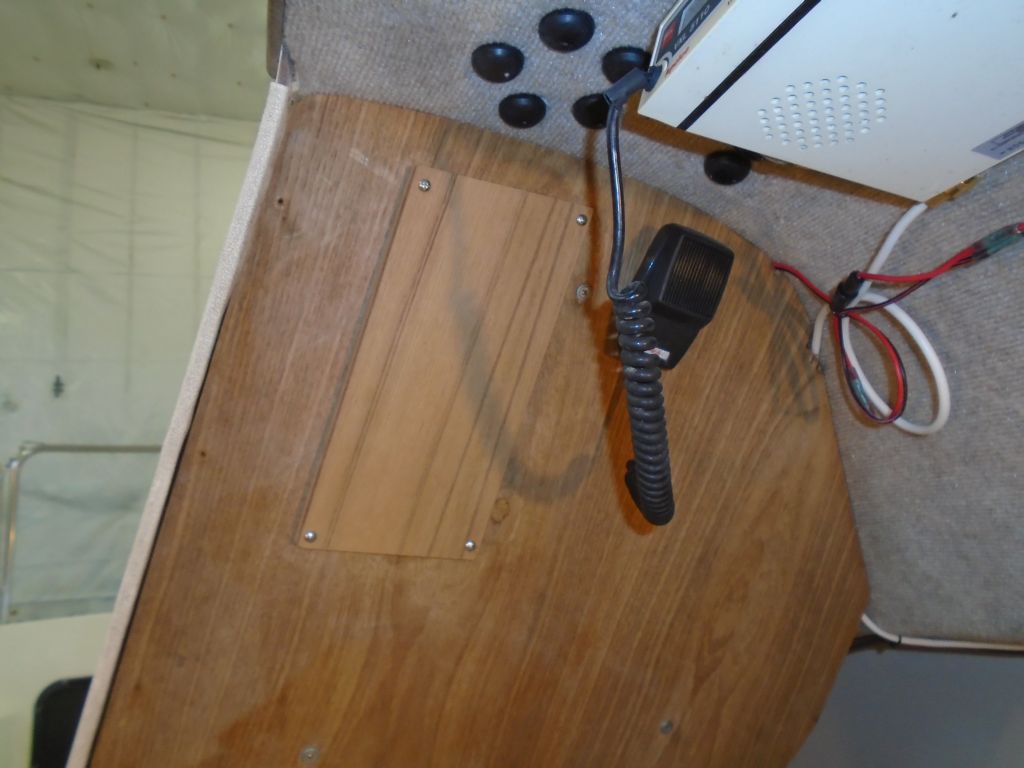
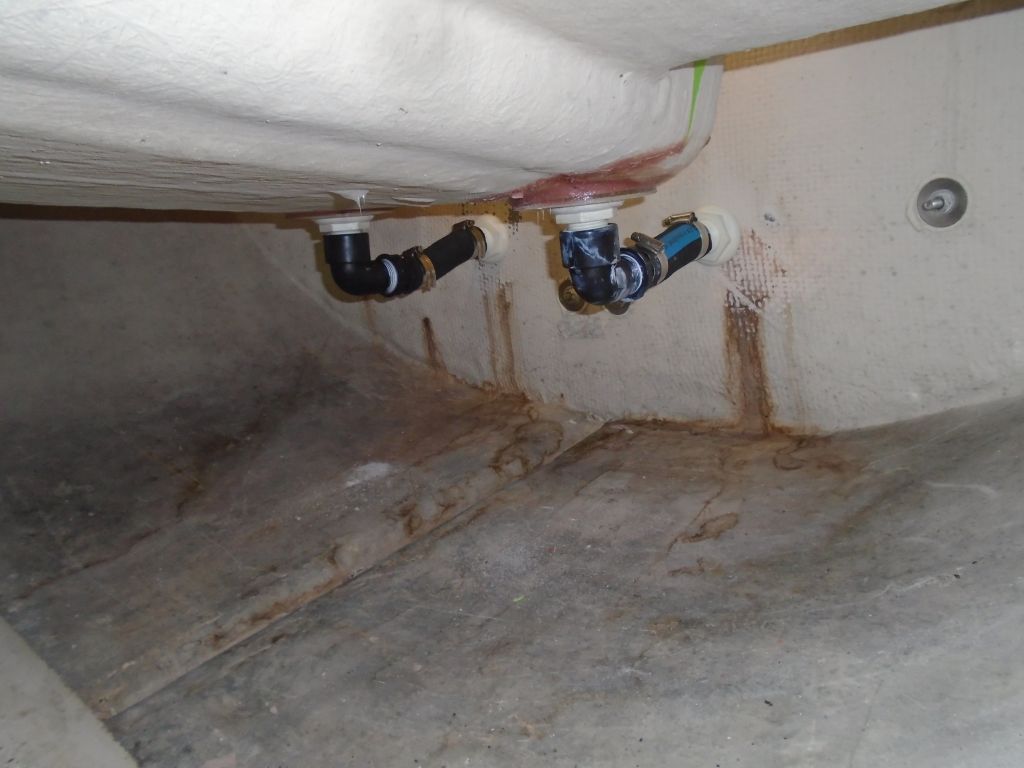
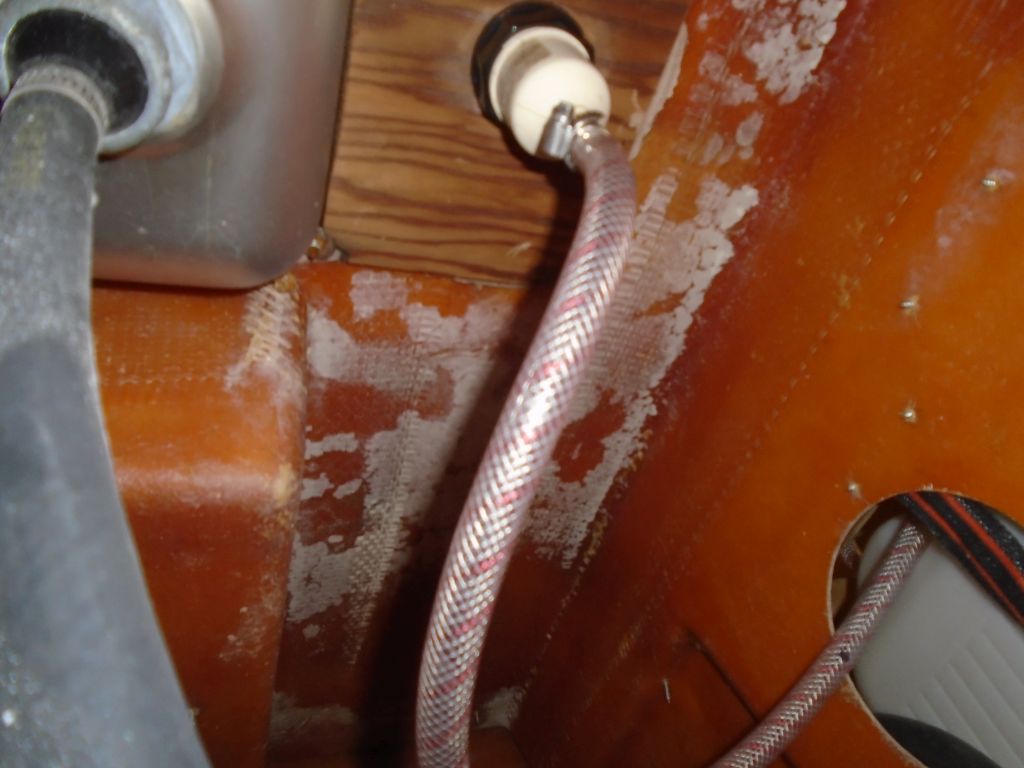
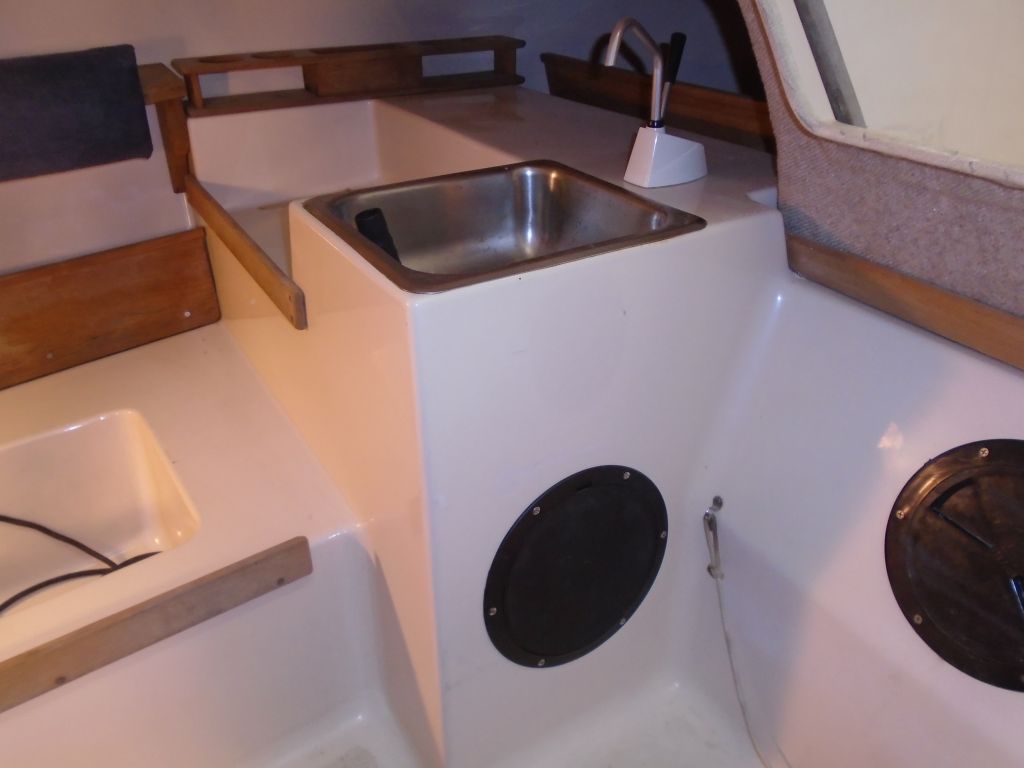
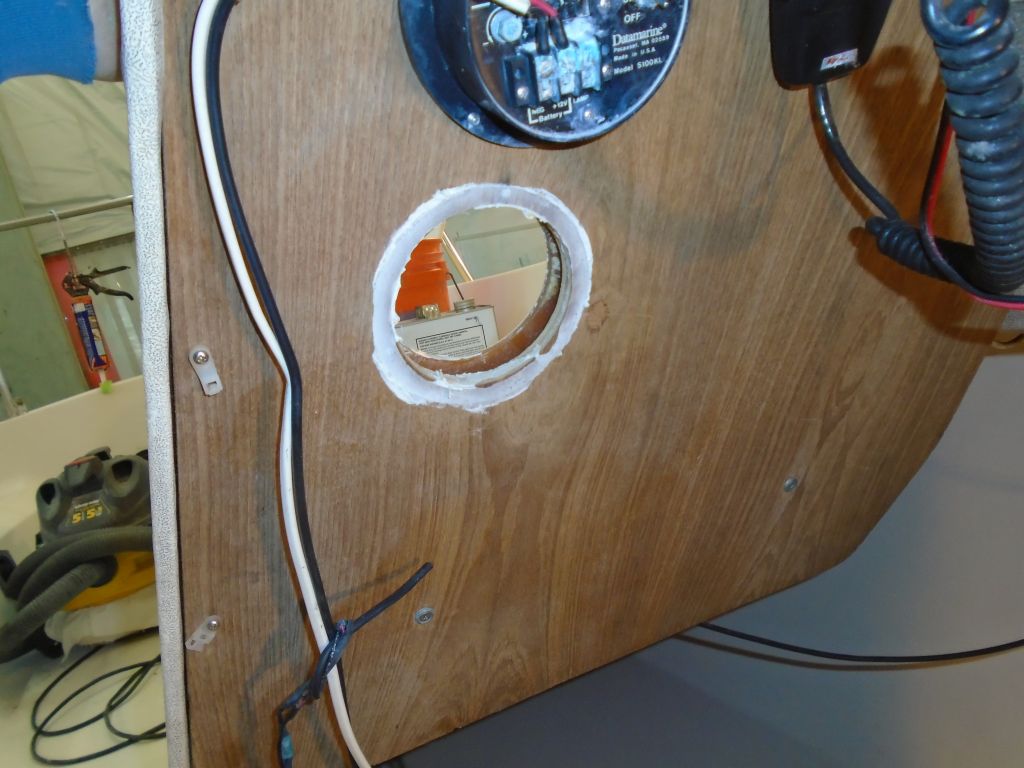
To access the underside of the galley sink and its supply faucet, I had to cut an access hole from the cabin, which I did now that I had the new access port on hand.

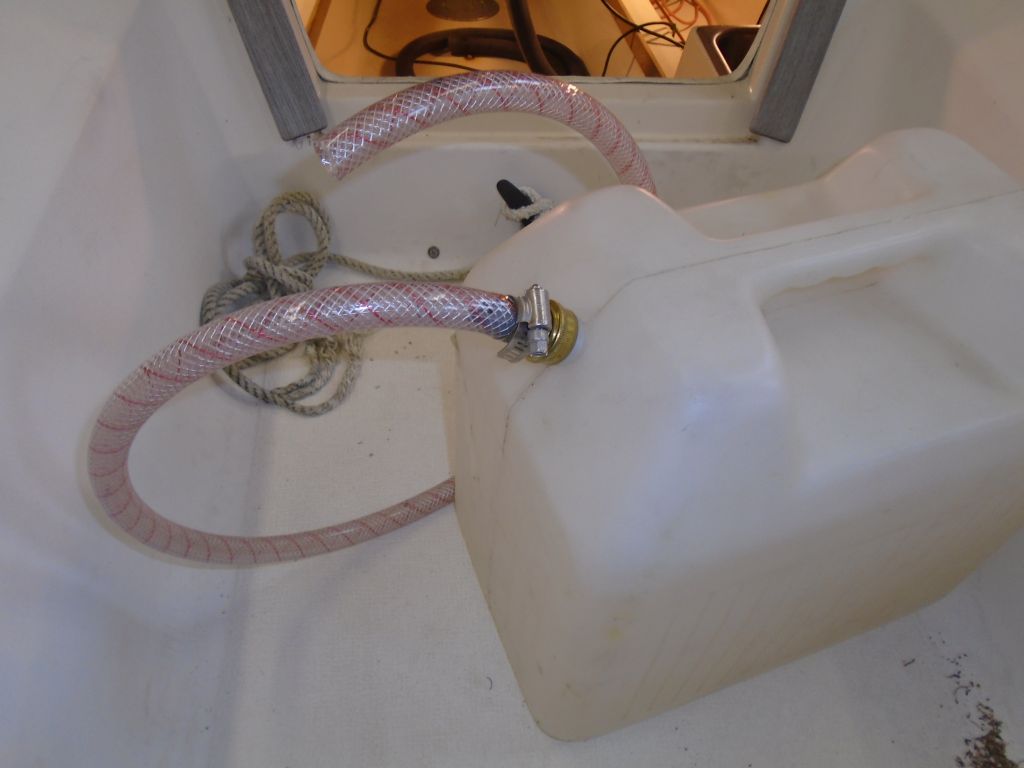
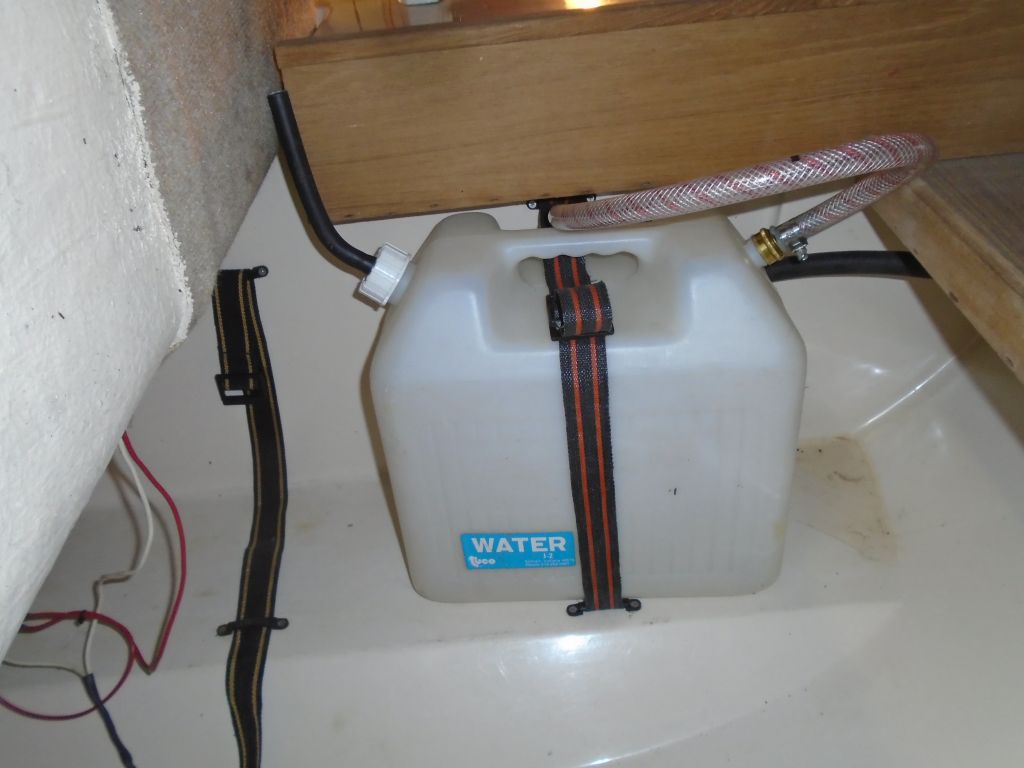
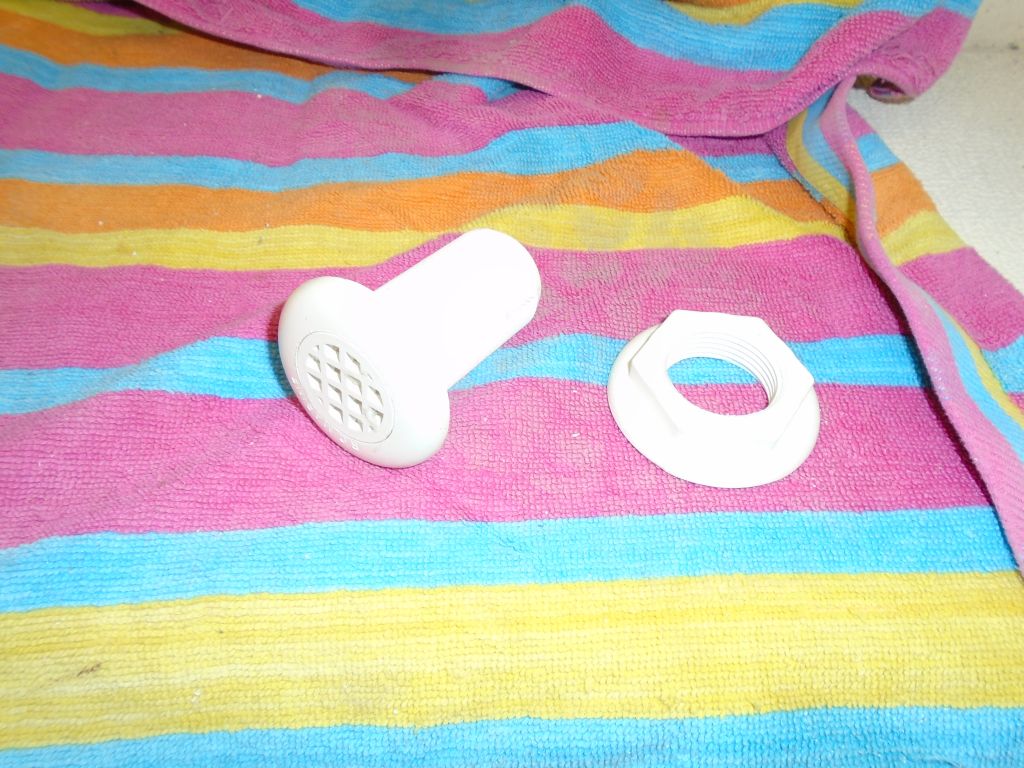
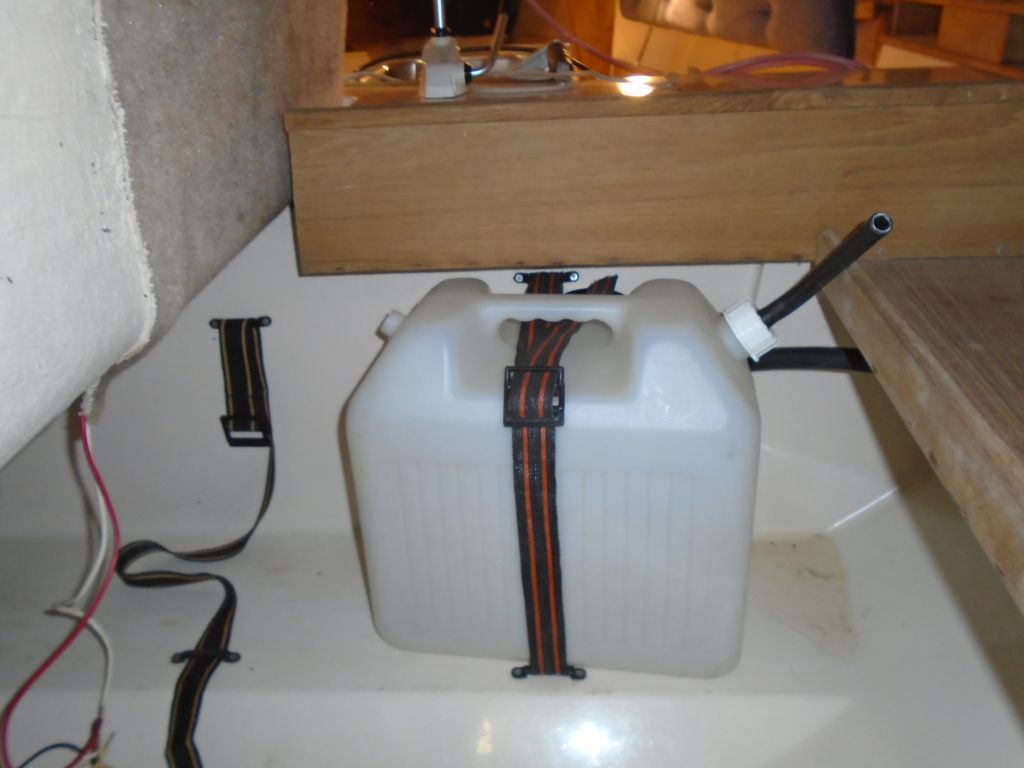
The supply fitting on the portable water tank was broken, and lacked a dip tube/hose to actually draw water from the tank, so I replaced the fitting with a new one that I luckily happened to have on hand, and fitted in a flexible dip tube to the bottom of the tank. Then, I led a new supply hose between the tank and the sink faucet, and, to wrap up the work, installed the new plastic inspection port in the opening beneath the sink.
Total time billed on this job today: 5.75 hours
0600 Weather Observation:
41°, clouds and showers. Forecast for the day: showers and rain, 40s
Thursday
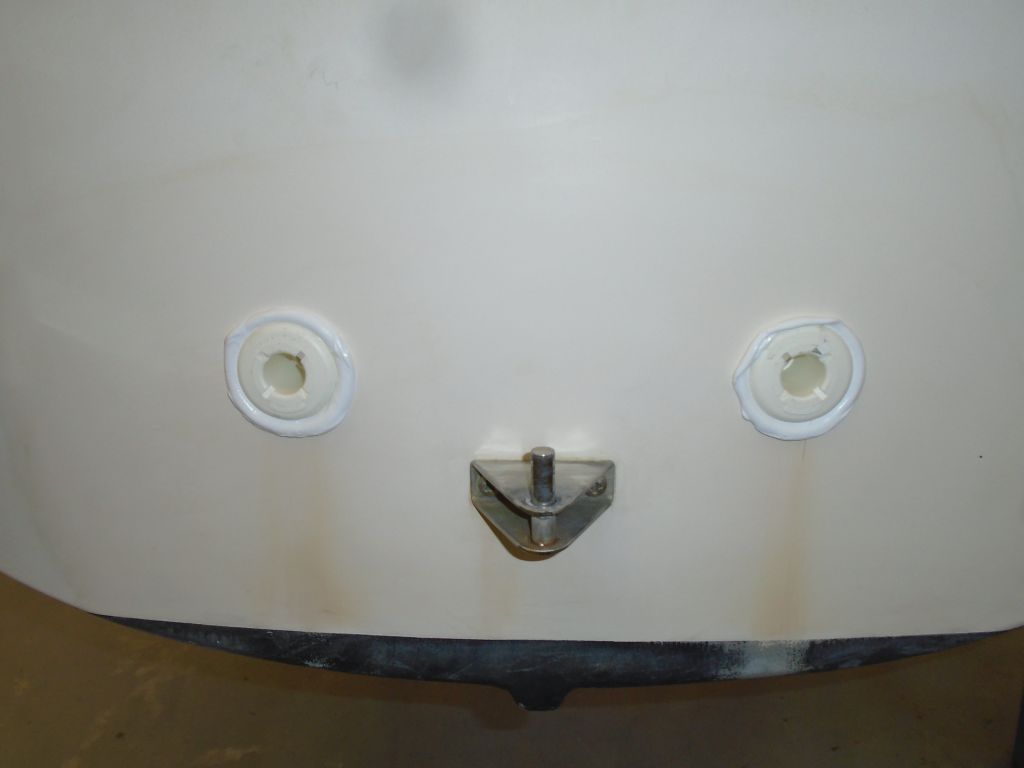
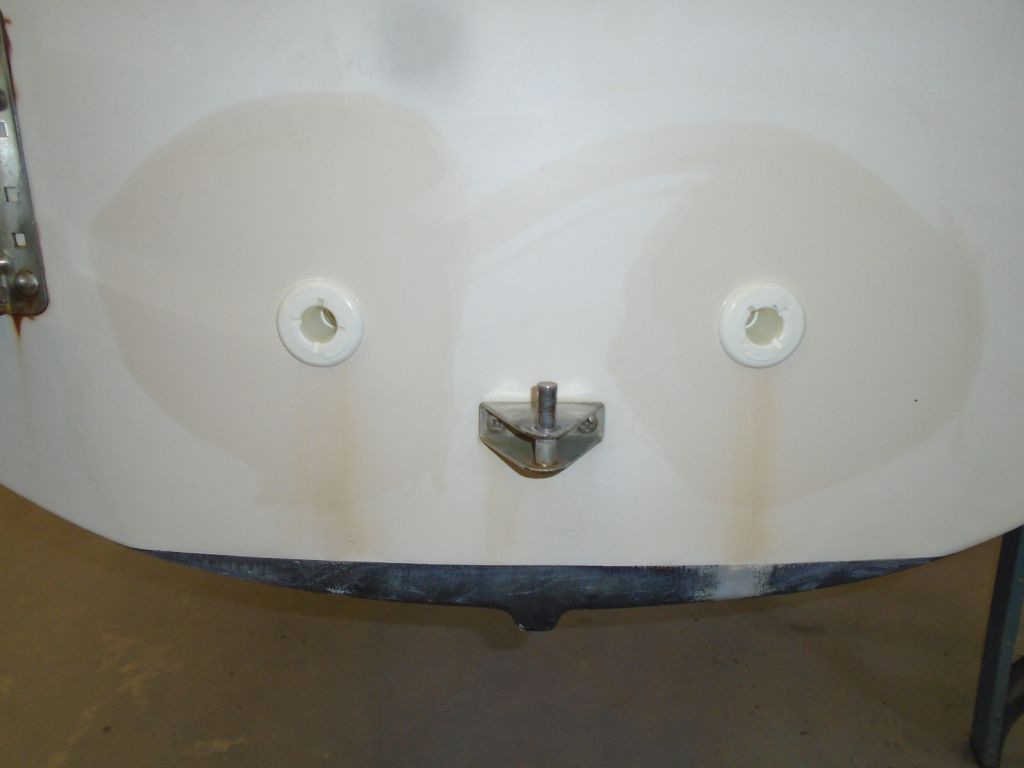
After some other business away from the shop, I got to work again on the scuppers. The epoxy had cured overnight, leaving my new recesses ready to go. The screened fitting fit flush and finely.

I was awaiting delivery of the second fitting–I only had one on hand–as well as some elbows I needed below the deck, so for the moment I held off on installation. I did install the two exit through hulls in the transom, completing that side of the new drainage system.

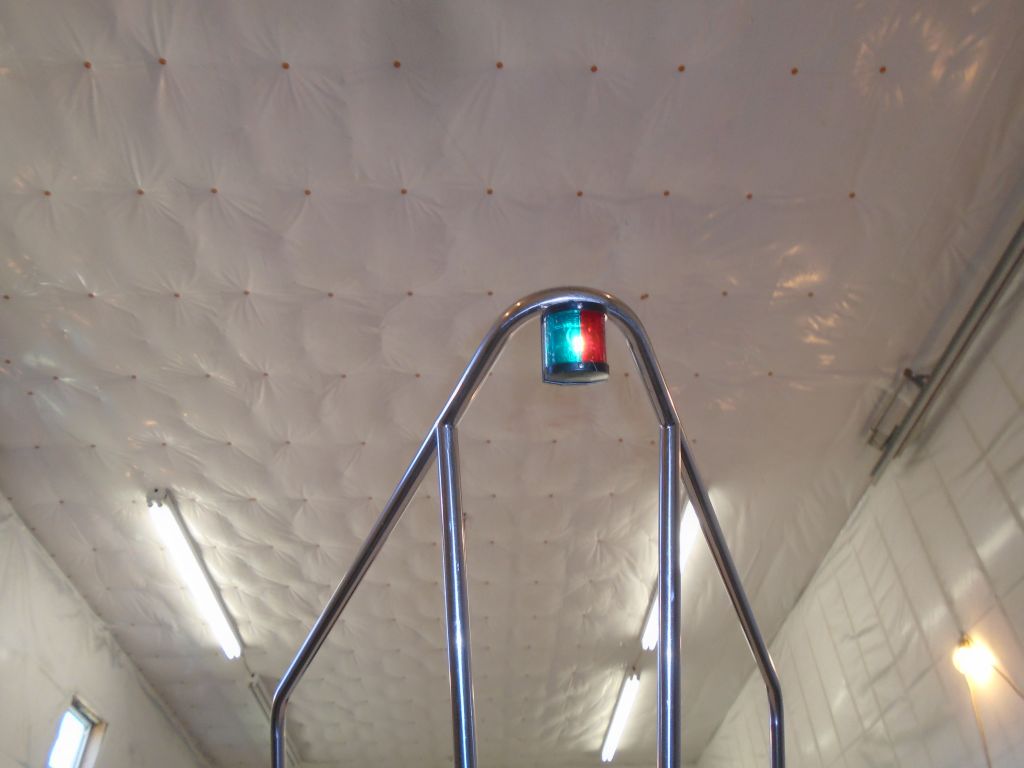
Next, I continued work on the electrical system. I hooked up a battery so I could start to check the various circuits for operation. Most of the lights on the boat–two of three cabin lights, plus the bow and stern lights–operated when tested, but the forward cabin light turned out to be rusted within and was missing its switch, and therefore inoperable. I removed the damaged fixture and ordered a replacement light.
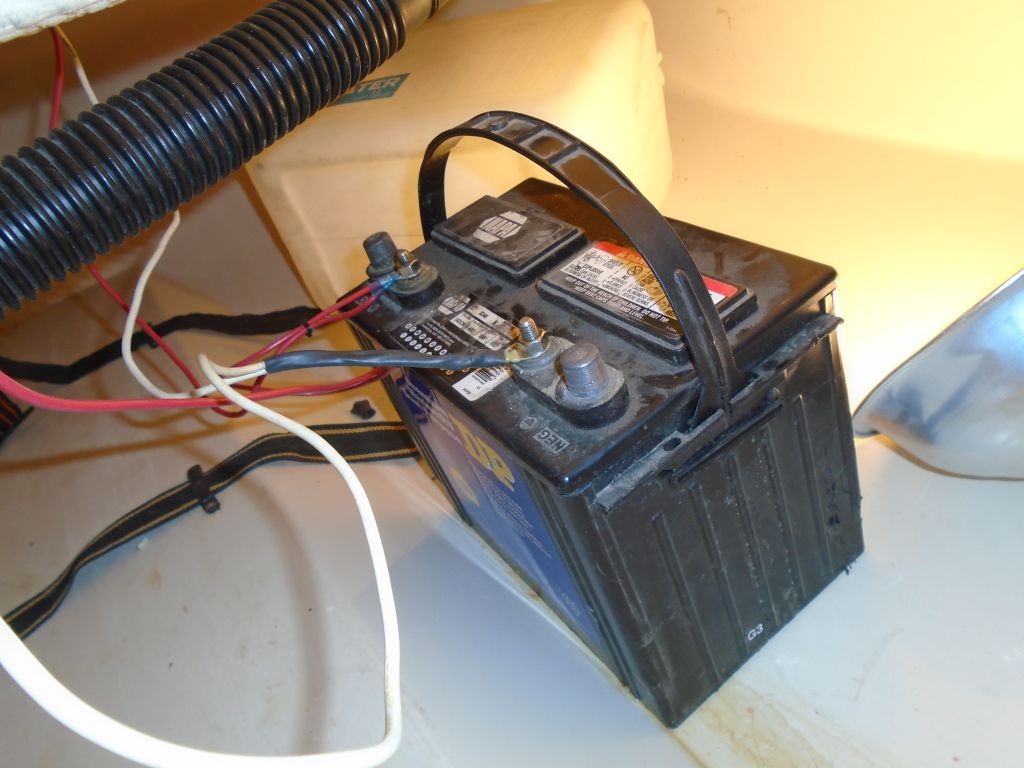
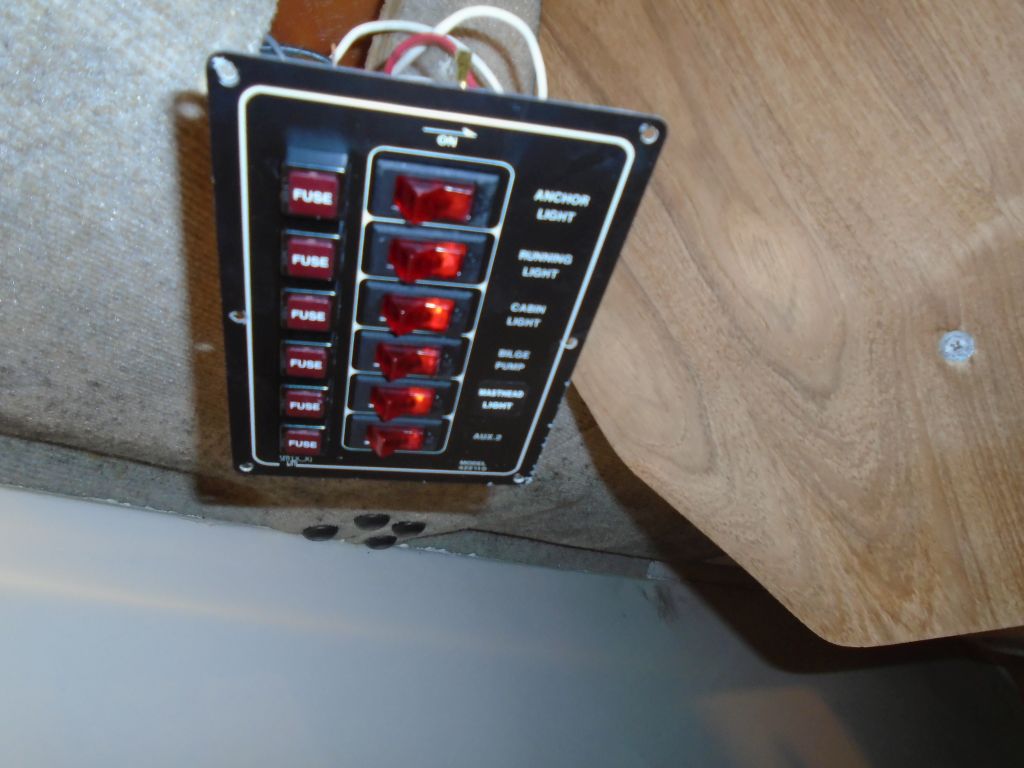


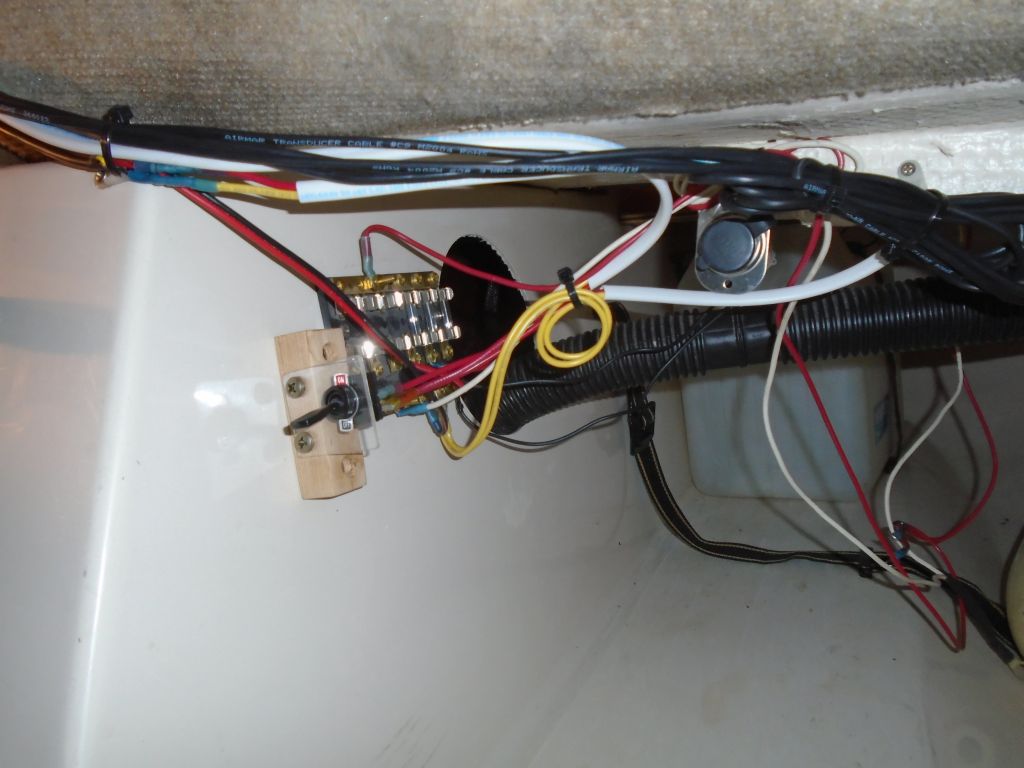
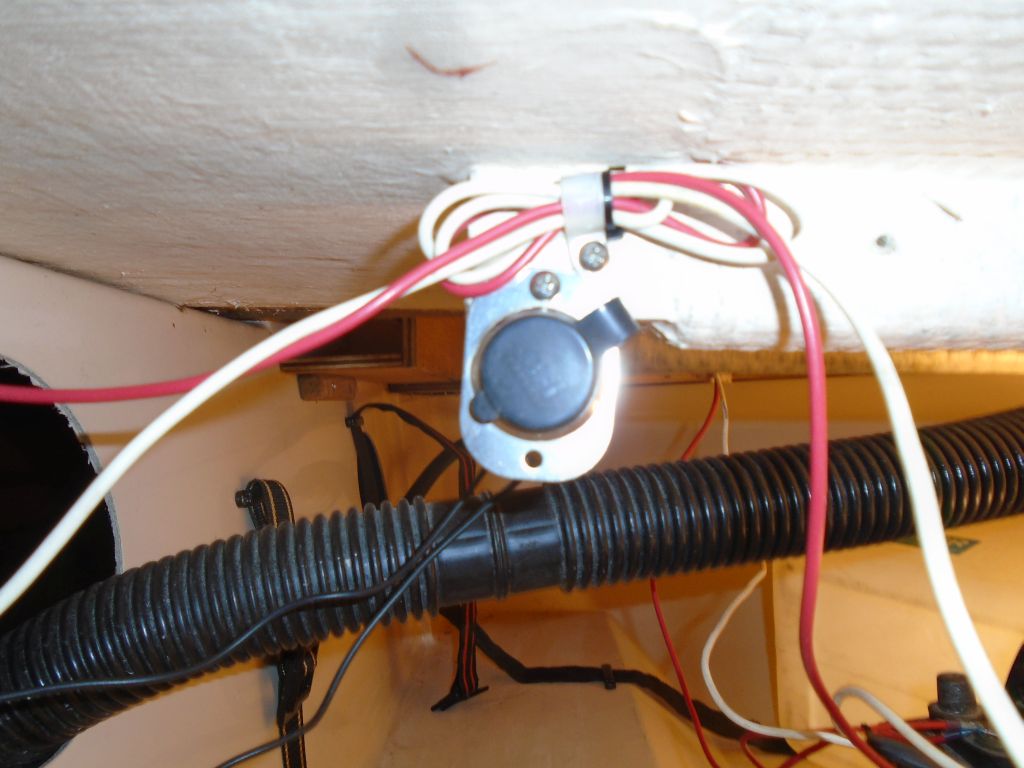
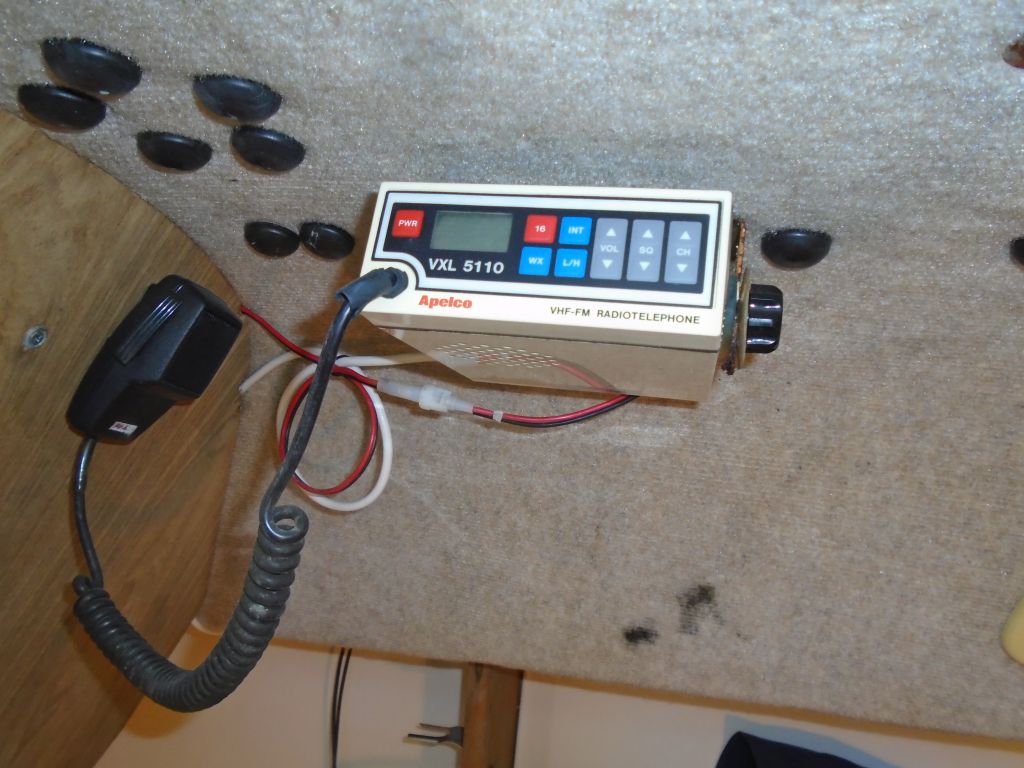
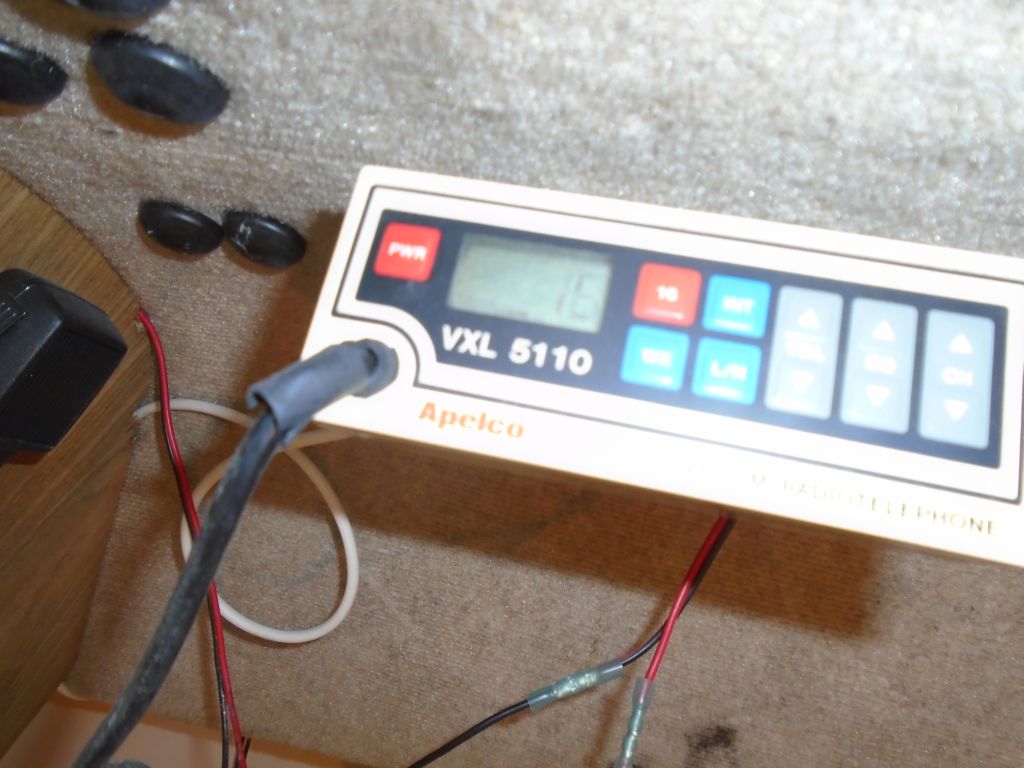
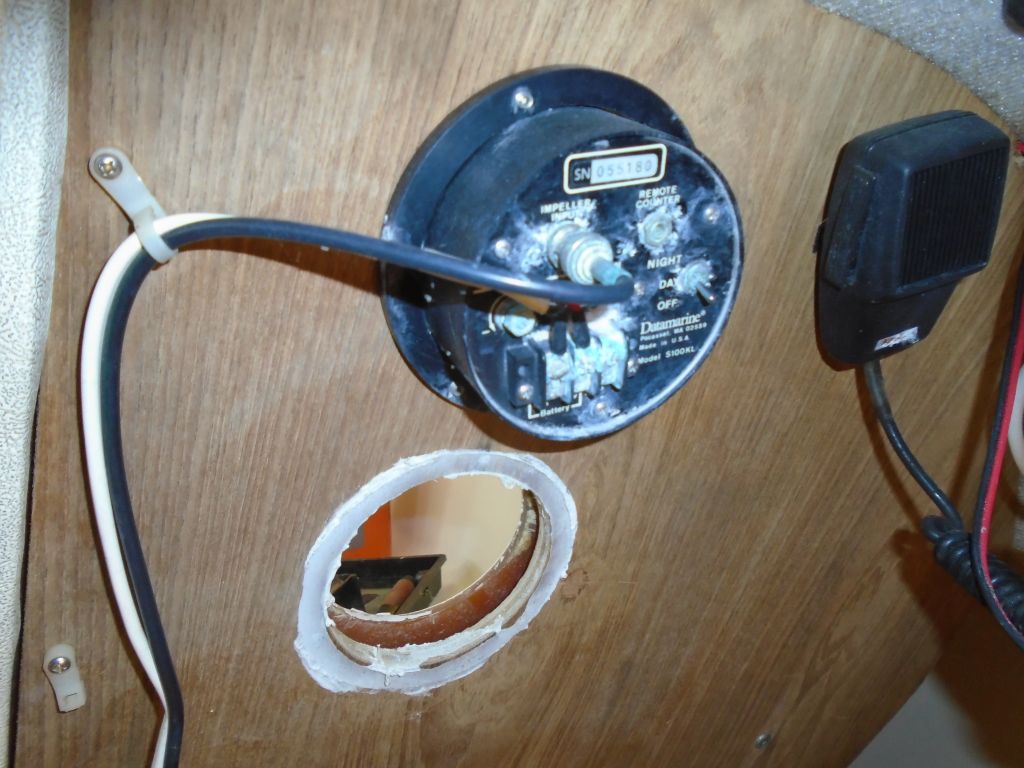
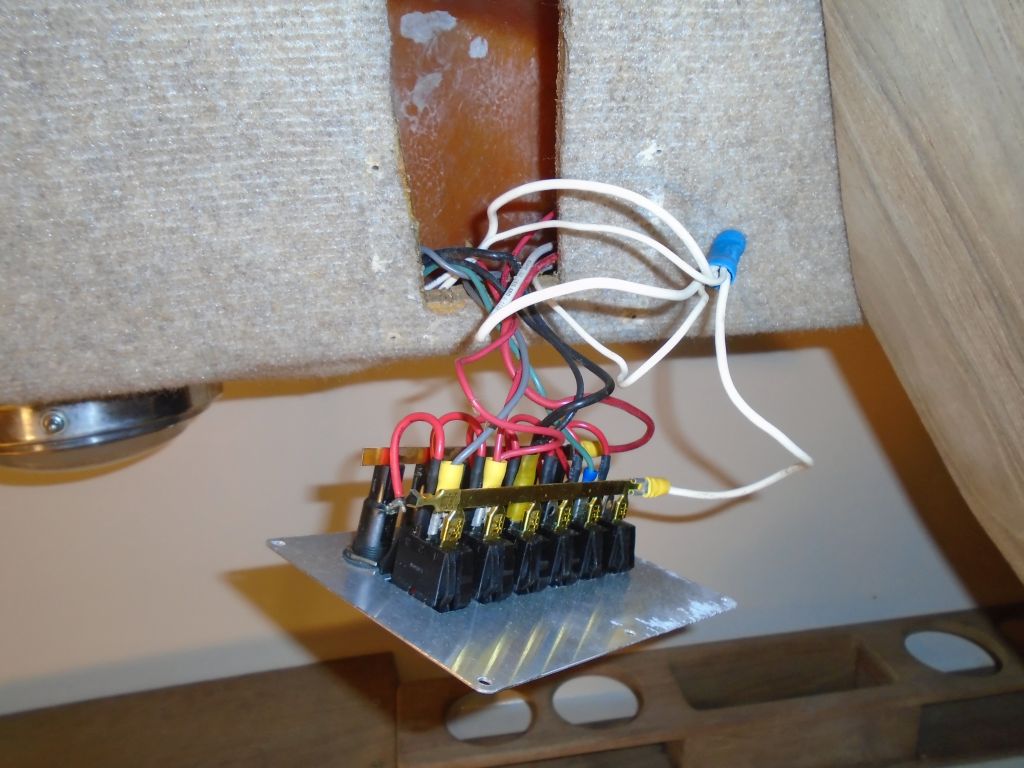
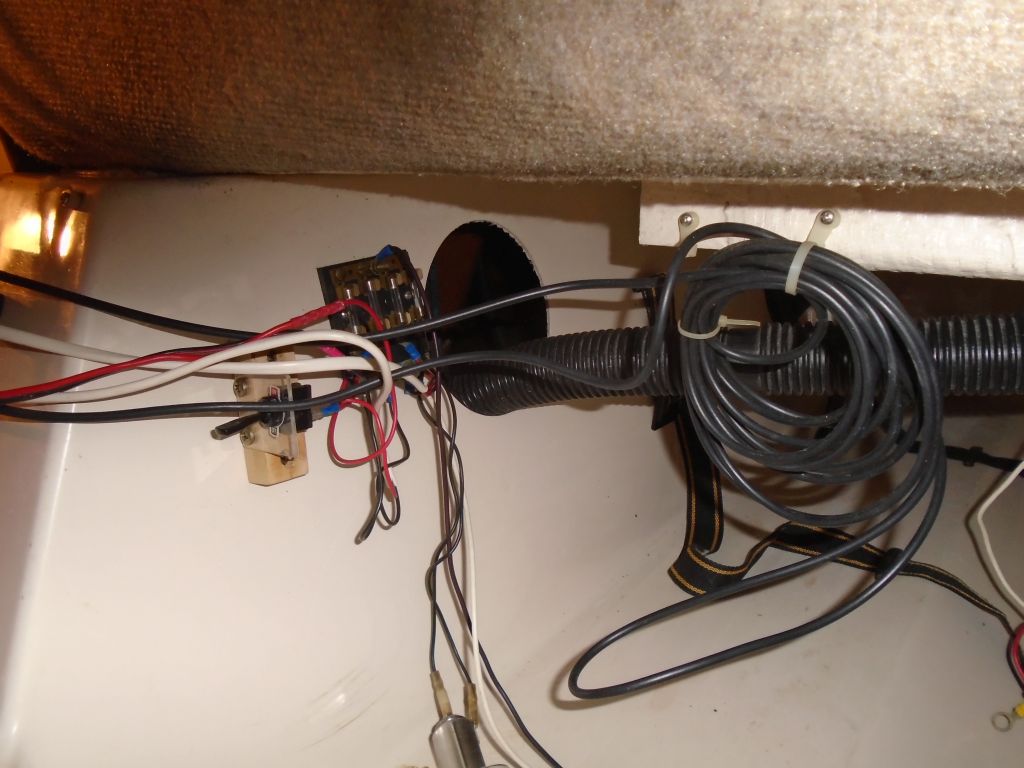
The owner reported that the VHF was inoperable, and after some troubleshooting and testing I traced the electrical problem to a bad fuse holder near the radio, which I replaced. This process also highlighted some issues with the existing fuse holder block on the port side of the boat, which serviced the VHF as well as the depthsounder and knotmeter (old as well as the new), and I couldn’t determine the issue, so I simply replaced the fuse holder/terminal block with a new one that I had on hand, and redid the short wire runs for the depthsounder and knotmeter, running them through an existing switch so they could be turned off as needed. At the same time, I secured a 12-volt outlet to a nearby structural member, and cleaned up the wiring pending final installation of the instruments a little later. Everything tested operational once I’d made these changes.

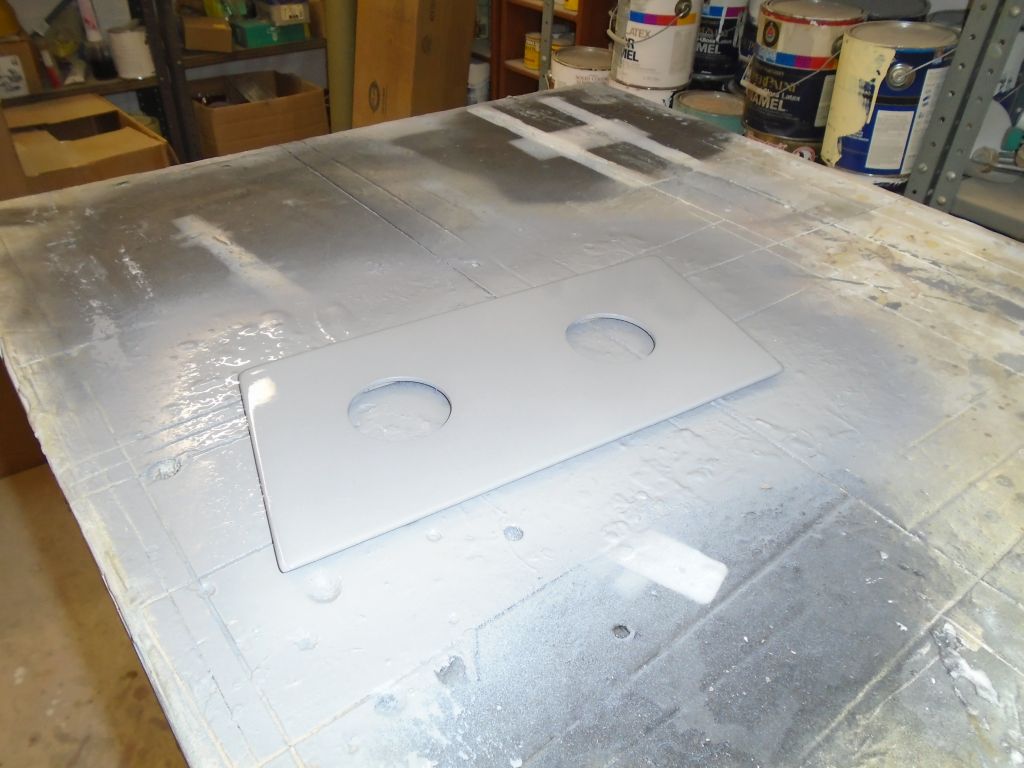
To ensure that I could complete the new instruments’ installation soon, I continued work on the exterior cover panel where they’d be mounted. I lightly sanded the primer that I applied earlier, then during the day spray-applied several coats of off-white LPU to generally match, or at least be consistent with, the existing deck surfaces.
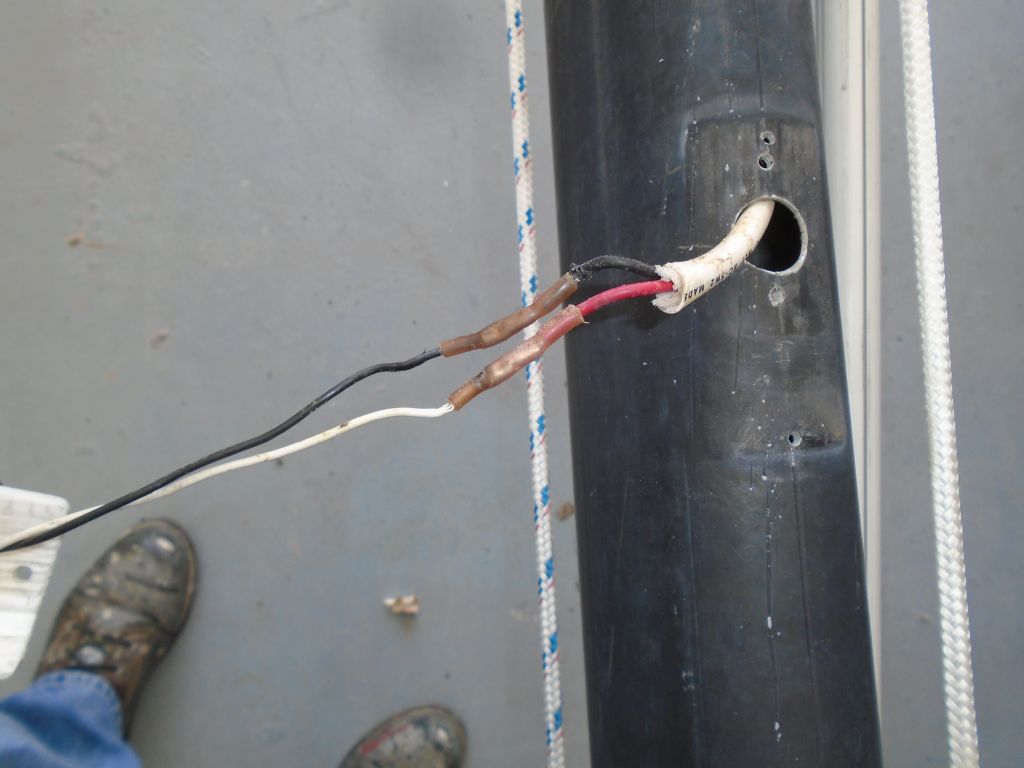
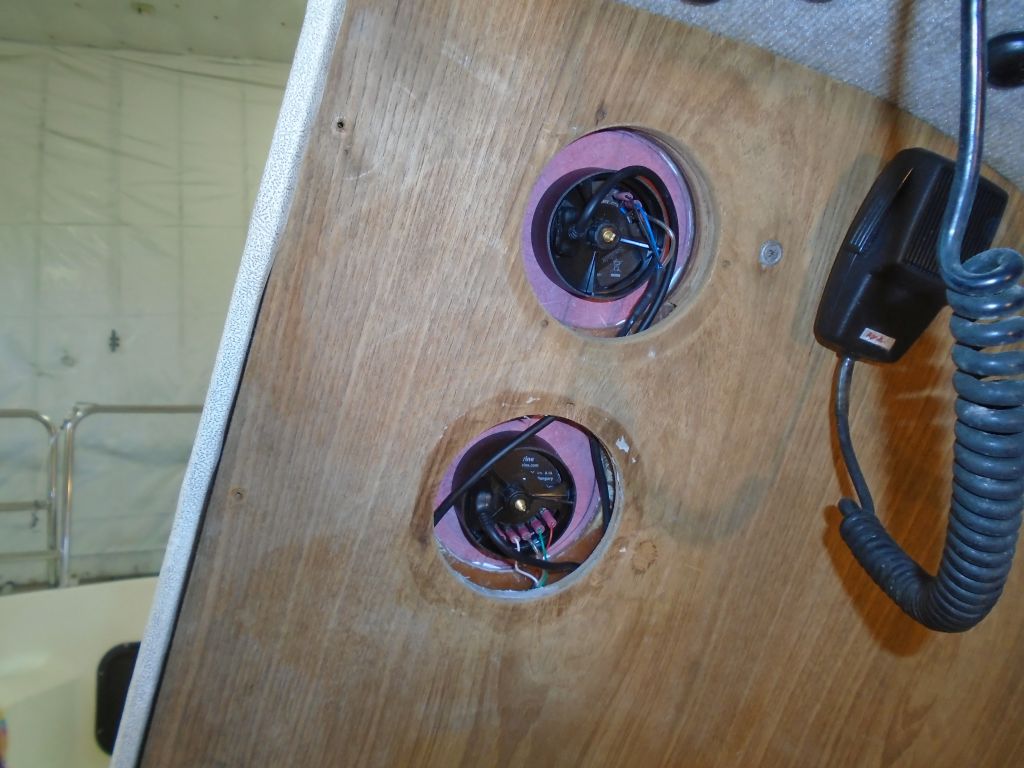
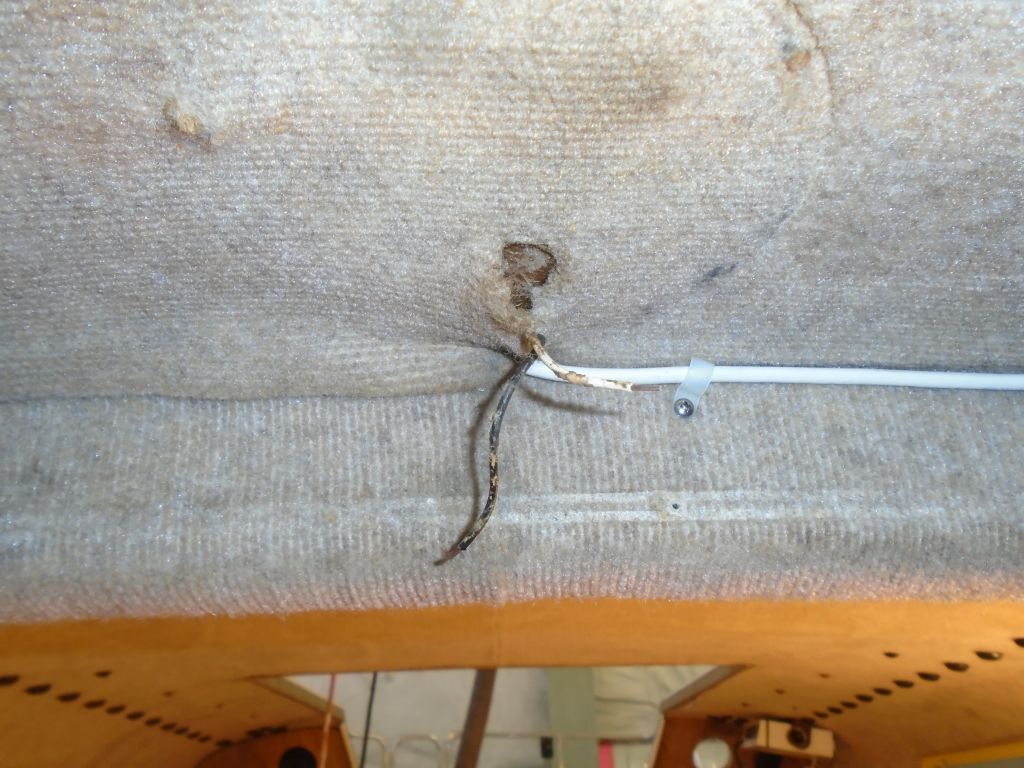
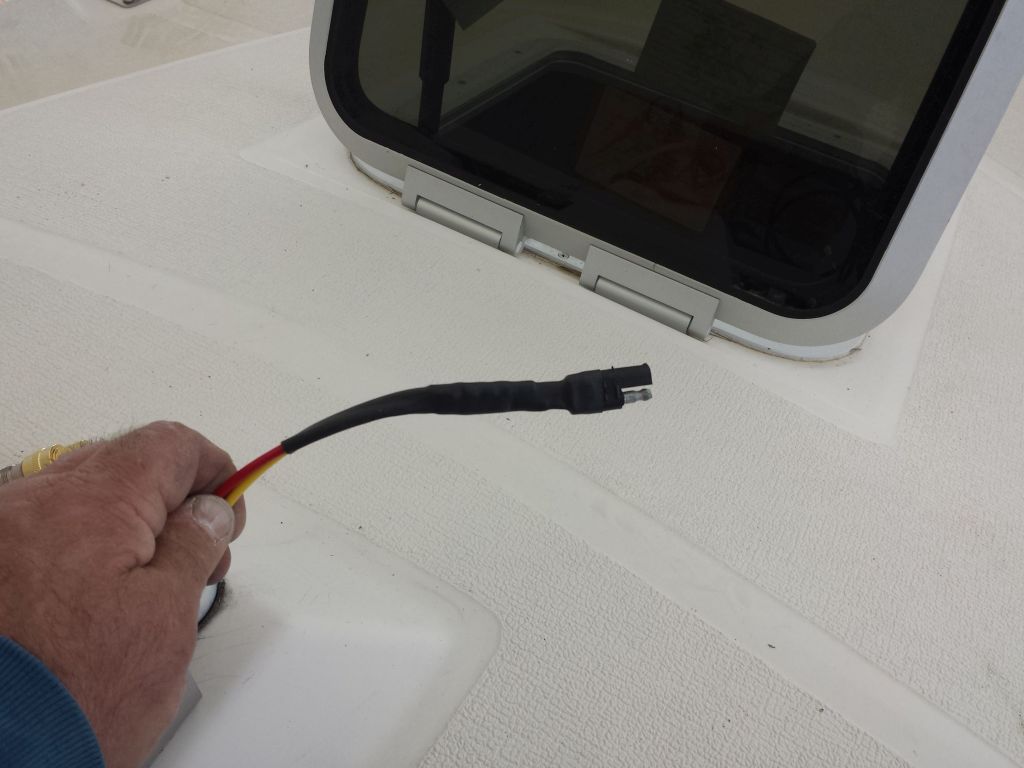
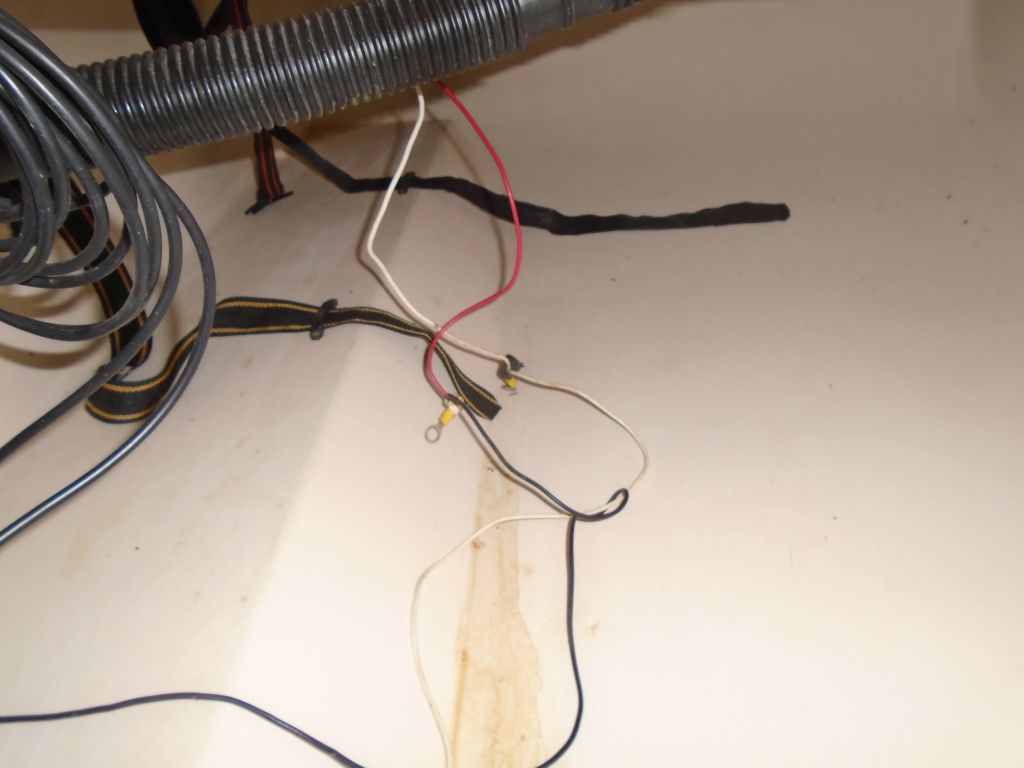
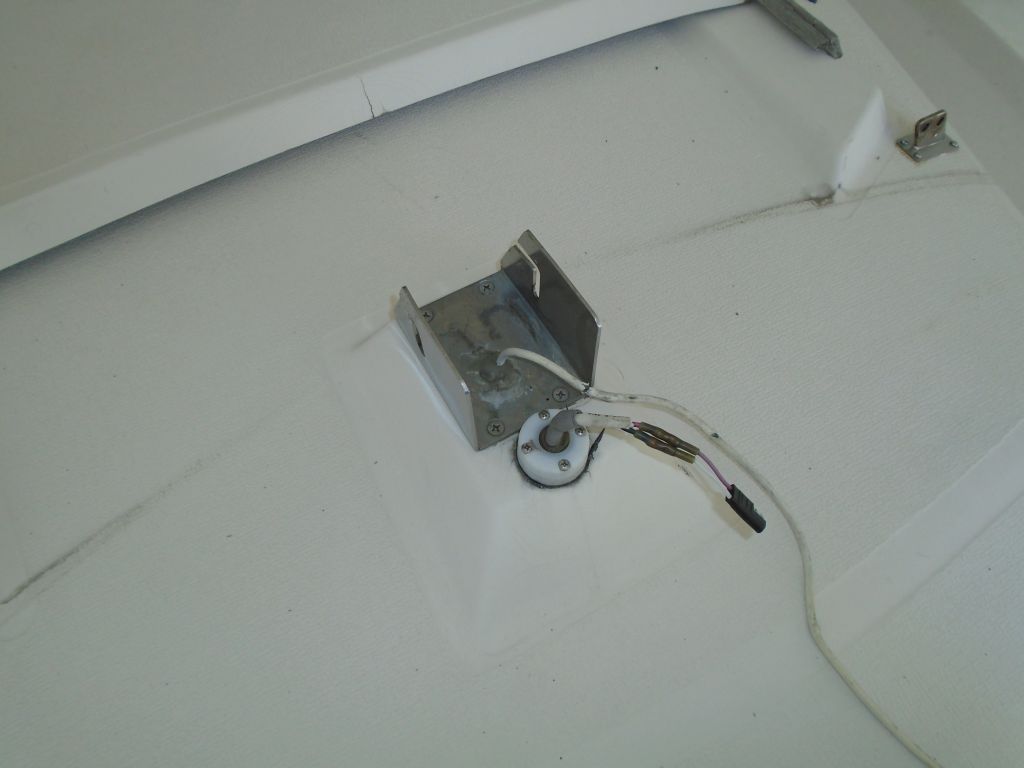
The wiring to the single mast light led through the deck forward of the mast step, and was hidden beneath the forward cabin light fixture (the one that didn’t work and I’d removed). I couldn’t get power to the plug above deck, so I looked into the issue further and eventually removed the existing wiring through the deck, cutting off several old extensions and rewires from the past till I had the basic wires remaining. Digging into the old wire harness leading to the mast light plug, I found that red connected to green, and black to white, so now I knew which wires were which inside the boat and could make up a connection to a new wire pair, which I led above deck through the existing cable clam and reconnected to the old 2-way plug for ease of mast stepping and unstepping. With the meter, these wires tested operational. Later, I’d redo the mast side of the lighting circuit as required, but this completed the boat side troubleshooting and testing, and repairs as needed.


Total time billed on this job today: 4.25
0600 Weather Observation:
Clear, 22°. Forecast for the day: Sunny, 50s
Wednesday
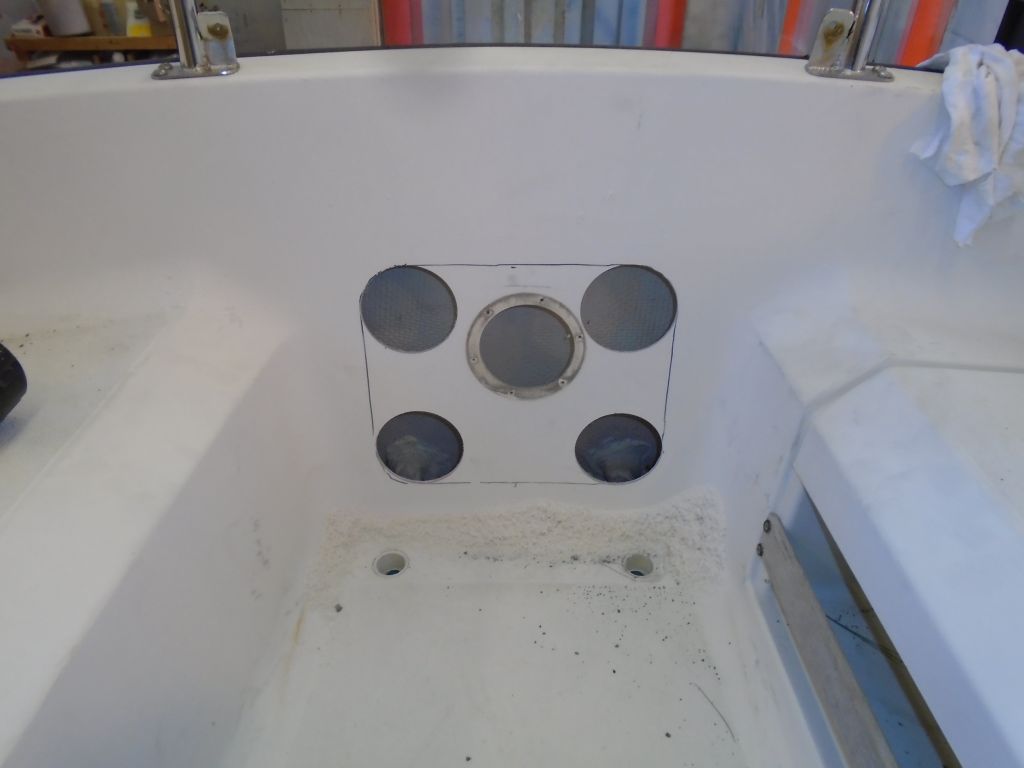
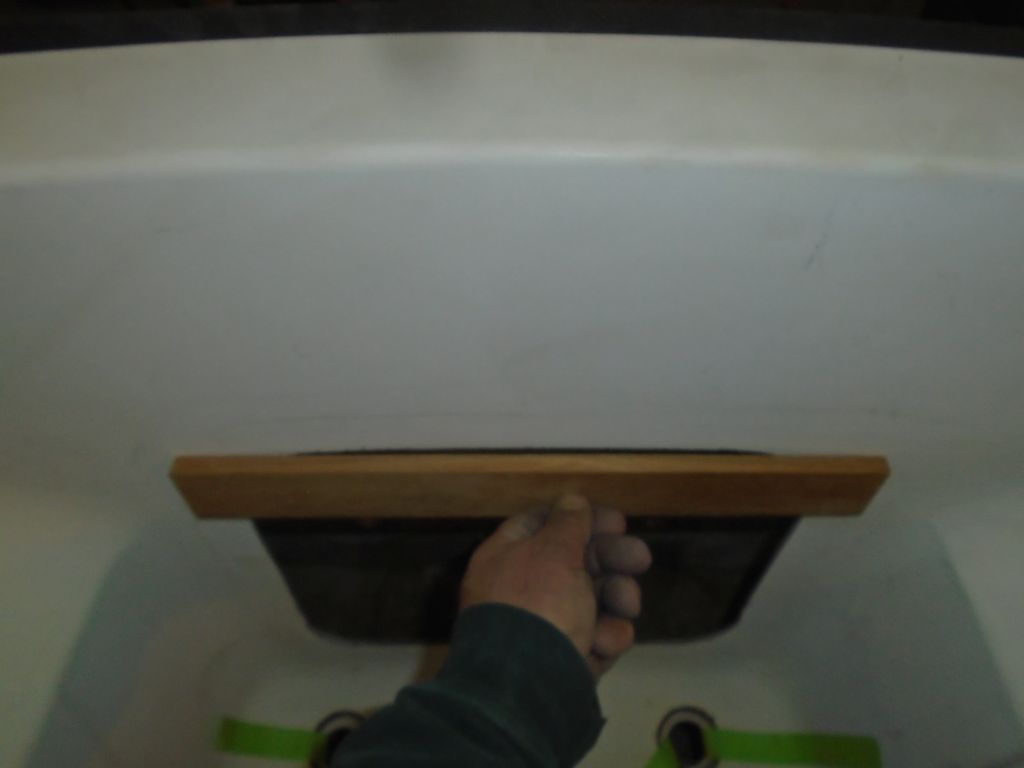
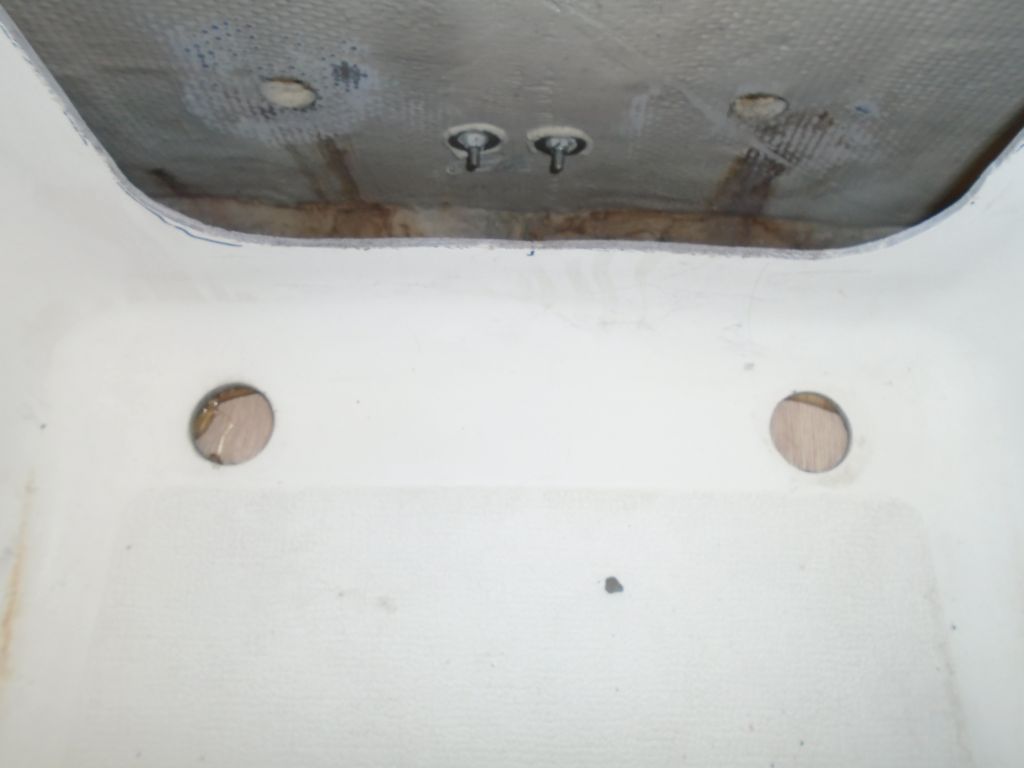
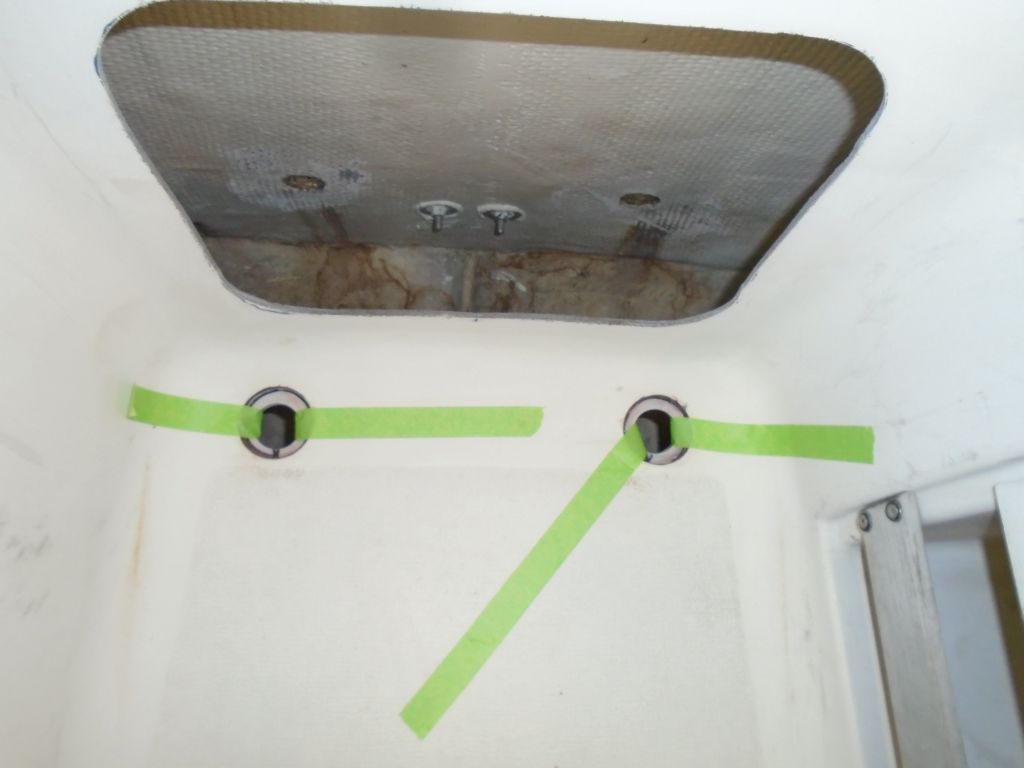
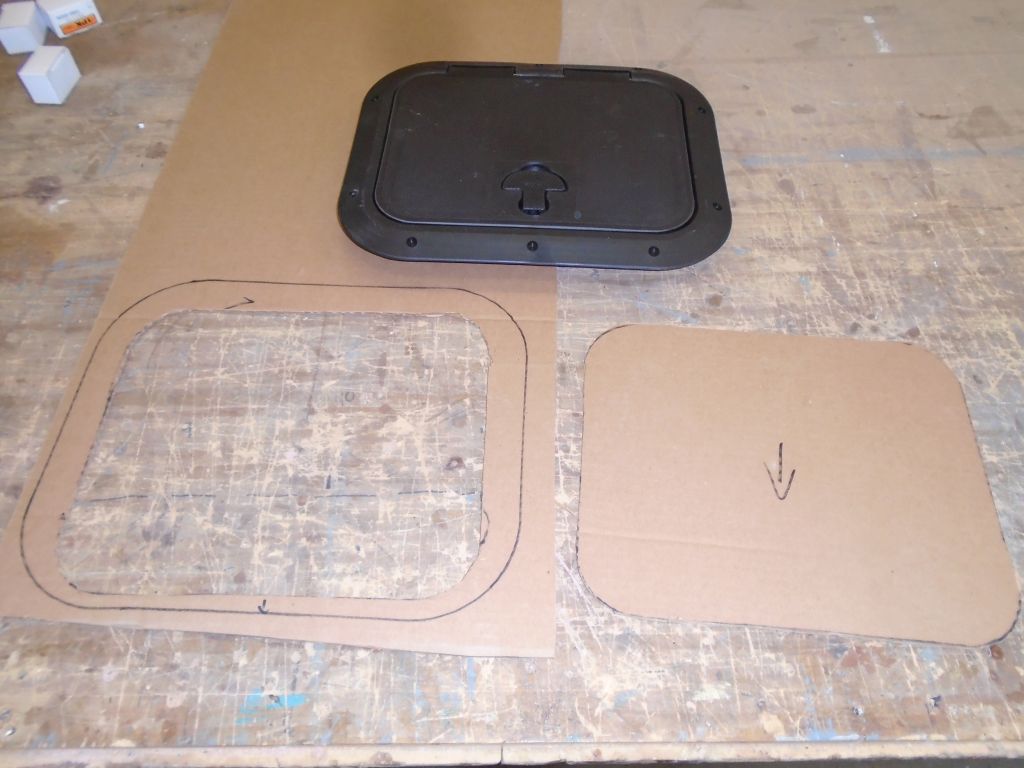
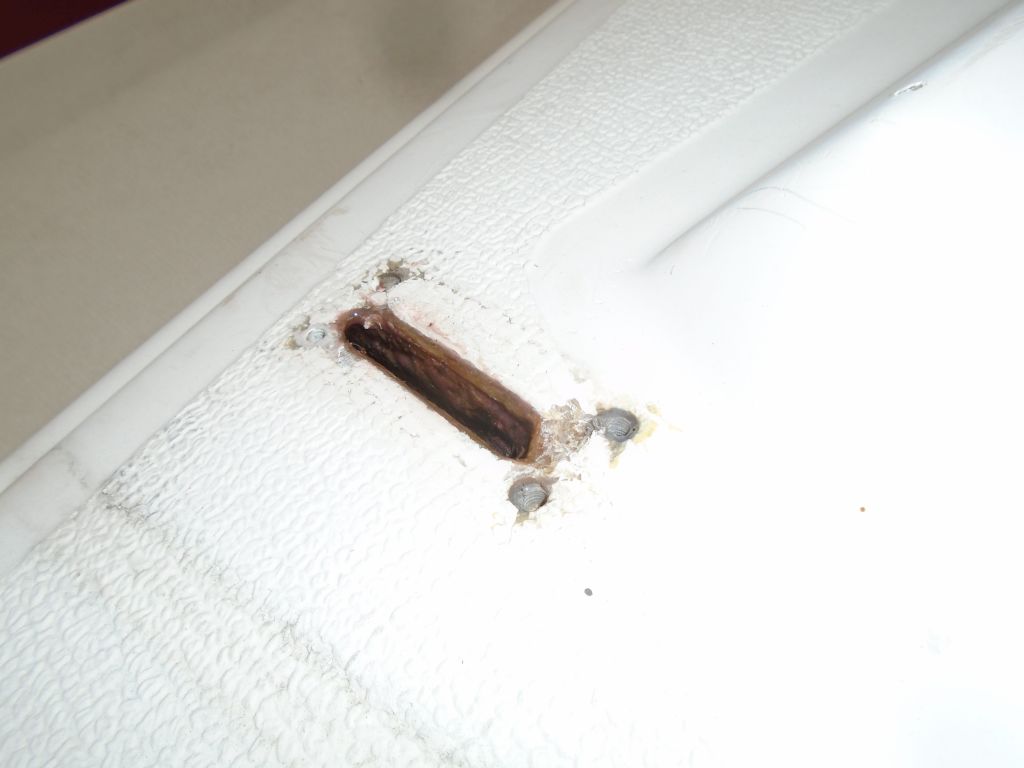
To access the aftermost part of the boat and the cockpit scuppers, the best way in seemed to be through the aft bulkhead in the cockpit, which would give access to the transom as well as the cockpit sole fittings. There was an existing access port there, but it was far too small for real access. To begin, I marked the bulkhead using the cardboard template of the cutout that I made earlier. With a 4″ hole saw, I made the 2″ radius cuts at the corners, then connected them with a saw to create the opening. The new opening gave quite good access to the required areas. Note that the original access port was not quite centered.


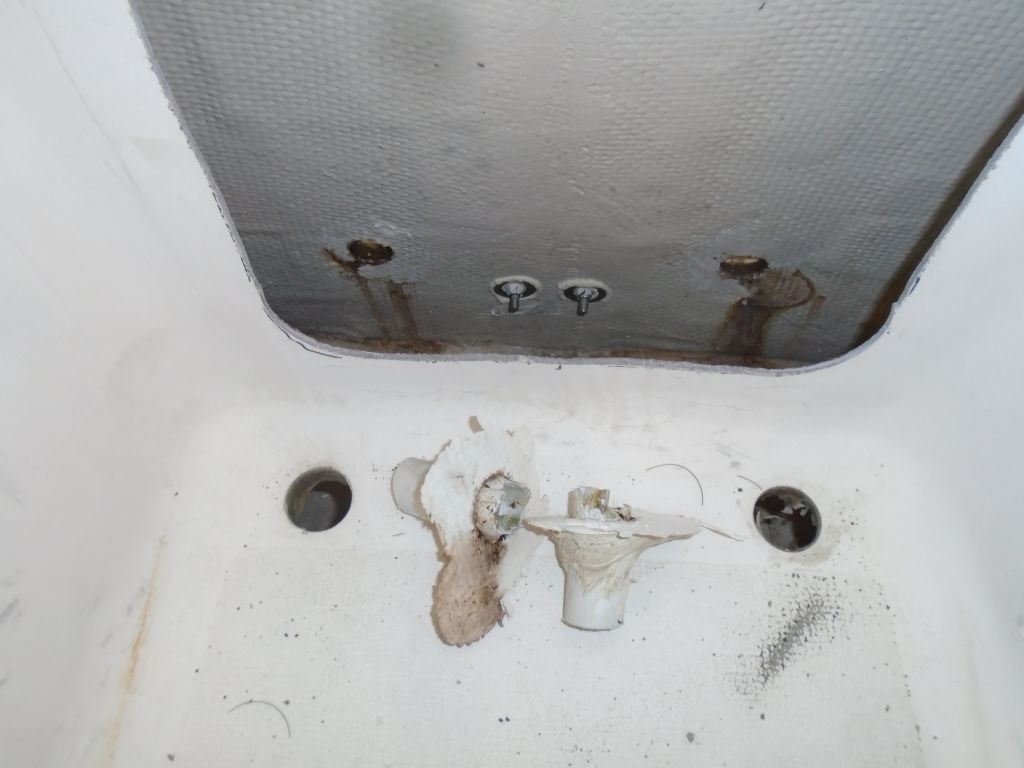
Next, I removed the old pipe and fittings. The cockpit side was already loose and took only a push from the top; the gobs of sealant securing the pipes to and through the transom were quite resilient, but eventually I got them loose and the pipes removed.

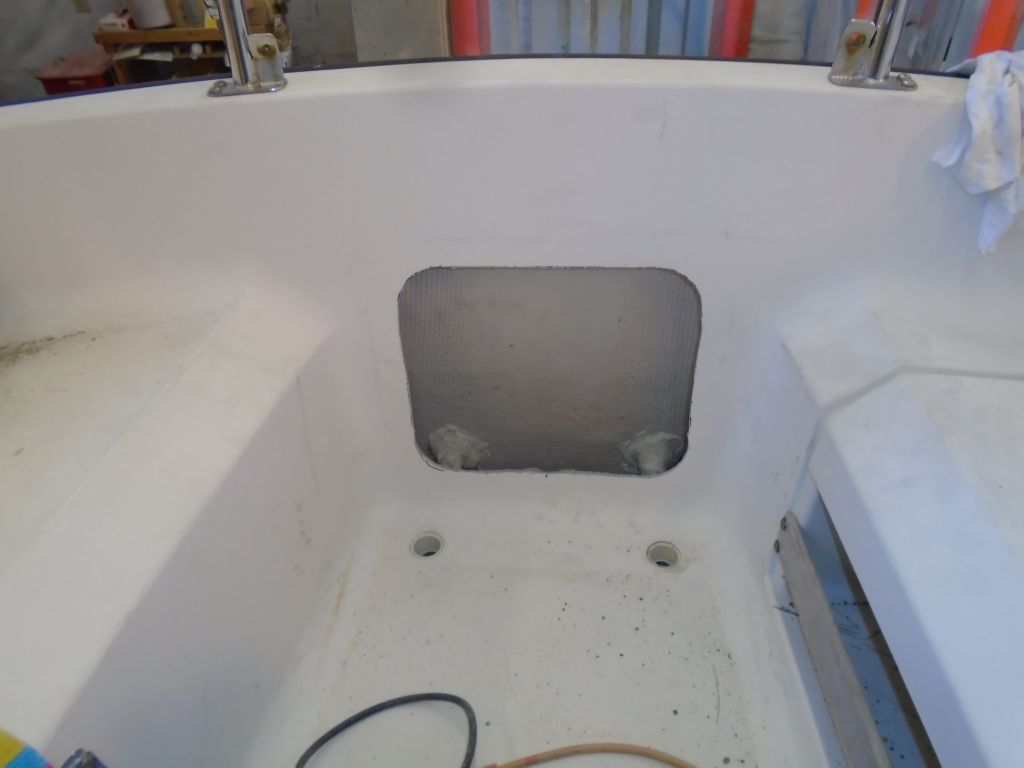
The bulkhead had a slight concave curve to its shape at the top of the new opening, and it was too severe to bend the new hatch into position. The bottom edge, and the vertical sides, were flat enough for a successful fit, but I needed to build a filler piece for the top to properly support the hatch and fill the gap. From teak stock, I scribed and cut a curved piece to fit; I’d await final installation of the hatch till I was done with all the scupper work, since the raw opening was quite a bit larger than the hatch itself.

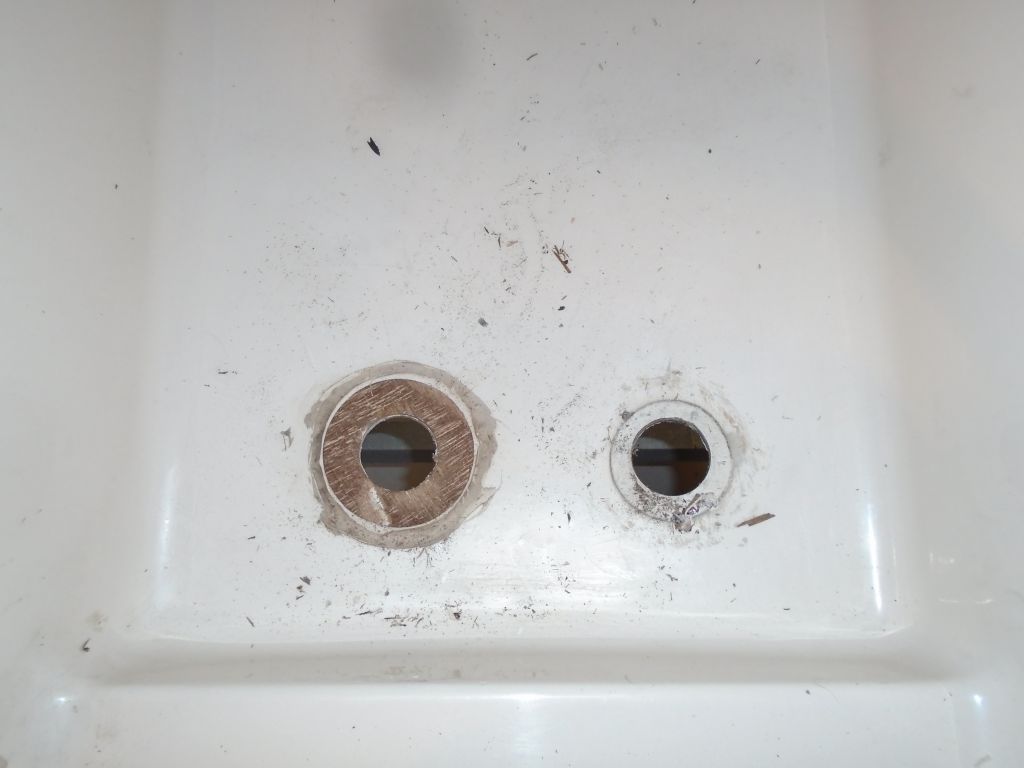
To rebuild the scuppers, I planned on new fittings at transom and cockpit sole, connected with hose to create a more flexible situation than the original pipe. For the cockpit, I selected Marelon fittings with a built-in screen. To provide complete drainage, I had to recess the mushroom fittings so they were flush with or beneath the sole surface. Since the laminate was no thicker than the thickness of the mushroom heads, I’d need to basically build a new supporting surface beneath the sole for the fittings. The original holes were the right size for the threads, but too small for the heads. So to open up the holes, I hot-glued some plywood beneath the openings, to give the hole saw pilot bit a guide, then used a larger hole saw to increase the diameter of the openings.
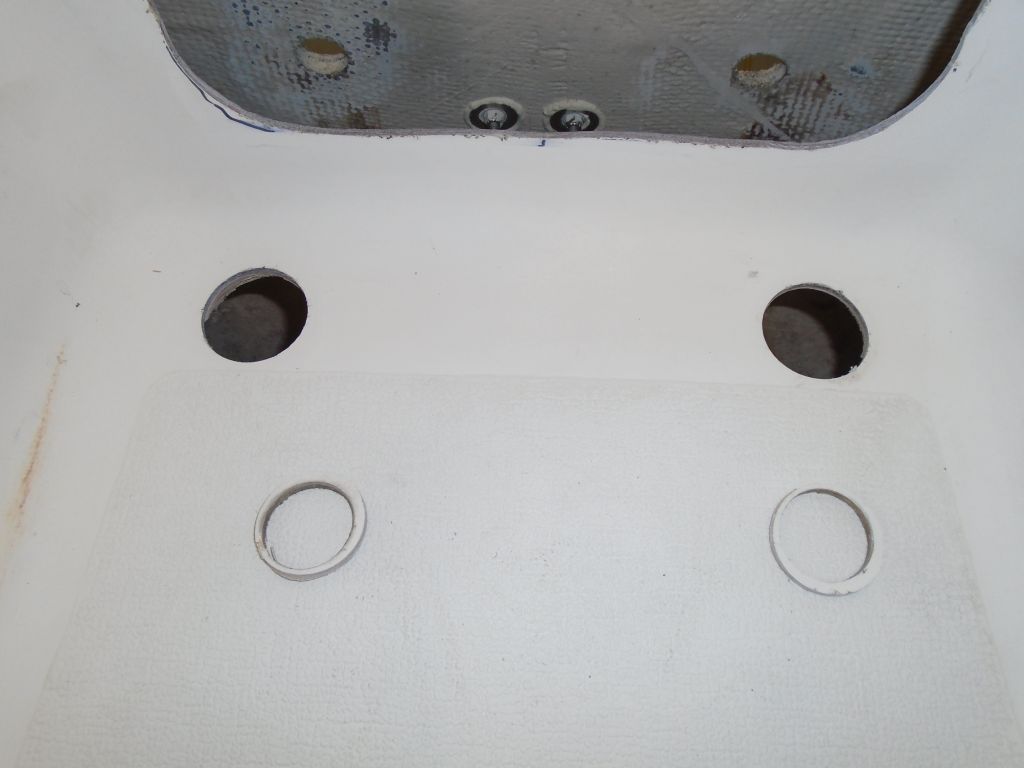
This allowed the mushroom head to fit flush through the sole.
To support the fitting below the sole, I used some circular cutouts from 1/4″ fiberglass, into which I drilled holes the right size for the fittings’ threaded necks. After cleaning up and sanding as flush as possible the bearing surfaces below the openings, I epoxied these discs in place, aligning the holes in the center. This effectively provided a “molded” flat-bottomed recess in the sole that would fit the scupper fittings cleanly. I made the epoxy mixture thick enough that it held the discs in place on its own, but to be sure that I continued to thwart gravity long enough for the epoxy to cure, I added some tape as a backup.

I also sealed the plywood edges of the transom cutouts with the thickened epoxy. Now I’d wait for all the epoxy to cure before I continued with work on the scuppers.
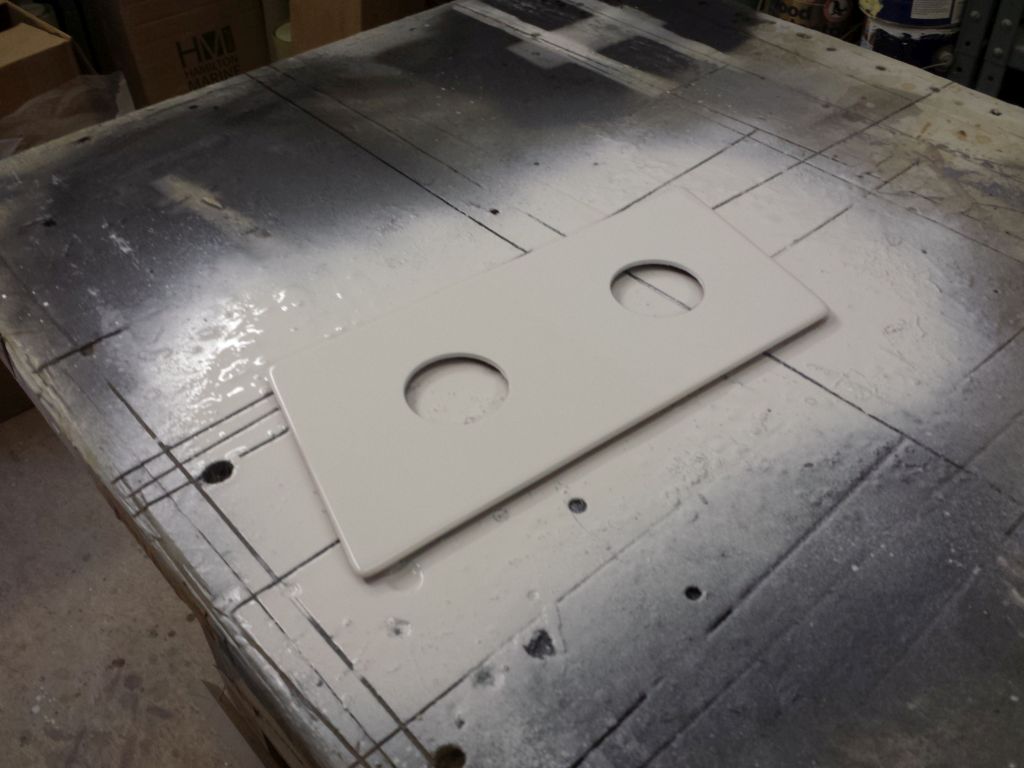
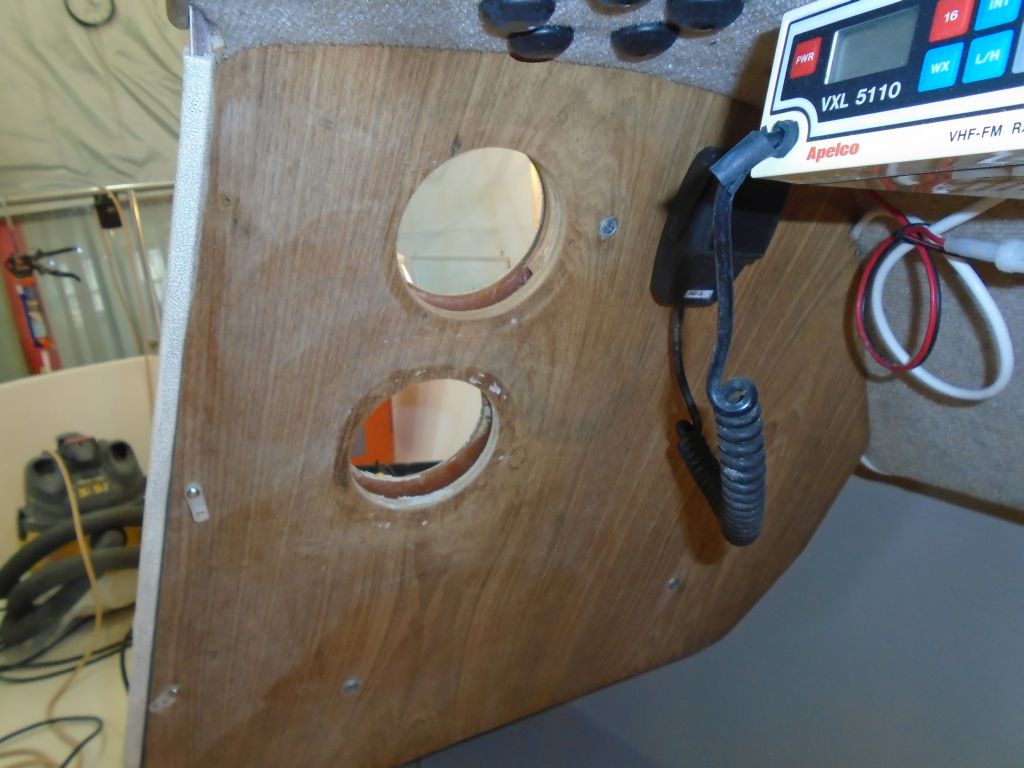
To cover the large holes left over from the old round instruments, I built a simple exterior panel from 1/8″ fiberglass laminate, which I cut to the angles required to tie in with the shape of the companionway and cabin top. After marking its position as needed, I drilled 2-1/8″ holes to accommodate the new instruments, then applied a few coats of epoxy primer during the remainder of the afternoon.
For the inside cover panel, I cut teak plywood to fit as needed, which blended well with the existing plywood cover on the bulkhead.
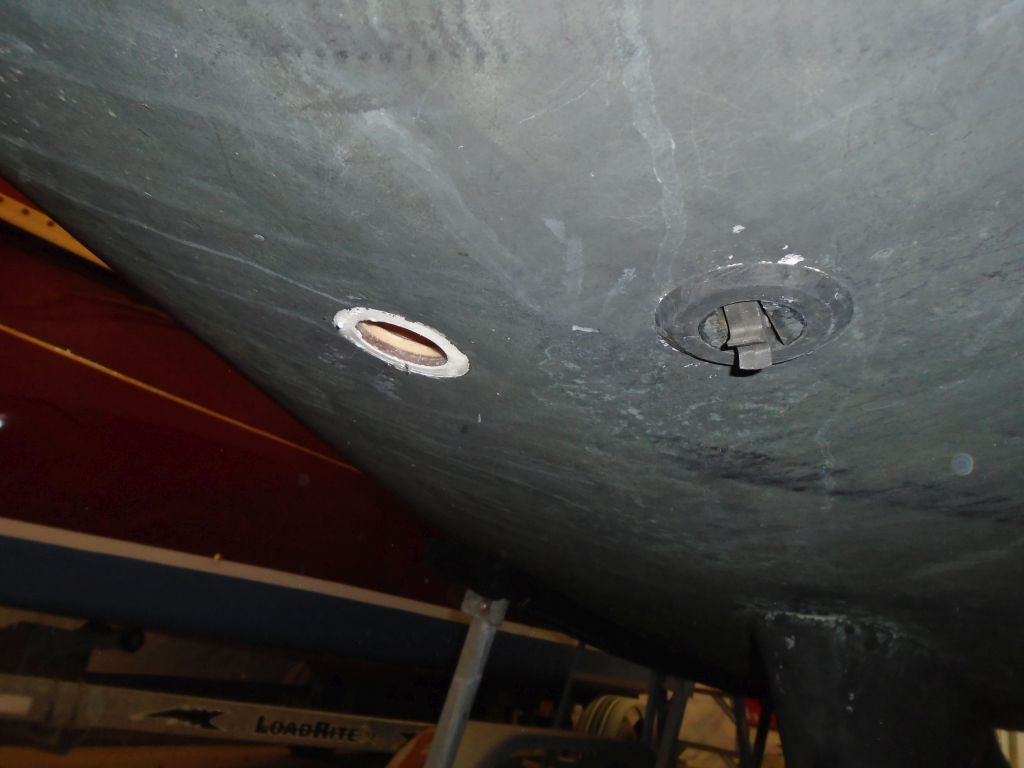
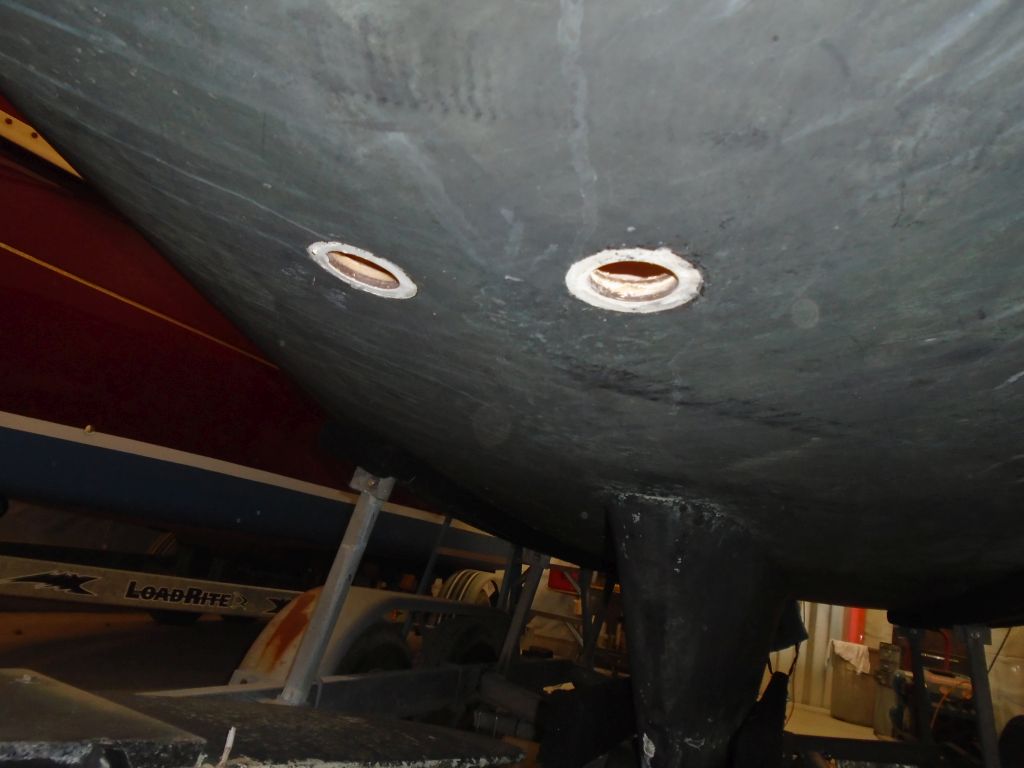
With the new instruments and transducers now on hand, I went ahead with the installation of the transducers (depth and speed), using the original holes in the boat, which I’d already prepared for the installation.
Then, I led the cables aft, following the same route and using the same support hardware as the original cables that I’d just removed. I’d make the final connections to the new instruments later, once the cover panels were done and ready for installation.
I finished up the minor keel work with a quick wash and sand of the filler I’d applied earlier.
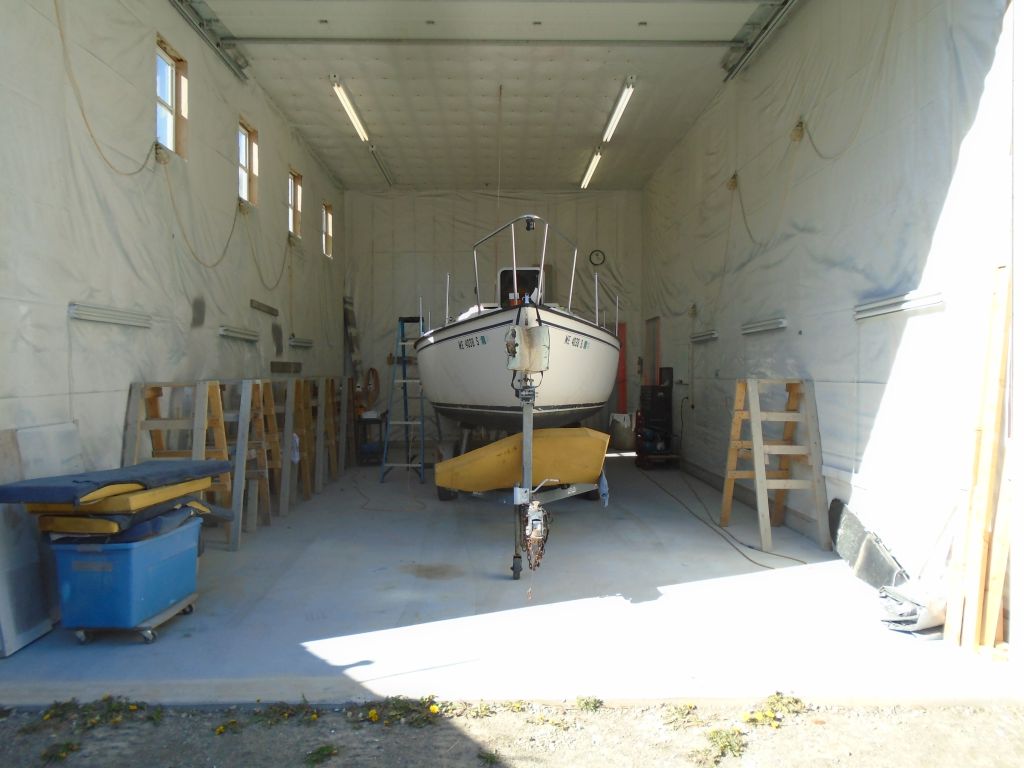
I’d moved some other boats around, which gave me the opportunity to reposition this boat alone in the center of the shop for better access for the remainder of the project.
Total time billed on this job today: 6.25 hours
0600 Weather Observation:
Clear, foggy, frosty, 22°. Forecast for the day: sunny, 50
Tuesday
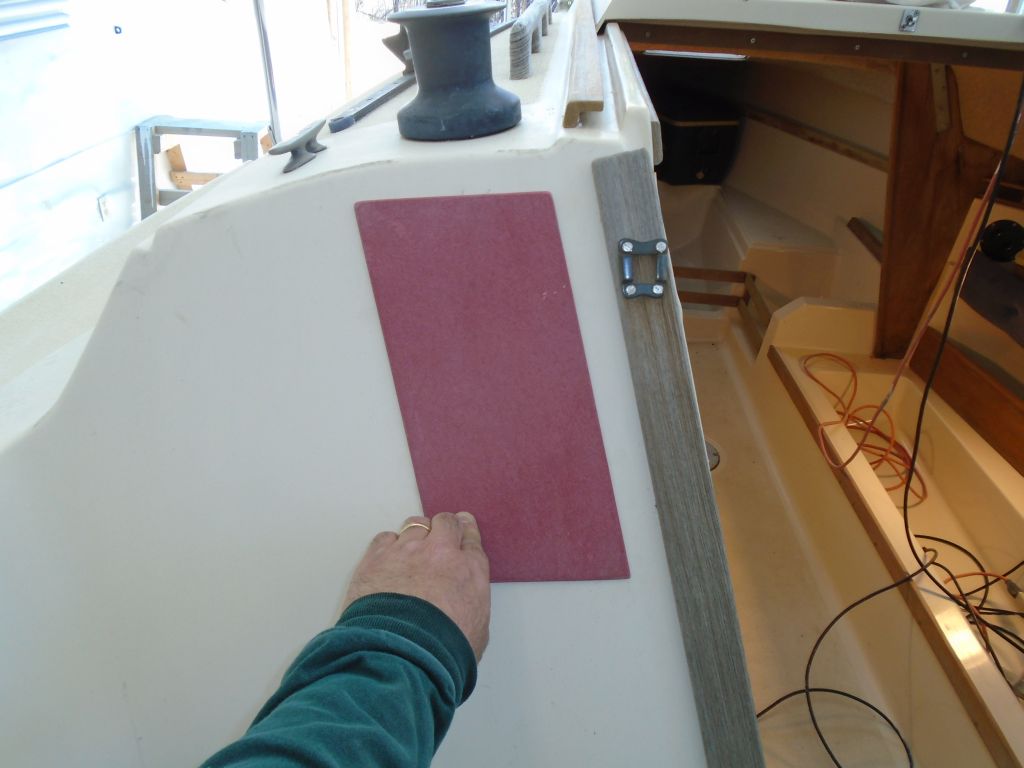
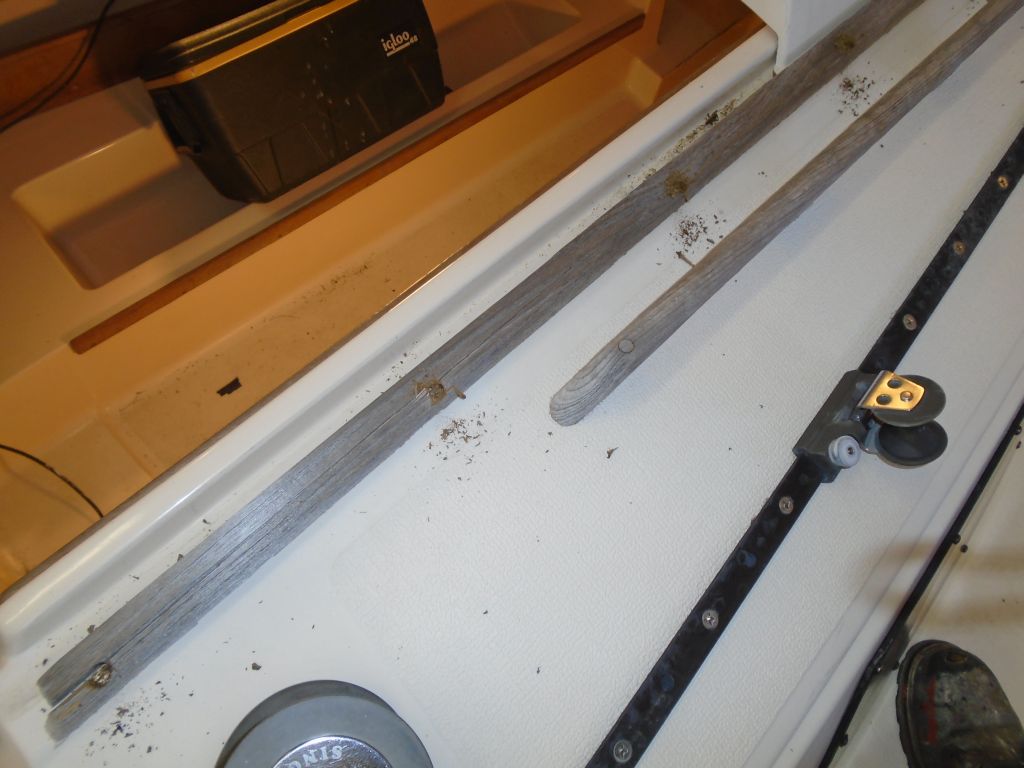
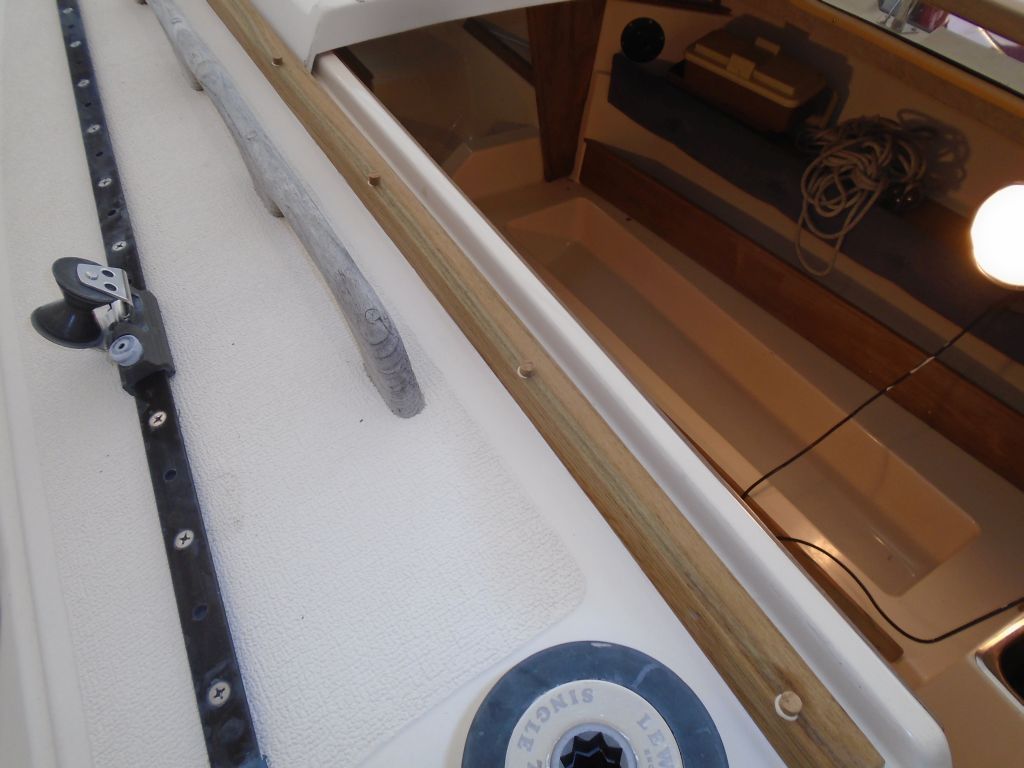
Starting out, I pared and smoothed away the excess bungs from the new companionway rails.

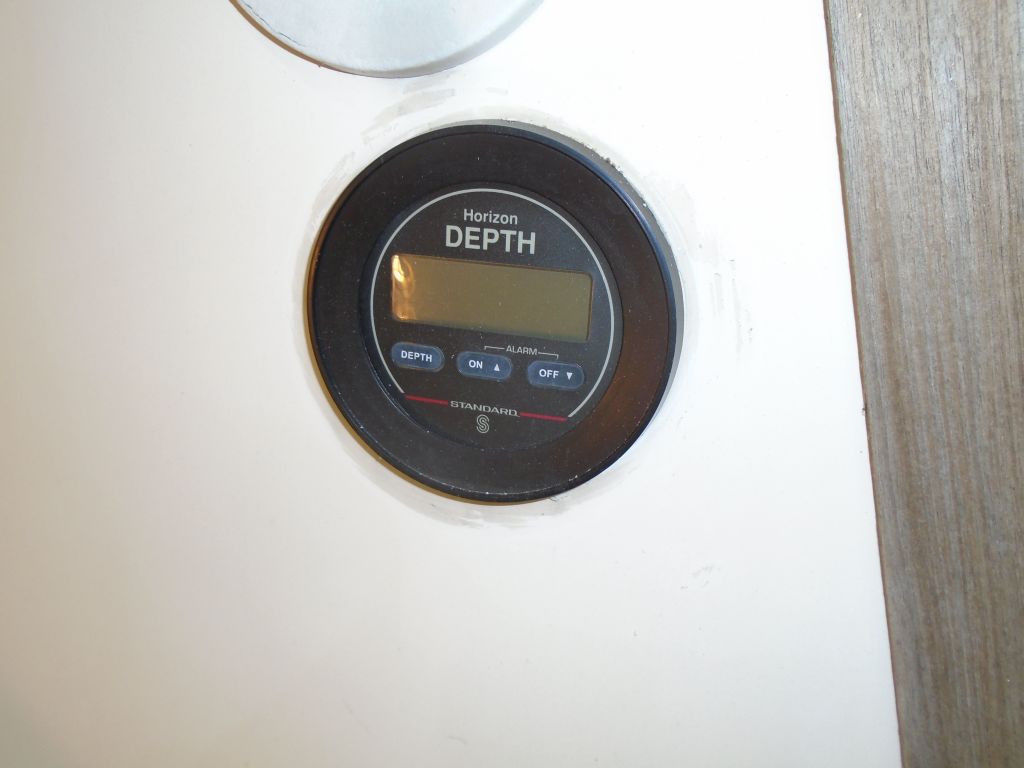
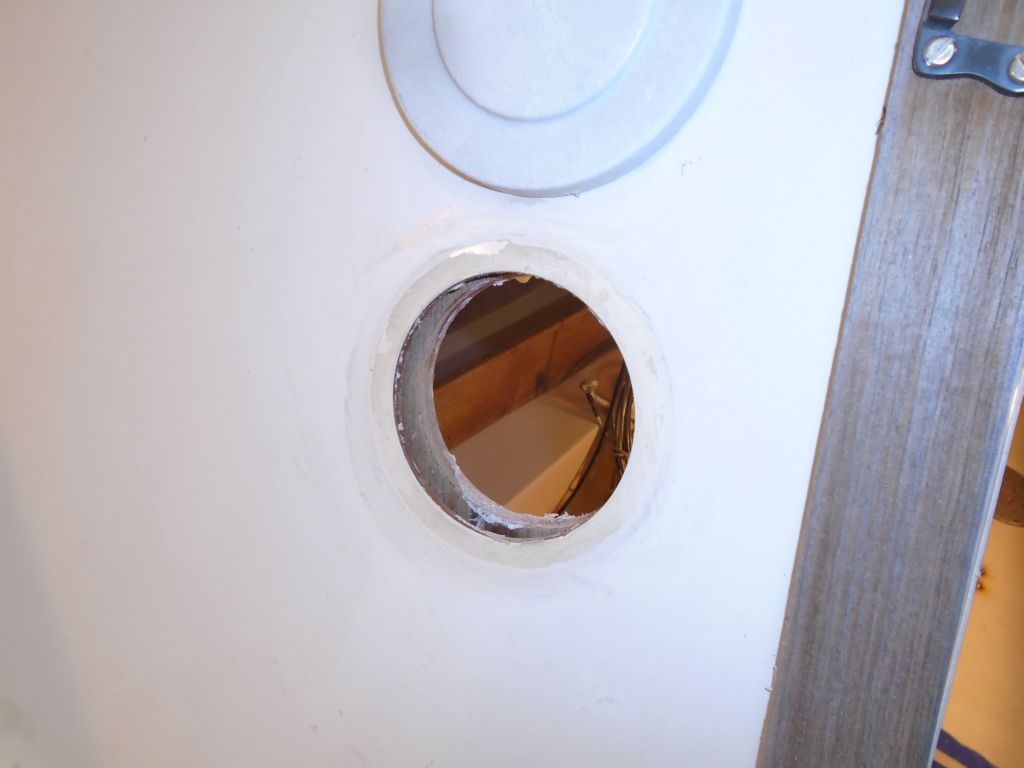
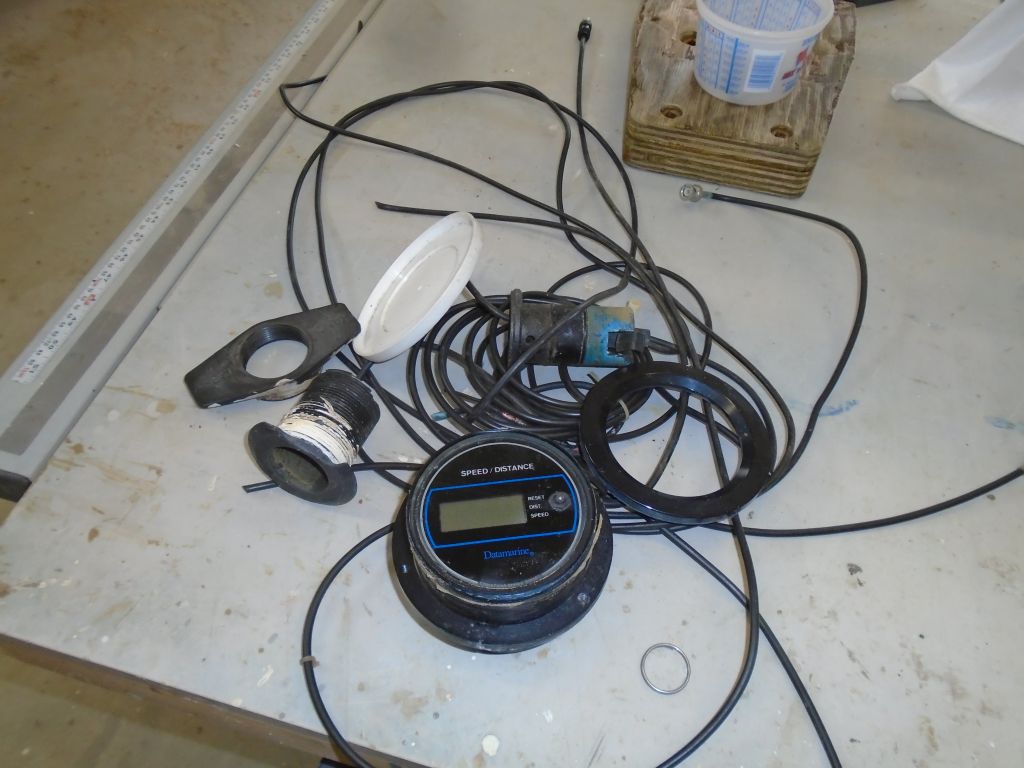
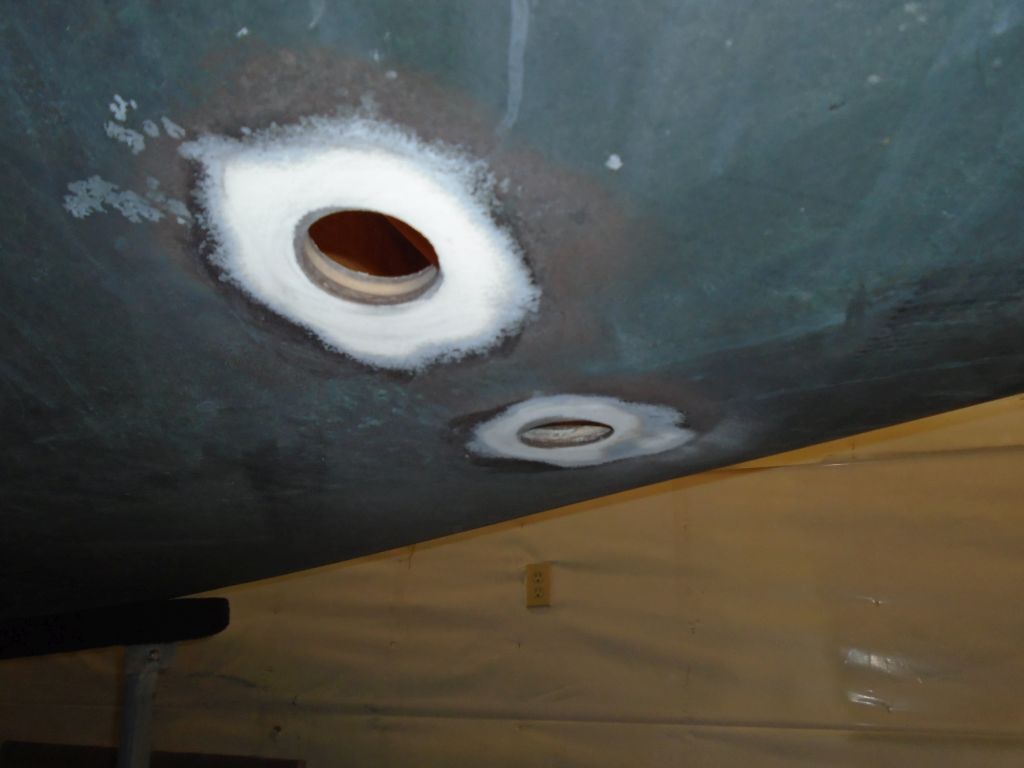
The owner reported that the depthsounder was non-functional, and replacment was on the work list. To begin, I removed the existing through-hull transducer, then the transducer wiring leading aft to the display unit mounted in the cockpit bulkhead. I removed the obsolete 4″ round display and all related components. 4″ round displays were no longer available on the market, so the replacement would be something else, and would require a cover plate over the larger hole left over from the old unit.

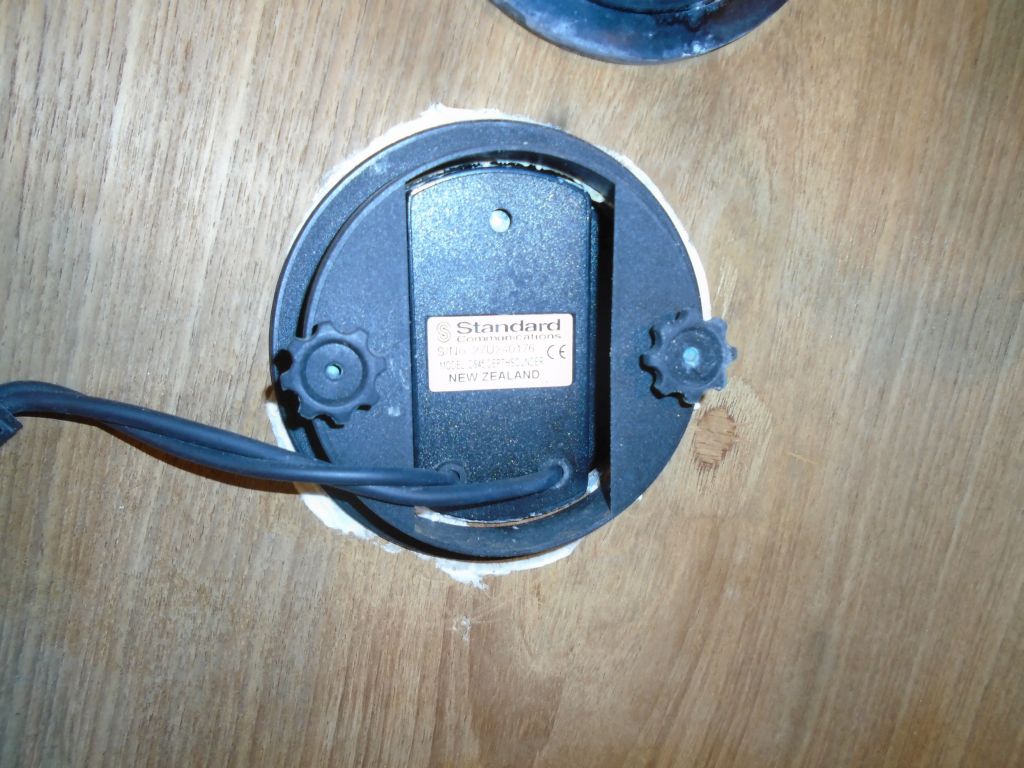
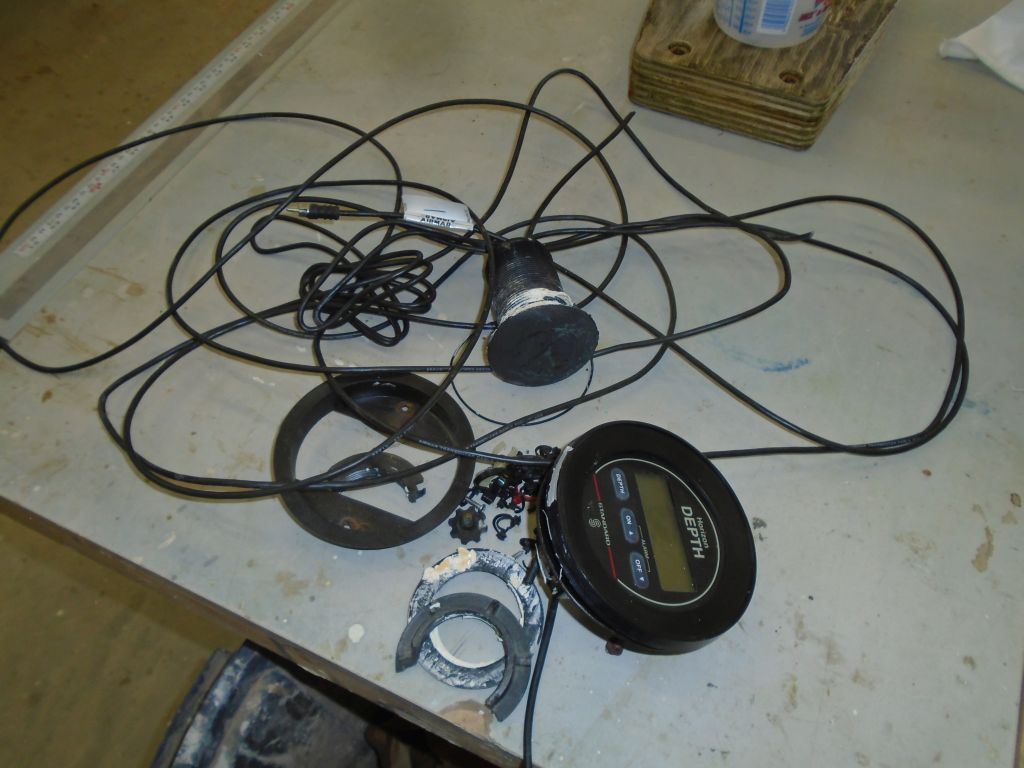
Later in the day, while on phone conference with the owner about the new depthsounder choices, he made the decision to also replace the old knotmeter, so with that decision made I went ahead and removed the old display, wiring, and transducer as required. The owner selected a matching set of new instruments, which I ordered at once.

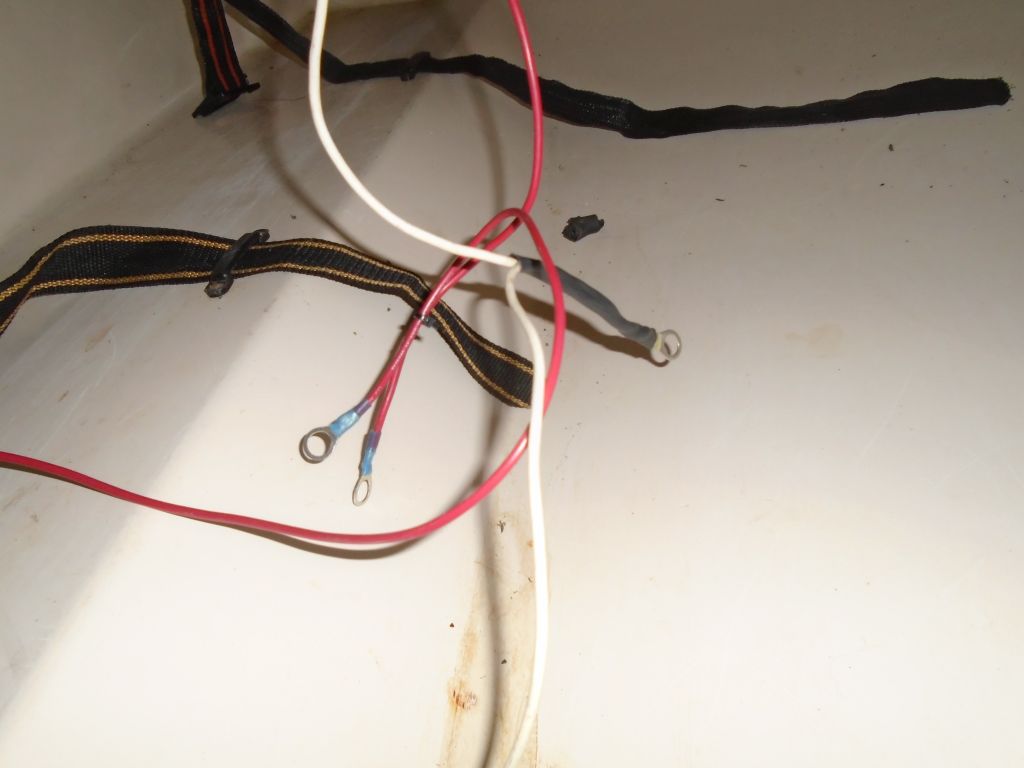
There were various minor wiring issues that became apparent as I looked over the boat’s electrical system, which was generally in good (original) condition, but there were a few improvements that I thought I could make right off the bat, starting with replacing the terminal ends on the two sets of wires that would connect to the battery, located in a large compartment below the cockpit. I also replaced a black (or maybe dark purple) wire that fed the positive supply to an auxiliary fuse panel on the port side with a red wire to eliminate confusion, and, further along these lines, secured together two white (negative, in this boat’s protocol) wires with a section of black heat-shrink to make it apparent which wires were which going forward. For now, the remaining wiring looked OK, but I’d test out various lighting fixtures and installations in the near future, now that I had the basic supply side in better shape.
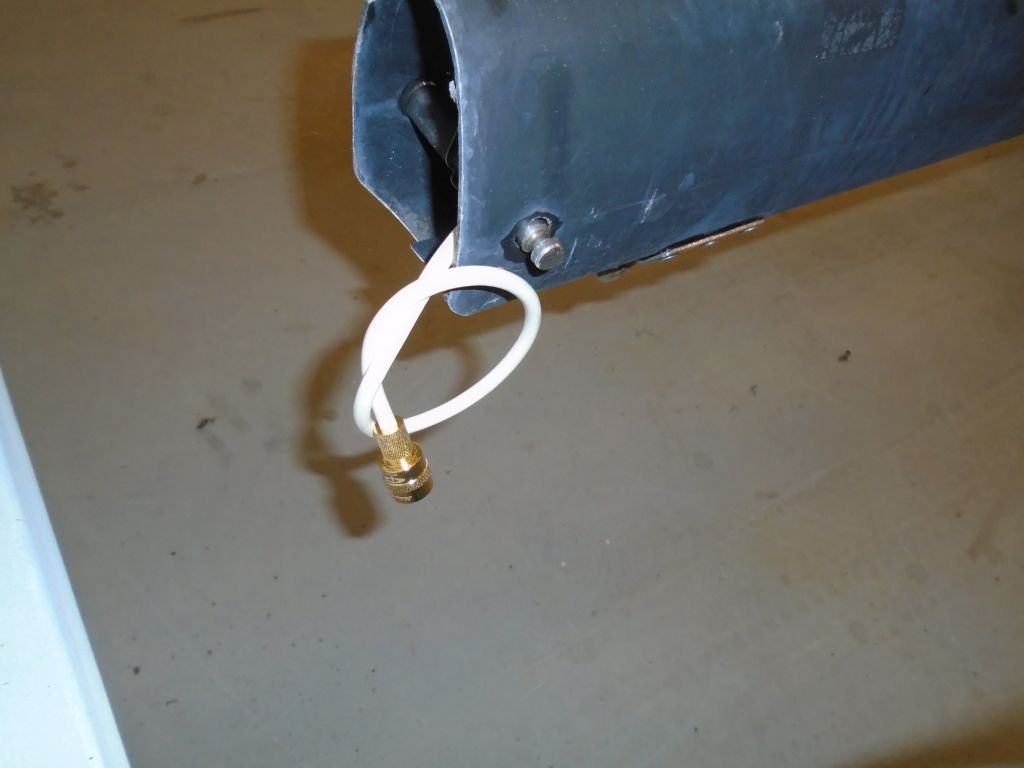
The existing VHF antenna cable, which led to deck through the mast step base, was in poor condition where visible, with numerous cuts through the insulation, so I replaced the entire length back to the VHF with a new cable.


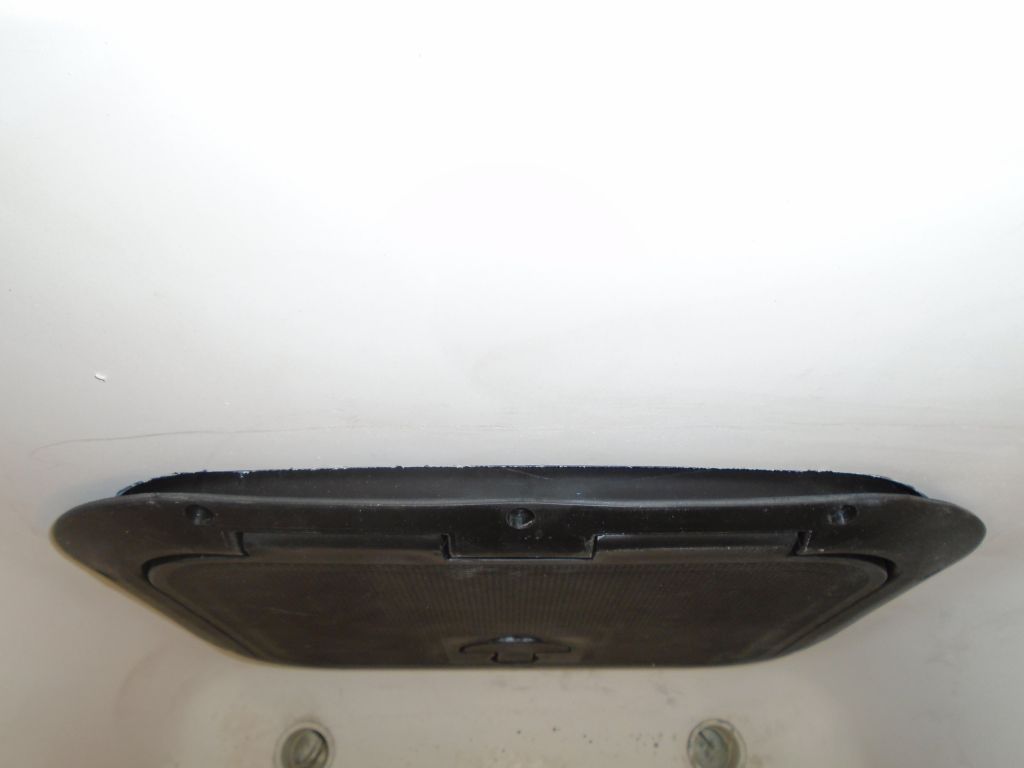
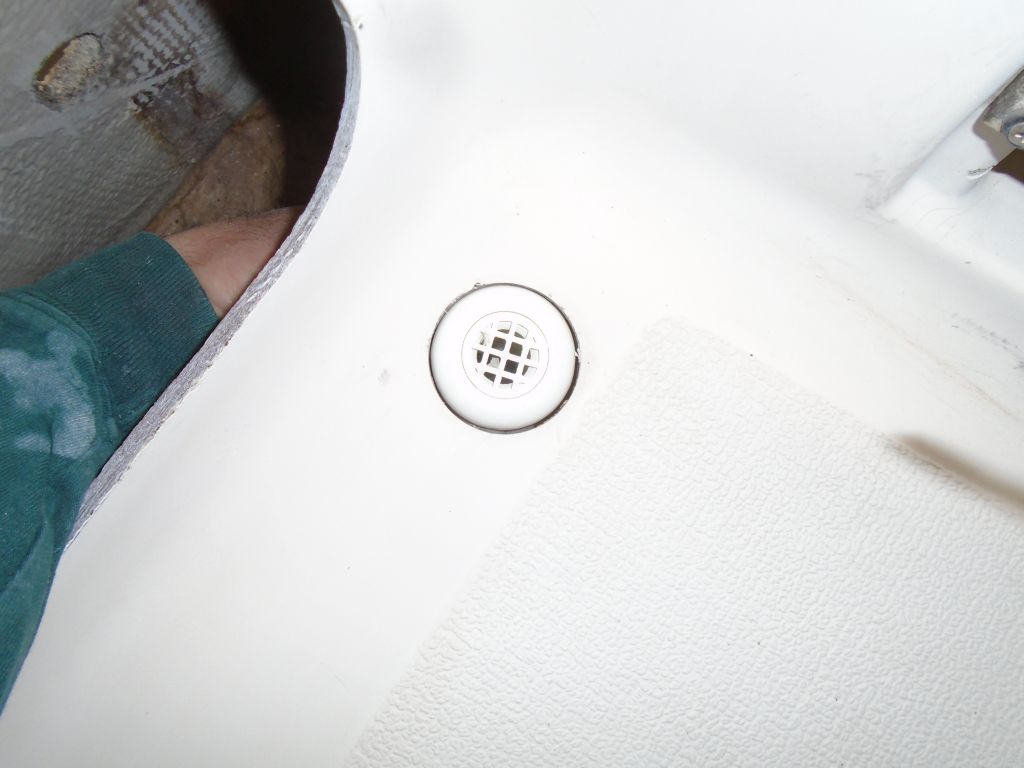
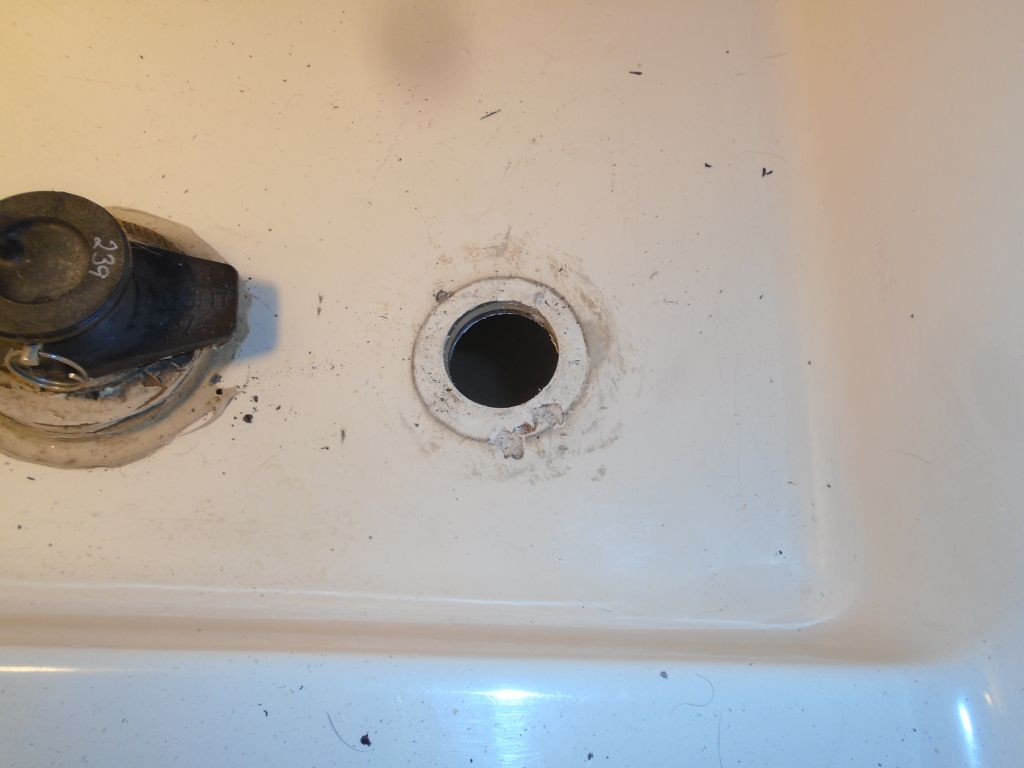
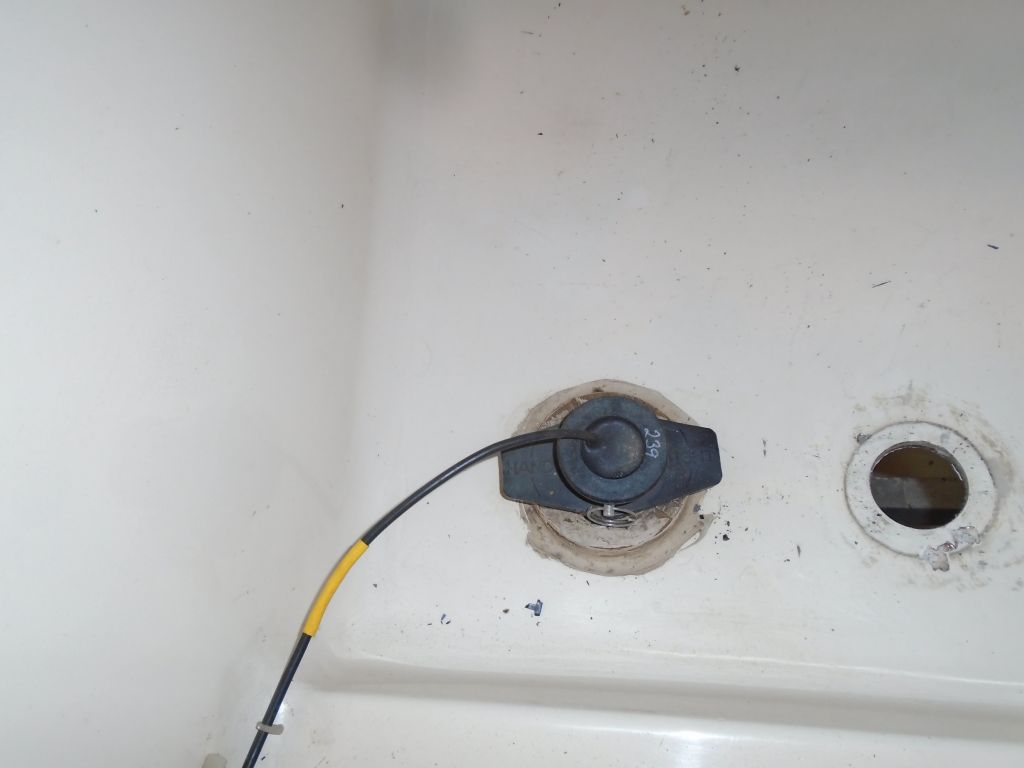
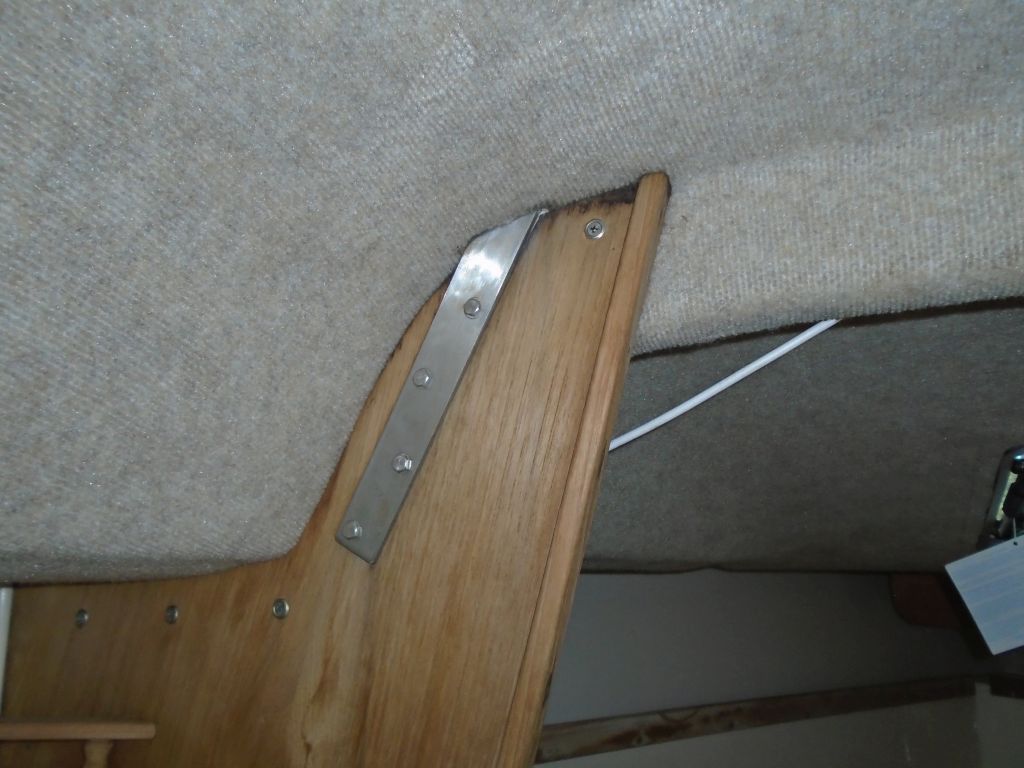
The galley sink featured a simple tankage and supply system consisting of a plastic jug in the cockpit locker. There was no connection visible between the tank and the hand faucet, and the owner had mentioned that the old hose was clogged with debris and mold. Although there was a round access hole located just behind the mobile tank–which allowed me to h old in a camera for the photo of the underside of the sink–the locker wasn’t large enough for me to climb into, and I made plans to install a new access port from the cabin so I could change the hose and (if necessary) the faucet to restore the sink to working order.

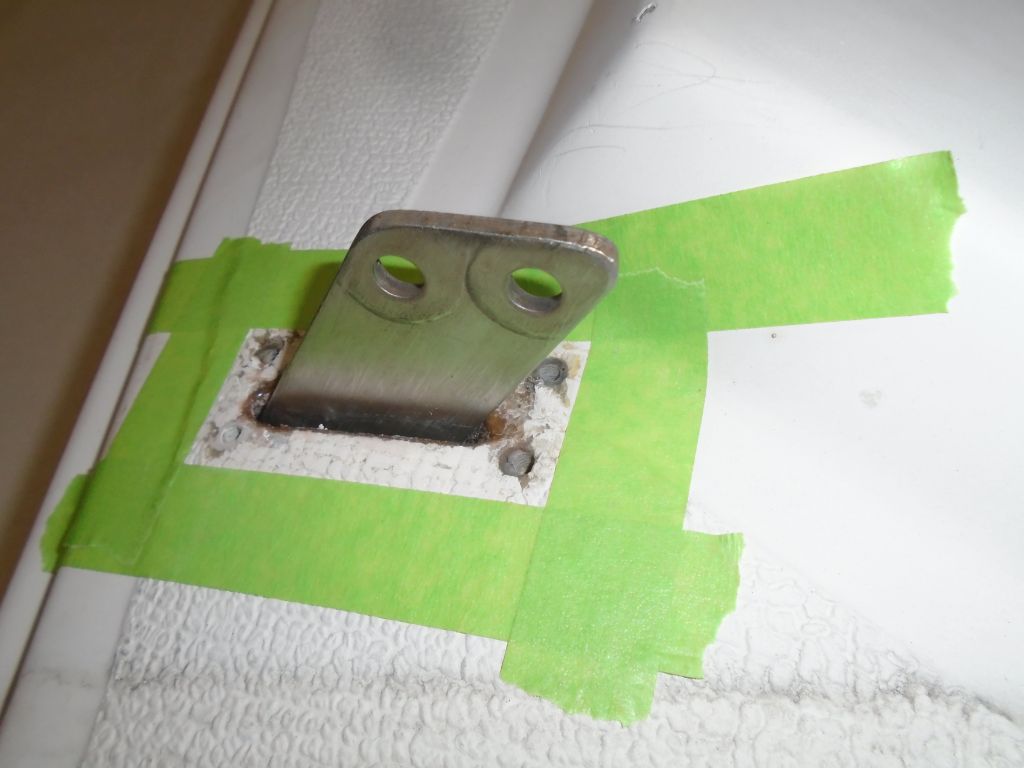
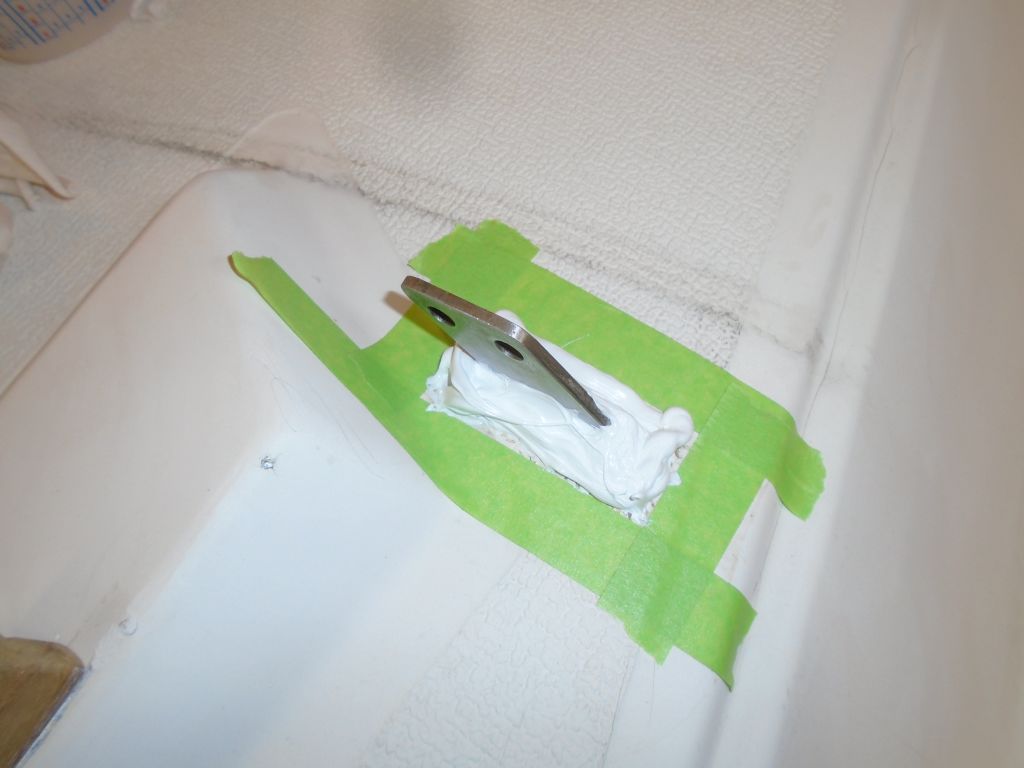
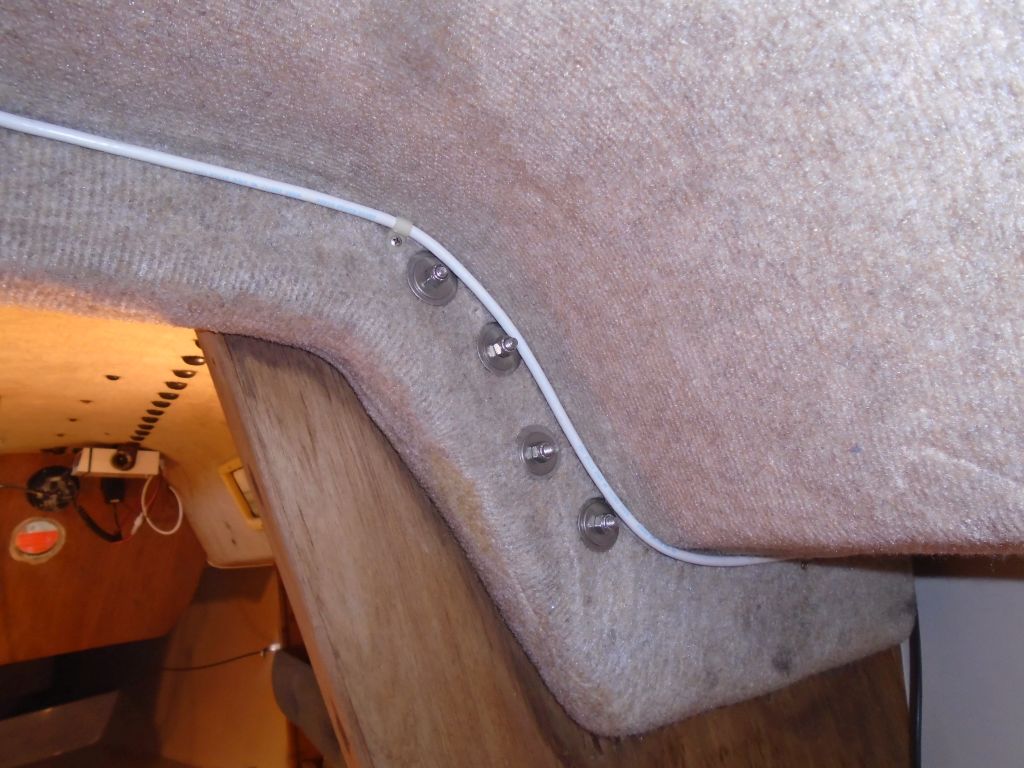
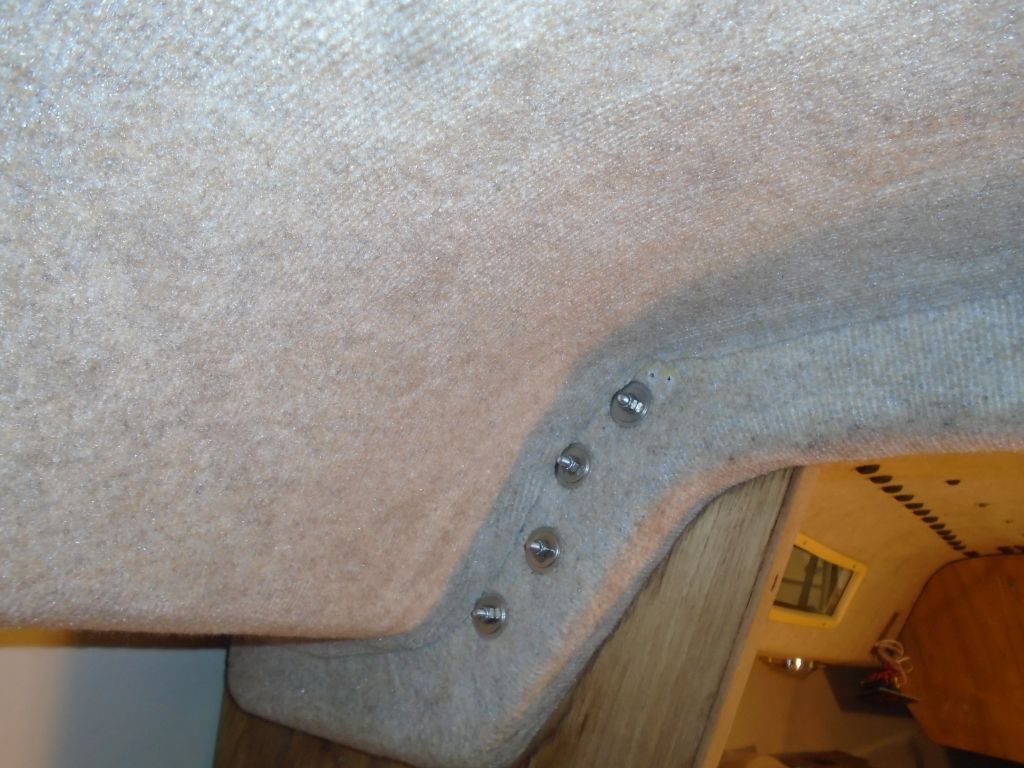
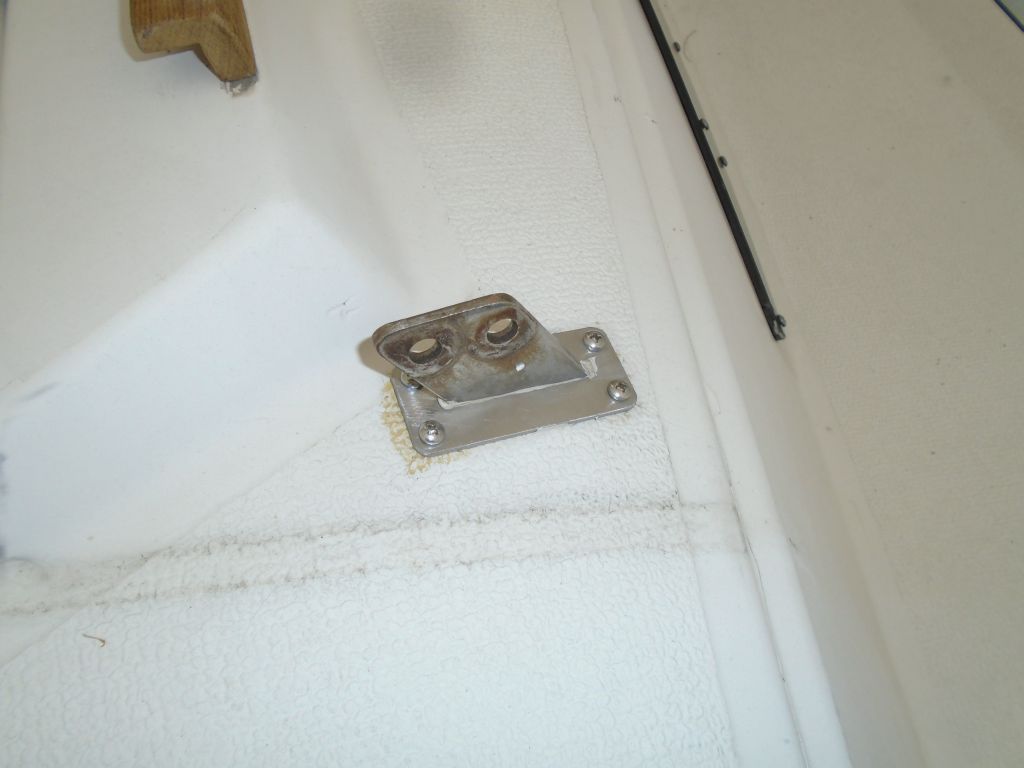
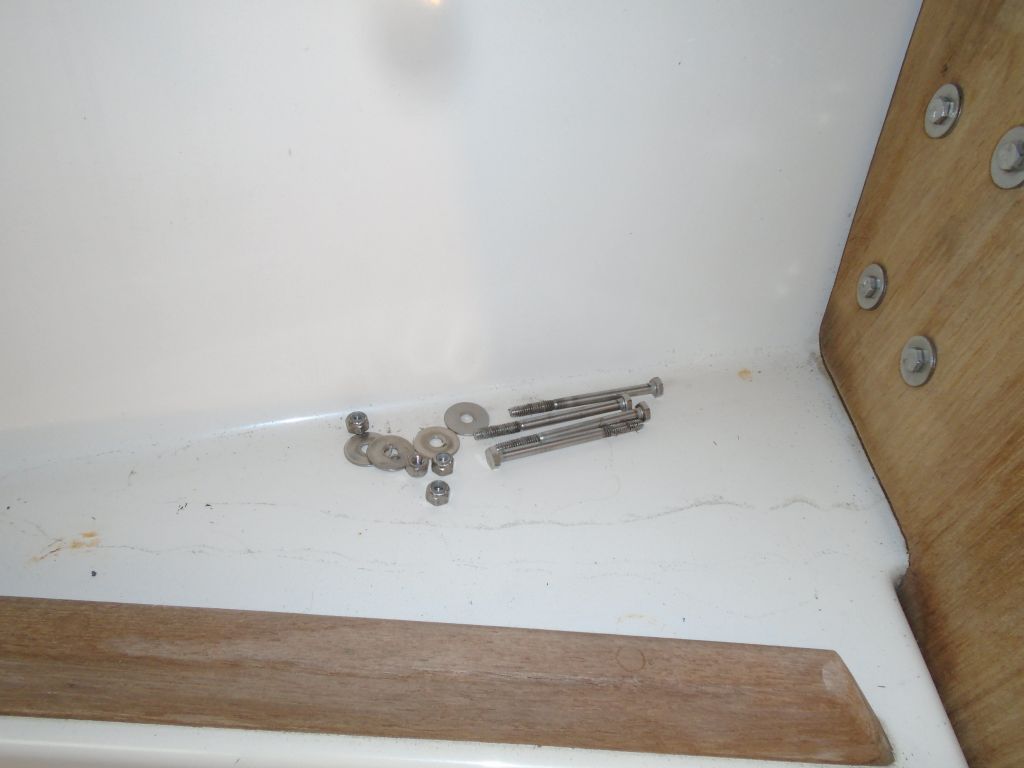
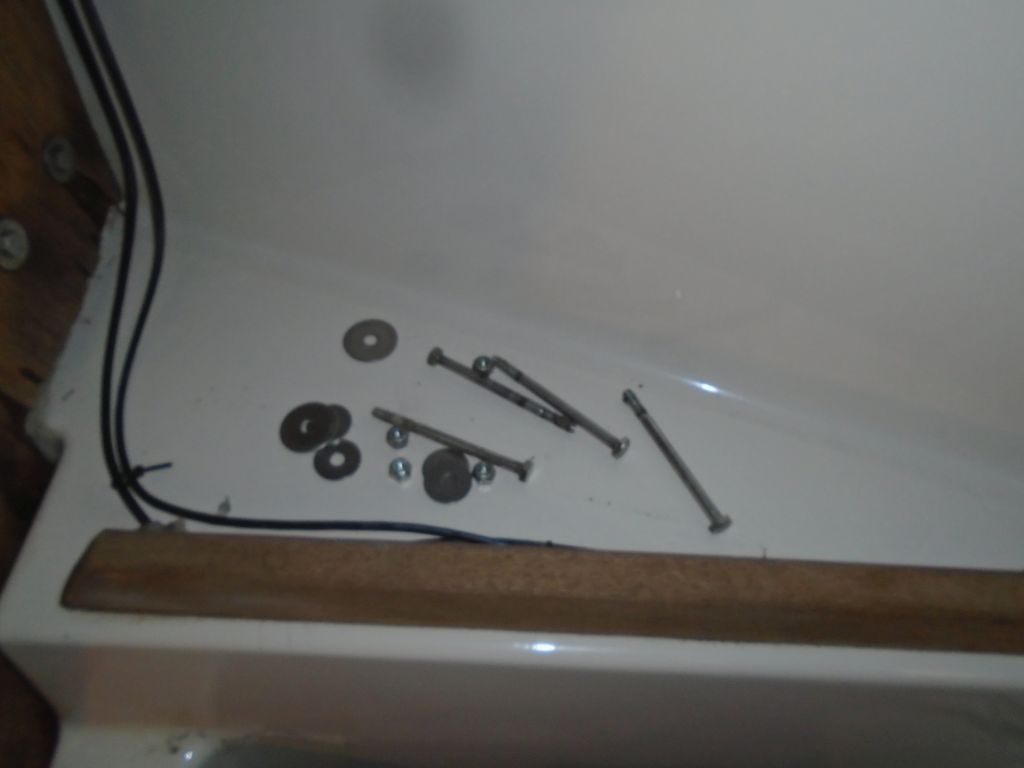
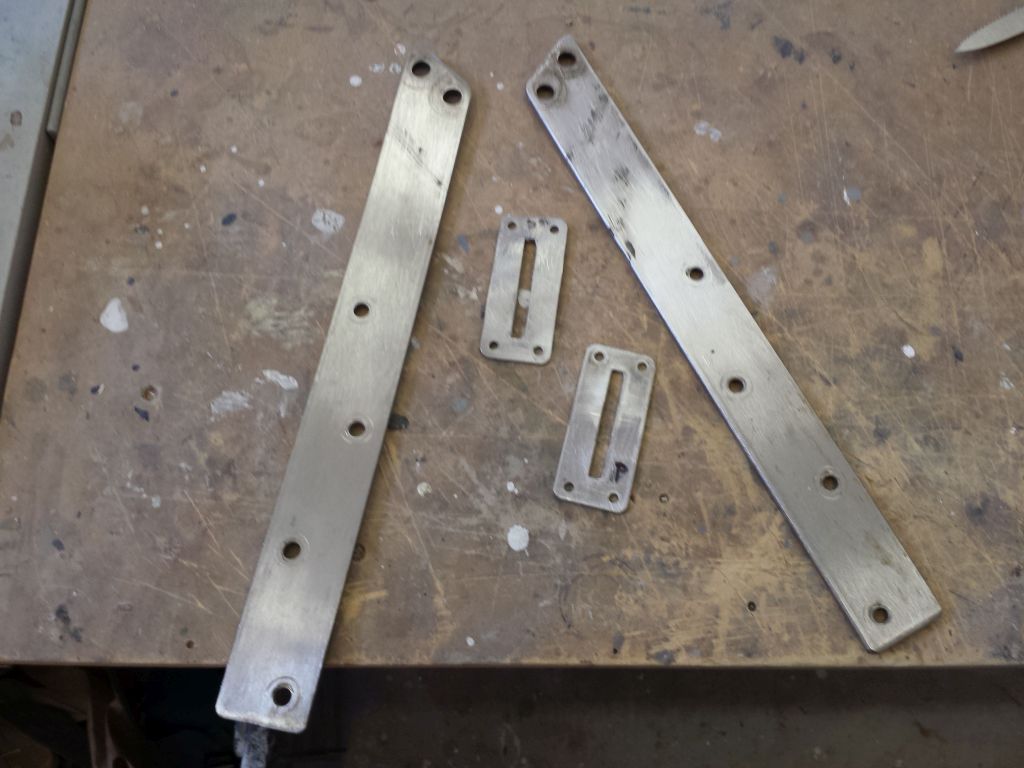
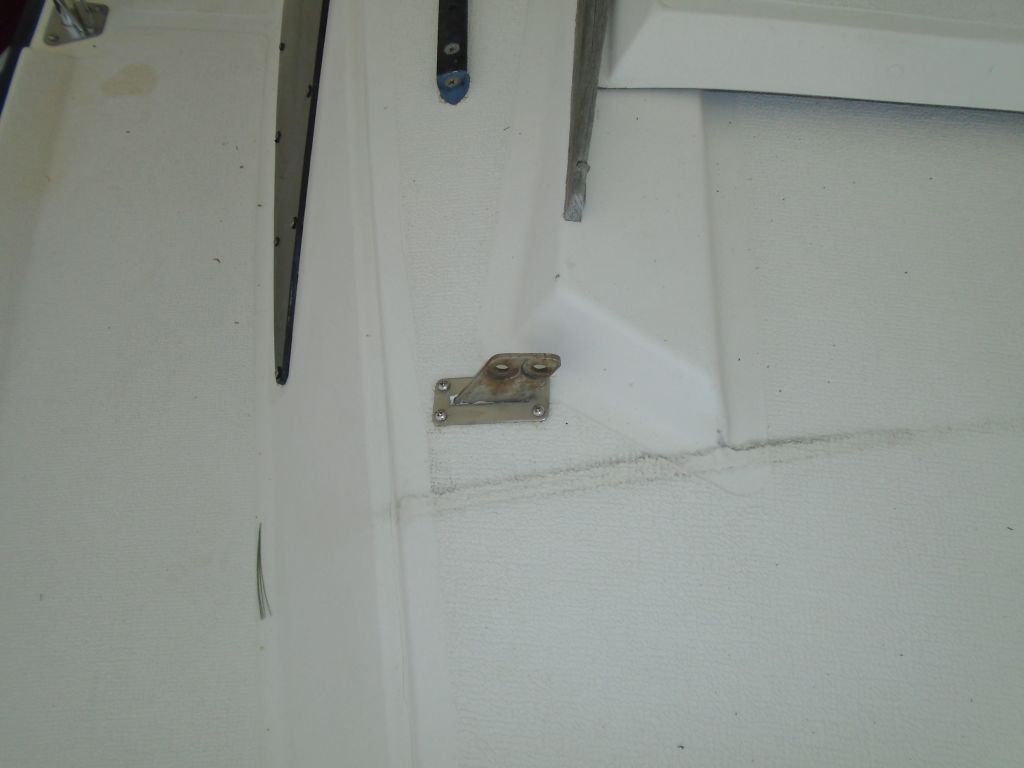
With new bolts on hand, I reinstalled the chainplates in heavy beds of sealant, forcing the sealant into the gaps around the chainplate as much as I could. I left the excess sealant to cure before attempting to remove it.


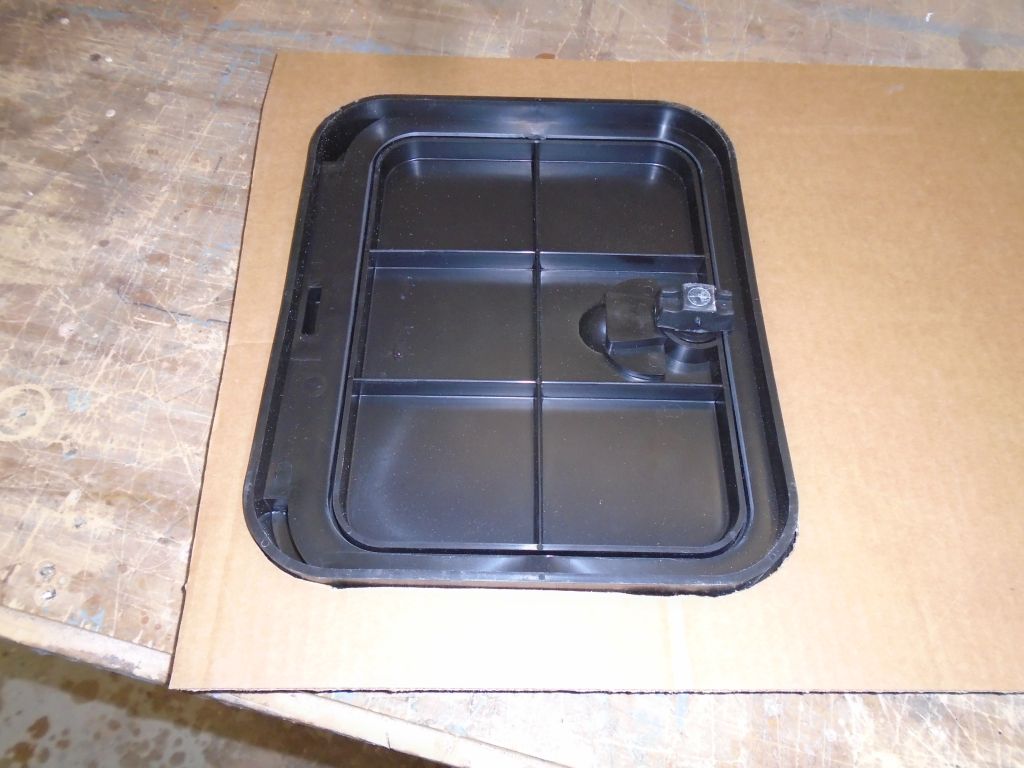
With a new plastic access hatch now on hand–black to match the other access ports on the boat–I prepared a cardboard template of the cutout, and would use this next time to open the aft end of the cockpit for access to the scuppers.
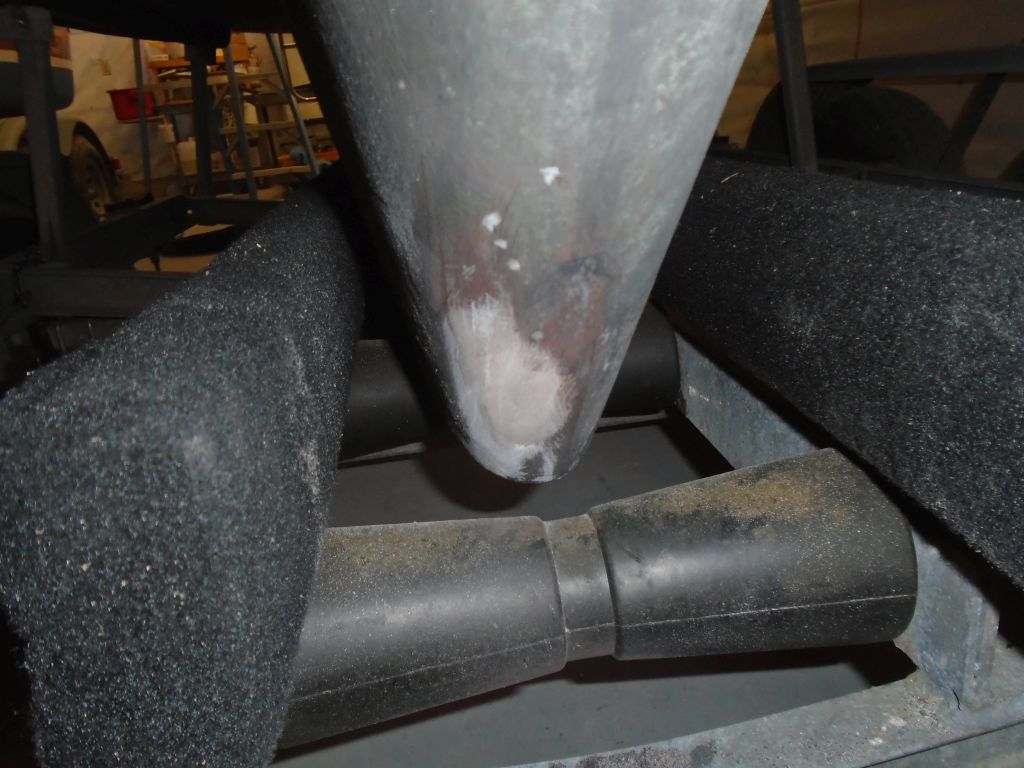
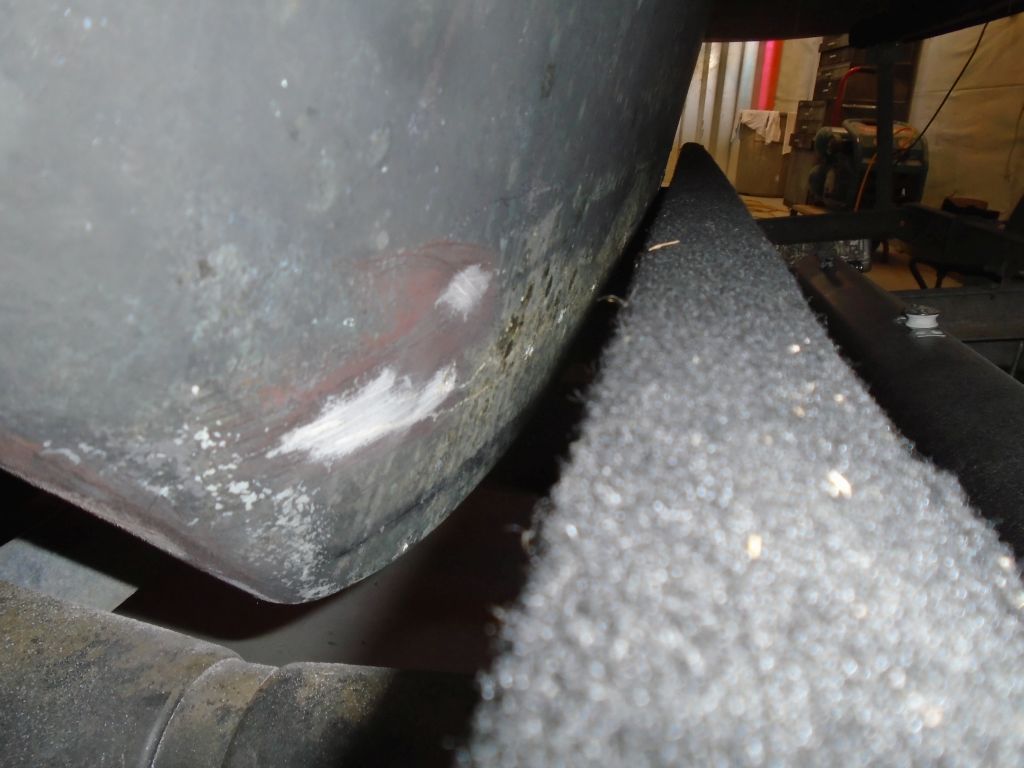
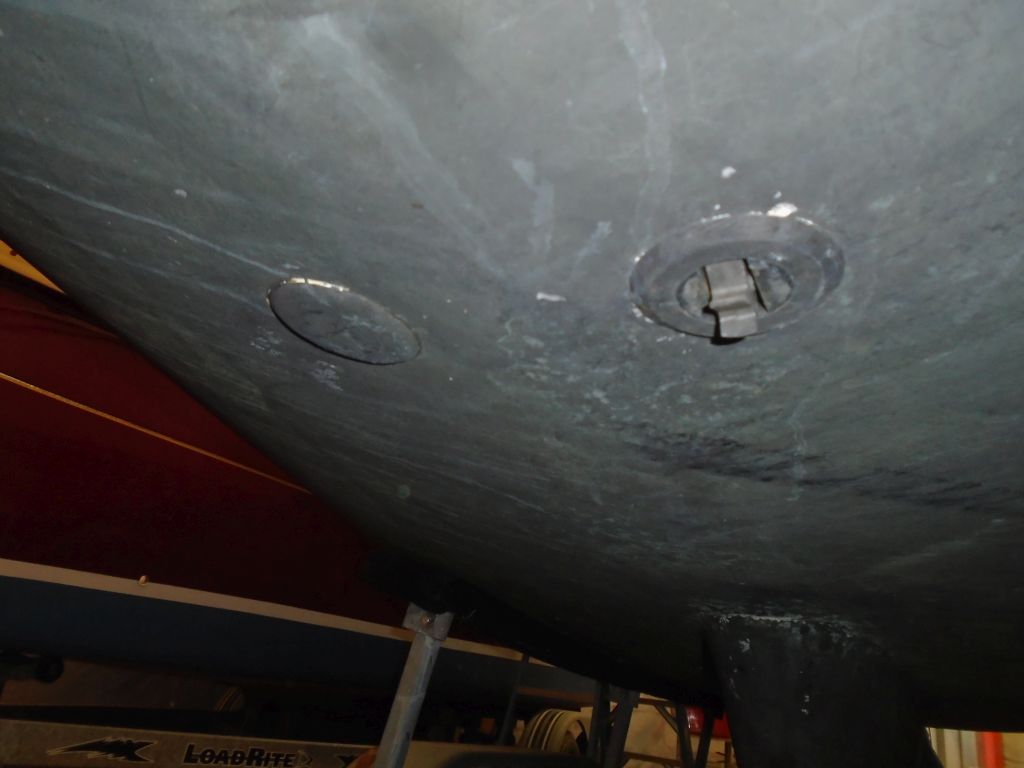
The leading edge of the keel had some minor impact damage, so to repair it I sanded away paint and loose material, then filled it with an epoxy fairing mixture.
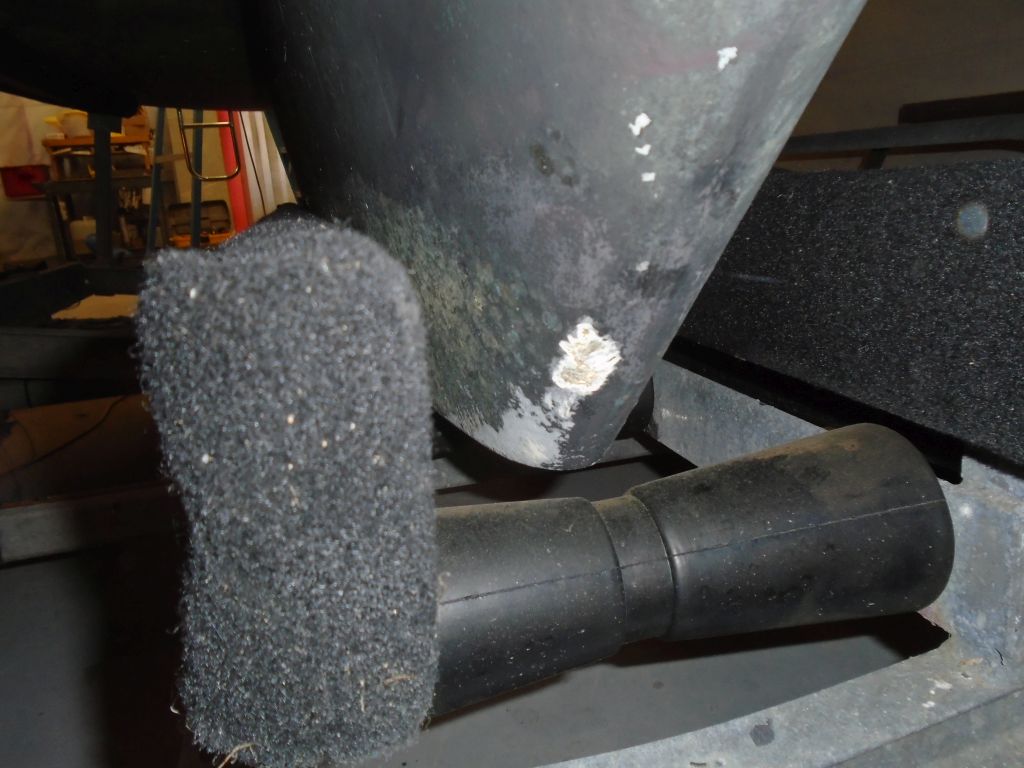

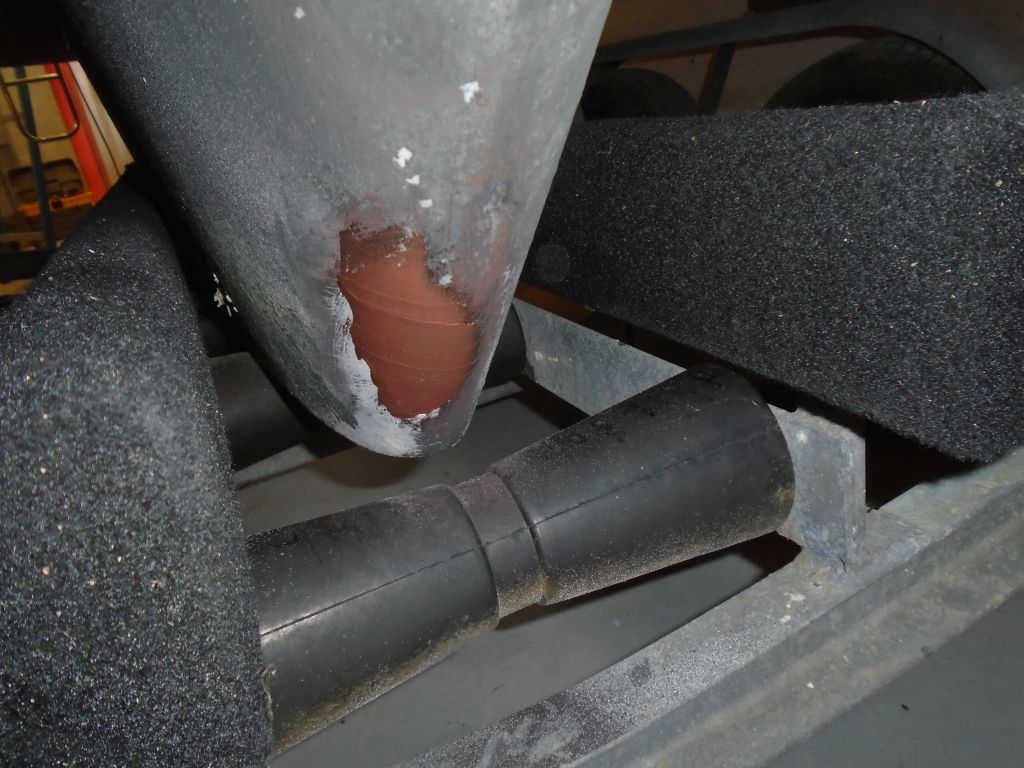
Meanwhile, I sanded away the paint from around the two through hull openings just forward, to prepare the hull for proper bonding of the new fittings when the time came for installation.

Total time billed on this job today: 7.25 hours
0600 Weather Observation:
Clouds, 36°. Forecast for the day: cloudy, snow, high around 40
Monday
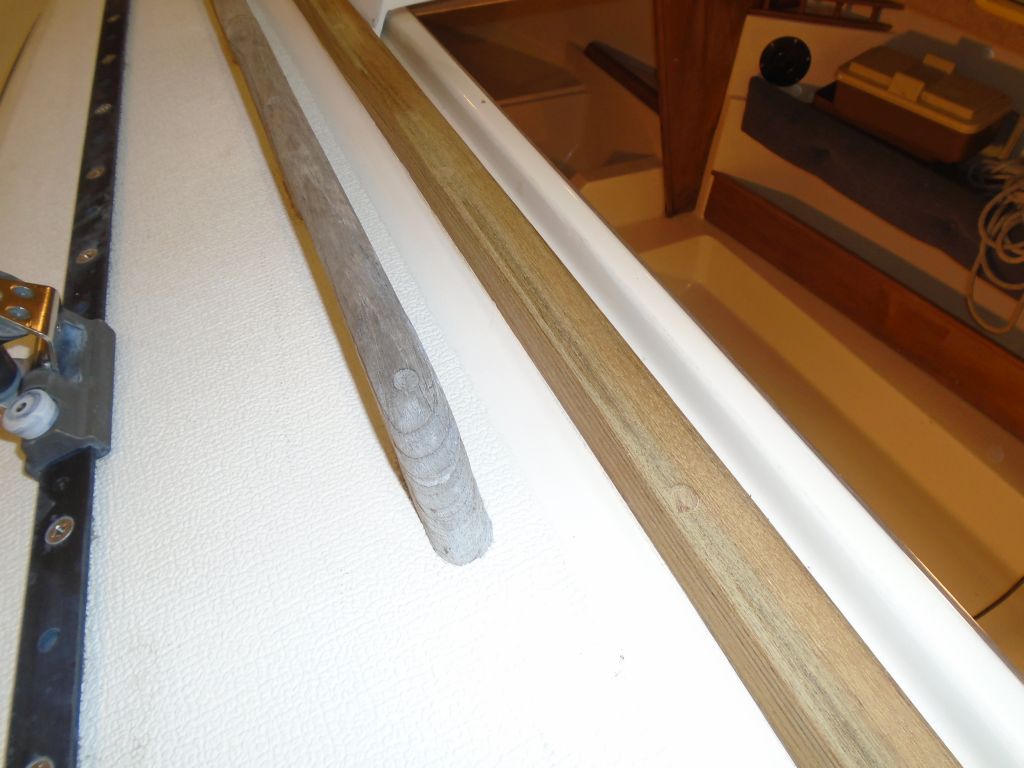
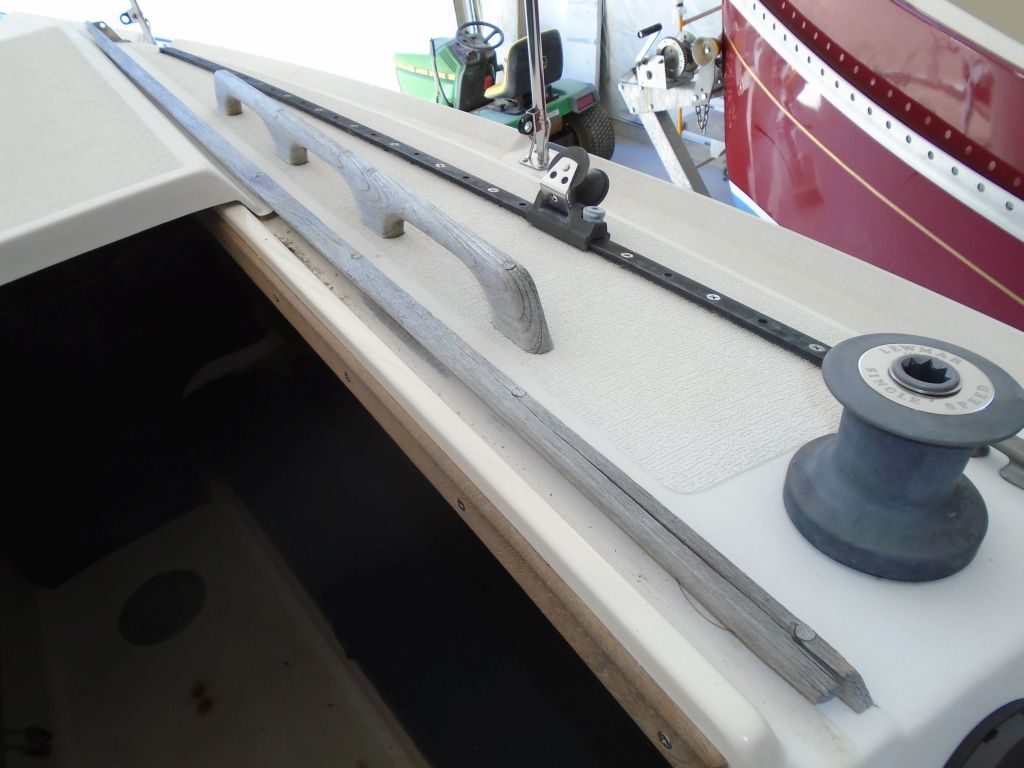
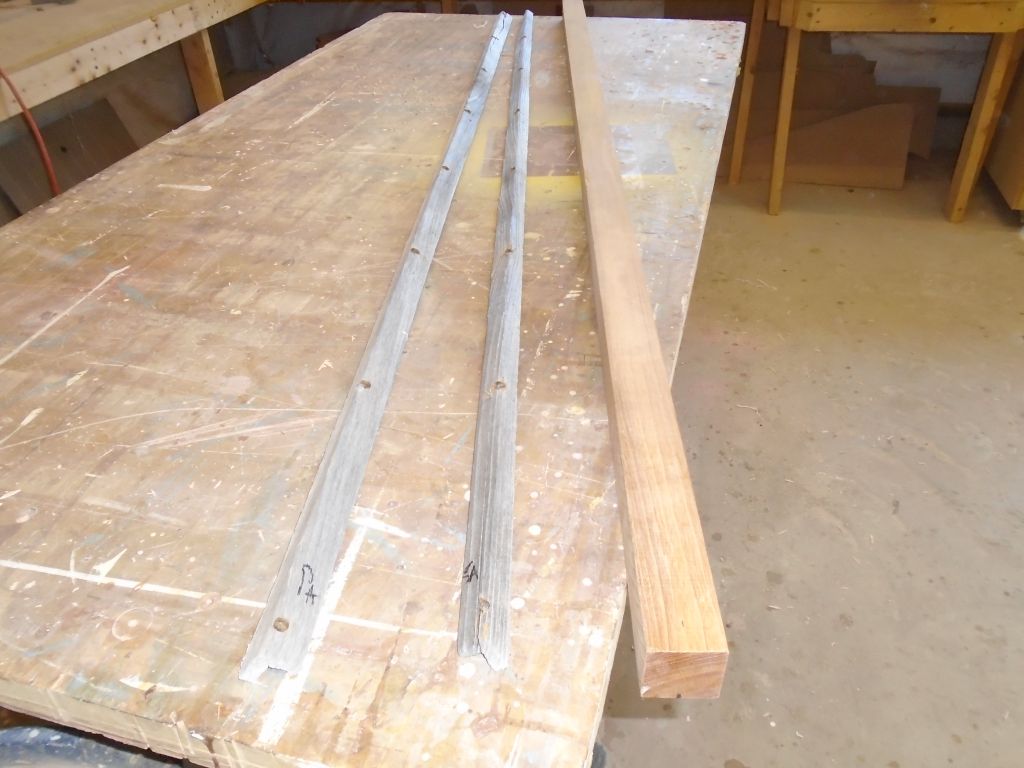
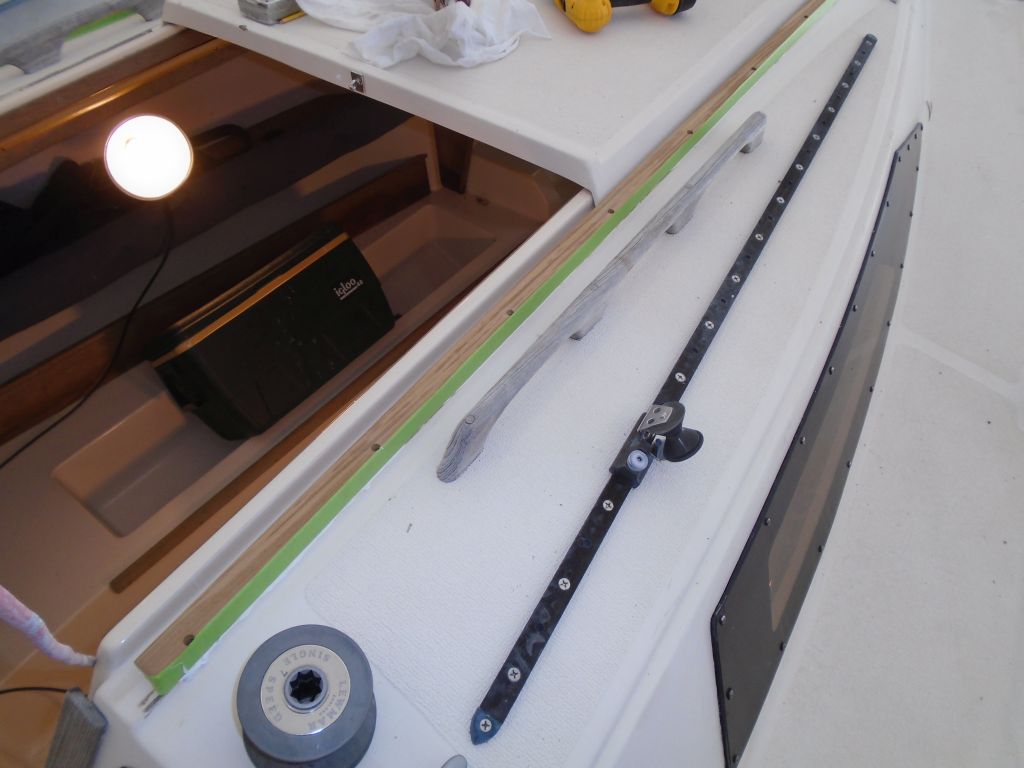
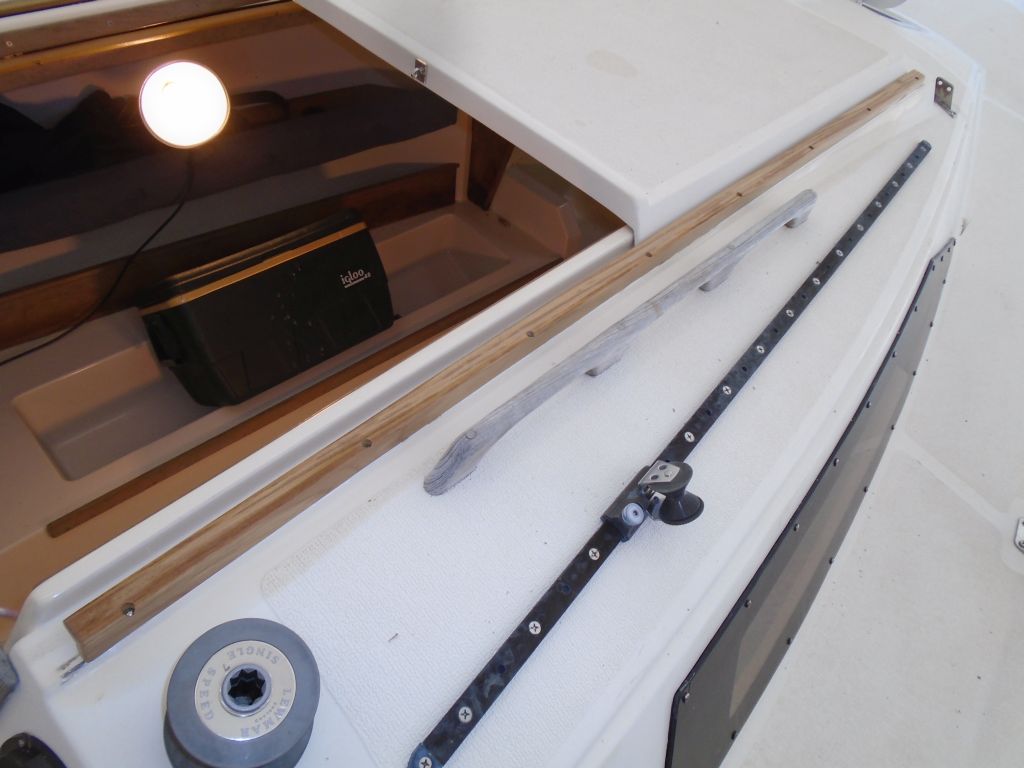
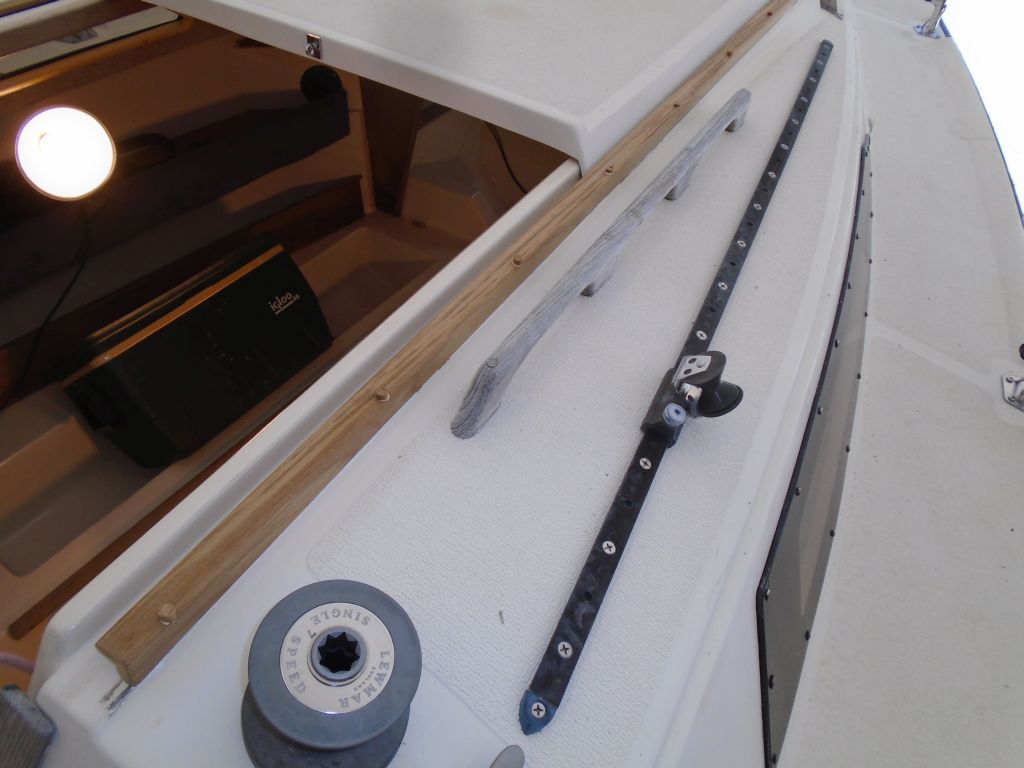
The sliding companionway hatch rode inside and beneath slim pieces of teak trim, which, over time, had become brittle and weathered, and were broken and cracked in places, limiting proper function as well as appearance. Replacement was warranted.
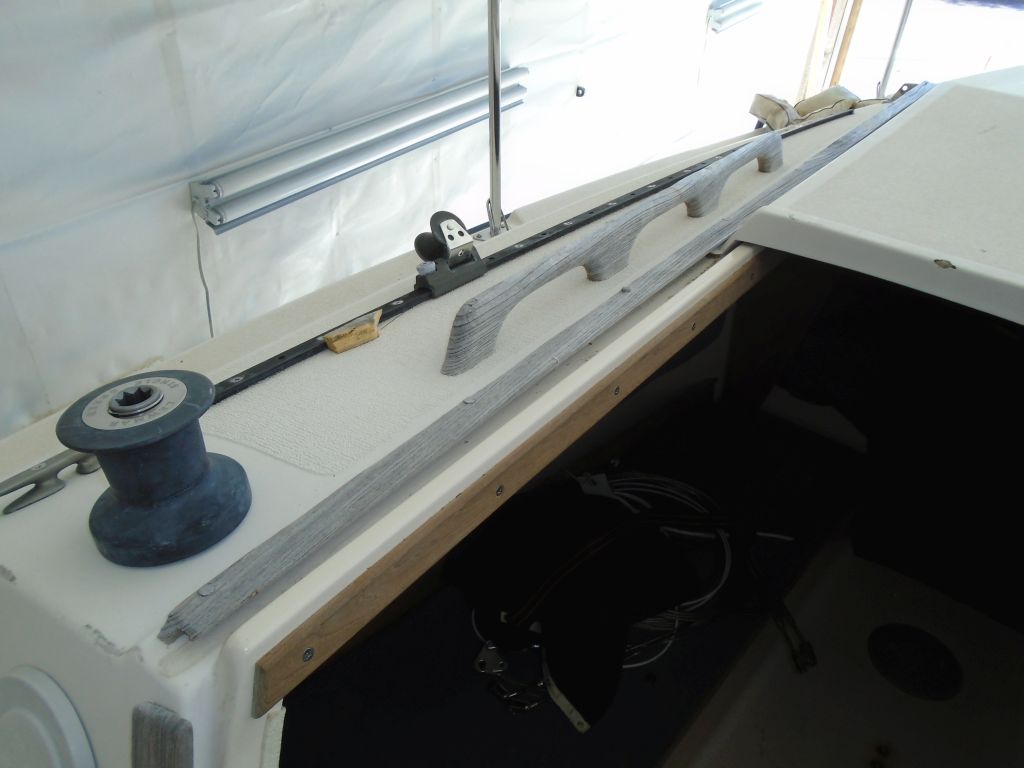

To remove the old trim for reproduction, I drilled out the bungs to expose the screw heads, then removed the trim easily from there.
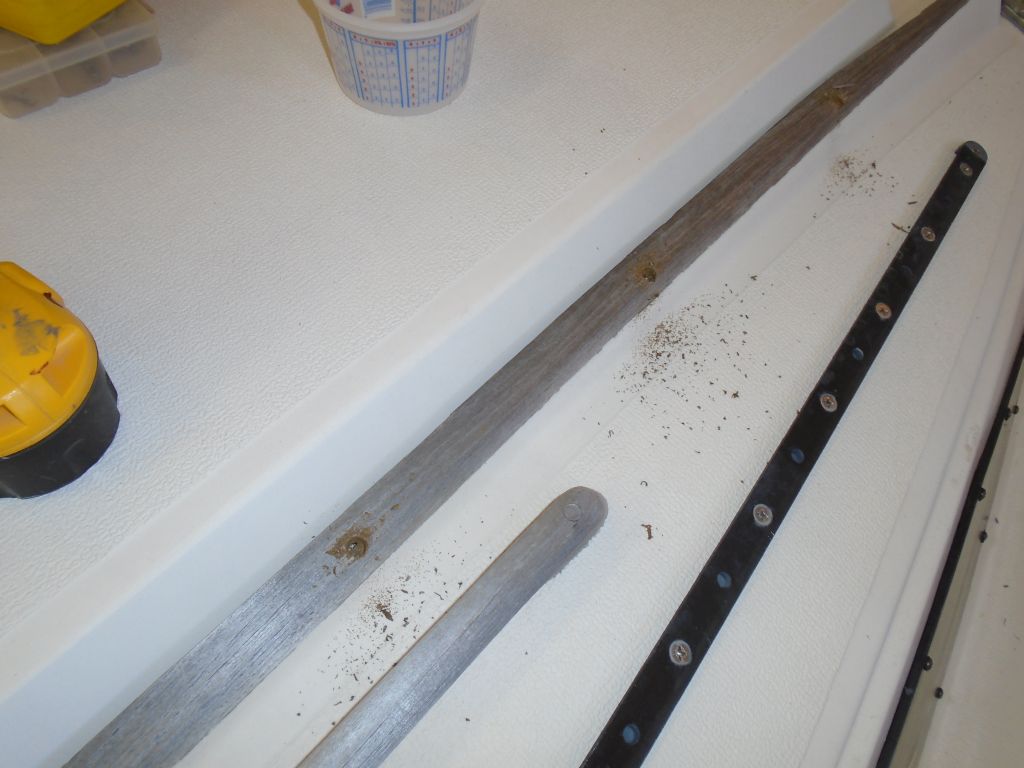
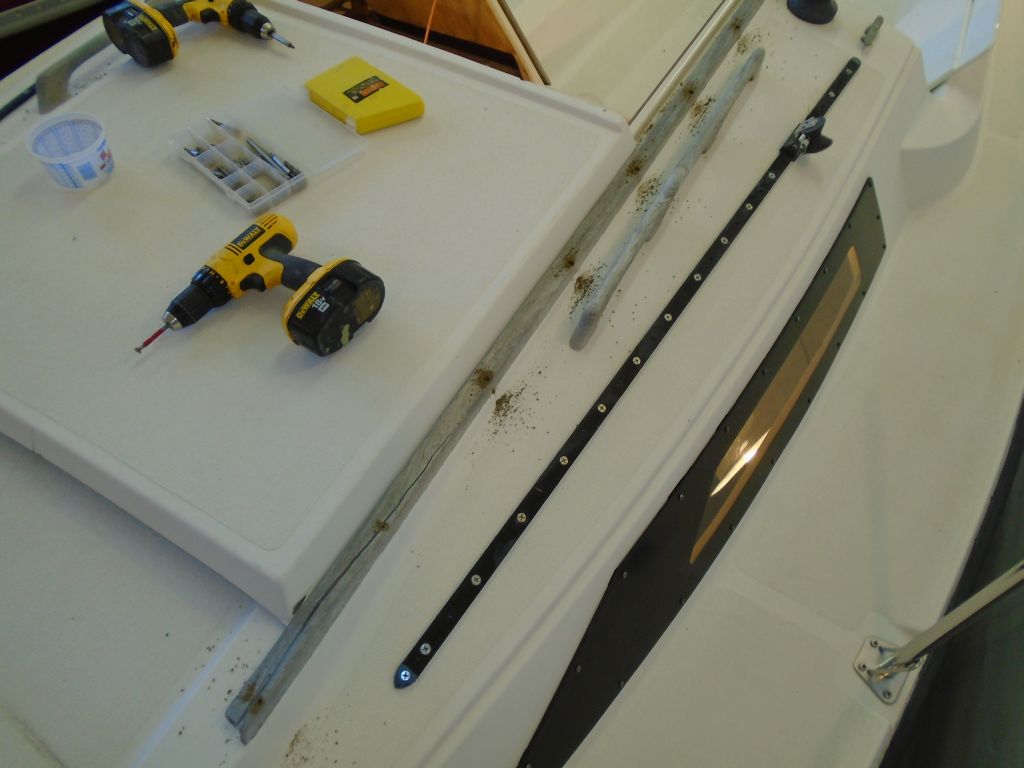
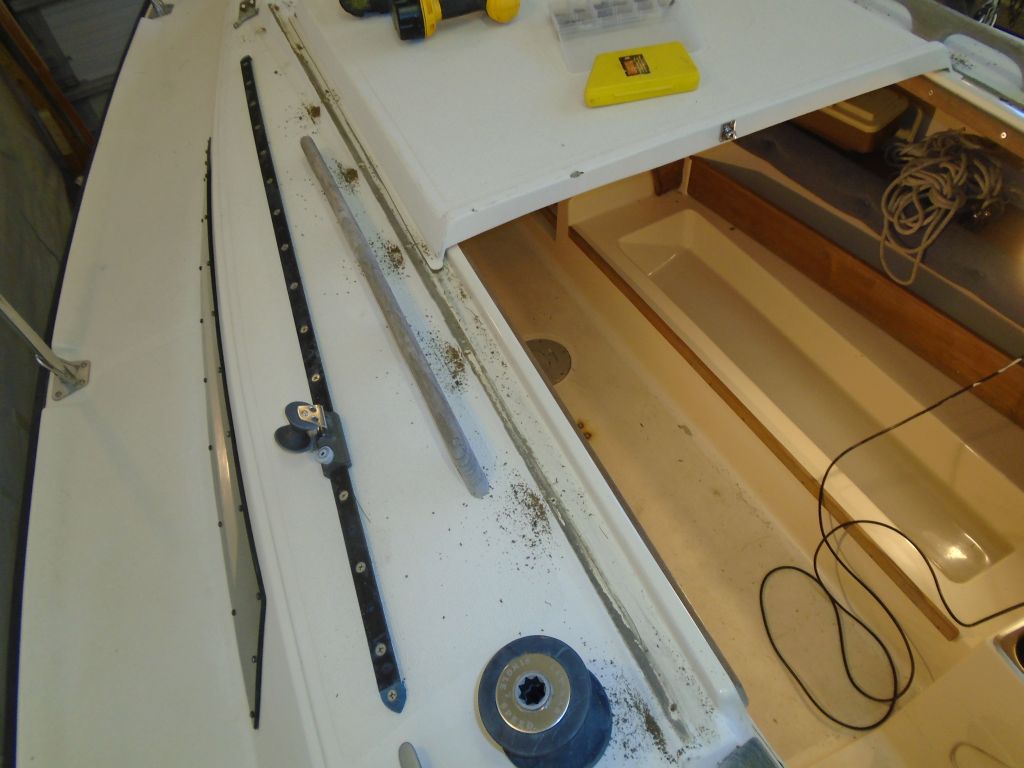
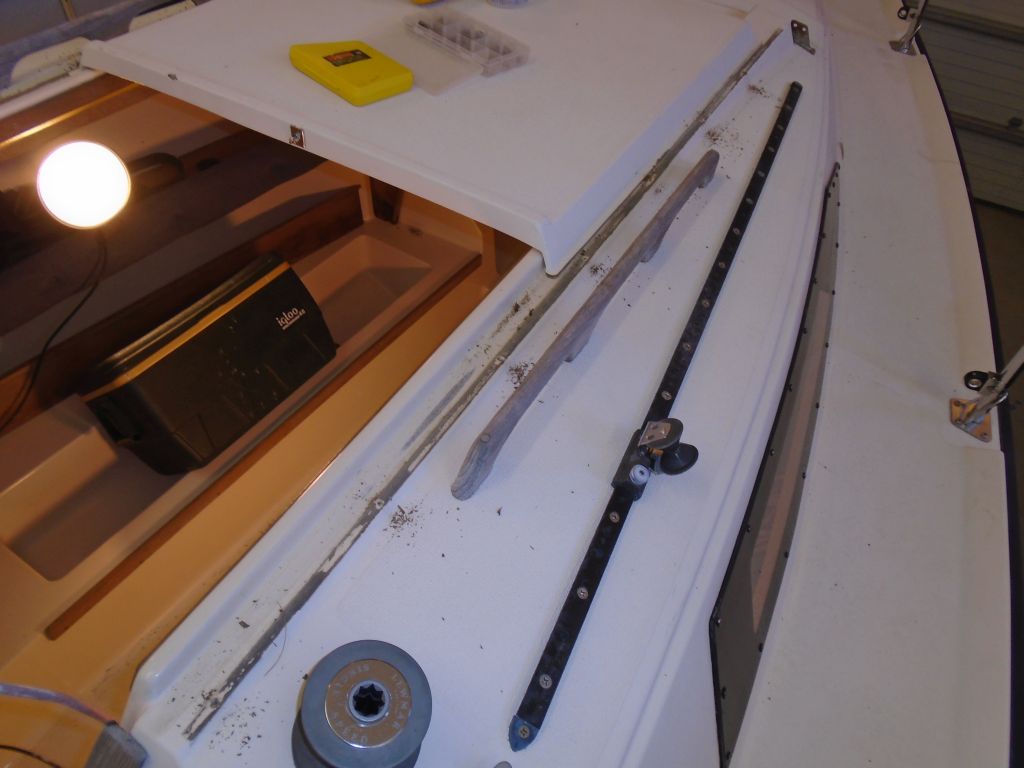
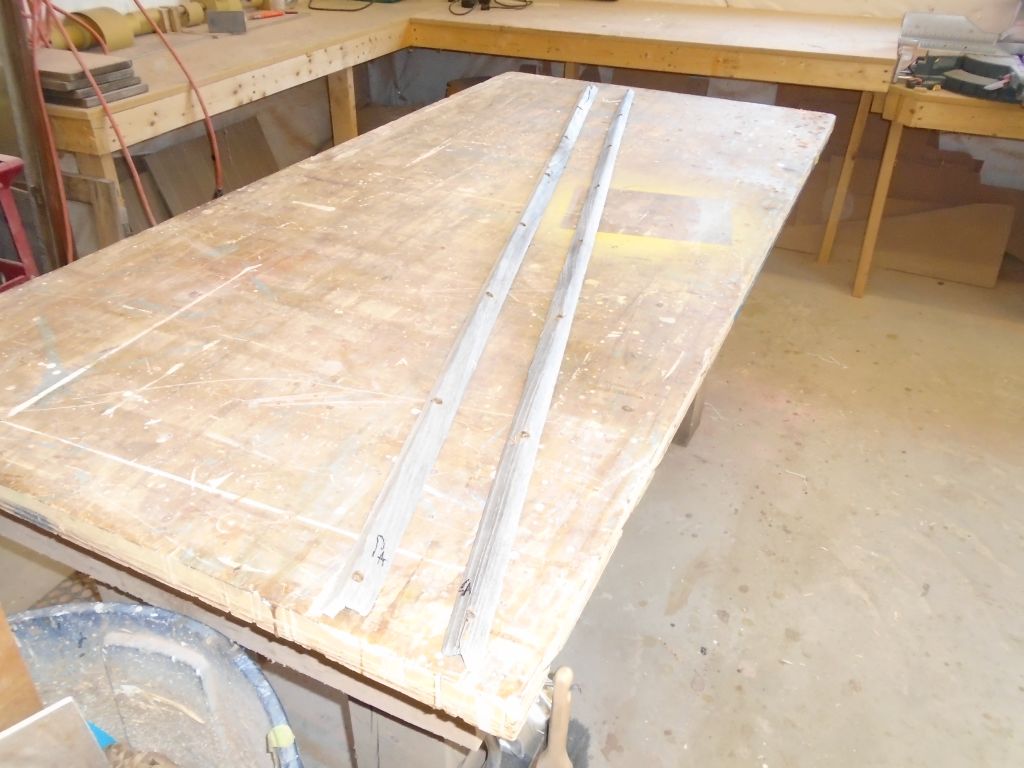
From some teak stock on hand, I milled new trim pieces, more or less duplicating through various saw operations the profile and details of the original trim, which was a sort of inverted, angled L shape. However, hoping to provide a little more strength over the long term, I made the top portion of the profile–the section that overhung the companionway hatch to hold it in place–a bit thicker than original. Afterwards, I cut the trim to the required length, pre-milled counterbores and screw holes for the fasteners, and sanded the pieces smooth, easing the edges as I went.
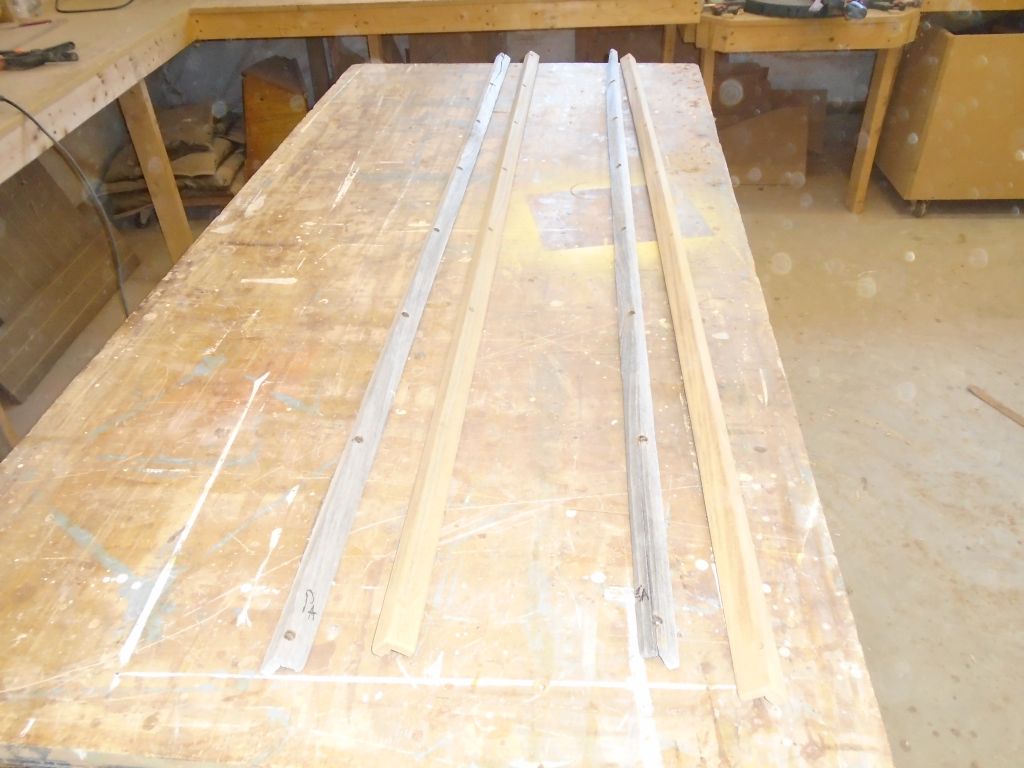
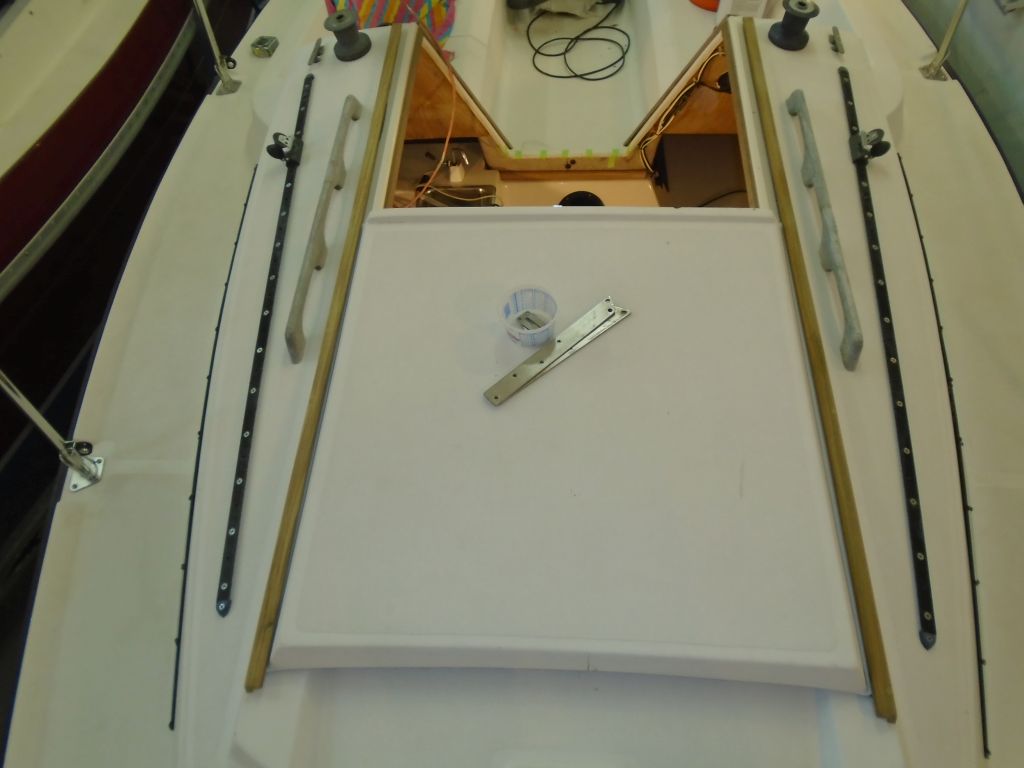
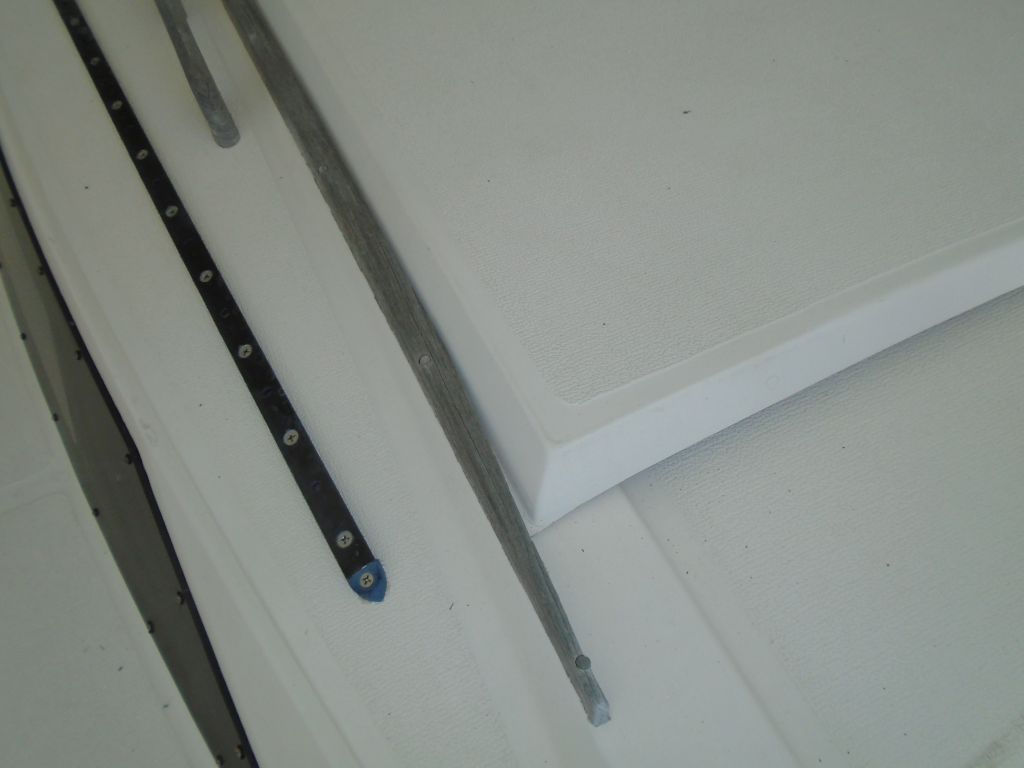
I intentionally changed the location of the screw holes to provide fresh material for the threads to grip, so I began the installation with a dry fit, in which I predrilled and secured all the fixing screws as needed.
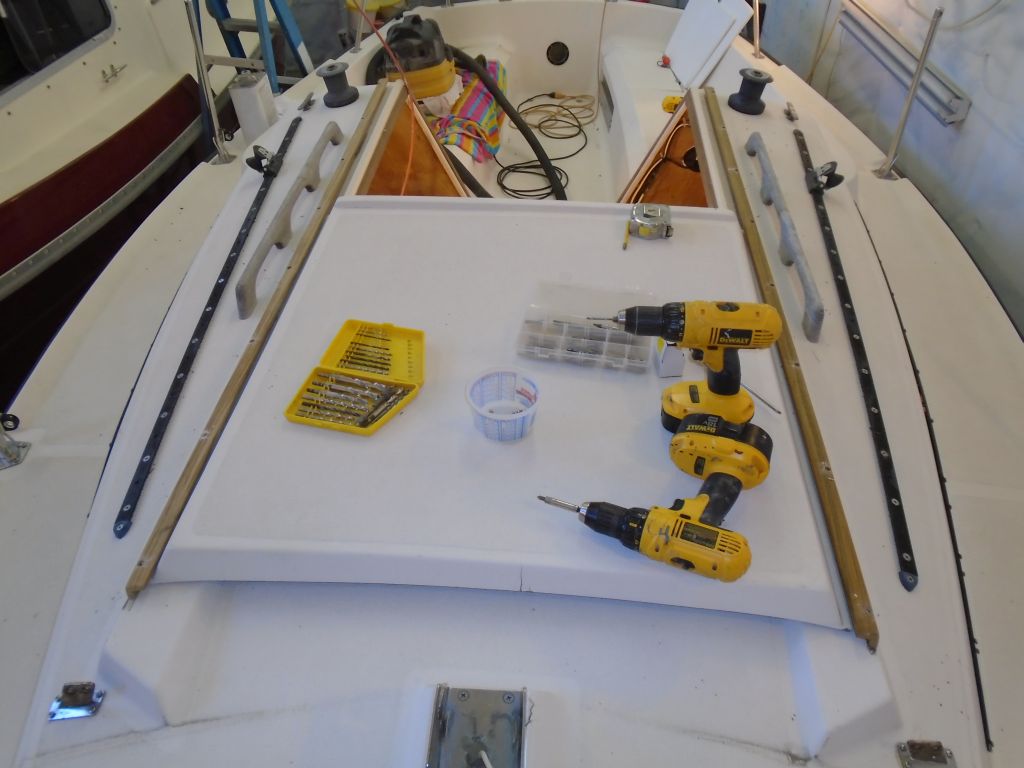

Next, I cleaned up the bonding surface, masked off the exposed edge of the teak trim, and installed the rails permanently with sealant and screws. After removing the excess squeezeout, I removed the masking tape, leaving the clean, bare teak. I bunged the screw holes, completing the job for now.


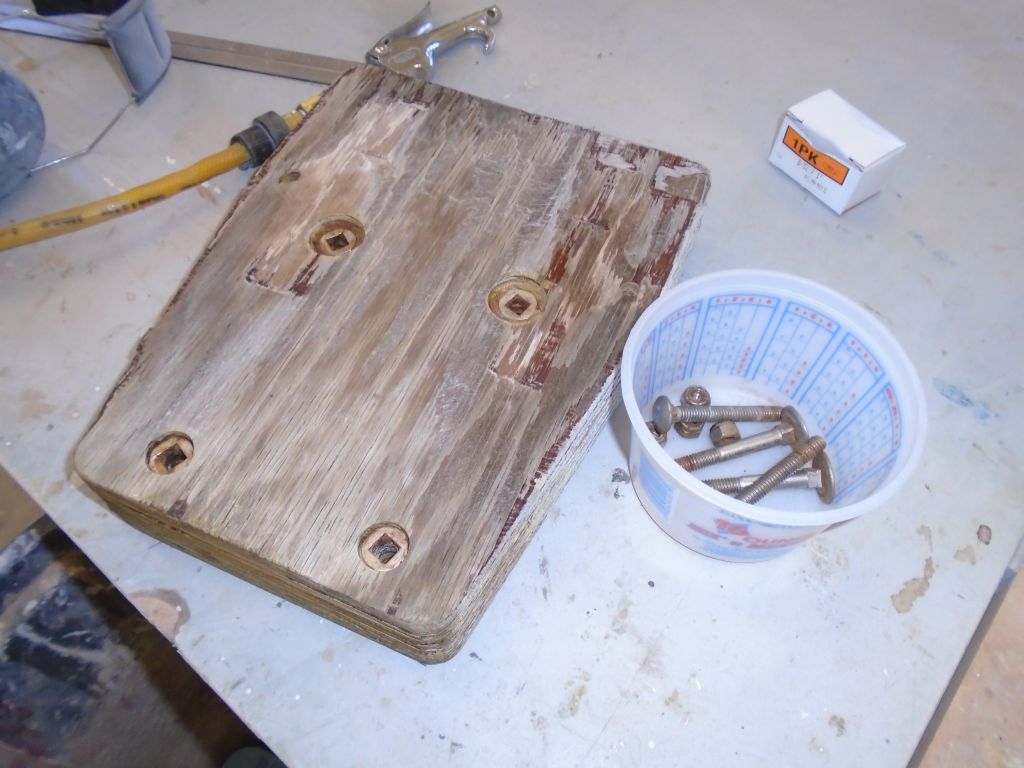
The owner had asked me to look at the original plywood outboard motor mount and see about somehow refinishing it. This would be possible, though it would never be beautiful, but as I looked at the piece I noticed plenty of splintering, compression, and missing chunks, and on impulse I decided it’d be better, less expensive, and ultimately more attractive and useful to purchase a replacement pad, which were now available in maintenance-free plastic. After confirming the bolt pattern was compatible, I ordered a new pad, and removed the old one to prepare for the new one’s arrival.


Meanwhile, I spent some time coming up with a new scupper plan, and ordering various materials for the job. I planned to remove the existing PVC pipe and elbows at both ends, and replace with new fittings and hose once I’d opened up access at the aft end of the cockpit. I ordered the new access port as well, and would begin this job later, once the pieces were on hand.
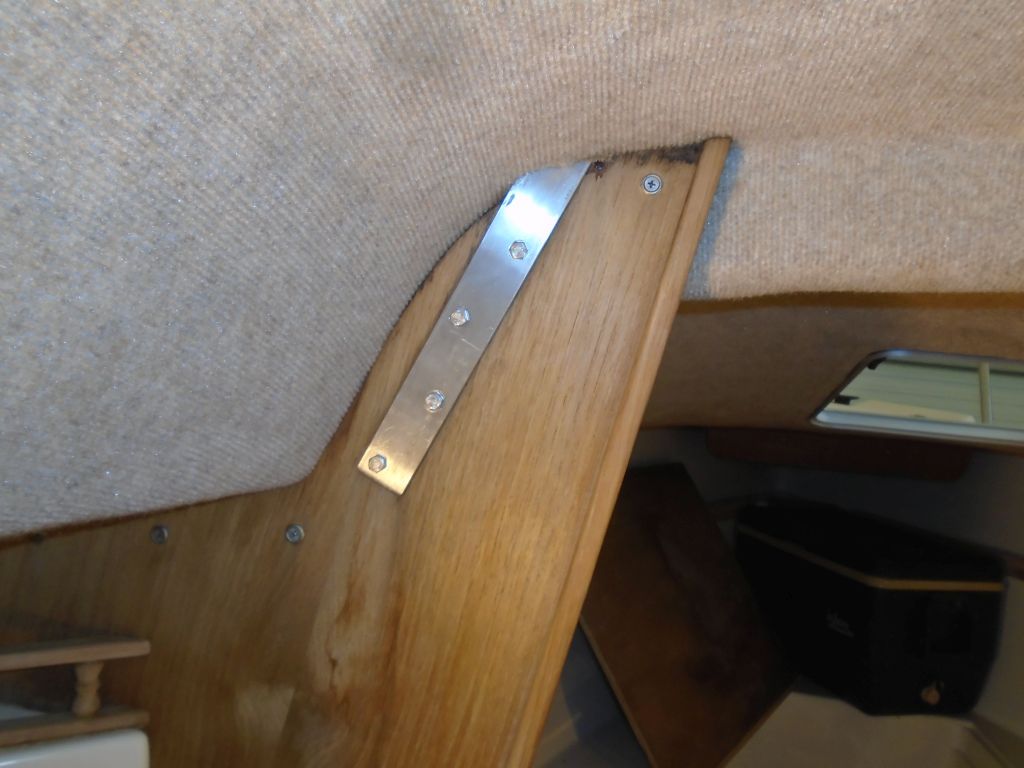
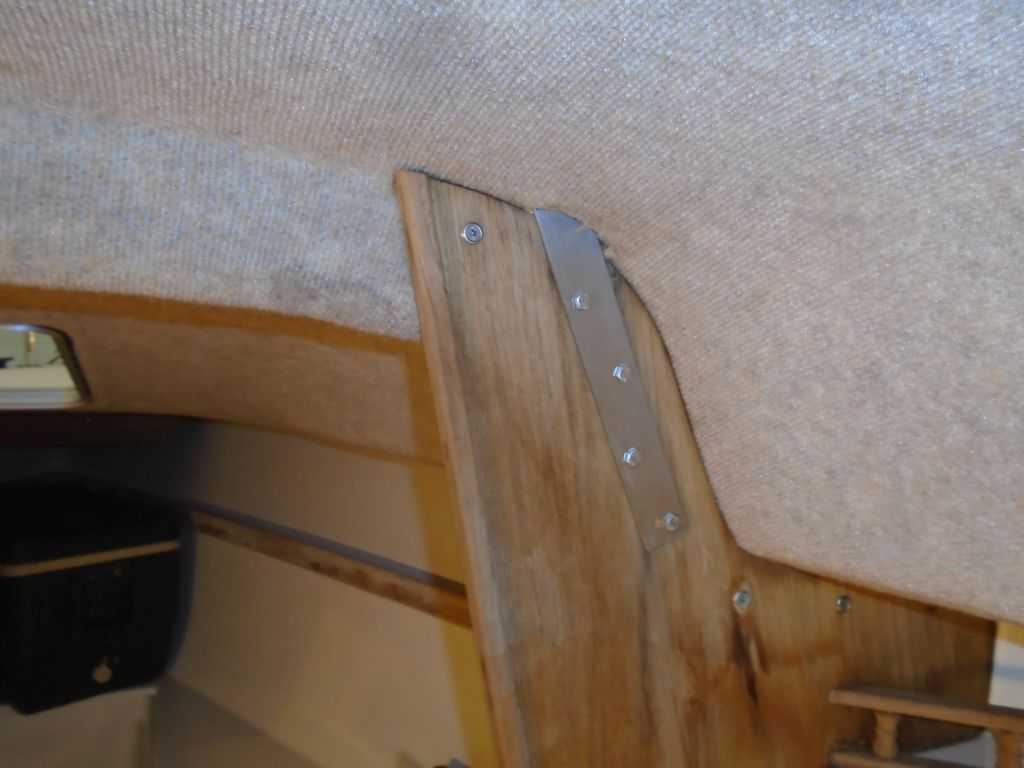
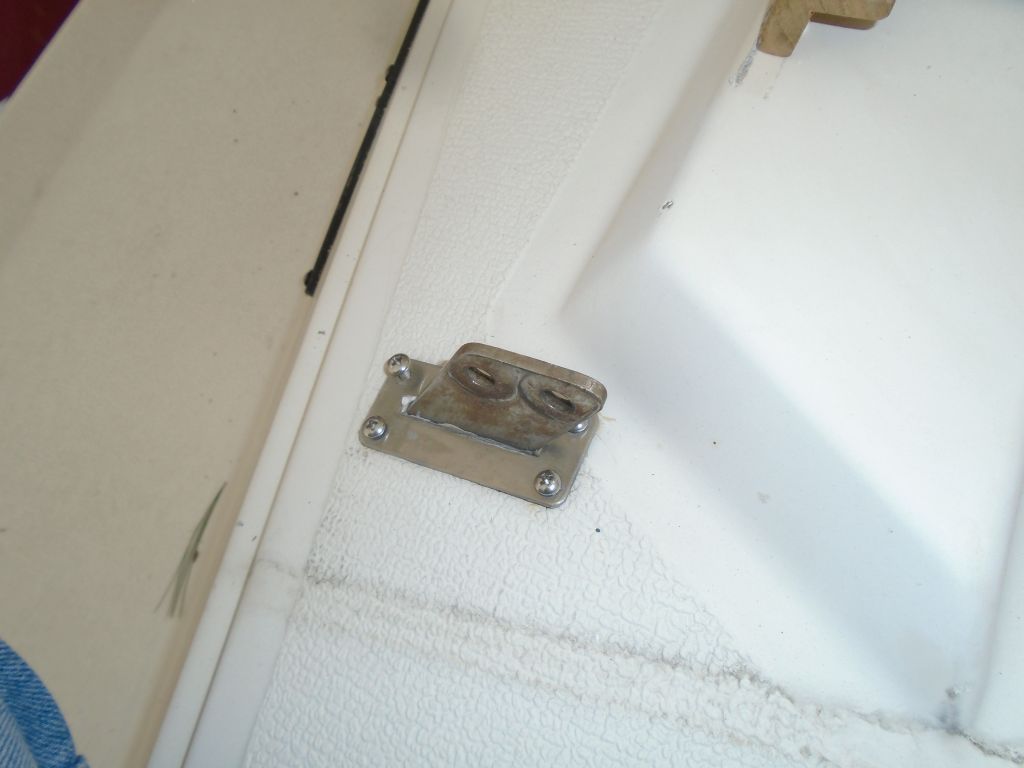
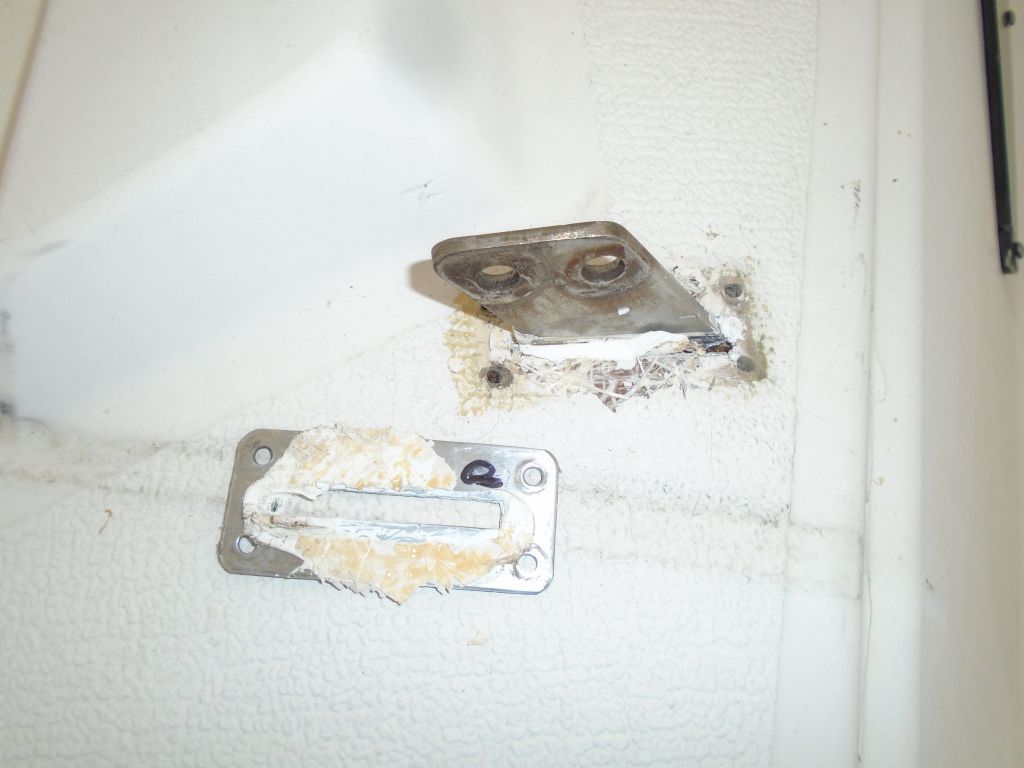
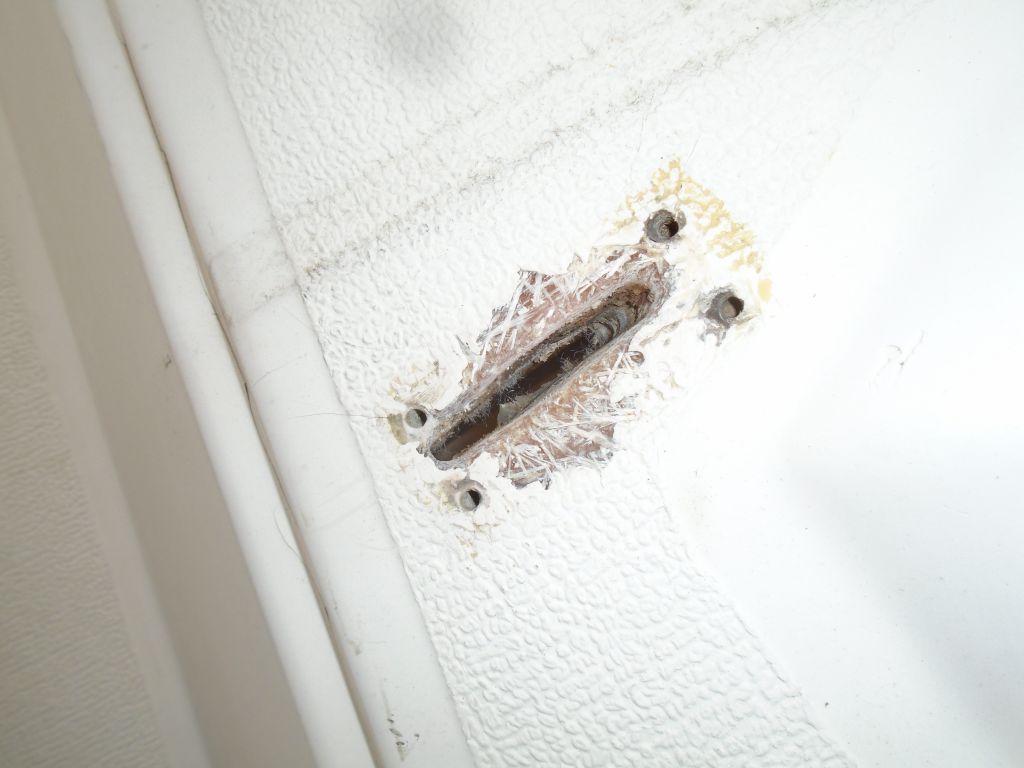
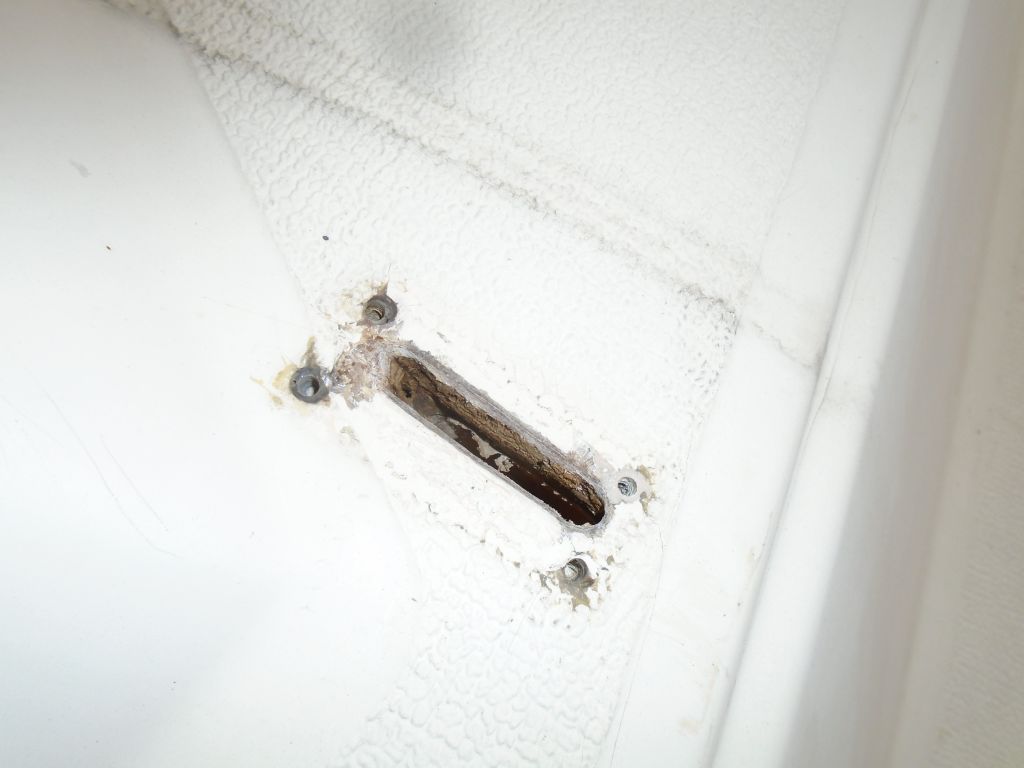
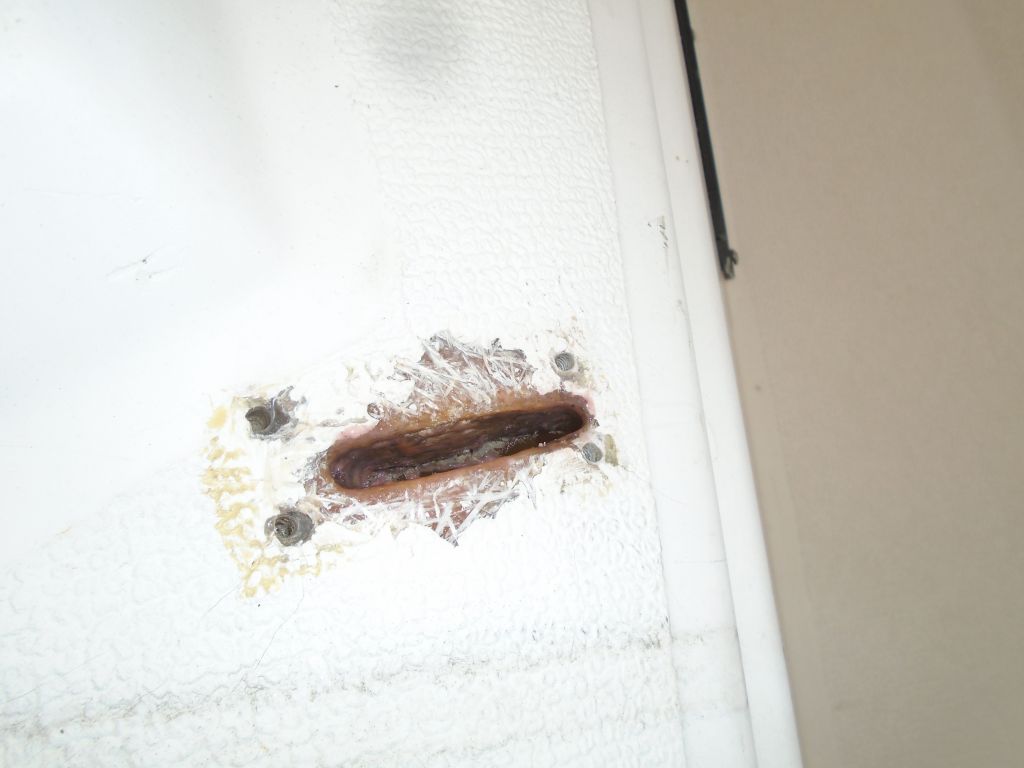
The owner reported a problem with chronic chainplate leakage, and indeed evidence of this was cl ear, with water staining on the bulkheads around the chainplates. Similar issues with this sort of through-deck design were common, as everything about the design and the forces involved made sealing a tenuous situation at best, but the leaks were probably more noticeable here because of the highly visible location well inboard and exposed on the bulkhead.
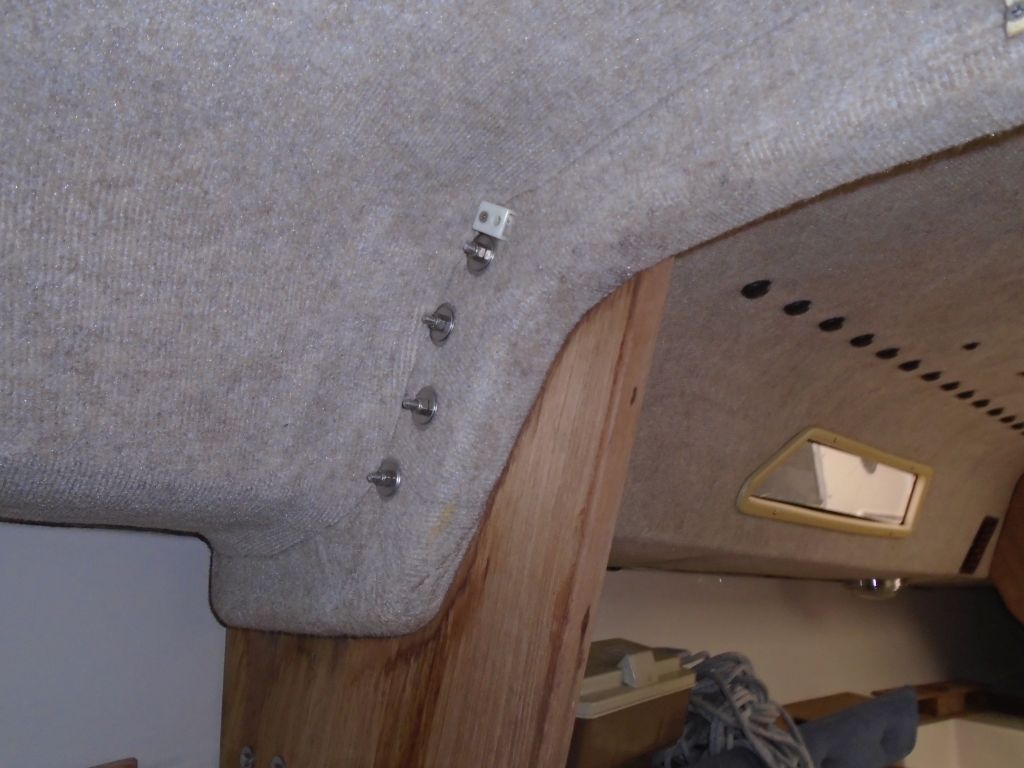
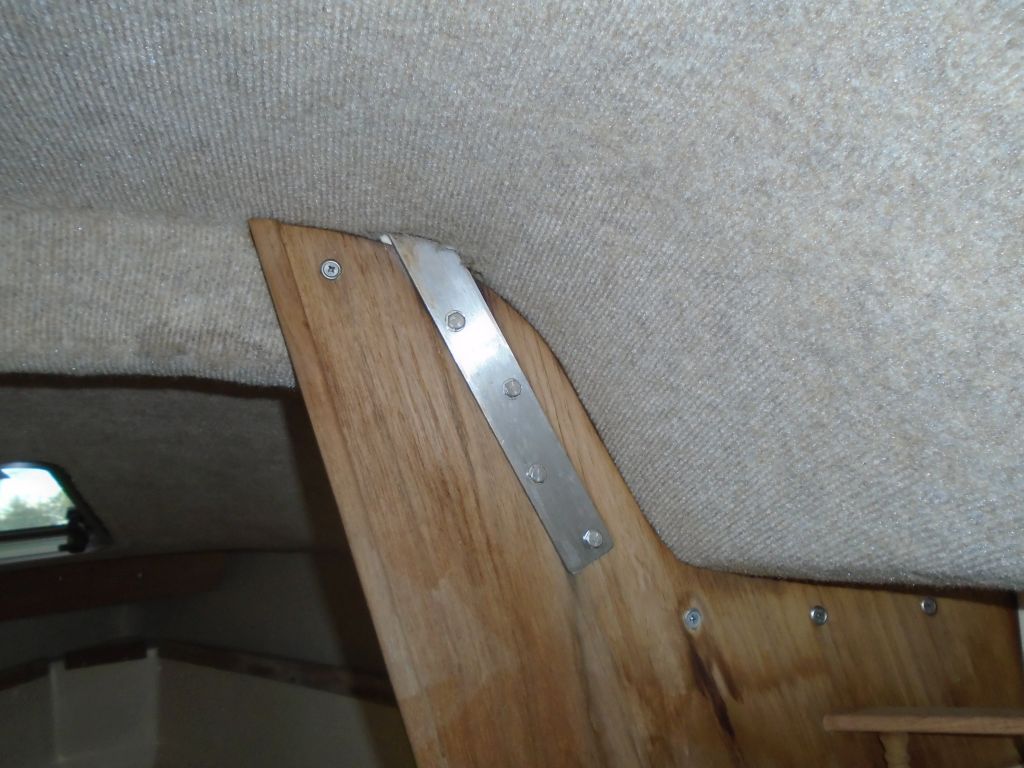
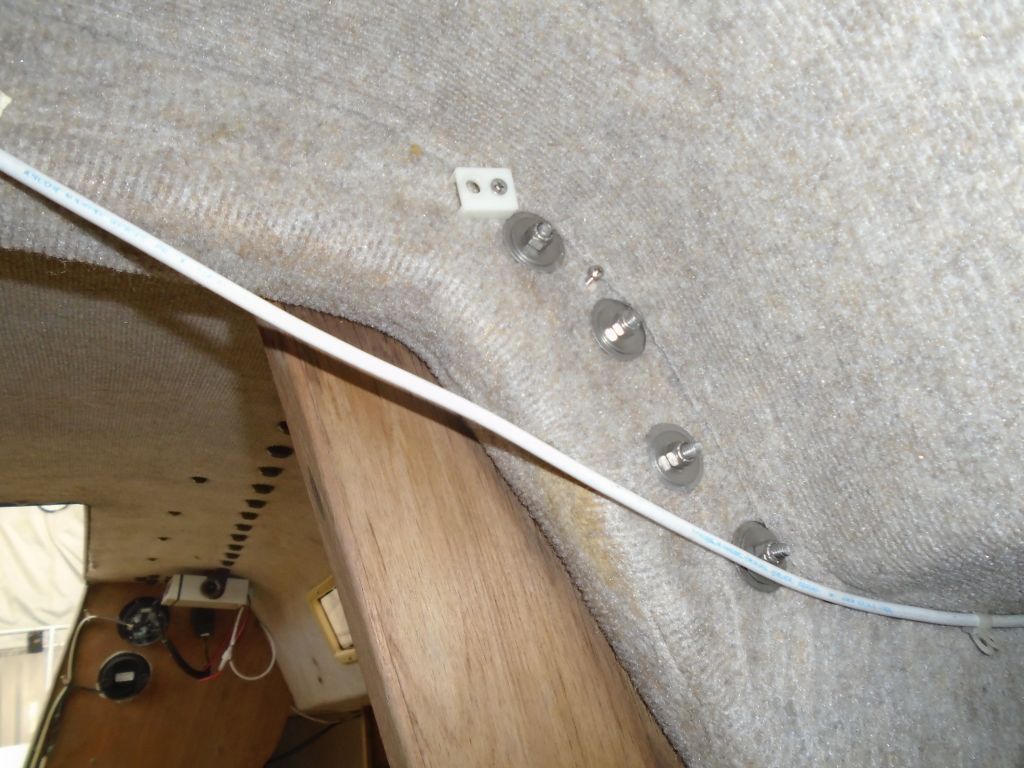
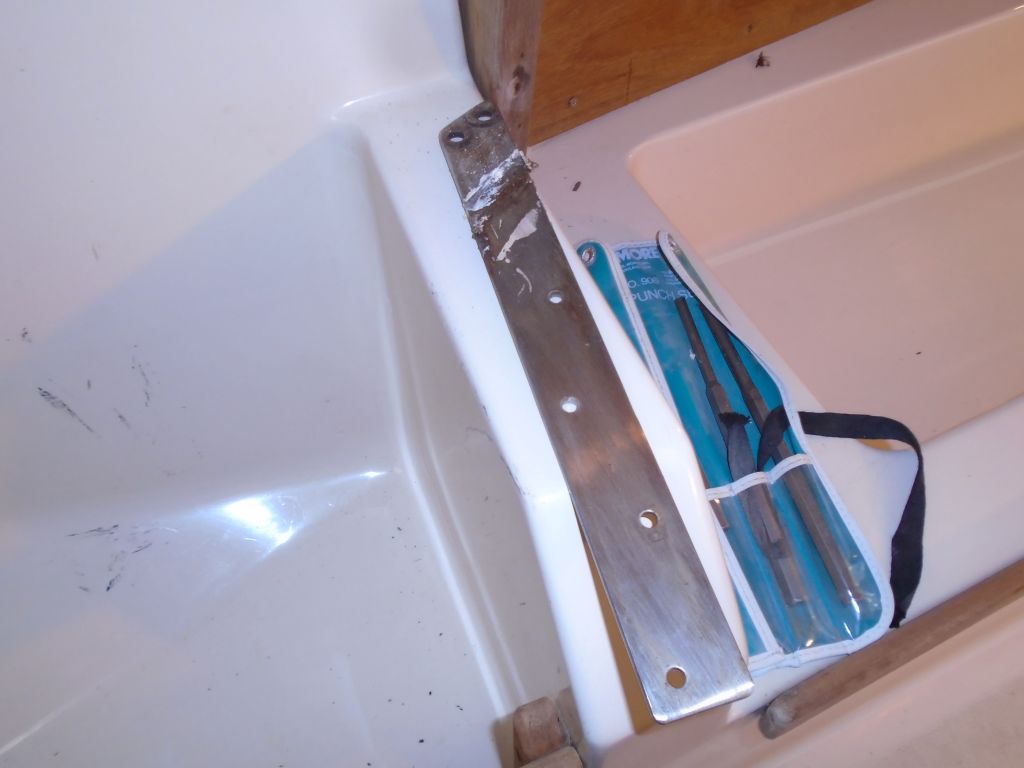
In any event, to address the issue now I removed the chainplates entirely, starting with the deck covers and then the stainless steel plates themselves, which were secured with four bolts through the bulkhead and a heavier support beam across the cabin. The various components were in good condition, and I cleaned them up to prepare for reinstallation, removing old sealant and staining. Though the fixing bolts were in sound condition, I decided to order new ones as a matter of course.
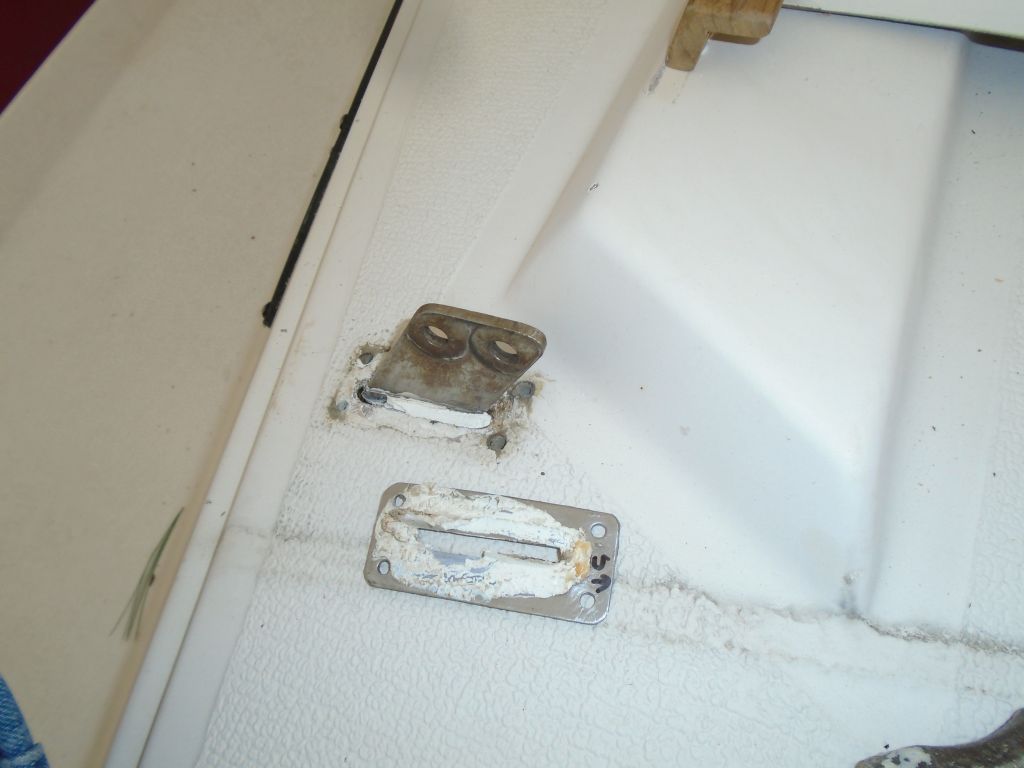


Afterwards, I cleaned up the chainplate slots through the deck, reaming out old sealant and other material to open them up as much as possible and provide a good sealing surface for reinstallation. Then, I sealed the insides of the openings through the deck with a thickened epoxy mixture; while there wasn’t an obvious issue with deck core moisture in these slots that required repair, it was sound practice to seal the openings now, while I had the chance.
Total time billed on this job today: 6.5 hours
0600 Weather Observation:
21°, clear. Forecast for the day: sunny, high in the 50s
Thursday
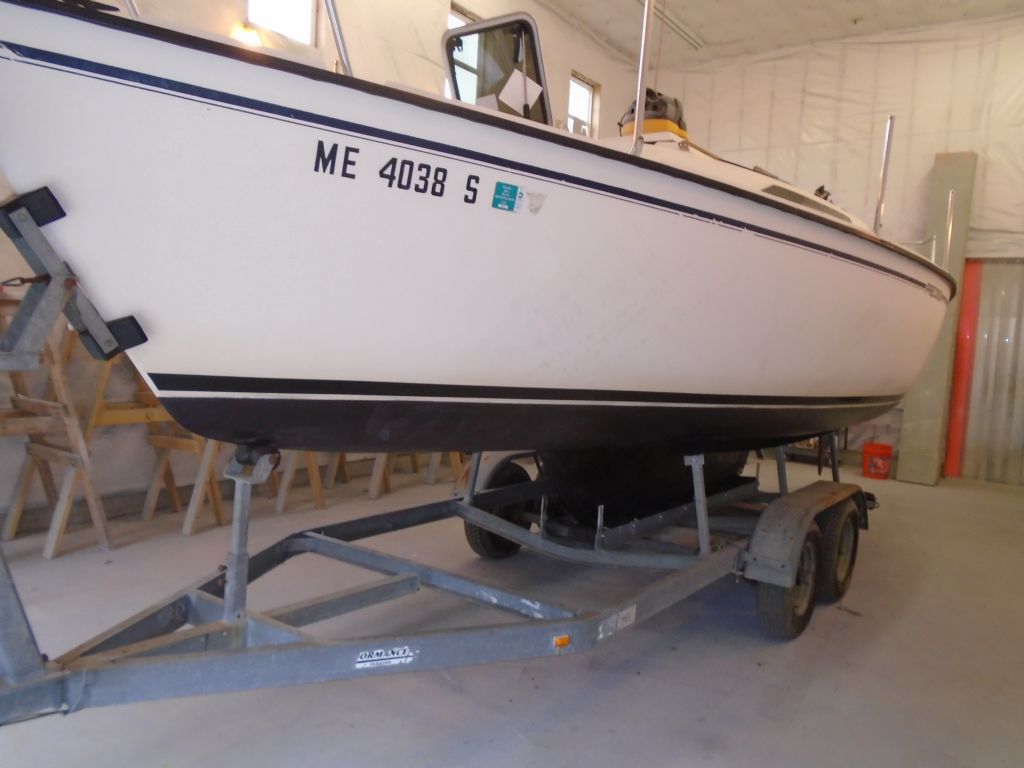
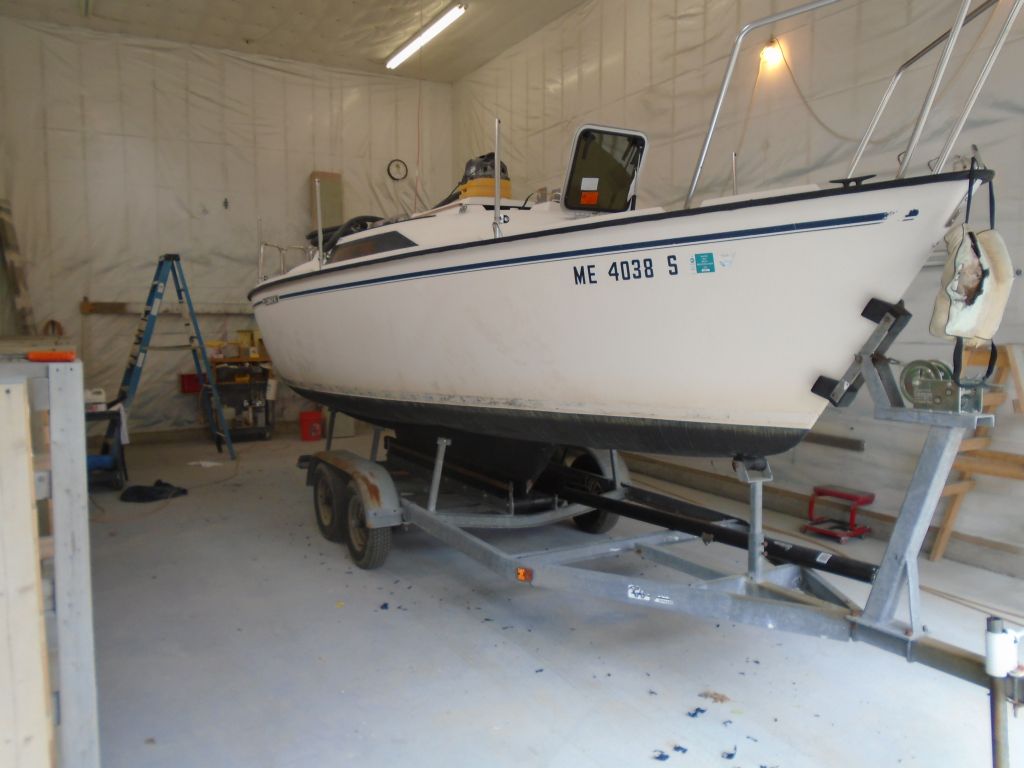
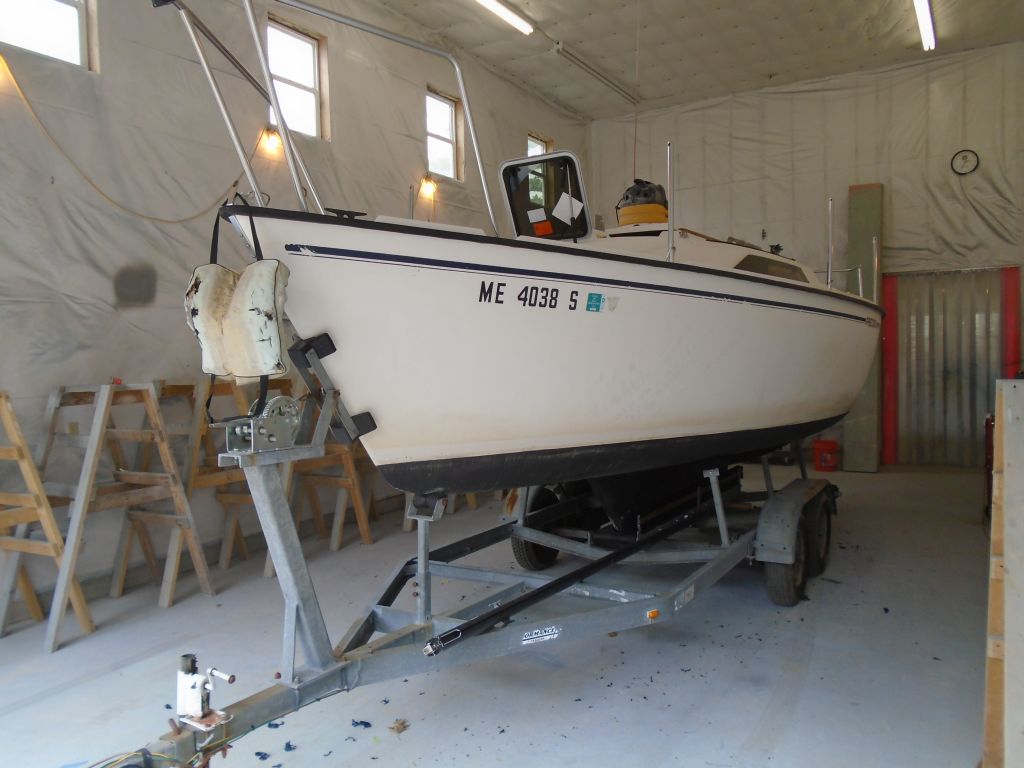
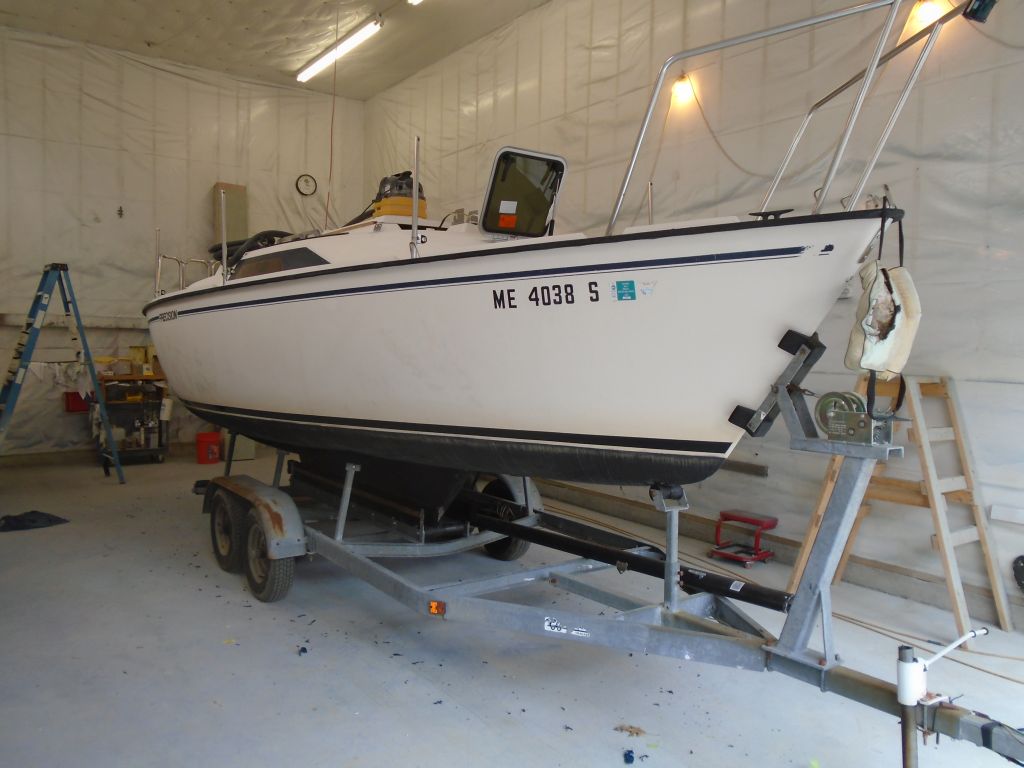
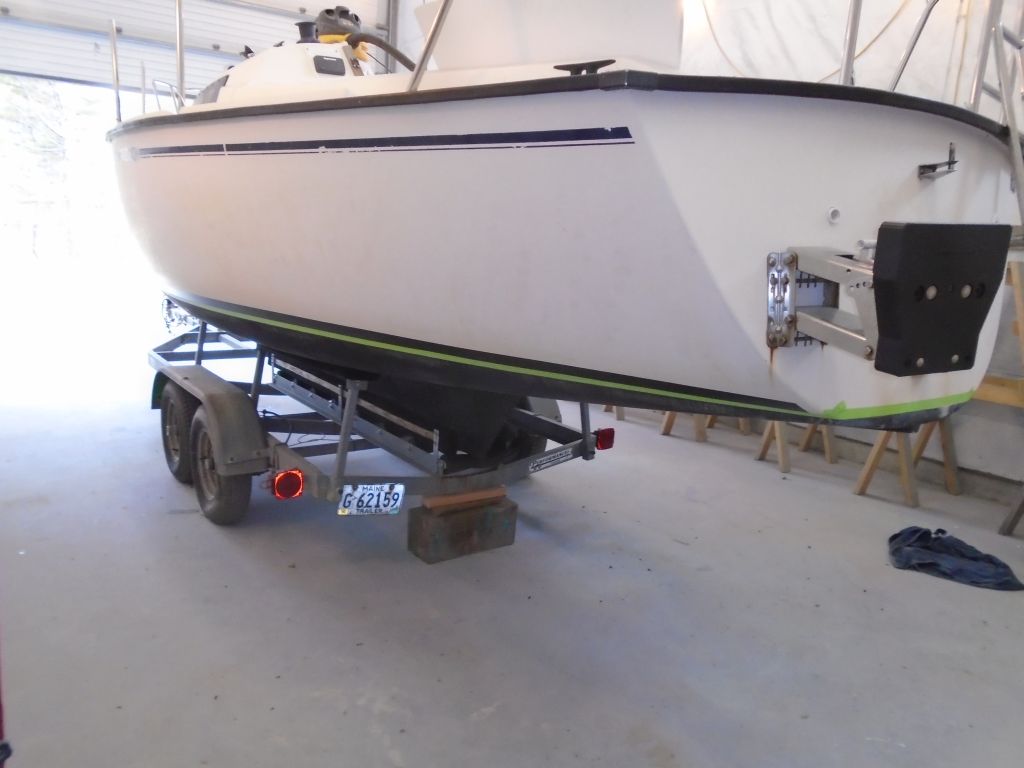
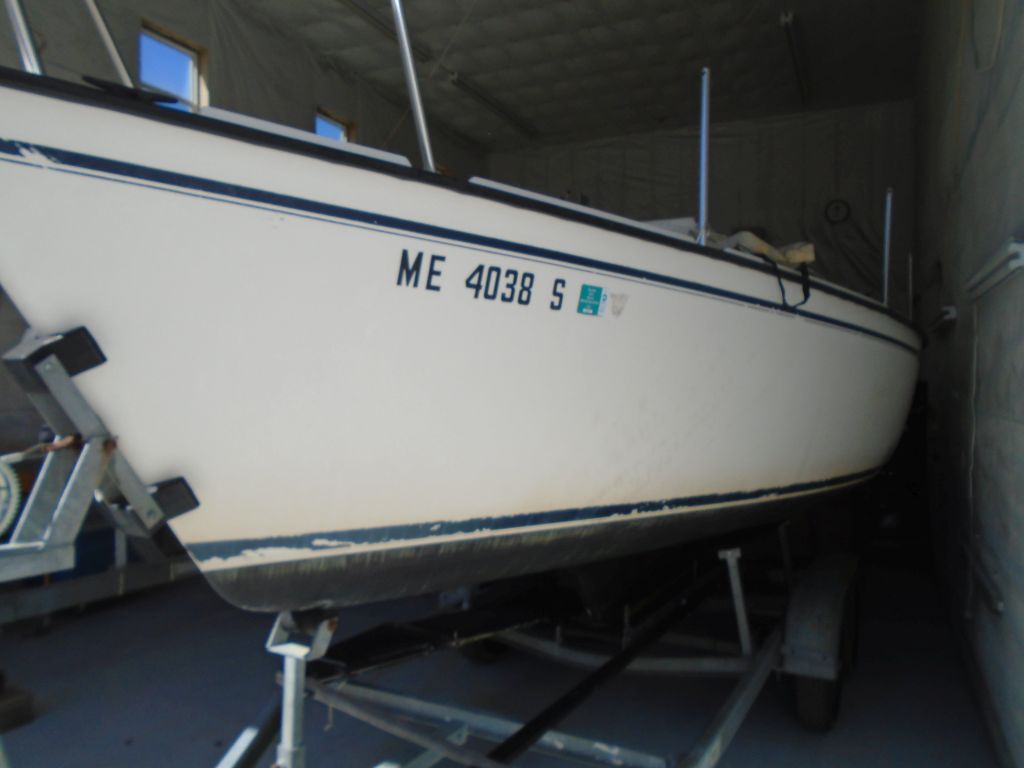
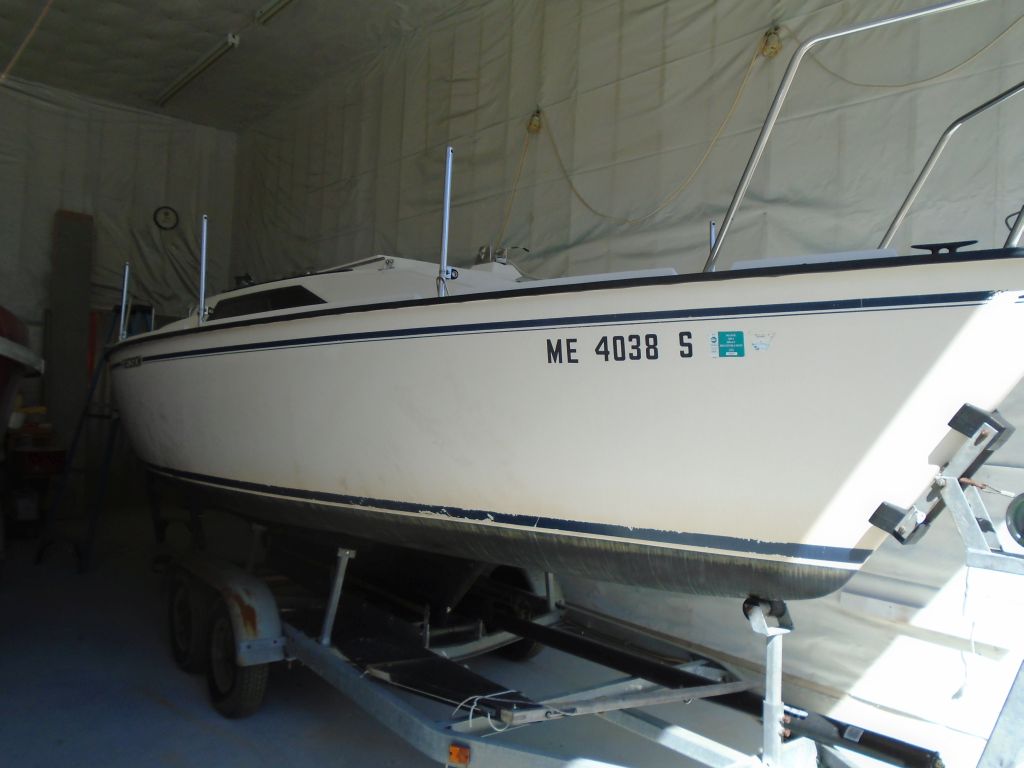
Getting ready to begin the project in earnest, I spent a short time aboard, documenting the initial condition of the boat and looking over the jobs list so I could begin to order any materials and parts required.
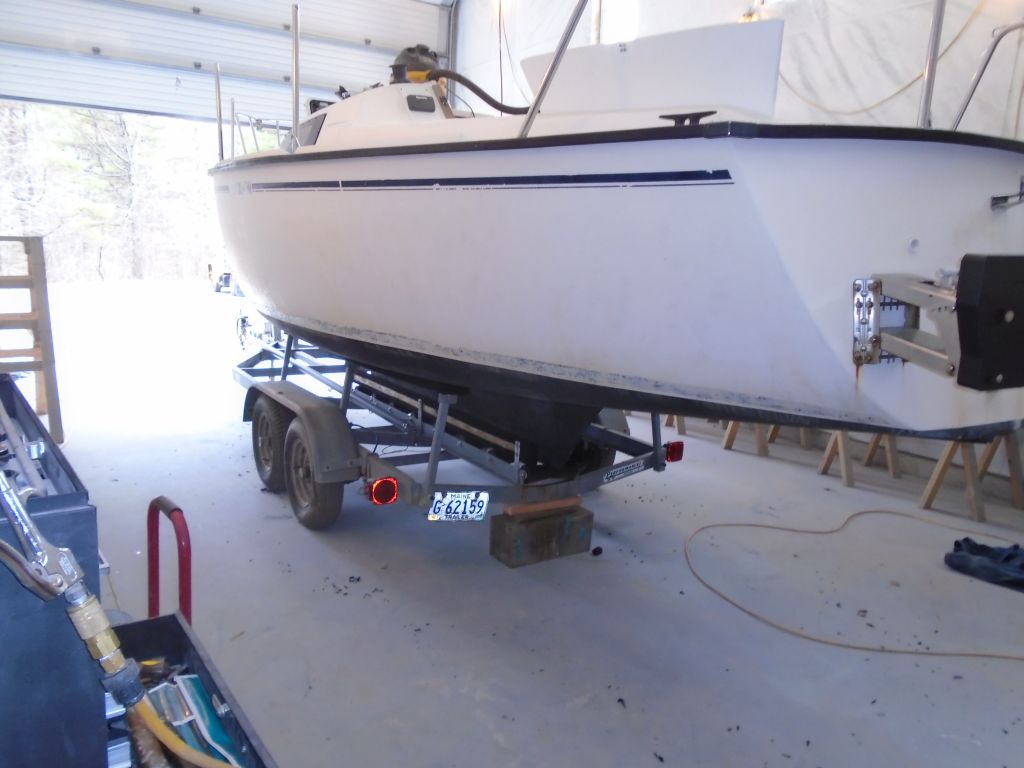
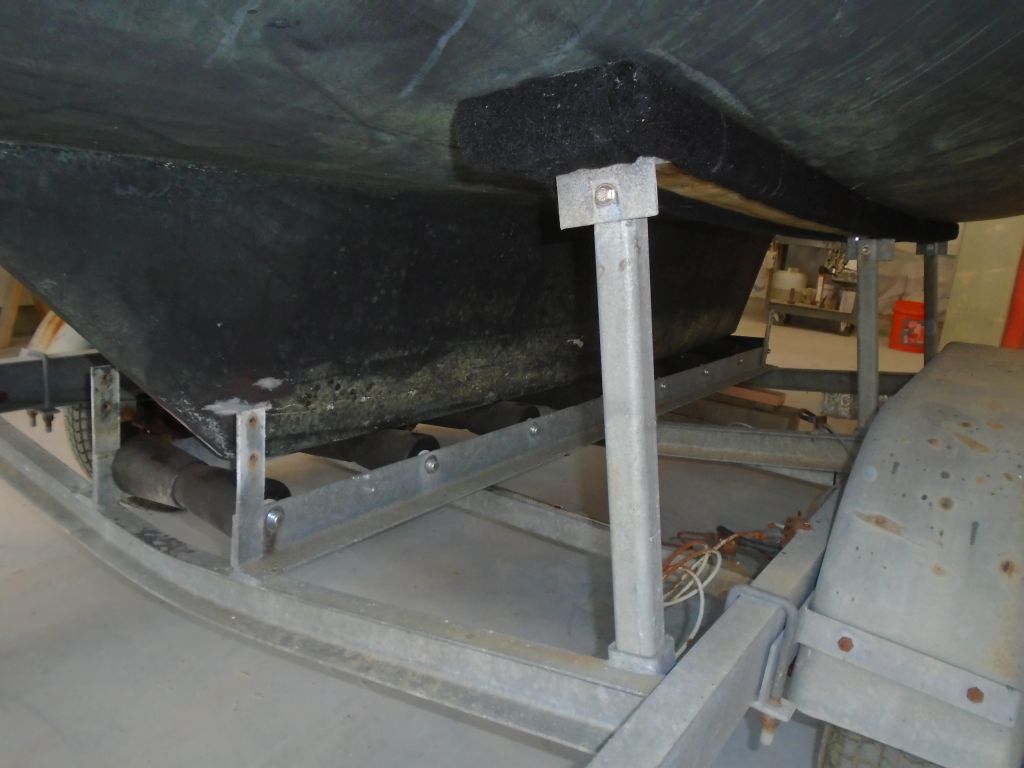
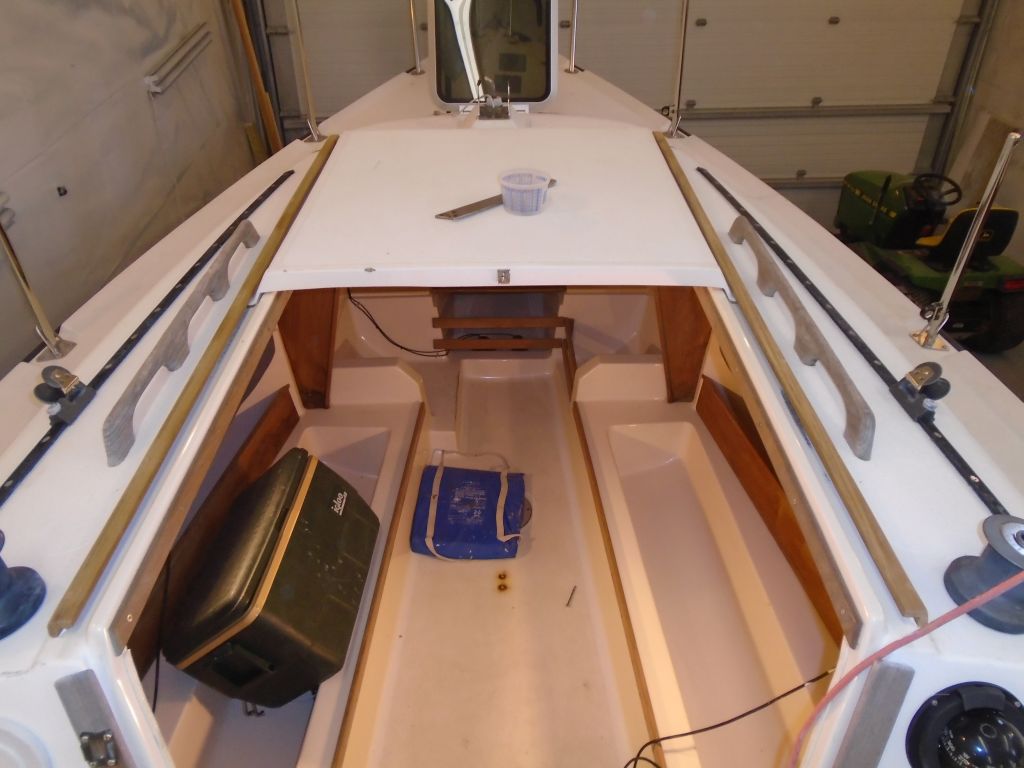
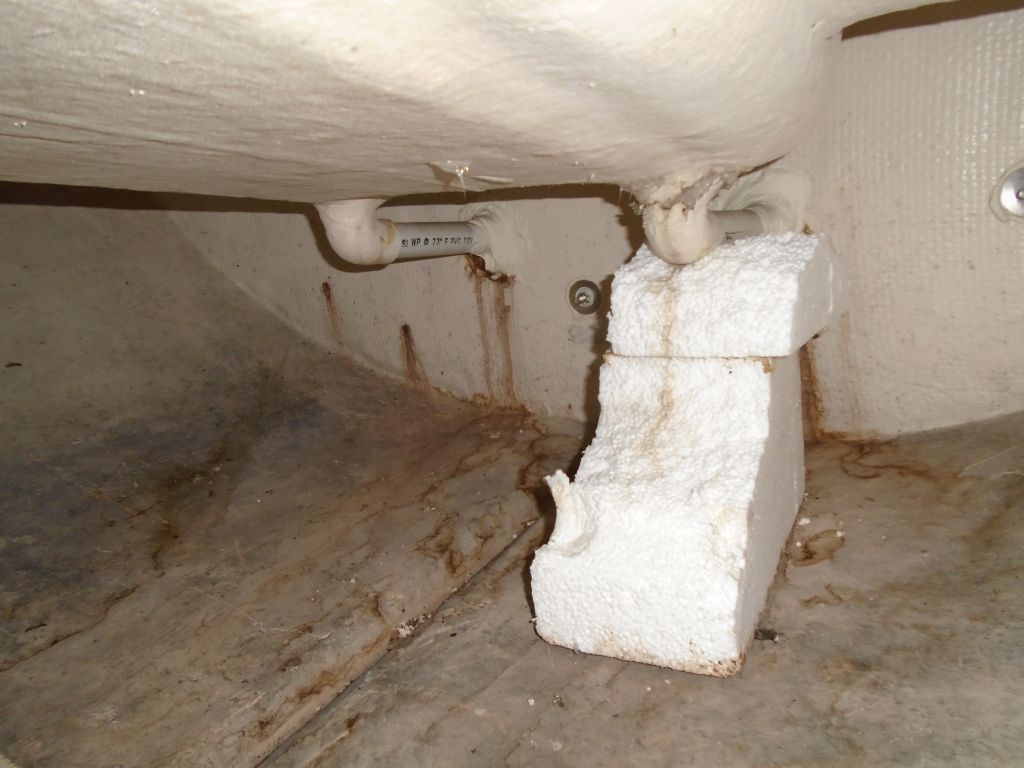
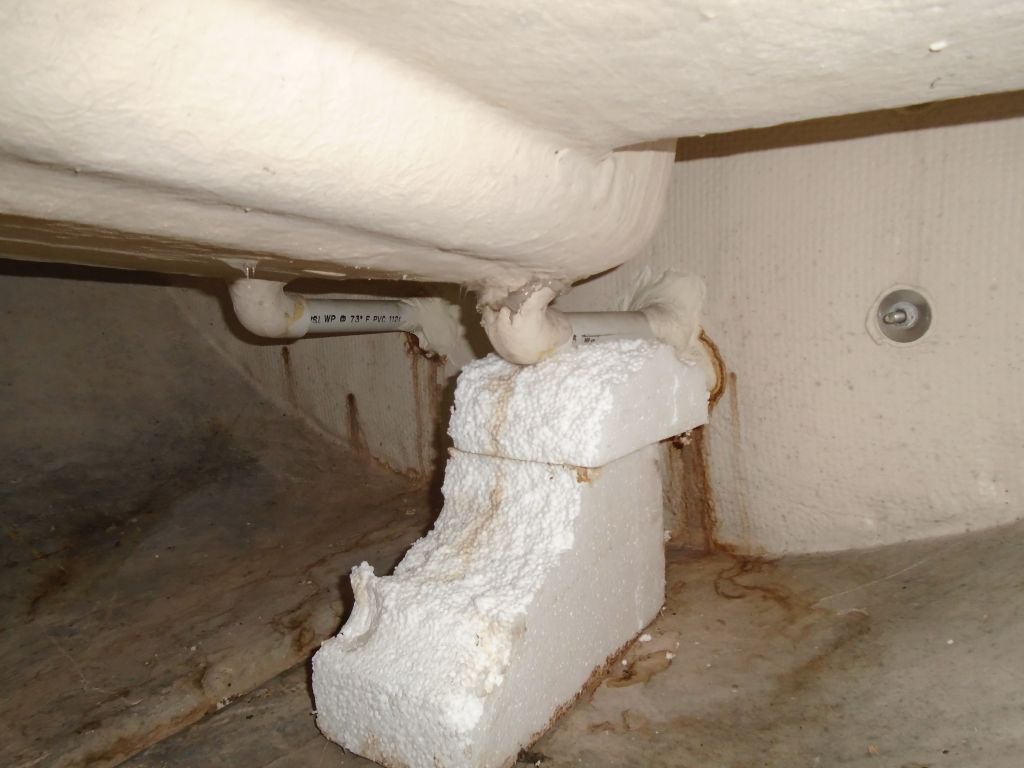
The biggest job, as it were, was the cockpit scuppers. The original scuppers used rigid plastic fittings and pipe to connect the cockpit well with the transom outlets, and these fittings had cracked over time, with several apparent attempts to stem the problem with sealant or other repairs apparent. The main issue with this situation was that access was essentially impossible for anyone other than a highly-skilled two year-old, as the molded interior structure and cockpit well prohibited direct access to the space from inside the boat–despite what looks like wide open access from the photos.

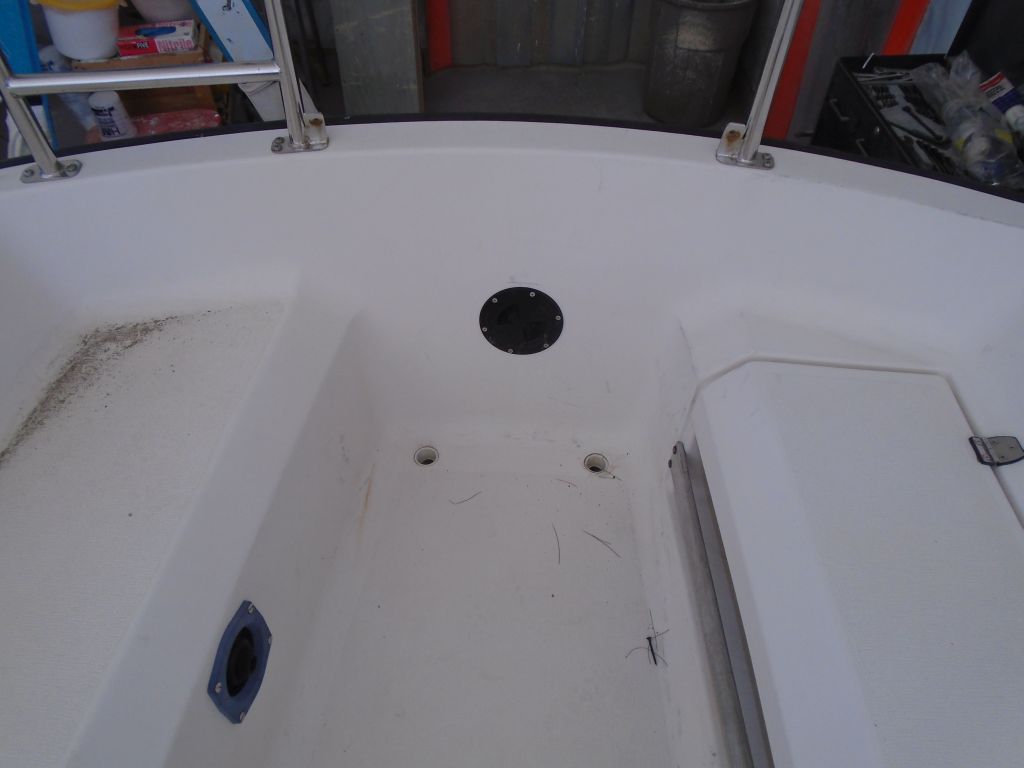
The answer to the access problem seemed to be to install a larger access hatch in the vertical section of the cockpit well, replacing the small round one. So creating this access would be the first part of the job, and afterwards hopefully the access would be sufficient to replace the fittings with a new system.
The interior cushions were badly worn and in poor condition, and I’d subcontracted their replacement to my trusted upholsterer. This job was already underway, and I removed the cushions from the boat to make more room for the other parts of the project.
The work list contained myriad and sundry smaller jobs, from rebedding the leaky chainplates to replacing the depthsounder to repairing some teak trim, among other things. I’d cover them all in more detail as the job got underway.


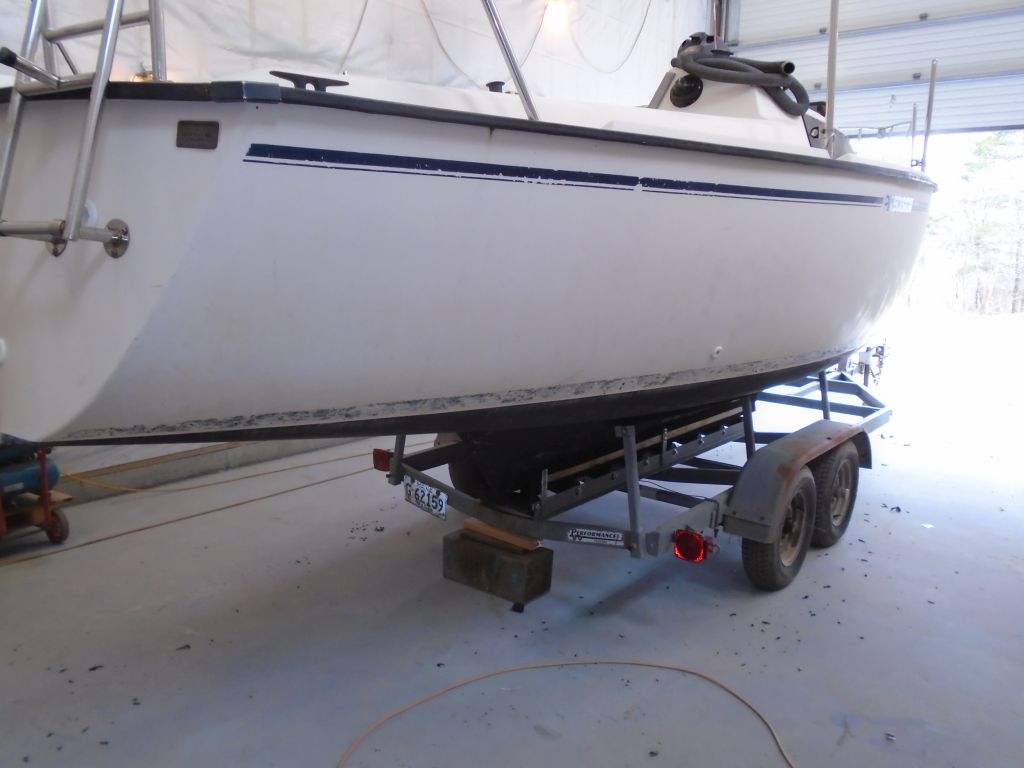
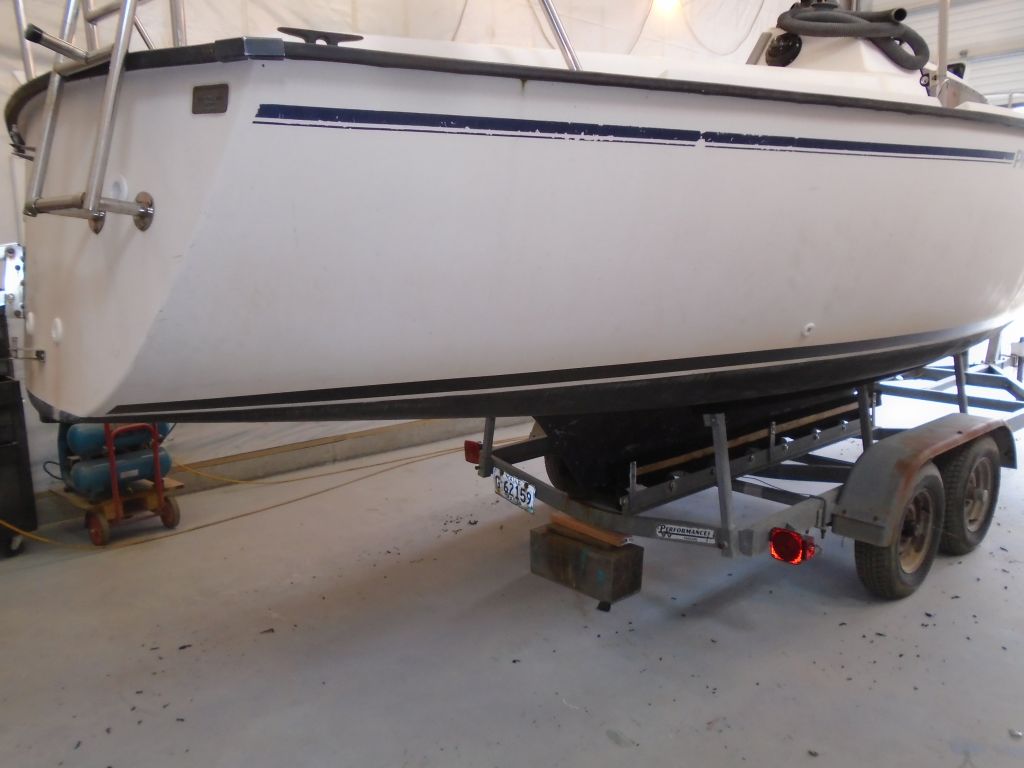
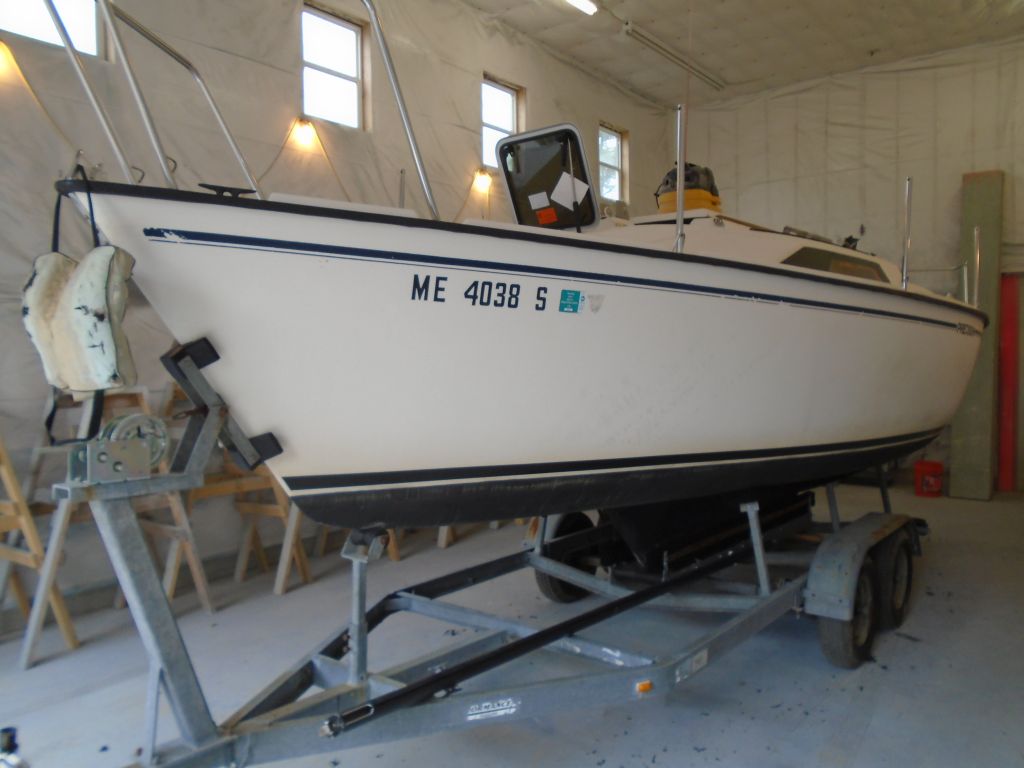
The hull would require some basic restorative work, including replacing the scuffed vinyl-tape bootstripe and painting the bottom.

Total time billed on this job today: .5 hours
0600 Weather Observation:
25°, clear. Forecast for the day: sunny, 70s