(page 6 of 7)

Halcyon 13

< Back to Halcyon

Monday

To begin, I sanded all the new little fiberglass patches around the deck, bringing them flush with the adjacent surfaces as needed.

I also cleaned up around the newly-cored poop deck areas, preparing the core and surrounding surfaces for the next steps.

The nature of recoring small deck sections like those on the poop deck, with cambers in two directions and other nearby molding complications, is such that the existing deck edge flanges tend to spring up once the decks are cut apart, and this, along with other intangible factors, often leads to the new coring being slightly lower than the underside of the existing deck surfaces.  So to bring the height to a compatible level, I cut and installed in epoxy two layers of fiberglass over the central sections of the core.  This would help the final layers of fiberglass lie properly over the repairs later.,

I went over the main deck areas again with a second round of fairing compound, applying it mainly over the new fiberglass patches from earlier, and a few other areas requiring additional filling.  This brought me to the end of a short work morning, after which I had to leave the shop on other business.

Total time billed on this job today:  2.5 hours

0600 Weather Report:
20°, partly clear.  Forecast for the day:  Mostly sunny, 34.

Halcyon 12

< Back to Halcyon

Monday

I removed the weights from the port chainplate area, where I’d installed new core last time.  I’d continue work on this area in the near future.

I spent the morning preparing and sanding the deck areas with two grits, smoothing and removing the excess skim coat as needed.  This left the material mainly in the vestiges of the old molded nonskid pattern and along the channels, where the pattern had been slightly raised, as well as in a few low areas here and there.  There’d be some minor additional filling required, which I’d handle soon, along with additional rounds of finish sanding throughout the process.

Next, I turned to the poop deck, where I spent some time on final preparations before laying out and cutting new sections of balsa core to fit.  Where possible, I extended the coring beneath the existing deck edges, leaving a few areas where the bottom-skin taper prevented installing full thickness of new core material.  I omitted the core in way of a known hardware location near the lazarette hatch, and I’d fill any small remaining gaps with thickened epoxy during the core installation.  On the starboard side, I left a narrow area extending forward along the sidedeck for now, and planned to rebuild it with fiberglass  later.

After final preparations, including cleaning the deck areas and bonding surfaces, wetting out the core with unthickened epoxy resin, and other tasks, I installed the new core in thickened epoxy adhesive, securing it with weights while it cured.

To finish up the day, I cut various fiberglass patches and installed them on the myriad test holes around the decks, which areas I’d previously dished out to accept the fiberglass.  The little patches would prevent the filled holes from printing through or cracking later.

Total time billed on this job today:  7 hours

0600 Weather Observation:
8°, clear.  Forecast for the day:  Sunny, 30s

Halcyon 11

< Back to Halcyon

Friday

I spent some time preparing various old fastener holes around the decks, mainly in the cockpit well. At each location, as needed, I used a countersink to create a wider opening to better hold fairing compound and fill these holes.  Belowdecks, I masked over these, and any other deck hole penetrations, to prepare them all for filling from above.

Afterwards, I cleaned up the decks with vacuum and solvent wash, paying close attention to all the various fastener and drill holes I’d made earlier, and prepared to skim coat the decks with epoxy fairing compound in order to fill the remnants of the molded nonskid pattern, along with other minor voids and pinholes.  Then, using several batches of epoxy mixed with fairing fillers, I used a trowel to cover most of the deck surfaces and cockpit with a thin layer of compound, filling the existing fastener holes at the same time.

On the port side, near the chainplates, I prepared a section of new balsa core to replace the damaged core I’d removed from this area earlier.  The coring covered the inner half of the opening;  I planned to build up solid fiberglass and epoxy in way of the chainplate slots themselves, which would prevent any future leakage at those slots from damaging deck core (and the same thing on the starboard side, which opening was smaller and would be entirely filled with fiberglass–no coring).

With the coring cut to fit, and other final preparations completed, I installed the new core in epoxy adhesive, and weighted it down to hold it securely to the bottom deck skin while the epoxy cured.

I’d continue work with the solid fiberglass portion of the chainplate repairs, as well as the poop deck recoring and repair, in the near future, and as I continued work on the main areas of the deck.

Total time billed on this job today:  5 hours

0600 Weather Observation:
37°, mostly clear.  Forecast for the day:  Sunny, temperature dropping through the day

Halcyon 10

< Back to Halcyon

Thursday

With other commitments, I had a short day planned, beginning with a visit from my rigging contractor, who inspected the standing and running rigging at my request, and on behalf of the boat’s owner.  He also took the old lifelines for replacement.

The rigging was in fair condition, with no significant issues like cracked swages or broken wire strands on the standing rigging, but was of indeterminate–but substantial–age, with numerous wire kinks from poor storage and general use, and various other issues that, taken together, suggested that it would be prudent, if not strictly necessary,  to upgrade the rigging at this time.

The three-strand halyards were in fair condition; one of them was sun-damaged and the material was spiky and friable in the hand, and the others, while in serviceable condition, could benefit from an upgrade as well.  The wire-rope spliced jib halyard had a number of broken strands, or “meathooks”, on the wire portion, and probably should be replaced at a minimum.

With the inspection done, and since I knew I’d have to remove the rigging in order to prep and varnish the spar later in the project, I decided to remove all the rigging from the mast now, which would ease access for the varnish work and also have the rigging easily accessible should the decision be made to replace it.  Afterwards, I covered the now-bare spar (and boom) with plastic again to protect it against dust, damage, and overspray during the rest of the boat work throughout the project.

Total time billed on this job today:  2 hours

0600 Weather Observation:
40°, light rain.  Forecast for the day:  showers, 40s

Halcyon 9

< Back to Halcyon

Wednesday

I got back to work on the  “bulk sanding” phase for the decks, continuing where I left off with the starboard sidedeck, where I sanded to remove the nonskid pattern and prepare those areas.  Afterwards, I moved on to the coachroof and cockpit, removing the molded pattern from those areas as well with my usual two-grit sanding process (40-80).

With the nonskid and flat deck areas  complete for now, I turned to the cockpit well and cabin trunk, which featured the original “smooth” gelcoated surfaces.  For these areas, I chose a less aggressive sanding tool, and sanded lightly only to scuff and clean these surfaces, the first step towards preparing them for additional work and, eventually, primer and paint.  I used a 6″ orbital finishing sander with 80 grit for these initial passes.  There’d be more standing later, including edge and detail sanding.

Afterwards, with a little time left in the day, I removed some additional deck hardware from the lazarette hatch (outboard well), which included a couple latches and two vents.  The fasteners securing the plastic vents were so rusted that I didn’t even bother to try to remove them, choosing instead to break out the old plastic vents, leaving the fasteners in place for the moment.  The old vents were already broken and unusable, so there was no reason to waste effort in their removal.  I’d cut away the old fasteners later.  With this hardware removed, I could soon get to the surface prep and minor repairs on this hatch.  I left the piano hinge connecting the two pieces in place for now, as I’d damaged all my screwdrivers and power bits of the proper size during earlier hardware removal efforts, so I’d have to wait till my replacements arrived before removing the hinge fasteners.

Total time billed on this job today:  7 hours

0600 Weather Report:
45°, rain.  Forecast for the day:  Rain ending, clearing, 40s

Halcyon 8

< Back to Halcyon

Tuesday

The decks were in original condition, had never been painted, and seemed generally sound overall, but I knew of at least a couple suspect areas I’d identified upon my first inspection of the boat some months ago–specifically the poop deck on either side of the large lazarette hatch.  Now, I went over the entire deck with a sounding hammer and drill to determine the condition of the remaining areas and seek out other areas requiring further structural attention.

Sounding results in most areas were good, with no issues indicated.  There were any number of small construction voids, or latent defects, where the top deck skin was not–and probably never had been–properly bonded to the core beneath.  In these areas, I drilled a hole to ensure that the core itself was in good condition, and to allow me to inject a small amount of epoxy during a later step to rebond the area and fill the voids.  One area in particular–the port sidedeck near cabin trunk in way of the chainplates–showed significant deck cracking and a more substantial void beneath, which was obvious later when I opened up the deck there.  This sort of failure is common in boats of older construction.

Anywhere there was an old fastener hole, I used a larger bit to bore out the hole, extending through the top skin and core but leaving the bottom skin in place.  This allowed me to inspect the coring at these critical areas, where leakage would be most likely to occur over the years, as well as to prepare the fastener holes for epoxy filling and fastener isolation.

Fortunately, most of the core was sound, and while some of the coring in the old fastener holes was discolored, it remained dry and sound in most places, and no major work would be required.  The coachroof and cockpit were in apparently good condition with no significant findings, other than several latent voids in the cockpit, particularly on the bridgedeck.  Around both chainplates, however, it was clear that some of the core had been saturated, so I marked these areas for further attention later.  The series of photos below shows various test holes and overbored fastener holes, along with the drill spoils and the four larger areas that would require more significant repairs at the chainplates and poop deck.

Next, I cut open the deck to expose and remove the damaged coring, starting with the poop deck.  I left a flange around the perimeters of the openings to allow room for bonding new fiberglass over the repair later, and dug out the wet and rotting core from within.

Port Poop Deck

Starboard poop Deck


Port chainplates, showing an embedded wire that led to one of the old interior lights


Starboard Chainplates

In each case, I cut the deck openings large enough to expose sound coring along the edges of the cut, where applicable, and removed the coring from within the openings as needed.  Afterwards, I used a grinder to grind a tapered recess around all the new openings, this to allow new fiberglass to overlap and lie flush with the adjacent deck areas during repairs.  I also dished out all my test hole openings to provide room for patching later.  Note that the laminating resin on this boat appeared to have been pigmented white (this was the case on another Sailmaster I worked on several years earlier), so the ground fiberglass is not readily apparent.

With the inspection, uncoring, and related preparations complete, I spent the remainder of the day working on the port sidedeck and entire foredeck to sand off the molded nonskid pattern and begin the surface preparations for refinishing.

Total time billed on this job today:  6.5 hours

0600 Weather Observation:
-5°, clear.  Forecast for the day:  clounding up, eventual mix to rain, becoming warmer

Halcyon 7

< Back to Halcyon

Monday

Next on my agenda was the interior surface prep.  The original coatings in the cabin were generally in good existing condition and sound, but simply aged and dirty.  Starting in the chainlocker forward and working aft, I spent most of the day sanding the overhead, inside of the hull, cabin trunk, bilge, lockers, and other areas as required, scuffing and cleaning the existing coatings and removing any (minimal) loose paint.  This was mainly a light sanding with 80 grit discs, and with the existing coatings in good shape there was no reason to make any attempts to remove the old paint.

Although I’d decided to remove the deadlights after all, for the moment I worked around them, as I was anxious to knock the sanding chore off my list first.

With the bulk of the interior now sanded and cleaned up, I turned to the deadlights.  These were the typical setup using an inner and outer aluminum frame, which fit into the opening and screwed to one another from the inside, sandwiching the lens between.  This was a popular yet dreadful approach to cabin windows back in the day, one that seems happily to have largely disappeared with the 1970s.  I’d removed, cursed at, and reinstalled many sets of this sort of frame over the years, and despite the experience they still tended to be some of the most challenging and frustrating tasks I dealt with in any project.

Removal of the port side was straightforward.  Working my way around the frame, I removed the screws from inside; a few were slightly stuck with corrosion, but broke free with firm screwdriver pressure.  I kept the screws in their proper position as I removed them, as sometimes in these sorts of frames each screw was custom-cut to fit during original installation, and I found long, long ago that it paid always to maintain the screws in their original positions.  The old sealant, watertight as it may have been, was dried out and crumbly as the frames came out, and it seemed well worth the effort to remove (and later rebed) these frames.

The starboard side was less fun.  Many of the screws along the bottom side of the frame were extremely welded in place with corrosion (stainless steel vs. aluminum), and ultimately there were three fasteners I simply could not budge, despite all efforts:  the screws were so firmly affixed that removal efforts bent two slotted  screwdriver blades and broke various impact gun bits in the process.   I eventually had to drill out the screw heads in order to complete the frame removal.  This took time and care, and I was glad I’d not tried to remove these frames at “quickly” before beginning the sanding job early in the day:  it would have affected my motivation.  Hopefully I could later remove the little studs stuck in the outer frame; there was a bit of the fastener still protruding, as I’d only drilled through the screw heads, so with luck extended soaks with penetrating oil and some additional work later might see these come out and leave the threaded sockets intact for reinstallation.

Finally, I removed the single opening port at the forward end of the cabin trunk.  No issues here, except this housing was extremely well bedded in place and took a little while to break free.

With the ports and deadlights out of the way, I finished up the sanding in those areas.

Total time billed on this job today:  7 hours

0600 Weather Observation:
-5°, clear.  Forecast for the day:  Sunny, 10°

Halcyon 6

< Back to Halcyon

Friday

Picking up where I left off, I continued work on the deck hardware removal, from the starboard chainplates and mast step to the hardware on the aft deck.  There were no particular suprises during this process; several of the fasteners were either stuck in place or broke off during removal, as before.

In the cockpit, there were a few more things to remove at the forward end, and I took care of those along with removing the vestiges of an old electrical system and the cockpit and seat drain hoses.

At this time, I was undecided how to proceed with the deadlights in the cabin.  The owner reported that they did not leak, and the lenses were in good condition (starboard better than port).  Knowing well the challenges and frustrations involved with reinstalling these types of frames and lenses, I was tempted to leave the windows in place and work around them, but I’d have to contemplate that more.  Typically, I did not like to leave anything in place during painting projects, but then again sometimes well enough was best left alone.

In the cabin, I removed a few existing wires and light fixtures, along with the sink drain plumbing, supply hose, icebox drain, and water tank fill, all of which I planned to replace later in the project.

One of the other items on my work list, and slated for attention very soon, was to remove the obsolete head discharge through hull on the starboard side and patching the hole.  The owner requested a simple portable toilet for the space.

The interior cabinetry and panels were generally sound, but in some areas there was water damage to the veneer and plywood laminations, most notably at the forward end of the cabin on either side of the mast support column.  The after portions of the settee bases also showed some similar–yet less dire–signs of damage from moisture over the years.  Whether these panels could be saved with a bright (varnish) finish remained to be seen, but I thought a simple alternative–which I’d effected on another Sailmaster project a few years earlier–might be to patch and paint these panels instead, saving the structural elements but forgoing the challenges of inefficient veneer repair.

With that, most of the dismantling was done, and I looked forward to diving into the first stages of surface prep and related work shortly.

Total time billed on this job today:  5 hours

0600 Weather Observation:
20°, dusting of snow.  Forecast for the day:  becoming sunny, 20s.

Halcyon 5

< Back to Halcyon

Thursday

I spent the day removing deck hardware, starting at the stem and working my way aft along both sides.  The hardware and fasteners were old and appeared to be original installations in most cases, and many of the fasteners were in poor condition, often breaking off during removal.   Bow pulpit, cleats, anchor hardware, chainplates, running lights…all were among the pieces I removed during a morning’s work.  The aluminum running light housings were in poor condition, and the starboard side fell apart during removal.

I’d continue with the remaining hardware on the aft half of the boat next time.

Total time billed on this job today:  4.5 hours

0600 Weather Observation:
25°, clear.  Forecast for the day:  Mostly sunny, 29°

Halcyon 4

< Back to Halcyon

Wednesday

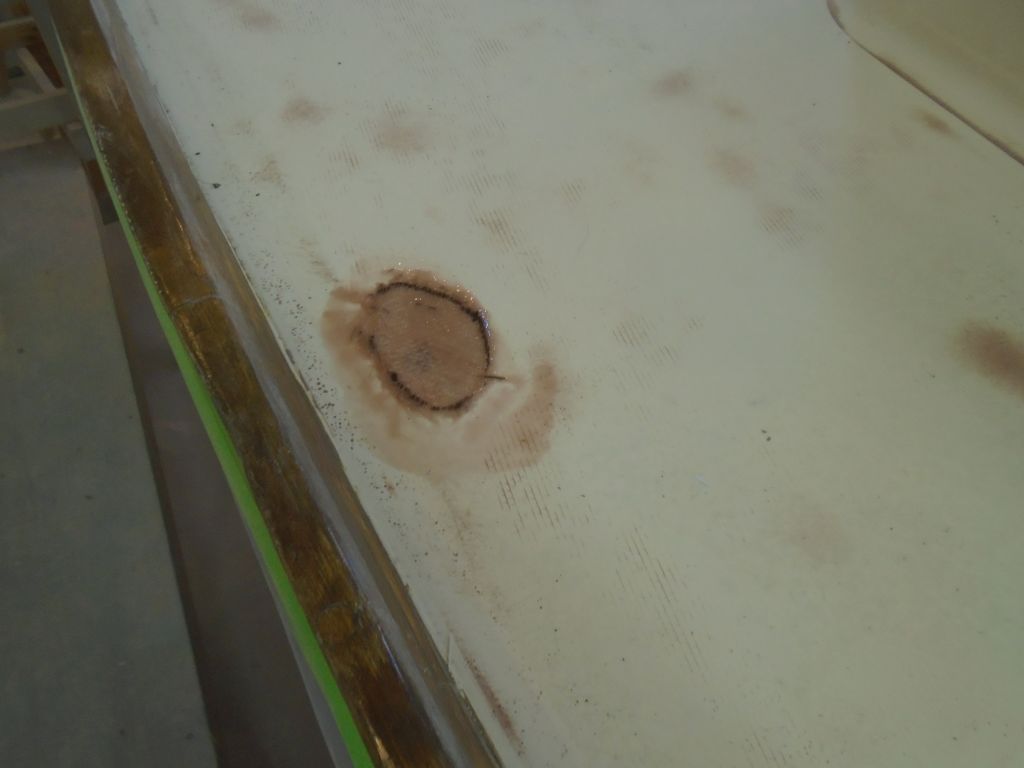
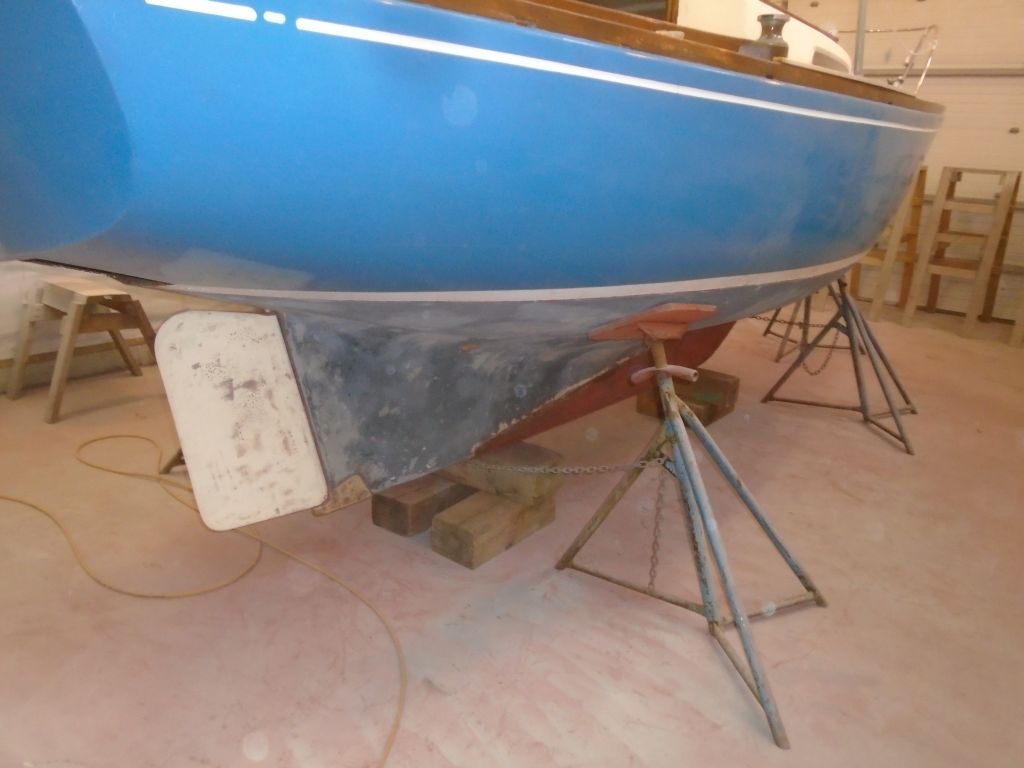
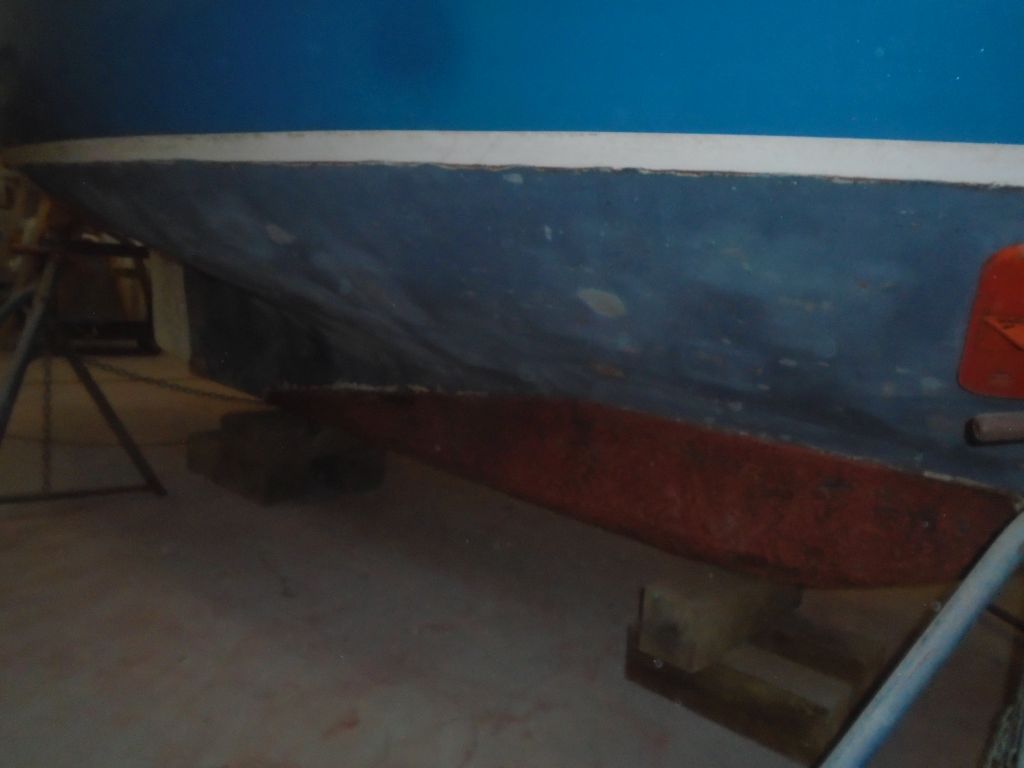
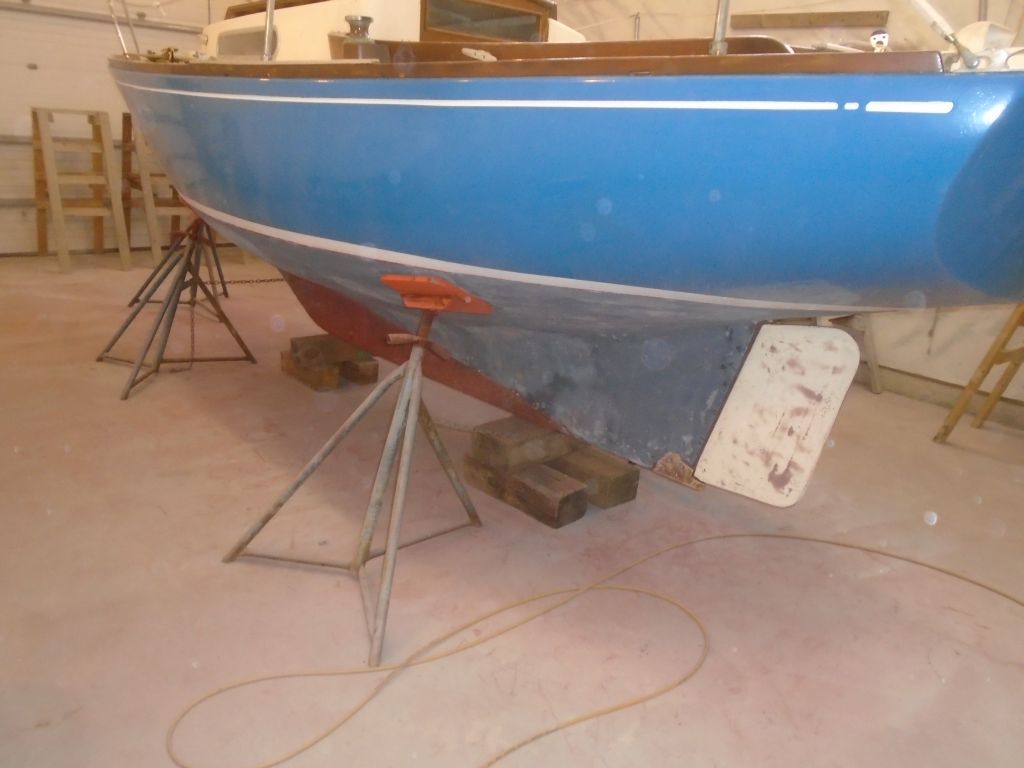
Finishing up the bottom work for now, I lightly water washed the new fairing patches, then sanded them smooth with the adjacent areas.

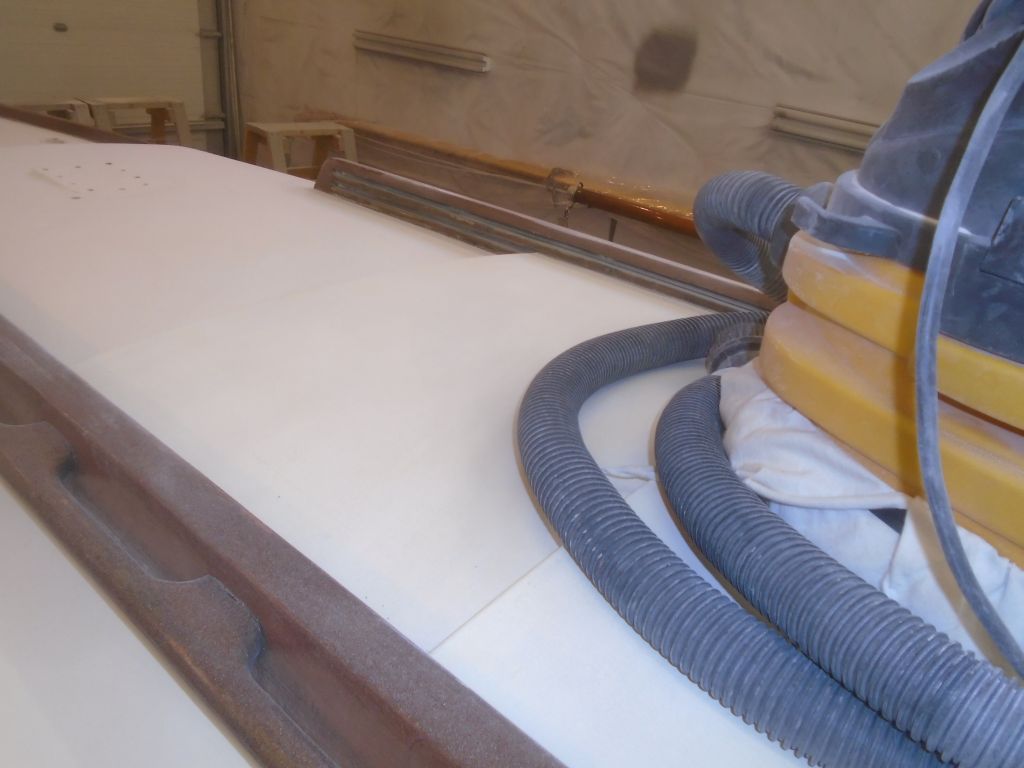
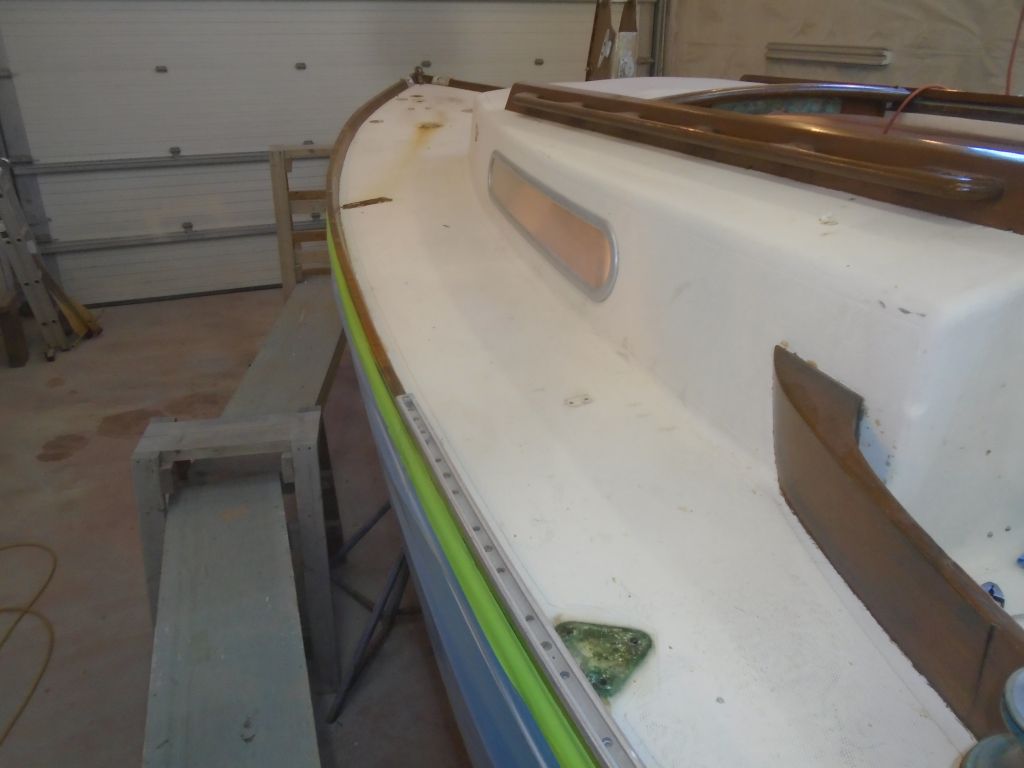
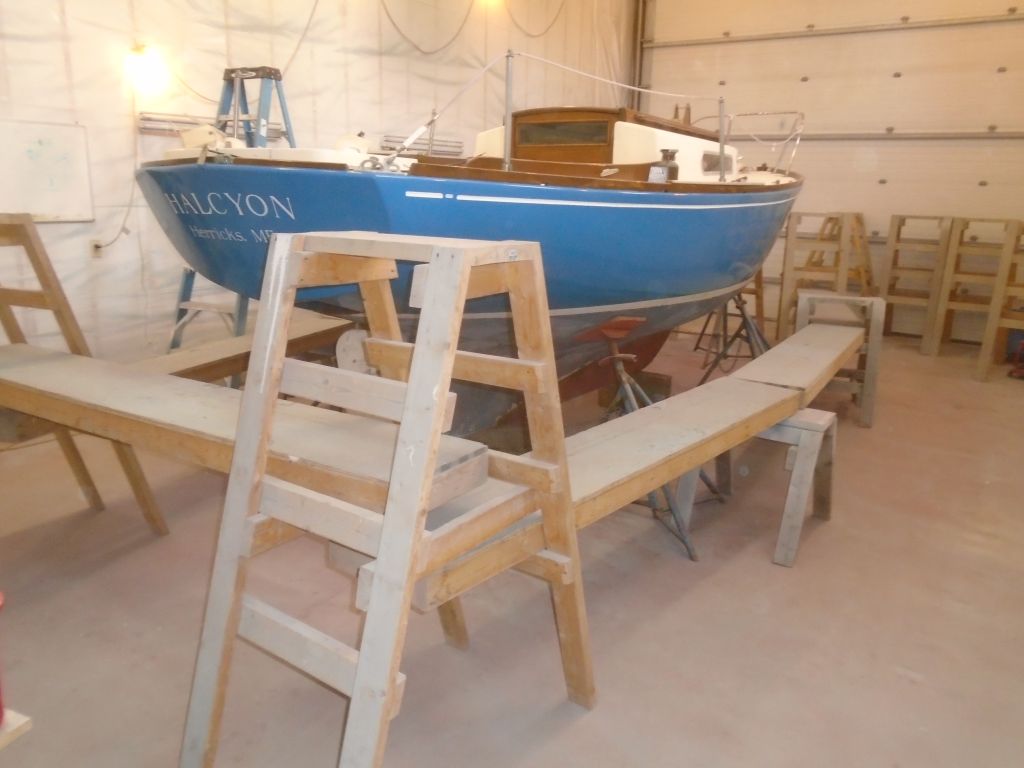
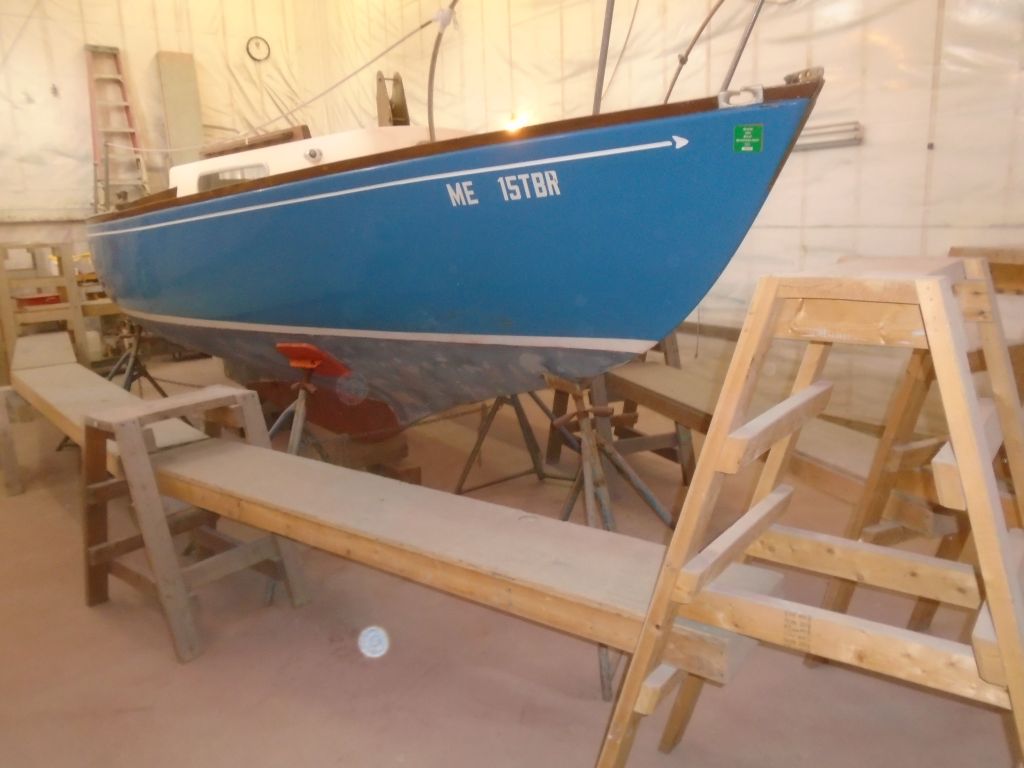
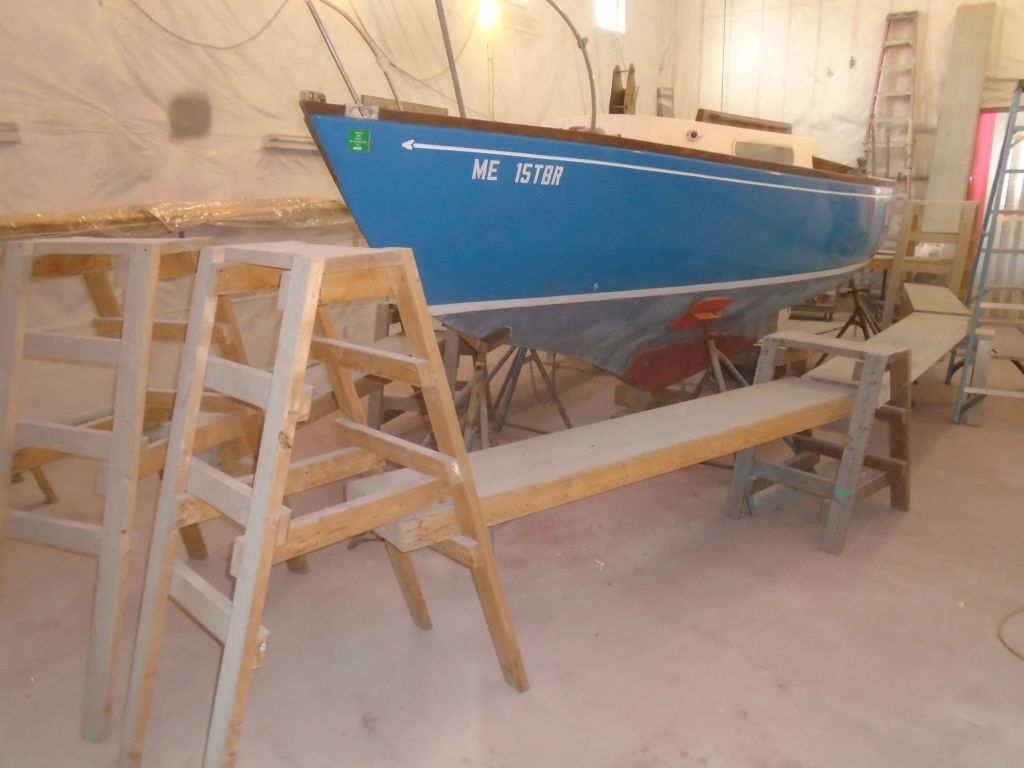
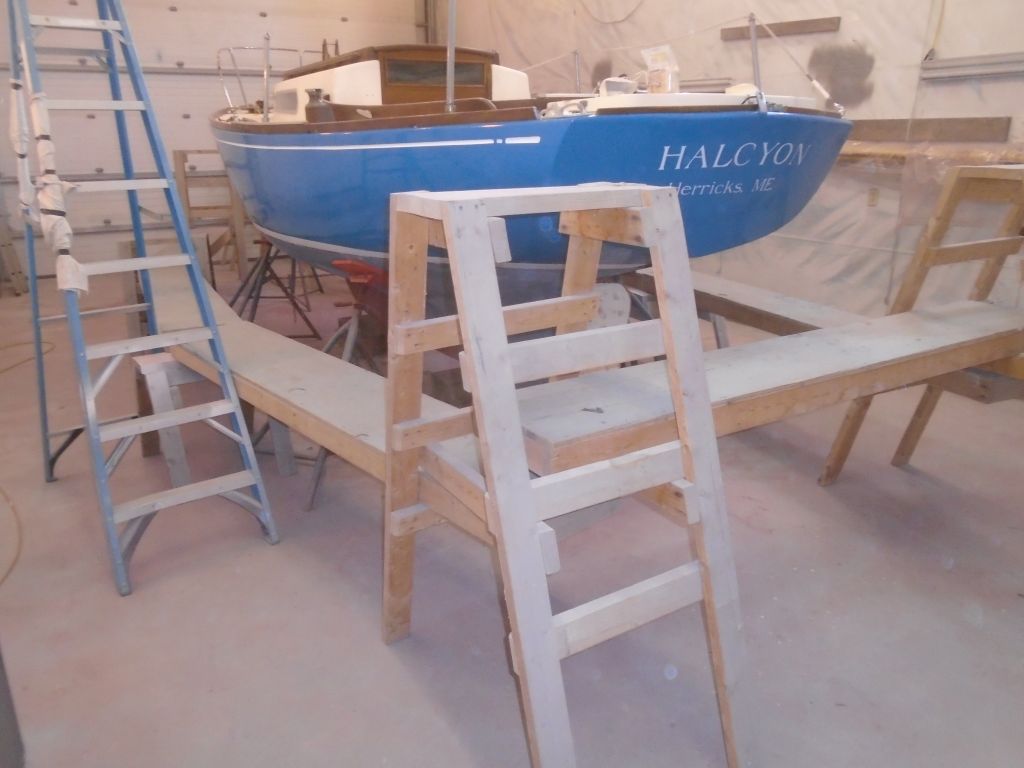
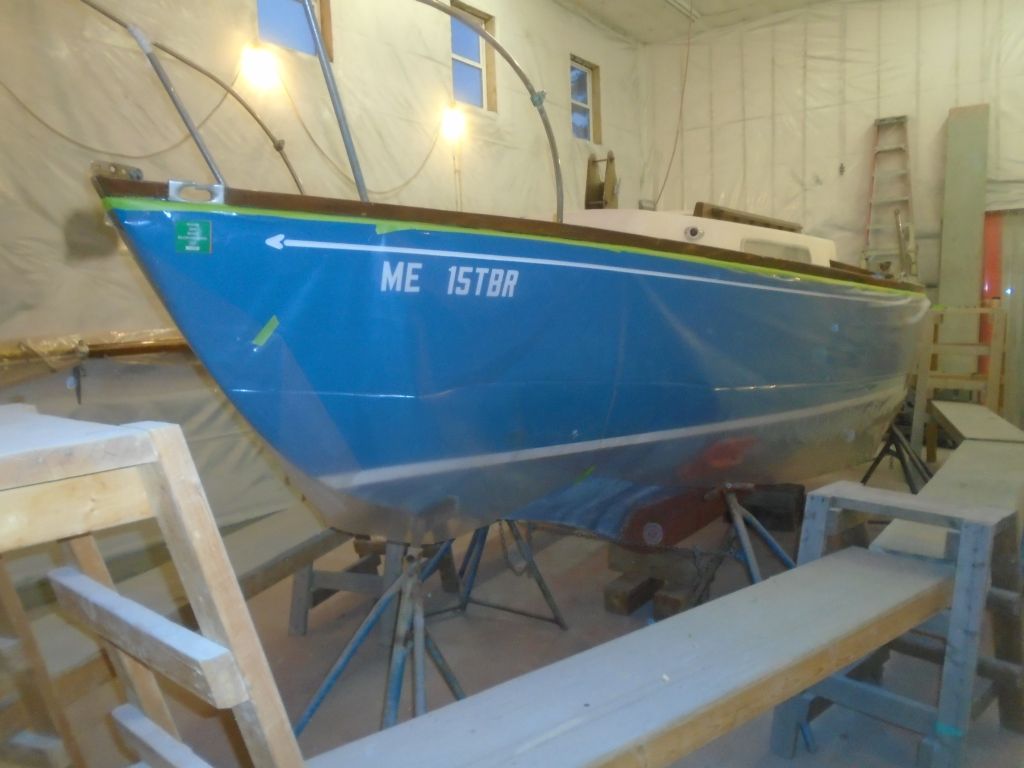
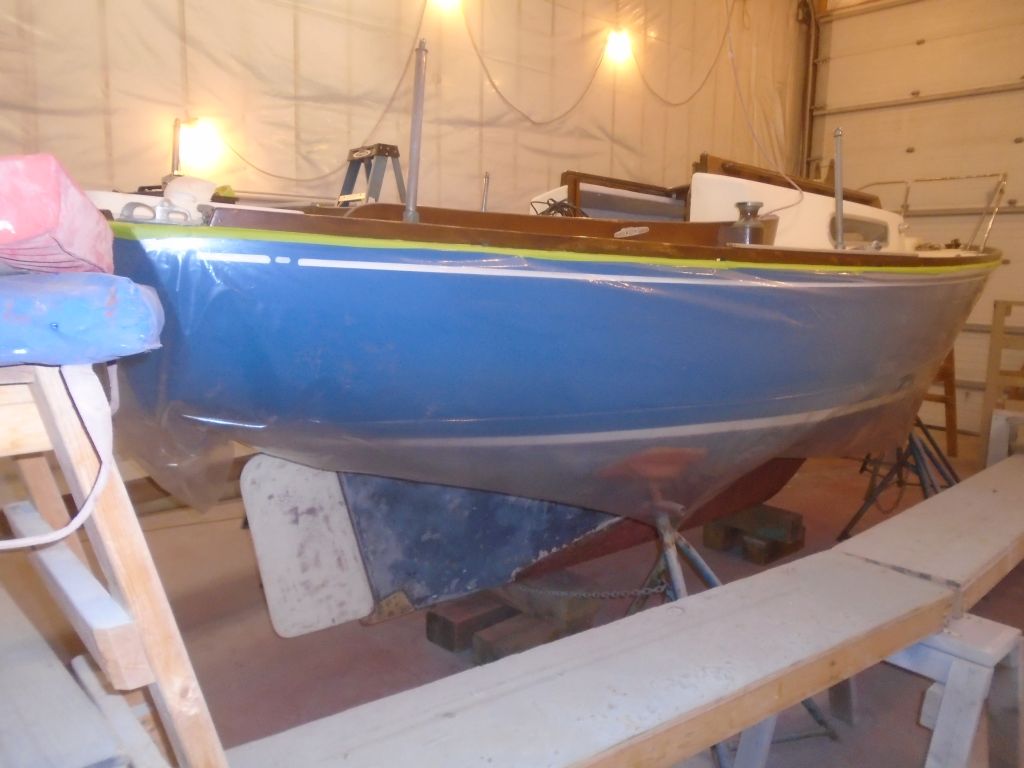
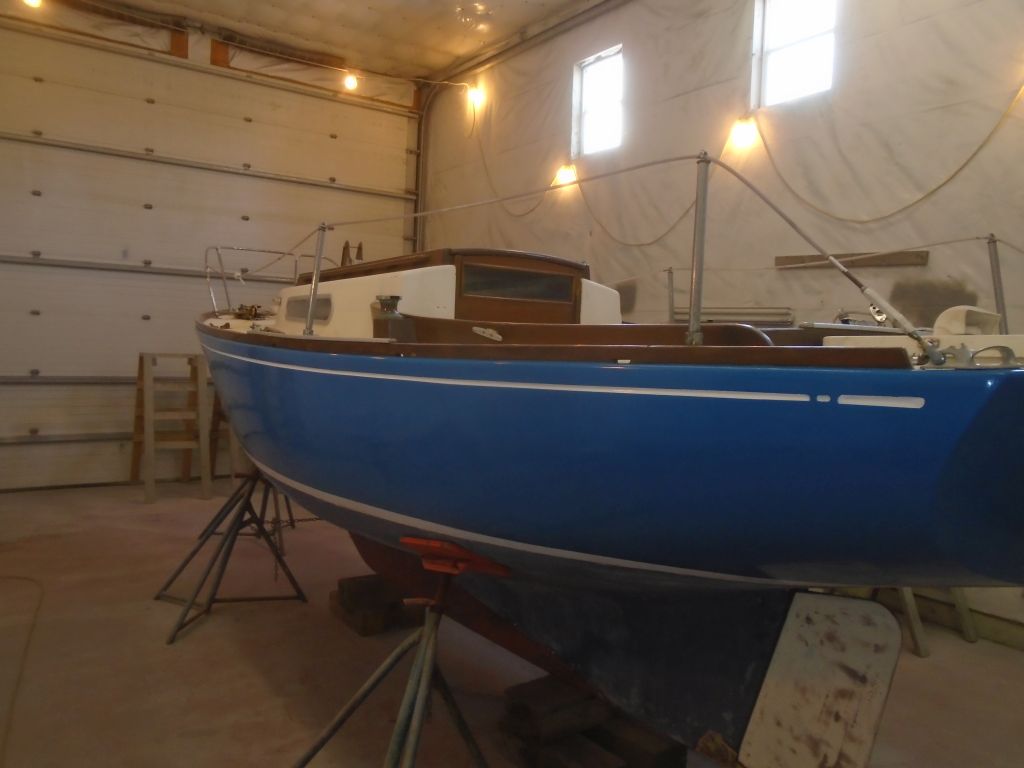
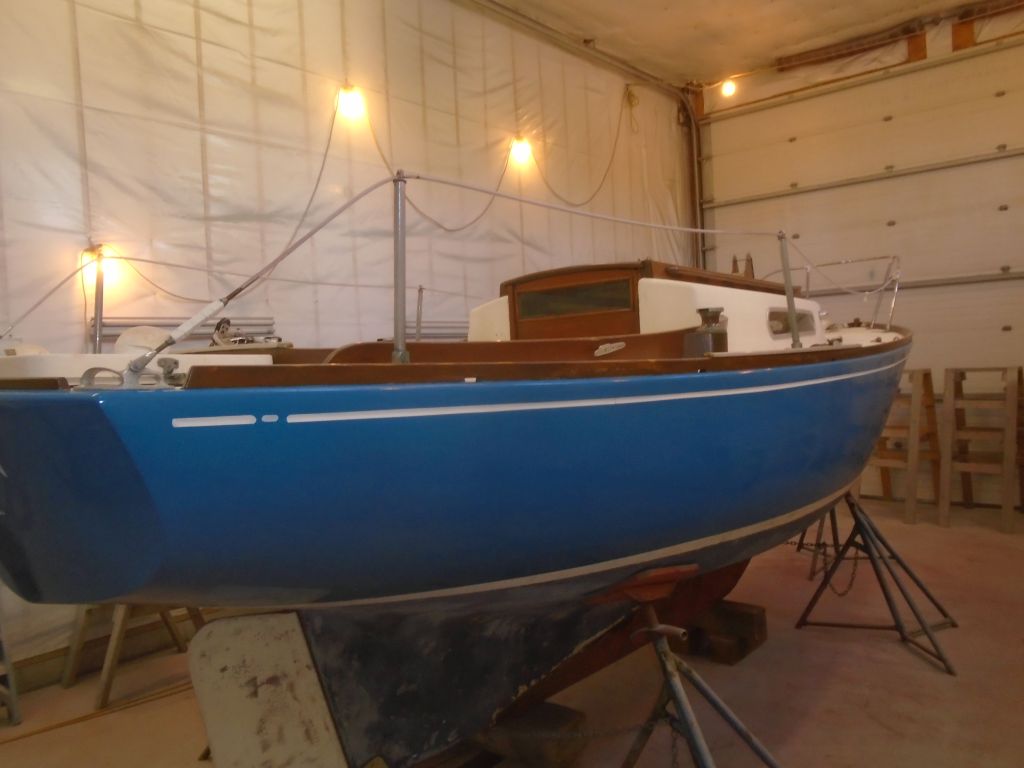
The bulk of my remaining work on this project would be on deck and in the cabin, as the owners had had the hull brushed a few years ago and were happy with the existing condition.  So with hull work complete for now, I set up staging around the boat to give me a comfortable working height around the perimeter of the decks.

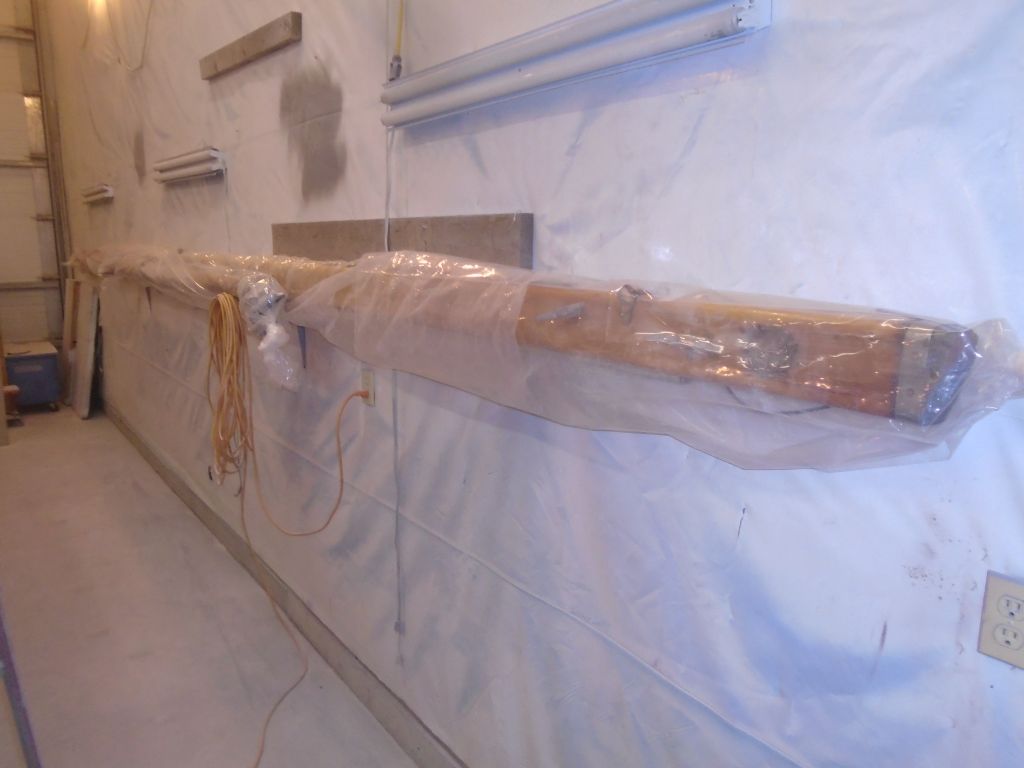
To protect the hull from spills or damage, I covered it with plastic that I taped to the top edge of the hull just outboard of the wooden toerails.

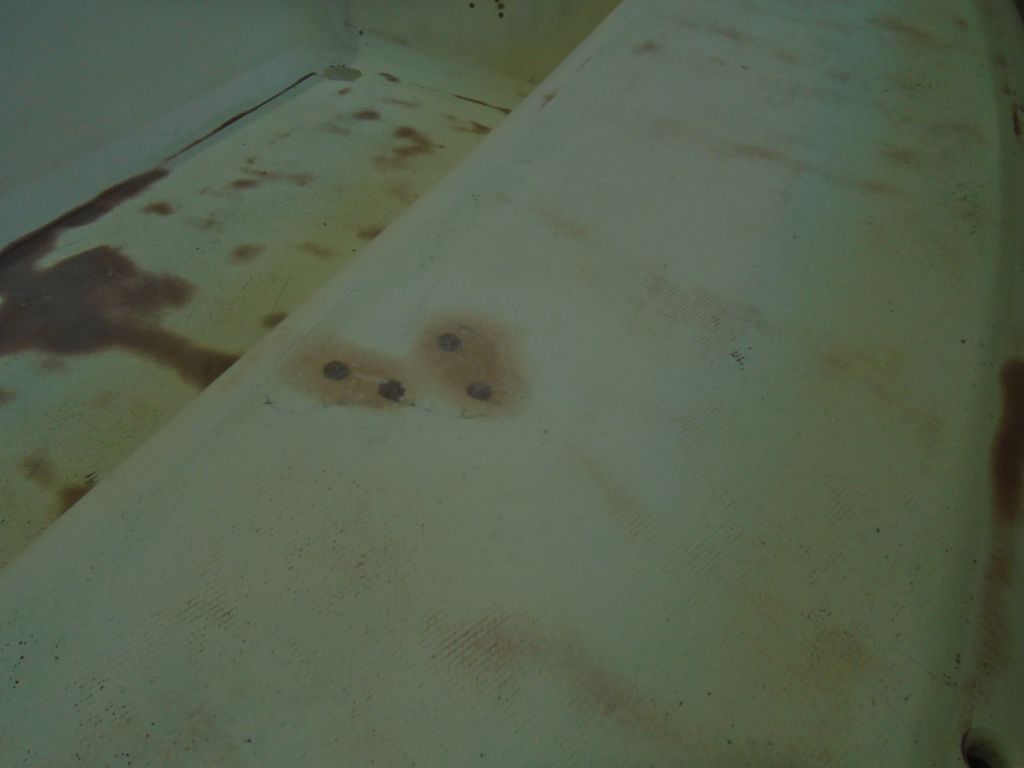
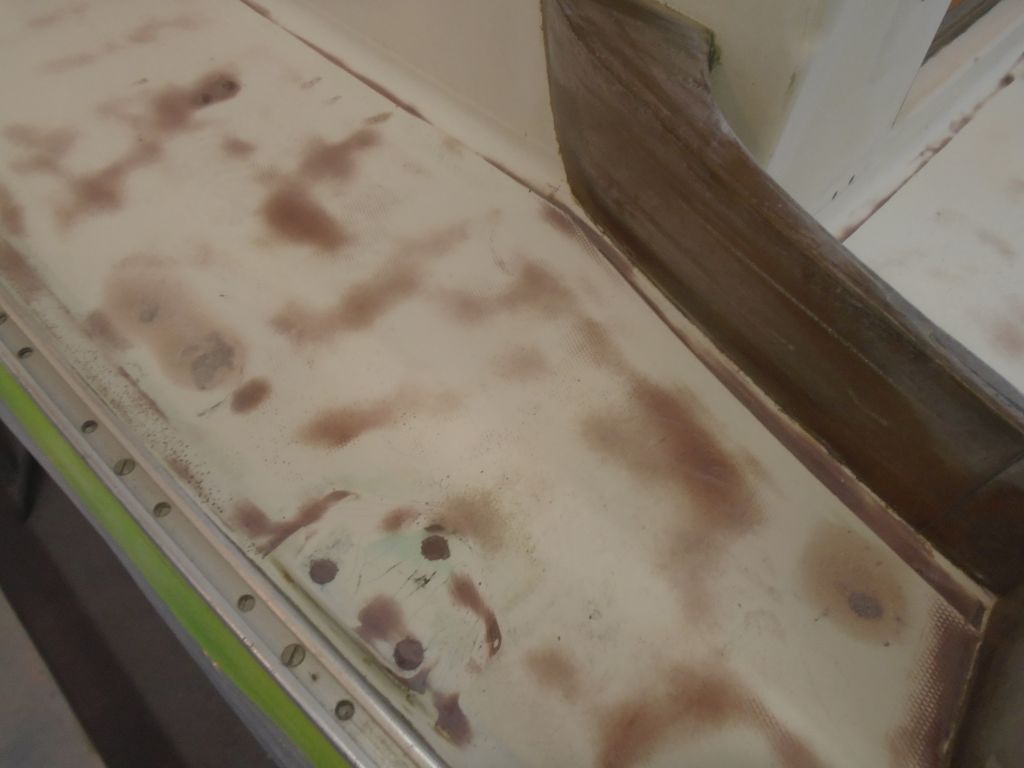
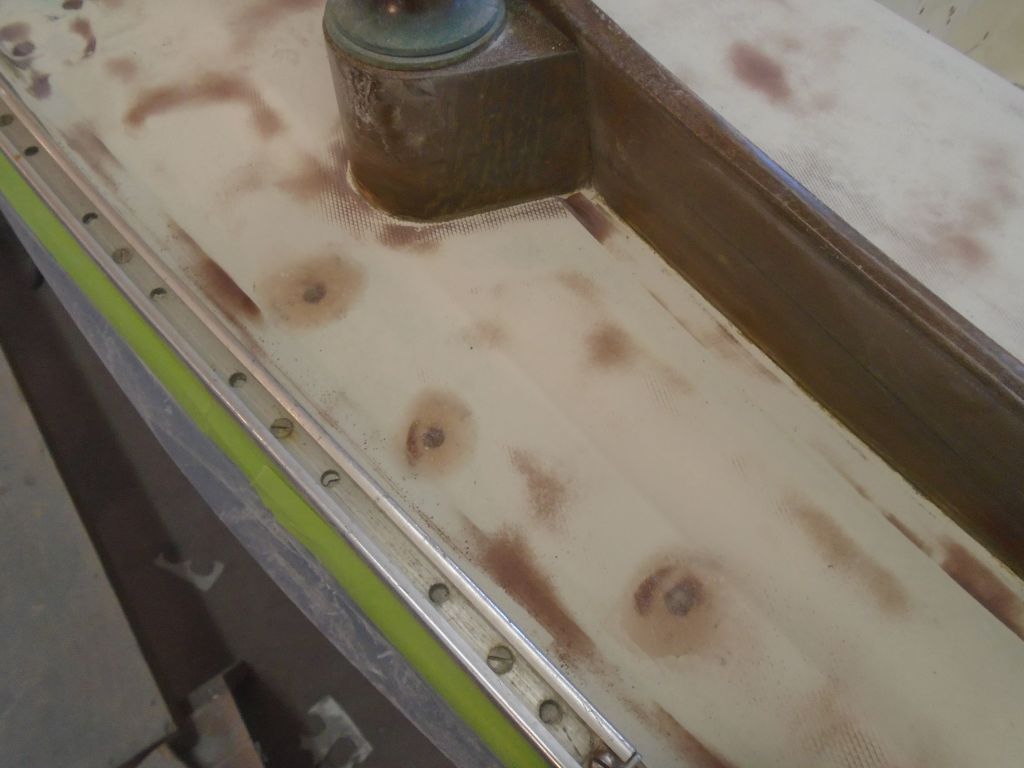
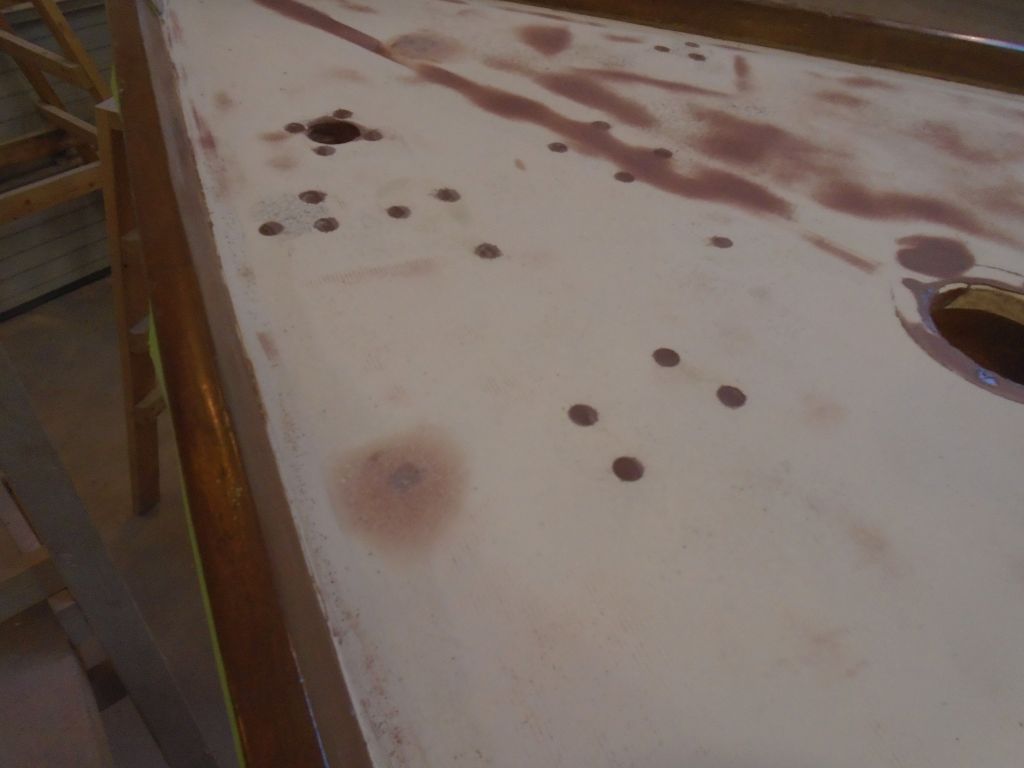
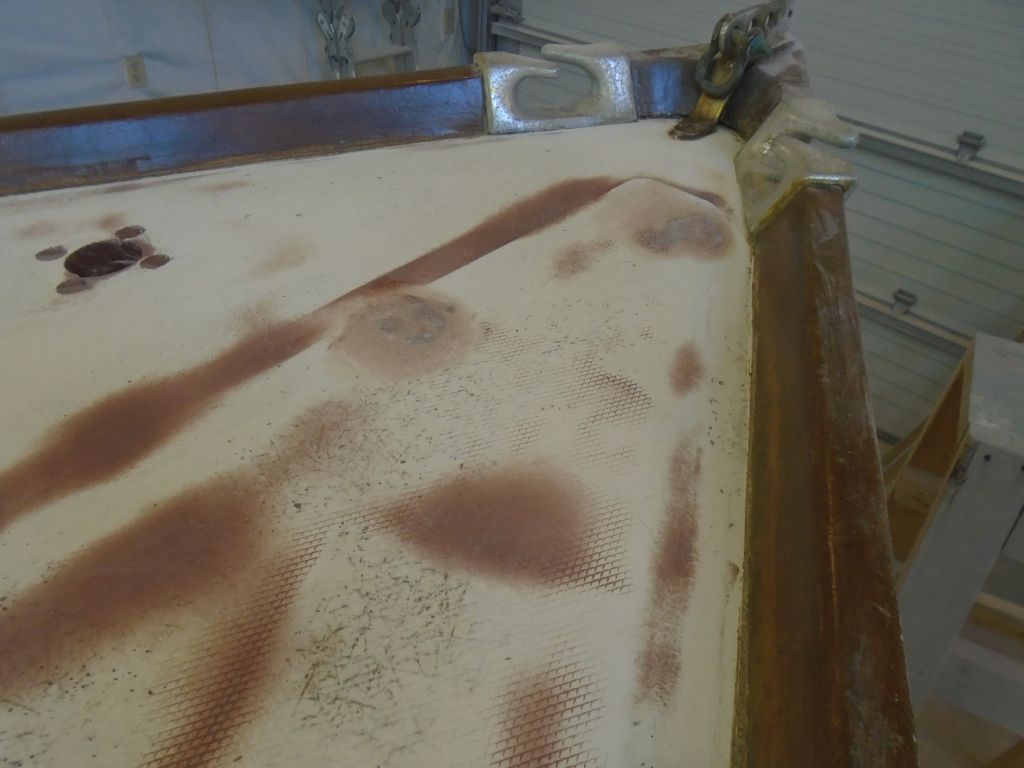
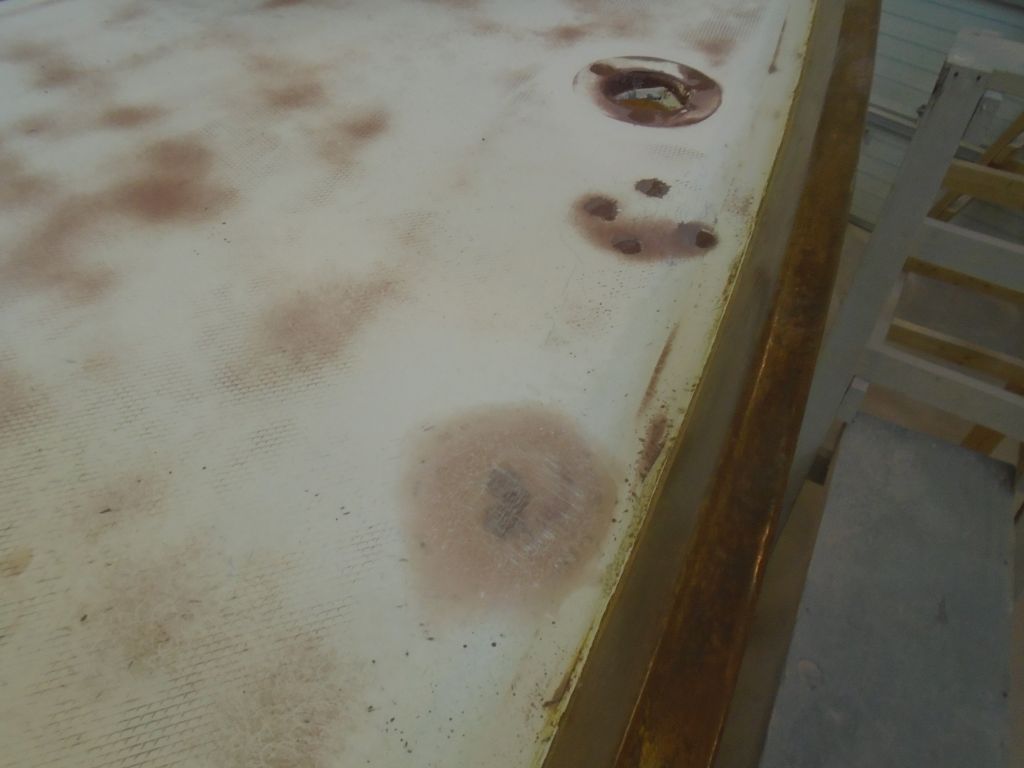
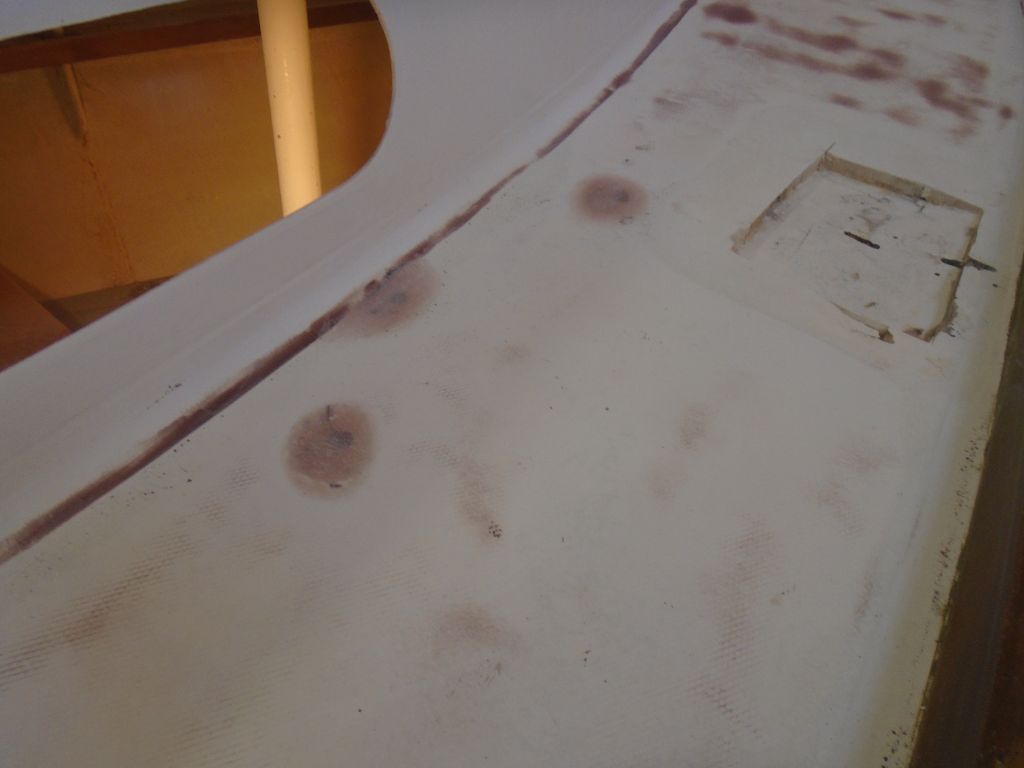
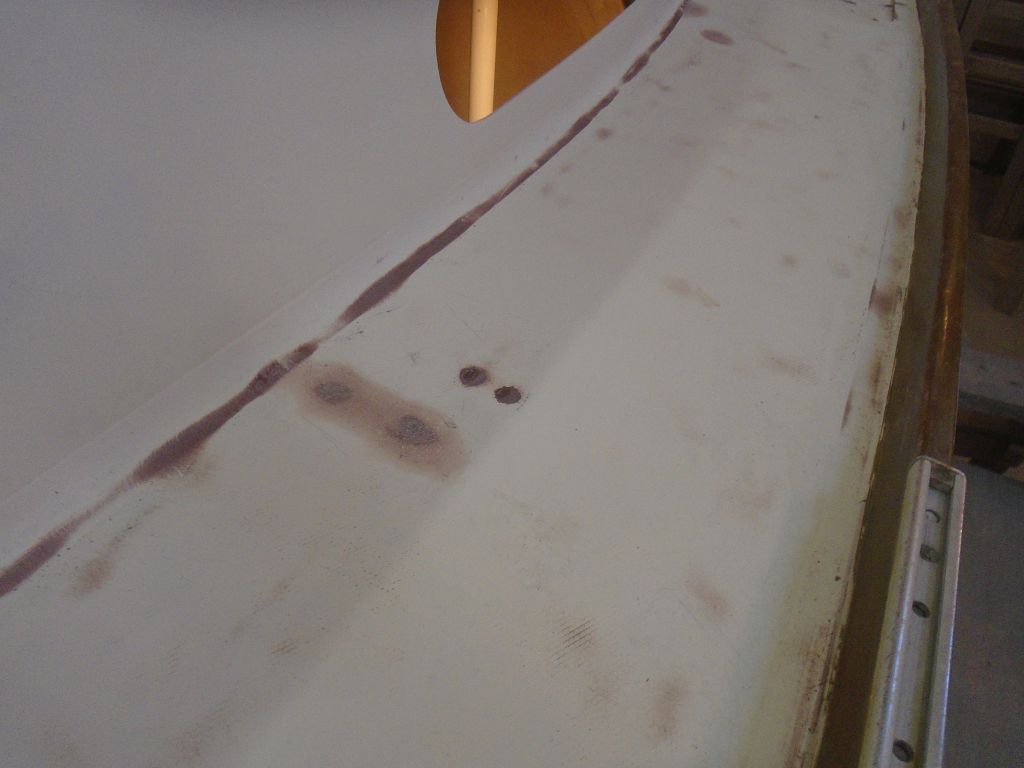
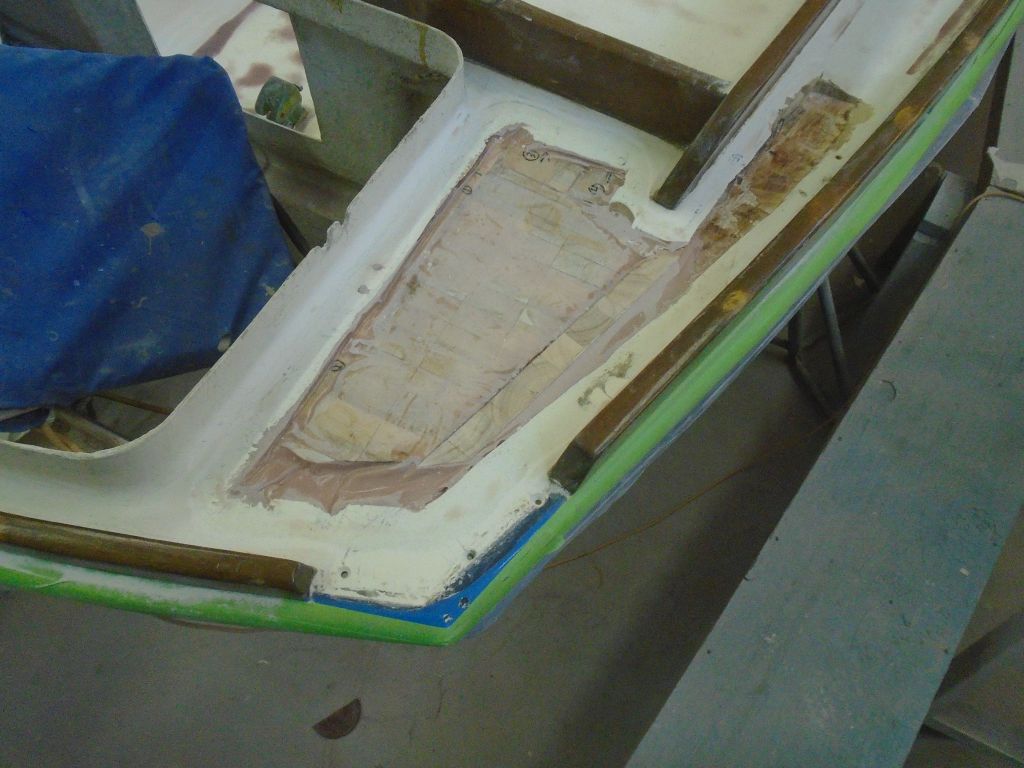
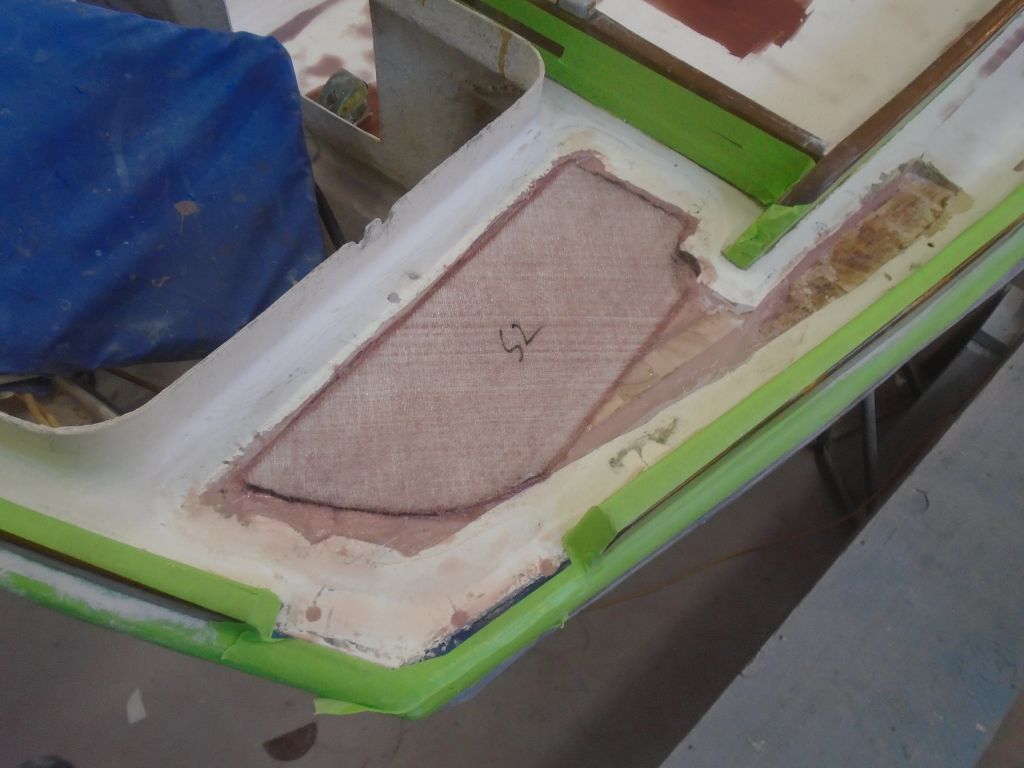
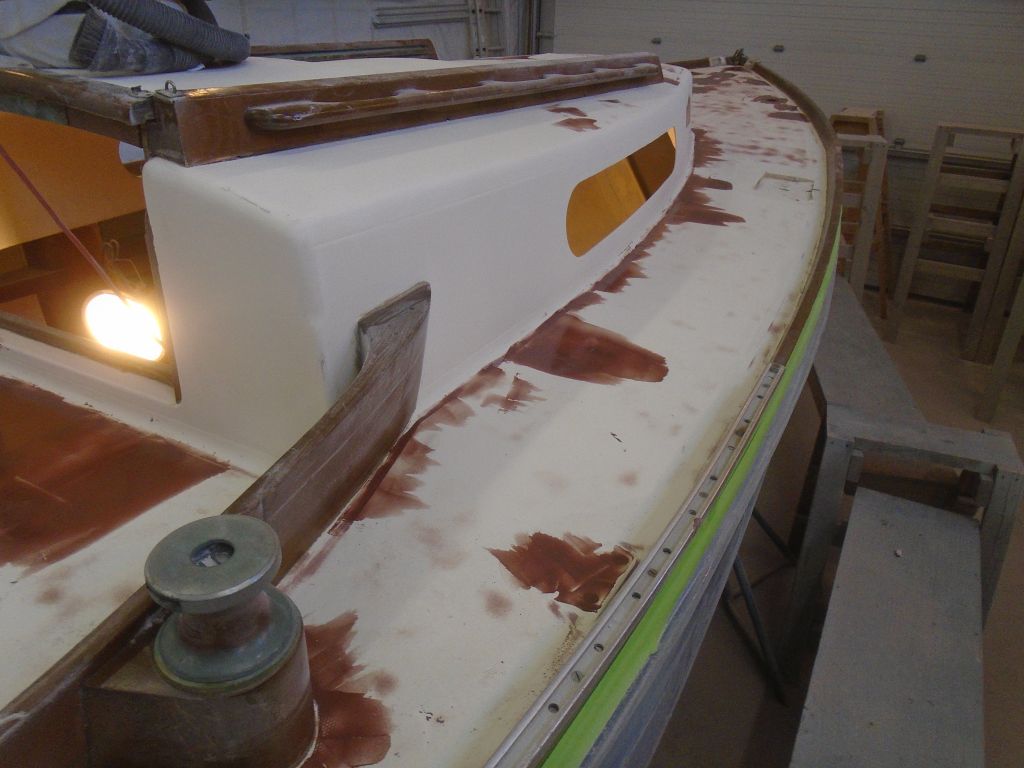
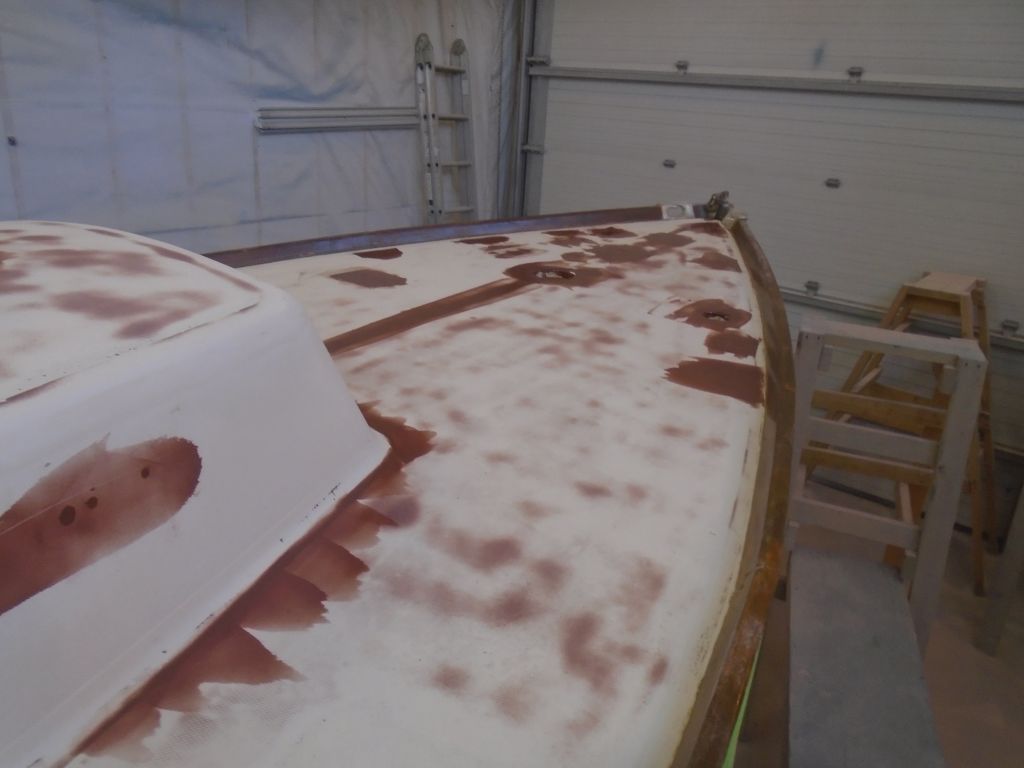
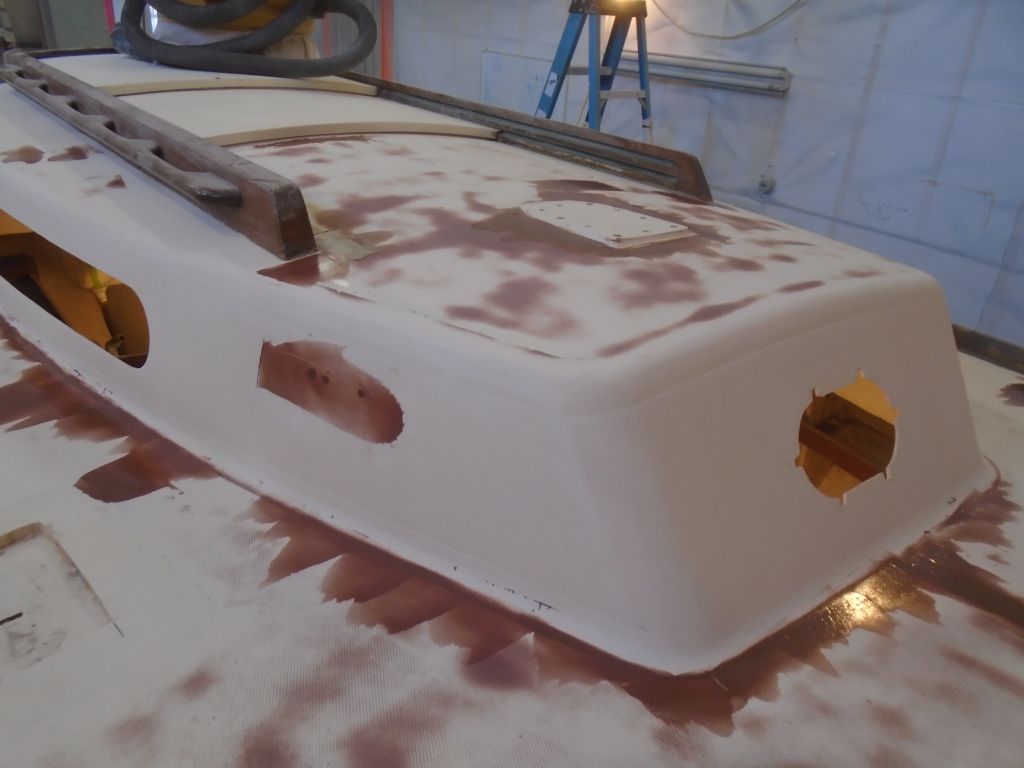
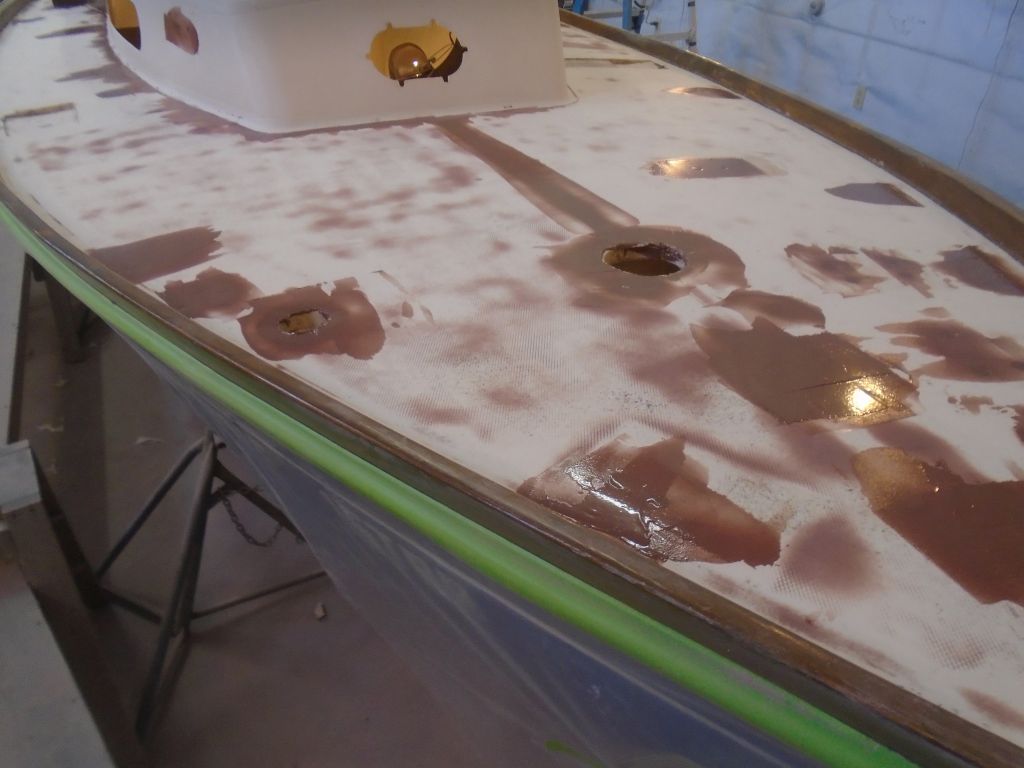
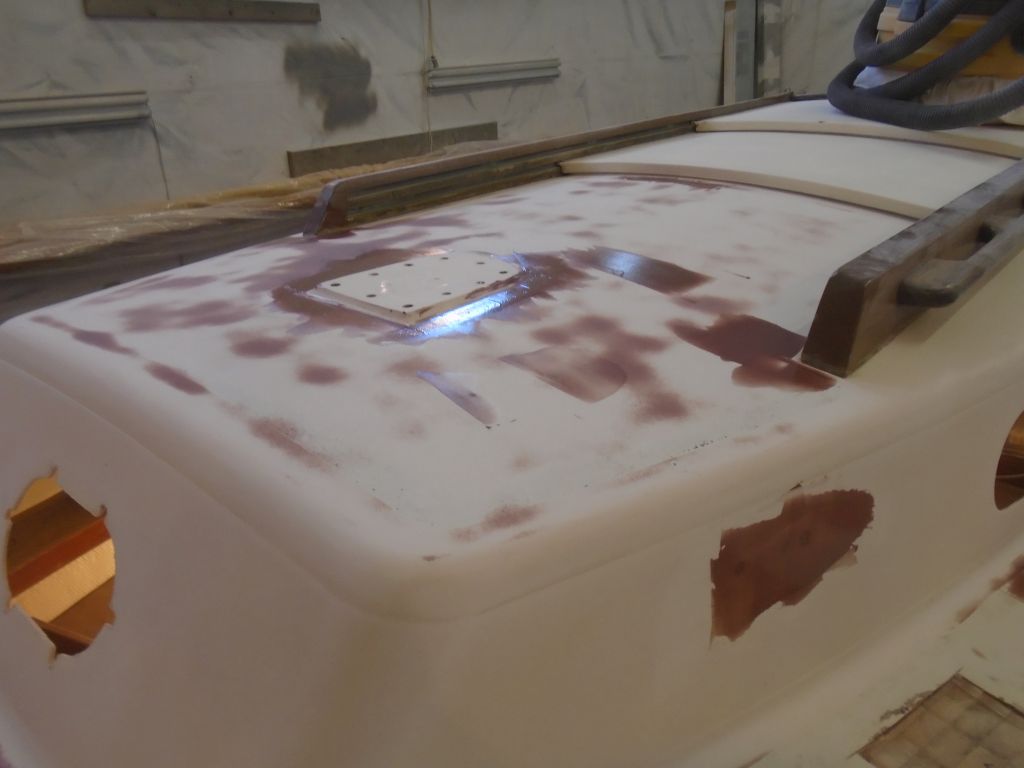
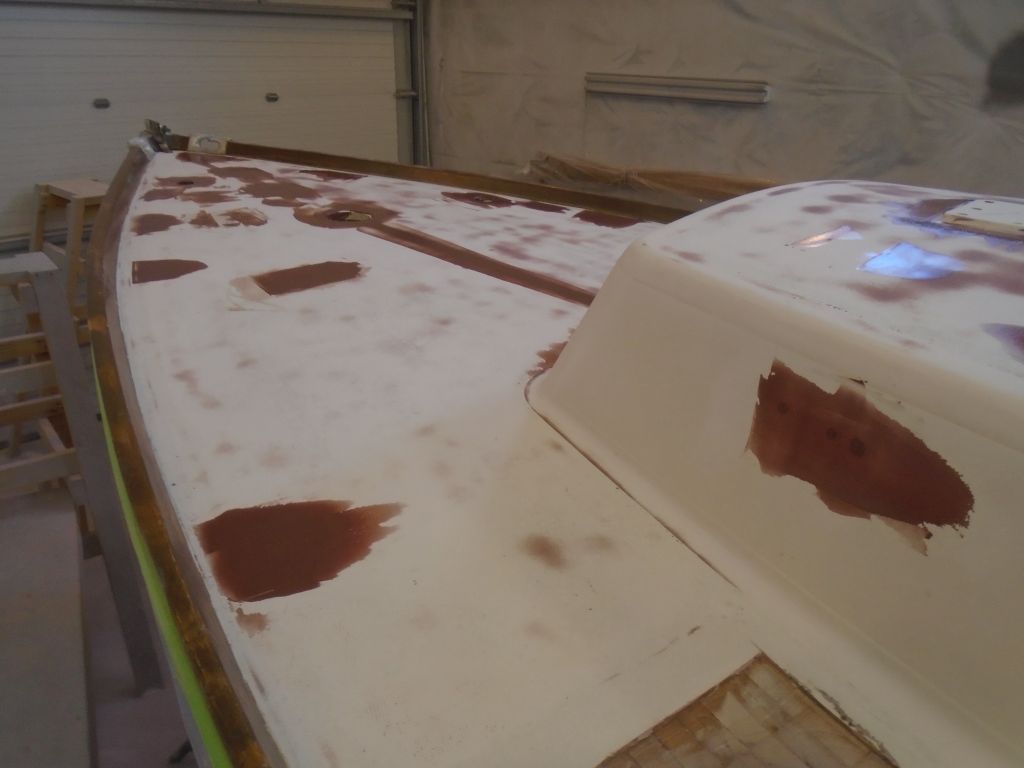
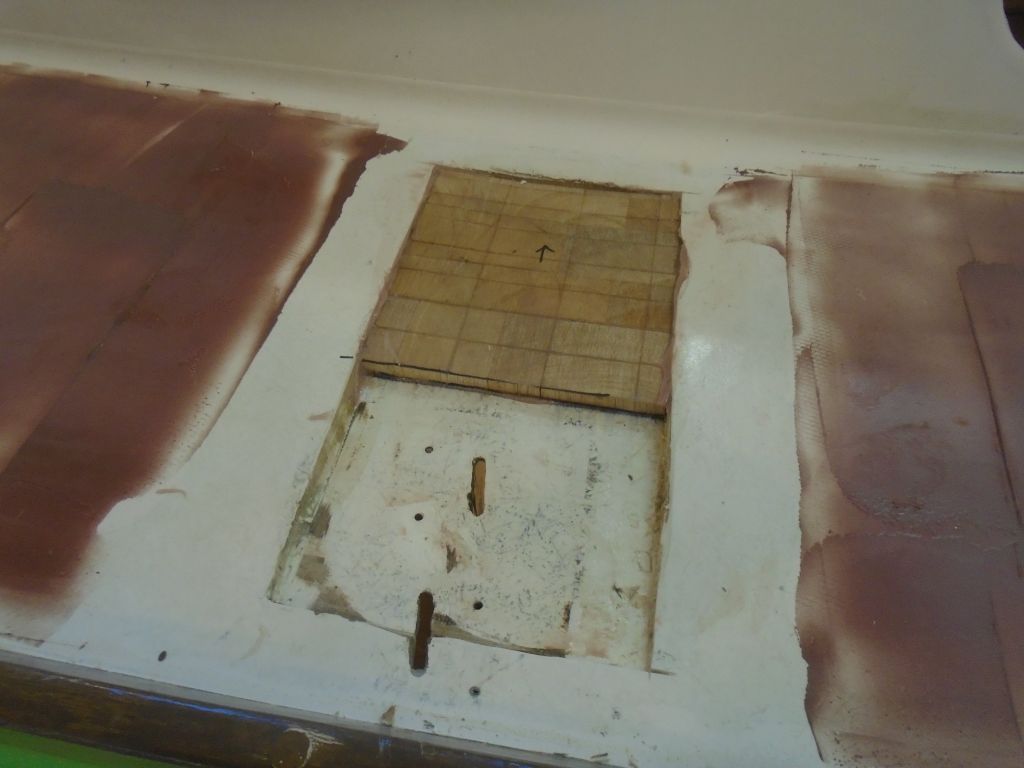
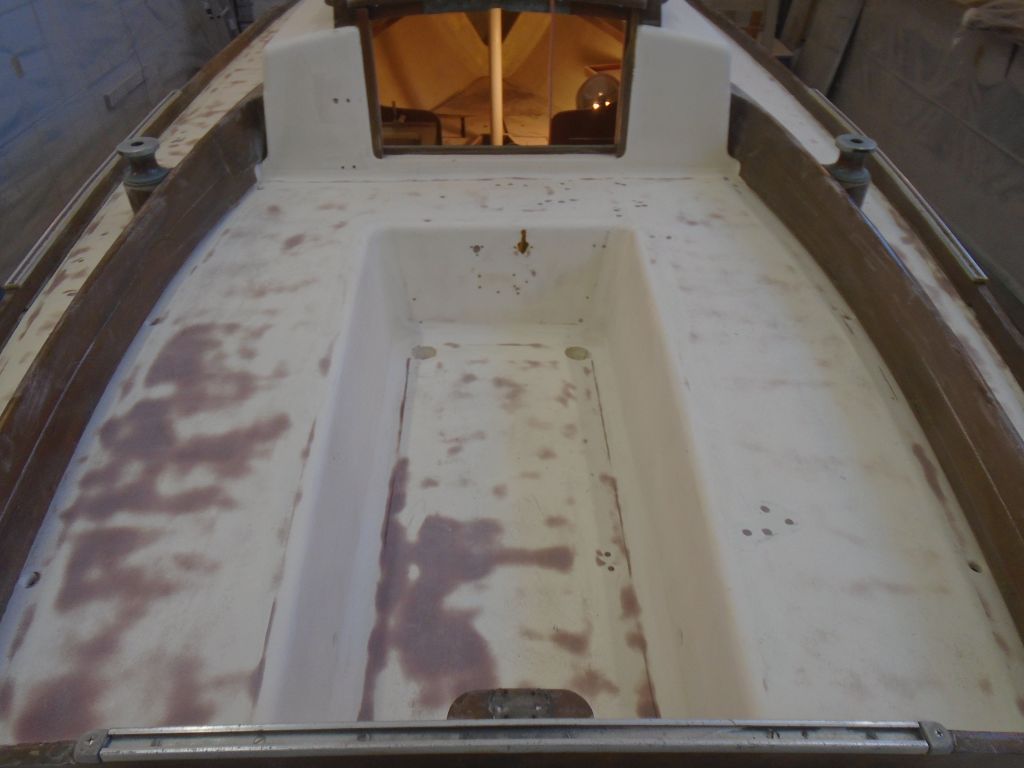
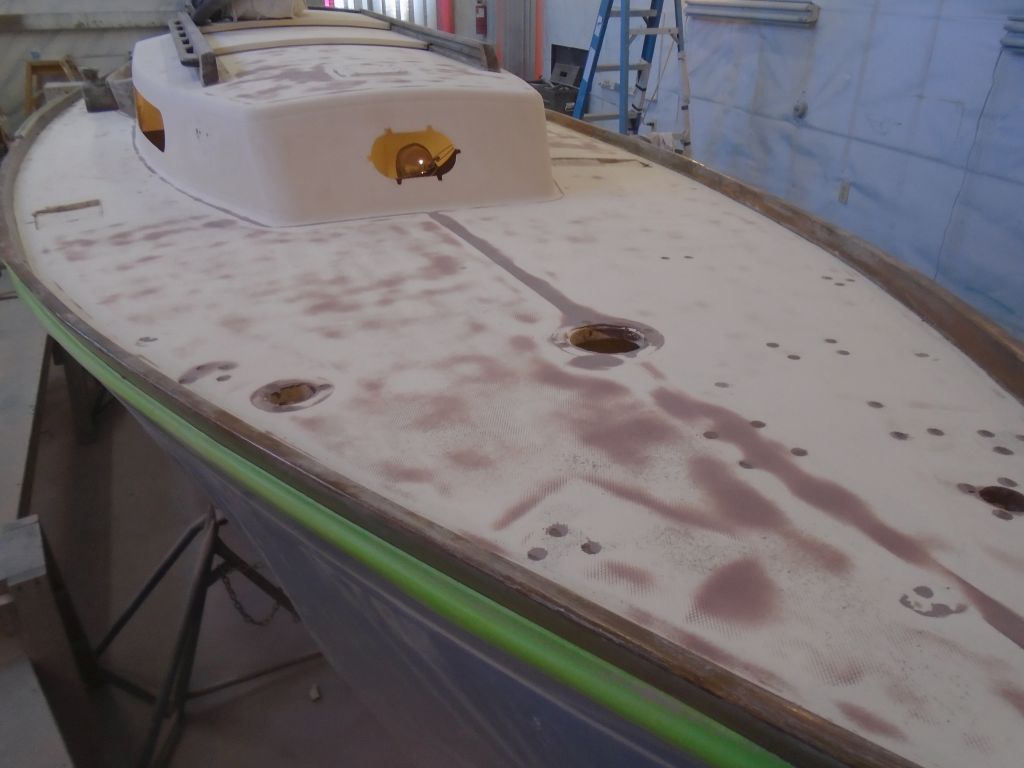
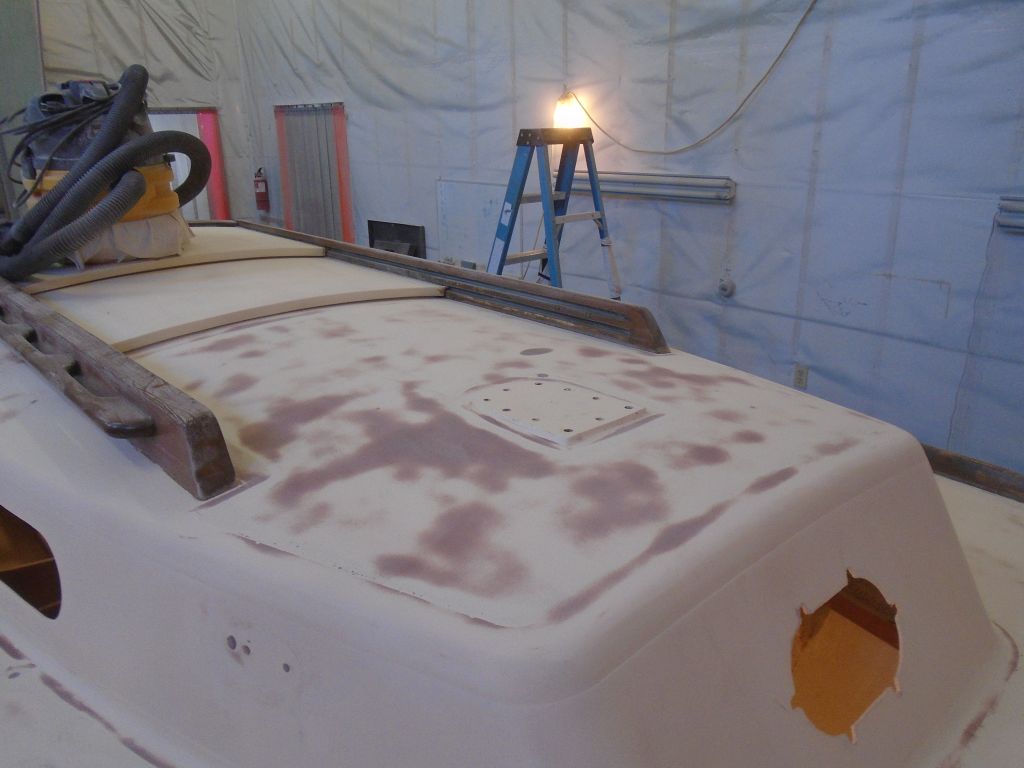
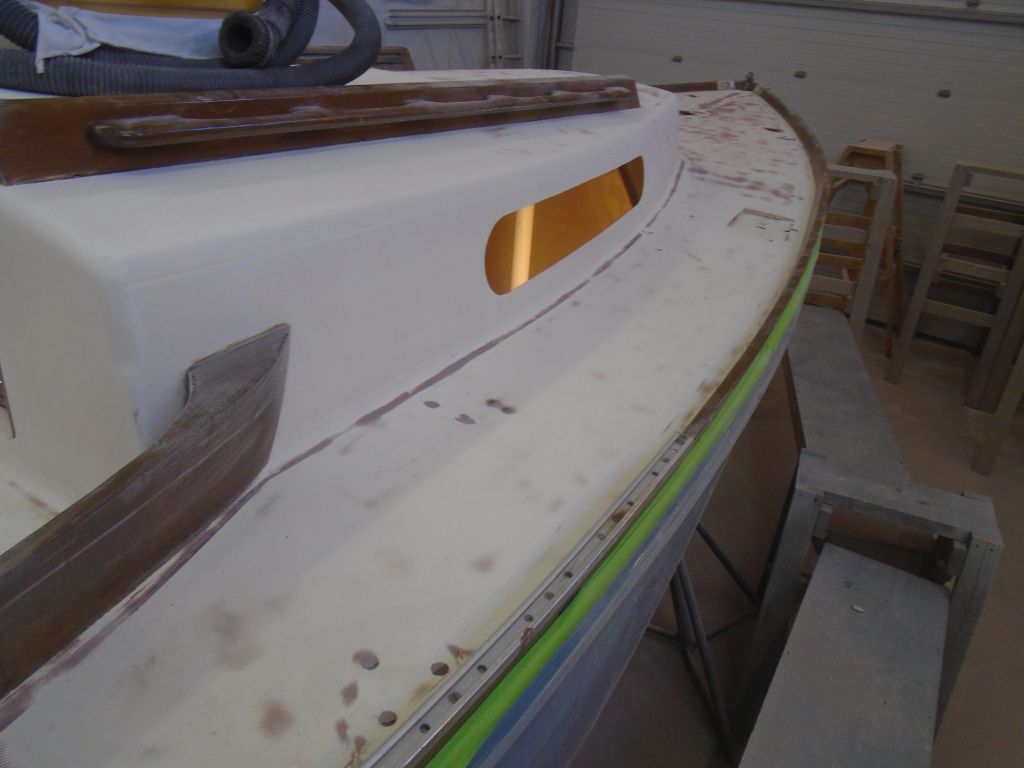
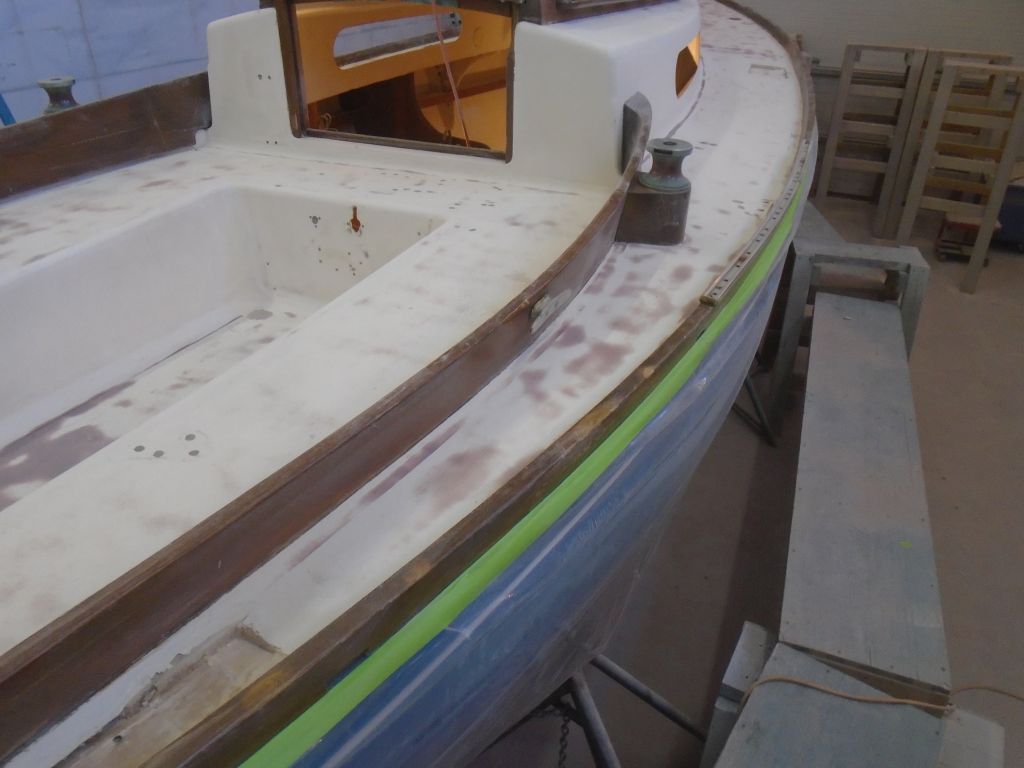
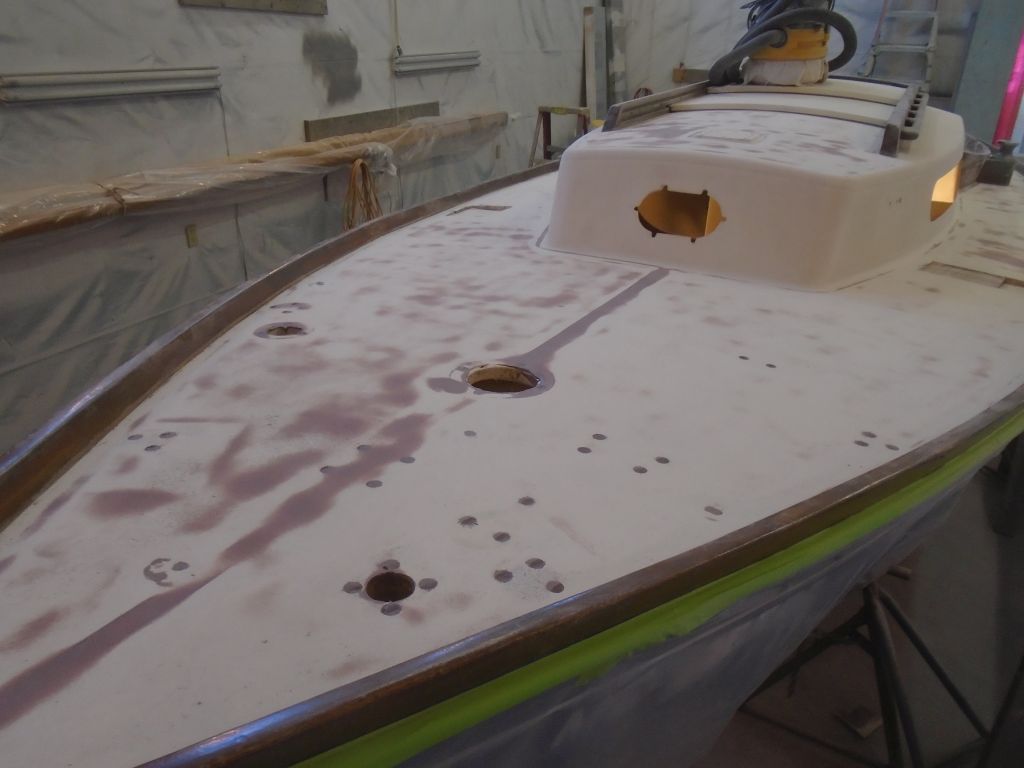
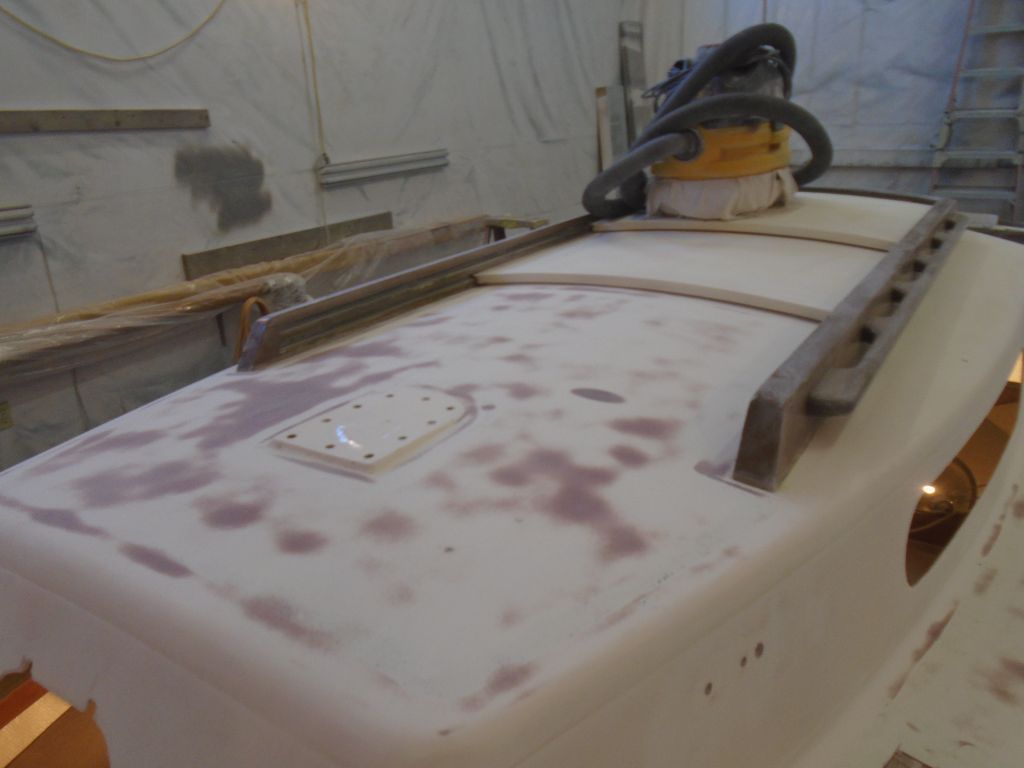
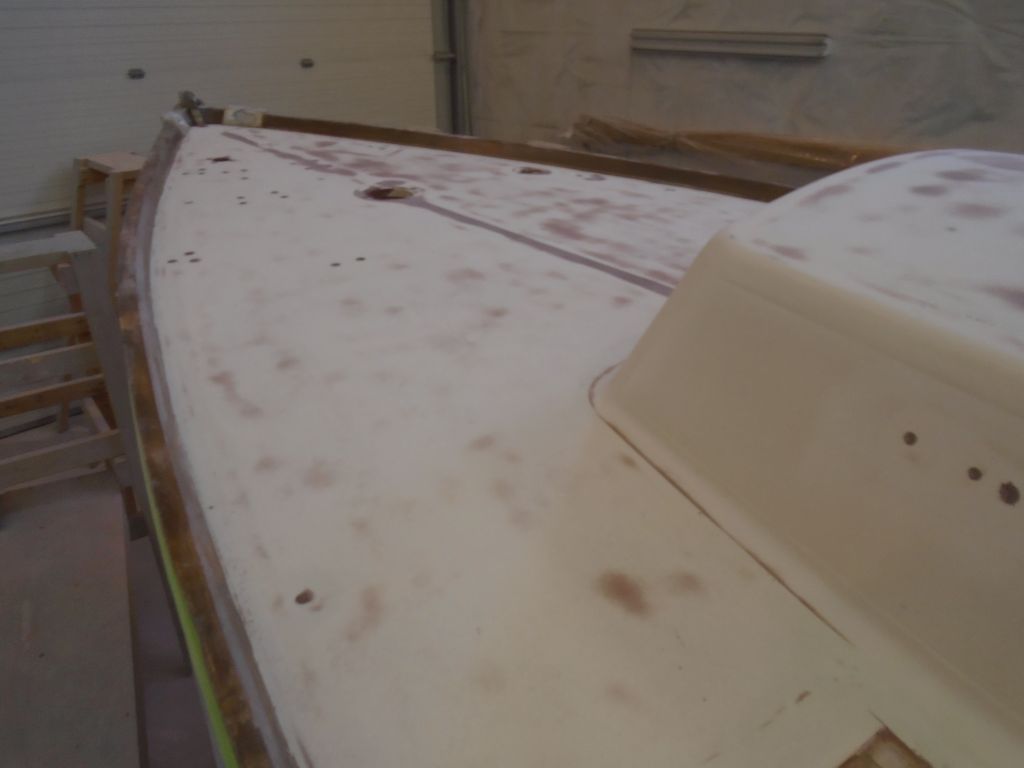
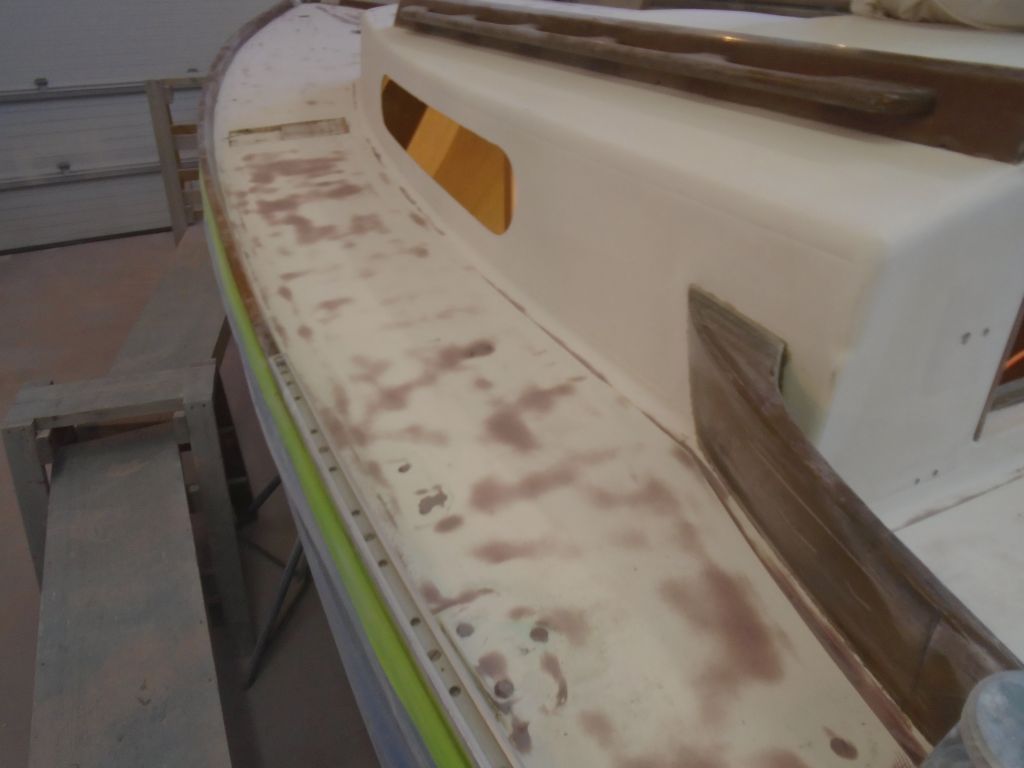
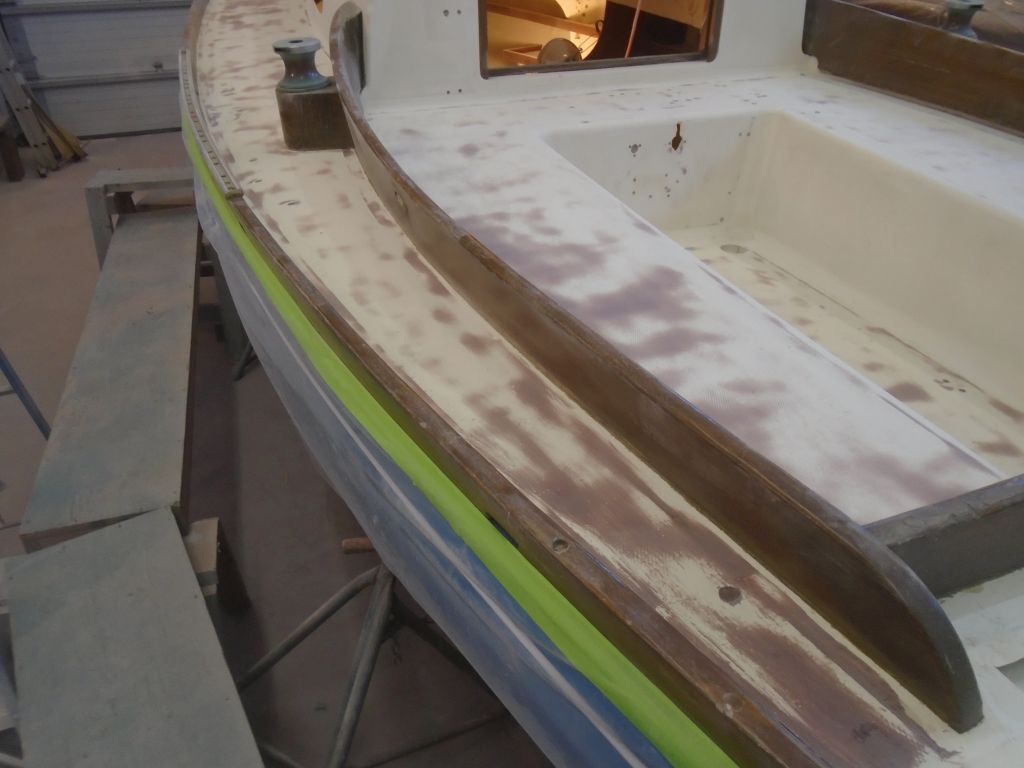
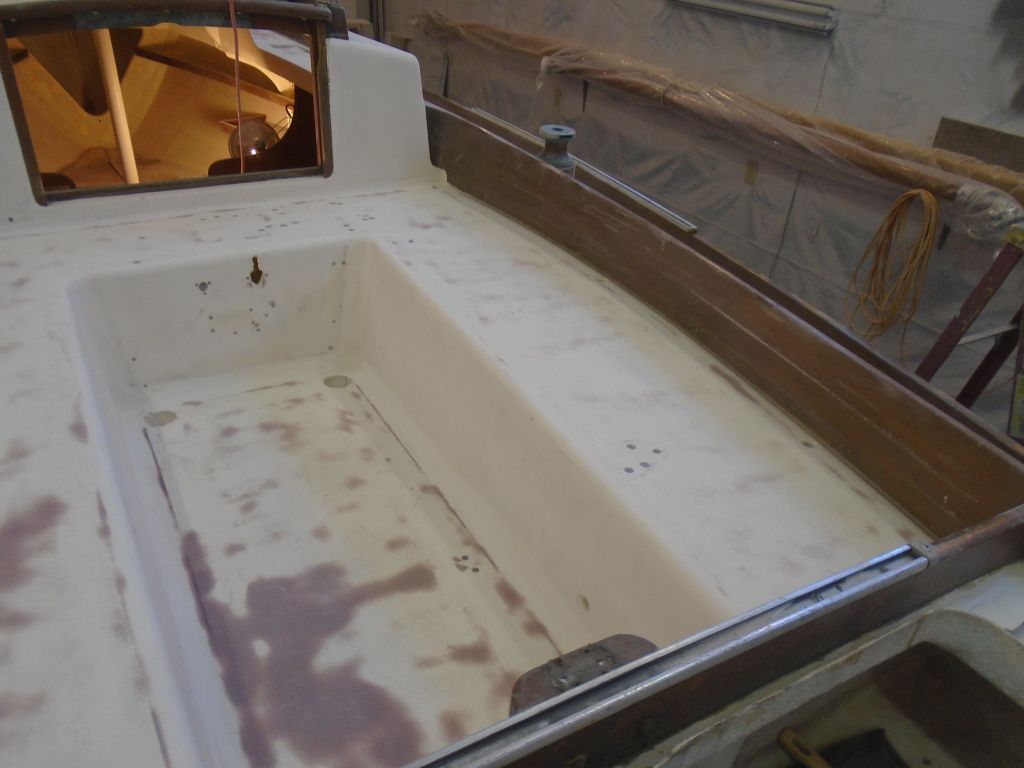
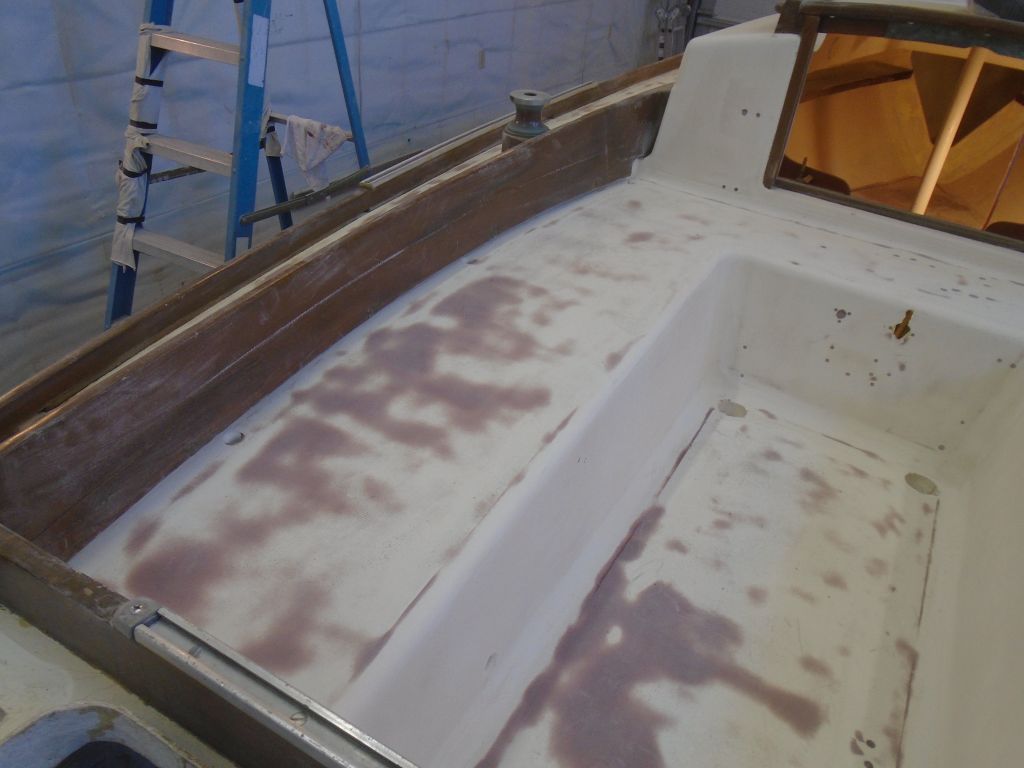
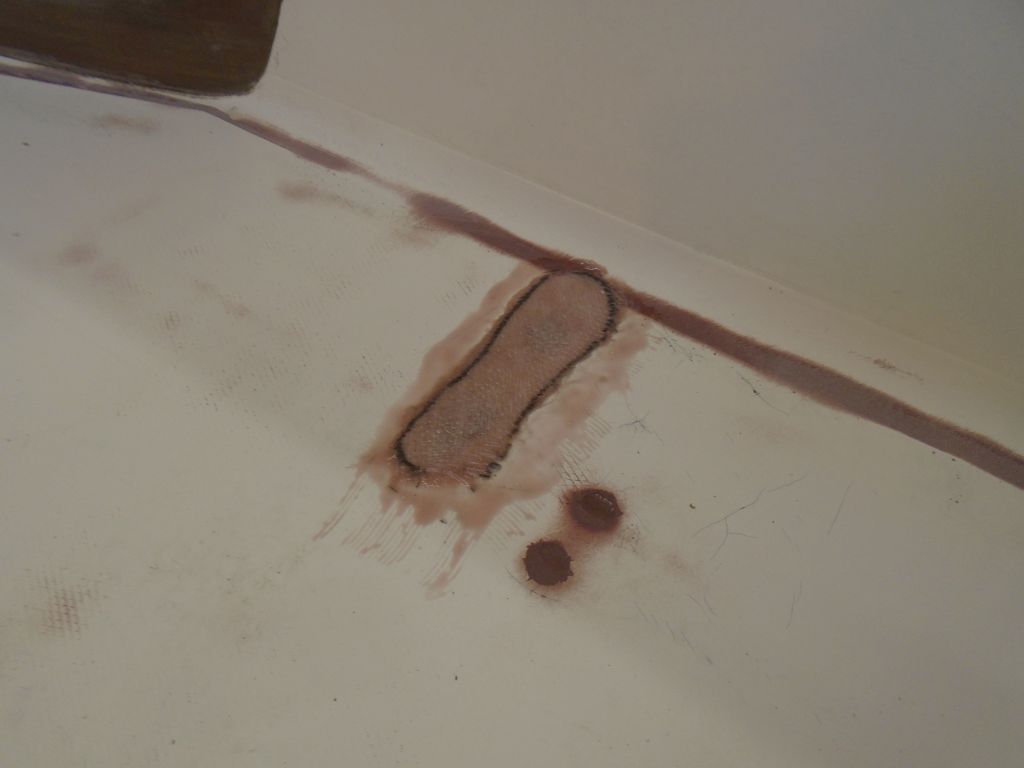
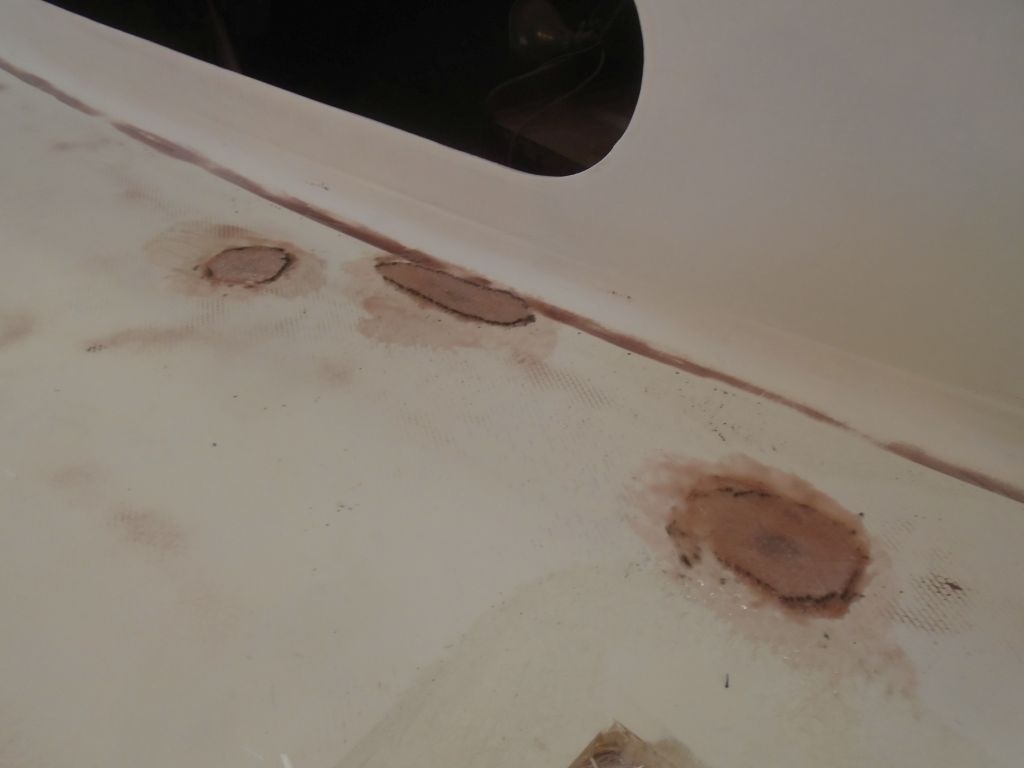
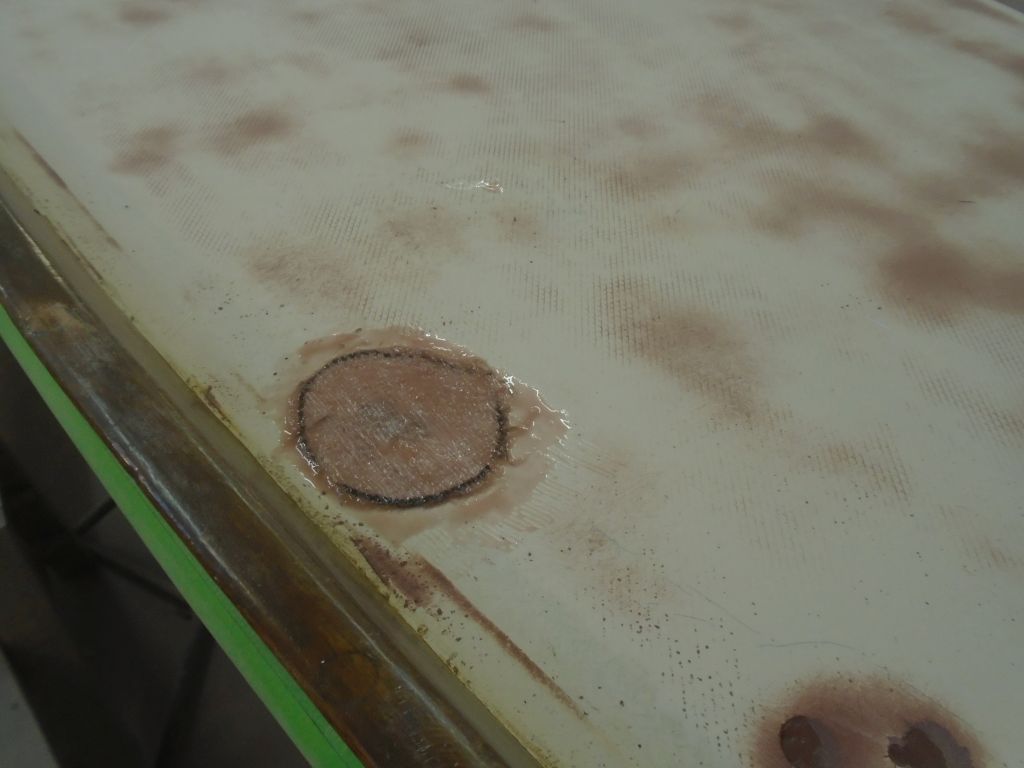
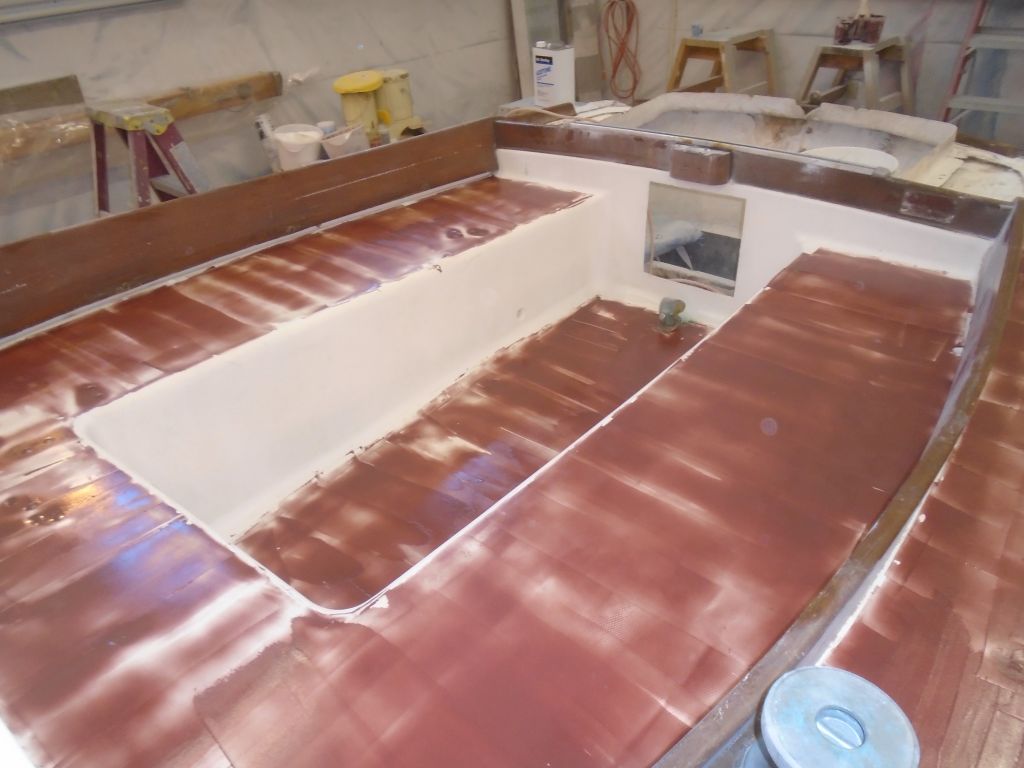
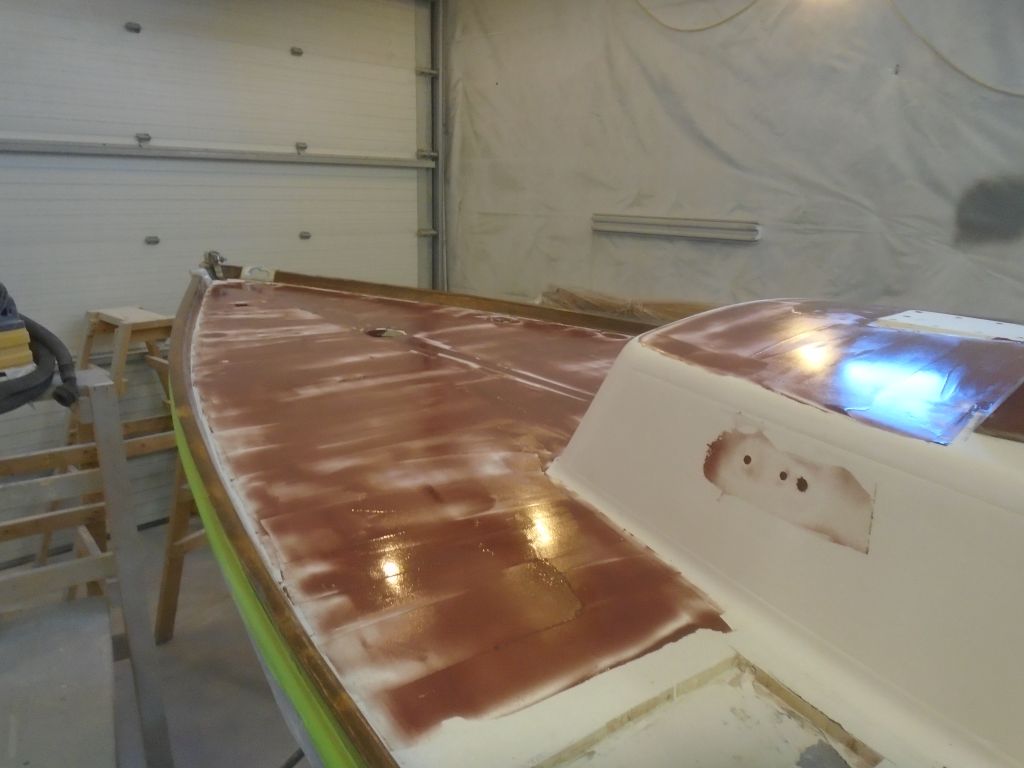
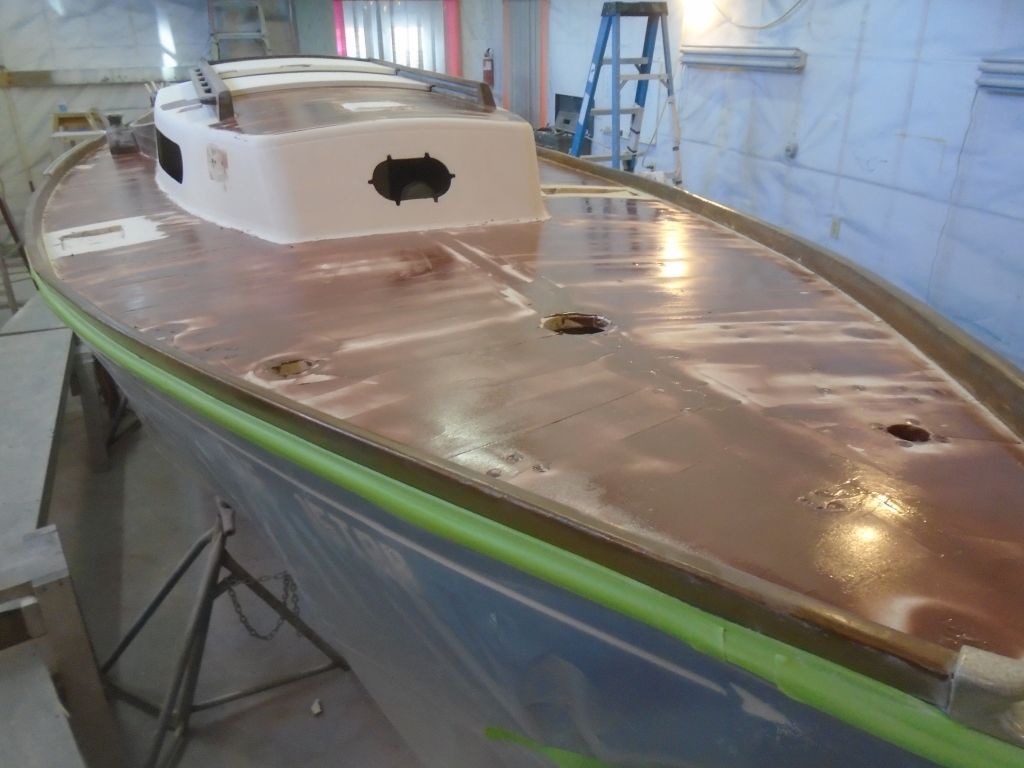
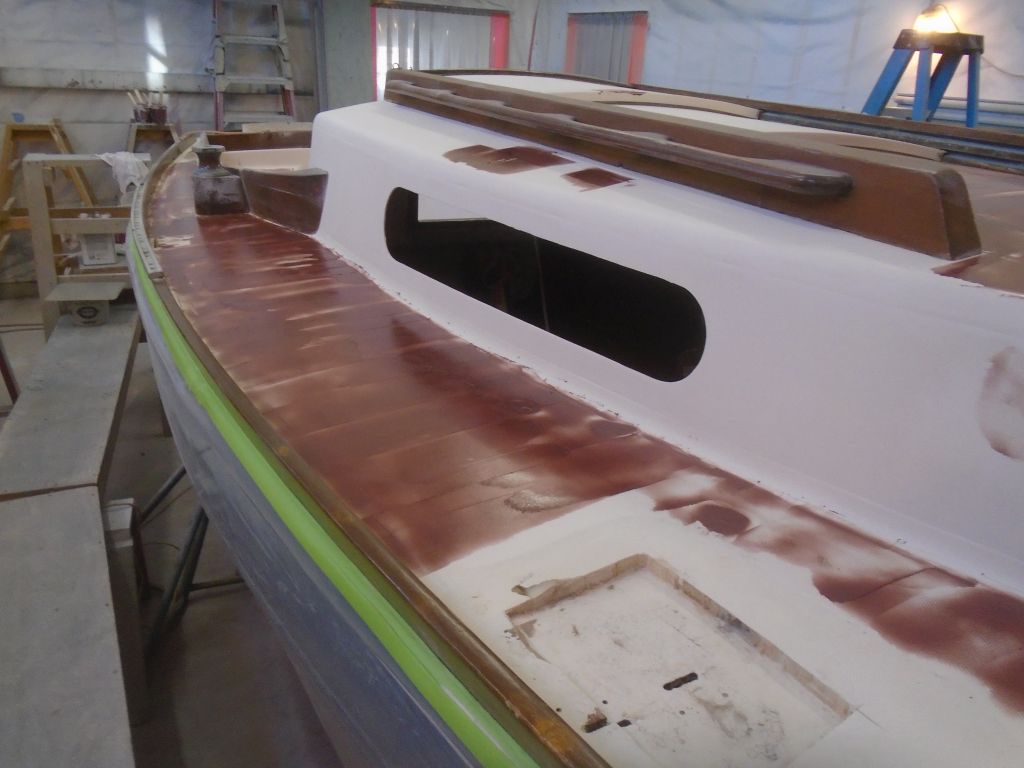
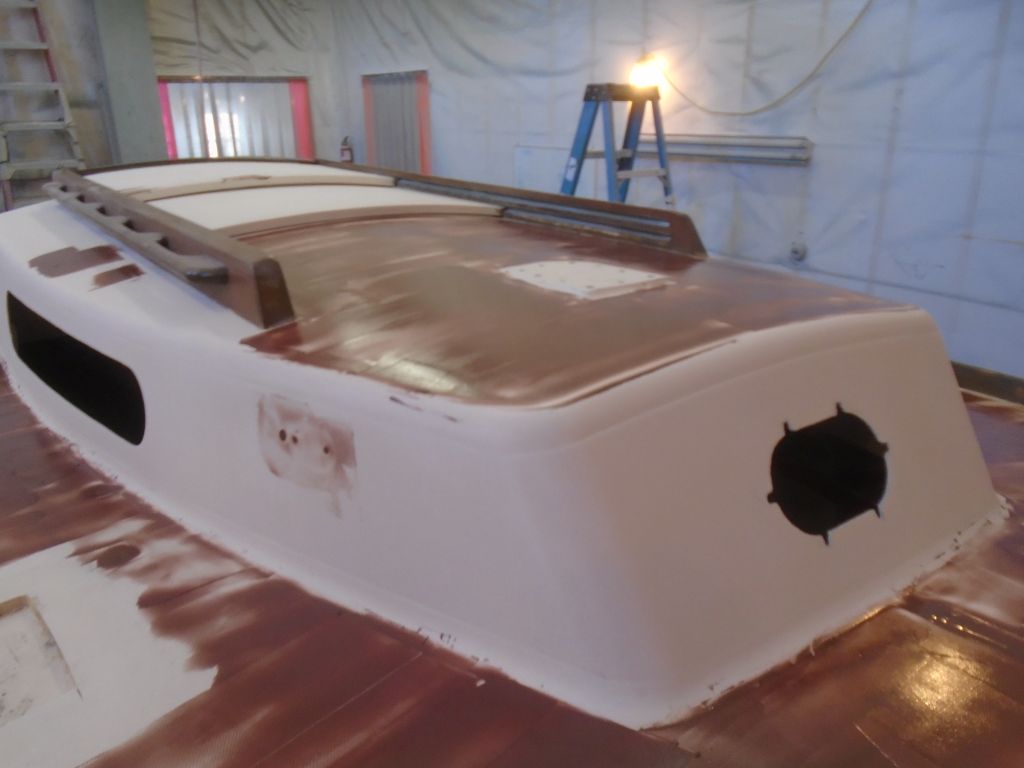
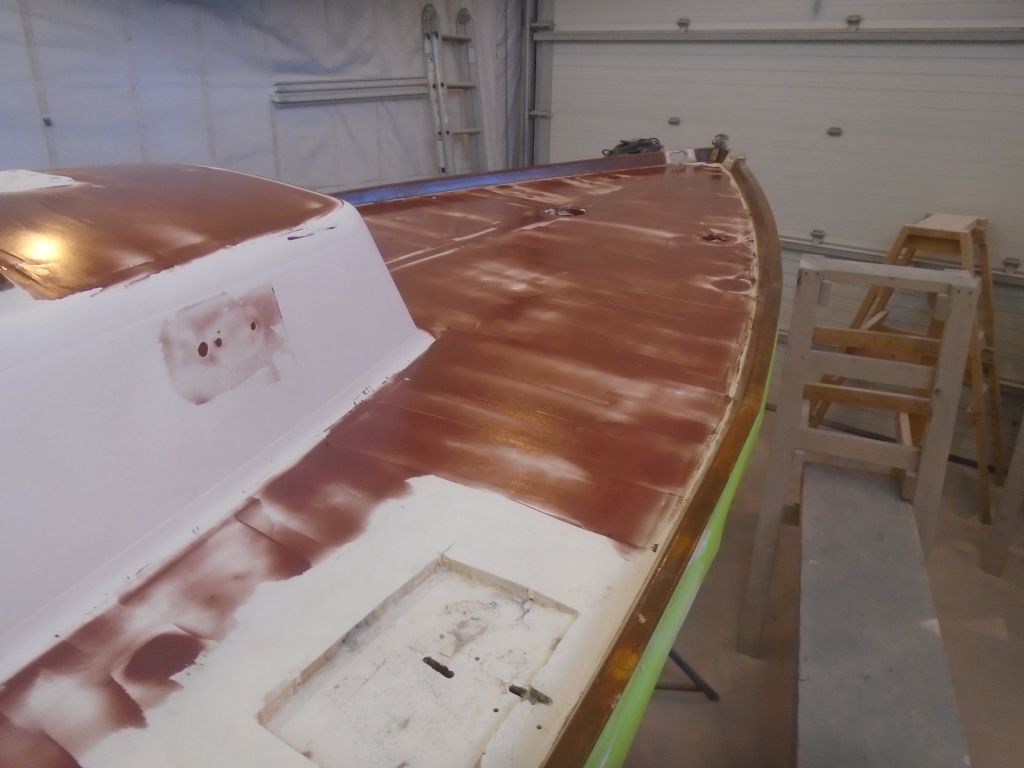
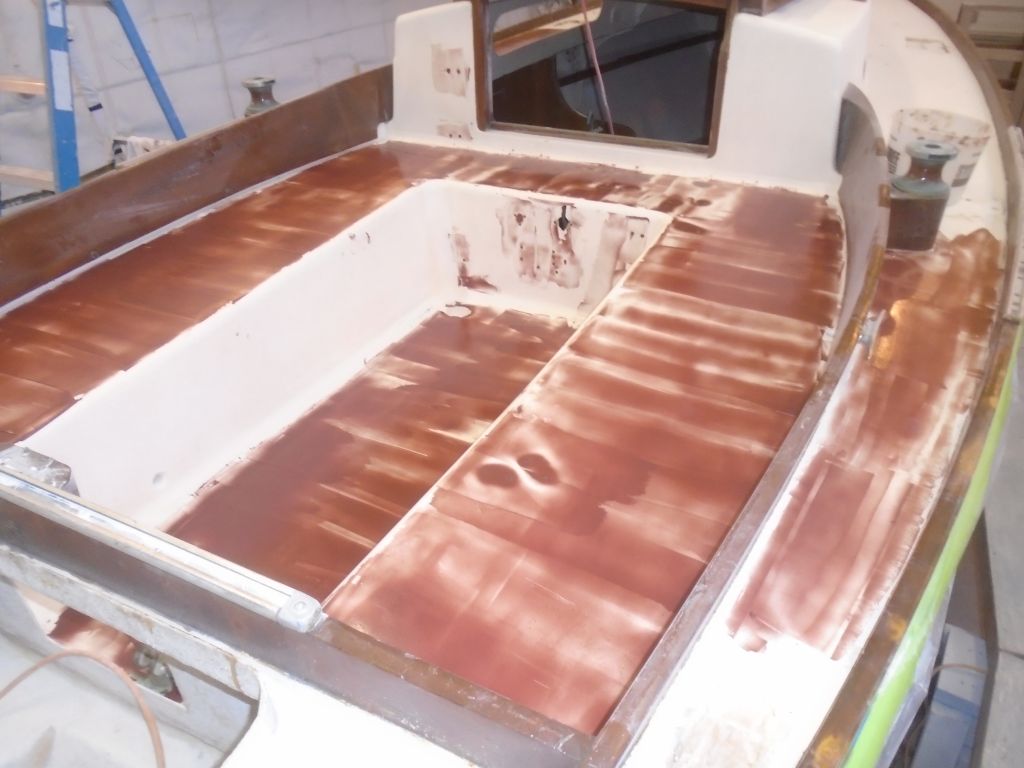
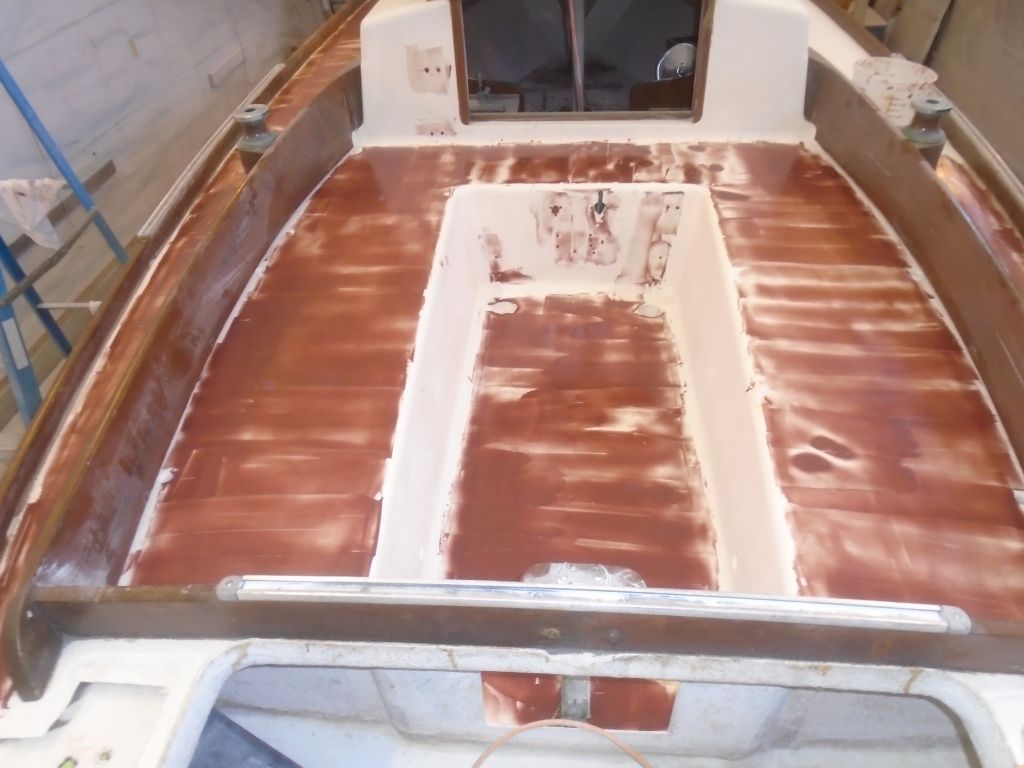
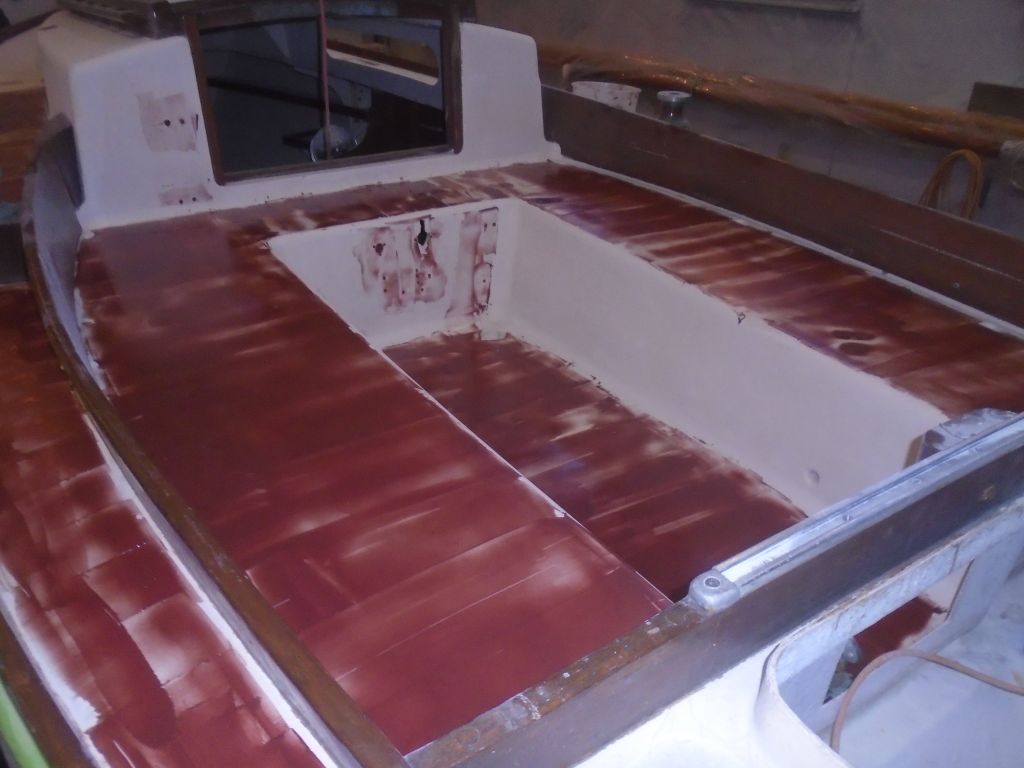
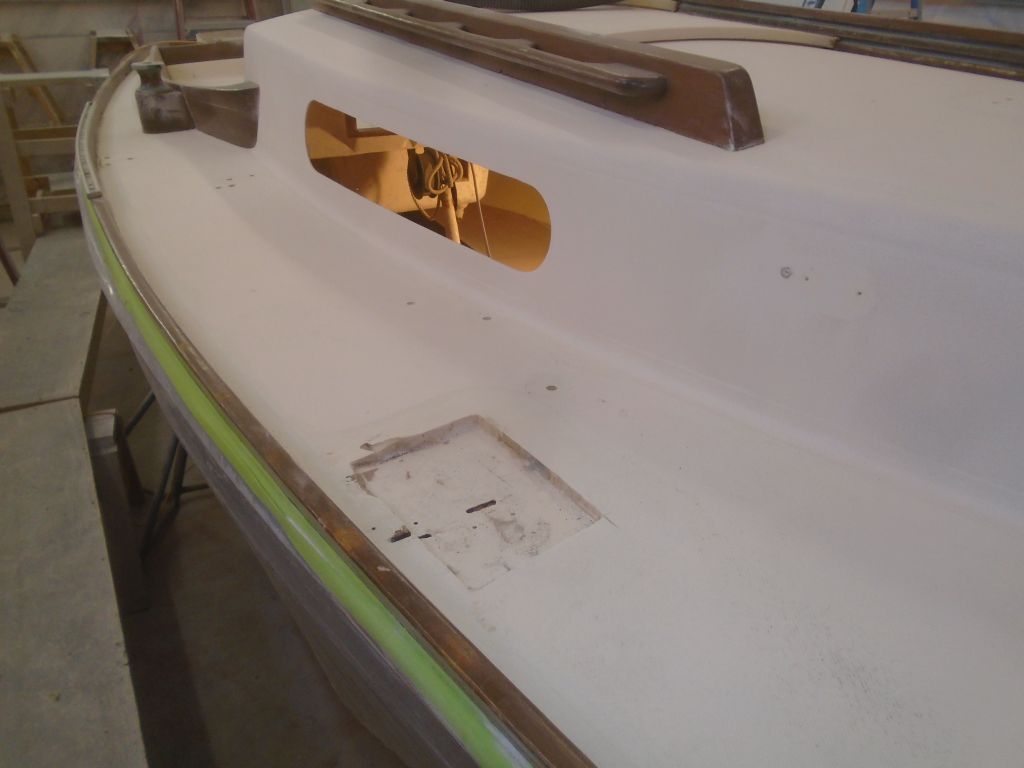
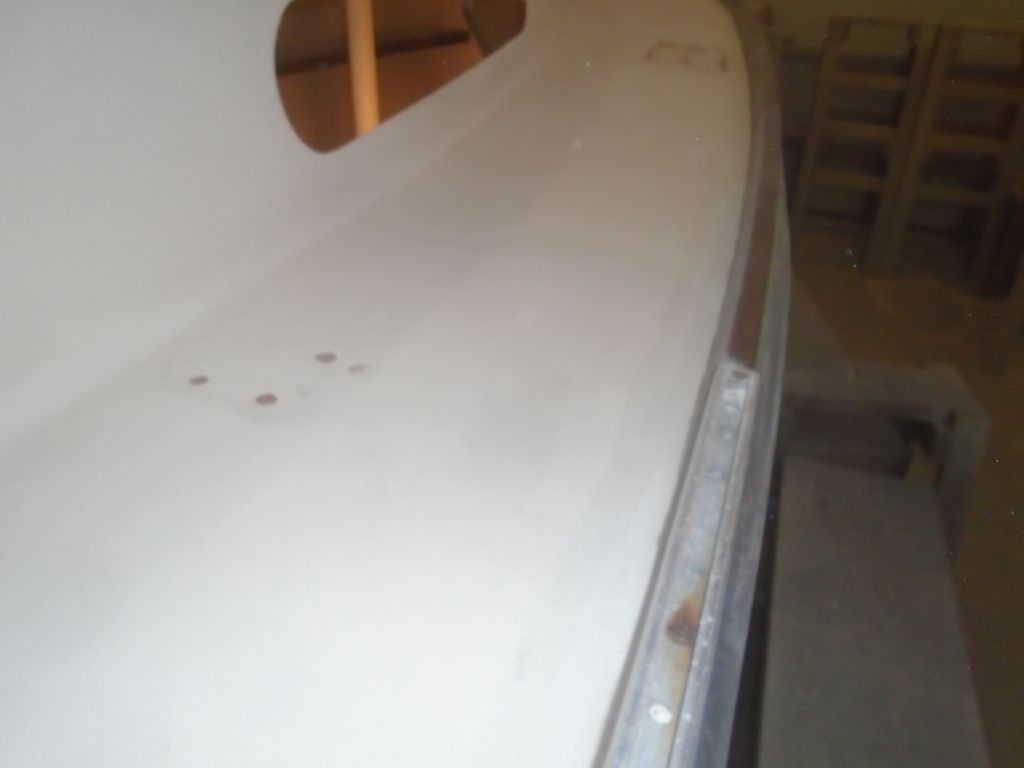
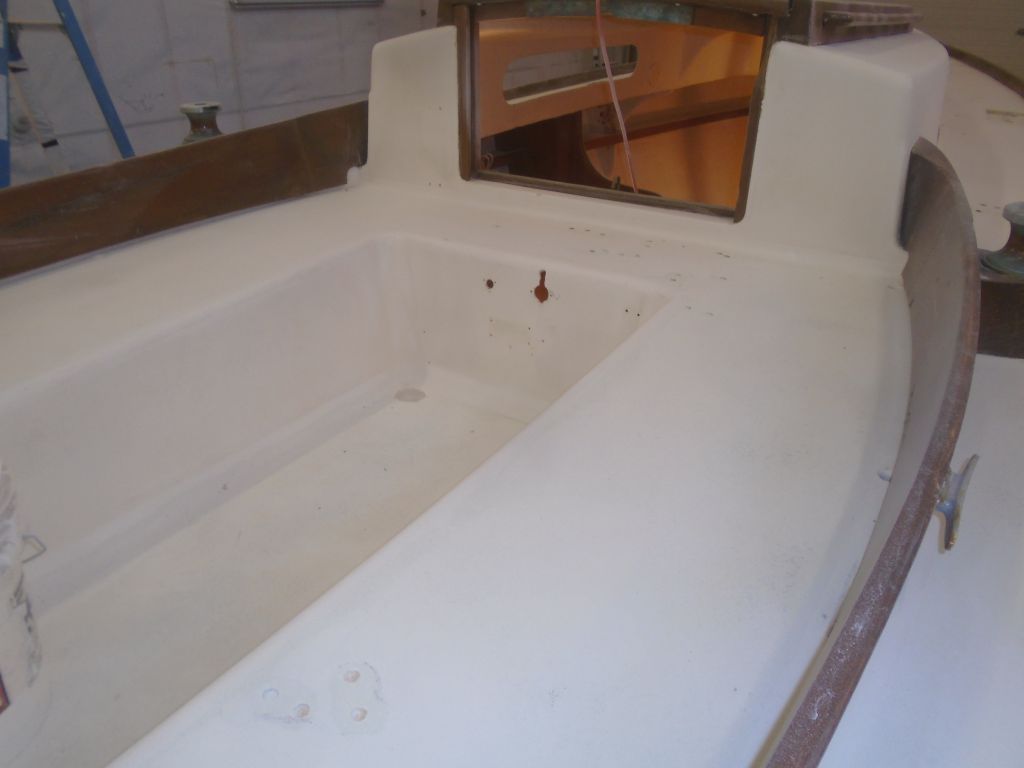
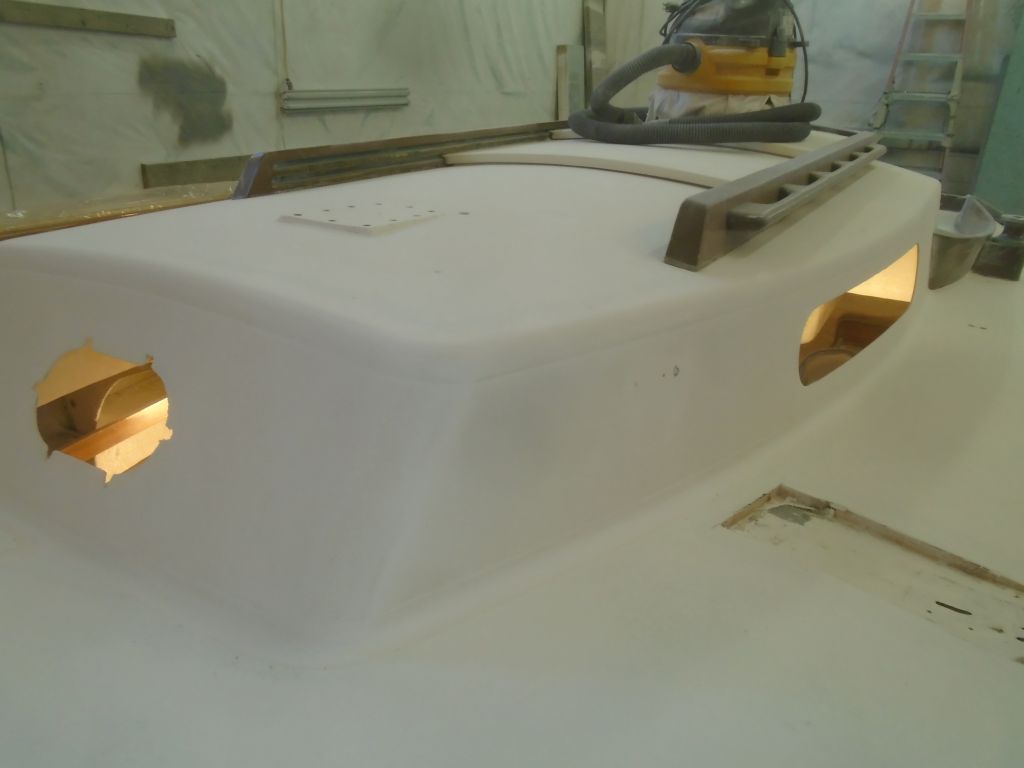
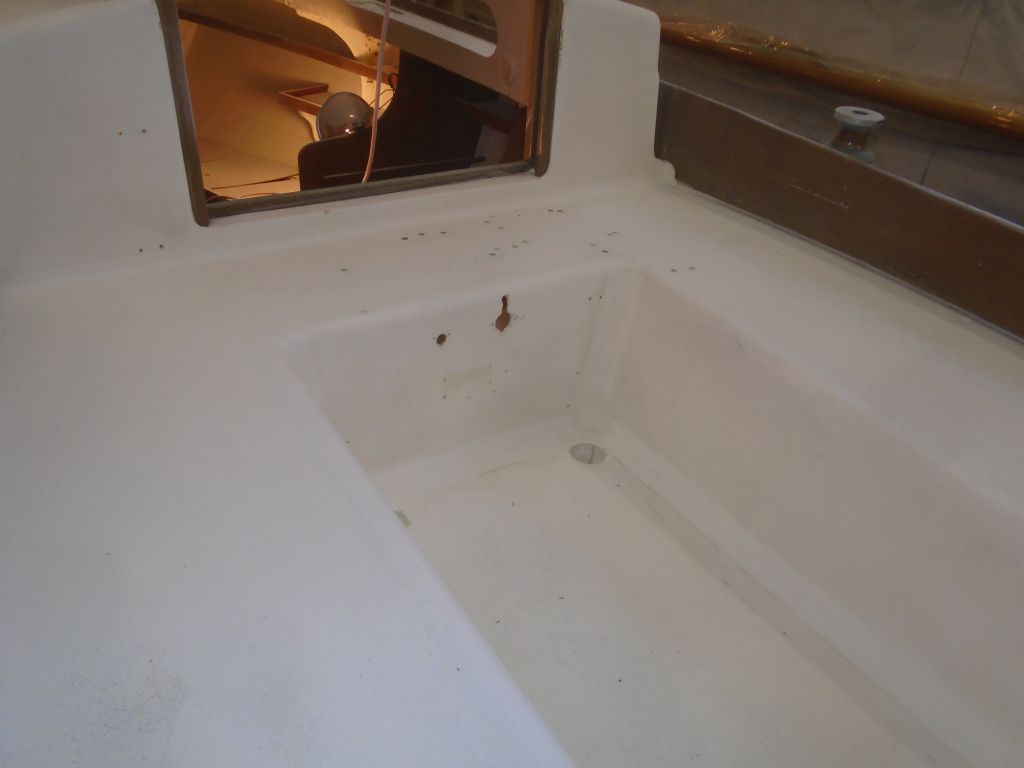
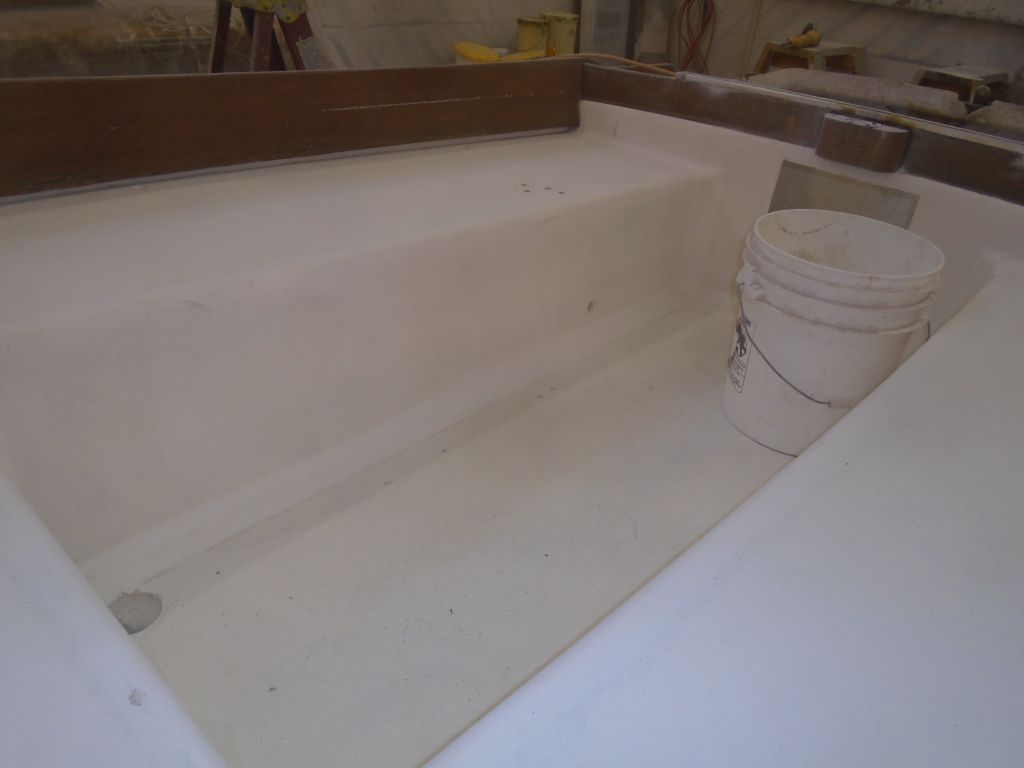
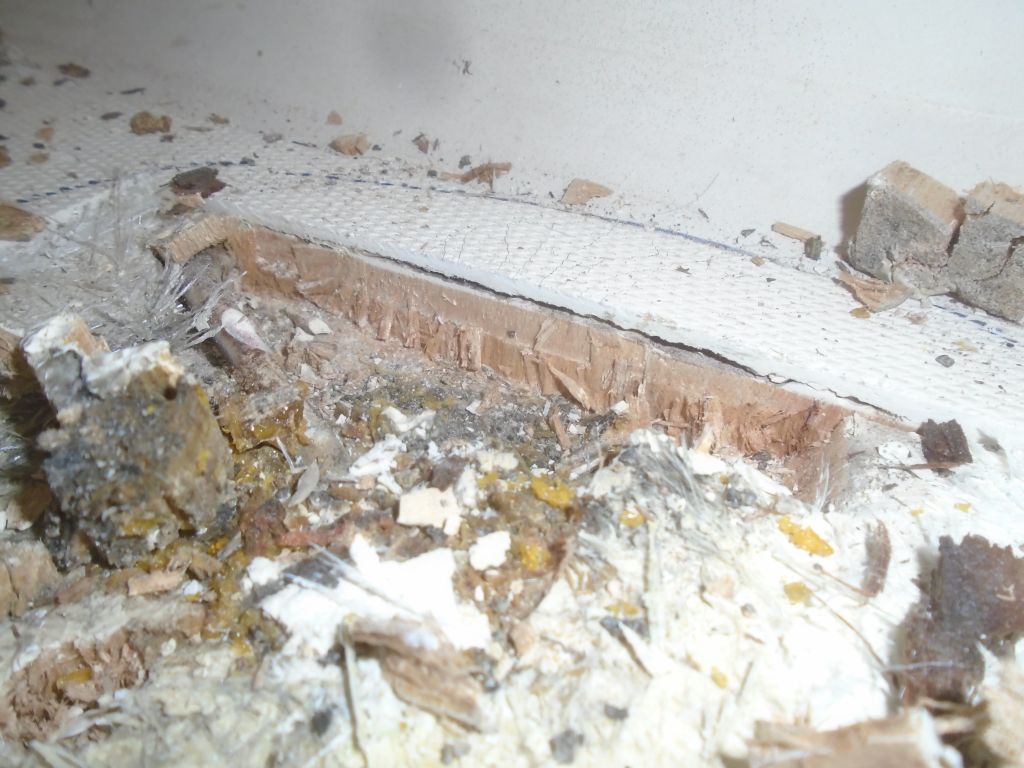
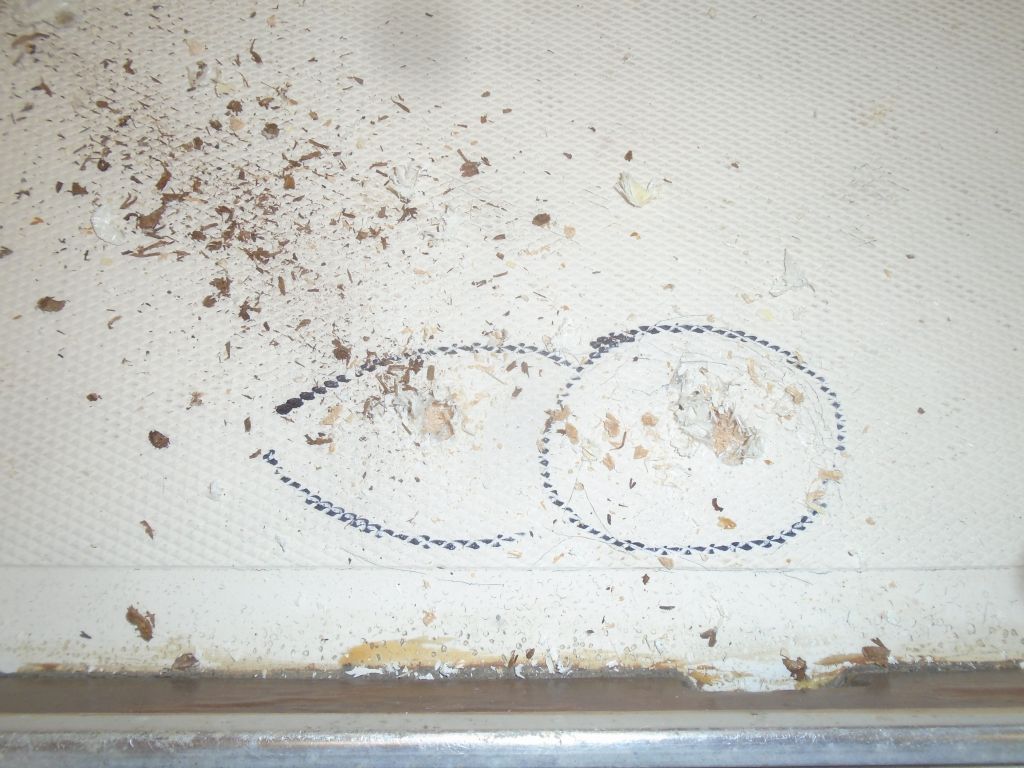
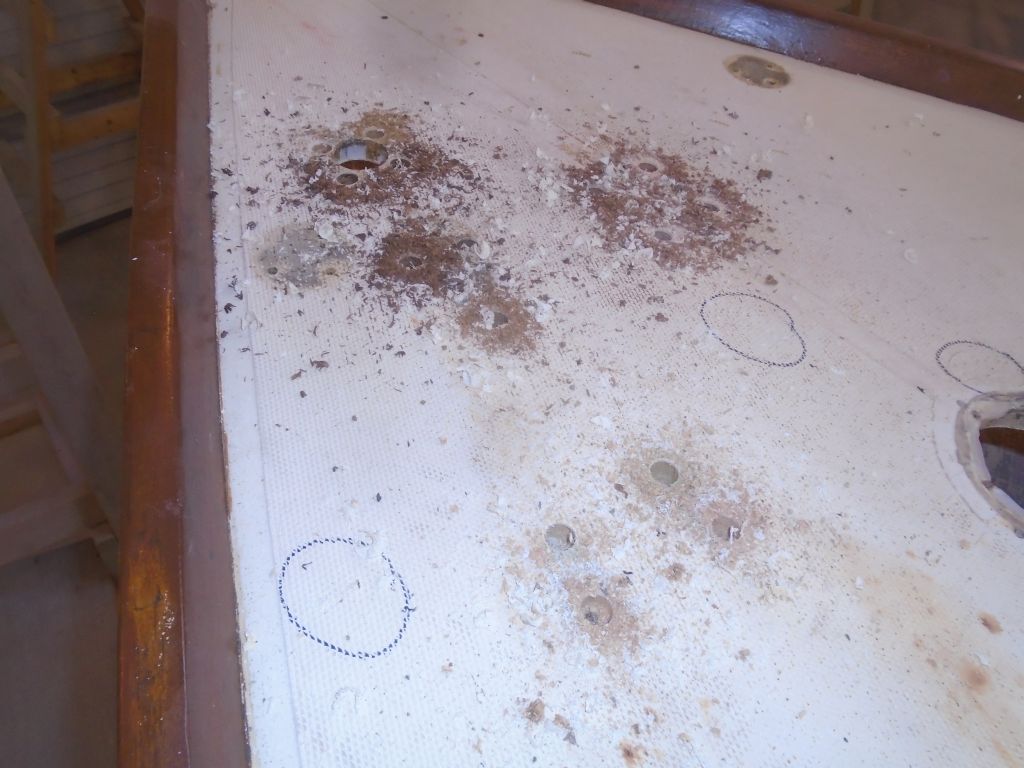
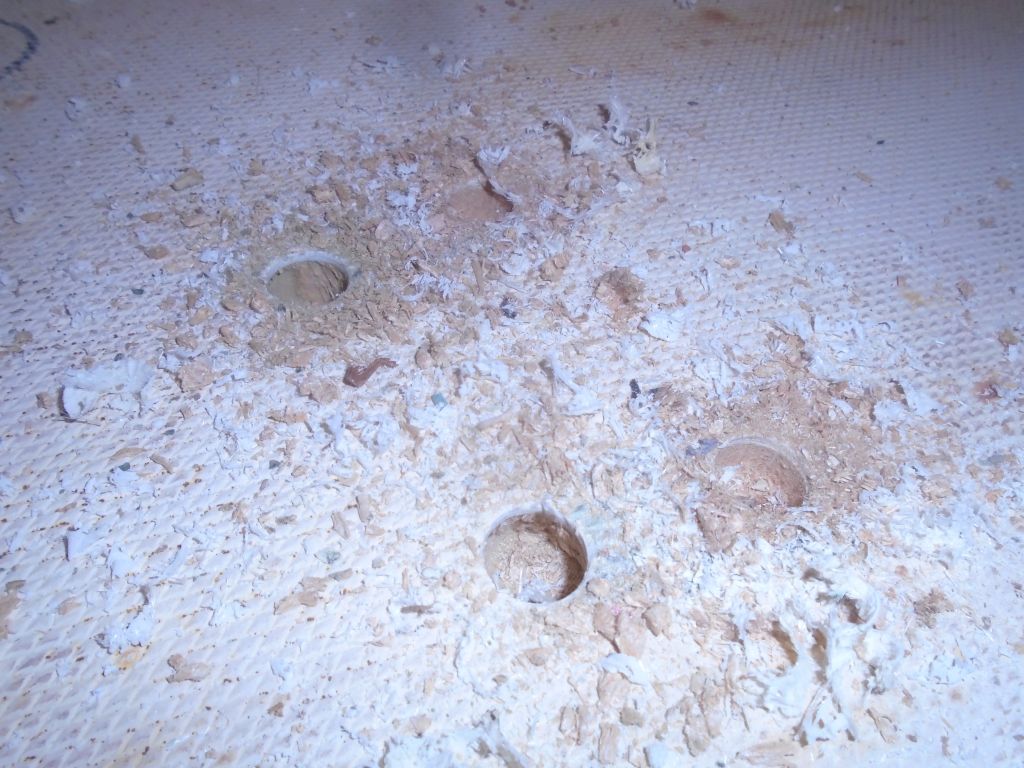
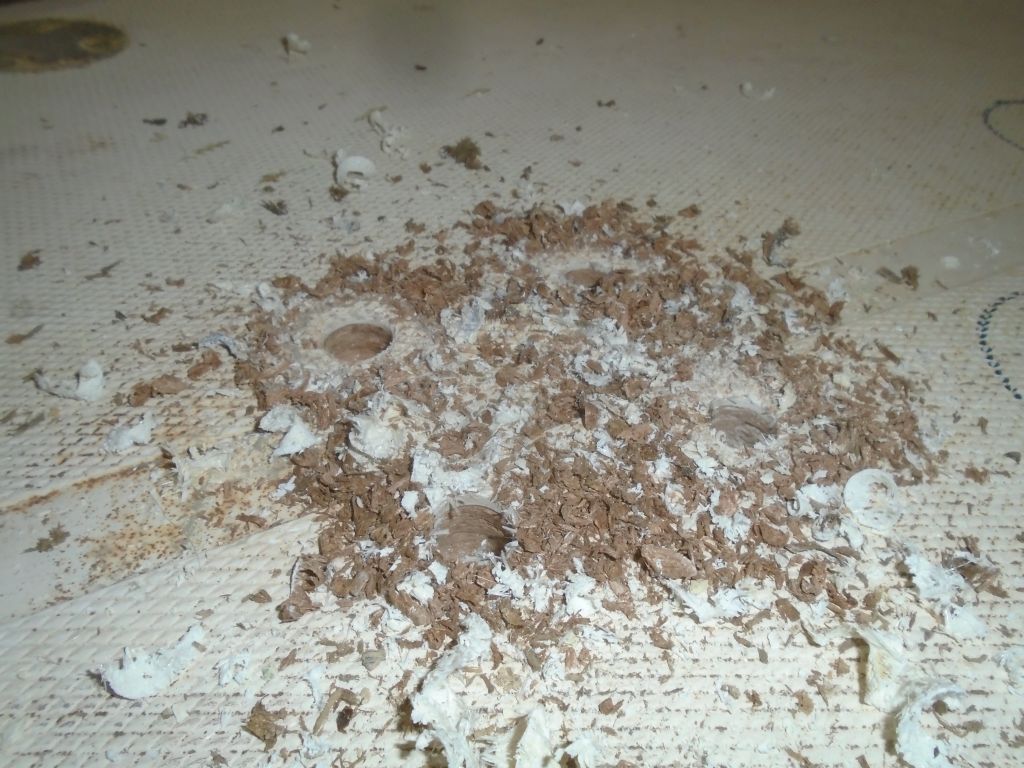
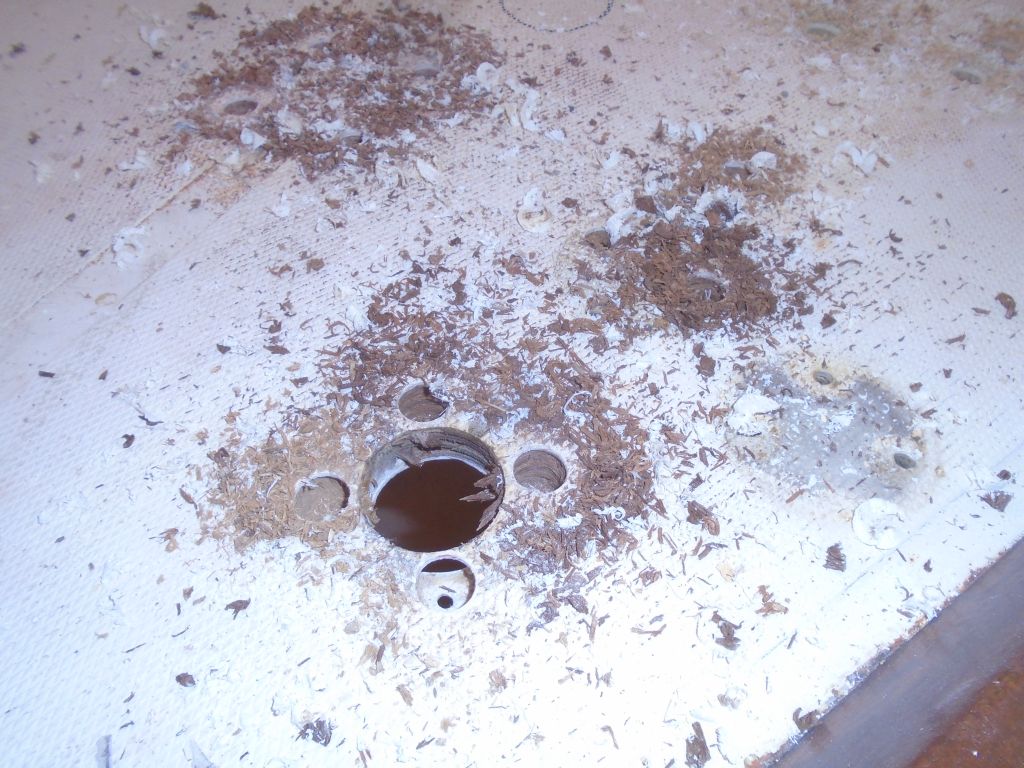
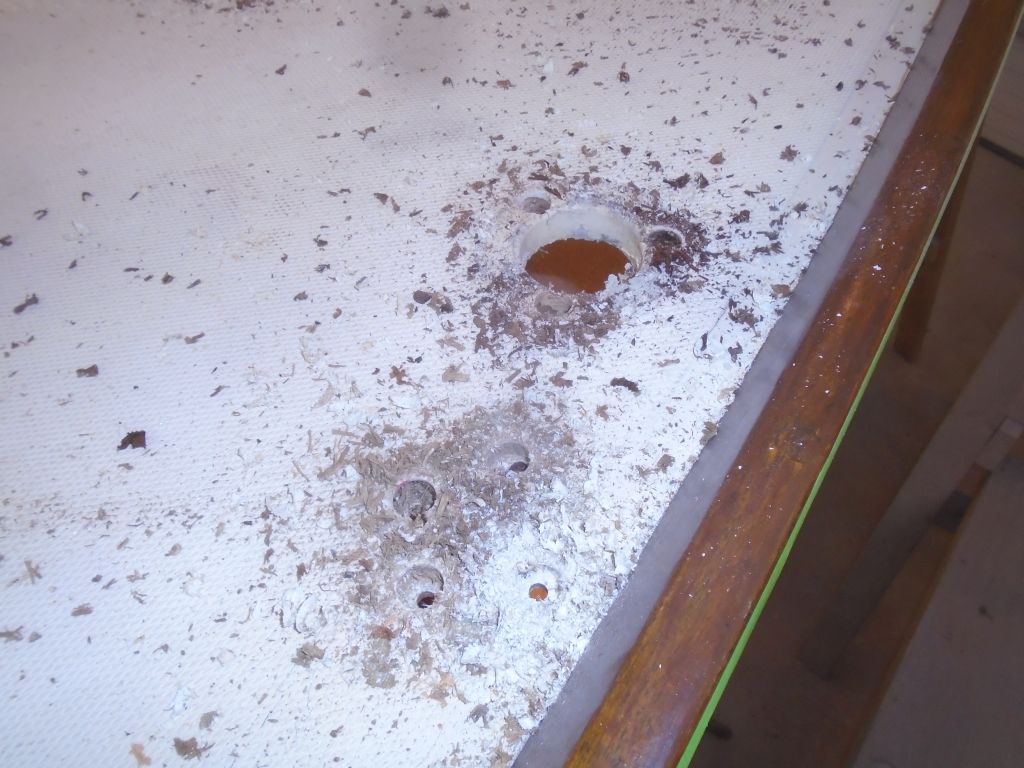
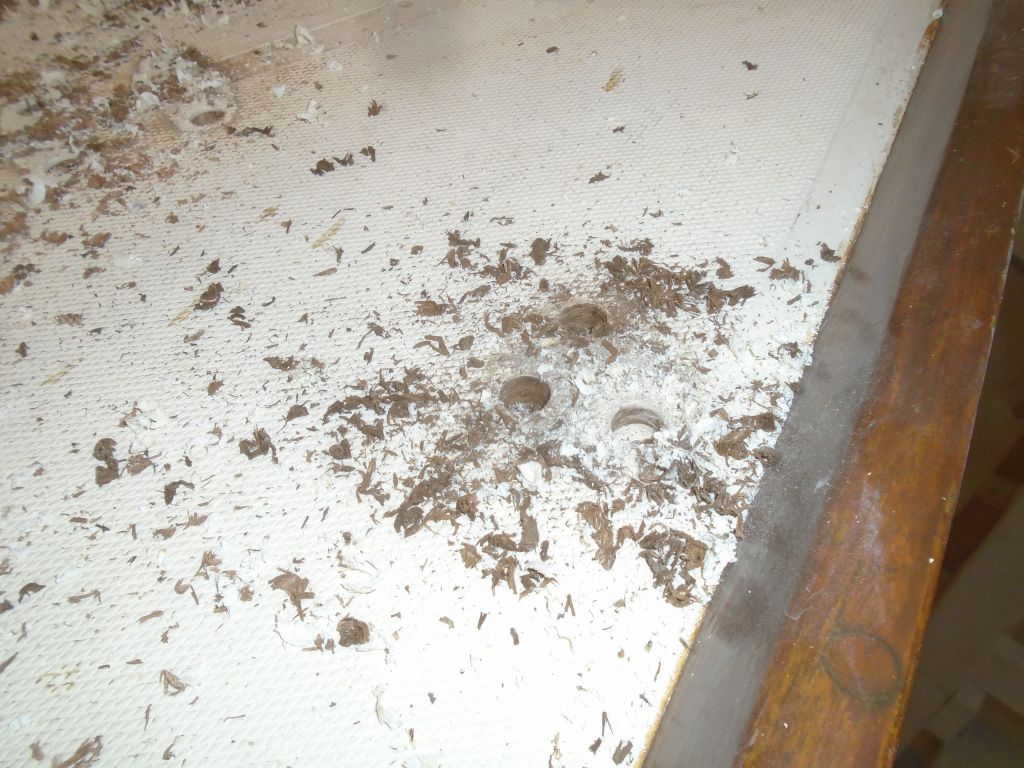
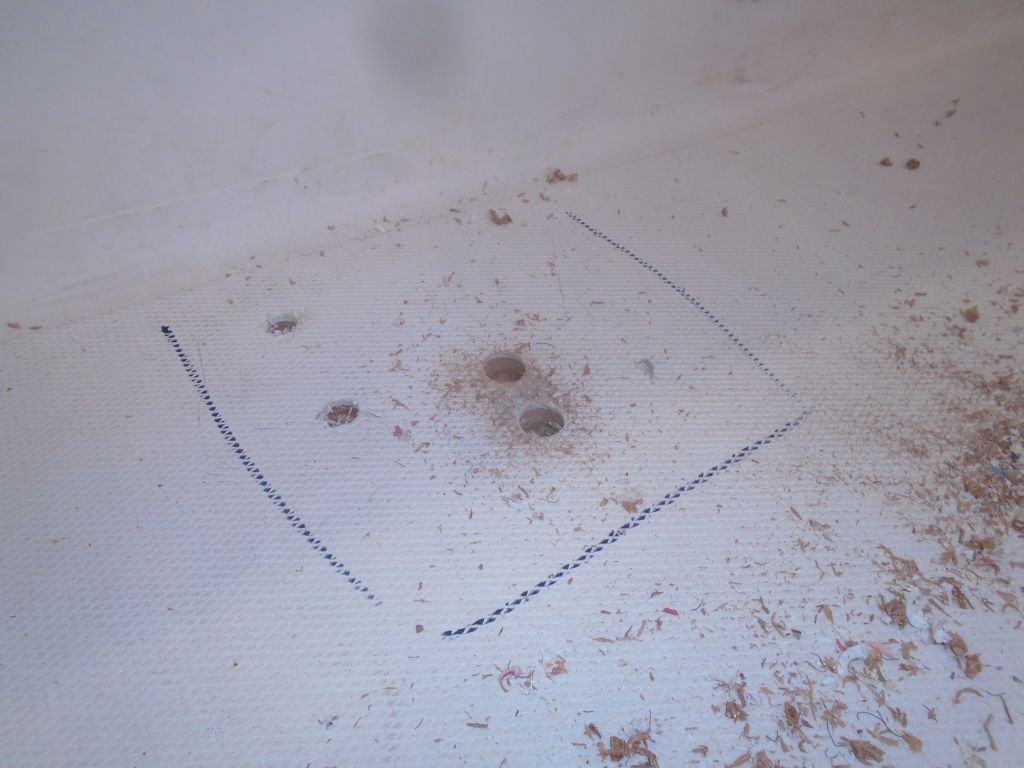
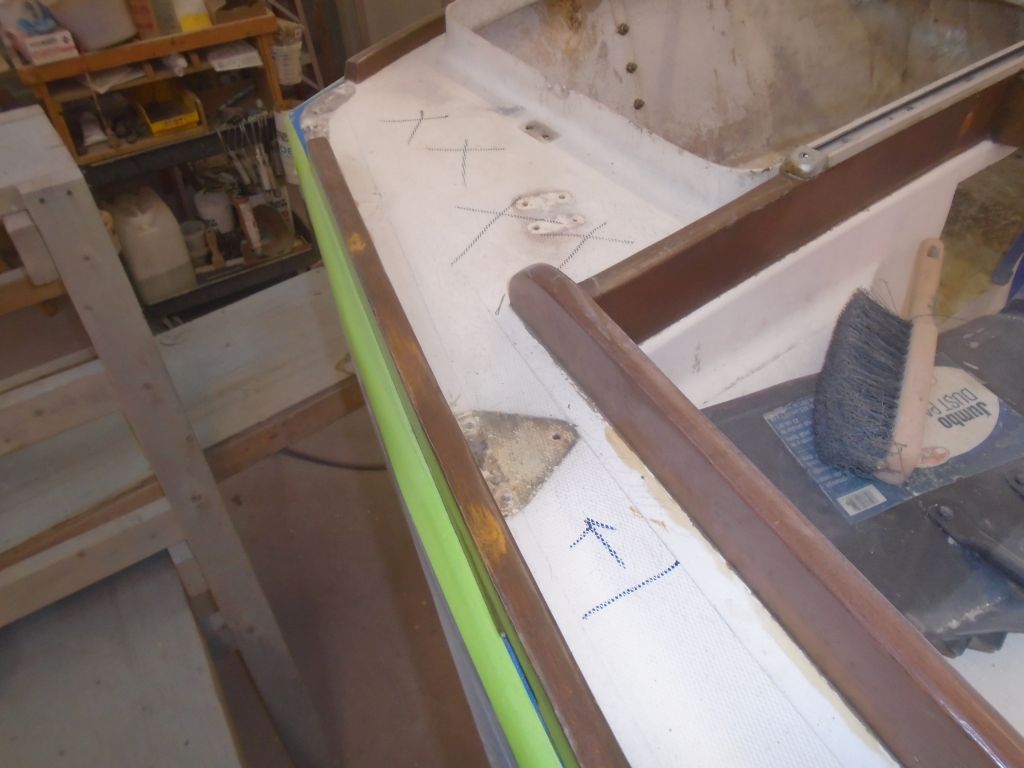
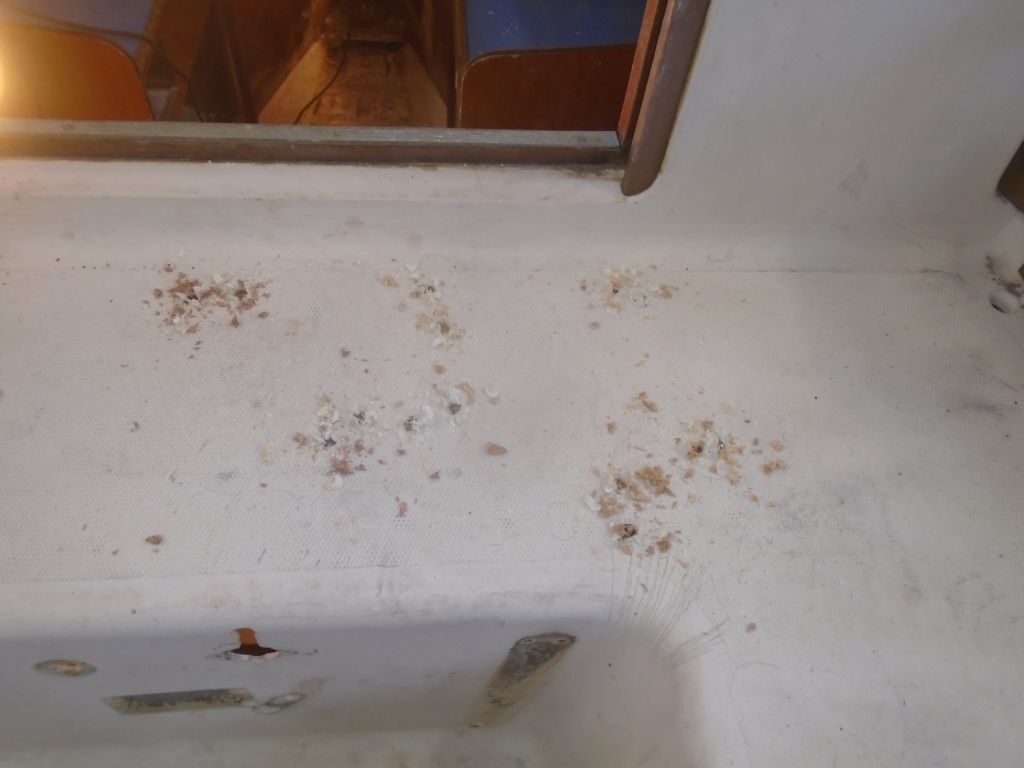
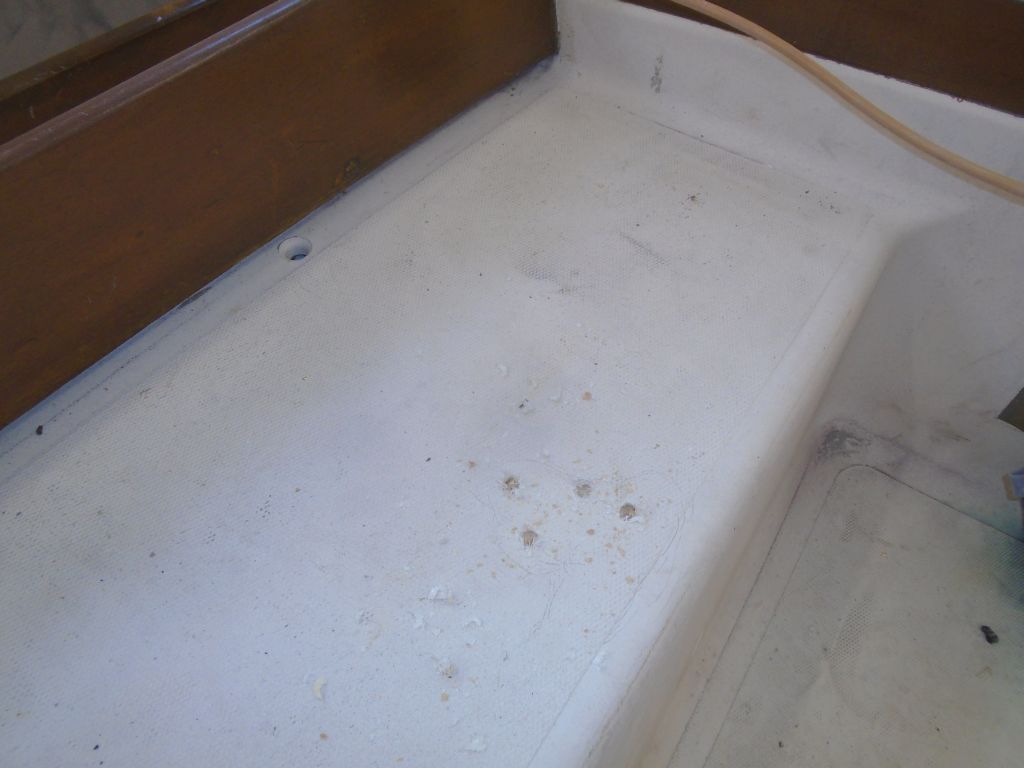
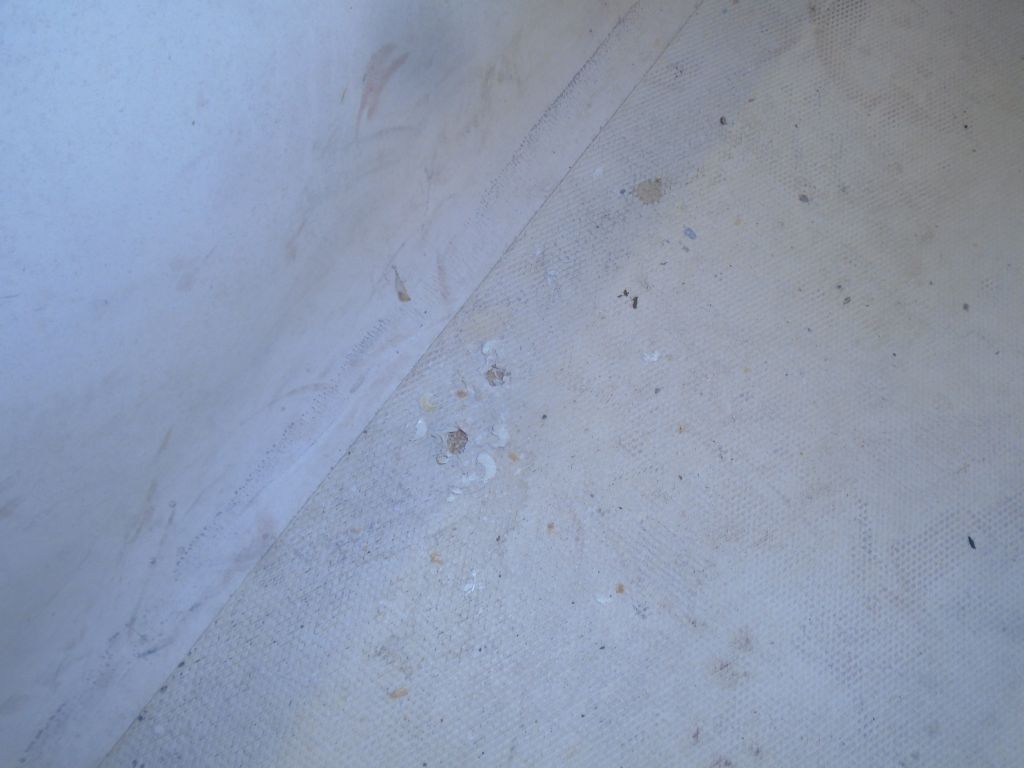
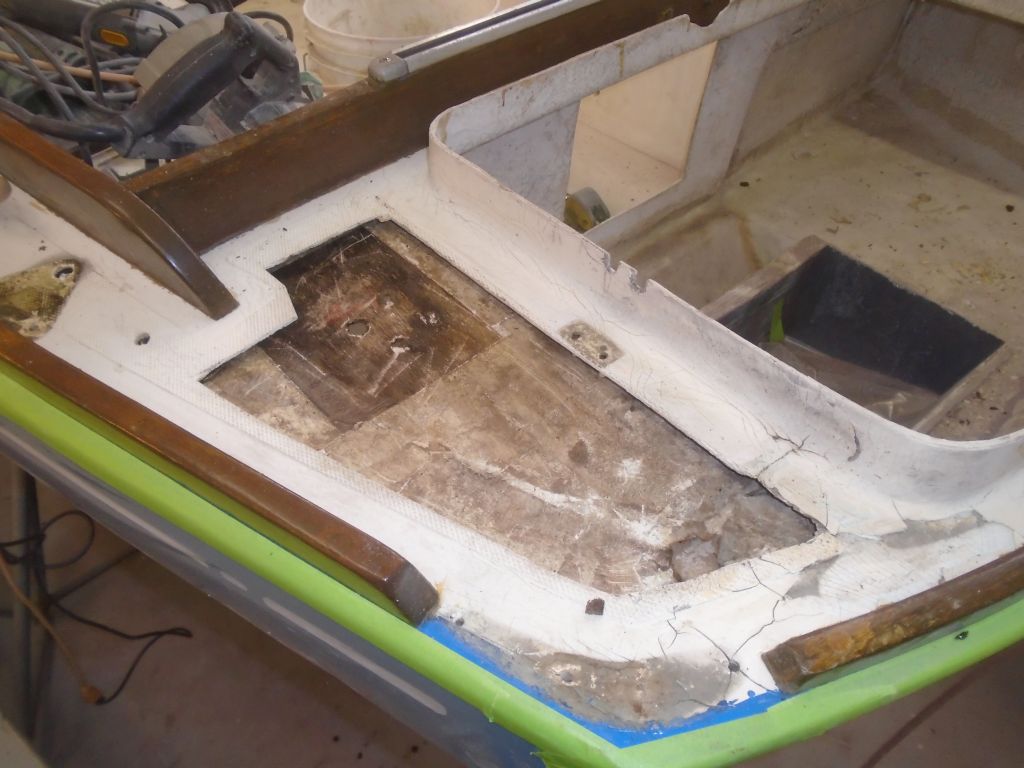
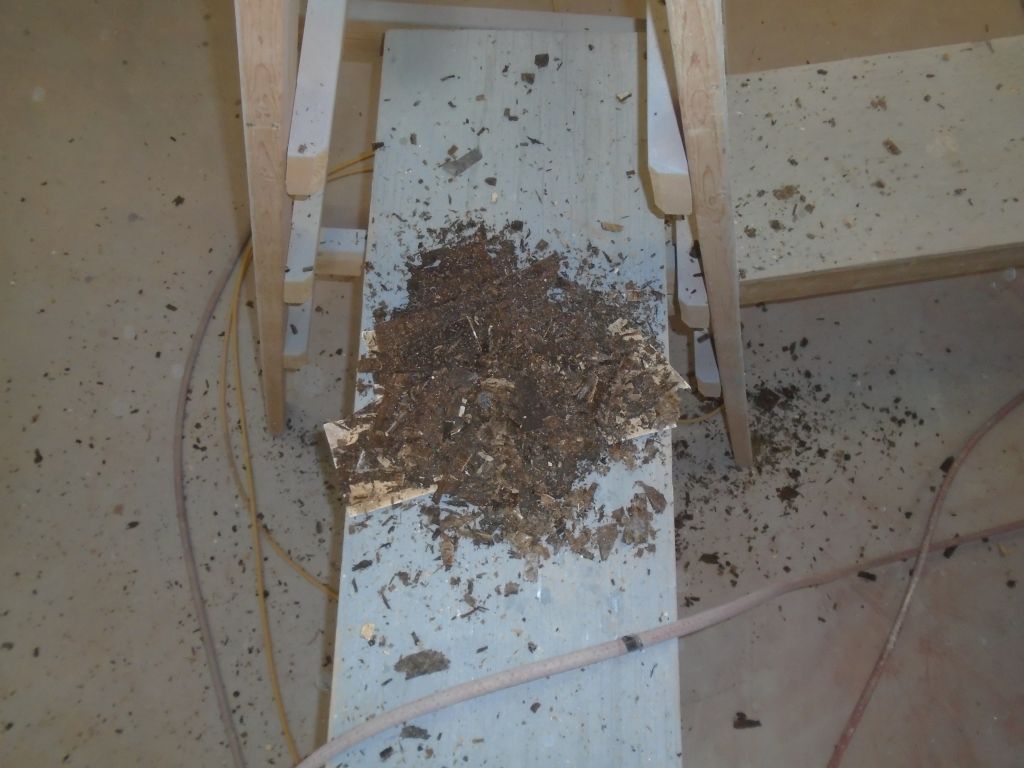
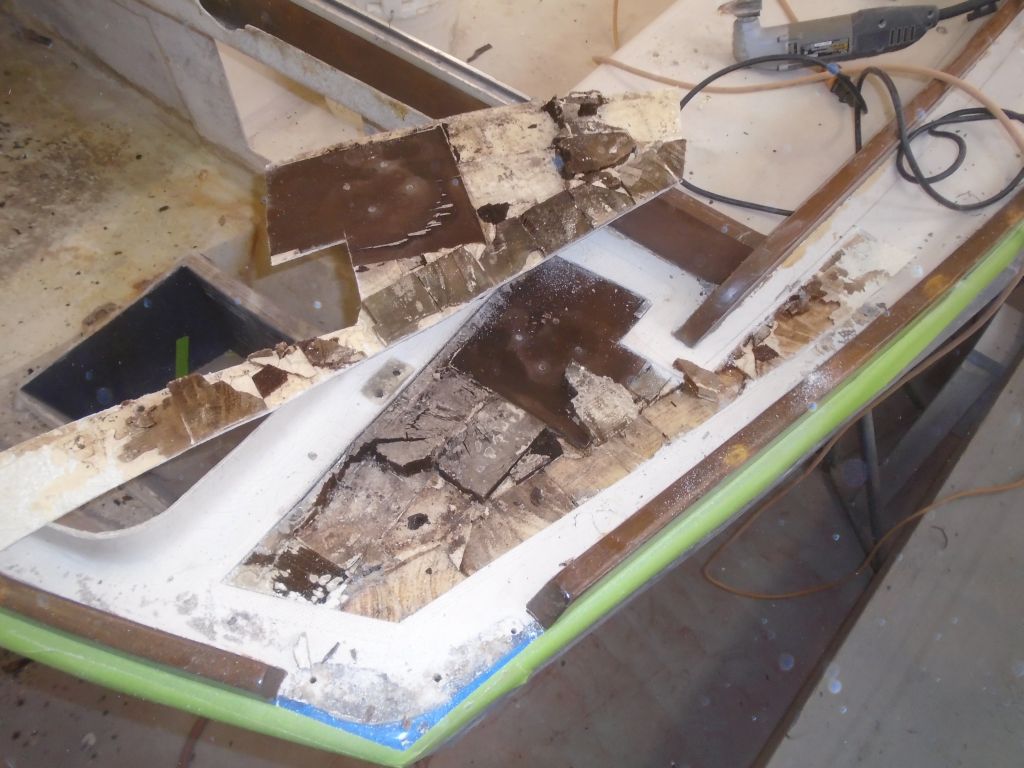
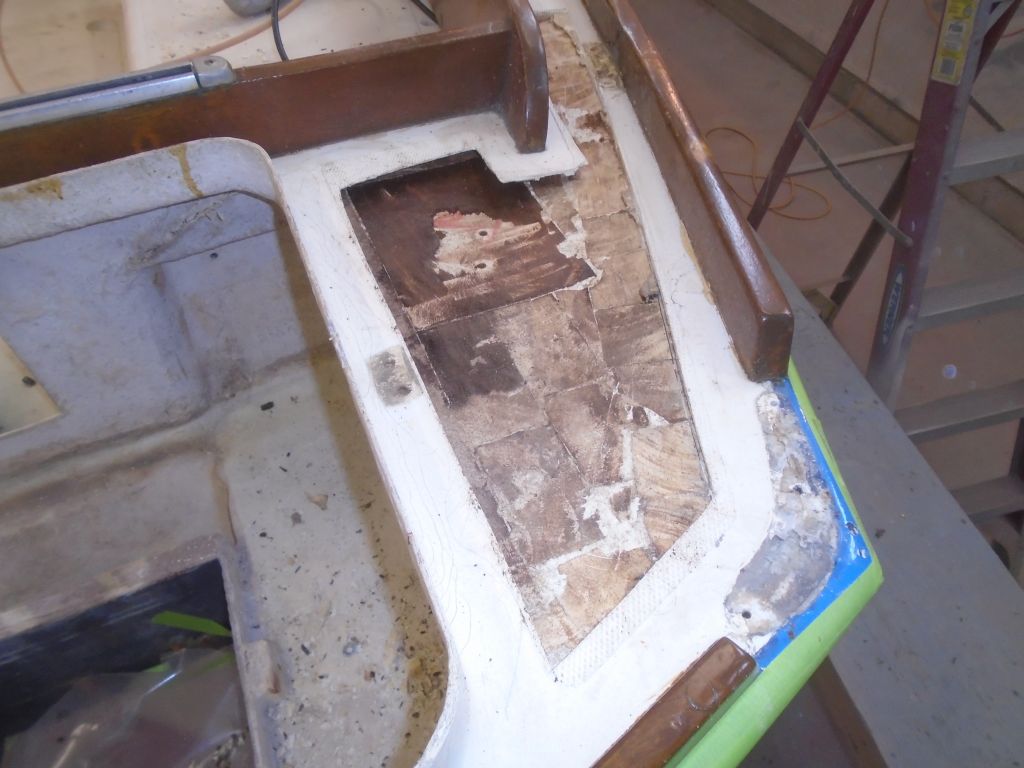
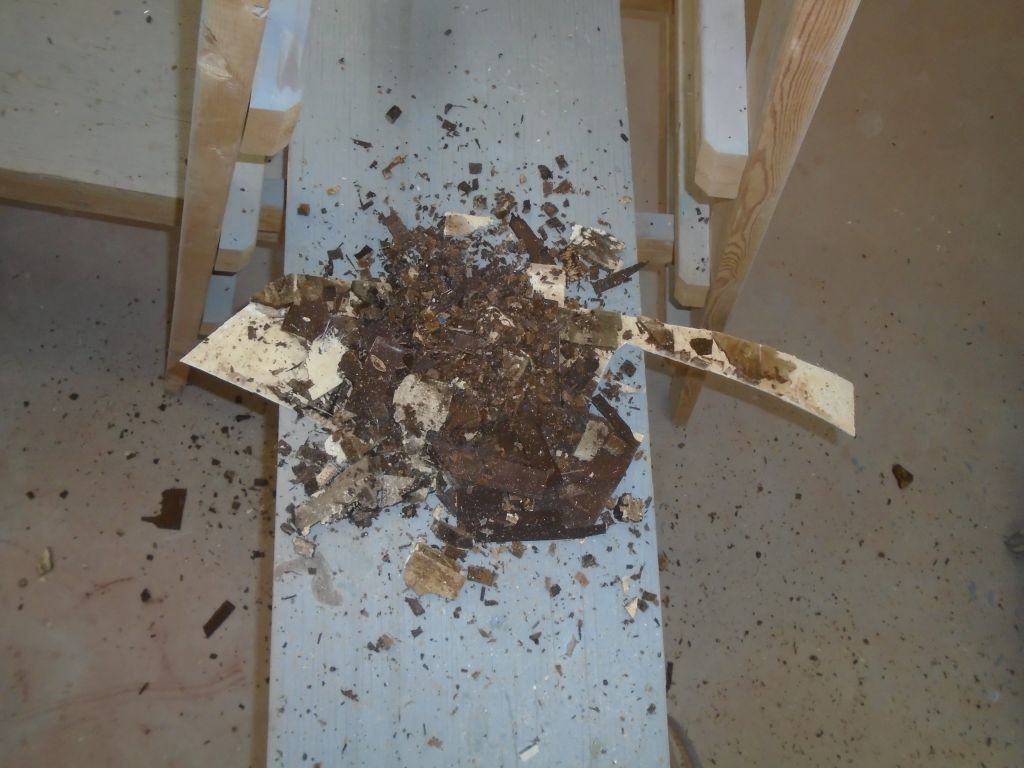
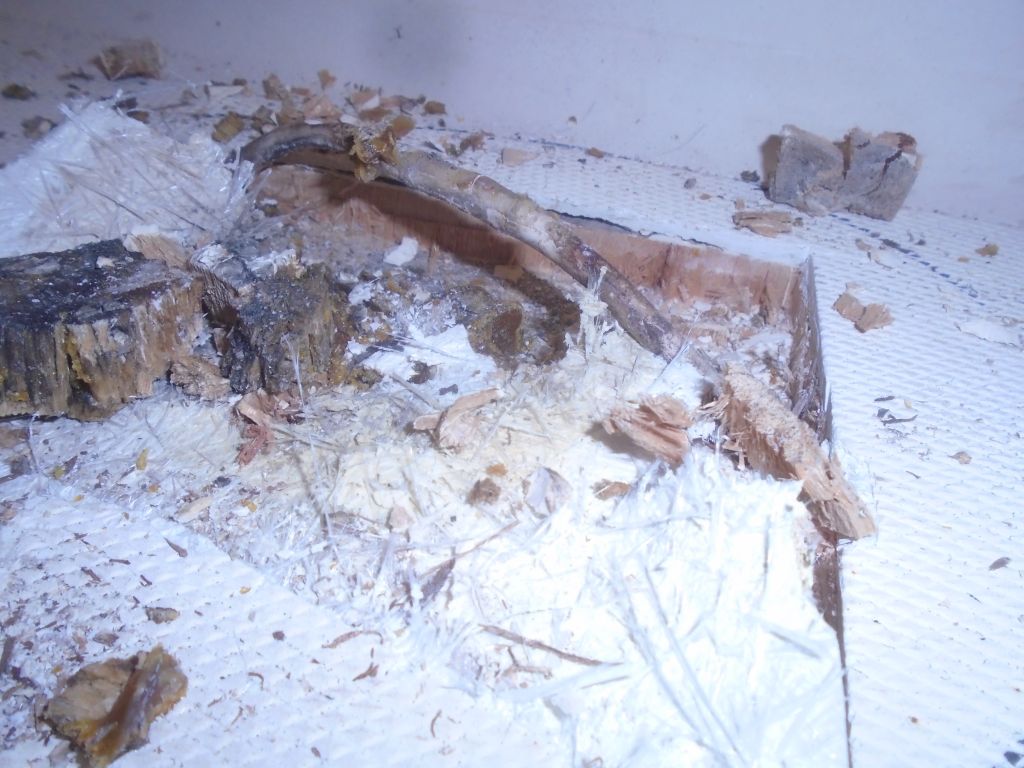
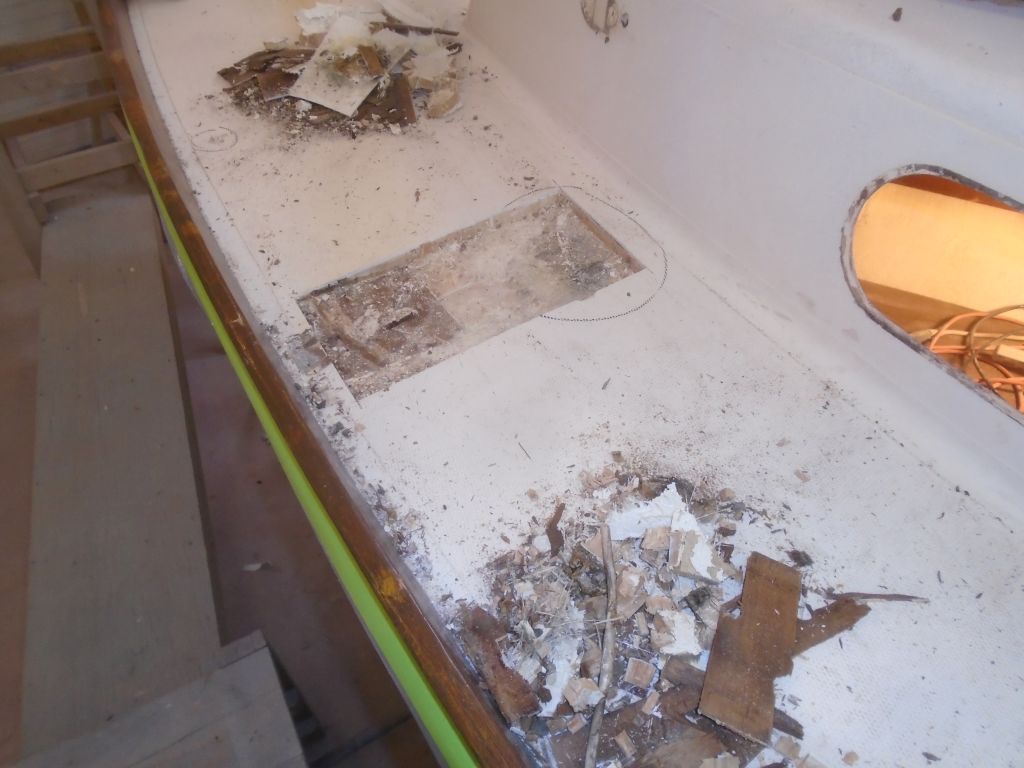
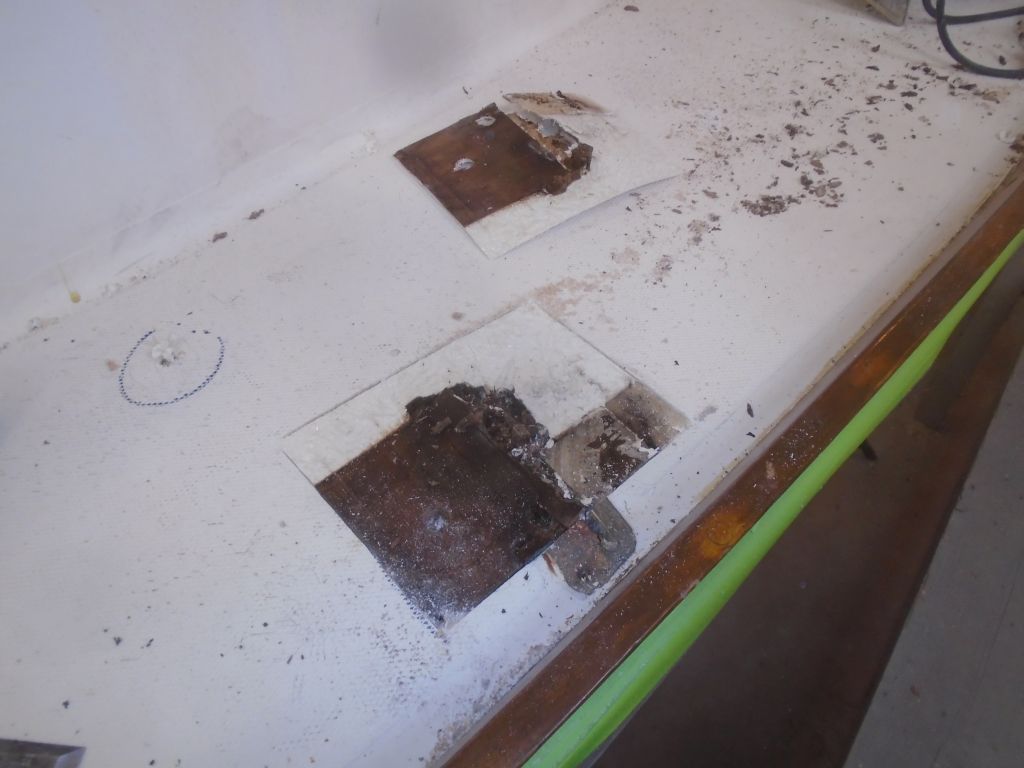
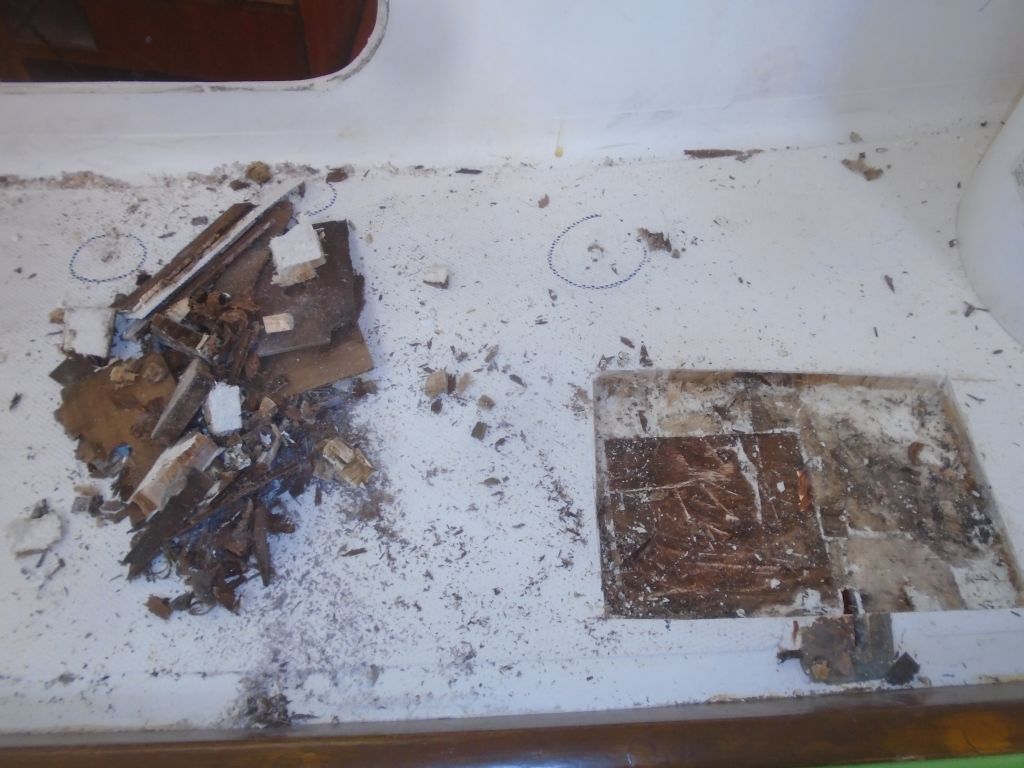
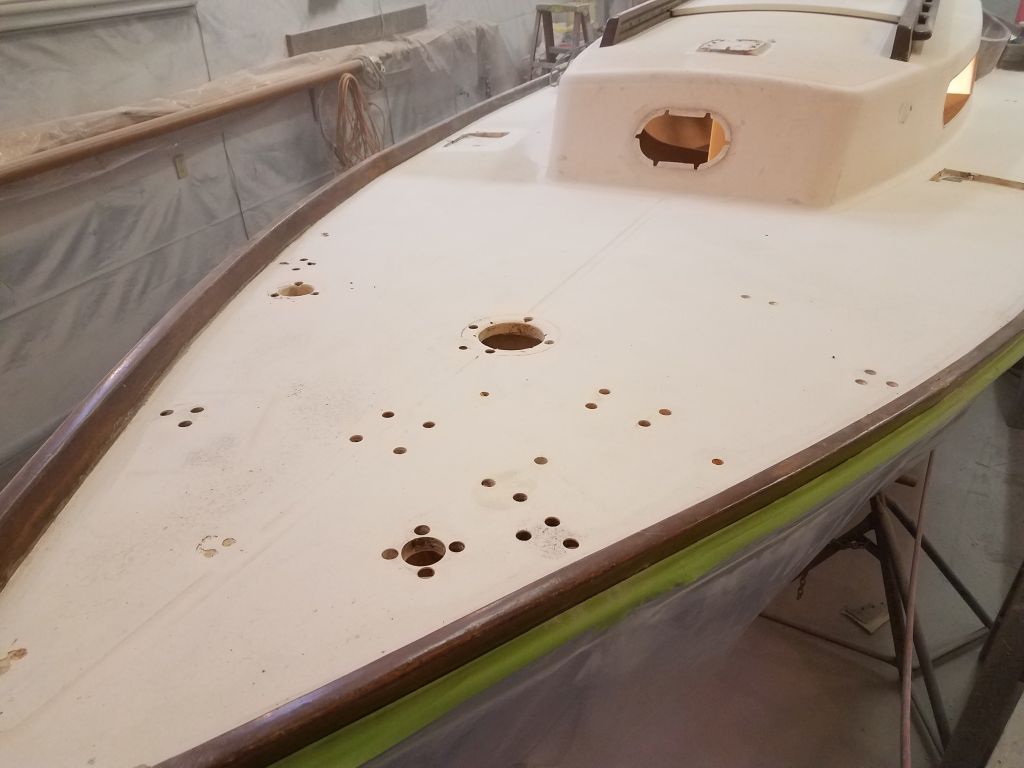
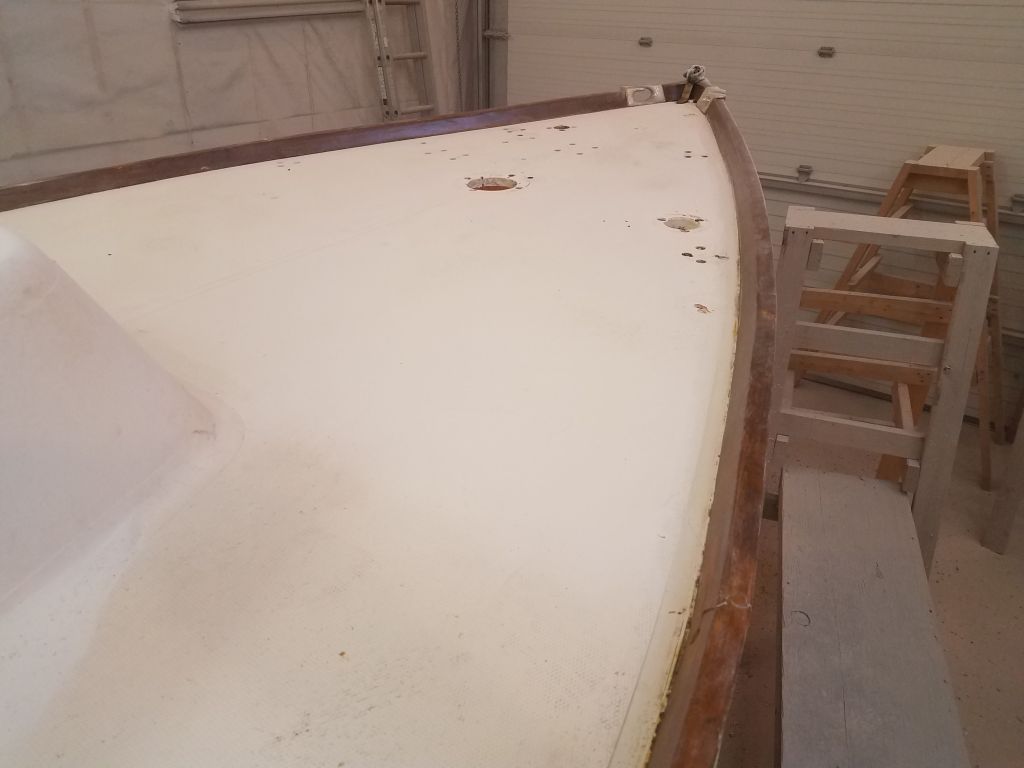
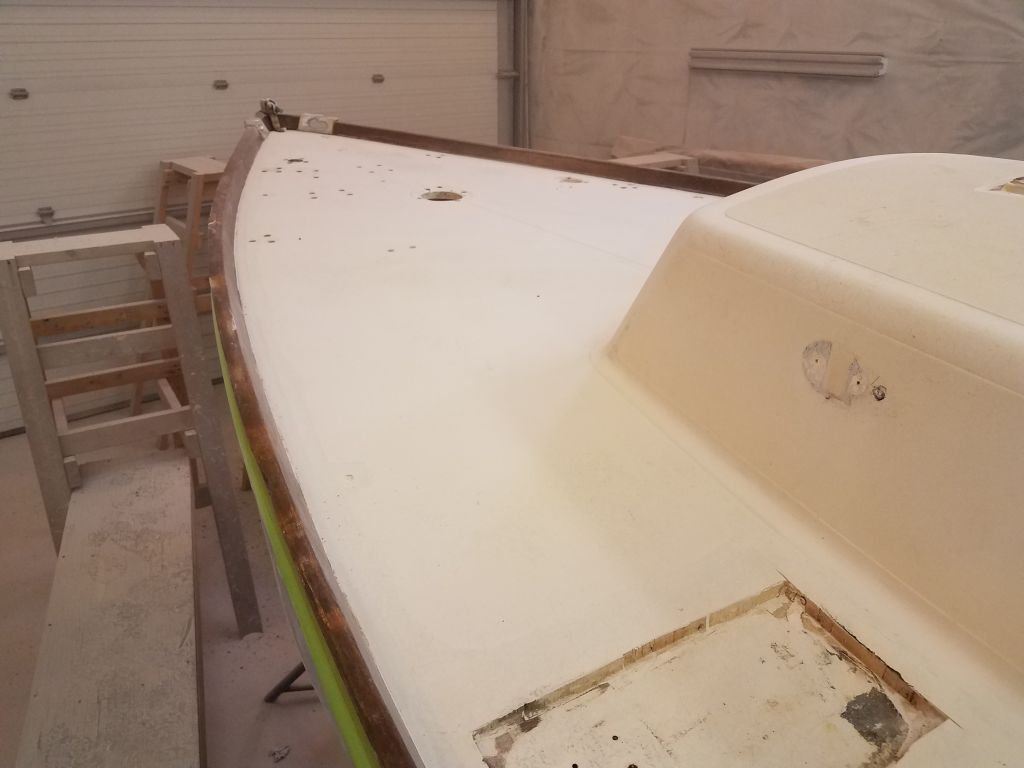
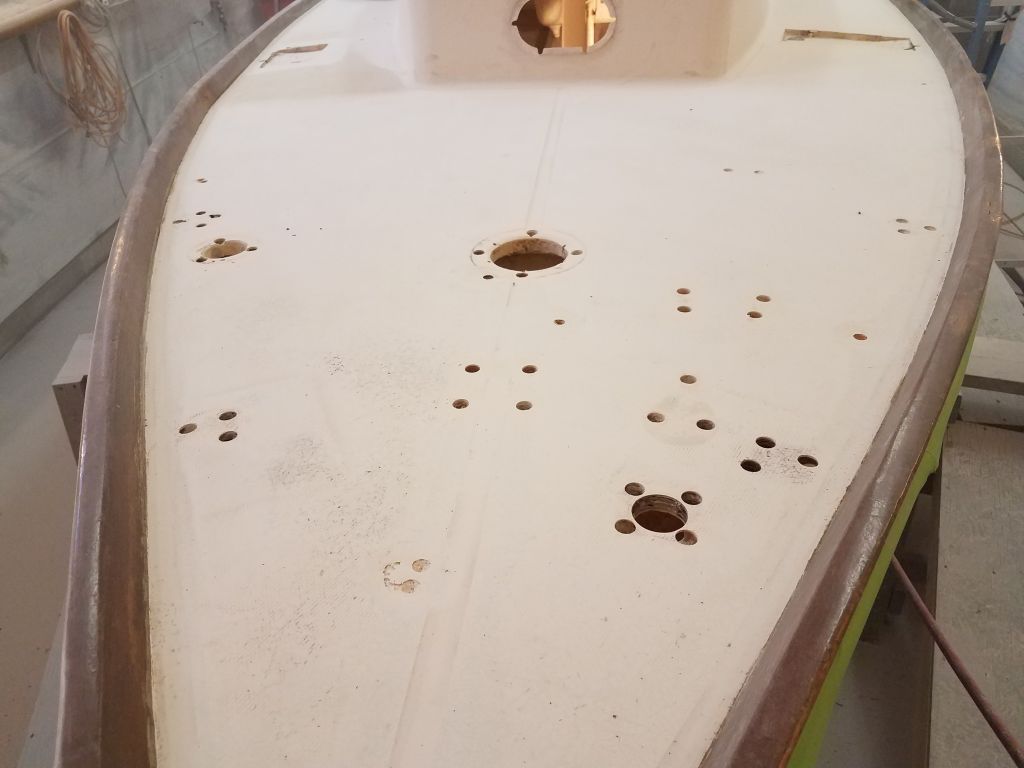
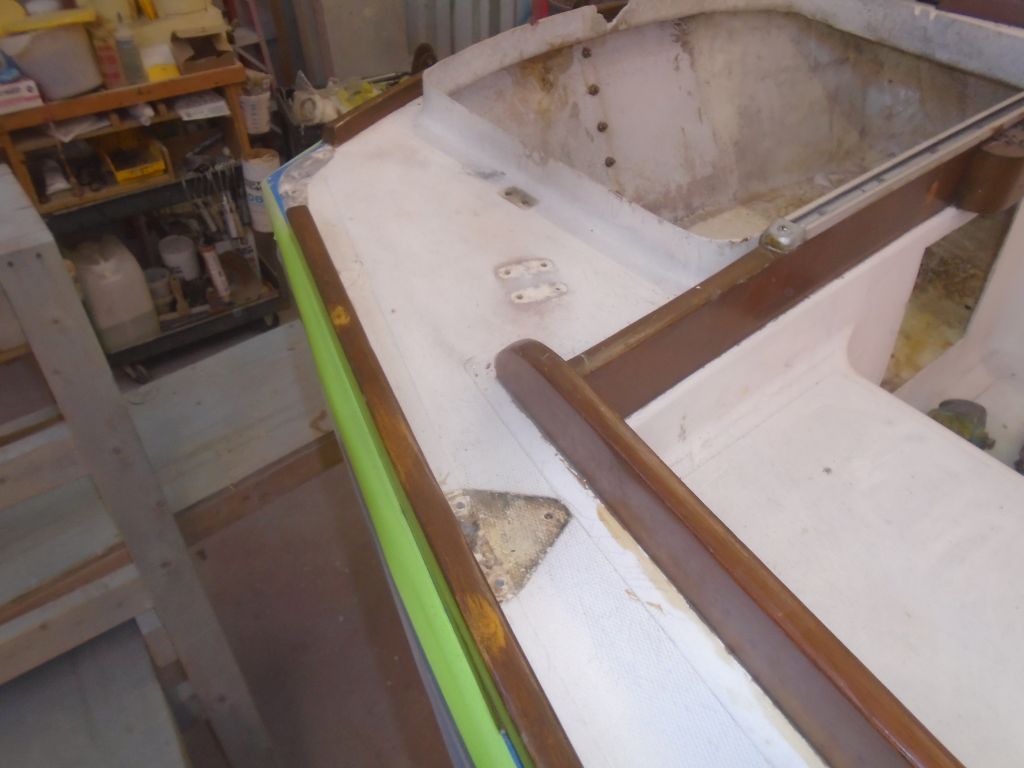
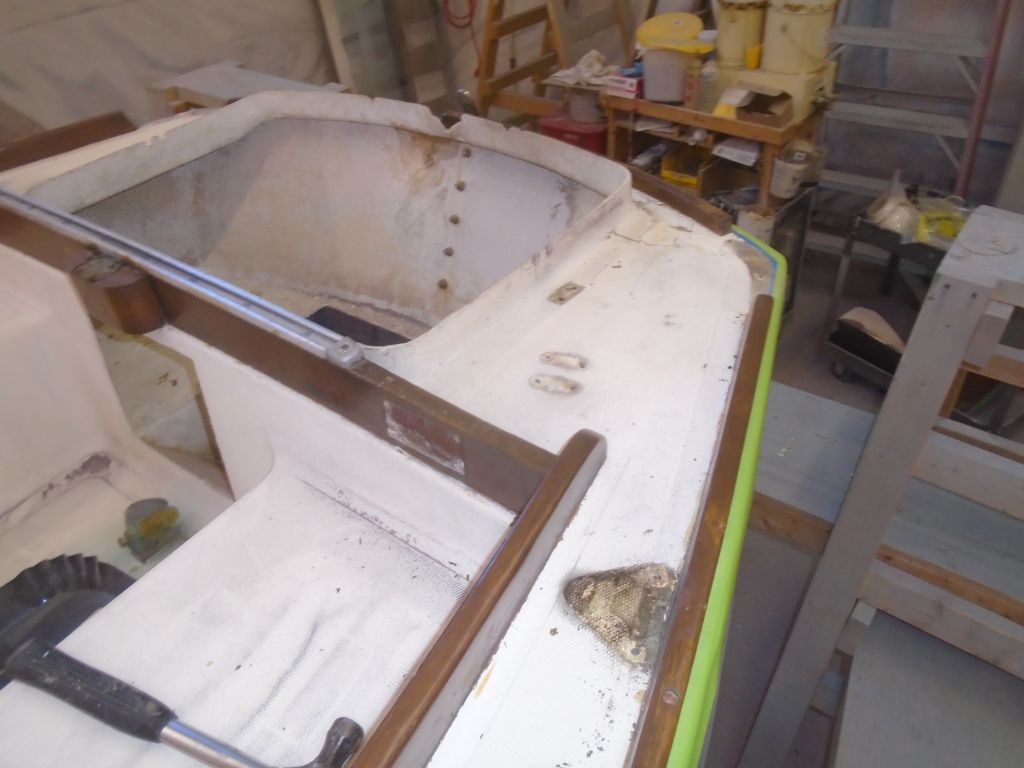
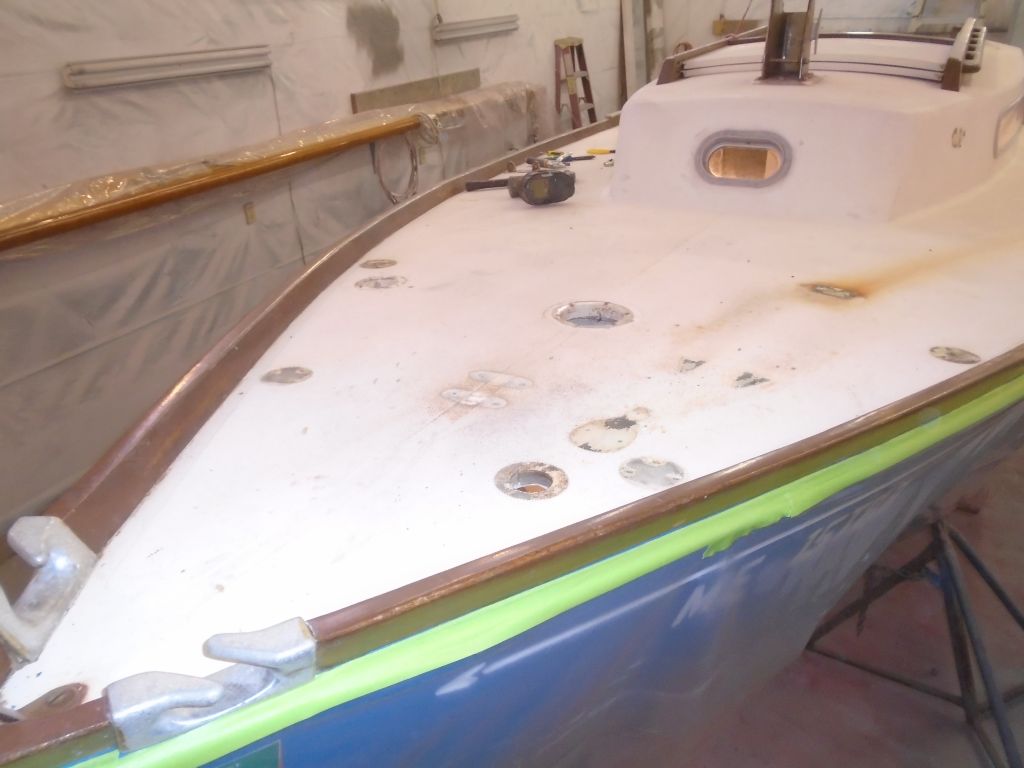
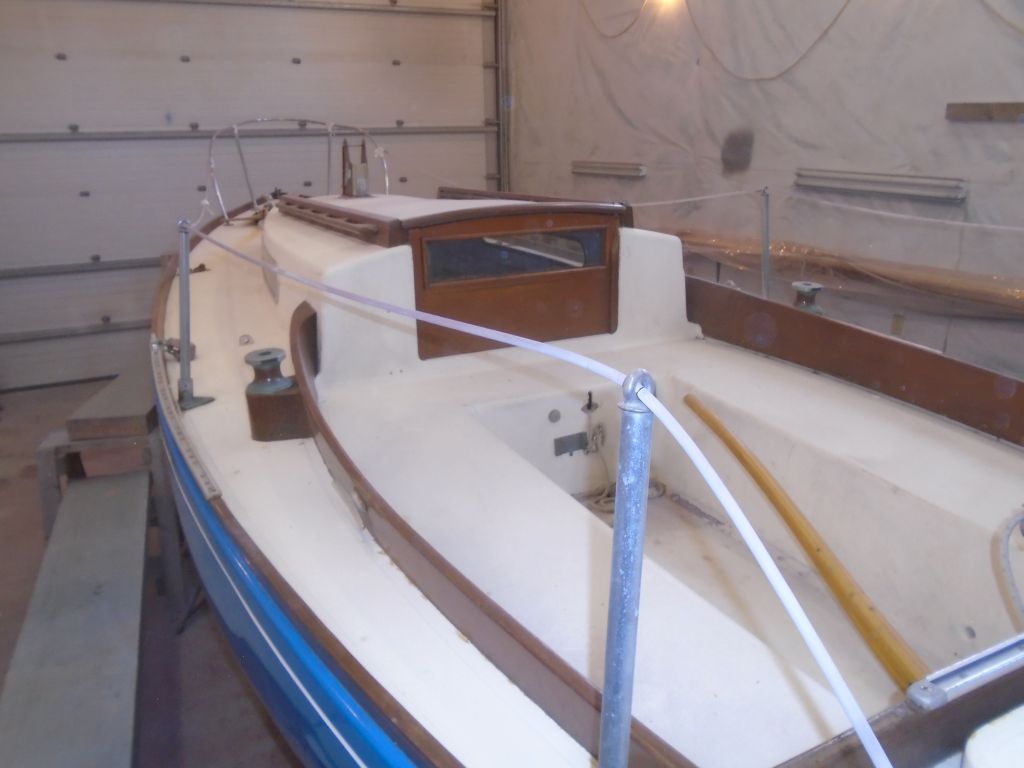
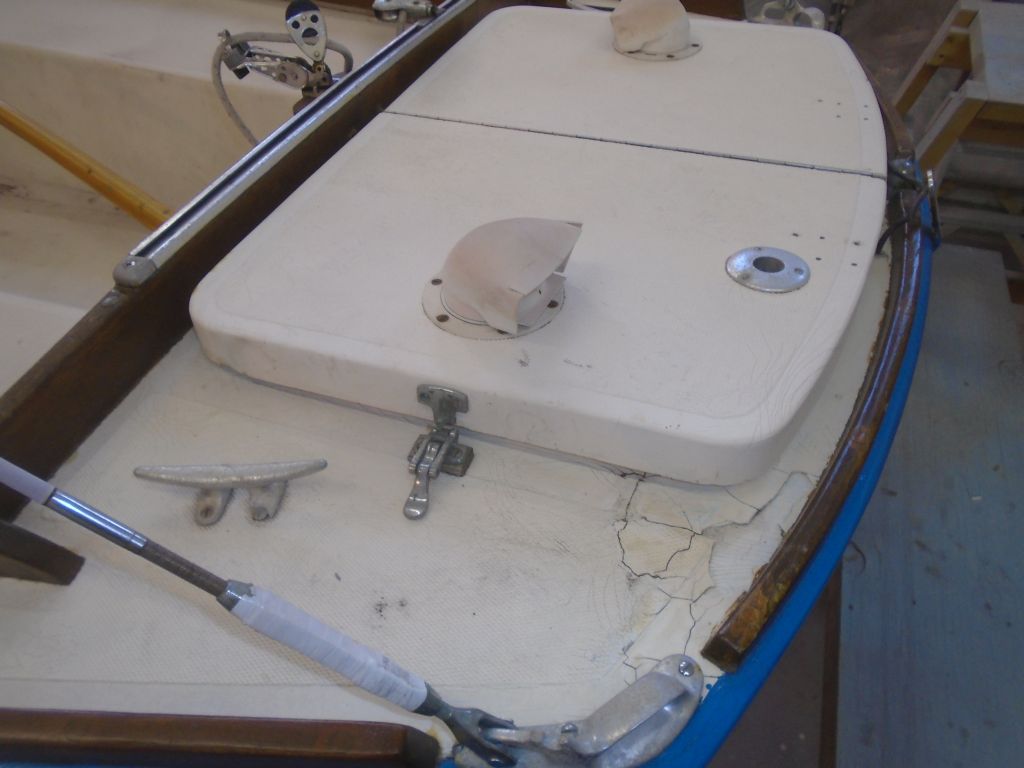
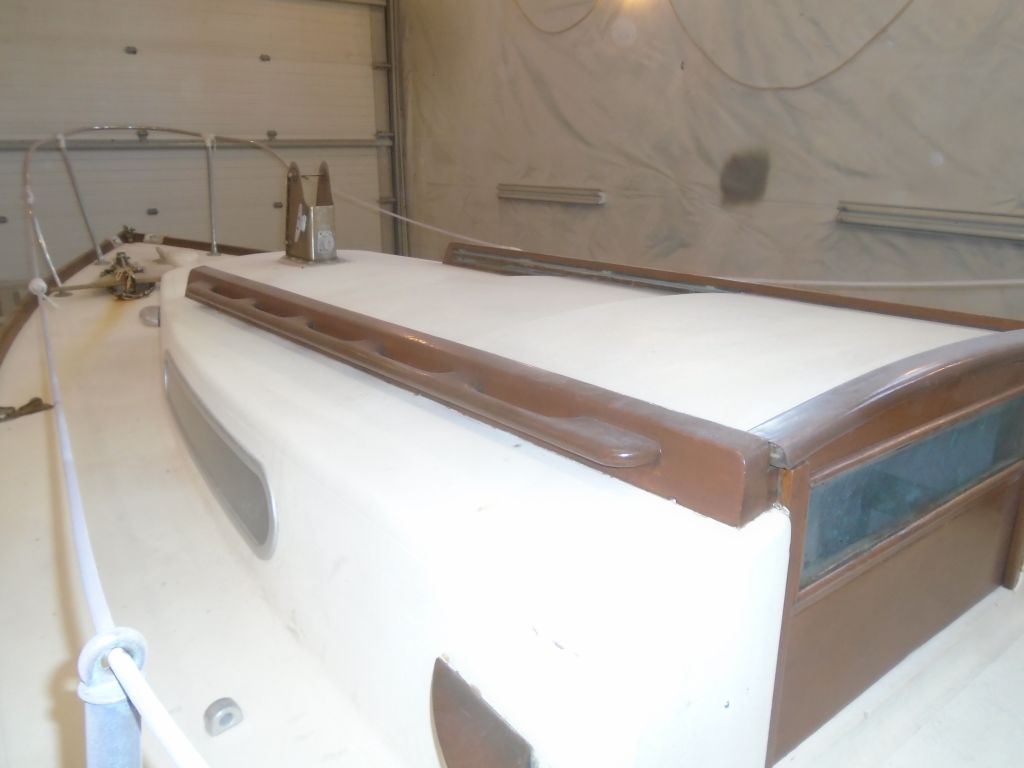
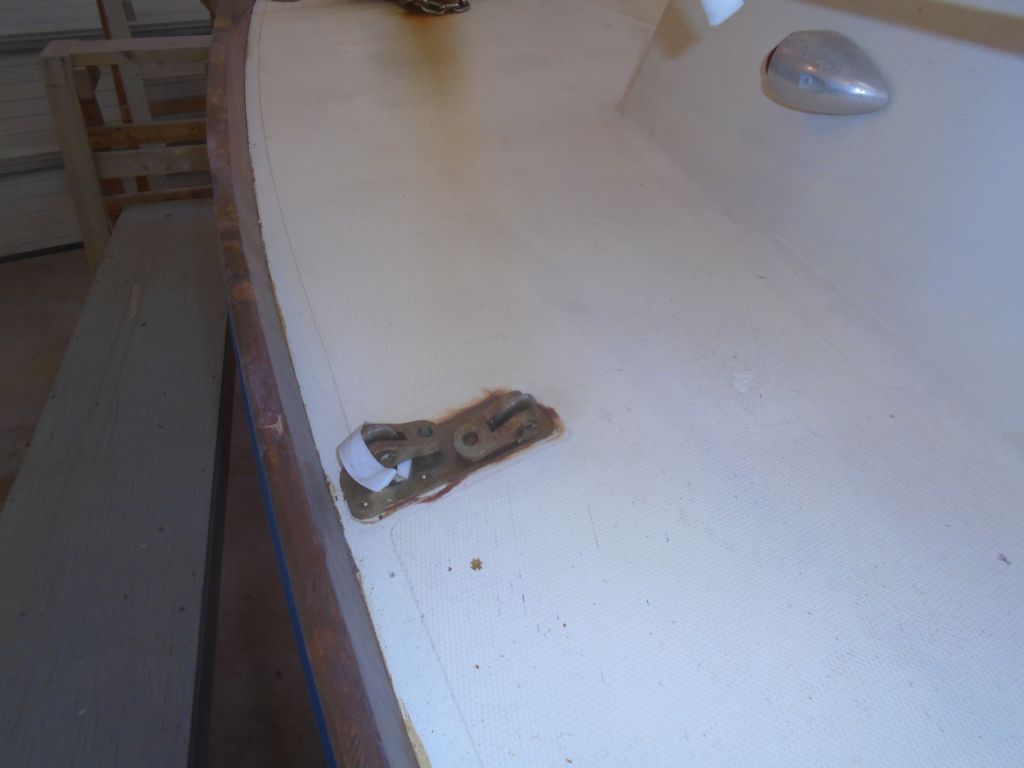
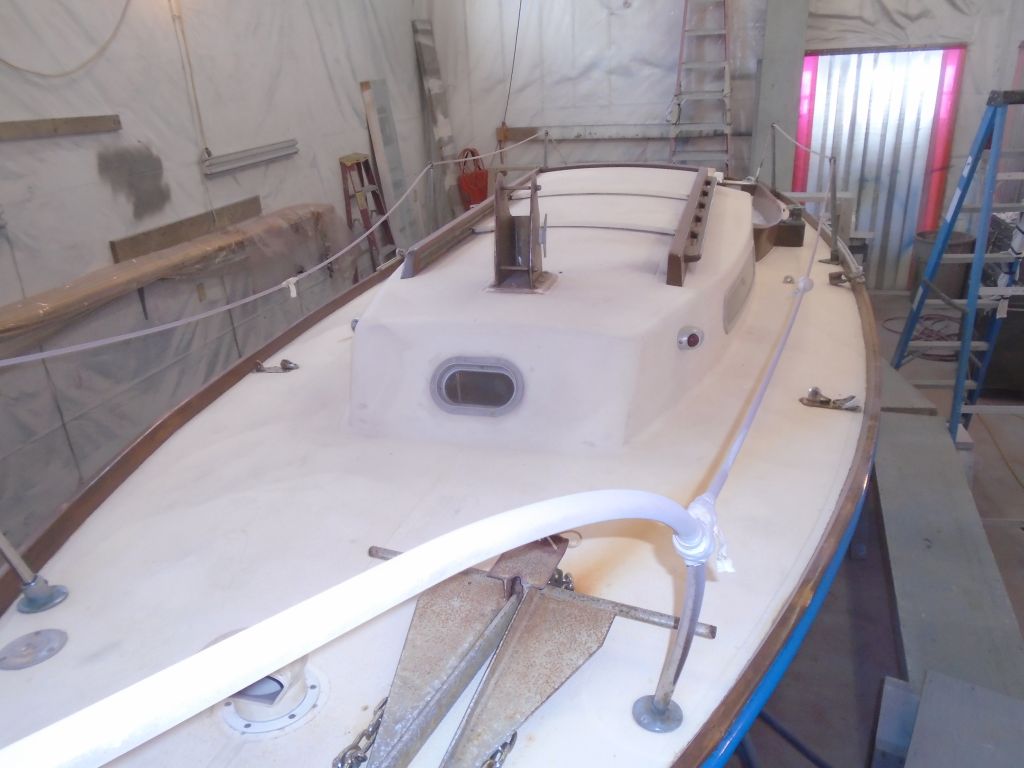
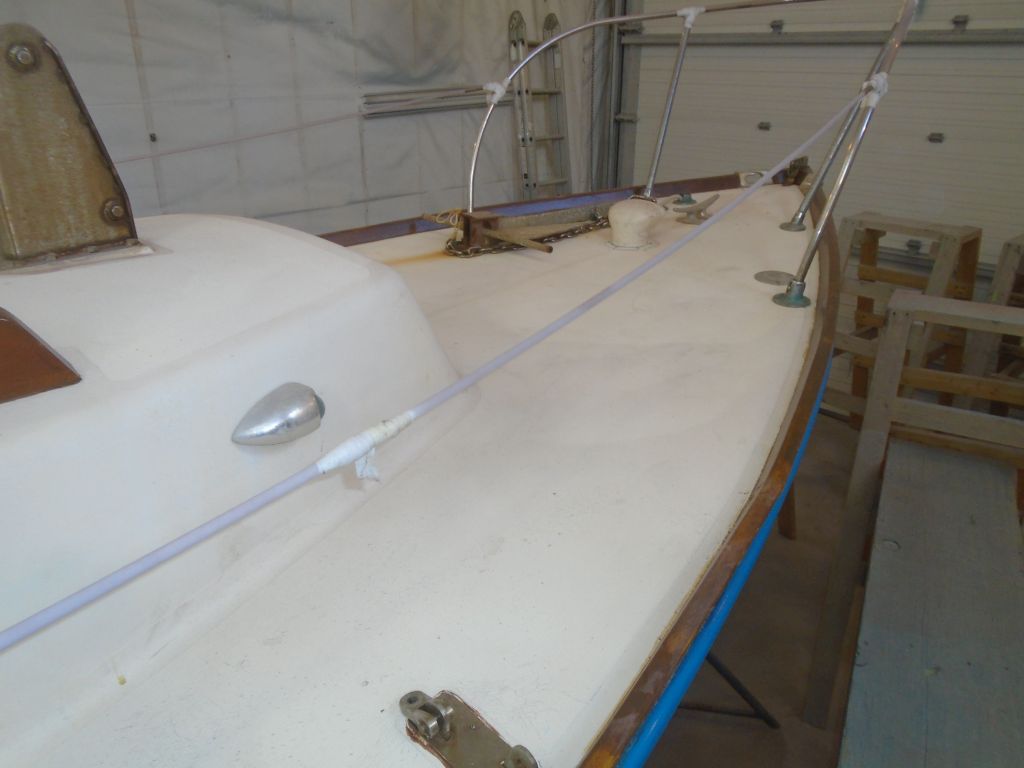
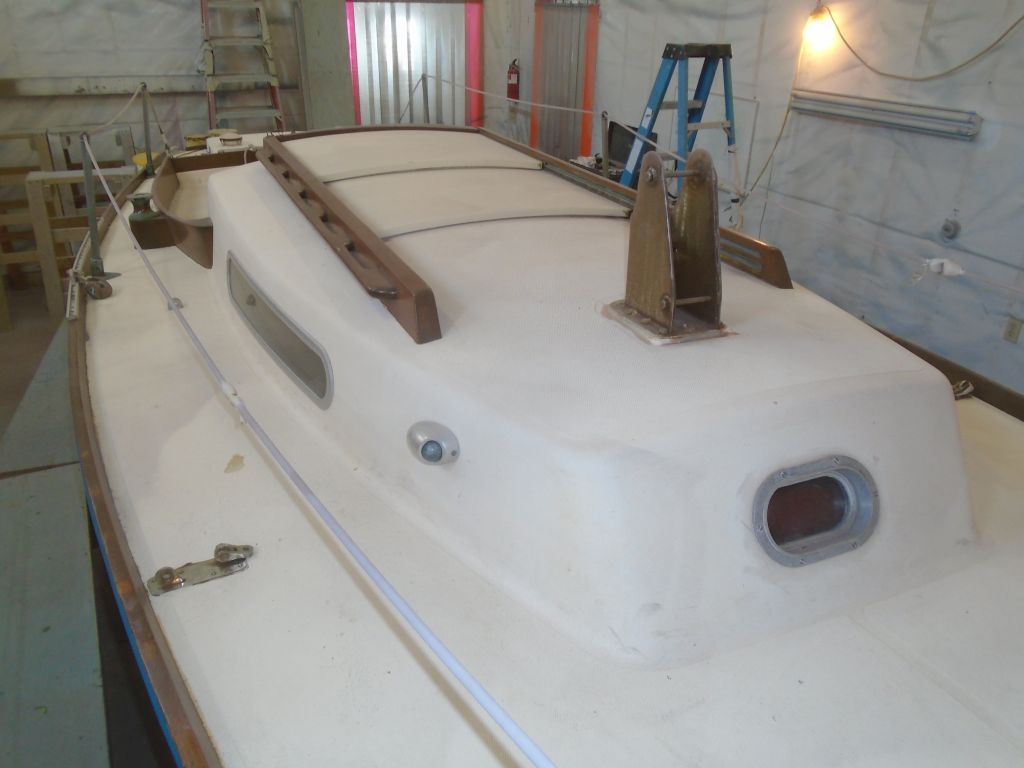
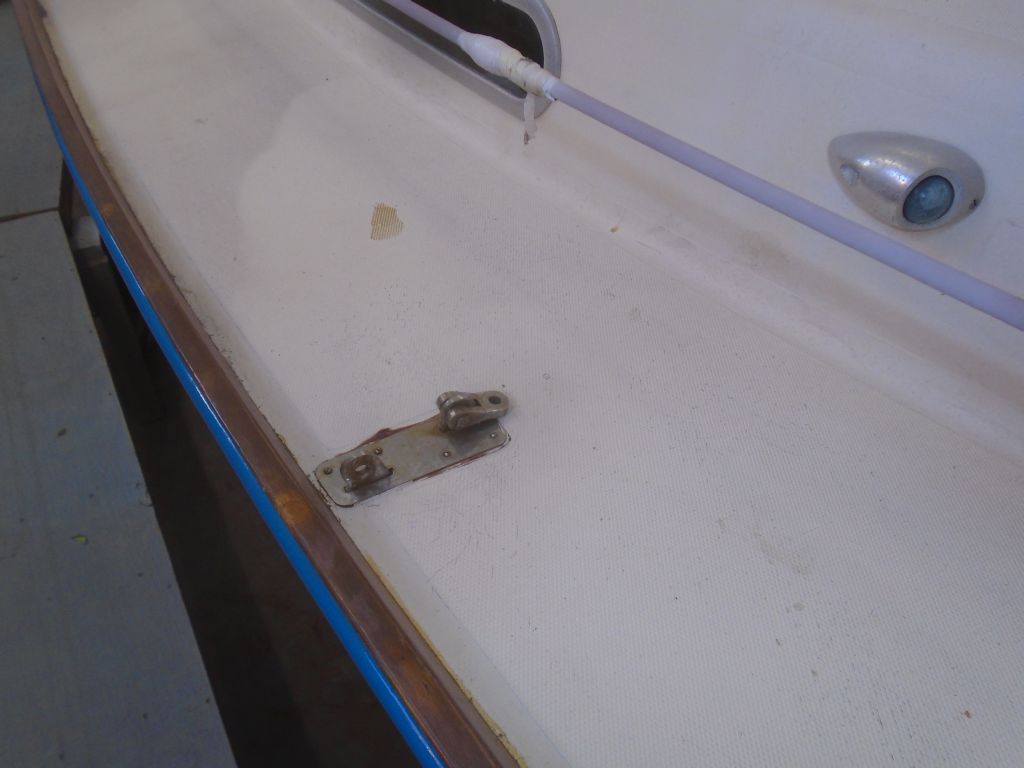
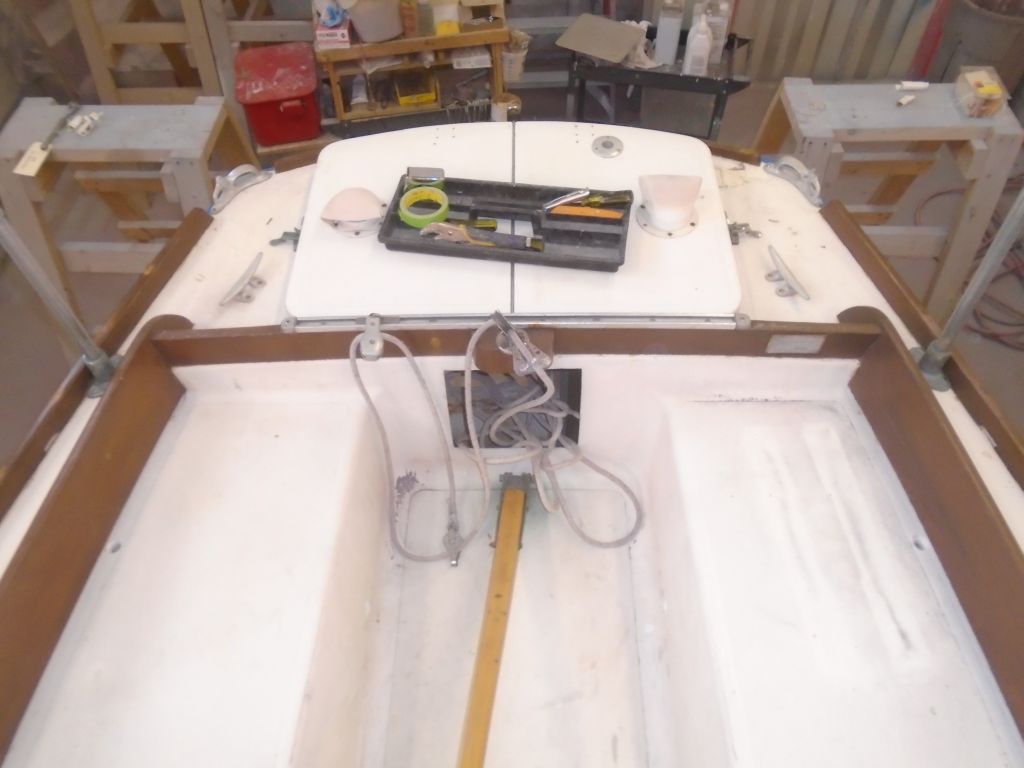
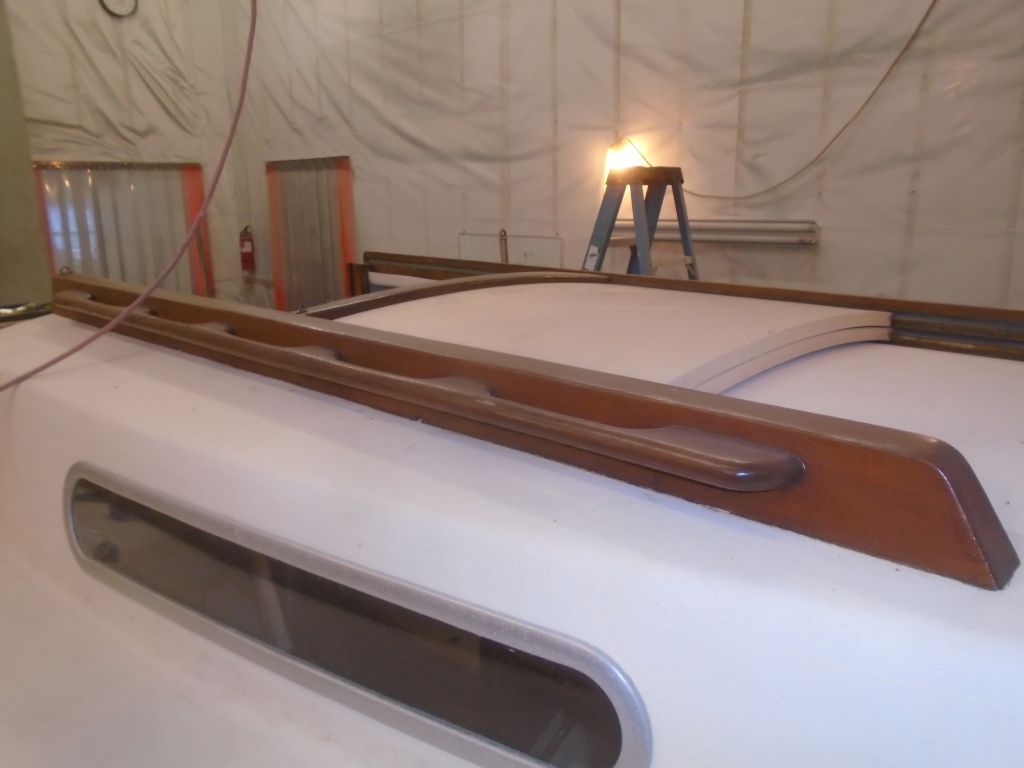
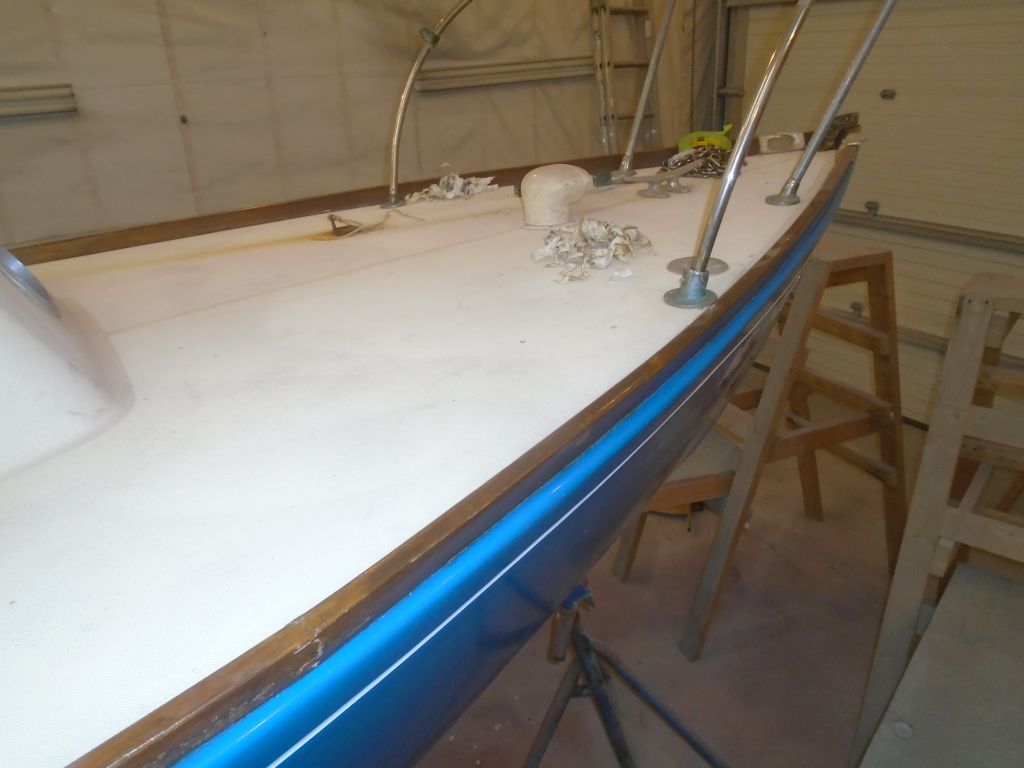
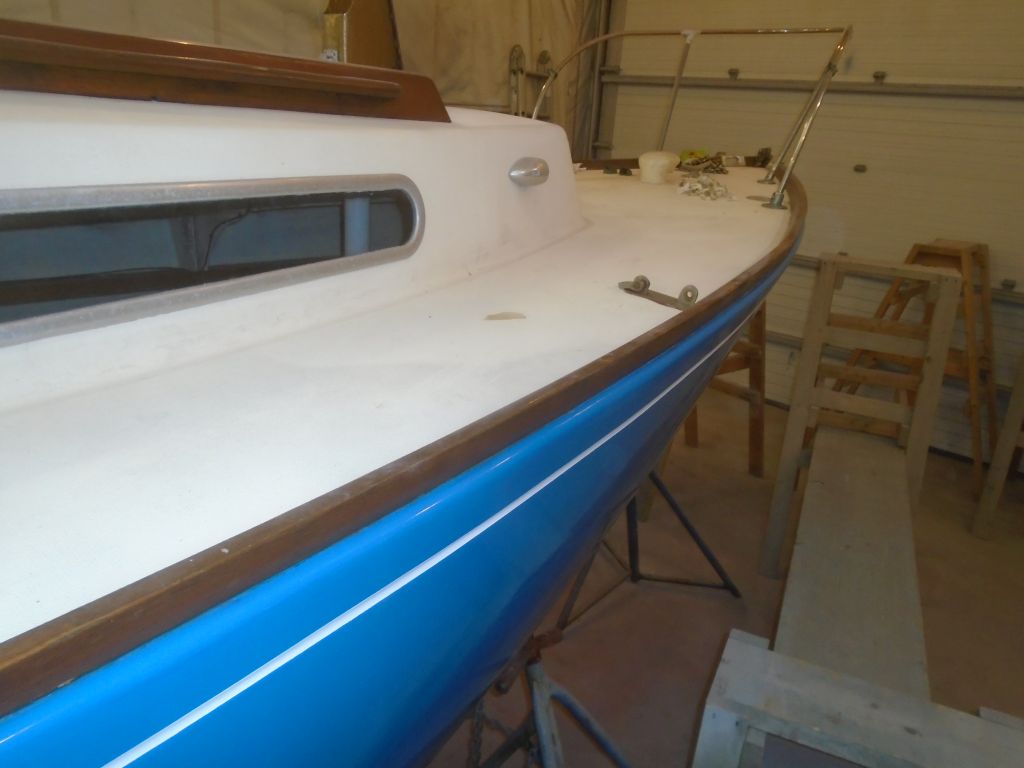
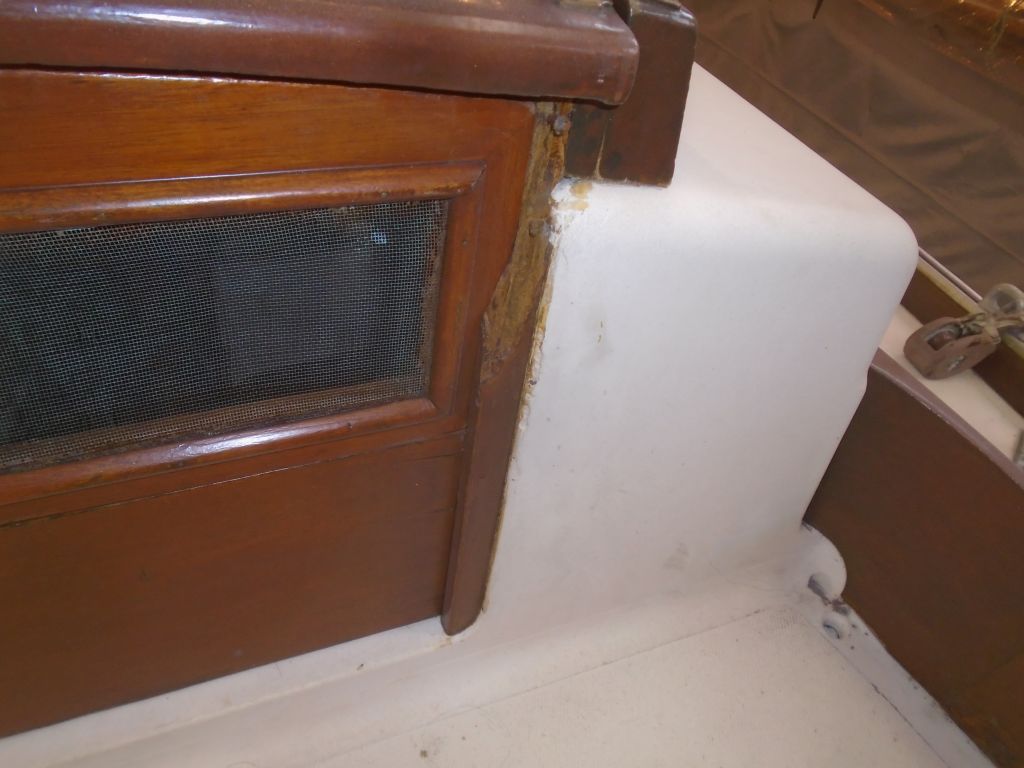
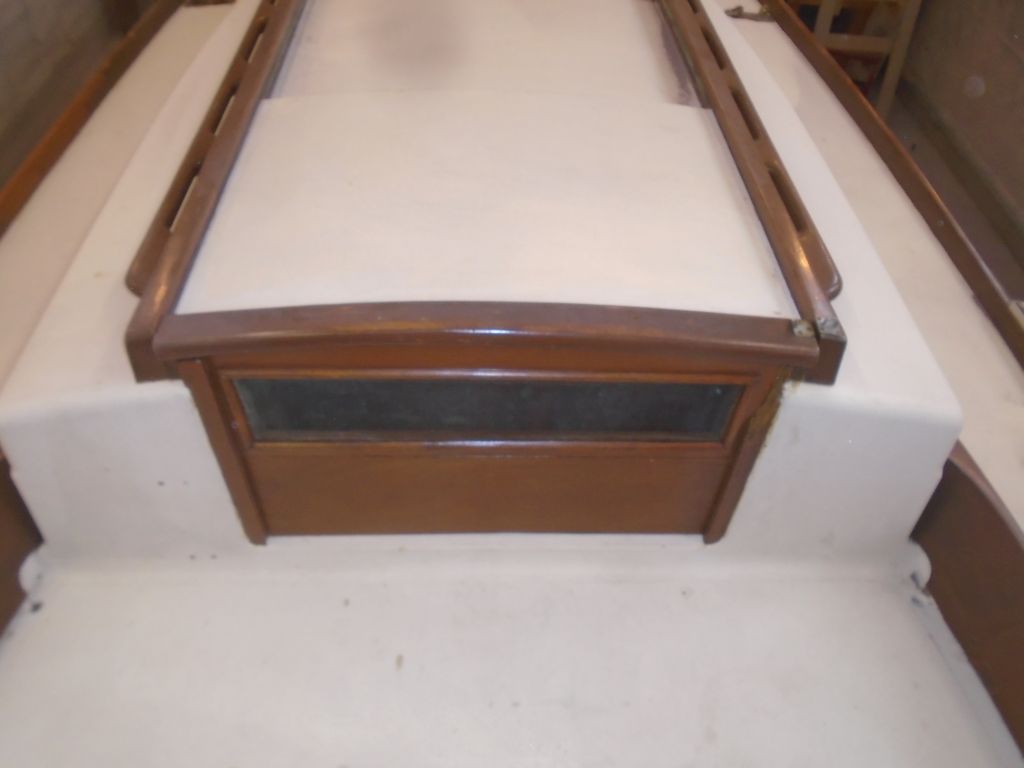
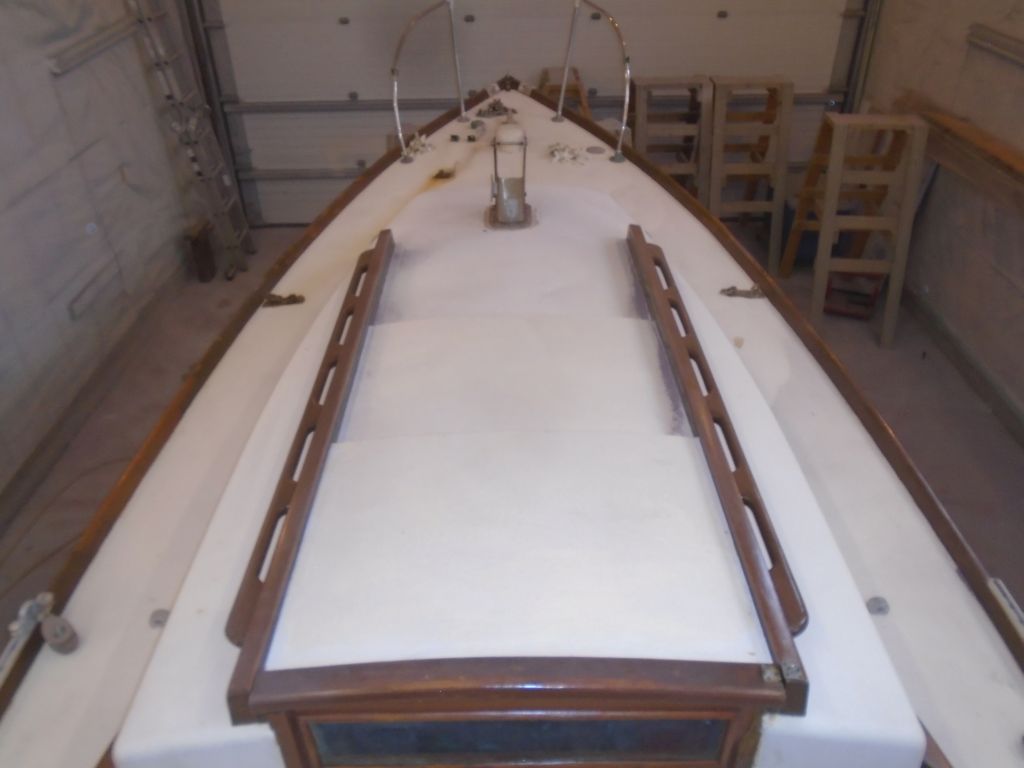
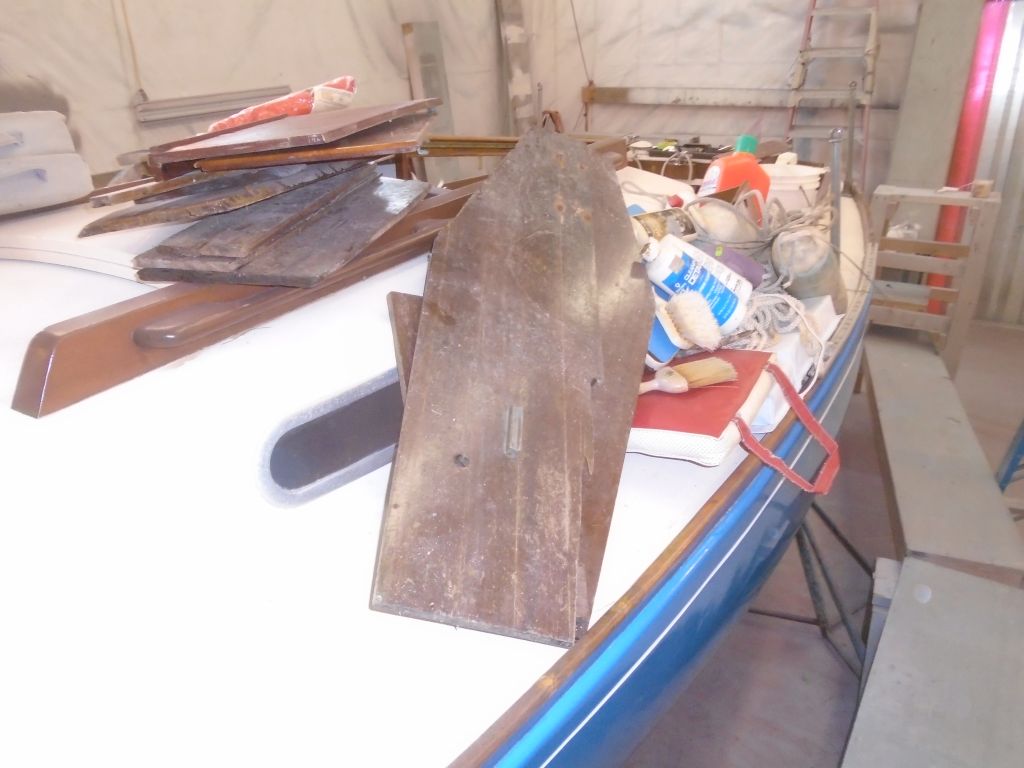
The decks were in original condition, generally fair in appearance but  well worn, with thin and checked gelcoat and  several areas where there were more significant cracks that could be indicative of structural damage.   My scope of work for the decks in the weeks ahead included inspecting for and repairing any damage, and refinishing the entire deck in the usual way.  These photos show the deck’s condition at this stage of the project.

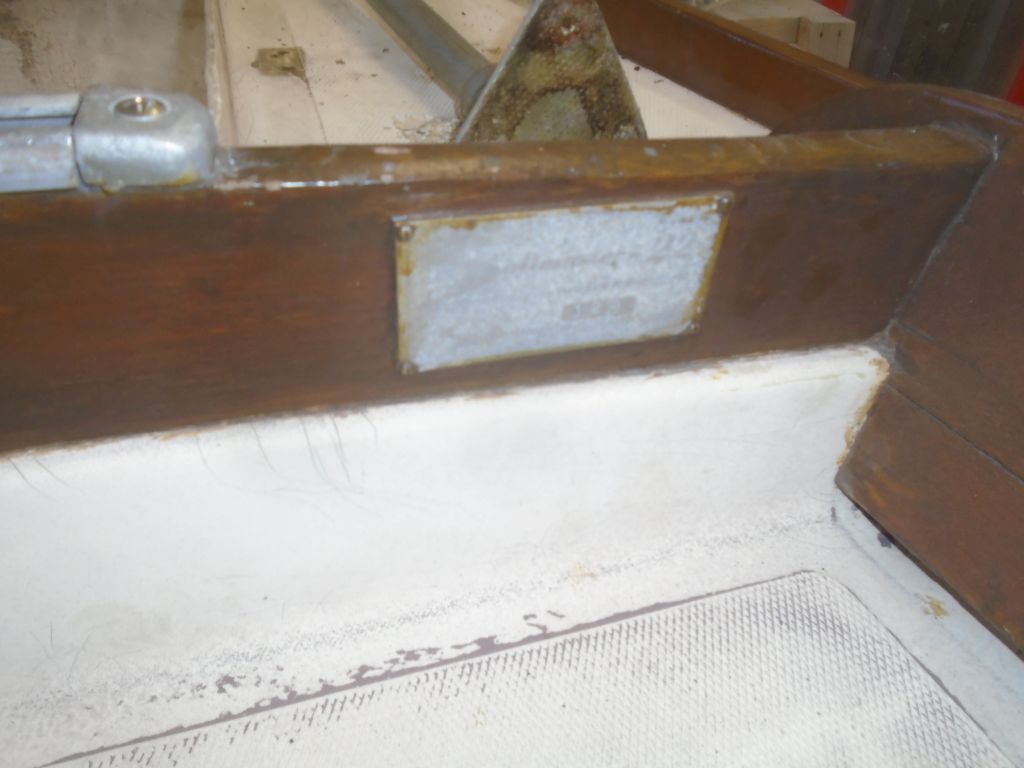
The exterior woodwork had been maintained for some time with Cetol wood finish, and was generally in fair or good condition,  The current work list included applying a maintenance coat of finish to this wood, but I’d assess things further as time went on.

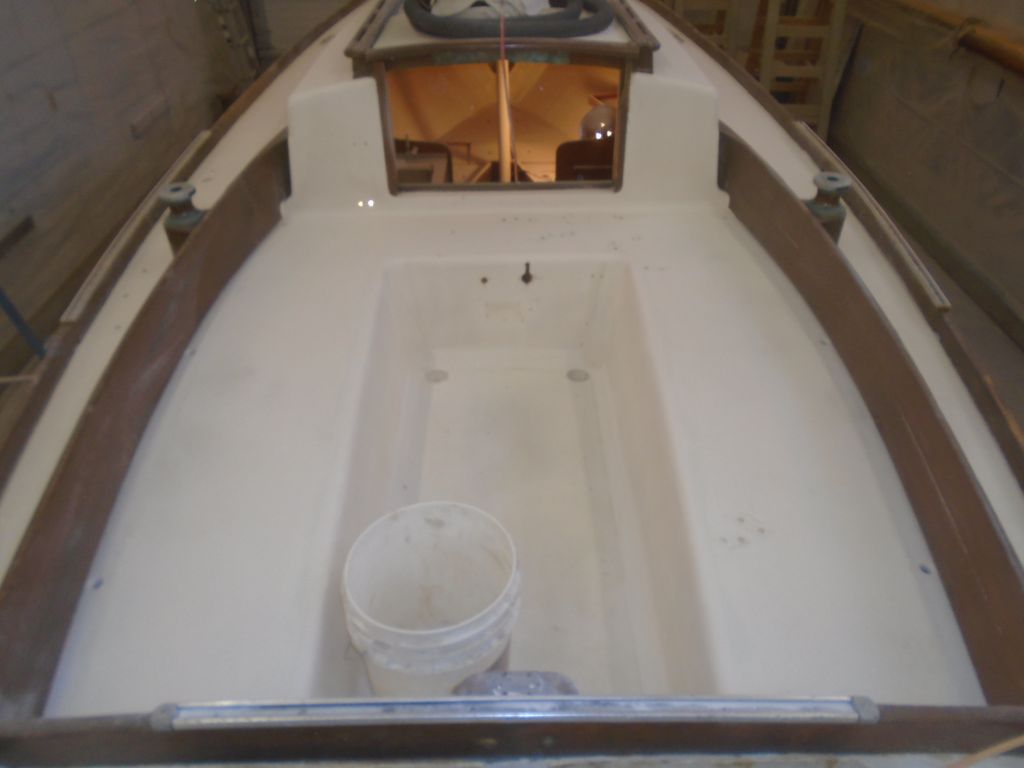
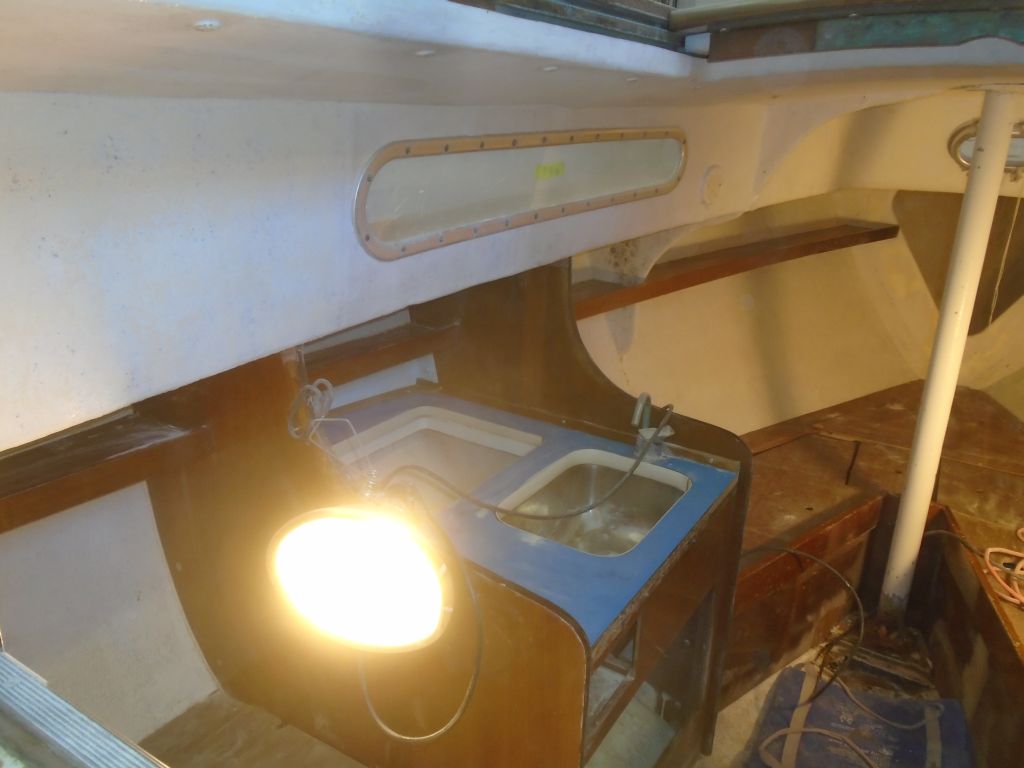
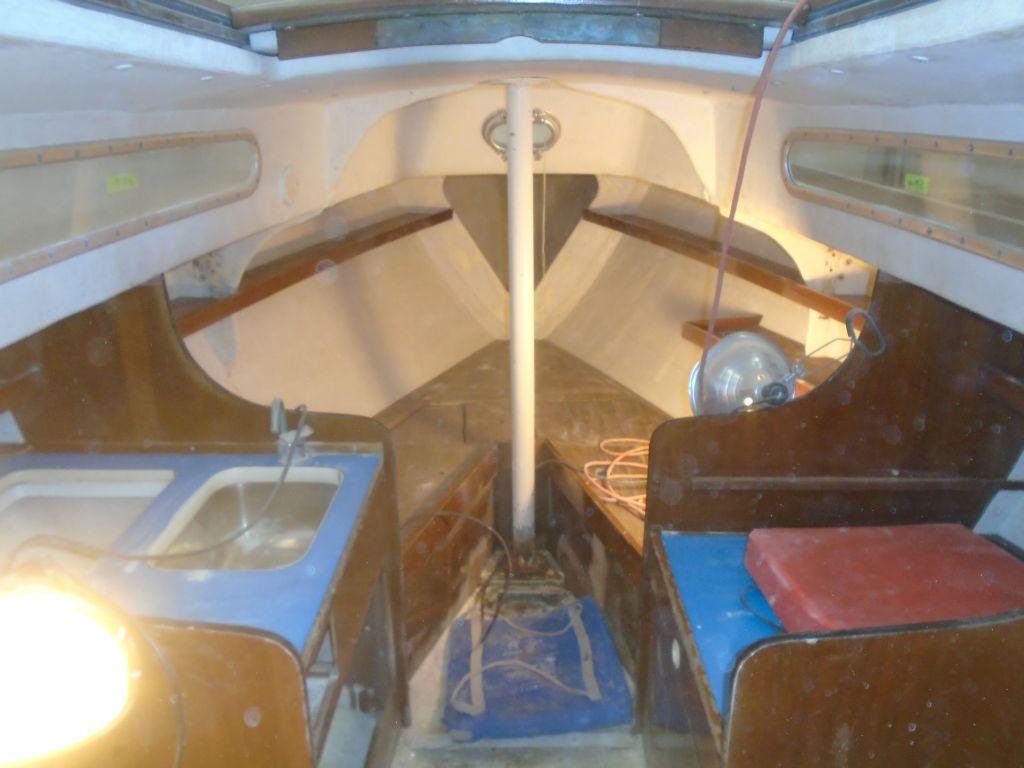
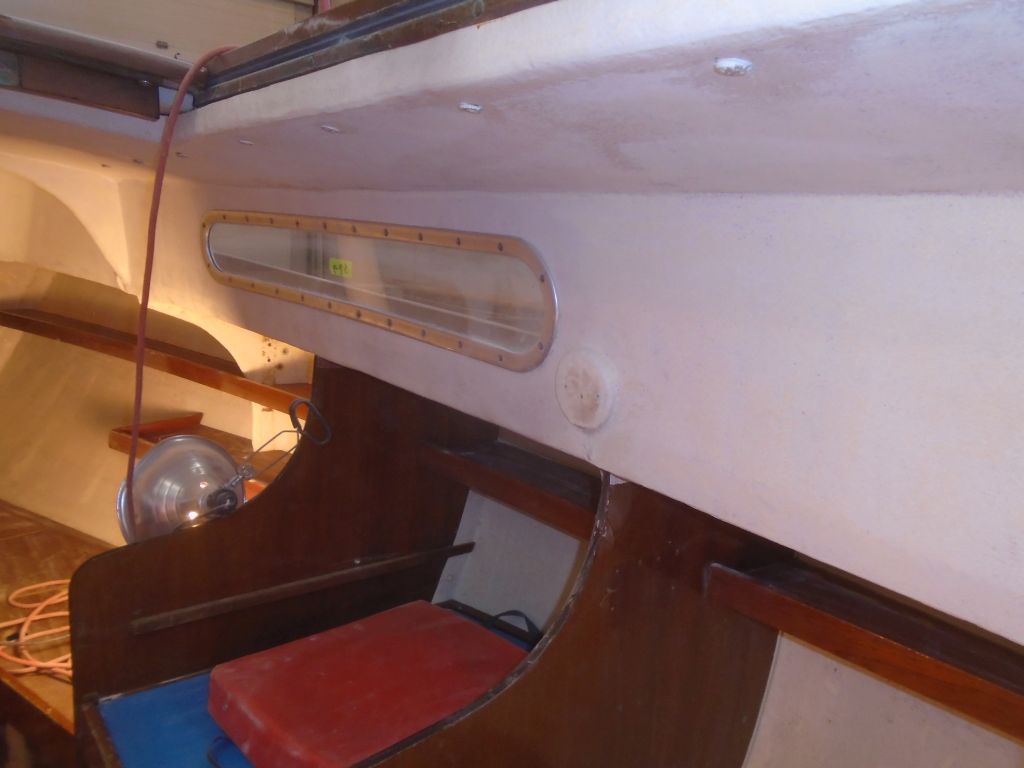
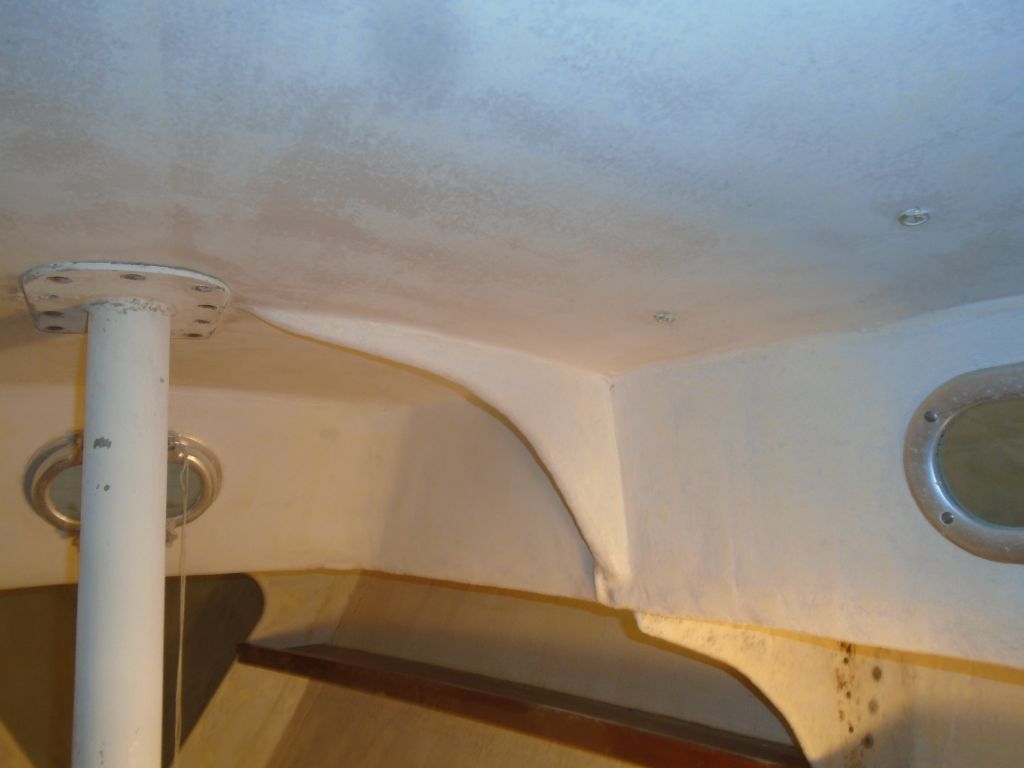
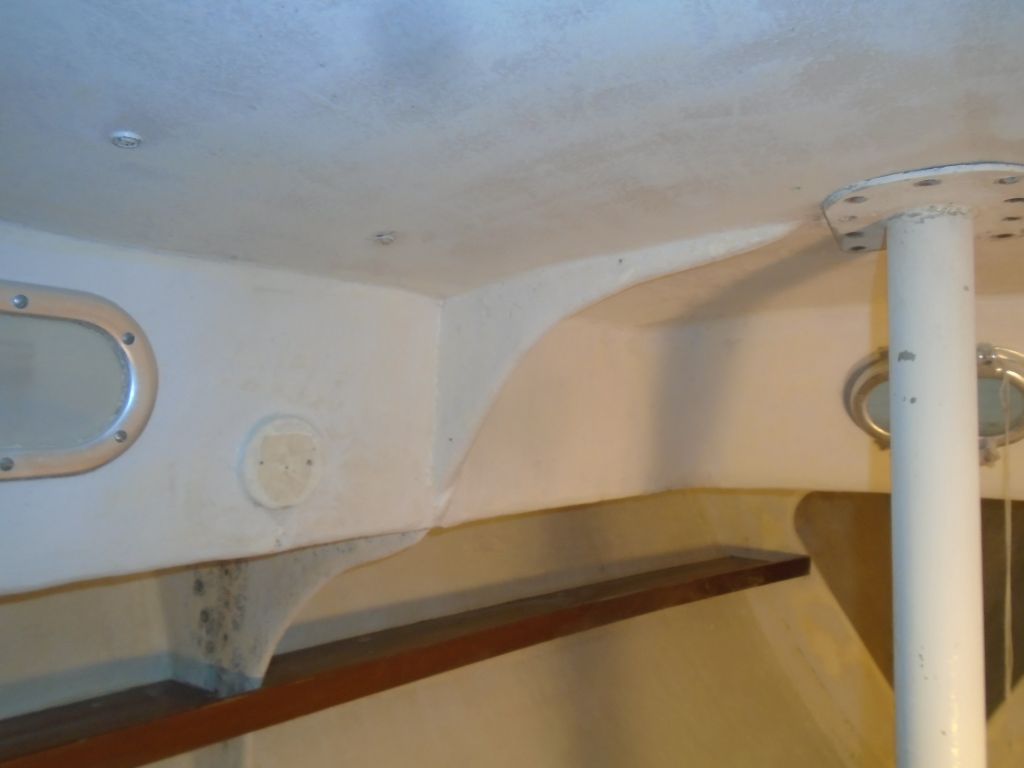
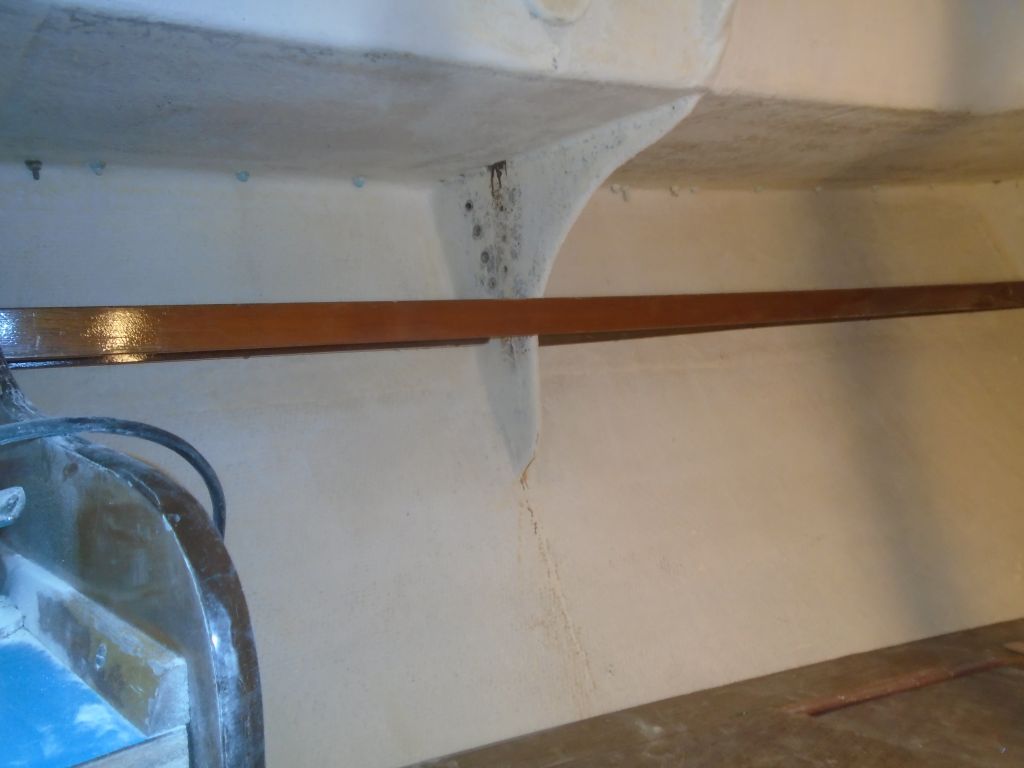
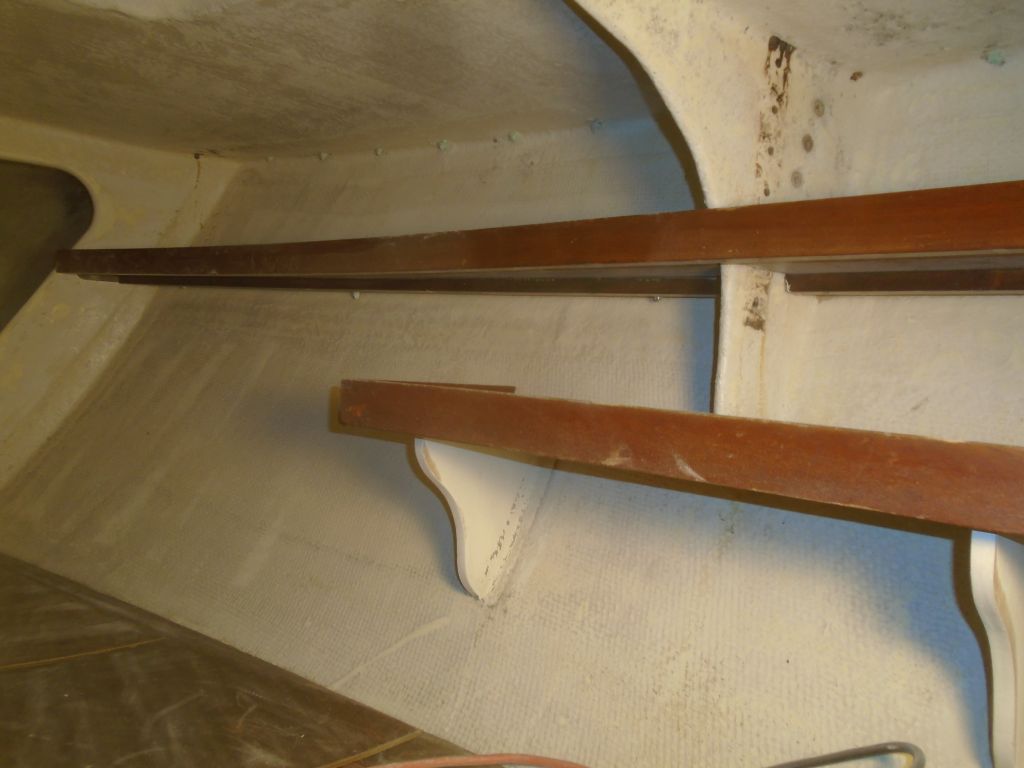
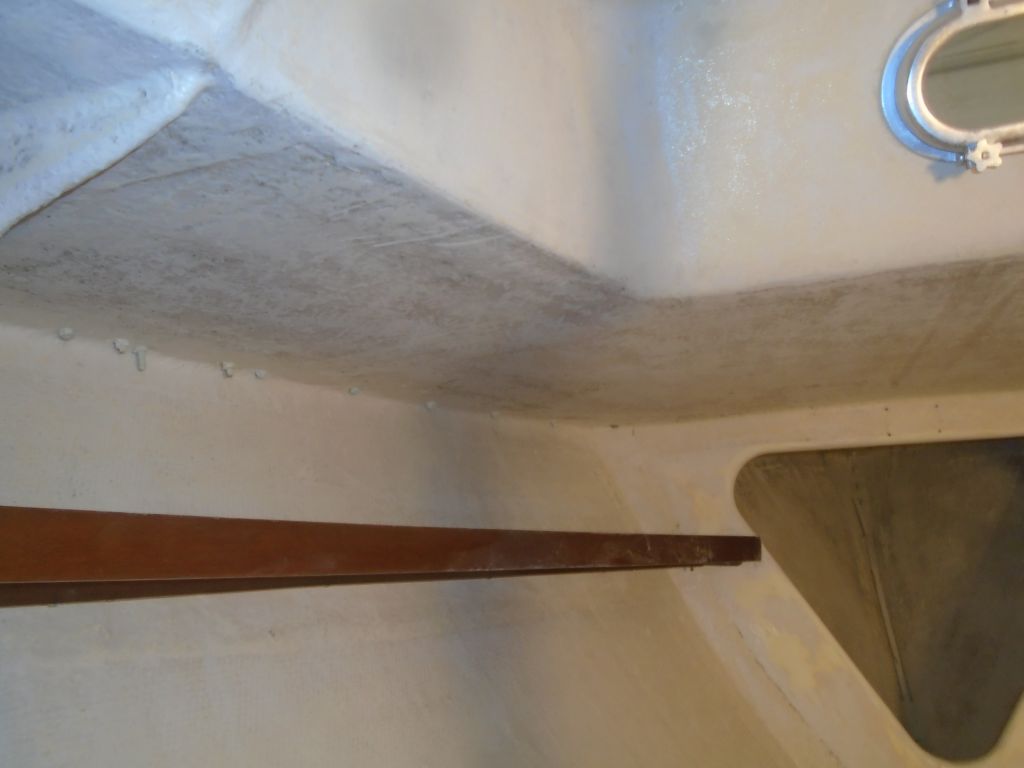
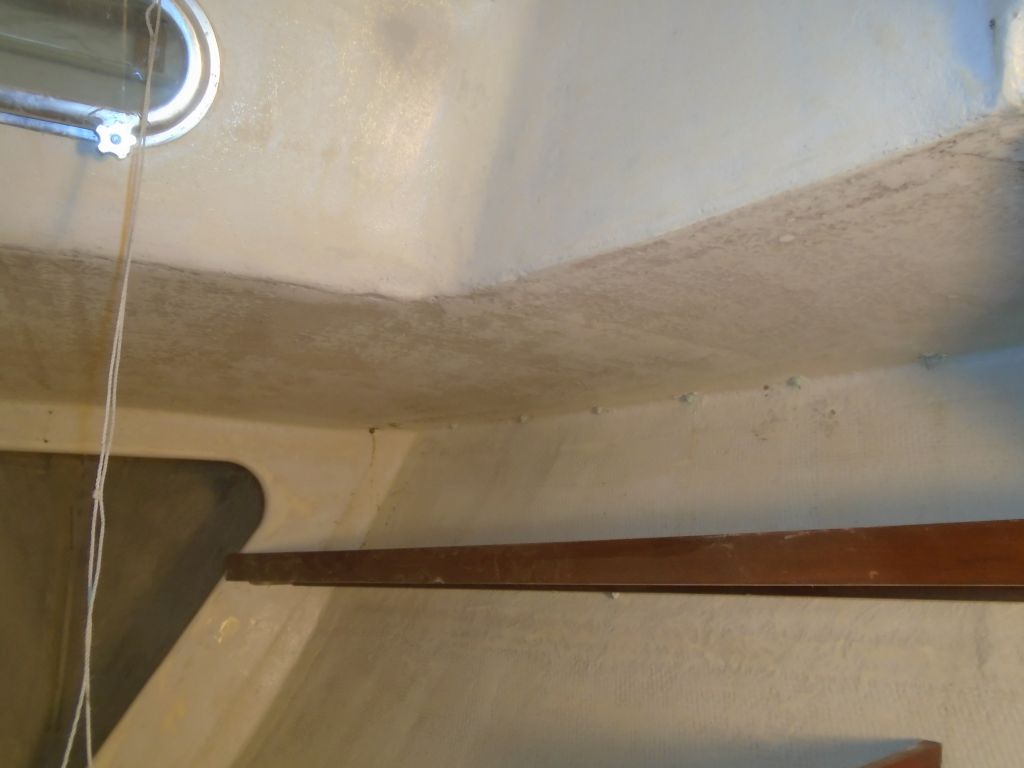
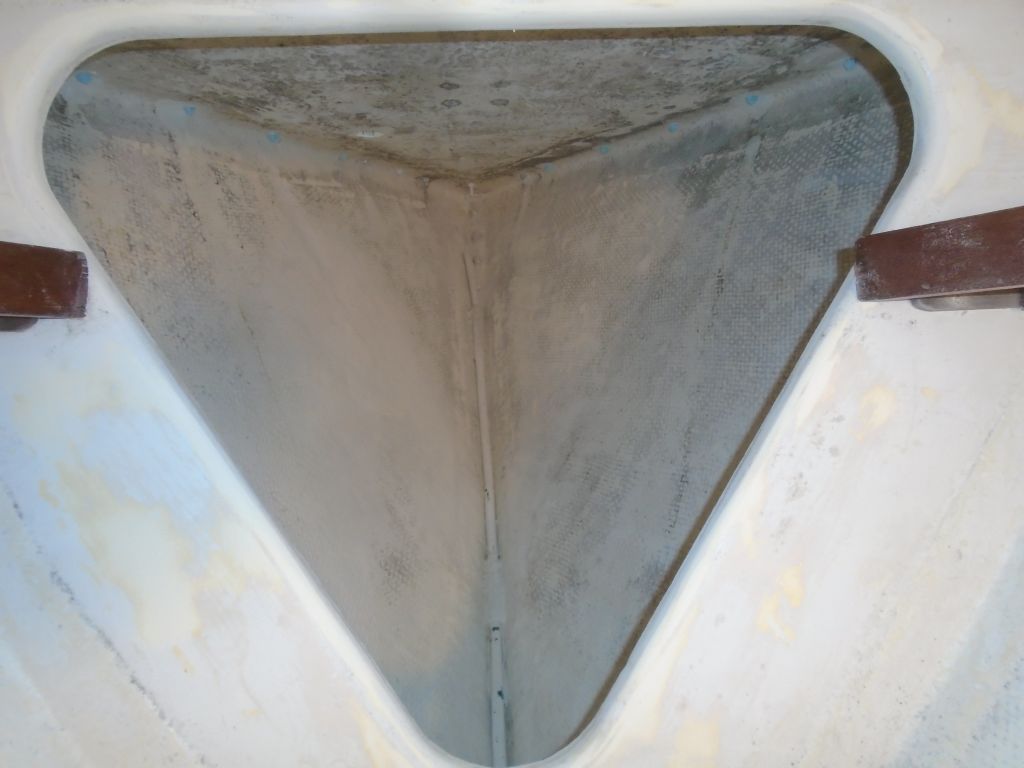
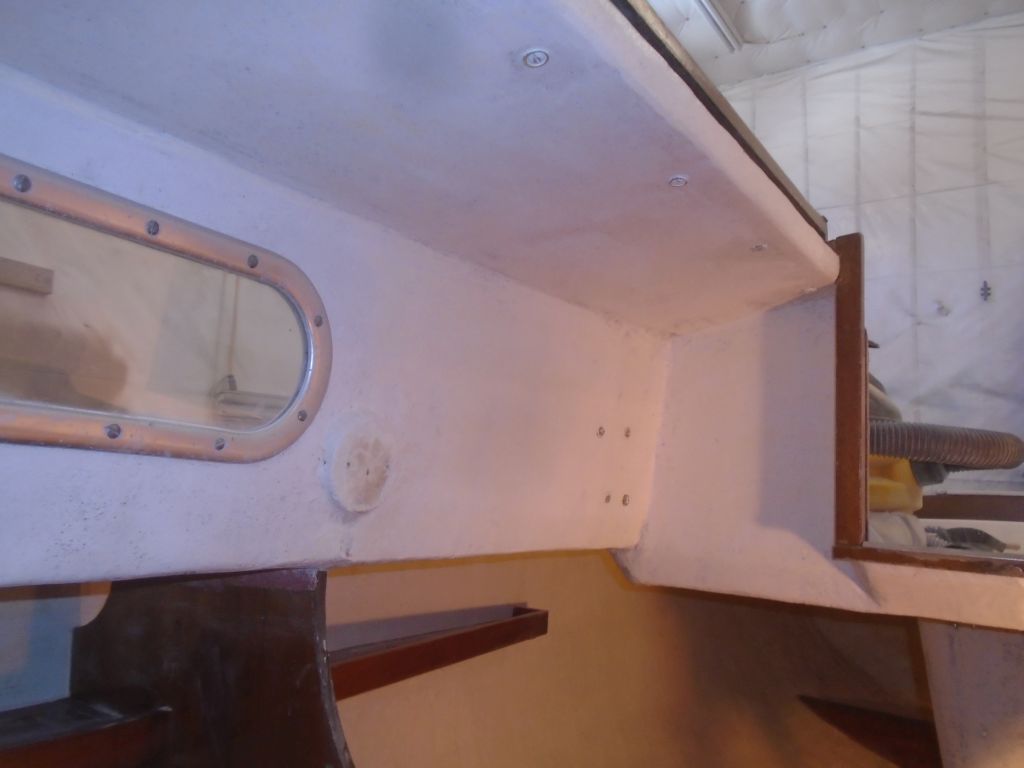
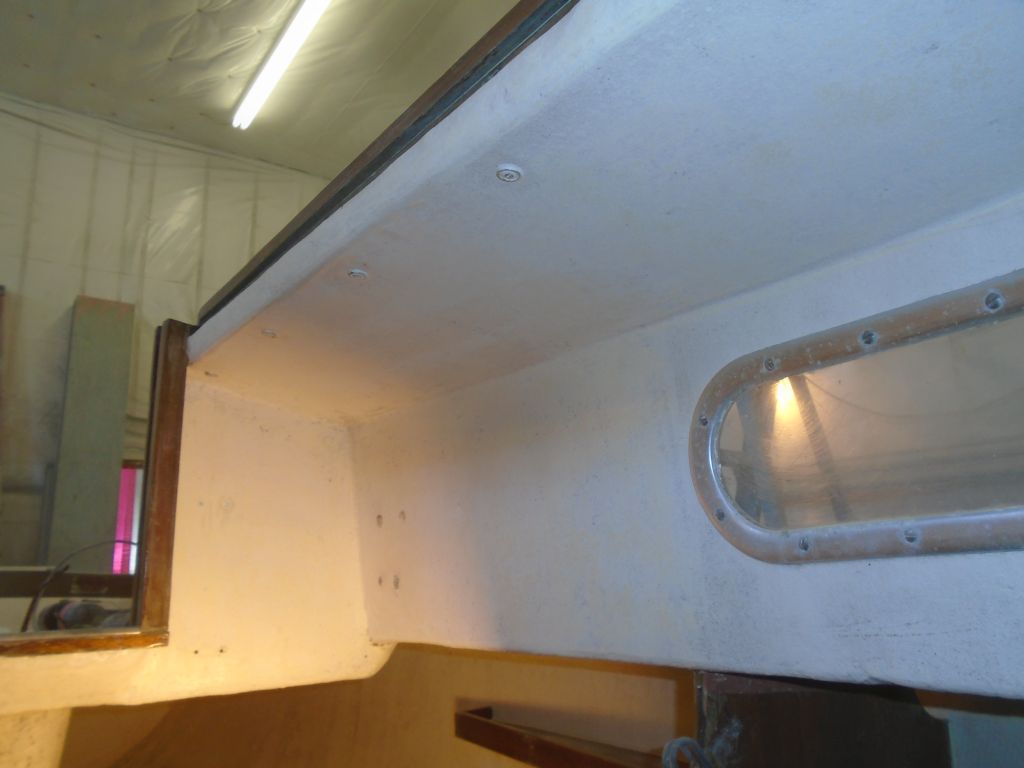
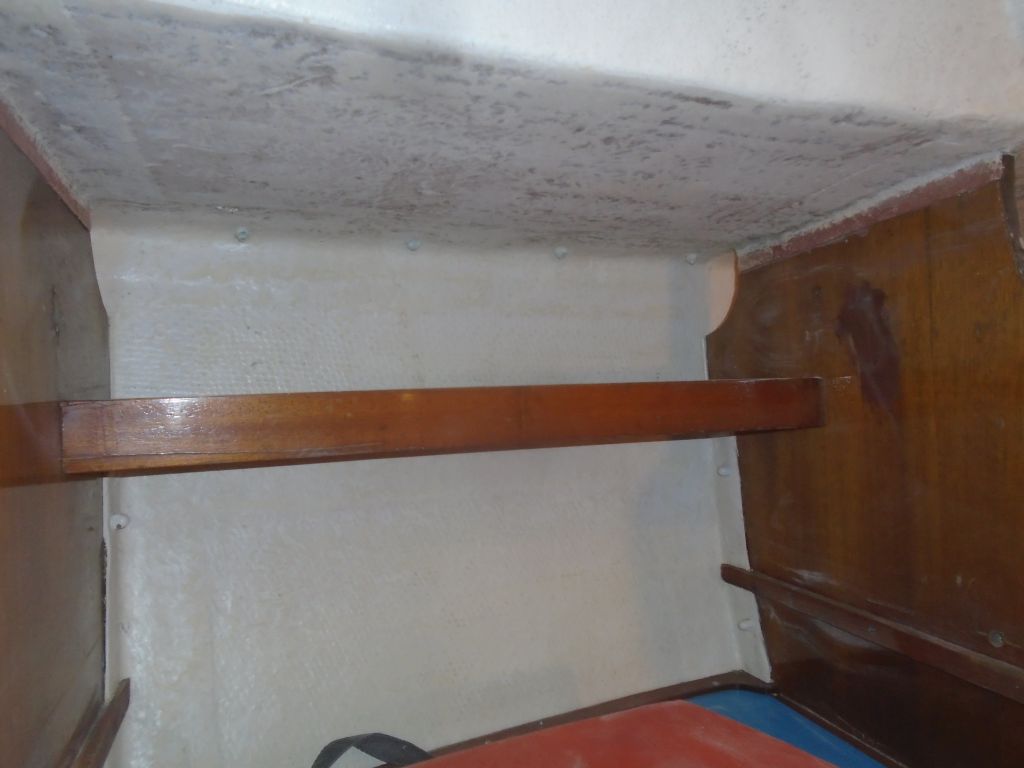
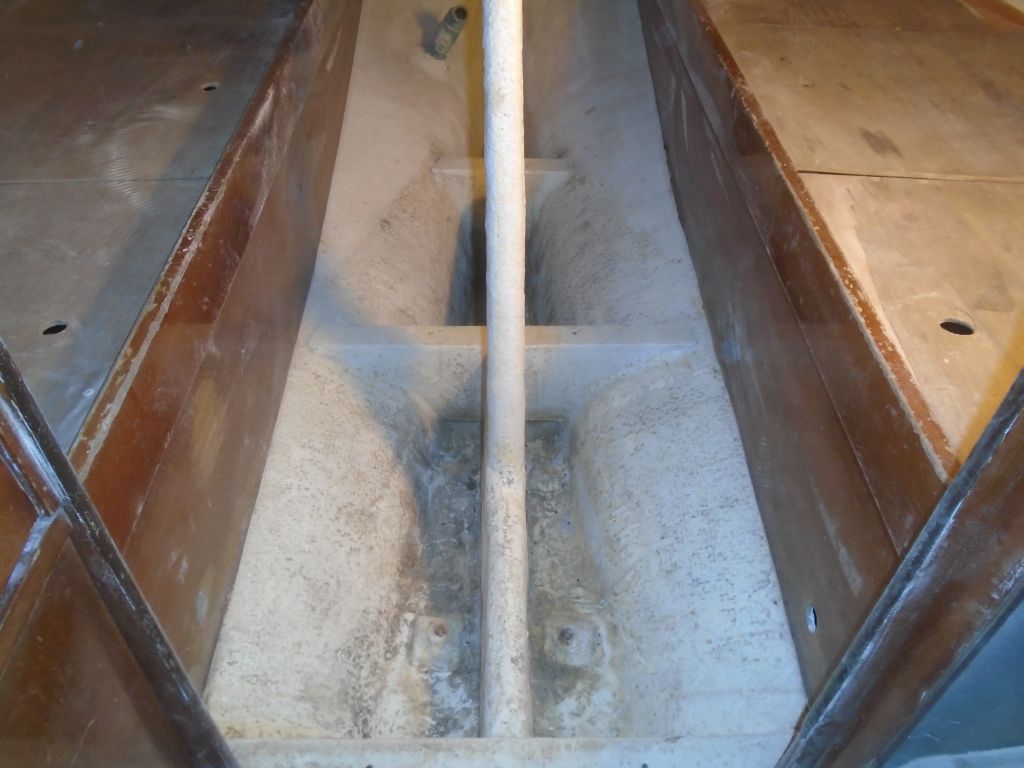
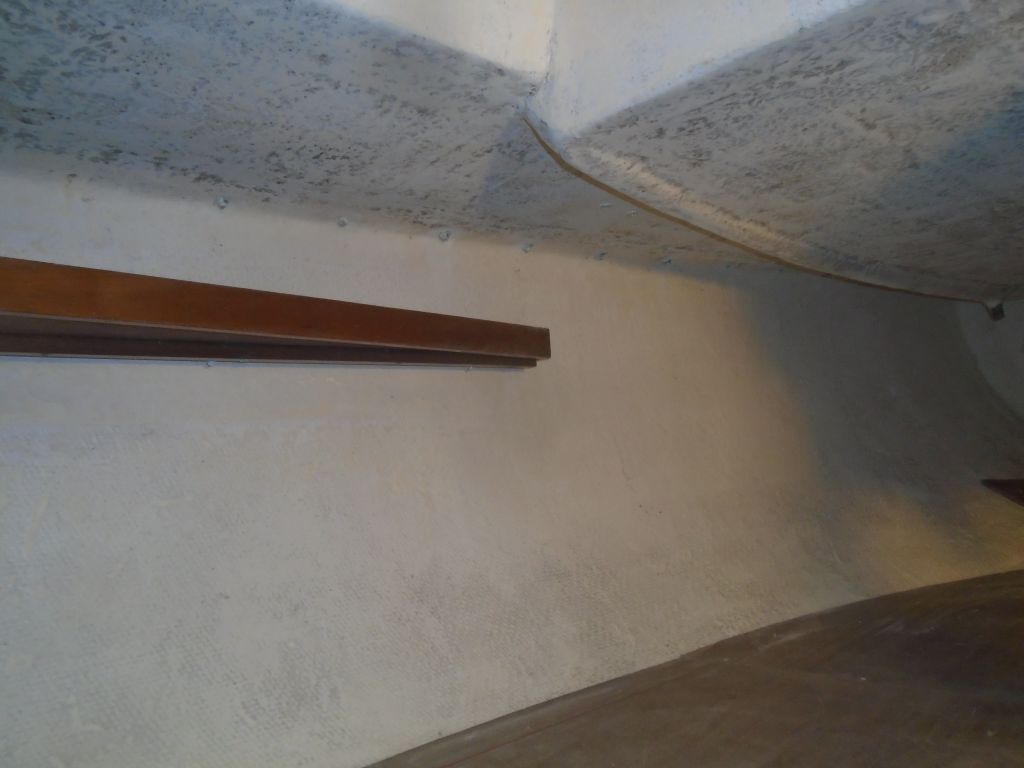
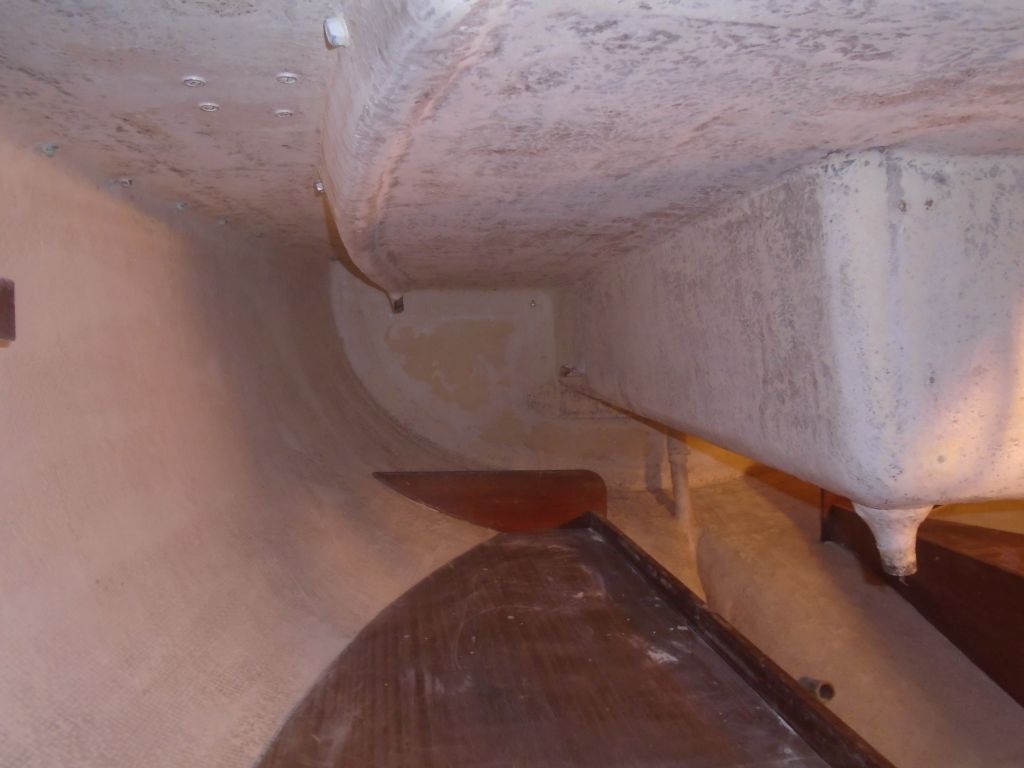
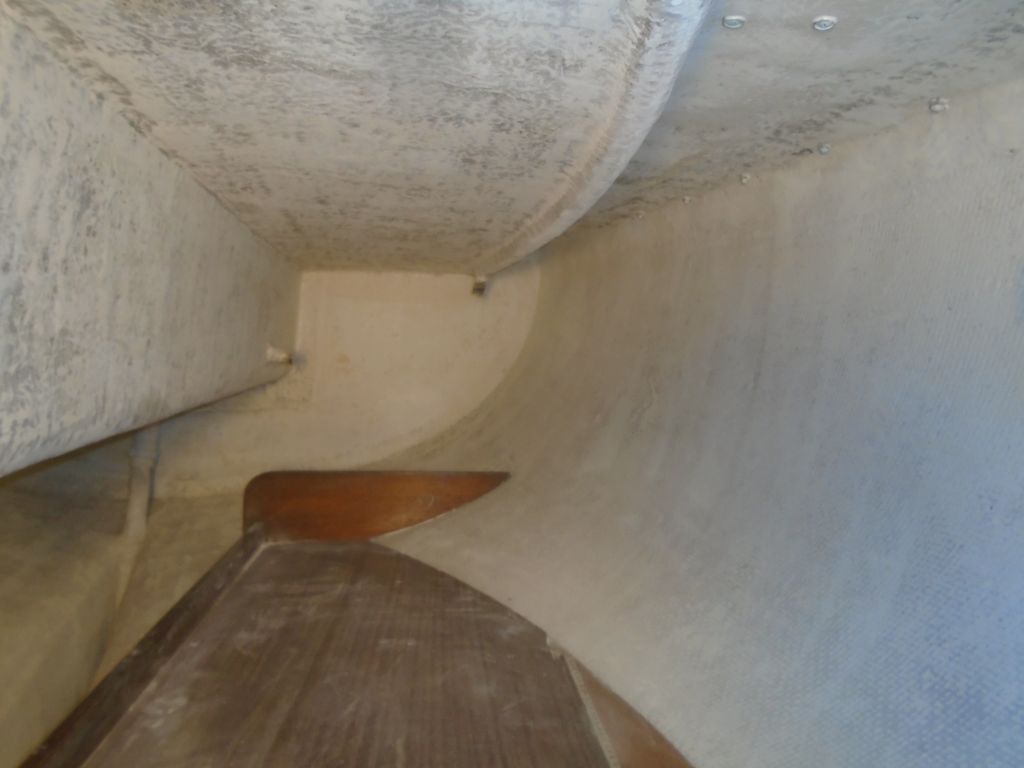
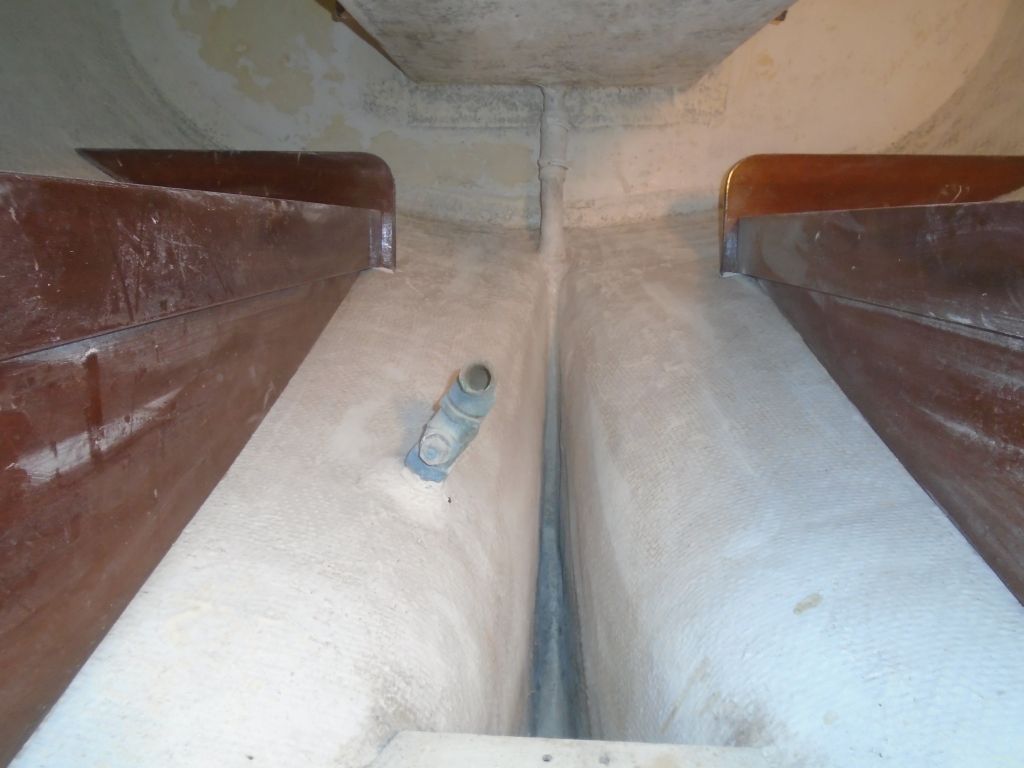
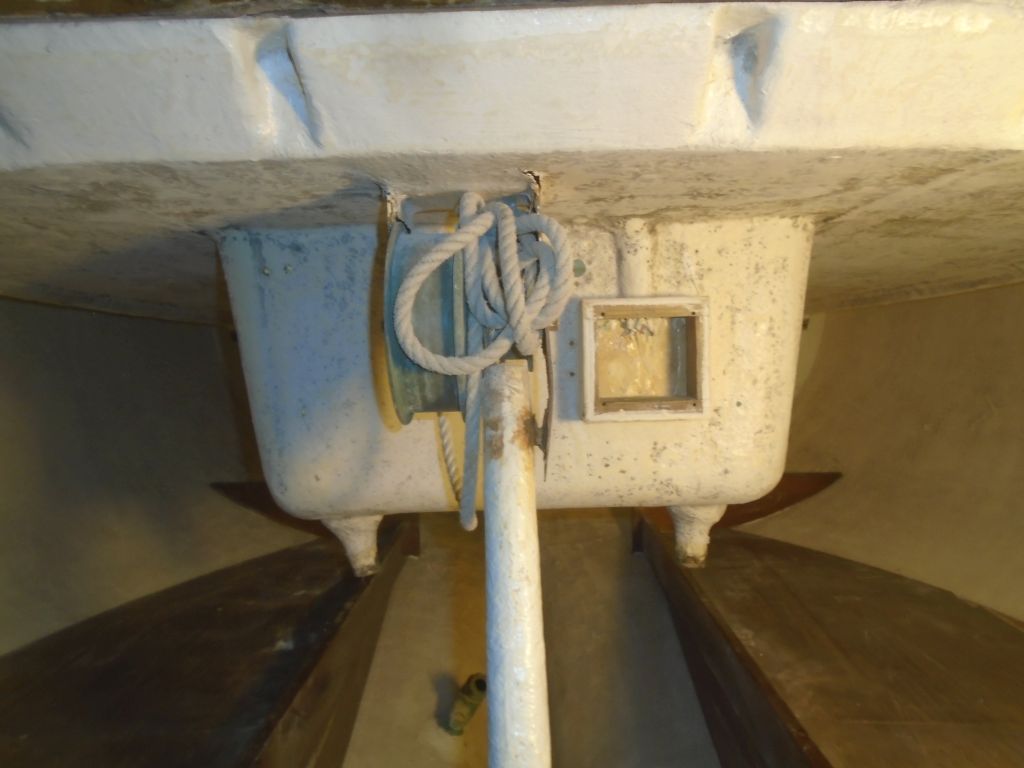
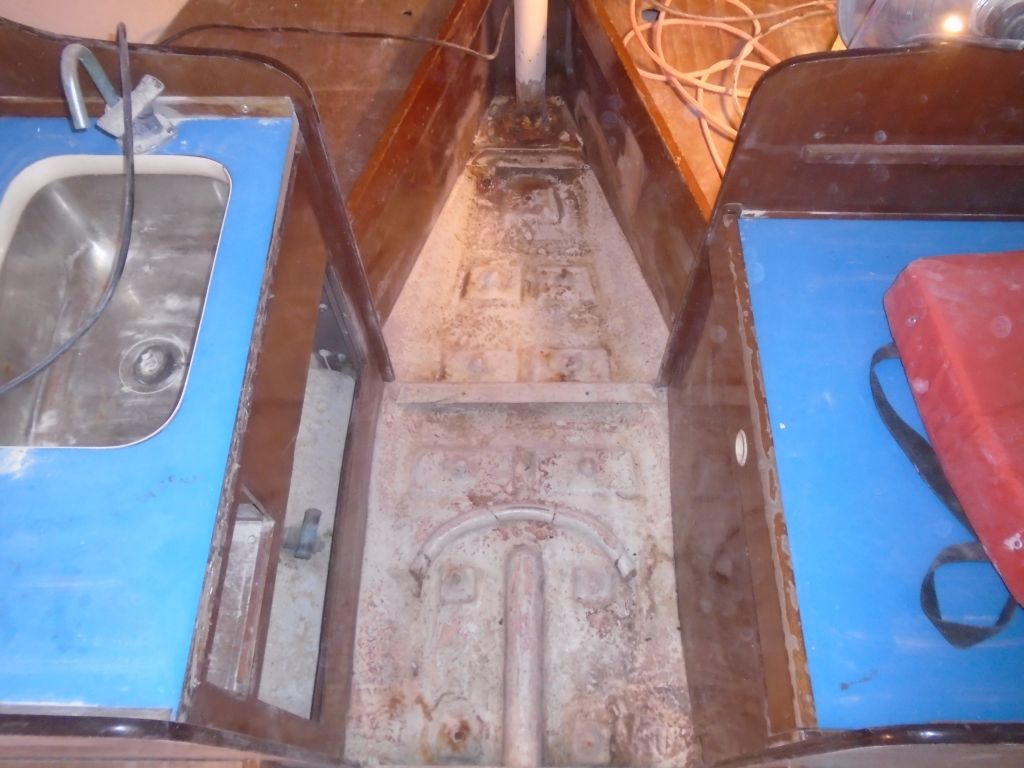
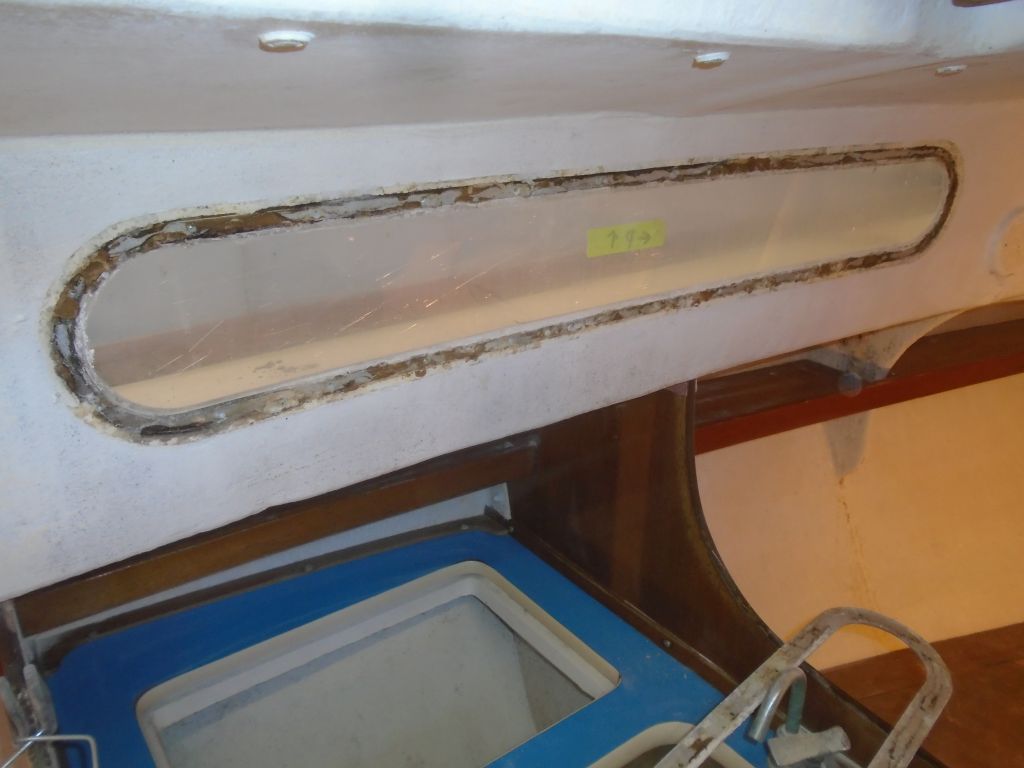
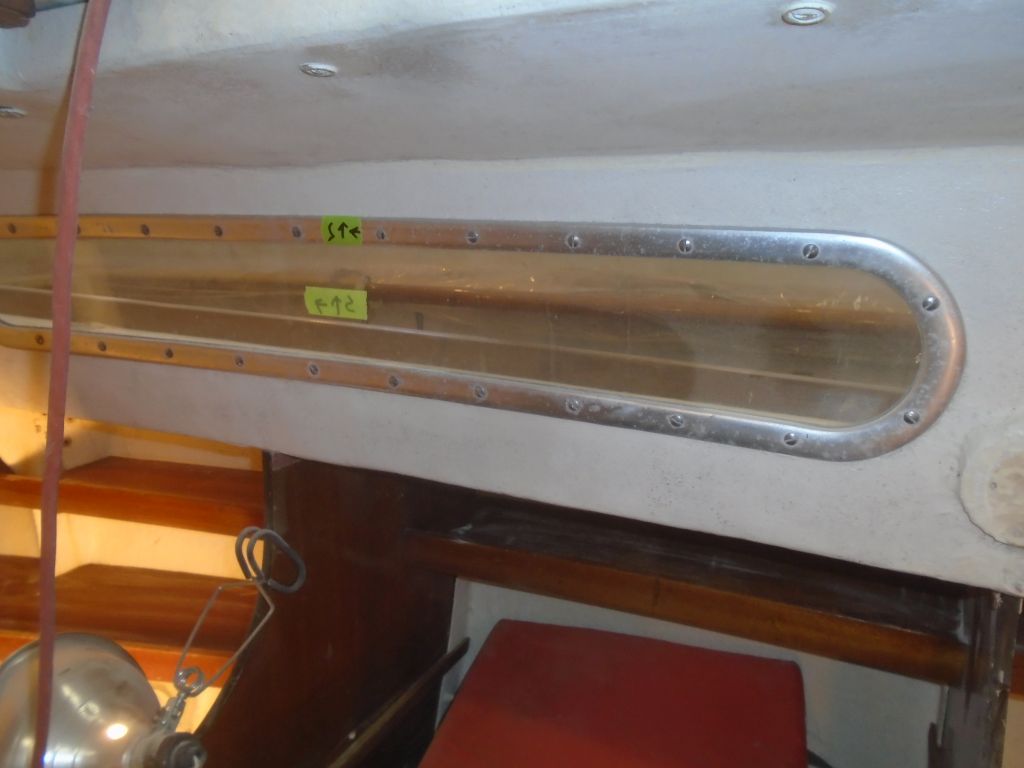
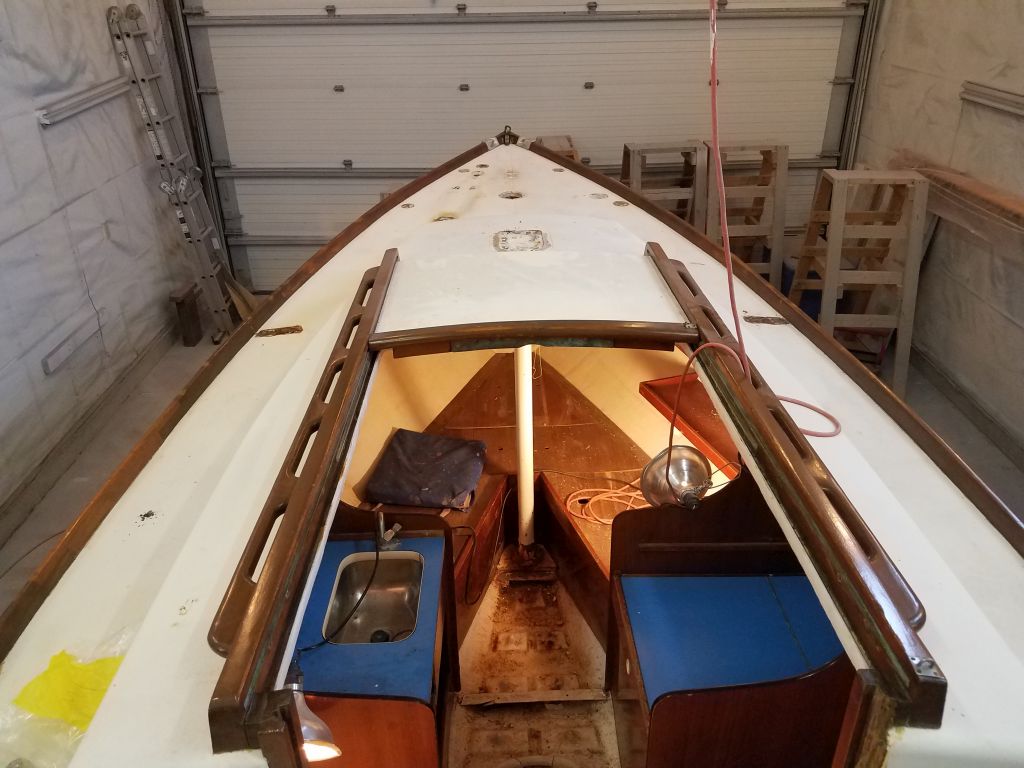
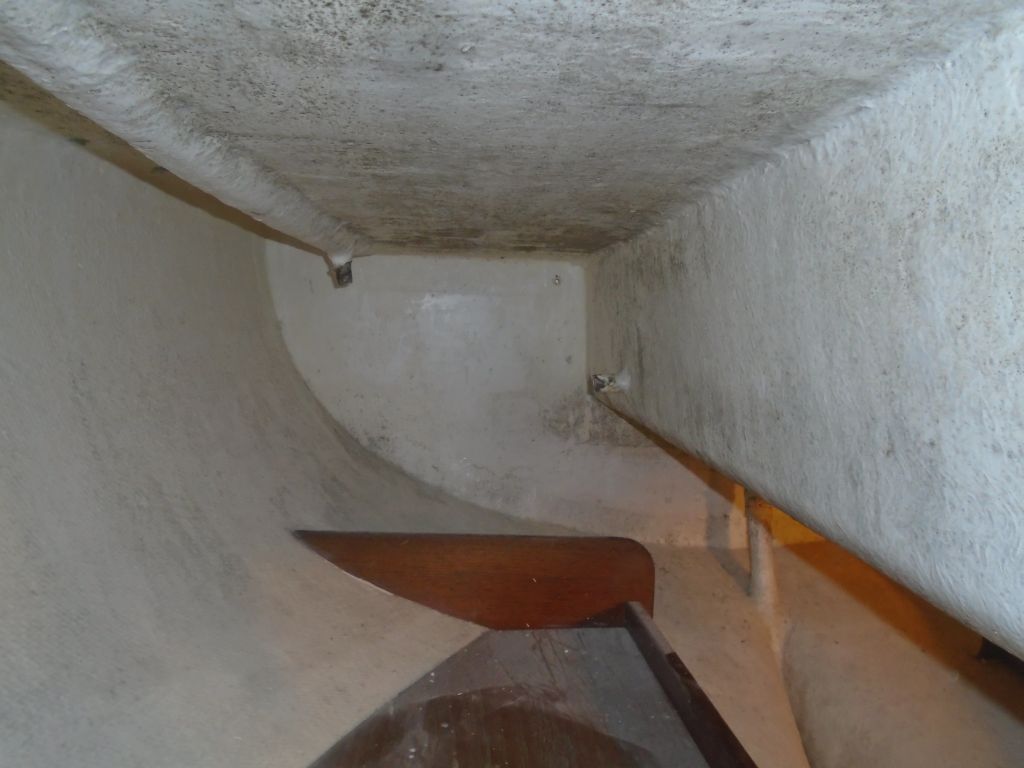
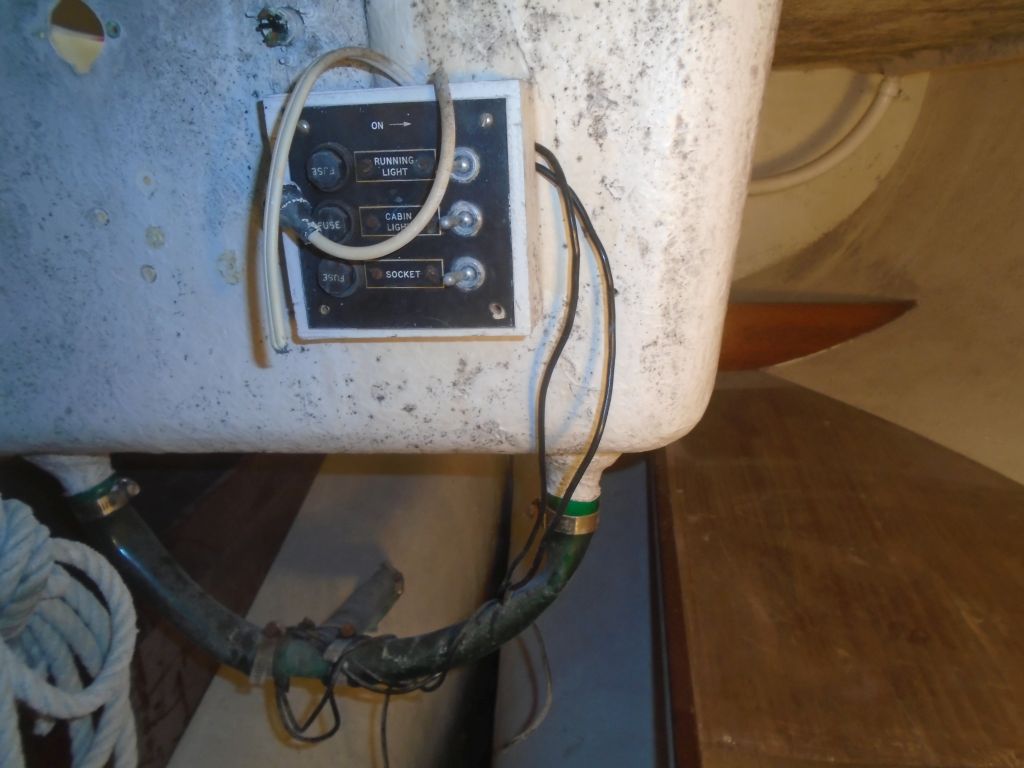
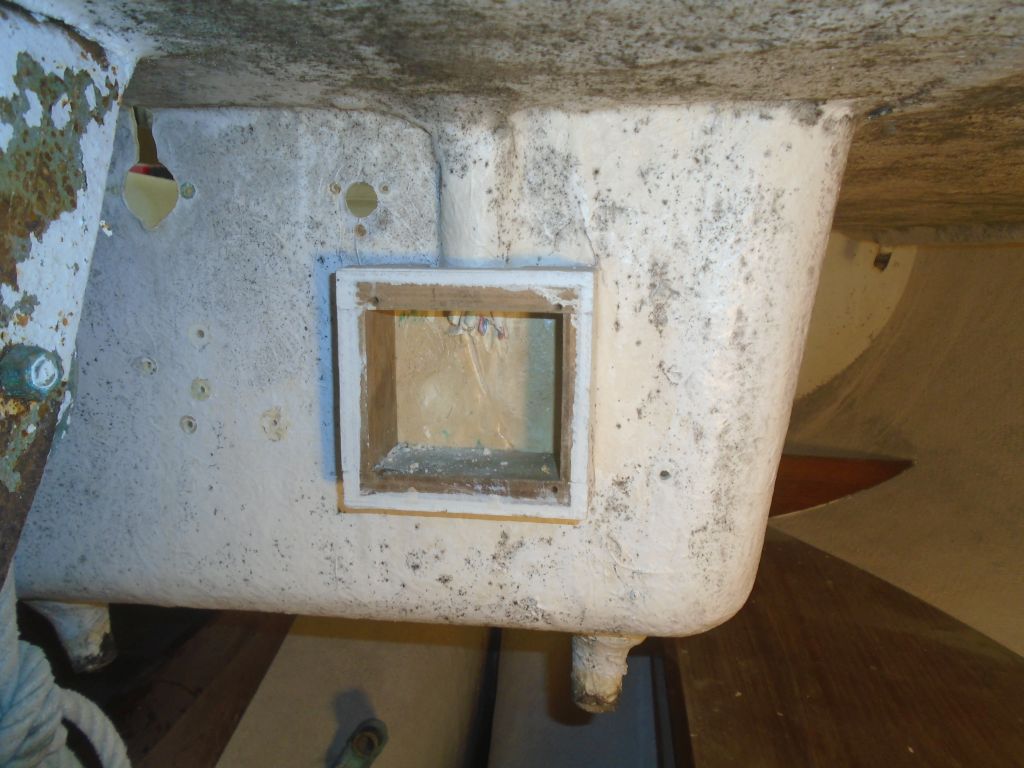
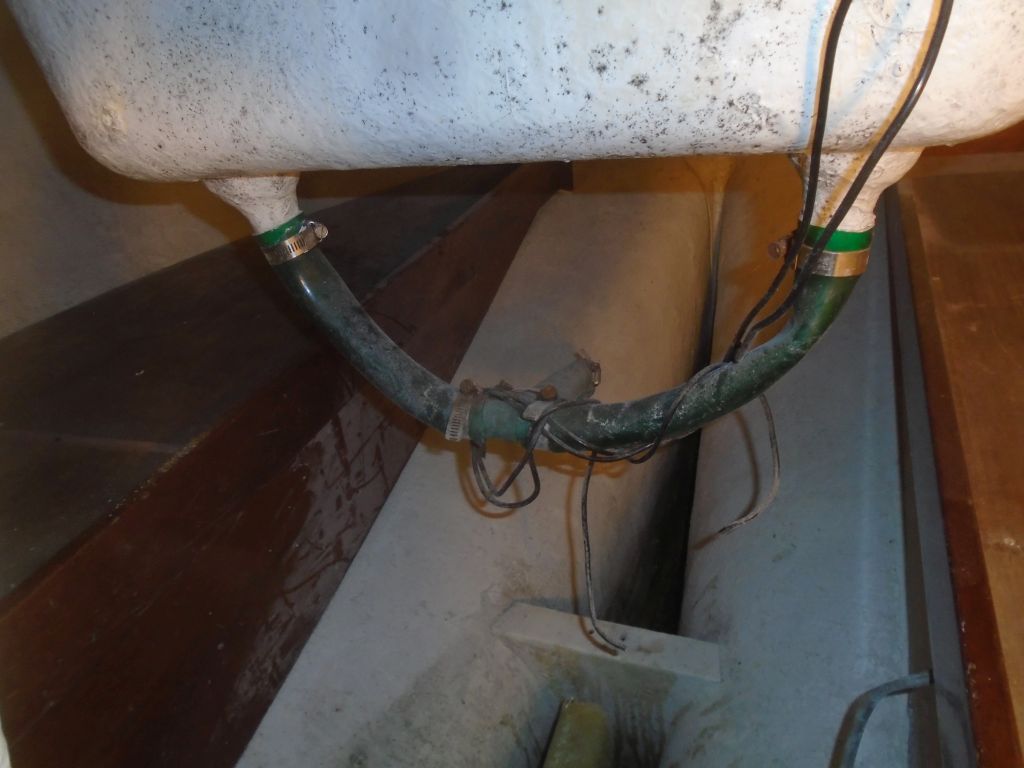
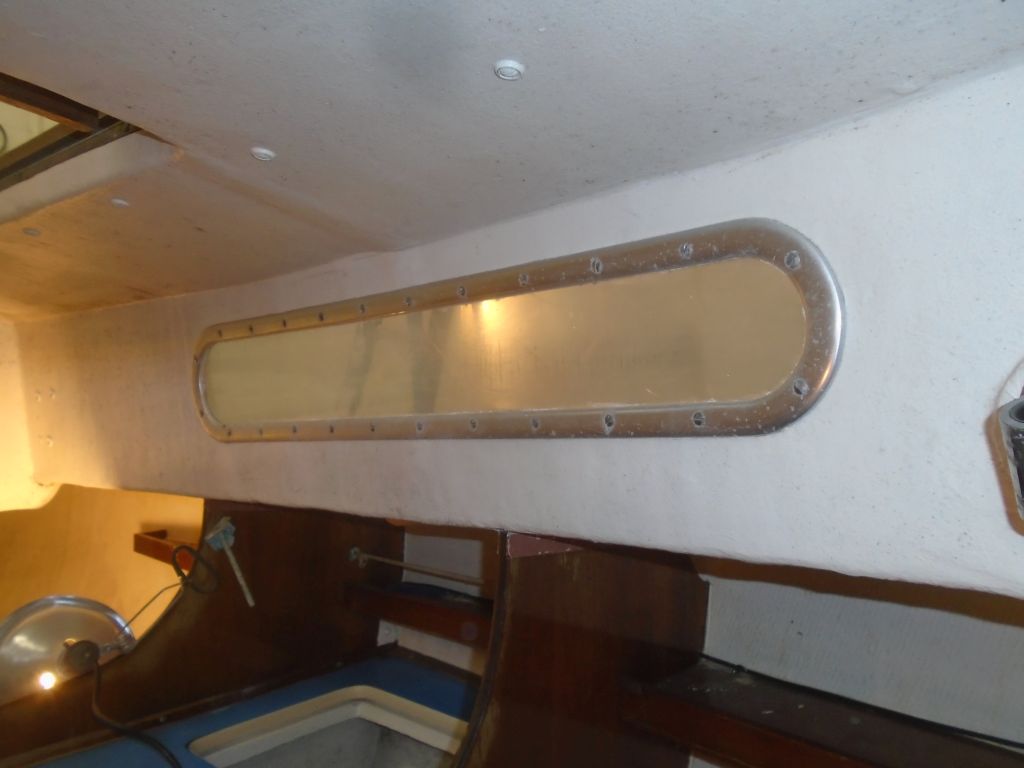
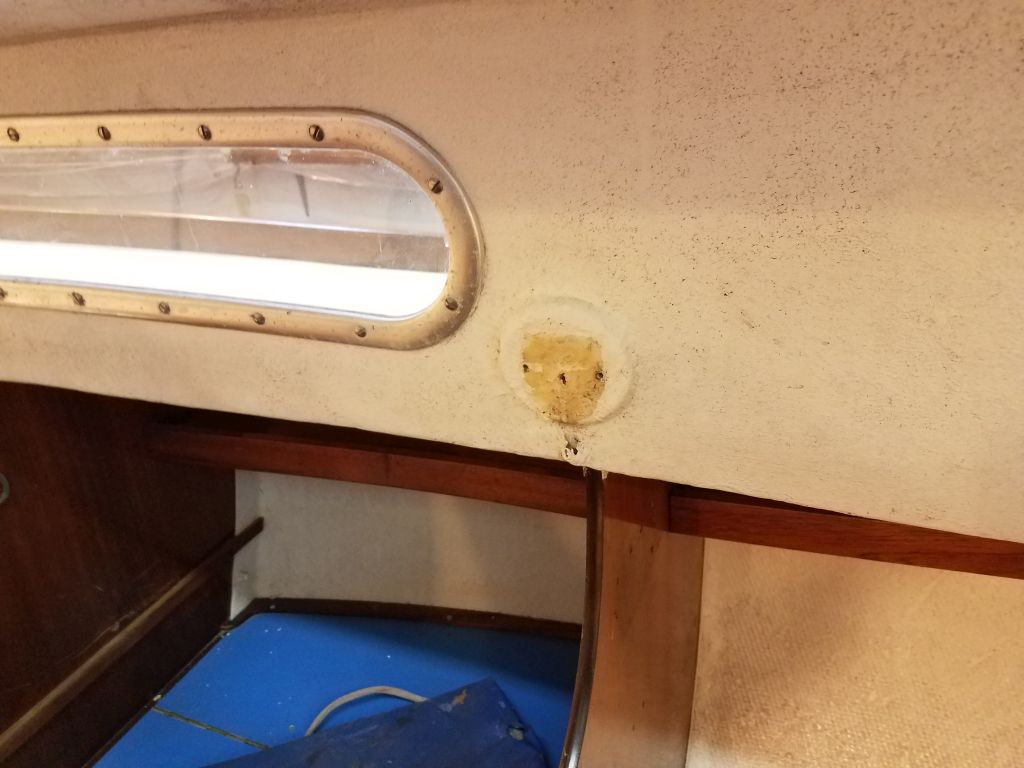
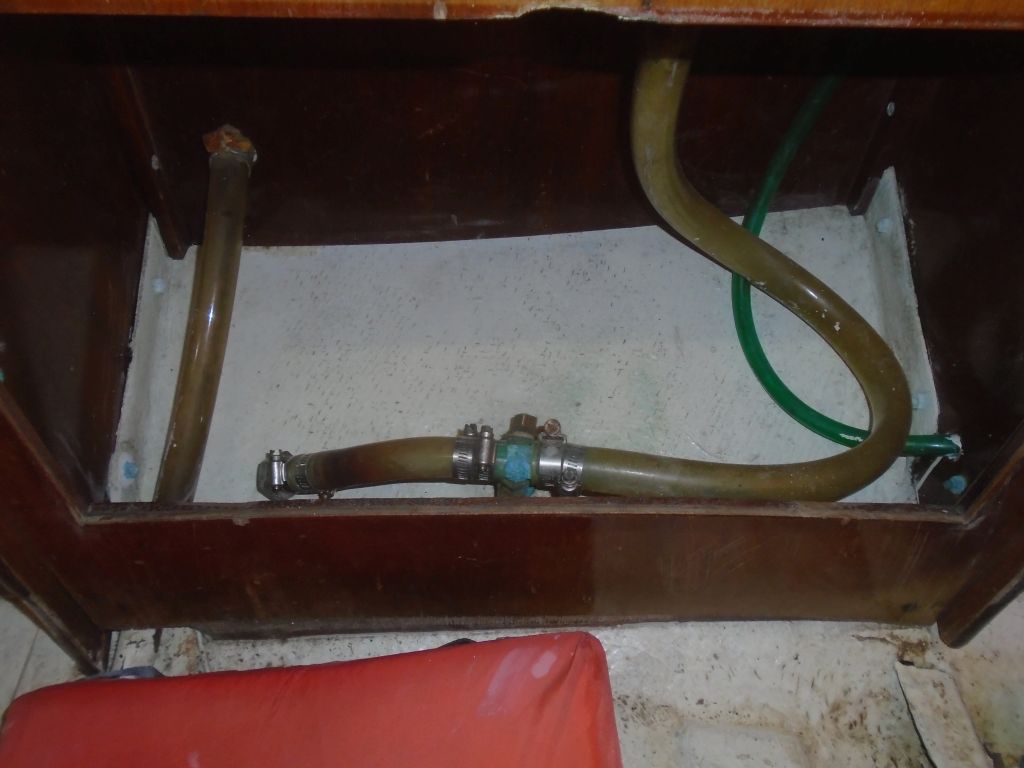
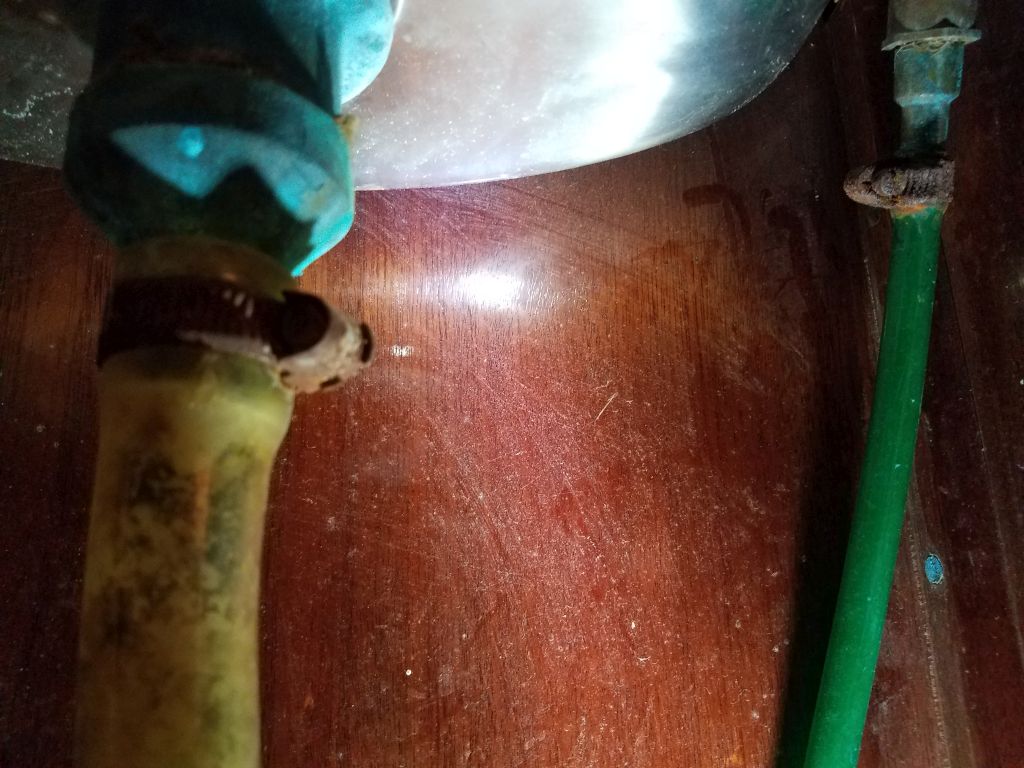
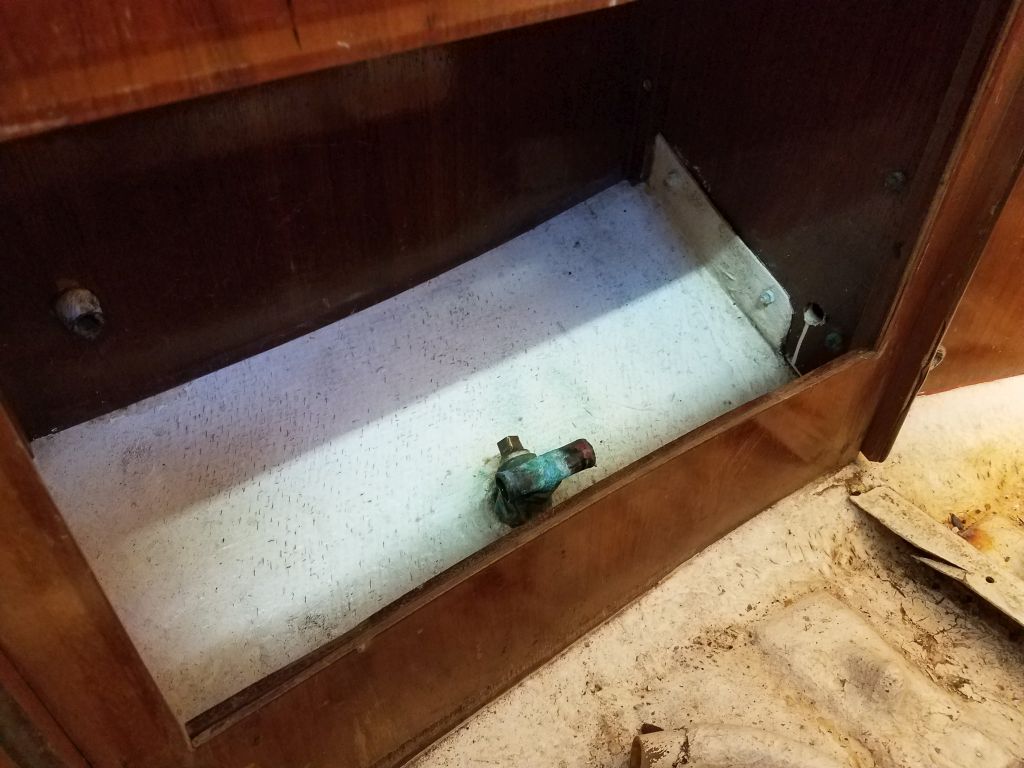
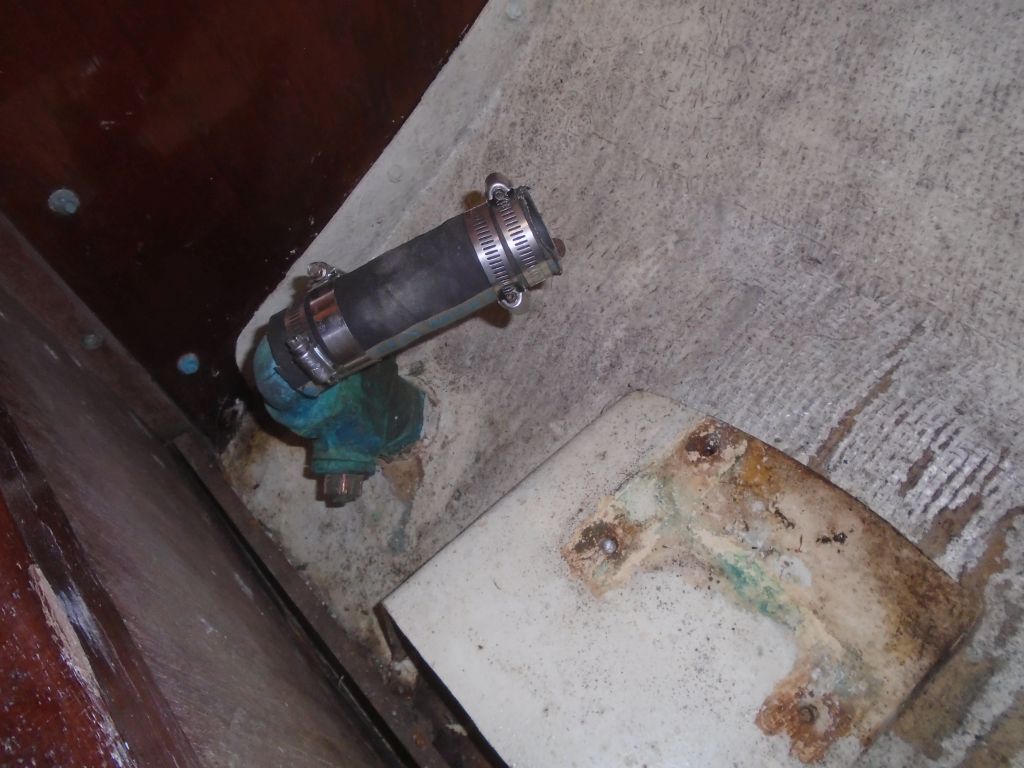
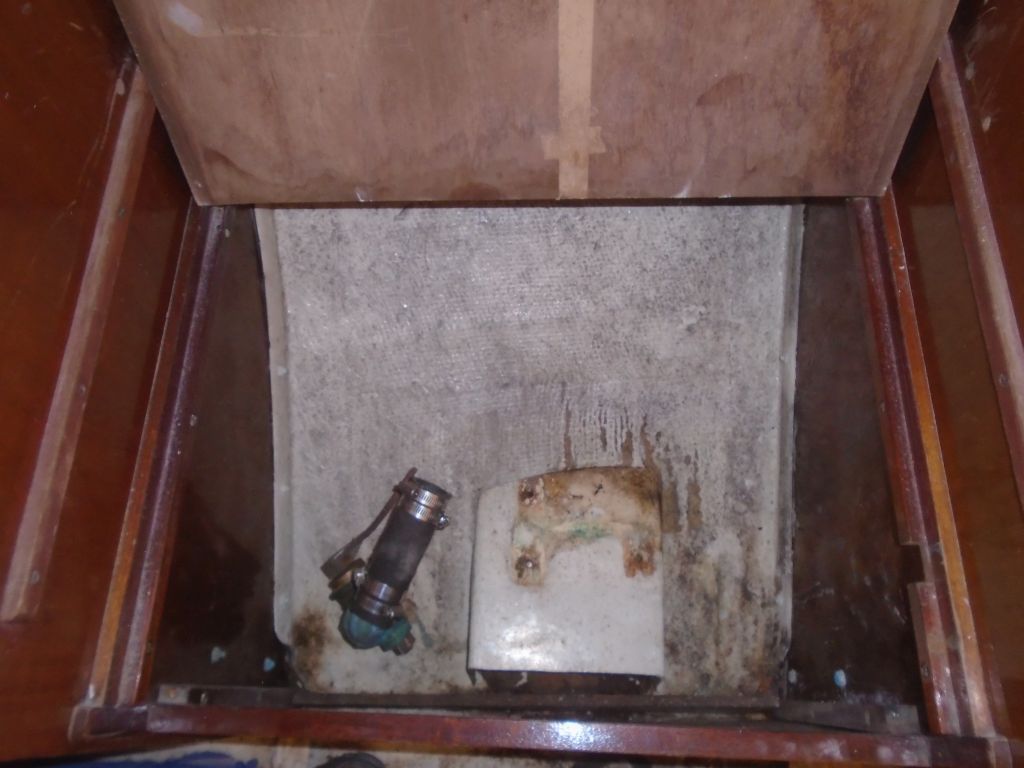
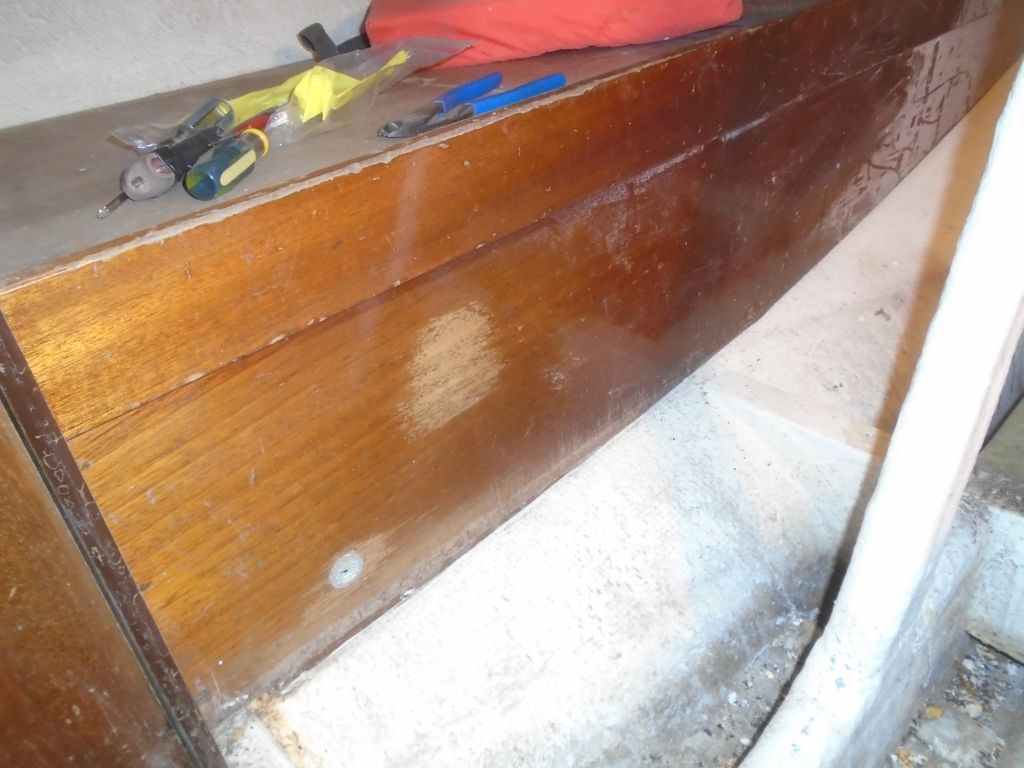
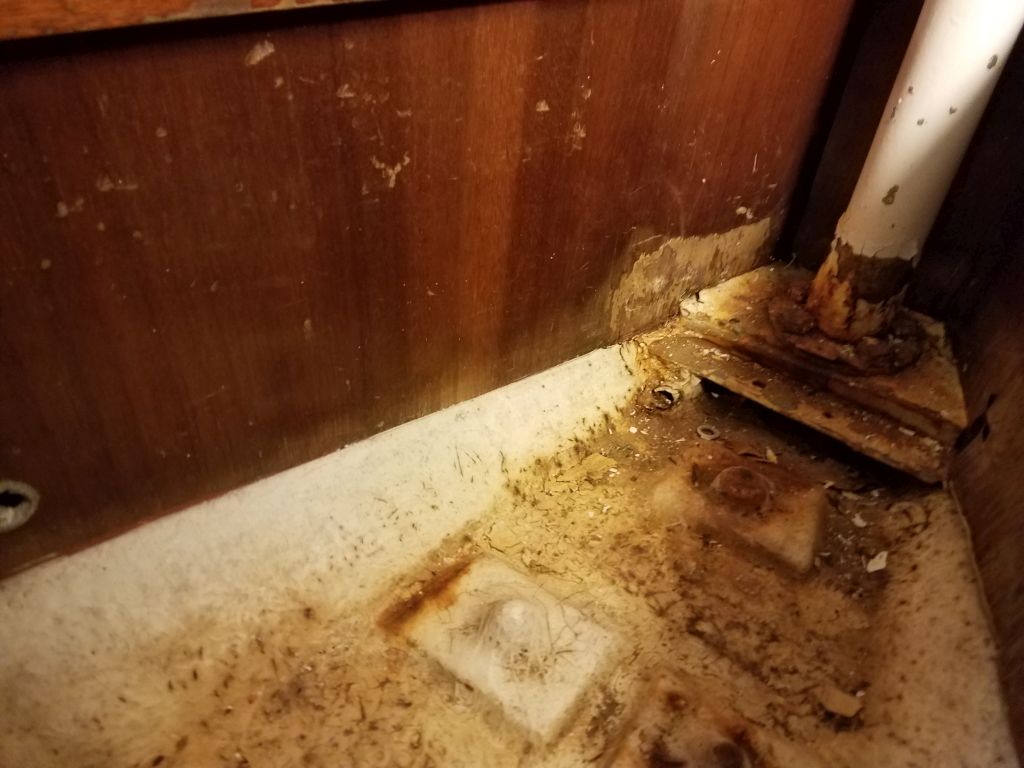
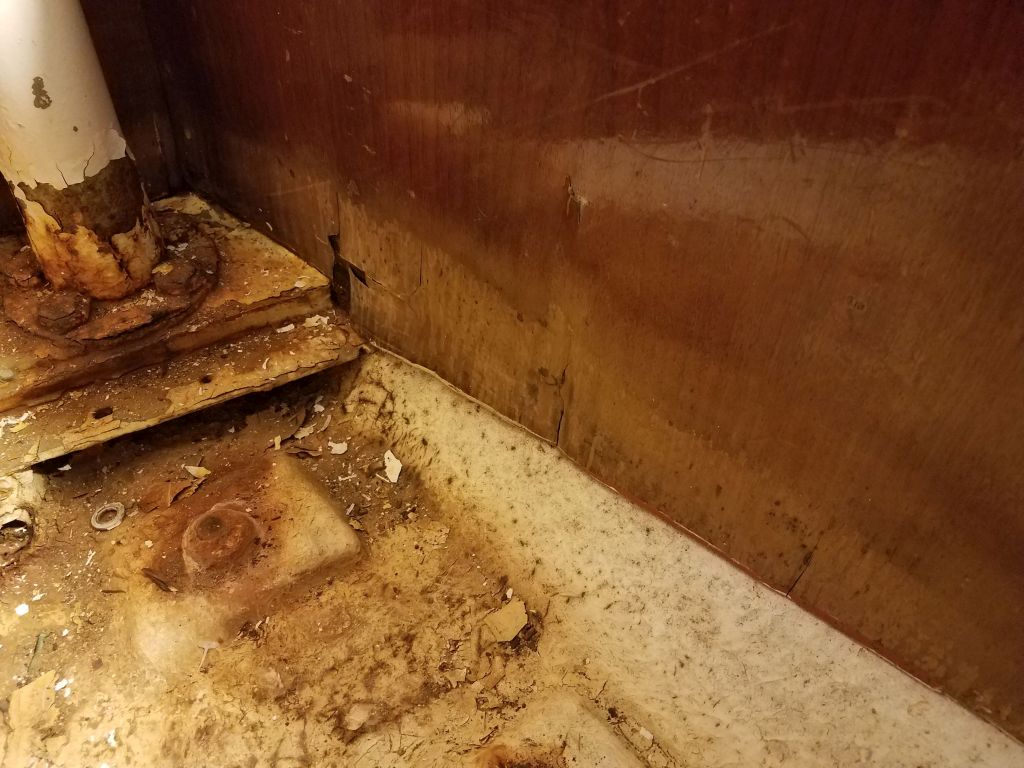
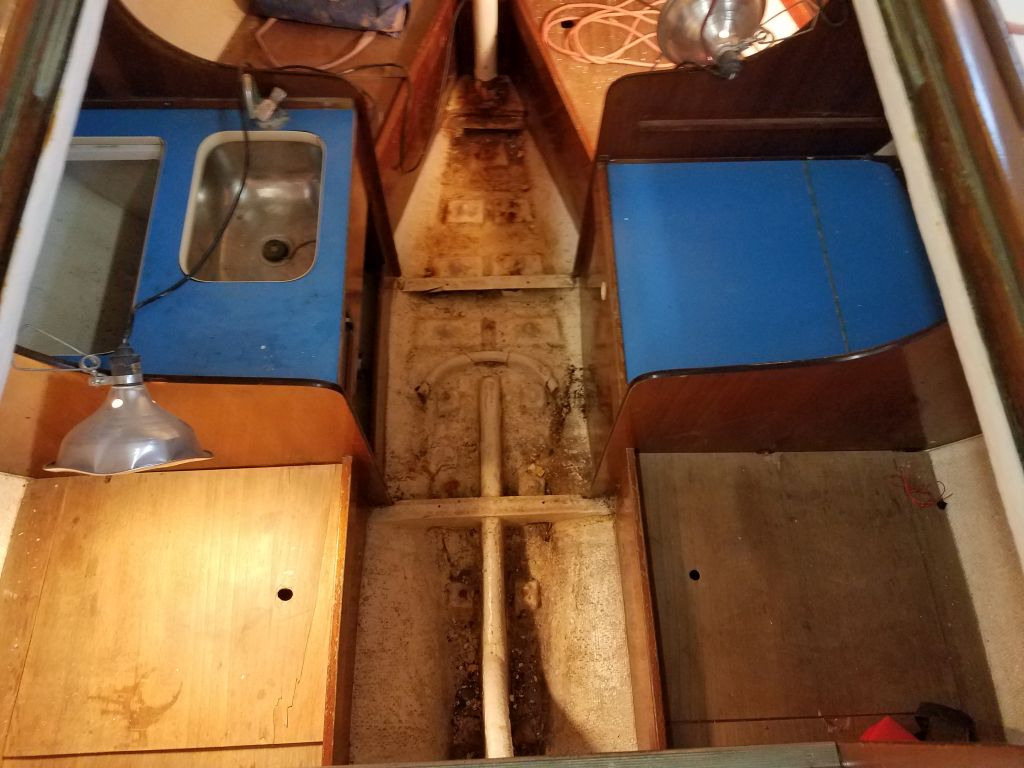
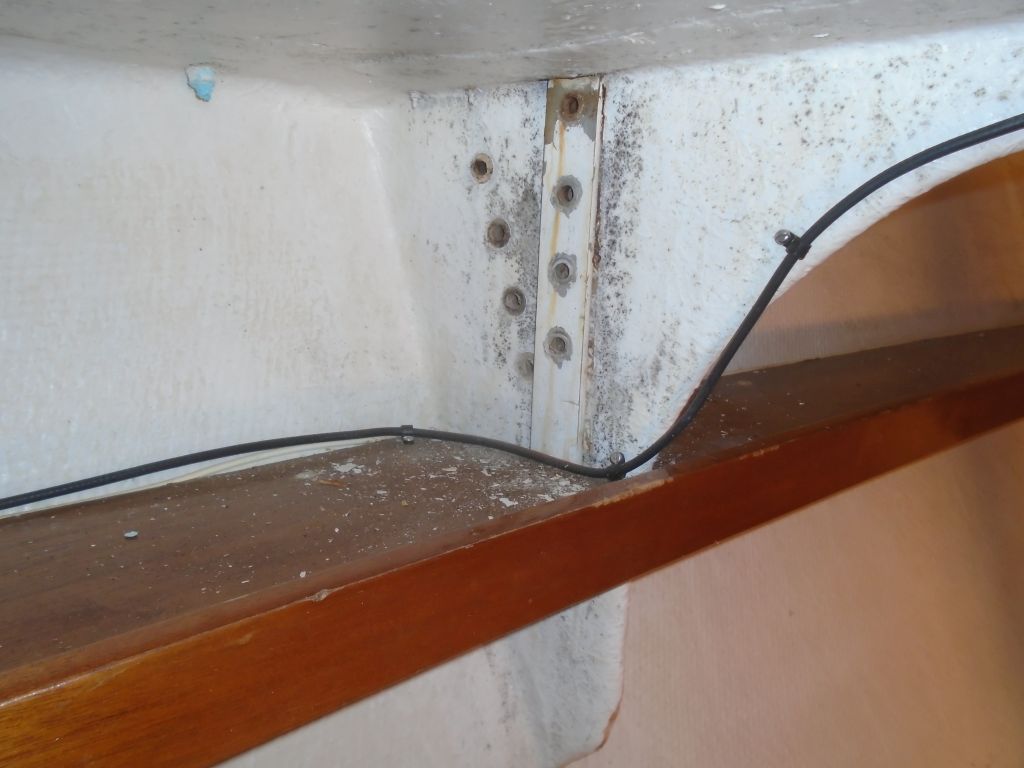
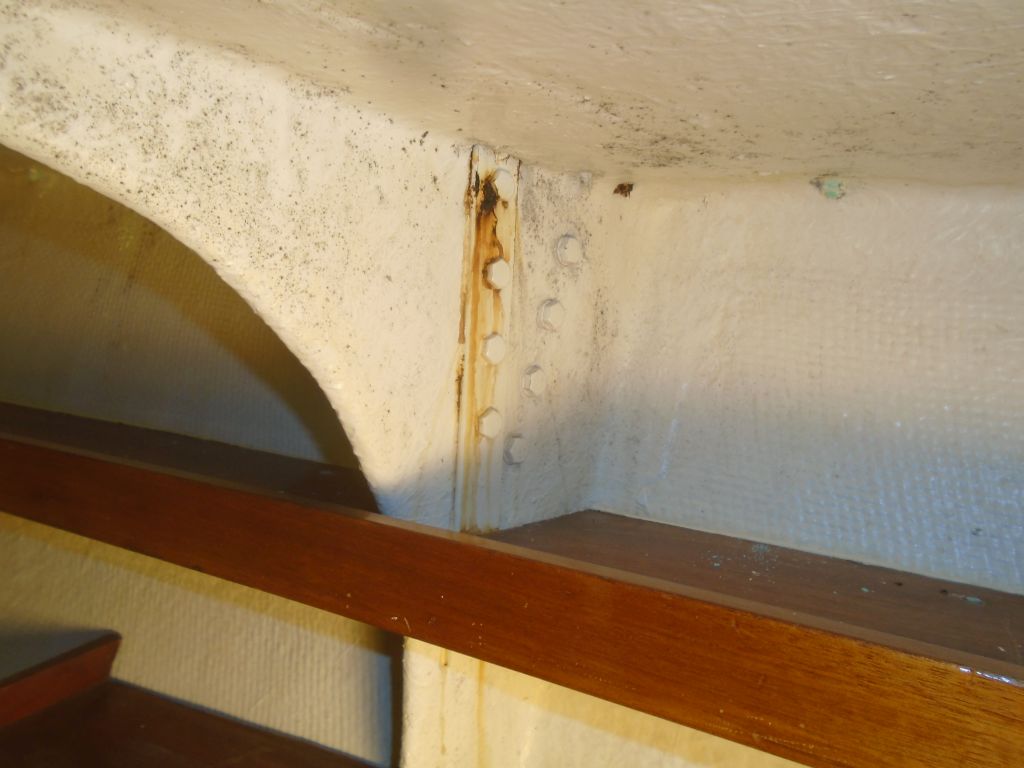
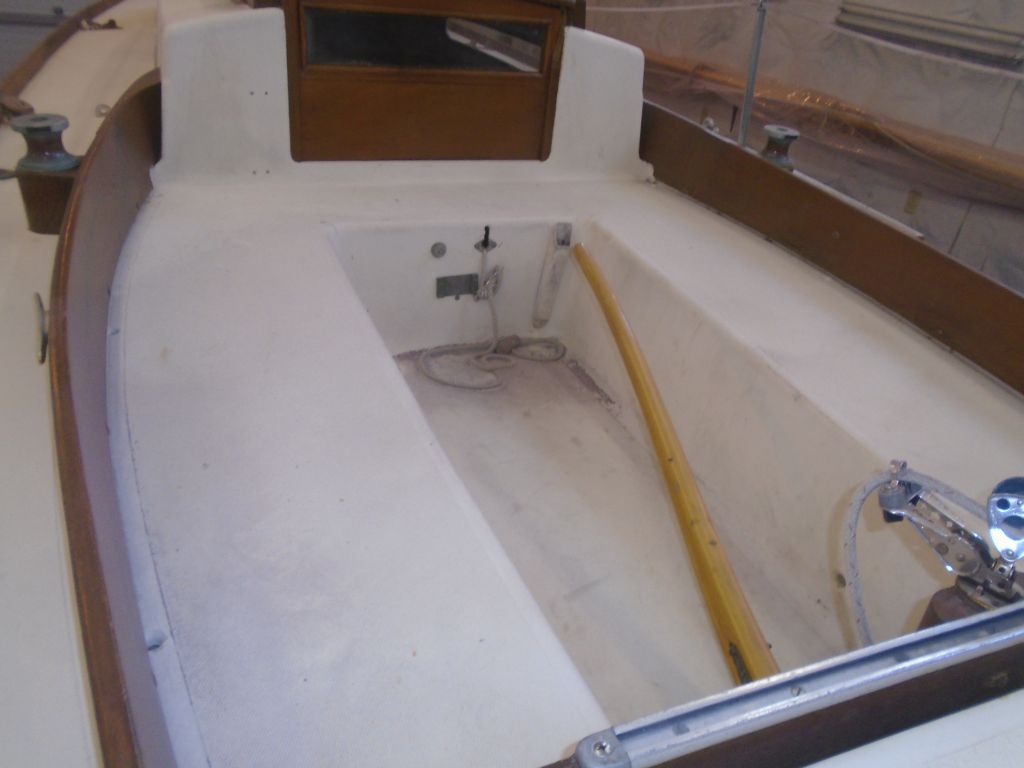
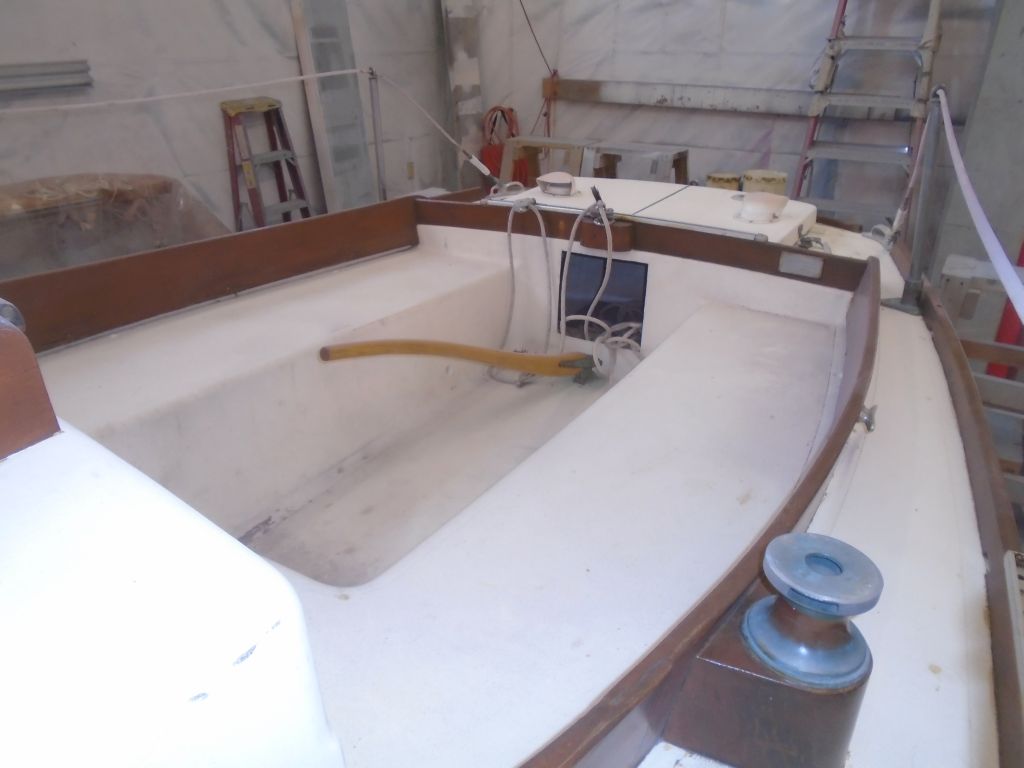
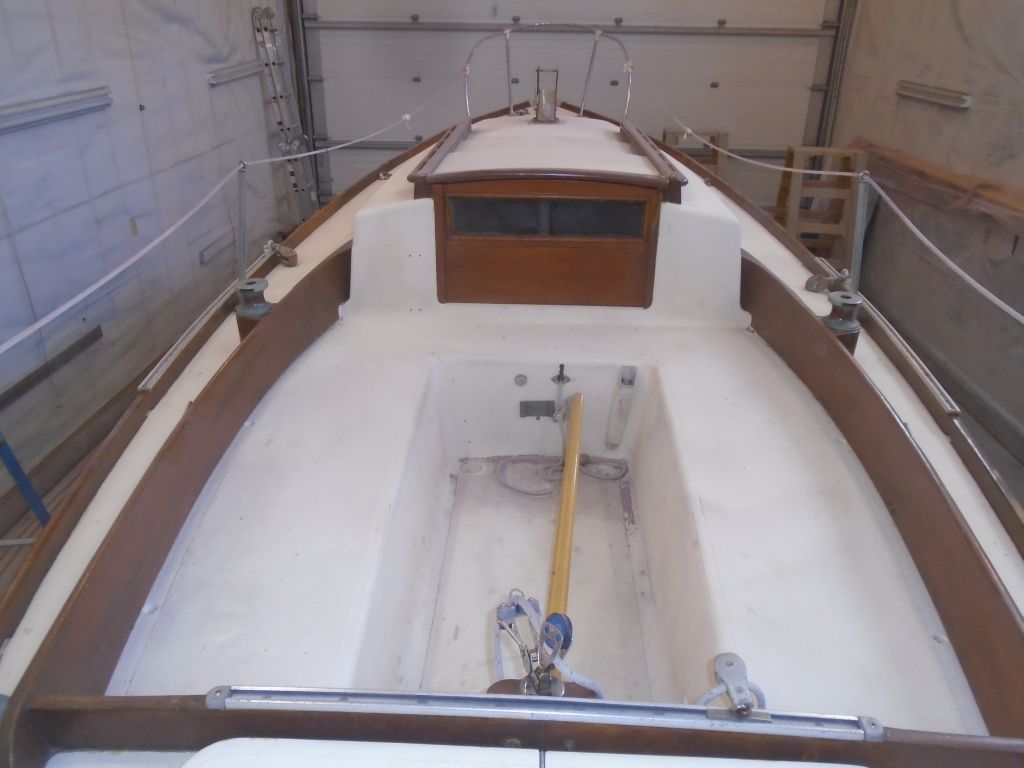
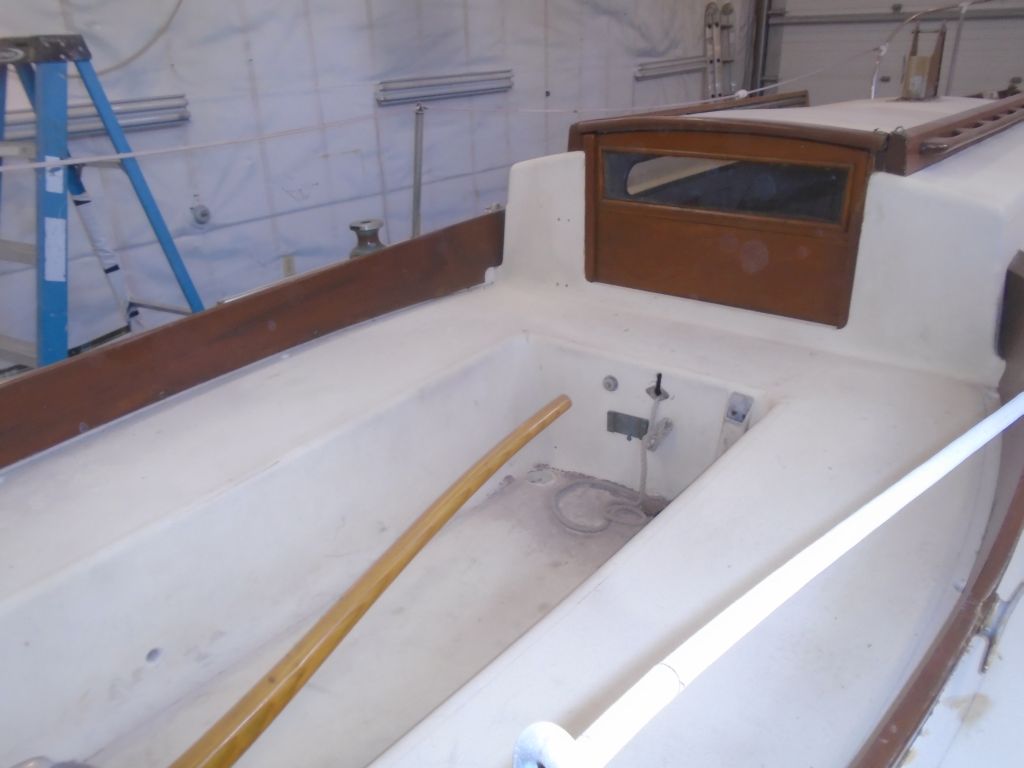
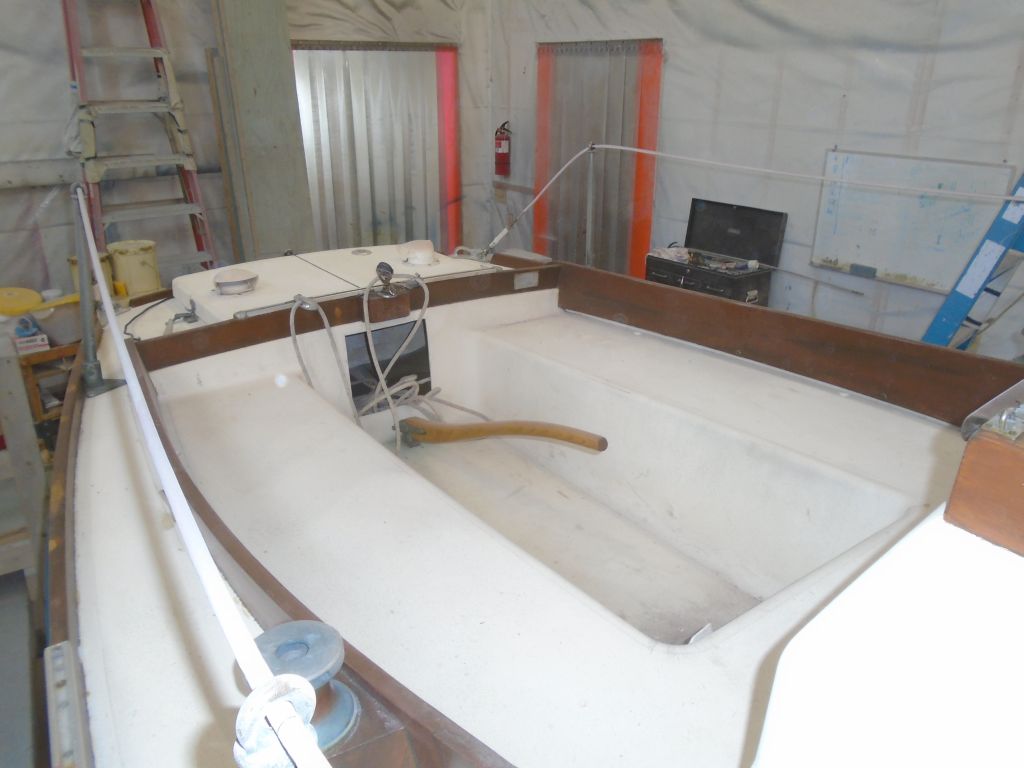
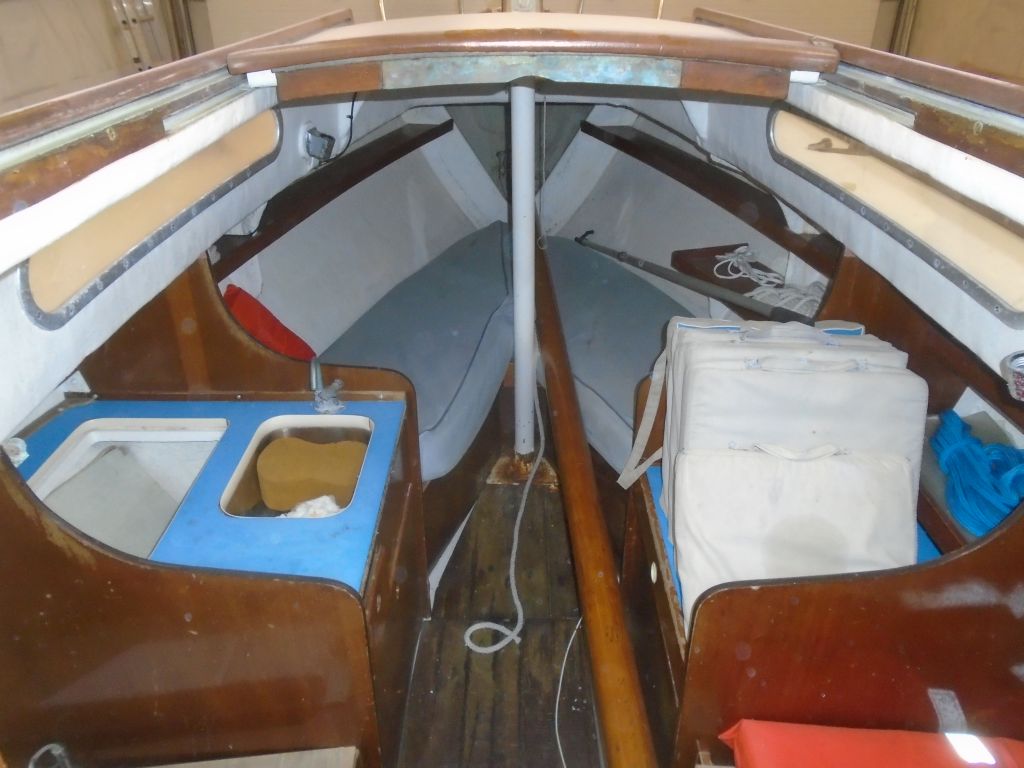
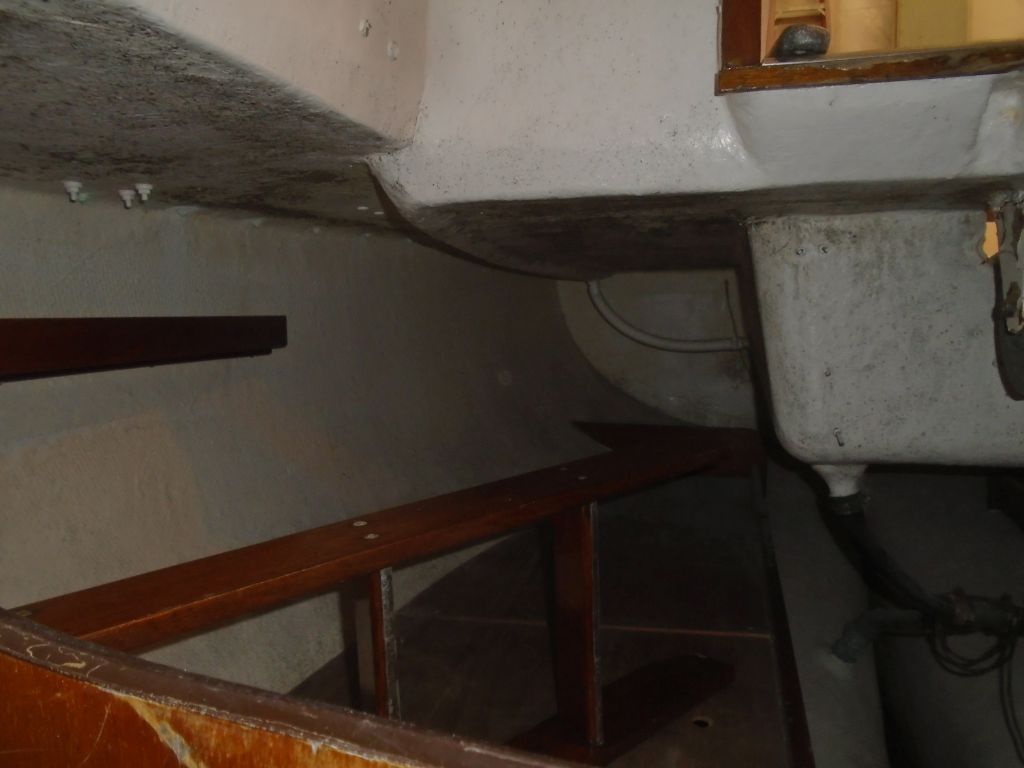
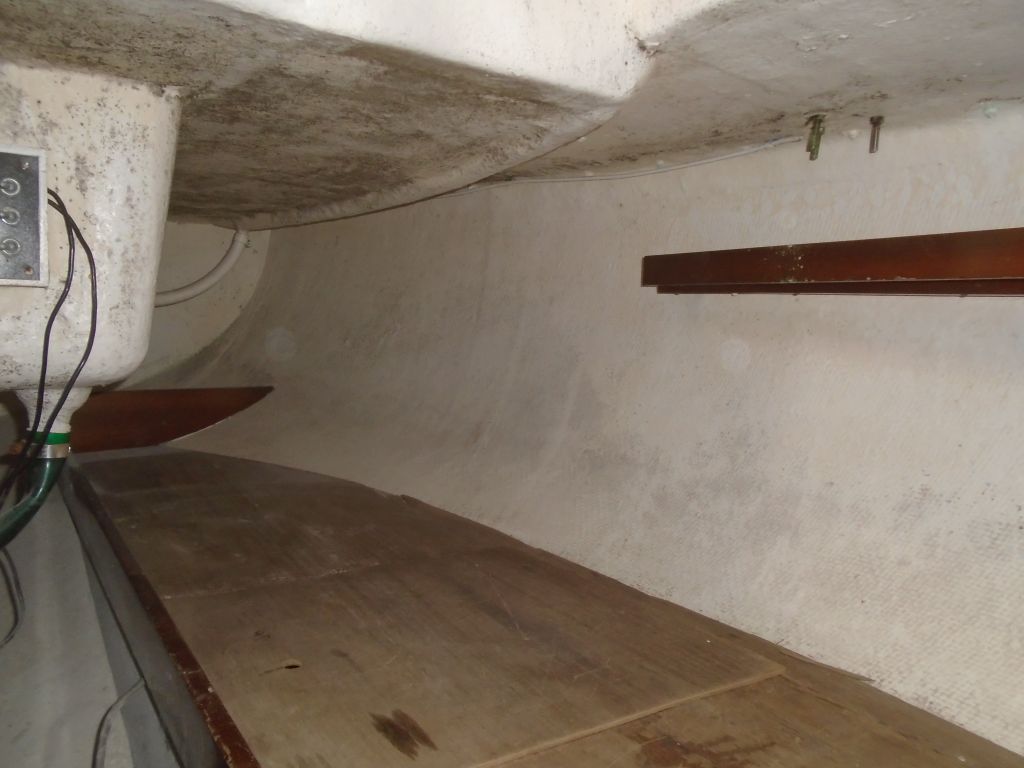
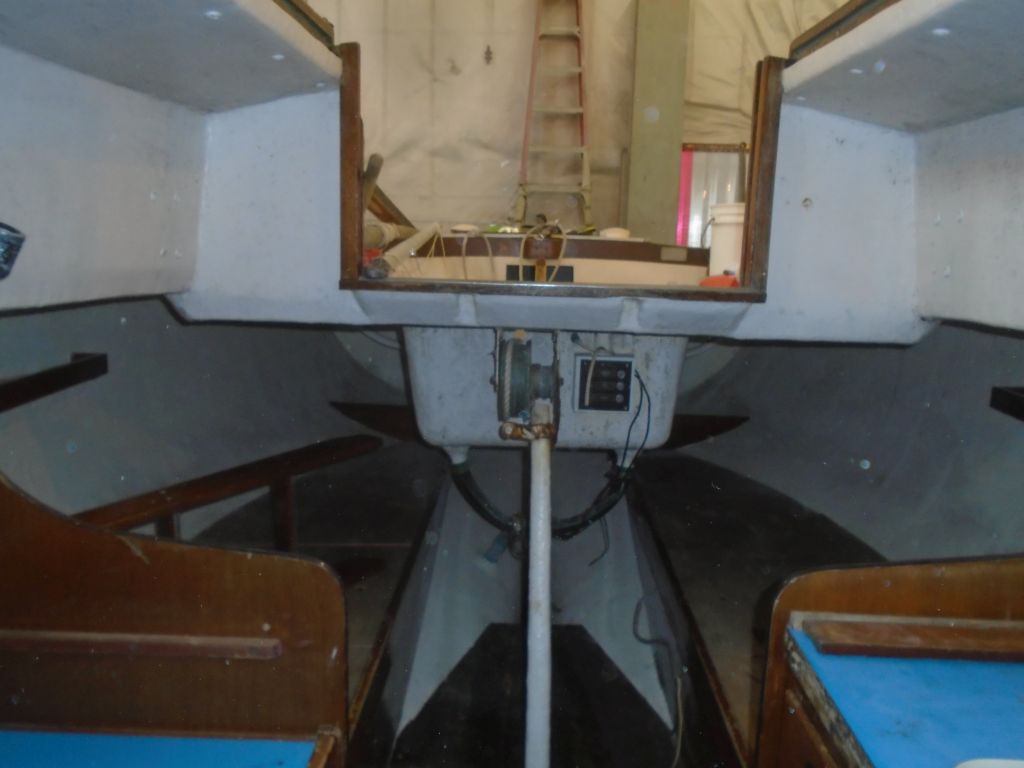
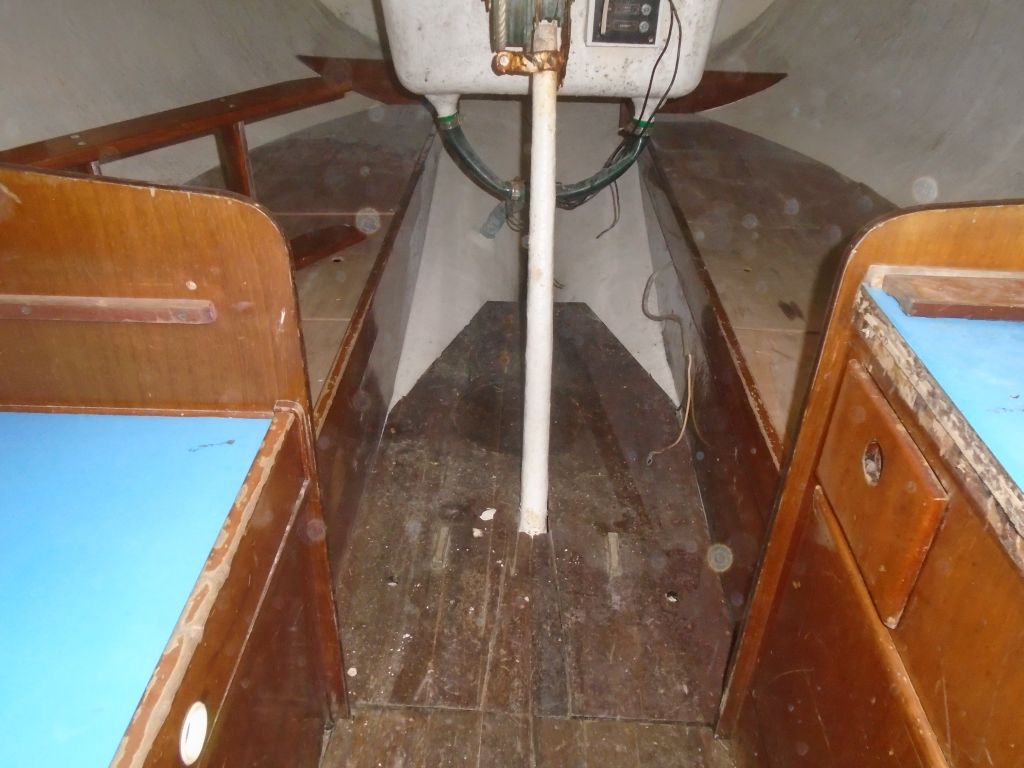
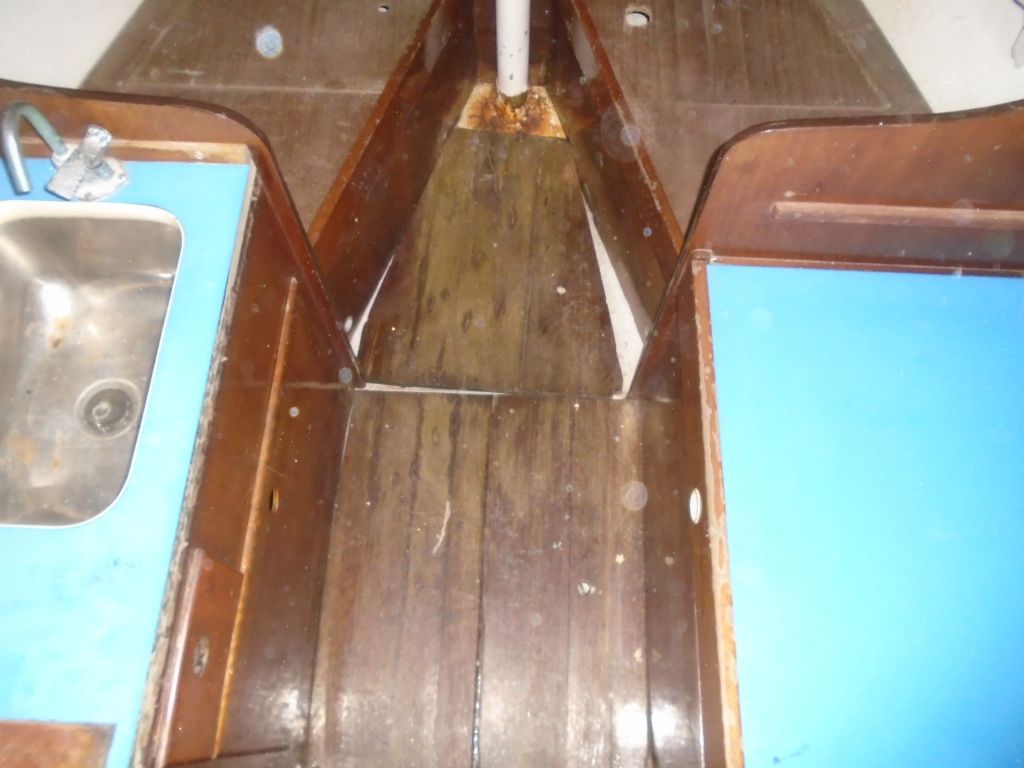
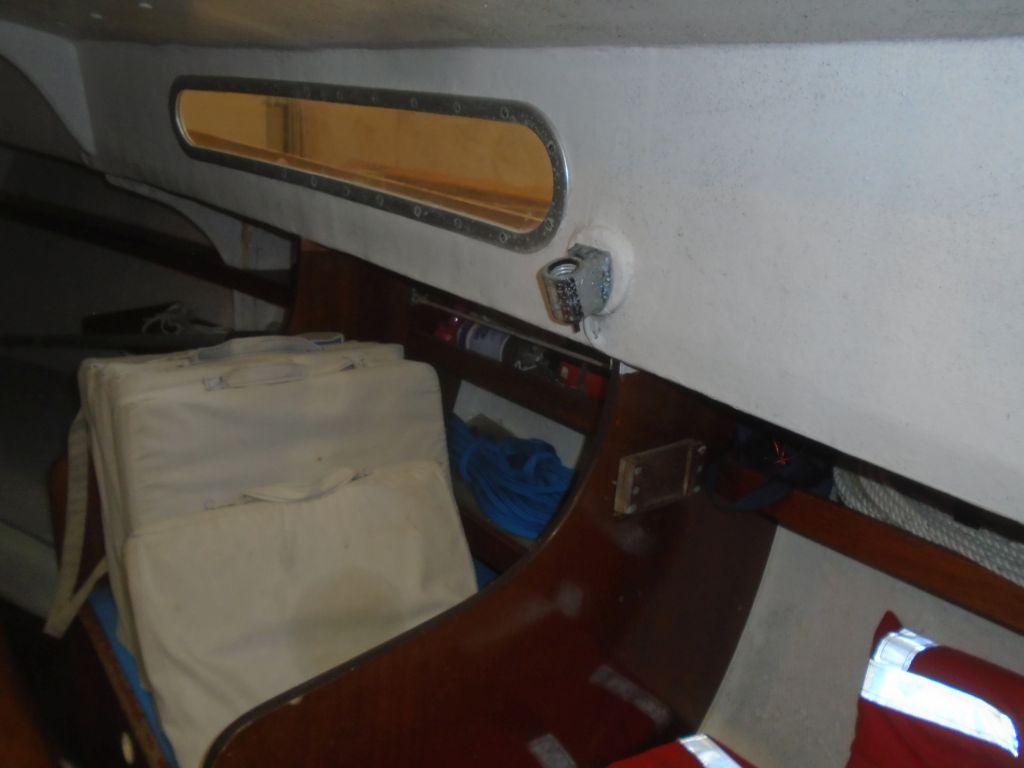
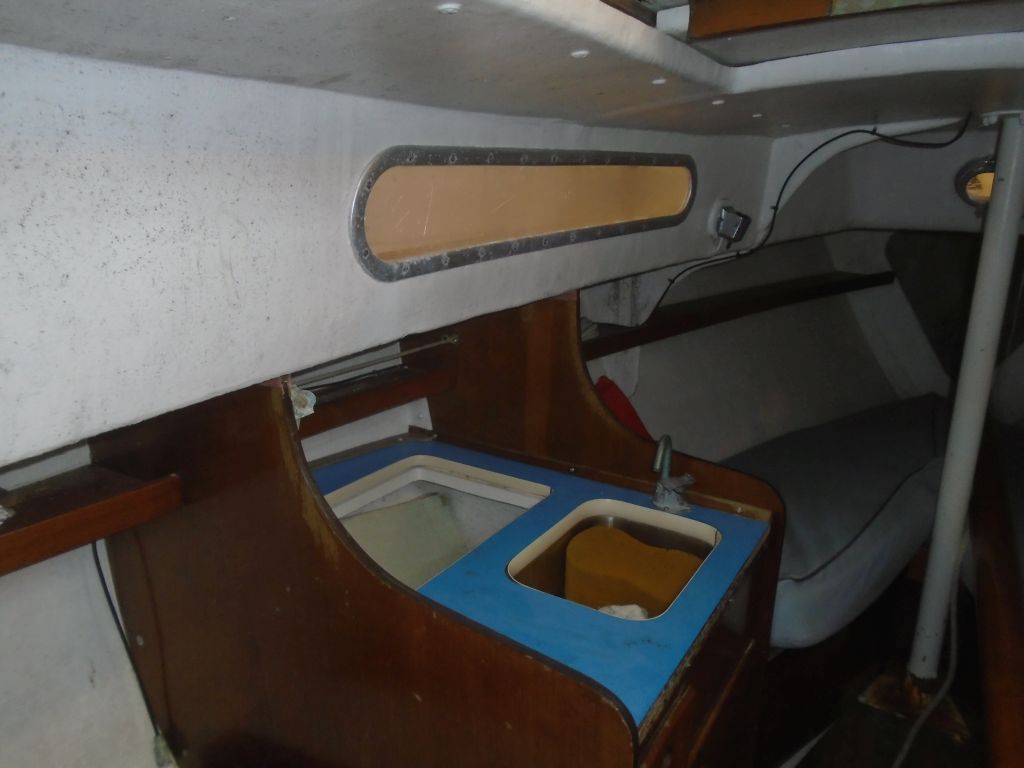
The interior appeared to be in original condition and in need of sprucing up, though at least most of the finishes were sound, if worn, tired, and dirty.  The work plan here included repainting the overhead, hull, and other areas, refinishing much or all of the woodwork, and some additional work in the galley and “head” areas, along with revamping the basic electrical system, adding a GPS, and other maintenance tasks.

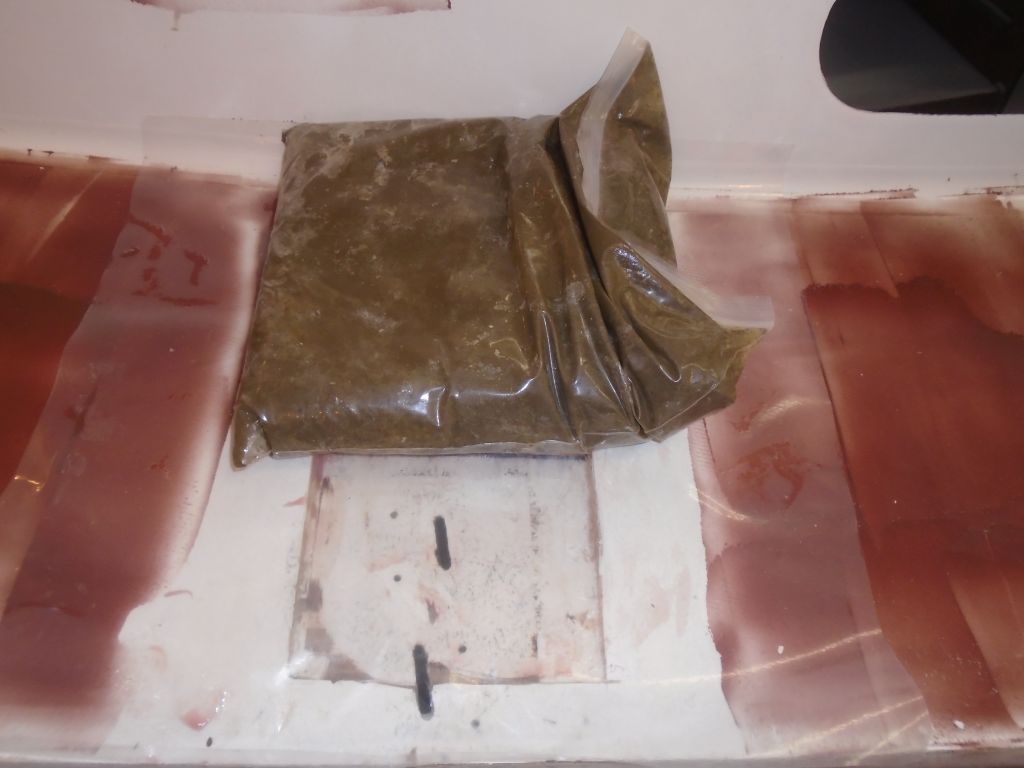
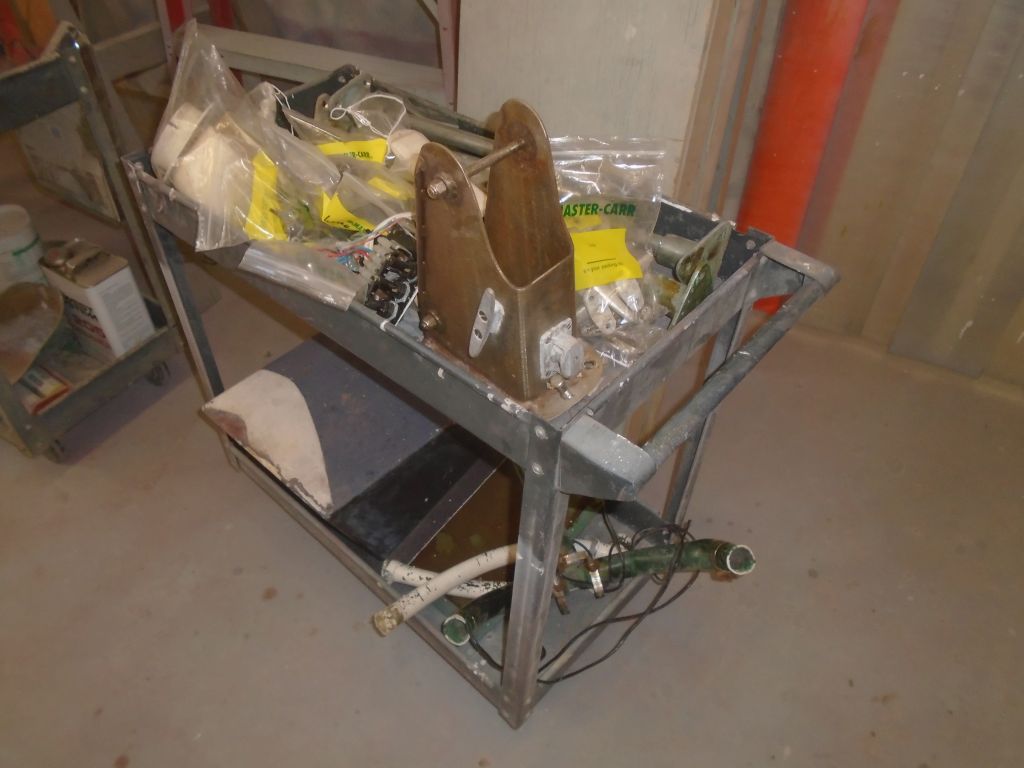
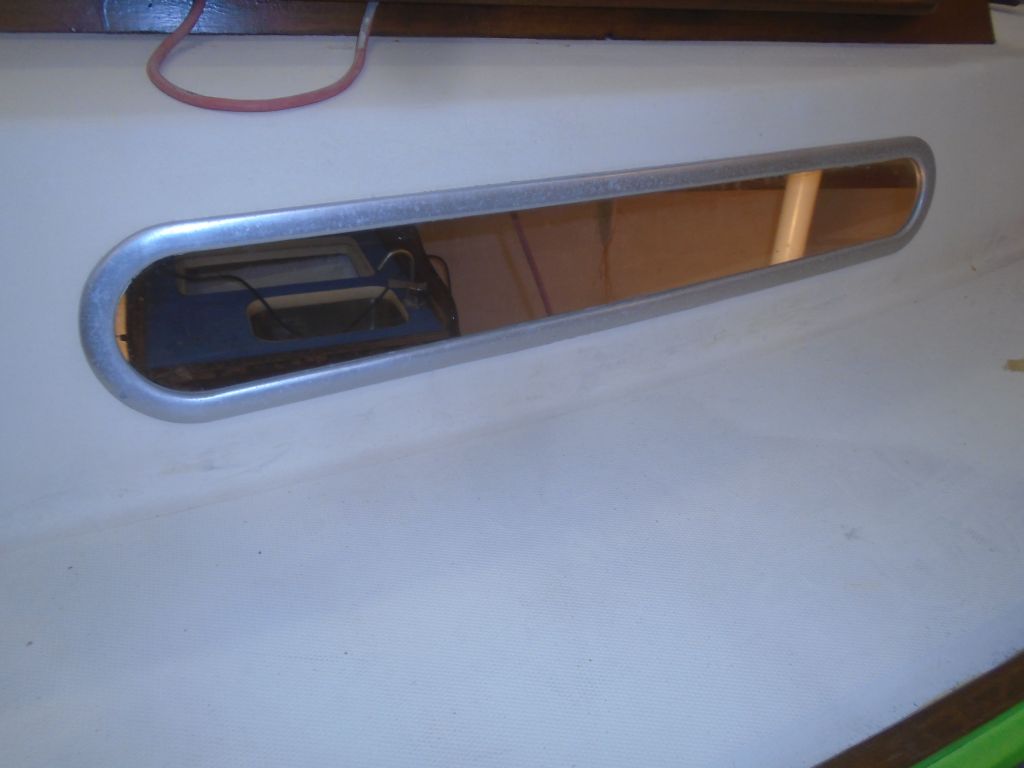
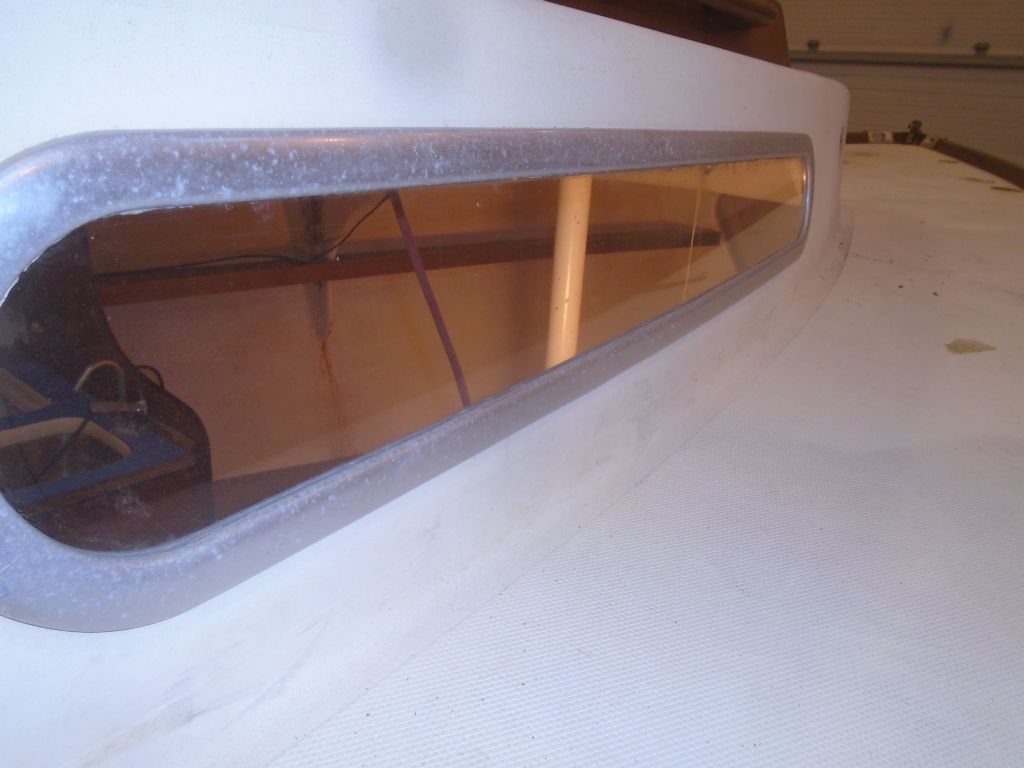
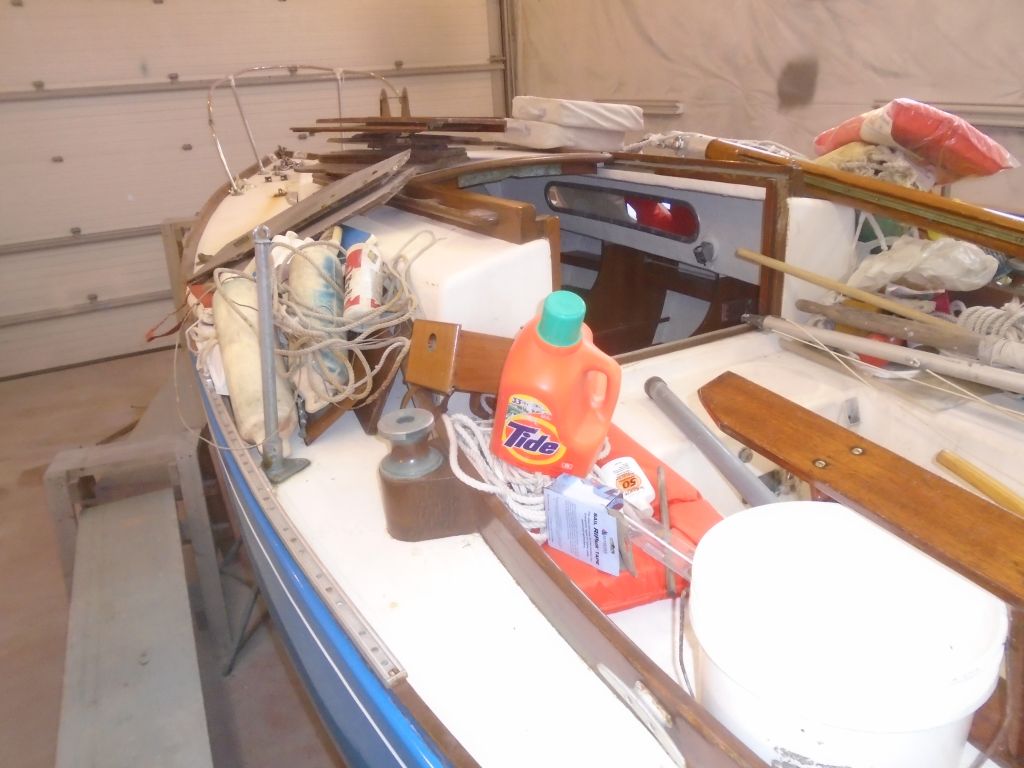
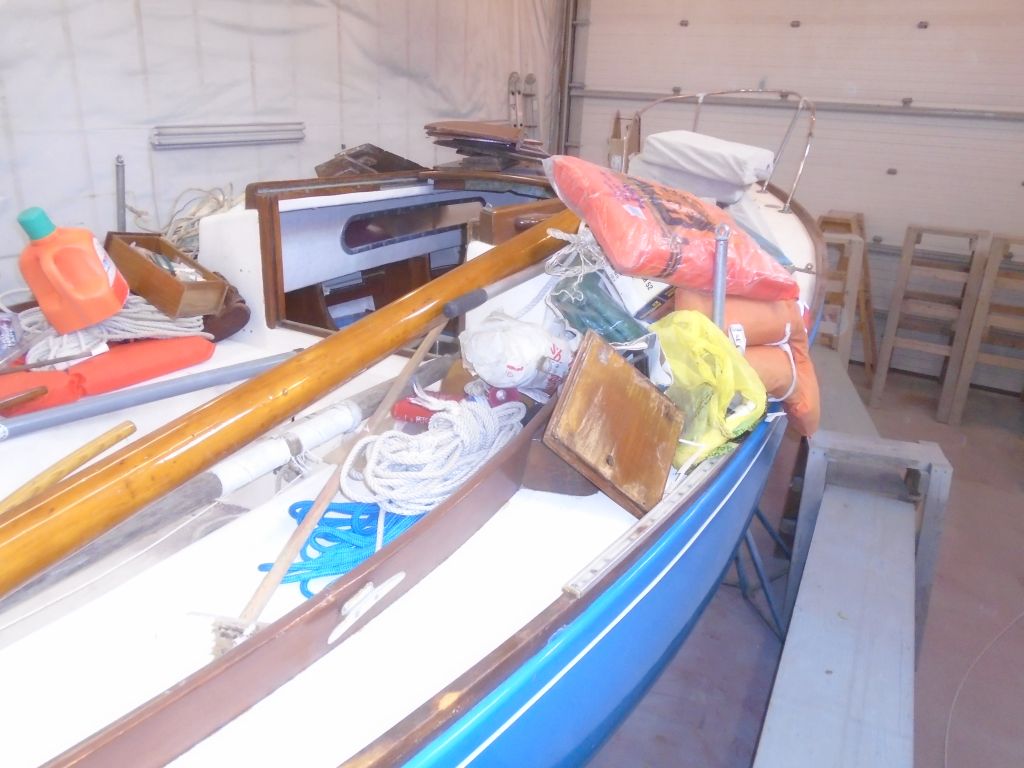
I removed all the contents of the cabin, storing it away for safekeeping for the duration of the project and, where needed, setting aside removable bits of woodwork, doors, cabin sole, etc. for later attention.

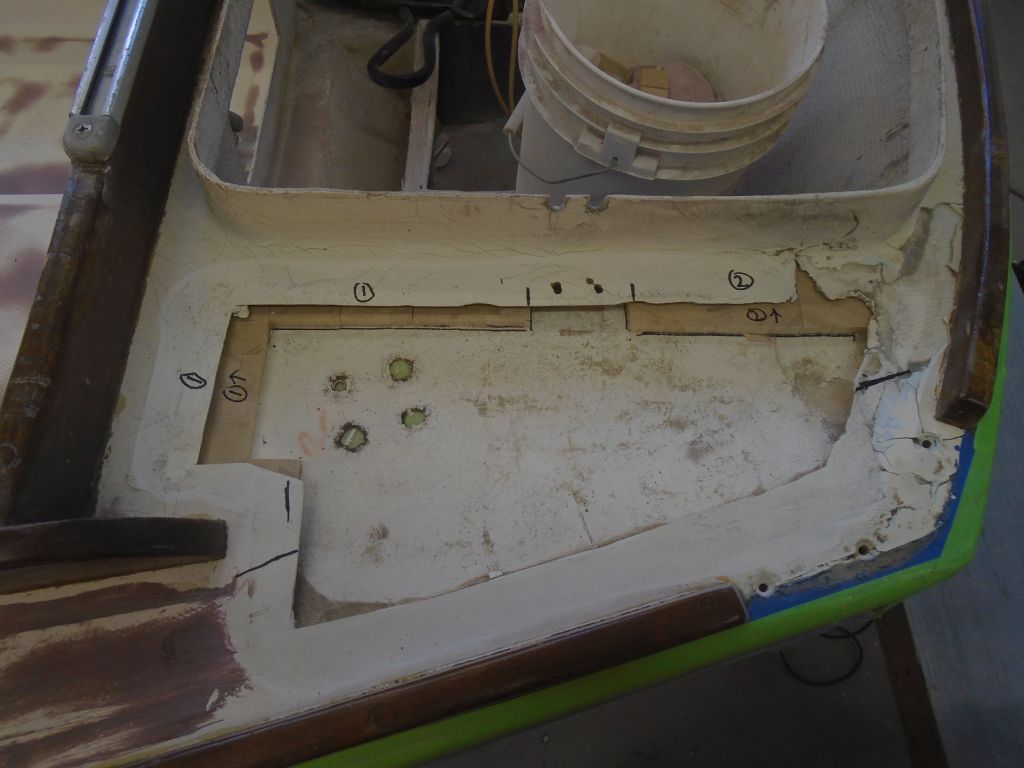
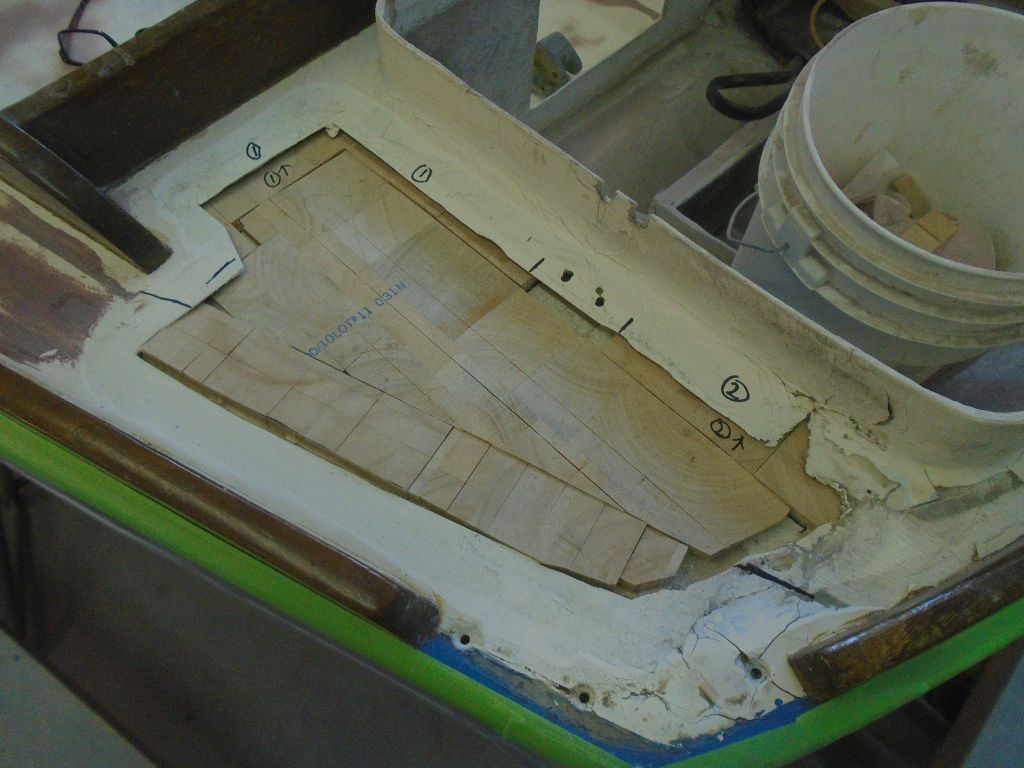
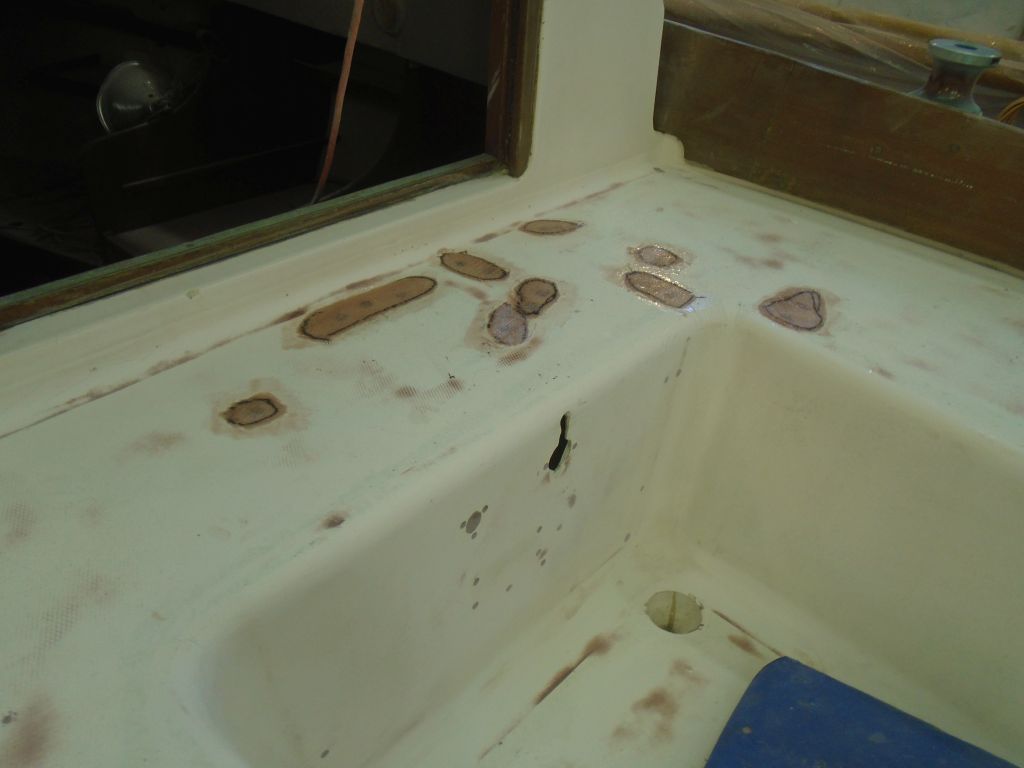
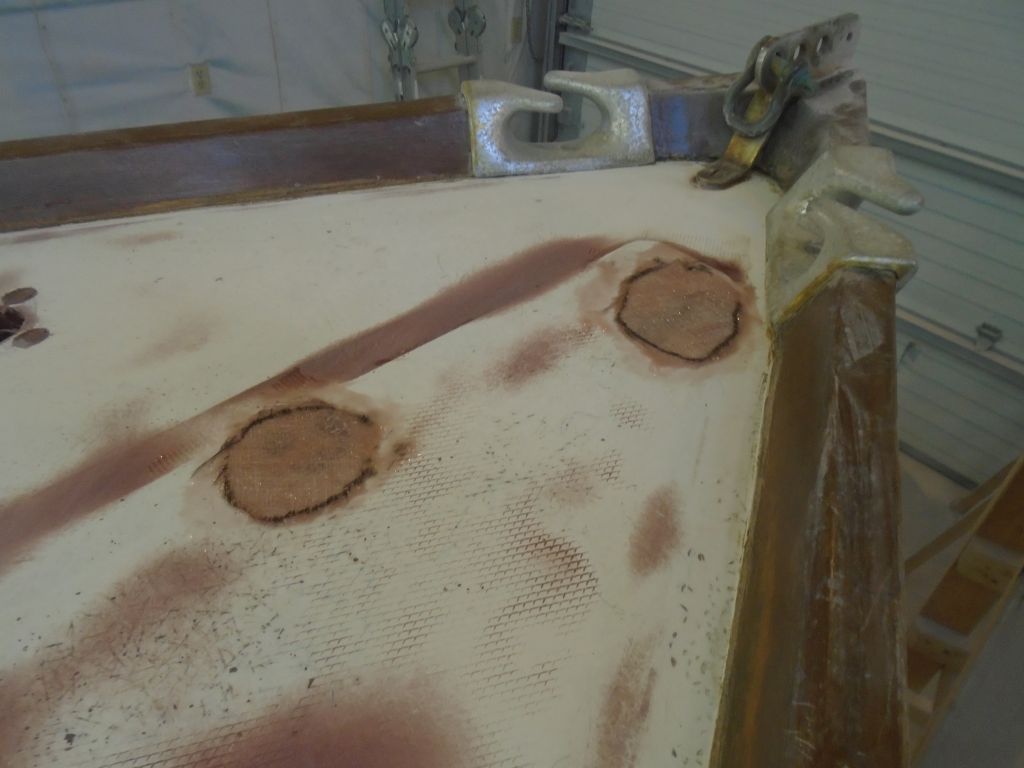
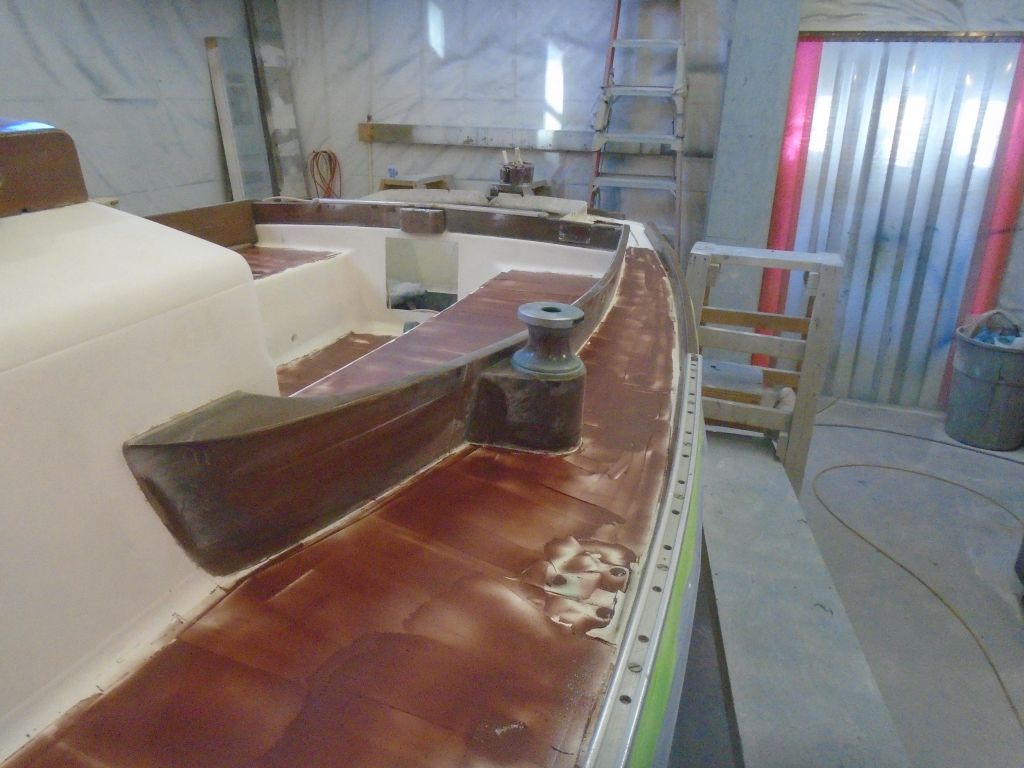
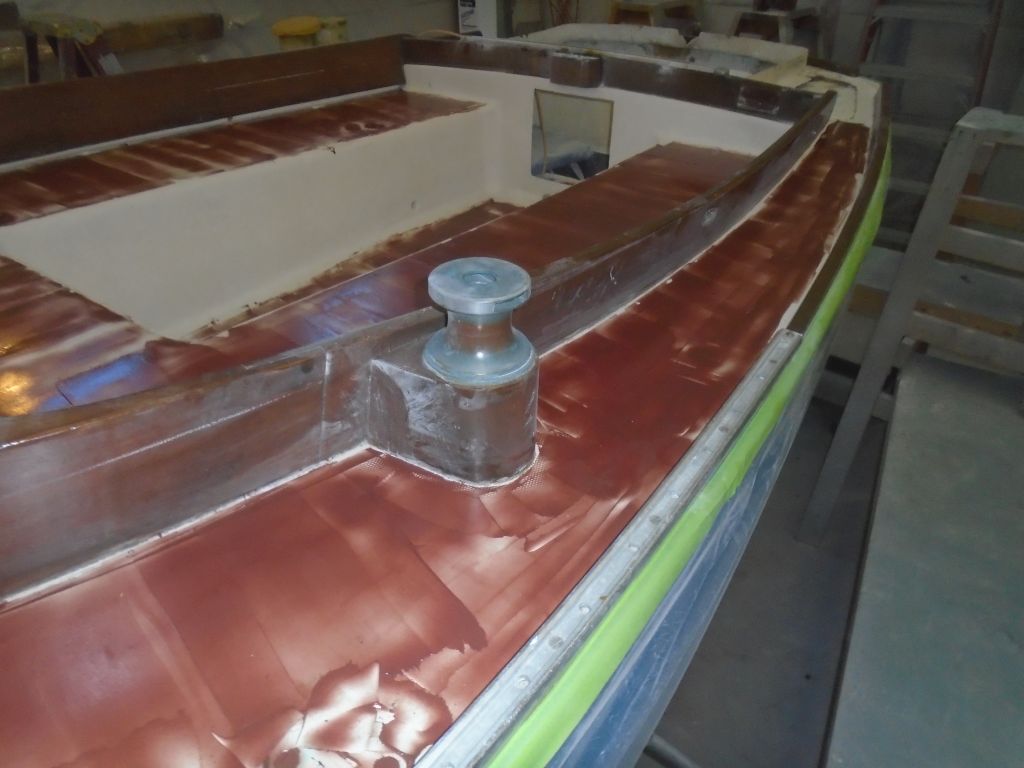
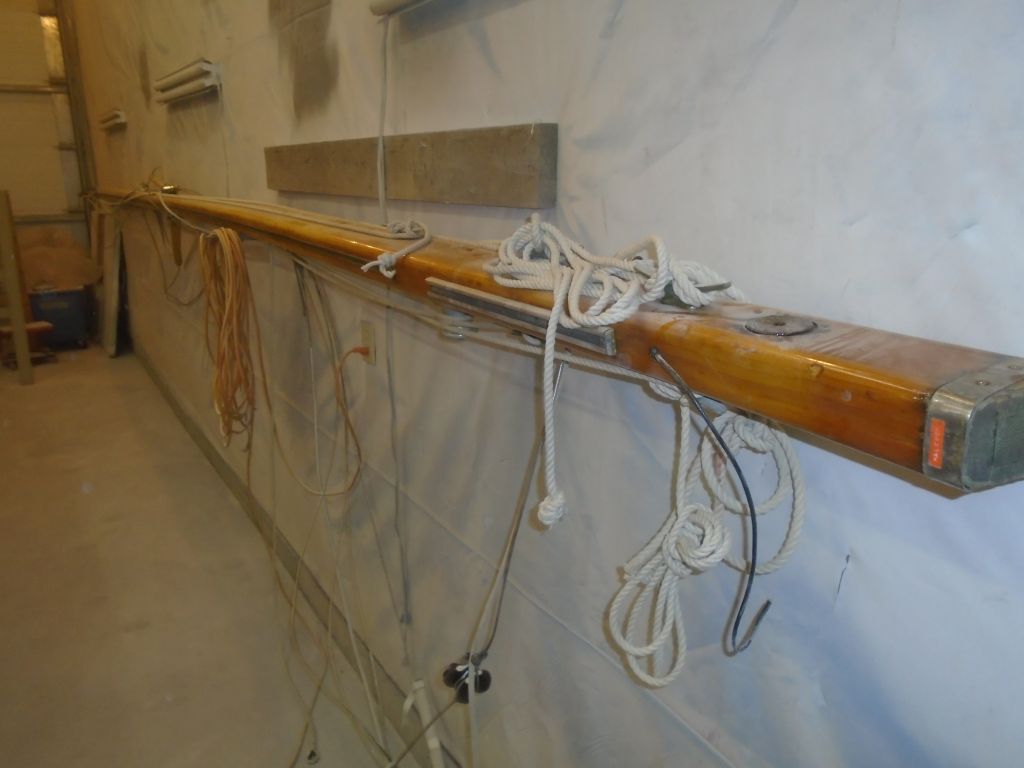
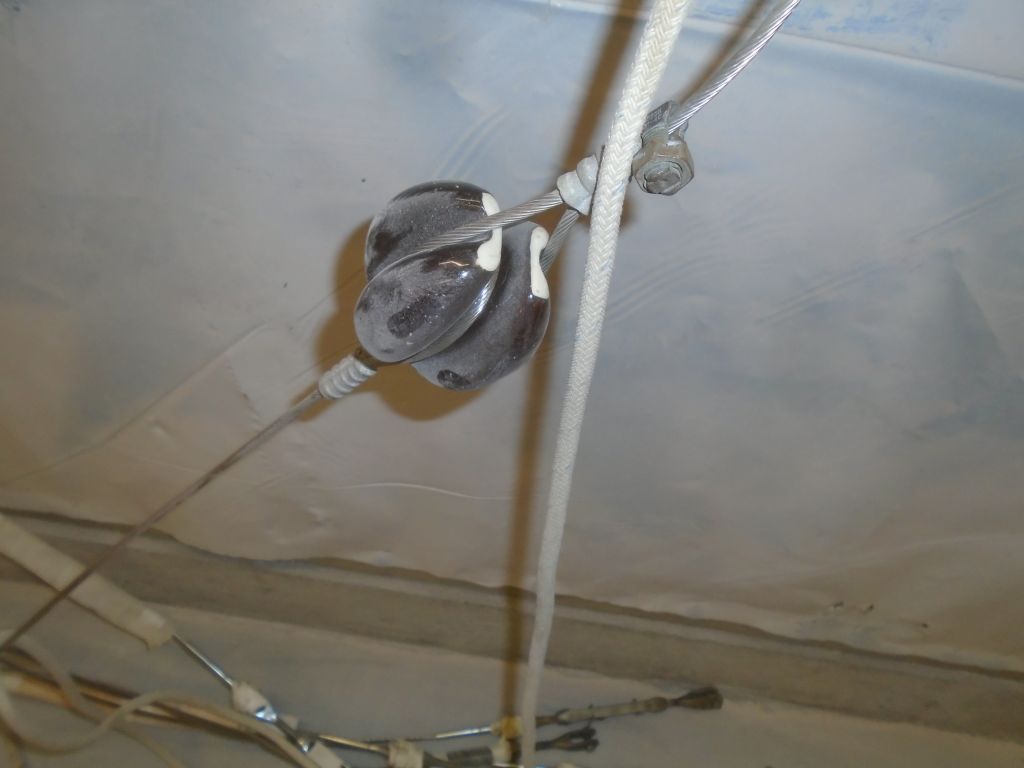
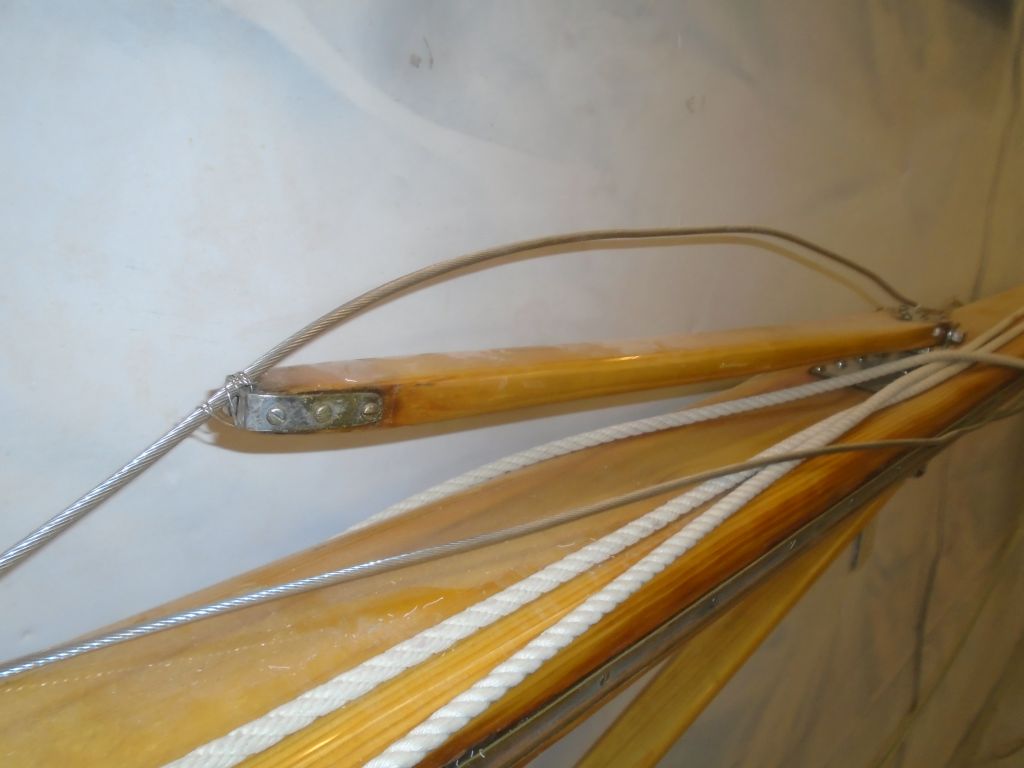
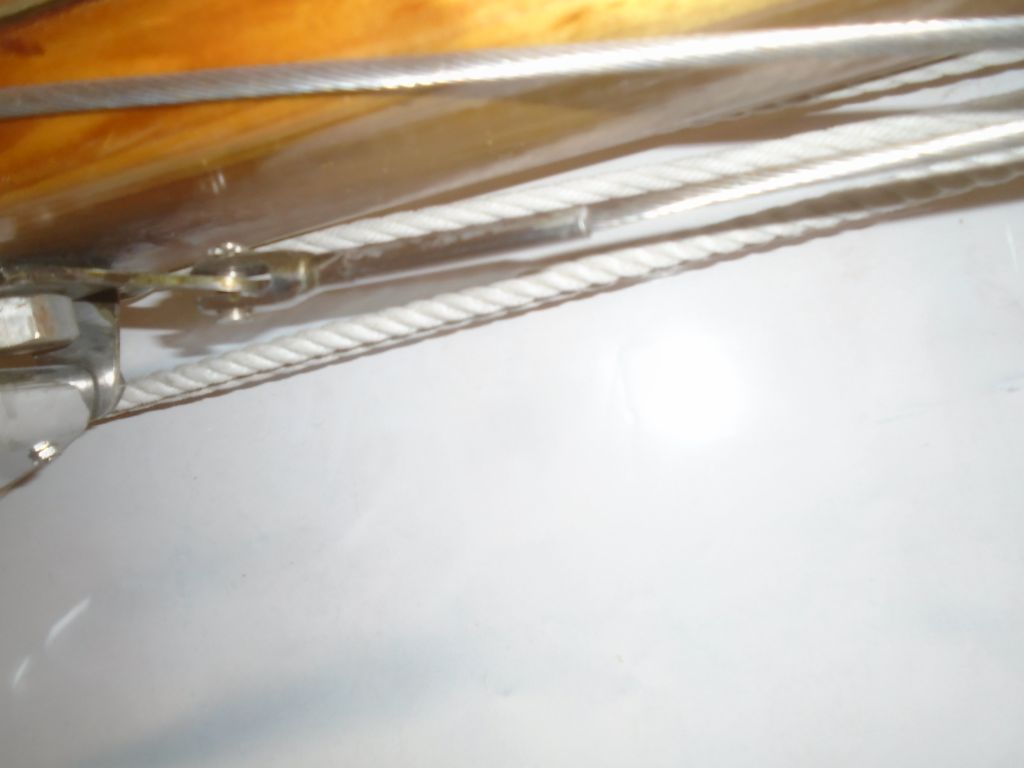
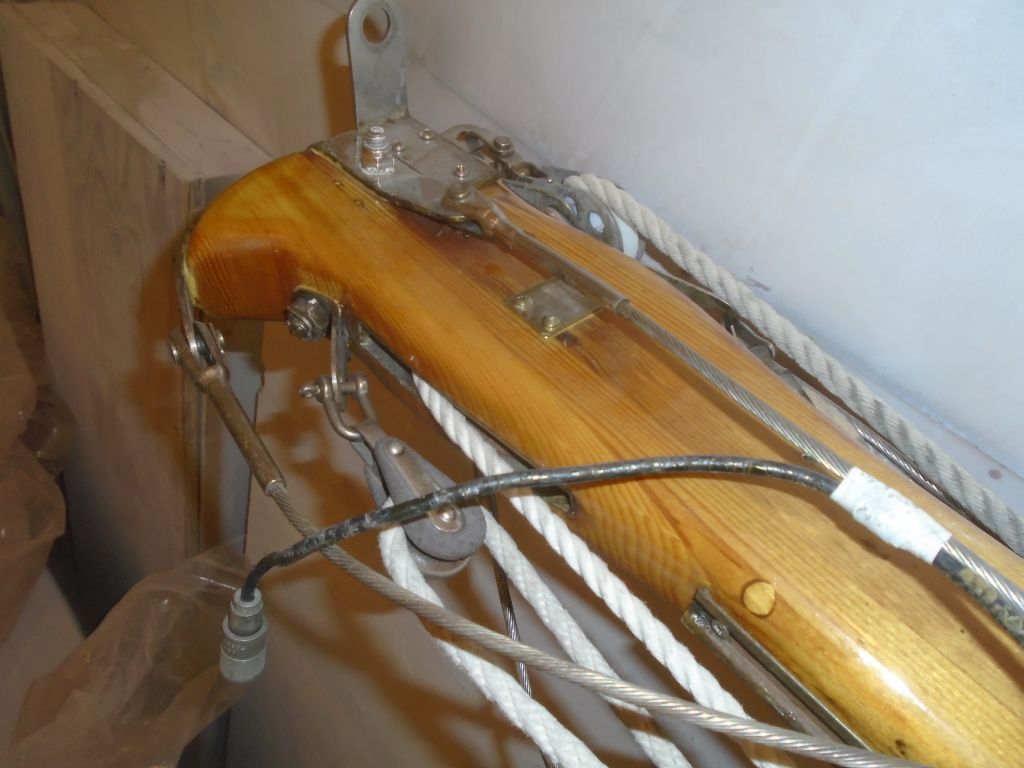
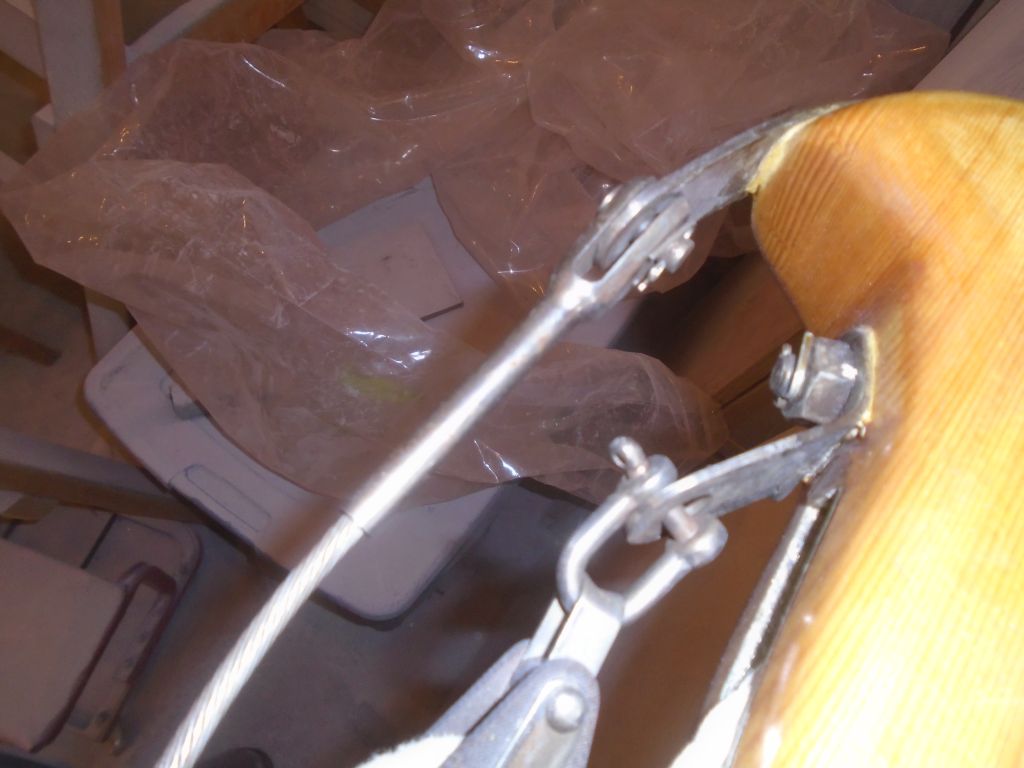
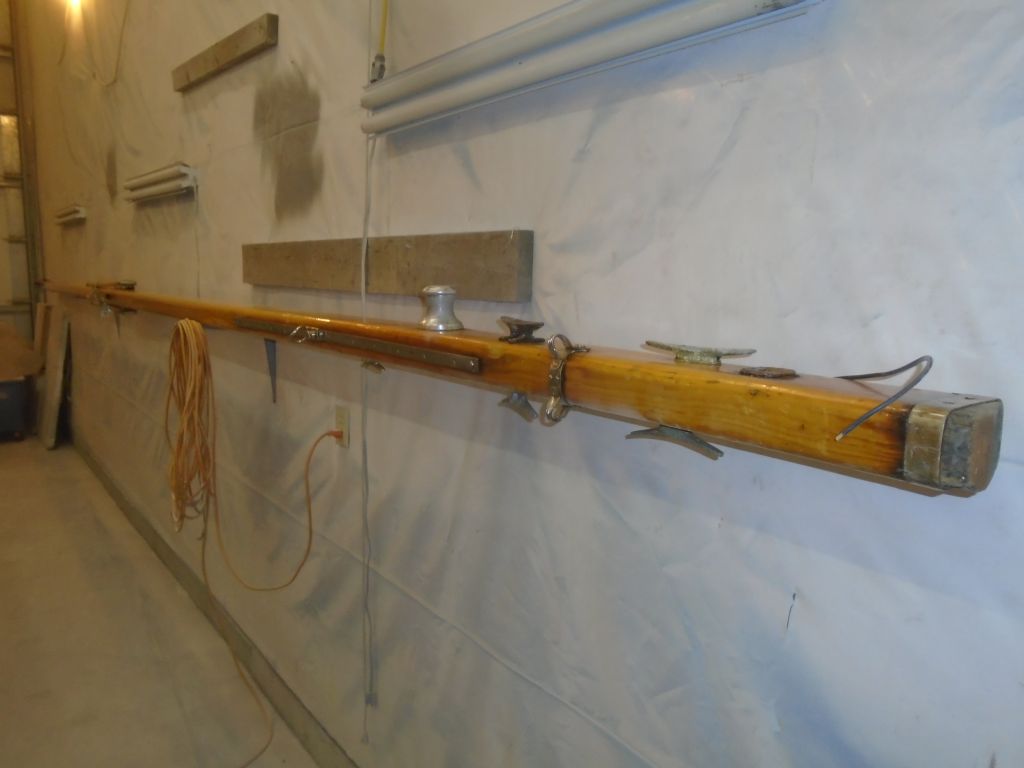
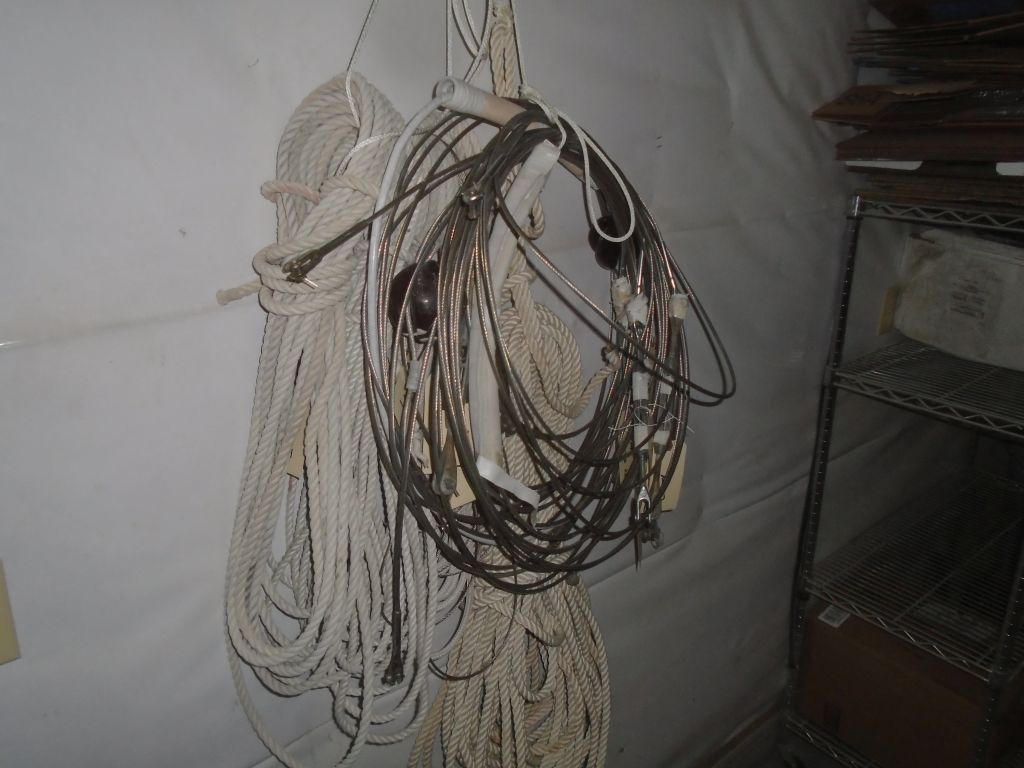
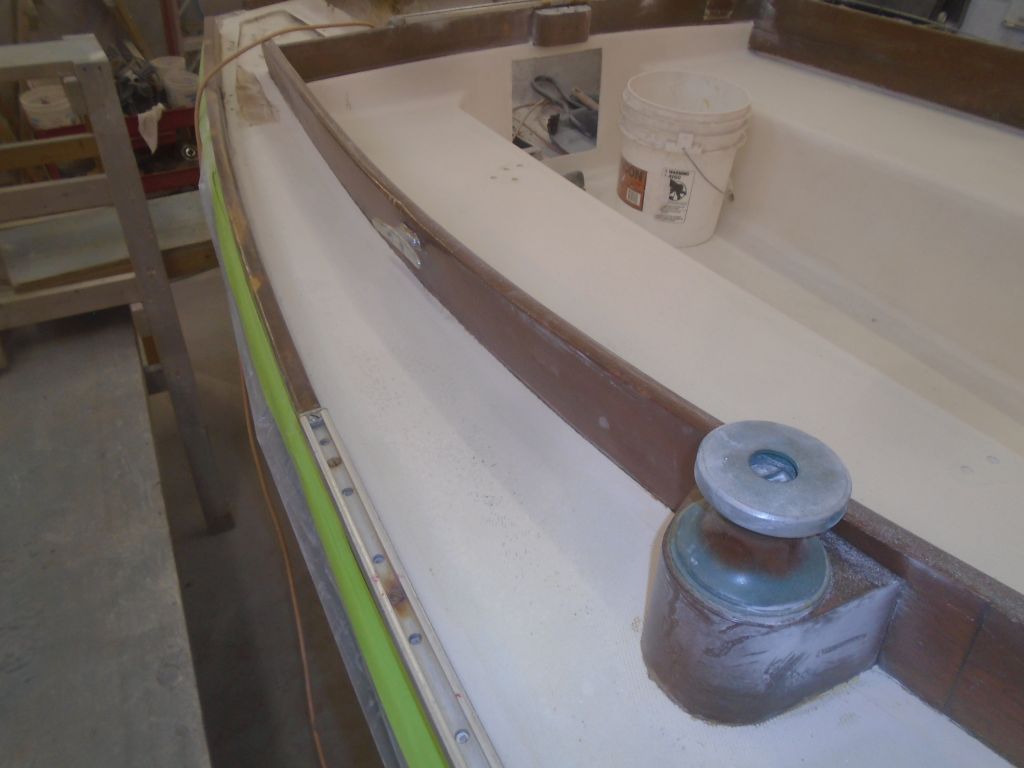
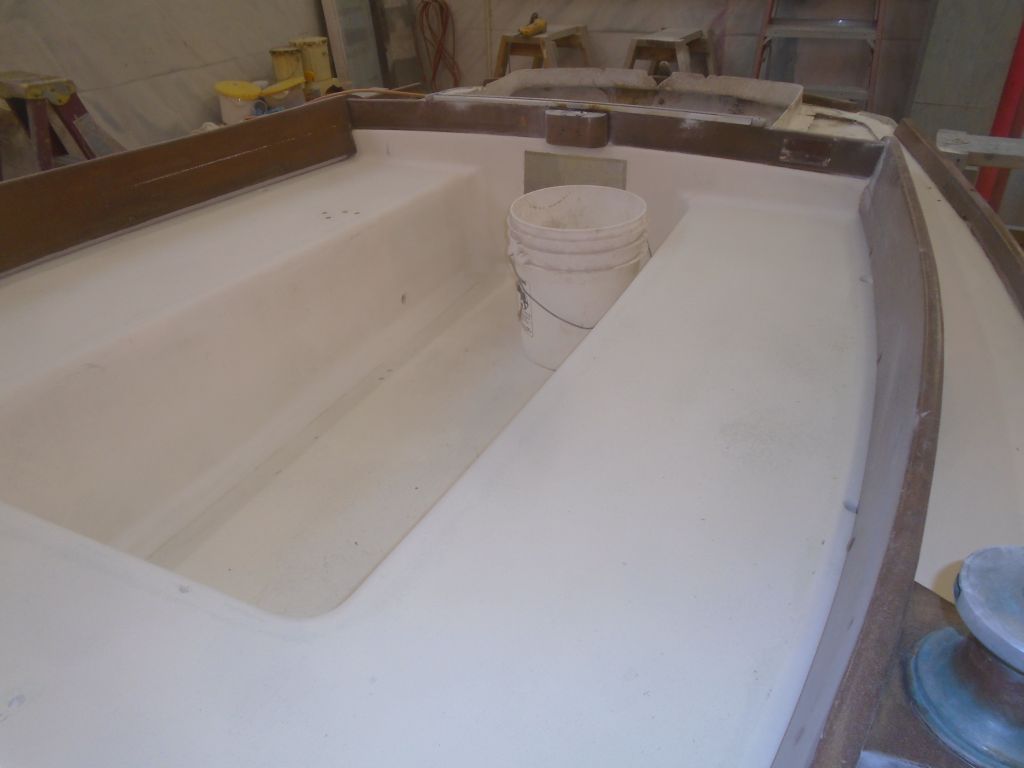
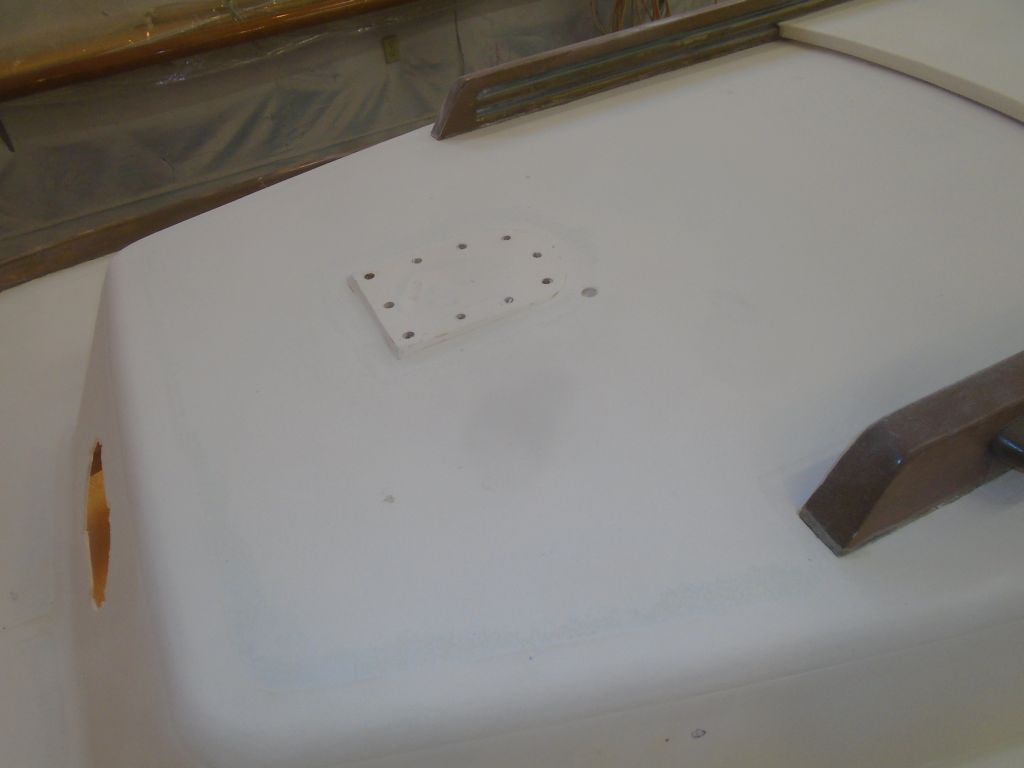
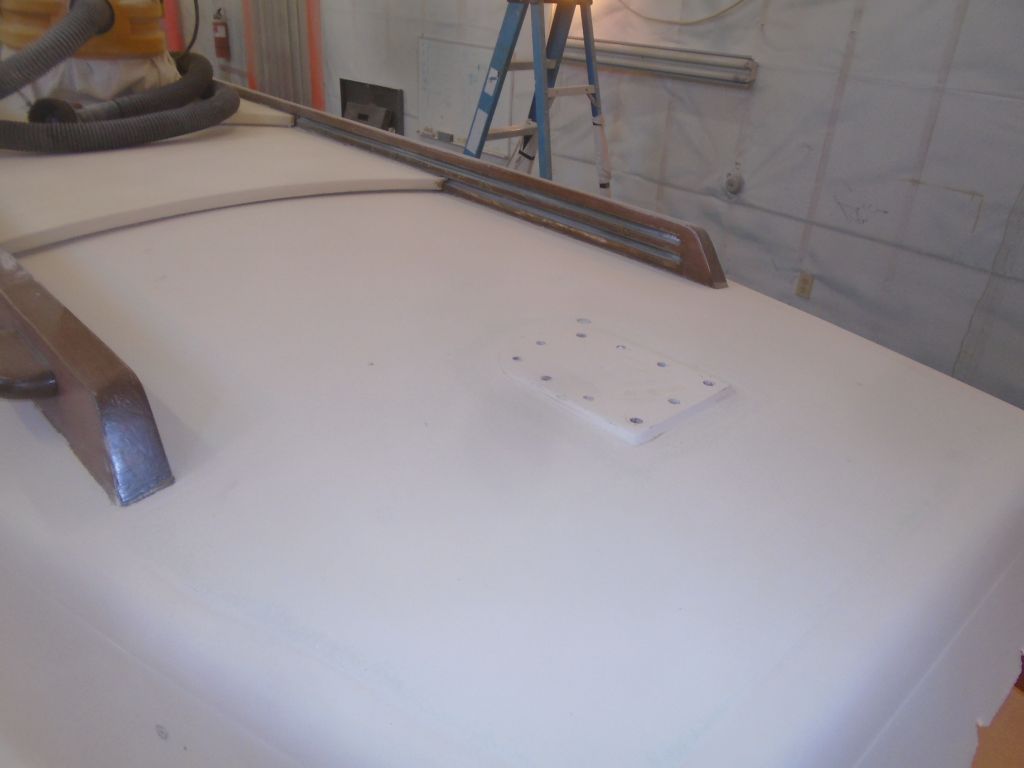
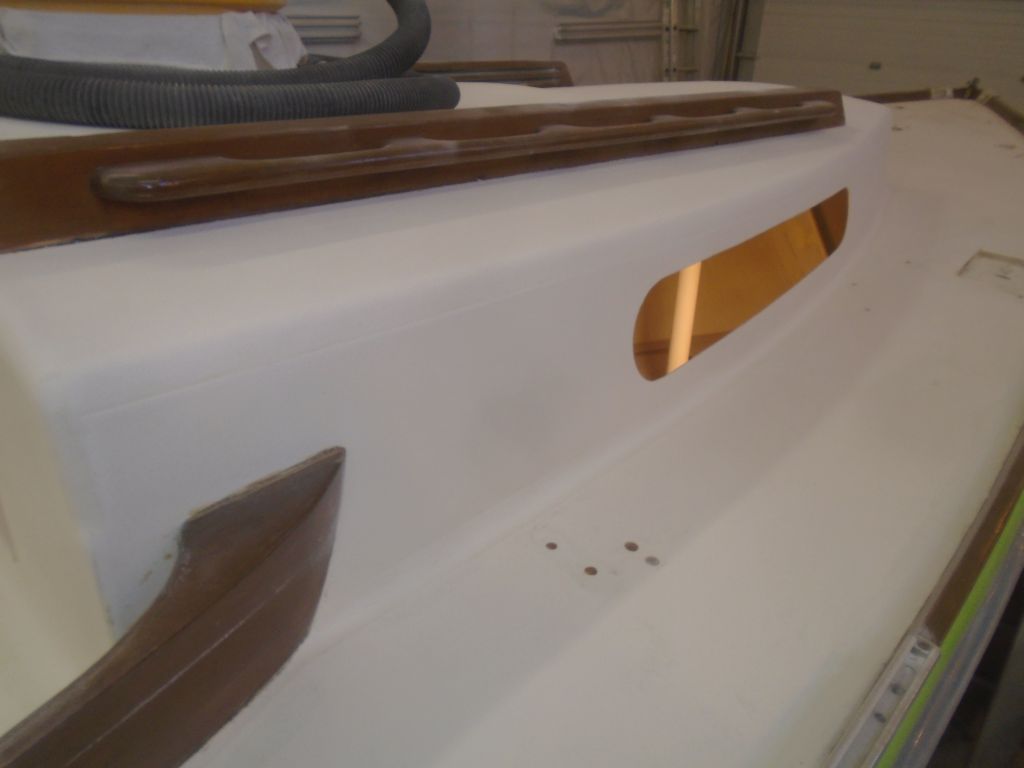
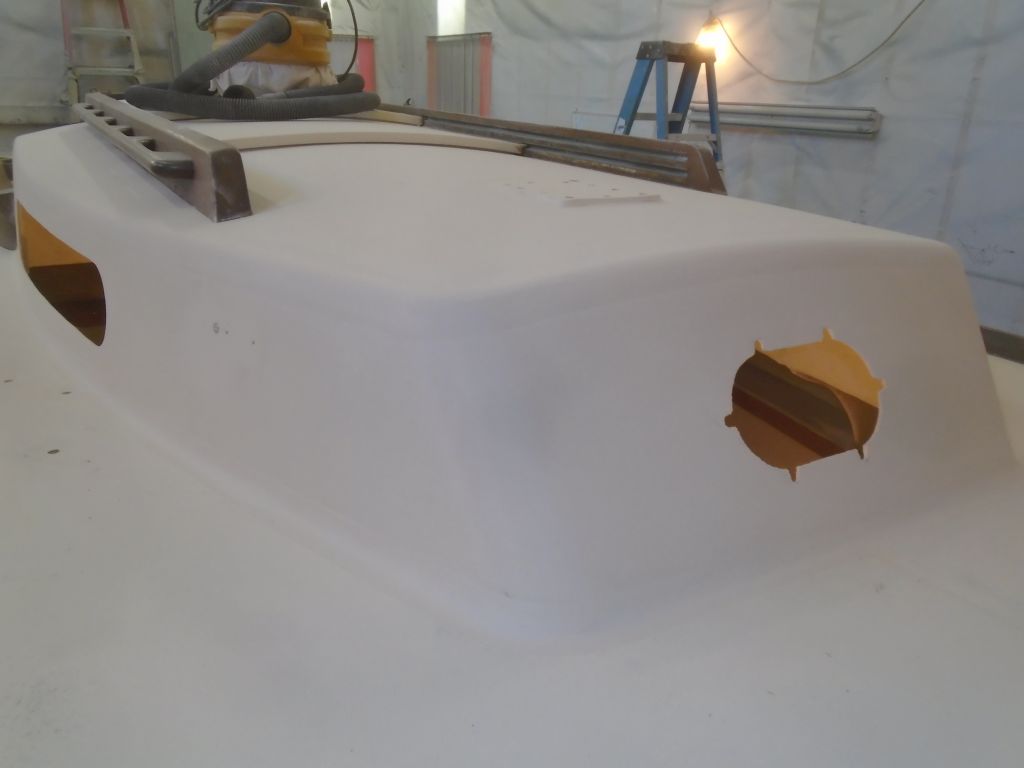
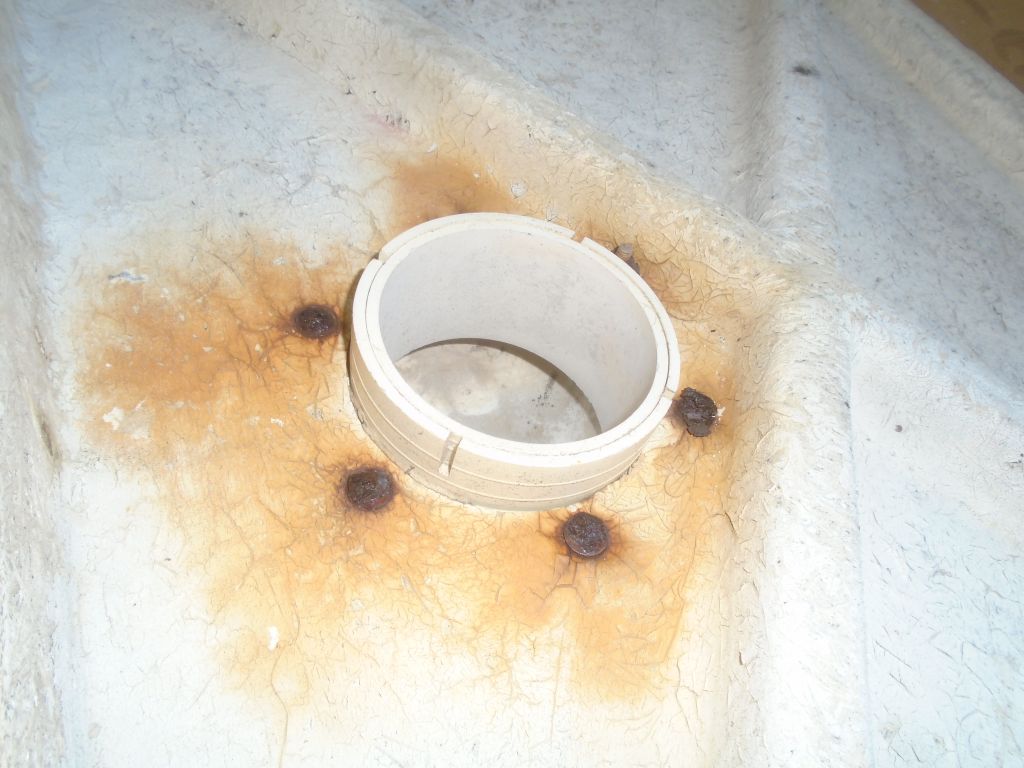
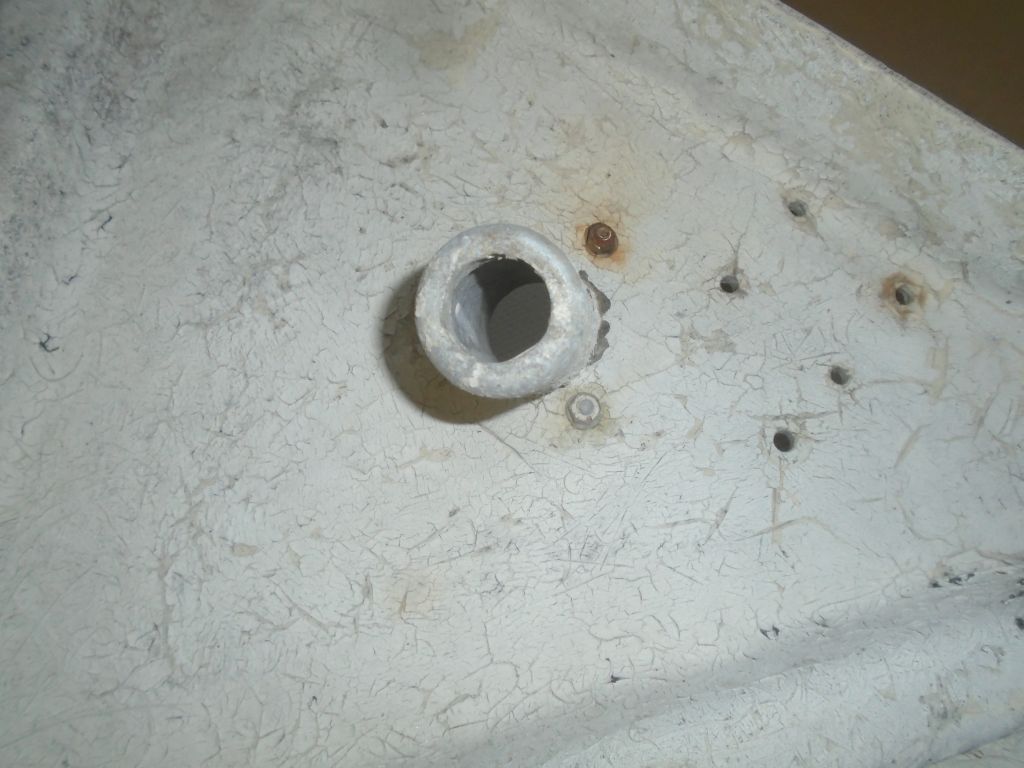
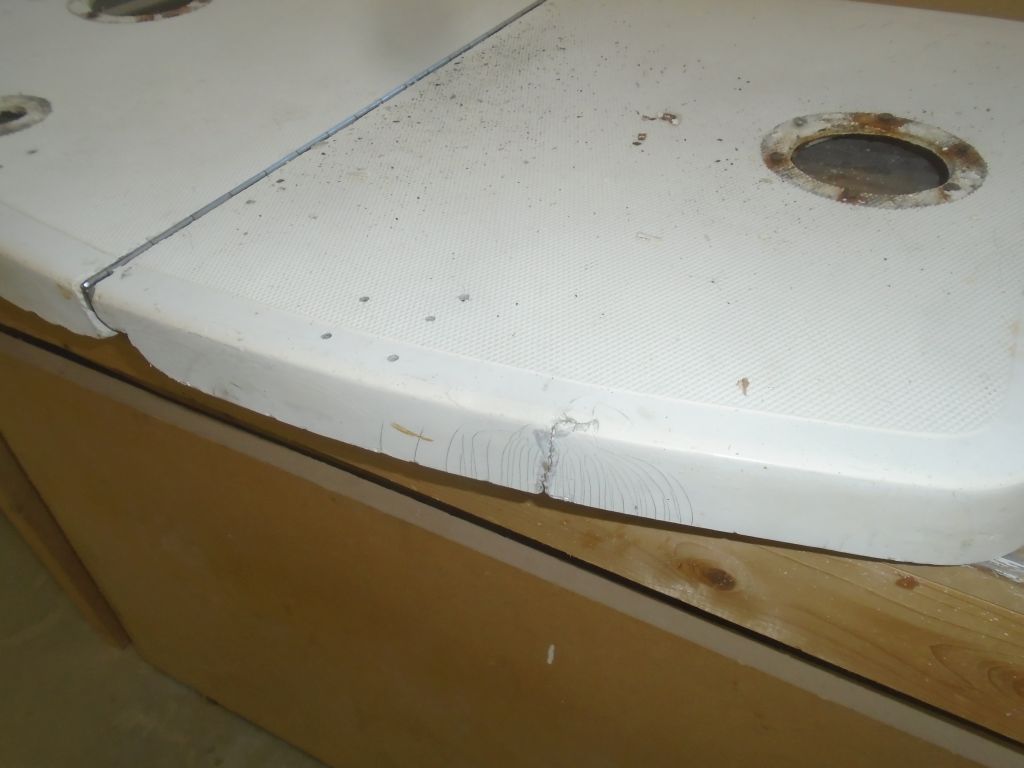
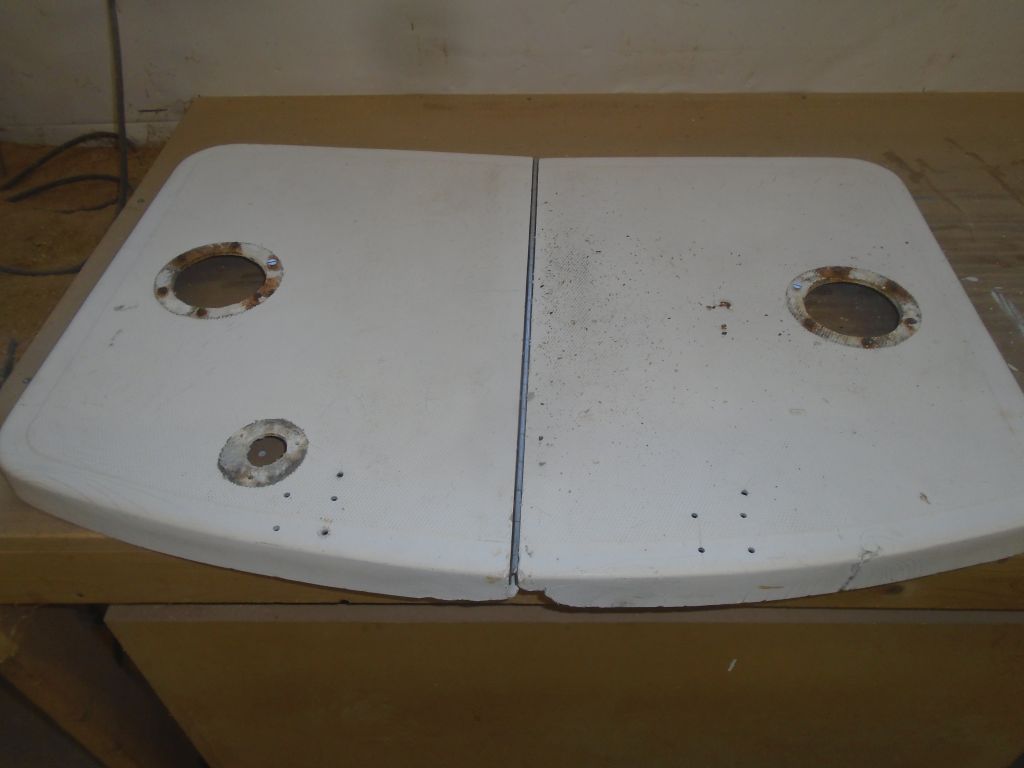
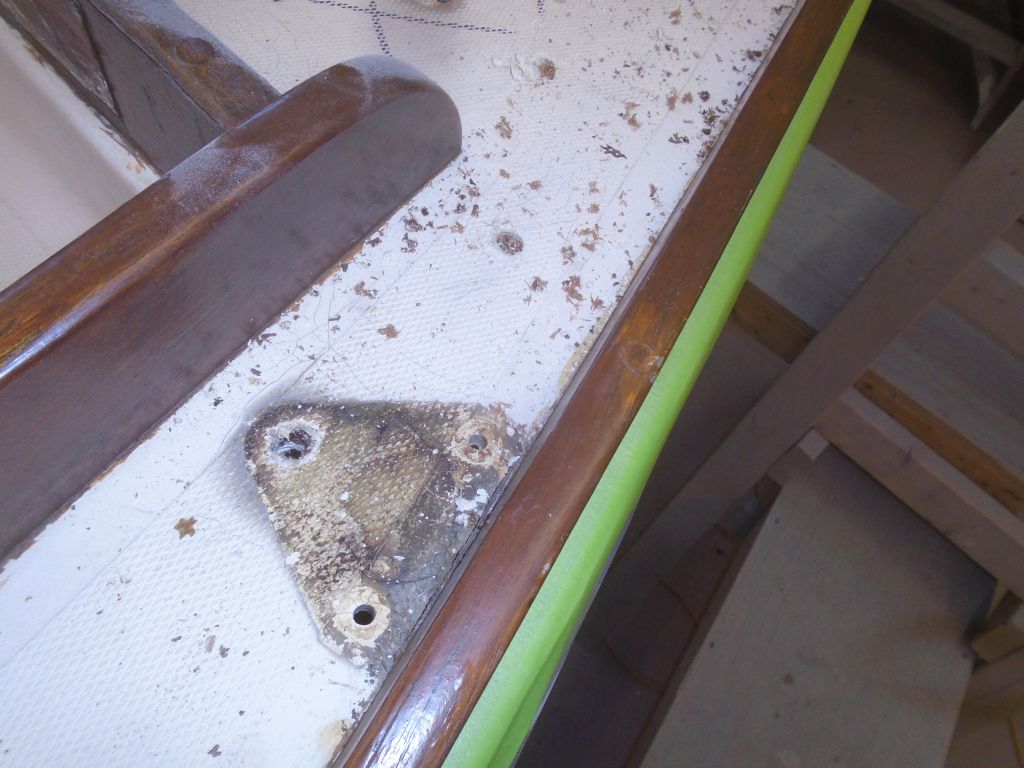
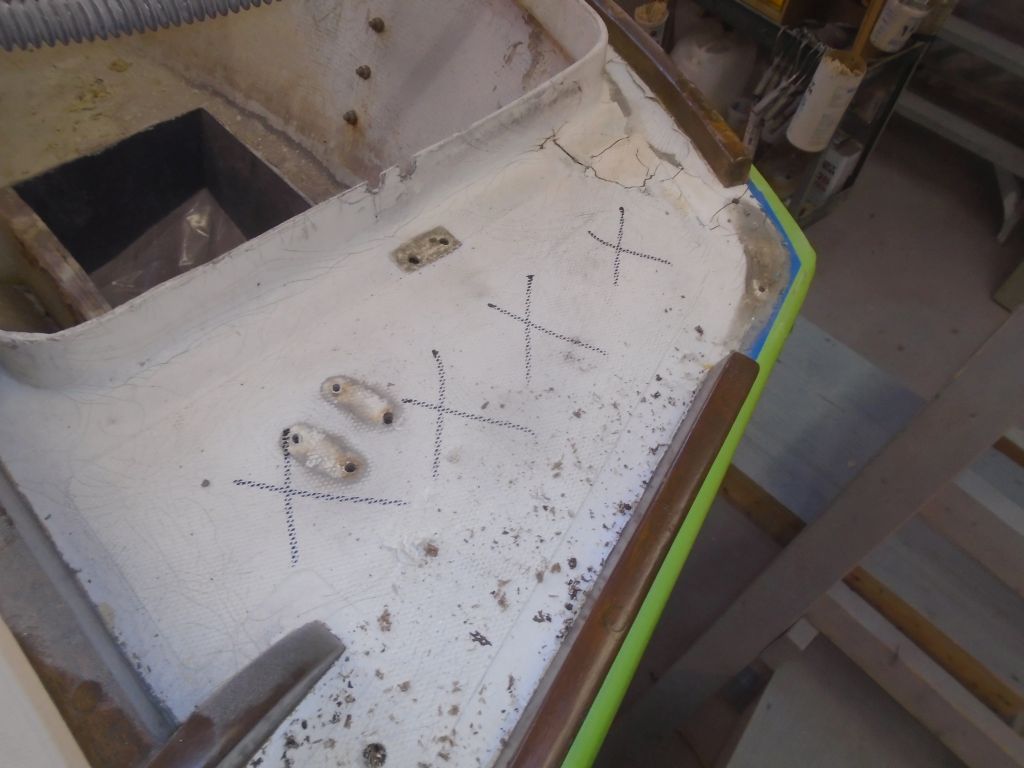
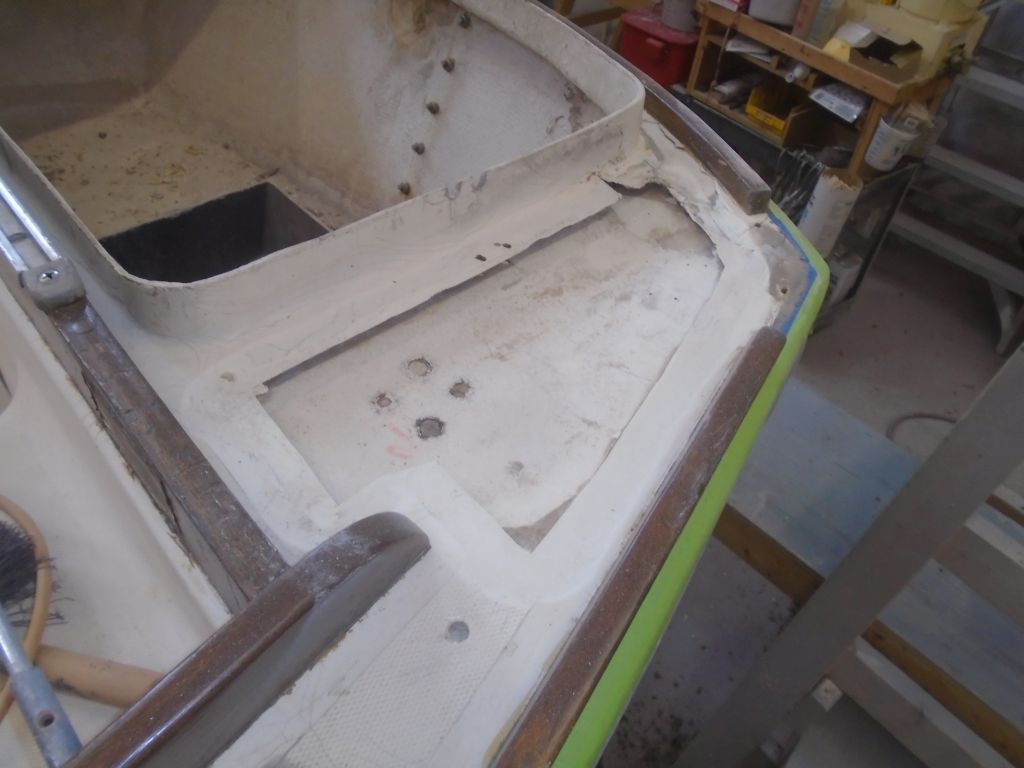
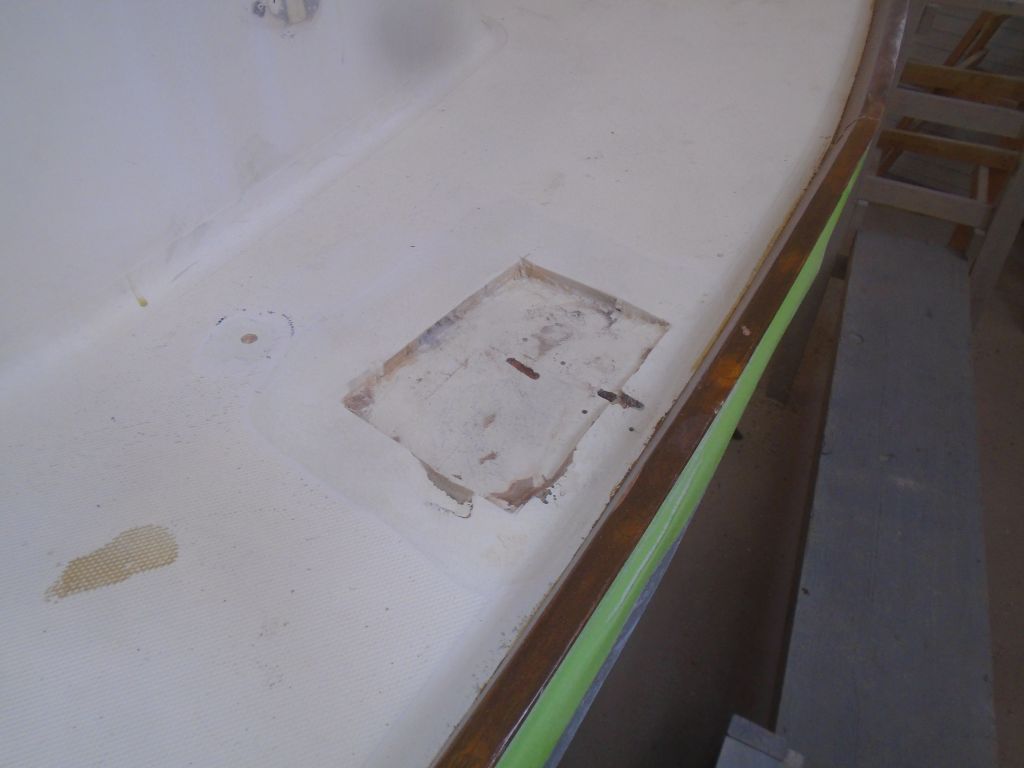
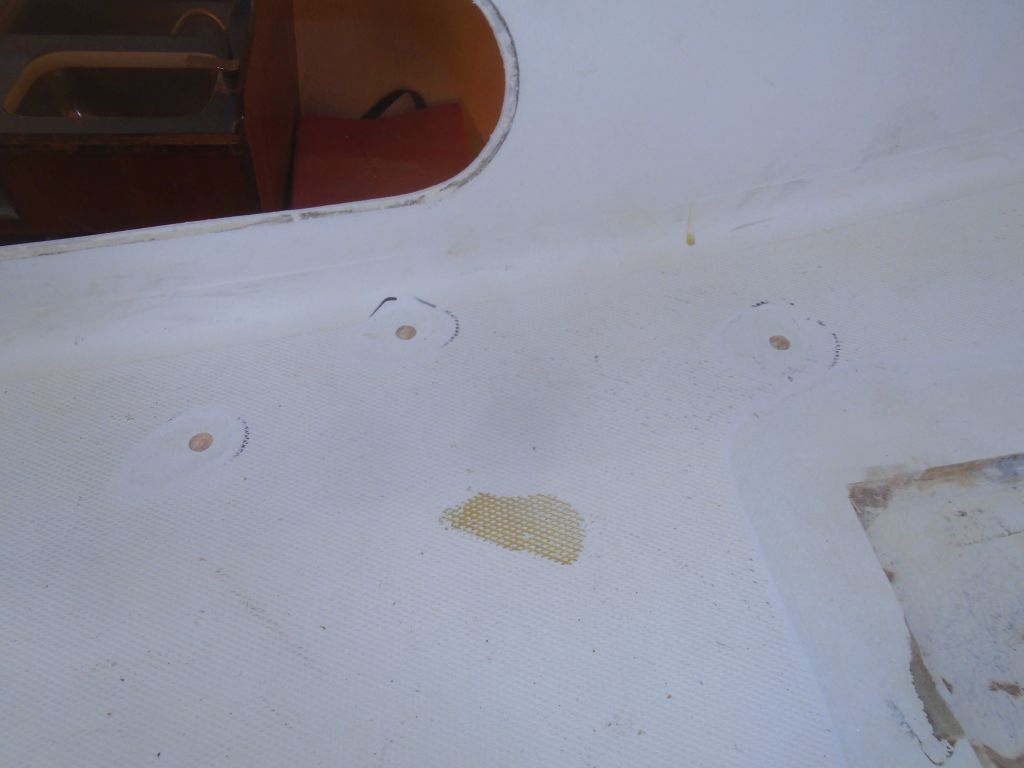
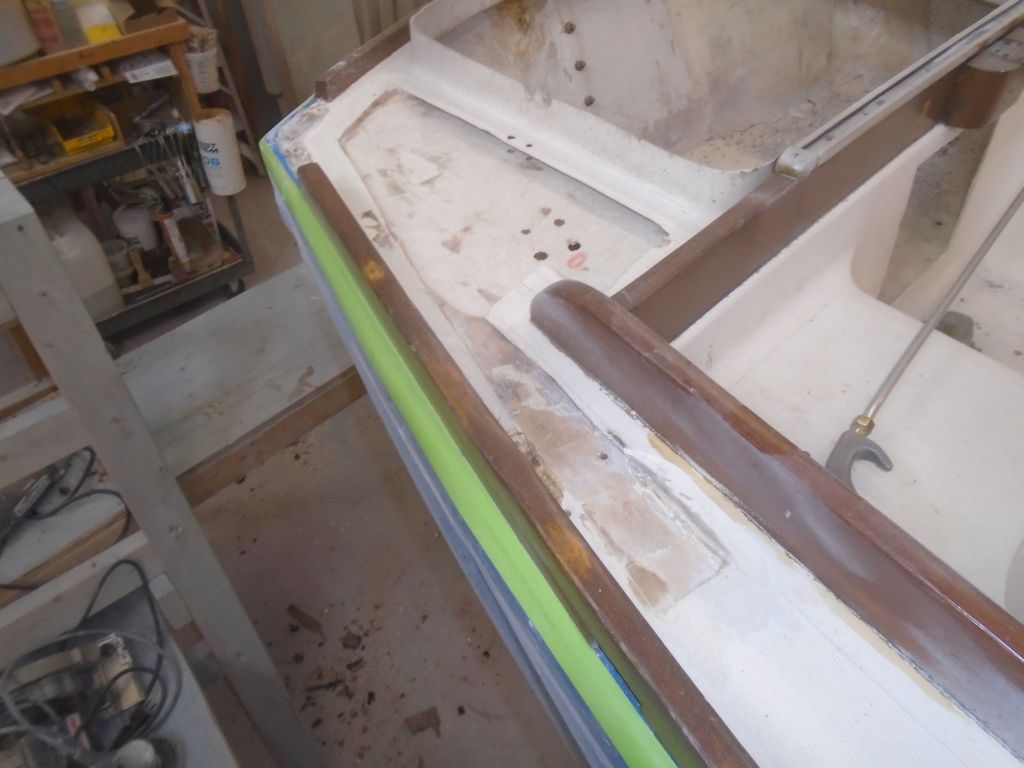
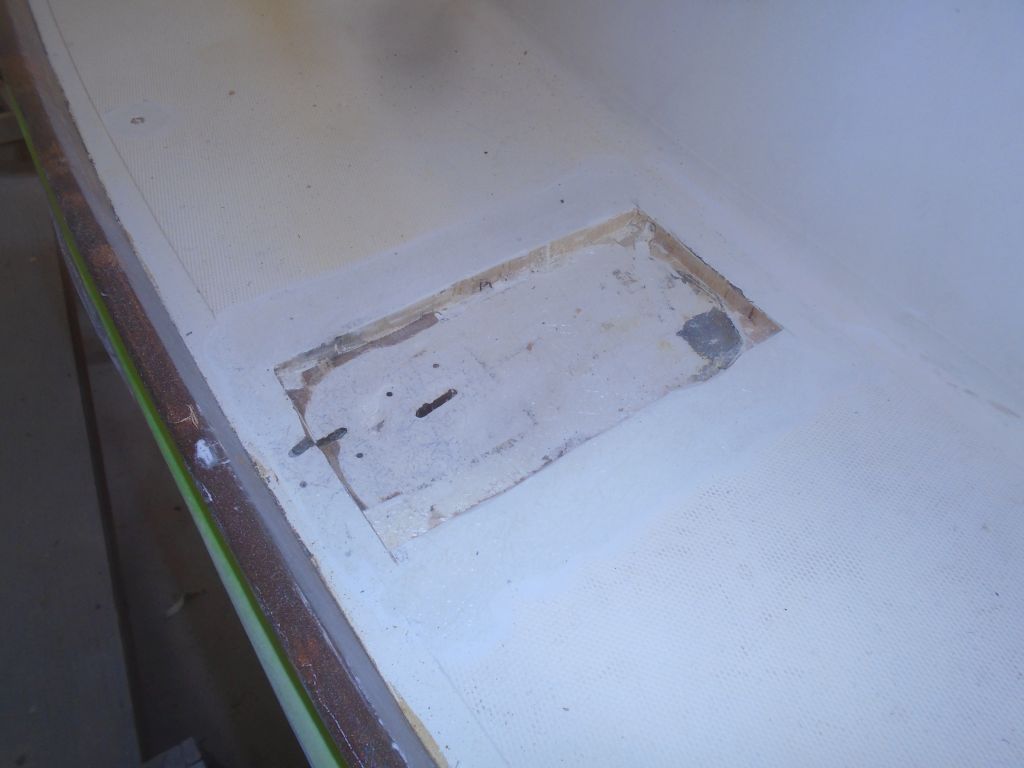
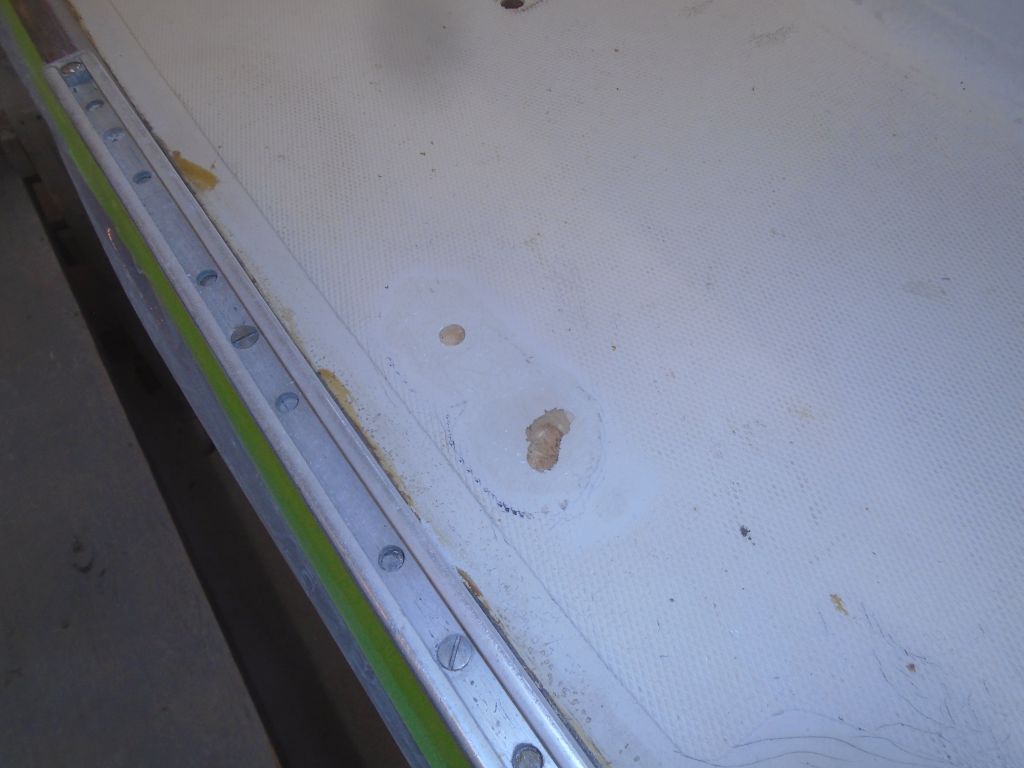
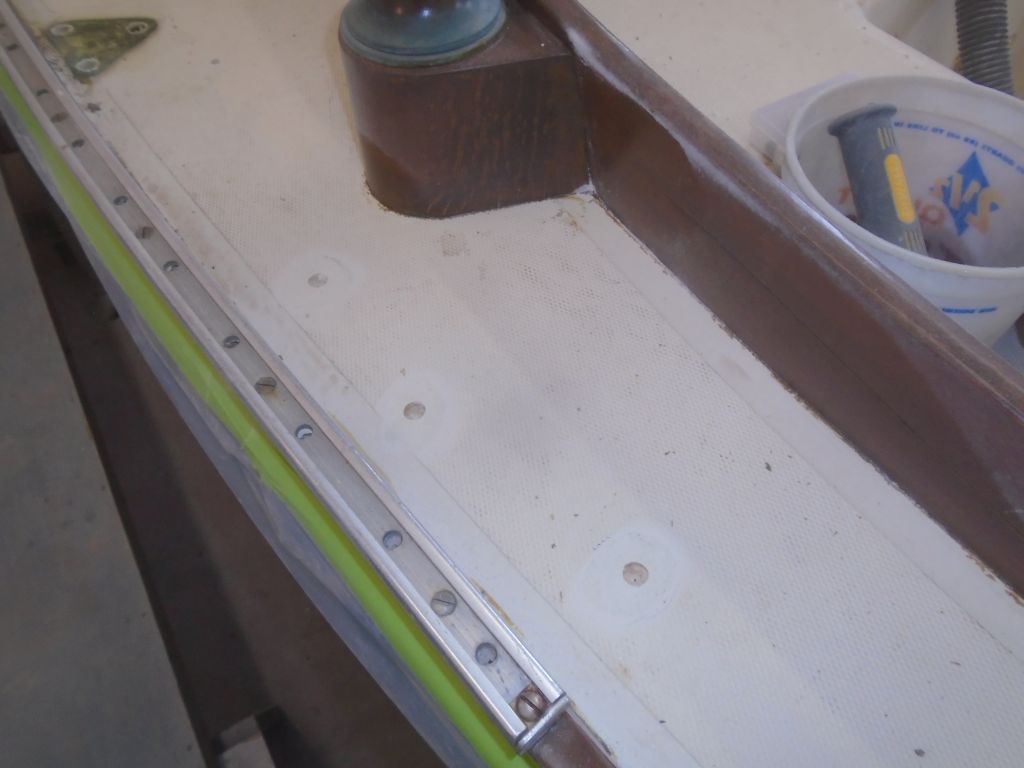
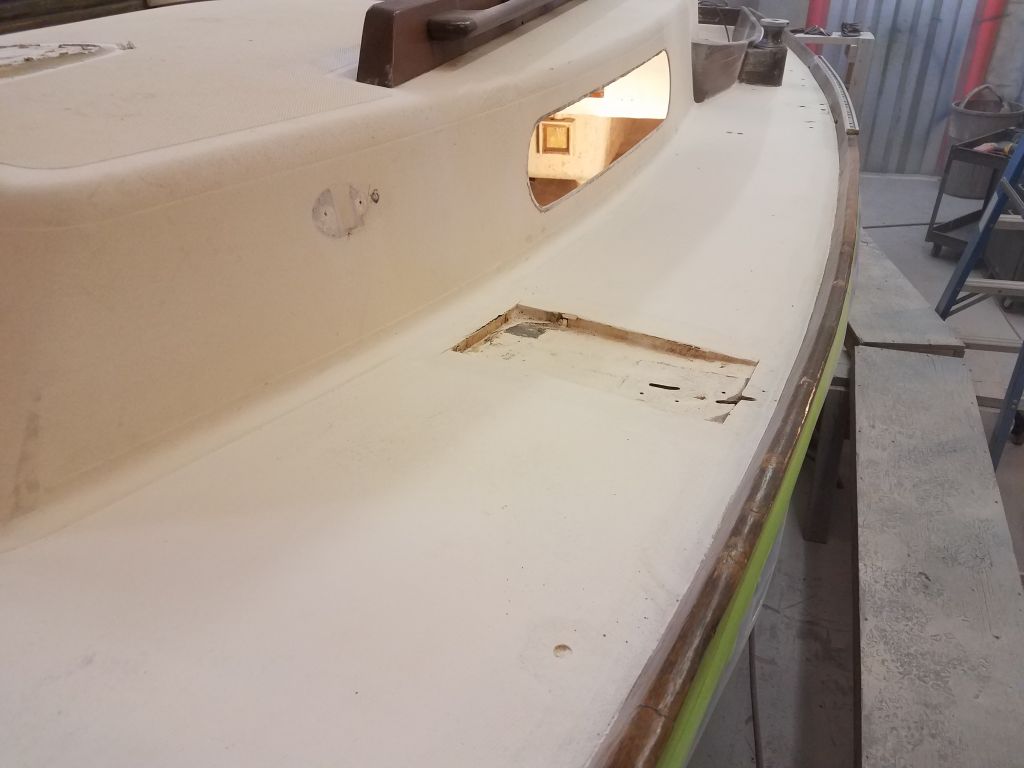
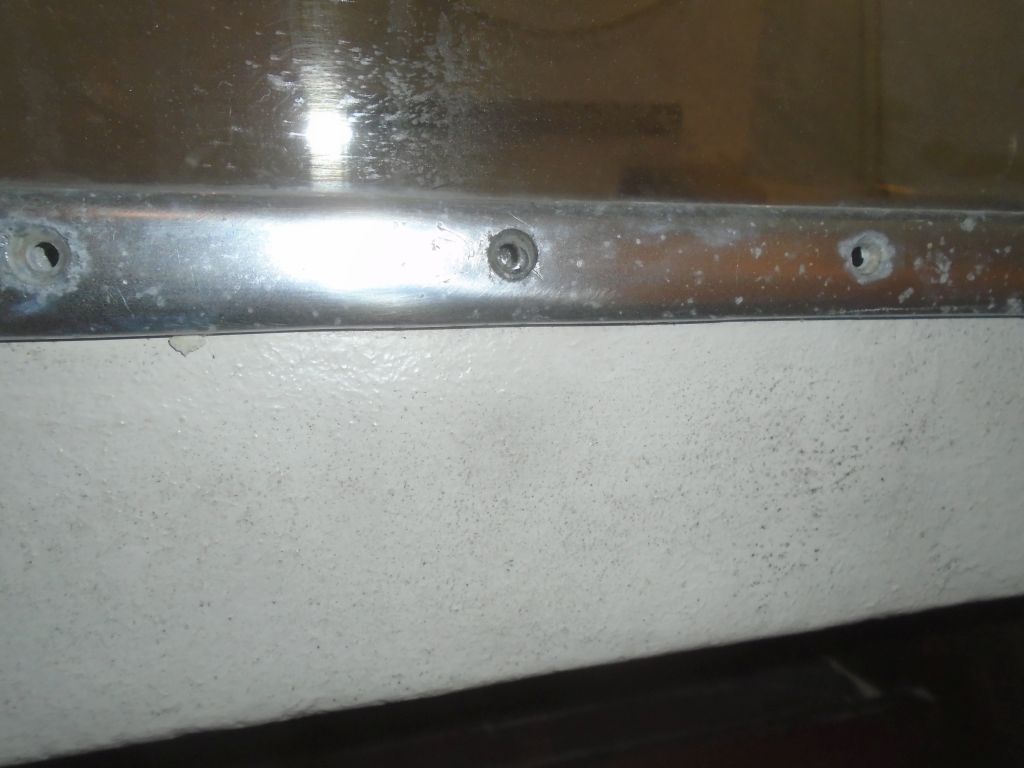
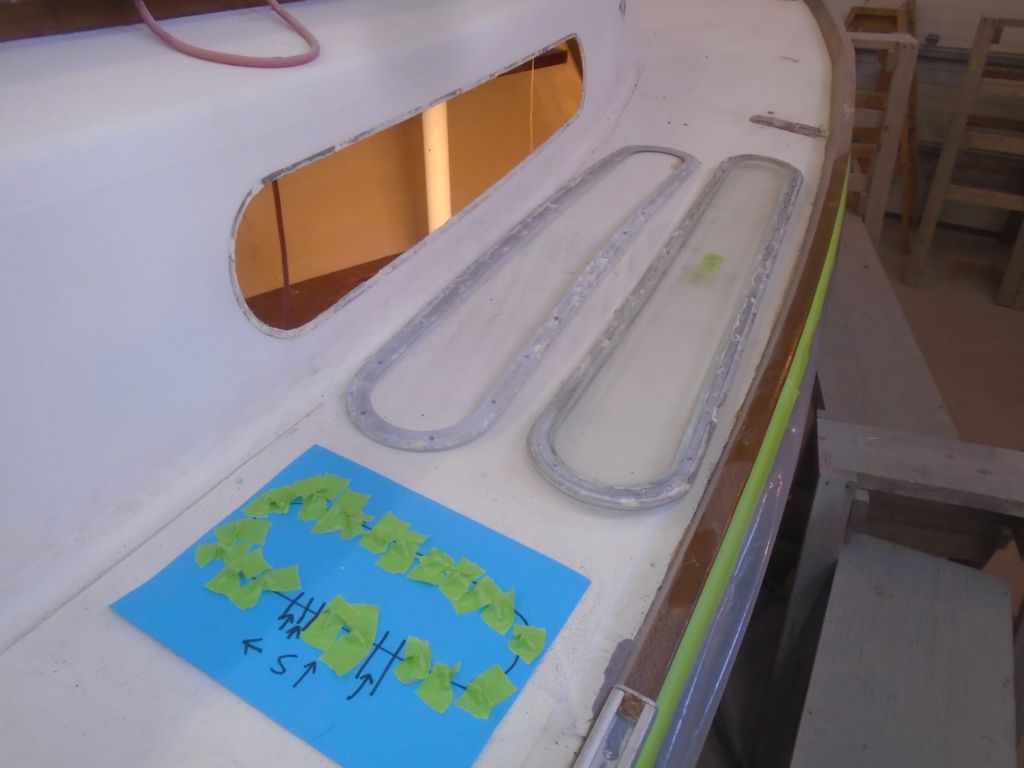
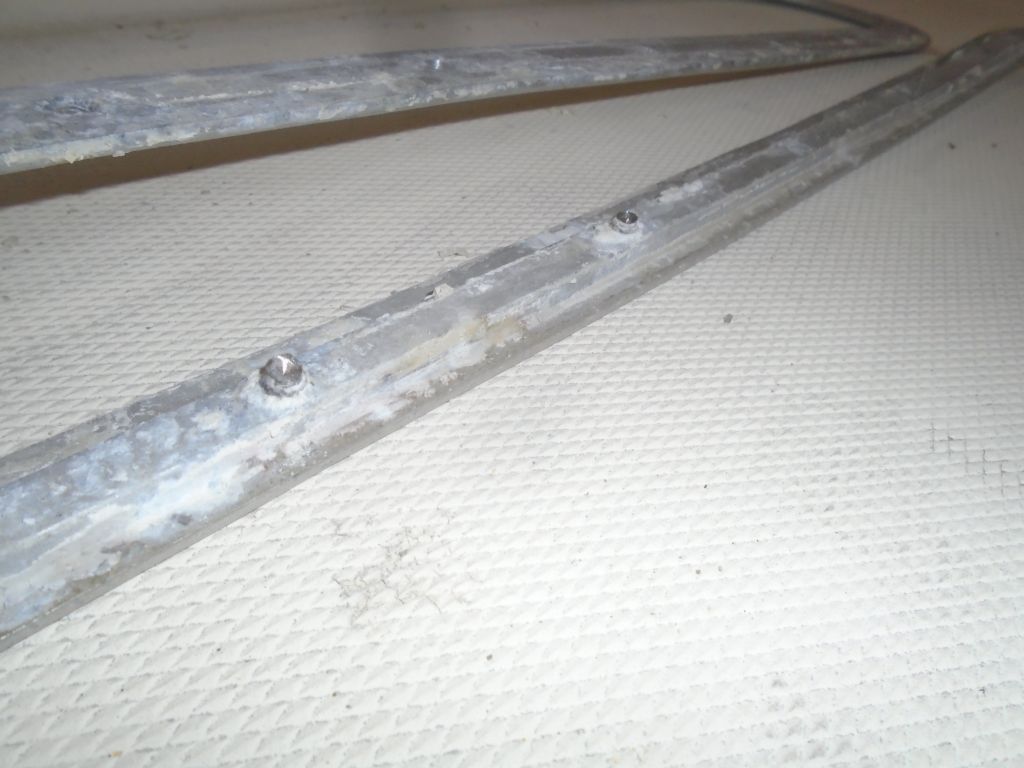
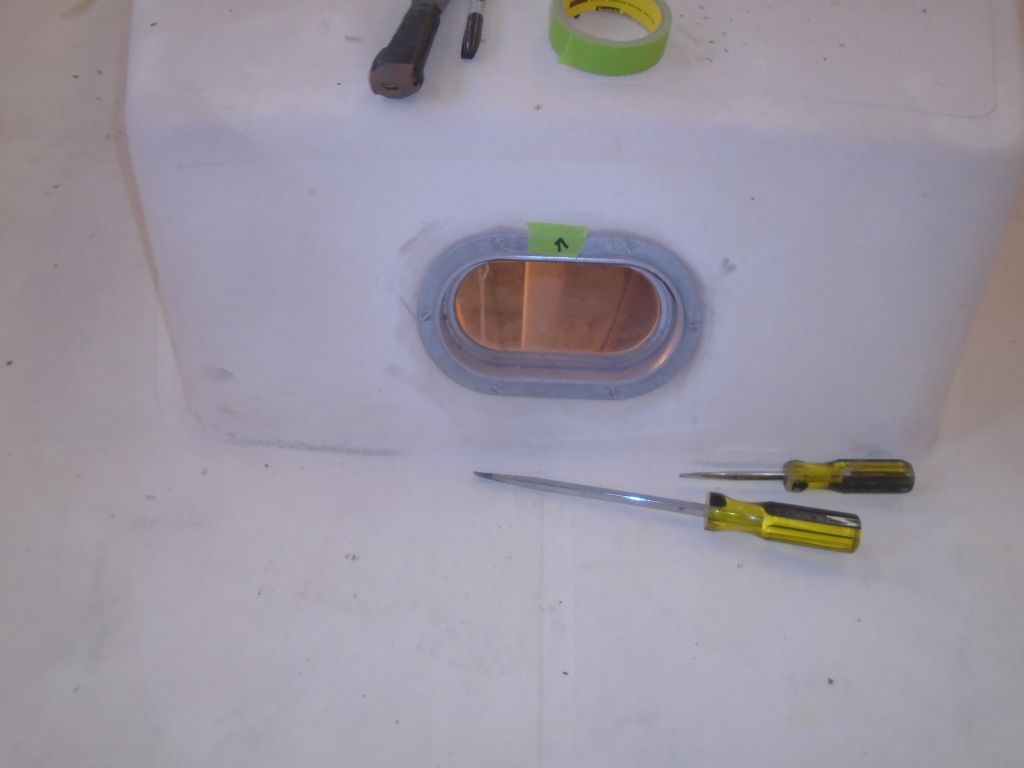
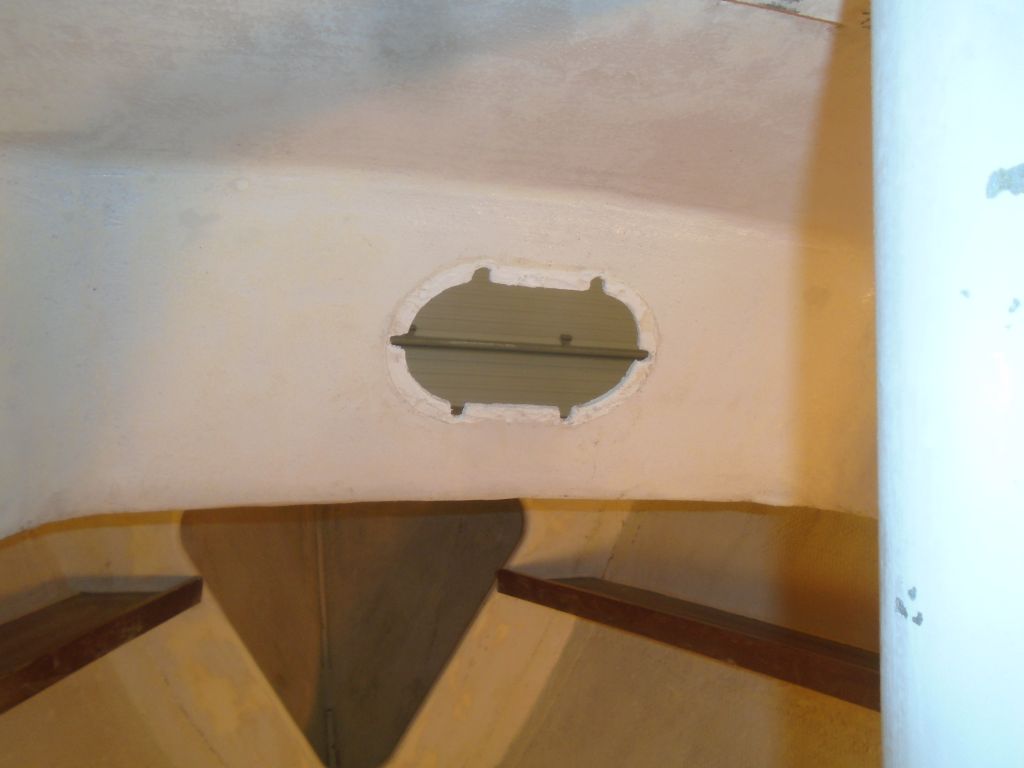
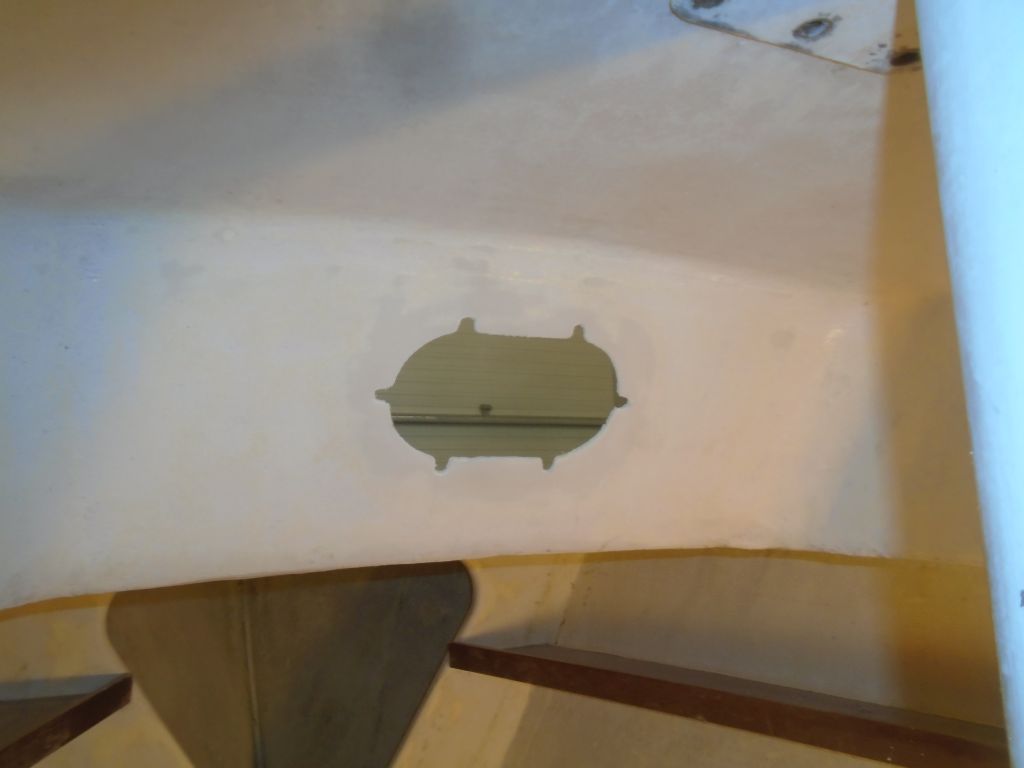
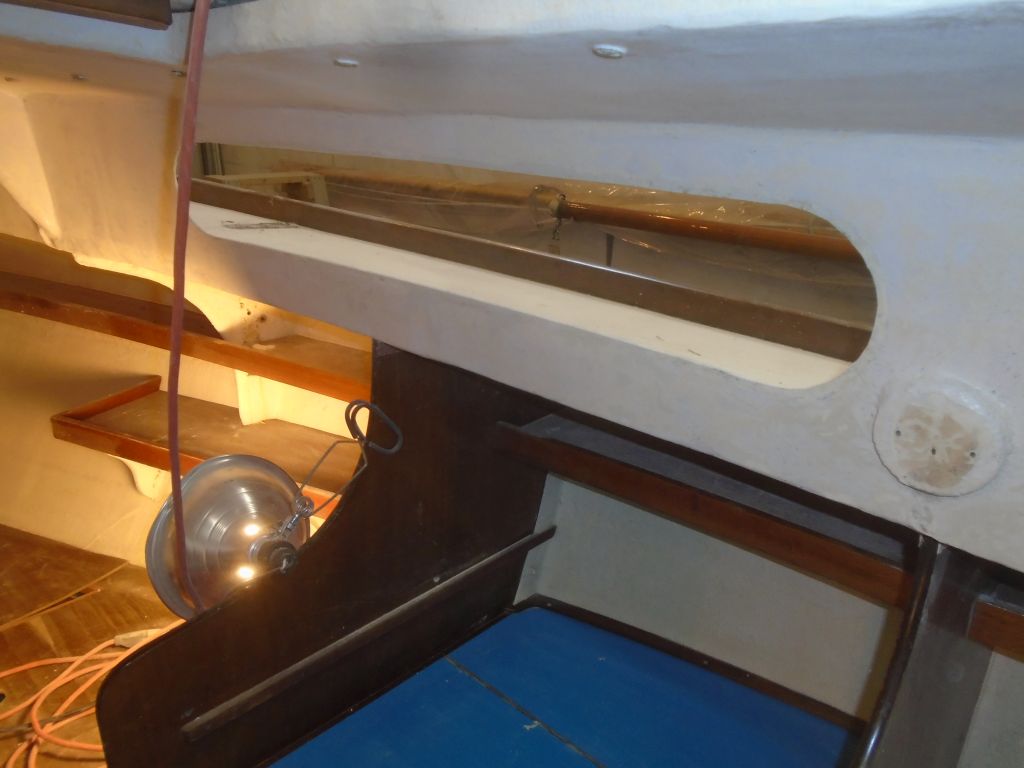
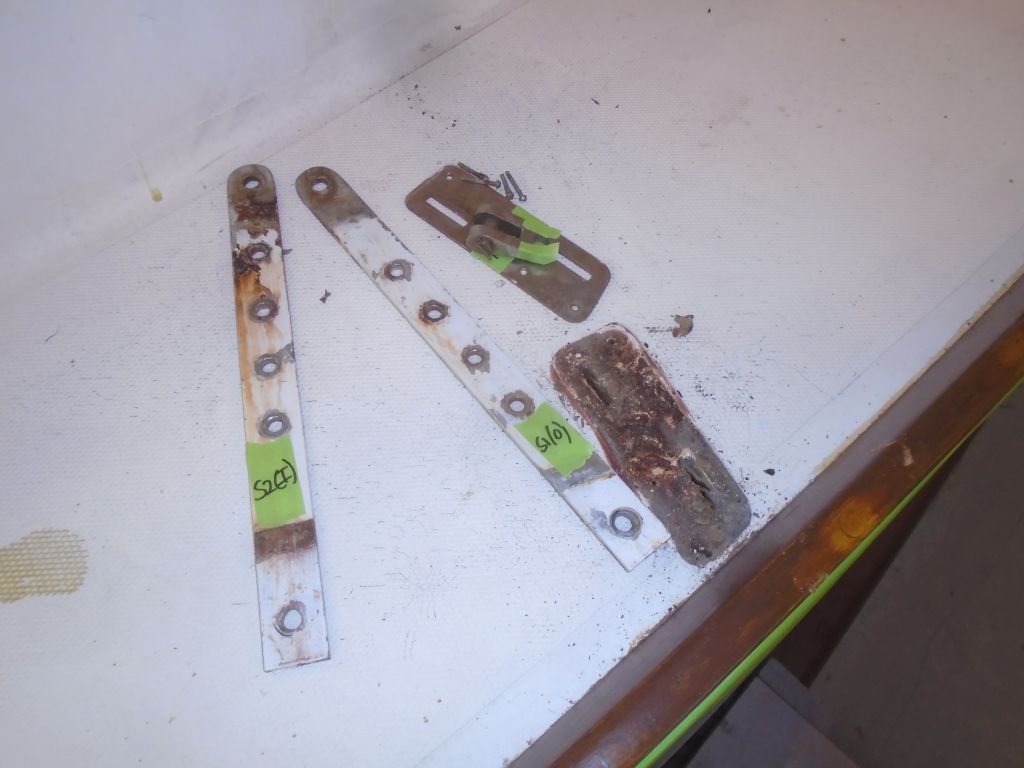
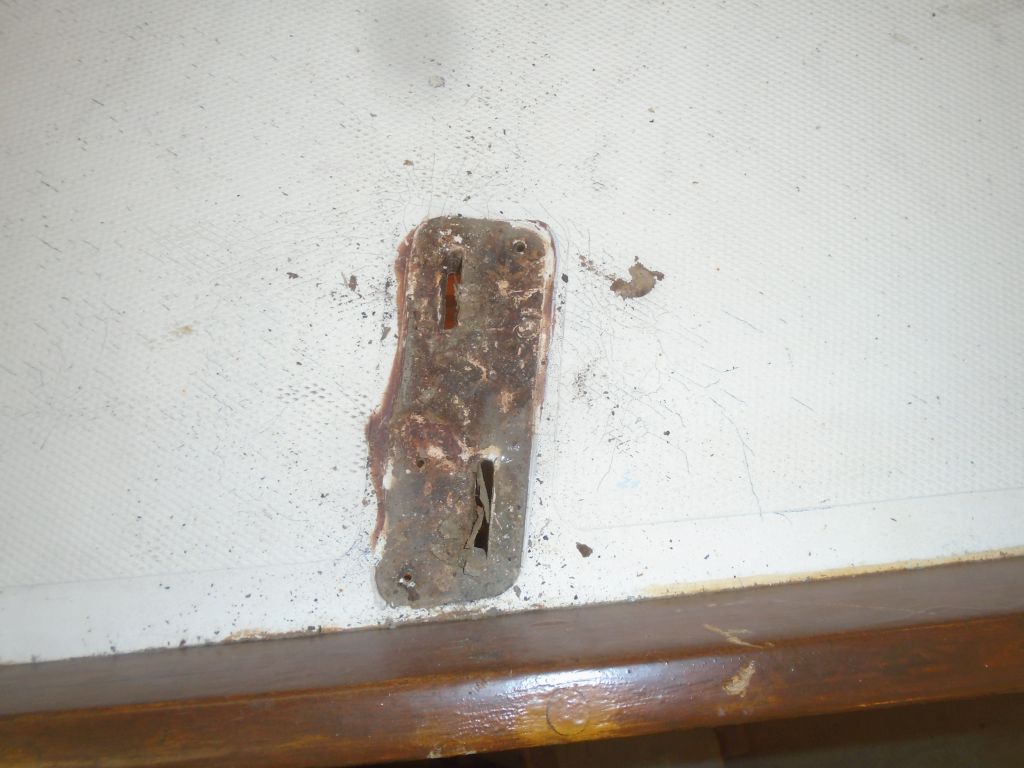
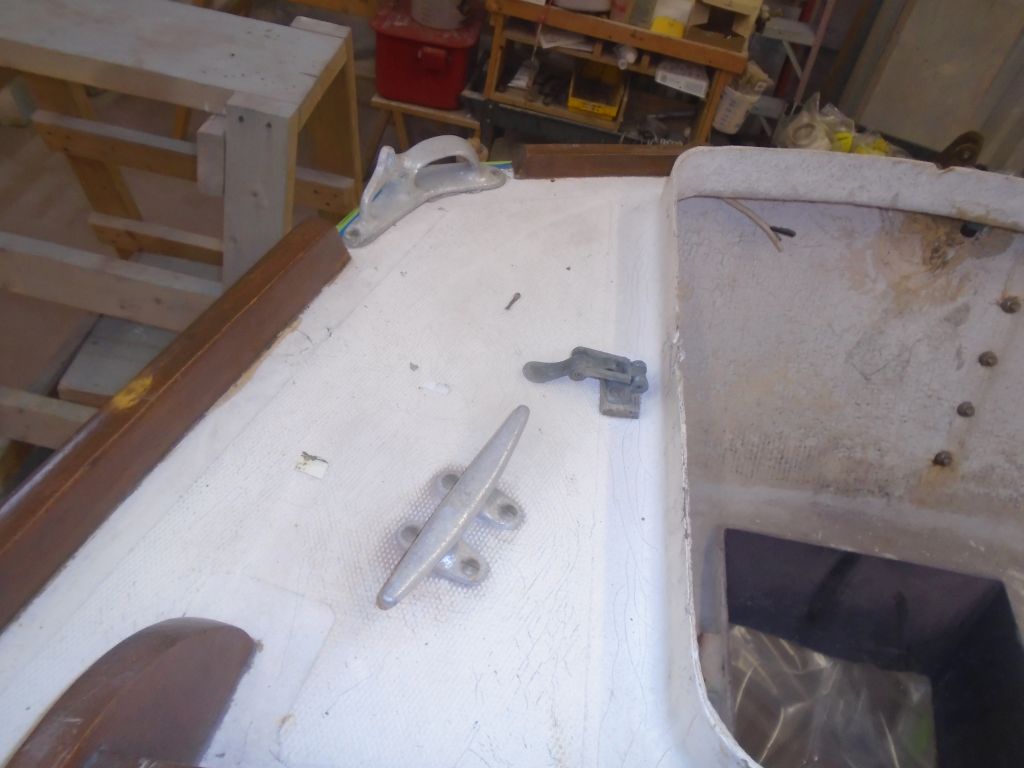
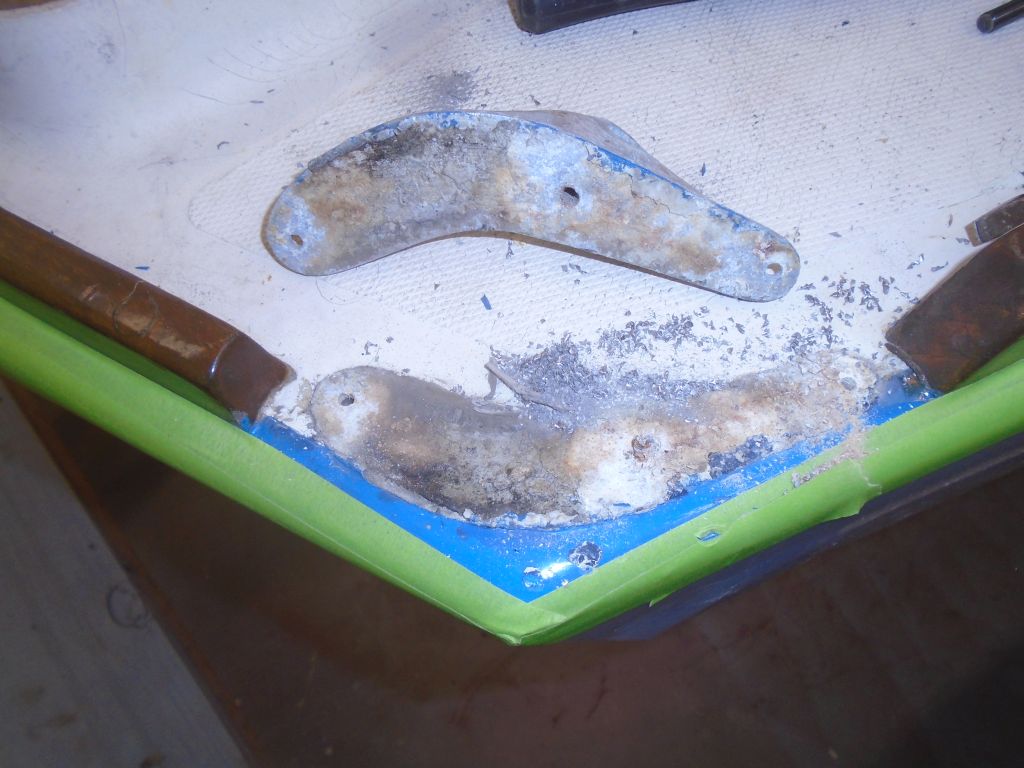
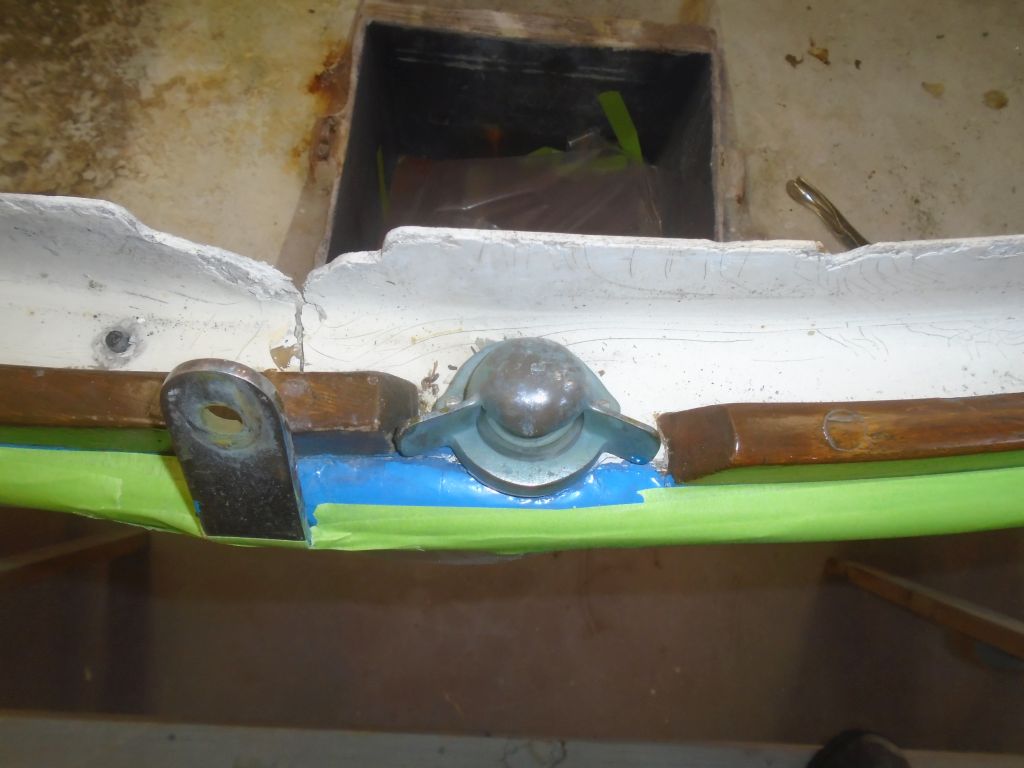
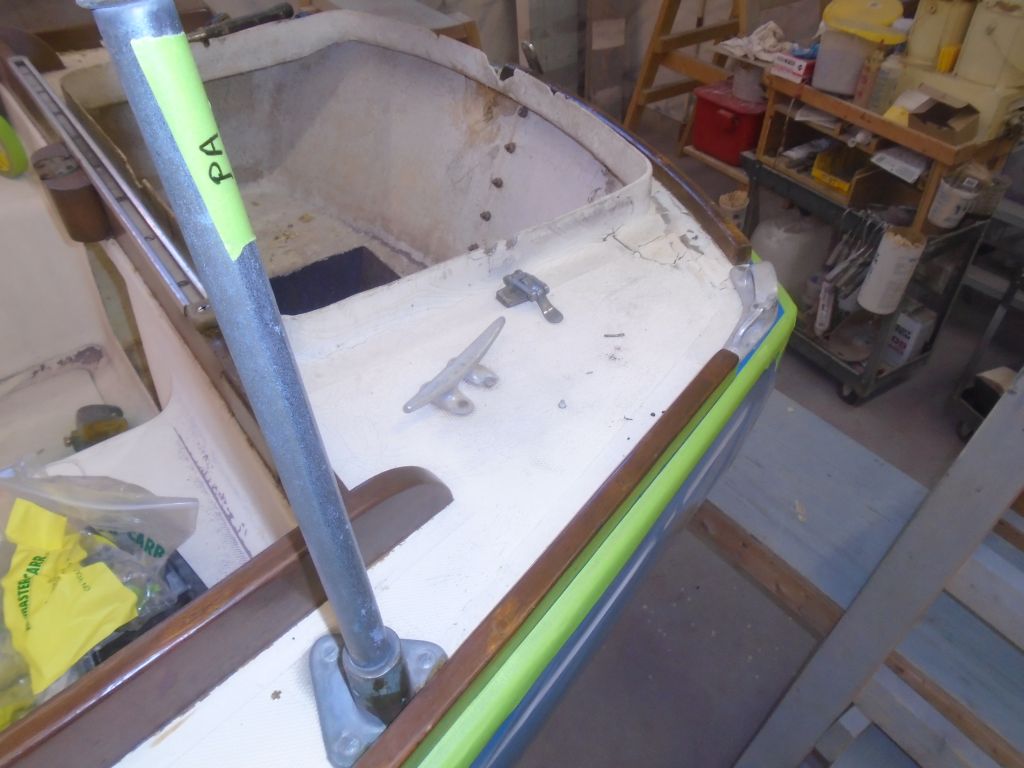
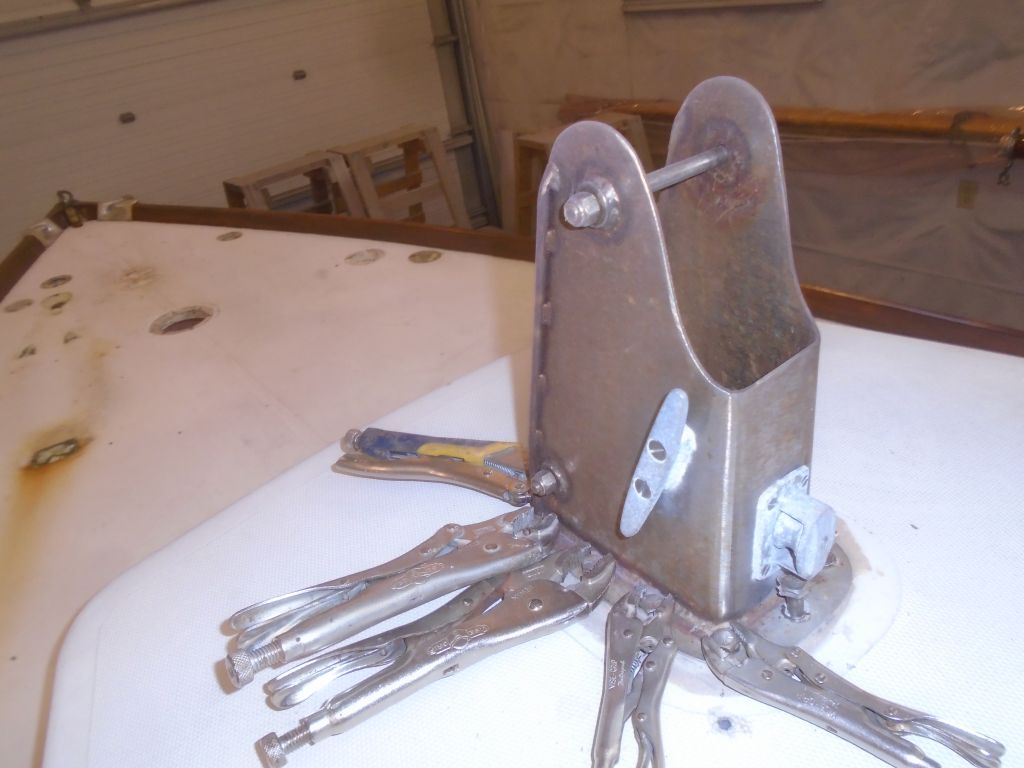
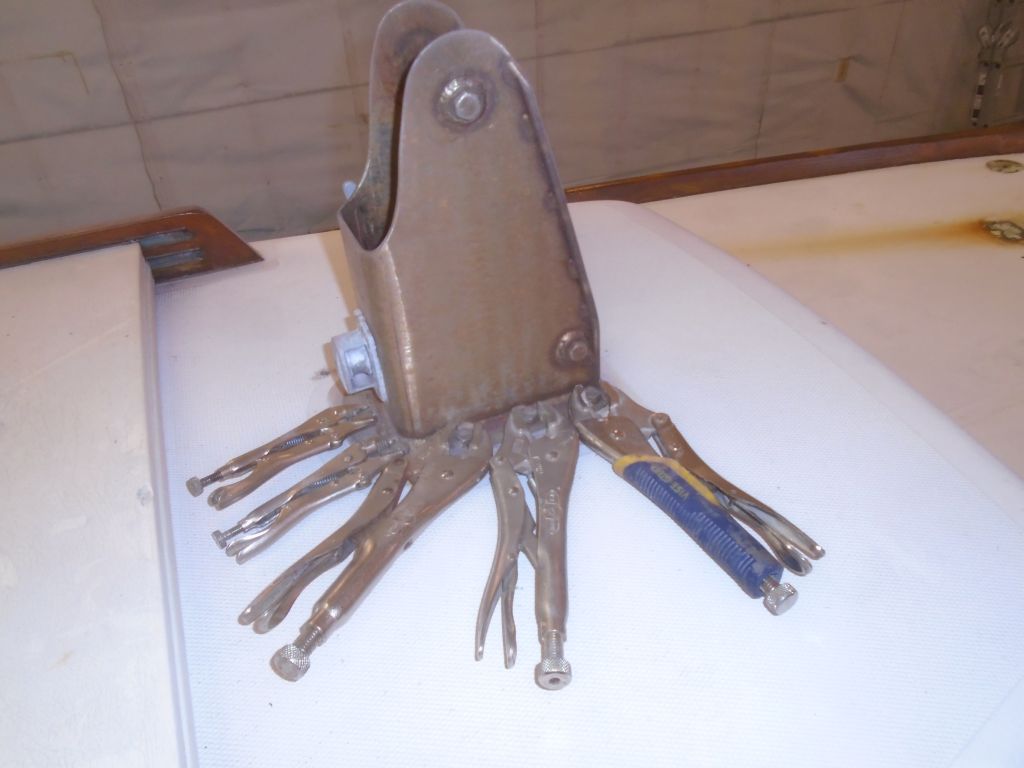
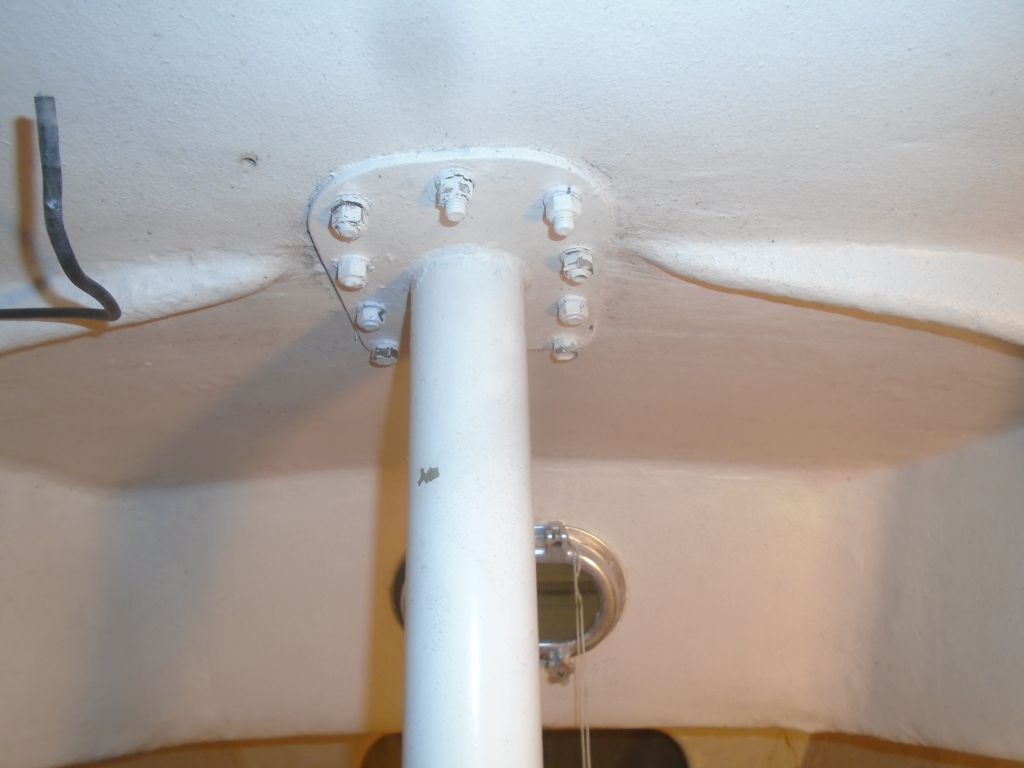
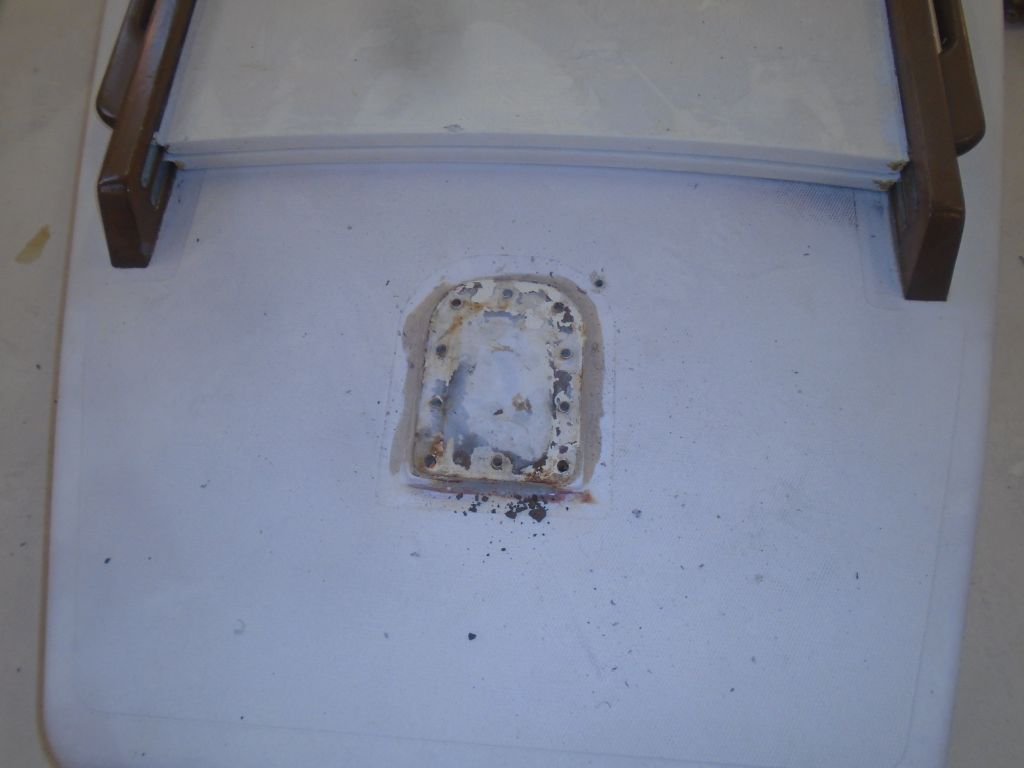
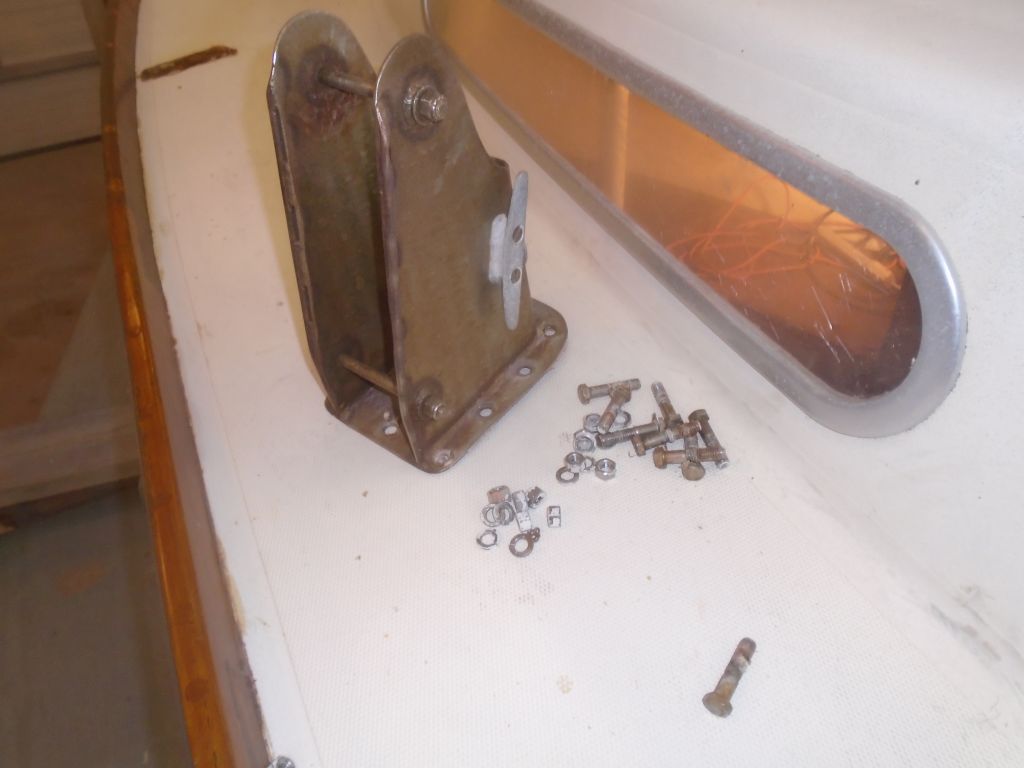
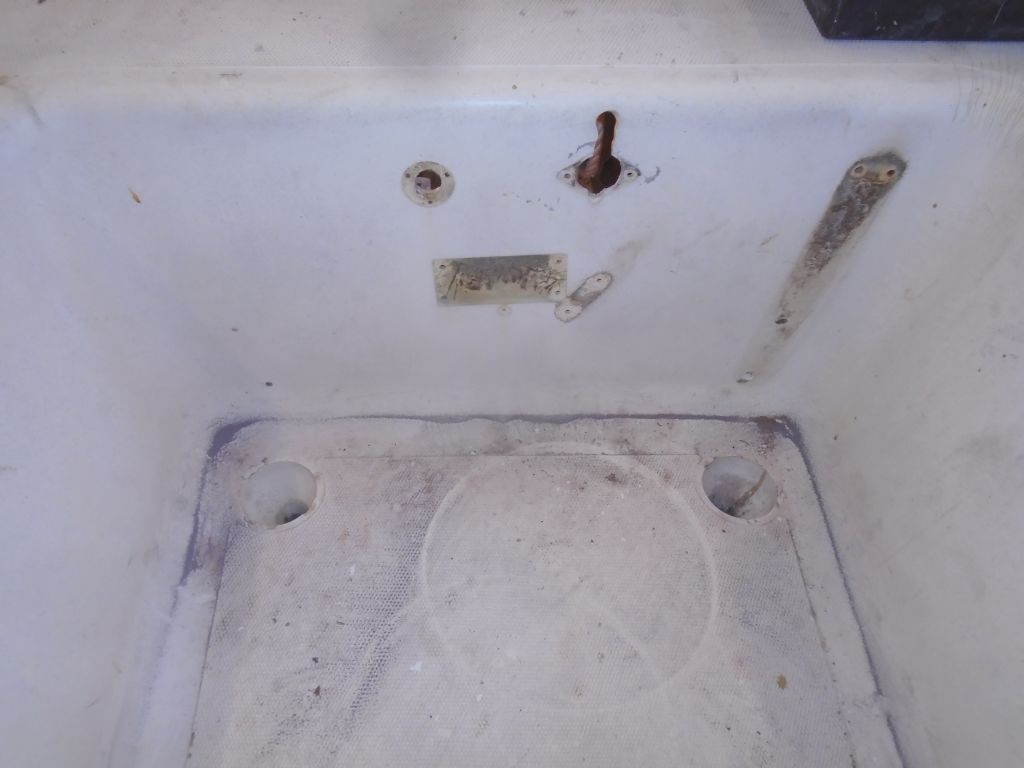
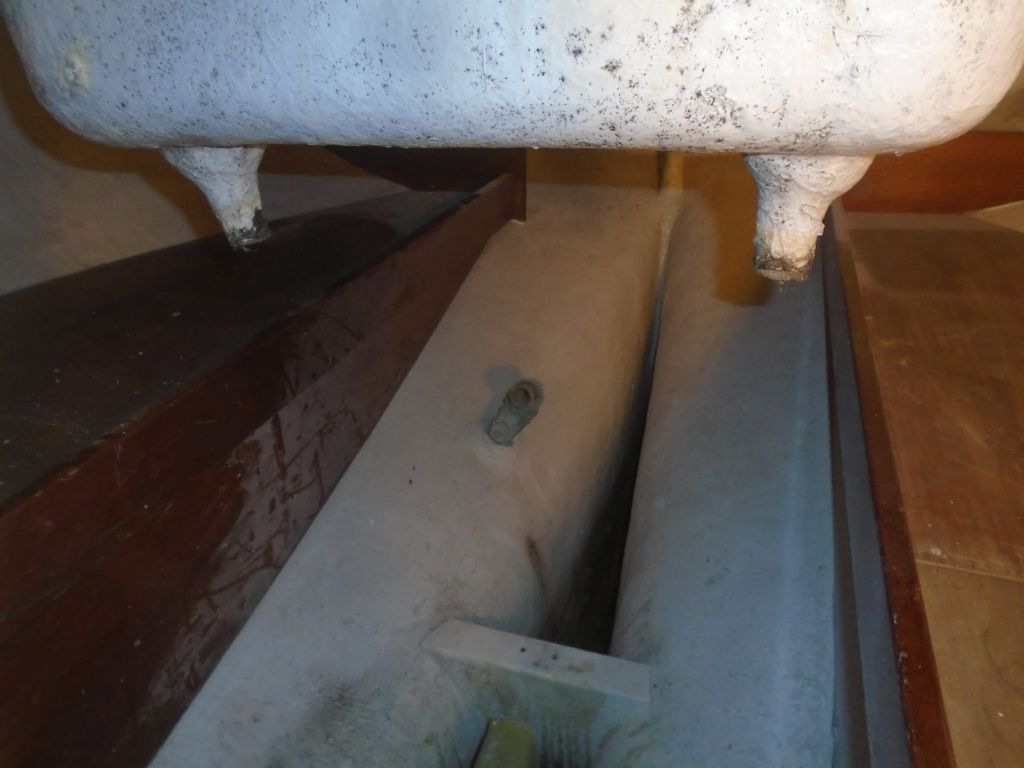
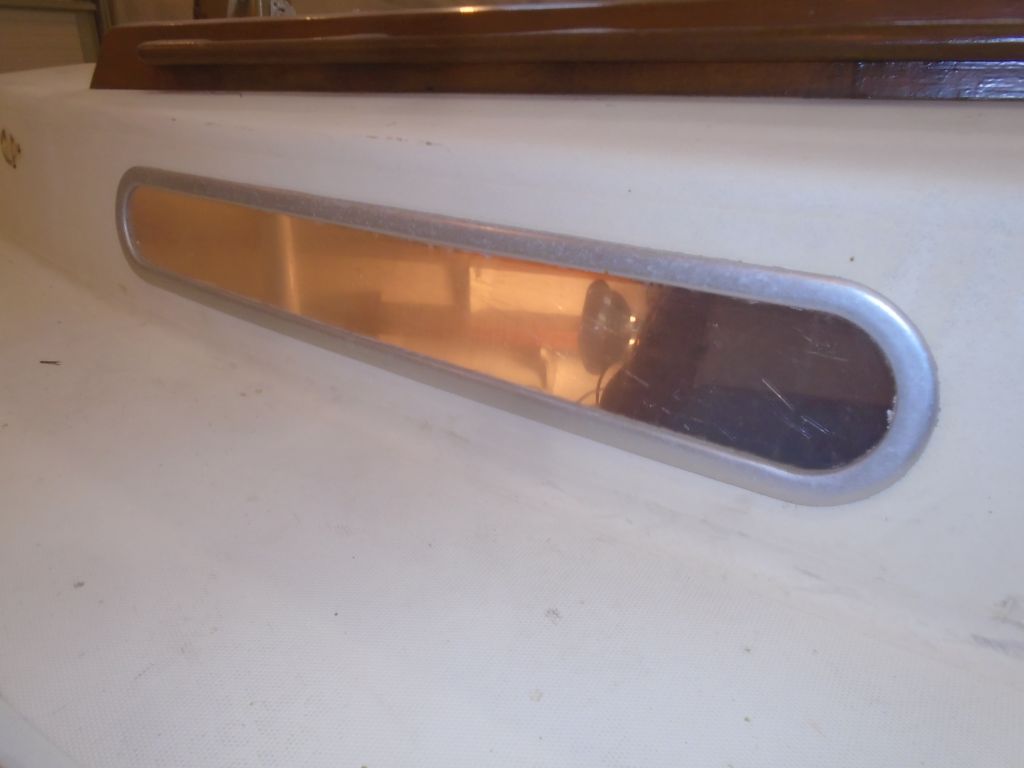
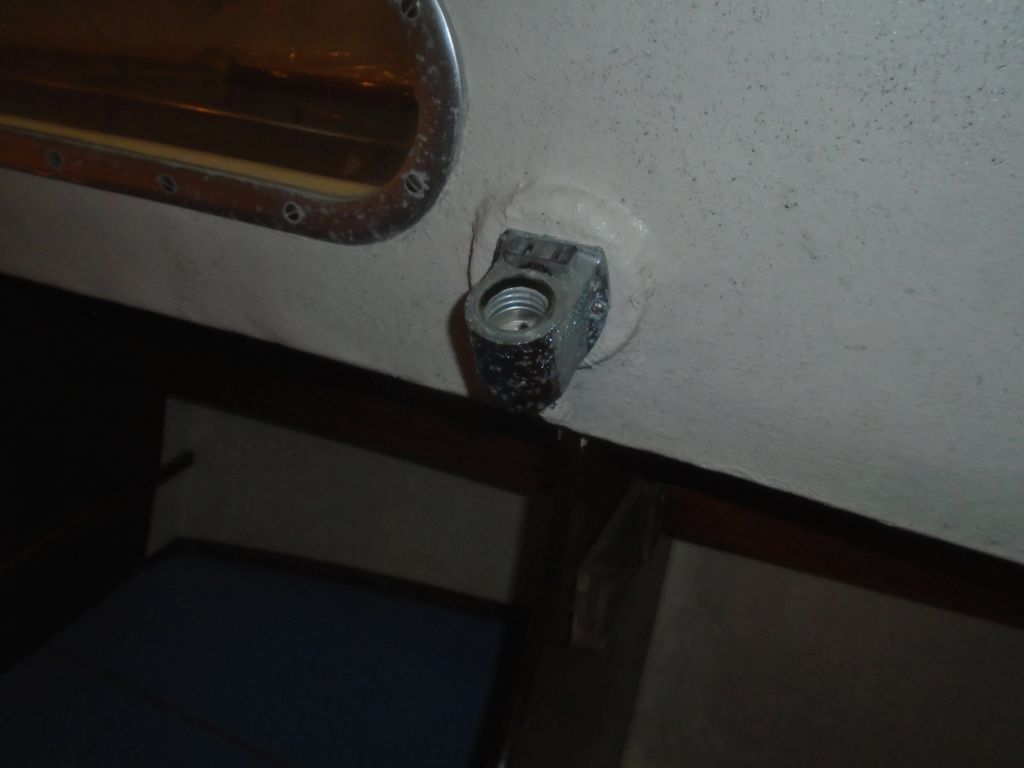
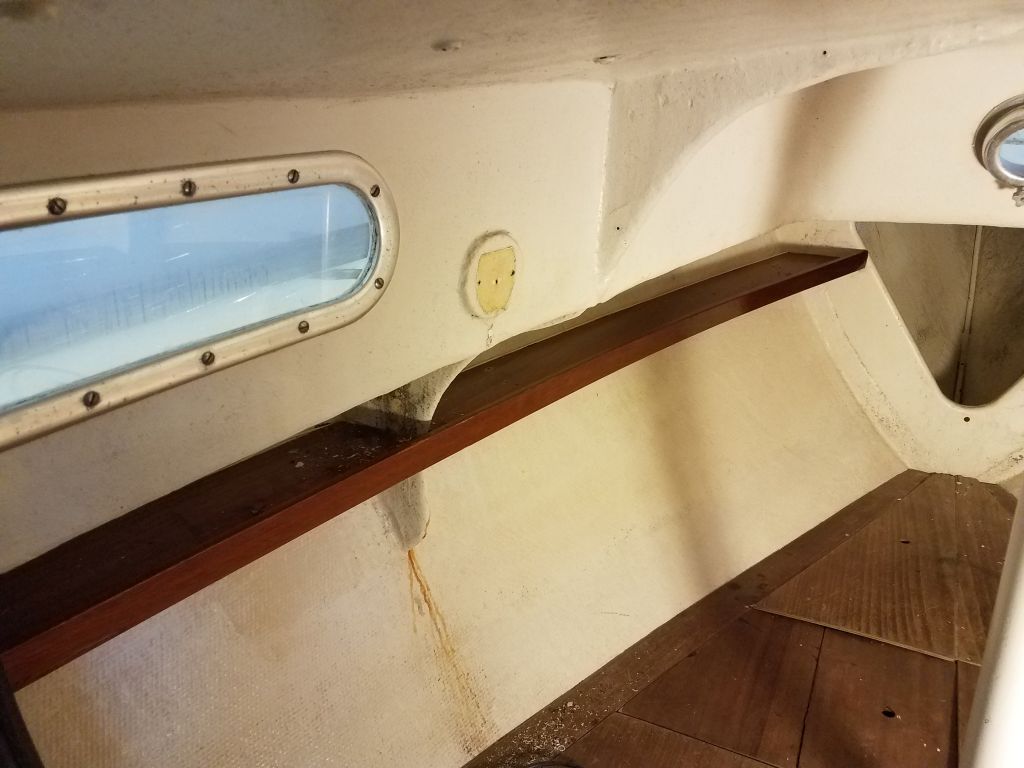
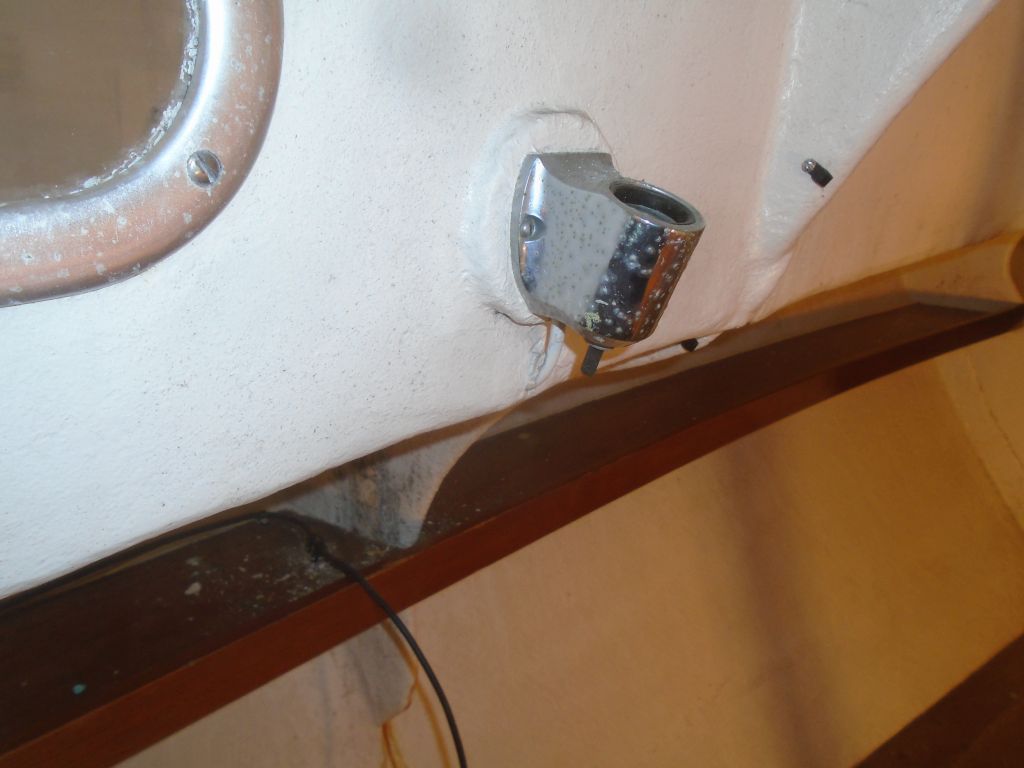
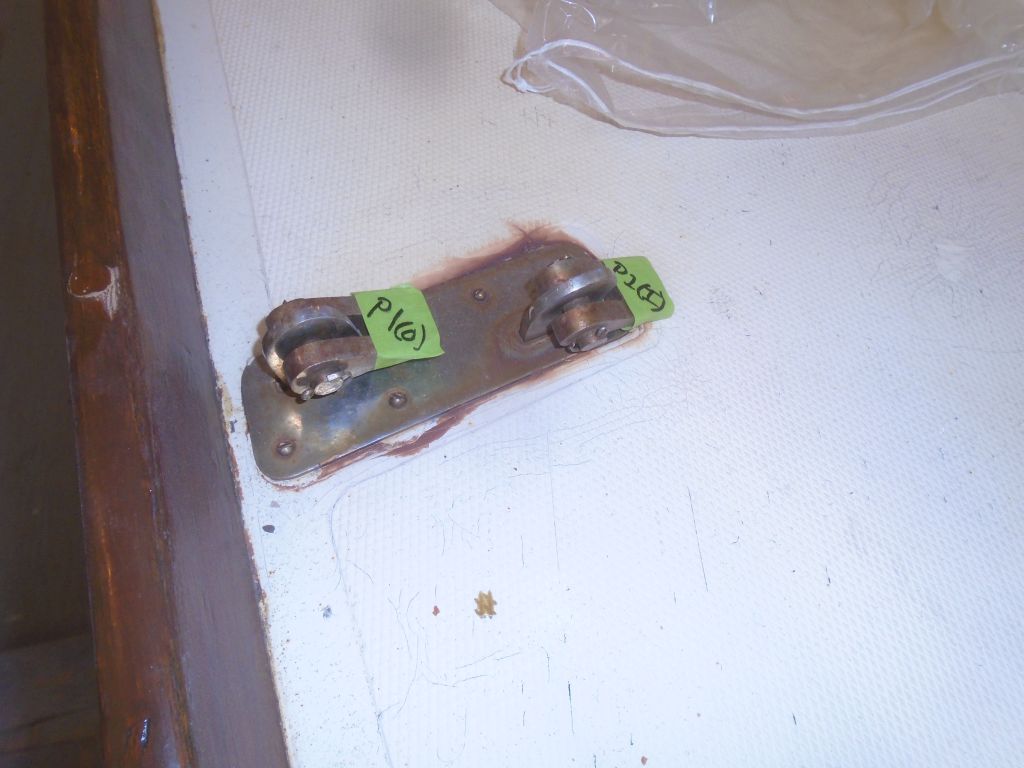
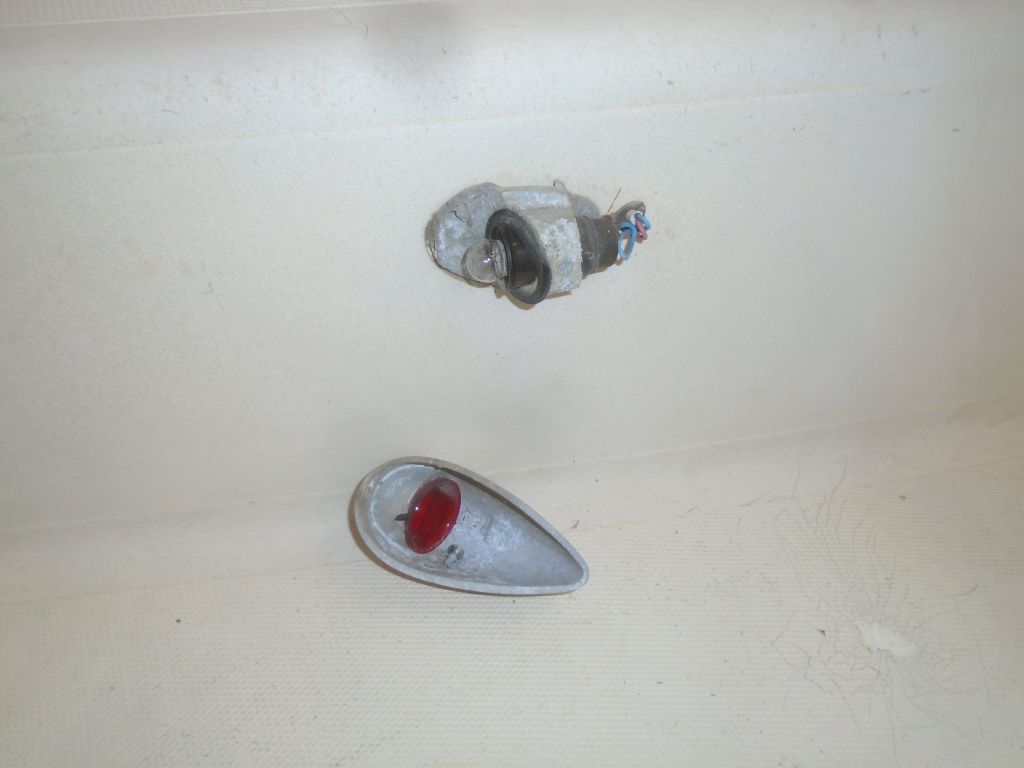
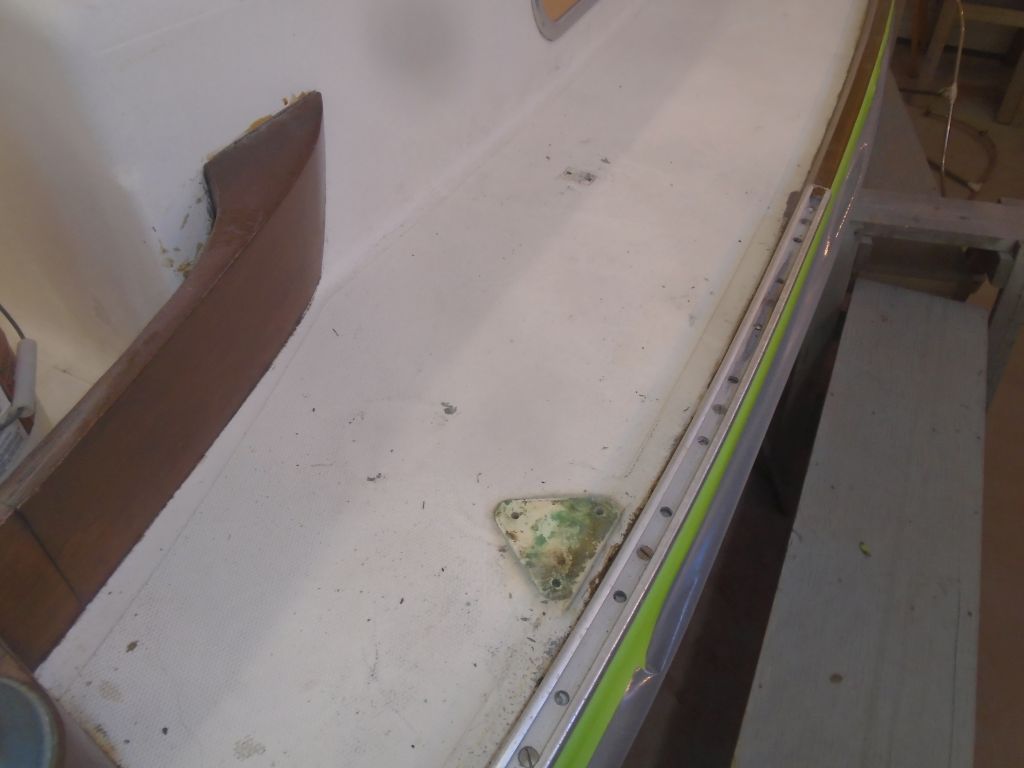
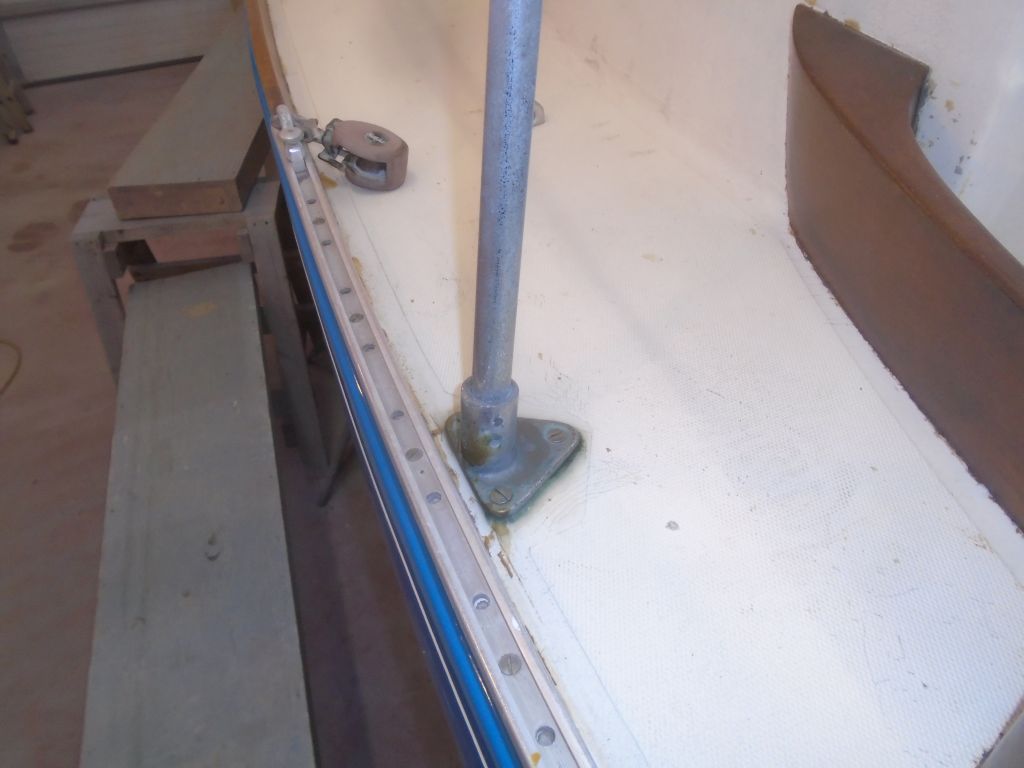
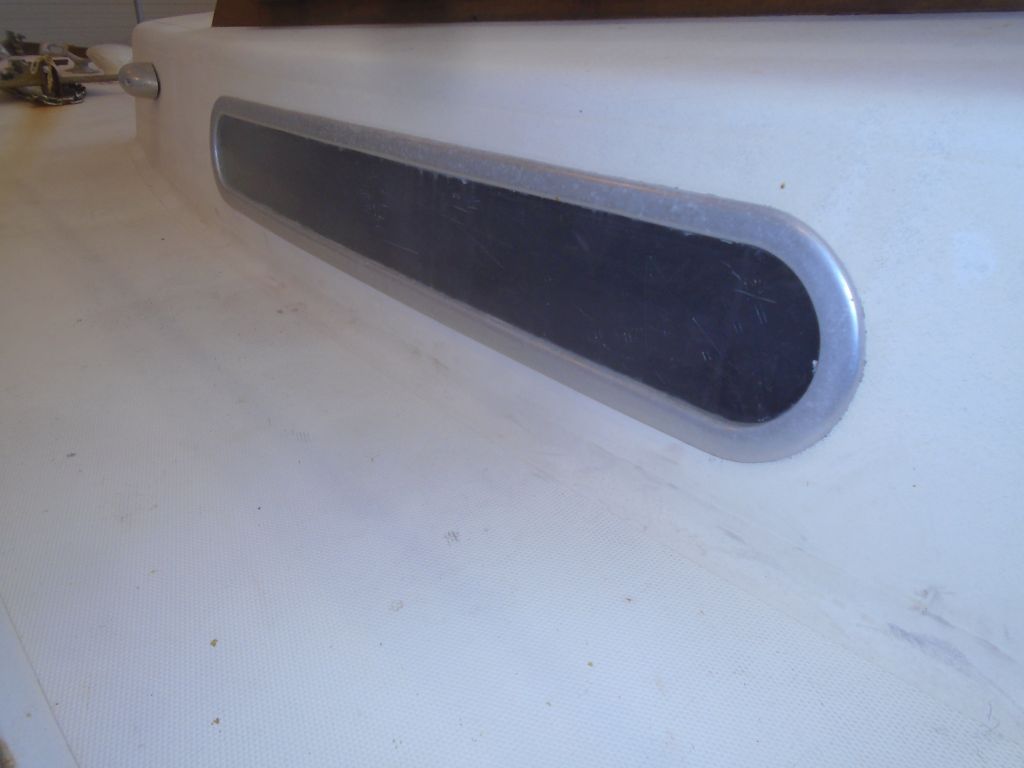
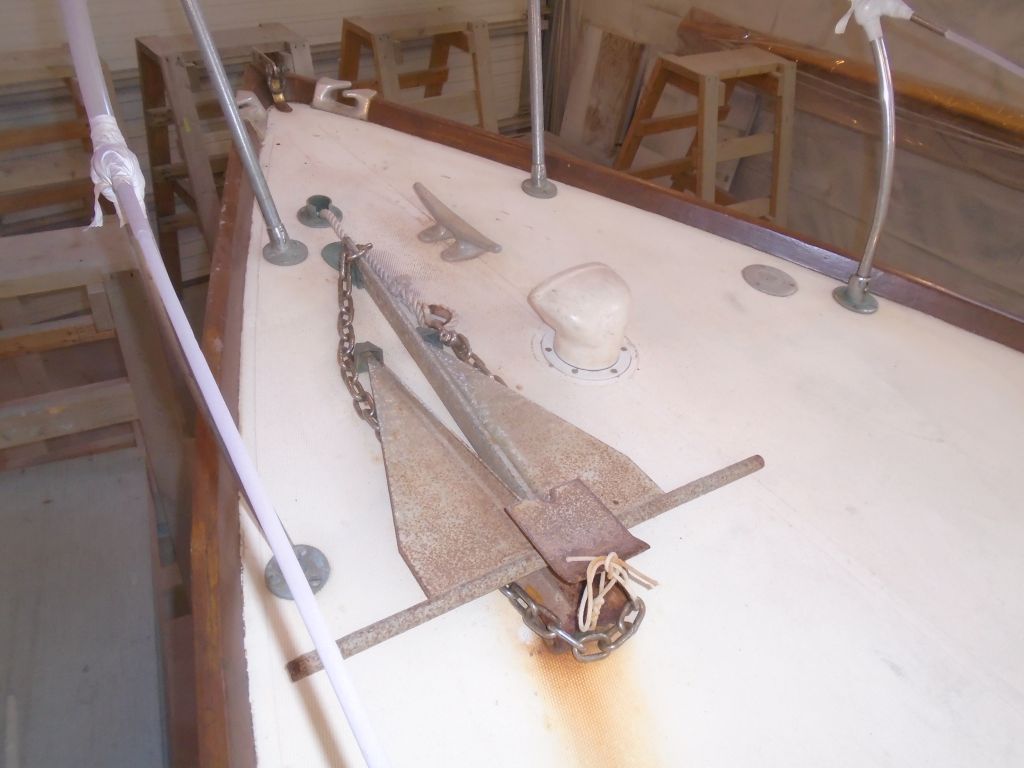
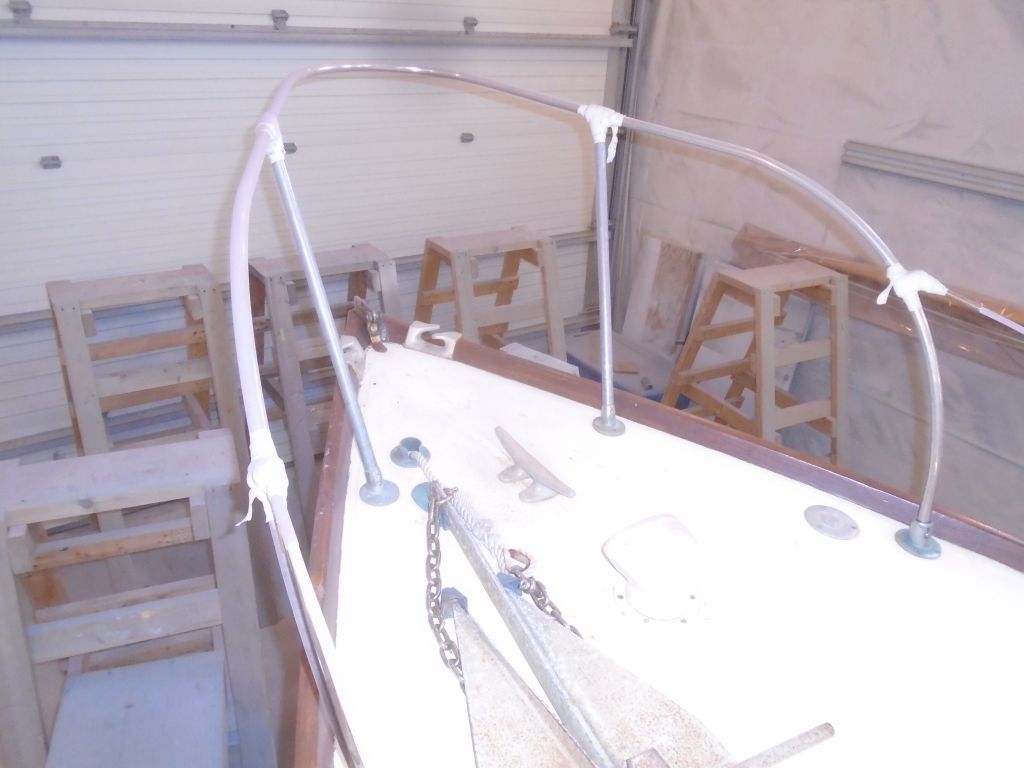
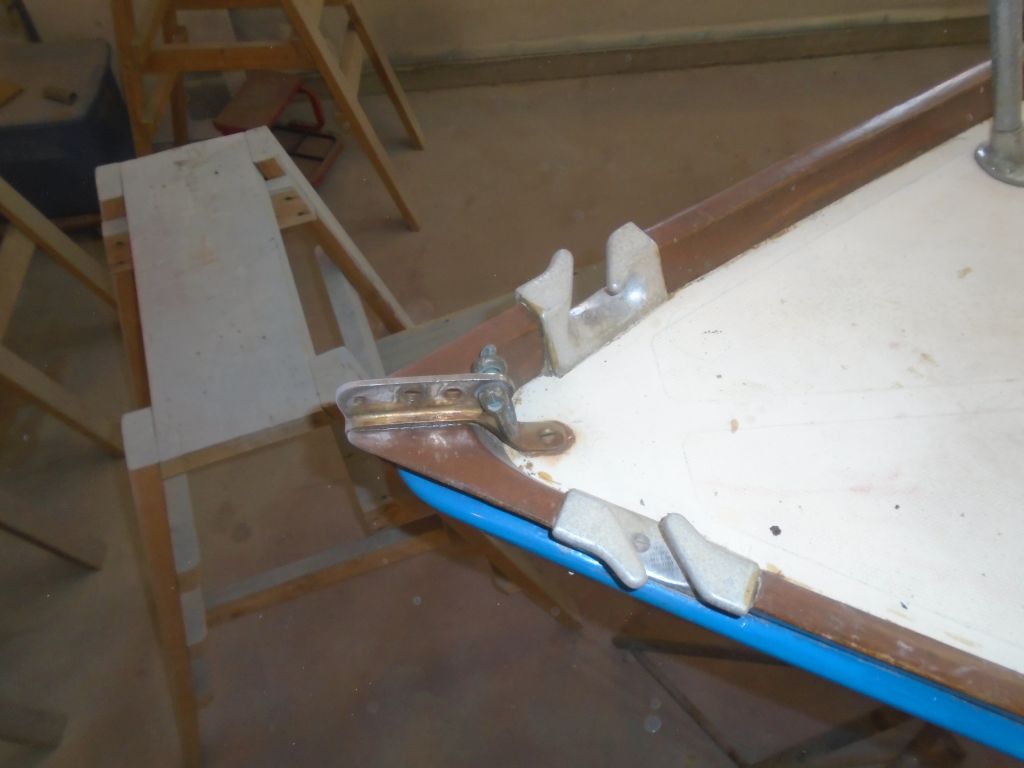
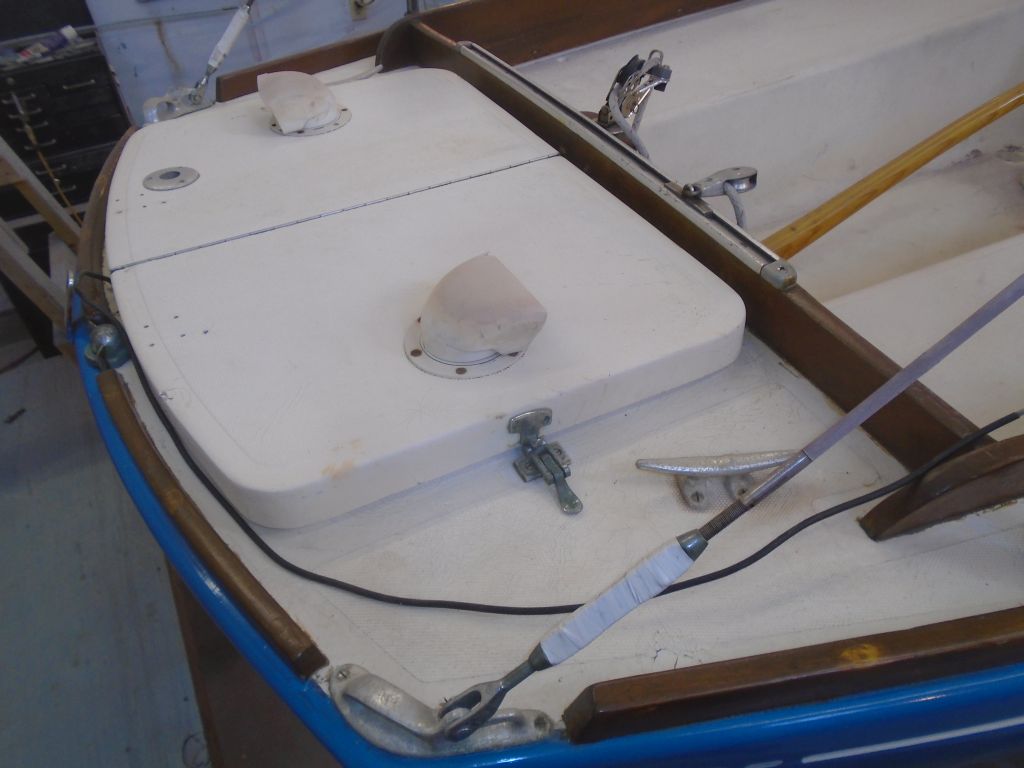
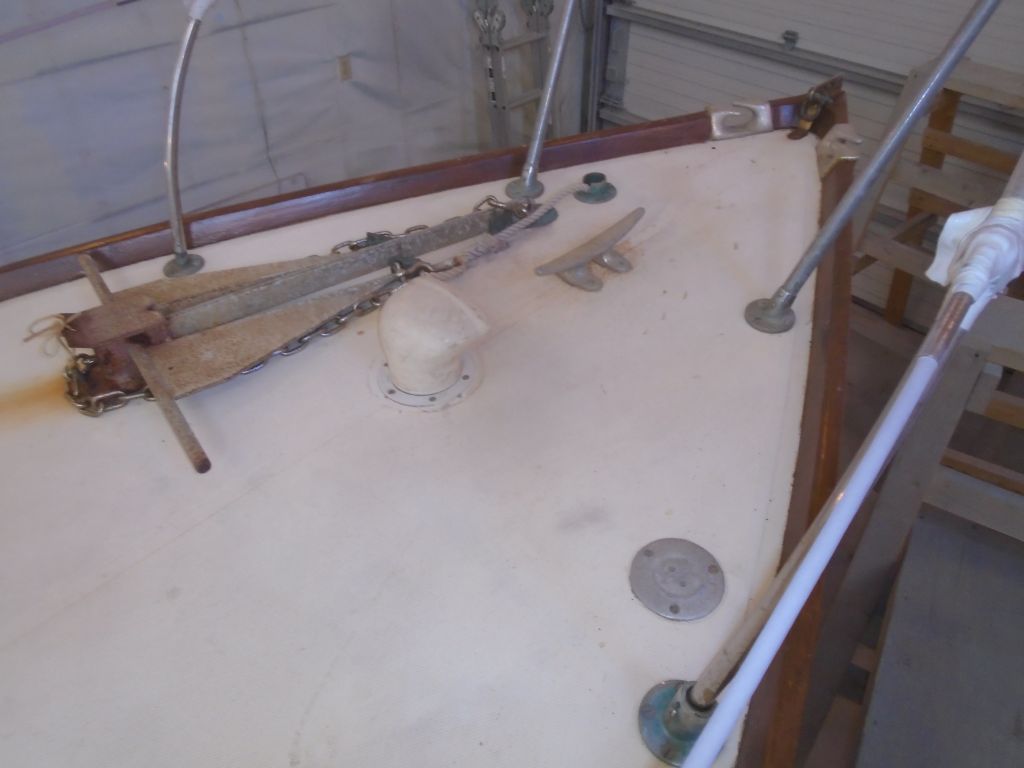
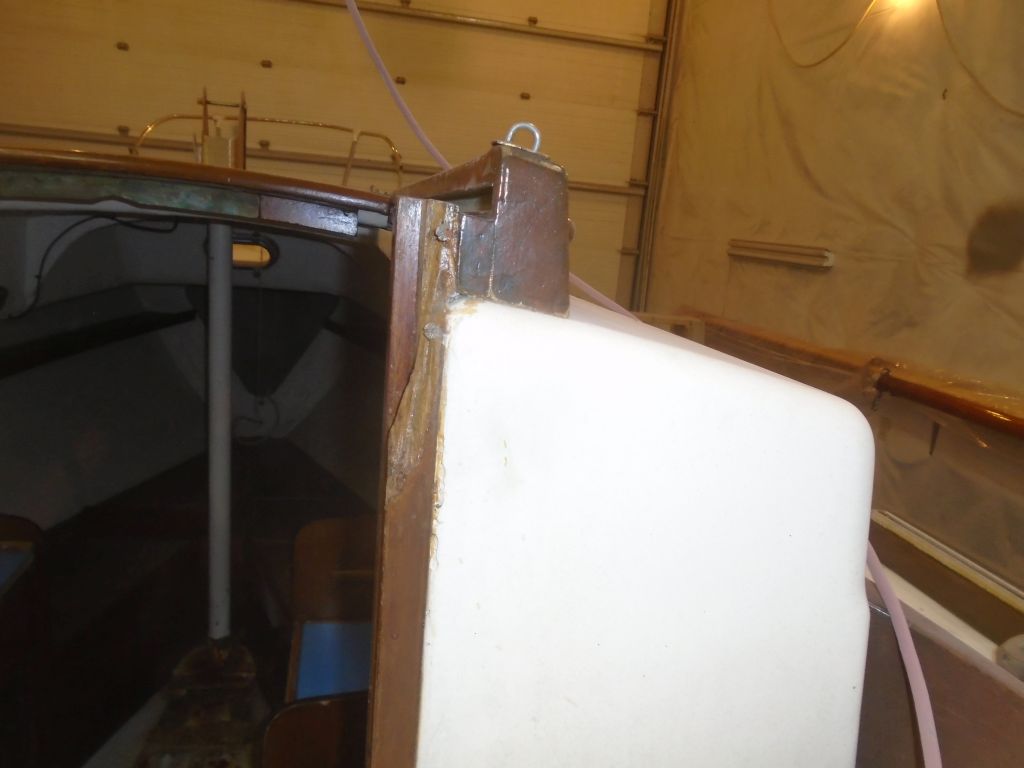
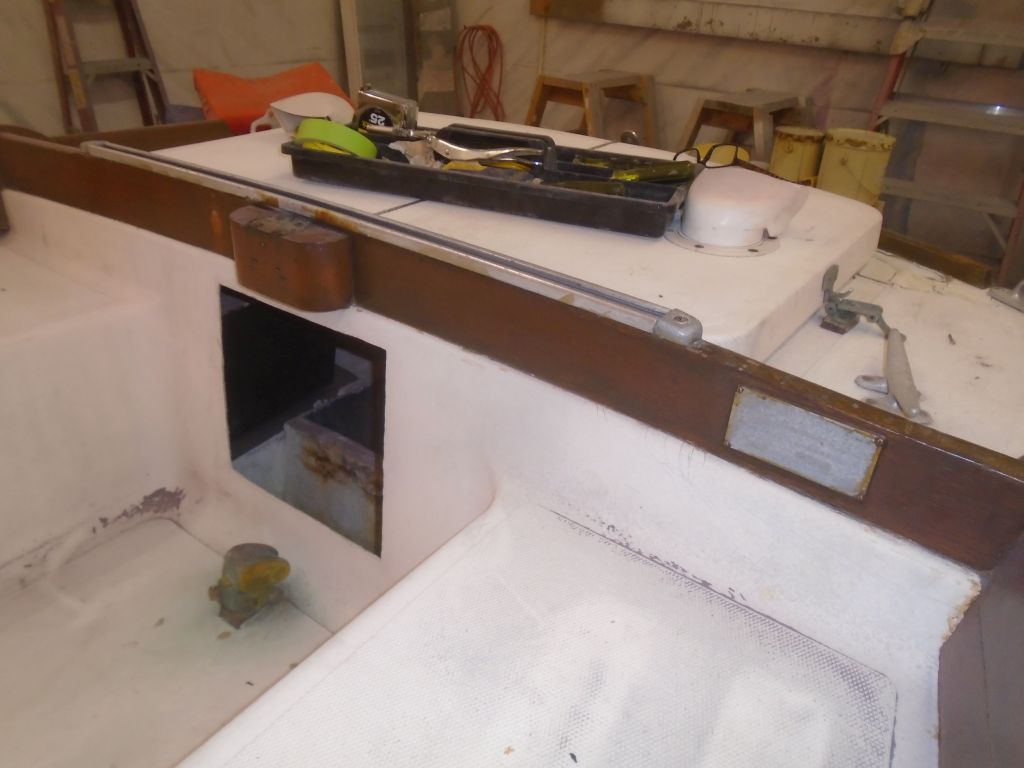
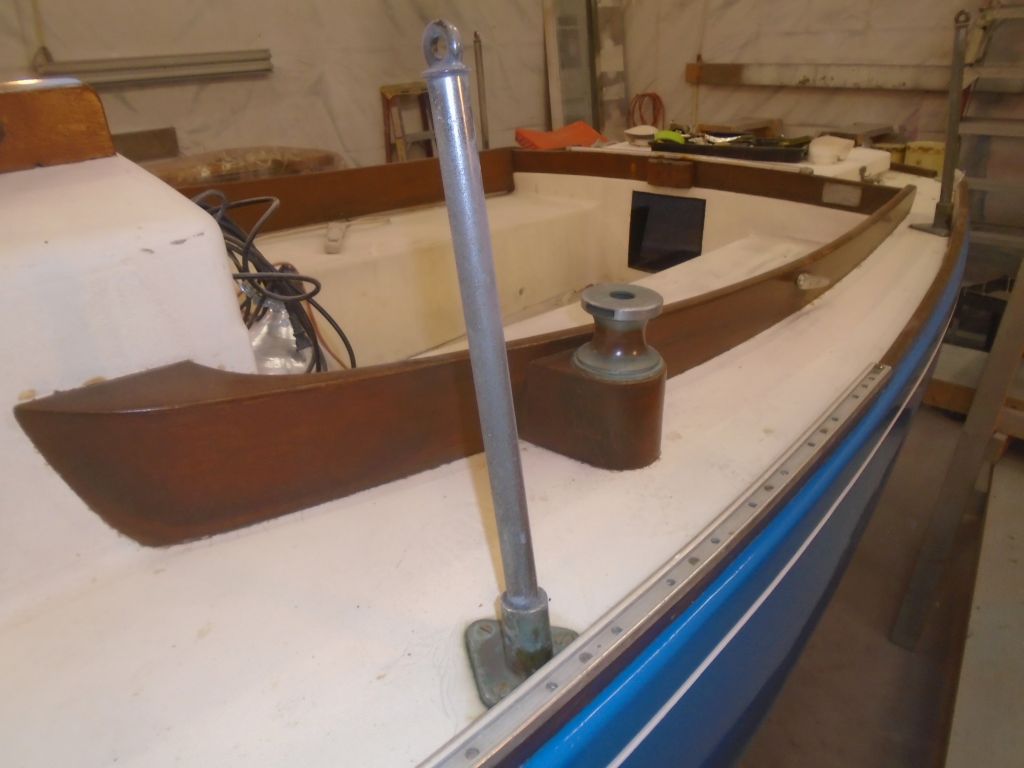
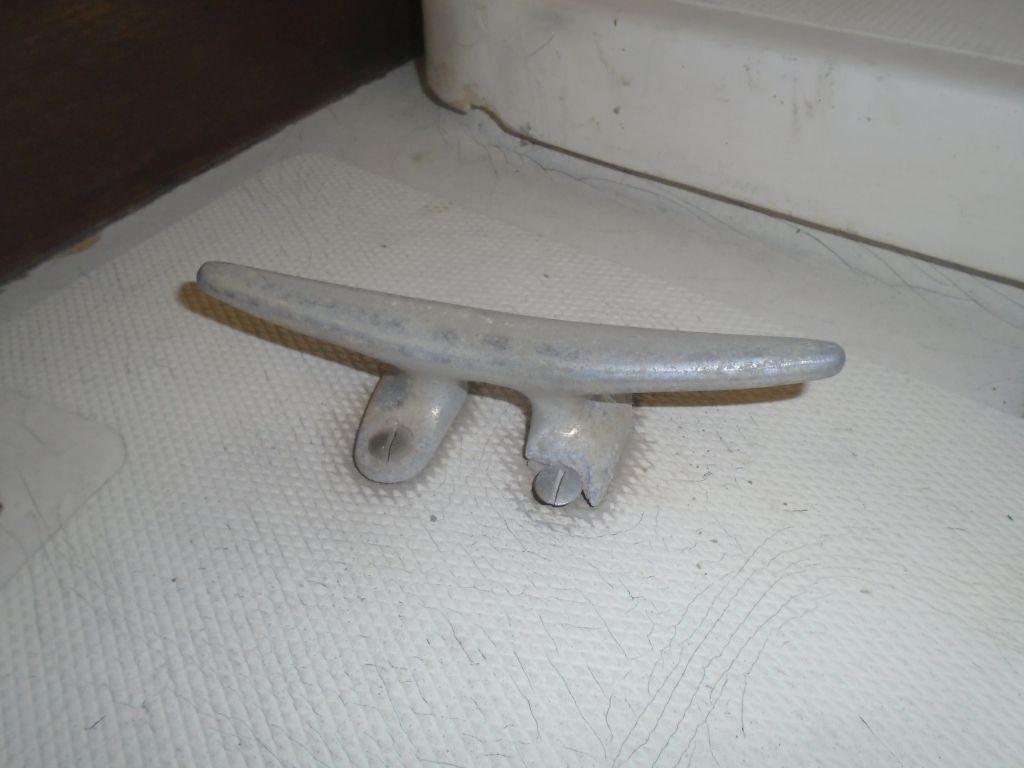
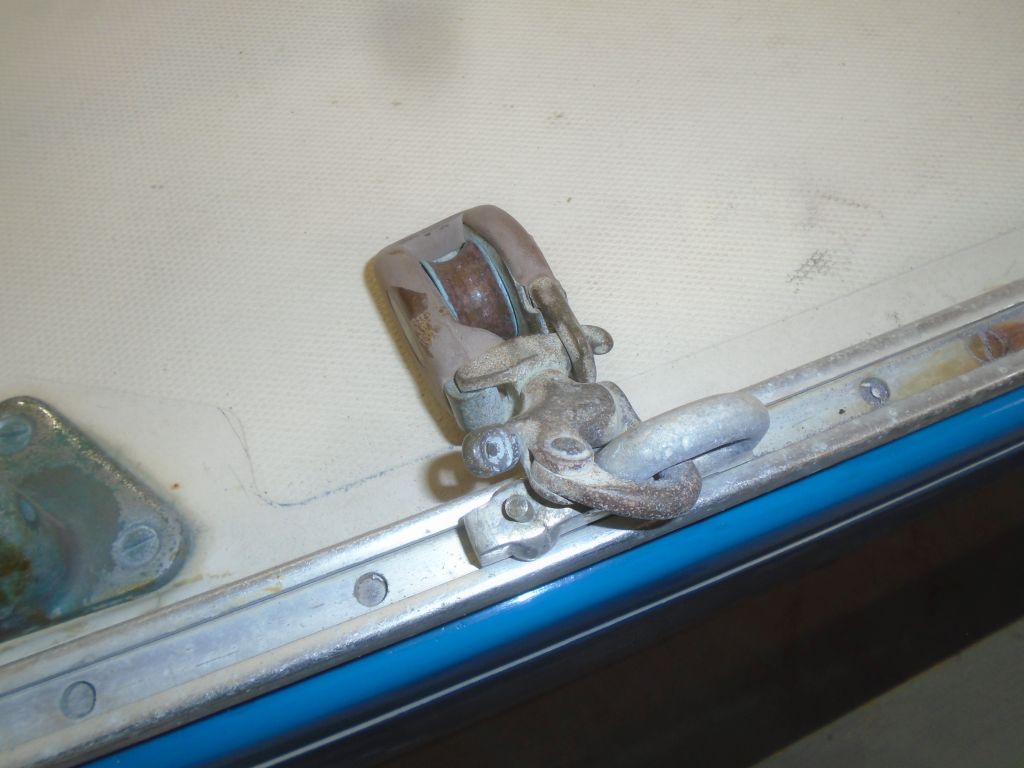
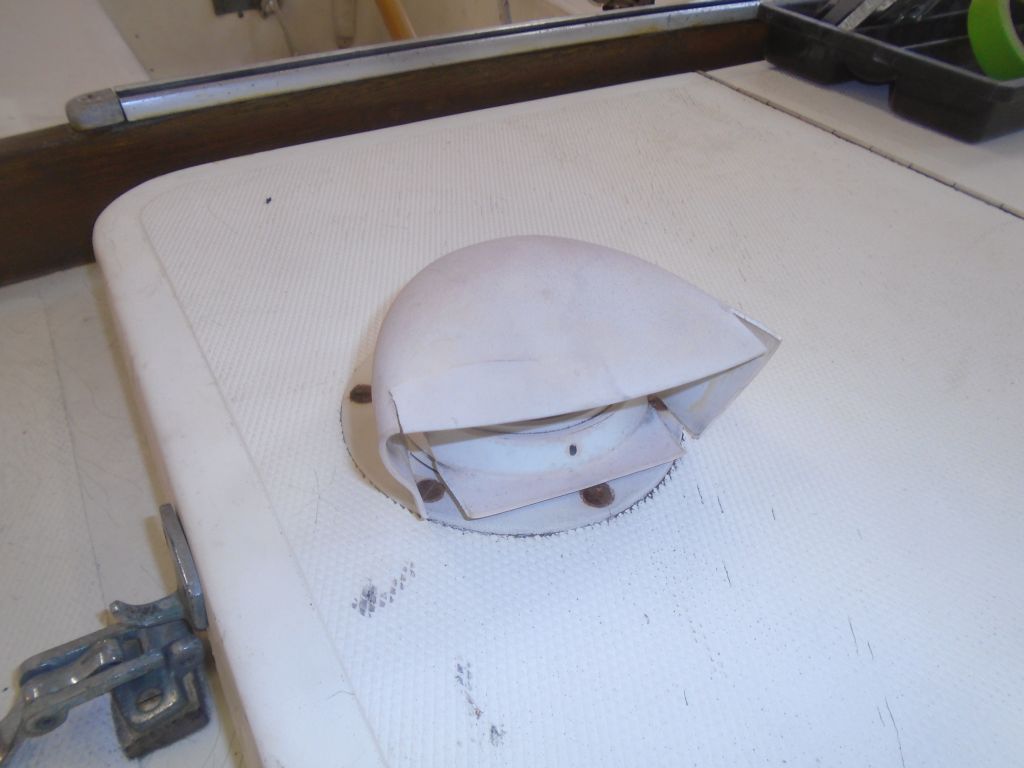
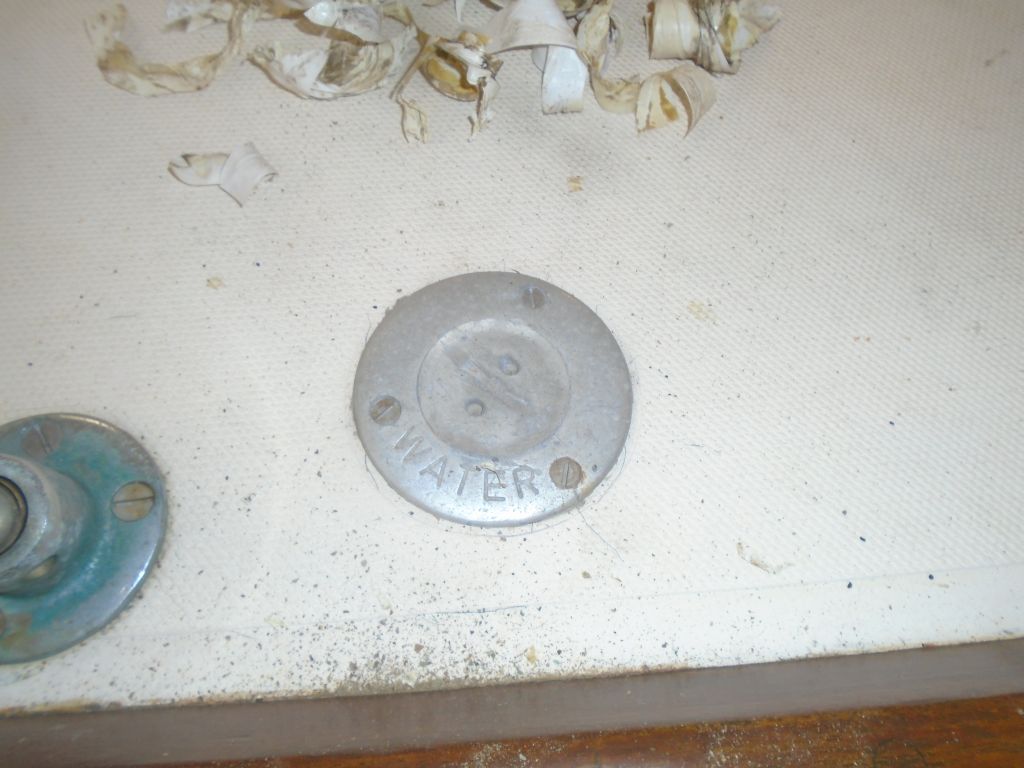
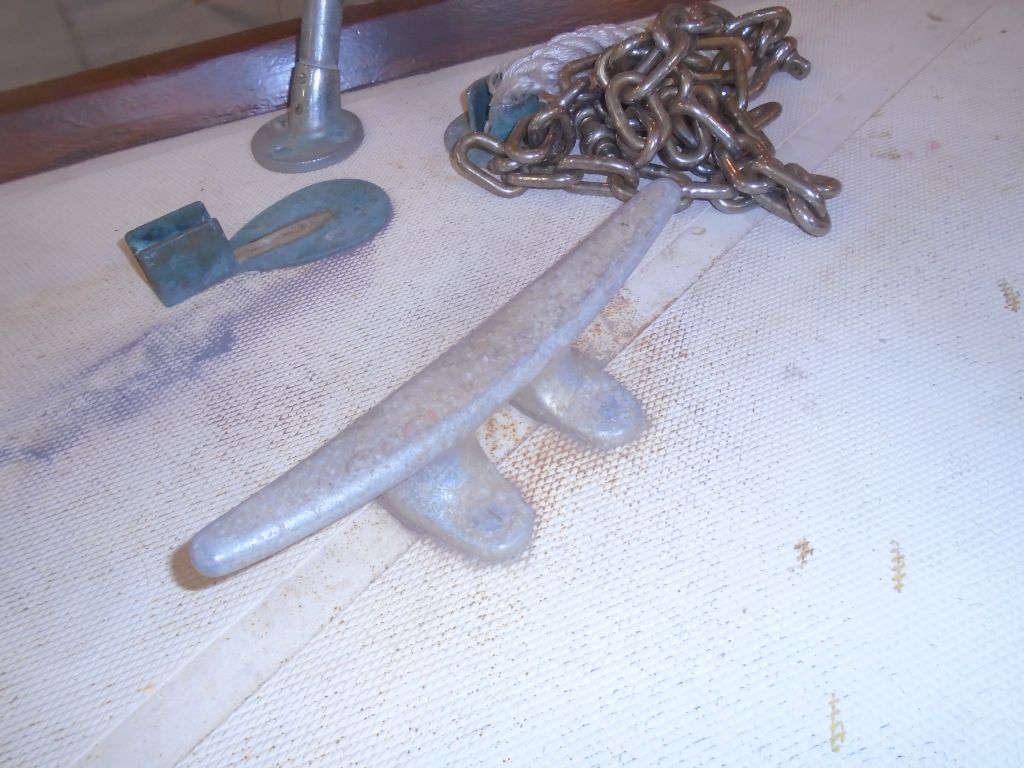
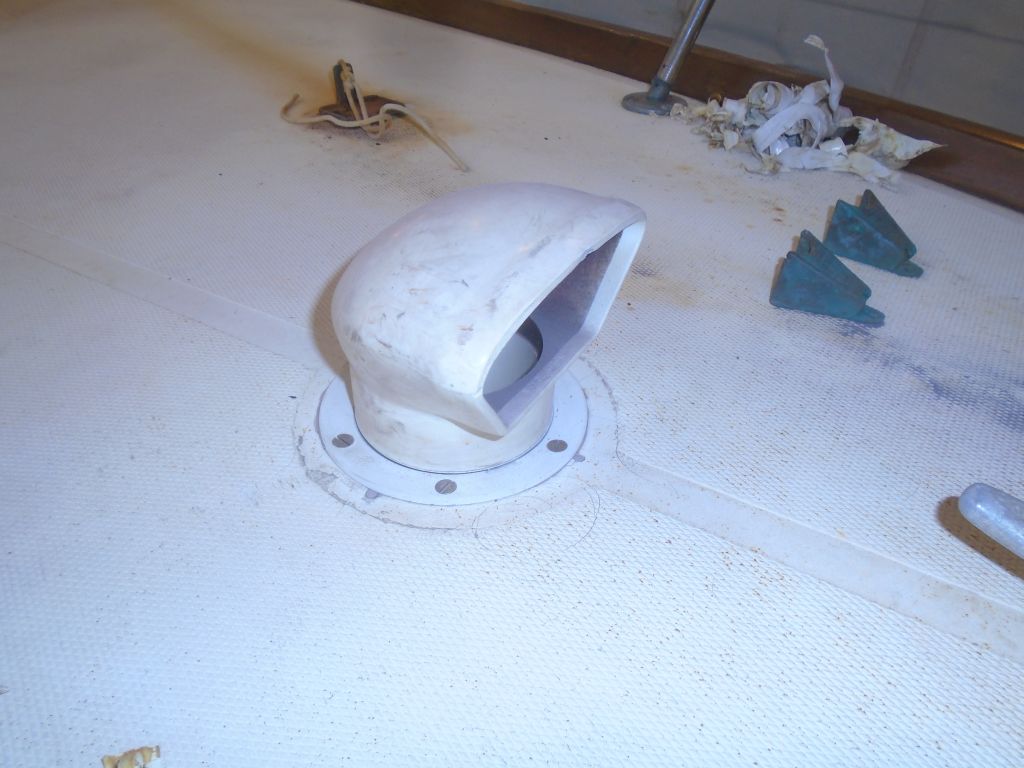
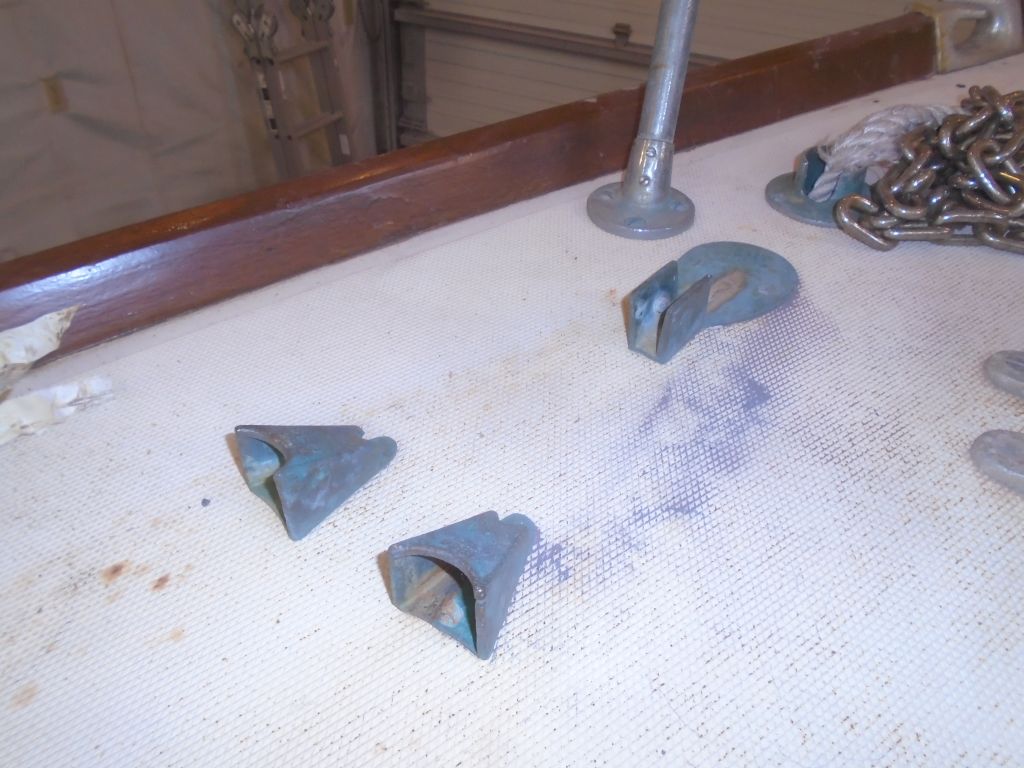
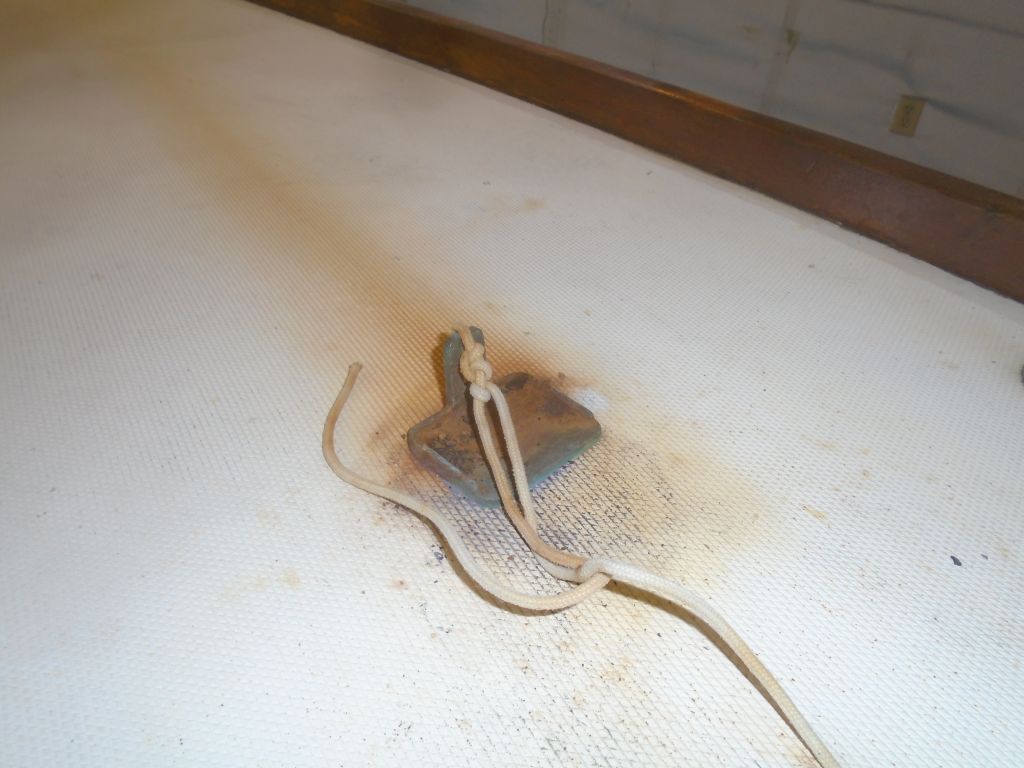
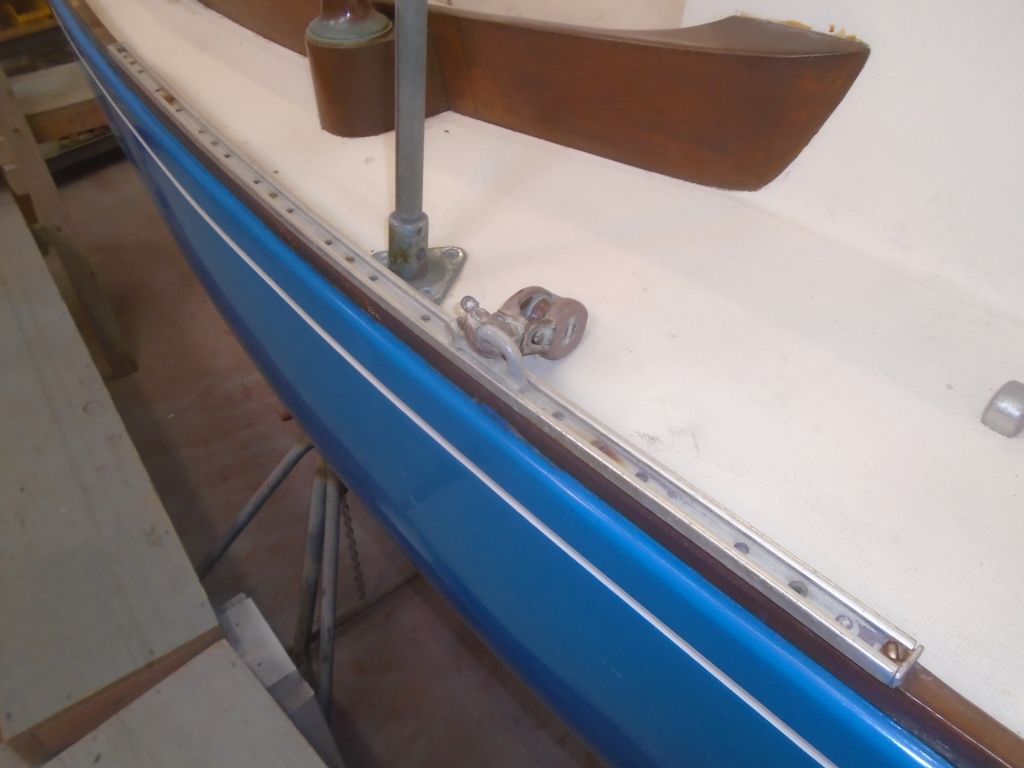
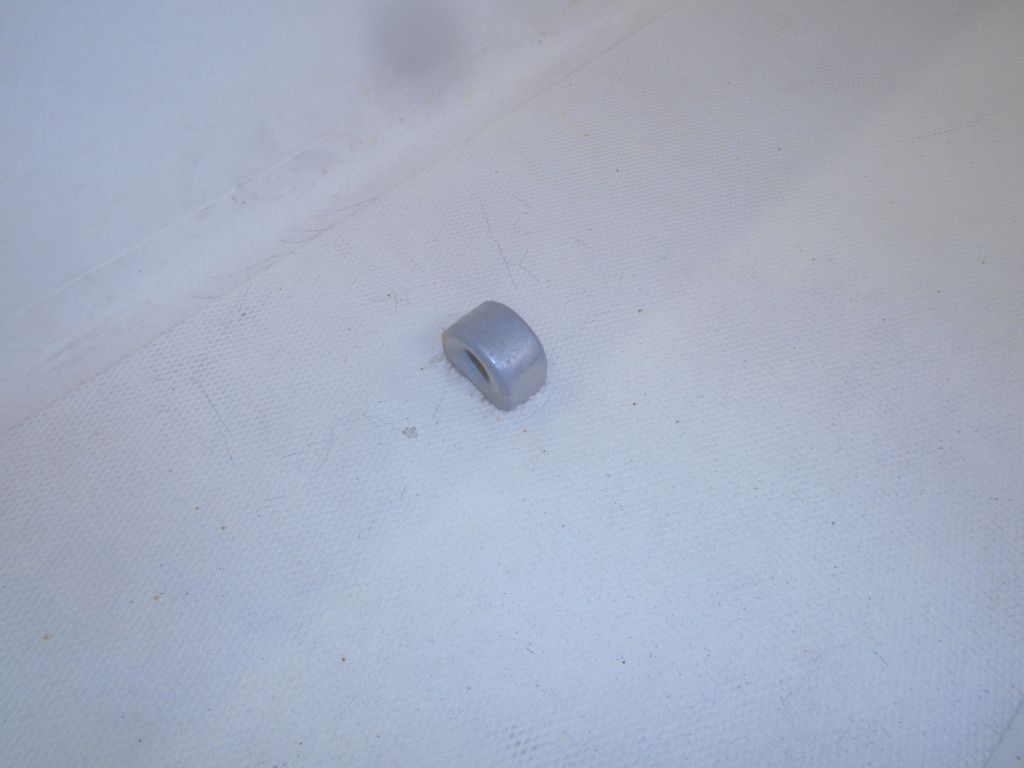
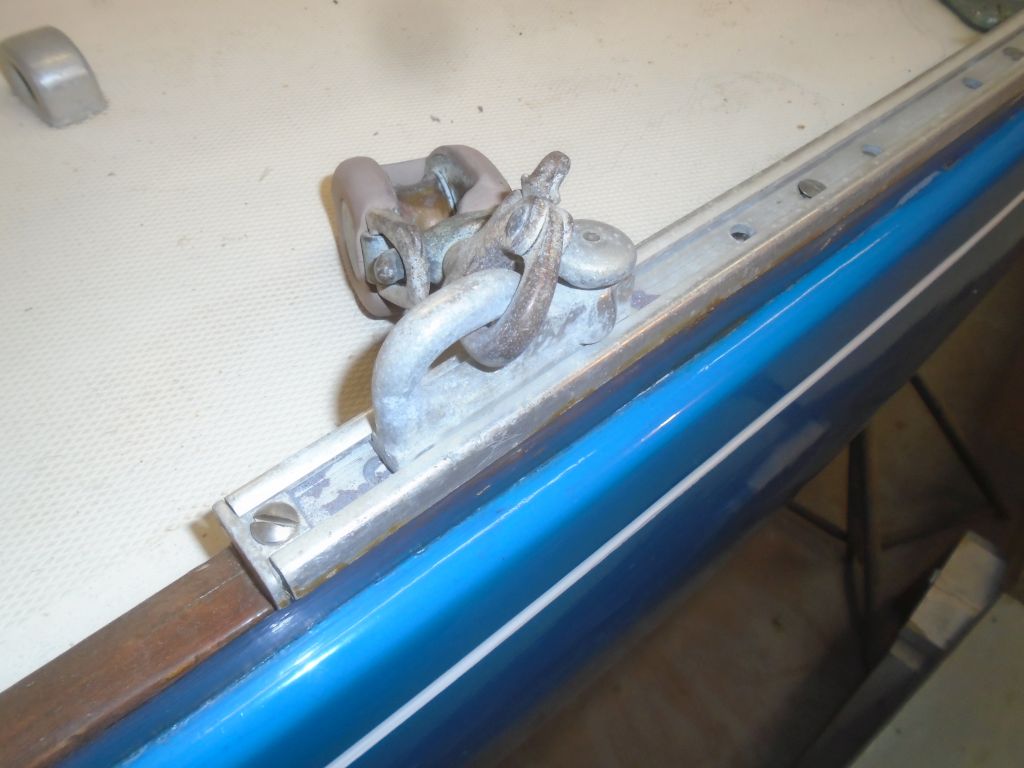
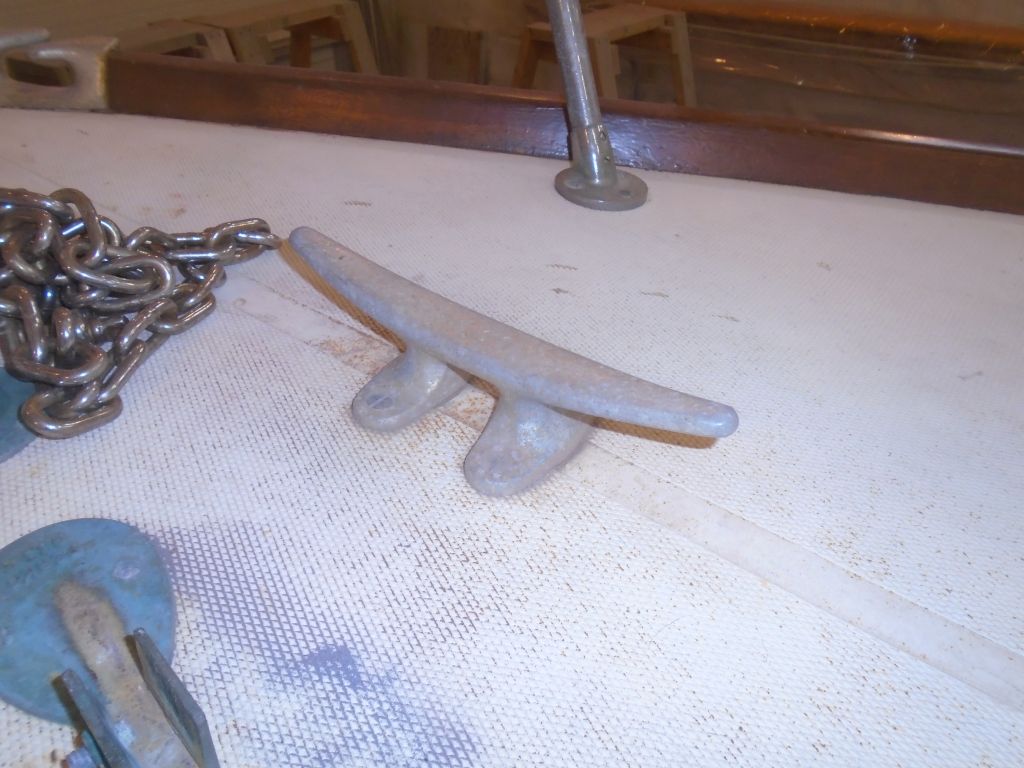
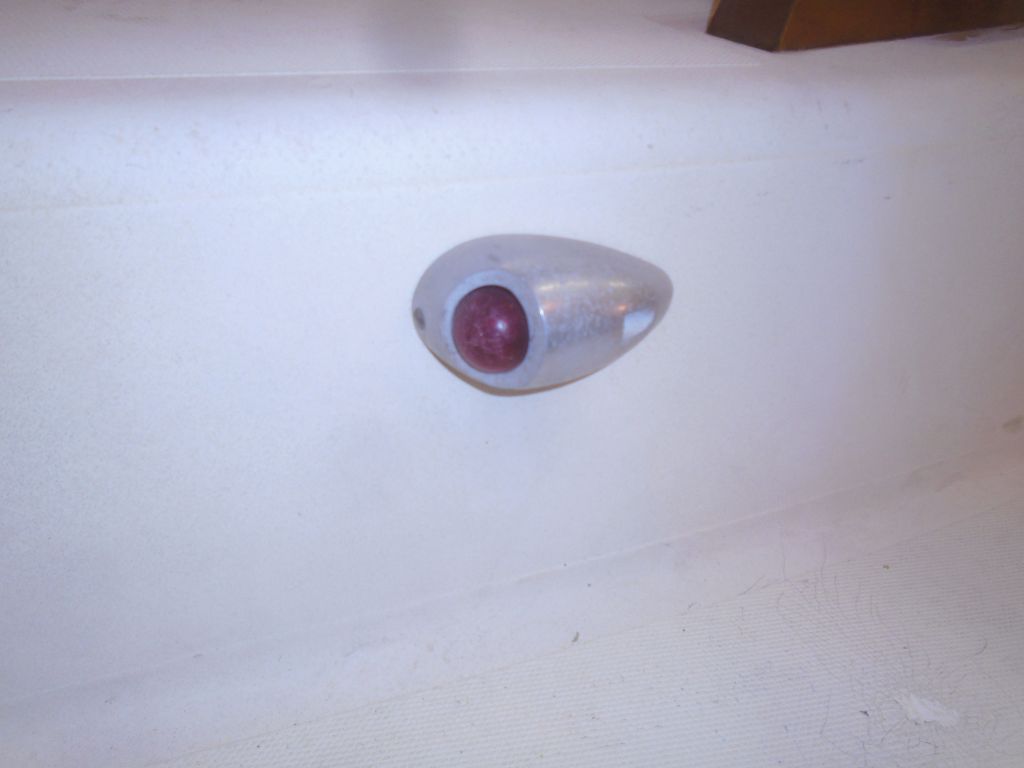
The original deck hardware–mainly aluminum with some bronze–was in fair condition overall, but several pieces were damaged or broken, including the port stern chock and stern cleat.  I hoped to source original-specific replacements for the damaged hardware, and, if luck was with us, perhaps replace some of the other pieces–which were pitted if sound–if better vintage pieces turned up.  These photos document the original placement and condition of the deck hardware.  The original lifelines were in poor condition, and replacement (along with a rigging inspection and assessment) was on the list for the project.

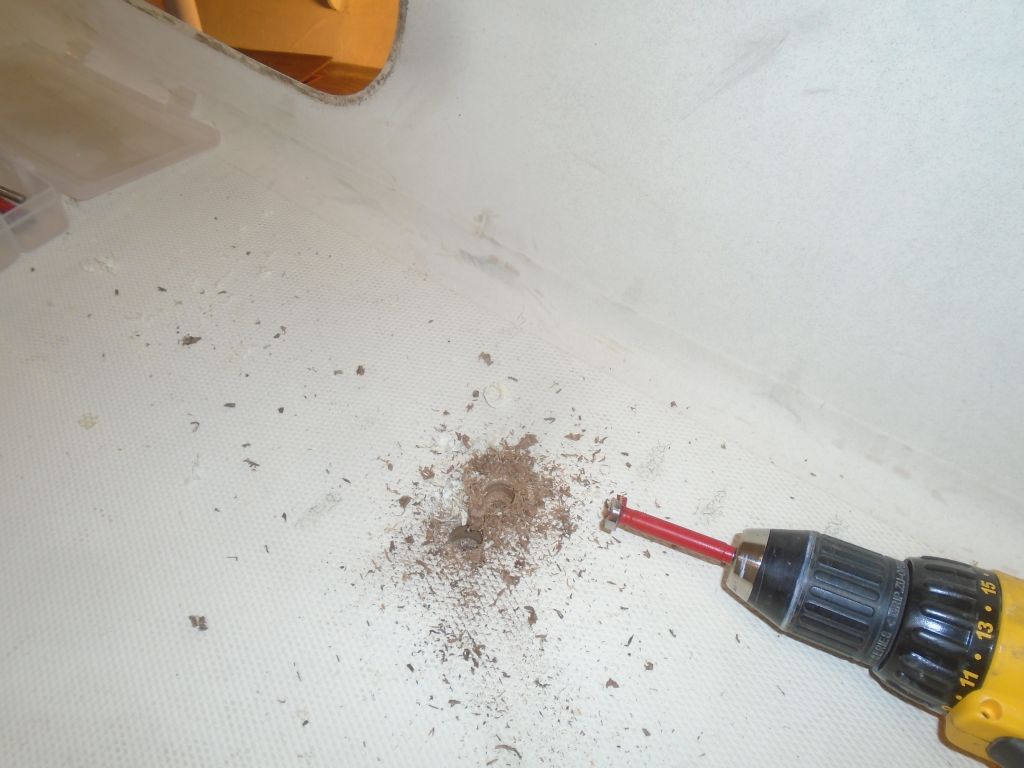
With the basic preparations, unloading, and initial inspection complete, I was ready to get down to business, and would start removing deck hardware next time.

Total time billed on this job today:  6.5 hours

0600 Weather Observation:
32°, rain; freezing rain; sleet.  Forecast for the day:  precipitation ending, clearing,

Older posts Newer posts