(page 2 of 13)

Calliope Girl 117

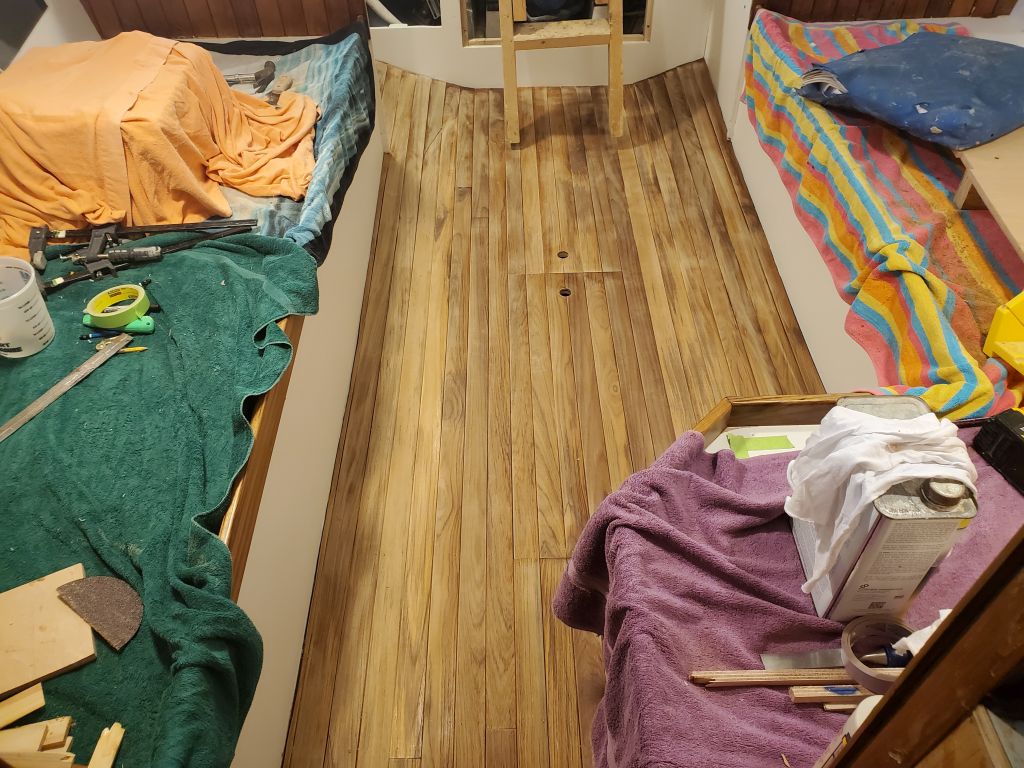
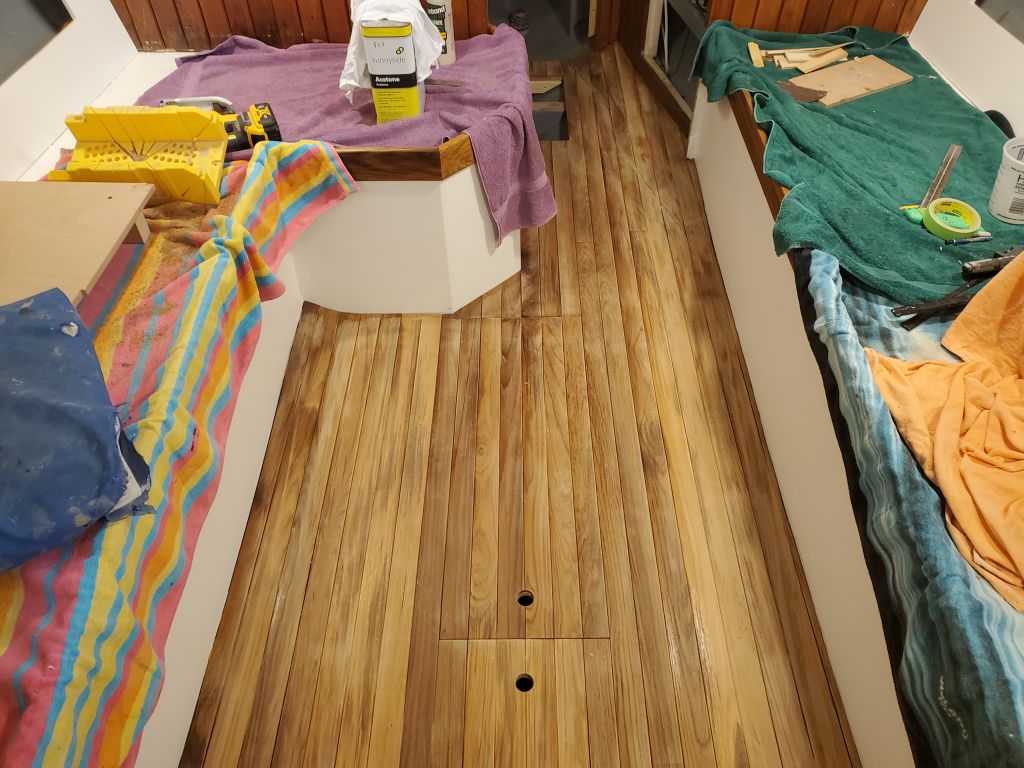
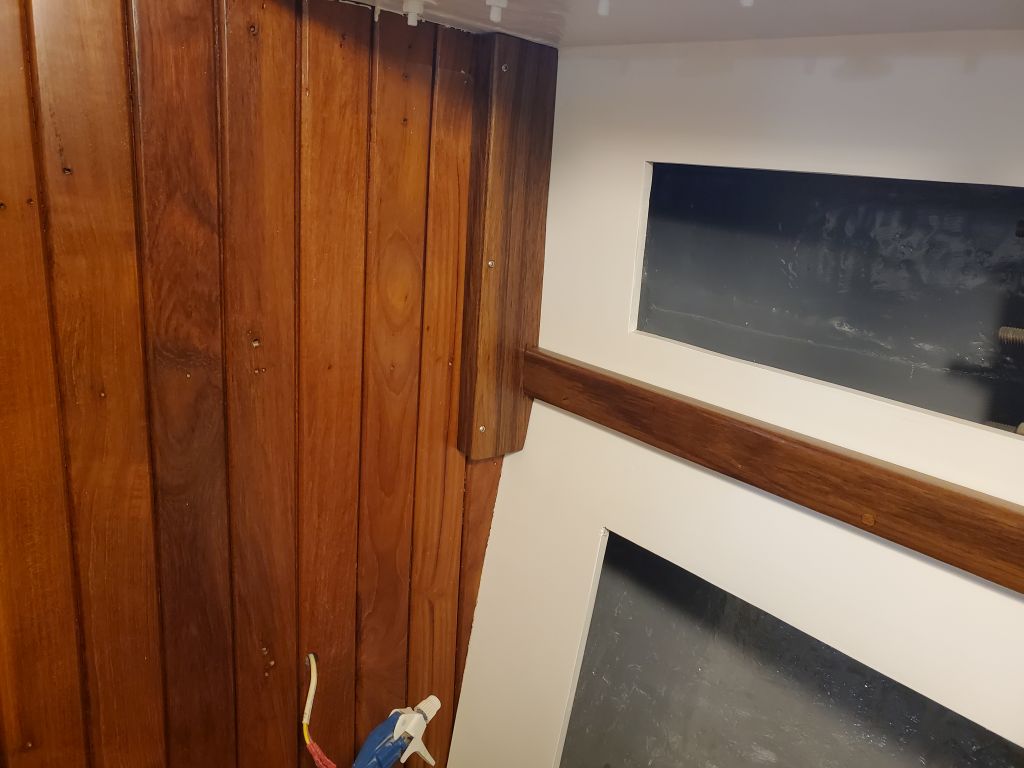
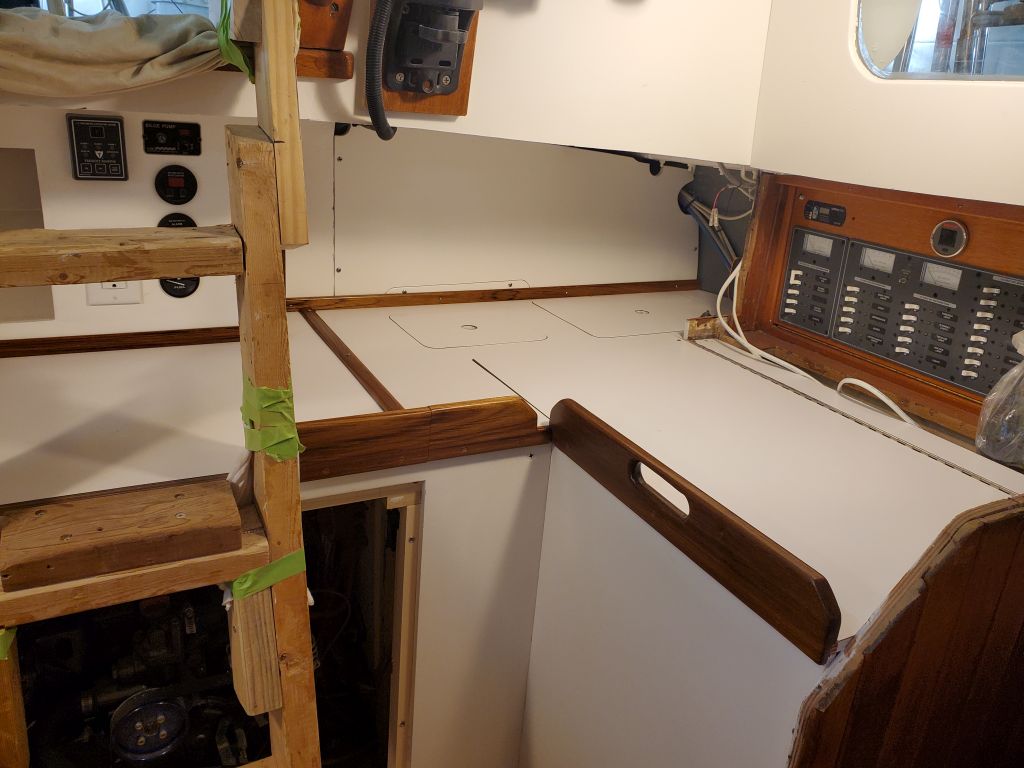
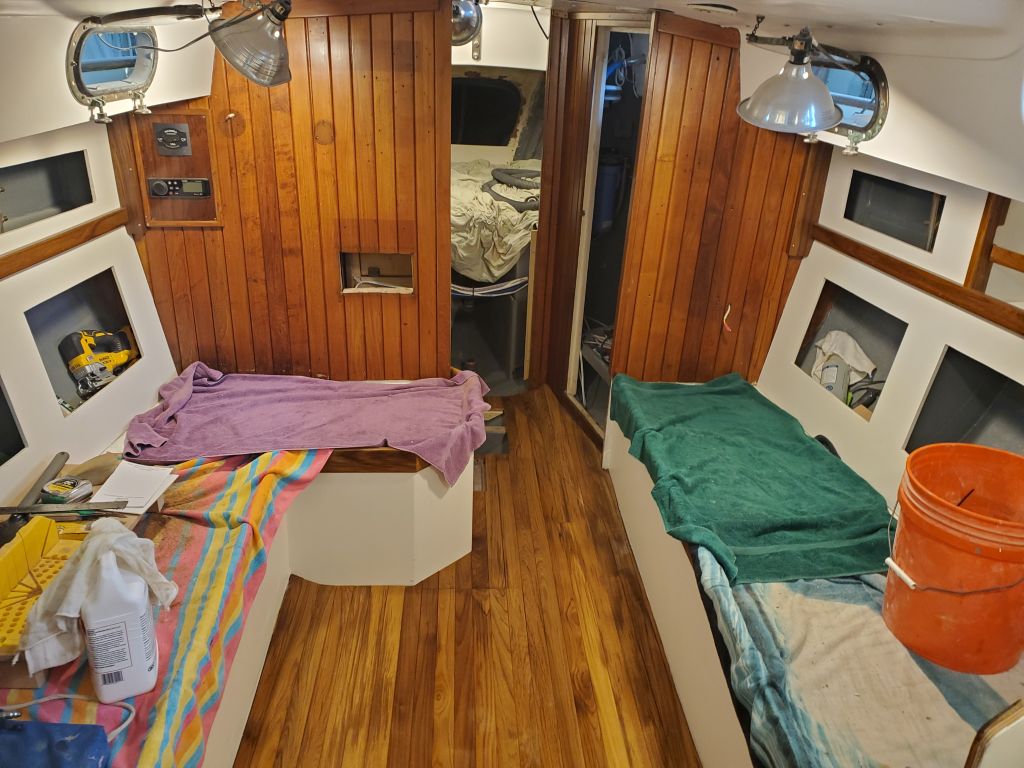
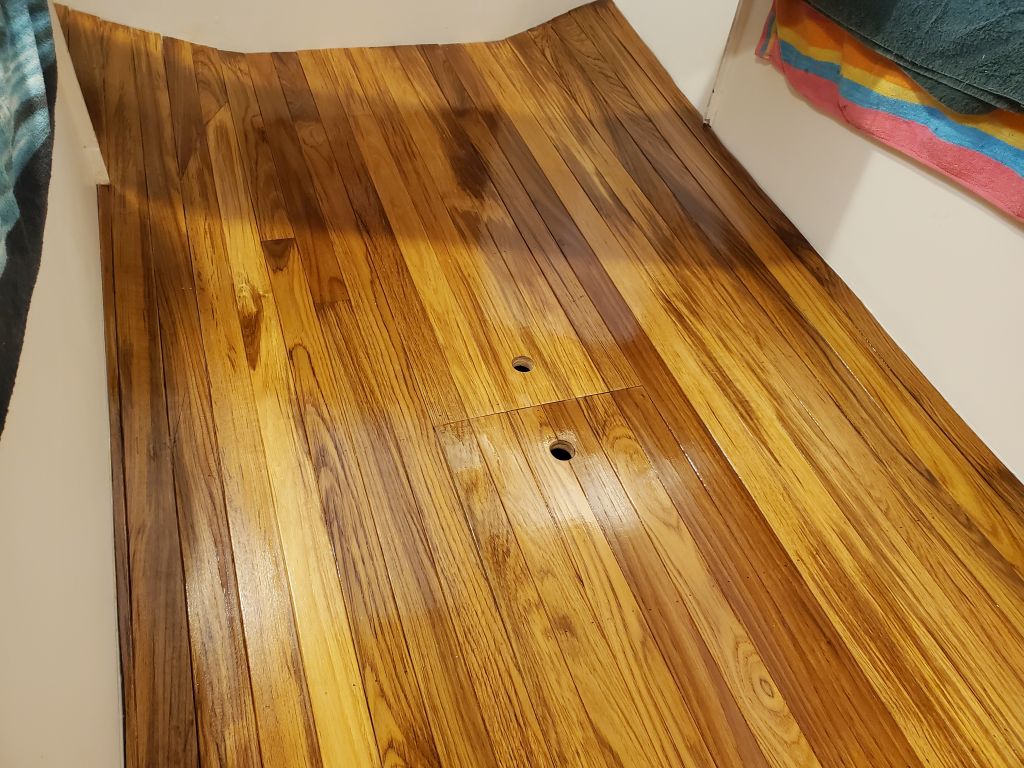
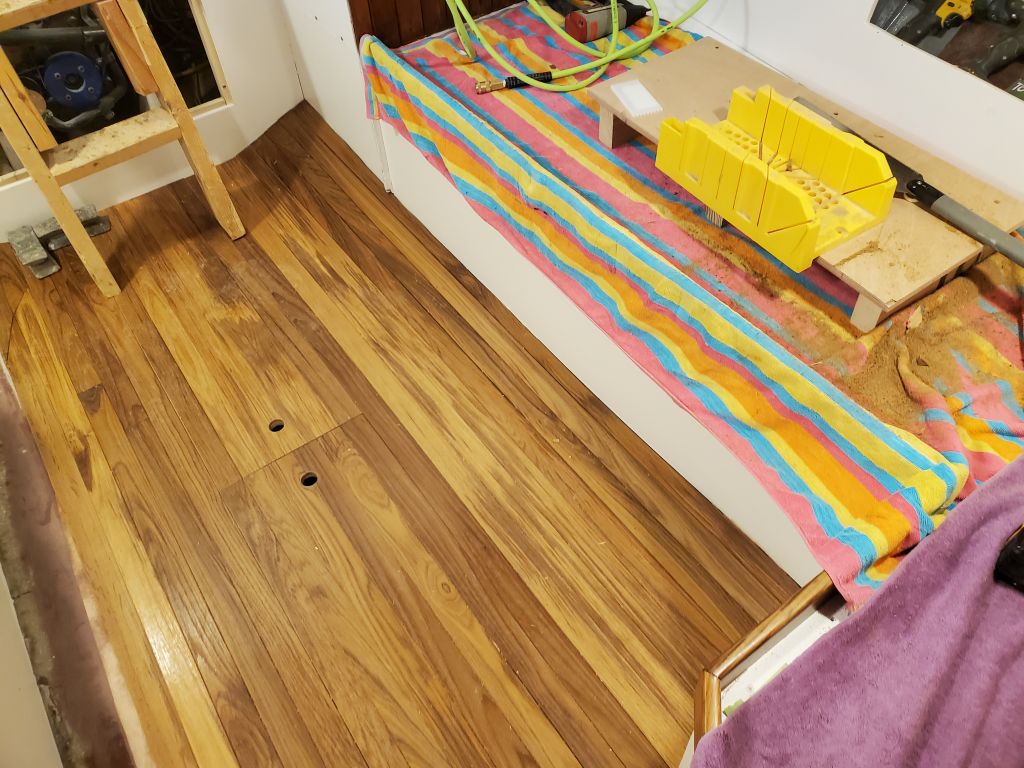
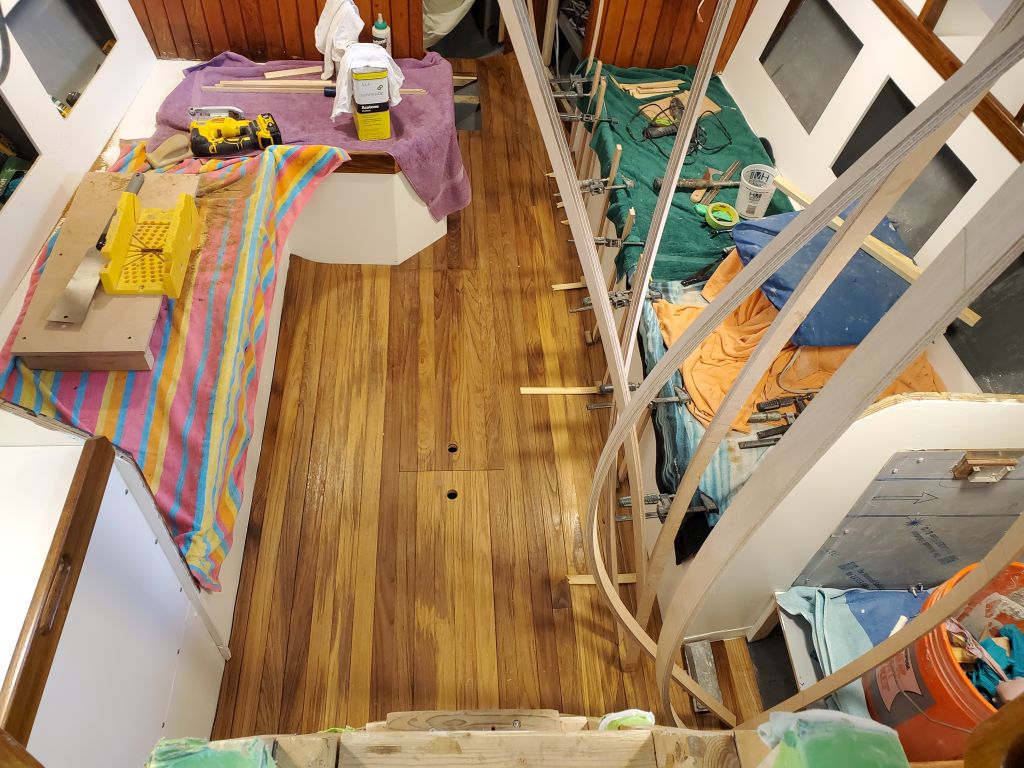
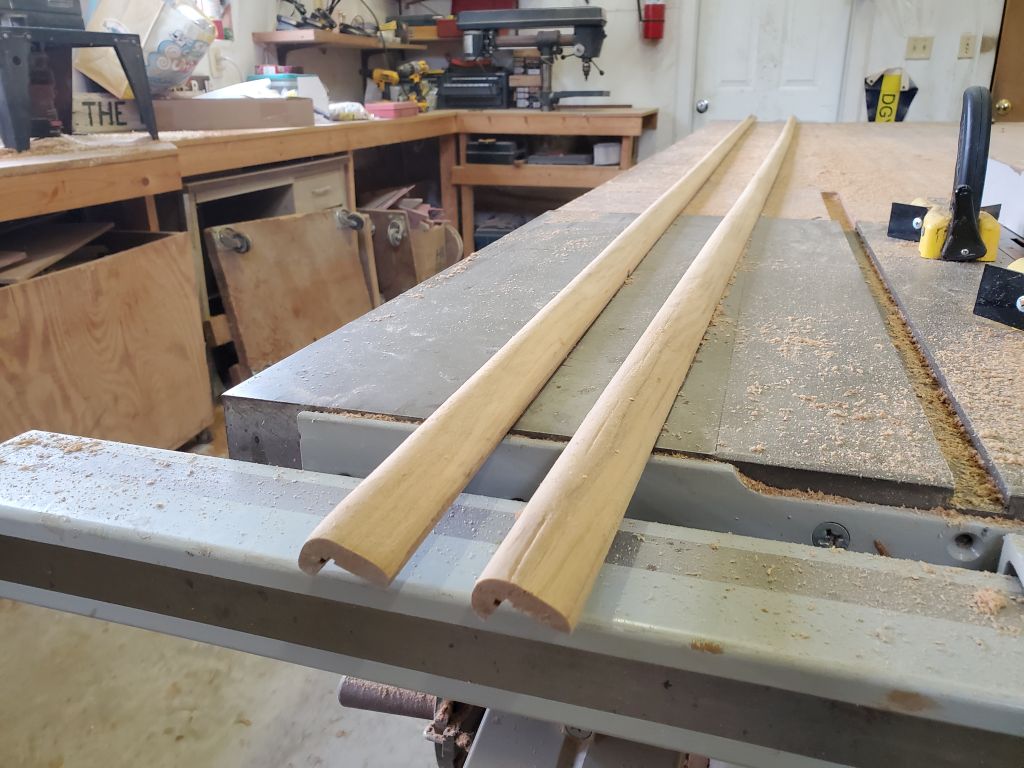
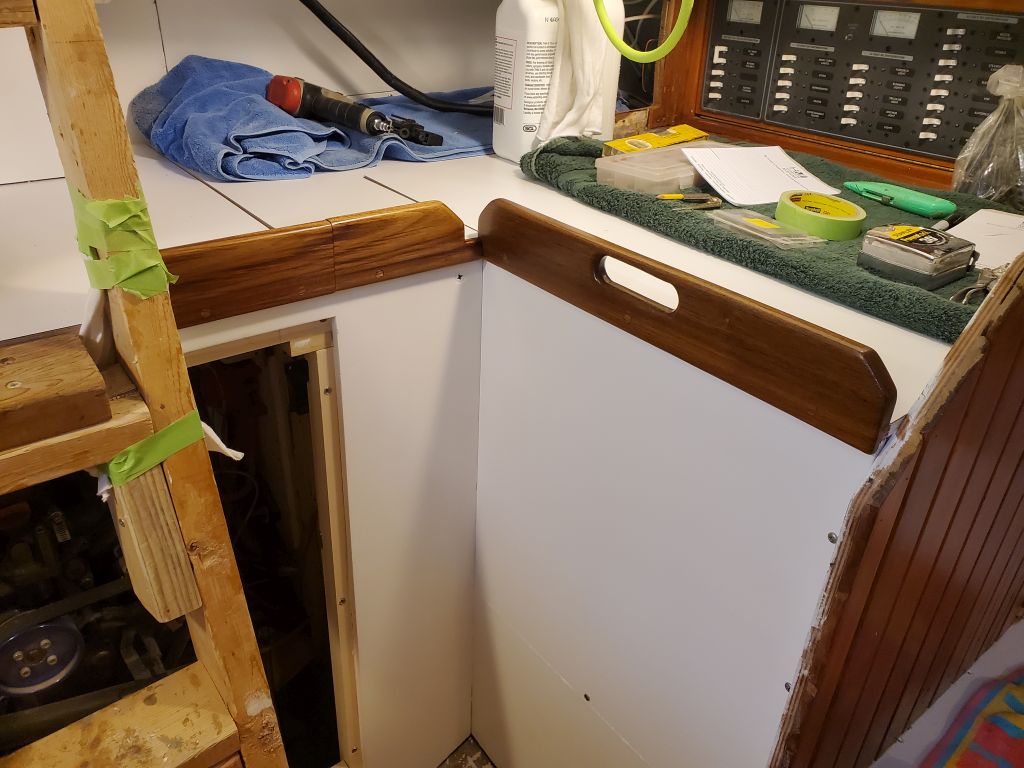
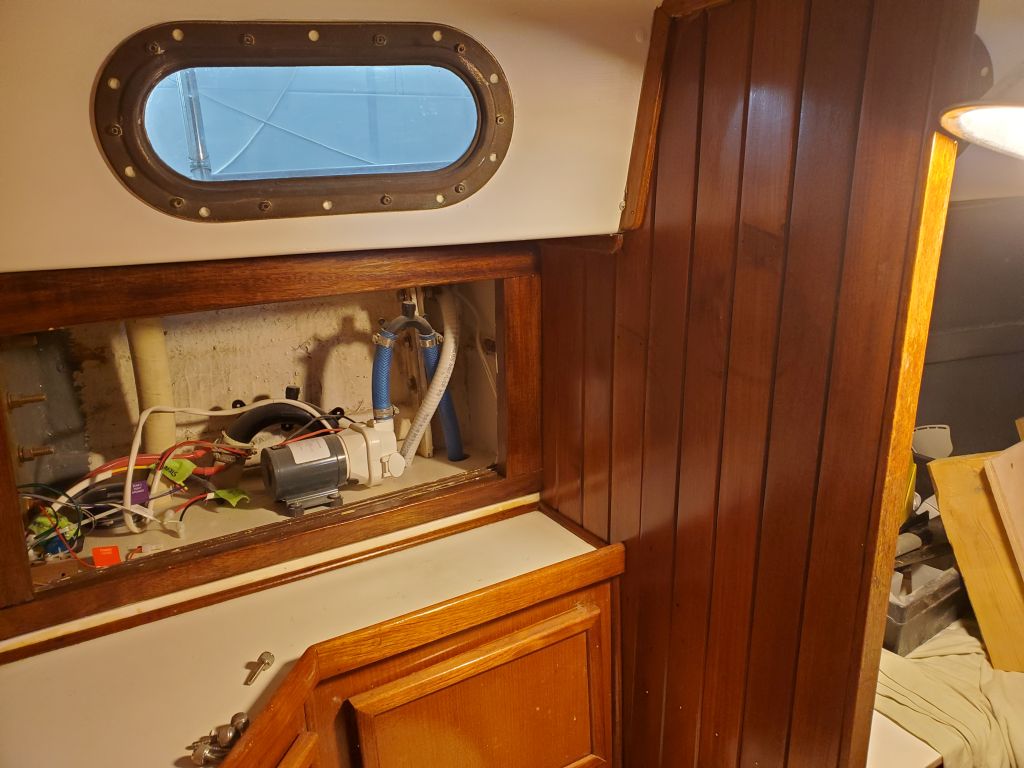
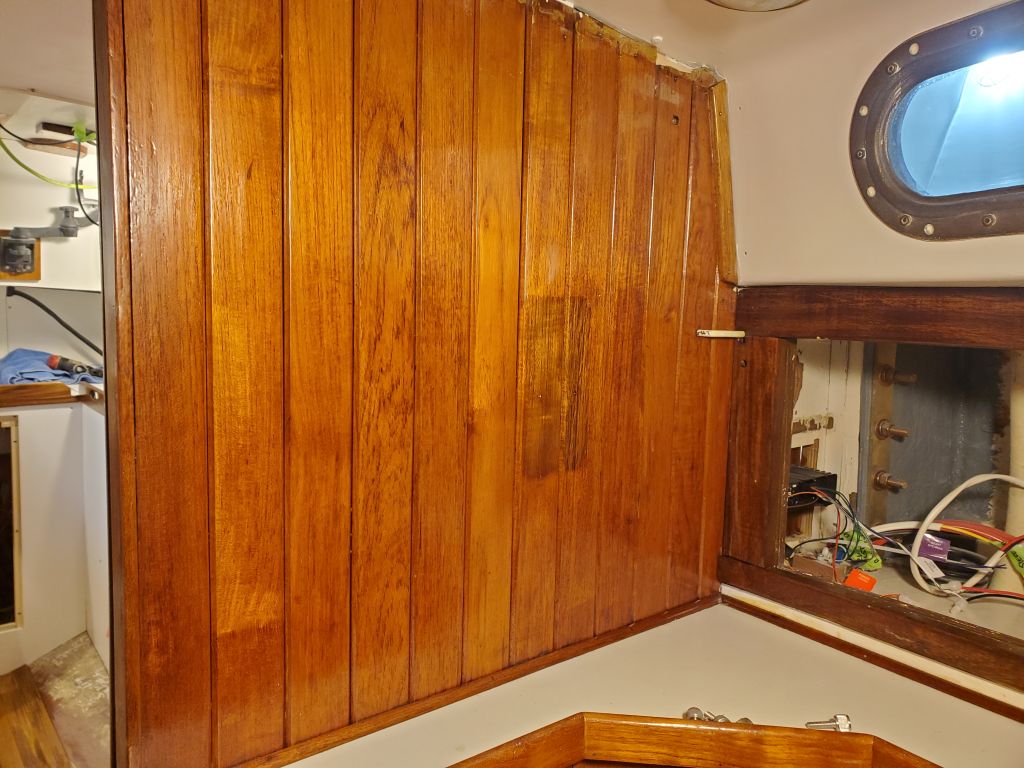
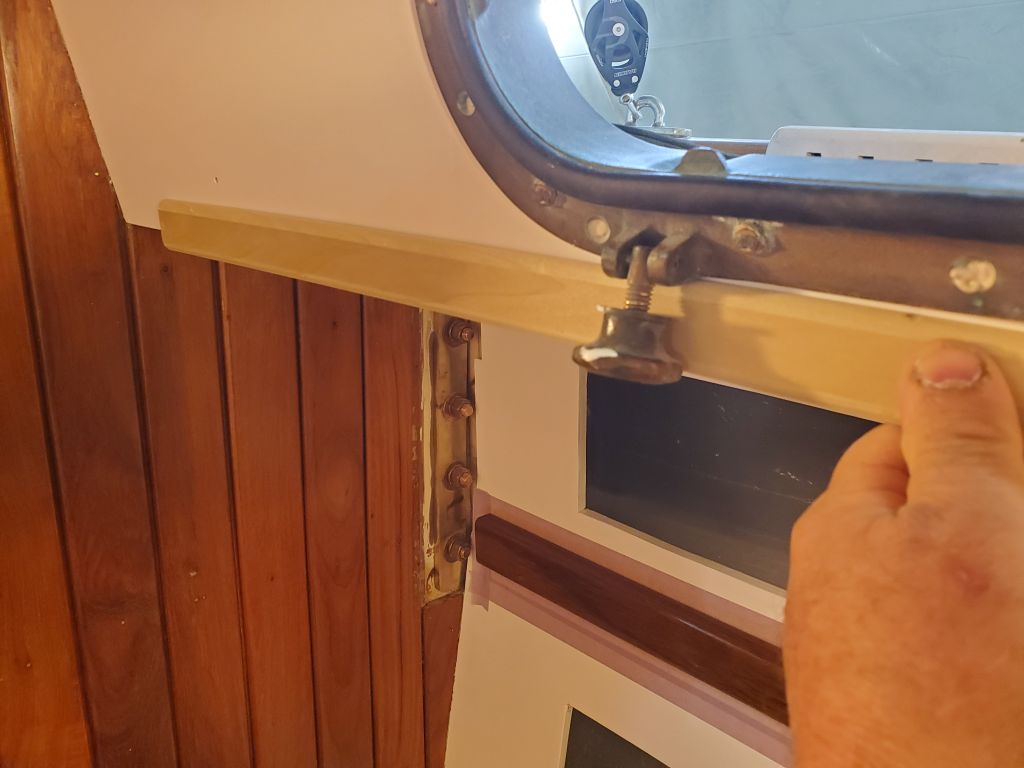
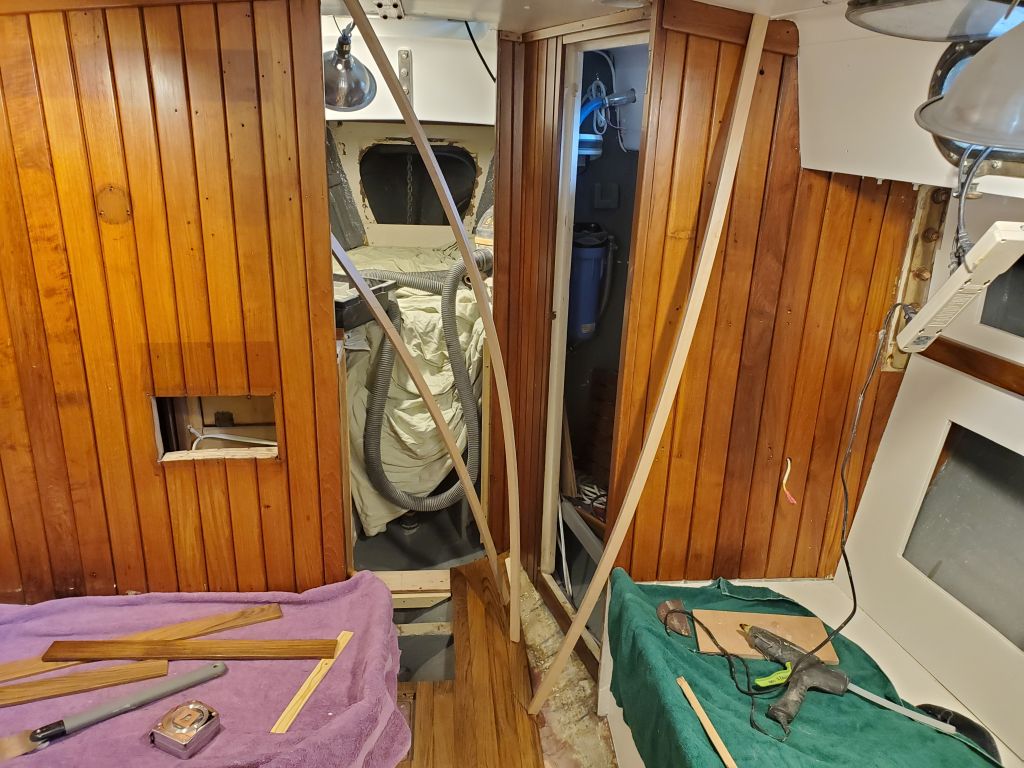
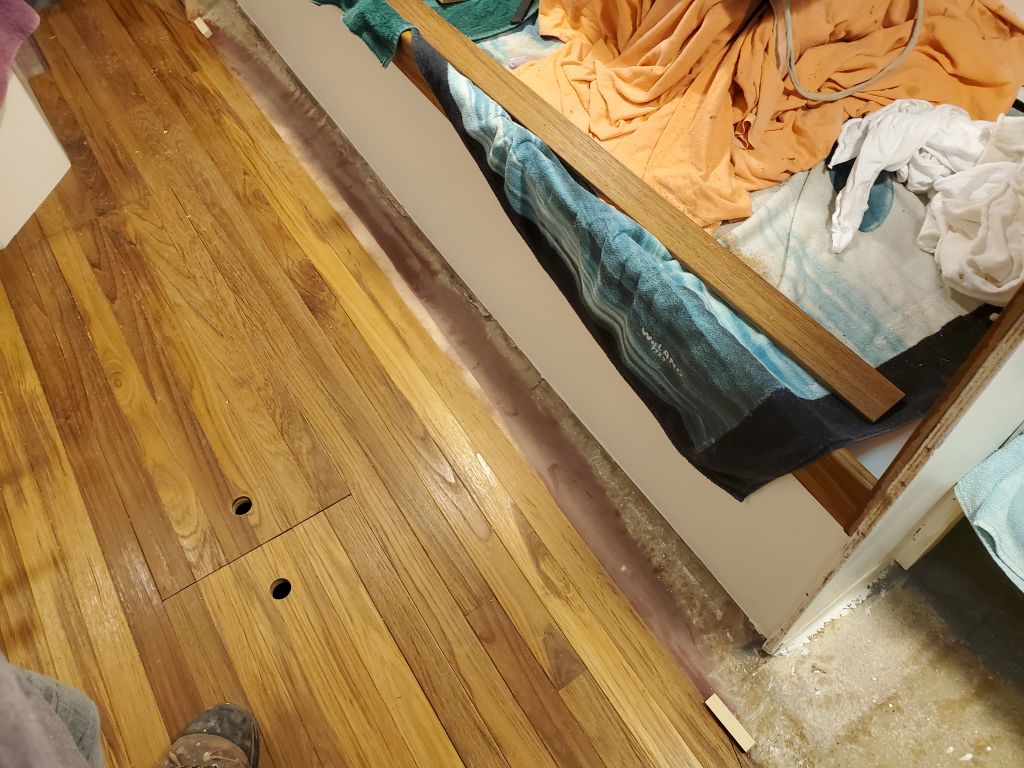
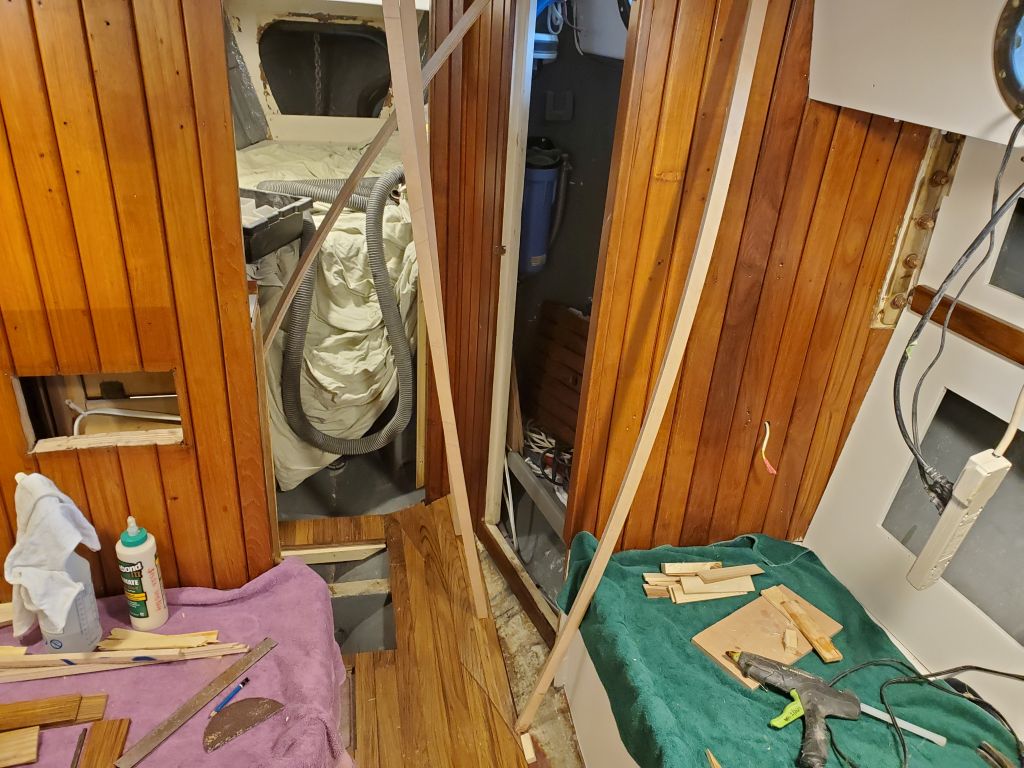
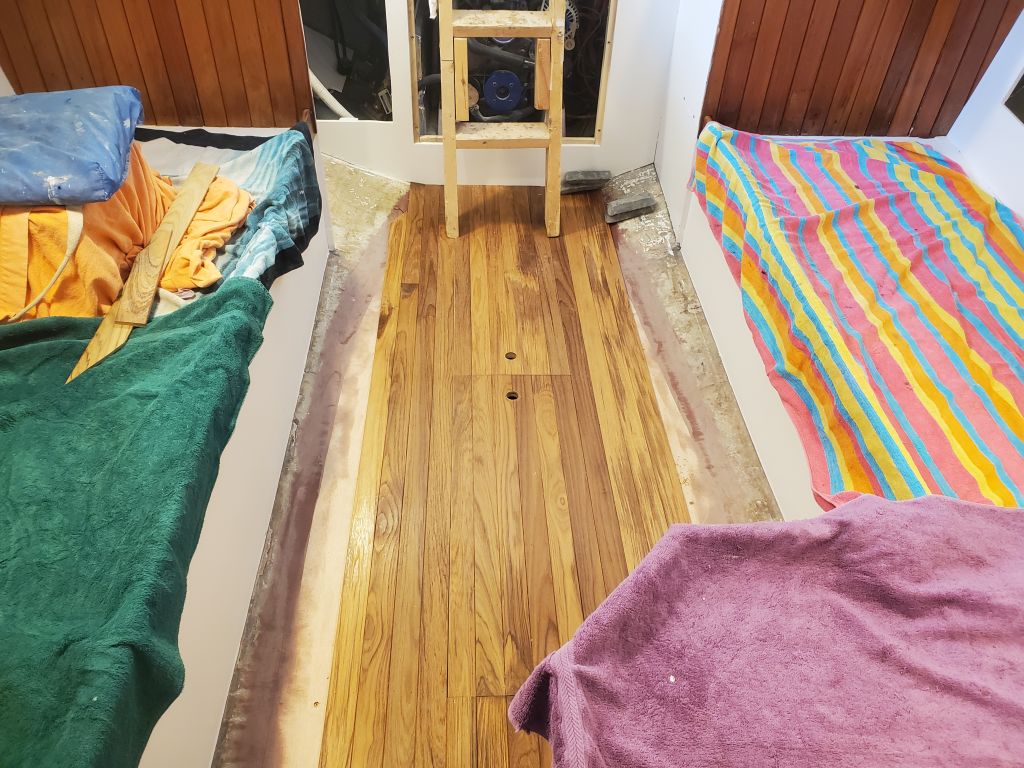
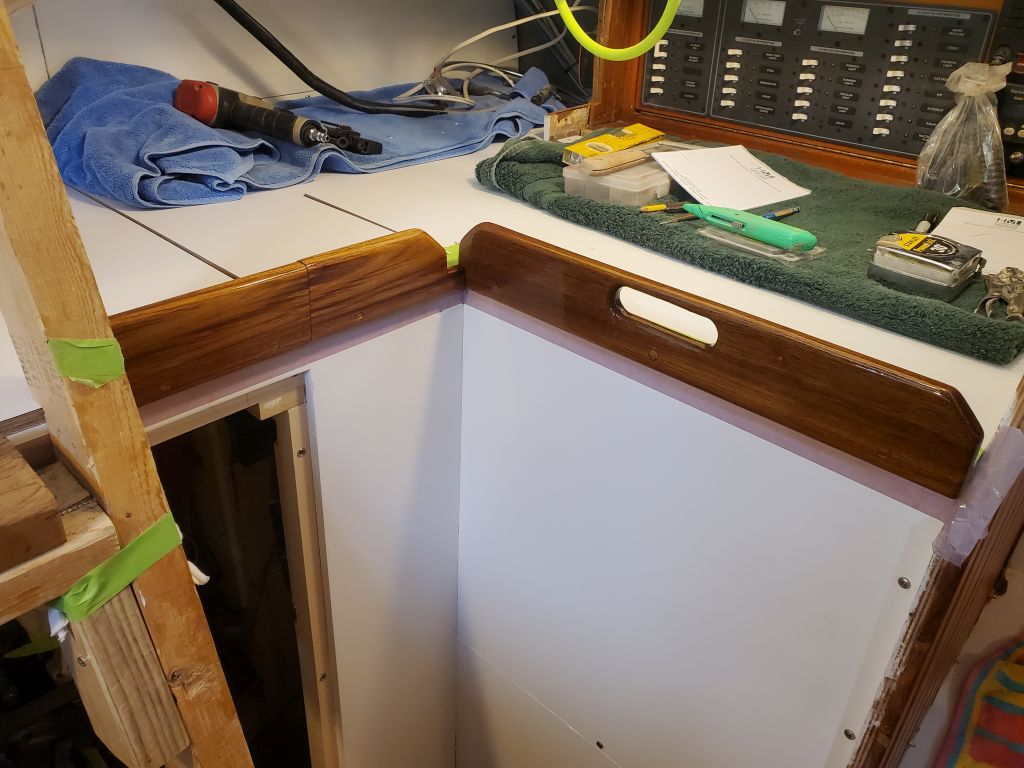
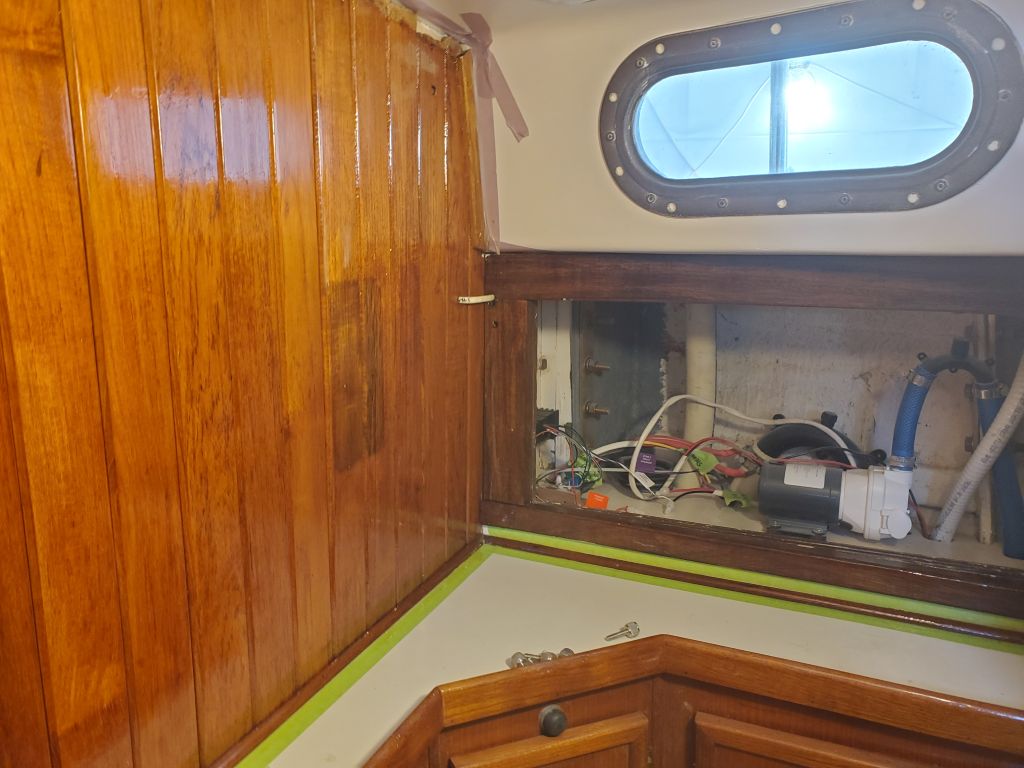
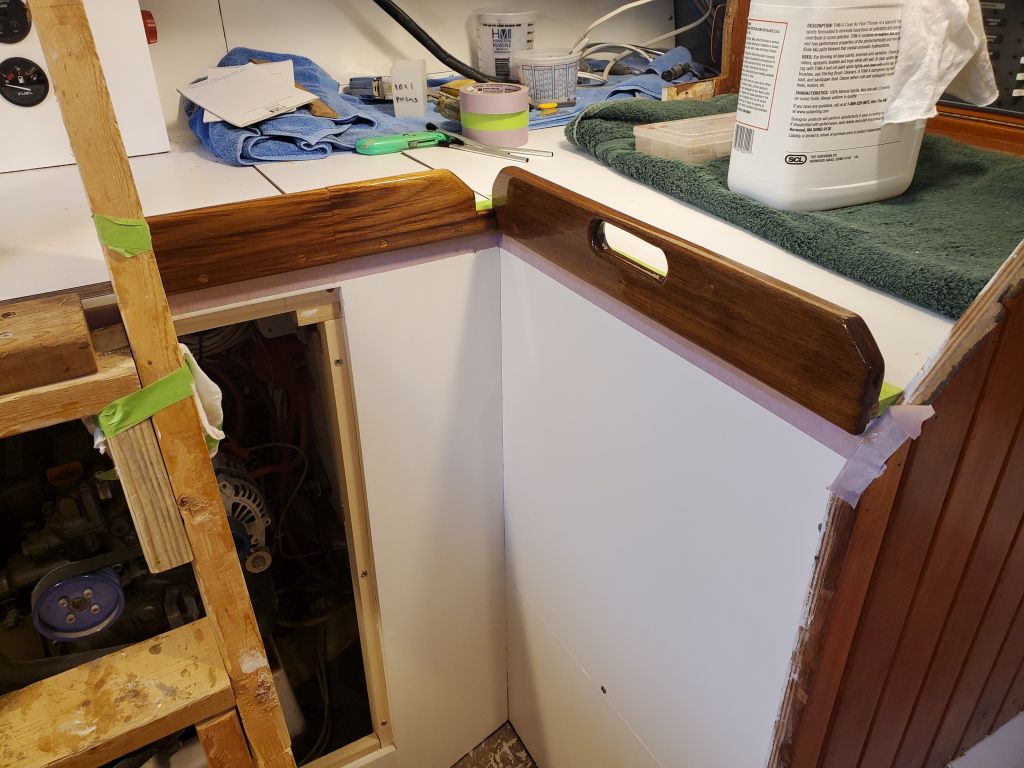
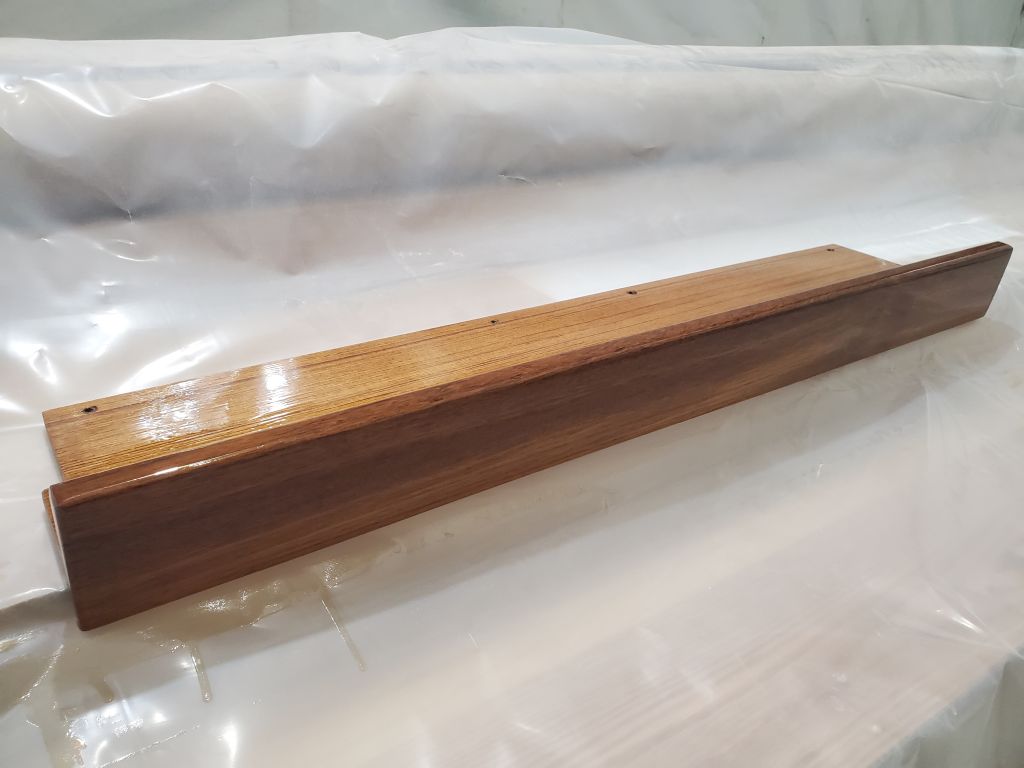
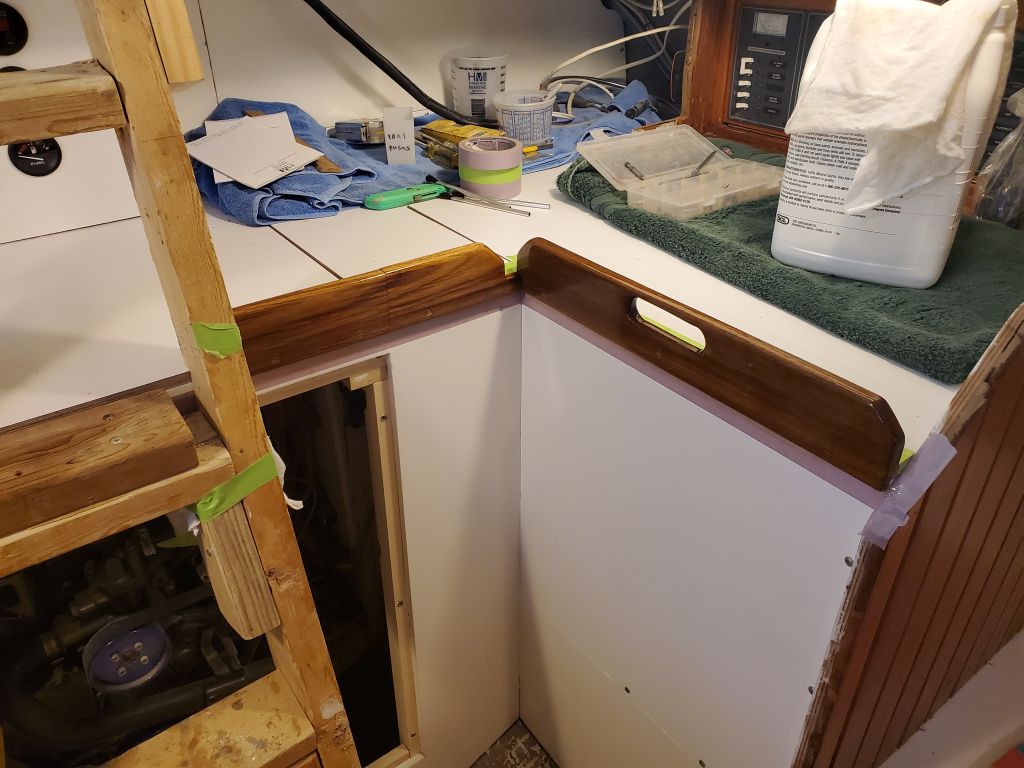
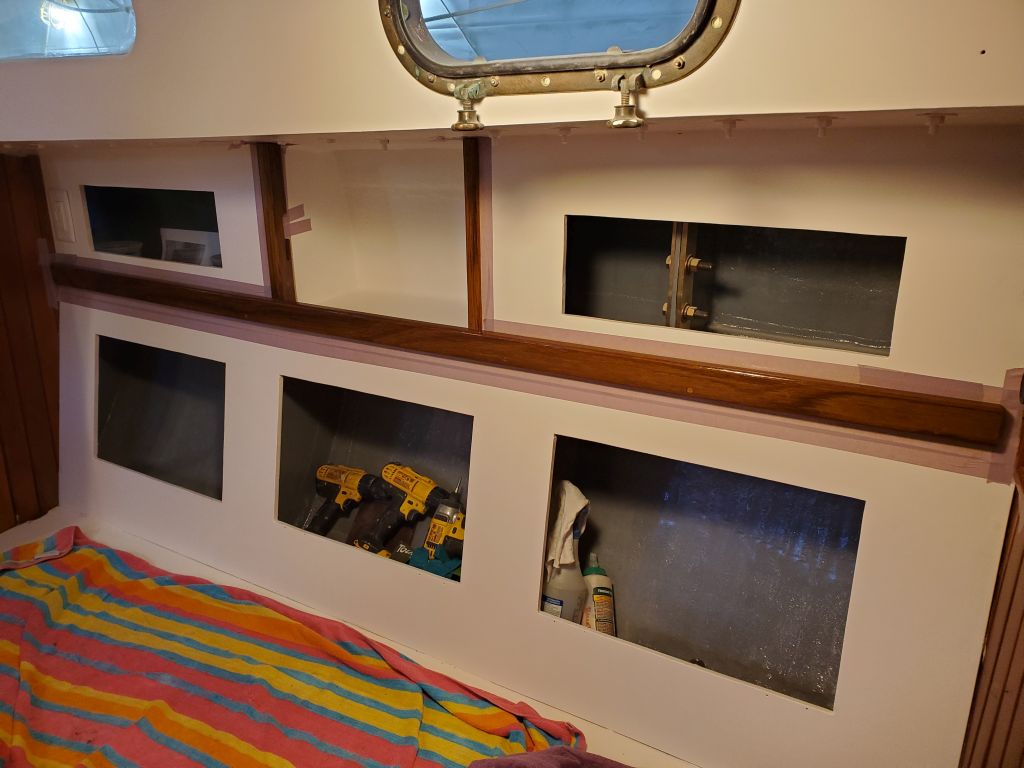
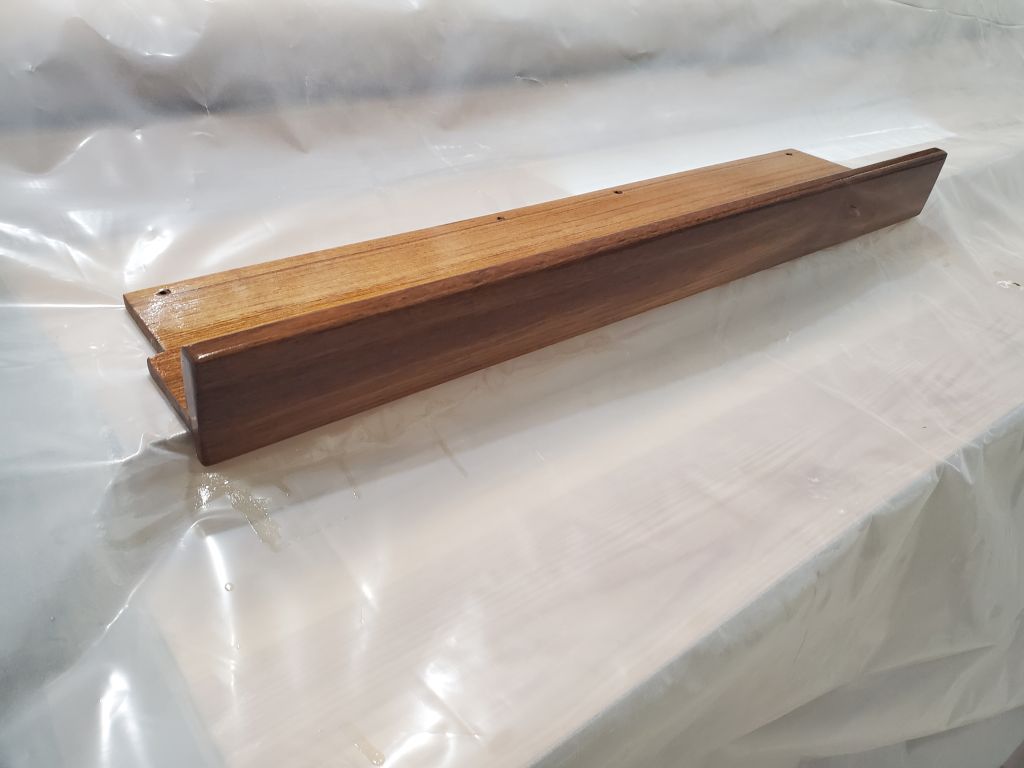
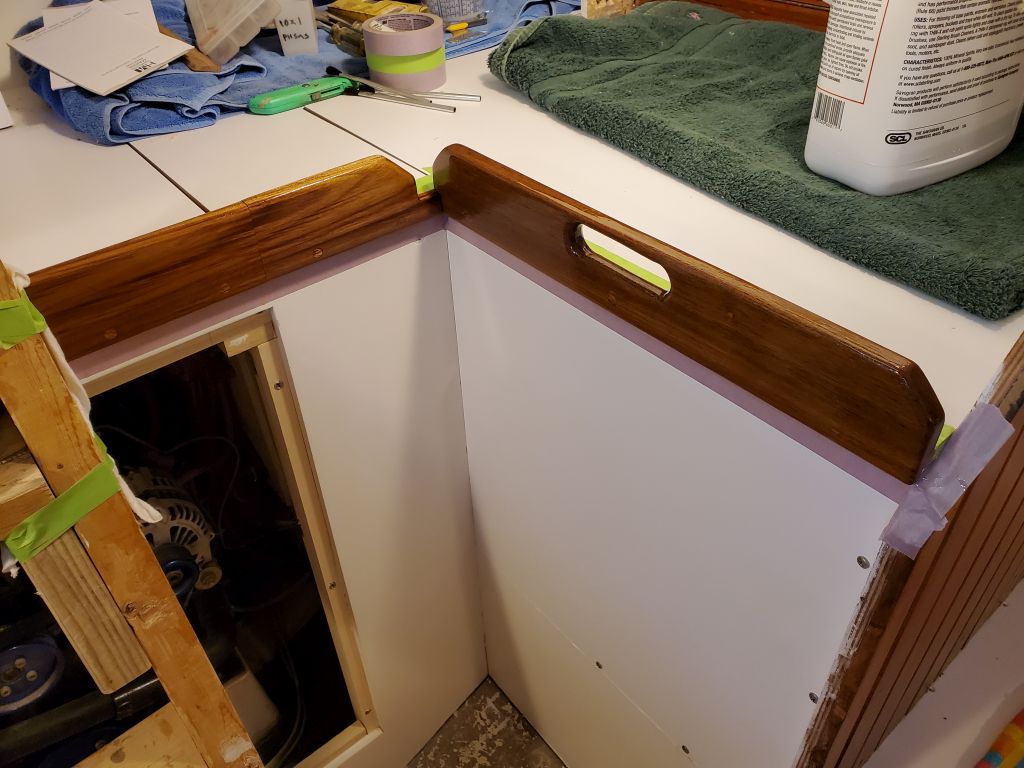
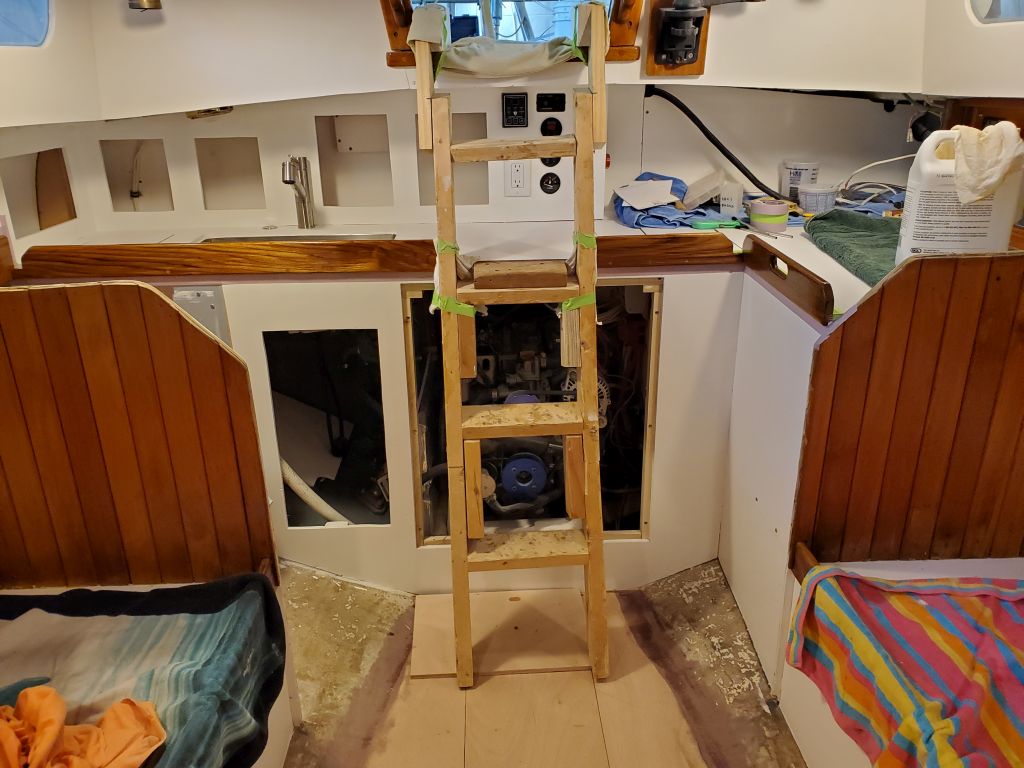
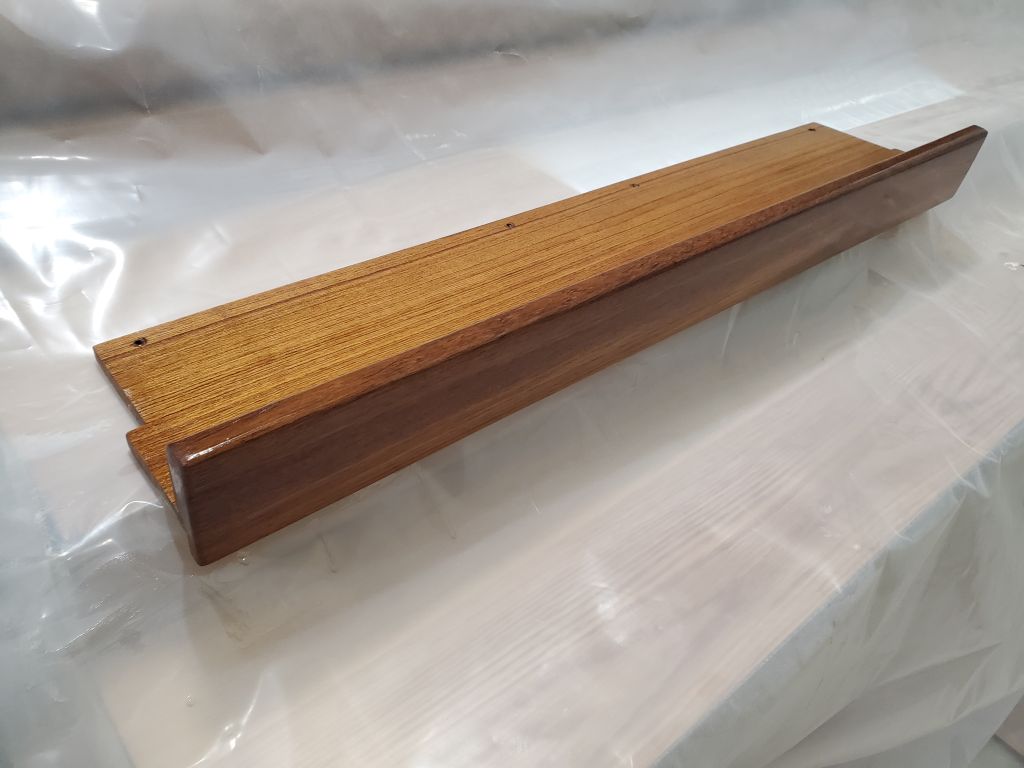
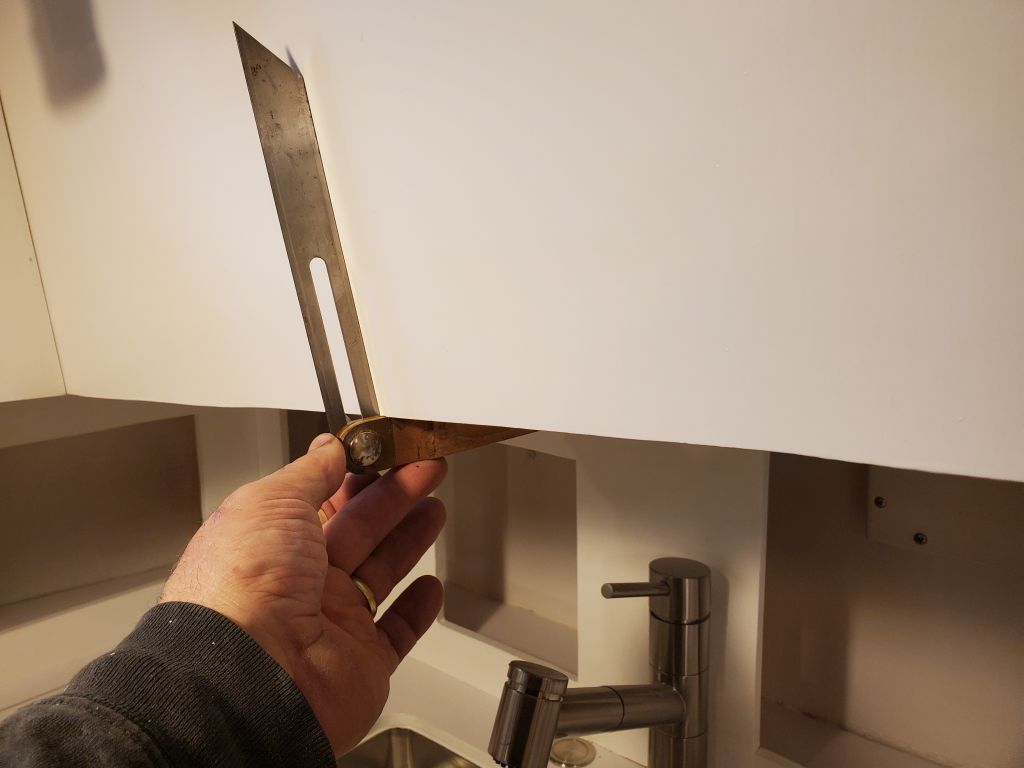
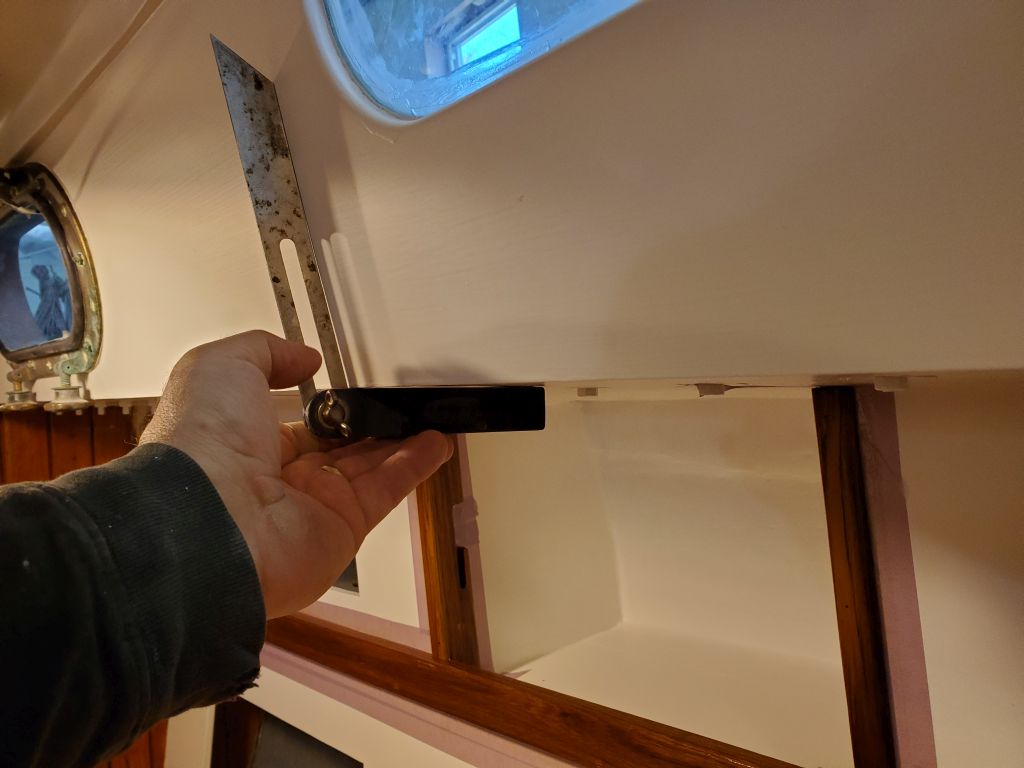
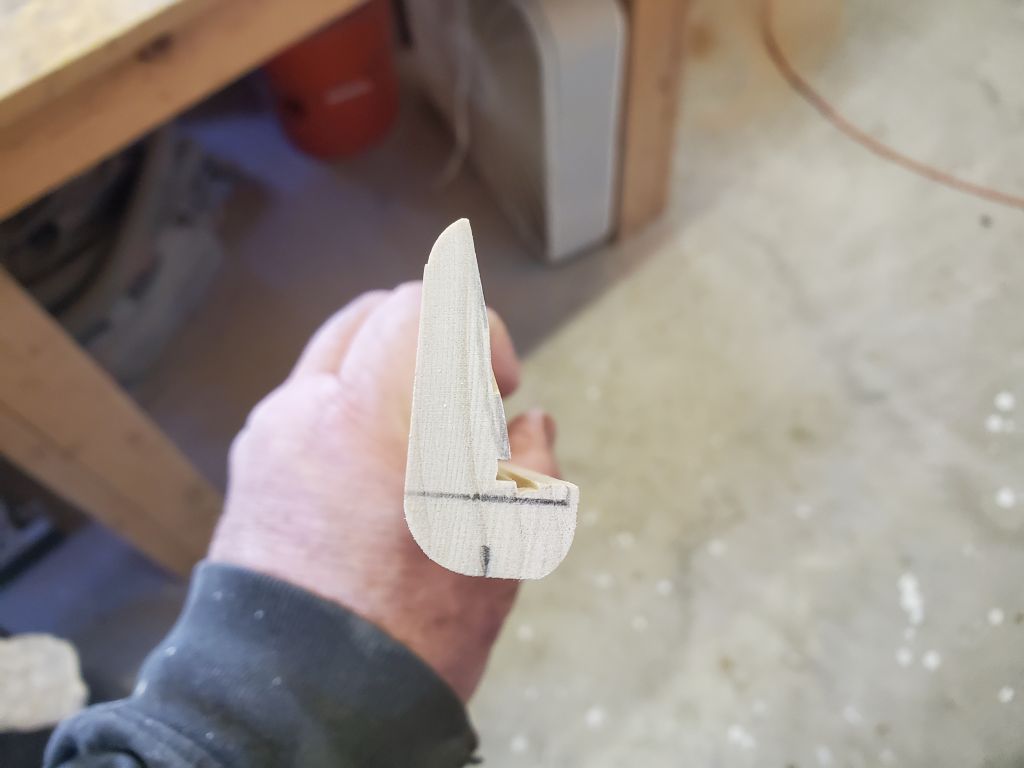
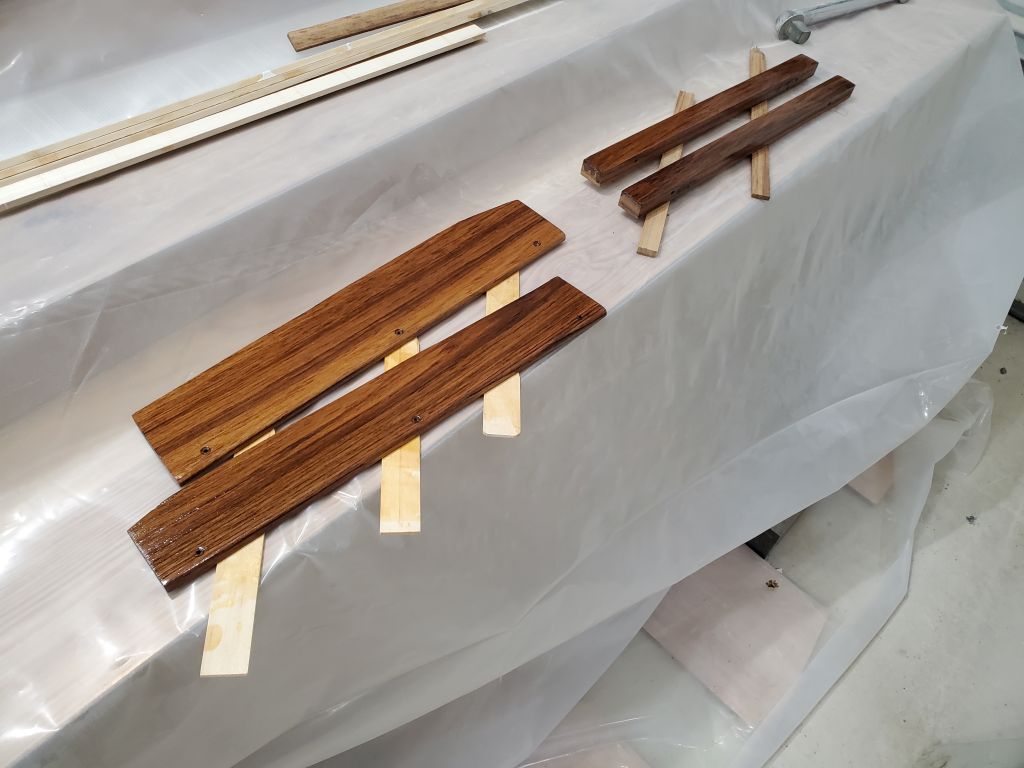
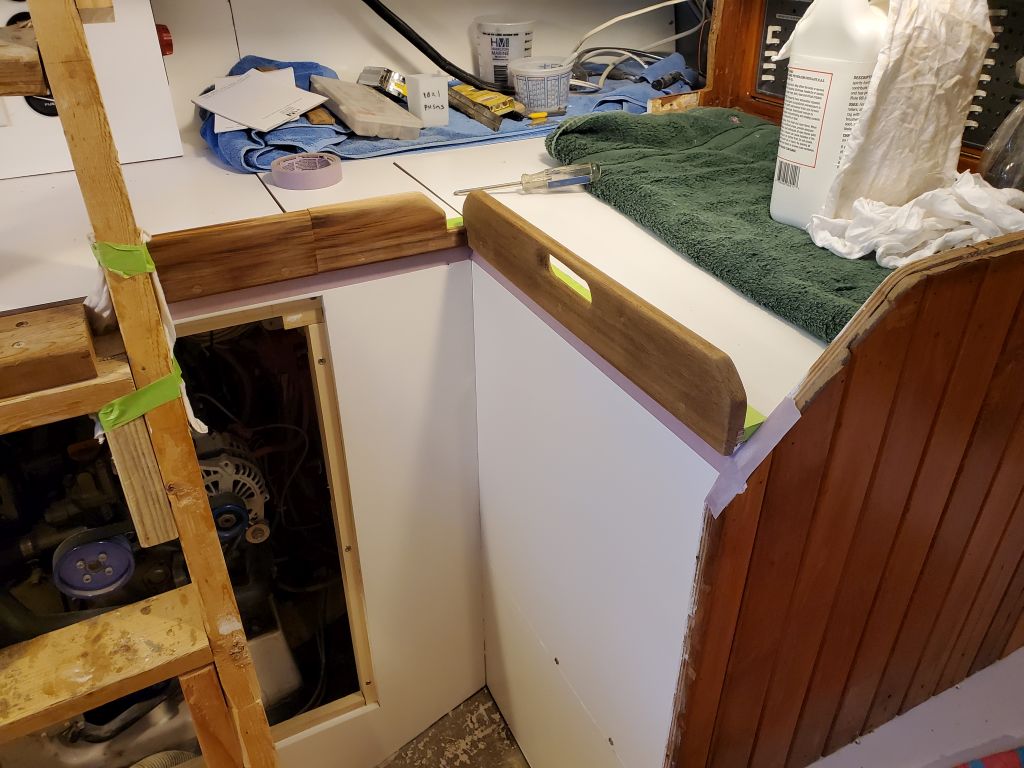
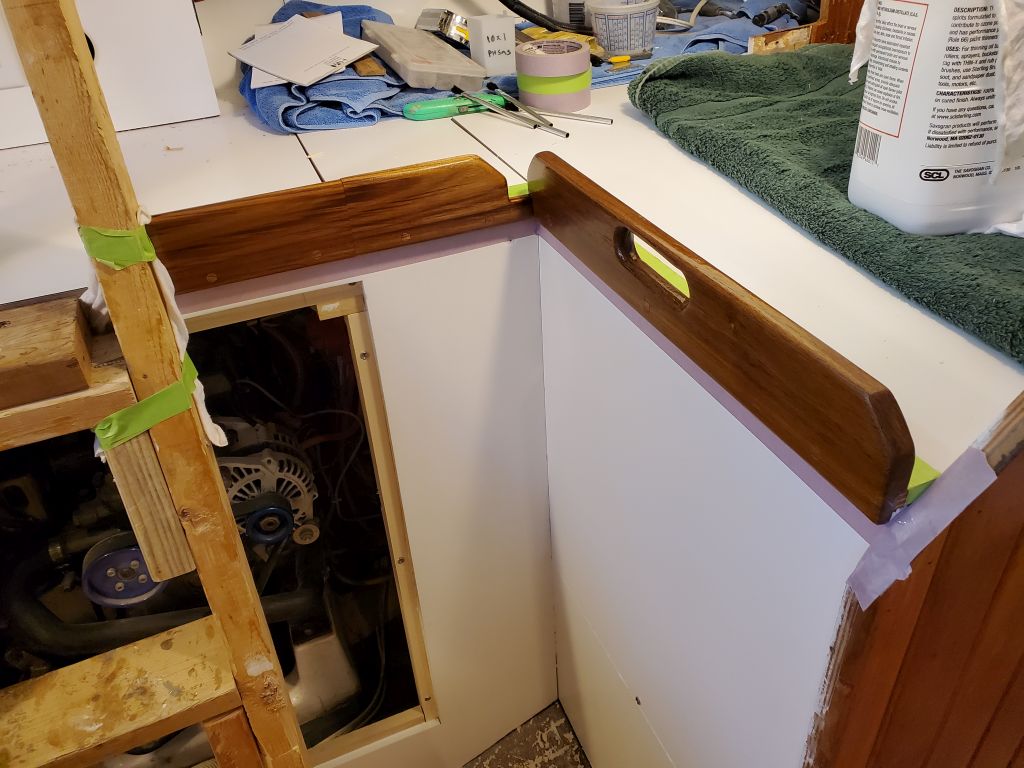
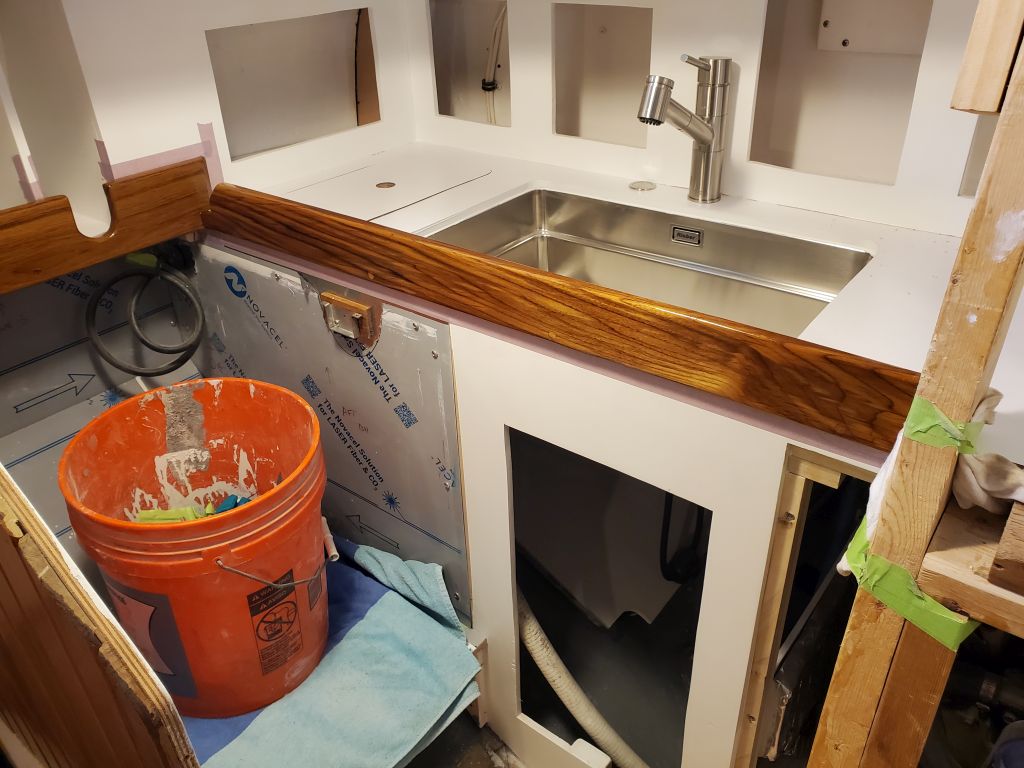
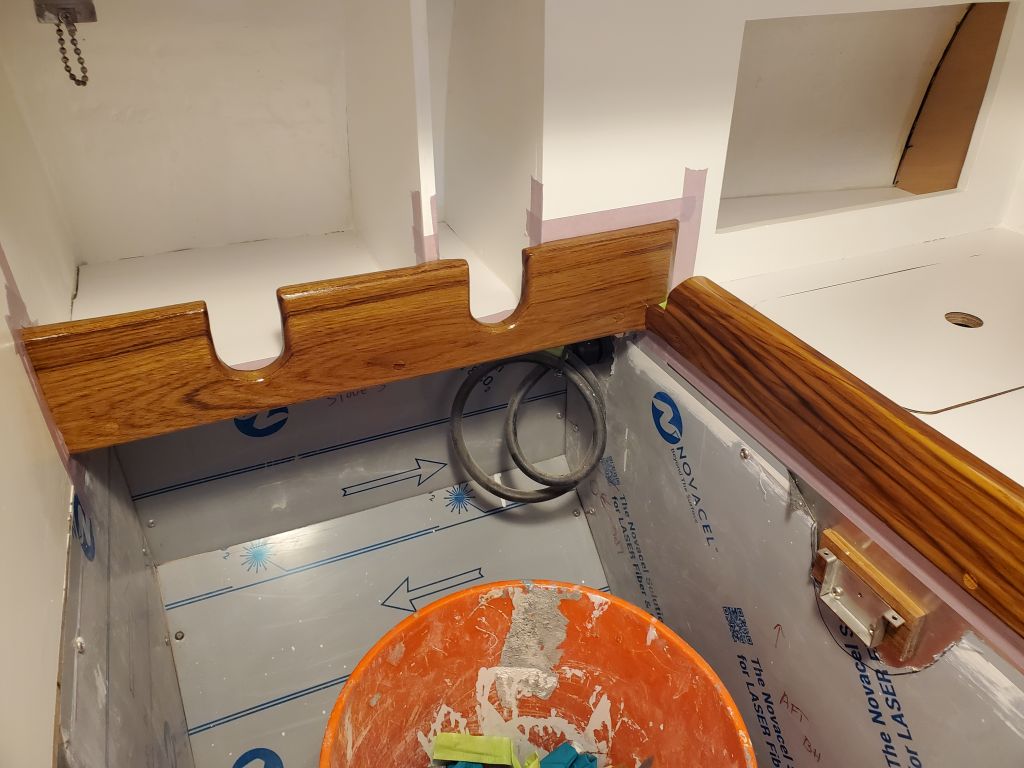
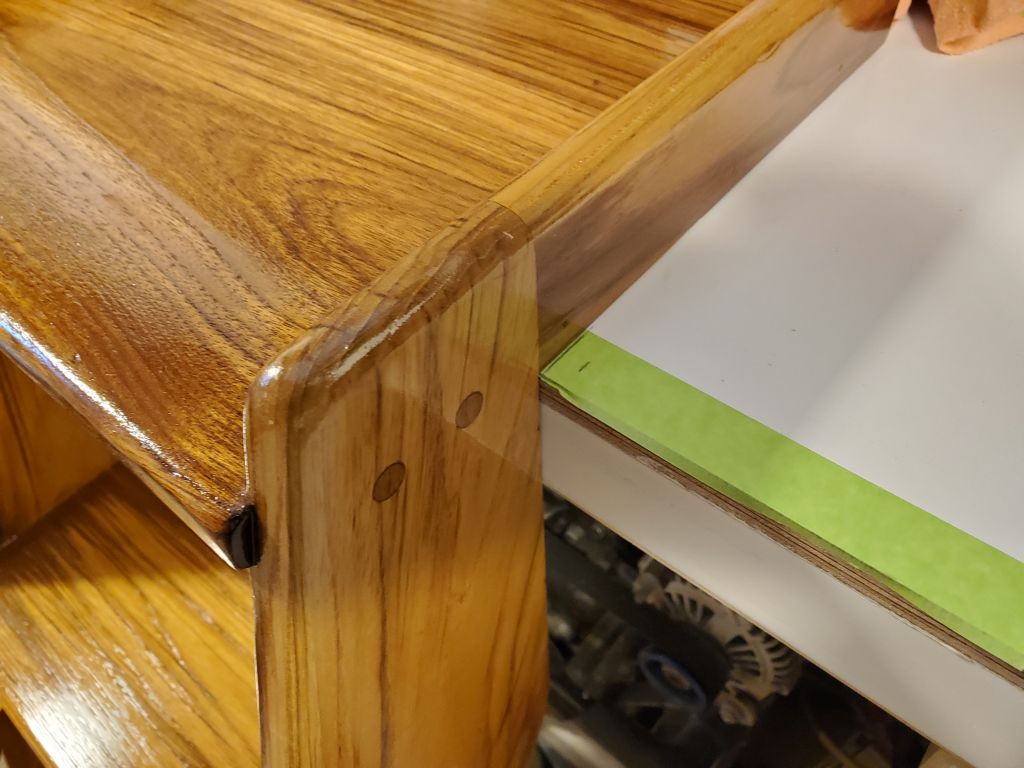
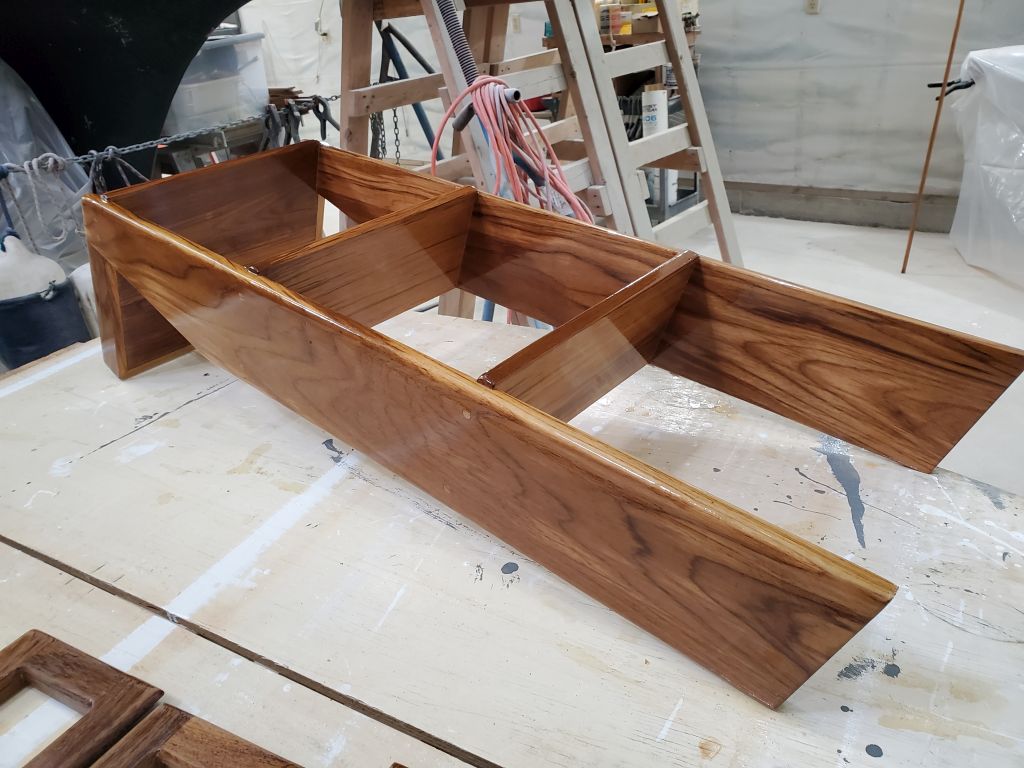
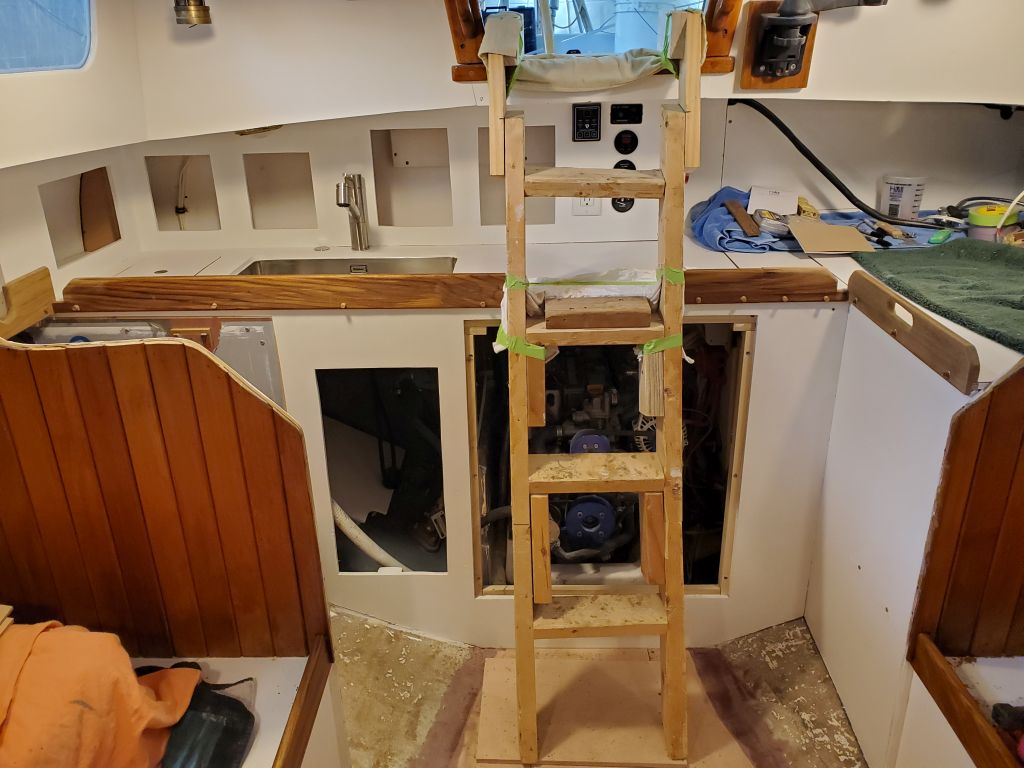
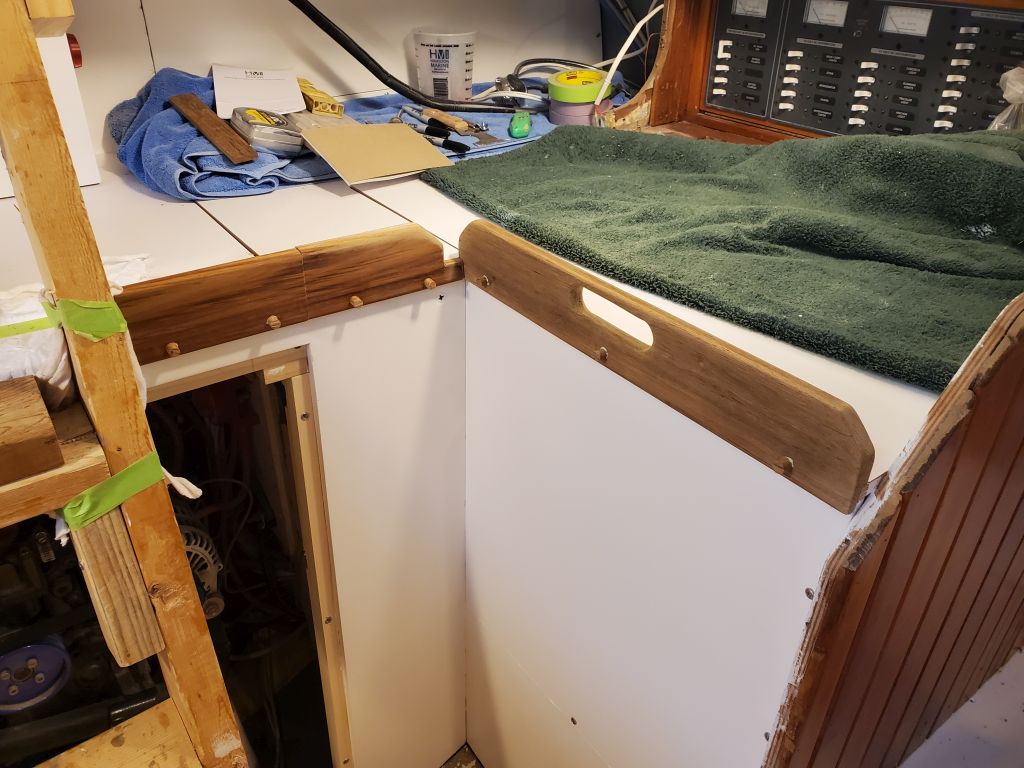
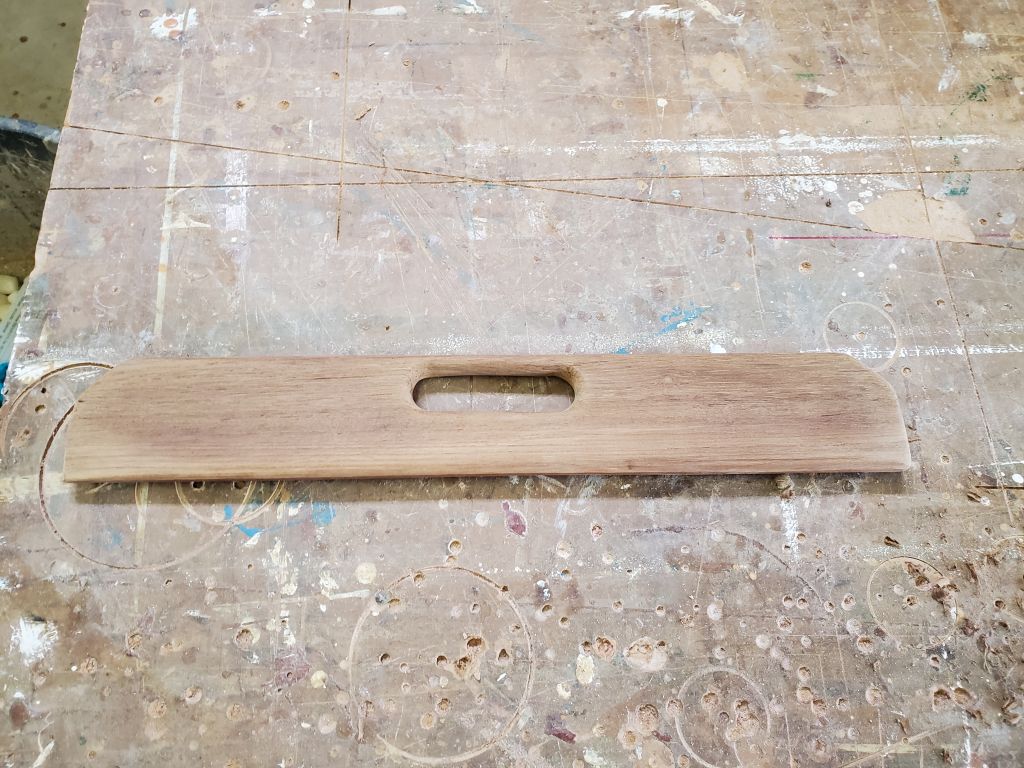
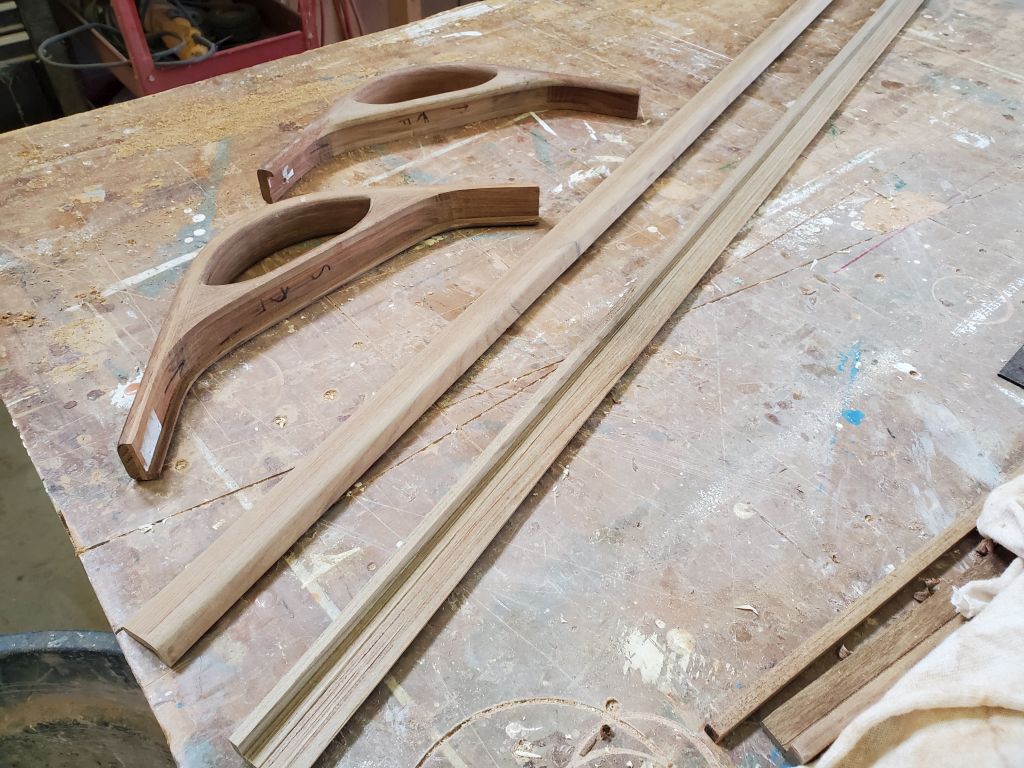
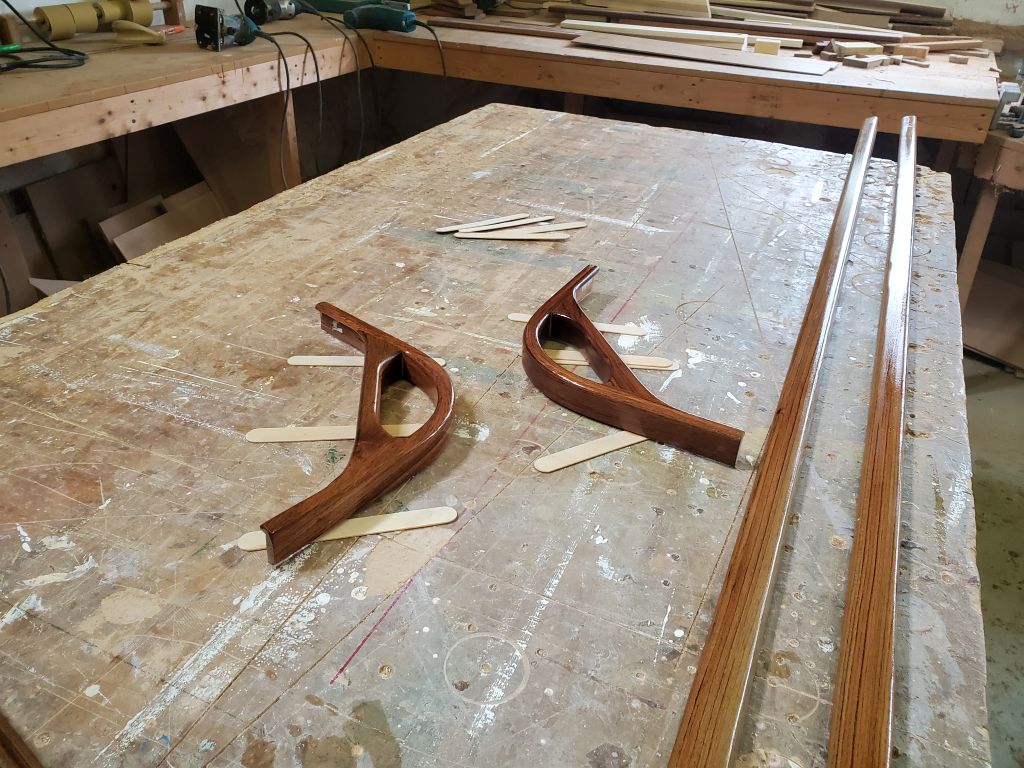
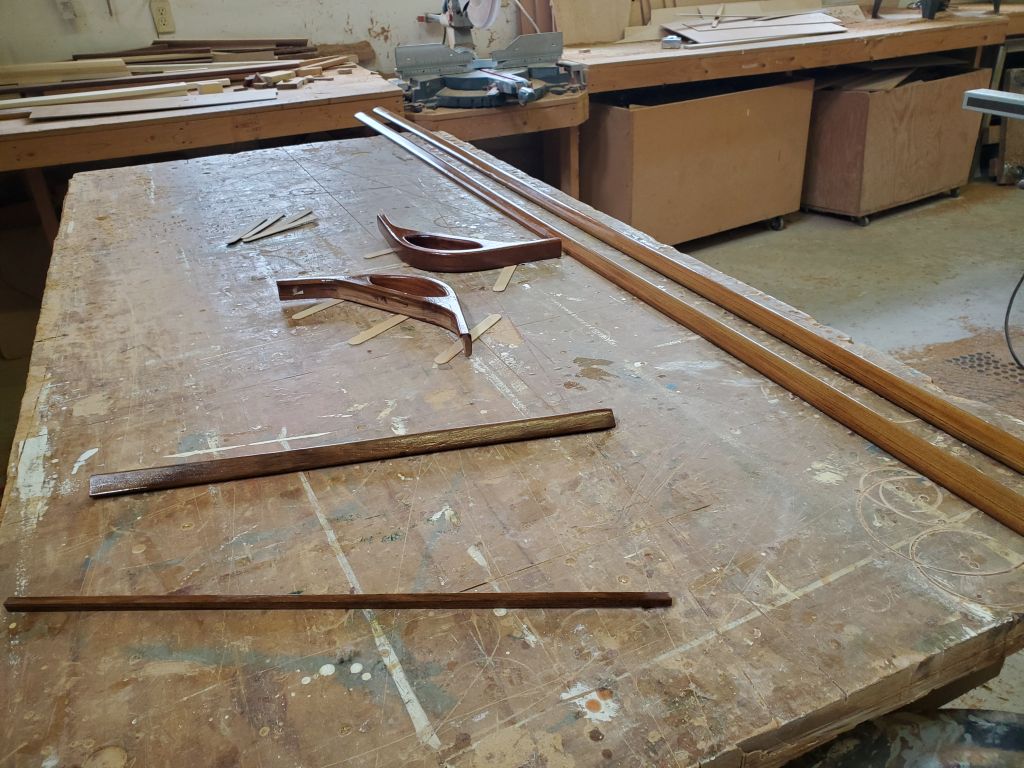
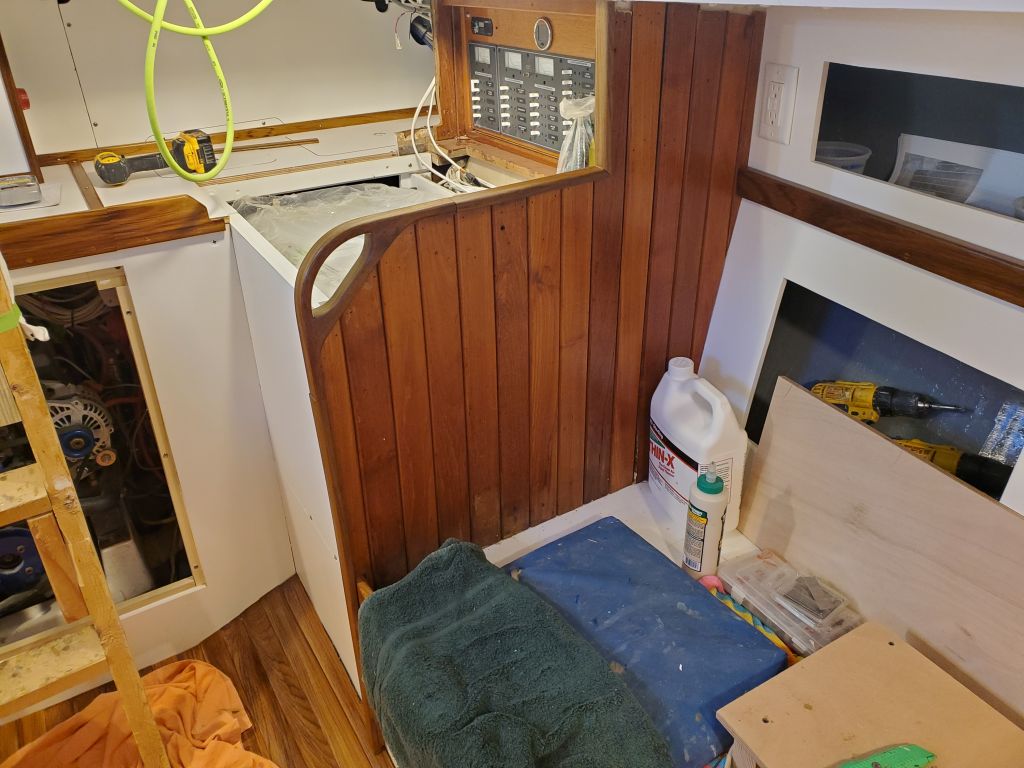
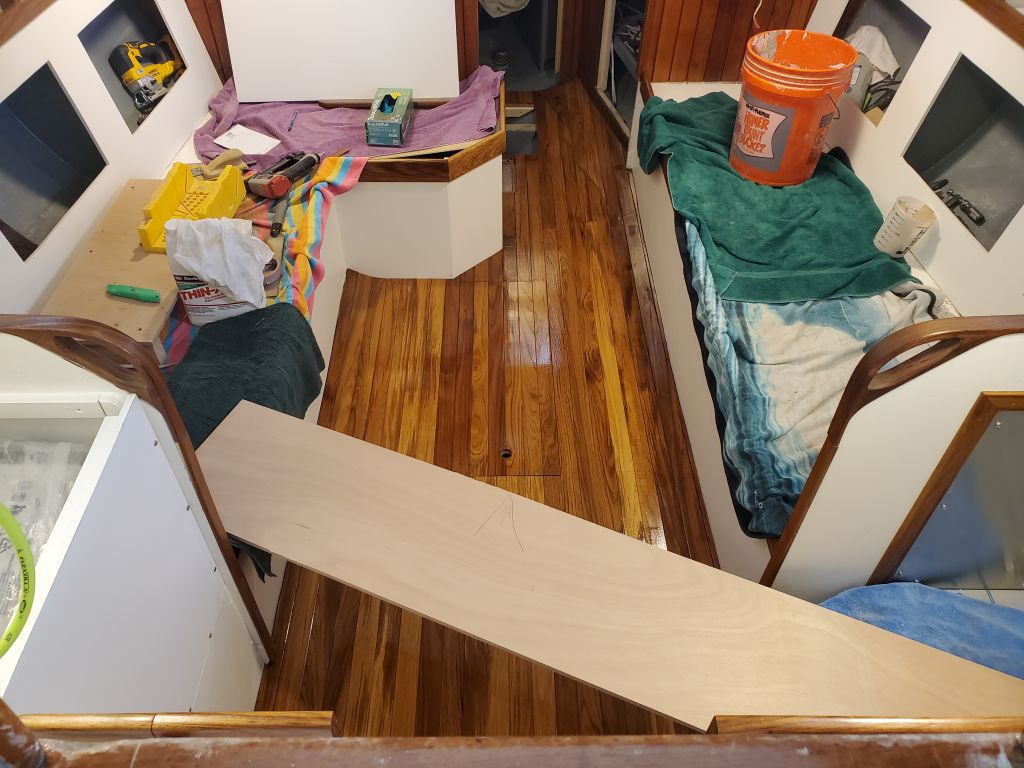
After starting the day by sanding the cabin sole and cleaning up thereafter, I turned to the trim on the galley bulkhead edges.  The shape and dimensions of this trim were dictated by the profile of the pre-manufactured teak bulkhead handles to fit and form the outside corners, which the owner had requested and with which I’d done some preliminary shaping work earlier.  Normally, this sort of trim would feature a recess and would slip over the bulkhead to cover both sides, but in this case the width of the recessed area of the handles was less than the thickness of the bulkheads, so I’d had to modify the handles–and the new trim I milled to match–accordingly, leaving the aft end flush with the bulkhead while the forward end overhung to better trim out the edge.

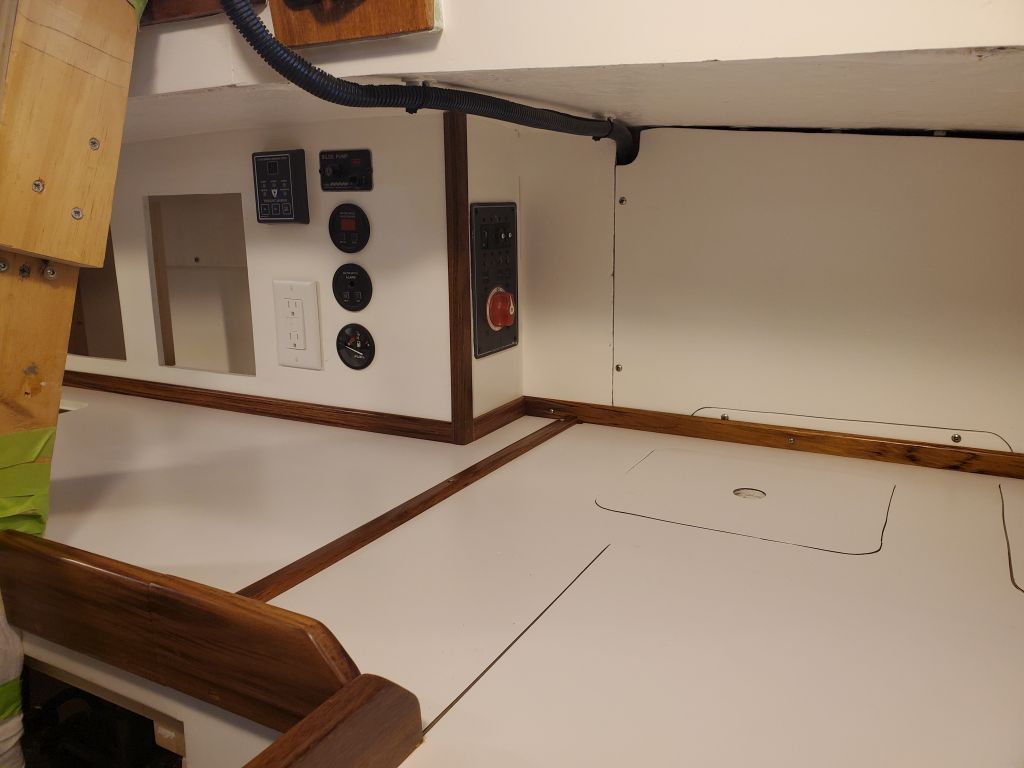
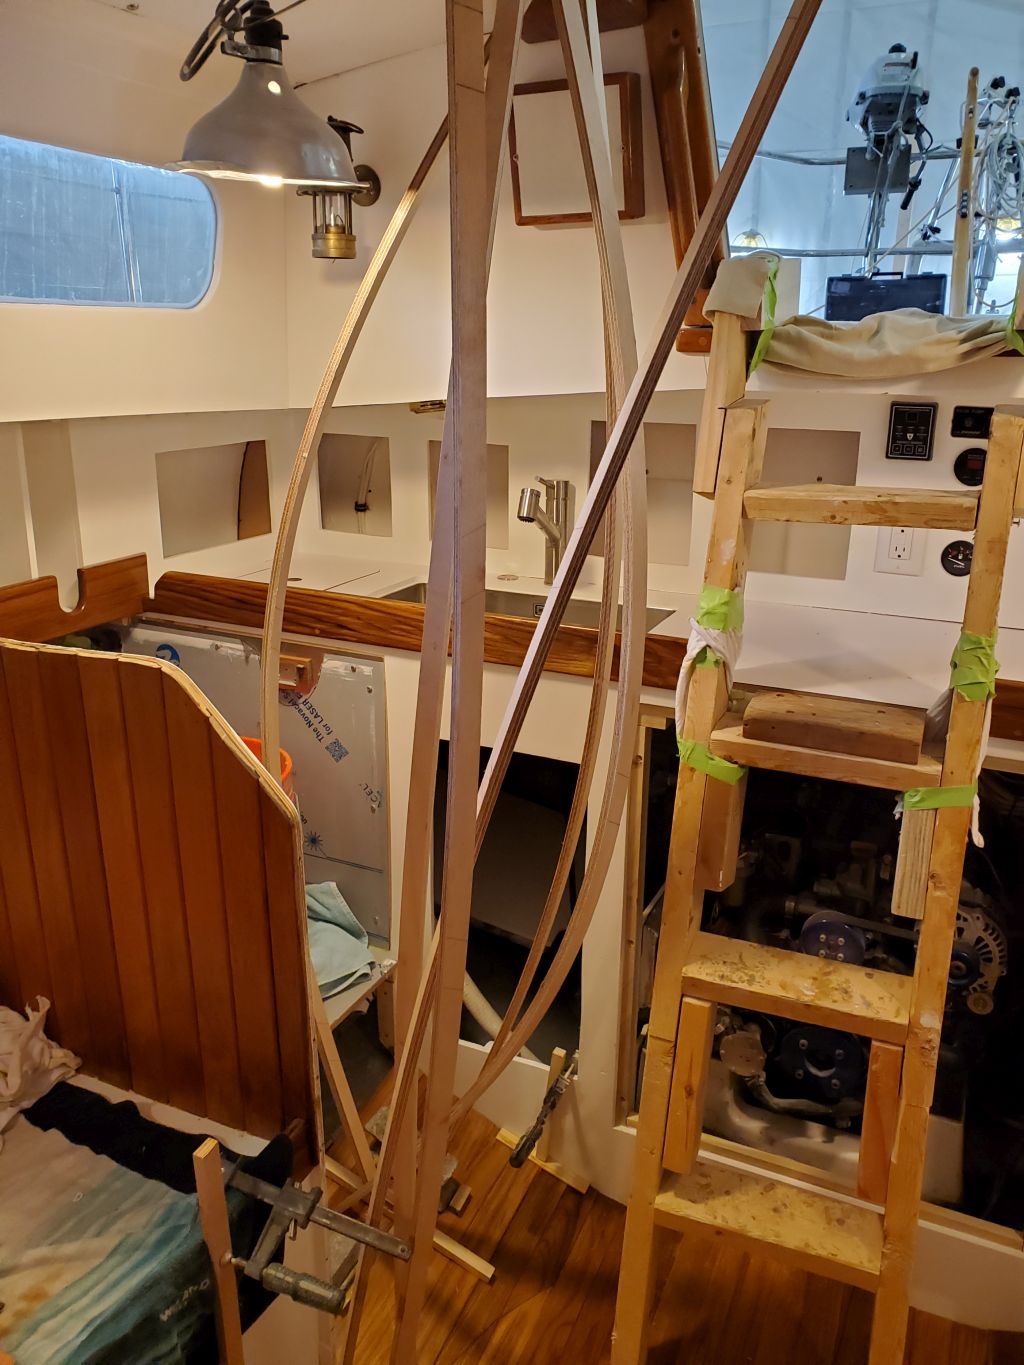
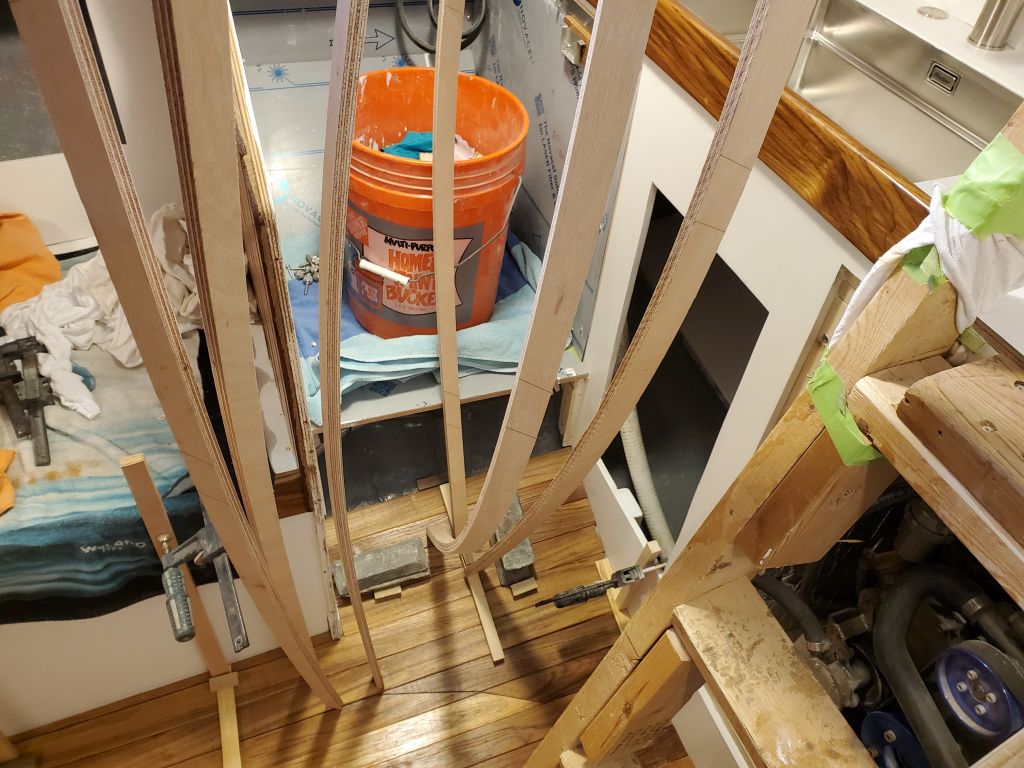
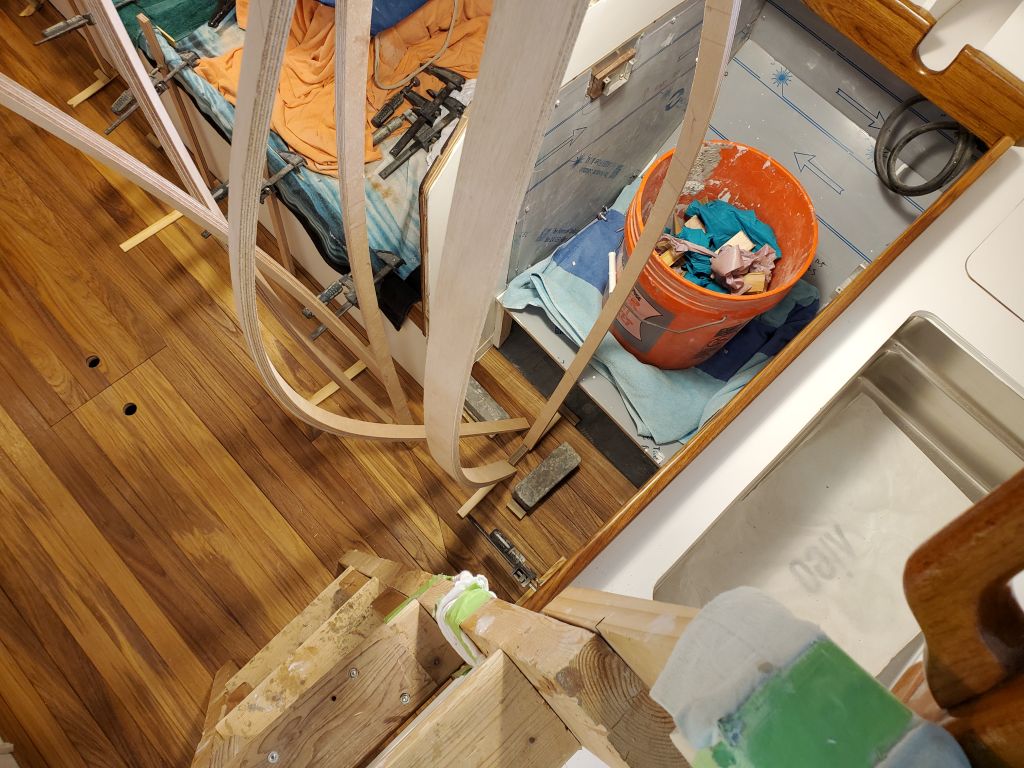
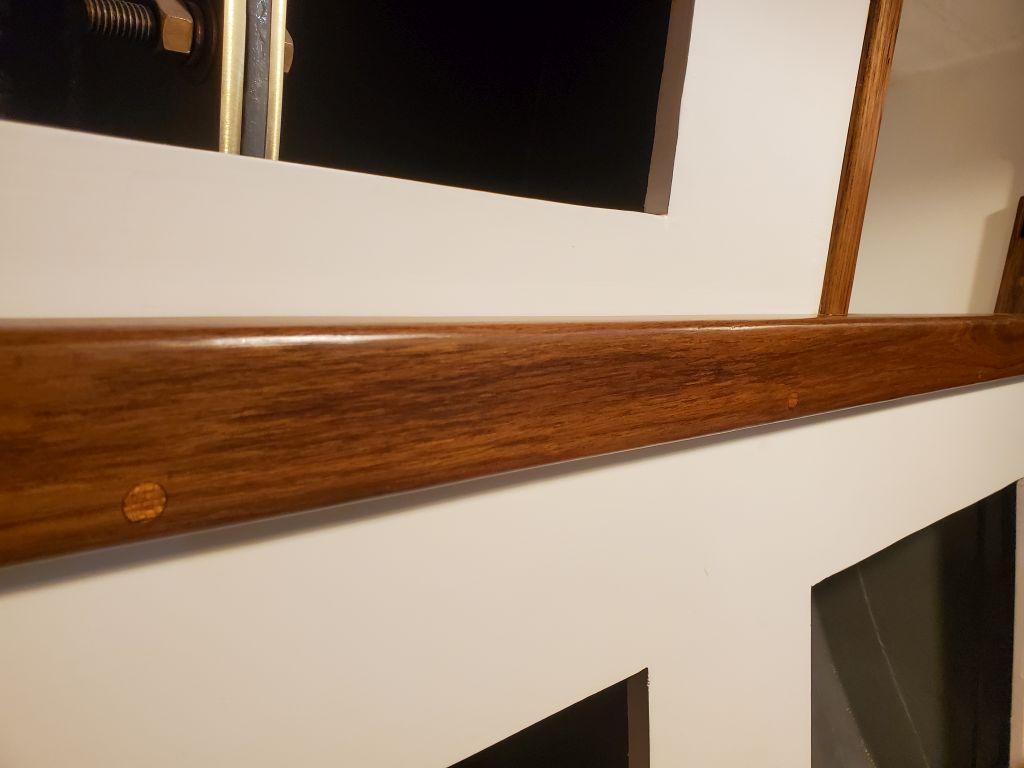
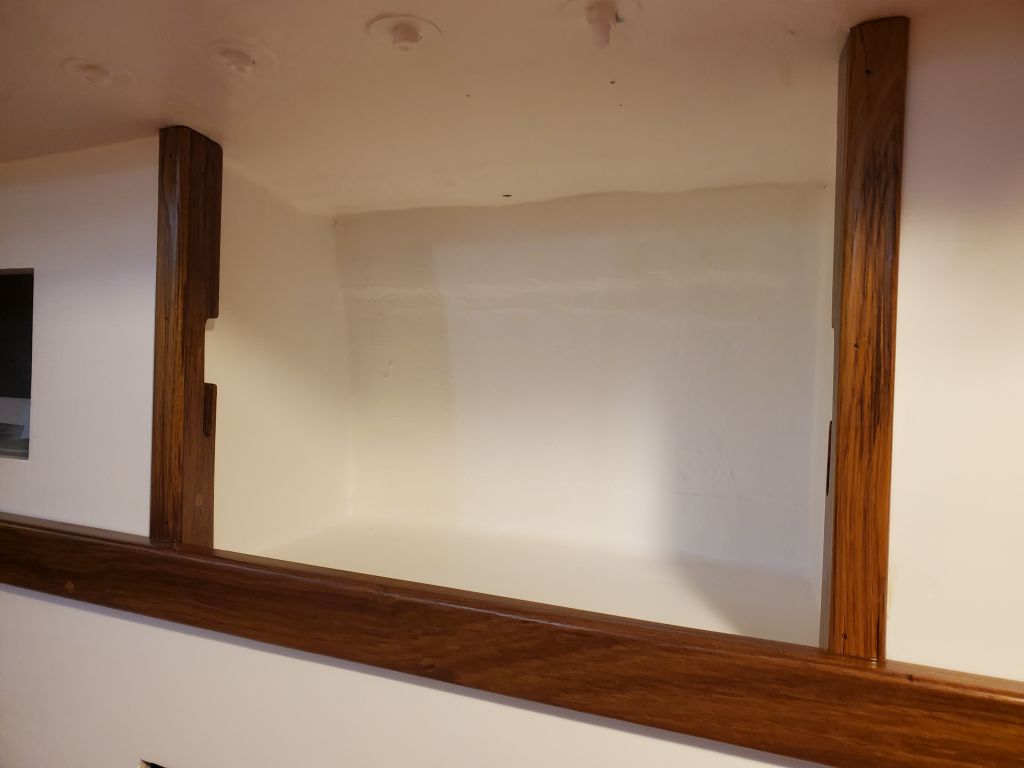
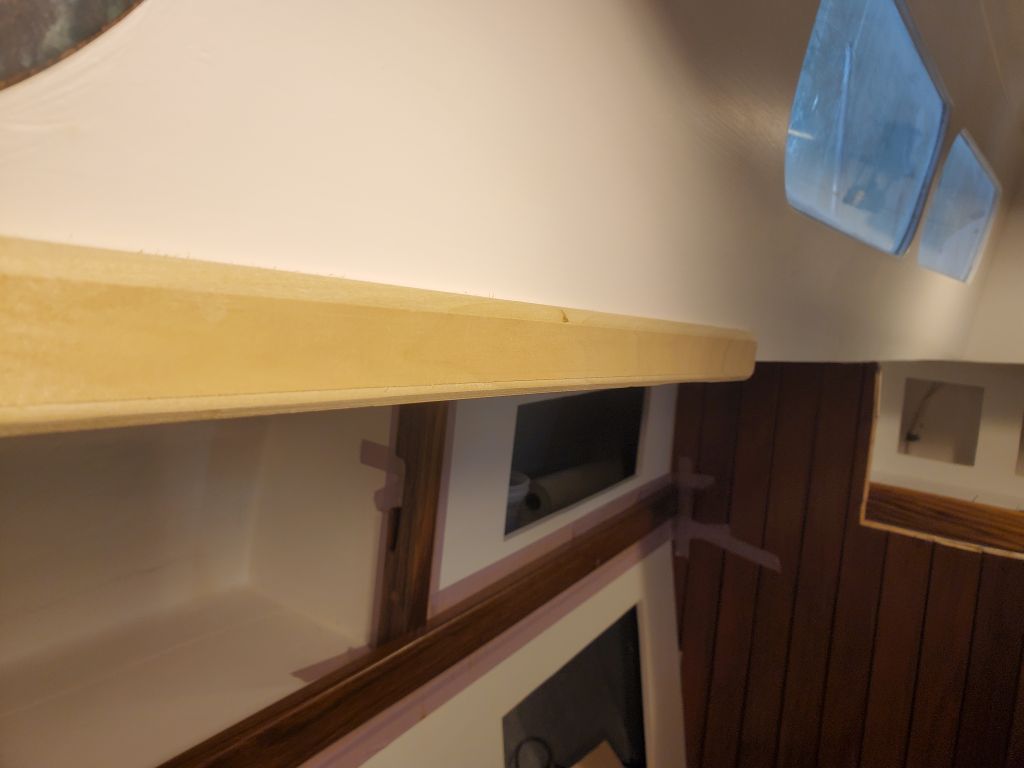
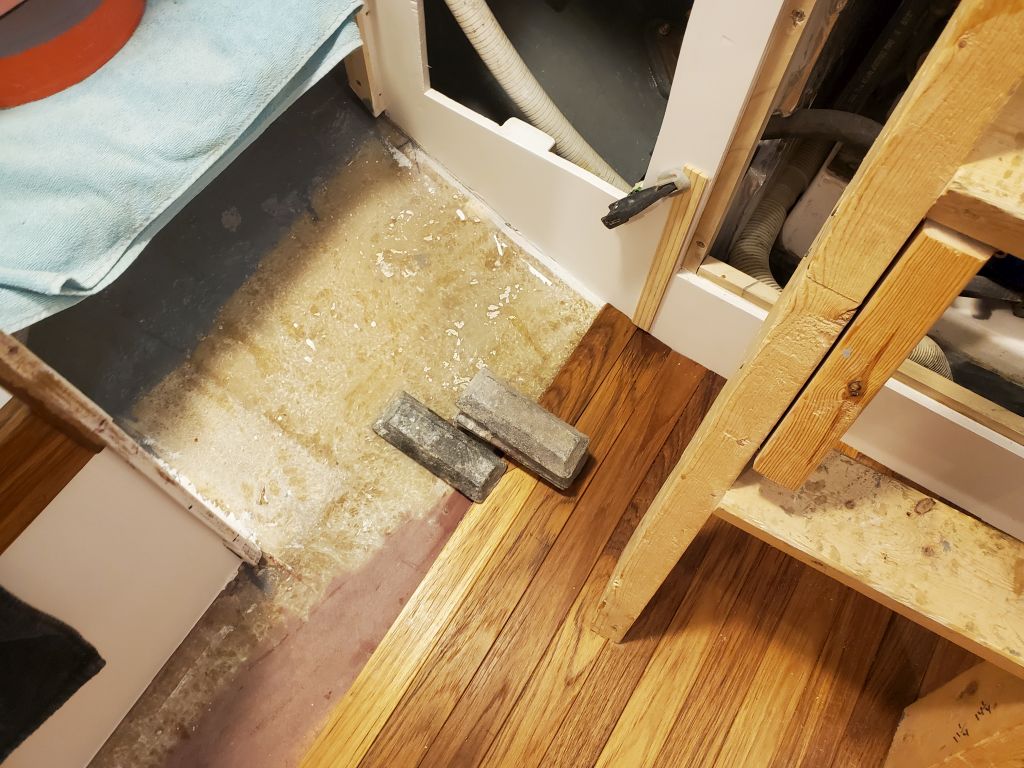
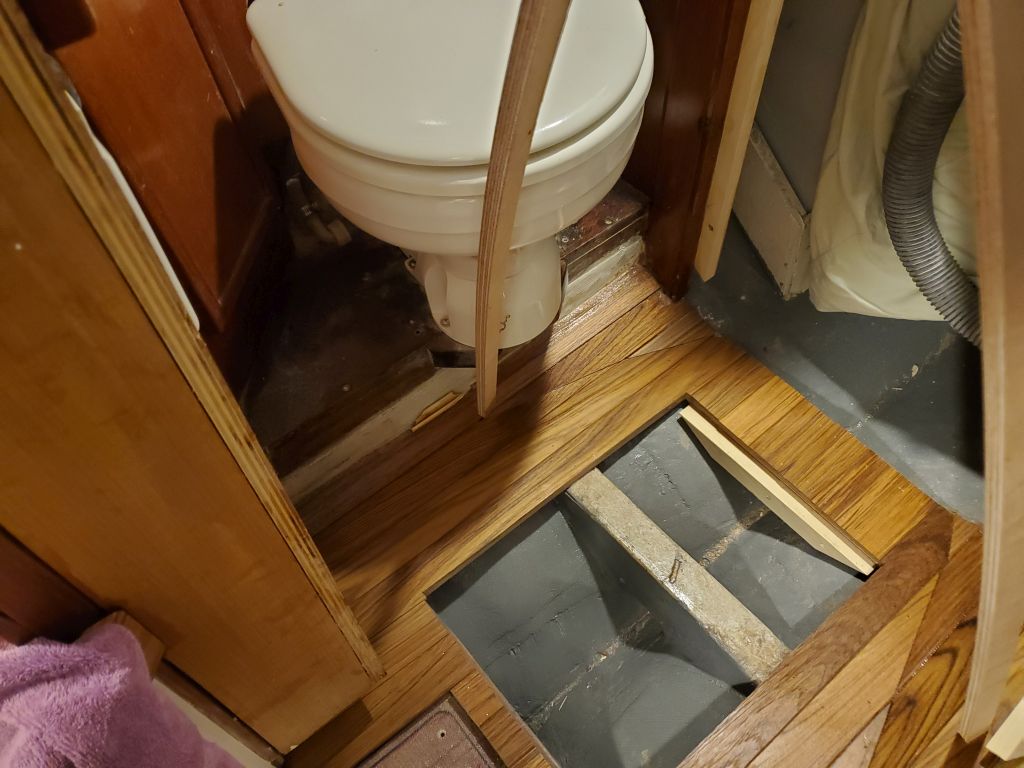
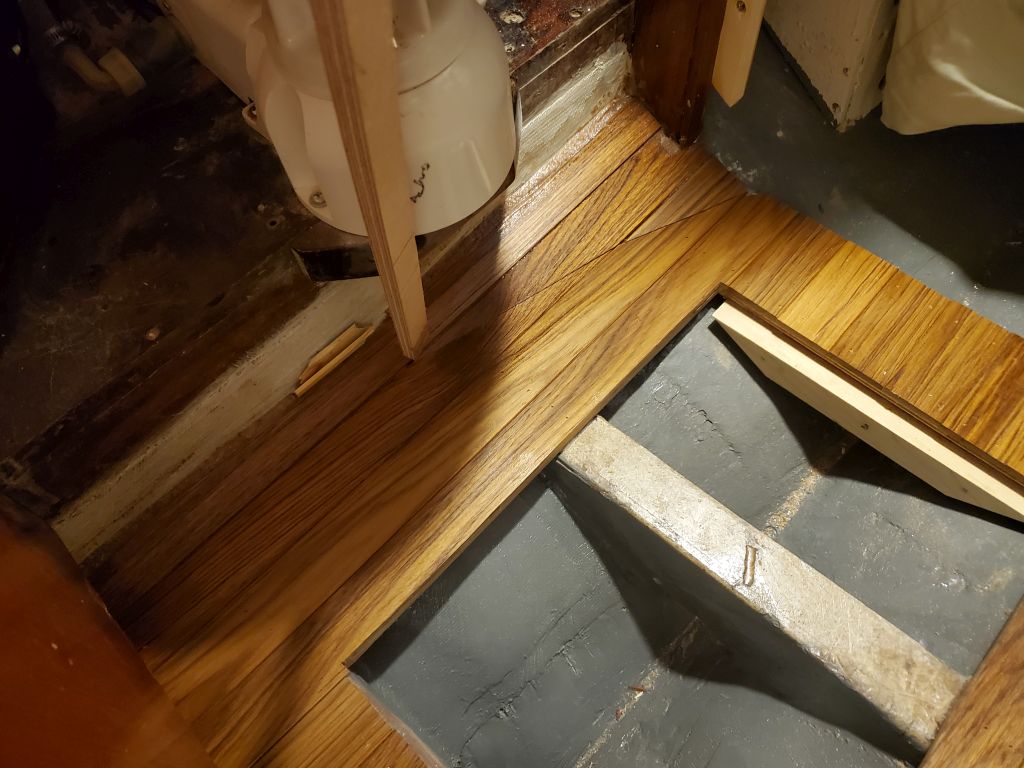
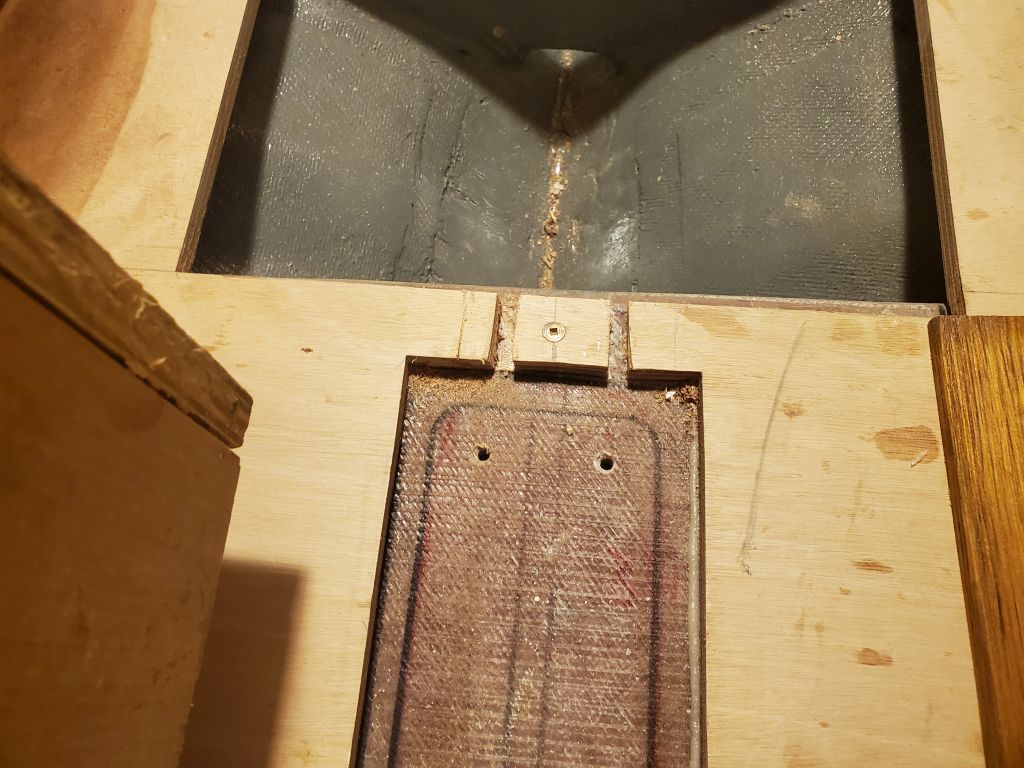
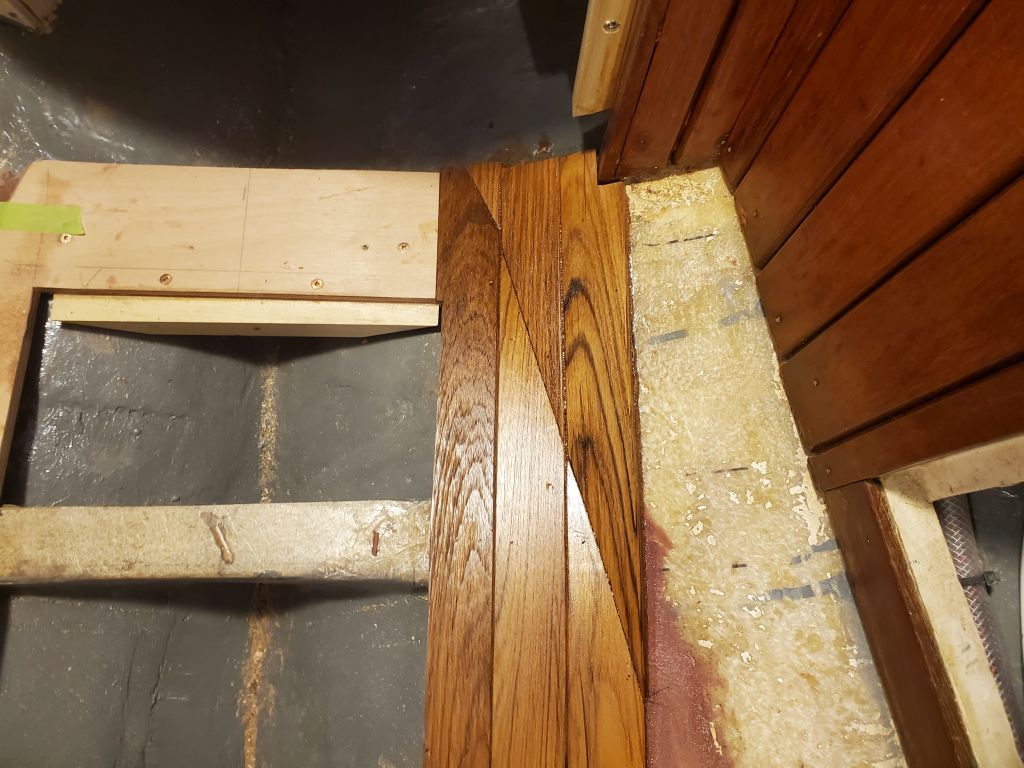
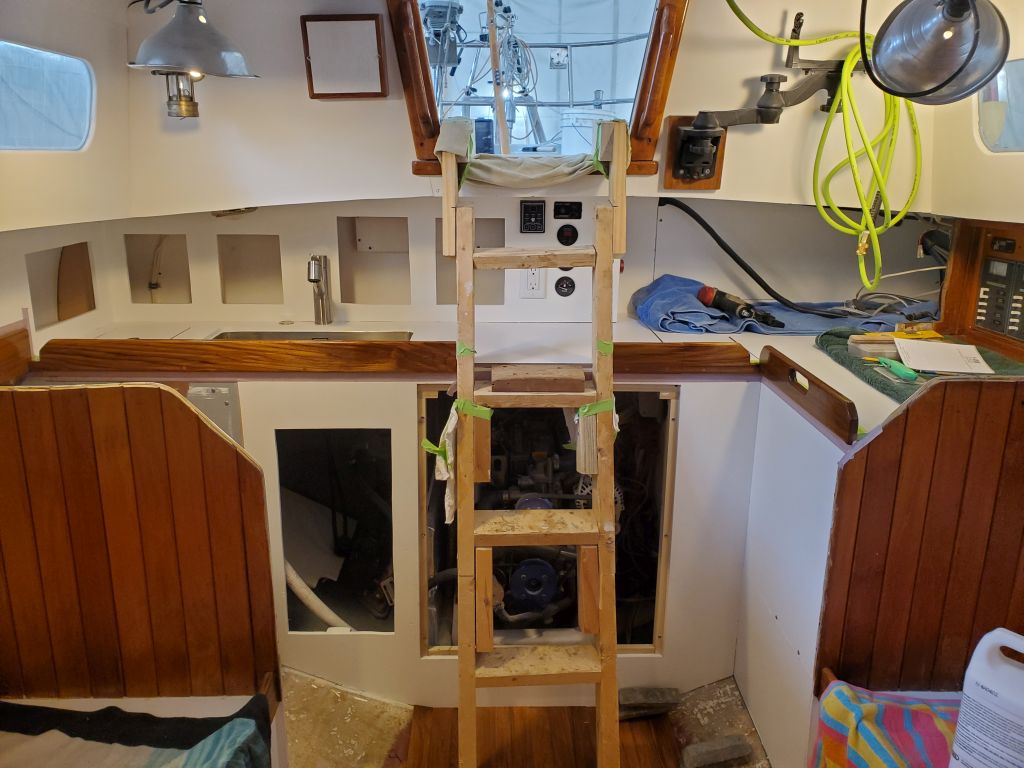
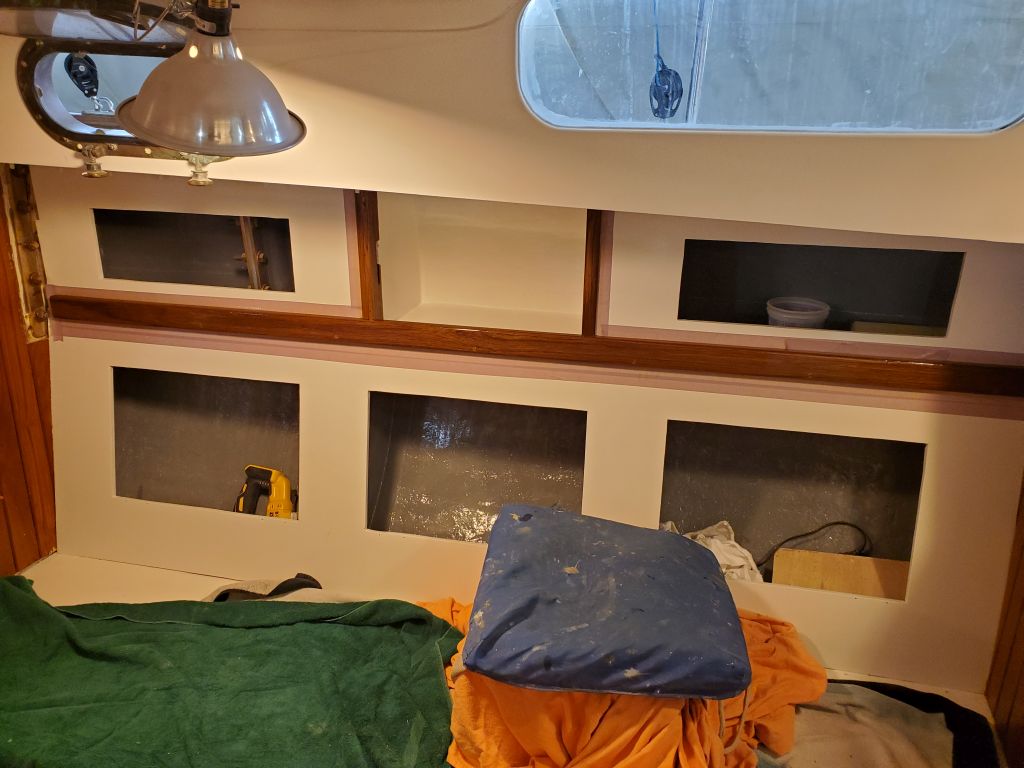
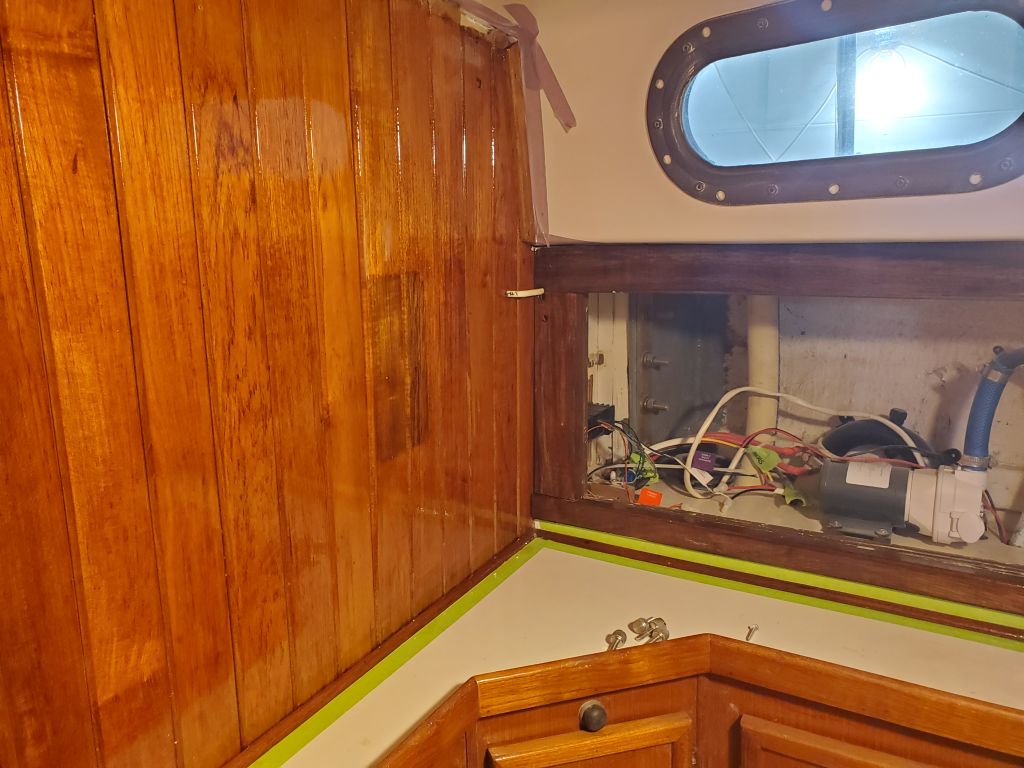
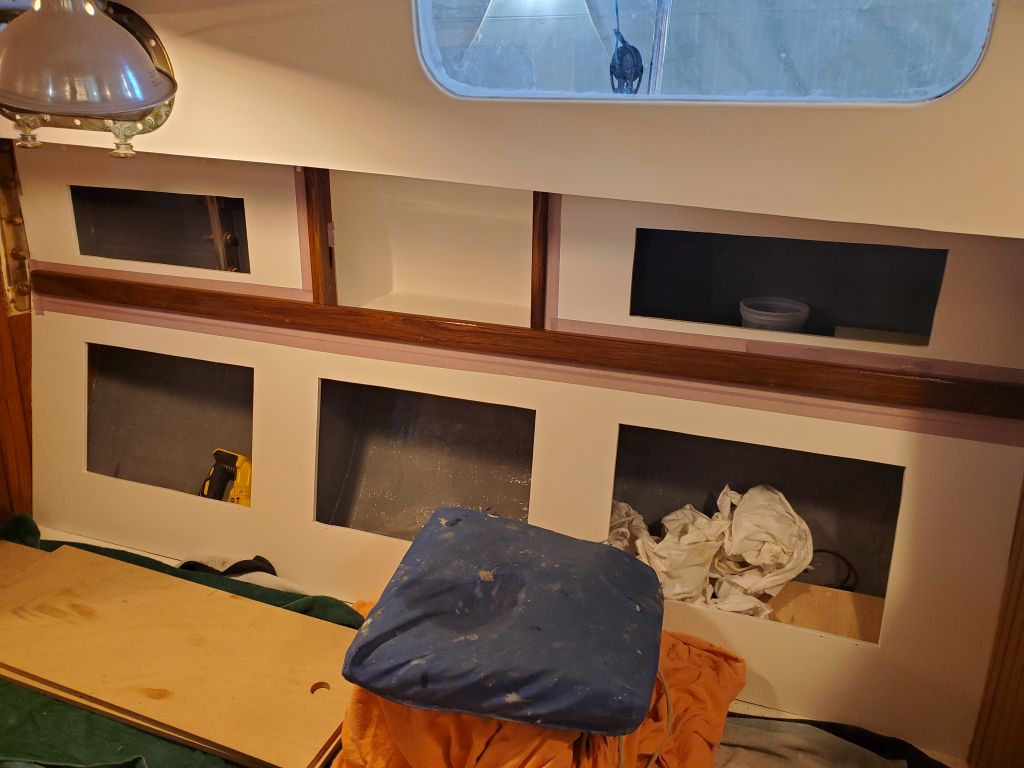
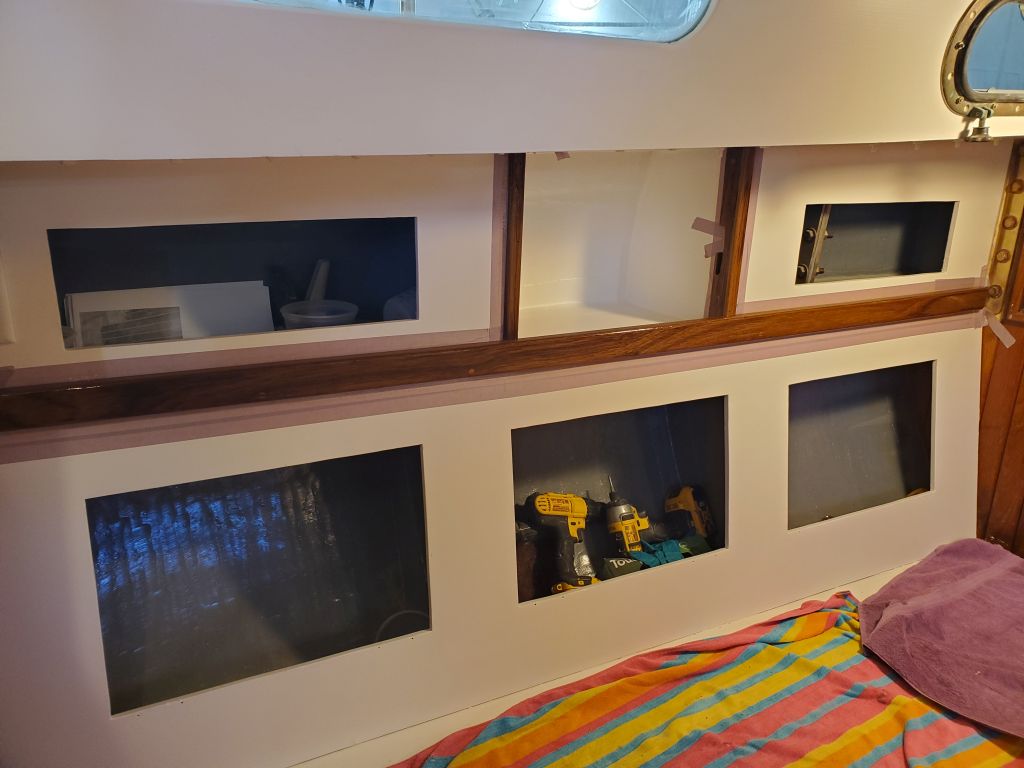
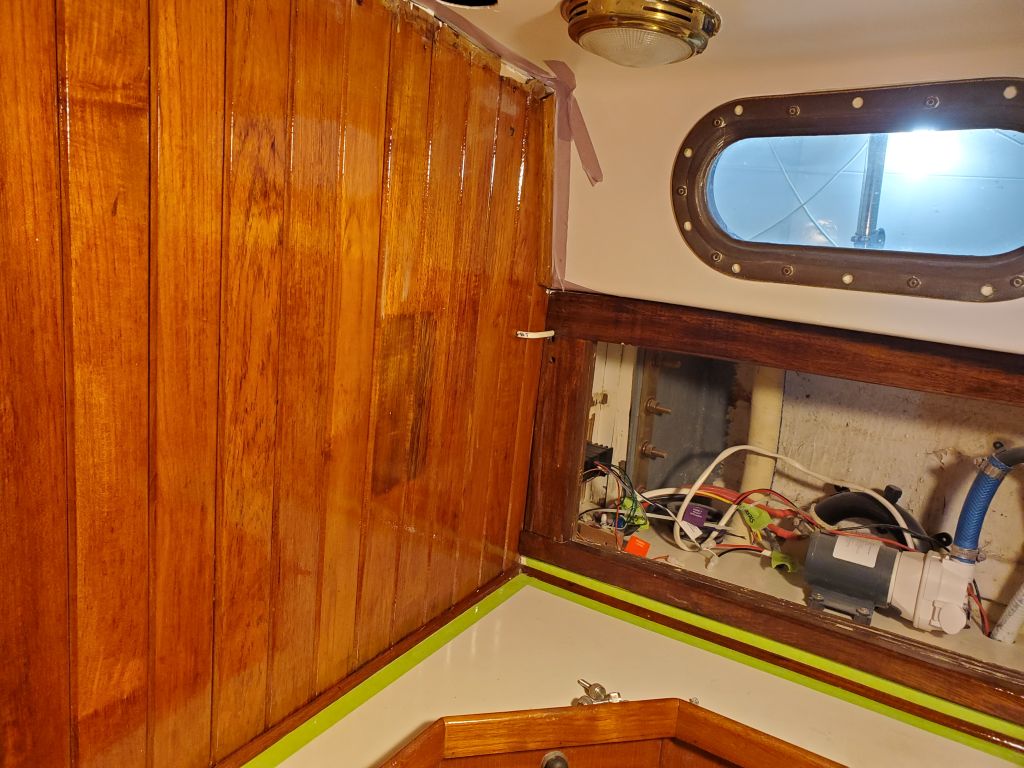
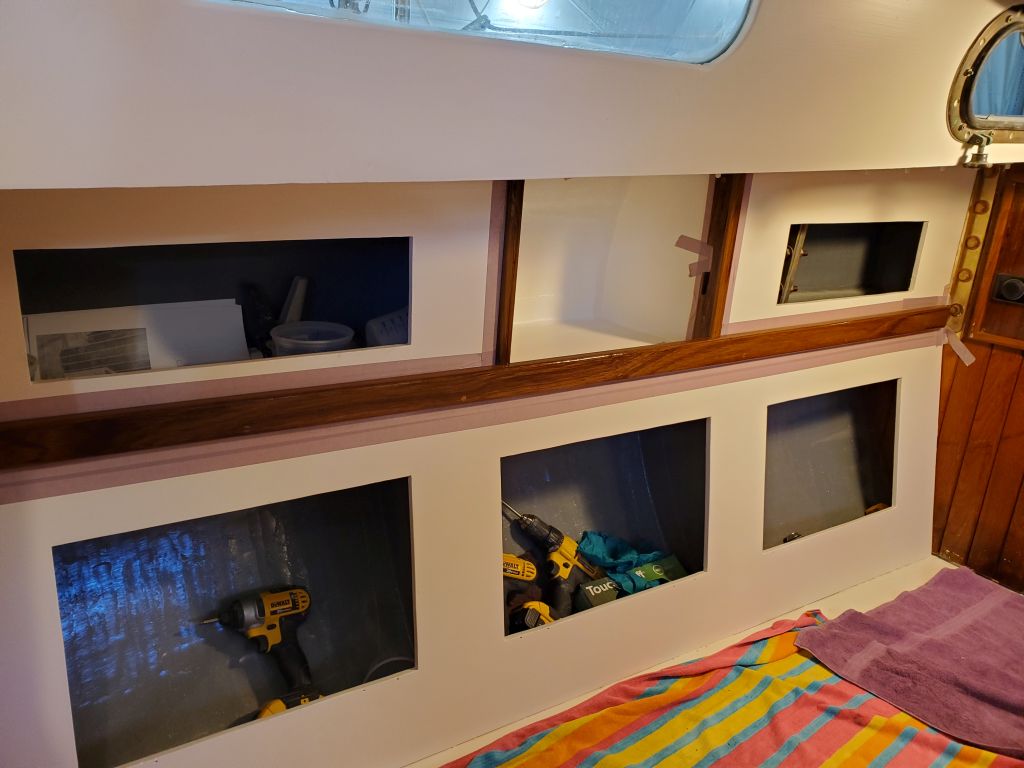
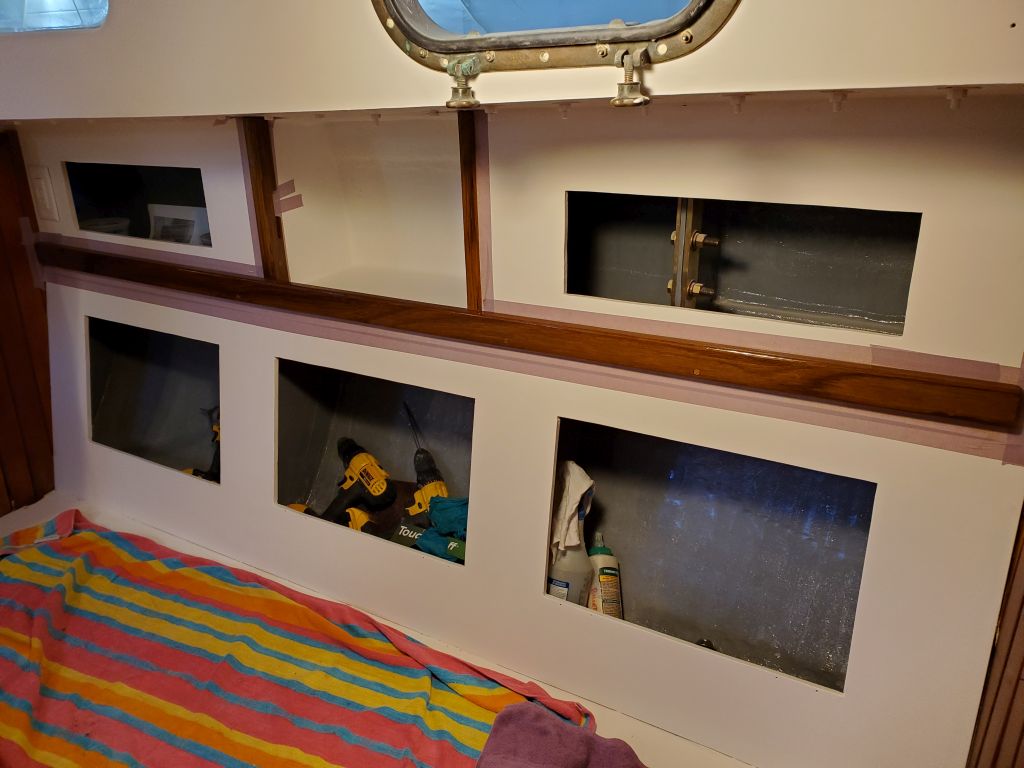
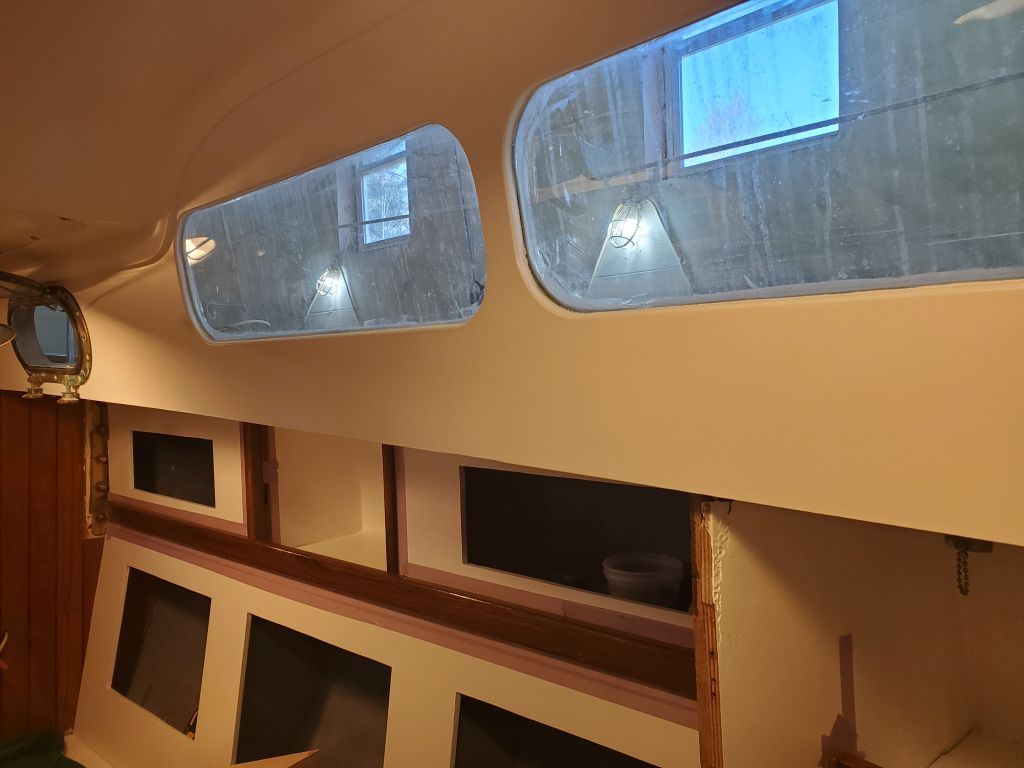
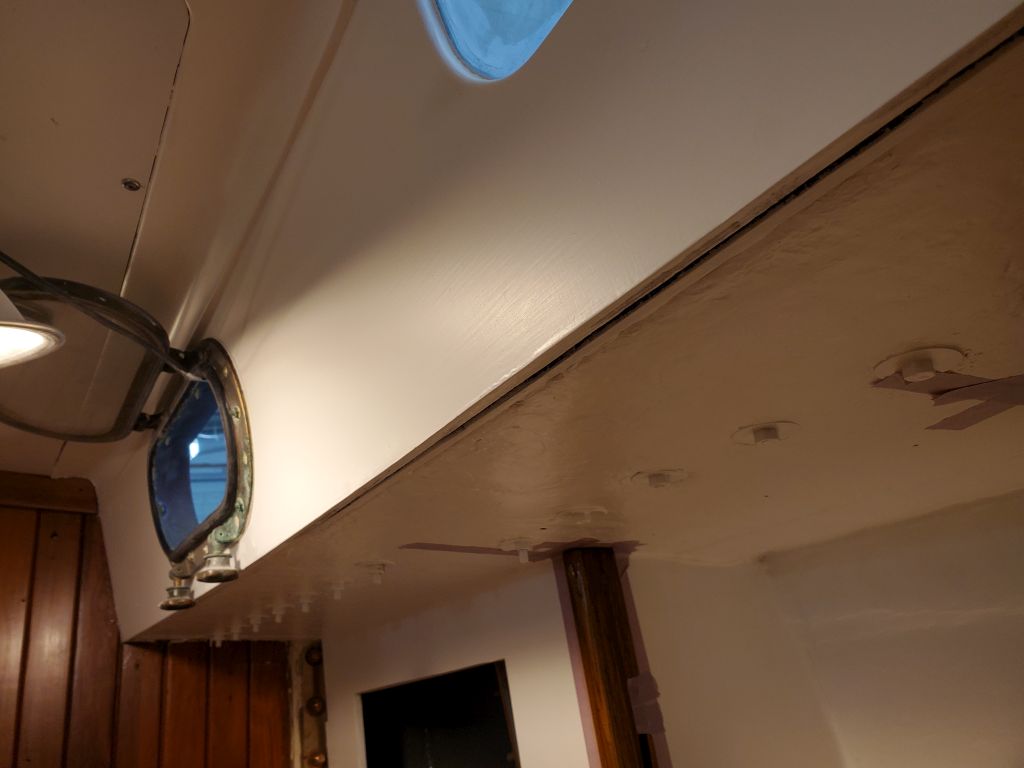
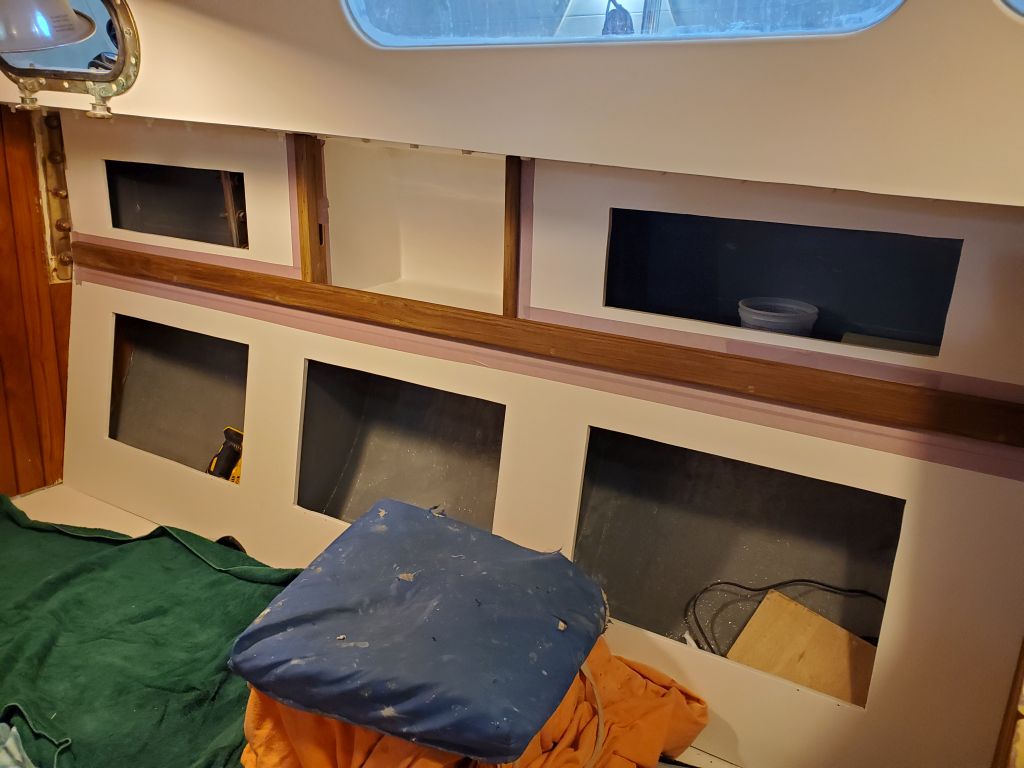
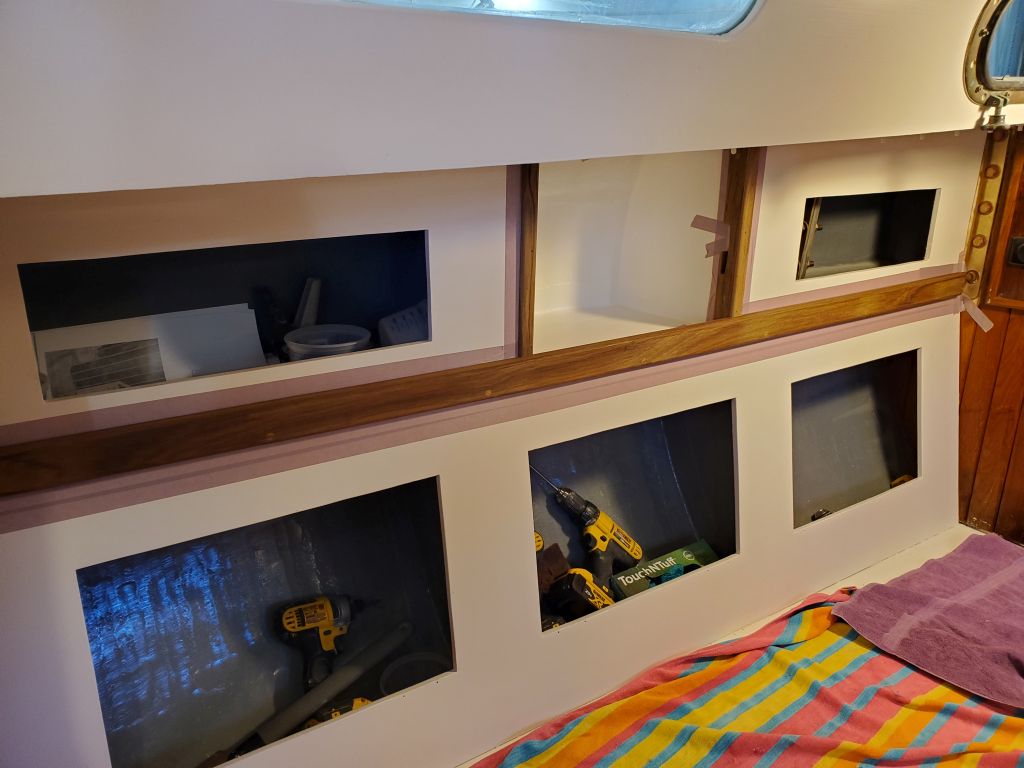
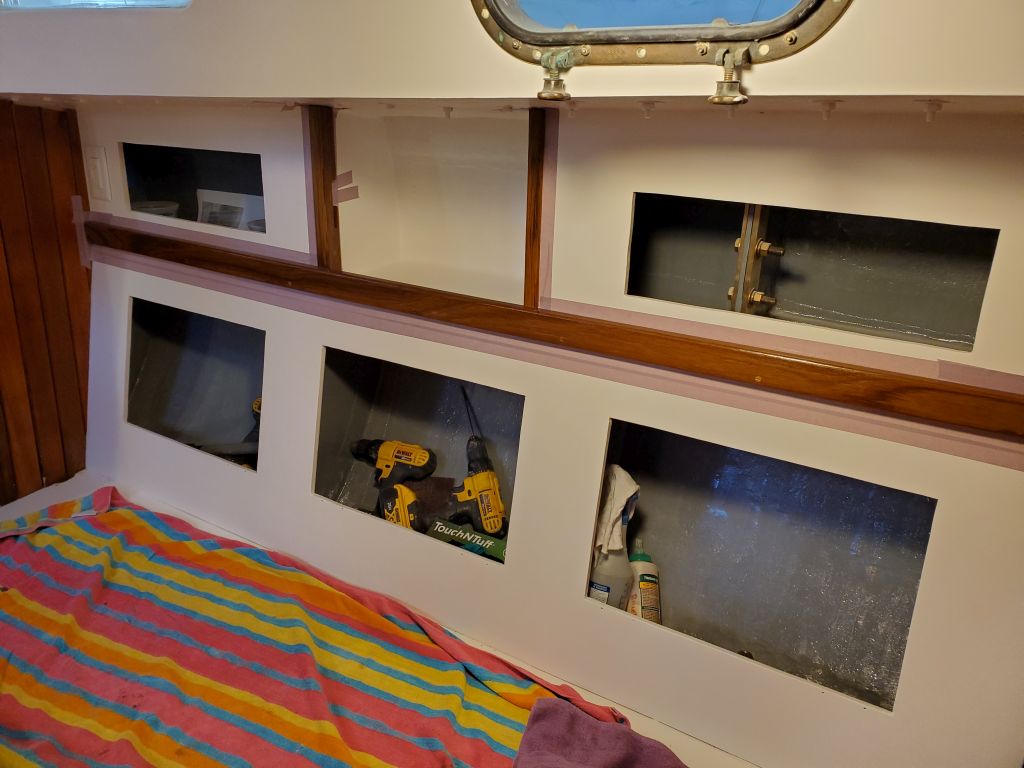
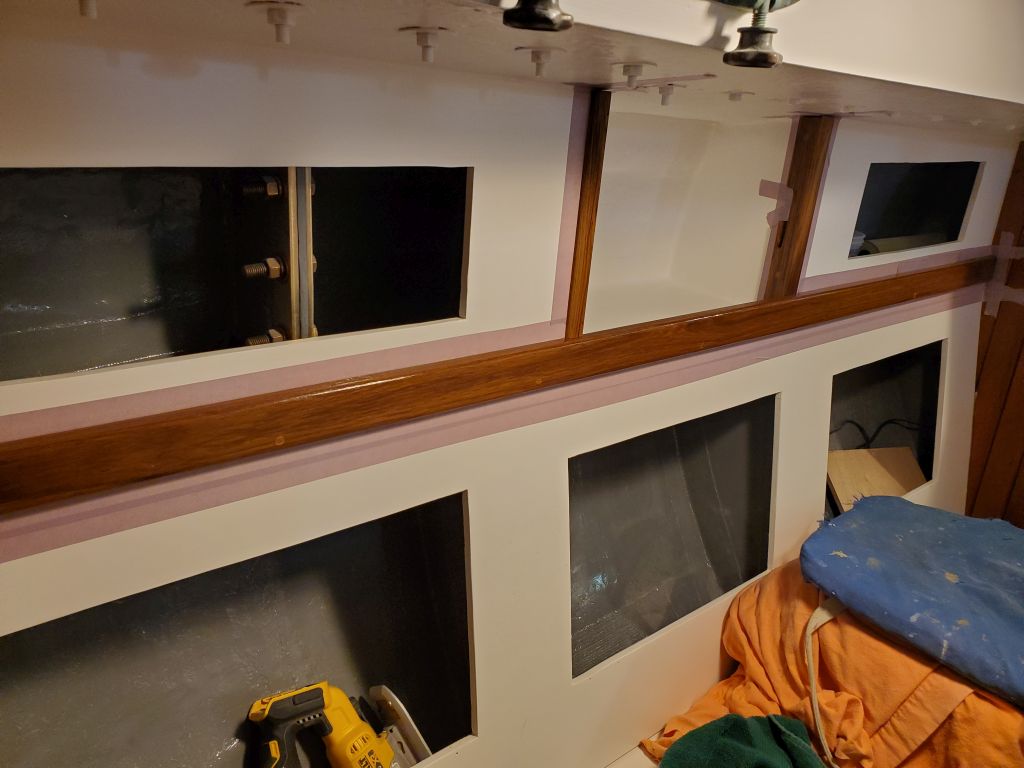
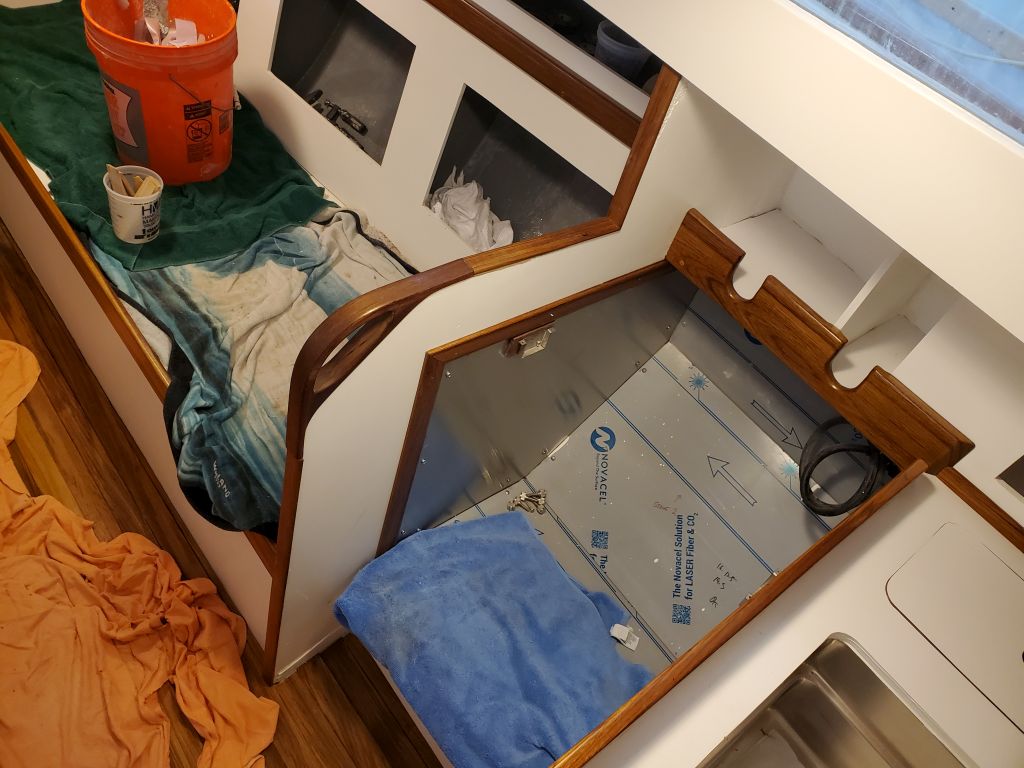
The point of all this is to explain why the trim was installed the way it was, and now, with these decisions and adaptations well in the past, it was time to do the final installation.  To prepare for the trim installation, a week or two earlier I cut a square corner into the bulkheads where they had previously curved to reach up towards the sidedecks, which curve had originally been matched by a similar curve where the handles would now be attached.  The square inner corner would make it easier to install the trim, versus trying to come up with a curved piece, and in any event the curve was now out of place in the cabin in its new format and aesthetic.

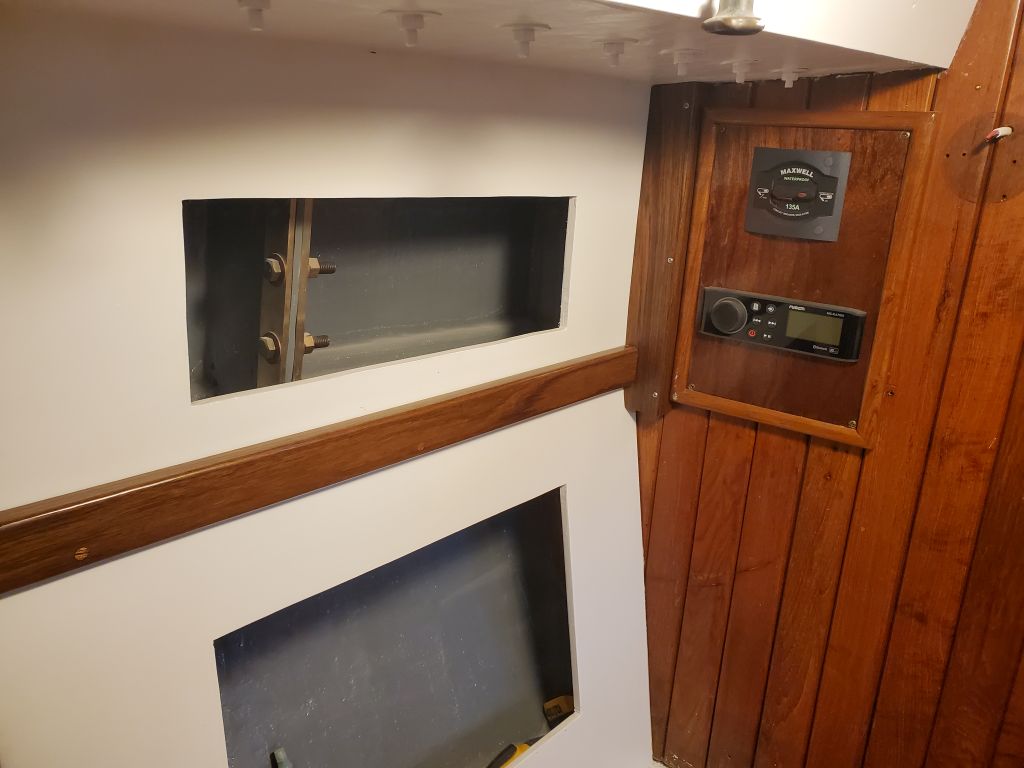
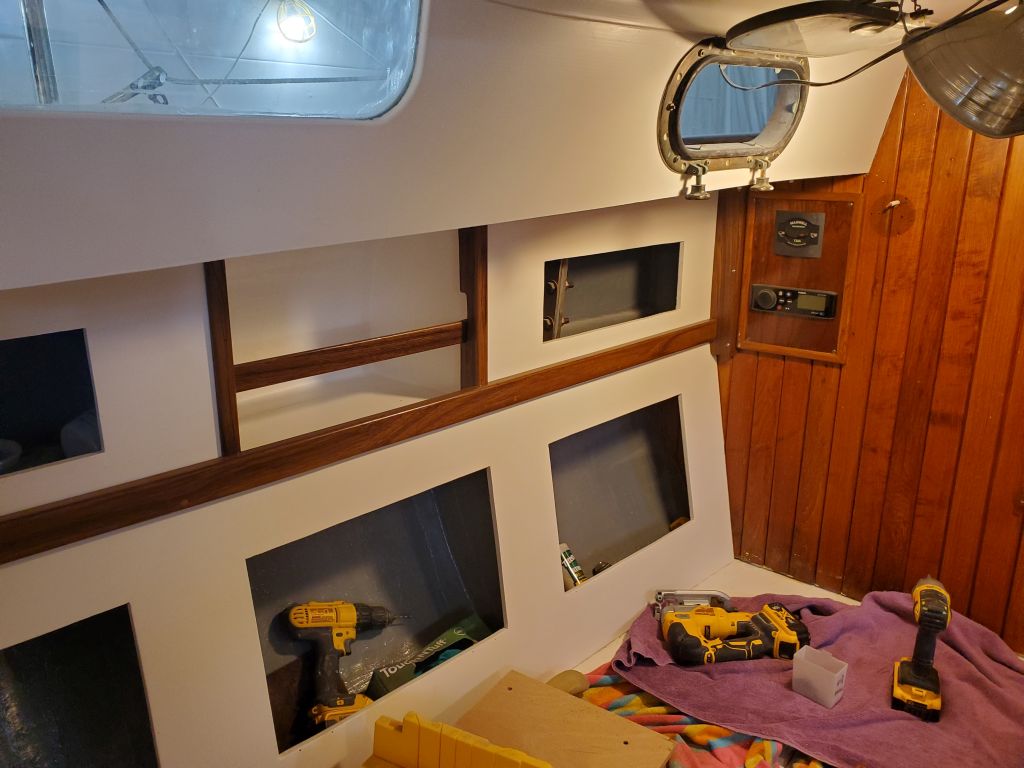
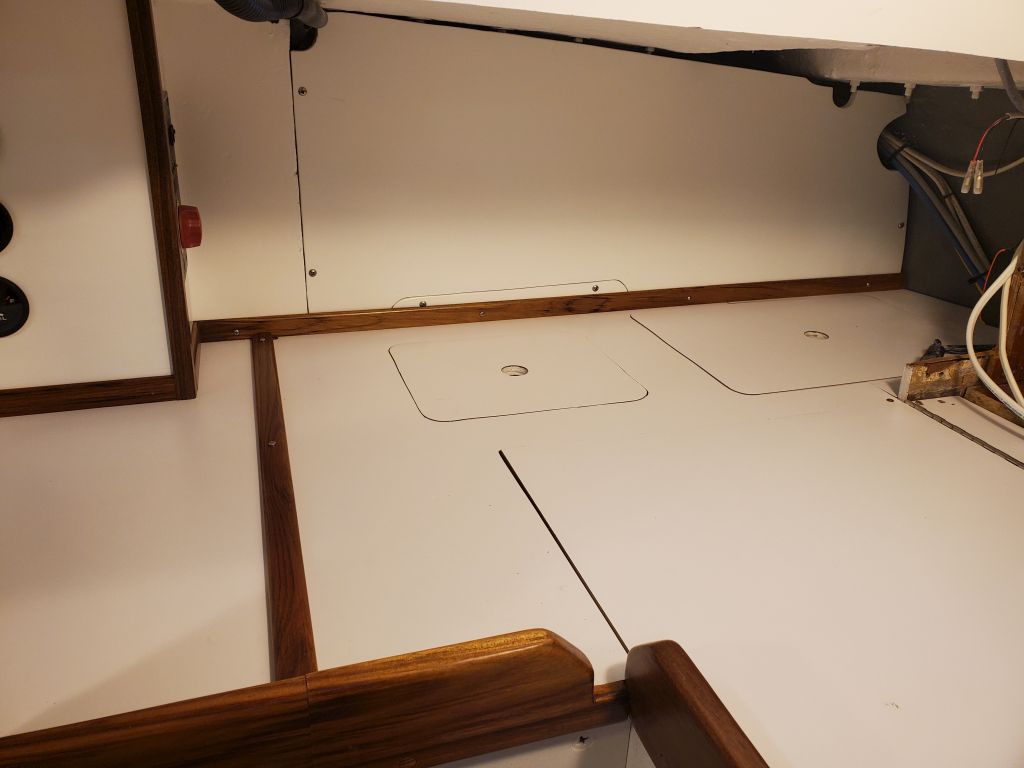
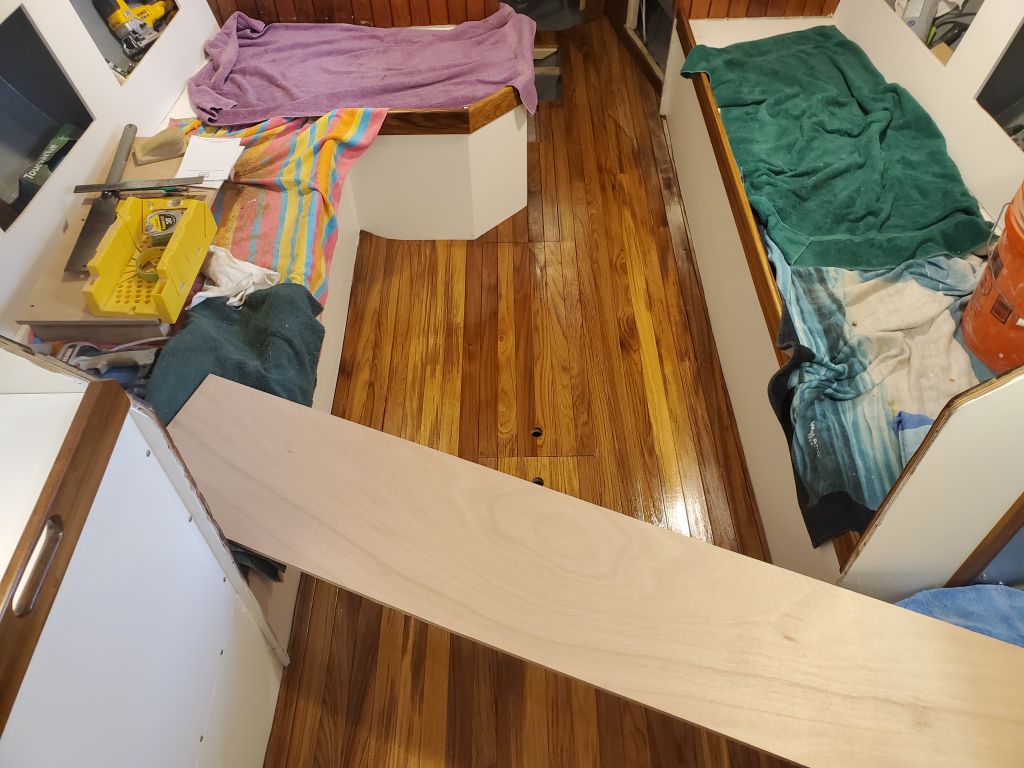
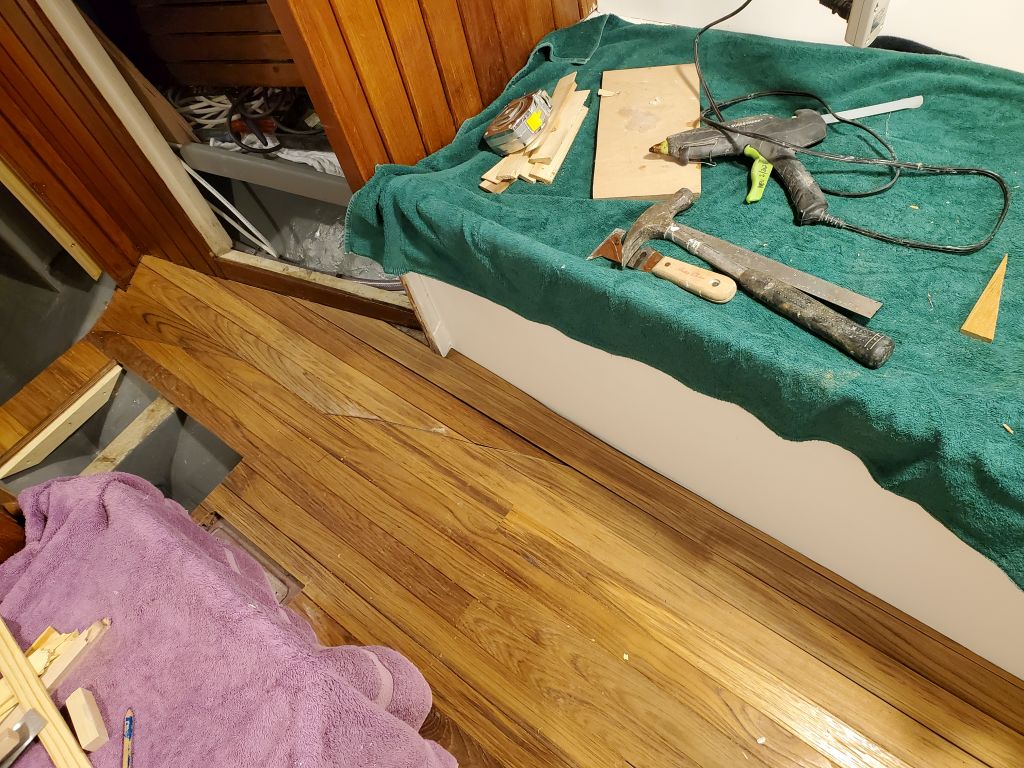
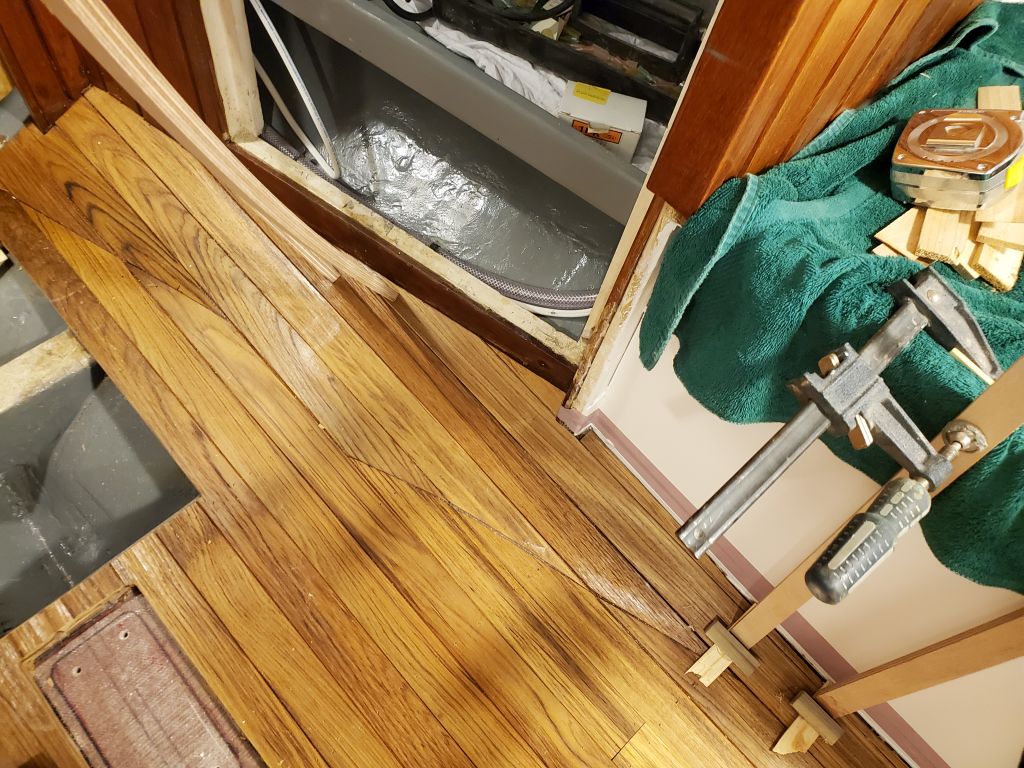
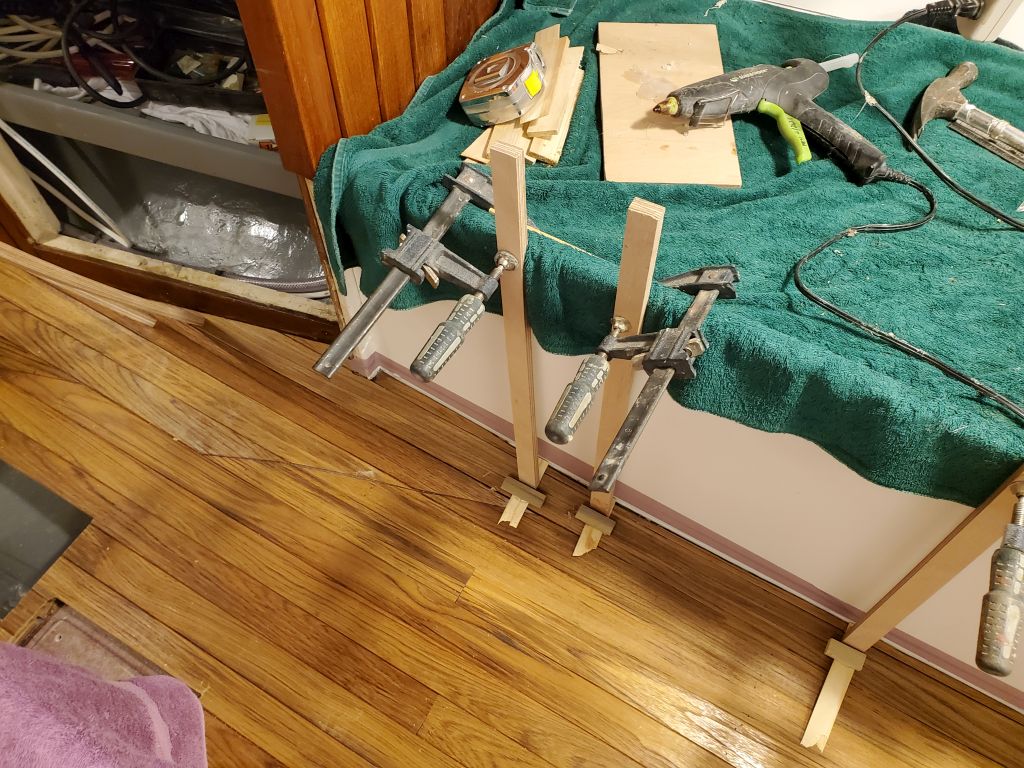
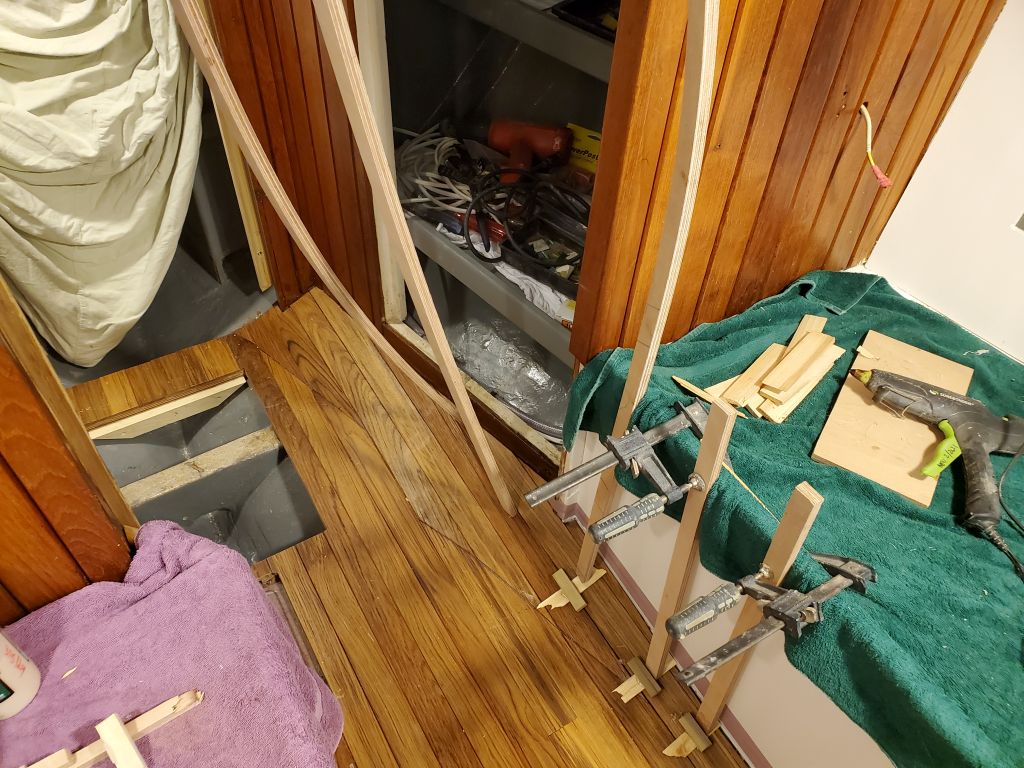
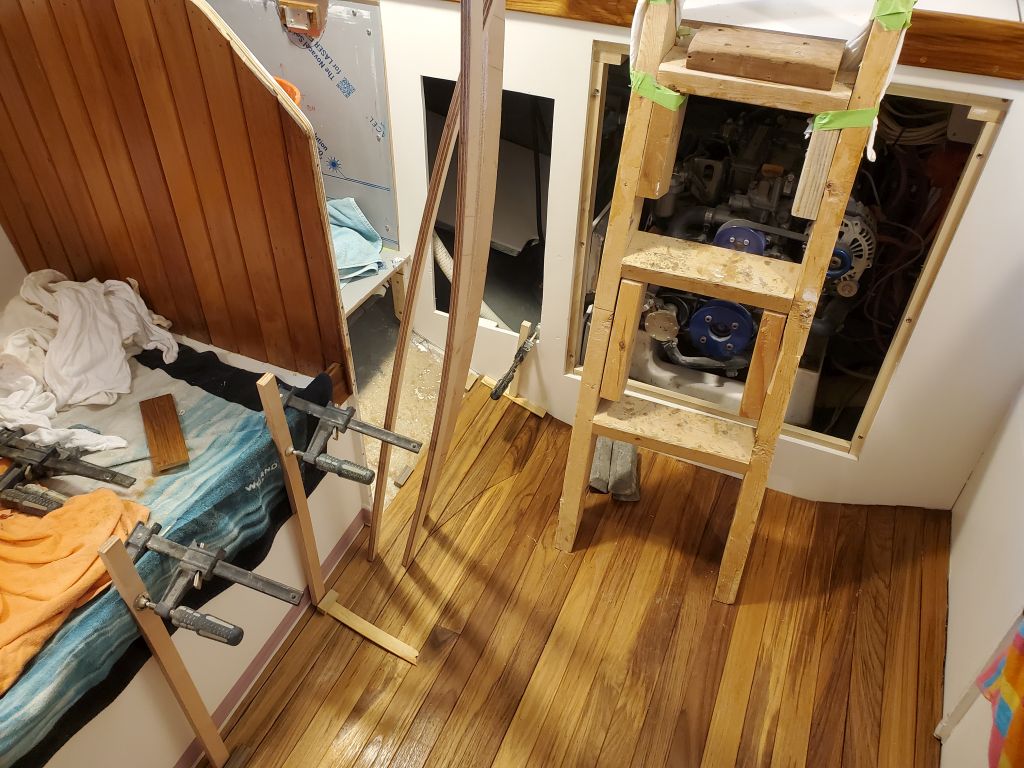
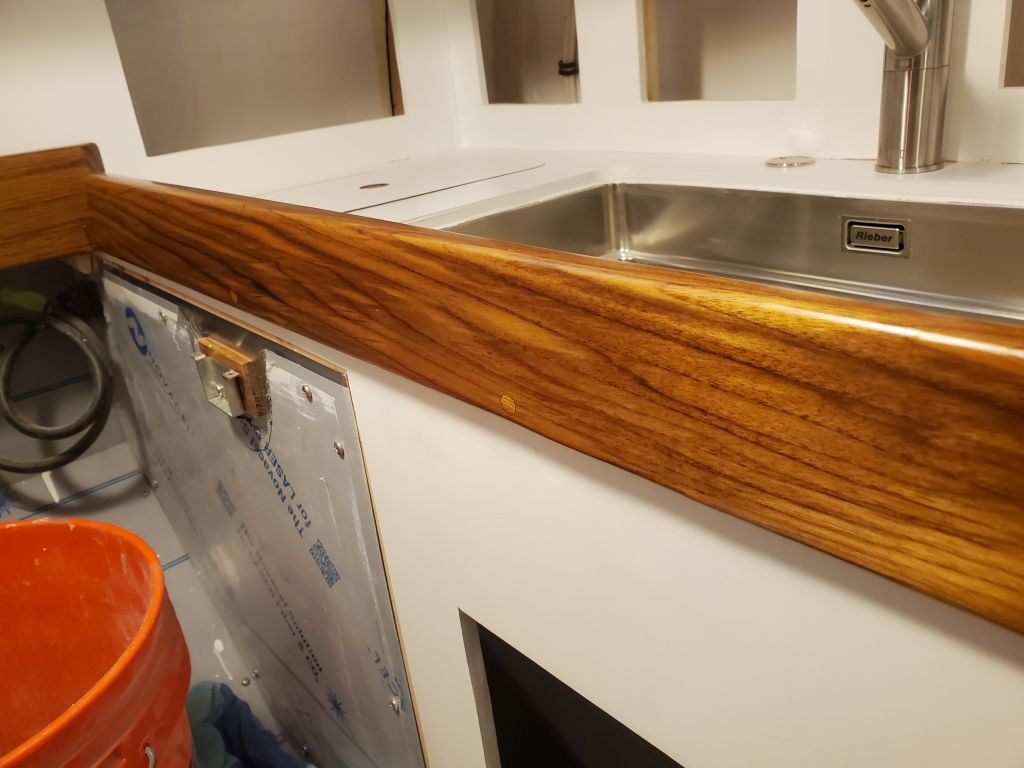
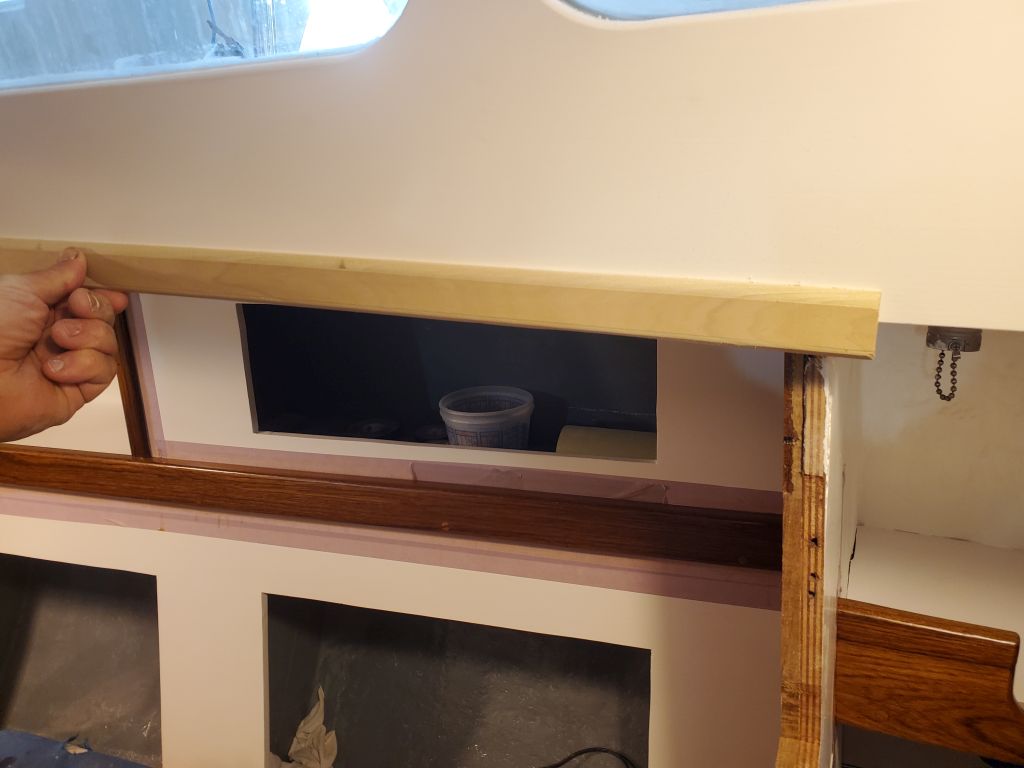
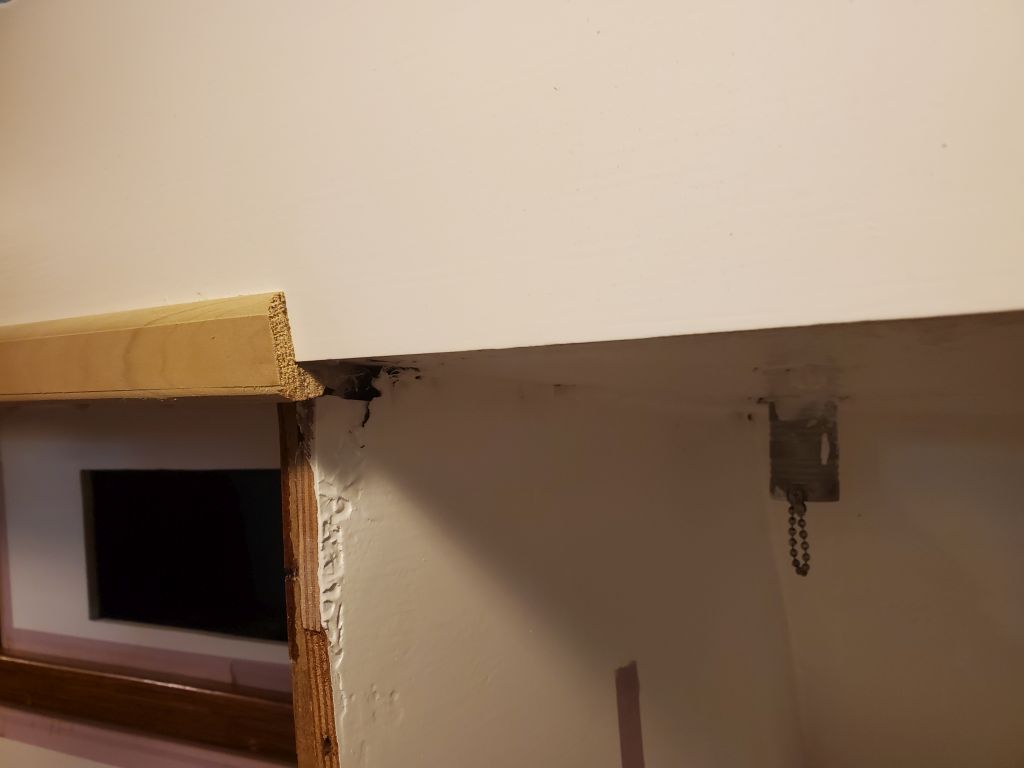
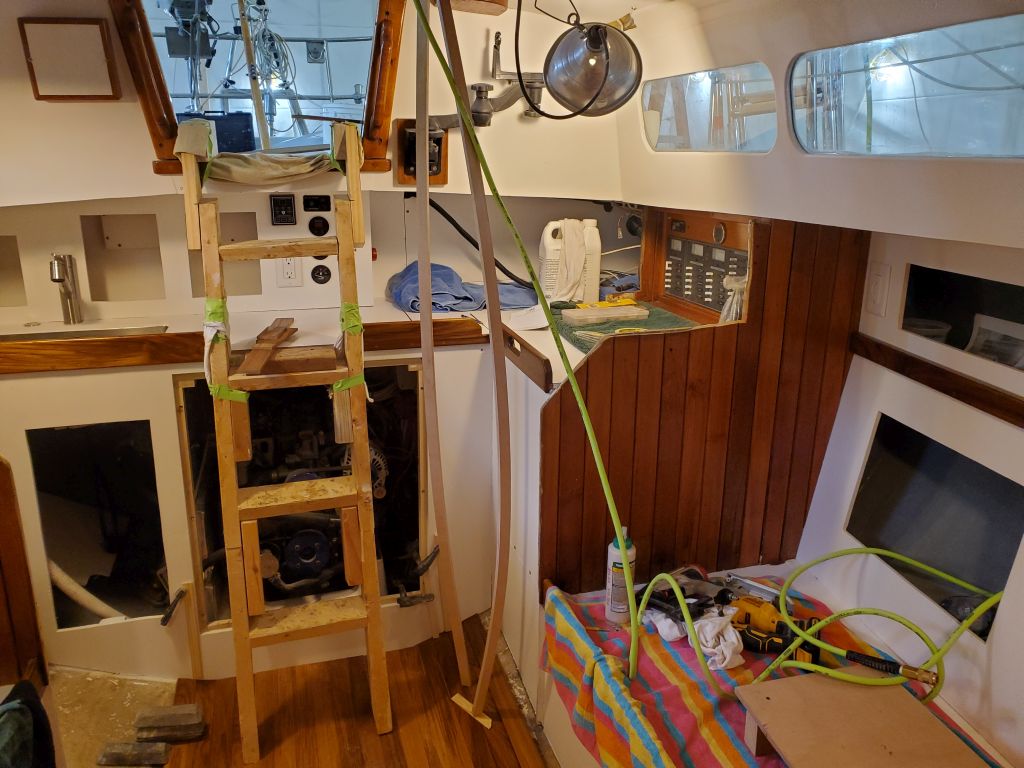
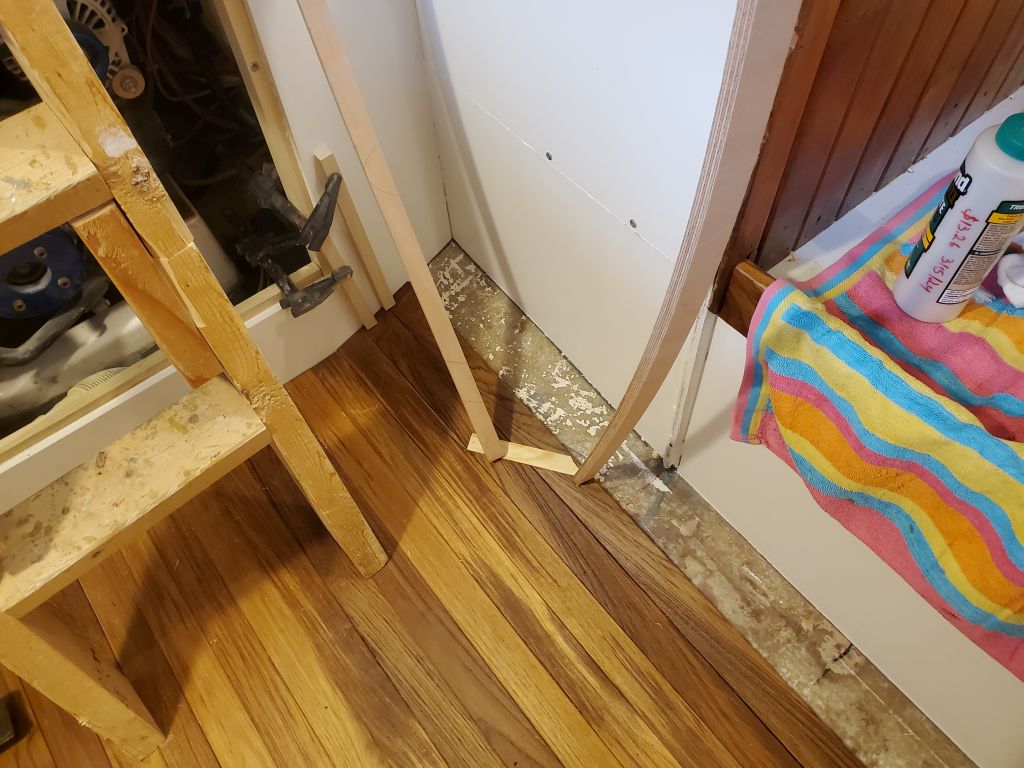
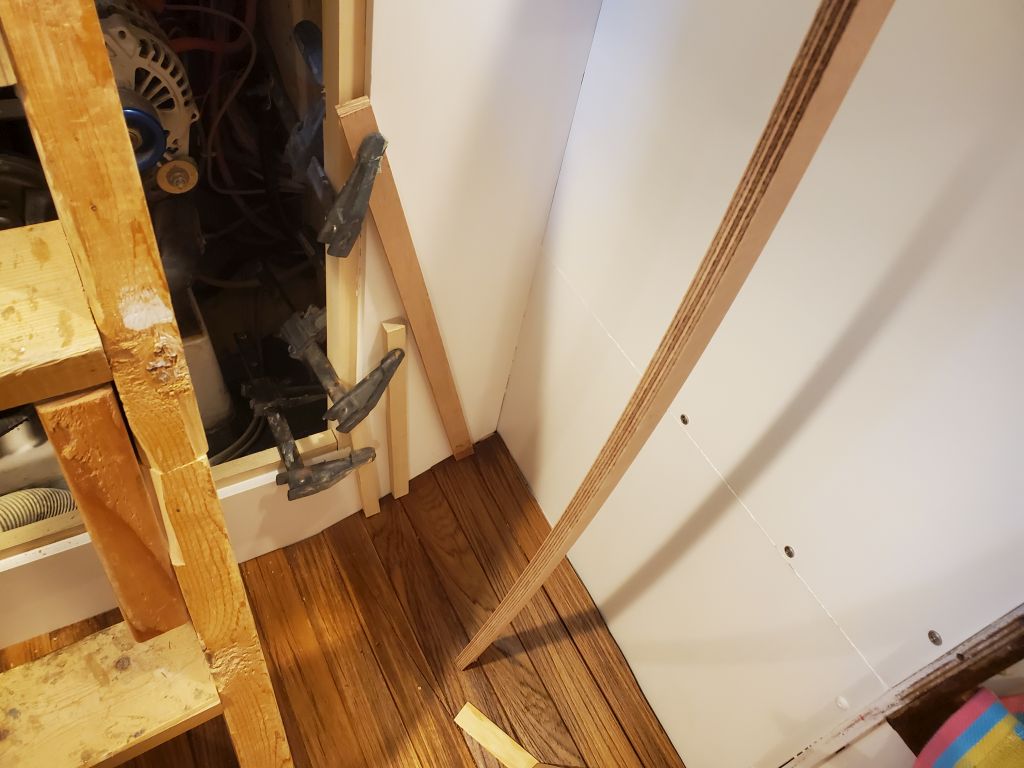
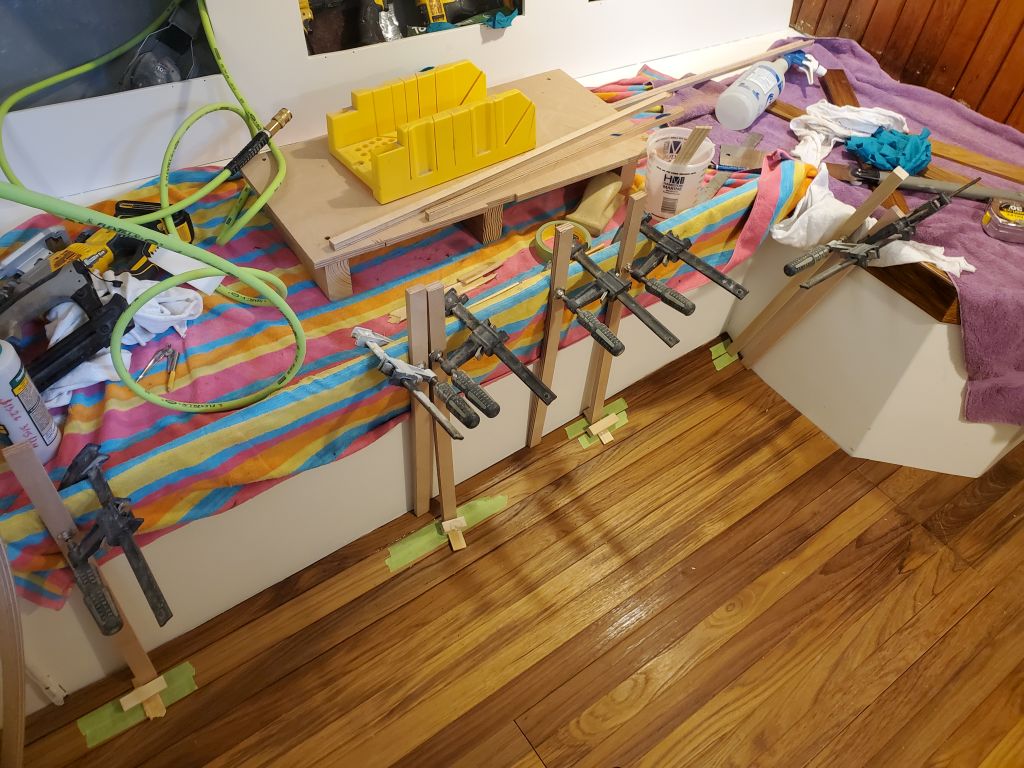
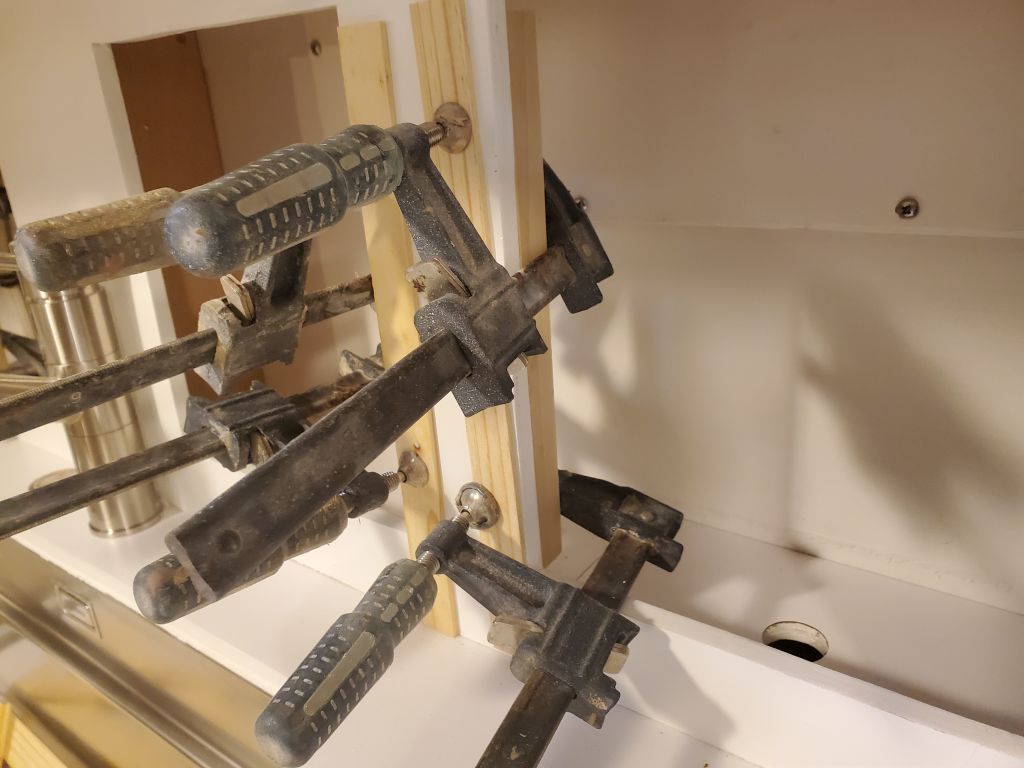
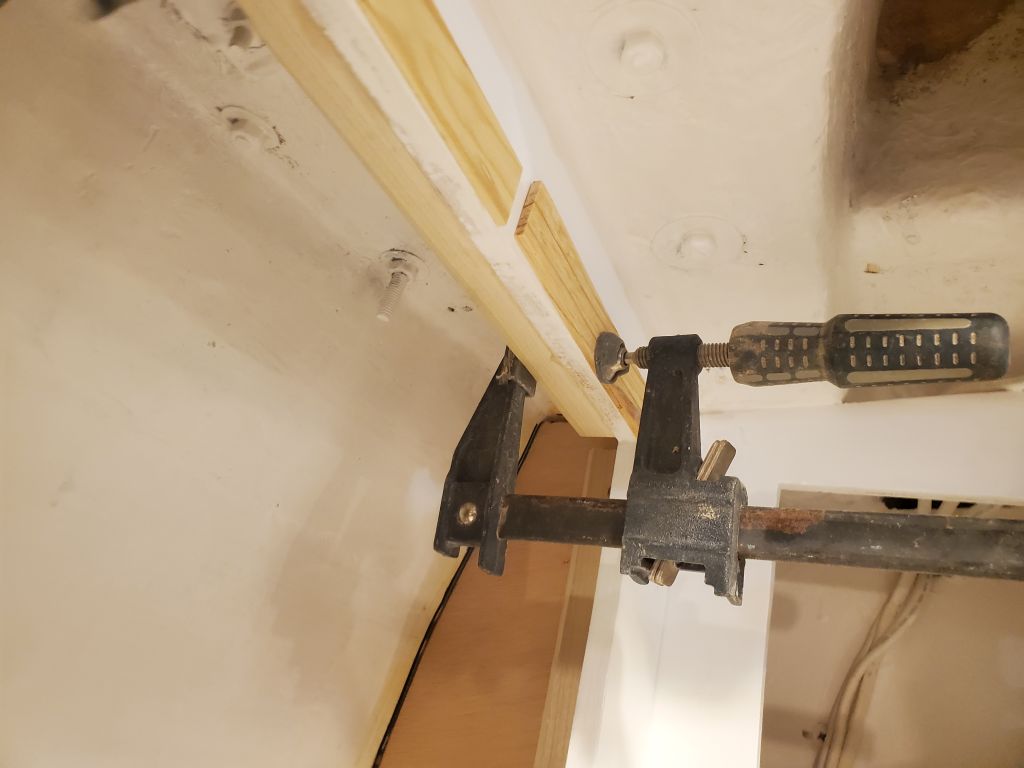
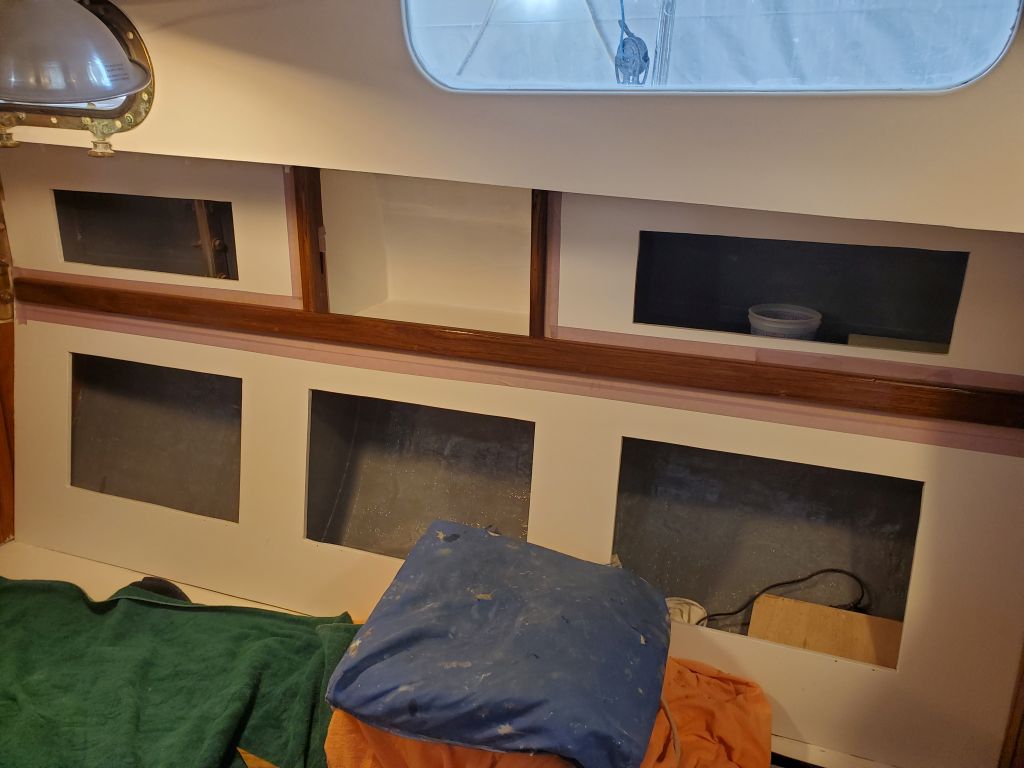
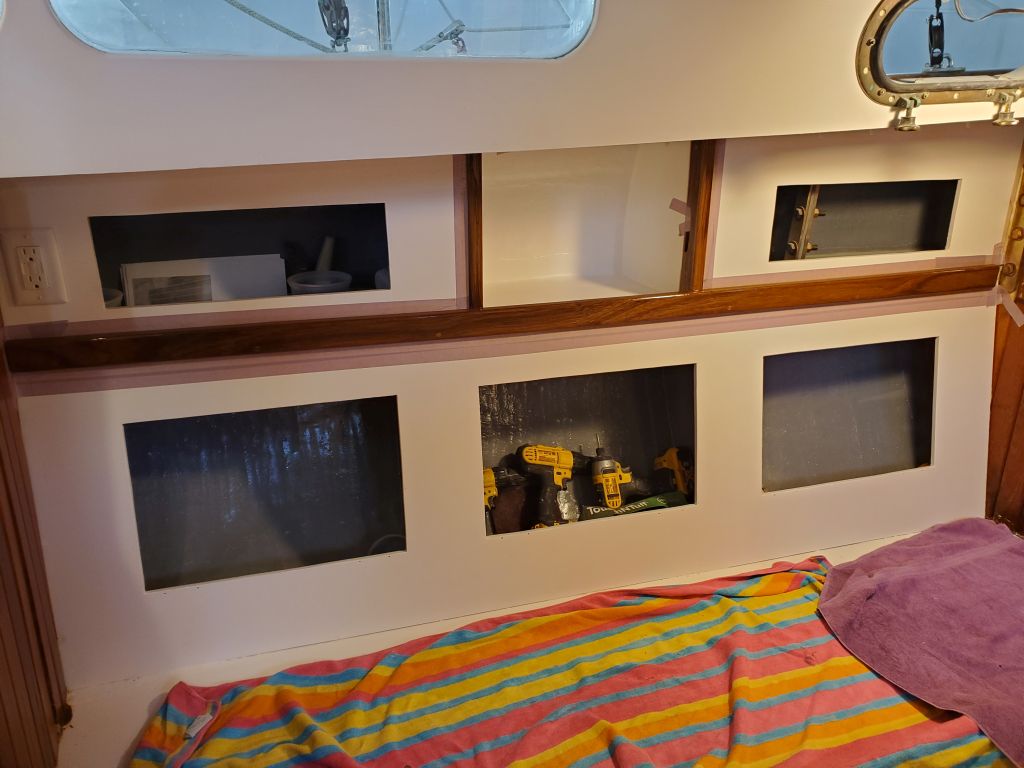
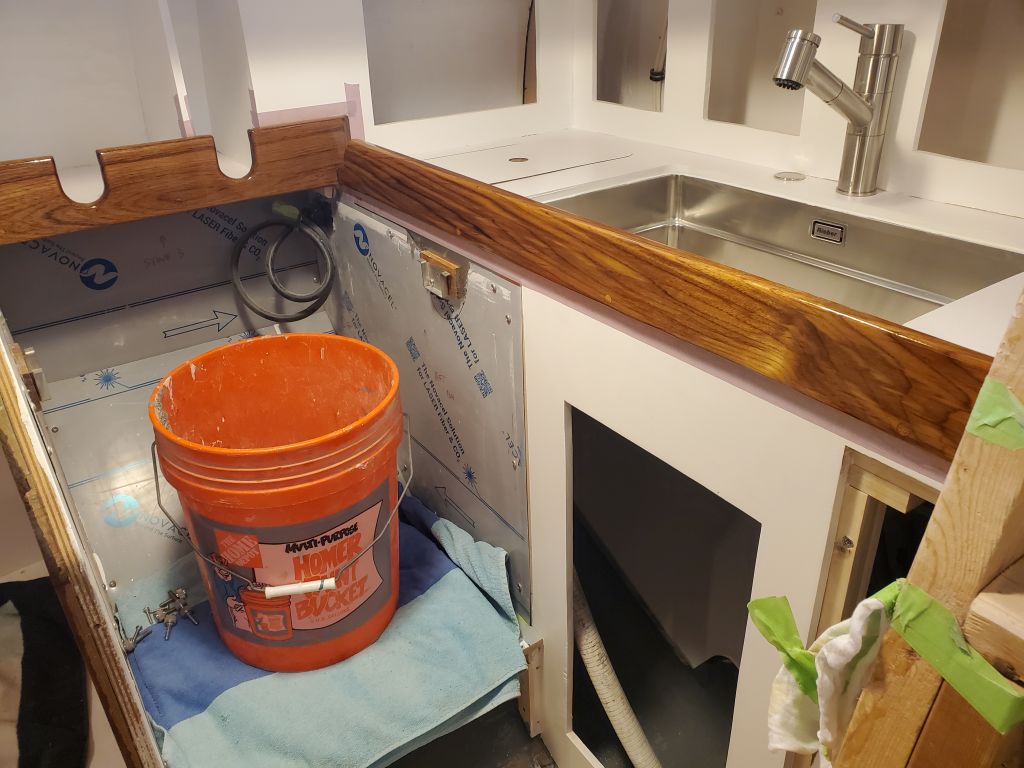
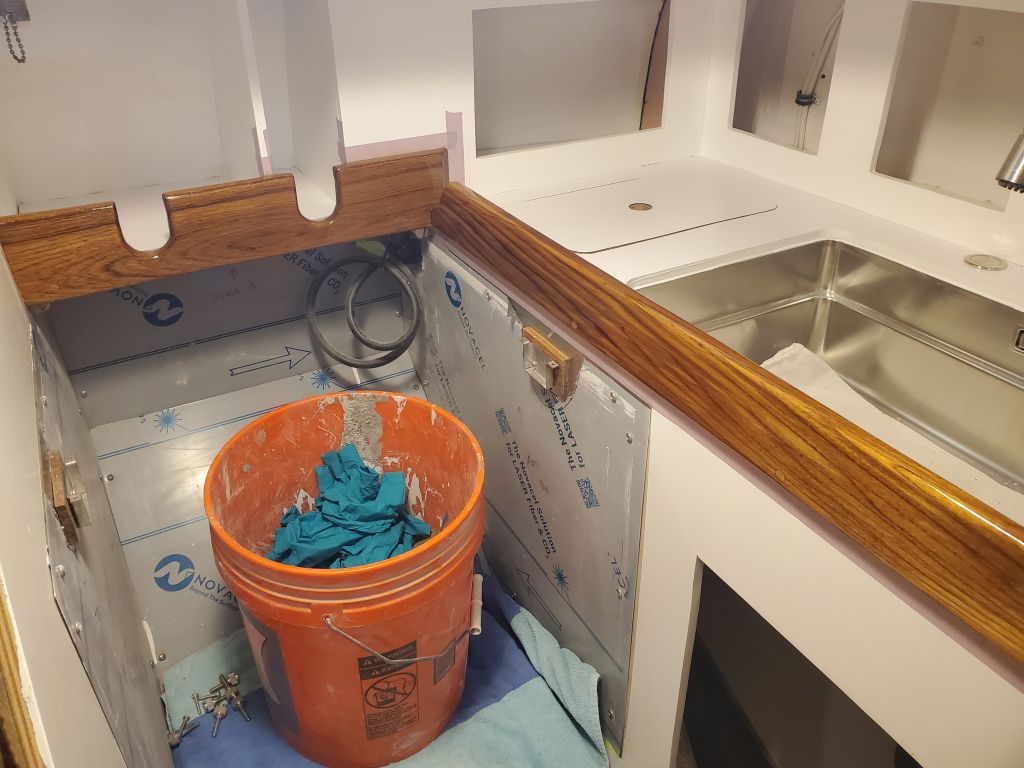
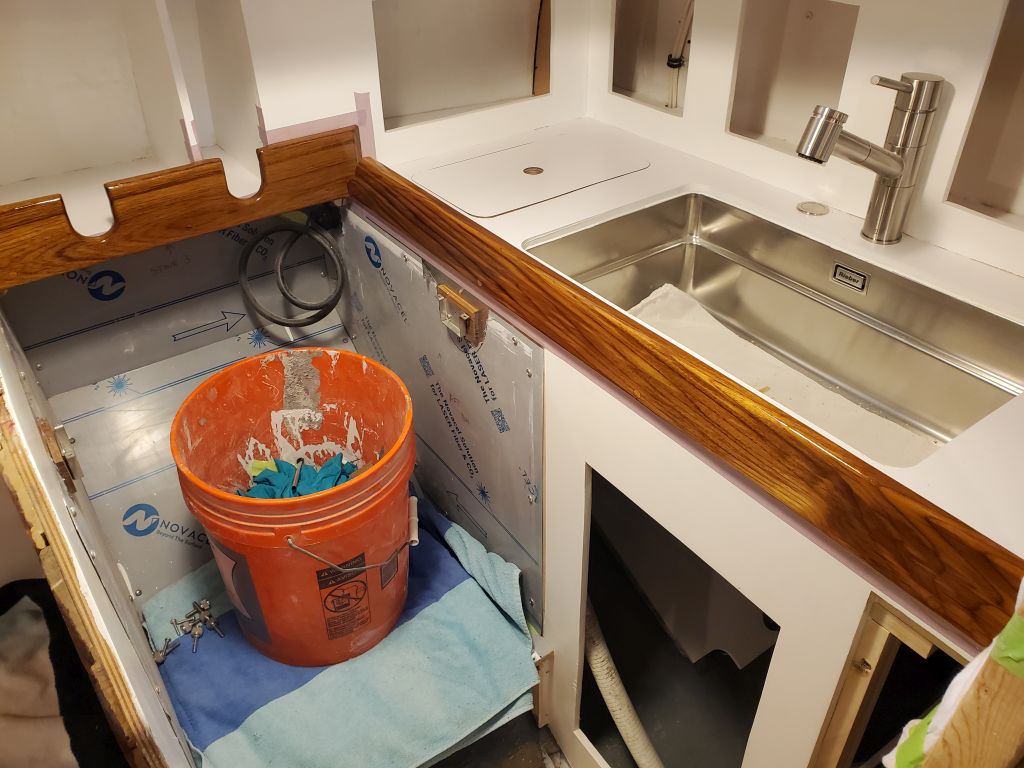
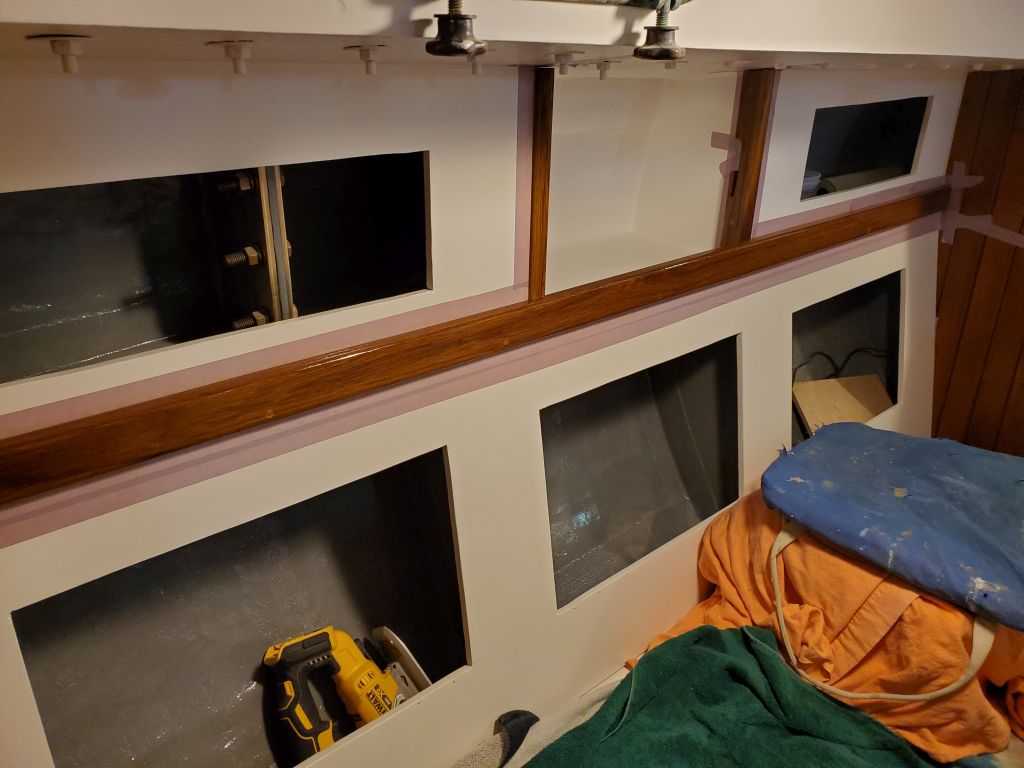
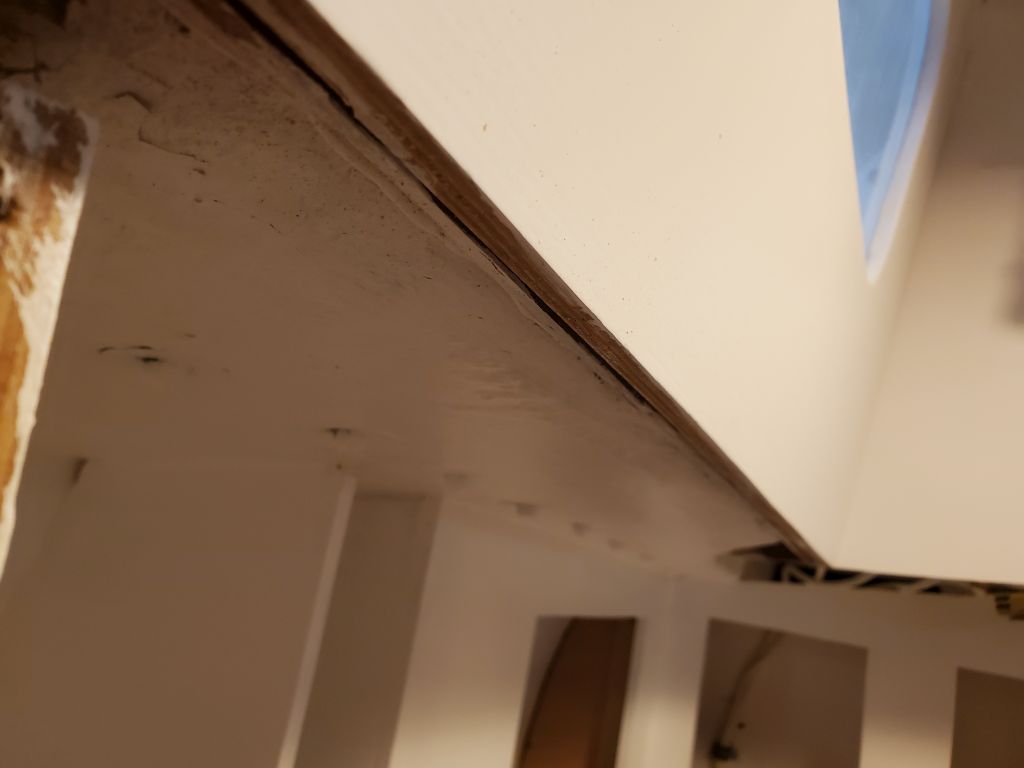
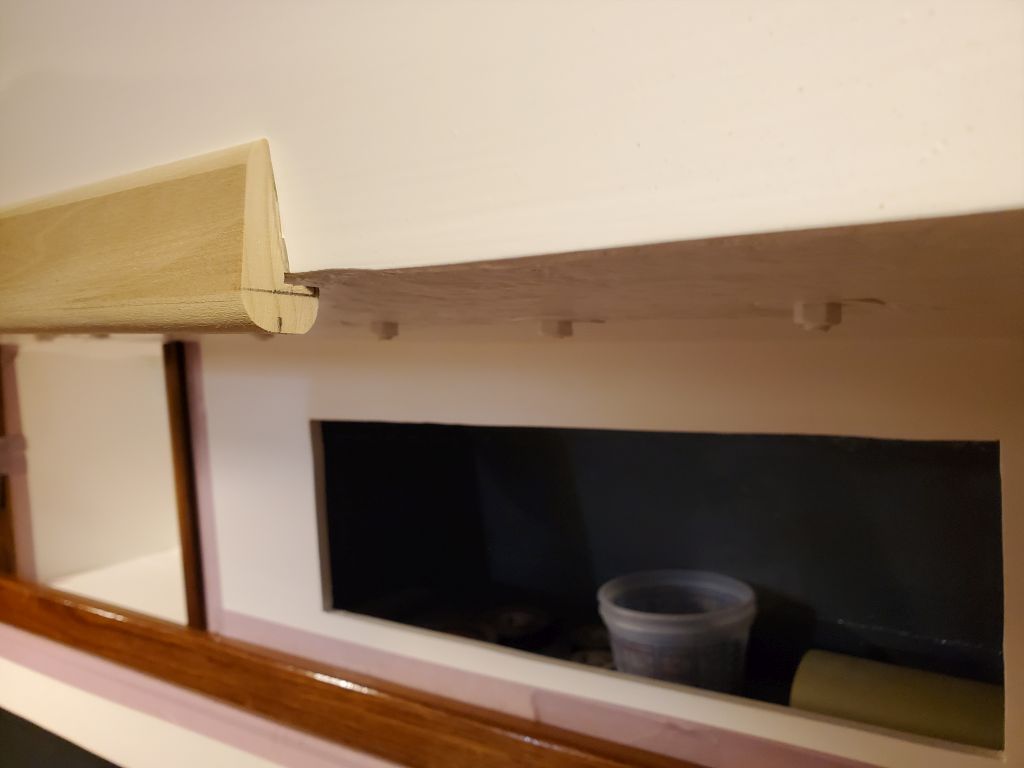
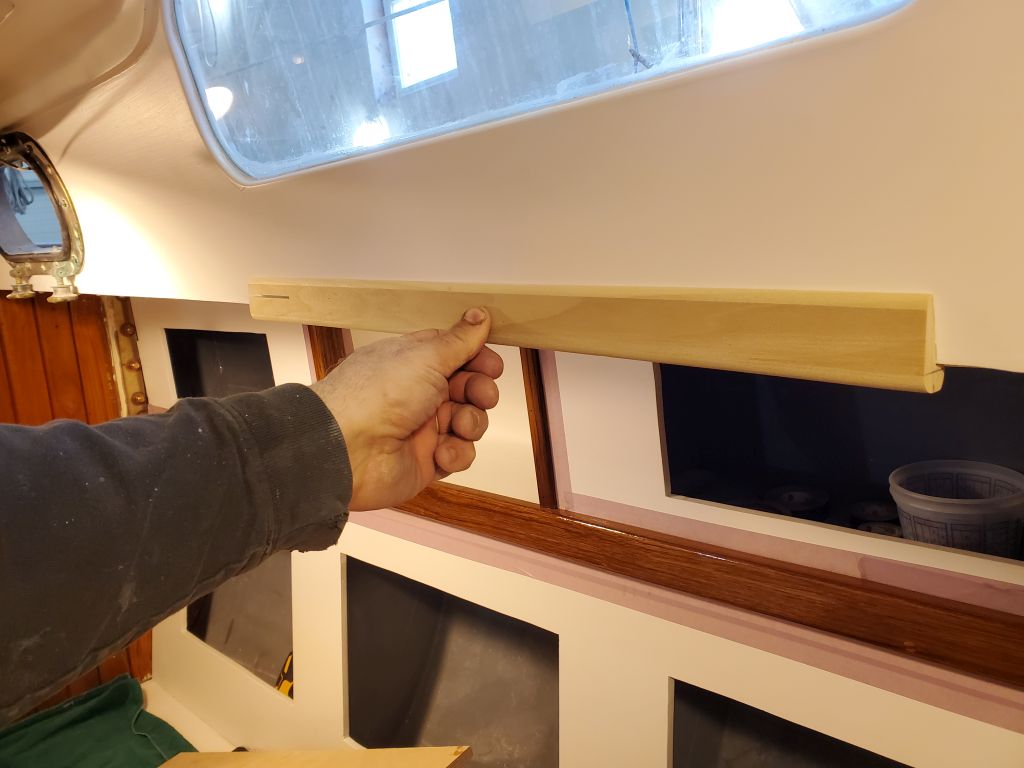
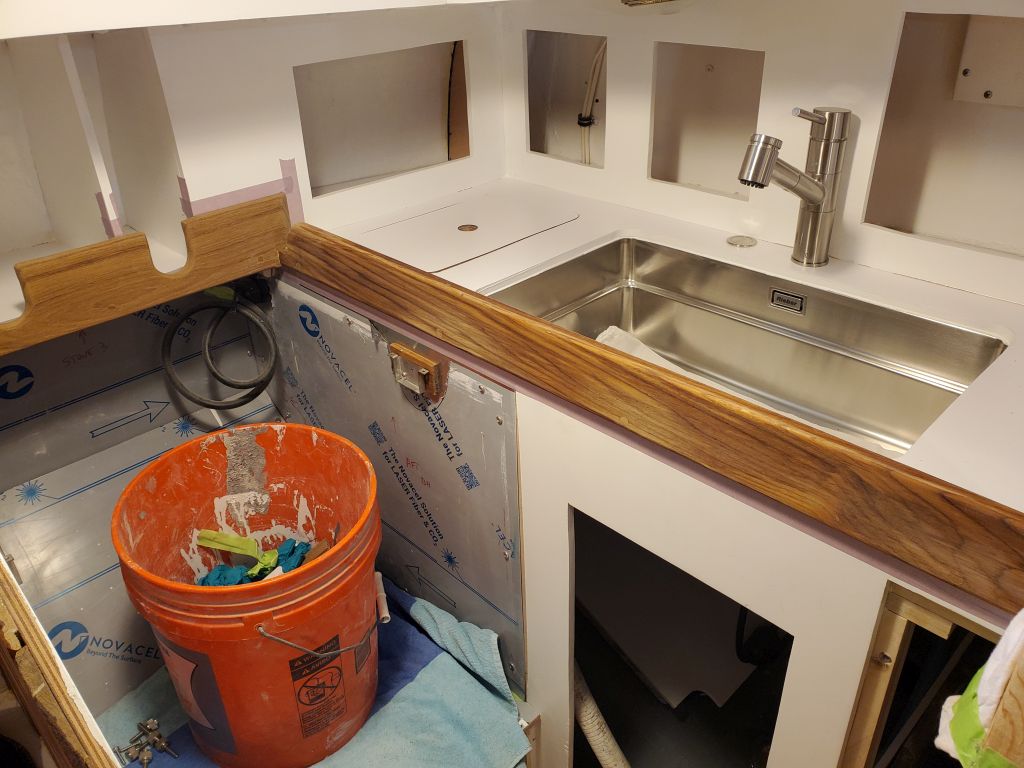
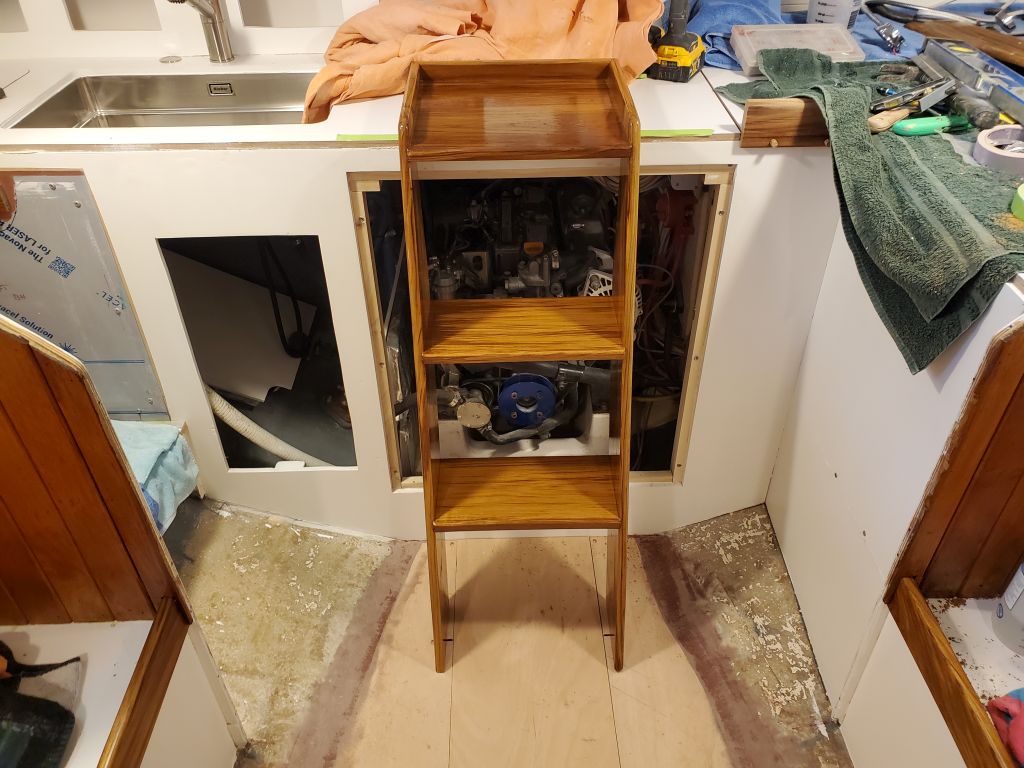
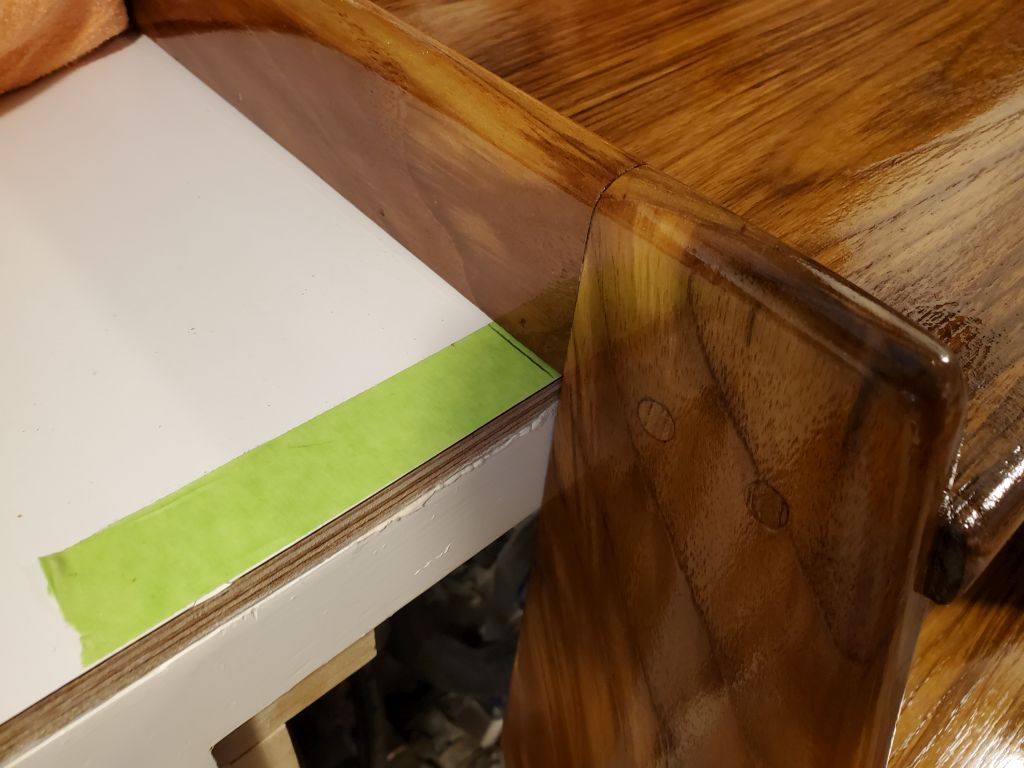
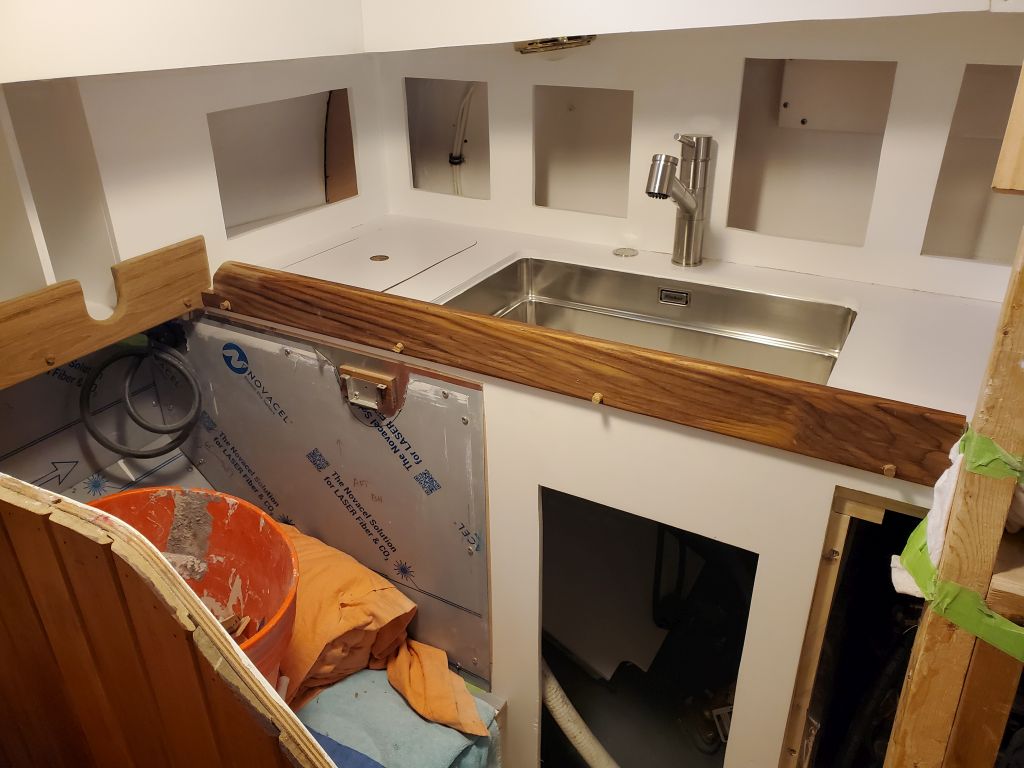
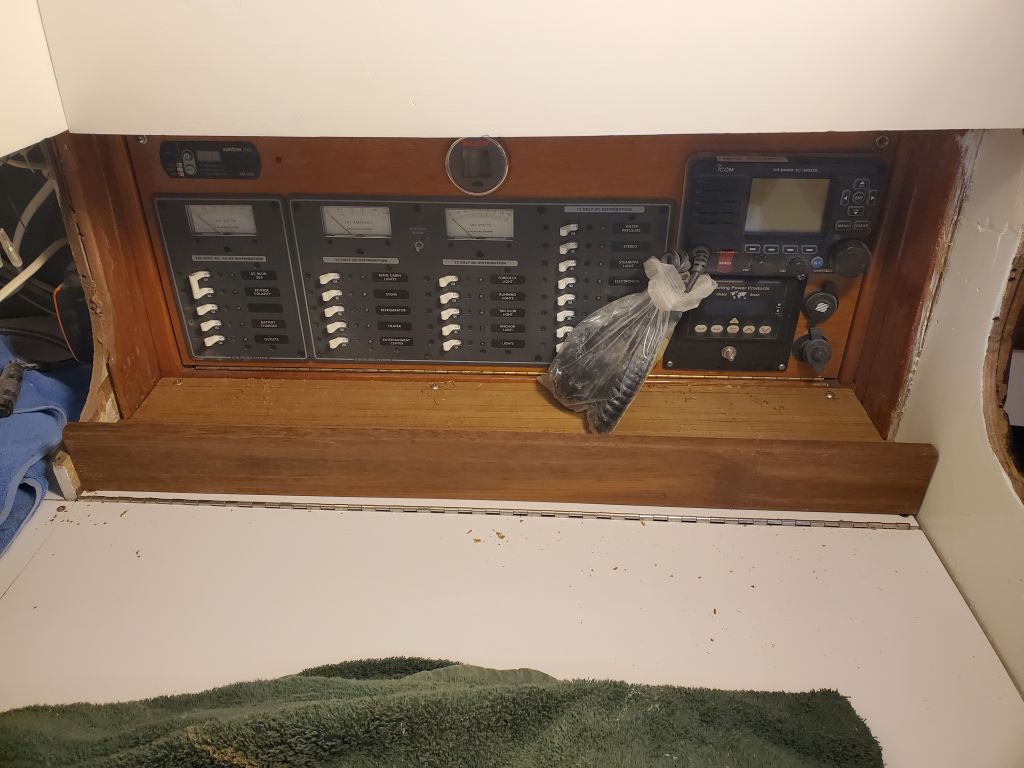
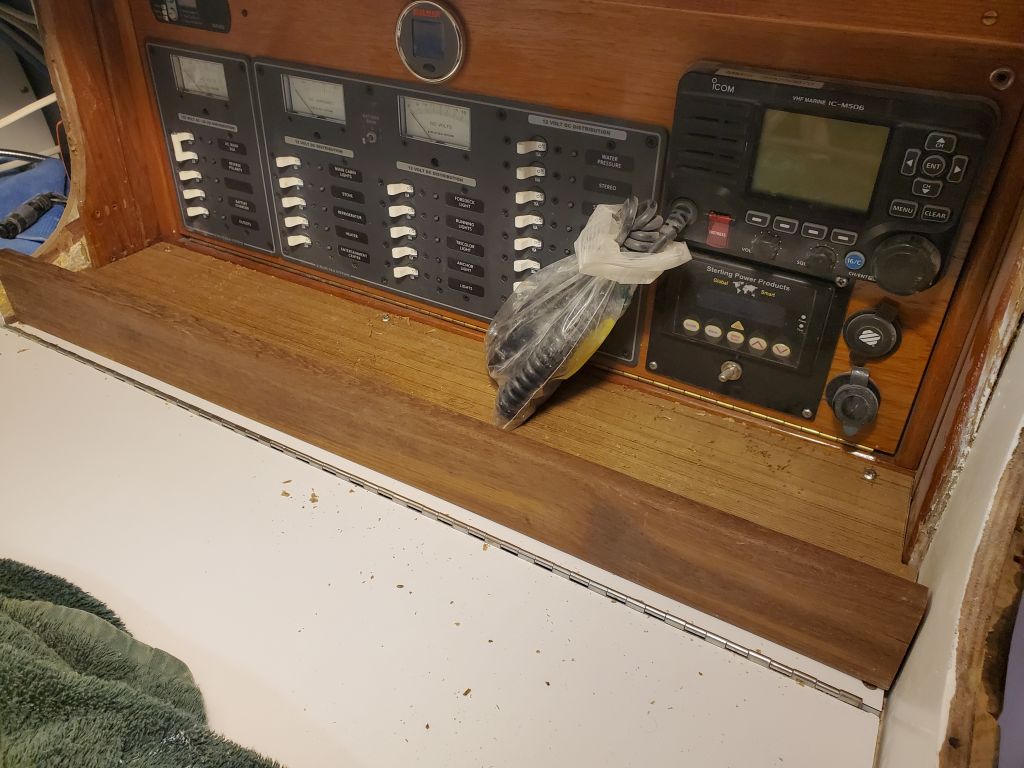
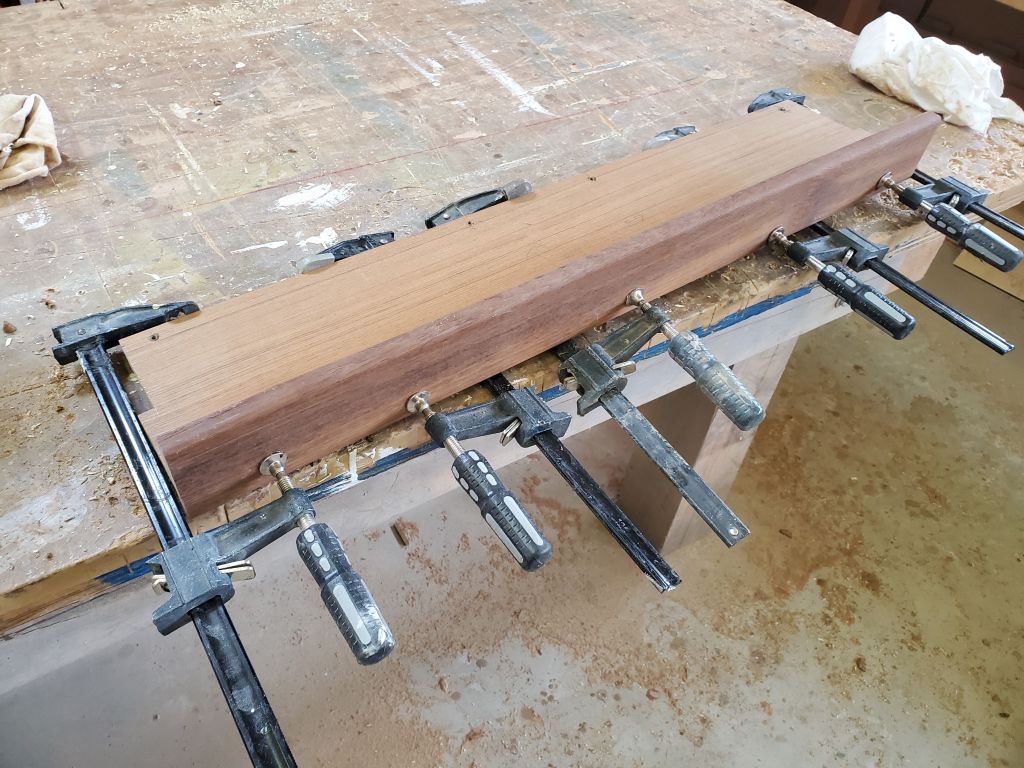
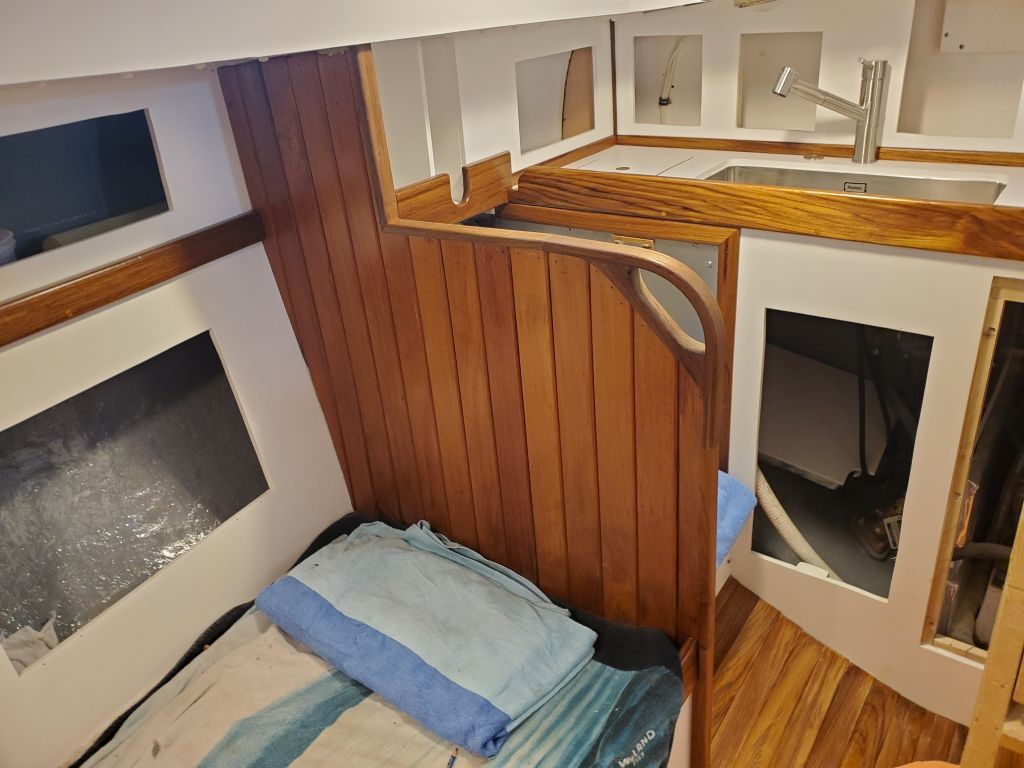
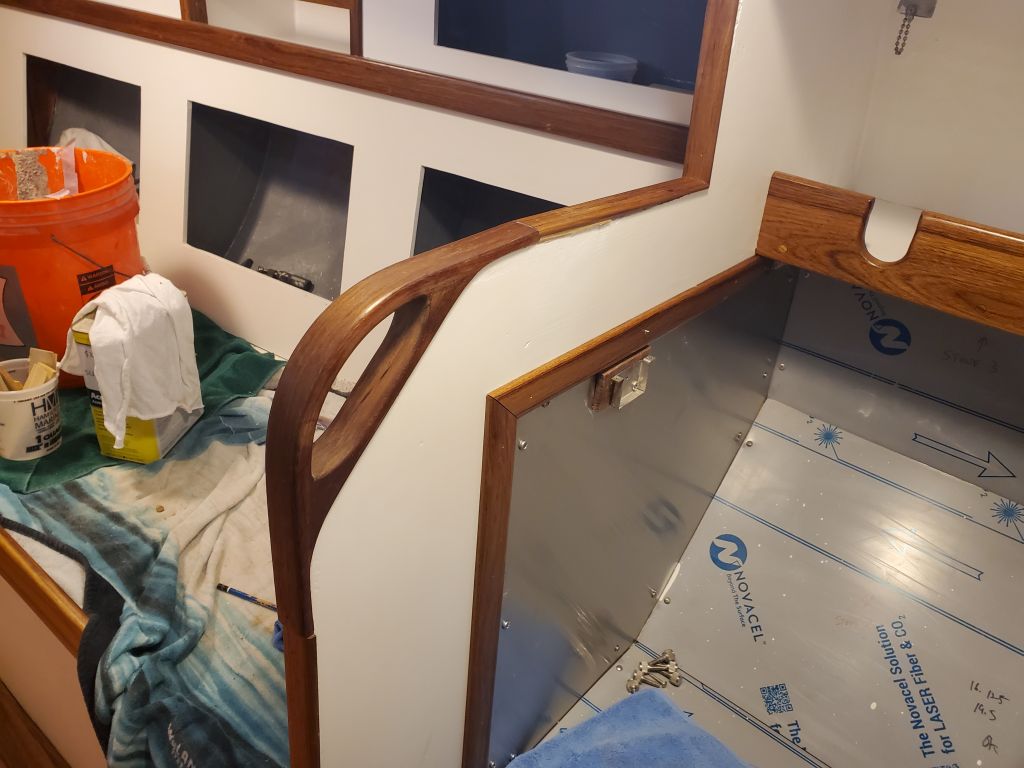
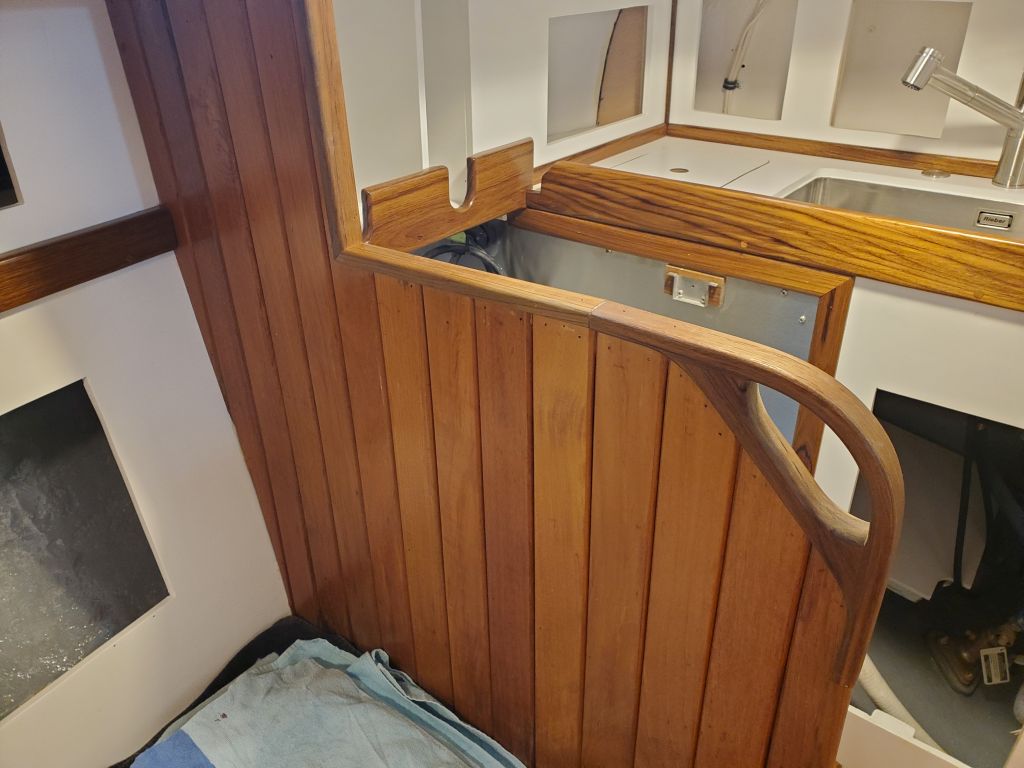
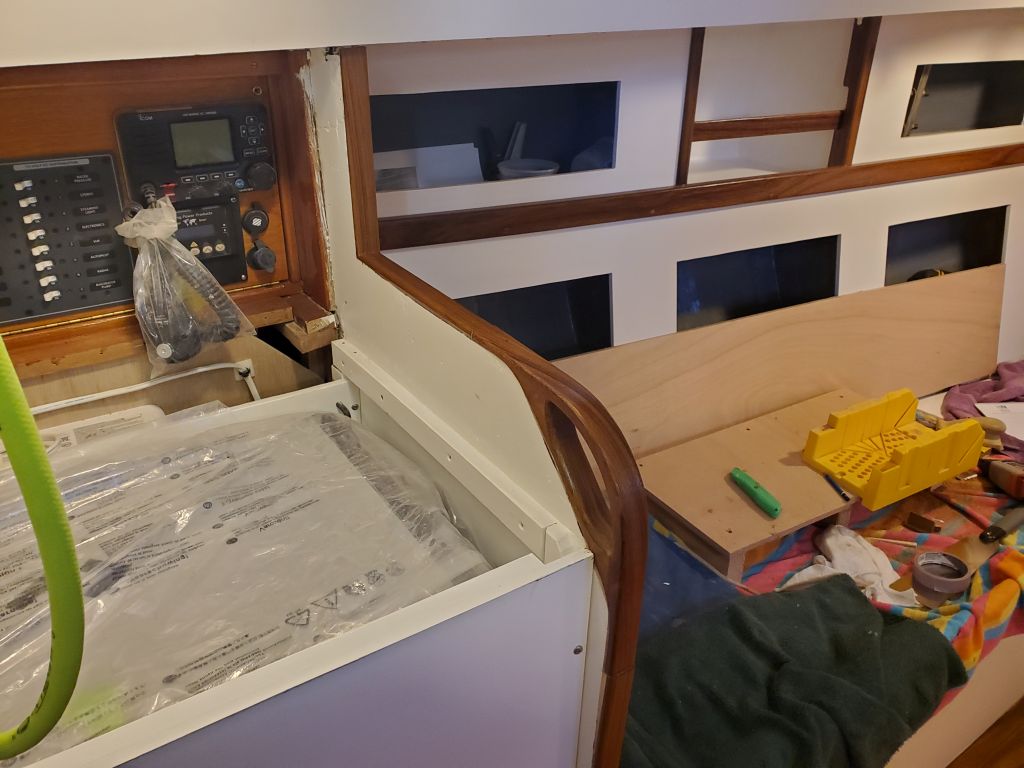
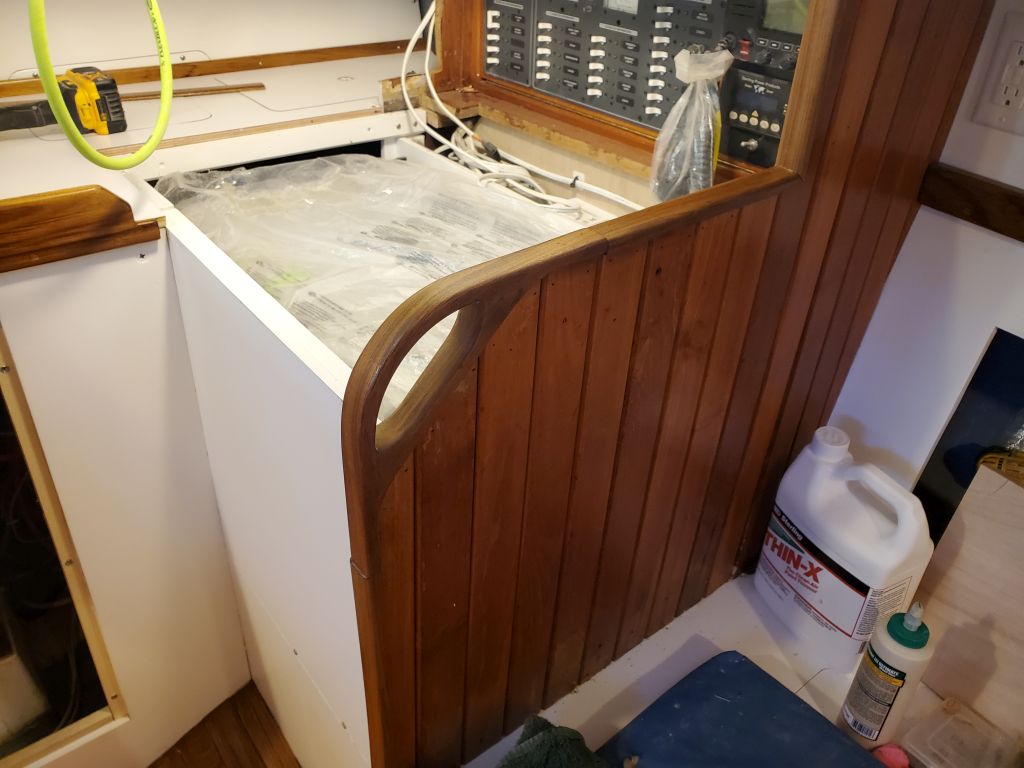
One side at a time, I cut the new trim to fit around the fixed position of the handles at the outer corners, then installed the trim in epoxy adhesive for strength, since one might tend to use the handles as handles.  To hold the trim while the adhesive cured, I used brads driven as needed.  Any minor misalignment at the seams between the handles and the adjacent trim would be cleaned up and faired in once the wood was firmly affixed next time.  The forward end, with its overhang, extended over the varnished faces of the bulkheads, while I kept the aft end flush, as there was no overhang here; later I’d mask and paint right up to the edge of the teak to hide the now epoxy-filled gaps along that edge.  I temporarily removed the refrigerator lid to improve access to the port side for installation.

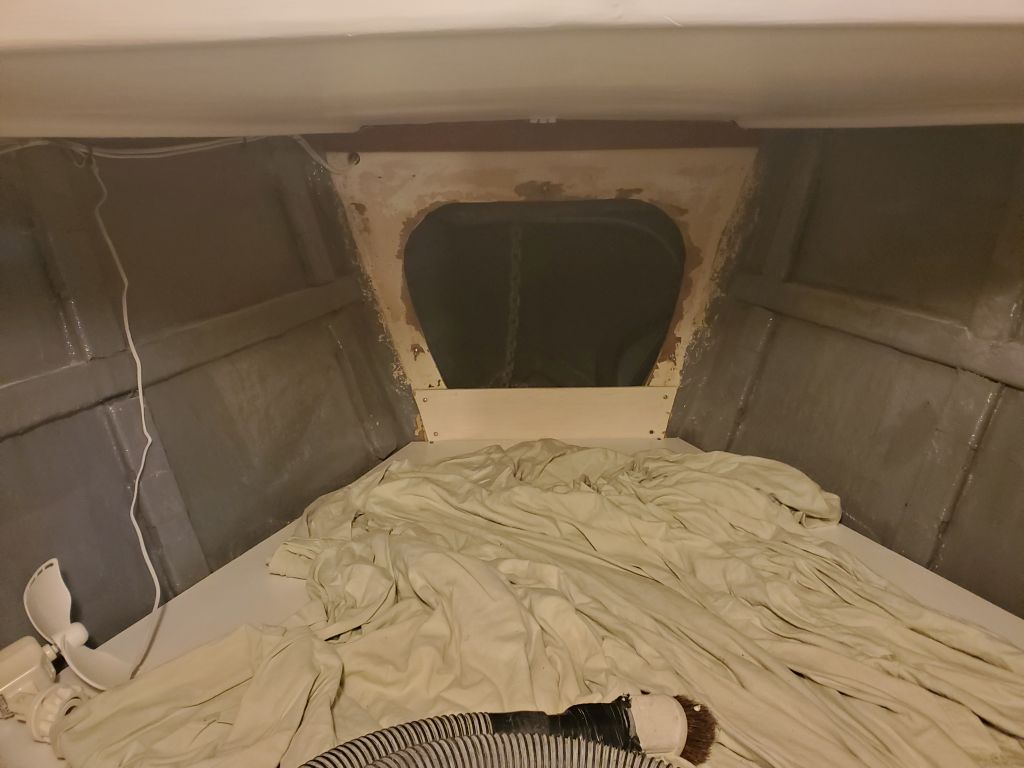
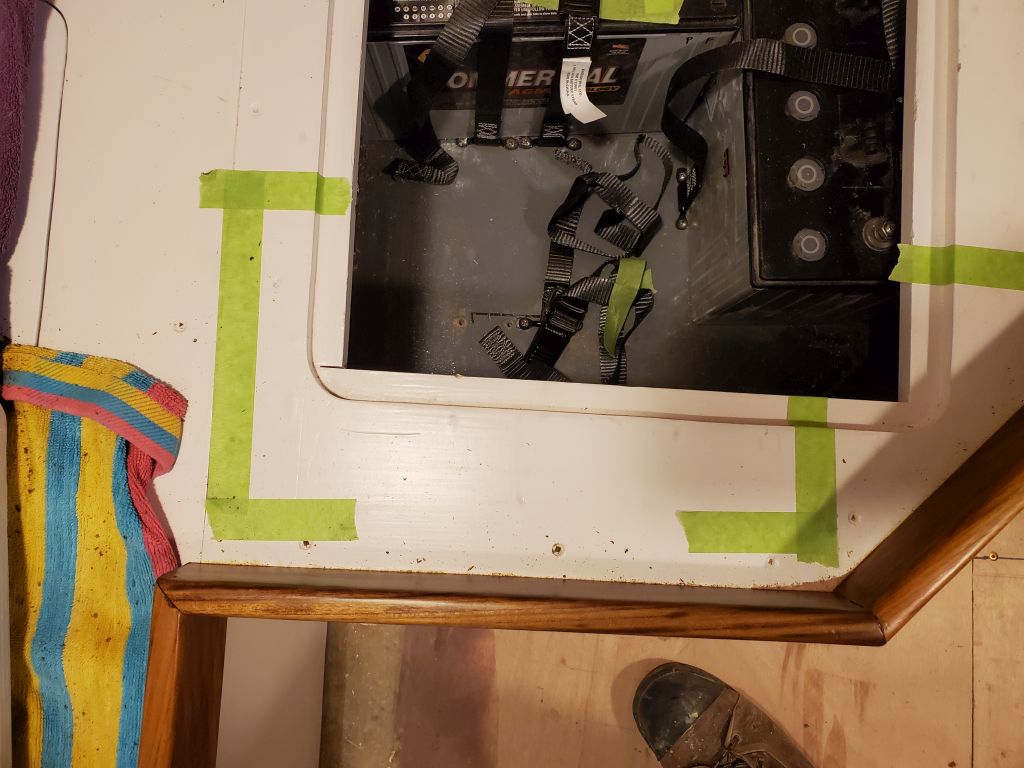
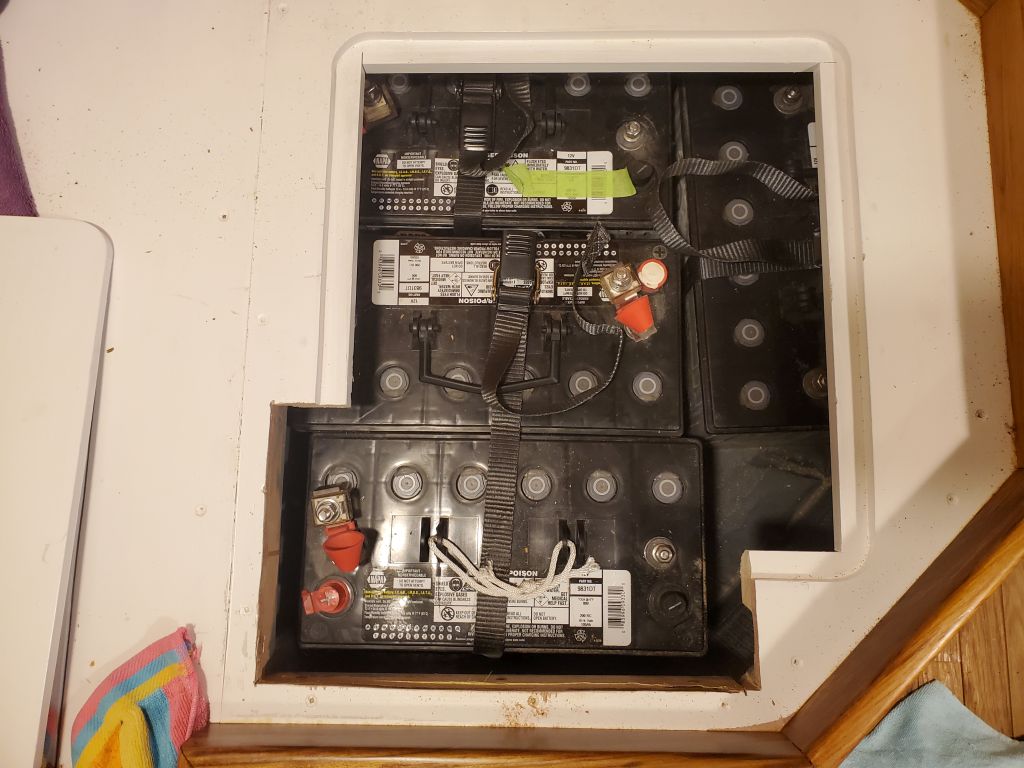
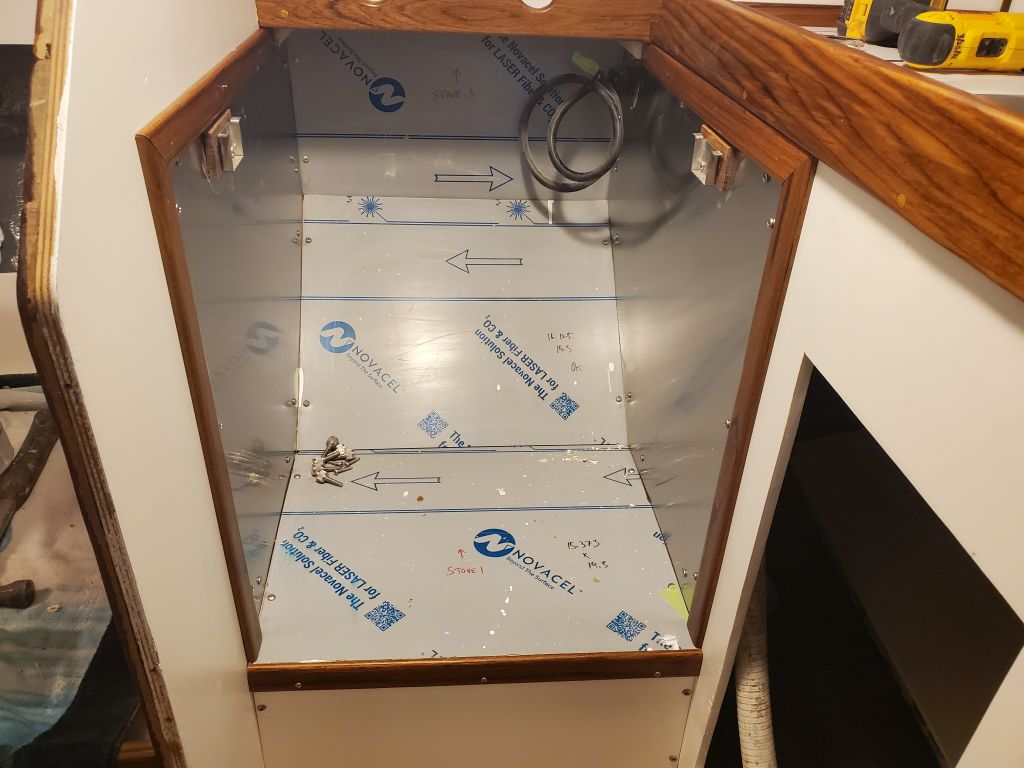
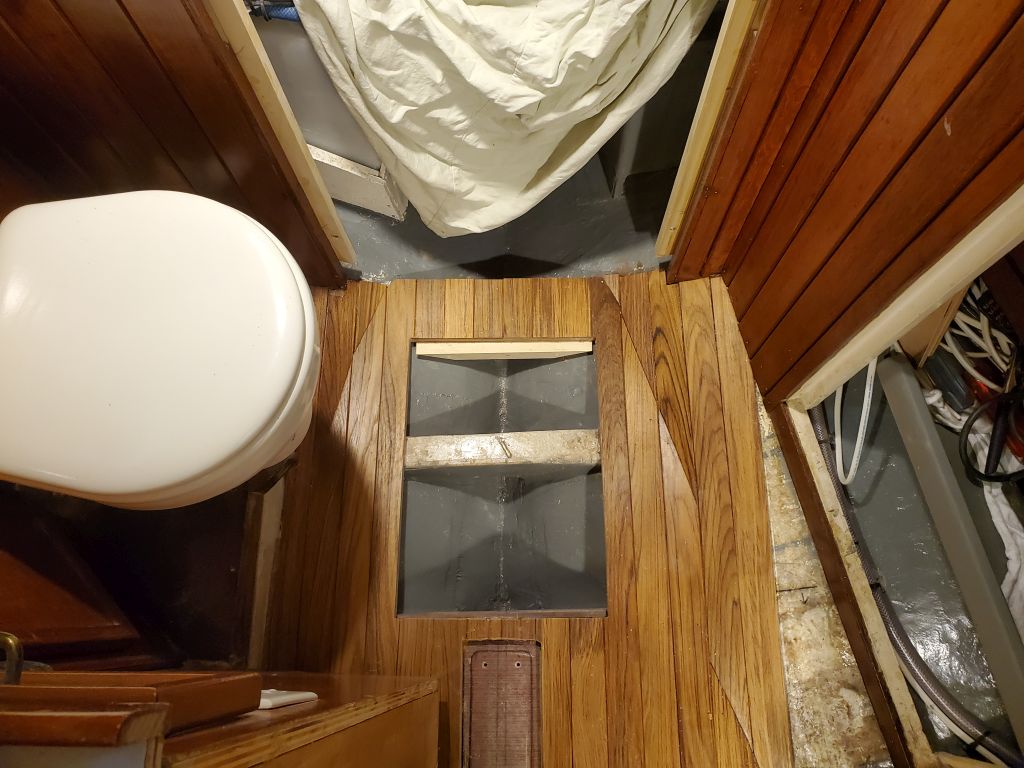
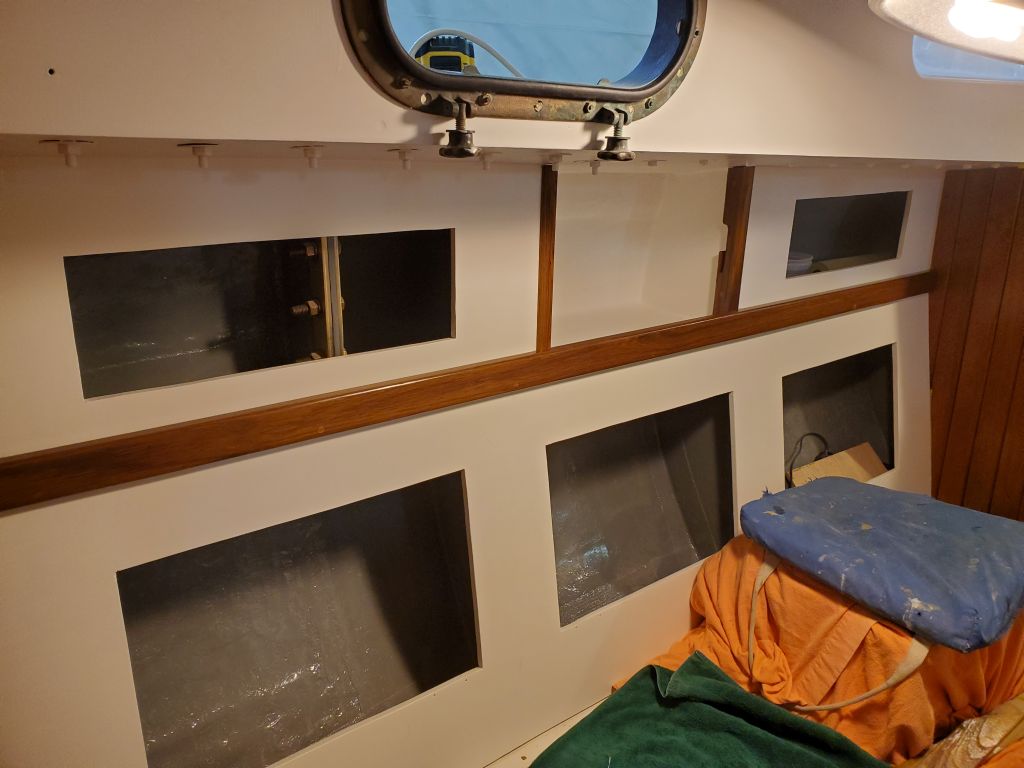
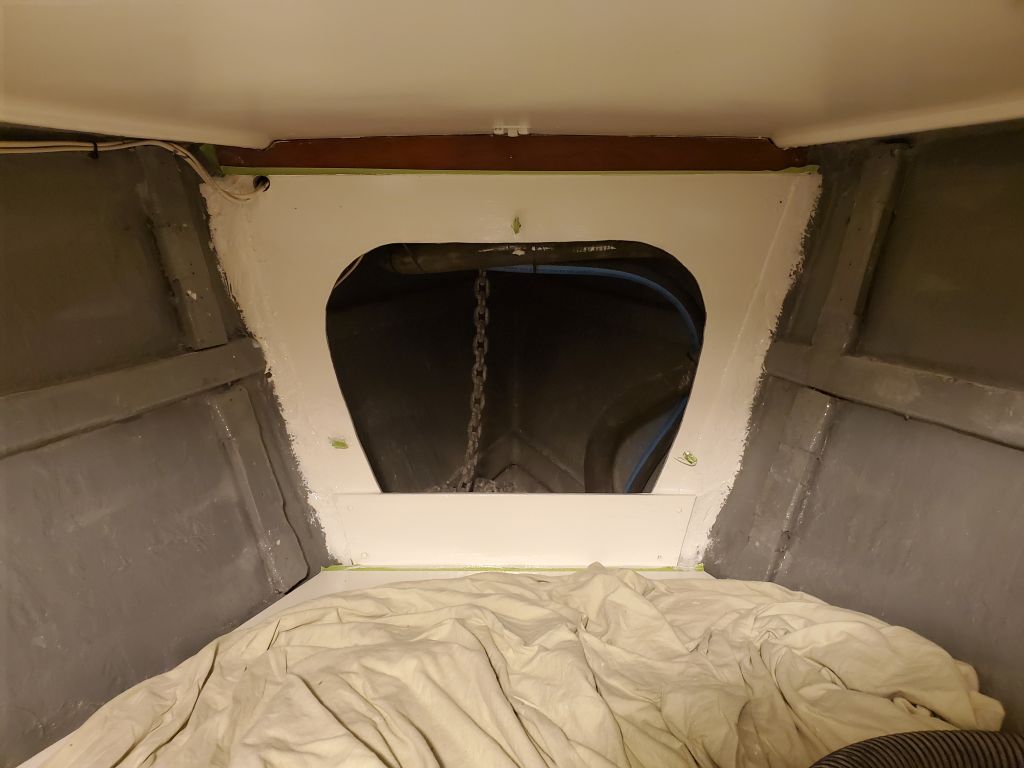
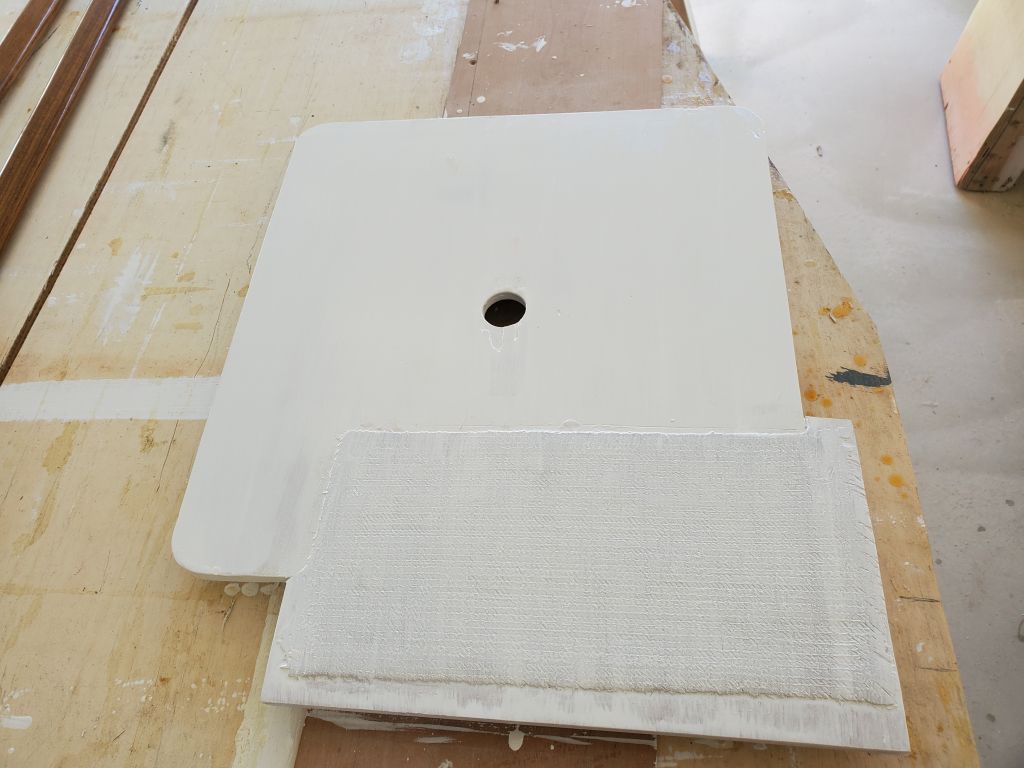
There were a few additional pieces of trim required to finish up in this area, but I held off on these till the epoxy cured fully on the edge trim so as not to disturb it.  Meanwhile, I took care of several smaller tasks, including another coat of white paint on the chainlocker bulkhead, and, after sanding and cleaning up from the epoxy work, a coat of primer on both sides of the battery locker hatch.

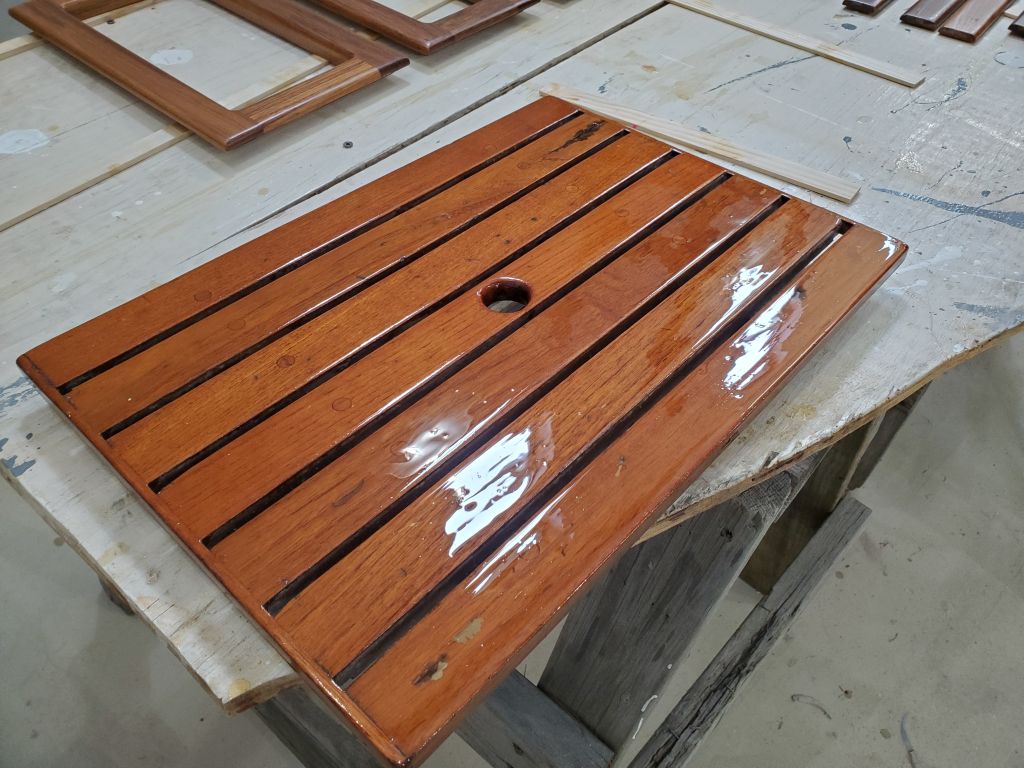
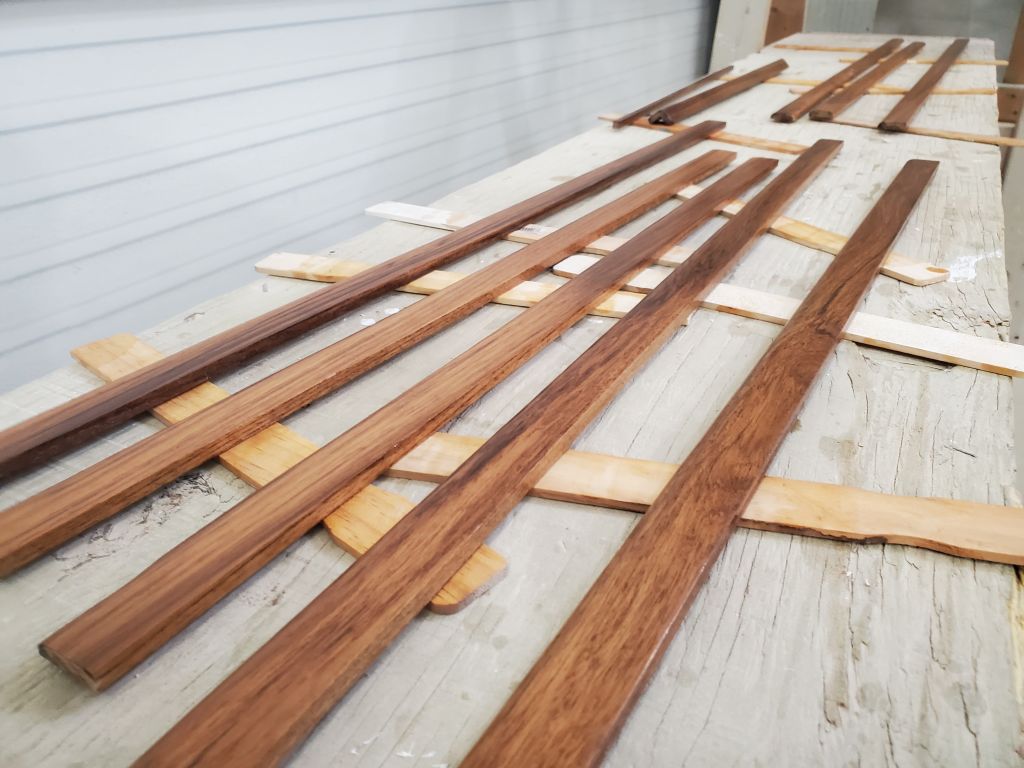
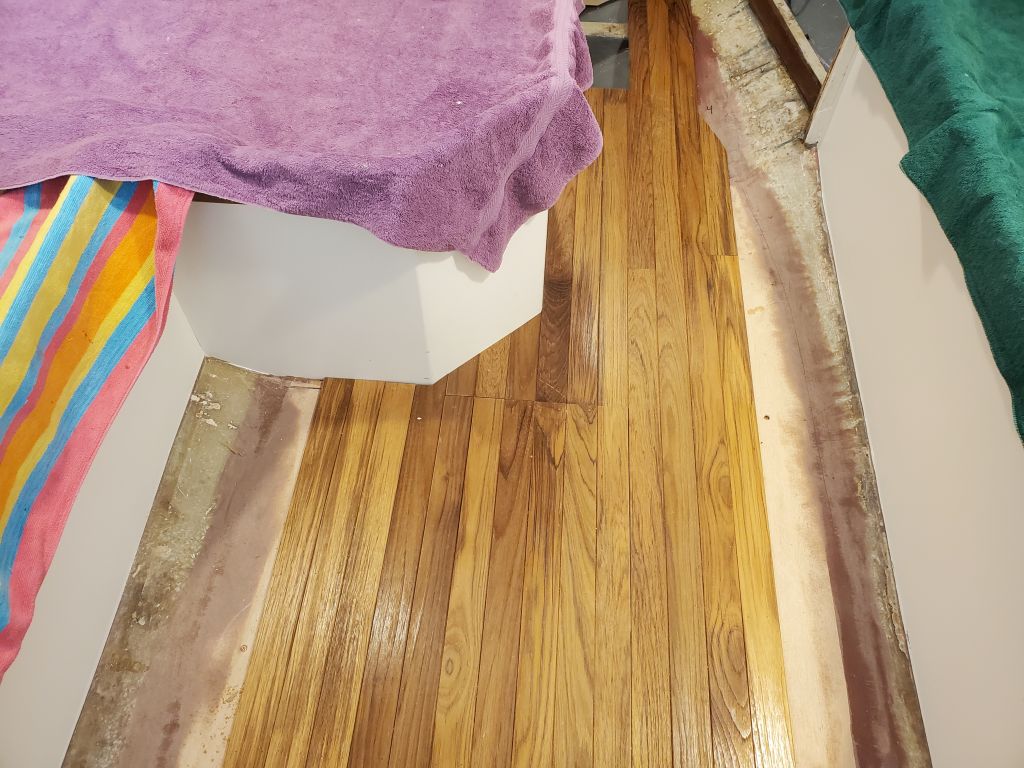
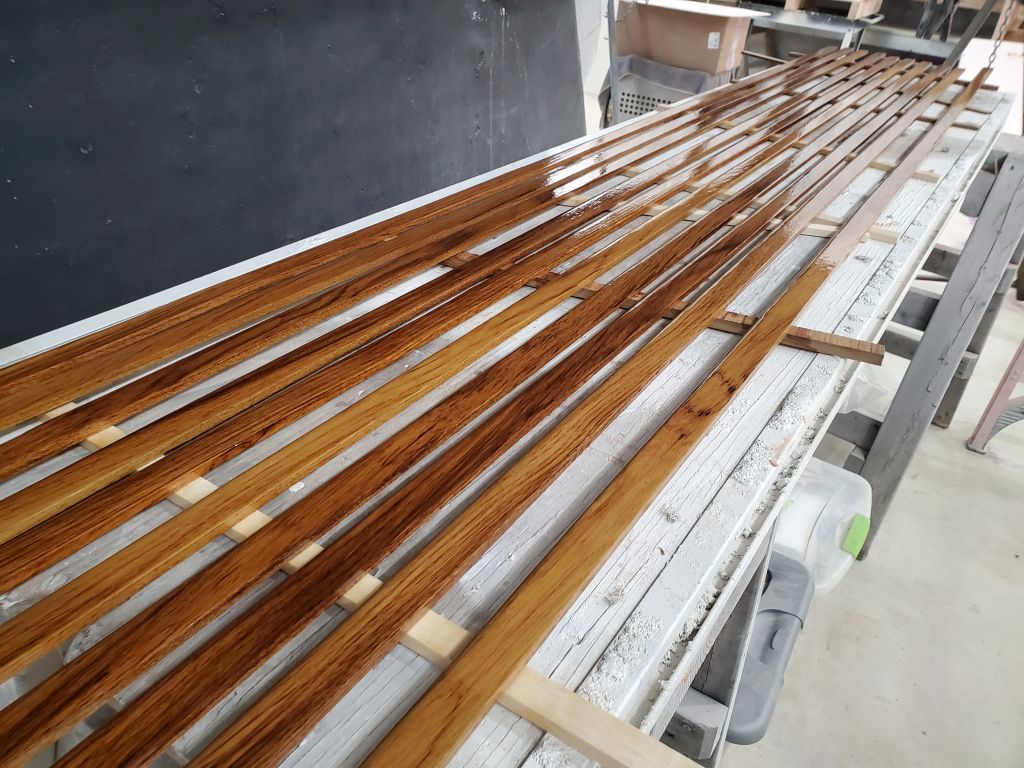
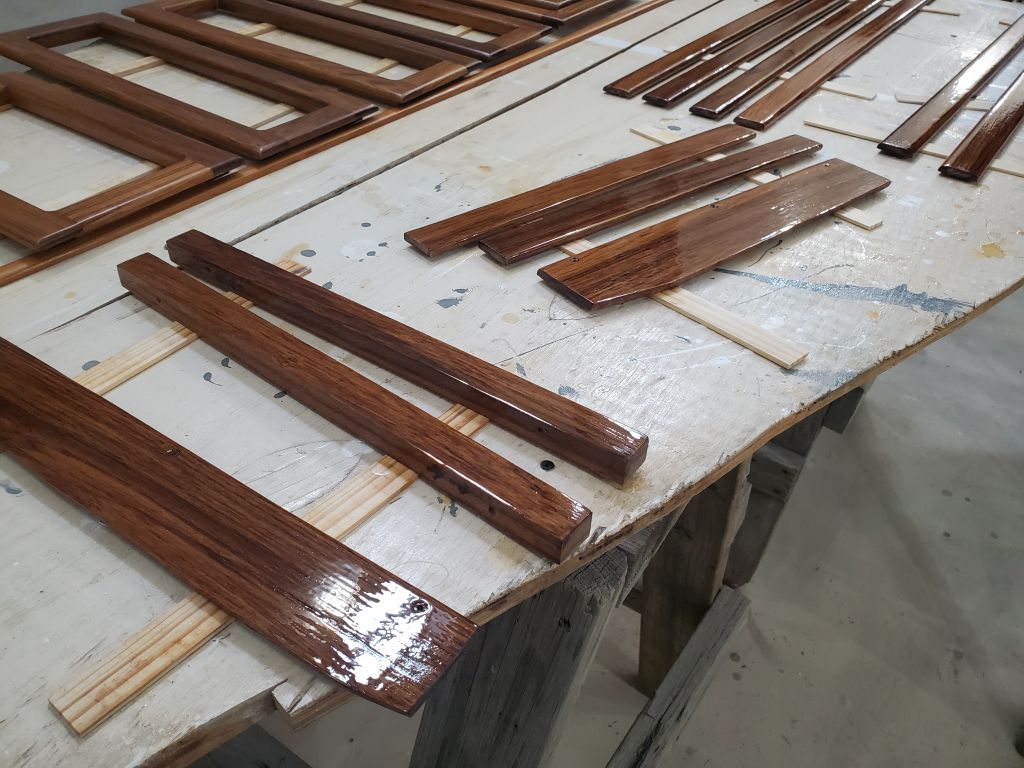
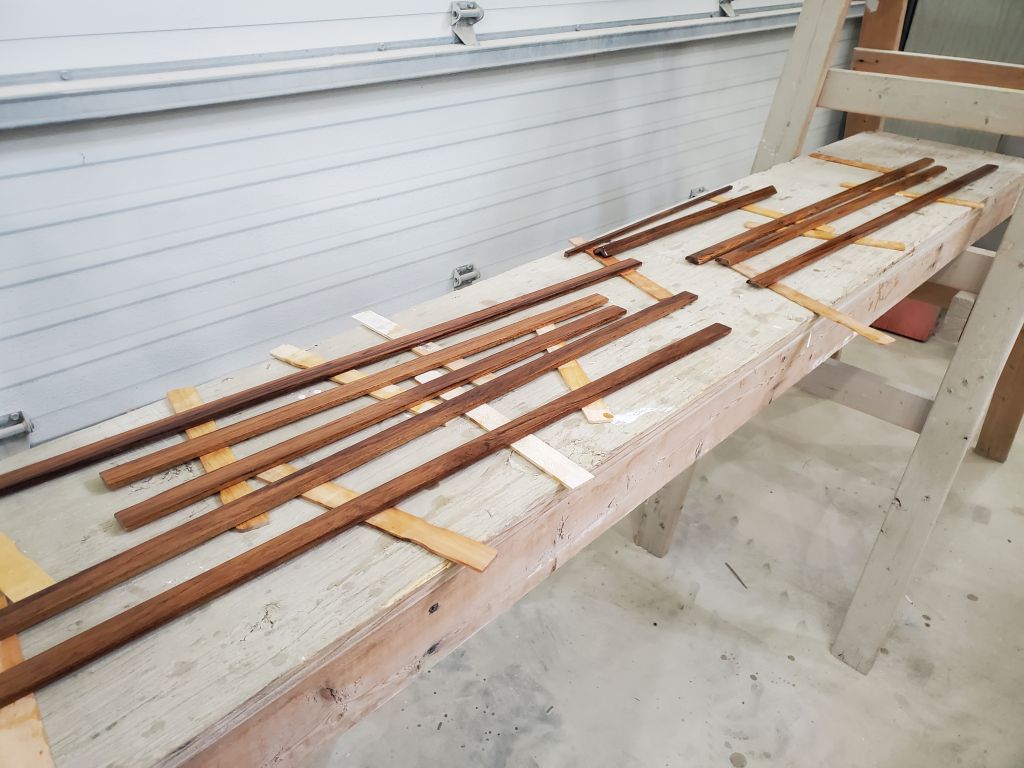
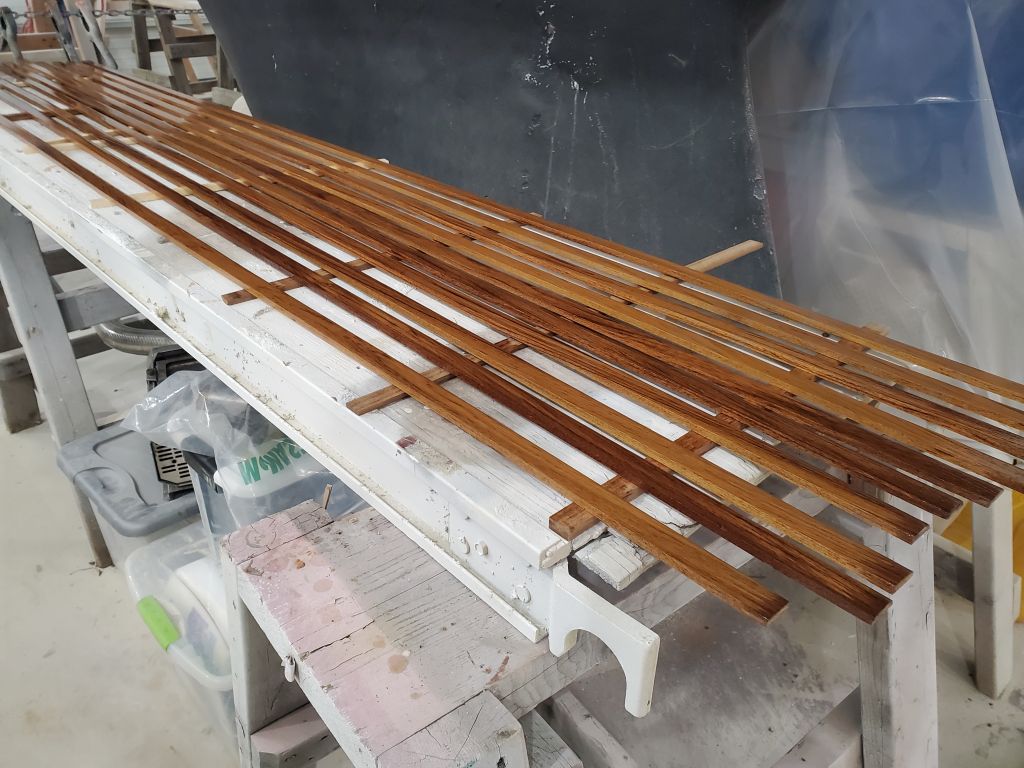
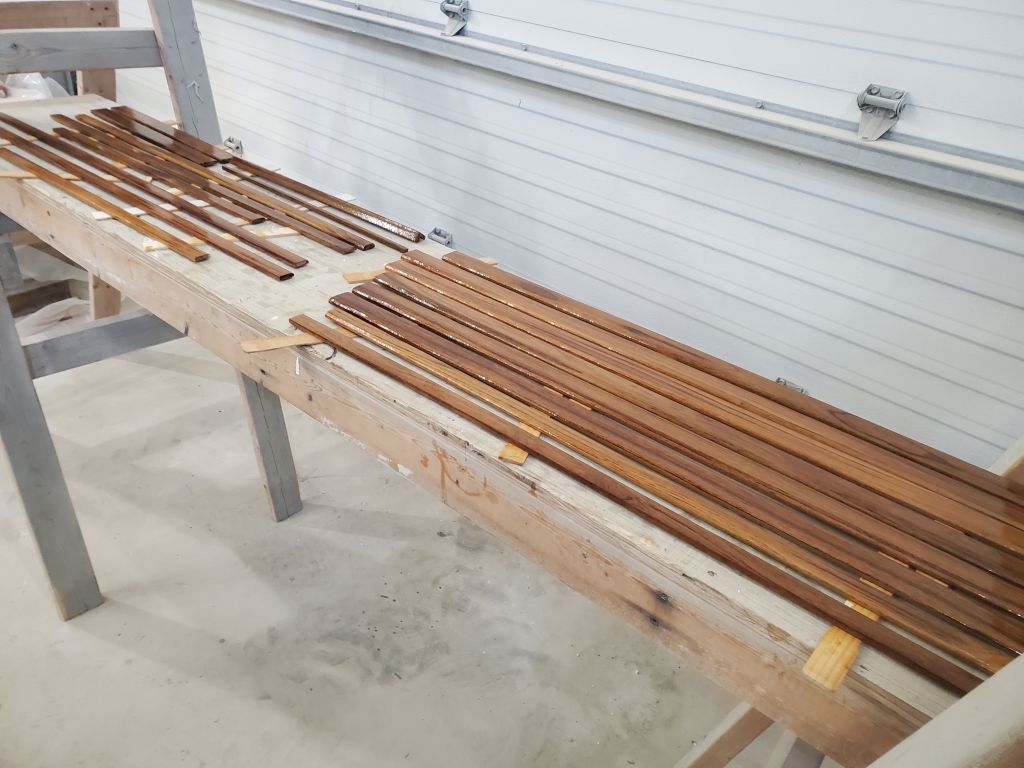
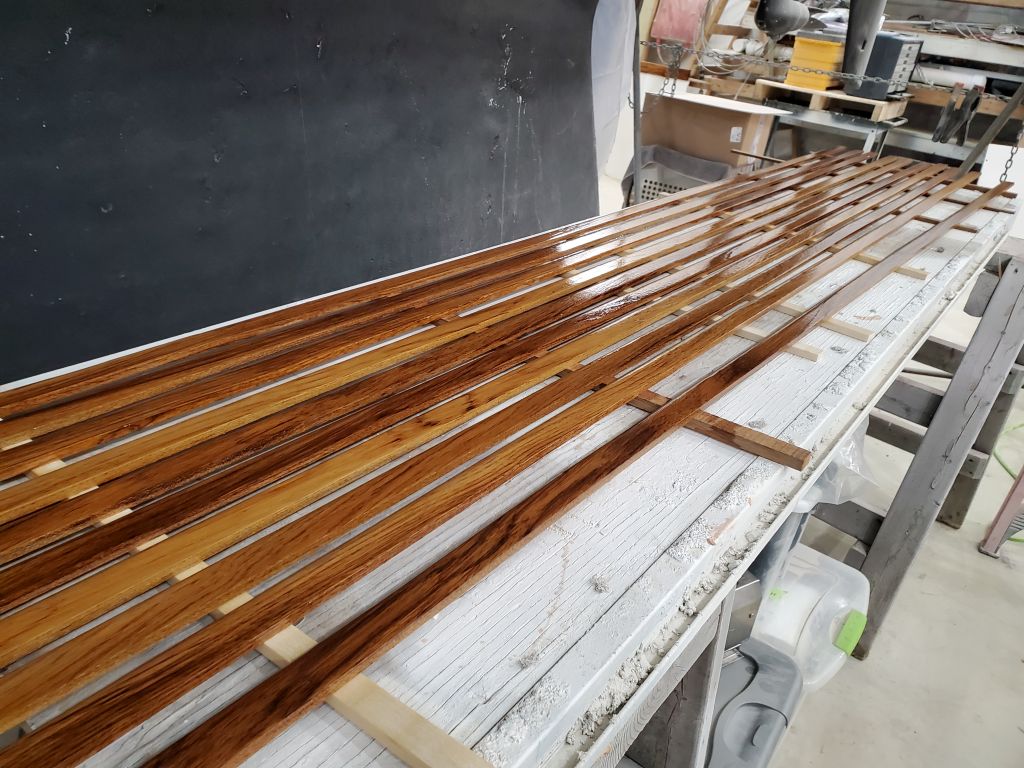
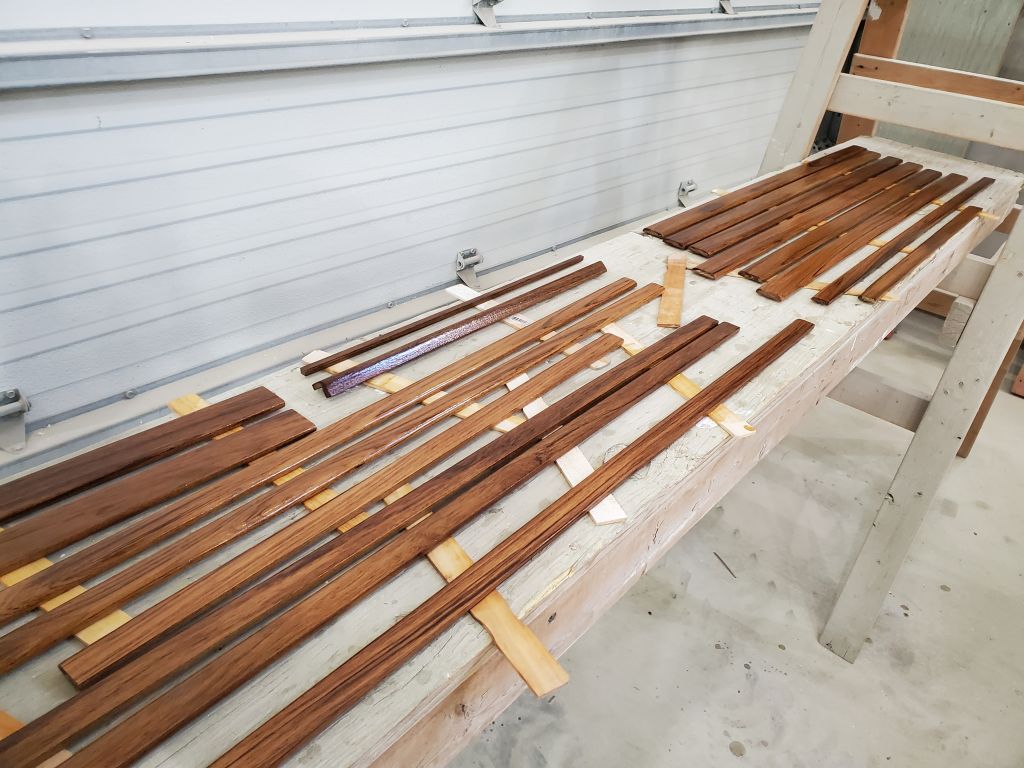
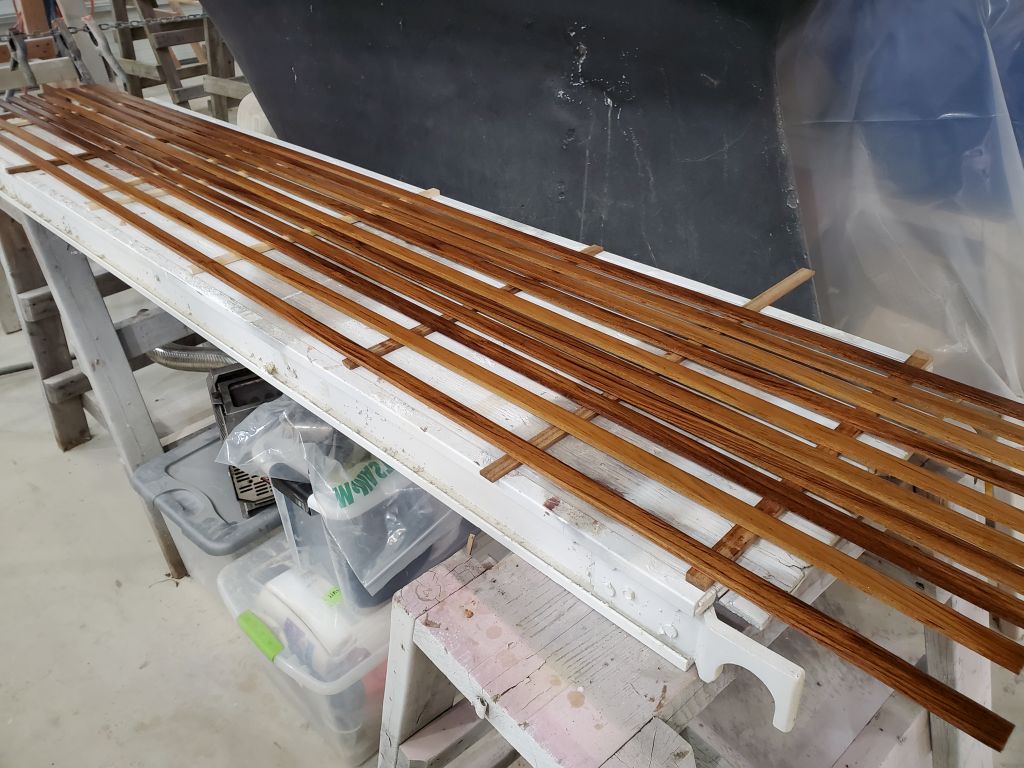
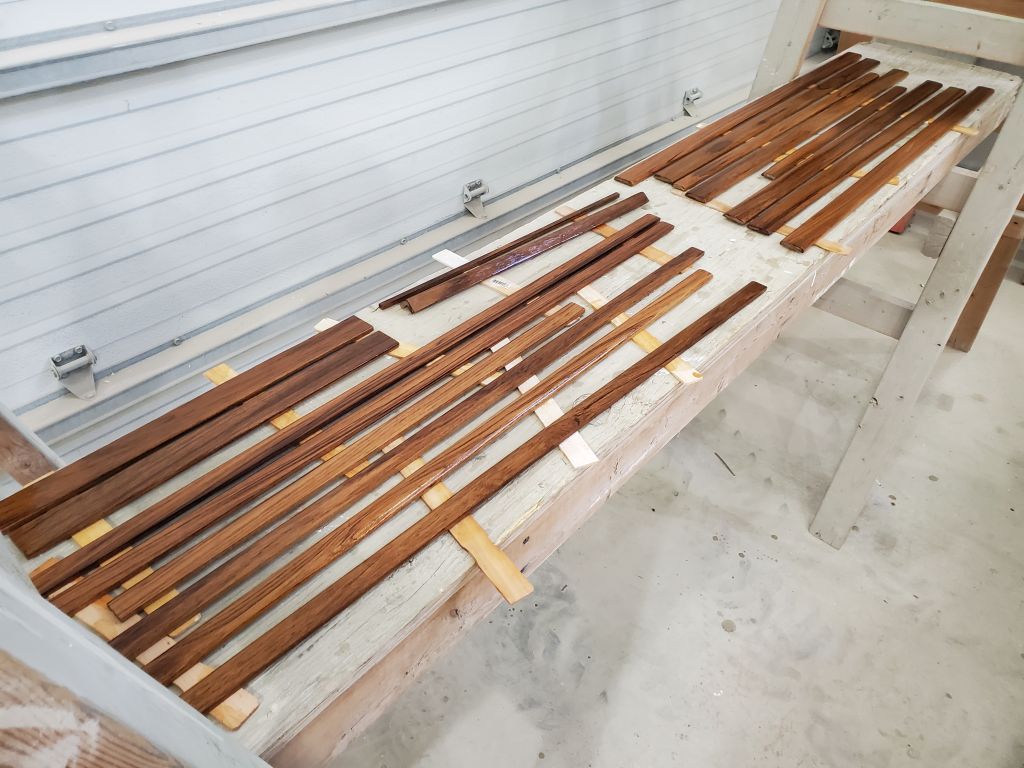
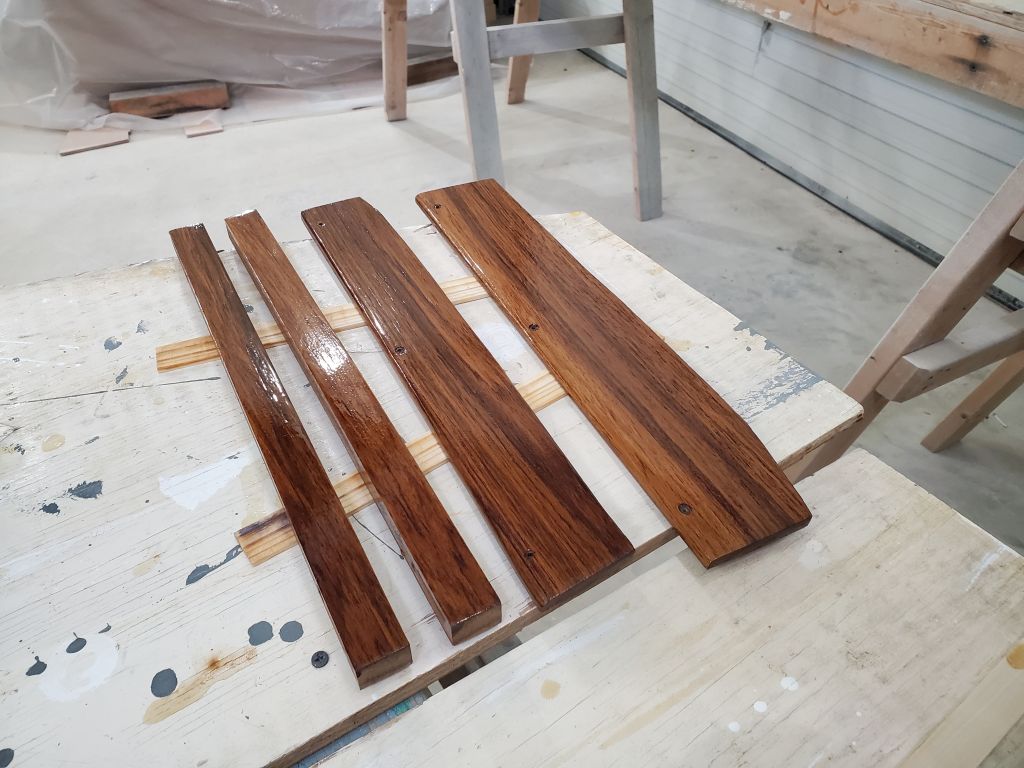
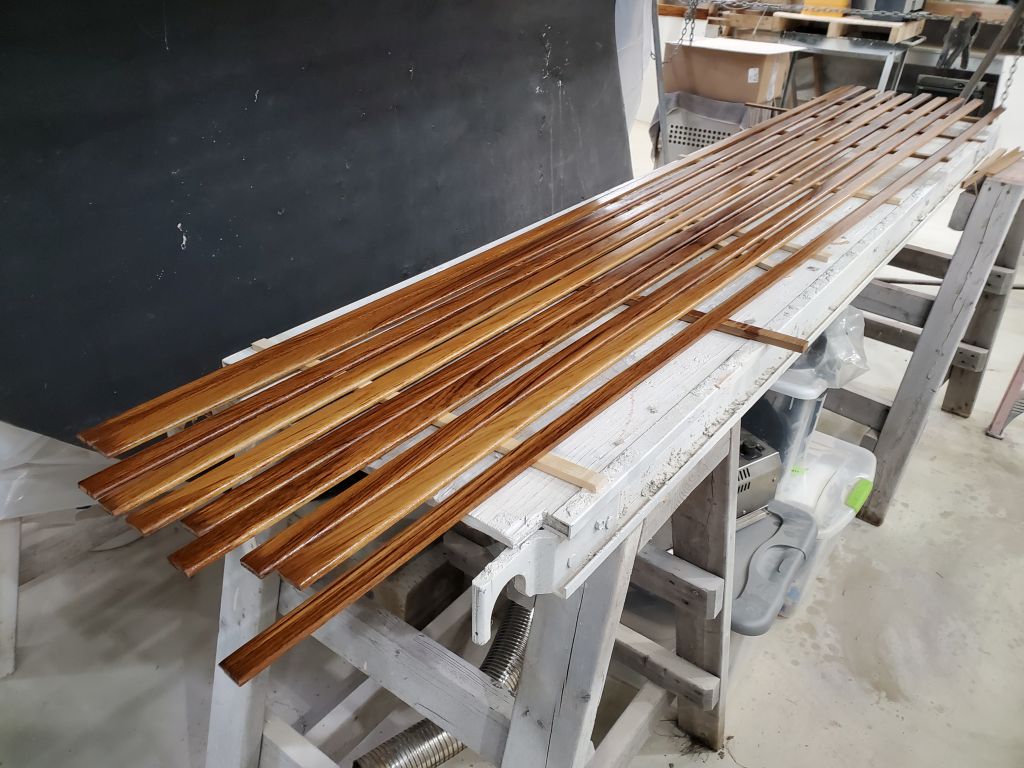
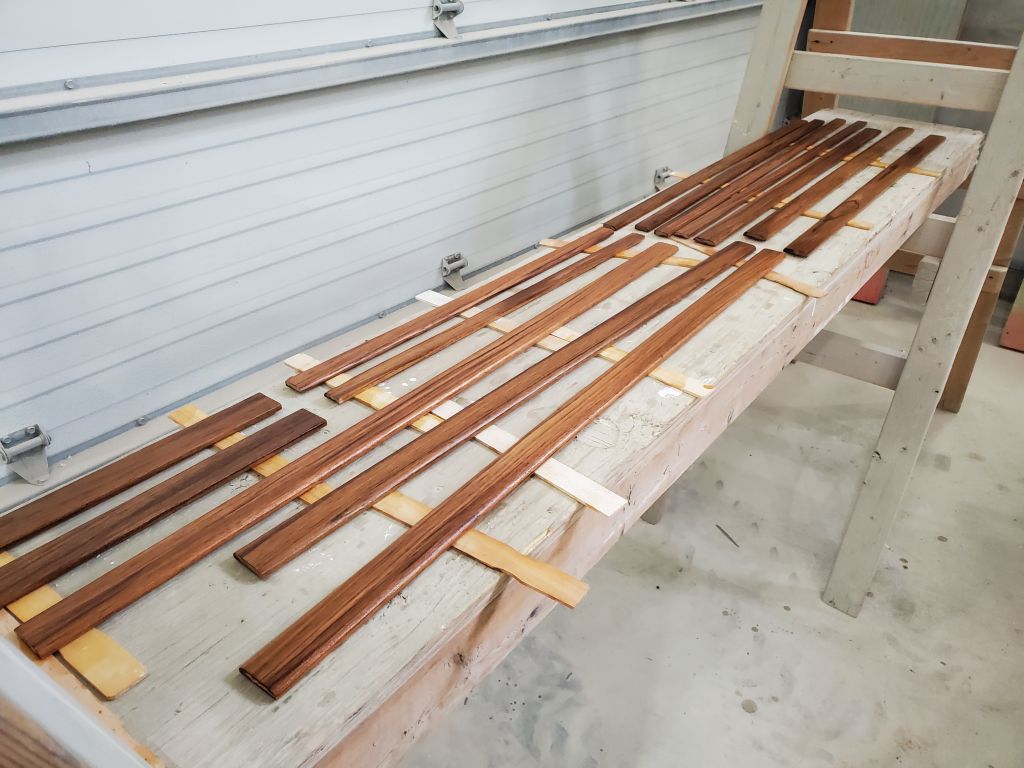
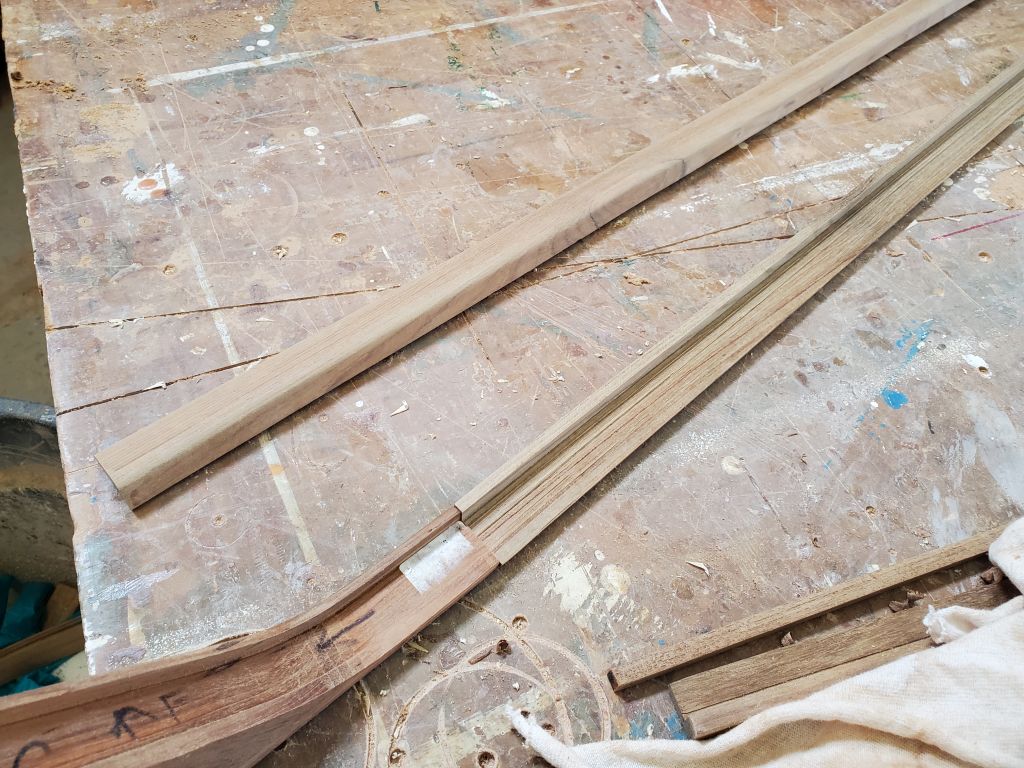
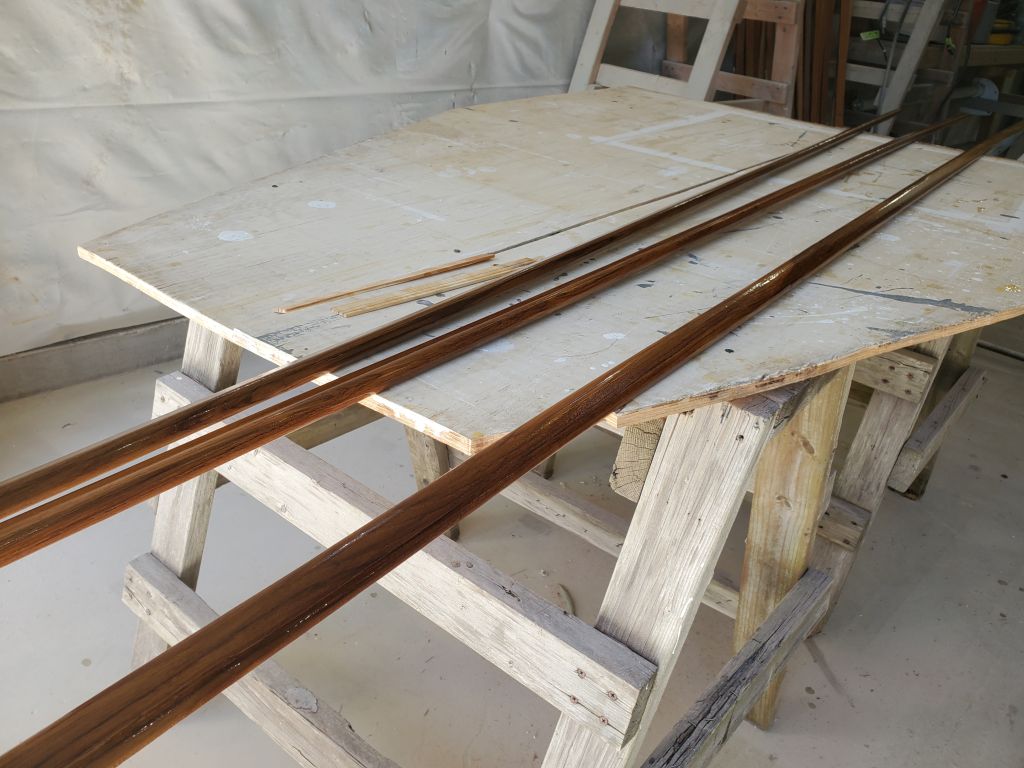
With no more trimwork planned for the day, and enough to keep me busy outside of the boat, I did a final cleanup inside and applied another base coat of gloss varnish to the cabin sole, and then to the long pieces of cabin side trim.

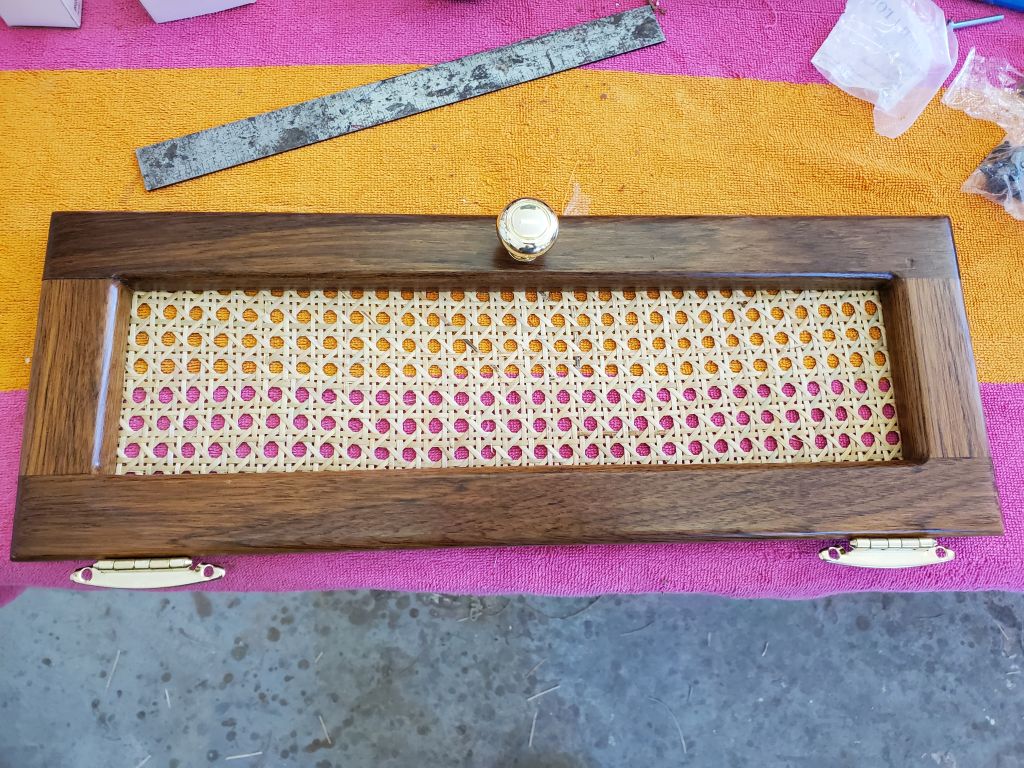
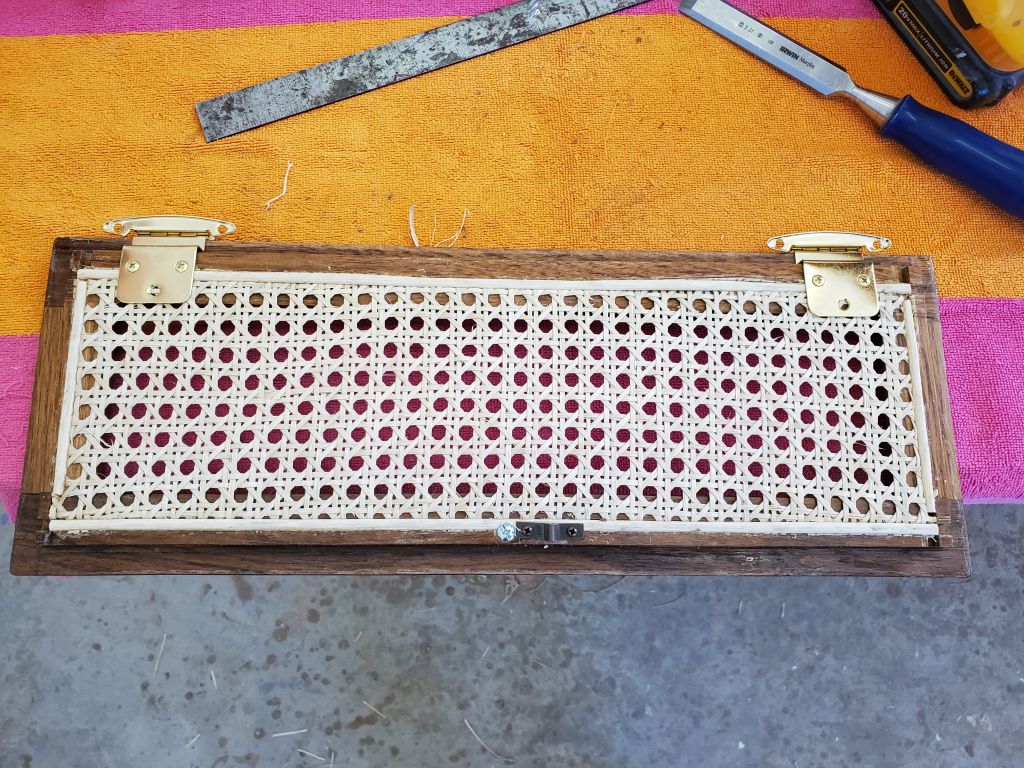
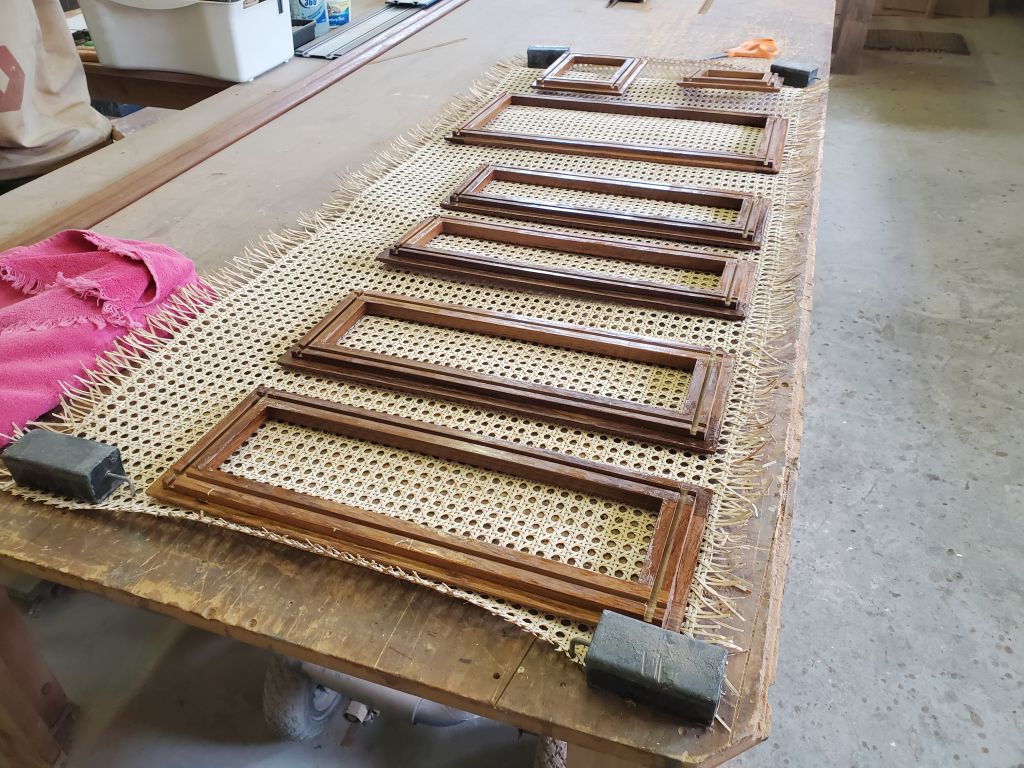
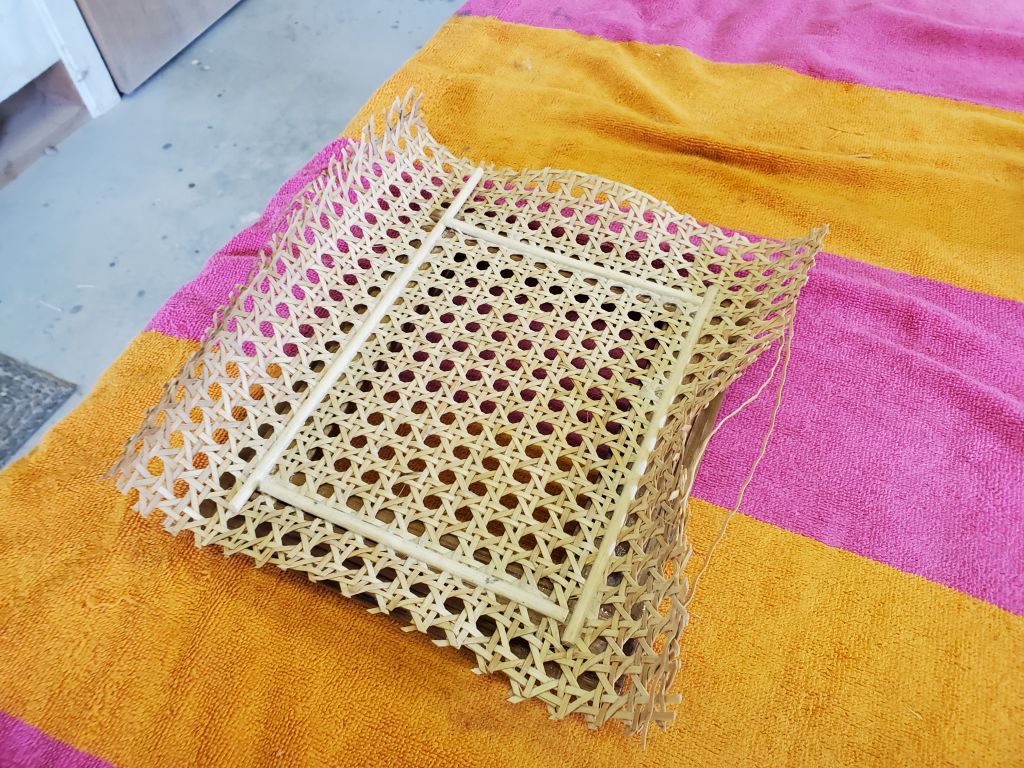
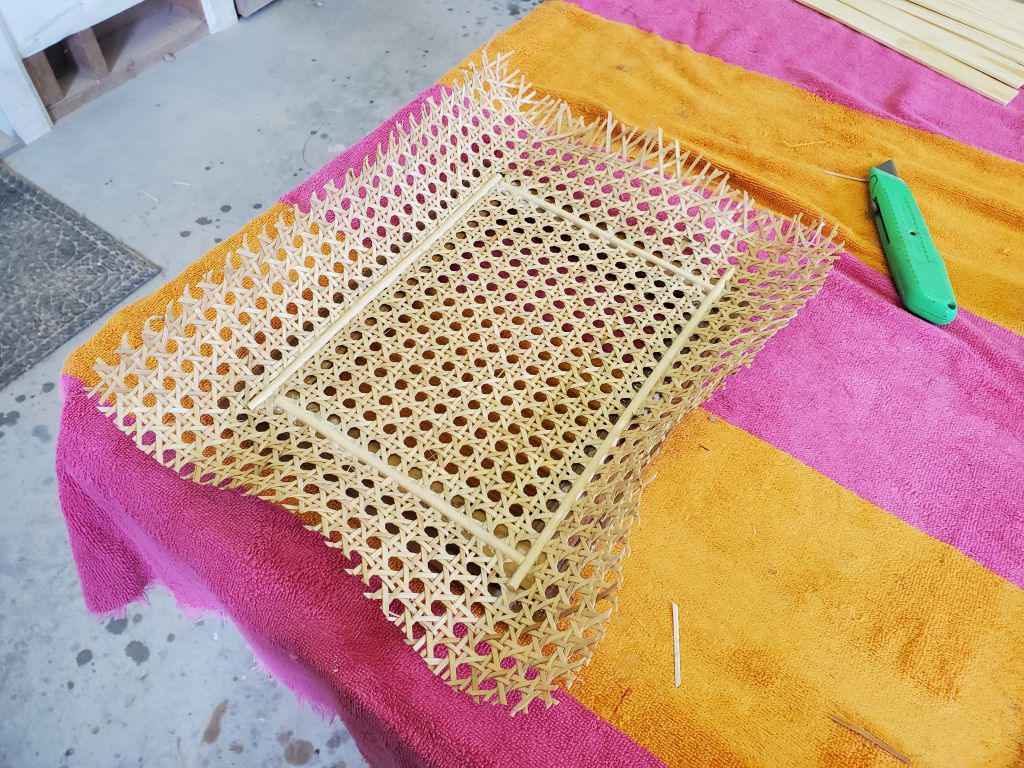
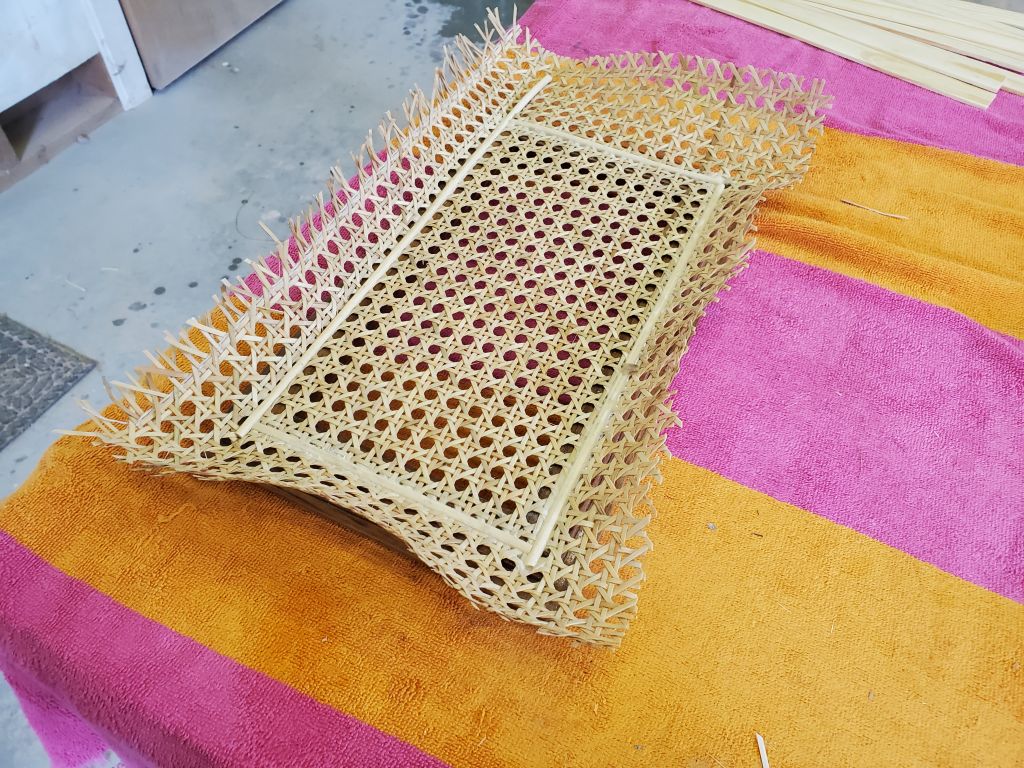
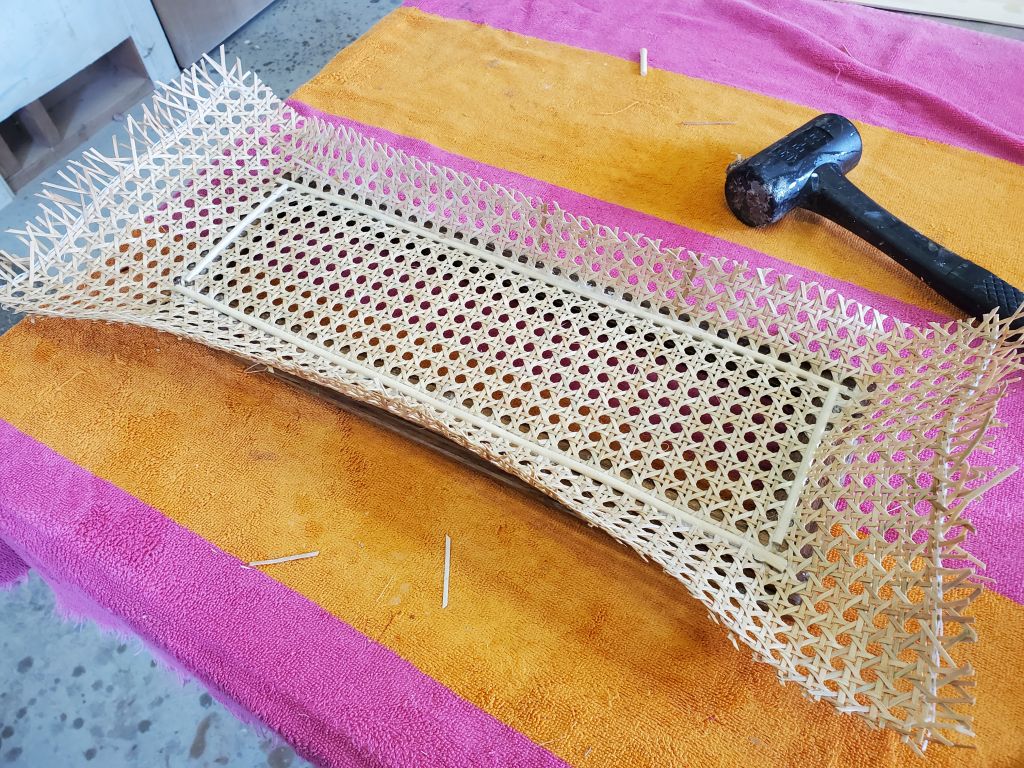
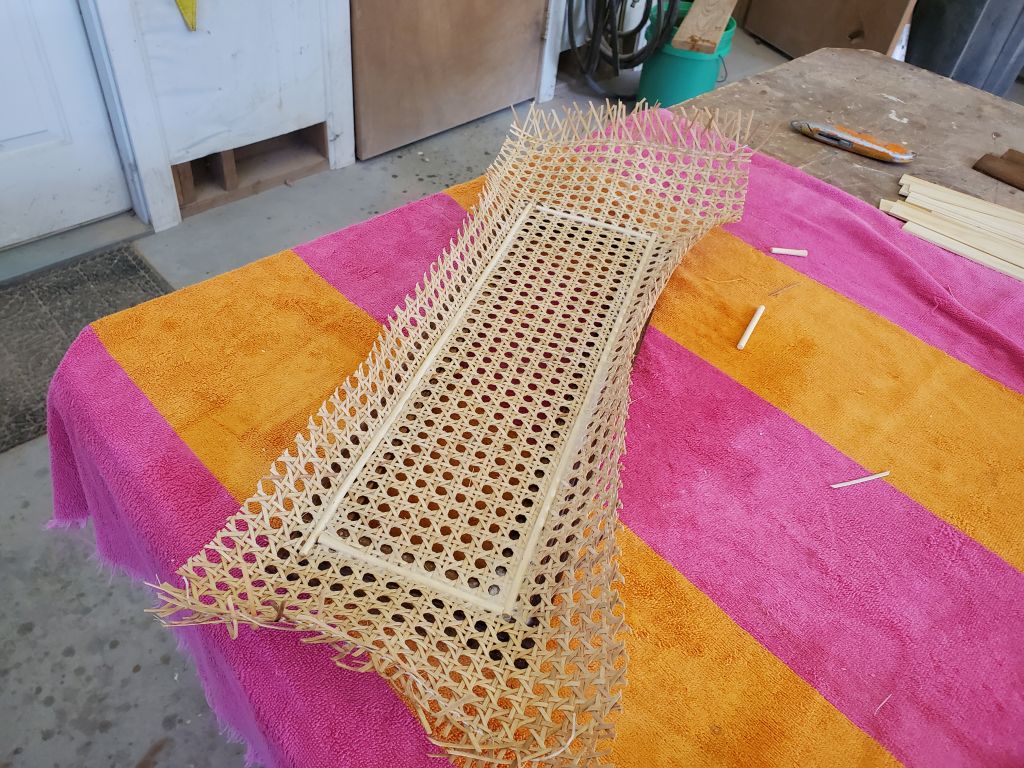
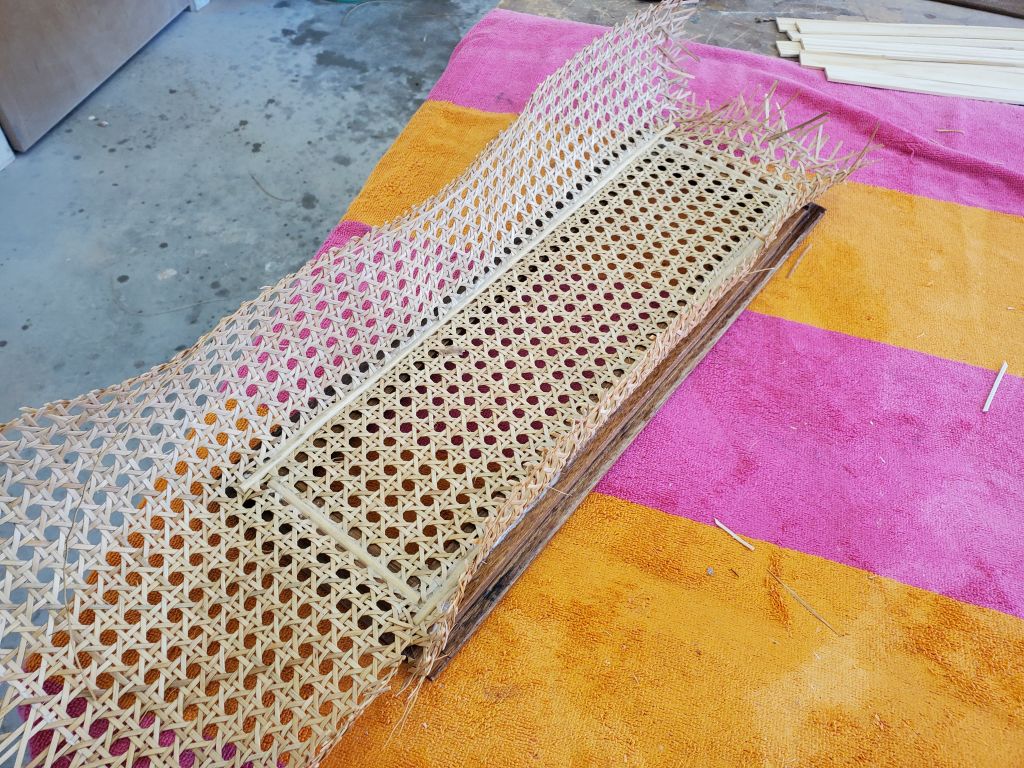
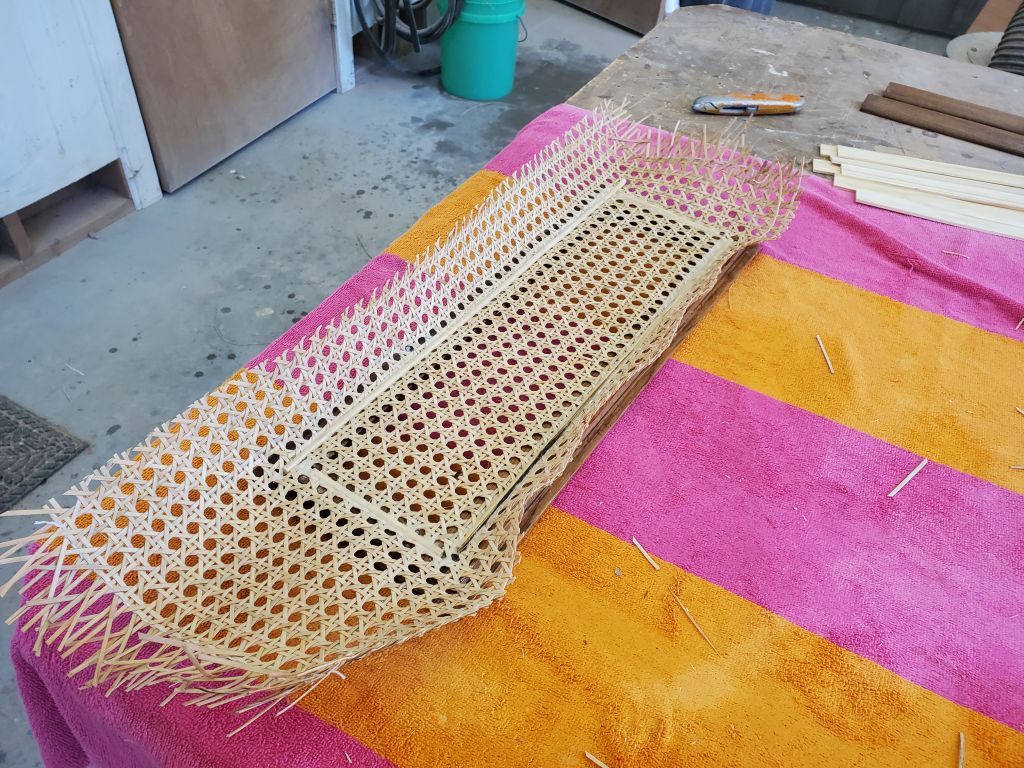
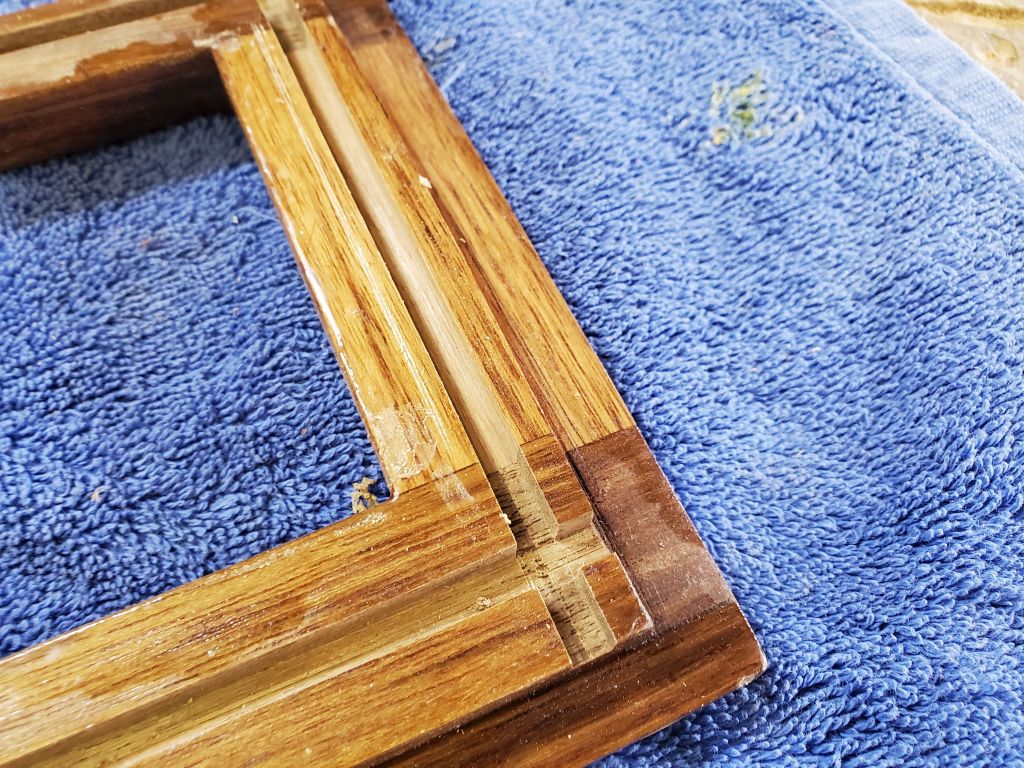
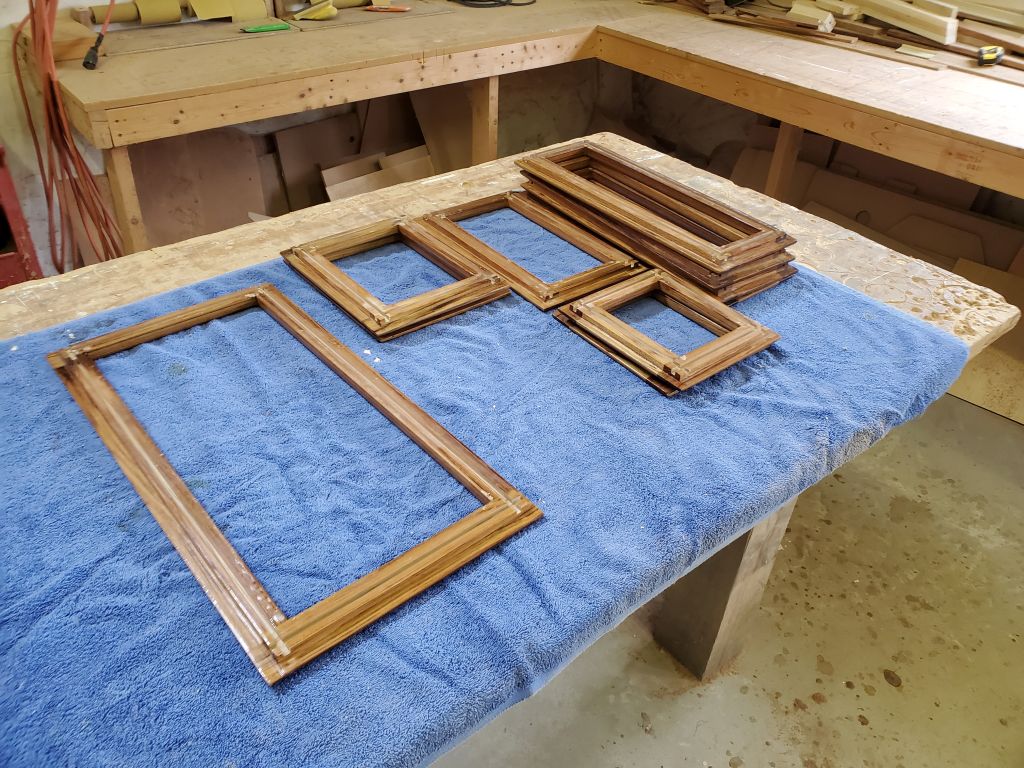
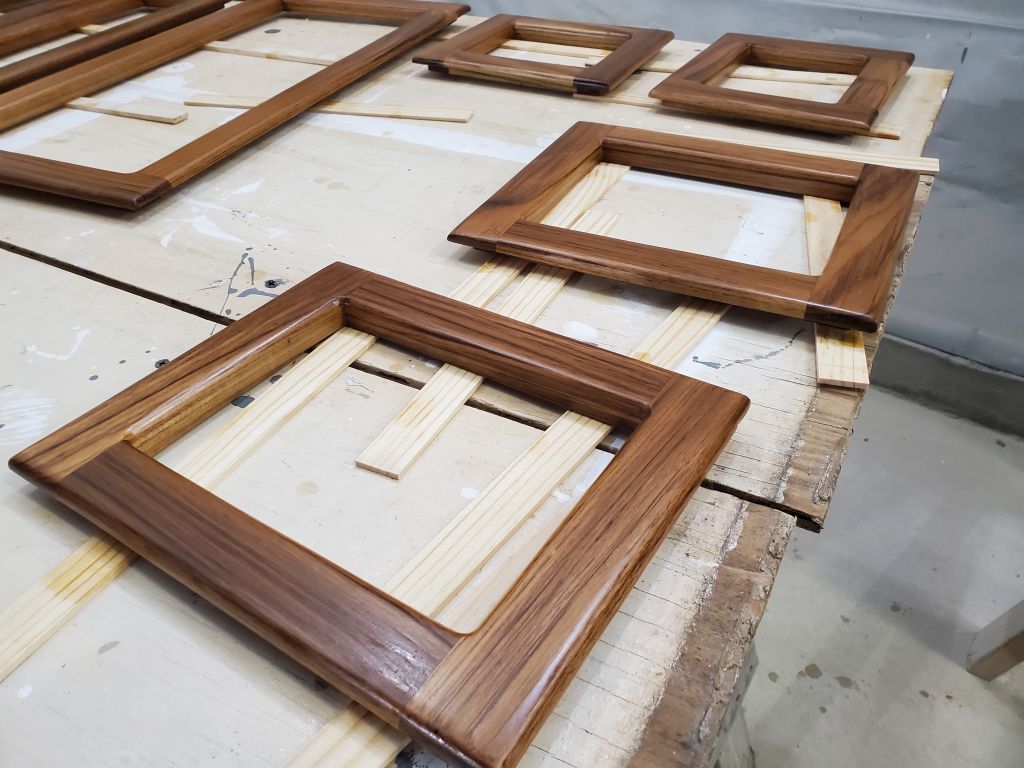
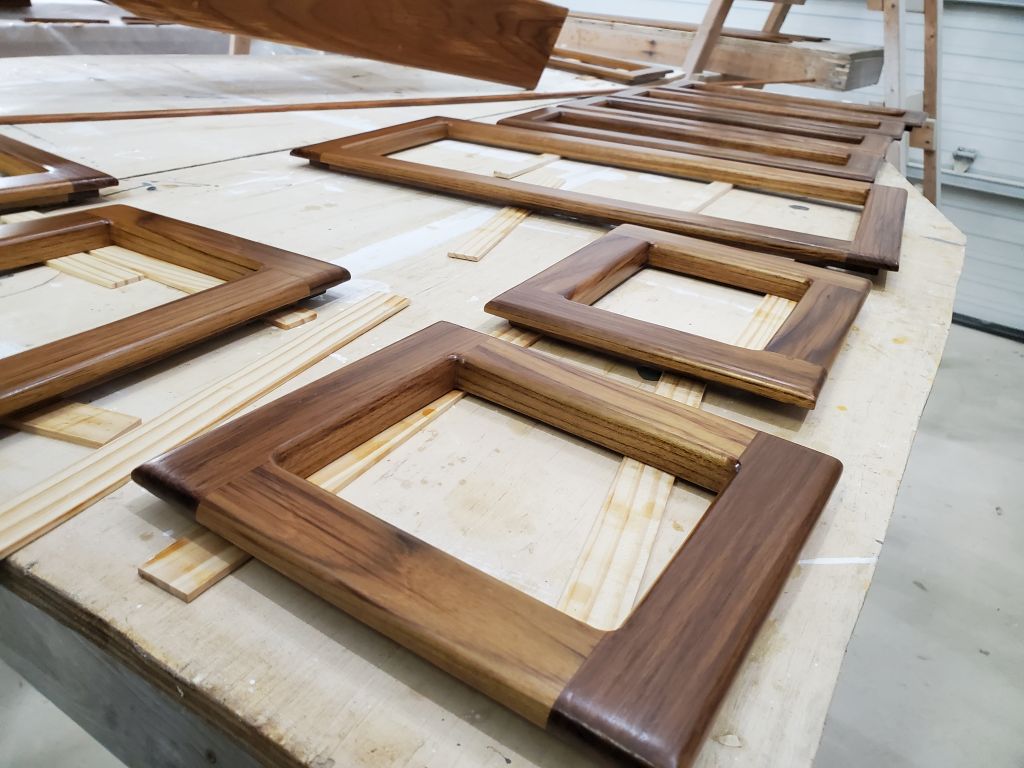
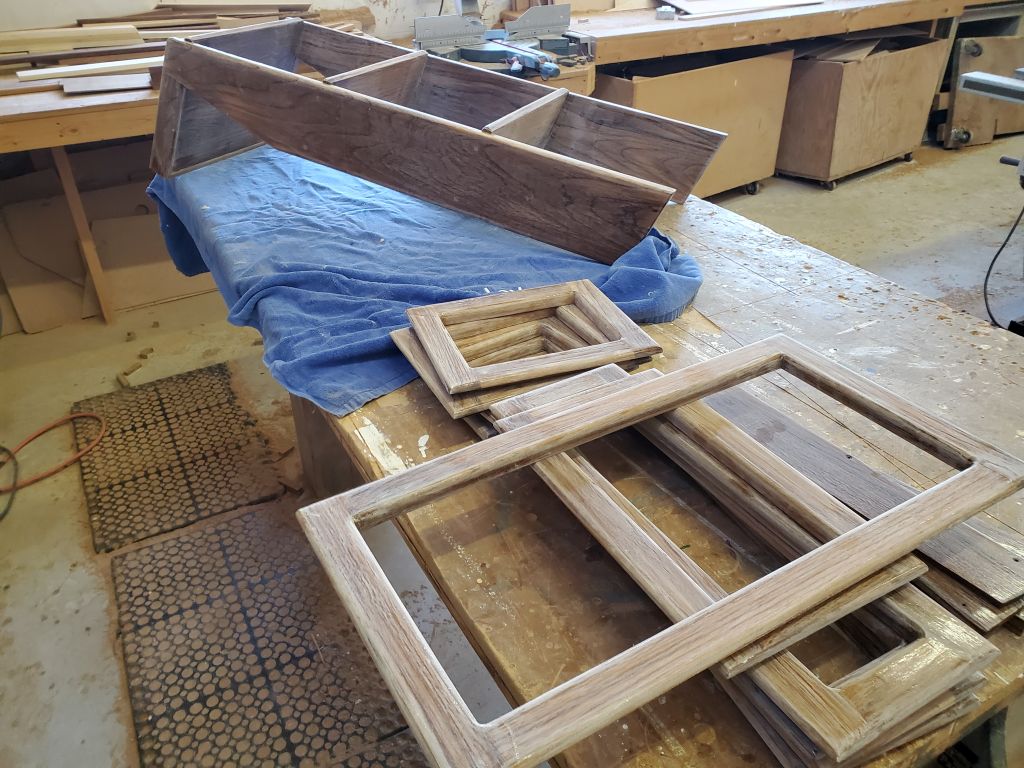
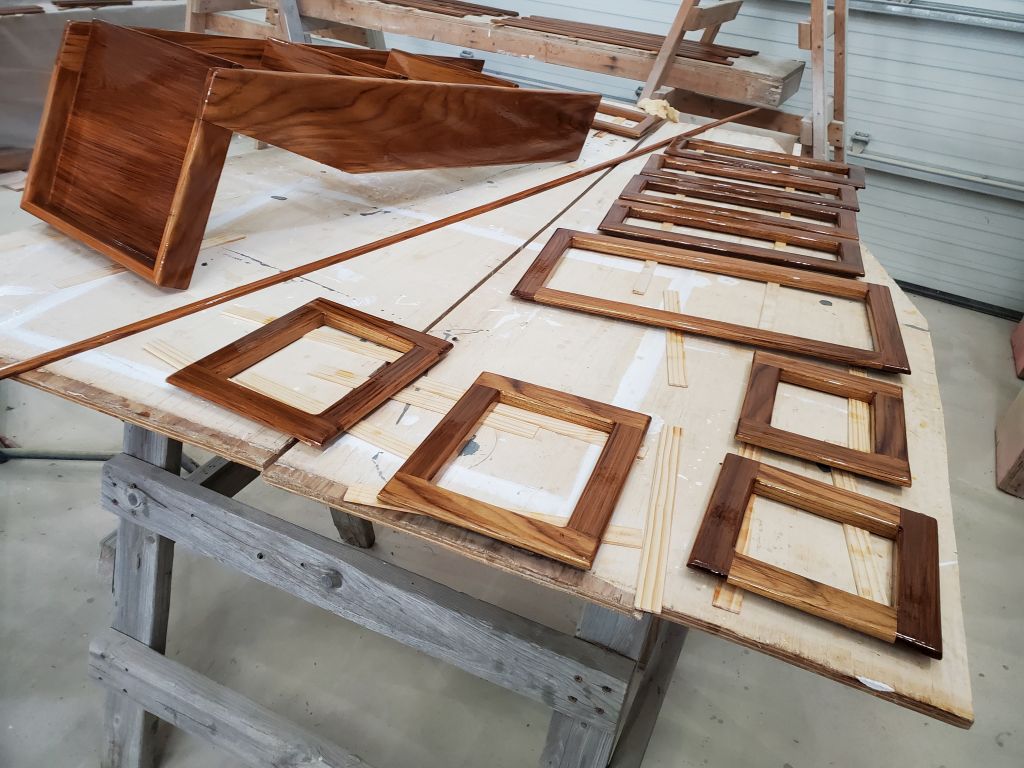
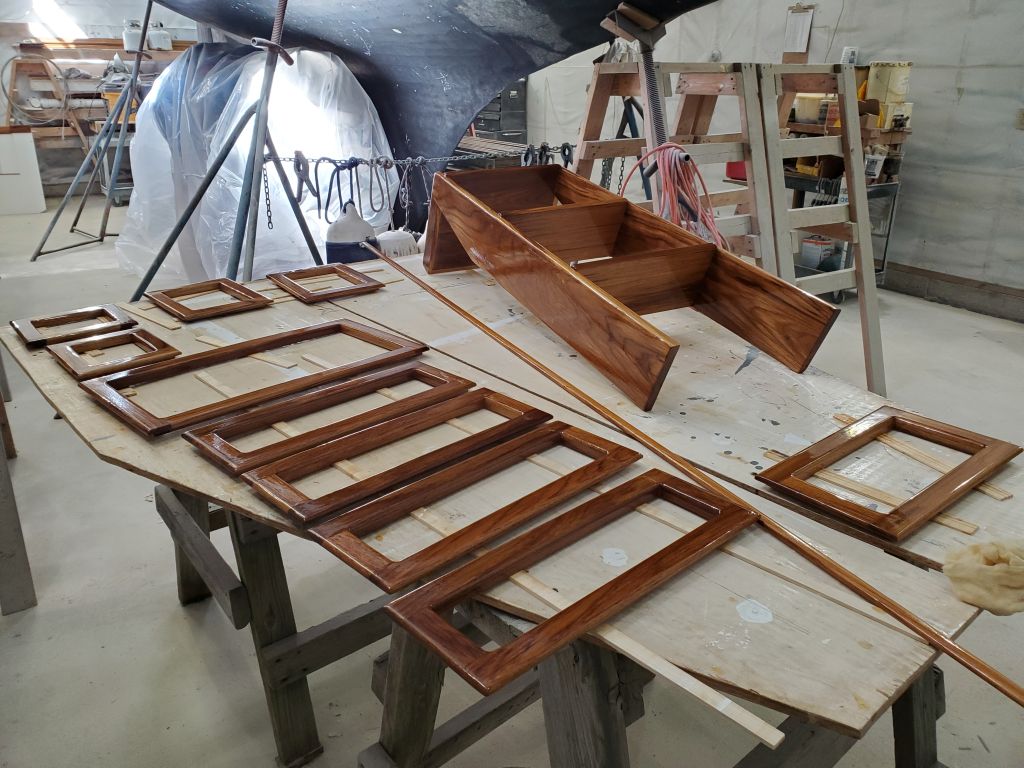
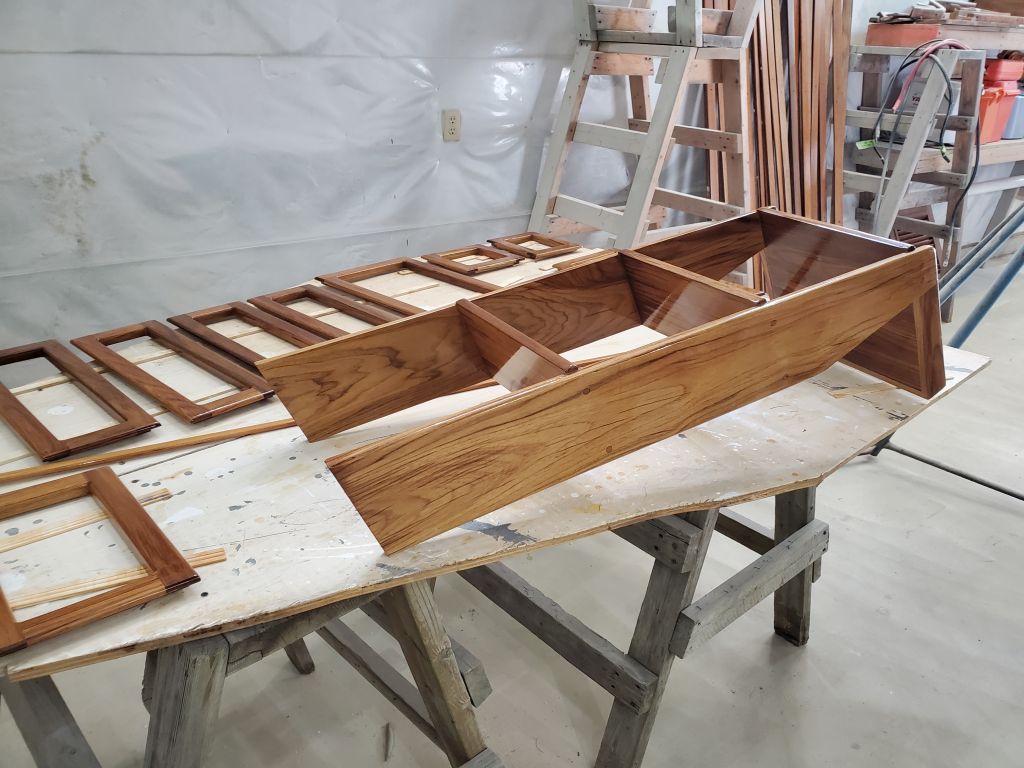
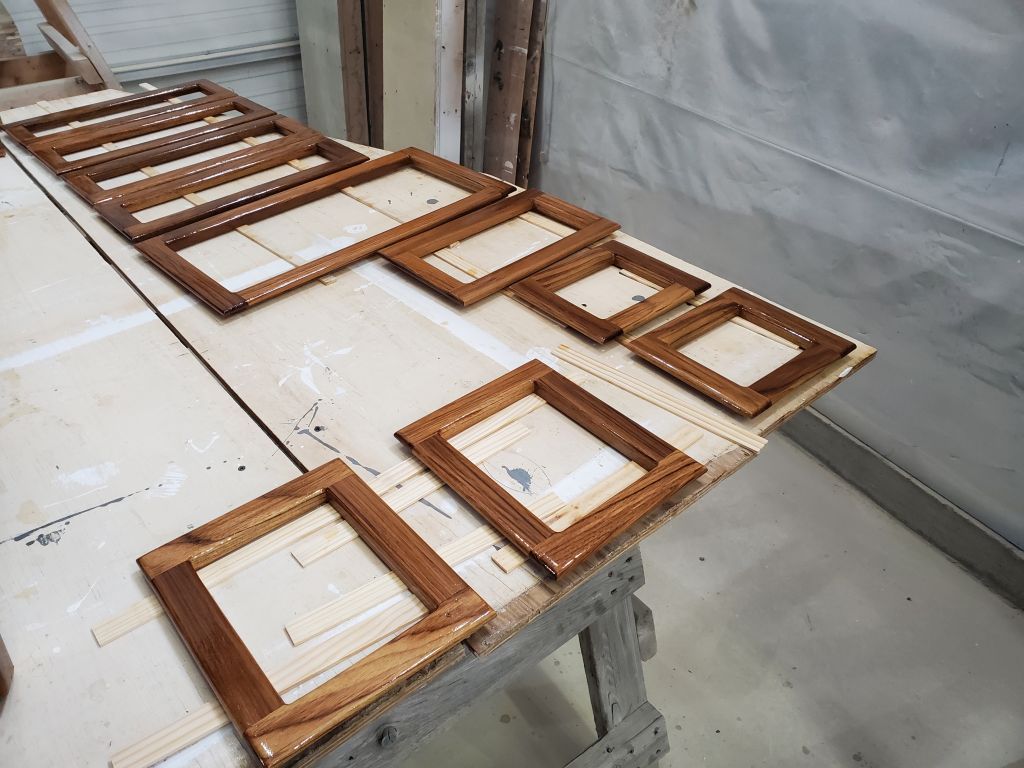
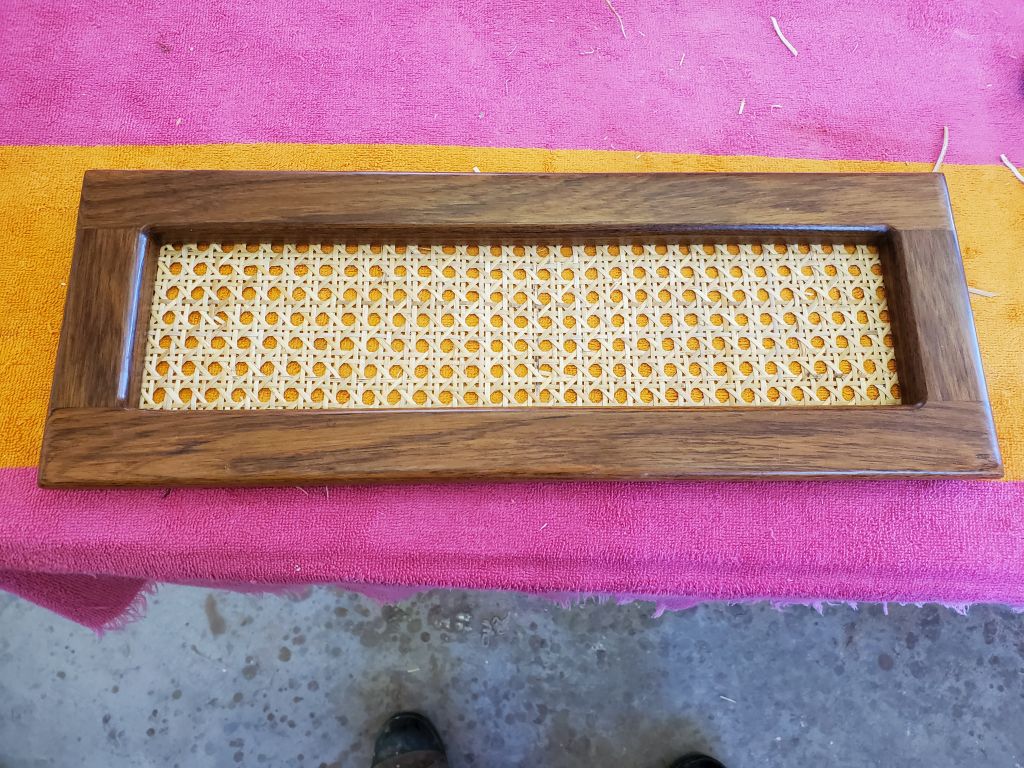
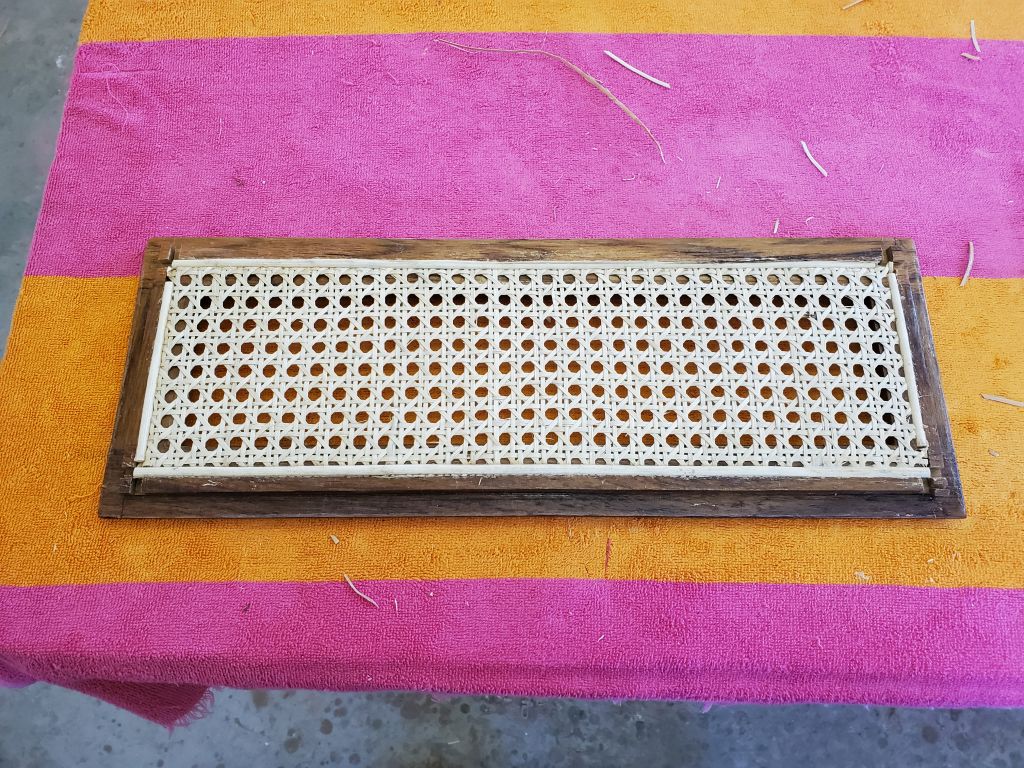
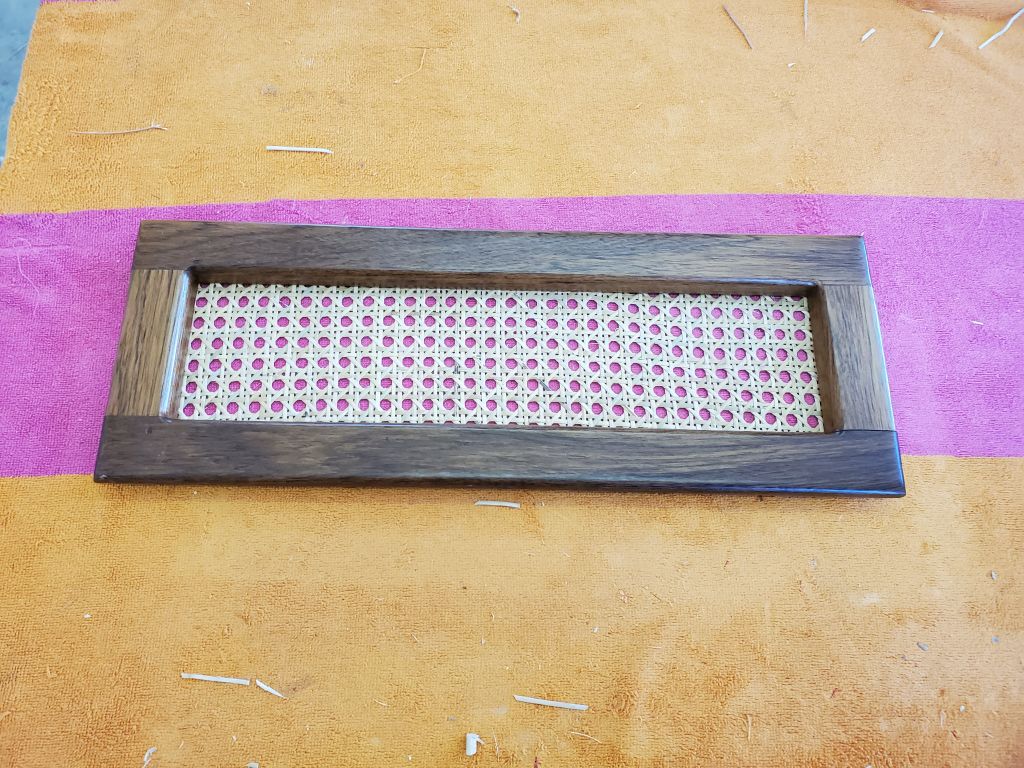
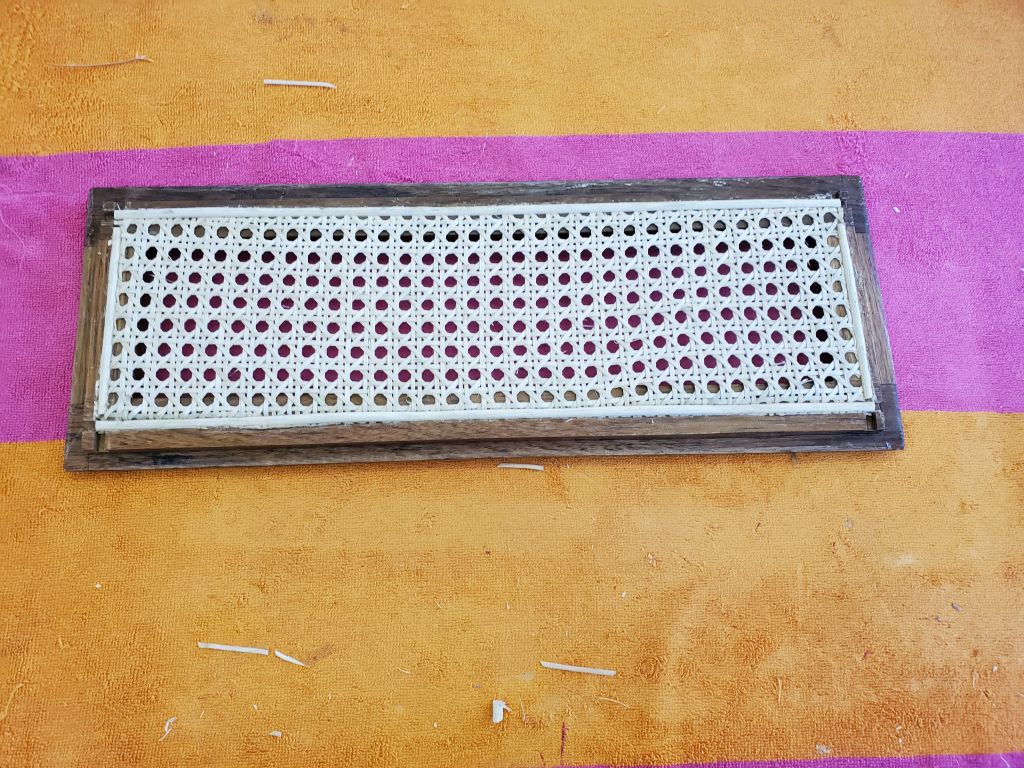
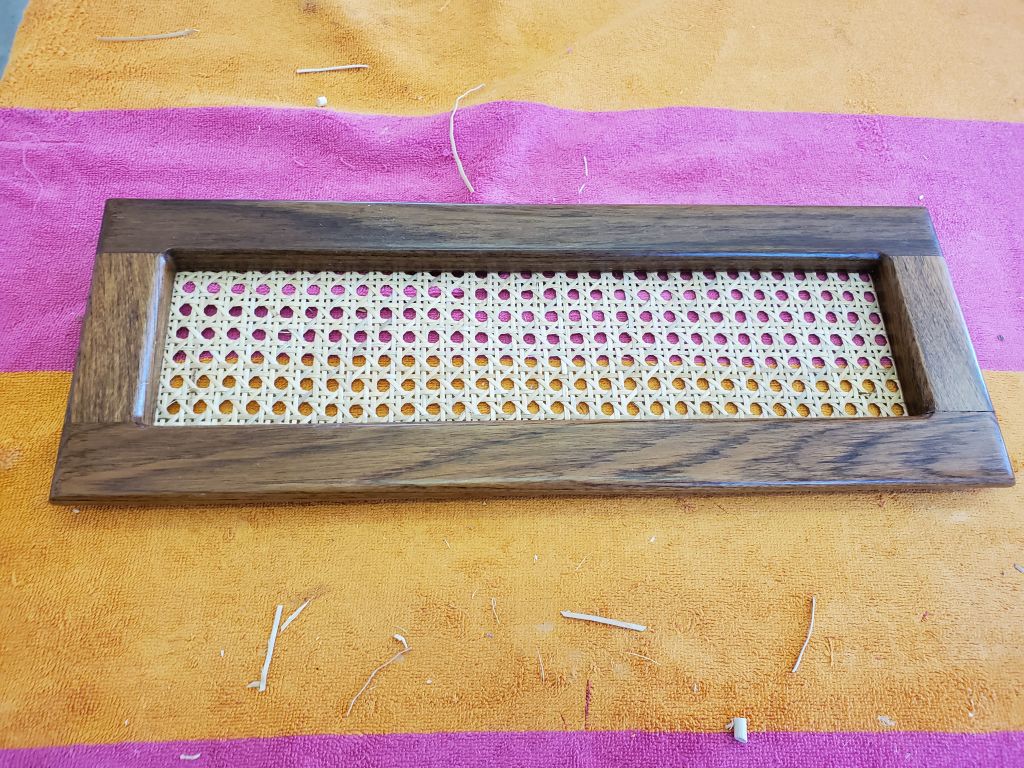
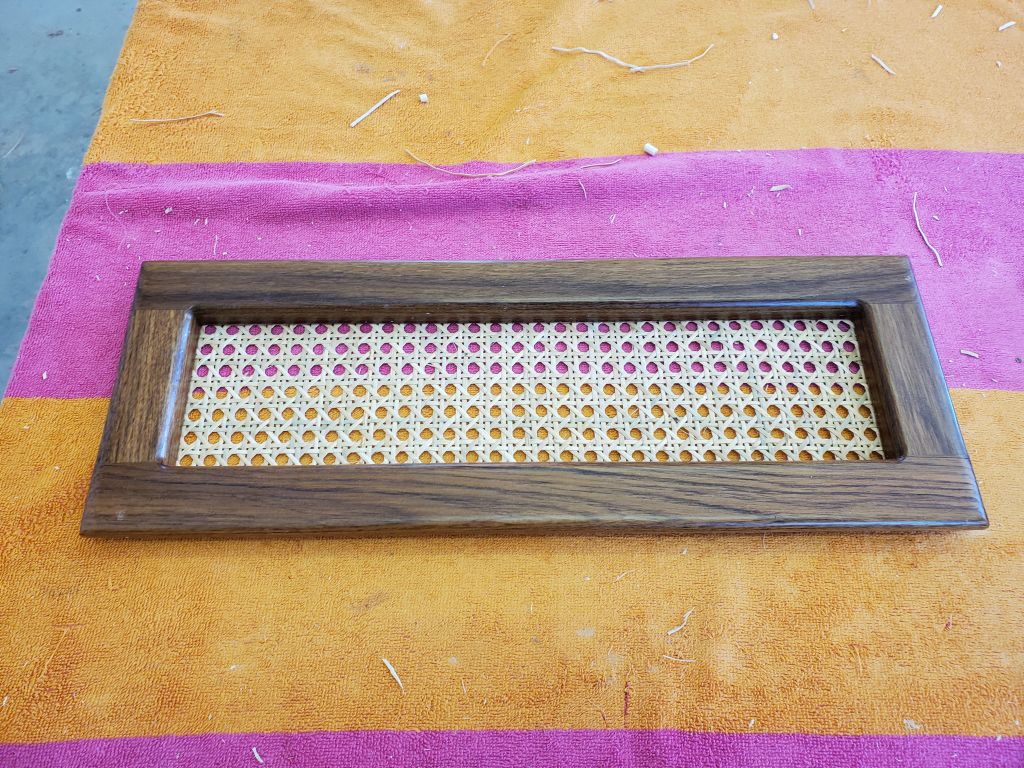
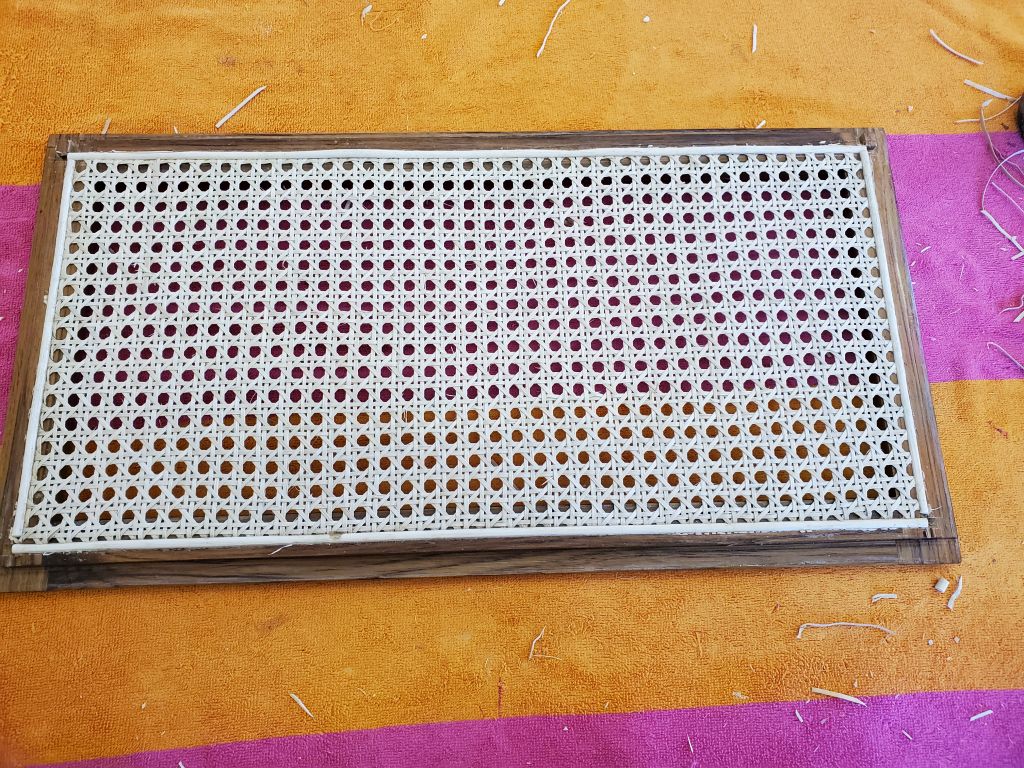
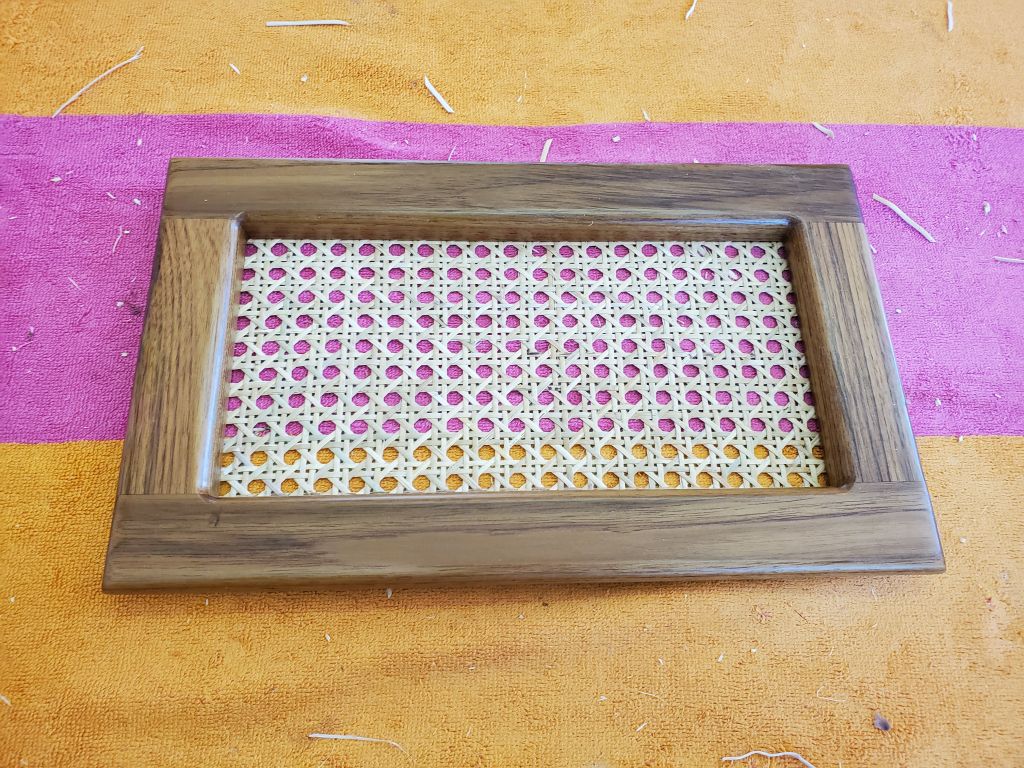
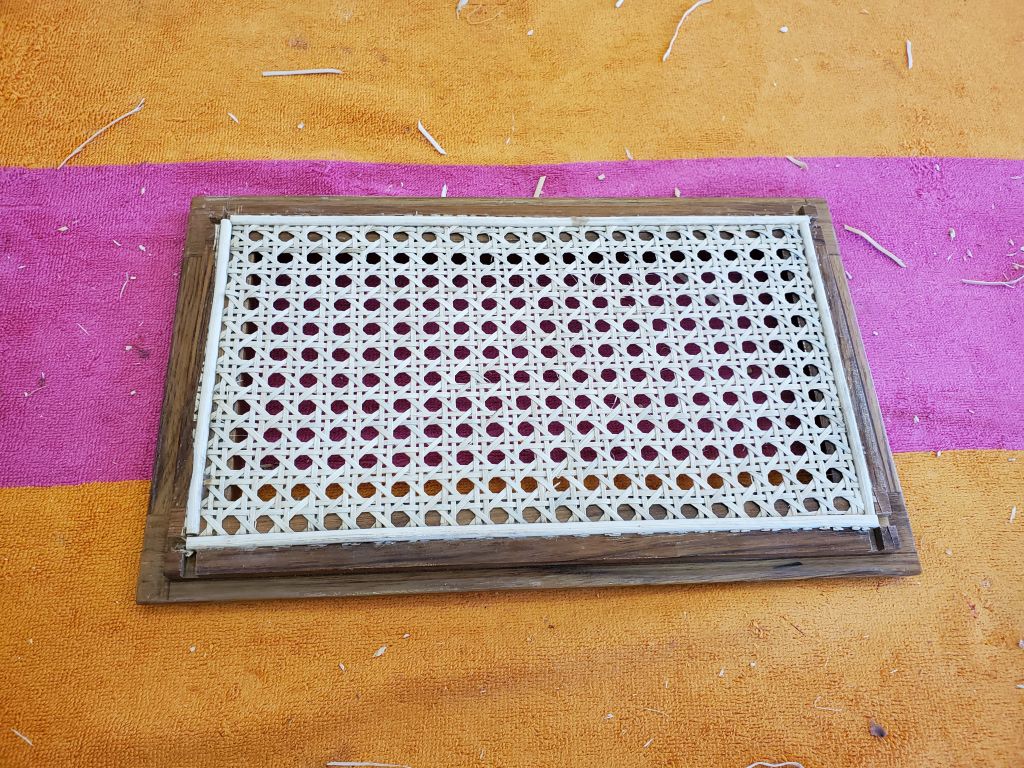
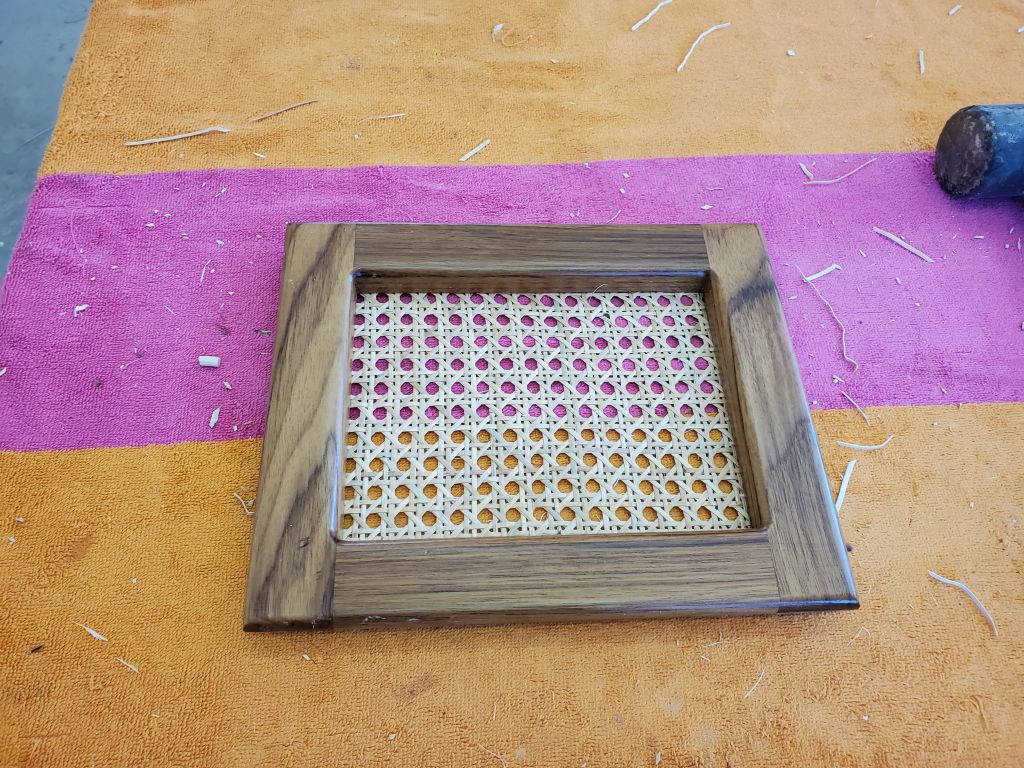
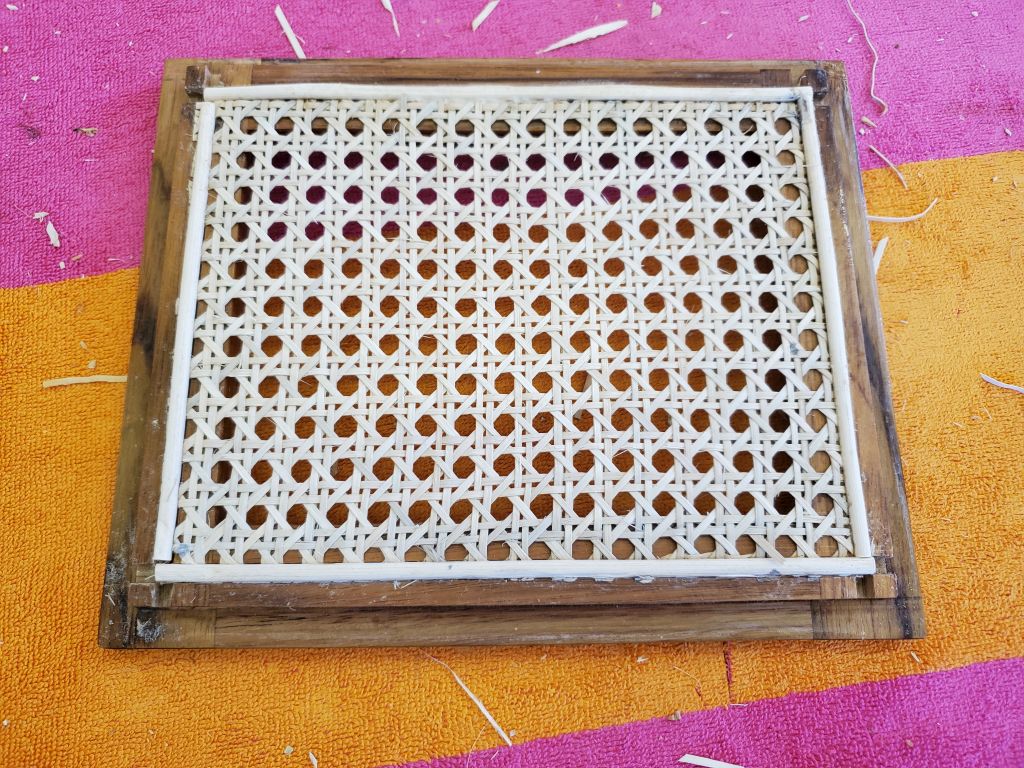
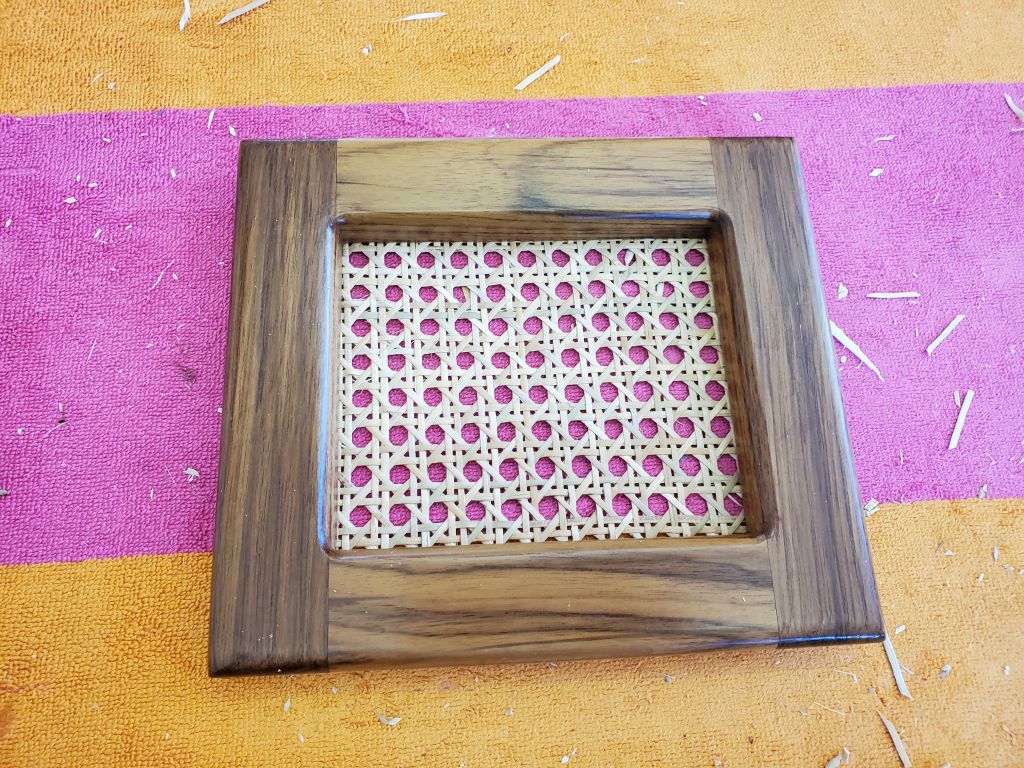
The caning had dried overnight, and now I trimmed all the excess from the nine doors.

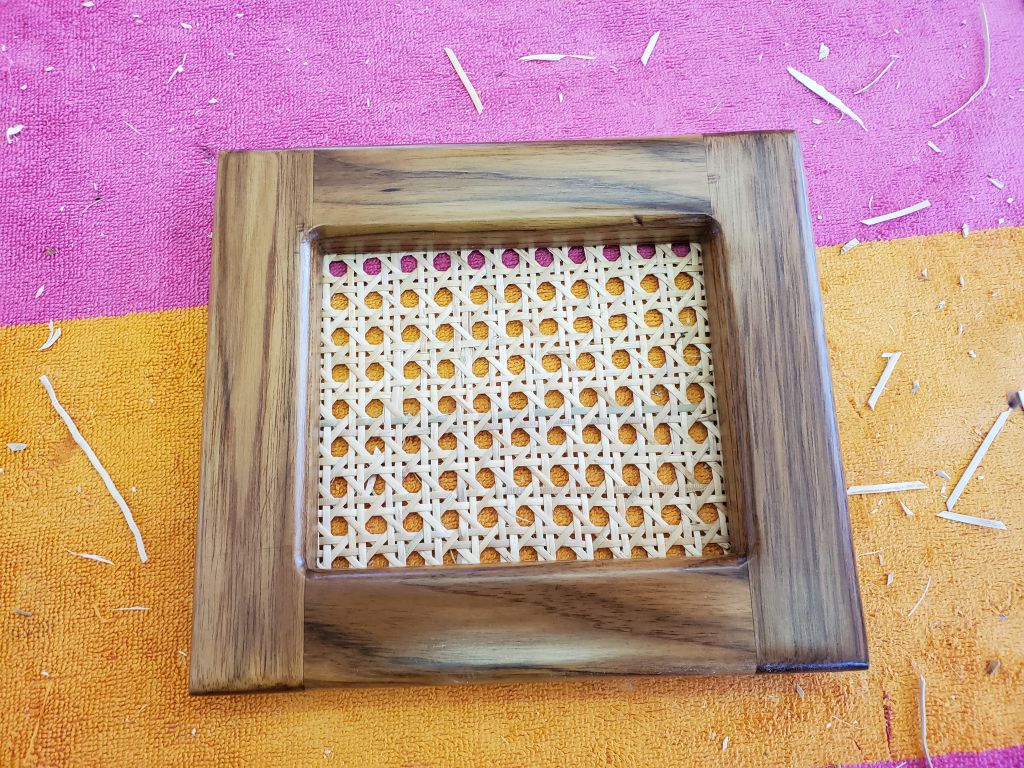
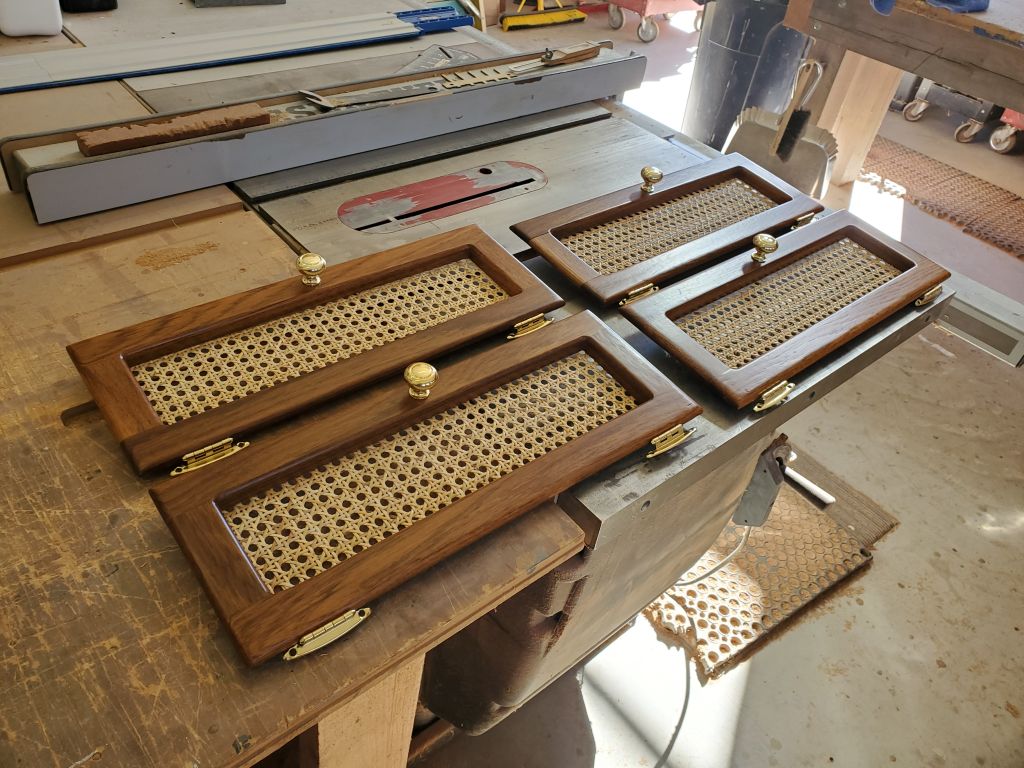
Next, I started working on the door hardware:  hinges, brass pull, and door catch.  I had enough time to finish four of the doors before the end of the day.


Callliope Girl 116

Back at it after a couple days away, my first order of business was to remove all the bracing and clamps from the last bit of the cabin sole, after which I gave the entire sole a good sanding to clean up from the installation and remove any errant spots of epoxy.

The chainlocker bulkhead had not been on my official list of concerns, but nevertheless should have been sanded and painted long ago; for various reasons it never had made it onto the daily radar, but today, while I had sanding equipment, I sanded it quickly to prepare for some fresh paint.

Earlier, in some undocumented work, I’d started to install the four batteries in their new compartment on the port side, installing hold downs and straps as I went.  This went well enough till I had a couple batteries in place and discovered to my displeasure that the opening, and the way the overhangs worked inside the compartment, prevented the last two batteries from angling in, even though the opening itself was abundantly larger than any single battery.  At that earlier time, I’d left things as is to be dealt with another time…and another time turned out to be now, as I just wanted to get the situation dealt with.

I needed a way to drop the last two batteries in vertically, after which they could be easily positioned as needed, and this meant enlarging the hatch.  To do this in the least-destructive way possible, I eventually chose to enlarge the after end, directly over the position of the final battery; an option would have been to create the opening over the starboard-most battery, the one oriented longitudinally, but I thought the after location was better.  So with reluctance, but the grim determination born of fate, I made the cuts required, after which I could install the final two batteries without issue.

To rebuild the hatch, I patterned the L-shaped opening and cut out a piece of plywood to fit, then epoxied and fiberglassed it from the underside to the adjacent square hatch in the appropriate corner, after the usual surface prep to remove paint from the faying surfaces.  Sometime very soon, I planned to spend time finalizing the battery and any other wiring tasks still remaining on my list.

For now, however, my focus was on installing trim, starting with the chainplate covers and bookshelf stops, now completely varnished.  Then I continued with some trim around the edges of the stove surround, and at the juncture between galley countertop and upper cabinets.  Where needed, I made the trim removable with screws so the port side of the galley could be dismantled should it ever be necessary.

There was more trim to come, but now, right after lunch, I wanted to focus on the cabin sole varnish, as I needed to apply a coat every day, and I wasn’t sure how long it would take.  I had other work I could finish in the woodshop during the remainder of the day, so didn’t mind closing off the interior this early in the day (for one day, anyway).  First, however, I started with a coat of white paint on the chainlocker bulkhead after some quick masking.

Next, I applied a coat of varnish to the entire cabin sole.  The plywood across the aft end is my temporary platform to help me get out of the boat since I had to remove the ladder for the varnishing.

While I had the varnish out, I applied another coat to the new cabin side trim (2) and grate from the head sole (2, plus whatever was on there originally); I’d sanded these earlier in the day.

I spent the remainder of the afternoon working on the caning inserts for the nine cabinet doors in the cabin.  The door frames themselves were all prepared for this, and to begin I cut larger pieces of caning into pieces as needed for each door.  Then, working with about half the pieces, I soaked them–and some reed spline–in water for 15-30 minutes to soften and expand the caning fabric.

Next, one door at a time, I installed the fabric, pressing it into the pre-cut grooves in the door frames and installing the spline with glue to hold the caning tightly.  It had been some time since I’d done any caning work, but the process was straightforward, if sometimes frustrating getting the fabric to cooperate with the grooves.  One is supposed to use wooden wedges to bend the fabric into the grooves, but I didn’t have any, and in any event I’d found during some earlier job that these didn’t work so well anyway.  My tool of choice, strange as it seems, was a half-moon-shaped plastic protractor, about 6″ long; the curved edge worked pretty well to rock the caning into the groove.  I’d used one of these long, long ago in my first caning job–out of necessity at the time–and found it worked well enough that I now had a box of protractors on hand just for this purpose.  (I broke three during this installation.)

In the event, by the end of the day I’d installed the fabric in all nine doors and set them aside to cure and dry overnight.  The fabric would shrink as it dried, pulling it tight across the opening, and later I’d trim all the excess and clean up the excess spline from the various corners.

Calliope Girl 115

I unclamped the sole planks from last time, and cleaned up a bit and reorganized so I could focus on the final planks remaining on the starboard side.

There were 4 pieces required:  three longer sections (full-length to the galley bulkhead), and one shorter piece at the forward end to accommodate the curvature of the hull.  I laid out, measured, and cut the various pieces required, including a thin strip along the starboard settee, and checked everything with a dry-fit.

Next, I prepared a large batch of thickened epoxy adhesive, and secured the planks with various braces as needed to press everything tightly into the adhesive.

After a while I tempted fate by removing a couple glue blocks on the outer edge of the planks where they ran by the galley, so hopefully I could finish up the final short planks to fill the small area.  Removing the glue blocks (which I’d installed to hold the planks tightly together originally) had no ill effects, so I could proceed and install the four final, short planks to fill the starboard galley space.  These required a seemingly inordinate number of vertical braces to press tightly into position.

With the sole complete for now–at least all the planks laid–I turned to the cabin side trim and milled and sanded the three pieces according to the second prototype I’d made earlier.  The piece destined for the aft end of the cabin was similar, but featured a different angle (7 degrees) since that was what I had measured at the aft bulkhead.  Once these were completely milled and sanded, I cleaned them and applied a sealer coat of varnish to all sides.

While I was at it, I sanded and varnished the bilge access grate from the head–original to the boat  (or at least to her iteration upon arrival here).  I planned just to spruce up the part and eventually varnish it to match the cabin sole.

Next, I started some prep work for the cabinet doors, which were to receive a caning insert.  To accept the caning and spline, I had to mill groves on all four sides of the backs of the frames, so after working on a sample piece to get the spacing and depth where I wanted it, I milled slots in all the doors, taking three passes on the table saw for each slot to achieve the final width.  In the past, two passes had done the trick, but the spline I had was a bit thicker, and I was using a thin blade in the saw.

I was looking forward to completing the caning, the final step before I could install the hardware and then install the doors in the boat, but that would be for another time soon as the day was done.

Calliope Girl 114

Happy with the state of the varnish on the interior trim and bulkheads, I removed all the masking tape to complete the job.

I test-fit the new piece of trim profile that I’d milled late last time, and it seemed to do the trick and accomplished what I had hoped.

With that, I turned my attention to the cabin sole for the rest of the day, continuing where I’d left off with a difficult piece at the starboard end of the forward cabin, extending forward along the slope and curve of the hull. This piece required quite a bit of pressure in the form of long braces running to the overhead in order to hold it securely while the epoxy cured.  Similarly, I filled in a small piece of the same plank at the aft end, though this was easier to hold in place with some weights and one clamp at the aft end.

Leaving the starboard side for now, I continued work on the port side, where the shape of the hull allowed full-length planks, as long as I could reasonably torture them into position along the curve of the hull at the aft end.  I installed two planks in turn, using glue and brads where I could on the plywood substrate, and bracing them accordingly against the overhead and with clamped-on boards at the aft bulkhead.

The final two planks to complete the port side of the sole required less bending to fit, but were entirely located on the fiberglass hull, so I had to come up with more creative clamping means to hold them securely in the epoxy while it cured.

Using some offcuts from the longer planks I’d installed, I installed more pieces of the teak sole to finish up around the hatch in the head sole, and cut and installed the final longer pieces against the port side and up on the curves of the port hull, using additional plywood-strip bracing from the overhead as needed.

By now, I’d mainly run out of pre-milled stock for the sole, other than several shorter pieces that would come in handy later.  I’d estimated the requirements roughly when I milled the original batch, but didn’t want to mill more than needed and risk wasting the material.  So from a long teak board (from which I first cut the blanks needed for the cabin side trim), I milled four more 2″ wide by 1/4″ thick strips of teak, and sanded the v-match profile on the corners.  This would give me enough stock to finish the starboard side of the sole.

The pieces on the starboard side that I’d installed earlier in the day had cured enough that I felt OK removing some or all of the bracing so I could continue with the next row of planking.  This one included a long section on the flat plywood substrate, plus a shorter angled piece at the aft end, and a longer one at the forward end, which, like its immediate predecessor, would require quite a bit of clamping pressure to hold it in place on the hull.  Measuring, cutting, installing, and clamping these three pieces consumed most of the remainder of the day, and the various clamping means required blocked access for additional work regardless.

As a final step for the day, I used a small router to trim the planks around the mast step opening, and the bilge access in the head, where I’d let the planking run slightly long for this purpose.  I couldn’t reach my vacuum through the forest of braces, so left cleaning up for next time, when I planned to finish the final pieces on the starboard side.


Calliope Girl 113

I began the day in the cabin, lightly sanding the head bulkheads and trim to prepare for the final coat of satin varnish later in the day.   Since I’d spent time over the weekend, the remaining bits of brightwork I’d been working on most recently were now complete and resplendent in their satin glow.

Once I’d finished that work, I took a few minutes to glue hardwood cleats along one side of each  galley locker door opening, where it would remain to help locate door catch hardware later.

I spent most of the day working on the cabin sole to install the 1/4″ x 2″ teak planks to create the final surface.  Working on the bench, I started with the two bilge access hatches, which ran down the centerline of the boat and would form the layout basis for the remainder of the sole.  The hatches were six planks wide by design.  Once these planks were installed, I used the hatches to finish up some basic layout in the boat, particularly just forward of the hatches where I laid out the planks to determine where they’d fall on the mast step recess so I could then cut some water drains on each side where the slot would be covered by a plank later.

I didn’t take any incremental photos of the planking, but worked throughout the day to install all the long, straight planks on either side of the bilge hatches, and then began installing some of the shorter planks where the sole met the curvature of the hull at the corners.  The layout from the hatches continued nicely and neatly past the battery box with a full plank, and then beyond on either side. I installed all the planks with glue and brads, and a thickened epoxy mixture on the exposed hull as needed.

I might have liked to continue a bit more, but it was growing late in the day and I needed to stop in order to clean up and get ready to apply the final coat of satin varnish to the interior trim and head bulkhead, along with the port side galley shelf.  Finishing the varnish now was important to keep other aspects of the interior moving forward as well.

With about 30 minutes left at the end of the day, I prepared a second prototype of the trim for the lower edge of the cabin sides.  The first attempt was good in concept, but the way I cut the angles made it visually clunky.   Now, I more or less replicated the cuts, except I started with a slightly narrower blank (1-1/4″ vs 1-1/2″) to better clear the ports forward, and cut the 14° angle on the short bottom leg, with the taller leg cut at a vertical, so that when installed, the  trim would visually follow the angle of the cabin trunk.  I didn’t test-fit the piece in the boat now as I didn’t want to introduce dust to the curing fresh varnish, but all in the fullness of time.


Calliope Girl 112

Next verse, same as the first.  This time, however, I switched to satin varnish for the final coat on all the loose small trim pieces and chainplate trim covers (coat 5), while sticking with the usual gloss varnish for the 4th build coat on the interior trim.

Calliope Girl 111

In a brief weekend workday, I prepared for and applied another coat of gloss varnish to the interior trim (third coat) and small loose trim pieces (mostly 4th coat).

Calliope Girl 110

With the satin varnish now cured overnight, the cabinet door frames and companionway ladder were looking pretty good.

Continuing the varnish base coat buildup was next on my task list, with the usual round of light sanding and cleaning followed by another coat of gloss varnish on all ongoing parts–head bulkheads, interior trim, and the various loose trim pieces.

Over the past week or two, since completing the cabin sole, I’d noticed a bit of flex at the seams where the large bilge access panels met the sole, and while I expected that the 1/4″ teak planks would eventually help stiffen these areas, I thought it best to add some support cleats now and ensure that the sole always felt solid underfoot.  So with eight pre-made cleats cut to fit, I epoxied and screwed them into place beneath the outer sole edges as needed to help reinforce the sole.

I’d now made or installed nearly all of the interior trim as needed, but now I could address some of the last “major” trim needed:  the lower edges of the cabin trunk, where the plywood sheathing (installed during some earlier iteration) had a raw, sharp edge along the sides and aft end of the main cabin.  Trim would dress up the appearance and also ease the cracking of skulls on the low and sharp corner, something with which I had become painfully familiar over the past few months.

I used bevel gauges to get a read on the angles involved so I could start to conceive and cut trim to fit.  These angles turned out to be just under 14° on the cabin sides, and 7° at the aft bulkhead.

From here, and with a series of milling steps, I came up with a prototype trim profile.  The basics of the profile ended up OK, but when I test-fit it I realized it would be better if I cut the angle portion into the short lower leg of the trim (where it covered the edge of the plywood), rather than the longer vertical leg, as in its current iteration the trim seemed overly chunky and ended up vertical on its main and largest side, at odds with the angle of the cabin trunk.  Otherwise, beyond some minor adjustments in height (mainly to ensure clearance beneath the two opening ports forward), the trim profile was  on track and the changes would be an easy fix, just adjusting how I cut the inside faces of the the piece to change how the angle played, and I’d continue with the second prototype next time, but for now I had to leave for an appointment.

Calliope Girl 109

I began the day as per usual, with a round of sanding for all the ongoing brightwork pieces.  I spent extra time on the cabinet doors and companionway ladder, as the base coats were done and I planned to finish up with the satin varnish this time around.  I left these pieces for finishing late in the day so I’d not stir up any dust for what I hoped would be the final coat.

After sanding and cleanup, I applied another base coat to all the small trim strips and chainlocker trim pieces.  I also sanded and applied a sealer coat to the galley refer shelf and trim.

In the cabin, I cleaned off the excess bungs from all the trim I’d recently installed, then sanded the trim as needed to prepare it for varnish.  Afterwards, I thoroughly cleaned the cabin and trim, then masked off for the varnish process, including the port side of the head bulkheads, which I’d previously sanded for fresh finish.

Later, I applied a coat of gloss varnish to all these areas in the cabin.

Finally, after final preparations and tack-off, I applied a coat of satin rubbed-effect varnish to the door frames and companionway.

Calliope Girl 108

I brought the companionway ladder into the boat so I could set it in place in the galley and mark the countertop where it landed.  This would allow me to continue installing the adjacent fiddles later.

With that done, I continued with my routine of sanding, cleaning, and varnishing the ladder, door frames, and chainplate trim.

In the woodshop, I worked to sand smooth and as necessary the small pile of trim that I’d milled the day before, then cleaned all the assorted new pieces and applied a sealer coat of varnish to all sides.  These smaller pieces of trim were to be completely pre-finished before installation.

In the galley, I continued the fiddle installation, cutting the trim to fit around the opening I’d marked for the companionway ladder (and which still fit perfectly my construction ladder).  Around the corner at the refrigerator lid, I milled a piece of the fiddle stock to fit and milled in a handle to ease opening of the lid.  I bunged all the fastener holes securing the fiddles.

To cover the space between the refer locker and the electrical panel beyond, I patterned, then cut, a teak shelf to span the gap, supported by the remnants of the old nav station beneath the electrical panel and a fiddle at the inboard end.  I milled the shelf down to about 3/8″ thickness to allow adequate clearance for the panel to tip forward for access.  In keeping with the nature of the port side of the galley, this shelf assembly would remain removable if needed, so once the sizing and related details were set, I could remove it to secure the fiddle permanently and varnish the part before installation.

During the remainder of the day, I milled two lengths of trim to match the profile of the prefab teak handles that would anchor the galley bulkheads, with a series of milling operations required to obtain the final profile, and also milled some various small trim and support cleats I’d need elsewhere in the project.  By the end of the day, I’d worked through the milling and sanding operations and had enough time for a sealer coat of varnish on these pieces.

Older posts Newer posts