| Kaholee Refit |
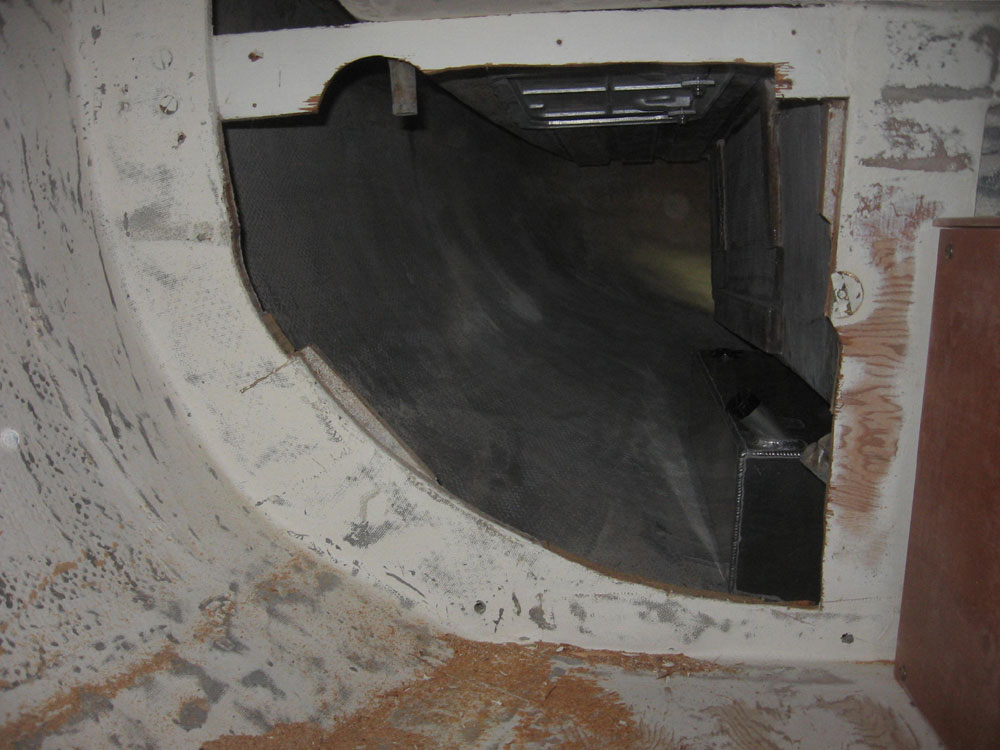
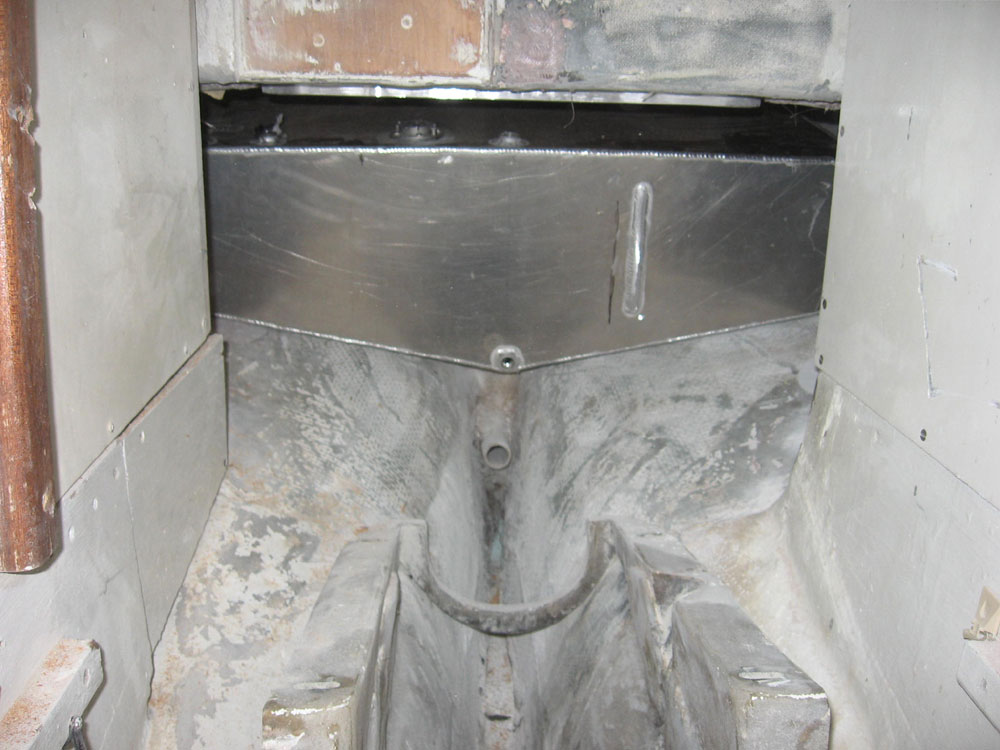
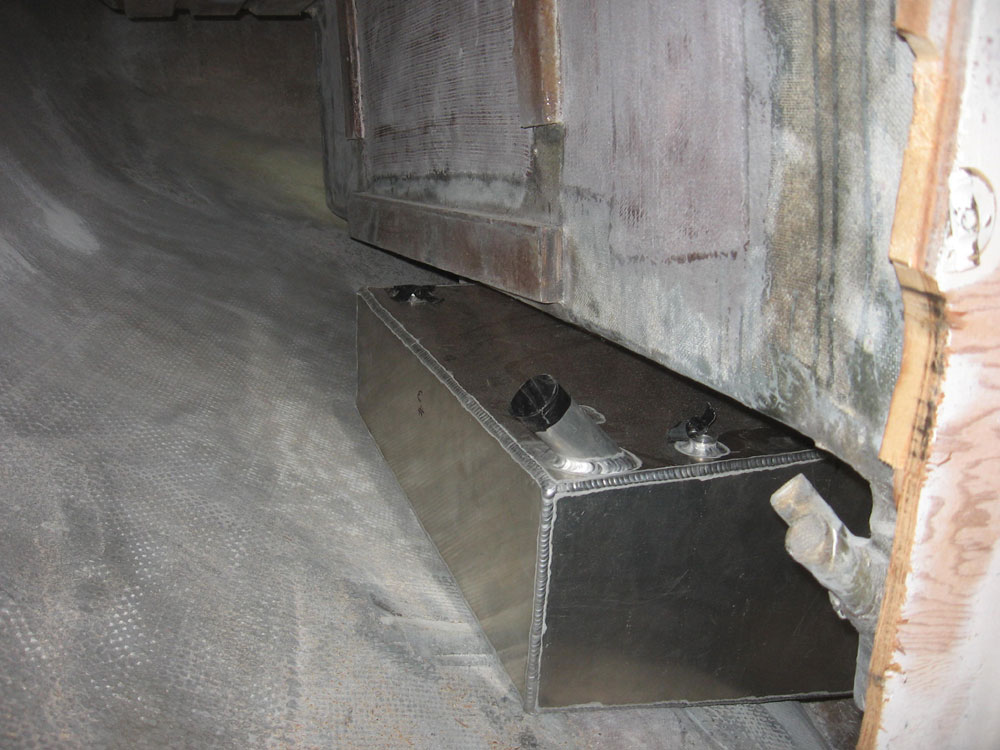
February 19, 2007 I began today with the fuel tank. Last week, I briefly tried to test-fit the tank, but discovered that the opening in the aft bulkhead through which the tank needed to fit was a little small and needed to be enlarged. I had been able to fit the tank mockup because the whole mockup was flexible and easier to twist into position; obviously, the new tank was not flexible. |
|
|
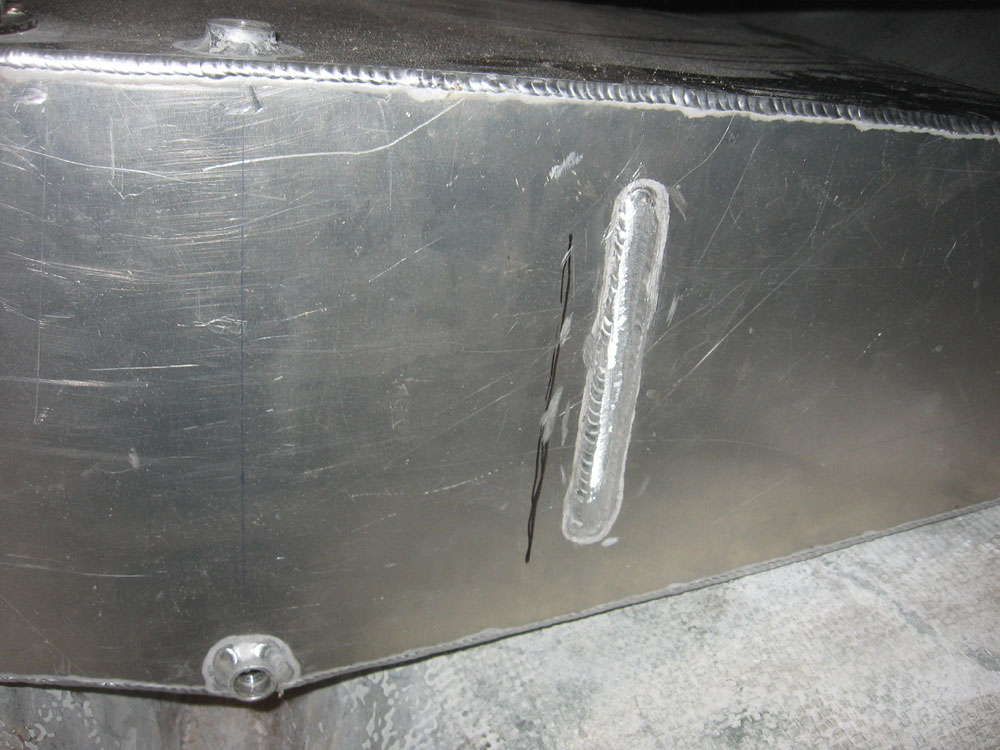
Knowing this in advance, I prepared a saw and other equipment to enlarge the opening as needed. It took a couple tries to get the cuts large enough in the right places. Then, I discovered that a protruding flange on the forward face of the tank--a flange mistakenly installed by the welding shop--was in the way, so I took the tank off the boat into the shop and cut off the flange, then ground the remains relatively flush, smooth, and burr-free. I didn't attempt to remove the thickness of the weld beads, as I didn't want to compromise the integrity of the tank. About 1/4" projection remained. |
|
|
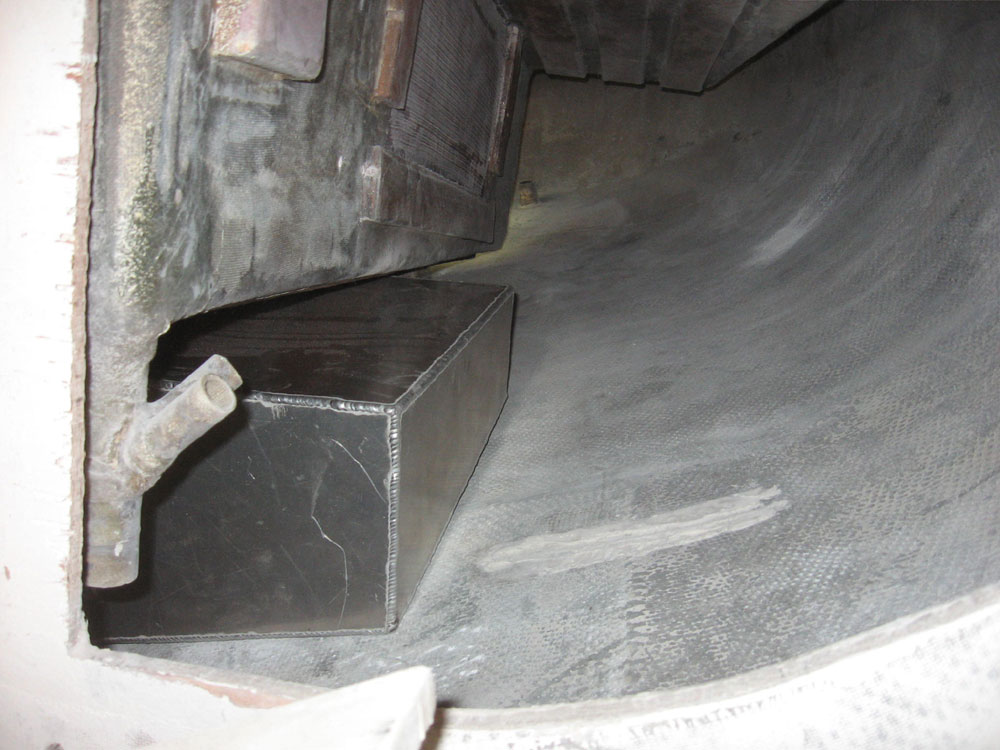
With that, the tank slipped fairly easily into position beneath the cockpit. The way the tank was shaped, it appeared that I didn't need to build up battens beneath the tank to keep some air and water space beneath, as I had thought I might; the tank rested on a couple spots on its back bottom edge, and at the forward corners, with plenty of breathing room elsewhere. |
|
|
Before I could think about permanently installing the tank, I had a few more steps ahead, beginning with determining how to install the proper fuel hose barb fittings on the tank. What should have been a simple task was complicated by the fact that the welding shop installed female threads for 1/2" pipe, working under the blind assumption that this would easily fit commonly available fittings. As it happens, for 1/4" ID fuel hose, such fittings are rare, and, as far as my searching indicated, unavailable in a 90° elbow, which was desirable here because of the limited overhead clearance. What made this all the stranger was the fact that the threads for the supply and vent fittings were 1/2" thread (too large), while the threads on the fuel return fitting and drain plug on the front of the tank were the desirable 3/8" thread. I wondered why they weren't consistent one way or the other. While I had specifically mentioned the ID of the fuel hose I needed the tank fittings sized for when sending the specs to the welding shop, I hadn't anticipated the need to specify thread size or type for any female fittings. In this way, one learns that one can never provide too much specific information for any outsourced task, and to never make any assumptions: something to remember for next time. After quite a bit of searching, I eventually settled on some reducing bushings that would thread into the 1/2" female threads in the tank, and provide the needed 3/8" female thread for the required barb fitting on the supply. IN addition, the threads in the tank were a little gunky, so I ordered taps so that I could clean them out. I needed to accomplish these tasks before installing the tank permanently, since the clearance would not easily allow me to do it otherwise. I had planned to make more progress towards the final fuel tank installation and other tasks, but ended up spending most of the rest of the day discussing various engine, alternator, and electrical options for the boat, as well as researching some options for each. With a measured drawing of the chosen engine in hand (Beta Marine BD722), I roughly measured out the existing engine space to ensure that the engine would fit without any insurmountable clearance problems; it looks like a clean fit. |
|
|
|