|
| |
August 21, 2003
Two earlier forays into
test-grinding the inside of the hull indicated that the job was going to
be tougher than anticipated. All along, I knew that grinding out the
interior was not going to be particularly fun, but certain portions proved
to be worse than I had thought.
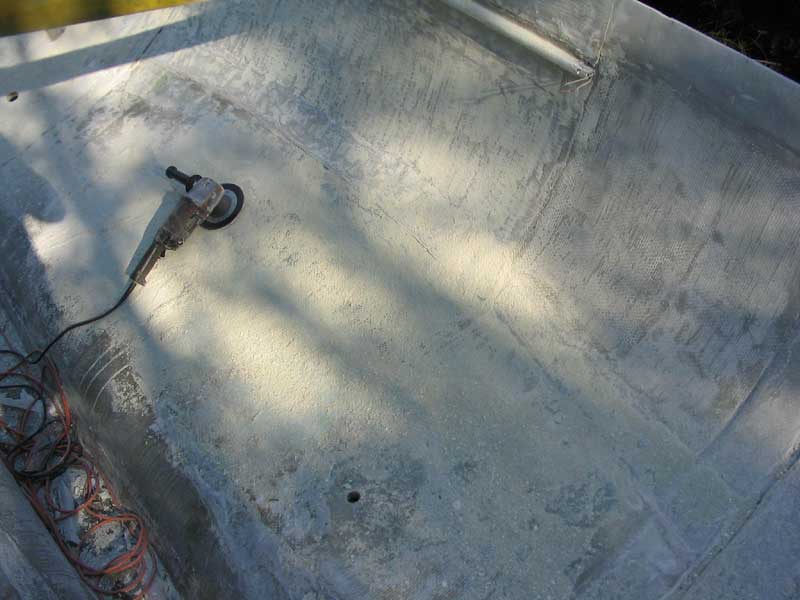
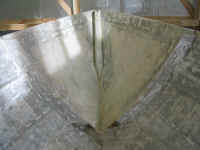
 I performed my first trial
run on the inside of the hull several weeks prior. Armed with my big
7" angle grinder and soft-pak sanding pad that I used on the bottom,
I attacked the starboard quarter with some 40 grit Stikit
discs. These did an acceptable job removing most of the paint,
grime, and rough edges left over from tabbing, spilled resin, and
generally sloppy glasswork. Soon, though I reached the remains of
the aftermost bulkhead. Earlier, I had sawn this out of the way as
close as possible to the hull with a Sawz-all, but there remained
1-2" of the plywood bulkhead, plus 1/4"+ of fiberglass tabbing
thickness on each side--all amazingly well adhered. The soft-pak and
40 grit didn't begin to touch this, which didn't surprise me.
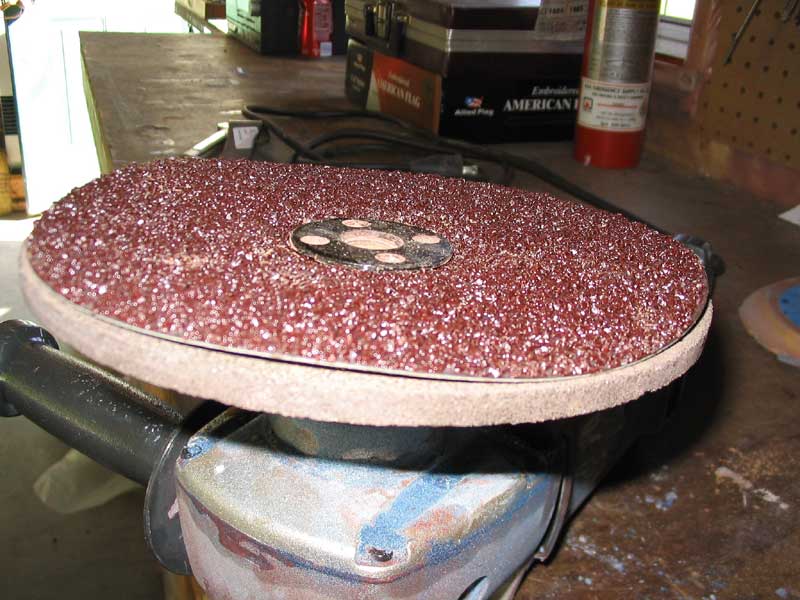
Undaunted, I pointed my computer browser to the McMaster-Carr website and
ordered some heavy duty grinding discs for my 7" hard pad on the
grinder, choosing a box of 36 grit and a box of amazing 16 grit. I performed my first trial
run on the inside of the hull several weeks prior. Armed with my big
7" angle grinder and soft-pak sanding pad that I used on the bottom,
I attacked the starboard quarter with some 40 grit Stikit
discs. These did an acceptable job removing most of the paint,
grime, and rough edges left over from tabbing, spilled resin, and
generally sloppy glasswork. Soon, though I reached the remains of
the aftermost bulkhead. Earlier, I had sawn this out of the way as
close as possible to the hull with a Sawz-all, but there remained
1-2" of the plywood bulkhead, plus 1/4"+ of fiberglass tabbing
thickness on each side--all amazingly well adhered. The soft-pak and
40 grit didn't begin to touch this, which didn't surprise me.
Undaunted, I pointed my computer browser to the McMaster-Carr website and
ordered some heavy duty grinding discs for my 7" hard pad on the
grinder, choosing a box of 36 grit and a box of amazing 16 grit.
When I next had a chance to
try working on the boat again, I installed one of the 16 grit discs on the
grinder, reached for my trusty full facepiece respirator and hearing
protection, and climbed aboard. Almost immediately, I was sadly
disappointed. The 16 grit and hard backing could barely make any
headway against the bulkheads! I had been sort of counting on this
being the answer, and for a time I was a little stumped.
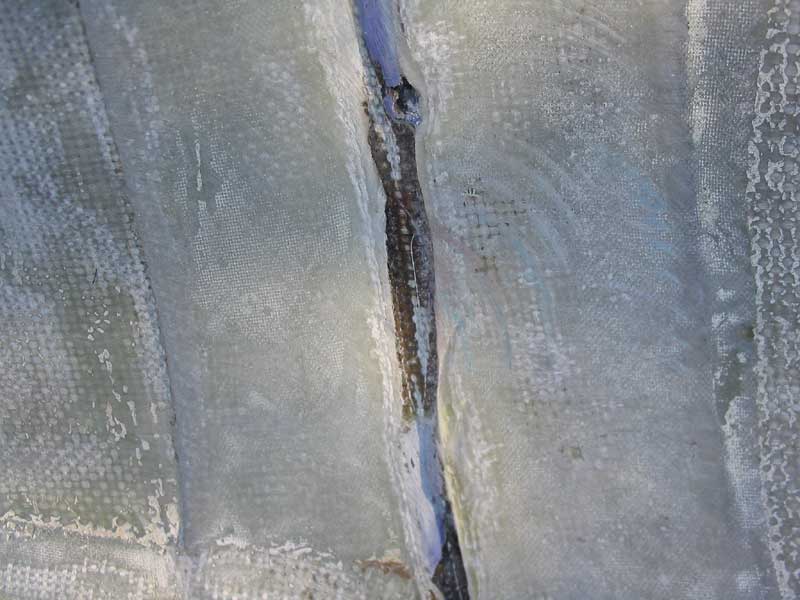
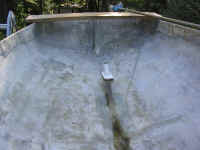
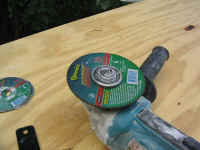
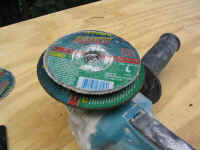
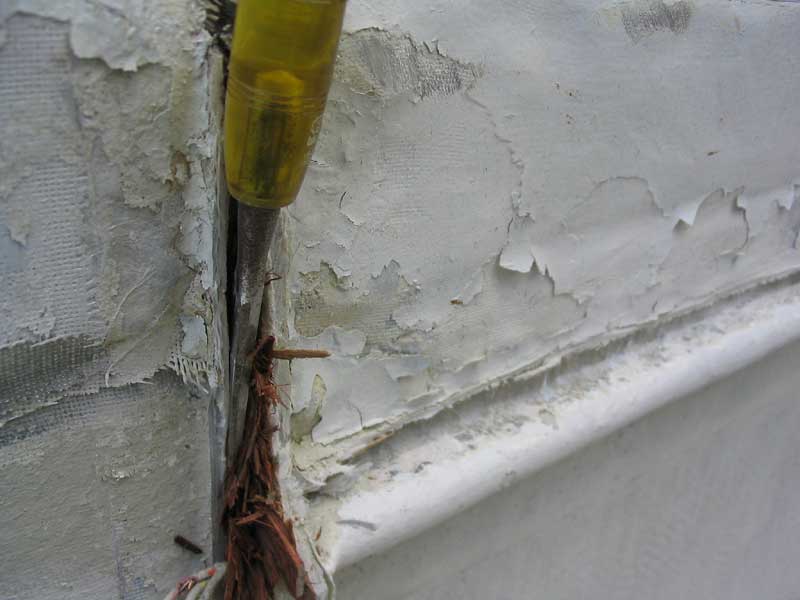
 I
decided to try a cutting disc on my small angle grinder. I purchased
several thin discs that looked like they'd cut easily through fiberglass,
and installed one on the tool. It did work quite well, and buzzed through
the tabbing rather easily. However, the discs wore out quickly,
requiring frequent replacement. But at least it worked. By
cutting through the tabbing in this way, I could remove the plywood and
often some or all of the tabbing that had been secured to the
plywood. In most cases, the tabbing portion that was bonded to the
hull was too well adhered to attempt to remove. This meant that
there was a 3/4" gap between two sections of tabbing that I would
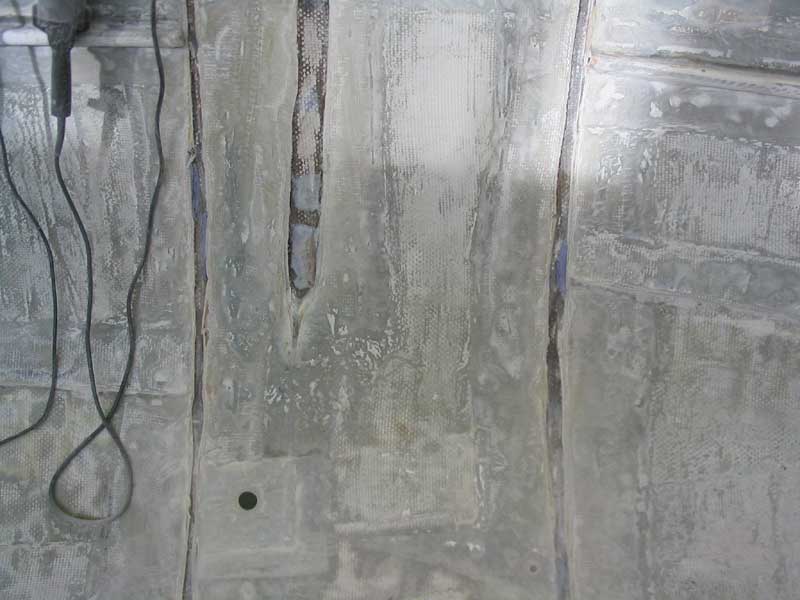
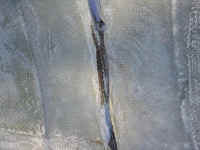
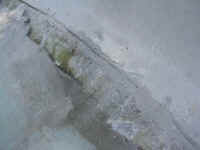
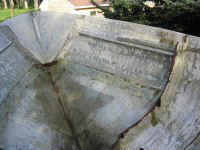
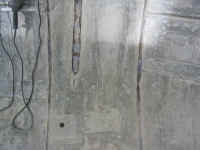
have to fill later if I wanted a smooth interior surface (I do). The
depth of the depression--shown in this photo as the dark strip in the
center--is about 2/4" - 3/8" or so. There was more of the
blue adhesive gunk behind portions of the bulkhead, which I will chisel
out before I do any further filling work here. I
decided to try a cutting disc on my small angle grinder. I purchased
several thin discs that looked like they'd cut easily through fiberglass,
and installed one on the tool. It did work quite well, and buzzed through
the tabbing rather easily. However, the discs wore out quickly,
requiring frequent replacement. But at least it worked. By
cutting through the tabbing in this way, I could remove the plywood and
often some or all of the tabbing that had been secured to the
plywood. In most cases, the tabbing portion that was bonded to the
hull was too well adhered to attempt to remove. This meant that
there was a 3/4" gap between two sections of tabbing that I would
have to fill later if I wanted a smooth interior surface (I do). The
depth of the depression--shown in this photo as the dark strip in the
center--is about 2/4" - 3/8" or so. There was more of the
blue adhesive gunk behind portions of the bulkhead, which I will chisel
out before I do any further filling work here.
Once the plywood was
removed, and most of the tabbing, the big grinder with 16 grit disc worked
relatively well at smoothing things down, though the rough contours and
relatively high speed of the grinder tended to rip and tear the discs
prematurely if I wasn't careful. After removing the bulk material in
this manner, I switched back to the soft-pak pad and 40 grit, and
performed a final smoothing. (It's kind of amusing when 40 grit seems like
a smooth paper!)
|
|
 The
heat buildup on the pad was enough to cause the discs' adhesive to melt,
and the discs would often begin to spin off, frequently causing rips in
the sandpaper. With care, though, this process worked pretty well,
and removed the outer layers of paint, grime, and rough edges.
Working in this manner, I cleaned up the after third of the boat on both
sides, creating mountains of dust in the process. With this done, I
cleaned up the mess and rinsed out the inside of the boat, since there was
so much dust that it was difficult to see what had and what had not been
sanded. The
heat buildup on the pad was enough to cause the discs' adhesive to melt,
and the discs would often begin to spin off, frequently causing rips in
the sandpaper. With care, though, this process worked pretty well,
and removed the outer layers of paint, grime, and rough edges.
Working in this manner, I cleaned up the after third of the boat on both
sides, creating mountains of dust in the process. With this done, I
cleaned up the mess and rinsed out the inside of the boat, since there was
so much dust that it was difficult to see what had and what had not been
sanded.
There's much more interior
sanding, grinding, and prep work to come, but at least I made some
progress in that general direction. In preparation, I ordered 20
cutting discs for my small grinder, and 30 more 40 grit Stikit discs for
the large grinder. The softpak pad for the large grinder is pretty
torn up, and I'll need to get a replacement for that as well.
|
August 27, 2003
With a new arsenal of
cutoff discs (20) for my small grinder, it was time to get back to
work. I was a driven man as I attempted to complete the
nastiest portions of the grinding work before the boat was moved to
the inside of the new boat barn, about six weeks hence. The cutoff discs
worked really well cutting through the tabbing. Were the tabbing more
typical (i.e. thinner), the discs would be the est. As it was,
however, with tabbing ranging between 1/2" to an astonishing
7/16" thick, the discs wear out extremely quickly; the edge gets worn
away as the disc cuts, and soon the outer cutting edge is worn back to the
metal backing disc on the grinder, which is needed to support the thin,
fragile discs. |
|
|
|
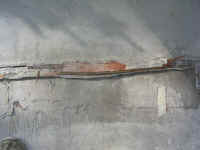 Ultimately,
the combination of several cutoff discs' full service life and persuasion
with hammer and chisel freed the worst of the plywood remnants from the
settees and bulkheads. The general process I used involved cutting
through the tabbing with the cutoff disc, and then breaking free any
tabbing I could with the hammer and chisel. This also helped to
release the plywood remains inside the tabbing after which, in most cases,
the pieces could easily be freed. This typically left a small ridge
that could later be ground away. Ultimately,
the combination of several cutoff discs' full service life and persuasion
with hammer and chisel freed the worst of the plywood remnants from the
settees and bulkheads. The general process I used involved cutting
through the tabbing with the cutoff disc, and then breaking free any
tabbing I could with the hammer and chisel. This also helped to
release the plywood remains inside the tabbing after which, in most cases,
the pieces could easily be freed. This typically left a small ridge
that could later be ground away.
|
|
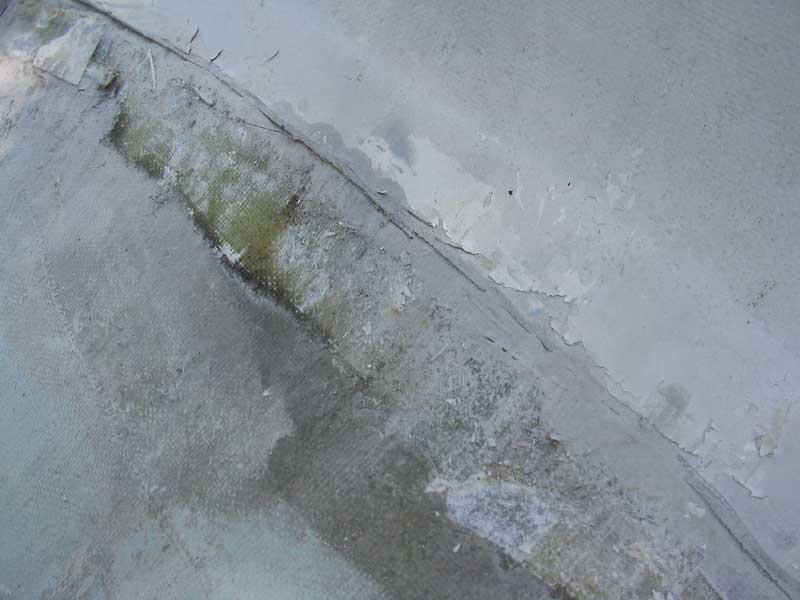
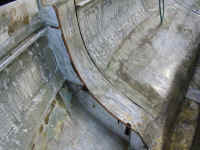
 The
settees had been secured with heavy tabbing at the top edge, but also with
sloppy tabbing beneath, which had obviously been installed once the
plywood was in place by the workers reaching up beneath the settees, in
the tight, angled, space, and applying the resin-soaked tabbing. The
pieces were uneven and messy, but fortunately, once the plywood was
removed, they proved to be easy to pry off with a chisel by inserting the
point into the gap at the upper side and hammering the chisel into the
space. The
settees had been secured with heavy tabbing at the top edge, but also with
sloppy tabbing beneath, which had obviously been installed once the
plywood was in place by the workers reaching up beneath the settees, in
the tight, angled, space, and applying the resin-soaked tabbing. The
pieces were uneven and messy, but fortunately, once the plywood was
removed, they proved to be easy to pry off with a chisel by inserting the
point into the gap at the upper side and hammering the chisel into the
space.
|
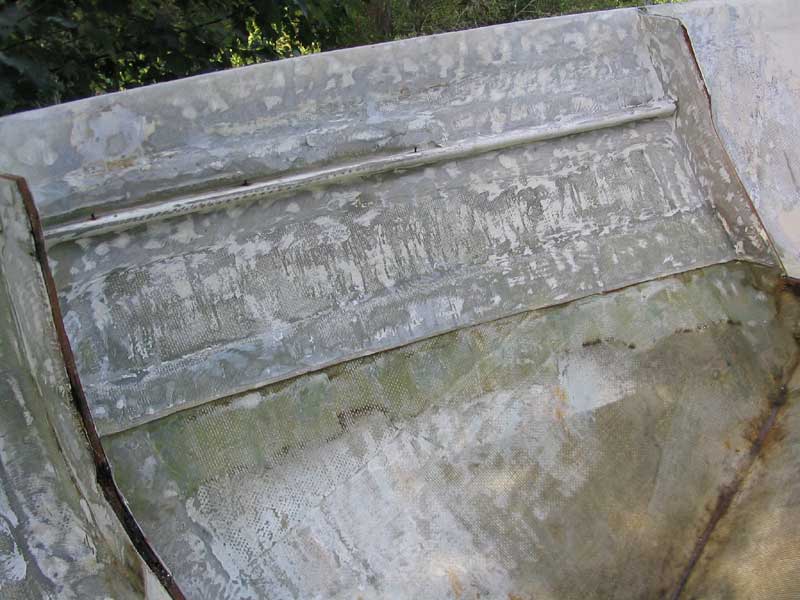
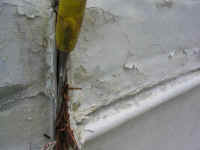 The
bulkheads had originally been secured, it seemed, with some blue
putty-like material (which resembles nothing as much as pool cue
chalk). Frankly, Pearson did a fantastic job tabbing the bulkheads
when the boat was built in 1960. Even though some of the plywood was
wet after 40 years of service, none of the essential bulkhead tabbing was
loose anywhere on the boat. In fact, the bulkheads were tenaciously
adhered in most cases, making removal a chore. I spent quite a bit
of time working on a particularly stubborn section of the starboard
ex-salon bulkhead with two hammers and a chisel before I could finally
persuade the plywood to release from its tabbing nest. The
bulkheads had originally been secured, it seemed, with some blue
putty-like material (which resembles nothing as much as pool cue
chalk). Frankly, Pearson did a fantastic job tabbing the bulkheads
when the boat was built in 1960. Even though some of the plywood was
wet after 40 years of service, none of the essential bulkhead tabbing was
loose anywhere on the boat. In fact, the bulkheads were tenaciously
adhered in most cases, making removal a chore. I spent quite a bit
of time working on a particularly stubborn section of the starboard
ex-salon bulkhead with two hammers and a chisel before I could finally
persuade the plywood to release from its tabbing nest. |
|
In this manner, I prepared the second third of
the boat (from the aftermost bulkhead up to the remaining full bulkhead
just aft of the vee berth) for paint removal and grinding. Because
this section of the hull was largely visible from the interior of the boat
(back when it had an interior), the hull was painted with a number of
layers of thick paint. Much of this was flaking off, but surprisingly,
some of it was well adhered and proved to be somewhat resistant to
removal.
 I
began the initial sanding with my 7" grinder, hard pad, and 16"
grit discs. This is an effective combination to remove bulk stock
remaining from the old tabbing installations, and I also used it to scuff
the painted areas, which removed all the loose and flaking paint as well
as a good portion of the various paint layers. I ground the
starboard side as far forward as the main bulkhead, which is still
installed nearly intact. I
began the initial sanding with my 7" grinder, hard pad, and 16"
grit discs. This is an effective combination to remove bulk stock
remaining from the old tabbing installations, and I also used it to scuff
the painted areas, which removed all the loose and flaking paint as well
as a good portion of the various paint layers. I ground the
starboard side as far forward as the main bulkhead, which is still
installed nearly intact.
|
|

|
August 28, 2003
After much effort, I finally
got the remains of the vee berth removed. Talk about
overbuilding--these simple plywood platforms
(which I had cut back as far as the 1/4" thick fiberglass tabbing
several months earlier) were solidly secured and showed no inclination for
easy removal. With the cutoff discs and my small grinder, I cut
through the remaining tabbing and then, with great effort, managed
to--slowly--pry the plywood and lower tabbing away from the hull, breaking
the secondary bonds free with continued pressure from a 1" chisel and a
flat bar that I alternatively hammered into the growing gap, working from
the bow aft. It's interesting in these Tritons. The cockpit sole
was so weakly constructed that it flexed underfoot, but the settees and vee
berth were secured with enough fiberglass to sink a battleship.
|
|
|
|
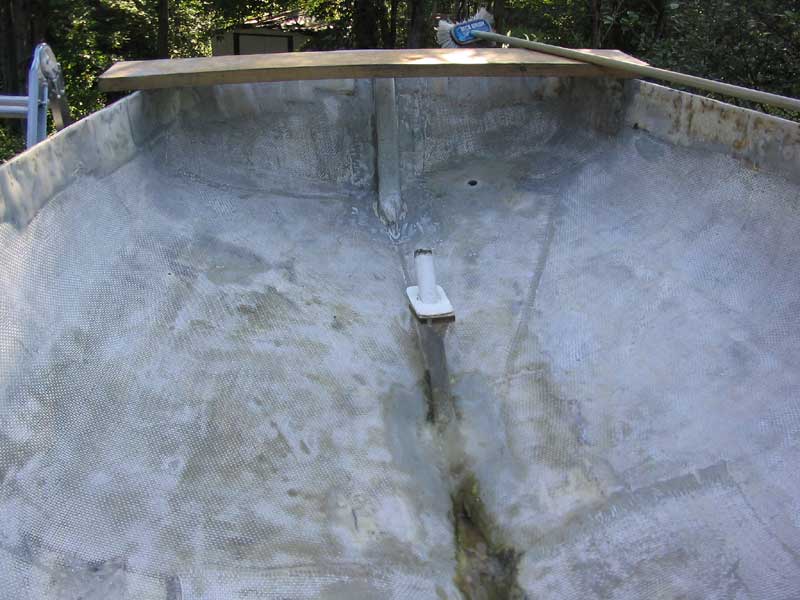
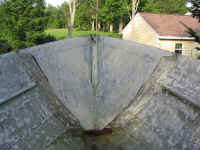
With that, virtually all of the wooden interior structure was gone.
All that remained was the forwardmost (chainlocker) bulkhead web, which I
intended to leave in place, and the main bulkhead a bit farther aft, which I
cut back just outside the fiberglass tabbing to open things up. I left
this in place to keep the hull stiff enough in that area for moving the boat
one more time; it will eventually be removed entirely.
|
|
|
|
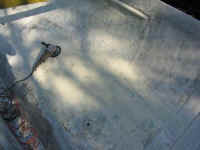
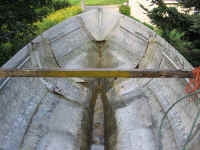
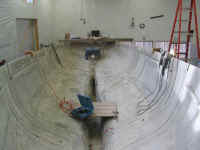
Next, I geared up for some serious grinding. My goal was to grind the
entire remaining areas of the hull (port salon, vee berth, chain locker)
with the heavy-duty 16 grit paper to remove the worst of the remaining
paint, rough fiberglass, and to begin the smoothing process. Several
discs, and hours, later, the job was complete, and I spend a goodly amount
of time cleaning up the mountains of dust and paint chips from the hull
before washing everything down with a hose to remove residual dust.
With each grinding, I moved closer to my ultimate goal of completing all the
unbuilding and demolition work, and being prepared for new construction!
|
|
|
December 4, 2003
 After
many weeks (OK, months...) hiatus from actual progress on the Daysailor
itself, I finally completed the removal of the final bits of remaining
interior structure: a small portion of the main bulkhead, blocking
around the old head through hull location, and the port chainplate knee. After
many weeks (OK, months...) hiatus from actual progress on the Daysailor
itself, I finally completed the removal of the final bits of remaining
interior structure: a small portion of the main bulkhead, blocking
around the old head through hull location, and the port chainplate knee.
Using the same tools and
techniques as during earlier portions of this unbuilding process, I cut away
the tabbing and chiseled out the bulkheads, then ground the remaining
tabbing edges down as flush as possible with my big grinder and 16 grit
discs. Then, I sanded the forward part of the hull and the
newly-ground bulkhead areas with 40 grit discs mounted on a new 8"
soft-pak pad for the grinder, removing the remaining paint and smoothing the
rough interior surface of the hull. This finally wrapped up the
preparation of the interior of the hull for future building steps.
This process, as before,
created large amounts of abrasive, shop-clogging dust. However, the
process was nearly a pleasure this time, as I was trying out a new shop
accessory: a supplied air respirator system. The system consists
of a small compressor, which supplies air to a full face mask through a
length of air hose, and provides fresh, cool air to the user. Despite
the hose, the mask was comfortable to wear, and the air supply was clean and
easy to breathe.
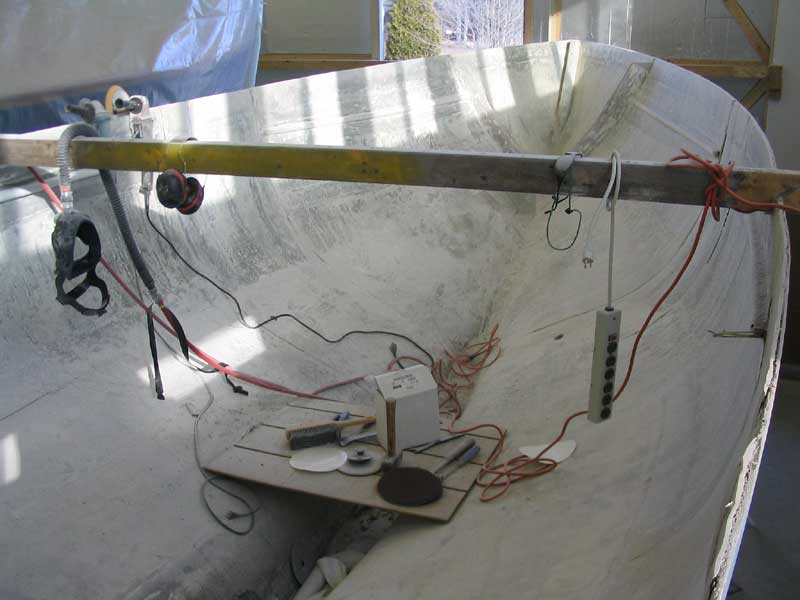
Click here
for a brief sidebar about the supplied air system details.
|
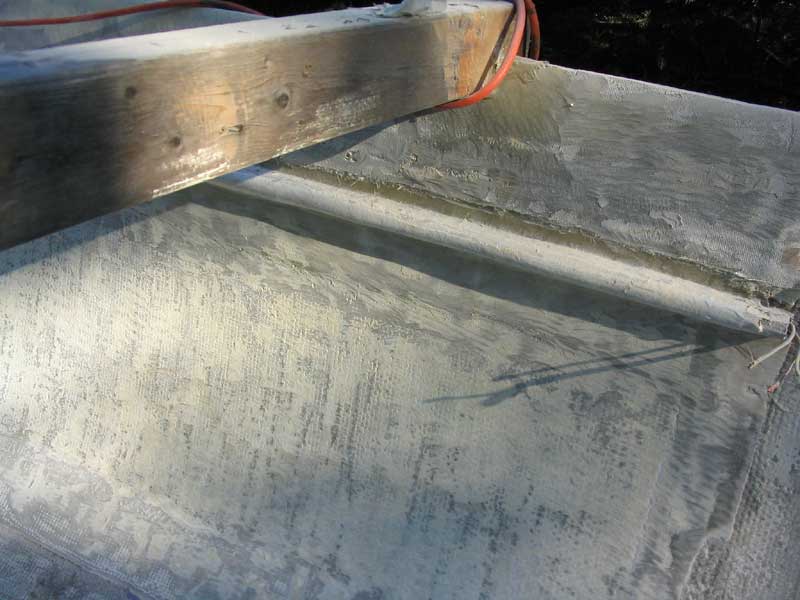
|
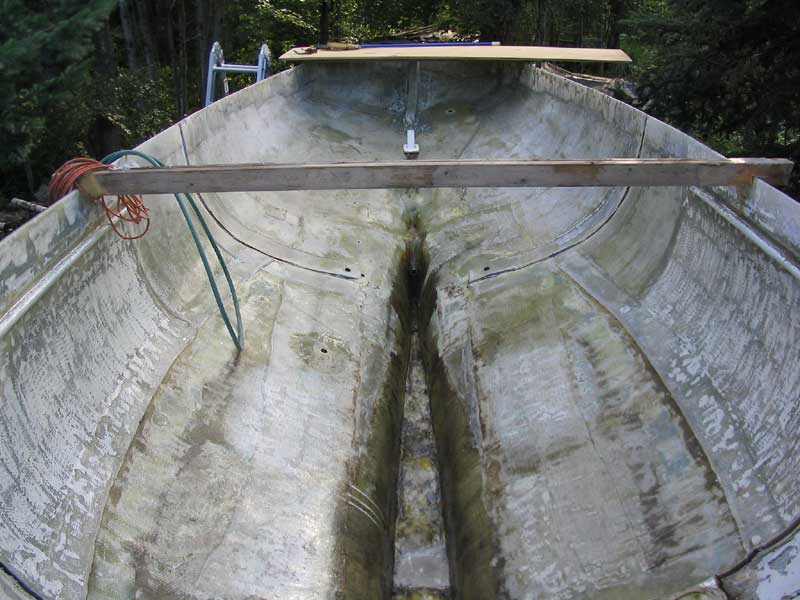
 The
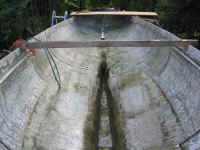
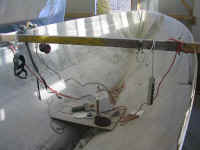
wooden cross beam that I had installed just prior to cutting off the deck
was getting in the way, and, with the boat now in her final project
location, the beam was unnecessary. In fact, I noticed that the beam
was actually pulling the hull slightly inwards in that location,
creating a minor unfairness when the sighting the sheer down the
length. So I removed it, freeing up the bare hull for new
construction. The
wooden cross beam that I had installed just prior to cutting off the deck
was getting in the way, and, with the boat now in her final project
location, the beam was unnecessary. In fact, I noticed that the beam
was actually pulling the hull slightly inwards in that location,
creating a minor unfairness when the sighting the sheer down the
length. So I removed it, freeing up the bare hull for new
construction.
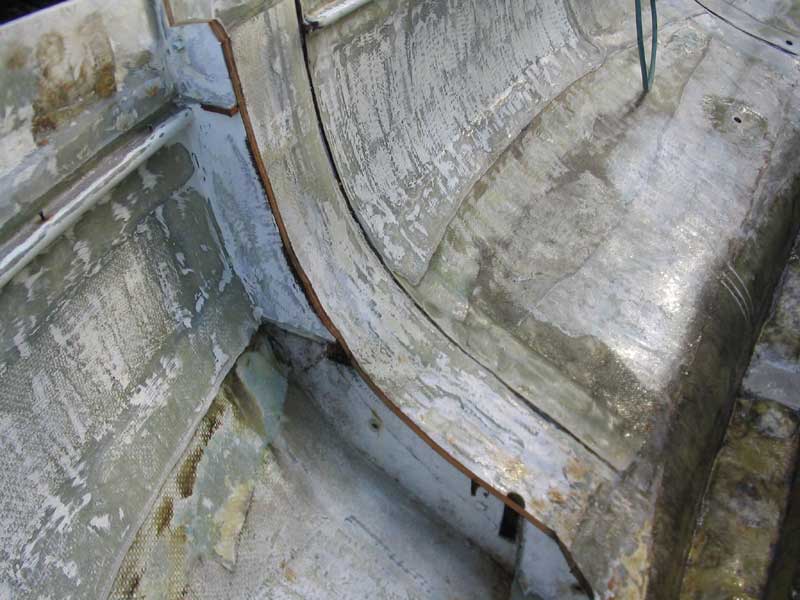
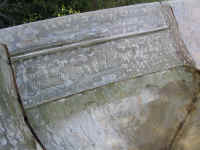
The sole
remaining original structural member (other than the stem and transom knees,
which also remain in place) was the small chain locker bulkhead.
Earlier, I had decided to leave this in place, but to cut it back more
closely to the hull. I marked out 4" all the way around and
removed the excess with a jigsaw.
|
|
|
|
This
day brought to a close the unbuilding and preparation
of the hull for the new construction. Earlier, I had decided to create
a loose goal of one year's anniversary from the delivery of the boat to my
yard (which occurred on December 23, 2002), so it was doubly satisfying to
complete the unbuilding and demolition work--and nice to be done with the
messiest part of the project.
|
Next: new construction. Continue>
|
|

 The
bulkheads had originally been secured, it seemed, with some blue
putty-like material (which resembles nothing as much as pool cue
chalk). Frankly, Pearson did a fantastic job tabbing the bulkheads
when the boat was built in 1960. Even though some of the plywood was
wet after 40 years of service, none of the essential bulkhead tabbing was
loose anywhere on the boat. In fact, the bulkheads were tenaciously
adhered in most cases, making removal a chore. I spent quite a bit
of time working on a particularly stubborn section of the starboard
ex-salon bulkhead with two hammers and a chisel before I could finally
persuade the plywood to release from its tabbing nest.
The
bulkheads had originally been secured, it seemed, with some blue
putty-like material (which resembles nothing as much as pool cue
chalk). Frankly, Pearson did a fantastic job tabbing the bulkheads
when the boat was built in 1960. Even though some of the plywood was
wet after 40 years of service, none of the essential bulkhead tabbing was
loose anywhere on the boat. In fact, the bulkheads were tenaciously
adhered in most cases, making removal a chore. I spent quite a bit
of time working on a particularly stubborn section of the starboard
ex-salon bulkhead with two hammers and a chisel before I could finally
persuade the plywood to release from its tabbing nest.