|
|
~MENU~ |
| Home |
| The Concept |
| The Boat |
| Bringing Her Home |
|
Weekly Progress Log |
|
Daysailor Projects |
| The Boat Barn |
| Resources |
| Other Sites |
| Email Tim |
|
|
|
Systems: Diesel Fuel System |
|
Earlier, I had chosen a location at the
forward end of the engine room in which to place the fuel tank, and at
that time constructed a
rigid platform to secure the tank. Now, it was time to buy and
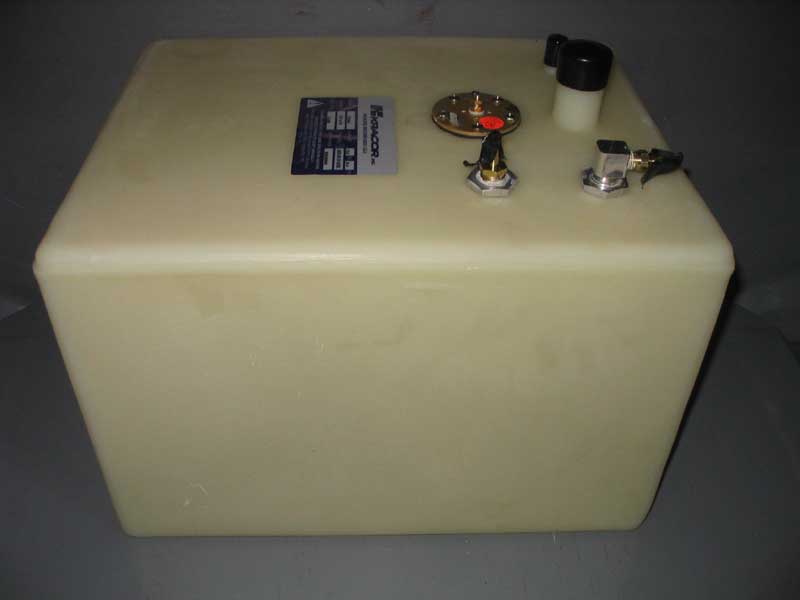
install a tank, filter, and associated plumbing. Originally, I had expected to use a plastic fuel tank, such as the rotomolded type made by Tempo. Then, browsing through yet another catalog, I found an aluminum tank that was the right size and for only a small price premium, so I decided to go with that. I ordered the tank, but when it arrived it was not only damaged in shipment, but the tank was not what I had expected: the tank I received was for abovedecks use, complete with a screw-on fill cap. (It was the plastic cap, with built-in gauge, that was damaged.) I contacted the vendor and received a replacement tank, but to my dismay the new tank was also an abovedecks model. A careful scrutiny of the catalog seemed to indicate that I had been mistaken in my impressions about the tank. I had been sure that the model number I chose set up for belowdecks installation, and the small picture included seemed to reinforce this belief, but in the end I determined that I had been mistaken. They did have another tank, with a different model number, that appeared to be the right thing, but my inspection of the tanks I had received showed relatively poor quality of construction, with welding that lacked the look of high quality, so I elected to not buy an aluminum tank after all. |
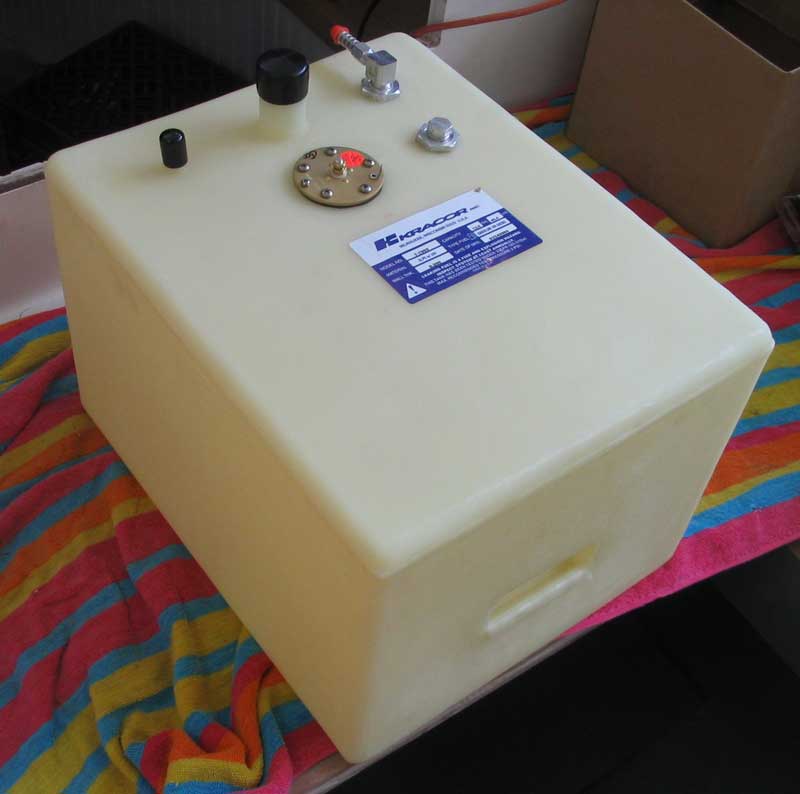 By
now, it was the beginning of the week in which I had intended to install
the fuel system, and I was still tankless. I consulted some other
catalogs, and eventually settled on a 12 gallon plastic tank by Kracor,
which seemed to be a nicer tank than the plastic Tempo tanks and was
already set up with a fitting for diesel return lines (while the Tempo
tanks require a retrofit kit). To my pleasure, the tank--and the
aluminum hold down brackets--were in stock, meaning that I would have
them the next morning, so I ordered the tank. By
now, it was the beginning of the week in which I had intended to install
the fuel system, and I was still tankless. I consulted some other
catalogs, and eventually settled on a 12 gallon plastic tank by Kracor,
which seemed to be a nicer tank than the plastic Tempo tanks and was
already set up with a fitting for diesel return lines (while the Tempo
tanks require a retrofit kit). To my pleasure, the tank--and the
aluminum hold down brackets--were in stock, meaning that I would have
them the next morning, so I ordered the tank. |
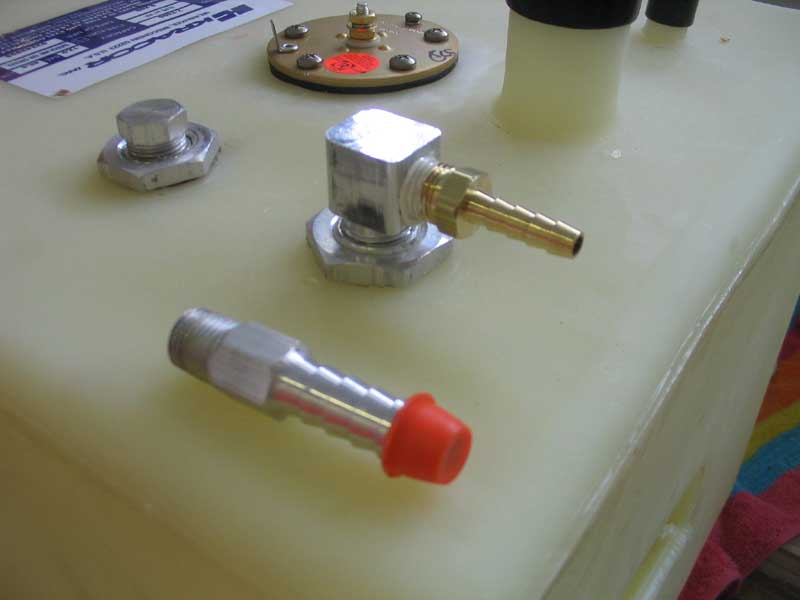 With
the tank in hand, the first item of business was to change out the fuel
line fittings. The fitting supplied with the tank was for 3/8"
fuel line, but I was only using 1/4", so I removed the fitting and
replaced it with the proper size. I also removed the blank plug
for the return line and installed a second nipple there. With
the tank in hand, the first item of business was to change out the fuel
line fittings. The fitting supplied with the tank was for 3/8"
fuel line, but I was only using 1/4", so I removed the fitting and
replaced it with the proper size. I also removed the blank plug
for the return line and installed a second nipple there. |
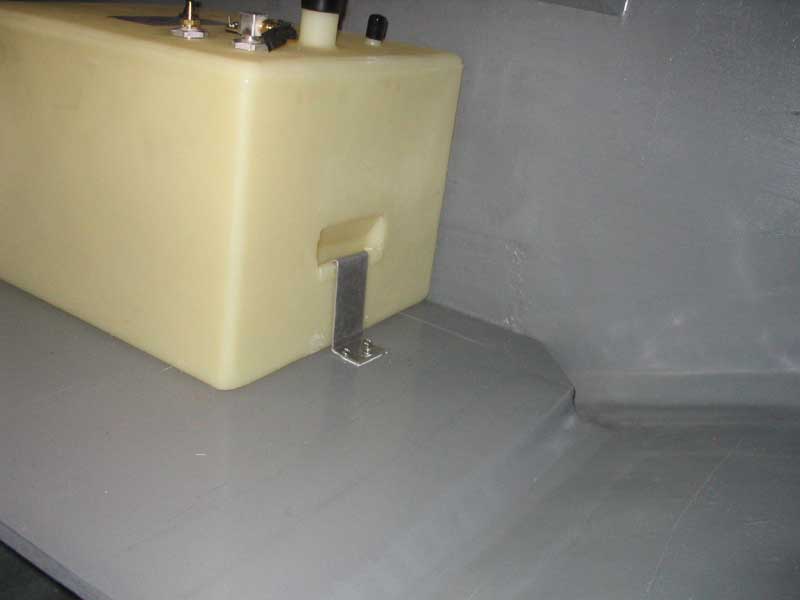 Next,
I placed the tank on the platform and secured it in place with the two
aluminum brackets, which hooked over some molded recesses in the tank
wall. Plastic tanks swell when filled with fuel, so I left some
room for expansion by securing the bracket braces about 1/2" away from
the tank. I coated the bottom of the brackets and the screw holes
with polysulfide as a safeguard. Next,
I placed the tank on the platform and secured it in place with the two
aluminum brackets, which hooked over some molded recesses in the tank
wall. Plastic tanks swell when filled with fuel, so I left some
room for expansion by securing the bracket braces about 1/2" away from
the tank. I coated the bottom of the brackets and the screw holes
with polysulfide as a safeguard. |
|
|
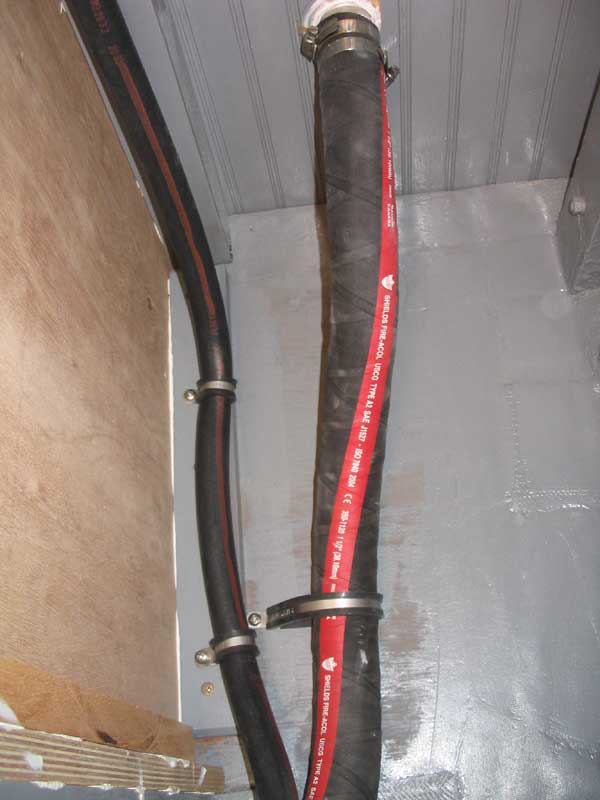
 With
the tank secured in place on the platform, I turned my attention to the
fuel fill hose. I planned to run the fill up to the starboard
sidedeck, the closest location, so with a length of 1-1/2" A2 fuel fill
hose attached to the tank nipple I roughed out the run, and then secured
the hose in place with rubber-lined stainless steel cushion clamps,
adding some split hose chafe protection in a few areas where required.
For the moment, I left the top end of the hose long while I installed
the deck fitting. With
the tank secured in place on the platform, I turned my attention to the
fuel fill hose. I planned to run the fill up to the starboard
sidedeck, the closest location, so with a length of 1-1/2" A2 fuel fill
hose attached to the tank nipple I roughed out the run, and then secured
the hose in place with rubber-lined stainless steel cushion clamps,
adding some split hose chafe protection in a few areas where required.
For the moment, I left the top end of the hose long while I installed
the deck fitting. |
|
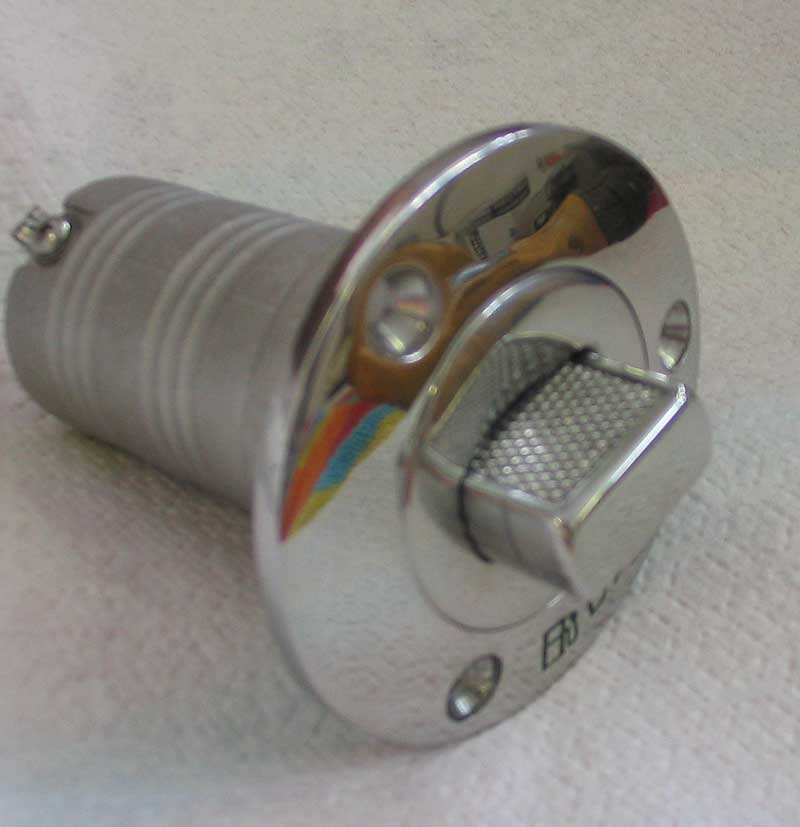
I found a really interesting deck fitting for the project. Instead of the traditional slotted fill cap, which tend to be hard to remove and require special tools, my new fitting featured a unique pop-up lever built into the fill cap. The knurled stainless steel popup lever allowed the cap to be turned, and a quick press pushed it flush with the surface. |
|
|
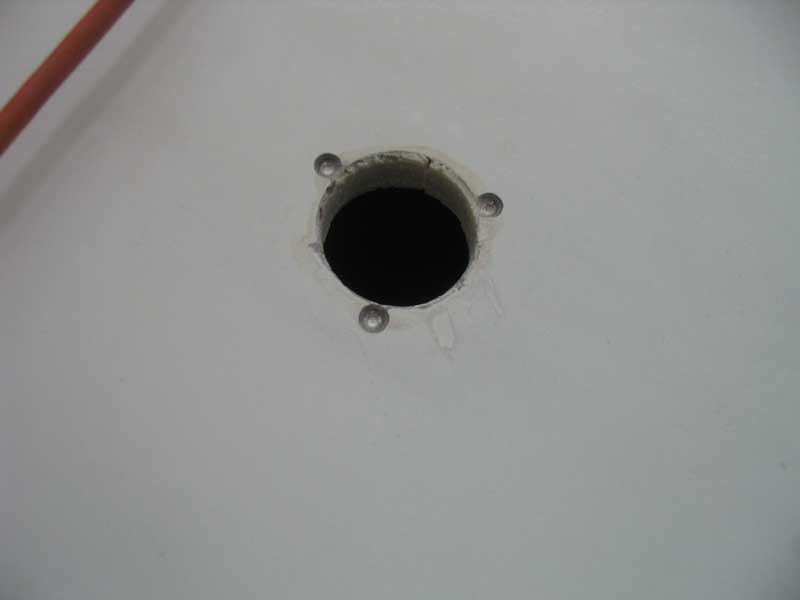
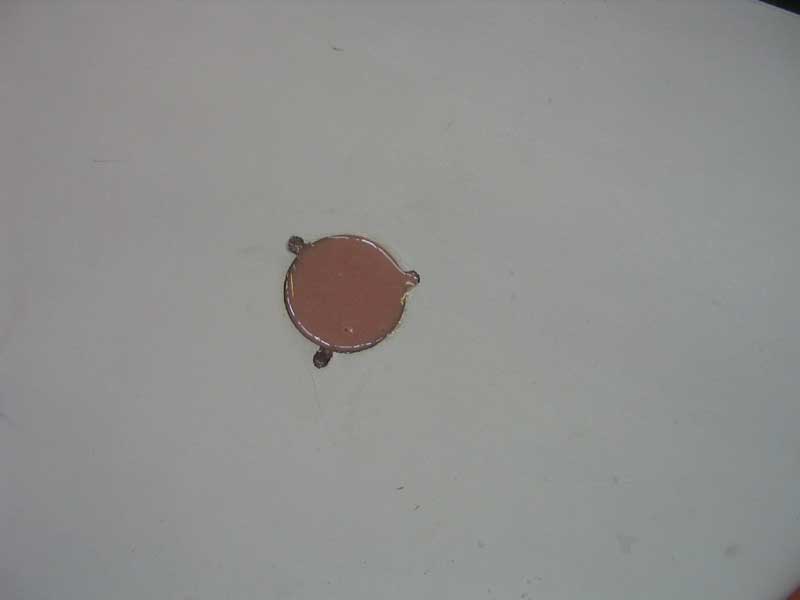 Once
I determined the location for the fill plate, I drilled an appropriately
sized hole with a hole saw, and marked and drilled for the fastener
holes. I chose a saw slightly larger than the fill plate.
Then, I taped over the bottom of the hole and filled the opening with
thickened epoxy resin, including the overdrilled screw holes, and
allowed that to cure overnight. The next day, I bored a new--and
slightly smaller--hole in the center of the epoxy plug, leaving a thin
band of epoxy all around the opening, thereby sealing the plywood deck
structure against moisture. Once
I determined the location for the fill plate, I drilled an appropriately
sized hole with a hole saw, and marked and drilled for the fastener
holes. I chose a saw slightly larger than the fill plate.
Then, I taped over the bottom of the hole and filled the opening with
thickened epoxy resin, including the overdrilled screw holes, and
allowed that to cure overnight. The next day, I bored a new--and
slightly smaller--hole in the center of the epoxy plug, leaving a thin
band of epoxy all around the opening, thereby sealing the plywood deck
structure against moisture. |
|
|
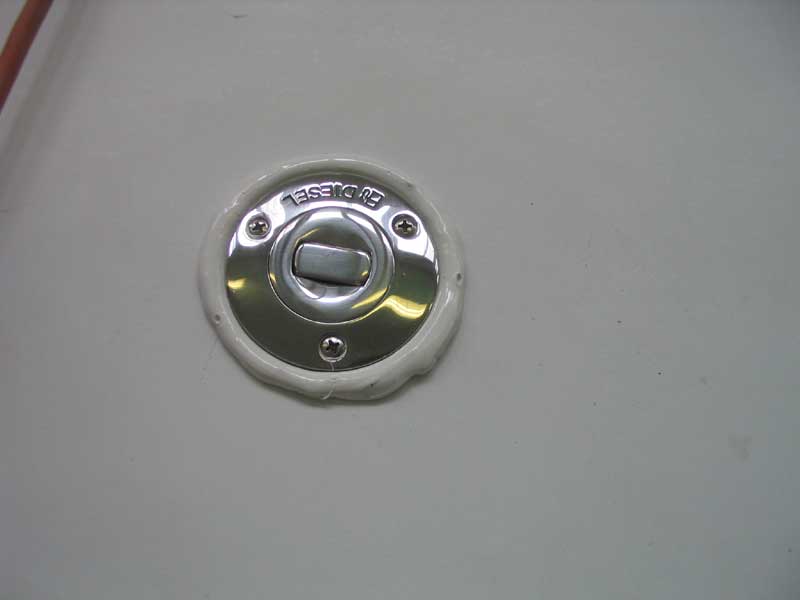 Next,
I installed the fitting in a heavy bed of polysulfide, coating all
surfaces, and fastened it in place with three #12 oval head screws.
I cleaned up the excess caulk, and continued belowdecks by cutting and
installing the fuel fill hose on the underside of the fitting, clamping
it securely. Next,
I installed the fitting in a heavy bed of polysulfide, coating all
surfaces, and fastened it in place with three #12 oval head screws.
I cleaned up the excess caulk, and continued belowdecks by cutting and
installing the fuel fill hose on the underside of the fitting, clamping
it securely. |
|
|
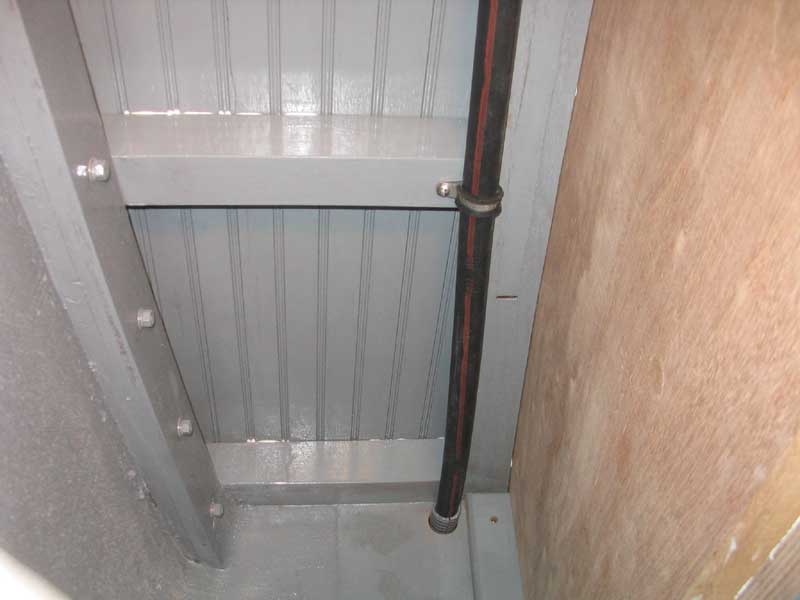 I
ran the 5/8" vent line from the fuel tank to the transom, securing it
along the way with cushion clamps as required. I ran the line up
beneath the starboard sidedeck, and where the hose passed through the
after bulkhead I added some split hose for chafe protection. I
ran the 5/8" vent line from the fuel tank to the transom, securing it
along the way with cushion clamps as required. I ran the line up
beneath the starboard sidedeck, and where the hose passed through the
after bulkhead I added some split hose for chafe protection. |
|
|
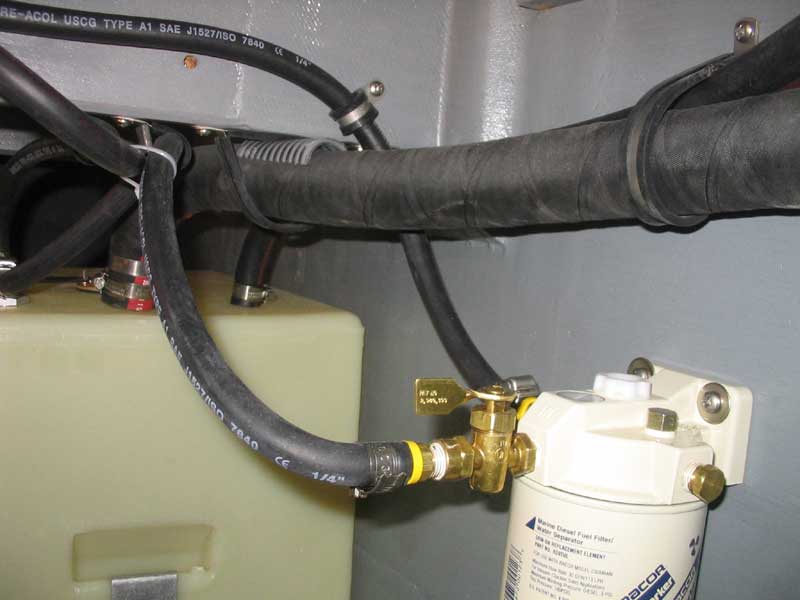 After
some consideration and several mockups, I decided to mount the fuel
filter on the forward bulkhead, just to starboard of the tank--and out
of the way, yet easily accessible, location. On the inlet of the
filter, I installed a bronze shutoff valve, and installed the
appropriate nipple on the outlet. I sealed the threaded fuel
fittings with pipe dope. After
some consideration and several mockups, I decided to mount the fuel
filter on the forward bulkhead, just to starboard of the tank--and out
of the way, yet easily accessible, location. On the inlet of the
filter, I installed a bronze shutoff valve, and installed the
appropriate nipple on the outlet. I sealed the threaded fuel
fittings with pipe dope. |
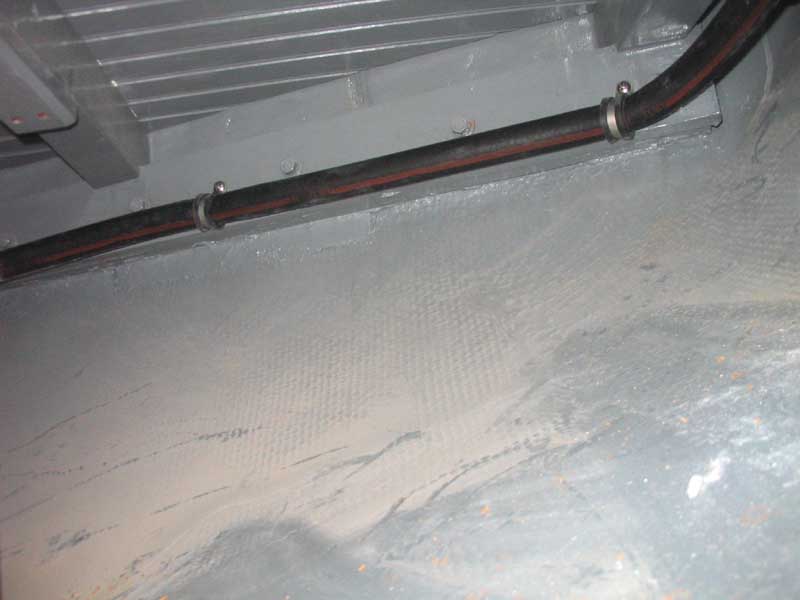
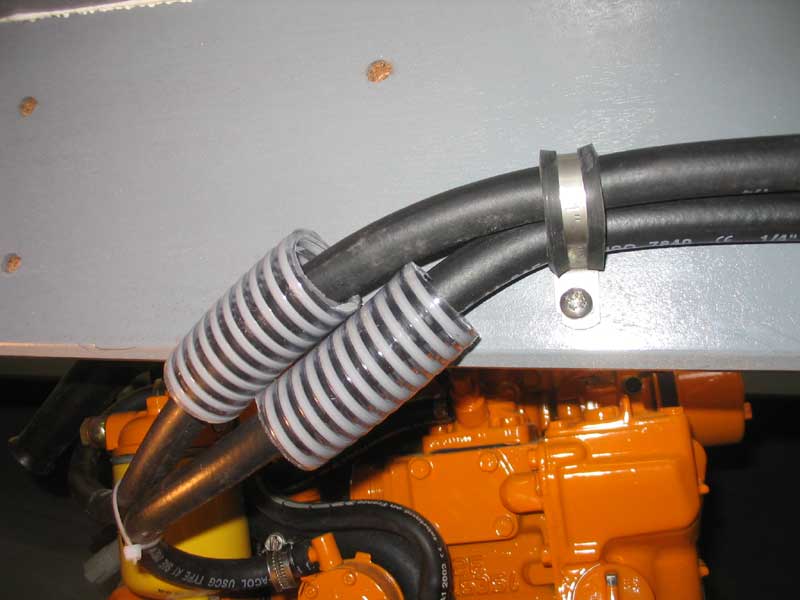
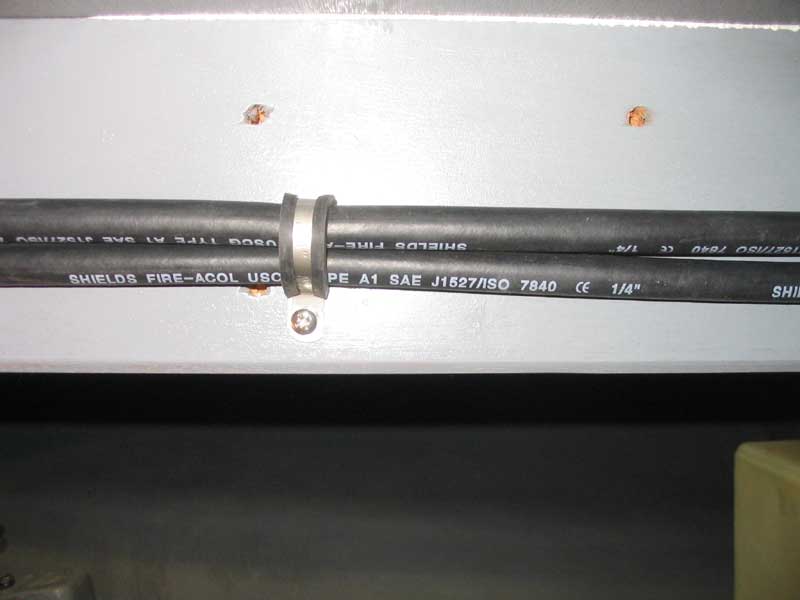 With
the filter mounted, I ran the supply and return lines as required,
keeping the lines neatly secured and out of the way as much as possible.
I was able to make the runs to the engine and back on the back side of
the nearest cockpit support beam, hiding the lines from view--and from
accidental damage. I added some chafe protection where required,
such as where the hoses made the turn beneath the beam at the after end
when they ran out to the engine. With
the filter mounted, I ran the supply and return lines as required,
keeping the lines neatly secured and out of the way as much as possible.
I was able to make the runs to the engine and back on the back side of
the nearest cockpit support beam, hiding the lines from view--and from
accidental damage. I added some chafe protection where required,
such as where the hoses made the turn beneath the beam at the after end
when they ran out to the engine. |
 Surprisingly,
the whole process--from tank receipt to installation to conceiving,
running and securing the various hoses--took nearly an entire day, but
was great fun and very satisfying. Surprisingly,
the whole process--from tank receipt to installation to conceiving,
running and securing the various hoses--took nearly an entire day, but
was great fun and very satisfying.
|
|
Back to the Main Menu> |