
|
|
~MENU~ |
| Home |
| The Concept |
| The Boat |
| Bringing Her Home |
|
Weekly Progress Log |
|
Daysailor Projects |
| The Boat Barn |
| Resources |
| Other Sites |
| Email Tim |
|
|
|
From a Bare Hull: The Deck (Page 4) |
|
|
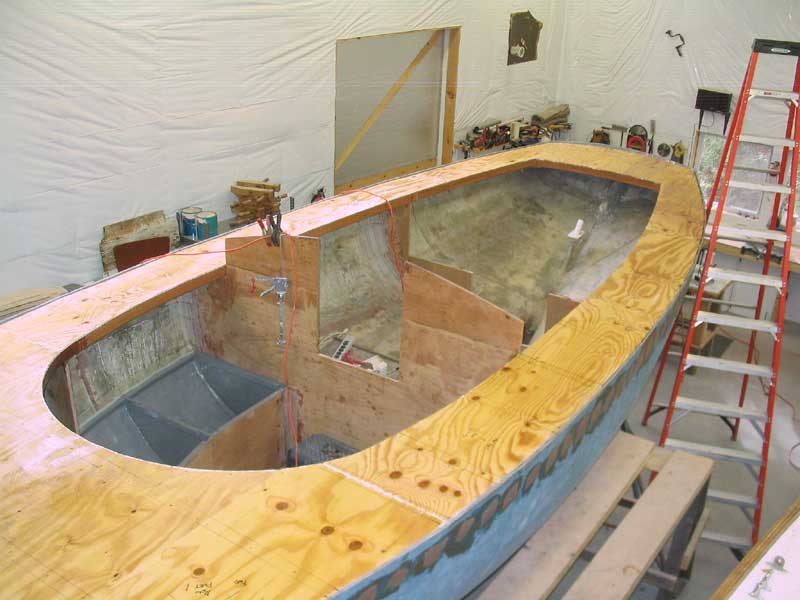
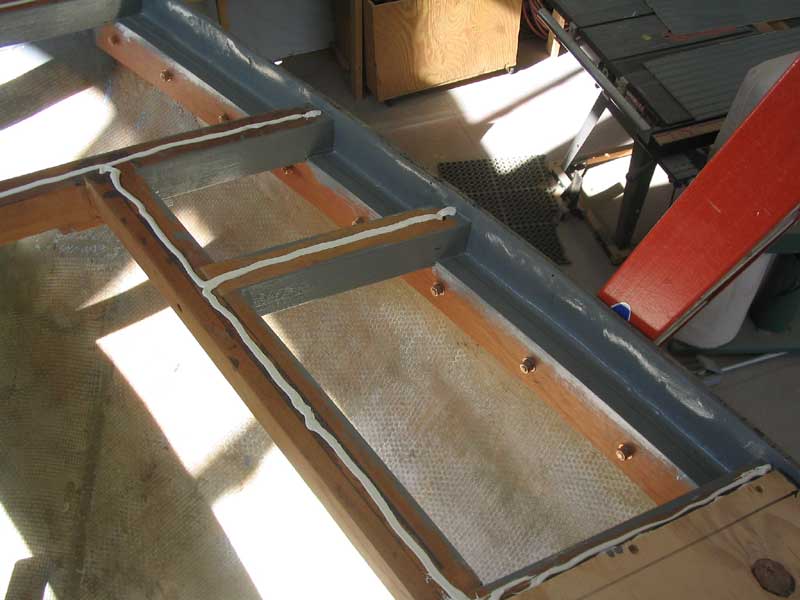 After
double-checking the panels' fit, I permanently installed them, one at a
time. I laid down a bead of 5200 adhesive on the center of each deck
beam, and on the carlins, trying to keep the bead of such a size as to
minimize squeezeout beneath when the panels were installed. After
double-checking the panels' fit, I permanently installed them, one at a
time. I laid down a bead of 5200 adhesive on the center of each deck
beam, and on the carlins, trying to keep the bead of such a size as to
minimize squeezeout beneath when the panels were installed.
|
 Then,
I carefully laid the panel into place on the beams, aligned with some
reference marks I had made earlier. I secured the panels with bronze
screws into the beams, pre-drilling and countersinking so the heads would
remain flush. In this manner, I installed the four after panels.
The other panels would have to wait for installation until the painting was
complete. Then,
I carefully laid the panel into place on the beams, aligned with some
reference marks I had made earlier. I secured the panels with bronze
screws into the beams, pre-drilling and countersinking so the heads would
remain flush. In this manner, I installed the four after panels.
The other panels would have to wait for installation until the painting was
complete.
|
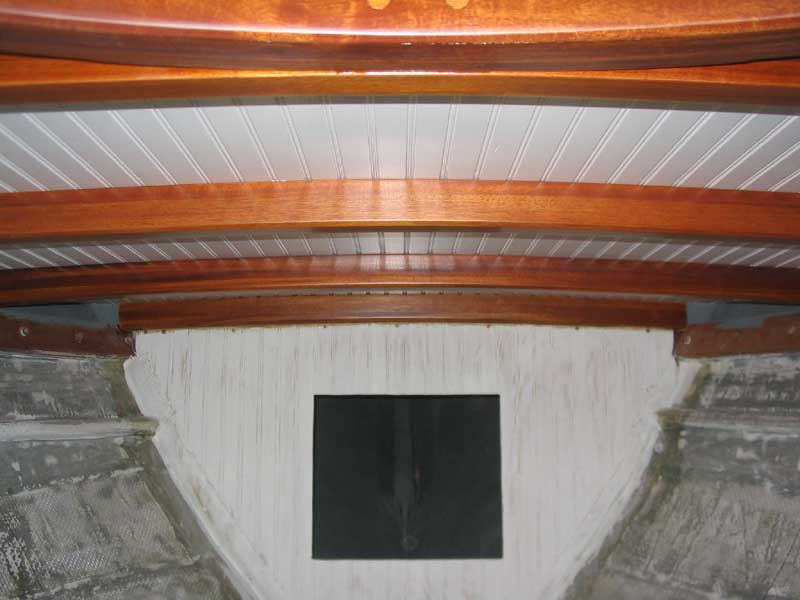
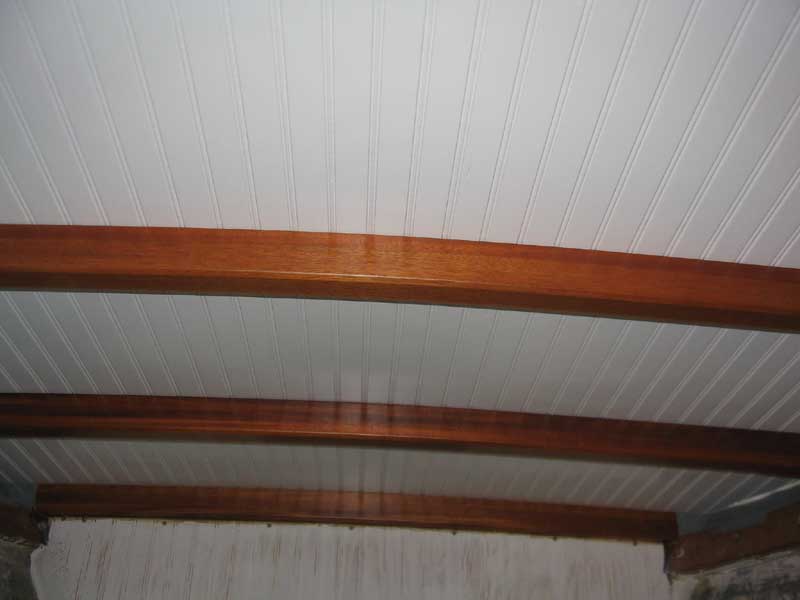
 Over
the next several days, I continued working on the forward deck
panels. Since they would be exposed in the finished boat, I wanted the
beaded surface to be as smooth as possible, and with a fine paint
finish. I ended up applying three finish coats of semi-gloss paint
above two coats of primer, sanding between each coat. I applied the
paint with a mohair roller and tipped it off with a good china bristle
brush, ensuring that there was adequate thinner in the paint for good
leveling. Over
the next several days, I continued working on the forward deck
panels. Since they would be exposed in the finished boat, I wanted the
beaded surface to be as smooth as possible, and with a fine paint
finish. I ended up applying three finish coats of semi-gloss paint
above two coats of primer, sanding between each coat. I applied the
paint with a mohair roller and tipped it off with a good china bristle
brush, ensuring that there was adequate thinner in the paint for good
leveling.
|
|
|
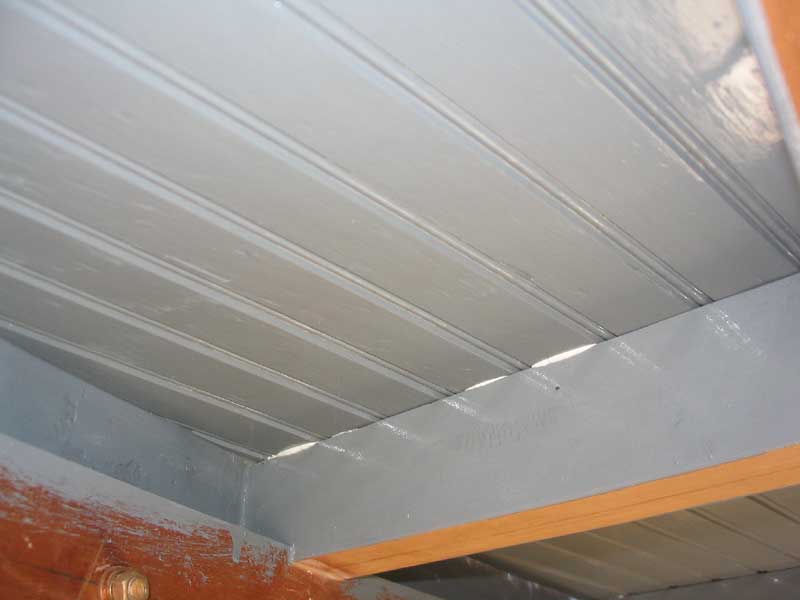
 The
effect of the semi-gloss white beadboard over the satin-varnished mahogany
deck beams was stunning, and exactly what I had envisioned. I was
extremely pleased to see the end result. The
effect of the semi-gloss white beadboard over the satin-varnished mahogany
deck beams was stunning, and exactly what I had envisioned. I was
extremely pleased to see the end result.
|
|
|
 Later, when the epoxy "hot coat"
had cured, I washed the surface with water and a Scotch-Brite pad to remove
any amine blush from the surface before proceeding. I dried and cleaned the surface, and was ready to proceed with the next step. Later, when the epoxy "hot coat"
had cured, I washed the surface with water and a Scotch-Brite pad to remove
any amine blush from the surface before proceeding. I dried and cleaned the surface, and was ready to proceed with the next step.
|
|
|
 Next,
I
Next,
I