|
| |
|
From a Bare
Hull: The Deck
(Page 3)
|
|
Sheathing the Decks: Underlayment
My specifications for the decks included two layers of plywood
sheathing: the first layer, which would be visible from the interior
of the boat, was to be painted beadboard paneling, with a second layer of
marine, BS-1088 Meranti plywood above. The entire deck was to be
sheathed in fiberglass when complete.
I briefly struggled with the
decision to use an interior grade, relatively low-quality plywood in the
decks (the fir beadboard ply), but ultimately I decided that as a
nonstructural installation, and with careful construction practice, there
was no reason to be concerned in this instance. The killer of most
deck constructions--cored or plywood--is when water is allowed to somehow
penetrate these products. Therefore, I'd have to ensure that
the plywood would forever remain dry. |
 I
began with a stack of beadboard plywood, obtained from the local home
center. This material, built of fir and similar in
appearance and construction to ordinary AC plywood, is 11/32" thick and
features the appearance of beaded boards on the good side. Designed to
be painted, the heavy grain pattern, with appropriate coats of primer and
topcoats, disappears, leaving behind a smooth, attractive surface. I
planned to cut the various pieces needed to shape, and then remove them for
priming and painting before final installation. I
began with a stack of beadboard plywood, obtained from the local home
center. This material, built of fir and similar in
appearance and construction to ordinary AC plywood, is 11/32" thick and
features the appearance of beaded boards on the good side. Designed to
be painted, the heavy grain pattern, with appropriate coats of primer and
topcoats, disappears, leaving behind a smooth, attractive surface. I
planned to cut the various pieces needed to shape, and then remove them for
priming and painting before final installation.
|
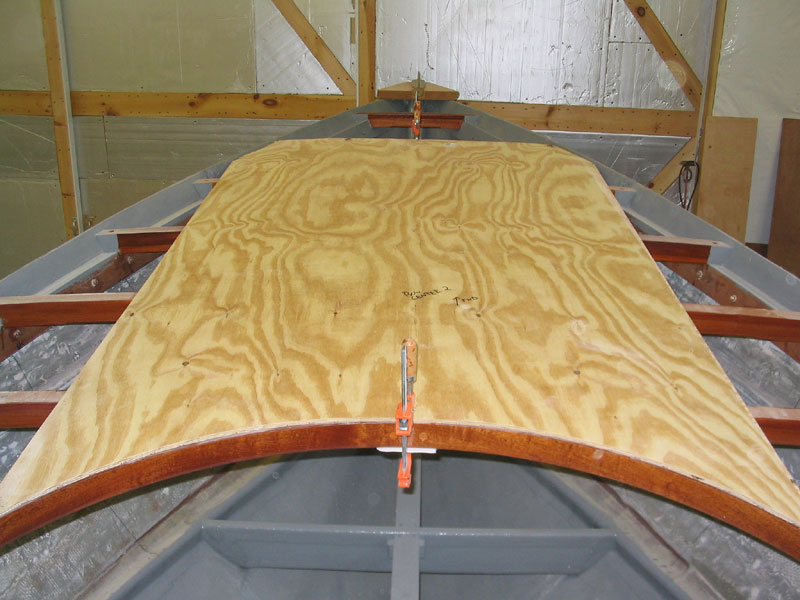
 With
a full sheet in hand, I began at the bow. I marked the center of the
sheet, which turned out to be located at one of the beads, with 15
"boards" on each side of the center bead, and aligned the plywood
on the deck beams to determine its final location. To
allow the sheet to fall properly on the deck beams, and also to extend aft
far enough so that its full width could be used in way of the curved cabin
trunk beam, the front edge ended up on the second deck beam, leaving a short
space in the chainlocker for a smaller piece of plywood. With
a full sheet in hand, I began at the bow. I marked the center of the
sheet, which turned out to be located at one of the beads, with 15
"boards" on each side of the center bead, and aligned the plywood
on the deck beams to determine its final location. To
allow the sheet to fall properly on the deck beams, and also to extend aft
far enough so that its full width could be used in way of the curved cabin
trunk beam, the front edge ended up on the second deck beam, leaving a short
space in the chainlocker for a smaller piece of plywood.
The front corners of the sheet overhung the
sides of the boat, so I marked the overhangs for trimming. I also
traced the contour of the aft end where it overhung the curved deck
beam. With the markings complete, I trimmed the excess with a jigsaw.
|
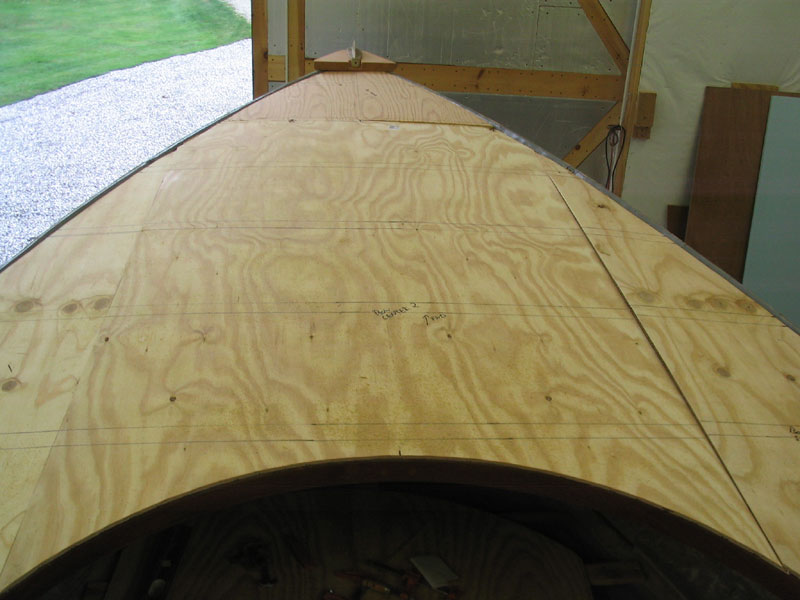
 Satisfied
with the fit, I continued on, cutting and fitting adjacent sheets as
needed. The plywood comes with rabbetted edges to allow adjoining
sheets to overlap in a way such as to make the seams invisible on the beaded
side, so on the two partial sheets on either side of the larger centerline
piece, I concentrated on ensuring that the seams fit tightly. I didn't
overly concern myself with a perfect fit along the hull, as this area would
be invisible inside the finished boat, and also was structurally unnecessary
for a perfect fit to be achieved. Waterproofing of the decks would be
achieved with fiberglass sheathing. Satisfied
with the fit, I continued on, cutting and fitting adjacent sheets as
needed. The plywood comes with rabbetted edges to allow adjoining
sheets to overlap in a way such as to make the seams invisible on the beaded
side, so on the two partial sheets on either side of the larger centerline
piece, I concentrated on ensuring that the seams fit tightly. I didn't
overly concern myself with a perfect fit along the hull, as this area would
be invisible inside the finished boat, and also was structurally unnecessary
for a perfect fit to be achieved. Waterproofing of the decks would be
achieved with fiberglass sheathing.
|
|
 Through
the rest of one afternoon, I completed the foredeck and sidedecks to just
aft of amidships. The next morning, I completed the remainder of the
decks, from amidships aft to the transom. Through
the rest of one afternoon, I completed the foredeck and sidedecks to just
aft of amidships. The next morning, I completed the remainder of the
decks, from amidships aft to the transom.
|
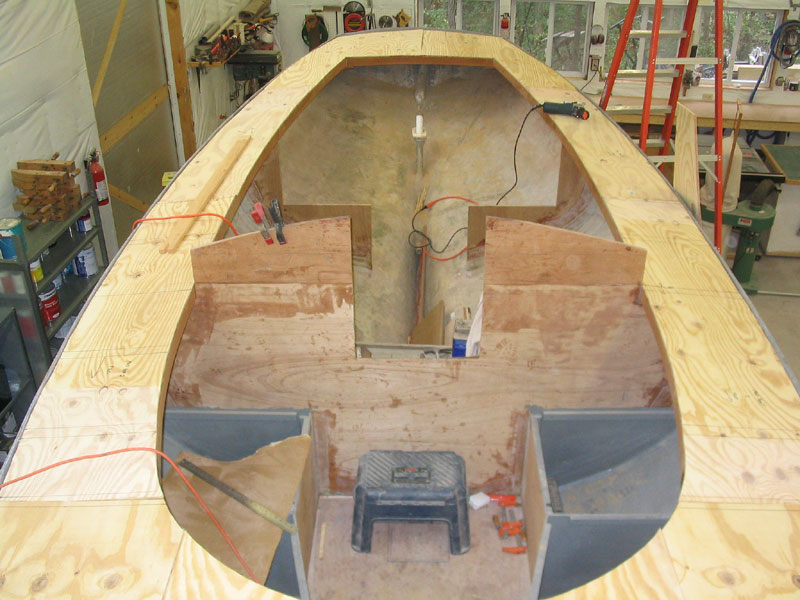
 When
all pieces were cut, I marked the locations of the deck beams across the
entire widths of the various panels, to provide reference later when
attaching the plywood permanently to the beams. I also noted a few
areas where the panels spanned certain bulkheads; I planned to paint only
those areas in the cabin white, while I'd paint the remaining sections gray
to match the surrounding hull and locker areas. When
all pieces were cut, I marked the locations of the deck beams across the
entire widths of the various panels, to provide reference later when
attaching the plywood permanently to the beams. I also noted a few
areas where the panels spanned certain bulkheads; I planned to paint only
those areas in the cabin white, while I'd paint the remaining sections gray
to match the surrounding hull and locker areas.
|
|
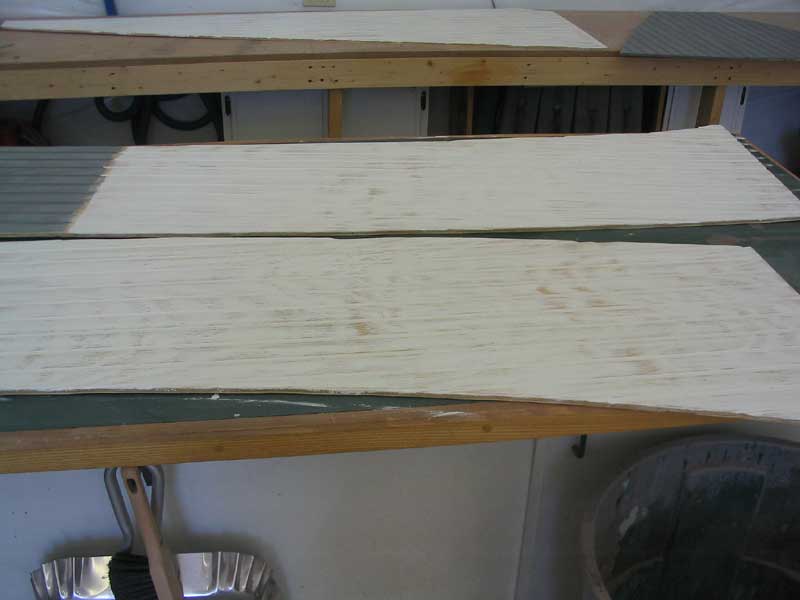
 Finally,
I removed all 10 panels down to the floor of the shop, where I sanded each
panel with 220 grit paper to smooth the surface before painting. After
vacuuming up the dust, I continued by rolling and tipping the first coats of
gray paint in most areas, and white primer on the sections that were to be
exposed to the cabin. Several of the panels required one gray section
and one white section, depending on their location relative to the
cabin. Finally,
I removed all 10 panels down to the floor of the shop, where I sanded each
panel with 220 grit paper to smooth the surface before painting. After
vacuuming up the dust, I continued by rolling and tipping the first coats of
gray paint in most areas, and white primer on the sections that were to be
exposed to the cabin. Several of the panels required one gray section
and one white section, depending on their location relative to the
cabin.
|
 I left the paint to dry overnight before
continuing, after which I sanded them with 220 grit and prepared for a
second coat of gray paint and white primer. With the second coat, I
deemed the gray areas complete, but the white, visible areas were just
getting started. Again, I sanded the primer thoroughly, all the time
working to smooth out the beadboard as much as possible. Each coat of
paint would fill the grain further, and make for a more pleasing appearance. I left the paint to dry overnight before
continuing, after which I sanded them with 220 grit and prepared for a
second coat of gray paint and white primer. With the second coat, I
deemed the gray areas complete, but the white, visible areas were just
getting started. Again, I sanded the primer thoroughly, all the time
working to smooth out the beadboard as much as possible. Each coat of
paint would fill the grain further, and make for a more pleasing appearance.
|
 Next, I applied the first of several coats of
white semi-gloss enamel (Interlux). I thinned the paint to promote
flow and elimination of brush marks. Sanding between each coat, I
applied several coats of paint, until the panels looked and felt the way I
wanted. With that, I moved on to the final installation of the panels. Next, I applied the first of several coats of
white semi-gloss enamel (Interlux). I thinned the paint to promote
flow and elimination of brush marks. Sanding between each coat, I
applied several coats of paint, until the panels looked and felt the way I
wanted. With that, I moved on to the final installation of the panels.
Continue>
|
|


