|
| |
|
From a Bare
Hull: The Cockpit
(Page 3)
|
|
Cockpit
Sole: Initial Fitting
I was excited to begin installation of the cockpit sole; with all the
beams and understructure permanently and completely installed, there was
no reason to wait. Granted, there were several tasks in the bilge
area beneath the sole that would require attending to, but I didn't plan
to permanently install the sole just yet, so I could remove it as needed
to complete these other chores. |
|
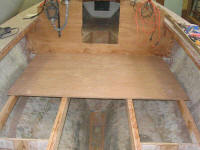 I had three sheets of 18mm (3/4")
Meranti plywood in stock for the cockpit
sole; the sole is over 6' wide at its widest, and over 11' in total
length. I had stored the plywood at the front of the shop, and now
moved a sheet of it to the work area for rough cutting. I was amazed
by the sheer weight of the sheet; wrestling it onto the bench for cutting
was a challenge. I was glad there were only three to deal with. I had three sheets of 18mm (3/4")
Meranti plywood in stock for the cockpit
sole; the sole is over 6' wide at its widest, and over 11' in total
length. I had stored the plywood at the front of the shop, and now
moved a sheet of it to the work area for rough cutting. I was amazed
by the sheer weight of the sheet; wrestling it onto the bench for cutting
was a challenge. I was glad there were only three to deal with.
|
|
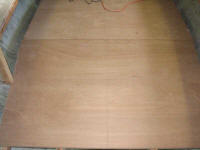 I cut the first sheet to just over 6', and hefted it into the boat.
I intentionally left the sheets overlong to extend beyond the edge beams
for later trimming. Once the first sheet was in place, I repeated
the process with the second sheet, and then the third (and final) sheet. I cut the first sheet to just over 6', and hefted it into the boat.
I intentionally left the sheets overlong to extend beyond the edge beams
for later trimming. Once the first sheet was in place, I repeated
the process with the second sheet, and then the third (and final) sheet.
|
|
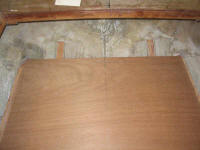 The
third sheet required additional cuts for a good fit and to allow the sheet
to conform to the curvature of the hull. Since the area in question
would eventually be hidden from view (except from inside the eventual
lazarette), I could have just cut the sheet off square at a point
vertically beneath the deck edge above, but I thought it would make a
nicer job to continue the plywood until it died out naturally into the
hull. Therefore, it took several scribes and recuts before the sheet
slipped into place properly. The
third sheet required additional cuts for a good fit and to allow the sheet
to conform to the curvature of the hull. Since the area in question
would eventually be hidden from view (except from inside the eventual
lazarette), I could have just cut the sheet off square at a point
vertically beneath the deck edge above, but I thought it would make a
nicer job to continue the plywood until it died out naturally into the
hull. Therefore, it took several scribes and recuts before the sheet
slipped into place properly.
|
|
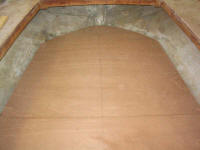 With
all three sheets in place and overhanging the outside edge of the curved
edge beams, it was time to cut off the excess. I temporarily secured
the sheets to the beams with a few drywall screws, and then chucked a
straight-cutting pattern bit into my big router; with this, I trimmed the
overhanging excess flush with the outer edges of the beams. The
router couldn't get right up to the bulkheads, so when the major trimming
was complete I removed the sheets and finished the cuts with a handsaw and
jigsaw. With
all three sheets in place and overhanging the outside edge of the curved
edge beams, it was time to cut off the excess. I temporarily secured
the sheets to the beams with a few drywall screws, and then chucked a
straight-cutting pattern bit into my big router; with this, I trimmed the
overhanging excess flush with the outer edges of the beams. The
router couldn't get right up to the bulkheads, so when the major trimming
was complete I removed the sheets and finished the cuts with a handsaw and
jigsaw.
|
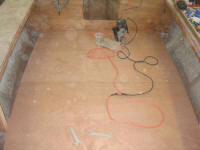 It
was weird standing on the new cockpit sole, after so much time clambering
around inside the empty hull. The rough fitting of the sole
reinforced how large the finished cockpit would be--quite impressive,
really. It
was weird standing on the new cockpit sole, after so much time clambering
around inside the empty hull. The rough fitting of the sole
reinforced how large the finished cockpit would be--quite impressive,
really. |
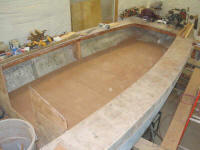 I
had several tasks to complete before I could consider permanently
installing the plywood cockpit sole, including some additional
construction projects in the engine room/bilge, some painting, and
figuring out how to configure the sole hatches that would provide access
to the engine room after the sole was installed. All these tasks
were next on the list, as the sole had to be permanently installed before
I could continue work on the cockpit sides. I
had several tasks to complete before I could consider permanently
installing the plywood cockpit sole, including some additional
construction projects in the engine room/bilge, some painting, and
figuring out how to configure the sole hatches that would provide access
to the engine room after the sole was installed. All these tasks
were next on the list, as the sole had to be permanently installed before
I could continue work on the cockpit sides. |
|
Cockpit Hatches
Now that I had a nice cockpit sole, the next
step was to cut big holes in it, to provide access hatches for the future
engine room and to the bilge area beneath. After some thought and
consideration, I decided that the hatch would comprise the center portion
of the sole, running from two feet aft of the amidships bulkhead all the
way through the second sheet of sole plywood--a total of six feet of
hatch, in two pieces. This would allow access, when the hatches were
removed, to the entire engine, shaft, and stuffing box, as well as to the
forward end of the bilge where I planned to install the fuel tank and
batteries.
|
|
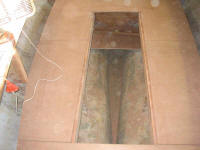
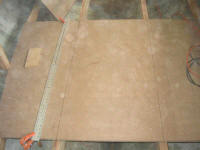 While
I hadn't worked out all the hatch details (such as how to make them
watertight), I knew that I had to make these cuts in the sole regardless.
I spent some time laying out the cut lines in the center of the two
centerline longitudinal support beams, and then cut the hatches out of the
plywood with my circular saw. I clamped a straightedge to the
plywood to ensure a straight cut. While
I hadn't worked out all the hatch details (such as how to make them
watertight), I knew that I had to make these cuts in the sole regardless.
I spent some time laying out the cut lines in the center of the two
centerline longitudinal support beams, and then cut the hatches out of the
plywood with my circular saw. I clamped a straightedge to the
plywood to ensure a straight cut.
|
|
|
|
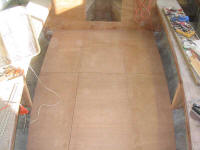
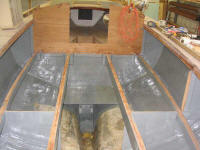 With the hatches cut, I was ready to move onto
the final steps before permanently installing the cockpit sole:
painting out the beams and inside of the hull. For this, I used
Interlux Bilgekote gray, and applied one coat with brush and roller to
most of the inside hull surfaces and the sides of the beams, as well as
the bulkheads below sole height. I left some areas unpainted for
now, most notably the area where the engine foundation would be built
later. With the hatches cut, I was ready to move onto
the final steps before permanently installing the cockpit sole:
painting out the beams and inside of the hull. For this, I used
Interlux Bilgekote gray, and applied one coat with brush and roller to
most of the inside hull surfaces and the sides of the beams, as well as
the bulkheads below sole height. I left some areas unpainted for
now, most notably the area where the engine foundation would be built
later.
|
|
Painting coincided with the Christmas rush, keeping me out of the shop for
a few days, so the paint had time to dry thoroughly before I needed to
walk on the newly-painted areas. My next step was to permanently
install the cockpit sole pieces, which I had to do before I could continue
with many other steps in the overall construction process.
|
|
I installed the sole pieces in a bead of 3M 5200 adhesive, a bead of which
I laid on the tops of the beams as needed. Then, I screwed the sole
to the beams with bronze screws, completing its rough installation.
Continue with the
cockpit> |
|

 It
was weird standing on the new cockpit sole, after so much time clambering
around inside the empty hull. The rough fitting of the sole
reinforced how large the finished cockpit would be--quite impressive,
really.
 I
had several tasks to complete before I could consider permanently
installing the plywood cockpit sole, including some additional
construction projects in the engine room/bilge, some painting, and
figuring out how to configure the sole hatches that would provide access
to the engine room after the sole was installed. All these tasks
were next on the list, as the sole had to be permanently installed before
I could continue work on the cockpit sides.
I
had several tasks to complete before I could consider permanently
installing the plywood cockpit sole, including some additional
construction projects in the engine room/bilge, some painting, and
figuring out how to configure the sole hatches that would provide access
to the engine room after the sole was installed. All these tasks
were next on the list, as the sole had to be permanently installed before
I could continue work on the cockpit sides.


