
110 Cookson Lane | Whitefield, ME 04353 | 207-232-7600 | tim@lackeysailing.com
Blue Teal | Friday, June 28, 2013
I began with some deck work, to continue and wrap up some of the ongoing jobs. At the stern, I drilled a 3/4" hole through the epoxy plug I formed in the deck earlier, which would allow passage of the solar panel's MC-4 wire connector, then installed the remainder of the cable clam, leaving enough wire on deck to extend to the top of the support pole and connect with the mating wire on the solar panel itself. Down below, I led the other end of the wire forward to the engine room, where I'd later connect it to the solar controller.
Actually, with the clarity of hindsight and the advance of logic, I realized later that I had made a mistake, and I needed both ends of the cable here, one each for + and -, and that the center of the cable needed to be led forward to be later cut in half and connected to the controller. So I'd correct that problem forthwith.
Back on the foredeck, I used the windlass riser plate to mark and drill the fastener and wiring holes through the epoxy deck plugs. I held off in installation for now, as first I needed to prime the nearby patch, which I did using a two-part epoxy primer.

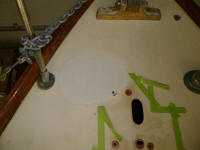
Over an existing hole in the deck, I laid out for a new SS cowl vent and base, and marked and overdrilled the fastener holes before filling them with thickened epoxy; I also filled the abandoned fastener holes leftover from the old vent installation.
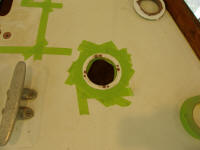
One of the last engine hose connections was for the vented loop in the raw water discharge line, running from the heat exchanger to usual spot just below the high point on the exhaust riser. In the adjacent cockpit locker, I installed a 1" SS vented loop, and connected it with hoses to the engine.


The two bilge pumps on board (electric and manual) had originally been led to the side of the hull, a poor location. The work list called for me to lead these discharges aft to the now-abandoned original engine exhaust fitting. To avoid for now the problems of removing and patching the old fittings in the topsides, and because access to the fittings in question was extremely limited inside the tight locker and above the fuel tank, I capped off short sections of hose with bronze fittings, closing off the old through hulls for now till they could be removed and patched perhaps during some future exterior work phase on the boat. To keep the fittings from banging around or causing issues with the metal tank beneath, I strapped them to a nearby hose.
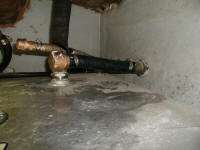
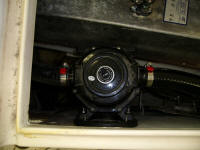
I reversed the bilge pump body to reposition its inlet and outlet for more logical hose connection, then reinstalled it in its original spot before connecting the suction side, which I'd already led to the bilge, and then running a new outlet aft to the lazarette, where I connected it to a bronze tee fitting at the transom outlet. Meanwhile, I led new 3/4" hose from the electric diaphragm bilge pump, located in a galley locker, to the 3/4" side of the bronze tee fitting at the transom.
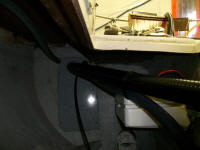


The owner had the idea of mounting an electronics swing-arm mount to the back side of an existing padeye on the cabin bulkhead, which worked well after a minor modification to the base of the swing-arm to accommodate the bolt pattern.


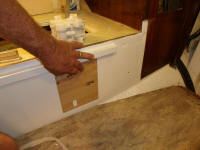
I installed a foot pump for a salt water faucet in the galley in the settee base on the starboard side, a little forward of where a new battery box/step was to be installed. Using a pattern I'd made for these pumps, I drilled the slot for the pump handle, and three bolt holes before bolting the pump in place.
To accommodate the pump's 1/2" hose requirement, I installed a bushing and 1/2" pipe-hose fitting in an existing 3/4" through hull fitting, then installed intake and discharge hoses to and from the pump, leaving excess discharge hose for later connection to the galley faucet, as the galley in this boat featured a removable sink module that was not on hand.


Total Time on This Job Today: 8 hours


