
110 Cookson Lane | Whitefield, ME 04353 | 207-232-7600 | tim@lackeysailing.com
Ashantee | Wednesday, April 8, 2015
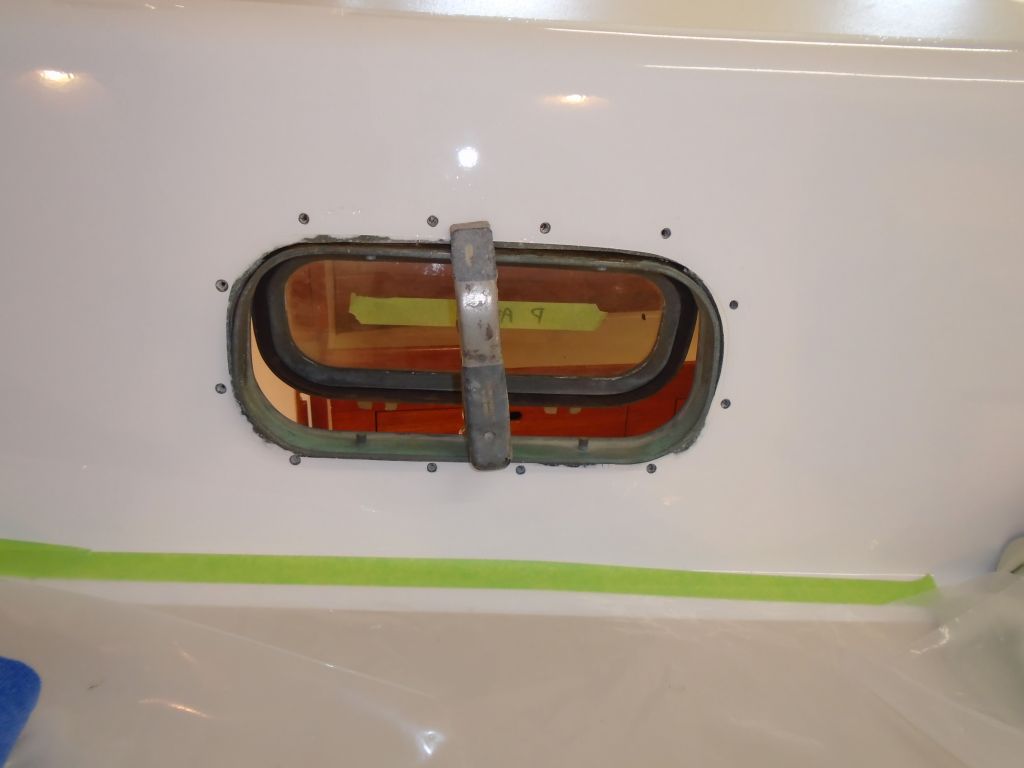
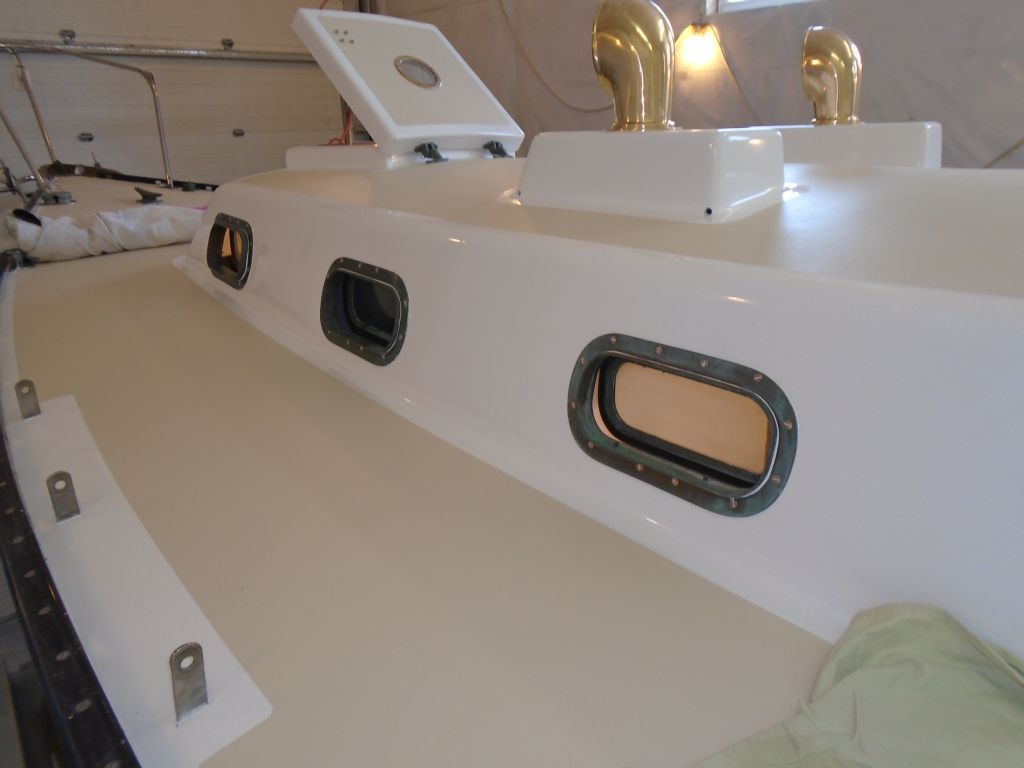
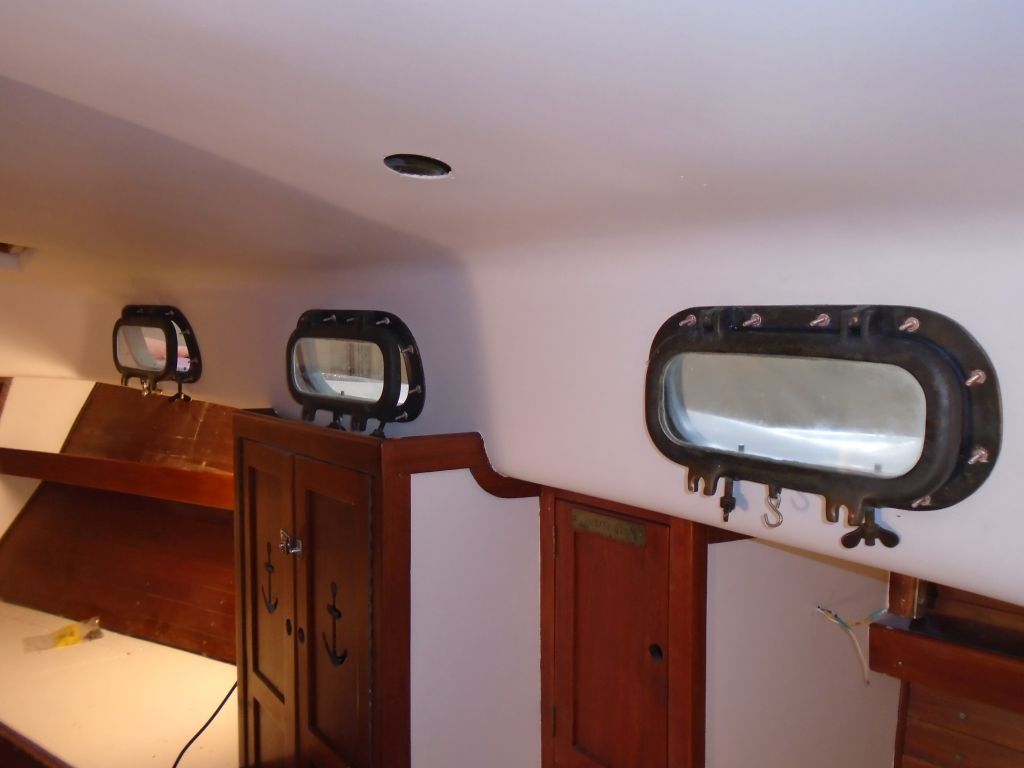
After some initial setup and preparing the materials required, I turned to the opening ports' installation. To begin, I ran a drill bit through all the holes in the cabin side, as some had become partially filled during the deck work earlier. Then, I used a countersink to bore small bevels at all the screw locations, my usual practice to allow a place for extra sealant at the fasteners themselves. I installed protective plastic over the decks to give me a clean work space and prevent a mess from going everywhere.

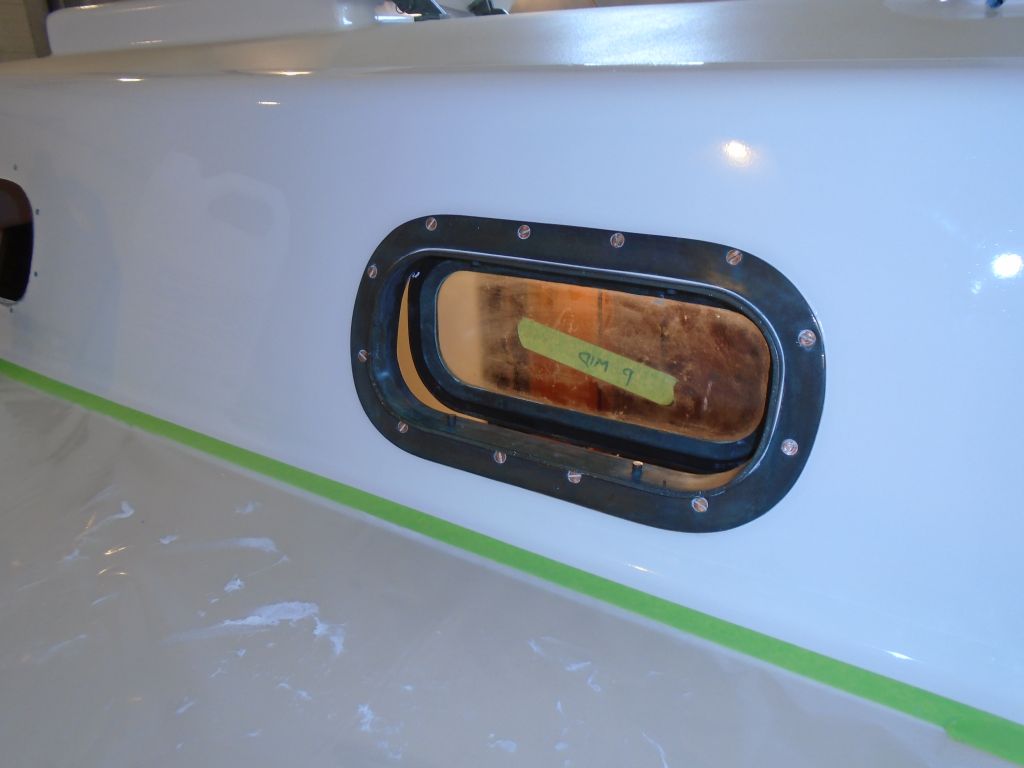
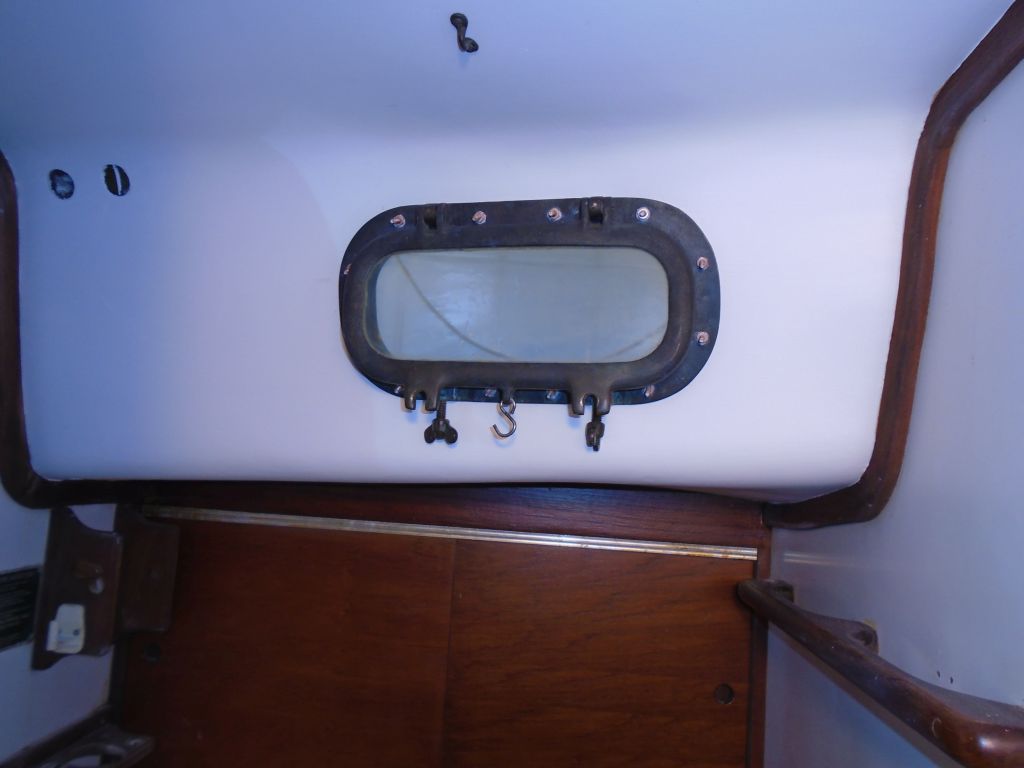
I started on the port side aft, and learned a lot from the first experience. I tried removing the opening part of the port to improve access and make the assembly lighter, but the screws were well fixed and I decided not to press it. I dry-fit the port to test its fit and to determine how best to proceed. The opening was a fairly close fit, but not tight enough to hold the unit in place on its own, so I added a spring clamp at the top, thinking the slim clamp would fit better on the inside of the port between the hinges.
The opening didn't leave a lot of room for sealant around the port body, so although I didn't want to bed the inside part of the port, I decided to add a strip of butyl tape right at the juncture between the inner flange and the spigot.

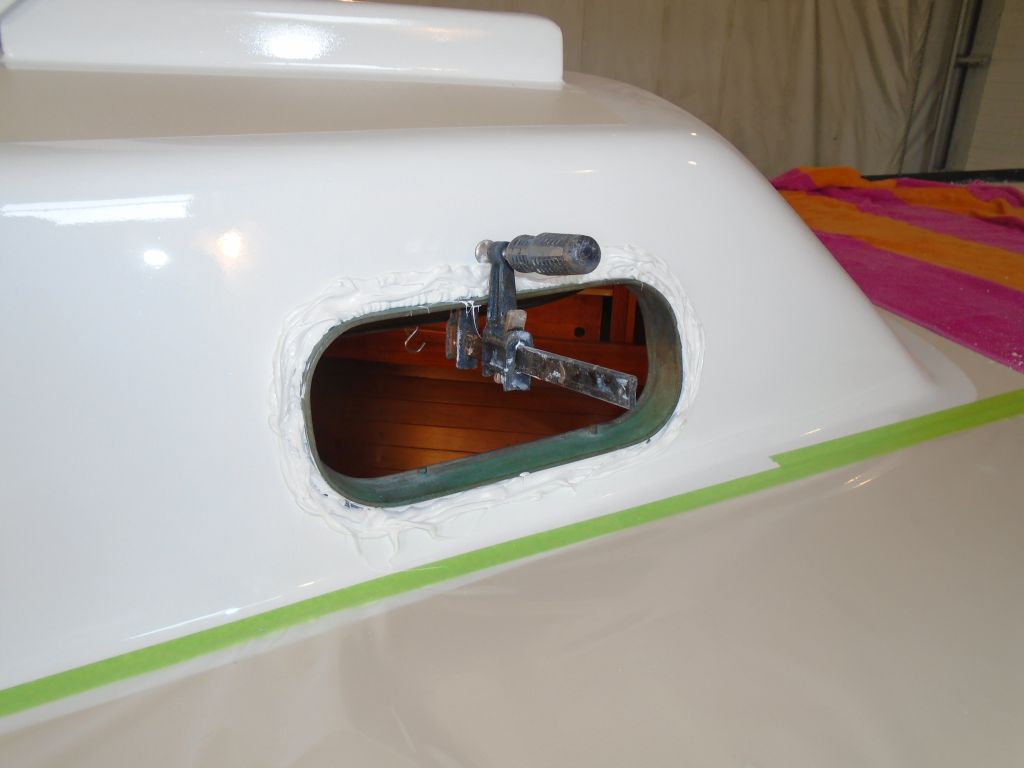
With the port back in place and clamped, I applied sealant around the edges, and then onto the cabin side where the outer trim ring would fit. I was generous with the sealant. Here I began to see how I'd have to do things differently on the other units: I had to remove the clamp to expose all the top for sealant, and this led to some awkward juxtapositioning of the port, my hand, the caulking gun, and the trim ring. Not to mention the camera.
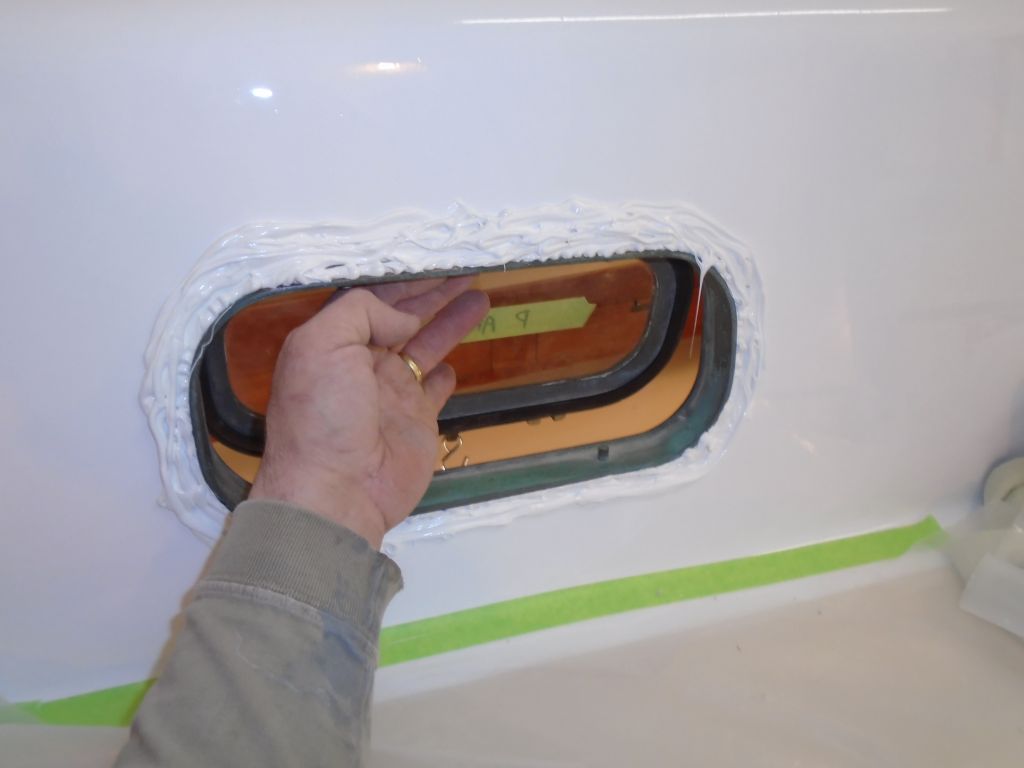

In the event, with some effort--and learning all the while--Igot the trim ring on, and secured with a couple new 10-24 flat head machine screws through the flange, reaching inside to get a couple nuts going first, before inserting the rest of the screws. Then, from inside I installed the remaining nuts and tightened everything as much as possible. To complete the job, I had to reach through the port to hold either the nut or the screw head while tightening from the other side. I first tried this from within, but it was too hard to find the slotted screw heads blindly, so I moved outside and used a small ratchet and socket to hold the nuts within while tightening the screw. Because I couldn't reach the nuts along the top because the opening part of the port was in the way, I used locking pliers to hold those while turning the screws.
This was all a lot less fun than I'd hoped it would be, but I was older and wiser by the end of the first one. It's not like I hadn't done this before, but every boat and specific hardware is different. Several aspects of my first port hadn't proved to be the best option.
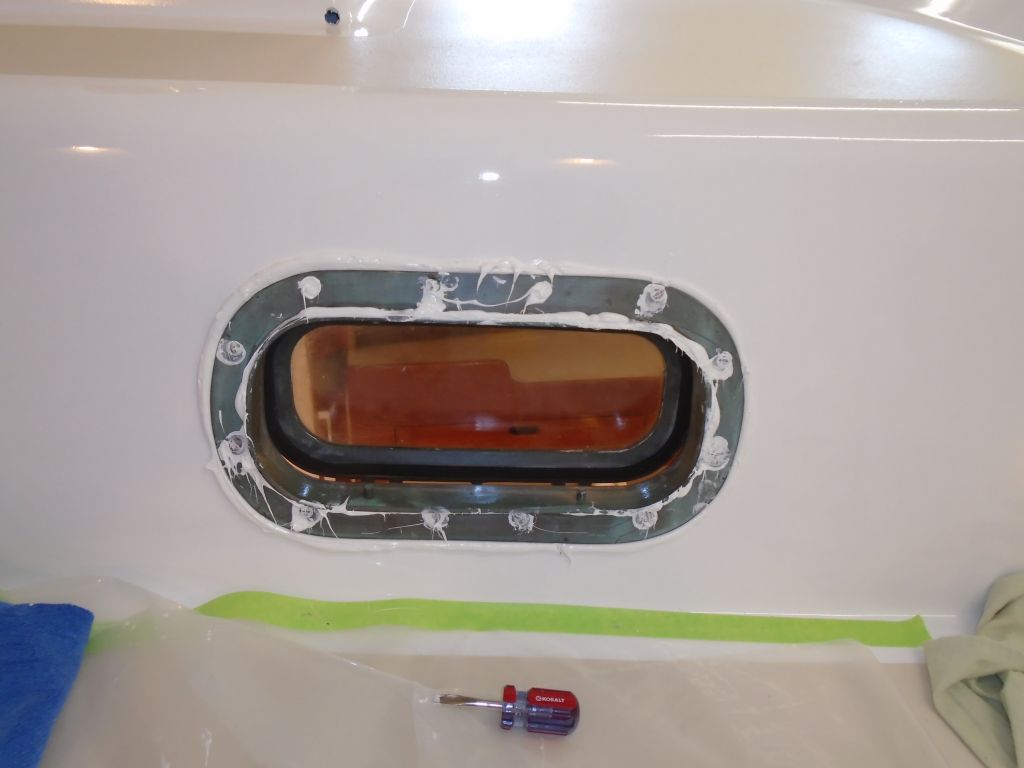
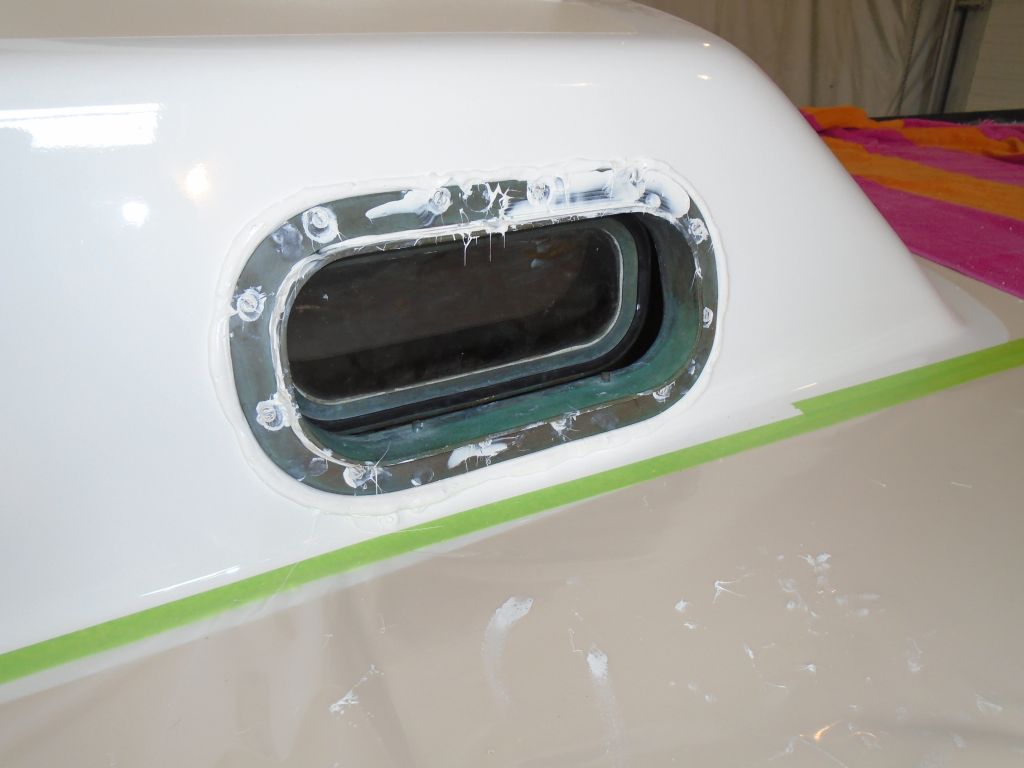
With the port tightly bolted in place, I cleaned up the excess sealant inside and out, and retooled myself for the next five. The bolts were intentionally over-long, and I'd come back later and address the excess.

For the remaining ports, I used a bar clamp to secure the inner body instead of the spring clamp. Not only did this hold the port much more securely, but it also worked better at drawing the port (and the ill-fitting interior liner) more tightly into position. Plus, I could align it so that the outer part of the clamp was above the footprint of the trim ring, allowing me to apply the sealant everywhere while the clamp was in place. And the inner part of the clamp held the opening part of the port out of the way, making the reach-through access easier.
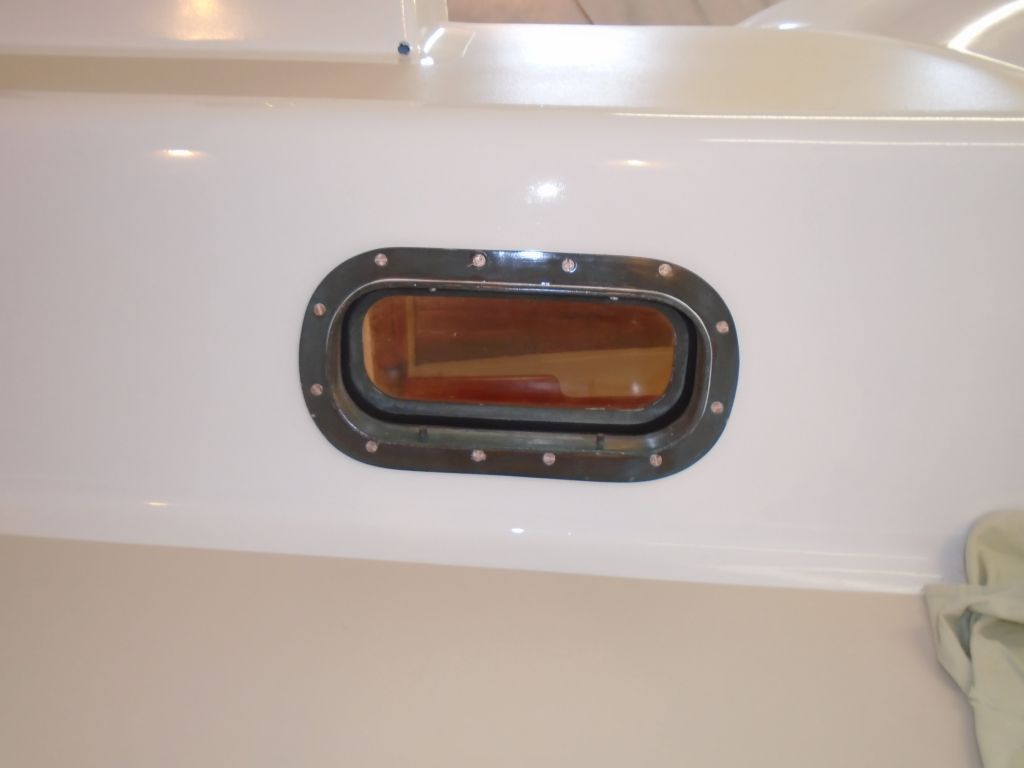
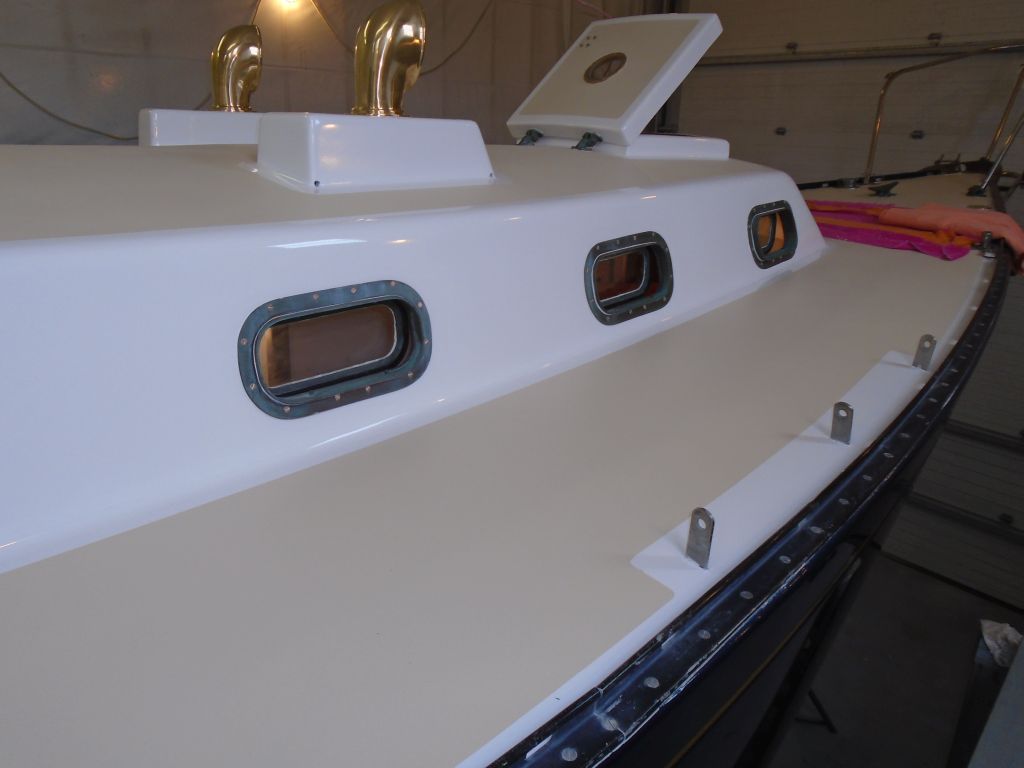
In practice, this worked much better, and I installed the remaining two ports on the port side in about the same time it'd taken me to do the first one.

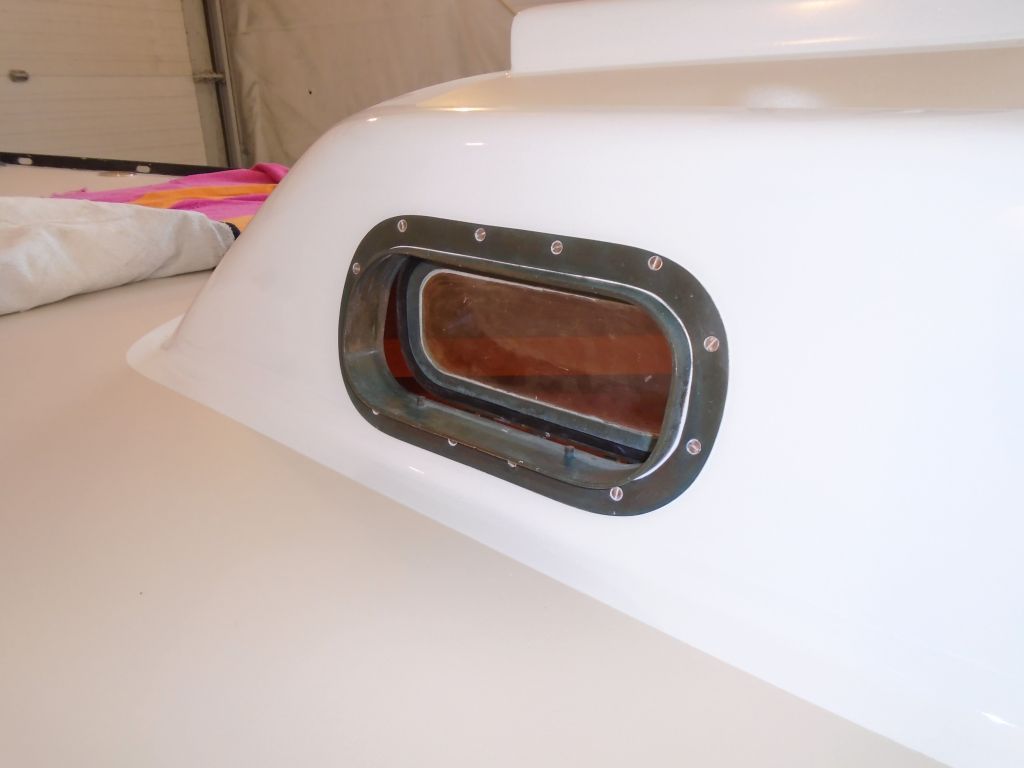
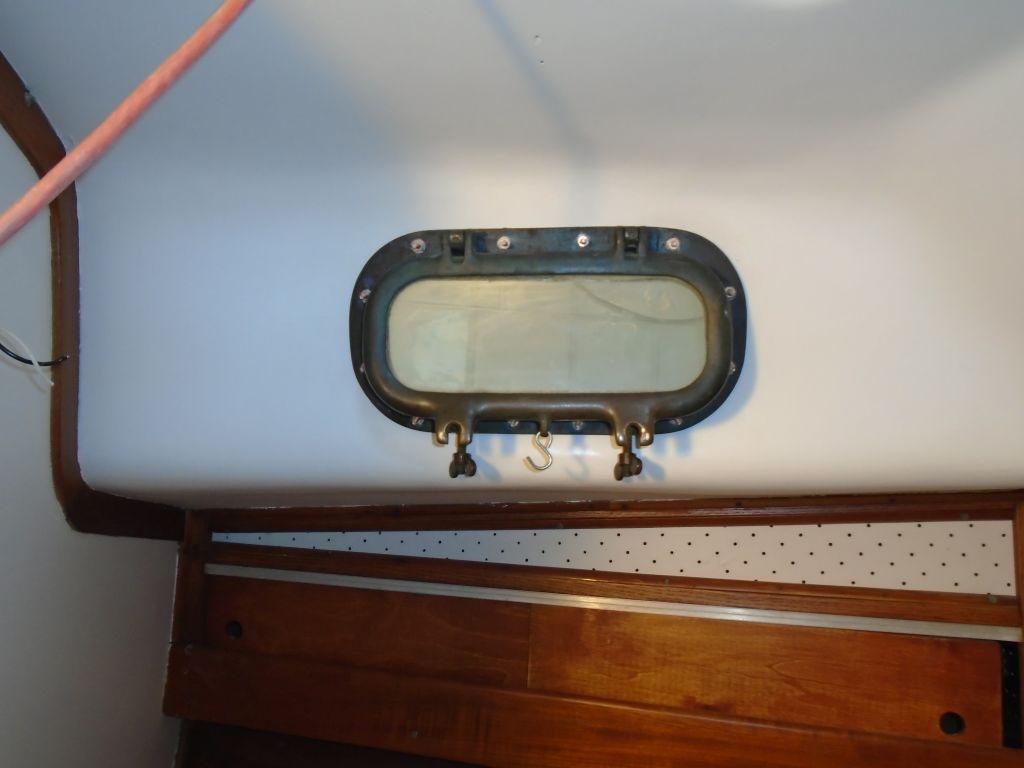
After lunch, I moved my operation to the starboard side, and installed the three ports there. By now, I had the process down pat, and these three ports took about two hours to complete, versus over three for the port side.

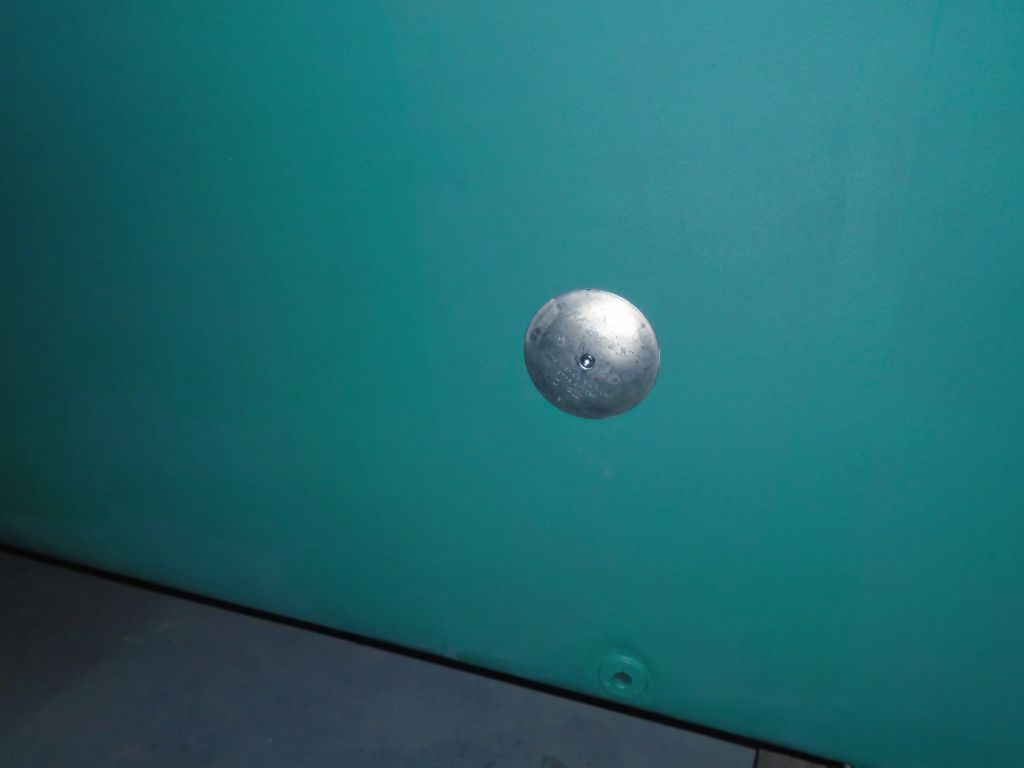
With that complete, I used up what remained of my motivation to take care of two tiny projects. First, I installed a new round zinc on the keel. This oddly-placed zinc was directly connected through the hull to the ship's common bonding system within. The owner requested that the new zinc be larger than the old, so I installed the next-larger size.
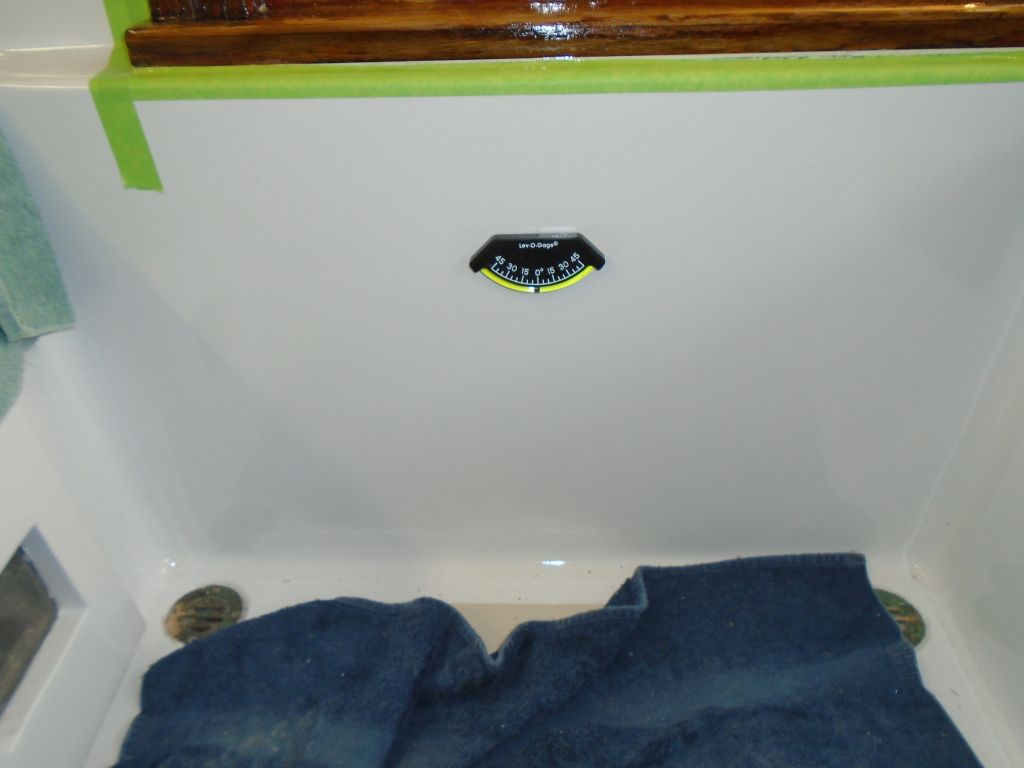
With the boat level, I measured the center of the cockpit well and installed a new inclinometer to replace the broken old one. Self-adhesive, the unit was straightforward to install.
Total Time Billed on This Job Today: 6.75
Hours
0600 Weather Report:
Clear and calm, 20°. Forecast for the day: Partly sunny with increasing clouds and chance of snow overnight, 40°
