Wednesday
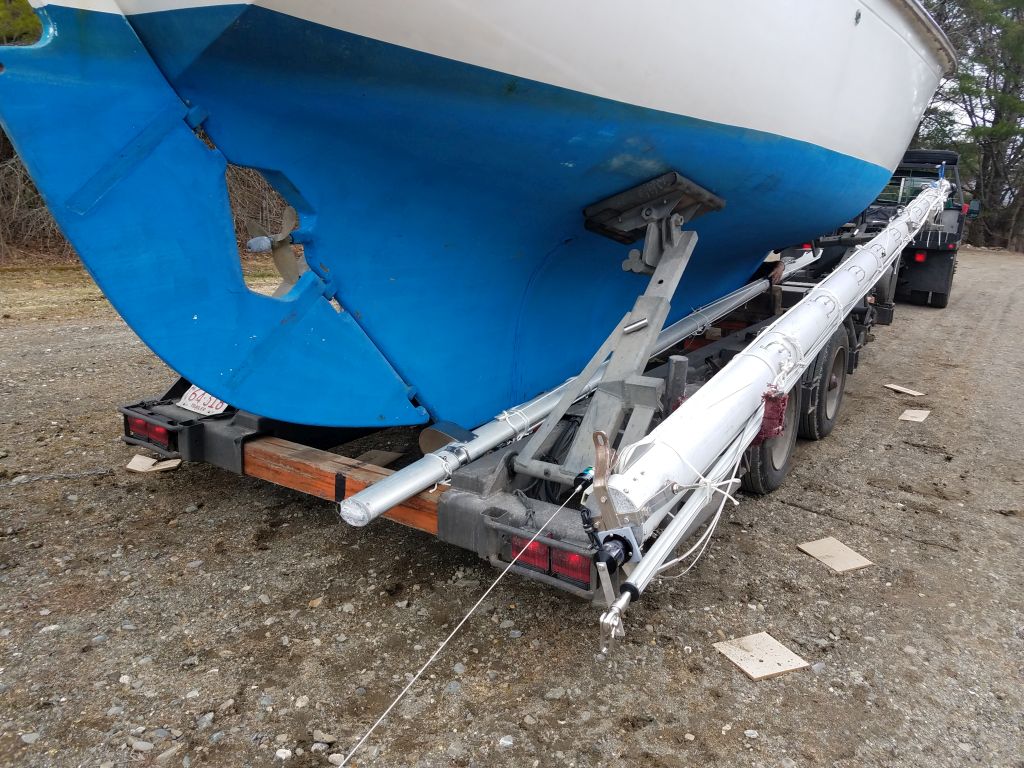
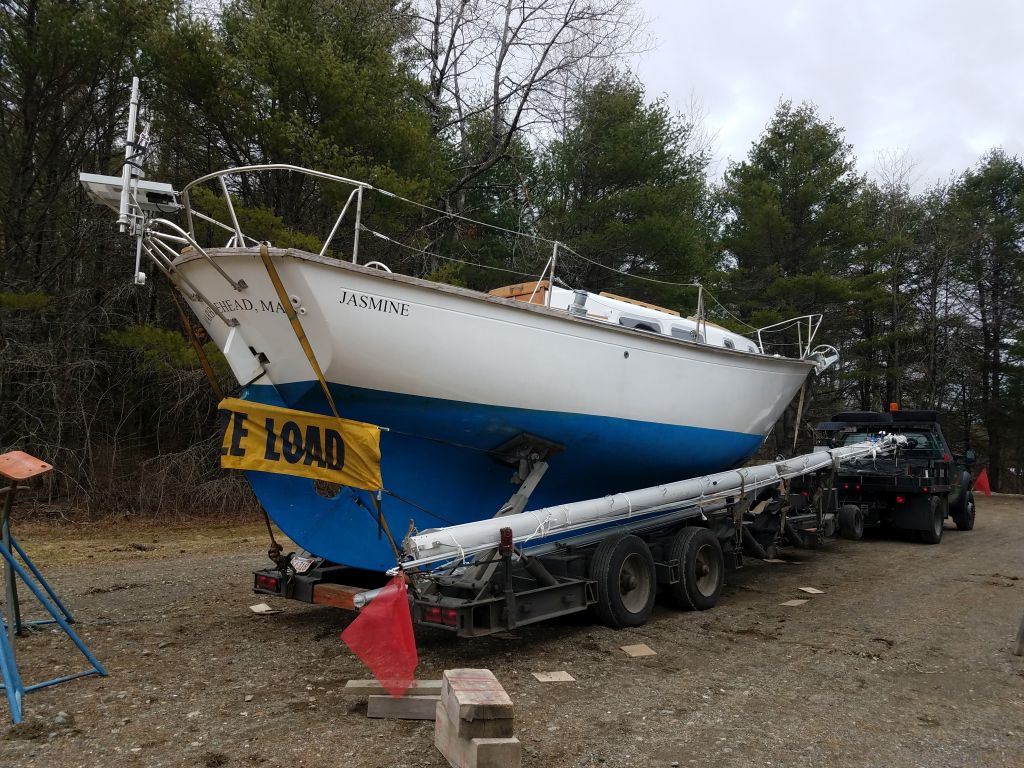
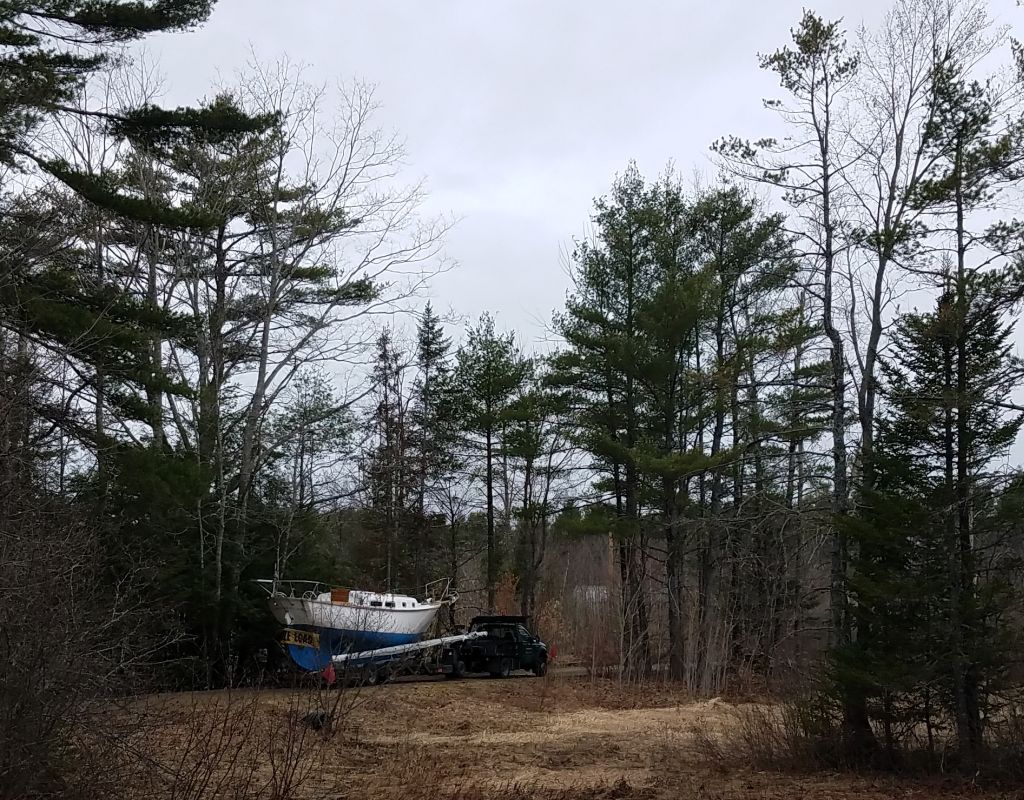
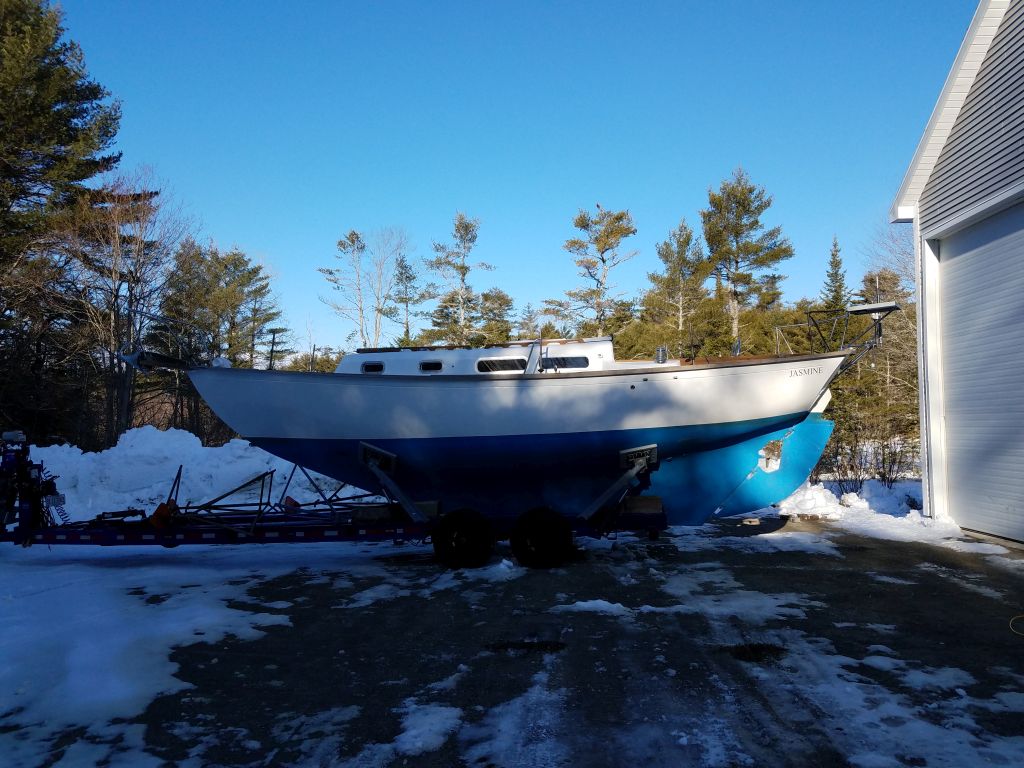
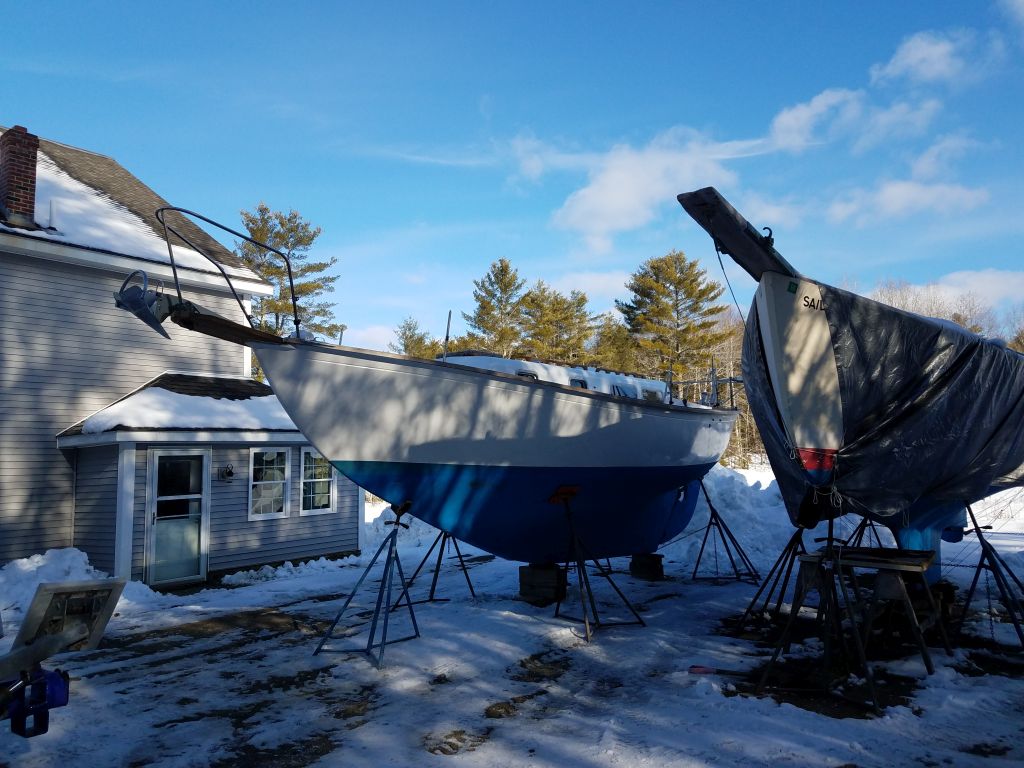
With all work complete, including all-new rigging that had been completed in the weeks since I moved the boat outdoors, Jasmine departed the shop on a truck, headed for her owner’s home waters.


Wednesday
With all work complete, including all-new rigging that had been completed in the weeks since I moved the boat outdoors, Jasmine departed the shop on a truck, headed for her owner’s home waters.
Friday/Tuesday
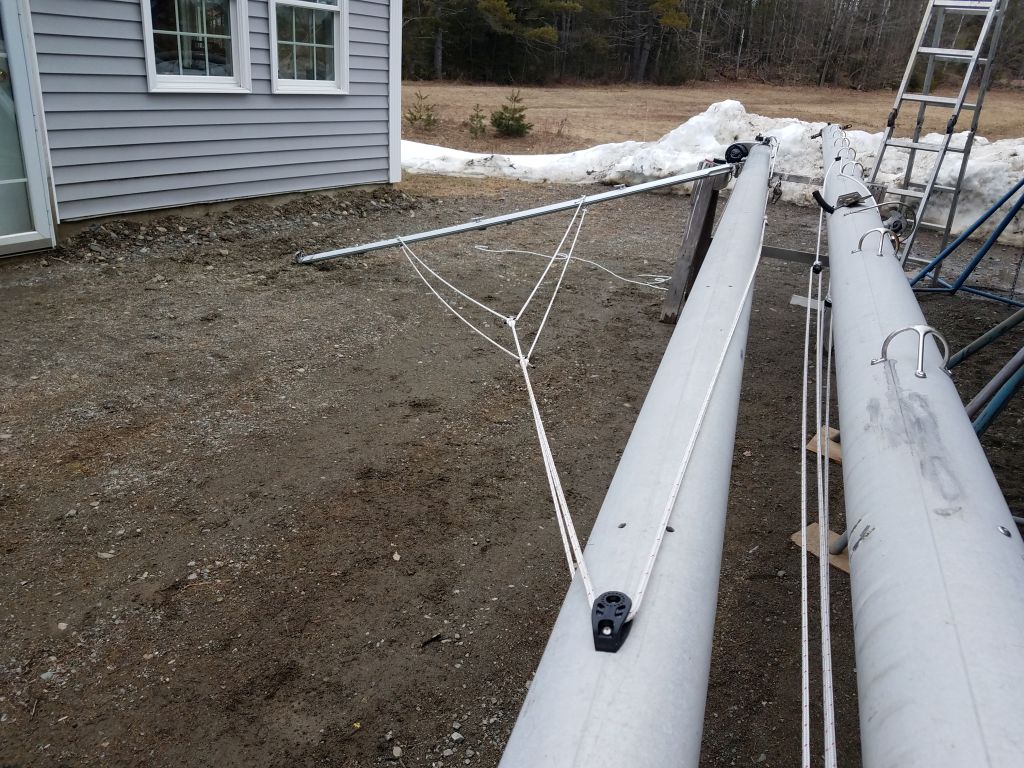
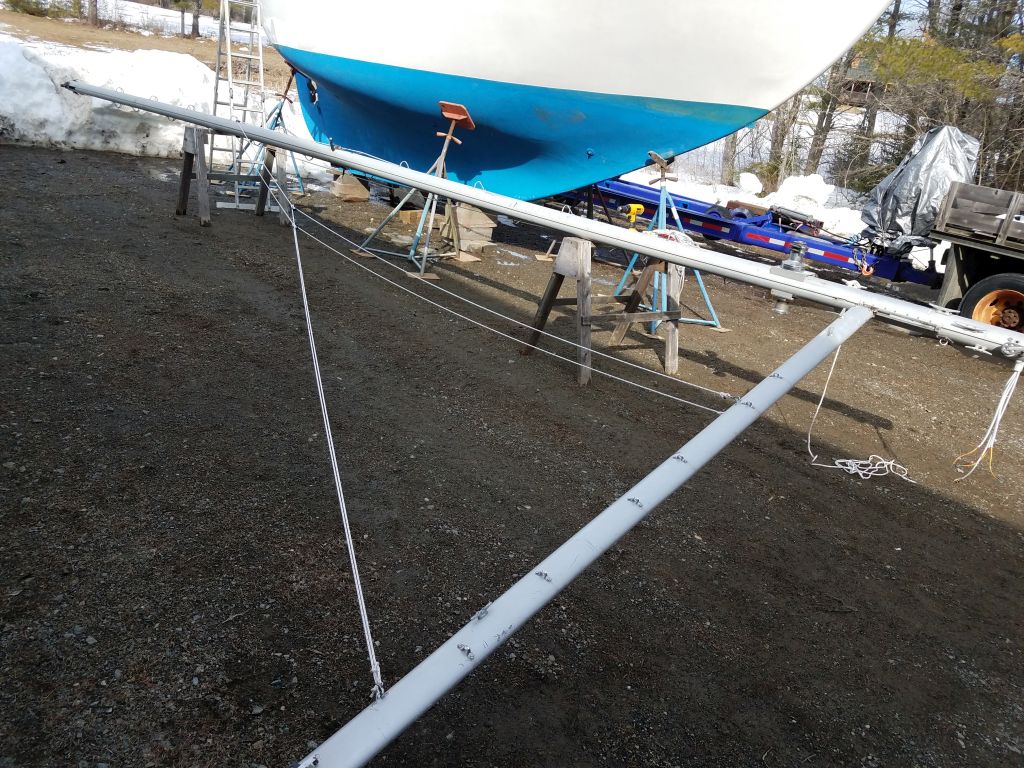
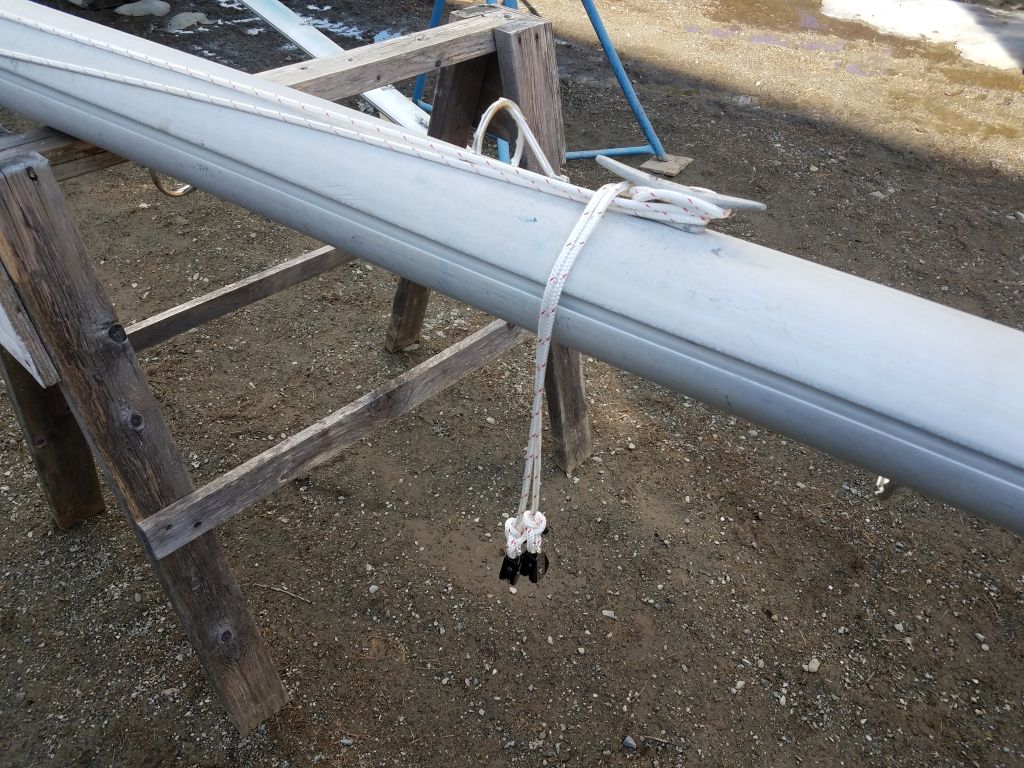
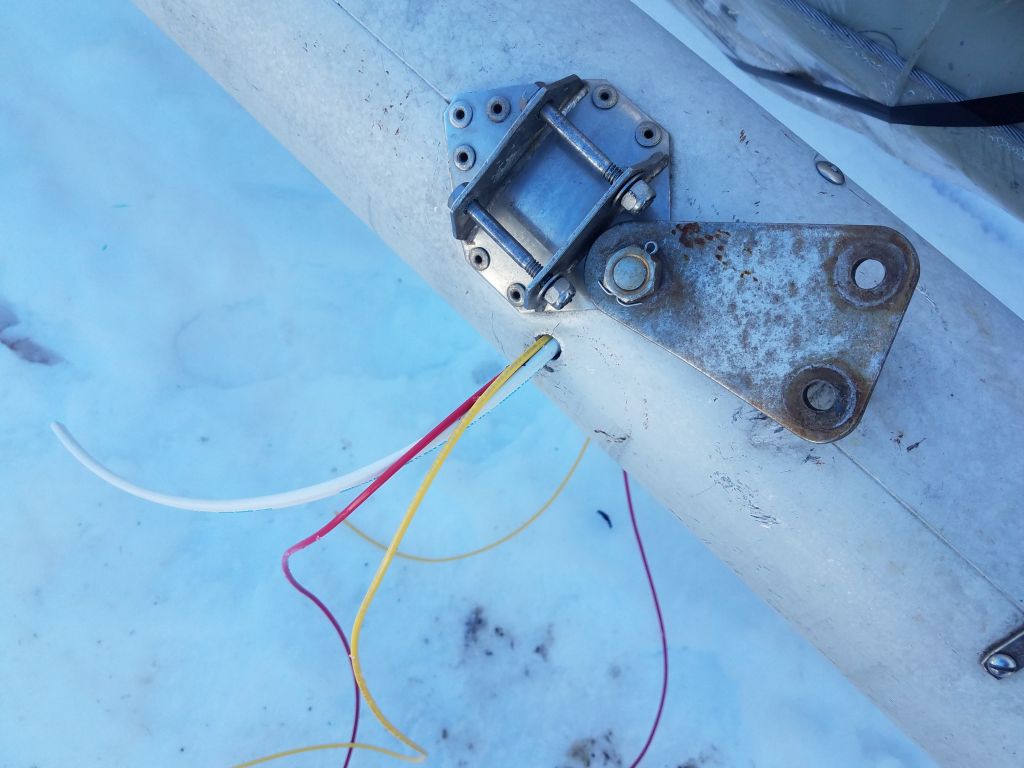
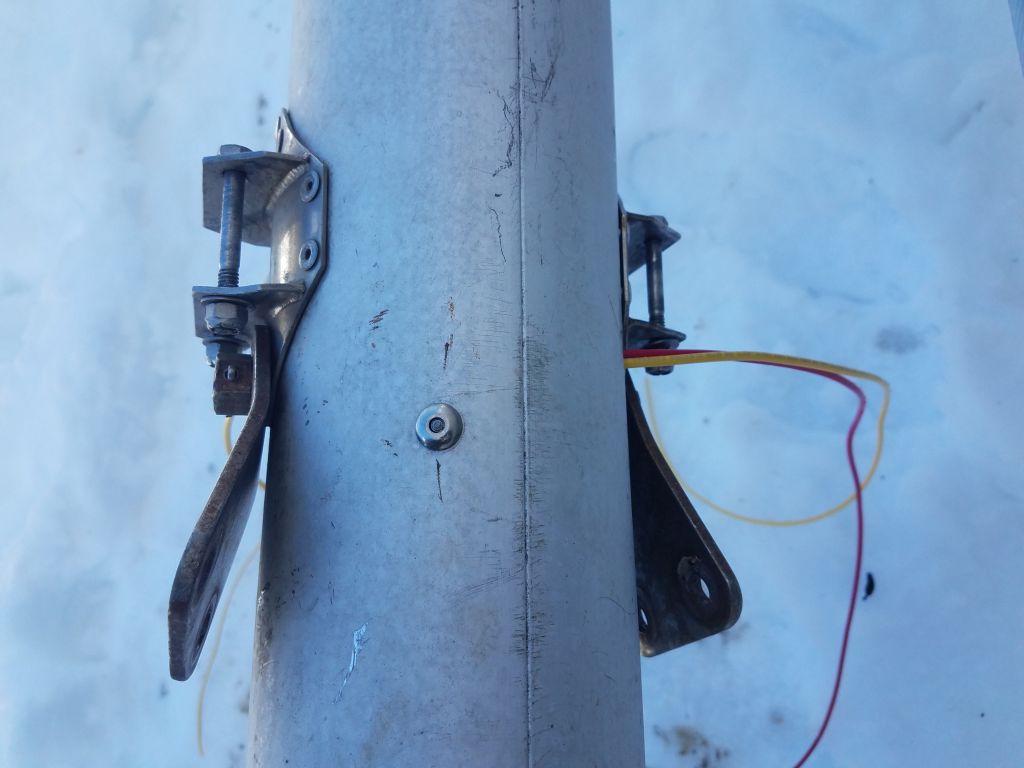
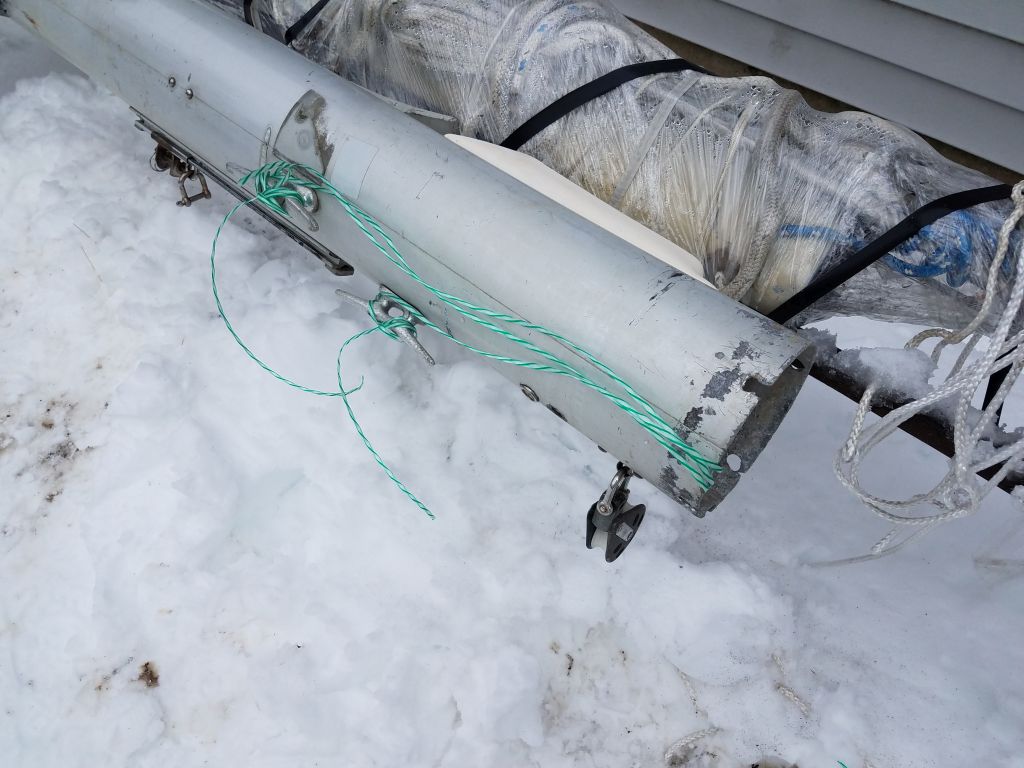
On the mizzen mast, I repeated the same basic installation process for the lazy jacks, starting with cheek blocks mounted a couple feet below the sidestay tangs.

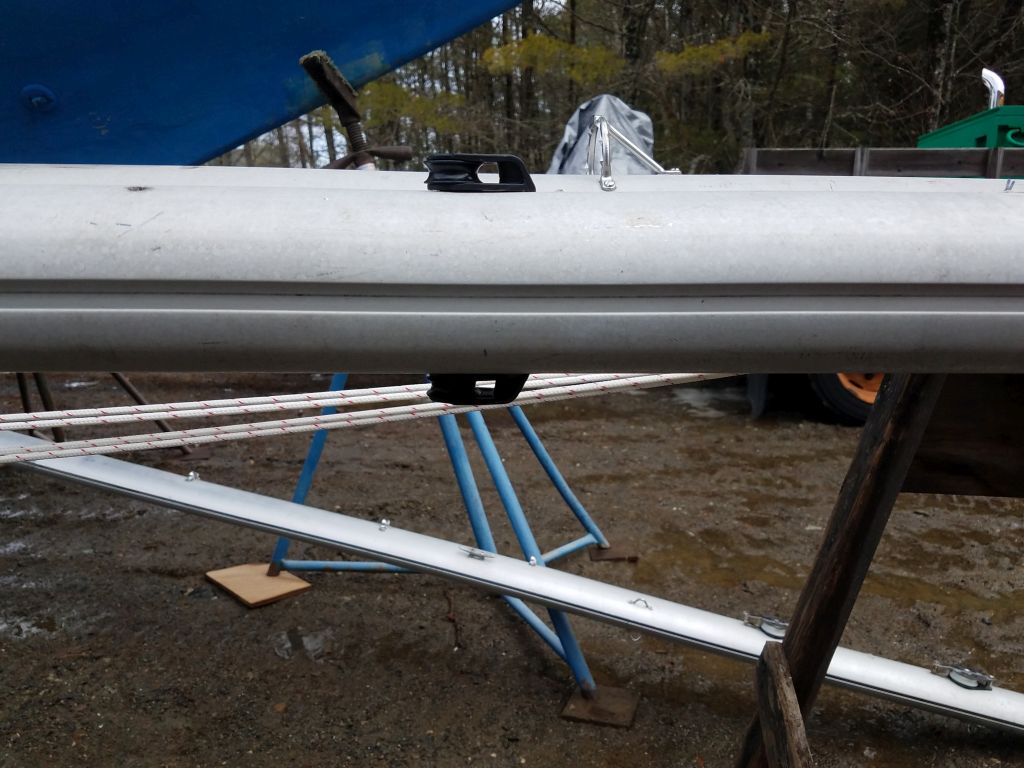
My original thought had been that a single leg would be sufficient for the mizzen, which I’d imagined was a little smaller. But when I strung the line and looked at the boom and mast in reality, I thought that the single leg might not be sufficient after all, as the boom was a bit longer than I’d pictured in my mind while planning, so I decided to go with two legs on each side like on the main mast.
After a delay while I awaited new parts to come so I could finish the modified mizzen jacks, I finished up the installation with extra blocks, additional line, and eye straps on the boom, stringing the lines as with the main boom to create a pair of adjustable legs on each side and allow for retraction of the lazy jacks when desired.

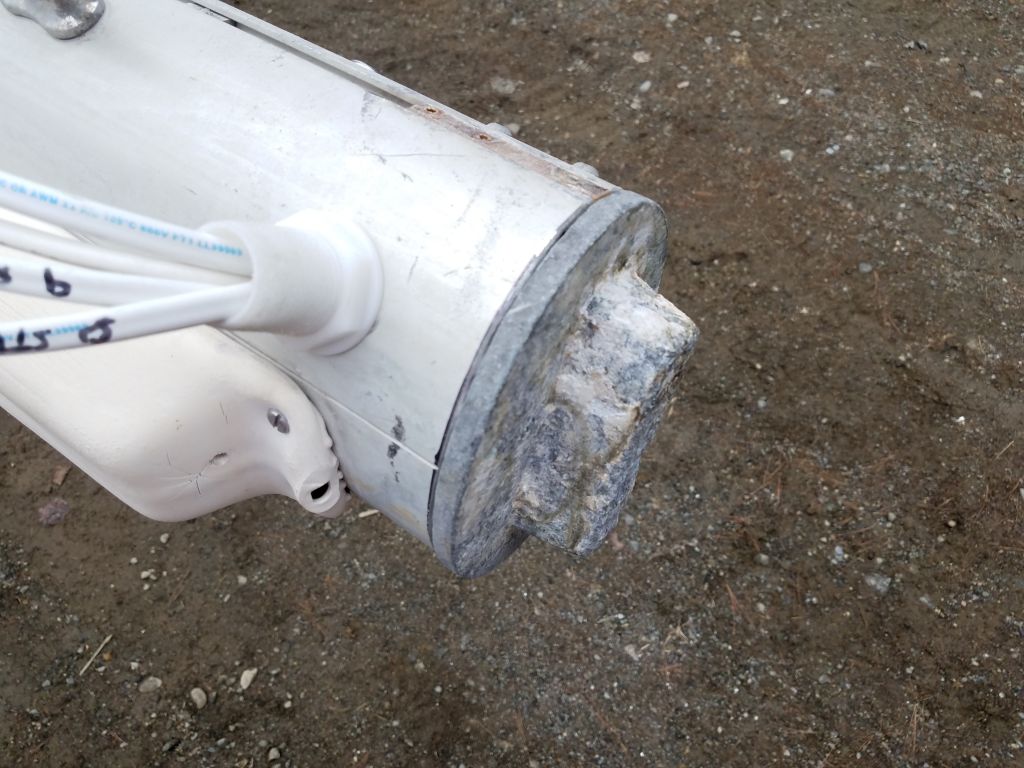
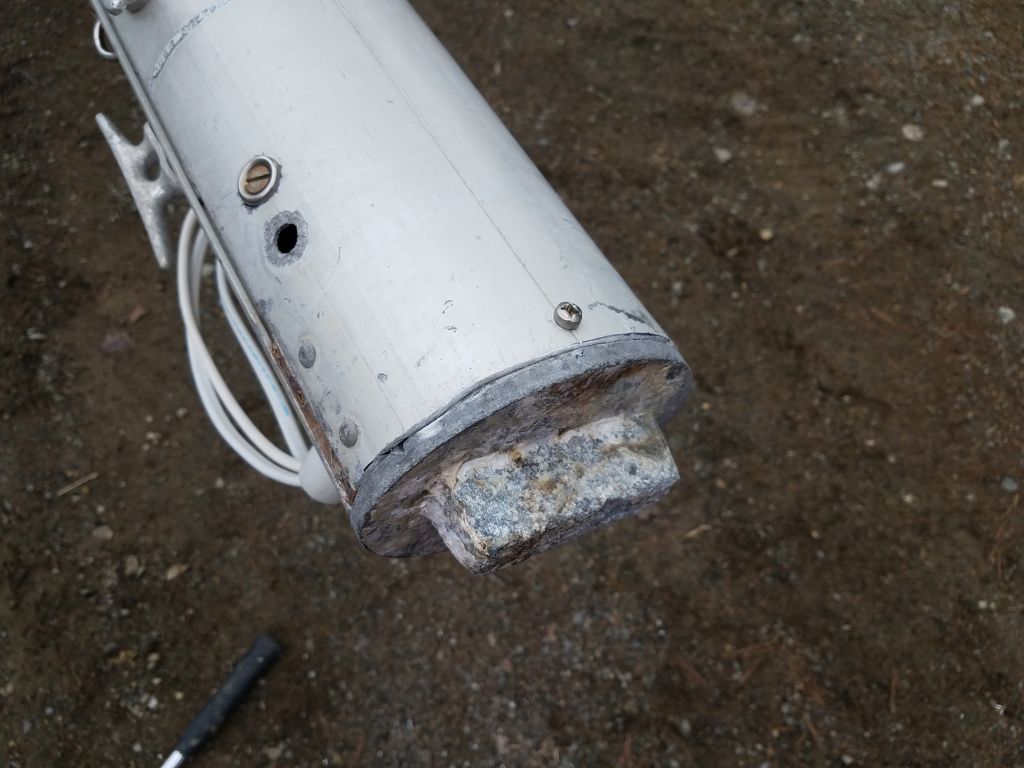
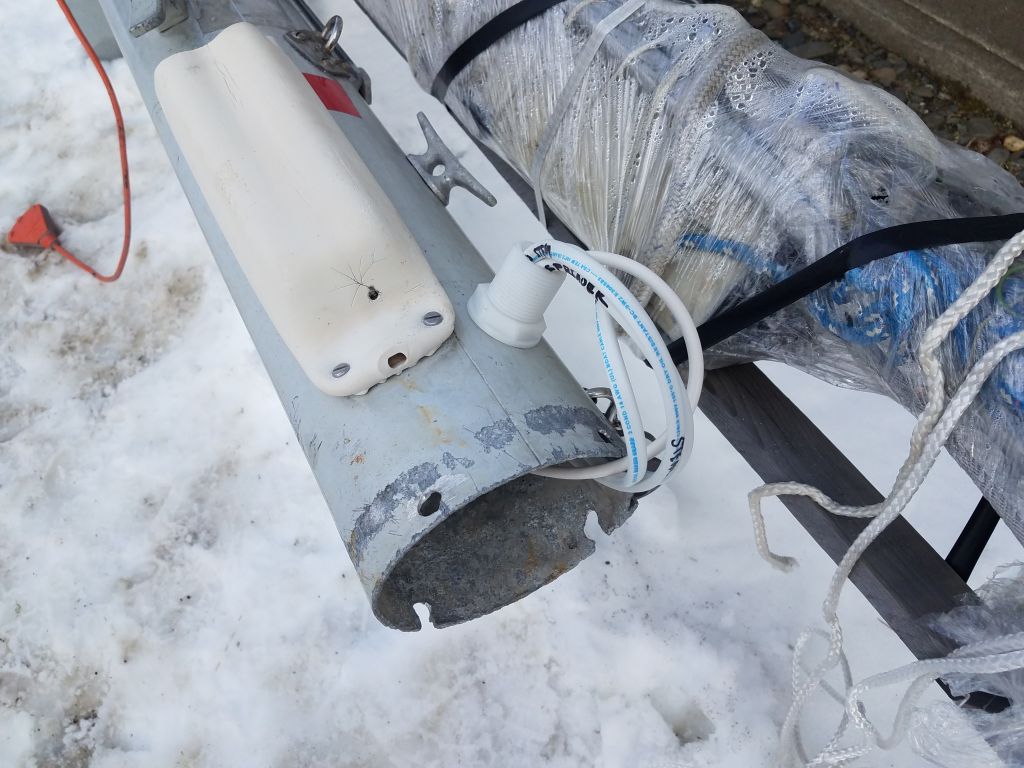
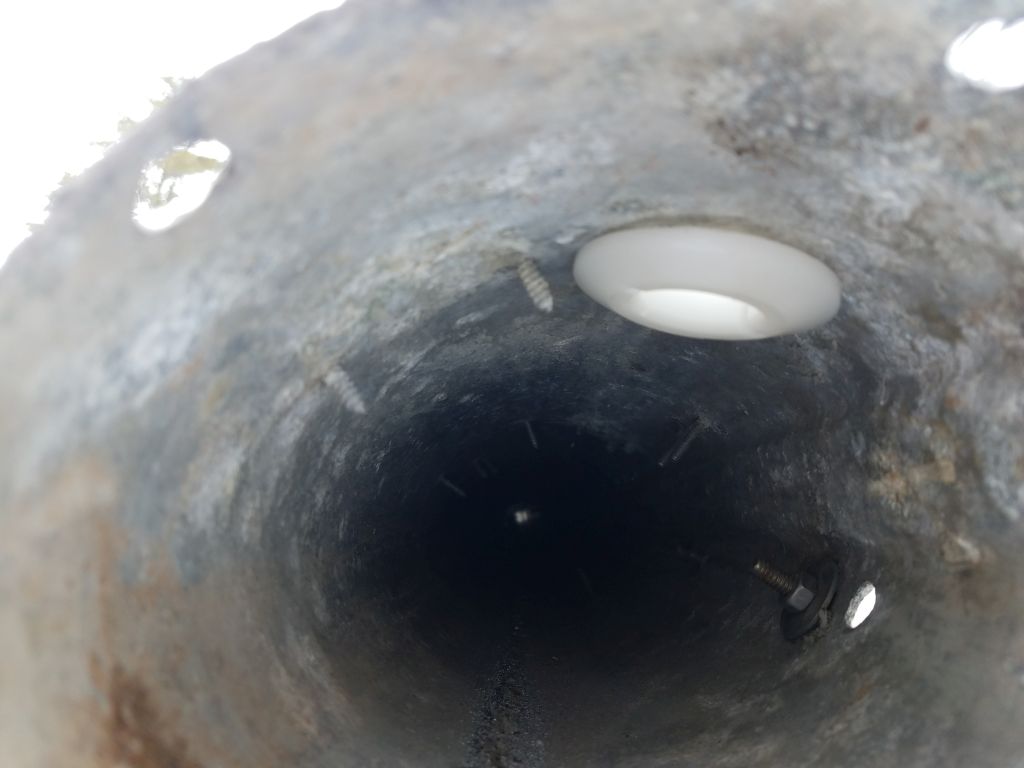
The final task for me on the mast was to remove the corroded part of the mast butt. I’d originally planned on having the riggers do this along with their work list, but with some time on hand now I decided to take care of it. Earlier, I’d determined that I needed to remove 1-1/2″ of the mast to clear the old corrosion at the bottom, and I’d rebuilt the mast step on the boat 1-1/2″ higher to accommodate this. To begin, I made a mark at the correct height all around the base of the mast. Then, I cut to the mark with a saw.
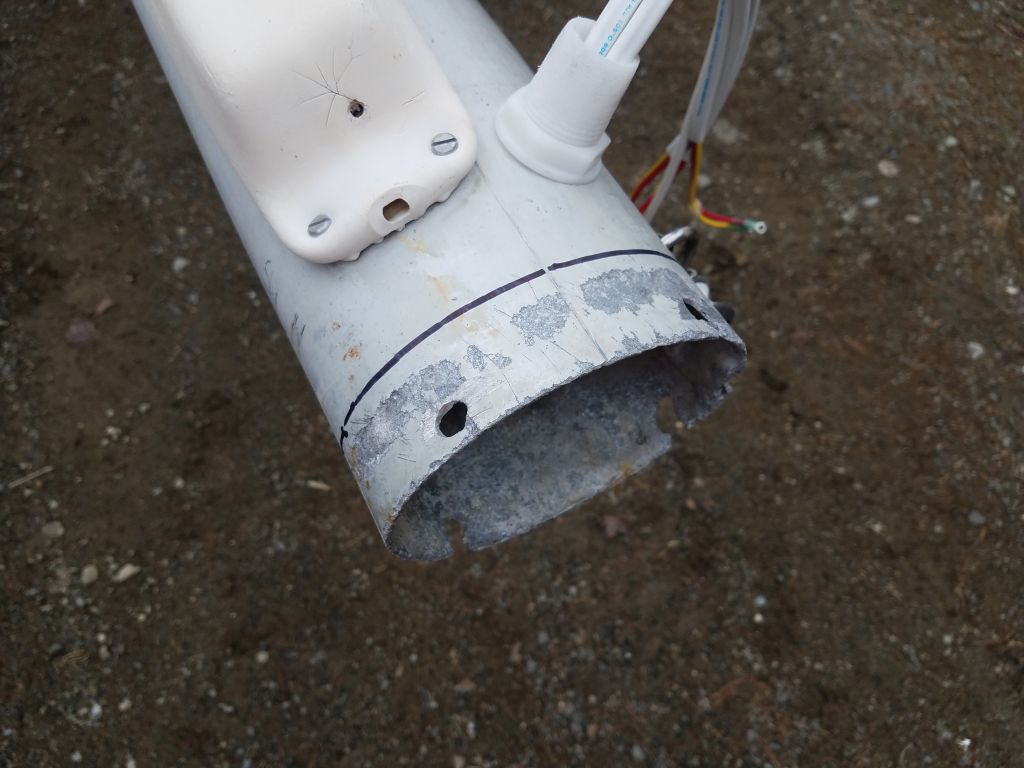

After some minor work to accommodate the cast aluminum mast base plug, I finished up by reinstalling it with a couple machine screws to hold it in place; I didn’t see why it needed any more than two.


Total time billed on this job today: 2.25 hour
0600 Weather Observation: 30°, partly cloudy. Forecast for the day: Mainly cloudy, low 40s
Thursday
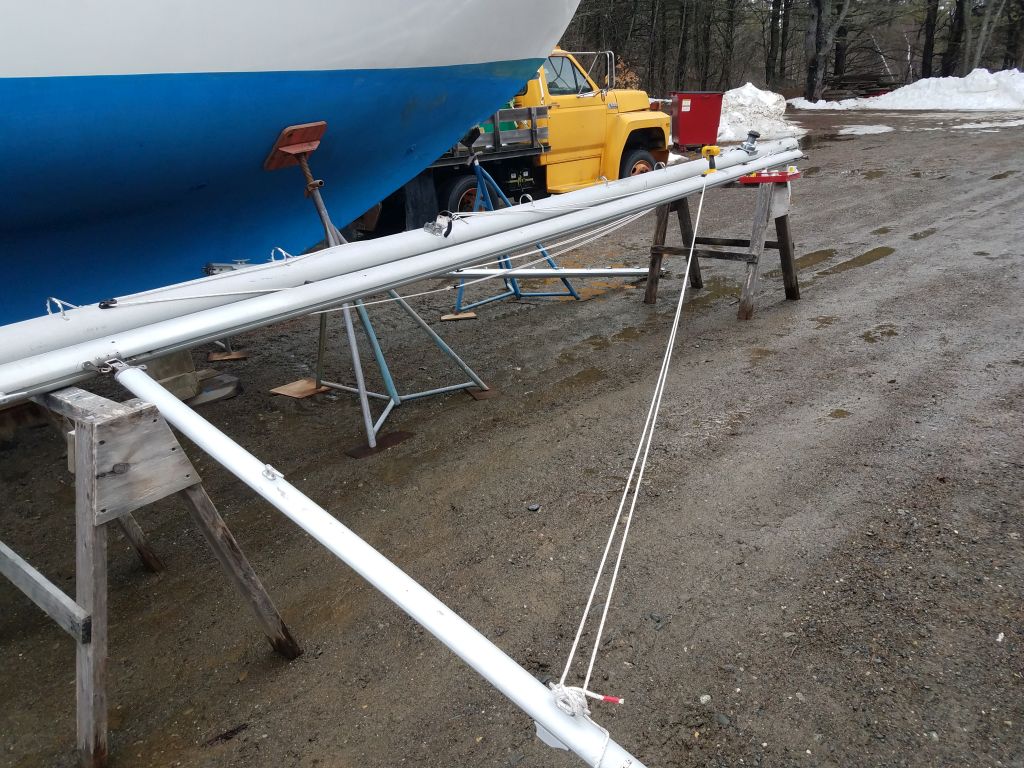
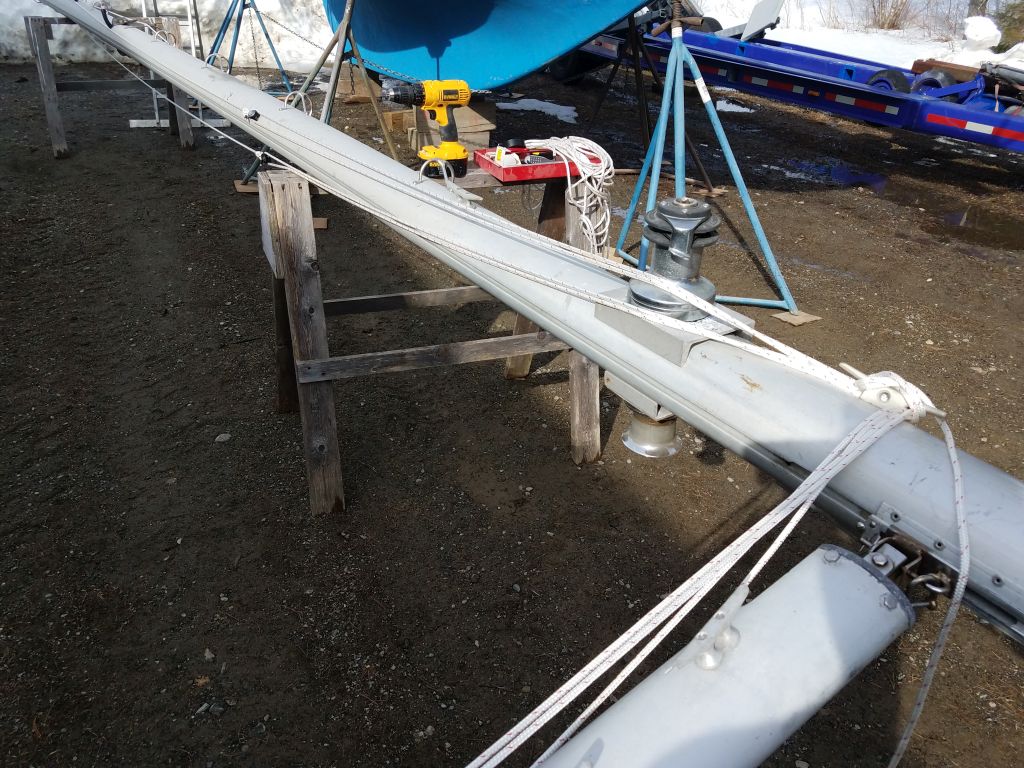
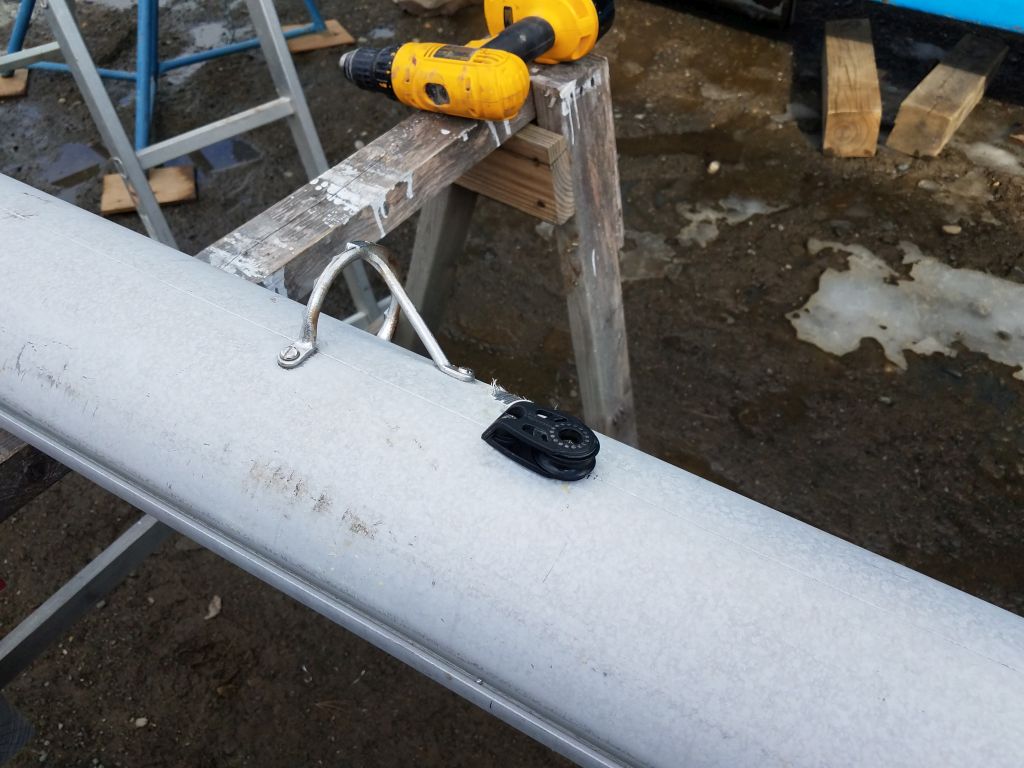
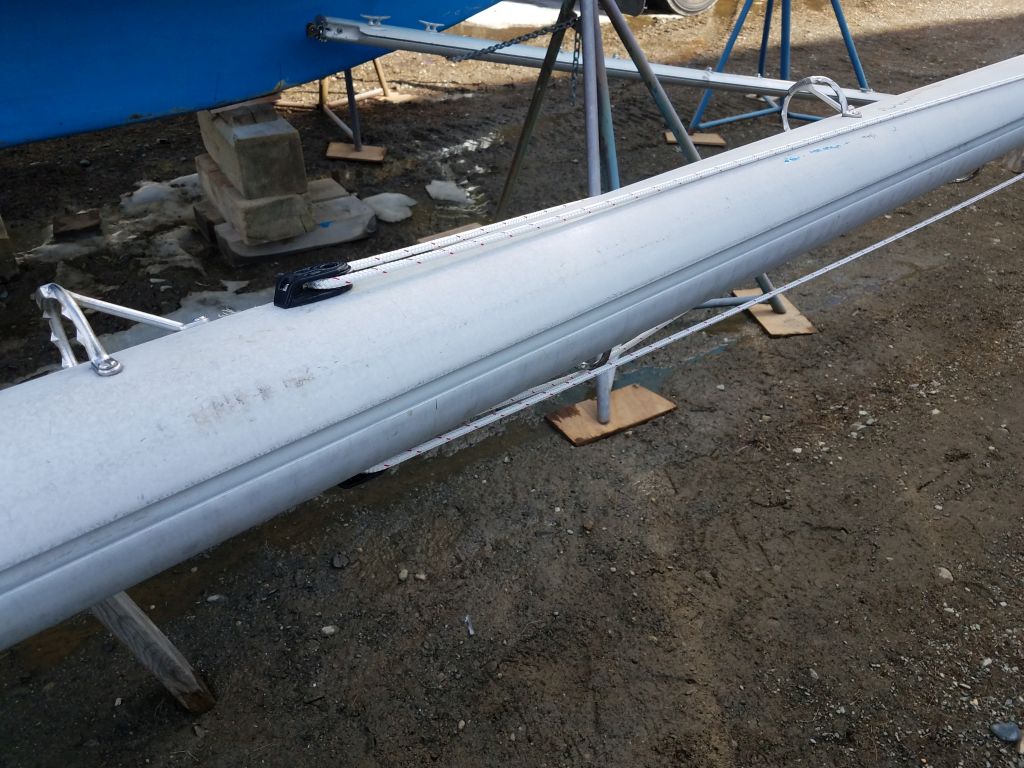
To finish up the lazy jacks on the mainmast, I determined appropriate locations on the boom to accept the two lower legs and installed small eye straps on each side, then led another length of line from one location to the other, leading up through the turning block at the end of the main control line. I secured the lines to snap hooks for easy installation and removal as desired.
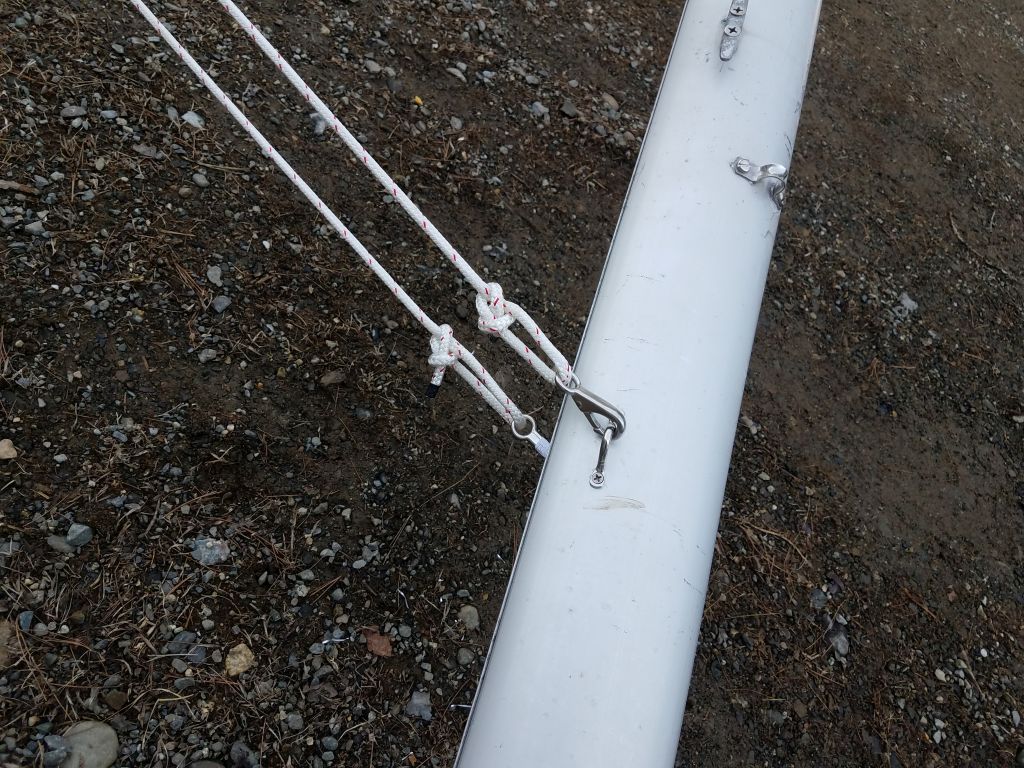


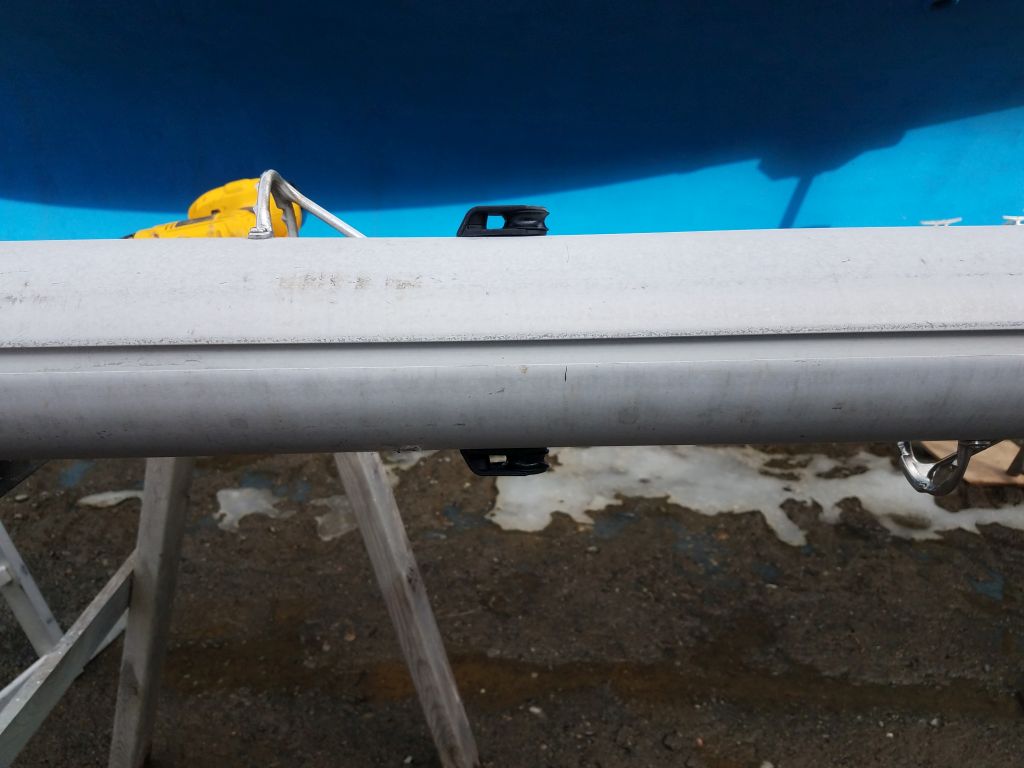
By adjusting the single control line on the forward side of the mast, the lazy jacks could be easily deployed or retracted forward along the boom to the gooseneck.
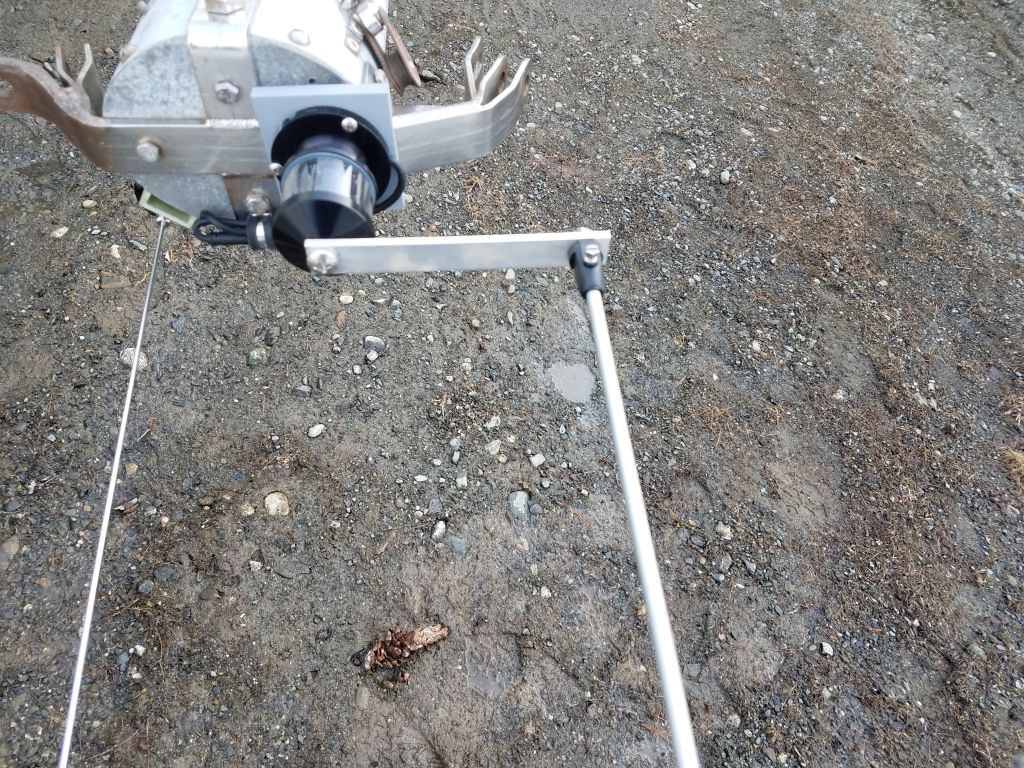
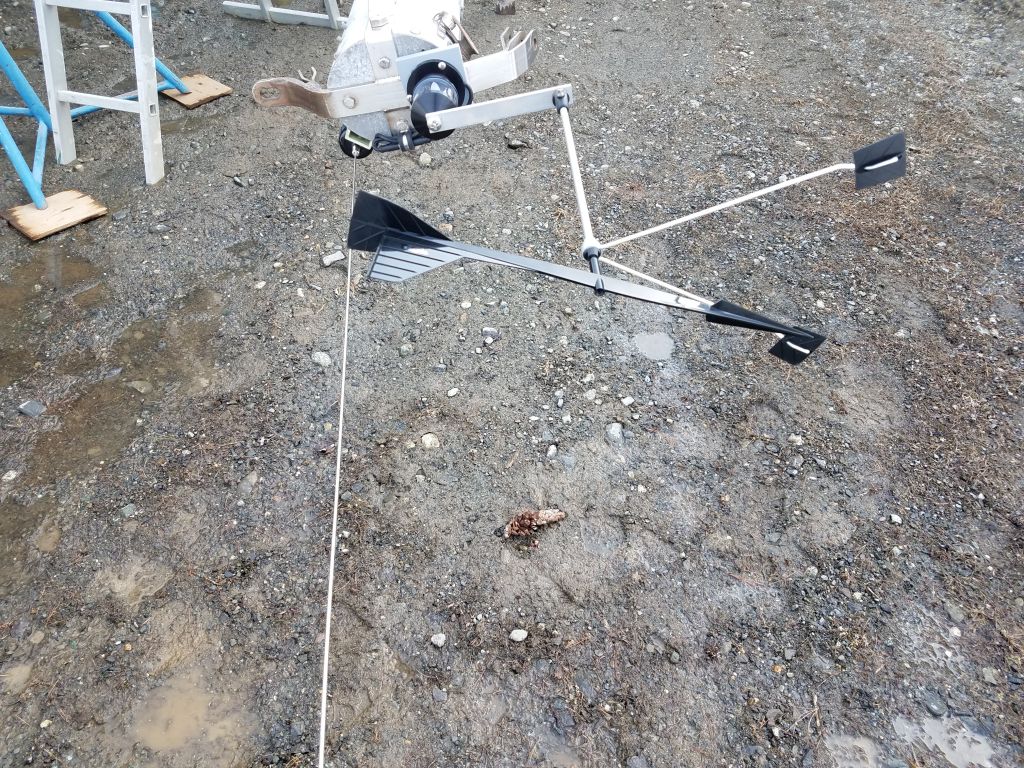
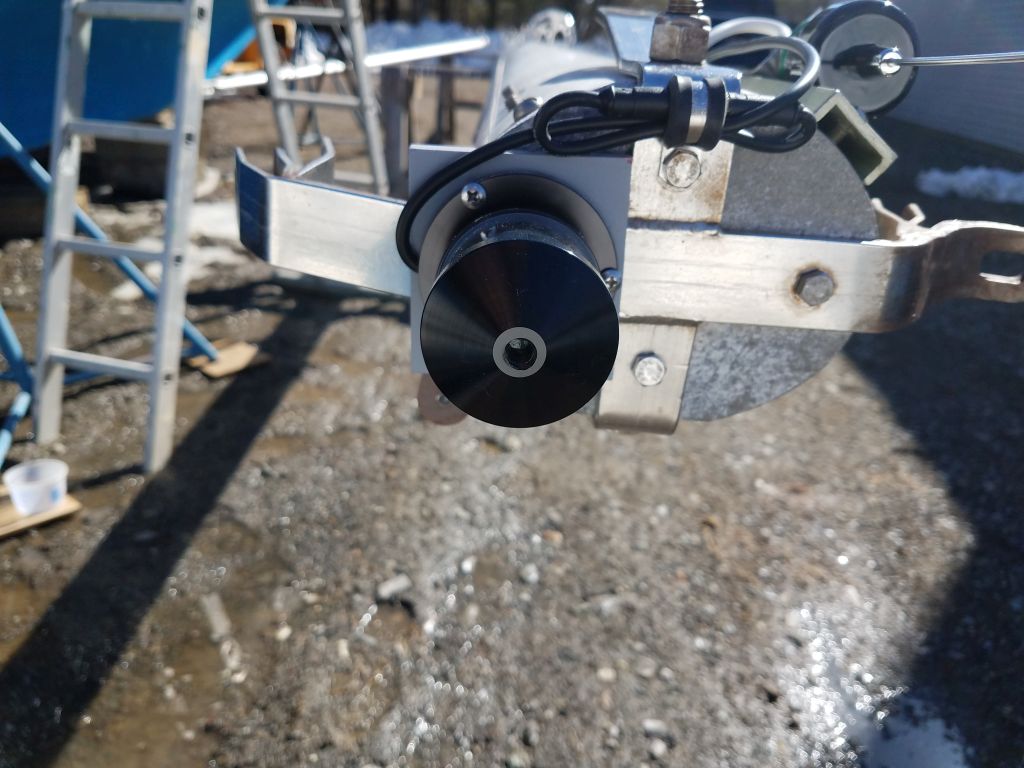
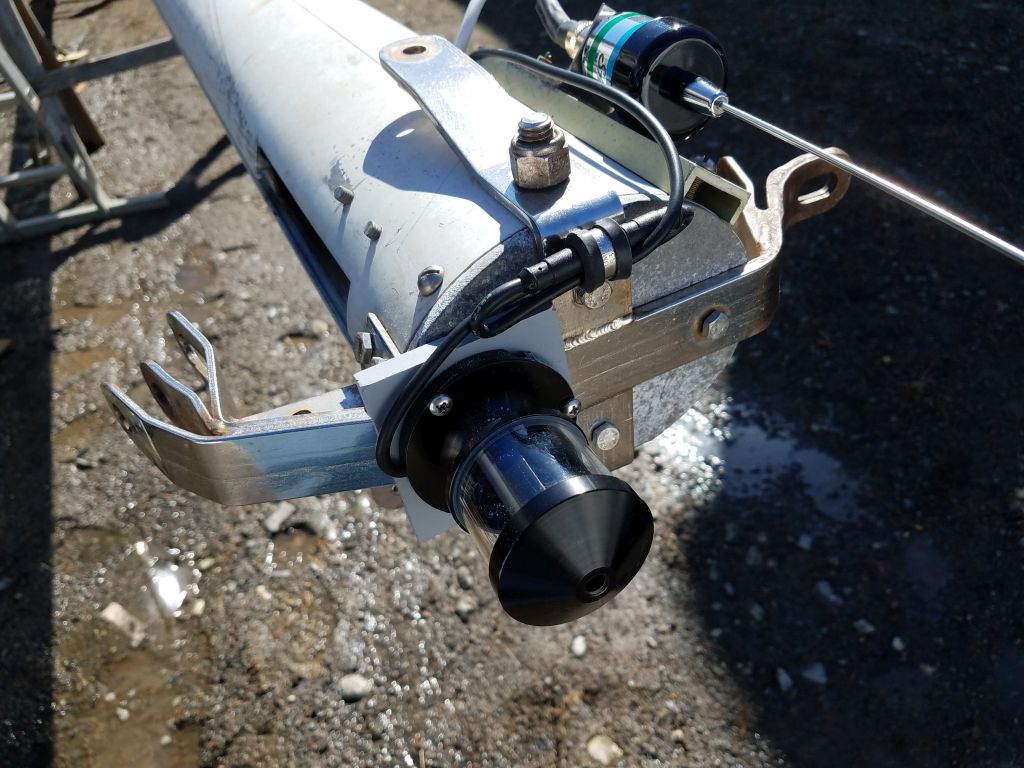
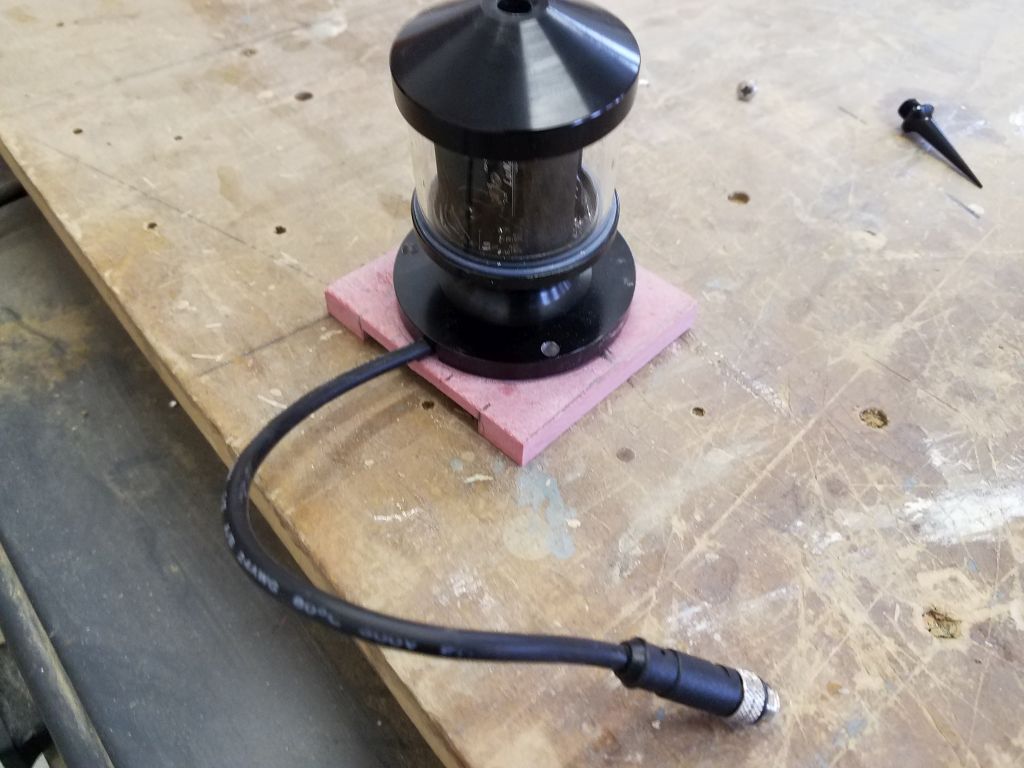
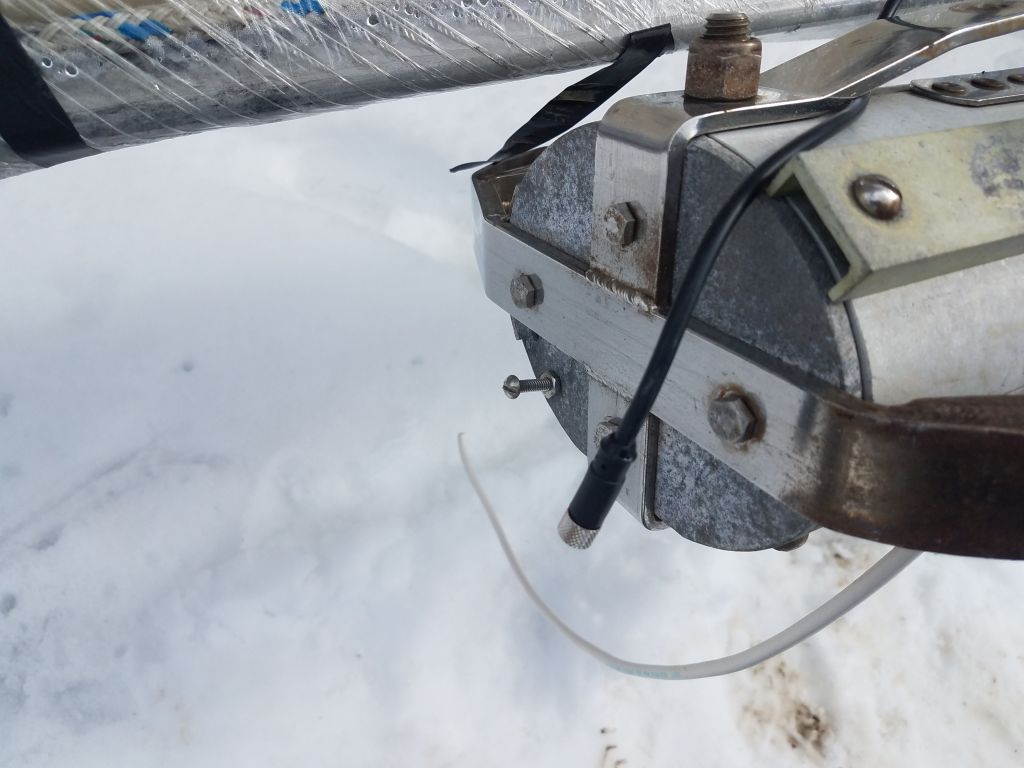
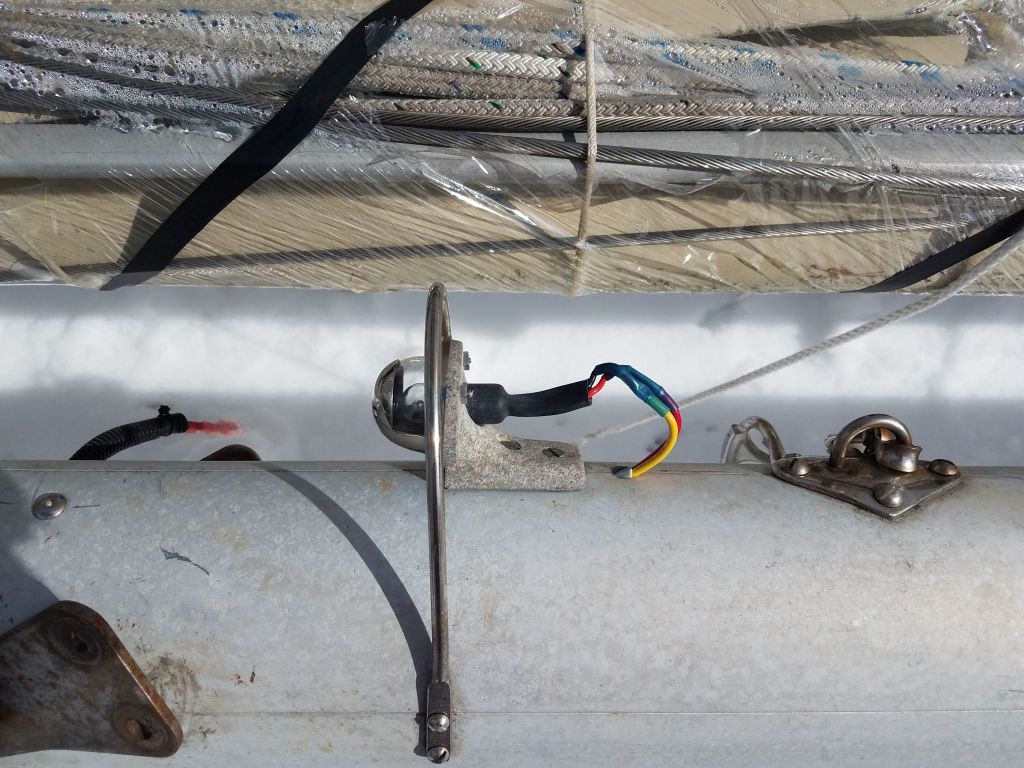
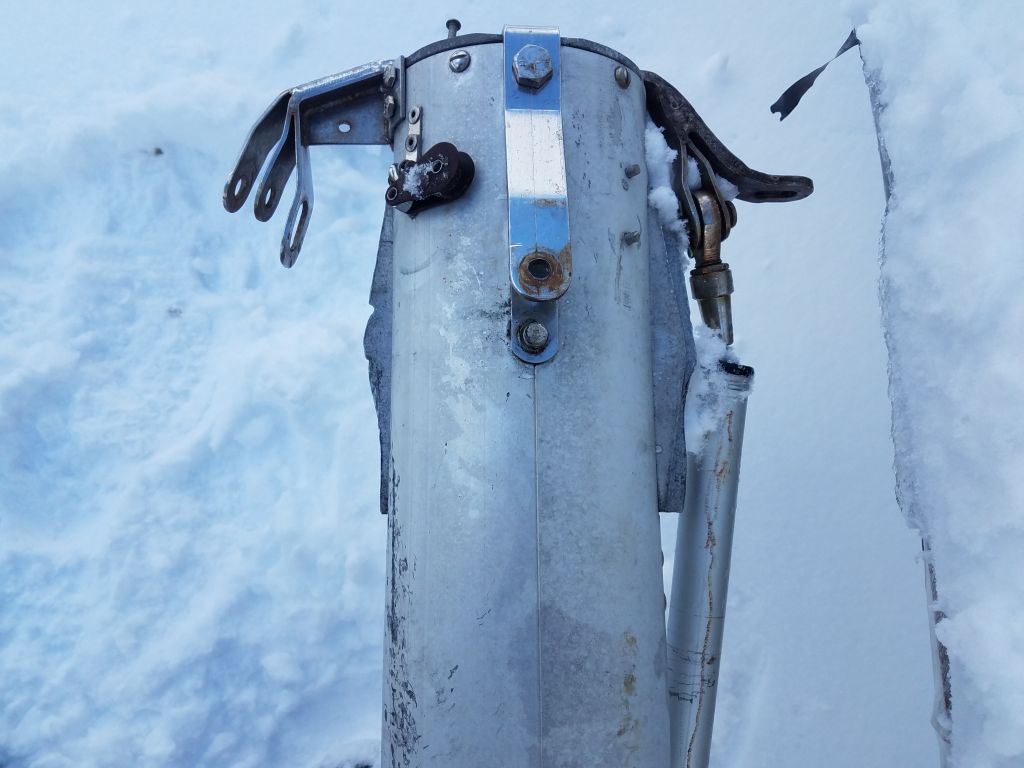
The masthead light assembly featured a threaded top to accept a Windex mount, but in this case the nearby VHF antenna interfered with the proper rotation of the wind indicator. So I made a simple offset with some aluminum stock to extend the Windex mount further aft to allow clearance past the antenna, and also improve visibility of the vane from the cockpit.
Total time billed on this job today: 1 hour
0600 Weather Observation: 25°, clear. Forecast for the day: Mainly sunny, high around 50°, increasing clouds late in the day and light rain overnight
Wednesday
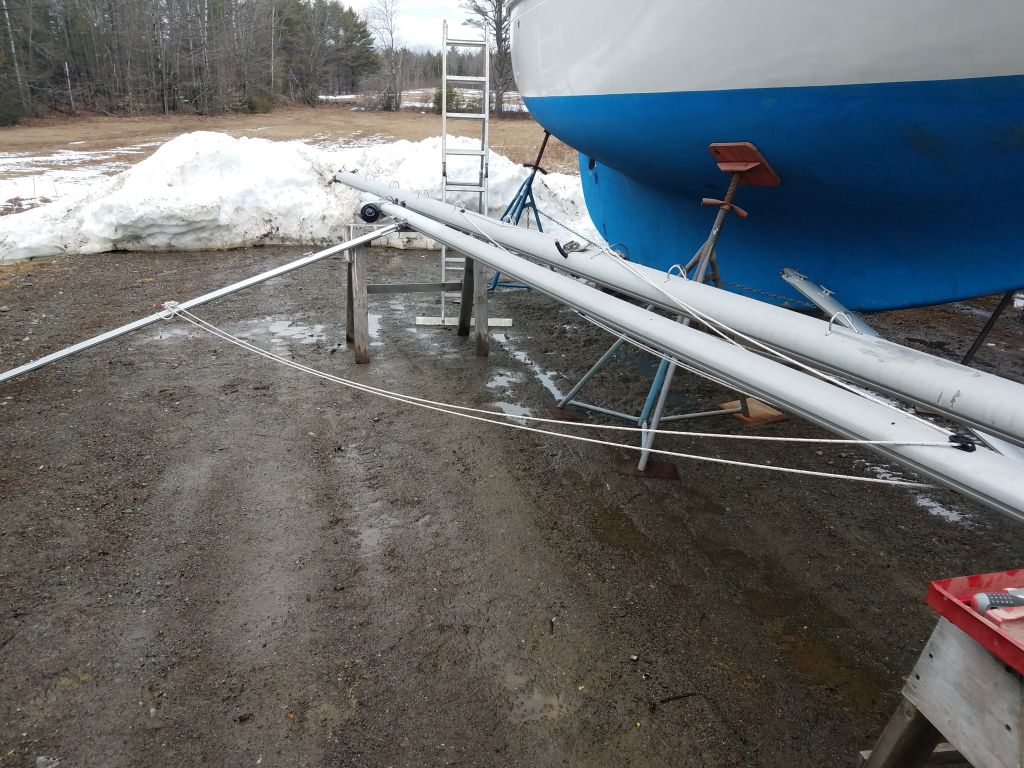
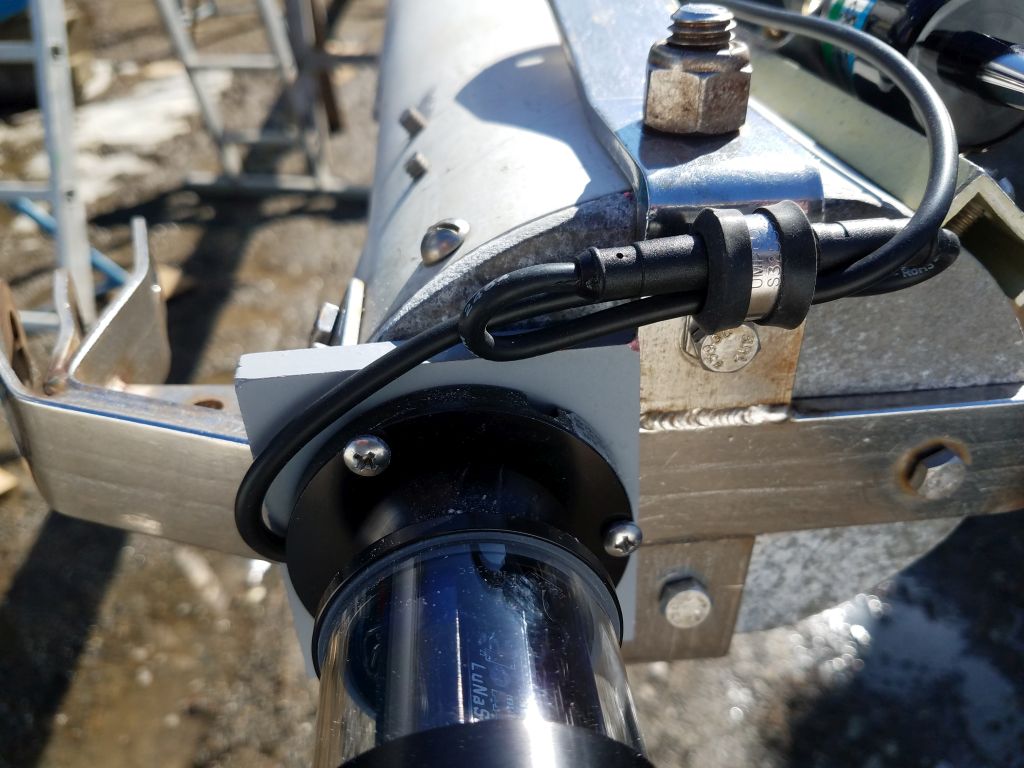
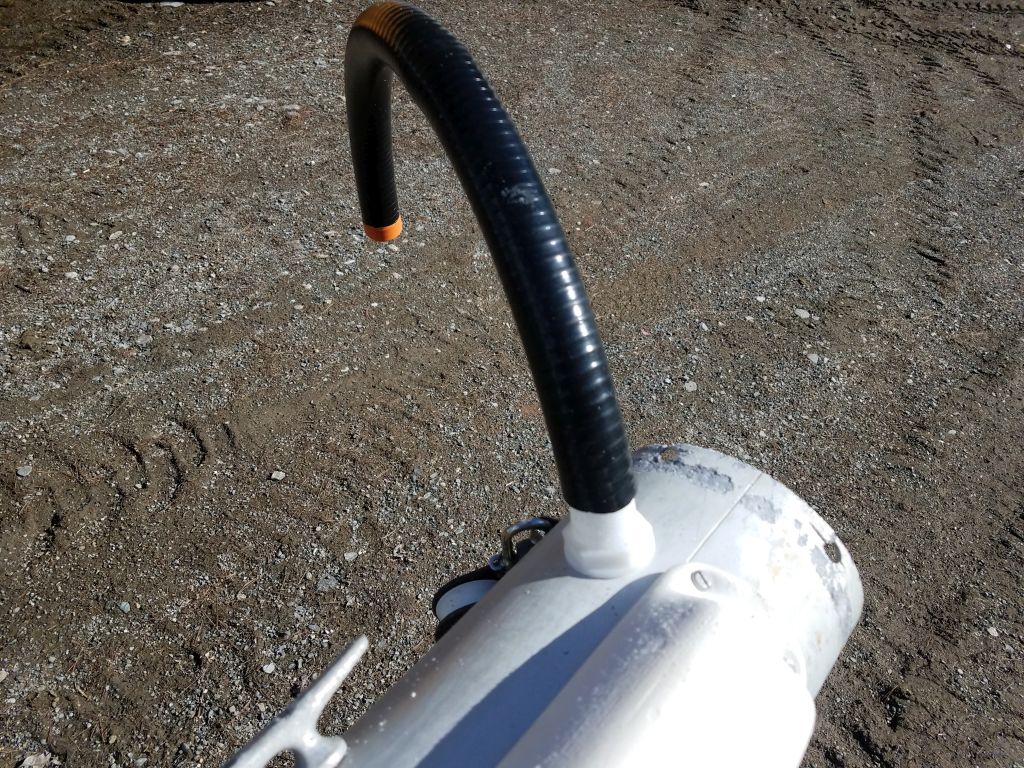
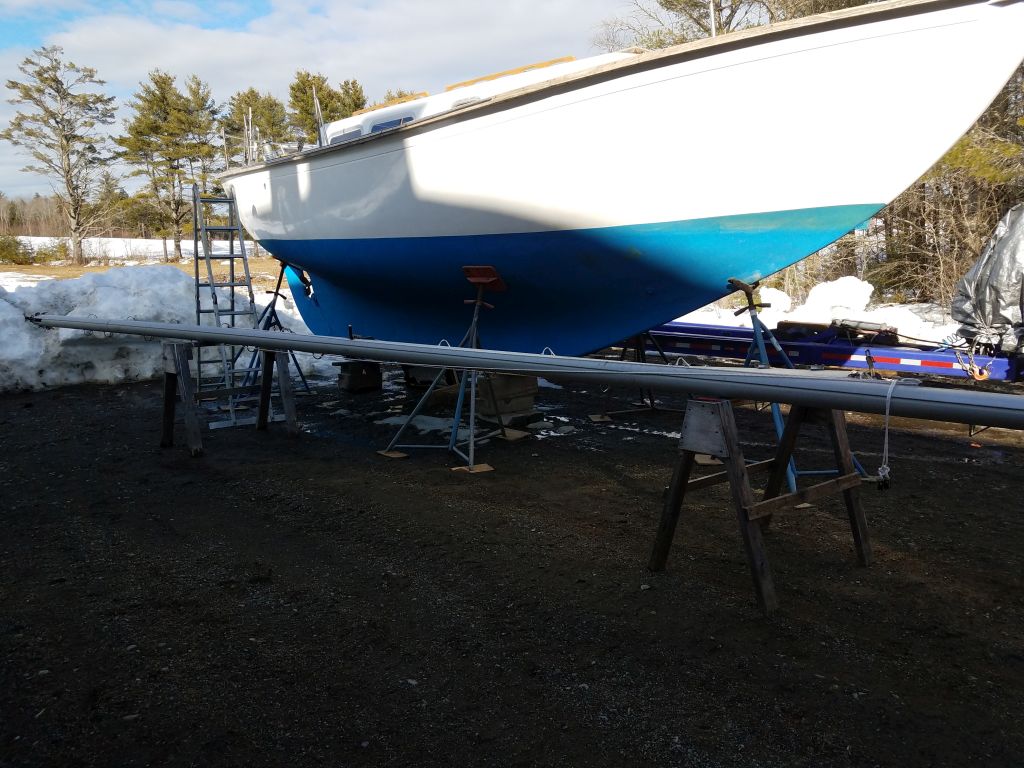
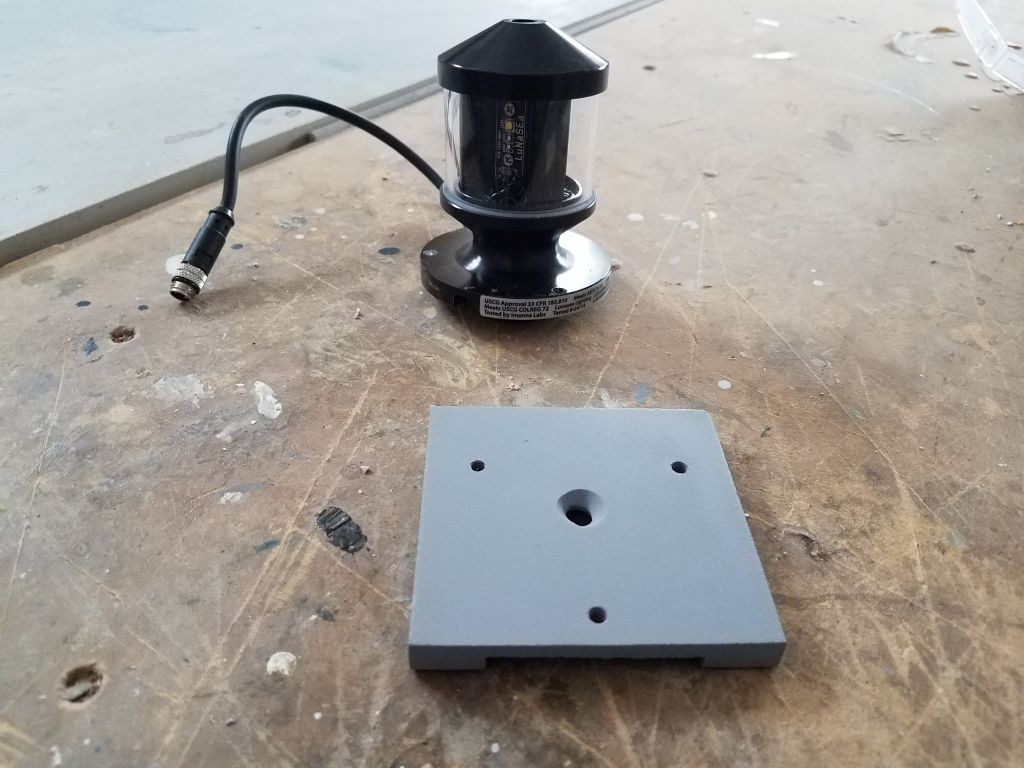
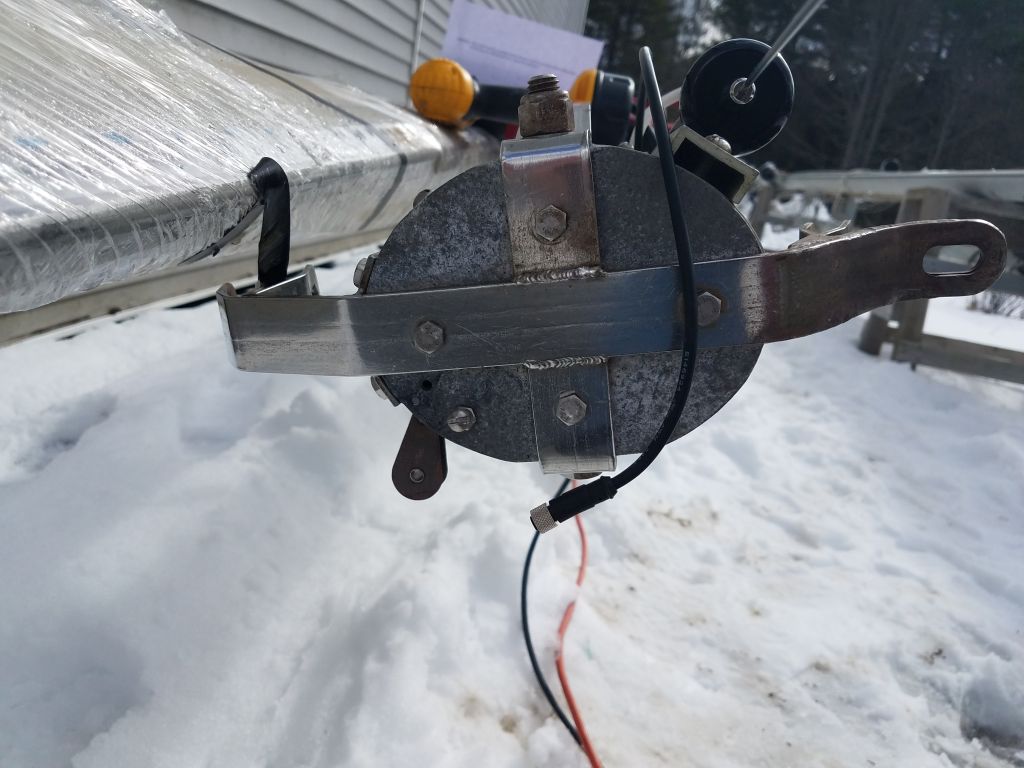
Taking advantage of better-than-expected weather, and with a less-than-optimistic temperature forecast for most of April, I moved Jasmine’s main mast from its storage area over to the other side of the building and near the boat, where I had more convenient access. I had just a few small tasks to complete on the spar, beginning with the final installation of the masthead light assembly. I secured my new mounting platform to the masthead with a screw through one of the original strap bolt holes, then secured the aluminum light fixture with three machine screws into the holes I’d already prepared. I secured the wiring with a rubber-lined clamp that I attached to another of the masthead strap bolts.
With a drum sander, I pared down the plastic wiring fitting at the base of the mast till I could slide on the 1-1/8″ hose I’d purchased as a conduit. This hose could be cut to the proper length later for routing the wires from the mast through the deck and into the head for connection.
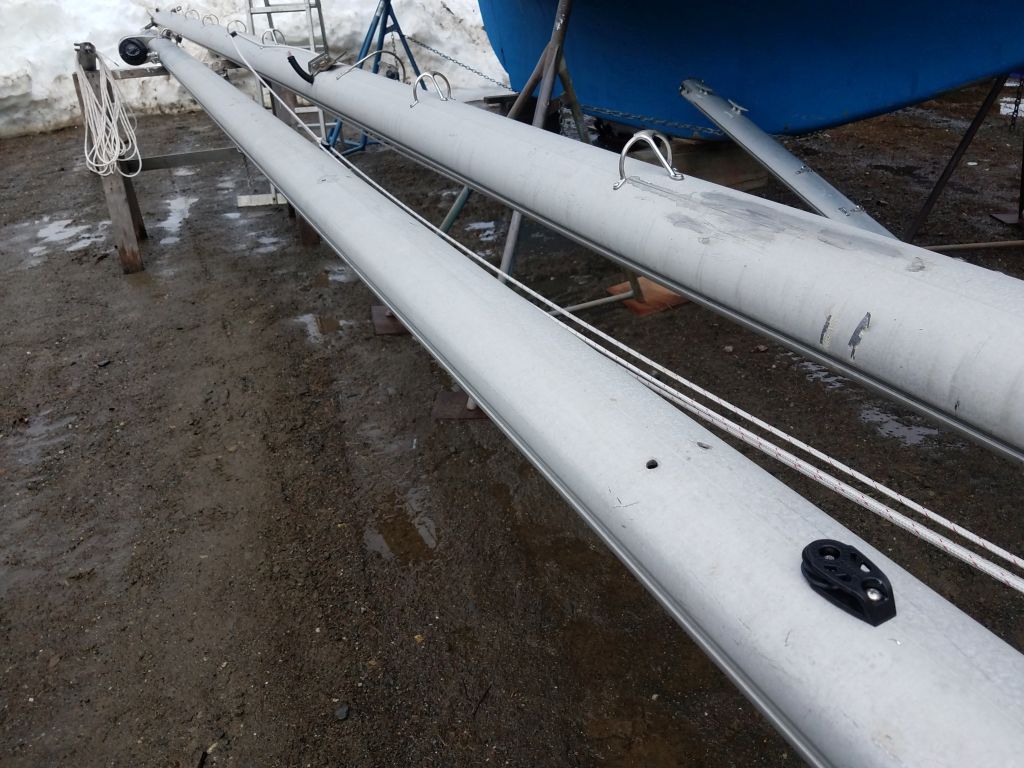
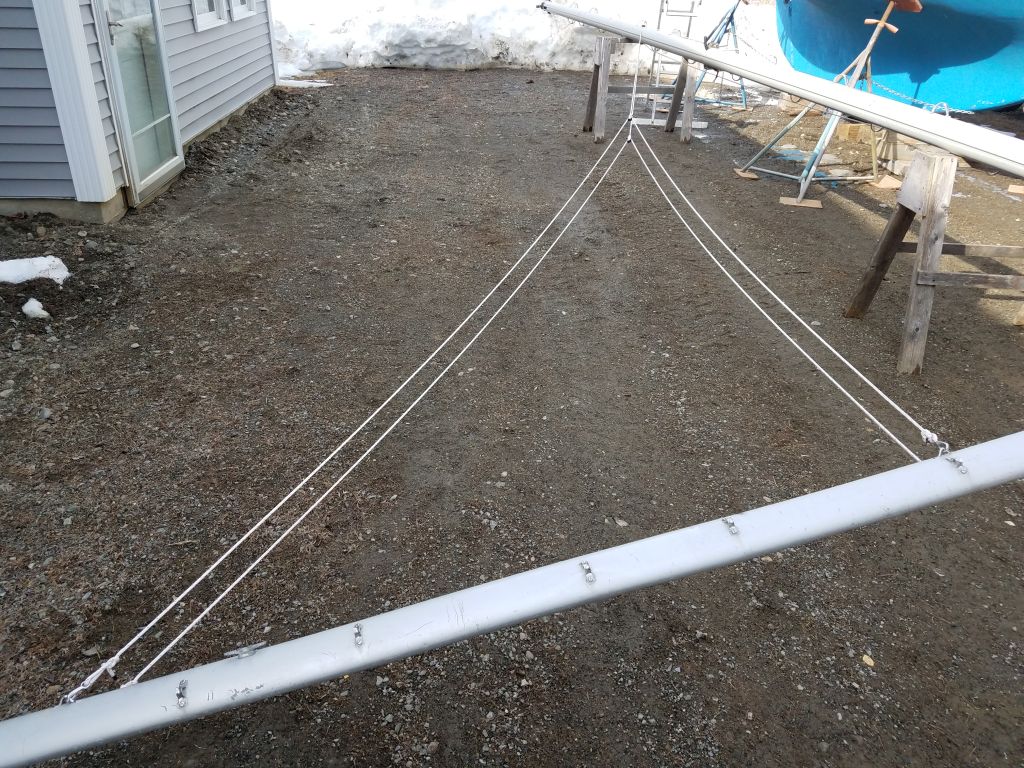
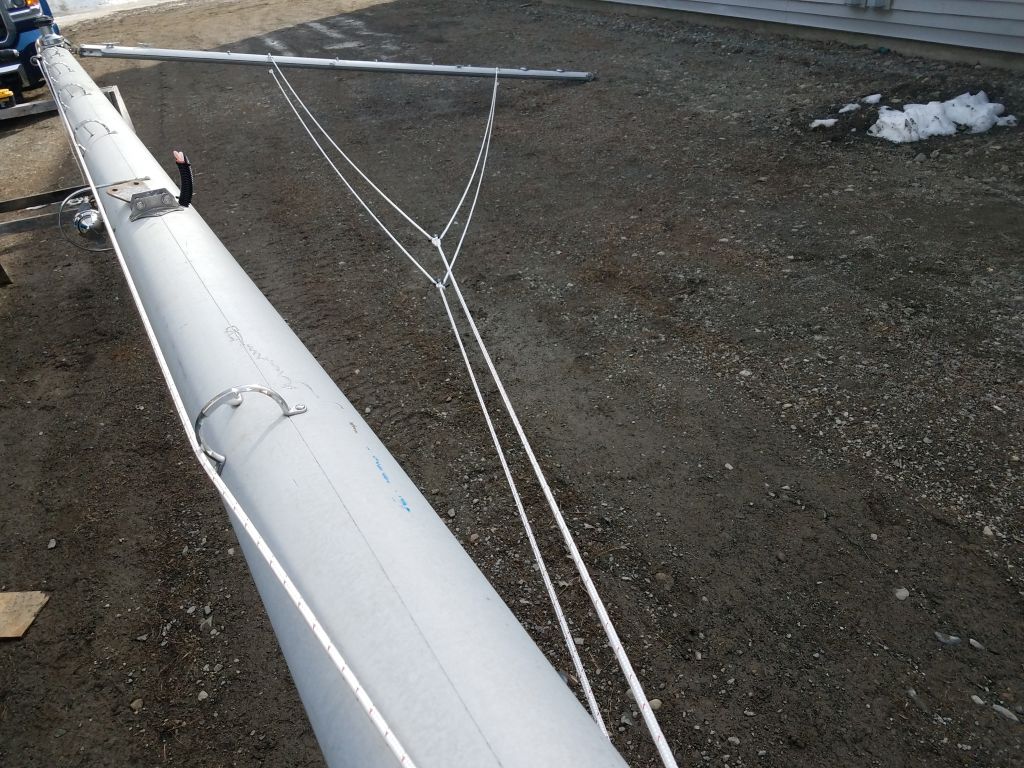
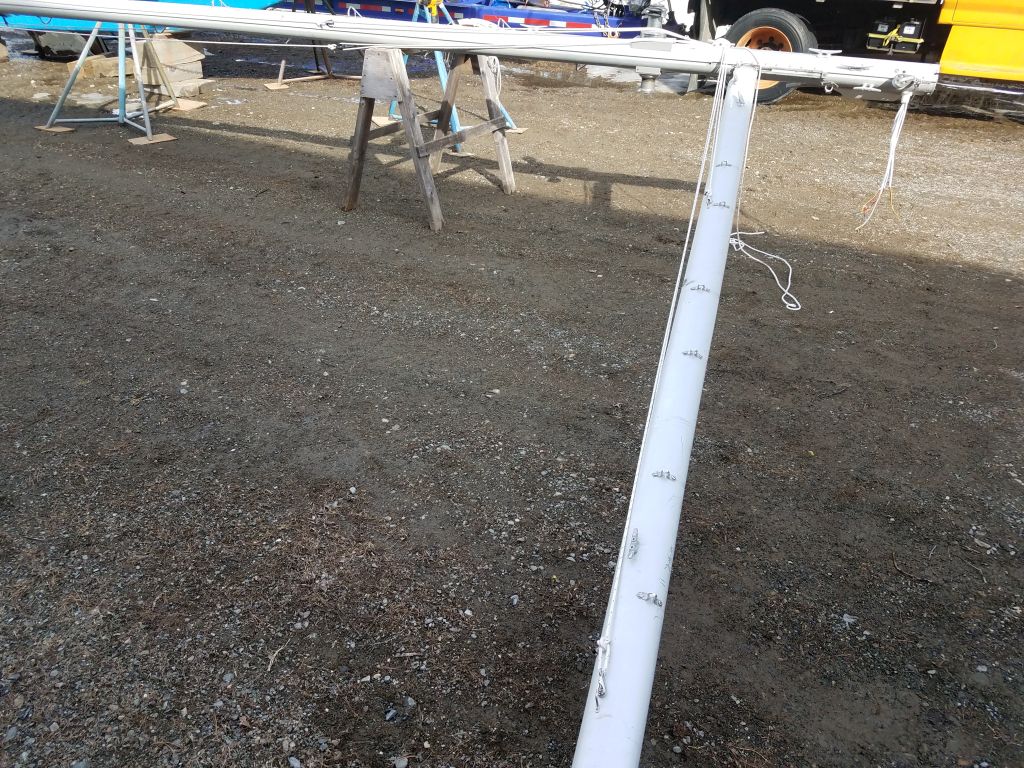
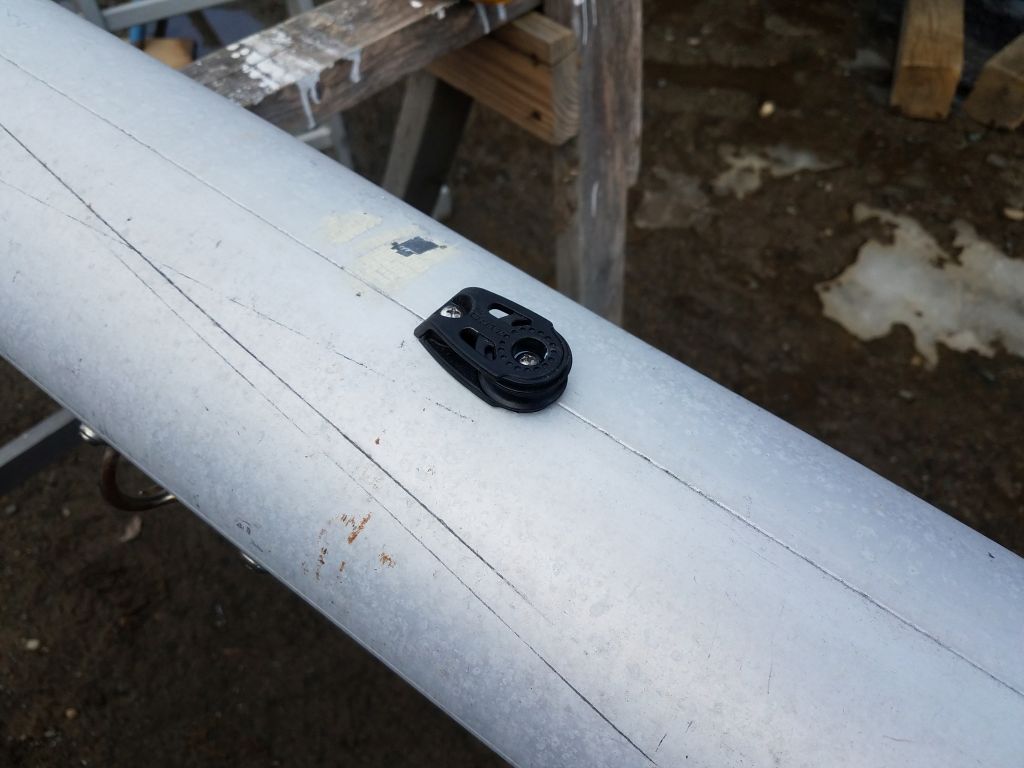
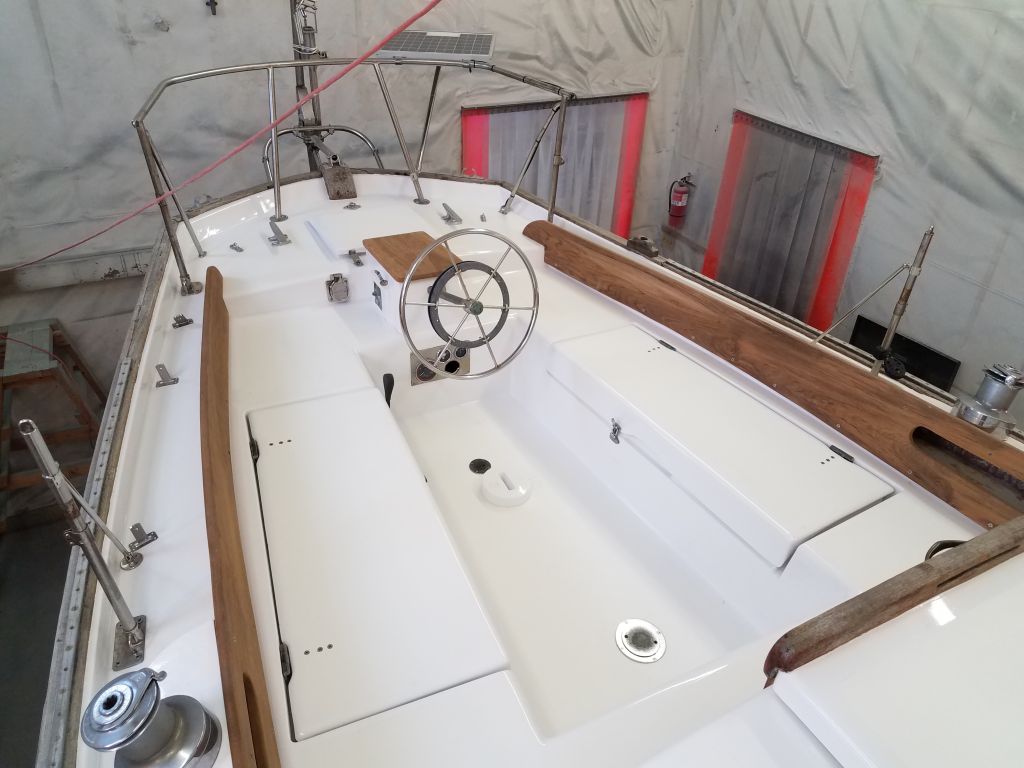
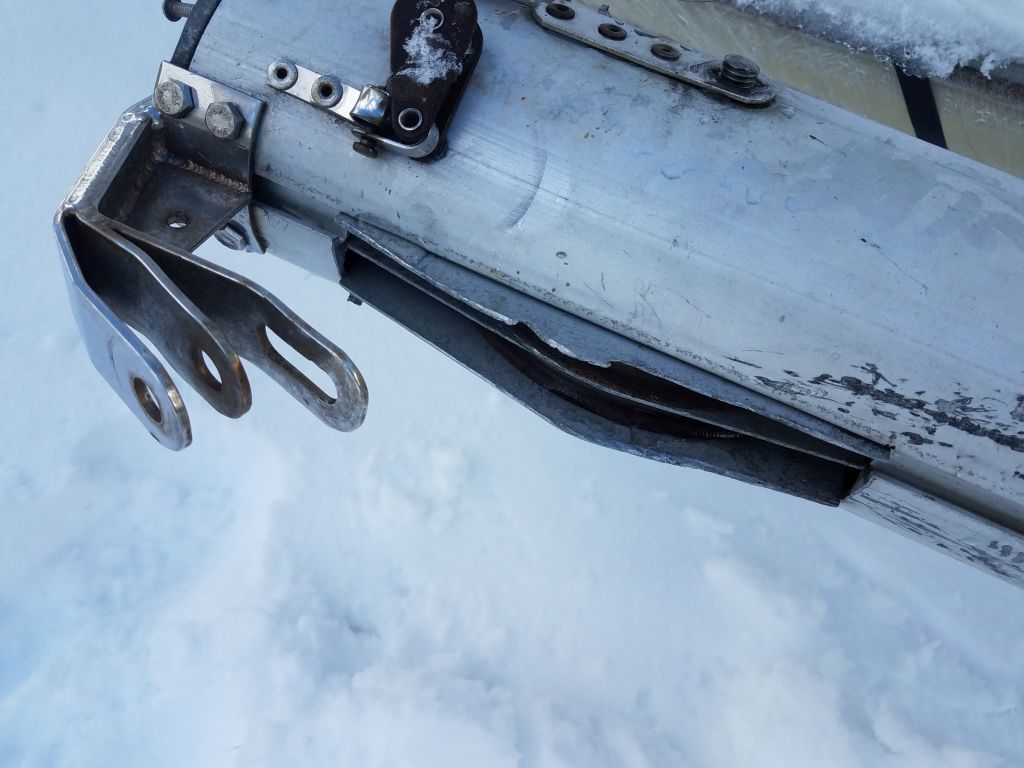
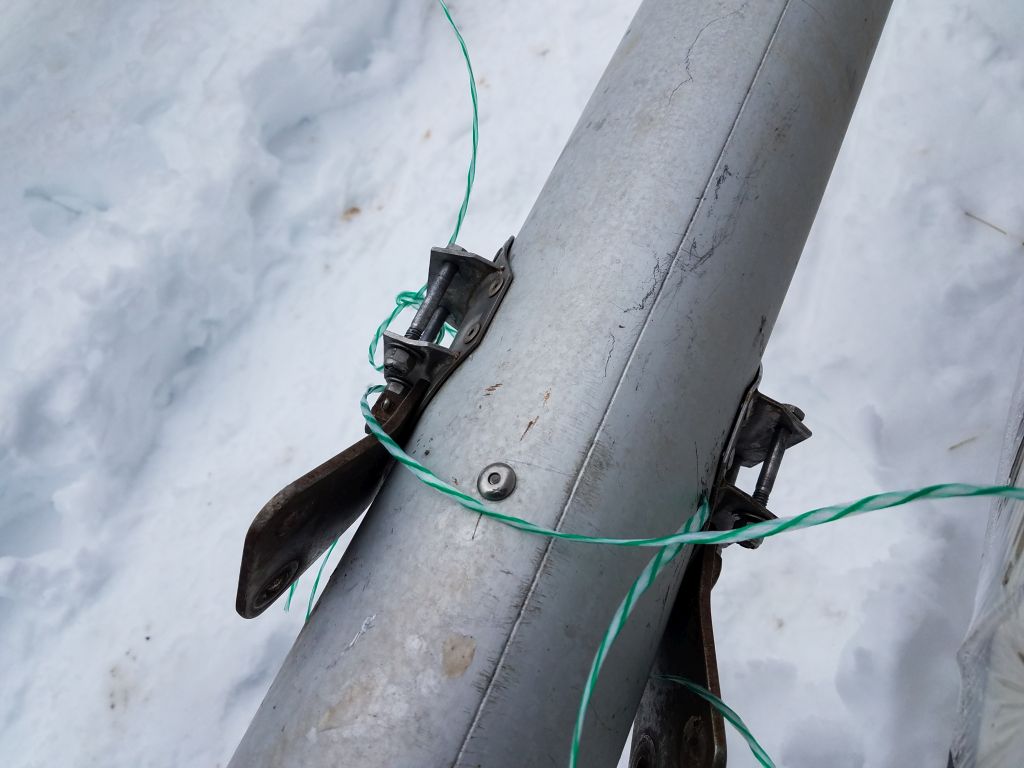
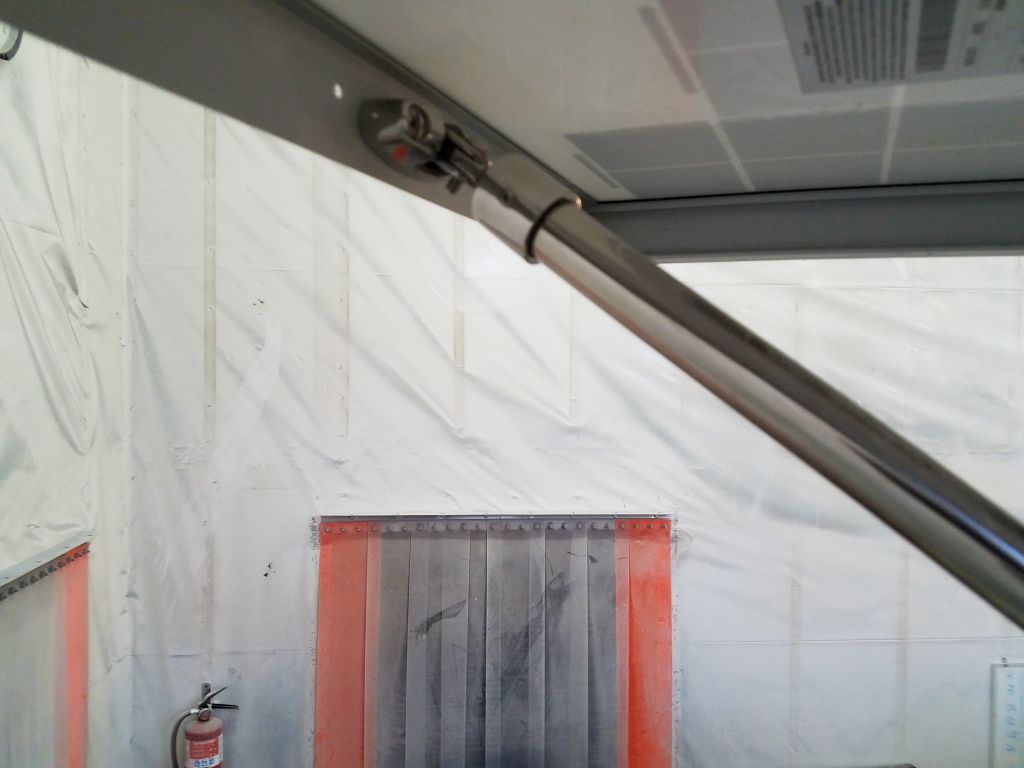
Next, I started the installation of a lazy-jack system, a retractable and simple system I’d been using for many years. On. each side of the mast, a few feet above the spreaders, I installed a small cheek block for the main control lines, using two machine screws in tapped holes, all protected with Tef-Gel. I ran a continuous line through these blocks and through another block on the front side of the mast, from which I then led a tension line down towards the mast base. This arrangement formed the main part of the system and allowed easy tensioning and retraction of the jacks if desired. It’s a difficult system to photograph and works more easily than I can describe it, though I’ve done so in various other project logs in past years.
By now, it was late in the day, and I left the remaining lazy jack installation–all on the boom itself–for another time. I’d also repeat the installation on the mizzen mast another time.

Total time billed on this job today: 2 hours
0600 Weather Observation: 32°, cloudy. Forecast for the day: Rain or snow shower, then mainly cloudy, 40s (it ended up being sunny and mid-50s during the afternoon)
Friday
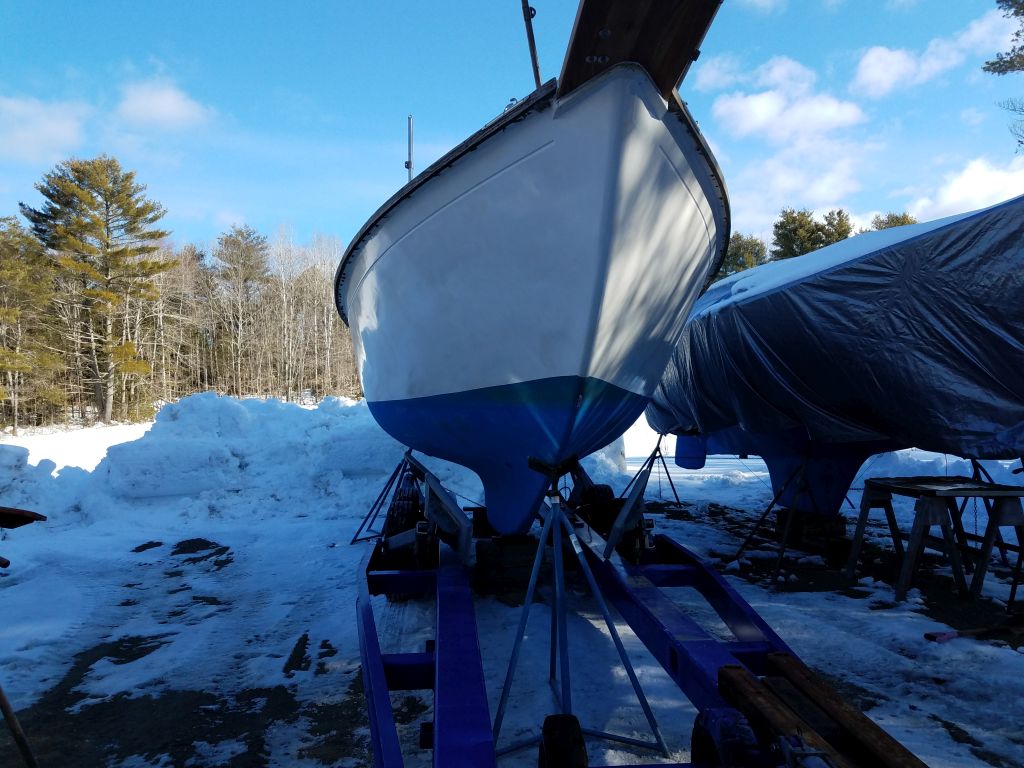
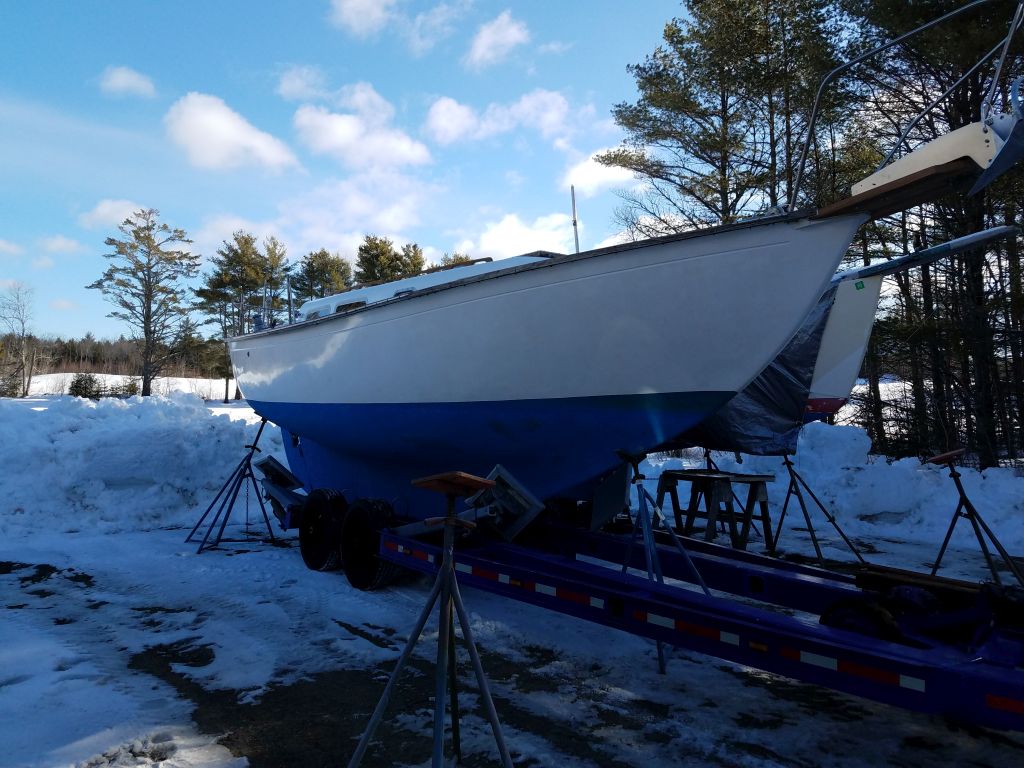
Taking advantage of about the best outdoor conditions I could hope for in the near future, I moved Jasmine outdoors to open up the shop for a new project.

Total time billed on this job today: 1 hour
0600 Weather Observation: 30°, mostly clear. Forecast for the day: Sunny and windy, high around 34°
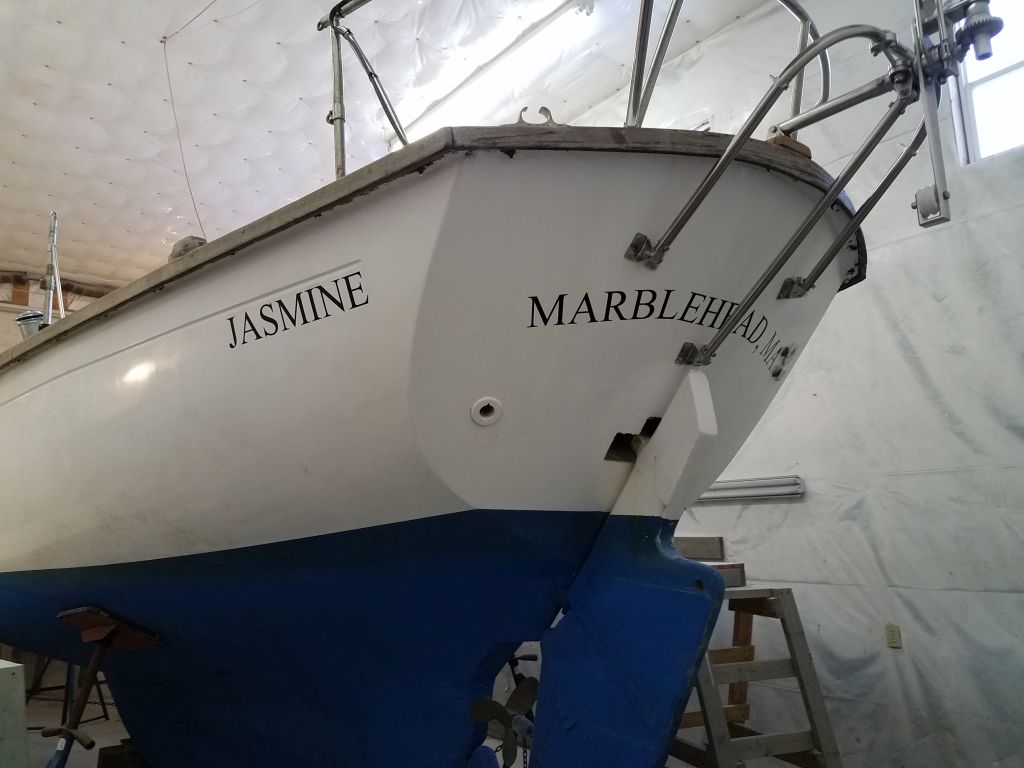
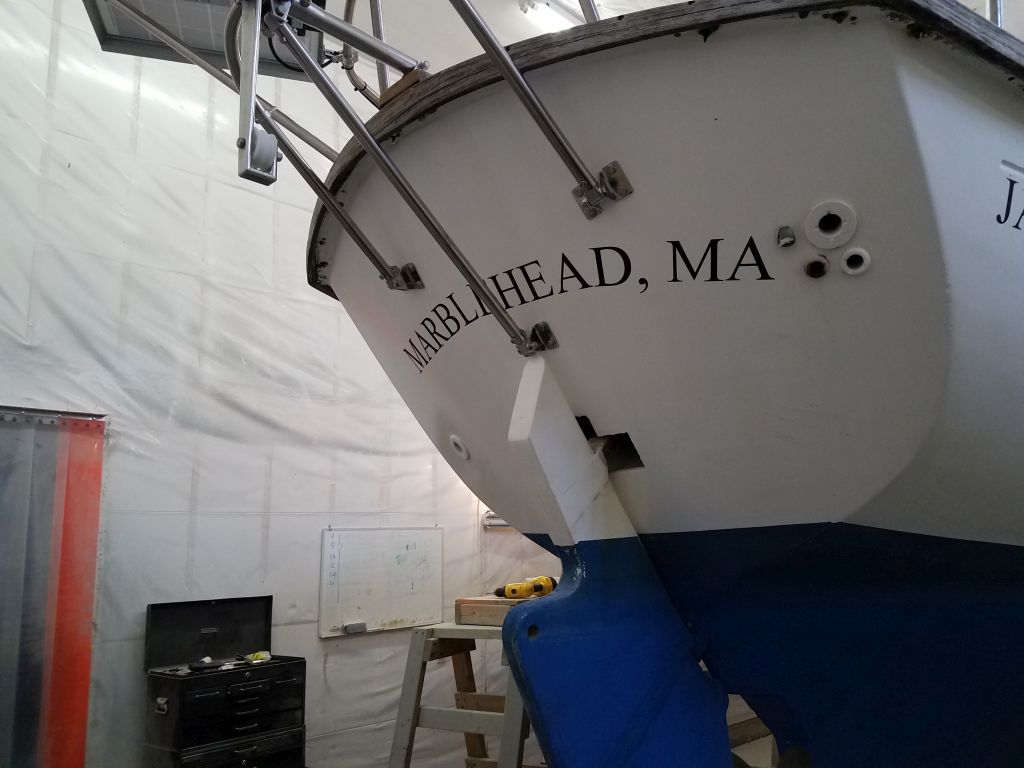
Tuesday
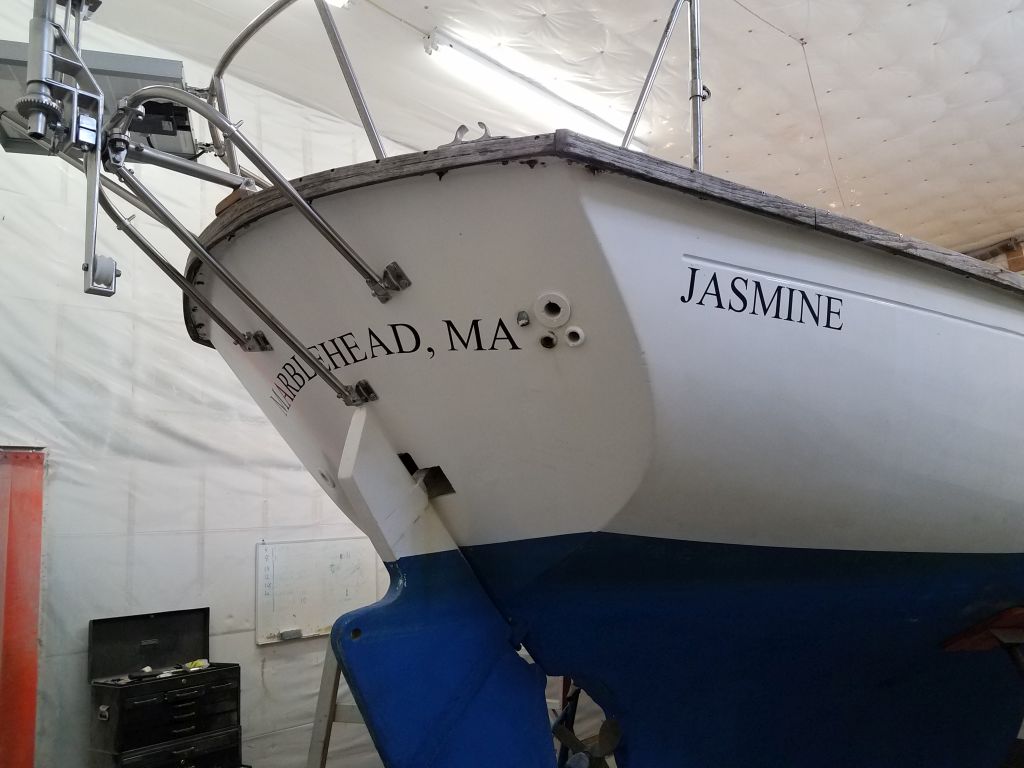
Earlier, I’d ordered and picked up the new, simple lettering for the owner’s name and hailport, and now I installed it on the quarters and transom as requested.
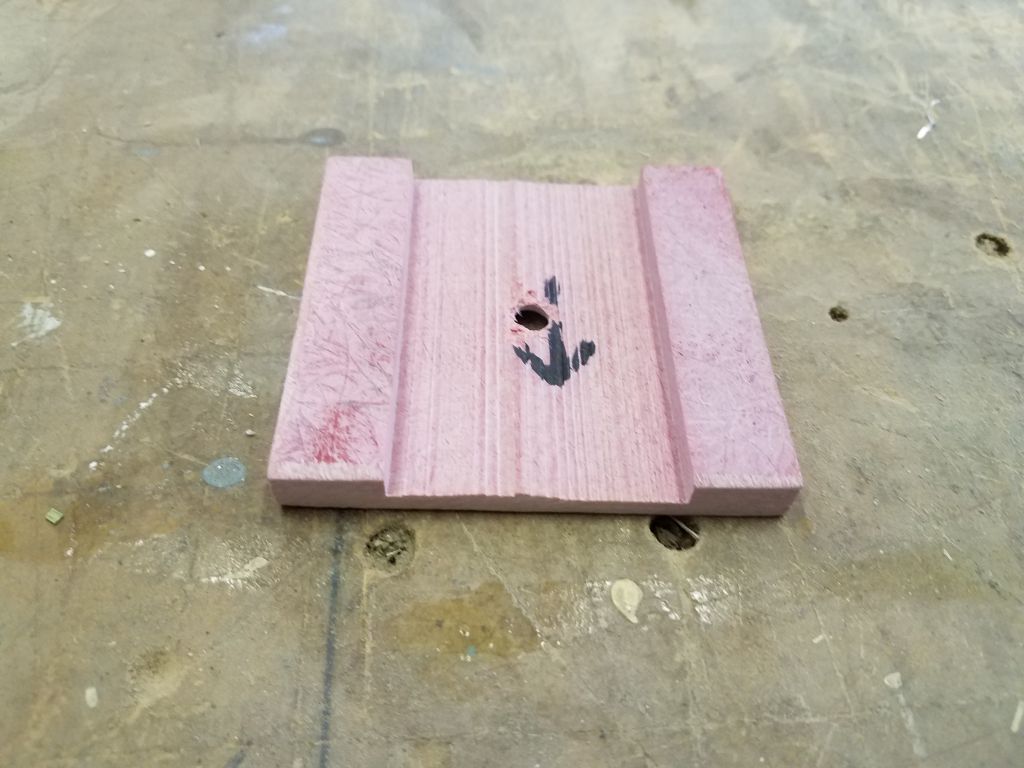
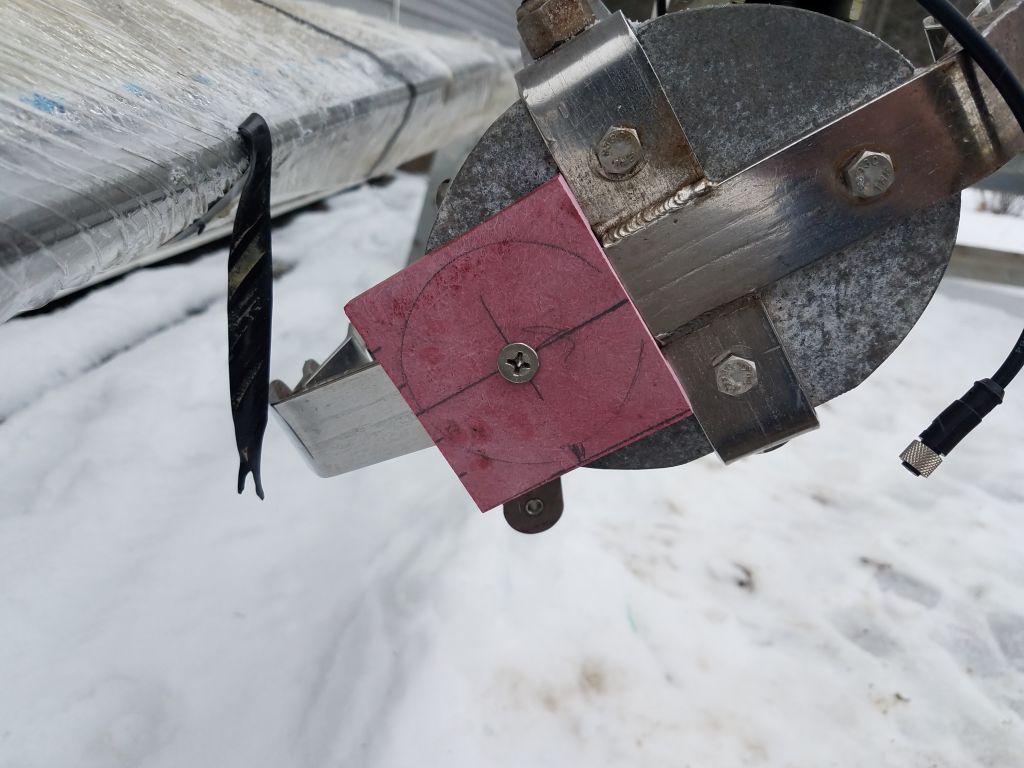
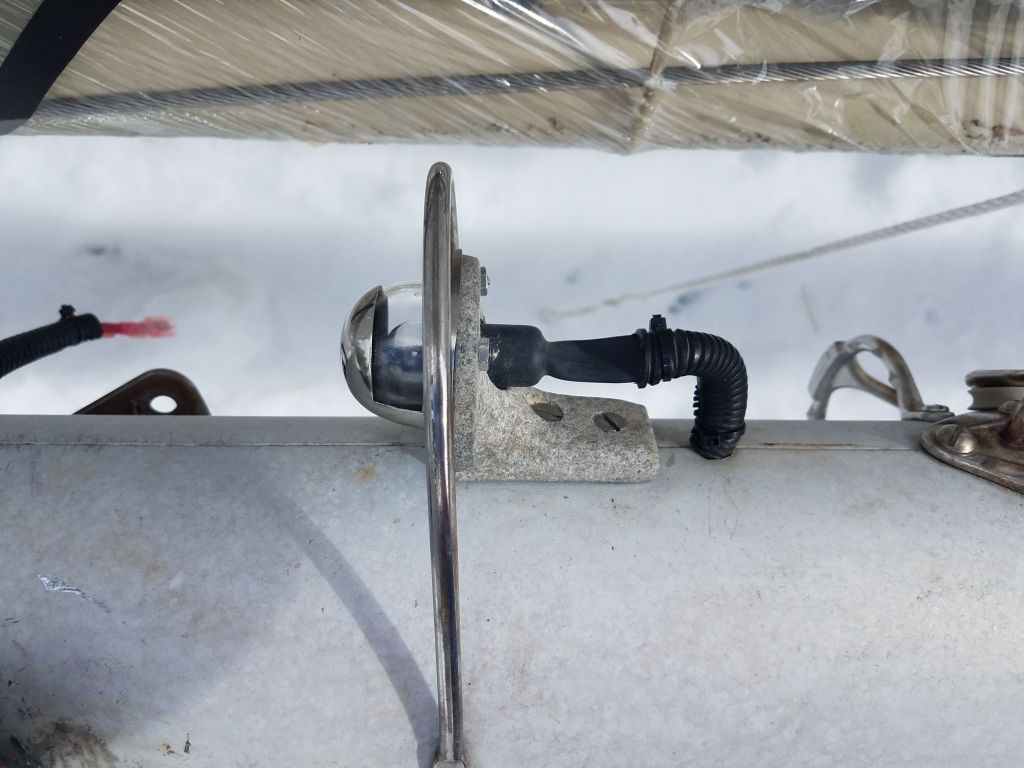
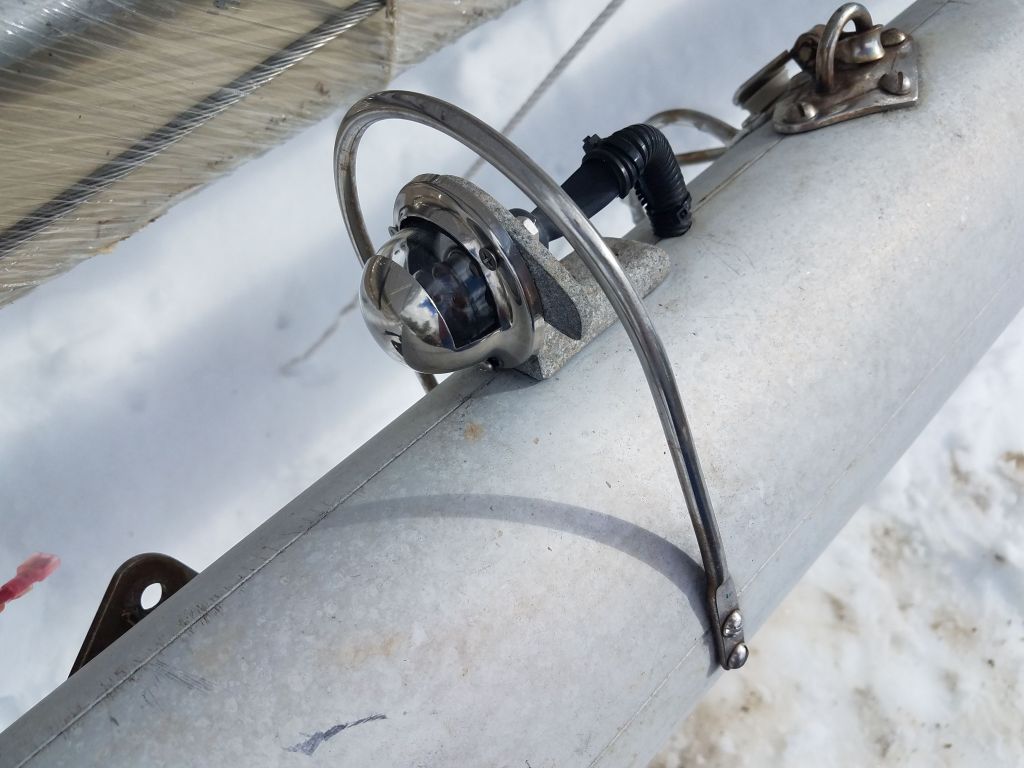
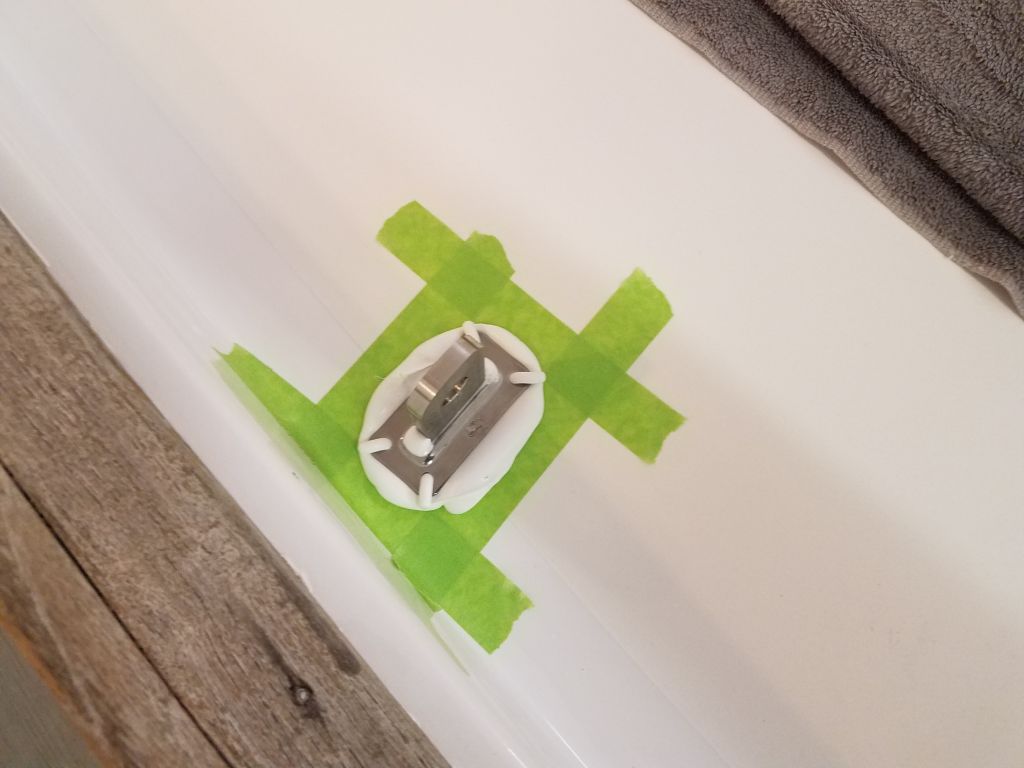
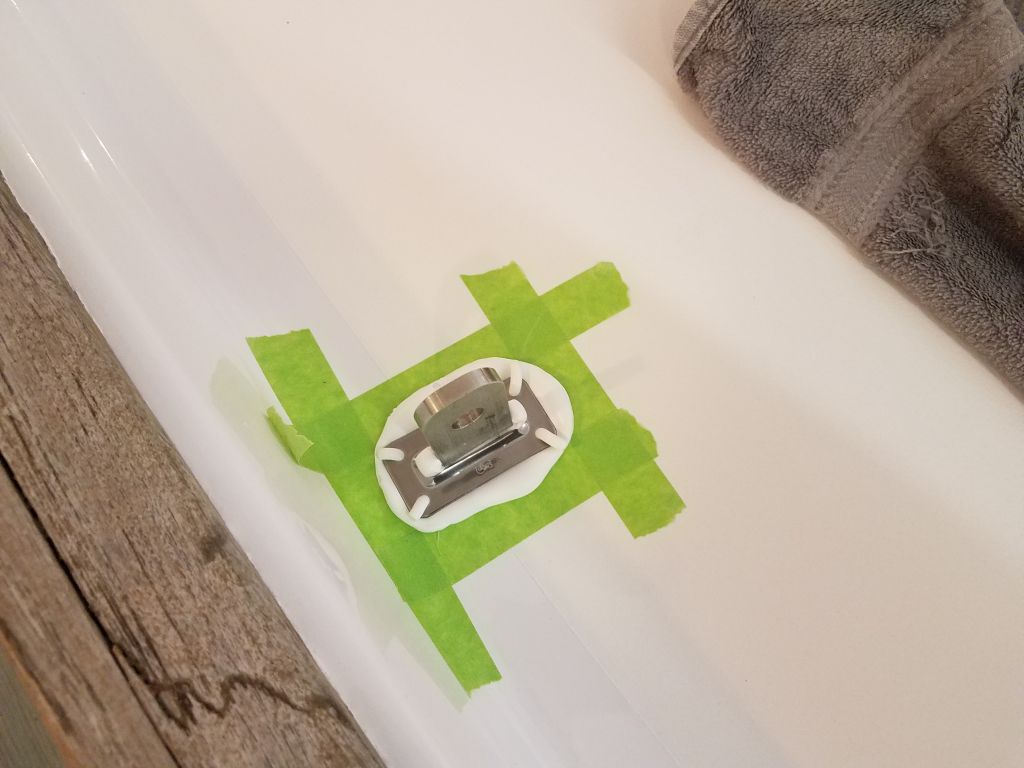
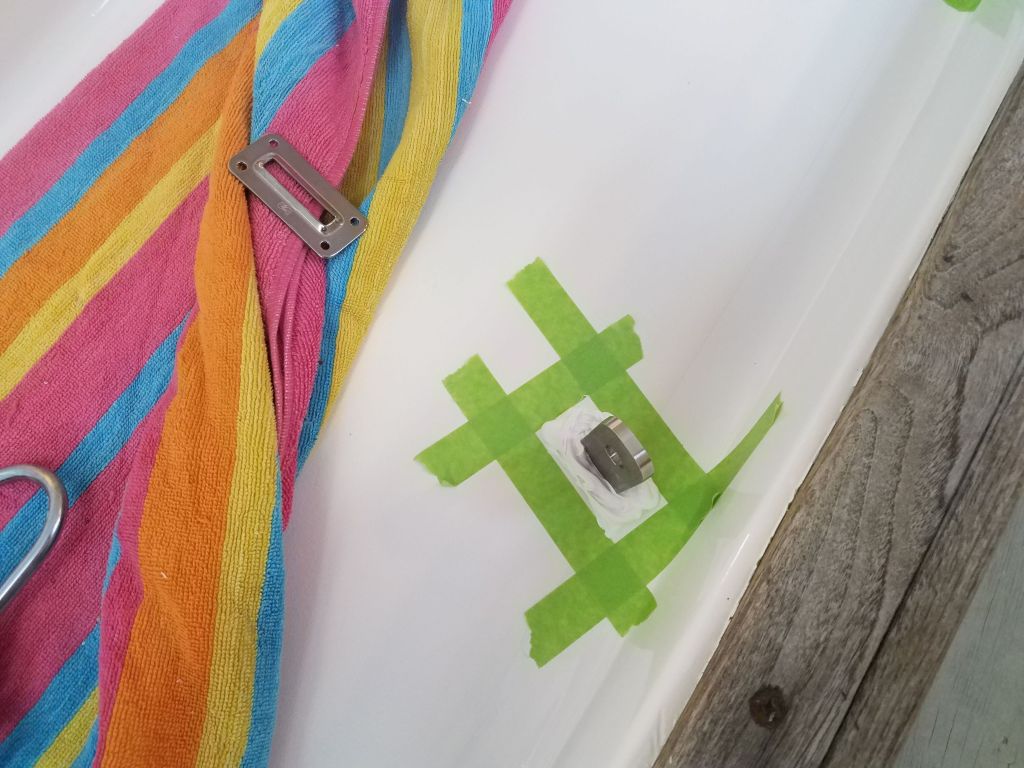
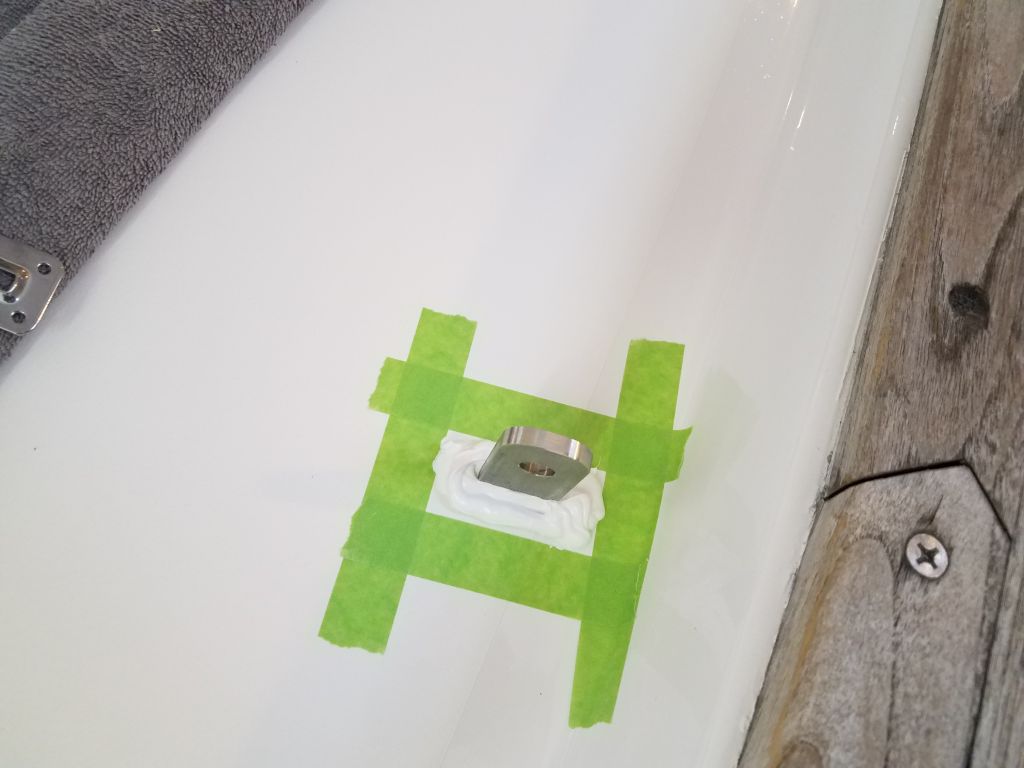
To accommodate the stainless steel rigging straps that wrapped above the masthead and impacted the location for the new tricolor/anchor light fixture, I made up a little platform from fiberglass, dadoing out the base to fit over one of the straps. To secure the base in place, I removed one of the hex bolts securing a strap at the after end of the mast, and prepared a hole in the fiberglass base through which I could install a replacement screw. Later, I painted the little base, leaving all ready for installation at my next opportunity.
The return of winter weather, after rather a hiatus during February, came during an inconvenient time for me, just as I wrapped up this job and was hoping to move boats around and load my next project into the shop, but no one asked me first. I’d seriously considered making the moves yesterday, before the onset of a large snowstorm, but ultimately decided to wait till after the snow. But in any event, my work on Jasmine was essentially complete, other than a few minor tasks related to the mast, and to prepare for any opening in the next several days when I could possibly make some boat moves, I dismantled the staging and cleaned up the boat, removed protective towels and electric cords and lighting, and closed her up to await a yard move as soon as I could.


Total time billed on this job today: 2.75 hours
0600 Weather Observation: 31°, cloudy. Forecast for the day: Snow beginning later and becoming heavy in the afternoon and overnight, 12-24″ forecast
Monday
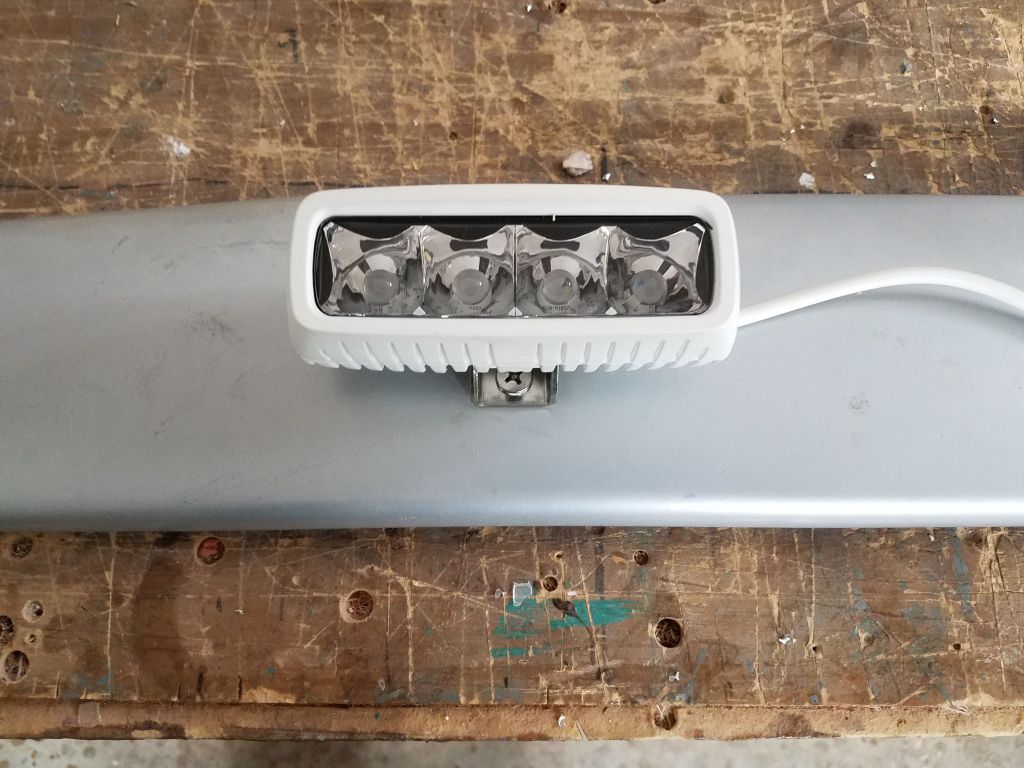
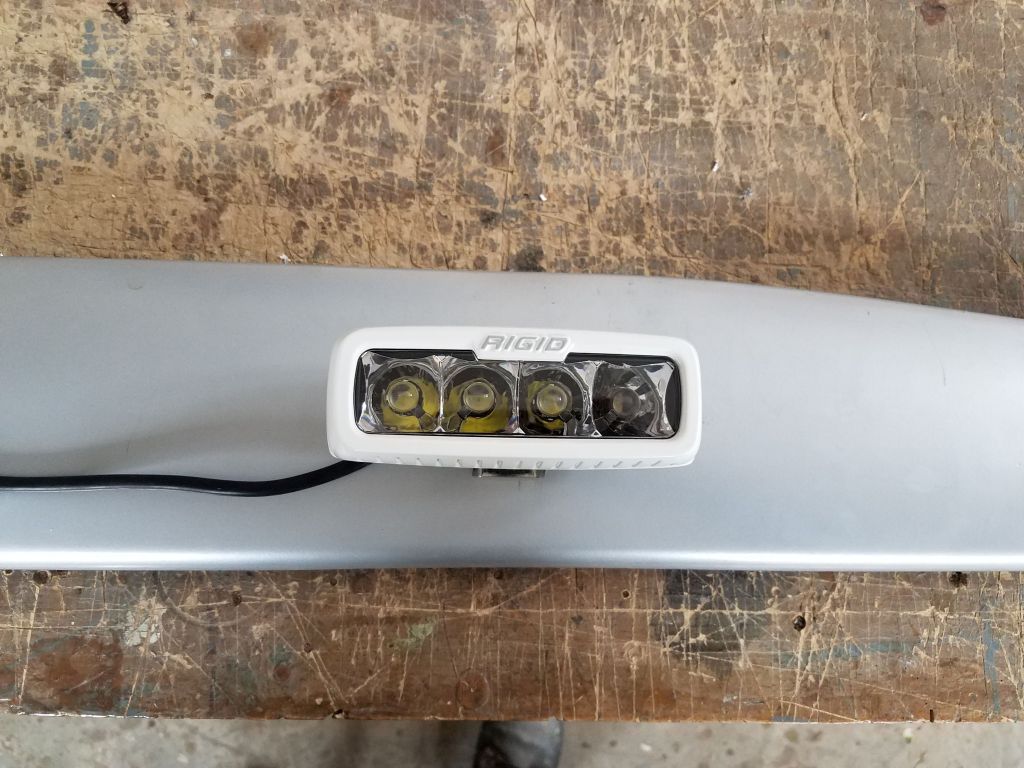
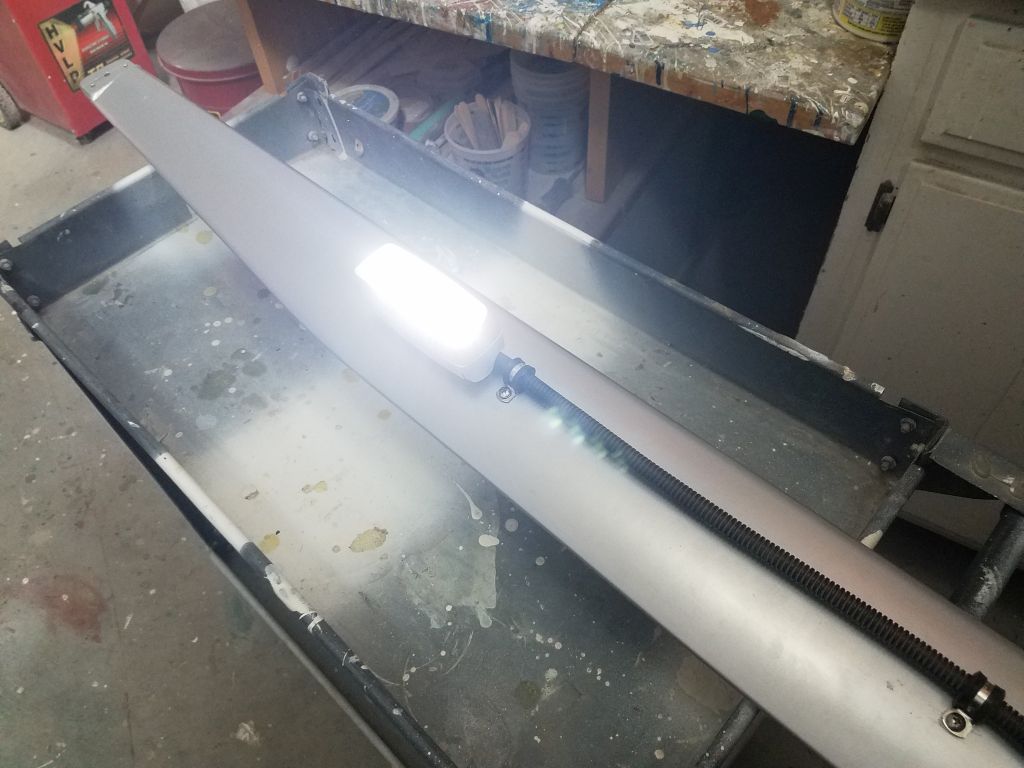
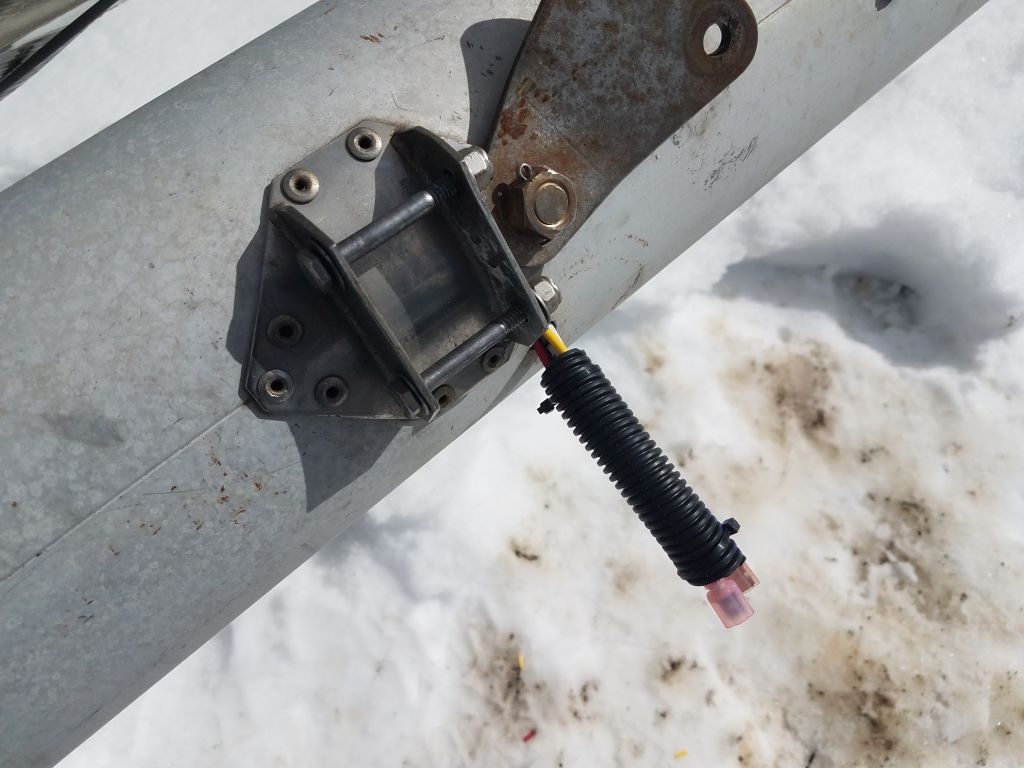
The owner requested spreader lights, and I found some nice little aluminum-housed LED lights that would do the job well. With the spreaders on hand in the shop, I began with the basic installation and spreader-side wiring.
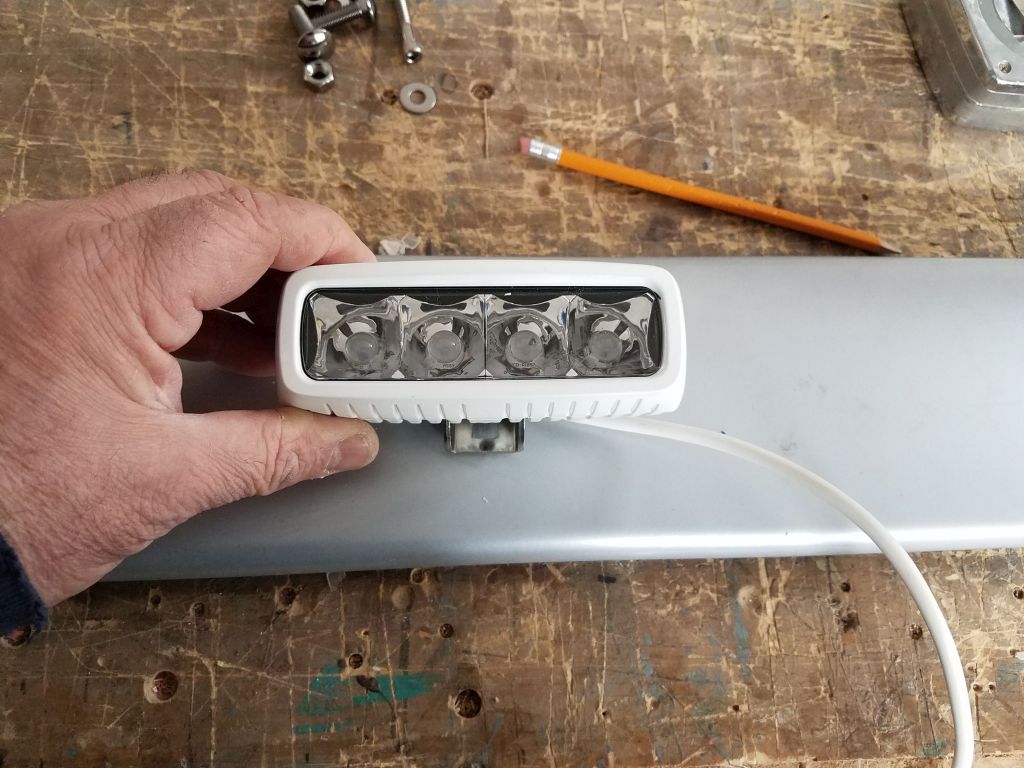
The lights featured a small stainless steel bracket that allowed light rotation up to 90°, which is where I needed it for this installation so that the lights would face directly down to the deck below. After determining the position for the light and its bracket, I installed the bracket with a single machine screw into a threaded hole in the bottom side of the spreader; the bracket was designed for a carriage bolt, but that type of fastener wouldn’t work in this blind installation. The two lights, ordered at the same time from the same vendor and while essentially identical, apparently were different “model years” and had slightly different wiring harnesses, one with a shorter black wire with a factory plug. This did not impact much for this installation and had no practical ramifications when all was said and done.

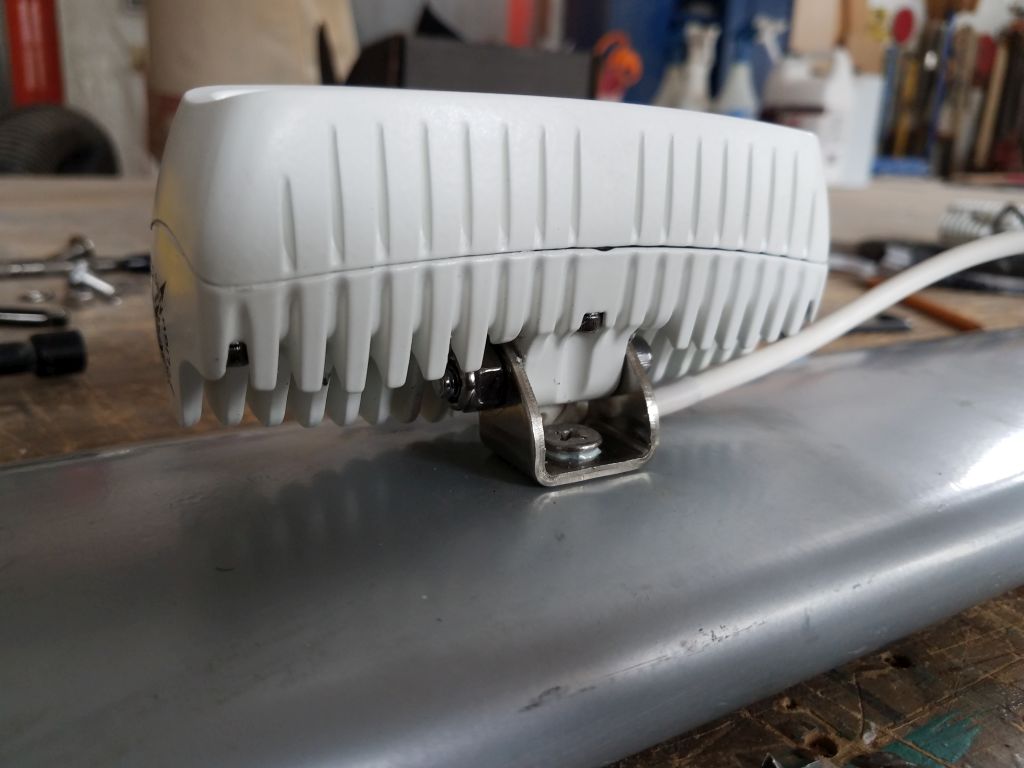
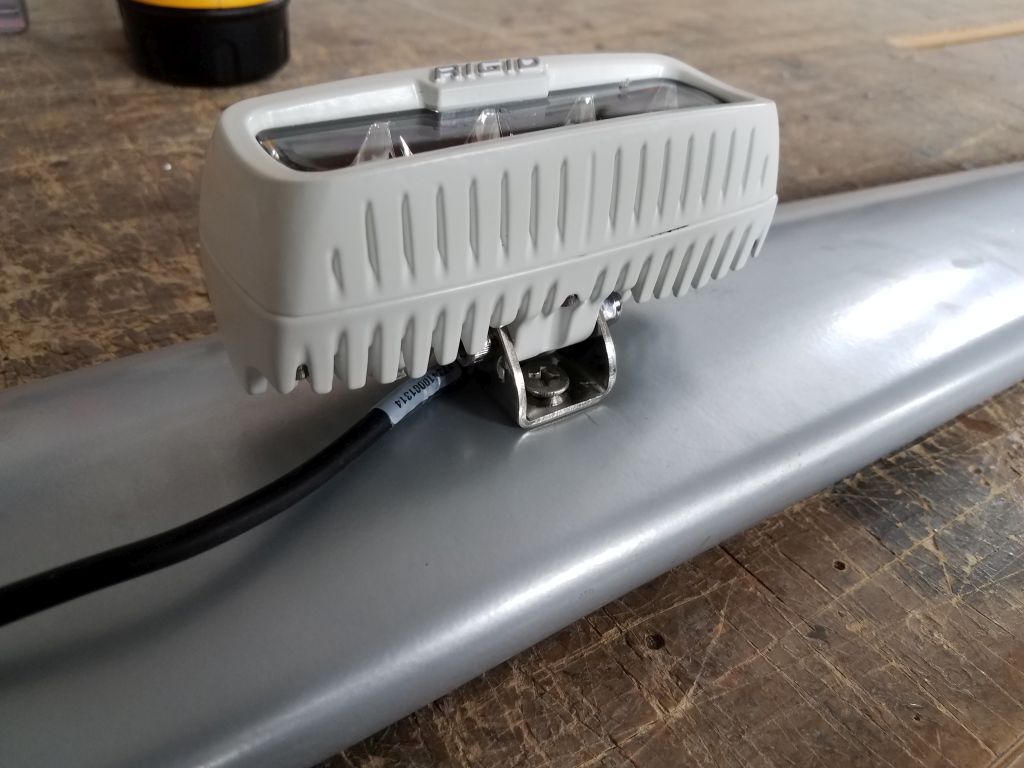
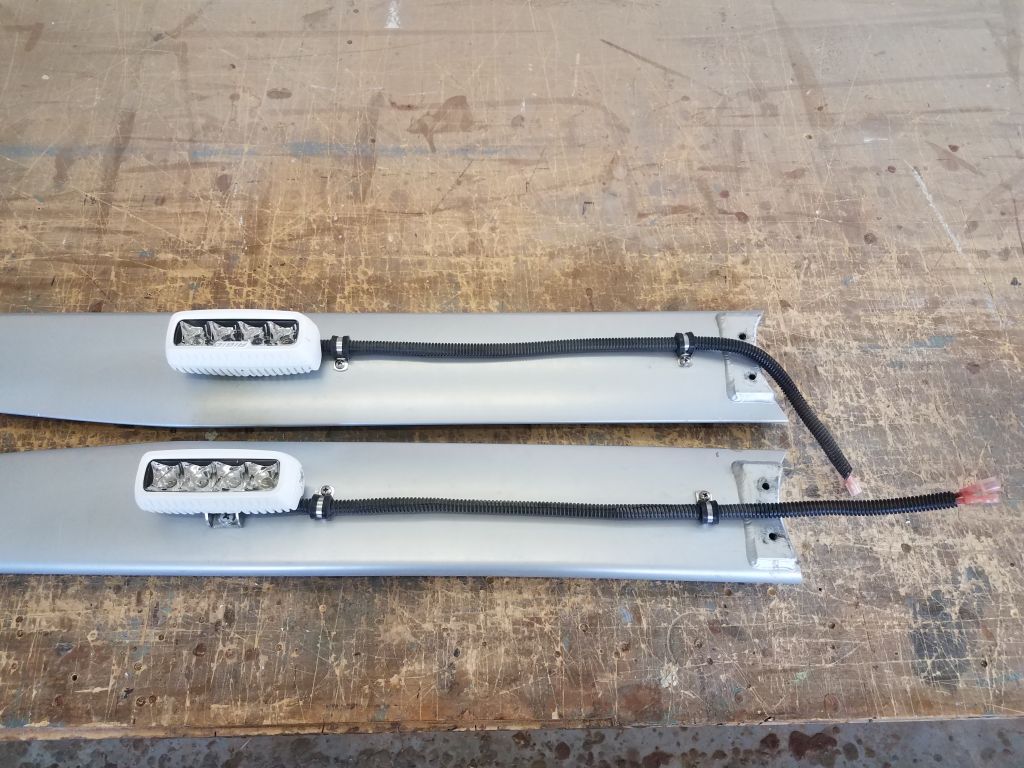
With the lights secured in their brackets, I completed the wiring that would lead to the mast for eventual connection. Since the spreaders might be removed in the future, I planned for plug-in connectors for the wiring. The white wire lead on one of the lights was pretty much the right length as it was, but the black wire on the other side was shorter, so I began by extending the wires to the same length as the other side. I added water-resistant plugs at the ends of the wires–male for one wire, female for the other, so that the mast side wiring couldn’t be accidentally reversed–then secured the wires to the spreaders with wire clamps and flexible conduit for looks and protection.


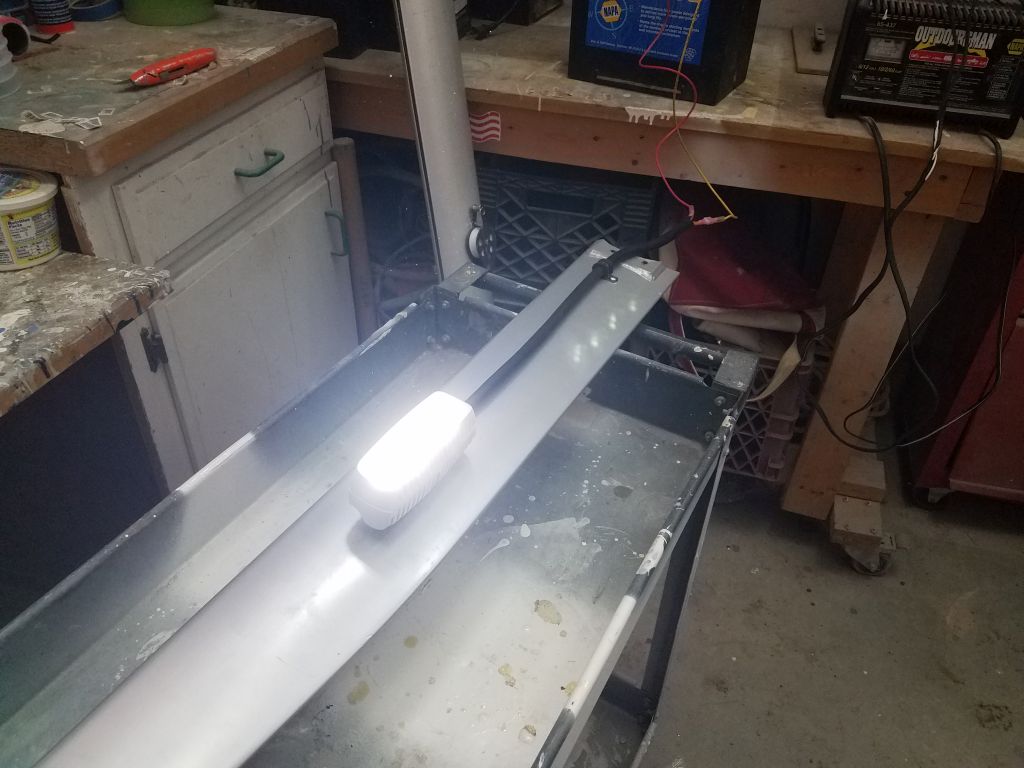
I made up a quick test lead connector and checked the lights’ operation with a battery. I was impressed by the light produced.

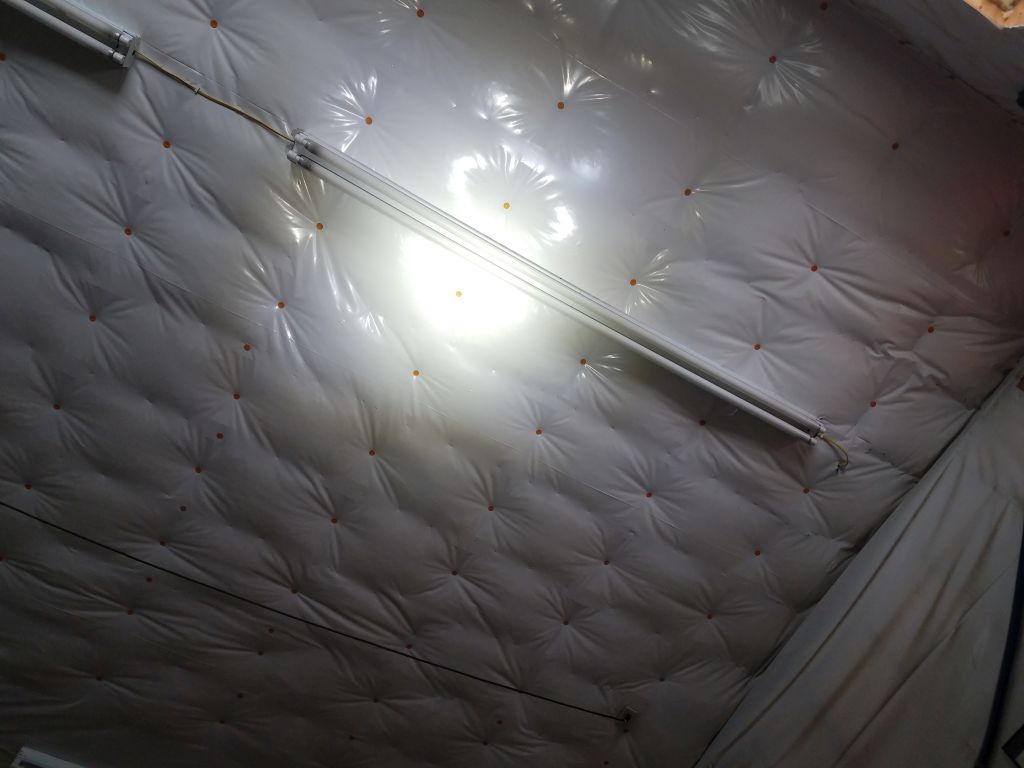
This photo shows the light bloom on the shop ceiling, about 15′ above the light itself.
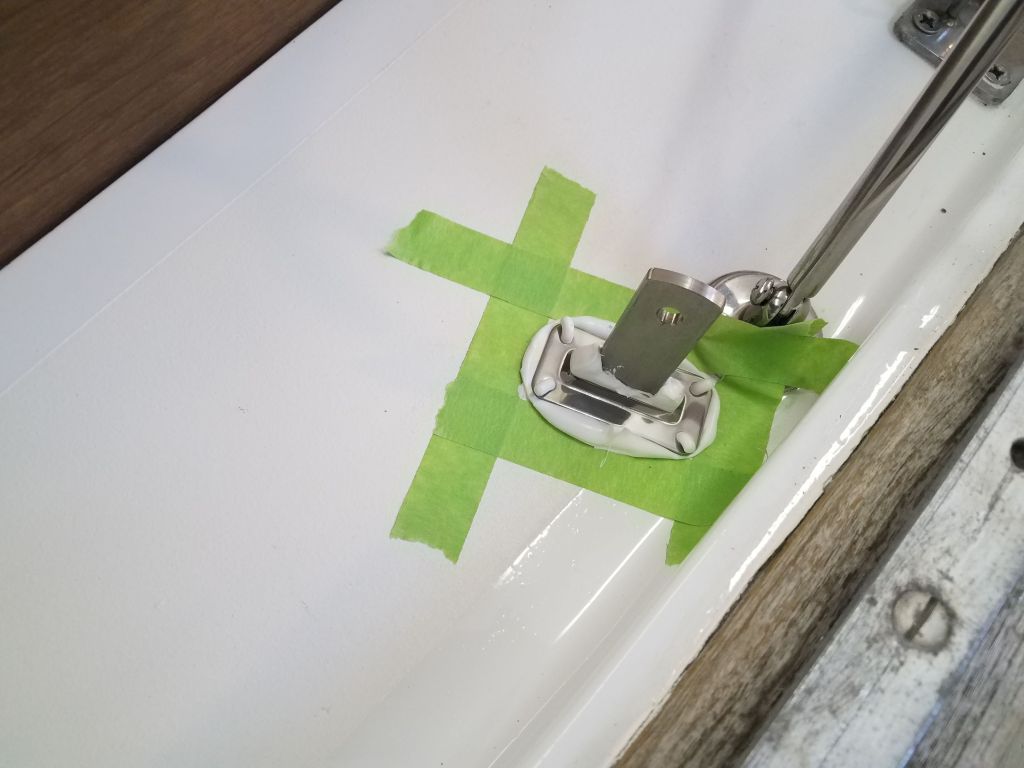
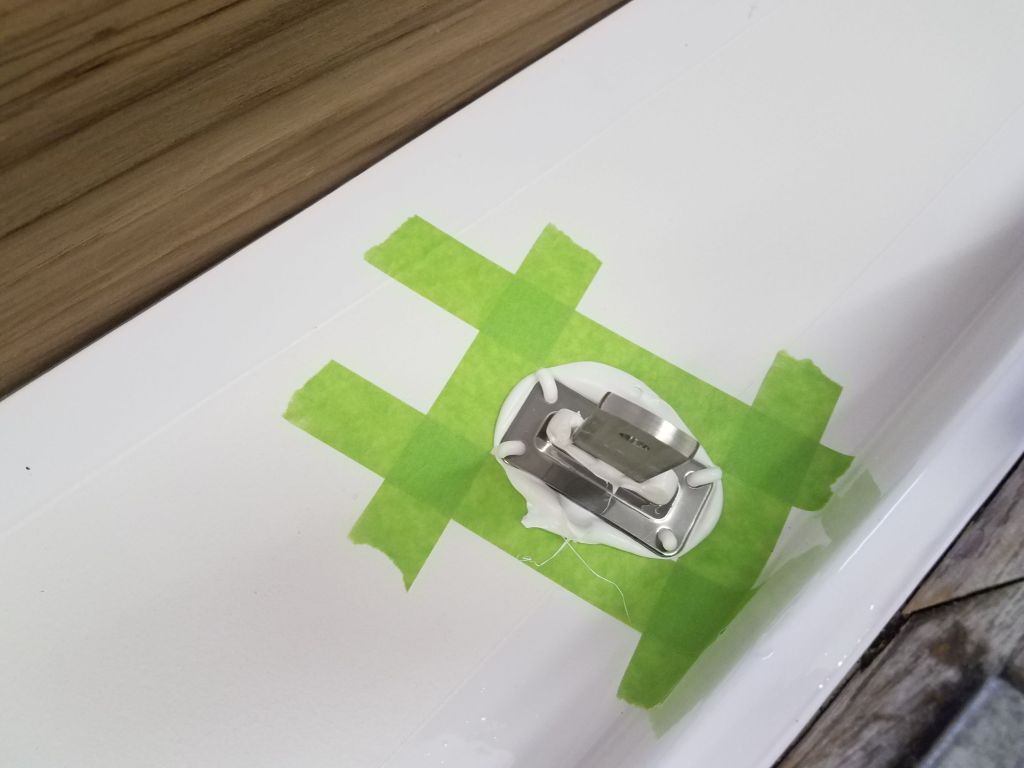
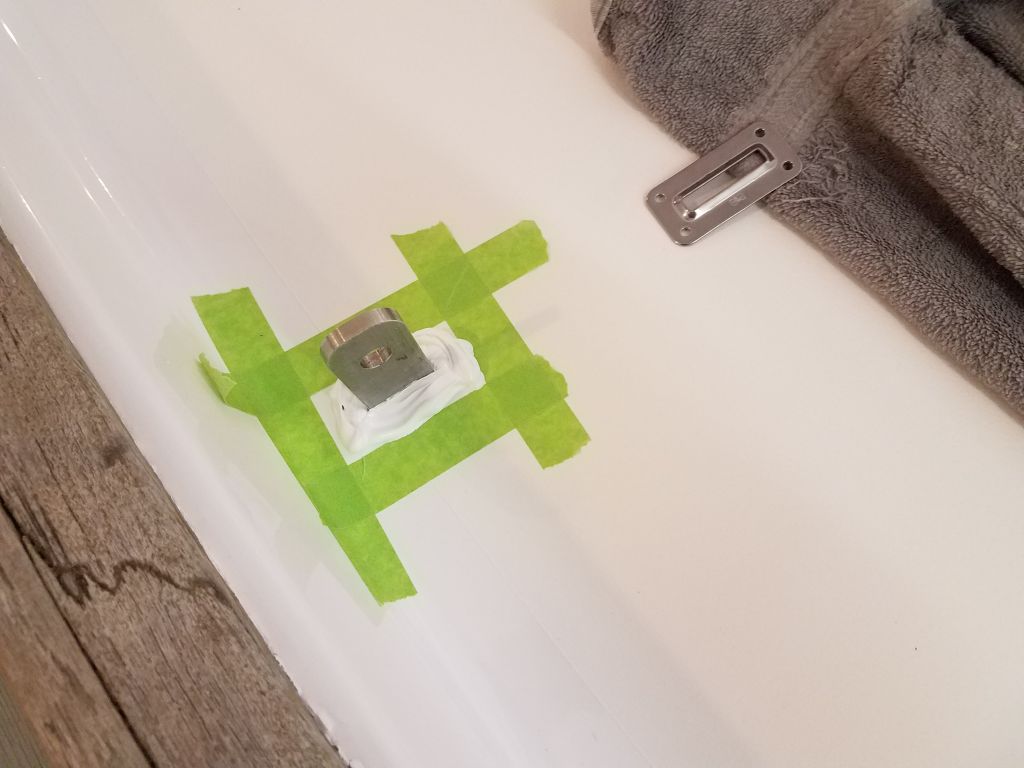
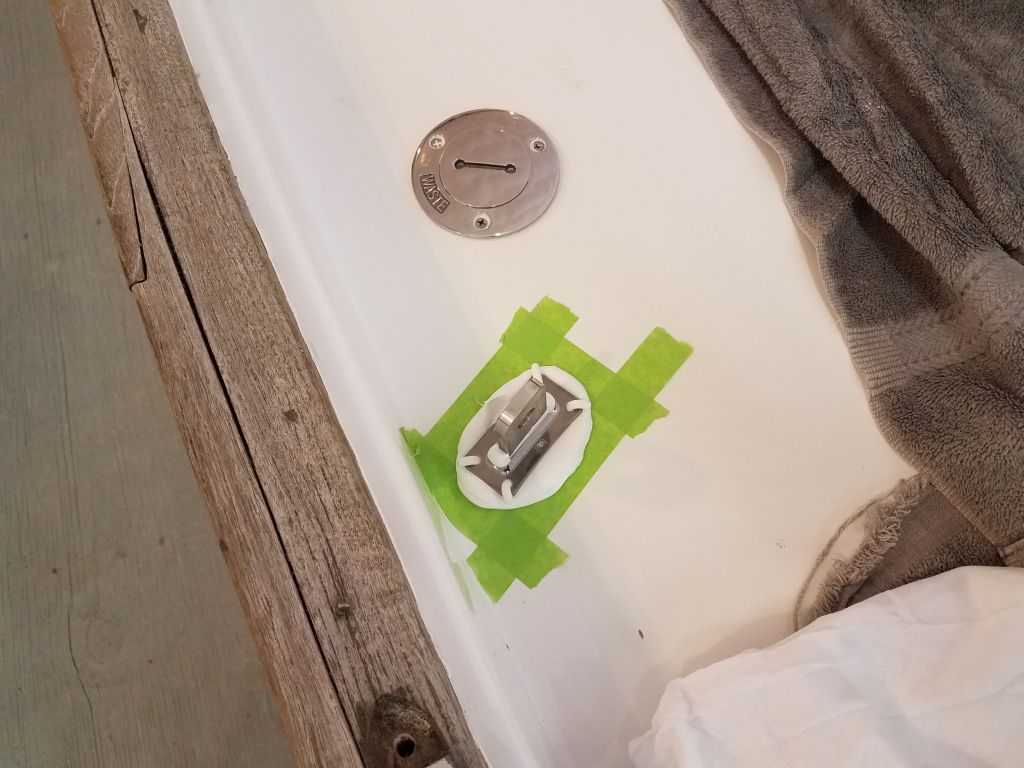
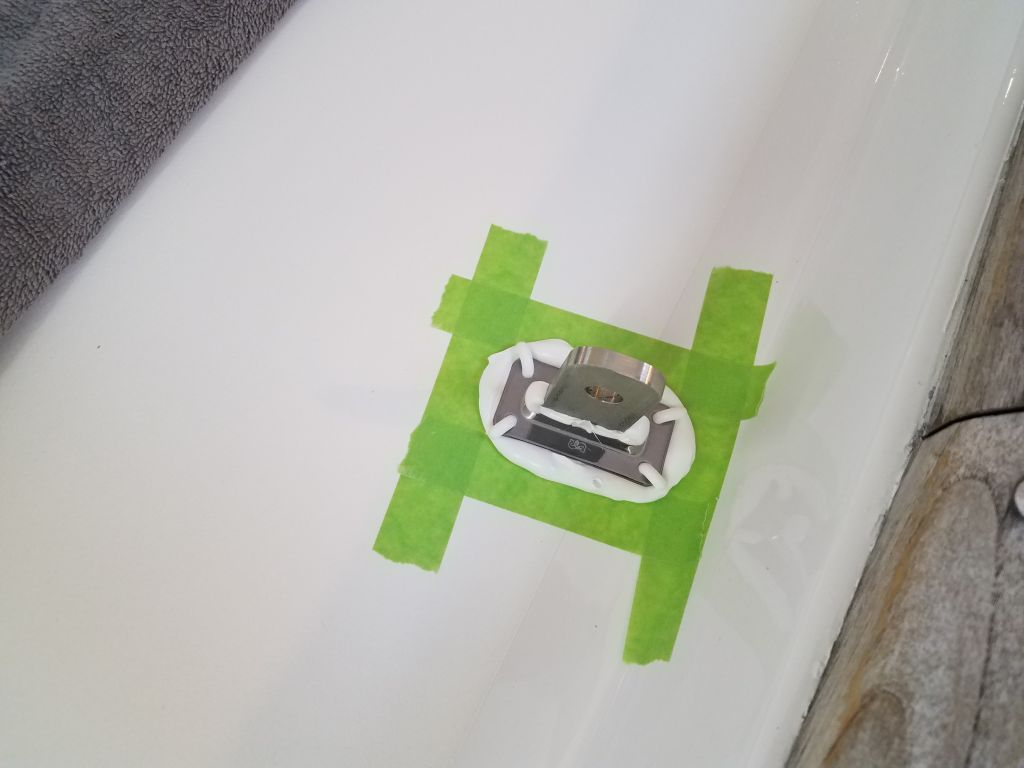
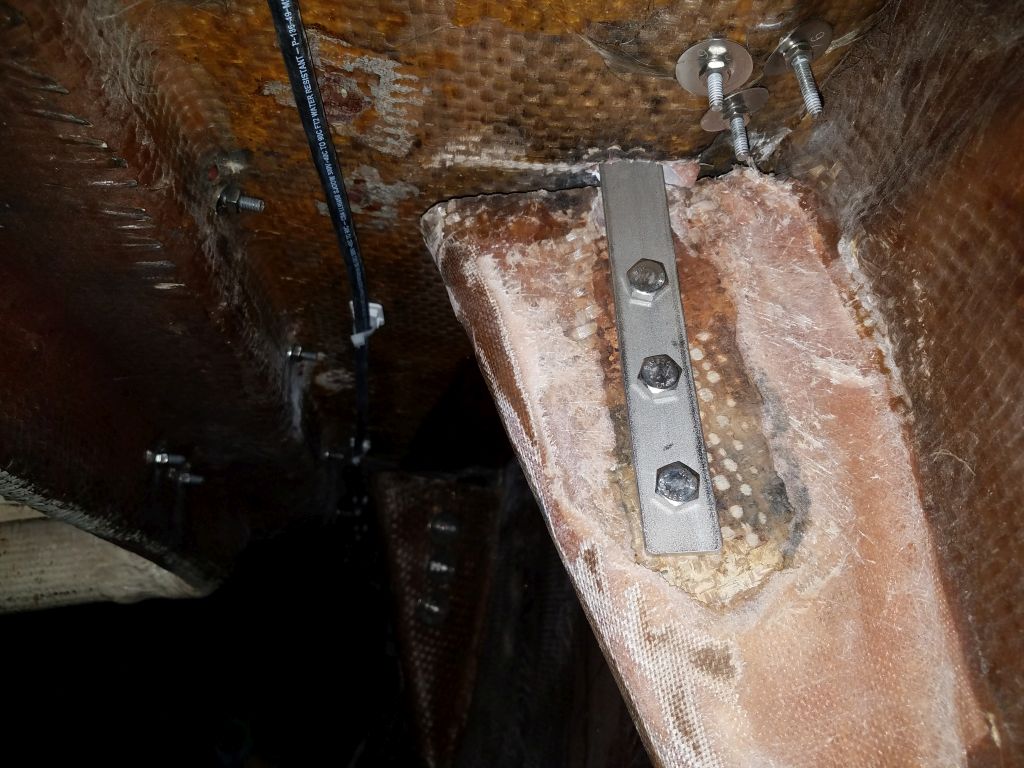
With the sealant securing the chainplate covers now cured, I removed the excess and cleaned up as necessary.
I completed the electrical panel by installing a few final panel labels that I’d had to order.

Taking advantage of another decent day outside, I picked up where I left off with the mast and, using the messengers I installed earlier, ran in the wires for the light at the masthead, spreader lights, and the steaming light, along with the VHF antenna. At the spreaders, I led a short wire pair across from one side of the mast to the other so I could wire both sides of the spreader lights.


At the masthead, I wired up the connector for the new tricolor/anchor light. The light came pre-wired with a short harness and a waterproof (according to the light’s literature) connector, so for the moment I just connected the other side of the connector to the new mast wire. This part of the harness was long enough that I could make the wiring connections inside the mast and just run the small harness out through a pre-existing hole in the side of the mast.

I postponed installing the fixture itself on the masthead, which had some stainless steel strops over the top that were in the way of the mounting location. I had a plan for mounting the light and would take care of that soon.
Continuing down the mast, I made up the connections for the spreader light wiring, with the corresponding connector plugs for those I’d installed on the spreaders themselves. I interconnected the wires from both sides of the mast and left short harnesses on each side to allow room for connection of the wires when the spreaders were installed.

Finally, I connected and installed the steaming light, using a small traditional-type fixture that fit on an existing little platform.

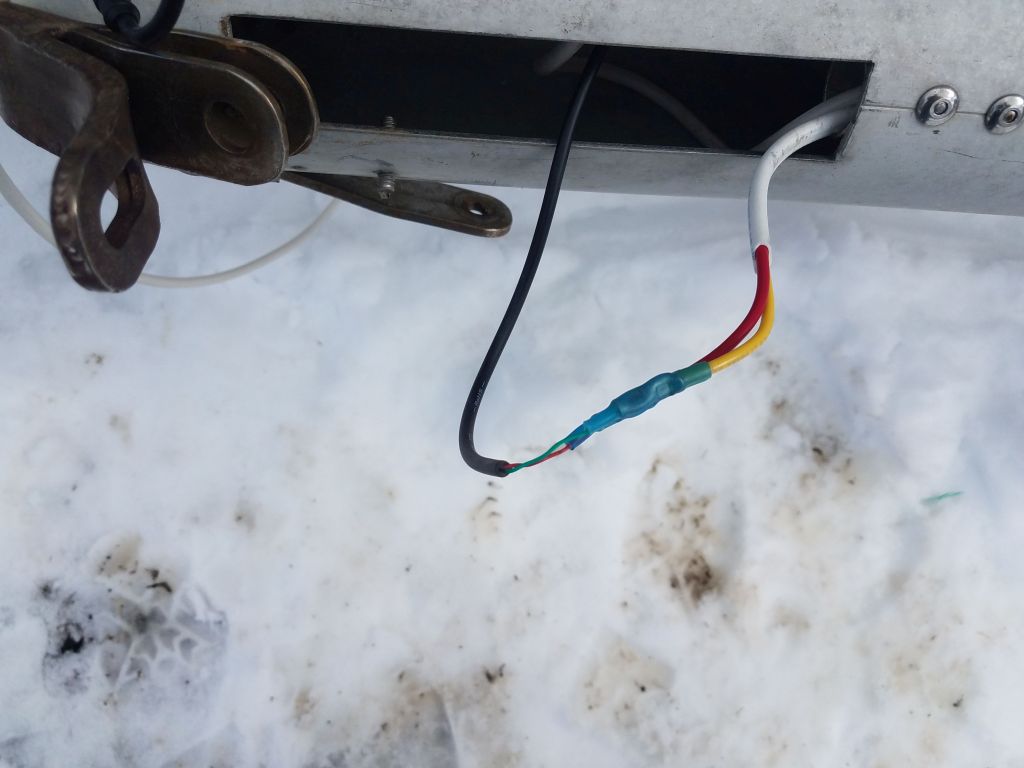
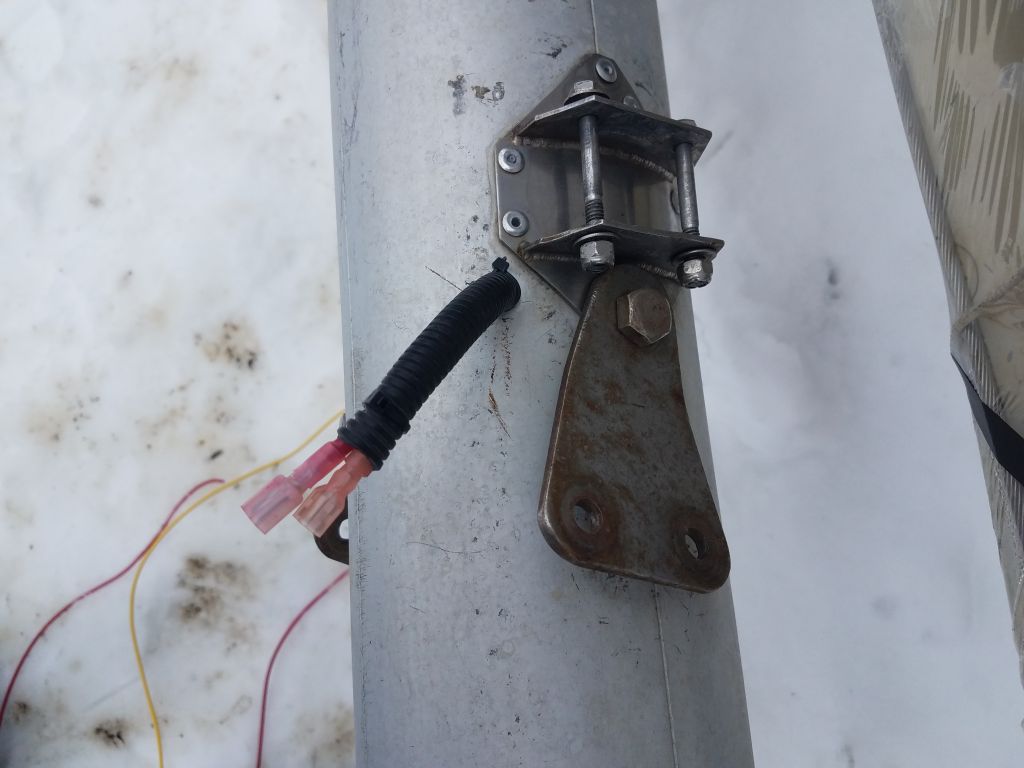
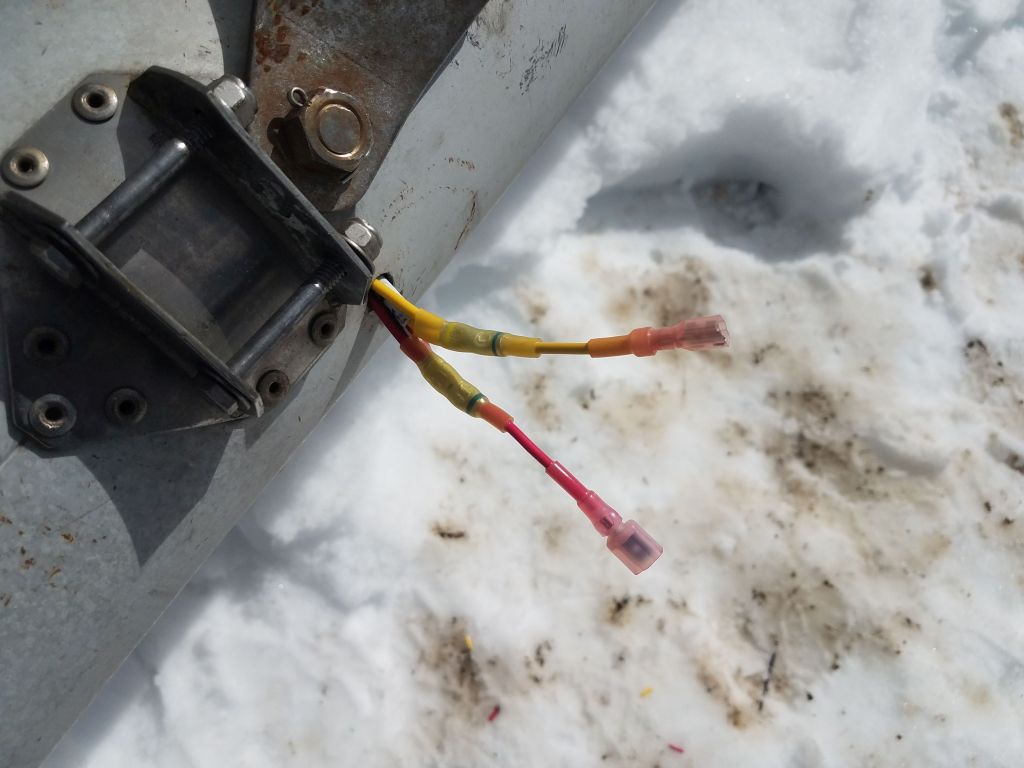
At the base of the mast, I led all the wires out through the wire fitting I’d installed, and, leaving ample slack for running into the boat, made up the wire terminal ends for later connection to the terminal block in the head. I tucked the wire ends back into the base of the mast for now to limit exposure.

Total time billed on this job today: 7 hours
0600 Weather Observation: 16°, clear. Forecast for the day: Mainly sunny, increasing cloudiness in the afternoon, around 40°
Friday
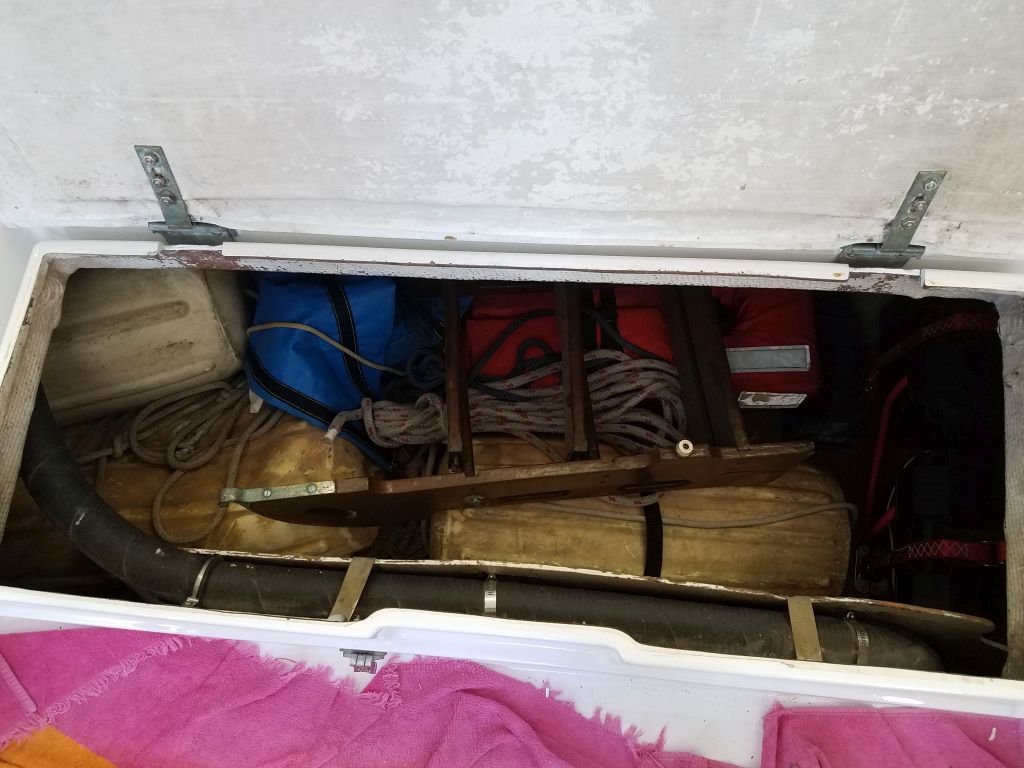
With most work on board now complete, I loaded most of the gear back on board.

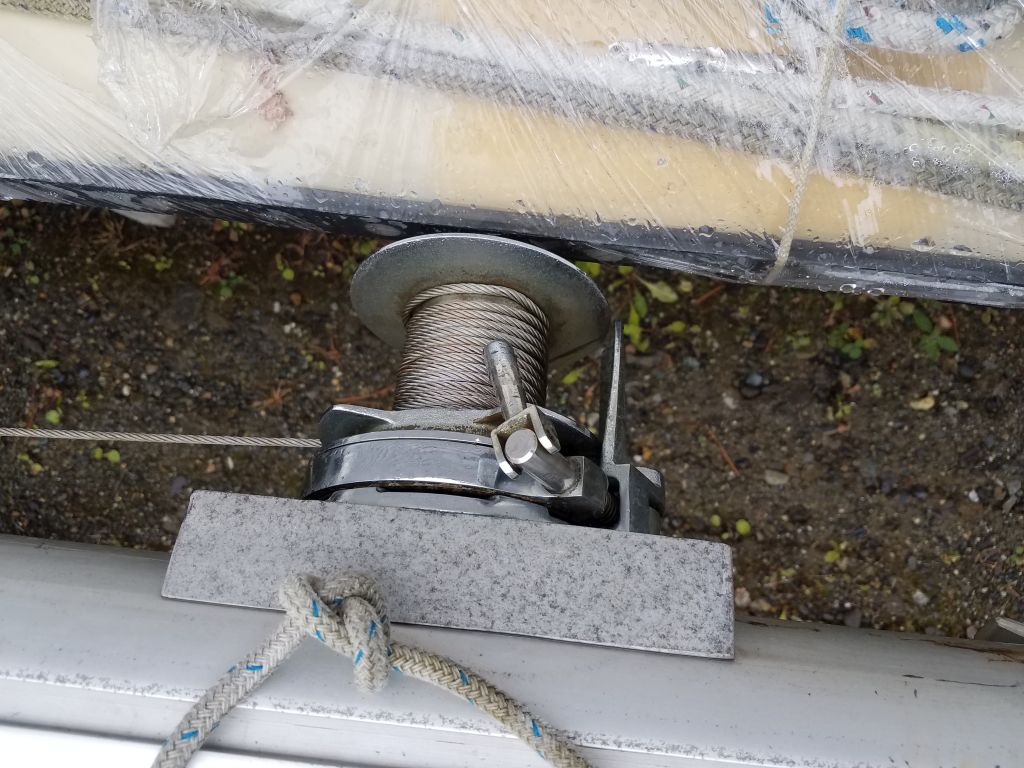
The riggers asked me to remove and send to them the masthead sheaves, which were to be replaced, so I headed out to the mast where, despite a recent large snowfall, the weather was surprisingly pleasant and benign. The two sheaves and aluminum divider plates were held in place with a single bolt, and the assembly came apart easily. I packaged up the sheaves and shipped them off.


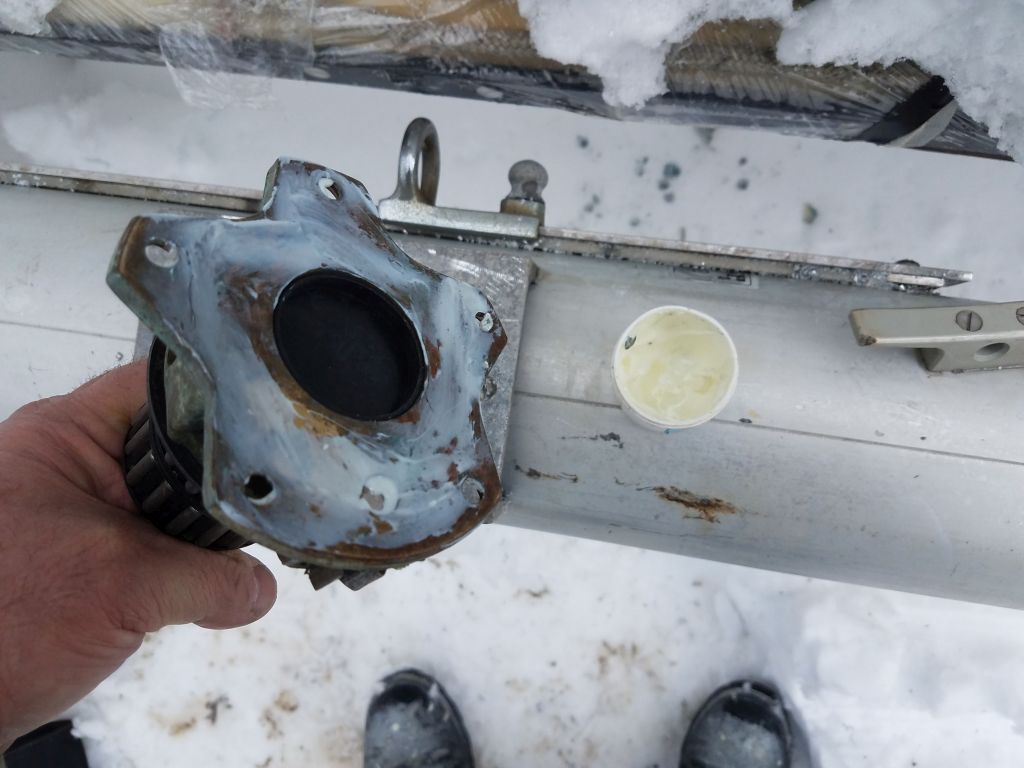
In order to remove the sheaves, I first had to remove the existing all-wire main halyard, which led to an old Barient #3 reel winch that the owner planned to replace. One thing led to another, and while I’d not planned on doing much in the way of mast work till better weather in a few weeks, once I got looking at the winch I decided to try removing it now.
Disaassembly was straightforward. There was a single screw inside the winch handle socket on top of the drum, and after removing this the drum came off with minor prying from beneath, as the surfaces were dry with age. Six machine screws held the base to the raised platform om the mast, and happily these came out without trouble, releasing the winch. This left behind some piles of aluminum-y corrosion, but later I scraped clean the original winch pad and found it to be acceptable for re-use.
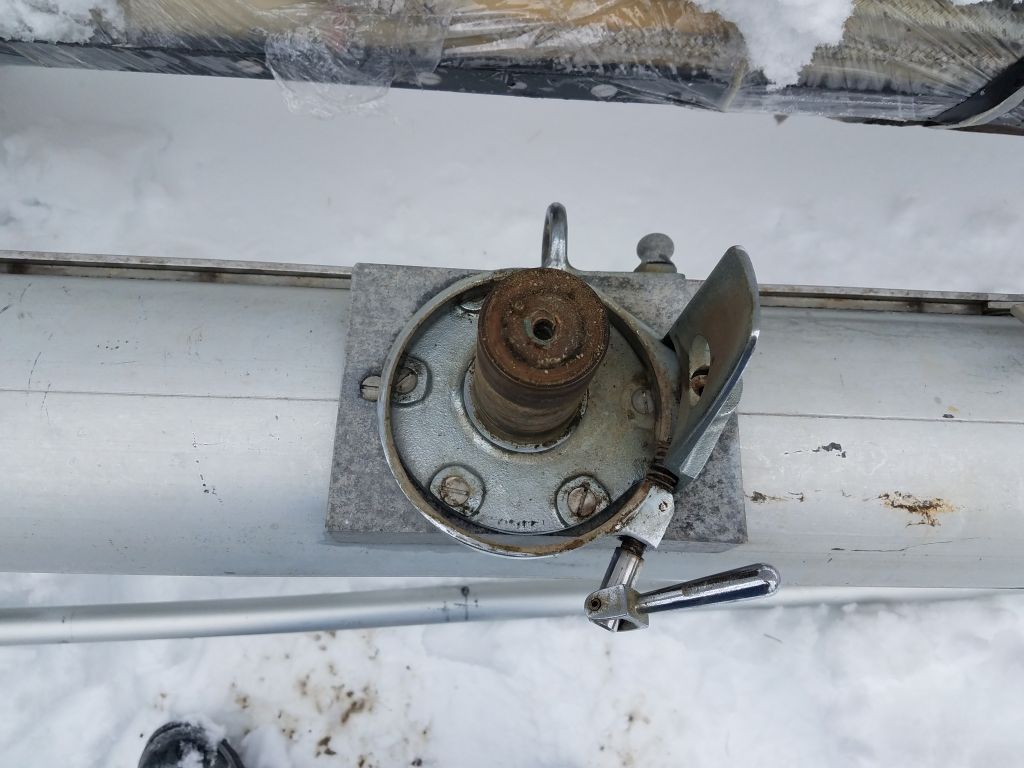


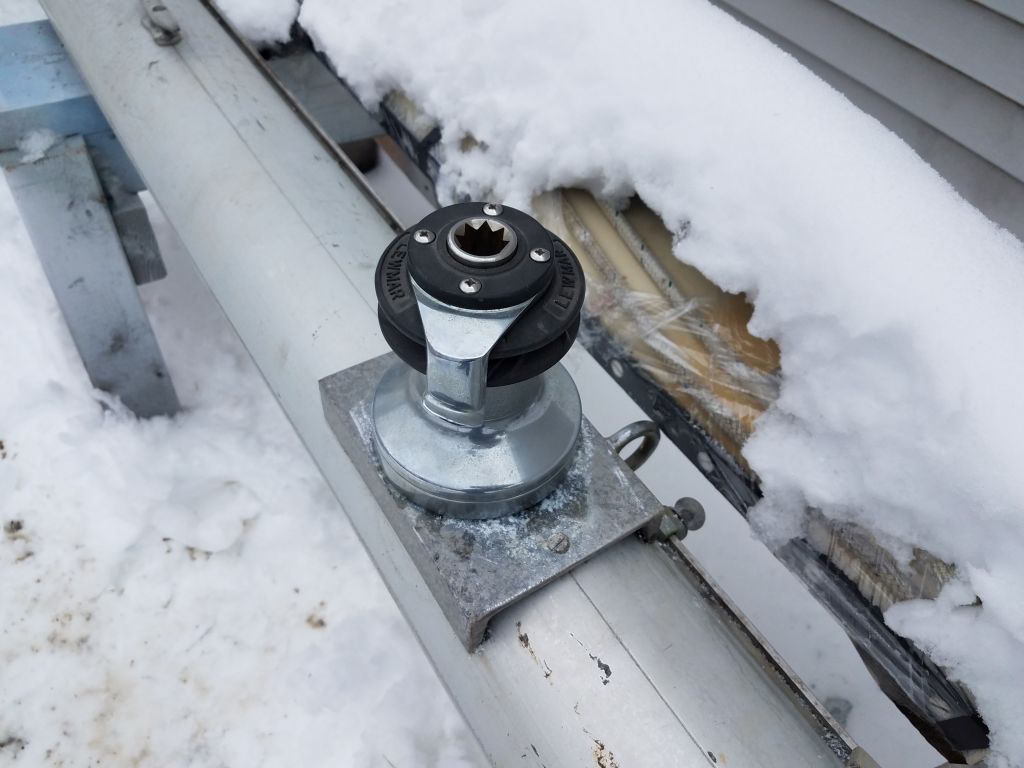
The “new” winch, a recycled Lewmar #16 self-tailer that I’d had on hand, fit the winch pad well, and I laid out, drilled and tapped the fastener holes for 1/4=20 machine screws. I lightly coated the base of the winch with Tef-Gel, and coated all the fasteners as well during installation.

The cast mast base was just loose inside the spar, as someone had drilled out the old fasteners sometime, and I found I could slip it right out. As with the other work this day, one thing led to another, and I decided that with the base loose and the sheaves removed from the masthead, it was a perfect opportunity to at least run in some messengers for the new wiring I needed to install.
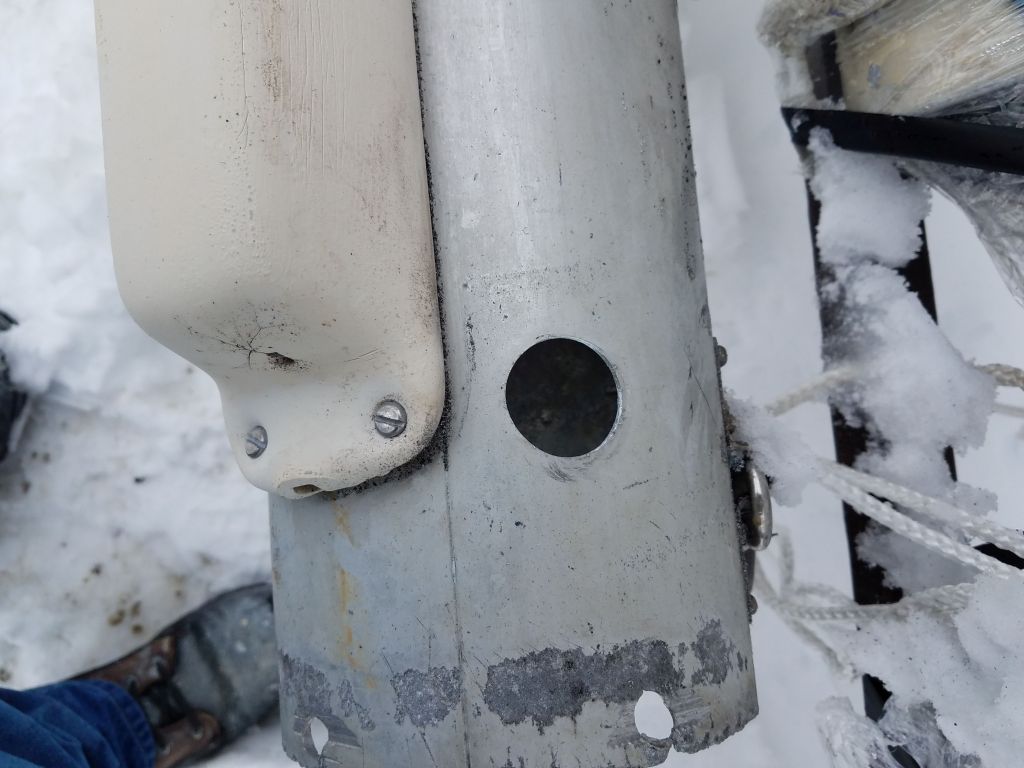
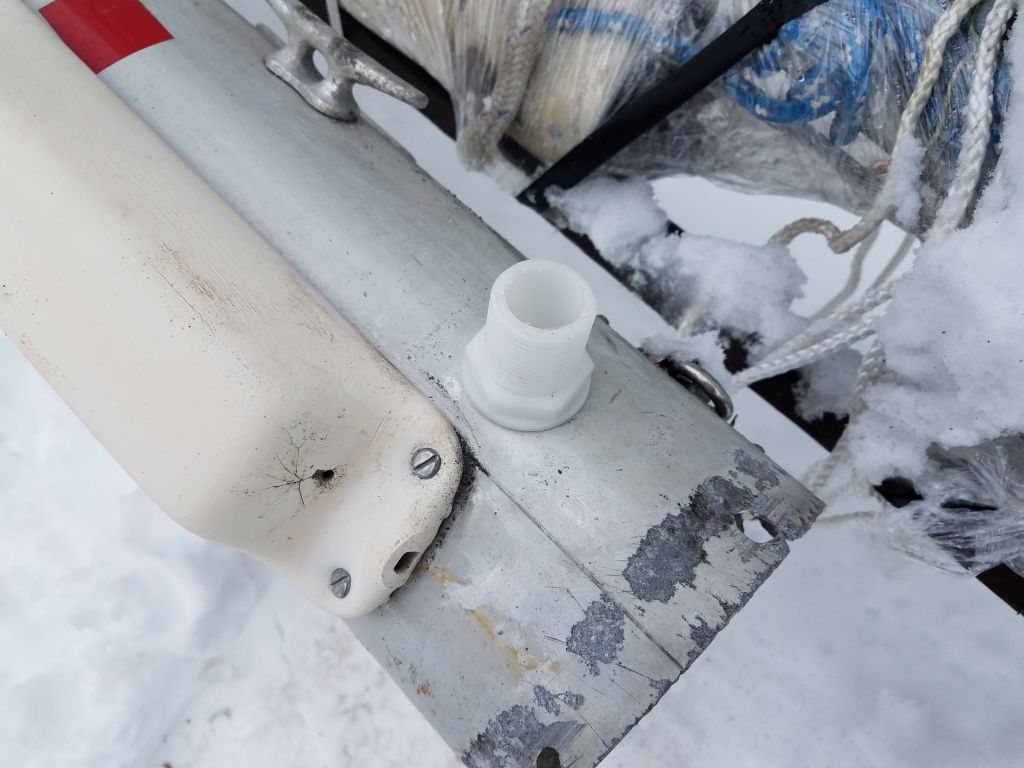
First, though, I used a drum sander to open up an existing wiring exit hole near the bottom of the mast so it would fit my new fitting. For this mast, since I knew the wiring hole would be accessible from inside the mast, I chose a basic plastic through hull fitting for the other end of the mast wiring conduit. Sometimes I use surface-mount fittings, but here it was easy to install the fitting from inside. I chose plastic for this end because I’d need to modify the fitting to accept the hose leading to the deck fitting, and in any event strength wasn’t an issue here. Since the full length of a through hull with hose nipple would be too long here, I chose this fitting based on the size of the threaded portion, which was a close match to the 1-1/8″ pipe nipple on the deck fitting. By cutting off the hose end of a 1″ plastic through hull, I could (after installation) pare down the threads (overall diameter about 1-3/16″) accordingly to accept the other end of the hose securely. For now, I just installed the fitting. Later, when I had a piece of hose, I’d sand down the threaded portion to fit.
I finished up my bout of mast work for now by running in messenger lines for the masthead lighting and VHF, as well as spreader lights and the steaming light further down the mast. I used a wire snake to pull in the small messengers, and I’d use these messengers later to pull in the wires. I find the small messenger lines to be easier to pull wires through tight mast spaces than the unwieldy metal snake. I was tempted to just run in the wires now too, but decided to wait till another time.
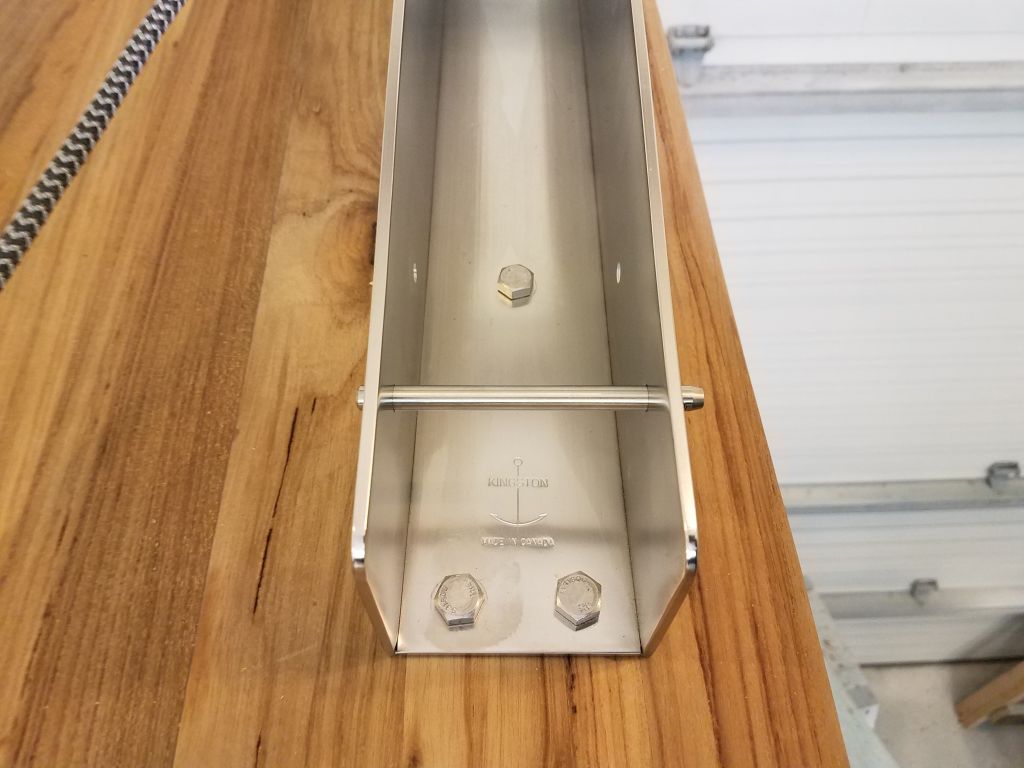
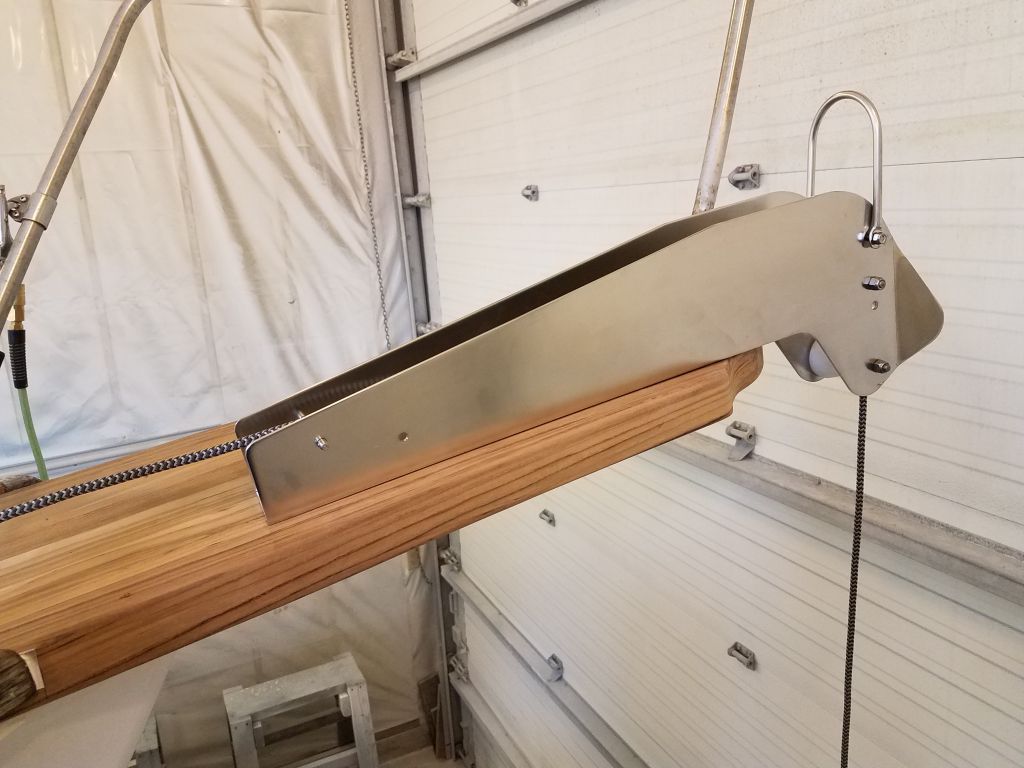
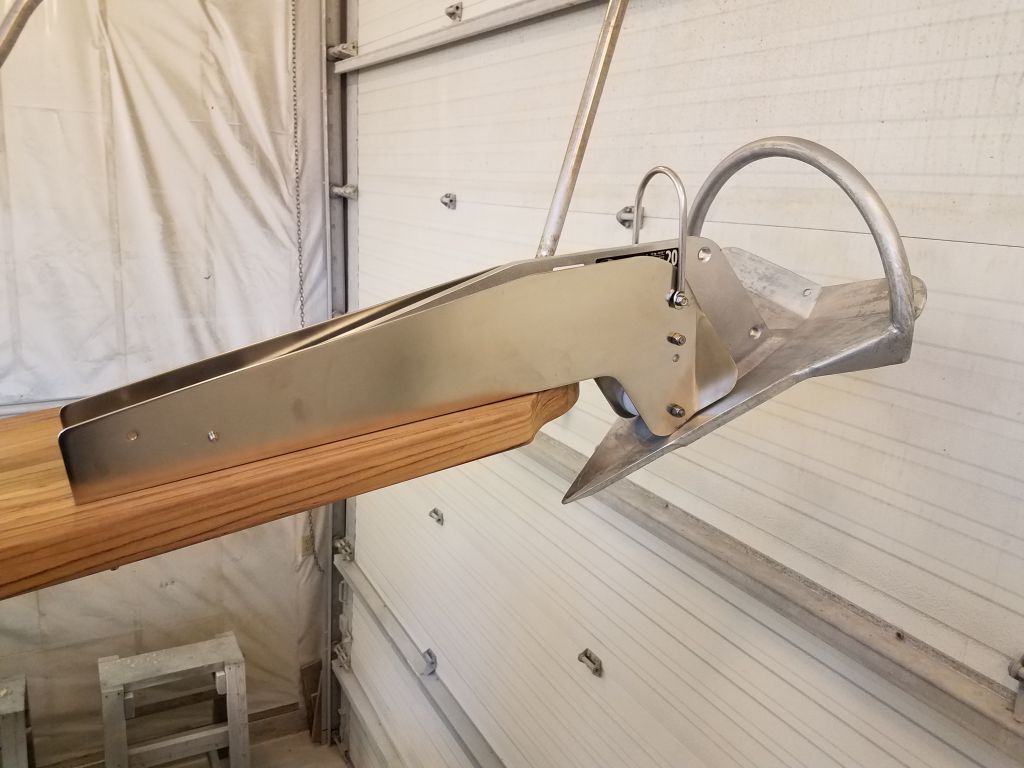
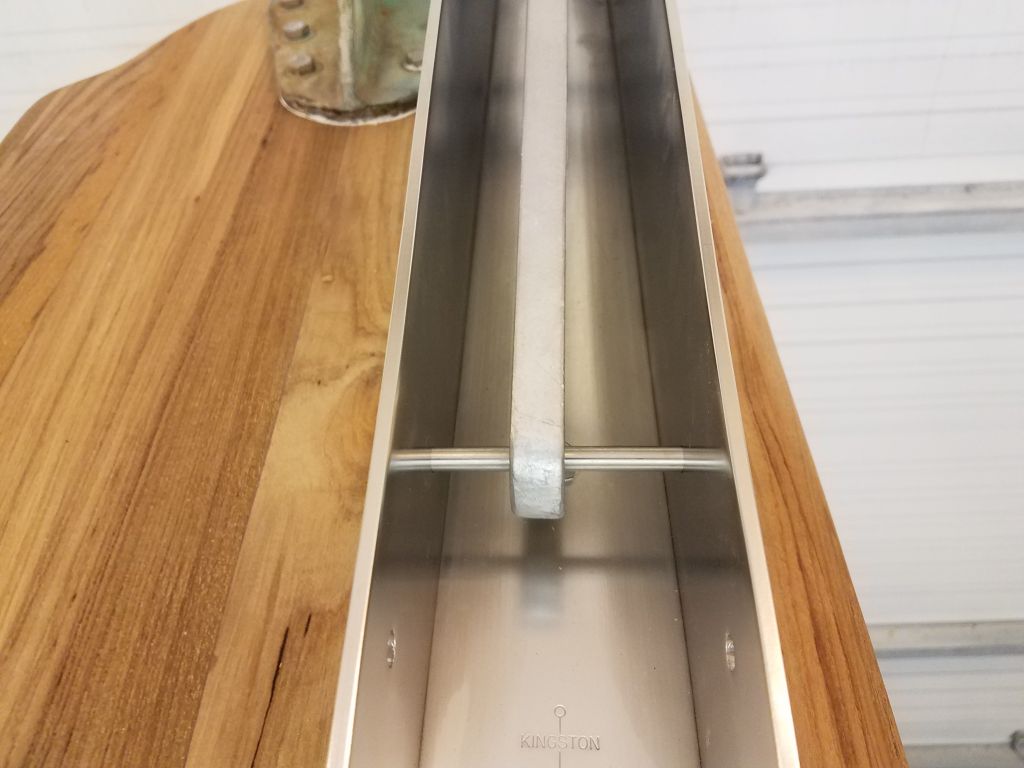
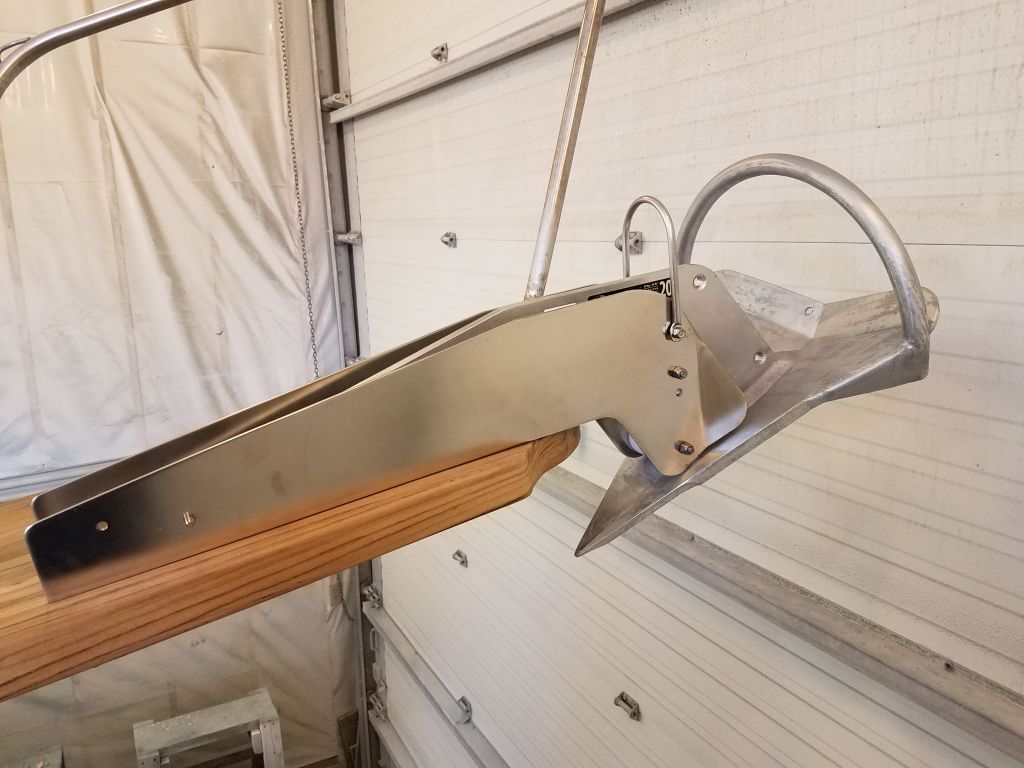
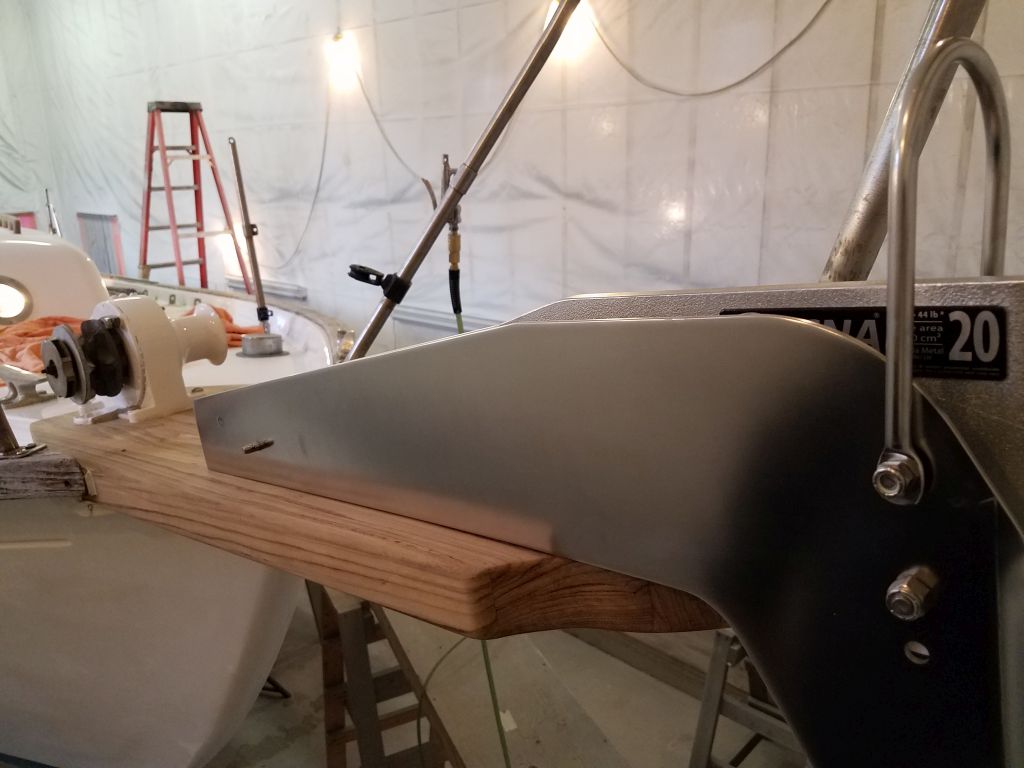
Later, the new anchor roller I’d ordered to fit the owner’s Rocna 20kg anchor arrived, and I went ahead with the installation. The roller, a Kingston KR-2025, was a great fit for the anchor, one of the few designed specifically for this brand and size, and featured a long, deep channel that would protect the bow platform from damage from the anchor shank.
Because of the stem fitting at the end of the platform, the roller couldn’t be absolutely perfectly aligned with the windlass and remain parallel with the platform itself. I used a length of line to determine the most practical lead for the roller, and with just a slight misalignment from the edge of the platform, I was able to provide a lead that would work well for the anchor chain later.
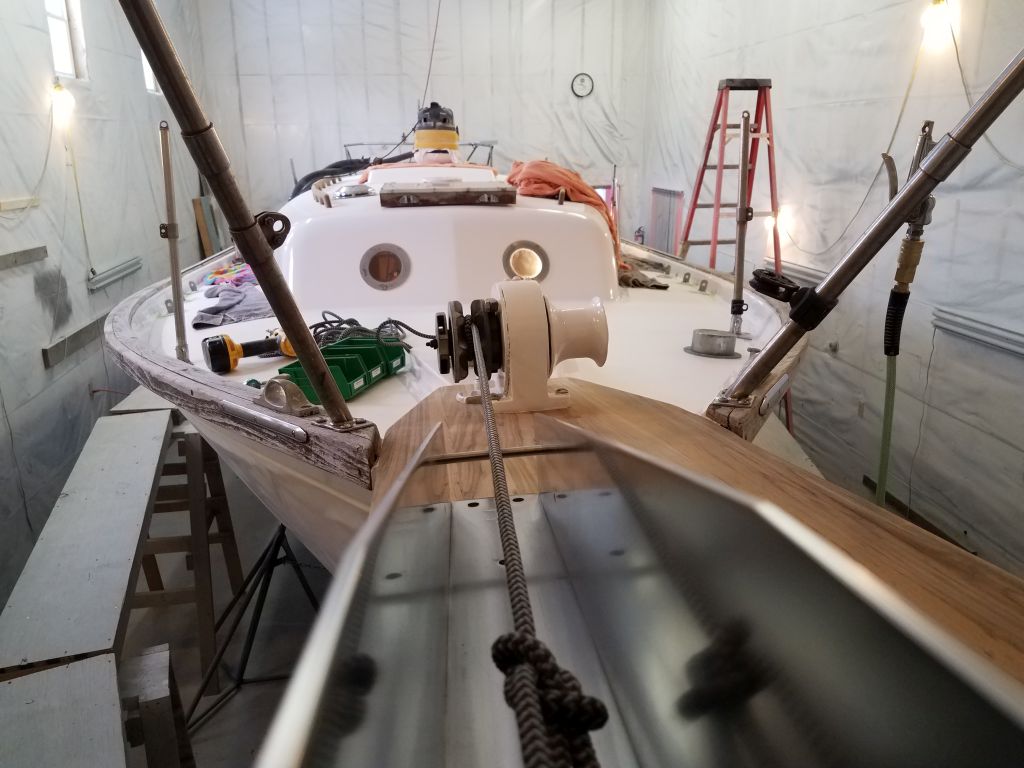

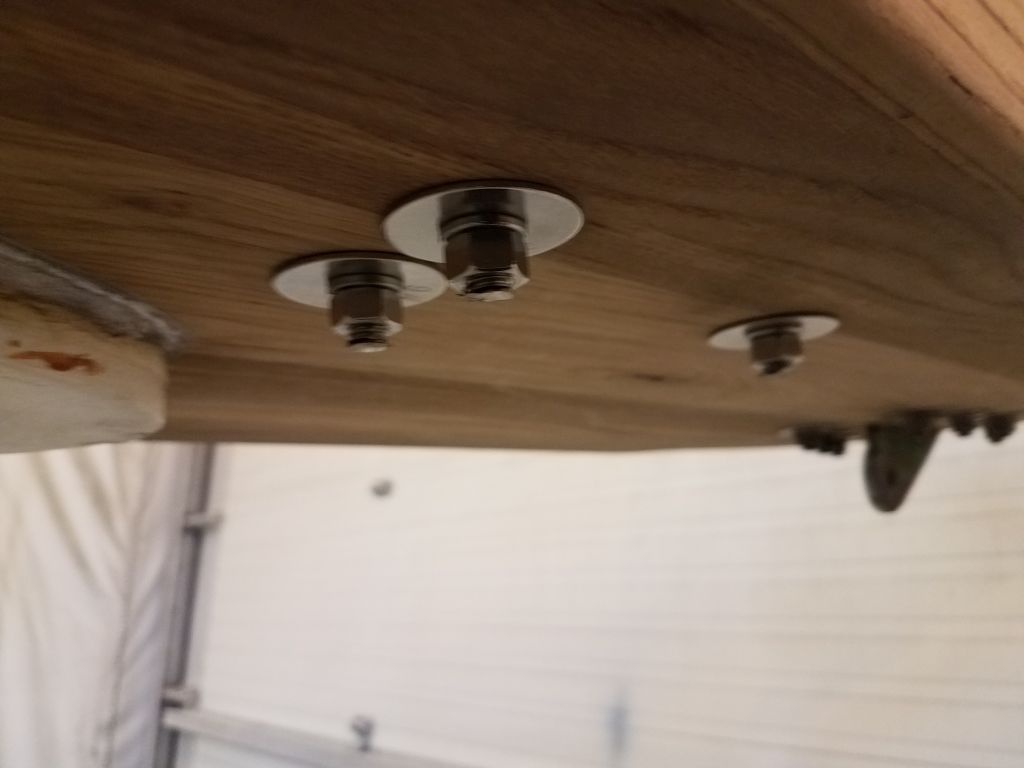
Installation was straightforward with three bolts through the after end of the roller.

I test-fit the anchor in place afterwards. This roller provided two mounting locations for a pin at the aft end: one further aft, designed to go through a shackle or link of chain aft of the anchor itself, and one further forward (shown in use here) that fit perfectly through the eye at the end of the anchor shank to pin it in place. When chain through the windlass, this roller would hold the anchor tightly against the dual rollers at the forward end to prevent movement.


Total time billed on this job today: 5.5 hours
0600 Weather Observation: 30°, partly clear. Forecast for the day: Clouds and sun, light wind, low 30s
Thursday
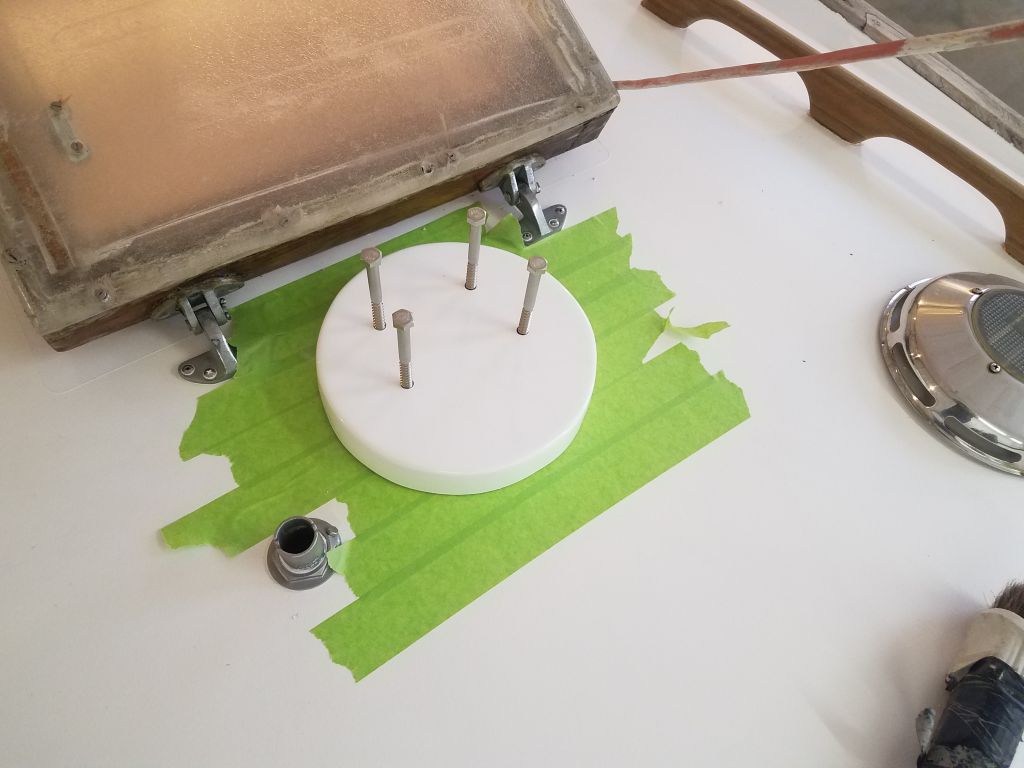
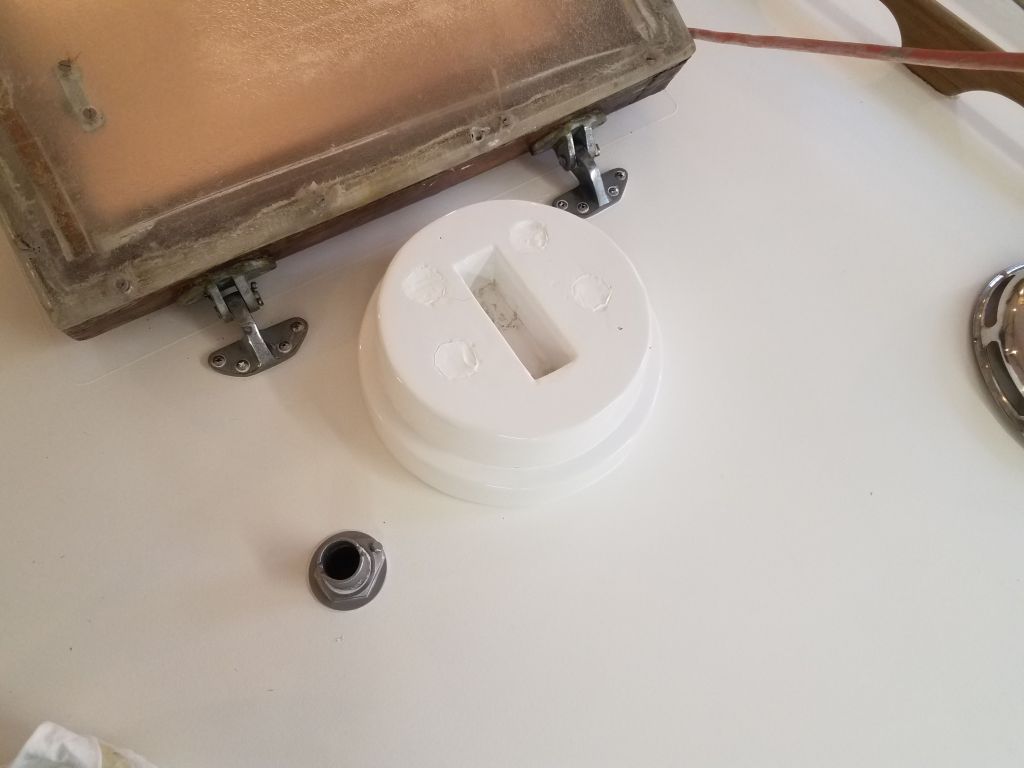
Just a few jobs remained on my list, and I started with the main mast step, which installation I’d delayed while I built a 1-1/2″ riser to make up for the amount that needed to be removed from the mast base to eliminate a corroded area there. Earlier, I’d used the original mast step to locate and drill holes through the riser; the riser was just a bit larger in diameter than the original step.
Using the new base as a guide, I masked off the deck areas around the base, and drilled pilot holes in the deck for the new lag screws that would secure the step.
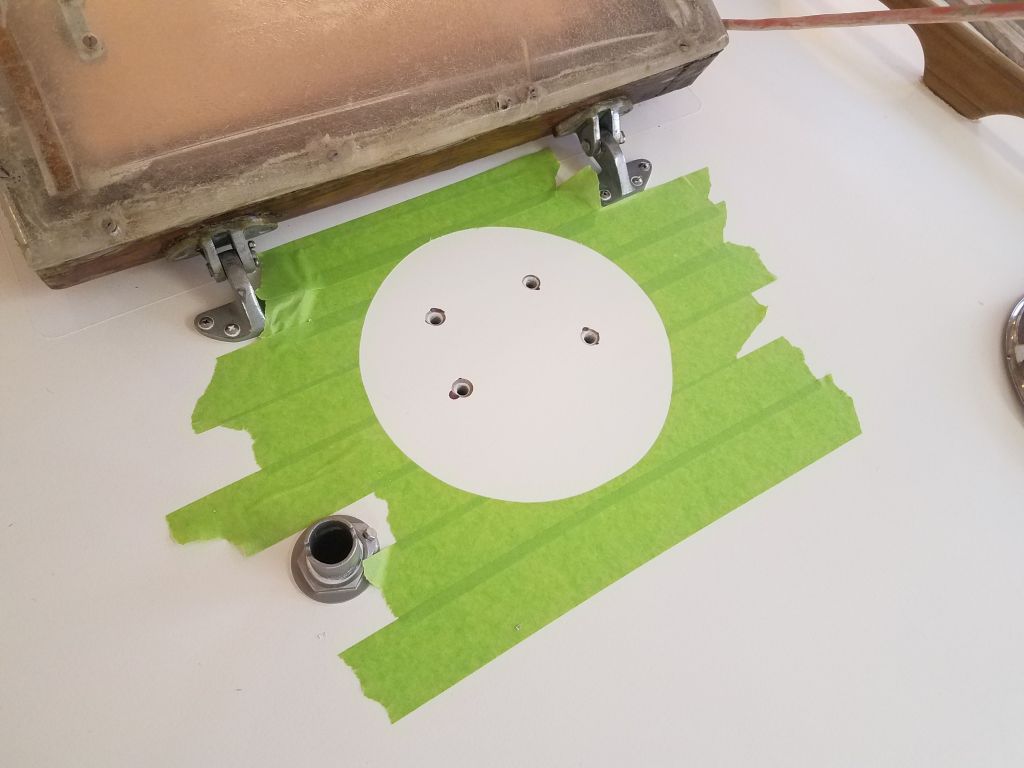
Afterwards, I applied sealant heavily to the deck and installed the riser, then applied more sealant to the top of that and installed the mast step and lags, drawing the whole assembly down into plate tightly.


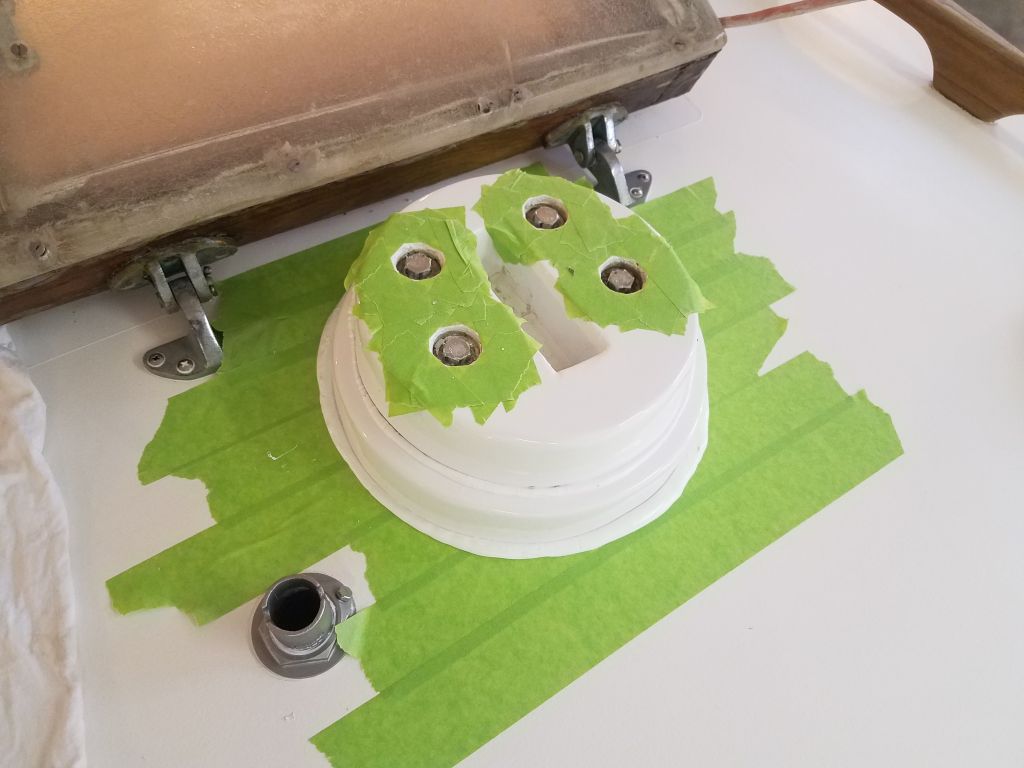

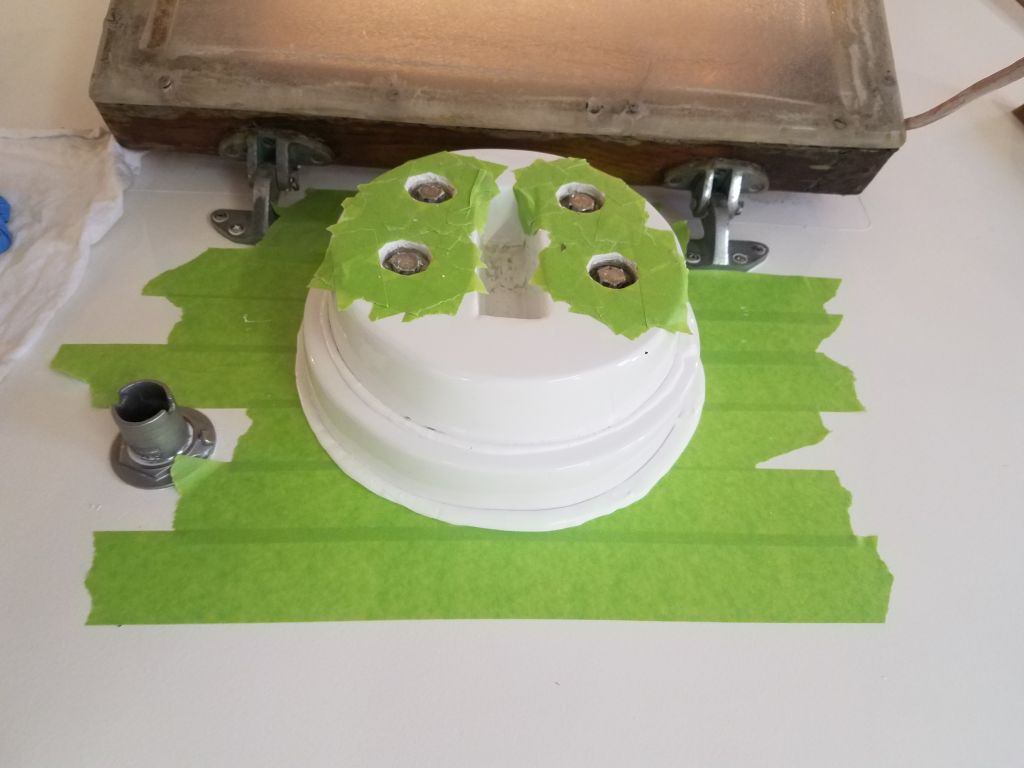
I used excess squeezeout to fill the space around the bolt head recesses, and cleaned up the residue as needed.

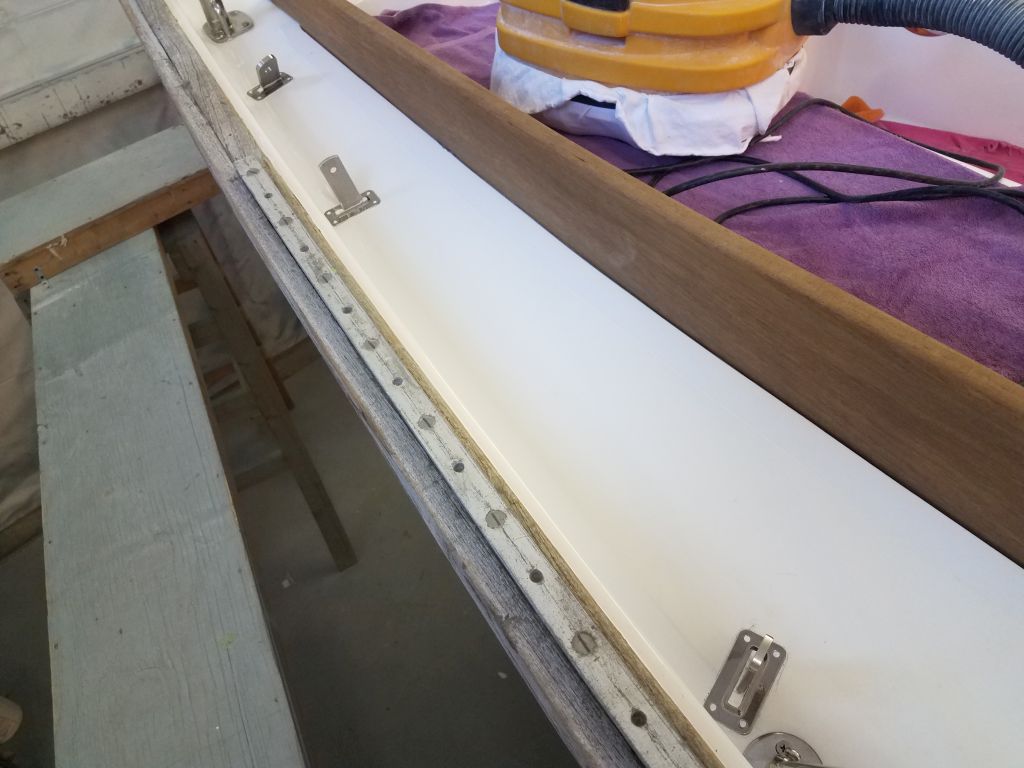
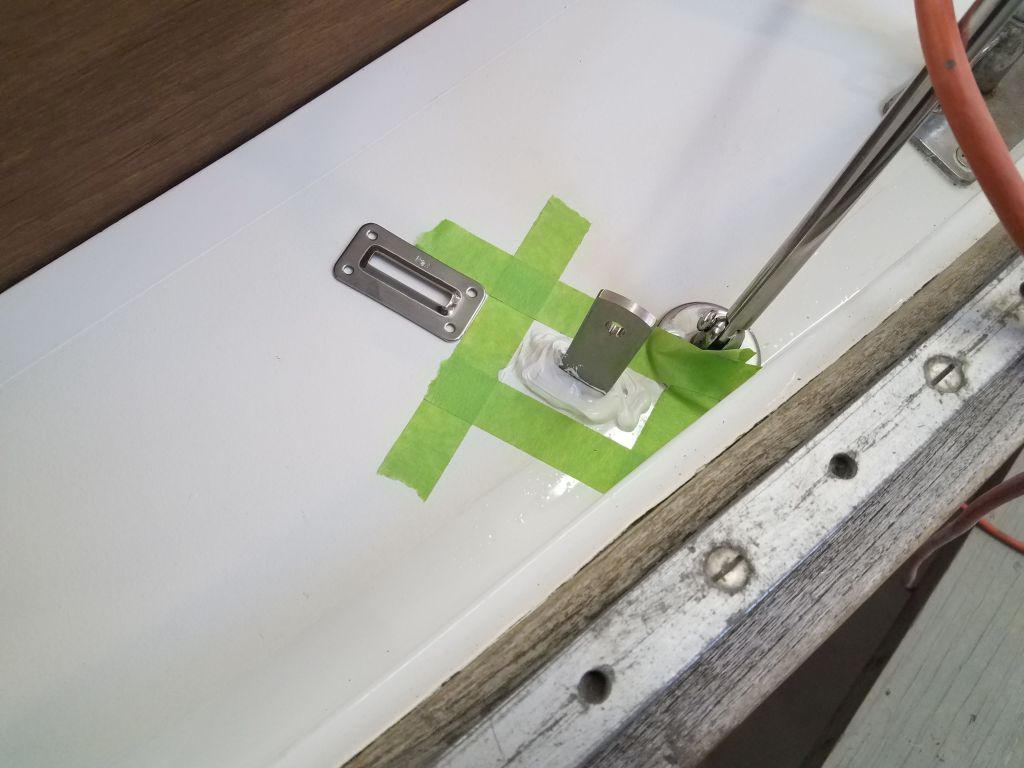
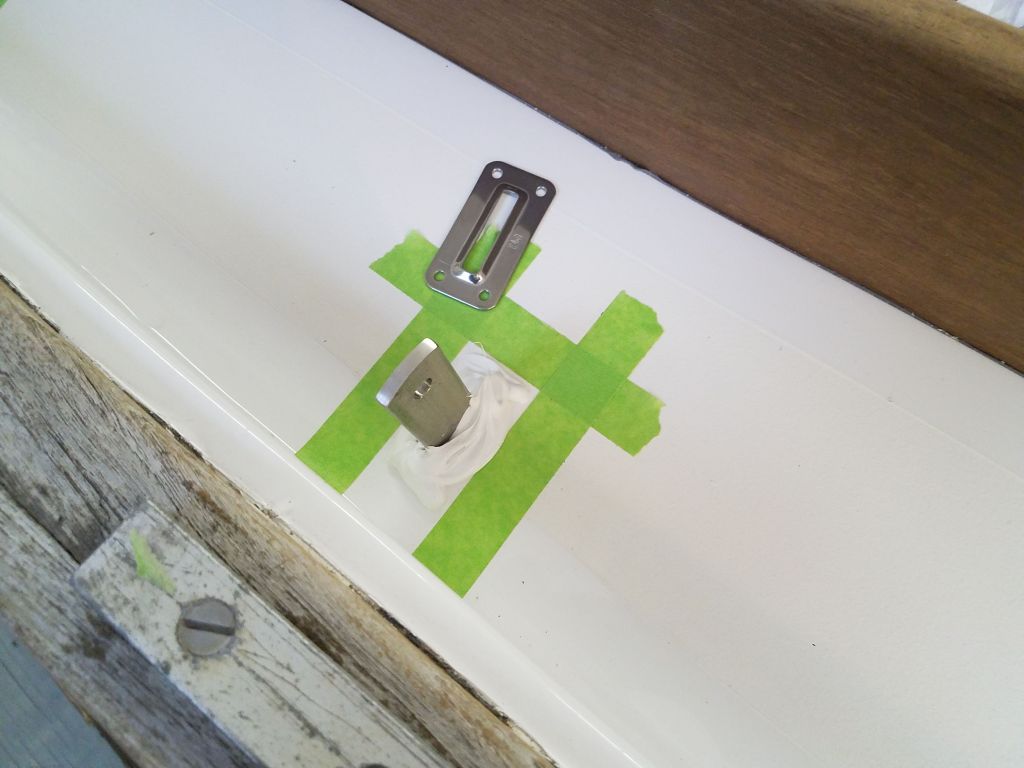
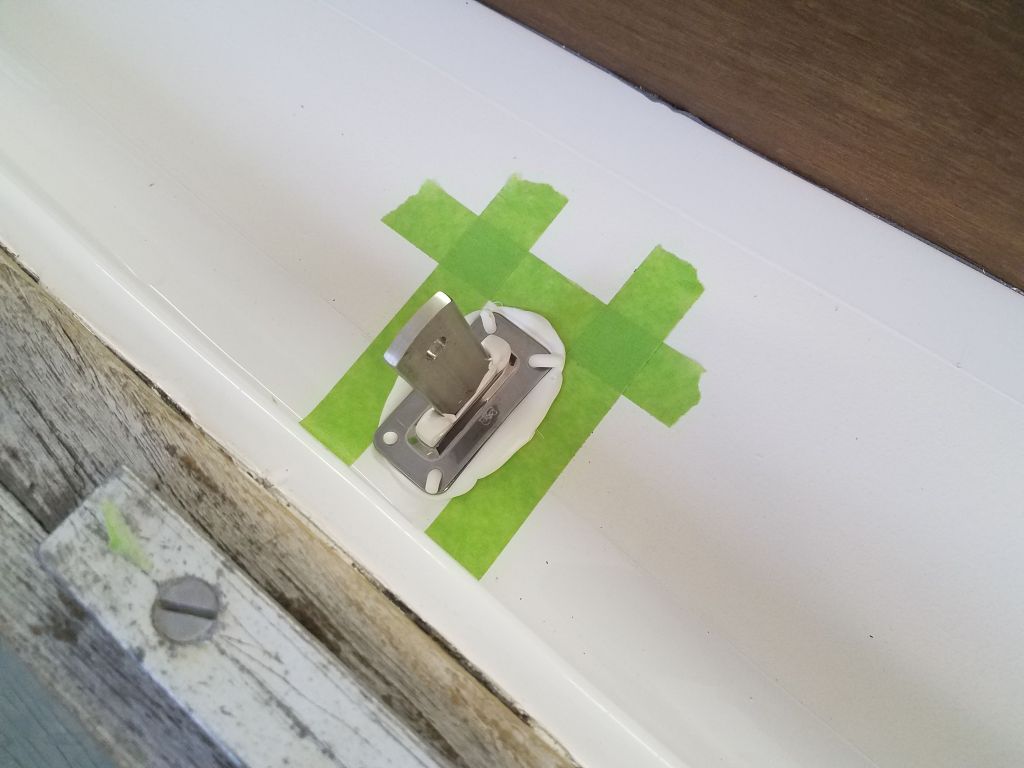
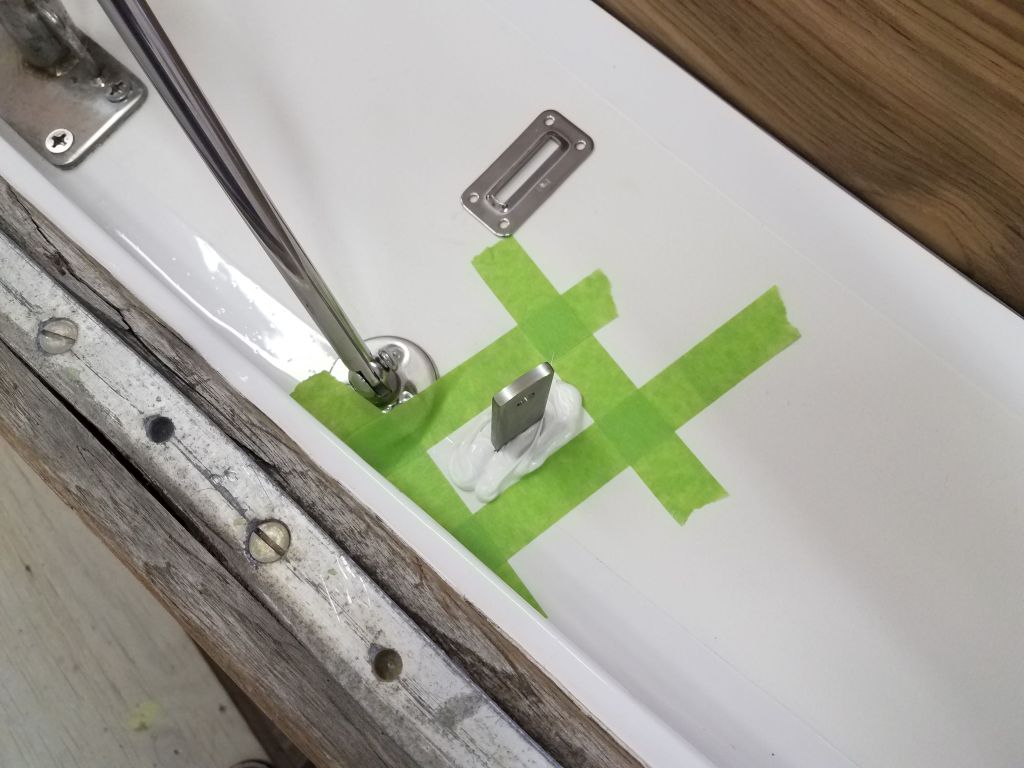
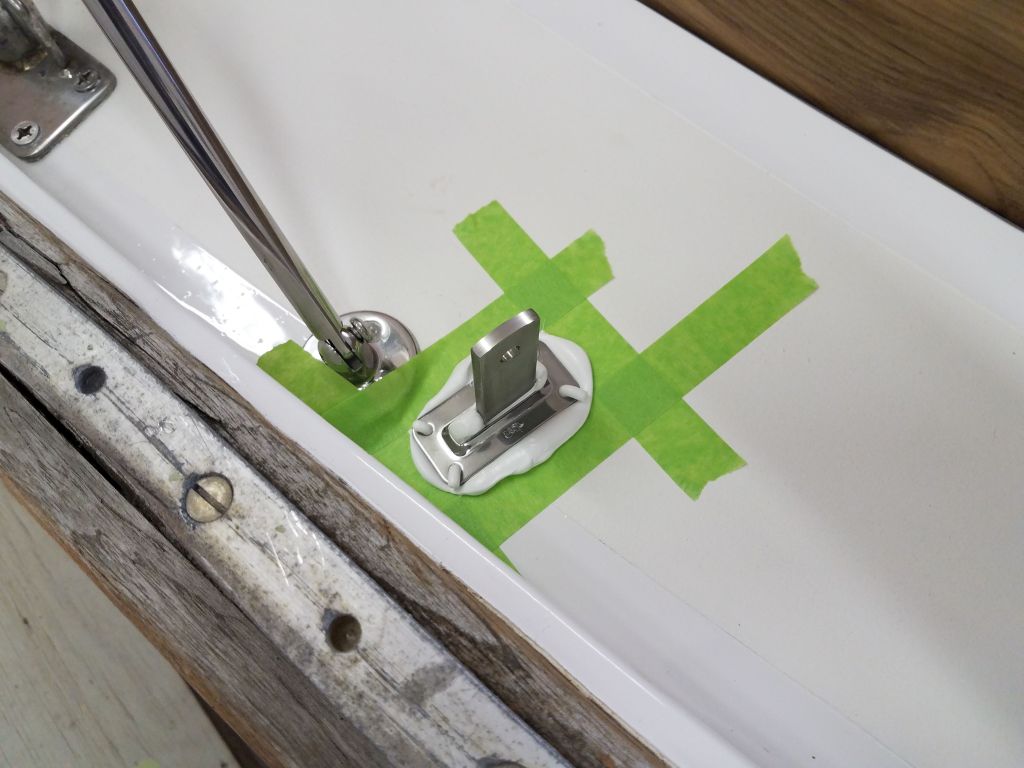
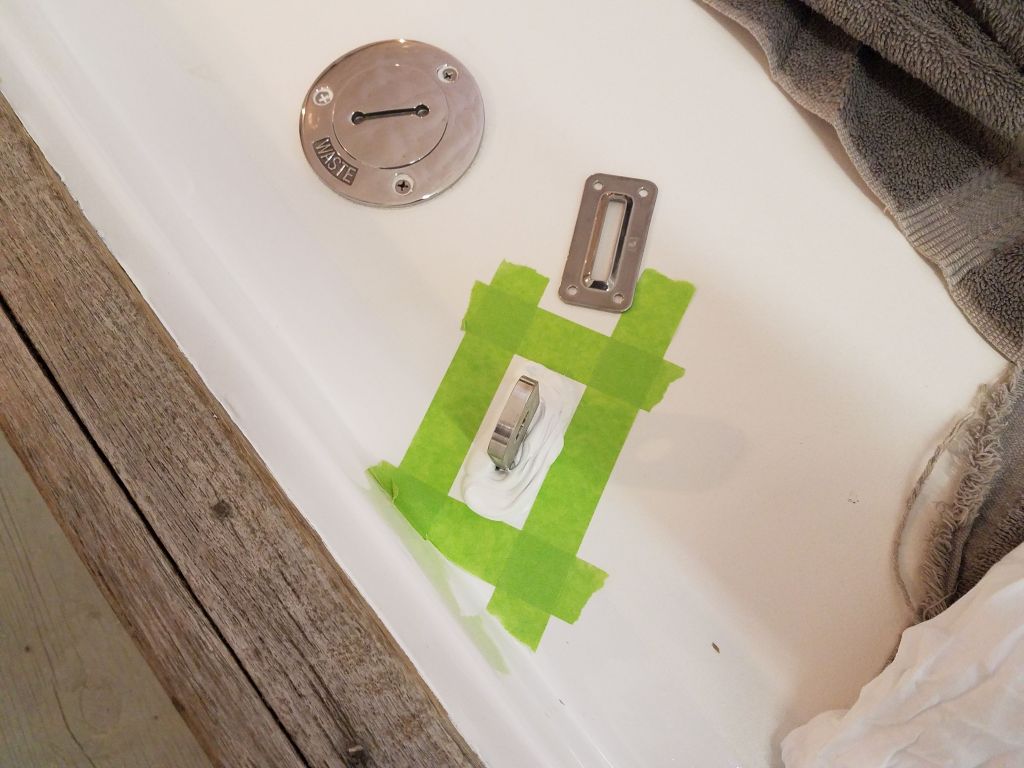
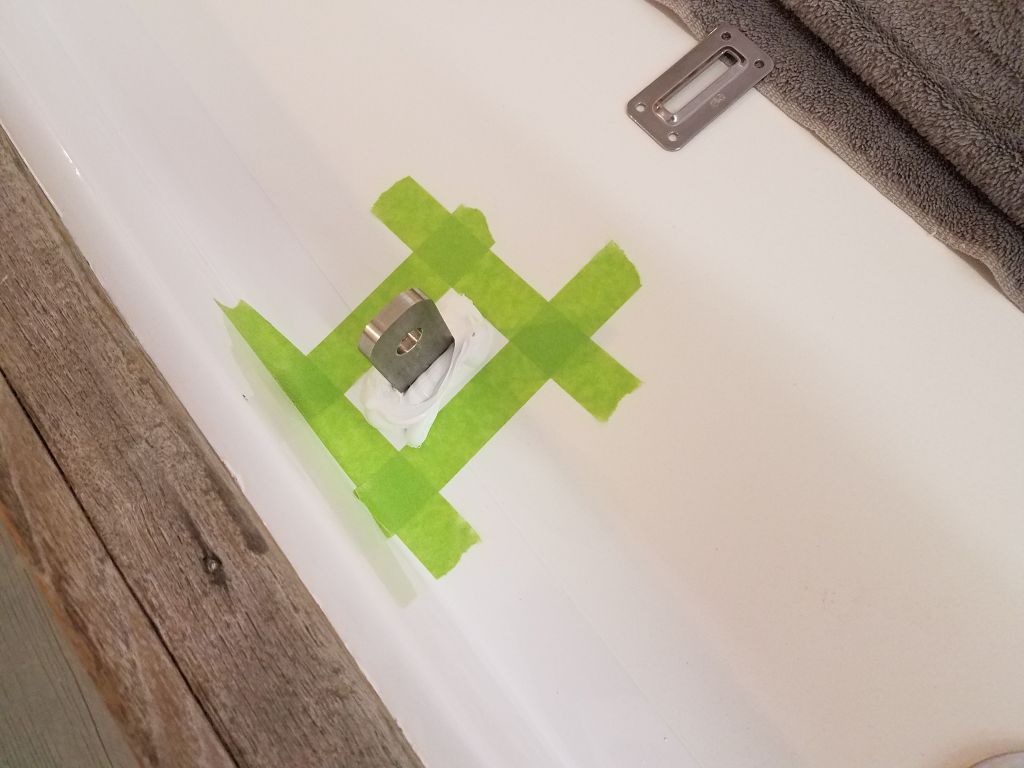
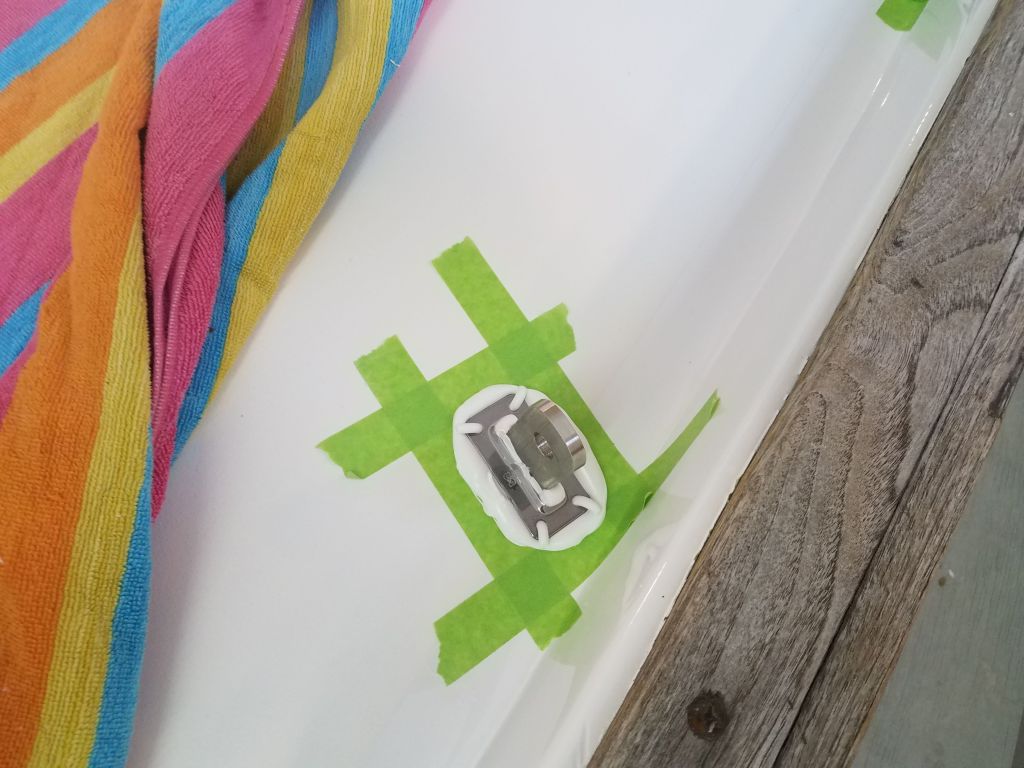
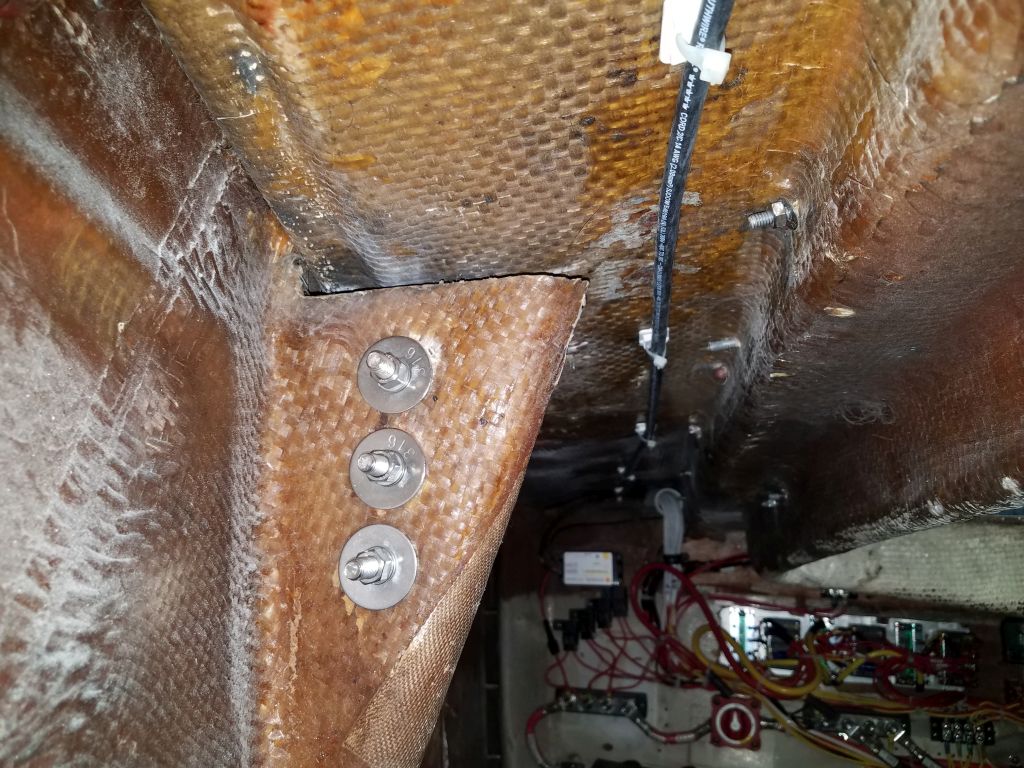
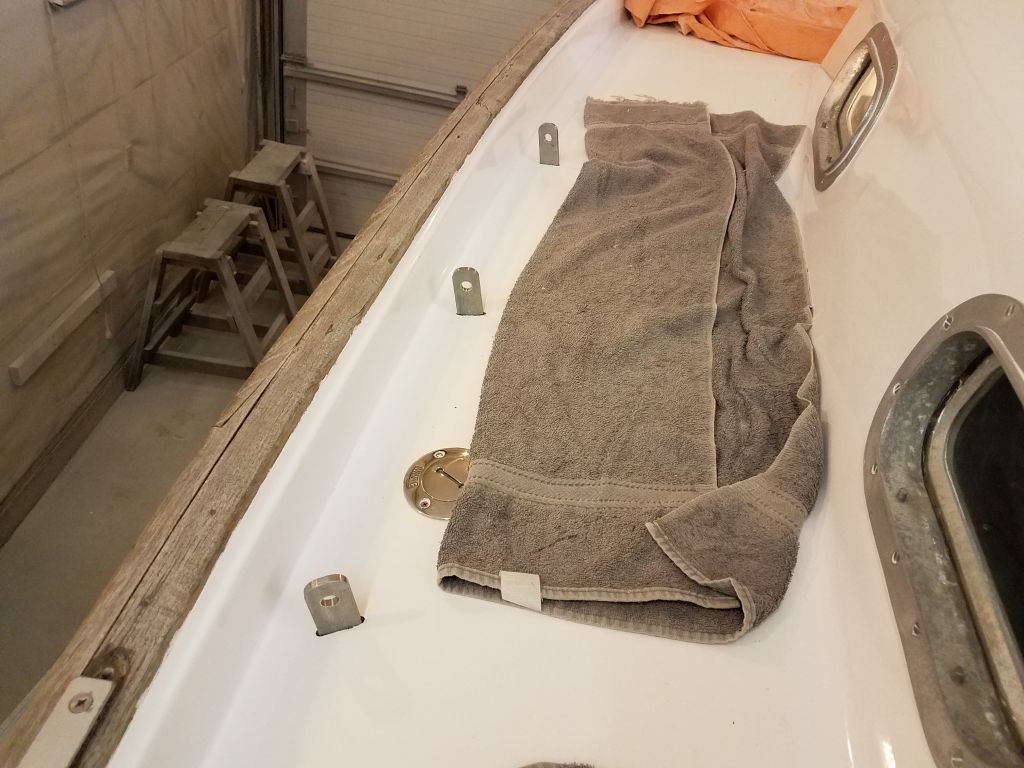
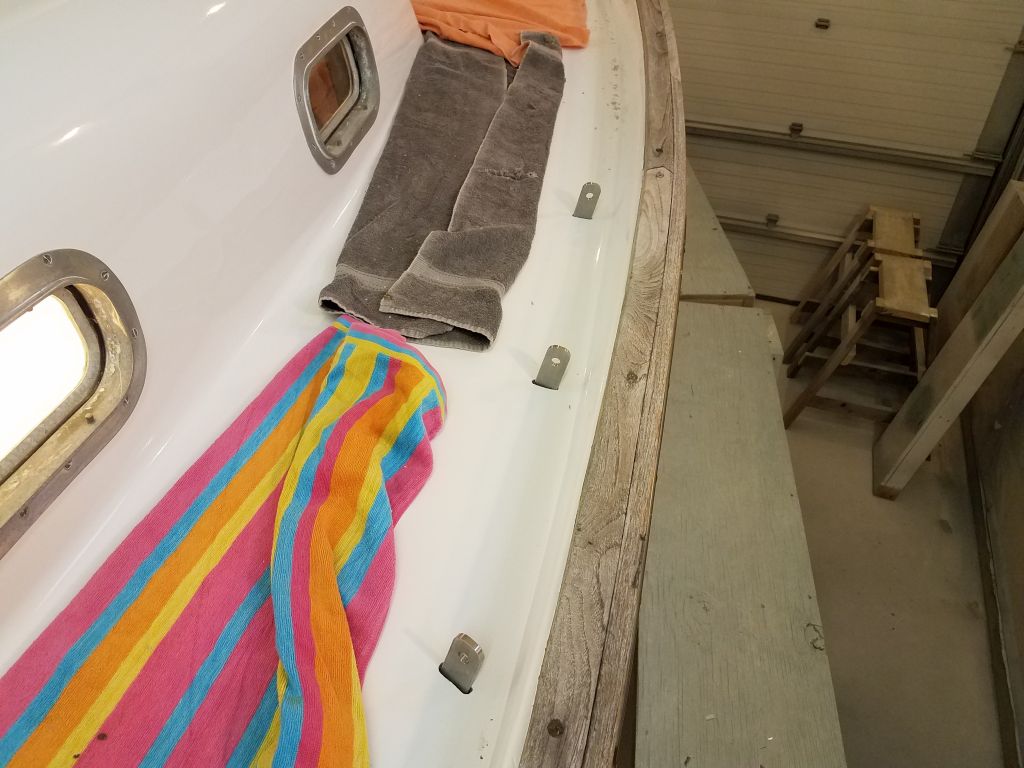
To finish off the chainplates, I installed stainless steel deck plates that fit over the slots and provided a harbor for sealant. At each location, I masked around the perimeter of the new plate, then applied sealant heavily around the slots and chainplates before pressing the deck plate into the sealant. I saw no need for fasteners. I left the squeeze out for later cleanup once it had cured.


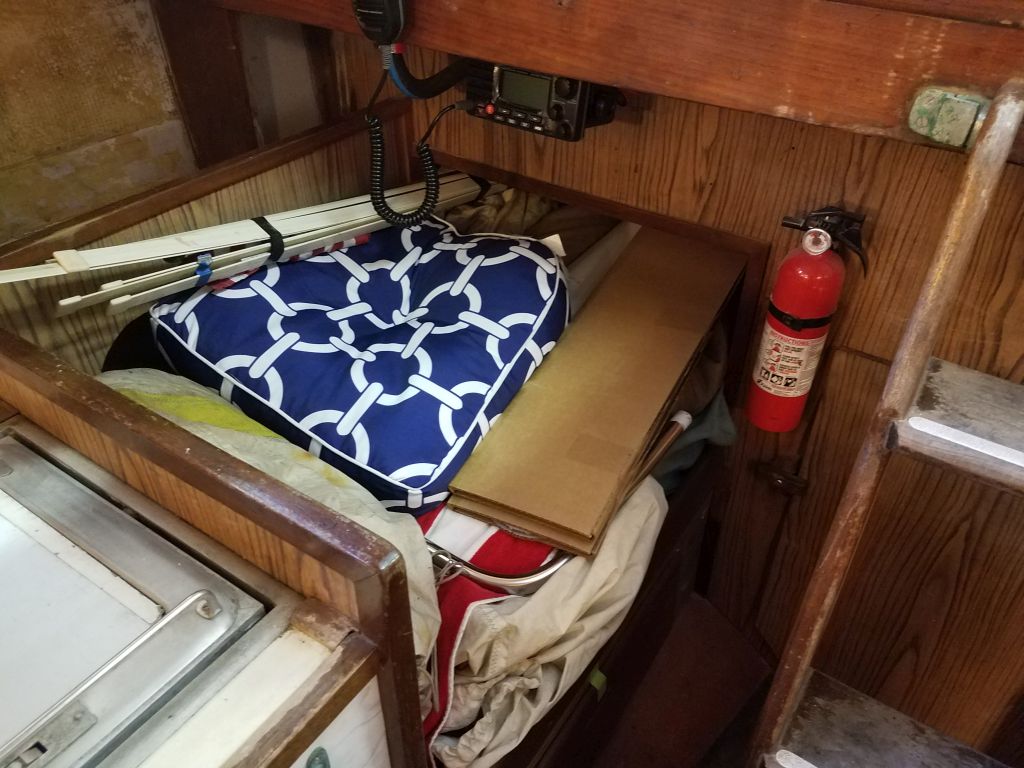
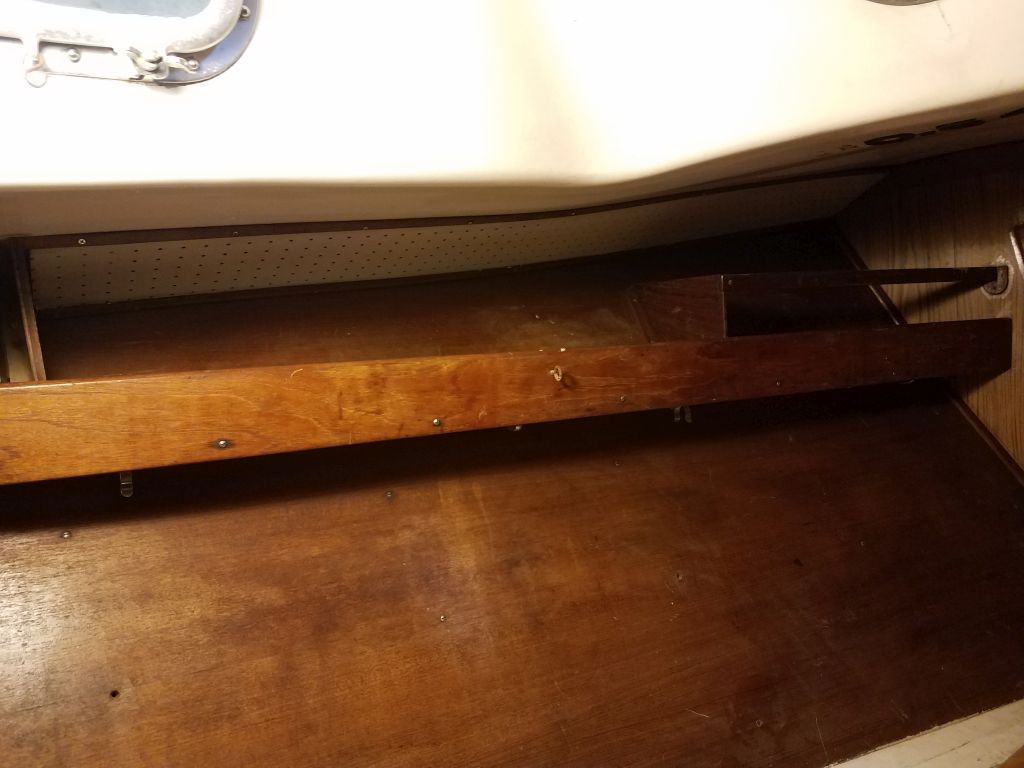
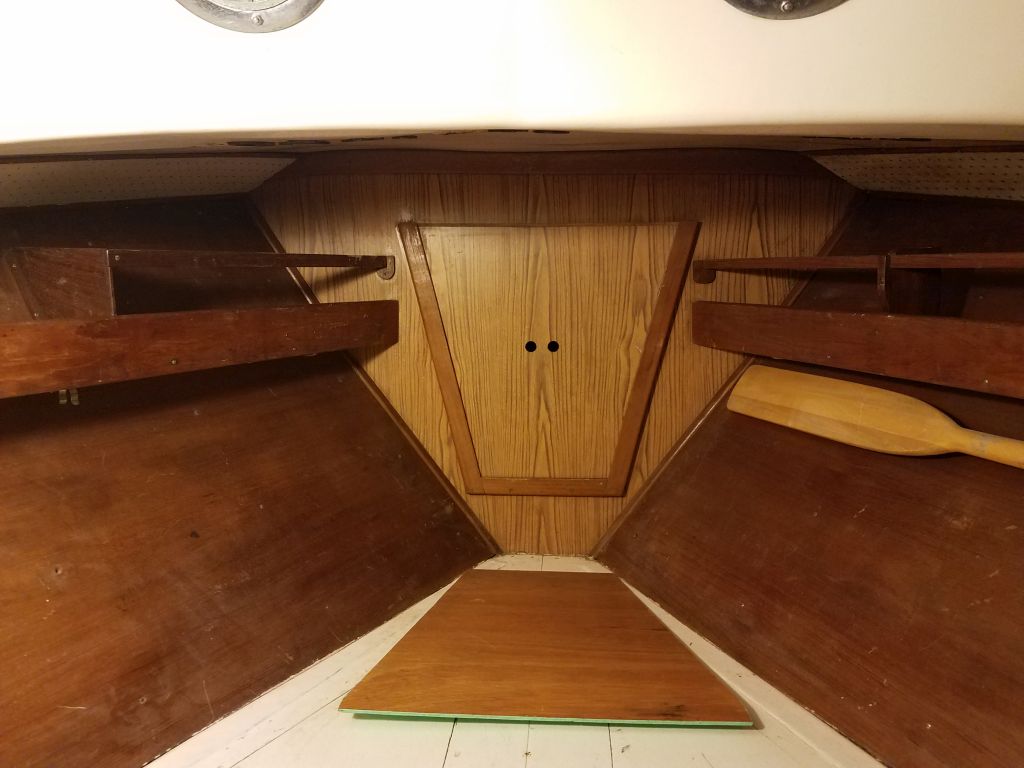
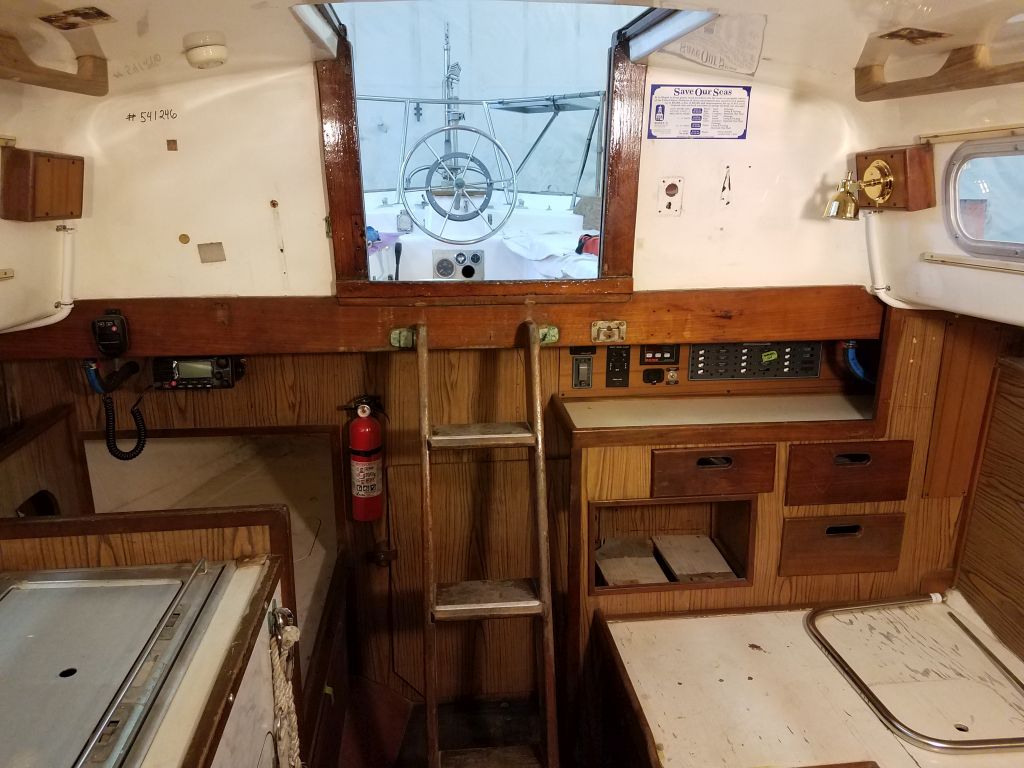
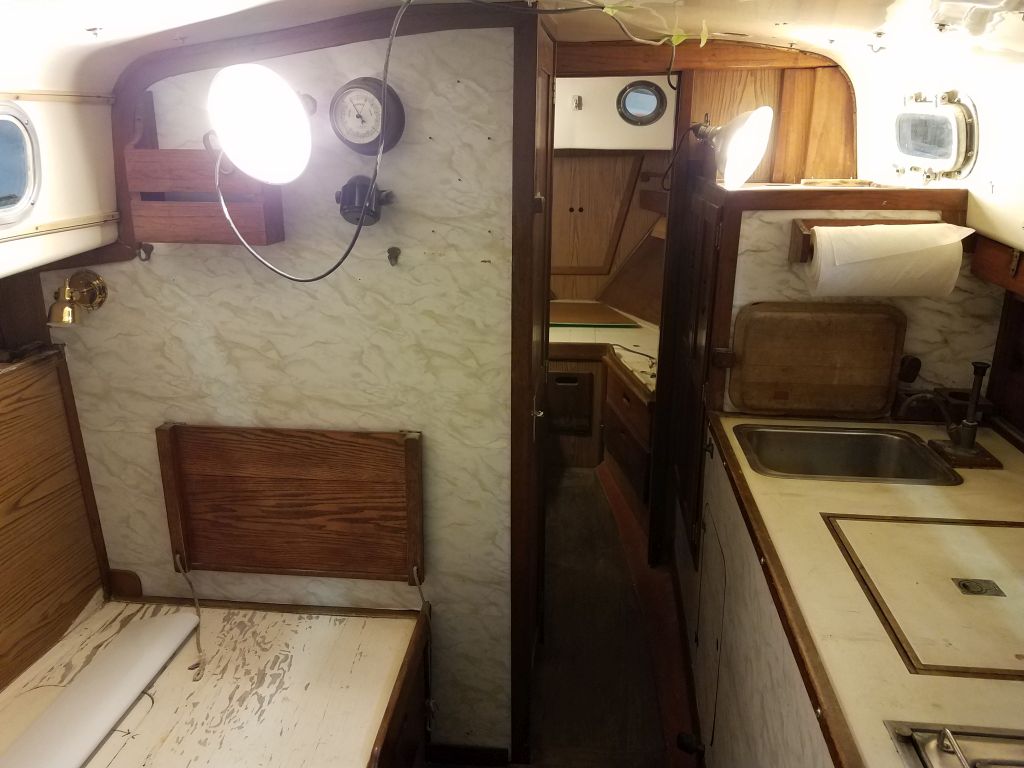
With work belowdecks complete, I cleaned up the entire cabin and related spaces, then turned to some minor reassembly. Early in the project, to gain access to various hardware I’d removed some cosmetic covers from the forward cabin, along with a shelf and fiddle in the hanging locker, as well as the doors to the hanging locker , and now I reinstalled these items. With tools and supplies gone, the cabin was empty and ready for me to start reloading the gear that had been on board when the boat arrived here.

In the cockpit locker, I’d earlier removed the connection at the aft end of the exhaust hose, which had allowed greatly improved access to the spaces there for hardware and wiring work. Now, with work complete, I reinstalled the hose, securing it with clamps and heavy wire ties as needed to route it along the cockpit locker opening and up along the coaming before turning down to the existing outlet.

Still ahead, I’d finish up a few minor things and load gear back on the boat. In addition, I had a short list of work to do on the mast, including running new wiring and installing light fixtures, and I would take care of that in due course as allowed by the vagaries of late winter and spring weather.
Total time billed on this job today: 6.25 hours
0600 Weather Observation: 29°, heavy snow and windy, about 6″ from overnight. Forecast for the day: Heavy snow during the morning, then tapering off later in the day, around a foot total accumulation expected
Wednesday
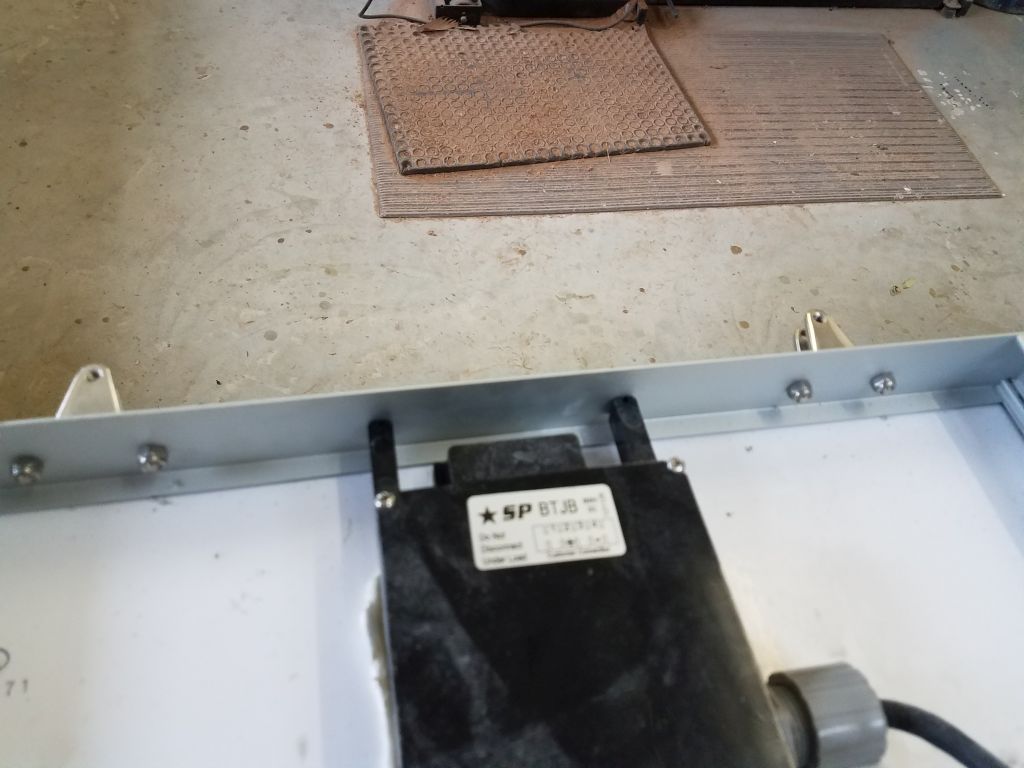
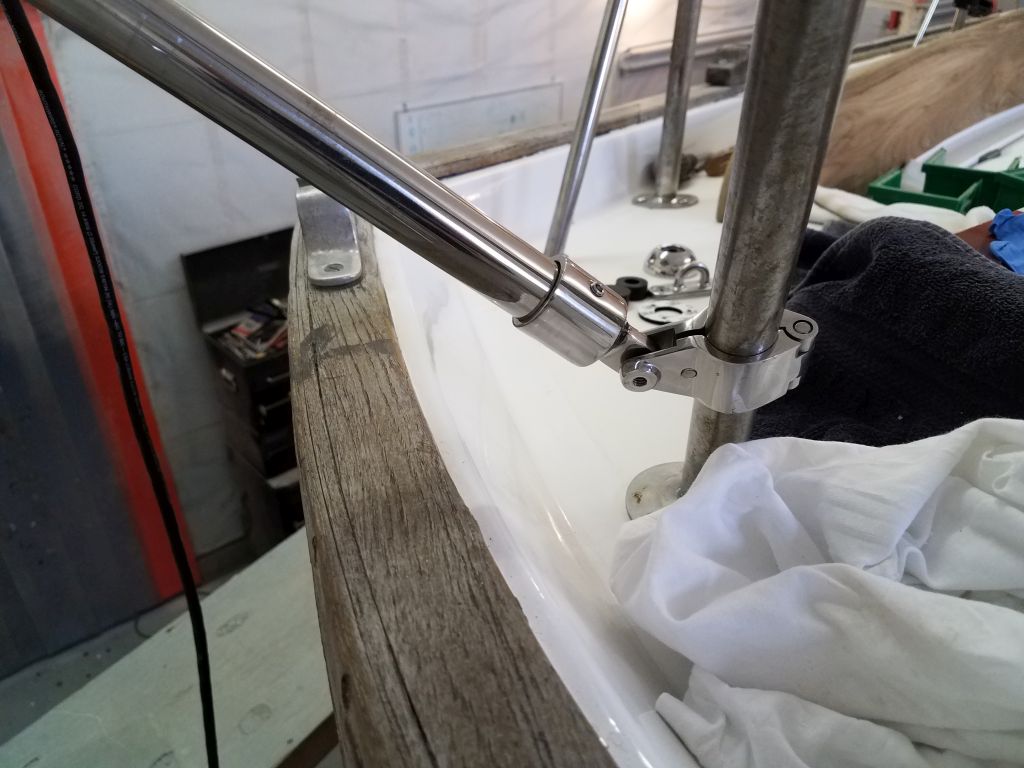
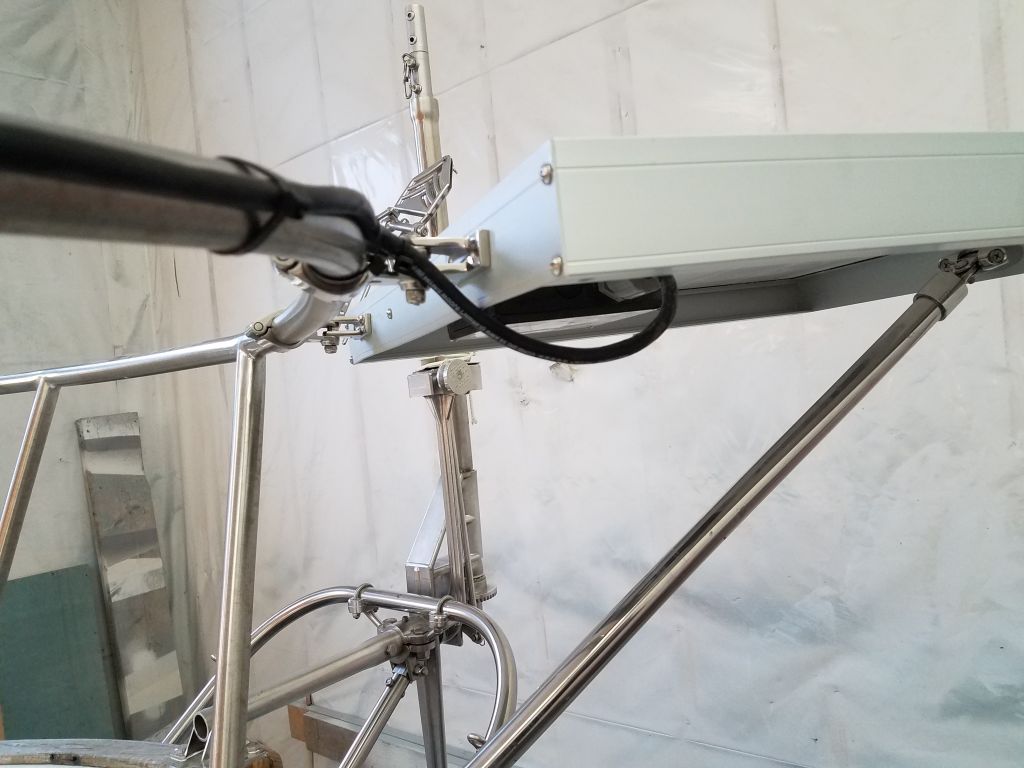
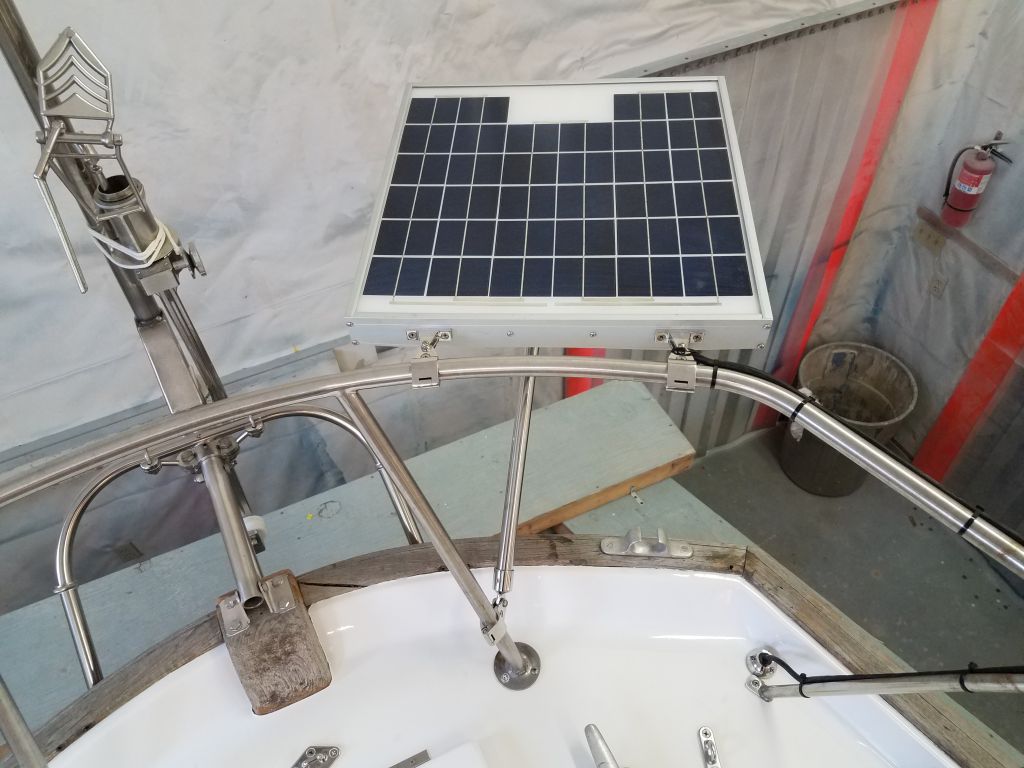
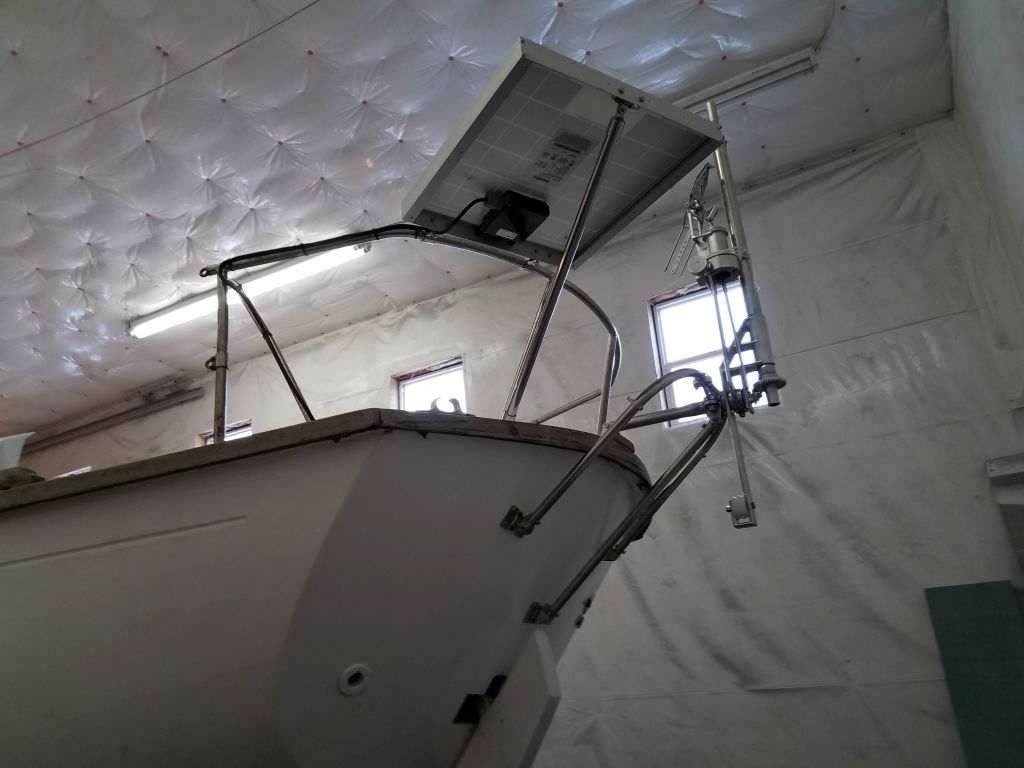
The owner had a small solar panel already on board, though when the boat arrived here the panel had just been temporarily wired and had no mounting system. Now, he requested that I install the panel on the stern pulpit using some hardware that he provided. Holding the panel against the port side of the rail, I ensured that it wouldn’t affect the windvane operation or otherwise be in the way, and I made some marks to show roughly where I needed to install brackets on the panel frame.
Down on the bench, I installed the two brackets on the panel frame itself, bolting through the aluminum frame. These brackets would accept the business end of a pair of clamp-on rail mounts and would form the basis for the support of the panel. Because of the way the two hardware parts interfaced, the machine screws supplied with the rail mounts were a bit short, but for now the threads just engaged so I could use these screws in the immediate term for fitting the panel.


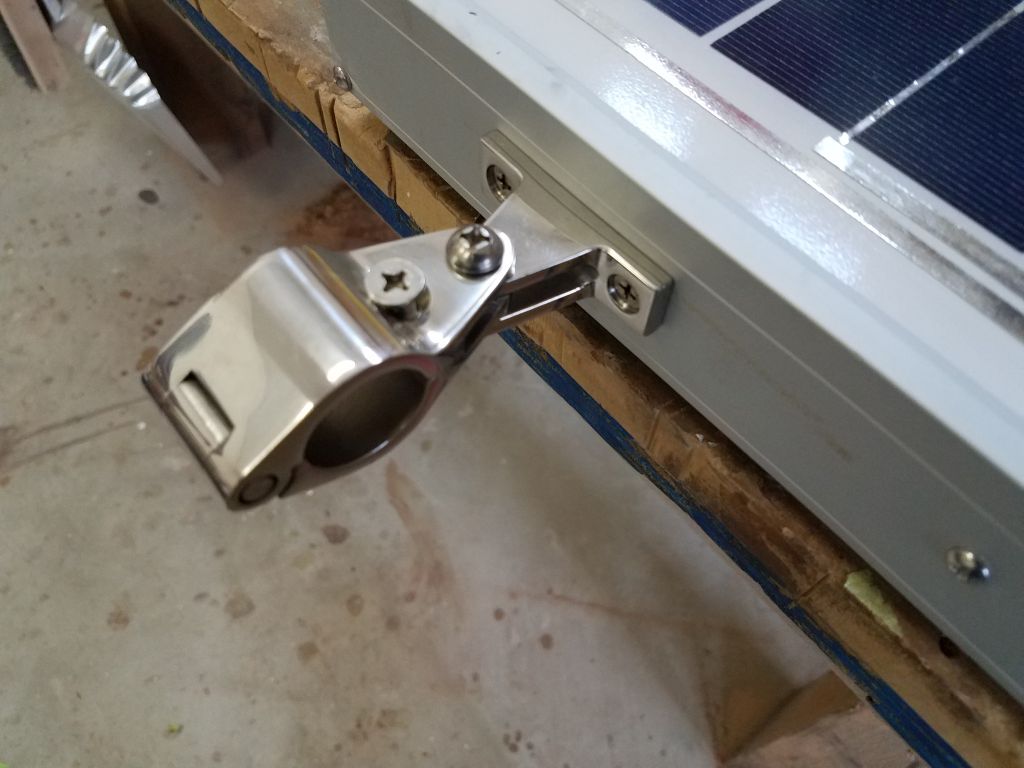
I clamped the fittings to the rail and installed the panel, which held it securely enough so that I could prepare an angled support from beneath, which I’d make from 1″ stainless tubing. Using the hardware on hand, I installed a swivel mount for one end to the center of the panel on the aft side, then cut a piece of tubing to run down to a third clamp-on rail mount, which I installed on the nearest vertical stanchion. I cut the tubing so that the panel ended up horizontal; there was some adjustment possible by sliding the lower rail mount one way or the other as needed.
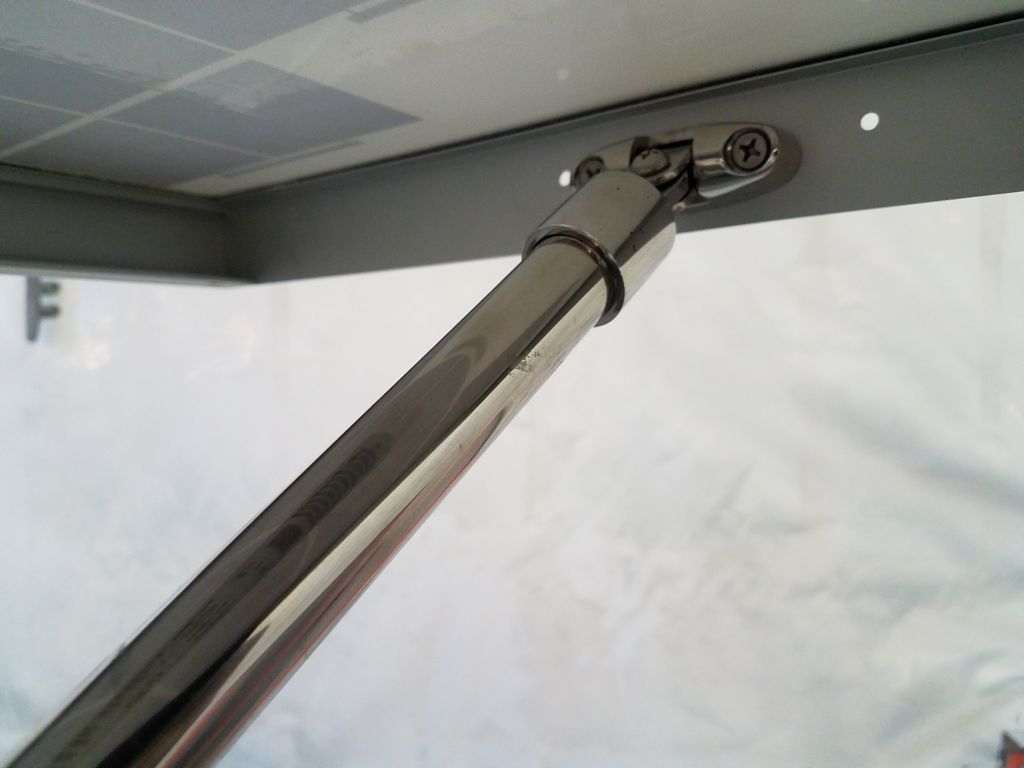
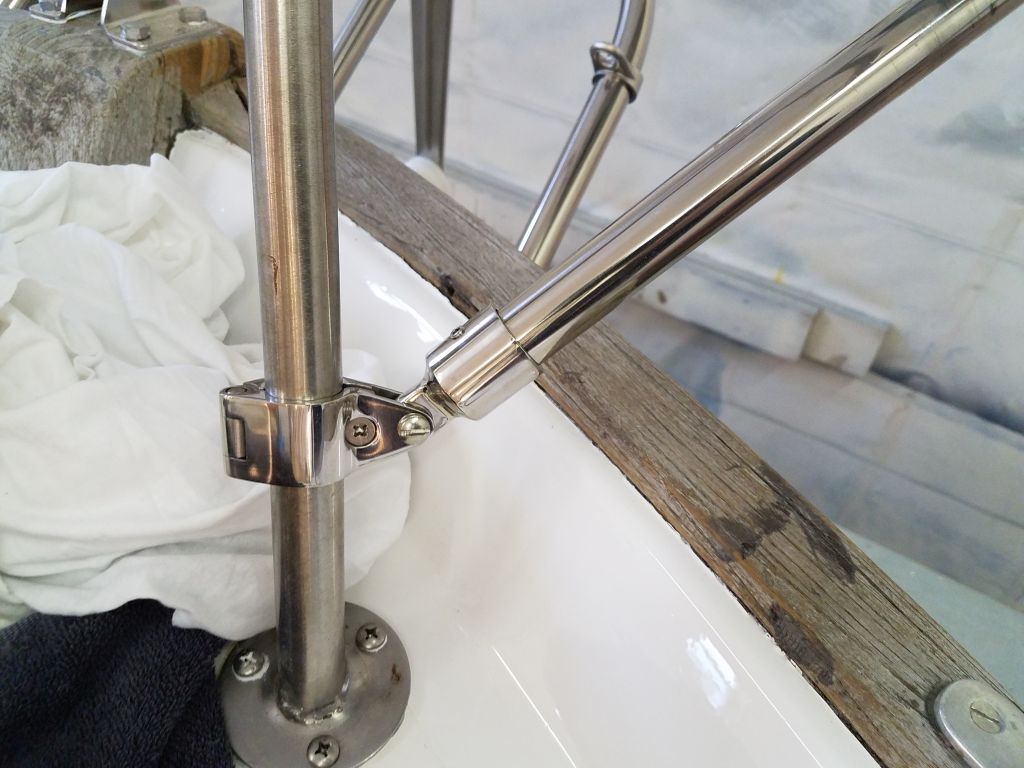
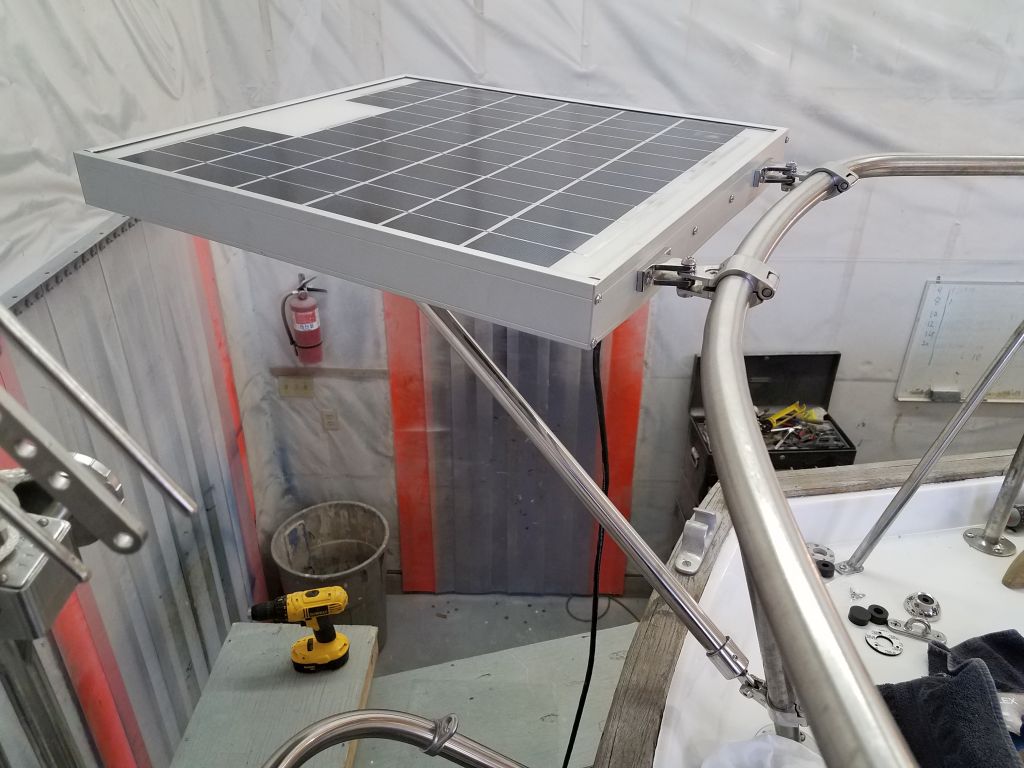
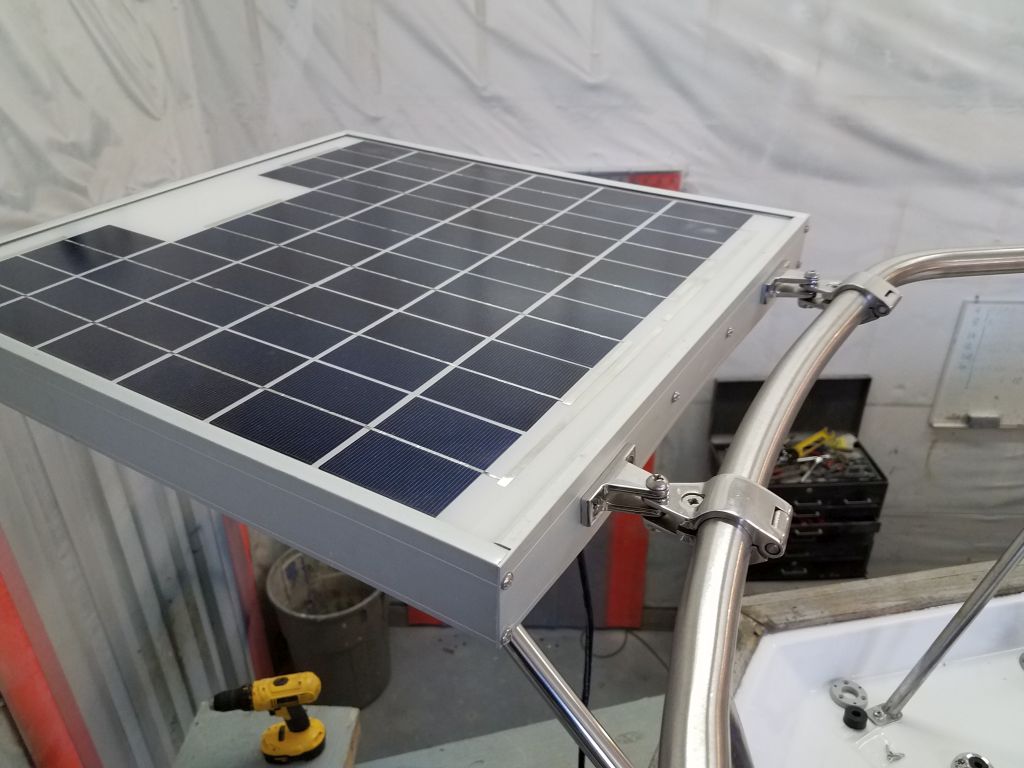
This completed the main panel support, and the panel seemed sturdy and solid, with only a hint of movement between the tubing end fittings on the lower angle support–a function of the hardware itself. To better secure together the panel mounts and upper rail fittings, I replaced the short machine screws with through bolts and secured them tightly.

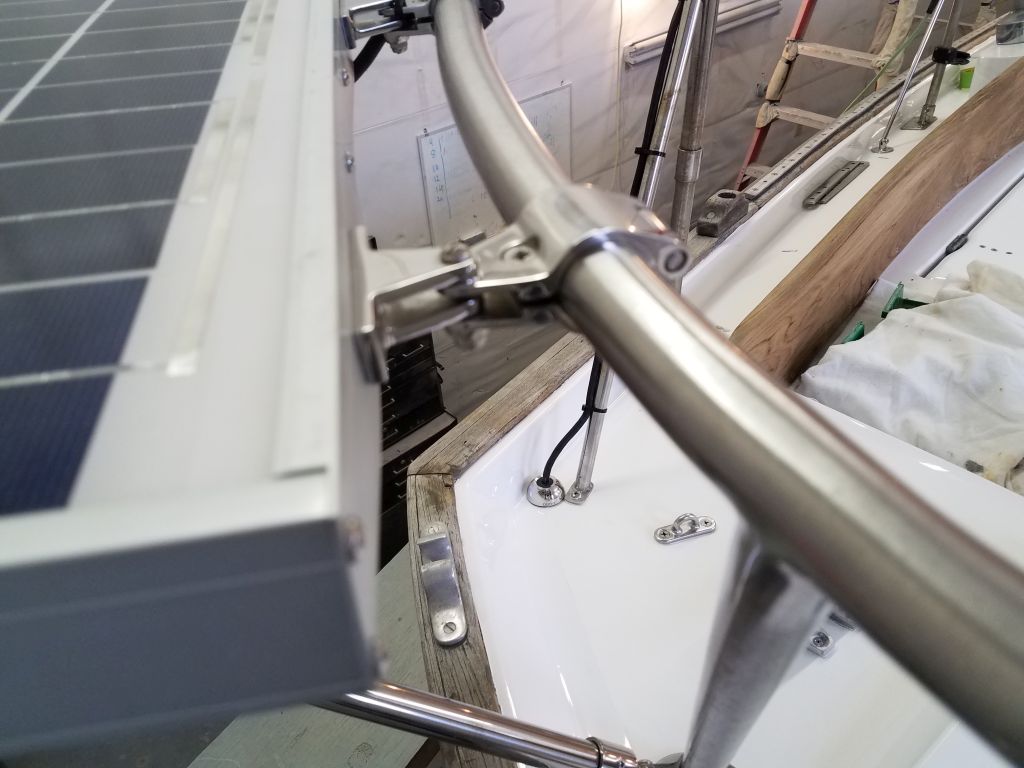

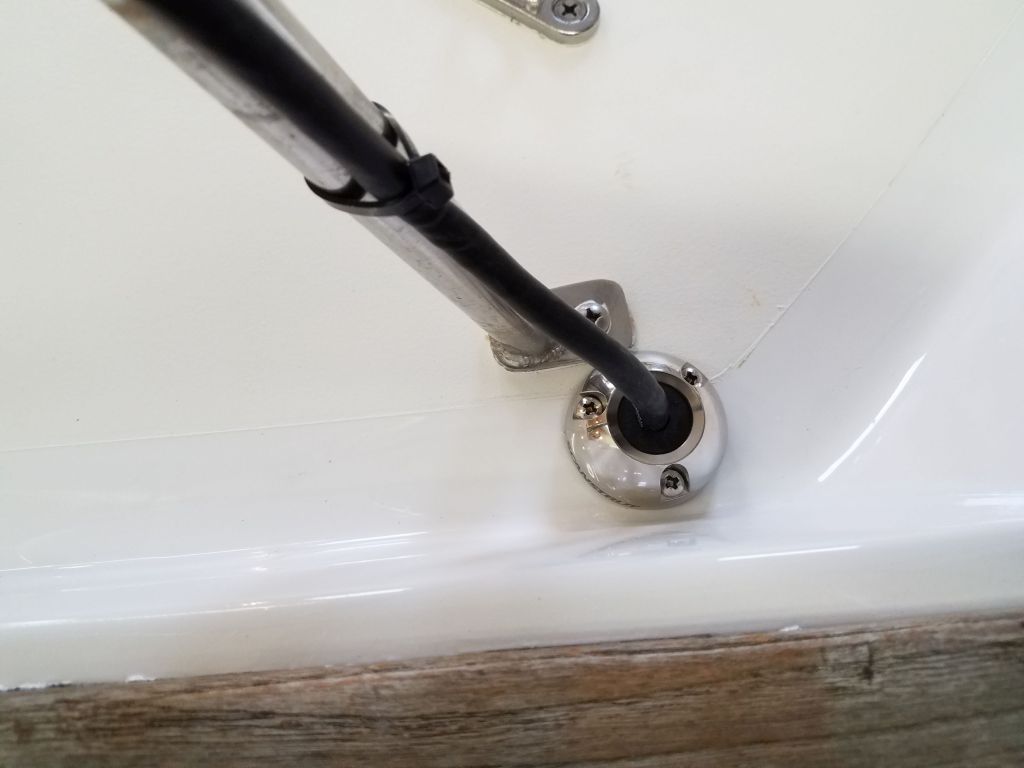
To run the wire belowdecks and to the panel controller (already installed by the owner the previous year), I installed a through-deck cable fitting, choosing a location near a stanchion and far enough outboard to pass through the solid area of the deck. I secured the wire along the pulpit and stanchions, then through the fitting and forward to the controller, securing it along the way to the wire mounts I’d installed before. I left the excess wire bundled beneath the deck near the deck fitting, so the panel could be dismounted and moved as needed and within the limits of the excess cable available.

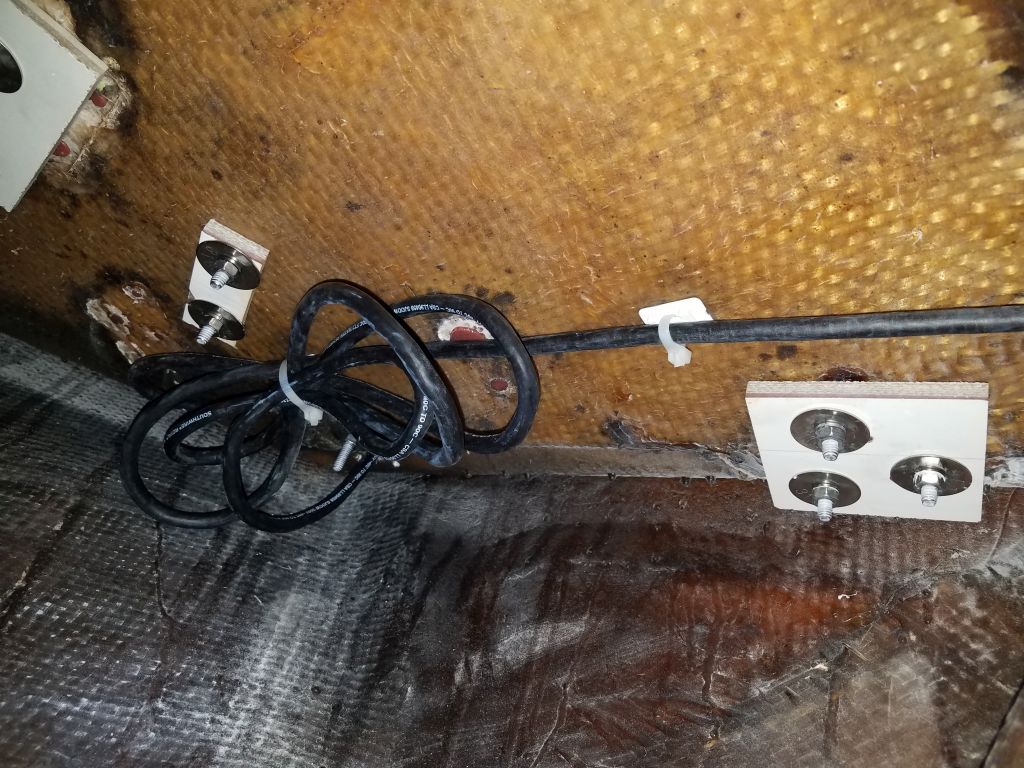
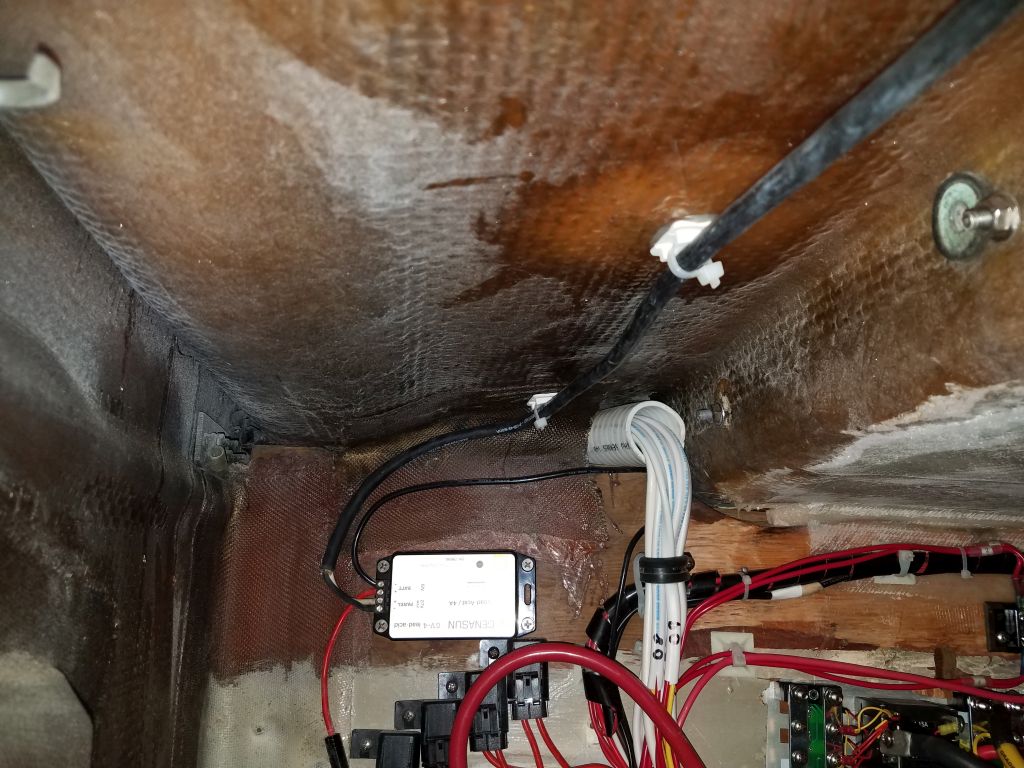

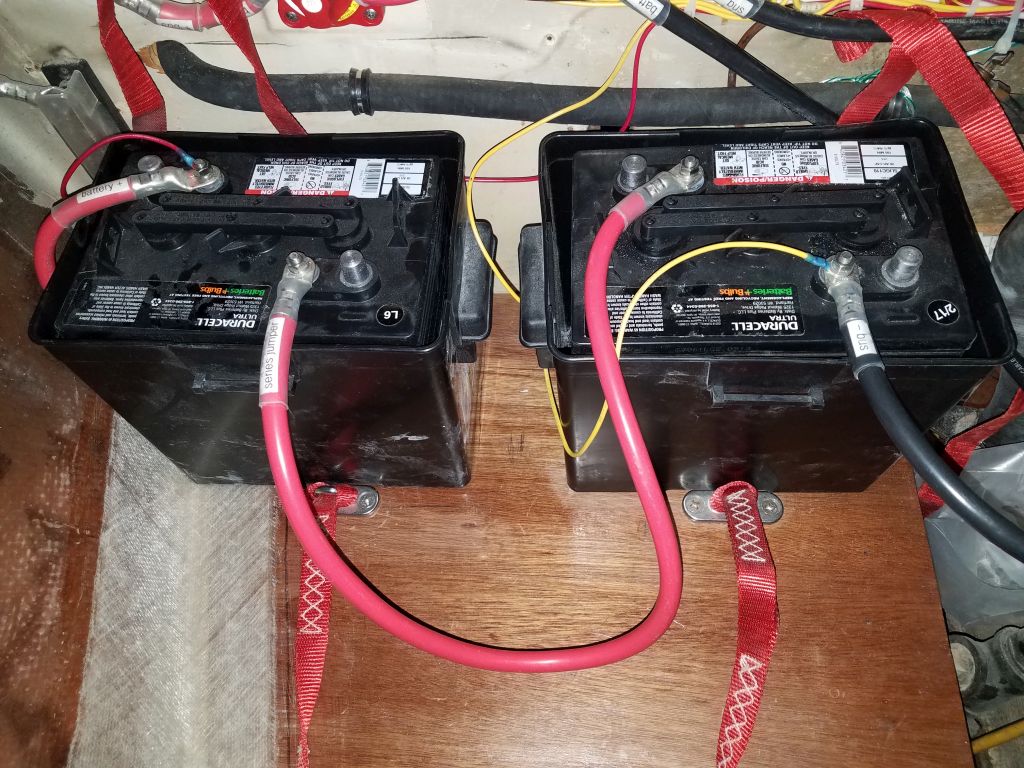
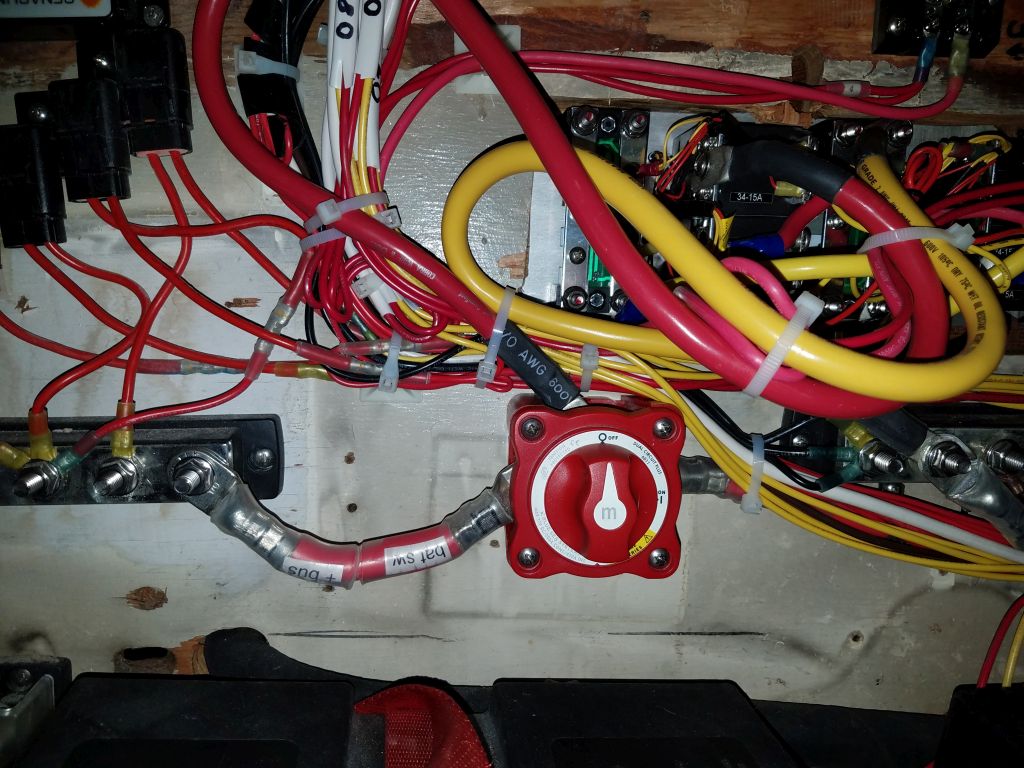
The boat’s pair of 6-volt deep cycle batteries was charged and ready, and with the panel in place I decided to reinstall the batteries so they could benefit from the trickle charge from the panel, both while inside the shop and, later, outdoors again. As I installed the batteries, I realized that I should have run the power feed from the service panel through the existing battery switch, not from the positive buss, since the buss was on the battery/always hot side of the switch. Since I didn’t install or change any of the basic battery and engine-side wiring, which the owner had installed the previous season, it hadn’t immediately occurred to me. So I re-led the supply cable to the proper terminal on the battery switch, and finished up the other battery connections. I led a pair of wires from the new battery gauge to the battery terminals as required, a simple installation that didn’t require a shunt like most battery monitors. The battery boxes fit securely in the space I’d built for them on the new platform, and I strapped them down with the nylon straps.


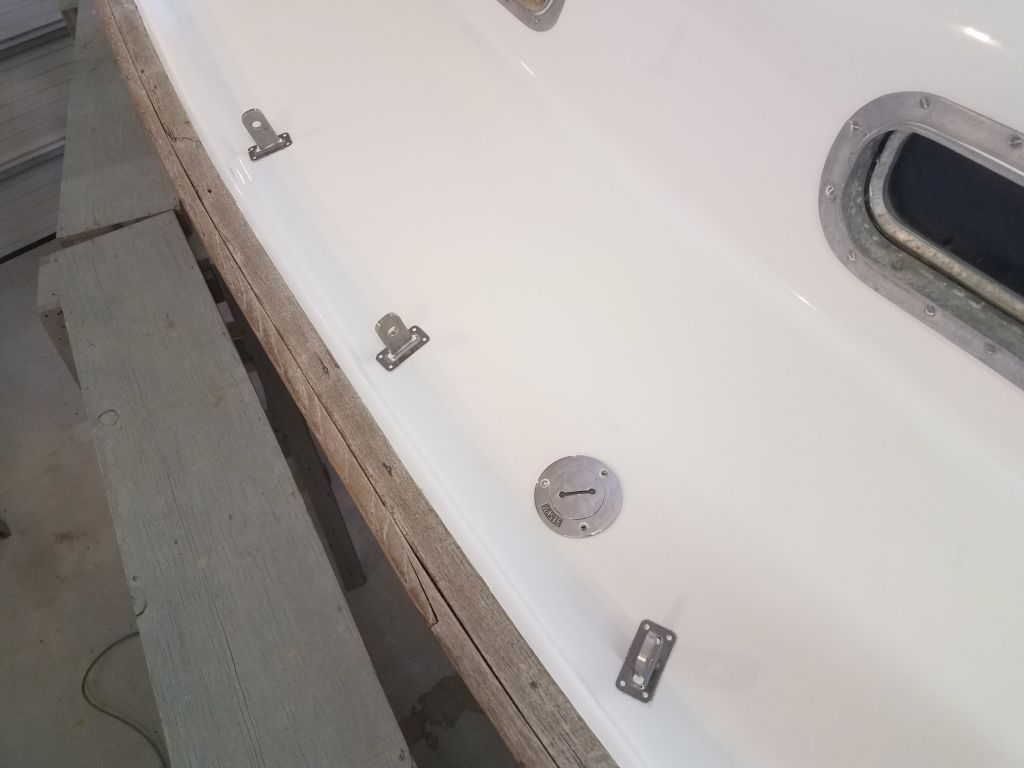
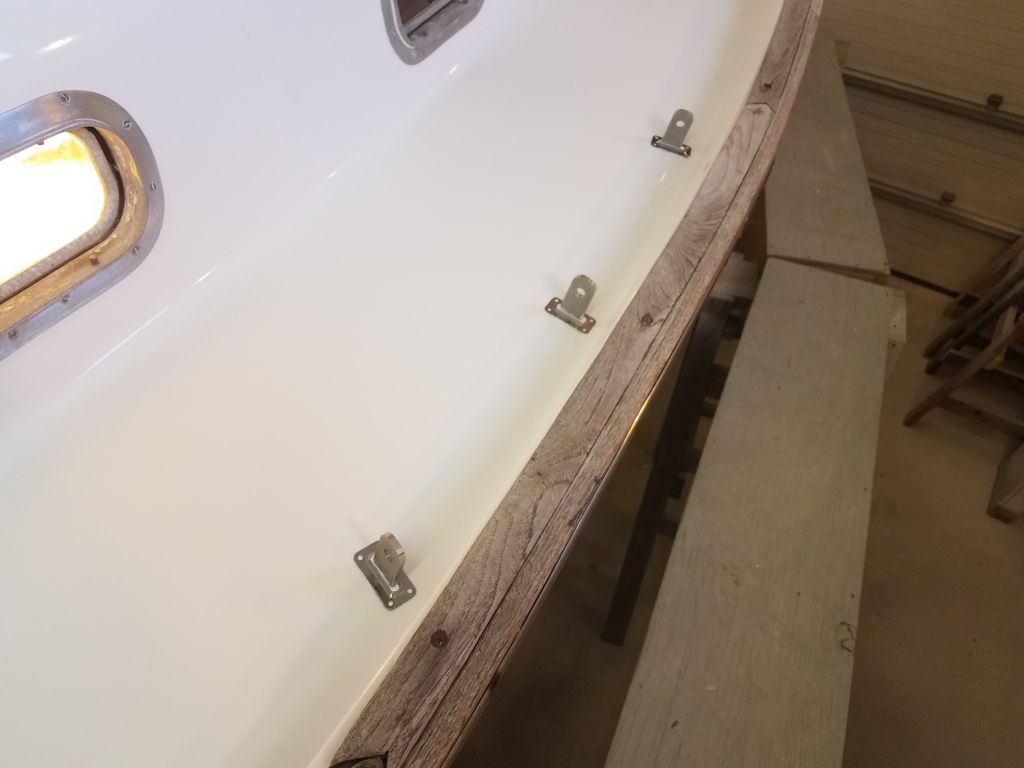
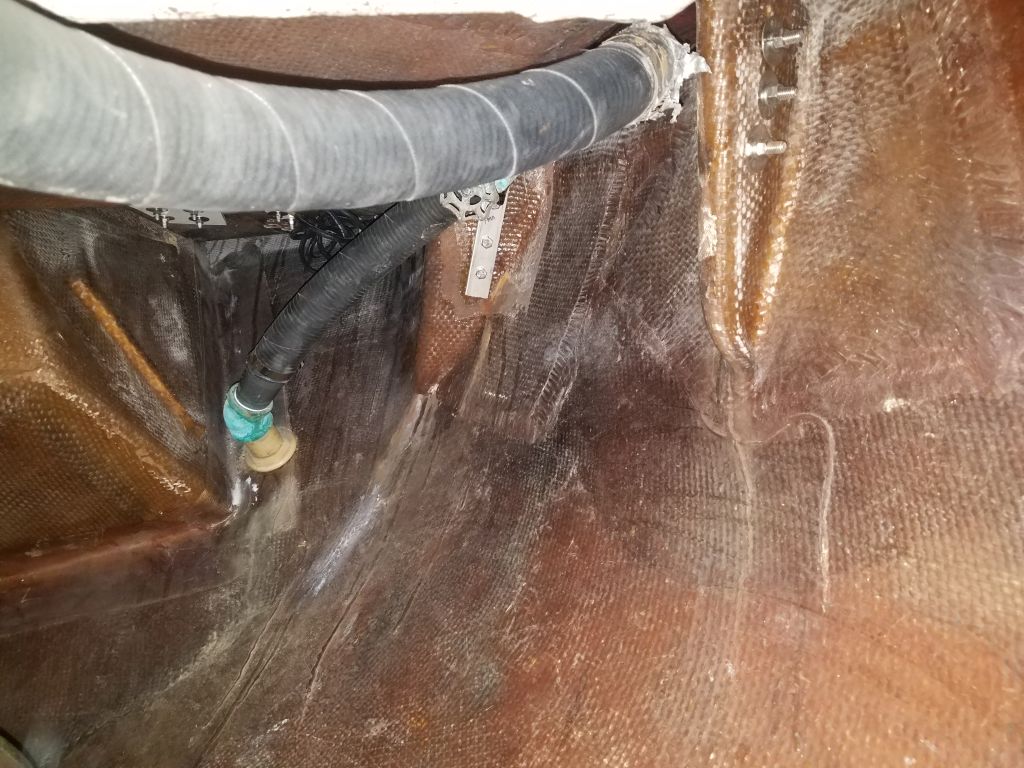
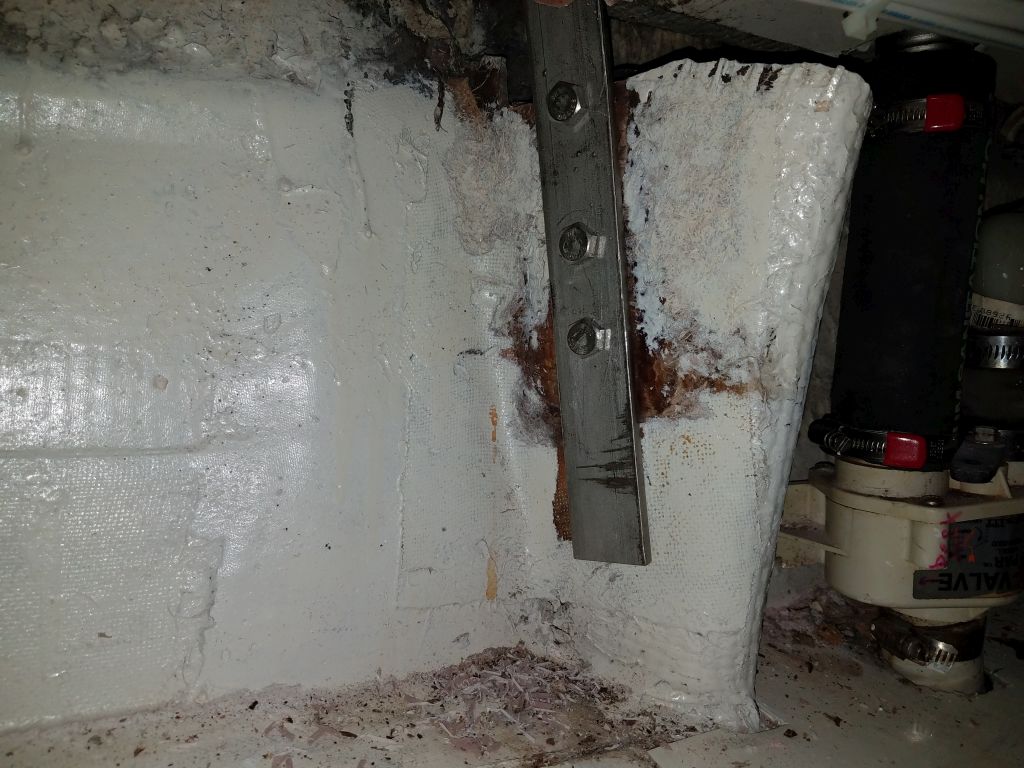
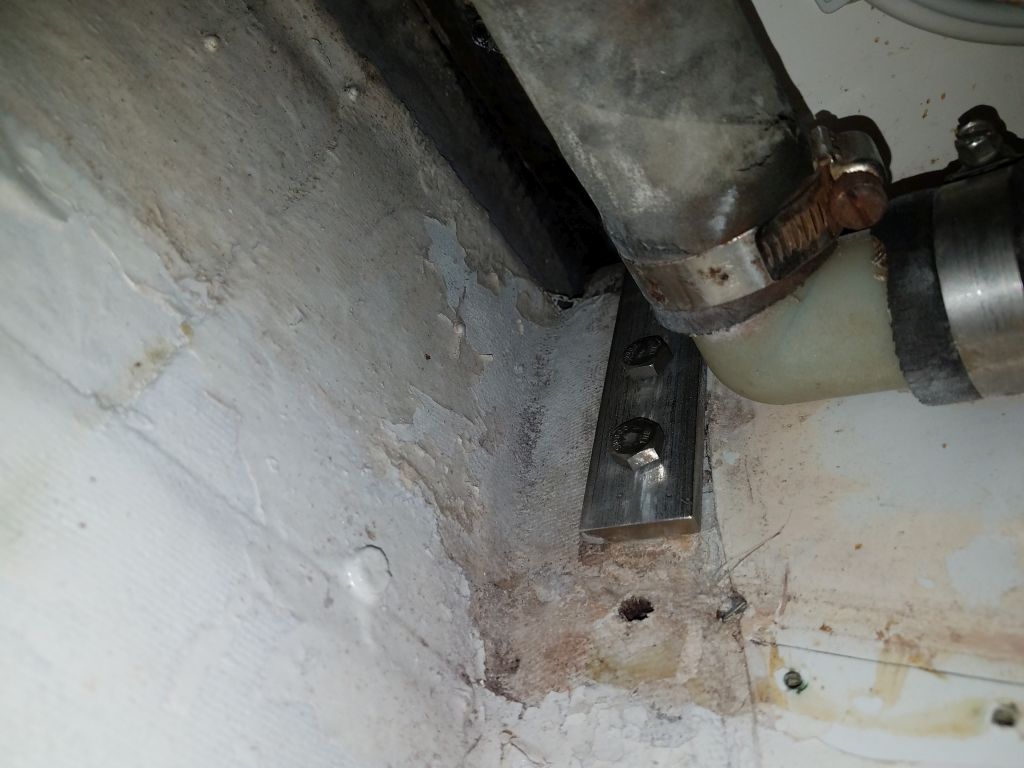
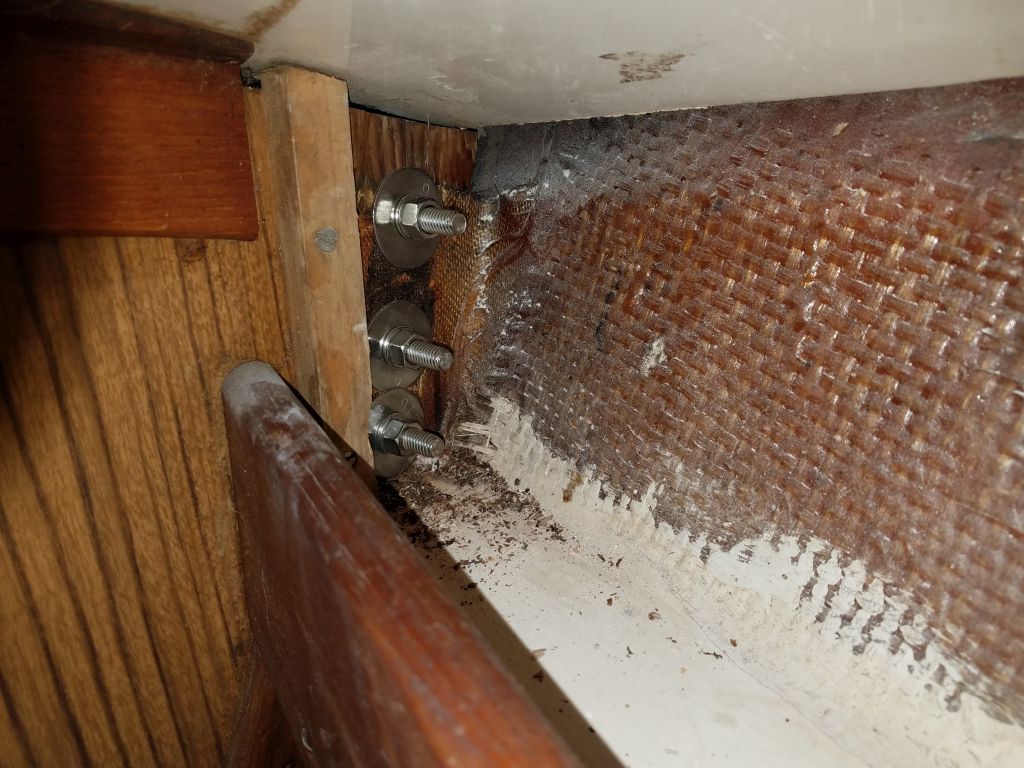
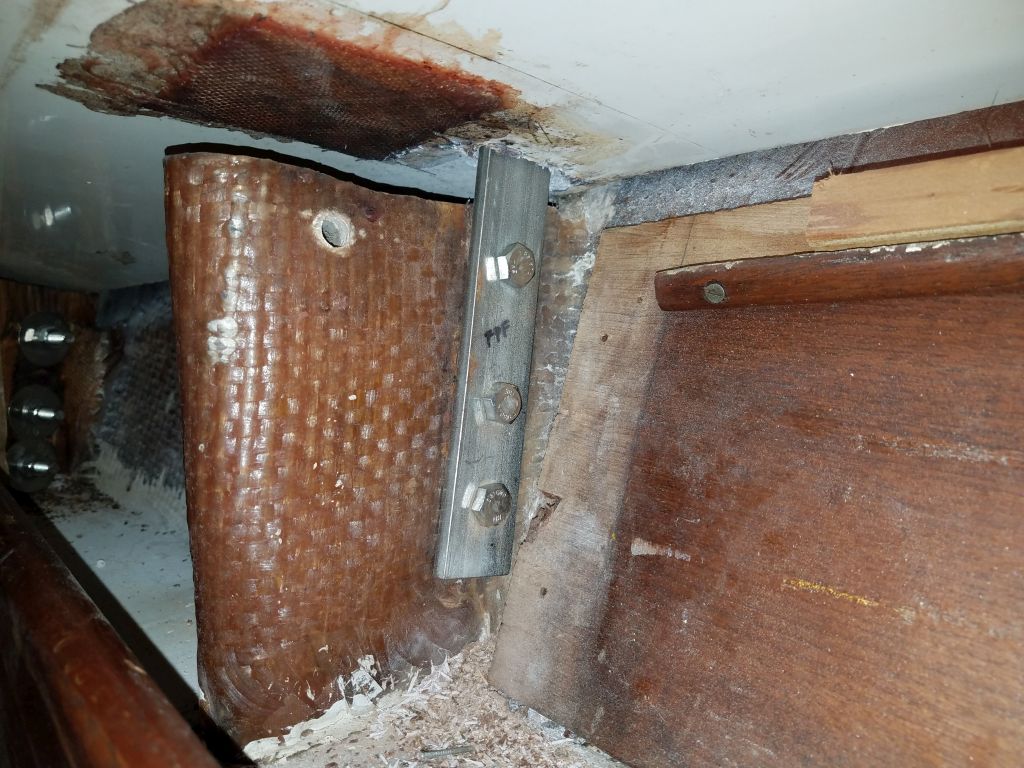
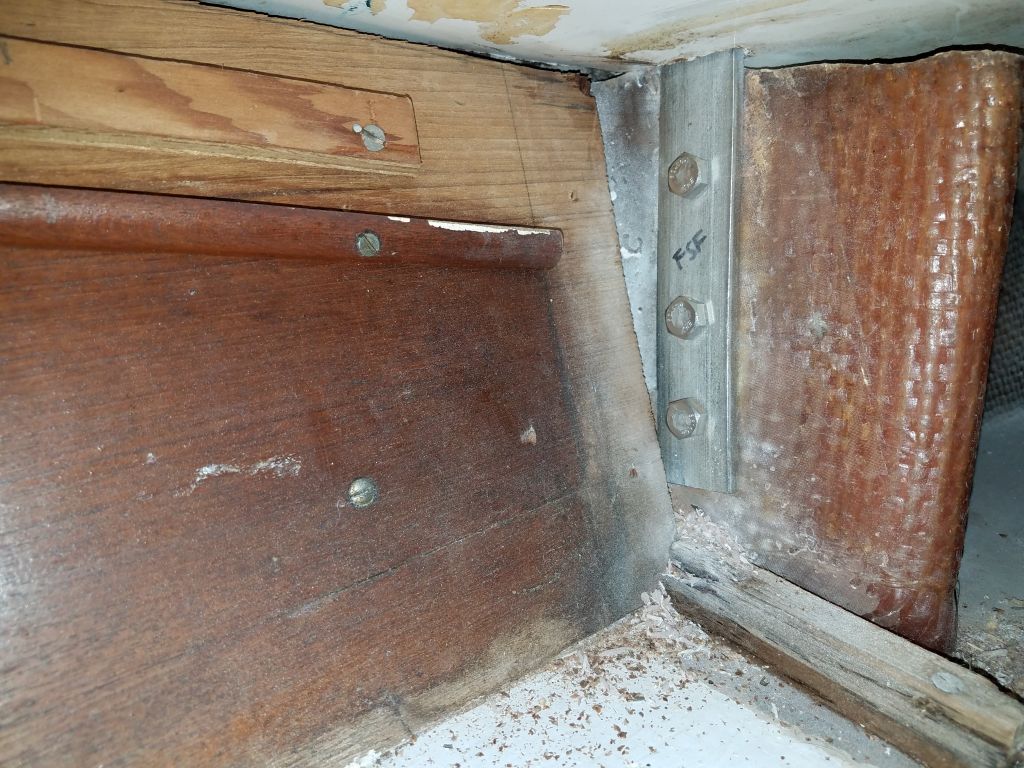
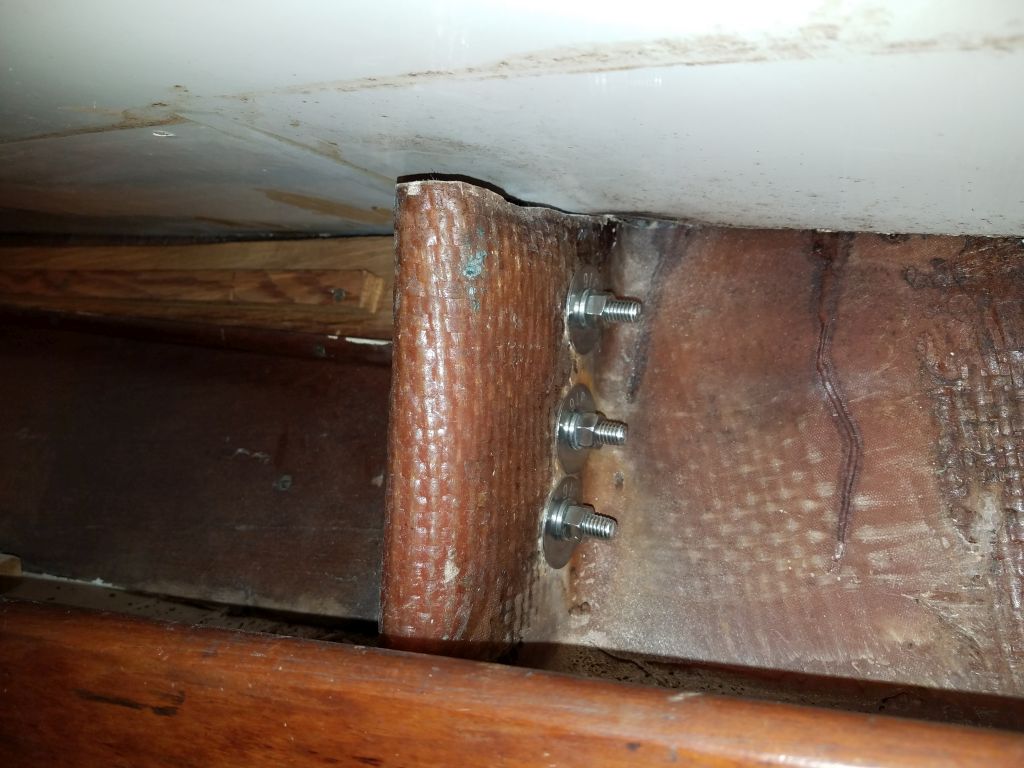
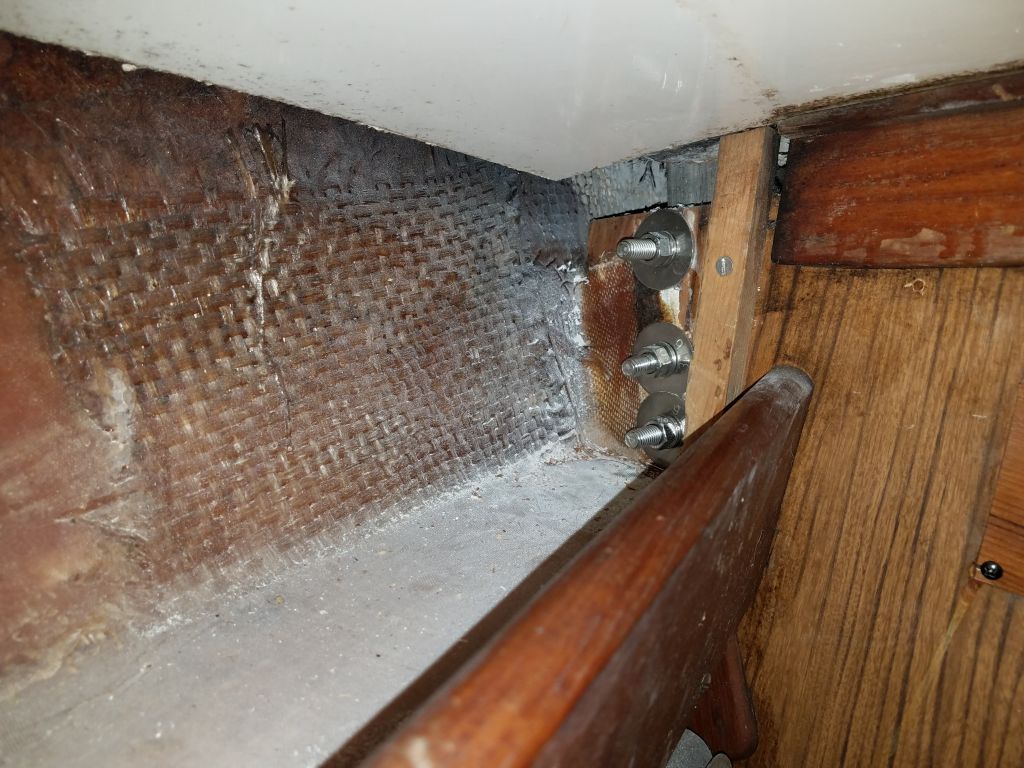
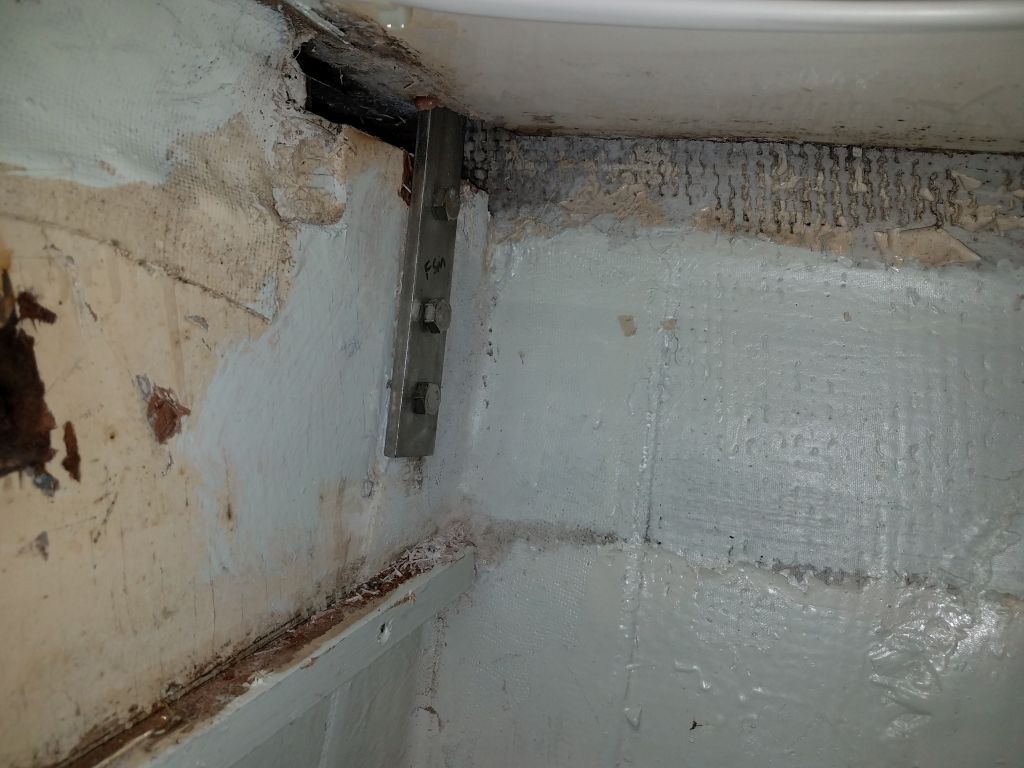
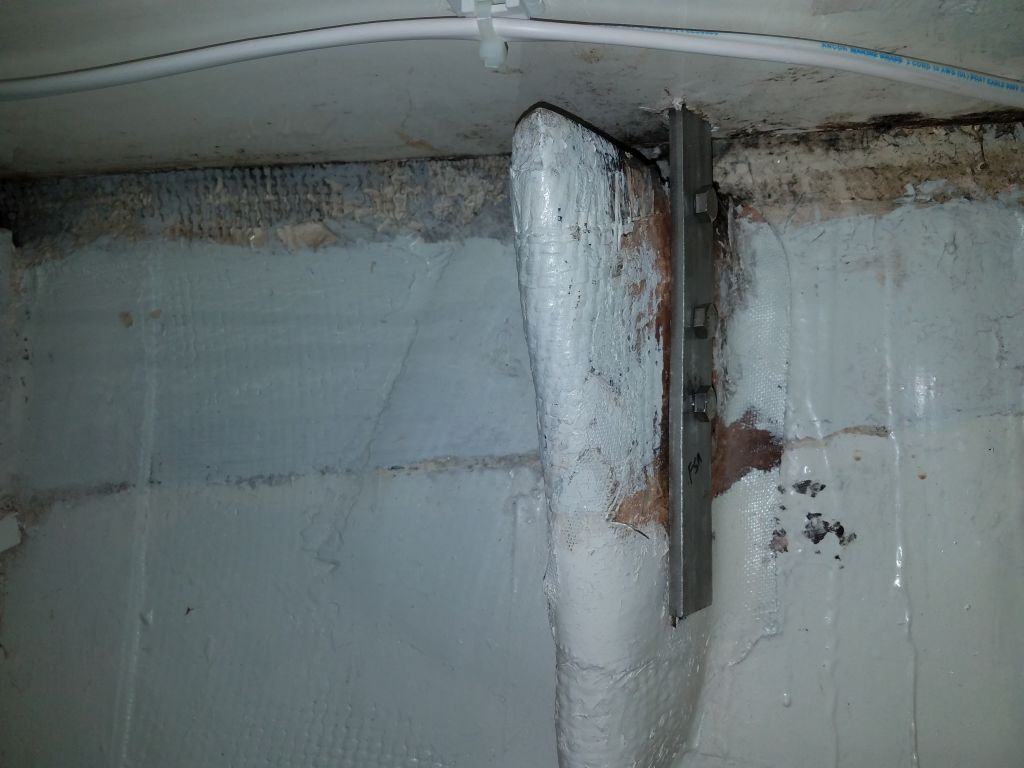
Once my new, longer bolts arrived for the chainplates, I got to work on the final installation of the remaining nine chainplates, beginning with the port after three, which serviced the mizzen stays and mainmast backstay. I’d install deck cover plates and sealant for all the new chainplates later.
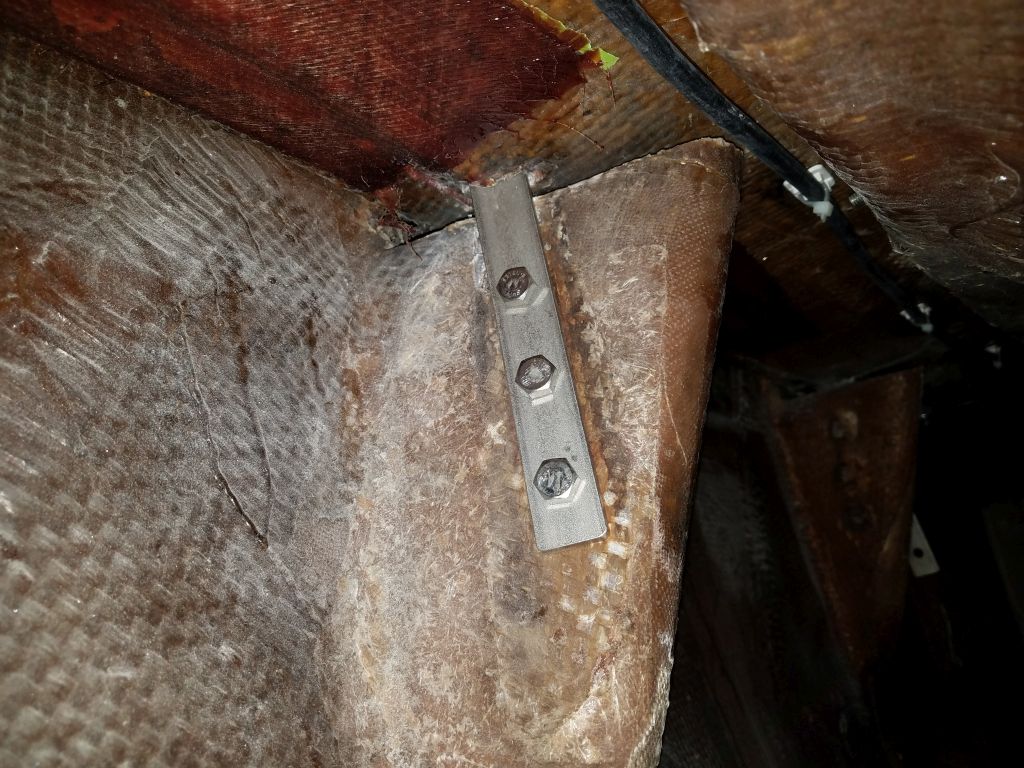

I finished up the day with the six chainplates for the mainmast. Access to the knees for securing many of these chainplates, particularly on the port side, was tight and at the limits of practical workability, so this chore took time, but by quitting time all the new chainplates were in place and bolted securely with the new bolts and large washers.


Total time billed on this job today: 7.5 hours
0600 Weather Observation: 30°, cloudy. Forecast for the day: Clouds, snow showers, then steadier and heavier snow overnight.