
110 Cookson Lane | Whitefield, ME 04353 | 207-232-7600 | tim@lackeysailing.com
The new propeller shaft arrived late Tuesday, so with the final piece in hand I could at last complete the engine installation.
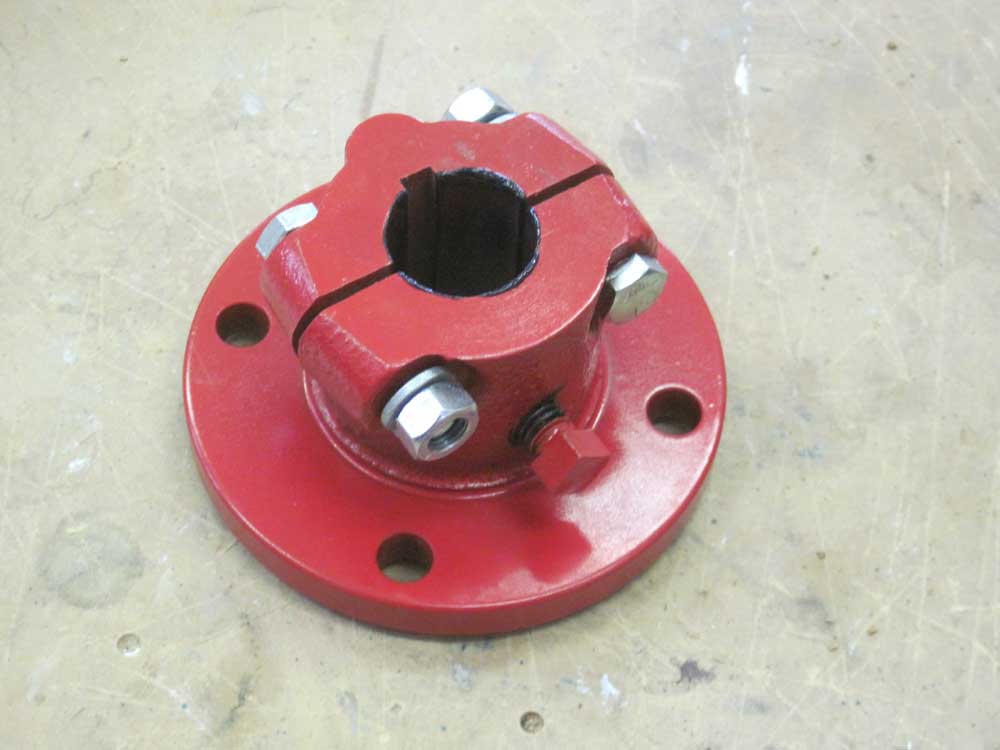
A day before beginning the installation, I took a moment to prime and paint the steel shaft coupling to minimize rust in the future.
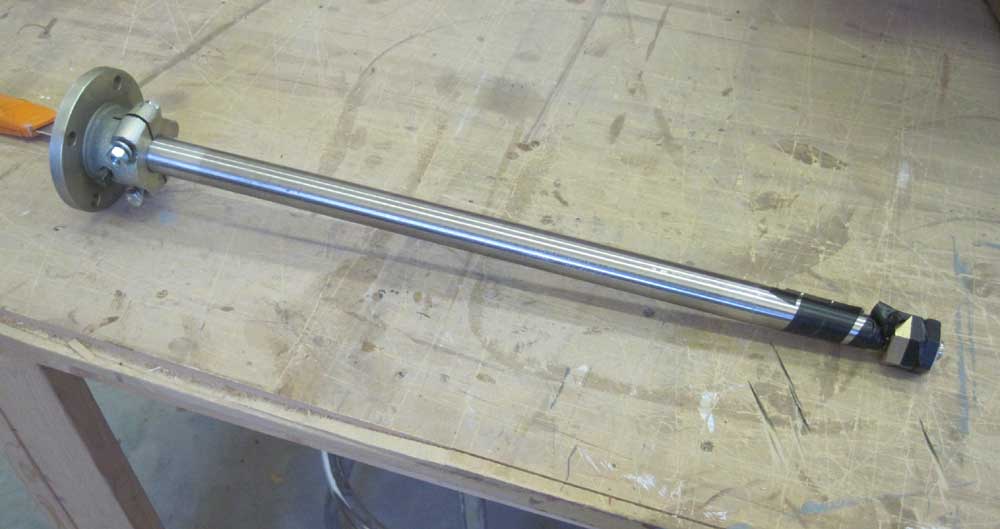
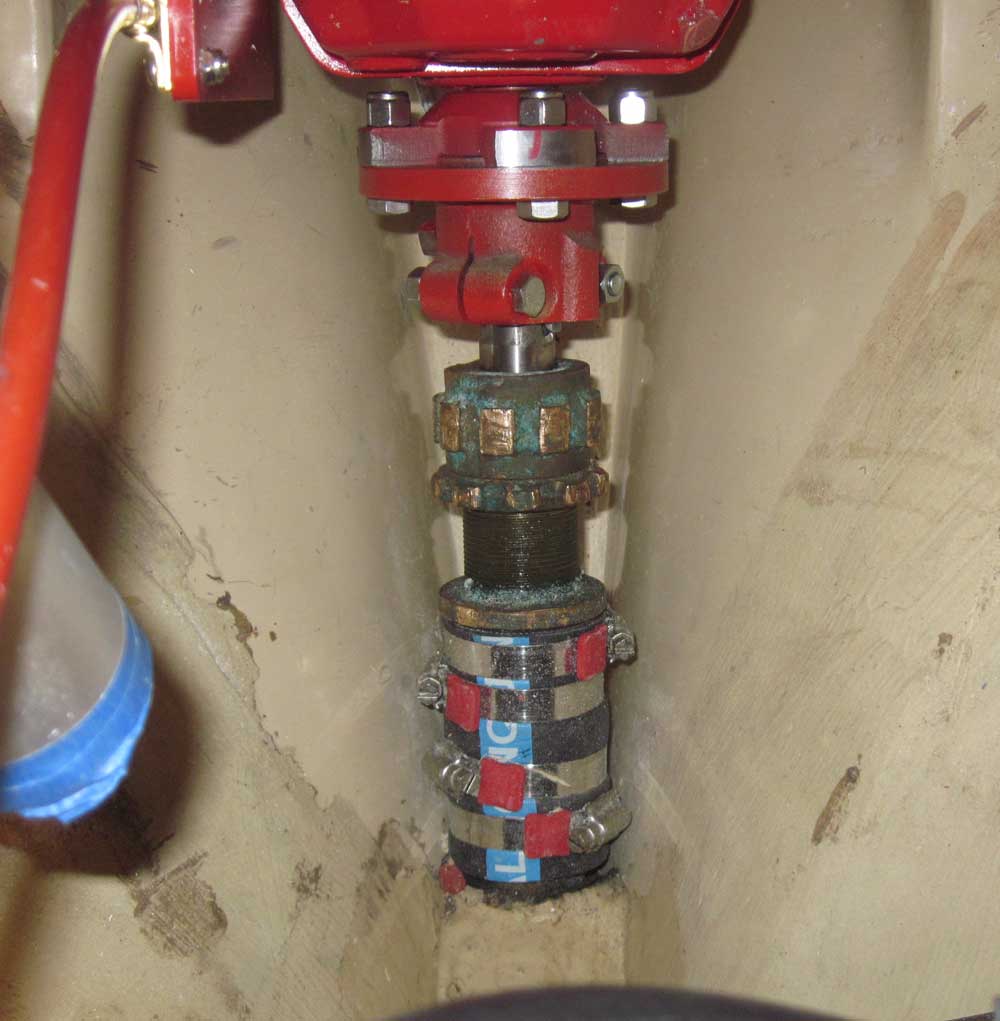
After first test-fitting the shaft to ensure it was the correct length as specified and as ordered, I prepared to install the coupling. This turned out to be a challenge because of the tight clearance between the stuffing box and the transmission. While there was plenty of room for the coupling itself, I couldn't extend the shaft far enough through the packing nut to install the shaft key, which needed to be in place before the coupling could go on.
It seemed simple enough to install the key in the coupling instead, then get the coupling started on the protruding 1/2" of shaft before pushing the shaft the rest of the way in from outside. However, the key was just loose enough in the coupling's slot that it didn't want to stay in place within the coupling, so my first attempts at this led to the key falling out before I could properly start the coupling.
To hold the key in place while installing the coupling, I used a very small amount of 5-minute epoxy, being careful to keep the application extremely minimal so as not to raise the key higher than intended, which would cause fit problems. This worked excellently, and once I got the coupling and key started on the shaft, it was easy to push the shaft the rest of the way into the coupling from outside the boat. The semi-split coupling made this job easy.
It took a few trips up and down the ladder to push the shaft in far enough without going too far, as there was a specific point at which the shaft needed to stop, to allow the set screw to entre the milled dimple on the end of the shaft. By sighting through the set screw's hole, I could align the dimple properly. There was no room ahead of the coupling to see the end of the shaft, or to insert fingers to feel if the shaft was flush with the inside of the coupling.
With the shaft and coupling in the right harmony, I installed the setscrew, locking the shaft in the proper position, then tightened the two clamp bolts to compress the coupling together over the shaft.

The aft end of the engine was a bit low, and a bit off to starboard, so I made a number of adjustments to the mounts' heights and positions to eventually bring the transmission coupling into proper alignment with the shaft. Eventually, when the couplings were properly aligned, I tightened all the various bolts securing the engine and flex mounts, and bolted the coupling in place.

Now that the shafting and alignment were complete, I could wrap up a couple remaining installation jobs, most notably the exhaust. I installed the waterlift muffler on the starboard aft engine mount stud, after first installing a couple nuts beneath it as spacers, and connected the outlet hose and a length of highly-flexible corrugated hose between the high-rise engine exhaust elbow and the muffler.
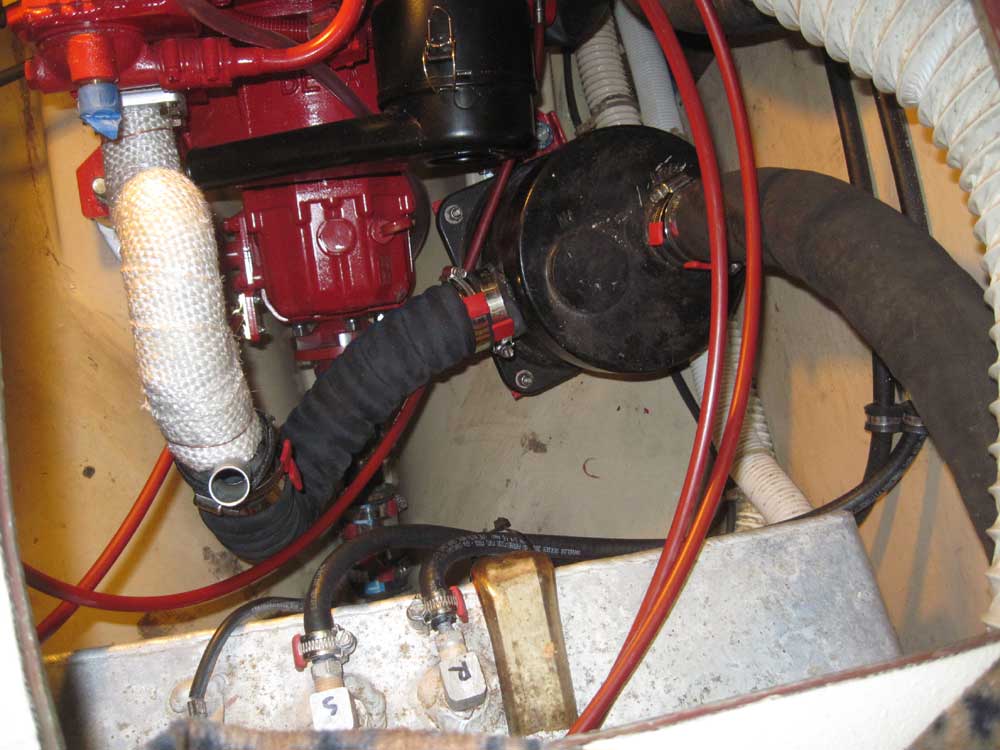
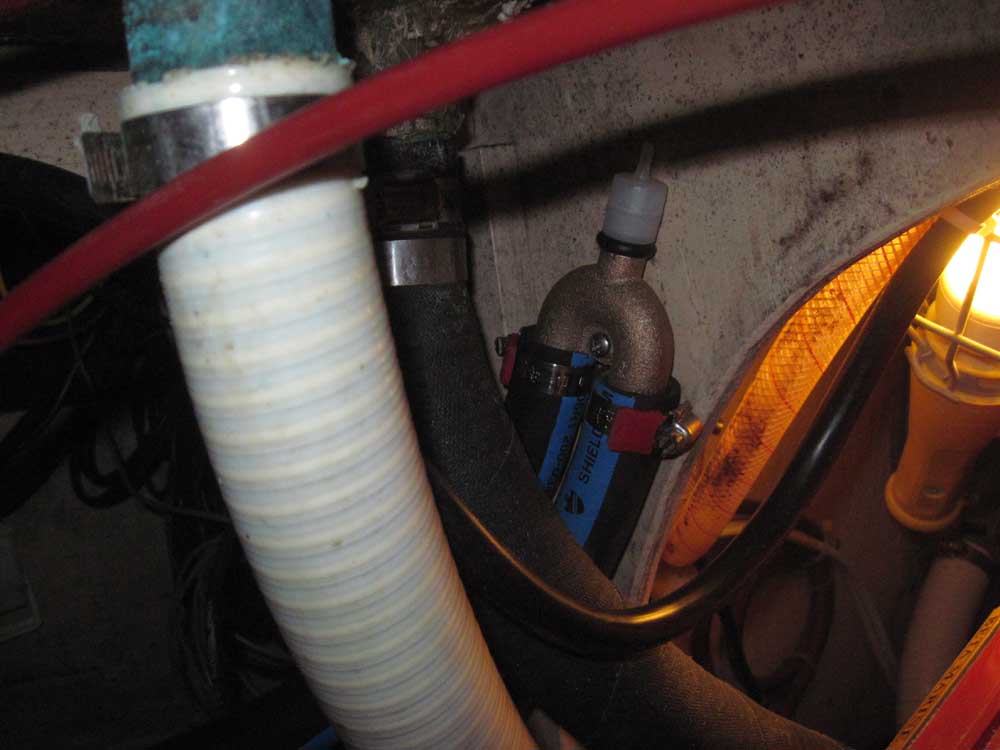
With the major components of the exhaust system complete, I installed a bronze siphon break for the raw water injection hose, leading hoses to and from the siphon break to their appropriate connection points on the engine and exhaust elbow.

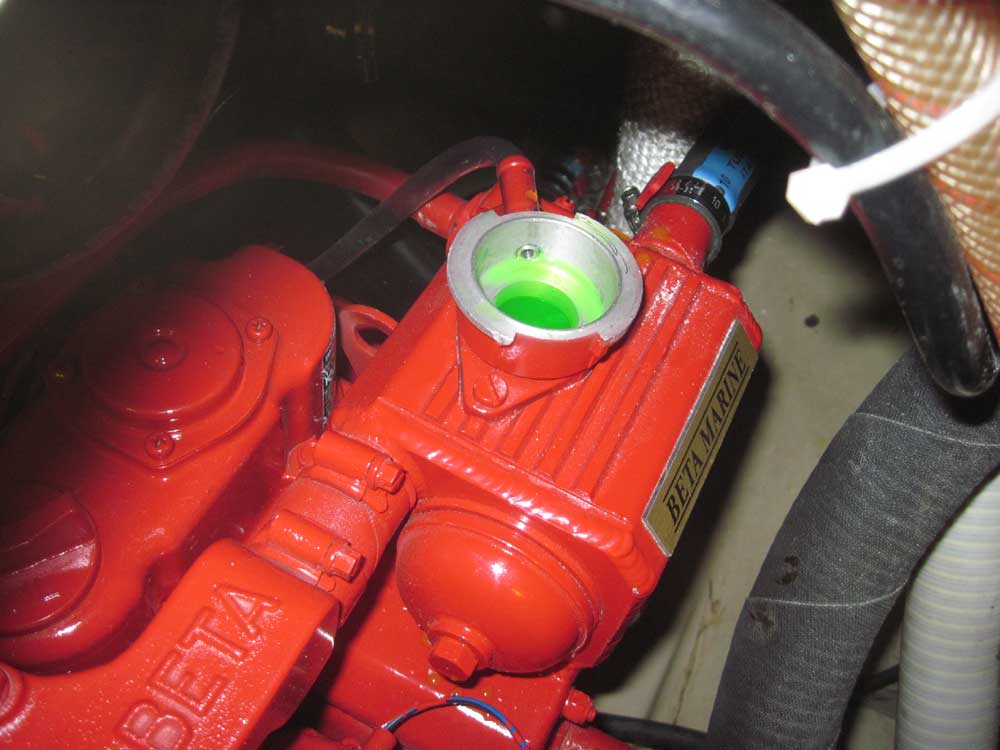
I added coolant to the heat exchanger, and engine oil to the oil reservoir, and this wrapped up the engine installation for now. I'd wait to test the engine till spring.
I reinstalled the galley sink, bringing the project full circle.

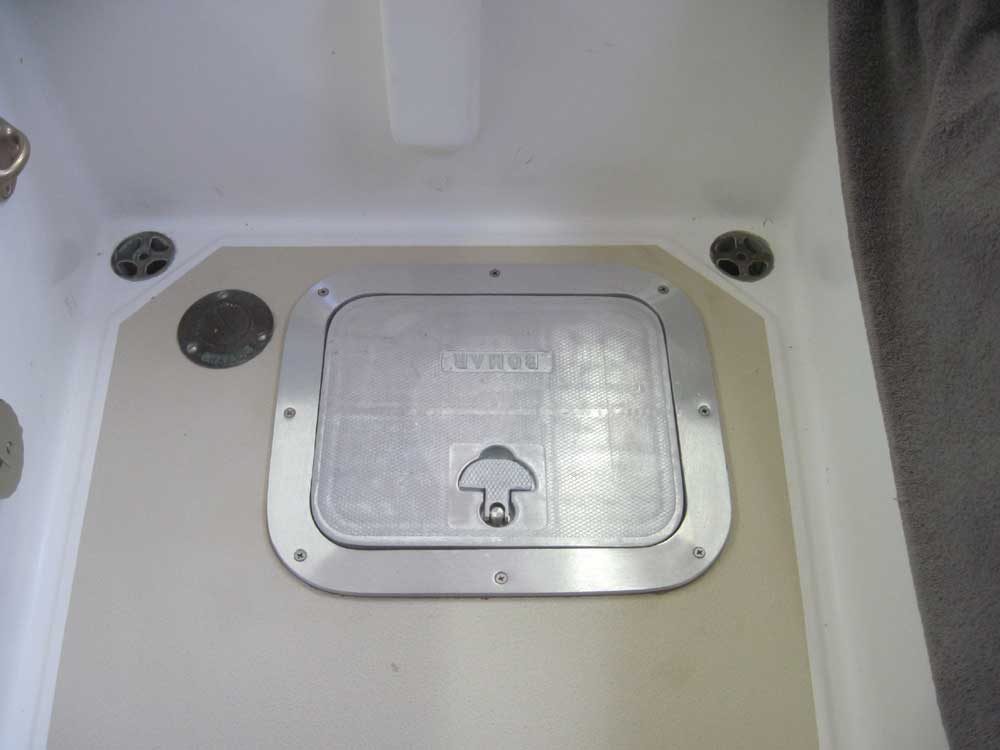
Finally, I installed the new cockpit hatch permanently; I'd left the hatch installation for last because the deck cutout was just a bit larger than the hatch opening itself, and I thought it'd be helpful to have as much room as possible during the shaft installation and alignment chores.
Final installation was straightforward: I masked off the deck around the hatch perimeter, drilled for the mounting screws (into the already-prepared deck surface), and secured the hatch with sealant and stainless steel screws.

After removing all my tools and other detritus from the boat, and doing a final vacuum and cleanup, I returned the interior cushions and other gear to the boat for storage. This completed the work on Bugs for now; I had a short list of minor jobs to wrap up in the spring before the boat headed off for a season on the water.


Total Time on This Job Today: 5.75 hours
