| Kaholee Refit |
October 6, 2007 I had time today for a half day. I began by sanding yesterday's primer on the shower box and then applying a first coat of gloss white. Next, I applied Bilgekote to the battery boxes, now that they were complete. |
For a few days, I'd been contemplating the B744V bronze transducer (multi-function: speed, depth, and temperature) that came with the Raymarine ST-60 instruments. It's a huge elliptical arrangement, and I spent a bit of time over several different days working out how and where to install it. Where I wanted it was on the leading edge of the keel on the centerline, where an old transducer had been located. It was a good location for many reasons. Slogging through the directions, which covered several transducer models, too many irrelevant installations, and contained frequent allusions to a "fairing", I finally came to the conclusion that I was on my own and fully capable of safely and effectively mounting the unit where and how I wanted. |
|
|
Eventually, I decided to cut a shark bite out of the keel to allow the unit to be somewhat flush, with minimal protrusion. First, though, I used a 2" hole saw to mill a hole through the keel in way of the old location; there was already a 2" hole there from the previous transducer housing, but I had filled the top portion of it with epoxy earlier in the process. With the hole drilled, I inserted the transducer to estimate where to cut the shark bite. Then, I cut out the section of the leading edge of the keel with a Sawz-All and a carbide-tipped blade. The cutting was surprisingly easy, and took only a minute or two. |
|
|
After some sanding and paint removal, I was ready to begin installation with a test fit. the location ended up a bit more forward than I'd hoped, since it made sense to use the old location, but otherwise looked good. The transducer housing needed to be surrounded by and enclosed with fiberglass, so I elected to use the housing as a mold. I covered it with a few thicknesses of black tape to provide protection from the epoxy and to allow a bit of extra room inside the new molding for additional sealant in the final installation. Then, I applied some paste wax for good measure. I cut a piece of 1/4" prefab fiberglass to just a bit larger than the size and shape of the transducer, and then epoxied the arrangement to the hull in the shark bite. The prefab fiberglass provided a lip against which to apply some thickened epoxy to begin the fairing and installation process; then, over the transducer, lip, and onto the hull, I applied one layer of fiberglass to mold the shape of the transducer. I applied some heat to accelerate the curing process, since I wanted to remove the transducer before the epoxy cured fully, lest it become somehow stuck undesirably in place despite the tape and wax. Once the fiberglass was semi-cured and hard enough to hold its own shape and to stay in place, I removed the transducer, leaving the new mold alone to cure on its own. |
|
|
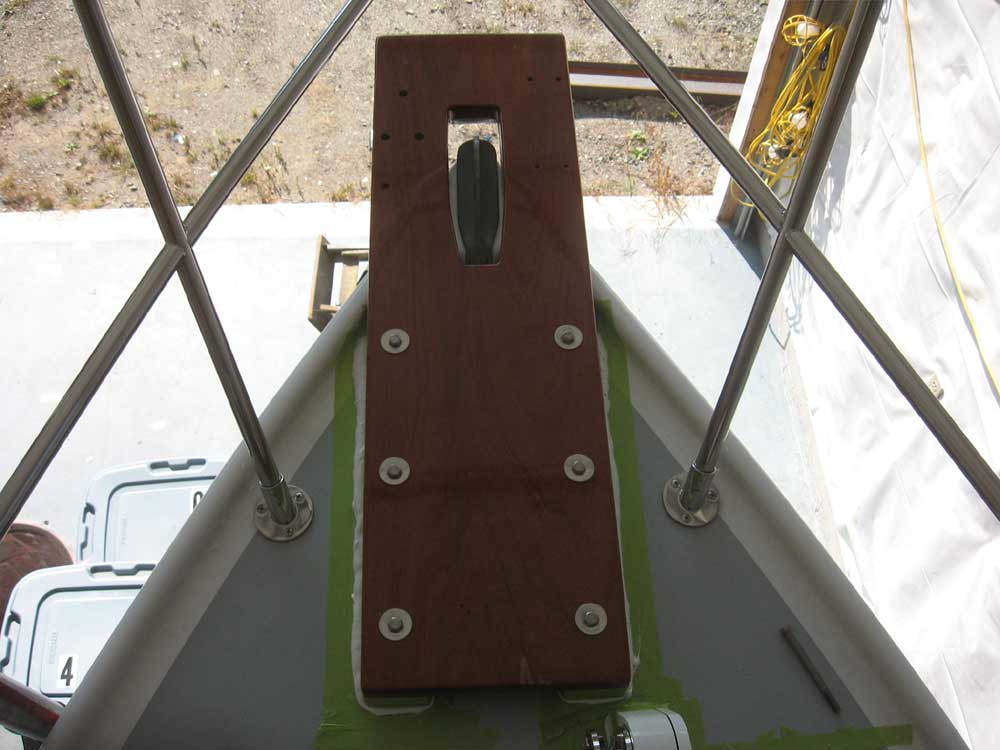
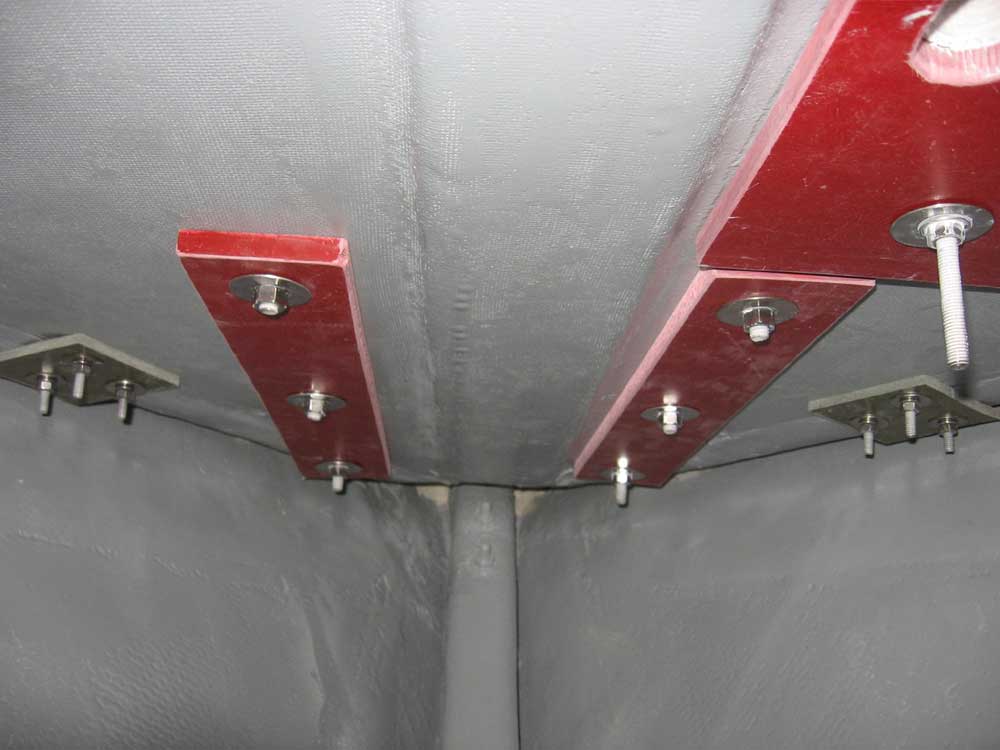
Also today, I had Heidi come help me install the anchor platform. I applied a heavy bed of polysulfide sealant to the deck and bolt holes, and then she held the bolts from above while I installed the backing plates, fender washers, and nuts from inside the chain locker--an easy task for two, nearly impossible for one. |
|
|
|
|
|