| Kaholee Refit,
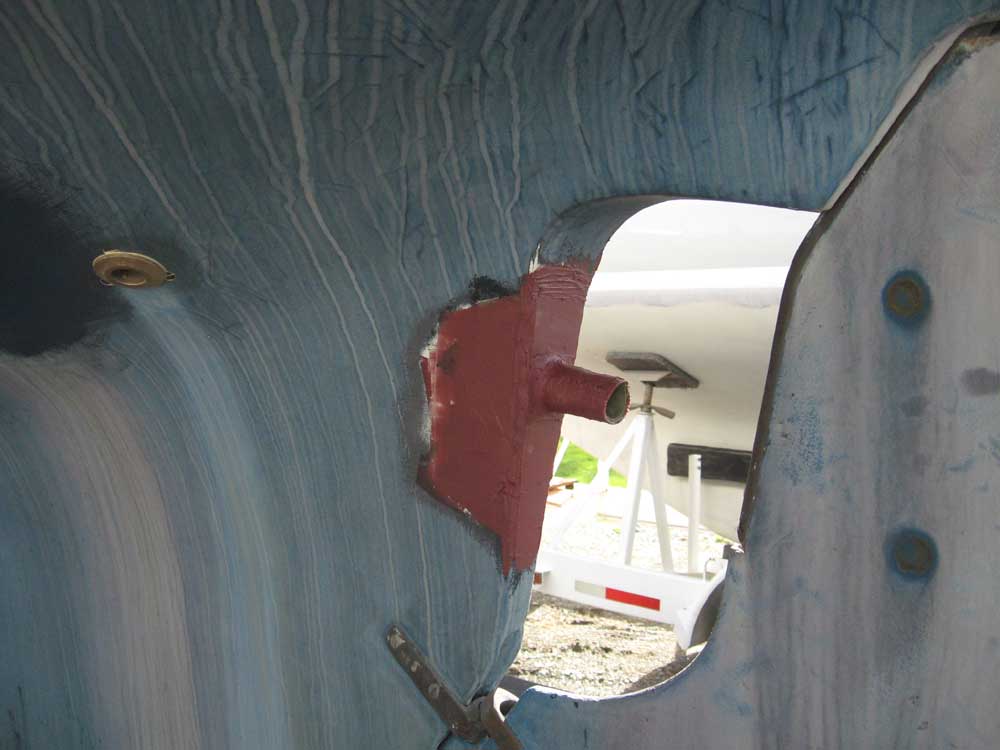
Phase 3 | Monday, May 5 (and days preceding) Over the weekend, I worked on the shafting and related issues. I wanted to get the new stern tube installed--what I thought would be a pretty straightforward task. Silly me. The troubles began almost immediately. First, the prop shop had supplied a huge, long, semi-split coupling along with the shaft. I hadn't asked for this coupling, but since it was there I thought there was no harm in trying to use it. Then I realized that I had no choice but to use it, since this coupling had a single set screw (and the shaft had a corresponding dimple), whereas all normal couplings and shafts have a pair of screws and dimples. So I decided to press on using the large coupling, though I had grave doubts about whether there was enough room for it inside; the coupling was nearly twice as long as the stock coupling. The shaft fit inside this split coupling was incredibly tight; I thought it'd slip right in, since the coupling featured cast gaps on each side and large bolts to either side to allow it to be tightened around the shaft. But it was a tighter fit into this coupling than into the regular coupling (which is always a tight fit by design), so that added extra frustration. For now, though, I didn't need to get the shaft all the way in--just enough to allow me to align the stern tube to the engine properly. It started to rain lightly early in the process, which wasn't forecast, but for the moment the rain was light enough to ignore. With the various pieces in hand, I climbed into the boat and attempted to make things fit. It soon became clear that there simply wasn't sufficient clearance for the bulky,1.25" drive saver coupling supplied with the engine, the extra long steel shaft coupling, and the stuffing box, unless I was willing to accept the inability to service the stuffing box packing without removing the engine or shaft. Obviously, that was unacceptable. Strike one: ditch the extra-long coupling, which resigned us to the requirement to have the end of the shaft dimpled properly to match the double set screws of the original, engine-supplied coupling. This wasn't a big deal, but seemed unnecessary nonetheless. Next, we proceeded with the stock engine coupling. At least this would fit inside the boat and allow some clearance for the packing nut. Armed once more with all the couplings, shaft, stuffing box, and tube, I tried once more to fit things in place properly enough to align and install the new stern tube. However, as we proceeded it became unhappily clear that the shaft was the wrong length--too long. This was extraordinarily frustrating since I quickly determined that the extra length was because the prop shop had failed to account for the 1.25" width of the drivesaver coupling--a measurement that I had clearly indicated they needed to account for in the extensive documentation and information package I provided them with when I went to their shop in person to order the shaft back in January. This error carried an extra bite because the prop shop had also ordered me the incorrect propeller--an error that fortunately I caught well in advance and was able to correct so that I finally received the correct propeller several weeks ago. Strike two: with the shaft extra long, there was no choice but to return it to the prop shop so they could fix their error. While I expected them to be able to do it quickly, it was just one more--and unnecessary--irritation to deal with. In the event, I finally got things temporarily installed sufficiently enough to get the new stern tube aligned and adjusted where it needed to be--extra shaft length notwithstanding. With that done, despite the light rain, I used a syringe to force thickened epoxy into the space around the stern tube, and then formed a nice fillet around the outer edge. I set up some heat lamps, as it was cool outside, and left it to cure. I left extra length on the stern tube for now. I'd hoped to be able to install some fiberglass reinforcement later in the day, but persistent rain on both Saturday and Sunday prevented me from doing so. Finally, on Monday I could continue the work. After calling H&H on the phone, I sent Allen off with the shaft to return it for the necessary modifications. Meanwhile I washed and sanded the epoxy from Saturday, cut off the tube at the correct length, and then applied several layers of flexible 10 oz. cloth on the stern tube and out onto the deadwood to reinforce the area. Later in the day, when the epoxy had cured sufficiently, I applied a coat of fairing compound to the area. |
|
|
Late Monday evening, we also managed to get the old wires out of the mast. Someone in a previous ownership had thought it a wise idea to foam the wires in place, and removing them was not a simple task. We eventually ran a stiff wire snake up to the top of the mast from the base, and secured the wires to the snake at the top. By pulling the snake back through the bottom of the mast, we formed a loop of sorts that managed to break free some of the foam on its way down, but it soon snagged again and broke the attachment to the wires. Fortunately, we were able to access the wires in the center of the mast's length through one of the spreader holes, and with an hour's work finally got all the wire out through this 3/4" hole. Removal might have been easier, except that during the hardware-stripping process, Allen had cut off the extra wire at the base of the mast, thinking logically enough that it'd be no trouble to pull out the remains. Unfortunately, this meant that there wasn't any wire to grab onto outside of the mast, which led us to the other processes at which we eventually succeeded. Meanwhile, I worked on a few small pieces of trim remaining to be completed in the interior, and some other tasks on the punch list. I didn't have a lot of time available to dedicate to jobs, fitting them in during the evenings and weekends as time allowed, but slowly but surely, the list dwindled. |
|
|
|