|
|
~MENU~ |
| Home |
| The Concept |
| The Boat |
| Bringing Her Home |
|
Weekly Progress Log |
|
Daysailor Projects |
| The Boat Barn |
| Resources |
| Other Sites |
| Email Tim |
|
|
|
Systems: Diesel Engine: Engine Controls, Panel, and Initial Commissioning |
|
Engine Controls and Panel While I never forgot about the need to install engine controls in the cockpit, it was never a priority, designwise. Therefore, only after the cockpit seating areas were complete did I really think about addressing the location of the controls. I wanted the controls to be easily accessible, yet not overly visible or in the way. At one point in the building process, I had contemplated building covered lockers beneath portions of the cockpit seats, which would have been a location for the controls, but this plan never materialized. |
 With only the installation of the controls and panel standing between me
and an operational engine, I decided to get the job done, finally.
After inspecting the cockpit and the engine room beneath, I settled on a
convenient location for a control panel--far enough forward to be
convenient to use for the helmsman, but far enough aft to be out of the
way of passengers and activity in the forward end of the cockpit.
This location also allowed easy access for cables and wiring to the
engine room. With only the installation of the controls and panel standing between me
and an operational engine, I decided to get the job done, finally.
After inspecting the cockpit and the engine room beneath, I settled on a
convenient location for a control panel--far enough forward to be
convenient to use for the helmsman, but far enough aft to be out of the
way of passengers and activity in the forward end of the cockpit.
This location also allowed easy access for cables and wiring to the
engine room. |
 I decided to build a very simple plywood panel that would span the
distance between the bottom of the cockpit seat and the sole, and would
be located just inset from the edge of the seat. I felt this would
satisfy the various requirements, and would give adequate room for
operation of the control lever. I pressed onward, and cut a panel
to fit the space. I added a cleat to the cockpit sole to support
the bottom of the panel, and fit everything in place before proceeding.
Then, I removed the panel for further work. I decided to build a very simple plywood panel that would span the
distance between the bottom of the cockpit seat and the sole, and would
be located just inset from the edge of the seat. I felt this would
satisfy the various requirements, and would give adequate room for
operation of the control lever. I pressed onward, and cut a panel
to fit the space. I added a cleat to the cockpit sole to support
the bottom of the panel, and fit everything in place before proceeding.
Then, I removed the panel for further work. |
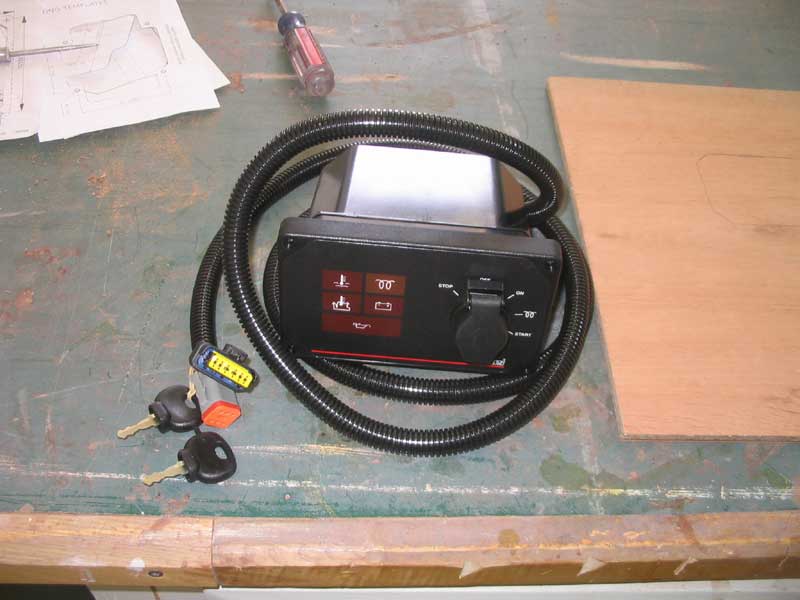
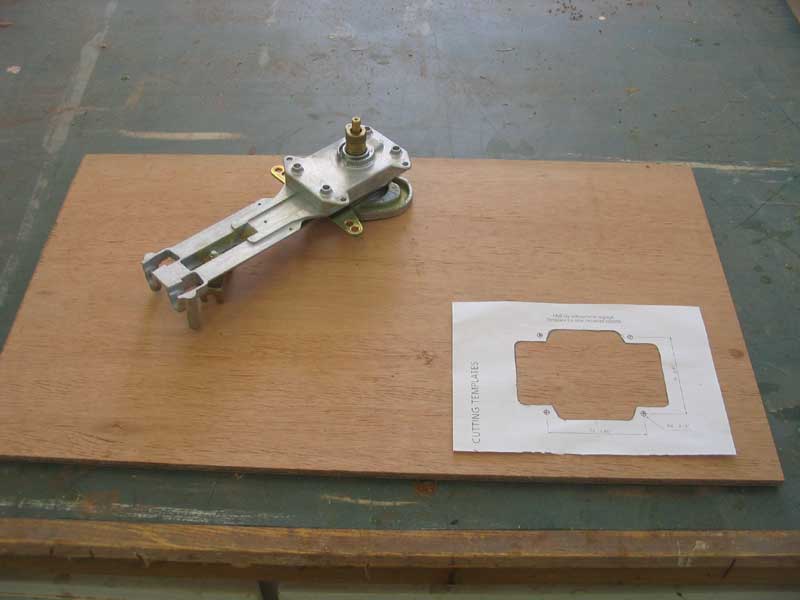
 Next, I laid out two templates, provided by the manufacturers, for the
engine controls and engine panel. After shuffling things around a
bit, I settled on the locations and cut out the openings required, using
the templates as a guide. I installed both items with screws,
replacing the junky zinc-plated screws provided with the Teleflex
control with stainless steel. (Why do they do that, anyway?) Next, I laid out two templates, provided by the manufacturers, for the
engine controls and engine panel. After shuffling things around a
bit, I settled on the locations and cut out the openings required, using
the templates as a guide. I installed both items with screws,
replacing the junky zinc-plated screws provided with the Teleflex
control with stainless steel. (Why do they do that, anyway?) |
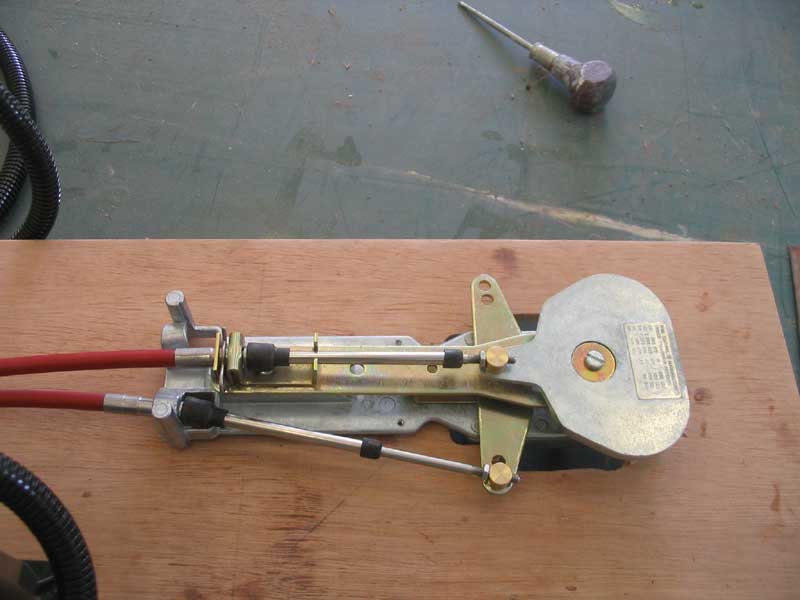
 Next, I installed the engine control cables on the Teleflex single lever
control. Installation was easy enough, but I had to choose one of
two positions for the transmission cable; the correct location depended
on which way the lever moved, and which way the transmission lever
itself moved in order to select forward of reverse. It was a 50/50
chance, so I connected the cable to one of the two possible positions. Next, I installed the engine control cables on the Teleflex single lever
control. Installation was easy enough, but I had to choose one of
two positions for the transmission cable; the correct location depended
on which way the lever moved, and which way the transmission lever
itself moved in order to select forward of reverse. It was a 50/50
chance, so I connected the cable to one of the two possible positions. |
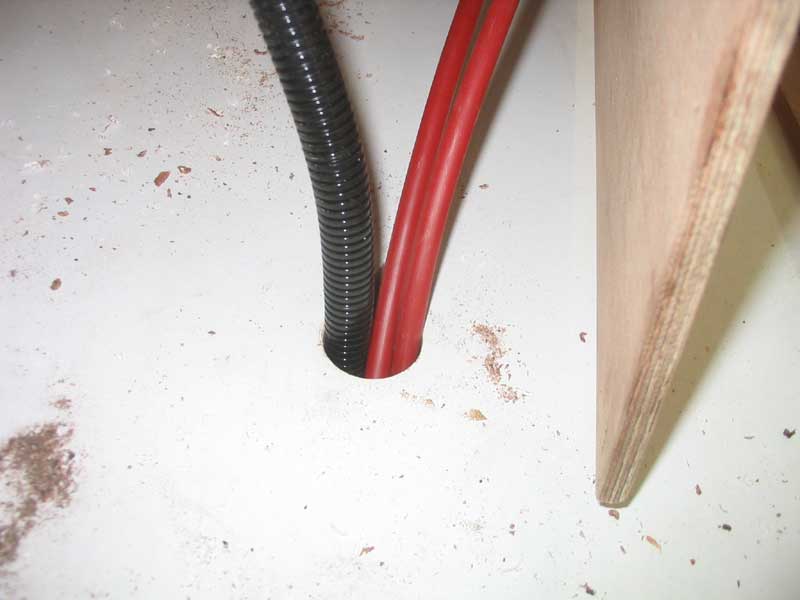
 On deck, I bored a large hole in the cockpit sole (wincing) to accept
the two cables and the wiring harness. Then, I fed the cables and
harness through the hole, and installed the panel in place beneath the
cockpit bench. In the engine room, I connected the cables to
throttle and transmission, chuckling ruefully when I discovered that of
course I had chosen the wrong side of the control when I attached the
gear cable earlier. Fortunately, switching it was not a big deal,
even with the panel in place. I connected the two wiring harness
plugs, and the installation was complete. I bundled the excess
wiring harness and secured it up beneath the sole, out of harm's way. On deck, I bored a large hole in the cockpit sole (wincing) to accept
the two cables and the wiring harness. Then, I fed the cables and
harness through the hole, and installed the panel in place beneath the
cockpit bench. In the engine room, I connected the cables to
throttle and transmission, chuckling ruefully when I discovered that of
course I had chosen the wrong side of the control when I attached the
gear cable earlier. Fortunately, switching it was not a big deal,
even with the panel in place. I connected the two wiring harness
plugs, and the installation was complete. I bundled the excess
wiring harness and secured it up beneath the sole, out of harm's way. |
|
Engine Initial Commissioning
|
|
Finally, I added 12 gallons of diesel to the fuel tank, managing to spill what seemed like 20 gallons on deck (it was an ounce or two, but made a mess). They need to build jerry jugs with a little 1/4 turn valve at the end of the spout, so that one could actually place the spout in the tank fill before any fuel started pouring out. This seemed so simple...why does such a thing not exist? |
 With that, the engine was ready to fire--or would be as soon as I bled
the fuel system. At the primary filter, I worked the plunger pump
endlessly to fill the large filter and, hopefully, the fuel lines and
secondary filter. It was discouraging for a time because cracking
the bleed screw on the secondary filter failed to produce even the
slightest sign of pressure, air, or fuel--until a hopeful phhfffst
after 5 or 10 minutes of priming. The engine was supposed to
be self-bleeding, but still--some fuel had to get to the system.
Eventually, despite still having received no fuel out of the bleed screw
on the secondary, I decided to just crank the engine and see how we were
doing. With that, the engine was ready to fire--or would be as soon as I bled
the fuel system. At the primary filter, I worked the plunger pump
endlessly to fill the large filter and, hopefully, the fuel lines and
secondary filter. It was discouraging for a time because cracking
the bleed screw on the secondary filter failed to produce even the
slightest sign of pressure, air, or fuel--until a hopeful phhfffst
after 5 or 10 minutes of priming. The engine was supposed to
be self-bleeding, but still--some fuel had to get to the system.
Eventually, despite still having received no fuel out of the bleed screw
on the secondary, I decided to just crank the engine and see how we were
doing. |
|
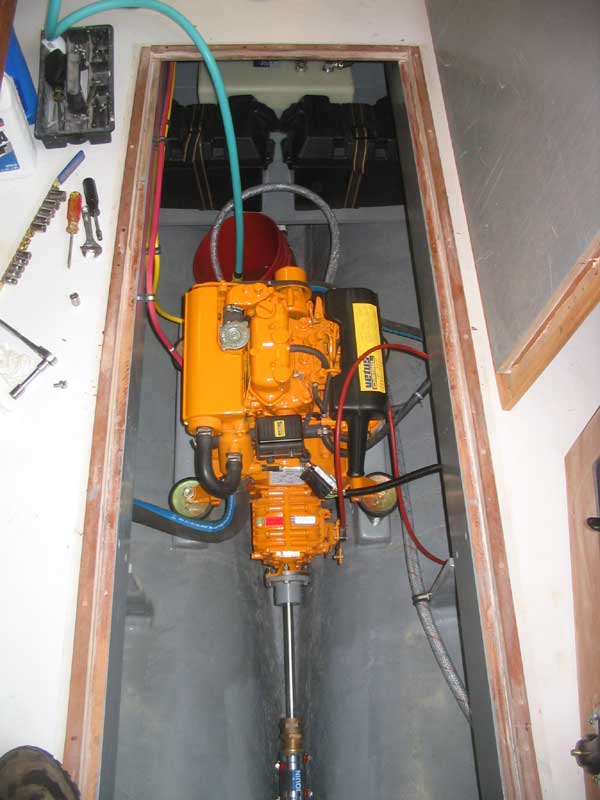
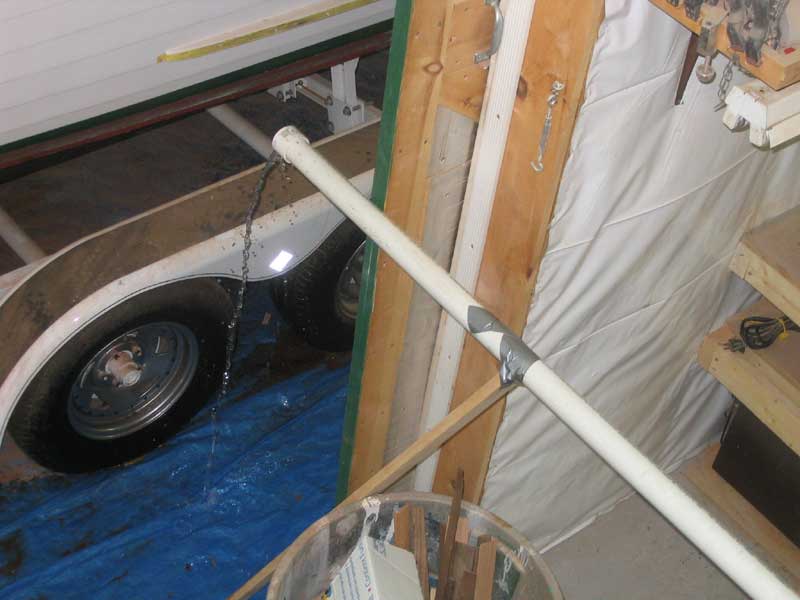
I placed a 5 gallon bucket in the bilge and filled it with water, keeping the hose nearby, and attached a temporary intake hose between the bucked and the raw water strainer, removing the actual hose running from the seacock. Then, I rigged up my exhaust bucket beneath the exhaust outlet in the counter, and I was ready to go. I checked the jackstands for tightness, and cranked the engine over. |
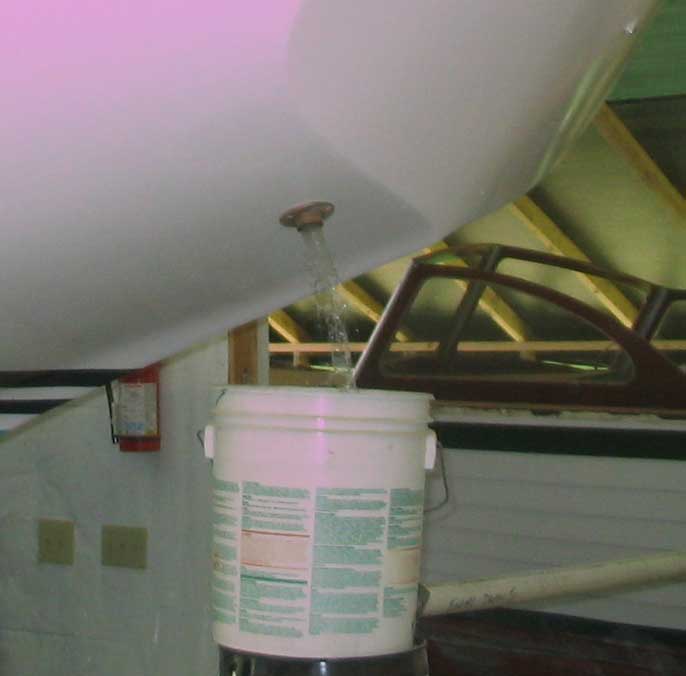 She started right up! After a few dry moments, cooling water
started to come out the transom exhaust, and all the warning lights shut
off on the panel. Sweet! I ran the engine for several
minutes (10?), enjoying the sound of the engine and noticing how
smoothly it ran, at least once raised past idle speed. I briefly
clutched into forward and reverse to confirm that I had the controls
hooked up correctly, and eventually shut the engine down after a
successful test run. She started right up! After a few dry moments, cooling water
started to come out the transom exhaust, and all the warning lights shut
off on the panel. Sweet! I ran the engine for several
minutes (10?), enjoying the sound of the engine and noticing how
smoothly it ran, at least once raised past idle speed. I briefly
clutched into forward and reverse to confirm that I had the controls
hooked up correctly, and eventually shut the engine down after a
successful test run.The engine installation was complete. |